Category: Recipes

Recipes I’ve tried and sometimes modified that I think you should try!

Pineapple Pockets to the Rescue-Pining for a Cookie

Pineapple Pockets to the Rescue-Pining for a Cookie

There are a couple of baking books that are my go-tos for cookies, especially during the holidays, like Rose Levy Berenbaum’s Christmas Cookies, Alice Medrich’s Cookies and Brownies and Flo Bracker’s Sweet Miniatures.  I find myself reaching for Sweet Miniatures when I want an elegant, fancy cookie. Yes it will probably require a bit more effort than drop cookies, but it’s Christmas, when else are you going to pull out all the stops?

Pineapple Cakes from Taiwan inspired me to make the Pineapple Pockets from Sweet Miniatures.  Taiwanese Pineapple Cakes are little bite-sized squares of pineapple jam cloaked in a sweet, buttery pastry crust.  I’m obsessed with these little cake-like cookies.  My introduction to these treats came years ago when a friend returning from a trip to Taipei brought back Te Chia Pineapple Cakes. It was love at first bite.  The sweetness from the pineapple offset by the buttery shortbread crust…needless to say, I was smitten.  I casually mention pineapple cakes to every friend that goes back to Taiwan while giving them my best wistful look.

While these Pineapple Pockets are more complicated than your average drop cookie, the resemblance to Taiwanese Pineapple Cakes put these on my must-bake holiday cookie list. The process begins with  making a caramelized pineapple jam then a pastry dough. The dough is rolled and cut into circles, dotted with the jam, and then shaped into cones.  Labor-intensive, but in the end, you are rewarded with a meltingly tender cookie highlighted by the dollop of golden, caramelized pineapple preserves. They are absolutely delicious and well worth the effort.  But most importantly, they are delicious enough to satisfy my Pineapple Cake craving. Now I don’t have to wait for friends to take pity on me and bring them back from Taiwan!

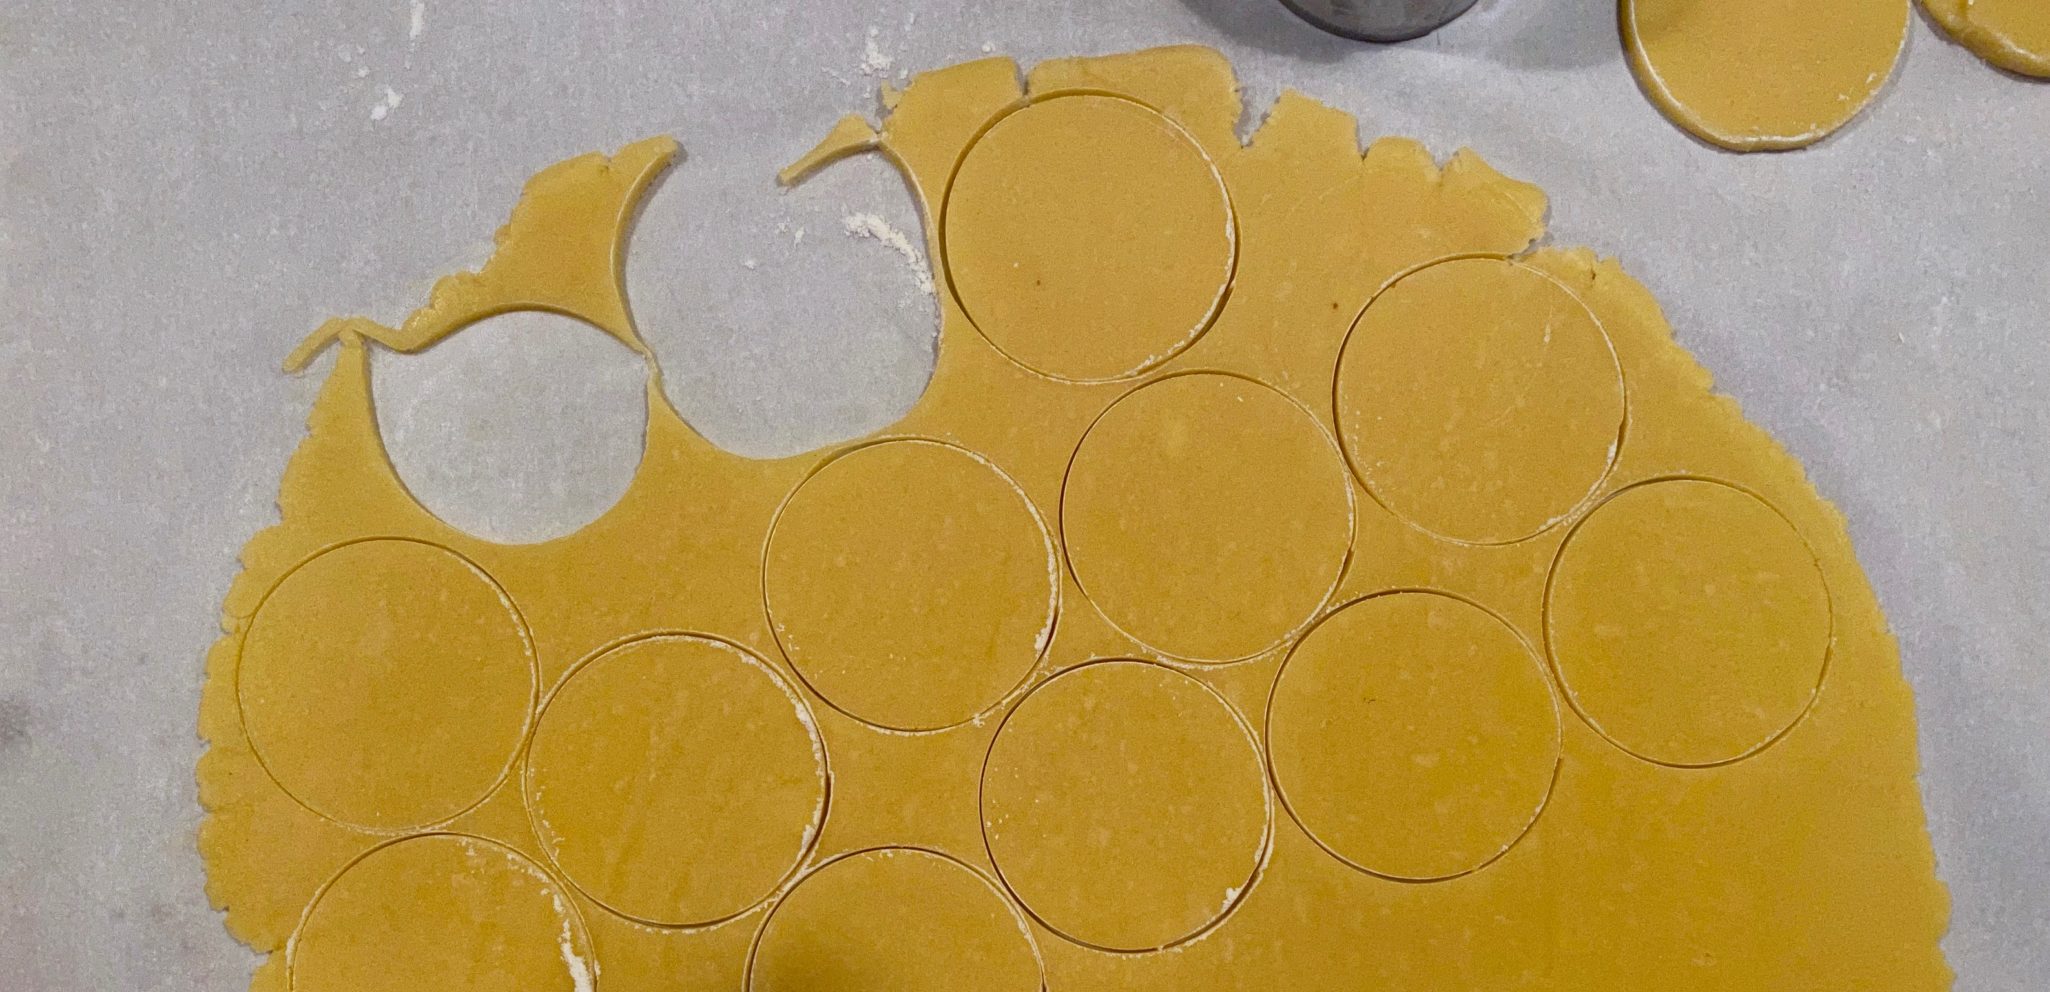
The jam is made first and set aside to cool. I added 1/2 tsp of vanilla to the jam and a pinch of salt to enhance the flavor.   Make the dough, chill it, then roll it into a circle. The dough should be about 1/8-3/16 inch thickness. Use a 2 inch round cutter for the circles.  Your best friend is your refrigerator.  If the dough gets soft or sticky during the process, put it back in the fridge to chill. This will make it easier to handle.

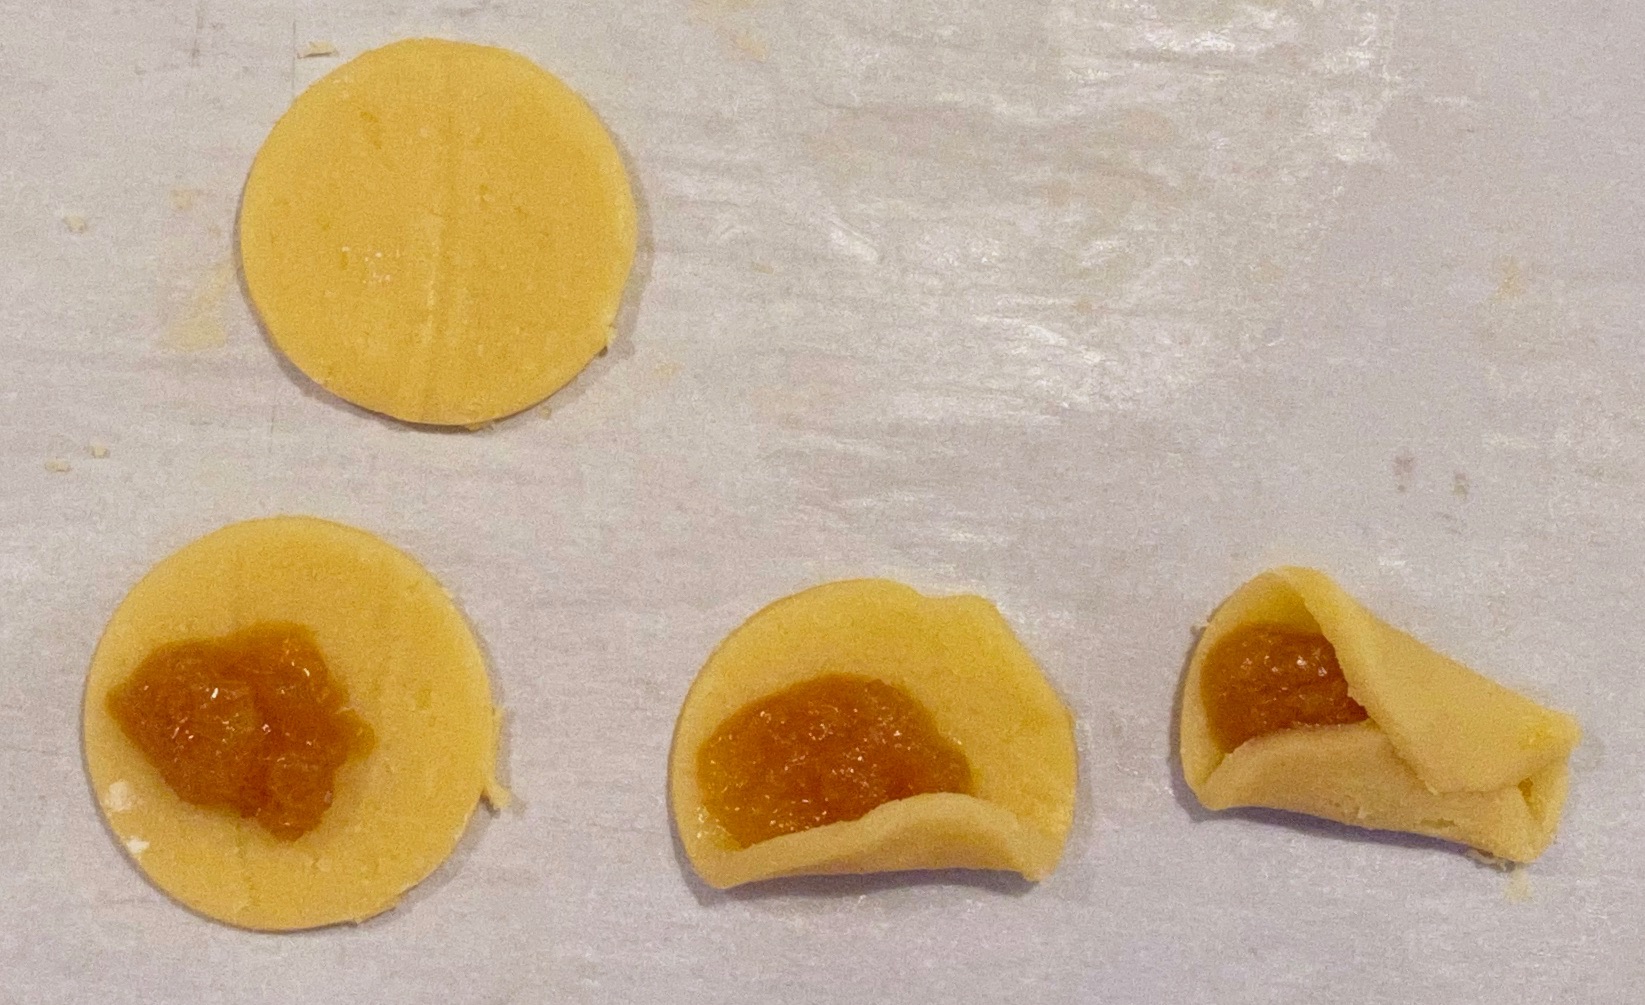
Position the jam off-center.  Using a butter knife or thin blade spatula, flip the edge closest to you over the jam.  Angle your spatula on the opposite side and flip towards you, overlapping with the first.

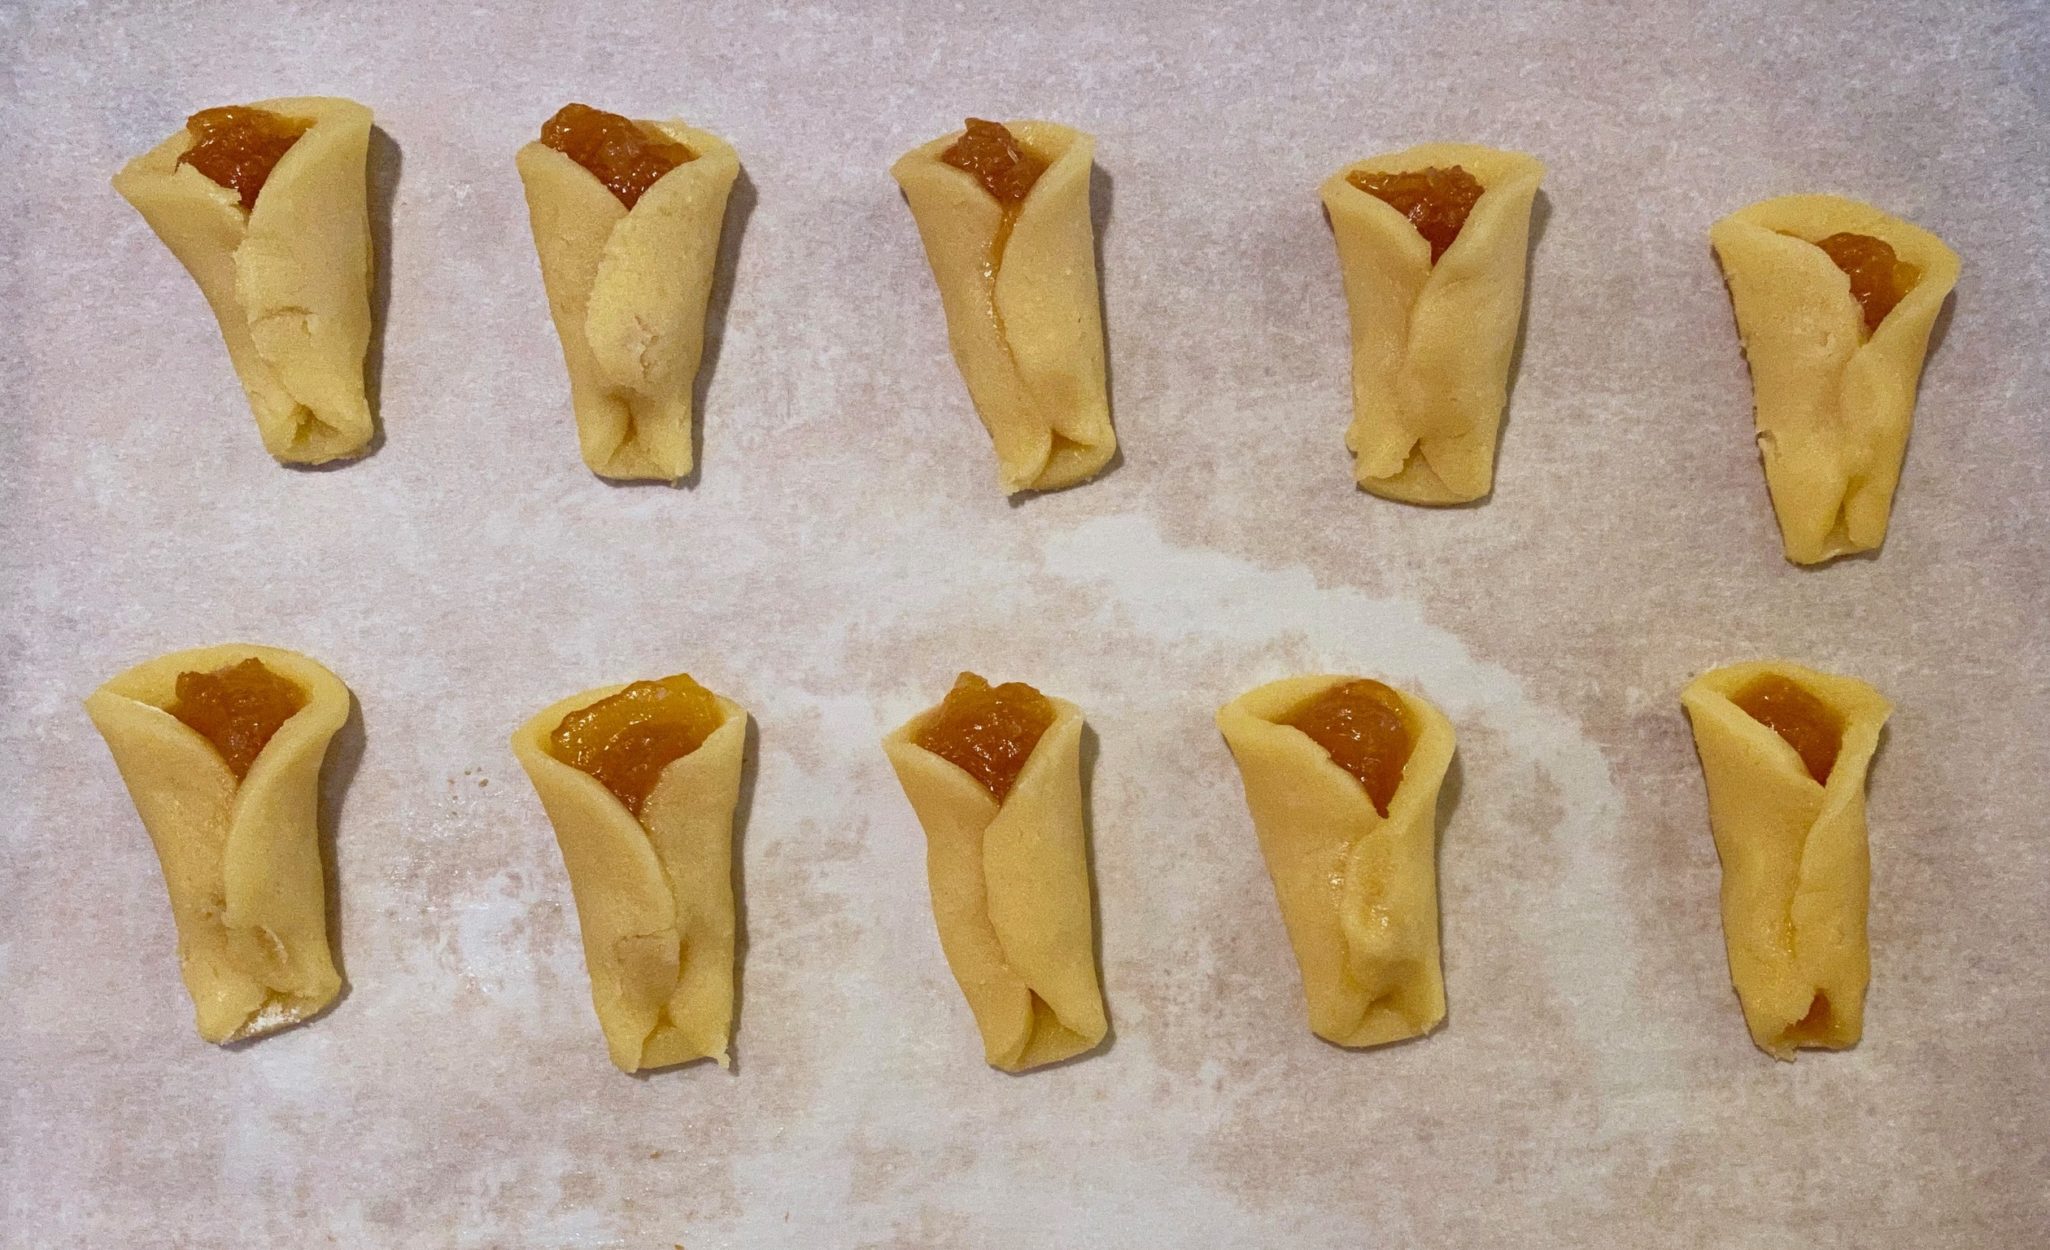
Ta-da, ready to bake!  Sprinkle powdered sugar on the finished cookies for a festive look.  In a pinch, you could use jarred preserves, make sure whatever you use is not too runny or thin.

Pineapple Pockets

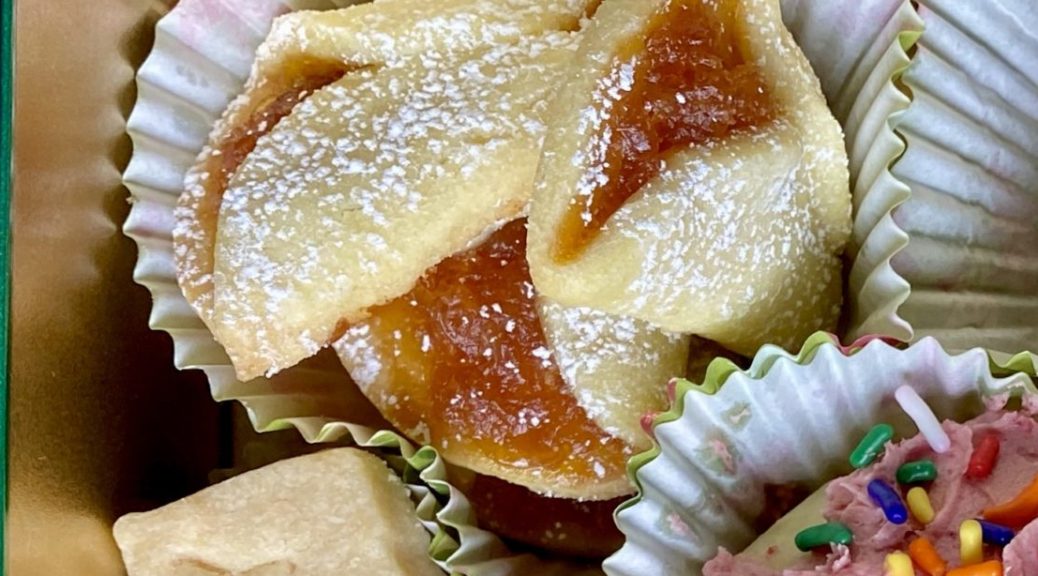
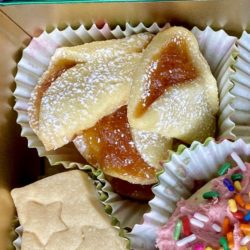
Flo Bracker's delicious Pineapple Pockets. Caramelized Pineapple Jam encased in a buttery, tender pastry and shaped into a cone.
Course cookies
Cuisine American
Keyword cookies, flo bracker, holiday cookies, Pineapple cakes, Pineapple Pockets
Prep Time 1 hour
Cook Time 14 minutes

Ingredients

Dough

  • 6 ounces unsalted butter, room temp 1-1/2 sticks
  • 1/4 cup granulated sugar 50gms
  • 1/2 cup unsifted powdered sugar 50gms
  • 2 egg yolks
  • 1 tsp vanilla
  • 1-2/3 cup unsifted all-purpose flour 235gms

Pineapple Filling

  • 2 tbsp water
  • 1/3 cup granulated sugar 65gms
  • 8-ounce can crushed pineapple in natural juice
  • 1/2 tbsp unsalted butter

Instructions

  • In bowl of mixer, cream butter at medium low speed until smooth, about 1 minute. Beat in sugars at medium speed until creamy. Add egg yolks, one at a time, then vanilla, beating until well combined and slightly fluffy. Scrape down the sides of bowl. Lower mixer speed, and gradually add flour and mix just until it is combined.
  • Gather dough into a disc and chill 15-30 minutes. Divide dough in half and on parchment or wax paper, roll each piece into a circle. approximately 11 inches in diameter and 1/8 inch thick. Transfer to a baking sheet, cover top with parchment and refrigerate until firm about 2 hours.

Pineapple filling

  • In a medium saucepan, combine water and sugar over low heat. Swirl occasionally and wash down any sugar crystals that form on the side with a brush dipped in cold water to dissolve them. Increase heat to medium-high and cook without stirring until sugar thickens and turns amber in color about 8 minutes. Take it off the heat and add crushed pineapple and juice all at once. Careful as mixture will bubble up. Stir to combine and return the pan to stove and cook over med-high heat until mixture is golden and syrupy. Remove from stove and stir in butter. Place in bowl and set it aside to cool.

Putting It All Together

  • Preheat oven to 325
  • Remove one piece of dough, peel off parchment. Put parchment back on dough and flip dough over and peel off bottom parchment.
  • Use a 2 inch round cookie cutter cut out circles and place on lined baking sheets. Place 1/2 teaspoon of cooled jam off-centered on circle. Fold over one edge of dough over jam, then overlap the opposite edge at an angle to form a cone. See pics.
  • Bake one sheet at a time, for 12-14 minutes until edges ar light golden.
  • Remove from oven and place on wire rack to cool for 5 minutes. Lift cookies off and place directly on cooling rack.
  • Sprinkle with powdered sugar. optional)
  • Store at room temp for up to 10 days.

The 2020 Holiday Cookie Tin

Jest Jammin’ (Christmas Cookies)

Jest Jammin’ (Christmas Cookies)

I remarked to hubby the other day, “I ‘ve been pretty bad about baking holiday treats the last few years, huh”.  It was a rhetorical question as I pulled out more than a few jars of expired jams.  I love filled cookies-Thumbprints, Linzer bars, Raspberry Oaties so I have a penchant for stocking up on “stuff” like preserves, sprinkles, holiday cupcake liners…in preparation for the holiday season.

Somehow I curtailed my cookie baking tradition a “few” years ago.  Homemade granola and Candied Spiced Pecans were so much easier.  I finally resurrected the cookie baking last year.  I eased my way back with an assortment of slice and bake cookies (check out my index for slice and bakes!) but this year, as I guiltily tossed several jars of raspberry preserves, I exclaimed…

JAM IT, I’m baking filled cookies this year!

So without further ado, here is the line-up for this year’s holiday cookie jam-stravaganza.

Cranberry Cherry Ribbon Cookies– Sweet-tart cranberry cherry jam sandwiched between buttery shortbread.  I hope Nancy Baggett doesn’t mind, I construct these cookies differently than in her All American Cookie Book- this one is for you, Joe B. (Recipe link soon!)

Raspberry Cheesecake Thumbprints– Good, but I’d make my Thumbprints instead if you like walnuts, or Emeril’s Thumbprints that have a hint of citrus. Yummers.

Dorie’s Jammers filled with recently bought jams (strawberry, peach and cherry) from Sunblest Orchards. Dorie, my baking hero.

Pineapple Pockets – Flo Bracker’s Sweet Miniatures.  Buttery, melt-in-your-mouth cookie with a little scoop of caramelized pineapple jam.  Mele Kalikimaka!

Not jam-filled but a holiday imperative I make these

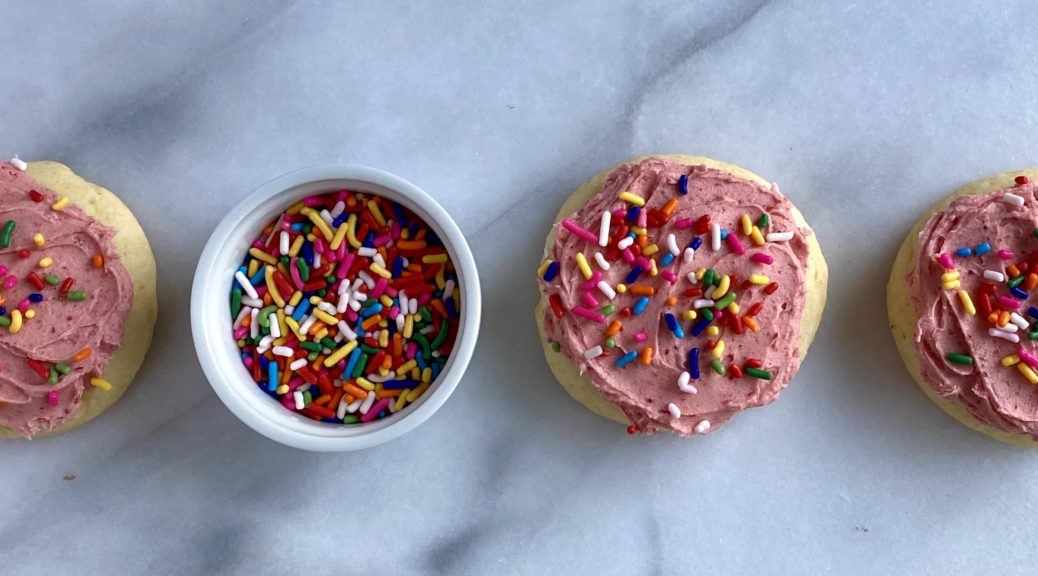
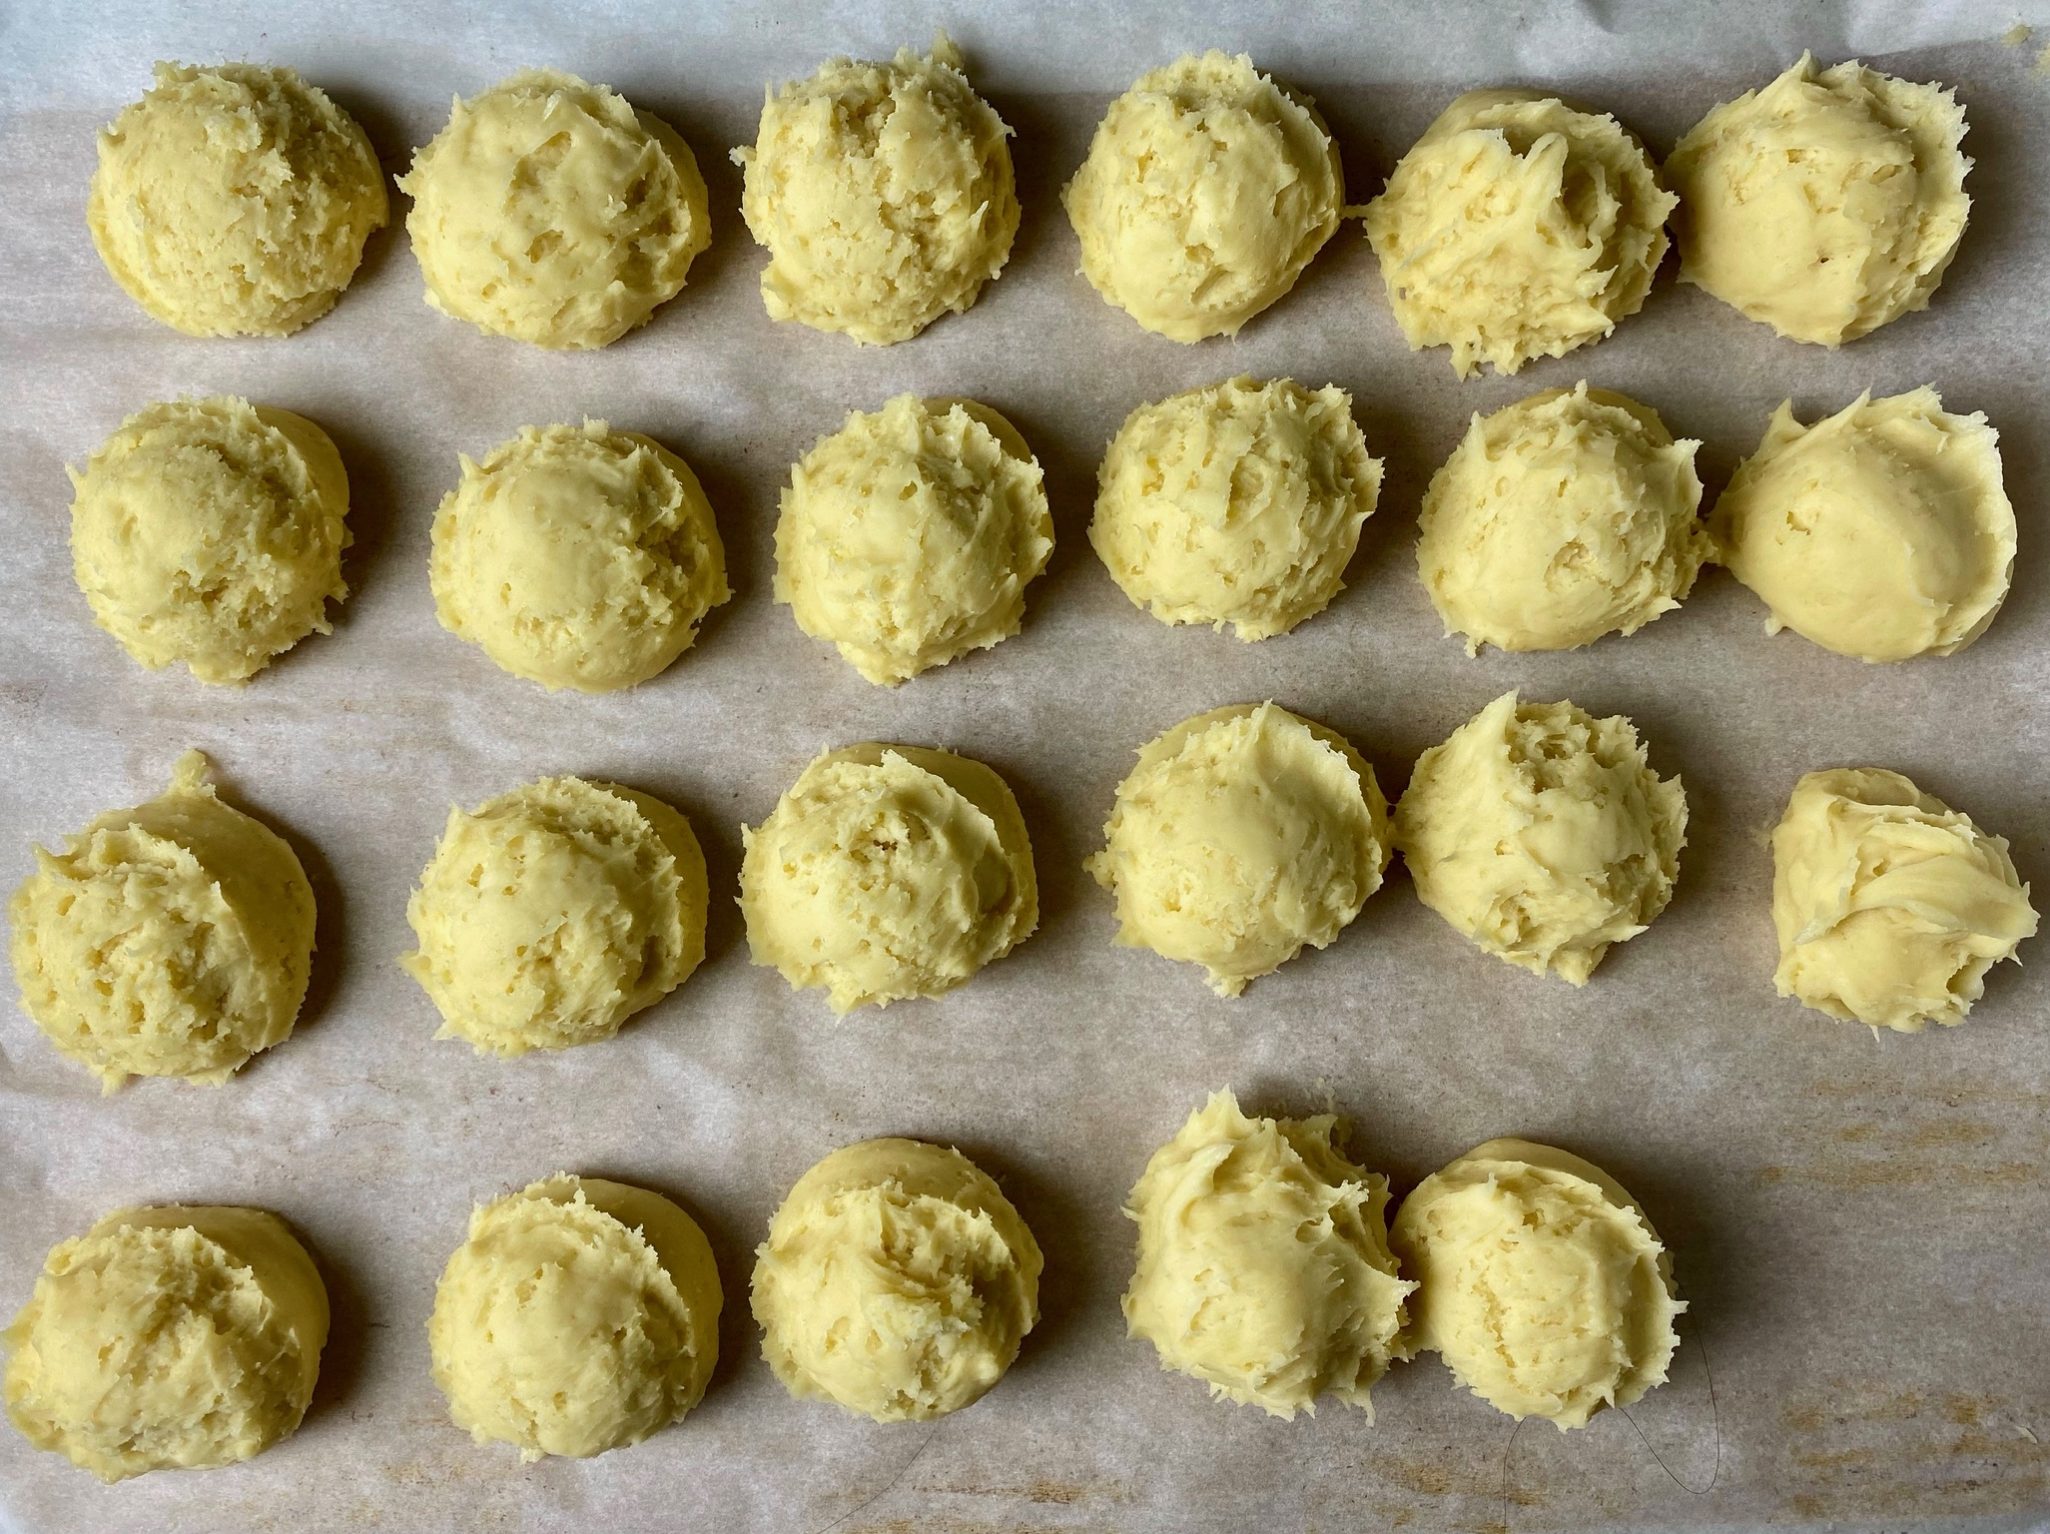
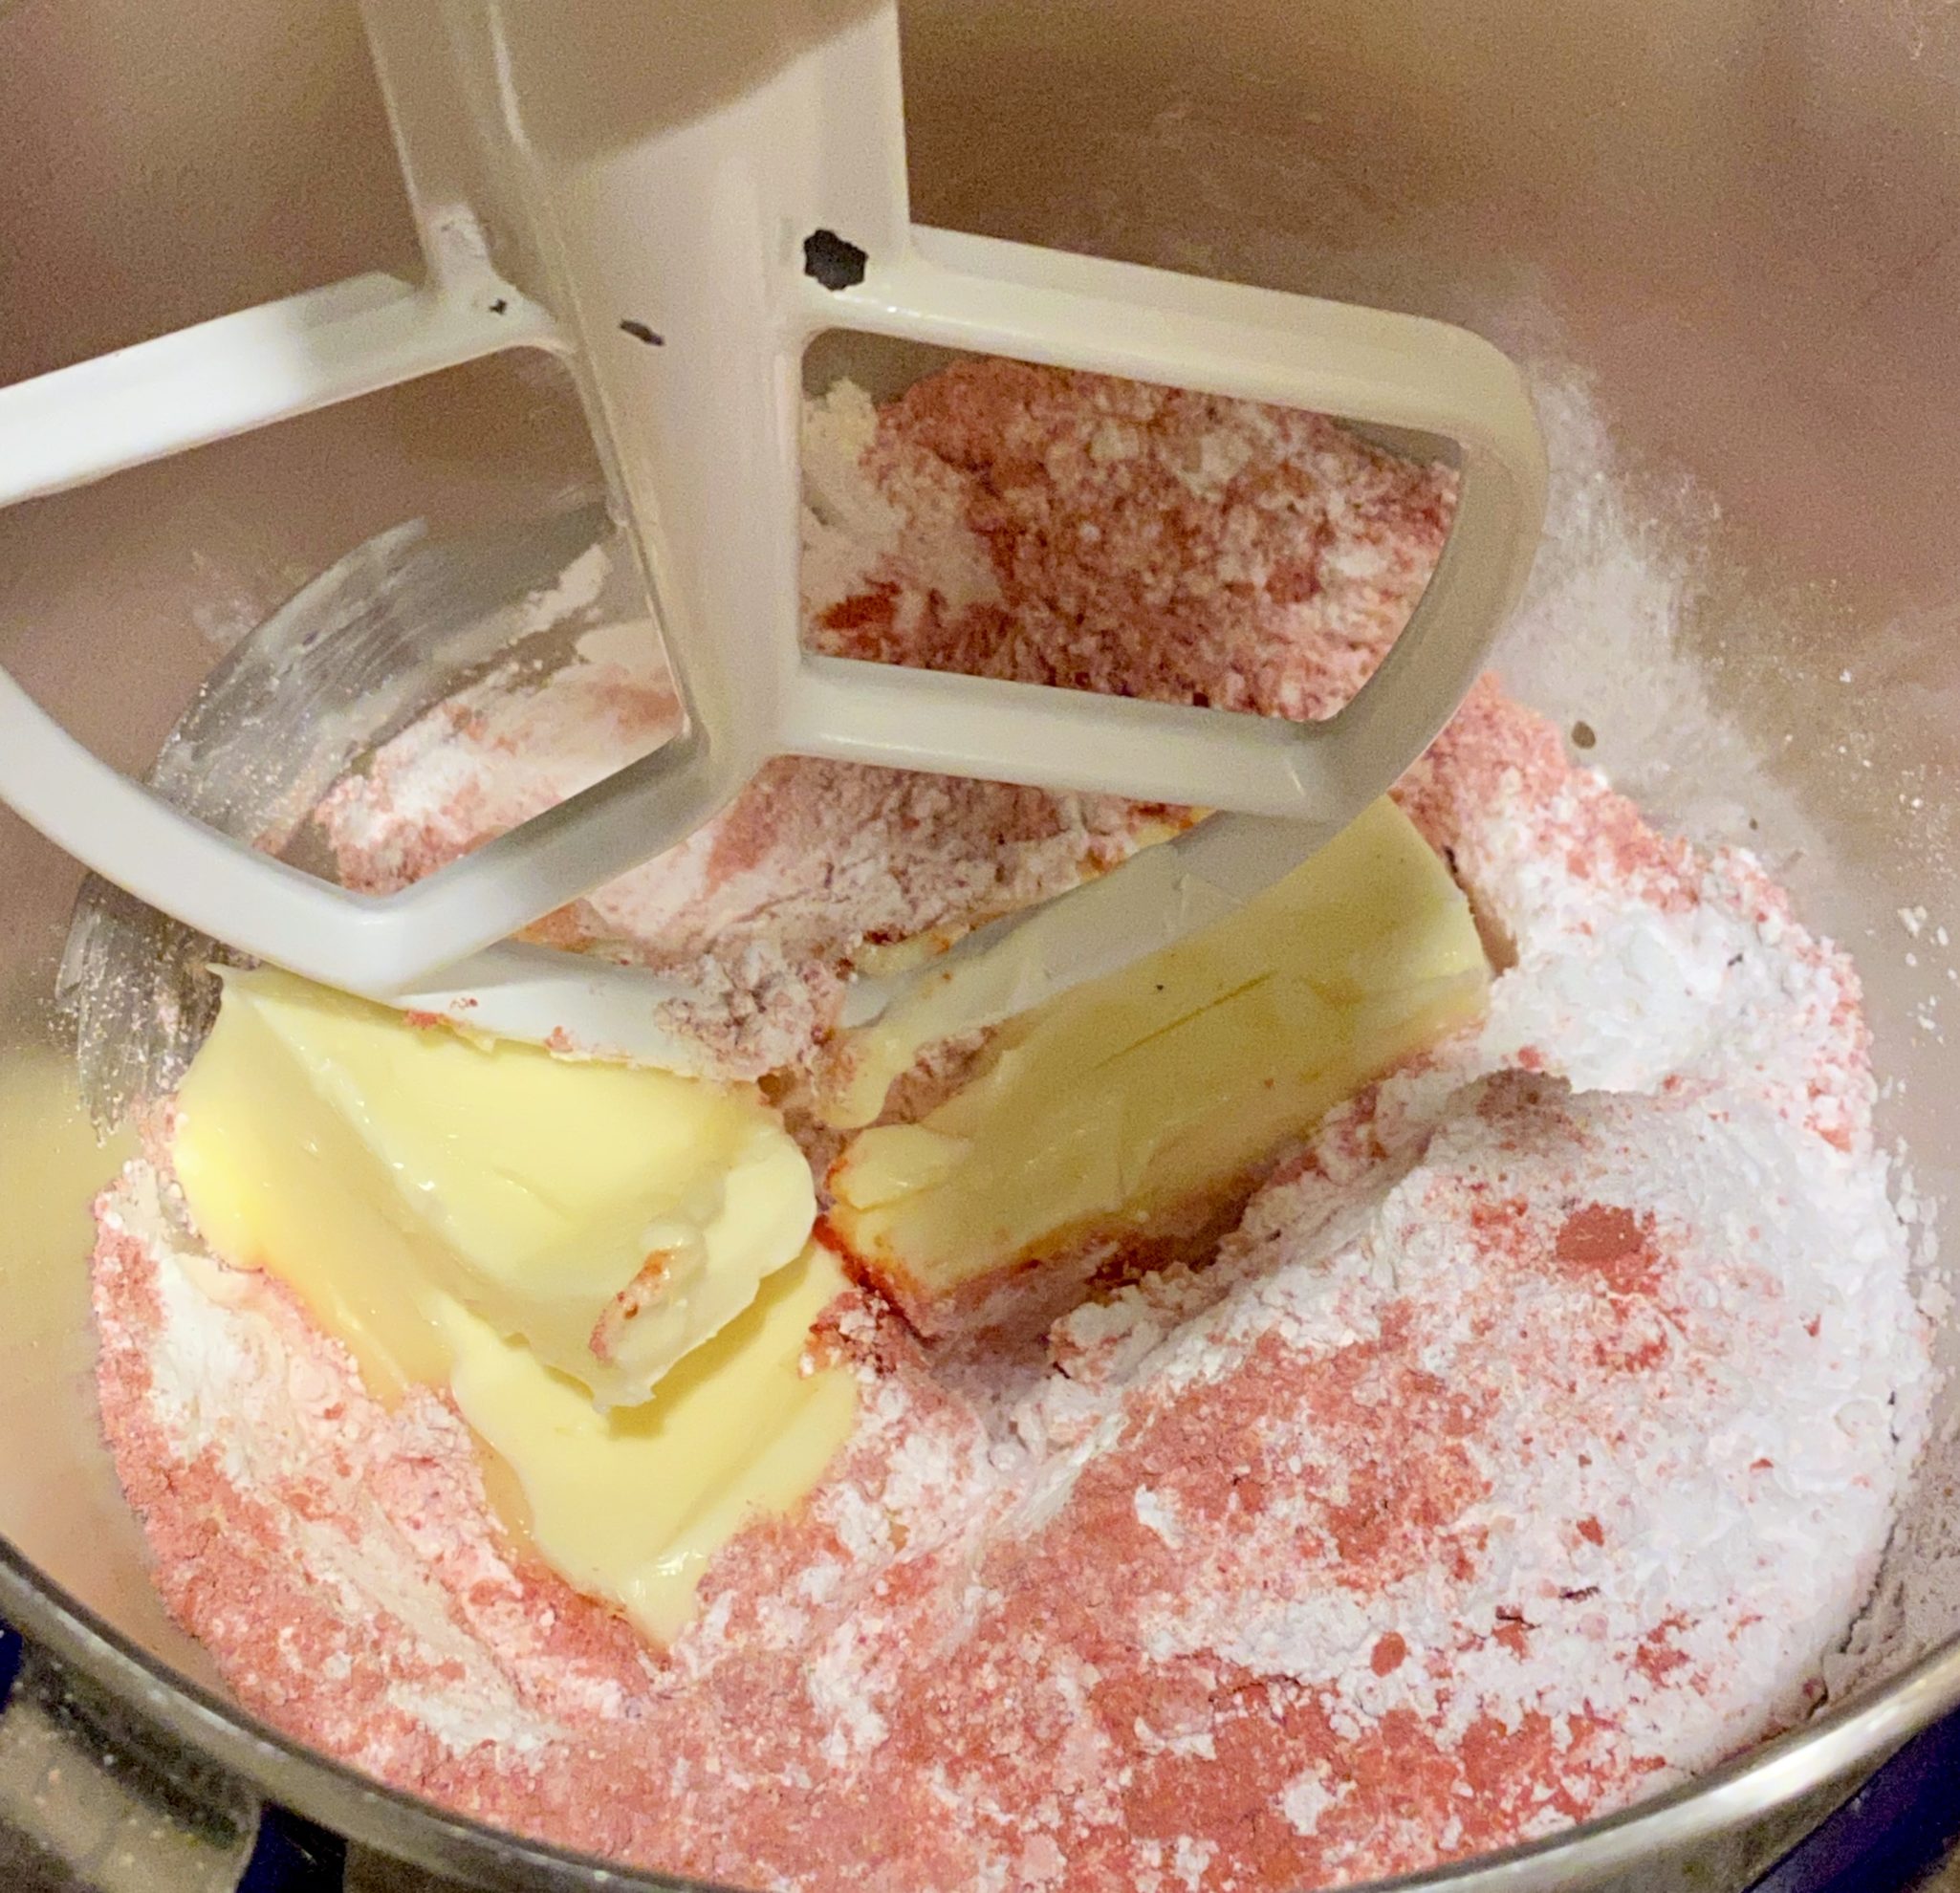
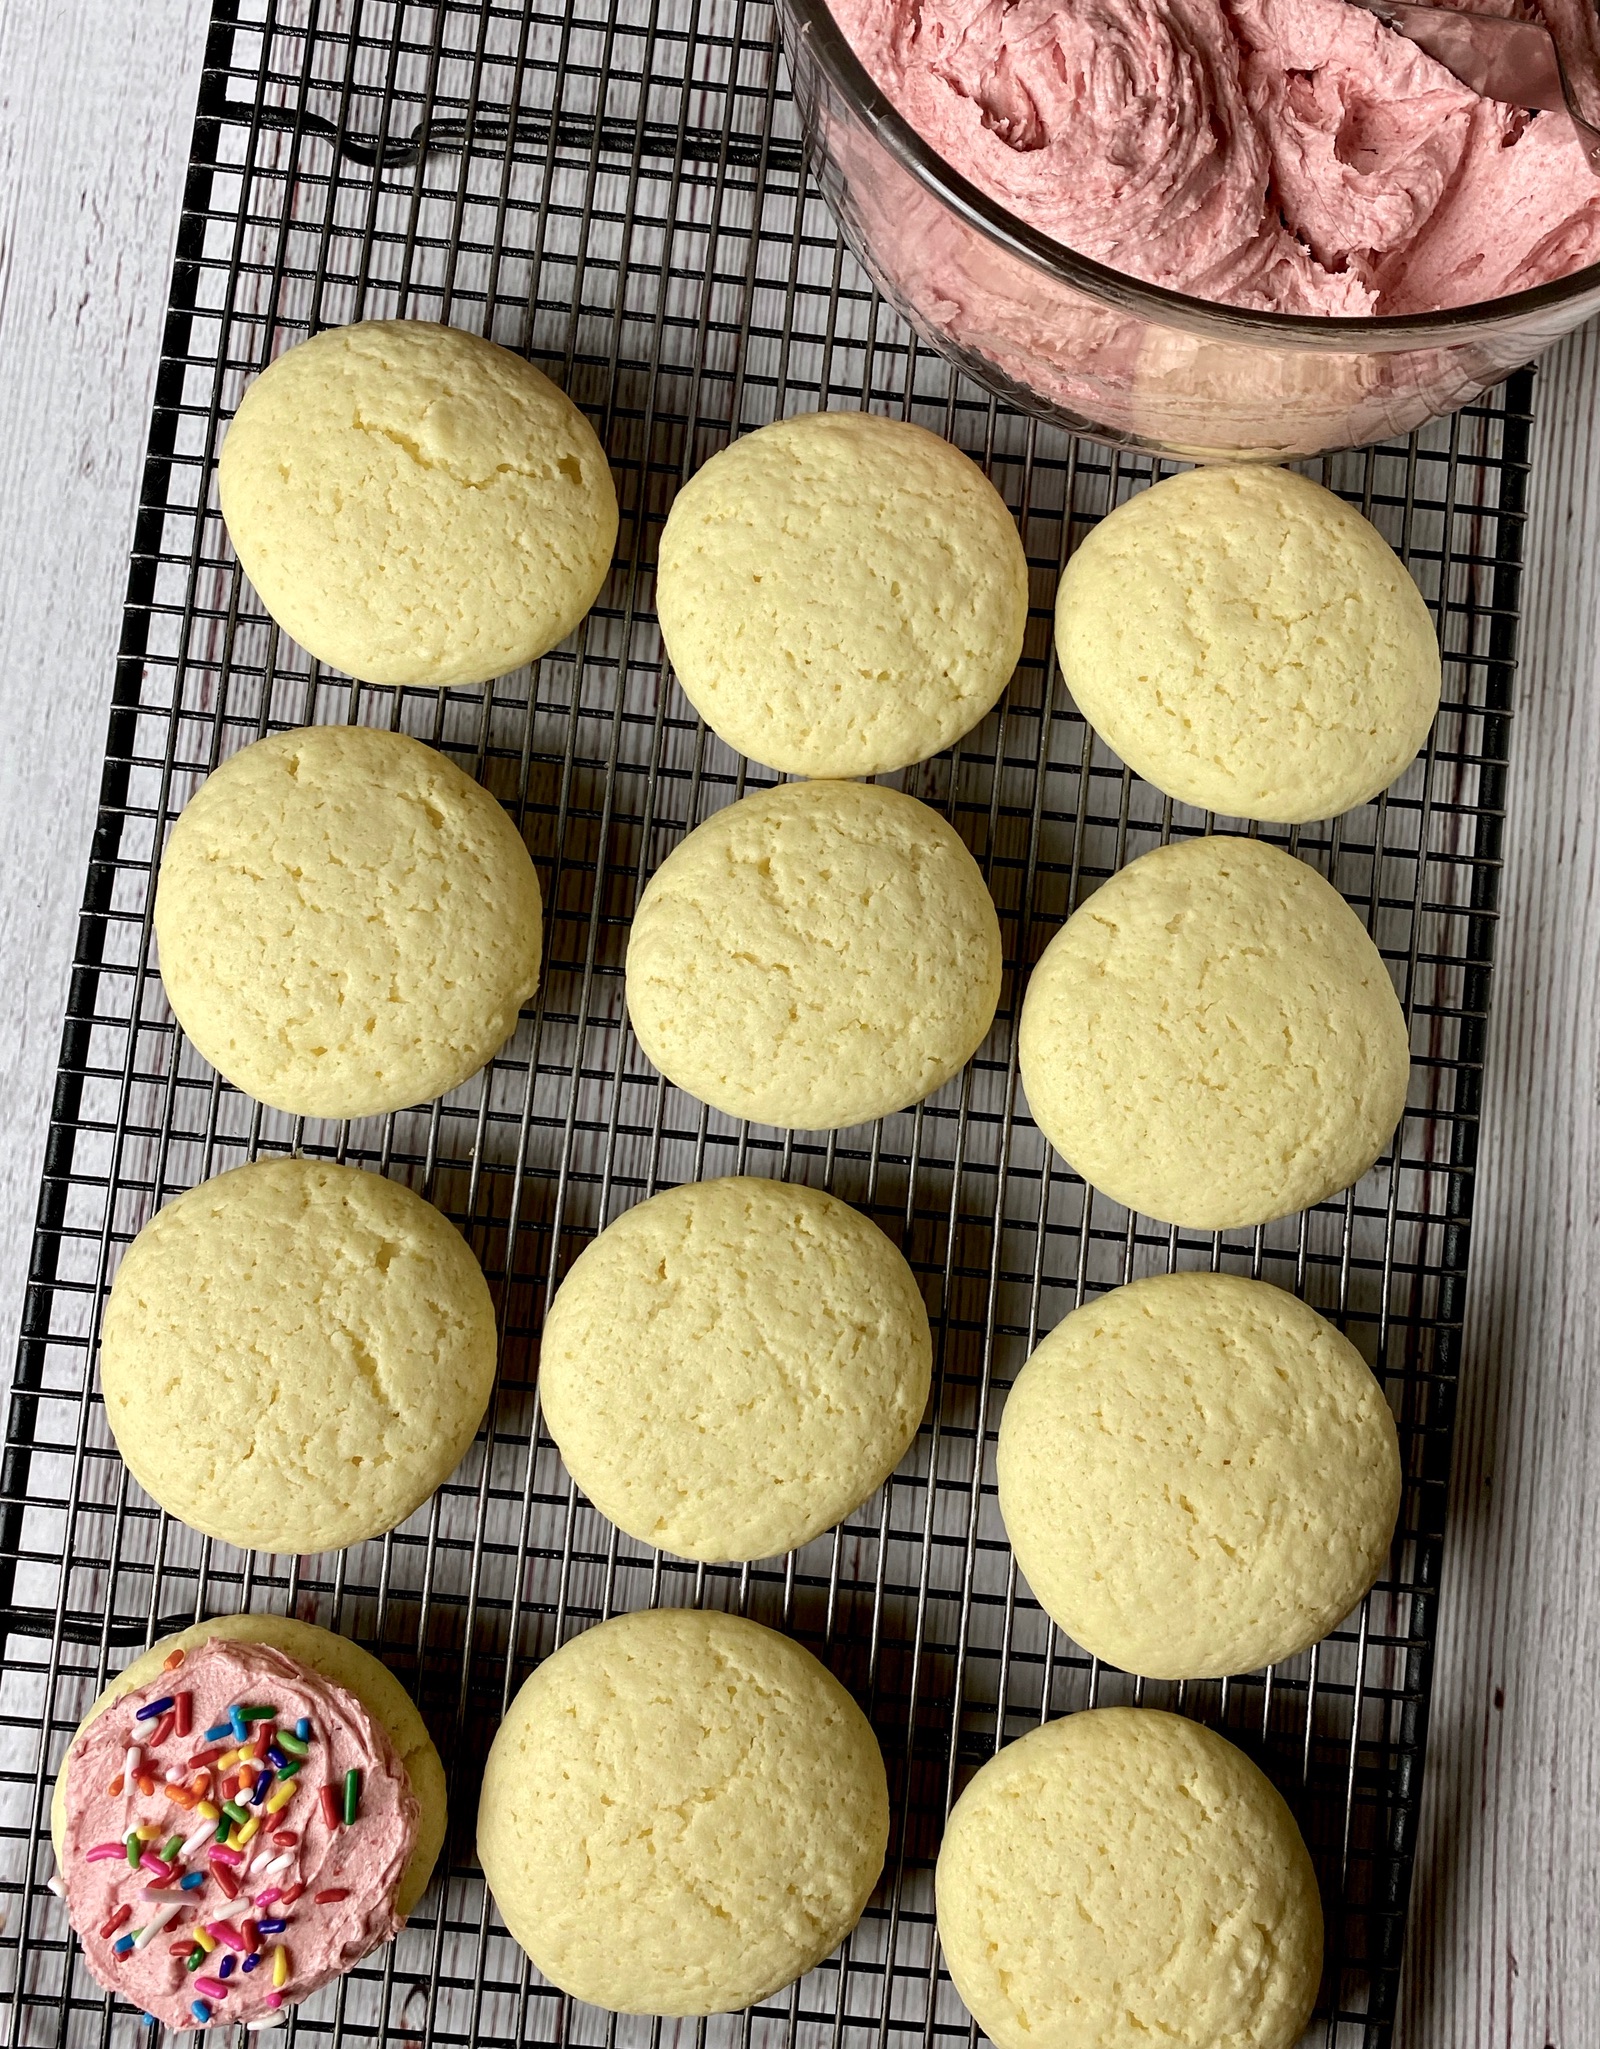
Eric Kim’s Grocery Store CookieThese cookies make me happy!  I don’t even like the supermarket ones, but these?  Make them now, you’ll thank me.   A soft, tender cake-like vanilla cookie with hot pink raspberry frosting-SO DELICIOUS. Here is his video on making these little smiles. Recipe with my notes posted thru link.  Shhh, don’t tell NYT cooking.  I subscribe-it’s all good.

Traditional Scottish Shortbread-because it’s my favorite and if I’m making cookies, I’m making these.  Looks are deceiving, they are scrumptious.

Pecan Tartlets-not a jam but it is a filled cookie and oh so good. Hubby would disavow me if I didn’t make them.

Yes, this is my holiday cookie run-down.  Any of these would make an awesome sweet treat to ring in the New Year, kick 2020 to the curb and usher in 2021.  But don’t just bake them during the holidays, make them for Ground Hog Day, Valentine’s Day, MY birthday, YOUR birthday, because it’s Tuesday. Anytime you want to make someone smile.  Jamie made Sally’s Baking Addiction Best Sugar Cookies for the delicious beauties below!

Or For A Great Cause!

Happy Holidays

Peanut Butter Miso Cookies -Kool, Bake Me Some of that Funky Stuff

Peanut Butter Miso Cookies -Kool, Bake Me Some of that Funky Stuff

Always on the lookout for cookies with a twist, I came across these cookies in New York Times Cooking.  There I was nonchalantly scrolling through my feed when it popped up on my screen PEANUT BUTTER MISO COOKIES.  Say what?  Miso?  In a cookie?  Like a lot of folks, I have had Miso Soup, but in a cookie? I was intrigued.

This is essentially a  peanut butter cookie that sneaks in miso paste to add umami. It will have your cookie tasters guessing…what’s that yummy salty, edgy flavor? A cookie with a twist, something different but familiar.

Miso Primer

Before getting to the recipe, let’s talk about Miso.  Miso is made from soybean that has been fermented with Koji, (the fungus Aspergillus oryzae).  It is a cornerstone of Japanese cuisine.  It adds a salty, earthy flavor to soups, marinades, and salad dressings.  There is white miso or Shiro Miso, red miso or Aka Miso and mixed miso or Awase Miso (red and white).  White miso is mild and sweet while red miso is aged longer and develops a much saltier, earthy taste, and is darker in color.  Awase. Miso is a blend of both red and white miso.  Shiro Miso is the most popular, so if you had to pick just one, this is the way to go. Try Hikari White Organic Miso which can be found in most Japanese stores.  Miso Honey Ribs, and Japanese Cha Siu from No Recipes both use white miso and are really delicious.

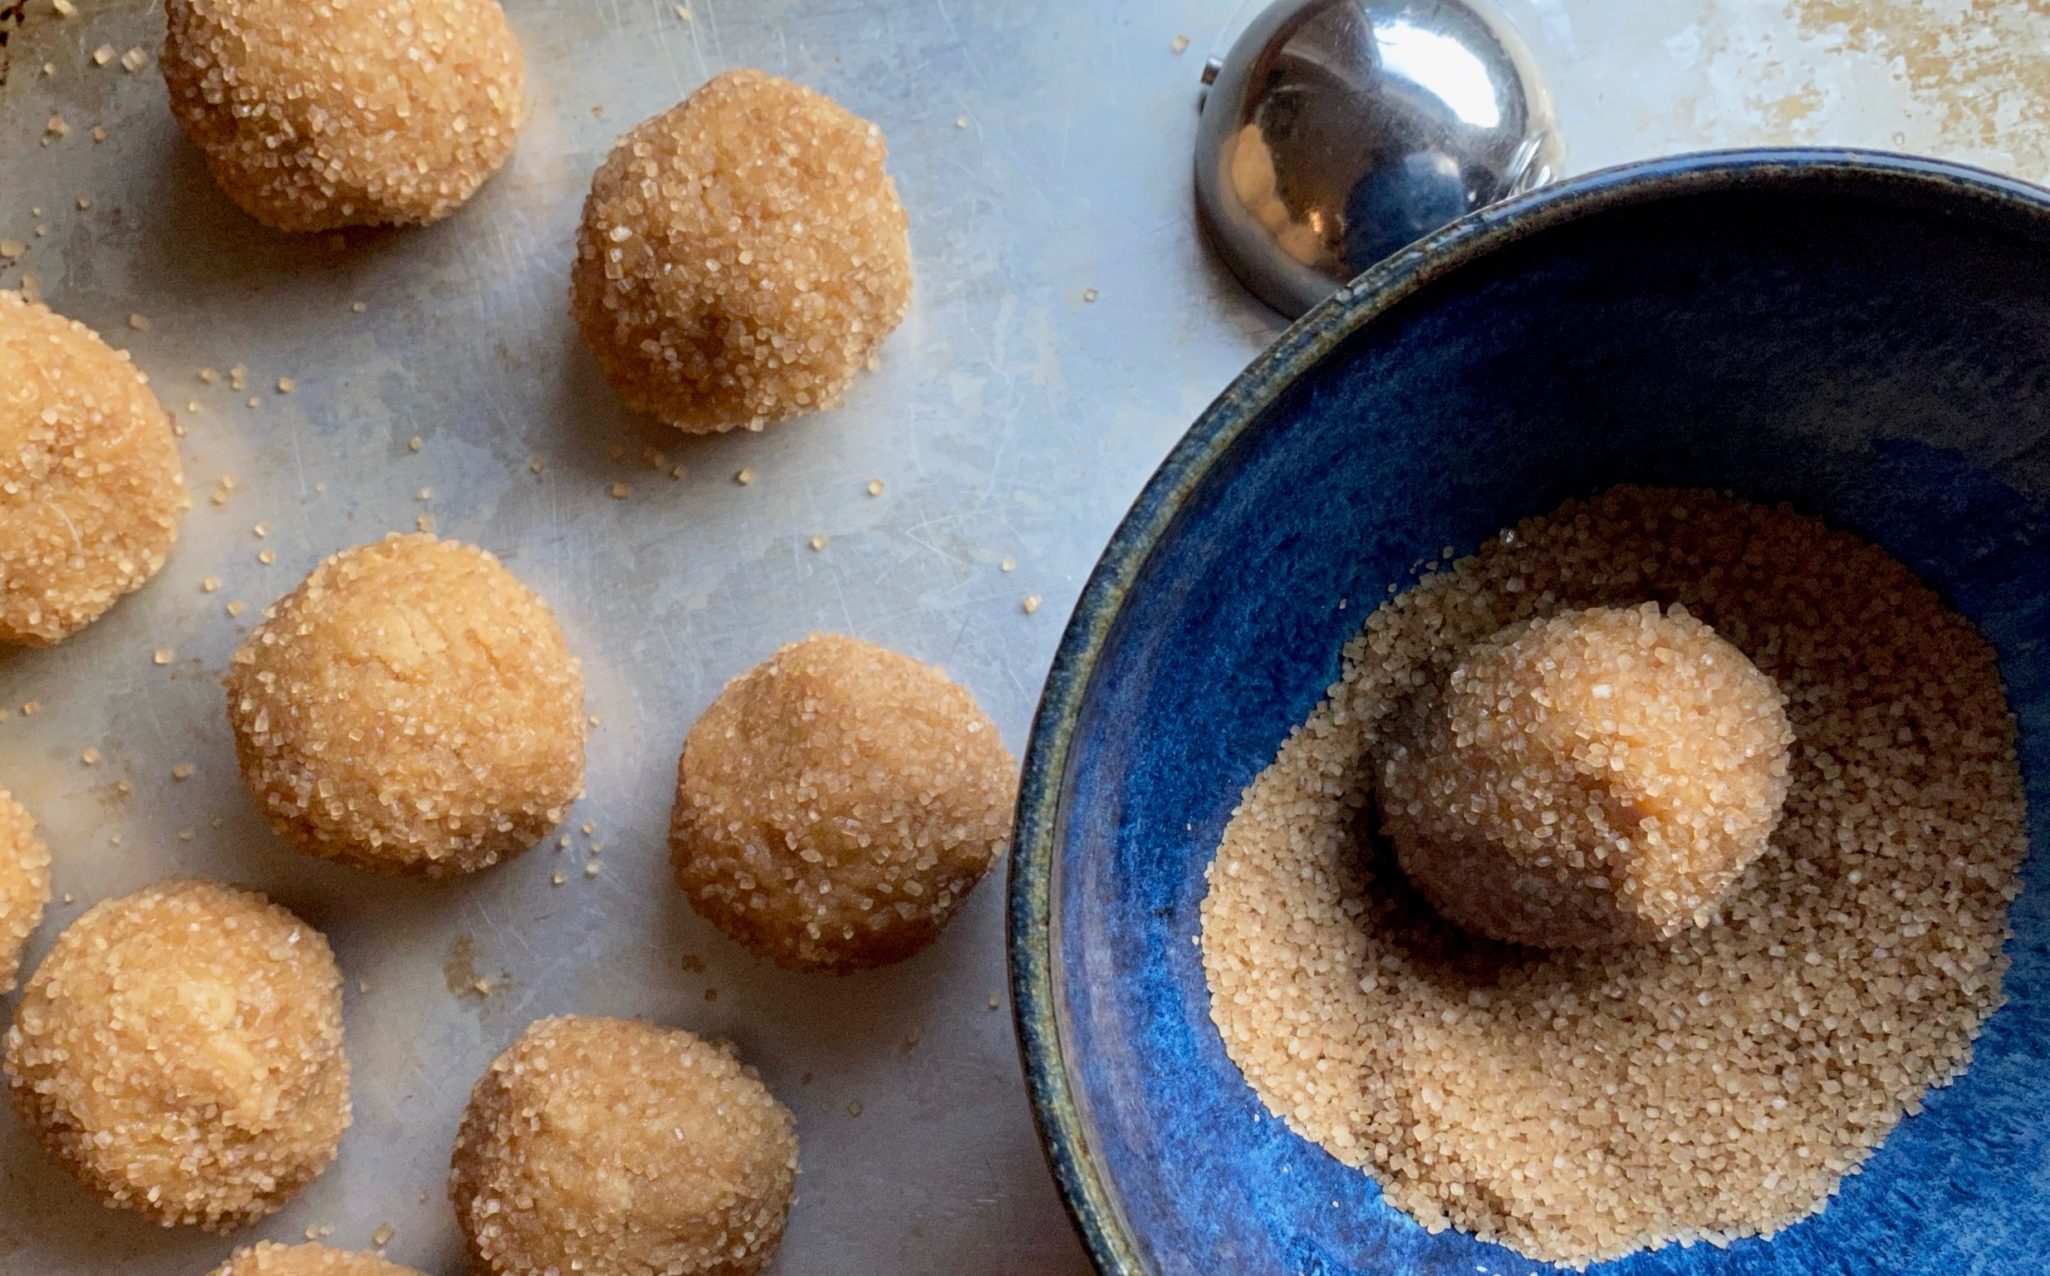
These cookies follow the standard cookie-making process.  Cream butter and sugar until light and fluffy.  Add white miso and peanut butter and cream mixture again, add egg and vanilla and stir in flour.  Pop the dough into the fridge to chill for about 15 minutes.  The dough will firm up and be easier to handle.  Use a 2 tablespoon ice cream scoop (#30-#36) to scoop out portions of dough, and hand shape to form a nice smooth ball.  Roll cookies in Demerara sugar or raw sugar which provides a nice crunch.  Place on a baking sheet.

The KEY to this recipe, let the cookie dough rest.  Put it in the fridge for a minimum of 2 hours to allow the miso to mellow.  The longer you let it rest the mellower the miso gets.
A great addition to these cookies would be white chocolate chips to compliment the miso or butterscotch chips.

Pan Rapping

A trick from Sarabeth’s baking book.  When the edges of the cookies are just beginning to set and the centers puff up, reach in the oven, lift the cookie sheet up, and rap or drop it on the rack.  This will cause the cookies to deflate and create those characteristic cracks.  Bake until the edges are set.  Yes, the precursor to pan banging cookies.

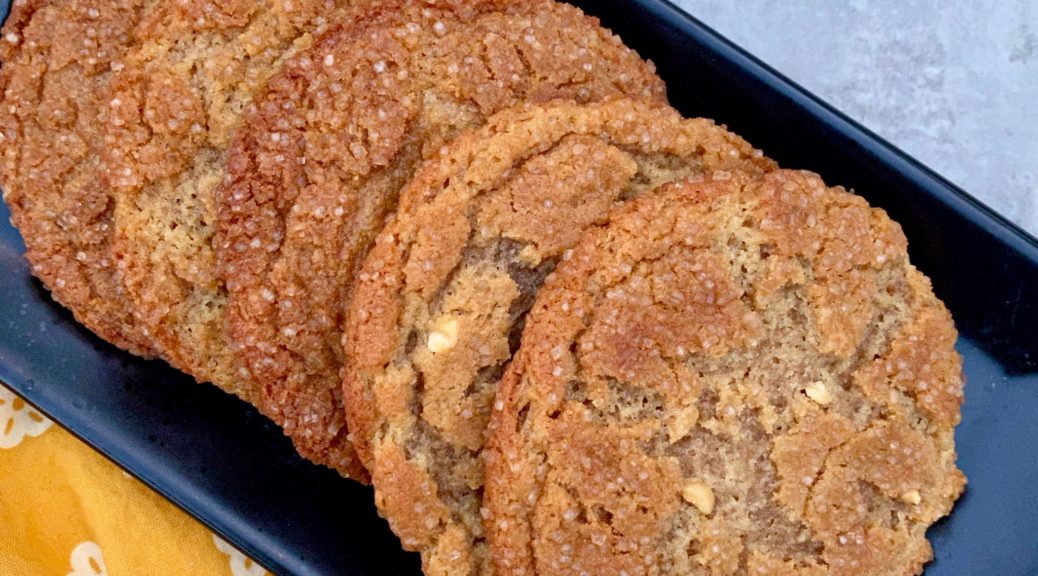
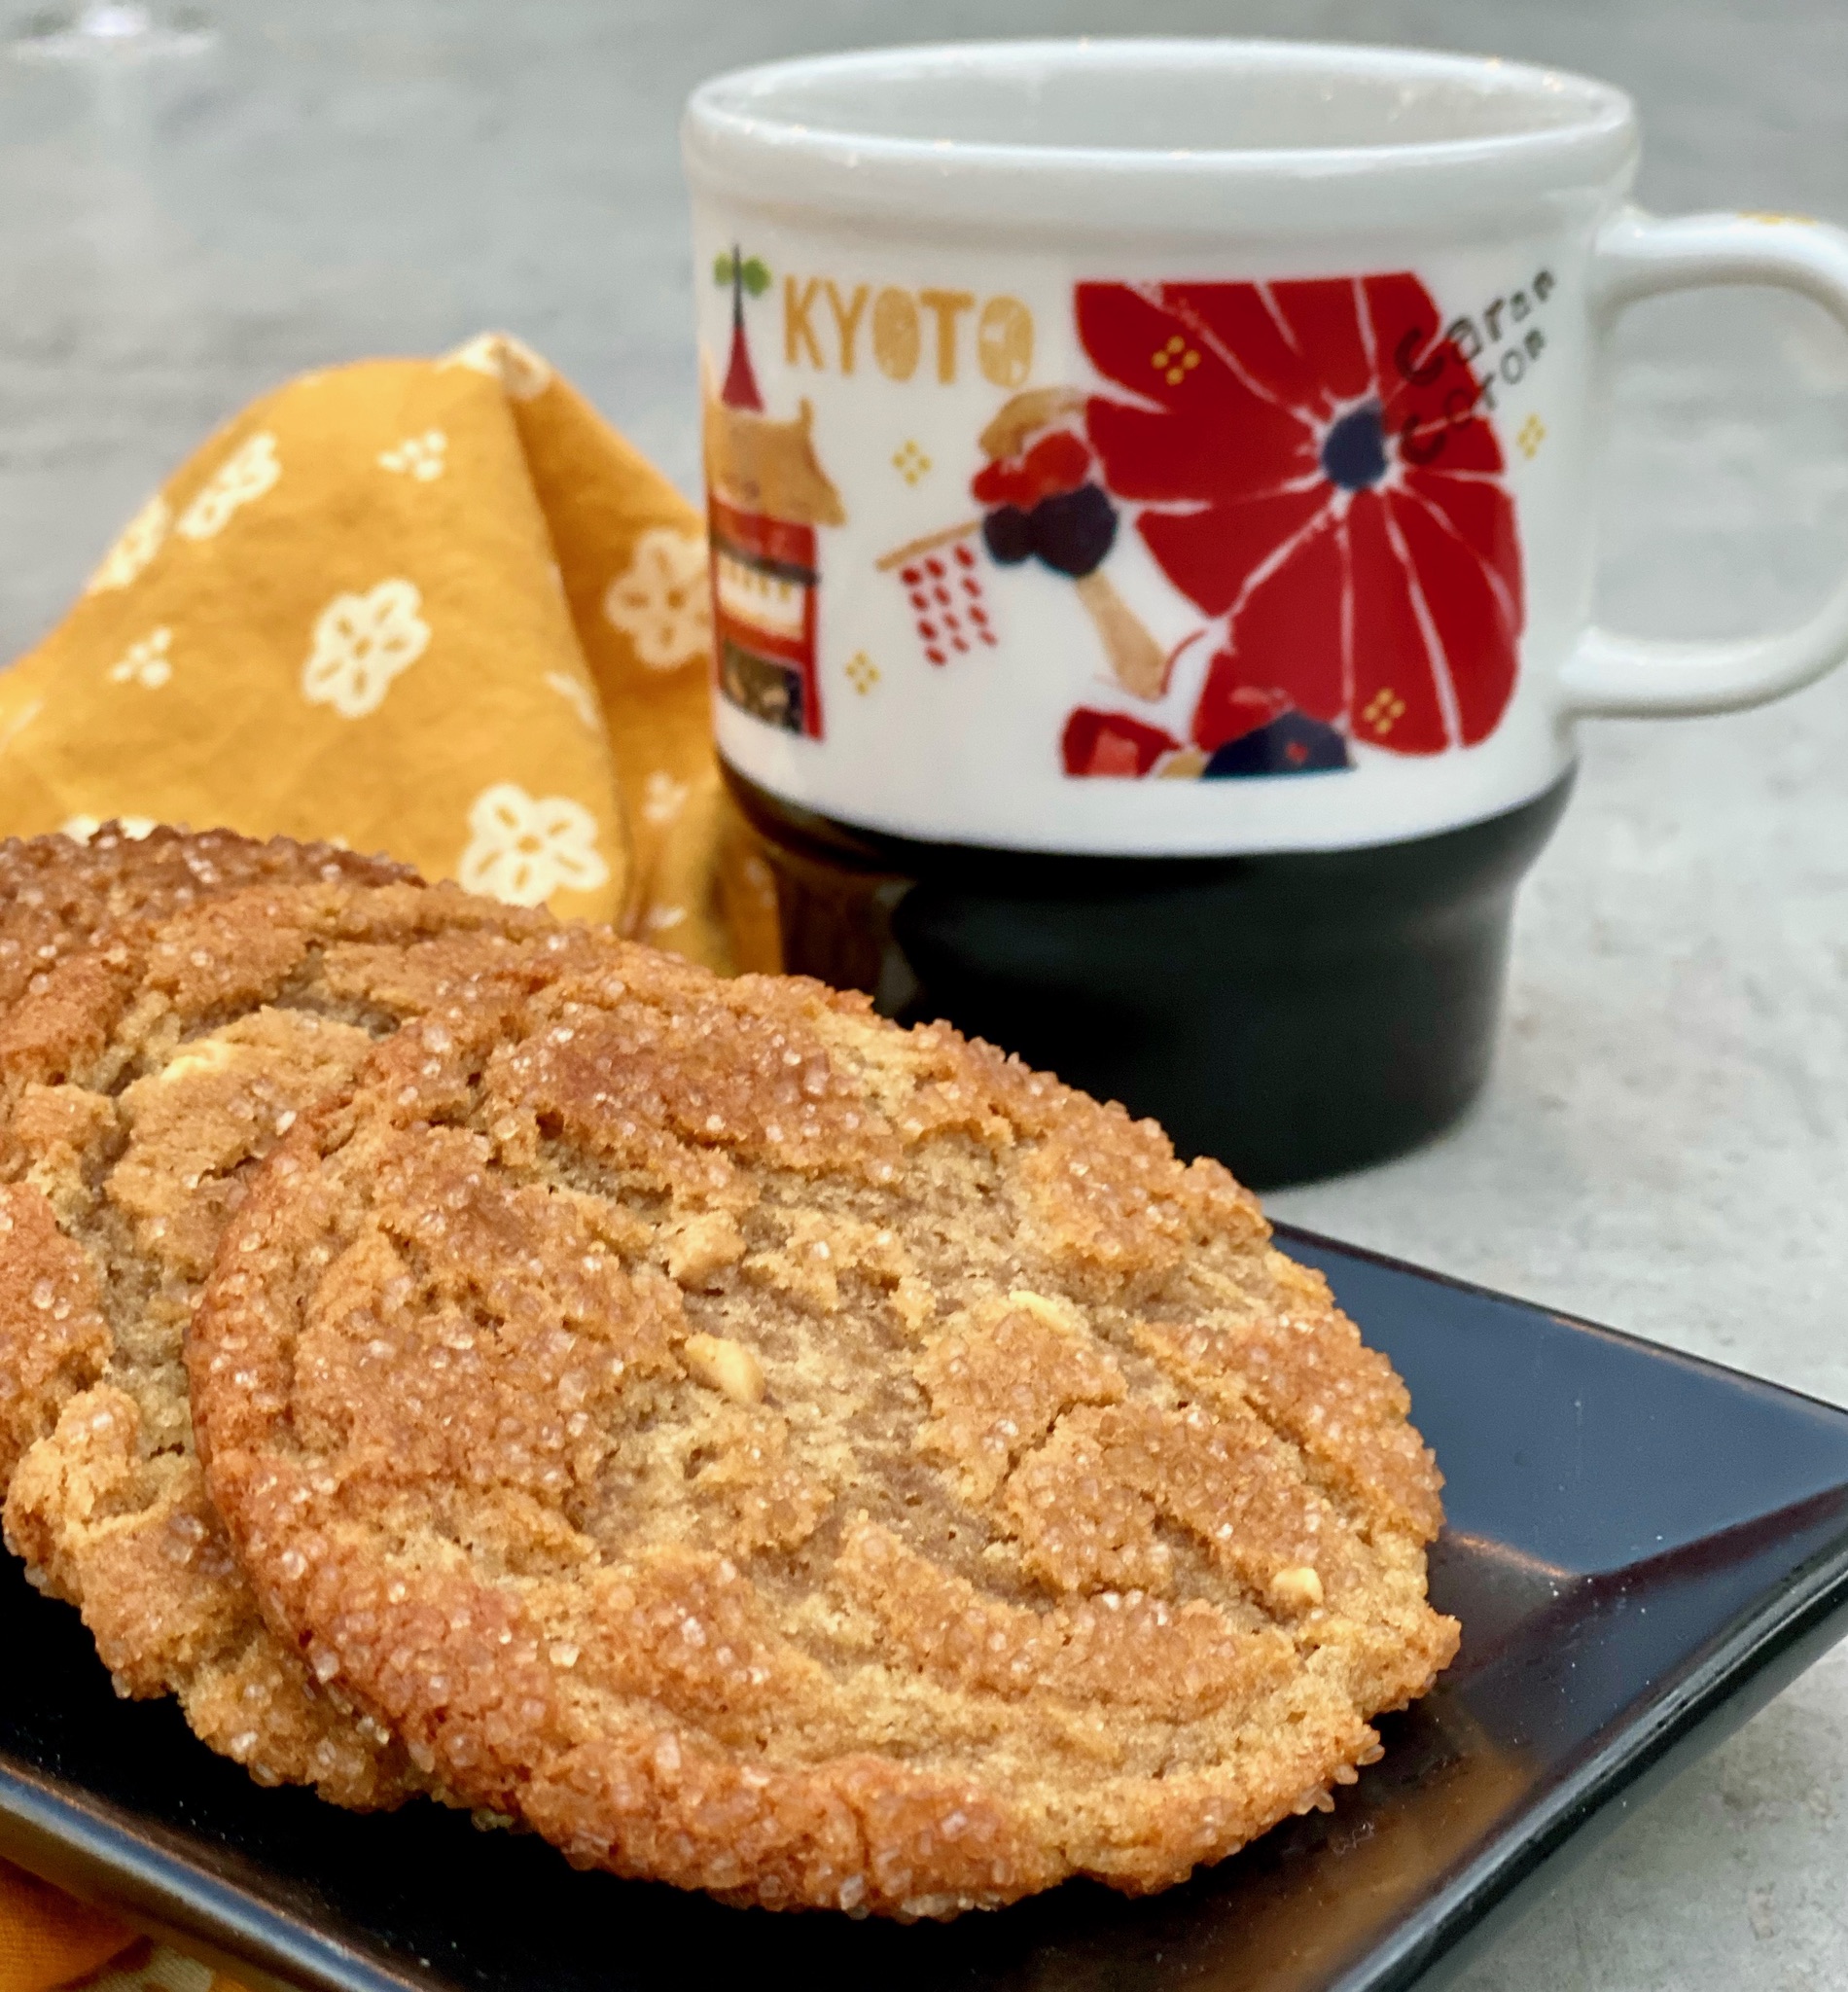
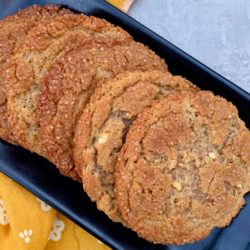
The sweet, salty, earthy flavor of these cookies pairs well with a nice cup of tea.  The edge is crispy, the center is chewy and every bite has a nice crunch from the sugar.  It’s different, it’s delicious, and a great addition to any holiday box of treats.

Peanut Butter Miso Cookies

A sweet, salty, earthy, crispy-edged, cookie with a chewy center and a miso twist. Delicious!
Course cookies
Cuisine American, Asian-American
Keyword Peanut Butter Miso Cookie
Prep Time 20 minutes
Cook Time 15 minutes

Ingredients

  • 1 ¾ cups all-purpose flour 225 grams
  • ¾ teaspoon baking soda
  • ½ teaspoon baking powder
  • ½  cup unsalted butter (1 stick), at room temperature 115 grams
  • 1 cup light brown sugar 220 grams
  • ½ cup granulated sugar 100 grams
  • cup white miso paste 80 milliliters
  • ¼ chunky peanut butter 60 milliliters
  • 1 large egg
  • 1 ½ teaspoons vanilla extract
  • ½ cup 105 grams Demerara sugar, plus more as needed
  • 2/3 cup white chocolate chips or butterscotch chips optional

Instructions

  • In a medium bowl, combine flour, baking soda and baking powder, and whisk until incorporated. Set aside.
  • In the bowl of an electric mixer fitted with the paddle attachment, mix butter, light brown sugar and granulated sugar at medium speed until light and fluffy, about 5 minutes.
  • Add miso and peanut butter to the mixing bowl, and continue to mix at medium speed, about 1 minute. Scrape down sides of the bowl to make sure all of the ingredients are evenly incorporated, and mix a bit more if needed. Add egg and vanilla extract, and mix until just combined.
  • Add 1/3 of the flour mixture to the mixing bowl, and mix on low speed until flour mixture is incorporated. Repeat with remaining flour mixture in two batches until all of it is incorporated.
  • Place 1/2 cup Demerara sugar into a small bowl. Scoop out a ball of dough (about 50 grams per cookie-use a 2 T ice cream scoop), and roll each portion between your hands until it is nice and round. (If the dough is too soft to roll, you can pop the mixing bowl in the refrigerator for 5 to 10 minutes to firm the dough up slightly.) Roll the piece of dough into the bowl of Demerara sugar and turn to coat. Transfer each ball to a parchment-lined baking sheet, arranging them about 3 inches apart. Repeat with all of the dough.
  • Refrigerate for 2 hours and up to overnight. (Even 15 minutes of refrigerator time will help the dough firm up, and the flavors meld. The longer the dough is refrigerated, the more mellow the flavors will be.)
  • When ready to bake, heat oven to 350 degrees. Bake cookies for about 15 minutes, until crisp at the edges and slightly puffed in the middle. They should still be a bit underdone in the center. Pull out the baking sheet and hit it against a counter. Place back into the oven to finish for about 3 to 4 minutes. When cookies are firm at the edges and slightly puffed in the center, pull them out and again hit the baking sheet against the counter. The cookies should appear flat and crinkly at the center.
  • Let the cookies cool on a baking sheet for a few minutes, then transfer to a cooling rack. Store fully cooled cookies in an airtight container; they should retain their chewy texture for a few days.
Taiwan Turkey Rice, 嘉義火雞肉飯 Deliciousness in a Bowl

Taiwan Turkey Rice, 嘉義火雞肉飯 Deliciousness in a Bowl

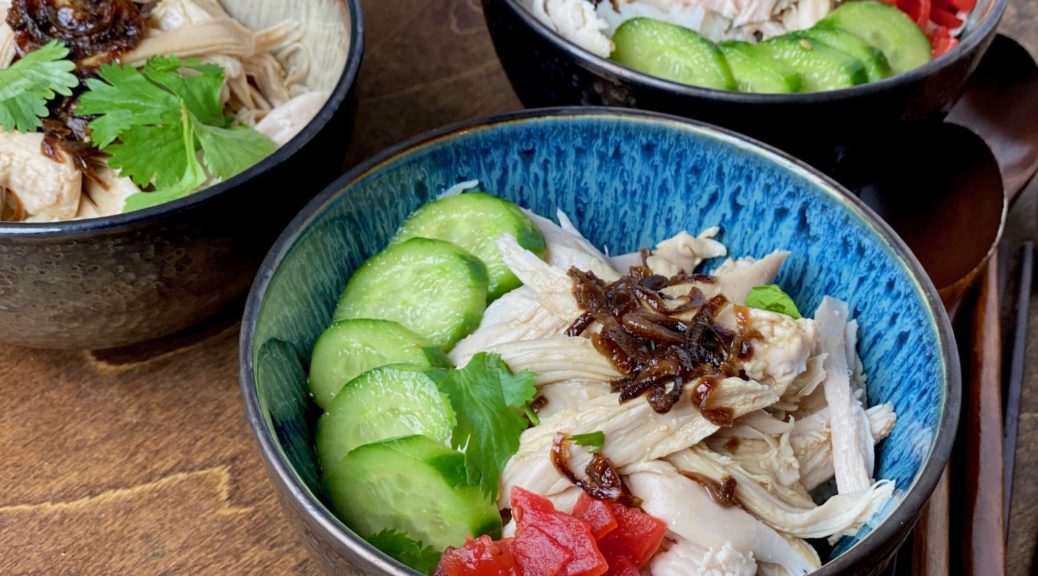
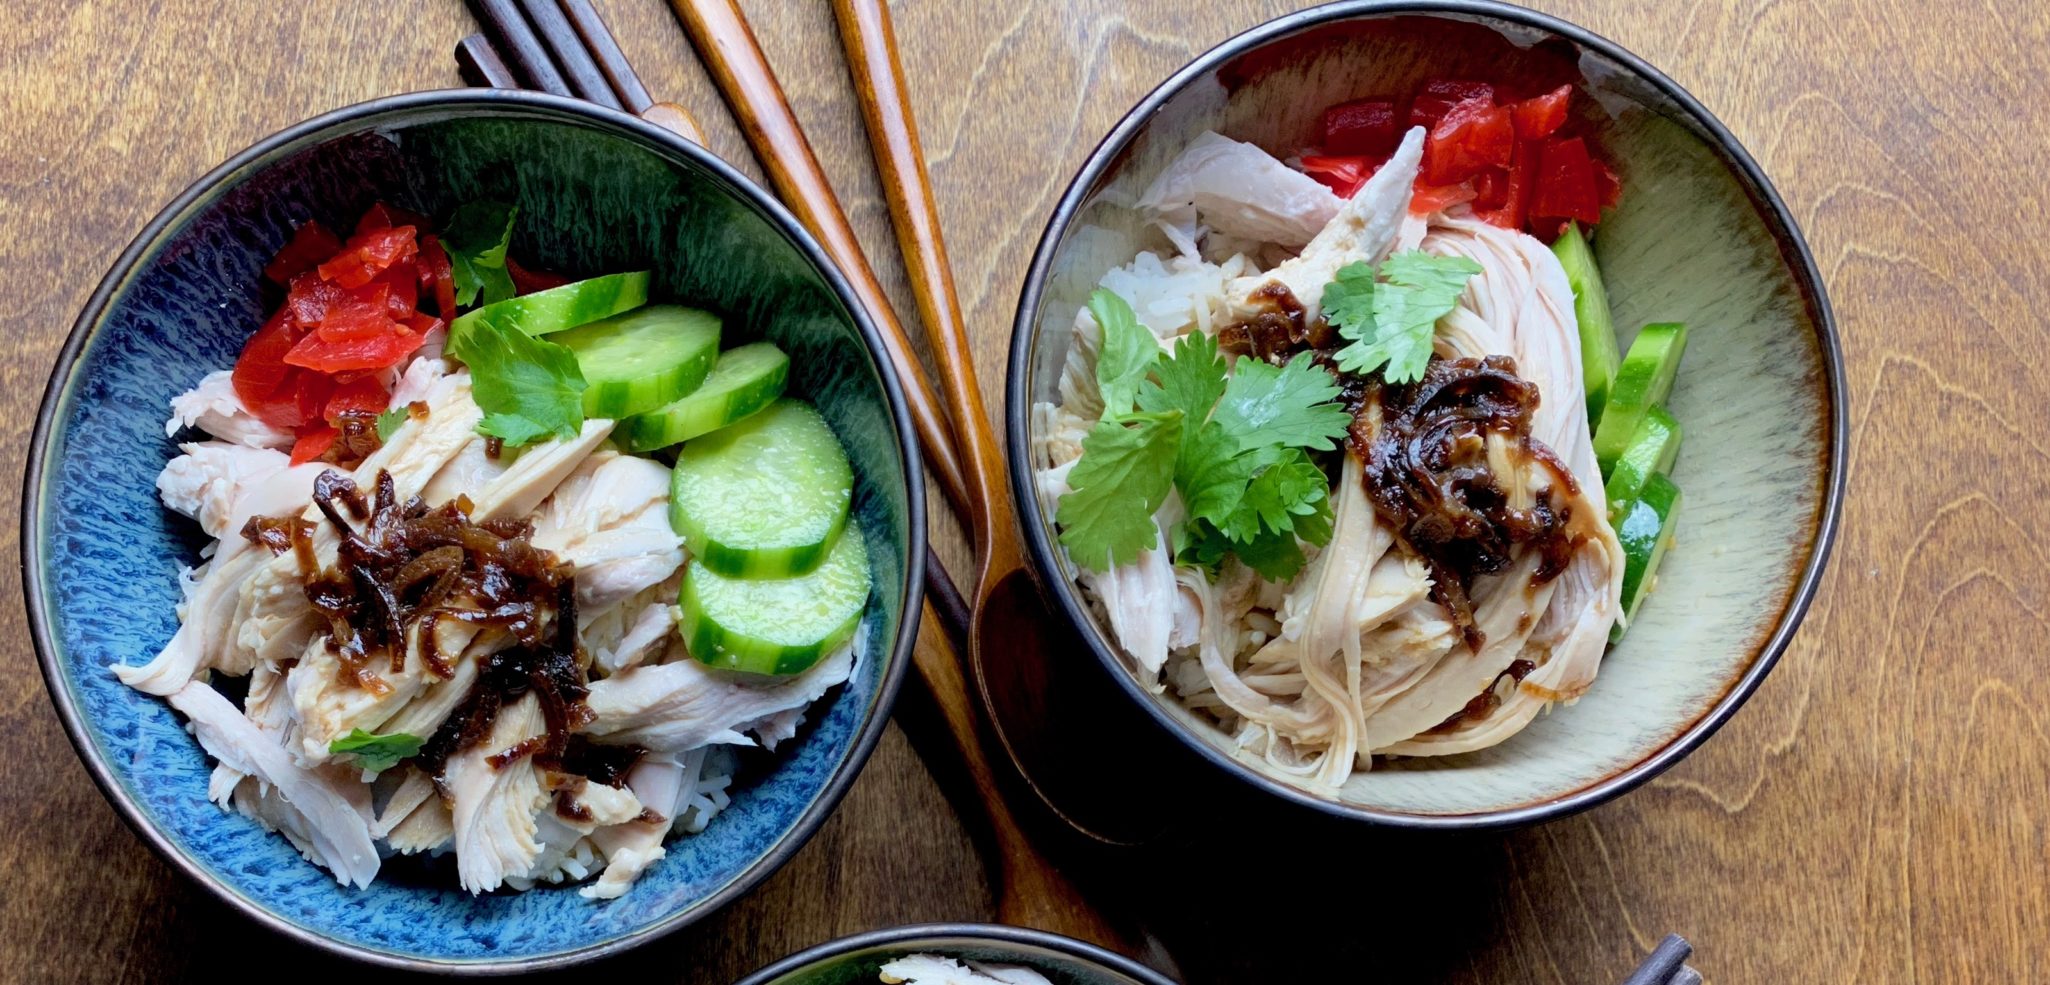
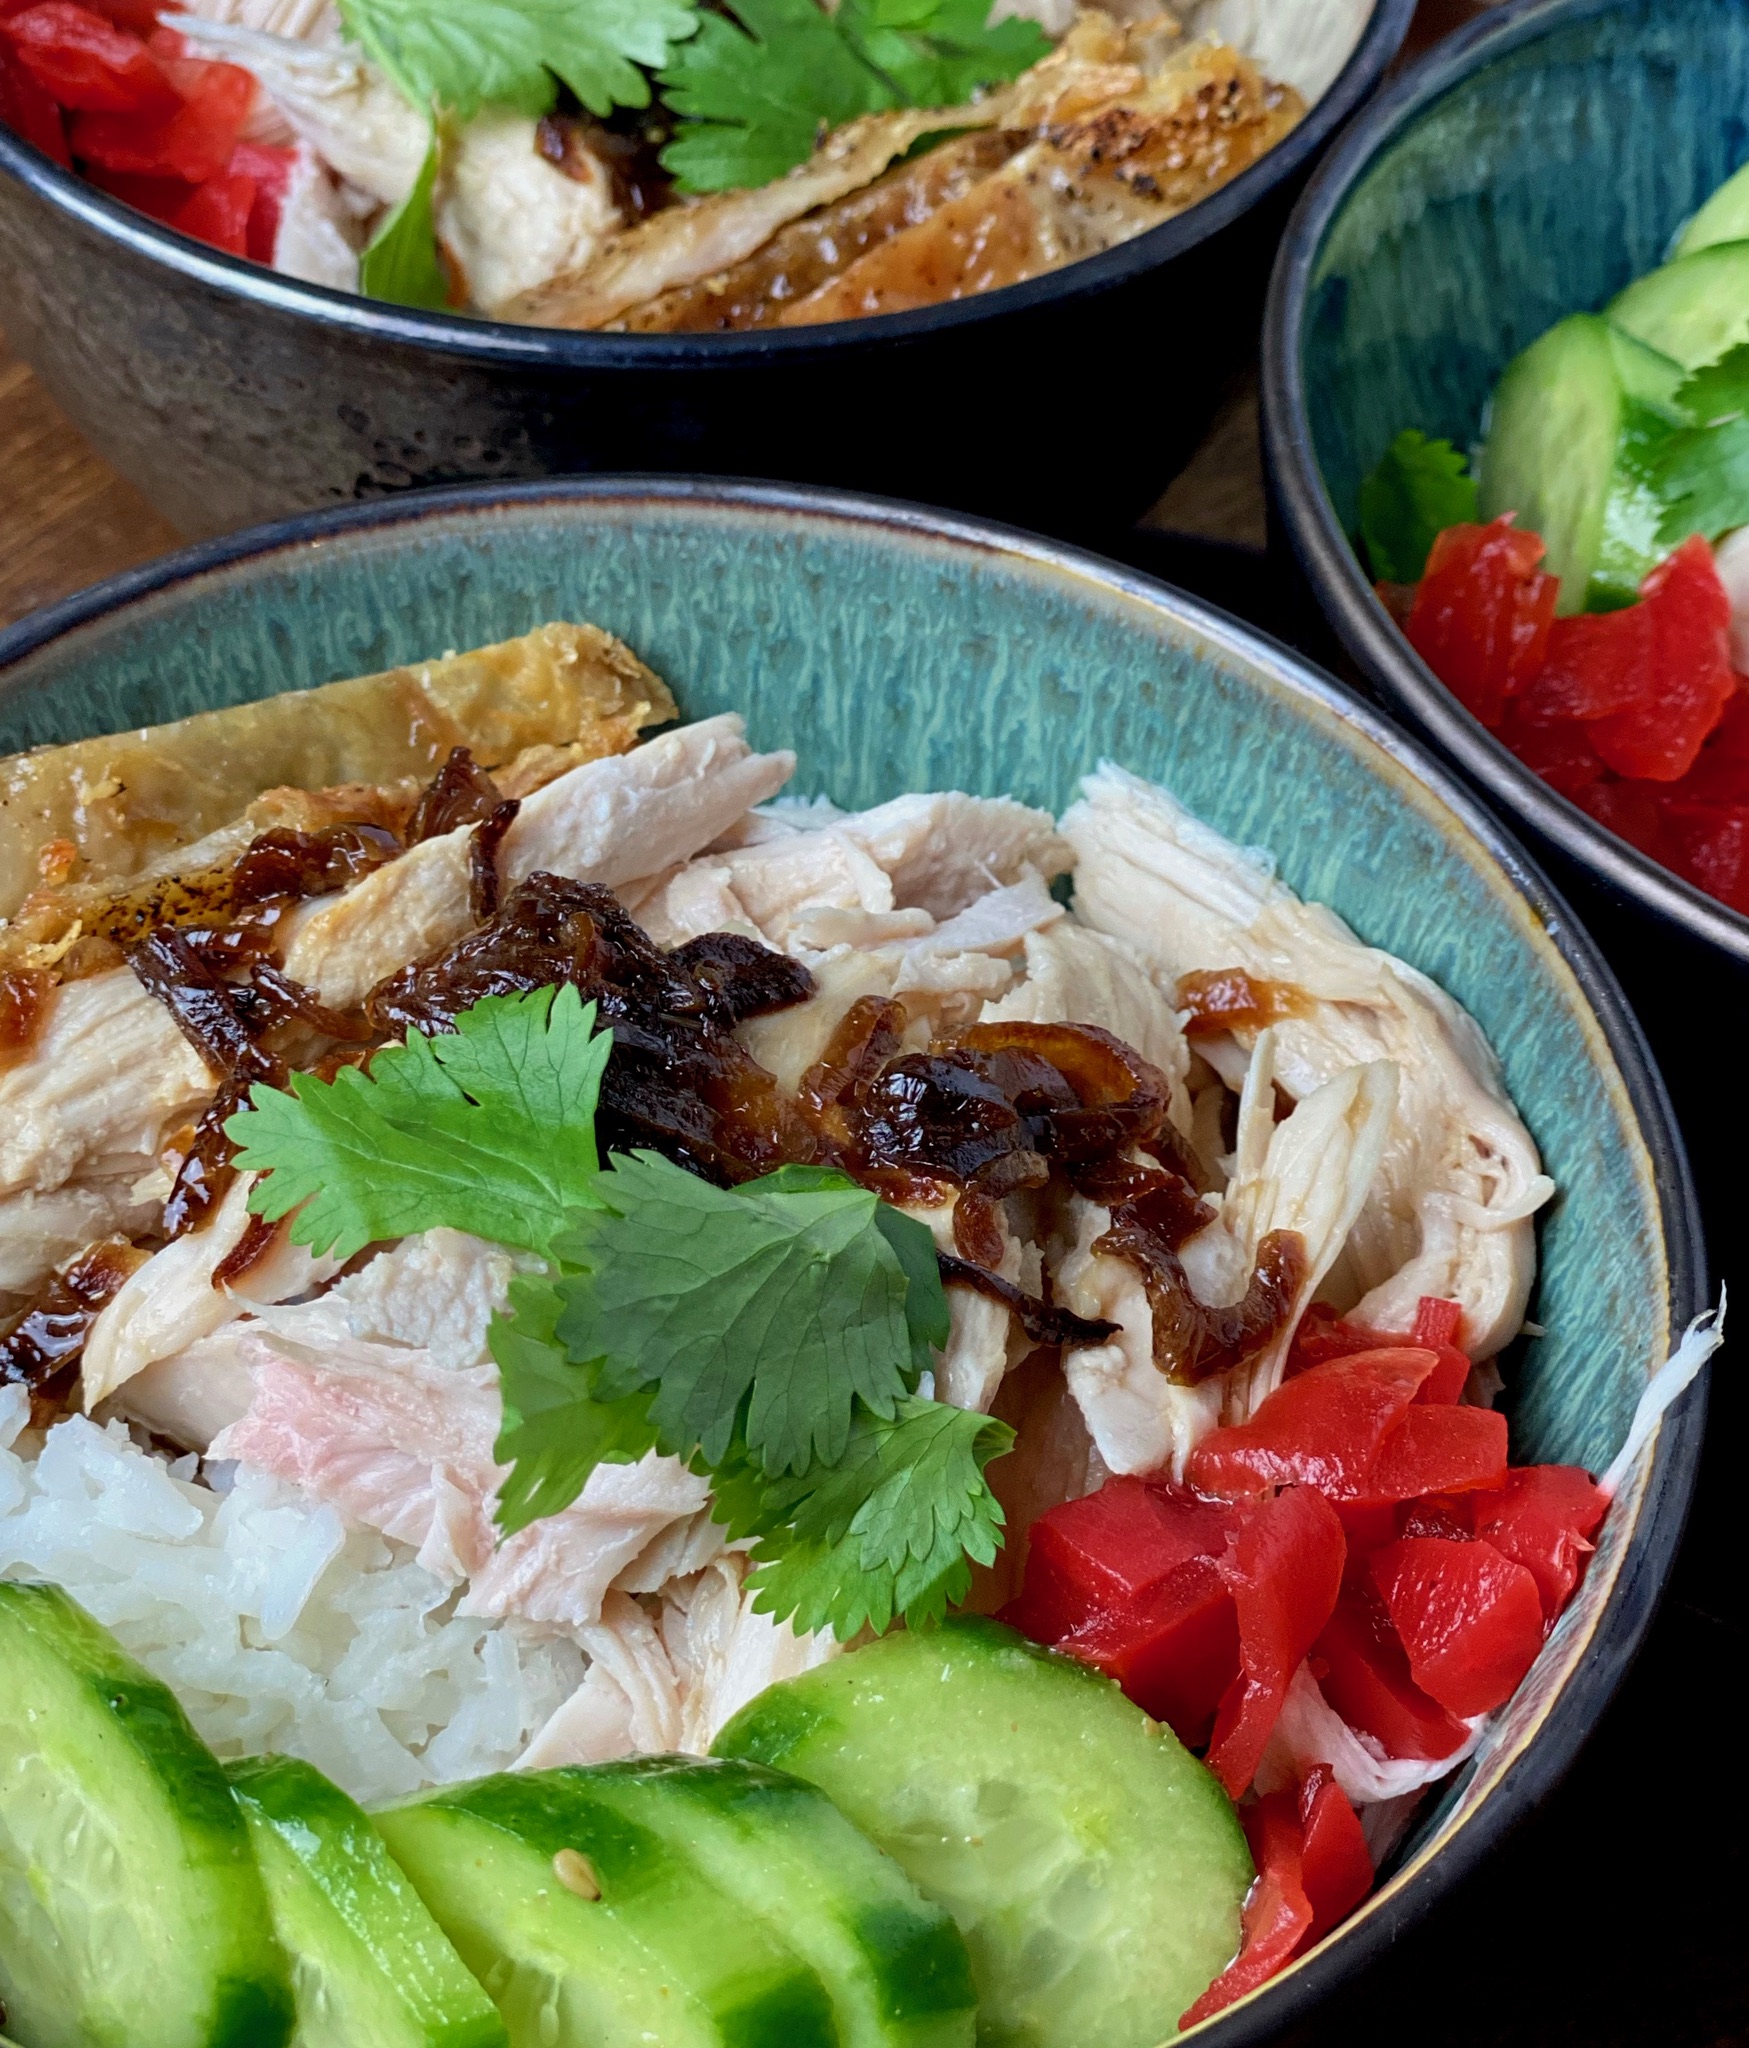
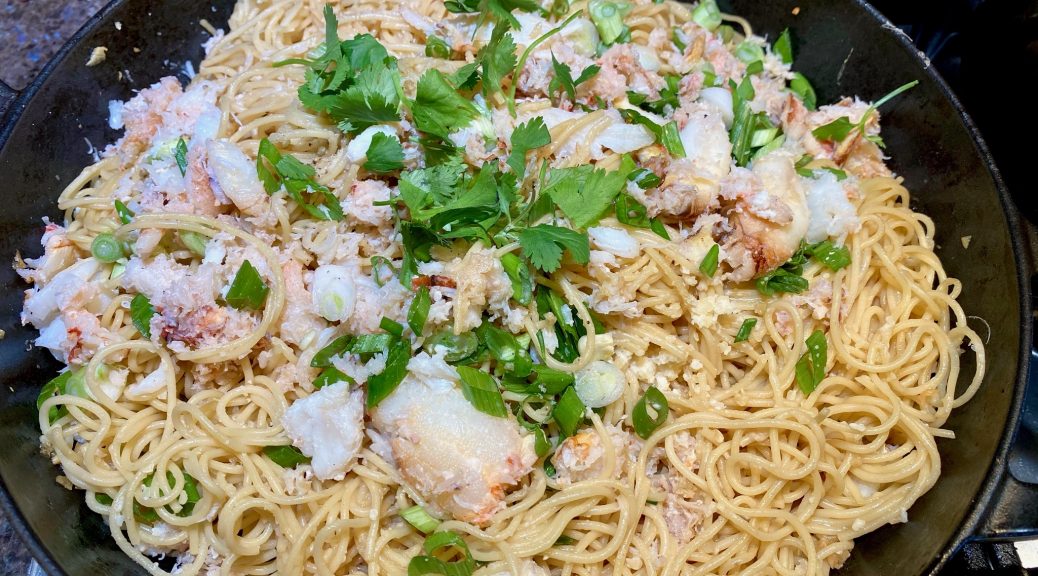
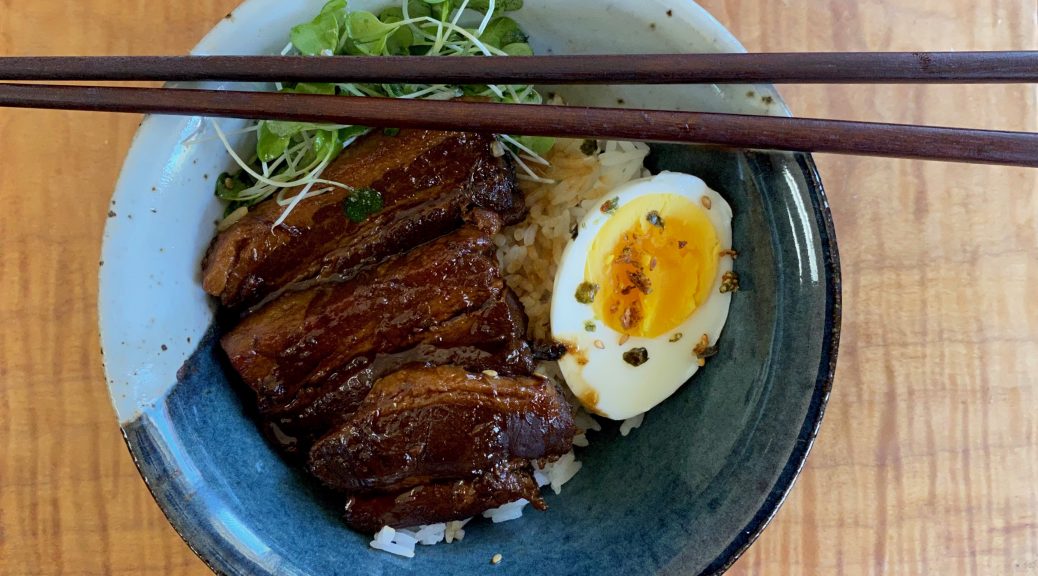
Only a couple of weeks have gone by since Thanksgiving and I have turkey on the brain, again!  Not that I didn’t get my fill of turkey on Thanksgiving but this dish caught my eye as I was roaming around the food-sphere looking for Thanksgiving ideas, Taiwanese Turkey Rice.  What?  Maybe it’s like rice soup? Nope, it is a bowl filled with rice, topped with succulent shreds of turkey, dressed with a soy sauce, fried shallots, turkey dripping emulsion and served with Asian pickles.  Damn, doesn’t that sound delicious?

SIGN ME UP NOW

I was drooling.  If you have perused my IG or blog for recipes you may have noticed that I LOVE one bowl meals like soups and stews.  My comfort zone is curled up on the couch, spoon in hand and a bowl in the other, filled with either rice or noodles topped with anything yummylicious…like THIS.

I did a bit of sleuthing for  this dish.  Turkey is not something you find in the Asian food vernacular.  It turns out, Taiwanese Turkey Rice (嘉義火雞肉飯) hails from southern Taiwan, specifically Jia Yi.  It is a super popular street food and turkeys are grown specifically for this dish.  Originally the turkey was shredded as a garnish for the classic dish, Lu Rou Fan, 魯肉飯, Stewed Pork over Rice, but folks liked the turkey so much, they started making it without the Stewed Pork, thus Taiwanese Turkey Rice was born.

Turkey Rice is similar to Hainan Chicken Rice or Thai Chicken and Rice.  The flavor profile of the sauce sets it apart though, oh yeah, and the turkey, but in a pinch you could use chicken for this dish.  I decided to cook the turkey ala Hainan Chicken style. The turkey is poached so you end up with moist succulent meat plus the stock which serves as the basis for the sauce.  There are a plethora of recipes out there right now that take advantage of turkey leftovers to make this dish including this one from Serious Eatsbut I wanted the real deal so I started with uncooked turkey breast.

Two blogs jumped out and served as the basis for info and recipe for Taiwanese Turkey Rice, Choo Choo-ca-Chew  and The Food Dictator.  A wealth of information and great recipes.

The Turkey

I started with a turkey breast, well, half of a turkey breast and poached it, just like Hainan Chicken.  The poaching liquid is seasoned with salt, ginger, scallion, rice wine and Better Than Bouillon Chicken Base (game changer).  If you have a box of turkey stock from TJ’s, use that and water for a more flavorful stock.  (I think their turkey stock is better than the chicken stock in a box.

When you buy your turkey make sure the skin is still attached***  Remove the skin at home and reserve. Drop the turkey into the boiling poaching liquid (ok, don’t just DROP it, gently place…to avoid 3rd degree burns).  Bring the stock back to a boil and turn the heat down so the stock is simmering.  Cover and let simmer for 10 minutes.  Turn the flame off, NO PEEKING, and let the turkey sit for 25 minutes undisturbed.  Think of it as a spa day for the turkey.  Once it is done take it out of the pot, let it sit until it is cool enough to handle.  Remove meat from bone and shred into bite size pieces.  Reserve in bowl and cover to keep warm.

Gimme Some Skin***

A trip to Minneapolis, back before the time of COVID, we caved into Wes’s penchant for Caesar Salad at the Butcher & The Boar (sadly gone) one night for dinner.  A few tweaks made their Caesar a standout.  The Romaine lettuce was grilled, and in place of croutons, bits of chicken skin baked to a crispy golden finish adorned the salad. ㄹingerlicking good.

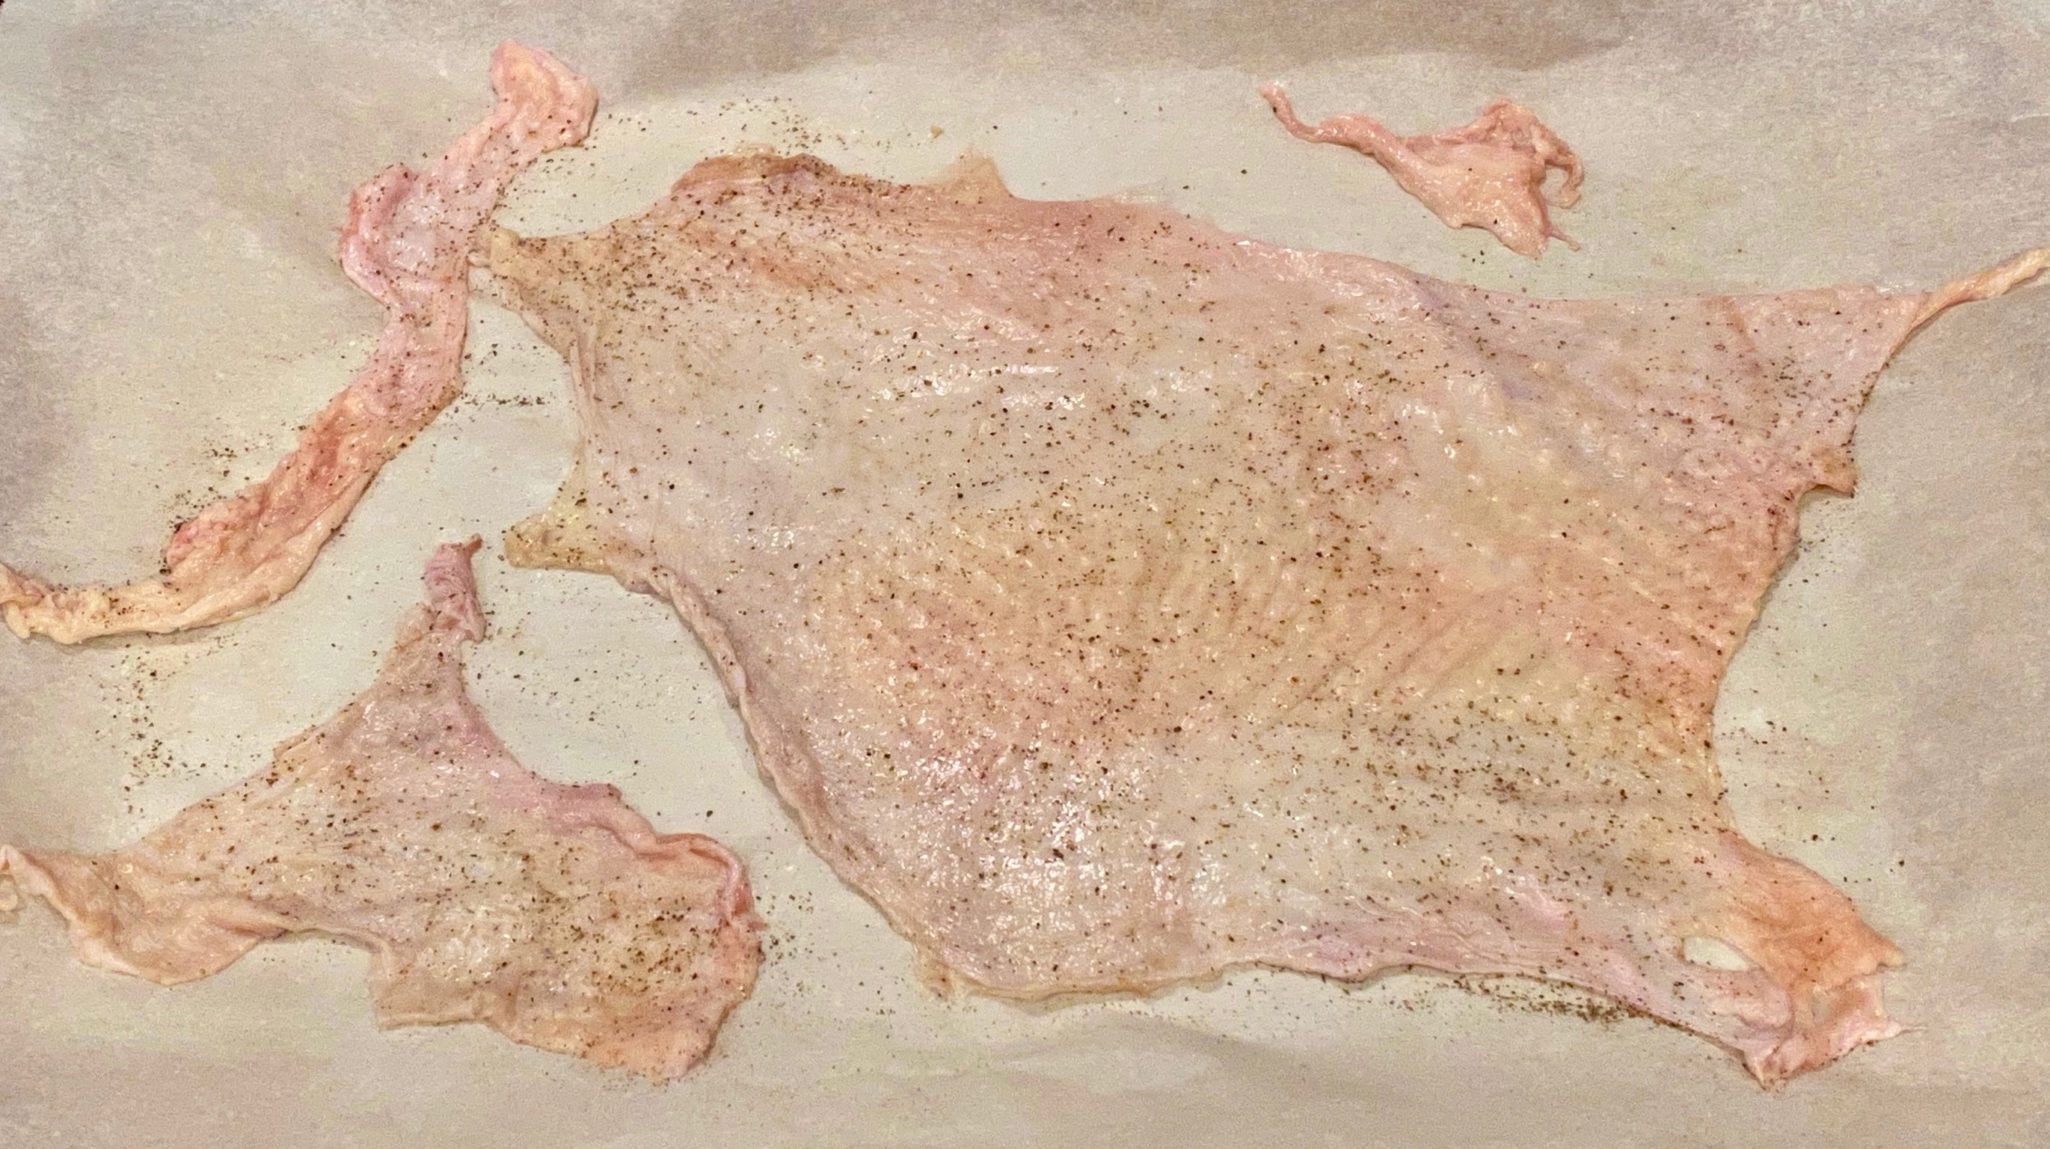
Crispy chicken skin (in this case turkey) is pretty quick and easy to make.  Spread the skin out on a parchment lined rimmed baking sheet.  Salt and pepper.  Cover with a sheet of parchment and top with another baking sheet to keep the skin flat.  Bake at 375 degrees for 20-25 minutes until skins are deep golden.  You should have a nice puddle of oil from this, KEEP the oil.

The rendered oil is used in the sauce for the dish.  The crispy skin is a bonus that I use as a garnish for turkey rice.  It provides added crunch and flavor to the dish, its damn delish.

The Sauce

Hainan Chicken or Chinese Poached Chicken is served with a ginger, scallion, sauce with or without slices of chili.  For Taiwanese Turkey Rice, the sauce is made with fried shallots, light soy sauce, a bit of sugar and the rendered oil from the turkey.  It’s deceptively simple for a sauce that is so delicious.  I buy a ton of shallots, thinly slice and fry them. The oil is kept in the fridge and the shallots in a jar on the counter.

Here is a detailed description on how to make fried shallots from Serious Eats.  IN A PINCH, you can buy fried shallots at most Asian markets and avoid frying your own.  IN A DOUBLE PINCH, TJ’s has fried crispy onions in a can during the holidays, (probably for the green bean casserole I hate) that make a pretty good substitute.

The Rice

Traditionally served over plain rice, you can bump it up by using the poaching liquid to cook the rice.  Just reserve enough for the sauce.  For the rice use any long grain or Jasmine Rice.

The Sides

Pickles are often served with Turkey Rice.  I like pickled ginger, takuan (pickled Japanese radish), or Vinegared Chinese pickles.  I love soft boiled eggs (like ramen eggs) and fresh cucumbers lightly dressed as sides. Garnish with scallions or cilantro.  Lip-smackin’ good.
Taiwanese Turkey Rice

Course Main Course, One dish meals
Cuisine Asian
Keyword Rice Bowl, Soul Food, Taiwanese, Turkey Rice
Prep Time 20 minutes
Cook Time 1 hour 15 minutes
Servings 2 servings

Ingredients

  • 2 C Shredded Turkey* You can use Thanksgiving turkey leftovers

Poaching Liquid

  • Water Enough water to cover turkey
  • 2-3 slices ginger
  • 2 scallions
  • 1 tsp salt
  • 1/4 cup rice wine
  • 1 tablespoon Better Than Bouillion Chicken Base

SAUCE

  • 3 Shallots Thinly sliced
  • 1-1/2 TBsp Oil Lard, Vegetable Oil, Chicken Fat or Half and Half
  • 3 TBsp Soy Sauce Light Soy Sauce (Pearl Ridge is good)
  • 1 TBsp Sugar
  • 3/4 C Chicken/Turkey Broth

RICE

  • 2 C Rice Steam or cooked according to instruction. You can also use the chicken stock from boiling the chicken to cook rice if making from scratch. It really enhances the flavor

Instructions

Turkey

  • Start with just enough water to cover the turkey breast in a pot. Add ginger, scallions, rice wine, and stock base and bring to a boil. Add turkey and cook for 10mins then turn the heat off and let it sit in the pot for 25 mins or until cooked through. This method makes silky, tender, turkey.
  • Remove from pot, cool until you can handle and shred into small pieces. Cover and reserve.
  • The poaching liquid can be reduced by 20-30% to concentrate the flavor. Taste.

SAUCE

  • In a frying pan, heat up 1-1/2 TBsp of oil of your choice. I use 1/2 shallot oil and 1/2 rendered fat from turkey
  • Add the sliced shallots to the oil and fry until crispy golden. Remove shallots or you can leave them in the sauce. I like to remove them and sprinkle them on the finished bowl. Or go half and half.
  • Add the turkey stock, soy sauce, and sugar to the pan, careful the oil may splatter
  • Cook on high to slightly reduce the sauce.

The Bowl

  • Layer shredded turkey over steaming rice, pour amount ofsauce you want over the turkey.
  • Garnish with pickles, or green veggies, or cucumbers, fried shallots, scallions, soft boiled egg, or reserved crispy turkey skin.

Notes

Leftover holiday turkey can be used for this dish.  Make sure you keep the pan drippings from the turkey and use this for the oil in the sauce.  You can use turkey stock or water for the sauce.
Thin, Crispy, Gooey, Chocolate Chip Cookies-Get It On, Bang a Pan

Thin, Crispy, Gooey, Chocolate Chip Cookies-Get It On, Bang a Pan

I have been a slouch when it comes to holiday cookies this year. LUCKY FOR ME, Jamie is home and baking up a storm…I get the difficult task of eating and posting about whatever deliciousness she has baked up.

I had all this planned of course.  My copy of Sarah Kiefer’s 100 Cookies finally arrived which I then strategically left on the kitchen island in full view. Heh, heh, heh.  The book is a beauty both in content and style.

She took the bait. Flipping through the book, Jamie landed on the Neopolitan Cookies exclaimed “so making these”.   I kept nodding enthusiastically with every cookie she mentioned.  We loved the Neapolitans, buttery, chewy,  flavored with vanilla, strawberry, and cocoa.  These are definitely going in the rotation.  The Smores Bars were labor-intensive but worth the effort. Imagine a blondie base, coated with chocolate and topped with a layer of toasty homemade marshmallow fluff.

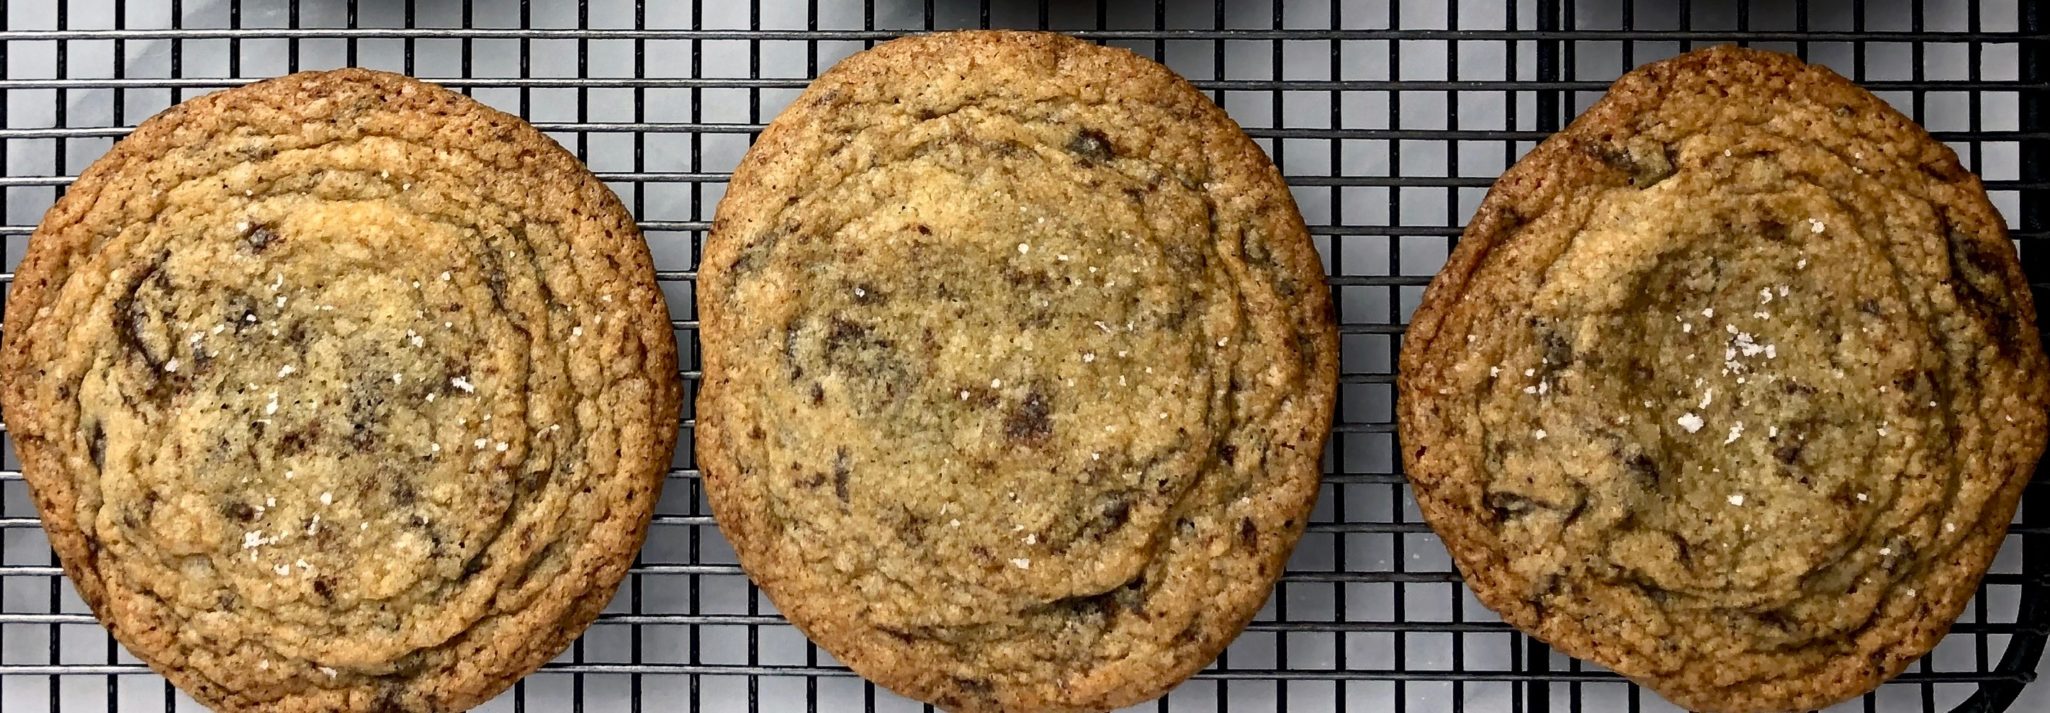
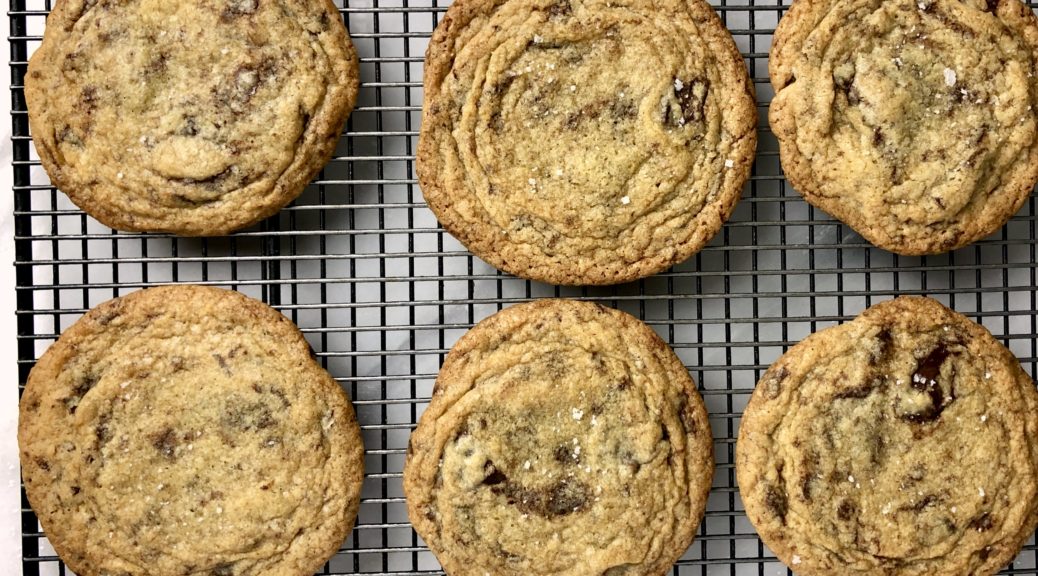
Despite the many CCC recipes we have, her Chocolate Chip Cookies and the pan banging technique proved irresistible.  All we can say is make room for this bad boy in your chocolate chip cookie file, it’s that good.  The cookies are thin, crisp-edged yet soft in the center.  They’re dotted with chopped dark chocolate bits and finished with a sprinkle of Fleur de Sel.  The dough is sweet so don’t skip the Fleur de sel and definitely use dark chocolate for balance.

You should be running to your kitchen now to make these.

Pan-banging

No, not headbanging which is what I have been doing all year, it’s been that kinda year.  I first came across pan-banging in Sarabeth’s Bakery cookbook (a beautiful cookbook)  Sarabeth’s Kitchen is a New York institution known for their breakfasts, jams, and baked goods.  Her version of Chocolate Chip Cookies, Chocolate Clouds, calls for rapping the pan on the oven rack with a couple of minutes left in baking.  This causes the cookies to deflate and develop their signature cracks.  I adopted this rapping the pan for several of my drop cookie recipes including the Oatmeal Apricot Cookies from Dahlia Bakery.  Love the way cracks and crevices look in drop cookies.

Sarah takes it to a whole new level, by repeatedly banging the pan in 2-minute intervals, you get these super cool circular ridges that look like a tree’s age rings.  The cookies bake thin and flat, they spread quite a bit, so plan on about 5 cookies per baking sheet.

So take your 2020 aggressions out by making these pan banging chocolate chip cookies and end up with beastly cookies. Win-win.

Chocolate Chip Cookies (100 Cookies)

From 100 Cookies Thin and Crispy, Ridged Chocolate Chip Cookies
Course cookies
Cuisine American
Keyword chocolate chip cookies
Prep Time 20 minutes
Cook Time 10 hours 14 minutes

Ingredients

  • 2 cups all-purpose flour (284 grams) Gold Medal AP Flour will give you better ridges
  • ½ teaspoon baking soda
  • ¾ teaspoon salt
  • ½ pound unsalted butter (227 grams) 2 sticks, room temperature
  • 1 ½ cups granulated sugar (300 grams)
  • ¼ cup brown sugar (55 grams) dark brown preferred
  • 1 large egg
  • 2 tablespoons water
  • 1 tablespoon vanilla extract
  • 6 ounces bittersweet chocolate (170 grams) about 60 percent cacao solids, chopped into coarse pieces, bits and shards. We used TJ's Pound Plus Dark Chocolate
  • Fleur de sel or Maldon Salt, for sprinkling

Instructions

  • Adjust an oven rack to the middle position. Line 2 baking sheets with parchment paper
  • In a small bowl, whisk the flour, baking soda and salt.
  • In the bowl of a stand mixer fitted with a paddle, beat the butter on medium until creamy about 1 minute. Add the granulated and brown sugars and beat on medium until light and fluffy, 2 to 3 minutes. Add the egg, vanilla and 2 tablespoons water, and mix on low to combine. Add the flour mixture, and mix on low until combined. Add the chocolate and mix on low into the batter. (At this point, the dough can be refrigerated for several hours or overnight.)
  • Heat the oven to 350 degrees. Form the dough into 2.5 ounce (~70 gram) balls (#24 ice cream scoop 1/3 cup each). Place 4-5 balls an equal distance apart on pan.
  • Place the baking sheet in the oven and bake 7 minutes, until the cookies are puffed slightly in the center. Lift the baking sheet and let it drop down against the oven rack, so the edges of the cookies set and the inside falls back down. (This will feel wrong, but trust me.) Bang it down, if necessary, to make the center fall.
  • After the cookies puff up again, 2 minutes later, repeat lifting and dropping the pan. Repeat a few more times, every 2 minutes, to create ridges around the edge of the cookie. Bake 13 to 14 minutes total, until the cookies have spread out, and the edges are golden brown, but the centers are much lighter and not fully cooked.
  • Transfer the baking sheet to a wire rack and sprinkle with Fleur de sel or Maldon salt. Let cool10-15 minutes before removing the cookies from the pan.
  • Repeat with remaining cookies. Store in an airtight container.

Notes

We used a #24 ice cream scoop, ~2.5 ounces and baked for 14 minutes.  The original recipe calls for 3 ounces of dough and bake for 15-16 minutes. 
You can use King Arthur Flour (higher protein) but it may not develop as many ridges. 
I would recommend weighing ingredients, esp flour, for accuracy.
The Apple Pie of My Eye (Cinnamon Bun Apple Pie)

The Apple Pie of My Eye (Cinnamon Bun Apple Pie)

Our Thanksgiving dinner was a little family affair as I suspect most people’s celebrations were.  We modified our dinner, kept it small, moved it earlier in the day so we could eat outside, roasted turkey parts instead of the entire bird (wow, cut the cooking time a ton!), and settled for fewer side dishes.

But when it came to dessert…there was no compromise on PIE.

We made three pies…for six people.  Yep, one pie for every two persons.

Sounds about right.

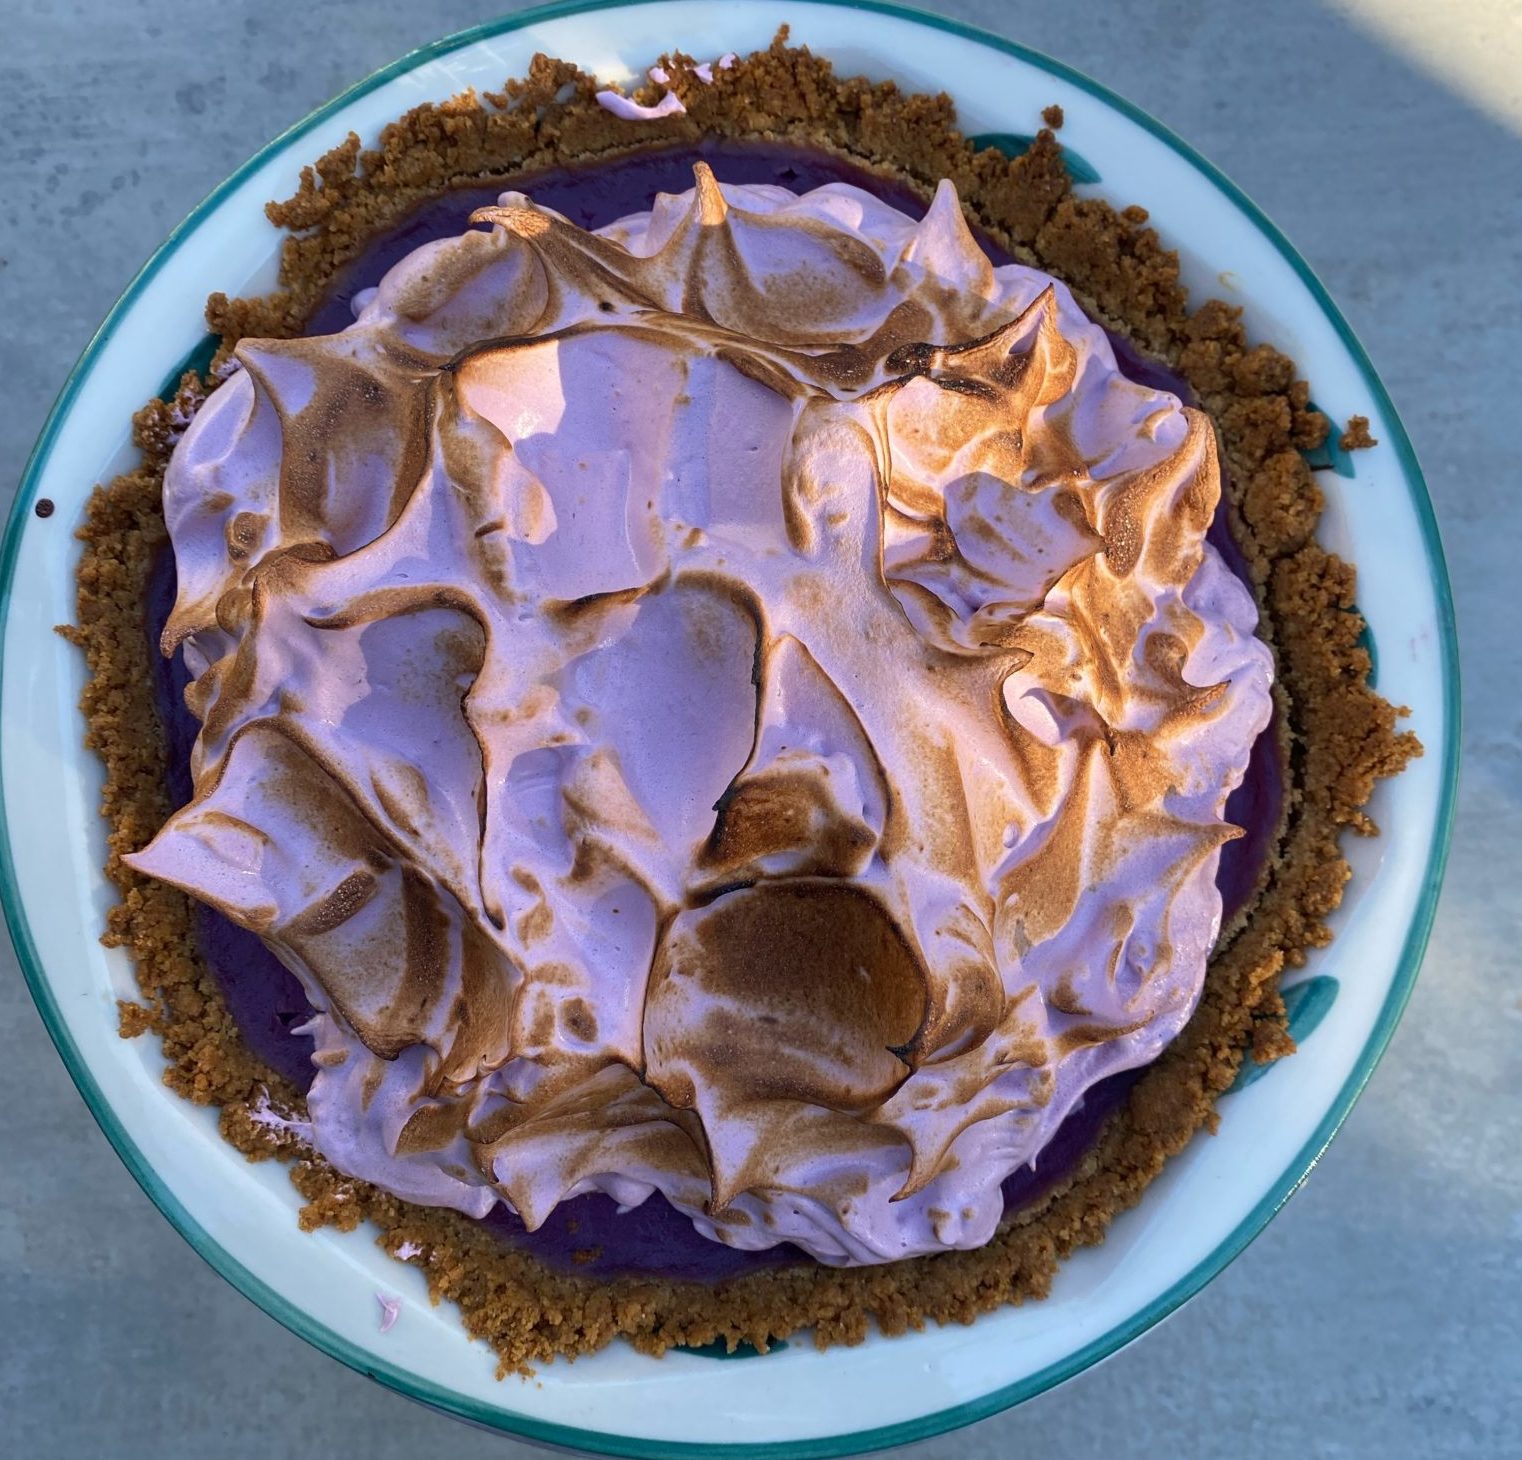
Jamie worked on a Purple Sweet Potato Pie (post coming soon) from ZoeBakes.  A pie she tried last year and was determined to improve upon this year.  A graham cracker crust that replaced the butter-flour crust proved to be a delicious tweak.

Sadly pumpkin pie was outvoted by Pecan Pie (I am shocked, Jordan generally votes with me for pumpkin, switched camps-what an ingrate). The Pecan Pie from  Park Chow has been my go-to recipe for years.  Initially disappointed we didn’t have pumpkin pie, one bite of that pecan pie and all thoughts of pumpkin vanished.

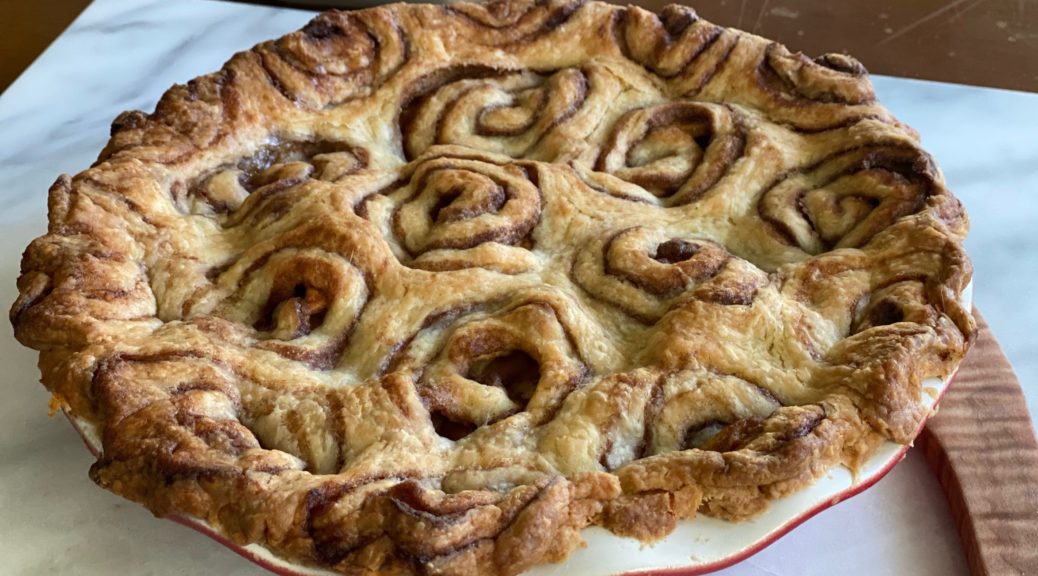
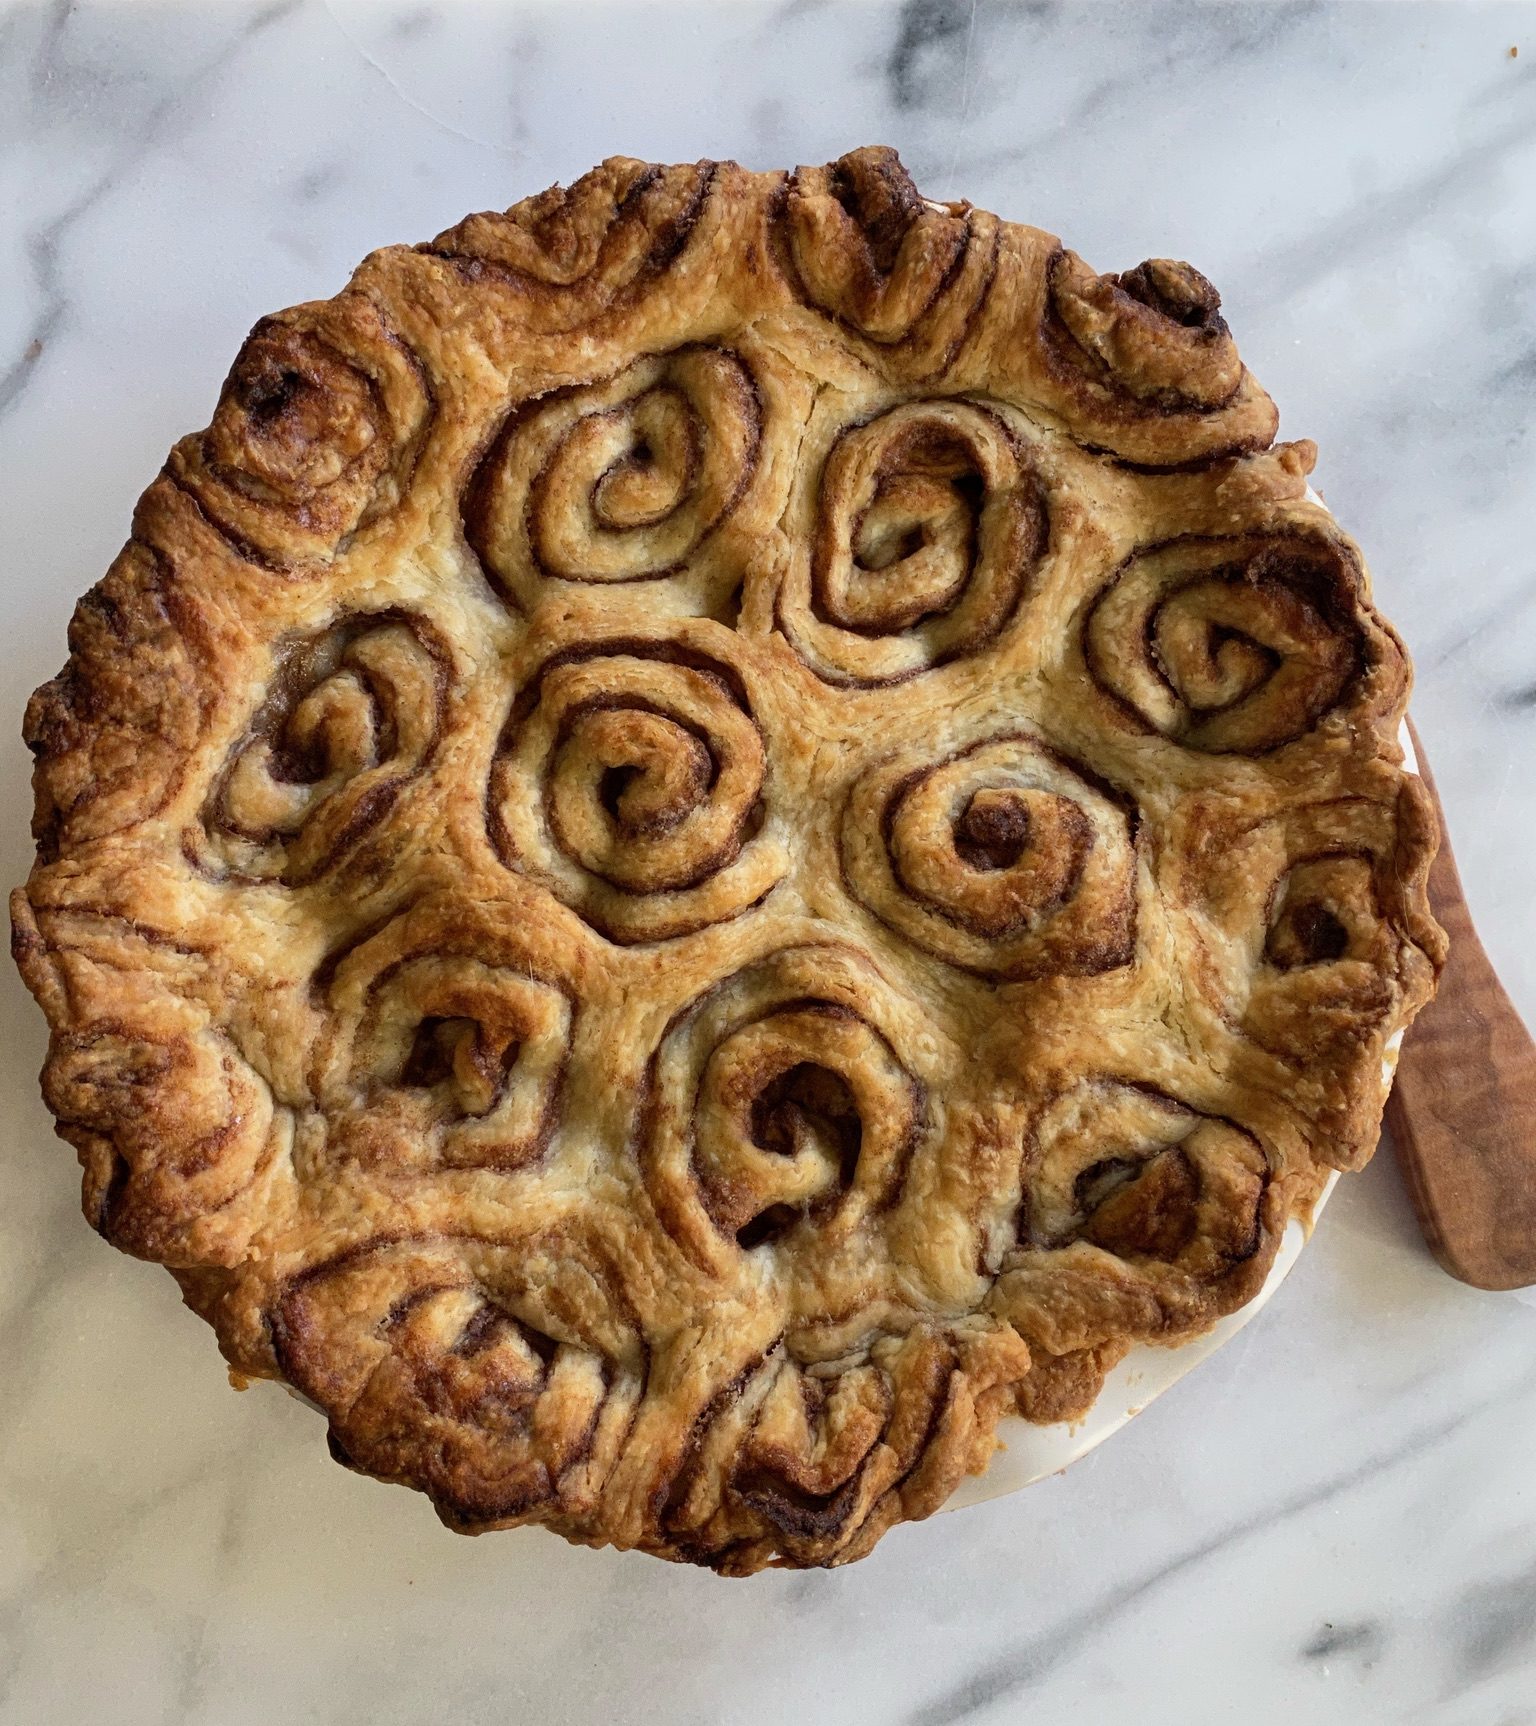
The final pie, drum roll please APPLE PIE.  The hubster’s favorite pie and admittedly mine too (in the fruit category at least).  King Arthur Baking posted a Cinnamon Bun Apple Pie that I immediately put on my gotta make Bucket List. WHAT A GENIUS RIFF.

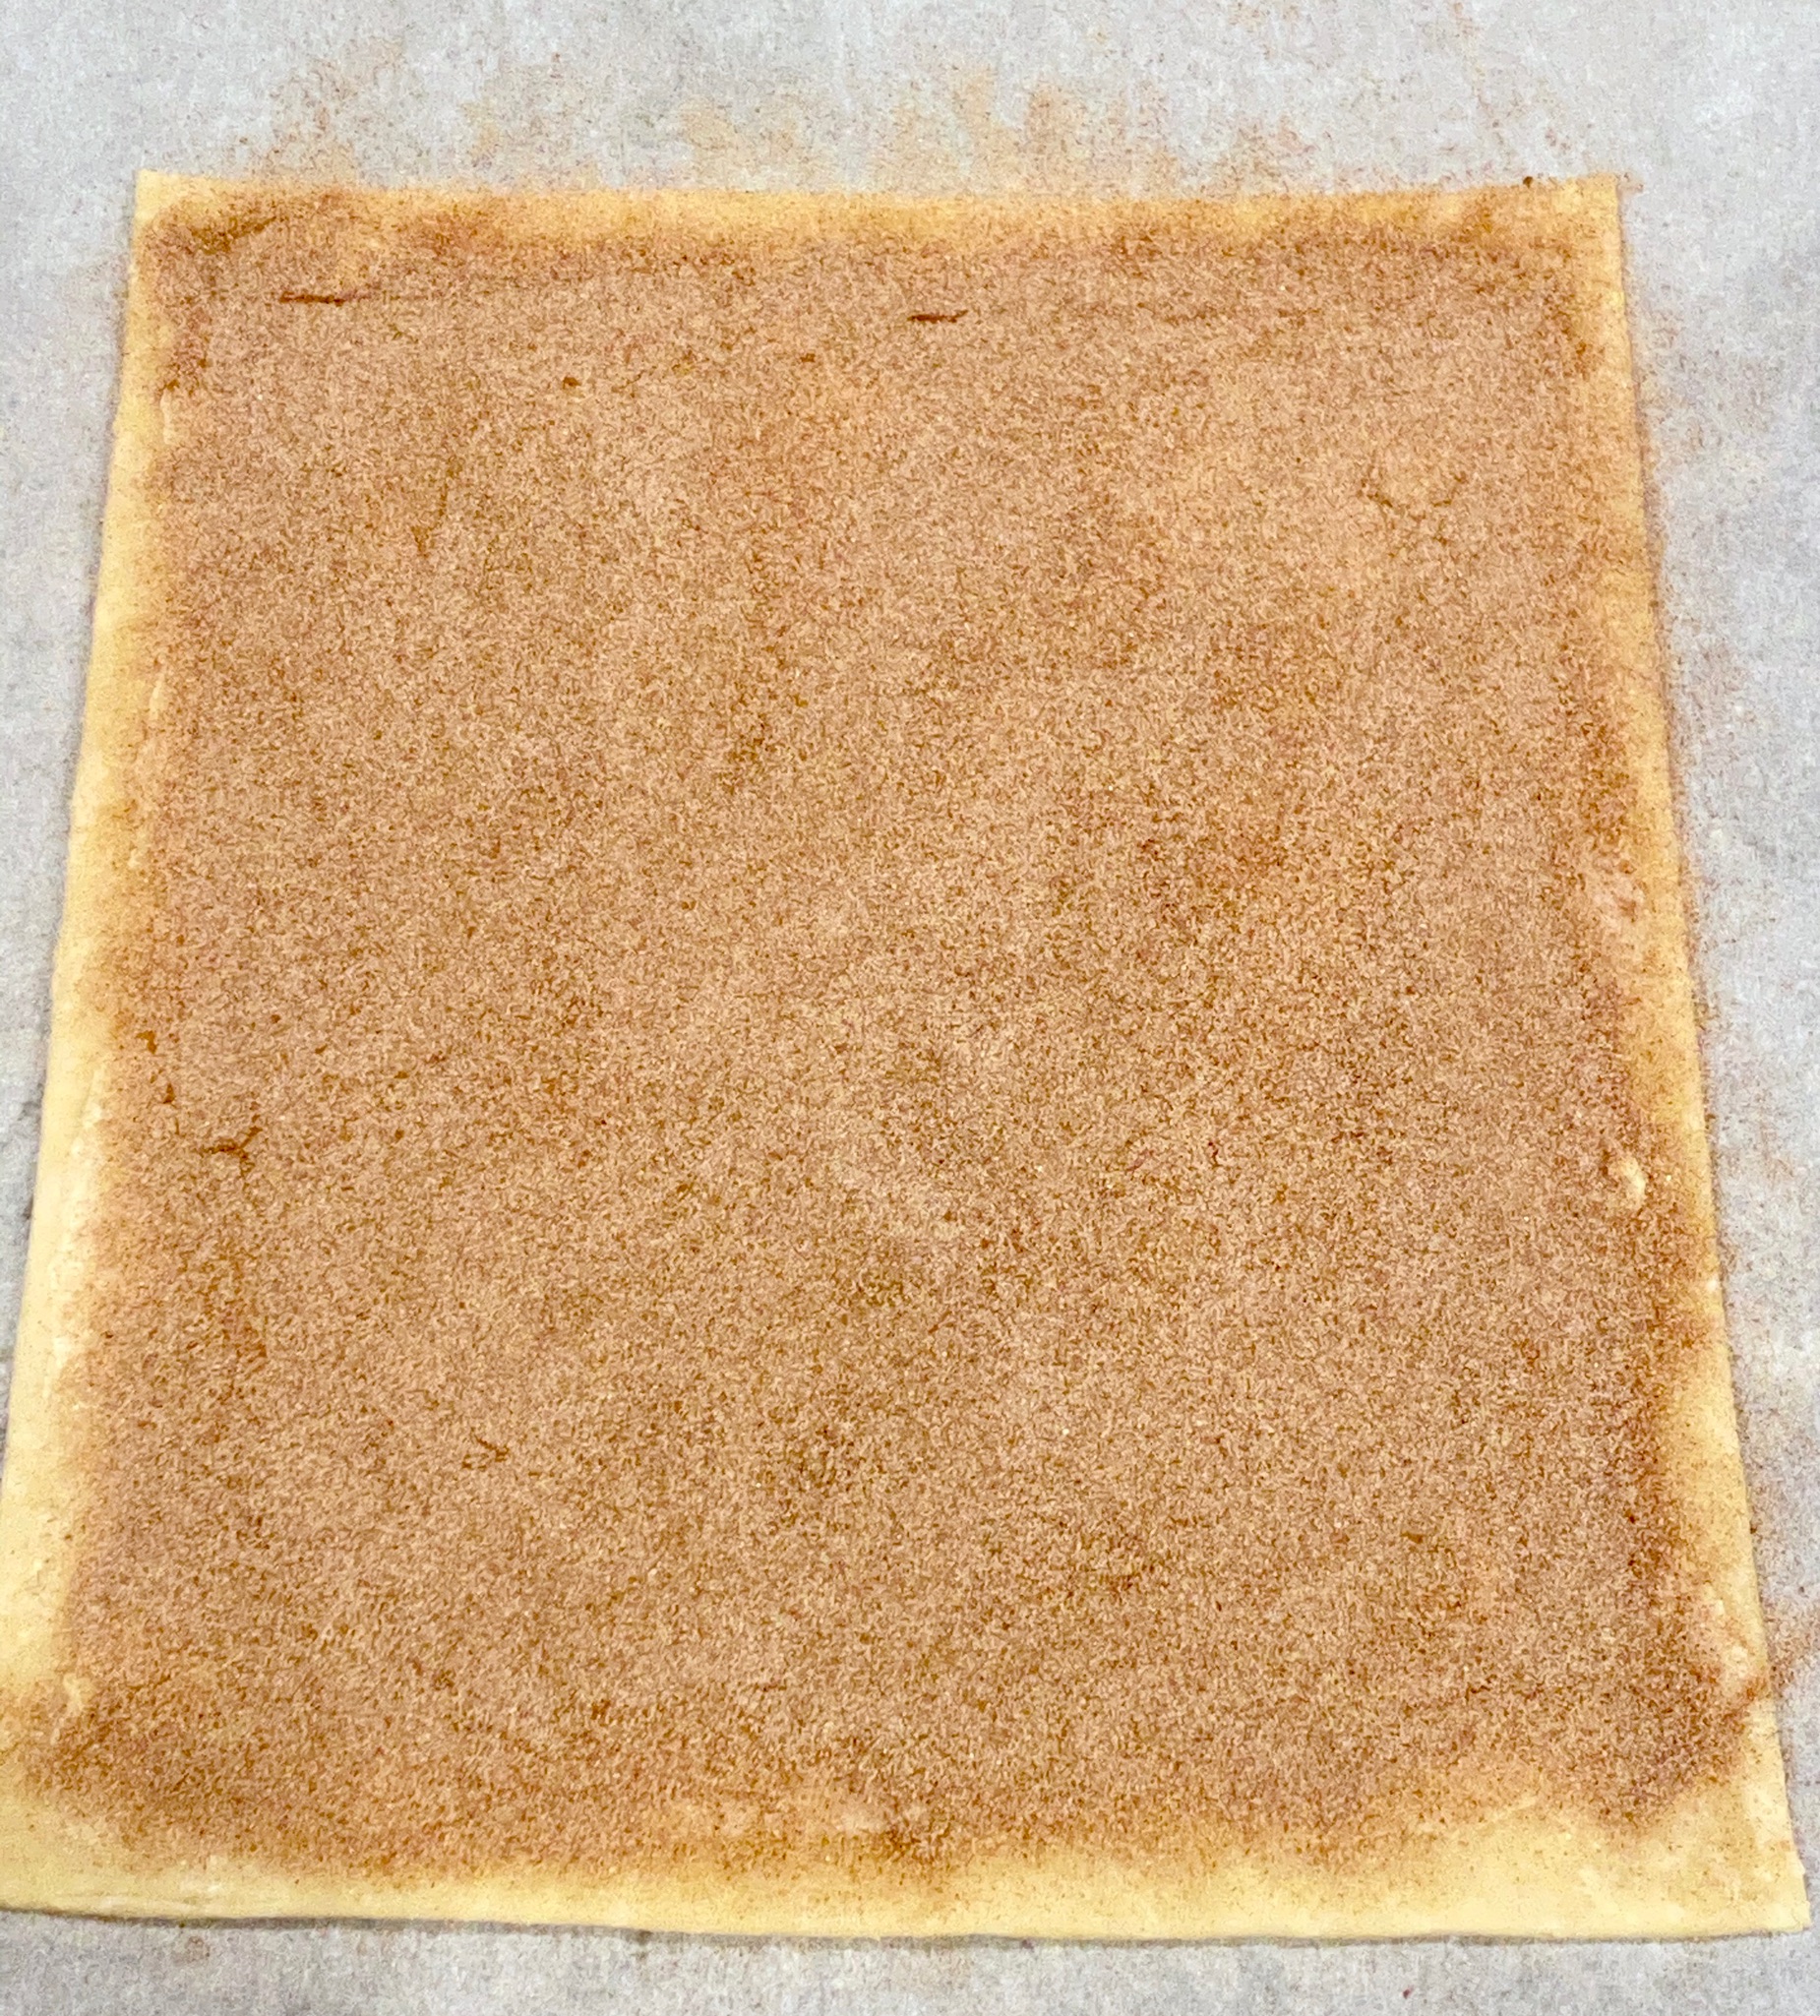
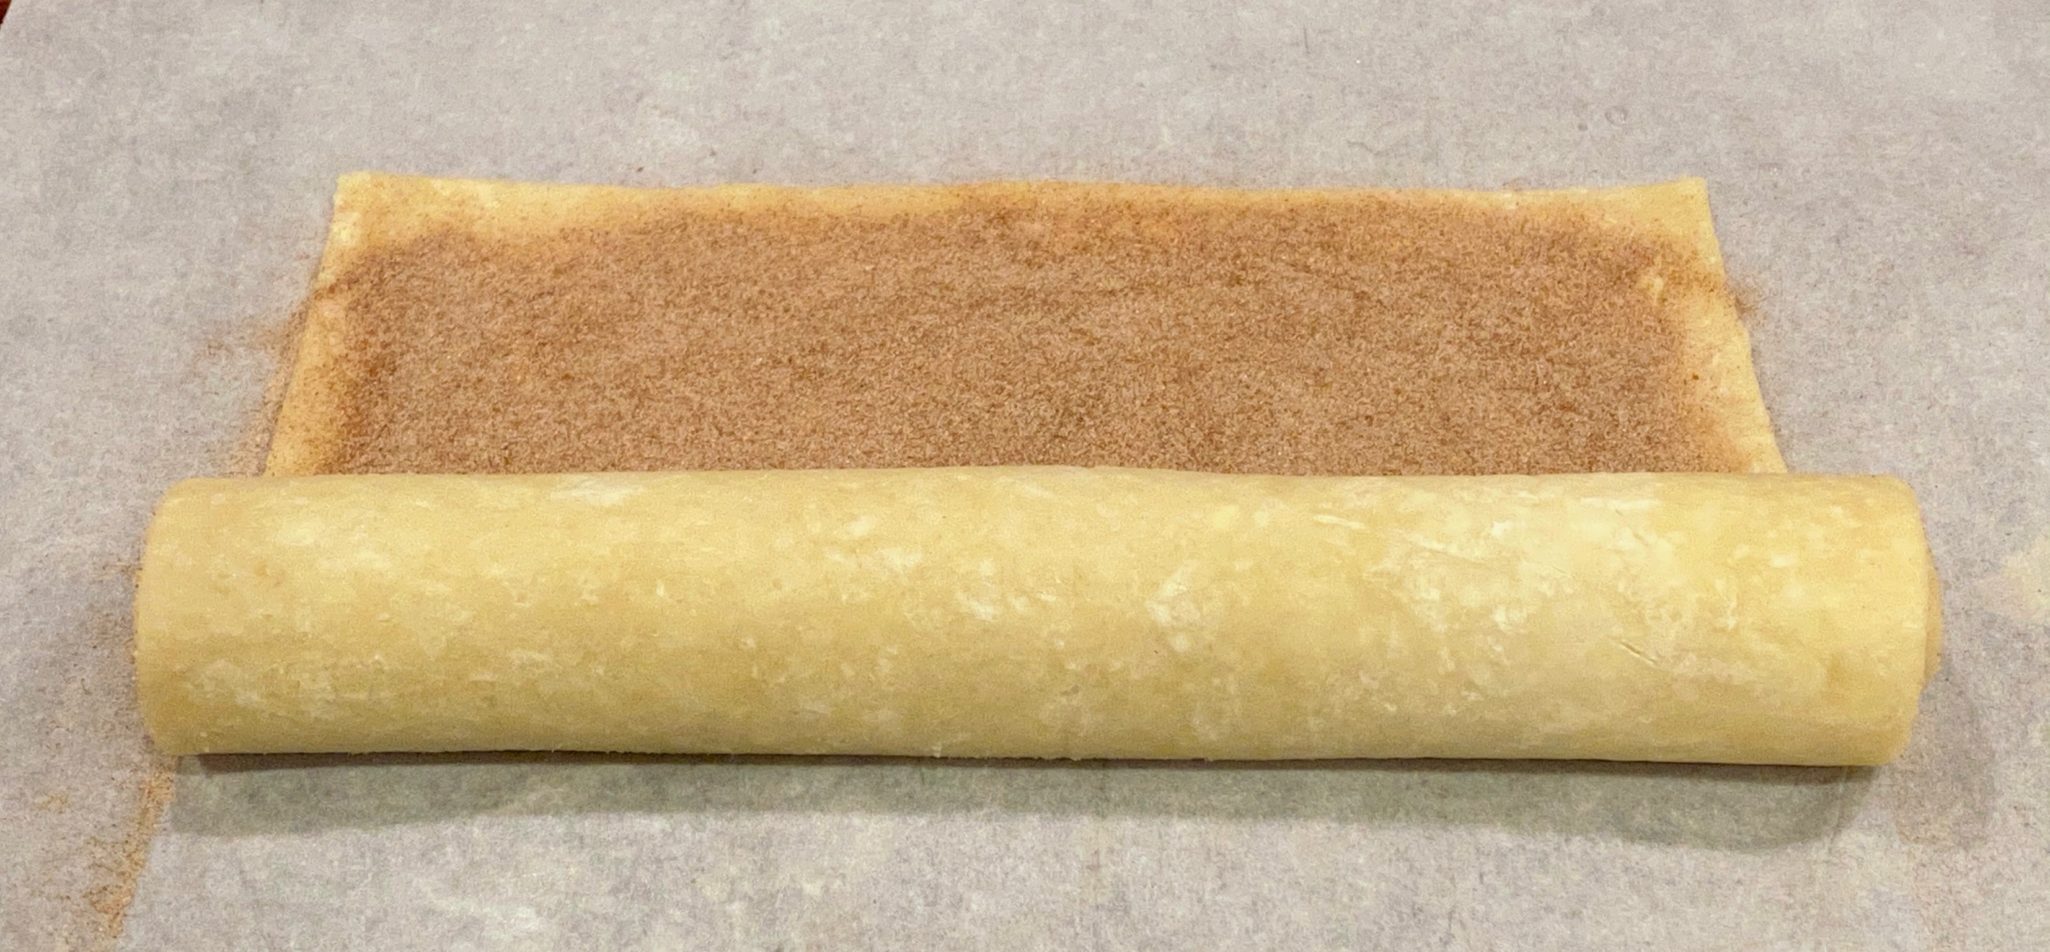
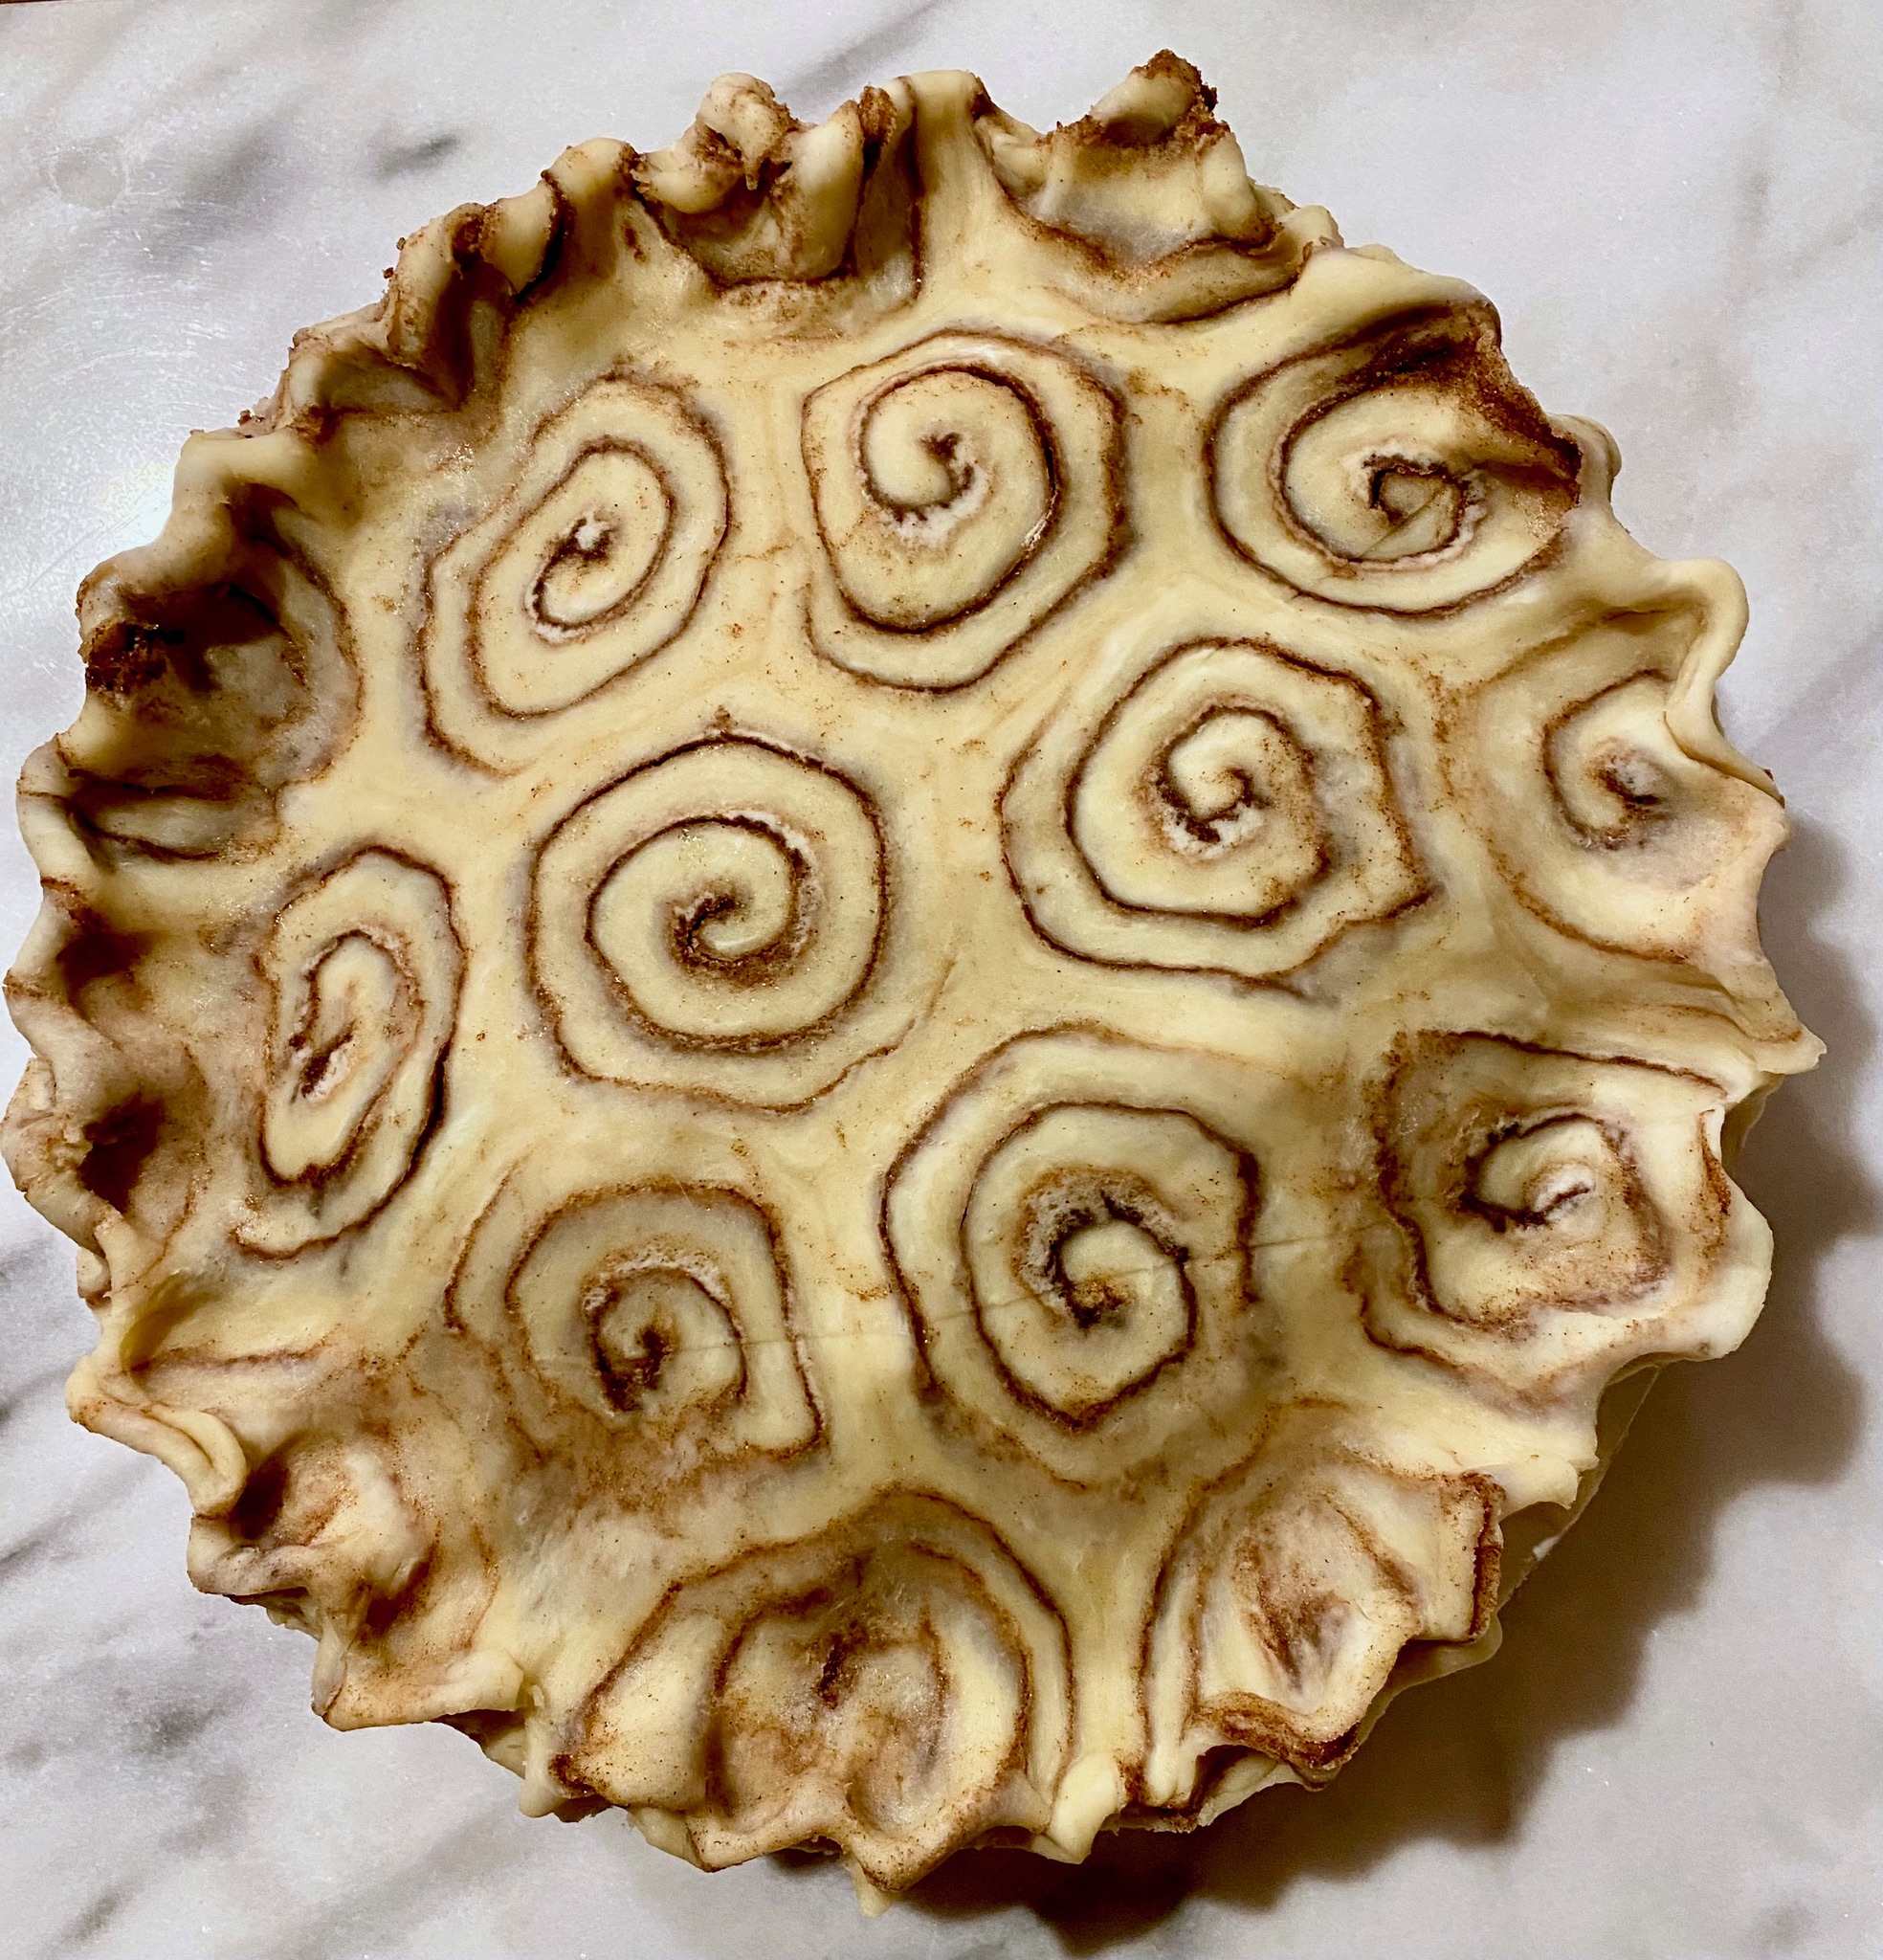
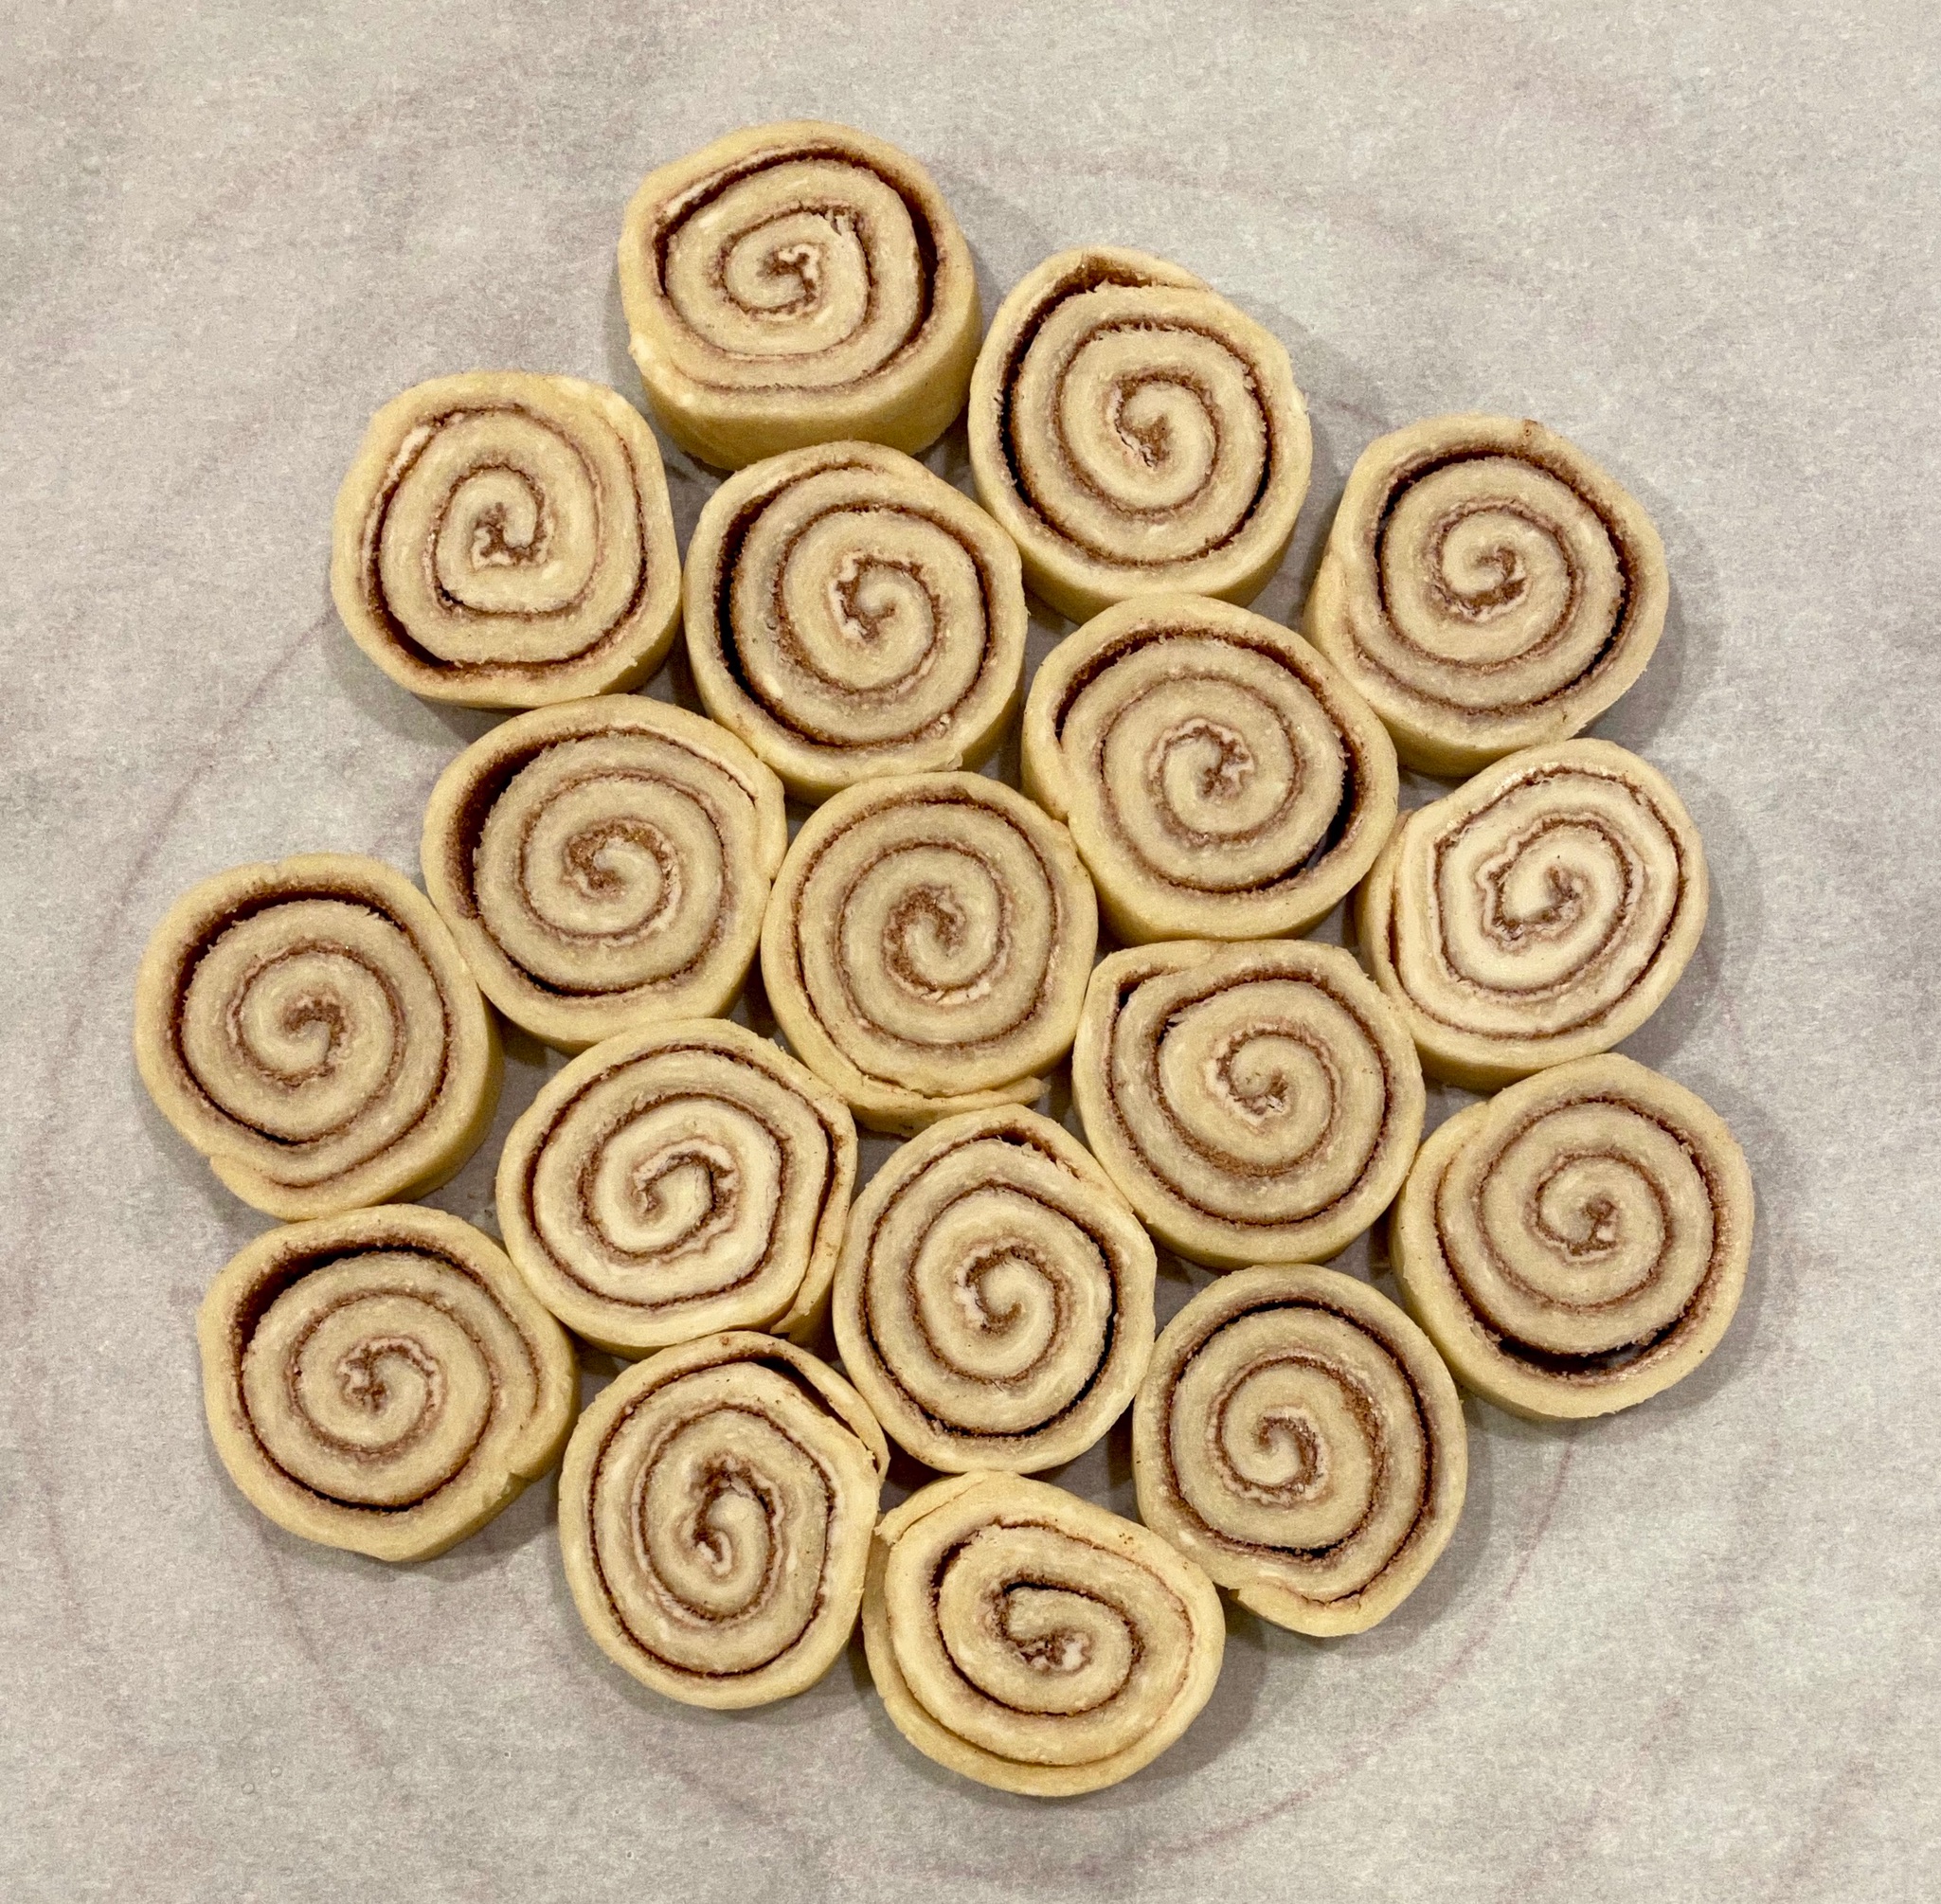
The top dough for the pie is rolled out in a rectangle, buttered and sprinkled with cinnamon sugar.  The dough is then rolled up like a carpet and chilled (ok, frozen), and cut into spirals.  The spirals are placed side by side and once again rolled to flatten and smoosh the spirals together.  Voila’ pinwheel top pie crust-too CUTE.  Not only cute but the cinnamon sugar added a cinnamon bun element to the pie….it was DELISH.  It wasn’t that much more work for the huge WOW factor return.

I used my own apple pie recipe and Dorie Greenspan’s pie crust, which worked perfectly.  Dorie’s piecrust makes quite a bit of dough so I was able to roll it out to 1/8 inch thick and then trim it down to a 9×13 rectangle.  Feel free to use your own favorite apple pie recipe.

So, sign up for desserts next holiday and try this pie!  Auntie “Always brings finger jello” will be unduly impressed.

The Process

I rolled the crust out, on parchment paper,  to 1/8-inch thickness and then using a pizza cutter, trimmed it to a 9 x 13 rectangle.  Use an offset spatula (easy peasy) to spread the softened butter on the dough.  The cinnamon sugar should cover the dough completely (oops) except for 1/4-inch on one side of the short end, preferably the short side furthest from you.

Use the parchment paper to help roll the dough into a log.  Try to keep it tight when rolling.  Pinch the seam on the log closed and wrap the log in the parchment.    I have PVC pipe that I slide the log into before chilling to keep the log completely round. You could use a paper towel roll.  Cut one line entirely down the tube so you can then wrap the roll around the dough log.  Place in freezer, seam side down.  Chill until firm, a minimum of 30 minutes.

Remove log from freezer and cut into 1/4-inch slices. Rotate the log as you cut to prevent a flat edge.  If the log gets too soft, throw it back in the freezer for a couple of minutes.  Arrange the spirals touching next to each other and as close as you can get to a circle shape.  Roll the dough to 1/8-inch thickness using even pressure to keep the spirals as round as possible.  You should end up with a circle about 14 inches in diameter.  Good luck may the pie force be with you.  Just kidding, it’s really not that bad.

Roll the dough loosely around your rolling pin.  Center over far edge of pie and unroll towards you, over the apples.

Crimp the edges and you are ready to bake.  If the edges brown too quickly, cover with foil.  My spirals were not tight enough so you will see where a couple of them collapsed.  NBD-it’s called the rustic look.

Ta-da, Cinnamon Bun Apple Pie, ready for the center of the dessert table, like a BOSS.

Mom’s Apple Pie

My go-to Apple Pie recipe, been using this for years. Tried and true.
Course Dessert
Cuisine American
Keyword Apple Pie, apples, Cinnamon Bun, Pie crust
Prep Time 45 minutes
Cook Time 45 minutes

Ingredients

My current favorite pie crust recipe is from Dorie Greenspan. It makes a generous amount of dough so you will have excess that you can use for hand pies or small pie.

  • Pastry for 9-inch Two-Crust Pie Link in notes
  • 3/4 cup sugar 1/2 cup granulated sugar + 1/4 c dark brown sugar
  • 1/4 cup all-purpose flour*
  • 1/2 teaspoon ground mace
  • 1/2 teaspoon ground cinnamon
  • Dash of salt
  • 6 cups thinly sliced pared tart apples about 6 medium
  • 2 tablespoons butter
  • 1 tablespoon KA Boiled Cider (secret apple booster) optional

Instructions

  • Prepare pie crust. Place in fridge to chill while making filling.
  • Heat oven to 425 degrees.
  • Mix sugar, flour, mace, cinnamon and salt.
  • Stir in apples. Turn into pastry-lined pie plate; dot with butter.
  • Cover with top crust that has slits cut in it; seal and flute.
  • Make a 3 inch aluminum foil ring. Set aside to use if crust browns too much
  • Bake at 425 for 15 minutes. Lower temperature to 375 degrees, bake until crust is golden brown and juice begins to bubble through slits in crust, 40 to 50 minutes. Cover edge with ring if necessary.
Orange You Gonna Try Persimmons? They’re Delicious

Orange You Gonna Try Persimmons? They’re Delicious

It’s persimmon season!

About this time every year, my friend & co-worker, Trang, comes to work with bags of homegrown persimmons.  I am not ashamed to admit I am Johnny on the spot when she is doling them out.  I adore persimmons.  The thought has crossed my mind that I should plant my own persimmon tree but I think I will just depend on the generosity of friends that have persimmon trees. (HINT HINT)

How to enjoy persimmons.  Eaten out of hand, diced and tossed in salads, and baked in bread, cookies, and puddings.  How about stirred into a risotto for a sweet counterpunch to the cheese and rice?  Or dried, a wonderful way to enjoy them throughout the year.

I have been especially waiting for this persimmon season.  Way back at the beginning of this year from HELL, we celebrated our birthdays with dinner at State Bird Provisions in The City. (Dining in a restaurant-remember that?).  State Bird adopted the Chinese tea house concept, little plates of deliciousness brought out on trays for you to pick and choose from, just like dim sum.  Their signature fried quail, dumplings, risotto, house ribs…plate after plate of tasty tidbits that dazzled us.

The kicker for me was a beautiful dish consisting of bite-size pieces of crisp, sweet persimmons bathed in a dressing of sesame, Kinako powder, and ginger finished with a sprinkling of toasted black sesame seeds and flaky salt.  Simple and absolutely delish, I made a mental note to try this at home.  I found the recipe in my copy of the State Bird Provisions Cookbook.  The dish is incredibly easy to make. I spent more time getting the ingredients than putting the dish together.  The cookbook runs the gamut from this simple, elegant dish to complex dishes better left to enjoy at their restaurant.  I think of it as a coffee table cookbook, beautiful photos, an interesting read.

A Persimmon Primer

There are two kinds of persimmons, Hachiya and Fuyu.  They are NOT interchangeable.  Hachiya is an oblong, acorn-shaped fruit and pretty astringent.  They cannot be eaten until they are super soft and very ripe.  If eaten before they are soft, they will make your mouth pucker.  I use Hachiyas for baking (soft gushy fruit is not my thing).  Fuyu’s are flat, round, more tomato shape. They are non-astringent and can be eaten while they are still firm. For this salad, select ripe, firm fruit.

The recipe calls for grapeseed oil but you could use canola oil instead.  We bought Kinako Powder at H-Mart but it can be found in most Asian stores. Made of soybean, it has a nutty flavor, kind of like roasted peanuts.  If you have munched on manju or mochi covered with a fine light brown powder that’s Kinako.  Toasted sesame oil and black sesame seeds can also be found in Asian markets.
Persimmons with Kinako Dressing and Black Sesame Salt

A simple and delicious tapas dish of sweet persimmons served with a savory sesame soybean powder dressing from State Bird Provisions
Course Appetizer
Cuisine American, Asian
Keyword Persimmons with Kinako Dressing and Black Sesame Salt
Prep Time 15 minutes

Ingredients

  • 6 ripe Fuyu persimmons peeled and cut into chunks

Dressing

  • 1/2 cup kinako roasted soybean flour, plus more for sprinkling
  • 1 teaspoon kosher salt
  • 1/2 teaspoon ground ginger
  • 1/4 cup plus 1 tablespoon grapeseed oil or substitute canola oil
  • 1/4 cup plus 1 tablespoon toasted sesame oil found in most Asian stores
  • 2 tablespoons unseasoned rice vinegar
  • 2 tablespoons Black Sesame Salt

Black Sesame Salt

  • Makes about 1/4 cup
  • 1/4 cup pre-toasted black sesame seeds
  • 1/4 teaspoon flaky sea salt

Instructions

Dressing

  • Combine the kinako, kosher salt, and ground ginger in a medium bowl and stir well. Slowly pour in the oil, sesame oil, and vinegar, whisking constantly until the dressing is well combined. It helps to let it sit just a bit for the powder to absorb liquid.
  • Pour the dressing in shallow serving bowls, arranging the persimmons on top, and sprinkle on the black sesame salt and a generous pinch of kinako. Serve immediately.

Black Sesame Salt

  • Combine the sesame seeds and salt in a mortar and pound until the mixture resembles coarsely ground black pepper.
  • Transfer to an airtight container and store in a cool, dry place for up to 2 weeks.
Pudding In the Late Night Hours Calls for Chocolate

Pudding In the Late Night Hours Calls for Chocolate

Life is on hold as we await the results of the 2020 presidential election.  I swore I wasn’t going to agonize over the process leading to the final result.  My plan was to ignore CNN, Twitter, WAPO, NYT…I decided to watch Hamilton for the umpteenth time, followed by my favorite K-drama.  As they say…

The Best Laid Plans

A quick sneak peek at Twitter and I was hooked.  It has been an agonizingly slow crawl to the finish as the Biden/Harris ticket chips away at the vote count in the battleground states. There I was tabbing back and forth between my K-drama and Twitter.  At 2am I had to stop the madness, I resorted to my favorite stress-buster activity, COOKING followed by my second favorite stress reliever-EATING.

Win-Win

At that time of the night, I needed something delicious, and comforting.  I had been eyeing a recipe in NYTcooking for a chocolate pudding made with oat milk.  Many of my friends are dairy intolerant or vegan so I am always on the lookout for desserts that fit the bill.  The fact that this pudding was quick and easy made this a no-brainer for my sleep-deprived, anxiety-riddled brain.

This pudding is so ridiculously easy and so incredibly delicious bookmark this post now.  You will thank me.  I used Planet Oat Milk but the recipe states you can use soy or almond, I’m sticking with oat milk.  I used Dutch-processed cocoa which gives the pudding its intense dark color.  You can use natural cocoa which will give you a lighter-colored pudding, either is fine.  Whisk the dry ingredients together, cocoa, sugar, cornstarch, and salt.  Slowly add the oat milk and then cook it over medium heat, STIRRING constantly so it doesn’t scorch and stays lump-free and smooth.  I used TJ’s Dark Chocolate Pound Plus Bar which resulted in a rich, intense chocolate flavor.  Experiment with different chocolates to change the sweetness and chocolate intensity.

Topped off the pudding with cocoa nib crumble from Manresa and I was in business.  Yummy.  I imagine an infinite variety of toppings would be lovely like softly Whipped Coconut Cream, whimsical sprinkles, flaked coconut, cookie crumbs, or fresh berries.

My little bowl of chocolate pudding did the trick, calmed my nerves, and gave me the courage to…GO TO BED!

Print Pin
5 from 3 votes

Oat Milk Chocolate Pudding

A delicious chocolate pudding from NYT Cooking that is dairy free and vegan
Course Dessert
Cuisine American
Keyword Chocolate Pudding, dairy-free, Dark chocolate, oat milk, Simple Bread Pudding, vegan
Prep Time 10 minutes
Cook Time 10 minutes

Ingredients

  • cup (65 grams) granulated sugar
  • cup (30 grams) unsweetened cocoa powder
  • 2 tablespoons cornstarch
  • teaspoon fine sea salt
  • 2 cups (480 milliliters) oat milk or soy or almond milk
  • 3 to 4 ounces (85 to 115 grams) bittersweet bar chocolate finely chopped, I used TJ's Dark Chocolate, which is accidentally vegan 😉
  • 1 teaspoon vanilla extract

Instructions

  • In a medium saucepan whisk together the sugar, cocoa, cornstarch, and salt. Slowly stir in the milk and stirring constantly until smooth and combined.
  • Cook over medium-low heat. Stir the mixture continuously, scraping the bottom, sides, and corners of the pan, until the pudding thickens, begins to bubble, and coats the back of the spoon or spatula, 5 to 10 minutes. Careful to not let the pudding scorch on the bottom and corner of the pot, lower heat if it cooks too fast or starts to scorch.
  • Add the chocolate and stir vigorously until the pudding is very thick and smooth, about 30 seconds longer.
  • Remove from the heat and stir in the vanilla. Spoon the pudding into a serving bowl or individual cups or ramekins. Serve warm, at room temperature or chilled. It will thicken as it cools. Garnish with whipped cream, sprinkles or chocolate chips or cookie crumbles. Use your imagination!

Notes

Before refrigerating, press plastic wrap onto the surface of the pudding to prevent a “skin” from forming on top.
The pudding will keep in the refrigerator for up to 3 days.