Category: Asian Dishes

Crying Tiger Beef (Grillin’ and Chillin’)

Crying Tiger Beef (Grillin’ and Chillin’)

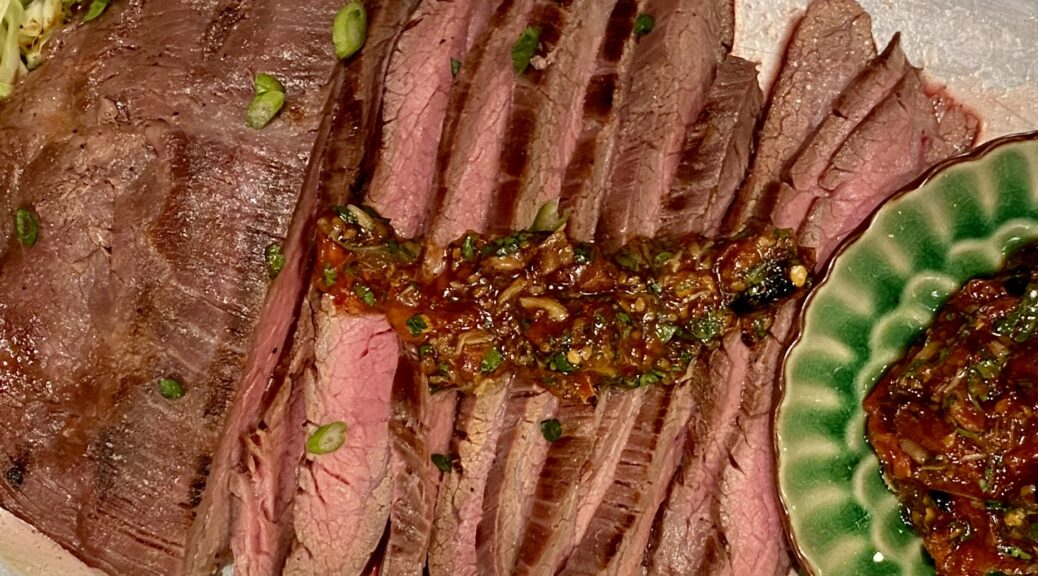
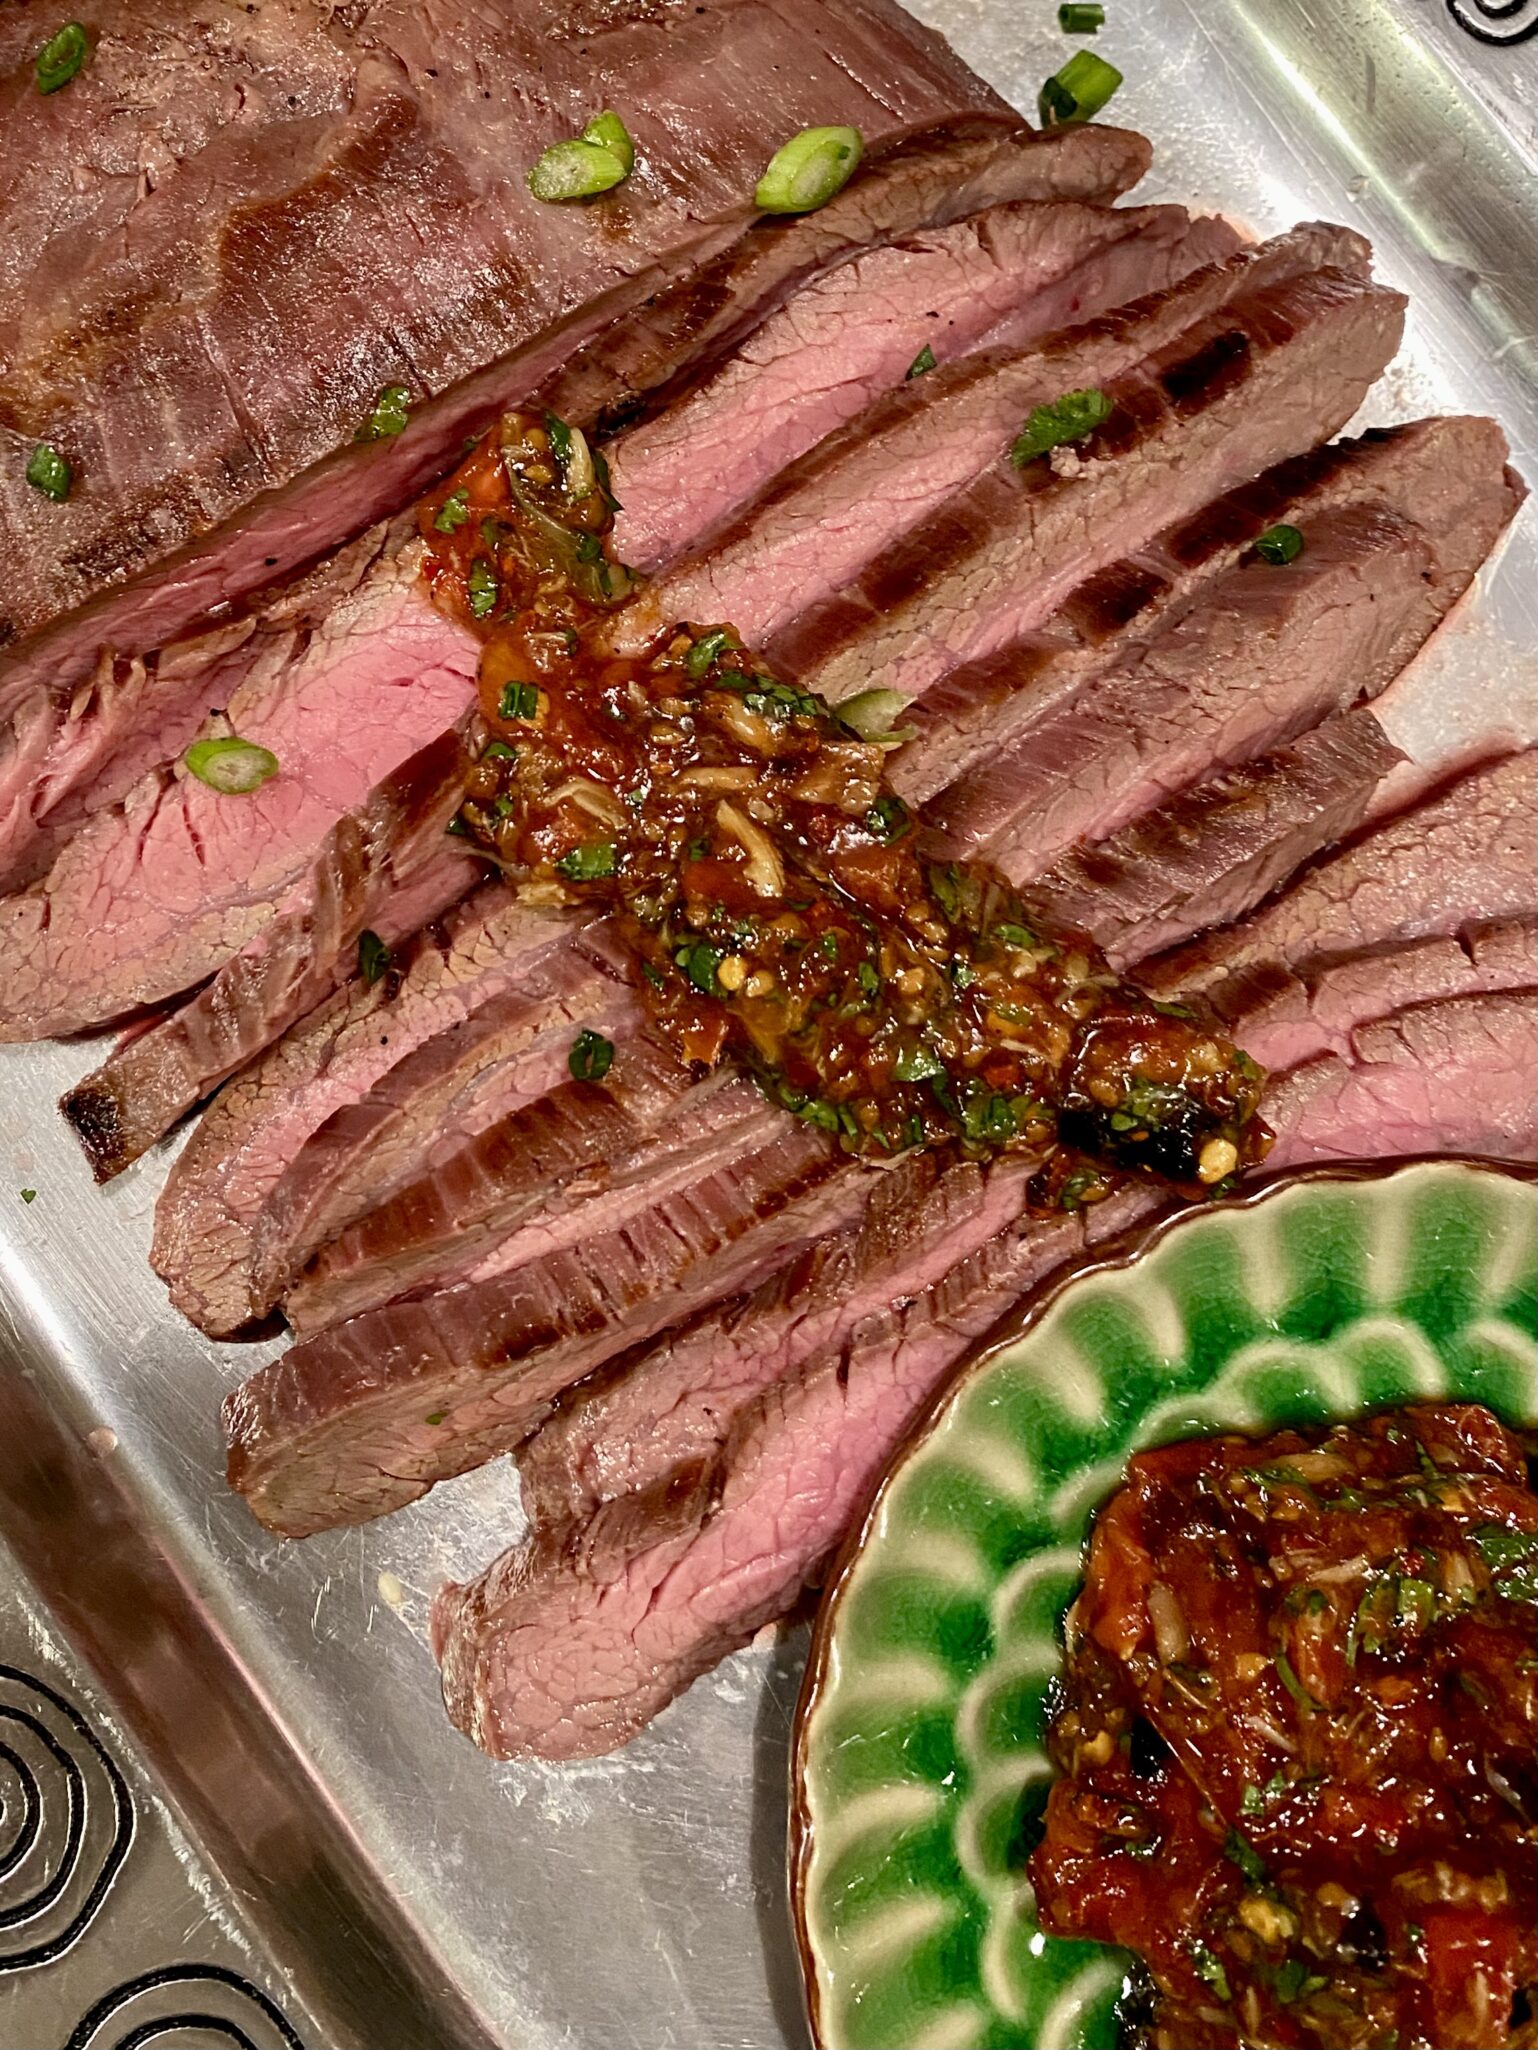
A reel for Crying Tiger Beef had me salivating until I read the words “recipe coming soon”.  Nooo, it looked so yummy I wanted to try it immediately.  But, I understand. How many times have I posted a dish on IG or FB with the same caveat?  Coming soon.  So I turned to a tried and true cookbook, Simple Thai Food: Classic Recipes from the Thai Home Kitchen by Leela Punyaratabandhu, and found her recipe for Crying Tiger Beef.  It’s a great book for a “Thai food is not in my wheelhouse but I love it” person, like ME.  Her recipe for Pad Thai is my go-to.

Tomatolly Off on a Thai-gent

The dipping sauce for  Crying Tiger Beef in Simple Thai is a variant.  Instead of the traditional one made with toasted rice and tamarind, this one has roasted cherry tomatoes.  Since tomato season is upon us and I am a tomato FREAK, this was a no-brainer.  Glad I did, it’s delicious.  I will include both recipes for you to try.  I expect a report on which version reigns supreme in your house.

Where’s the Beef?

The marinade and sauce work with different cuts of beef.  Wanna get fancy? Ribeye or NY strip steaks.  A quick weeknight meal, flank steak, or skirt steak gets the 👍.  Flanken-style short ribs would work well also.

I opted for the family-friendly flank steak, lean but flavorful and a great cut to barbecue.  First, marinate your flank steak in a simple blend of oyster sauce, soy sauce, and oil.  It’s amazing how it flavors the meat.  I have both Chinese and Thai oyster sauce.  I used the Thai version but the Chinese Oyster Sauce by LKK, with the lady and kid in a boat would be perfect and you really don’t need to go out and get Thai oyster sauce which will be much harder to find.  You (West Coast peeps) can find LKK at major grocery chains, Costco, and most Asian grocery stores.

Sauce Me Up

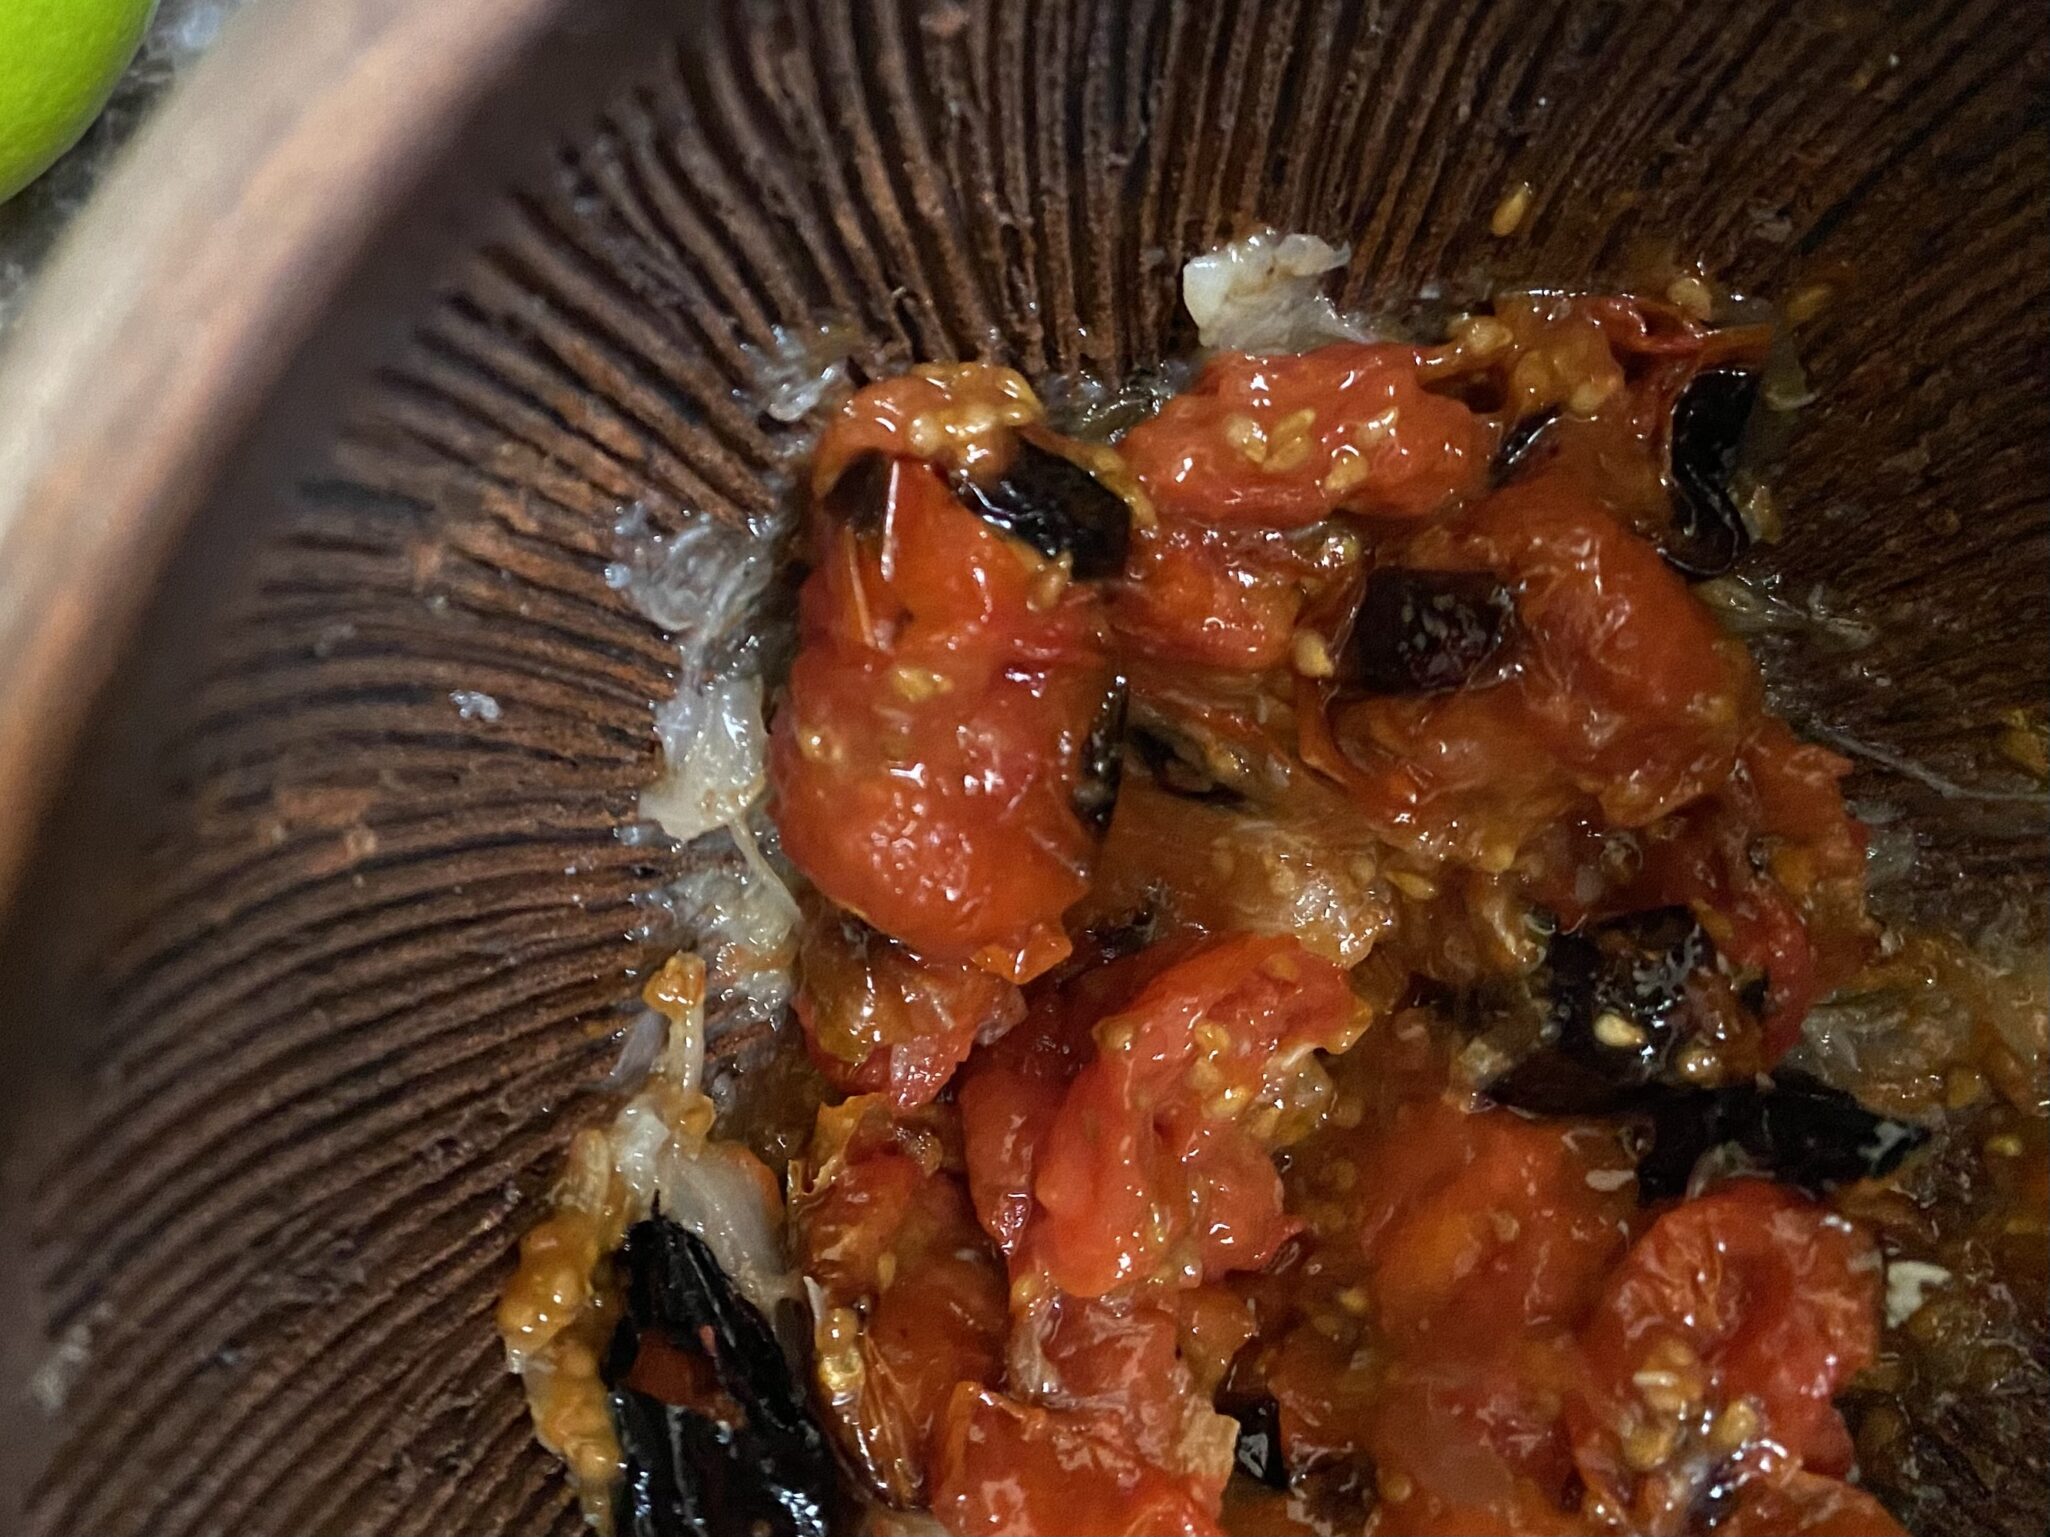
As your meat marinates, make your sauce.  Broil tomatoes, garlic, and shallots until soft with charred spots.  Transfer tomato mixture to a food processor or mortar and pestle (shades of being a pharmacist).  Pulse or pound until the mixture becomes a chunky sauce.  Don’t purée!  Pour the sauce into a bowl and add fish sauce, lime juice, chili flakes (to desired heat level!!), sugar and cilantro. I absolutely love this sauce, so much umami.  I generally double the sauce recipe, it’s that good.

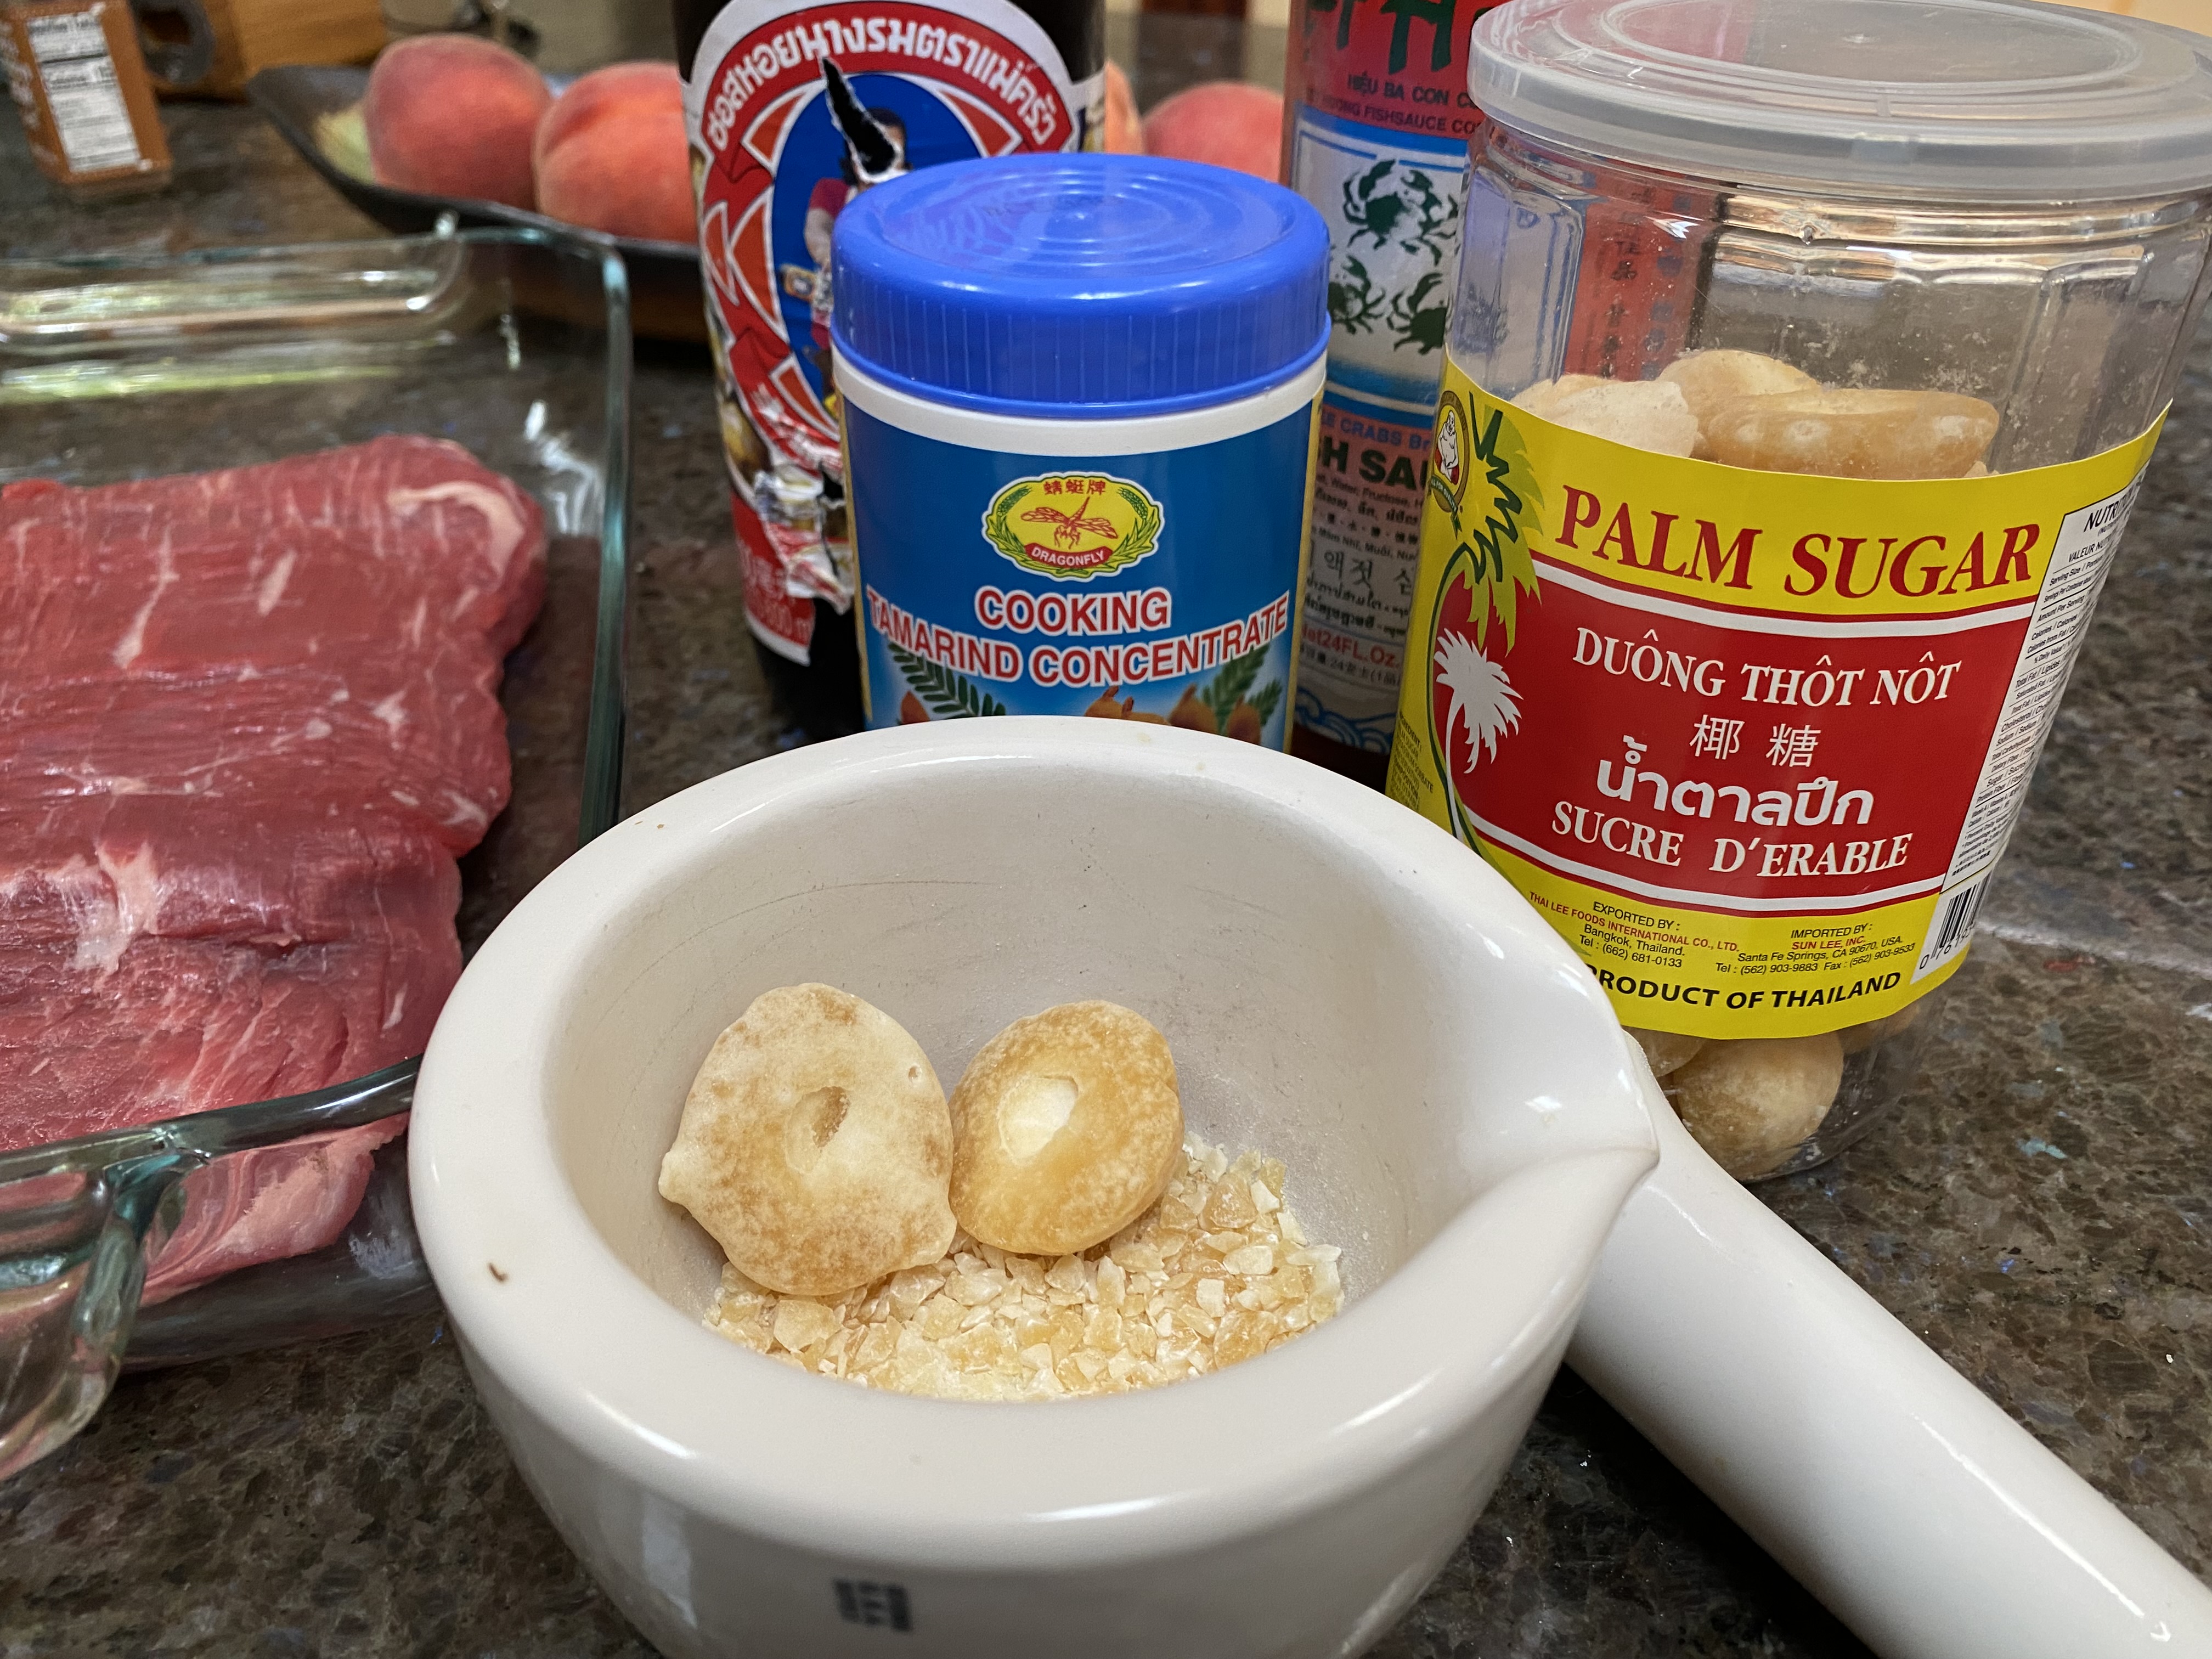
Palm Sugar-feel free to use brown sugar if you don’t have palm sugar.  But if you want to, palm sugar comes in little squares or egg-shaped pieces, very dense.  My recommendation would be to pulverize those little suckers (very cathartic) before using it.  It would take forever and a day to melt.  You’re welcome.

Crying Tiger Beef with Roasted Tomato Sauce

Easy and delicious Thai dish, Crying Tiger Beef. Grilled steak is topped with a spicy sauce made with roasted tomatoes, shallots, and garlic and seasoned with lime juice, fish sauce, red onions, and cilantro.
Course bbq, dinner, main dish
Cuisine Asian, Thai
Keyword cherry tomatoes, Crying Tiger Beef, grilled beef, pad thai
Prep Time 5 minutes
Cook Time 20 minutes

Ingredients

Marinade

  • 1 tablespoons neutral oil
  • 1 tablespoon soy sauce
  • 1 tablespoon oyster sauce
  • 1/2 teaspoon ground white or black pepper
  • 1 flank steak, about 1 ⅔ pounds total This recipe works with steaks too. So if it is date night...2 nice ribeyes would be perfect!

Dipping Sauce

  • 4 ounces cherry tomatoes
  • 1 large shallot (1 oz) halved
  • 3 large garlic cloves
  • 1 tablespoon fish sauce
  • 1 tablespoons fresh lime juice
  • 1 tablespoon red pepper flakes I have never used over 1 teaspoon!
  • 1/2 teaspoon packed light brown sugar or palm sugar
  • 2 tablespoons coarsely chopped cilantro leaves and stems

Garnish

  • 1 tbsp Glutinous or sticky rice, raw optional, but recommended
  • Handful cilantro sprigs coarsely chopped, for garnish
  • sliced cucumbers and tomatoes

Instructions

  • For the beef, in a wide bowl or square pan, stir together the oil, soy sauce, oyster sauce, and pepper. Add the beef and turn to coat all sides.
  • Prepare a medium-high fire in a charcoal grill or preheat a gas grill to medium on one half and medium-hot on the other half. Heat source shold be indirect. Place flank steak in center of grill. Grill about 4 minutes a side for medium rare. Remove from heat. Let meat rest about 5 minutes before slicing.
  • Slice beef against the grain into 1/4-1/2 inch slices then arrange on a serving platter. Sprinkle with the ground toasted rice (optional) and garnish with the cilantro. Serve with the sauce.

Sauce

  • Place tomatoes, unpeeled shallots, and garlic on a small sheet pan and broil, turning often until charred and squishy. This should take about 7-10 minutes.
  • While the beef rests, finish the sauce. Squeeze shallot and garlic out of their skins. Using a mortar and pestle or bowl and fork, smush the shallots and garlic into a rough paste. Add the tomatoes, and blend to form a chunky sauce. Don't puree the tomatoes. Transfer to a serving bowl and stir in the fish sauce, lime juice, pepper flakes, sugar, and chopped cilantro. The sauce should have the consistency of a chunky salsa. Let it sit a few minutes, then taste; add more lime juice, fish sauce, and pepper flakes, if needed. The sauce should taste primarily sour and spicy and then salty with a hint of sweetness.
  • You could make this in a food processor, just don't overprocess the sauce! Use the pulse button only to avoid this.

Toasted Rice Powder

  • Place raw glutinous rice in a small skillet over medium-low heat. Swirl pan continuously until rice is golden brown and has a nutty aroma. This will take about 10-15 minutes. Remove from heat and pour into a mortar or small bowl. Set it aside to cool. Once cooled, grind in the mortar or in a small food processor, until rice becomes a powder.
  • Sprinkle this on your meat right before serving.

The traditional sauce is delicious too. It’s a little more difficult finding tamarind.

Tamarind is tangy and adds a sweet and sour flavor profile. You can find it as a paste or pulp to make a paste. Get the paste for convenience.  The other component is toasted sweet rice powder.  You can probably buy this but I always have sweet rice (glutinous rice aka sticky rice) on hand. The raw rice can be toasted on the stovetop and ground in a mortar and pestle or spice grinder.

Crying Tiger Beef with Tamarind Sauce

Course bbq, dinner, lunch
Cuisine Thai
Keyword Crying Tiger Beef, Thai

Ingredients

Marinade for Beef

  • 1 tbsp oyster sauce
  • 1 tbsp fish sauce
  • 1 tsp brown sugar
  • 2 x 200g 7 oz ribeye steaks (or any other steak cut you prefer)
  • vegetable oil for brushing
  • steamed rice or sticky rice to serve

Spicy Dipping Sauce-Nahm Jim Jaew

  • 2 tsp raw glutinous rice also known as sticky rice
  • 1 tbsp tamarind concentrate
  • 3 tbsp fish sauce
  • 1 tbsp lime juice
  • 1 tbsp brown sugar
  • 1 tbsp chilli flakes
  • 1 small red shallot sliced into fine wedges
  • 2 tsp finely chopped coriander cilantro

Instructions

  • Combine the oyster sauce, fish sauce and brown sugar. Pour the mixture over the steaks and use your fingers to massage the marinade all over the steak pieces. Allow to marinate while you prepare the remaining ingredients.
  • For the spicy dipping sauce, toast the rice in a dry frying pan over high heat until golden brown and fragrant (it should smell like popcorn). Use a mortar and pestle or a spice grinder to grind to a fine powder. In a bowl, combine the tamarind, fish sauce, lime juice, sugar, chilli flakes and toasted rice powder. Mix until well combined. Then stir through the shallot and coriander. Transfer to a small serving bowl and set aside until ready to serve.
  • Heat a large heavy-based frying pan over high heat. Brush with oil. When hot, add the steaks and cook for 2-3 minutes, turning the steaks every so often until you get a nice charred colour. Then turn the heat to low and continue cooking (and flipping the steaks) for another 2-3 minutes (for medium rare) or until cooked to your liking. Before slicing, transfer to a cutting board and allow to rest for 3 minutes.
Tomato Egg Fried Rice & the Fishy Bits

Tomato Egg Fried Rice & the Fishy Bits

A couple of weeks ago I was reading a post from the Woks of Life, a lovely blog on Asian cooking. Their post was on a classic Chinese dish, Salted Fish Fried Rice.  Salted Fish is a Cantonese ingredient made from white fish like croaker, salted and air-dried.  This process concentrates the flavor of the fish, it’s salty, fish-forward, and well, kinda funky in a good way.  Their twist was to substitute anchovies for the salted fish (hom yu, 鹹魚).  My first thought was “Yum, I gotta try this, I think I have anchovies in my pantry”.

They also have a cookbook out and it’s gorgeous.  If you need (who doesn’t)  a cookbook that covers Chinese cuisine for the novice to seasoned cook, Woks of Life fits the bill. You can order it from Books, Inc. or in the Bay Area, from Omnivore Books which has signed copies.

Dad and Gung Gung 1940s

Tales of My Grandfather

As I read their post, memories of my grandfather bubbled to the surface.  He lived in an SRO (single room only) in the heart of Chinatown above Sun Tai Sam Yuen Restaurant.  It was convenient and comfortable for him.  A line cook at Original Joe’s and at the Fairmont’s Tonga Room he walked to work from Chinatown.  His neighbors, Cantonese men of similar age, had migrated to Gum San (San Francisco) looking for work.

Read More Read More

Eric Kim’s Grape Tomato “Quick Kimchi” (Rock-Paper-Scissors)

Eric Kim’s Grape Tomato “Quick Kimchi” (Rock-Paper-Scissors)

Every Sunday I meet up with friends for coffee then we walk to our local farmer’s market to stock up for the week.  Every year, like clockwork, when summer is upon us, the following conversation takes place between us…

While Walking Back From the Market…

She who shall not be named Person #1 So, who is going to buy the Granny Cart?  I can’t lug any more melons, corn, and peaches.  We need wheels.  I feel like a Sherpa and my shoulder hurts.

She who shall not be named Person #2  Aren’t you the one on Medicare already?  You should get it.

She who shall not be named Person #3 But you’re the one with the watermelon, half flat of strawberries, and 6 ears of corn!

She who shall not be named Person #1 Wait a minute, you’re the one with grandkids, you get it.

She who shall not be named Person #2 I’m the youngest, I’m not getting it.

Needless to say, due to vanity, we are still schlepping our haul in multiple tote bags, occasionally stopping for a breather.  This Sunday may have been the breaking point, none of us could resist, so much amazing fruit right now. We loaded up on berries, peaches (Biscuit Berry Peach Cobbler), cantaloupes, (Melon, Prosciutto & Mozzarella with Basil Oil), and watermelons, (Watermelon and Tomato Salad).  Somebody has to bite the bullet and get that cart!

Tomatoes Are Coming…Update They’re Here!

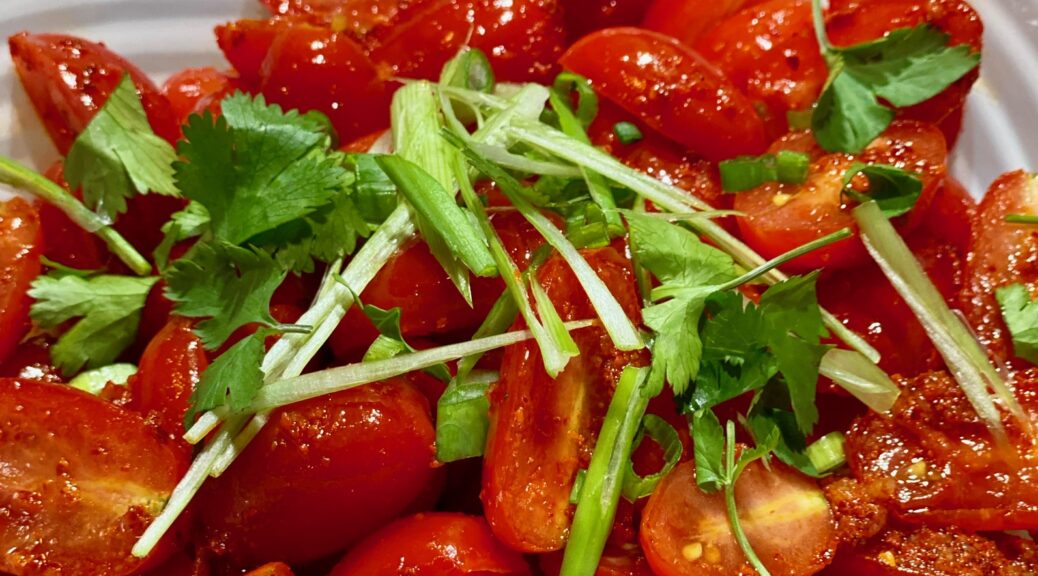
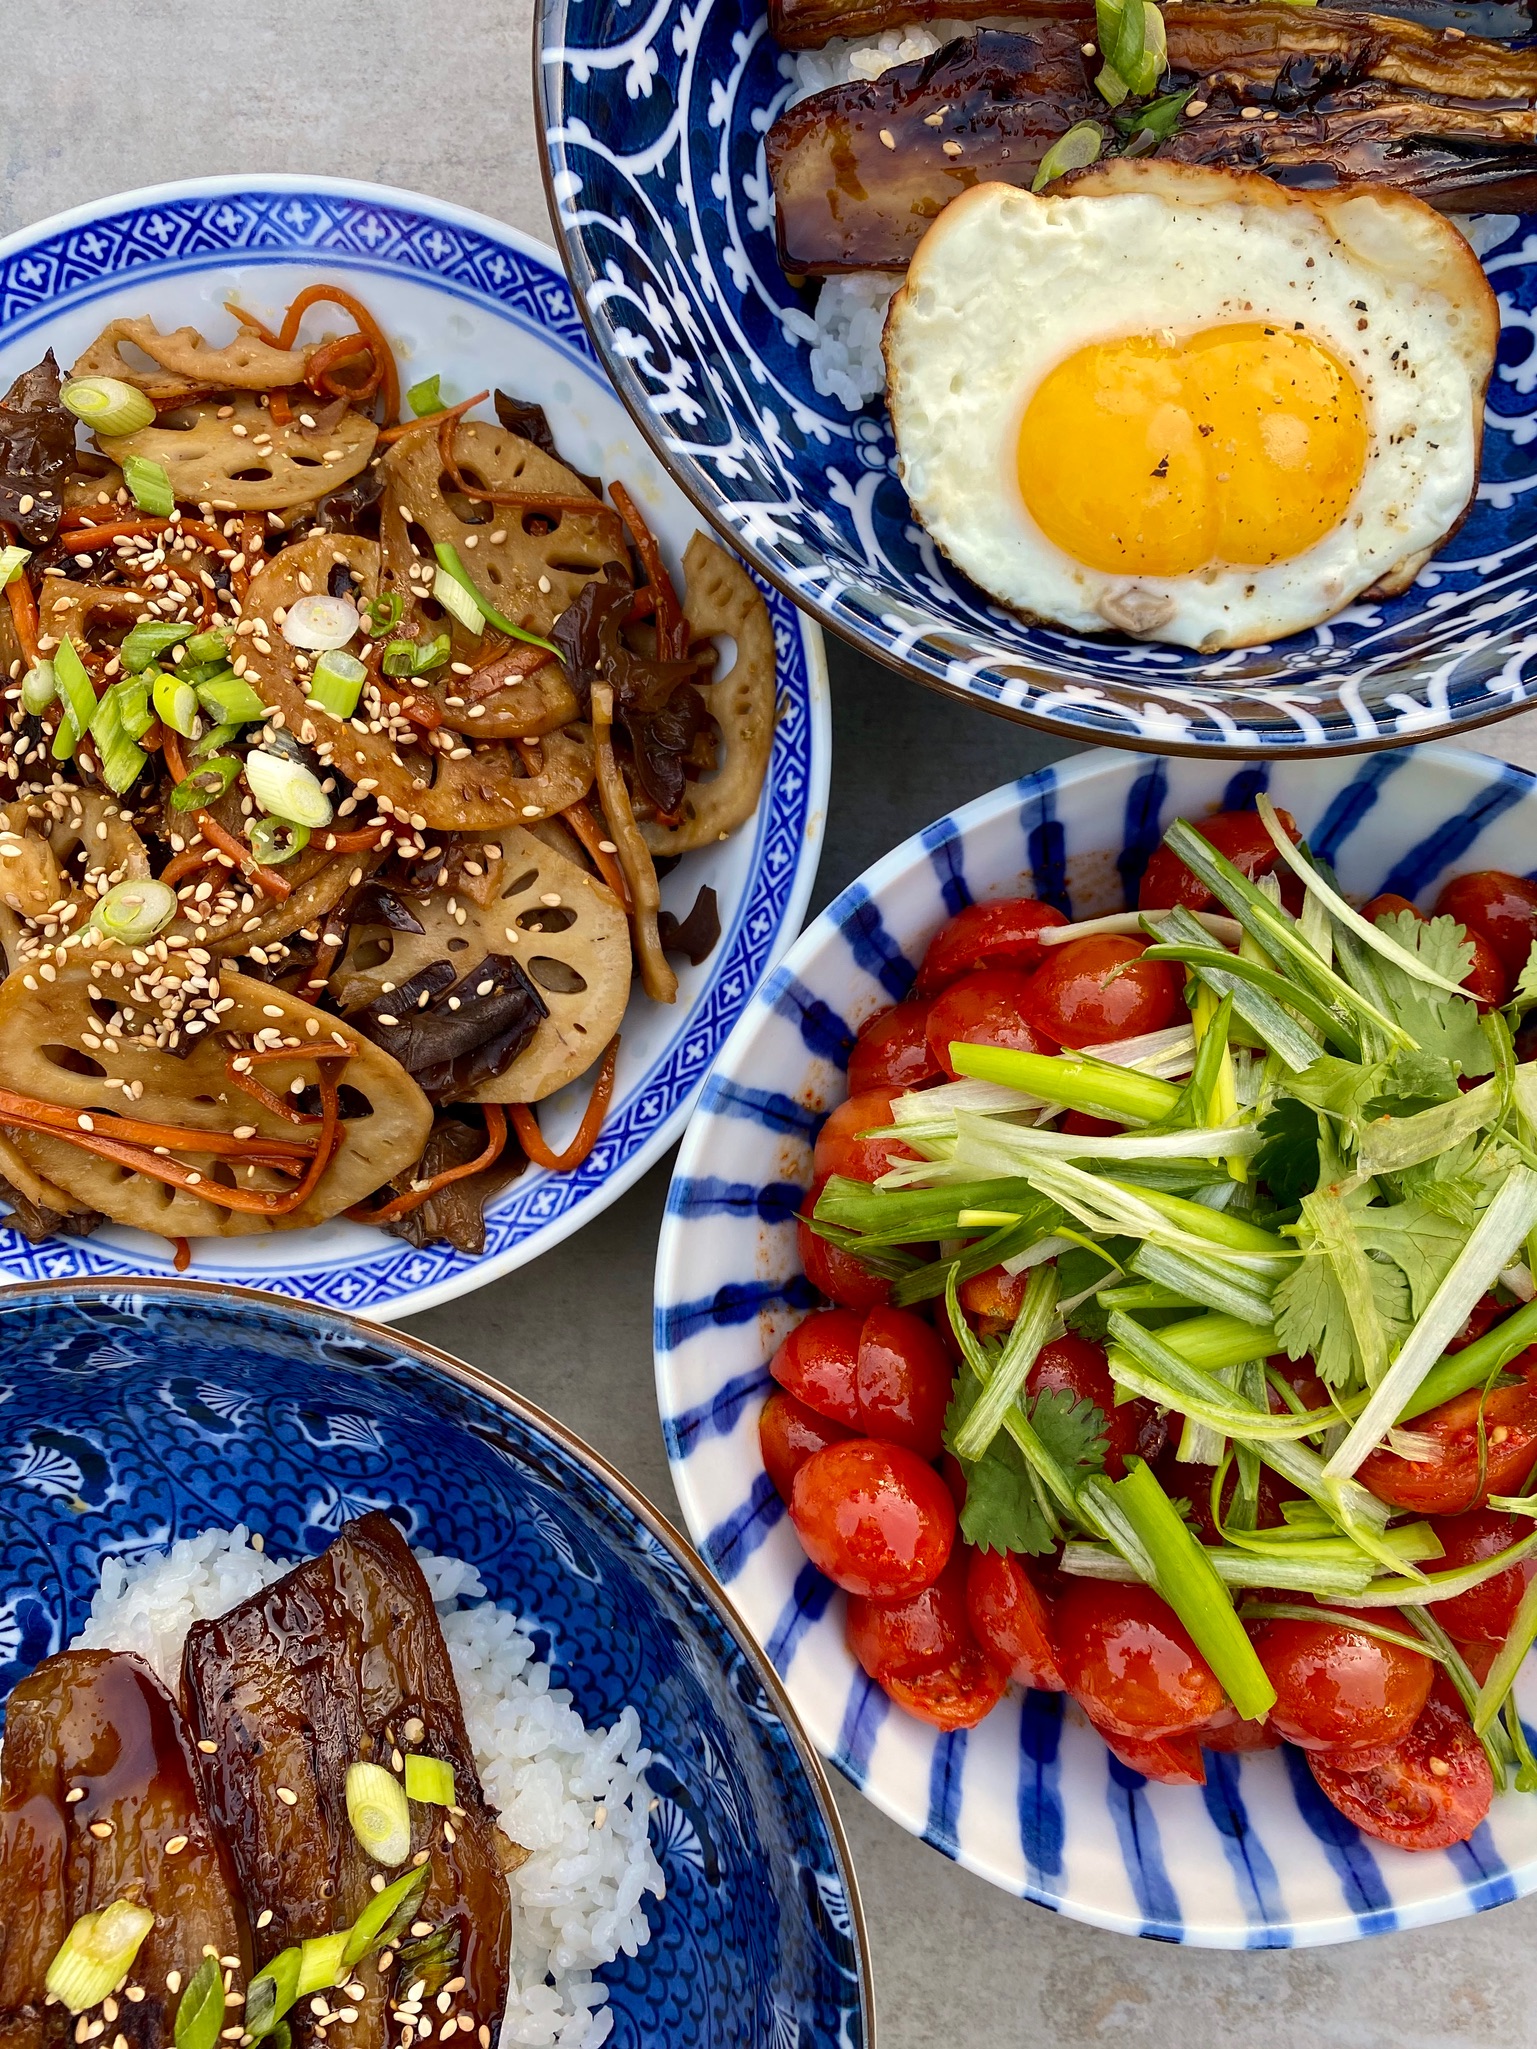
And I bought my first baskets of cherry tomatoes of the season today.  One of my favorite dishes, especially with the 90-degree weather we are having, is Eric Kim’s Grape Tomato Quick Kimchi.  I’m staying away from the stove as much as possible and this dish fits the bill. It’s the perfect way to enjoy those lovely tomatoes.

Side Dish Today…Lunch Tomorrow

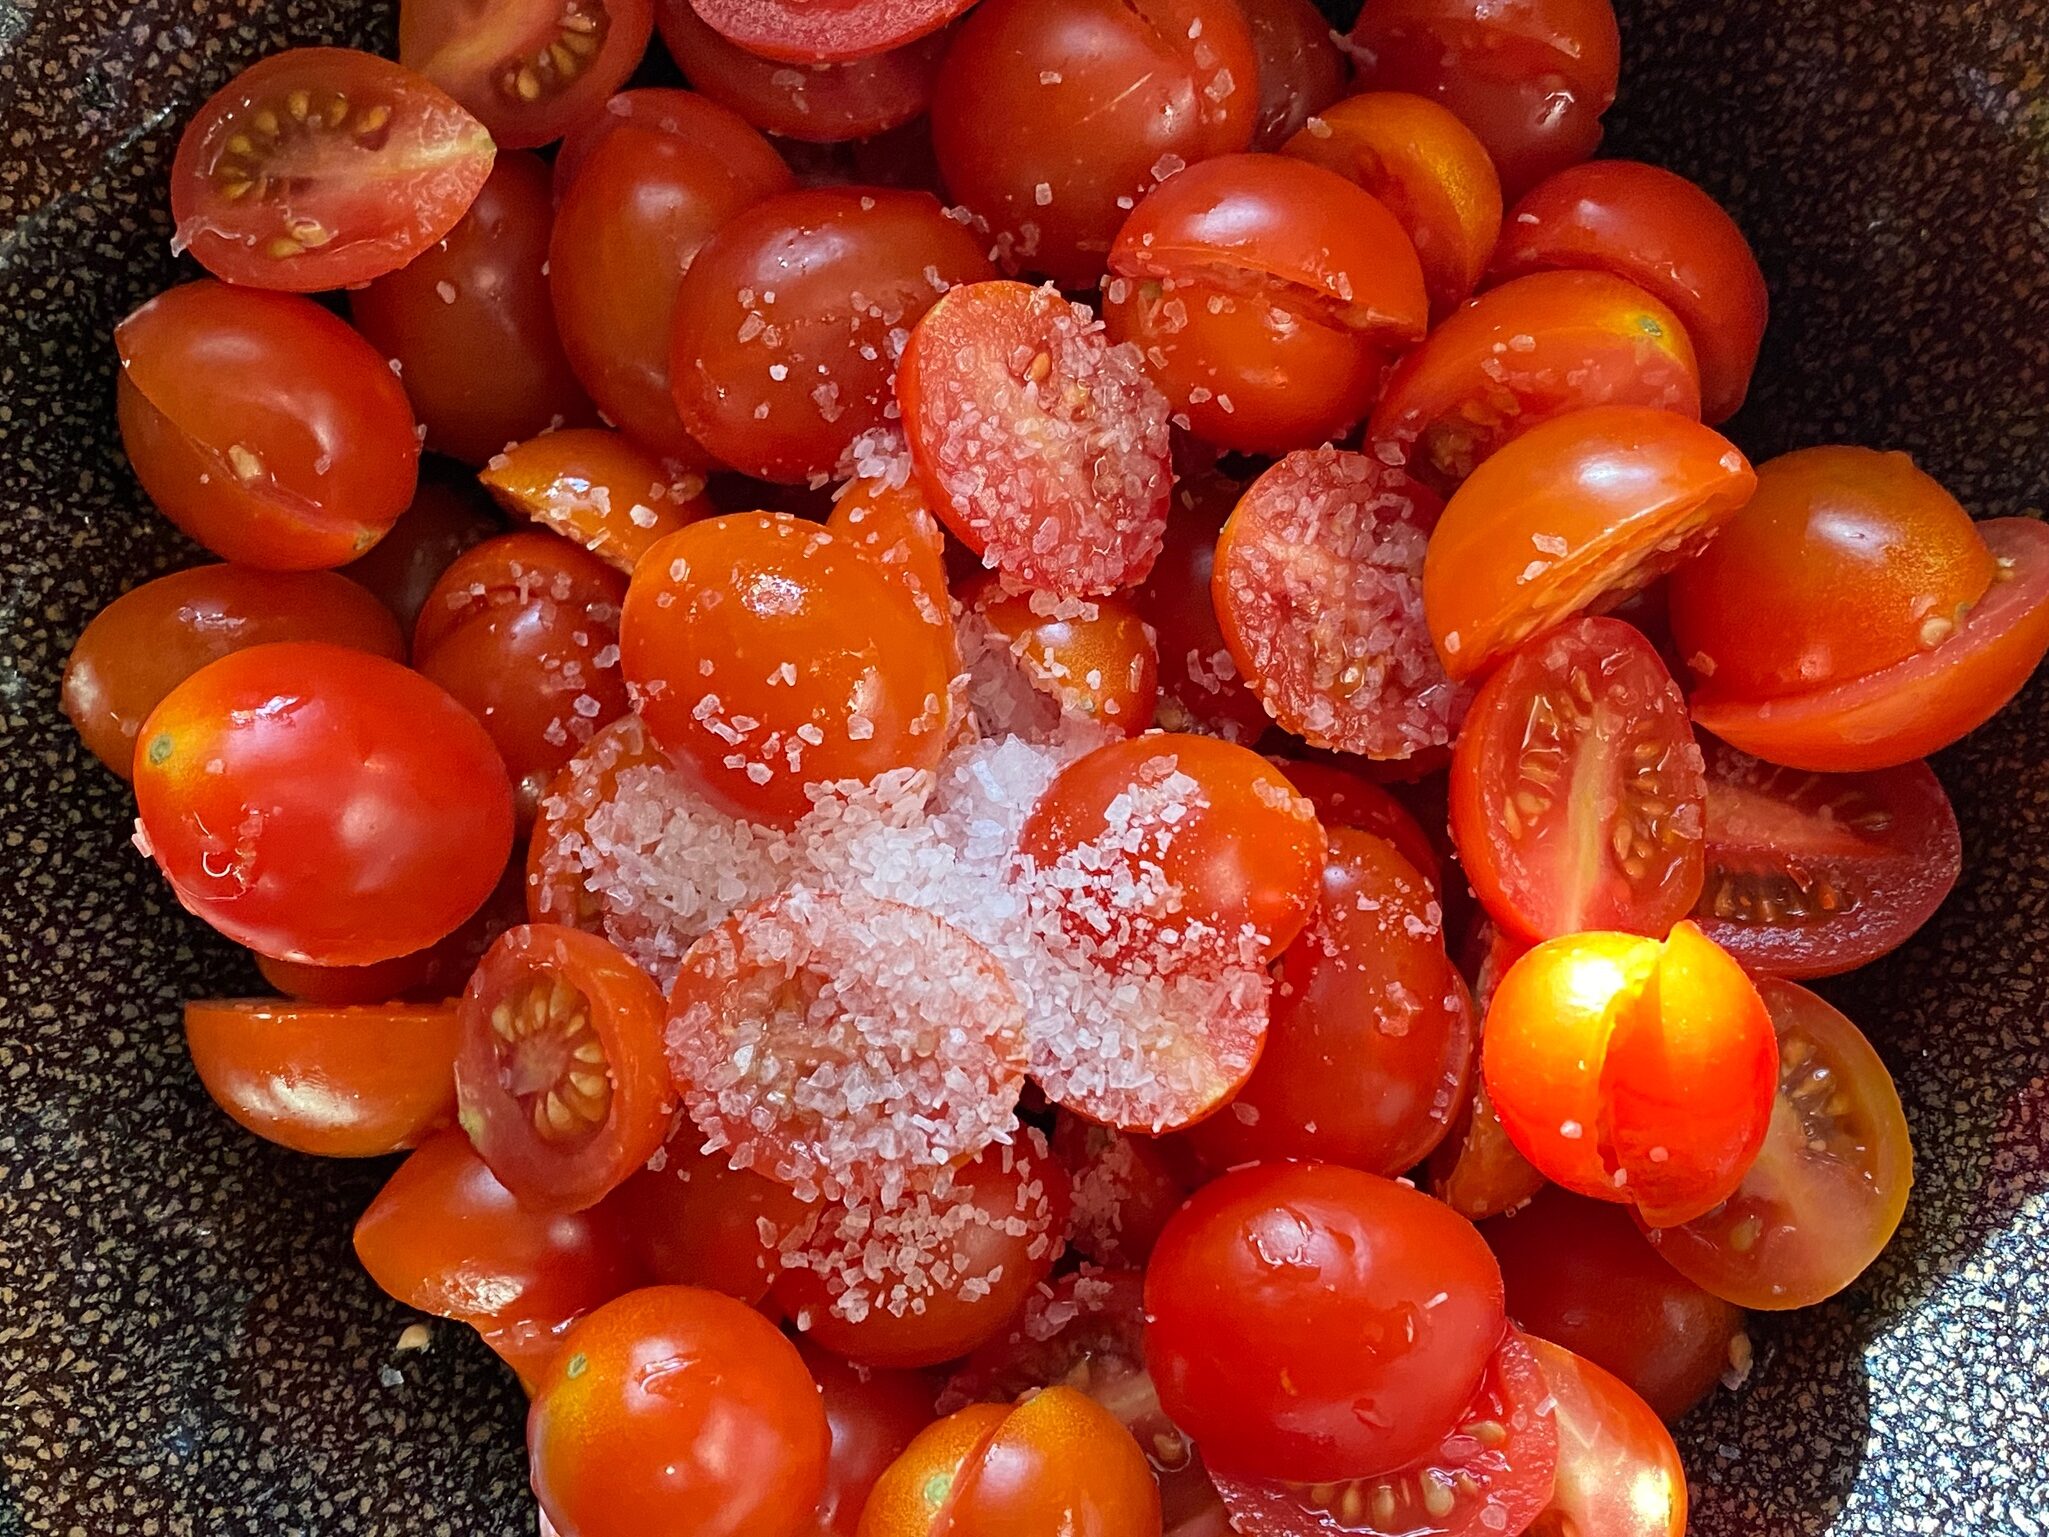
Simple to make, the time-consuming part is salting and allowing the tomatoes to drain.  Use any variety of cherry tomatoes.  The dressing consists of vinegar, fish sauce, sugar, and Gochugaru.  Red Boat or Three Crabs, are good choices for fish sauce.   Either can be found in any Asian store.  Gochugaru is Korean chili powder that can also be found in most Asian stores.  Your best bet would be a Korean market or online.  If you can’t find it feel free to substitute with chili flakes (1/4 tsp or to taste) or Aleppo pepper powder (1:1).  Toasted sesame oil provides a nutty, sweet finish to the dressing.

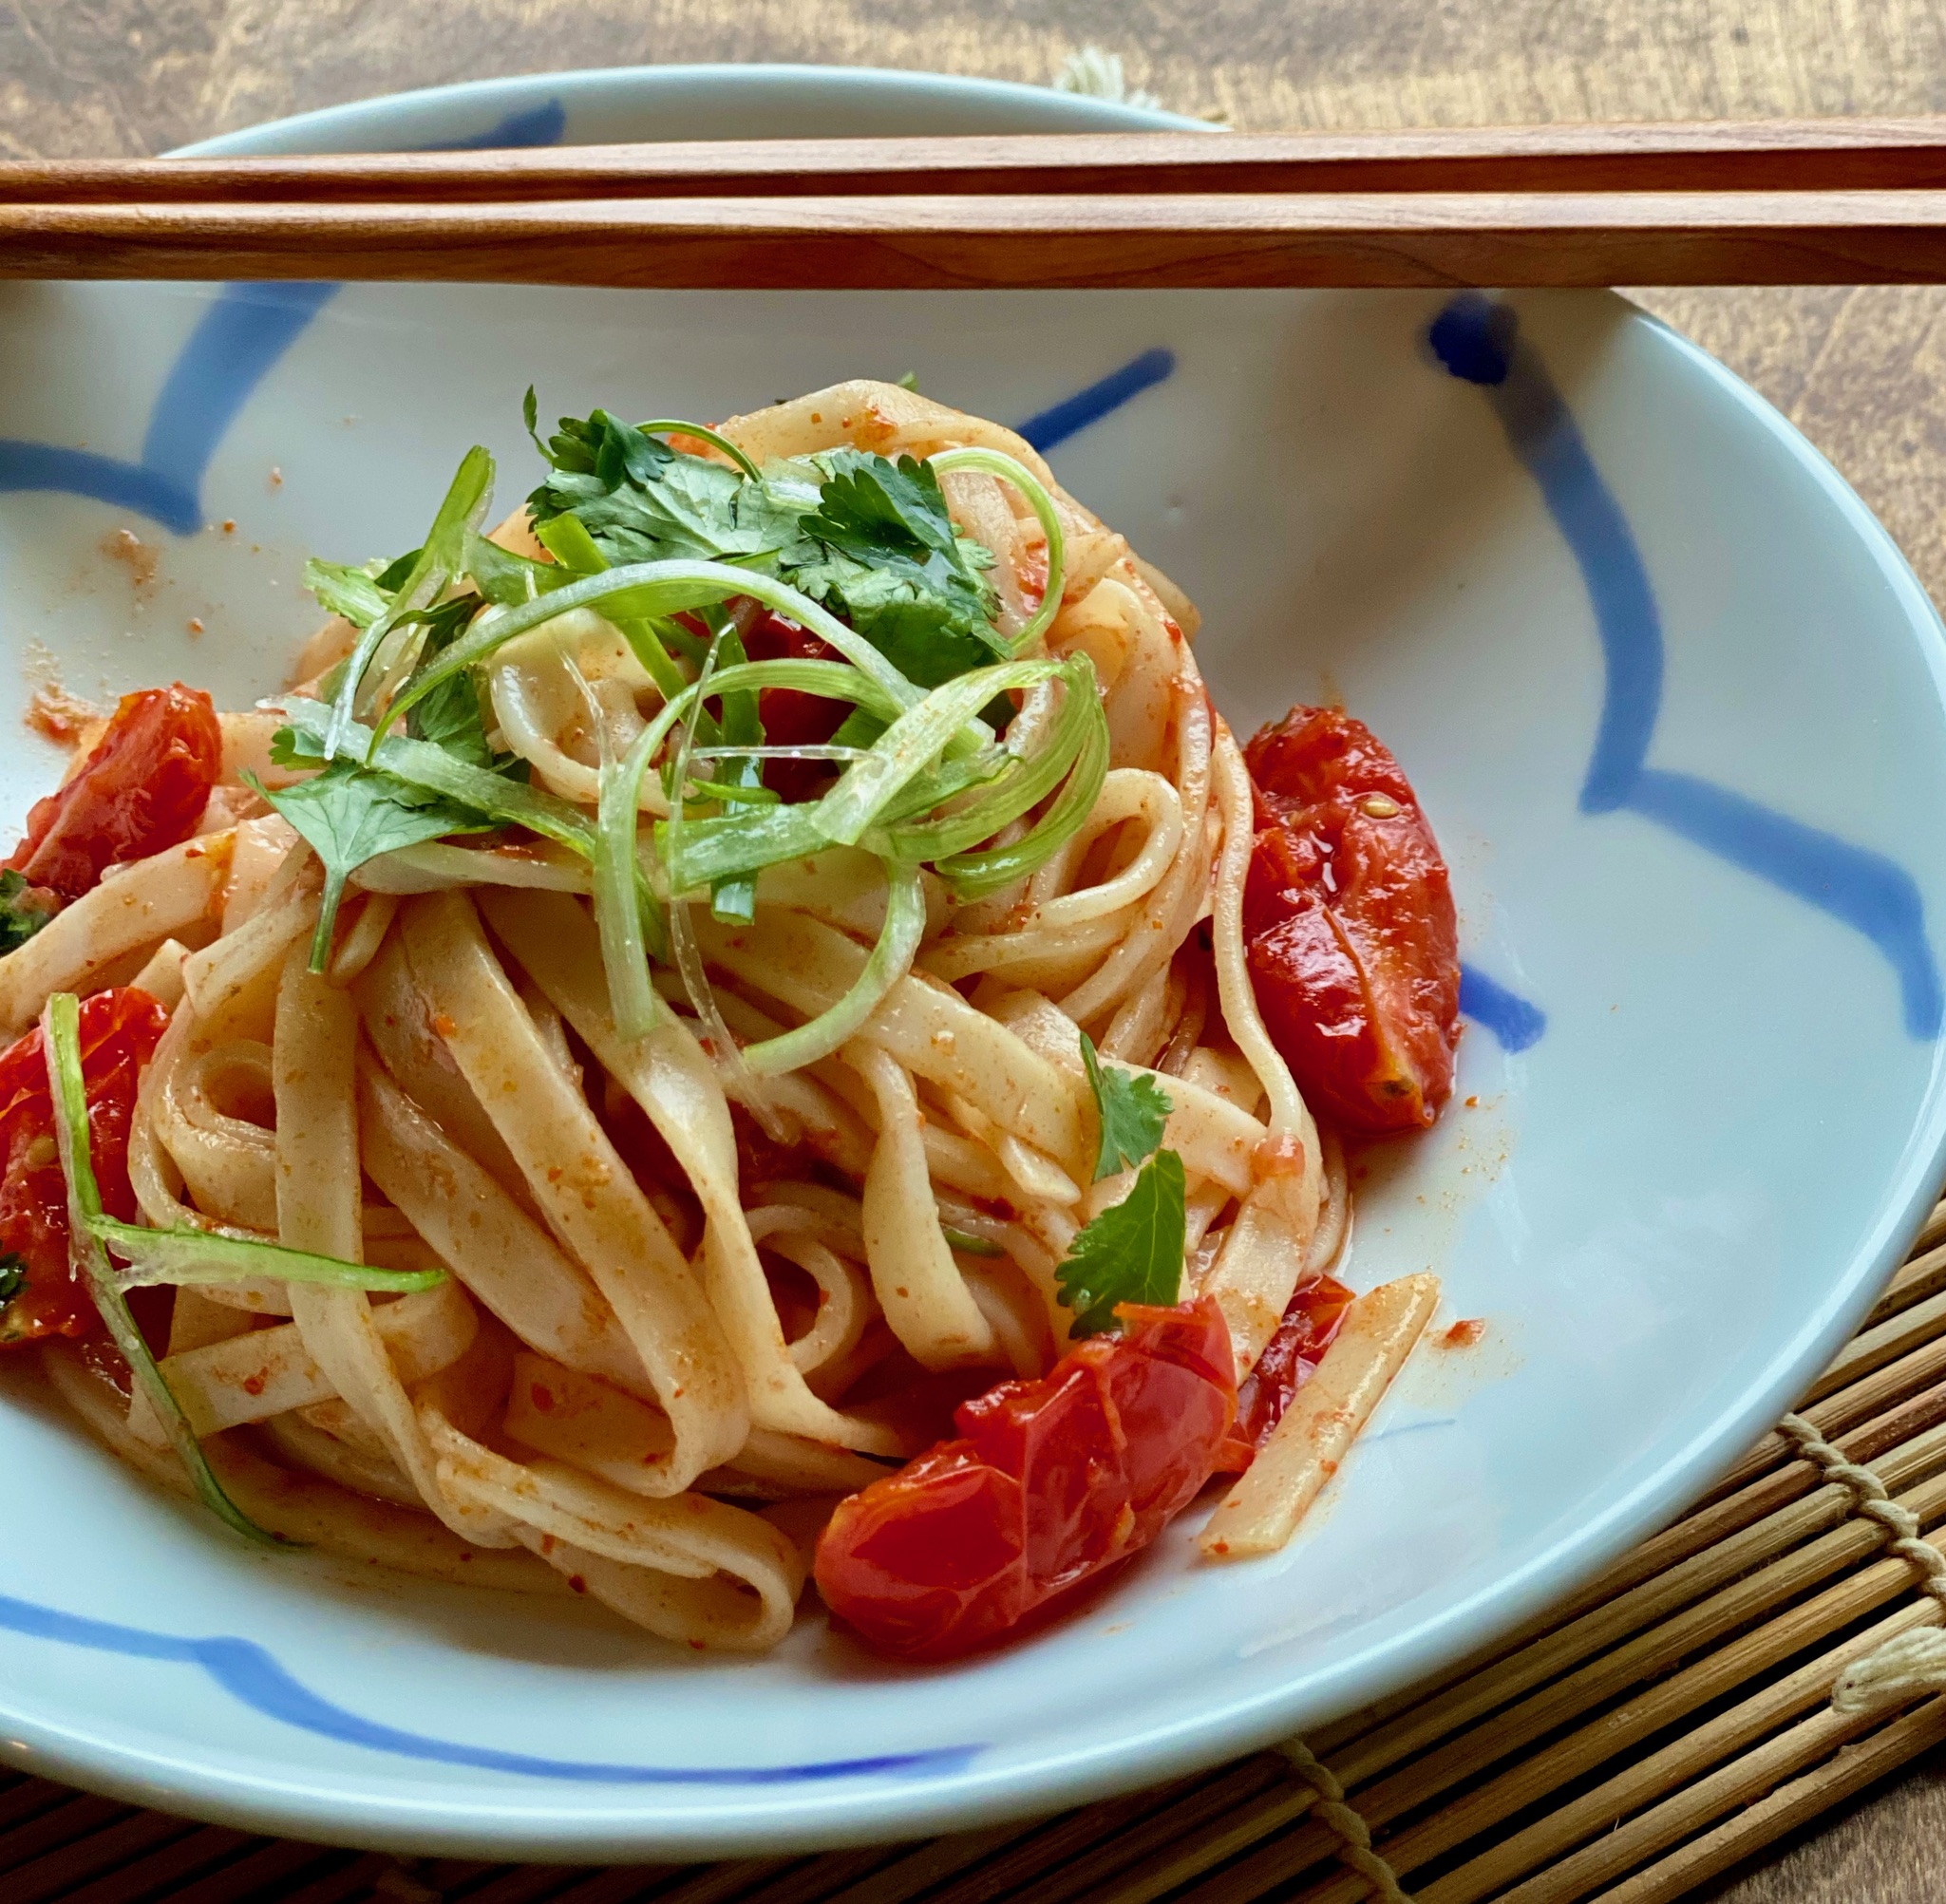
Serve it as a salad or side dish, like Banchan, it goes well with any kind of meal.  I make a big batch so I have extra for an easy lunch the next day. Just cook up some pasta, either ramen noodles or Angel Hair pasta, and toss it with the leftover tomatoes and sauce.  The pasta warms the tomatoes and picks up the flavors of the dressing, it’s delicious.

With tomatoes coming into season now and the weather warming up, this easy-to-make dish is perfect.

Grape Tomato ‘Quick Kimchi’

Eric Kim's Quick Tomato Kimchi. Refreshing, easy to prepare banchan using fresh cherry tomatoes is the perfect summer dish
Course Appetizer
Cuisine Korean-American
Keyword Banchan, cherry tomatoes, Cold Noodles with Tomatoes, grape tomatoes
Prep Time 30 minutes
Cook Time 5 minutes

Ingredients

Tomatoes

  • 1 pound grape tomatoes (or any ripe cherry tomato) about 2 to 3 cups, halved lengthwise
  • 1 teaspoon kosher salt

Banchan Dressing

  • 2 tablespoons white distilled vinegar substitute with rice vinegar
  • ½ teaspoon finely grated garlic
  • 1 tablespoon plus 1 teaspoon sesame oil Toasted sesame oil like Kadoya
  • 1 tablespoon gochugaru powder of flakes
  • 2 teaspoons fish sauce
  • 1 teaspoon granulated sugar

Garnish

  • Thinly sliced scallions chopped chives, or cilantro or flat-leaf parsley leaves for garnish (optional)

Instructions

  • In a medium bowl, toss the tomatoes with the salt, transfer to a colander, and let drain about 30 minutes. In the same bowl, add vinegar and garlic and set aside.
  • After 30 minutes, add the sesame oil, gochugaru, fish sauce and sugar to bowl with the vinegar and garlic and whisk to combine. Pat the tomatoes dry, then add the tomatoes to the dressing and toss until well coated.
  • Garnish with the optional herbs before serving. This is best eaten right away, but can be refrigerated for up to 24 hours.
  • Make this for banchan for dinner and use any remaining as a pasta sauce the next day. It is delicious with somen noodles. Cook as directed. Add tomatoes to hot noods and mix. Serve immediately.
Gochujang Buttered Noodles (Ketchup Noodles 2.0)

Gochujang Buttered Noodles (Ketchup Noodles 2.0)

My Dad made dinner most of the time.  Every evening he would leave the office, shop for dinner ingredients, go back to the office, pick up my mom, then go home.  Once home, he donned his apron and cranked out a typical Chinese meal in about 30-45 minutes.  A typical meal consisted of a quick soup, stir-fried beef with vegetables, and steamed fish.  It takes me 30 minutes just to decide what to make let alone have it on the table. Yep, my Pop was Dinner Dad Extraordinaire.

But when I stop and think about it, my mom was the one who got us up, made us breakfast, packed our lunches, and made most of the non-Asian holiday meals.  I have been giving short shrift to my mom all these years.  She accounted for 2/3 of our daily meals and my favorite lasagne.  Aiyah, I can’t believe I “marginalized” my own mom.

The Real Deal

My mom was instrumental in trying new things in our house.  An early adopter of the microwave, yogurt (before it was fashionable and filled with fruit and sugar), and frozen food.  Fridays meant Date Night for the parents and Swanson’s TV Dinners for us, and thanks to Swanson’s genius ad campaign, we got to eat in front of the TV.

There are a couple of dishes that my mom made that trumped (sorry) everything else.  First, Avocado Sandwiches.  My mom was ahead of her time-avocados, mashed with a little bit of mayo, S & P, and a squirt of lemon juice, slathered on white bread.  The OG of Avocado Toast. She’d make a killing.

Second, Ketchup Noodles. Butter, noods, ketchup,  a little salt and pepper.  There you have it, perfection.

Which Brings Me to…

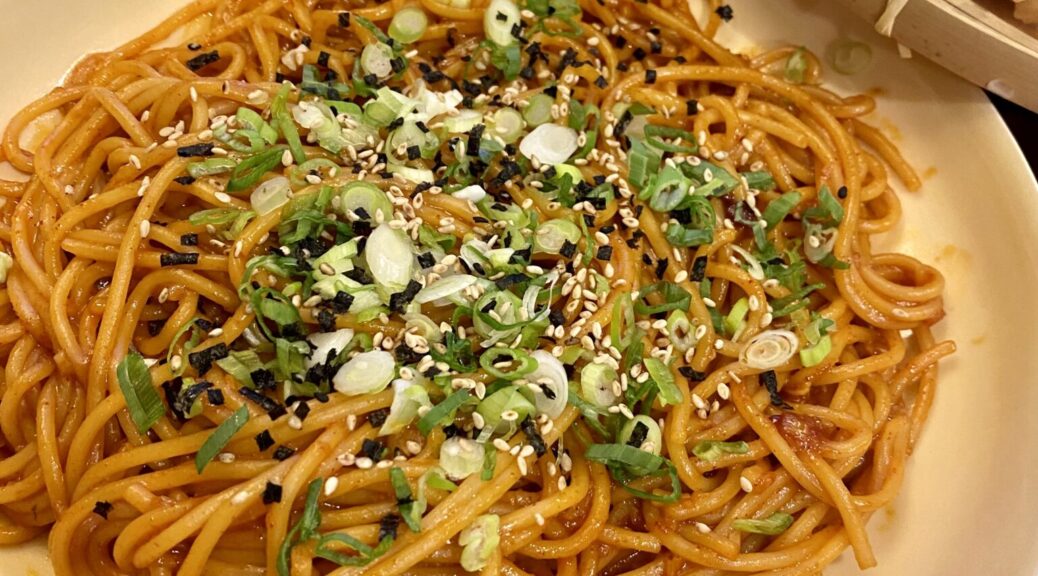
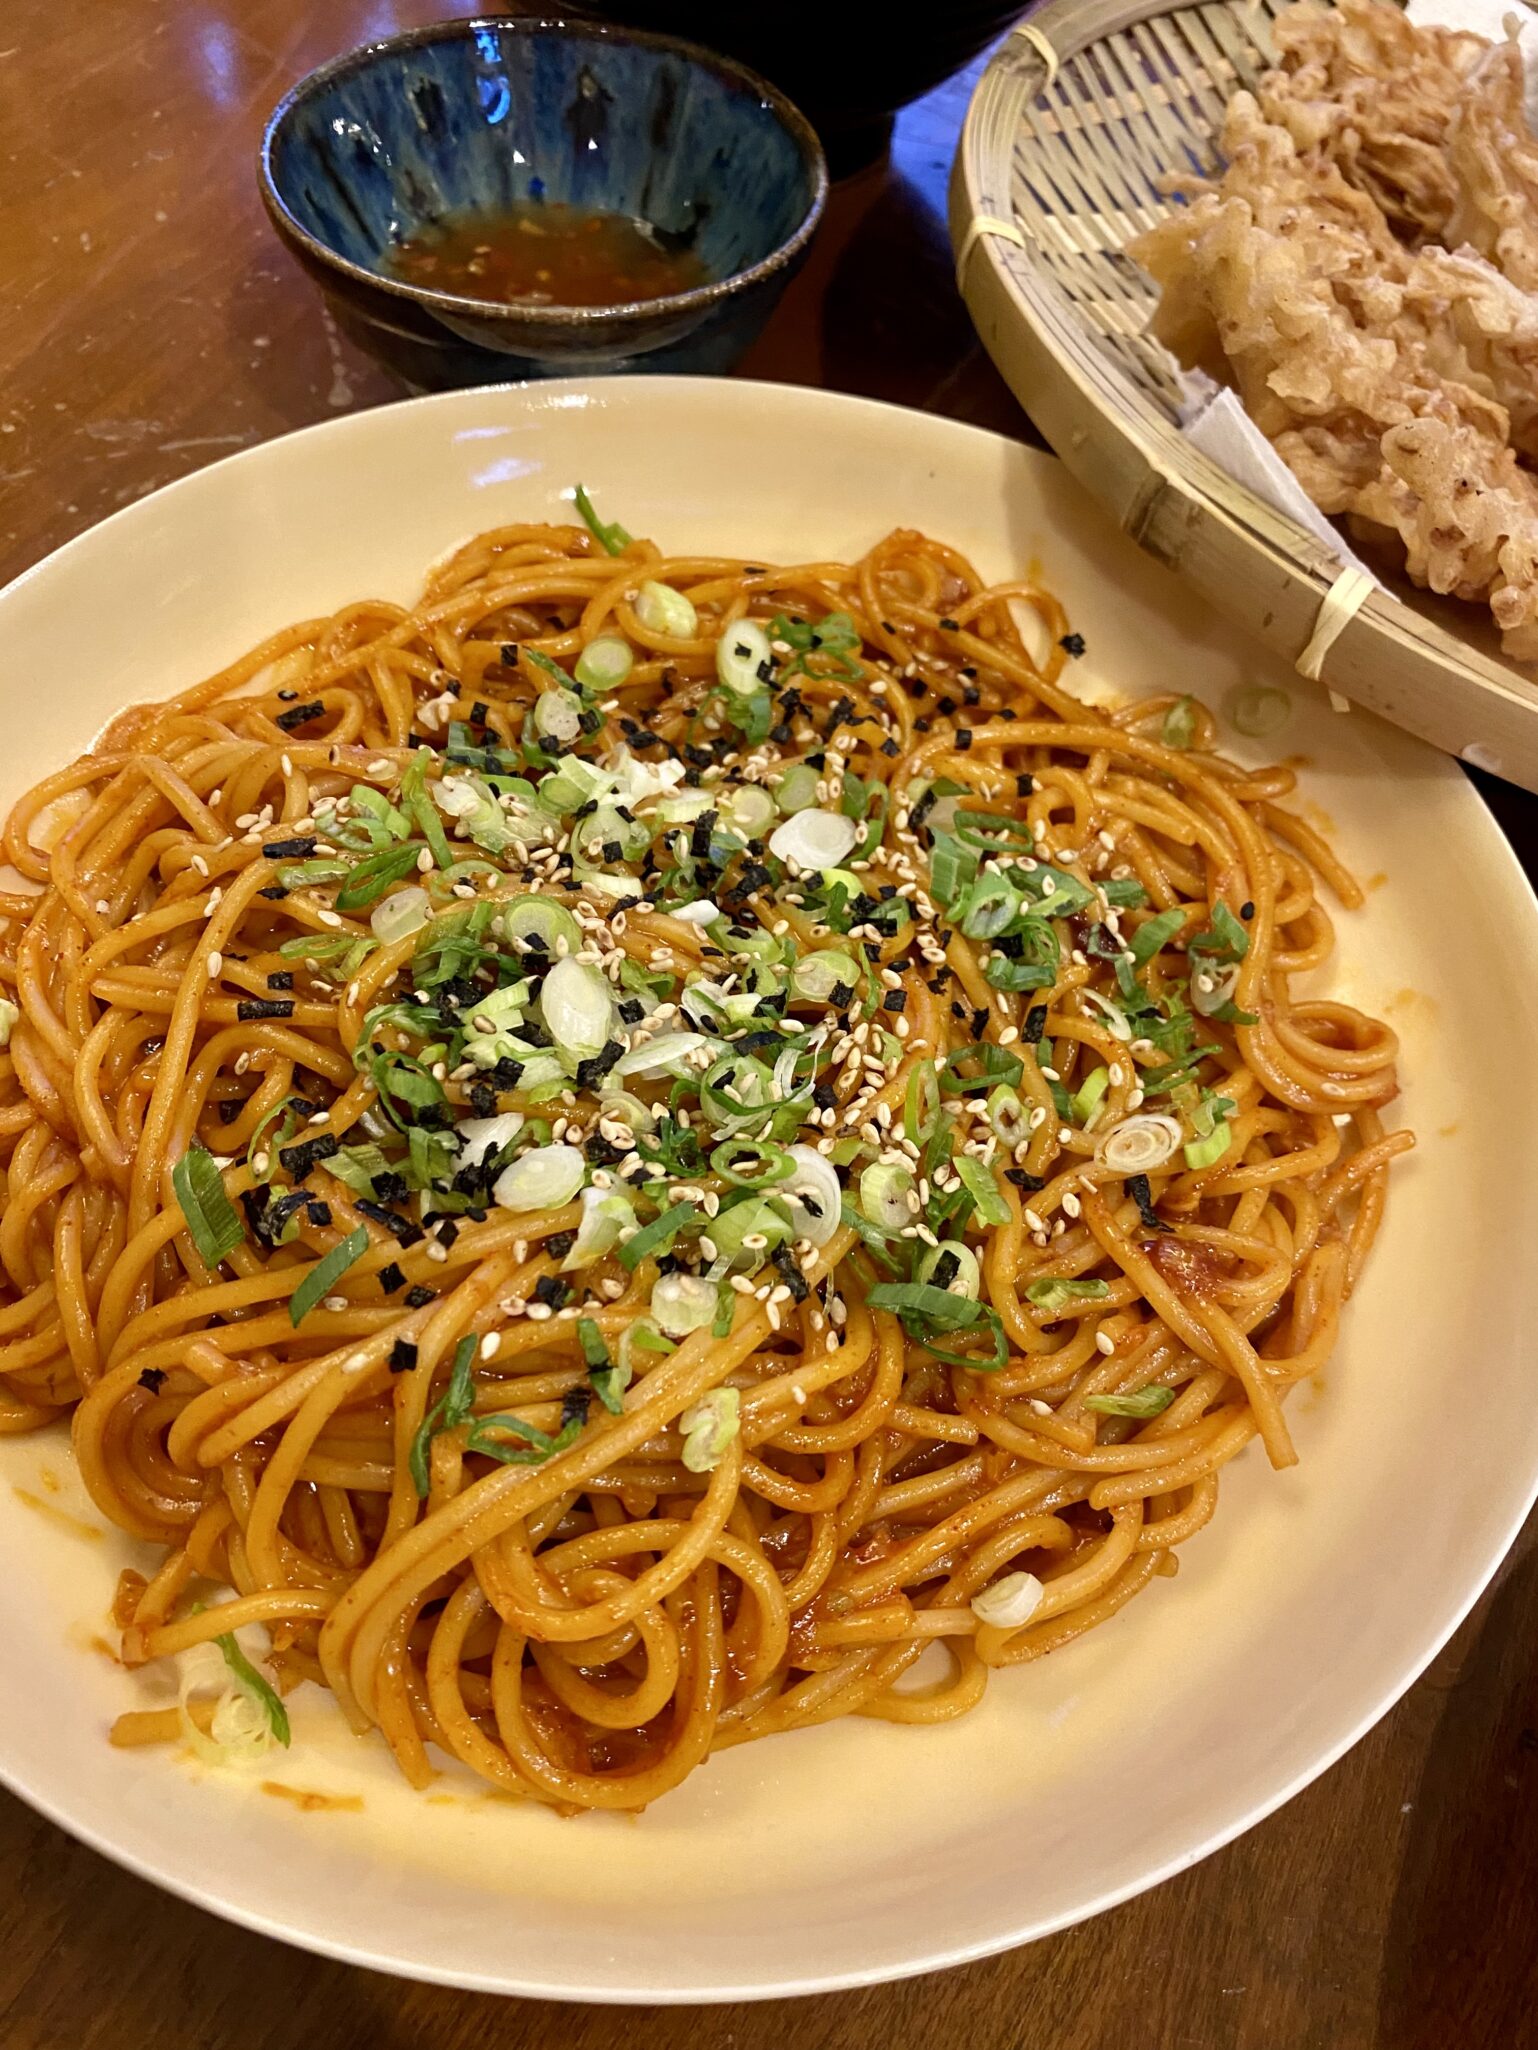
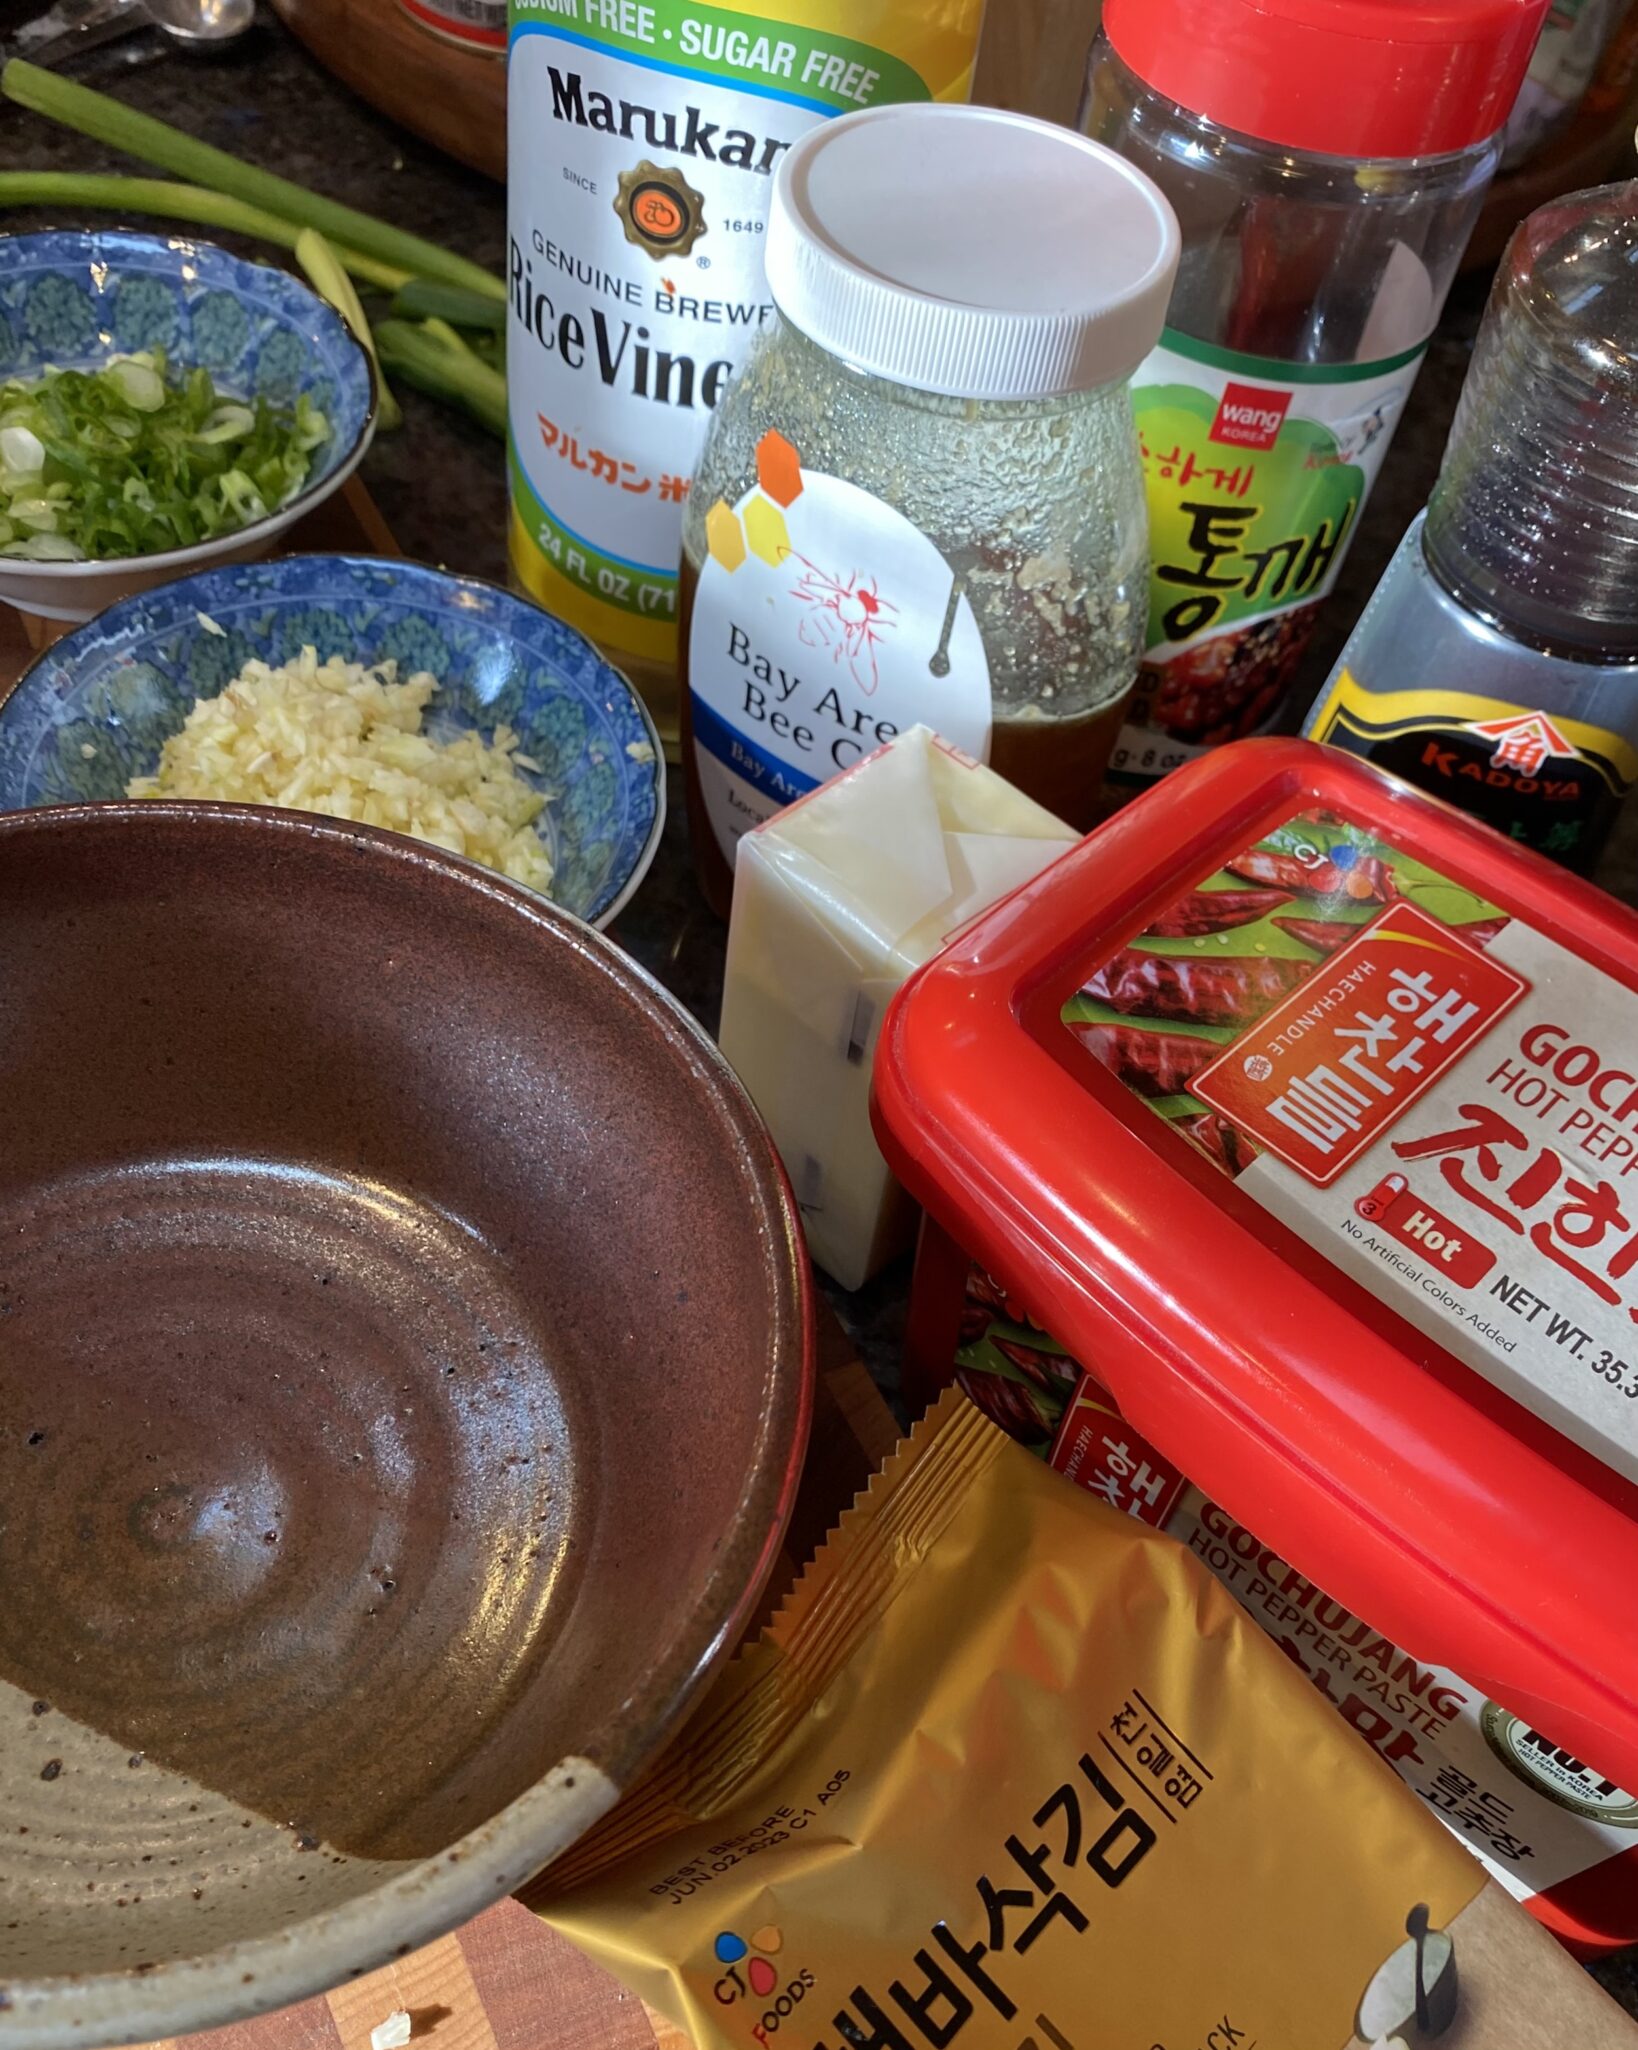
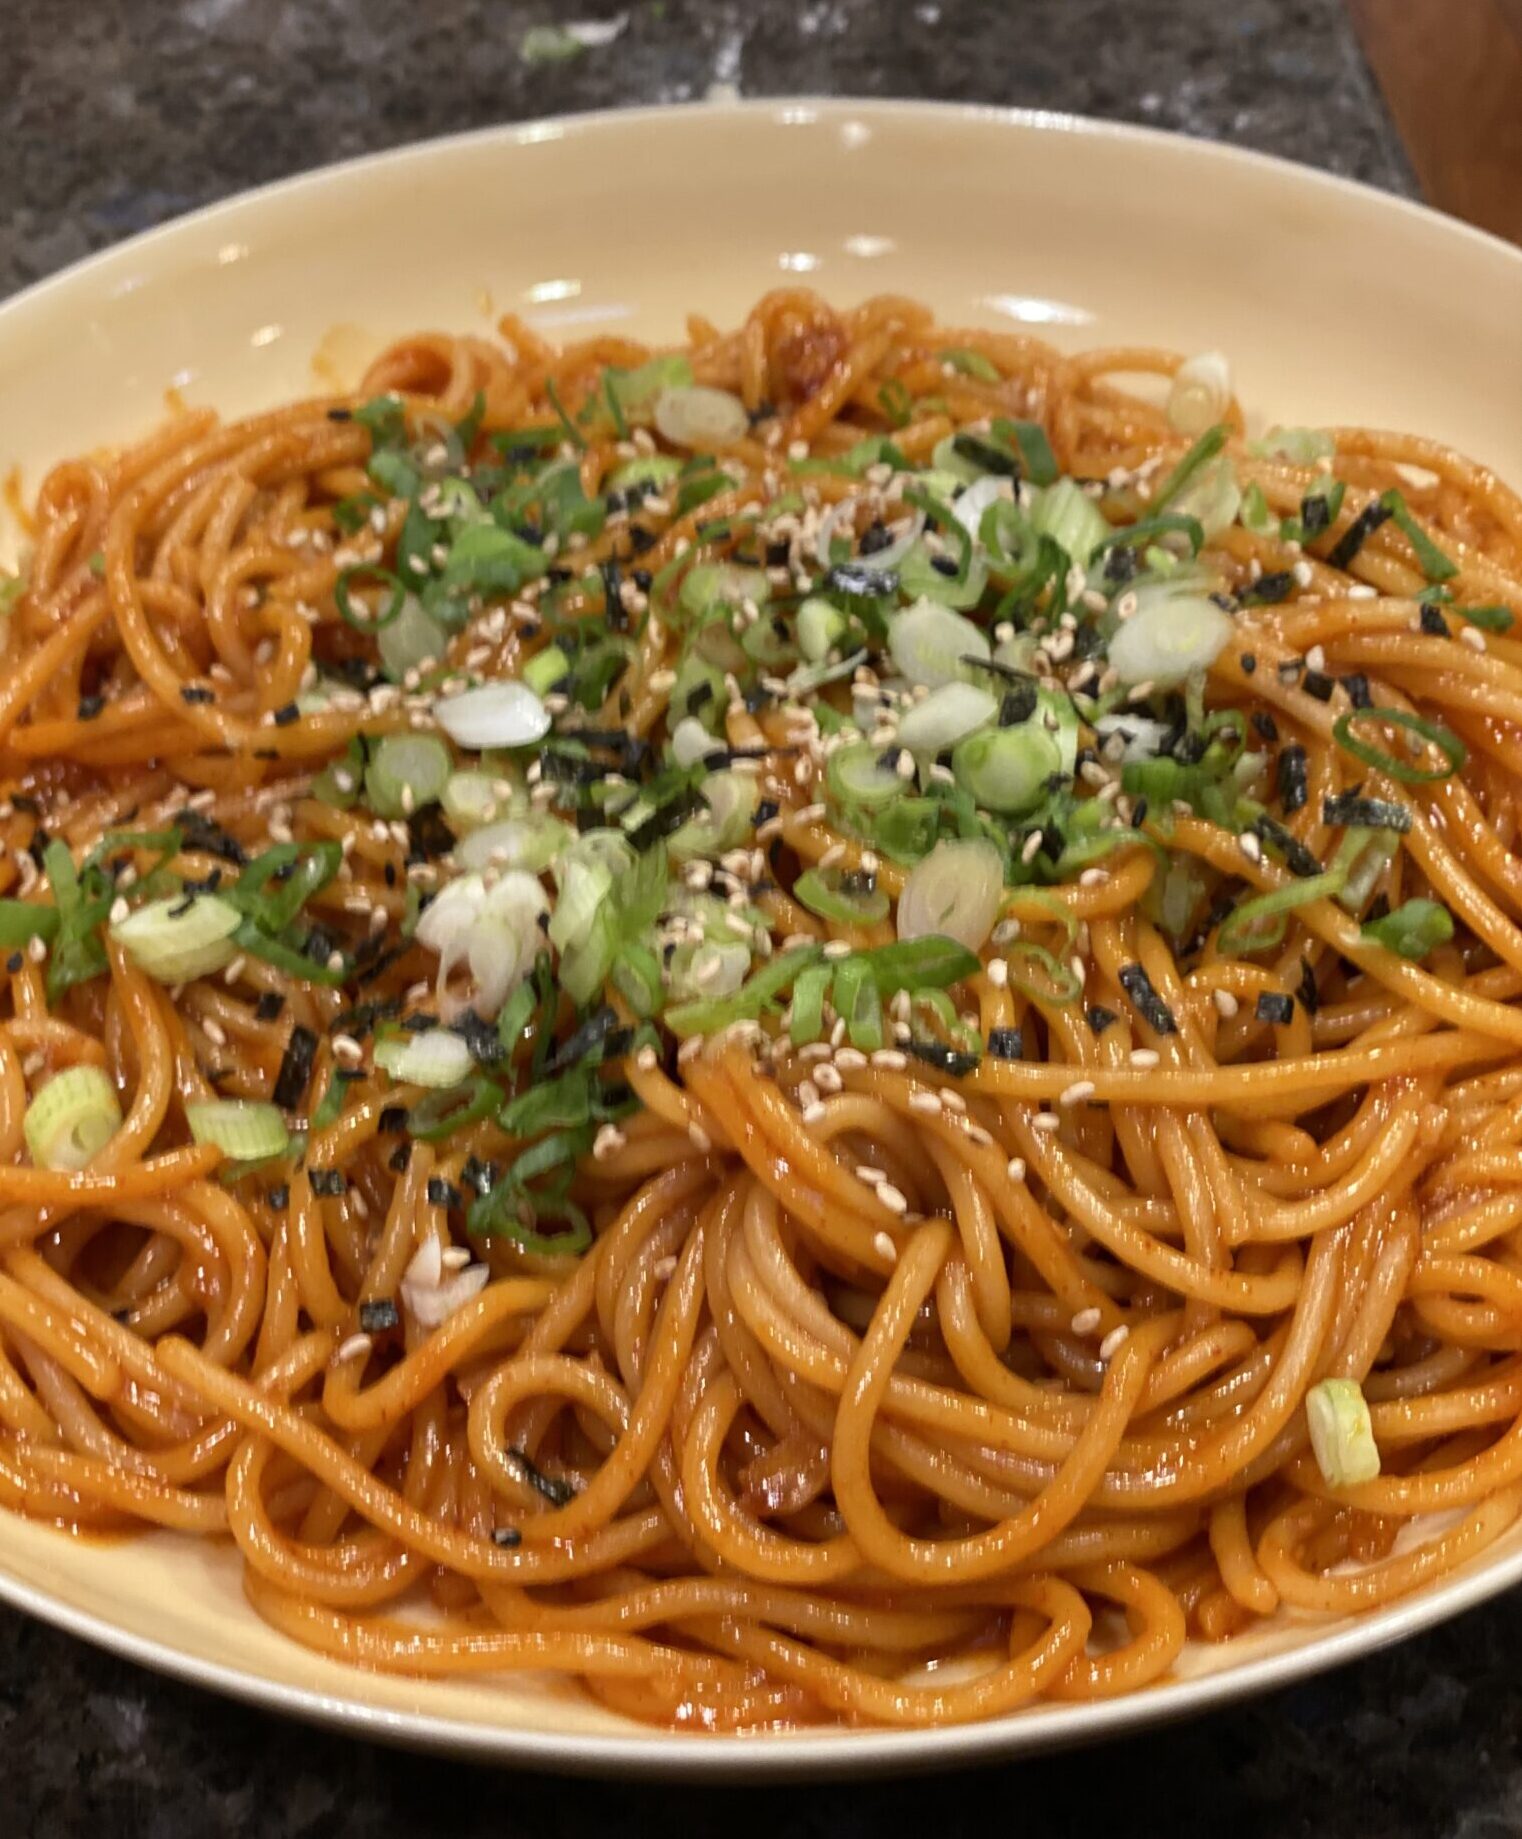
Gochujang Buttered Noodles.  A trademark Eric Kim recipe, easy, fast, and absolutely delicious.  I can’t give him 100 percent credit, this dish reminds me of my Mom’s Ketchup Noodles, think of his version as Ketchup Noodles 2.0.  Gochujang, the Korean, sweet and spicy chili paste replaces ketchup, and honey and vinegar bring a balanced sweet-tart flavor.  Fresh garlic adds punch. It’s delicious.  Another Eric recipe goes viral.

The Sauce

Gochujang or Korean Chili Paste comes in mild, medium or hot and can be found at most Asian grocery stores.  Trader Joe’s also carries a gochujang paste.  Do not confuse this with Gochujang Sauce which is thinner in consistency and probably contains sweeteners.   Use mild honey or agave syrup for the sweetener and rice vinegar or sherry vinegar for the acid, together they bring balance to the dish.

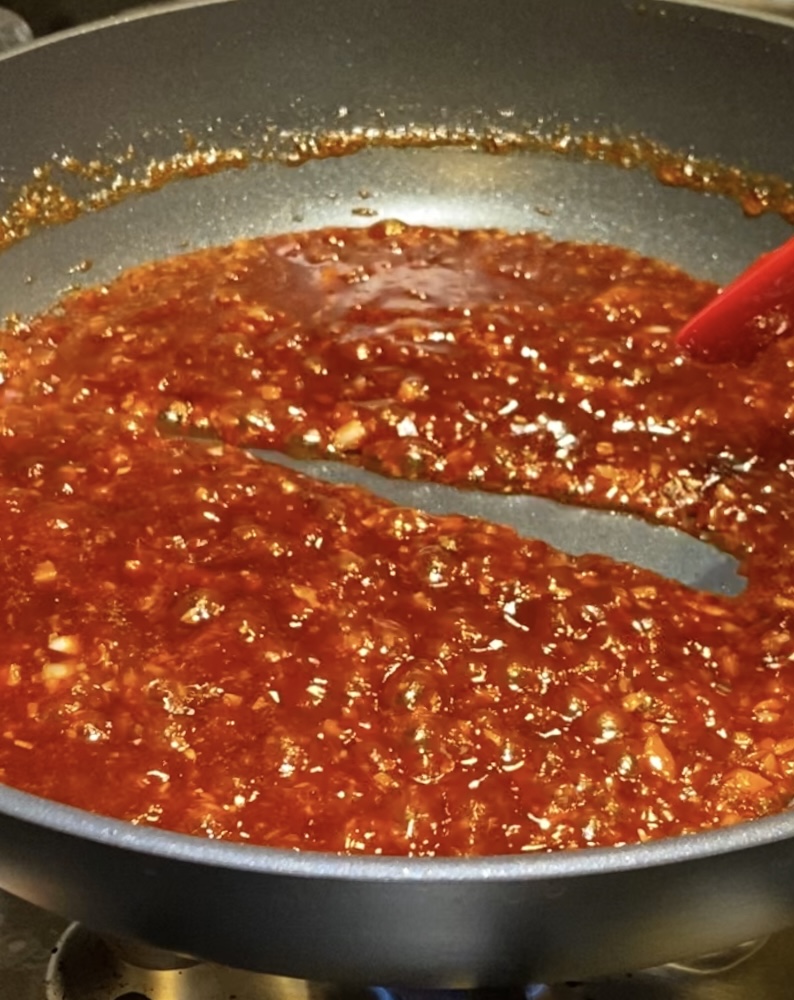
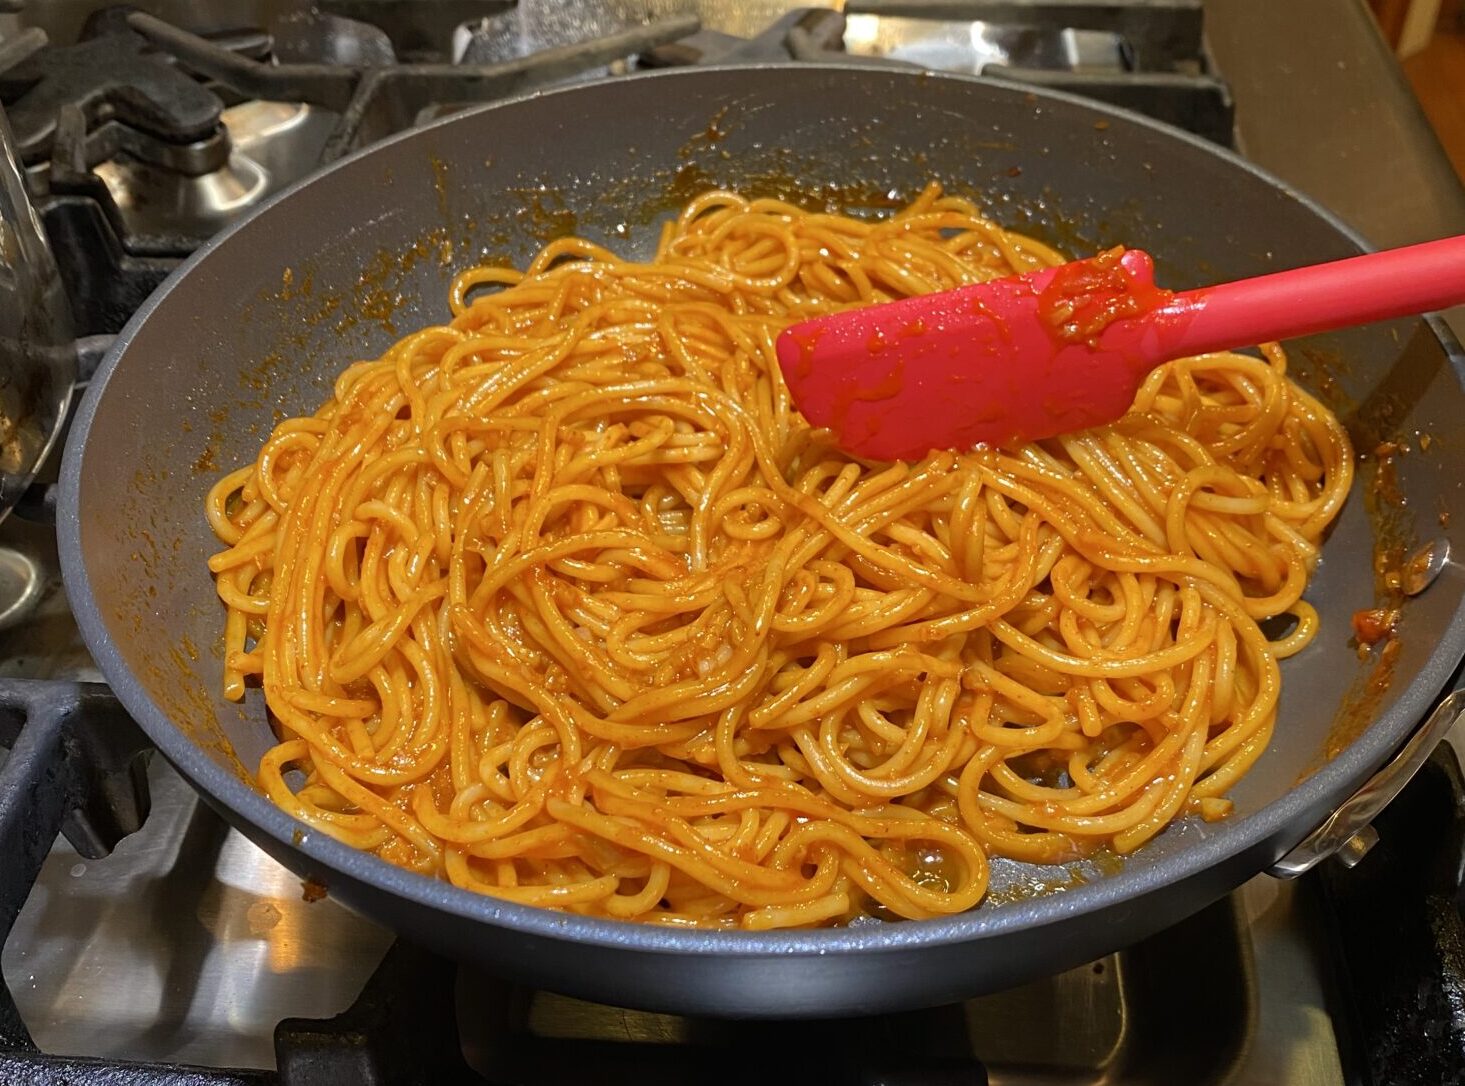
Reduce the sauce until you you run your spatula through it and it stays separate for a couple of seconds.  It will be syrupy and have a nice sheen.  Add your pasta and reserved pasta water (a little at a time to desired consistency).

The Noods

Asian pasta, like ramen or Taiwanese dry noodles, is my favorite for its texture, but spaghettini or linguine works in this dish.  The bottom line, use your favorite pasta.

Finish the dish by garnishing it with chopped scallions, sesame seeds, and crushed seaweed.  I also like to drizzle some sesame oil on top.

Enjoy!

Gochujang Buttered Noodles

Ingredients

  • 1 pound spaghetti or other long pasta
  • 6 tablespoons unsalted butter
  • 12 garlic cloves finely chopped (about ⅓ cup)
  • Kosher salt and black pepper
  • ¼ cup gochujang paste
  • ¼ cup honey
  • ¼ cup sherry vinegar or rice vinegar
  • Finely chopped cilantro or thinly sliced scallions optional

Instructions

  • Bring a large pot of water to a boil. Add the spaghetti and cook according to package instructions. Reserve 1 cup of the cooking water. Drain the spaghetti and return to its pot.
  • While the pasta cooks, melt 4 tablespoons of the butter in a skillet over medium-low. Add the garlic and season generously with salt. Cook, stirring occasionally, until the garlic starts to soften but not brown, 1 to 3 minutes.
  • Stir in the gochujang, honey and vinegar, and bring to a simmer over medium-high. Cook, stirring constantly, until the mixture reduces significantly, 3 to 4 minutes; when you drag a spatula across the bottom of the pan, it should leave behind a trail that stays put for about 3 seconds. Remove from the heat.
  • Transfer the sauce to the pot with the spaghetti and add the remaining 2 tablespoons butter. Vigorously stir until the butter melts. Add splashes of the pasta cooking water, as needed, to thin out the sauce. Taste and season with salt and pepper. Top with the cilantro or scallions (if using) and serve immediately.
Miso-Honey Chicken with Asparagus Sheet Pan-tabulous!

Miso-Honey Chicken with Asparagus Sheet Pan-tabulous!

Sam Sifton’s What to Cook column in the NY Times is my usual starting point for what should I make for dinner during the week.  I found Yossy Arefi’s Sheet Pan Miso-Honey Chicken and Asparagus in his column a little while ago and bookmarked it.  Like so many others, I have jumped on the sheet pan meal train.  I love a cooking method that includes hashtags like #quick, #easy, and #delicious.  This recipe was simply yummy and had me licking my plate clean at the end.

Da Sauce

The flavor from the marinade manages to hit every note-sweet from honey, and spicy from chili sauce.  Eartiness and salty from the miso.  The ginger and garlic create an added one-two flavor punch.  It is absolutely delicious.  Reserve half of it to serve at the table for those who just can’t get enough of it, like me!

Most of the ingredients for the marinade are items that you probably have in your pantry or fridge, especially if you like Asian cuisine.  For those not familiar with miso-the star of this marinade, miso is a cornerstone in Japanese cooking.  It is made from soybeans that is fermented and it is responsible for that salty, slightly funky flavor and umami.  It comes in two basic types, white and red.  White miso is milder and if I could only have one miso, this would be it.  Here is a primer on miso from Spruce Eats.  Look for it in Asian grocery stores and many of the larger supermarkets.  There really isn’t a substitute so if your local markets don’t carry it, try online.

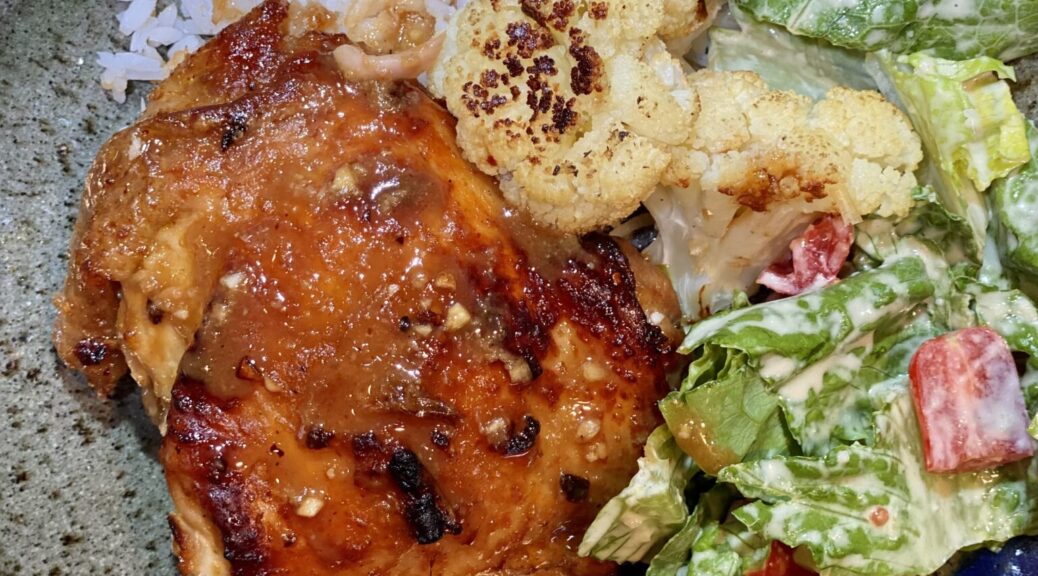
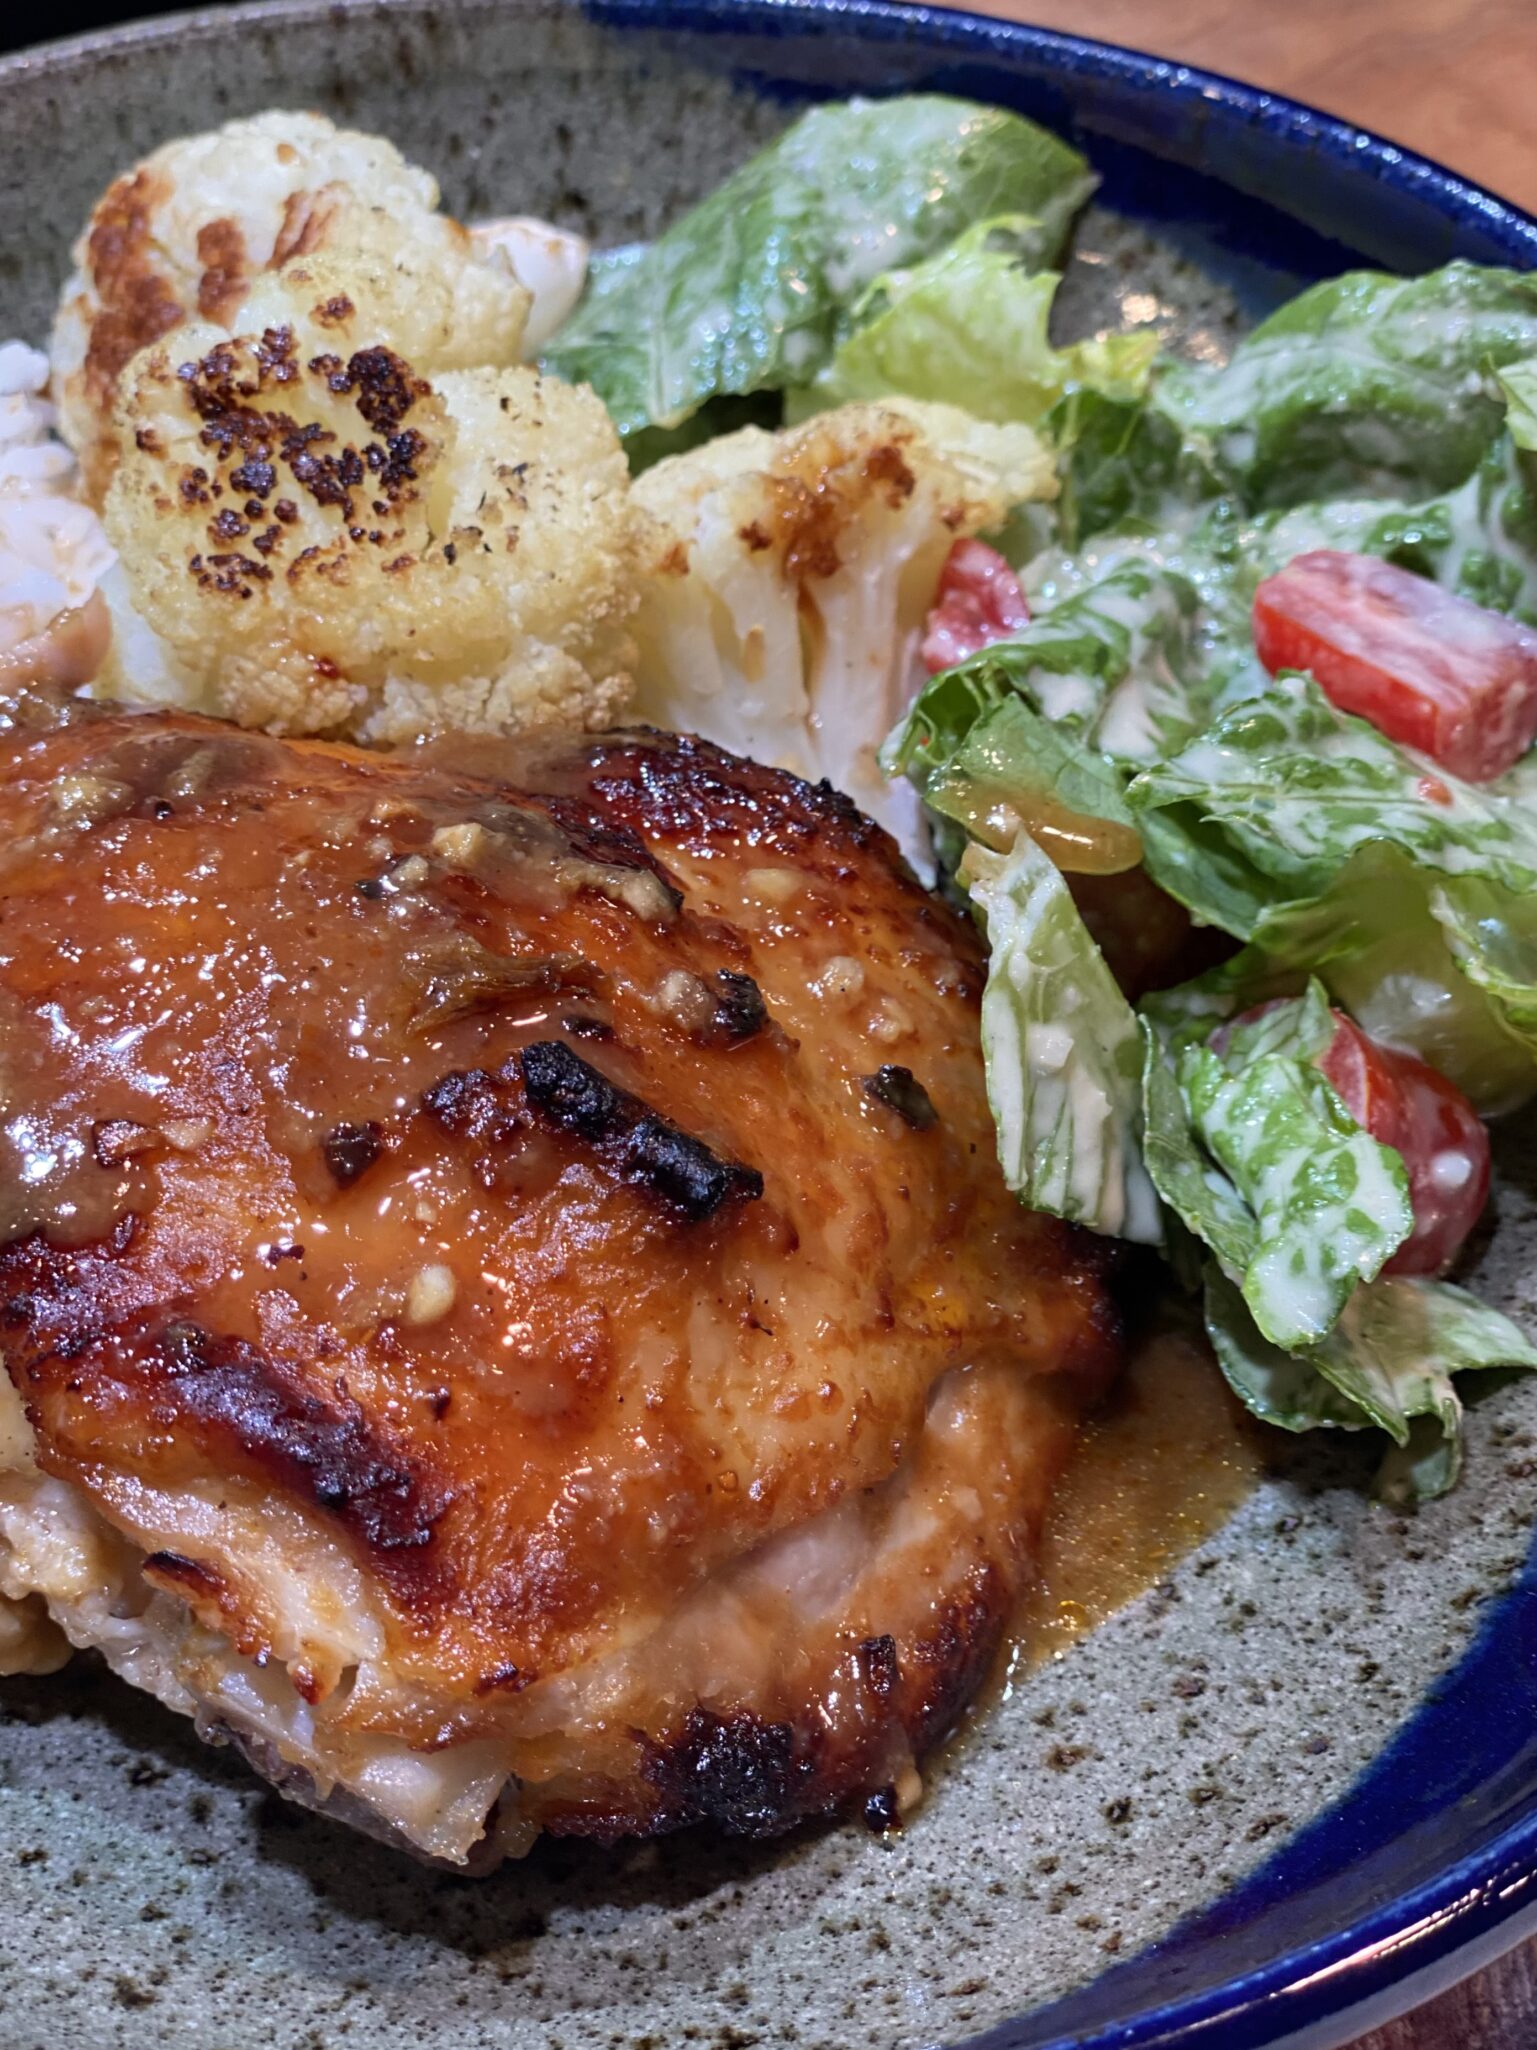
Improvising for the lack of asparagus, I grabbed a head of cauliflower from my crisper and I was in business.  I prefer bone-in chicken so I slathered the marinade on bone-in, skin-on chicken thighs and opted to roast it.  Roast the chicken and cauliflower in a 425-degree oven for approximately 25-30 minutes until the chicken is crispy and browned, and the cauliflower is tender and golden.  It would be tough to broil bone-in chicken and have it cook through, high-heat roasting works well.

Sheet-Pan Miso Honey Chicken with Asparagus

An easy and delicious one-pan meal. Chicken thighs are marinaded in honey, miso, and soy sauce elevated with the addition of minced garlic and ginger. Delicious!
Course Main Course, Meat
Cuisine Asian-American
Keyword Chicken thighs, gochujang, NYTcooking, sheet pan meal
Prep Time 10 minutes
Cook Time 30 minutes

Ingredients

Marinade

  • 3 tablespoons white miso
  • 3 tablespoons mild honey
  • 3 tablespoons soy sauce or tamari
  • 1 tablespoon rice vinegar
  • 2 teaspoons finely grated fresh ginger
  • 2 teaspoons finely grated garlic
  • 2 teaspoons chile-garlic sauce or other hot sauce
  • 1 tablespoon neutral oil + 1 tablespoon water for marinade

The Stars

  • 1 Pound large bunch asparagus trimmed
  • 2 teaspoons neutral oil for asparagus
  • 1½ to 2 pounds chicken thighs boneless, skinless (although I like leaving the skin on

The Garnish

  • Salt and pepper
  • 2 scallions thinly sliced

Instructions

  • Make the marinade: In a bowl, whisk together the miso, honey, soy sauce, rice vinegar, ginger, garlic, chile-garlic sauce, 1 tablespoon oil and 1 tablespoon water. Refrigerate half the marinade for serving.
  • Place the chicken in a shallow dish or zip-top bag and pour the remaining marinade over the top. Toss the chicken until coated and let marinate in the refrigerator for up to 30 minutes.
  • When you are ready to cook, heat the broiler with a rack set 6 inches below it. Line a large baking sheet with aluminum foil. * See notes for directions to roast chicken instead of broiling.
  • Remove the chicken from the marinade, scraping off and discarding any excess. Place the chicken in a single layer on one side of the baking sheet, with the flatter side up. Place the asparagus on the other side. Drizzle the asparagus with remaining oil, then season the asparagus; toss to coat.
  • Broil until the chicken is cooked through with some charred spots and the asparagus is browned, about 10 minutes.
  • To serve, top the chicken with a drizzle of the reserved marinade and a sprinkle of scallions.
  • Serve with rice, if desired.

Notes

A variety of vegetables can be substituted for asparagus such as bok chop, broccoli, or chard. I had a head of cauliflower in my crisper and thought, why not?  I was in business.  Too lazy to debone the chicken I slathered the marinade on bone-in, skin-on chicken thighs and roasted the chicken and cauliflower in a 425-degree oven for approximately 25-30 minutes until the chicken was crispy and browned, and the cauliflower tender and golden. Just know the bone in chicken will take approximately 35 minutes to roast so cut your vegetables to a size that needs the same amount of time.
Roasted Chicken & Croutons with Fish-Sauce Butter-Sheet Pan Magic

Roasted Chicken & Croutons with Fish-Sauce Butter-Sheet Pan Magic

I couldn’t help but tweak Eric Kim’s Roasted Chicken with Fish-Sauce Butter title.  I added Croutons to the title because… lets be real, the croutons are the star of this dish.  It reminds me of Roti Roti, a food truck fixture in the Bay Area.  A simple winning formula of chickens roasting on a spit, dripping all that deliciousness onto a bed of potatoes below it.  Well, that’s this dish but with bread and your own oven.

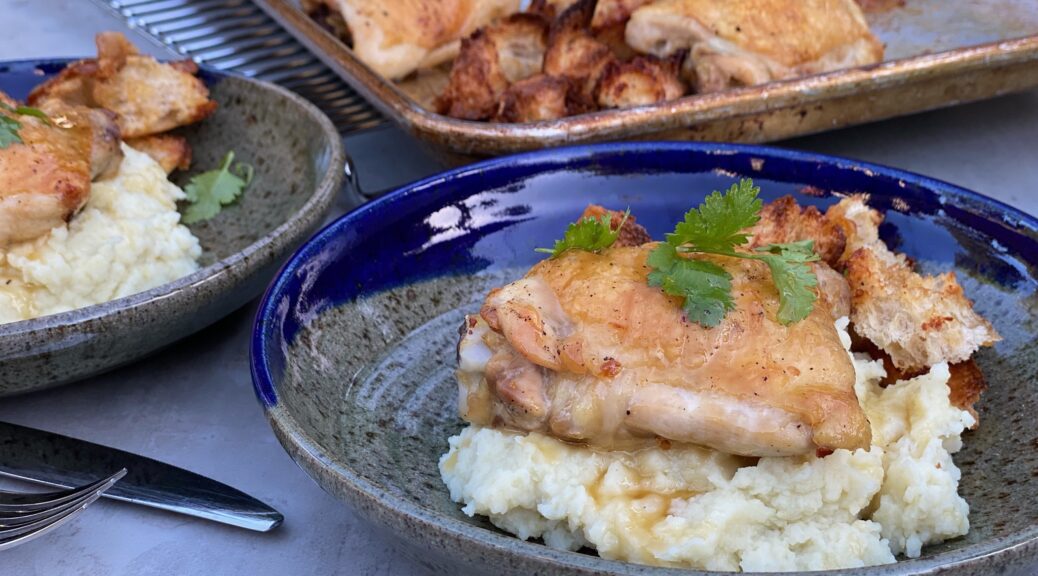
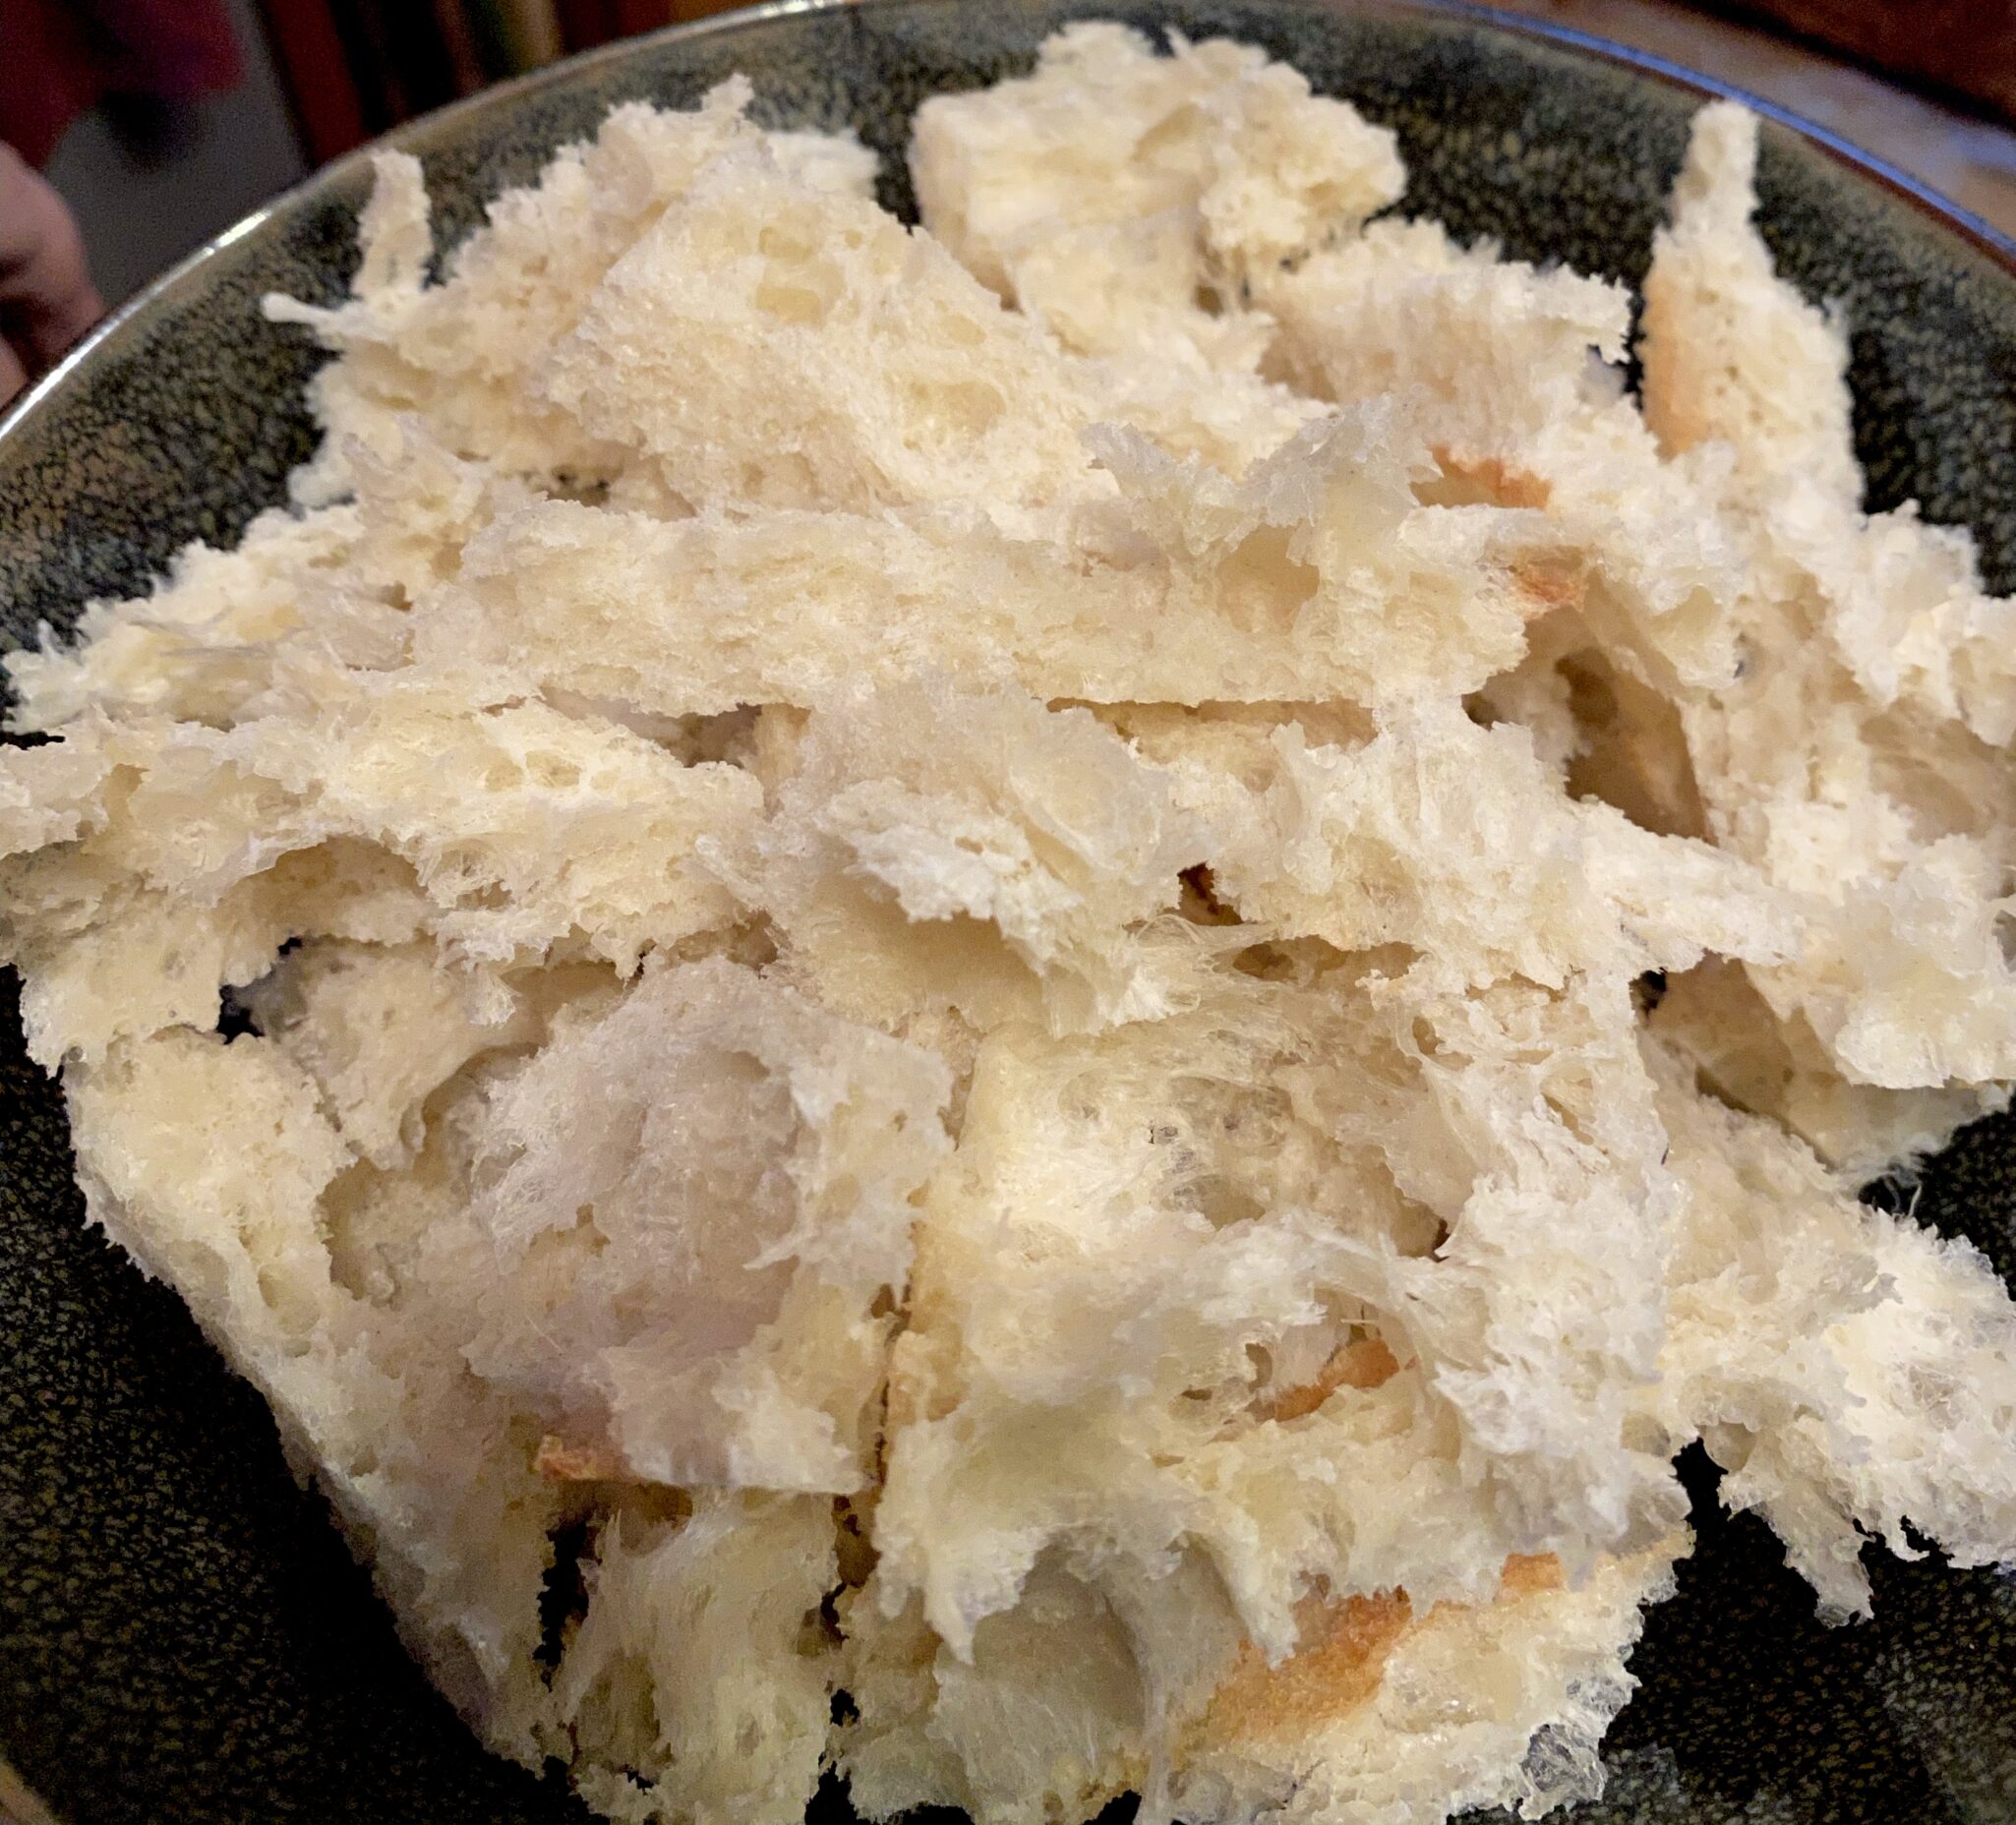
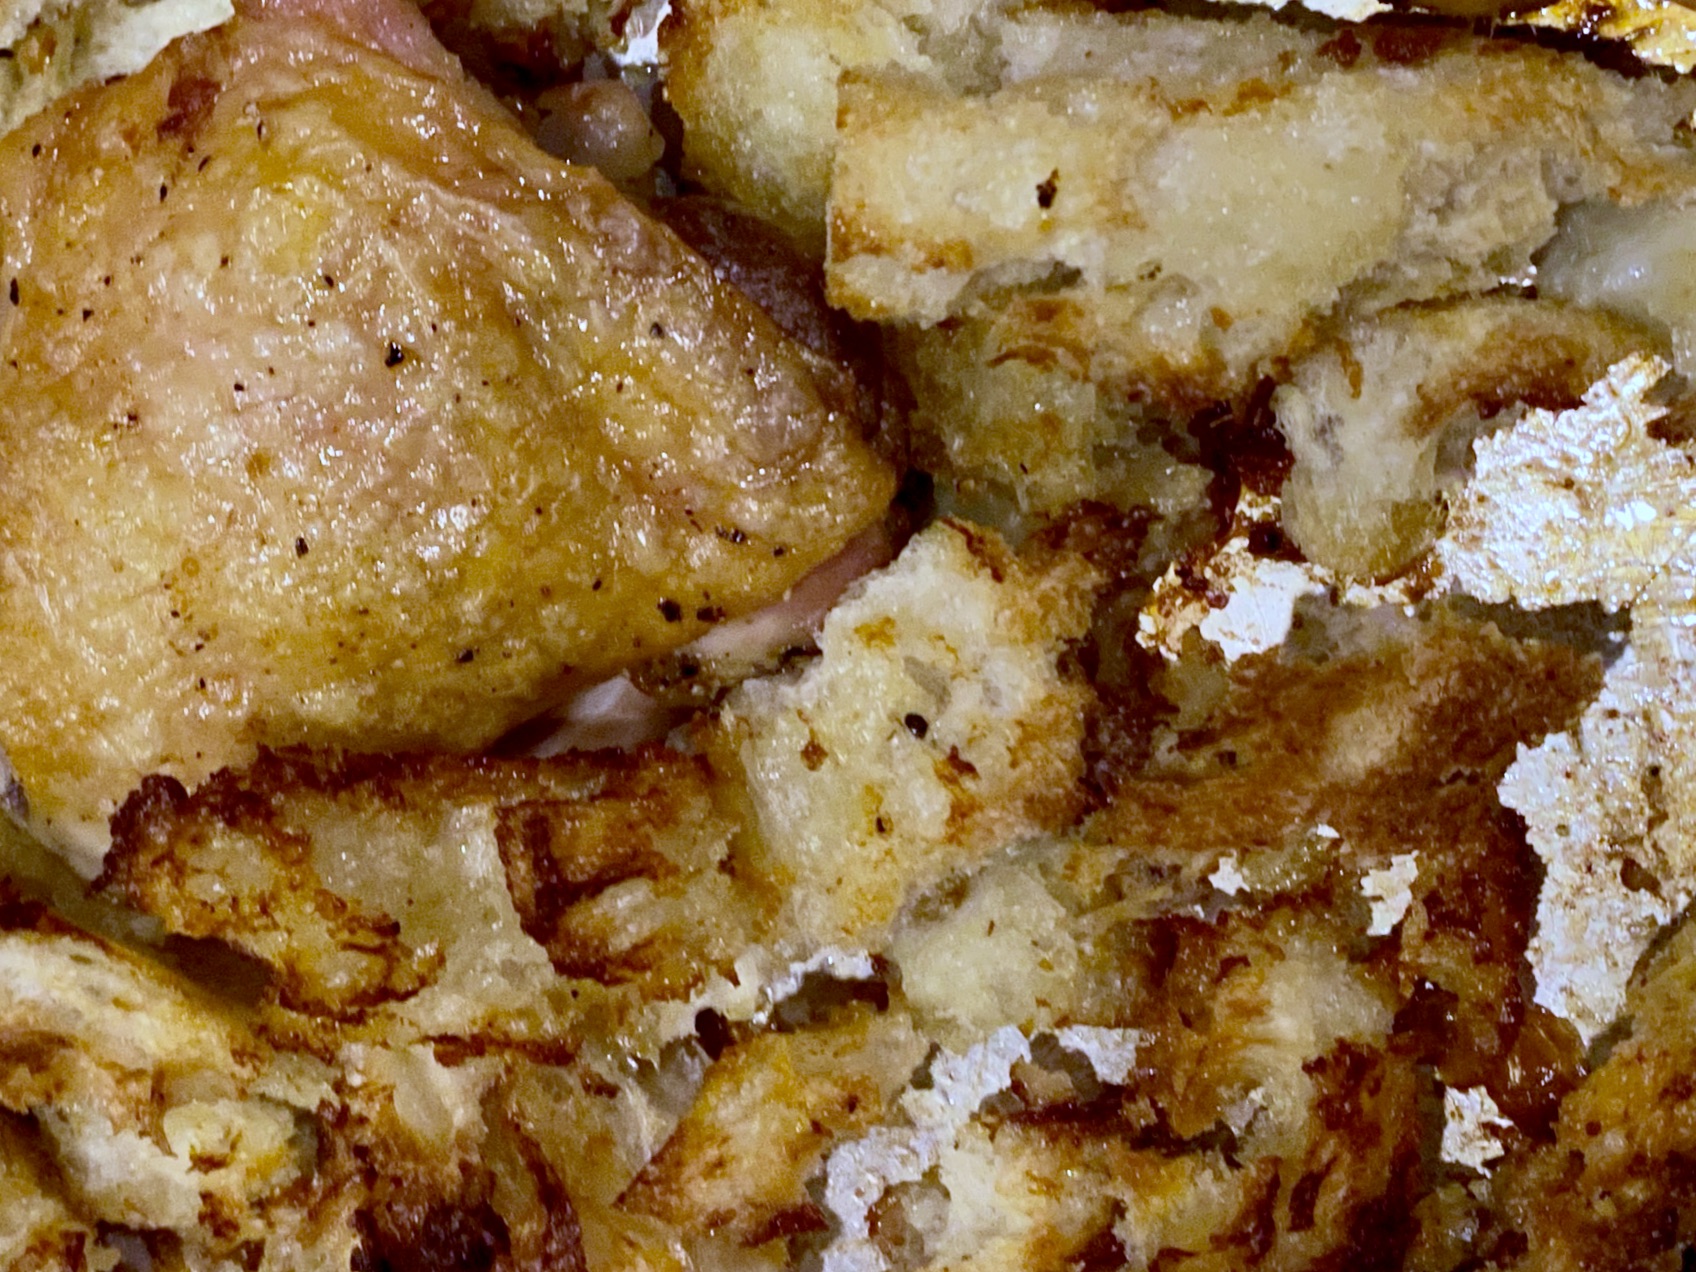
First, roast chicken thighs on a sheet pan (the operative words for an easy meal) in a 450-degree oven.  This gives you crispy skin chicken and a pool of deliciousness aka SCHMALTZ on the pan.  Then toss flakes (yes flakes, more on that later) of bread onto the pan and smoosh it around so it soaks up the chicken fat.  Shove it back into the oven, and fifteen minutes later those bread flakes have morphed into golden, crunchy, umami bombs.

It’s Soooo Good

I divide the dish evenly between me and the hubsters, he gets the chicken,  I get the croutons, yep, 50-50 all the way.

Let’s talk flakes.  You can use any bread you like, sourdough, milk bread, or my favorite, ciabatta.  The key is to tear the bread so you get shards or flakes.  Cubes don’t cut it for this dish, not enough surface area. Try to tear or split the bread to form flakes for ultimate crispness.

The rest is easy-peasy.  Place chicken on a sheet pan, and season with salt and pepper.  Go easy with the salt as the fish sauce has salt. Drizzle olive oil on the chicken and flip each piece around to coat each piece.  Roast for approximately 25 minutes.  I prefer bigger pieces of chicken so the skin crisps without drying out the chicken.  Pull the chicken out, there should be a nice puddle of schmaltz in the pan.  Add the croutons to the pan and toss the bread in the chicken fat.  Slide the pan back into the oven to crisp the croutons and finish the chicken.  If the chicken is cooked through before the croutons, pull them out and continue to bake the croutons.

Meanwhile…

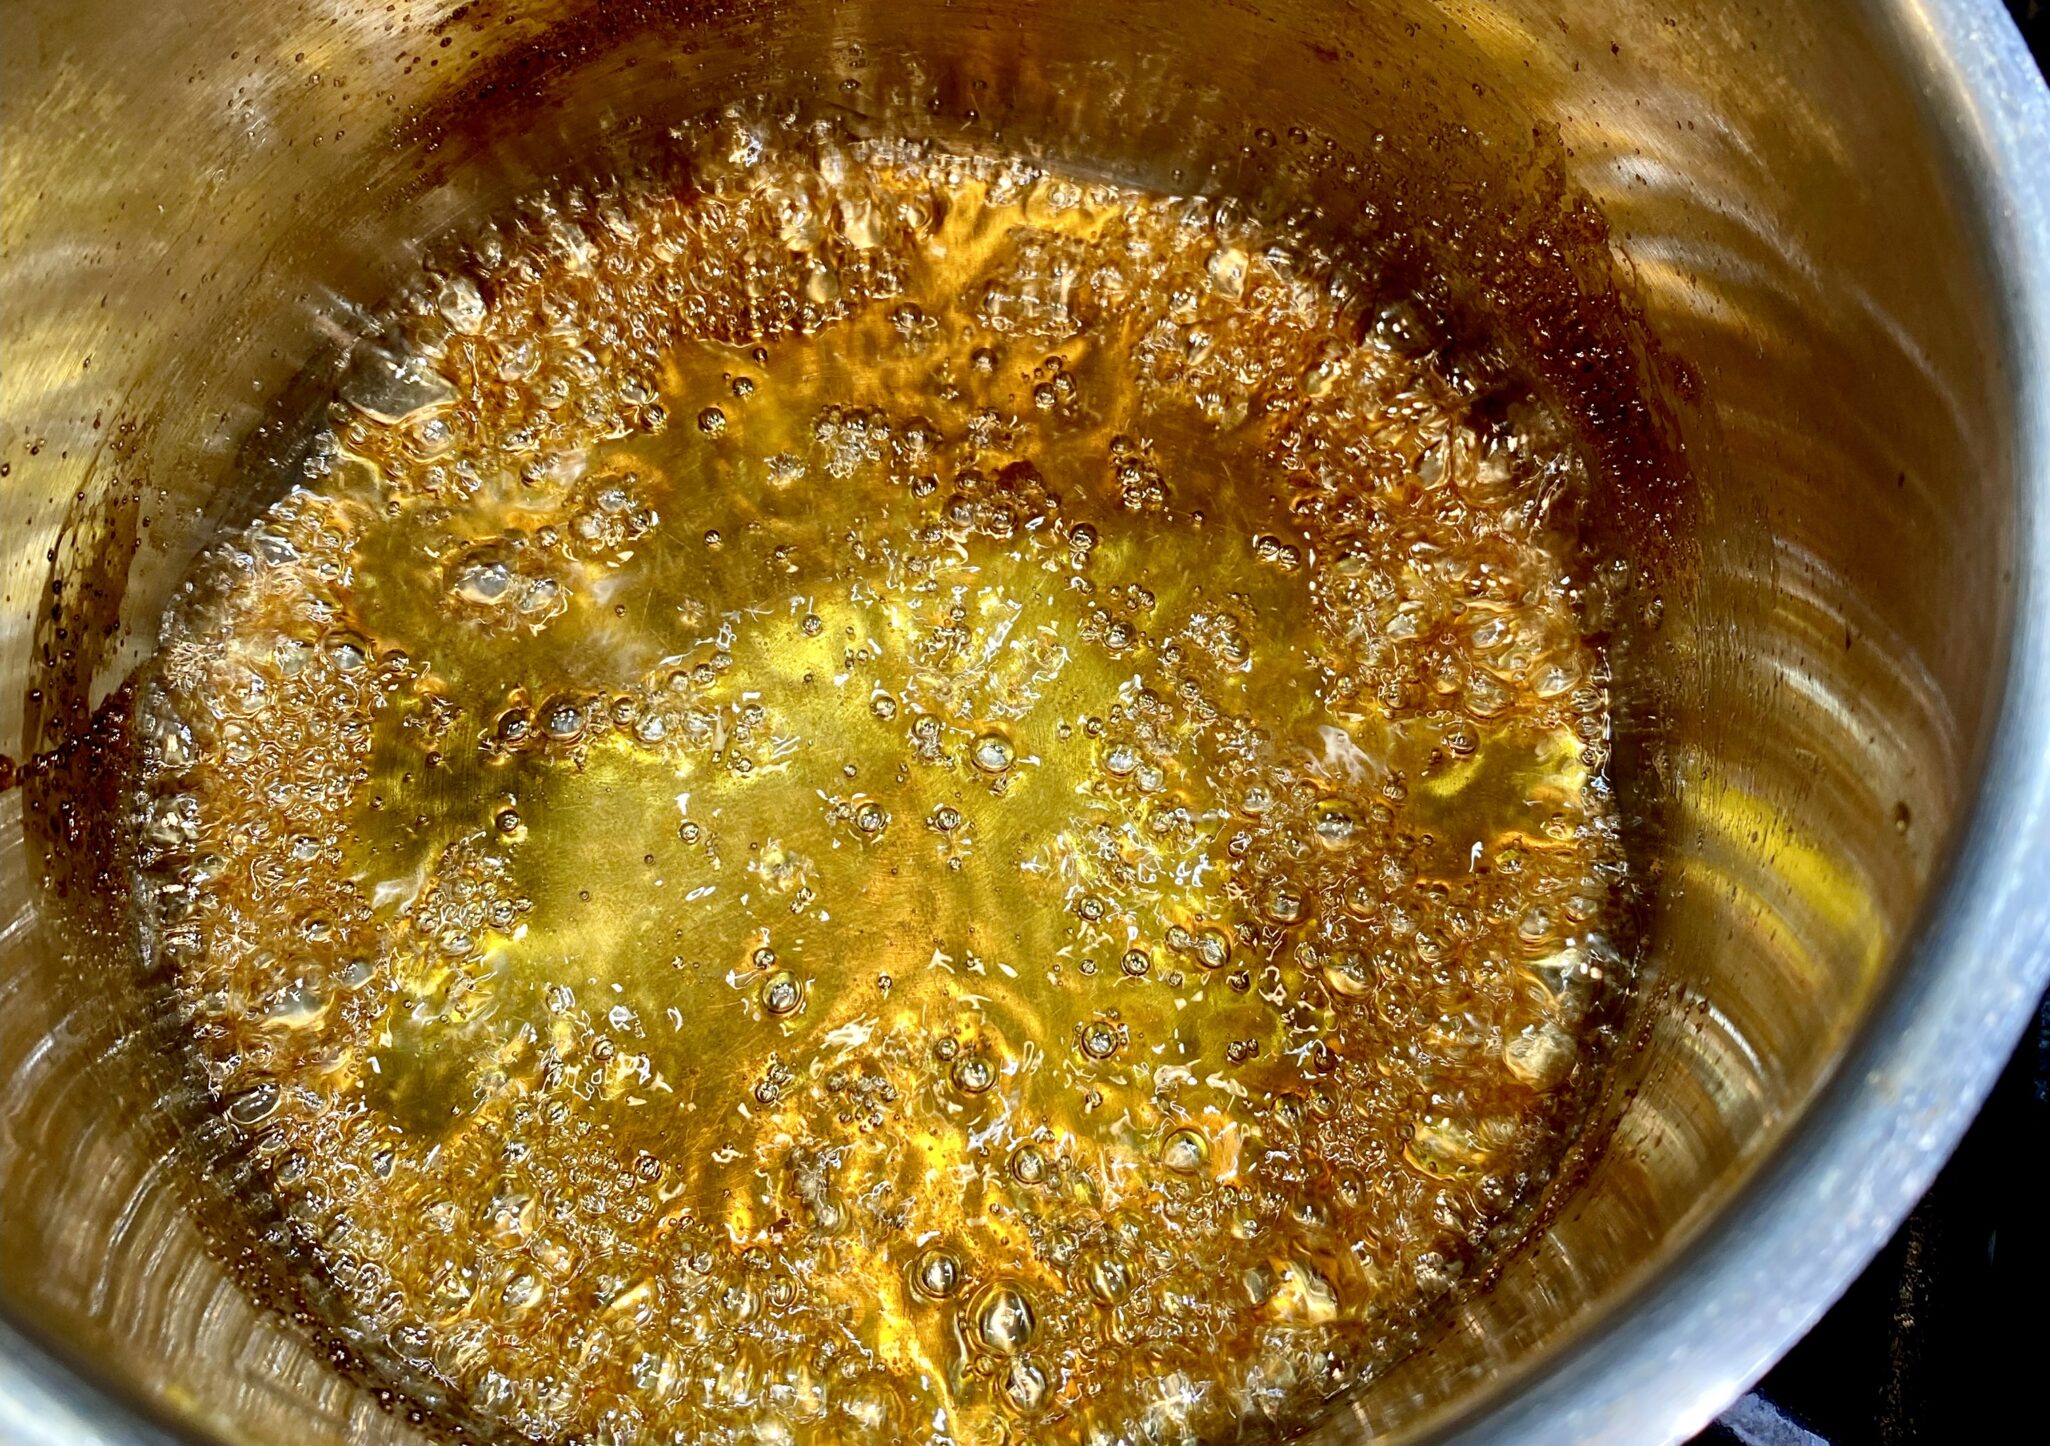
While the chicken and croutons are roasting, make the Fish-Sauce Butter.  The sauce is genius, easy to make, and delish with just four ingredients, fish sauce (I use 3 Crab Vietnamese Fish Sauce), lemon juice, brown sugar, and BUTTER.  Reduce the first 3 ingredients to a syrupy consistency.  When the surface of the sauce is covered with bubbles, turn the heat off and add the chunk of COLD butter to the pan and swirl to create an emulsion.

Leave the chicken and croutons in the pan, drizzle some of the sauce on the chicken and croutons, garnish with cilantro and green onions, and bring the pan to the table.  So easy. Serve the remaining sauce on the side. If you want to be fancy, transfer chicken and croutons to a serving platter.

Accompaniments?  Rice, double carb, is always yummy, or I like serving it with mashed cauliflower.  Another winner from Eric Kim.  Sheet pan magic happening here.

Roasted Chicken and Croutons with Fish-Sauce Butter

From Eric Kim via NYTCooking, roasted chicken thighs, toasty croutons, and a scrumptious, quick sauce made with Vietnamese Fish Sauce, brown sugar, lemon, and butter. The perfect weekday meal.
Course dinner, Main Course
Cuisine Asian-American
Keyword brown butter, Chicken thighs, croutons, fish sauce, oven-baked
Prep Time 15 minutes
Cook Time 35 minutes
Servings 2 servings

Ingredients

  • 4 bone-in skin-on chicken thighs (about 2 pounds)
  • Kosher salt such as Diamond Crystal and black pepper
  • 2 tablespoons olive oil
  • ¾ pound bread crusts removed, bread torn into bite-size pieces about 4 cups;
  • 1 tablespoon dark brown sugar
  • 1 tablespoon fish sauce
  • 1 tablespoon lemon juice
  • 3 tablespoons COLD unsalted butter kept in one piece
  • Cilantro leaves with tender stems for serving
  • scallions or chives, chopped garnish for serving

Instructions

  • Heat oven to 450 degrees. Pat the chicken dry with paper towels and season lightly with salt and pepper. (The fish-sauce butter is plenty salty, so don’t overdo the salt here.)
  • Arrange the chicken skin-side up on a sheet pan and drizzle the oil over the chicken skin, coating it evenly.
  • Roast until the chicken is light gold and the sheet pan is a pool of hot, rendered chicken fat, SCHMALTZ, about 20-25 minutes.
  • Take the sheet pan out of the oven, scatter the bread around the chicken. Using tongs toss gently to coat in the chicken fat.
  • Place the pan back in the oven and roast until the chicken is golden, crispy and sizzling (you’ll hear it), about 15 minutes.
  • While the chicken roasts, combine the brown sugar, fish sauce and lemon juice in a small saucepan and bring to a simmer over medium heat. Cook, occasionally swirling the pan or stirring the sauce with a wooden spoon, until it bubbling vigorously and the mixture has reduced by about half, 2 to 3 minutes.
  • Turn off the heat and add the butter, constantly swirling the pan or stirring with a wooden spoon, until all of the butter has melted and incorporated into the fish sauce mixture. It should be a heavy syrup consistency.
  • To serve, scatter the cilantro and scallions or chives over the chicken and croutons. Spoon some of the fish-sauce butter over each chicken thigh, reserving some to add to each plate for dipping the chicken and croutons while eating, so yummy.

Notes

Roasting chicken thighs in a hot oven is a hands-off way to achieve two of life’s greatest pleasures: crispy skin and golden schmaltz. And you want that chicken fat because it will crisp hand-torn bread into croutons. A bold but balanced fish-sauce butter that you whip up on the stovetop while the rest of the meal takes care of itself in the oven, takes this over the top. Be sure to start with cold butter; the gradual melting of the fat helps thicken the sauce without breaking it.
After making this dish...go get his cookbook, Korean American, another winner.
Chicken Wings and Daikon Nimono + TV for Rainy Days

Chicken Wings and Daikon Nimono + TV for Rainy Days

It’s raining once again in California.  Which is the best excuse to stay home (in sweats), watch a lot of TV, bake, and cook.  I started the weekend on a carb bender. First, I made No-Knead Focaccia from Bon Appetit, it gets a big thumbs up, pillowy, springy, and delicious.  Caveat:  You have to start a day earlier for said focaccia, since there is 8 hours of resting time. Then I started on Kristina Cho’s Milk Bread from Mooncakes and Milk Bread, also extremely delicious.  Think of it as the Asian version of Brioche, slightly sweet, buttery, rich, and soft.

THEN, I needed a Bread Bake Break

Well, actually, my hips needed a break.  The combination of being a couch potato and baking is, to say the least, lethal.  I had to pick one, couch or carbs. Couch won.  Mainly because I started watching a cute, sweet Japanese show on Netflix called Makanai:  Cooking for the Maiko House. In a nutshell, two BFFs go off to Kyoto to become geishas.  One becomes a geisha while the other is a total washout but a fabulous cook (thanks to her grandmother), and becomes the Makanai or resident chef for the house, a role usually held by an older woman.  Each episode features something yummy, often a comforting, homestyle dish, made by Kiyo.

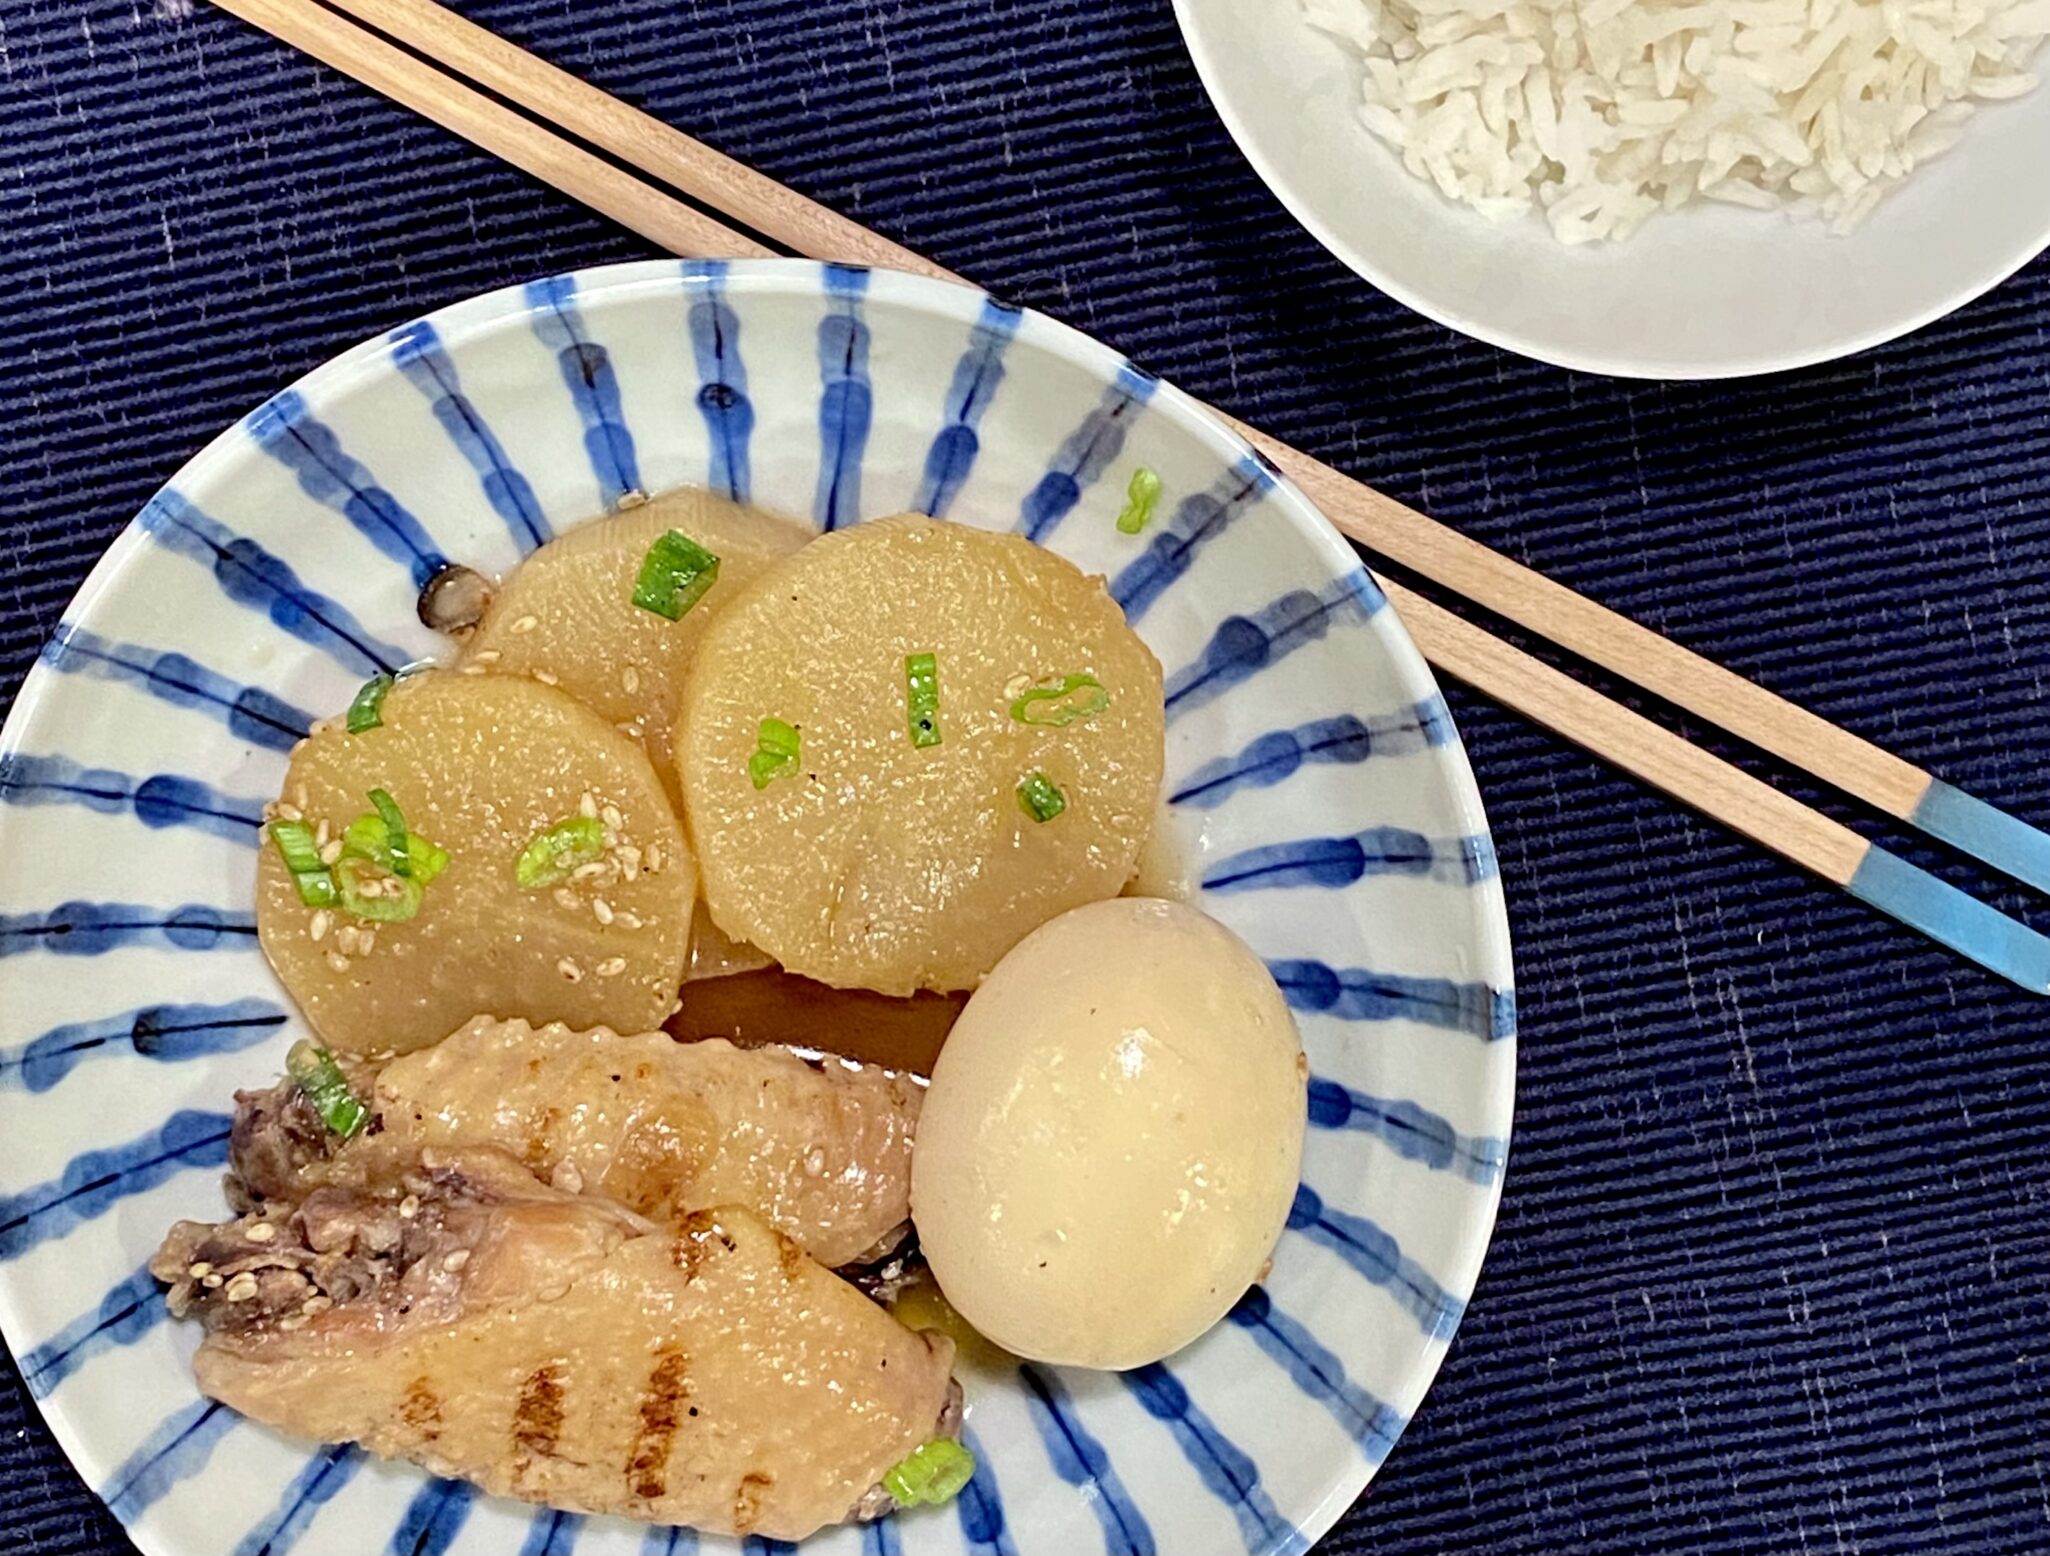
Well, you can’t sit there watching without a bowl of something delicious.  The cold, wet, weather and The Makanai put me in the mood for Nimono.  Nimono, a family-style dish usually contains protein, vegetables, or tofu simmered in a seasoned dashi (stock).  I scoured my fridge and found chicken wings and daikon (radish) perfect for Nimono.

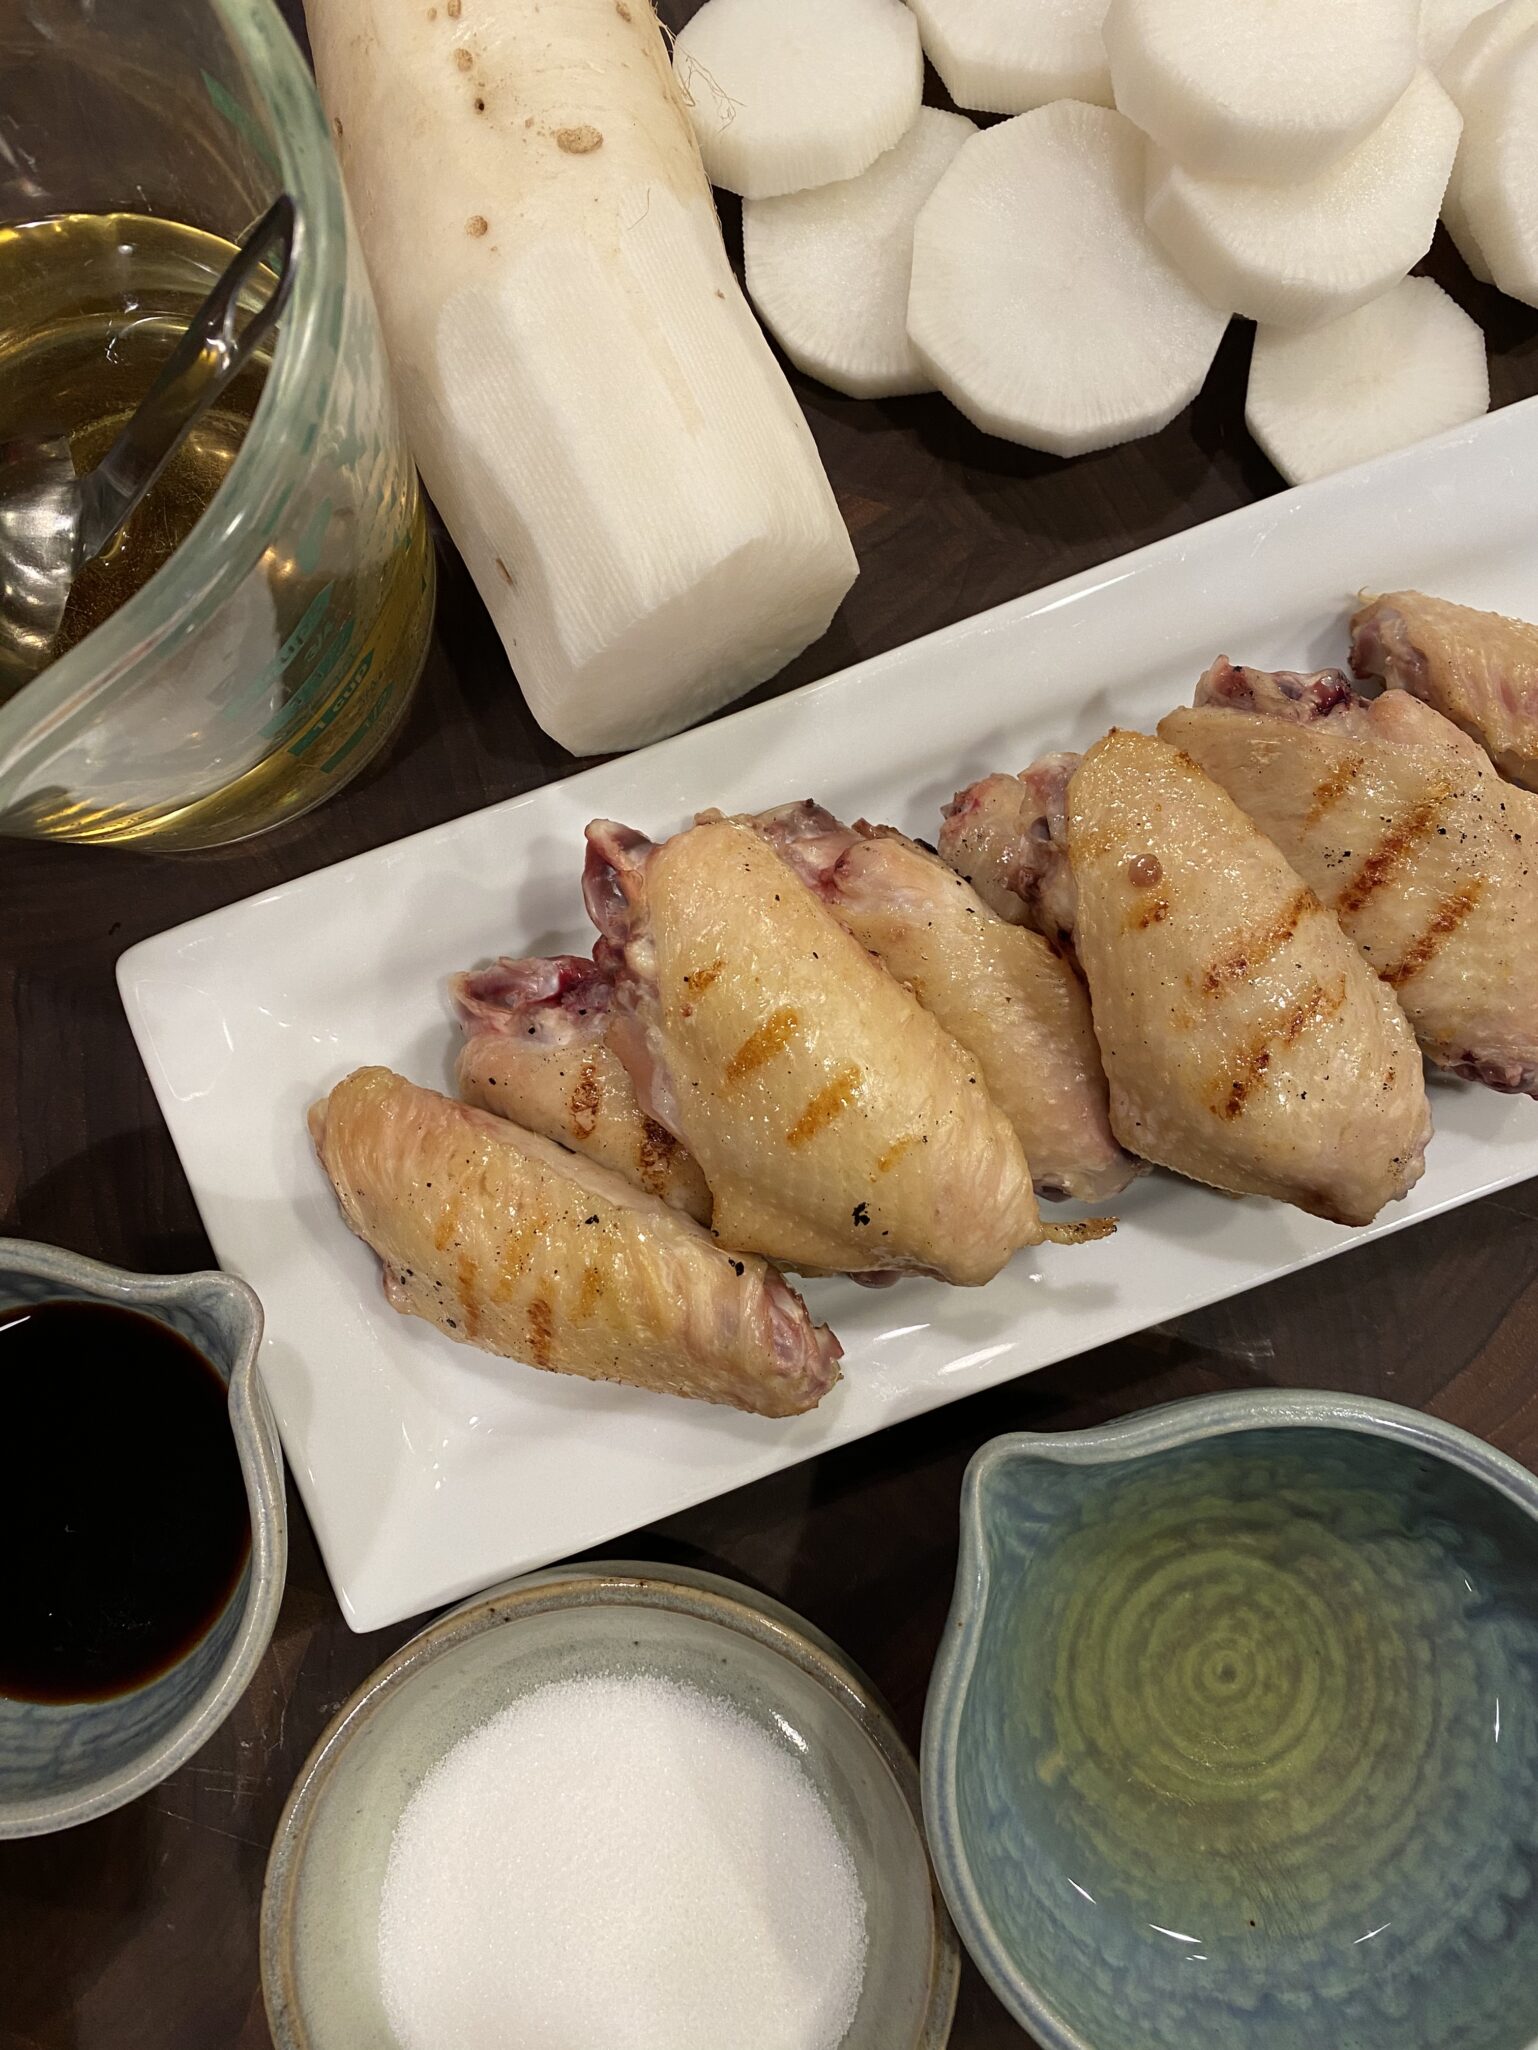
Start by browning the wings.  I got fancy and grilled them, don’t bother, one more pan to clean. Then add your dashi, seasonings, and sliced daikon and bring to a boil. Cover the Nimono with a piece of parchment.  This keeps everything submerged so it cooks evenly.  Lower the heat and simmer for 15-20 minutes or until the daikon is soft. Pierce daikon with a knife to test, if it pierces easily, it’s done.   Korean radish would work well also.

Meanwhile, as the chicken and daikon are simmering, make your eggs.  Use the ramen egg recipe for a soft center yolk.  Cool the eggs and peel.  Place eggs in cold water to chill (so it doesn’t overcook when you put it in the Nimono).

When the radish is soft, Place eggs in Nimono.  Try to submerge them so they absorb the flavor of the broth.  Simmer an additional 5 minutes.

Garnish with green onions, and or sesame seeds.  Serve with rice and eat while sitting in front of the telly watching Makanai, Midnight Diner, or Julie and Julia…

Print
5 from 1 vote

Chicken Wings and Daikon Nimono and Netflix

Simple and quick Japanese braised dish of chicken wings and radish
Course One dish meals
Cuisine Asian, Japanese
Keyword Chicken, daikon, ninono, one pot meal
Prep Time 15 minutes
Cook Time 20 minutes

Ingredients

Ingredients:

  • 8-12 Chickin wings
  • 6-8 Ounce Daikon radish can use Korean radish cut into 1/2 inch rounds
  • 4 Eggs boiled till the yolk is still jammy, see ramen eggs post

Seasonings and stock:

  • 1 Clove Garlic
  • 2 tsp Instant Japanese soup stock (you will need 1 cup of dashi) or make dashi with packet or Shiro dashi
  • 2 tbsp Sugar
  • 1 tbsp Soy sauce if using dashi packet, increase to 2 T
  • 4 Tbsp Sake
  • 2 Tbsp Mirin

Options

  • Add mushrooms or sliced carrots with daikon if you like

Instructions

  • Make dashi and set aside. You can use the powder Hondashi, or dashi bags, or Shiro Dashi concentrate. For concentrate dilute 1:12 Make 1-1.5 cups
  • Peel and cut the daikon into 1/2 inch slices. Set aside.
  • Sauté the chicken wings approximately 2 minutes a side in a 3-4 quart saucepan. They should be light brown.
  • Add dashi to pot followed by soy sauce, mirin and sake. Add daikon on top. Bring to a boil then lower heat to a simmer. Use an otoshibuta (dropped or parchment lid) while simmering although you can forego this step. Simmer for 15-20 minutes or until radish is soft when pierced with a knife.
  • While chicken is simmering, make ramen eggs or hard boil the eggs just until the yolk is barely set. Peel and place eggs in an ice bath. When nimono is done, add peeled eggs to it and let it simmer another 5 minutes. Make sure the eggs are submerged in the broth.
  • Ladle the Nikon into bowls, garnish with green onions and sesame seeds. Serve with rice and a half or whole egg per person. It's worthwhile making nimono in advance, since it tastes better the next day. Or just make a larger quantity to keep. Reheat before eating at home, or reheat then let cool down again if using for bento. Can be stored in the fridge for 2-3 days.
Mille-Feuille Nabe Blooming Delish!

Mille-Feuille Nabe Blooming Delish!

I’m sure I saw this on TikTok or an IG Reel.  It looked so delicious I knew I was going to make it, if not today, definitely tomorrow.  Jackpot, making it today, why?  As most of you know I stop at grocery stores so often I should be classified as a professional food shopper.  The beauty of being a “pro”, I generally have the ingredients for any dish found on the internet, lol. This is a perfect example, a quick perusal of my kitchen and I was in business.

Thinly sliced pork – check. From Asian Market. I always keep some in the freezer, ALWAYS.

Napa Cabbage – check. Picked up a head at the Hankook Market last weekend, cause you never know when you might need some cabbage…

Mushrooms – check. My fridge qualifies as a certified mushroom farm most days.

Dashi or Broth – check. I pulled my bottle of Shiro Dashi from the fridge. Literally concentrated dashi that you dilute with water, VERY good, stupid easy. For a detailed run down check out Guide to Shiro Dashi

OR I can make Dashi with packets from Japan that I keep squirreled away in my pantry.  Again, VERY good,  a bit more work than Shiro Dashi, still super easy.

I won’t go into making my own Dashi cause that would defeat the dinner in a few minutes mantra.

Korean radish – check.  You don’t need it, I just happen to have some so why not?

Staples – check.  Green onions, sesame seeds, soy sauce S&P…Hello? Would not be caught dead without any of these.

Pot- check. Y’all know I didn’t have to list this but I wanted to mention the tiny Donabe I bought at the MANRESA fire sale.  It gives me JOY.  I also used my gorgeous Staub pot for the family-sized version.

So that’s it, all you need to make this scrumptious, perfect when it is cold and wet outside, quick and easy dish.

Let’s Goooooo!

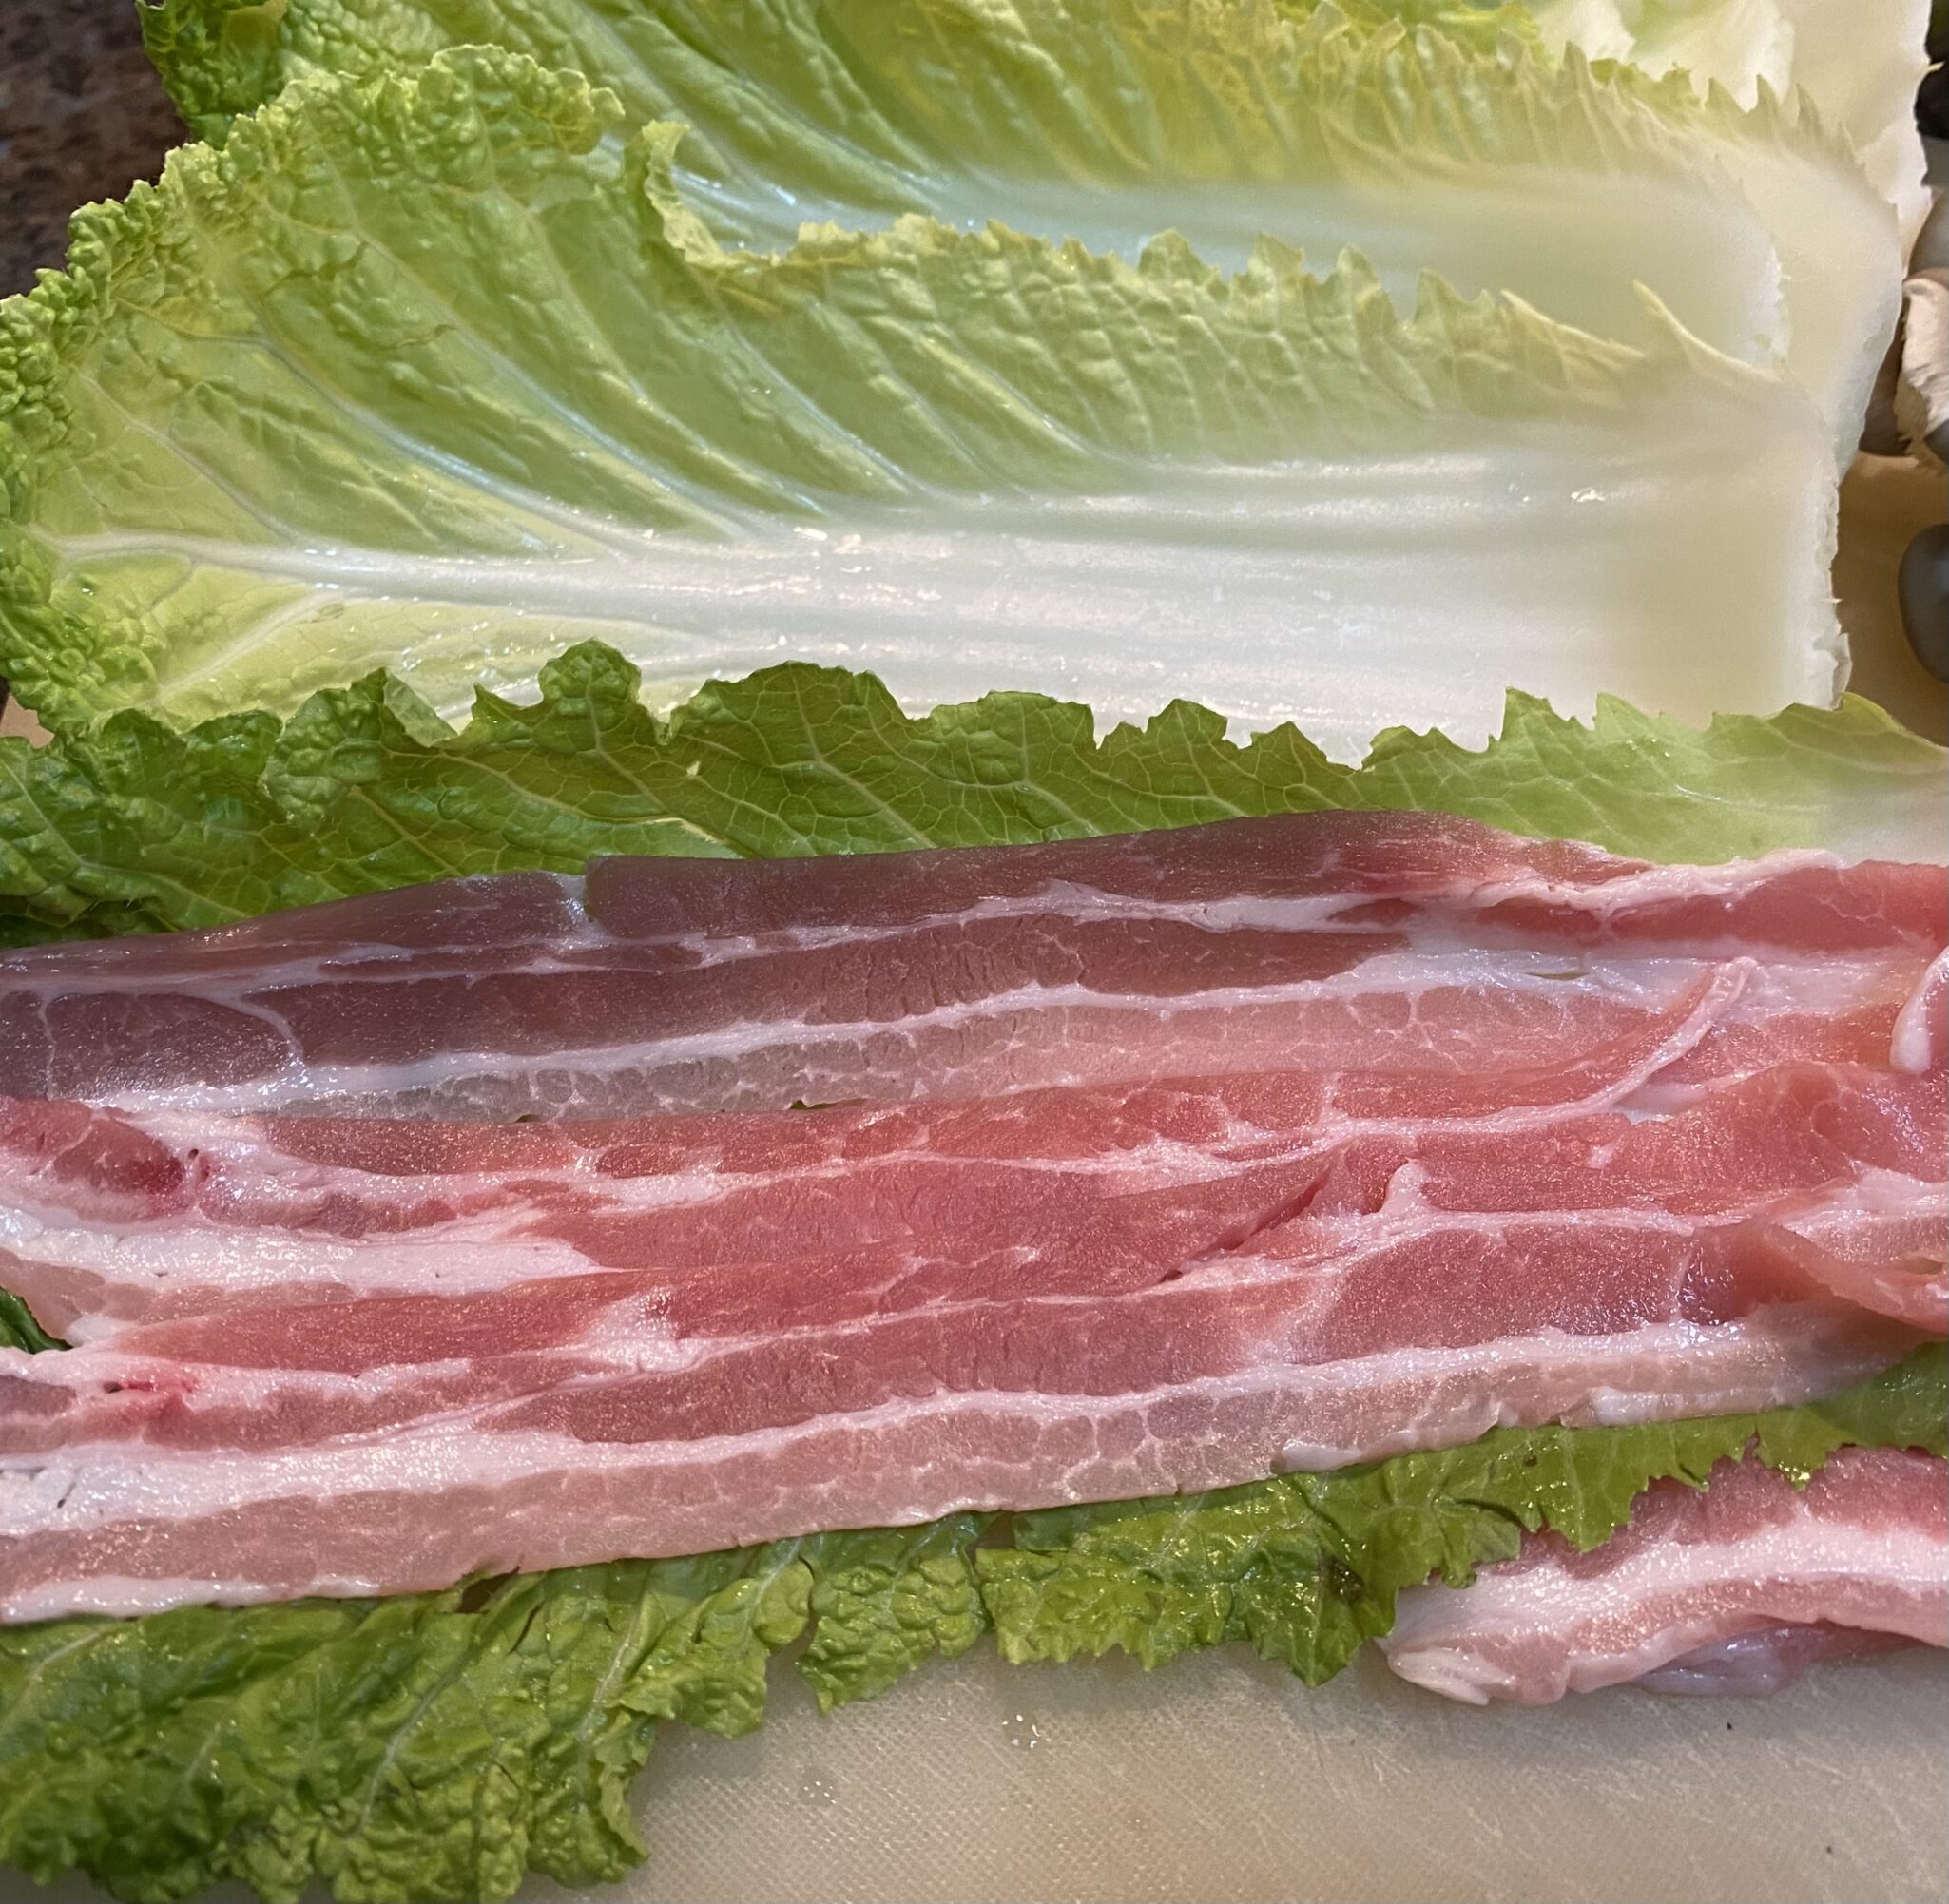
This is super easy, TRUST ME.  Have I ever steered you wrong?  Start with your Napa Cabbage, wash and separate the leaves.  You only need 1 head of cabbage and you won’t use all of it, unless you are feeding a cast of thousands, then you’re on your own.

Take out your thinly sliced pork, I’m sure this would work with beef also. Use any protein cut for Shabu Shabu or Hot Pot.  I know you are thinking, 🤔, can I use bacon?  My inclination is no, as much as I love bacon, the flavor may be too much and too salty for this Nabe.  But if you are feeling bold, try it.  Definitely REPORT BACK to me!

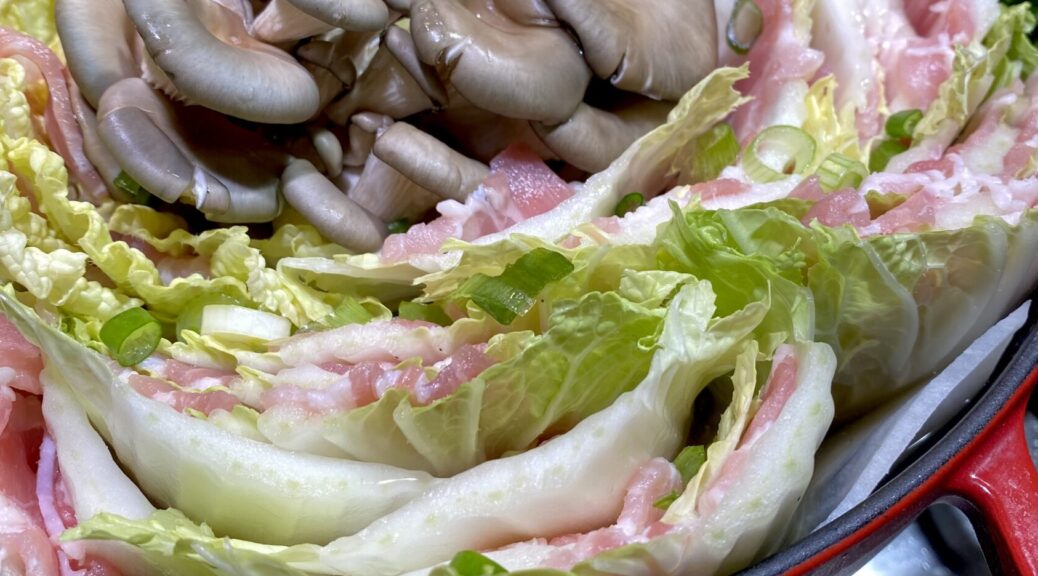
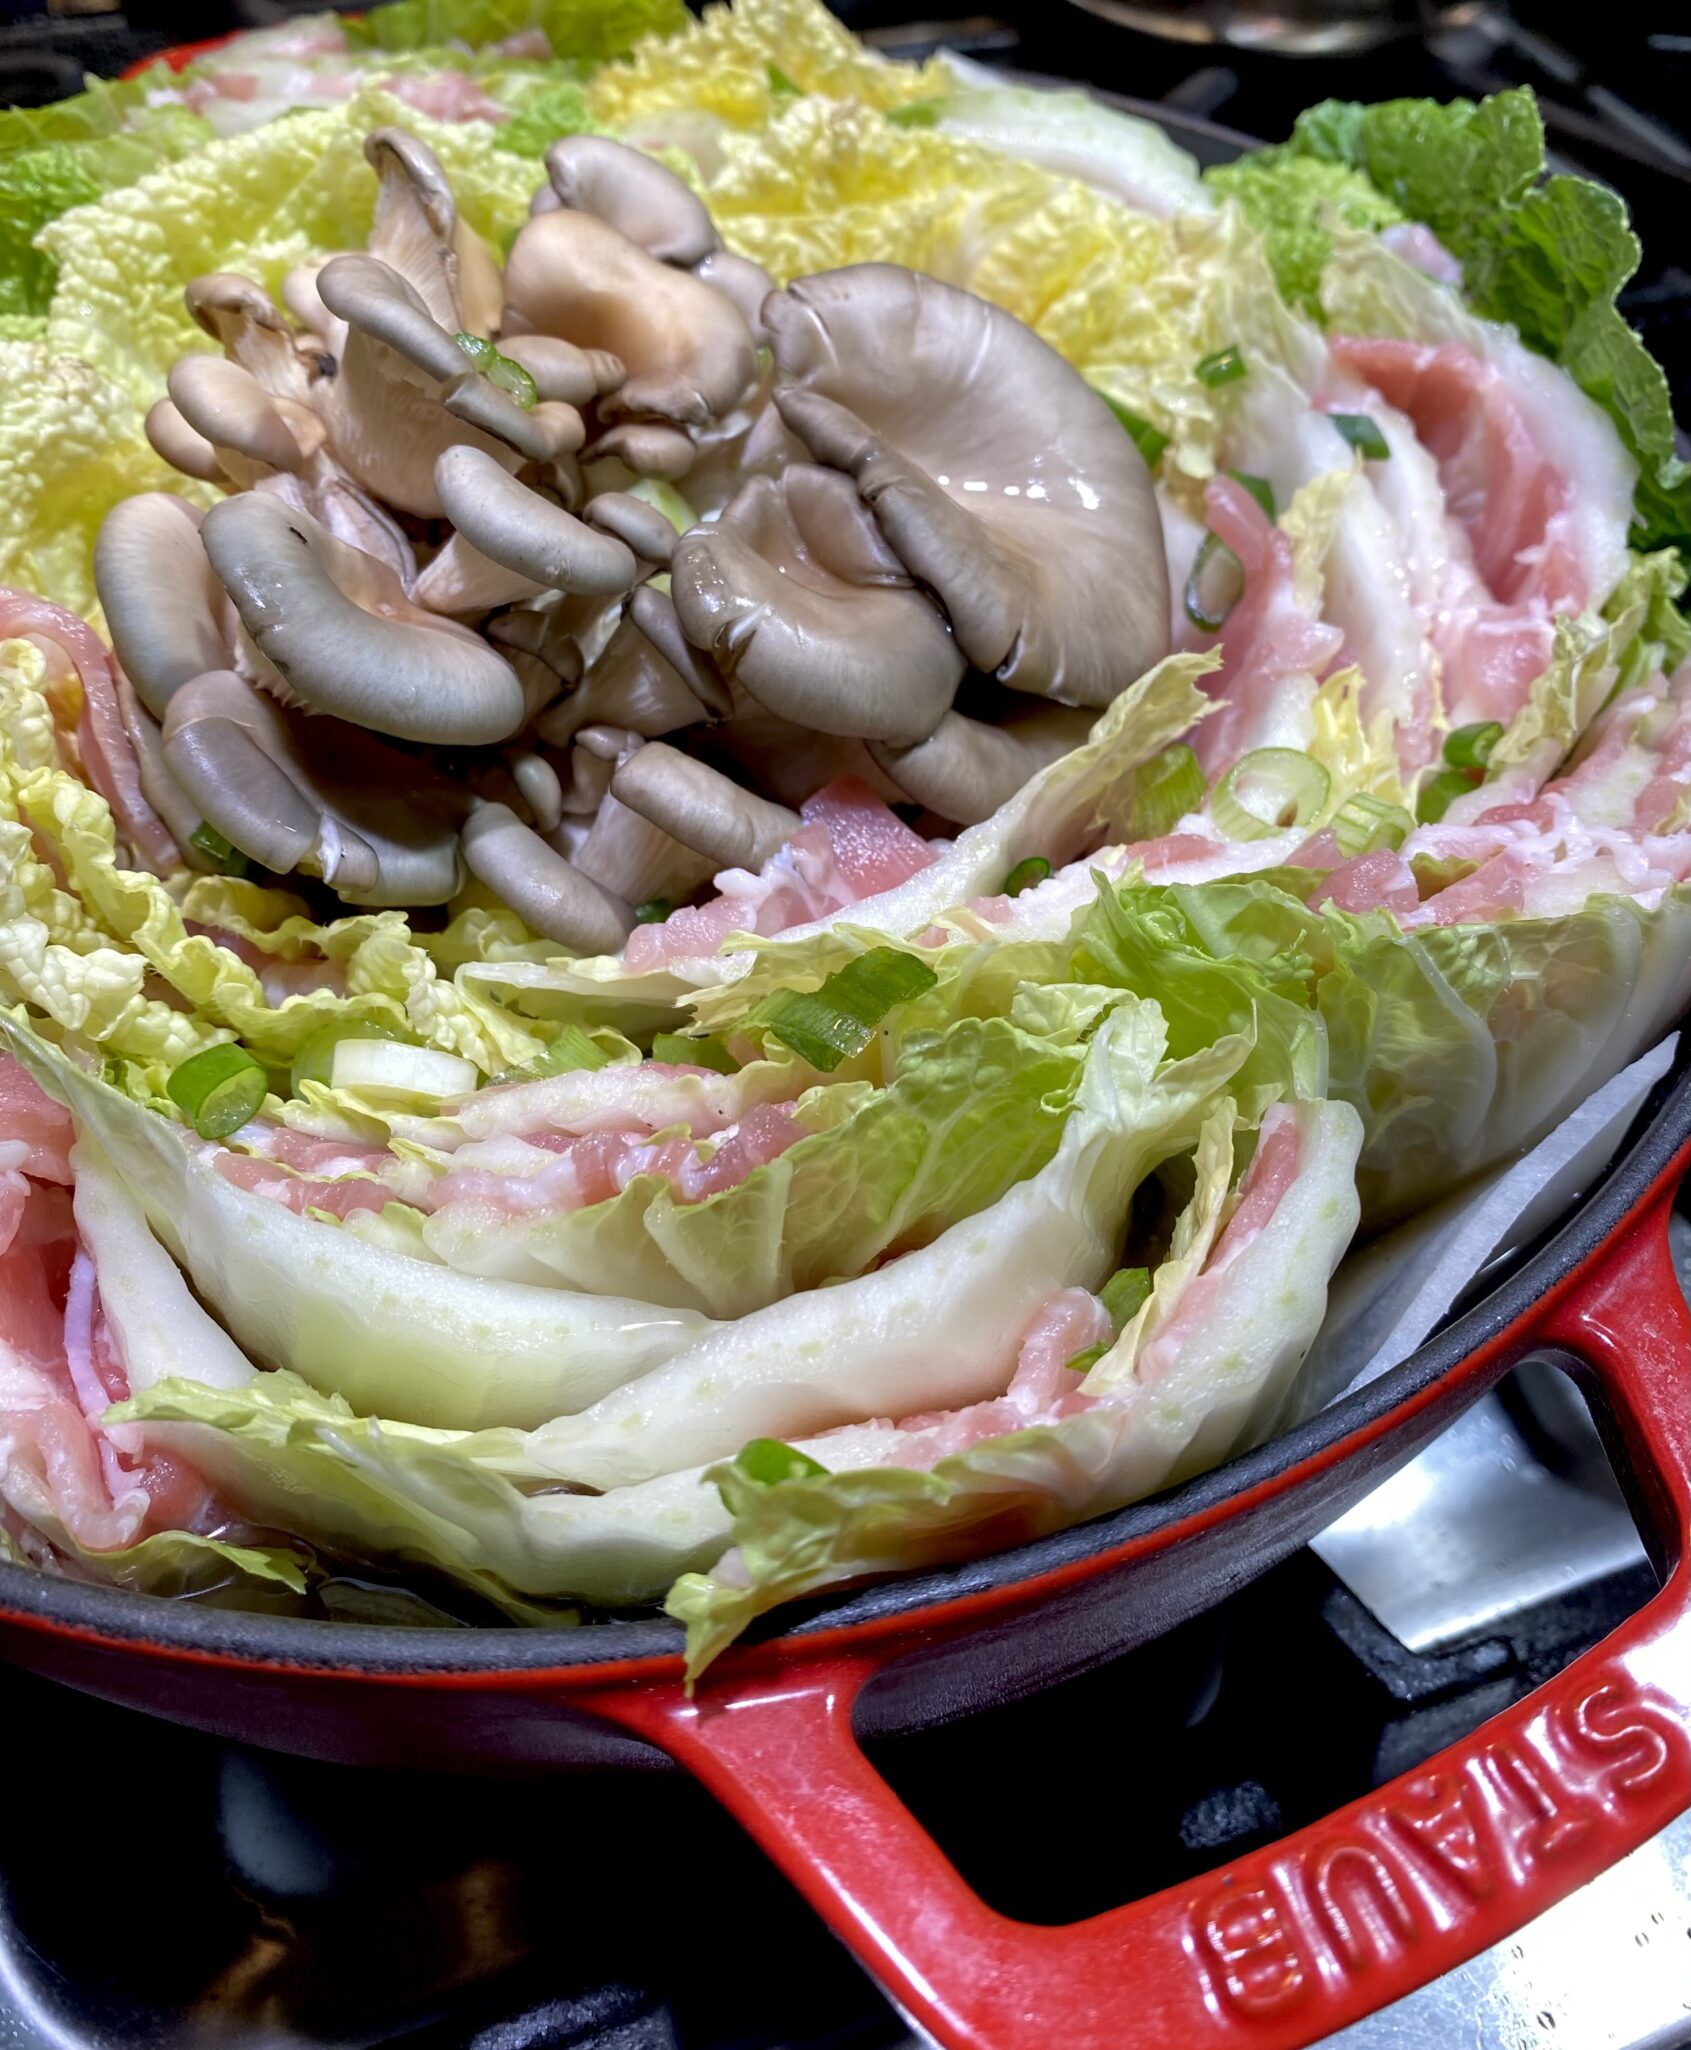
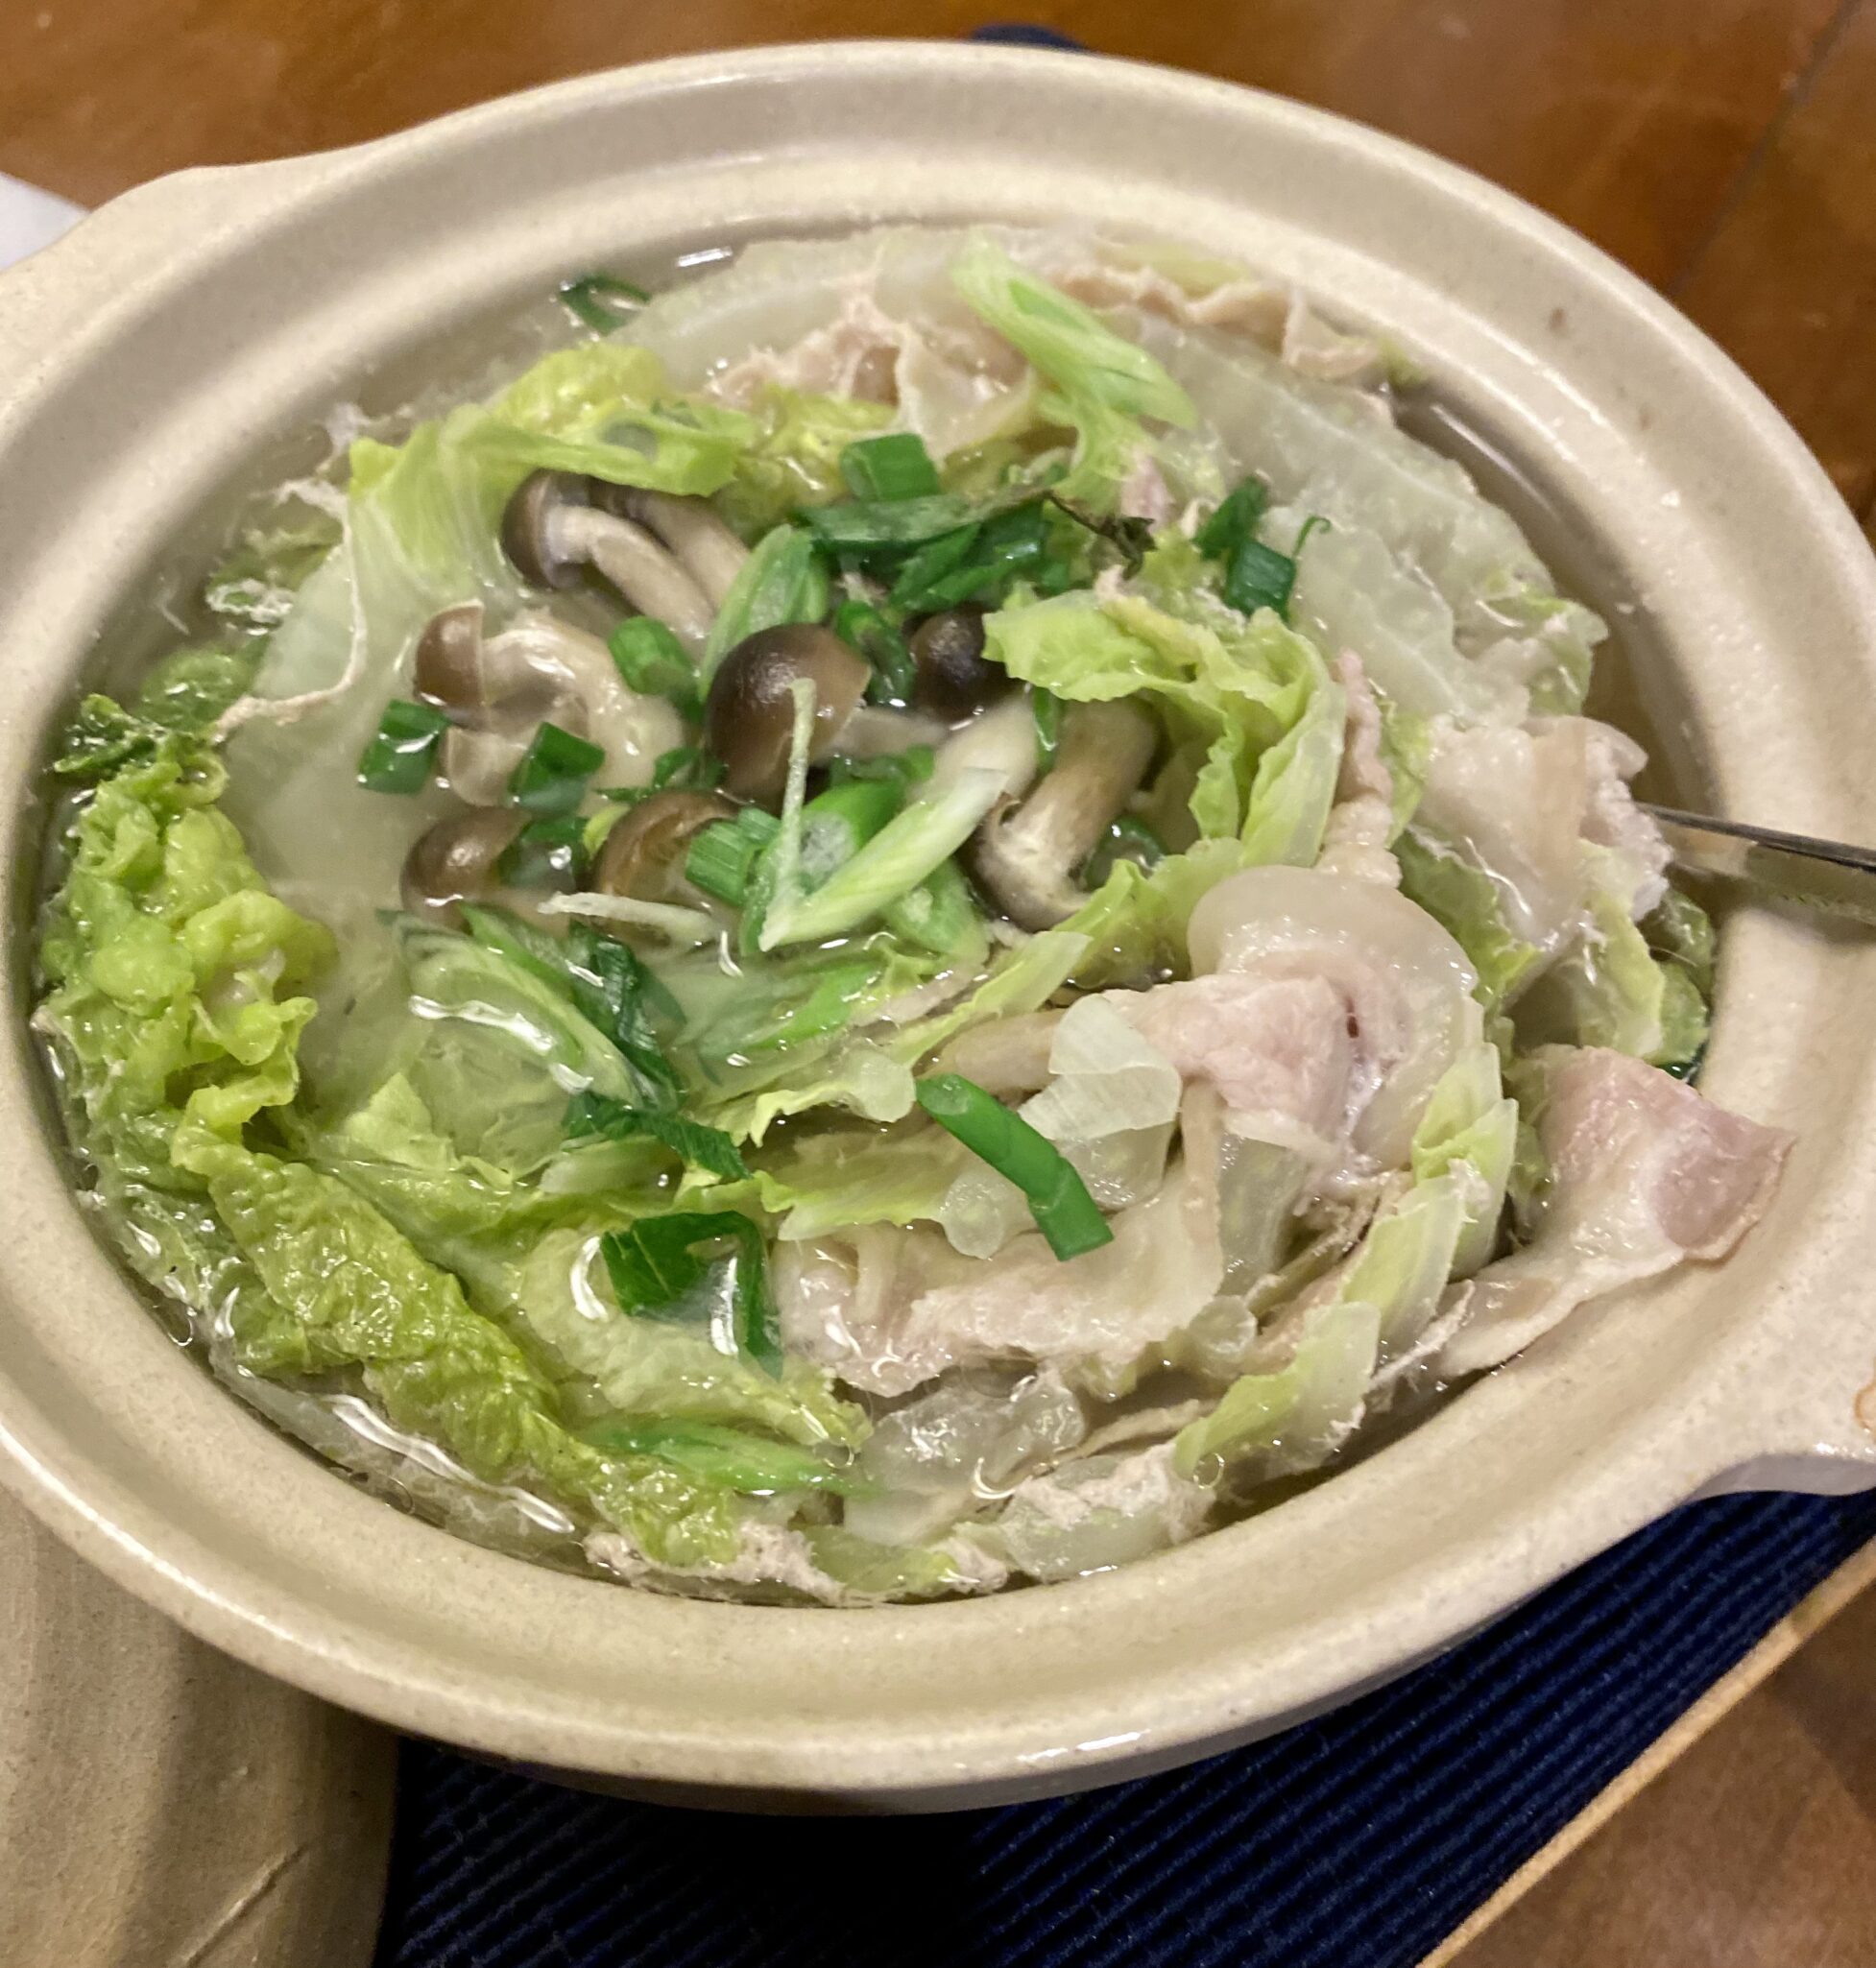
Layer the pork on the Napa Cabbage, covering most of the leaf. Continue layering until you have a stack of 3-4 leaves.  Cut crosswise into 3-4 sections, and try to match it up with your pot.  Each section should be about 2-2.5 inches in height. Definitely not taller as you will need to cover the pot when cooking.  Continue circling the pot with the sections until you reach the center.  I finished with slices of Korean radish surrounding a bouquet of mushrooms smack dab in the middle, totally optional.  But so good.

To finish, add dashi to barely cover the cabbage, cover, and cook.  Cook for 10-15 minutes, the beauty of thinly sliced meats and veggies.  Dinner is served! BACK to the dashi.  Dashi is a fish-based stock, used in many yummy Japanese dishes.  There are ka-zillions of ways to make dashi.  Skip the traditional and time-consuming options.  I use Shiro-dashi alot.  It is a seasoned concentrated fish stock that comes in a bottle.  Dilute Shiro-dashi 10-12 fold for soups and casseroles, EASY PEASY.  The other way is using dashi packets, kind of like tea bags.  Drop it into the water, let it sit to infuse the flavor from the packets, and presto dunzo.

CAVEAT: The Shiro Dashi is seasoned with salt and sugar while the dashi packets just impart the fish flavor.  You will need to add salt or soy if using the dashi packets.

That’s it!  Serve it up with bowls of hot, steaming rice, maybe fry an egg or if you have Mayak Eggs or Ramen Eggs yum. So damn delicious it is criminal.  Or use the flavorful broth on a lovely bowl of noodles, udon noodles would be delicious.

A Picture is Worth a Thousand Words…check out my Instagram for a reel on Mille-Feuille Nabe!

Mille-Feuille Nabe

Japanese Hotpot with Napa Cabbage and thinly sliced pork belly arranged in layers in a donabe of casserole. Dashi serves as the cooking broth that turns this into a lovely dish perfect for cold weather.
Course dinner, Main Course, One dish meals
Cuisine Asian, Japanese
Keyword Mille-feuille, napa cabbage, Pork Belly, soup
Prep Time 15 minutes
Cook Time 15 minutes

Equipment

  • 1 donabe If you have one, but any casserole type pot will do.

Ingredients

Main Ingredients

  • 1 napa cabbage medium size should do
  • 1-1½ lb Thinly sliced pork belly smaller the pot the less you will need
  • 1 bunch of mushrooms like enoki or shiimeji optional
  • Korean Radish or Daikon, thinly sliced optional

Dashi

  • 1 knob ginger 1 inch, 2.5 cm
  • 5 cups dashi See post for dashi options!
  • 2 Tbsp sake cut in half or omit if using Shiro Dashi
  • 1 Tbsp soy sauce cut in half or omit if using Shiro Dashi
  • ½ tsp kosher salt Diamond Crystal; use half for table salt

Finishing Touches

  • green onions, diced for garnish
  • Chili oil or Shichim Togarashi at the table
  • Rice to serve with hot pot or boil some noodles to have with the flavorful broth!
  • Any kind of eggs-Ramen, Mayak or raw that you crack and cook in the broth

Instructions

  • Remove leaves carefully from the base, wash and drain well. Don’t throw away any leaves that naturally came off while rinsing. We’ll use these leaves later on. If you happen to get a ginormous cabbage cut in half or quarters lengthwise. I usually buy small ones so I use the whole leaf. Pat them dry before next step.
  • Layer the pork belly and napa cabbage by placing one slice between each of the leaves. Cover leaves with pork belly, trim if necessary to fit. Repeat 3-4 times depending on size of pot.
  • Cut each napa cabbage wedge into 3-4 pieces each about 2 to 2½ inches (5-6 cm) long. Each section should not be taller than your cooking pot. Try to keep the layers of napa cabbage and pork belly neatly stacked as you slice.
  • Next, start stacking the ingredients in a donabe, hot pot, or regular 10-inch pot. I used a shallow Staub pot with the grill top. Turn the stacks on their side as you pack them so the pink and green layers are visible. Start from the outer edges of the pot and work your way toward the center. Place the thicker cabbage leaves near the outside edge and the tender leaves in the center. Make sure that you pack the pot tightly as the layers will become loose once the ingredients start to cook.
  • If you don’t have enough layers to pack the pot tightly, consider using a smaller pot or place other ingredients in the center. I Like to stuff enoki mushrooms or shimeji mushrooms in the center. Or use slices of radish to surround the mushrooms.
  • Make you dashi. Don’t reduce the salt If you are using dashi from packets since the napa cabbage will release liquid during cooking and dilute the soup. If using Shiro Dashi that is seasoned omit half the soy sauce and sake. Taste your broth, it should not be too salty.
  • Pour the broth into the pot with the napa cabbage and pork belly. Start cooking on high heat. Once boiling, skim off the foam and fat on the surface using a fine-mesh skimmer. Then, reduce the heat to medium low and cook covered until the napa cabbage is tender and the pork belly is cooked through, roughly 8-10 minutes.

Garnish

  • Garnish with chopped green onion/scallion, have shichimi togarashi (Japanese seven spice) on table or sprinkle on top of dish. Serve while hot with rice or boil up some noodles to serve in the delicious broth!
    I like adding a ramen egg or a Mayak egg t round it out.
Chewy Black Sesame Rice Cake #CakeforTimmy

Chewy Black Sesame Rice Cake #CakeforTimmy

I first made Eric Kim’s Chewy Black Sesame Mochi Cake after a “Bake-a-long” with him, a perk for purchasing his book, Korean American. I was on a “mochi-bender”, if a recipe called for sweet or glutinous rice, I made it.  His cake is not only made with mochi, it has black sesame seeds.  I LOVE sesame seeds in any form, game on.

Bake-A-long

For those of you who #1 Have read this far down, #2  Pretty darn observant…yes, the Bake-A-Long was quite a while ago.  While I loved the sesame flavor and texture of the cake, not gonna lie, the cake was pretty sweet.  Eric seems to have a pretty high sugar barometer.  I made a mental note to file it away in my brain to try again with a smidge less sugar.

52 Reasons To Try It Again

For all the evils of social media (I say this with a half chuckle) the best thing about it has been finding my peeps.  Finding folks with similar interests that I would never in a million years have connected with if not for Facebook or Instagram. A virtual community that shares a common interest.  Groups like Food52’s Cookbook Club on Facebook (yep, you need to use FB) where folks like you and I can share recipes, reviews, and kitchen adventures.

Each month features a new (or old) cookbook, which, if you are like me, a cookbook addict, probably have or are in the process of getting.  It gives me that little shove to open up that cookbook and try it.  It’s also a great resource for tips and reviews for many of the recipes.

This month the selected cookbook is Korean American by Eric Kim.  Which reminded me that I haven’t made anything from it in a while.  Time to tweak that Chewy Black Sesame Rice Cake again.

Oops, I Did It Again.  But as Muffins

I decreased the amount of sugar in the recipe and made muffins instead of a cake.  Kinda like having my own personal dessert.

Sweet or glutinous rice flour is not to be confused with rice flour.  Sweet rice is much stickier than rice flour.  They are not interchangeable.  Koda Farms sweet rice is known as Mochiko and is pretty easy to find especially at Asian grocery stores.

Black sesame seeds can be found at most grocery stores in the spice section.  Asian grocery stores will also carry sesame seeds in larger quantities and not quite as expensive.  You

To reduce the sweetness cut sugar by 1/4 to 1/2 cup.  I cut it by 1/2 and it was still sweet enough for my taste. You may have to play with a little.  The time between making the original recipe (full sugar load) and when I made the muffins with half sugar taxes my memory as to whether the texture was different

The batter is fairly runny and pourable.  Very doable as a cake or muffins.  Shorten baking time to 20-25 minutes if making muffins.

Looking for something just a little different, gluten-free, and delicious, look no more, it’s right here.

Chewy Black Sesame Rice Cake

A delicious, dense, chewy, sesame flavored cake from Eric Kim
Course Dessert
Cuisine Asian-American
Keyword Black Sesame Seed, cake, chewy, ERic KIm, Mochi
Prep Time 20 minutes
Cook Time 1 hour

Equipment

  • 1 9 inch cake pan or
  • 1 12-cup std muffin pan

Ingredients

  • Cooking spray or butter and flour with plain rice flour

Eggs and Tings'

  • 2 large eggs
  • 1 cup sugar (it's pretty sweet, I use 1/2 cup)
  • ¼ cup honey mild
  • ¾ teaspoon kosher salt

The Wet Stuff

  • 1 cup whole milk
  • 2 tablespoons unsalted butter melted
  • 1 tablespoon vanilla extract yes, 1 TABLESPOON
  • ½ teaspoon toasted sesame oil

The Crunch

  • 4 tablespoons toasted black sesame seeds divided equally in half

The Dry Stuff

  • 1 teaspoon baking powder
  • 8 ounces (227g) glutinous rice flour aka mochiko or sweet rice flour NOT plain rice flour

The Finish

  • Powdered sugar for serving

Instructions

  • Preheat the oven to 350°F. Mist an 8-inch round cake pan with cooking spray or buttered and dusted with rice flour.
  • In a large bowl, whisk together the eggs, sugar, honey, and salt until fluffy and pale yellow, about 2 minutes. Whisk in the milk, vanilla, melted butter, and sesame oil until combined. Ain't gonna lie, I use my mixer on medium speed.
  • Using a mortar and pestle (or a coffee/spice grinder), pulverize 2 tablespoons of the black sesame seeds into a rough powder. It should smell very fragrant. Add this sesame powder, along with the remaining 2 tablespoons of whole black sesame seeds, to the bowl with the egg mixture, followed by the baking powder and rice flour. Whisk to combine, then carefully pour the batter into the greased cake pan. This part you can do by hand or machine.
  • Bake until the top is nicely browned and cracked slightly (this is a good sign), 50 to 60 minutes. You can also insert a chopstick or toothpick into the center of the cake, and if it comes out clean, then it’s done.
    For muffins, fill a 12-cup muffin tin that has been buttered to 7/8 full. Bake for approximately 25 minutes.
  • Cool completely before dusting with the powdered sugar and slicing into wedges to serve. The cake will keep in an airtight container at room temperature for up to 5 days.