Category: Book Reviews

Review of books I have read or listen to!

Donut Loaf Around, Make This Soon!

Donut Loaf Around, Make This Soon!

I visited my town library recently and requested the cookbook Midwest Made by Shauna Sever. This is a feeble attempt to be more discriminating before buying another cookbook.  The librarian cheerfully responded with, “we can order that from Amazon for you! The book will be sent directly to you and you can then keep the book for any length of time. When you are good and ready, return it to the library.

You’re joking, right?  Nope.

Two days later, I found a brand spanking new copy of Midwest Made sitting on my front doorstep.  I broke open that puppy and started scanning the book for recipes I wanted to try.

I started with her Jammy Winter Fruit and Brown Butter Bars (will post soon).  The cookie dough, studded with walnuts and oatmeal, serves as both the base and topping.  It’s a keeper.  But the filling, an apple and pear jam, didn’t stand out.  I would try a berry jam or use tart apples next time to bump up the flavor.  

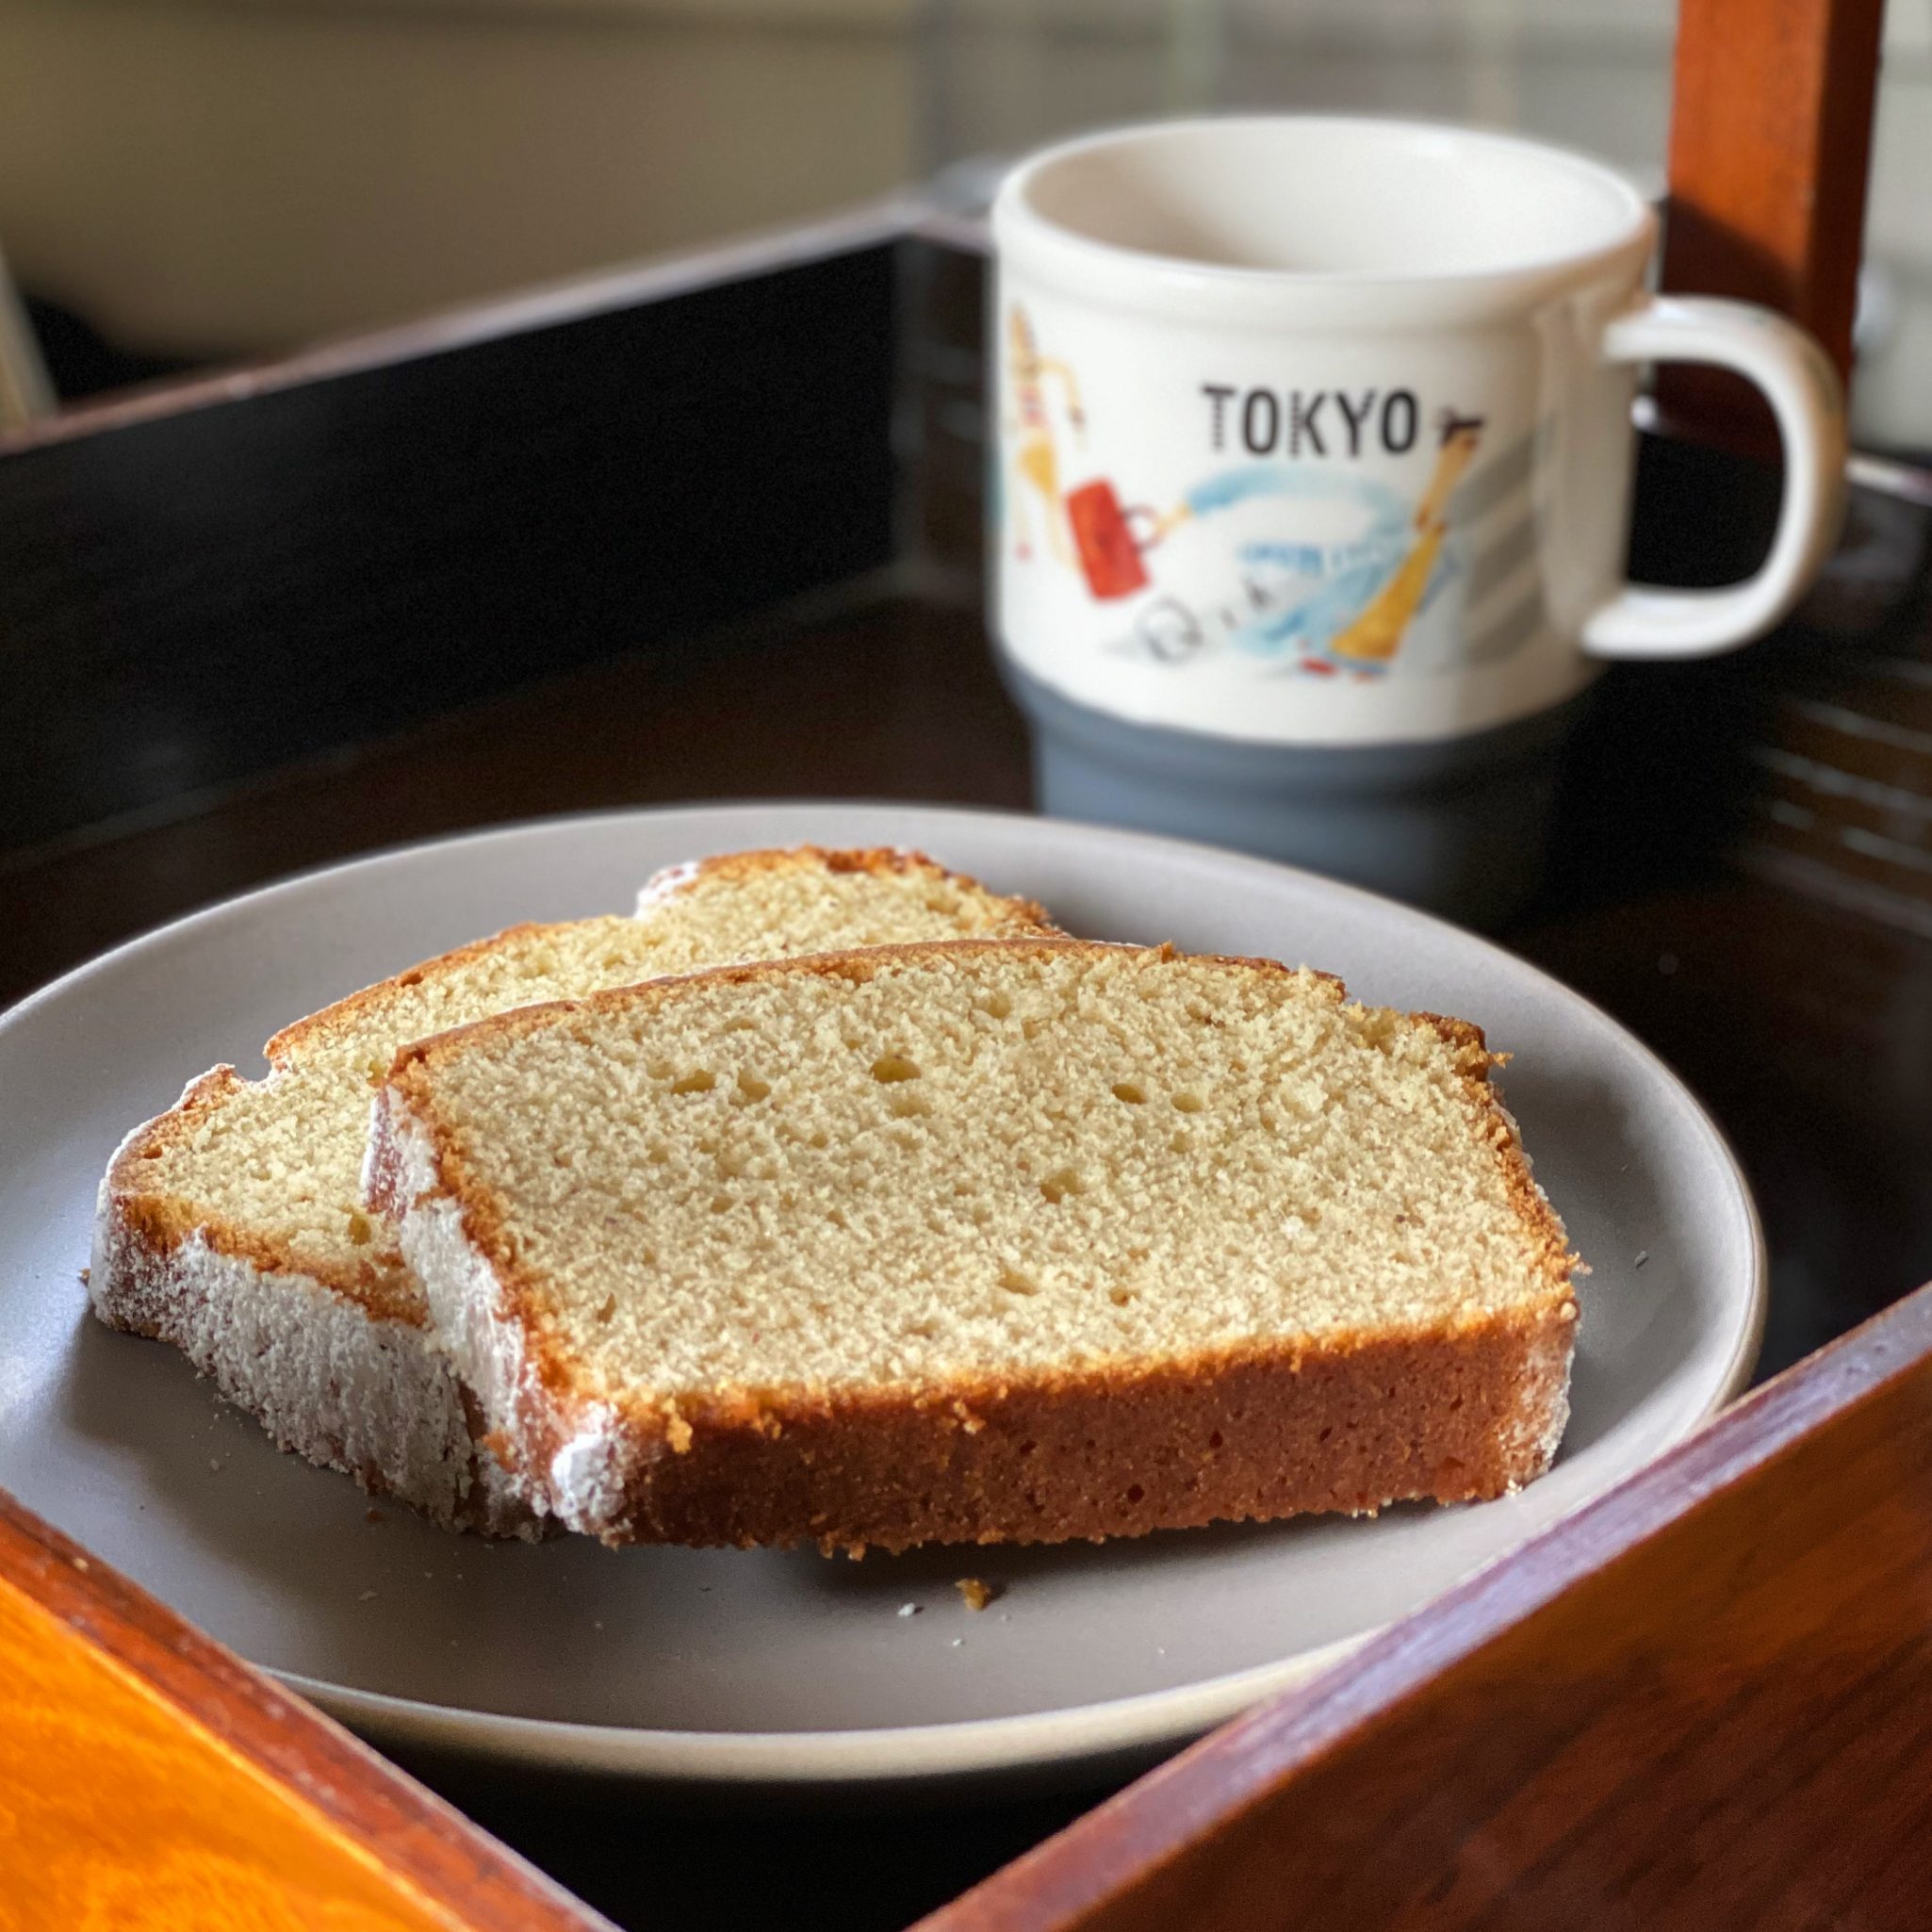
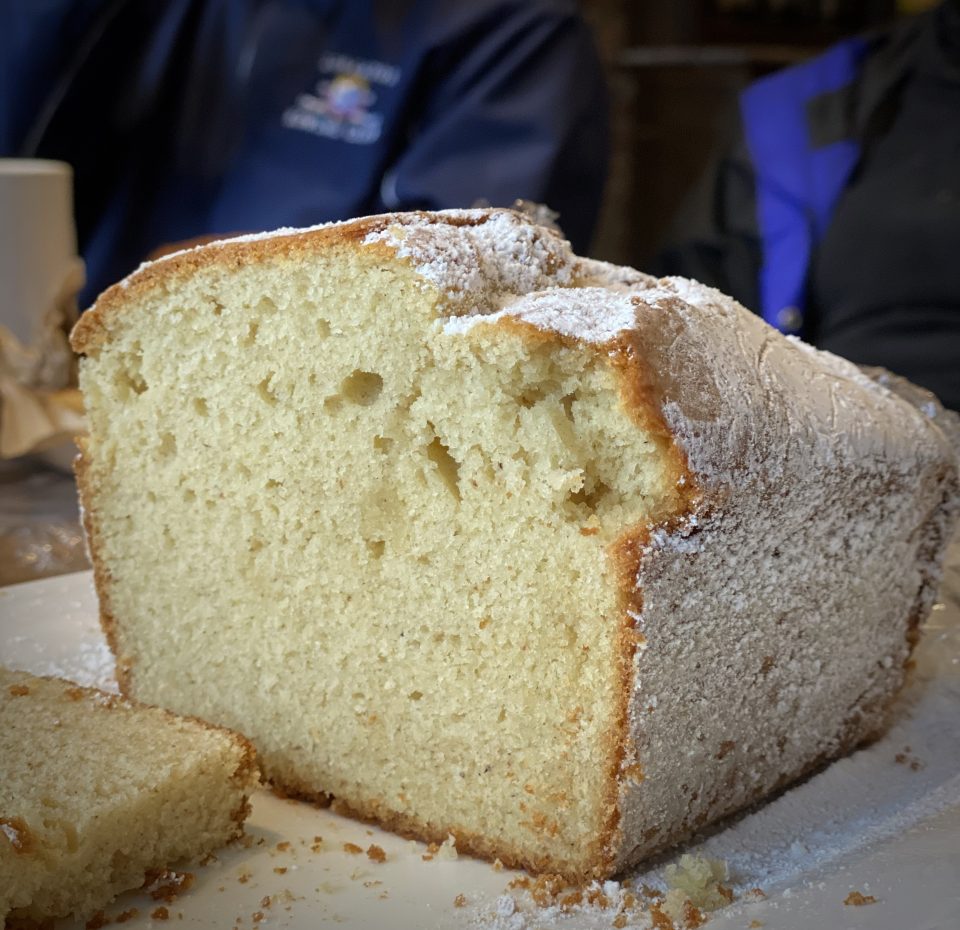
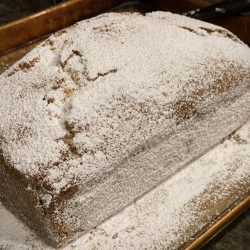
On the other hand, the Donut Loaf was a straight winner!  Initially, the 2 teaspoons of nutmeg threw me for a loop, not my favorite spice. But multiple positive reviews convinced me to take the donut challenge.  I’m glad I did.  Think giant powdered sugar donut but sliced from a loaf.  The inside of the loaf is moist, tender with a nice crumb with just a bit of density like a cake donut.  The outside makes me feel like a kid again, a flurry of powdered sugar with every bite.

The recipe is pretty much a classic loaf bread cake.  Cream butter and sugar.  Add just a quarter cup of the flour mixture, beat and then add eggs one at a time. I’m not sure why she adds a small amount of the dry ingredients before the eggs, maybe it prevents the batter from curdling after adding the eggs.  Just a guess.  Add the dry ingredients by alternating with the buttermilk.  The process results in a fine crumb, tender cake-delicious.  I used freshly grated nutmeg for the cake as recommended.  It wasn’t overpowering but surprisingly subtle.

Donut Loaf from Midwest Made

Powdered sugar donut of your childhood back as an easy to make Donut Loaf
Course Cake, Dessert, Snack
Cuisine American
Keyword Donut Loaf, Loaf bread
Prep Time 15 minutes
Cook Time 1 hour

Ingredients

  • Nonstick cooking spray for pan
  • 2 3/4 cups unbleached all-purpose flour spooned and leveled
  • 2 1/2 teaspoons baking powder
  • 1/2 teaspoon baking soda
  • 1 teaspoon fine sea salt
  • 2 teaspoons freshly grated nutmeg
  • 14 tablespoons unsalted butter at room temperature
  • 3/4 cup plus 2 tablespoons granulated sugar
  • 1 teaspoon vanilla extract
  • 3 large eggs at room temperature
  • 1 cup well-shaken buttermilk at room temperature
  • To finish:
  • 1 cup powdered sugar sifted, plus more as needed
  • 2 tablespoons unsalted butter melted

Instructions

  • Position a rack to the lower third of the oven and preheat it to 325°F. Spray a 9x5-inch light-colored metal loaf pan with nonstick cooking spray and line it with 2 perpendicular strips of parchment paper — 1 cut skinnier to fit lengthwise across the bottom and up the 2 short sides, 1 to fit crosswise and up the 2 longer sides. Cut the strips long enough to have a few inches of overhang on all sides.
  • In a medium bowl, whisk together the flour, baking powder, baking soda, salt, and nutmeg.
  • In the bowl of an electric mixer fitted with the paddle attachment, beat the butter on medium-high speed until creamy. Add the sugar and vanilla and beat until light and fluffy, about 3 minutes. Beat in 1/4 cup of the flour mixture. Beat in the eggs, 1 at a time. Reduce the mixer speed to low, and stir in the remaining flour mixture and buttermilk in 5 alternating additions, beginning and ending with the flour mixture. Finish folding the batter by hand to make sure everything is incorporated — the batter will be very thick.
  • Scrape the batter into the prepared pan and smooth the top. Bake until the loaf is golden with a couple of cracks on top, and a toothpick inserted into the center comes out clean, 60 to 75 minutes. Let cool in the pan set over a wire rack for 15 minutes. Use the parchment paper to lift the loaf from the pan. Let rest for another 30 minutes.
  • When the loaf is cool and firm enough to handle, but still slightly warm, sift the powdered sugar all over a large rimmed baking sheet (keep the sieve handy). Peel the parchment from the cake. Gently turn the loaf over in 1 hand, using part of your forearm to support it. Using a pastry brush, brush the bottom of the cake with some of the melted butter. Carefully set the loaf, right-side up, in the powdered sugar. From there, brush the long sides with the butter, turning the cake from side to side to coat in sugar, then brush and coat the short sides. Lastly, brush the top with the butter, grab a handful or two of sugar from the tray, deposit into the sieve, and sift sugar generously over the top of the loaf. Roll the entire loaf in sugar once more so that it resembles a giant powdered sugar donut. Carefully transfer the cake to a wire rack to cool completely before slicing and serving, touching up the loaf with a quick sifting of sugar as needed.

Notes

Nutmeg: Freshly grated makes a difference.
Jan Hagels, Anyway You Slice It, That’s the Way I Want It

Jan Hagels, Anyway You Slice It, That’s the Way I Want It

Bah Humbug, for some reason I have not been able to get into holiday “drive”.  Maybe I’m still jet lagged from our trip to New Orleans or I am still in a Creole butter coma.

The Cookie Cure

Gotta Snap Out Of It. Maybe baking tried and true recipes might work.  I dug out my Christmas cookie journal to peruse and get in the cookie mood.  A binder filled with cookie recipes from magazines, photocopies of recipes from books along with my own notes, and pictures drawn by my kids when they were little.   It’s my cookie bible.

I flipped to “Our Favorite Cookies”, from an old issue of Ladies Home Journal.  Ninety percent of you are thinking, what? It’s a Women’s magazine, think, Better Homes and Garden with dresses and makeup tips. Raise your hand if you remember it (seriously dating yourself now). This is the epicenter of my annual holiday cookie extravaganza.

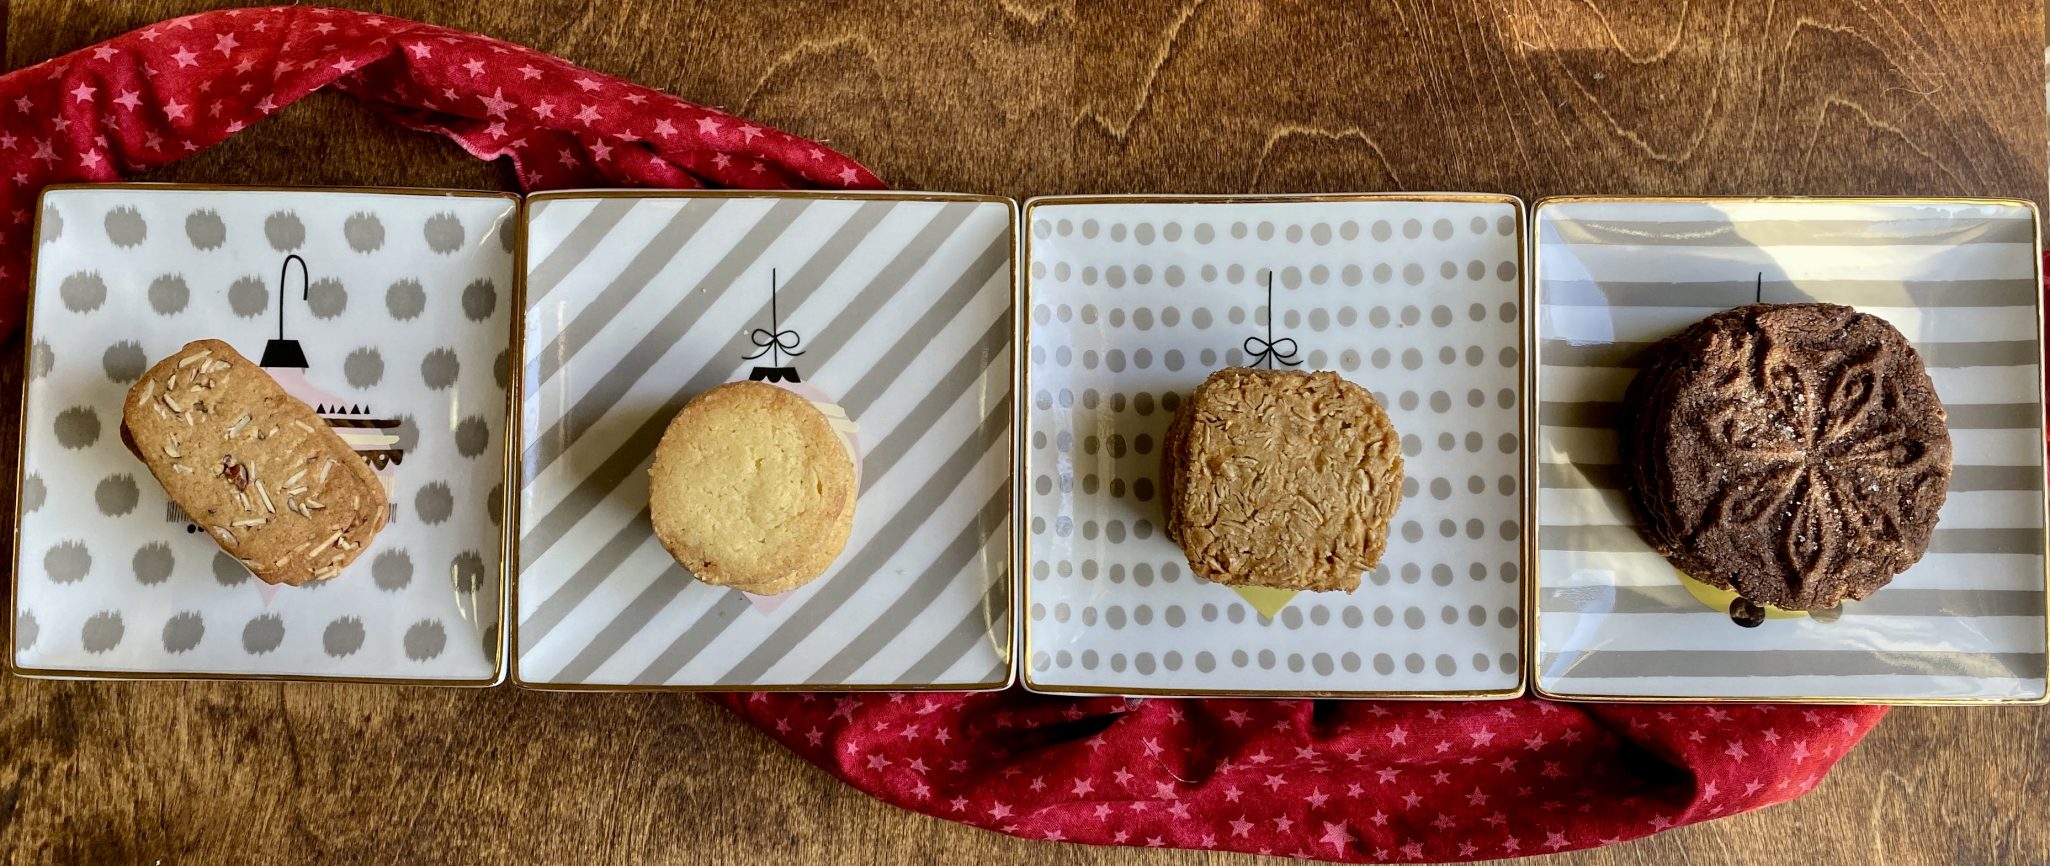
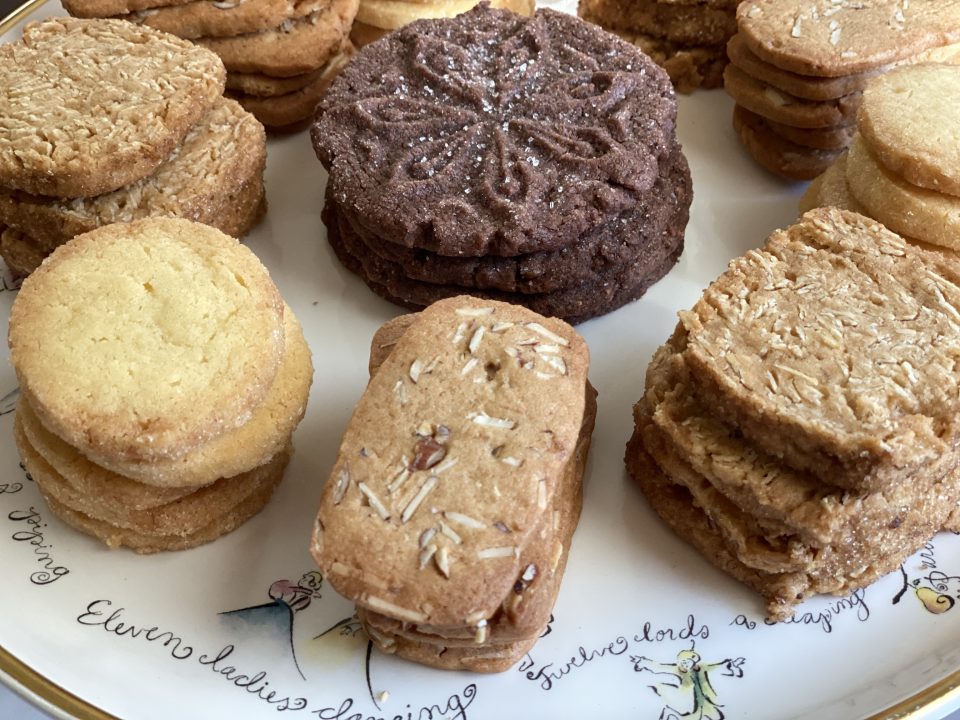
Jan Hagels are on the “gotta make them every year” part of the list.  Which is always a good way to start to find your cookie groove.  These little Dutch gems are thin and crispy, spiced with cinnamon, ginger, and allspice, and flecked with sliced almonds.  They are my mom’s favorite and the first one she will reach for on the cookie platter.  How can I not start with these?

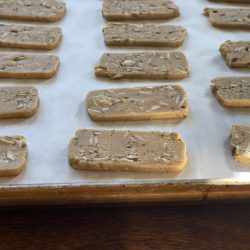
Options, roll out the Jan Hagel dough and emboss the dough for traditional Jan Hagel OR form the dough into a log, chill, slice, and bake.  Yeah, picking option #2.  Chill the dough well, which makes it much easier to slice into the prerequisite 1/8-inch slices.  Bake on parchment as the cookies will stick to the pan as they cool.  Trust me on this one.

This recipe makes quite a few cookies and the finished cookie keeps very well.  Stash a log in the fridge or freezer for freshly baked cookies at a moment’s notice.

Just Can’t Put My Finger On It

The Walnut Thumbprints from the same article also find their way onto my annual baking list.  They’re buttery, nutty, tender, a little bit crumbly, and absolutely delicious. Last year I switched hazelnuts for the walnuts, a genius move.  Find toasted hazelnuts at TJ’s, which makes life infinitely easier.  As much as I love pecans, they aren’t a good choice, they don’t have that pronounced bite walnuts and hazelnuts have.

Slice, Slice Baby

On a roll with slice and bake cookies.  Next up, Ginger Oaties from Grand Central Bakery cookbook, a book that has languished on my shelf for years.

Jan Hagels

Lovely slice and bake Dutch cookie made with almonds, butter, and brown sugar. Flavored with allspice, cinnamon, and ginger. Sweet, spicey, crisp, perfect with a cup of tea.
Course cookies
Cuisine Dutch
Keyword Dutch Almond Cookies, holidays, Jan Hagel
Prep Time 20 minutes
Cook Time 10 minutes

Ingredients

Da Dry Stuff

  • 1-1/2 cup All purpose flour
  • 1 tsp baking powder
  • 1 tsp cinnamon
  • 1/2 tsp ginger
  • 1/4 tsp salt
  • 1/8 tsp allspice

Cream the Following:

  • 1/2 cup butter reg salted (its an old recipe), if using unsalted increase salt to 1/2 tsp, 1 stick or cube
  • 1/2 cup dark brown sugar
  • 1/4 cup granulated sugar

Da Wet Stuff

  • `1 large egg
  • 1 tsp vanilla extract

Adds

  • 3/4 cup sliced almonds

Instructions

  • Combine flour, baking powder, cinnamon, ginger, salt, and allspice in medium bowl. Beat butter and sugars in mixing bowl until light and fluffy. Beat in egg and vanilla. Gradually add flour mixture until blended. Stir in almonds.
  • Gather and shape dough into 8x2-1/2 -1-12 inch brick. Wrap in wax paper or parchment and chill for at least 4 hours or overnight.
  • Preheat oven to 350 F. Cut brick crosswise into 1/8-inch thick slices. Line cookie sheet with parchment and bake 8-10 minutes until firm.
  • Cool on wire rack. Makes 3-1/2 dozen
Beta Testers (Lemon Poppy Seed Shortbread, Mexican Hot Chocolate Shortbread, Pistachio Shortbread Cookies)

Beta Testers (Lemon Poppy Seed Shortbread, Mexican Hot Chocolate Shortbread, Pistachio Shortbread Cookies)

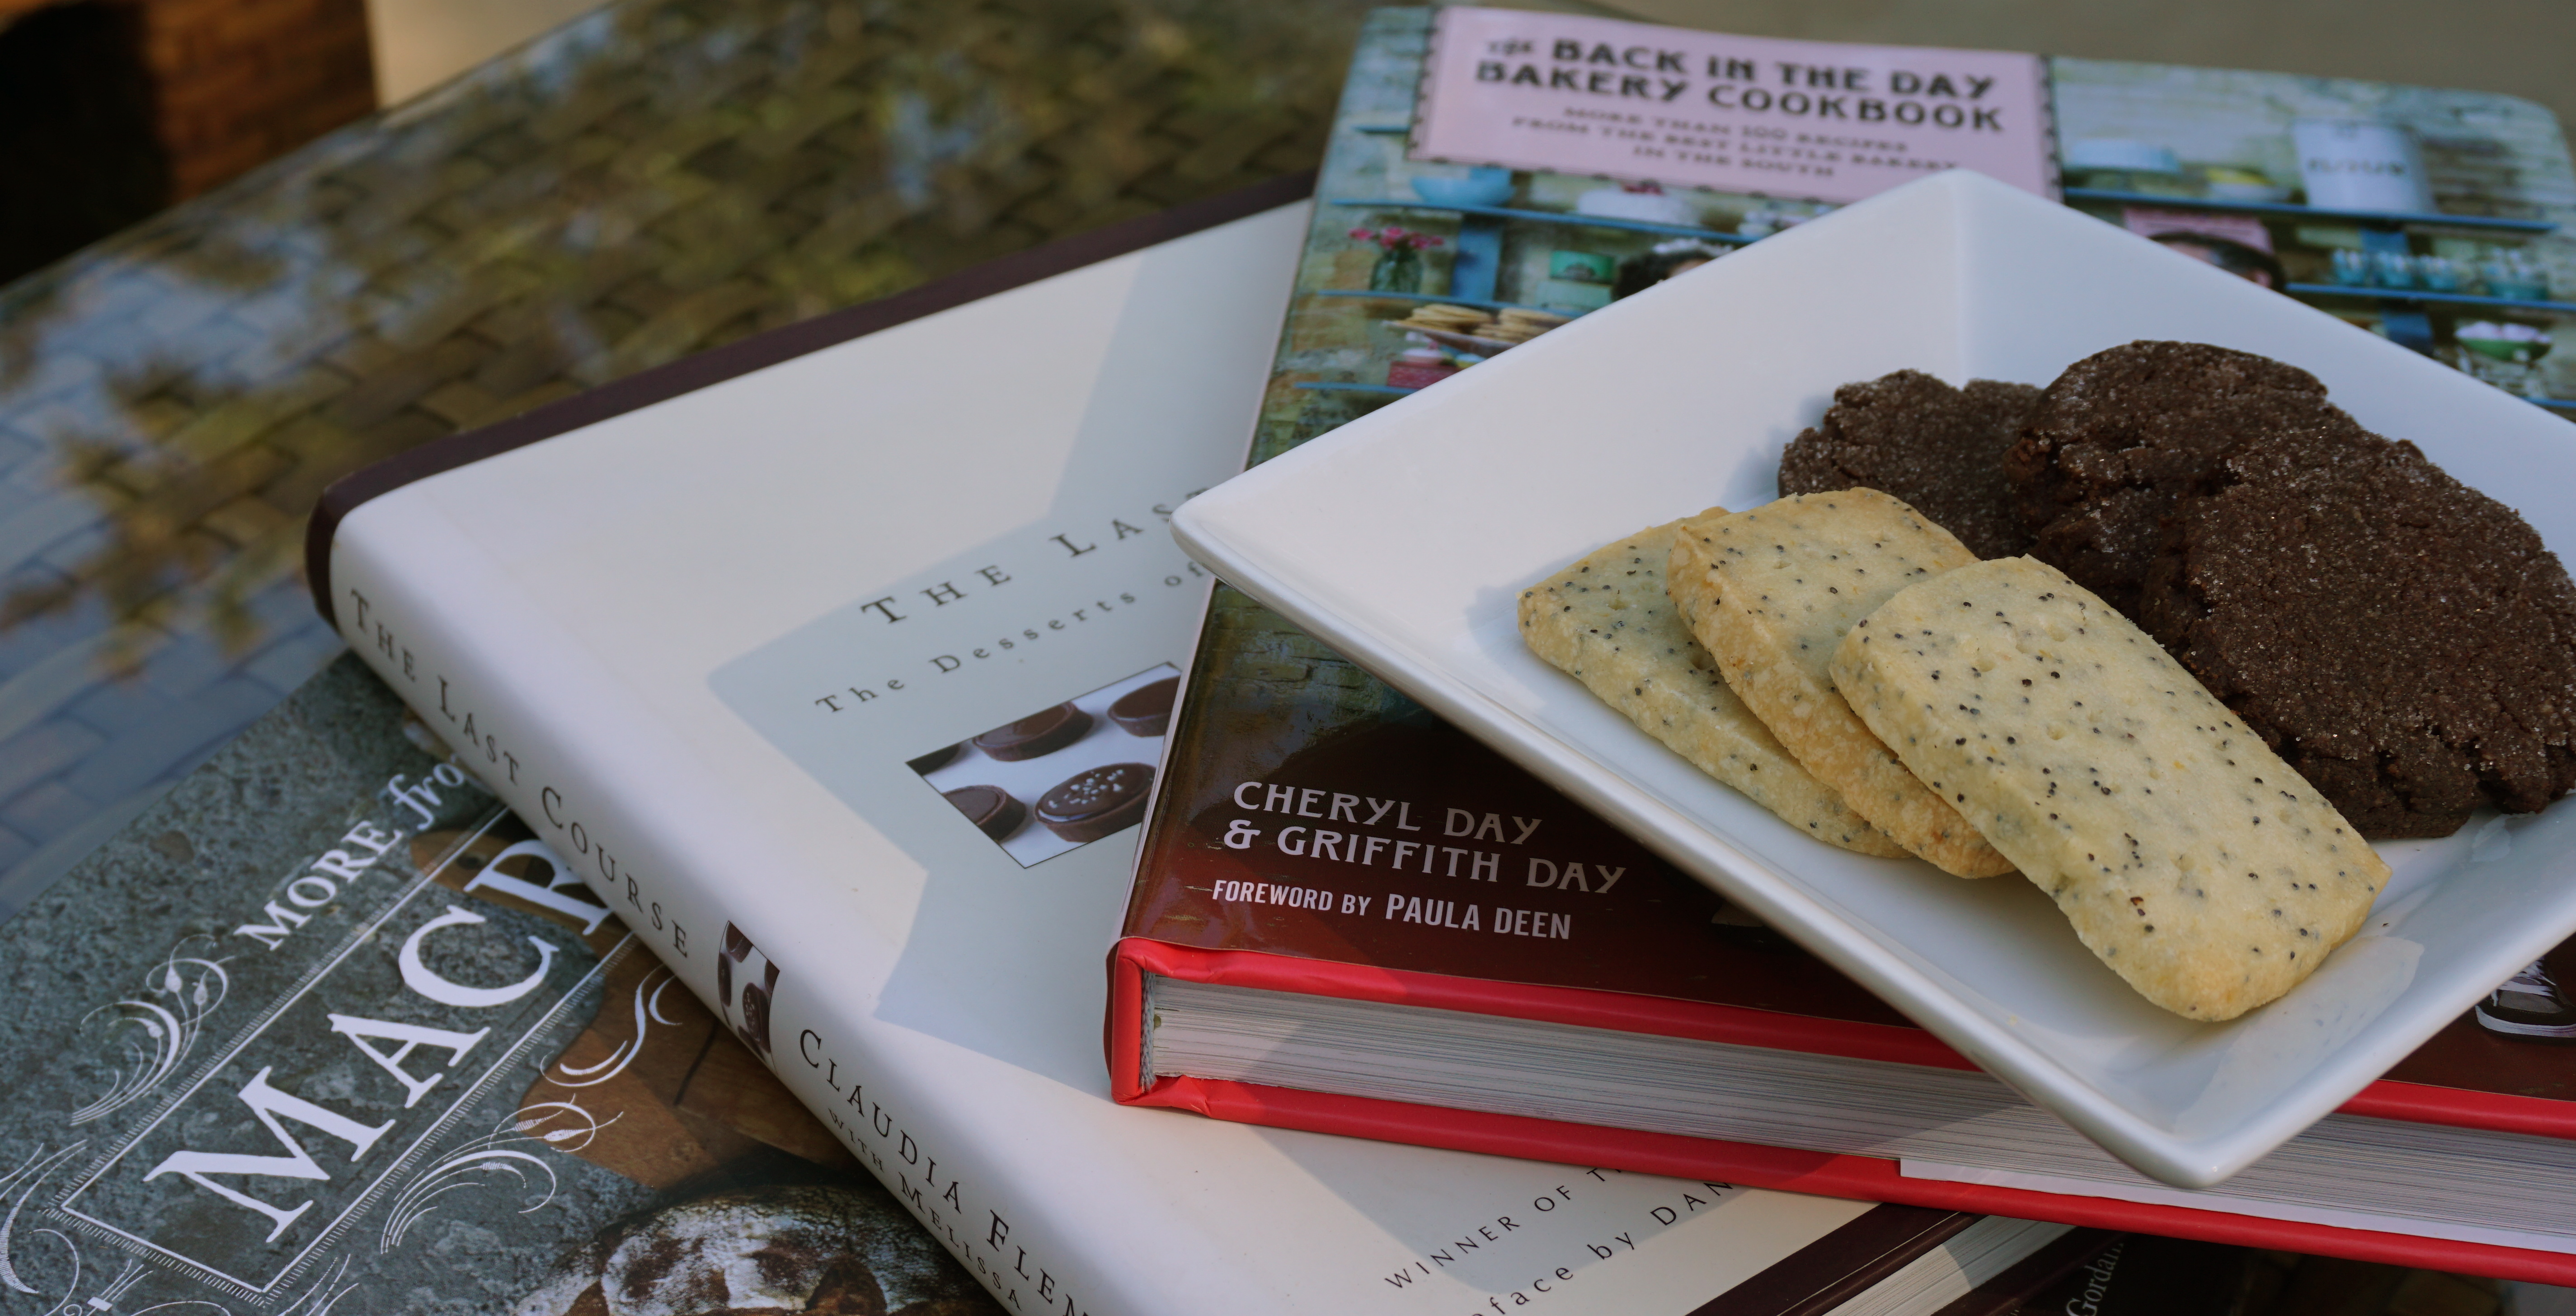
With the reprint of Claudia Fleming’s “The Last Course”, I reached into the archives for a post on a trio of shortbread I “tested” on friends and family.  A delectable triple play of cookies that would be lovely in a holiday cookie tin or a festive platter for the annual swap.  Fleming’s Lemon Poppy Seed cookies are buttery, tender, lemony with a crunch from the poppy seeds while Back in the Day’s  Mexican Hot Chocolate Shortbread are rich, chocolatey, and spicy.  Bake em’ TODAY.  I love pistachios for their color and flavor, both shine in Macrina Bakery’s Pistachio Shortbread.

Without further ado, a trio of tasty cookie bites from “back in the day” that you should bake today!

Human nature always prevails and I am no exception.  Every New Year’s Day I make a couple of resolutions…lose weight, get more sleep, test more cookie recipes for next year’s holiday box, one out of three ain’t bad!  If I were a major leaguer with a 333 batting average I’d be batting clean up.

DSC01290

So from my collection of cookbooks, I pulled out Back in the Day Bakery Book and made the Mexican Hot Chocolate Shortbread,  Lemon Poppyseed Shortbread from Claudia Fleming’s The Last Course (re-issued!) and Pistachio Shortbread from More From Macrina Bakery.  I don’t like to rely on my taste buds only, so my trusty crew friends, nieces, & family were my “beta testers”.  Consensus was there was no consensus!  Although I might have to give the edge to the Mexican Hot Chocolate shortbread, me and Joe Biden..here to cast the final vote.

A successful beta test since these three recipes would all make the cut for the holiday cookie basket.

Mexican Hot Chocolate Shortbread

These cookies taste like a mug of rich hot chocolate. The deep mocha-flavor is followed by a kick of cayenne pepper. Don't let the heat put you off; it only enhances the flavor.
Prep Time 15 minutes
Cook Time 10 minutes
Author Back In the Day Bakery

Ingredients

Dry Ingredients #1

  • 1 3/4 cups unbleached all-purpose flour
  • 1/2 cup almond flour

Creamed Mixture

  • 1/2 pound 2 sticks unsalted butter, at room temperature
  • 1/2 teaspoon pure vanilla extract
  • 1/2 teaspoon pure almond extract

Dry Ingredients #2

  • 1 cup packed light brown sugar
  • 1/2 cup Dutch-processed cocoa powder
  • 1/2 teaspoon ground cinnamon
  • 1/4 teaspoon espresso powder or finely ground coffee
  • 1/2 teaspoon fine sea salt
  • 1/4 teaspoon cayenne pepper

The Finishers

  • 1/2 cup mini semisweet chocolate chips
  • 1/4 cup granulated sugar for dusting

Instructions

  • Line two cookie sheets with parchment.
  • Whisk the flours together in a medium bowl and set aside.
  • In the bowl of a stand mixer fitted with the paddle attachment (or in a large mixing bowl, using a handheld mixer), cream the butter, vanilla, and almond extract until the mixture is pale in color, 1 to 2 minutes. Turn the speed down to low, add the brown sugar, cocoa, cinnamon, espresso, salt, and cayenne pepper, and continue to mix until the mixture is smooth, 2 to 3 minutes. Add the flour mixture in thirds until just combined. With the mixer running, sprinkle in the chocolate chips, mixing until just combined.
  • Transfer the dough to another bowl and finish mixing by hand to make sure no bits of flour or butter are hiding on the bottom of the bowl and the dough is thoroughly mixed.
  • Use a small ice cream scoop to form the cookies, about 1 rounded tablespoon each, and place on the prepared cookie sheets, leaving 1 inch between the cookies to allow for spreading.
  • Flatten each cookie with a cookie stamp dusted with granulated sugar, or gently flatten each cookie with the palm of your hand and then dust the tops with sugar. They will have little cracks in the top. Refrigerate the cookies for at least 1 hour, or up to 5 hours. Position a rack in the lower third of the oven and preheat the oven to 350°F. Bake the cookies, one sheet at a time, for 8 to 10 minutes, rotating the pan halfway through the baking time for even doneness (see Tip). Cool the cookies completely on wire racks. Store the cookies in an airtight container for up to 3 days at room temperature.
  • Tip: It is really difficult to tell when dark chocolate cookies are done. Pull them out when they are firm to the touch on the edges and the sweet smell of chocolate has begun to fill your kitchen.

Lemon-Poppy Seed Shortbread (Claudia Fleming, The Last Course)

Ingredients

  • 1 cup 2 sticks unsalted butter, softened
  • 3/4 cup confectioners’ sugar
  • 1 1/2 teaspoons fresh lemon juice
  • 1 1/2 teaspoons grated lemon zest
  • 1/2 teaspoon vanilla extract
  • 2 cups all-purpose flour sifted
  • 1 1/2 tablespoons poppy seeds
  • 1/2 teaspoon salt

Instructions

  • Using an electric mixer, beat the butter and sugar until creamy and smooth, about two minutes. Add the lemon juice, zest and vanilla and beat well.
  • In a bowl, combine the flour, poppy seeds, and salt. Add the dry ingredients to the butter mixture and mix until combined. Form the dough into a disk and, wrap in plastic wrap and chill for at least 3 hours and up to 3 days or freeze for up to 2 months.
  • Preheat oven to 300° F. Roll the dough between two sheets of wax paper to a 1/4-inch-thick rectangle. return dough to refrigerator for an additional 30 minutes. Cut the shortbread into shapes with a two-inch cookie cutter, or use a knife, and place 1 inch apart on parchment-lined baking sheets. Do not reroll scraps, if using cookie cutter. Prick shortbread with a fork and bake until pale golden all over, 23 to 25 minutes. Cool on a wire rack.

PISTACHIO SHORTBREAD COOKIES

Ingredients

  • 1 cup unbleached all-purpose flour plus more for the work surface
  • 1/4 cup granulated sugar
  • 1/2 teaspoon kosher salt
  • 1/2 cup shelled raw or roasted pistachios
  • 1/2 teaspoon vanilla extract
  • 1 stick 4 ounces unsalted butter, cold, cut into 1/4-inch pieces
  • 1 to 2 tablespoons granulated sugar sanding sugar, or raw sugar, for garnish

Instructions

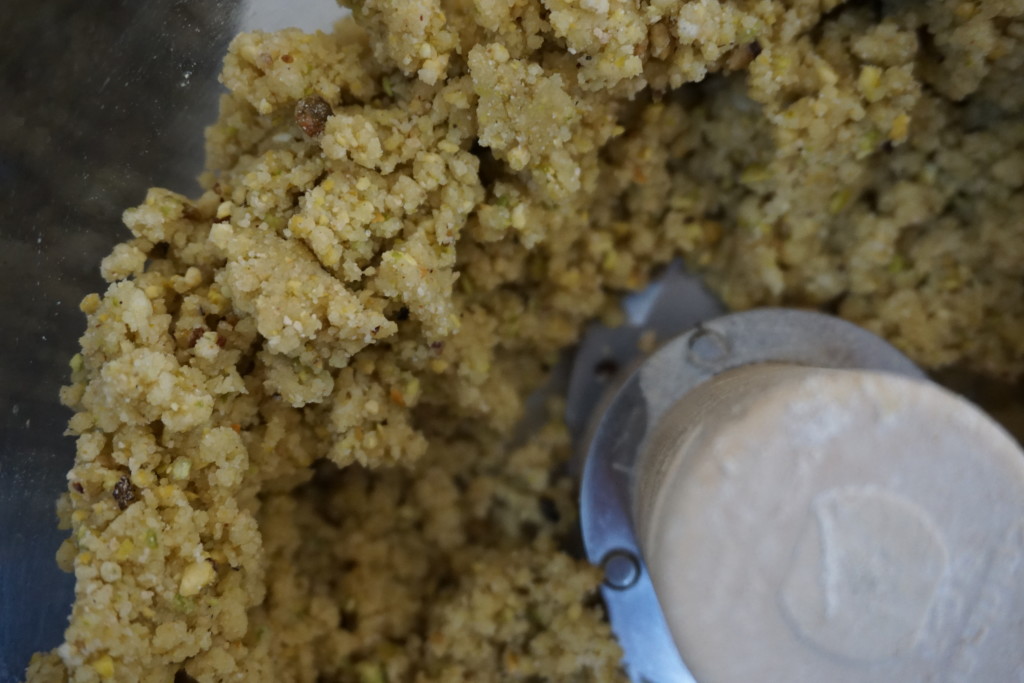
  • Pulse the flour, granulated sugar, salt, pistachios, and vanilla in the bowl of a food processor for 1 to 2 minutes, until the pistachios are finely ground. Scatter the butter pieces in the food processor and pulse several times to cut the butter into the flour. Stop pulsing when the ingredients just come together and cling to one another. (Watch carefully, as food processors work very fast and can easily overmix the dough. At first the mixture will have a coarse, crumbly texture, but then if you’re not careful it will quickly turn into a paste.)
  • Turn the dough onto a lightly floured work surface and shape it into a log about 2 inches in diameter and 10 inches long. (If the dough is too sticky, toss it in the fridge for 10 or so minutes to make it easier to work with. Dampening your hands ever so slightly with cold water also helps.) Place the log on a piece of plastic wrap or parchment paper. Tightly roll the wrap around the log and twist the ends to seal them securely. Refrigerate for at least 2 hours or up to 5 days. (This dough also freezes well for up to 3 weeks if wrapped tightly in plastic.)
  • Position 2 racks in the center of the oven and preheat to 325ºF (163ºC). Line 2 rimmed baking sheets with parchment paper and set aside.
  • Cut the chilled cookie dough into 1⁄2-inch-thick coins and place about 2 inches apart on the prepared baking sheets. Lightly brush the top of each shortbread cookie with water and sprinkle with sugar. Bake for 15 to 18 minutes, or until the cookies are lightly golden brown on both top and bottom. Let the cookies cool on the baking sheet for 5 minutes, then transfer to a wire rack to cool completely. Store the pistachio shortbread cookies in an airtight container at room temperature for up to 2 weeks.


Snickerdoodles (Alice in Cookiewonderland)

Snickerdoodles (Alice in Cookiewonderland)

It has been 1610 days since I sat down and penned my inaugural post, Jamigos 2.0 to launch 3jamigos.  As I reflect on that number all I can think is WHAT TOOK ME SO LONG TO INCLUDE MY FAVORITE COOKIE?  I mean, sheesh, of the 100 cookie recipes I have posted, it doesn’t include my all-time favorite non-shortbread cookie (notice how I slipped in that qualifier, shortbread=cookie perfection).  Unbelievable, and how did I discover this faux pas?

I was tasked with making cookies for an End of Summer Party for our political action group (sanity saver).   I automatically went to my blog and typed in S N I C K E R D O O D L E S in the search box and waited, NOTHING popped up.  A quick search of my cookie index revealed, what the heck, no Snickerdoodles.

Are you kidding?

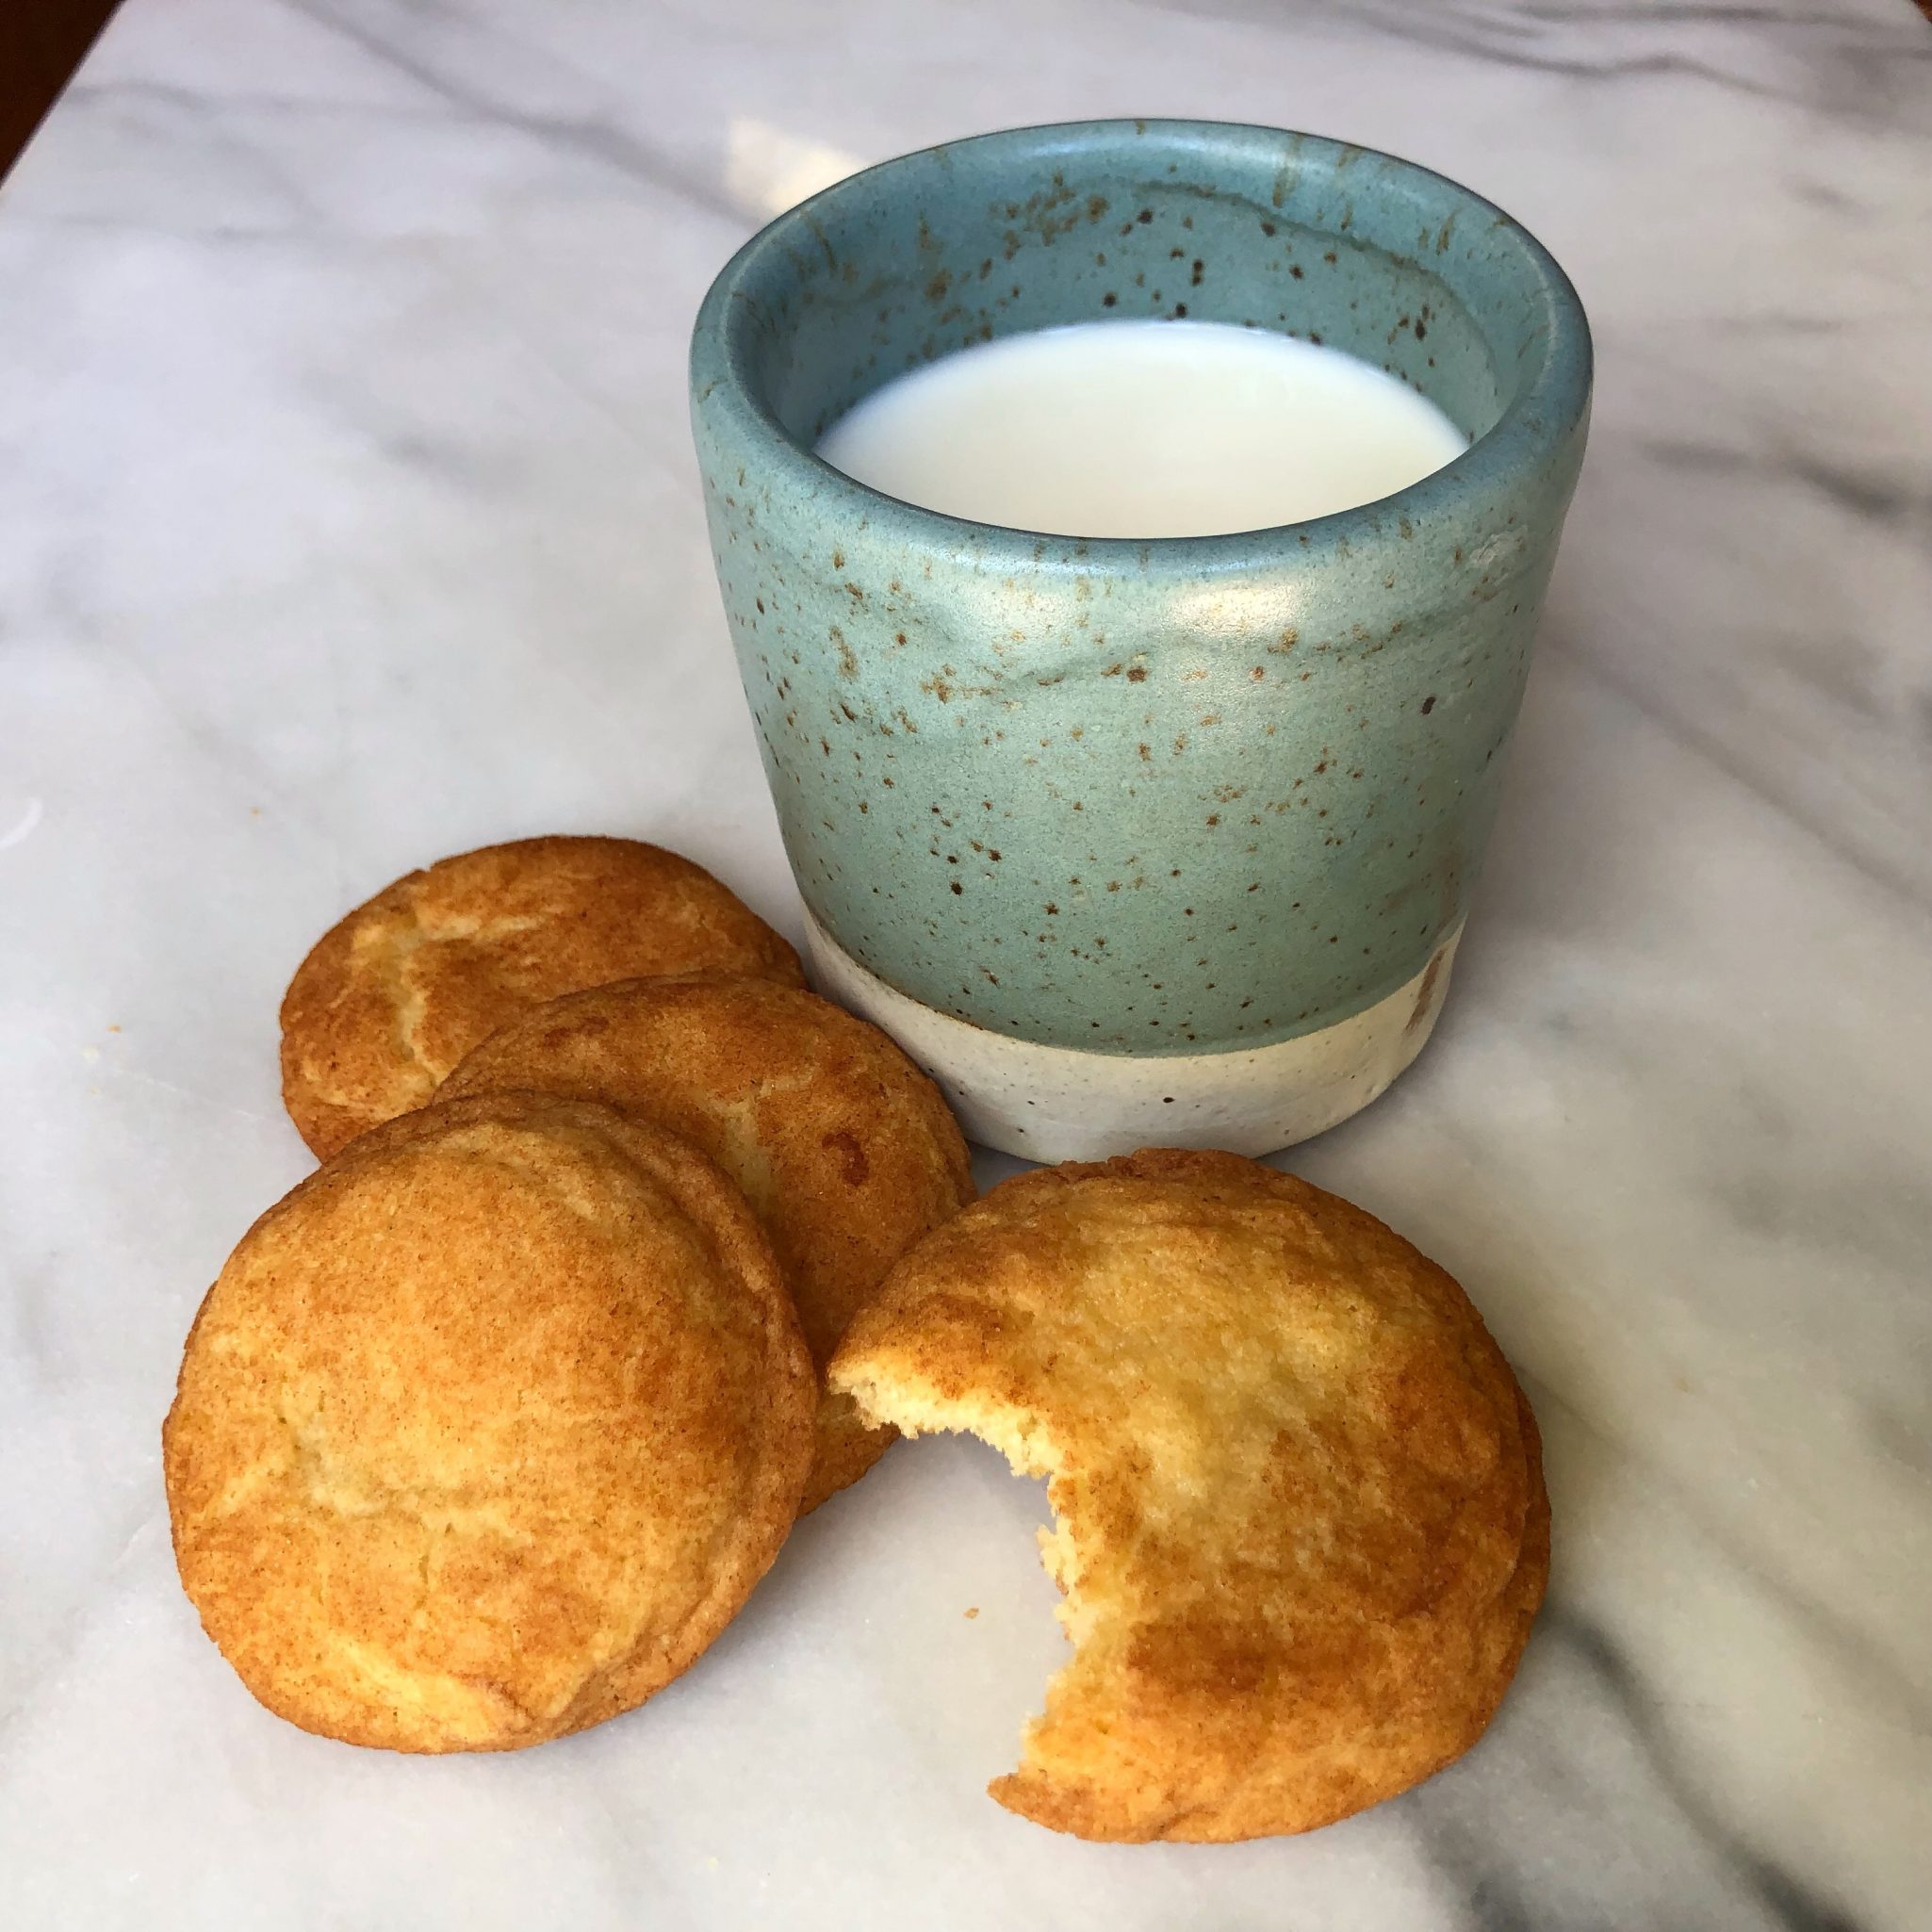
I’ve never posted Snickerdoodles on my blog?  Hellooo, time to fix that.  I got busy, made a batch for the meeting, snitched a couple to have with an ice-cold glass of milk, and sat down to write this post.

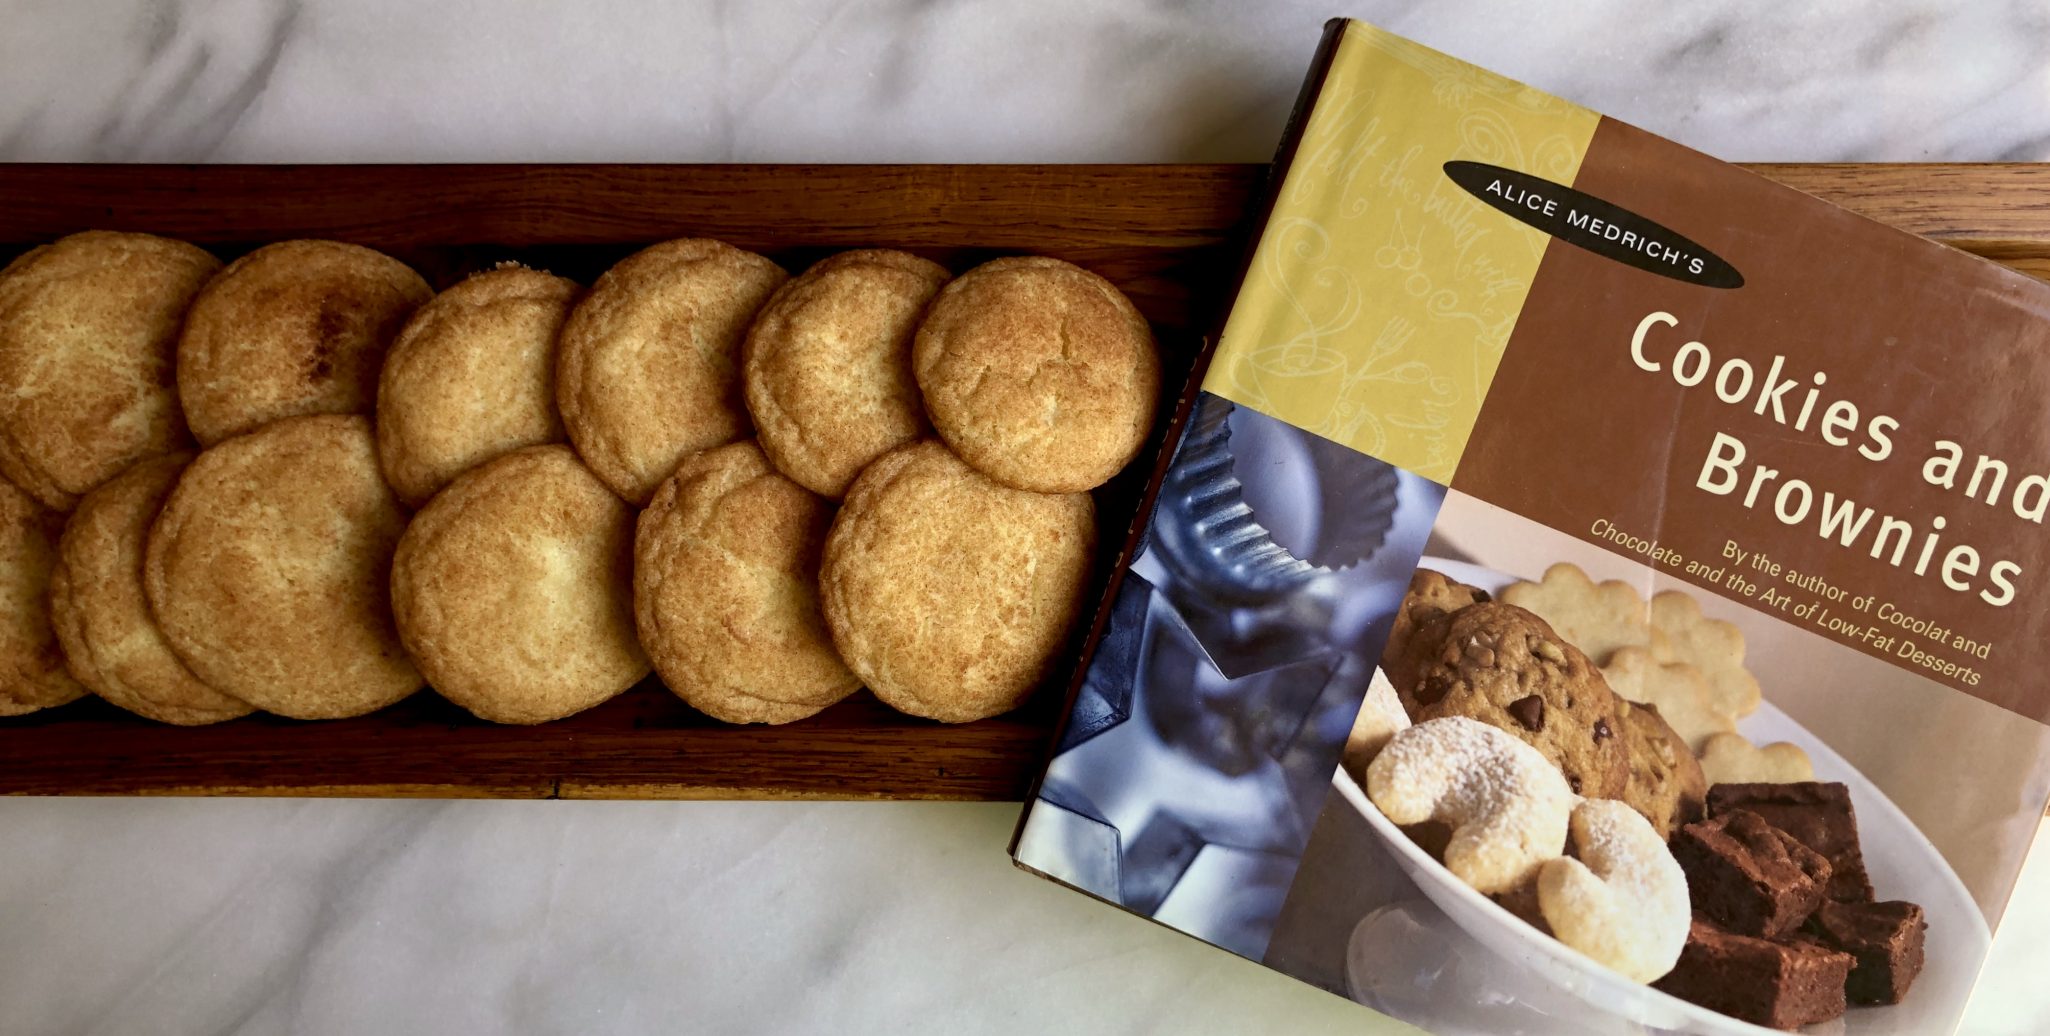
EVERYONE needs a scrumptious recipe for Snickerdoodles.  Buttery, sweet and spicy, crispy edges, soft chewy center,  finished with cinnamon sugar.  The quintessential cookie.  My favorite recipe comes from the cookie maven, Alice Medrich.  Unlike other recipes I have seen, hers are made with just butter. Yep, no shortening in these bad-boy bites of sweet cinnamon bliss.  The recipe is from her small but mighty book, Cookies and Brownies, long out of print but available on the secondary market. The book is worth getting just for this and her Lemon Bar recipe. Well written with easy-to-follow directions, it’s a keeper.  My copy is frayed and tattered, well worn from use.

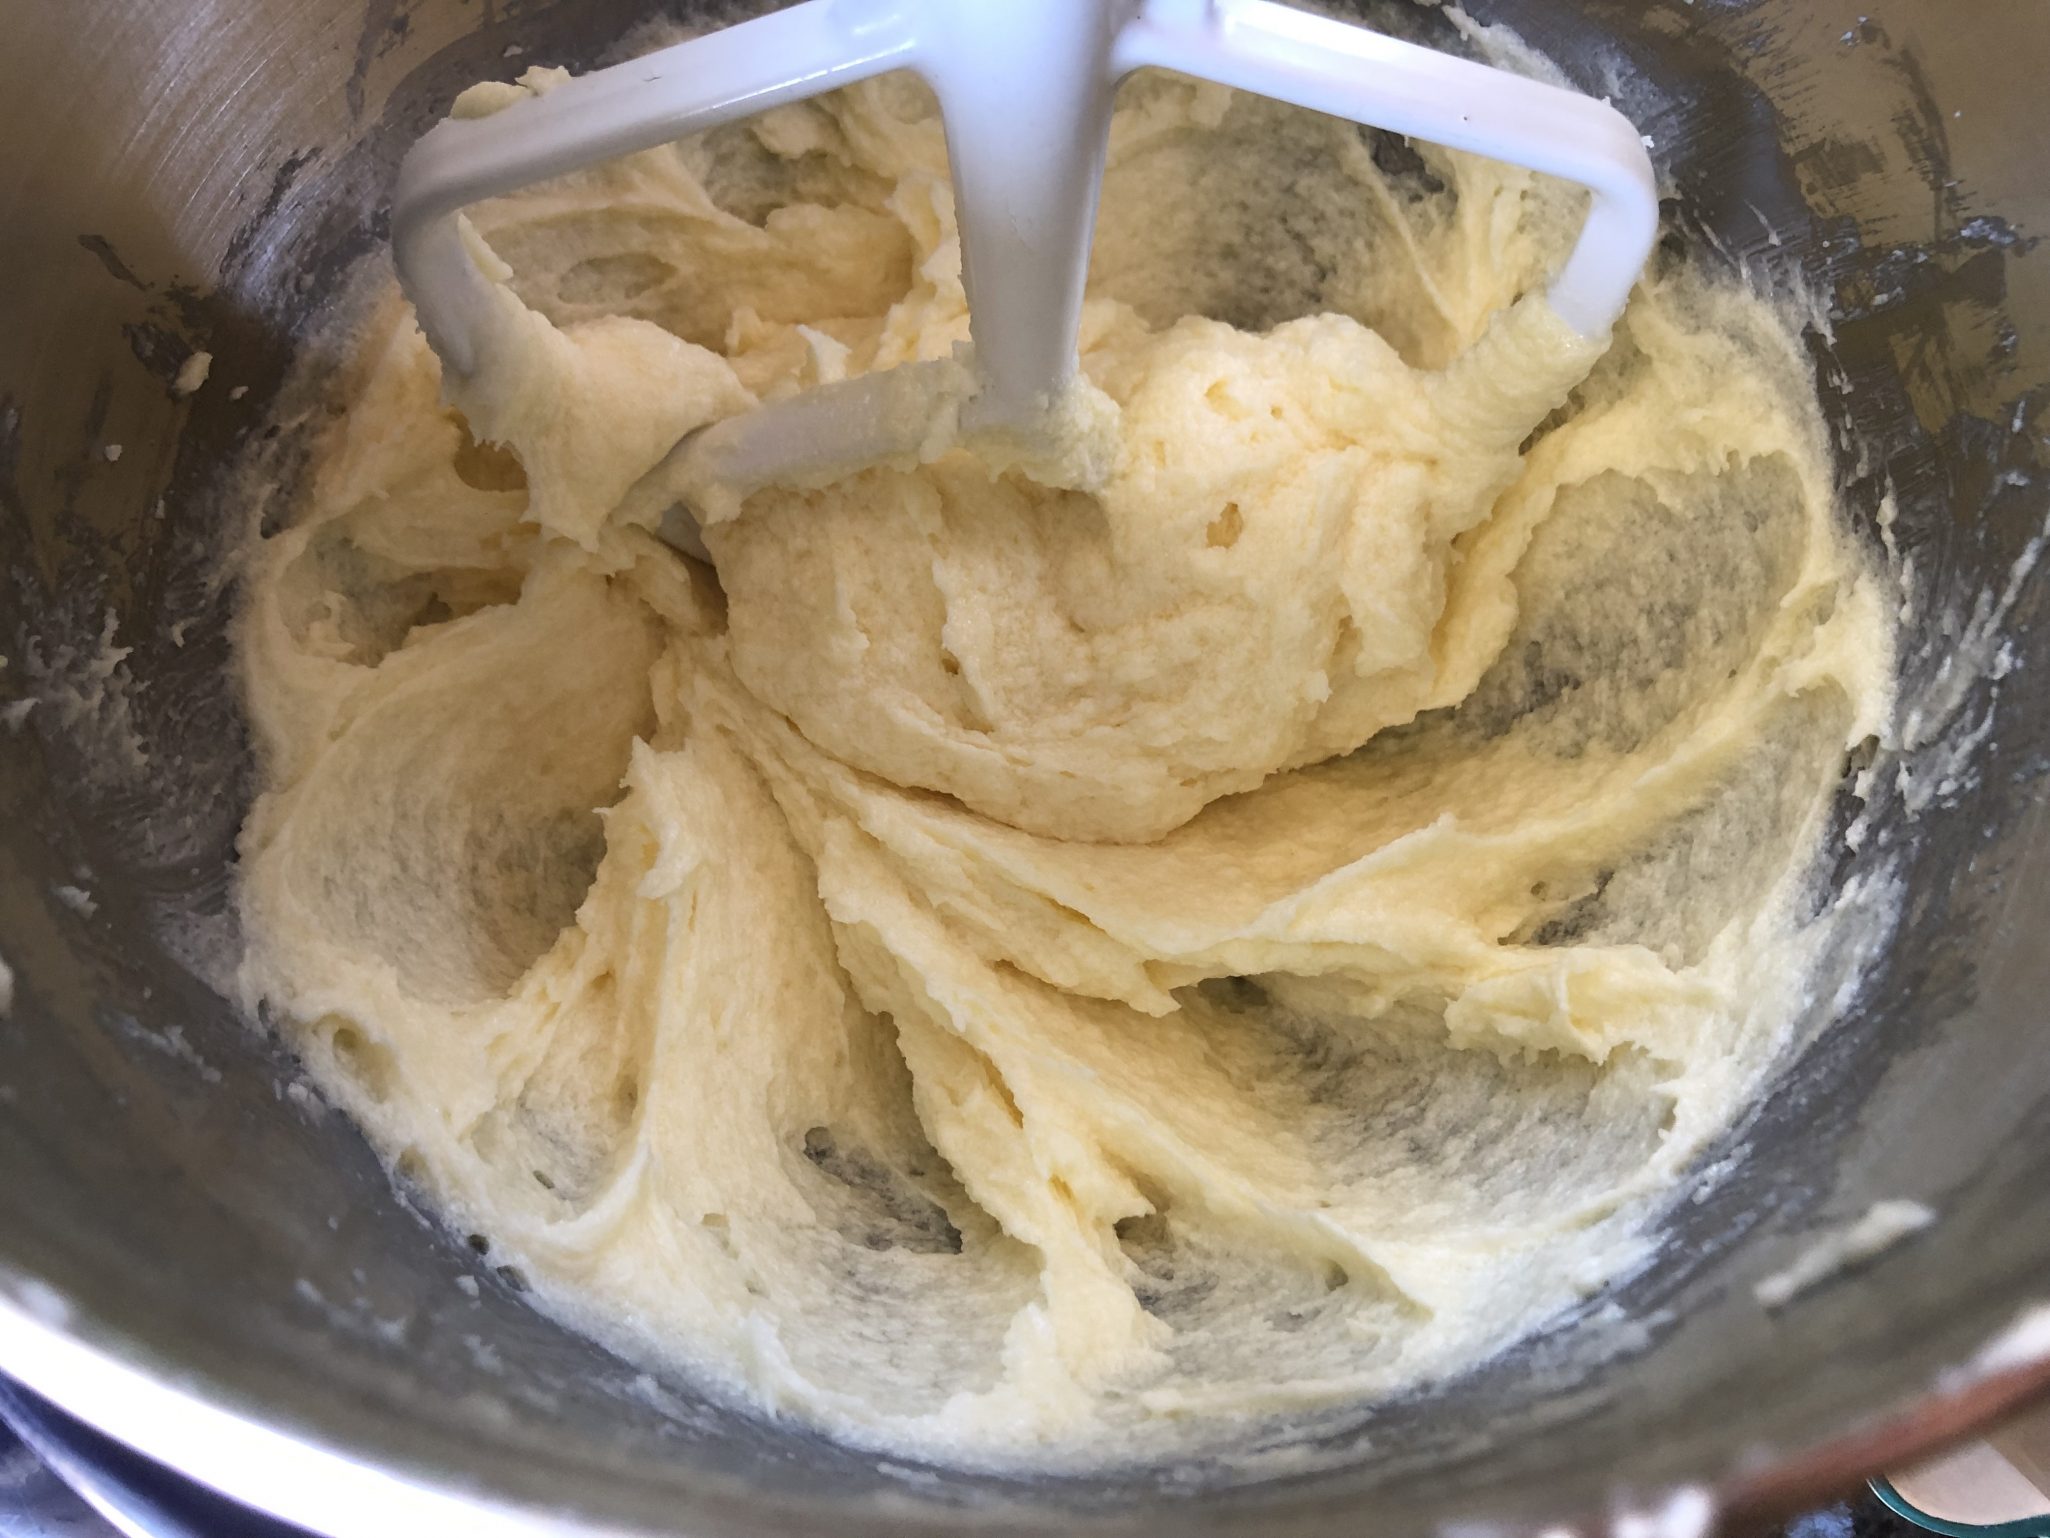
Cream butter and sugar together to smooth but NOT fluffy.  Add eggs, beat until blended.

Add flour and stir just until combined.  Don’t overmix.  The mixing changes the consistency of the cookie.  Fluffy butter-sugar mixture gives a cakier cookie, go for smooth and creamy.  After adding the flour mixture do not beat the dough too much or you will end up with a tough cookie.

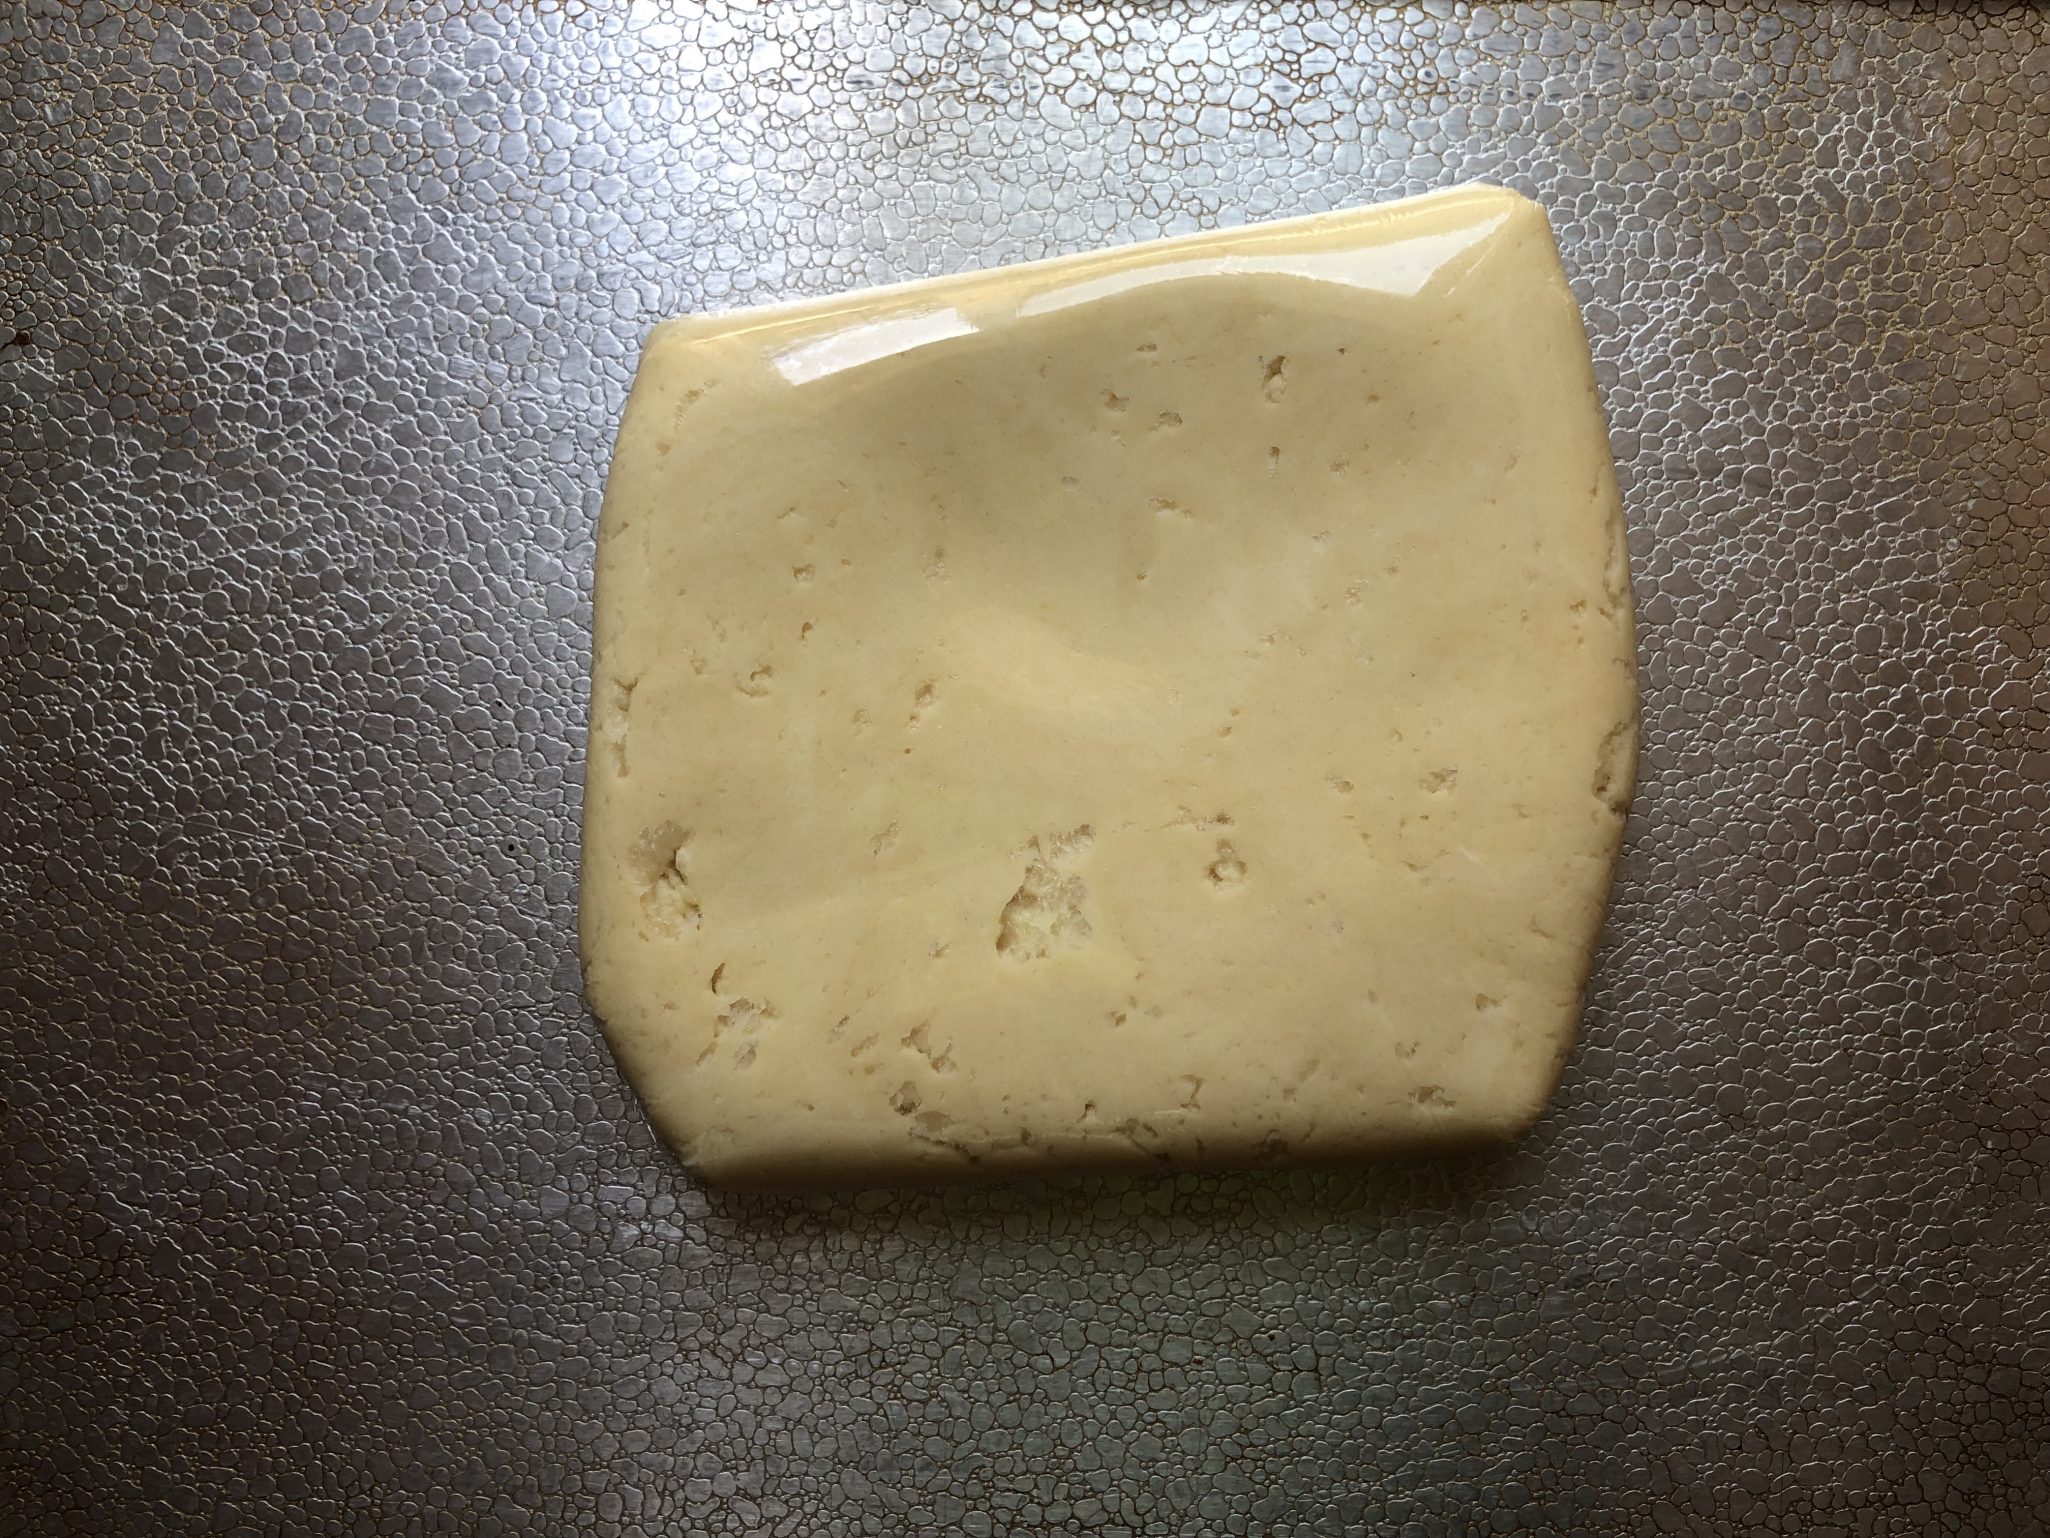
Gather dough into a disc, shape doesn’t matter.  Keep the thickness to about an inch.  This will make it easier to scoop and form the cookies after chilling.

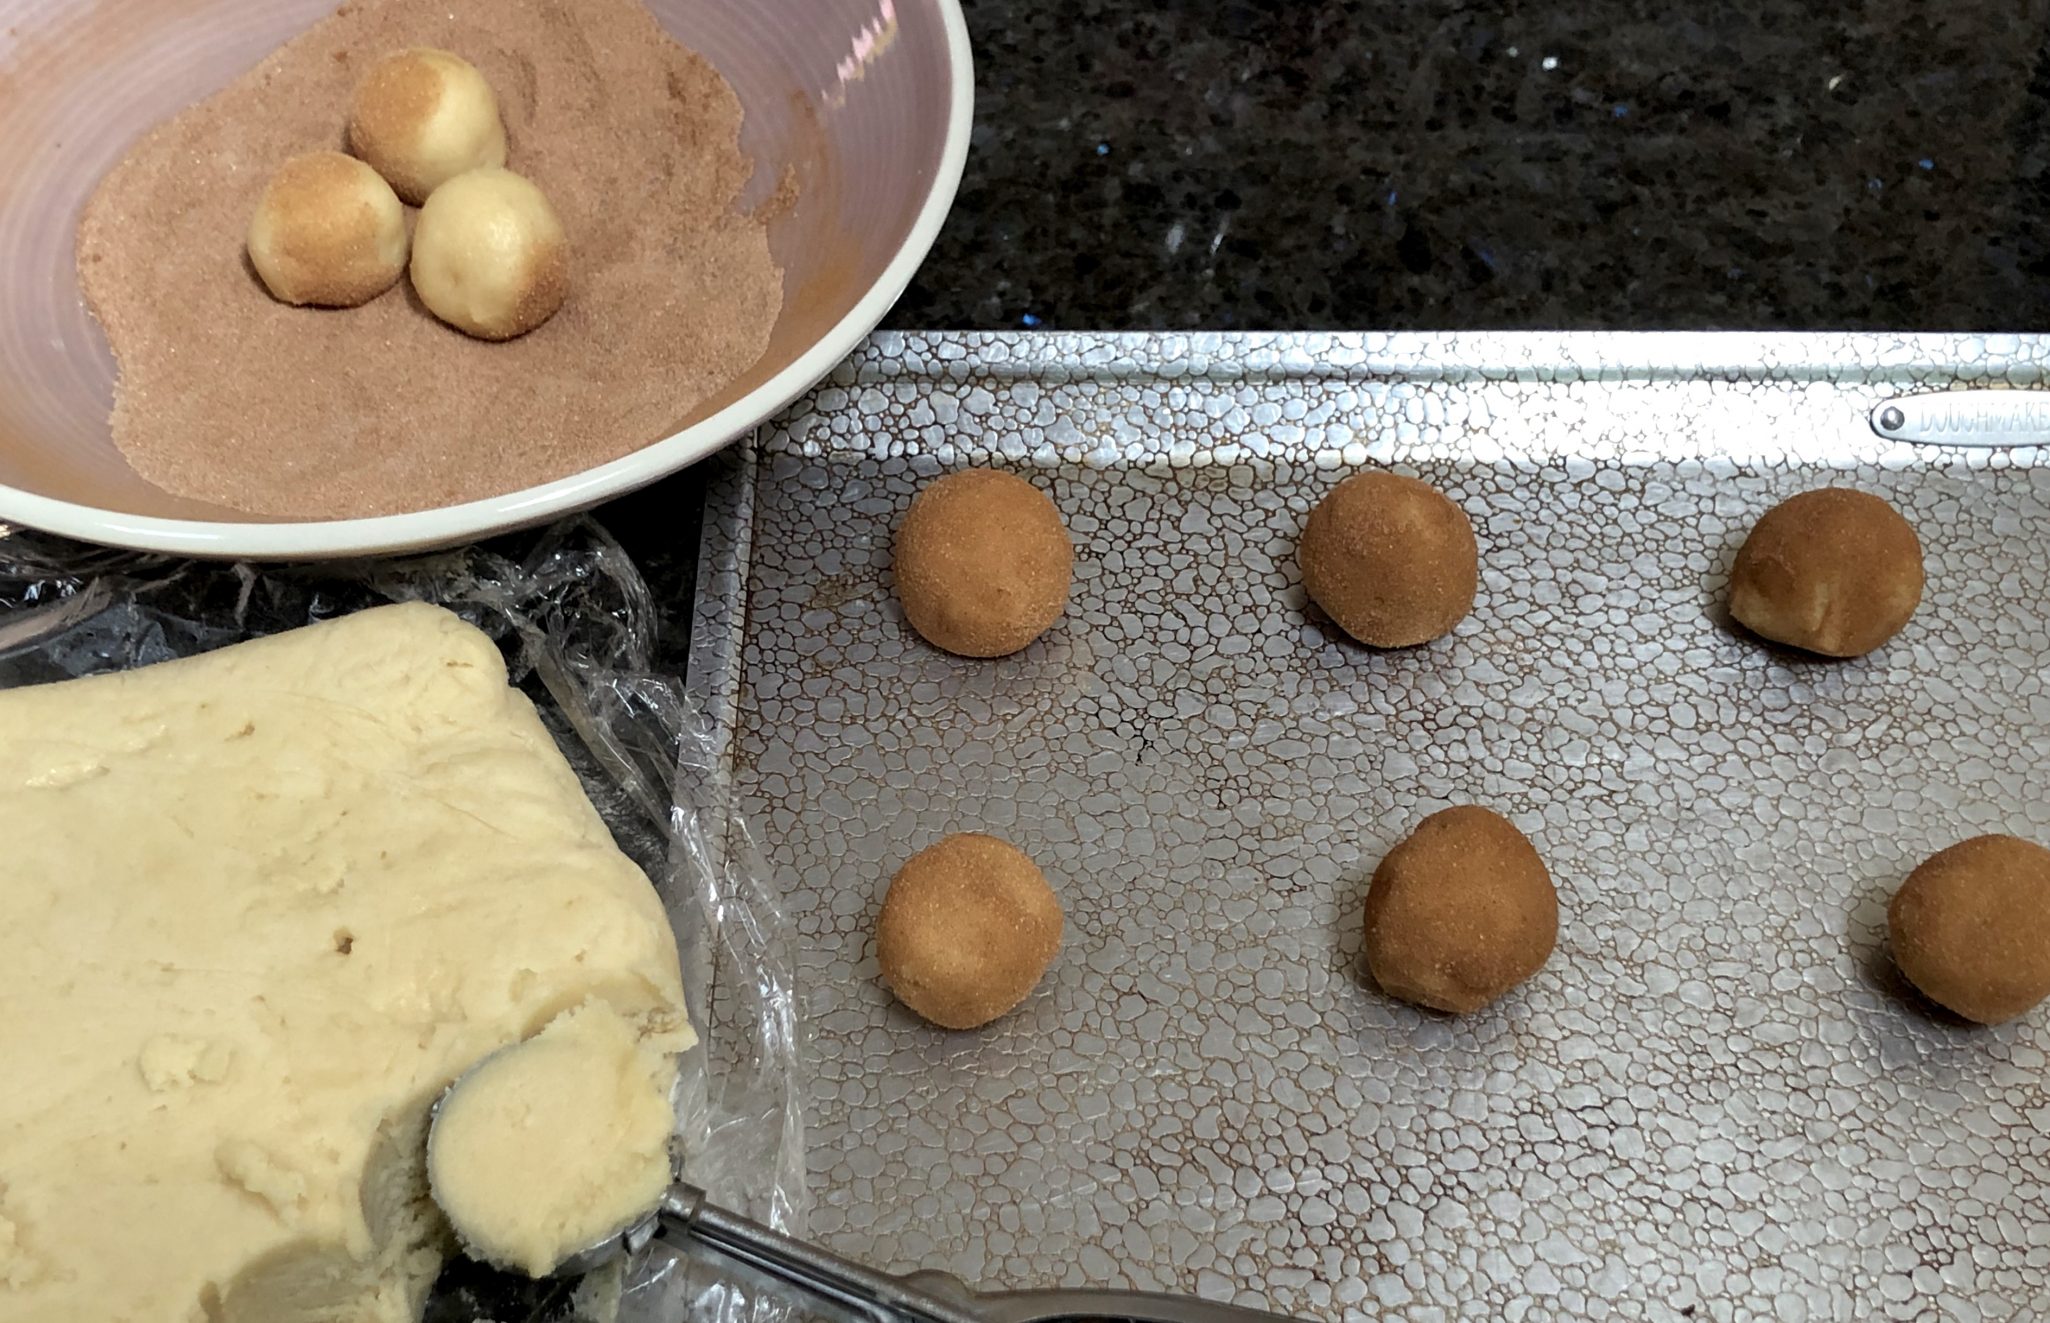
After chilling the dough,  use a 1 tablespoon ice cream scoop (#70) to form balls.  Shape the scoops into smooth balls and roll in cinnamon sugar.  Use a good quality cinnamon, like Penzey’s . This is a great cookie to make with the kids or grandkids, never met a kid that didn’t like to roll balls of cookie dough in copious amounts of cinnamon sugar all the while licking their fingers.

The one tablespoon scoop yields a cookie about 2 inch in diameter.  All well and good, BUT, the smaller you make the cookie the harder it is to end up with a cookie that has crisp edges and a soft center.  If that is what you are looking for, try making bigger cookies. Increase your baking time by a couple of minutes.

Bake cookies 8-10 minutes until the edges are golden brown.  I like the centers soft, if you like crunchy cookies, bake them a bit longer.  How long?  Don’t know, I don’t like them that way.

Snicker Doodles

Course cookies
Cuisine American
Keyword Snickerdoodles
Prep Time 20 minutes
Cook Time 10 minutes

Equipment

  • Cookie sheets, lined with parchment paper or greased

Ingredients

  • 3 cups unbleached all-purpose flour (13.5 ounces)
  • 2 teaspoons cream of tartar
  • 1 teaspoon baking soda
  • ½ teaspoon salt
  • ½ pound unsalted butter, softened (2 sticks)
  • cups sugar 10.5 ounces
  • 2 large eggs
  • 2 teaspoons ground cinnamon
  • 2 tablespoons granulated sugar

Instructions

  • Preheat the oven to 400° Position rack in the middle of the oven.
  • Combine the flour, cream of tartar, baking soda, and salt in a bowl and mix thoroughly with a whisk or fork.
  • In a medium mixing bowl with an electric mixer, beat the butter with the 1½ cups sugar until smooth and creamy, not fluffy. Beat in the eggs just until blended. Add the flour mixture and stir or beat on low speed just until incorporated. Gather the dough into a disc and wrap in plastic wrap. Refrigerate until firm, at least 30 minutes.
  • Mix the remaining 2 tablespoons sugar and the cinnamon in a small bowl. Form level tablespoons of dough with an ice cream scoop, into 1-inch balls. Roll the balls in the cinnamon sugar and place 2 inches apart on the lined or ungreased cookie sheets.
  • Bake for 8 to 11 minutes, until the cookies puff and begin to settle down. To create crevices, when cookies puff, tap cookie sheet on rack. This causes the cookie to sink, creating crinkles. Rotate the cookie sheet from front to back halfway through the baking time to ensure even baking. Bake until the edges are golden. Remove from oven and allow to cool for a couple of minutes. Remove cookies with a spatula to a wire rack. Don't let them cool completely or the cookies will stick to the sheet. I bake on ungreased sheets to minimize spreading.
  • Cool the cookies completely before stacking or storing. May be kept in an airtight container for several days.
Peanut Butter Mochi, that’s my Jam

Peanut Butter Mochi, that’s my Jam

My cookbook addiction continues unabated. One of my new favorites is A Common Table by Cynthia Chen McTernan.  It’s a beautiful cookbook filled with not only mouthwatering photographs of her food but wonderful stories about her family and friends. Her recipes are approachable and her writing inviting.  In contrast to the cookbooks of yesteryear, today’s cookbooks, like A Common Table, breathe life, warmth, and a personal connection into each recipe.  It makes me want to call my Mom, my kids, my aunties and uncles and say, “Hey, come on over we gonna cook, eat, and talk story”.

Have You Eaten Yet? (code for I ❤️ you)

This is not a cookbook that strives to teach one to cook, it’s more like a series of love letters, first and foremost to her family and friends, and then to all of us.  Her soulful, homey food reflects her southern upbringing, her Chinese heritage, her hubby’s Hawaiian-Korean-Irish roots, and their lives together. These are recipes I imagine are passed down from grandmother to mother and mother to daughter.  Each generation adding its own personal stamp.

Two Red Bowls is Cynthia’s blog, ground zero for her food and family tales.  She has managed to juggle a toddler, a newborn, a blog, and a book, no small feat.  Wow!

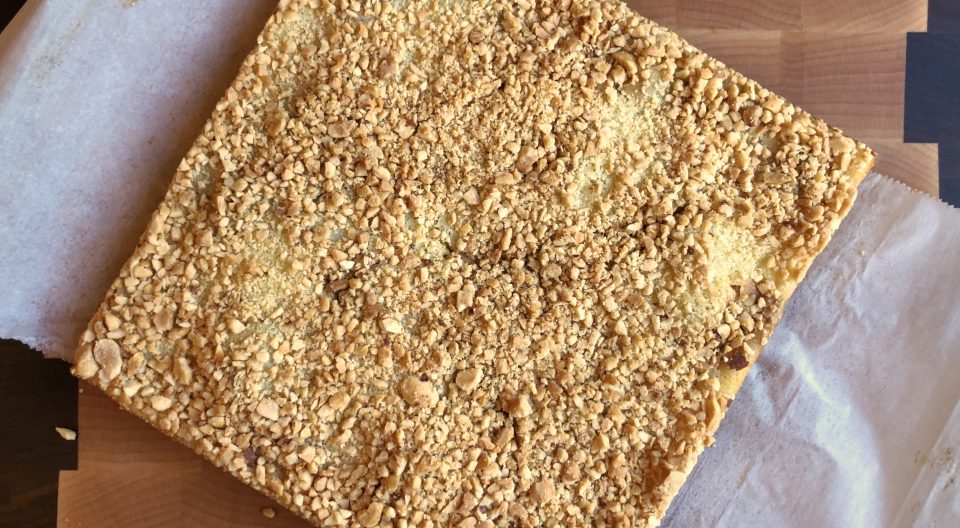
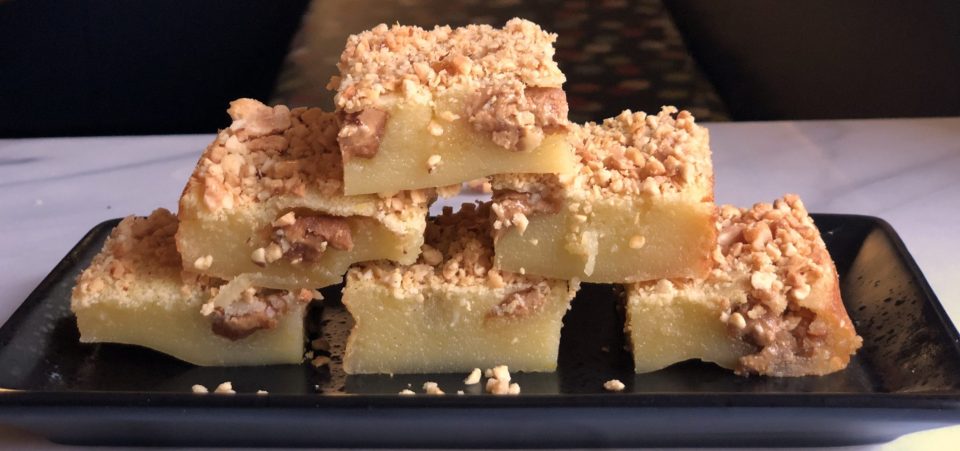
Onto her delicious food.  Needing a gluten-free dessert to bring to a potluck, I instantly thought of the peanut butter mochi in her book.  Mochi, made of glutinous rice flour, is chewy, dense, and all the craze right now.  Imagine a marshmallow but dense, chewy, and only slightly sweet. Mallows on roids.  To top it off, soooo easy to make.  Literally, one bowl plus a wooden spoon. The addition of peanut butter brings a familiar flavor and texture to the mochi, a great intro for the uninitiated.  Did I mention GLUTEN FREE?

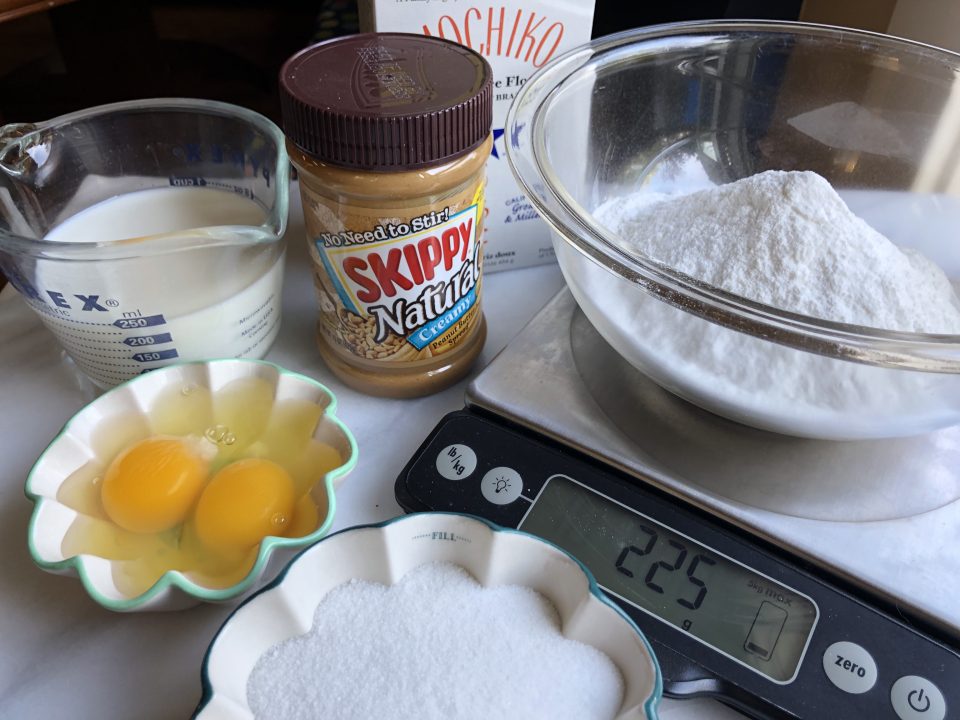
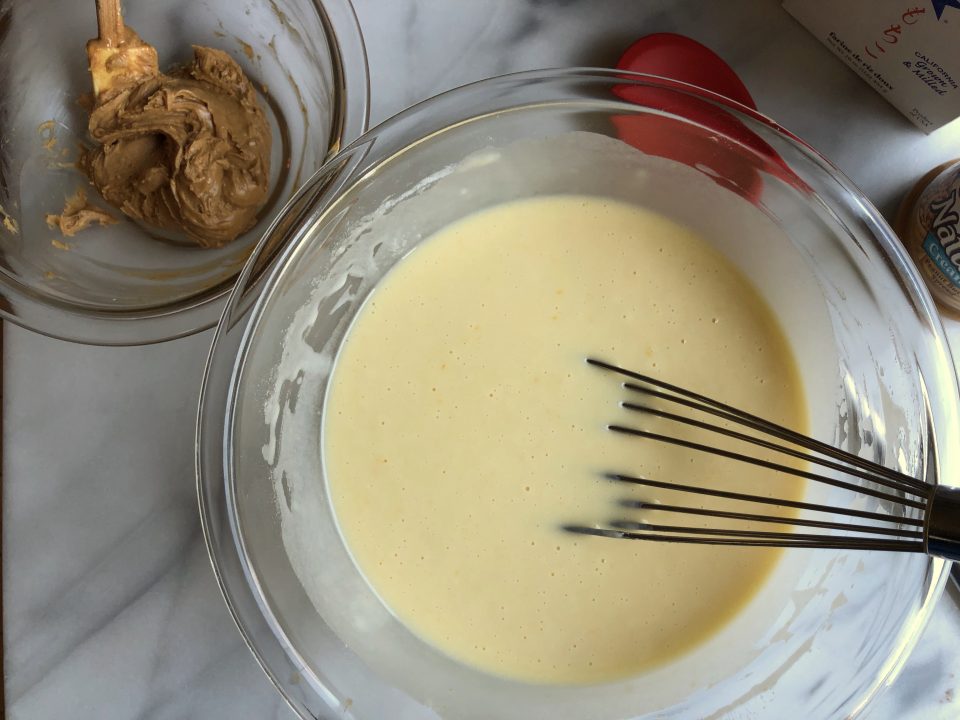
The gold standard for rice flour and readily available is Koda Farms Blue Star Mochiko.  Ground into a fine powder, it blends quickly and is easy to work with. Throw the flour, sugar, eggs, and milk in a bowl.  Stir, don’t worry about overmixing (no gluten), pour, and bake.  The batter will resemble a thick, elastic pancake batter.

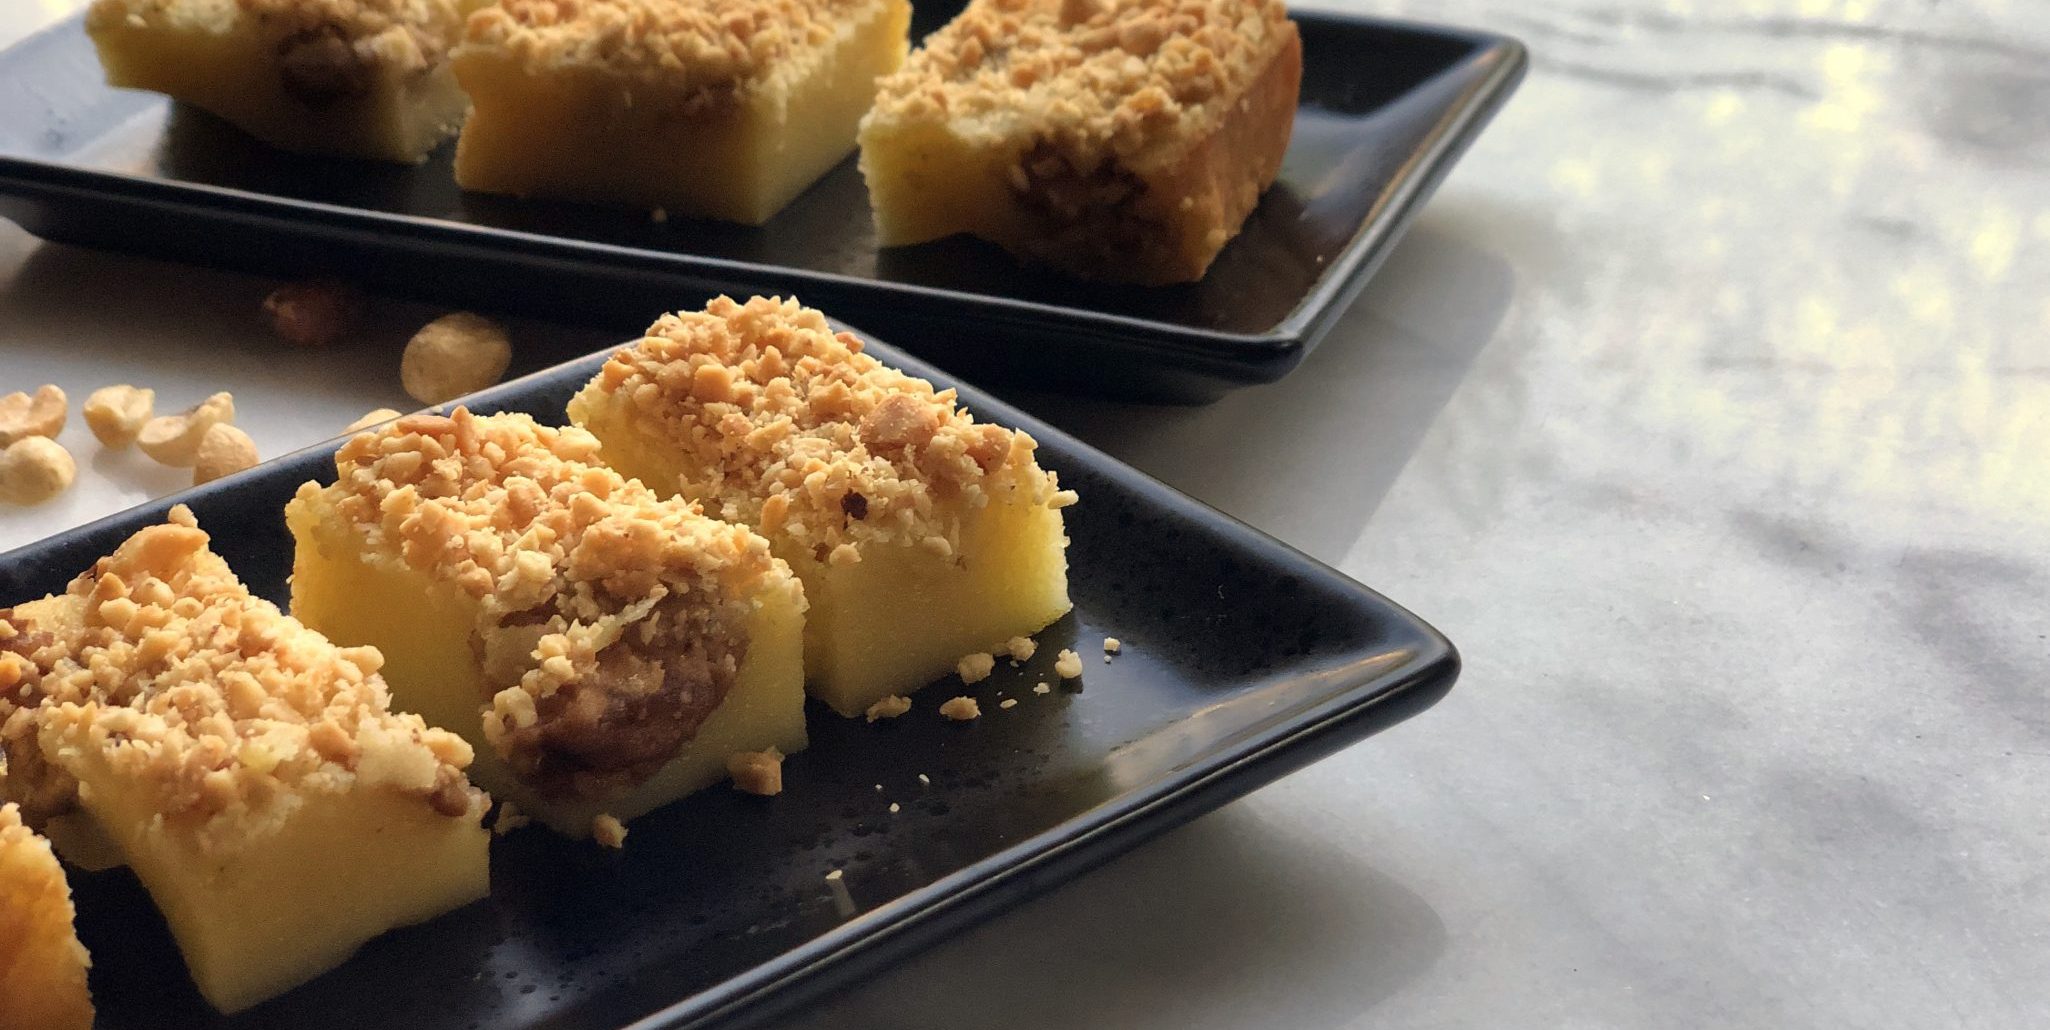
Plop the peanut butter evenly into the batter so that everyone gets a bite of peanut butter, and then it’s oven time.  Midway through baking, sprinkle crushed peanuts on top.  Next time I am thinking of using honey-roasted peanuts, to really accentuate the play on sweet and salty.  The batter will puff while baking, not to worry, it will flatten as the mochi is cooling.

Once it has cooled a bit, dig in, warm mochi is yummy.  I cut mine into squares and then further divided half of the squares into rectangular bars.  Just so delicious, the combo of chewy mochi, pockets of oozy soft peanut butter, and the crunchy peanut topping-the trifecta of yum.  It’s hard to resist and eat just one. It’s dense in texture and calories but so worth it!

I think you could make this milk-free by using coconut milk in place of milk. I have yet to try it.  Andrea Nguyen, Asian cookbook author extraordinaire created a riff by adding black sesame paste, Black Sesame Peanut Butter Mochi, which looks delish, I am so going to make her version soon.

Peanut Butter Mochi
Print Pin
5 from 2 votes

Peanut Butter Mochi

Gluten free and delicious.  Made with sweet rice flour a dense, chewy, a totally addicting treat! A quick and easy recipe!
Course Dessert, Snack
Cuisine Asian, Asian-American
Keyword Mochi, peanut butter, sweet rice flour
Prep Time 10 minutes
Cook Time 50 minutes
Total Time 1 hour
Servings 16 Servings

Ingredients

Filling

  • 6 Tbsp Peanut butter Natural, creamy or chunky
  • 2 Tbsp Powdered sugar

Cake

  • 1-1/2 Cups Sweet rice flour 225gm
  • 3/4 Cup Granulated sugar
  • 1/8 Tsp Salt
  • 1 Cup Whole milk
  • 1/2 Cup Vegetable oil
  • 2 Eggs
  • 1 Tsp Vanilla
  • 1/2 Cup Roasted peanuts Or substitute honey roasted peanuts
  • 1 Tbsp Brown sugar Optional, to be added to plain roasted peanuts,

Instructions

  • For the peanut butter filling, whisk together the peanut butter and confectioner’s sugar until smooth. Set aside.
  • Preheat the oven to 350F. Line an 8-inch square baking dish with parchment paper, letting the paper go up the sides so you can easily lift the cake out later on.
  • In a medium bowl, combine the sweet rice flour, sugar, milk, oil, eggs, and vanilla, whisk until smooth. Don’t worry about overworking the batter when making the cake, sweet rice flour is GLUTEN FREE.
  • Pour half the batter into the prepared baking dish. Used 2 small spoons or small teaspoon ice cream scoop to drop spoonfuls of the filling evenly across the batter, then pour the remaining batter over the filling. Bake, uncovered, for 20 minutes.
  • While the mochi is baking, place the peanuts in a food processor or blender and pulse until finely chopped. Remove the mochi cake from the oven, sprinkle of the crushed peanuts across the top. The cake maybe puffy so spread nuts as evenly as you can. The cake will fall as it cools.  
  • Return the cake to the oven and bake until the center bounces back when pressed, an additional 15 to 20 minutes. Let cool about 20 minutes before trying to lift the parchment paper to remove the cake from the pan. 
  • Enjoy warm or at room temperature. The mochi slices cleanly when cool, but is delish warm.
  • Store in an airtight container and keep at room temp if cool, or refrigerate. Microwave pieces on high with 15-second blasts to refresh.
Keep Calm and Salmon On

Keep Calm and Salmon On

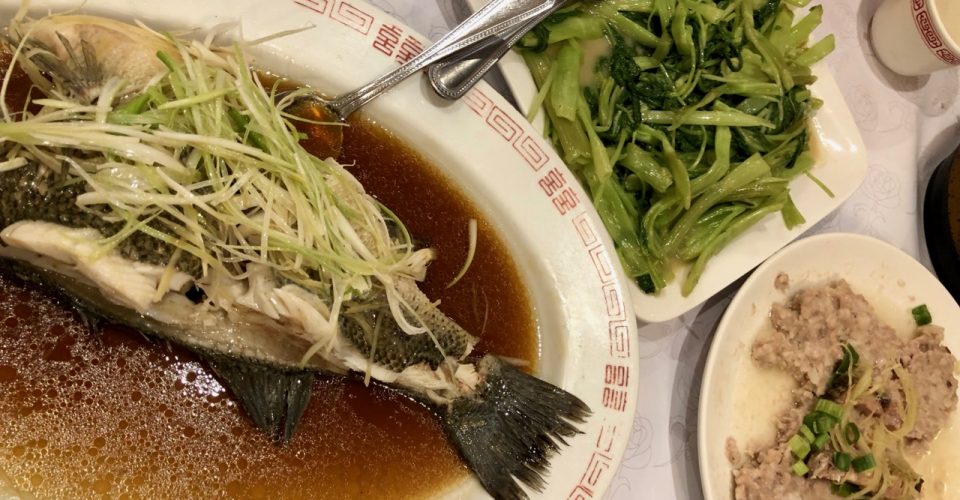
Growing up, most meals included at least one seafood dish.  Steamed rock cod with ginger and scallions, flounder with brown bean sauce sitting on a bed of tofu or stir-fried prawns with tomato and garlic (SOUL FOOD).  My dad would finish work and then head out to the shops in Chinatown to find the fresh catch of the day.  The markets carried locally caught cod, bass, or flounder kept cold on a bed of ice. My dad checked the freshness by looking at the clarity of the eyes. Sometimes he opted for live fish, crab, or shrimp from the tanks that lined the wall.  He peered into each tank before selecting the one he wanted. Once satisfied with his choice he would barter with the fishmonger for a good price.

So my exposure to seafood was two extremes

Freshly caught fish steamed and flavored with ginger, green onions, and cilantro. The sauce was pure heaven, an amalgamation of liquid created from the fish juices, soy sauce, and aromatics.  My brother and I fought over who could ladle the most sauce over their rice, a tradition my kids have continued.

On the flip side was Friday night frozen FISHSTICKS with catsup!  Date night for the folks meant dinner in front of the TV for my brother, my cousins and me.  I hate to admit it, but from the ages of 4-10, I probably liked the fish sticks more. Silly girl.

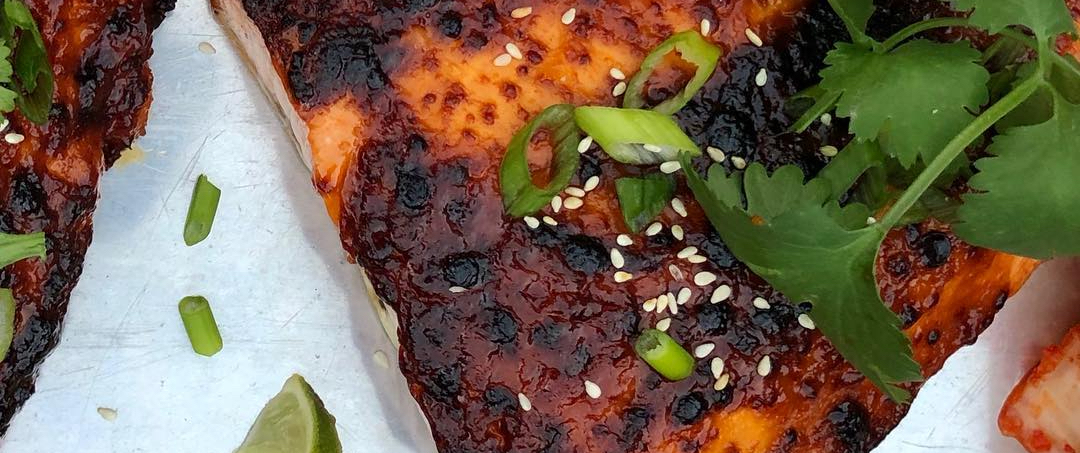
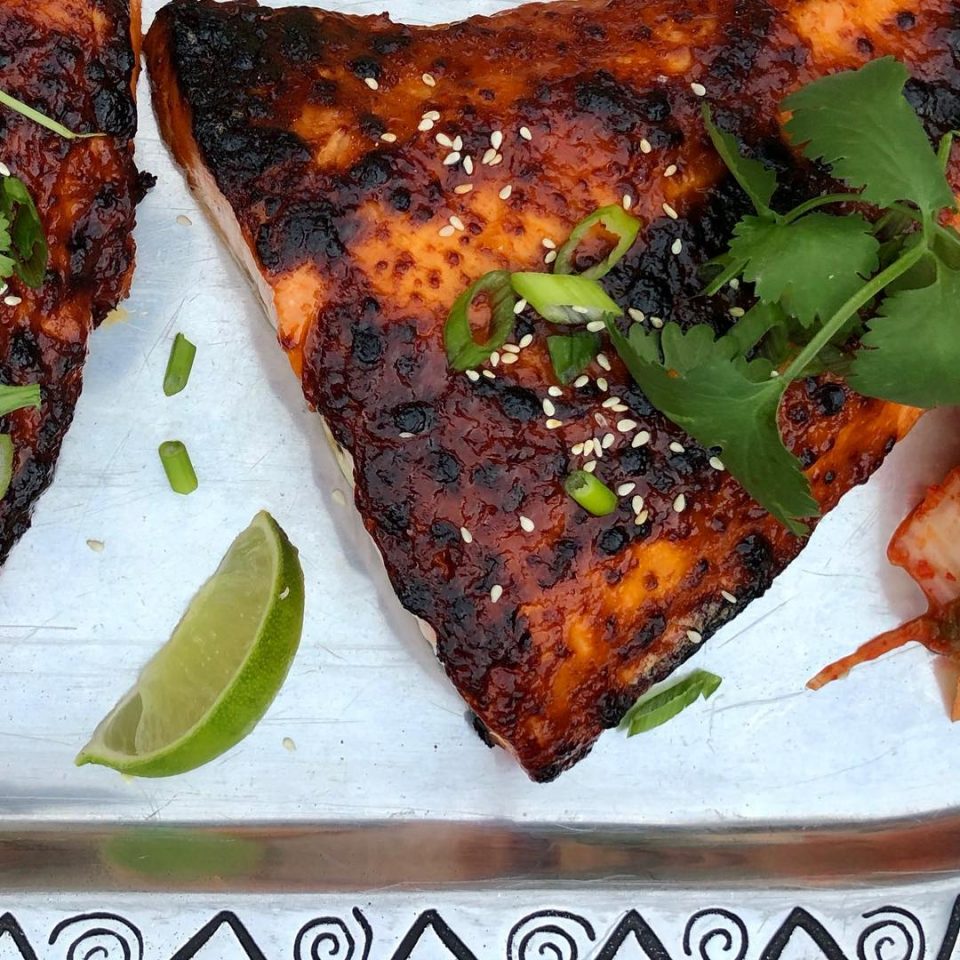
One fish not typically part of Asian cuisine is Salmon. I discovered salmon late in the game and ironically it’s the fish we prepare at home now more often than any other fish. I am always on the lookout for new and different recipes for salmon.  Whaddya know…from Everyday Korean Cookbook, one of my current favs (check out her site to preview a couple of recipes), I found the recipe, Roasted Salmon with Gochujang Mayo. The sauce, sweet from the mayonnaise, spicy from the Gochujang, and citrusy (is that a word?) from a squeeze of lime is pretty darn tasty.  The mayo comes together in a snap.  Slather it on the fish, pop it in the oven and finish it under the broiler.  So easy and so delicious.  It’s a keeper.  The recipe calls for the Japanese mayo, Kewpie, but you can make your own with Best Foods mayo.

From the Japanese cookbook, Just One Cookbook. Kewpie imposter recipe!

For 1 cup of American mayonnaise (like Best Foods), add 2 Tbsp rice vinegar and 1 Tbsp sugar. Whisk until the sugar dissolves. For 1 Tbsp of American mayonnaise, add 1/2 tsp rice vinegar and 1/8 tsp sugar.

That’s a WRAP

What is my favorite way to serve this salmon? Classic Korean style-bibb lettuce used as a wrap.  It’s the Asian version of a taco. I put a bite of rice or noodle, bit of kimchi, morsel of salmon and dab of chili sauce in the lettuce, wrap it, and eat the whole thing in one bite.  Hmmm…. Crispy cool lettuce, warm soft kernels of rice, spicy sweet salmon, salty, briny umami-packed kimchi topped with scallions, cilantro and lime.  A party in my mouth, sooooo good!

Next time you need a delicious marinade for your salmon, give this one a go!

Roasted Salmon with Gochujang Mayo adapted from Everyday Korean

Quick and tasty roasted salmon with spicy, sweet Gochujang Mayo. Perfect meal at the end of a long day.
Course Main Course
Cuisine Asian
Prep Time 10 minutes
Cook Time 20 minutes
Total Time 30 minutes

Ingredients

  • 1 1 1/2-to-2-pound wild salmon fillet (skin on is fine), pin bones removed
  • 2 tablespoons mayonnaise preferably Kewpie.
  • 2 tablespoons oyster sauce Lee Kum Kee-please
  • 1-2 teaspoons gochujang Korean red pepper paste
  • 1 teaspoon fresh grated ginger
  • 3-4 cloves garlic minced (~2 teaspoons)
  • 1 tablespoon fresh squeezed lemon lime, or tangerine
  • 1 Garnish scallions, cilantro, toasted sesame seeds, lime wedges,

For serving: Steamed rice, kimchi or sliced cucumbers and bibb lettuce leaves

Instructions

  • Place 1 oven rack on the highest level of oven and a second rack below. Heat oven to 475 degrees. Line sheet pan (shallow baking sheet) with aluminum foil; lightly grease foil with cooking spray.
  • Pat salmon dry with paper towels. Place fillets (skin-side down) on foil-lined baking sheets; set aside.
  • Mix together mayonnaise, oyster sauce, gochujang, ginger or garlic, lime juice in a small bowl. Brush or spoon sauce evenly over salmon.
  • Place baking sheet on second rack in oven, and roast 8 minutes, until sauce sizzles and begins to brown. Heat oven to broil. Place salmon on top rack of oven, and broil on high another 3 to 5 minutes, depending on thickness of fillet and desired doneness. 
  • Serve with bibb lettuce, rice and garnish, if desired, with toasted sesame seeds, sliced green onion, cilantro, lime wedges, kimchi, and/or cucumber slices.

Notes

Serve with bibb lettuce, rice and garnish, if desired, with toasted sesame seeds, sliced green onion, cilanto, lime wedges, kimchi, and/or cucumber slices.


Do You Really Want to Feed Me? Food52 Club Blueberry Cake with Almond & Cinnamon

Do You Really Want to Feed Me? Food52 Club Blueberry Cake with Almond & Cinnamon

For all you Boy George Fans, my title nod to the 80’s.  Have I mentioned the Food52 Cookbook Club?  I’m sure I have.  From the geniuses at Food52, a Facebook group that features a cookbook each month.  A cynic might say “what a great marketing idea!”.  Ok, it is, but it is actually a wonderful way to share insights and critiques on a book.  By the end of each month, you have a pretty darn good idea which recipes are winners and which are not so great or need some tweaking. Photos for each recipe and a comment or two posted by members…invaluable.  I literally have cookbooks I have never made a single thing from but when Food52 features it, I’m trying recipes from the book like a crazy person.

This month’s selection is Dining In by Alison Roman.  I had picked up a copy awhile back at a cute indie bookstore, Leigh’s Favorite Books in Sunnyvale.  Aside from one fantabulous cookie recipe (click on the link to find out which cookie, I’m so evil) I already have thanks to Bon Appetit’. I didn’t see anything I felt compelled to try.  I shoved the book on a shelf and forgot about it.

Until, of course, it became this month’s featured Food52 Cookbook Club book.

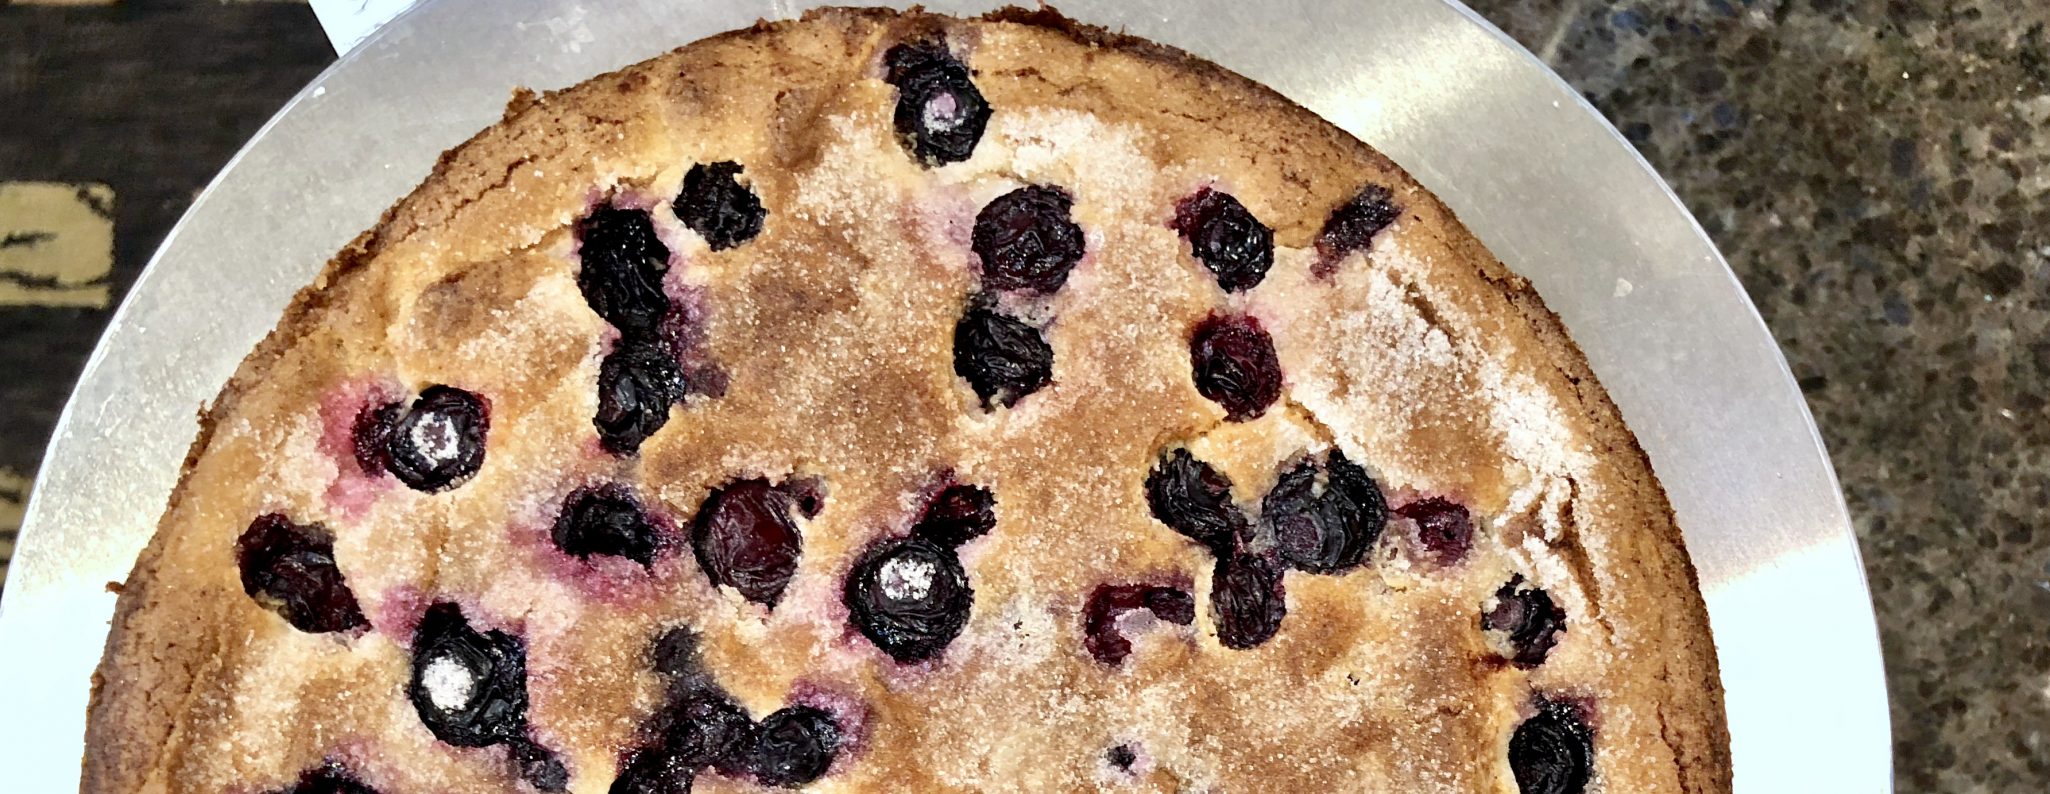
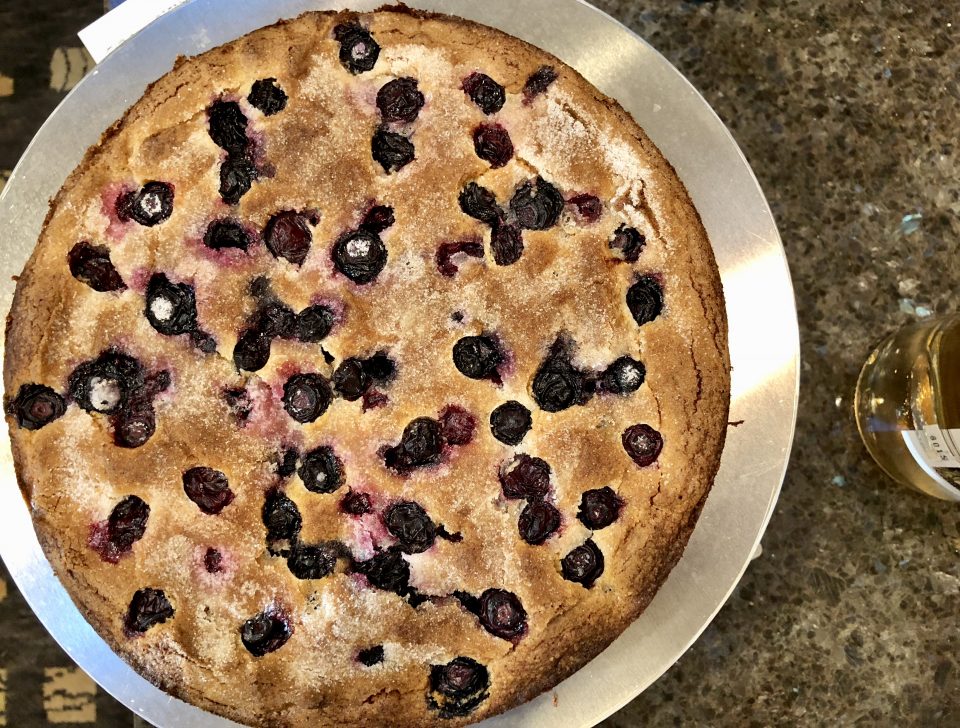
My pictures don’t do justice to this Blueberry Cake with Almond and Cinnamon, but the requests for the recipe had me expediting this post.  Made for a happy hour postcard writing session (democracy in action), this cake was the star of the evening. Make it now while sweet, plump, blueberries can still be found at the Farmer’s Market.

This cake is hands down delicious.  Buttery, tender, not too sweet with a nice crunch from the sprinkling of sugar on top and a hint of spice from the cinnamon.  Hmmm, it’s dreamy. The recipe calls for both almond flour and all-purpose flour.  Despite not having any liquid the cake is very tender, actually surprisingly so.  I’m thinking its the almond flour.  Costco has a nice, reasonably priced almond flour.  Whole Foods has Bob’s Red Mill, nice, not so reasonably priced.  Don’t confuse it with almond meal which is not ground fine enough.

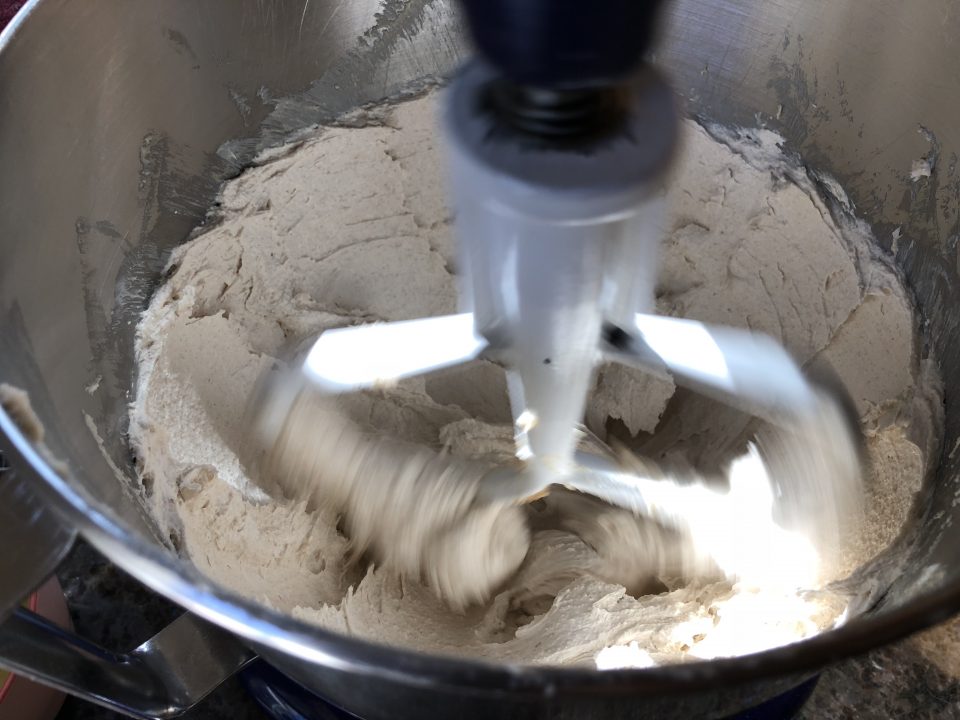
Another key to this recipe, beating the butter until it is nice and fluffy.  This aerates the batter adding to its tenderness.  I was surprised at how difficult it was to incorporate the flour mixture into the batter.  I dumped all of it in at once.  Next time I might try dividing the flour mixture and mixing it in a portion at a time.  The almond flour is a bit heavier than reg flour so use the fold method, like folding egg whites into a batter.  Don’t overdo it. The book has a teeny eeny mistake, it lists 2 cups of blueberries in the ingredients but calls for only 1-1/2 cups in the directions.  Just use 1-1/2 cups of berries, that’s plenty. If you are a blueberry-holic, toss the remaining 1/2 cup berries on top of the batter before sprinkling the sugar on top.

The cake does not rise significantly.  I baked it in a springform, but you could use a tart pan.  But in all honesty, I didn’t want to chance it…too many overflow experiences have caused me to be rather cautious.  I also tried a Honey Yogurt Pound Cake with Raspberries-yummy-ga-nummies. TBP (To be posted) soon.

So, get thee to the Farmer’s Market or grocers, buy some berries and bake this cake.  You’re welcome.  This book is not just a dessert book and judging by the posts on the Food52 page, I’ll be diving into the savory recipes soon.  I’ll get back to you when I do.

By the way, there is a Food52 Baking Club too, if you’re wondering…

Blueberry Cake with Almond and Cinnamon

Blueberry Cake with Almond and Cinnamon

Ingredients

  • Nonstick spray for the pan
  • 1 cup almond flour
  • ¾ cup all-purpose flour
  • 1 tsp baking powder
  • tsp ground cinnamon
  • ¾ tsp kosher salt
  • ¾ cup 1½ sticks unsalted butter, at room temperature
  • ½ cup light brown sugar
  • ¼ cup plus 3 tbsp granulated sugar
  • 2 large eggs
  • 1 tsp vanilla extract
  • 1 ½ cups blueberries

Instructions

  • Preheat the oven to 375°F. Spray a 9-inch fluted tart pan or round cake pan with nonstick spray.
  • Whisk together the almond flour, all-purpose flour, baking powder, cinnamon, and salt in a medium bowl.
  • Using an electric mixer, in a medium bowl, beat the butter, brown sugar, and ¼ cup of the granulated sugar together on medium-high speed until the mixture is super light and fluffy, 3 to 4 minutes.
  • Scrape down the sides of the bowl and with the mixer on medium, add the eggs one at a time, beating until each one is incorporated, followed by the vanilla. Increase the speed to medium-high and beat until the mixture is pale and nearly doubled in volume, 4 to 5 minutes. Fold in the almond mixture until no dry spots remain. Gently add 1½ cups of the blueberries by hand, making sure you don’t totally smush them.
  • Transfer the batter to the prepared tart pan and, using a spatula or the back of a spoon, smooth the top. Sprinkle the remaining 3 tablespoons granulated sugar on top and bake until the cake is deeply golden brown and pulls away from the edges slightly, 30 to 35 minutes. It should start to crackle a bit on top (what you’re looking for).
  • Remove from the oven and let cool completely before slicing.

Notes

The cake can be baked 4 days ahead, wrapped tightly in plastic wrap, and stored at room temperature.
Korean BBQ Flavor Shortcut

Korean BBQ Flavor Shortcut

Korean bbq comes to mind when summer rolls around and barbecue gets top billing. I love Korean barbecue especially Kalbi and Bulgogi. Kalbicross-cut or flanken-style beef ribs, are marinated in a garlicky soy sauce mixture flavored with sesame oil, green onions, sugar to sweeten and fresh ground pepper. The ribs are marinated for at least a couple of hours before they’re thrown on the grill. Cut crosswise (genius), they cook in minutes, a good thing since the aroma the sizzling meat and marinade as it caramelizes makes me hungry. Bulgogi, thin strips of meat, marinaded in a similar manner, is cooked on the grill, wrapped in lettuce along with a bite of rice, a bit of kimchi and dollop of gochujang and then quickly STUFFED in your mouth…hot, sweet, salty, crunchy..so good.  Party in my mouth.

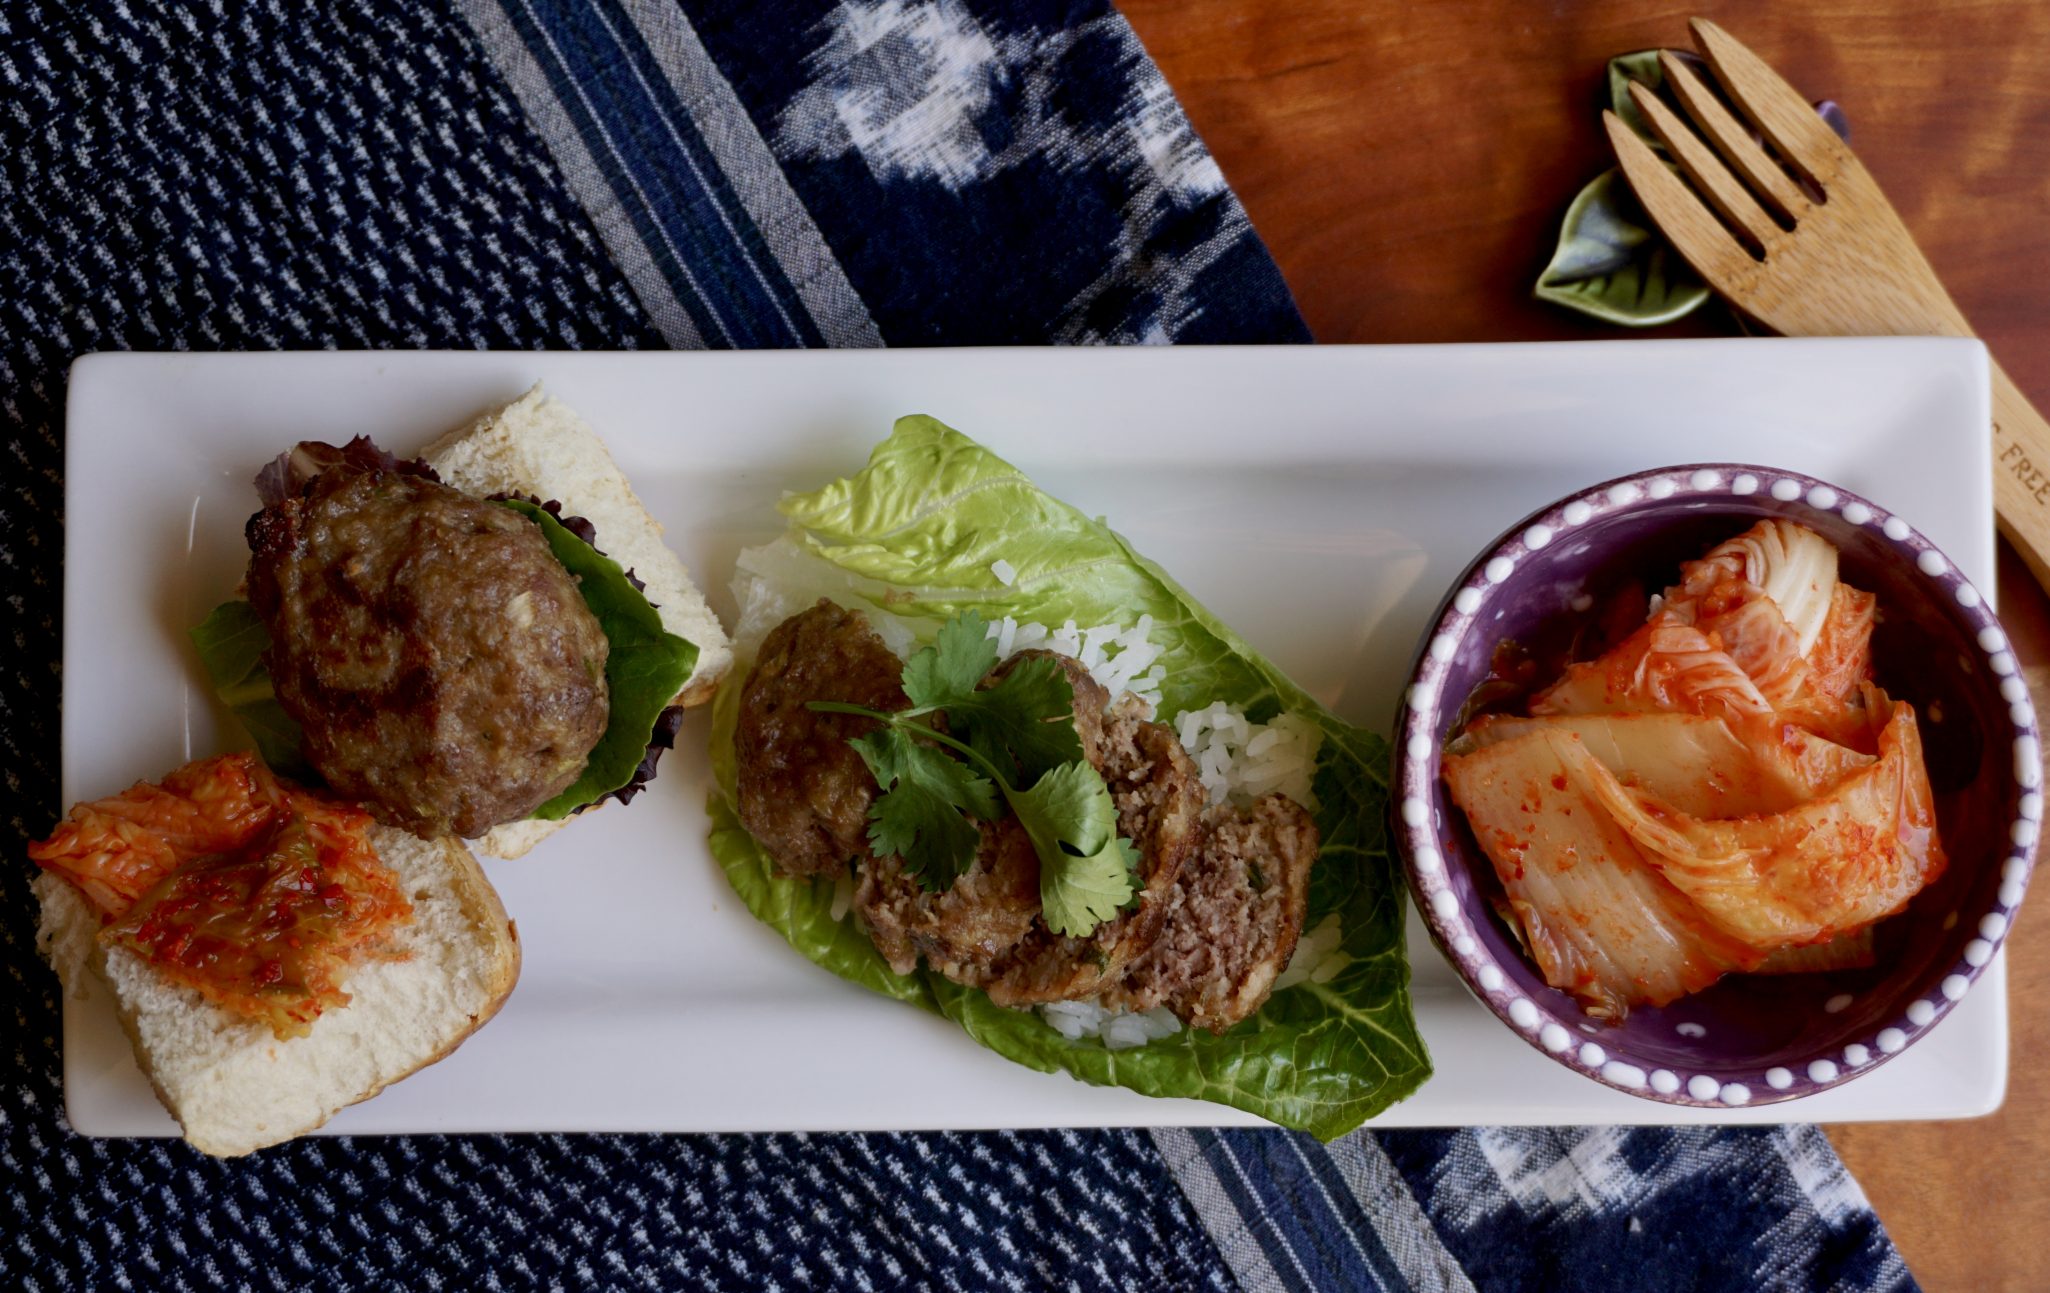
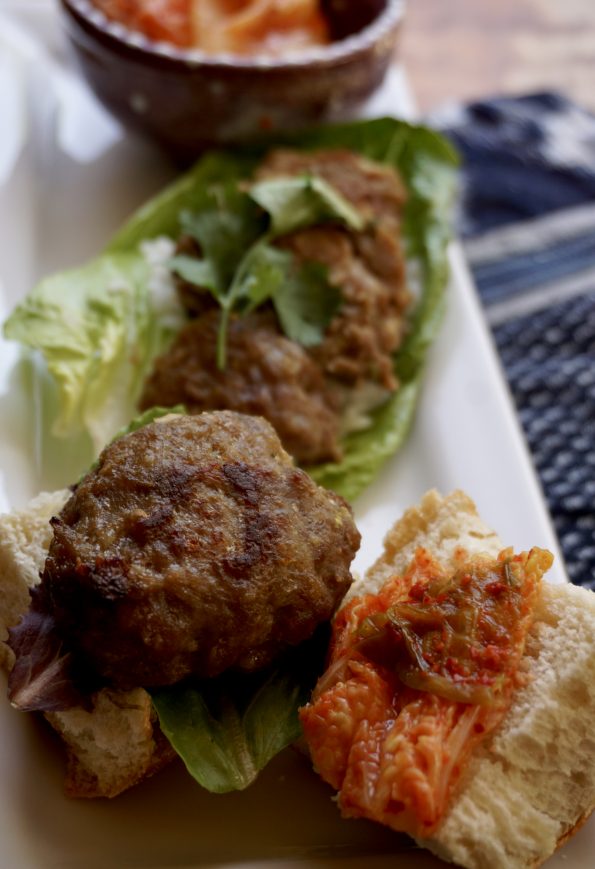
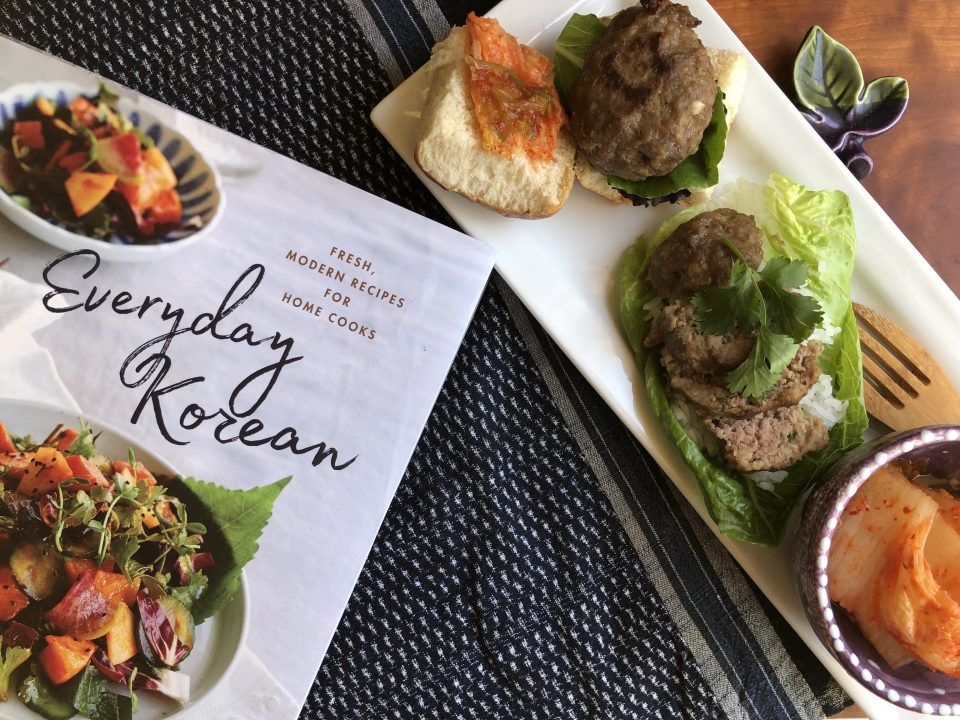
I came across a recipe for Bulgogi Meatballs, the perfect answer to when you are craving Korean bbq but don’t have the time to marinade the meat.  A combination of ground beef and pork seasoned like Bulgogi, then formed into meatballs and fried or baked is a spot-on stand-in for Korean bbq.  The Bulgogi meatballs can be served by themselves with various dipping sauces, wrapped in lettuce, served with rice or made into a slider topped with cheese and kimchi.  It’s simple, quick and delicious.

Bulgogi Meatball sliders

The recipe comes from Everyday Korean, yes, another cookbook I picked up recently.  Gorgeous photos and a fusion twist caught my eye.  A flatbread topped with a Gochujang Sour Cream and mozzarella will be my next foray in this book.  Intriguing, different. I’ll keep you posted.

bulgogi meatballs from Everyday korean

Beef Bulgogi Meatballs

This recipe, from Everyday Korean by Kim Sunée and Seung Hee Lee, is a tasty spin on a familiar dish. Shape these into meatballs and serve with the dipping sauces along with lettuce leaves or steamed rice. Or make them into sliders to serve on toasted mini buns with grated Cheddar cheese, mayonnaise and mustard.
Author Everyday Korean

Ingredients

  • ¼ cup low-sodium soy sauce
  • 3 Tbsp dark brown sugar
  • 3 Tbsp minced green onion
  • 2 Tbsp minced garlic
  • 2 Tbsp toasted sesame oil
  • 2 tsp fish sauce
  • ¾ tsp freshly ground black pepper
  • ¼ Asian pear or Bosc or Bartlett pear, grated
  • 1 ⁄3 cup panko breadcrumbs
  • 1 lb ground beef preferably chuck and short rib
  • 1 lb ground pork or veal
  • 1 large egg lightly beaten
  • Toasted sesame seeds for garnish (optional)

Ssamjang

  • ½ cup doenjang fermented soybean paste or miso
  • ¼ cup gochujang Korean fermented chile paste
  • 2 Tbsp sesame oil
  • 1 Tbsp sugar
  • 1 Tbsp rice vinegar or cider vinegar
  • 1 Tbsp minced garlic
  • 1 Tbsp minced green onion white parts only
  • 1 Tbsp minced jalapeño serrano chile stems and seeds removed (optional)

Soy Vinegar Dipping Sauce

  • ¼ cup low-sodium soy sauce
  • ¼ cup rice vinegar or cider vinegar
  • 1 Tbsp sugar
  • 1 Tbsp finely chopped green onion
  • 1 tsp gochugaru Korean red pepper flakes, optional
  • 1 tsp toasted sesame oil optional
  • Toasted sesame seeds for garnish (optional)

Instructions

To make meatballs::

  • In a large bowl, mix together first 8 ingredients. Add panko, ground meats and egg; mix just until combined (do not overmix). Cover; refrigerate 30 minutes and up to 2 hours.
  • Preheat oven to 425°F.
  • Form meat mixture into 40-50 mini meatballs or about 18 slider patties; place on a foil-lined baking sheet. Bake 18-20 minutes or until golden and cooked through but still tender and moist, turning the pan halfway through cooking time.
  • OR
  • Heat 1 tablespoon vegetable oil in a large pan over medium-high heat. Add meatballs or patties to pan, leaving space. Cook, shaking pan occasionally until meat begins to brown on one side (~3 minutes). Gently flip over and cook for another 3-4 minutes. Until just cooked thru.
  • Garnish with sesame seeds, if desired. Serve with Ssamjang and Soy-Vinegar Dipping Sauce.

To make Ssamjang::

  • In a small bowl, combine all ingredients. Refrigerate in an airtight container up to 2 weeks. Makes about 1 cup.

To make Soy-Vinegar Dipping Sauce:

  • In a medium bowl, combine soy sauce, vinegar, sugar, onion, and gochugaru and sesame oil, if desired. Sprinkle with toasted sesame seeds just before serving, if desired. Refrigerate in an airtight container in the refrigerator up to 3 days. Makes about ½ cup.
Gettin’ Jjigae with Anthony Bourdain (Korean Army Stew)

Gettin’ Jjigae with Anthony Bourdain (Korean Army Stew)

Ok.  Are you looking at the pic above and thinking WHAAAT?  Hot dogs? Spam? Kimchi? VanCamps BAKED Beans? ARE YOU KIDDING ME? It’s like Mom pulling things out of the fridge and the pantry to make dinner… in the 1960s.  But stay with me, these are actually the building blocks for Anthony Bourdain’s version of Budae Jjigae or Army Stew.  A crazy concoction created during the Korean War when food was scarce and the US Army PX was ground zero for processed foods like SPAM and hot dogs-cheap, available protein.  Combined with familiar Korean ingredients, a not so healthy but totally delicious, comforting stew was born.

budae jjigae ingredients

Anthony Bourdain’s mischevious side was in overdrive when he decided to make this dish for Anderson Cooper. He thoroughly enjoyed watching Anderson squirm as he popped open the can of SPAM, container of kimchi, hot dogs, rice cakes, plopped them in a pan and added a generous dollop of Gochujang or Korean pepper paste on top.  Anchovy stock is poured over this bed of deliciousness and set to simmer for 30 minutes. A pack of INSTANT RAMEN is added at the very end. Ten minutes later Bourdain was doing a happy dance while slurping his noodles. So was an amazed Anderson.  Catch the episode here, watch it, smile and remember his wicked sense of humor, his intellect and his ability to never take himself too seriously. Then go make your family a pot of Budae Jjigae to fill your tummy, warm your soul and comfort your heart.

budae jjigae

This dish is like that bad boy you were always crazy about in high school, knew you should stay away from but just couldn’t.  My favorite line in the clip is when he says to Anderson, “it seems so wrong but taste so right, like true love”. Budae Jjigae is right up my alley, processed meats, fermented vegetables, ground meats and instant ramen noodles, yum.  I grew up on baloney sandwiches on white bread, Fizzies as the fruit in my lunch, Spaghetti out of a can, thanks to Chef Boyardee, and Friday night Swanson’s TV dinners.  In college, I survived on instant ramen and Banquet frozen fried chicken.  Those were the days.

Just before serving, place a slice of American cheese right on top so it melts and oozes all over your ramen.  That literally takes it over the top.  Thank you, David Chang, for that addition.

Tips for your Budae Jjigae

Use Korean instant ramen, my favorite brand, Shin Ramen.  If you don’t make Budae Jjigae, at least try the instant noodles. Use the seasoning packet and up your ramen game with an egg cracked into your bowl of noodles (the soup will cook it) and topped with a Kraft single (uh-huh you all know what I am talking about, real cheese food).  You end up with a pretty fine bowl of totally unhealthy but ridiculously yummy noodles.  To appease your conscious add some veggies, corn, peas, kimchi or shredded lettuce.

If you can find it, use Vienna Sausages (those old enough know EXACTLY what I am talking about, mini hot dogs in a flip top can) in place of hot dogs.

Rice cakes (tokbokki) come either tubular or disc shape, either will work.  You can find them at Korean markets, along with kimchi, Gochujang and pepper flakes.

In place of anchovy stock you can use Japanese dashi or broth.

Have plenty of beer on hand to wash it all down and to toast the life of Mr. Bourdain.

Gettin’ JJigae with Anthony Bourdain (Korean Army Stew)

Ingredients

  • 1 dried shiitake mushroom
  • 4 large dried anchovies heads and guts removed, wrapped in cheesecloth
  • One 3 × 5-inch sheet dried edible kelp or konmbu Use Japanese dashi in place of anchovy stock
  • ½ teaspoon sea salt
  • 12 ounces SPAM cut into ½-inch- thick slices
  • cups Napa cabbage kimchi tongbaechu drain
  • 8 ounces sliced Korean rice cakes
  • 1 white onion peeled and thinly sliced
  • 2 scallions white and light green parts, thinly sliced
  • 5 garlic cloves peeled and crushed
  • 3 hot dogs thinly sliced
  • 6-8 ounces ground pork
  • 3 tablespoons soy sauce
  • 2 tablespoons gochujang Korean fermented chili paste
  • 3 tablespoons medium/fine gochugaru ground Korean red pepper he uses a dash only I used about a teaspoon, he did not come close to 3 T in the video...trust me start small
  • 3 tablespoons cheongju Korean rice wineor Chinese rice wine of Sake
  • 3 tablespoons canned baked beans
  • 1 package ramen noodles preferably the Korean brand Shin, seasoning packet discarded

Instructions

  • To make the anchovy broth, combine the mushroom, anchovies, kelp, 4 cups water, and the salt in a medium, heavy-bottom pot, and bring to a boil. Reduce to a simmer and cook for 30 minutes. Remove from the heat, strain and discard the solids, and set the broth aside.
  • Place the SPAM, kimchi, rice cakes, onion, scallions, garlic, hot dogs, and pork in small separate piles in a large shallow pot.
  • Add the soy sauce, gochujang, gochugaru, and cheongju to the pot, then slowly pour in the reserved anchovy kelp broth. Add the baked beans and 1½ cups water. Bring the contents to a steady simmer over high heat, stirring occasionally with a wooden spoon.
  • Cook for about 10 minutes, then add the ramen noodles. Ladle the broth over the noodles to help them break apart. Continue to cook for 2 or 3 minutes, until the noodles are cooked through but still chewy.