Category: Recipes

Recipes I’ve tried and sometimes modified that I think you should try!
Gettin Figgy Wit It (Fig & Honey Tart)

Gettin Figgy Wit It (Fig & Honey Tart)

I’m pretty jazzed, a friend is gifting me a fig tree!  She took a cutting, threw it in dirt and whaddya know, it grew into a full-fledged tree. I’m going to be really embarrassed if it doesn’t survive on my watch.  Farmer Deb is not a moniker associated with me.  
I am content to be the recipient of anyone else’s green thumb bounty.  This includes figs, which I adore. Until my little tree matures, I will happily take extra figs off your hands.  Put that right in the box, next to the “what am I going to do with all these” zucchinis and persimmons.  

Yep, bring it on.

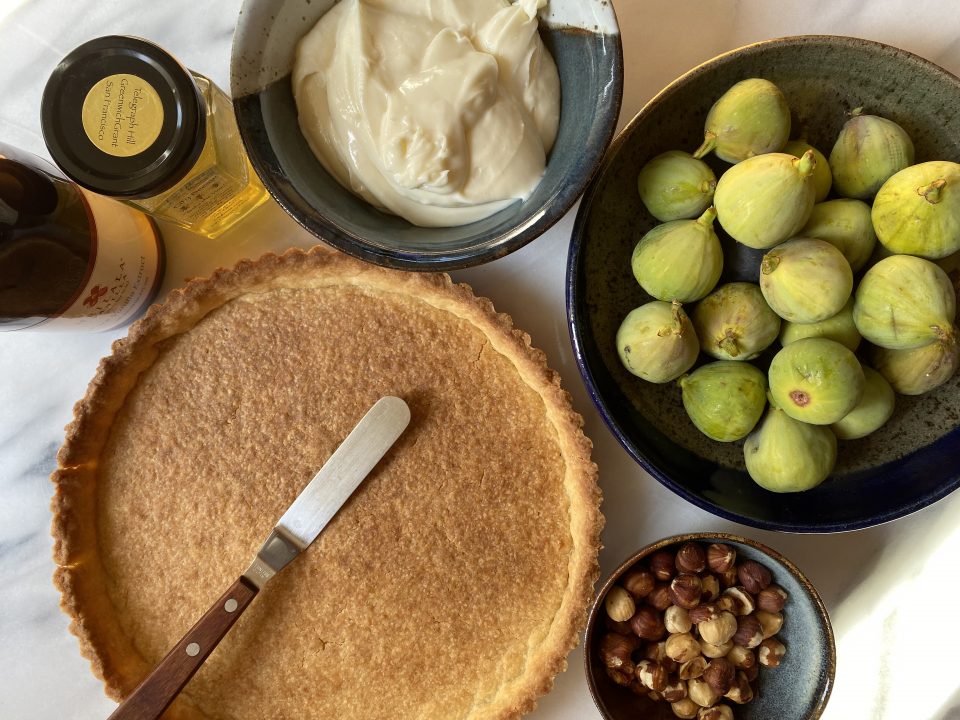
Lucky for me, Snookies brought me a couple of generously filled baskets of green and purple figs.  After popping a couple of them into my mouth (yum), I got online to FIG-ure out delicious ways to use these little bad boys.

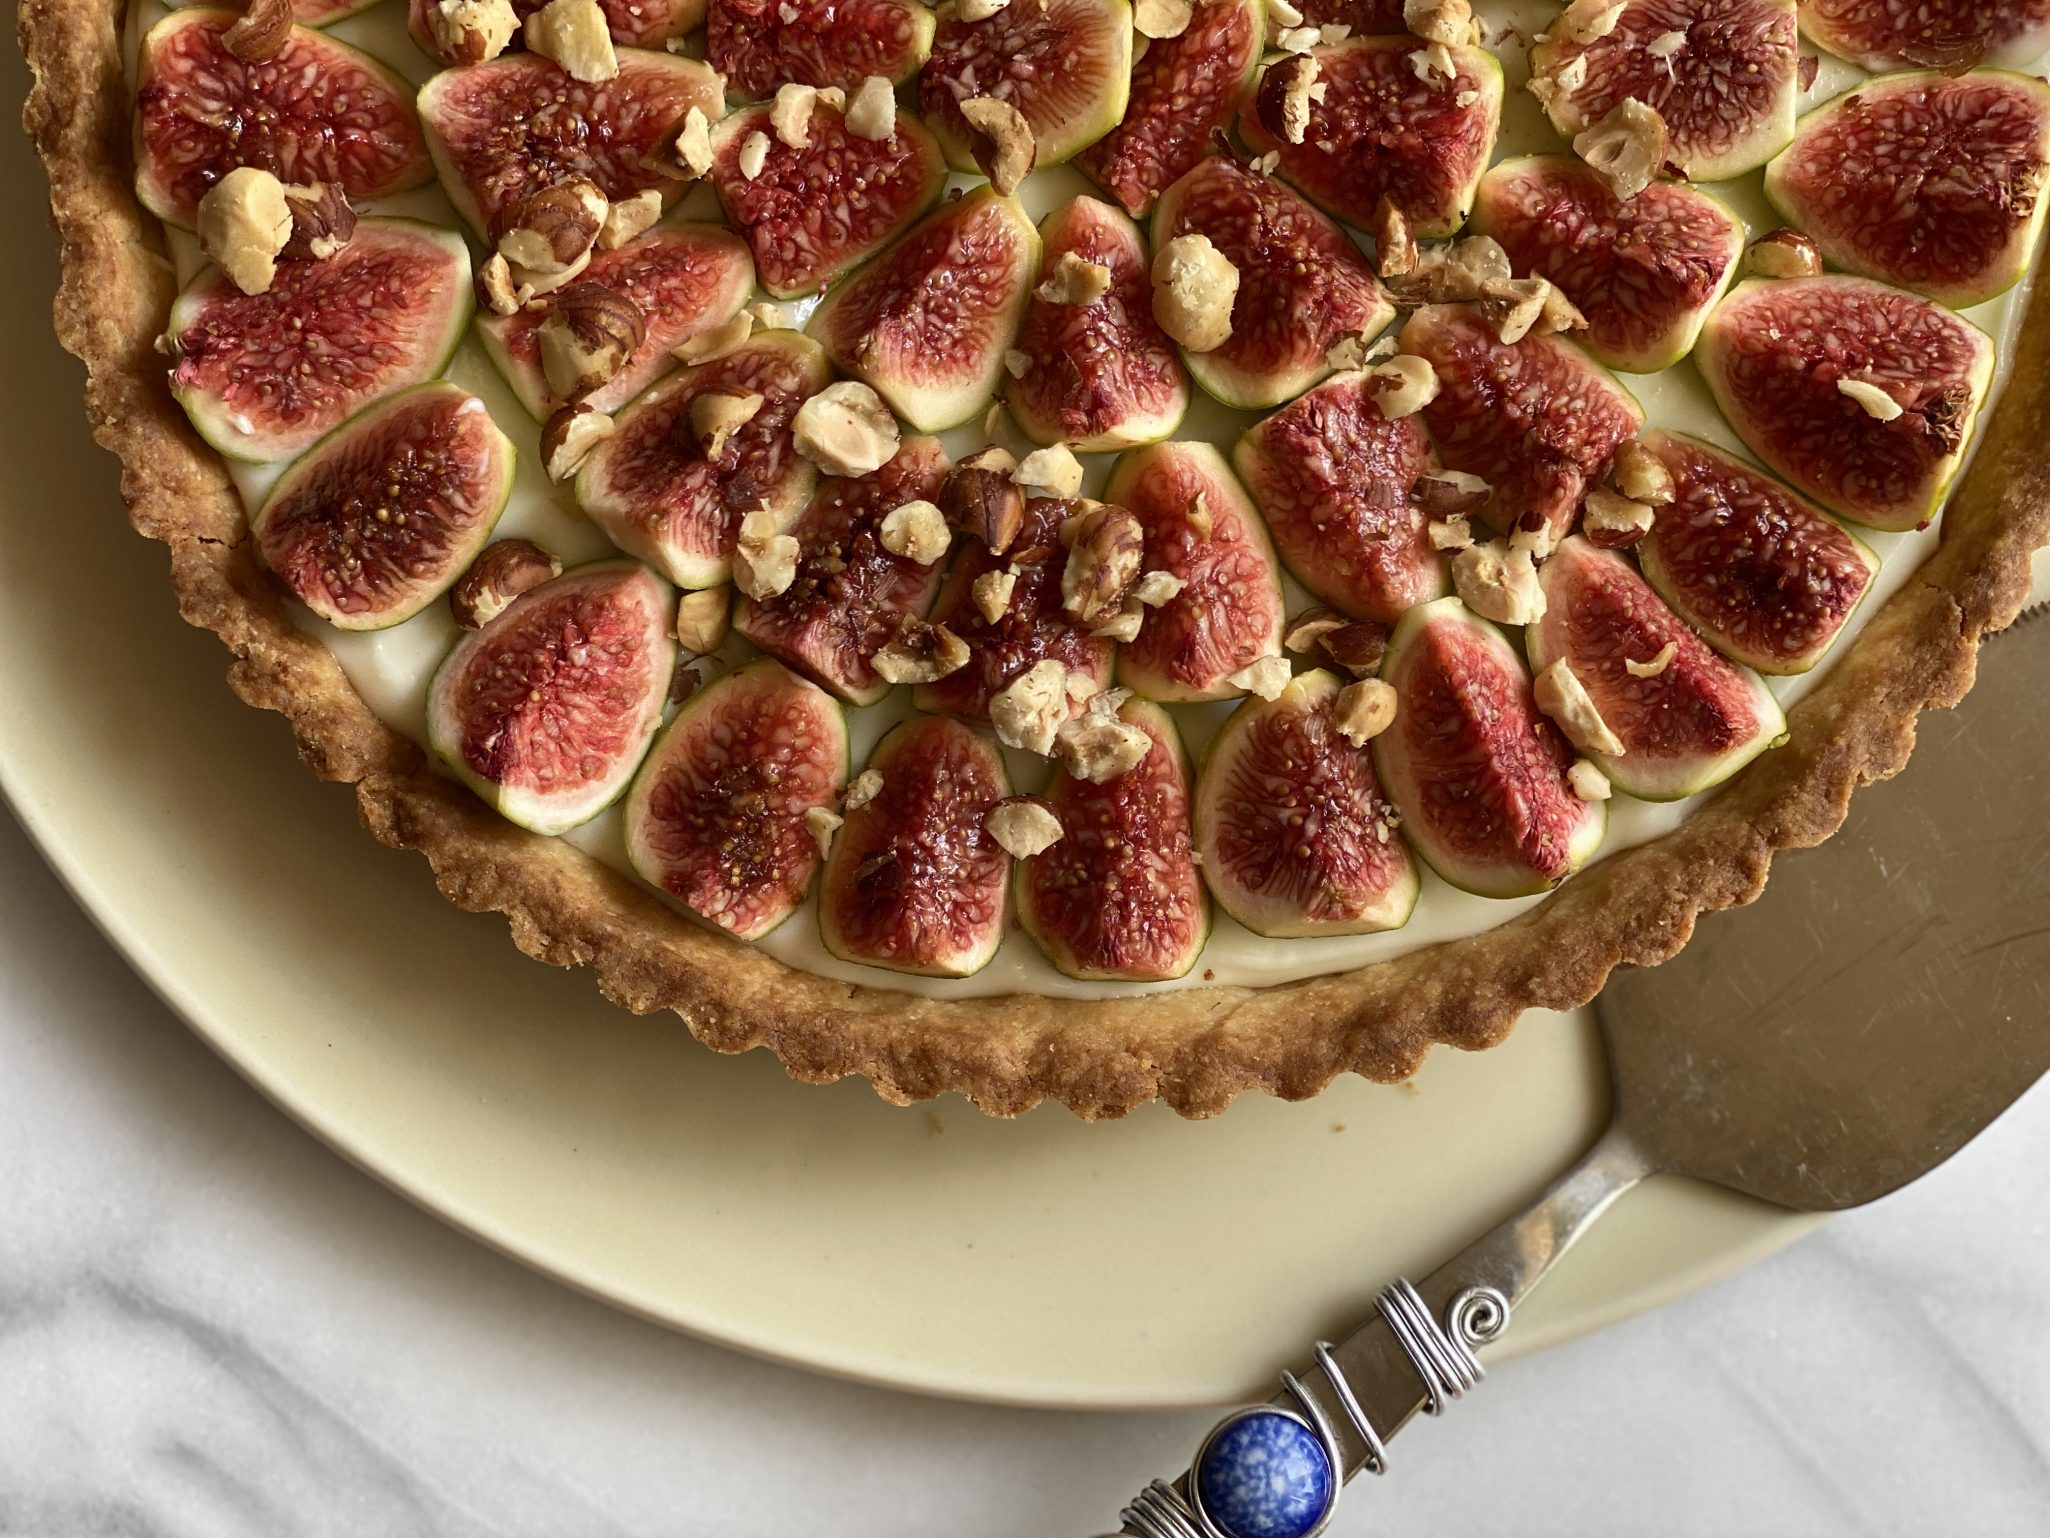
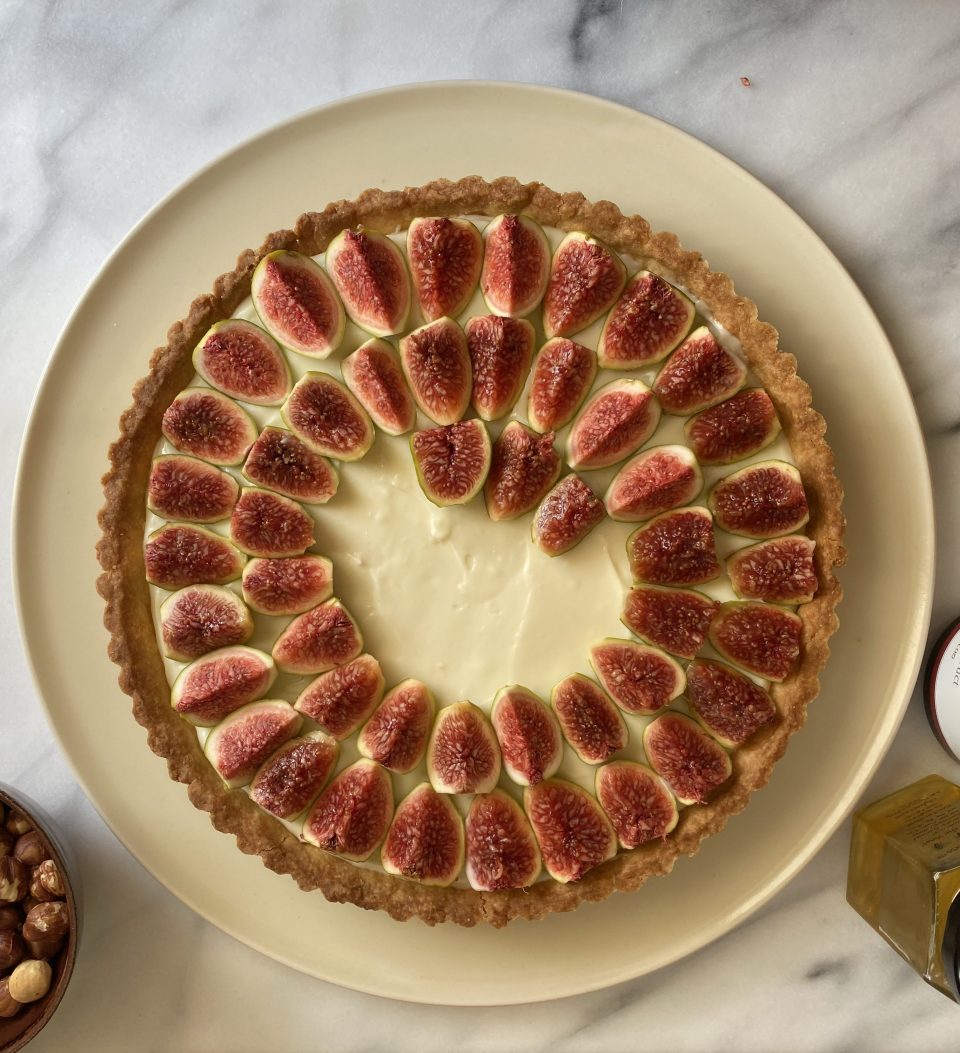
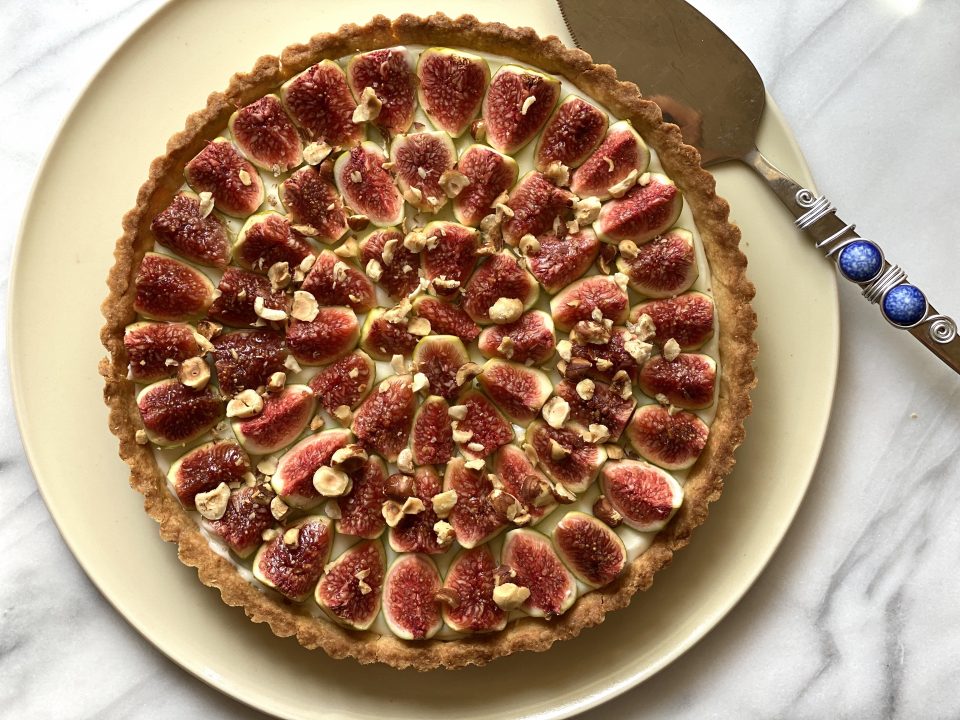
A Fig & Honey Tart from The Little Epicurean caught my eye instantly. The tart is as beautiful as it is delicious AND it is pretty darn easy to make.  Your friends and family will be SO impressed.  Word.

To start the crust is very easy to work with.  Don’t be intimidated by the whole pie crust thang.  The addition of almond flour and sugar creates a tender, cookie like crust that oozes with buttery goodness. A couple of interruptions had me taking the dough in and out of the fridge before finally fitting it into the tart pan and baking it off.  If the crust gets a little soft, toss it back in the fridge.  By the time I rolled out the dough and placed it in the pan, talked to Jamie on the phone for a bit,  it was getting pretty soft.  I ended up pressing pieces into the pan, worked like a charm.

The filling is stupid easy.  Combine cream cheese with honey and sugar, give it a good mix and that’s it.  I added a teaspoon of vanilla to add depth.  Quarter the figs and place in concentric circles on top of the filling.  Dust with raw or Demerara Sugar.  Go to the garage and grab your blow torch and caramelize the sugar.  Drizzle honey over tart and sprinkle chopped pistachios on top.  I used hazelnuts cuz that’s what I had on hand, Yums.

FRESH FIG TART WITH HONEY AND PISTACHIOS

Course Dessert
Cuisine American
Keyword fig, honey, little epicurean, tart

Ingredients

Crust

  • 1 cup all purpose flour
  • 1/3 cup almond flour
  • 1/2 tsp fine sea salt
  • 2 Tbsp granulated sugar
  • 1/2 cup unsalted butter cut into tablespoons, cold
  • 1 egg yolk cold

Filling

  • 8 oz package cream cheese
  • 1/2 cup granulated sugar
  • 2 Tbsp honey
  • green figs or purple figs quartered, as needed
  • 1 tsp Vanilla extract
  • Pistachios or toasted hazelnuts Chopped

Instructions

Crust

  • In a food process, combine flour, almond flour, salt, and sugar. Pulse to mix.
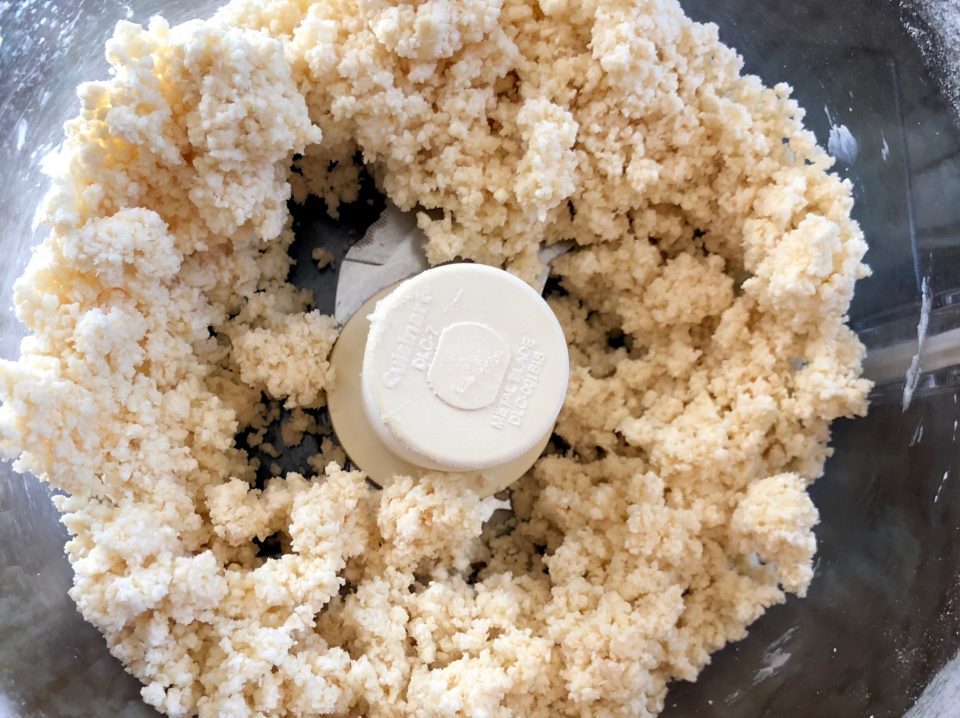
  • Add cold butter. Pulse 4 times at 3 second intervals to lightly mix together the ingredients. Add egg yolk and pulse until dough begins to come together.
  • Dump the dough onto a clean working surface. Gather the dough together and push into a ball. Flatten dough to about 1-inch thickness.
  • Wrap dough in plastic wrap and let chill in the fridge for 30 minutes, or until well chilled.
  • Preheat oven to 350 degrees F. Roll dough out on a lightly floured work surface. Press dough onto the bottom and up the sides of a 9-inch fluted tart pan with a removable bottom.
  • Bake for 25-30 minutes until golden brown. Let cool on wire rack to room temperature before filling with cream cheese.

Filling

  • Using a hand mixer or a stand mixer, beat cream cheese until smooth. Add sugar and honey. Mix until combined. Spread cream cheese filling into cooled tart shell.
  • Arrange cut figs on top of cream cheese filling. Cover with plastic wrap and keep chilled in the fridge until ready to serve.
  • Before serving, sprinkle with Demerara Sugar and caramelize.
  • Drizzle honey over tart and sprinkle nuts on top
Pecan Tartlets-The Perfect Little Nutty Bite

Pecan Tartlets-The Perfect Little Nutty Bite

We were invited to Rosh Hashanah dinner the other night and I volunteered to bring dessert.  It’s usually a no brainer since our host LOVES Lemon Bars.  But then I remembered I had promised to post Mrs. S’s Pecan Tartlet recipe.  The Lemon Bars would have to wait for another occasion.

Mrs. S, for all of you that have not read my Toffee Bars post (hint, hint), is my baking muse and mom of my BFF, Joy.  Every Christmas, since I met Joy in middle school, I have been the lucky recipient of a plate of Mrs. S’s holiday cookies.  They were delicious and beautiful.  She was meticulous and something of a control freak (I can SO relate) so she would shoo us out of the kitchen when she started her holiday baking.  Occasionally she would let us help with just the finishing touches, placing the pecan halves in her chocolate thumbprints or rolling her meltingly tender almond crescents in powdered sugar.  But mixing the cookie dough itself, nope, that was her domain.

My Favorites

Her Toffee Bars and Pecan Tartlets.  When I became interested in cooking and baking and not just eating, I asked for her cookie recipes and she was gracious enough to share them with me.  For Mrs. S making these cookies became second nature.  Details and how-to’s were committed to memory, not to paper.  Over the years I have figured out the little extra steps she took that elevated her cookies, especially her Pecan Tartlets, above the rest.  I’ve also added my tweaks to make the process easier and faster.

How-Tos:

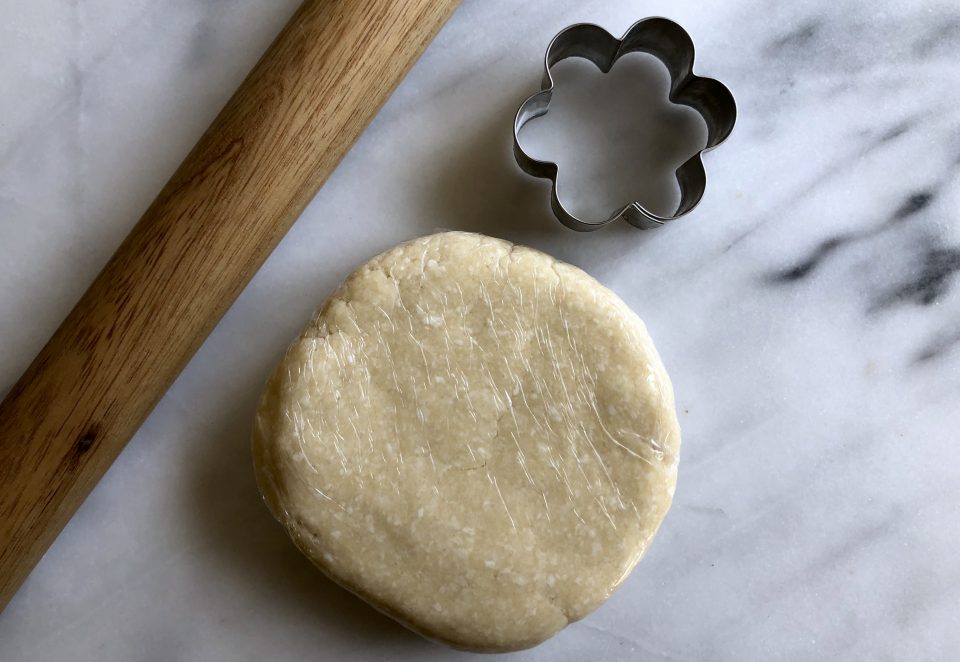
The tart crust is butter and cream cheese-based and similar to a cookie dough.  It does not include any liquids so it won’t shrink much.  I make the dough in a food processor, much like tart dough.  The dry ingredients are placed in the food processor bowl and pulsed a couple of times to combine.  The original recipe includes up to half a cup of sugar in the dough, way too much.  I often don’t add any sugar but if you like a sweeter crust, add a MAX of 1/4 cup.  Note that the more sugar you add, the quicker you will need to roll out the dough as the sugar makes the dough stickier and tougher to work with.  Add the butter and cream cheese and pulse until the dough just starts to clump.  Do not overprocess.  Gather the dough and chill for approximately 2 hours. 

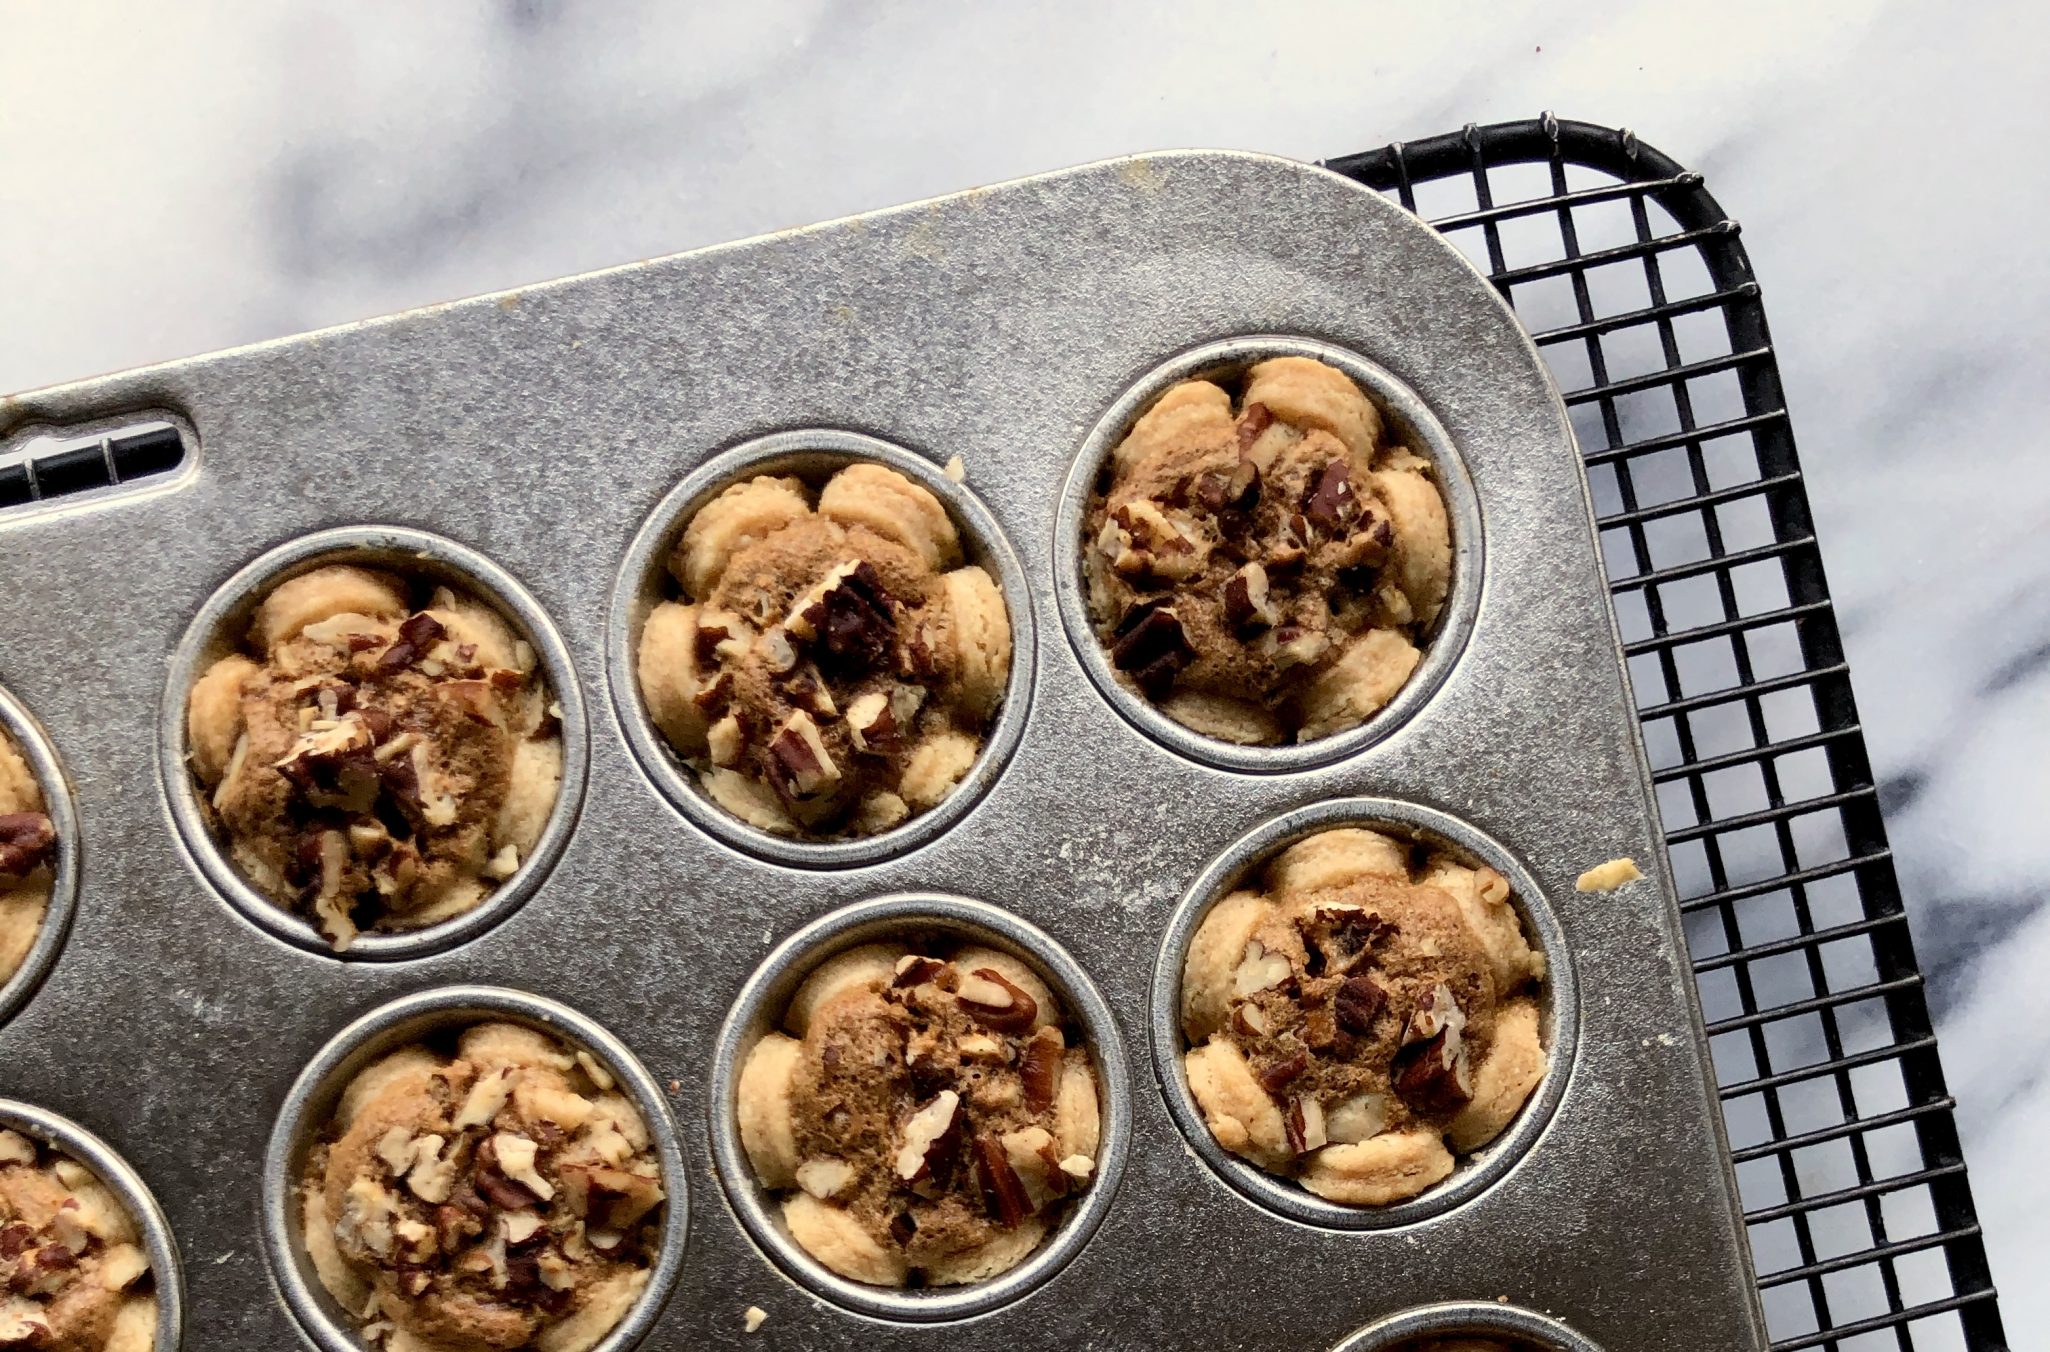
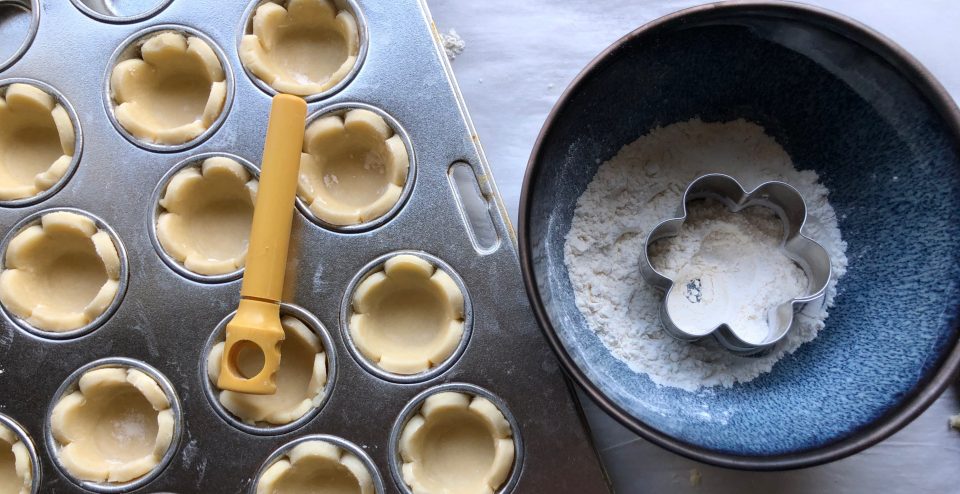
You could scoop out dough, roll it into balls and press each into tiny muffin tins which is pretty easy, but then you wouldn’t get those cute scalloped edges.  Mrs. S’s method was to roll the dough out approximately 3/16 inch thick and cut it with a flower petal cookie cutter.  I know, lots of work but, look at how nice they look.  The genius of using the petal cutter is the shape makes it very easy to press the dough into the muffin tins.

Next Step:

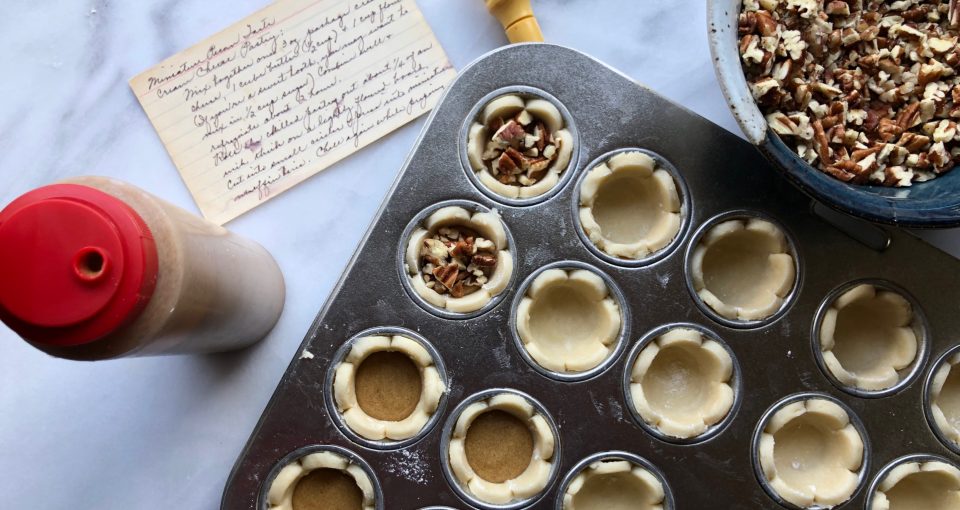
Make the filling while the dough chills in the fridge.  Here’s the cheat.  Pour the filling into a squeeze bottle.  I replace the top with the lid from the honey I buy at TJ’s.  The spout is bigger which allows the filling to flow easily…a nice squirt into each muffin cup.  How EASY is that?  Ingenuity being the mother of invention, my cheapie wine opener works perfectly for pressing the dough evenly into the muffin tin.

Fill the tarts to where the petals meet and sprinkle the pecans on top.  Walnuts or a mix of different nuts would be delicious too.  Follow the baking instructions.  When slightly cooled, dust the tarts with a nice layer of powdered sugar.

Enjoy these little bites of bliss.  Don’t wait until the holidays to make them!

MINIATURE PECAN TARTS

Bite-sized pecan tarts, sweet, nutty and delicious!
Course cookies, Dessert
Cuisine American
Keyword cookies, holiday baking, Mini Pecan Tarts, pecans
Prep Time 45 minutes
35 minutes

Equipment

  • mini-muffin tin
  • 2 inch petal cookie cutter optional

Ingredients

Cream Cheese pastry

Mix together:

  • 3 ounce cream cheese
  • 1 stick butter salted, or if using unsalted add 1/4 tsp salt
  • 1 cup all-purpose flour  preferably Gold Medal but any will work

Filling

Blend together:

  • 1 tablespoon softened butter
  • 1 cup firmly packed brown sugar light brown sugar
  • 1 egg large
  • 1 teaspoon vanilla
  • 1 cup chopped pecans substitute mixed nuts if you like, walnuts

Instructions

Dough

  • Original instructions: Combine well and refrigerate. Cut into small circles and press into mini-muffin tin.
  • My instructions: Mix the dough in a food processor. Place flour in fp bowl. Add butter and cream cheese to flour. Pulse mixture just until it begins to clump. Do not overprocess. Pour onto wax paper or plastic wrap and pat into a disc shape. Chill for at least 2 hours.
  • On a lightly floured surface, roll pastry out to 3/16-1/4 inch thickness. Cut into small circles. I use a petal cutter 2.5-inch or a plain round 2-inch cutter. Press circles into ungreased muffin tins. Chill muffin tins while making the filling.

Filling

  • Blend filling ingredients well. Pour into a squeeze bottle. I use a plastic TJ honey container that has an opening about 1/8inch. This is a quick way to fill the muffin tins. You could use a spoon.
  • Fill prepared muffin tins about 3/4 full.  Allow filling to settle slightly.  Fill each muffin tin to the top with finely chopped pecans (about 1 cup)  Chill.
  • Bake in a preheated oven at 350 degrees for 15 minutes.  Reduce temperature to 250 degrees and bake 20 minutes longer. Allow tarts to cool and carefully remove from tins.
  • Sprinkle lightly with powdered sugar while still warm.  Allow to cool before removing from tins.

Notes

There aren't instructions for the prepared muffin tins.  I'm guessing at lightly greased.  I generally don't grease the tins and occasionally I lose a tartlet to sticking but for the most part a little pry with a thin bladed knife and the tarts come out of the pan.
Cheesy Corn, Are You Ready for Some Football Food?

Cheesy Corn, Are You Ready for Some Football Food?

I love the fall season. Aside from all things pumpkin and apples, I start thinking about foods that go hand in hand with watching football.  My dad was a sport’s junkie and he definitely passed the sports-watching gene to my brother and me.  He also liked to cook.  Every Sunday he would have a big pot of Rice Soup or Congee simmering just for the 49er game. I’m not sure what I looked forward to more, the Rice Soup (Instant Pot) filled with bits of chicken, potatoes, tiny pork meatballs, topped with green onions and cilantro, or the football game.  

Football Food

In addition to the soup, football watching requires yummy totally bad for you snack food and I just discovered one that would fit in perfectly with a sport-watching spread.  One of my favorite cookbooks this year, A Common Table, has a popular Korean snack that must have been created to go with beer and fried chicken and therefore football.  Korean Cheesy Corn. Yep, the best thing since sliced bread. Okay, I’m kidding but it is good and stupid easy.

Start with fresh corn from the Farmer’s Market.  It is so good right now.  Frozen corn or canned corn (lots of Korean recipes start with canned corn) would work, but, come on, go fresh and support your local farms.

And now a public service announcement, a video on how to take corn off the cob from Saveur using a bundt pan! It works like a charm!

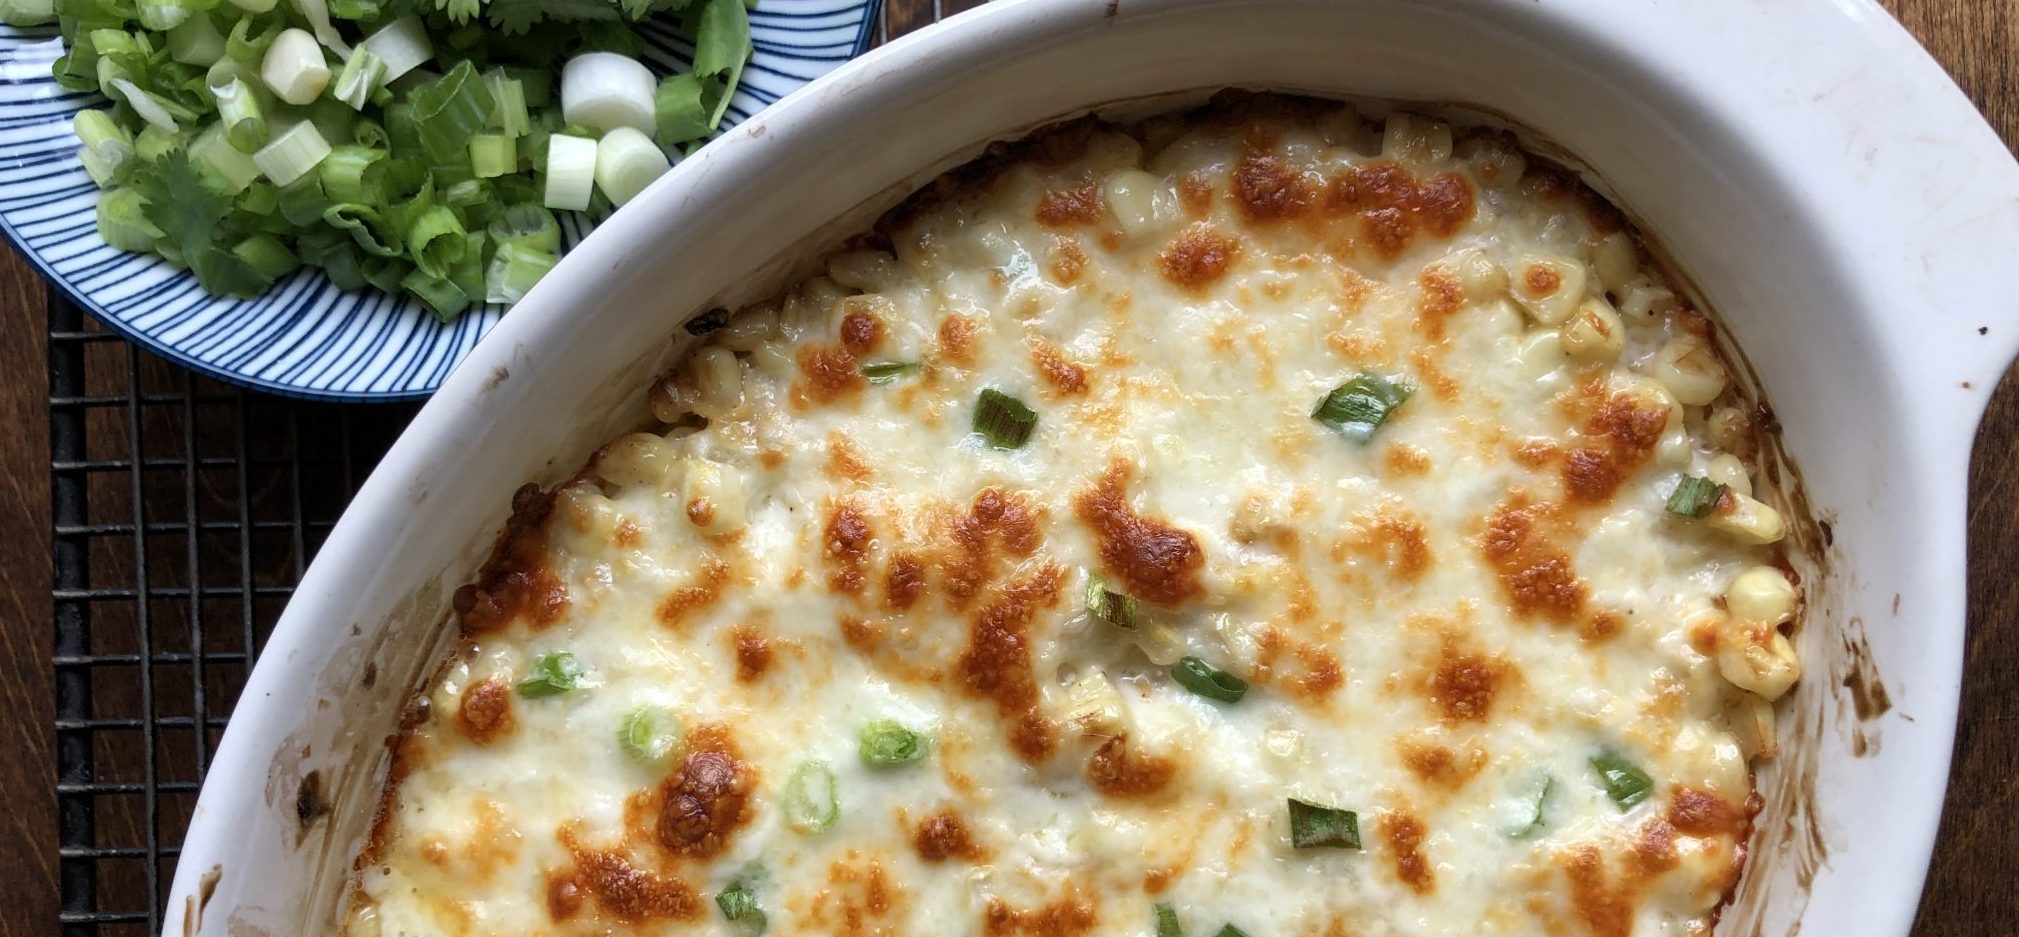
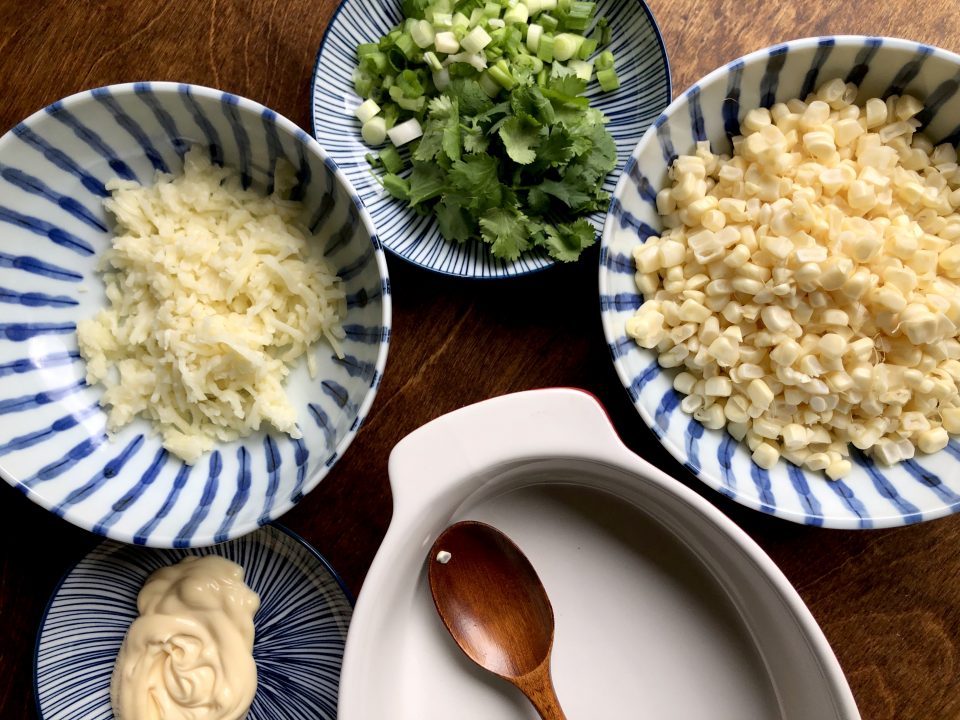
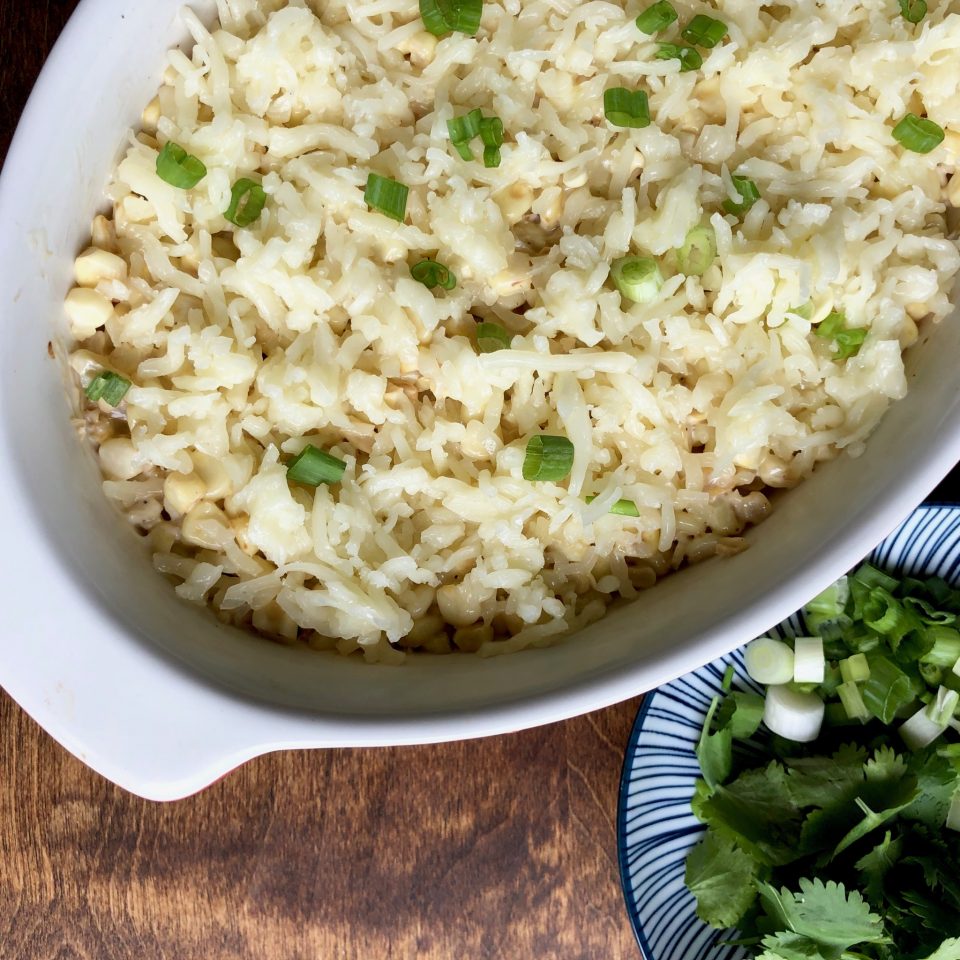
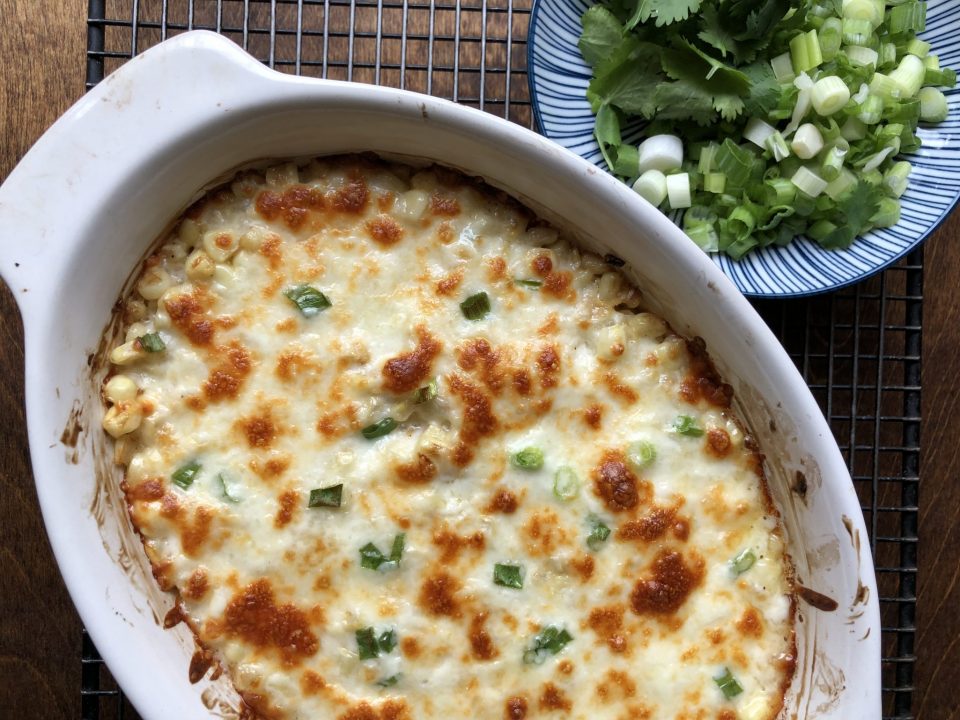
From here on in it’s a downhill slide.  Stir-fry corn in oil or butter until it is soft.  Combine corn with mayonnaise and place in an ovenproof dish. I use Kewpie Mayo which is slightly sweet but use whatever mayo (better be Best Foods) you have in the fridge.  Sprinkle a crap ton of Mozarella cheese on the corn and bake at 500 until the cheese is browned, gooey and melty. So delicious.  Versions of Korean Cheesy Corn add sugar.  If your corn is sweet you won’t need to, but if you like it sweeter add 1-2 teaspoons of sugar.  If you use Best Foods or Hellman’s add 1 tsp of sugar.

The corn, mozzarella, mayo, green onions, and cilantro are the basic ingredients for this yummy super easy dish.  Of course, you can go CRAZY and add extra fixings to bring it to a whole new level.  A bucket list of add-ons includes bell pepper, red onion, jalapeno peppers, or crumble in bacon (cuz everything is better with bacon).   You can also add cut-up rice cakes cause what’s a few more calories in a totally not-on-your diet dish.

Ready set, dig in!

Korean Cheesy Corn

Delicious, decadent and easy. Korean Cheesy Corn a popular Korean dish. Perfect as a side dish or snack.
Course Side Dish
Cuisine Asian
Keyword cheese, Corn, Korean, Korean Cheesy Corn, snack
Prep Time 15 minutes
Cook Time 5 minutes
Servings 4 servings

Ingredients

  • 1-1/2 cups fresh corn about 2 ears, canned or frozen can be used
  • 2 tbsp mayonnaise, preferably Kewpie add 1-2 teaspoons sugar if using regular mayo
  • 1 tbsp unsalted butter or vegetable oil
  • 1/4 tsp salt
  • 1/4 tsp fresh ground pepper
  • 1/2 cup shredded mozzarella or more if you are a cheese freak. Additional 1/4 cup stirred into corn with mayo.
  • 1/4 cup sliced green onions
  • 1/4 cup cilantro coarsely chopped
  • 1/8-1/4 cup additions ie. bell pepper, diced red onions, bacon, optional

Instructions

  • Preheat oven to 500 degrees
  • In a large non-stick skillet, heat butter or oil. Over medium heat, add corn and if using bell peppers, jalapeno or onions. Cook, stirring frequently until soft about 4-5 minutes. Season with the salt and pepper.
  • Transfer corn to an ovenproof dish, stir in mayo and sugar if using.
  • Sprinkle cheese evenly over the surface and bake for 5-7 minutes until cheese is melted, bubbling and starts to brown. Like a pizza!
  • Garnish with green onions and cilantro and serve immediately.
The Joy of Cookies (Toffee Bars)

The Joy of Cookies (Toffee Bars)

Joy is one of my oldest friends.  We went to school together and I mean that literally.  We lived a few blocks from each other, every day we would meet on the street corner halfway between our houses to walk and talk the final mile to school.  Sometimes, on the walk home, we wouldn’t be done talking so we would walk to one of our houses, turn around and walk back to the meeting point together before parting ways.  Silly, huh.  Yep, BFFs.

Holiday Highlight

Every Christmas I eagerly awaited her mom’s plate of holiday cookies.  Joy’s mom, whom I affectionately called Mrs. S, was an amazing baker (and a marvelous cook too). During the holidays, you could find her holed up in her kitchen busy baking no less than 6-8 different kinds of cookies.  Almond Crescents, Spritz Cookies shaped into wreaths decorated with red and green sugar, Chocolate Pecan Thumbprints, Pecan Tartlets, Chocolate Chippers, and Lemon Bars.  Her crescents were perfect, her scalloped-edged Pecan Tartlets were the gold standard of bite-sized pies.

In short, she was my muse for holiday cookies.  I love all of her cookies, but my favorite?  Hands down, her Toffee Bars.  A shortbread crust, buttery and sweet, painted with milk chocolate and finished with a sprinkling of chopped almonds.  Cookie Nirvana.

Attention to Detail

I have most of Mrs. S’s recipes.  Her Pecan Tartlets find their way into every holiday cookie box.  The Hubster considers it blasphemous if they are not included.  I am religious about following her recipes, I mimic each step.  I cut out each tiny pie crust with a flower petal cookie cutter. How else do you get cute scalloped edges?  I meticulously shape each ball of almond-infused dough into crescent-shaped moons. Warm from the oven, I roll each cookie in powdered sugar and place it on a cooling rack.  Then, sift powdered sugar over the cookies for that snow-capped look.  Yep, that little extra step.  Her attention to detail was what set her cookies apart and that’s what I learned from her.

It’s been a few years since she left us.  Every Christmas since, as I am perusing recipes and pulling out my butter, flour, and sugar- I think of her.  I imagine her scurrying around her kitchen churning out tray after tray of her delicious cookies.  Then I hear her voice prodding me, it’s time to get busy and bake.

A Fine Understudy

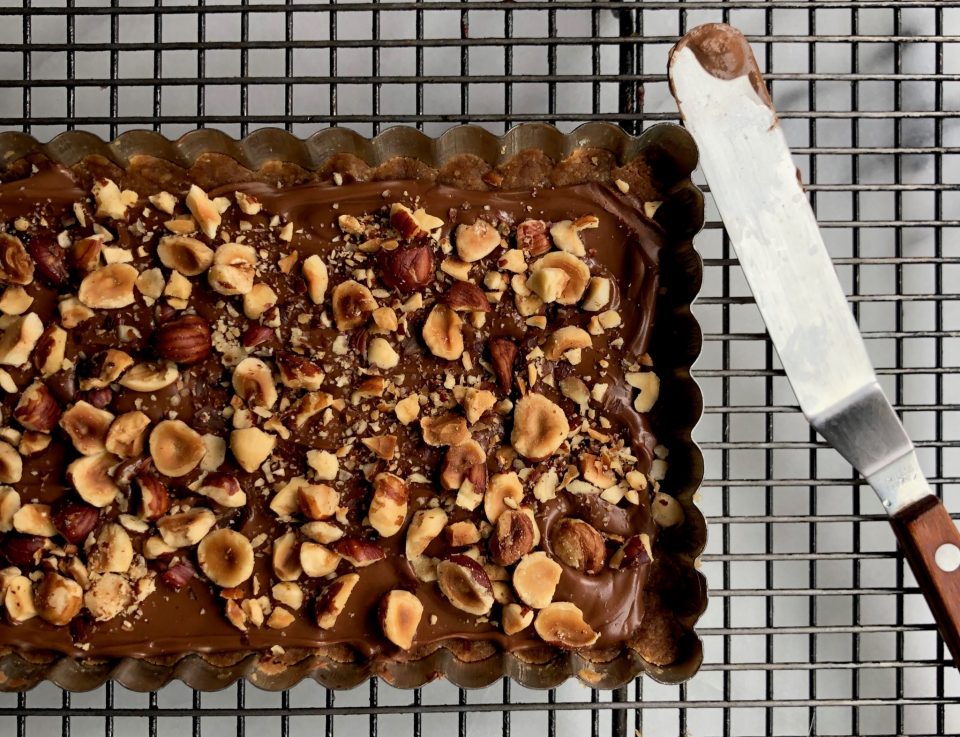
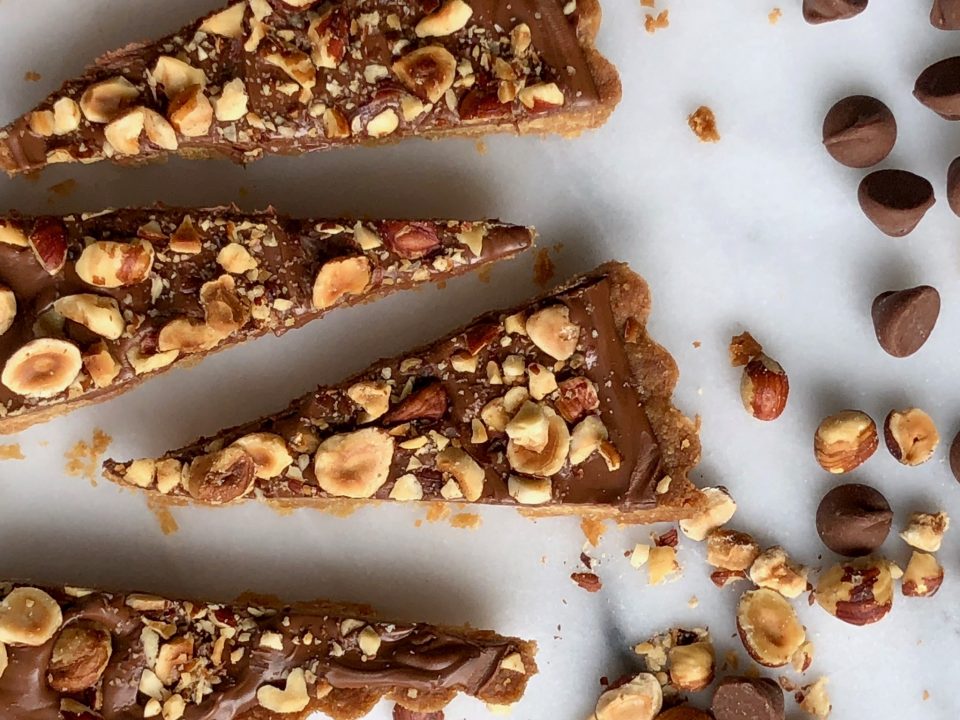
Unfortunately, I don’t have Mrs. S’s recipe for those Toffee Bars that I love so much. (Update: Found it! Mrs. S’s Toffee Squares) But Alice Medrich does.  Her Cookies and Brownies book contains toffee bars that are so good, they would make Mrs. S proud.  The crust starts with melted butter making these incredibly easy to make. Stir together brown sugar and flour with the butter, press into a pan and bake to a golden brown.  For this batch, I scattered a combo of semi-sweet and milk chocolate chips on the warm crust, let them melt, and ice the melted chips over the crust.  For the final touch, sprinkle toasted hazelnuts over the chocolate.  Next batch?  Endless possibilities, limited only by your imagination.

Kid version:  Use all milk chocolate and either toasted almonds or pecans.  Got milk?

Adult version:  Use semi-sweet chocolate or dark chocolate and toasted hazelnuts, finish with Maldon Salt.  Serve with some bubbly.

Sporty twist version:  Perfect during a ballgame, your choice of chocolate and salted or honey-roasted peanuts.  Play ball!

Allow bars to cool on a rack.  Use a serrated knife to cut the pan into bars or wedges.

Toffee Bars

A buttery, brown sugar crust topped with chocolate and hazelnuts. A riff on Alice Medrich's Toffee Bars.
Course cookies, Dessert
Cuisine American
Keyword toffee, toffee bar recipe, Toffee Bars
Prep Time 15 minutes
Cook Time 30 minutes

Equipment

  • 8x8 inch square pan or 9' tart pan with removable bottom. Any pan with roughly same area I like to use a 12x5 rectangular tart pan and cut the cookies into wedges.

Ingredients

Shortbread base

  • 8 tbsp unsalted butter
  • 1/2 cup light brown sugar packed
  • 1 tsp vanilla
  • 1/8 tsp salt
  • 1 cup all-purpose flour

Topping

  • 6 ounces milk or semisweet chocolate chopped, if bar or block or use chips
  • 1/2 cup toasted nuts your choice!

Instructions

  • Preheat oven to 350 degrees. Position rack in lower third of oven

Shortbread base

  • Cut butter into chunks and melt in a saucepan over medium heat or place in heatproof glass bowl, loosely cover and microwave at 40% power for 15 seconds, repeat if necessary.
  • Remove from heat and stir in brown sugar, salt and vanilla. Add flour and mix just until combined.
  • Press dough into a lined (parchment or foil) 8x8-inch pan or a tart pan with a removable bottom
  • Bake for 20-25 minutes or until well browned at the edges and golden brown in the center

Topping

  • Scatter chocolate evenly on top of warm crust. Let stand to allow the chocolate to melt. If necessary, place in the oven for a minute to help melt the chocolate. Spread chocolate evenly over the crust with an offset spatula or the back of a spoon.
  • Sprinkle toasted chopped nuts over chocolate. Set on rack to cool.
  • Lift and transfer bar to cutting board. Use a sharp knife (I like using a serrated knife)and cut into 2x2" squares or wedges. If necessary chill in fridge to set chocolate.
  • See story above for variations.
Fall Into the Porkfect Meal

Fall Into the Porkfect Meal

I walked out this morning and for the first time, there was a slight chill in the air. Is Fall finally here? Hmmm. Let me check.  That crisp feeling in the air, apples instead of stone fruit at the farmer’s market (I found both last weekend) and PUMPKIN SPICE LATTES in every Starbucks.

Fall is coming.

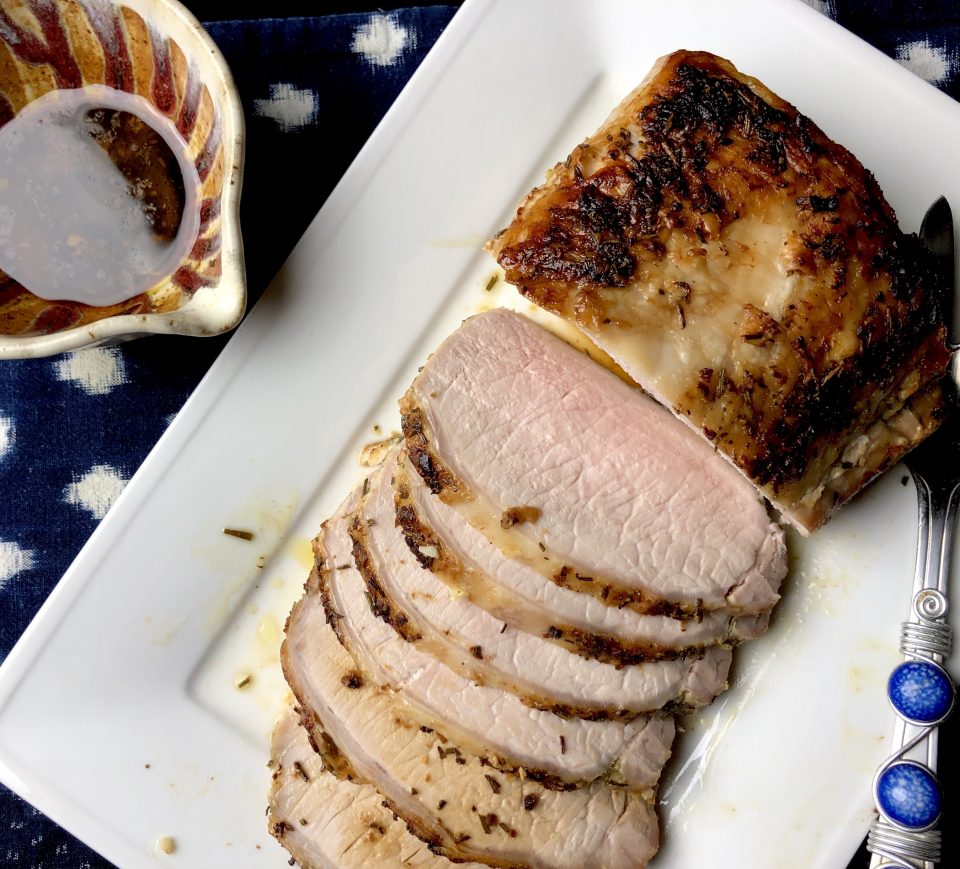
With my postcard posse coming over, I didn’t want something light.  I had a hankering for all things homey and satisfying.  A little chill in the air will do that to you.  I dug through my recipes and found the perfect dish, a Roasted Pork Loin with Garlic and Rosemary from Epicurious.  Yum.  Doing the happy dance, making an easy, delicious pork roast for dinner with friends.

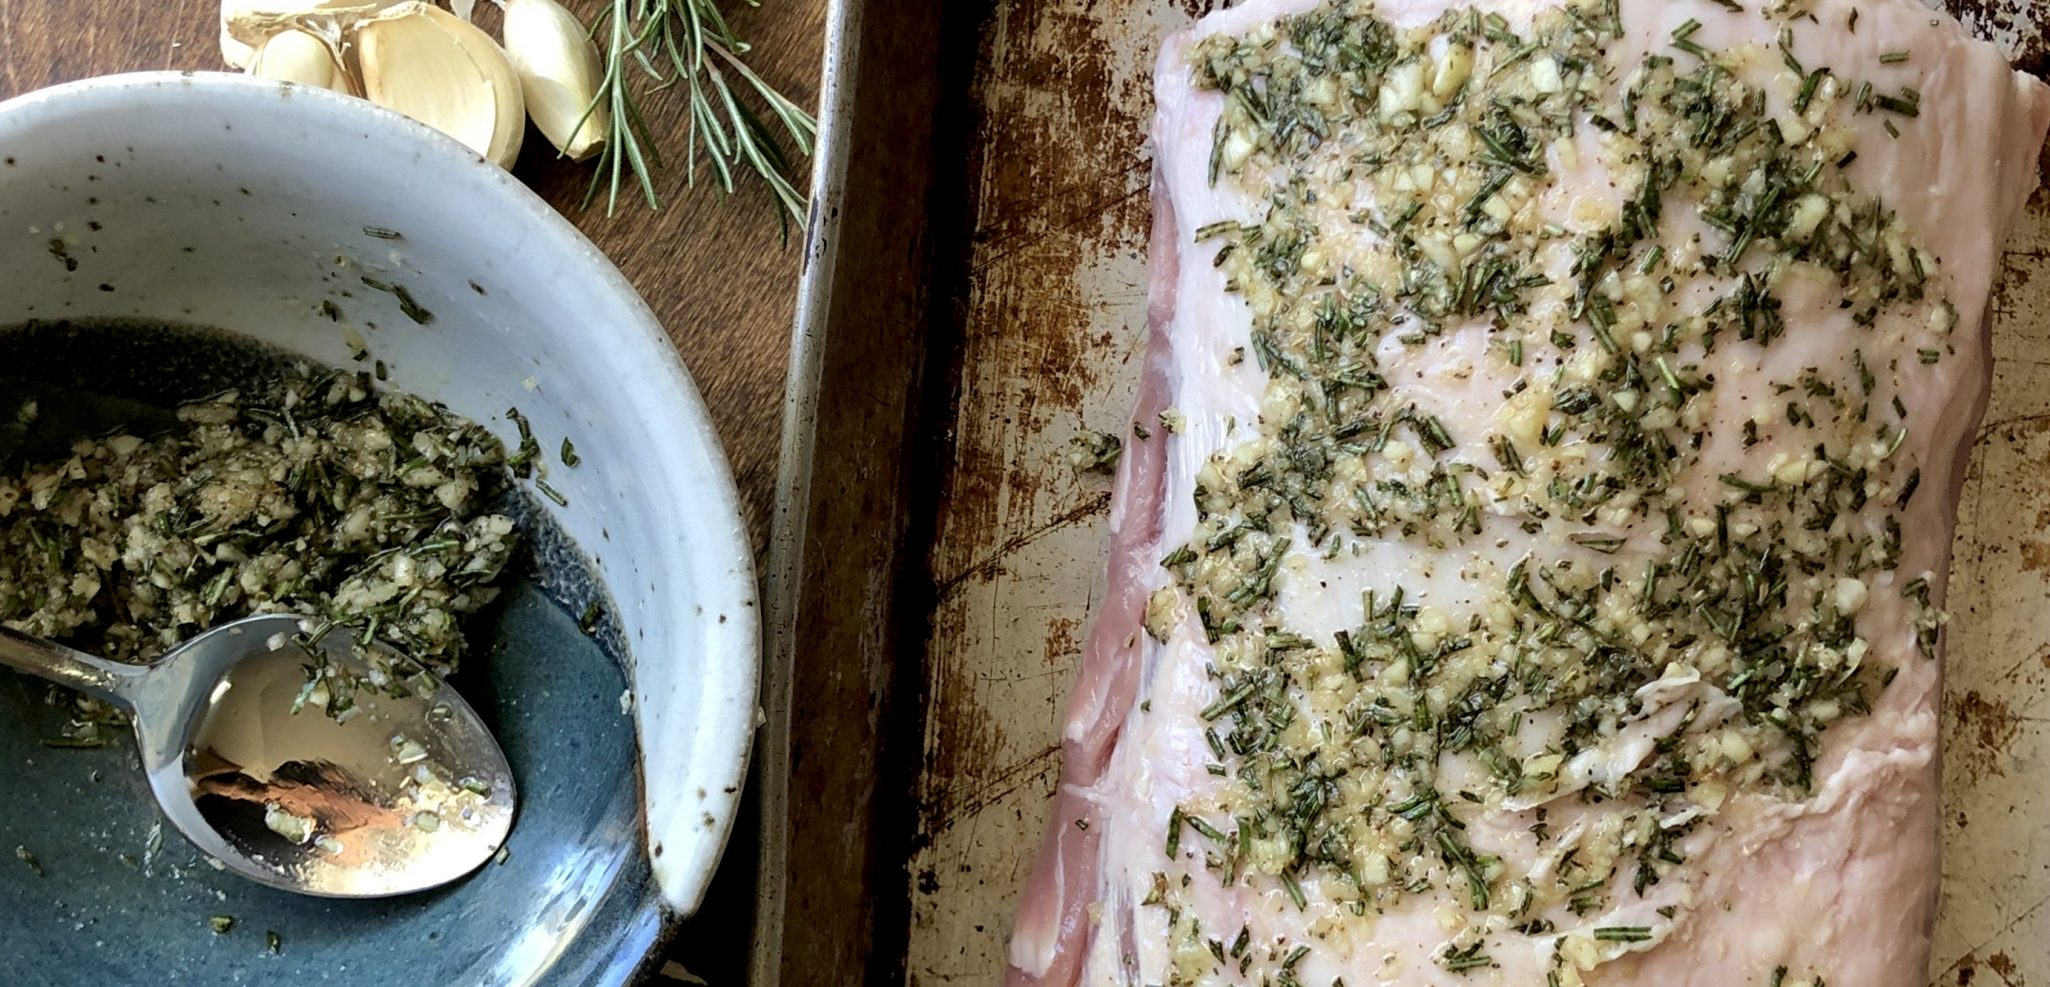
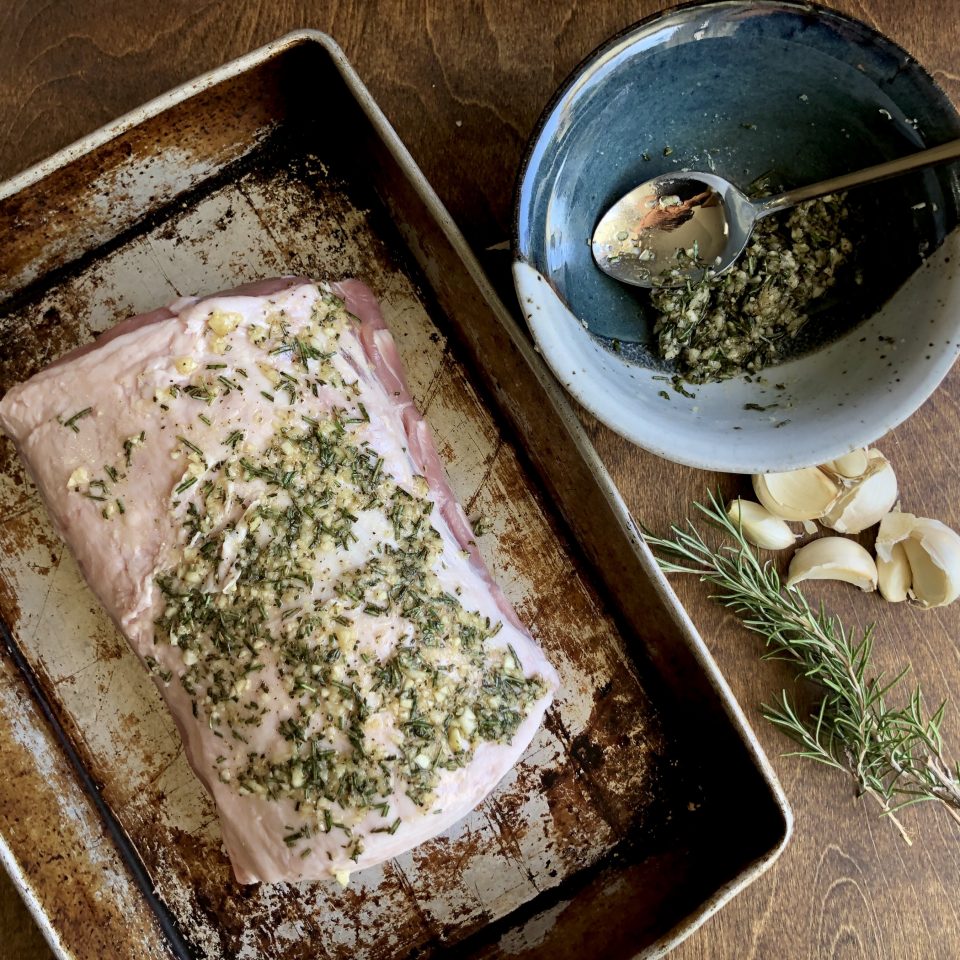
The dish starts with a simple rub of finely chopped fresh rosemary, minced garlic, coarse salt and a couple of grinds of pepper.  I like to smash my garlic and finely chop it but by all means, use a press if you like.  My mom and dad insisted on mincing herbs and meat by hand using their trusty Chinese cleaver.  I have adopted that practice.  Maybe it’s a way to feel connected to them although I do think it improves the texture and flavor of a dish.  Use coarse kosher salt but (I’m gritting my teeth as I write this) in a pinch you could use regular salt.  Make sure to reduce the amount by half if you make the switch.  I add a couple of tablespoons of olive oil to help bind the mixture and adhere to the pork roast.

Time to rub a dub-dub the spice mix onto the pork.

Don’t you love a beat-up looking well-used pan?  This pan is hubby’s and dates back to his single days.  Still going strong after all these years.

Like the Big Fig Newton, here’s the tricky part.  Don’t overcook it!  Pork is pretty lean nowadays so it can end up being dry if it is cooked too long.  The original recipe calls for over an hour of cooking time…which is fine, IF YOU LIKE JERKY.  Back in the day, the final temp for pork was around 160.  The new recommendation is 145 with a 3 minute rest time. A little pink is A-OK.  So, please, invest in an instant thermometer and don’t overcook your pork.  If you come across an older recipe, use the new guidelines or your pork will be like the Sahara Desert.

Roast the pork loin, fat side down, for 25 minutes.  Then flip and roast an additional 10-15 minutes.  Start checking the meat temperature at 10 minutes!  The roast will continue to cook as it rests, so if the temp is around 140, take it out and let it rest.

The tasty bits left in the pan make for a nice au jus so don’t toss it!  Just pour them into a bowl and serve alongside the roast.  You could gussy it up by deglazing the pan with some white wine and throwing in a bit of butter.  Hmmm-killer.

Leftovers?  Grab a loaf of ciabatta and make yourself one b*tchin sammie.

To finish off the meal with a Fall theme, I have a bushel of just-picked pears and apples from my friend Shannon.  Her pears and apples worked perfectly in my go-to apple crisp recipe.  Top with vanilla ice cream for a delicious sweet finale.

Roast Pork with Garlic and Rosemary

Course Main Course
Cuisine Italian
Keyword easy recipe, garlic, pork roast, roast pork loin, roast pork with garlic and rosemary, rosemary
Prep Time 15 minutes
Cook Time 50 minutes
Servings 8 servings
Calories 187kcal
Author Adapted from Epicurious

Equipment

  • roasting or baking pan

Ingredients

  • 4 large garlic cloves pressed or chopped finely
  • 4 teaspoons chopped fresh rosemary or 2 teaspoons dried
  • 1 1/2 teaspoons coarse kosher salt
  • 1/2 teaspoon ground black pepper
  • 1-2 tbsp olive oil
  • 1 2 1/2-pound boneless pork loin roast well trimmed
  • Fresh rosemary sprigs optional

Instructions

  • Preheat oven to 400°Line 13 x 9 x 2-inch roasting pan with foil.
  • Mix first 5 ingredients in a bowl. Rub garlic mixture all over pork.
  • Place pork, fat side down, in a roasting pan. Roast pork 25 minutes. Turn roast fat side up. Roast until thermometer inserted into the center of pork registers 140-145°F., about 15 minutes longer. Remove from oven; let stand 5 minutes.
  • Pour any juices from roasting pan into small saucepan; set over low heat to keep warm. Cut pork crosswise into 1/3-inch-thick slices. Arrange pork slices on a platter. Pour pan juices over. Garnish with rosemary sprigs, if desired.


Cool Hand Cuke (Cucumber Salad from A Common Table)

Cool Hand Cuke (Cucumber Salad from A Common Table)

This summer I have been the lucky recipient of what seems like a bushel of cucumbers from the gardens of friends and neighbors.  Luckily, I LOVE cucumbers.  I saute’ julienned strips of cucumbers for Bi Bim Bap, put crispy slices in sandwiches in place of lettuce, and thrown every salad I toss together.  What’s a cheeseboard with an array of dips without cucumbers to serve as a “dip-stick” (lol) for them?  So much better than celery if you ask me.

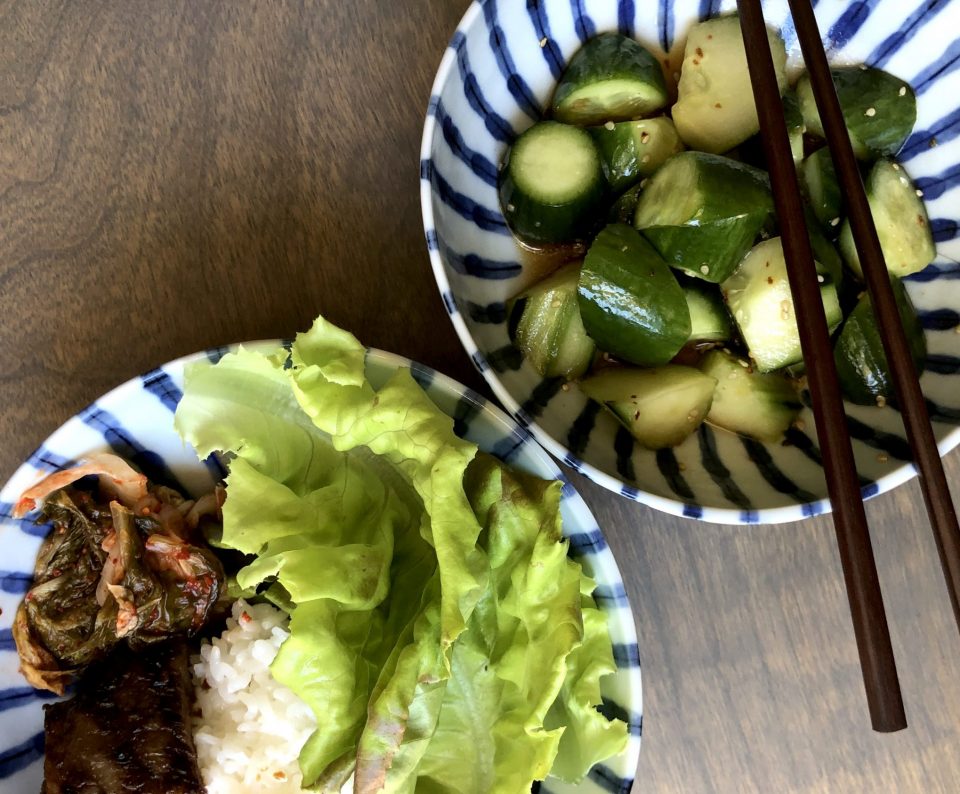
But what is my favorite way to serve cucumbers?  As a refreshing cold dish.  I posted a simple Korean Cucumber Banchan (side dish) recently that is flavored with soy sauce, chilis, and sesame oil and sprinkled with green onions and Korean chili powder.  It’s incredibly easy and TASTEE!

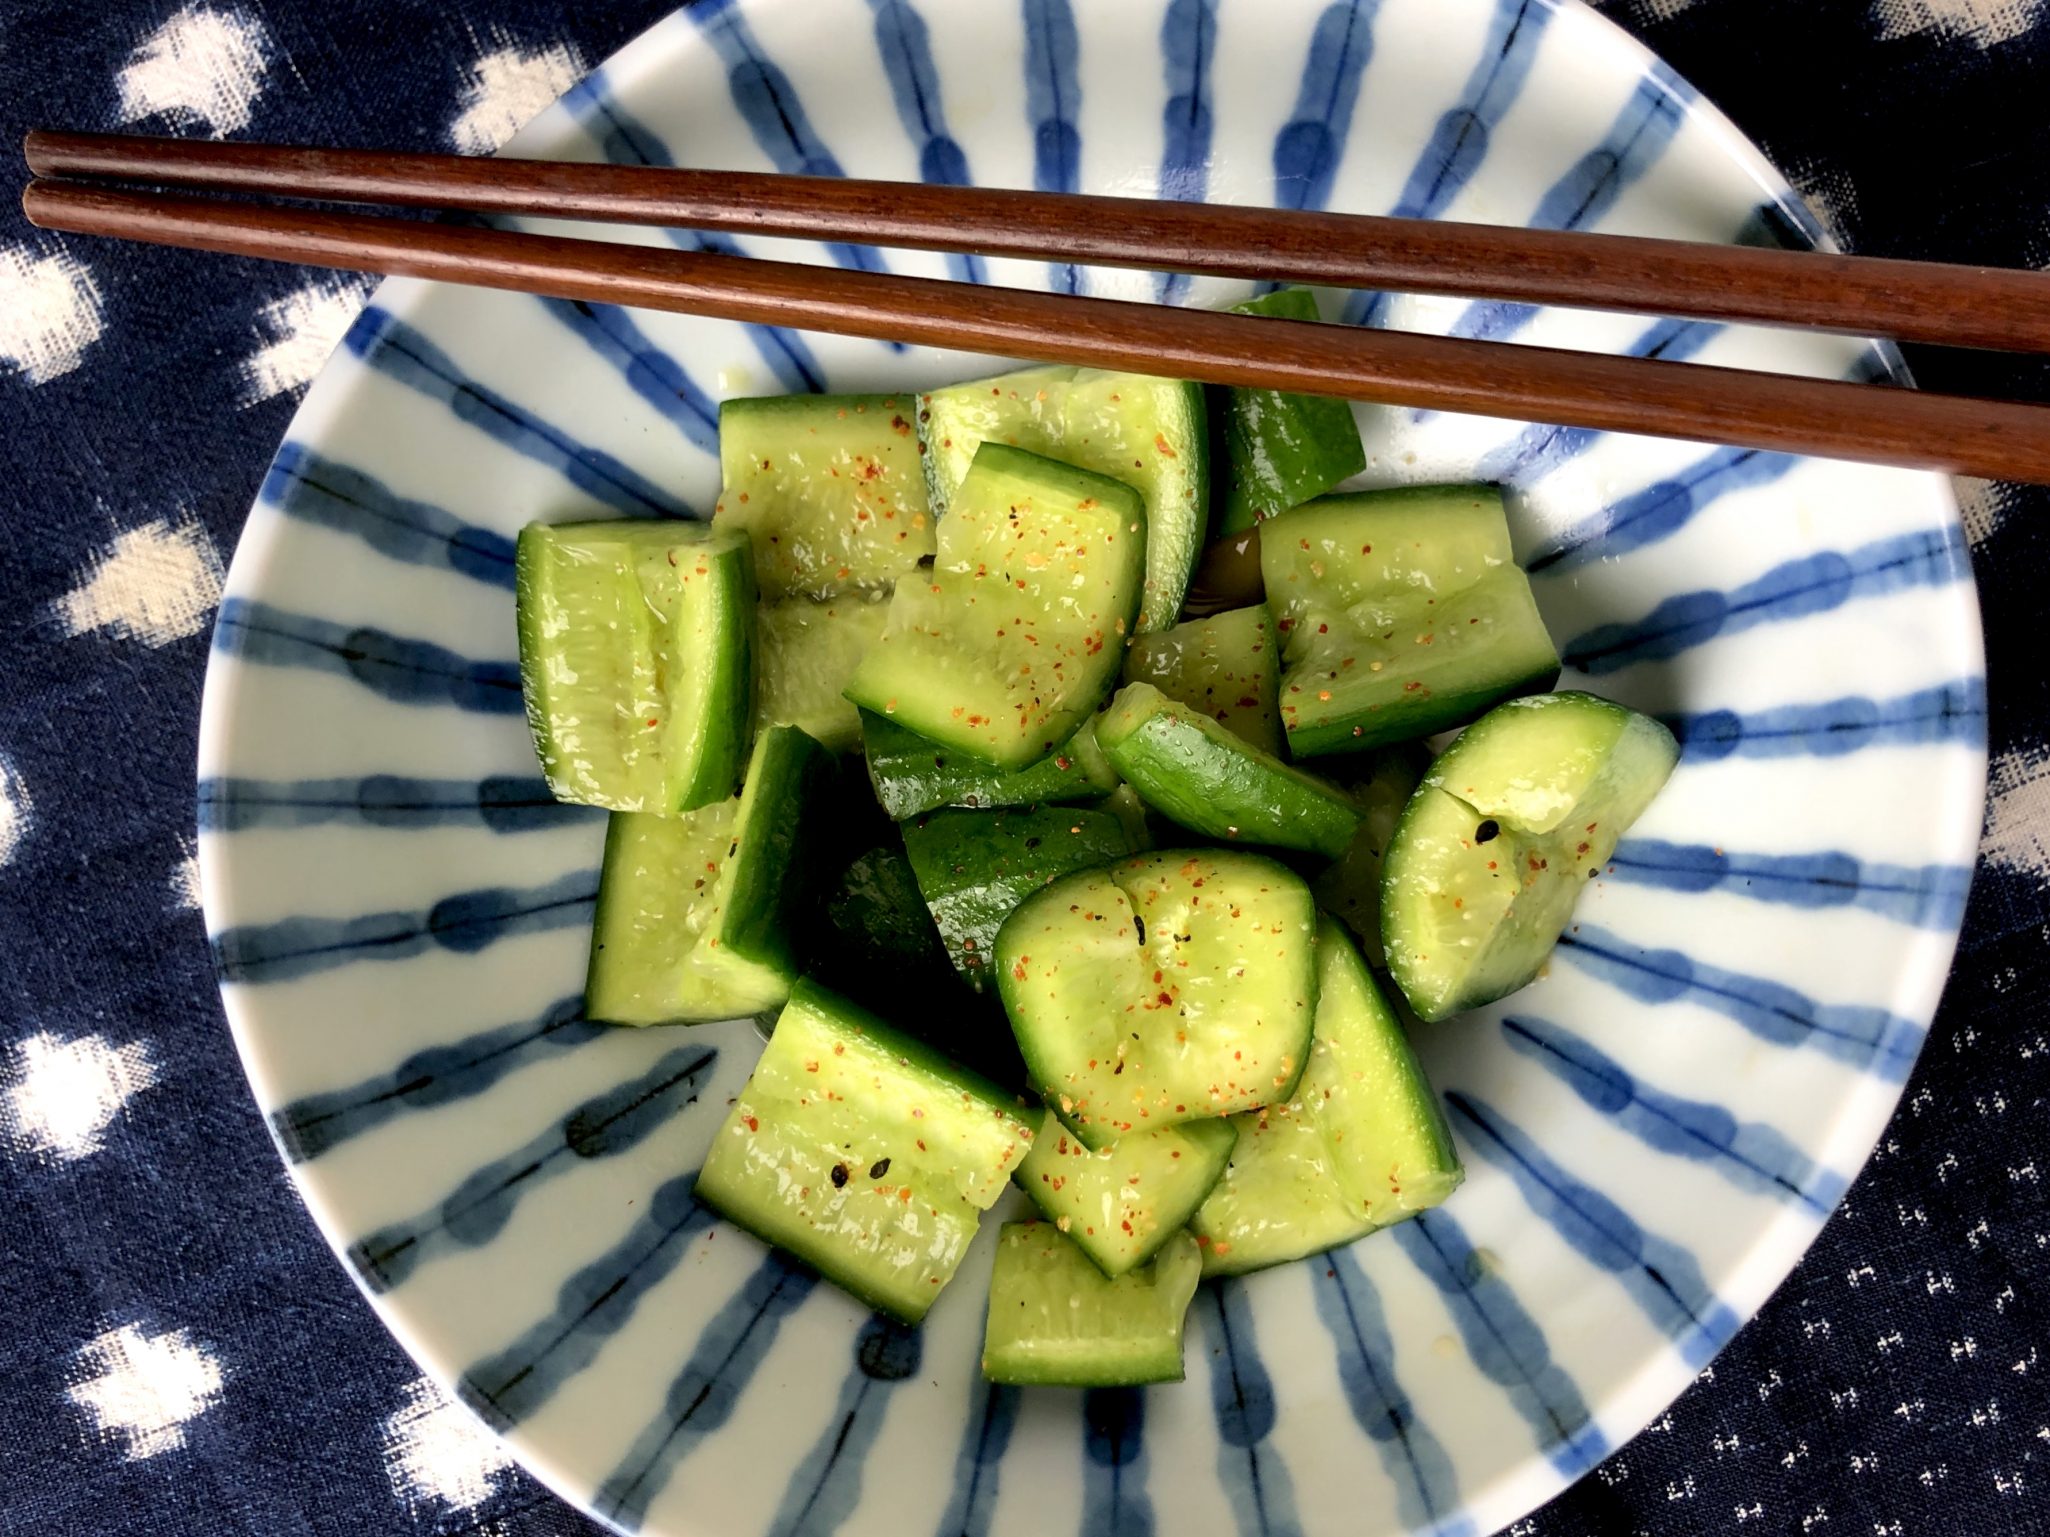
I also love the Smashed Cucumber Salad from A Common Table cookbook (love, love, love).  A classic Chinese dish that is perfect on a hot summer day.  Cukes, crisp and refreshing are dressed in a blend of soy sauce, vinegar, and chilis. The secret is to lightly smash the cut pieces of cucumber and salt them.  The added surface area allows the salt to extract more moisture and the cucumbers to then absorb the dressing.   It’s so simple, comes together in minutes, and makes a lovely side dish.  I use English or Persian cucumbers, fewer seeds and the skin is much thinner, no peeling necessary!  American cucumbers, on the other hand, have a thick waxy skin, which means peeling.  They also have more seeds and higher water content. Stick to the English or Persian cucumbers, trust me.

As summer comes to an end and you fire up the barbecue for the last time, this would be a perfect, refreshing side dish.

Chinese Cucumber Salad

A cool and refreshing cucumber salad which has its roots in Chinese cuisine.
Course Salad, Side Dish
Cuisine Chinese
Keyword cucumber salad
Prep Time 10 minutes

Ingredients

  • 1 lb Persian or Kirby cucumbers unpeeled (2 to 3 small cucumbers if using Persian)
  • 1/2 teaspoon kosher salt or more to taste
  • 1 to 2 teaspoons rice vinegar I use 1 teaspoon
  • 1 teaspoon sesame oil
  • 1/2 to 1 teaspoon soy sauce 1 teaspoon or more to taste, substitute Ponzu, Soy Dashi or Yuzu Soy Sauce
  • 1/4 teaspoon crushed red pepper flakes to taste or use Korean chili powder, Gochugaru

Instructions

  • Slice the cucumbers in half lengthwise, then into 1-inch pieces or cut at a diagonal and rotate cucumber 1/4 turn, cutting angled 1-inch pieces.
  • Place the pieces cut-side down on a cutting board. Working with a few pieces at a time, lay the broad side of a wide chef's knife or cleaver on top of the cucumbers, and carefully use the palm of your free hand to smash down lightly on the blade.
  • Place the smashed cucumbers in a colander and sprinkle them evenly with the salt. Set aside until cucumbers release water, 20 to 30 minutes.
  • Stir 1 teaspoon rice vinegar, 1 teaspoon sesame oil, 1 teaspoon soy sauce, and red pepper flakes together and add to drained cucumbers. Taste and adjust seasonings, if desired. Let sit at room temperature or in the refrigerator for a minimum of 30 minutes to 1 hour (*note: the salad will taste better with more time, so if time allows, refrigerate and marinate for 6 hours or longer to let the flavors develop.

Notes

The key for crispy cucumbers is to smash and salt the cukes!
Snickerdoodles (Alice in Cookiewonderland)

Snickerdoodles (Alice in Cookiewonderland)

It has been 1610 days since I sat down and penned my inaugural post, Jamigos 2.0 to launch 3jamigos.  As I reflect on that number all I can think is WHAT TOOK ME SO LONG TO INCLUDE MY FAVORITE COOKIE?  I mean, sheesh, of the 100 cookie recipes I have posted, it doesn’t include my all-time favorite non-shortbread cookie (notice how I slipped in that qualifier, shortbread=cookie perfection).  Unbelievable, and how did I discover this faux pas?

I was tasked with making cookies for an End of Summer Party for our political action group (sanity saver).   I automatically went to my blog and typed in S N I C K E R D O O D L E S in the search box and waited, NOTHING popped up.  A quick search of my cookie index revealed, what the heck, no Snickerdoodles.

Are you kidding?

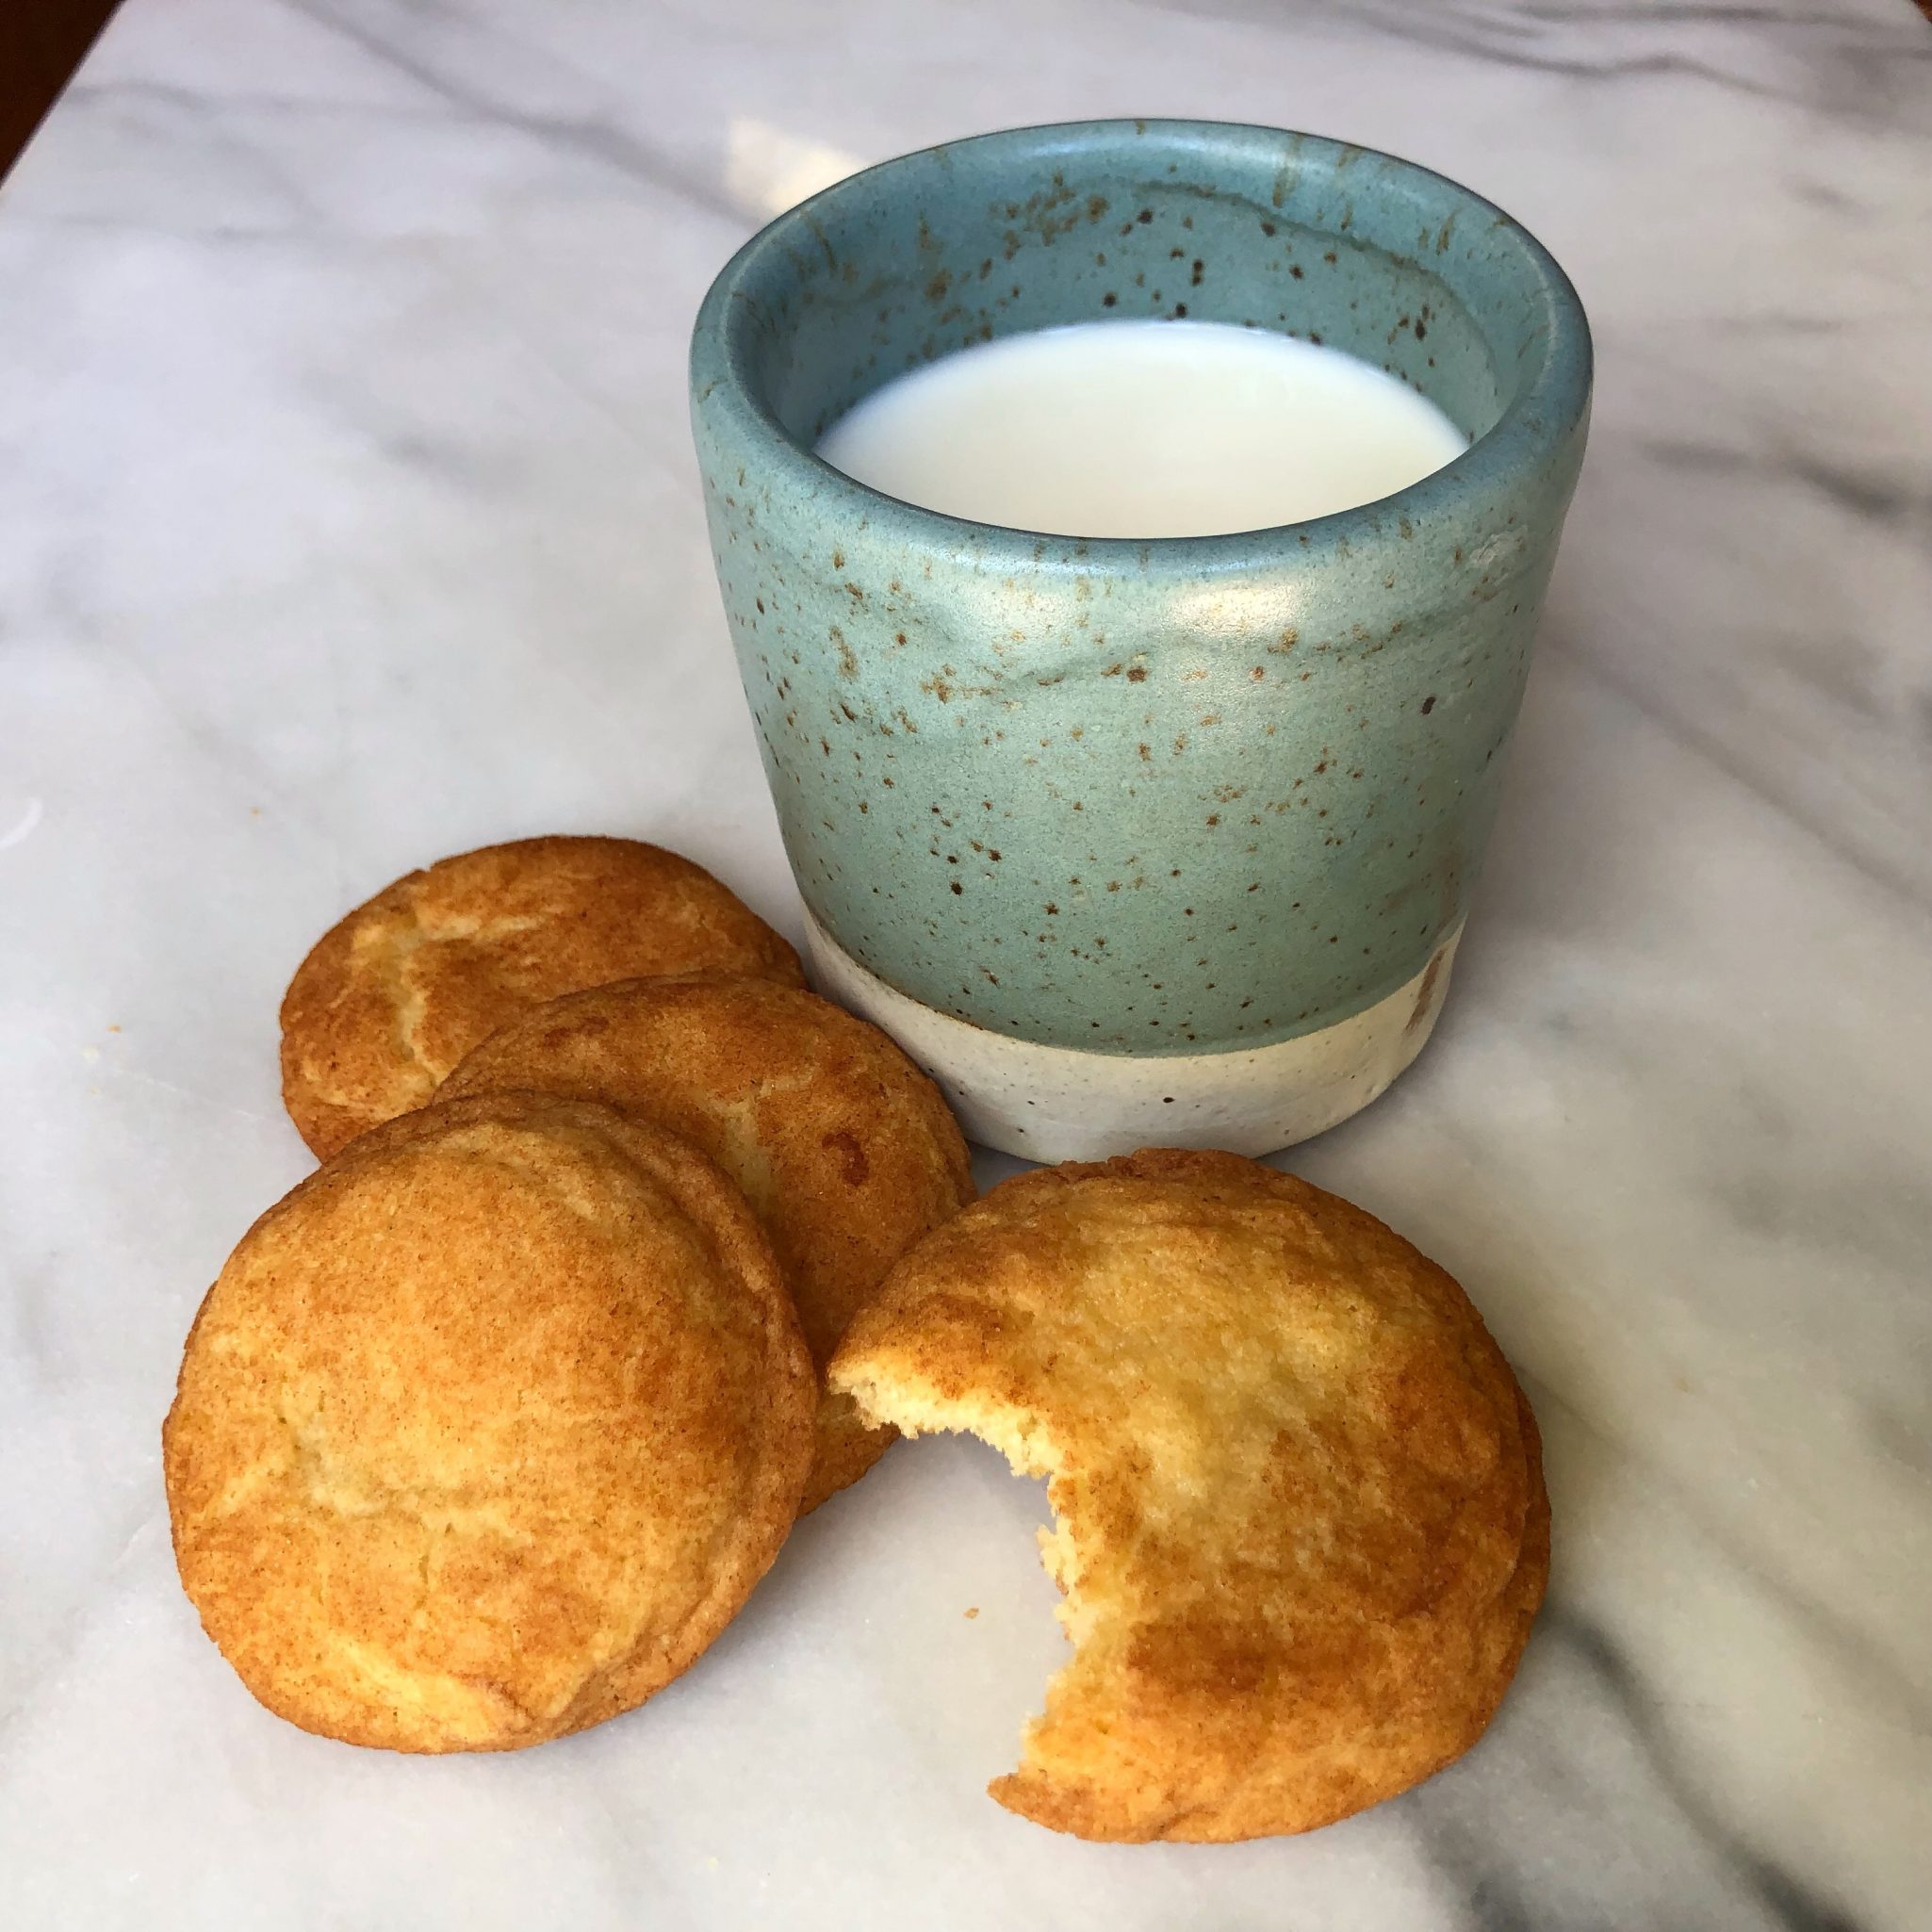
I’ve never posted Snickerdoodles on my blog?  Hellooo, time to fix that.  I got busy, made a batch for the meeting, snitched a couple to have with an ice-cold glass of milk, and sat down to write this post.

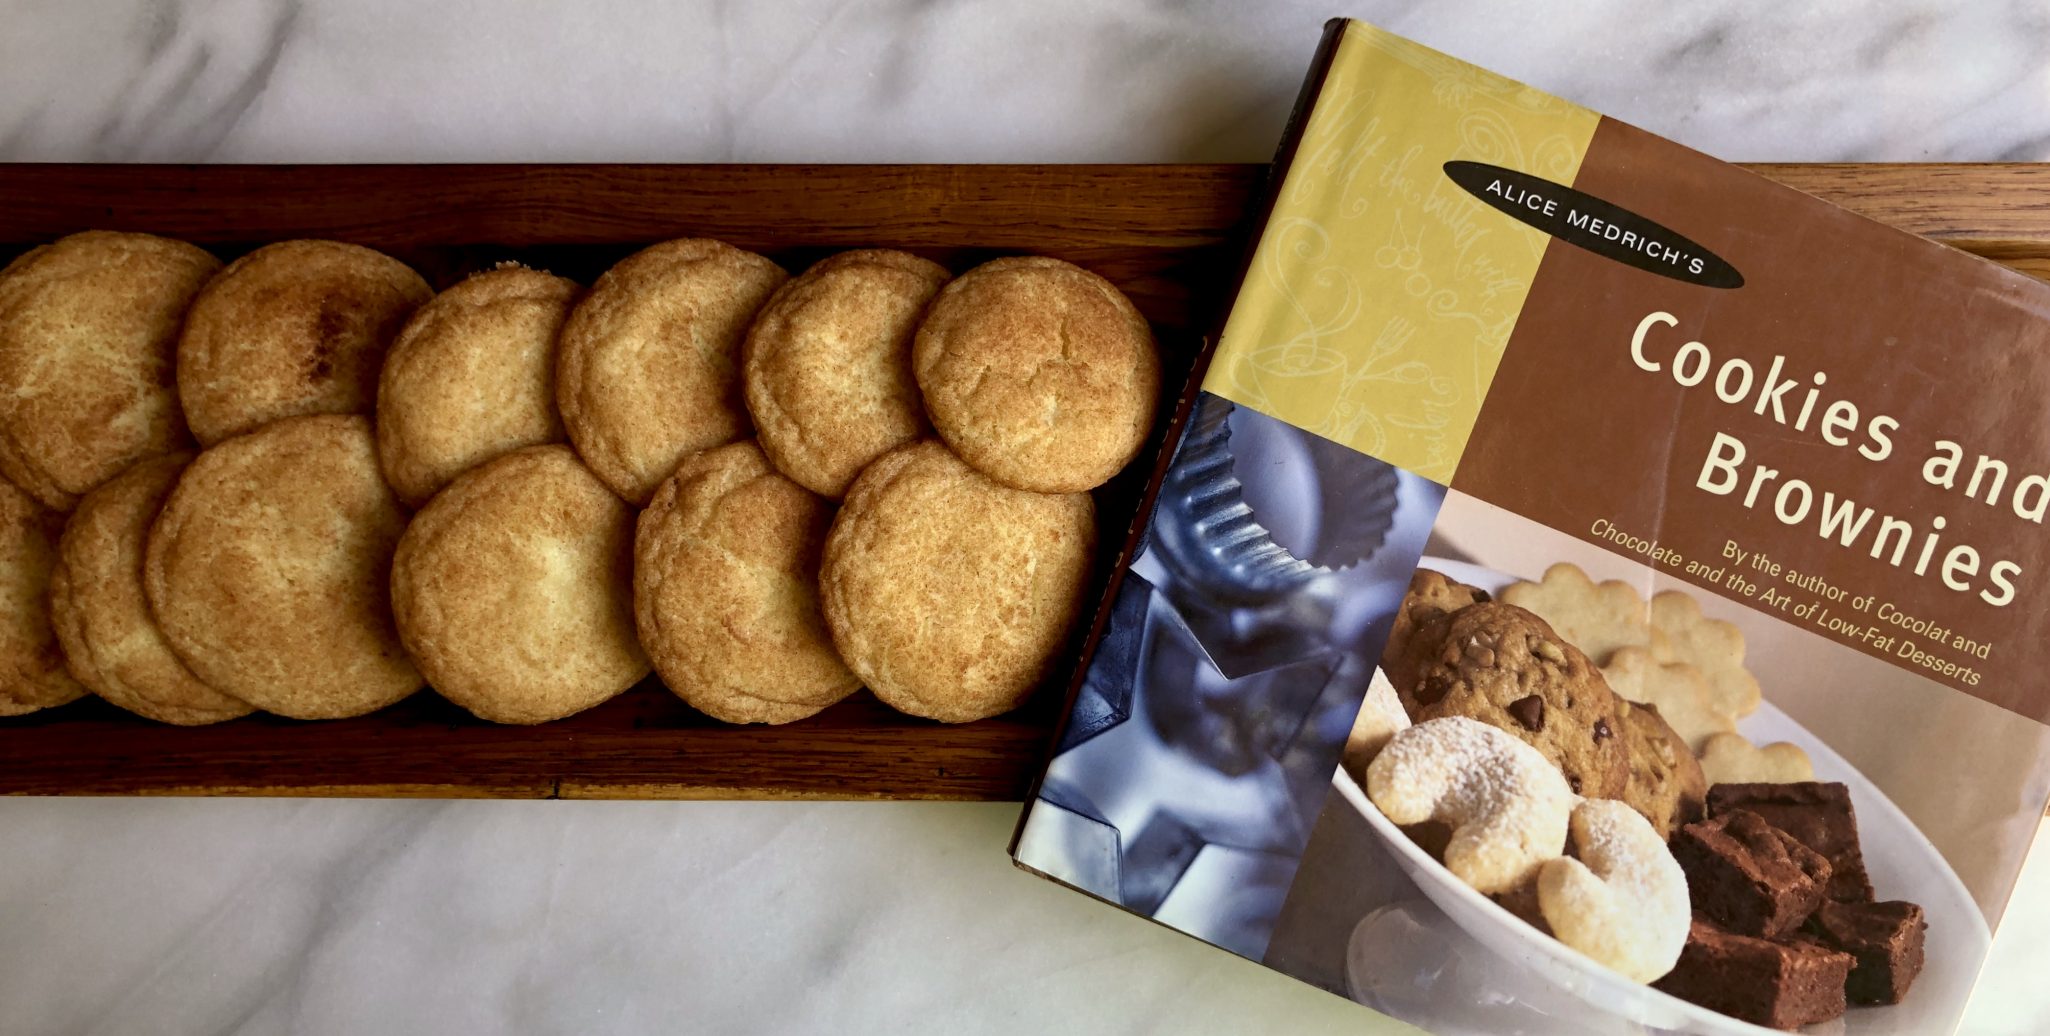
EVERYONE needs a scrumptious recipe for Snickerdoodles.  Buttery, sweet and spicy, crispy edges, soft chewy center,  finished with cinnamon sugar.  The quintessential cookie.  My favorite recipe comes from the cookie maven, Alice Medrich.  Unlike other recipes I have seen, hers are made with just butter. Yep, no shortening in these bad-boy bites of sweet cinnamon bliss.  The recipe is from her small but mighty book, Cookies and Brownies, long out of print but available on the secondary market. The book is worth getting just for this and her Lemon Bar recipe. Well written with easy-to-follow directions, it’s a keeper.  My copy is frayed and tattered, well worn from use.

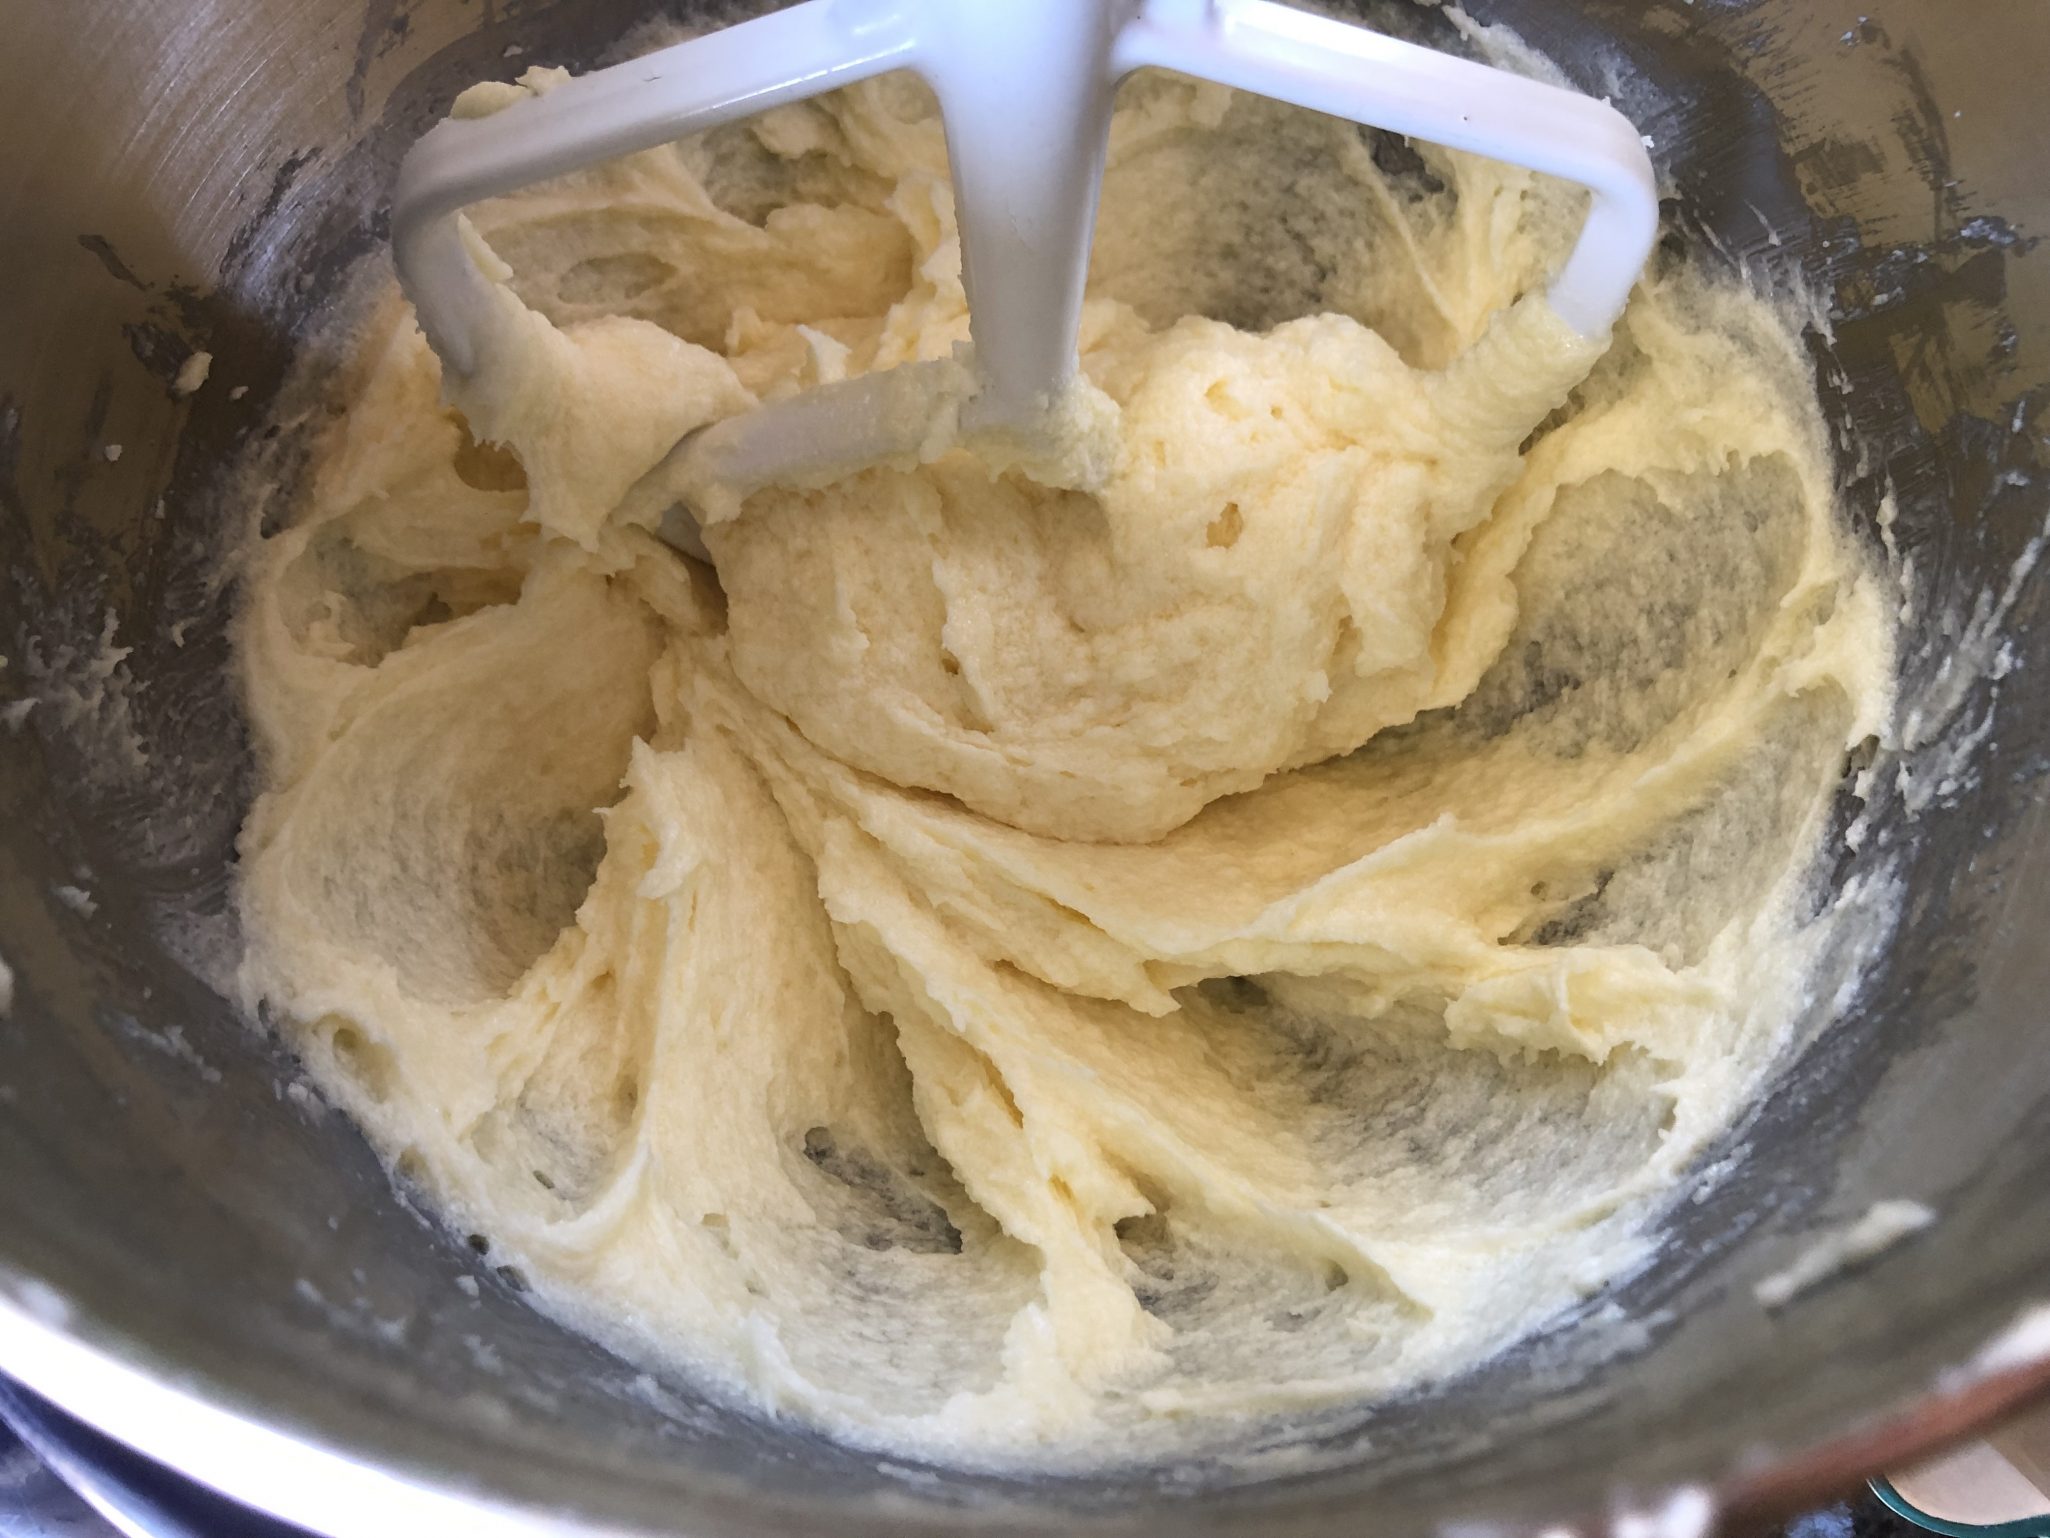
Cream butter and sugar together to smooth but NOT fluffy.  Add eggs, beat until blended.

Add flour and stir just until combined.  Don’t overmix.  The mixing changes the consistency of the cookie.  Fluffy butter-sugar mixture gives a cakier cookie, go for smooth and creamy.  After adding the flour mixture do not beat the dough too much or you will end up with a tough cookie.

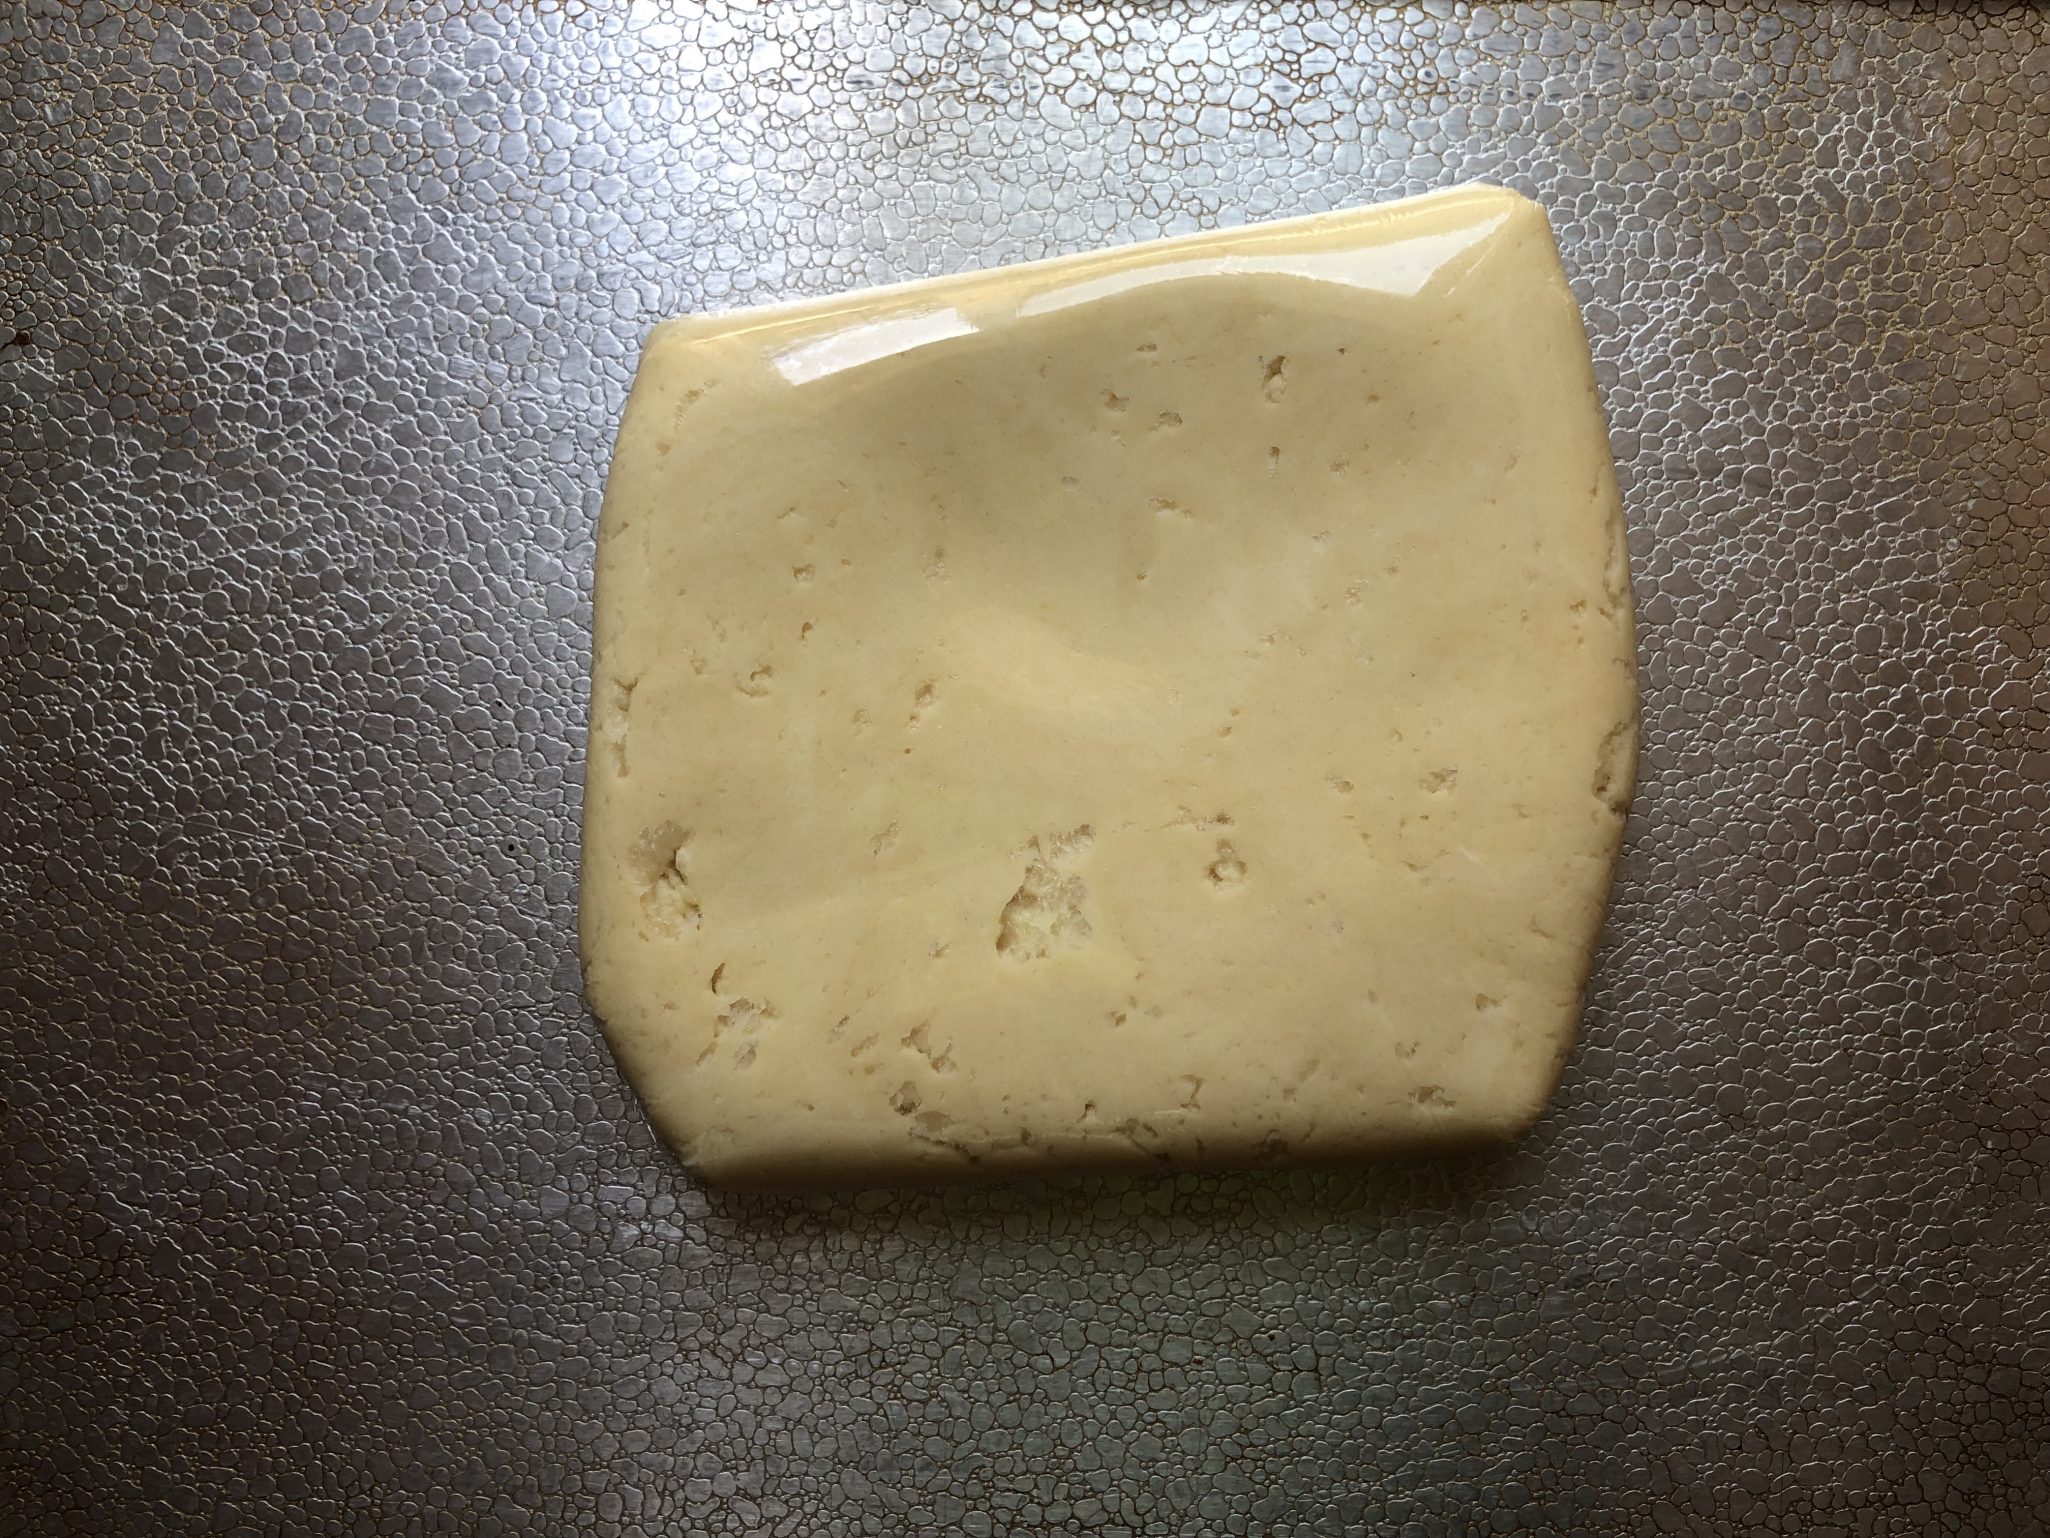
Gather dough into a disc, shape doesn’t matter.  Keep the thickness to about an inch.  This will make it easier to scoop and form the cookies after chilling.

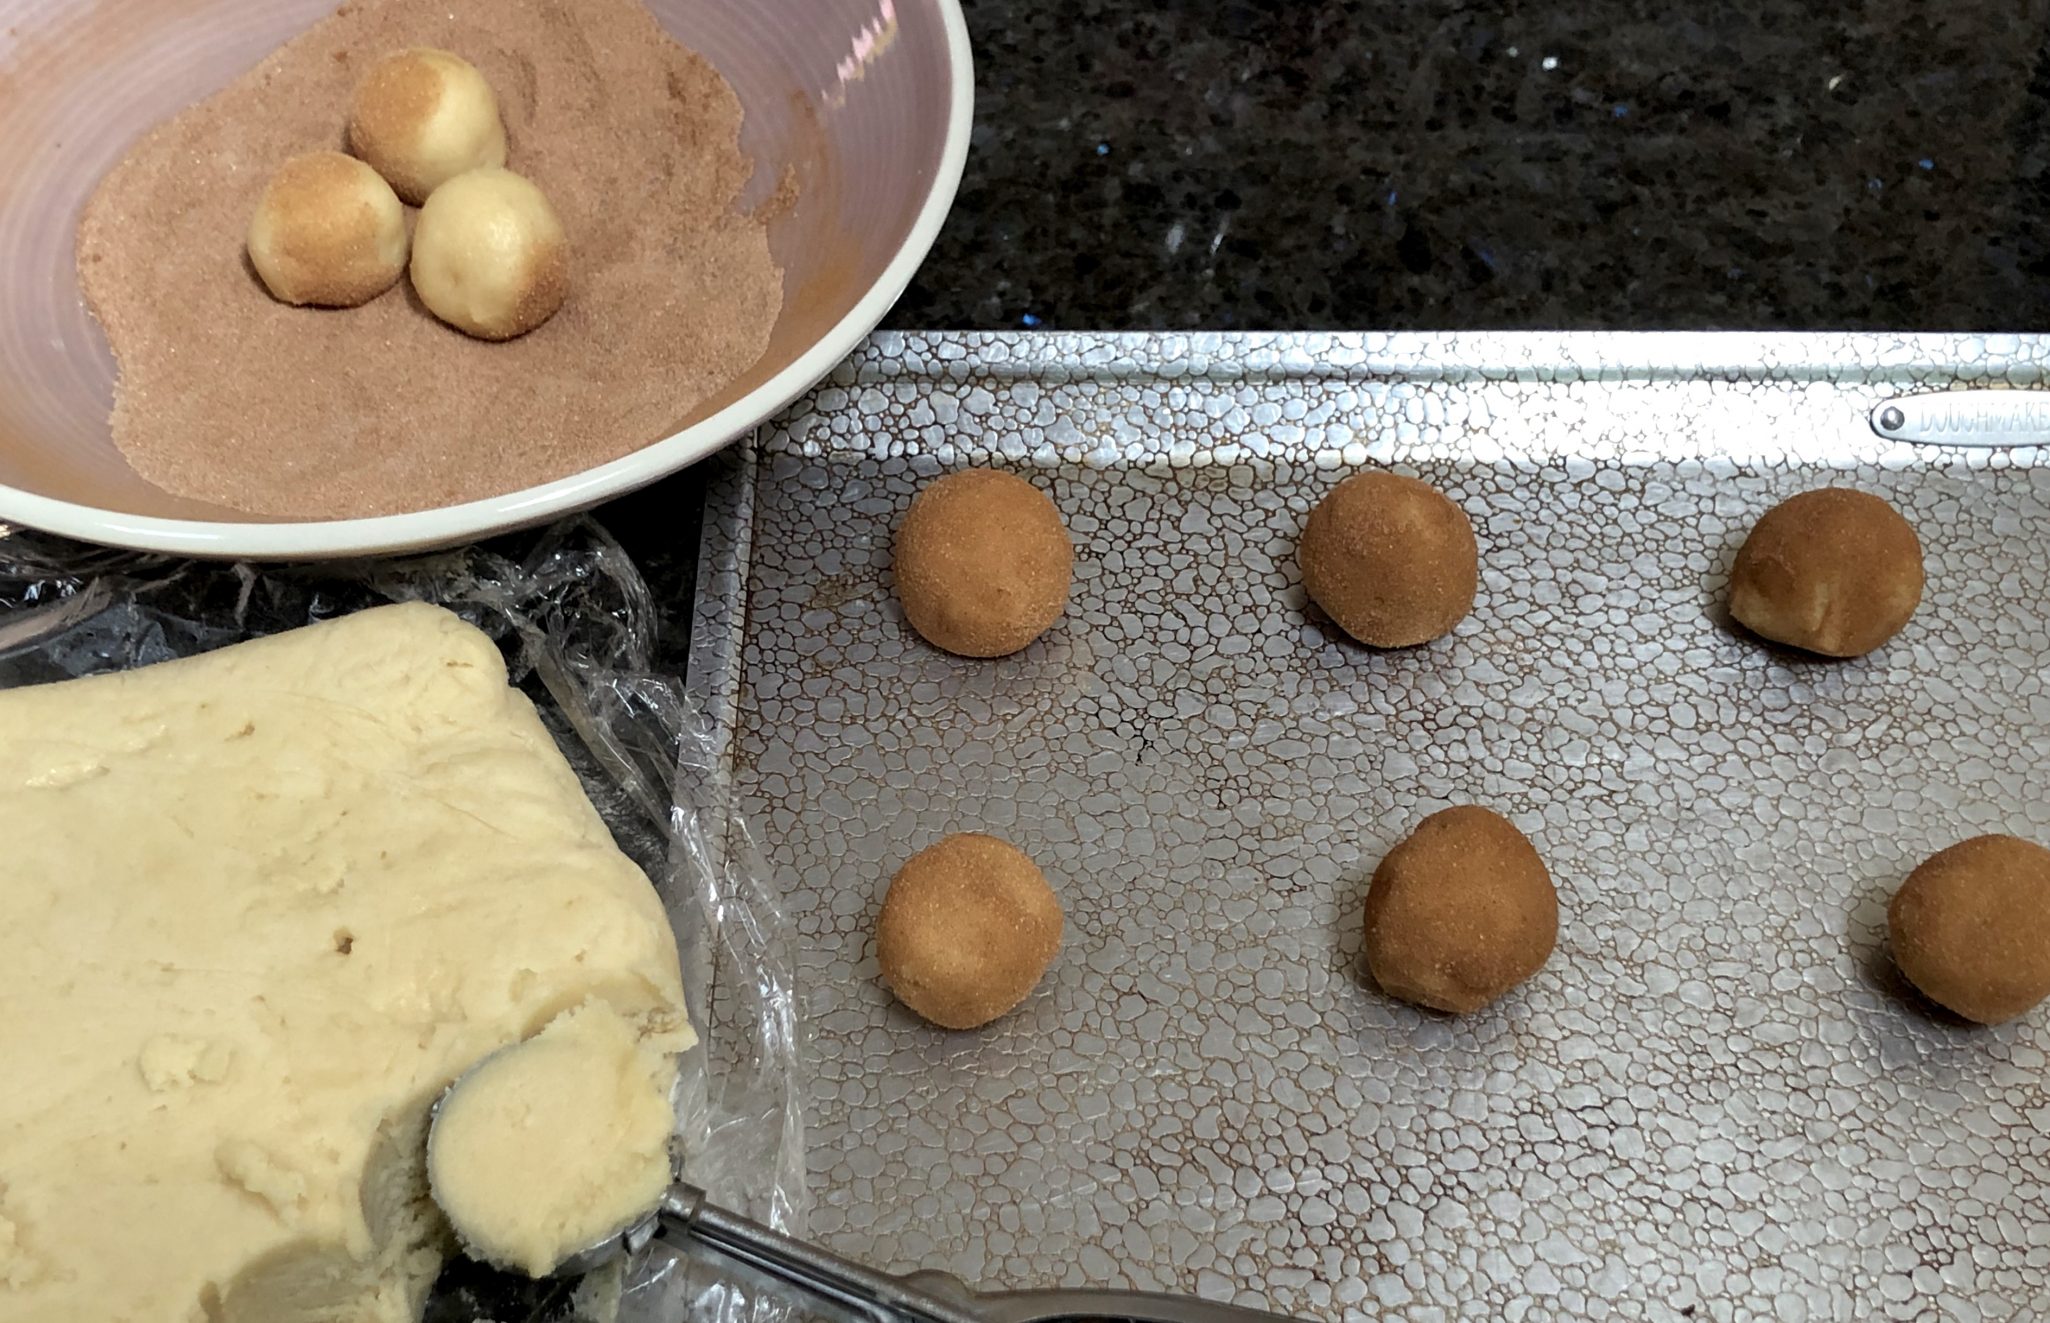
After chilling the dough,  use a 1 tablespoon ice cream scoop (#70) to form balls.  Shape the scoops into smooth balls and roll in cinnamon sugar.  Use a good quality cinnamon, like Penzey’s . This is a great cookie to make with the kids or grandkids, never met a kid that didn’t like to roll balls of cookie dough in copious amounts of cinnamon sugar all the while licking their fingers.

The one tablespoon scoop yields a cookie about 2 inch in diameter.  All well and good, BUT, the smaller you make the cookie the harder it is to end up with a cookie that has crisp edges and a soft center.  If that is what you are looking for, try making bigger cookies. Increase your baking time by a couple of minutes.

Bake cookies 8-10 minutes until the edges are golden brown.  I like the centers soft, if you like crunchy cookies, bake them a bit longer.  How long?  Don’t know, I don’t like them that way.

Snicker Doodles

Course cookies
Cuisine American
Keyword Snickerdoodles
Prep Time 20 minutes
Cook Time 10 minutes

Equipment

  • Cookie sheets, lined with parchment paper or greased

Ingredients

  • 3 cups unbleached all-purpose flour (13.5 ounces)
  • 2 teaspoons cream of tartar
  • 1 teaspoon baking soda
  • ½ teaspoon salt
  • ½ pound unsalted butter, softened (2 sticks)
  • cups sugar 10.5 ounces
  • 2 large eggs
  • 2 teaspoons ground cinnamon
  • 2 tablespoons granulated sugar

Instructions

  • Preheat the oven to 400° Position rack in the middle of the oven.
  • Combine the flour, cream of tartar, baking soda, and salt in a bowl and mix thoroughly with a whisk or fork.
  • In a medium mixing bowl with an electric mixer, beat the butter with the 1½ cups sugar until smooth and creamy, not fluffy. Beat in the eggs just until blended. Add the flour mixture and stir or beat on low speed just until incorporated. Gather the dough into a disc and wrap in plastic wrap. Refrigerate until firm, at least 30 minutes.
  • Mix the remaining 2 tablespoons sugar and the cinnamon in a small bowl. Form level tablespoons of dough with an ice cream scoop, into 1-inch balls. Roll the balls in the cinnamon sugar and place 2 inches apart on the lined or ungreased cookie sheets.
  • Bake for 8 to 11 minutes, until the cookies puff and begin to settle down. To create crevices, when cookies puff, tap cookie sheet on rack. This causes the cookie to sink, creating crinkles. Rotate the cookie sheet from front to back halfway through the baking time to ensure even baking. Bake until the edges are golden. Remove from oven and allow to cool for a couple of minutes. Remove cookies with a spatula to a wire rack. Don't let them cool completely or the cookies will stick to the sheet. I bake on ungreased sheets to minimize spreading.
  • Cool the cookies completely before stacking or storing. May be kept in an airtight container for several days.
Almond for Pie! Cherry Slab Pie with Marzipan Crumble

Almond for Pie! Cherry Slab Pie with Marzipan Crumble

Right next to my favorite strawberry stand at the farmer’s market is a cherry stand. A couple of weeks ago was their last time at the market for the season. So, of course, I couldn’t resist and loaded up on cherries hoping to savor the last pick of the season.

Which meant I was constantly tossing unadulterated cherries into my mouth.  Around the 50th cherry, the thought-there must be another way to enjoy these bad boys, danced through my head.  Coincidentally, a post from Ipso Fatto appeared in my inbox for a luscious-looking cherry slab pie.  Fortuitous or can Google read minds now. Hmmm.

The recipe is originally from Vintage Baker by Jessie Sheehan.  This is not the first time I have tried one of her recipes. I also posted her Butterscotch Potato Chip Balls that are, in a word, scrumptious. She also has a blog, Jessie Sheehan Bakes, which I have added to my blogs to follow. Plenty of photos and helpful notes to go along with her well-written recipes.

Did not even know I had a cherry pitter…go figure, another kitchen gadget, makes me so happy.

Do not get freaked out by the word PIE.  The crust for this slab pie is made in the food processor and pressed into a removable bottom pan. No rolling here! Very easy.  The dough is made with regular flour and almond flour (which helps keep the crust tender), butter, an egg yolk, and sugar.

Pulse ingredients in the food processor until it just starts to come together.  Do not over-process.  If you pinch the dough and it stays together, stop.

Press the dough into a springform pan. See, EASY.

The crumble is made with almond paste to amp up the almond further.  Ahhh, cherry and almond, like Fred and Ginger, a spot on flavor combination.

I made half the recipe which is the best way to resist the temptation of eating an entire slab pie.  An excellent strategy for me of little self-control.  I used a 9 inch round springform pan which worked perfectly.

This pie is delicious, the buttery crust and marzipan crumble all supporting the star of the show-juicy sweet cherries.  If only cherry season was a little longer, sigh.

Cherry-Almond Slab Pie with Marzipan Crumble

Lovely, easy to make slab pie from Vintage Baker
Course Dessert
Cuisine American, Asian
Keyword cherry, marzipan crumble, slab pie, vintage baker
Prep Time 30 minutes
Cook Time 1 hour 10 minutes
Servings 8 servings

Equipment

  • 9x13 pan
  • 9 inch springform pan

Ingredients

Almond Piecrust

  • 2 cups all-purpose flour 280gms
  • 3/4 cup almond flour 90gms
  • 1/3 cup granulated sugar 65gms
  • 3/4 tsp salt
  • 3/4 cup unsalted butter, chilled 165gms, cut into 1/2 inch pieces
  • 1 tsp almond extract
  • 1 egg yolk
  • 1/4 cup cold water

Marzipan Crumble

  • 1 cup all-purpose flour 140gms
  • 7 ounces almond paste
  • 2/3 cup granulated sugar 130gms
  • 1/2 cup unsalted butter, chilled 110gms cut into 1/2 inch pieces

Cherry Filling

  • 10 cups pitted cherries, fresh or frozen do not throw
  • 3/4 cup cornstarch 105gms
  • 2 cups granulated sugar
  • 1/4 tsp salt
  • 2 T lemon juice
  • 1/2 tsp almond extract
  • Sliced almonds for sprinkling

Almond Glaze

  • 1 cup confectioners' sugar 120gms
  • 1/4 cup heavy cream 60ml
  • 1/8 tsp almond extract

Vanilla Ice Cream!

Instructions

Piecrust

  • Preheat oven to 400 degrees
    Grease 13x9x2 inch pan with non-stick cooking spray or softened butter, line bottom with parchment paper, grease paper. Set aside.
  • Combine AP flour, almond flour, sugar and salt in the bowl of a food processor fitted with the metal blade. Pulse to combine ingredients. Distribute butter on top of the flour mixture and pulse until coarse crumbs with a few pea-sized pieces.
  • Combine almond extract, egg yolk and 1/4 cup cold water. Add liquid mixture to food processor and continue to pulse until the dough begins to clump. Do not overdo it! Transfer the dough into prepared pan, press it evenly onto the bottom and two thirds up the sides. Wrap pan in plastic wrap and place in freezer while you make the crumble and filling.

For the Crumble

  • Add flour, almond paste and granulated sugar to food processor bowl. Pulse to combine. Add butter and process until it comes together in one mass. Remove from processor and break in bits. Cover and wrap and store in freezer until needed.

Filling

  • Combine cherries, cornstarch, sugar, and salt in a bowl. Add lemon juice and almond extract and stir well.
    To assemble pie, pour cherries into pie crust. Top with crumble and sprinkle sliced almonds on top.
  • Bake 80-90 minutes, less for fresh cherries, rotating the pan after 30 minutes and tenting with foil so it doesn't brown too much. Pie is ready when the filling bubbles thru the center.

Glaze

  • Combine powdered sugar, cream and extract in a bowl and whisk until smooth. Drizzle on pie.
  • Serve with Vanilla ice cream, that's an order.

Notes

This recipe can be halved, which is what I did.  Weigh ingredients if possible for accuracy.  
For the egg, one large egg is about 3 tablespoons.  Beat egg and mesure out 1-1/2 tablespoons for half recipe.
Half recipe can be baked in a 9 inch springform pan.
Baking time will be shorter, start checking at 50 minutes.


(Hiyashi Chuka – Ramen Salad) Swept Away By A Summer Ramence Summer Madness #2

(Hiyashi Chuka – Ramen Salad) Swept Away By A Summer Ramence Summer Madness #2

TAs temps edged upward this past week, I began thinking about cold noodle dishes to counter the heat. One of our favorite ramen joints in San Jose features a summer noodle salad that the hubster loves. This prompted me to think it was time to add a cold ramen dish to my repertoire.  I perused one of my favorite sites, Just One Cookbook, and found a classic Japanese cold ramen dish, Hiyashi Chuka.  Bingo, I was off to the races.  At first glance, it seemed very similar to my Somen SaladThe dressing has soy sauce, sesame oil, sugar, and rice vinegar, for instance.  A big difference is Hiyashi Chuka starts with a thicker, more substantial ramen noodle.

Summer Ramence

The dish is eye-candy, the noodles are hidden by a colorful palette of toppings including julienned pale green cucumbers, orange-tinged crab leg, slivers of green onions, pink honey ham and shreds of fried egg.  Cold noodle salads like this refreshing and delicious Hiyashi Chuka are perfect for summer potlucks, picnics and pool parties.  I hope you will add it to your summer rotation.

The Skinny on Noods

Both fresh or dried noodles work in this dish.  I like using fresh ramen or lo mein. If you can get a hold of ramen noodles by Sun Co. from Hawaii, get it. This brand supplies the bulk of ramen houses in the US. and has a really nice chew or consistency.  In a pinch, you could use linguine or spaghetti but my first choice would be an Asian noodle. If you are gluten-free, rice or yam noodles would be a good substitute.  Confused about the multitude of Asian noodles out there? Here is a great Asian noodle primer from Serious Eats.

Dressing It Up

The dressing is on the sweet side so I would start with two tablespoons of sugar, taste and add more if desired.  You can use Ponzu, a citrus soy sauce, instead of soy sauce. Toppings can be ANYTHING you like or have on hand.  Keep in mind you want the play between sweet and salty, crunchy and soft. I like cucumbers, honey ham, imitation crab, egg, corn, and tomatoes. Don’t like imitation crab?  Use bay shrimp or splurge on real crab.  You can substitute honey turkey, shredded chicken (leftover soy sauce chicken would work really well) or char sir (bbq pork) for the ham. I leave out the lettuce sometimes or substitute shredded cabbage.  I love a good sprinkling of chopped scallions and cilantro.  Oishii!

HIYASHI CHUKA (COLD RAMEN)

A delicious, refreshing cold noodle salad that is perfect for summer!
Course Main Course, Salad
Cuisine Asian
Keyword japanese, Noodle, Ramen, Salad, sesame
Prep Time 45 minutes
Cook Time 10 minutes
Servings 8 Servings

Ingredients

Dressing

  • 6 Tbsp soy sauce Any all purpose soy like Kikkoman will work, or substitute half with Ponzu for a hint of citrus
  • 4 Tbsp sugar Adjust to taste! Start with 2 tablespoons
  • 3 Tbsp rice vinegar
  • 2 Tbsp sesame oil
  • 2 Tbsp water
  • 1 Tbsp white sesame seeds roasted/toasted
  • ¼ tsp ginger grated
  • ½-1 tsp la-yu, optional Japanese chili oil

Egg crepe, shredded

  • 2 large eggs beaten
  • 2 tsp sugar
  • ¼ tsp salt kosher or sea salt; use half if using table salt
  • neutral flavor oil vegetable, canola, etc

Toppings

  • 1/4-1/2 pound Bay shrimp
  • 1 Persian/Japanese cucumbers or 1/3 English cucumber, julienned
  • 1 iceberg lettuce shredded, or use romaine lettuce
  • ½ Tomato cut into wedges, or cherry tomatoes quartered
  • 3-4 slices Honey Ham Sub bbq pork, or honey turkey, Canadian bacon, julienned
  • 4-6 imitation crab meat kanikam or splurge and use real crab, or fish cake, shredded or julienned
  • 1/2 cup Kaiware radish sprouts or green onions, chopped

Other toppings

  • Poached chicken or leftover soy sauce chicken shredded, in place of ham
  • Julienned carrots
  • dried wakame seaweed
  • shredded nori seaweed kizami nori

Noodles

  • 2 package fresh ramen noodles 12 ounces each substitute dry ramen noodles, or Lo-mien

Garnish

  • 1 Tbsp white sesame seeds roasted/toasted
  • Japanese karashi hot mustard optional
  • pickled red ginger beni shoga or kizami beni shoga, optional

Instructions

  • Combine dressing ingredients in a medium bowl and whisk together. Set aside or if made in advance, store in fridge.
  • For eggs, make thin egg crepes and cut it into thin strips. Heat oil in non-stick pan over medium heat. Pour the egg mixture into the pan, tilt & swirl pan to distribute egg. Like making a crepe. Cook until set and flip egg over. You will have a few brown spots, but should be predominantly yellow. Slide crepe onto a plate and reserve. When it is cool enough you can roll the egg crepe up and cut it into thin strips.
  • You can use large prawns if you like, but I like using bay shrimp which generally come precooked. Easy peasy.
  • Cut all the topping ingredients as directed.
  • For the noodles, bring a pot of water to a boil and add the noodles. Separate the noodles before dropping into water. Cook according to package directions. Drain the water and rinse the noodles to remove starch. Allow noodles to cool completely. Chill in fridge if desire. Place noodles in a serving bowl and mix half of dressing into noodles.
  • Place all the toppings and pour the remaining dressing on salad before serving. Serve with karashi hot mustard and pickled ginger on the side, if desired. Refer to pics, ingredients are usually arranged in a radial pattern on top of the noodles.