Category: Instant Pot

Corned Beef & Cabbage (Let’s Hash It Out)

Corned Beef & Cabbage (Let’s Hash It Out)

I feel if I am going to eat a meal that is associated with a holiday I ought to learn a little bit about that particular holiday and its significance to the culture or country of origin.  The extent of my knowledge regarding St. Patty’s Day is corned beef and cabbage.

So Friday as I was pulling my corned beef out of the fridge, I googled St. Patrick’s Day.  In a nutshell, Patrick, before he became a saint, is credited with bringing Christianity to Ireland.  St. Patrick’s Day is the day of his death.  A folktale credits him with driving the snakes out of Ireland, symbolism for pagan religions as there are no snakes in Ireland.

Corned Beef and Cabbage is not the chosen celebratory meal in Ireland but rather came about here in America.  Corned beef and cabbage were both relatively cheap and out of necessity became the meal of choice for the poor Irish immigrants striving to make a new life here.  In Ireland, you are more likely to have Irish Stew and Soda Bread.

Shortcut Corned Beef

I will admit, I make this once a year.  Don’t get me wrong, I love Corned Beef, I just don’t make it at home…except on Saint Patty’s Day.  As a kid, my favorite breakfast was Corned Beef Hash by Mary’s Kitchen.  Yep, hash out of a can, I thought it was delicious.

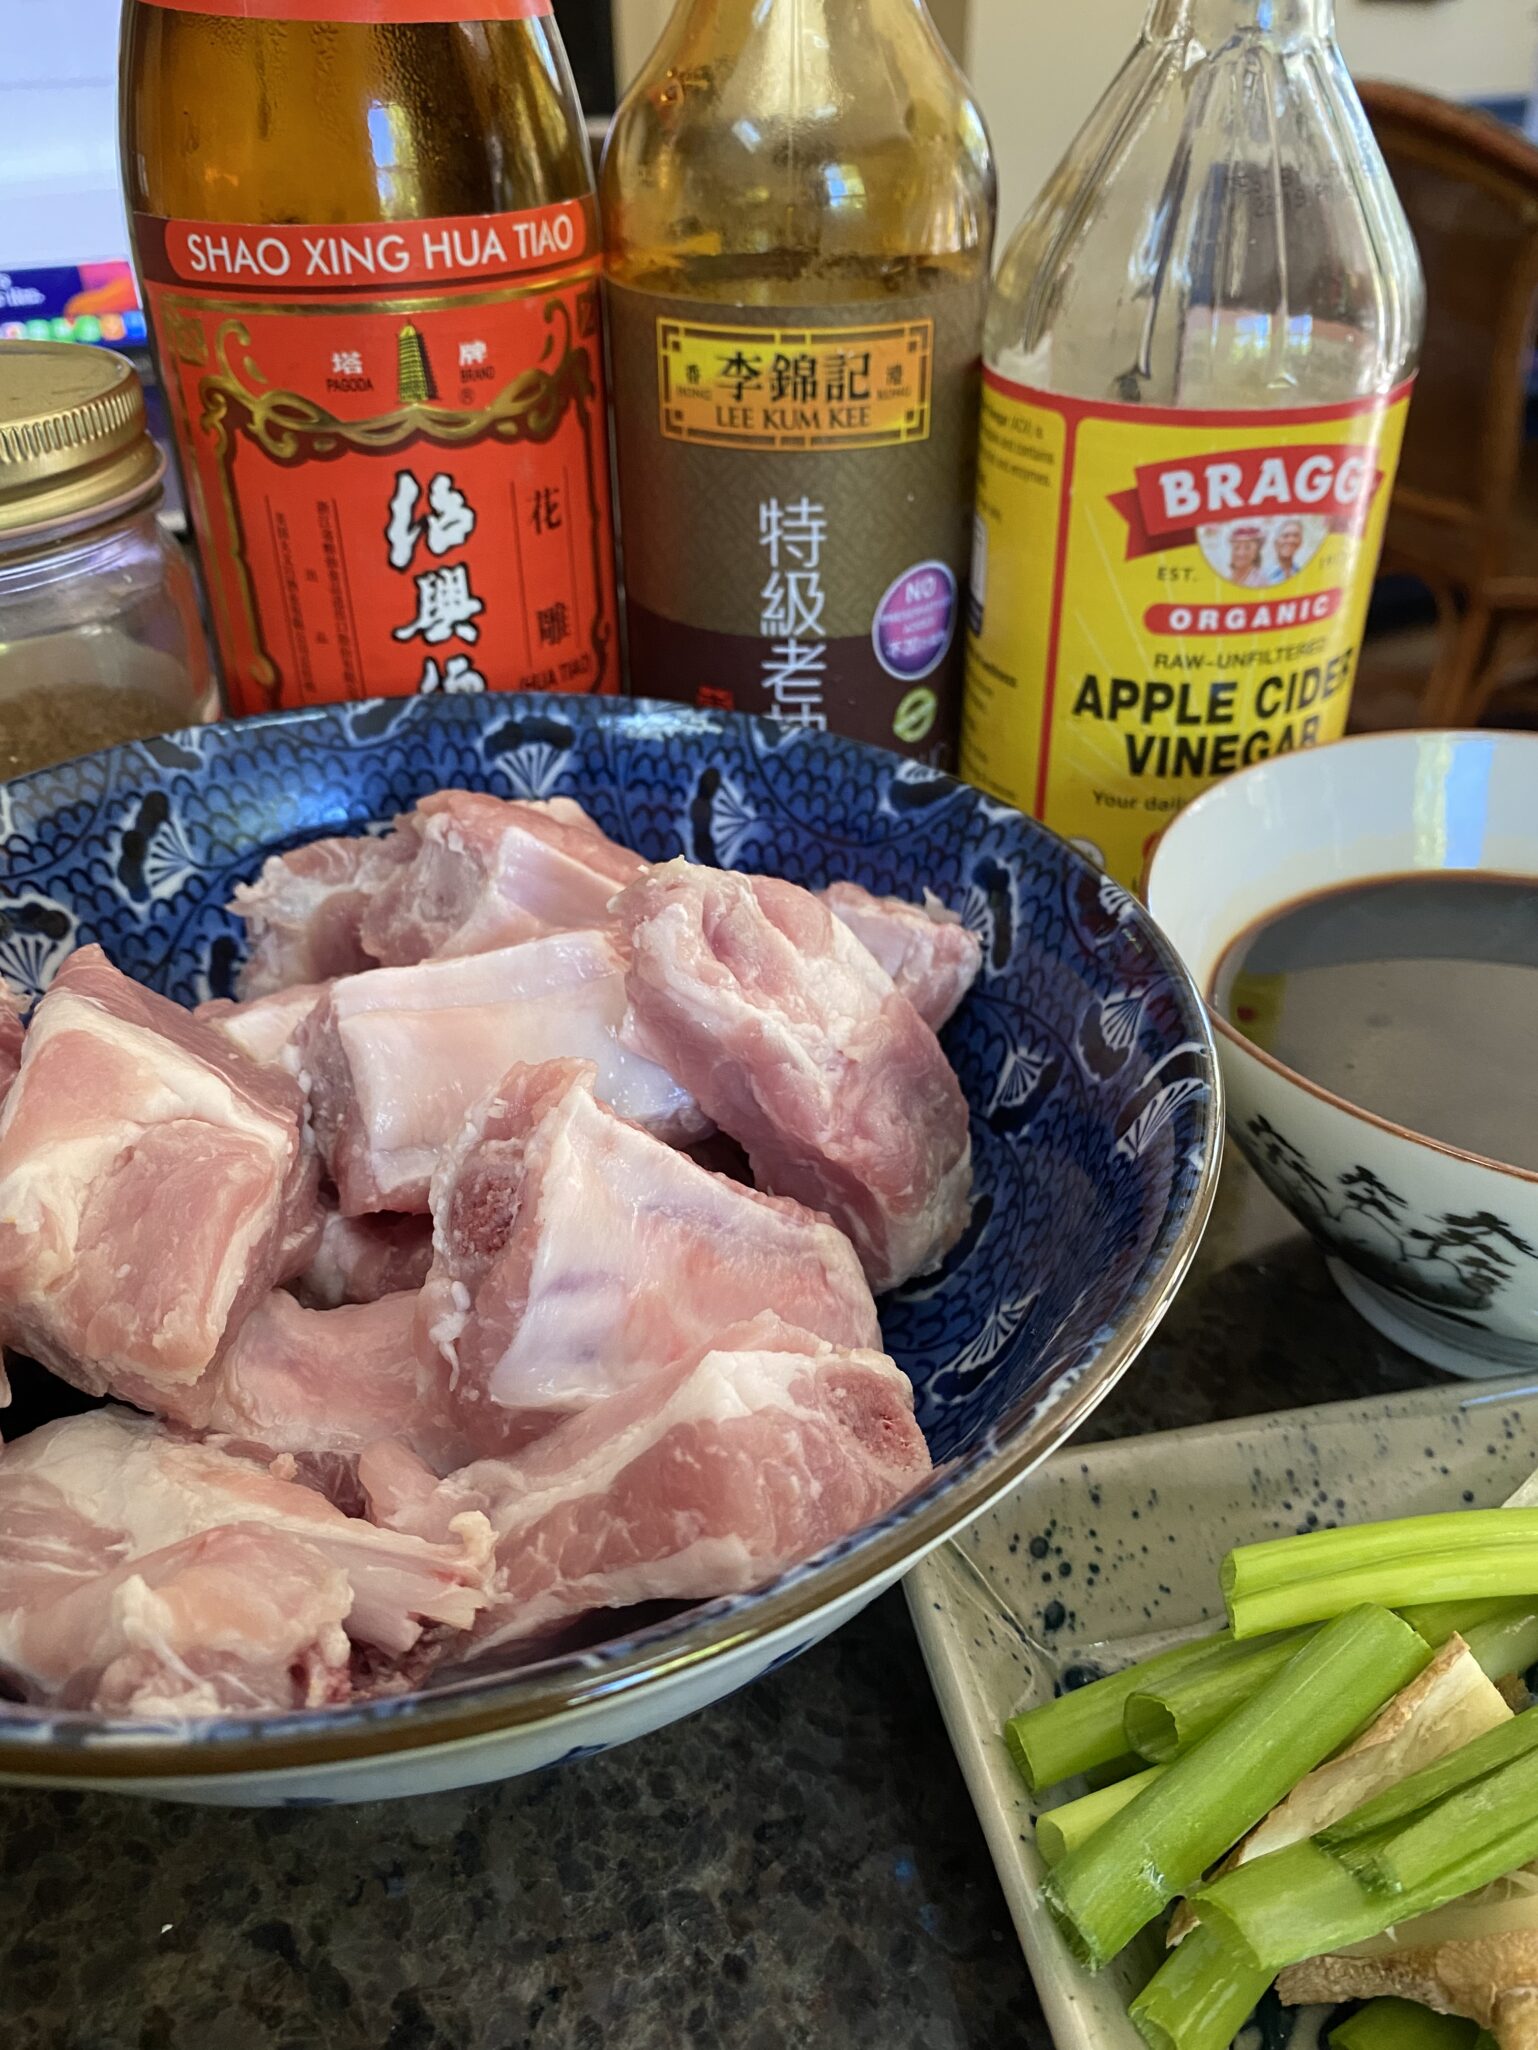
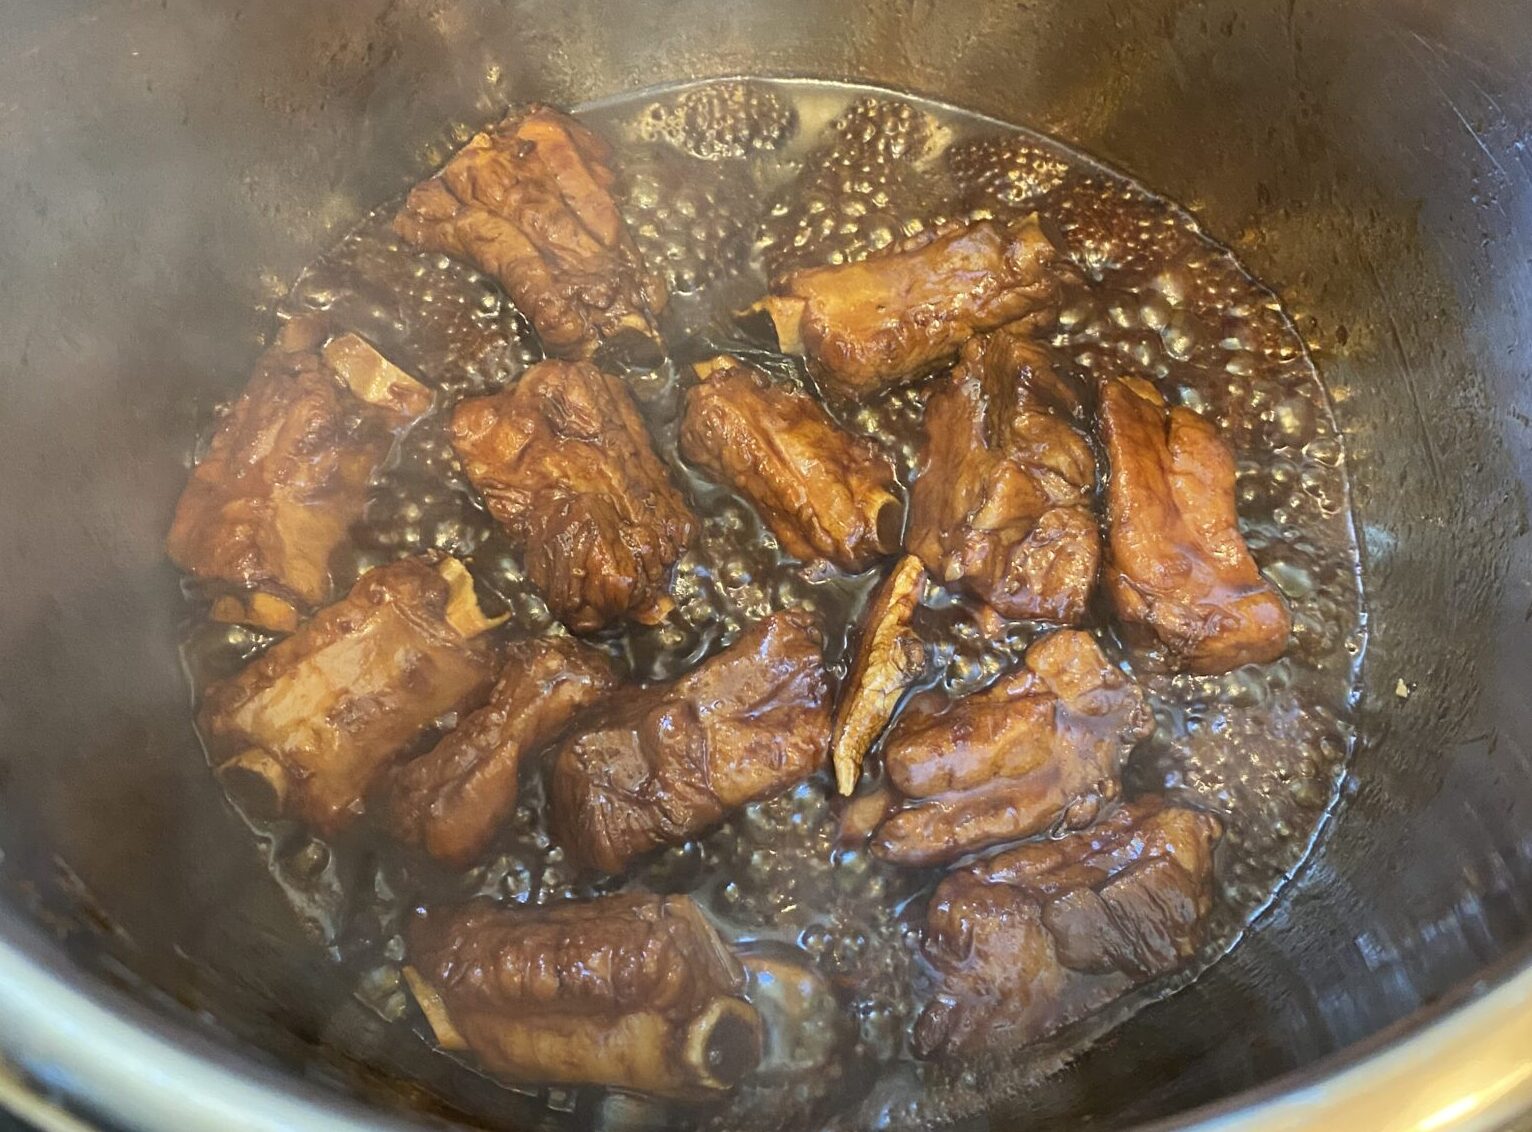
Two things I did differently this year.  On a whim, I splurged on Wagyu Corned Beef Brisket from Costco.  Second, we pulled out the Instant Pot.  With two unknowns it’s hard to know if the Waygu or the IP was responsible for just how delicious the corned beef came out.  It was tender, moist, and delicious.  A variety of recipes found online served as my guide with a shout-out to Simply Recipes.

  • Various recipes I looked at called for a 2.5-pound chunk of corned beef. I don’t know about you, but after cooking,  it shrinks quite a bit and that wouldn’t be enough, not in my family at least. There would be little left for my fav breakfast hash (not acceptable in my book).  The piece I bought was 4 pounds and fit nicely in my 6-quart Instant Pot.  This was enough for dinner, the next day’s lunch, and a generous skillet of hash for that leisurely weekend breakfast.
  • Rinse corned beef thoroughly before placing it in the pressure cooker, helps keep the salt at bay.
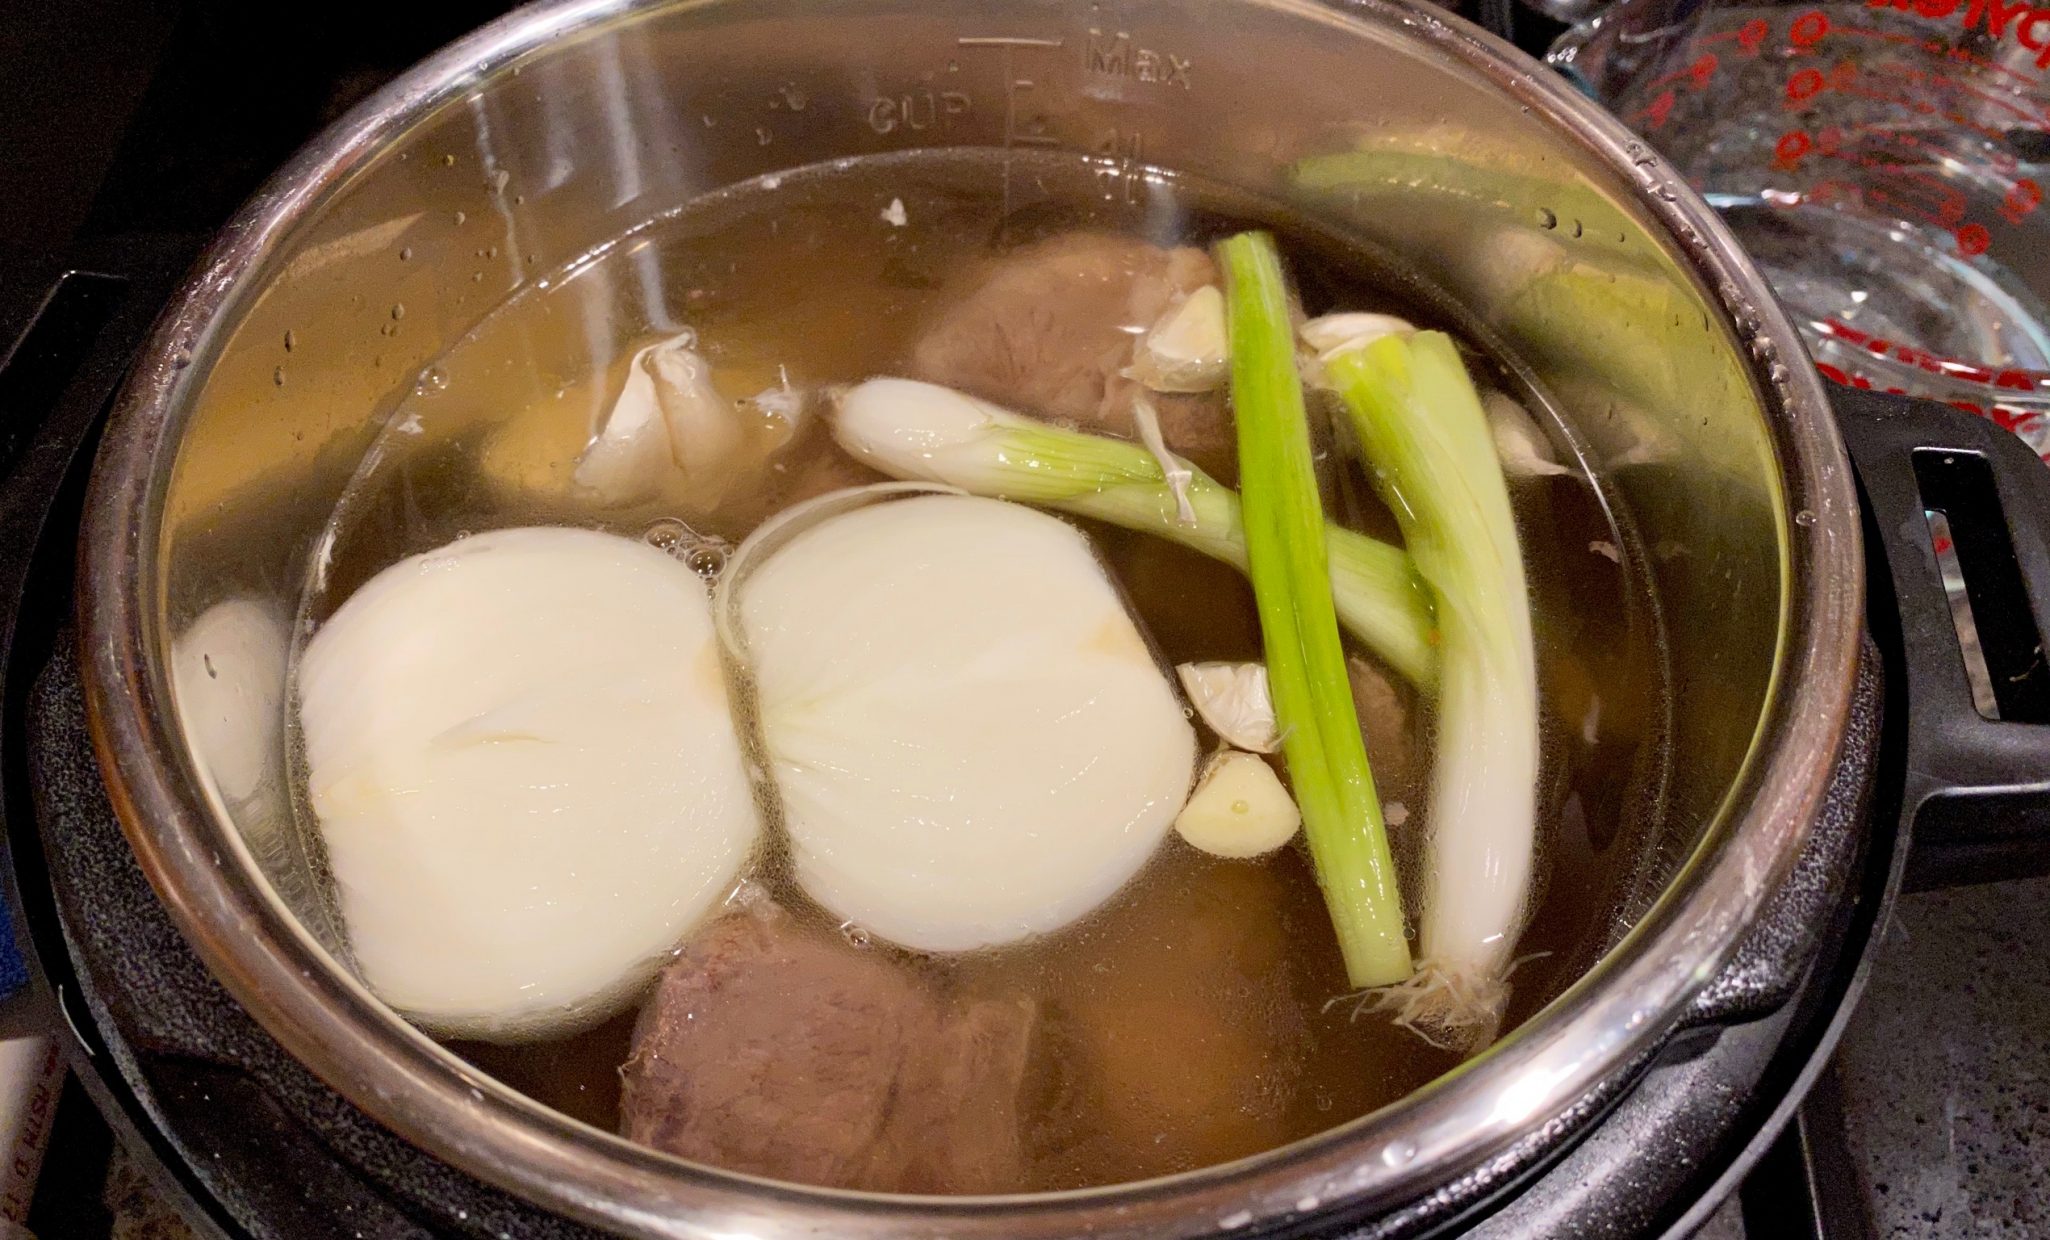
  • Place the corned beef on the metal trivet that comes with the Instant Pot, makes it much easier to lift out when it is done.
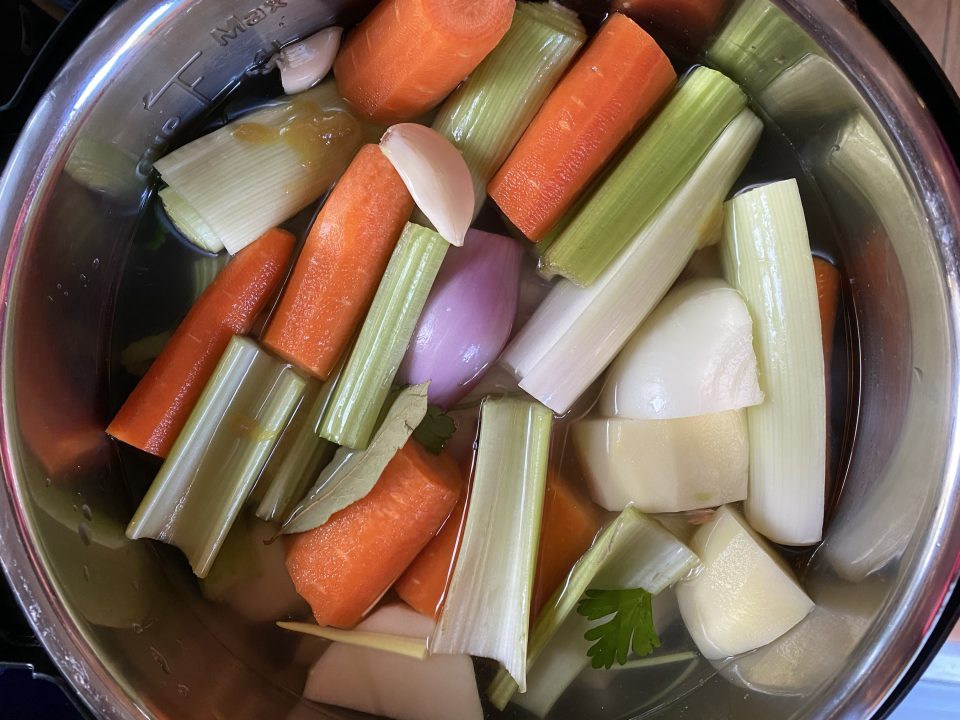
  • Add 1 quartered yellow onion and a couple of cloves of garlic to the pot.  Sprinkle the seasoning packet that comes with the corned beef and 1 tablespoon of brown sugar on the surface of the meat.
  • Add 4 cups of liquid to the pot.  It may not completely cover the meat, and that’s okay.  The liquid can be all water, water, and beef stock 1:1, or a can of stout and water.  The Wagyu beef was on the salty side.  So be careful with the stock, use low sodium or homemade.

Let’s Get to the Easy Part

Seal your Instant Pot and set it to high pressure for 85 minutes and go relax, but tell everyone you are making dinner, they’ll never know.

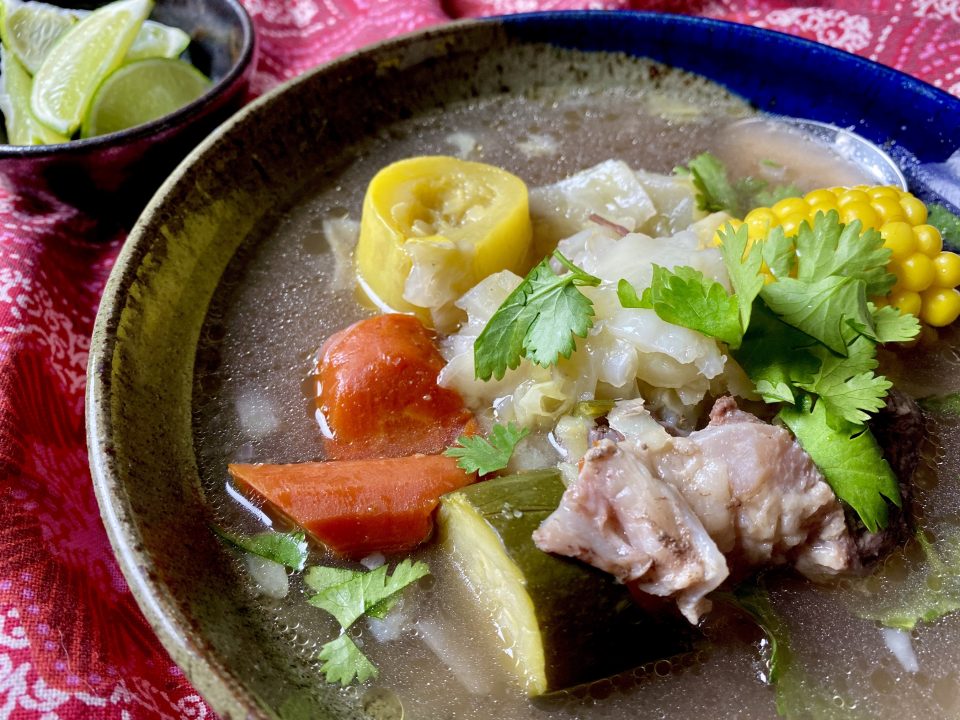
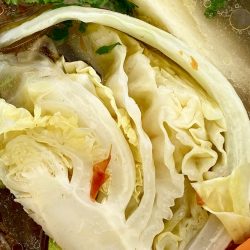
Once the cycle is complete, turn off the Instant Pot and allow the corned beef to natural-release for 15 minutes before taking it out.  If it has not completely depressurized, vent the pot before taking off the lid.  Add your potatoes, carrots, and cabbage (that you prepped while it was cooking, oops, forgot to mention).  Place potatoes and carrots into the pot first, then the cabbage on top. Seal the pot and set a timer for 5 minutes.  Quick release when it is done.

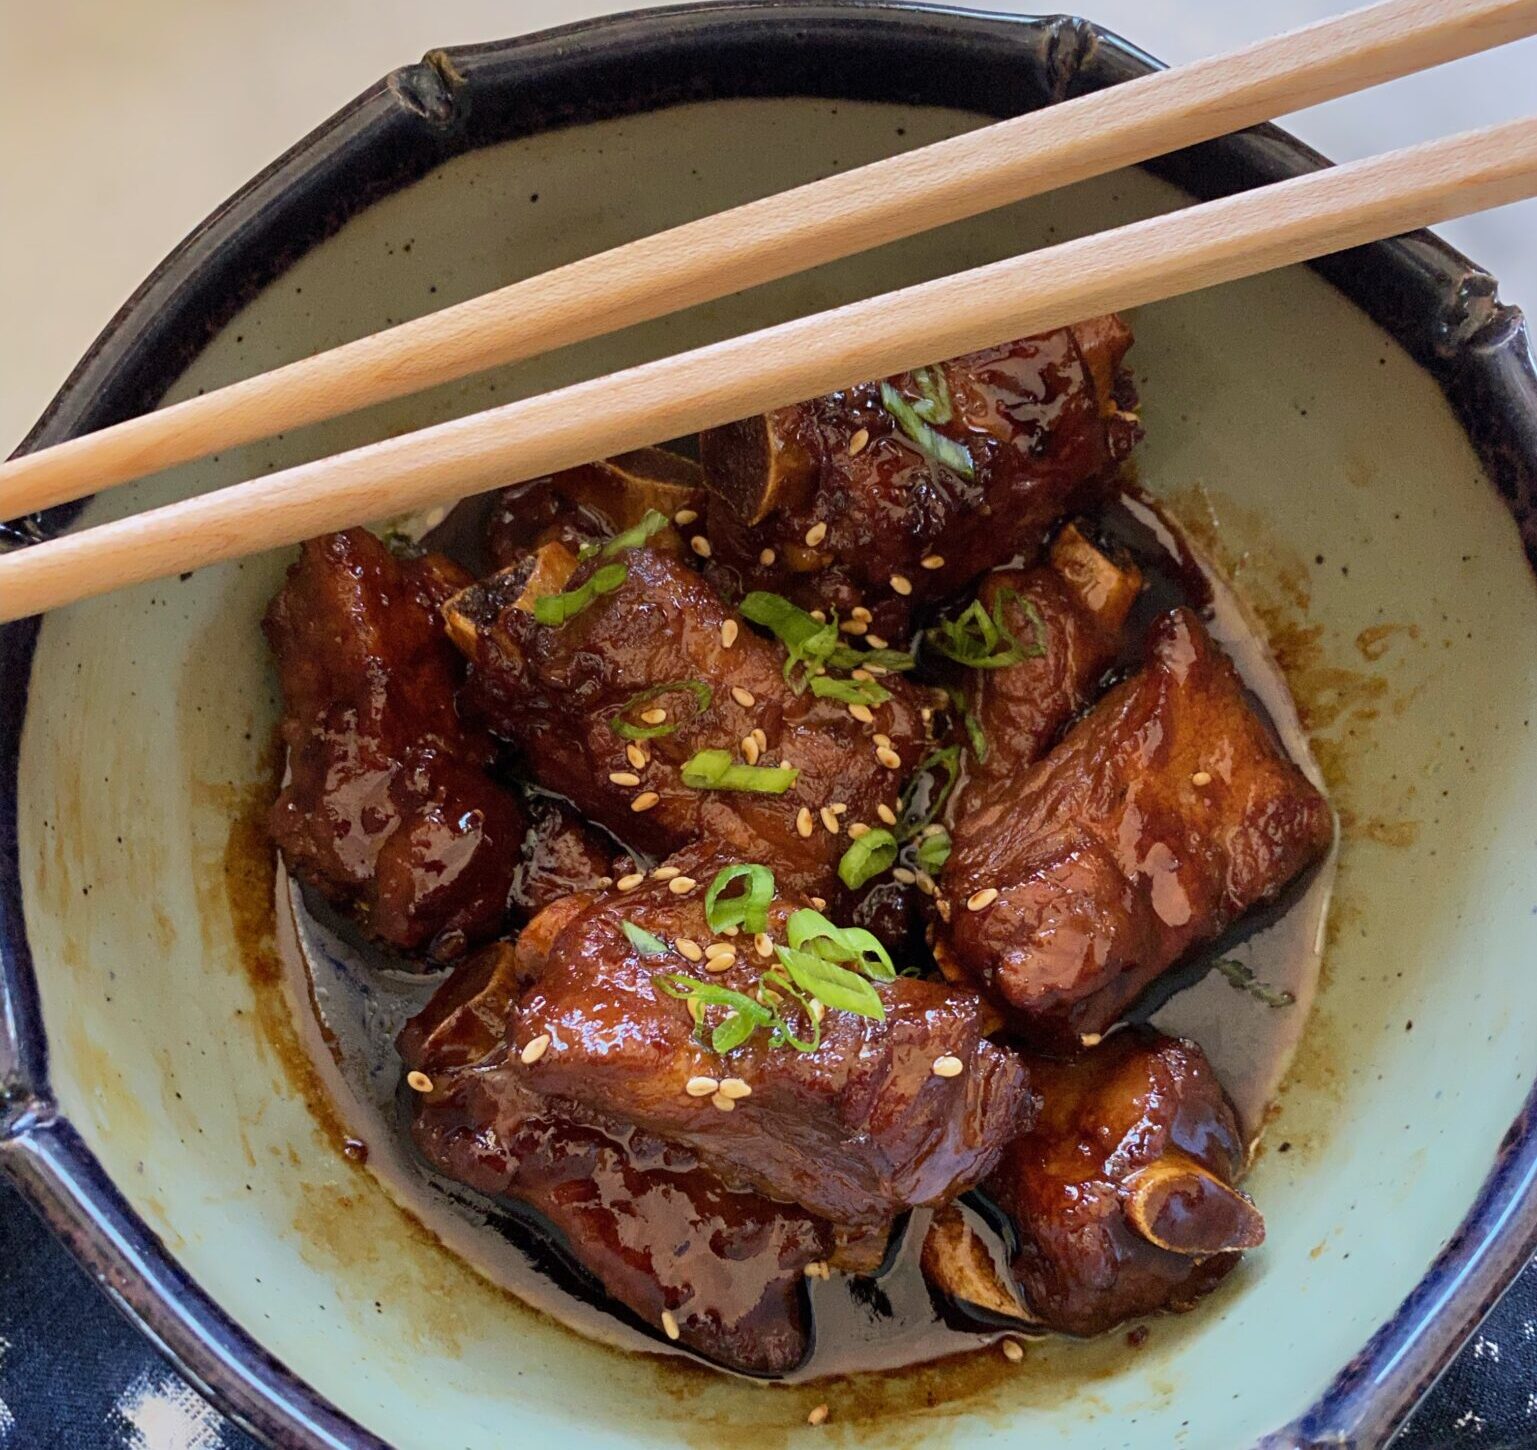
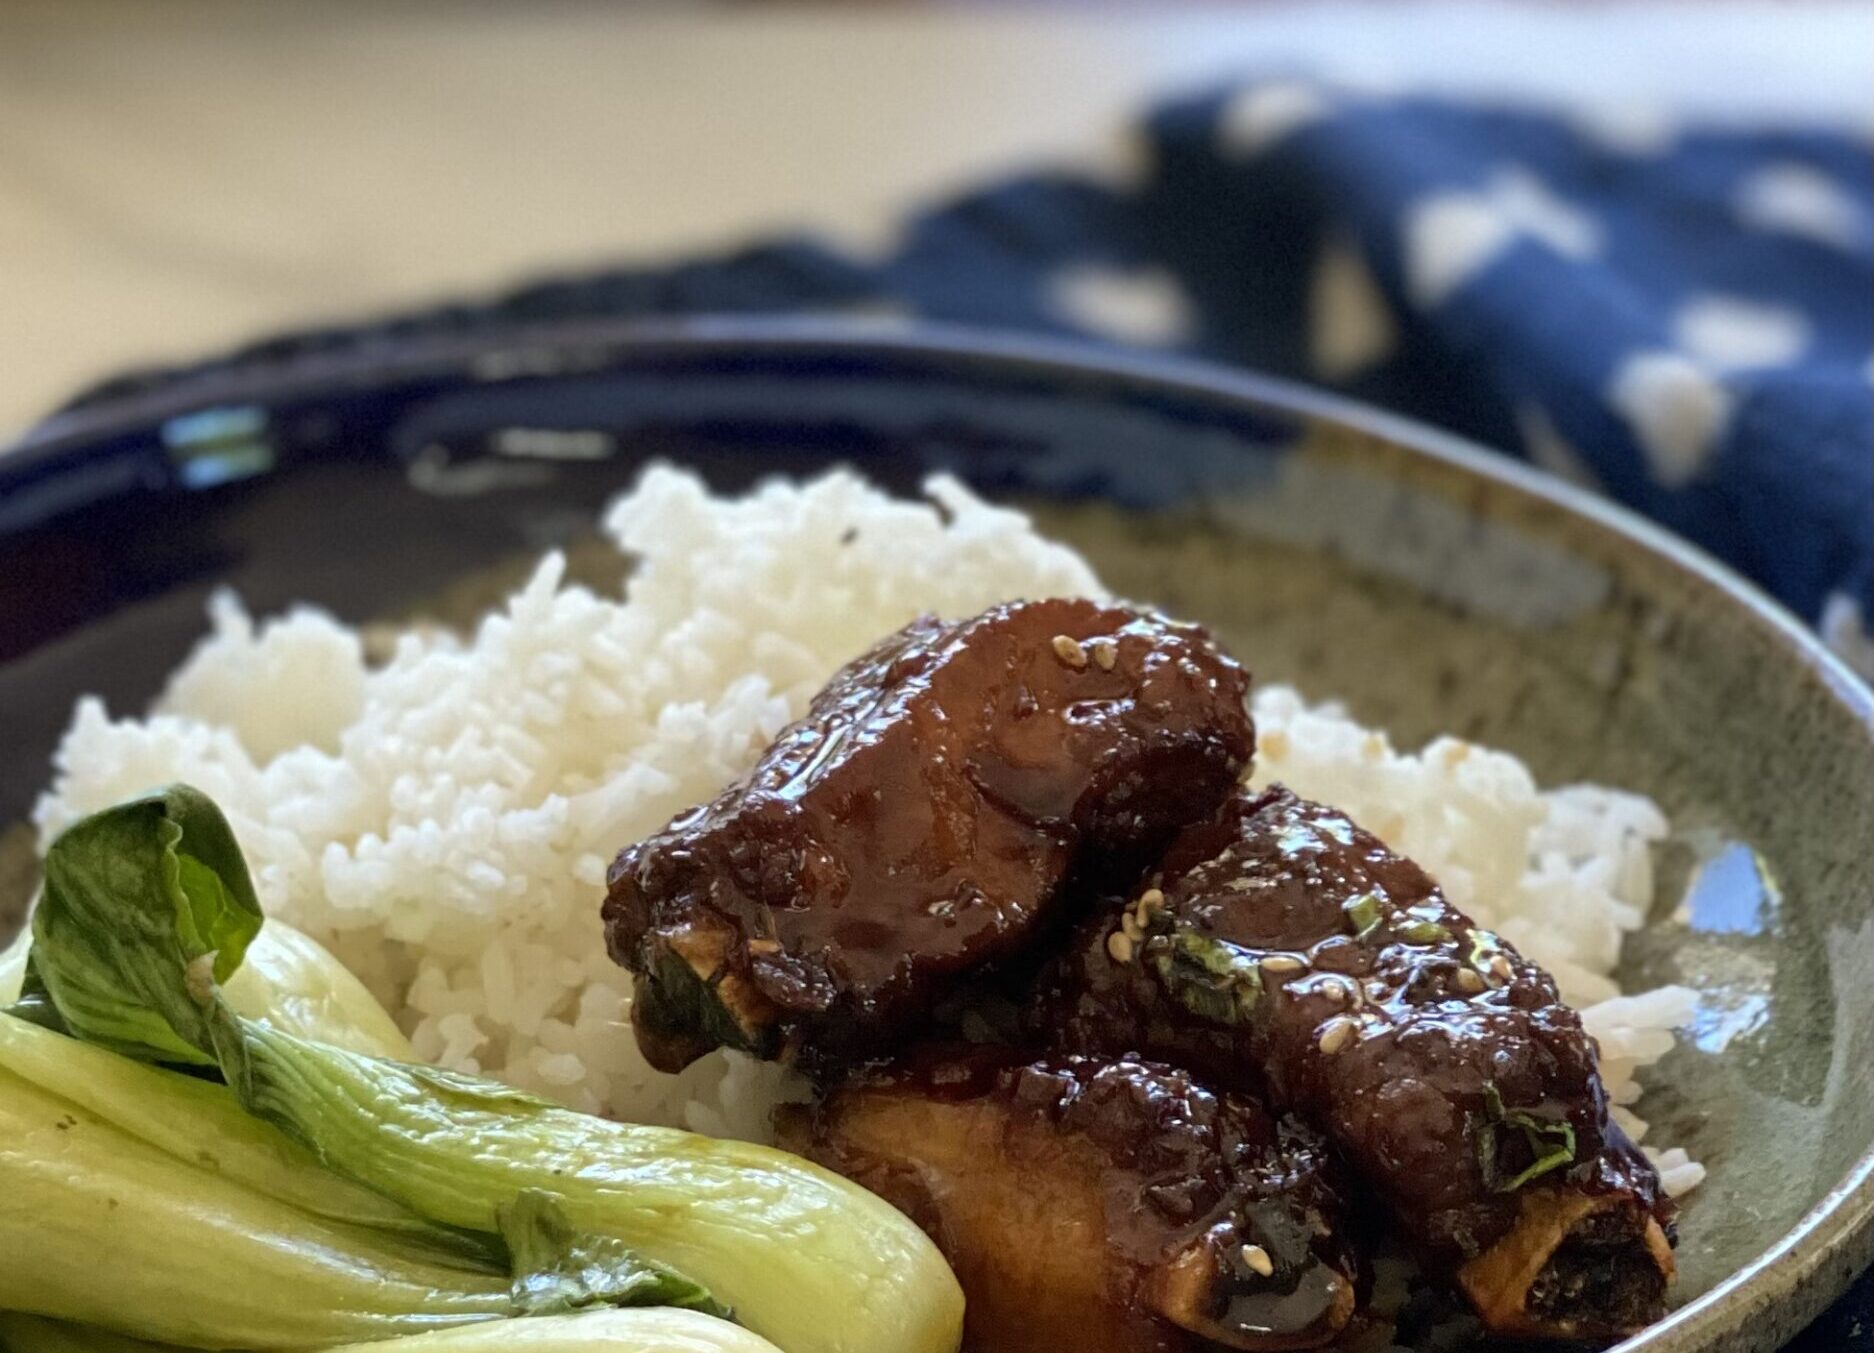
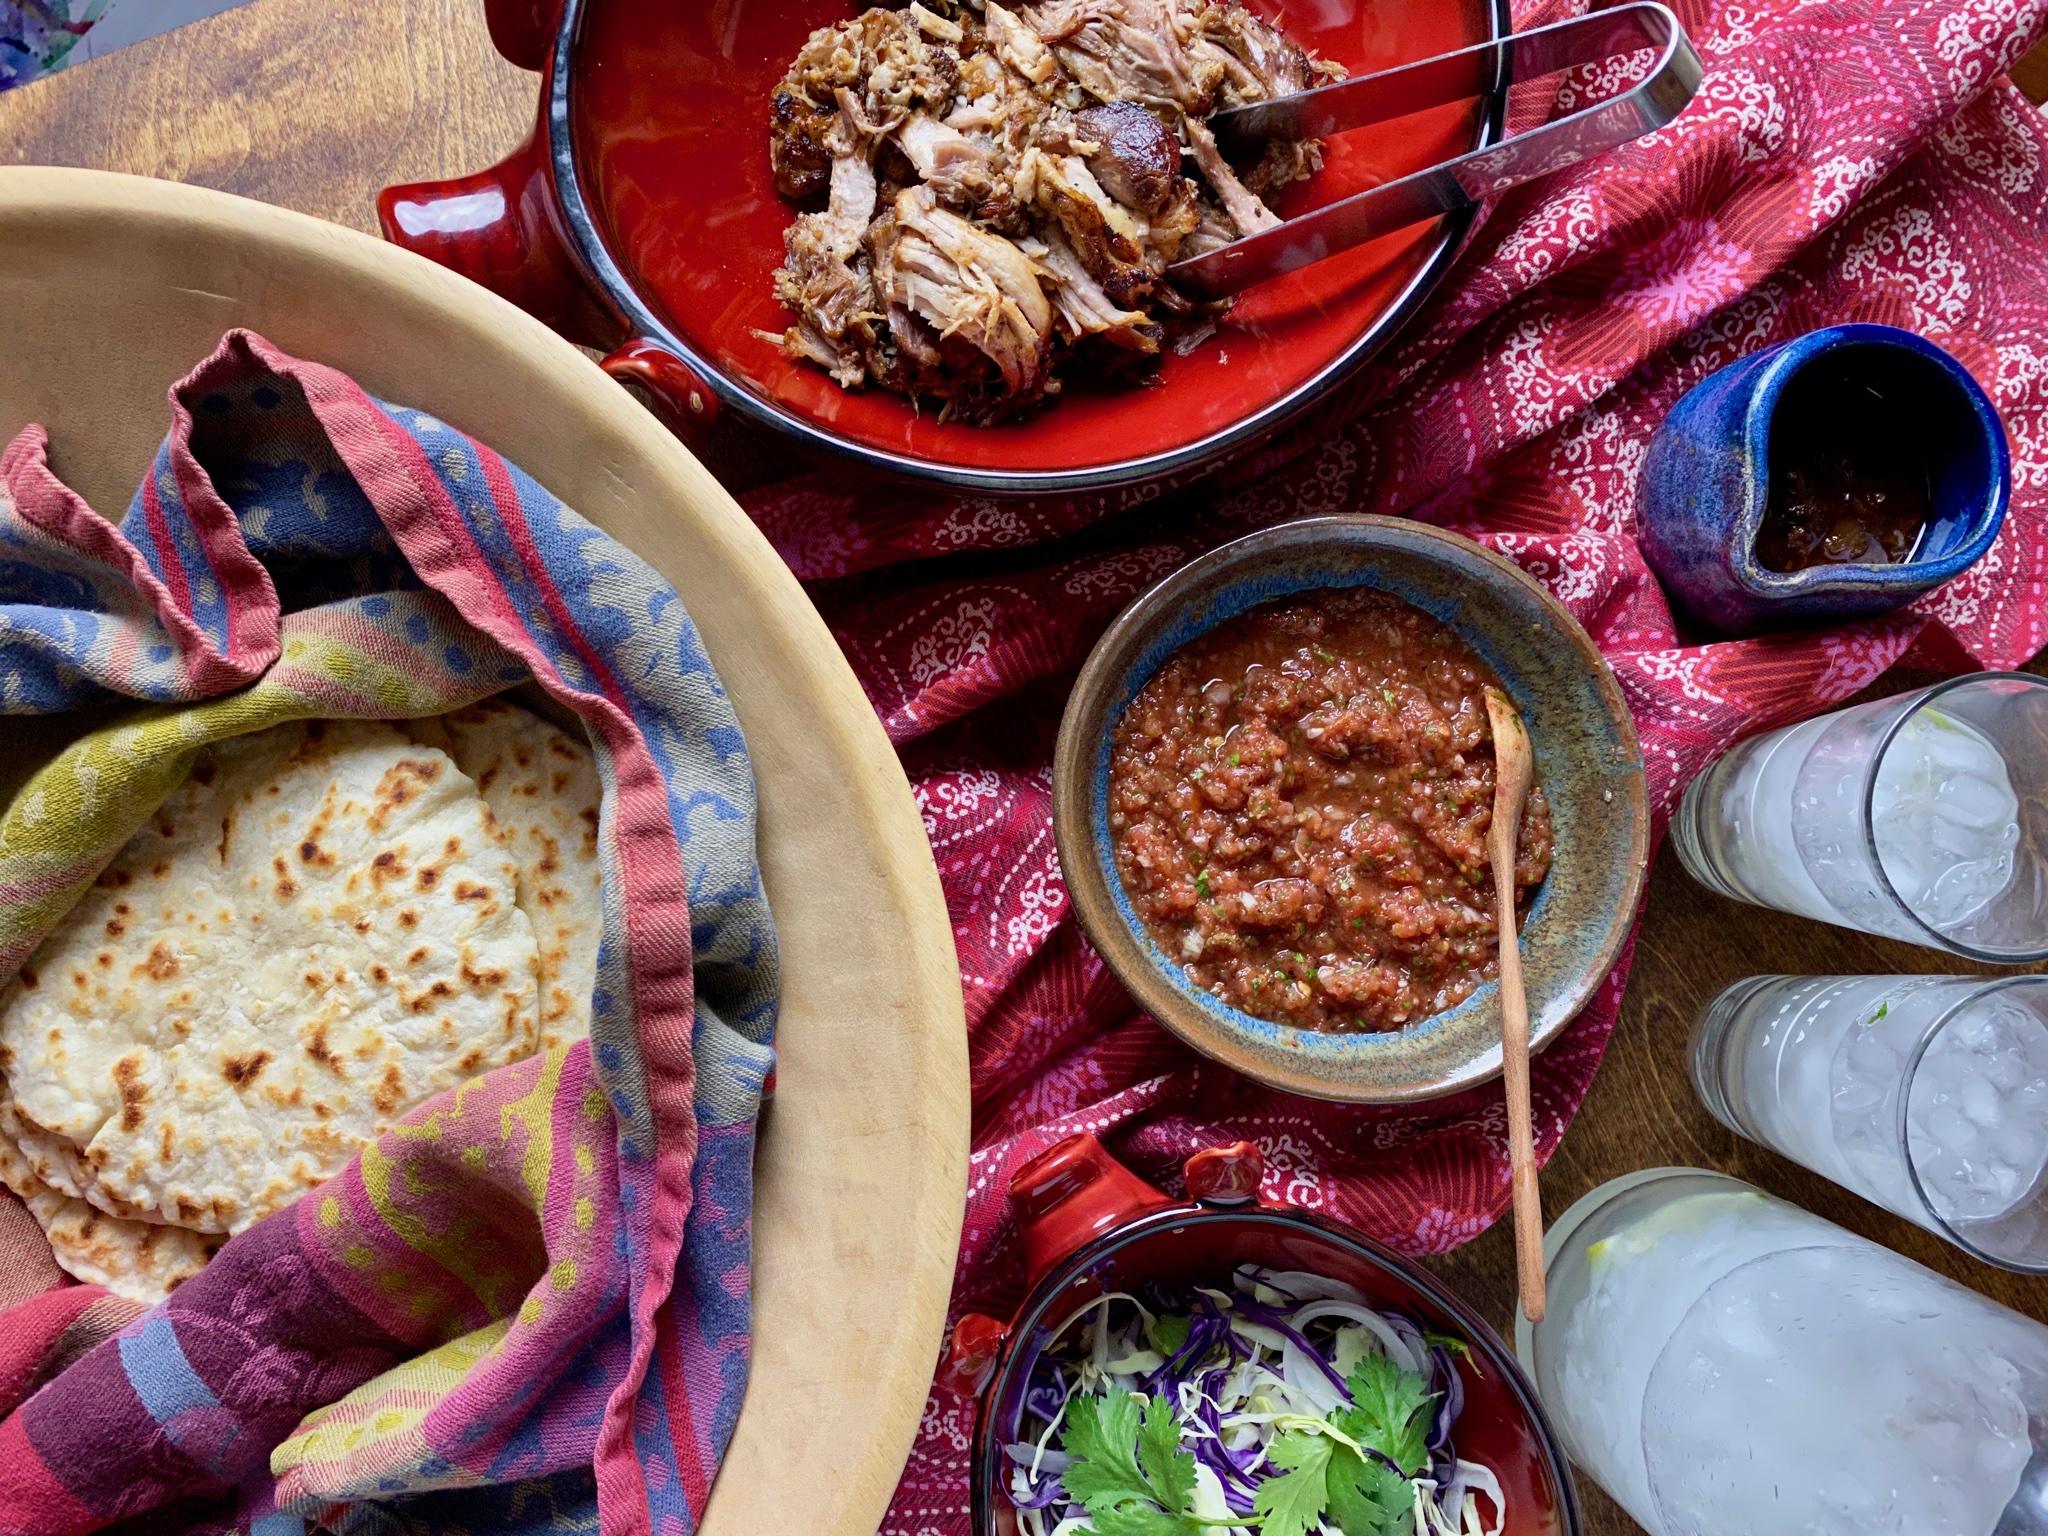
Slice corned beef against the grain.  Serve with honey mustard and veggies on the side or if you are like the Hubster, make a sandwich…yum.  Happy Saint Patrick’s Day!

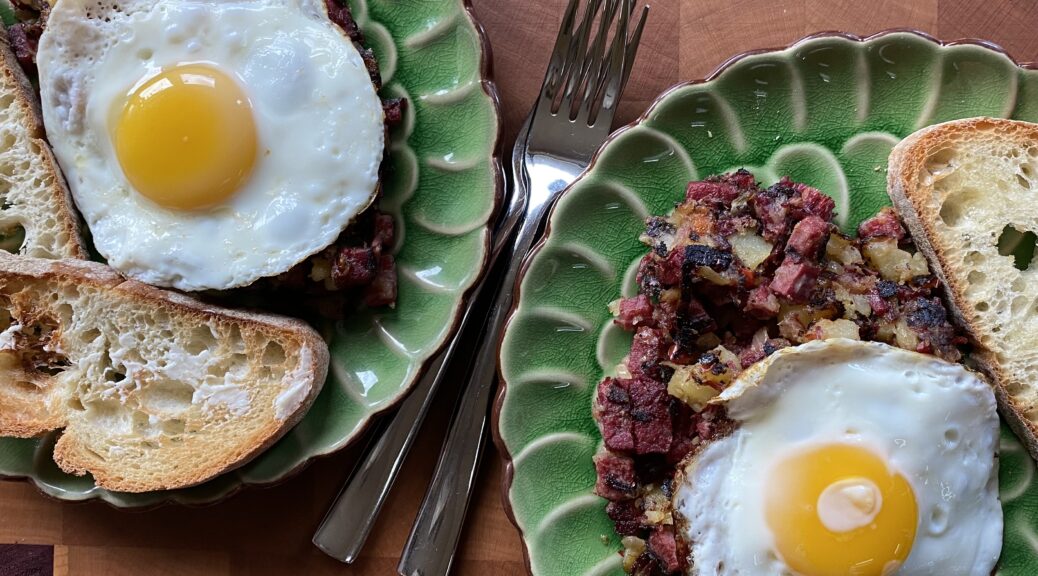
But What About Breakfast?

I like corned beef, I LOVE corned beef hash.  The remaining corned beef became Sunday breakfast.  I pulled out my cast iron skillet, the remaining beef and potatoes, chopped some onion and bell pepper, bada-bing-bada-boom, hash.

Feel free to add other vegetables or change the proportions.  This can easily be a veggie-focused hash, more potatoes, throw in the leftover cabbage, add some mushrooms…it will be delightful and perfect for a weekend relaxing breakfast.

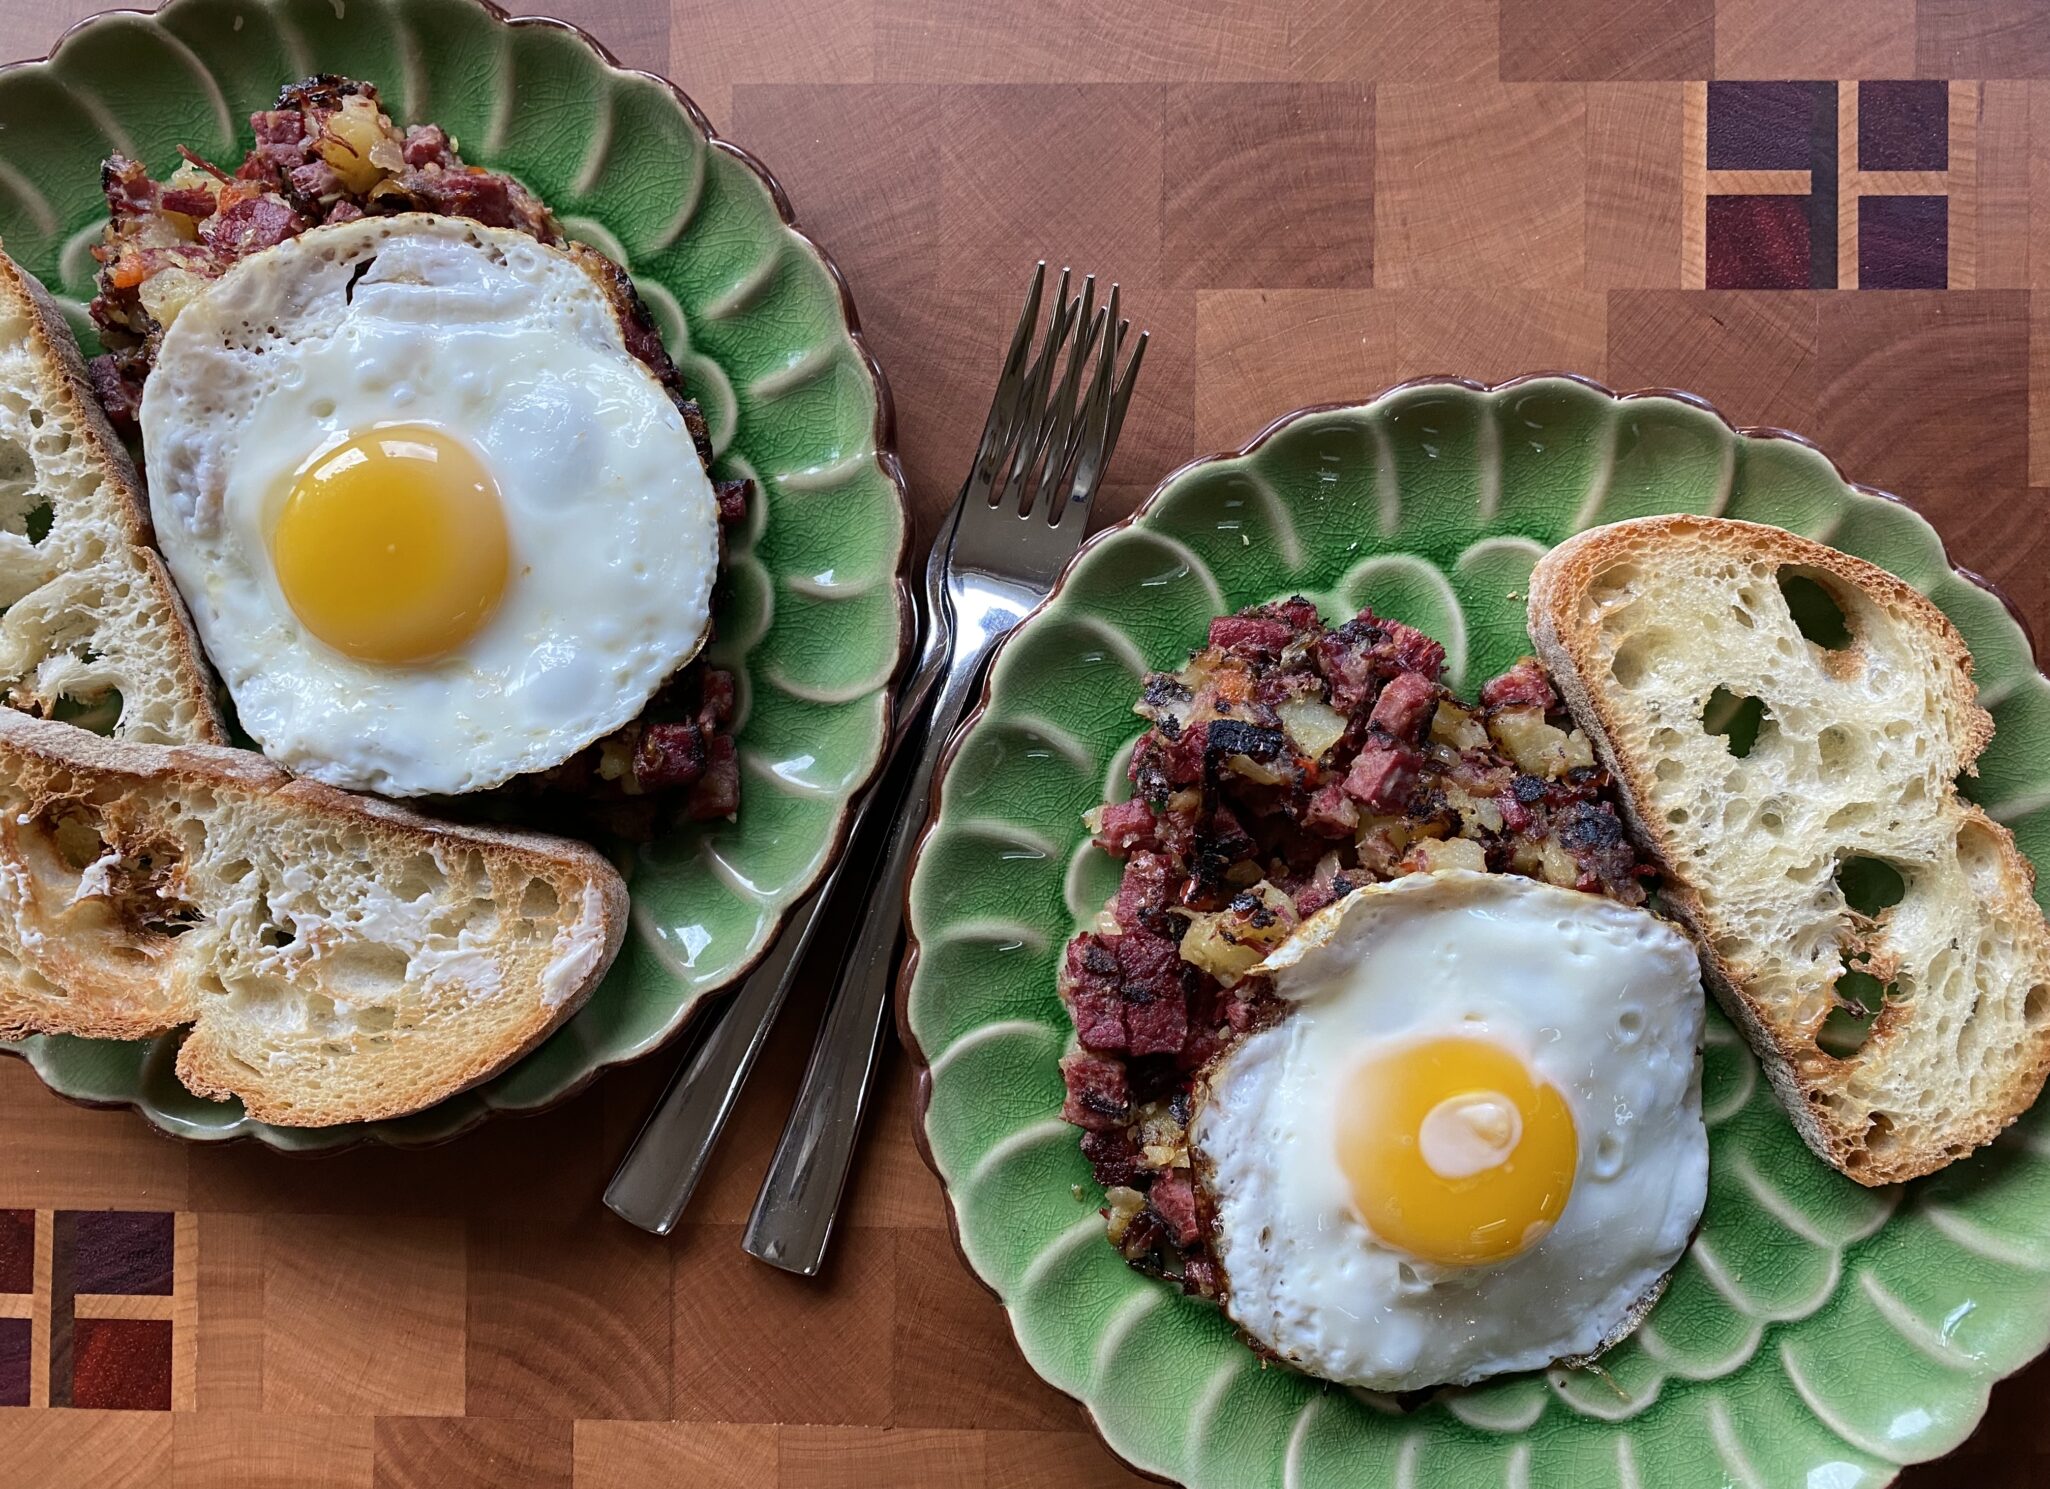
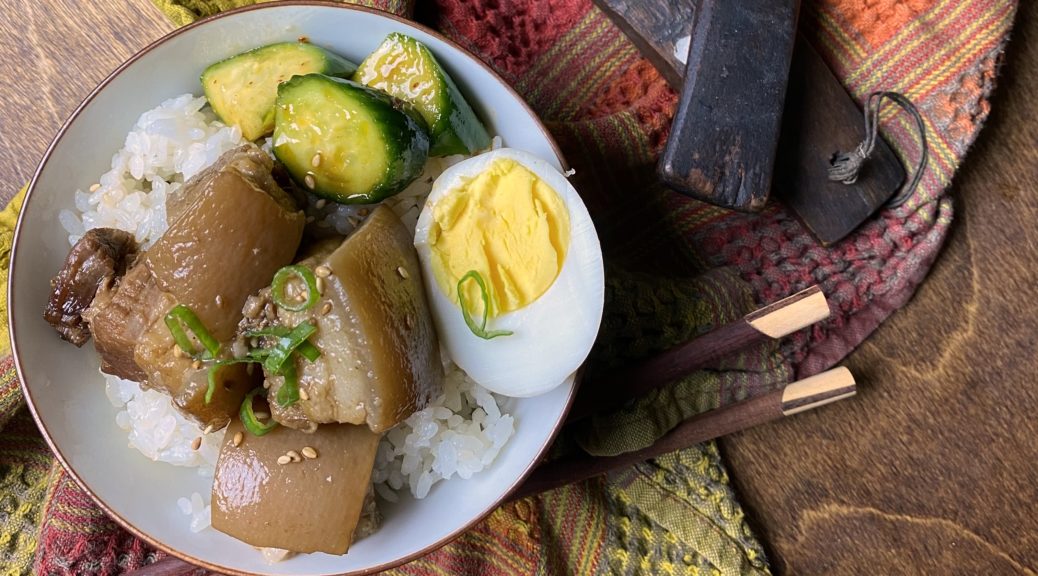
Beautiful board made by 3jamigos woodworking.

Corned Beef Hash and Eggs

What to do with leftover corned beef? Hash of course!
Course Breakfast, Brunch, lunch
Cuisine American, Irish-American
Keyword cabbage, Corned beef, corned beef hash, potatoes
Prep Time 10 minutes
Cook Time 15 minutes
Servings 4 servings

Equipment

  • cast iron skillet

Ingredients

  • 2 to 3 tablespoons unsalted butter
  • 1 small onion finely chopped (about 1 cup)
  • 1/4 green or red bell pepper or pepper of choice!, chopped
  • 2 to 3 cups cooked corned beef finely diced or chopped
  • 2 to 3 cups chopped cooked potatoes from dinner 🙂
  • Kosher salt and freshly ground black pepper
  • Chopped fresh parsley or scallions
  • Eggs one per serving

Instructions

  • Heat butter in a large skillet (preferably cast iron) on medium heat. Add the onion and pepper and cook a few minutes, until translucent.
  • Add corned beef and potatoes. Spread out evenly over the pan. Increase the heat to medium-high and press down on the mixture with a heat-proof spatula.
  • Do not stir the potatoes and corned beef, but let them brown. If you hear it sizzling, that's a good sign.
  • Use a spatula to peek underneath and see if they are browning. If nicely browned, use the spatula to flip sections over in the pan so that they brown on the other side. Press down again with the spatula.
  • If there is too much sticking, you can add a little more butter to the pan. Continue to cook in this manner until the potatoes and the corned beef are nicely browned.

Egg-a-licious: Your choice, hash is good with eggs cooked any style

  • Or cook eggs like Shashuka. When hash is close to being done, create depressions in the hash and crack an egg into each spot. Cover skillet for a couple minutes until egg is cooked to your liking.
  • Remove from heat, top with chopped parsley or scallions. Season with freshly ground black pepper and salt to taste.
Easy as 123 Spareribs

Easy as 123 Spareribs

As I was driving home the other day I called the Hubster and asked “What’s for dinner?”.  The retired guy replied, “I thought you were making dinner”.  Excuse me? Moi?  The person driving home after a full day at WORK?

Fine, I’ll make dinner but you are on cleanup…

A pack of spareribs, cut crosswise into thirds (thanks Asian market), a knob of ginger and bunch of scallions in the fridge-time to make Irene Kuo’s 12345 Spare Ribs from Food52.  The rest of the ingredients are in my pantry, soy sauce, vinegar, rice wine and sugar, that’s all I need. Oh, and my trusty Instant Pot.

I added the step of browning the ribs with ginger and scallions just to give it a flavor boost. Feel free to skip this step and start by putting the ribs and braising liquid in the instant pot without frying. Add a couple of minutes to the cooking time.

Set time for 15 minutes and let your IP do it’s thing. Meanwhile make some rice and veggies, any greens will do nicely.  Give it a couple of minutes before releasing the pressure on your IP. Remove ribs. switch to sauté and reduce sauce until it thickens to a syrupy consistency.  Add the ribs back in and stir to heat and coat them with sauce.

Scoop rice into a bowl, top with the ribs and greens, and garnish with green onions.  Enjoy!

Epilogue

Me? I headed to the couch, turned on the telly, and relaxed while the hubs did the dishes!

The ingredients for these ribs can be found in most Asian markets.  Use Shaoxing Wine (Chinese Sherry) or dry sherry.  Dark soy sauce has added molasses, don’t substitute regular soy sauce which is actually saltier than dark soy.  Favorite brands include Koon Chun or Lee Kum Kee.

Sweet & Sticky Chinese Ribs

Adaptation of Irene Kuo's 1-2-3-4-5 Spare Ribs. Sweet, savory braised ribs, delicious with a bowl of rice. Using a pressure cooker will keep ribs moist and shorten the cooking time.
Course Drinks, Main Course, Meat
Cuisine Asian, Asian-American, Chinese
Keyword Instant Pot, spareribs
Prep Time 10 minutes
Cook Time 18 minutes

Equipment

  • 1 Pressure Cooker I use an Instant Pot

Ingredients

Fry It Up

  • 1 1/2 pounds pork spareribs ask the butcher to cut the slab of ribs crosswise into 3 pieces. You can cut them into individual ribs at home
  • 1 stalk scallion, cut into 3 inch lengths optional
  • 2 slices fresh ginger, smashed optional

Braising Liquid

  • 1 tablespoon dry sherry preferably Shao Xing Wine
  • 2 tablespoons dark soy sauce
  • 3 tablespoons cider vinegar
  • 4 tablespoons sugar
  • 5 tablespoons water

Garnish

  • 1-2 stalks green onions, sliced diagonally in 1/8-1/4" pieces

Instructions

Instant Pot Directions

  • Set Instant Pot on saute'. Once heated add 1 tablespoon of vegetable oil. Toss in ginger and scallions and saute' briefly (30 sec) then add spareribs. Fry until the ribs lose their pinkness.
  • Add braising liquid ingredients. When the liquid comes to a boil, stir well to coat the ribs, turn off saute function, and place lid on Instant Pot.
  • Set IP on high pressure (use Meat setting) and adjust time to 15 minutes. When it is done, wait a couple of minutes before CAREFULLY releasing pressure to your Instant Pot.
  • Remove ribs from pot. Set Instant Pot to saute' and reduce remaining liquid to a thick syrupy sauce. Turn it off and add ribs back into pot, stir to coat the ribs. Spoon ribs onto a serving plate.
  • Garnish with scallions. Serve immediately with rice.

Stovetop Directions

  • Put the ribs in a skillet or saucepan and set it over high heat; add the rest of the ingredients and stir to mingle. When the liquid comes to a boil, adjust heat to maintain a very gentle simmering, and cover and simmer for 40 minutes. Stir and turn the spareribs from time to time.
  • Uncover and turn heat high to bring the sauce to a sizzling boil; stir rapidly until the sauce is all but evaporated. Garnish with scallions. Serve hot with rice.

Notes

Using a pressure cooker not only shortens the cooking time but ensures tender and moist ribs.
Buta no Kakuni (Japanese Pork Belly) Skin in the Game ブタの角煮

Buta no Kakuni (Japanese Pork Belly) Skin in the Game ブタの角煮

Bowl + Spoon = Soul Food

My favorite equation, like Eat = MC(squared), which, in my book, stands for M-meat, C-Cooked & Crazy delish.  After trying several Chinese pork belly recipes I switched gears and made Japanese style braised pork belly, Buta no Kakuni.  Pork belly simmmered in a soy sauce-sugar mixture until the pork is meltingly tender and suffused with a sweet-salty flavor.

One of our frequent stops pre-Covid was a Ramen joint in Saratoga called Kahoo (sadly gone).  While the rest of the fam ordered bowls of delicious ramen and Karaage (fried chicken), I would order their Buta no Kakuni and a bowl of rice.  The pork was soft, unctuous, and tender. It literally jiggled when the pork is placed on the table.  A soft boiled egg sits, nestled in the pork, and ups the richness and decadence of the dish.  I would spoon the pork with some of the sauce on the rice and break the soft-cooked egg over the top so it oozed over pork and rice, it’s divine.  Finish with a side of greens like bok choy or broccoli (gotta have something healthy in the bowl) and this is a bowl made in heaven.

The Lowdown

Start with a slab of pork belly with the skin on.  Yep, skin on.  Pork belly with skin can be found in most Asian Markets.  The skin is Ah-mazing.  The braising turns the pork skin into this silky smooth, melt-in-your-mouth layer striated with flavor-infused meat. If pork belly was a dance it would be the perfect tango.  Splurge, look for pork belly with skin.  Not gonna lie, this is dish is not on the New Year’s resolution list so enjoy in moderation.  The dish is so flavorful that a little goes a long way.  Drizzle the sauce over the pork and rice and pair it with lots of greens.  You can also use Boston Butt or shoulder, which would still be delicious, just not porkfect.

Instantly Easier

Pull out your Instant Pot for this dish (adapted from Sylvia Wakana).   The pressure cooker shortens the cooking time and simplifies the process a little.  Cut the pork belly into 1.5-2 inch chunks, brown them in your IP, add water, ginger, scallion and shiitake mushrooms (optional) seal the pot, set the cooking time 35 minutes, and let the pot do its thing.  I add dried shiitake mushrooms just for a bit more umami, you could use dried anchovies or bit of dashi instead). Release the pressure at Drain pork and remove aromatics.  Rinse the pork and place it back into the cleaned Instant Pot bowl.  Add sauce ingredients, seal and set for another 10-15 minutes depending on size of pieces.

I like to make Buta no Kakuni in advance so I can stick it in the fridge and chill it.  When it is time to eat, I skim off the fat that has now congealed (making it easy to remove), throw a couple of ramen style eggs into the pot, and reheat the pork.  The flavors have saturated the pork, you have skimmed the fat to make it a bit healthier…win, win, time to enjoy!

Garnish with slivers of green onions, sesame seeds and a dash of Shichimi (Japanese Chili powder) for a little kick.  I have been sprinkling Momofuku Spicy Salt to finish my dishes, pretty yummy!

This is blustery weather, stay inside, curled up on the couch food. Enjoy.

Instant Pot Buta no Kakuni (Braised Pork Belly)

Buta no Kakuni, Japanese Braised Pork Belly made in an Instant Pot. Tender and delicious chunks of pork in a sweet-salty sauce. Served over rice is down home Asian Soul food..
Course Main Course
Cuisine Asian
Keyword buta no kakuni, Instant Pot, japanese, Pork Belly, Rice Bowl
Prep Time 10 minutes
Cook Time 1 hour 15 minutes

Equipment

  • Instant Pot

Ingredients

  • 2 lbs pork belly skin on cut into 1-1/2 to 2 inch cubes
  • 3 green onions washed and crushed with flat part of knife to release flavor
  • 1 inch ginger peeled and sliced
  • 3 dried shiitake mushrooms Shhhh, don't tell my mom, I don't soak them beforehand, I just throw them in the pot.
  • 1 tbsp oil
  • water for cooking the pork belly
  • Sauce
  • 1/2 cup water
  • 1/2 cup soy sauce
  • 1/2 cup sake
  • 1/2 cup mirin
  • 1/4 cup sugar
  • 4 soft or hard boiled eggs just cooked enough so you can peel each egg. yolk should be runny
  • green onions diced for garnish

Instructions

  • Prep ingredients: Cut pork belly into 2" x 2" cubes (or as close to that as you can get depending on the type of pork belly you have).
  • Press the "Sauté" function on your Instant Pot and set to high (or "More"). Heat the oil and sear the pork belly a little bit to render some of the fat from the pork belly.
  • Drain fat that has rendered out, pour enough water into the pot to cover the pork belly. Add in sliced ginger, green onions and shiitake mushrooms.
  • Cover and lock the lid. Press the "Cancel" button to stop the sauté. Press "Manual" to use the pressure cooker function. Set cook time to 35 minutes.
  • When it is finished, carefully move steam handle to the venting position to let out the steam until the float valve drops. Once depressurized, remove the lid carefully. Pour contents into a strainer/colander to drain the water. Discard aromatics. Rinse the pork belly under warm water.
  • Put the pork belly back into the Instant Pot and add the sauce ingredients. Press the "Sauté" function and set it to "More." Stir the pork and sauce mixture to combine, bring to a simmer for a minute (just enough to burn off the alcohol). Press "Cancel" to stop the sauté. Cover and lock the lid. Press "Manual" and set the cooking time for 10-15 minutes depending on size of pieces.
  • When it's finished cooking, carefully push the steam release handle to the venting position to let out the steam until the float valve drops (you can also let the pressure release naturally). Once depressurized, remove the lid carefully.
  • Press the "Sauté" and put it on "Less" (or low) to bring to a low simmer. Add in your soft or hardboiled eggs. Simmer until sauce is reduced slightly (couple of minutes).
  • Place 2-4 pieces of the pork on top of a bed of rice, drizzle generously with sauce. Garnish green onions. Split egg in half and place along side pork. Serve with greens of choice, bok choy, cabbage, your choice.

Notes

If you make this ahead of time, chill pork and skim off the fat before reheating.  I know it makes me feel better!  Place eggs in the pork & sauce to absorb some of the flavor from the braising liquid.  Take them out to skim the fat and add them back in when reheating.
Taiwanese Pork Belly Rice Bowl (Lu Rou Fan-卤肉饭)- In Hog Heaven!

Taiwanese Pork Belly Rice Bowl (Lu Rou Fan-卤肉饭)- In Hog Heaven!

Continuing my virtual traveling by cooking, I’m imagining myself in Taipei right now.  I have not been back to Taiwan in ages and yet I find myself thinking about Taipei and my visit so long ago.  Growing up in San Francisco the majority of Chinese are from Hong Kong and the Guangdong (Canton) region.  I was fortunate enough in college to spend a summer in Taipei (yes, on the Taiwan Love Boat Trip).  I sampled  Shao Lung Bao, Oyster Egg Omelets, Popcorn Chicken, Beef Noodle Soup, and Red Bean Shaved Ice while wandering around the night markets.  Everything was so delicious, different from Cantonese food, and yet familiar at the same time.

Bowl Food is Soul Food

If you have followed 3jamigos, you know I have an obsession with bowl food and eating with a spoon.  The Taiwanese dish Lu Rou Fan 滷肉飯 falls squarely in this category.  In fact, this iconic dish was the basis for Taiwanese Turkey Rice, a favorite bowl I posted around Thanksgiving.  Shreds of turkey garnished each bowl of Lu Rou Fan.  People liked the turkey garnish so much, it got its own gig, Turkey Rice, the spin-off.

Back to Lu Rou Fan.  Season diced pork belly with star anise, cinnamon, and aromatics like garlic, shallots, and ginger,  are braised in a soy sauce and sugar mixture until it is melt-in-your-mouth tender.  Place a generous scoop of the braised pork, half of a hardboiled egg, and greens on top of a bowl of steamed rice.  Grab your spoon and dig in, bowl food is soul food.

After surveying different sites for Lu Rou Fan, my version is a mash-up of recipes I found.  The non-negotiables are pork, ginger, shallots, garlic, and a sauce flavored with star anise, soy sauce, sugar, and rice wine.  Start with pork belly cut into approximately 1/3 inch slices then diced.  Thick slab pork belly can be found in most Asian grocery stores.  I also add ground pork to the diced pork belly for a saucier texture, like a ragu’. Shiitake mushrooms are used to pump up the umami as does dried shrimp.  Shrimp is optional, if you decide to use it, soak and finely mince it before adding.  I have mentioned my lack of affinity for star anise, so I use only one clove and add a cinnamon stick instead.  If you like star anise feel free to use two.  Last but not least…

Pull Out the Instant Pot!

The pressure cooker reduces the effort and time to making Lu Rou Fan, a win-win.  Saute’ pork, add the aromatics and liquid, and 30 minutes later your Lu Rou Fan is ready for the finishing touches.  How easy is that? Make this dish a day in advance to allow the flavors to meld and to chill the Lu Rou.  Skim the solidified fat off before serving.

Finishing Touches

When the pressure cooker is done, release pressure and set the pot to saute bring the pork mixture to a boil, and reduce to desired consistency OR if the sauce is not thick enough, add a cornstarch water mixture to thicken. You want lots of sauce to drizzle on your rice so do not reduce too much.

The star of this dish is the succulent, saucy pork belly dancing on the main stage of rice but there are supporting actors.  Hard-boiled eggs often accompany Lu Rou Fan.  Boil, peel, and place eggs in the pork sauce after it has finished pressure cooking.  While the sauce thickens, the eggs will absorb the color and flavor of the pork.  The eggs will be hard-boiled, so for those who have come to love six-minute ramen eggs-this ain’t it.  Use soft-boiled instead of hard-boiled eggs to add to the sauce for a less-cooked egg.  Or cook six-minute eggs ramen style and use this in place of the hard-boiled eggs.  It’s your bowl of goodness, do what you want.  Serve with greens such as seasoned cucumbers, or steamed bok choy or broccoli.  Garnish with green onions and more fried shallots. YUMMY.

Taiwanese Pork Belly Rice (Lu Rou Fan)

Another Soul Food Bowl, made a little quicker in an Instant Pot. Braised pork belly seasoned with soy sauce, garlic, ginger, star anise and shallots. Delicious over rice or noodles. Comfort food.
Course Main Course, Meat
Cuisine Asian
Keyword Lu Rou Fan, Taiwanese Pork Belly Rice
Prep Time 20 minutes
Cook Time 45 minutes

Equipment

  • Instant Pot

Ingredients

  • 1 lb skin-on pork belly diced into 1/3 inch pieces
  • 1/4 lb ground pork
  • 1 tbsp vegetable oil or shallot oil
  • 3 slices ginger
  • 2 tbsps shaoxing wine
  • 2 tbsps dark soy sauce
  • 1 tbsp regular soy sauce
  • 1/4 cup fried shallots or onions
  • 1 shallot, finely diced
  • 4 cloves garlic chopped (1.5 tbsp)
  • 1 star anise
  • 2-3 dried shiitake mushrooms soaked until mushrooms are softened, remove from water andnreserve soaking liquid, dice mushrooms
  • 1 tbsp dried shrimps chopped OPTIONAL
  • 1 stick cinnamon or 1/2 tsp ground cinnamon
  • 2 tbsp rock sugar or brown sugar (30gms rock sugar_
  • 2/3 cup hot water or reserved liquid from mushrooms
  • Soy sauce /salt to taste
  • fried shallots and green onions garnish
  • 2 eggs hardboiled or cooked Ramen style

Instructions

  • Turn on the "sauté" function of the pressure cooker, press "adjust" once to switch to "more" for browning.
  • Once the oil is hot, add pork belly and give it a stir so that it's not sticking to the bottom. Saute' just until pork belly starts to brown, add ground pork. Let pork cook until it loses its pinkness and the liquid evaporates.
  • Add ginger, shallot, garlic, saute briefly before adding soy sauces, Shaoxing wine, cinnamon, star anise, rock sugar, shiitake mushrooms, and fried shallots. Mix it well and add reserved mushroom liquid or hot water. Cover with the lid.
  • Turn on the "manual" function, set the timer to 25 minutes. Allow 10 minutes before release of pressure and opening. Skim off the fatty oil from the top.
  • If the sauce seems too thin, turn on the "sauté" function, and "adjust" to "more" to thicken and darken the pork belly. Saute to desired sauce thickness and color. Season with light soy sauce or salt to taste. Alternatively, taste sauce after opening the pot. If it has enough flavor but is thin, mix 1 tbsp cornstarch with 2 tbsp water. Add to mixture and bring to a boil to thicken sauce.
  • Ladle the braised pork over rice with some sauce. Top with an egg* and greens of choice. Garnish with green onions and more fried shallots.

Egg

  • Generally, eggs are hardboiled, peeled and added during cooking..which makes a very hard-boiled egg. I like ramen eggs or runny eggs
  • Boil eggs to just past soft boiled stage. See post for link to ramen eggs. Have eggs peeled and ready to go when pork is finished cooking. Add to pork and allow to sit in sauce until you are ready to serve. Cut eggs in half and place 1/2 in each bowl of rice.

Notes

Use skin-on pork belly as the skin becomes tender, juicy and flavorful after absorbing all the flavors from spices and soy sauce. 
Use leaner ground pork (e.g. pork shoulder) as a substitute if the pork belly is too fatty. But really, you don’t need a ton on your rice.  Reduce the cooking time accordingly.  
Galbitang-Korean Rib Soup-Finding Comfort In Souper Ways

Galbitang-Korean Rib Soup-Finding Comfort In Souper Ways

The fires in California have cast an apocalyptic haze to our skyline.  We actually hit the water for an early morning row, but coming off the water we noticed we were the only ones left at the reservoir.  The pic confirmed, maybe rowing this morning wasn’t such a good idea. Bad for the body, but good for the mind and soul.  My trade-off.

That being my biggest problem means I consider myself pretty fortunate during these unprecedented times.  I try to do the little things, we order take-out from hole-in-the-walls. I buy from independent bookstores (for cookbooks, check out this post), talk to people, stay informed, advocate, and DONATE both time and money.

Another gut-punch

I started writing this post awhile ago already in a somber mood, not knowing that we would suffer more bad news, RBG had passed away.  Inspirational, amazing, tenacious, persistent, brilliant, a fighter to the end.  In this year of turmoil and devastating loss, we have yet more to endure.  Icons and role models we have lost, John Lewis, Chadwick Boseman, and now Ruth Bader Ginsburg.  Dedicated to their chosen paths, dignified, courageous, filled with conviction, compassion, and honor.  Fighters…for all of us.  I am devastated.  All I can do is keep up the fight in whatever small way I can.

In times like these, I find myself longing for comfort food (making a ton lately).  Tonics to heal the heart.  Foods that nourish and renew the soul.  Dishes that say “hey, it’s okay, it’ll be better tomorrow”.

I decided to make a traditional Korean beef rib soup, Galbitang.  Similar to some of my father’s soups, they usually require love and time.  Lucky for me, I found a recipe for Galbitang from Korean Bapsang (a favorite site) made in an Instant Pot.  Yay, delicious, comforting soup in a fraction of the time.

The star of this soup is the short rib of course 

I used a combination of short rib and beef chuck, yummy.  But really, the supporting cast is just as important-onion, ginger, garlic, Korean radish, and soup soy sauce that add layers of flavor.

Soup soy sauce is specifically made for soups and stews, lighter in color and saltier than regular soy sauce, it adds umami to the soup.  In a pinch add a little bit of salt and regular soy sauce (which is too dark to use as a straight replacement).  I like Chung Jung One or Sempio for soy sauce.  Korean radish is sweeter and milder than regular radish, it’s delicious and refreshing in the soup.  You can find both at any Korean market. or online for the soy sauce. I am a food gadget and product junkie…if you live near me and want to try the soup soy sauce-call me. I’ve got lots.

The first, quick run through the pressure cooker is to remove the “scuzz” from the meat, you know impurities and gunk, so you have a nice clear broth. But keep the liquid from that initial go-around. It can be strained and used as your cooking stock-flavor bump starter.  Then just dump everything in your Instant Pot, except the radish, set it for 35 minutes and sit back and relax.  A ten-minute natural pressure release and you are ready for the last step.  Use the saute function, add the cut radish to the soup and cook for approximately 10 minutes or until the radish looks translucent.  Dunzo.  Skim any oil off the top, garnish with green onions and serve immediately.  Serve with rice or with nangmyeon (noodles). It will make you feel all warm and happy.

Instant Pot Galbitang (Beef Short Rib Soup)

Equipment

  • 6 qt pressure cooker

Ingredients

  • 3 to 4 pounds short ribs
  • 1 medium onion cut into halves
  • 2 large scallions white parts
  • 8 plump garlic cloves or 1 whole bulb If using bulb, cut into halves crosswise
  • 3 thin ginger slices 1-inch rounds
  • 2 Tablespoons soup soy sauce
  • salt and pepper
  • 1 pound Korean radish cut into bite size pieces about 1.5-inch square, 1/3-inch thick
  • 3 ounces starch noodles nangmyeon soaked in warm water for 30 minutes - optional
  • 2 scallions finely chopped garnish

Instructions

  • Trim off any thick layer of surface fat. In the pot, rinse the ribs with cold water a couple of times to remove impurities. Drain, and fill the pot with enough water to cover the ribs.
  • Close the lid tightly. Press the “Manual” function and High Pressure, and using the “-” button, adjust the time to 2 minutes. Make sure the pressure switch is turned to “sealing”. When finished, carefully release the pressure.
  • Pour cooking liquid through a fine strainer and reserve. Thoroughly rinse the ribs and clean the pot.
  • Return the ribs to the pot, and add the onion, garlic, ginger and soup soy sauce. Add reserved cooking liquid and enough water to bring it to 10 cups, making sure the water level stays below the max line for the pot. Close the lid tightly. Pressure cook the ribs for 35 to 40 minutes, depending on how big the pieces of meat are. NPR 10 minutes.
  • Open pot and remove meat and aromatic vegetables with a strainer. Skim off the fat.
  • Put the ribs back in the pot along with the cut radish. Change the Instant Post setting to “Saute-normal”, and boil until the radish turns translucent, about 10 minutes-15 minutes. Add the optional noodles a couple of minutes before turning the Instant Pot off.
  • Salt and pepper to taste. Remove any remaining fat by skimming surface or chill the soup and discard solidified fat and reheat gently. Garnish with chopped scallions and serve. Typical, my kids love putting their rice in the soup. Ono!

Notes

You can use chuck roast cut in chunks for 1/3-1/2 of meat but do keep at least half of the bone-in ribs in the soup.  
The radish can be either scrubbed or peeled, I prefer peeled. Korean radish is delicious, sweeter, milder without that bite radishes can have.


What a Difference a Week Makes

The wind shifted and the weather got better.  I know the fires rage on as does the pandemic and our political travails, but this day was a good day to row.  We all need a little respite from time to time.  I am rejuvenated..back to text banking, phone banking, and stress relief baking.

Cinco De Mayo Dinner in the Time of COVID

Cinco De Mayo Dinner in the Time of COVID

A brief moment of escape from the reality of our world right now to enjoy a Margarita and celebrate Cinco de Mayo.  I got the last bottle of Margarita Mix at TJs and unintentionally created a Cinco de Mayo dinner that looked like an ad campaign for kitchen appliances. Tortilla press for homemade tortillas (so fun), food processor for salsa (so easy), an Instant Pot for Carnitas (so fast), and finally my rice cooker for Mexican Rice (so true, a rice cooker, lol).

I pulled out my tortilla press for a low tech appliance start to stamp those flour tortillas.  I prefer corn tortillas but the fam outvoted me, I didn’t have any Masa Harina anyways. LOL. The King Arthur Flour website was my first stop for a recipe for tortillas.  I found their recipe for Simple Tortillas and I was in business.

The Tortillas

The dough comes together quickly. I used shortening.

The tortilla is simple and contains flour, salt, shortening or oil, and water.  It comes together quickly and is kind of fun to make, especially if you have a tortilla press.  This is a no-brainer fun cooking project with your kids or when without kid but you are abiding by SIP orders for a pandemic.  Find the recipe for Simple Tortillas on King Arthur Flour here.


The dough is divided into 8 pieces. Keep them covered or oiled while you press each flat. This is the tricky part, I tried both a cut-up Ziploc bag and parchment in the press and they still stuck a little.  I ended up dusting each ball of dough with flour to help keep it from sticking.
When the tortilla starts to bubble, flip it over.
Ta-Da! Homemade tortillas are thicker and fluffier than commercial products. These were warm, chewy, and tasty-yum!

Carnitas

Carnitas are probably my favorite taco, burrito, anything filling.  Love em’ and since I had a pound of pork in the fridge and it was Cinco de Mayo. Yep,  no-brainer, Carnitas Tacos for dinner.  Found a tasty recipe on Simply Happy Foodie for small-batch carnitas in a 3 quart Instant Pot. I threw it all in my 6-quart pot which worked fine.  Next time I am doubling or tripling the recipe, that good.

Instant Pot Carnitas

Delicious Carnitas made in half the time in an Instant Pot!
Course Main Course
Cuisine Mexican
Keyword Carnitas in an Instant Pot
Prep Time 15 minutes

Equipment

  • Pressure Cooker or Instant Pot

Ingredients

  • 2 Tbsps Olive or vegetable oil
  • 1 tsp Salt
  • 1/4 tsp Pepper
  • 1 Tbsp Cumin
  • 2 tsp Chili Powder
  • 1 tsp Smoked Paprika or reg
  • 1 tsp Oregano
  • 1 tsp Coriander Powder
  • 1/8 tsp Cayenne Powder use 1/4 tsp or more for spicier
  • 1 to 1-1/2 lbs Pork Shoulder / Pork Butt * cut in 3" chunks
  • 1/2 small Onion chopped
  • 1 Bay Leaf
  • 1/2 Cinnamon Stick about 2-3 inches long
  • 4 cloves Garlic finely chopped or minced
  • 1/2 cup Orange Juice or Pineapple Juice

Instructions

  • Combine oil, salt, pepper, cumin, chili powder, paprika, oregano, coriander powder, and cayenne pepper in a medium size bowl. Mix well.
  • Add the pork to the spice mixture and toss to cover all of the meat with the mixture.
  • Press Saute button on Instant Pot. If you can adjust the heat, use high or more on your pot. When display reads “Hot” add the meat. Cook until browned on all sides, but not done. Remove from pot and set aside.
  • Add onion, bay leaf, and cinnamon stick and cook until onions are tender, stirring occasionally and scraping the bottom of the pot to deglaze (get those brown bits off the bottom) Add a small amount of water to help the deglazing.
  • Add the garlic and cook for a few seconds, stirring constantly.
  • Add the pineapple juice or orange juice and stir.
  • Add the meat back in to the pot and just nestle it down into the juice (it won't be covered).
  • Place the lid on the pot and set the Steam Release Knob to Sealing.
  • Cancel the Sauté function by pressing Cancel
  • Press the Pressure Cook button and set the time to 30 minutes.
  • When the cooking cycle has ended, let it sit for 15 minutes. It will start naturally releasing the pressure.
  • Turn the steam release knob to Venting and release any remaining steam/pressure. There may not be any left, and that's okay. When the pin in the lid drops down it is safe to open the lid.
  • BEFORE you stir, take a spoon or a small measuring cup and skim off the extra fat that is on top and discard. It's a lot easier doing it this way than pouring it into a fat separator!
  • Stir the meat and transfer just the meat to a sheet pan with sides or ovenproof dish. Reserve sauce. Using two forks, shred the meat and spread on baking sheet.
  • Broil the carnitas to get those nice crispy bits. Slide them under the broiler until they reach the desired crispness. Watch carefully it will go fast!
  • Garnish with sour cream, salsa, cilantro, diced white onions or green onions, avocado, and serve with those warm delicious homemade tortillas.

The Salsa

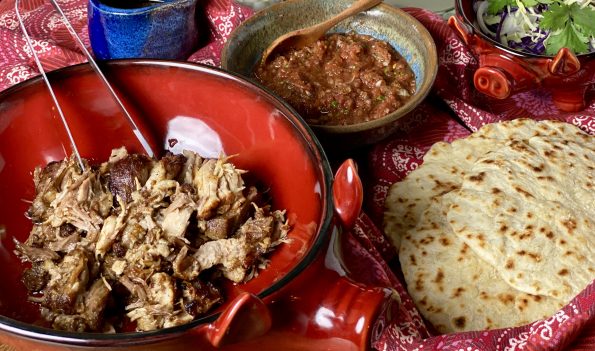
A quick and super easy salsa that starts with Fire-Roasted Tomatoes in a can!  I posted this for Cinco de Mayo a couple of years ago.  It is my go-to salsa.  Find it here!


Mexican Rice

I adapted this recipe from Mexican Everyday by Rick Bayless.  It is right up my alley since it is made in a rice cooker, the only way I know how to make rice.  It’s easy and delicious.  I use half of the quick salsa to make Mexican Rice, and the rest to serve.

Mexican Red Rice

Classic Mexican Red Rice made in a rice cooker, so easy, so delicious
Course Side Dish
Cuisine Mexican
Keyword Meican Red Rice, Rice Cooker
Prep Time 10 minutes
Cook Time 40 minutes

Equipment

  • Rice Cooker

Ingredients

  • tbsp vegetable oil or olive oil
  • cups white rice
  • 1 cup homemade quick salsa commercial salsa will work also
  • 1 cup chicken broth
  • salt to taste start with 1/2 tsp
  • cups frozen peas optional
  • 1 /2 can roasted chilis 4oz you know the mild kind in the little cans, optional
  • 1-2 cloves garlic finely chopped
  • 1/2 tsp ground cumin

Instructions

  • Heat a medium (3 quart) ovenproof saucepan over medium heat.
  • Add the oil. When it is hot add garlic and fry for 1 minute to soften. Add rice and stir frequently until the grains of rice turn from translucent to milky-white – don’t worry if some of them brown.
  • Pour sauteed rice mixture into rice cooker pot.
  • Add the salsa, chicken broth, chilis, ½ tsp salt and cumin. Set to cook.
  • Fluff the rice and mix in the peas. Adjust the salt to taste, then serve
Melting Pot, Instant Pot, Matzo Ball Soup

Melting Pot, Instant Pot, Matzo Ball Soup

In the time of COVID-19 seems like we are all craving comfort food.  I find myself yearning for dishes like soups, stews, foods from my childhood, and all things carb seems to be my mantra.  Apparently, I’m not the only one, bread baking has become a national pastime making it really difficult to find flour and yeast.

My cooking and baking reflect my Californian roots. A typical day “in the life of” will find us having an All-American breakfast of bacon and eggs, followed by a Carne Asada Burrito or lamb shawarma for lunch, and sushi or pho for dinner.  I’m lucky to live in such a diverse community-a melting pot.

Hmmm, ultimate comfort food.  Let the Soup Games begin

On an overcast, gray day last week, I had a hankering for a big steamy bowl of soup.  I had just wished friends a Happy Passover so I had matzo ball soup on the brain. I pulled out a fresh chicken from the Korean grocery store, a variety of vegetables I had picked up at the Farmer’s Market, and my Instant Pot.

Insta-Matzo Ball Soup-Pot

The recipe from Spruce Eats (another great site!) for Instant Pot Matzo Ball Soup served as the basis for my soup.  I started with a small fresh whole chicken 2.5-3 pounds and lots of vegetables including onions, carrots, celery, leeks, garlic, and potatoes, feel free to use whatever vegetables you like.  Add the chicken, cut vegetables, and seasonings to your Instant Pot, turn the lid and close the vent. Set the timer to 25 minutes.  Voila, that’s it, easy-peasy.  Note, it will take a while to get to pressure, approximately 20-25 minutes in addition to the cooking time of 25 minutes.  Once it is done, let the pot natural release for 15 minutes.  You can also use cut-up chicken for the stock, I prefer a whole chicken.  Don’t limit yourself to Matzo Ball soup. This is killer chicken soup, throw in a handful of rice or pasta instead of matzo balls-delicious alternatives.

Put chicken in first and pile veggies on top. Fill pot with water.

Two Schools

Do you like your matzo ball soup with just broth and matzo balls?  When I was a student in LA, a LONG time ago, I loved going to Canter’s Deli on Fairfax. An iconic joint, a classic Jewish deli, with great sammies (Killer Reuben) and traditional matzo ball soup-just rich savory broth and a giant matzo ball.  After a long night of studying, a bowl of soup at Canter’s was always a treat.

BUT, if you like lots of STUFF in your soup (which I am a big fan), remove the chicken and veggies when the stock is done.  Let the chicken cool so you don’t burn your tootsies when shredding it.  Cut the reserve veggies into bite-sized pieces. Set the shredded chicken and cut veggies aside to add to the stock later. This transforms your soup into a substantial meal. A glass of wine, a slice of homemade bread to go along…now you’re talking.

While the Instant Pot is doing its thing, make your matzo balls.  I could lie and post a recipe for homemade matzo balls but I won’t…..I USE A BOX MIX and I’m not afraid to admit it.  A tweak I learned from a friend is to use one whole egg and two egg whites in place of two whole eggs-lighter, fluffier matzo balls. Use an ice cream scoop to portion your matzo balls.  To shape each ball and make the outside smooth, roll each one by hand.  Wet your hands so the matzo balls don’t stick to them while rolling.

Remove the chicken and vegetables when the stock is done.  Switch the Instant Pot to saute’, and bring it to a boil.  Add your matzo balls, bring it back to a boil then reduce the heat to low.  Cover and cook for an additional 20 minutes.  Add reserved shredded chicken and vegetables to warm.  Ladle out all that goodness into bowls and enjoy!

Instant Pot Matzo Ball Soup

Delicious and comforting, Matzo Ball Soup made in an Instant Pot!
Course Soup
Cuisine Jewish
Keyword Chicken, Instant Pot, matzo ball soup
Prep Time 15 minutes
Cook Time 55 minutes

Equipment

  • Pressure Cooker

Ingredients

Chicken Stock

  • 1 whole chicken about 3 pounds with bone and skin, sub 2.5 pounds of chicken thighs
  • 8 cups water
  • 4 ribs celery with leaves, cut into 2-inch lengths
  • 1 onion, large, chopped or use a combination of leeks and onions
  • 4 carrots peeled, cut into 1-inch chunks
  • 1 potato, peeled and cut into quarters Yukon Gold
  • 4 cloves garlic peeled and smashed
  • 4 sprigs parsley
  • 1 bay leaf large, or 2 small leaves
  • 2 teaspoons kosher salt or to taste
  • Black pepper freshly ground, to taste or as desired

Matzo Balls

  • 3 large eggs divided 1 whole egg, 2 egg whites
  • 2 tablespoons vegetable oil use chicken schmaltz or duck fat
  • 1 pkg matzo ball mix manischewitz matzo ball mix

Instructions

  • Place the chicken in Instant Pot, followed by the water, celery, onions, carrots, potato, garlic, parsley, bay leaf, kosher salt and pepper. Lock the lid in place and turn the valve to the sealing position.
  • Select the manual setting, high pressure, and set the timer for 25 minutes. When the time is up, let the pressure release naturally for 15 minutes. Carefully release the remaining pressure.
  • Meanwhile, prepare the matzo ball mixture as the chicken and vegetables are cooking.
  • In a large bowl, whisk the 1 egg and 2 egg whites until slightly beaten. Add eggs, vegetable oil or fat to matzo mix and stir to combine. Refrigerate mix for 15 minutes.
  • Use an ice cream scoop to portion out matzo balls. With moistened hands, further shape the matzo mixture into small balls. You should have about 10-12 matzo balls. Refrigerate until ready to cook.
  • Carefully remove the chicken and vegetables to a large bowl and set aside. Strain the broth through a fine mesh strainer, discarding the solids (garlic pieces, leaves, etc.) keep carrots, potatoes and onions.
  • Pour the broth back into the Instant Pot; set it on sauté and bring to a boil.
  • Drop the matzo balls into the boiling broth, add additional veggies at this point. Turn the sauté function to the low setting. Cover the pot and simmer the matzo balls for 20 minutes.
  • As the matzo balls cook, dice the reserved cooked vegetables. Remove the chicken from the bones and discard the skin and bones. You don't need all of the chicken for the soup. You could reserve breast meat for chicken salad or a pasta dish.
  • Shred the chicken. Return the chopped vegetables and chicken to the broth with the matzo balls and heat through.
  • Ladle soup into bowls. Include two to three matzo balls to each serving.
  • Remove leftover matzo balls from the soup and refrigerate them in a separate container.

Notes

When planning this soup, make sure you factor in enough time for the buildup and release of pressure. It will take about 25 to 30 minutes for the soup to reach pressure.  
Chicken fat, or schmaltz, is a popular fat for matzo balls, but vegetable oil or duck fat are fine alternatives.  A way to get rendered chicken fat is to make the broth and then refrigerate it until the fat solidifies on top. Skim fat to use for matzo balls.
Kindness of Strangers: Three Amigos Soup (Beef and Vegetable Soup)

Kindness of Strangers: Three Amigos Soup (Beef and Vegetable Soup)

Last week I headed up to the City to run some errands, check on my mom’s house and visit her at the assisted-living home.  We moved mom to a care facility after a couple of health emergencies and declining cognitive ability, sadly she could no longer live independently.

I arrived at her place around lunchtime and it was such a beautiful day, I decided to take her to Los Trinos, a little hole-in-the-wall down the block that serves delicious El Salvadorean food.  Using the walker to steady herself, we slowly made our way to Los Trinos.  The most difficult part of the walk is the Mission Street crossing.  She made it across like a real trooper.

A Hole in the Wall but Not in My Soul

Los Trinos, a tiny unassuming place with about 10 tables, serves the surrounding neighborhood.  It’s down-home cooking-Pupusas, Tacos, Churrasco, Sopa de Res, all made in a tiny family-run kitchen.  We settled on Carne Asada Tacos, pupusas filled with cheese and chicken, and a bowl of their Sopa de Res (beef and vegetable soup).  The soup is the epitome of comfort food, filled with carrots, chayote, zucchini, corn on the cob, and chunks of beef, it nourishes the body and the soul.  Beef shank is part of the leg, the meat is tough, sinewy, and lean (it does a lot of work after all) but with long slow cooking, morphs into tender and flavorful morsels and develops into a tasty stock.  Oxtails would be a good (but pricey) substitute for both flavor and texture.

On the way back, mom’s legs gave out and she collapsed crossing the street (Mission is a big fast street). I frantically tried to pick her up while grabbing her walker.  Immediately 3 guys came running to help us, literally carrying mom to the corner out of harm’s way. Luckily there is a bus stop there with seats. I told her I would run and grab a wheelchair.  One of the guys immediately said he would stay with her until I got back. I was so grateful to them. With all the craziness going on right now its acts of kindness and decency that restore your faith in people. They probably won’t see this but I wanted to thank the three of them who without hesitation jumped in to help us.

I got mom back and settled her in, told her she almost gave me a heart attack, she laughed.  She Was OK

In appreciation of the three guys who helped us, I have named my version of Caldo or Sopa de Res, Three Amigos Soup. It is soul food.  Comfort food made with love and made to be shared with family and friends.  My mom, notorious for not being a great cook (she left the cooking to my dad), somehow could fill a pot with water and like magic turn it into the most delicious soups.  Her beef and veggie soup, one of my favorites, starts like Three Amigos soup with beef shanks but veers Asian with the addition of ginger and shiitake mushrooms.

Inspired by the three gentlemen who helped me it felt right to make a pot of soup.  I made the soup in a pressure cooker and it takes half the amount of time.  If you have a 6-quart pressure cooker like me, half the recipe.  If you have the big Kahuna of Instant Pots, you can make the full recipe.

Confession time, I cheat by adding a heaping tablespoon of Better Than Bouillon Base, totally optional.  Or start with beef broth or stock instead of water for a richer flavor.

Three Amigos Soup (Caldo de Res)

Food for the soul, this beef and vegetable soup is nourishing, comforting, and just plain delicious. Filled with a variety of vegetables, including, carrots, potatoes, chayote and onions it makes a wonderful meal in a bowl.
Course Soup
Cuisine Mexican
Keyword Beef and Vegetable Soup, Beef shank, Caldo de Res, Carrots, chayote, comfort food, food for the soul, onions, potatoes
Prep Time 30 minutes
Cook Time 3 hours
Instant Pot 1 hour
Total Time 1 hour
Servings 10

Equipment

  • Instant Pot

Ingredients

The Stock

  • 10 cups water divided, for a richer stock, use beef stock instead of water or 1:1 water:stock
  • 2 pounds bone-in beef shank Substitute 2-2.5 pounds of oxtails, or a mix of both, chuck roast cut into 2-3 inch chunks would also work
  • 4 cloves garlic peeled
  • 2 bay leaves
  • 1.5 tablespoon coarse kosher salt
  • 1-2 Tbsp Better than Bouillon Beef Base optional, not necessary if using beef stock

The Veggies

  • 1 white or yellow onion Diced
  • 2 potatoes cut into eighths (Idaho, Russet or Yukon Gold)
  • 2-3 medium ears of corn shucked and cut into 2 inch pieces
  • 2 zucchini cut into thick chunks
  • 4 carrots sliced into thick coins
  • 1/2 head cabbage cut into eighths, leave the center stalk to keep cabbage together
  • 2 fresh tomatoes, cut in wedges optional but recommended, adds sweetness

Garnishes

  • 1 cup chopped cilantro for serving
  • 4 limes cut into wedges for serving
  • diced jalapenos, optional for serving

Mom's Beef and Vegetable soup

    Omit bay leaves, chayote, lime and jalapeños

    • 4-6 dried Shiitake Mushrooms, Cleaned and soaked in warm water for 10-15 minutes. reserve soaking liquid to use as stock for soup
    • 4 stalks celery, cut into 2-inch pieces
    • 1 1-inch piece fresh ginger Smashed Or cut into slices, in place of bay leaves
    • 1/4 Cup Rice wine or Shaoxing Wine Add with beef
    • 1-2 Fuzzy melons or piece of winter melon (1.5 pounds) Daikon or Korean radish would also work In place of zucchini and chayote,
    • 1 Tbsp Light soy sauce Just before serving, stir into soup
    • 1-2 Green onions sliced, to add when serving

    Instructions

    • In a large dutch oven or soup pot, add 10 cups of water, beef shanks, garlic, bay leaves, and salt. Bring to a boil, cover, reduce heat to a low simmer and continue cooking for 1 1/2 to 2 hours, or until the meat Is tender.
    • Skim off and discard any white or brown foam floating at the top of the pot as well as the bay leaves and garlic cloves. Transfer the cooked bone-in beef shank to a medium bowl and set aside to cool slightly.
    • Add the onions, potatoes, corn, zucchini, carrots, cabbage and remaining 2 cups of water to the pot.
    • Bring soup to a boil, reduce heat to a low simmer and continue cooking until all the vegetables are tender and cooked through, about 15 minutes.
    • While the vegetables are cooking, remove the bones and any tough sinewy parts from the beef shank and discard. Cut the tender meat into small bite-sized chunks. When the vegetables are fully cooked, add the meat.
    • Stir everything together and taste. Season with salt and pepper, if desired.
    • Ladle soup into large bowls, each bowl should have bit of everything. Garnish each bowl with cilantro, freshly squeezed lime juice and diced jalapeño peppers or a few dashes of Tobasco hot sauce (optional).

    Instant Pot Version

    • Place beef, shiitake, garlic, salt and 1/2 of diced onions in pot. Fill pot to 10 cup line.
    • Seal pot and set to cook at high pressure for 35-40 minutes. NPR for 10 minutes
    • While soup is cooking, prep vegetables. Remove meat from stock and add vegetables to Instant Pot, you might have to leave some out, it’s a lot of veggies. Seal and set cooktime for 15 minutes.
    • Quick release, season with salt and pepper. Ladle soup and goodies into large bowls. Garnish with cilantro and green onions and serve. Enjoy!
    Tryin’ to Squash A Cold! (Instant Pot Butternut Squash Soup)

    Tryin’ to Squash A Cold! (Instant Pot Butternut Squash Soup)

    How does that old adage go? Feed a cold, starve a fever?  The thought crossed my mind as I was miserably lying in bed, achy, congested, and generally feeling like crap.  Thank goodness for laptops and search engines…I found a Scientific America article that addressed this very proverb and whaddya know, going all Mythbuster, Scientific America, not only debunked it, but concluded it really should be “Feed a cold, FEED a fever”.  Yeah baby, I love science.

    What is the perfect antidote when it is cold, when you are sick, when you crave comfort, but you are too tired to fuss?  SOUP.  Am I right?  Yep, bowl therapy to the rescue.  It didn’t take long to find a soup that fit the bill.  From the blog Creative Bites, Pressure Cooker Creamy Butternut Squash Soup.  Lucky for me I had bought a butternut squash at the market and had all of the ingredients handy.  “Kold karma” pointed me to this quick (thanks to my Instant Pot) and easy, delicious soup.

    Here’s the HARD part.  The PREP.  Yeah, no getting around peeling that butternut squash and dicing ALL THOSE vegetables.  Well,  I suppose you could buy pre-cut squash, diced onions and minced garlic, but that’s your call. It’s part of cooking therapy for me.

    Butternut Squash soup Prep

    NOW, the EASY part.  Prep was 90% of the game.  You’re now sitting pretty on 3rd base ready to score, just a mere minutes from homebowl. Get it?  I love the apples and red bell pepper, they add a nice sweetness.   Saute the veggies in your Instant Pot.  It’s important when you add the stock, really stir the bottom of pot to release all those bits of saute goodness.   The pot is very sensitive to bits stuck on the bottom and will turn off as a safety precaution if the bottom isn’t clean.  Add the stock, seal the pot, and then set the timer for 5 MINUTES.  Yep, five minutes and quick release at the end.  With the time it takes to come to pressure, you’re still only looking at 15 minutes of cooking time.  Not bad.

    I used an immersion blender in the pot to puree the soup.  There are a lot of comments online about how it doesn’t work as well as a blender.  BUTTERNUTS.  Not creamy enough?  Throw the immersion stick back in and blend some more.  I’m willing to sacrifice a bit of creaminess (though I don’t think I am) to do this, as oppose to pouring HOT soup, in batches, into my blender.  I’m saving my blender for smoothies and Margaritas.

    Butternut Squash Soup in Mugs

    Go ahead and play around with this soup recipe. It’s very forgiving.  Got thyme?  Substitute for sage.  Got time?  Skip the Instant Pot, roast the vegetables instead.  See the prepped veggies above? Throw it all in a roasting pan, give it a good swig of olive oil, toss, salt and pepper and roast at 425 for about an hour).  The vegetables caramelize in the oven and add a sweetness to the soup that’s “souper” yummy.  Creative bites calls for goat cheese or cream cheese.  I like cream cheese because it adds a whole lot of mouth feel and just a slight tanginess.  You could probably use sour cream, creme fraiche or even just a touch of heavy whipping cream instead.  This would lighten the soup but you might lose that creaminess.

    FINISH WITH TOPPING MADNESS.  Once your soup is done, garnish with ANYTHING your little heart desires.  Toasted nuts or pepitas, bacon, sliced apples, or more BACON, croutons.  Did I mention bacon?  I was sent a mix of nuts as a soup topping by my Food52 Holiday Gift Swap buddy- it was perfect.

    Creamy Butternut Squash Soup Instant Pot

    Course Soup
    Cuisine American
    Keyword butternut squash
    Prep Time 15 minutes
    Cook Time 15 minutes
    Total Time 30 minutes

    Ingredients

    • 1 Tbsp. olive oil
    • 1 large yellow onion diced
    • 1 red bell pepper chopped
    • 2 tsp. diced garlic
    • 1 tsp. fresh ground ginger
    • 2 lb. butternut squash peeled and cubed 1 medium squash
    • 1 medium apple peeled cored and chopped
    • 1 tsp. sage Substitute thyme or curry powder
    • 1/8 tsp. chili powder
    • 1/4 tsp. sea salt
    • 3 c. chicken stock I used additional cup to thin down the soup a bit
    • 3 oz. cream cheese Sub goat cheese
    • 1/3 c. Parmesan cheese
    • Salted Pepitas for garnish Or anything you like, like BACON BITS, spicy nuts, chives, sliced apple, sautéed wild mushrooms...
    • 1 Tbsp Brown sugar, optional To add roasted squash’s sweetness

    Instructions

    • Turn on the Saute function on Instant Pot. Add the olive oil, onions and bell pepper. Saute on high for 4 minutes. Add the garlic and ginger and cook for 1 minute. Add the cubed squash, apple, sage, chili powder, sea salt and chicken stock.
    • Place the lid on your Instant Pot and move the knob to seal. Cook on high pressure for 5 minutes and do a quick release of the pressure.
    • Using an immersion blender in the Instant Pot, puree the mixture. Add the cream cheese and Parmesan, stir to melt and continue to puree until very smooth.
    • Garnish and serve.