Category: Recipes

Recipes I’ve tried and sometimes modified that I think you should try!

Bowled Over, Udon Want to Miss My Newest Obsession (Udon)

Bowled Over, Udon Want to Miss My Newest Obsession (Udon)

Hang on to your hats, imagine Times Square, with all its neon signs and flashing lights dedicated solely to FOOD.  Yep, that’s the only way I can describe the Dotonbori area of Osaka.  Swarms of people, whose sole purpose is to find all things delicious to eat.  A giant 3-D crab, or shrimp or potsticker over the door of a dining establishment making it easy to figure out their specialty.  The delicious aromas swirling around, changing with every step as they walk by tempura houses, ramen joints, crab feasts and yakitori vendors.

Welcome to Crazy Town for food

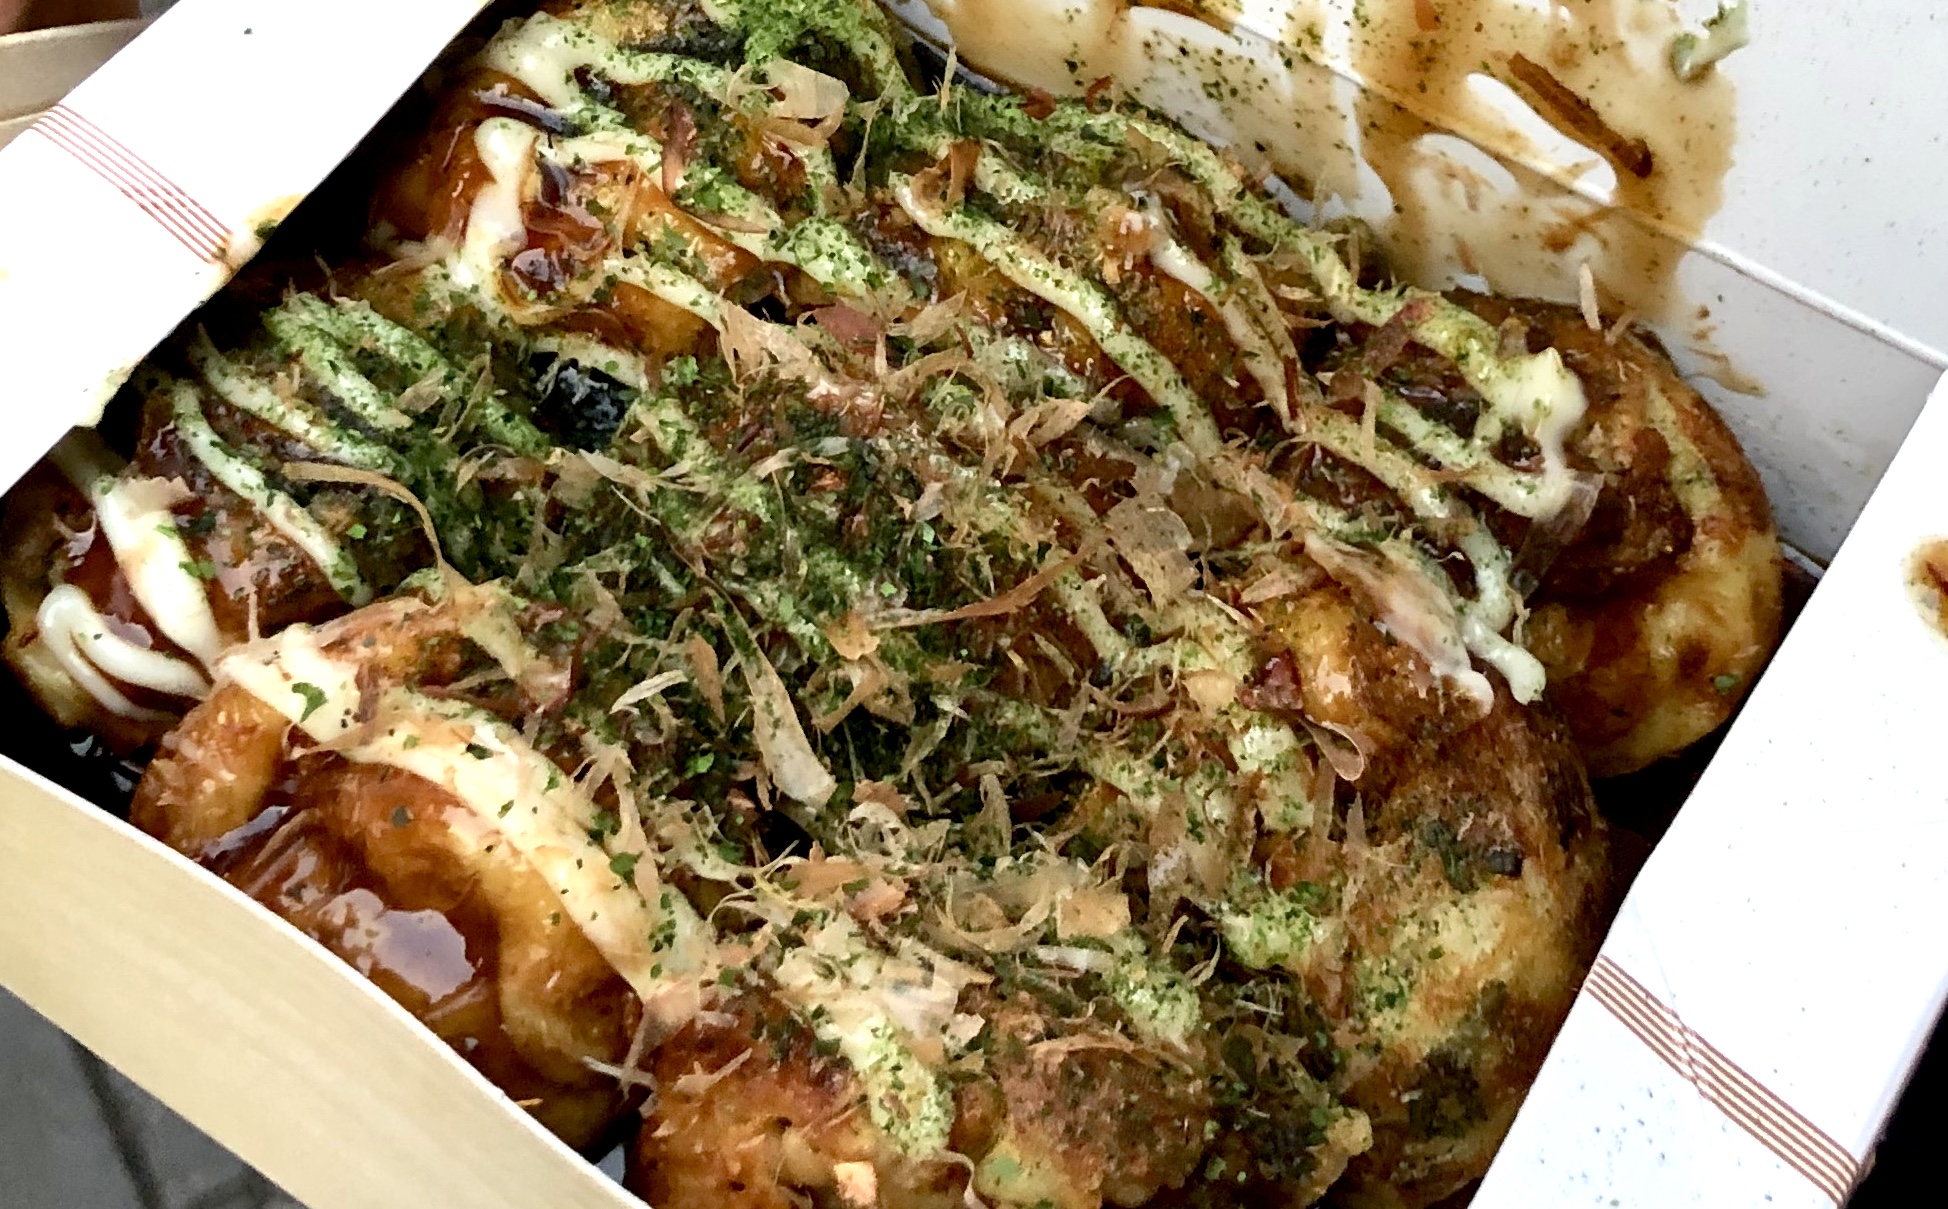
Yep, we bit.  Drawn by the people, hypnotized by the lights, we ate our way down the street.  We tasted Takoyaki, octopus cakes, (not really cakes, I just couldn’t bring myself to call them balls).  Think Ebelskiver with octopus bits.  We munched on skewers of yakitori, sampled matcha and black sesame soft serve and found taiyakis, fish-shaped cakes filled with red beans.

Udon want to miss the noodles

Our last stop was the perfect cap for the evening.  Walking back to our hotel we found a local shop in Namba with a trio of old cooks serving up delicious udon noodles.  We decided what toppings we wanted on our noodles, slipped our yens (=TWO DOLLARS A BOWL) into the machine, and handed the tickets to the chef.  Minutes later 3 hot steaming bowls of udon were placed in front of us.

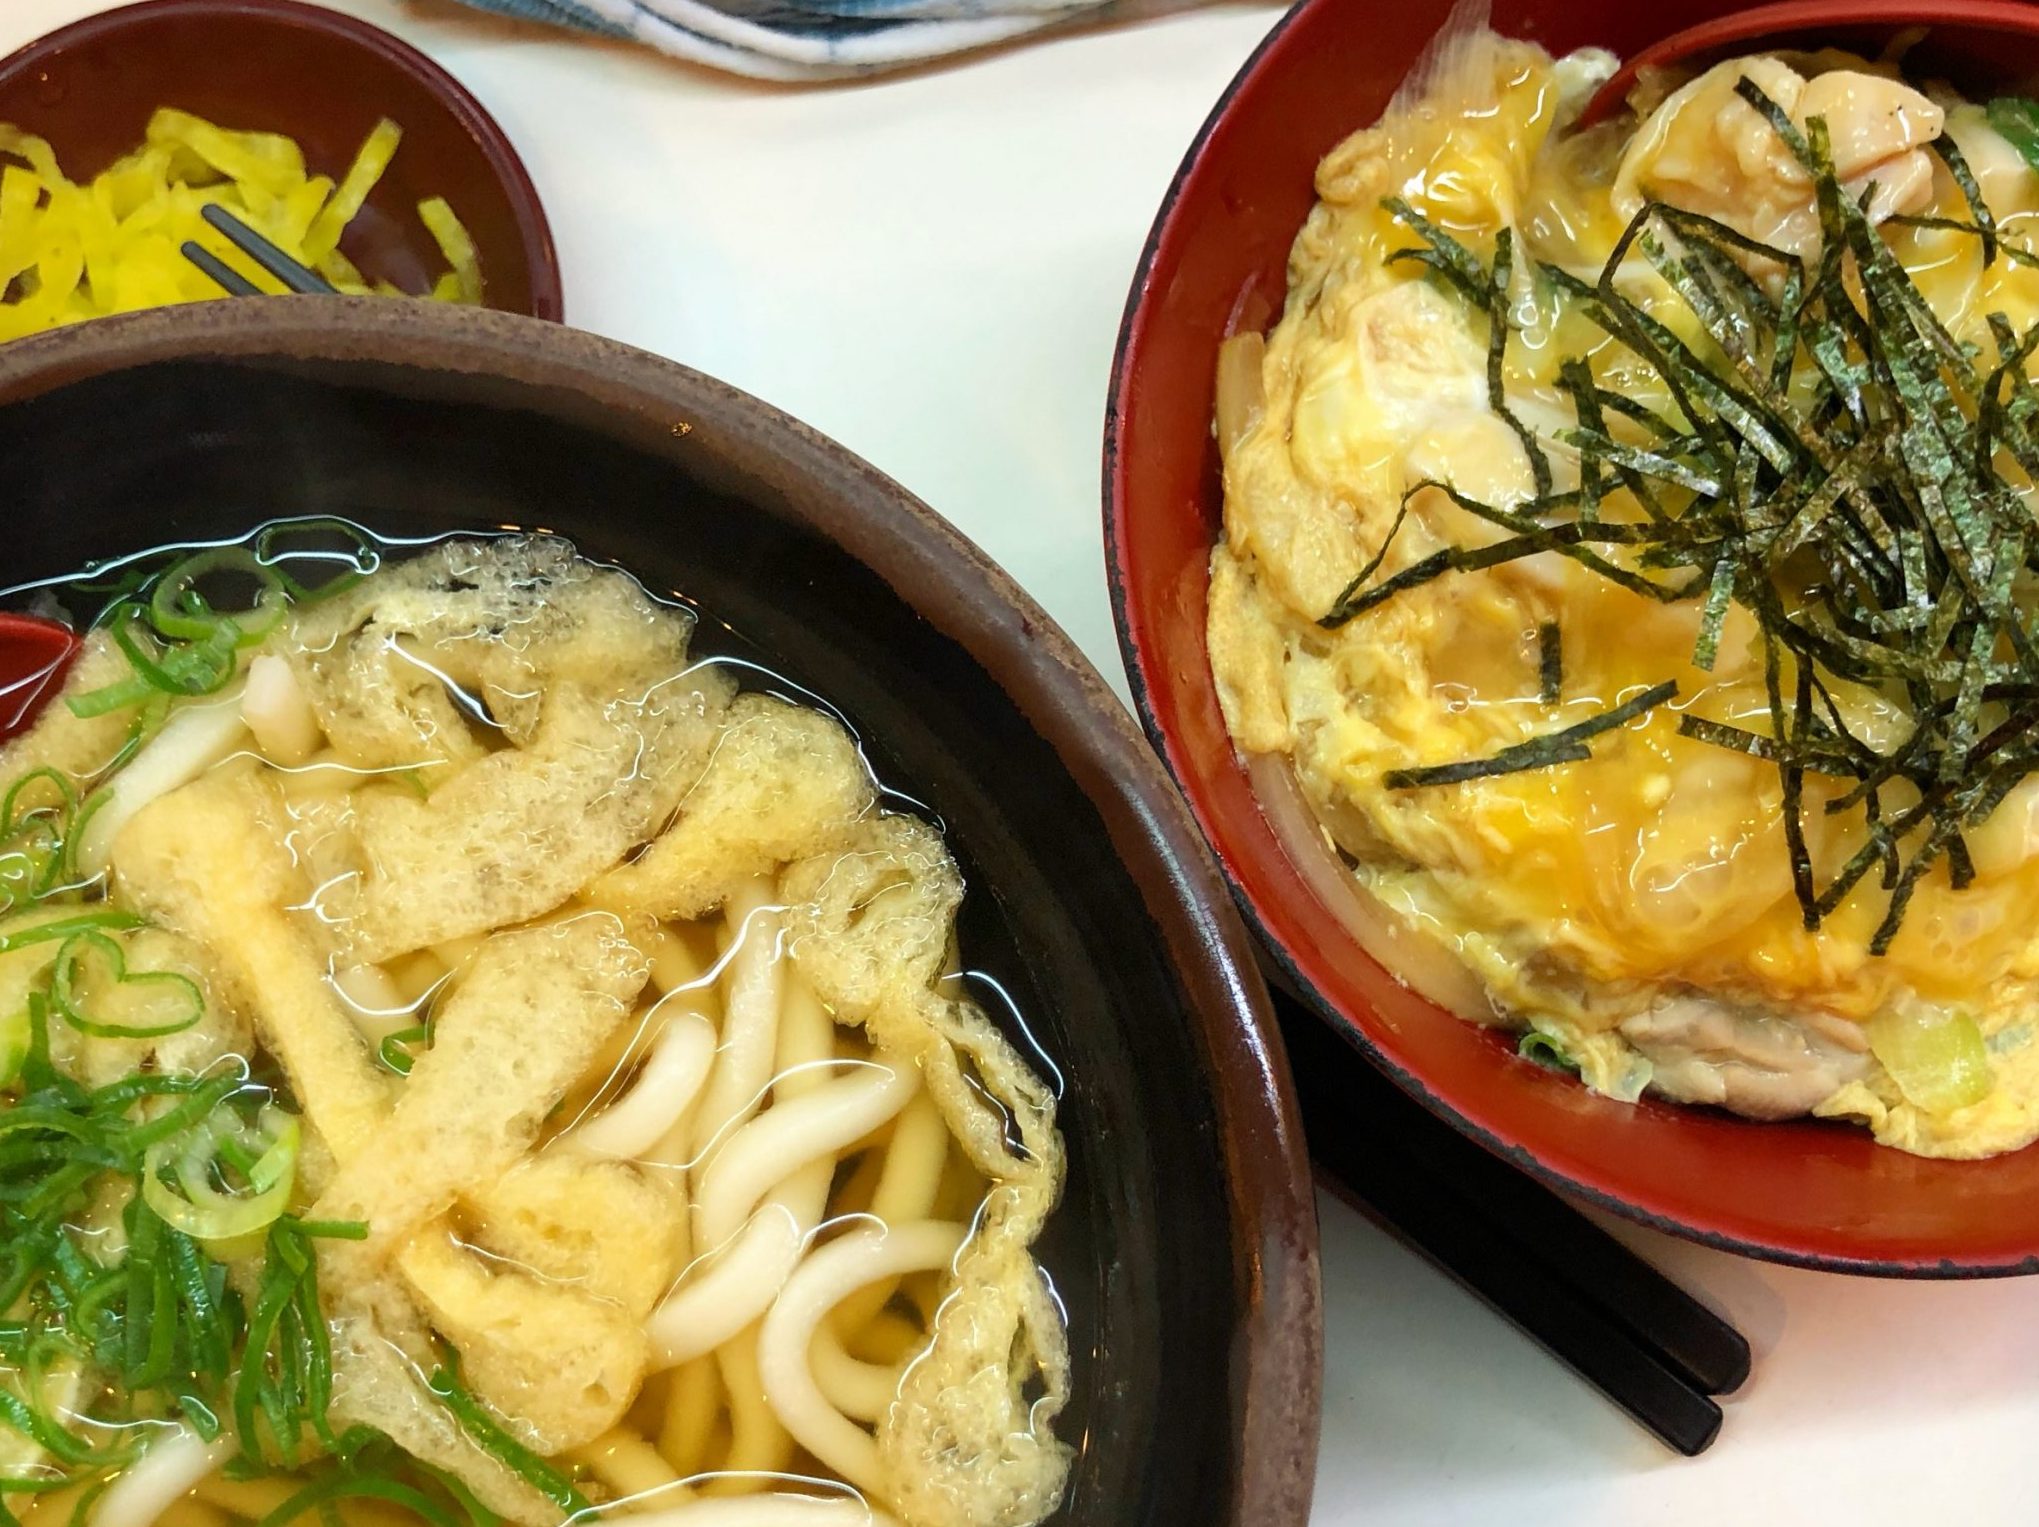
Unlike ramen, the noodles are much thicker with a definite chew.  The broth is flavorful but clear and light, fish-based, different than the rich, heavy broth that you find with ramen.  Toppings are simple-fried tofu (abura-age), a raw egg that cooks in the steaming hot broth, a single tempura shrimp, or a clump of shredded seasoned beef and a sprinkling of green onion.  We slurped our noodles and tipped the bowls to spoon out the last drops of broth.  You’d think we hadn’t eaten all day.  Ha!


Oyako-Udon combo set

Thus My Obsession with Udon Began…

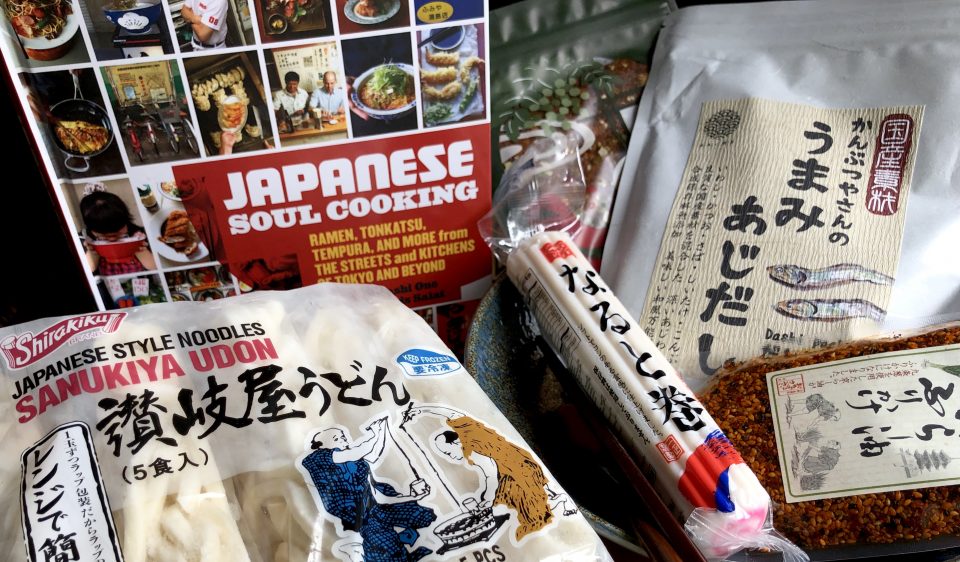
As soon as I got home plus 12 hours of catch-up sleep, I pulled out my copy of Japanese Soul Cooking by Tadashi Ono.  A gem of a book on homey Japanese comfort food.  I flipped to the udon section and then I was off to the market to look for ingredients.  I had purchased a delicious Dashi base in Tsujiki Market in Tokyo, perfect for my udon.  To make your own Dashi here is a great primer from Just One Cookbook. OR, Kikkoman makes a soup base Hon Tsuyu that makes a pretty good dashi broth base.

Working down my list, next the udon noodles. Udon comes fresh, frozen, and (if you can’t find fresh or frozen udon) dried.  Sigh, just not the same.  I also found abura-age or fried tofu skin which is used to make Kitsune Udon. The fried tofu skins are flattened and seasoned with soy sauce and placed on top of the udon.  Really delicious, and substantial enough for a satisfying vegetarian bowl of udon. It can be difficult to find abura-age though and in that case, Inari-age, seasoned deep-fried tofu pouches used to make Sushi Rice balls, is a convenient and easy substitute.  No need to season, just plop them on top of the cooked noodles.  Confused about tofu? Serious Eats’s Tofu primer is your ticket.  The carnivore in me though, bought some thinly sliced beef (sukiyaki beef is perfect) to make Niku Udon, yummo.

Making udon is very approachable.  It’s perfectly acceptable to start with a broth made from Dashi bags and pre-made noodles.

Udon Ingredients

Travel to Eat

People travel to buy clothes and souvenirs, I buy food, Dashi, Furikake’, Soba Boro cookies…yep, travel driven by food.

Studying up, here’s the scoop, on udon.

I used Dashi packets to make the Tsuyu.  This is your base,  add soy sauce and mirin to flavor the Tsuyu.

Optimally, use Sanukiya noodles, most likely found in the frozen section of your favorite Asian market.  The noodles are a bit firmer and hold up well.  The pre-cooked noodles only take a couple of minutes to separate and heat in hot water, presto-dunzo.  There are Korean versions of Udon noodles too, and they are very good.

Toppings for udon can be as simple as an egg, gently poached for the raw egg-squeamish, Abura-age, tempura, fishcake, or really ANYTHING you feel like putting on your noodles!

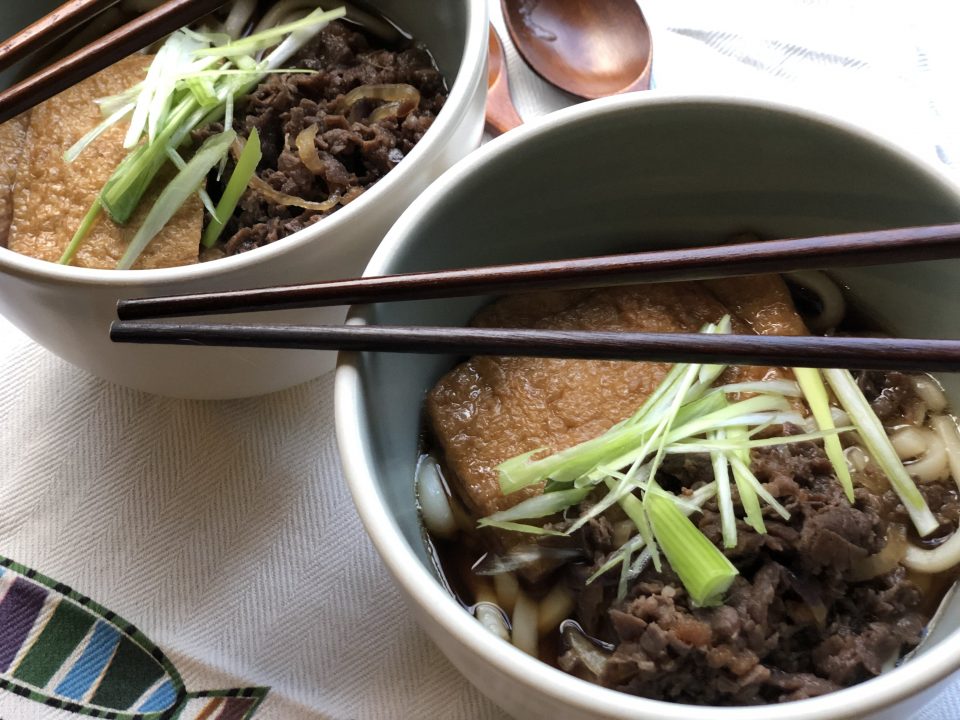
Kitsune Udon

Simple, satisfying, soulful, best describes a bowl of Udon, thick, slurpable, noodles, in a clear broth.
Course noodles, one bowl meal, One dish meals
Cuisine Asian
Keyword Kitsune, Udon
Prep Time 20 minutes
Cook Time 10 minutes

Ingredients

Abura-age (Tofu)

  • 1 package Abura-age or 4 Abura-age

For Simmering Abura-age:

  • 3/4 cup dashi soup stock
  • 2 Tbsp. sugar
  • 1 Tbsp. soy sauce
  • 1 Tbsp. mirin

For Soup:

  • 5 cup dashi soup stock
  • 3 Tbsp. mirin
  • 2 Tbsp. soy sauce
  • Salt adjusting the amount of salt to your preference

Noods and Garnishes

  • 4 packages pre-boiled udon noodles
  • Optional: 4 slices kamaboko fish cake for topping
  • green onions, sliced

Instructions

  • Heat dashi, mirin, sugar, and soy sauce in a medium pan and bring to a boil. Adjust the flavor with salt as you like.
  • Simmer aburaage in the soup on low heat until the liquid is almost gone. Set aside.
  • Boil water in a large pan and heat udon noodles as indicated in the package.
  • Drain the udon and divide into four bowls.
  • Pour the hot soup over udon noodles.
  • Top with seasoned aburaage and kamaboko slices.
  • Garnish with green onions

OR buy the more readily available Inari age or seasoned tofu pouches and just plop those straight into your bowl. Inari age is the fried tofu pouches used to make Inari Sushi

    Or the carnivore delight…

    Niku Udon

    Udon Noodles topped with stir fried seasoned beef and onions.
    Course Soup
    Cuisine Asian
    Keyword japanese, Noodle, soup, Udon
    Prep Time 20 minutes
    Cook Time 15 minutes
    Servings 4 servings
    Author Adapted from Japanese Soul Food

    Ingredients

    Niku Ingredients

    • 1/4 cup sake
    • 1/4 cup sugar
    • 1/4 cup soy sauce
    • 1 pound sukiyaki beef or thinly sliced flank steak, ribeye
    • 1/4 yellow onion, thinly sliced optional

    Soup

    • 6 cups udon tsuyu*
    • 4 bricks fresh or frozen udon noodles can substitute dried Sanuki Udon
    • 1-2 green onion thinly sliced
    • Shichimi togarashi

    Udon Tsuyu

    • 6 cups dashi
    • 1/2 cup mirin
    • 1/2 cup Usukuchi soy sauce light soy sauce
    • 1/2 - 1 teaspoon salt or to taste

    Instructions

    Tsuyu

    • Prepare broth and keep warm.

    Beef

    • Combine sake, sugar and soy sauce in a bowl and stir well. Add beef and mix together, coating meat well. Marinade beef for 10 minutes.
    • Preheat dry non-stick skillet or well seasoned wok/iron skillet. If including onion, saute onion slices just until soft before adding the beef. Add beef and marinade to skillet. Spread beef in skillet to cook evenly. Cook over high heat until beef has lost its pinkness and most of liquid has evaporated, approximately 5 minutes. Remove from heat and set aside.

    Udon Noodles

    • Bring large pot of water to a boil. Add each packet of noodles. gently spread noodles out. When water comes back to a boil, the noodles are done. Drain well and divide among bowls.
    • Pour hot broth over noodles. Divide beef among bowls, garnish with green onions and shichimi togarashi. Serve immediately.
    A Tale of Two Pancakes and Sushi

    A Tale of Two Pancakes and Sushi

    Nothing beats coming home.  Though we had a blast on our trip to Korea and Japan, it always feels good to open the front door, drop the bags and sleep in my OWN bed!  Aaaaahhhh, bliss.

    What else is nice, hmmmmmm

    HOME COOKING

    Yep, time to get back in my kitchen and make a mess.  I envisioned our first day back, a big pot of rice soup (congee), kick up our feet, and flip on the telly to catch up with the Warriors and Sharks.

    But before going home we spent our last day in Japan running around Osaka looking for early morning sushi, soufflé pancakes and Michelin starred Instant Ramen.  We went 2 for 3, couldn’t find the Instant Ramen which was just as well since I couldn’t fit much more in my suitcase anyway.

    Breakfast of Champions

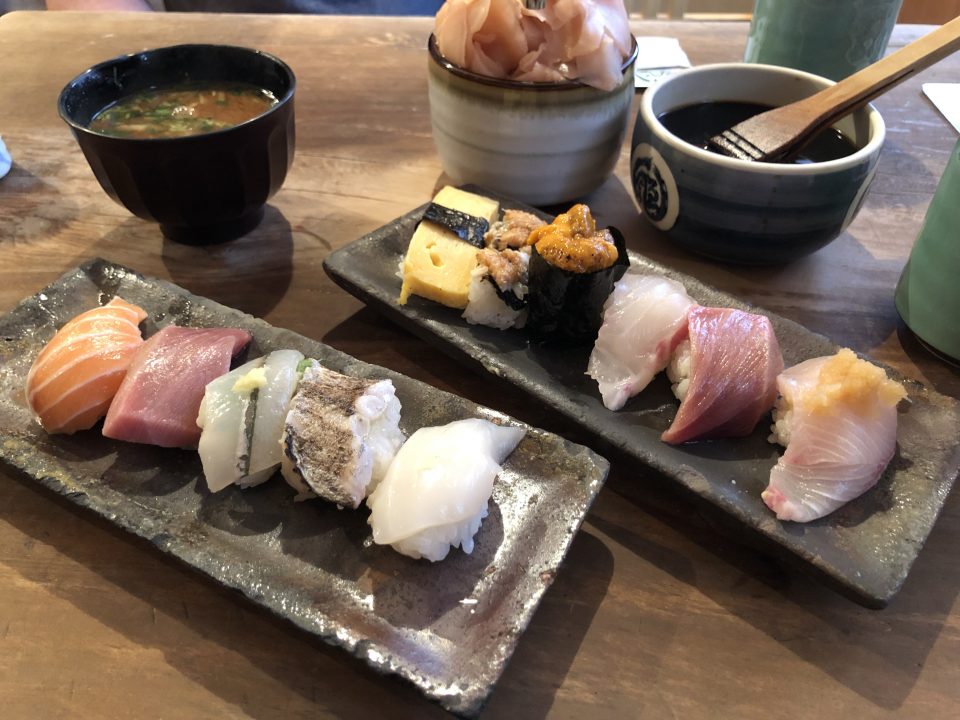
    At 6:30 am we found ourselves sitting in a small sushi place at the Osaka Fish Market, Endo Sushi.  Surprisingly, we were not alone nor the first ones there.  To make it easy, there is a set menu of sushi flights.  Each flight focus was different, shellfish, fish, tuna.  Fresh and delicious we ordered a set each, then another, then another to share.  Not a bad way to start the day.

    My Happy Place

    From there we headed back to town.  It was only 8:30.  Yes, enough time to find soufflé pancakes, the current rage.  So we head to Happy Pancake which doesn’t open until 10AM.  First in line baby, uh-huh.  The perks of getting up early.

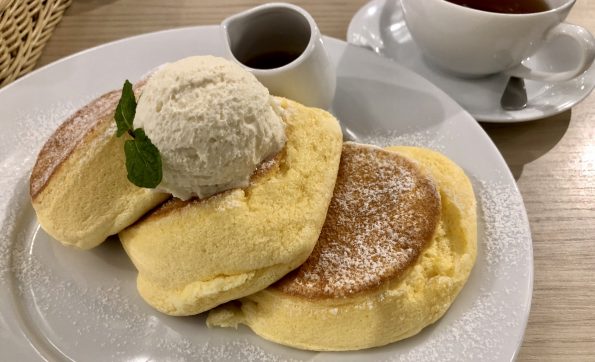
    Happy Pancakes with butter and syrup.  Number two on the bucket list, checked off.

    Light, fluffy, souffle-like, and EGGY.  Now, this might be your cup of tea…but for me, they were just way too eggy tasting, reminded me of a French omelet.  Y’all, if I wanted eggs, I would have ordered eggs. I hear there is a joint in Stonestown in San Francisco, and after a three-hour wait, you can try them…Me?  Nah.  I want real pancakes.

    When we finally made it home, top on my breakfast bucket list (or due to my screwed up time-clock, dinner bucket list), PANCAKES of course.  I pulled out my current favorite cookbook, A Common Table by Cynthia Chen McTernan of the blog Two Red Bowls and flipped to her recipe for Buttermilk Mochi Pancakes.

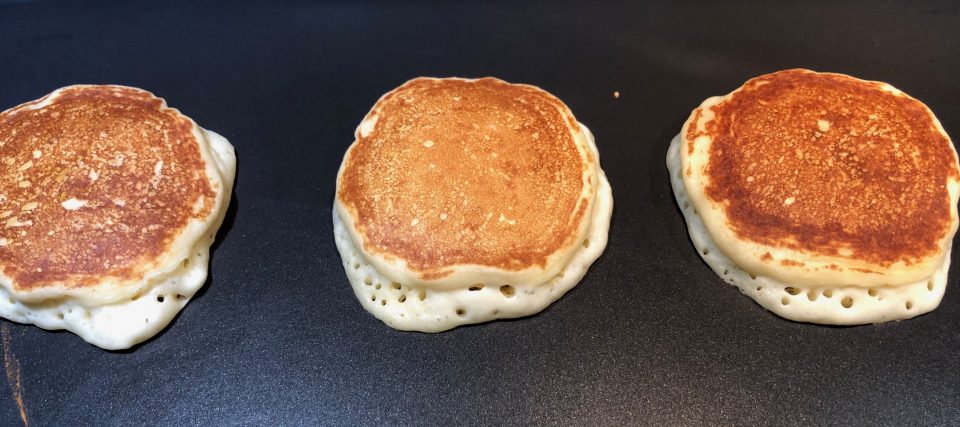
    Her little tweak is genius.  Using half all-purpose flour and half sweet rice flour, you end up with a light fluffy pancake with a nice, subtle, chew or elasticity and a tiny hint of that rice/mochi flavor.  It’s not eggy.  It’s pancakey!  I love it.  It’s delicious.  If you are a fan of the latest rage..mochi donuts and muffins, you’ll love these griddlecakes.

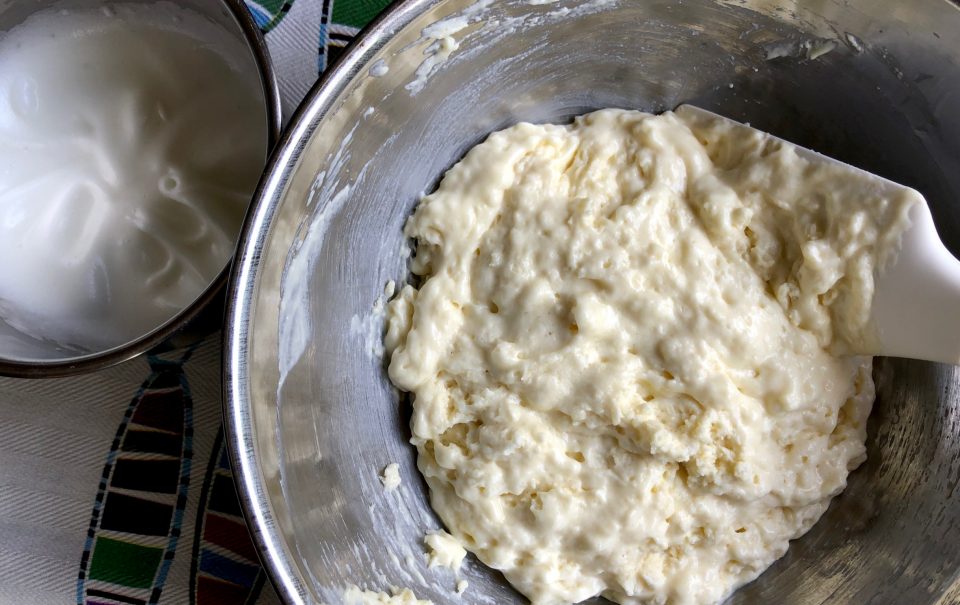
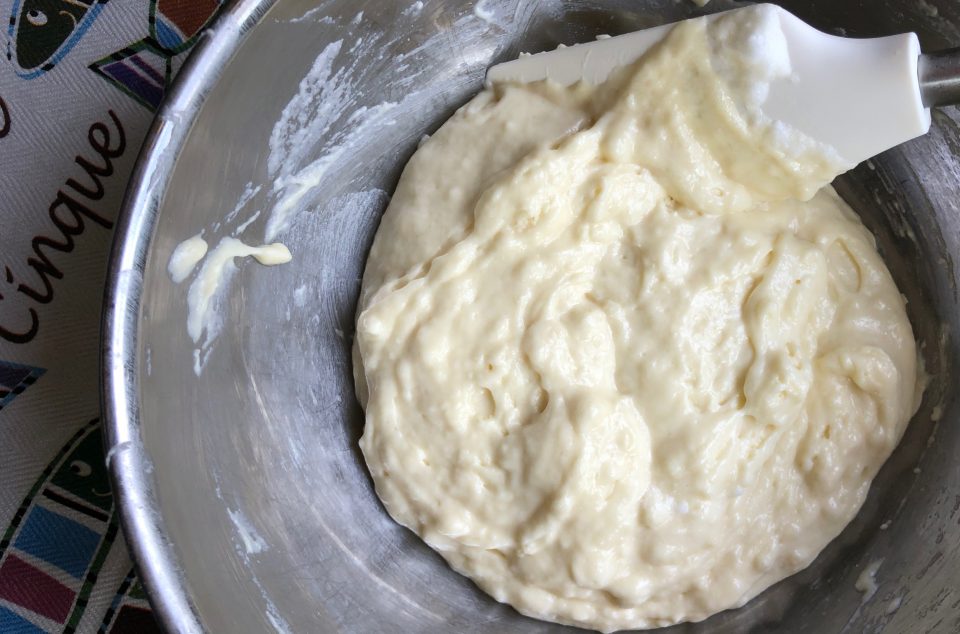
    It’s an easy batter to whip up.  I did stray from the recipe a bit.  I decided to whip the egg white and gently fold it into batter.  The recipe calls for just adding in the unbeaten egg white, but whipping the whites hopefully, adds air and lightness to the batter so I took the extra step.

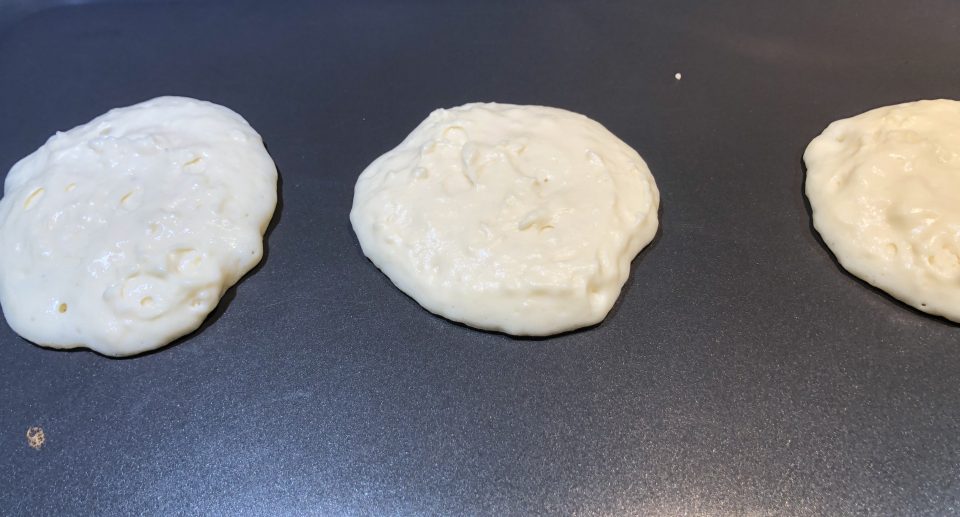
    Mix wet ingredients with dry ingredients just to incorporate.
    Whip egg white  until soft peaks and gently fold into batter
    CHEAT tip: Use an ice cream scoop to dole out the batter.
    If you use a non-stick pan, you won’t need oil or butter on your pan.

    These babies are so badass.  You need to try them.  If you don’t have sweet rice flour, use 100% AP flour, you’ll get perfectly respectable traditional pancakes but really, get yourself some sweet rice flour.  You’ll thank me, plus you now have rice flour to make her delicious Peanut Butter Mochi.

    Buttermilk Mochi Pancakes

    Course Breakfast
    Cuisine American
    Keyword Butttermilk Mochi Pancakes
    Prep Time 15 minutes
    Cook Time 10 minutes
    20 minutes
    Servings 3

    Ingredients

    • 1/2 cup 63gm all-purpose flour
    • 1/2 cup 70gm sweet rice flour like Mochiko Blue Star
    • 1 tablespoon sugar
    • 1 teaspoon baking powder
    • 1/2 teaspoon baking soda
    • 1/4 teaspoon salt
    • 1 large egg separated
    • 1/2 cup Greek yogurt whole yogurt
    • 1/2 cup milk of your choice I used 2%, I also warmed the milk before combining milk, butter and egg
    • 2 tablespoons unsalted butter melted and cooled, plus more for the pan and for serving
    • maple syrup or syrup of your choice for serving

    Instructions

    • In a medium bowl, whisk together the flours, sugar, baking powder, baking soda, and salt.
    • Separate egg, reserve egg yolk in small bowl. Place egg white in a medium small bowl and whisk until soft peaks are formed.
    • Add the egg yolk, yogurt, milk, and melted butter, and stir until just incorporated.
    • Gently fold egg white into batter.
    • Heat a 10-inch or 12-inch cast-iron or nonstick skillet over medium flame until a drop of water sizzles when it hits the pan. Lightly grease the skillet with butter (or flavorless vegetable oil), or if using a non-stick pan, forego greasing.
    • Use a measuring cup or a large ice cream scoop to drop 1/4 cup batter onto the pan.
    • When the edges of the pancake look dry and bubbles begin to form in the center, approximately 2 minutes, flip and cook on the second side until lightly golden, 1 to 2 more minutes.
    • Remove to a plate and repeat with the remaining batter. If desired, use an ovenproof plate (or a metal rack on a baking sheeand place the finished pancakes in the oven on its lowest heat setting to keep them warm while you cook the rest.
    • Serve immediately, with butter and maple syrup.

    Notes

    Add rice flour to your pancakes for a delightful twist! The rice flour adds a bit of elasticity and flavor while the pancake is still tender and fluffy. The best of both worlds for these mochi pancakes!
    Not a Cinco Minute Too Soon! Tres Leches Bread Pudding

    Not a Cinco Minute Too Soon! Tres Leches Bread Pudding

    Invariably when faced with several choices for dessert I gravitate towards buttery, bready, moist, saucey (new word alert).  Everyone generally clamors for the chocolate-centric desserts.  I am a sucker for a warm, gushy on the inside, crisp on the outside bread pudding.  I love a  fruit cobbler or Sticky Toffee Pudding? Oh yeah, right up my dessert alley.

    Two of my favorite desserts can be found in Houston.  At Kileen’s BBQ, where brisket is the bomb, their dessert, a bread pudding made with croissants, literally melts in your mouth.  A warm custard surrounds buttery, moist shards of croissants. YUM.

    My other favorite, The Tres Leches Cake at Chuy’s, a Tex-Mex institution found everywhere in Texas and beyond.  Yellow cake drenched with 3 kinds of milk, whole,evaporated, and sweetened condensed milk then topped with whipped cream and garnished with fresh berries.

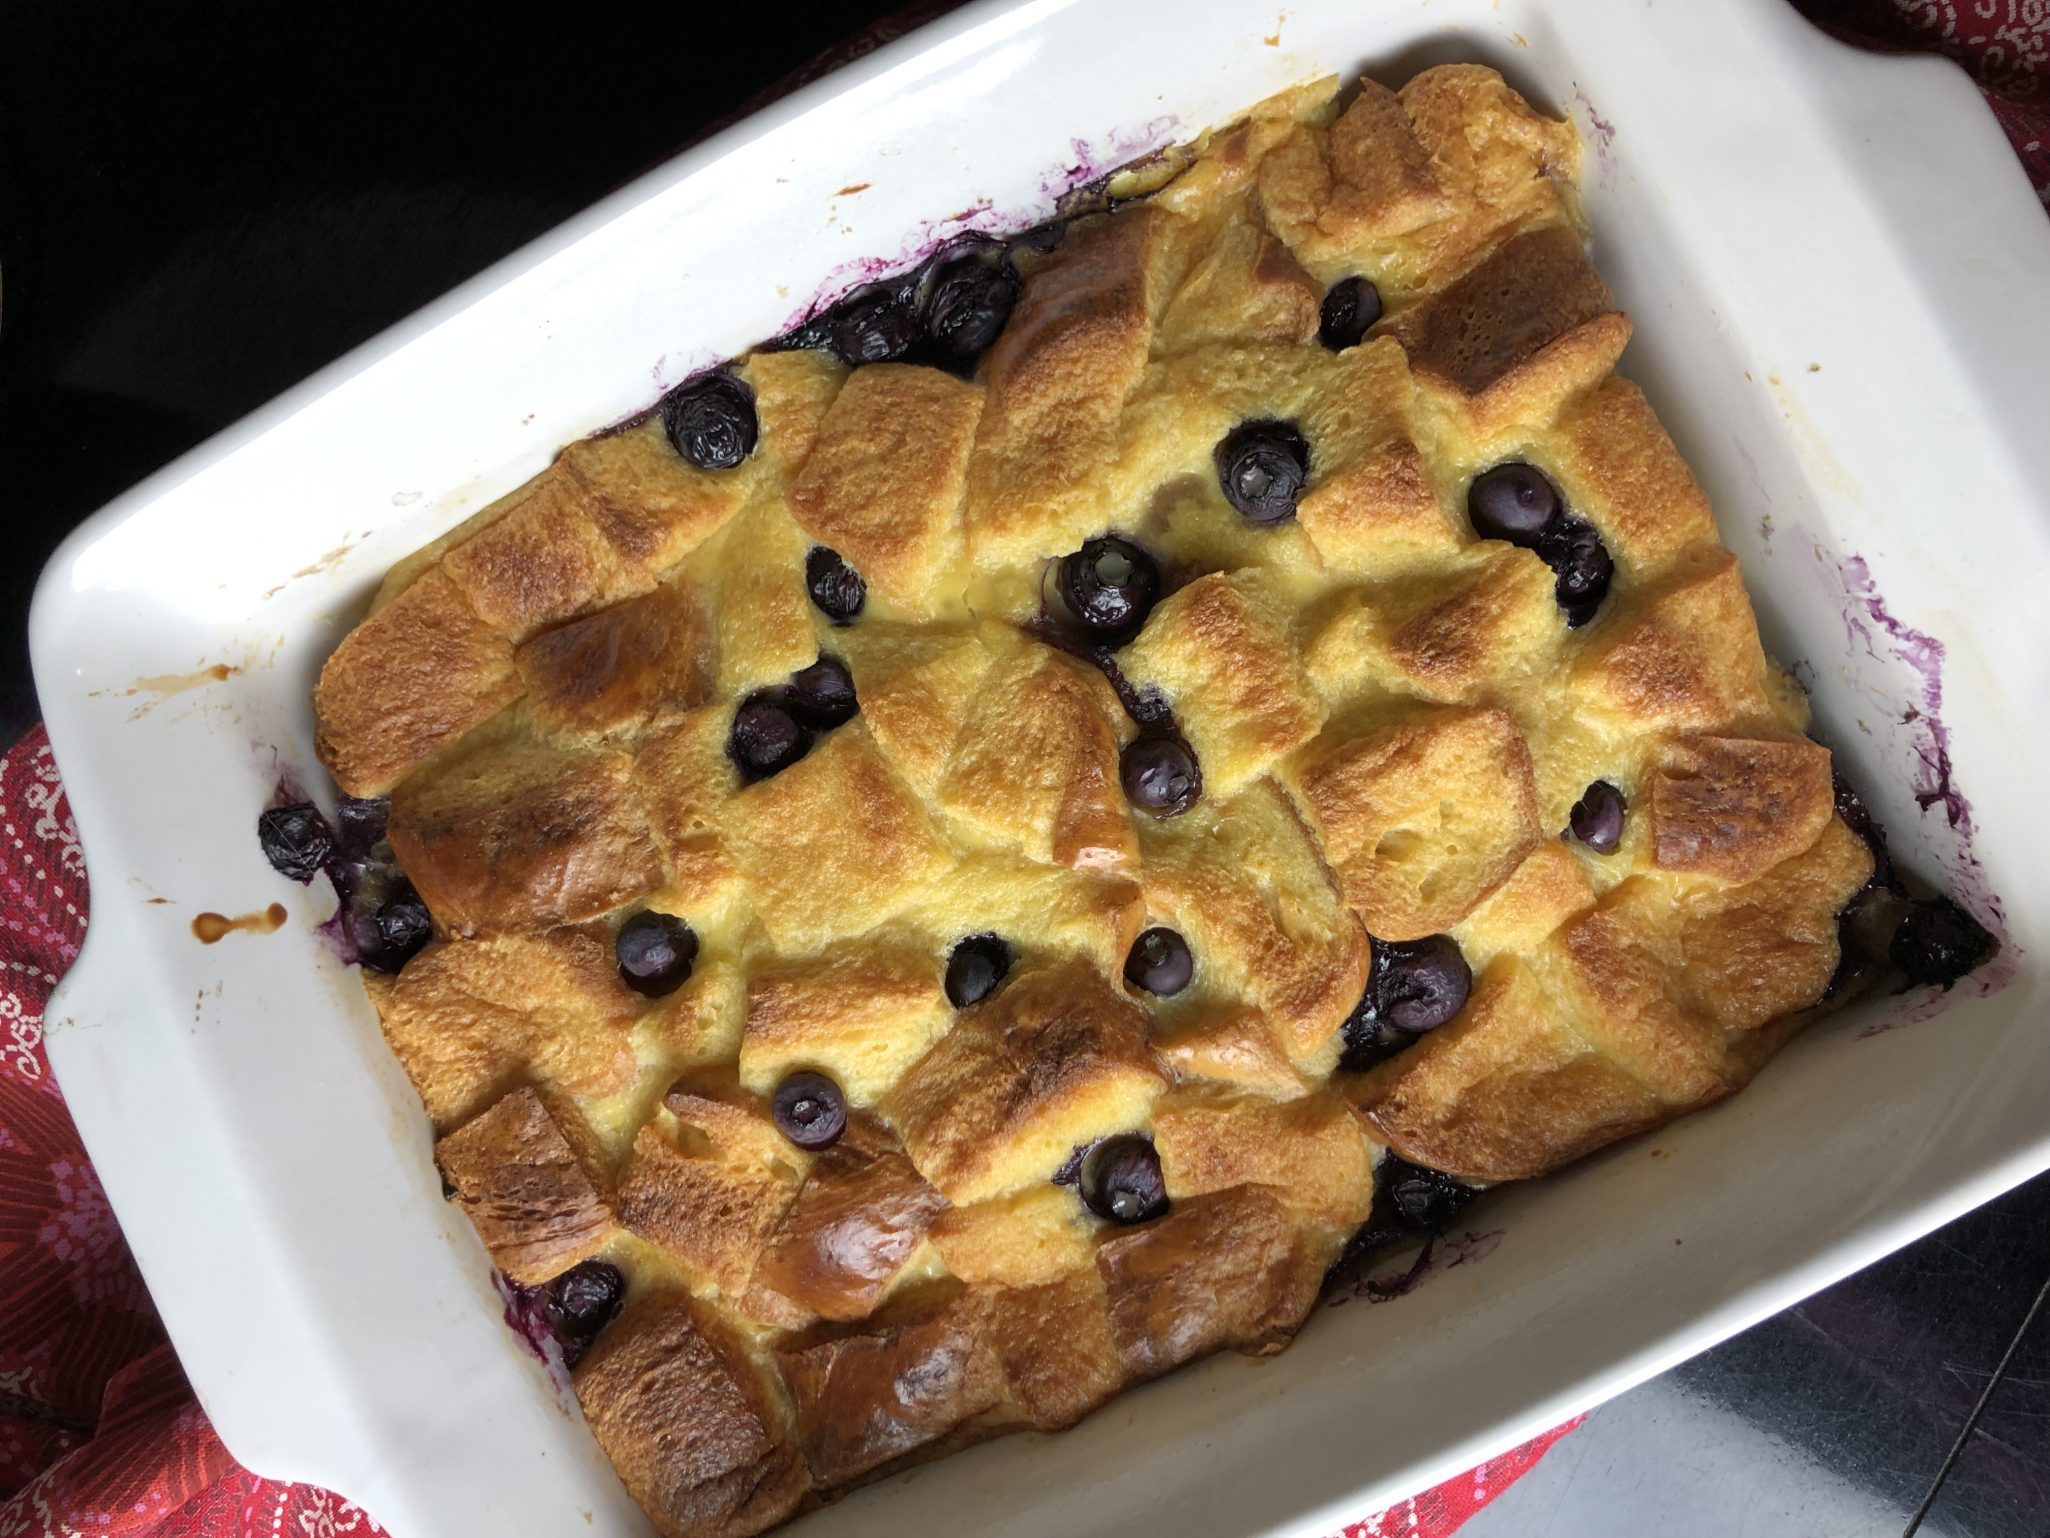
    Wouldn’t you know it, some ingenious person decided to combine my two favorite desserts for a delightful Tres Leches Bread Pudding. I came across the recipe in the NYT, JUST in TIME for Cinco de Mayo.  Perfect!

    So let someone else mix the Margaritas or tend the taco bar.  You make the dessert.

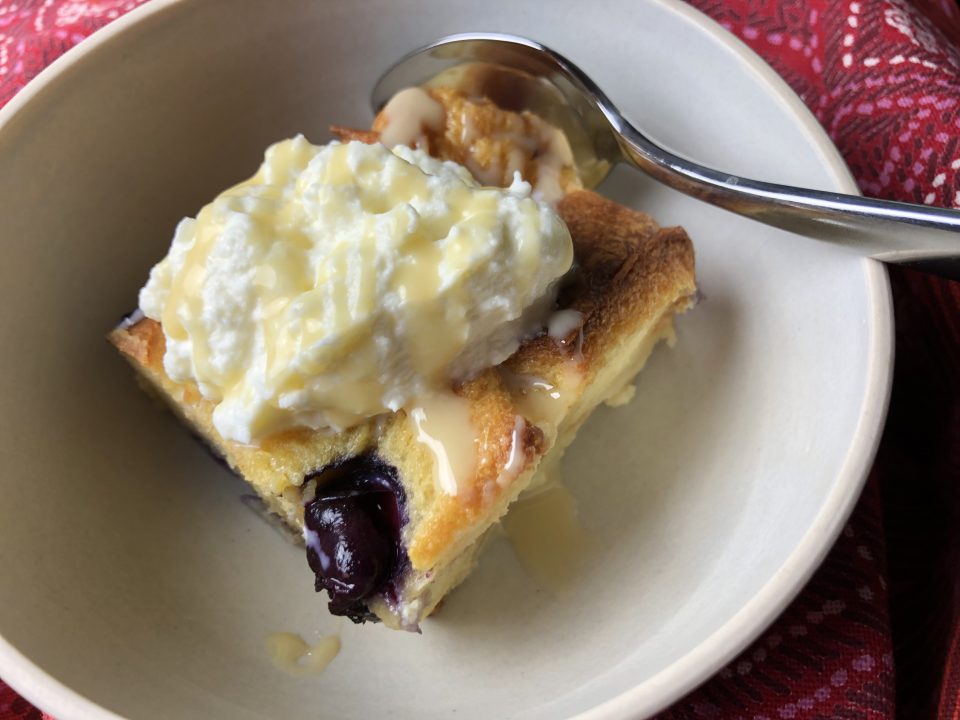
    The recipe calls for whole milk, evaporated milk and sweetened condensed milk.  The sweetened condensed milk provides the sugar so don’t substitute for it. I used TJ’s Brioche Loaf to make the bread pudding.  For a softer, more custard like pudding, use croissants instead. Both are delicious. Festive twist? Before sliding that puppy into the oven, sprinkle it with cinnamon sugar along with the condensed milk.  Serve with a big drizzle of sweetened condensed milk and a dollop of whipped cream.

    You’ll thank me…

    Tres Leches Bread Pudding

    Tres Leches Bread Pudding

    Ingredients

    Butter, for greasing the baking dish

    • 3 large eggs
    • 4 large egg yolks
    • 2 Cups heavy cream
    • 1 Cup Sweetened condensed milk
    • 1 Cup whole milk
    • 1 12-ounce can evaporated milk
    • 2 teaspoons vanilla extract
    • ½ teaspoon kosher salt
    • 12 Ounces brioche or challah or croissants cut into 1 1/2-inch cubes (about 8 cups)

    Instructions

    • Heat the oven to 350 degrees. Butter a 9-inch square baking dish.
    • In a large bowl, beat together the eggs and egg yolks until completely combined. Whisk in 1 cup/240 milliliters heavy cream, 3/4 cup/180 milliliters condensed milk, (reserve remainder of heavy cream and condensed milk ) 1 cup whole milk, 1 cup evaporated milk, vanilla and salt.
    • Set the bread in the prepared dish and pour the egg mixture on top. Press the bread down gently with a spatula to make sure all the pieces are immersed and soak up the liquid. Let stand at room temperature for 10 minutes.
    • Meanwhile, bring a kettle of water to a boil. Drizzle 2 tablespoons condensed milk over the pudding. Cover the baking dish tightly with aluminum foil then set it inside a large roasting pan. Pour the boiling water into the roasting pan until it reaches about halfway up the sides of the baking dish.
    • Bake until the center of the custard is almost set but still slightly wet, about 25 minutes. Carefully remove the foil and continue to bake until the custard is set in the center and the top is golden, about 30 minutes longer. Carefully remove the roasting pan from the oven and let the pudding cool in the water for about 20 minutes.
    • Whip the remaining 1 cup/240 milliliters heavy cream to soft peaks. Serve the pudding warm, room temperature or cold with a dollop of whipped cream. Drizzle with the remaining 2 tablespoons condensed milk.


    Yeh! A Delicious Chocolate Marzipan Scone Loaf

    Yeh! A Delicious Chocolate Marzipan Scone Loaf

    I recently added the cookbook Molly on the Range to the 3Jamigos shop.  I couldn’t resist, the Kindle edition is going for a buck ninety-nine. That’s just ridiculous, you can’t even get a cup of joe for that.  Molly on the Range has been out a couple of years and every now and then it would dance across my feed.  I’d think, cute book from that blogger, My Name is Yeh, and keep going.  Fast forward a couple of years, and well whaddya know, her book took off and she has a television show, Girl Meets Farm.  Overachiever, just kidding…but it piqued my interest so I got a copy.  I started reading… Julliard trained percussionist, city girl who moved from Chicago to the Big Apple to a farm in North Dakota. Huh?

    Well, the book is delightful. Her writing is warm, friendly, and spunky.  Her photos make me hungry and the drawn illustrations are a really nice touch.  I love cookbooks that tell a story.  Just like A Common Table, the recipes are the icing on the cake and the cake is the delicious stories of family, friends, and discovery.

    Her riff on a Midwest tradition the “hot dish”,  a casserole with wild rice or some sort of starch, canned cream soup, and frozen veggies   Come on now, who didn’t grow up with a casserole that started with Cream of Mushroom or Chicken Soup, hmm, hmm, good.  Her version is a made from scratch, a chicken pot pie filling topped with loads of tater tots.  SOUNDS GOOD TO ME.  As much as I love pie crust, I do have a soft spot for tots.

    Plus, she had me laughing with “You cover the bitch with Tater Tots”.  Cute with attitude, I like that.

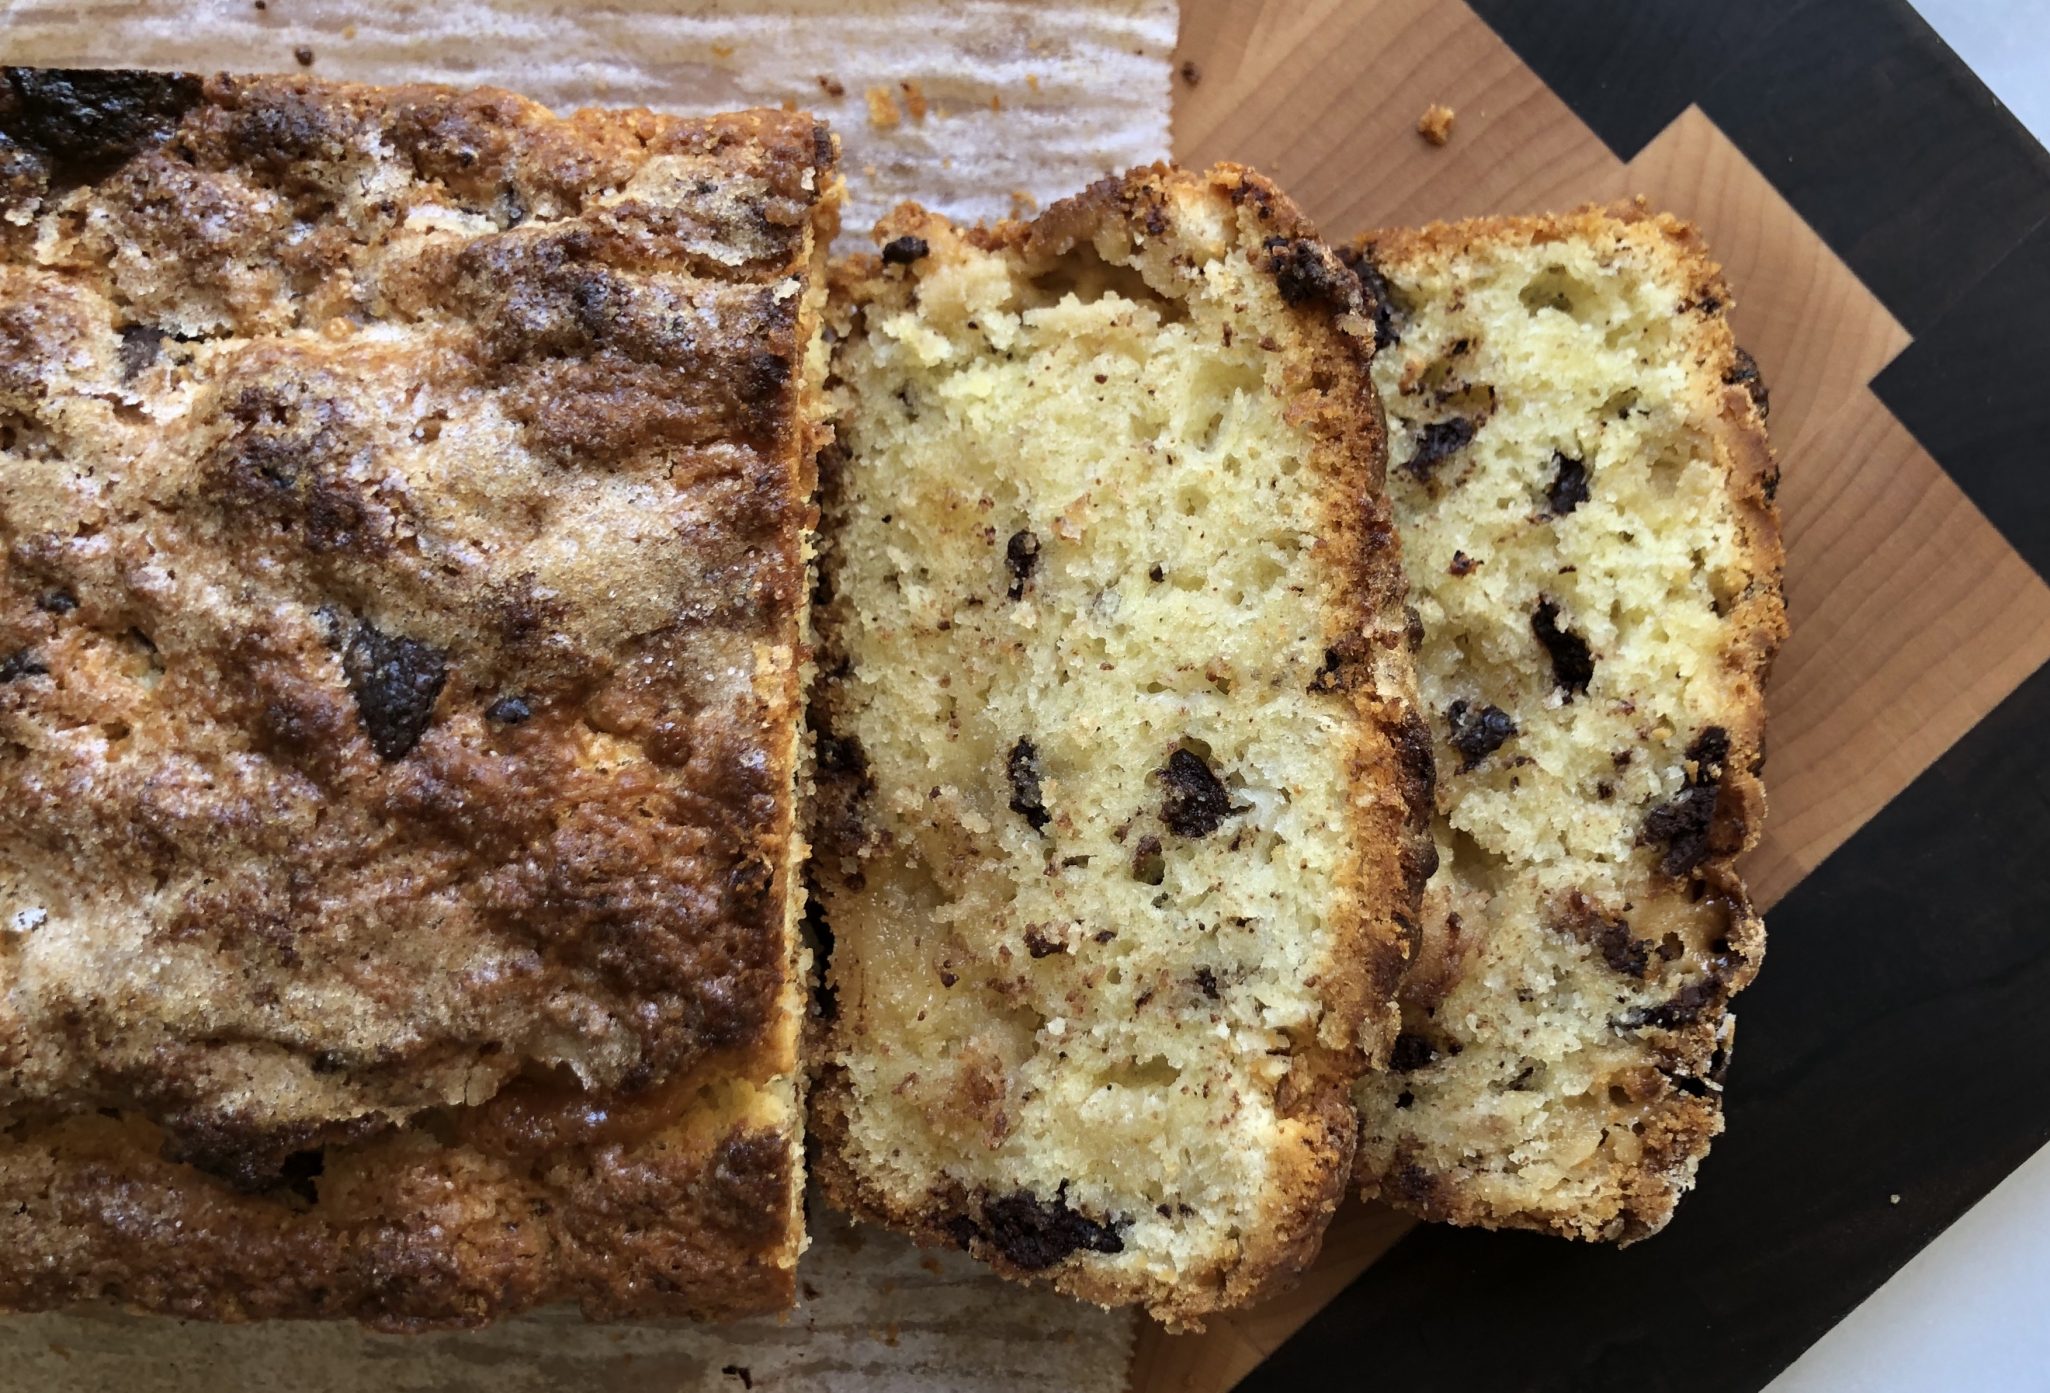
    But before trying the classic hot dish, another one of her recipes beckoned my baker side, Dark Chocolate Marzipan Scone Loaf.  Whaat? Scone loaf?  Yep, scone dough baked in a loaf pan. The texture is much like a scone, buttery, crumbly, not too sweet, PERFECT with coffee or tea.  The kicker? Little chunks of marzipan provide a burst of sweet almond flavor in each bite tempered by the bitterness of dark chocolate.  Like a rumble in your mouth.  Soooo good.

    Chocolate and Marzipan Loaf

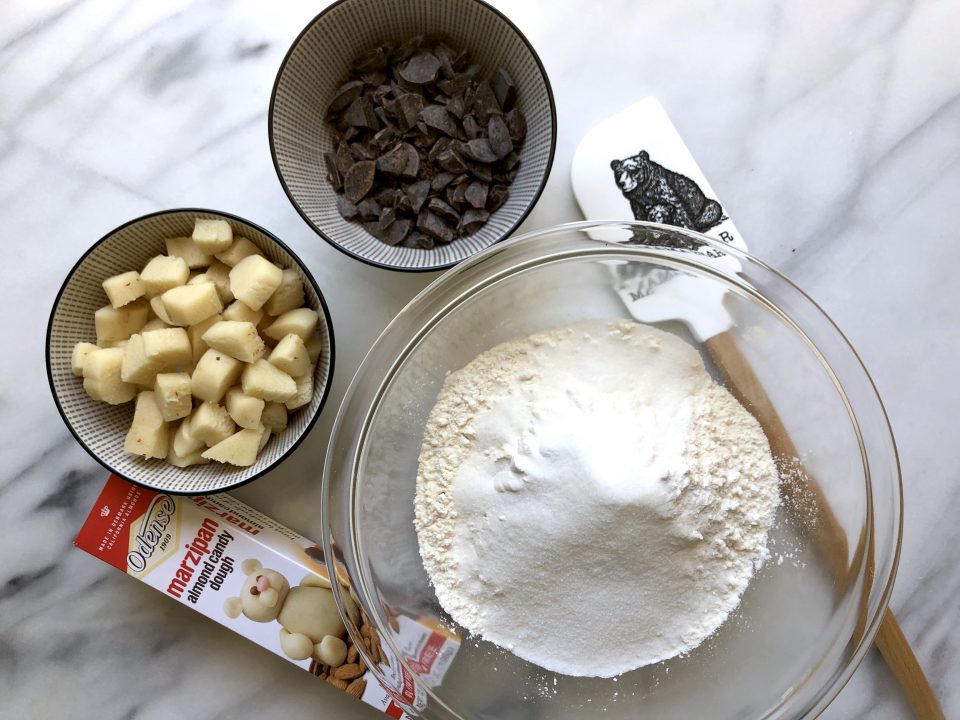
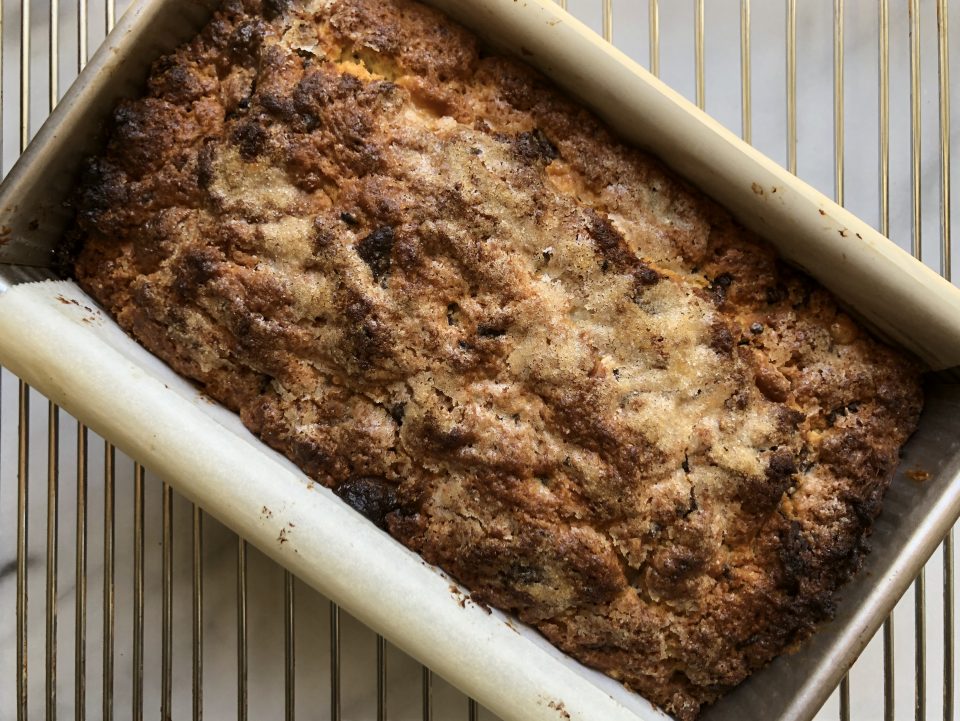
    The dough is a snap to put together.  Dry ingredients go into your food processor, pulse cold chunks of butter into the flour mixture. Pour butter-flour mixture into a bowl with marzipan and chocolate chunks.  Stir in eggs, cream, and extracts just until combined. Don’t overmix and keep ingredients cold (just like biscuits and scones).  Scoop the dough into a loaf pan, gently shaping it so the dough is even.  Sprinkle the top with sugar and bake. Before you know it you’ll be sitting down enjoying a delicious slice of chocolatey-almondy scone bread.  Yum!

    Dark chocolate Marzipan Scone Loaf

    Course Dessert
    Cuisine American
    Keyword Dark chocolate, marzipan, quick bread, scone loaf
    Prep Time 20 minutes
    Cook Time 45 minutes
    Total Time 1 hour 5 minutes
    Servings 8 servings

    Ingredients

    • 7 or 8 ounces marzipan chopped into ½-inch pieces
    • 1 tablespoon powdered sugar
    • ½ cup dark chocolate chips
    • 2 cups flour plus more for dusting
    • 1 tablespoon baking powder
    • ½ teaspoon kosher salt
    • 2 tablespoons sugar plus 1 teaspoon
    • ¾ cup cold unsalted butter cut into ½-inch cubes
    • 2 large eggs
    • ½ cup buttermilk or heavy cream
    • ½ teaspoon vanilla extract
    • ½ teaspoon almond extract
    • Jam for serving

    Instructions

    • Preheat the oven to 400ºF. Line an 8 x 4-inch loaf pan with parchment paper, allowing 1-inch wings to hang over the edges on the long sides.
    • In a large bowl, toss together the marzipan and powdered sugar to coat. Add the chocolate and set aside.
    • In a food processor, combine the flour, baking powder, salt, and 2 tablespoons of the sugar and pulse to combine.
    • Add the butter cubes and pulse until the butter is the size of peas. Add this to the bowl with the marzipan.
    • In a small bowl, whisk together the eggs, buttermilk or cream, and extracts and add to the dry ingredients. Use a spatula to stir just until combined.
    • Pour the mixture into the prepared loaf pan and spread it out evenly.
    • Sprinkle the top with the remaining 1 teaspoon sugar and bake until golden brown on top and a toothpick inserted into the center comes out clean.
    • Begin checking for doneness at 40 minutes.
    • Cool in the pan on a wire rack for 10 minutes. Remove to the rack to cool completely.
    • Slice with a serrated knife and serve with jam.
    Bacon Up Some Candied Bacon Bites

    Bacon Up Some Candied Bacon Bites

    Looking for something sweet and salty to round out a cheese board for a weekday meeting, I thought of the Bloody Mary I had at a happy hour in Minneapolis with Jamie. I don’t remember much about the Bloody Mary but the CANDIED BACON swizzle stick that served as a stirrer and edible garnish was delicious.

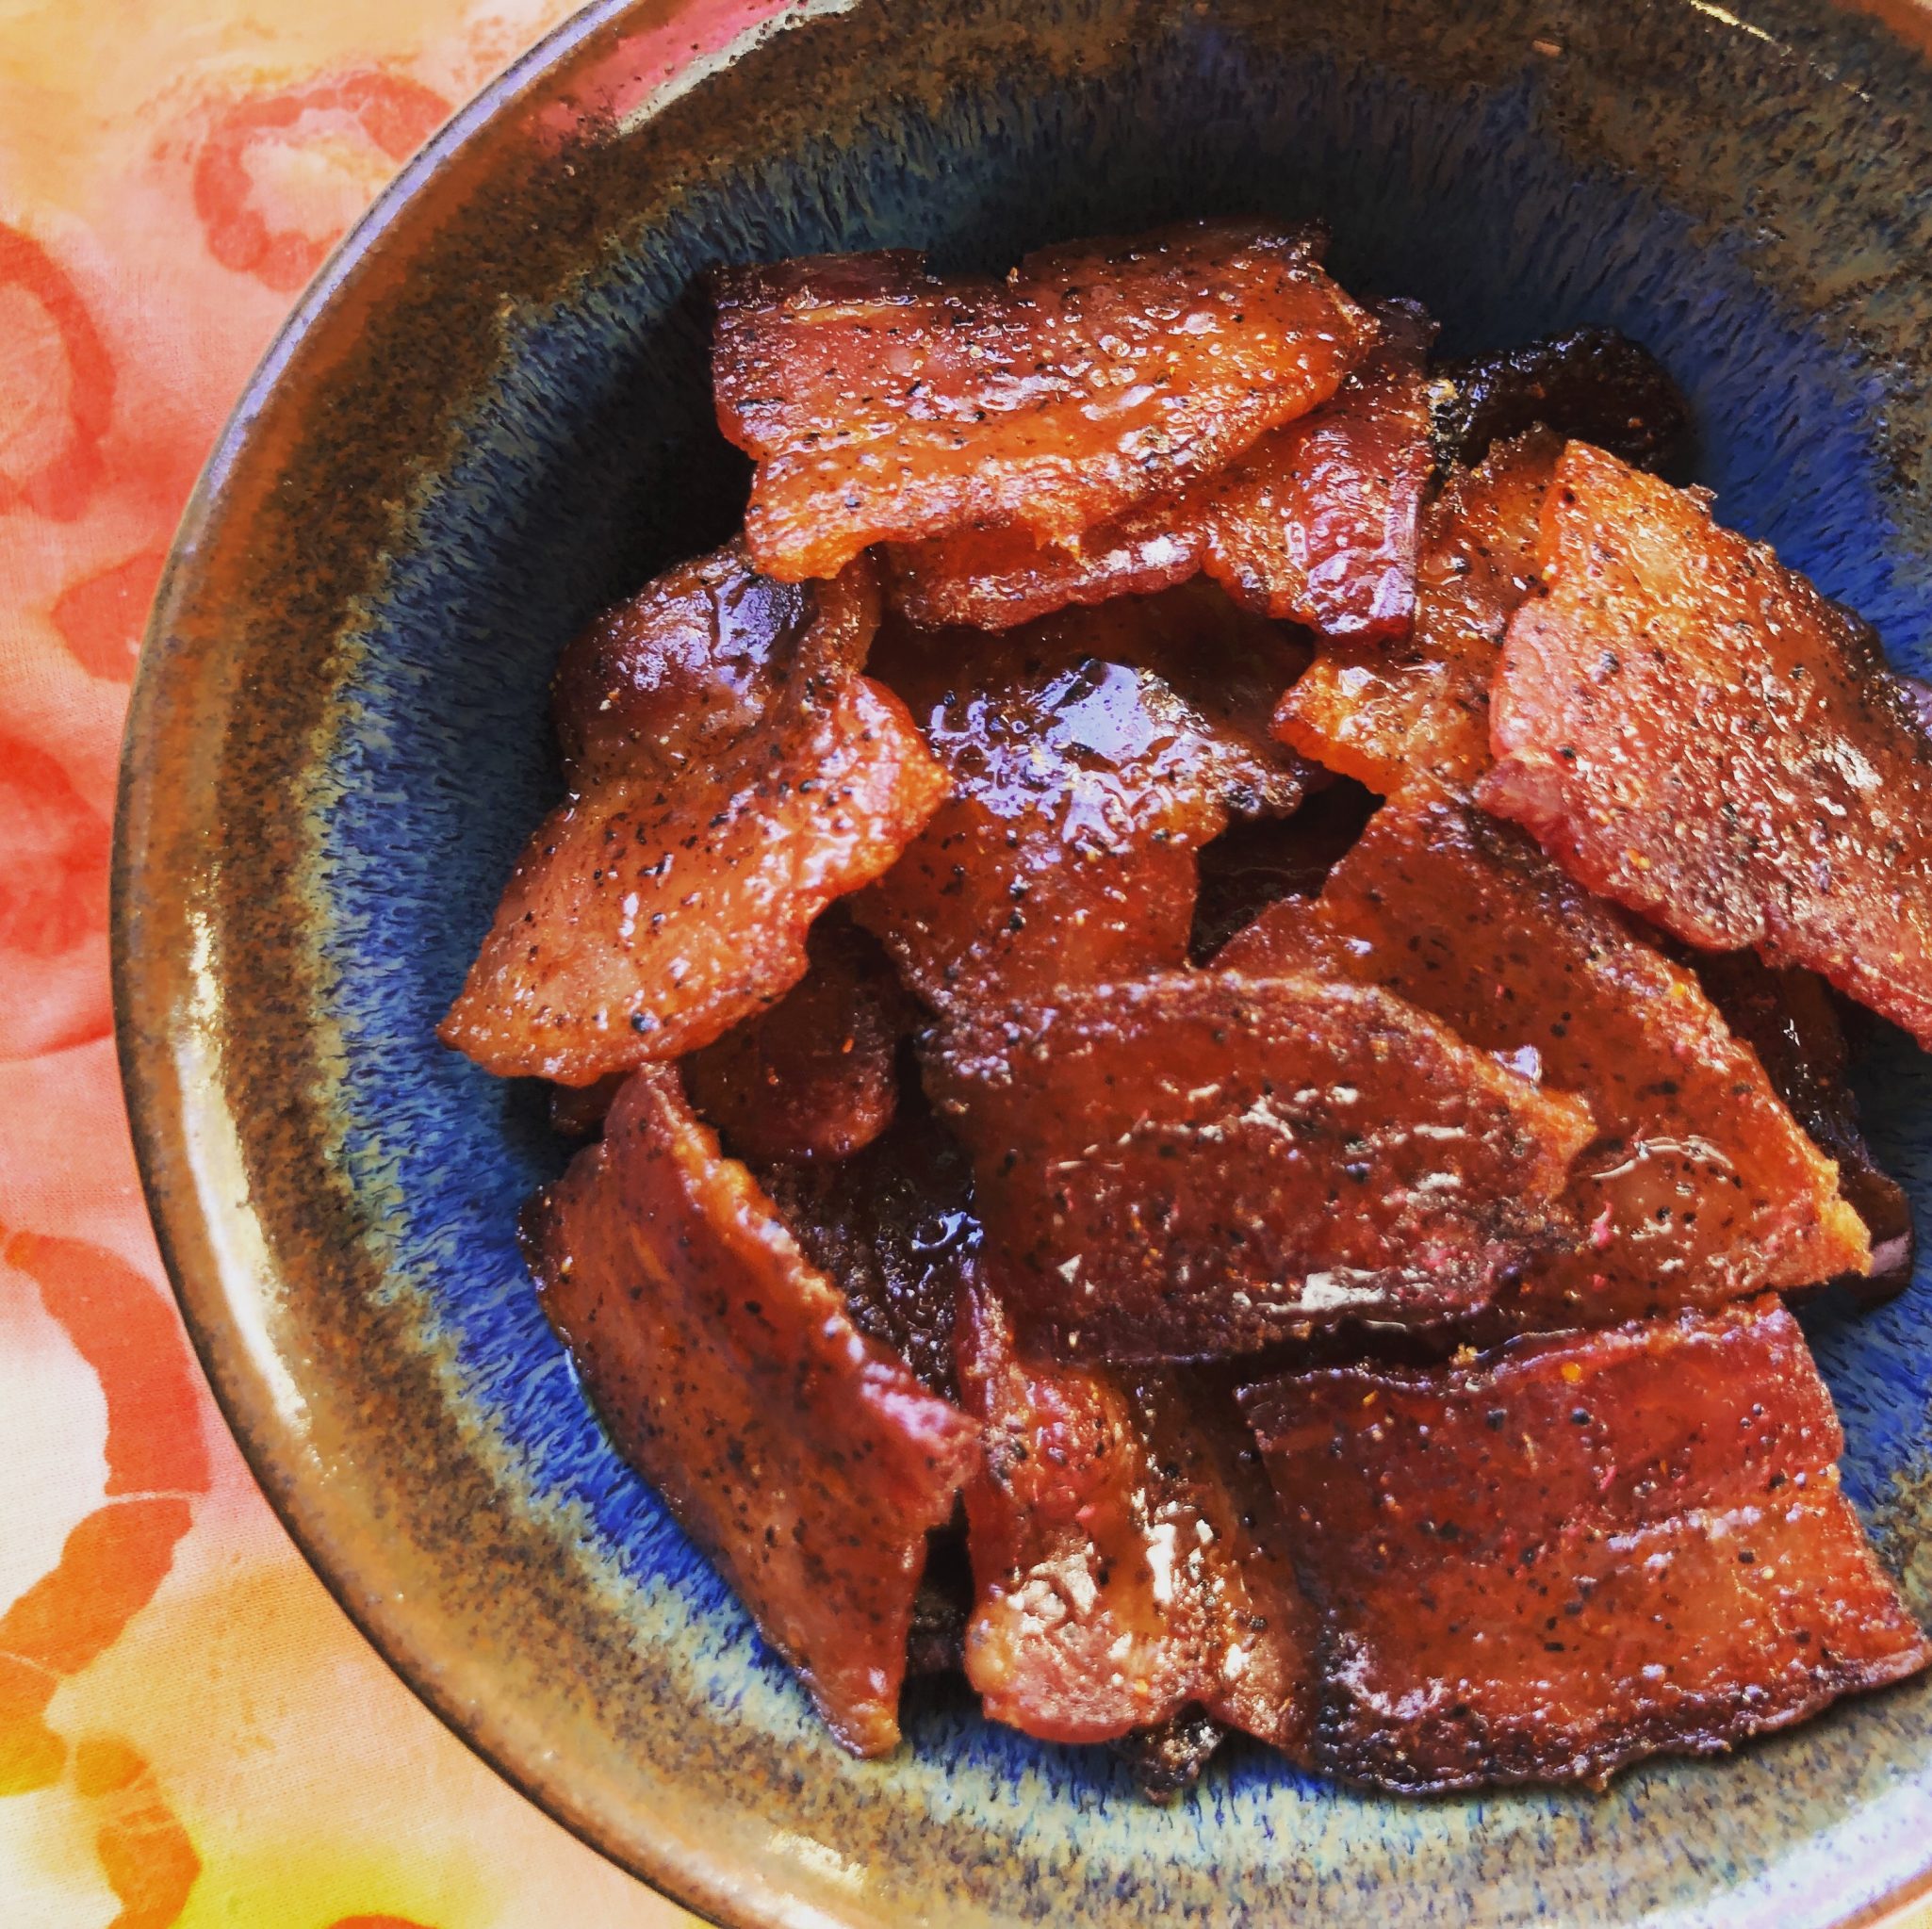
    Candied bacon would be perfect for my cheese board but in bite-size pieces to go along with the cheese and crackers.  In its simplest form, coat thick cut bacon pieces with brown sugar and bake, but no one leaves well enough alone.  For this batch, I used brown sugar and chili powder.  Next time I might use cayenne for spice, or smoked paprika for smokiness, chili pepper or black pepper…really whatever you like.  Another riff, combine Siracha Sauce and brown sugar, coat the bacon with the sauce and bake as directed.
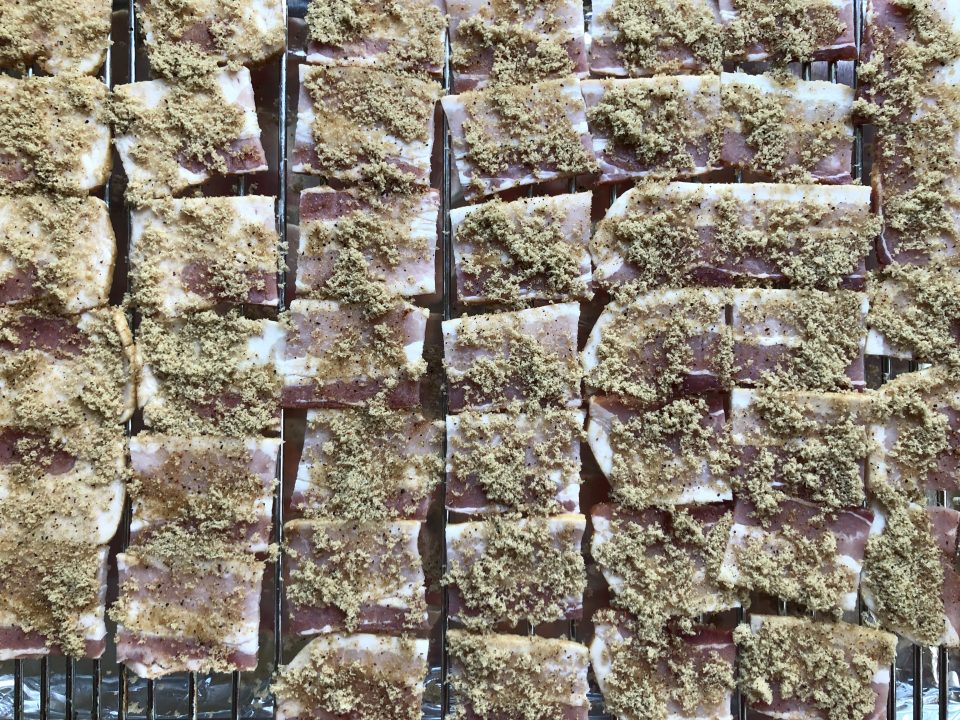
    Note: Line the pan with foil before placing the metal rack on the pan for the bacon.  You only need to spread the brown sugar and spices on one side.

    20 minutes later-ta-da, candied bacon for breakfast, drinks, happy hour munchies, salads…anything and everything is better with bacon.

    Candied Bacon

    Bacon Candy!
    Course Appetizer
    Cuisine American
    Keyword Candied bacon
    Prep Time 10 minutes
    Cook Time 20 minutes
    Total Time 30 minutes

    Ingredients

    • 1/2 cup packed light brown sugar
    • 1-11/2 teaspoon chili powder or 1 teaspoon black pepper, or smoked paprika, or 1/2 teaspoon cayenne pepper
    • 20 slices of thick-cut bacon 1 pound

    Instructions

    • Step Preheat the oven to 400°. Line large rimmed baking sheet with foil. Place a wire rack over the foil.
    • In a small bowl, whisk the brown sugar with the chili powder.
    • Cut bacon into approximately 2-inch pieces.  Arrange the bacon pieces on the rack and coat the tops with the chili sugar.
    • Bake for 20 to 25 minutes, until caramelized and almost crisp.
    • Allow bacon to cool completely on rack; remove from rack and serve.  If bacon is made early, leave at room temperature before serving.

    Notes

    A spicy twist, combine 1/2 cup brown sugar and 1/4 cup Siracha Sauce.  Coat the bacon and bake as directed.


    Two Pho-One Deal (Pho Ga Noodle Soup & Chicken Noodle Salad)

    Two Pho-One Deal (Pho Ga Noodle Soup & Chicken Noodle Salad)

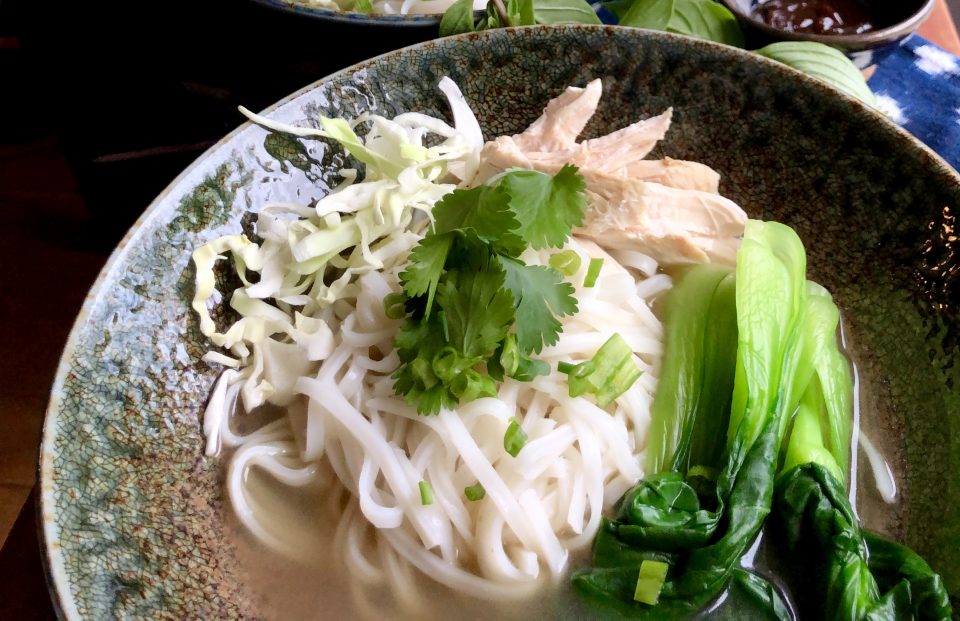
    Last week I posted a teaser on Instagram and FB of a really quick version of Pho Ga, Vietnamese chicken rice noodle soup. “In less than an hour, you will be sitting down to a steaming hot, delicious bowl of noodles. Recipe post tonight!”

    Sorry, stuff happens and I am a procrastinator by nature.  Tonight is NOW, finally (my humble opinion, worth the wait).

    I found the recipe for the quick and easy Pho in the Los Angeles Times.  I LOVE that paper.  When I lived in LA I religiously read the Wednesday Food Section (sometimes the front page but never the sports page-my dislike for the Dodgers never waned).  Some of my favorite recipes and stalwarts in my repertoire are from the LA Times.  I’m adding not only this Pho Ga Soup but a little gem that was tagged onto the end, a delicious chicken noodle salad, Phở Gà Trộn, made from the same ingredients, soooo good.  I almost like it more than the Pho Ga.  You can find the recipe and notes for Pho Ga Tron HERE.  Both recipes are from Andrea Nguyen, Asian cookbook author extraordinaire.

    Back to the Pho Ga.  Aside from going out to your favorite hole in the wall for pho, making pho at home is a weekend project. Making it after a long commute, on a weekday, ridiculous!  But a couple of shortcuts and whaddya know…nothing better than a delicious bowl of noodles after a horrendous commute.

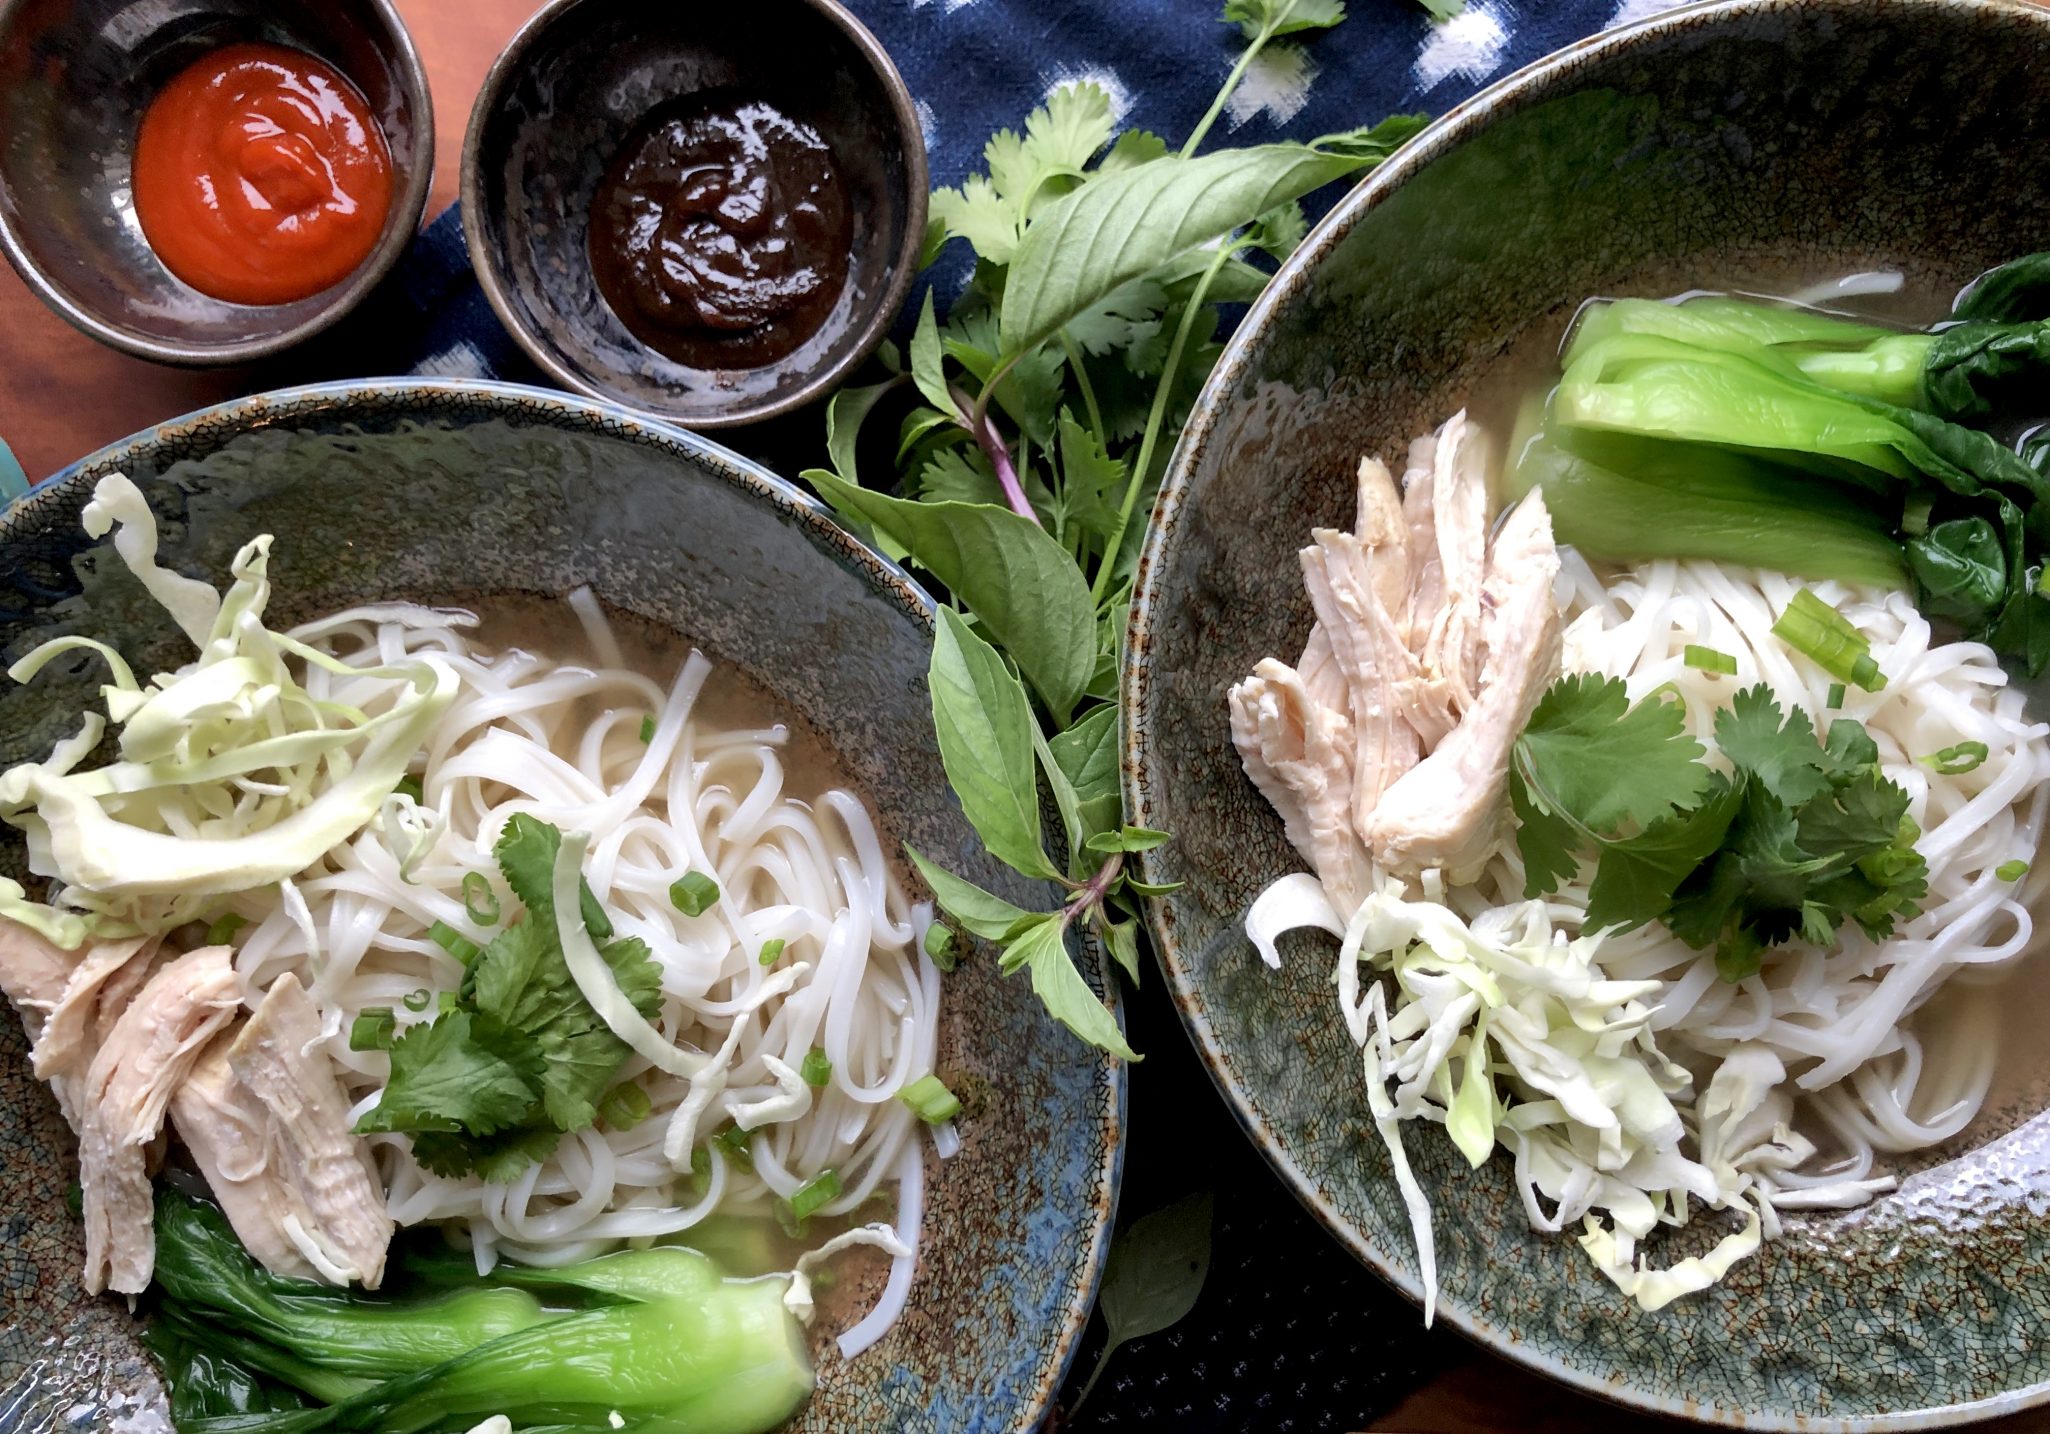
    Shhhh…The secret is to start with pre-made broth.  If you have homemade-grrrrreat, if not, low sodium canned or boxed broth works well. Toasted coriander seeds, green onions, and ginger are added to the broth along with chicken, cilantro stems and salt. While the broth simmers for about 20 minutes, prep your noodles and garnishes.  Boom, you have just doctored stock into a perfectly respectable, delicious, chicken soup for pho.  For garnishes, I usually have cilantro, mint, green onions or Thai basil and limes on the table.  Don’t forget to put out the Siracha and Hoisin Sauce!

    Quick Chicken Pho (phở gà nhanh)

    Course Main Course, Soup
    Cuisine Asian
    Keyword Pho Ga
    Prep Time 10 minutes
    Cook Time 25 minutes
    Total Time 35 minutes

    Ingredients

    • 3⁄4 inch piece ginger
    • 2 medium-large green onions
    • 1 bunch cilantro sprigs
    • 1 1⁄2 teaspoons coriander seeds
    • 1 whole clove
    • 3 1⁄2 to 4 cups low-sodium chicken broth
    • 2 cups water
    • 2 6- to 8-ounce boneless, skinless chicken breast or thigh reserve one for noodle salad
    • 1⁄2 teaspoon fine sea salt
    • 5 ounces dried narrow flat rice noodles such as banh pho, rice stick or pad Thai noodles
    • 2 to 3 teaspoons fish sauce
    • 1⁄2 teaspoon organic sugar or 1 teaspoon maple syrup (optional)
    • Pepper optional
    • 1/4 thinly sliced red onion optional for broth
    • 2-3 dried shiitake mushrooms optional for broth

    Garnishes

    • sliced green onions
    • chopped cilantro
    • Thai basil leaves leave on stem
    • fresh mint leave on stem
    • bean sprouts
    • lime wedges

    Instructions

    • Peel then slice the ginger into 4 or 5 coins. Smack with the flat side of a knife or meat mallet and set aside. Thinly slice the green parts of the green onion to yield 2 to 3 tablespoons, and set aside to use as a garnish. Cut the leftover sections into 2- to 3-inch lengths, bruise, then add to the ginger.
    • Coarsely chop the leafy tops of the cilantro to yield 2 tablespoons; set aside to use as a garnish. Set the remaining cilantro sprigs aside.
    • In a 3- to 4-quart pot, toast the coriander seeds and clove over medium heat until fragrant, 1 to 2 minutes. Add the ginger and bruised green onion sections. Stir until aromatic, about 30 seconds.
    • Remove the pot from heat for about 15 seconds to briefly cool, then pour in the broth. Add the water, cilantro sprigs, chicken, and salt. (optional, add mushrooms and red onions) Bring to a boil over high heat, then immediately then lower the heat to gently simmer for 20-25 minutes.
    • While the broth simmers, soak the rice noodles in hot water until pliable and opaque. Drain, rinse, and set aside.  Test your noodles, they should be soft and pliable but still have a slight bite.
    • After 10-12 minutes of simmering, the chicken should be firm and cooked through (press on it and it should slightly yield). Transfer the chicken to a bowl, flush with cold water to stop the cooking, then drain. Set the chicken aside until cool enough to handle, then shred into bite-size pieces. You will only need 1 chicken breast for the soup.  Reserve second one for noodle salad. If you don't plan on making the salad, use only 1 piece of chicken. 
    • When the broth is done simmering, strain it through a fine-mesh strainer into a medium pot.  Discard the solids. You should have about 4 cups broth. Season with fish sauce and sugar, if needed, to create a strong savory-sweet note. If using red onion you may not need sugar.
    • Bring the strained broth to a boil over high heat. Put the noodles in a noodle strainer or mesh sieve and dunk in the hot broth to heat and soften, 5 to 60 seconds. Lift the noodles from the pot and divide between the 2 bowls.
    • Reduce the heat to keep the broth hot while you arrange the chicken on top of the noodles and garnish with the chopped green onion, cilantro, and a sprinkling of pepper. Taste for seasoning. Return the broth to a boil and ladle into the bowls.
    • Extra broth can be refrigerated or frozen. You will need 1/2 cup of broth for the noodle salad.

    Notes

    Each serving: Calories 457; Protein 33 grams; Carbohydrates 70 grams; Fiber 2 grams; Fat 6 grams; Saturated fat 1 gram; Cholesterol 72 mg; Sugar 2 grams; Sodium 1,363 mg


    A Photastic Chicken Noodle Salad (Pho Ga Tron)

    A Photastic Chicken Noodle Salad (Pho Ga Tron)

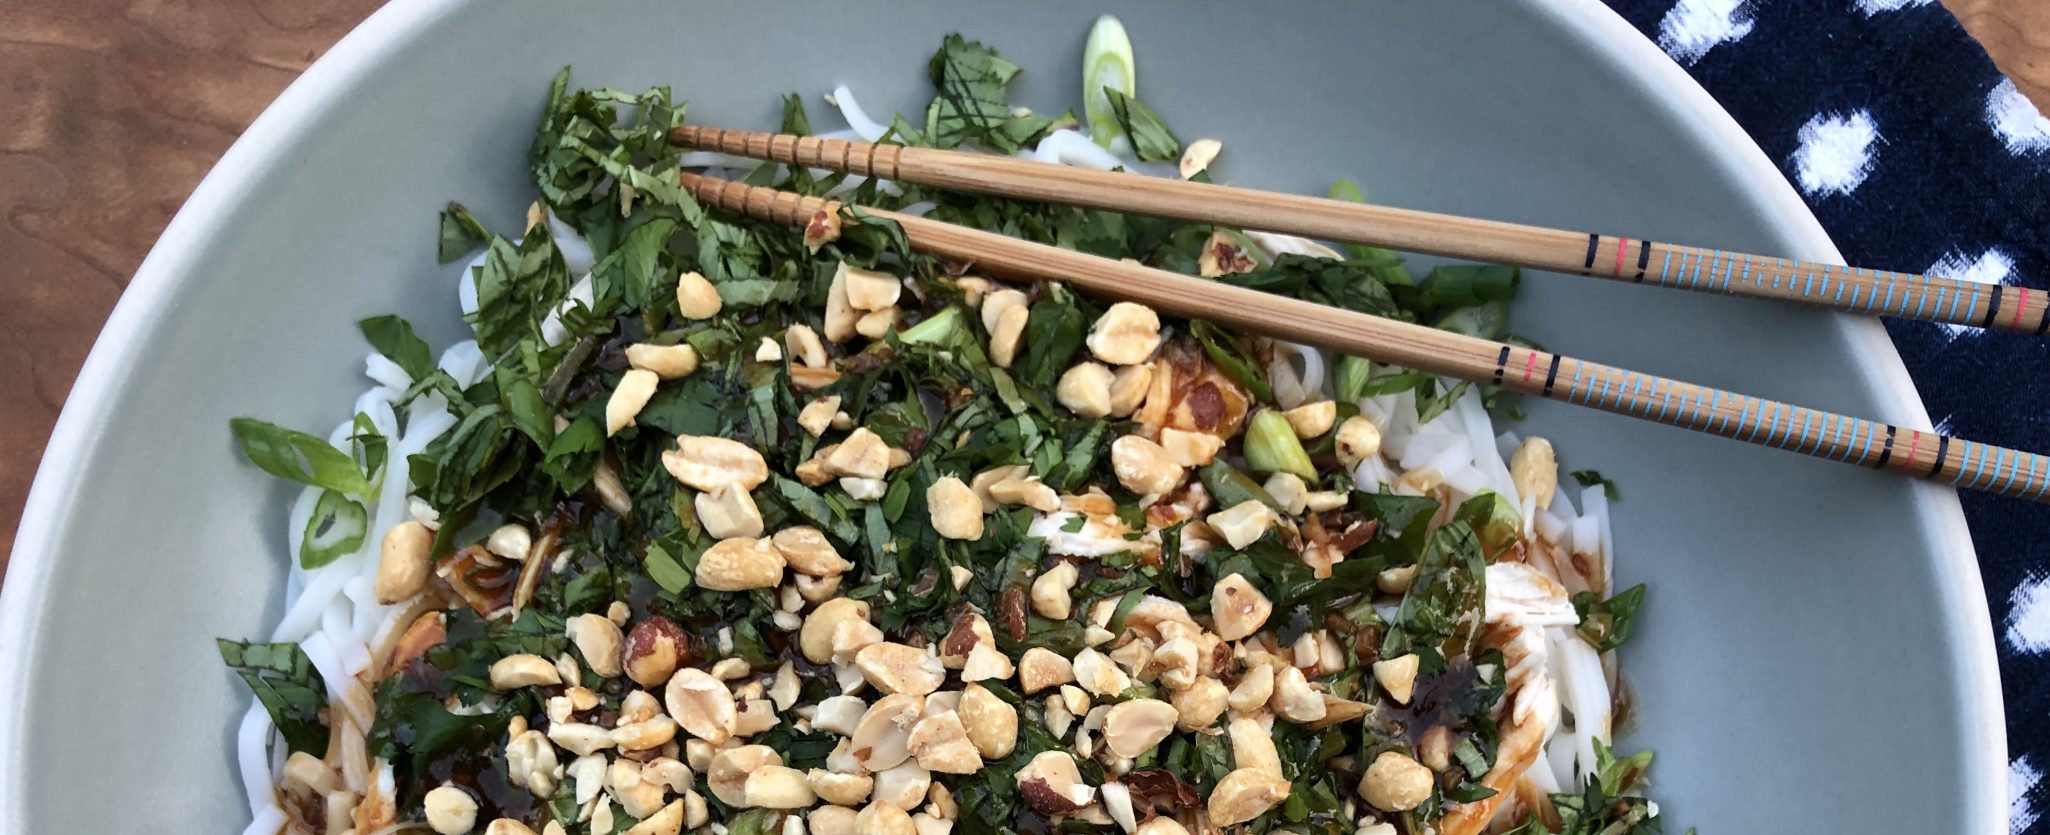
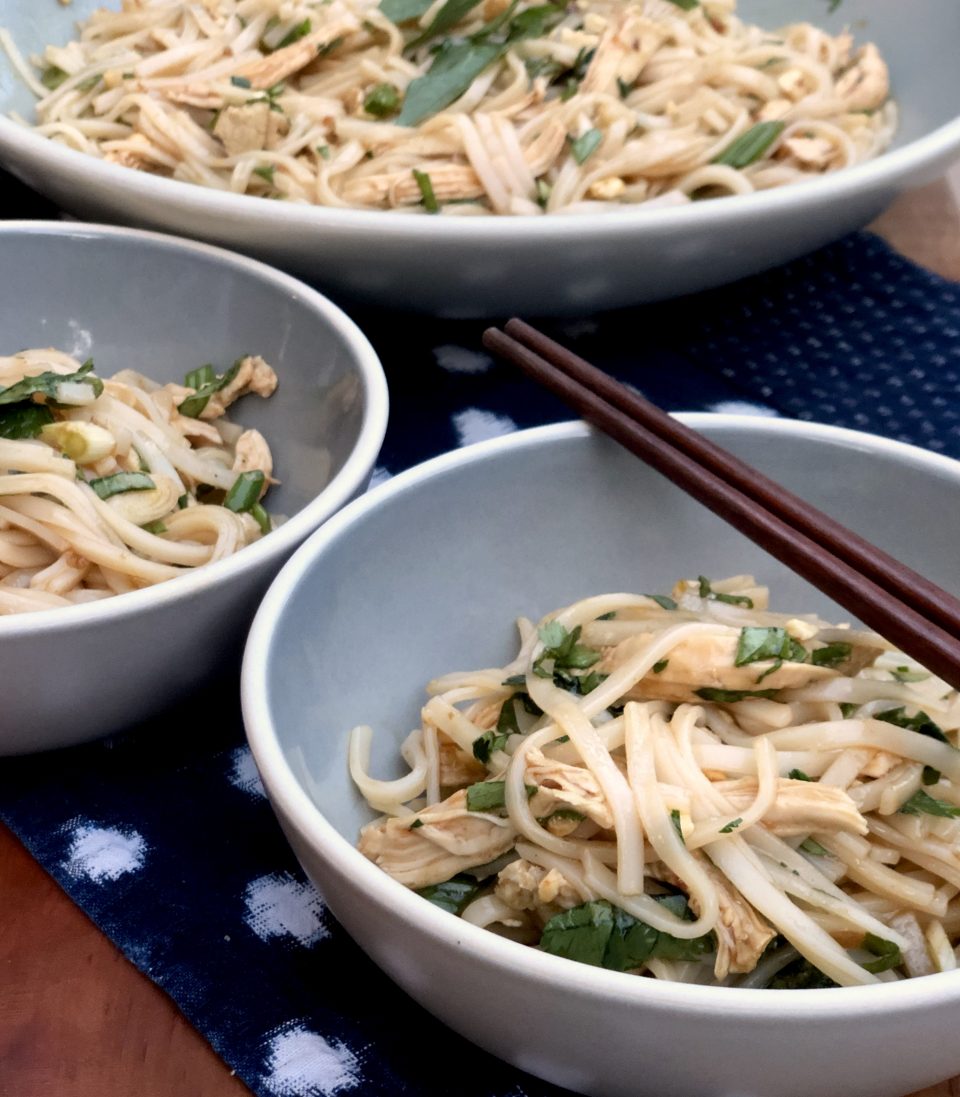
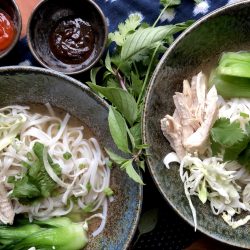
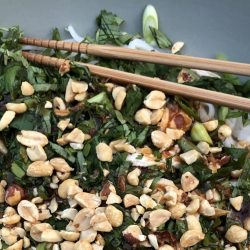
    I found a recipe in the Los Angeles Times for a quick delicious Vietnamese Chicken Noodle Soup, Pho Ga.  The author, Andrea Ngyuen also tacked on a second recipe, Pho Ga Tron, or Chicken Pho Noodle Salad.  The broth from the Pho Ga is a building block for the sweet and spicy dressing for the salad. The salad contains rice noodles, herbs, and greens, and is topped with crispy fried onions and roasted peanuts.  It’s lip-smacking good! Andrea actually makes the quick broth just for this dish and serves bowls of the broth alongside the salad.   Make the soup for Pho Ga one day, and reserve the extra broth to make the dressing for the salad another day.  I julienned romaine lettuce for added crunch. I bet napa cabbage or iceberg would also work.

    Chicken Pho Noodle Salad

    Course Salad
    Cuisine Asian
    Keyword Pho Ga Tron, Vietnamese Chicken Pho Salad
    Prep Time 20 minutes
    Cook Time 25 minutes
    Total Time 45 minutes
    Servings 4

    Ingredients

    Quick Chicken Pho broth, divided. See Quick Pho Ga recipe

    • 1/2 cup chicken pho broth
    • 1⁄2 teaspoon fine sea salt
    • 2 1⁄2 tablespoons sugar
    • 1 tablespoon sriracha sauce plus more for serving
    • 2 tablespoons unseasoned Japanese rice vinegar
    • 3 tablespoons regular soy sauce
    • 1 1⁄2 tablespoons canola or other neutral oil
    • 2 teaspoons finely chopped garlic
    • 1 1⁄2 teaspoons cornstarch dissolved in 2 teaspoons water
    • 10 ounces dried medium flat rice noodles
    • About 8 ounces cooked chicken from Quick Chicken Pho
    • 2 cups butter lettuce or soft leaf lettuce cut into narrow ribbons, with spines intact
    • 1⁄4 cup coarsely chopped fresh cilantro leafy tops only
    • 1/3 cup coarsely chopped fresh mint or Thai basil leaves
    • 1/3 cup unsalted roasted peanuts, coarsely chopped
    • 1/3 cup fried shallots or onion homemade or purchased
    • Thinly sliced green onions for garnish

    Instructions

    • Combine 1⁄2 cup of the broth with the salt, sugar, chile sauce, vinegar and soy sauce. Set this sauce mixture near the stove.
    • Put the oil and the garlic in a small saucepan. Heat over medium-low heat until the garlic sizzles and is light blond, 3 to 4 minutes. Remove the pan from heat for about 15 seconds to cool slightly, then add the sauce mixture. Place the pan over high heat and bring to a boil. Stir the cornstarch slurry, then swirl into the bubbly sauce. Once thickened, about 15 seconds, remove from heat and set aside for at least 10 minutes before using. This makes about 1/2 cup sauce.
    • Meanwhile, boil the noodles in a pot of water until tender chewy following the package instructions, about 5 to 7 minutes. Drain, cool quickly under running water, then set aside to fully drain and cool.
    • Reheat the remaining broth in a saucepan over medium heat. Meanwhile, cut or shred the chicken into bite-size pieces and, if needed, warm in a microwave oven to remove the chill and refresh; ideally the chicken has some succulence. Set aside.
    • To assemble, have 4 rice bowls for broth and 4 noodle-soup-size bowls for the salad. Put a little green onion into each rice bowl (use the rest for the noodle salad). Set near the broth.
    • Divide the lettuce among the noodle soup bowls. Add a portion of noodles and chicken, then drizzle over the sauce to taste. Top with the remaining green onion, cilantro, mint (or basil), peanut, and fried shallots (or onion).
    • Ladle the hot broth into the rice bowls. Serve immediately with the noodle salad bowls. Invite guests to wield spoons and chopsticks to toss their salads and enjoy the broth as soothing interludes. If the noodles seem too heavy with sauce, mix in a spoonful of broth. 

    Each serving:

    • Calories 613; Protein 33 grams; Carbohydrates 82 grams; Fiber 3 grams; Fat 18 grams; Saturated fat 3 grams; Cholesterol 72 mg; Sugar 10 grams; Sodium 1,795 mg
    Peanut Butter Mochi, that’s my Jam

    Peanut Butter Mochi, that’s my Jam

    My cookbook addiction continues unabated. One of my new favorites is A Common Table by Cynthia Chen McTernan.  It’s a beautiful cookbook filled with not only mouthwatering photographs of her food but wonderful stories about her family and friends. Her recipes are approachable and her writing inviting.  In contrast to the cookbooks of yesteryear, today’s cookbooks, like A Common Table, breathe life, warmth, and a personal connection into each recipe.  It makes me want to call my Mom, my kids, my aunties and uncles and say, “Hey, come on over we gonna cook, eat, and talk story”.

    Have You Eaten Yet? (code for I ❤️ you)

    This is not a cookbook that strives to teach one to cook, it’s more like a series of love letters, first and foremost to her family and friends, and then to all of us.  Her soulful, homey food reflects her southern upbringing, her Chinese heritage, her hubby’s Hawaiian-Korean-Irish roots, and their lives together. These are recipes I imagine are passed down from grandmother to mother and mother to daughter.  Each generation adding its own personal stamp.

    Two Red Bowls is Cynthia’s blog, ground zero for her food and family tales.  She has managed to juggle a toddler, a newborn, a blog, and a book, no small feat.  Wow!

    Onto her delicious food.  Needing a gluten-free dessert to bring to a potluck, I instantly thought of the peanut butter mochi in her book.  Mochi, made of glutinous rice flour, is chewy, dense, and all the craze right now.  Imagine a marshmallow but dense, chewy, and only slightly sweet. Mallows on roids.  To top it off, soooo easy to make.  Literally, one bowl plus a wooden spoon. The addition of peanut butter brings a familiar flavor and texture to the mochi, a great intro for the uninitiated.  Did I mention GLUTEN FREE?

    The gold standard for rice flour and readily available is Koda Farms Blue Star Mochiko.  Ground into a fine powder, it blends quickly and is easy to work with. Throw the flour, sugar, eggs, and milk in a bowl.  Stir, don’t worry about overmixing (no gluten), pour, and bake.  The batter will resemble a thick, elastic pancake batter.

    Plop the peanut butter evenly into the batter so that everyone gets a bite of peanut butter, and then it’s oven time.  Midway through baking, sprinkle crushed peanuts on top.  Next time I am thinking of using honey-roasted peanuts, to really accentuate the play on sweet and salty.  The batter will puff while baking, not to worry, it will flatten as the mochi is cooling.

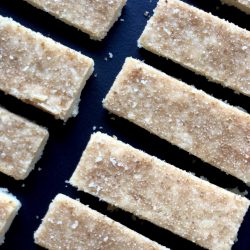
    Once it has cooled a bit, dig in, warm mochi is yummy.  I cut mine into squares and then further divided half of the squares into rectangular bars.  Just so delicious, the combo of chewy mochi, pockets of oozy soft peanut butter, and the crunchy peanut topping-the trifecta of yum.  It’s hard to resist and eat just one. It’s dense in texture and calories but so worth it!

    I think you could make this milk-free by using coconut milk in place of milk. I have yet to try it.  Andrea Nguyen, Asian cookbook author extraordinaire created a riff by adding black sesame paste, Black Sesame Peanut Butter Mochi, which looks delish, I am so going to make her version soon.

    Peanut Butter Mochi
    Print Pin
    5 from 2 votes

    Peanut Butter Mochi

    Gluten free and delicious.  Made with sweet rice flour a dense, chewy, a totally addicting treat! A quick and easy recipe!
    Course Dessert, Snack
    Cuisine Asian, Asian-American
    Keyword Mochi, peanut butter, sweet rice flour
    Prep Time 10 minutes
    Cook Time 50 minutes
    Total Time 1 hour
    Servings 16 Servings

    Ingredients

    Filling

    • 6 Tbsp Peanut butter Natural, creamy or chunky
    • 2 Tbsp Powdered sugar

    Cake

    • 1-1/2 Cups Sweet rice flour 225gm
    • 3/4 Cup Granulated sugar
    • 1/8 Tsp Salt
    • 1 Cup Whole milk
    • 1/2 Cup Vegetable oil
    • 2 Eggs
    • 1 Tsp Vanilla
    • 1/2 Cup Roasted peanuts Or substitute honey roasted peanuts
    • 1 Tbsp Brown sugar Optional, to be added to plain roasted peanuts,

    Instructions

    • For the peanut butter filling, whisk together the peanut butter and confectioner’s sugar until smooth. Set aside.
    • Preheat the oven to 350F. Line an 8-inch square baking dish with parchment paper, letting the paper go up the sides so you can easily lift the cake out later on.
    • In a medium bowl, combine the sweet rice flour, sugar, milk, oil, eggs, and vanilla, whisk until smooth. Don’t worry about overworking the batter when making the cake, sweet rice flour is GLUTEN FREE.
    • Pour half the batter into the prepared baking dish. Used 2 small spoons or small teaspoon ice cream scoop to drop spoonfuls of the filling evenly across the batter, then pour the remaining batter over the filling. Bake, uncovered, for 20 minutes.
    • While the mochi is baking, place the peanuts in a food processor or blender and pulse until finely chopped. Remove the mochi cake from the oven, sprinkle of the crushed peanuts across the top. The cake maybe puffy so spread nuts as evenly as you can. The cake will fall as it cools.  
    • Return the cake to the oven and bake until the center bounces back when pressed, an additional 15 to 20 minutes. Let cool about 20 minutes before trying to lift the parchment paper to remove the cake from the pan. 
    • Enjoy warm or at room temperature. The mochi slices cleanly when cool, but is delish warm.
    • Store in an airtight container and keep at room temp if cool, or refrigerate. Microwave pieces on high with 15-second blasts to refresh.
    Tryin’ to Squash A Cold! (Instant Pot Butternut Squash Soup)

    Tryin’ to Squash A Cold! (Instant Pot Butternut Squash Soup)

    How does that old adage go? Feed a cold, starve a fever?  The thought crossed my mind as I was miserably lying in bed, achy, congested, and generally feeling like crap.  Thank goodness for laptops and search engines…I found a Scientific America article that addressed this very proverb and whaddya know, going all Mythbuster, Scientific America, not only debunked it, but concluded it really should be “Feed a cold, FEED a fever”.  Yeah baby, I love science.

    What is the perfect antidote when it is cold, when you are sick, when you crave comfort, but you are too tired to fuss?  SOUP.  Am I right?  Yep, bowl therapy to the rescue.  It didn’t take long to find a soup that fit the bill.  From the blog Creative Bites, Pressure Cooker Creamy Butternut Squash Soup.  Lucky for me I had bought a butternut squash at the market and had all of the ingredients handy.  “Kold karma” pointed me to this quick (thanks to my Instant Pot) and easy, delicious soup.

    Here’s the HARD part.  The PREP.  Yeah, no getting around peeling that butternut squash and dicing ALL THOSE vegetables.  Well,  I suppose you could buy pre-cut squash, diced onions and minced garlic, but that’s your call. It’s part of cooking therapy for me.

    Butternut Squash soup Prep

    NOW, the EASY part.  Prep was 90% of the game.  You’re now sitting pretty on 3rd base ready to score, just a mere minutes from homebowl. Get it?  I love the apples and red bell pepper, they add a nice sweetness.   Saute the veggies in your Instant Pot.  It’s important when you add the stock, really stir the bottom of pot to release all those bits of saute goodness.   The pot is very sensitive to bits stuck on the bottom and will turn off as a safety precaution if the bottom isn’t clean.  Add the stock, seal the pot, and then set the timer for 5 MINUTES.  Yep, five minutes and quick release at the end.  With the time it takes to come to pressure, you’re still only looking at 15 minutes of cooking time.  Not bad.

    I used an immersion blender in the pot to puree the soup.  There are a lot of comments online about how it doesn’t work as well as a blender.  BUTTERNUTS.  Not creamy enough?  Throw the immersion stick back in and blend some more.  I’m willing to sacrifice a bit of creaminess (though I don’t think I am) to do this, as oppose to pouring HOT soup, in batches, into my blender.  I’m saving my blender for smoothies and Margaritas.
    Butternut Squash Soup in Mugs

    Go ahead and play around with this soup recipe. It’s very forgiving.  Got thyme?  Substitute for sage.  Got time?  Skip the Instant Pot, roast the vegetables instead.  See the prepped veggies above? Throw it all in a roasting pan, give it a good swig of olive oil, toss, salt and pepper and roast at 425 for about an hour).  The vegetables caramelize in the oven and add a sweetness to the soup that’s “souper” yummy.  Creative bites calls for goat cheese or cream cheese.  I like cream cheese because it adds a whole lot of mouth feel and just a slight tanginess.  You could probably use sour cream, creme fraiche or even just a touch of heavy whipping cream instead.  This would lighten the soup but you might lose that creaminess.

    FINISH WITH TOPPING MADNESS.  Once your soup is done, garnish with ANYTHING your little heart desires.  Toasted nuts or pepitas, bacon, sliced apples, or more BACON, croutons.  Did I mention bacon?  I was sent a mix of nuts as a soup topping by my Food52 Holiday Gift Swap buddy- it was perfect.

    Creamy Butternut Squash Soup Instant Pot

    Course Soup
    Cuisine American
    Keyword butternut squash
    Prep Time 15 minutes
    Cook Time 15 minutes
    Total Time 30 minutes

    Ingredients

    • 1 Tbsp. olive oil
    • 1 large yellow onion diced
    • 1 red bell pepper chopped
    • 2 tsp. diced garlic
    • 1 tsp. fresh ground ginger
    • 2 lb. butternut squash peeled and cubed 1 medium squash
    • 1 medium apple peeled cored and chopped
    • 1 tsp. sage Substitute thyme or curry powder
    • 1/8 tsp. chili powder
    • 1/4 tsp. sea salt
    • 3 c. chicken stock I used additional cup to thin down the soup a bit
    • 3 oz. cream cheese Sub goat cheese
    • 1/3 c. Parmesan cheese
    • Salted Pepitas for garnish Or anything you like, like BACON BITS, spicy nuts, chives, sliced apple, sautéed wild mushrooms...
    • 1 Tbsp Brown sugar, optional To add roasted squash’s sweetness

    Instructions

    • Turn on the Saute function on Instant Pot. Add the olive oil, onions and bell pepper. Saute on high for 4 minutes. Add the garlic and ginger and cook for 1 minute. Add the cubed squash, apple, sage, chili powder, sea salt and chicken stock.
    • Place the lid on your Instant Pot and move the knob to seal. Cook on high pressure for 5 minutes and do a quick release of the pressure.
    • Using an immersion blender in the Instant Pot, puree the mixture. Add the cream cheese and Parmesan, stir to melt and continue to puree until very smooth.
    • Garnish and serve.