Category: Recipes

Recipes I’ve tried and sometimes modified that I think you should try!

Donut Loaf Around, Make This Soon!

Donut Loaf Around, Make This Soon!

I visited my town library recently and requested the cookbook Midwest Made by Shauna Sever. This is a feeble attempt to be more discriminating before buying another cookbook.  The librarian cheerfully responded with, “we can order that from Amazon for you! The book will be sent directly to you and you can then keep the book for any length of time. When you are good and ready, return it to the library.

You’re joking, right?  Nope.

Two days later, I found a brand spanking new copy of Midwest Made sitting on my front doorstep.  I broke open that puppy and started scanning the book for recipes I wanted to try.

I started with her Jammy Winter Fruit and Brown Butter Bars (will post soon).  The cookie dough, studded with walnuts and oatmeal, serves as both the base and topping.  It’s a keeper.  But the filling, an apple and pear jam, didn’t stand out.  I would try a berry jam or use tart apples next time to bump up the flavor.  

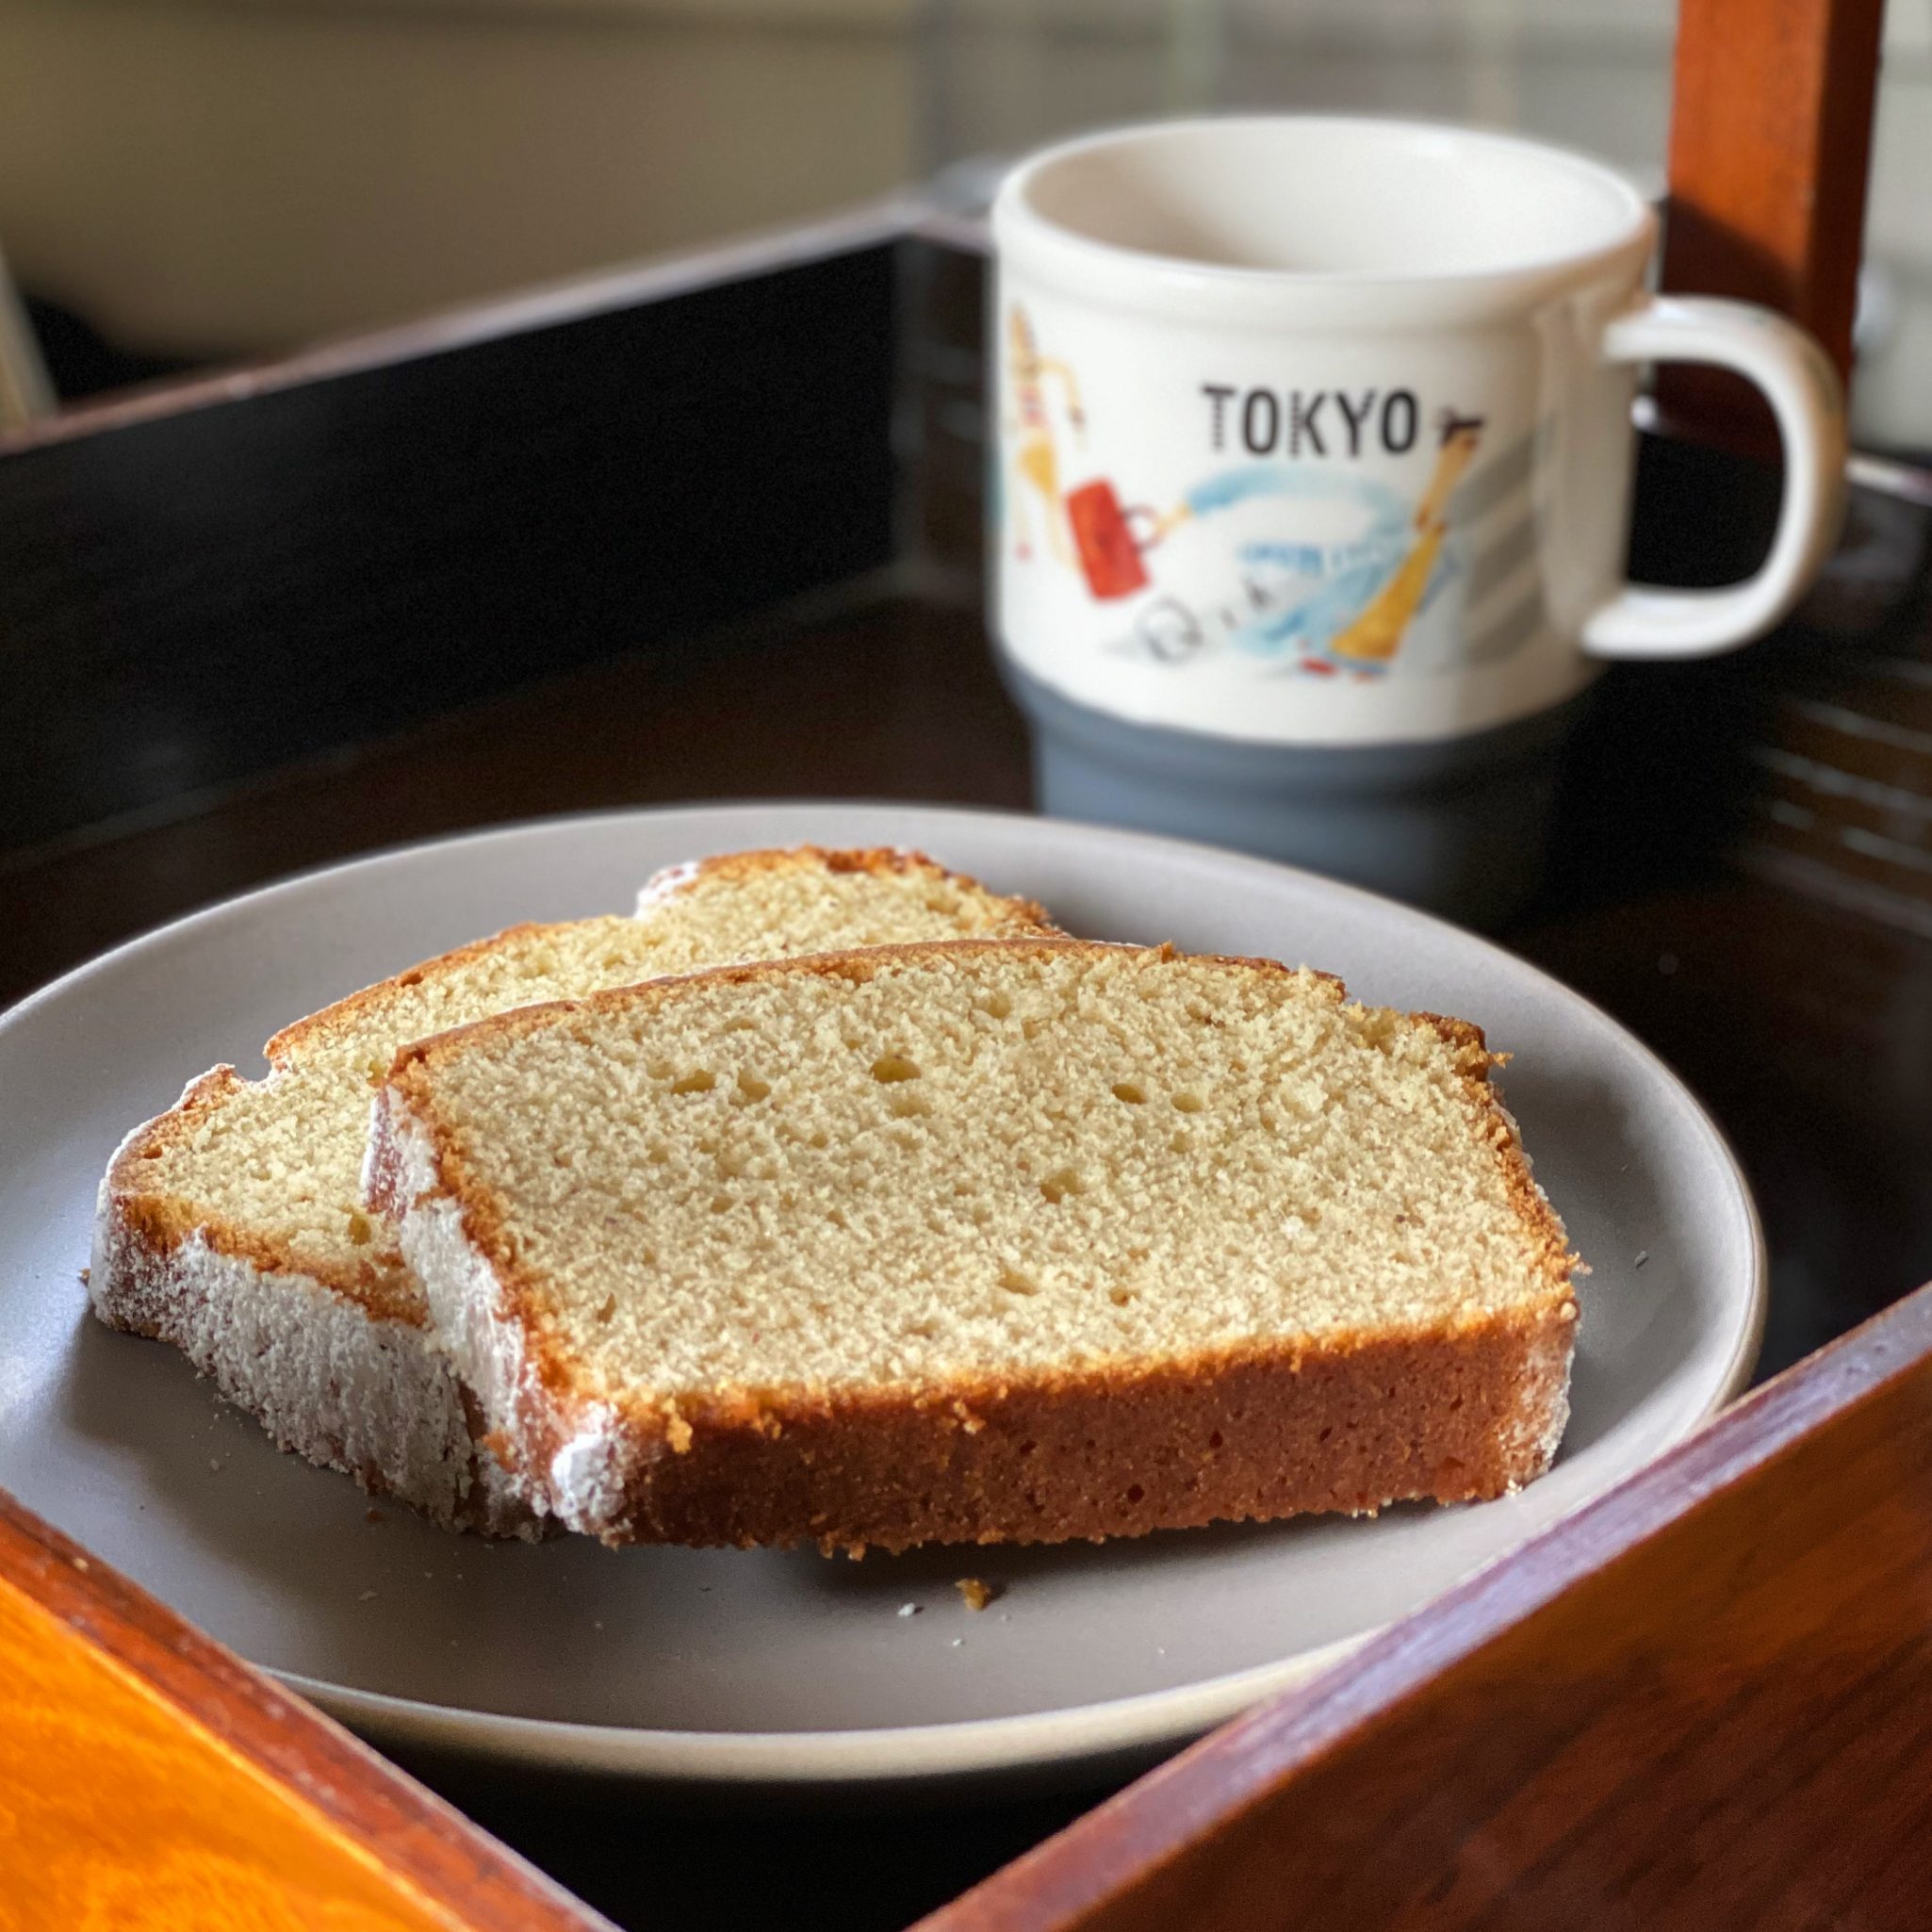
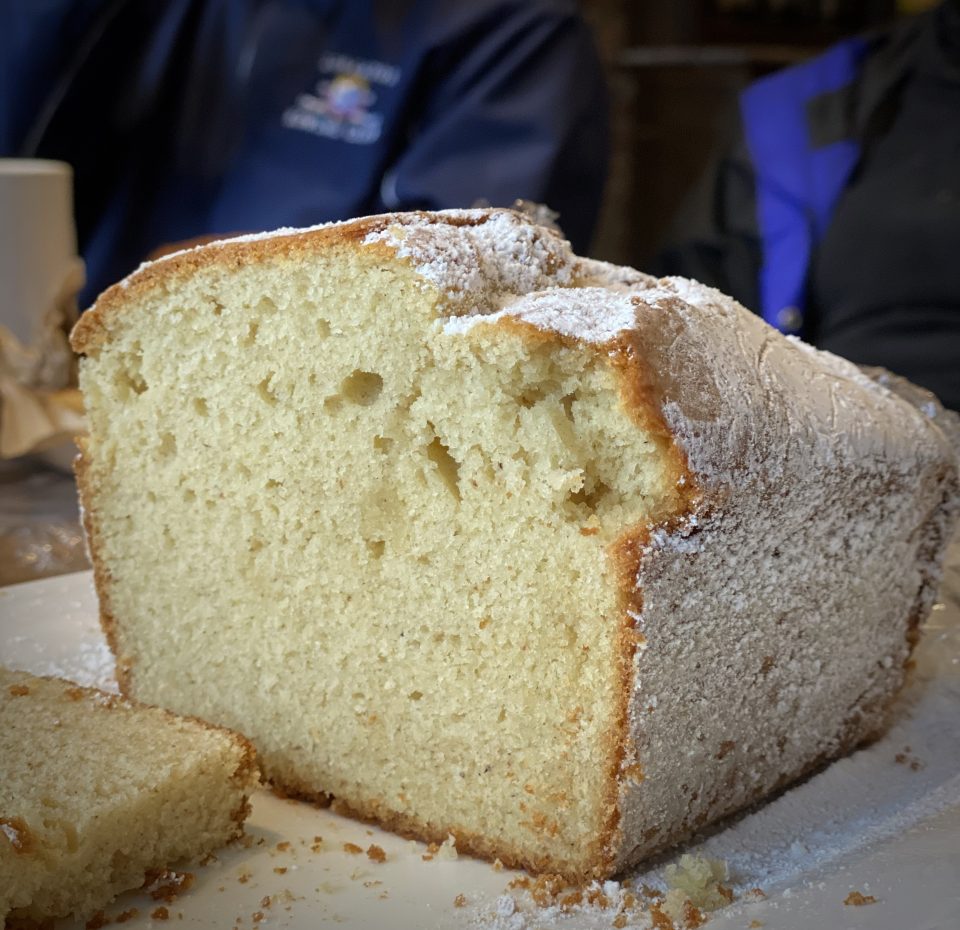
On the other hand, the Donut Loaf was a straight winner!  Initially, the 2 teaspoons of nutmeg threw me for a loop, not my favorite spice. But multiple positive reviews convinced me to take the donut challenge.  I’m glad I did.  Think giant powdered sugar donut but sliced from a loaf.  The inside of the loaf is moist, tender with a nice crumb with just a bit of density like a cake donut.  The outside makes me feel like a kid again, a flurry of powdered sugar with every bite.

The recipe is pretty much a classic loaf bread cake.  Cream butter and sugar.  Add just a quarter cup of the flour mixture, beat and then add eggs one at a time. I’m not sure why she adds a small amount of the dry ingredients before the eggs, maybe it prevents the batter from curdling after adding the eggs.  Just a guess.  Add the dry ingredients by alternating with the buttermilk.  The process results in a fine crumb, tender cake-delicious.  I used freshly grated nutmeg for the cake as recommended.  It wasn’t overpowering but surprisingly subtle.

Donut Loaf from Midwest Made

Powdered sugar donut of your childhood back as an easy to make Donut Loaf
Course Cake, Dessert, Snack
Cuisine American
Keyword Donut Loaf, Loaf bread
Prep Time 15 minutes
Cook Time 1 hour

Ingredients

  • Nonstick cooking spray for pan
  • 2 3/4 cups unbleached all-purpose flour spooned and leveled
  • 2 1/2 teaspoons baking powder
  • 1/2 teaspoon baking soda
  • 1 teaspoon fine sea salt
  • 2 teaspoons freshly grated nutmeg
  • 14 tablespoons unsalted butter at room temperature
  • 3/4 cup plus 2 tablespoons granulated sugar
  • 1 teaspoon vanilla extract
  • 3 large eggs at room temperature
  • 1 cup well-shaken buttermilk at room temperature
  • To finish:
  • 1 cup powdered sugar sifted, plus more as needed
  • 2 tablespoons unsalted butter melted

Instructions

  • Position a rack to the lower third of the oven and preheat it to 325°F. Spray a 9x5-inch light-colored metal loaf pan with nonstick cooking spray and line it with 2 perpendicular strips of parchment paper — 1 cut skinnier to fit lengthwise across the bottom and up the 2 short sides, 1 to fit crosswise and up the 2 longer sides. Cut the strips long enough to have a few inches of overhang on all sides.
  • In a medium bowl, whisk together the flour, baking powder, baking soda, salt, and nutmeg.
  • In the bowl of an electric mixer fitted with the paddle attachment, beat the butter on medium-high speed until creamy. Add the sugar and vanilla and beat until light and fluffy, about 3 minutes. Beat in 1/4 cup of the flour mixture. Beat in the eggs, 1 at a time. Reduce the mixer speed to low, and stir in the remaining flour mixture and buttermilk in 5 alternating additions, beginning and ending with the flour mixture. Finish folding the batter by hand to make sure everything is incorporated — the batter will be very thick.
  • Scrape the batter into the prepared pan and smooth the top. Bake until the loaf is golden with a couple of cracks on top, and a toothpick inserted into the center comes out clean, 60 to 75 minutes. Let cool in the pan set over a wire rack for 15 minutes. Use the parchment paper to lift the loaf from the pan. Let rest for another 30 minutes.
  • When the loaf is cool and firm enough to handle, but still slightly warm, sift the powdered sugar all over a large rimmed baking sheet (keep the sieve handy). Peel the parchment from the cake. Gently turn the loaf over in 1 hand, using part of your forearm to support it. Using a pastry brush, brush the bottom of the cake with some of the melted butter. Carefully set the loaf, right-side up, in the powdered sugar. From there, brush the long sides with the butter, turning the cake from side to side to coat in sugar, then brush and coat the short sides. Lastly, brush the top with the butter, grab a handful or two of sugar from the tray, deposit into the sieve, and sift sugar generously over the top of the loaf. Roll the entire loaf in sugar once more so that it resembles a giant powdered sugar donut. Carefully transfer the cake to a wire rack to cool completely before slicing and serving, touching up the loaf with a quick sifting of sugar as needed.

Notes

Nutmeg: Freshly grated makes a difference.
Everybody Have Jjigae Tonight (Kimchi Jjiggae-Korean Kimchi Tofu Soup)

Everybody Have Jjigae Tonight (Kimchi Jjiggae-Korean Kimchi Tofu Soup)

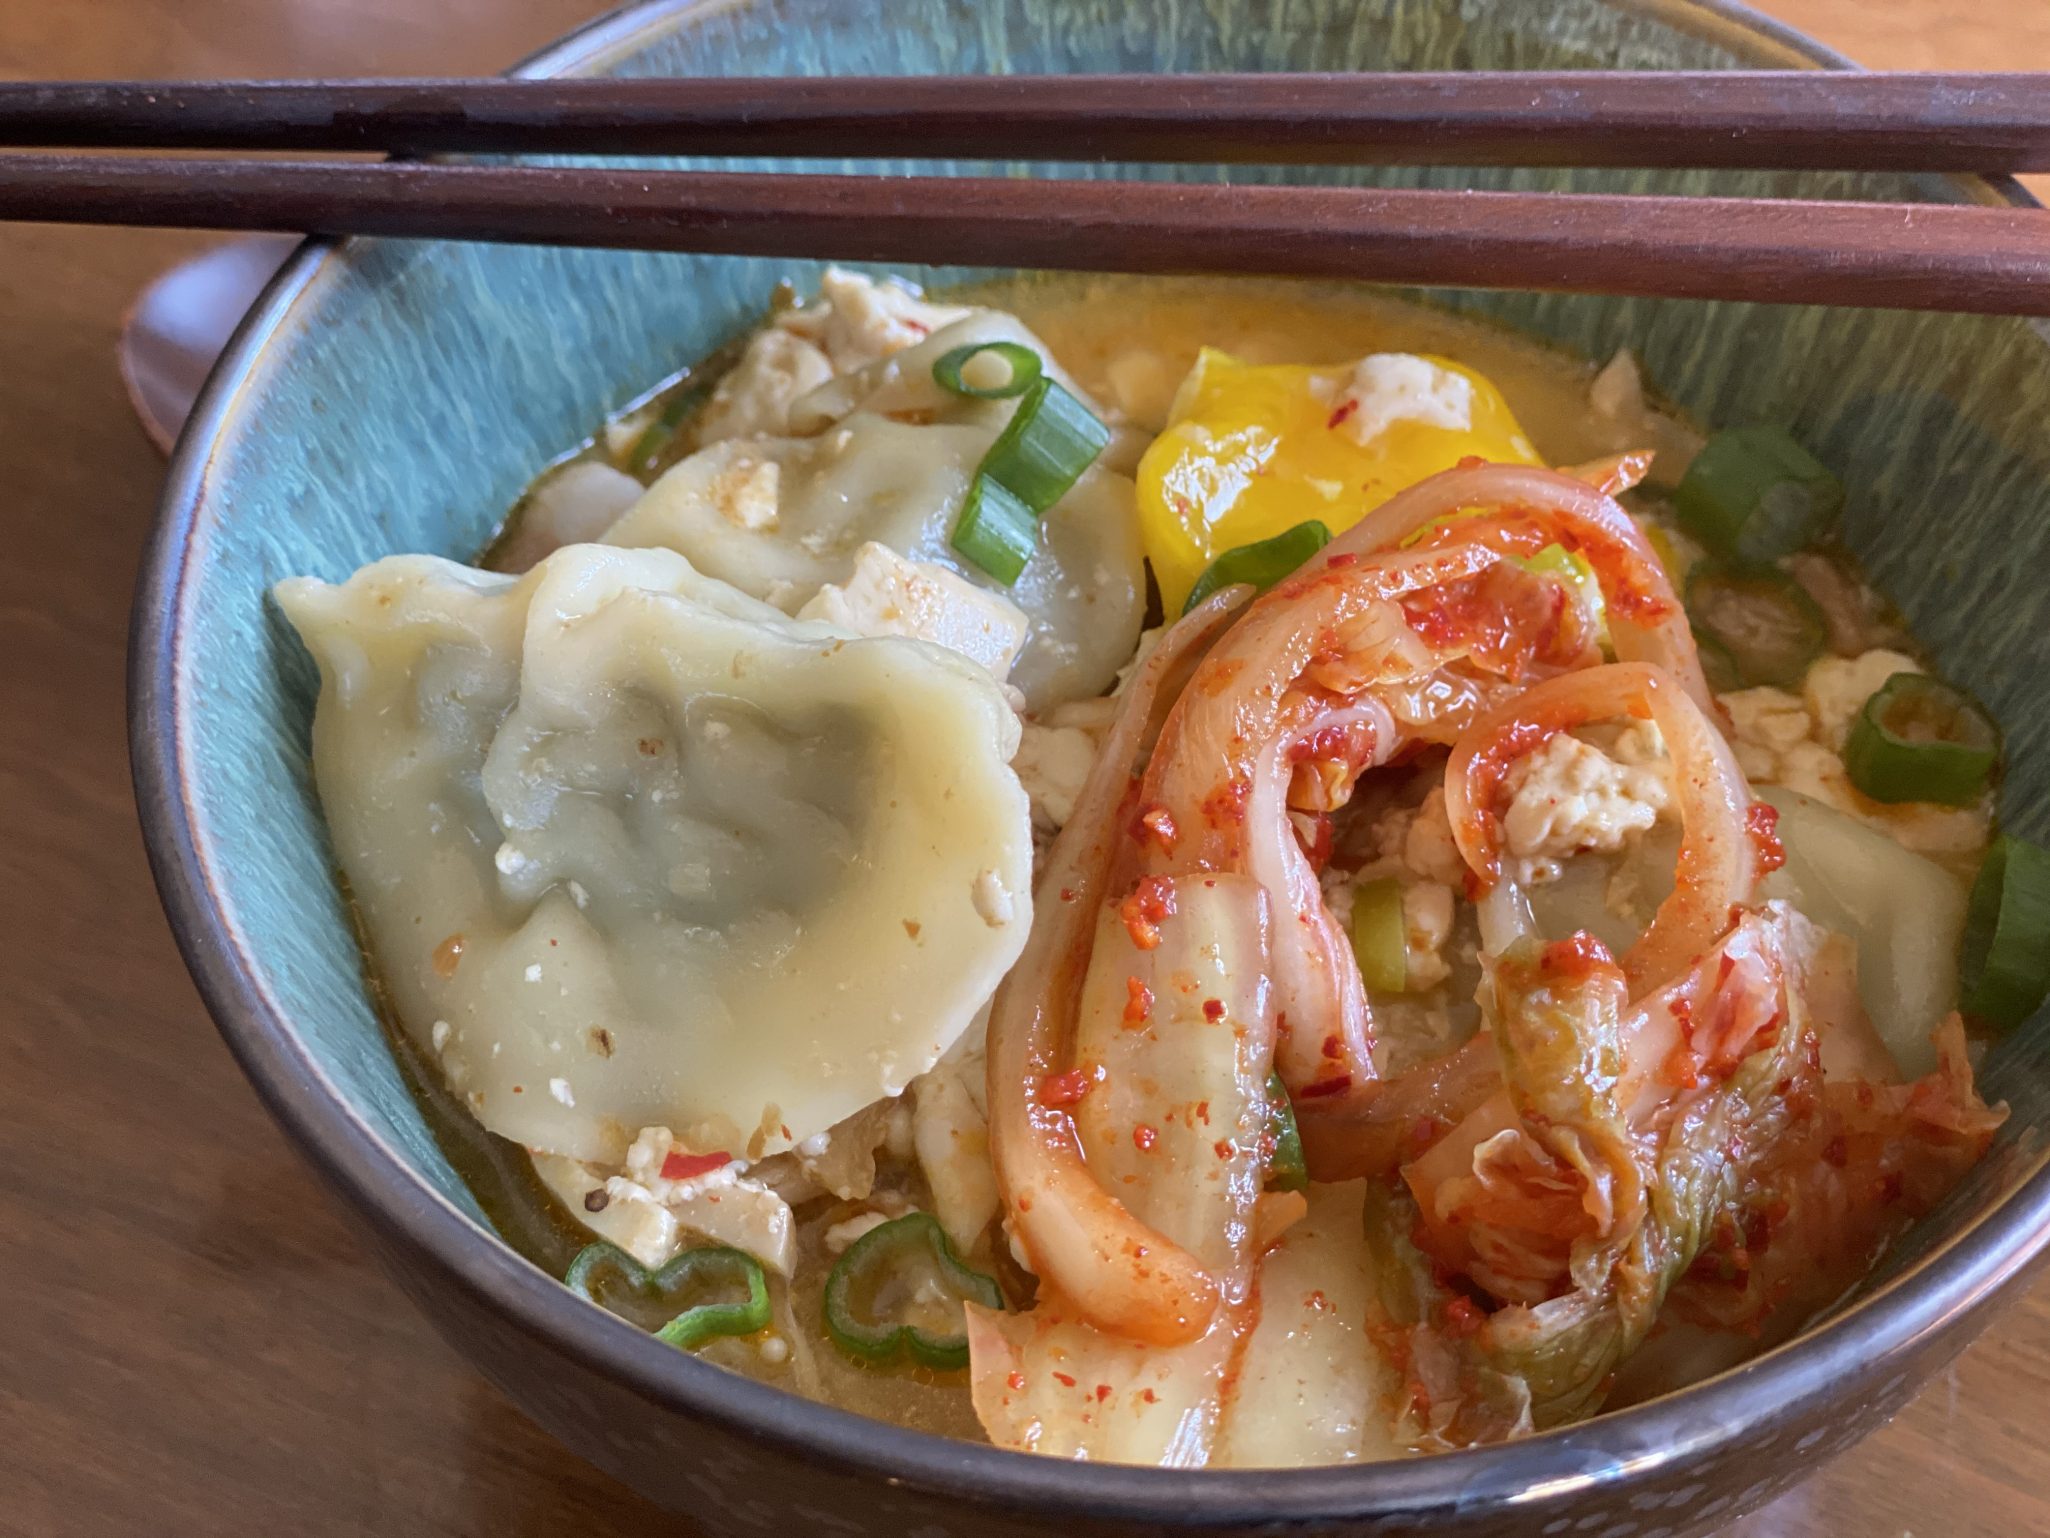
Y’all know I love soup, right?  I have about a dozen recipes for different soups on 3jamigos and now I am adding one more, Kimchi Jjigae or Kimchi Tofu Soup.  It is easy to make, super delicious and something a little different.  It’s a hearty soup with lots of yummy stuff. Along with kimchi, the soup has beef, or pork, tofu, mushrooms, onions, cabbage, basically, anything your little heart desires.  Jamie and I collaborated on this recipe (she made it, I ate it).  It is a mash-up of various recipes we found online.  If you like Korean food and would like to try making it at home, there are some really good blogs and Instagrammers you can check out, Korean Bapsang, and My Korean KitchenInstagrammer @Christy_l_kitchen’s video for kimchi tofu soup served as ground zero for Jamie’s delicious soup.

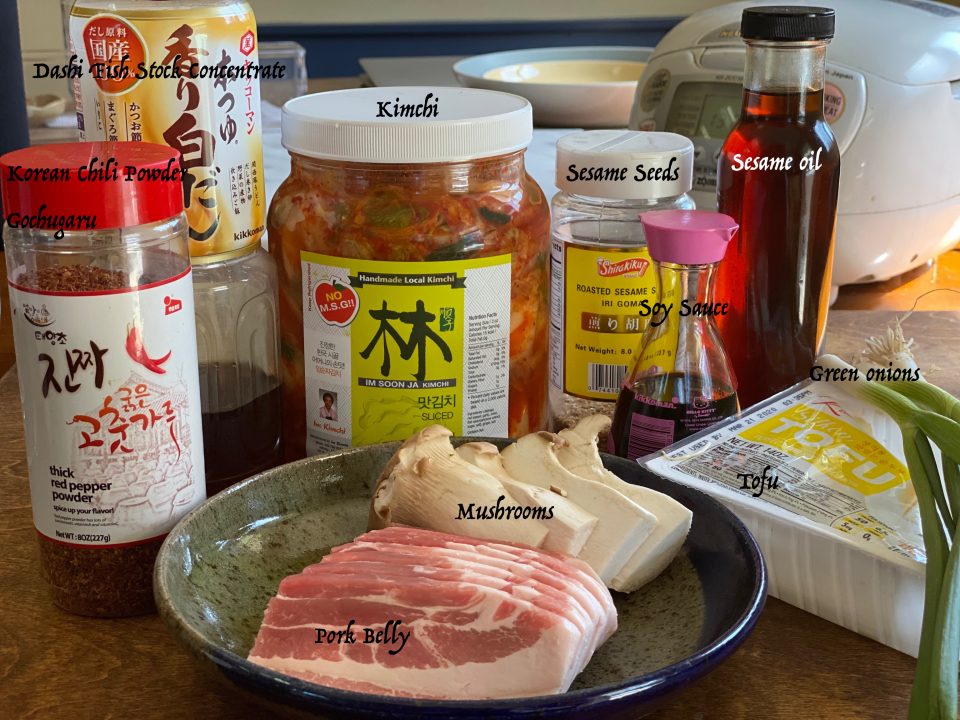
First, let’s run through the ingredients for Kimchi Jjigae.  If you live in the Bay Area, it will be easy to find the ingredients for this tasty pot.  Actually, any major metropolitan area probably has an Asian market and there are online sources. (Or call me, happy to take anyone Asian food shopping)  Once you have assembled the ingredients, putting the soup together is a SNAP.

Let’s start at the very beginning, a very good place to start…

Kimchi, or fermented cabbage, is essential to the soup.  It is the cornerstone of the soup providing umami, texture, and spice. Asian stores and larger supermarkets often carry Kimchi in their cold boxes.  My favorite brands are Ocinet and Im Soon Ja.  Use the one you like.

Tofu-made from soybean comes in various densities from super soft to extra firm.  Normally, SoonDubu Jjigae uses a very soft “silken” tofu. PERFECTLY acceptable to use firmer tofu if you like.  Tofu in tubes by Pulmone is a great choice. Kithcn has a nice primer on tofu that helps sort out the different varieties.

For protein, we used pork belly but again you can substitute beef or seafood such as shrimp or clams. Mushrooms are amazing and if you pull out the protein, the perfect vegetarian version.  Jamie added King Mushrooms (pictured) and Enoki Mushrooms (teeny tiny mushrooms), very tasty.

Gochugaru, Korean red pepper adds sweet, spicy, fruity, smoky-irreplaceable, look for it at Korean markets or online.  I like to use Gochujang (spicy sweet chili paste) along with the powder.

The soup can be made with water but if you want depth of flavor, use stock.  Traditionally an anchovy stock is used but we improvised by using a Japanese Shiro Dashi (fish-based stock) concentrate which I love.  In a pinch use chicken broth or a mushroom broth.  The recipe calls for 1 cup of liquid, I LOVE soup so I usually increase the amount of liquid 1.5-2 cups.  If you do too, taste for seasoning, you may want to increase the chili powder.

There you have it, all the ingredients for a pot of yumminess.

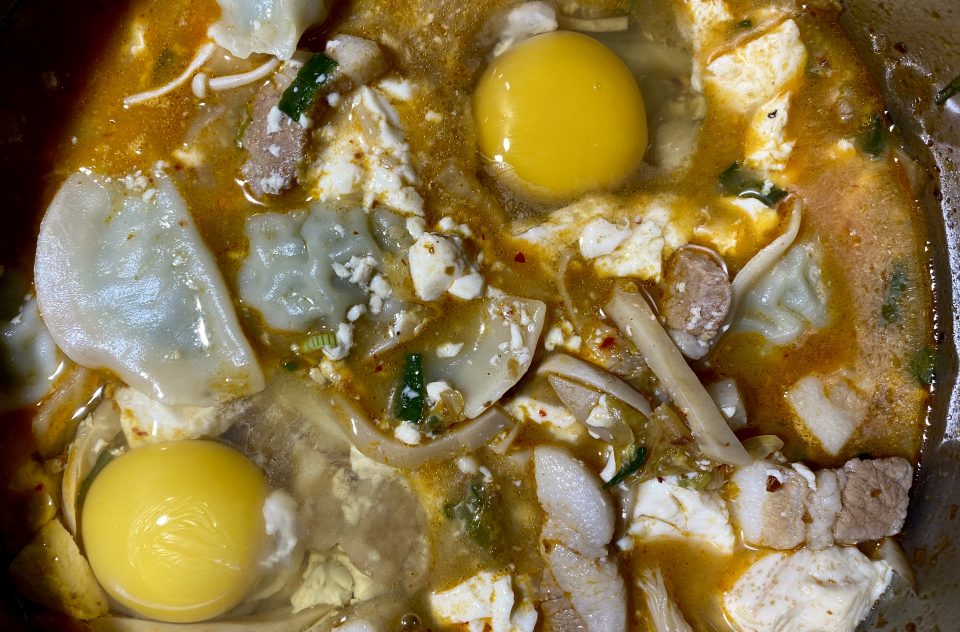
The hard part is over!  It’s downhill from here.  Saute’ your onions and pork, add kimchi and seasonings, stock, shrooms, and then the tofu. Top with green onions, Badda bing Badda boom, done.  Just a couple of minutes of work and dinner is served!  Koreans have a special little pot to cook Tofu Soup in, it retains heat, when you bring it to the table the soup is still bubbling furiously. Drop a raw egg in and let it cook in the piping hot broth.  We don’t have a special pot so we dropped the egg on top before taking the saucepan off the stove.

Variations on a Jjigae theme.  Did I mention we threw in mandu for good measure?  Because who doesn’t love dumplings!  To increase the veggie content without adding more kimchi, add sliced fresh cabbage or more mushrooms.

Korean Tofu Soup Kimchi Jjigae

Korean comfort food, Soondubu Jjigae or Tofu Soup. Tofu, pork, beef or seafood and Kimchi are the building blocks for this delicious, easy to make soup.
Course Main Course, Soup
Cuisine Asian
Keyword kimchij jigae, tofu soup
Prep Time 15 minutes
Cook Time 15 minutes

Ingredients

  • 1/4 yellow onion, thinly sliced
  • 1/2 cup thinly sliced pork belly or beef can sub seafood, shrimp or clams.
  • 1/2-3/4 cup thinly sliced kimchi
  • 2-3 shiitake mushrooms, thinly sliced or enoki mushrooms, 1 small pkg
  • 1-2 T red chili pepper flakes gochugaru add more for a spicier stew
  • 1 T Gochujang (chili paste)
  • 1 teaspoon minced garlic
  • 1/2 tablespoon sesame oil use a little more if using more gochugaru
  • 10 ounces soondubu extra soft/silken tofu, 1/2 carton of tofu
  • 1 cup anchovy broth can use water, dashi or chicken broth
  • 1/2-1 T soy sauce
  • 2 to 3 tablespoons juice from kimchi
  • pinch black pepper, dash of salt
  • 2 scallions divide white and green parts, finely chopped, add white part to yellow onion mix saute', reserve green part for garnish
  • 1 egg

Instructions

  • Heat 1 tsp oil in a small saucepan over medium heat. Add diced onion, scallions (white part) and pork or . Stir-fry until the meat is almost cooked, 3 - 4 minutes.
  • Add the kimchi, chili paste, garlic, soy sauce and sesame oil to pot. Stir to combine and saute for 1-2 minutes.
  • Pour in broth, juice from the kimchi and pepper flakes. Bring it to a boil, add mushrooms and continue to boil for 3 - 4 minutes.
  • Add the soft tofu in big chunks. Stir in salt to taste (I rarely add salt), start with 1/4 teaspoon, and black pepper.
  • Cook for 4 -5 minutes. Add chopped scallions just before removing the pot from the heat.
  • If desired, crack an egg into the soup to serve while it’s still boiling hot.
  • Serve with rice.

Notes

Shiro dashi concentrate is seasoned, reduce salt and/or soy sauce if used.
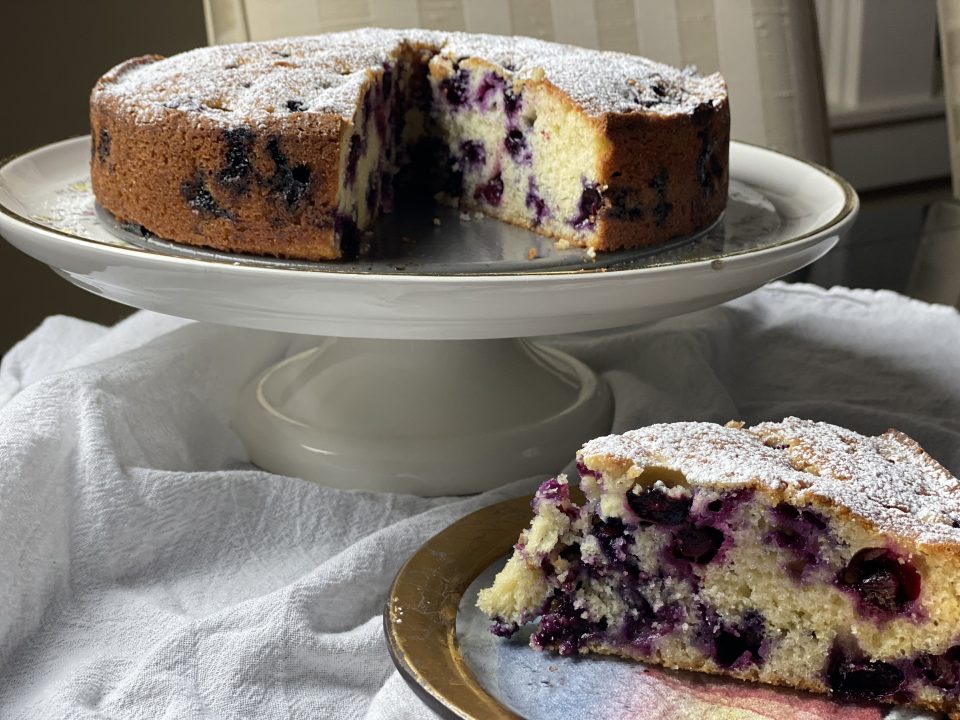
Is it A Cake Or A Ginormous Muffin! (Blueberry Muffin Cake)

Is it A Cake Or A Ginormous Muffin! (Blueberry Muffin Cake)

A friend mentioned she was making her daughter’s favorite cake, A Blueberry Muffin Cake for her birthday that day. She asked “I think I found the recipe on 3Jamigos, didn’t I?”

I had to tell her there wasn’t a Blueberry Muffin Cake on my site.  I try to tempt her with the Blueberry Boy Bait Cake or  Ottolenghi’s Blueberry Lemon Almond Cake on 3jamigos but to no avail, her response was “Too bad, it’s really easy and super tasty, I’ll have to look for it”.

Challenge accepted

Ok, she didn’t challenge me, but my curiosity was peaked so I googled Blueberry Muffin Cake.  1.01 seconds later, an array of recipes popped up on my feed.  A quick perusal landed me on a Blueberry Muffin Cake by Fine Cooking.  It not only looked yummy but seemed pretty darn easy to make too.  I saved the recipe thinking I would try it one of these days. Well, what should appear in my feed that very day?  A message from my favorite strawberry purveyors, P and K Farms, “no strawberries yet but we have blueberries this weekend!”  No brainer, making Blueberry Muffin Cake after a trip to the Farmer’s Market.

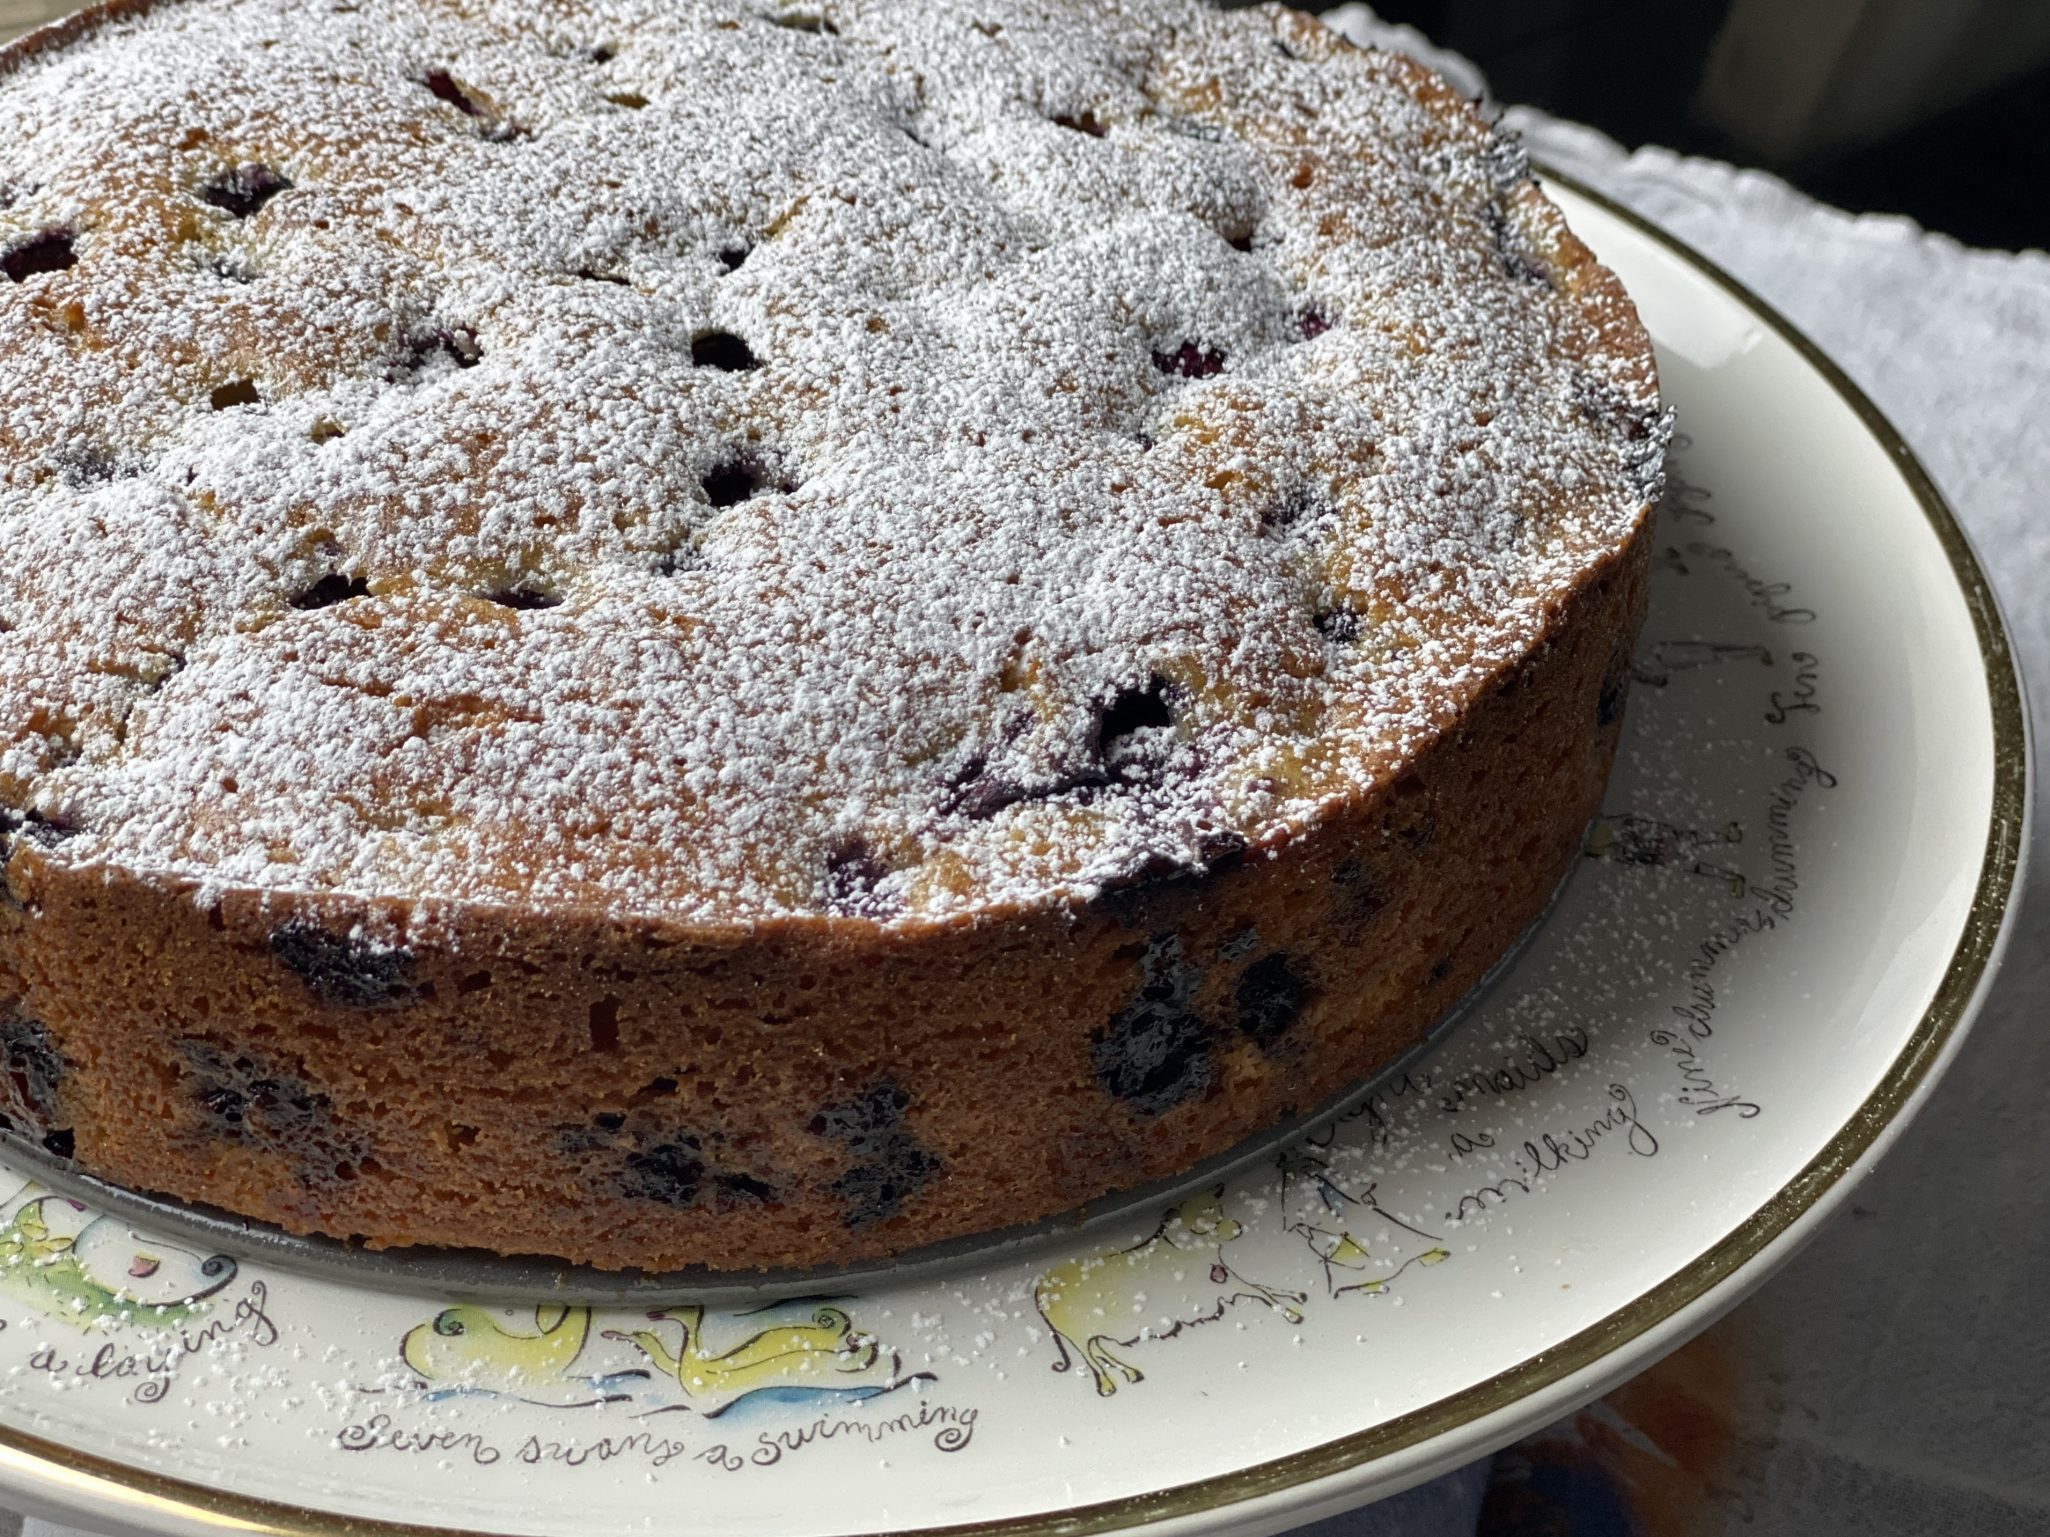
Essentially it is a muffin batter, easily whipped up in one bowl and baked in a springform pan.  The recipe starts with melted butter, no creaming butter and sugar together which makes this incredibly easy.  The cake is not too sweet, tender with a nice crumb and peppered with blueberries.  Perfect for a weekend breakfast or brunch or for an afternoon tea or coffee break.

The cake calls for a generous 2 cups of blueberries.  Which makes this cake a very berry delight.   I added lemon zest for a bit of zing.  Almond extract would also work well as an added dimension of flavor.  Things to remember, don’t over mix your batter once you start combining the dry and wet ingredients. You can substitute other fruit like raspberries, strawberries, diced peaches, or nectarines.  Really, you could knock this cake out in minutes, its that easy.  So what are you waiting for?  Go make this cake.

Course Breakfast
Cuisine American
Keyword Blueberry Muffin Cake
Prep Time 15 minutes
Cook Time 45 minutes

Ingredients

  • 4 oz. 1/2 cup unsalted butter, melted and cooled slightly; more for the pan
  • 9 oz. 2 cups unbleached all-purpose flour
  • 1-1/4 cups granulated sugar
  • 2 tsp. baking powder
  • 1 tsp. kosher salt
  • 1/2 cup whole milk
  • 2 large eggs
  • 1 tsp. pure vanilla extract
  • 3/4 lb. 2 cups fresh blueberries
  • Confectioners’ sugar for dusting (optional)

Instructions

  • Position a rack in the center of the oven and heat the oven to 350°F. Butter the bottom and sides of a 9-inch round springform pan.
  • Sift the flour, sugar, baking powder, and salt into a large bowl. Add lemon zest to dry ingredients, stir to combine. In a small bowl, whisk the butter, milk, eggs, and vanilla. Using a silicone spatula, stir the wet ingredients into the dry ingredients just until incorporated. Gently fold in the berries.
  • Scrape the batter into the prepared pan, spreading it evenly. Tap the pan on the counter once or twice to break any air bubbles.
  • Bake until golden-brown and a tester inserted in the center of the cake comes out clean, 45 to 55 minutes (if the top gets too brown, tent with aluminum foil).
  • Cool on a wire rack for 10 to 15 minutes. Run a paring knife around the edge of the cake and remove the side of the pan.
  • Transfer the cake to a serving plate and serve warm or at room temperature with confectioners’ sugar sifted over the top.

Notes

Use raspberries, blackberries or cut diced strawberries instead.  Stone fruits would work.  Omit lemon zest, add 1/2 teaspoon almond extract.
Hit Me With Your Bo Ssam, Fire Away (Momofuku’s Bo Ssam Slow Roasted Pork)

Hit Me With Your Bo Ssam, Fire Away (Momofuku’s Bo Ssam Slow Roasted Pork)

Need a dish to feed a big crowd?  A dish that is easy to make and requires little attention?  I have just the dish!

Bo Ssam

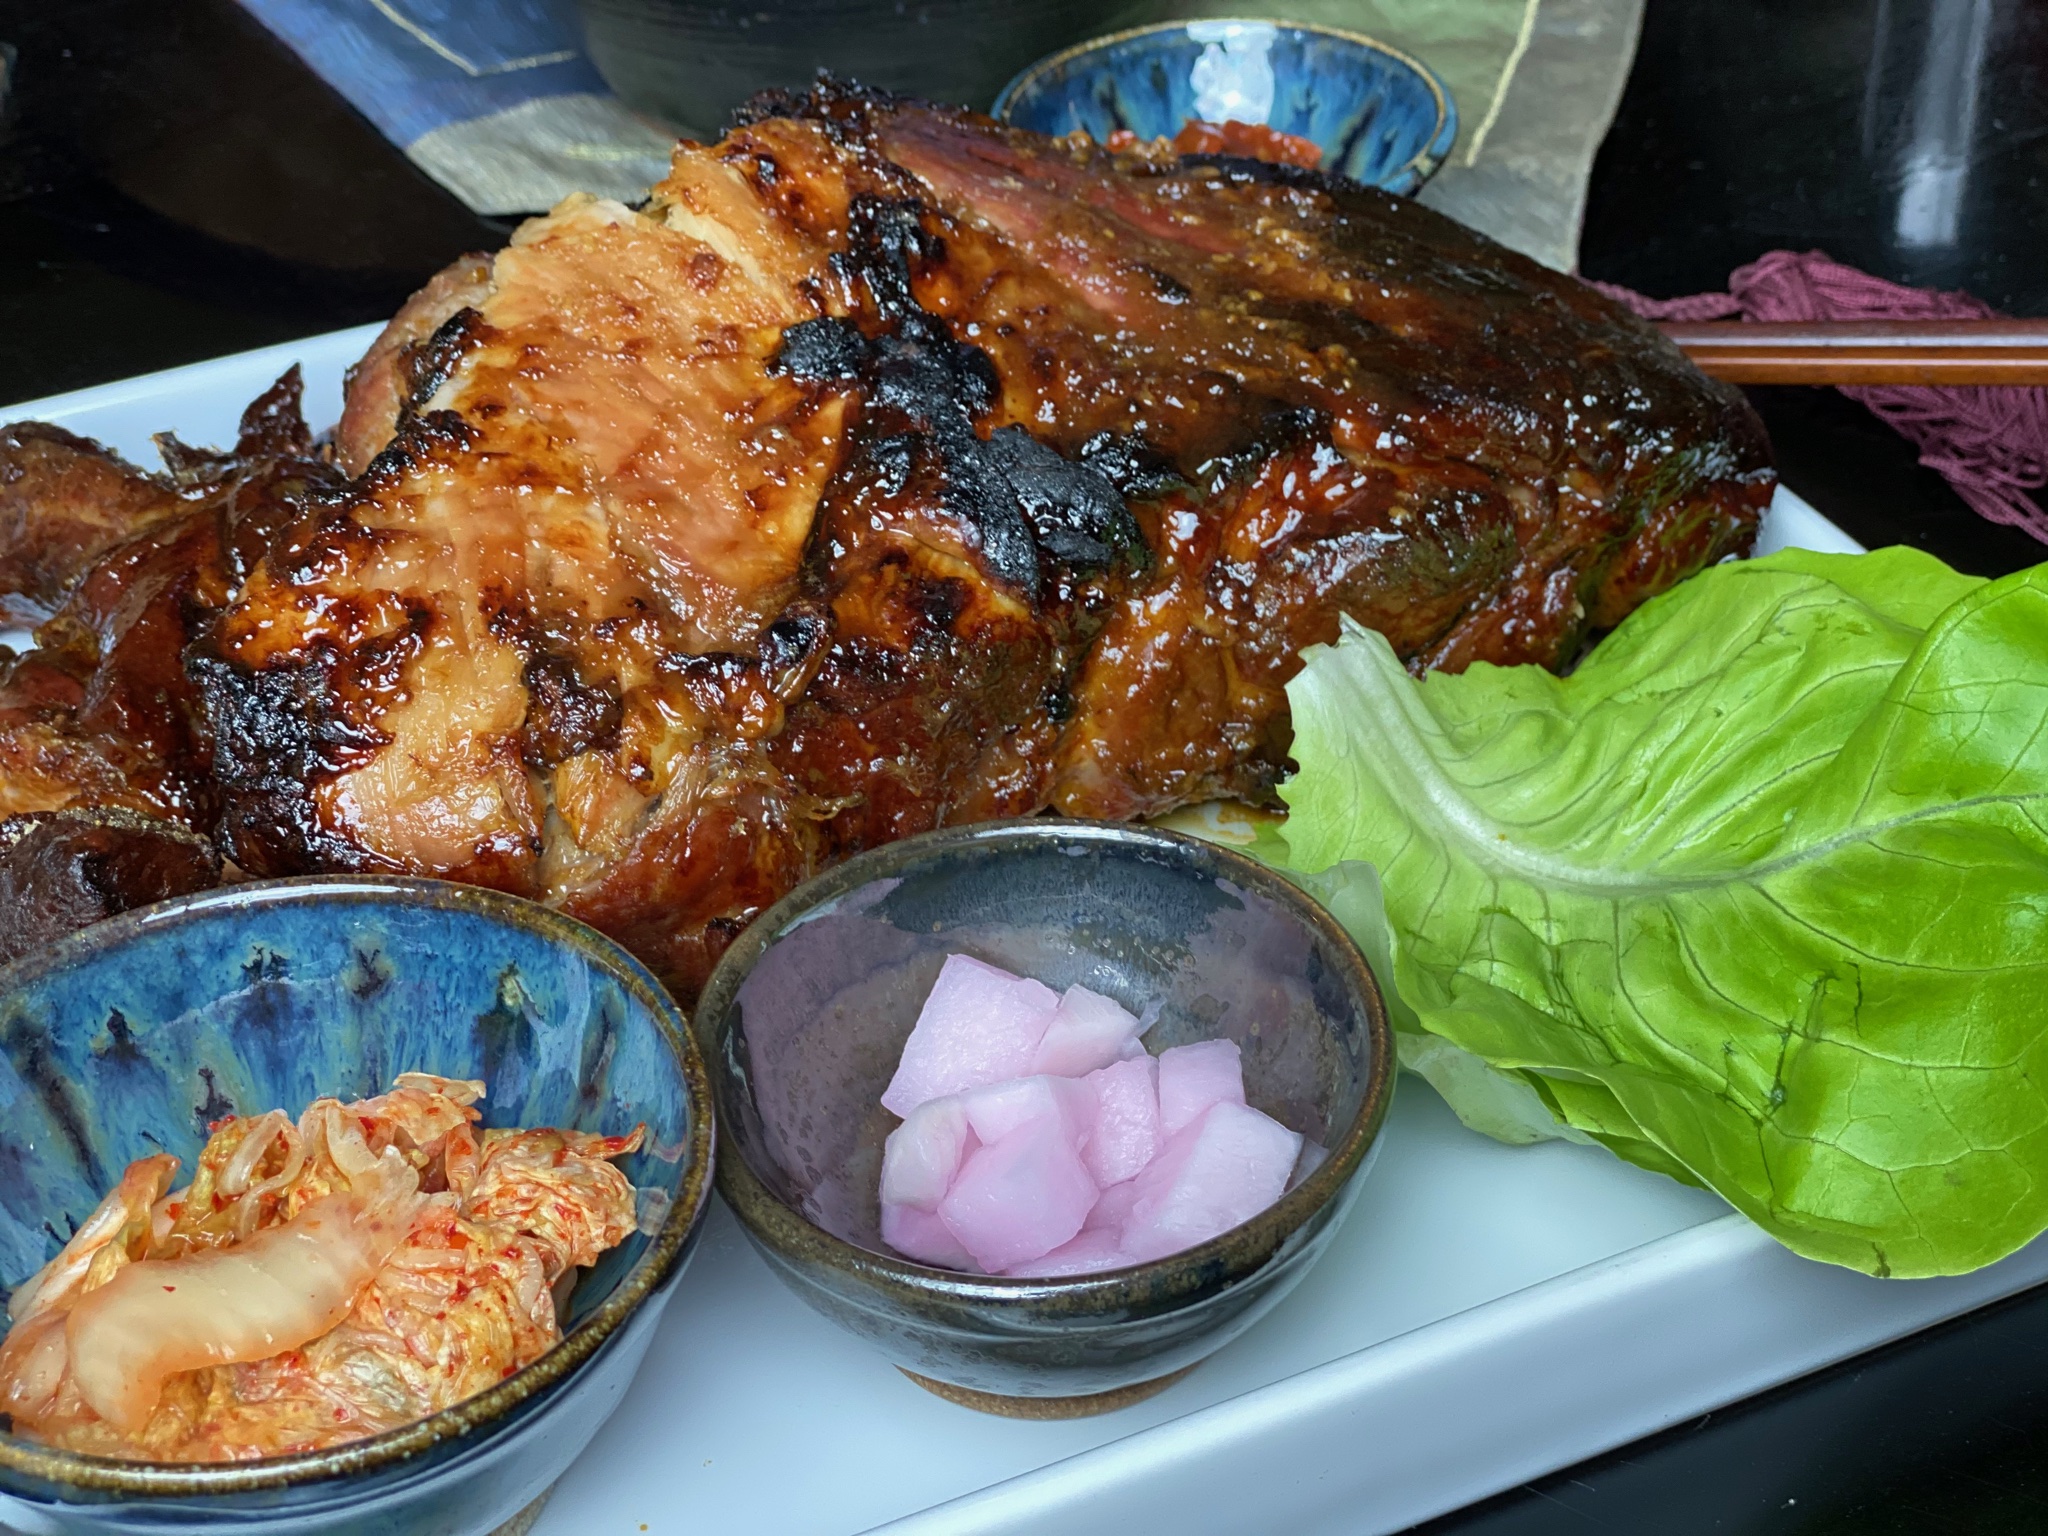
Whaat?  The best description I can give you is Korean Pulled Pork.

I have been meaning to try David Chang’s (Da Momofuku Man) recipe for Bo Ssam.  His Momofuku Cookbook is hands down one of my favorites. I actually like curling up in a chair and reading his cookbook.  Great narrative and I can relate to his use of “colorful” vernacular in the book.  When I had my kids I FORCED myself to limit the expletives that normally flowed through my lips.  I did a pretty darn good job until they were all ensconced in high school (or was it middle school?).  Then the flood gates reopened.  Am I proud of this? No, but for me, a verbal flurry of choice words is very cathartic.  I like to think of them as adjectives with emphasis NOT directed verbs.

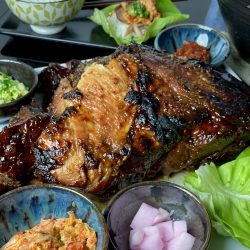
Back to Bossam.  Actually, traditional Bossam is pork belly boiled not roasted.  The Momofuku twist?  Slow roasting the pork.  Start with a nice FATTY Pork Butt roast (aka Boston butt or shoulder).  Make a rub of Kosher salt and sugar and rub this all over the roast. Discard any excess rub.  Let the roast sit for 6-24 hours in the fridge. Use coarse Kosher Salt Coarse made by Diamond.  Don’t use regular table salt or sea salt, it will be way too salty.  Morton’s also has a Kosher salt but it is actually saltier than Diamond.

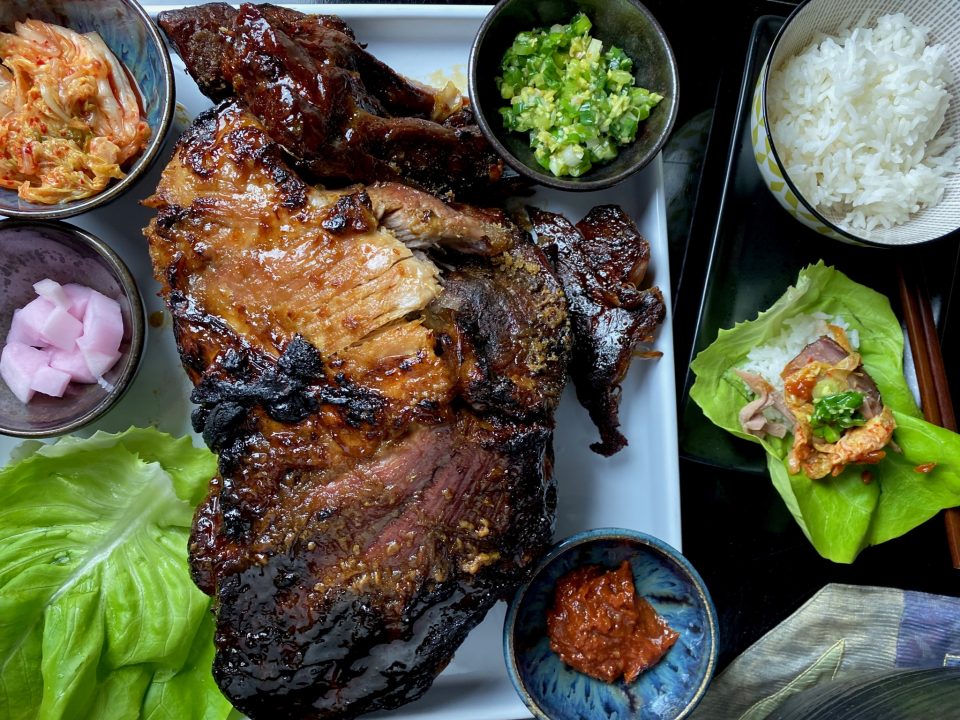
Remove the pork from the brine, put it in a pan and roast for oh…SIX HOURS.  I know a long time, but that’s what gives you tender, melt in your mouth bites of pork that you eat with all the trimmings-kimchi, rice, Momofuku’s ginger scallion sauce or ssamjang, and raw oysters (optional) wrapped in lettuce.  A brown sugar, salt and vinegar paste is painted on the roast and broiled for a caramelized, crispy, crust.  Yum.  Its a fun and incredibly delicious.  Perfect to share with family and friends.

I tweaked the Ginger Scallion Sauce a bit.  I actually heated the oil before adding it to the sliced scallions and minced ginger and rounded the soy sauce to 2 teaspoons.  I took the lazy way out and used commercial Ssamjang Sauce and added some sesame oil and seeds.  Ssamjang is made with of doenjanggochujangsesame oiloniongarlic, green onions, and optionally brown sugar.  Packs a flavor punch and is perfect with grilled foods.

Set everything on the table, condiments, veggies and that big beautiful pork butt.  Let everyone make their own wraps.  Take a piece of lettuce add a bite of rice, a dollop of sauce (ginger-scallion or ssamjang or both), a bit of kimchi and of course a nice little chunk of the meltingly tender, pork.

Serve with banchan on the side-cucumbers, potatoes, seaweed, whichever ones you prefer even a nice simple green salad would be wonderful.

Enjoy.

MOMOFUKU BO SSAM

Delicious slow-roasted pork served with traditional Korean sides, kimchi, ssamjang, rice, and wrapped in lettuce leaves
Course Main Course
Cuisine Fusion, Korean
Keyword Bo Ssam, Slow Roasted Pork
Prep Time 45 minutes
Cook Time 7 hours

Ingredients

Pork Roast

  • 8 to 10 pounds 1 piece pork butt, ideally bone-in with some fat ok lots of fat
  • 1 cup granulated sugar
  • 1 cup coarse Kosher salt preferably Diamond

Topping

  • 1 Tbsp coarse kosher salt
  • 7 Tbsp brown sugar
  • 2 tsp apple cider vinegar

Sides:

  • 1 dozen raw oysters shucked optional
  • 1 cup Napa Cabbage Kimchi plus 1 cup puréed
  • 1 cup Ginger Scallion Sauce see link in post
  • Ssämjang
  • Cooked Short-Grain Rice Count on a bowl of cooked rice per person
  • 3 to 4 heads Bibb lettuce leaves separated, well washed, and spun dry
  • Maldon or other high-quality coarse sea salt

Instructions

  • Place the pork in a roasting pan or baking dish. It should fit snugly. Combine 1 cup of sugar and 1 cup of the salt in a bowl and mix them well. Rub the mixture all over the meat. Cover it with plastic wrap then refrigerate it at least 6 hours or overnight. discard an excess sugar salt mix.
  • Heat the oven to 300 F. Cover the roasting pan with cooking foil. Wrap it around at least twice covering all the gaps. Remove the pork from the fridge and discard any juice. Leave the rub on the pork.
  • Place the pork in a roasting pan (fatty side up), set in the oven and cook it for about 6 hours. (This can vary depending on the size of the pork. See note below) Once cooked, the pork should be very easy to pull apart with tongs and forks. Remove the pork from the oven.
  • Combine the remaining salt, brown sugar and vinegar in a small bowl. Mix well. Gently rub the mixture all over the cooked pork (mainly the top of the pork). Use the back of a spoon to rub paste on pork since the roast will be pretty hot.
  • Turn the oven to 500 F. Place the pork in the oven and cook it until a dark caramel crust develops on the meat. It takes 5 to 10 mins. Serve hot, with the accompaniments.
  • When you first pull off the pork, it’s very moist and tender, but it dries out fairly fast (like within 20 mins)! So serve immediately and eat up. It still tastes good though!
  • For an easy ssam sauce, buy the ssamjang tub instead of making it from scratch. Add a couple of drops of sesame oil and a sprinkle of sesame seeds to the ssamjang if you like.

Notes

If you’re using a smaller piece of pork, reduce the rub ingredients (e.g. sugar, salt) and the cooking time. As a guideline it takes about 4 hours to 4.5 hours to roast 2 kg / 4.4 pounds bone-in pork shoulder.


Consolation Biscuits (Crazy Easy Buttermilk Biscuits)

Consolation Biscuits (Crazy Easy Buttermilk Biscuits)

.For those of you that could use a big helping of comfort right now (Talking to you Niner Faithful).  Here is my newest biscuit recipe find.

It’s hard to cook when your crying.  Luckily this recipe is extremely easy and doable, even through tears.  You are minutes away from consoling your sports-fan soul with a batch of warm biscuits, slathered with butter and your favorite jam.

What makes these so simple?  A nifty trick that comes from Cook’s Illustrated by way of Serious Eats and the blog, The Cafe Sucre Farine’.

Melted butter.  Yep, biscuits made with melted butter.

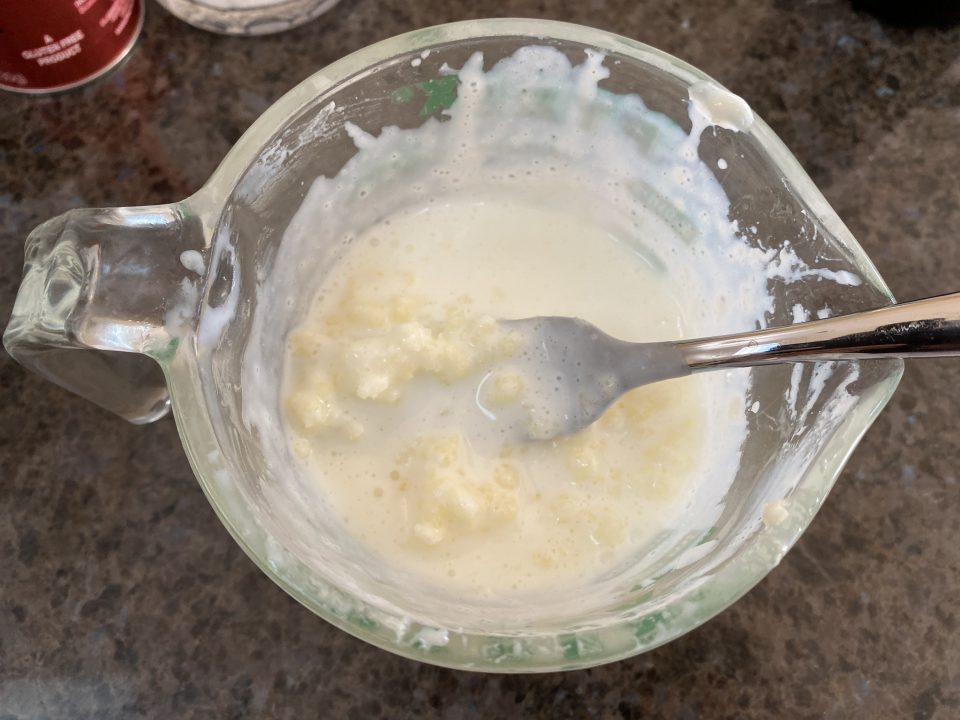
The trick is to melt the butter and then pour it into ice-cold buttermilk.  The butter solidifies into little globules mimicking the pieces of butter you get when you cut butter into the flour as in the traditional way of making biscuits.  How easy is that?

Pour the buttermilk mixture into the flour, stir together, voila’ ready to make biscuits!
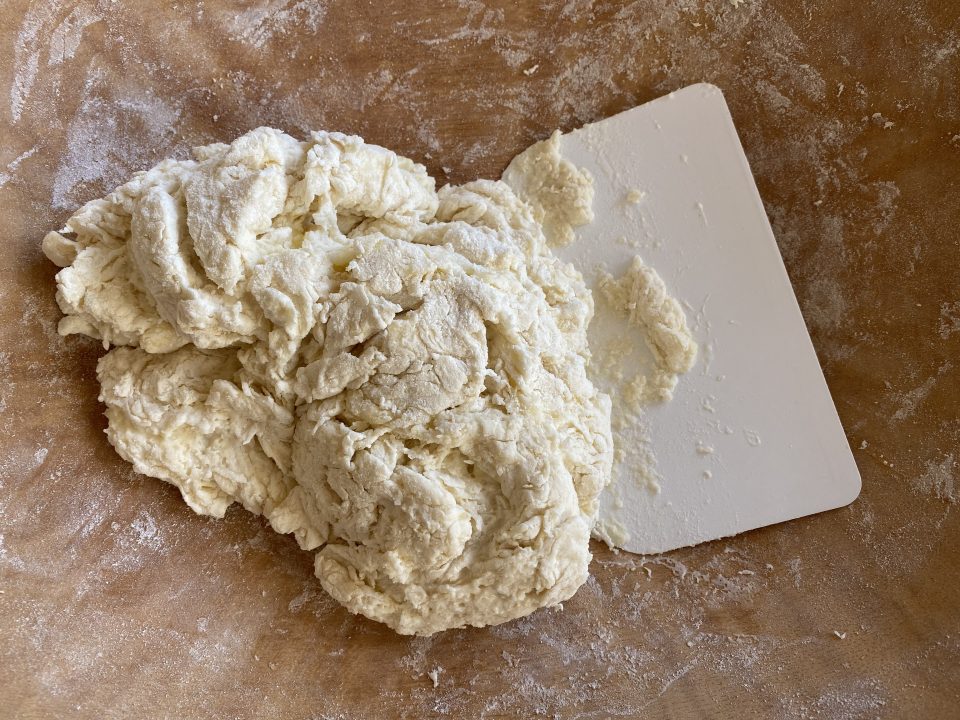
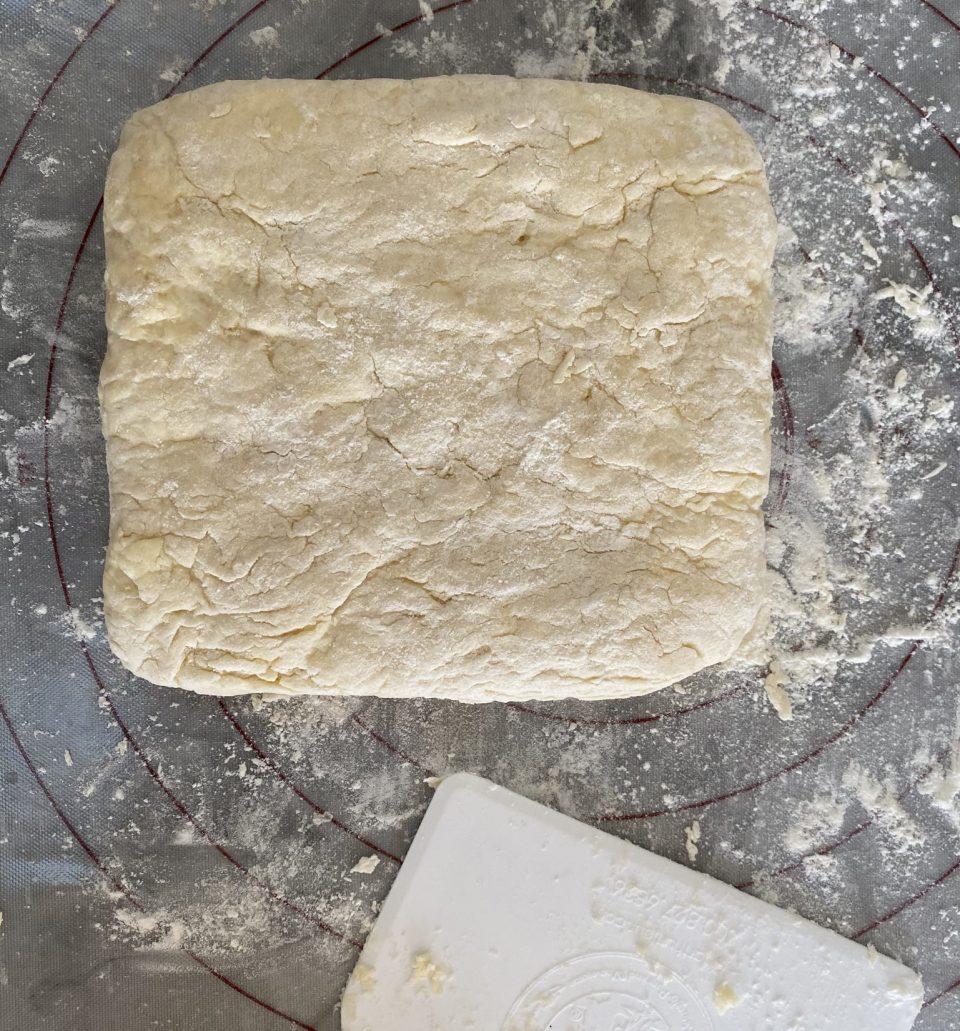
Gather dough and pat into a square.  It will not be a wet sticky dough.  If it seems wet, add flour, a tablespoon at a time. Knead the dough a couple of times, roll or pat the dough into a square.

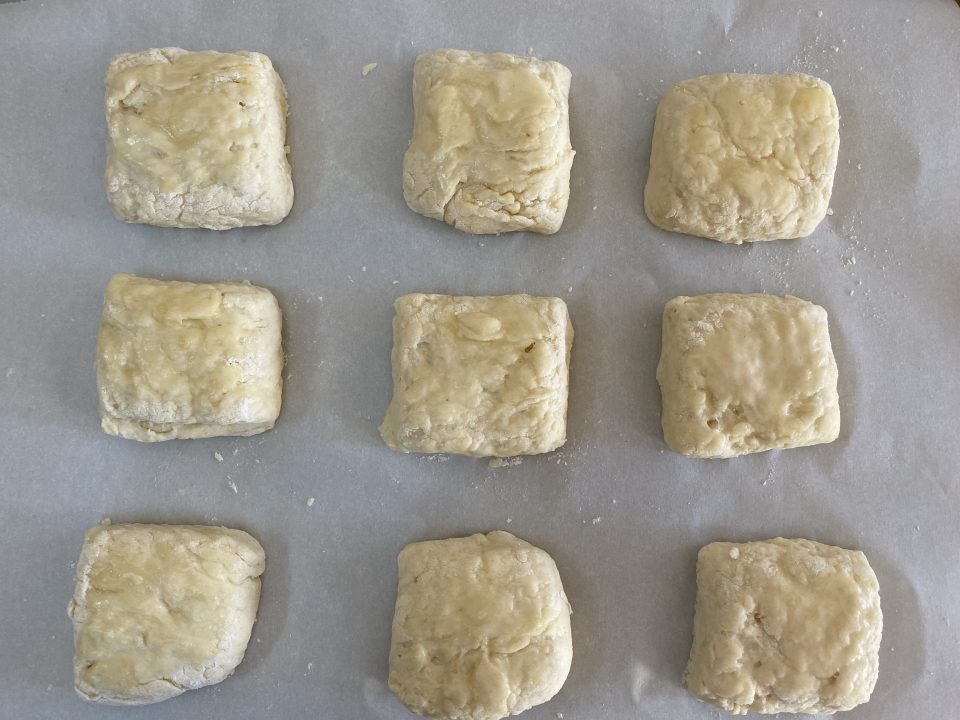
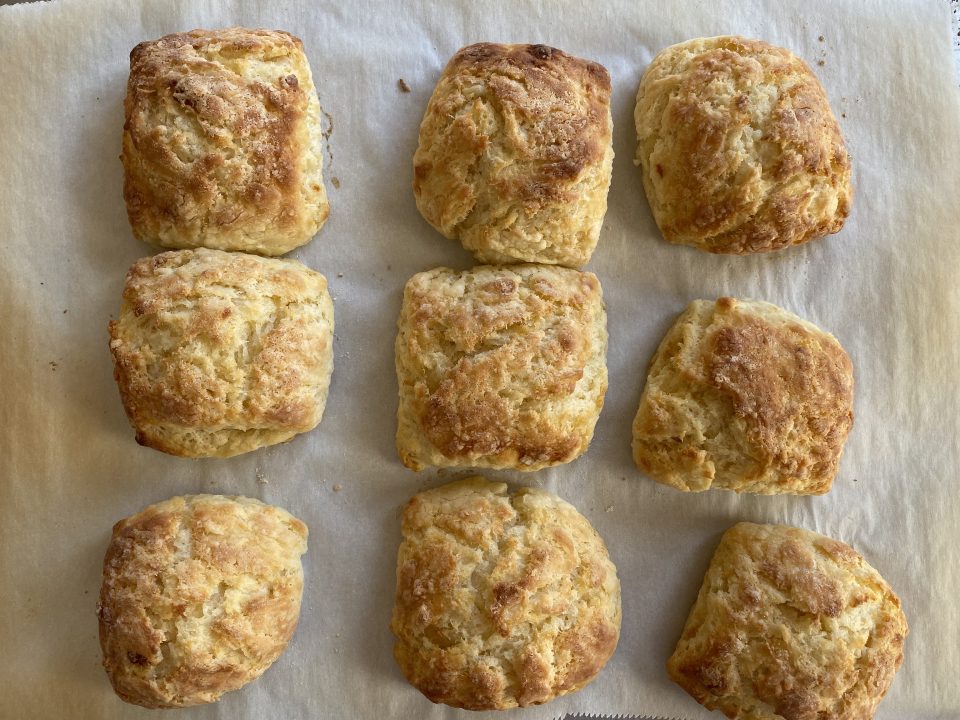
Cut the biscuit dough into squares.  This avoids the scraps and rerolling the remaining dough for round cutouts.  If you REALLY like round biscuits, just re-roll the scraps and cut again.

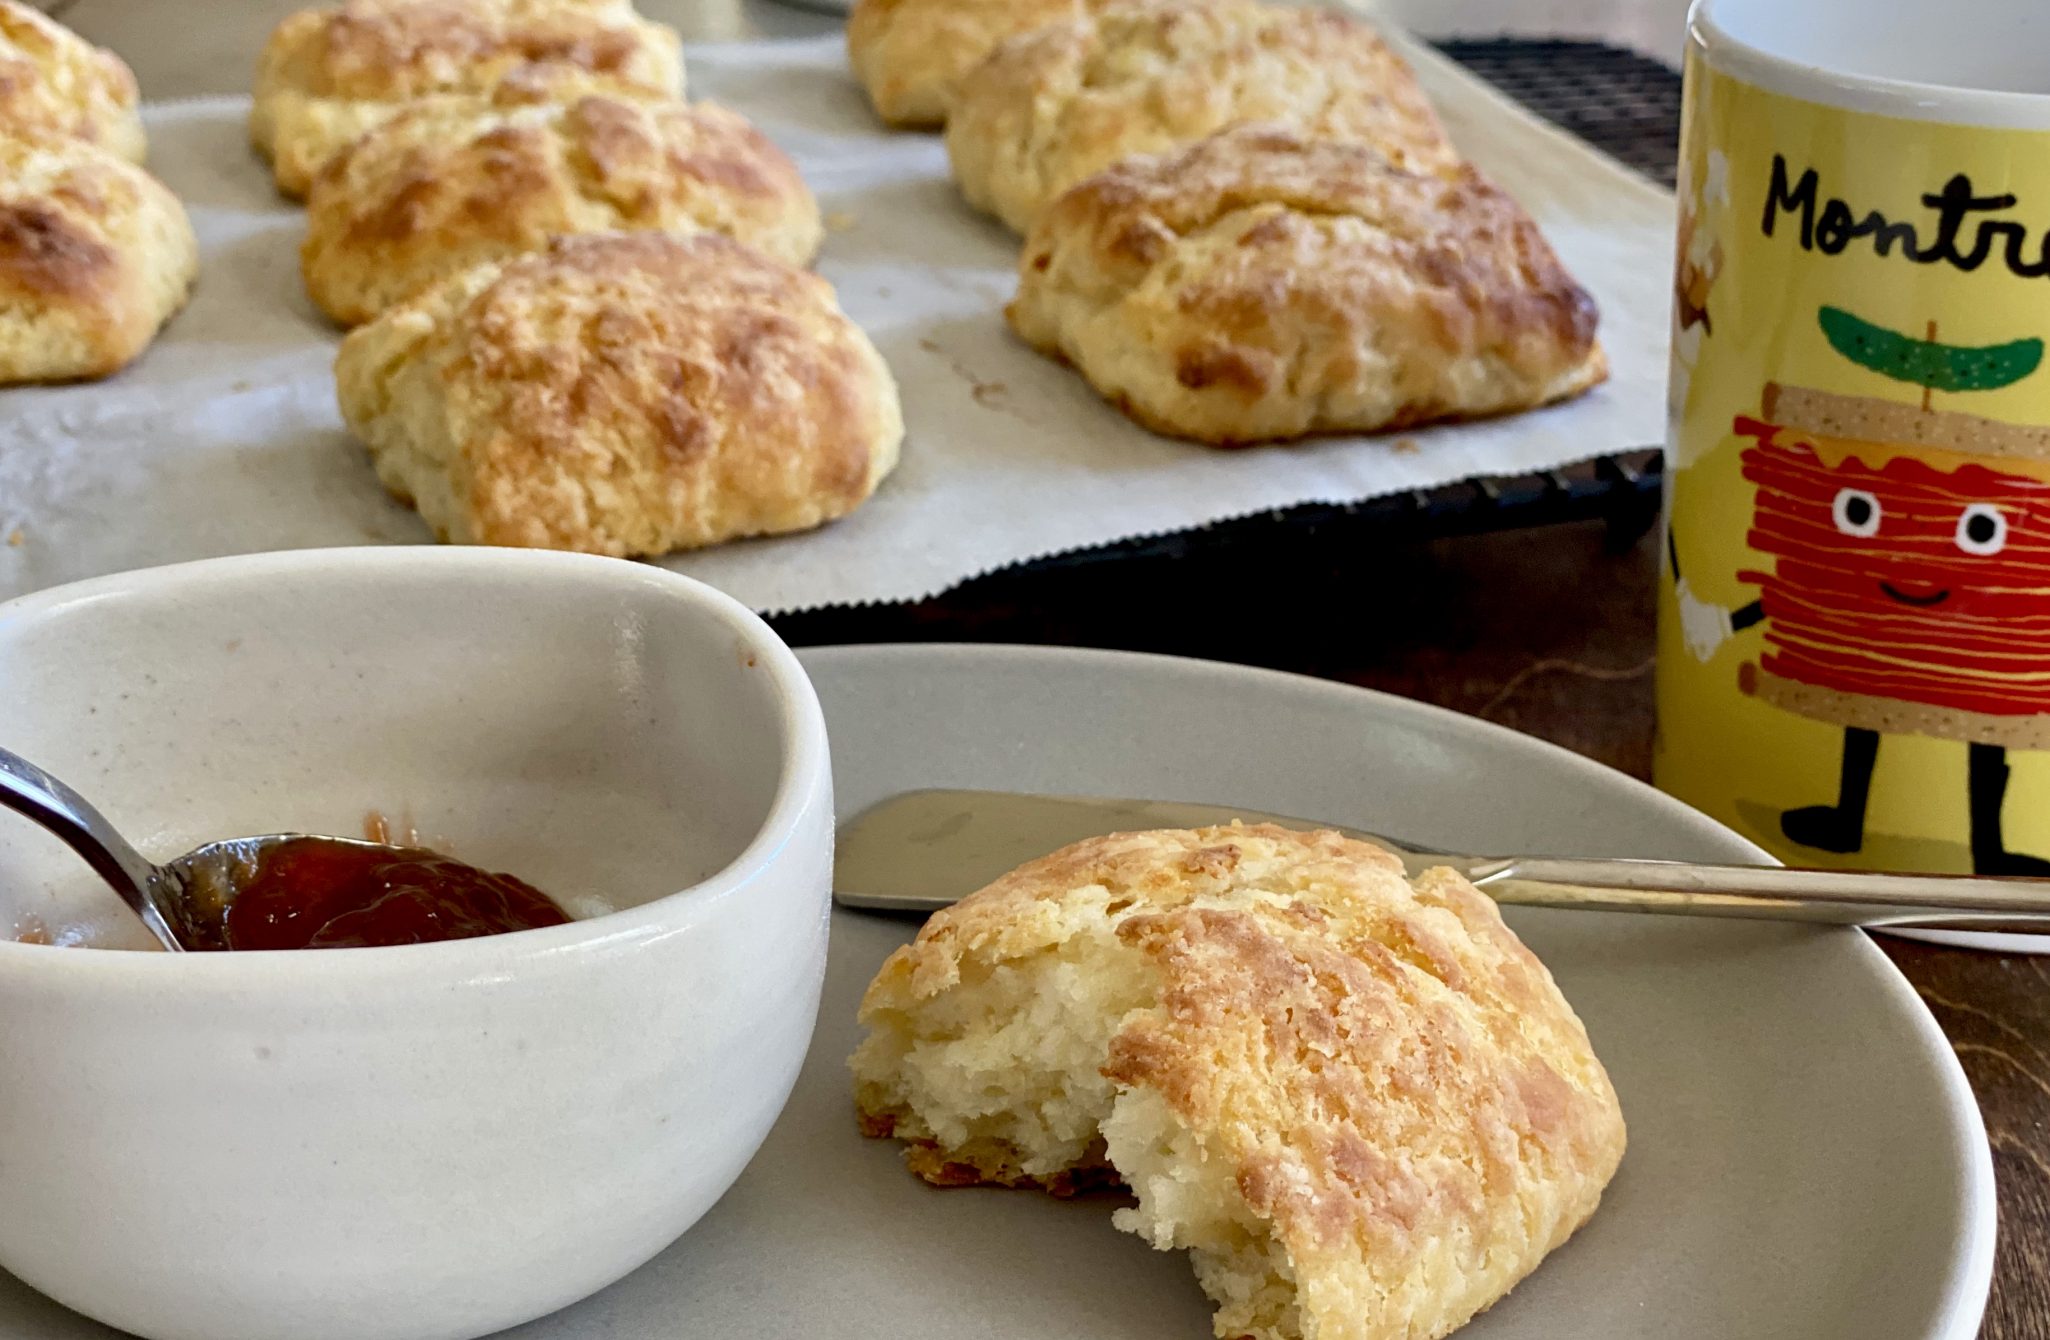
Bake these bad boys and brush with melted butter when they come out of the oven. You will be rewarded with buttery, flaky, tender, biscuits.  Everything you want in a biscuit that will help mend your broken NINER heart.

So, make these biscuits, tonight, tomorrow morning, or the day of the Chief’s victory parade.  That’s what comfort food is for.

Crazy Easy Biscuits

Course Breakfast
Cuisine American
Keyword buttermilk biscuits
Prep Time 20 minutes
Cook Time 18 minutes

Ingredients

  • 2 cups 10 ounces unbleached all-purpose flour
  • 2 teaspoons baking powder
  • 1/2 teaspoon baking soda
  • 1 tablespoon sugar you can reduce the amount of sugar to 1 teaspoon
  • 3/4 teaspoon sea salt or table salt
  • 1 cup cold buttermilk chill in freezer for 10 minutes
  • 8 tablespoons unsalted butter melted and cooled slightly (about 5 minutes), plus 2 tablespoons melted butter for brushing biscuits

Instructions

  • Adjust oven rack to middle position and heat oven to 450°F.
  • Whisk flour, baking powder, baking soda, sugar, and salt in large bowl.
  • Combine cold buttermilk and 8 tablespoons melted butter in a medium bowl, stirring until butter forms small clumps.
  • Add buttermilk mixture to dry ingredients and stir with a rubber spatula until just incorporated and batter pulls away from sides of the bowl. The dough will be stiff, not wet. If it is wet, add flour, 1 tablespoon at a time.
  • At this point, you can make drop biscuits or you can roll the dough and make cut out biscuits.
  • I like cut-out biscuits. Gather dough and place on a floured surface. Knead the dough a couple of times and roll or pat dough into a square approximately 1 inch thick. Cut into squares, you should have about 8 biscuits. For a flakier biscuit. Gather dough and roll dough into a square and then fold the dough over in thirds, you will have a rectangle now then roll dough into a 1-inch thick square.
  • Bake 10-18 minutes until tops are a nice golden brown. Start checking at 10 minutes.
  • Brush biscuit tops with remaining 2 tablespoons melted butter. Transfer to wire rack and let cool 5 minutes before serving.
  • Get out your favorite jam and EAT as MANY biscuits as you want. I know I will.
Kentucky Butter Cake (AVERYbody Should Have a Go To Cake)

Kentucky Butter Cake (AVERYbody Should Have a Go To Cake)

I hosted a postcard session a couple of weeks ago and as an enticement, I provided “snacks” for it.  Snacks in my book aren’t just a bag of chips and a bowl of dip, nope.  I mean to ask people to write and decorate a gazillion postcards, ya gotta have mouthwatering, lip-smacking, delicious food.  Am I right?

That day the weather was a chilly 55 degrees (remember we are talking California), so I made Sam Kass’ slow-roasted pork.  Just salt and pepper the meat, slide it into the oven and fuggedaboutit.  When it is done, shred and serve.  So darn easy and yummy.  I put out corn tortillas, guac, onions and salsa for taco “fixins” to go along.  For those who didn’t want tacos, I made  CRAZY GOOD OOEY-GOOEY Mac and Cheese.  So hard to pick which way to have my pork and eat it too.

No Dessert?

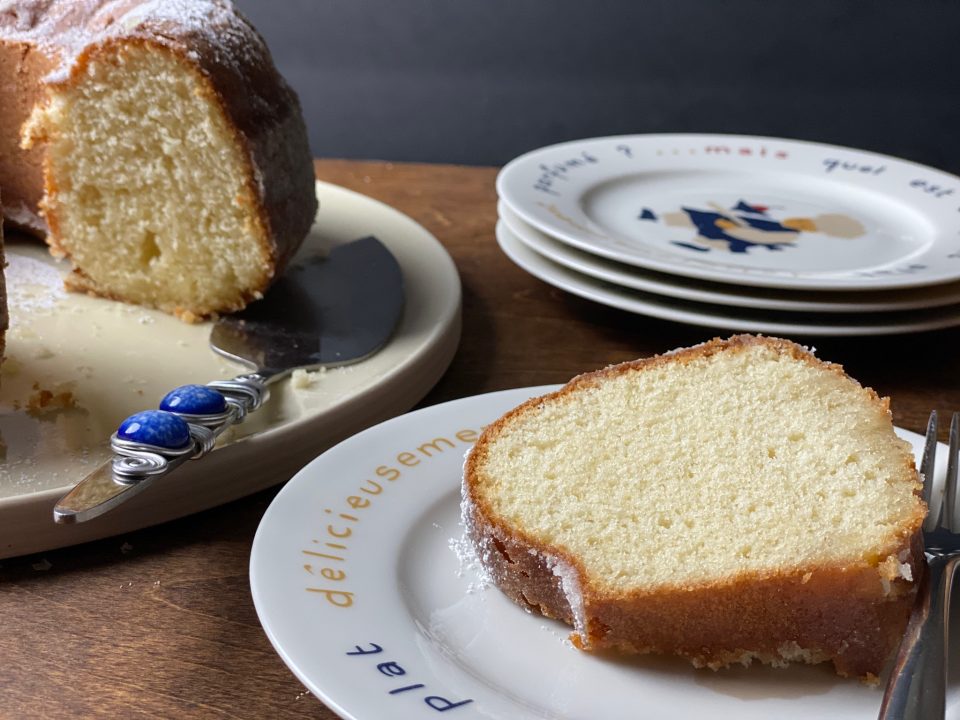
I didn’t have time to make dessert (I know, blasphemous) but luckily my friend’s daughter called while we were hard at work and volunteered to make dessert for us.  Yippee!  So sweet of Avery!  She arrived with a luscious Kentucky Butter Cake that was moist, buttery, sweet…downright delicious.  Oohs and aahs prevailed from all, including my kids who added: “this is the best cake ever”.  I immediately asked for the recipe.

Impatience got the better of me so I googled Kentucky Butter Cake and quite a few recipes popped up on my feed. I picked a recipe (using the scientific eenie-meanie-miney-moe method) from the blog, Cookies and Cups, and added a couple of tweaks from the blog Spicy Southern Kitchen.

I baked it, I glazed it, I cut it, I served it…to a resounding chorus of…

It’s OK, but Avery’s was much better

Repeated, ad nauseam …

I no longer like Avery.  Actually I no longer like my family, Avery is okay.

Just kidding. I got on the horn and called S (her mom), where’s the recipe?!  Her reply was, “I sent it to you days ago”. Oops, my bad…there it was buried in my inbox.

I noticed Avery’s baked at 325, mine at 350, used sour cream instead of buttermilk, and had WAY more of that delicious butter sugar glaze.

The version I used was like the “cooking light” version.  If you didn’t just have a bite of the original, it was perfectly acceptable.  If you put them side by side, fuggedaboutit.  Hands down Avery’s version comes out on top.

Cooking Light

I have included directions for Avery’s version and my “cooking light” version (for transparency’s sake).  A couple of tweaks could bring mine closer to Avery’s.  But then, you might as well just make Avery’s version. Your family and friends will be eating out of your hand.

Instead of that cup of low-fat buttermilk, use sour cream.  Yep, the start to a richer, moister cake.

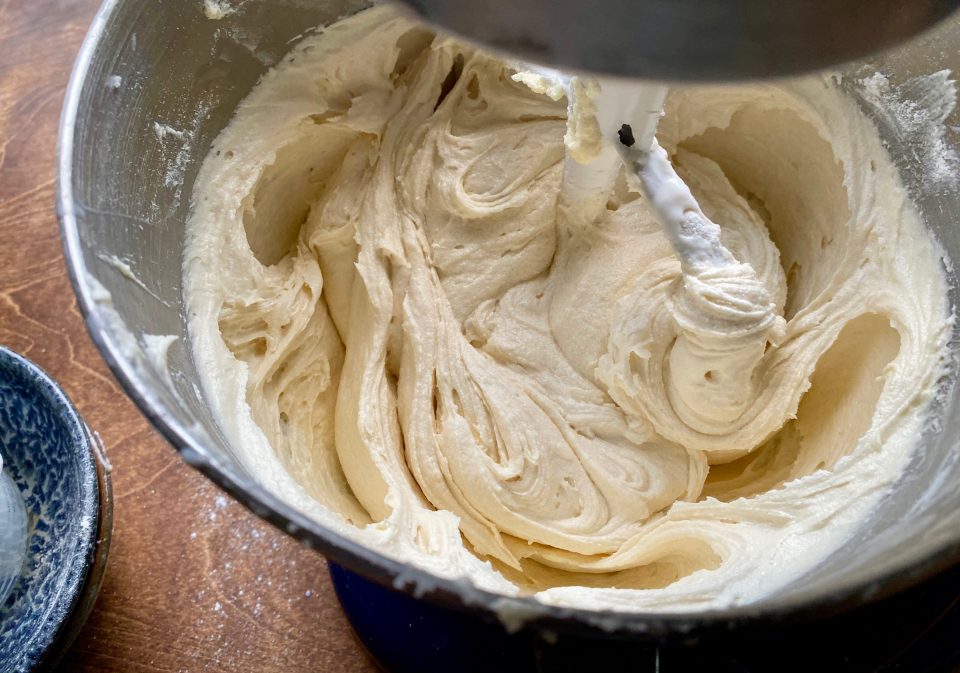
Cream butter and sugar, add eggs, then alternate flour with liquid (start and end with dry ingredients).  You’ll end up with a fluffy but substantial batter.

Bake the cake at 350 and you will get a nice brown crust, at 325 the cake will be lighter in color.  I would definitely bake the cake for less time if you use 350 degrees. Take the cake out and let it cool for 10 minutes.  Remove the cake from the pan to prevent sticking and then put it back in the pan for its luxurious bath of butter sugar syrup.  It will be easier to remove later, trust me, no actually, trust AVERY.

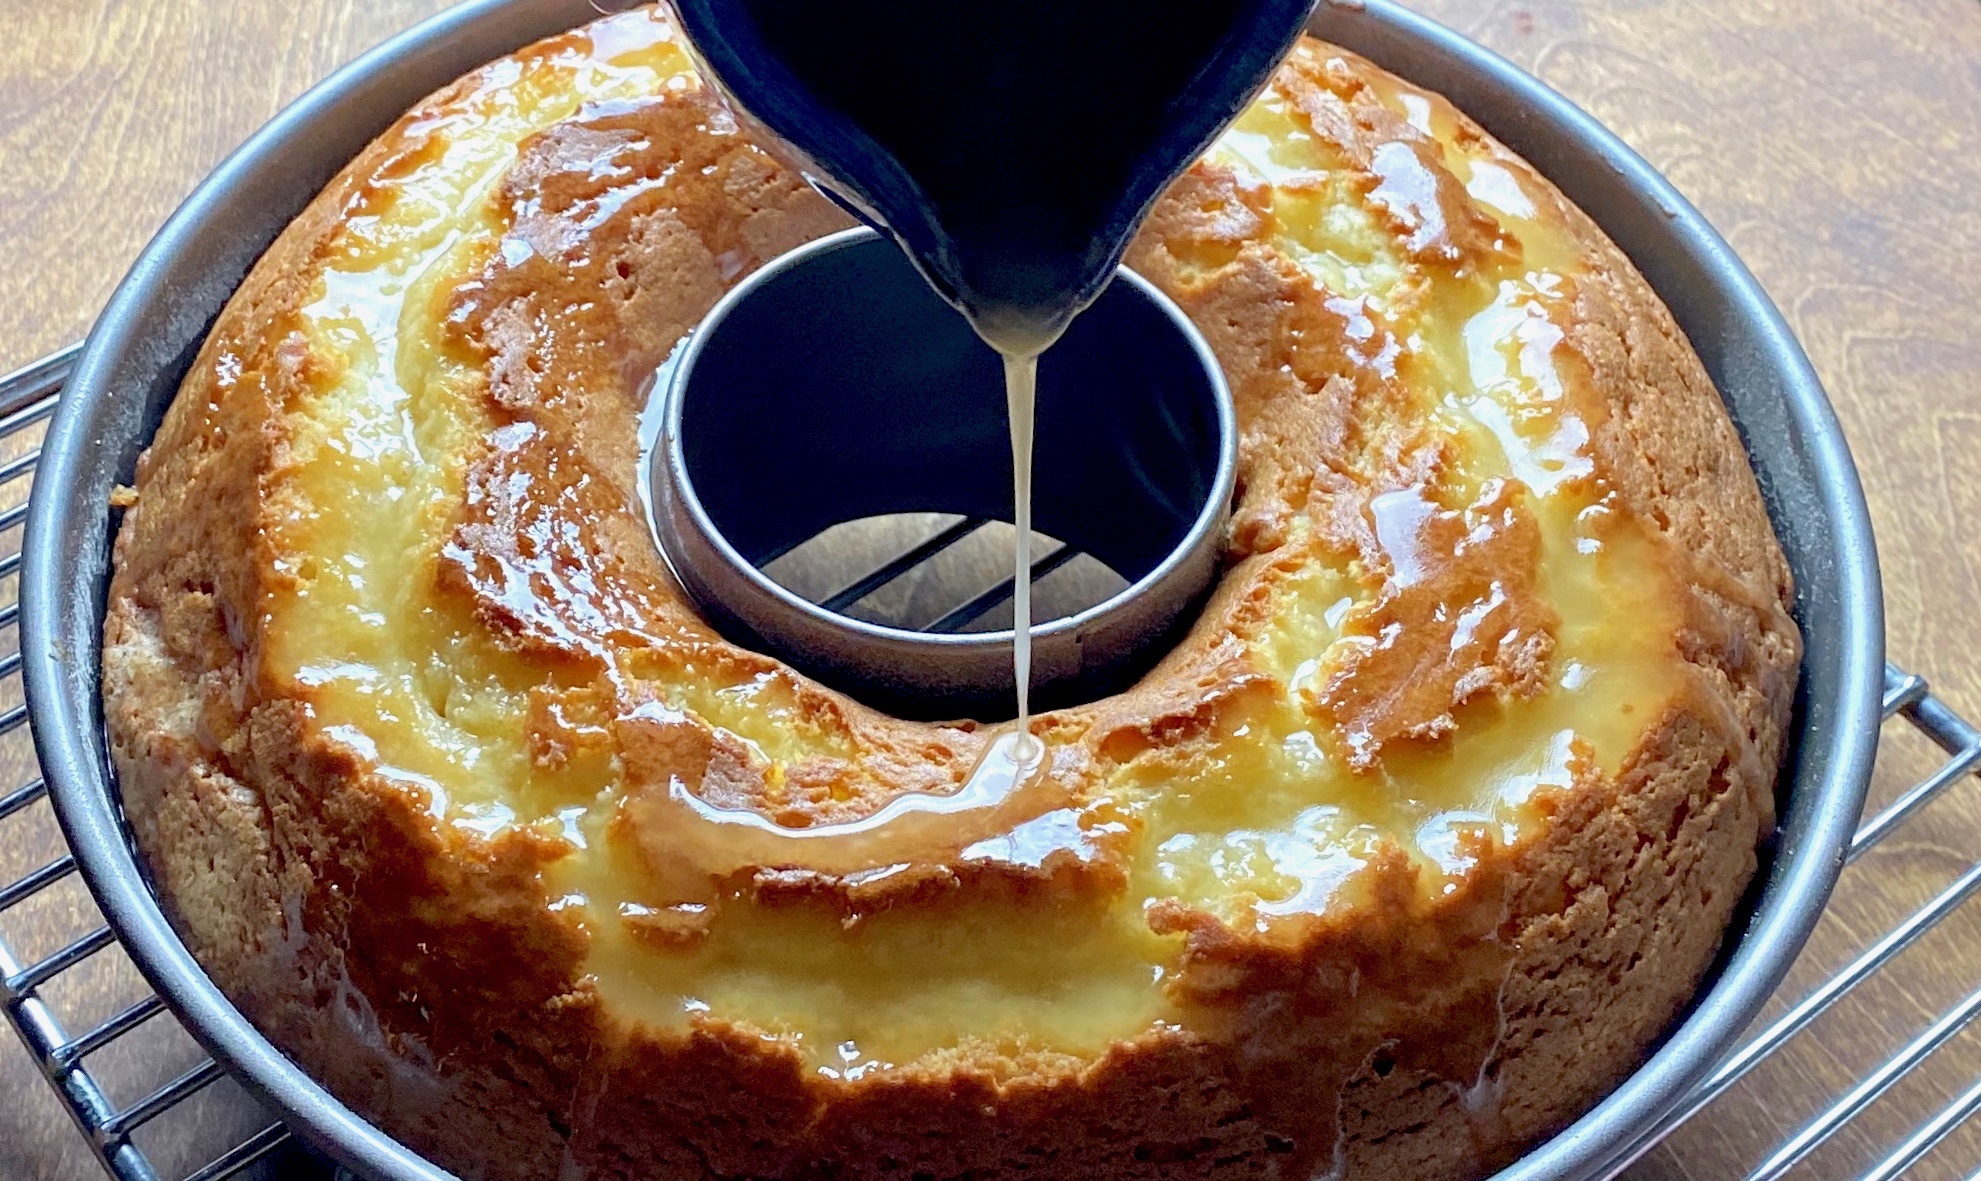
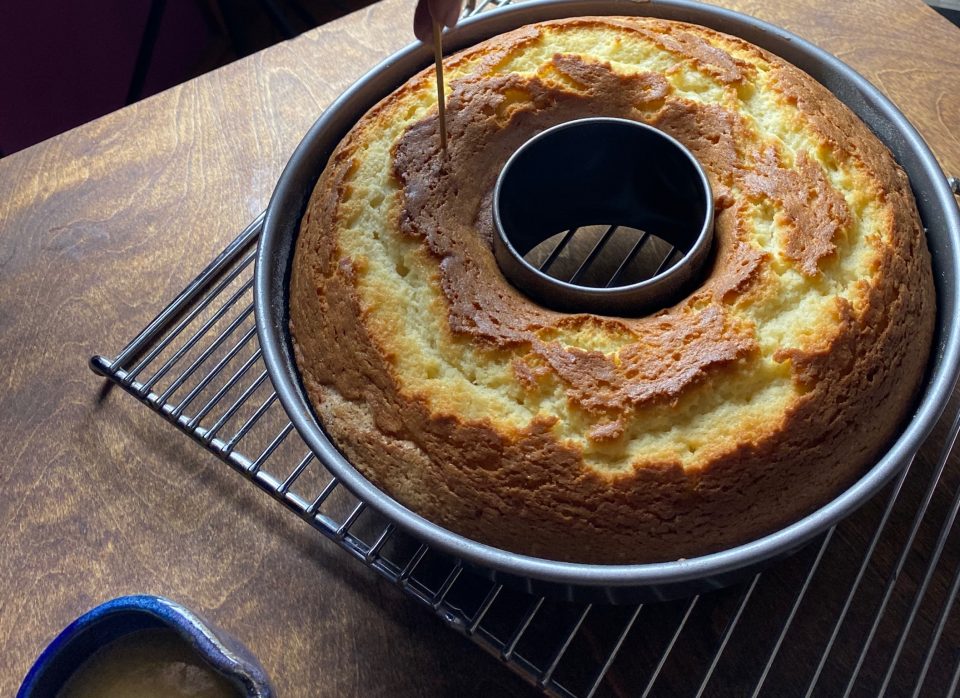
Use a skewer or skinny chopstick to poke holes ALL OVER the cake. Pour the sugar-butter glaze over the cake,  don’t be afraid, it will absorb all of it easily.  Let the cake sit a spell, remove from the pan and dig in!

This is a pic of my “cooking light version” which had considerably less glaze and cooked at a higher temp.  With Avery’s (yeah, that cake-baking brat again) you could see the glaze that had soaked into the cake, dreamy and delicious.

Kentucky Butter Cake

Rich, moist, buttery, everything delicious in a bundt cake
Course Dessert
Cuisine American
Keyword Bundt cake, Kentucky Butter Cake
Prep Time 20 minutes
Cook Time 1 hour 5 minutes

Ingredients

CAKE

  • 1 cup butter cubed at room temperature
  • 2 cups granulated sugar
  • 4 eggs
  • 1 tablespoon vanilla
  • 3 cups all-purpose flour
  • 1 teaspoon salt
  • 1 teaspoon baking powder
  • 1/2 teaspoon baking soda
  • 1 cup sour cream or 1 cup buttermilk

BUTTER GLAZE

  • 1/2 cup butter deb version (which really isn't enough syrup) 1/3 cup
  • 1 cup granulated sugar 3/4 cup sugar
  • 1/4 cup water 2 Tablespoons water
  • 1 tablespoon vanilla 2 teaspoons

Instructions

  • Preheat the oven to 325°F/165°C (Deb's version 350, start checking cake at 45 minutes)
  • Grease a 10″ bundt pan with butter or shortening very liberally. Dust the pan with flour and set aside.
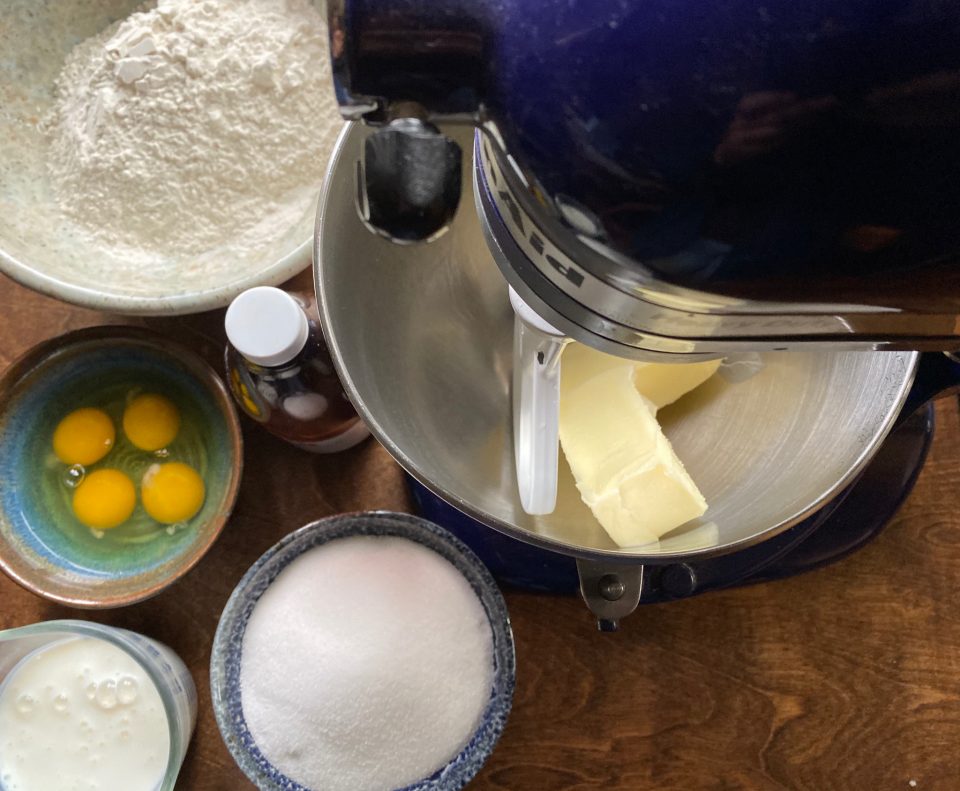
  • Cream butter and sugar with mixer until light about 2 minutes
  • Add eggs one at a time and mix well after each addition
  • Add vanilla, baking powder, baking soda, and mix to combine about 1 minute
  • Add flour and sour cream or buttermilk, alternating. Start with flour and finish with flour
  • Pour the batter into the prepared pan and bake for ~65 minutes until a toothpick entered into the center comes out clean.
  • When the cake is done make the glaze. Combine all ingredients into a small saucepan over medium-low heat. Stir continuously until the butter is melted and the sugar is dissolved. Do not bring to a boil.
  • Remove cake from pan and then put it back in pan to glaze cake. This helps keep the cake from sticking after glaze.
  • Poke holes all over the warm cake using a knife or skewer or skinny chopstick and pour the glaze evenly on the cake while still in the pan.
  • Allow the cake to cool completely in the pan and then invert the cake onto a serving plate.
  • Make this cake a day in advance, so the syrup has time to infuse the cake.
Jack Mac and the Cheese Attack (Crazy Good Mac & Cheese)

Jack Mac and the Cheese Attack (Crazy Good Mac & Cheese)

Happy National Cheese Day!  Any excuse to make a family favorite, mac and cheese.  I love mac and cheese. I unabashedly admit as a kid, I looked forward to the blue box of Kraft’s “Cheese and Macaroni”.  Pure marketing genius, neon yellow orange sauce. As I got older, my taste grew more sophisticated, the blue box was cast aside in favor of Stouffer’s Mac and Cheese from the freezer section of my supermarket, student life-student food. Come on, you can tell me, your college self loved Stouffer’s too.

When I had kids, my mac and cheese world expanded.  Being one of those crazy moms, I vowed to keep, processed foods and fast foods to a minimum.  I made macaroni and cheese from scratch and avoided my childhood favorites like Twinkies and Ho Hos.   I look back and think maybe I went a little overboard. But I’m pretty sure their time in college more than made up for the lack of processed and fast foods when they were little.

So I spent a lot of years making Mac and cheese from scratch.  I tweaked it to try to make it a little healthier by using 2% cheddar cheese, 2% milk, and substituted broth for some of the dairy. It was perfectly…

Adequate.

Now that the kids are adults, pasta all day everyday is a thing of the past.  Mac and cheese has moved to occasional status-holidays, first day of winter, bowl of comfort day, or of course, National Cheese Day.

You know what that means…

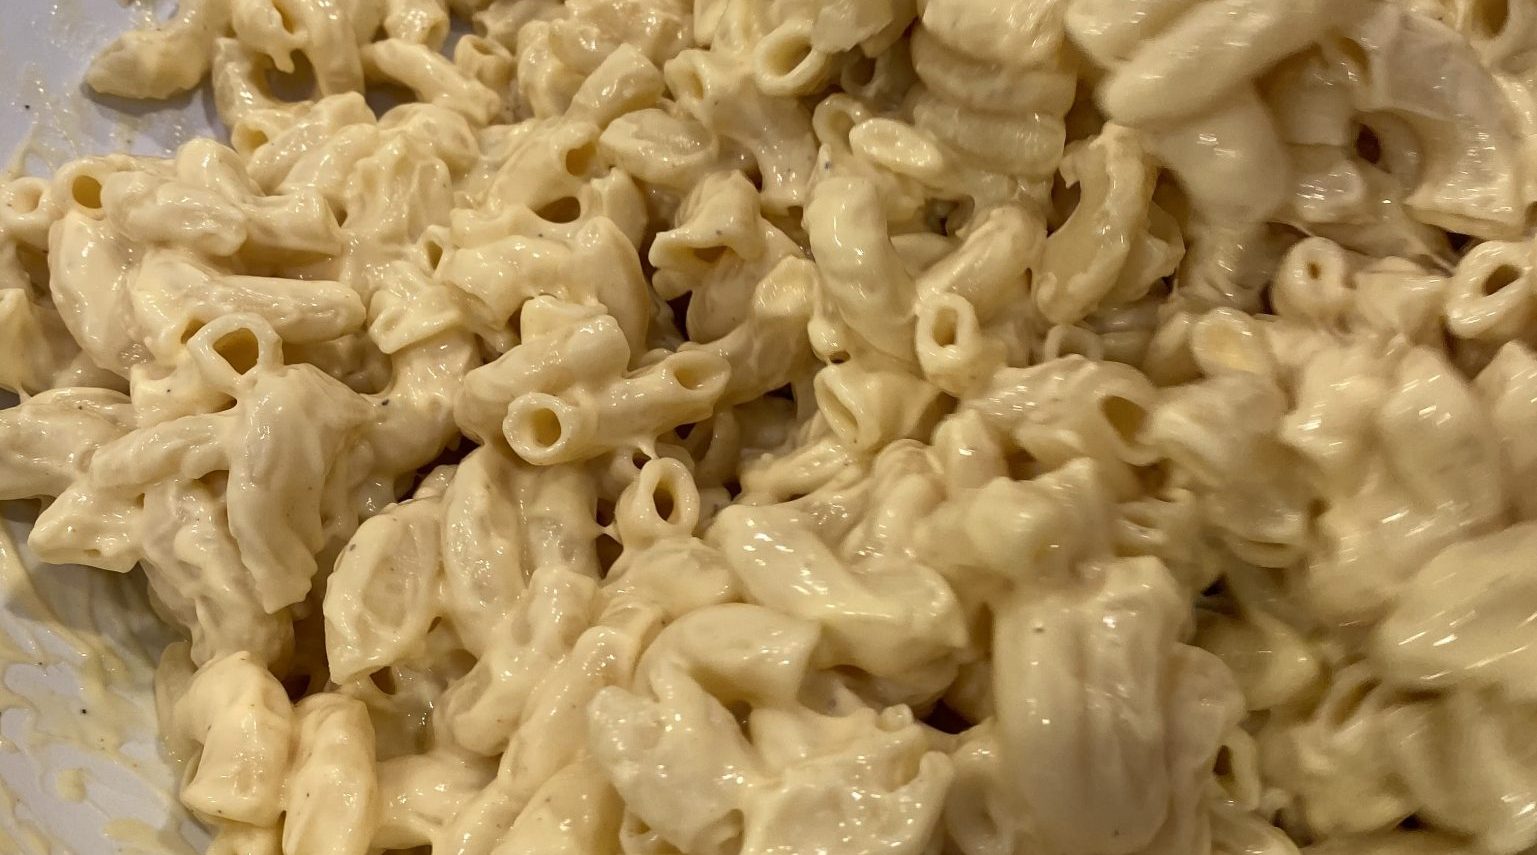
Calorie laden, luscious, ooey-gooey, make you wanna slap your momma, no holds barred, damn delicious mac and cheese.

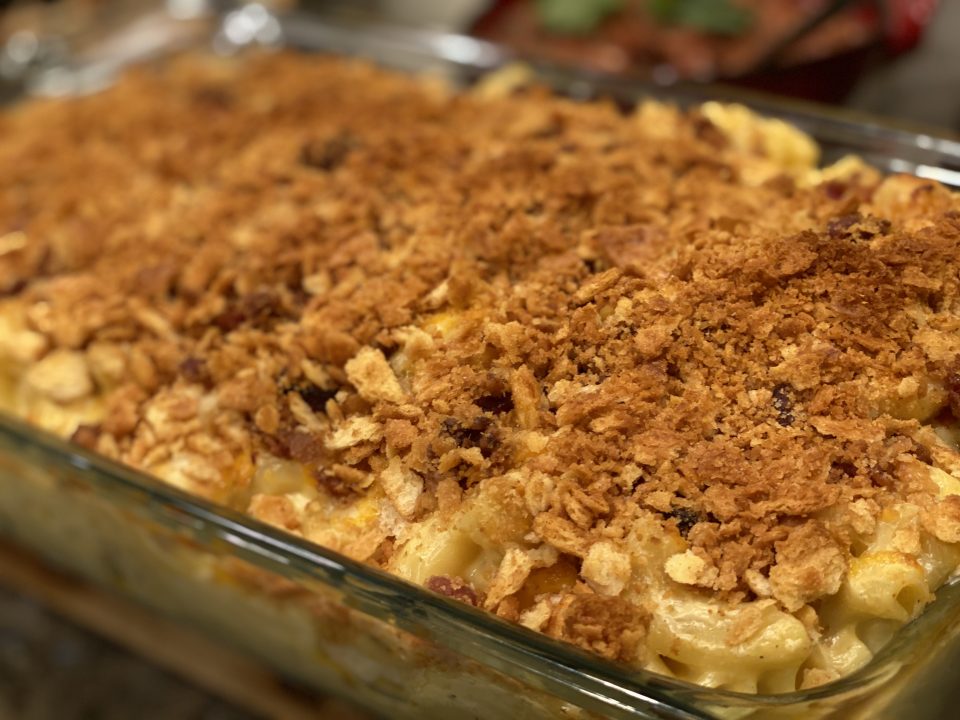
I adapted a recipe I found on the blog site, Chunky Chef, it’s BEASTLY GOOD.  Soft macaroni, (no al dente noods please), super cheesy (6 cups of cheese in this bad boy), gooey (one of those cheeses is mozzarella), rich (no 2% cheese or milk was involved in the making of this), porkalicious (bacon makes everything better), and just because I can, a crispy, topping of butter toasted Ritz crackers crumbs.  Yes, I went there.

Expect to run a marathon after eating this mac and cheese.  Immediately after.

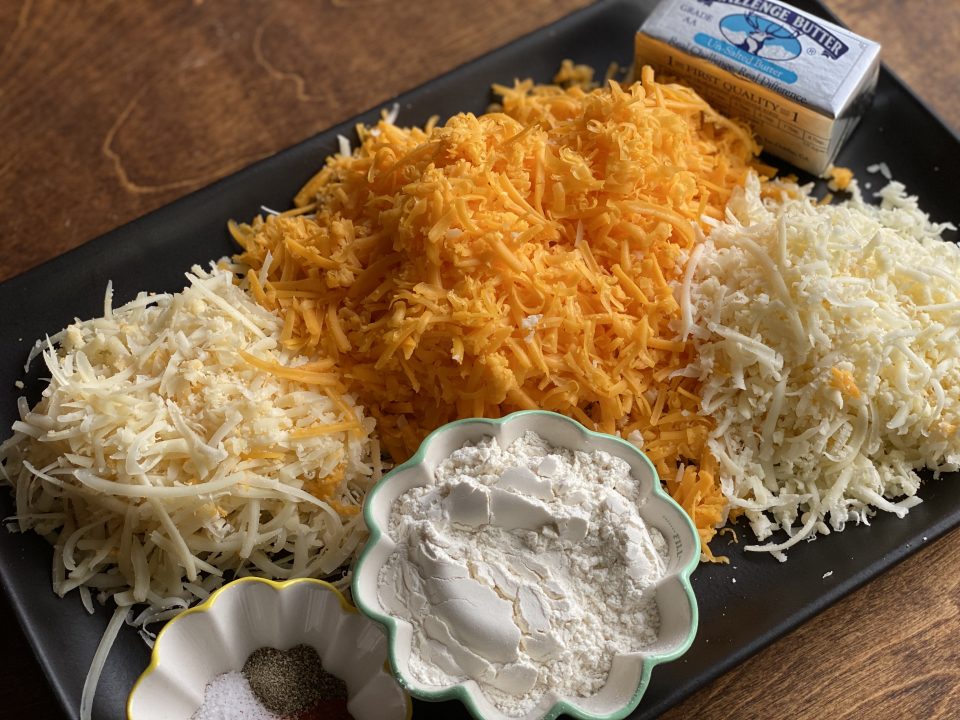
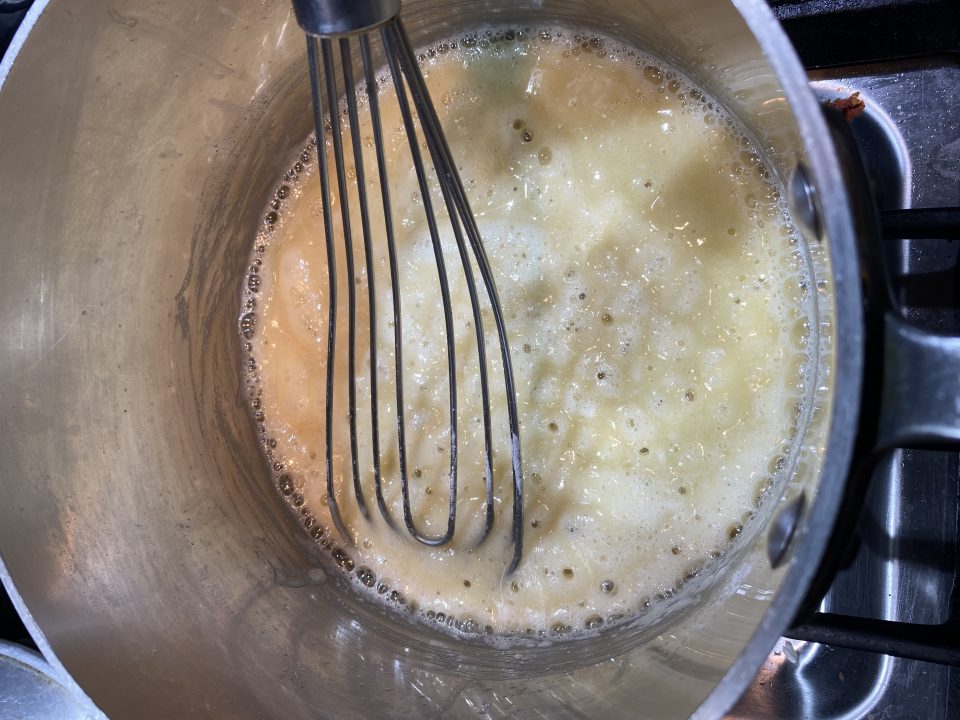
Start with making a classic bechamel by melting butter, adding flour for a roux and then gradually adding half and half and milk.  You will end up with a sauce that is kind of thick but still pourable.  Add copious amounts of hand-shredded cheese to this and season generously with salt and pepper, and a pinch of cayenne pepper.  Catch the hand shredded?  Yes, don’t start with pre-shredded cheese which has “stuff” added to it so it doesn’t stick together.

Add the macaroni to the sauce, give it a good stir and layer half of the pasta in a buttered 9×13 casserole.  Spread half of the remaining cheese on it and make another layer. Top with remaining cheese and buttery toasted crumbled Ritz crackers.  Bake 15 minutes so the cheese gets all melty and amazing. Serve as soon as possible.

Let’s go crazy…

Infinite possibilities to add your own stamp to this:

To the sauce:

Cayenne or smoked paprika

Mustard for a tangy hit

To the dish before baking:

Add diced chilis to spice it up

Crumbled bacon or pulled pork would be awesome

Shellfish- crab, lobster, shrimp so decadent

For the macaroni:

Substitute blanched or roasted cauliflower for some of the pasta or all of it if you want

Or add your favorite veggie, I like broccoli or mushrooms

File this recipe in the not so back of your mind for the next time you have a hankering for mac and cheese.

Creamy Homemade Baked Mac and Cheese

Course Main Course, Side Dish
Cuisine American
Keyword Crazy good mac and cheese
Calories 657kcal

Ingredients

  • 1 lb. dried elbow pasta
  • 1/2 cup unsalted butter
  • 1/2 cup all purpose flour
  • 1 1/2 cups whole milk
  • 2 1/2 cups half and half
  • 4 cups grated sharp cheddar cheese measured after grating
  • 1 cup mozzarella shredded Measured after grating
  • 1 cup grated Gruyere cheese measured after grating
  • 1/2 Tbsp. salt Or T Kosher salt
  • 1 tsp black pepper
  • 1/4 tsp. paprika or smoked paprika
  • 1/2-1 Tsp Cayenne pepper

Instructions

  • Preheat oven to 325 degrees F and grease a 3 qt baking dish (9x13"). Set aside.
  • Bring a large pot of salted water to a boil. When boiling, add dried pasta and cook 1 minute less than the package directs for al dente. Drain and toss with a bit of butter to keep from sticking.
  • Grate cheeses and toss together to mix, then divide into three piles. Approximately 3 cups for the sauce, 1 1/2 cups for the inner layer, and 1 1/2 cups for the topping.
  • Melt butter in a large saucepan over MED heat. Sprinkle in flour and whisk to combine. Cook for approximately 1-2 minutes, whisking often. Slowly pour in about 2 cups of the milk/half and half, while whisking constantly, until smooth. Slowly pour in the remaining milk/half and half, while whisking constantly, until combined and smooth.
  • Continue to cook over MED heat, whisking constantly, until thickened.
  • Stir in spices and 1 1/2 cups of the cheeses, stirring to melt and combine. Stir in another 1 1/2 cups of cheese, and stir until completely melted and smooth.
  • In a large bowl, combine drained pasta with cheese sauce, stirring to combine fully. Pour half of the pasta mixture into the prepared baking dish. Top with 1 1/2 cups of grated cheeses, then top that with the remaining pasta mixture.
  • Coarsely crush Ritz crackers. Set aside. Melt 1 T butter in a pan. Add cracker crumbs and saute until toasty brown. Kinda optional.
  • Sprinkle the top with the last 1 1/2 cups of cheese and cracker crumbs.
  • Bake for 15 minutes, until cheesy is bubbly and lightly golden brown.

Notes

See comments in post.
Mac and Cheese can be made ahead:
Make as directed (but do not bake), transfer to baking dish and cool completely. Cover tightly with foil and refrigerate 1-2 days ahead.
Before baking, let dish sit on counter for 30 minutes.
Bake at recipe temperature for 25-35 minutes, until hot and bubbly.

Cheesy White Bean Tomato Bake

What to do with all that leftover cheese from your scrumptious mac and cheese.  Note to self, never buy your cheese from Costco, New York Times Cooking to the rescue.  Easy-check. Quick-check. Uses up some of that extra cheese-check. Delicious-check. A riff on Korean Cheesy Corn, this is great dish for a happy hour, lunch paired with a green salad or late night munchie attack. 

This dish is as easy as beans from a can.  Really.  

Taking my cue from NYT Cooking I tweaked the recipe, a lot.  Not as much as everyone else judging from the comments, but enough to make it my own.  I doubled the tomato paste, threw in a sprig of rosemary, sautéed shallots and diced red bell pepper along with the garlic and last but not least, added some bacon. You don’t have to.

Make it your own-add nothing, add everything-sausage, spinach, kale (never me), or use different beans.

Yum.

A Sweet Mash-Up (Helmand Palace Kaddo)

A Sweet Mash-Up (Helmand Palace Kaddo)

I found myself in the city one evening last week driving down Van Ness Ave.  If you have driven down that boulevard lately, it has been under major construction for what seems like an eternity.  Major swaths of the street have been dug up and walled off with wood barriers and fencing.  I can’t even imagine how the businesses on the street are coping with such a major disruption.

On this night I reached the section near Green and Van Ness and much to my surprise, the walls and giant cranes were gone.  I spotted  the restaurant Helmand Palace, an Afghani restaurant I have been meaning to try for a long time.  A spot opened up (in the City that’s a sign) in front so I immediately parked my car and headed into the restaurant.  Obviously I was meant to have Afghani food tonight!

I zeroed in on the one dish I had to try, Kaddo.  What’s Kaddo, you ask? It’s pumpkin slow roasted in sugar and cinnamon until tender and smothered with a tomato based sauce of ground beef flavored with ginger, coriander and turmeric.  It’s topped with a cold yogurt sauce spiked with garlic and mint. Every bite is a melt-in-your-mouth revelation—soft, satiny, DELICIOUS.  It is mind bogglingly good.

I asked for TWO take-out orders of Kaddo (the fam was at home). While I waited, I told the host I had found their recipe for Kaddo on Epicurious.  His restaurant and their Kadoo, have been on my bucket list for a long time.  It didn’t disappoint.  Their Aushak, a dumpling filled with leeks and scallions layered with a meat sauce and yogurt was equally scrumptious.

A while back we celebrated Mom’s birthday with a visit to  Cala in San Francisco.  The food was delicious but their slow-roasted Sweet Potato with Bone Marrow Salsa Negra had me in a tizzy.  How could something so simple be so delicious?  Smitten Kitchen posted a recipe for slow roasted sweet potatoes that sounded so much like the amazing dish at Cala, it gave me an idea. You know where I’m going with this right?  Beautifully charred, meltingly soft sweet potatoes topped with Kaddo….oh yeah we are so going there.

SWEET MASH-UP TIME

I slow-roasted the sweet potatoes until they were soft, caramelized, and charred on the outside. While the sweet potatoes were roasting, I made the Helmand Palace meat and yogurt sauces. Remove the potatoes from the oven and let them cool so you can handle them.  Brush the roasted sweet potatoes with browned butter and top with sugar/cinnamon before adding the warm meat sauce and cold yogurt.  So good.

You can also set up a SWEET little fixings bar so everyone can choose their own toppings. Have the Kaddo sauces and any of the toppings from Sam Kass’s, Eat a Little Better at the ready for everyone to pick their favorite.

For vegetarians, skip the meat sauce and slather the cool minty, garlic yogurt sauce on the hot, charred sweet potato.

Potatolicious, you’re welcome.

Kaddo

Delicious appetizer adapted from Helmand Palace in San Francisco. Roasted sweet potatoes topped with a savory meat sauce and a cool mint-garlic yogurt.
Course Appetizer
Cuisine Middle Eastern
Keyword Kaddo
Prep Time 30 minutes
Cook Time 2 hours
Servings 4

Ingredients

  • 4-6 Sweet potatoes
  • butter
  • sugar
  • cinnamon

For the yogurt sauce

  • 2 C plain yogurt
  • 2 garlic cloves minced
  • 1 tsp dried mint
  • 1/2 tsp salt
  • For the meat sauce
  • 1/4 C vegetable oil
  • 1 large onion finely diced
  • 1 1/2 lbs. ground beef or mixture of lamb and beef
  • 1 large tomato seeded and finely chopped
  • 2 large garlic cloves minced
  • 1 1/4 tsp ground coriander
  • 1 1/2 tsp salt
  • 1 tsp freshly ground pepper
  • 1/2 tsp ground turmeric
  • 2 tbsp tomato paste
  • 1 1/3 C water

Slow Roasted Sweet Potatoes

  • 4 medium sweet potatoes (about 3 pounds), scrubbed clean
  • 4 teaspoons olive oil
  • 2 teaspoons kosher salt
  • 1 teaspoon freshly ground black pepper

Instructions

Slow Roasted Sweet Potatoes

  • Heat your oven to 275°F. Arrange sweet potatoes on a large, foil-lined baking sheet. Rub each with 1 teaspoon olive oil, 1/2 teaspoon salt (which will make a quite salty skin, use less if desired) and 1/4 teaspoon pepper until well coated.
  • Bake until very soft inside and caramelized on the bottom, about 2 1/2 hours.
  • Heat your broiler and run the potatoes underneath it — mine is fairly weak, and this took 5 to 10 minutes, but check in regularly, a more robust one might do it in 1 to 2 minutes — until lightly charred on top.
  • Let potatoes cool 10 minutes, then gently crush potatoes with your hands to expose the flesh.
  • Split sweet potatoes, brush insides with melted butter. Sprinkle with sugar and a dash of cinnamon.

Sauces (Make while sweet potatoes are roasting)

  • YOGURT SAUCE: Mix all the ingredients together. Refridgerate.
  • MEAT SAUCE: Brown the onions in the oil in a heavy-bottomed saucepan. Add meat and cook over medium-high heat, stirring, until browned. Add all other ingredients (except for the tomato paste and water) and cook, stirring, for another 5 minutes or so. Stir in the tomato paste, then add the water and bring to a boil. Lower the heat and let simmer, covered, for about 15 minutes.
  • Top each sweet potato with cold yogurt sauce and hot meat sauce. Serve immediately

Notes

The original recipe calls for 2 sugar pumpkins which are prepared as follows:
Make the pumpkin: It helps to have a serious vegetable cleaver for this bit. Preheat your oven to 300º. Wash off the outside of the pumpkins. Cut them in half. Scrape out the stringy stuff on the inside. Cut the halves into 3#-4# pieces or so. Peel them. Get rid of all the green and rind. Find a baking pan large enough to hold all the pumpkin pieces in a single layer. Cover the pumpkin pieces in the oil and place them hollow side up in the pan. Pour the sugar evenly over the pumpkin pieces. Cover the pan with aluminum foil. Bake for 2 1/2 hours, then baste the pieces with the pan juices, cover them up again, and bake for another 45 minutes. The sugar will all melt away and end up partially absorbed. The pumpkin pieces will turn dark orange and translucent. They will have a stunningly novel texture. 
You can substitute butternut squash for either the pumpkin or sweet potatoes.
In a Peanut Pickle with these Cookies (Peanut and Bittersweet Chocolate Cookies)

In a Peanut Pickle with these Cookies (Peanut and Bittersweet Chocolate Cookies)

I have mentioned this before, when it comes to cookies we are a divided family.  Shortbread cookies are my favorite, crumbly, buttery, crisp, not too sweet, perfect with tea or coffee.

My family disagrees.  Hubs and kids prefer chewy cookies.  While Hubs favors oatmeal cookies (like his Good Cookies), Jorge, freshly back from a year in Korea, will remind me (almost daily) that I have yet to make his favorite chocolate sprinkle cookies or even CCC.  All classic kid cookies-chewy, sweet and deliciously dunkable in an ice-cold glass of milk.

So, much to Jordan’s chagrin, the cookies that came out of the oven the other day were the Peanut and Bittersweet Chocolate Cookies, a slice and bake that is much more similar to shortbread.  I found the recipe in the LA Times (a boss cooking section, the reason I maintain a subscription) a few years ago.  The winner of their holiday cookie contest, it immediately went on my gotta make Cookie Bucket List.  It is delicious, buttery, crisp, not quite as dense as shortbread, and filled with peanut umami.  The cookies contain both peanut butter and finely chopped peanuts, a double nut hit.  Mr. Planter would be proud.  The bittersweet chocolate gives it an adult twist, a not too sweet hit of chocolate, yum.

I knew it was a winner when Jorge unconsciously kept eating the cookies all the while complaining about not liking peanut butter or crisp, short cookies and still asking “When are you going to make Sprinkle Cookies?” as he polished off the last one.

Necessity is the mother of invention and quite often, a good thing.  Stashed in the pantry, a jar of honey roasted peanuts that subbed for the salted peanuts I did not have.  To offset the sweetness from the honey, I sprinkled the cookies with Fleur de Sel before popping them in the oven.

The peanut butter, sugar, and butter are beaten until light and fluffy. Add the dry ingredients and combine, don’t overbeat.  Fold in the nuts and chopped chocolate.  The dough is very soft, transfer the dough to wax paper or parchment and shape into a log.  Place in the fridge and chill thoroughly.  Use a sharp knife or a serrated knife to cut the dough into 1/4 inch slices.  I rotated the dough while slicing to keep the cookies round.  If the dough crumbles, just smoosh it back together. Sprinkle the slices with Fleur de Sel and sanding sugar.

If you wanted to make a kid friendlier cookie, you can use semi-sweet or even milk chocolate for the bittersweet chocolate.  If you like peanuts, you are going to love these cookies.

Peanut and Bittersweet Chocolate Cookies

Course cookies
Cuisine American
Keyword Peanut and Bittersweet Chocolate Cookie
Prep Time 15 minutes
Cook Time 15 minutes

Ingredients

  • 1 1/4 cups flour
  • 1/2 teaspoon baking powder
  • 3/4 teaspoon baking soda
  • 1/4 teaspoon salt
  • 1/2 cup 1 stick cold butter
  • 1/2 cup chunky peanut butter
  • 1/2 cup sugar
  • 1/2 cup brown sugar
  • 1 egg
  • 1/2 teaspoon vanilla
  • 1 cup finely chopped roasted peanuts or honey roasted peanuts
  • 1 cup finely chopped bittersweet chocolate
  • Fleur de Sel for sprinkling
  • Sanding Sugar for sprinkling

Instructions

  • In a medium bowl, stir together the flour, baking powder, baking soda and salt in a medium bowl and set aside.
  • Beat the butter until creamy in a stand mixer. Beat in the peanut butter until blended. Beat in the sugar and brown sugar until light and fluffy.
  • Beat the egg and vanilla into the sugar mixture until combined. Add flour mixture and beat until thoroughly mixed. Stir in chopped peanuts and chocolate until evenly incorporated.
  • Divide the dough in half. Shape it into two logs about 9 inches long and wrap each log in plastic wrap, waxed paper. Twist ends to seal. Chill in the refrigerator overnight.
  • Heat the oven to 350 degrees. Unwrap the logs and cut into one-fourth-inch-thick slices. The dough is soft so rotate while slicing. If dough crumbles due to peanuts or chocolate just press it together to reshape.
  • Place the slices on parchment-lined baking sheets, and bake 10 to 13 minutes until lightly browned around the edges.
  • Remove the cookies to a wire rack to cool. Store the cookies in an airtight container.

Notes

Each cookie: 66 calories; 1 gram protein; 7 grams carbohydrates; 1 gram fiber; 5 grams fat; 2 grams saturated fat; 7 mg. cholesterol; 38 mg. sodium.