I am always on the lookout for mochi recipes. Aside from being downright delicious, it is nice to have gluten-free options in your arsenal. The blog, Little Fat Boy caught my attention with a recipe for Cinnamon Toast Crunch Butter Mochi. Holy moly, dessert with not just one but TWO of my favorite foods, mochi and cereal, I am all in.
Bad, Bad Mom
I’m going to admit, I was one of those crazy militant moms about snacks and cereals. The only cereals that graced our table included Special K, Honey Bunches of Oats, and Rice Krispies. BORING. The grams of sugar had to be in single digits for any box to make the cut. Hostess was not part of our family’s vernacular. To this day, I’m not sure if my kids have had a Hostess Twinkie.
Eventually, I came clean to my kids, and the flood gates opened. They rolled their eyes with righteous indignation as I rattled off my favorite childhood snacks and cereals-Captain Crunch, Lucky Charms, HoHos, Milk Duds, BigHunks…lol. Hey, I was a latch-key kid…unlike them…so lucky to have a mom to constantly police, I mean, watch over them!
Welcome to Adulthood
The perks of growing up, my days of being their sugar police are long over. In fact, during their college days, care packages with Dad’s Good Cookies, Brownies, Chocolate Chip Cookies, and candies were sent on a regular basis. We made up for years of deprivation.
All Things Mochi
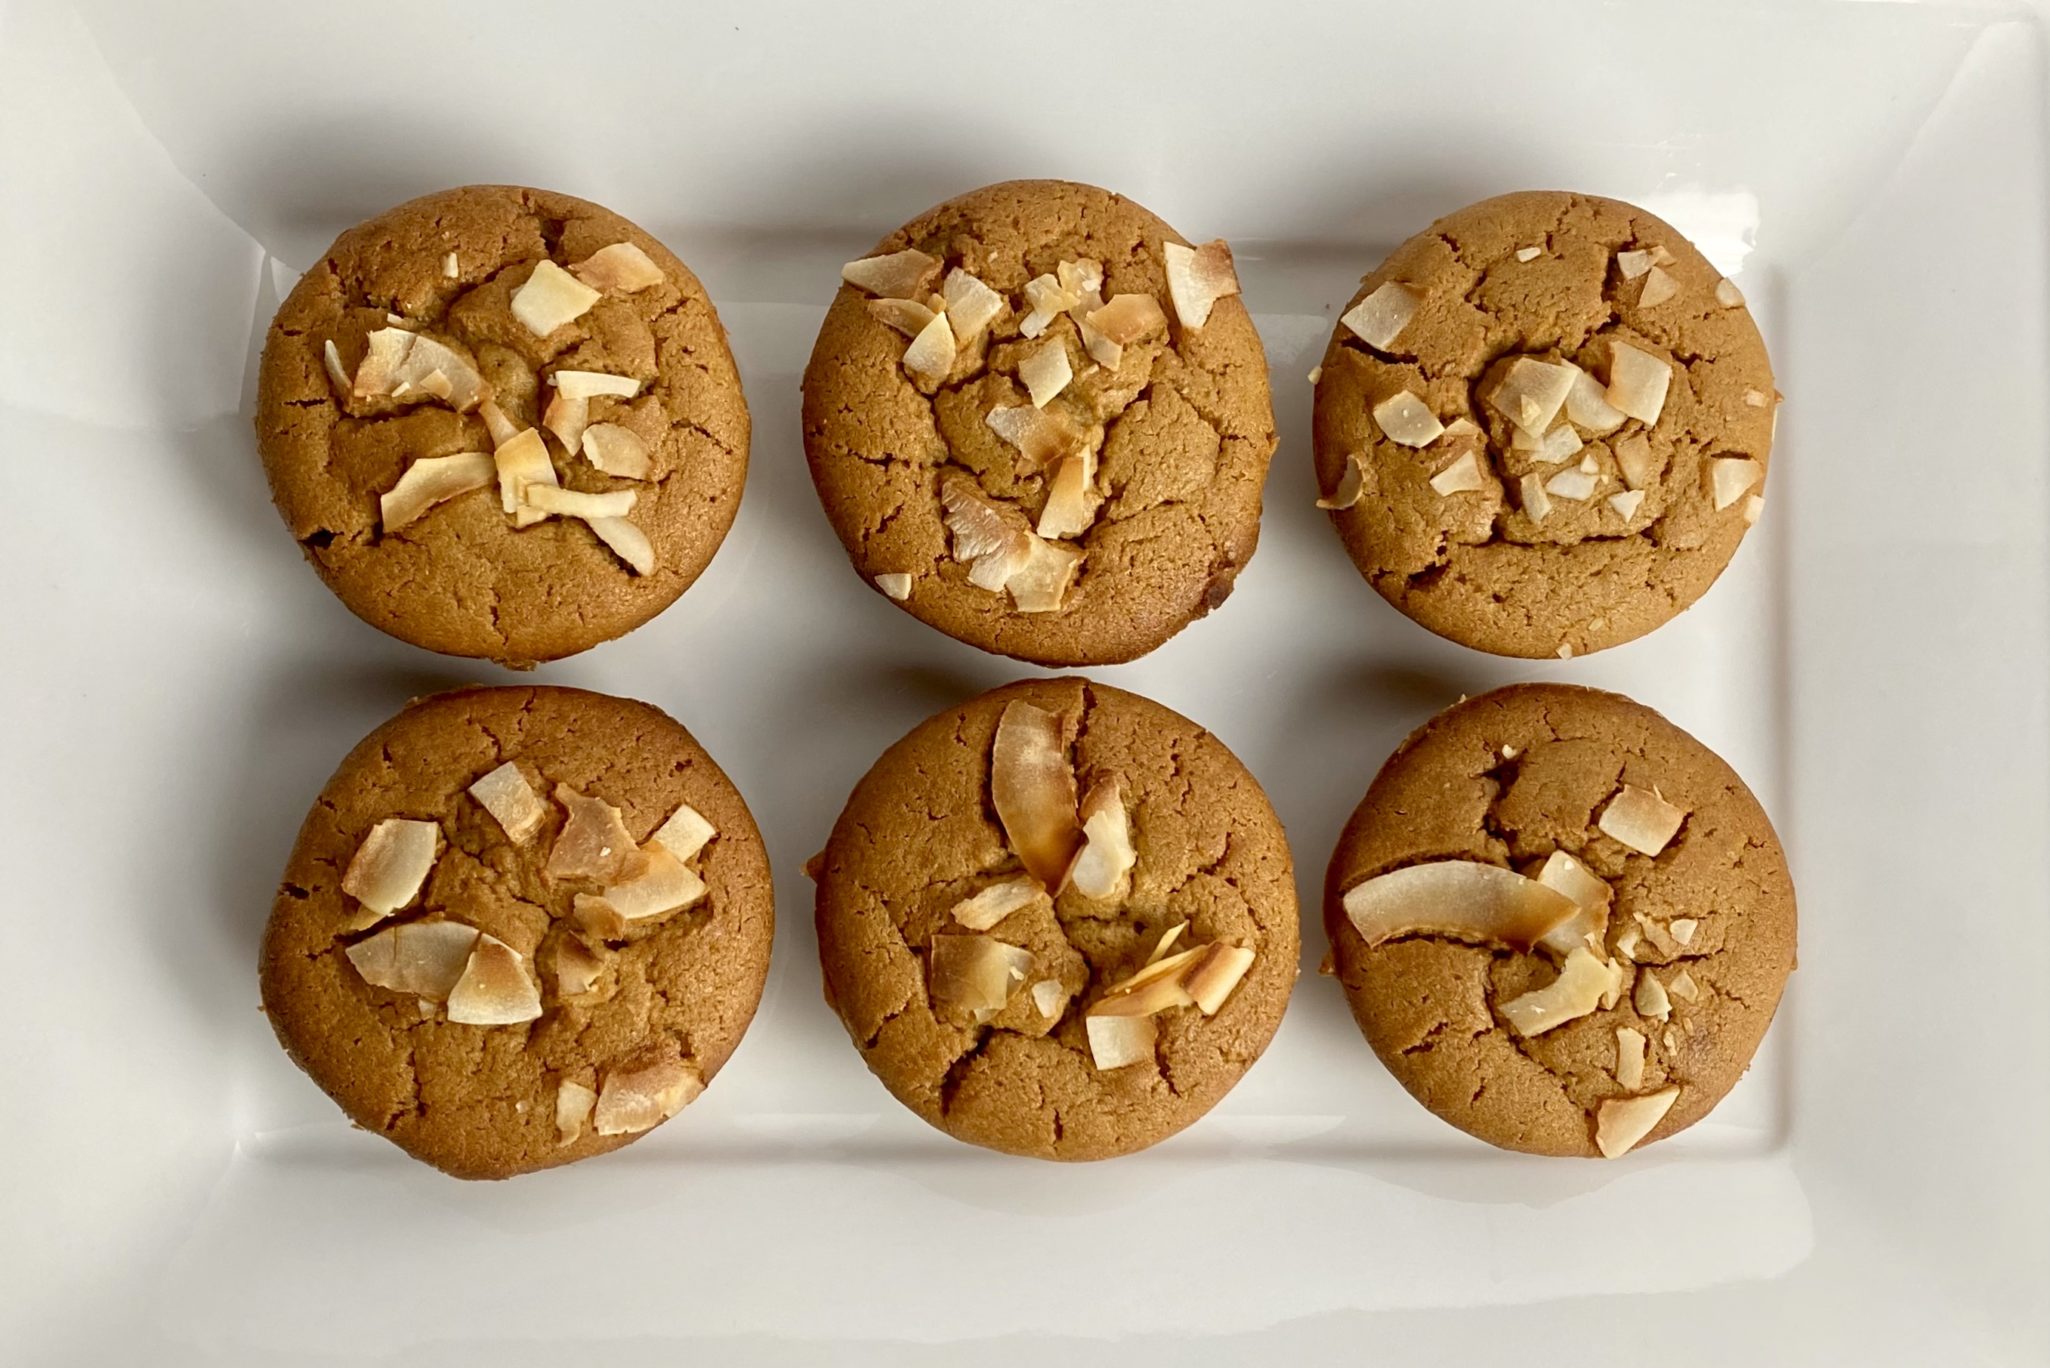
Ground Zero for mochi recipes is Butter Mochi Muffin,adapted from Snixy Kitchen (a gorgeous blog featuring gluten-free recipes), and still the most popular recipe posted on 3Jamigos. Variations followed, Mango Mochi Muffins, Chocolate Mochi Donutsand Brownies, and Misugaru Mochi Muffins…in fact mochi has its own category on 3Jamigos. This is the latest in my mochi mania recipes, Cinnamon Toast Crunch Butter Mochi. Remember the cereal milk at the bottom of your bowl you savored when you were a kid? Yep, use it to make your mochi.
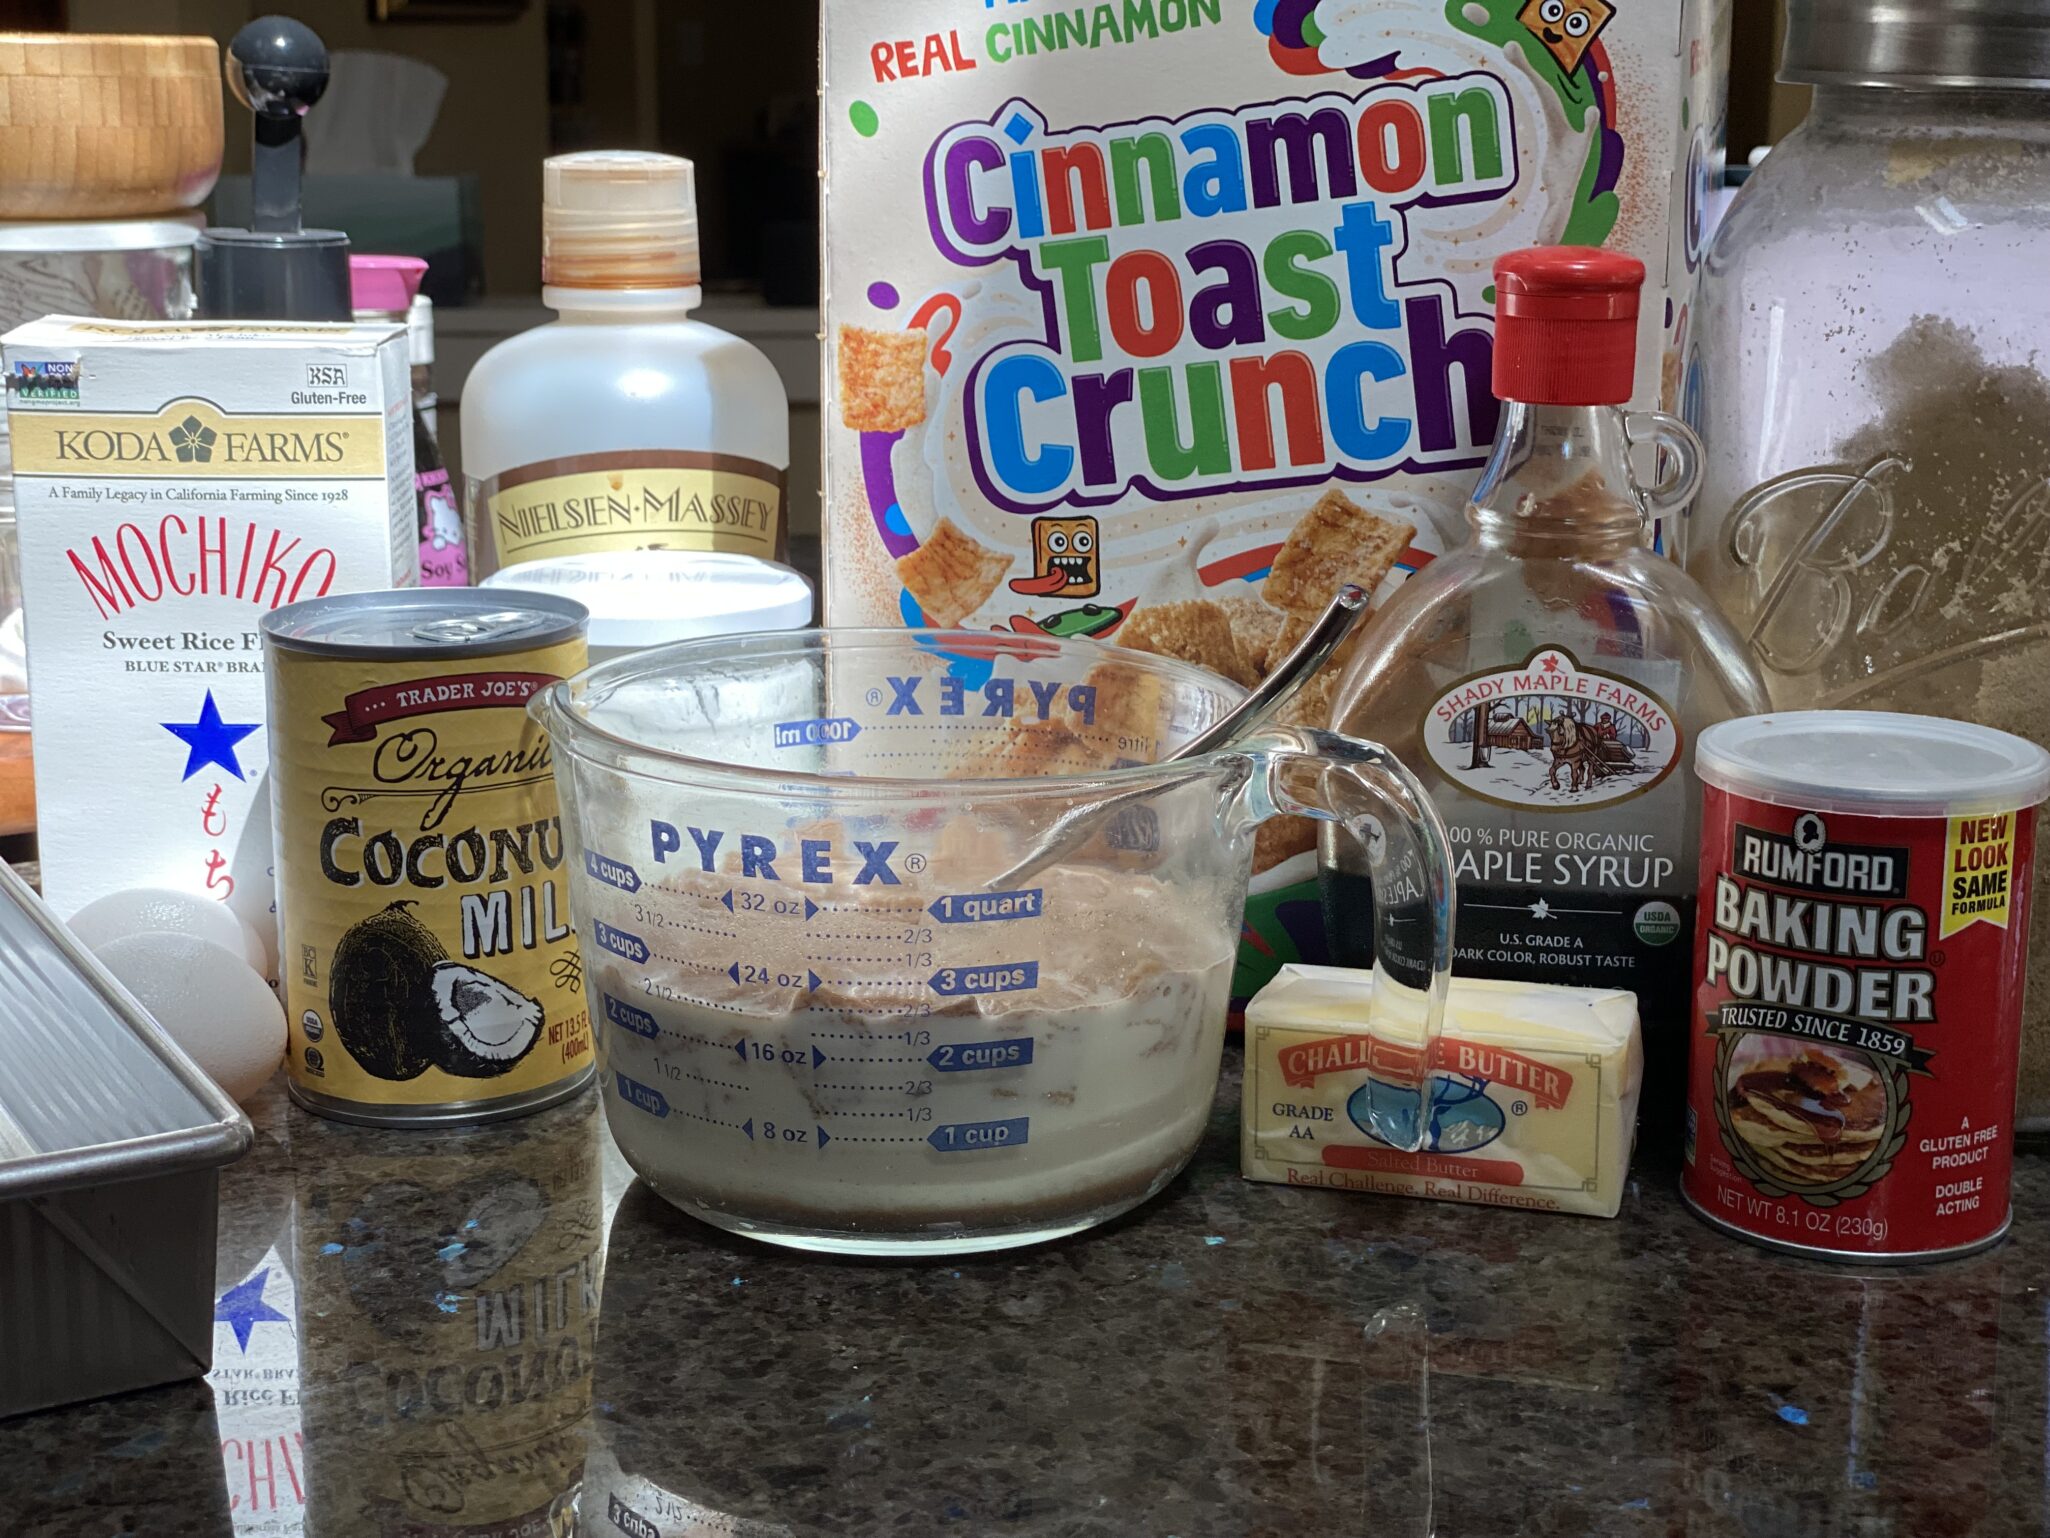
Soak the cereal for a minimum of an hour in one and a quarter cups of milk, stirring occasionally. The recipe calls for 1 cup of milk and half a can (200ml) of coconut milk. The cereal will absorb some of the milk, after soaking, if there is less than 1 cup of milk, add extra coconut milk to bring it to 1 cup.
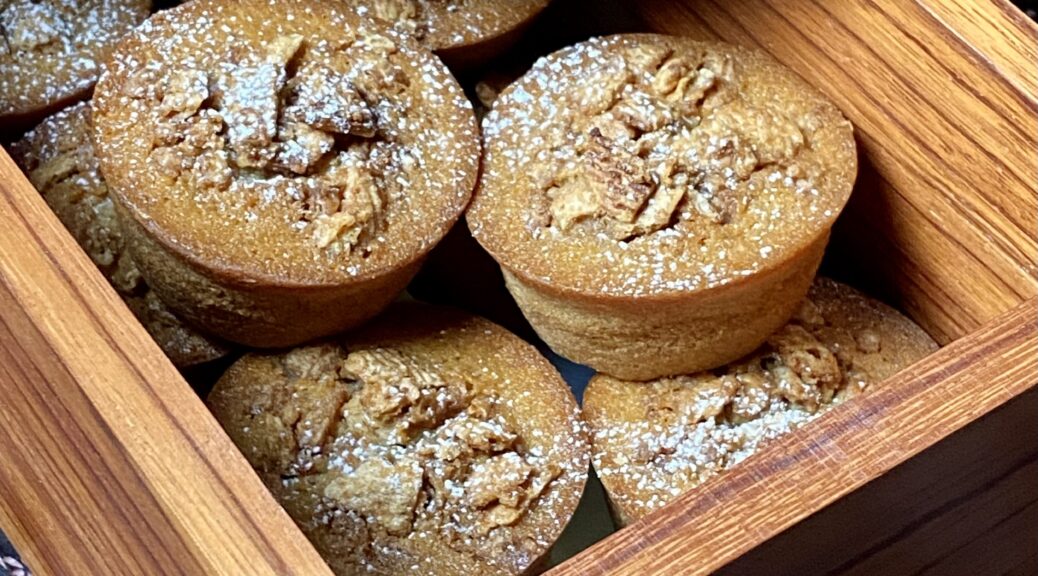
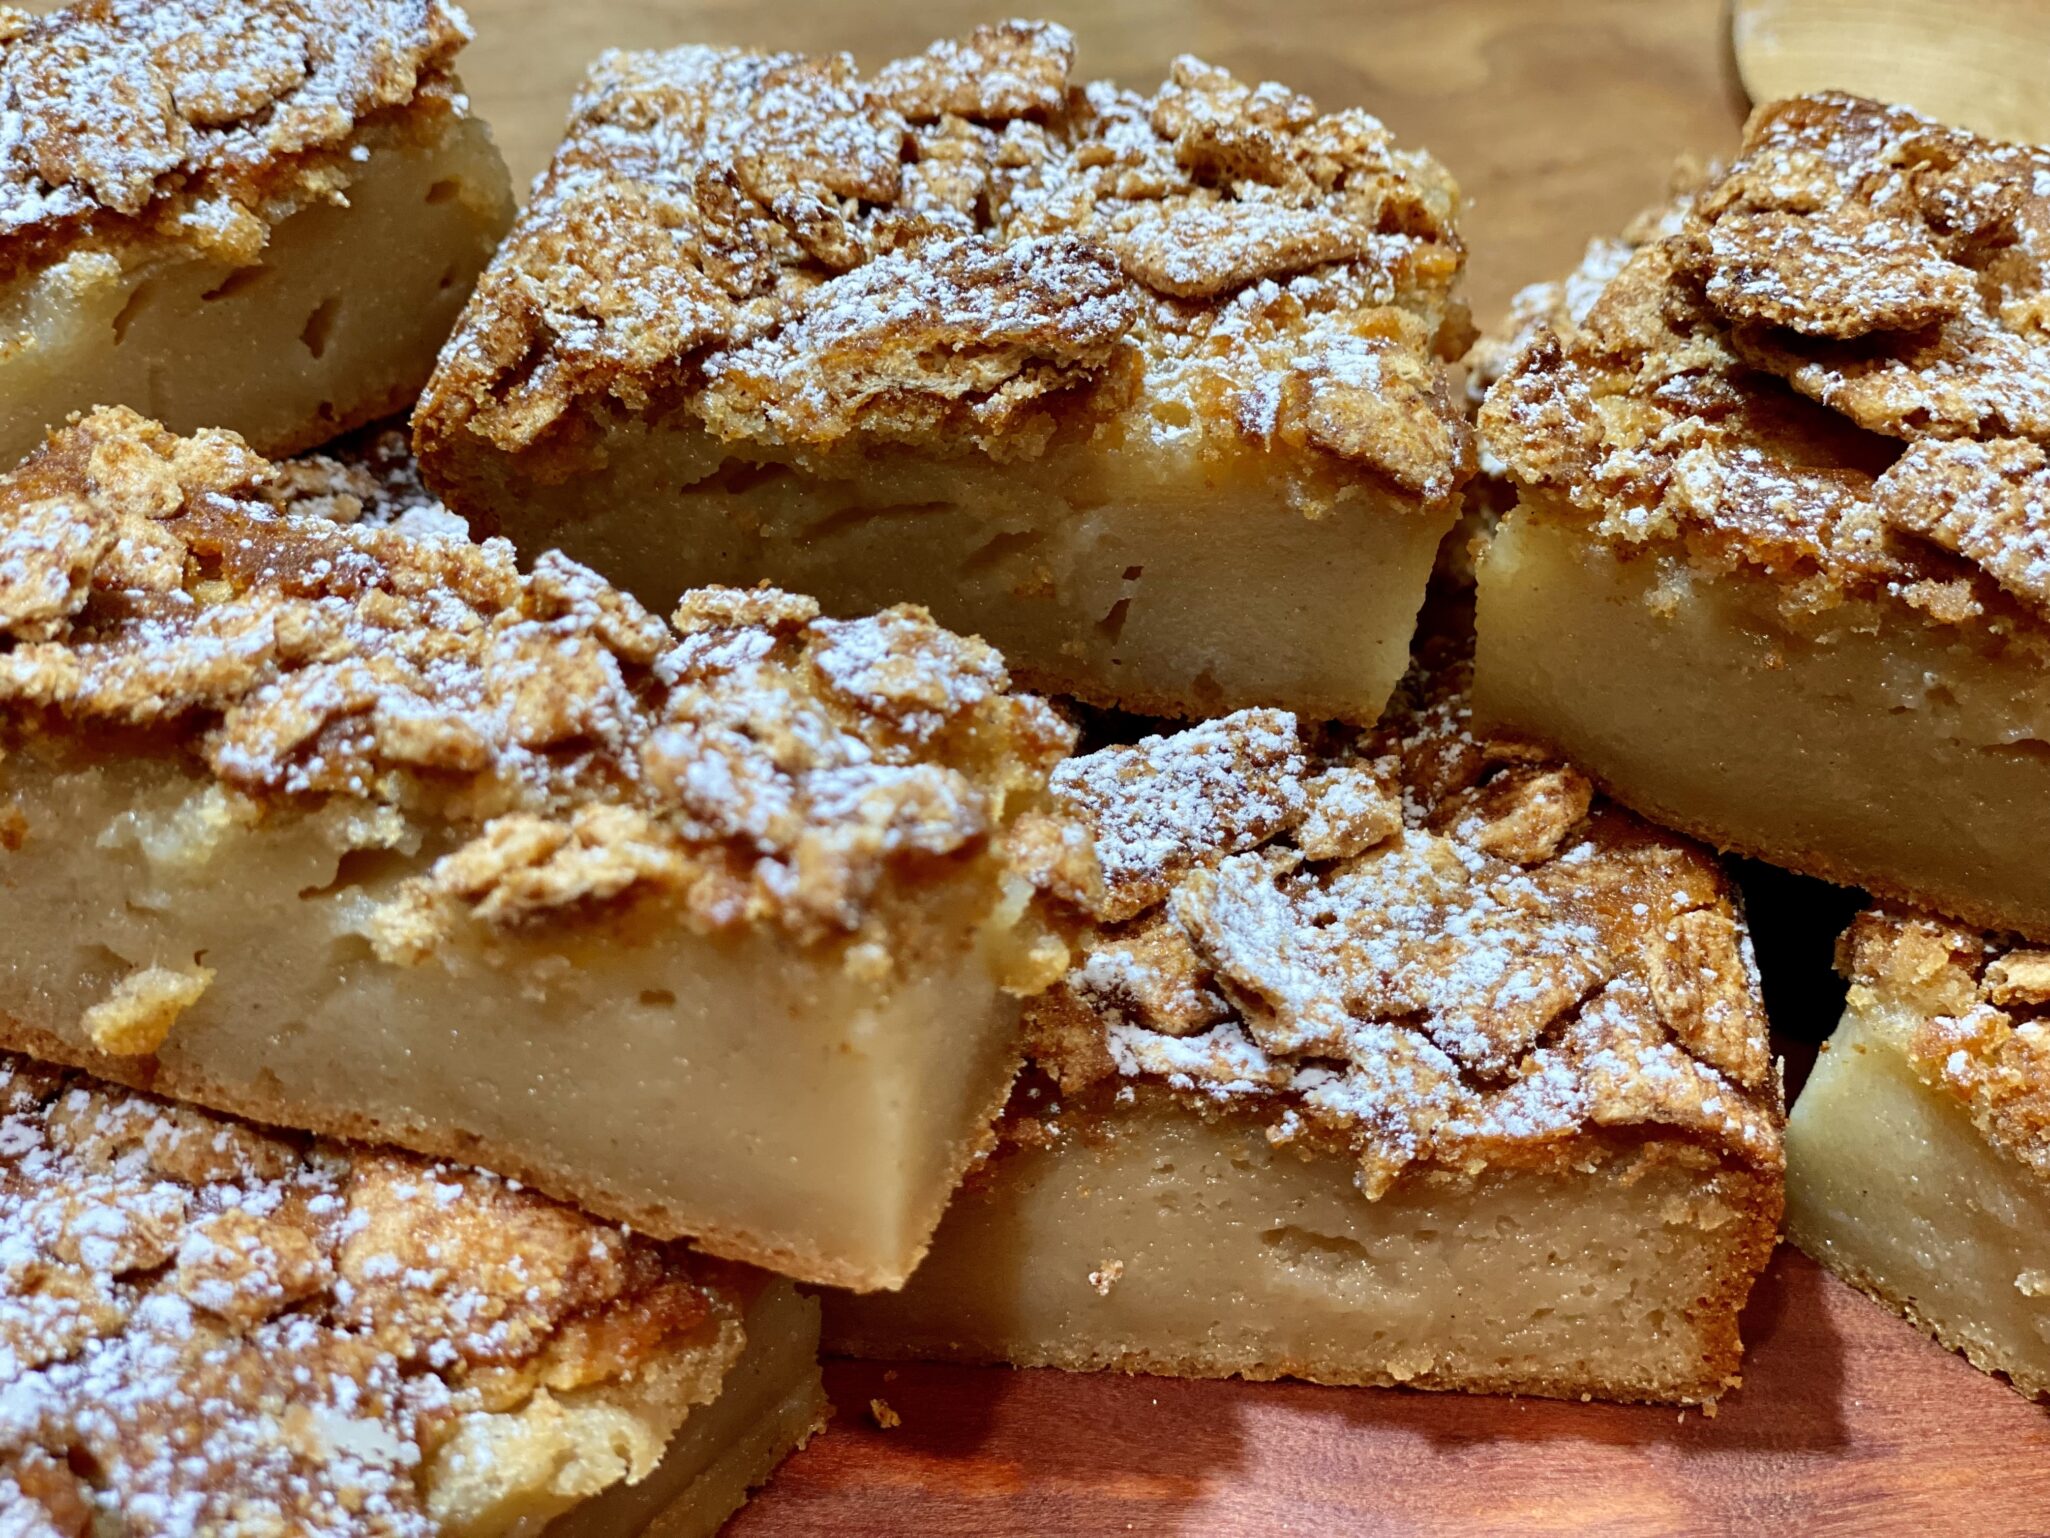
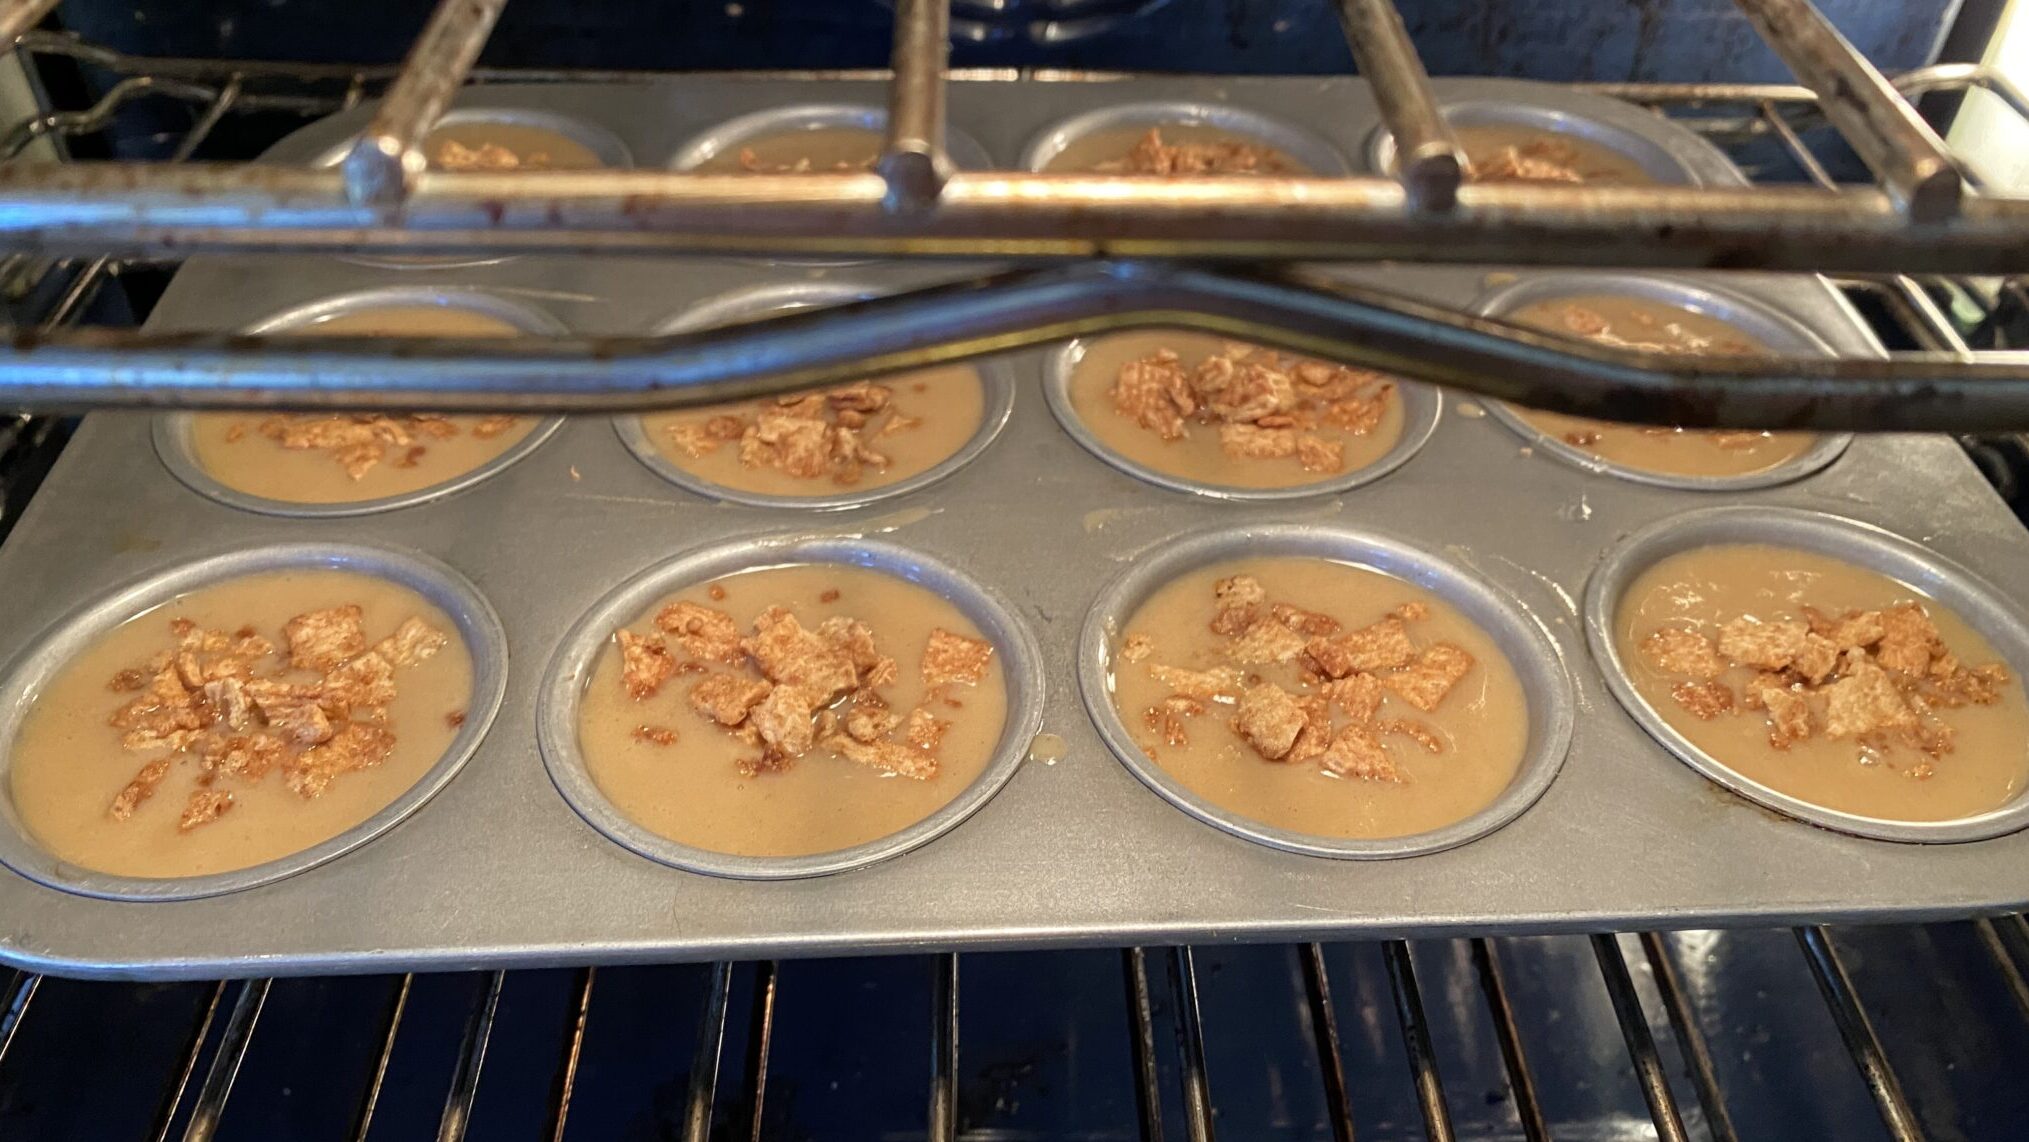
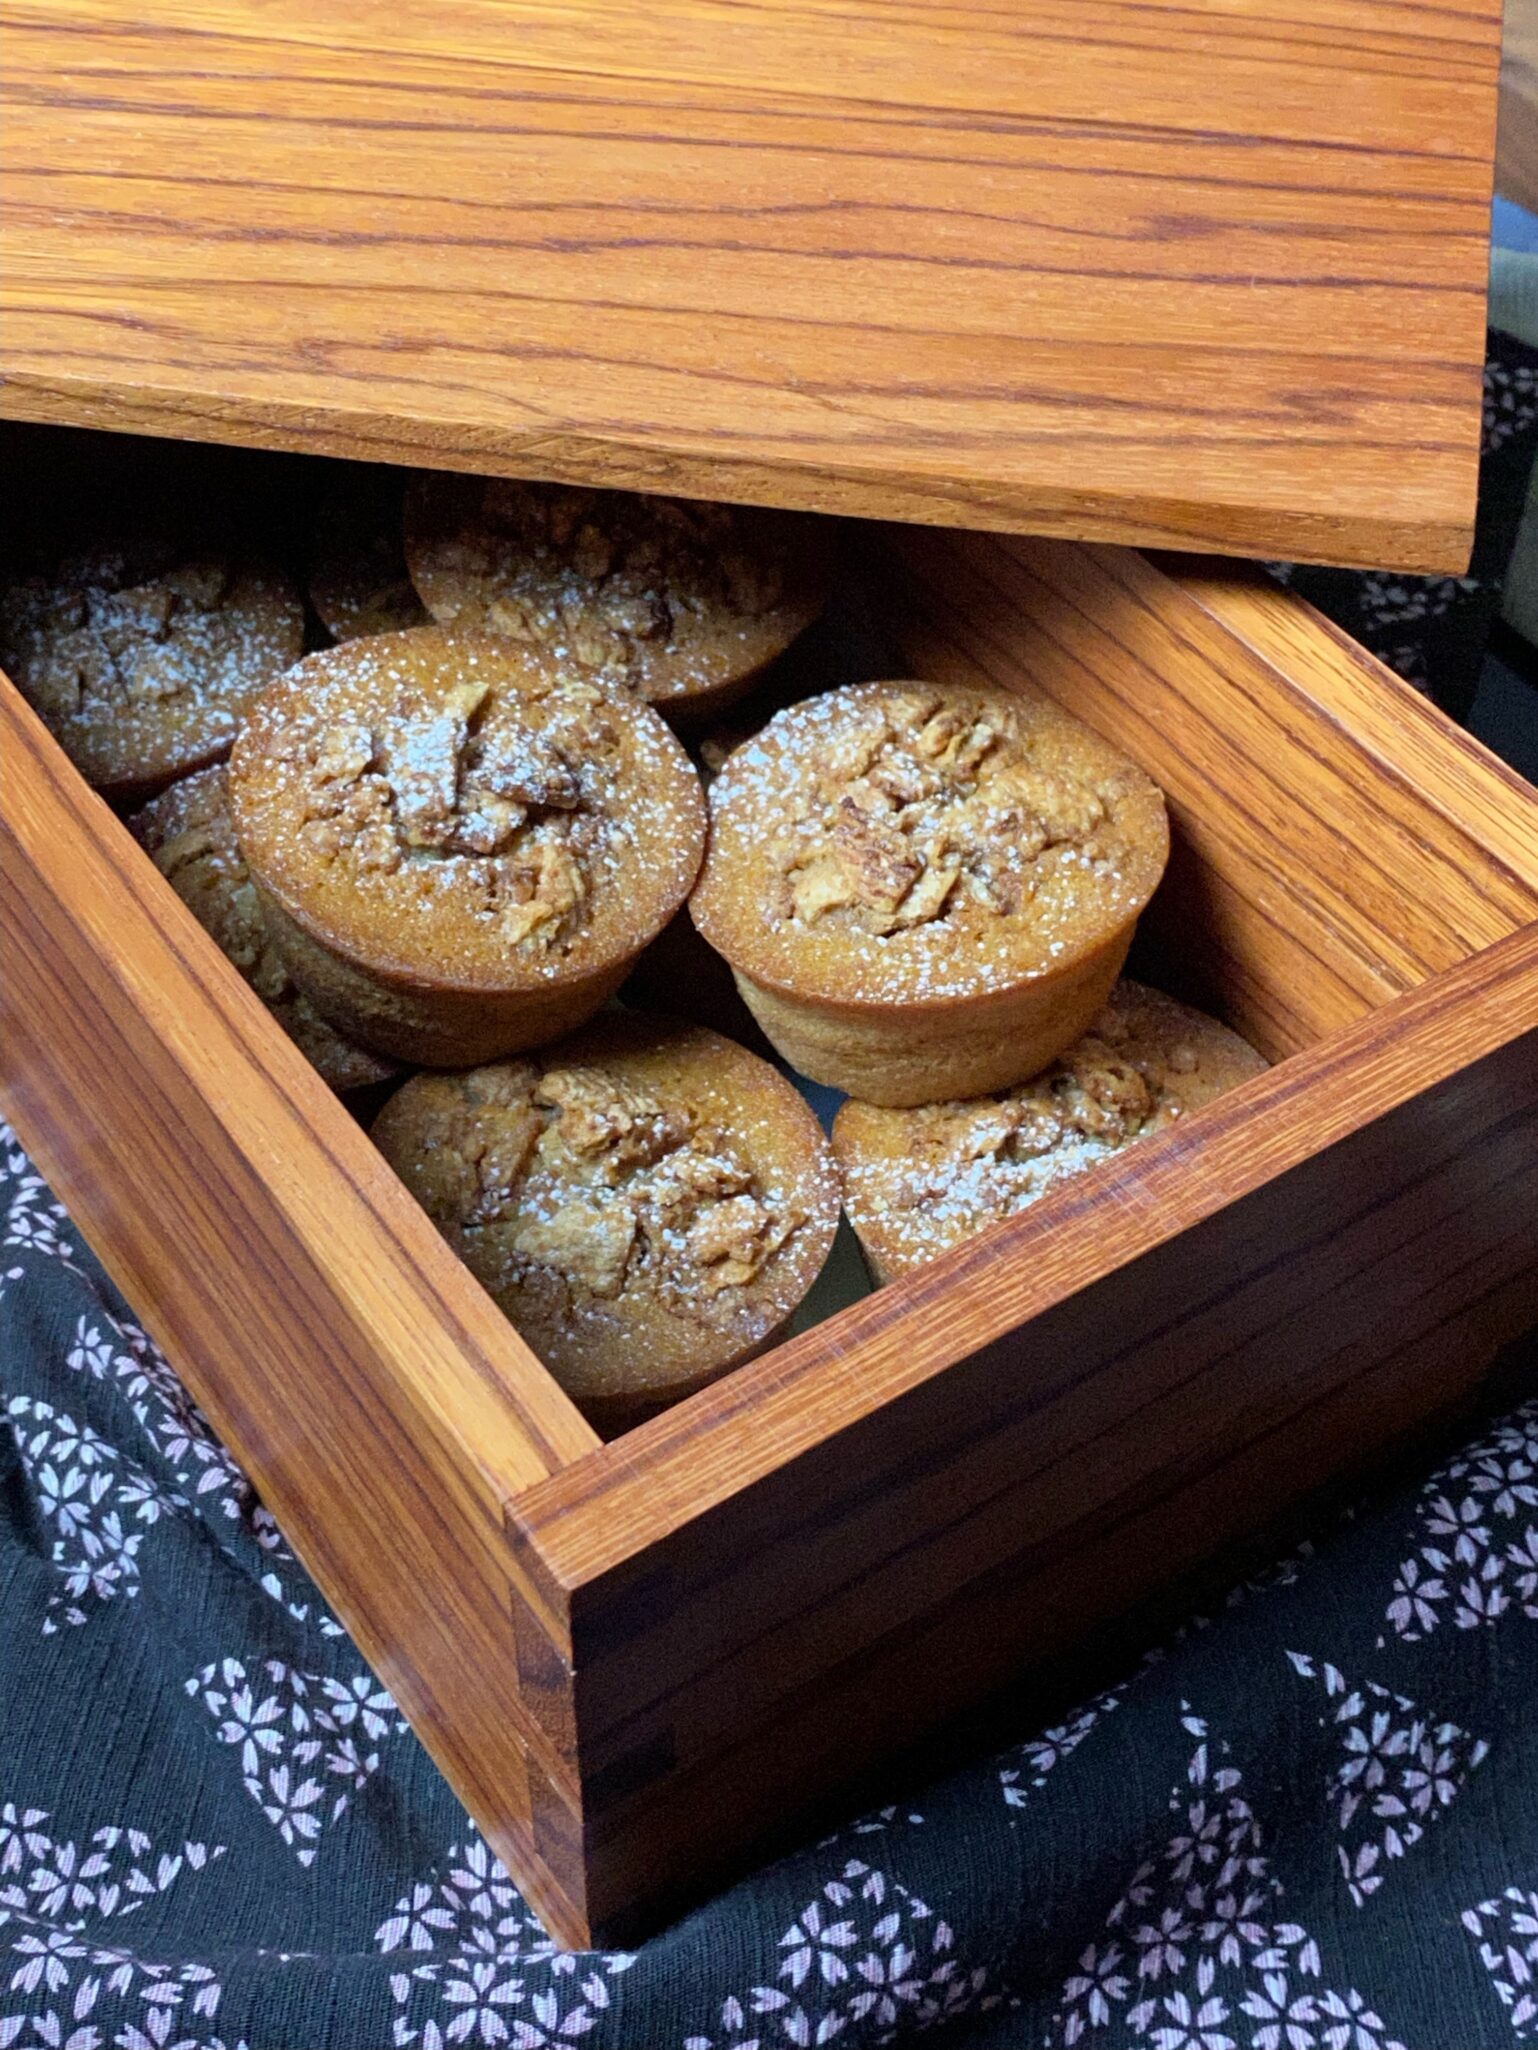
For the first batch, I followed Little Fat Boy, made them in a pan, and cut them into squares. For the second batch, I made muffins because everyone deserves their own sweet treat.
To further crisp the Cinnamon Toast Crunch topping, I used Christina Tosi’s method to make cereal crunch. Toast crushed cereal bathed in butter in the oven.
Delicious, sweet, with cinnamon and caramel undertones and the characteristic gooey, springy texture of mochi, this is a keeper. Add this to your bucket list.
1.25cupsmilk, I like whole but lowfat, skim and alternative milks will workto soak Cinnamon Toast Crunch
1/2can of coconut milk200ml I prefer full fat coconut milk
1/4cupunsalted butter melted
1Tbspmaple syrup or Golden Syrup
1teaspoonvanilla extract
The Dry Stuff
1/2box Mochiko sweet rice flour (glutinous rice flour)254 g
1cupbrown sugarpreferably dark brown
1/4teaspoonkosher salt
1tspbaking powder
1-1.25cupsCinnamon Toast Crunch Cerealto soak in milk
Topping
1cupCinnamon Toast Crunch Cerealfor topping
2tbspunsalted butter, melted
unsalted butter to grease pans
Instructions
Soak 1.25-1.5 cups of milk with Cinnamon Toast Crunch for at least an hour or overnight. Strain milk into a measuring cup. You should have 1 cup. If it is less than this, use extra coconut milk to make up the difference,
Preheat an oven to 350° F. Generously butter an 8x8 baking pan. For muffins, butter a 12-cup muffin tin.
In a separate mixing bowl, mix together rice flour, brown sugar, baking powder, and salt. Set aside.
Mix wet ingredients in large bowl, 2 large eggs, 1 cup milk (soaked in Cinnamon Toast Crunch), coconut milk, maple syrup, and vanilla extract. Blend until smooth.
Slowly pour dry ingredients into a bowl of wet ingredients, whisking as you pour until it becomes a smooth batter. Mix in melted butter into the batter until incorporated, then pour batter into the buttered pan. If making muffins, pour batter into each muffin tin approximately 7/8 full. Should fill 12 cups. Tap pans on the counter to release air bubbles.
Topping
Crush the extra Cinnamon Toast Crunch in a small bowl and add melted butter. Stir to coat cereal with butter. Pour onto a small baking sheet and bake at 275 degrees for 20 minutes or until toasty and fragrant. Remove and cool.
Sprinkle toasted cereal on batter just before baking. You can forego the toasting of the cereal but you lose some of the crispiness.
Da Finish
Cake pan mochi: Bake for approximately 60 minutes until golden brown and set. Stick a toothpick or bamboo skewer in, it should go in smoothly and come out without any sticky stuff. If you like your mochi a little more set bake a bit longer. The less time you bake the gooey-ier your mochi will be.For muffins bake approximately 40-45 minutes.
Once cool, sprinkle powdered sugar on mochi before serving. Slice cake into squares like brownies and serve.
Will keep a couple of days at room temp. Do not refrigerate. Mochi is freezable.
You might be wondering why this post is named Muffins de Mochi con Misugaru.
WELL, let me tell you why…
Apparently, I’m not supposed to use the term Mochi Muffins. It’s been trademarked.
How crazy is that?
Third Culture Bakery, out of Berkley, has trademarked mochi muffins and has been sending Cease and Desist letters to folks that have used the term mochi muffins, including small mom & pop bakeries, bloggers, Instagrammers, and AAPI-owned businesses.
The term mochi muffins, if you are Asian or Hawaiian, is pretty ubiquitous. And yet some bozo in the government granted a trademark to Third Culture Bakery in 2018. Shame on the trademark office for not doing their due diligence and shame on Third Culture for trying to trademark a term that is descriptive for a product they did not invent. Y’all, folks have been making mochi muffins, donuts, and cakes long before they came into existence.
The Happy Ending
It took a little while for me to post these mochi muffins and in the interim much has happened! After more bad press and focus on the story, Third Culture Bakery re-examined its stand and relinquished the trademark. Yay! Score one for the little guys and Subtle Asian Baking, a FB group that brought to light the trademark issue. So now I can go back to using Mochi Muffins!
Best of Both Worlds
I love how Asian American pastry chefs have been blending Asian ingredients with French techniques and visa versa. Croissants filled with Chinese BBQ pork or mochi, custard flavored pandan, ube snickerdoodles, I could go on and on.
So my contribution? A riff on Butter Mochi Muffins. I added Misugaru Powder and oat milk (instead of regular milk) to my butter mochi muffins and SHAZAAM, we have a winner.
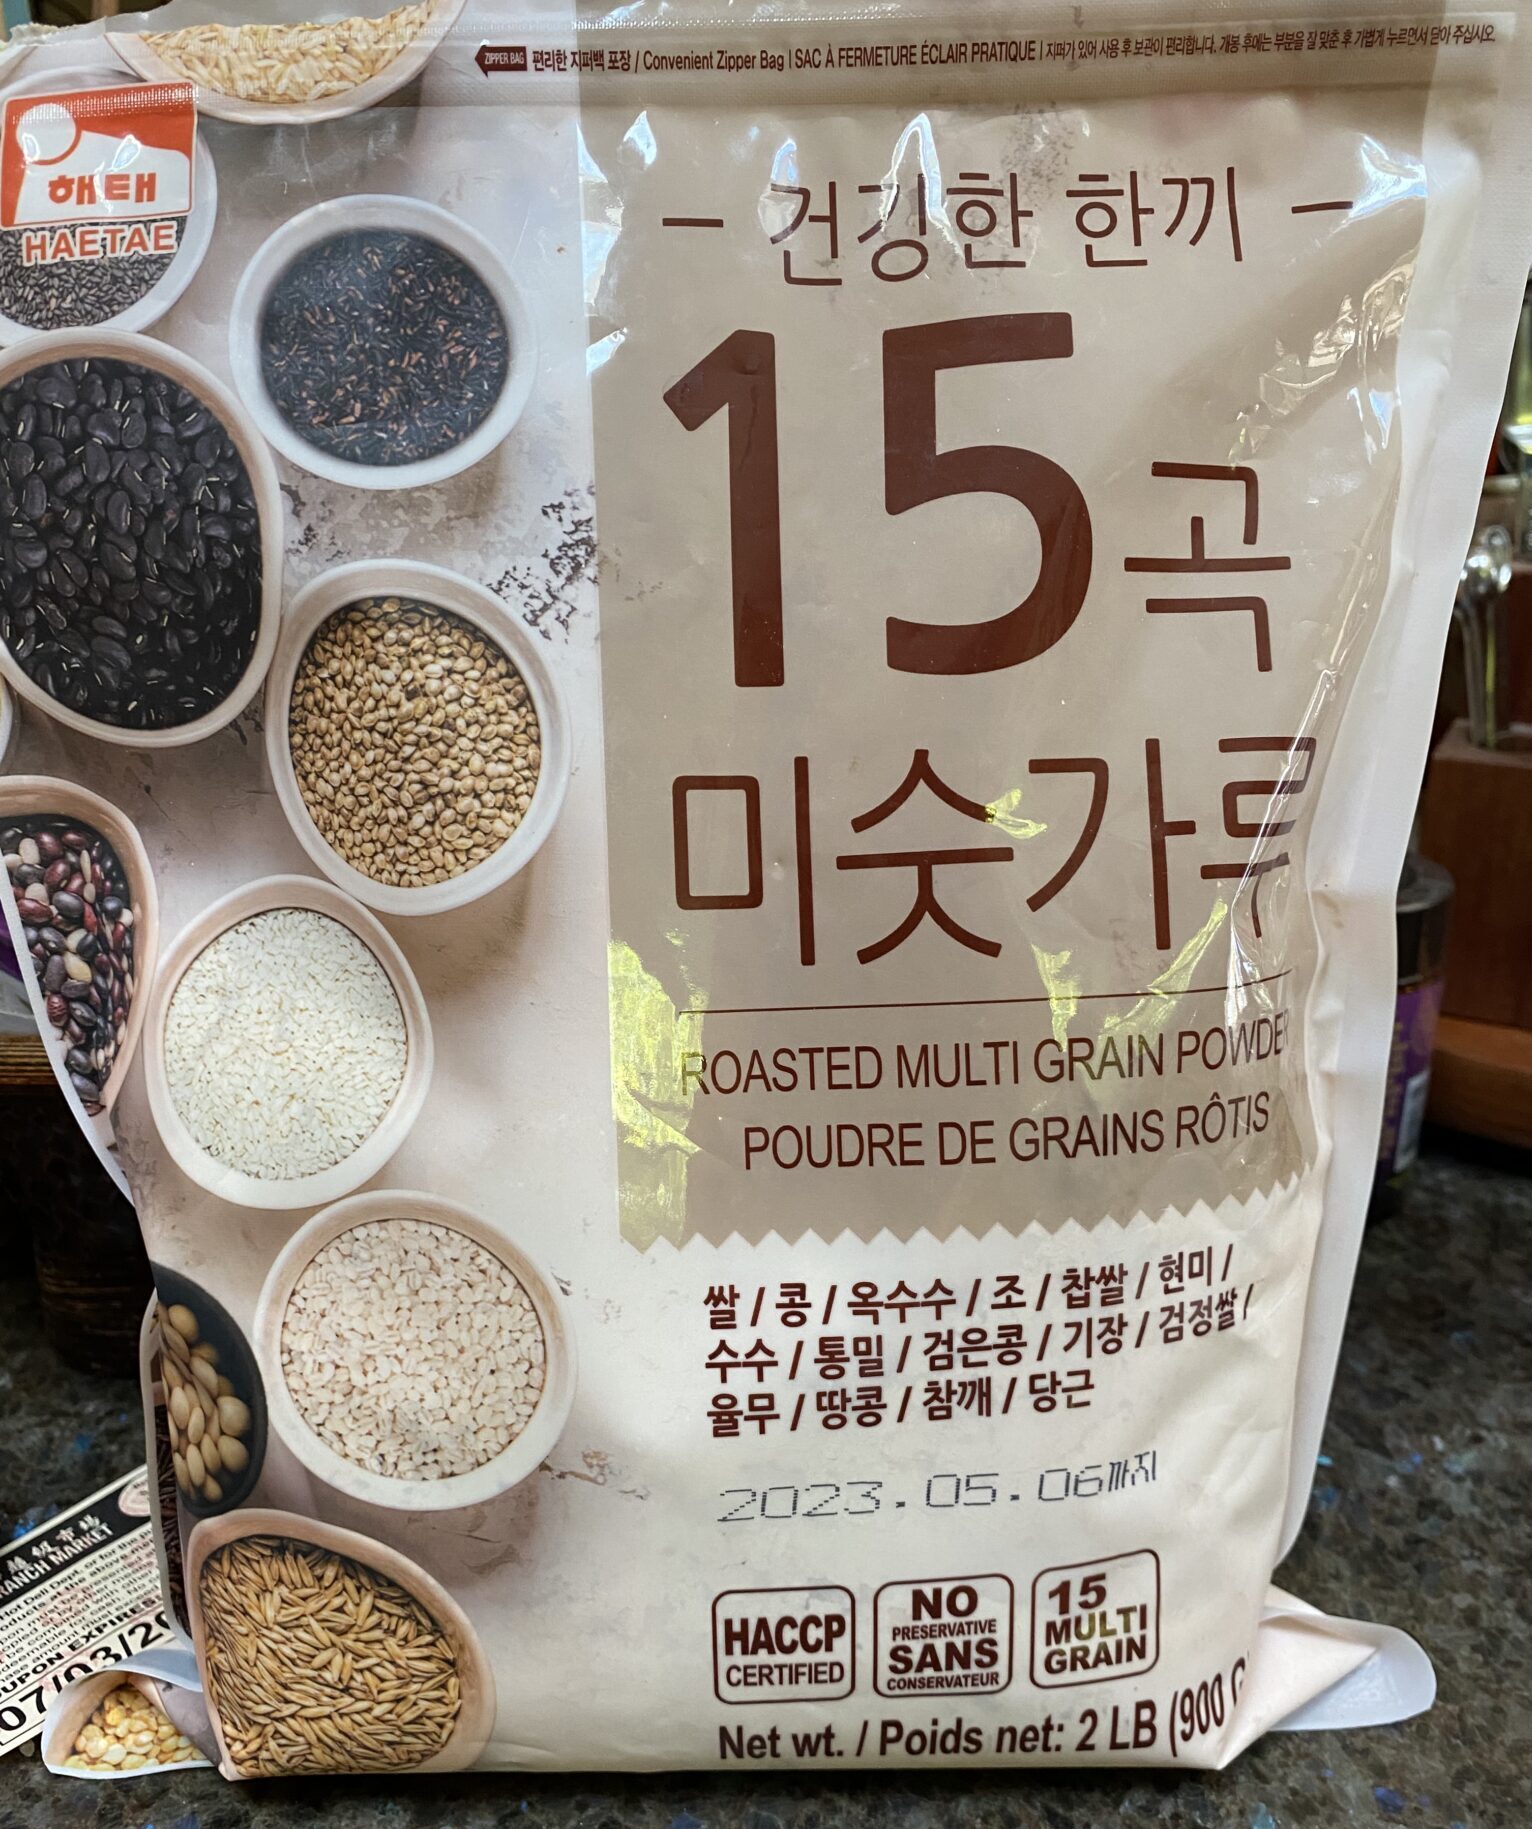
Misugaru Powder is a Korean multigrain drink that includes different grains, rice, and beans like sweet rice, brown rice, oats, azuki beans, and sesame seeds. You can find Misugaru at any Korean store or online. Mixed with milk or water it is a drink with a sweet, nutty, malty flavor. Kind of like Carnation Instant Breakfast, but tastier and healthier. I found various recipes using the powder in cookies and breads and thought, why not?
For the uninitiated, mochi is glutinous rice flour also known as sweet rice flour. “Stuff” made with sweet rice flour has a wonderfully chewy, elastic texture, think dense but still soft marshmallows. My first post on Mochi Muffins is by far the most popular post on 3jamigos. A staple in Asian and Hawaiian desserts, it was only a matter of time, before it would make its way into mainstream American desserts like muffins, donuts, and brownies. Besides being delicious and texturally so intriguing, mochi desserts are gluten-free! Win-win.
Notes on Making Mochi Muffins
Sweet Rice Flour: There are different mochi flours available. Mochiko by Koda Farms is probably the most widely available and works for almost all recipes. Asian stores will carry Thai and Korean Sweet Rice Flour in addition to Mochiko.
Milk: Regular or 2% milk can be used in place of the oat milk. Skip the skim. For Coconut milk, use full fat if possible. My go-to brands are Arroy-D, Chaokoh, and Trader Joe’s (super convenient).
Butter the muffin tins generously, and use regular rice flour (not the mochi flour) to prep the pans. If you don’t have any, skip the flour and just butter the pan.
I played with the baking temp to see if I could minimize the pointy top. I lowered the temperature to 360 degrees on a subsequent batch and it did seem less domed. This is appearance preference, the muffins tasted the same.
1CupOat Milk240gm, You can use reg 2% milk, do not use skim
2Large Eggs
The Dry Stuff
1-3/4CupGlutinous rice flour225gm
2tbspMisugaru powder
1CupGranulated sugar200gm
1tspBaking powder
1/4 tspsaltIf not using sprinkling salt, increase this to 1/2 tsp
Wrapping it up
Butterfor muffin tin
Fleur de Sel or Maldon Flake Saltto sprinkle
Shredded coconut, sweetened or unsweetenedfor garnish, optional
Black and white sesame seedsfor garnish, optional
Instructions
Preheat the oven to 375 degrees
Brush the cupcake tins liberally with butter and dust with regular rice flour
Combine coconut milk and butter in a microwavable bowl, nuke for 1 minute on full power
Remove and add milk or oat milk and eggs. Whisk until combined.
In a medium-sized bowl combine the glutinous rice flour, sugar, salt, Misugaru powder and baking powder.
Add dry ingredients to wet ingredients and stir until smooth. Use a spoon or spatula instead of a whisk to minimize bubbles. The batter will be the consistency of pancake batter.
Pour the batter evenly into a 12-cup muffin tin. Tap gently on a counter to remove air bubbles. You will have enough batter to fill each cup 7/8 full.
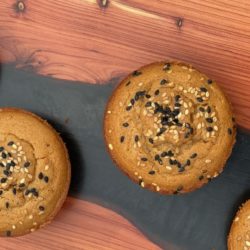
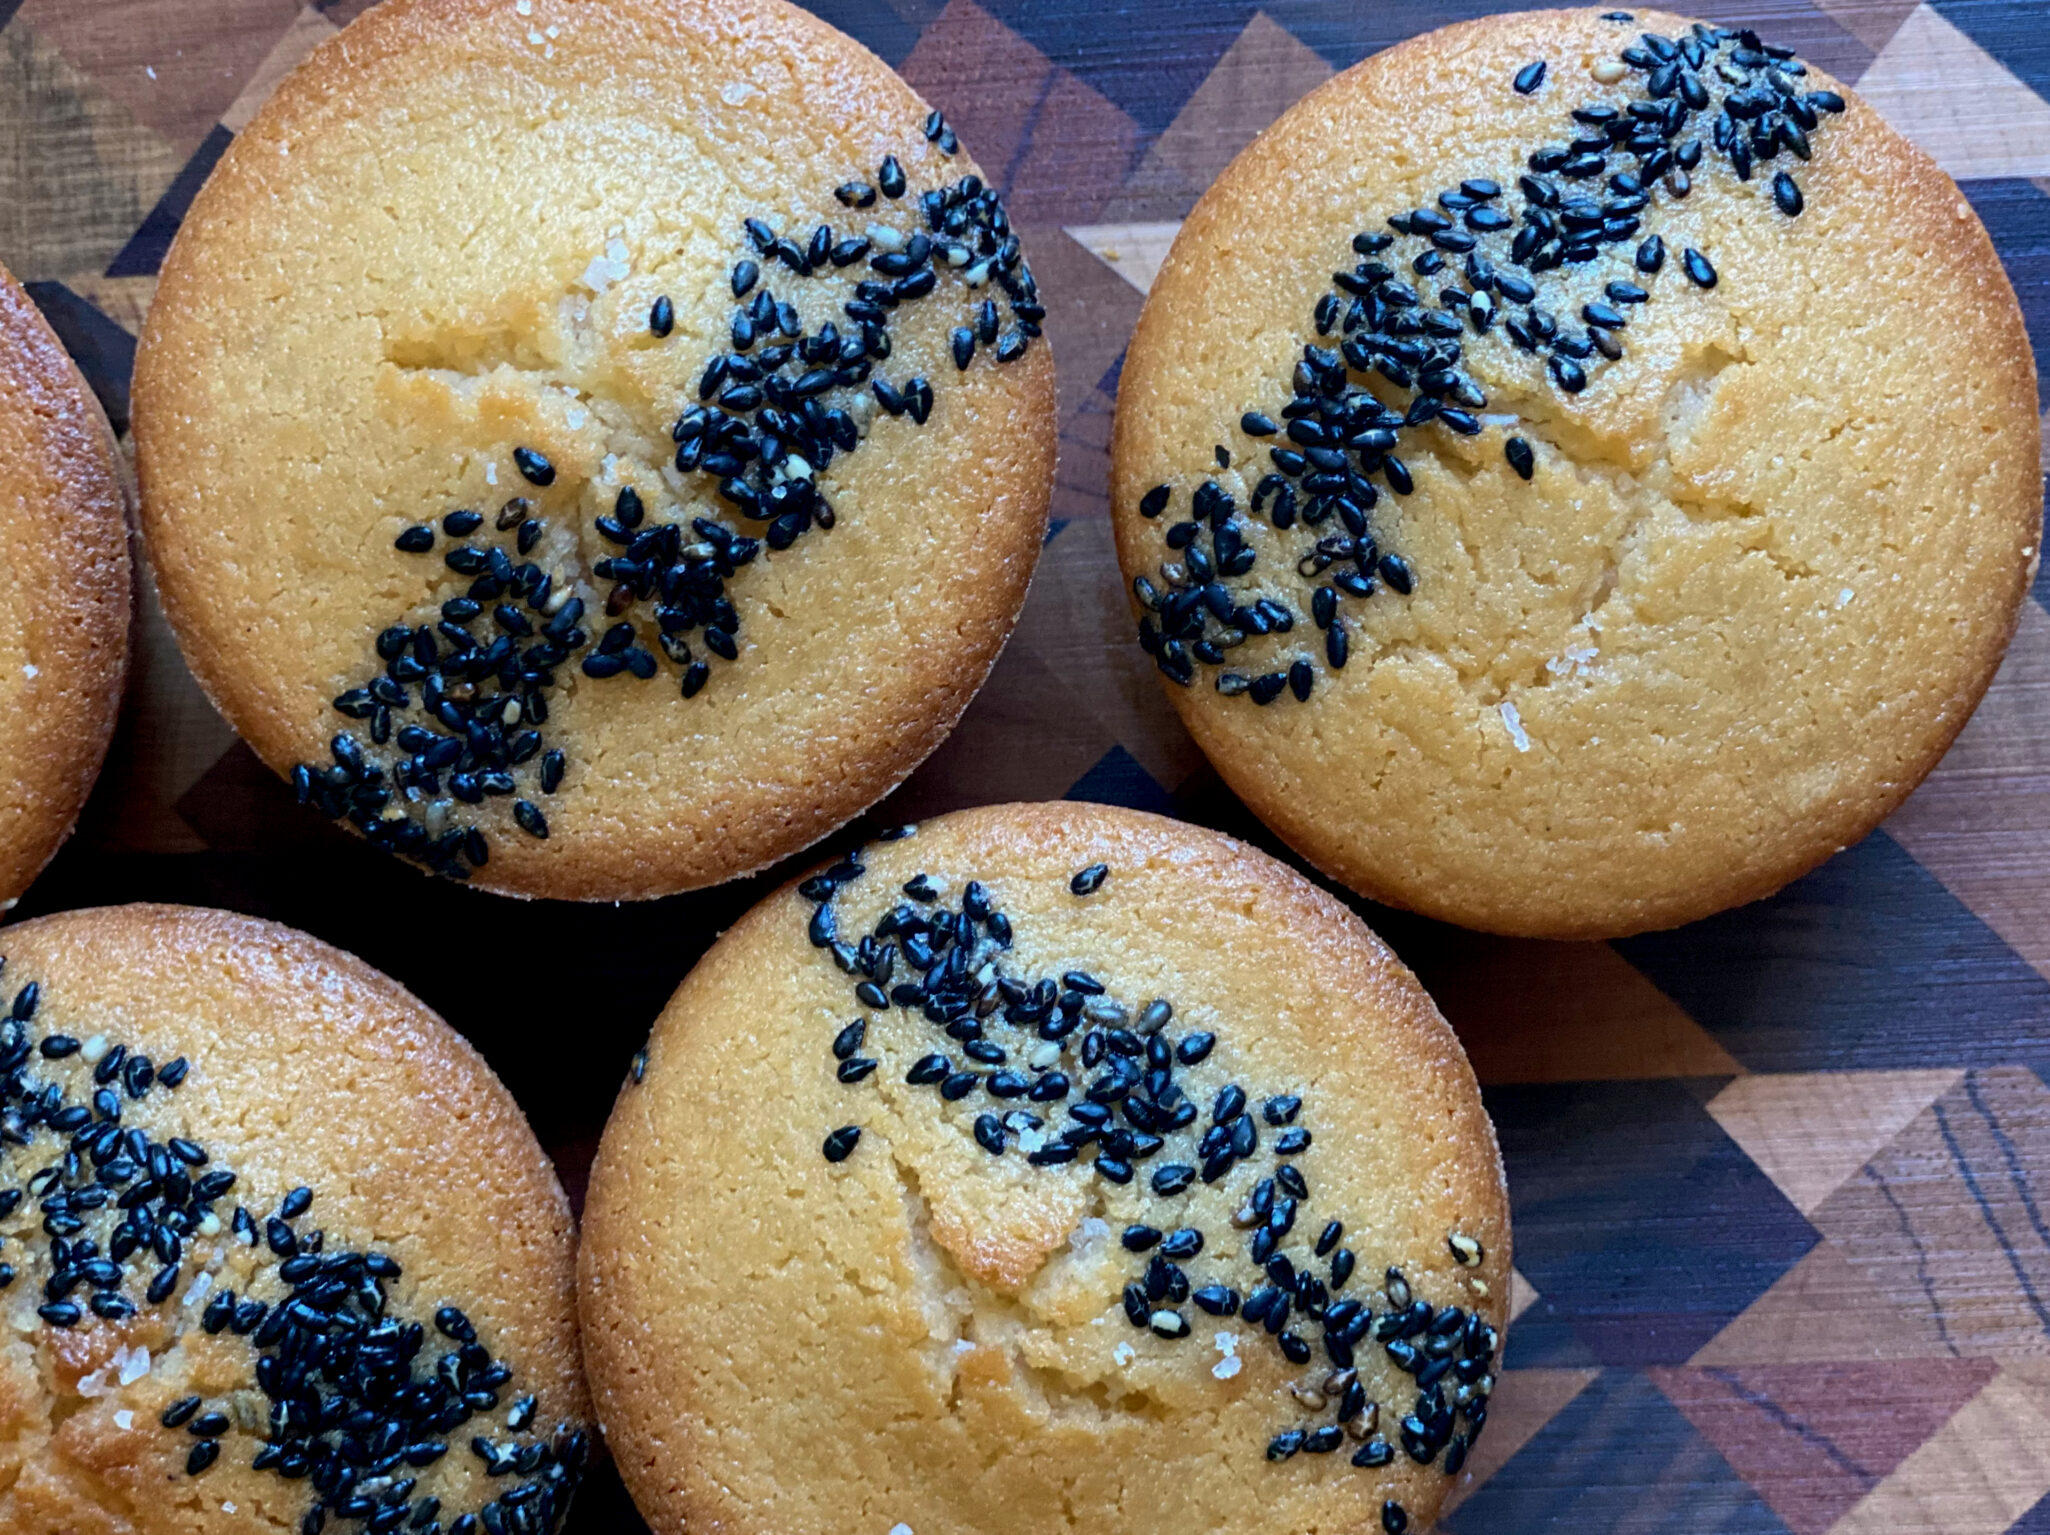
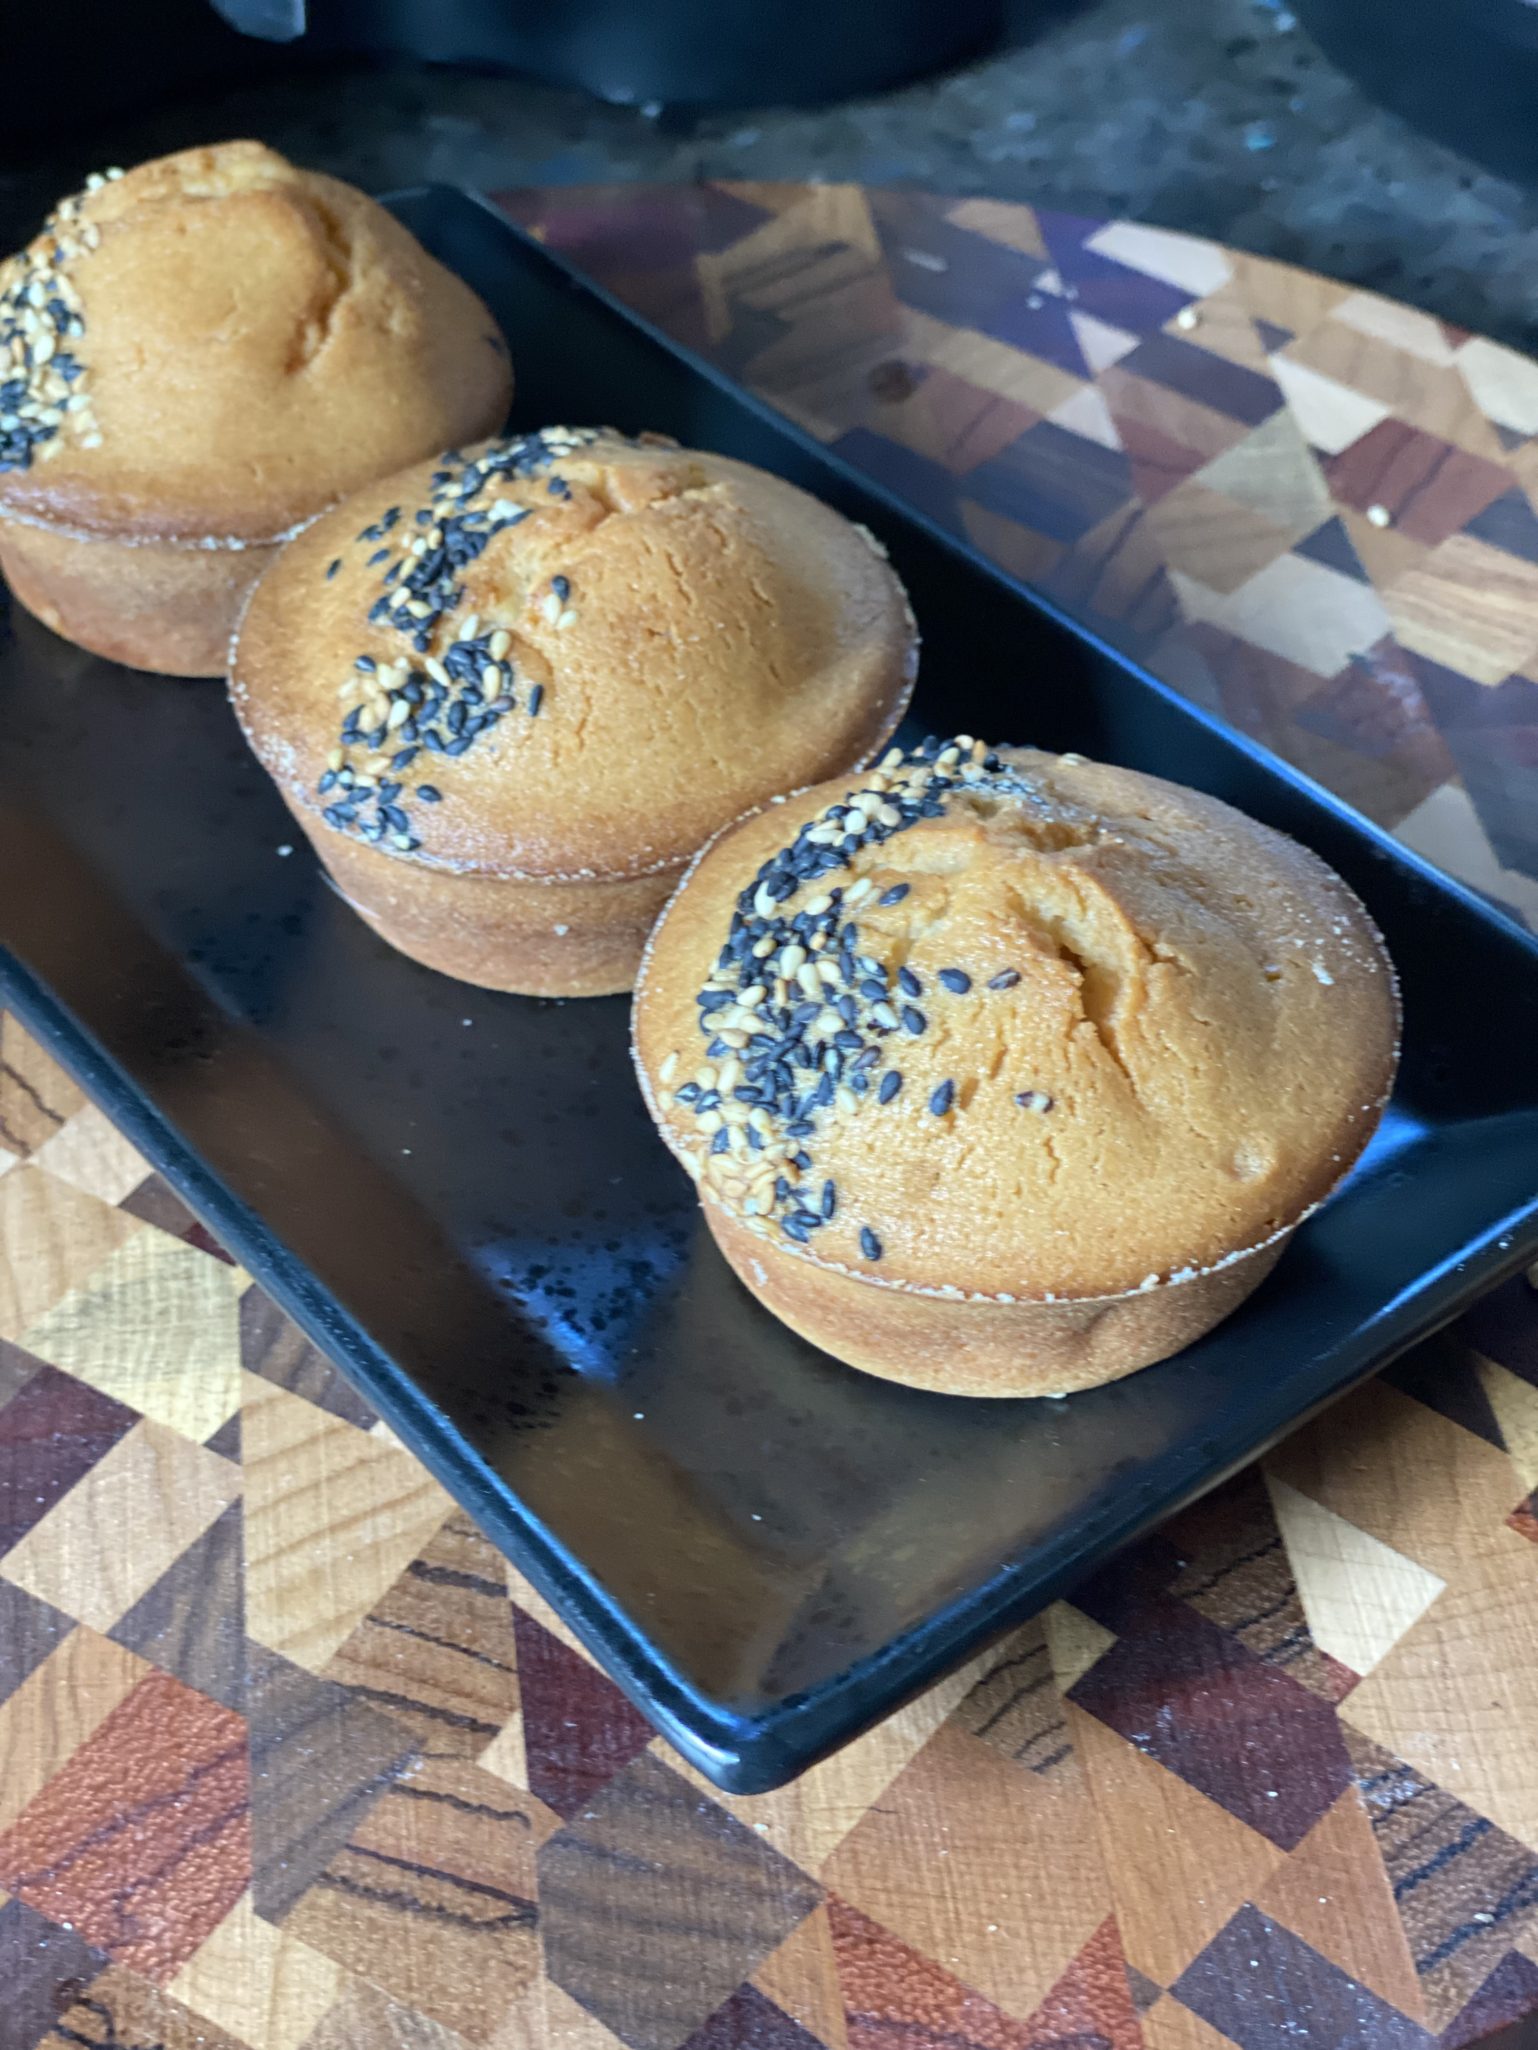
Top with black and white sesame seeds or coconut flakes if you like, and sprinkle with Fleur de Sel or any flaked salt, bake for 40-45 minutes, or until golden brown center and dark brown edge.
Remove from oven and let sit for 10 minutes in tin, then remove to cookie rack. Allow muffins to cool completely.
Muffins will keep at room temp for 2-3 days. They can be frozen for longer storage.
Mochi Ado about Something. I tried quite a few mochi recipes this year so it seems fitting that 2021 should end on a sweet rice note. 2021, the year of Mochi muffins, donuts, and now, brownies. Mochi brownies are delicious! I found quite a few recipes that were fairly similar and picked one from Kirbie’s Cravings as my starting point. There are a plethora of recipes out there including one from Fix, Feast, Flairwhose cookbook I have and love, Aloha Kitchen.
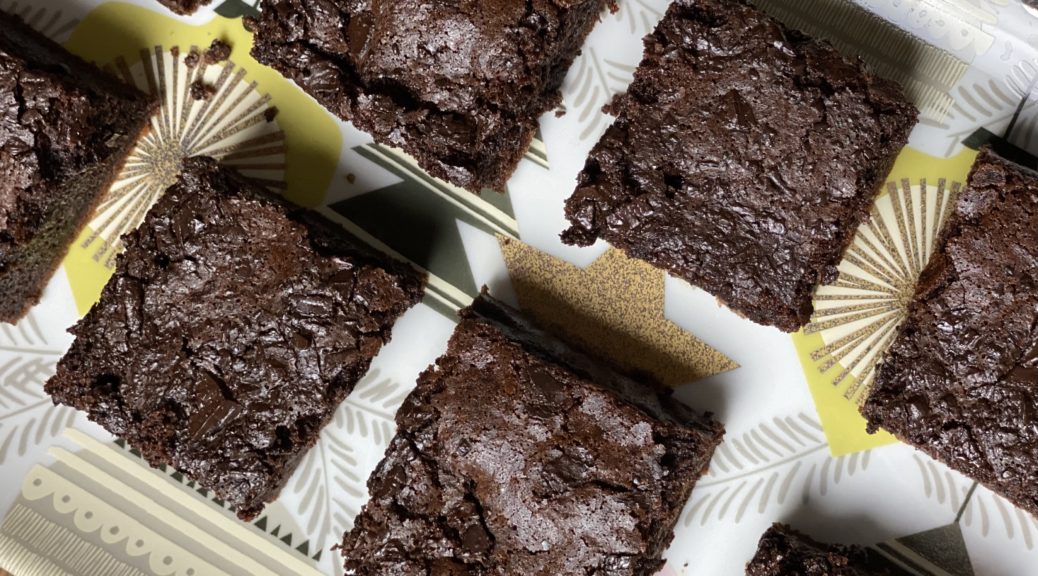
The Mochi Brownies are not too sweet, have that hallmark stretchy, elastic texture of mochi, intensely chocolate, and just darn delicious. If you like fudgy, chocolatey brownies, you are going to love these. Bonus, they’re GLUTEN-FREE and super easy to make. We are talking spoon, whisk, 2-bowl, done.
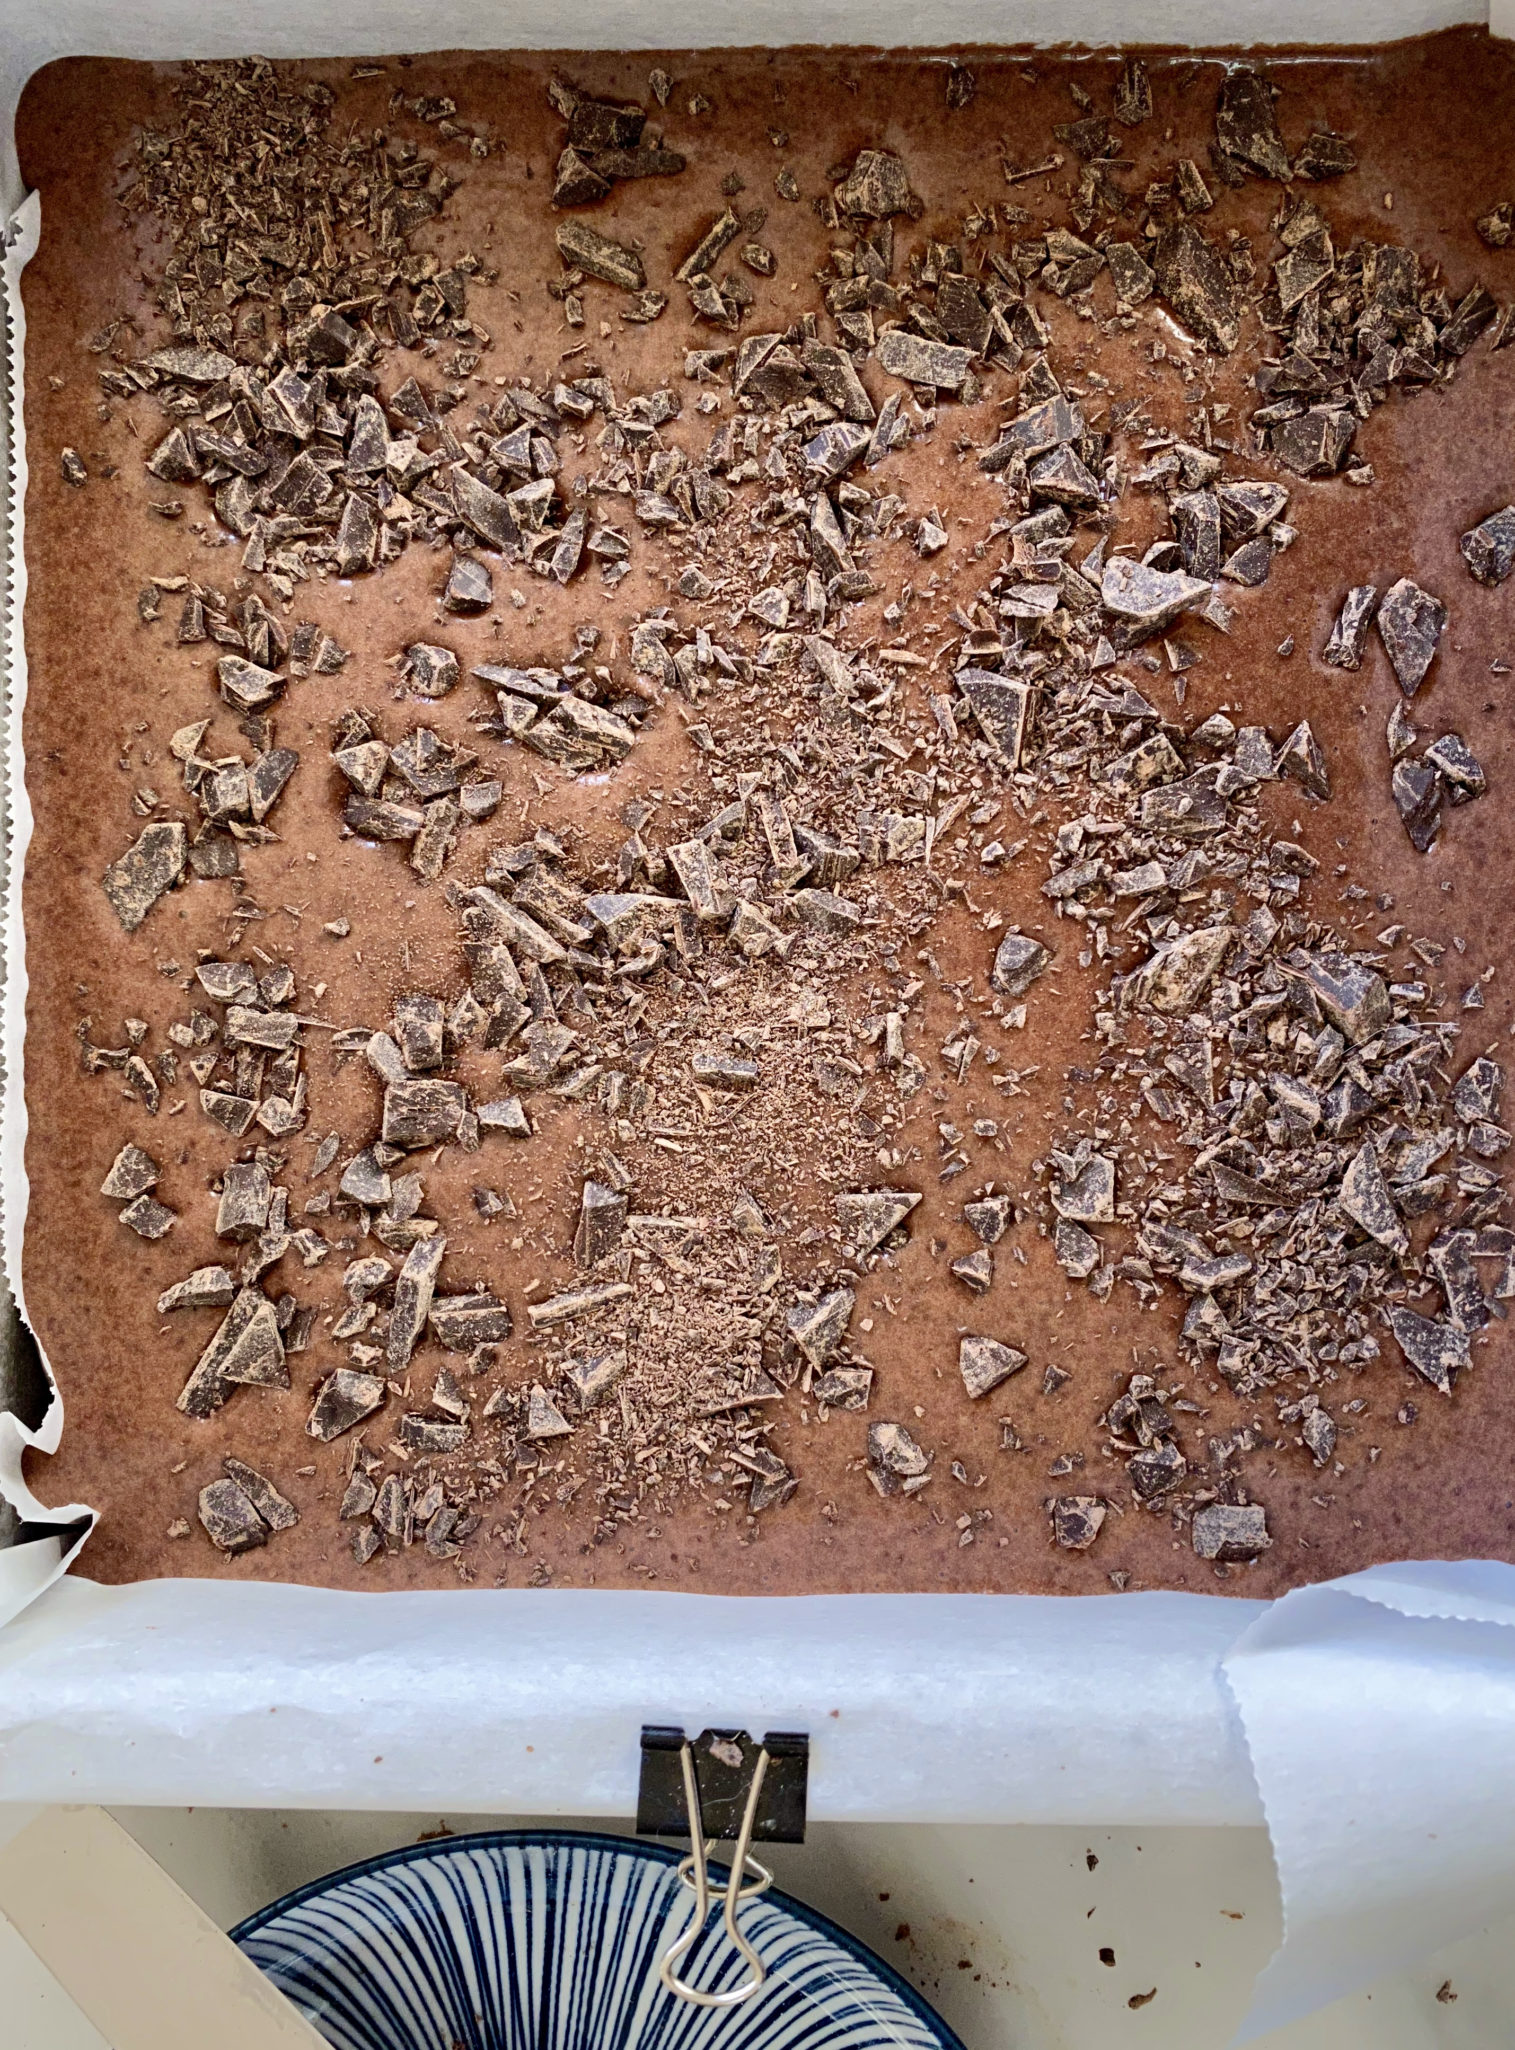
Look at that, office clips to hold your parchment in place
Cast of Mochi Characters
Mochi– Sweet Rice Flour aka Glutinous Rice Flour. NOT to be confused with rice flour. Go-to brand, Koda Farms Mochiko Sweet Rice Flour. Found in most big supermarkets, all Asian Markets and online for an arm and a leg 🤷🏻♀️. Bob’s Red Mill also has a Glutinous Rice Flour that can be used.
Cocoa-You can use any kind of cocoa powder in this recipe, natural or dutch-processed. The Dutch-process cocoa will give you a deeper, darker brownie color. King Arthur carries both types. Hershey’s is natural cocoa.
Baking Powder vs. Baking Soda- I used baking powder. I’m not sure it makes a difference. My logic, since I used Dutch-processed cocoa which has a neutral pH, I did not have an acid to kick start baking soda. Baking powder needs heat to activate it not acid. If you use natural cocoa you could use either baking powder or baking soda.
Liquid- I used whole milk, I haven’t tried it but I’m thinking this recipe would work with milk substitutes, evaporated milk, or coconut milk. It may change the texture a little.
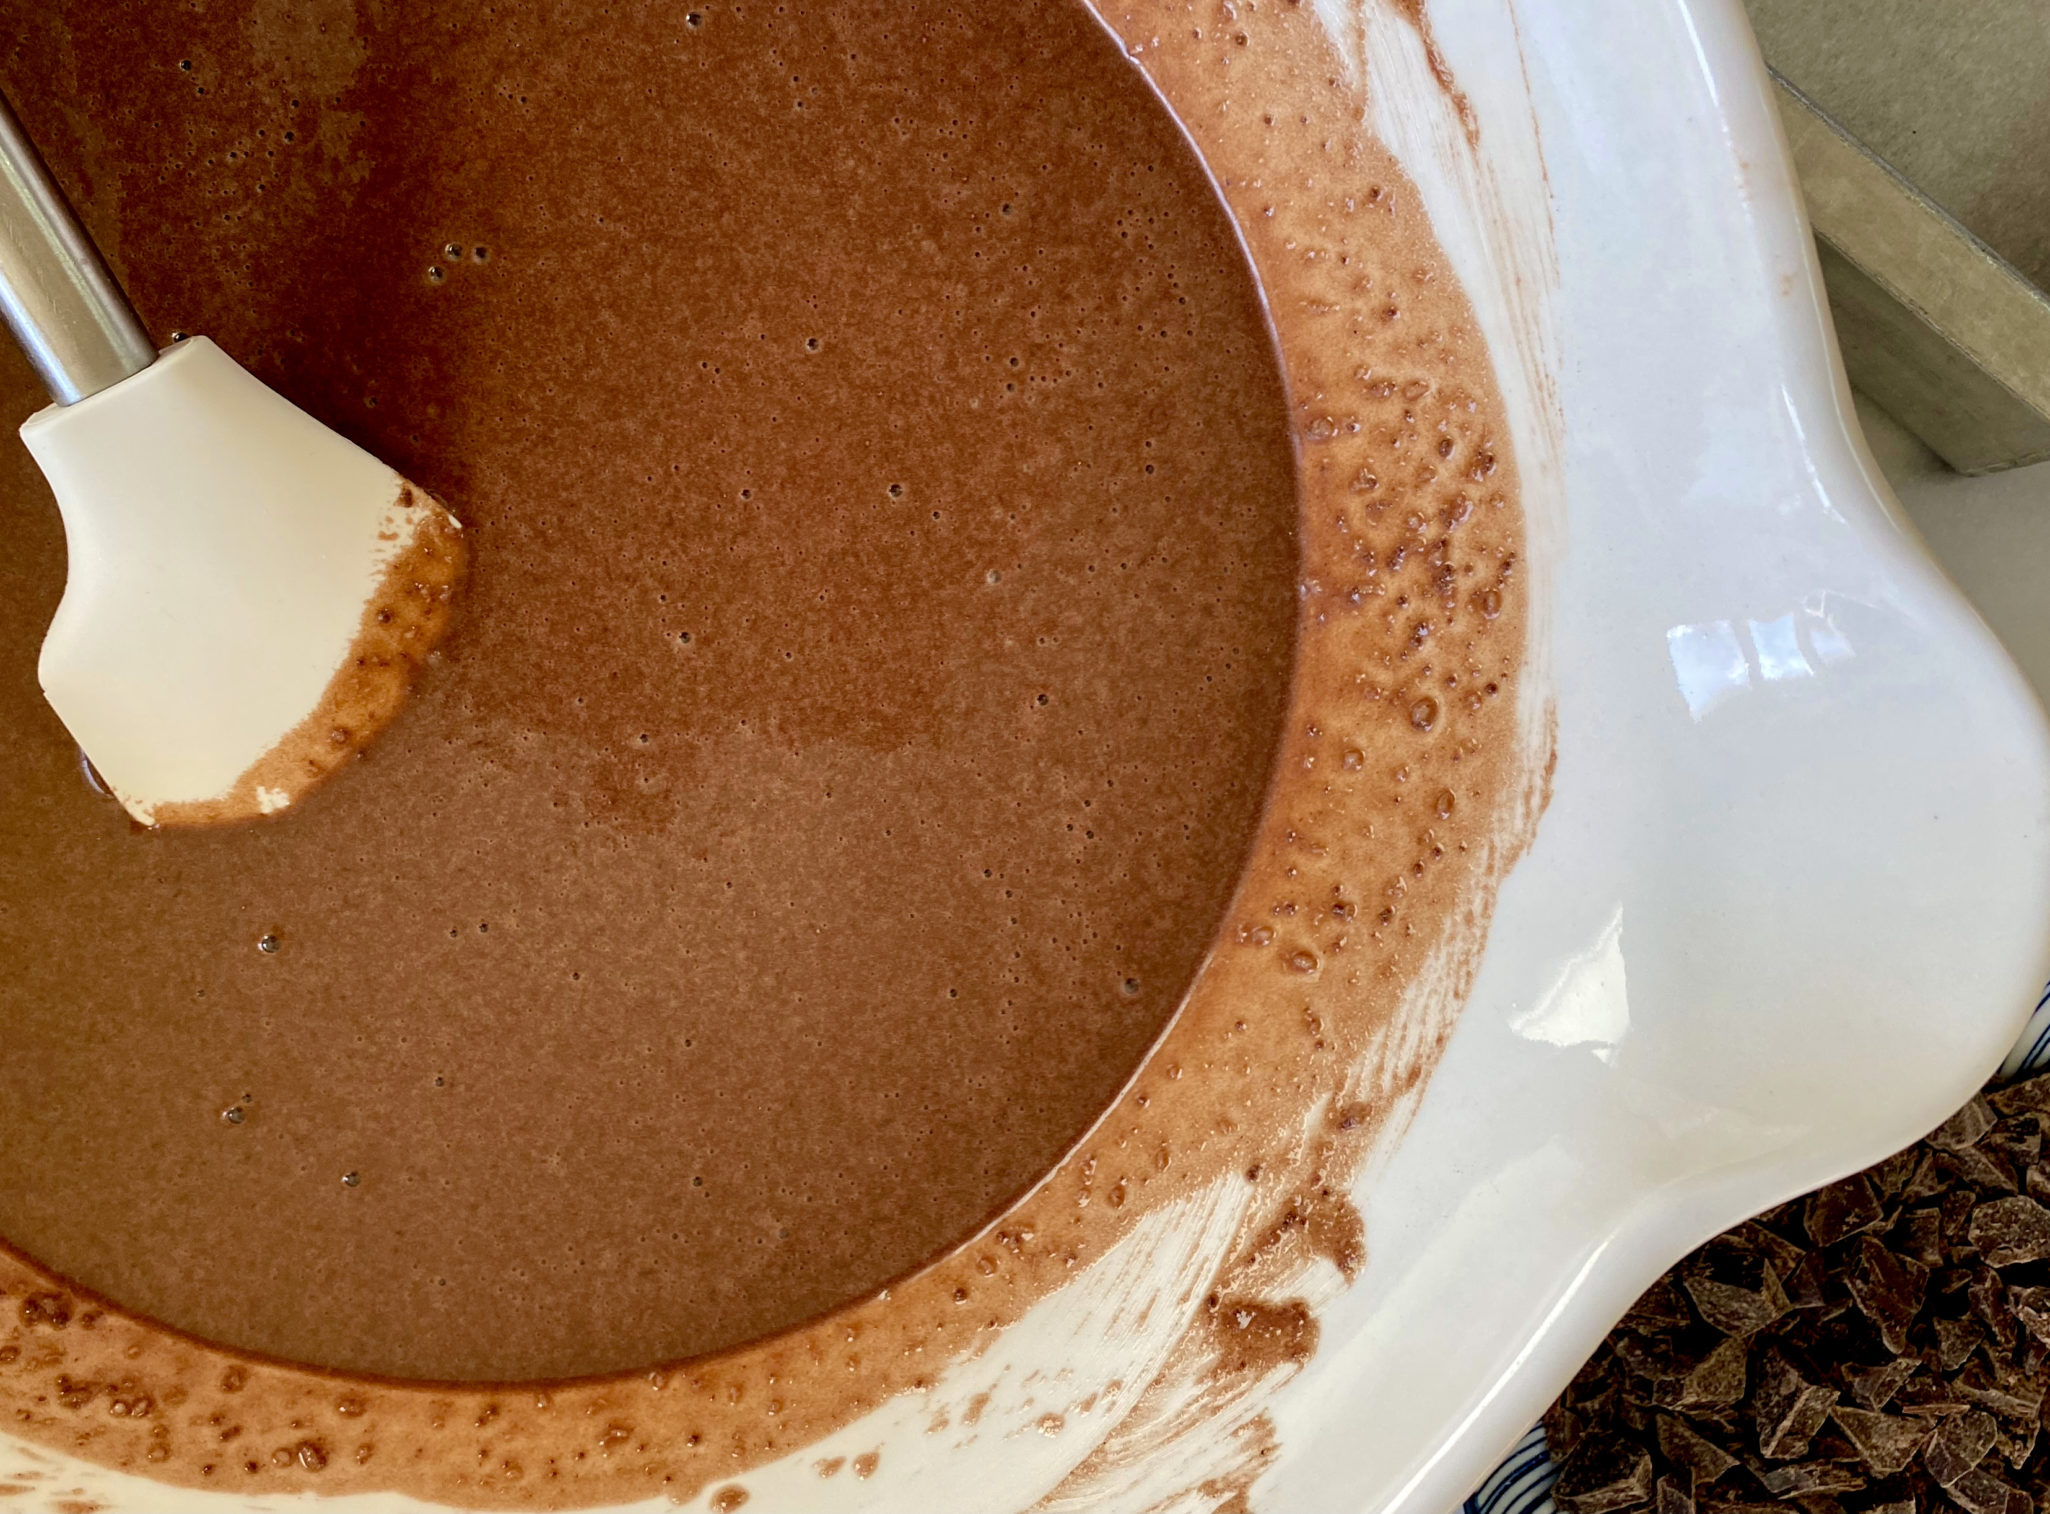
Chocolate-The brownies are not too sweet and pretty chocolate-y. Try different chocolates to sprinkle on top, milk chocolate or semi-sweet, chopped from bar form. Chips don’t melt well and don’t look as nifty as shards of chocolate. I hit the top at the end with my secret sprinkles, a mix of Maldon Salt, Demerara Sugar and Chocolate Sprinkles. For a festive look, you can use multi-colored sprinkles!
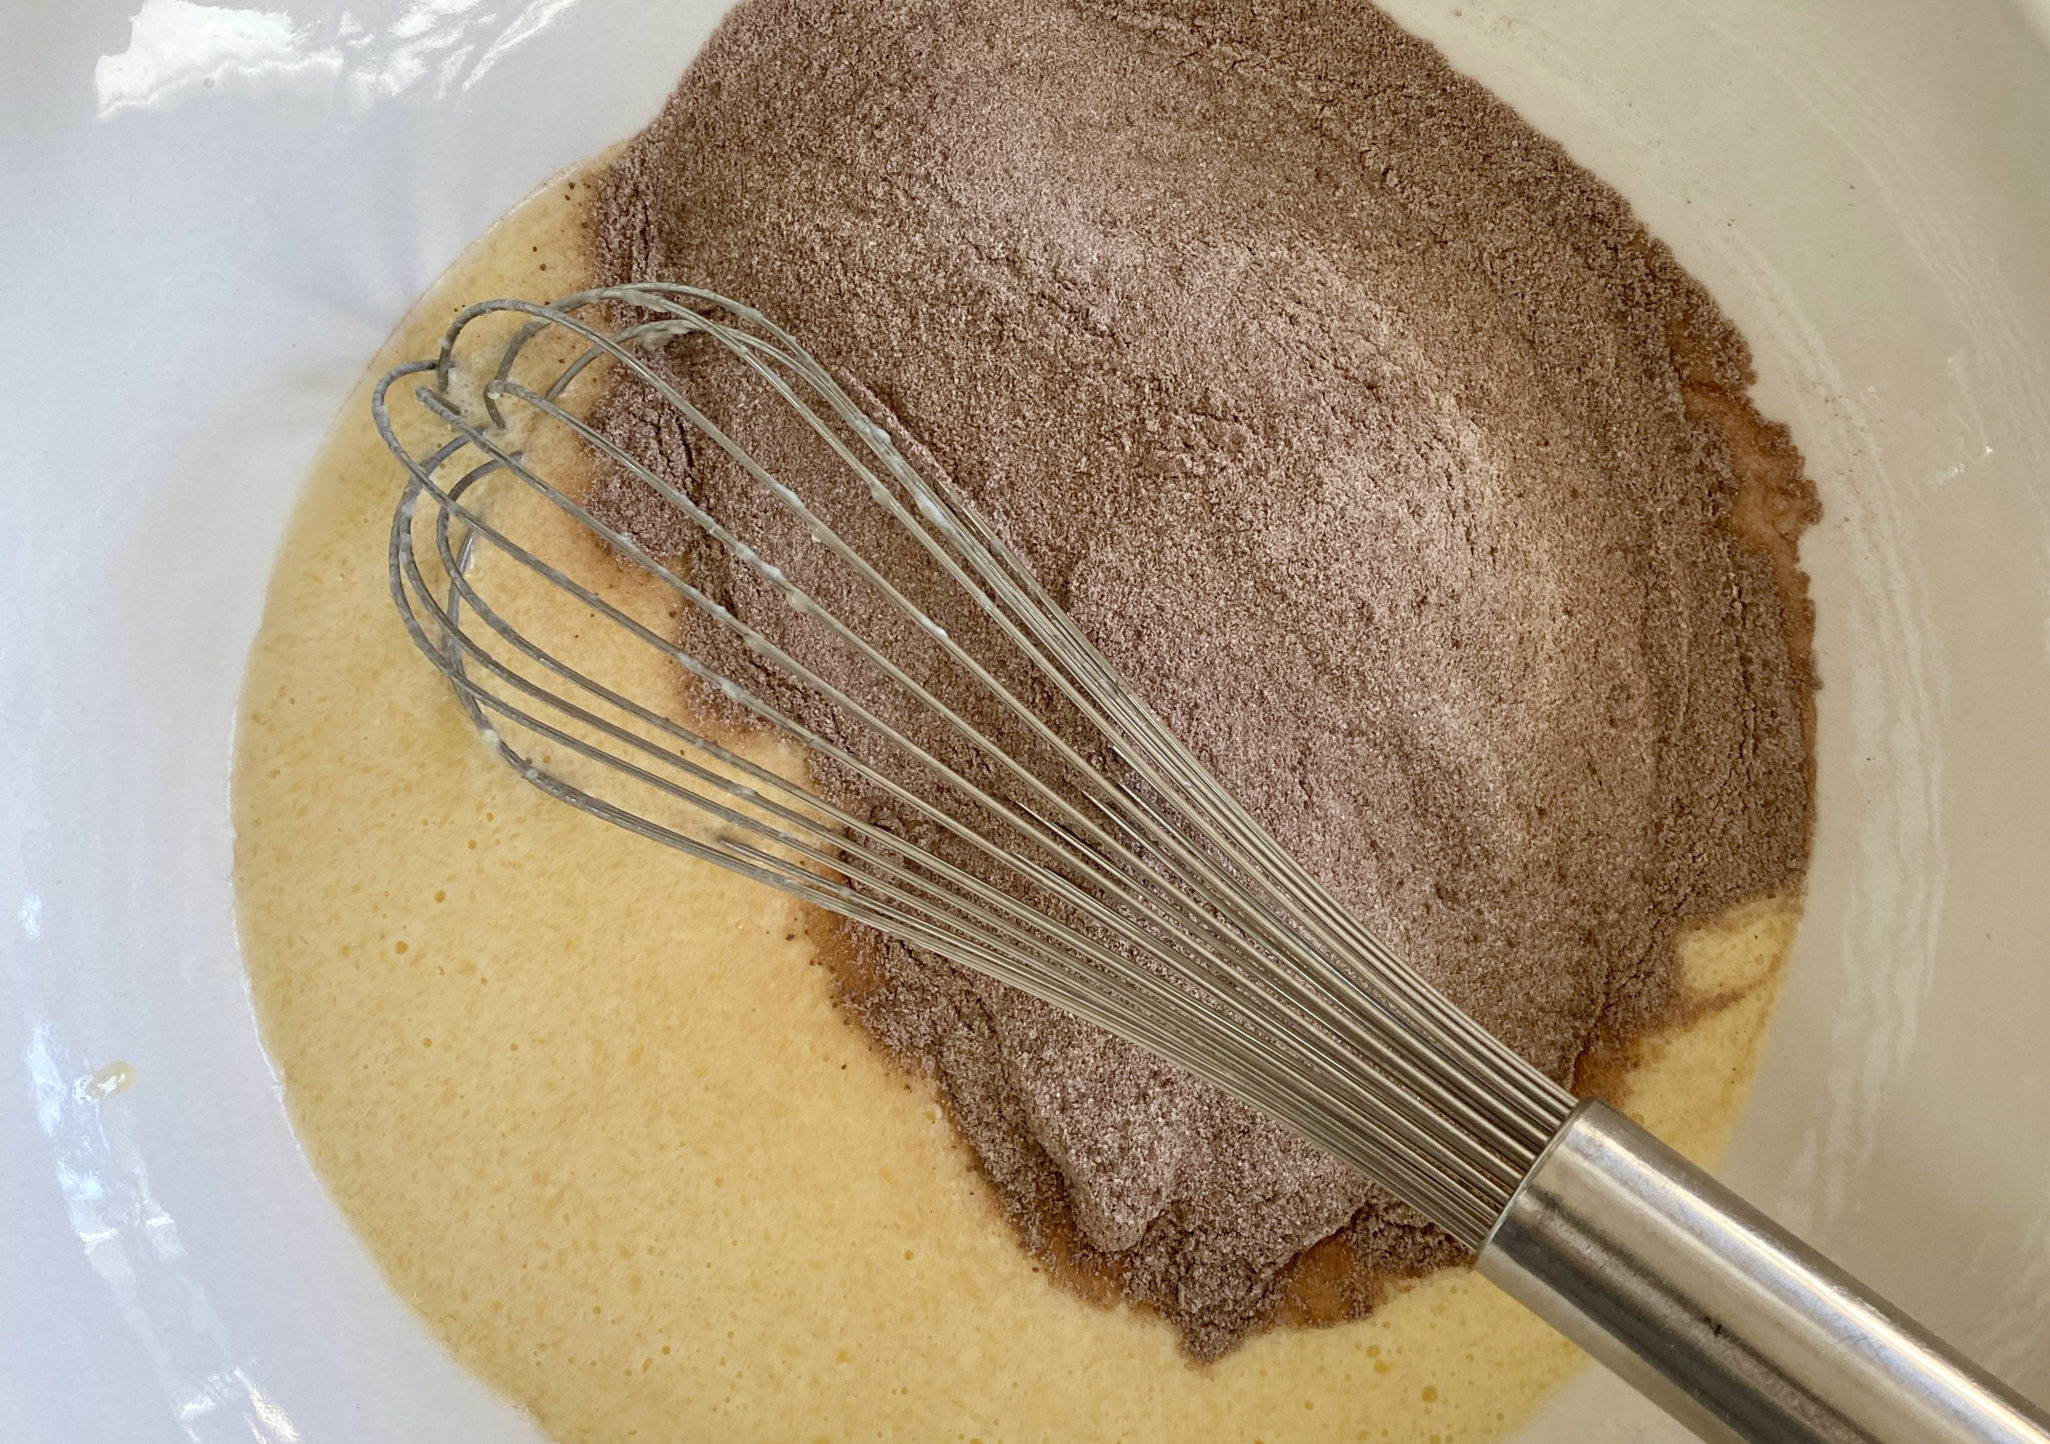
The Setting: Two Bowls, One Spoon, One Whisk
Literally, the ingredient list is the hard part of this recipe. Combine the dry ingredients in one bowl and the liquids in another, then add the dry to the wet, mix with a spoon or whisk, bada bing bada-boom, done. No need to worry about overmixing as Mochiko flour doesn’t have gluten. The batter will be like a runny pancake batter. Pour batter into your parchment-lined pan and bake. That’s it! An hour later you’re pulling mochi brownies out of the oven. Cool completely before cutting with a sharp knife. If it sticks put a little oil or butter on your knife.
Rewarded with delicious ooey-gooey chocolate brownies! Cookie #7
1 ½tspbaking powderyou could actually use baking soda in equal volume, if using natural cocoa which is acidic and will activate the baking soda
5tbspunsalted butter meltedIf you use low fat milk or milk substitute increase butter to 6 T
2large eggs
12ozwhole milk
1tspvanilla
3tbspchopped dark chocolatesweeter brownie, use milk chcolate or semi-sweet chocolate
Sprinkles!optional but festive!
Instructions
Preheat the oven to 350°F. Line an 8 by 8-inch baking pan with parchment paper.
In a medium bowl, add mochiko, cocoa powder, sugar and baking powder and espresso powder (optional). Whisk together until evenly mixed.
In a large bowl, add melted butter, eggs, milk, and vanilla extract. Whisk until evenly combined and no egg streaks remain. Add in dry ingredients. Mix until blended.
Pour batter into prepared baking pan. Sprinkle surface with chopped chocolate.
Bake 60 minutes or until mochi is set, there should be no jiggle. A toothpick inserted should come out mostly clean. Remove from oven and top with sprinkles. Cool completely before cutting.
Notes
You can replace whole milk with other milk substitutes. Keep in mind that different milk substitutes may change the texture of the brownies. Don't even try to cut the brownies before they cool completely! Store in a sealed container at room temperature for up to 2-3 days. If you want to make sure you have a nice layer of sprinkles, sprinkle brownies before baking. Sprinkle flaky salt and sugar when the brownies come out of the oven.
Right before the pandemic hit we capped off a year of traveling by going to Maui. A celebration for the hubster’s birthday and his early retirement was our excuse to pack our bags and head out for some sun, fun, and food. Little did we know it would be our last trip for quite a while.
Hawaiian Delights
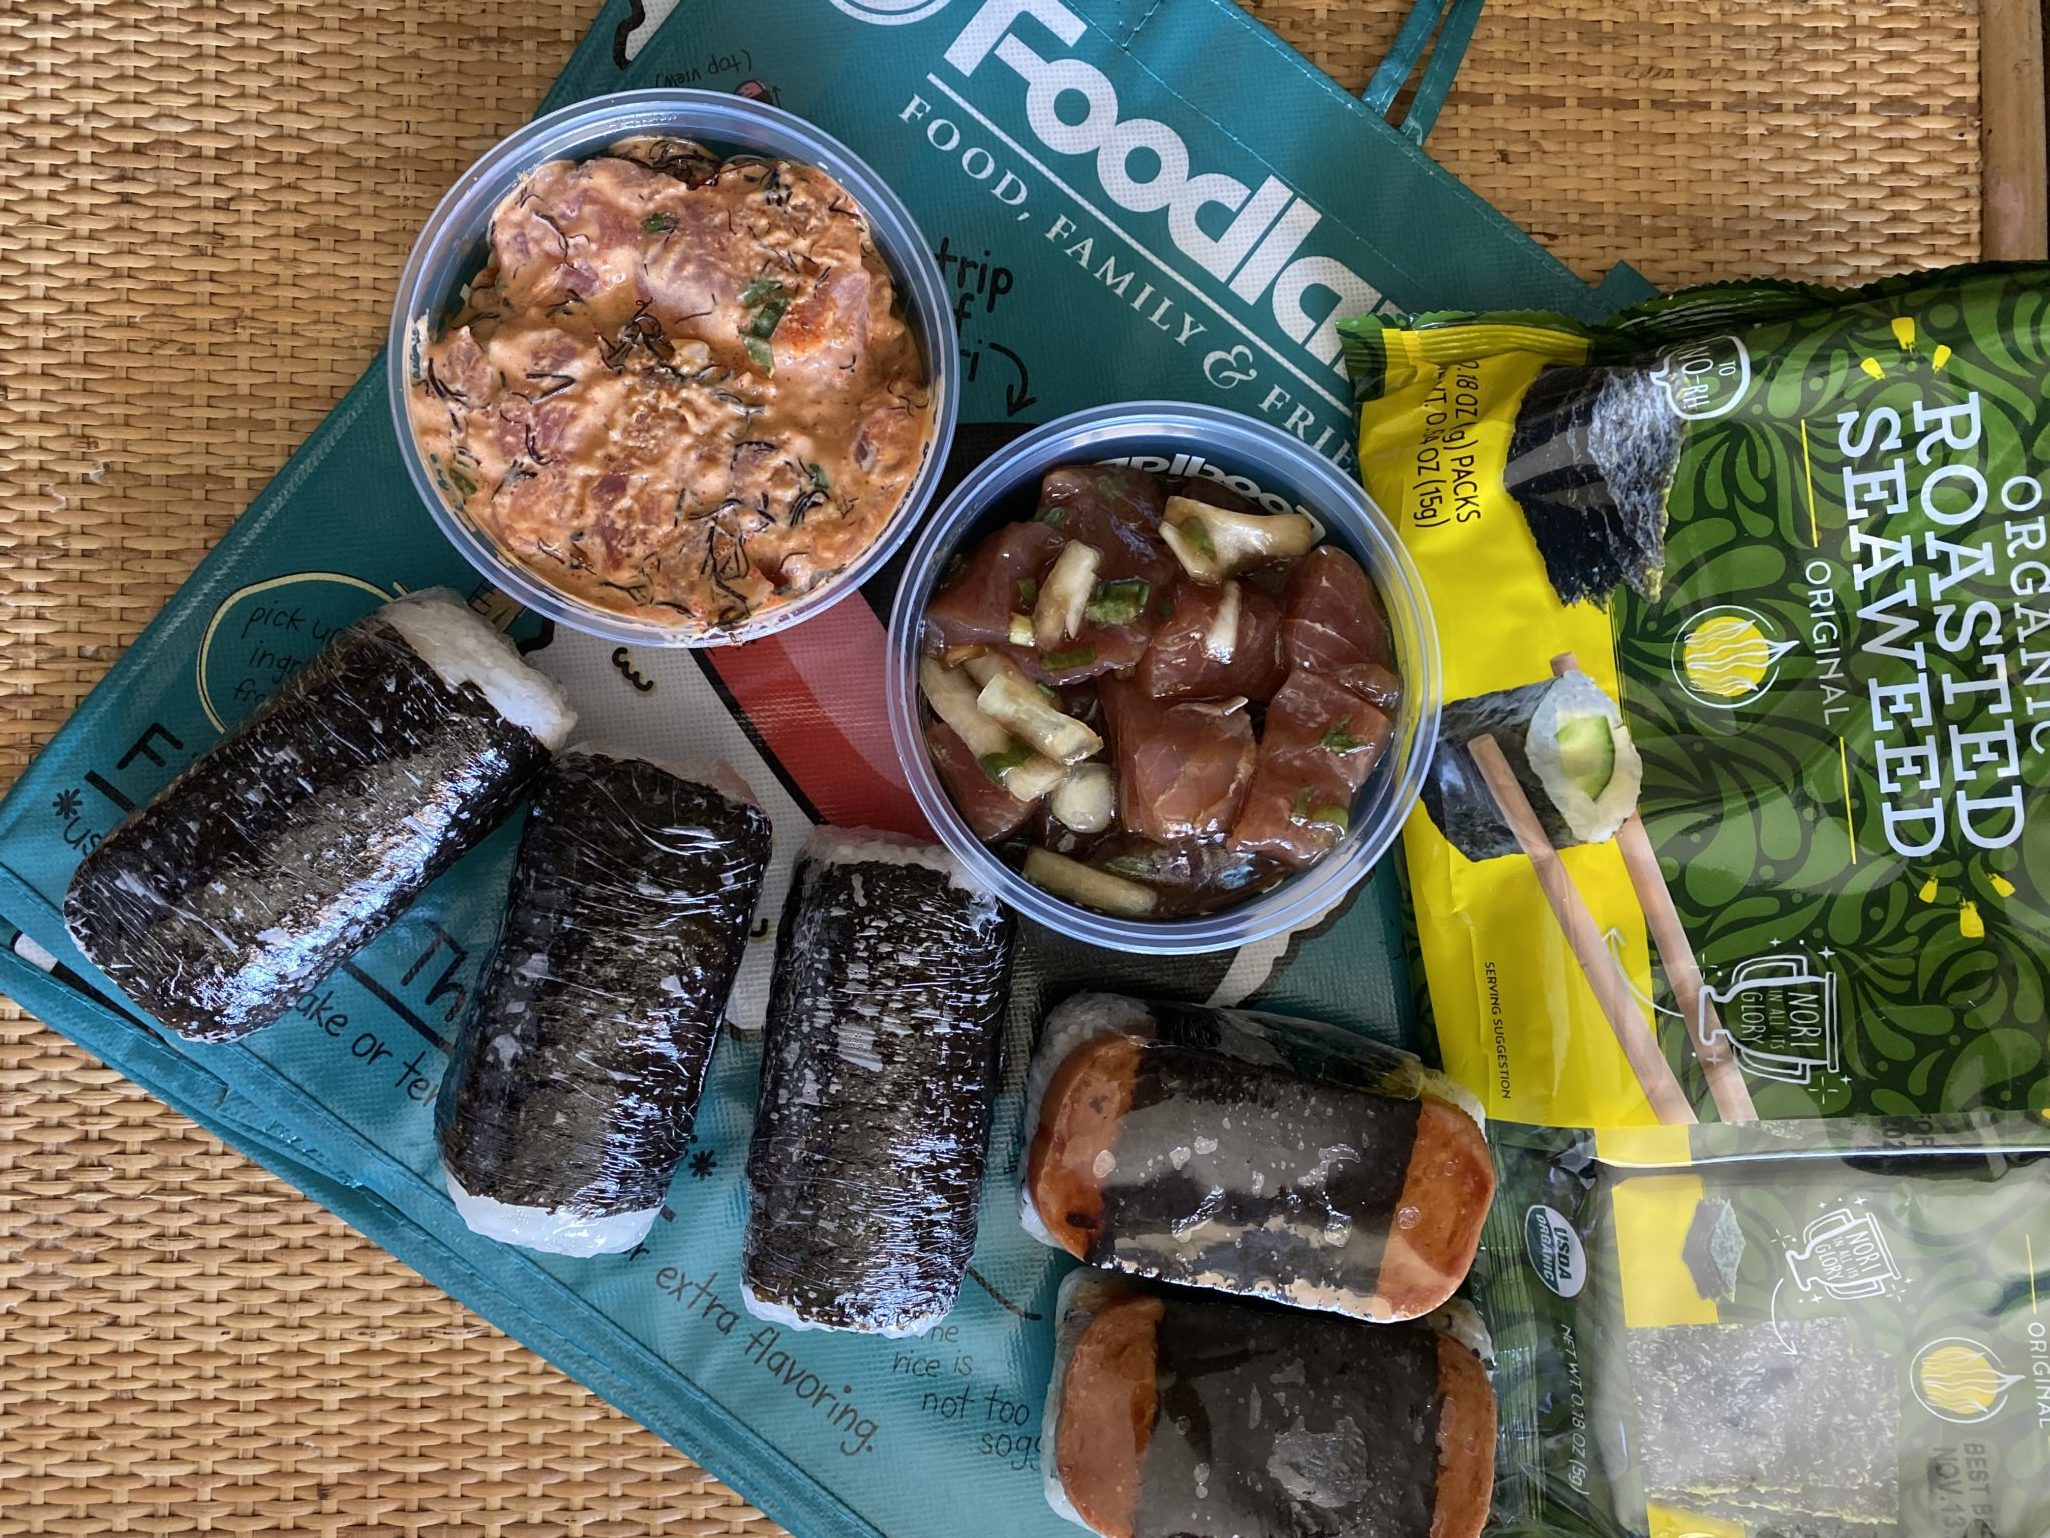
I am a sucker for Hawaiian food. A fusion of Native, Chinese, Japanese, Filipino, Portuguese, Korean and all of it tweaked so it taste great and is easy to eat while sitting on a beach! Our bucket list of food included Spam Musubi, a hunk of rice topped with a fried slice of SPAM and wrapped in seaweed, Poke’ (seasoned raw fish in a bowl with rice), island style bbq, Huli, Huli Chicken. YUM.
Then there are the sweets, Malasadas (best damn donuts), Haupia (coconut jello) and my favorite, Butter Mochi. Hawaiian Butter Mochi is the island’s answer to Blondies or Brownies but better (I know, them is fighting words). Buttery, gooey, sweet and so satisfying. Like our Spam Musubi quest, we went out of our way to find all things mochi.
This isn’t my first mochi rodeo, I posted a Butter Mochi Muffin recipe a while back that peeps really like (so says Google analytics, lol). Since then it has been off to the “rices” trying recipes with Koda Farms Sweet Rice (glutinous rice flour). Mochi now merits its own category in my recipe index. These muffins started it all, dense, chewy, with a touch of familiar cakiness, and the perfect amount of sugar. They are a great introduction to mochi-based desserts. BONUS: Mochi is gluten-free!
The Muffins that started it all!
Mochi Mania-Island Style
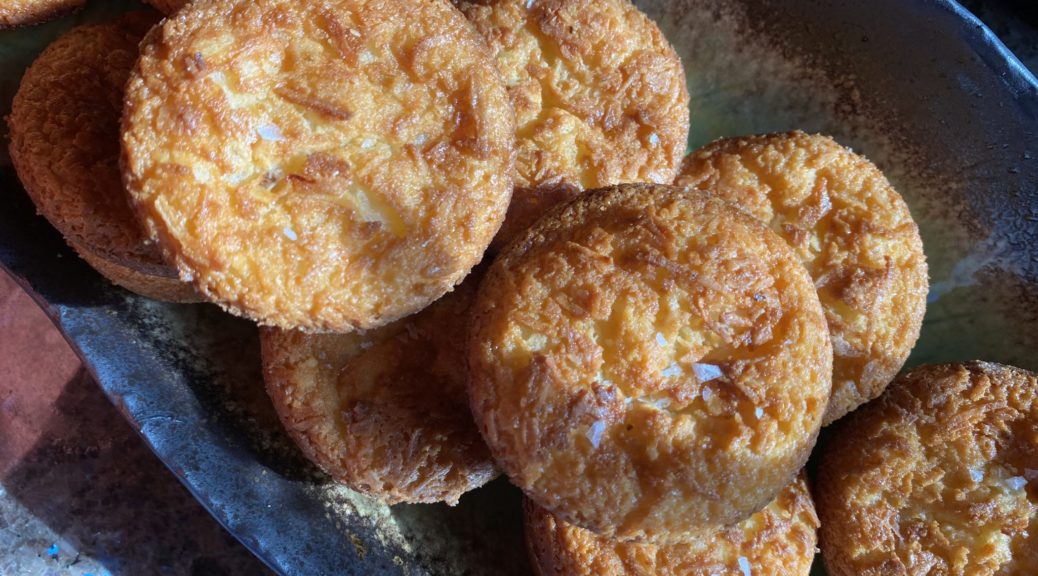
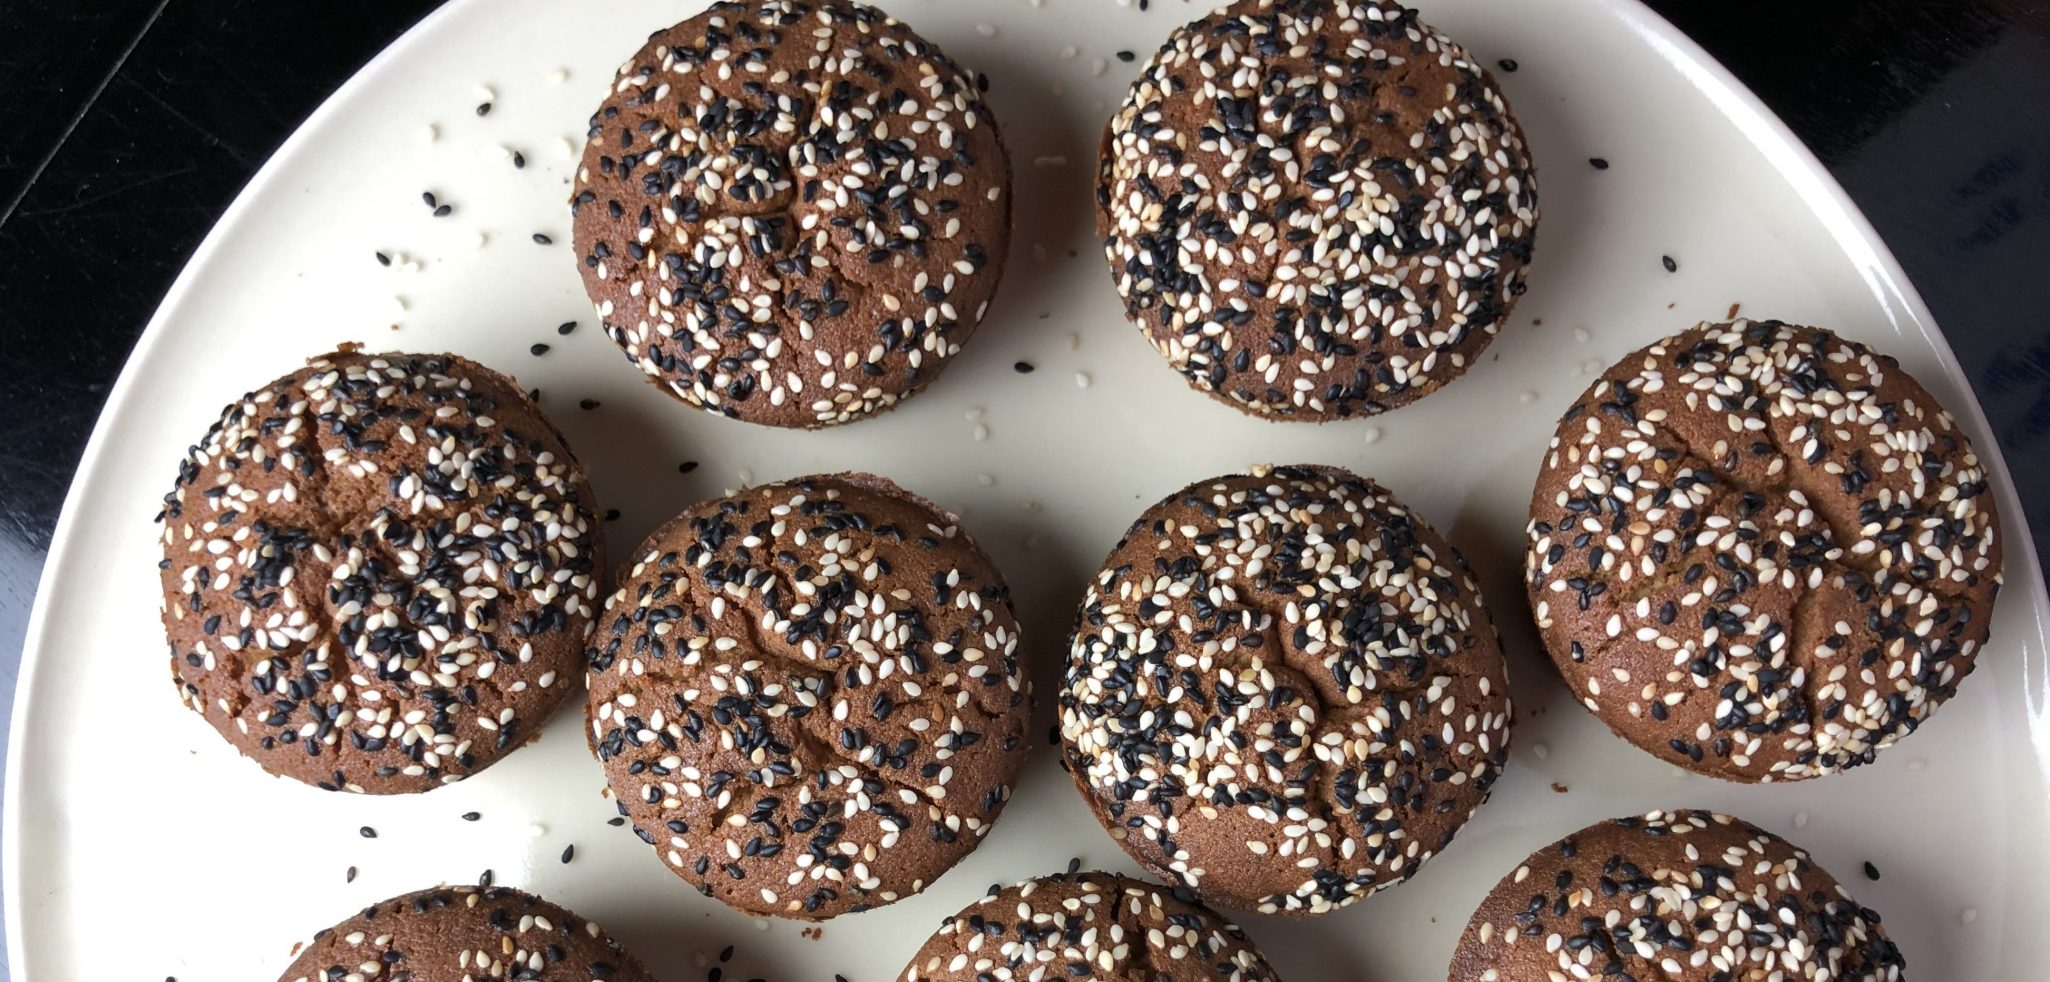
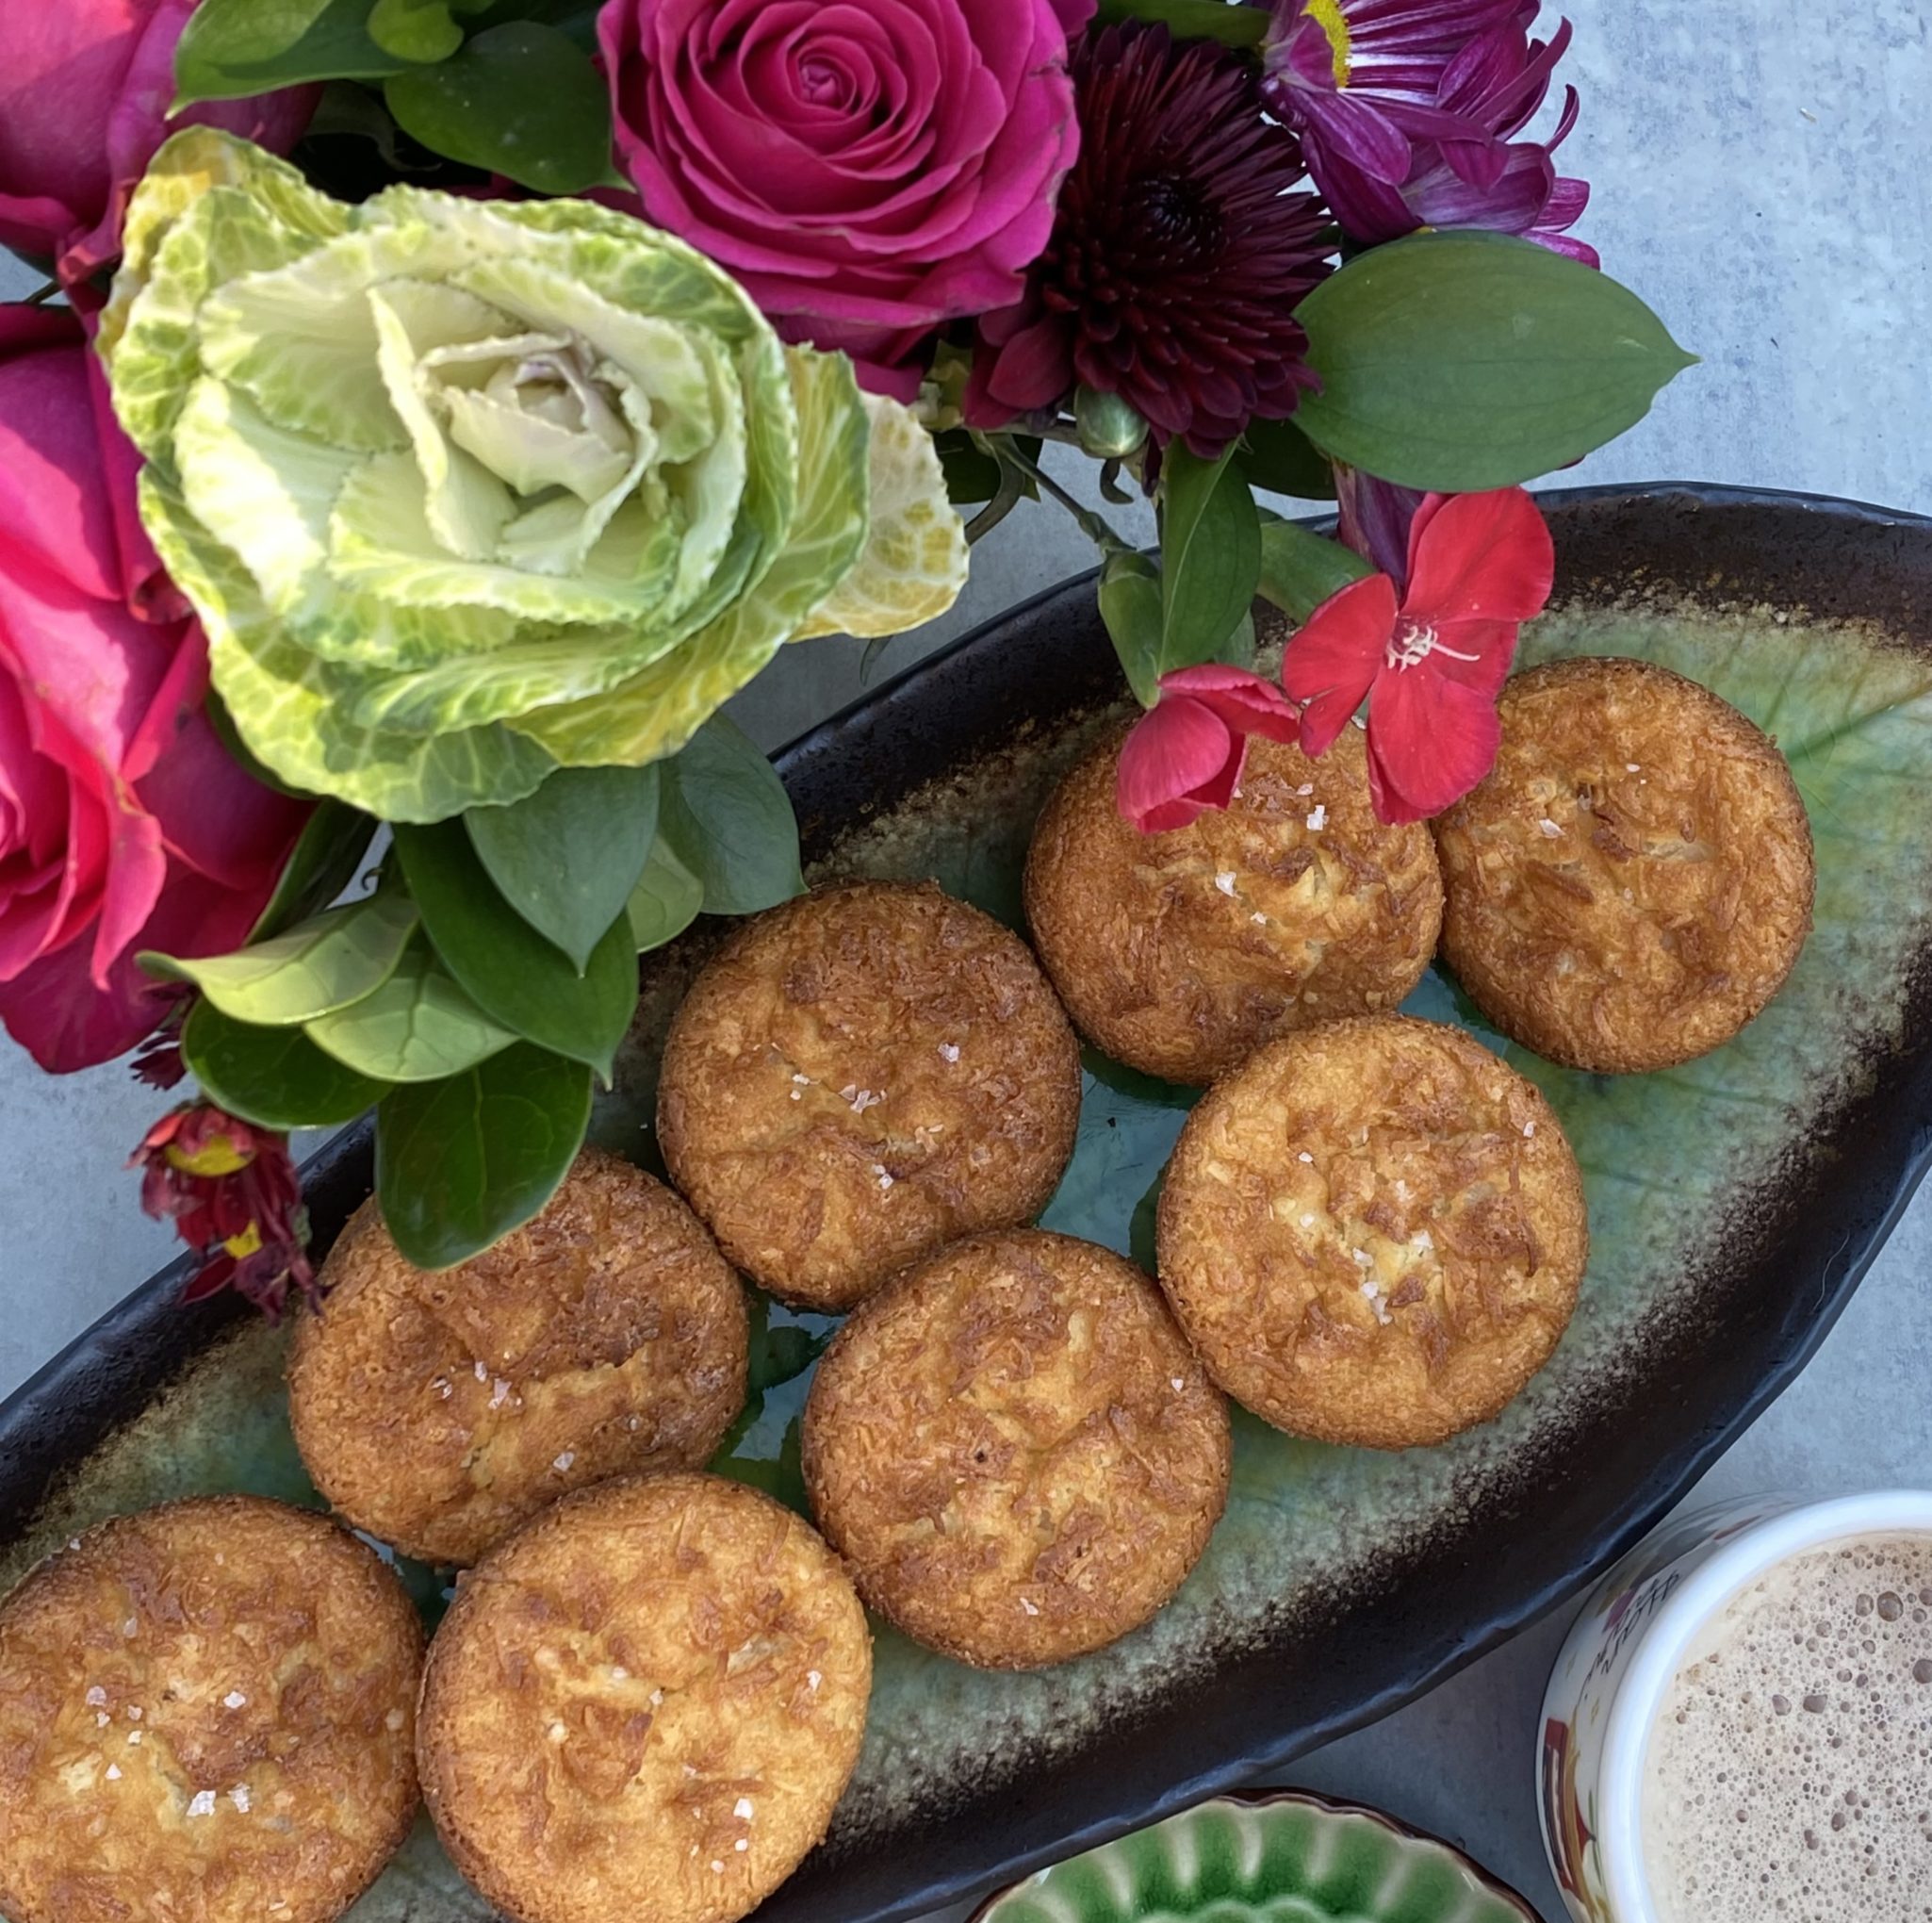
Hawaiian Butter Mochi takes mochi back closer to its Japanese roots, lighter, springier, and less cakey. The recipe calls for coconut milk and regular milk. The regular milk and less mochi flour are the “denseness” buster and gives the mochi its characteristic texture. Butter adds flavor. It is usually baked in a pan and then cut into squares but I decided to bake them in muffin tins. All for the edges folks. Each person ends up with their own gooeylicious mini-cake highlighted by a crispy, buttery edge, and finished with toasty shredded coconut and a sprinkle of Fleur de Sel, soooooo yummy.
Inspired by Aloha Kitchen and the website Catherine Zhang, these Butter Mochi Mini-Cakes are onolicious. I hope you will try them!
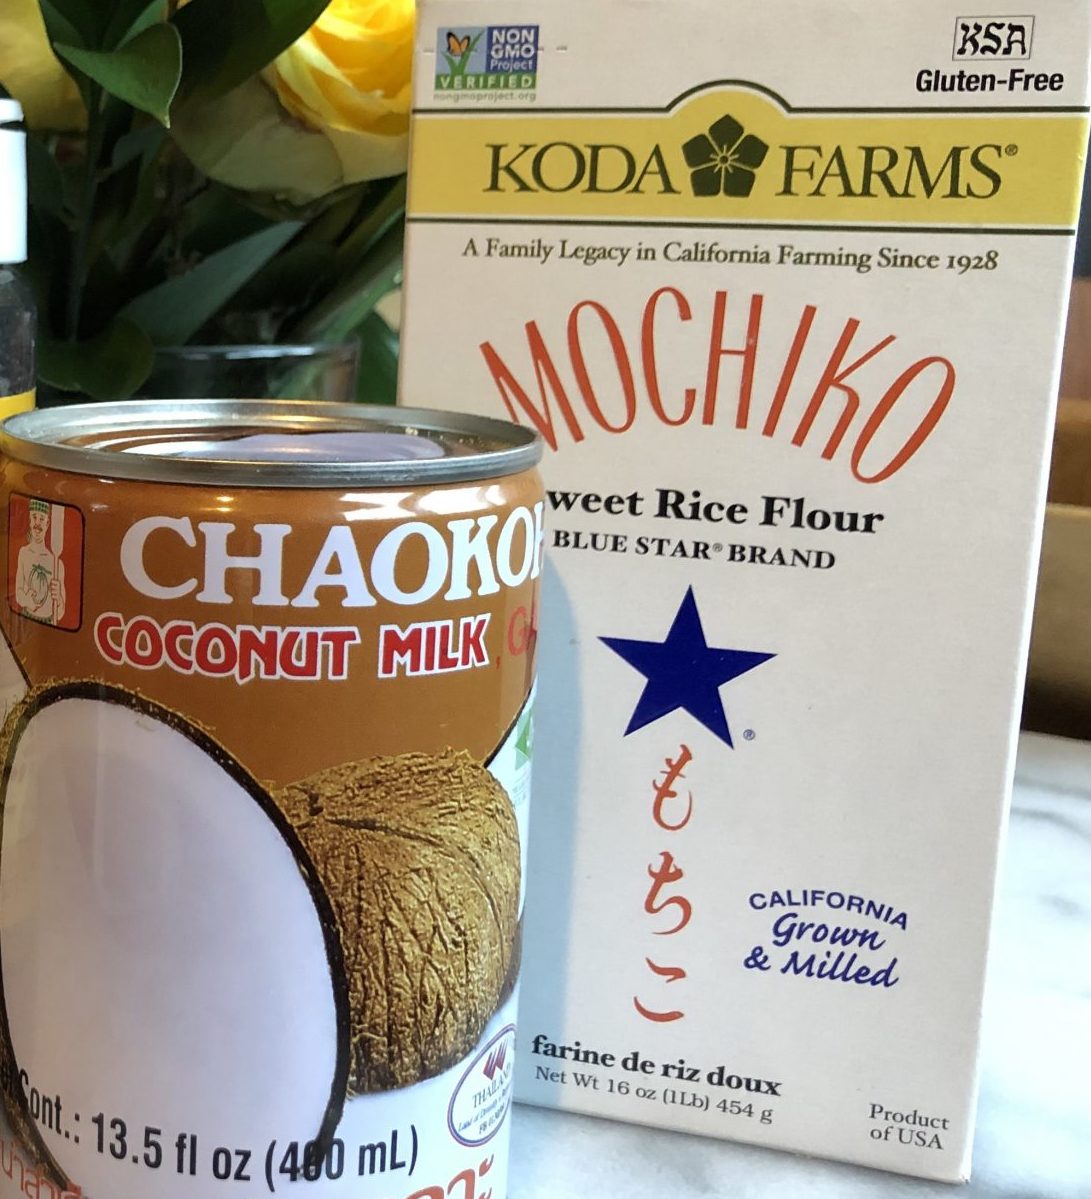
The two key ingredients you can find at most Asian stores, sweet rice flour and coconut milk. My go-to brands are Koda Farms Mochiko and Chaokoh or Arroy-D for coconut milk.
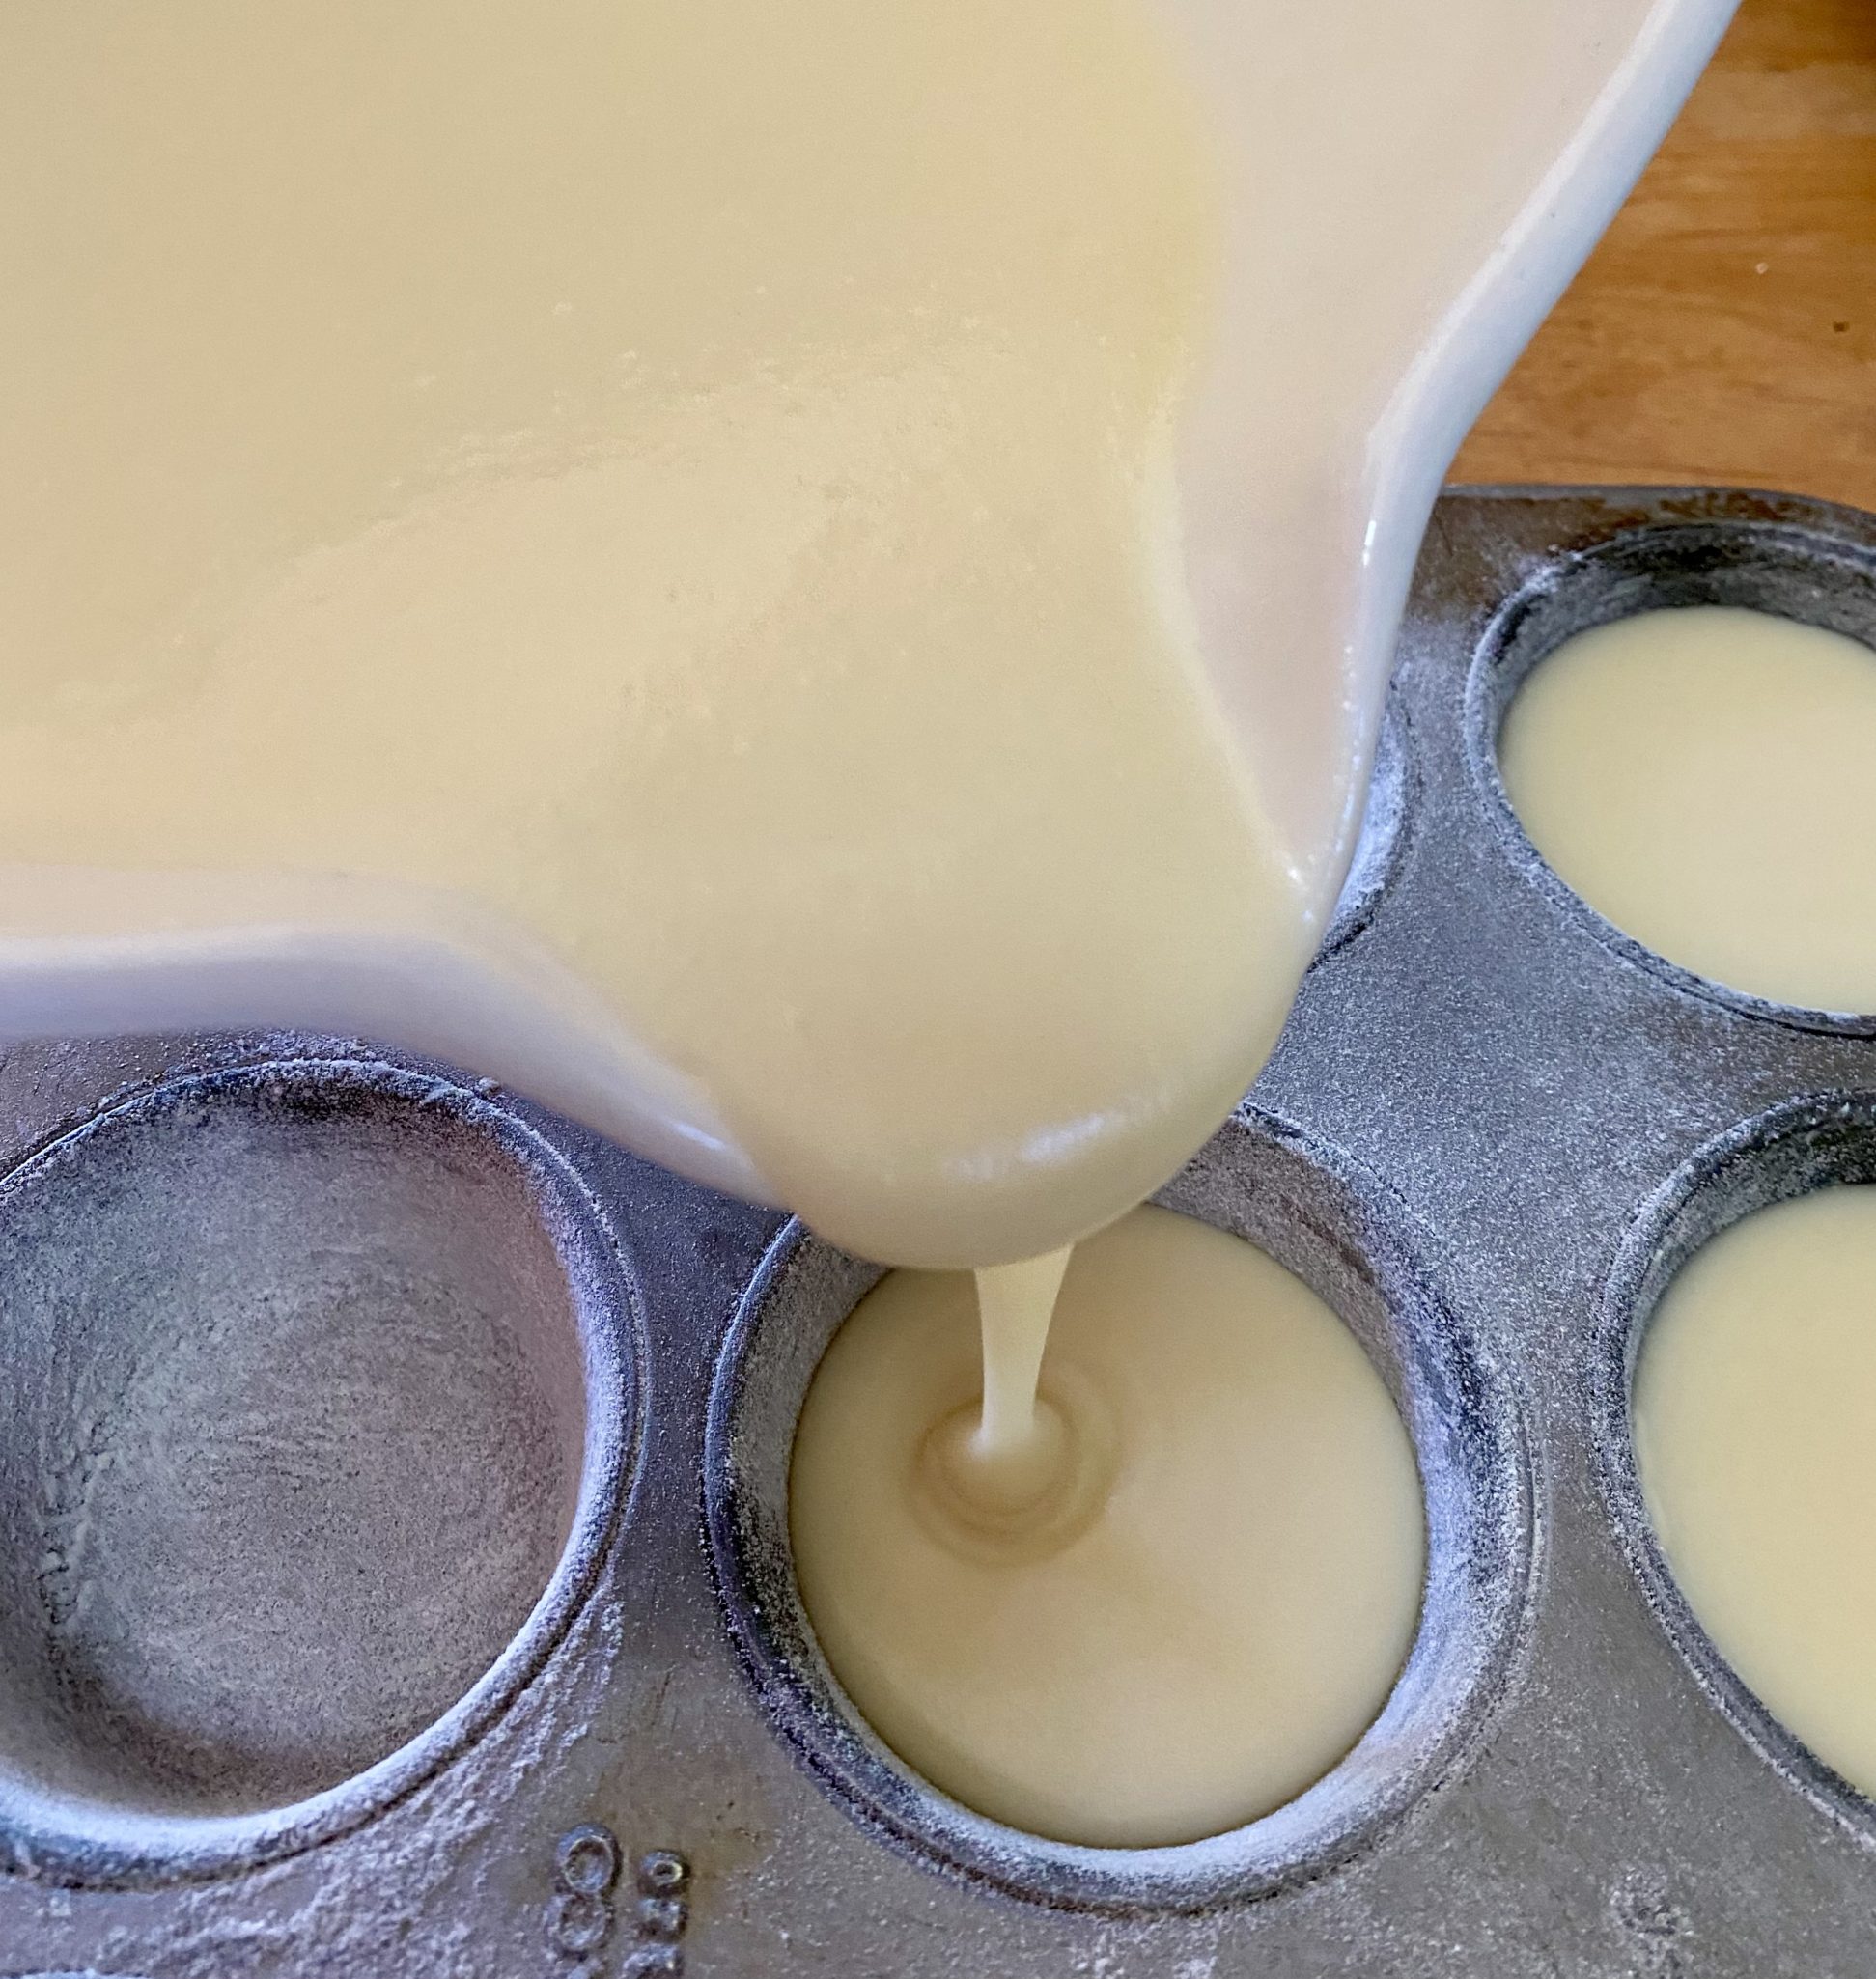
The batter will be very pourable due to the use of milk as part of the liquid and less mochi flour.
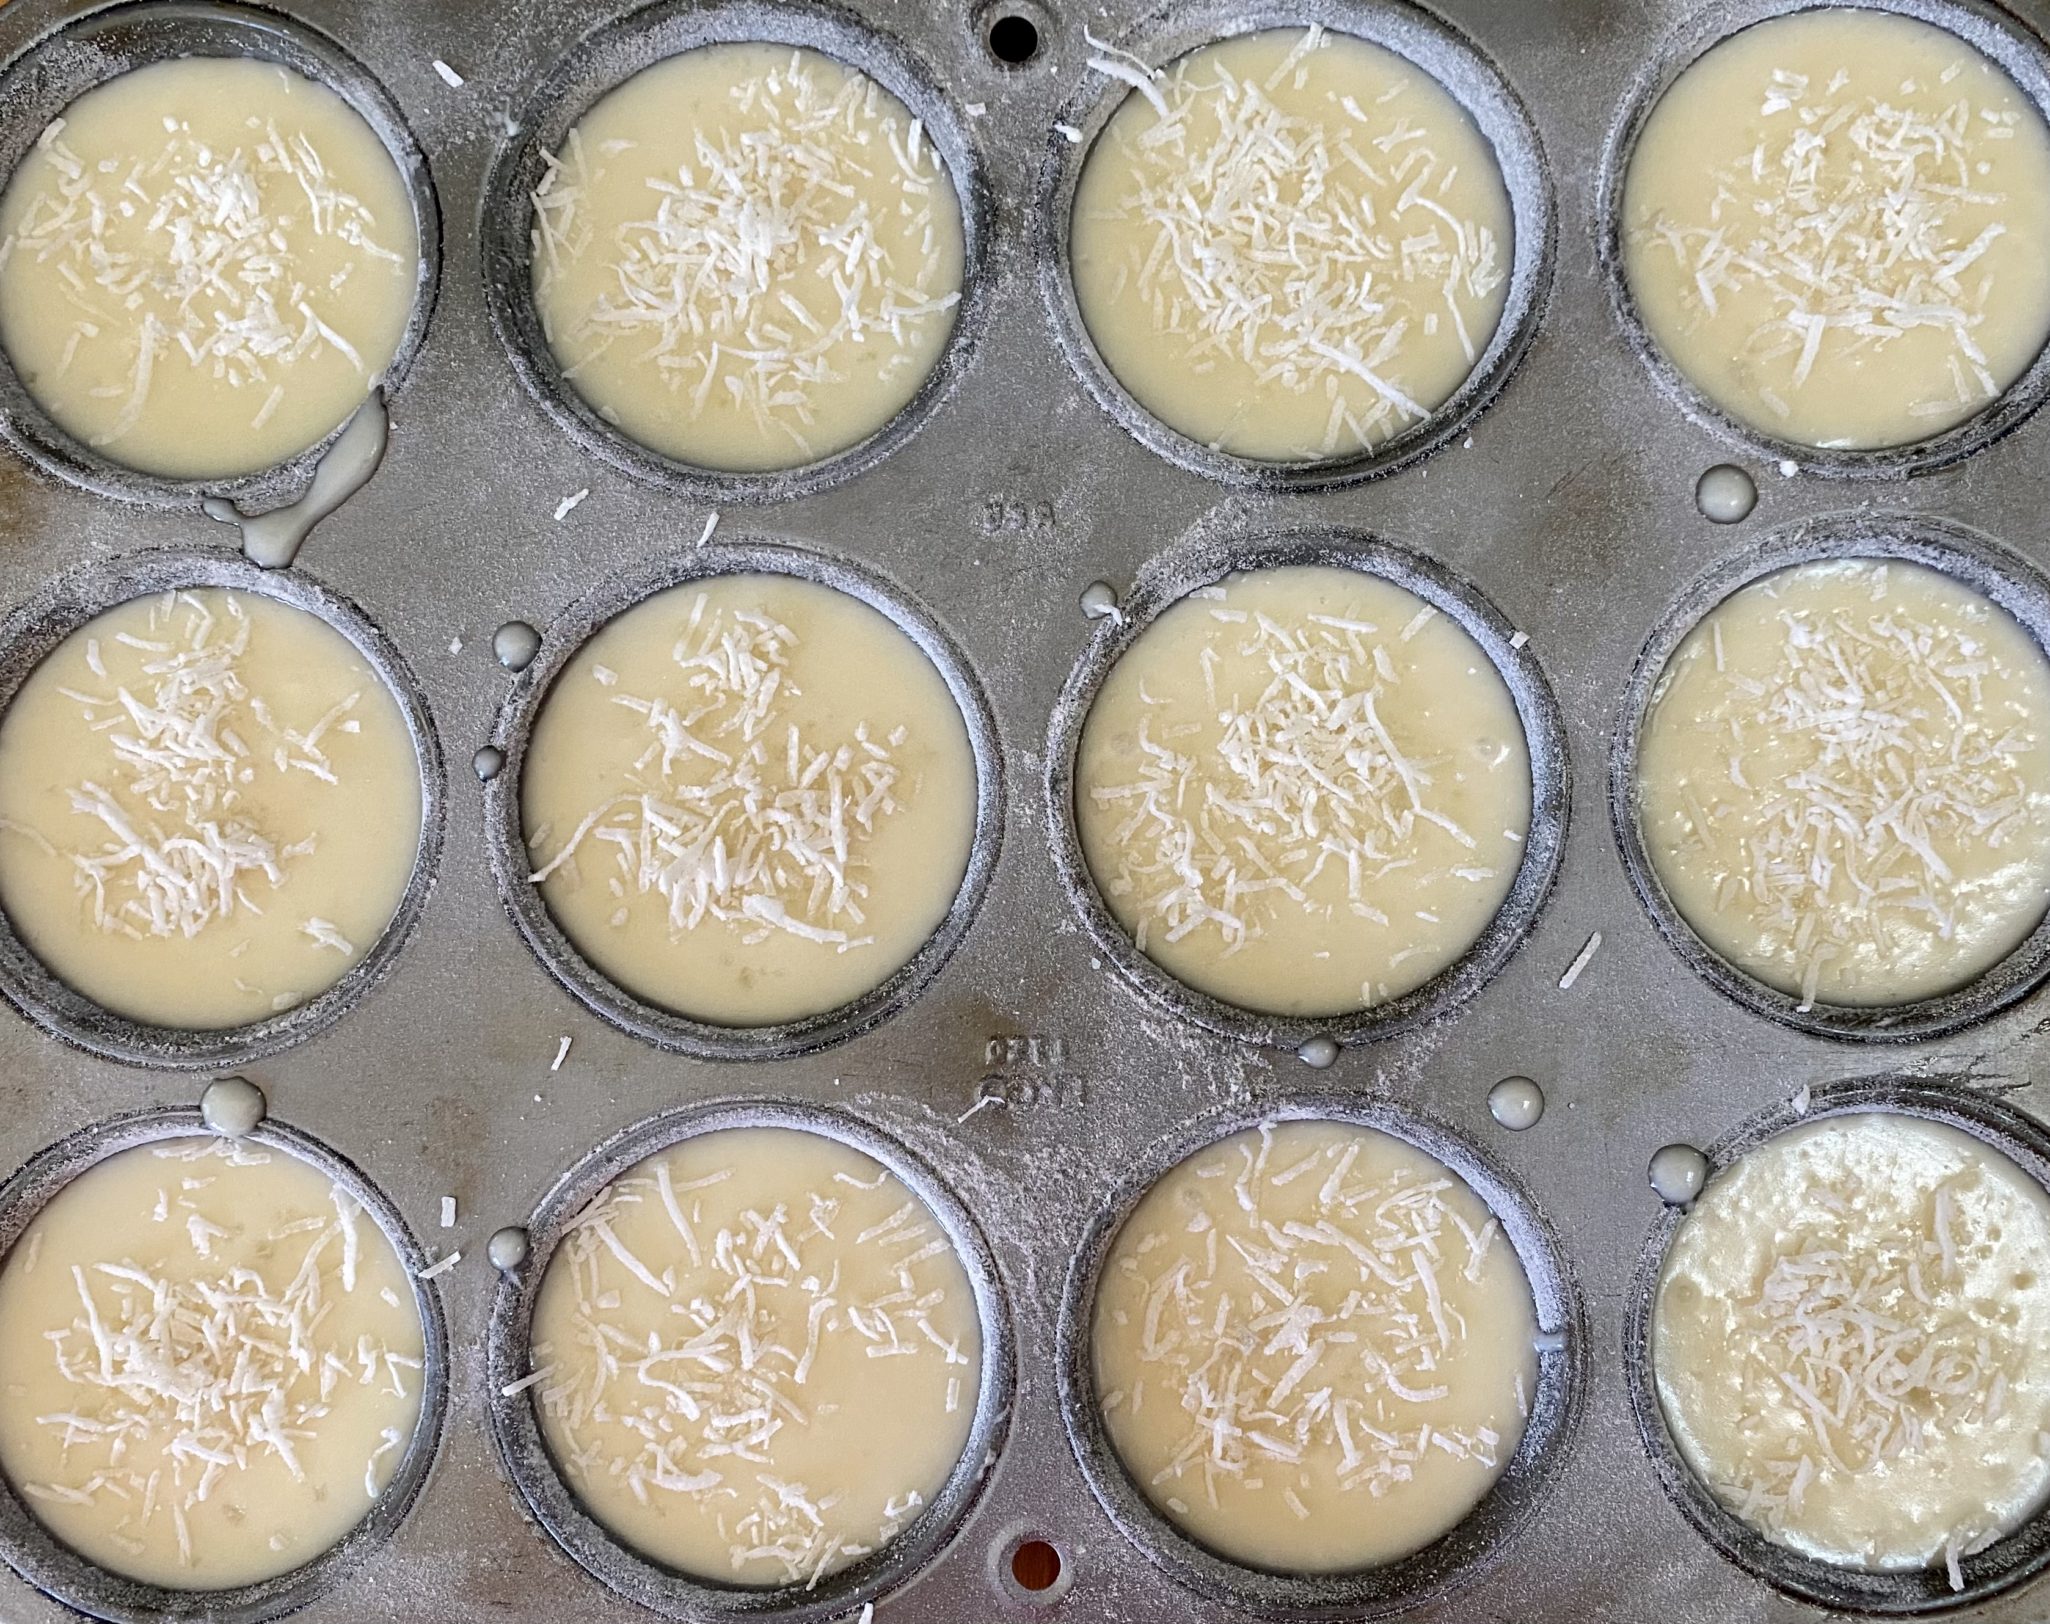
Don’t be afraid to fill the cups to 7/8. The mini-cakes will puff up but will fall as they are cooling. You will end up with a flat top or sometimes even a slight depression, it’s all good.
This muffin is a mash-up of Hawaiian Butter Mochi and Butter Mochi Muffins! Gooier and less cake-like than my butter mochi muffins. Baked as muffins they have crispy edges and a soft center-onolicious!
Course Dessert, Snack
Cuisine Asian, Fusion
Keyword butter mochi, hawaiian, Mochi, muffin
Prep Time 15 minutesminutes
Cook Time 45 minutesminutes
Total Time 1 hourhour
Ingredients
Da Wet Stuff
1/4 cupUnsalted butter55gm
3/4 cupCoconut milk170gm
1 cupWhole milk240gm
2Eggs
Da Dry Stuff
1 3/4 cupGlutinous rice flour225gm
1 cupGranulated sugar200gm
1tspBaking powder
Flaked or shredded coconut for garnish, preferably unsweetened but use what you like
Prep Yo Pan
Butter
Rice flouroptional
Instructions
Preheat the oven to 375 degrees
Generously grease 12-cup muffin tin with butter and dust with rice flour, if you don't have rice flour, skip it. The flour does help the batter rise in the pan and getting crispy edges.
In a large, microwave safe bowl combine the coconut milk and butter, heat in the microwave for 1 minute
Add the milk and 2 eggs, whisk until combined. I like whole milk but you can use 2% milk or alternative milk like oat milk.
In a medium sized bowl combine the glutinous rice flour, sugar and baking powder
Add the dry ingredients to the wet ingredients and whisk until smooth
Pour the batter evenly into the 12 muffin cups
Sprinkle with coconut and bake for 45 minutes, or until golden brown
Remove and cool. Muffins will keep for a couple of days on the counter. Pop them in a toaster oven to re-crisp edges. They also freeze pretty well.
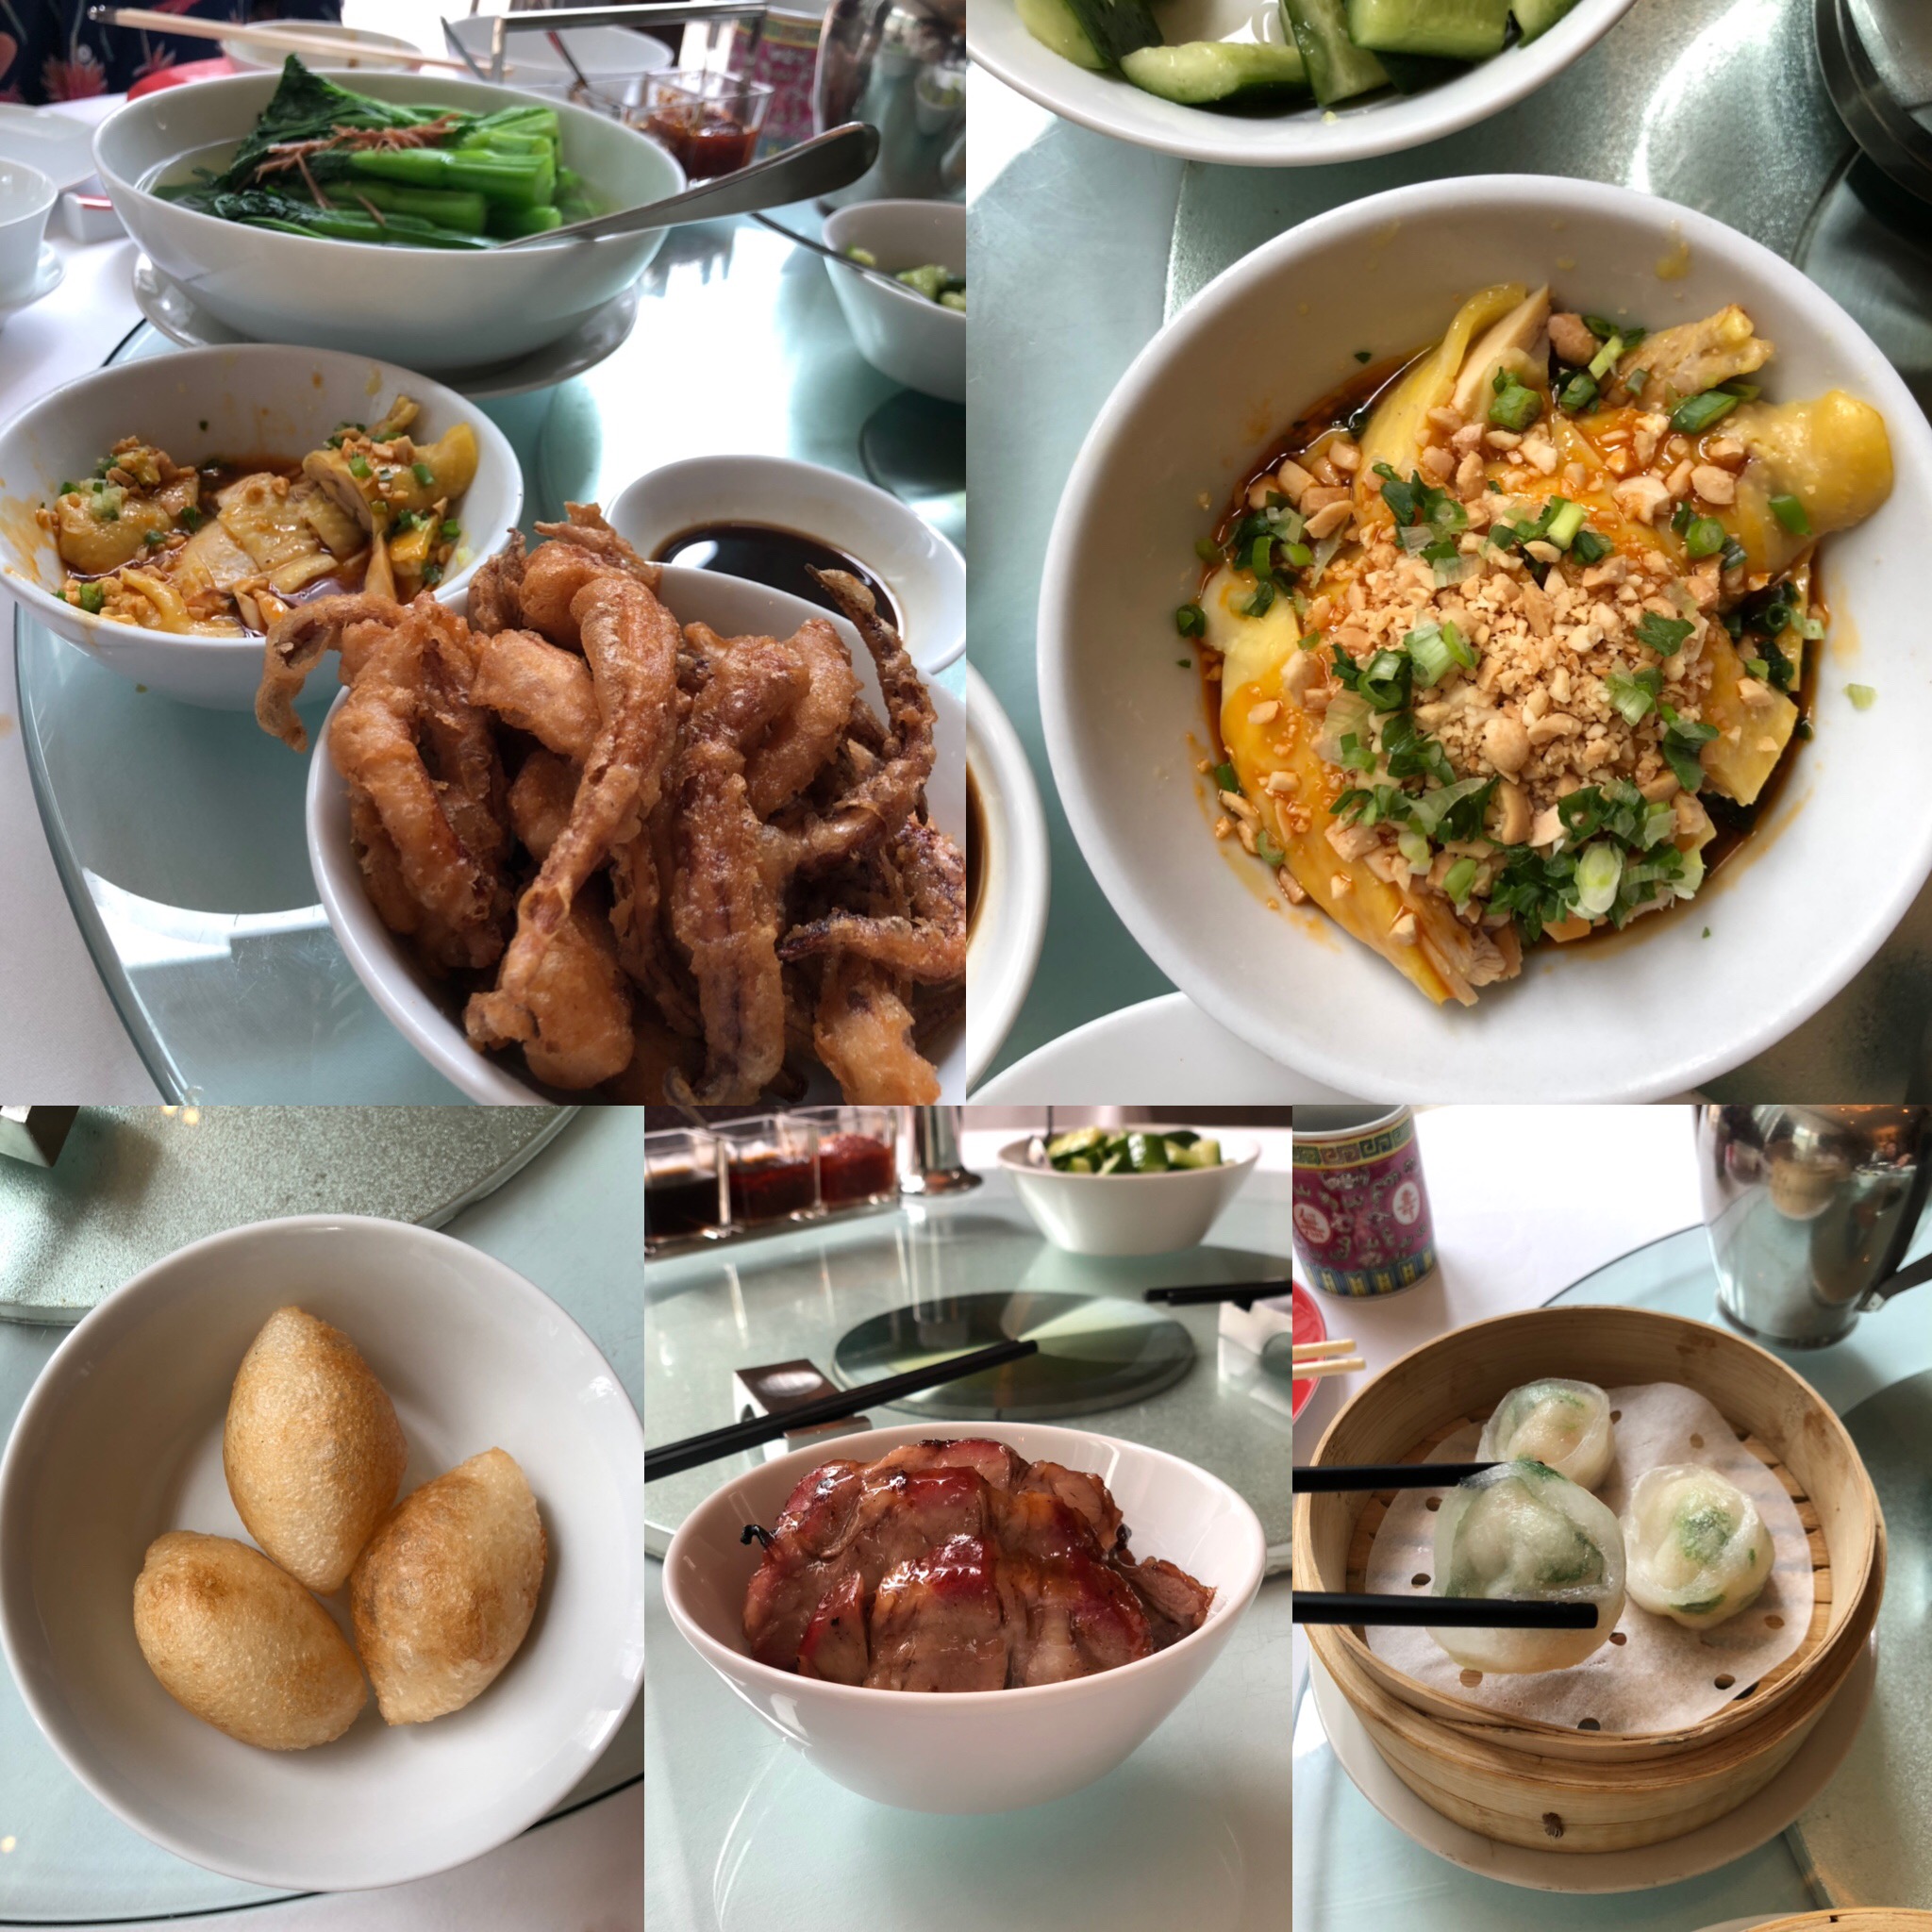
One of our favorite lunch outings is going for Dim Sum or Yum Cha. Dim Sum refers to the dazzling array of bite-size dumplings and morsels while Yum Cha means to drink tea. Yum Cha is a uniquely Chinese experience. In the good old days (pre-COVID), after being seated (after an interminable wait), a procession of carts appear and snake their way around the tables. Each cart holds steamer baskets of dumplings, plates of fried dumplings and egg tarts, chicken feet, black bean spareribs, noodles, and greens.
Let the games begin.
Start by waving your hand to get their attention and then point to the dishes you want. A running tab is kept, stamped for each dish placed on the table. Which, if you have hearty eaters, can run as much as going out for sushi!
Hyatt Regency Hong Kong
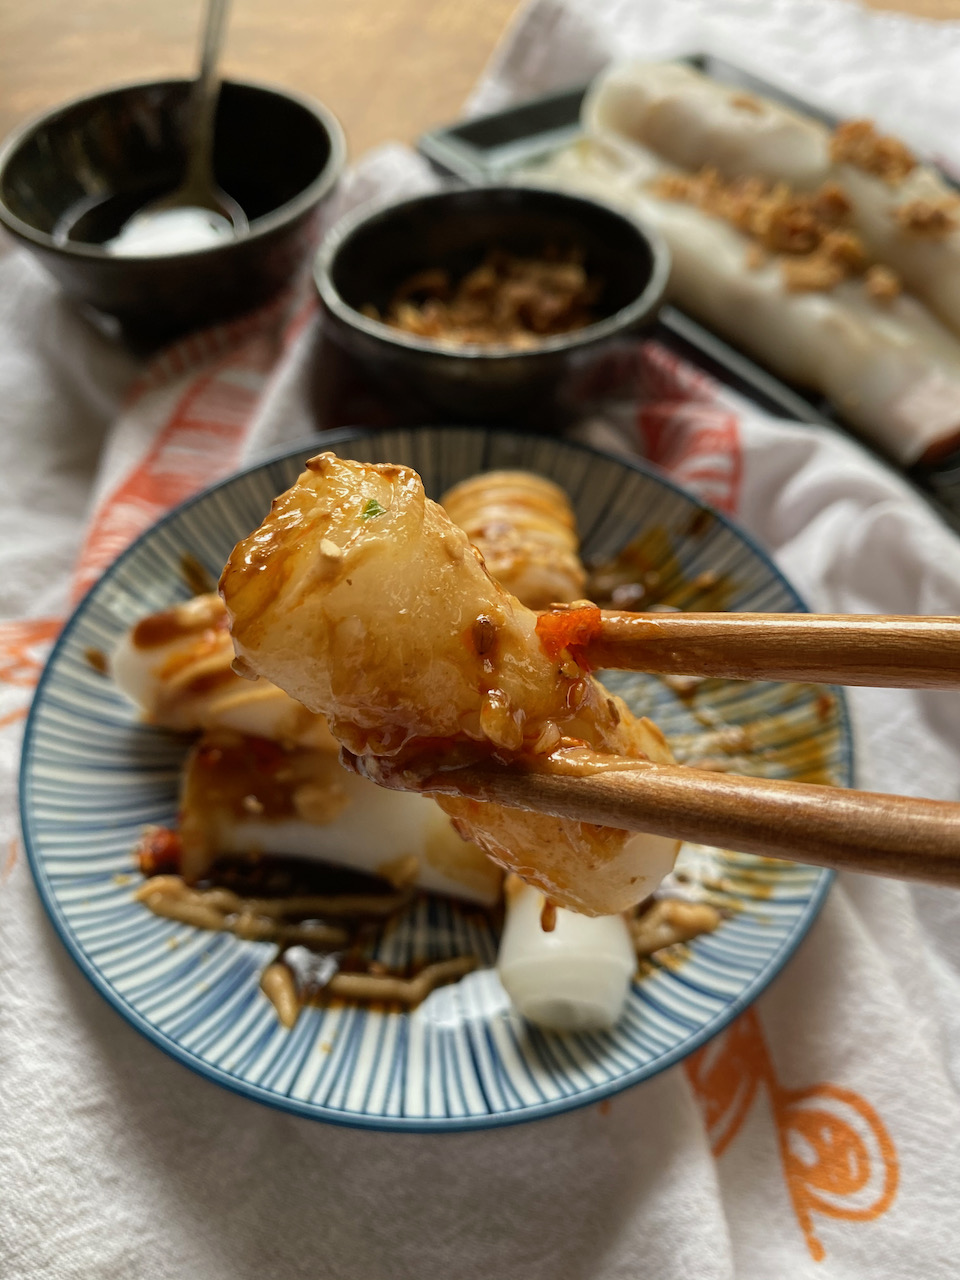
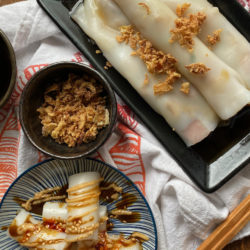
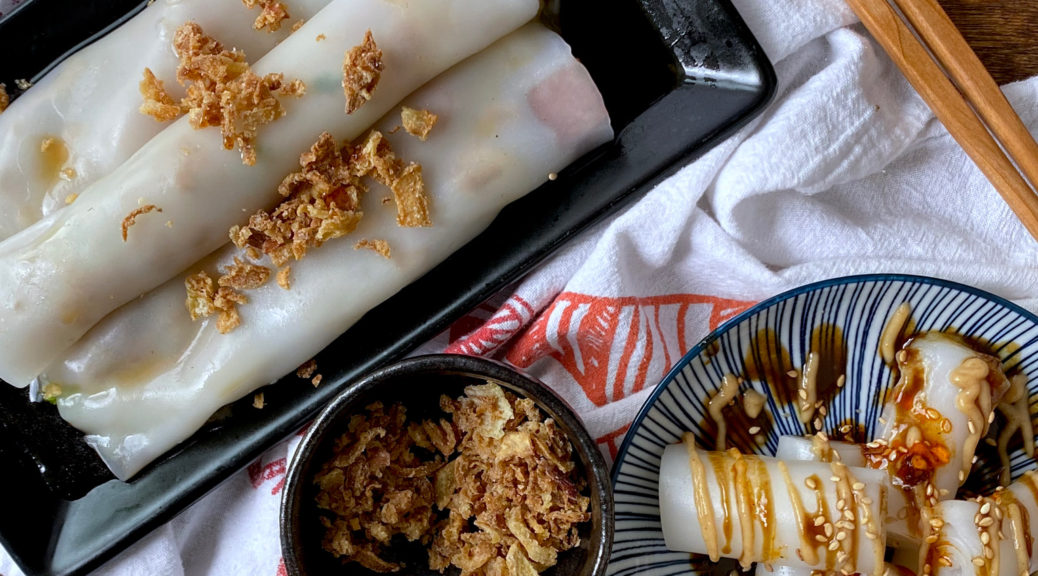
In the sweepstakes of little dishes that end up on our table when we go for Dim Sum, Cheung Fun or Rice Noodle Roll is an automatic ticket punch. The noodles have a soft, silky, smooth, texture and are neutral in flavor. This lends itself well to a variety of fillings like shrimp, bbq pork, or minced beef, and sauces. Filled noodle rolls are topped with a sweet, salty soy sauce while rice rolls without fillings are topped with sesame or Hoisin-based sauce (my favorite). These are known as Chee Cheung Fun (猪肠粉). (Funny story, the literal translation is Pig Intestine Noodle owing to their resemblance to said pork anatomy).
Never in a zillion years would I have thought of making Cheung Fun at home UNTIL I came across a recipe to make the noodles in the microwave. I was sold.
Game ON
The first hurdle is the ingredients. The rice noodle batter is a combination of:
Rice flour-plain rice flour NOT glutinous or sweet rice flour! Bob’s Red Mill at Whole Foods or Asian stores will have rice flour
Tapioca starch– also known as tapioca flour (I know, confusing!), derived from the starchy pulp of the cassava root. Used as a thickening agent like cornstarch.
Potato starch– is made from just the starch grains of potato and is NOT the same as potato flour which is cooked whole potatoes, that are dried and ground into flour. Potato starch is used as a thickener like cornstarch. It is used in gluten-free flour blends to provide texture and structure (straight from Bob’s Red Mill site, lol). Bob’s Red Mill sells potato starch as does most Asian markets.
No wheat products…gluten-free, ta-da!
This is How We Roll
Having Some “FUN”
Combine the flour and starches in a mixing bowl, add liquid, stir…dunzo. How easy is that?
The batter has a thin consistency and the starch and water will separate as it sits. Stir or whisk the batter well before pouring it into the cooking dish. I used two microwavable dishes to make the noods. A rectangular 9×6 glass pyrex dish and the shallow round Cook Anyday Microwave-ware bowl. The rectangular dish is the perfect shape to make rolls but doesn’t have a vented lid. You can use the plastic lid but keep it ajar when cooking to allow moisture to escape.
Lightly oil the bottom and 1/4 inch up the sides of your dish to prevent sticking. Brush the dish as needed, you may need to each time you make a roll. Pour about 1/3 cup of batter into the 9×6 dish ( a little less for the round bowl) to create a thin layer on the bottom. The round bowl needed only a generous 1/4 cup to cover the bottom of the bowl.
Microwave Magic
Place vented lid on top and microwave at full strength for 2 min and 10 seconds. My microwave is small and rated at 700 watts, you will need to find your microwave wattage and adjust accordingly either reducing the power or shortening the cooking time on a more powerful microwave. If your microwave has a turntable, use it. I found the noodles cooked more evenly when using the turntable. The noodle is done when it looks translucent and has some bubbles. Cracks in the cooked noodle are caused by either overcooking or using too much batter. Remove from the microwave and place in a cold water bath to cool. It will only need a couple of minutes but makes it much easier to roll.
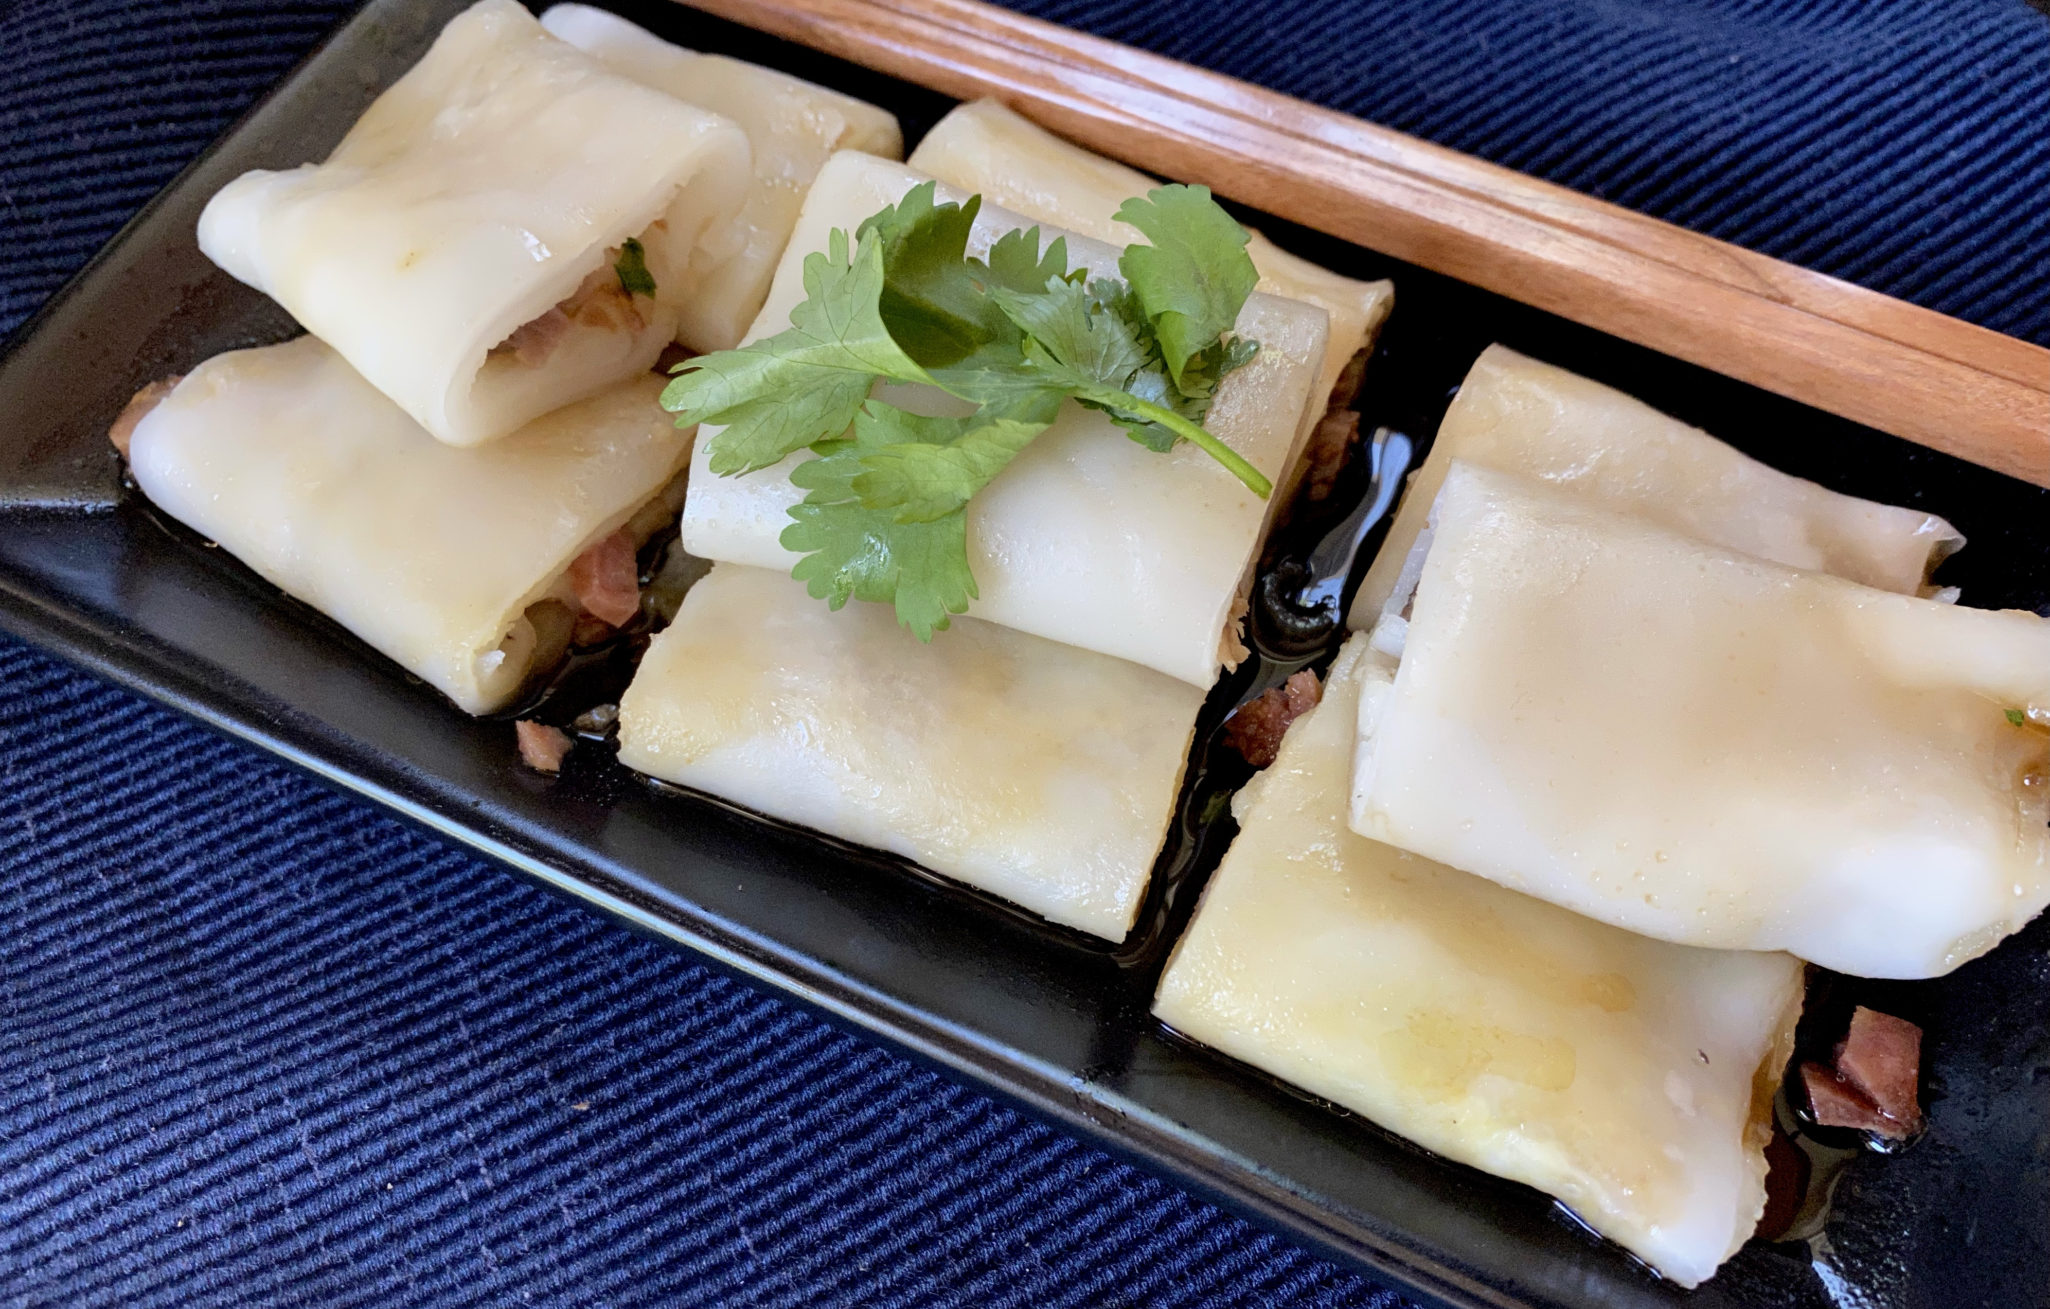
Using a spatula or dough scraper, start on one edge and lift and roll the sheet to make a roll. For filled rolls, scatter filling on one side of noodle, lift noodle, and roll to cover the filling. The noodle is pretty forgiving so just push, roll. Don’t worry, the rolling hides a lot of imperfections. A bench scraper is the perfect size for the rectangular Pyrex dish, score another point for the Pyrex pan.
The Bling, Fillings and Toppings
Rice noodles are neutral in flavor so it is the perfect foil for lots of different fillings and sauces. Favorite fillings include barbecue pork, shrimp, or a medley of fried egg, Chinese pickles, green onions, cilantro, and bbq pork. Use your imagination, leftover roast duck, roast pork, or go vegetarian, sauteed mushrooms, caramelized onions, corn, the possibilities are unlimited. I have added SPAM in a pinch! Top rolls with a sweet soy sauce, don’t skip it, you could add some chili oil, that’s copasetic. For a little crunch, I top the rolls with fried shallots or onions, totally optional.
Ji Cheung Fun is my favorite rice noodle roll. Roll the noodle into a cylinder since Ji Cheung Fun does not have a filling. Top with sauces, Peanut Sauce, and Hoisin Sauce, a play on sweet and salty flavors. Sprinkle peanuts or sesame seeds on top to add a nice crunch. I also hit it with Chili Crunch Oil…BAM, straight to Yumsville.
Comfort Finale
I rolled my last noodles intending to make a plate of Ji Cheung Fun but I really wasn’t in the mood for it. Instead, I had soup noodles on the brain, so I cut each roll into 1/2 inch wide noodles, placed them in a bowl, and turned my attention to the soup. Luckily, I had heirloom tomatoes from the market, a little bit of beef, and a couple of eggs in the fridge. A warm bowl of Tomato Egg Drop Soupwith Rice Noodles was ready in minutes and hit the spot.
A favorite dim sum dish, steamed rice noodles filled with bbq pork, shrimp or minced beef, served with sweet soy sauce. Made easy in the microwave!
Course Appetizer, dim sum, Side Dish
Cuisine Asian
Keyword Cantonese cooking, Cheung fun, dim sum, ji cheung fun, microwave, rice noodles
Prep Time 45 minutesminutes
Cook Time 3 minutesminutes
Ingredients
Batter
1cuprice flour140g
1/2cuppotato starch90g
1/2cuptapioca starch/flour70g
1tablespoonsugar
1/2teaspoonsalt
1tablespooncanola or vegetable oilplus more for brushing
2cupsroom temperature water470ml
2cupsjust boiled water470ml
Adds-ins
3tablespoonsthinly sliced scallions
3tablespoonschopped cilantro
Toppings
red pepper flakes
toasted sesame seeds
chili oil
Sweetened Cheung Fun Soy Sauce
2-2.5Tbsp light soy sauce adjust to taste
1/4cupwater
1½ tsp sugar
¼ tsp chicken powder
¼ tsp sesame oil
Hoisin Sauce
0.5Tregular soy sauce or dark soyreduce agave to 1/2 t if using dark soy
1.5THoisin Sauce
0.5TSesame oil
1-2Twater
1tAgave syrup or sugar
Peanut Sauce
1tbsppeanut butter1 generous tablespoon
2Twater
1/2tagave or sugar
1/2tsesame oil or chili sesame oil
Cheong Fun Sauce Simplified (variation of Sweetened Cheung Fun Soy Sauce)
1/2cuphot water
2tablespoonssugar
3tablespoonssoy sauce
1/2teaspoonsesame oil.
Instructions
Batter
Whisk together all the flours, sugar, and salt in a mixing bowl. Add 1 tablespoon of oil and 2 cups of room temperature water to the batter and stir to combine. Some of the flour will clump up. Don’t worry–keep stirring and the flour will loosen eventually.
Gradually add the boiled water to the batter. Pour the water in a steady stream with one hand and stir the batter with the other hand. Place a towel underneath the bowl to steady it while you pour and stir.
Set the batter aside. The flour will settle to the bottom in just a few minutes. Make sure to stir the batter before each time you are ready to pour a sheet of cheung fun.
MIcrowave directions:
1 9x6 or 8x8 glass pyrex dish
Rectangular Pyrex ~9x6 glass container, 8x8 glass container or Large shallow Cook Anyday Bowl
Brush bottom and 1/4 inch up sides of glass container or pan with vegetable oil. Stir batter and pour approximately 1/3 cup of batter into Pyrex pan. Loosely cover with lid. Place in microwave and set time for 2 minutes and 10 seconds, full power. (For reference microwave I have is ~700 watts, the low end of power for a microwave)
Set up a pan with cold water large enough to fit Pyrex container you are using to microwave.
When cooking is complete, remove from microwave and immediately place in pan of cold water. Allow pan to sit for a couple of minutes to cool. The rice noodle sheet should look transparent with a couple of bubbles. If there are opaque spots where it still looks white, microwave for additional 15-20 seconds.
Remove container from water bath. Using a bench scraper, run it around the edge of the noodle to loosen. Starting from the edge (short or long) nearest to you, use a bench scraper or spatula, lift and roll the rice noodle away from you. Keep lifting and rolling. Divide the rice noodle roll in to the length desired. For Ji Cheung Fun the pieces are approximately 2 to 2.5 inches in length.
For filled Cheung Fun: Pour batter into dish, scatter a line of filling at about 1/3 line of batter in the pan , from the edge you will begin to roll. See video.
Fillings
Go crazy, rice noodles are very neutral and will compliment almost anything you pair with it.
Have approximately 1/2 pound of filling for this recipe. But if you come up short, make non-filled noods, cut them up for nice big bowl soup.
Shrimp
Use medium sized shrimp, peel and deveined. Toss the cleaned shrimp with 2 tablespoons water, 1/2 teaspoon sugar and 1/8 teaspoon baking soda. After the shrimp have been coated, cover and refrigerate for 2 hours. After 2 hours, rinse the shrimp under a gentle stream of cold running water for 5 minutes to wash away the sugar and baking soda and pat thoroughly dry with a paper towel. This step is sort of optional. The texture is greatly improved but your prep time is increased. But, if you want snappy shrimp-just do it. This is from Woks of Life, boss site.
Marinate the shrimp with 1/4 teaspoon sesame oil, a pinch of salt, 1/2 teaspoon cornstarch, and 1/4 teaspoon ground white pepper. Cover and return to the refrigerator while you prepare the rest of the ingredients.
Pre-cook your shrimp so they will be ready when you make your noods. Lay the shrimp out in a single layer in a microwaveble dish, the shallow Anyday Bowl works, cover and microwave on full power for 4 - 5 minutes until the shrimp are opague, pink and cooked through. AS always, adjust time for your microwave. These numbers are for my 700 watt Spacesaver, adjust accordingly.
Other stuff
BBQ Pork- Dice or julienne. You can mix in green onions if you like.
Dried Shrimp, found in Asian grocery stores, soak to soften before using.
Shiitake mushrooms Use dried or fresh. Rehydrate dried and dice. Fresh shiitakes should be seasoned sitr fried.
Egg-Straight from wathching the Joe's Rice Roll Video. Scramble an egg and use with the batter. Add 1 -2 tablespoons of egg after pouring batter into pan. Nice effect and great with bbq pork and green onions!
Raise your hand if you have had Mango Sticky Rice. Just trying to gauge in the pantheon of delicious desserts, where Mango Sticky Rice lands. I live in a bubble in the Bay Area where you can be in an Asian restaurant or supermarket be it Thai, Chinese, Japanese, Korean, in minutes. Mango Sticky Rice is a mainstay dessert. I use to think it was intimidating to make at home but it really isn’t. Now, making the rice in the microwave takes any trepidation down to zero!
The ultimate mango dessert, Mango Bingsoo from UDessert Story
Vegan and Gluten-Free, Shazam!
Asian desserts generally are not too sweet. If I had to pick predominant flavors, I’d say mango, coconut, almond, and sesame are pretty popular. Sticky rice is a cornerstone, as is Tapioca (hello, boba). Many Asians are lactose intolerant so dairy is not a major player in Asian cuisine. Mango Sticky Rice is a win-win-win, coconut milk is used for the sauce and flavoring component, sticky rice-the base, so, no butter, eggs or wheat. Vegan, gluten-free, and dairy-free-mindblowing.
Stuck on Sticky Rice
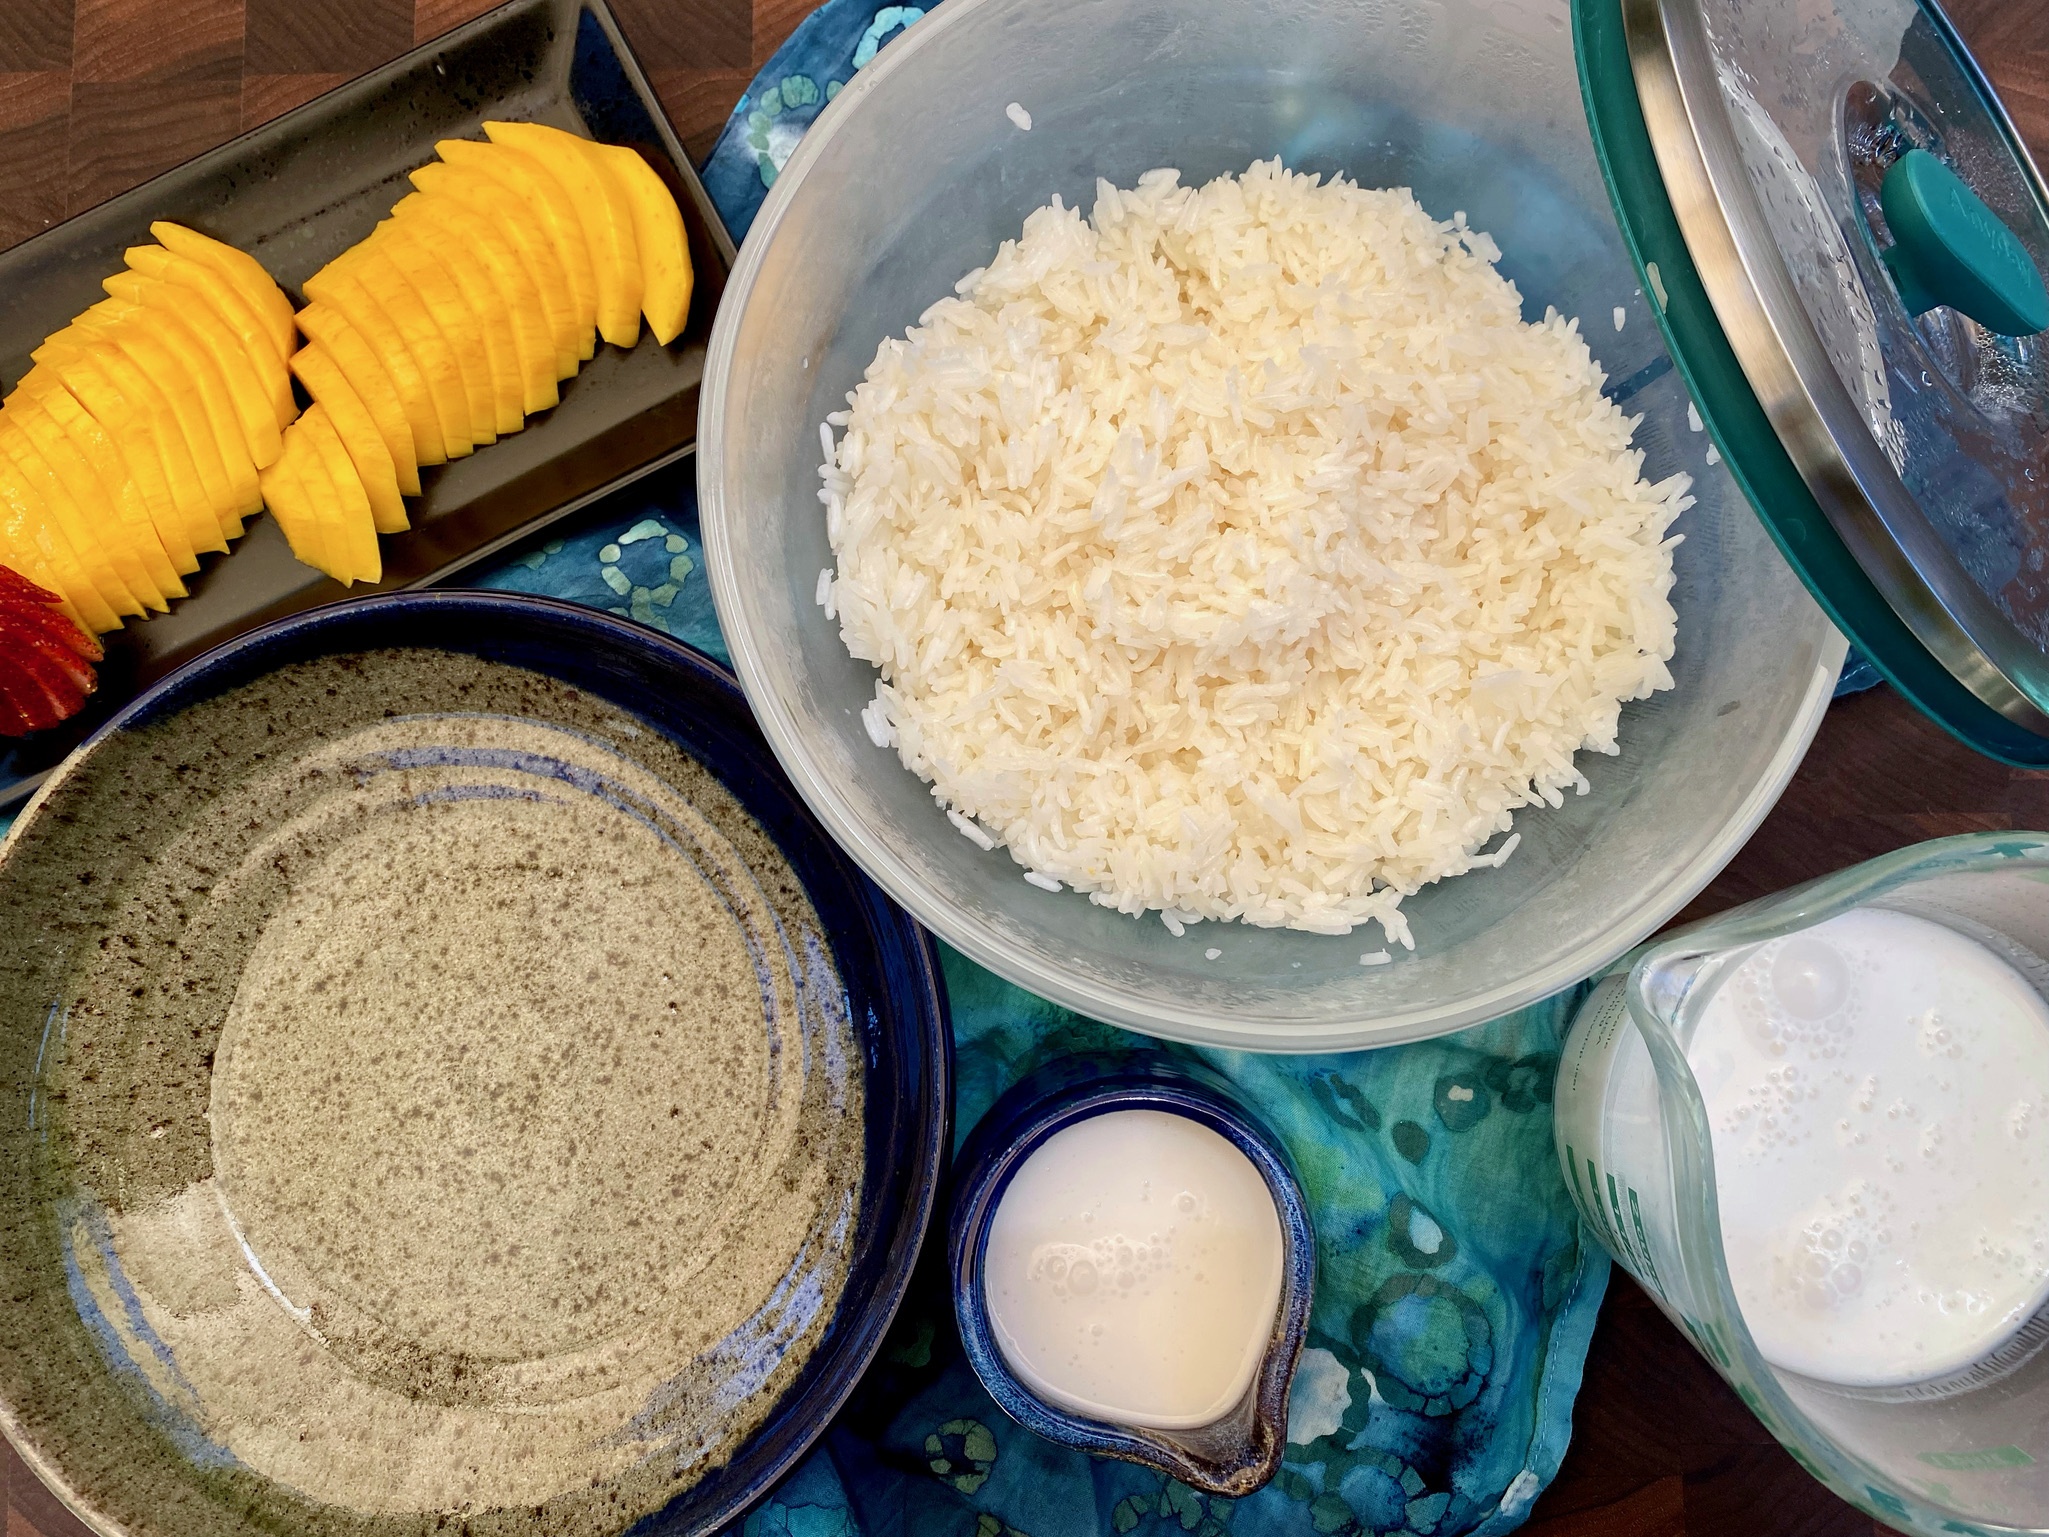
The foundation of this dessert is sticky or glutinous rice which can be found in most Asian stores. I use either Sweet Rice from Koda Farms or Thai Three Ladies Sweet Rice (the OG for this dessert). Normally, the rice is steamed, which is a long process, and then flavored with sweetened coconut milk.
I came across an article on Epicurious that featured Chrissy Teigen’s Mom and her cookbook. One of the recipes included is Mango Sticky Rice made easy, and not to mention quicker, in the microwave. This recipe is a mash-up of her recipe and my own recipe. My original post also has tips on what rice to buy and coconut milk, call it a mango sticky rice primer.
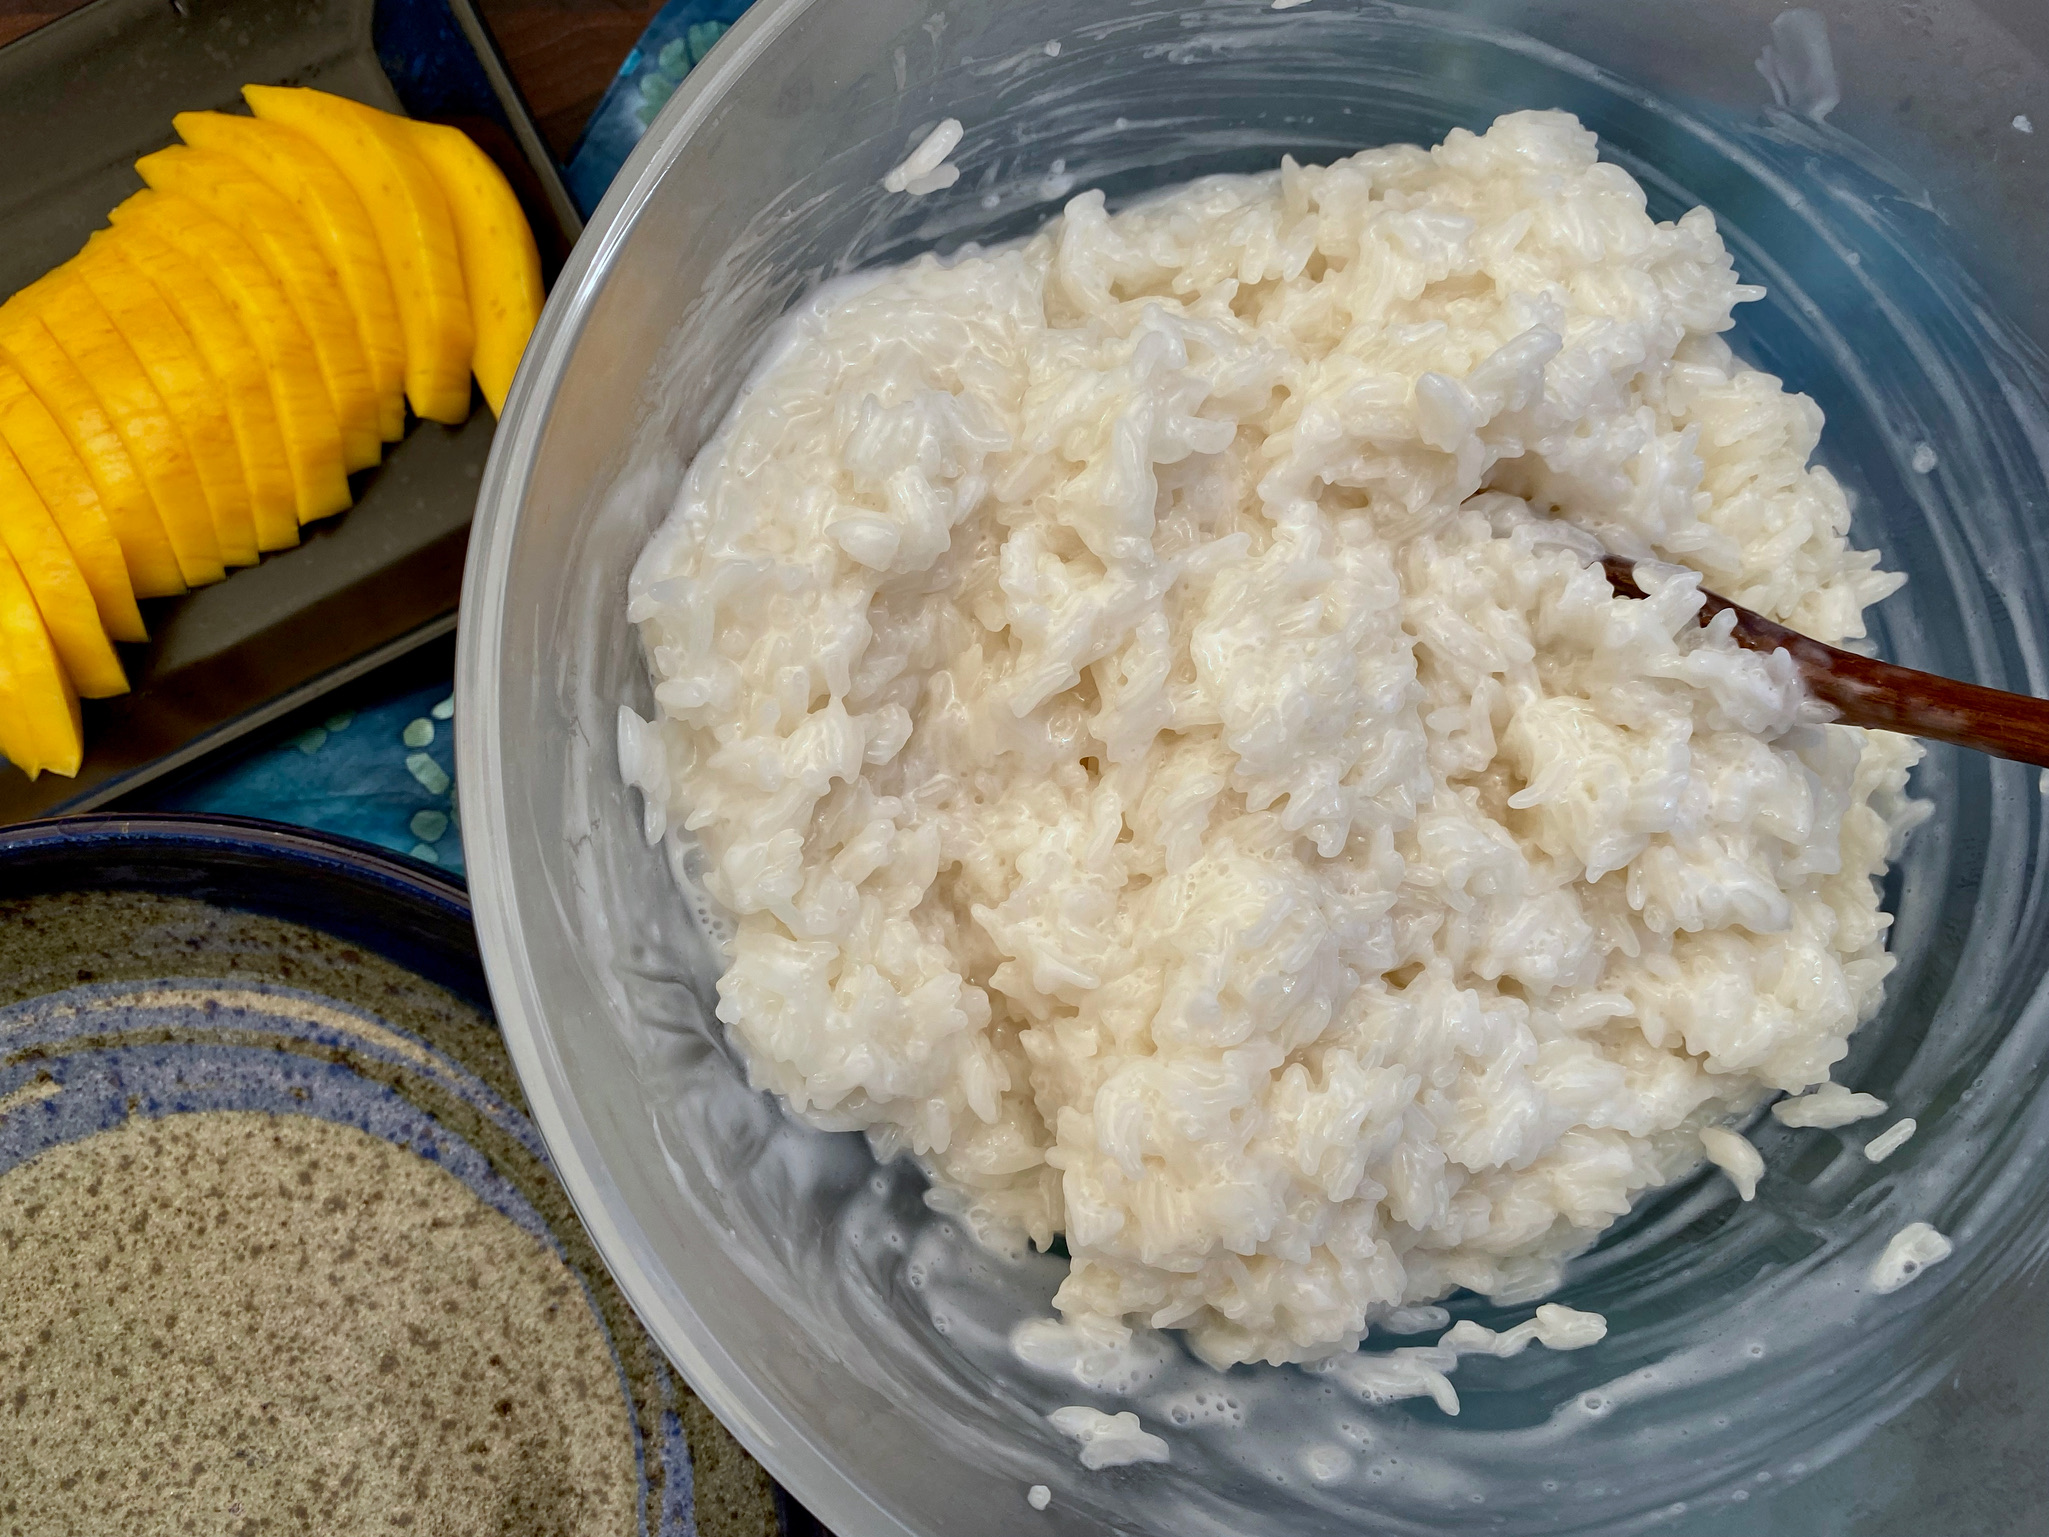
I used my Anyday Microwave Cookware, which worked like a charm-one bowl cooking, very convenient. Soak the rice for 10 minutes or up to 60 minutes in the same container you will use in the microwave. I inadvertently soaked the rice longer than 60 minutes (chatting with a neighbor) and the rice was a bit soft. I tried it again and soaked the rice for only 20 minutes and I washed the rice first (which isn’t in the Epicurious version), definitely recommend washing your rice.
Microwave Magic
Once the rice has soaked, cover the bowl with a vented lid or plastic wrap and place it in the microwave.
Cook for 3 minutes on high power, take it out, and stir the rice bringing the bottom rice up to the top, like a scooping motion.
There was still quite a bit of liquid left and the color of the grains was still opaque. So I placed it back in the microwave and cooked for another 3 minutes. After the additional 3 minutes, the liquid had been absorbed in the rice. The grains were a mix of translucent and opaque and had a bit of a bite, so I stuck it in for another minute.
This was 30 seconds too long along, the grains were a little too soft, the combination of a too-long soak and overzealous nuking.
I have a 700-watt Spacesaver GE Microwave, it’s on the low-end power-wise. Adjust time and power level based on the wattage of your microwave. The key is to get to know your microwave and how it cooks. Just keep in the back of your mind that the dish will only take 6-8 minutes so start fine-tuning the amount of time you microwave the rice at the 5-6 minute mark.
The Sauce
The coconut milk sauce is quick and easy to prepare. Use full-fat coconut milk, for the best flavor and consistency. Don’t let the milk boil, you just need it hot enough to dissolve the sugar. I hold some of the sauce back to serve on the side. Pepper’s recipe calls for 1-1/2 teaspoons of salt, I couldn’t bring myself to put that much salt. I used 1 teaspoon of Kosher salt which I thought was fine. I added 2 tablespoons of sugar which brought it more in line with my original post.
Pour the hot coconut milk over the cooked rice. Don’t be alarmed if it looks like a wet gloppy mess, stir well and let it sit for 10-15 minutes so the rice absorbs the milk.
So time savings? The original recipe calls for soaking the rice for 2-8 hours and steaming for 25 minutes. The microwave recipe calls for soaking the rice for 10-60 minutes and nuking it for 7-8 minutes. Hmm, don’t need to be a CPA to figure out the time savings. Enjoy!
½cupunsweetened shredded coconutToast and reserve for garnish.
1½cupsThai sticky riceThree Ladies Thai Glutinous Rice or Sweet (Glutinious) Rice from Koda Farms
1can13.5-ounce full-fat coconut milk
¼cupsugar + 1-2 tablespoonsSweeten to taste, if you have a sweet tooth, add additional 1 tablesppon of sugar.
1teaspoonkosher saltor 1/2 teaspoon reg salt
2large ripe mangoespeeled, pitted, and thinly sliced
Toasted sesame seedsfor garnish (optional)
Mint leavesfor garnish (optional)
Instructions
In a dry skillet, toast the coconut over medium-low heat, stirring, until lightly browned and fragrant, 4 to 5 minutes. Transfer to a small dish and set aside.
Wash rice to remove excess starch, rinse twice. Drain well and place sticky rice in a microwave-safe bowl and cover with 1¾ cups warm water. Let sit for 20 minutes.
Cover bowl with an upside-down plate or plastic wrap. Microwave on high for 3 minutes. Carefully stir the rice from top to bottom, then cover and cook the rice for another 3 minutes. Repeat the process, stirring and microwaving 3 minutes at a time*, until all the water has been absorbed and the rice has turned translucent (this means it’s cooked). Set aside to cool slightly.
In a medium saucepan, heat coconut milk just until it starts to bubble. Reduce the heat to a simmer, add the sugar and salt, and stir until they dissolve. Remove from the heat, pour 1-1/4 cups of hot sweetened coconut milk over the warm sticky rice, and stir to combine. Let sit for 5-10 minutes so the rice can absorb the coconut milk. Pour rest of coconut milk into a serving container.
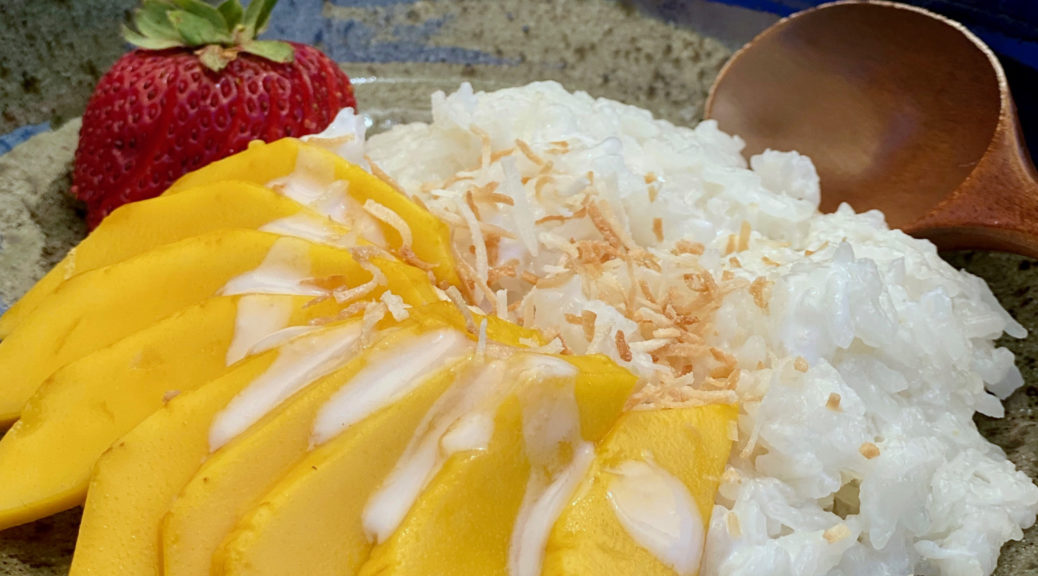
Place a scoop of rice in a shallow bowl or plate. Top with slices of mango. Serve with reserved coconut sauce on the side. Garnish with toasted coconut, sesame seeds and mint leaf.
This is a substantial dessert, serve small portions or sharable portions. I often garnish with sliced strawberries too.
Notes
This makes quite a bit of rice, the recipe can be halved.
Yes, on the Mochi treat trail once again. Aside from being delicious, Mochi is pretty darn easy to make thanks to Mochiko Sweet Rice Flour. I have been playing around with recipes that find their roots in Hawaiian Butter Mochi. Sweet Rice flour, butter, eggs, sugar, and different liquids (milk, coconut milk, fruit nectars….) combined and baked into delightful bars or muffins. A bit cakey, a bit chewy yet forgiving, sweet but not cloyingly so, and maddingly addictive. The Butter Mochi Muffins is by far the most popular recipe on 3jamigos. But…
There Is A New Kid In Town
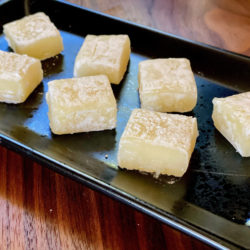
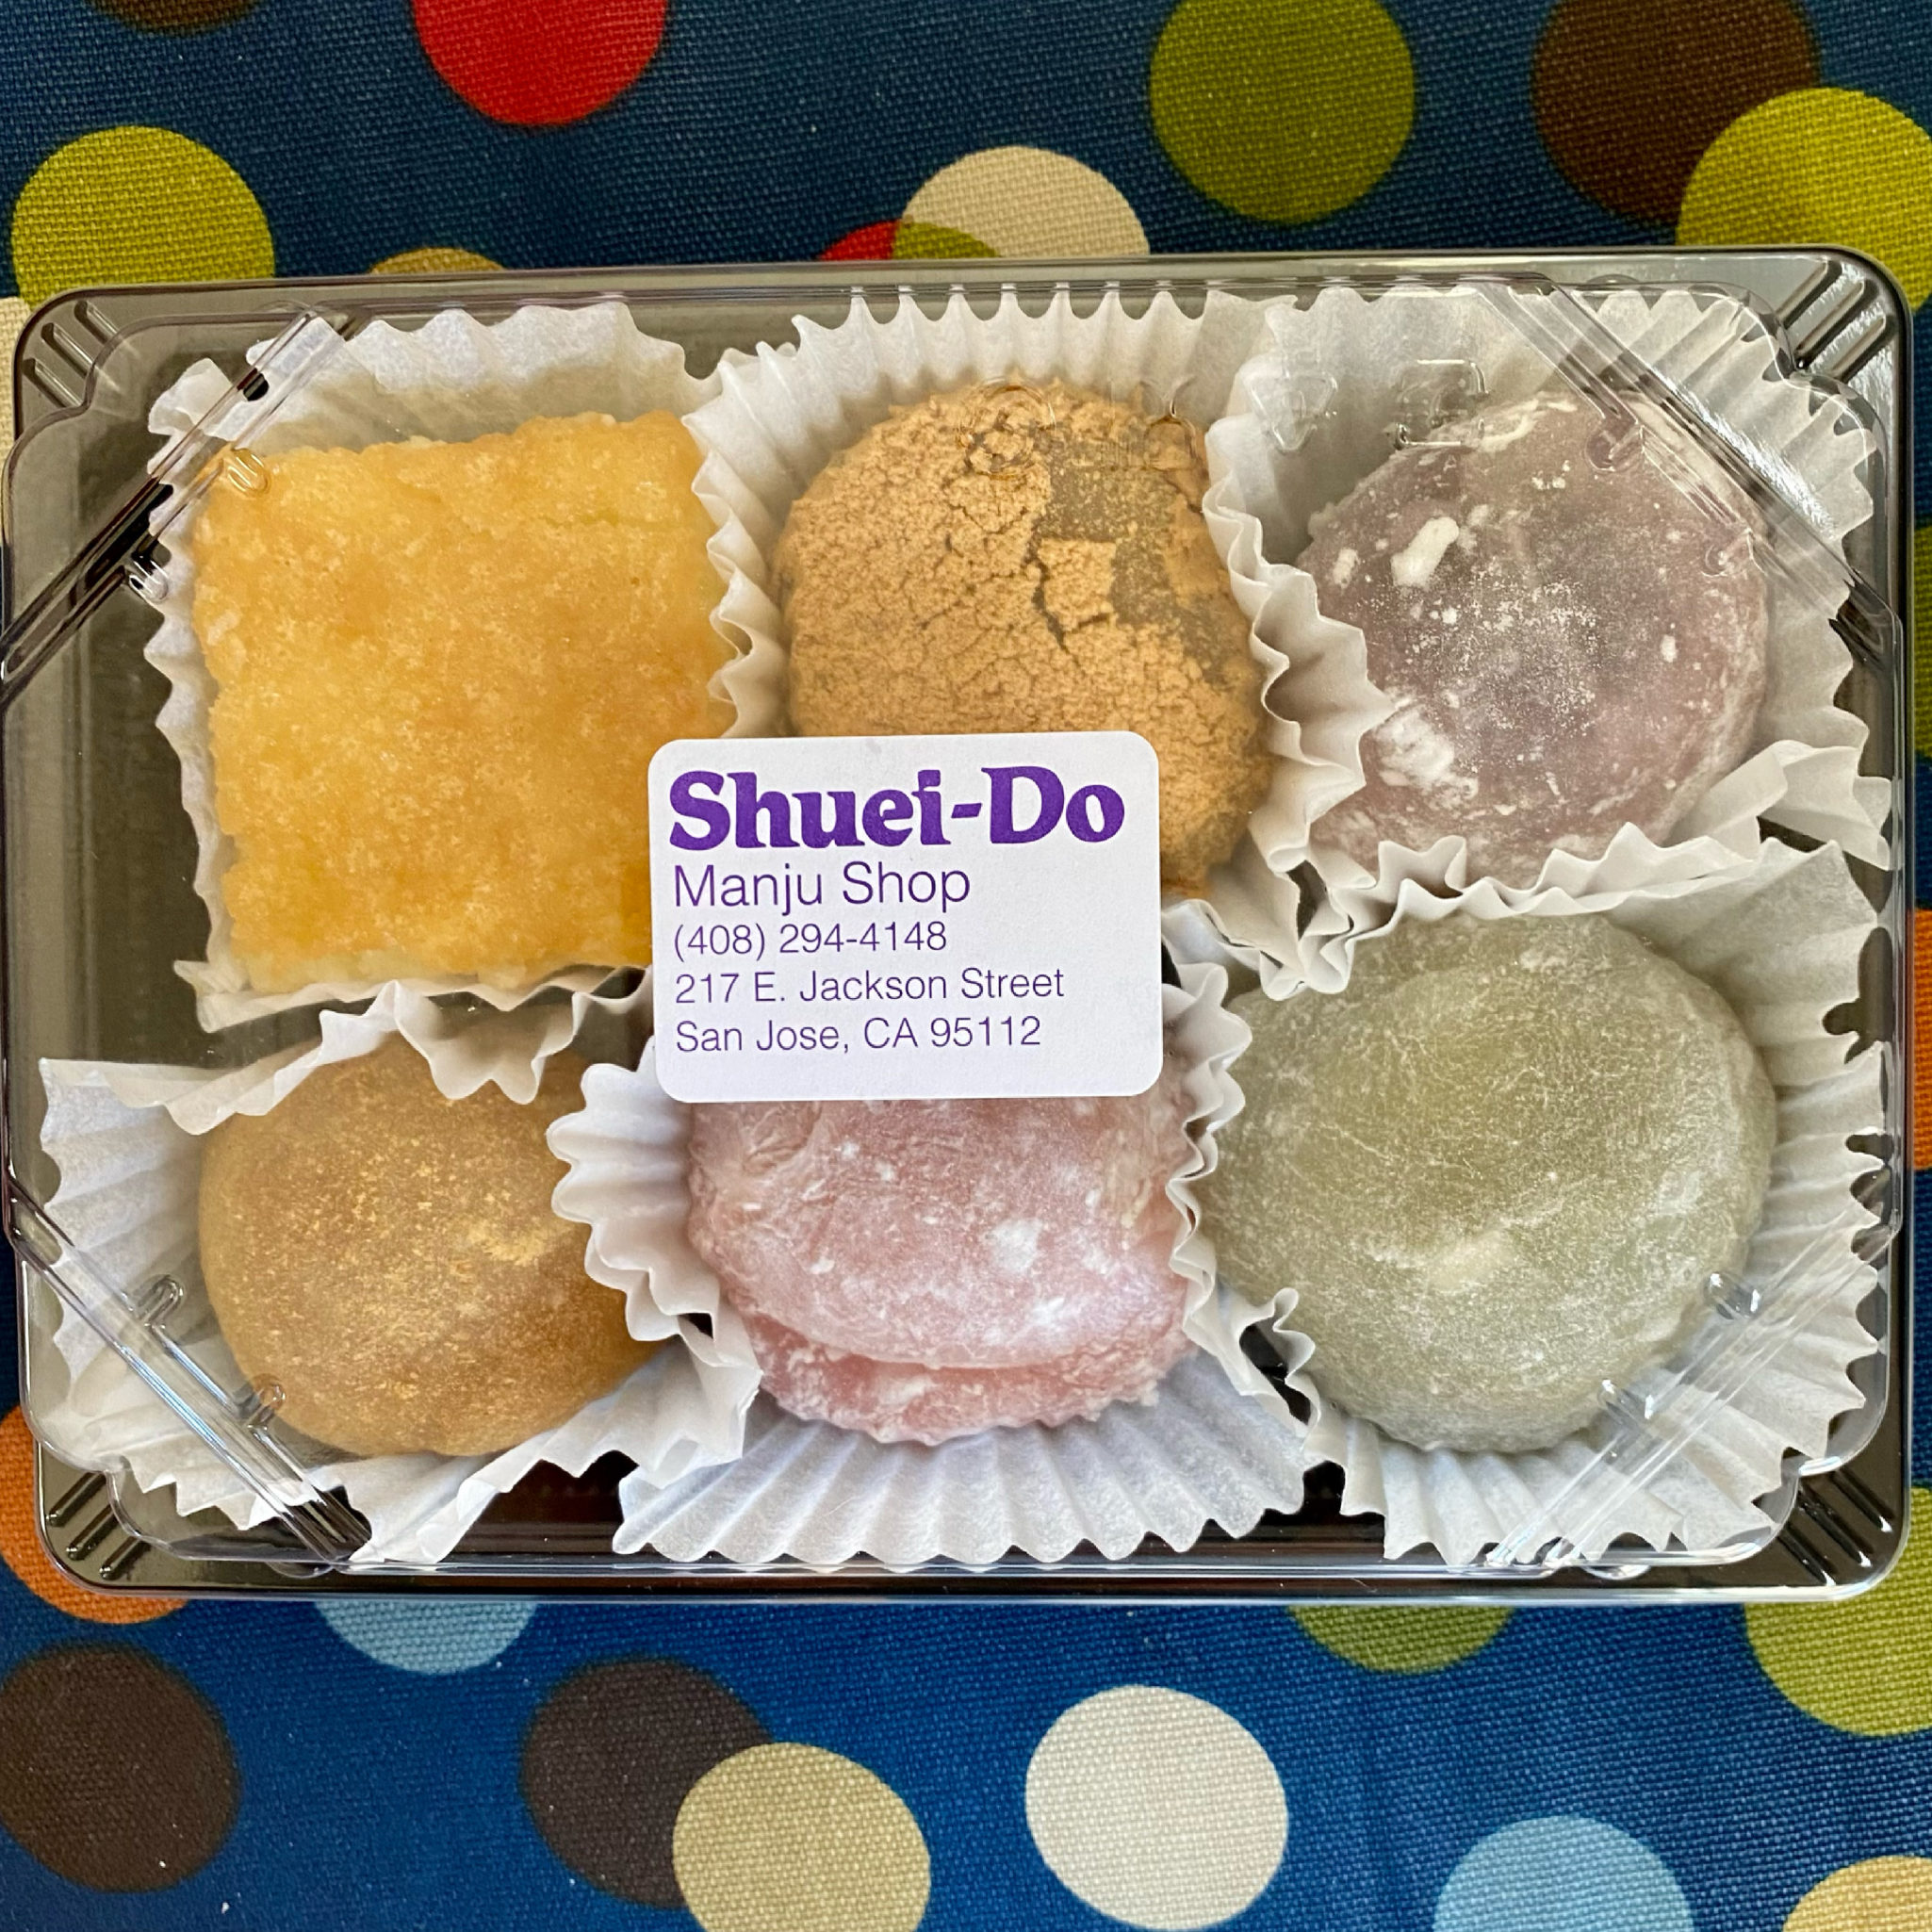
A recipe for Butter Mochi on No Recipes had me running to my kitchen. Whaddya know, these little gems are made in a microwave. Unlike baked Hawaiian Butter Mochi treats, this one is texturally similar to classic mochi found in Japanese Manju Shops. (Worth a visit! Shuei-Do in San Jose or Benkyodo in San Francisco). The riff of adding butter, sugar, and milk is genius. You end up with a soft, chewy, smooth, slightly sweet, buttery, insanely delicious treat.
Shortcuts: Momofuku, Microwave, and Mochiko
The microwave makes this a quick and easy treat. I’ve been playing around with cooking in the microwave ever since I bought a set of Cook Anyday Microwave cookware. Yes I know, I could have used the pyrex glass dish I have but…damn, that Dave Chang of Momofuku is really good at getting you to buy stuff, lol. And really, you can never have too many bowls. I listen to his podcastand its offshoot, Recipe Club. and I find myself laughing A LOT. A good thing during these crazy times.
Traditionally, Mochi starts with glutinous rice that is soaked, steamed, and laboriously POUNDED into a sticky mass that is used to form those cute little balls and squares you take for granted at the Manju Shop. Luckily, we can start with Mochiko or Sweet Rice Flour-no soaking or pounding. Just put everything in a bowl and stir. How easy is that? Along with the microwave, you will be cranking out batches of Butter Mochi in minutes.
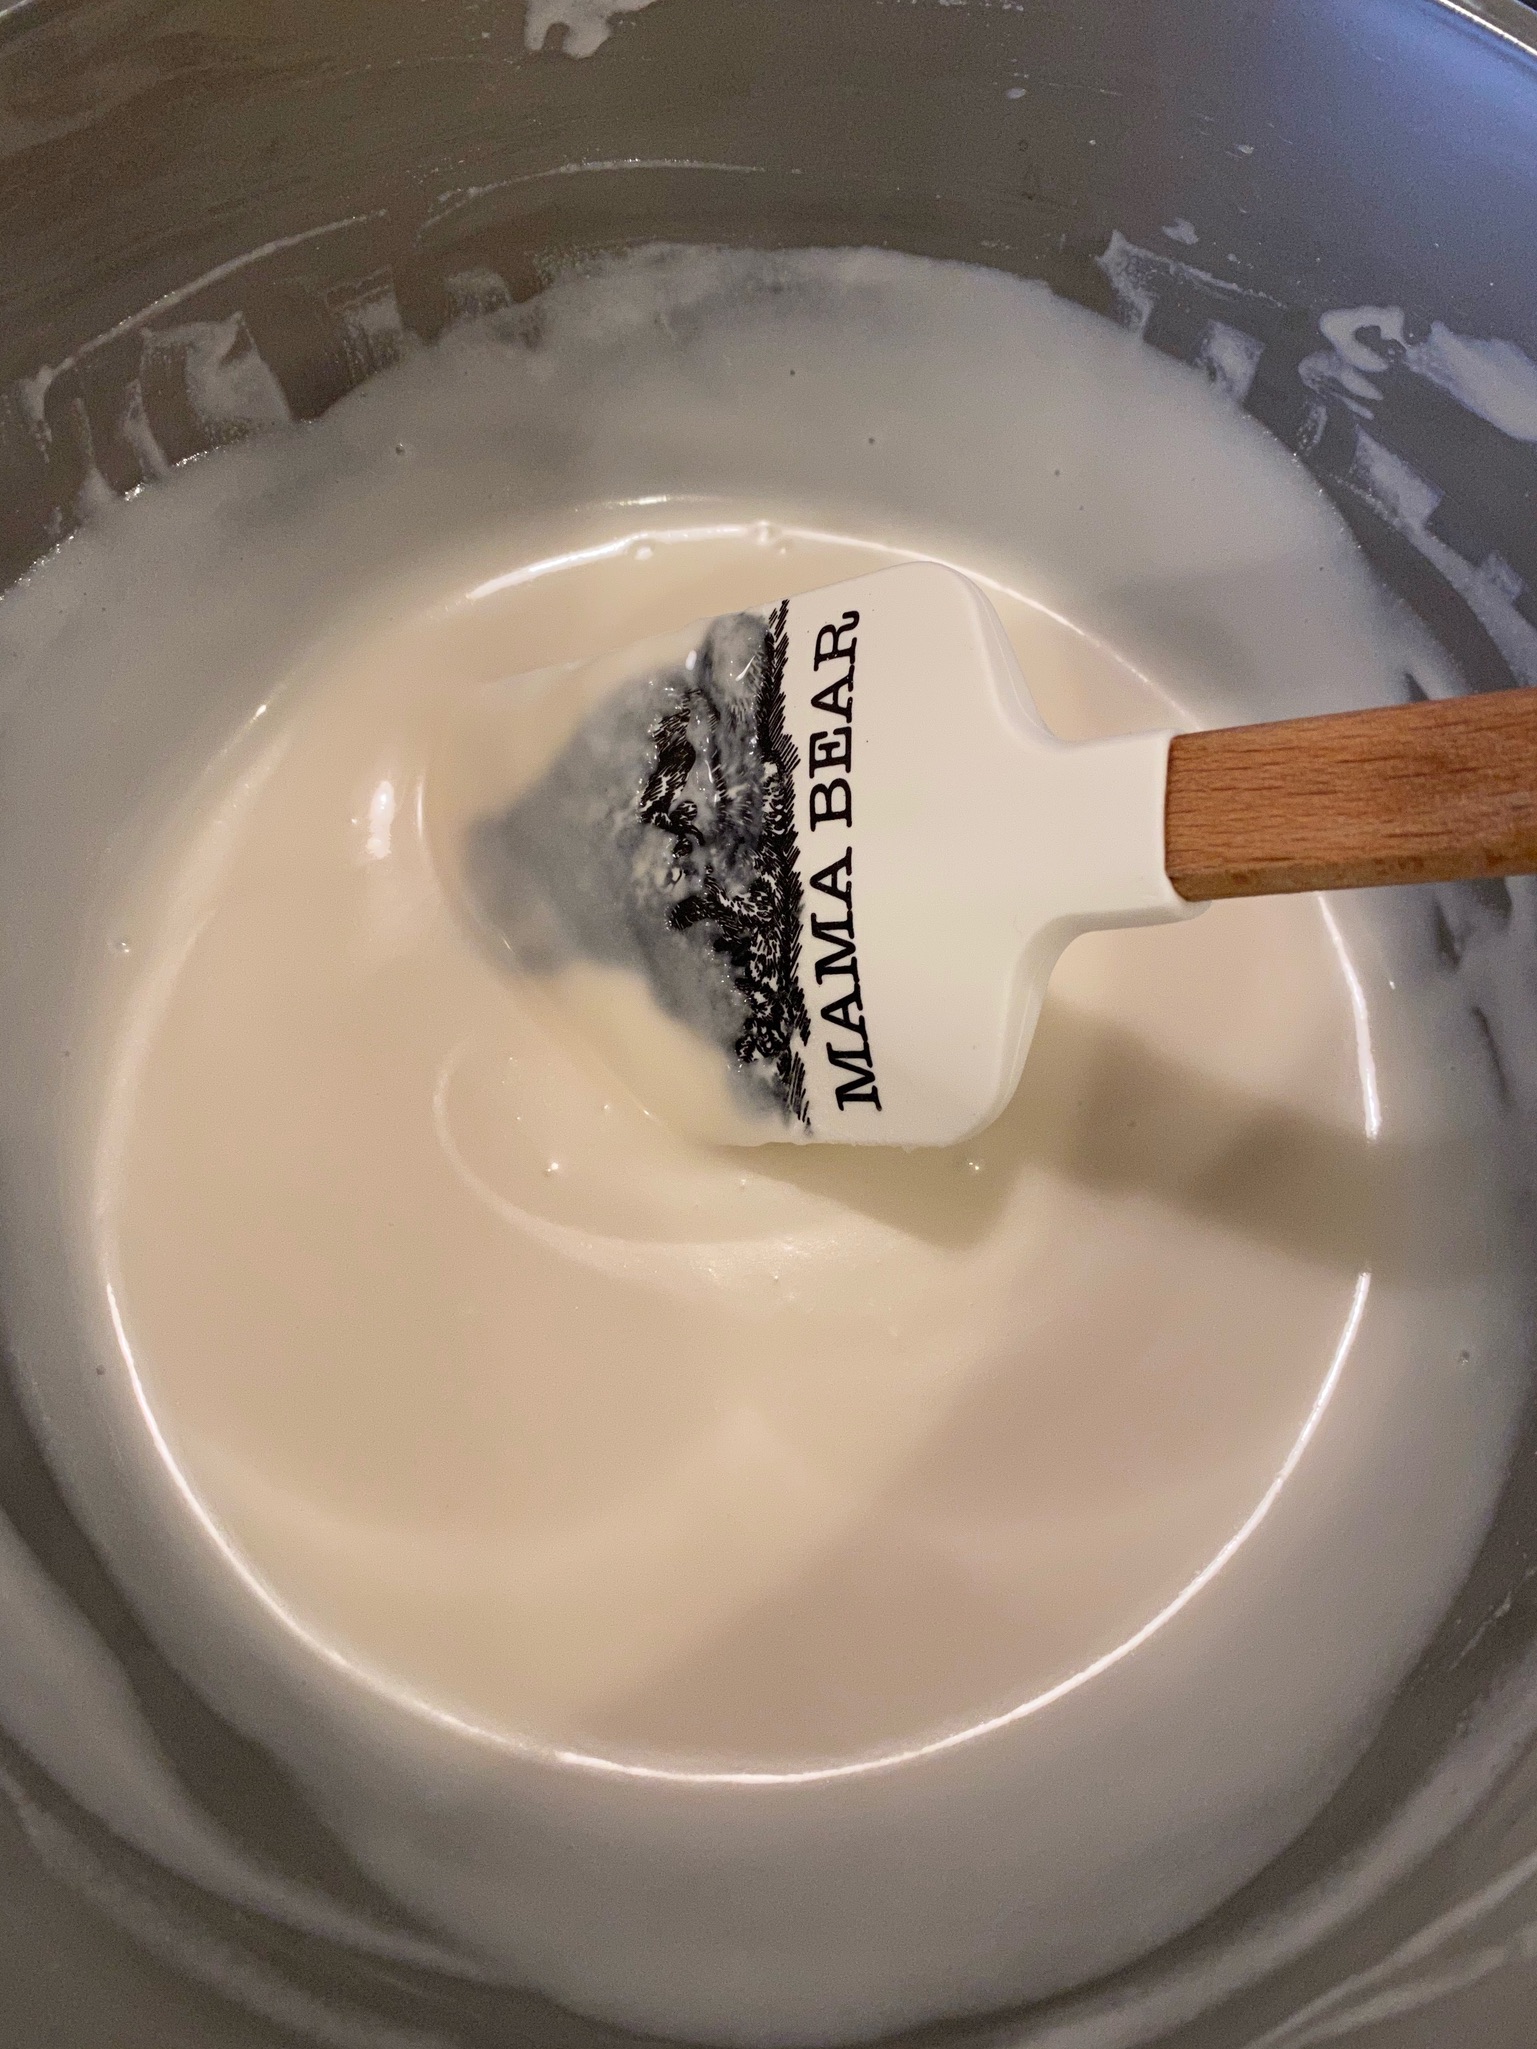
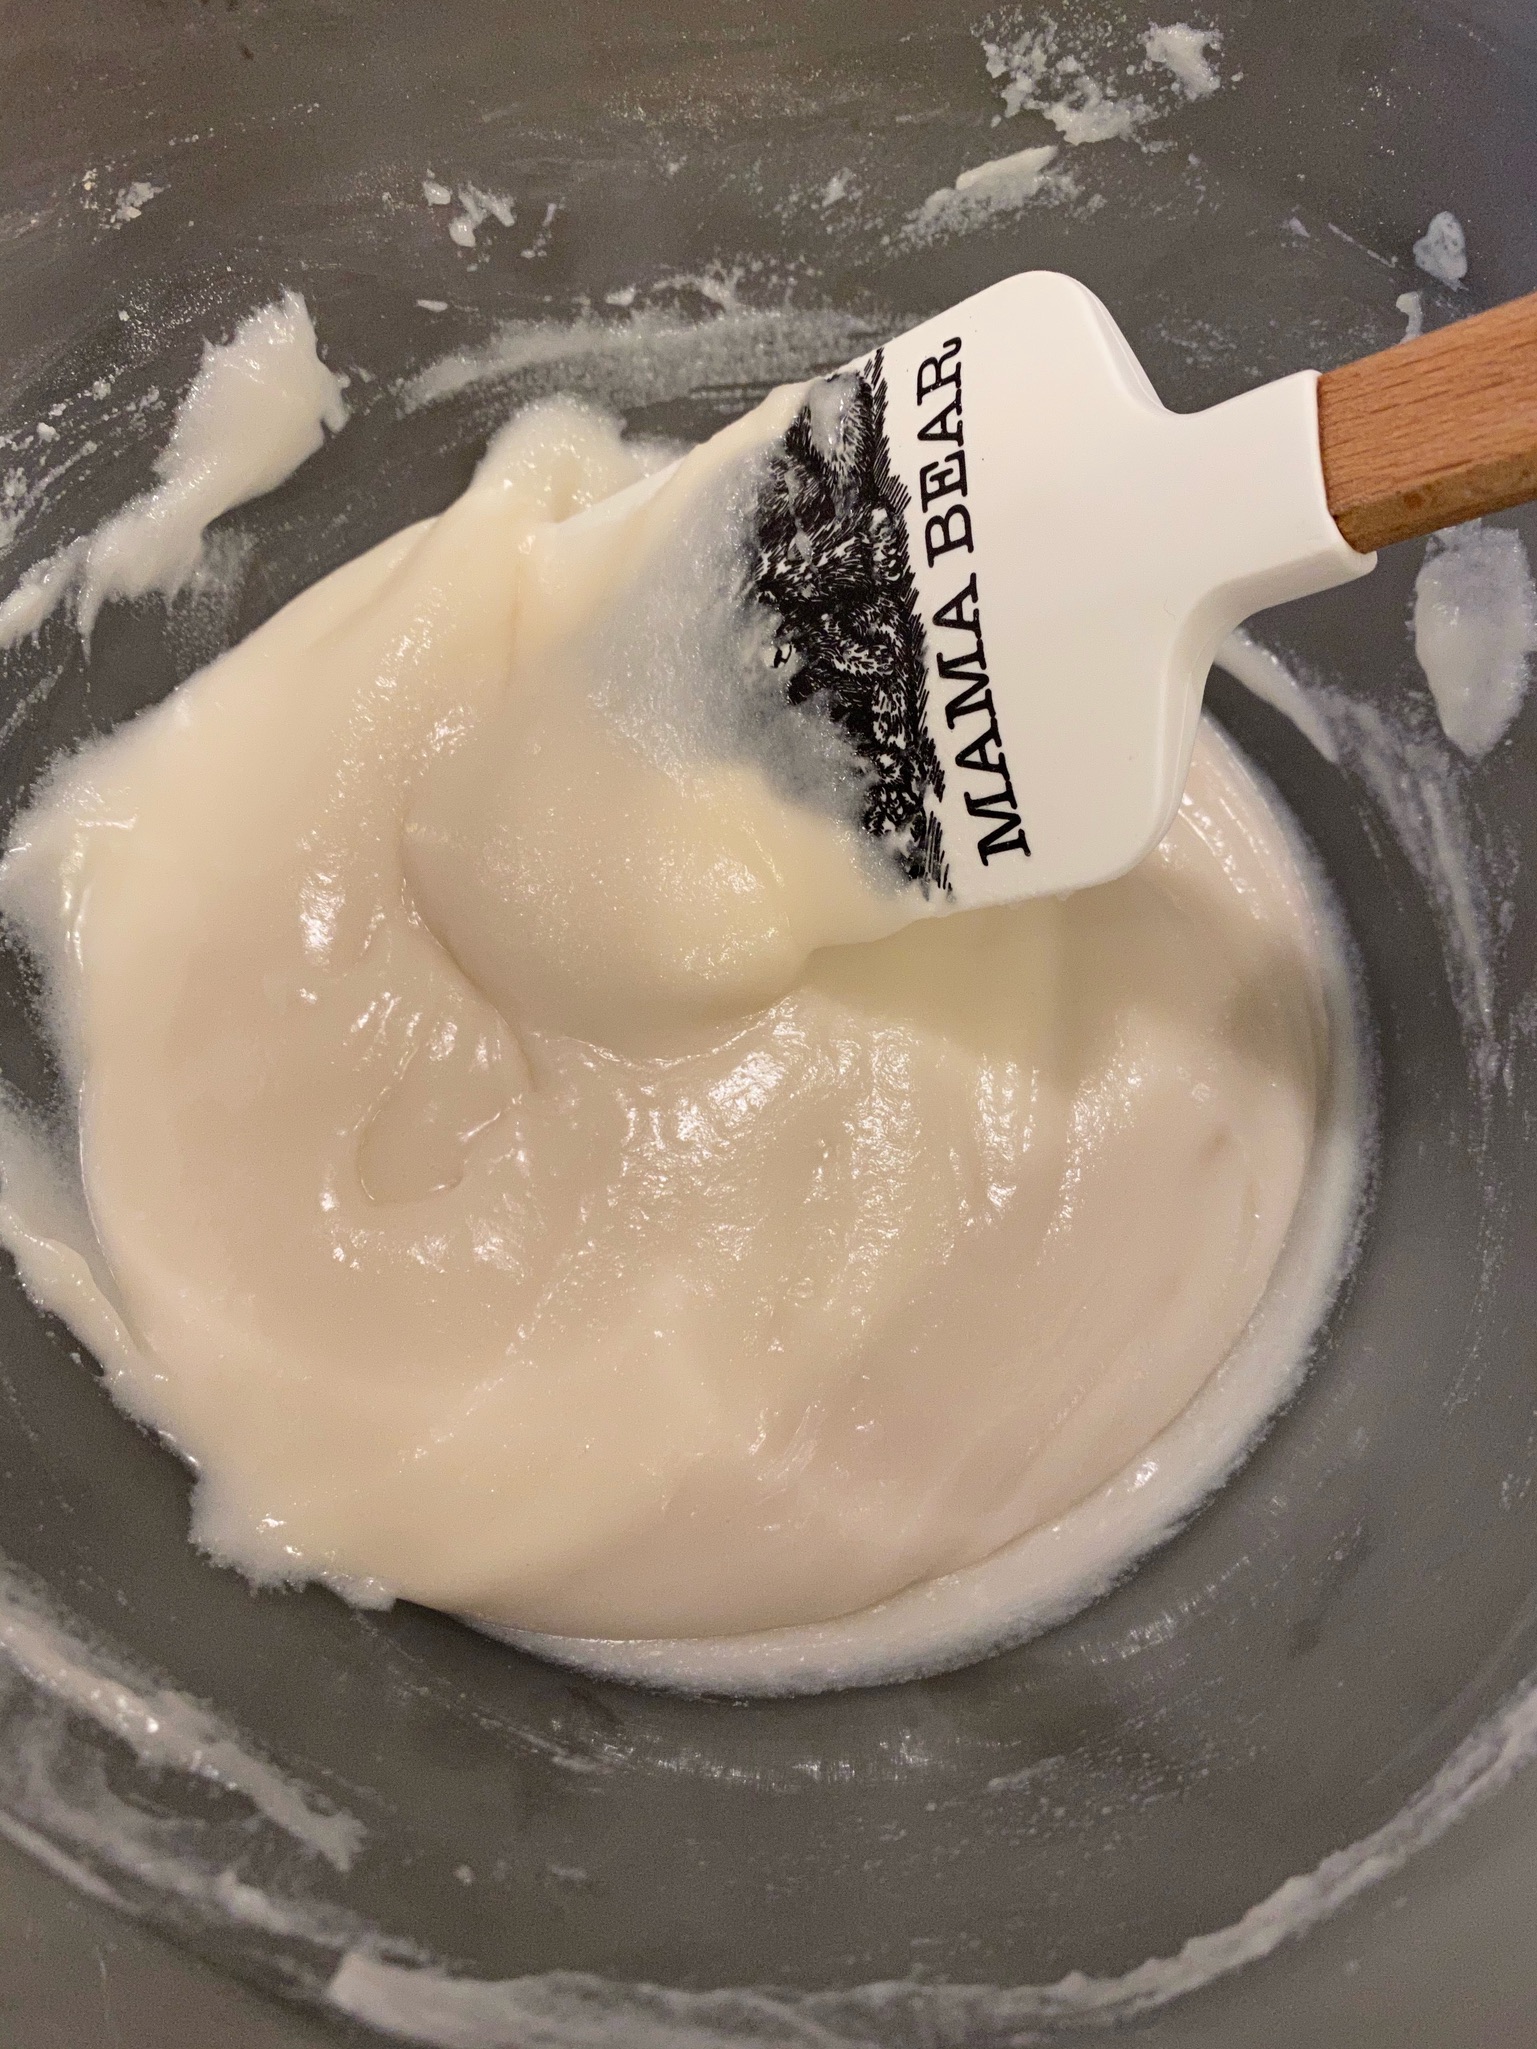
Combine Mochiko flour and sugar in a large glass bowl (or microwavable bowl). Add one-third of the milk, stir to make a smooth paste, gradually add the rest of the milk, and stir well for a lump-free batter. Place bowl in the microwave and nuke for two and a half minutes. The mochi will look thicker and form some lumps. Remove the bowl and add the butter. Stir until the butter is fully incorporated and the mixture is smooth again. The recipe calls for cultured butter which has a slight tang. I used Trader Joe’s French Cultured Butter. You could probably use European-style butter like Kerrygold Irish Butter. I also used salted butter which I think enhances the flavor.
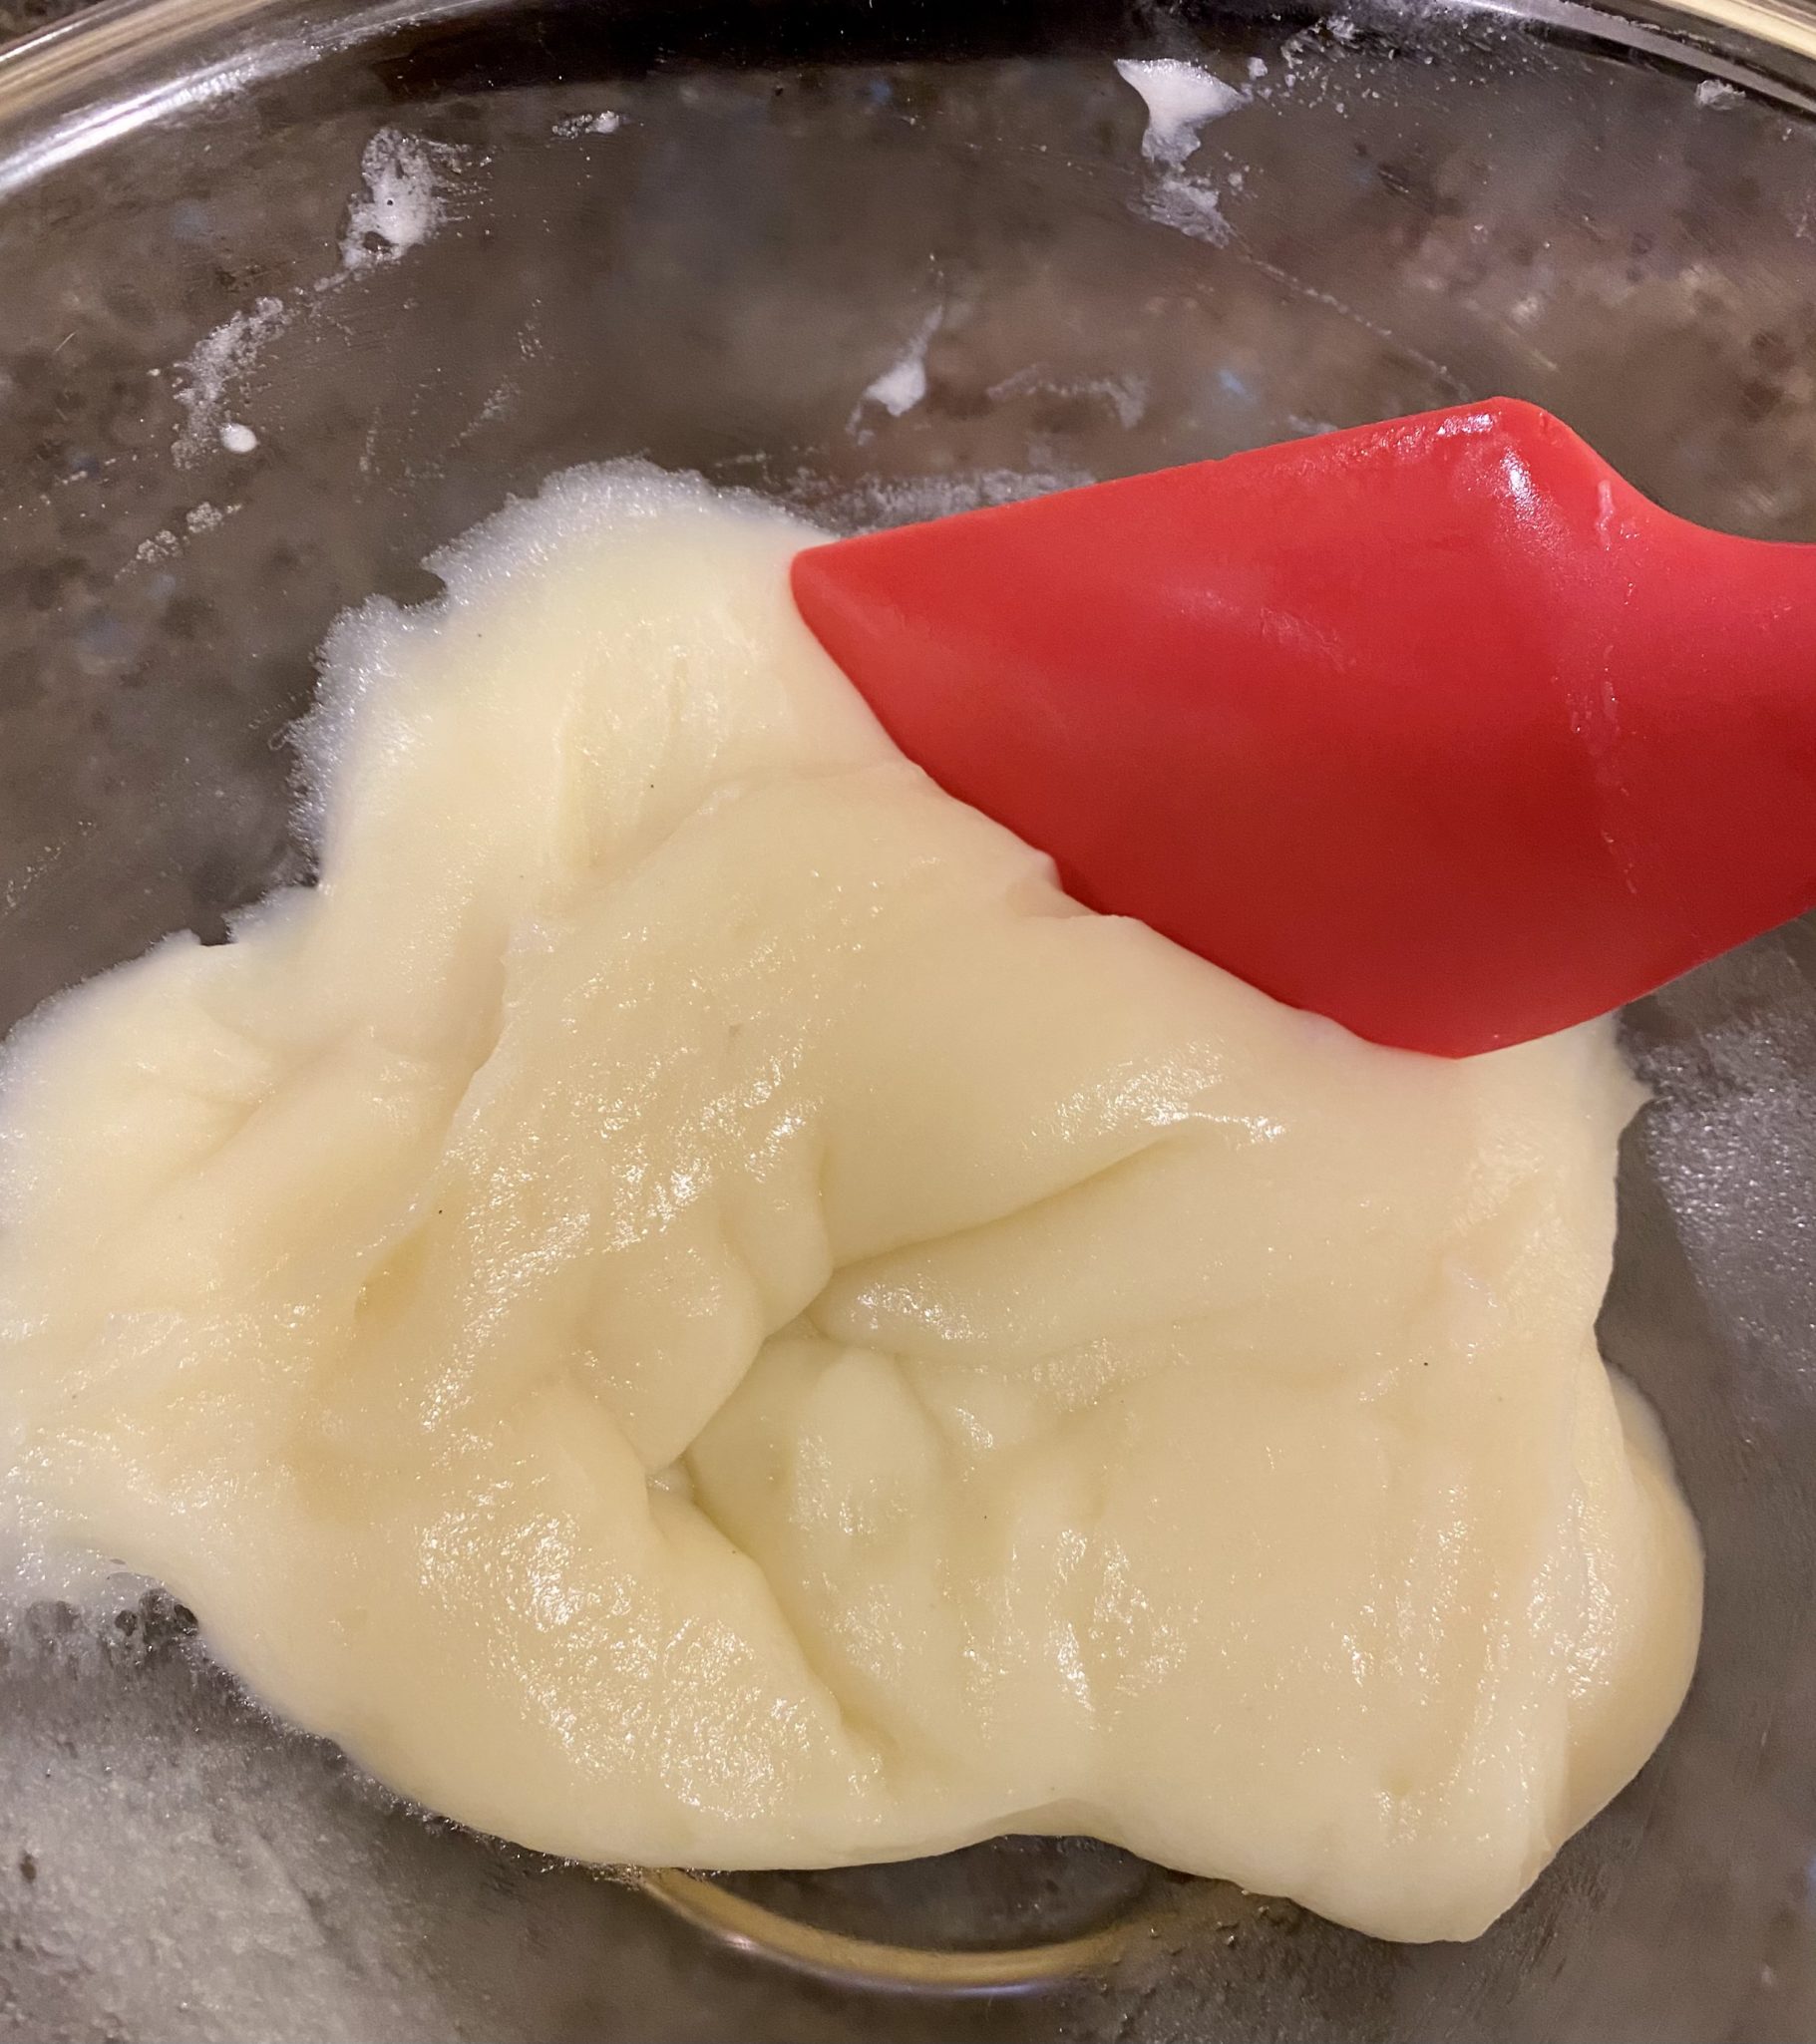
Put it back in the microwave for another three and a half minutes. Carefully (it’s hot!) remove the bowl from the microwave and knead the dough with a wooden spoon or silicone spatula NOT your hands. This helps create that translucent, elastic texture.
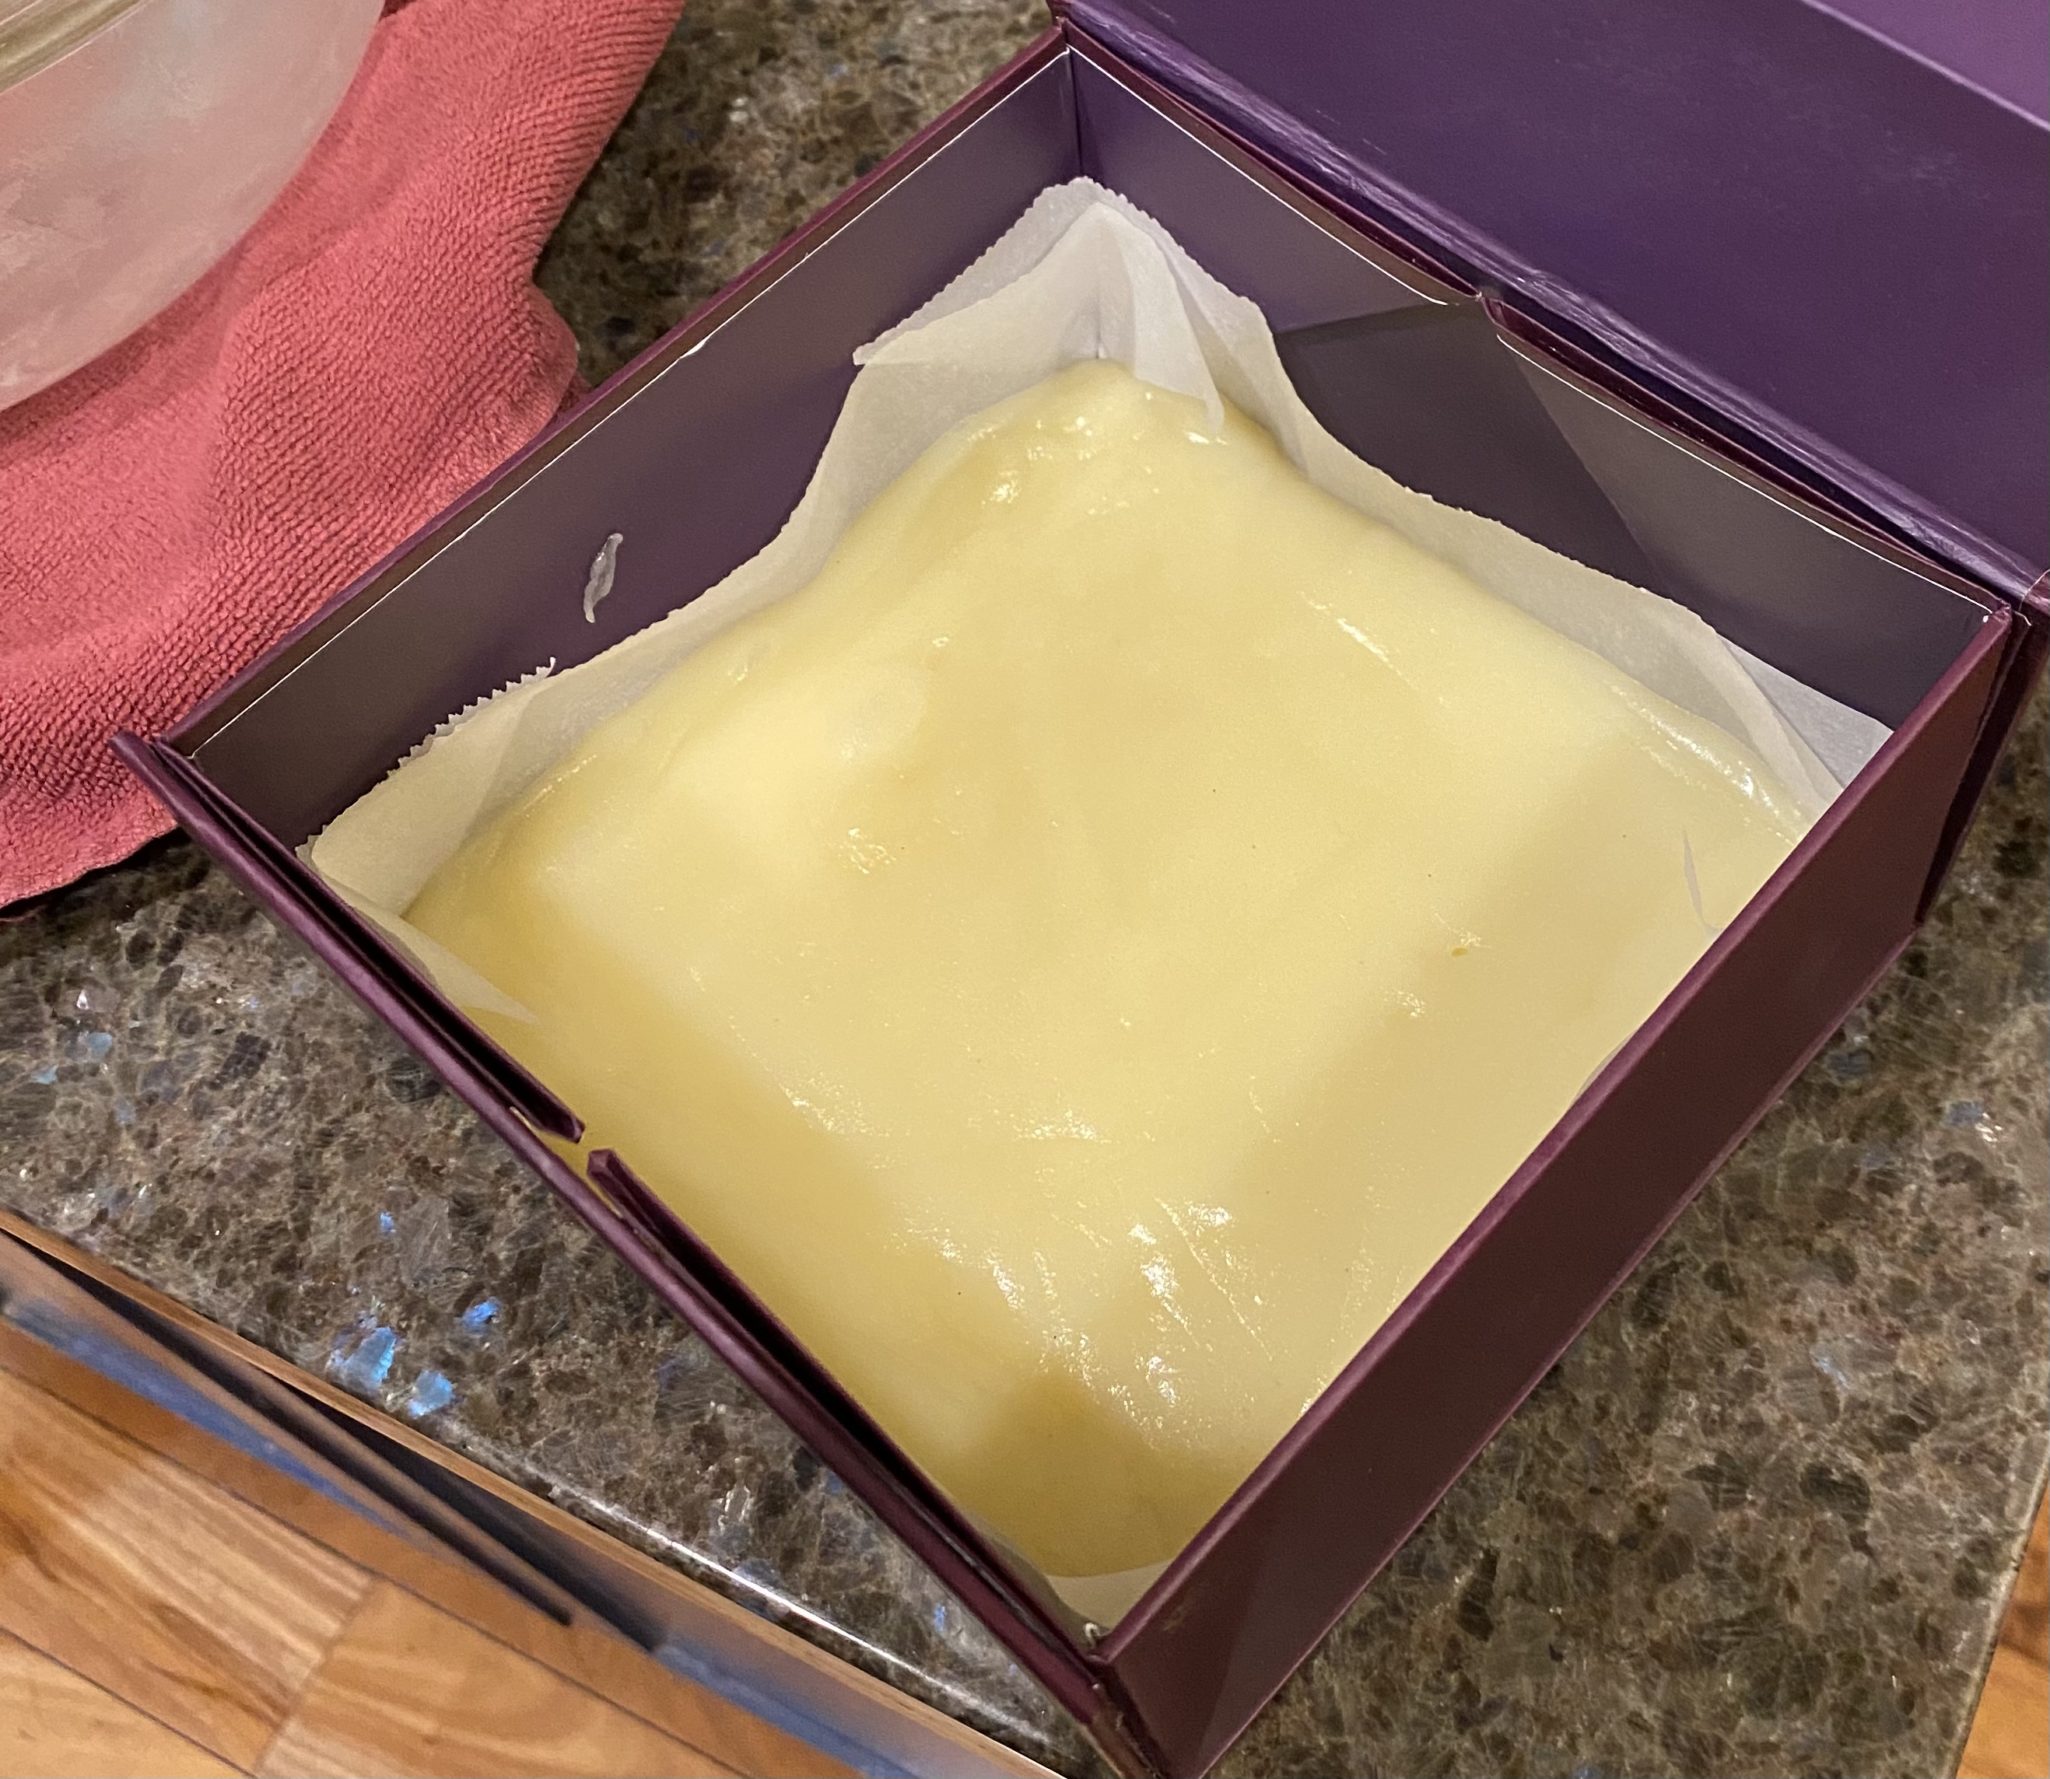
If it doesn’t get that translucent look or isn’t very elastic, try microwaving it another minute. Transfer the Mochi into a small square pan lined with parchment. The recipe calls for a five-by-five-inch pan. Hmmm, not a size I have so I improvised. Place pan (box in my case) in the fridge to chill.
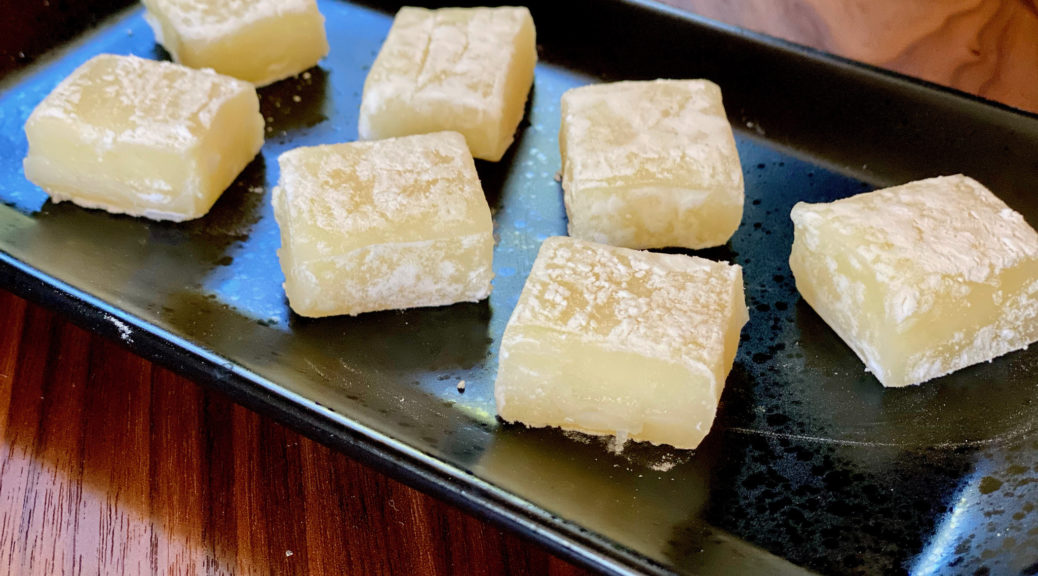
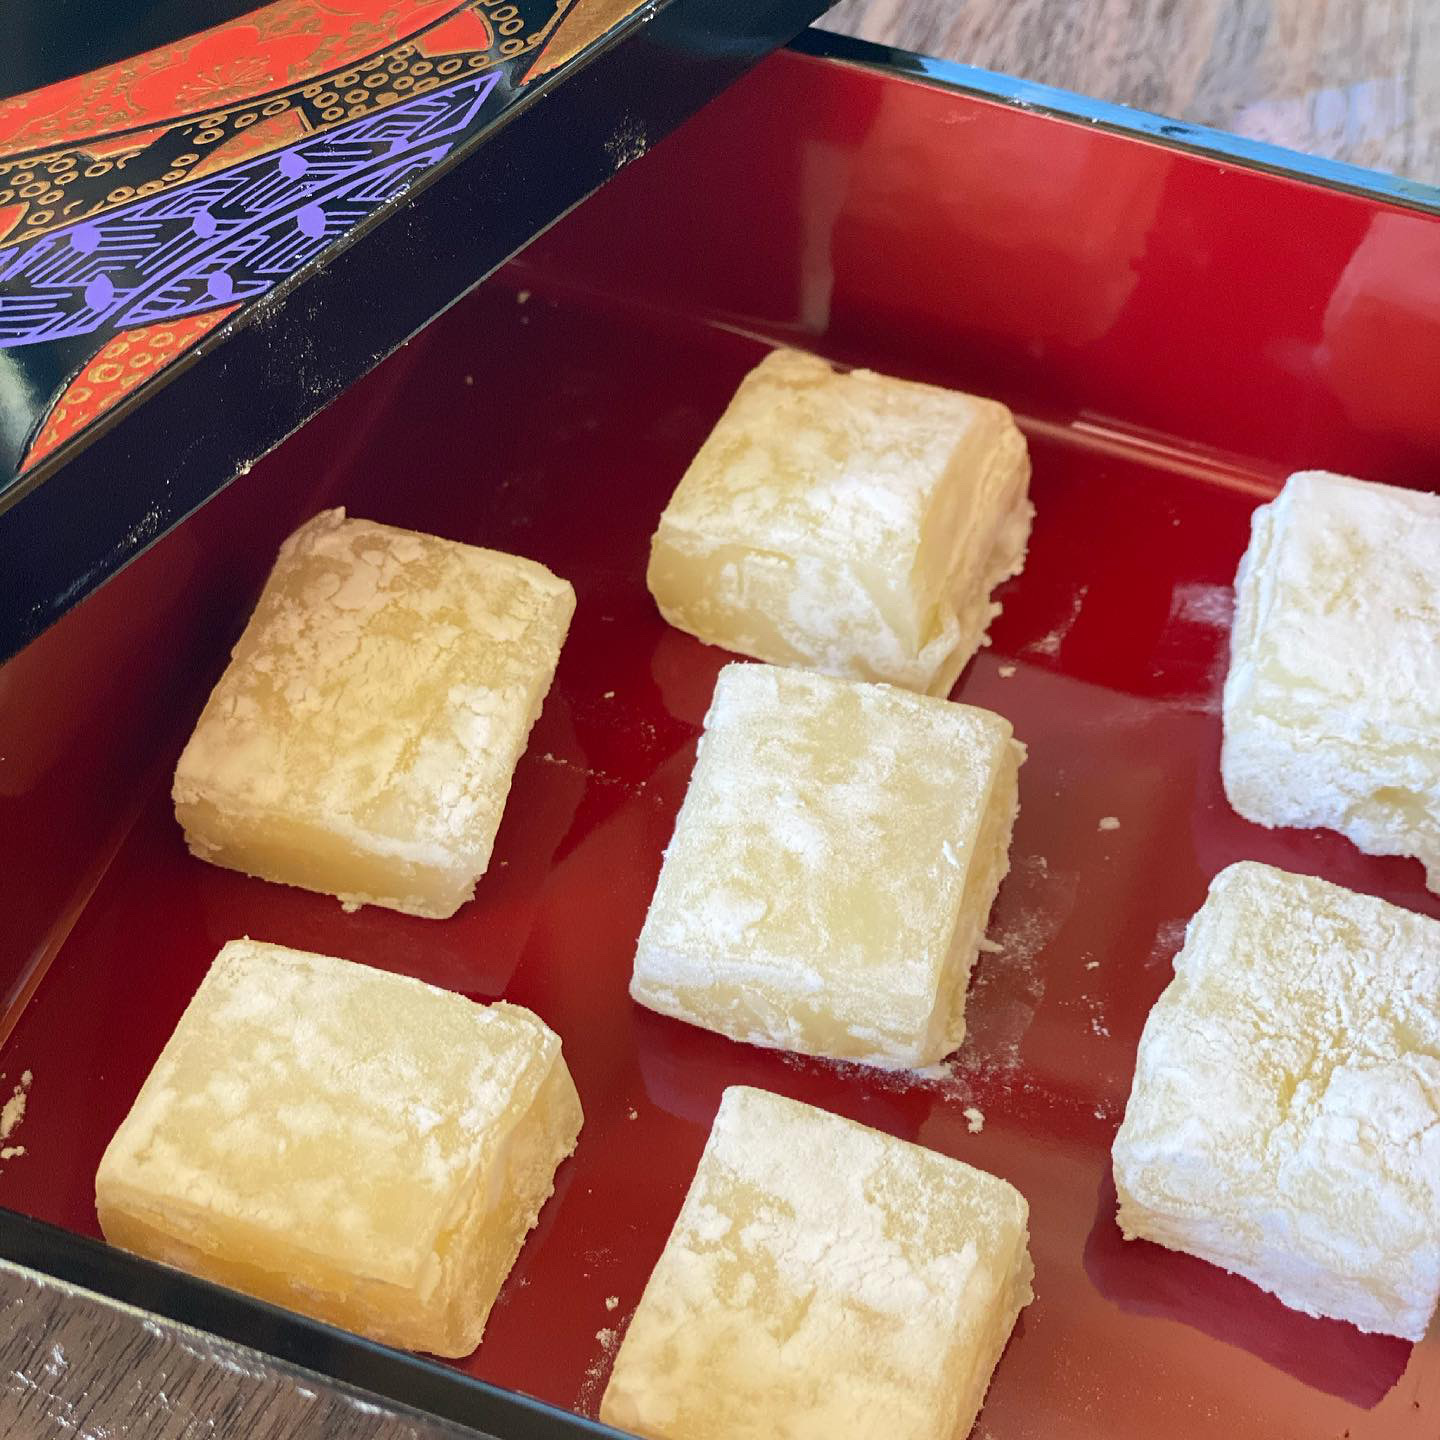
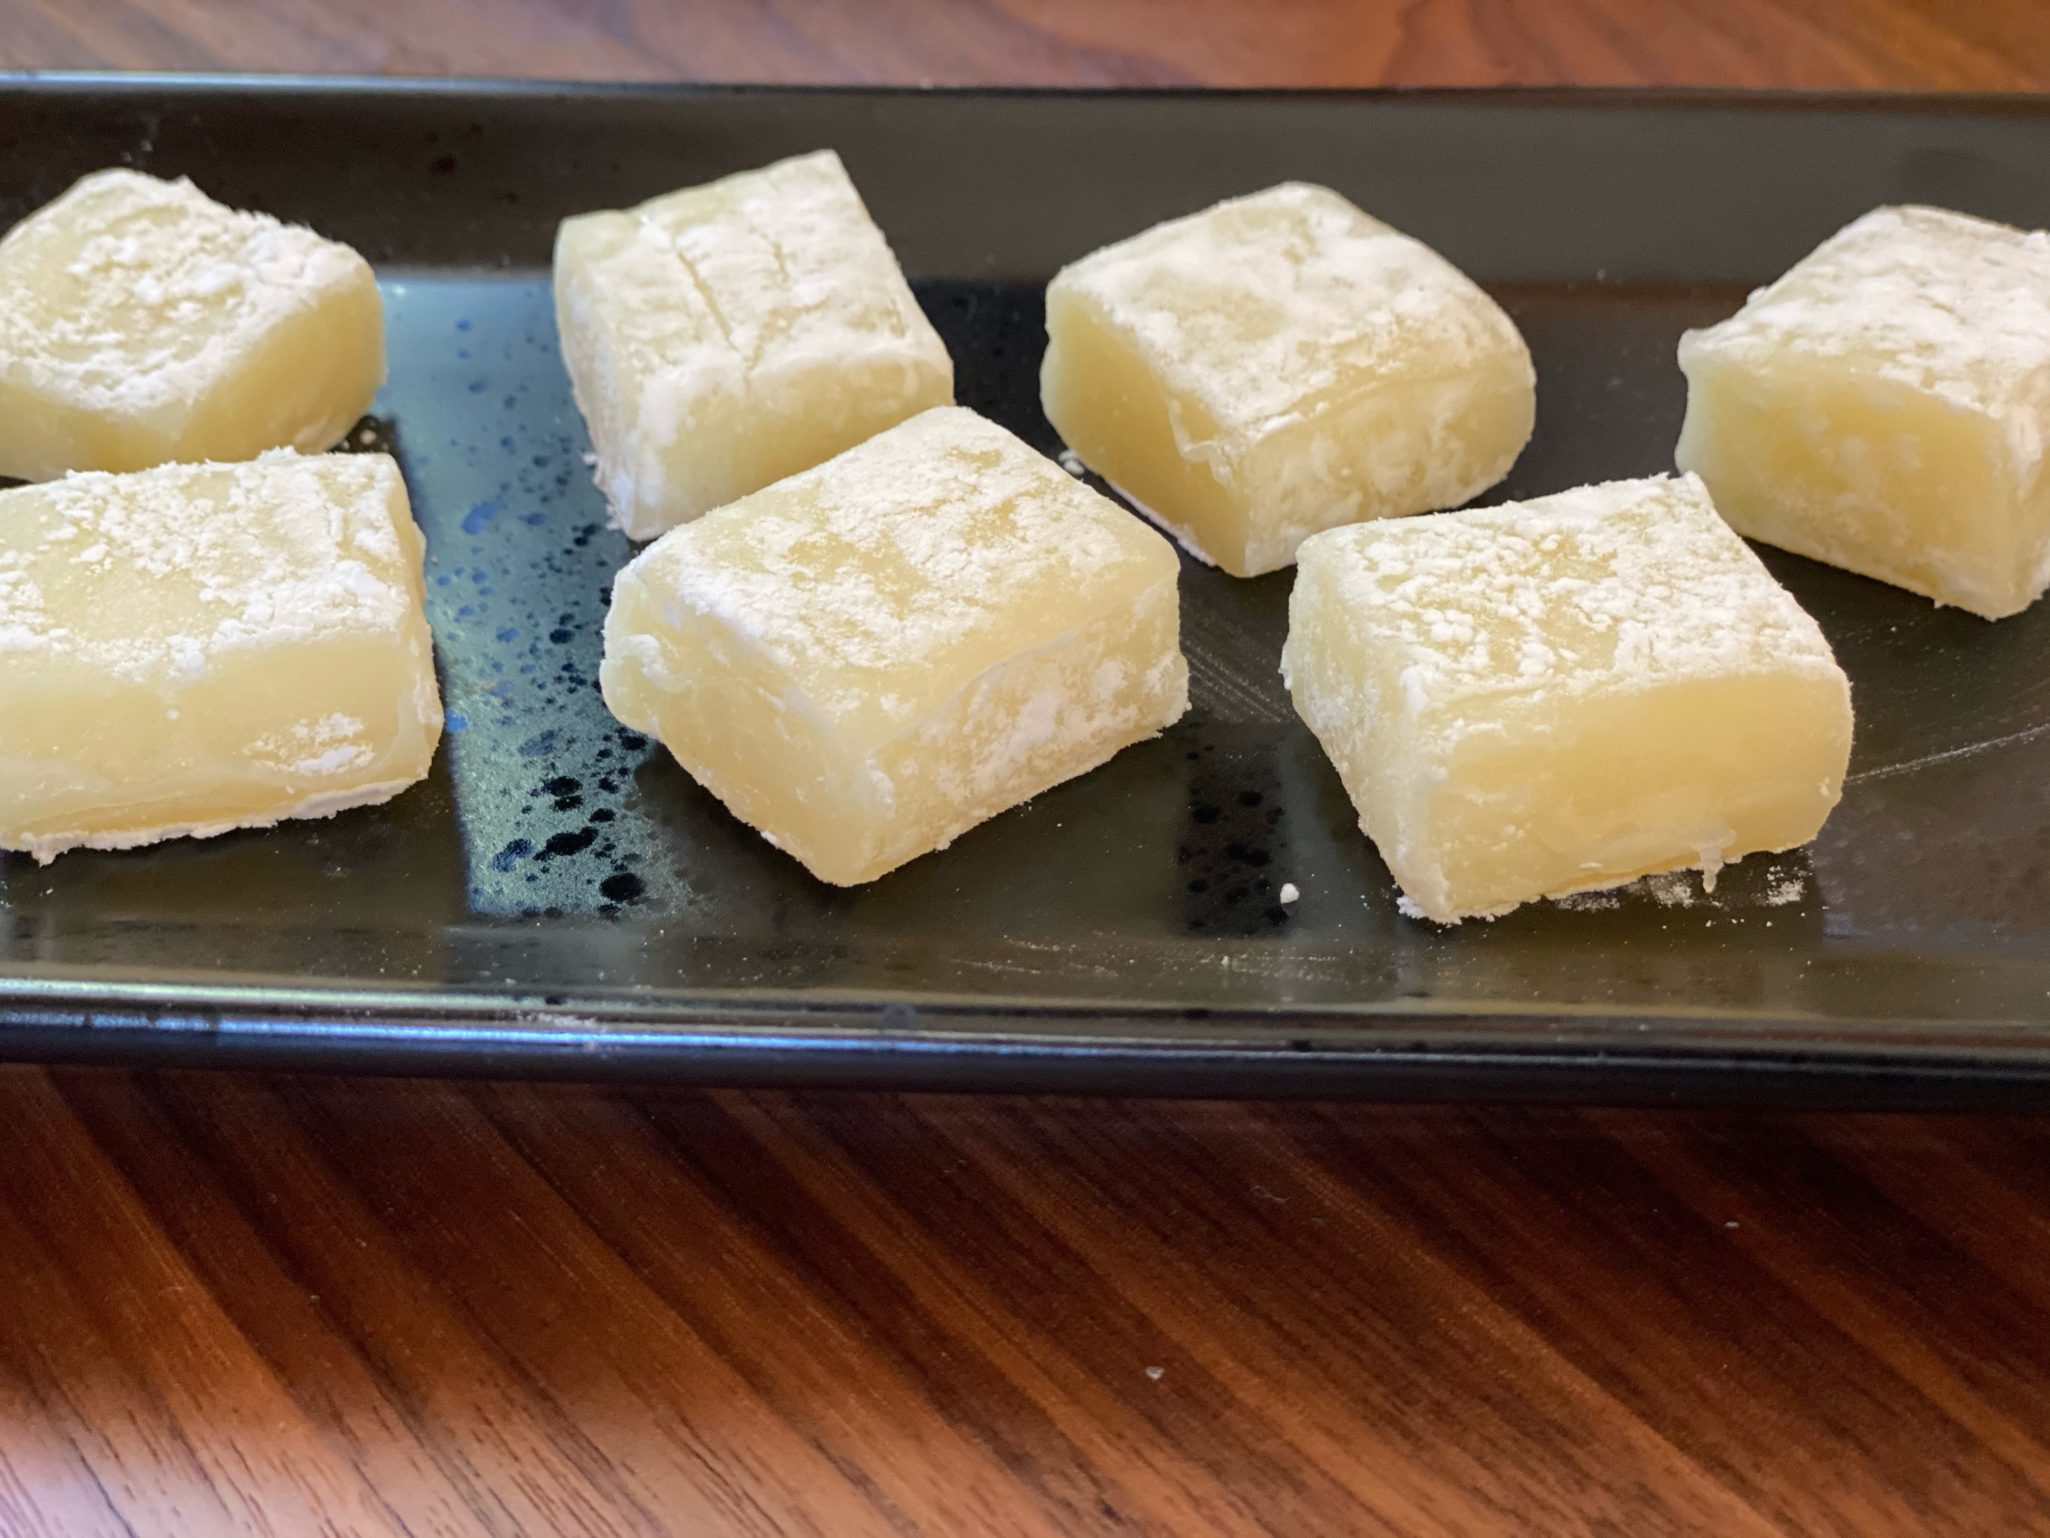
The final step is cutting the Butter Mochi. It will be really sticky. To keep the pieces from sticking dust with potato starch or cornstarch. Sorry folks, powdered sugar will not work as it will absorb moisture from the mochi and turn gummy. Serve. Mochi can be stored at room temperature for a day or in the fridge for longer. Bring to room temp before serving.
And one mor-chi tip
I made a second batch using coconut milk. For folks that are milk intolerant, this would work well. Win-win. Reduce the first microwave time to 2 minutes. It solidified a little quicker than the regular milk version which made stirring in the butter a little harder. You do lose a bit of the pure butter flavor but the coconut milk is a nice complement. Play around with the microwave times for your machine. For the second microwave session, I’d go 3 minutes first and check before zapping it further.
Butter Mochi made in the microwave! Soft, chewy, buttery, a hint of sweetness, this Japanese treat is easy to make and delicious!
Course Dessert
Cuisine Asian
Keyword brown butter, butter mochi, Dessert, mochiko, sweet rice flour
Prep Time 7 minutesminutes
Cook Time 7 minutesminutes
Ingredients
100gramsmochiko
90gramsgranulated sugar a little less than 1/2 cup
1cupwhole milk or coconut milk
3tablespoonsCultured Butter (45 grams)TJ's French Cultured Butter or Kerrygold Salted Irish Butter. I like the bit of salt.
Potato starch or cornstarch for dusting
Instructions
Line a 5-inch square pan with parchment paper. Use any small pan, 4x6 (lol, does anyone have a pan this size?)
Add the mochiko and sugar to a large microwave-safe bowl, and then add about 1/3 of the milk. Stir the mixture together until there are no lumps. Add the remaining milk and continue stirring until it is smooth.
Put the bowl, uncovered, in the microwave and set it to cook for 2:30. If you have a 600 watt microwave, use full power. Adjust accordingly.
Remove the bowl from the microwave and stir the mixture until it's mostly smooth.
Add the butter and stir until fully melted and incorporated.
Microwave uncovered for another 3:00-3:30. Get to know your microwave!
Carefully remove the bowl from the microwave. Use a silicone spatula to knead the mochi together. The mochi is very hot, do not get it on your hands as you stir. The mixture will get very sticky and turn a translucent yellowish-white color as you knead it. If this doesn't happen, microwave it for another minute or two.
Transfer it to the prepared parchment-lined pan and press the butter mochi into the corners and flatten off the top.
Chill the mochi in the refrigerator for a few hours to firm it up. Unmold the butter mochi and peel off the parchment paper. Use a sharp knife to cut it into approximately 1" squares and then dust each piece liberally with potato starch. Brush the excess starch off and serve.
Right next door to Shuei-Do, my favorite manju shop in Japantown, San Jose, is a Poke Shop, Aloha Fresh. As much as I like Poke, I love going for their butter mochi. They kick it up a notch by offering different flavors like guava, lilikoi, or a brownie macadamia nut version …all are absolutely onolicious. Butter Mochi at Aloha Fresh is limited to the weekends but lucky for me and you, Shuei-Do also makes a yummy Butter Mochi. Between the two – you are covered for your mochi fix.
But what if you can’t get to Japantown?
You can make your own AND it’s pretty darn easy.
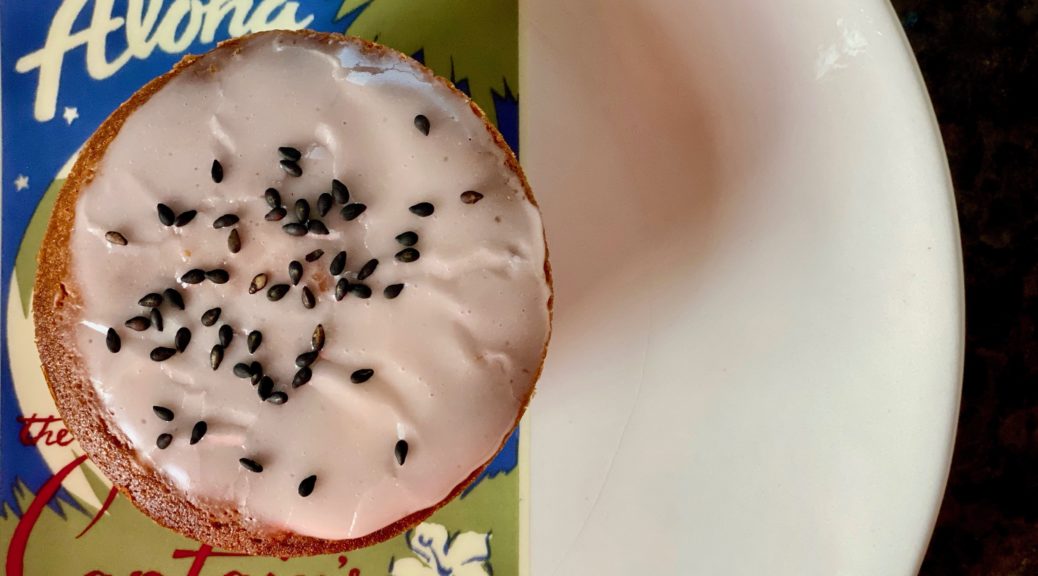
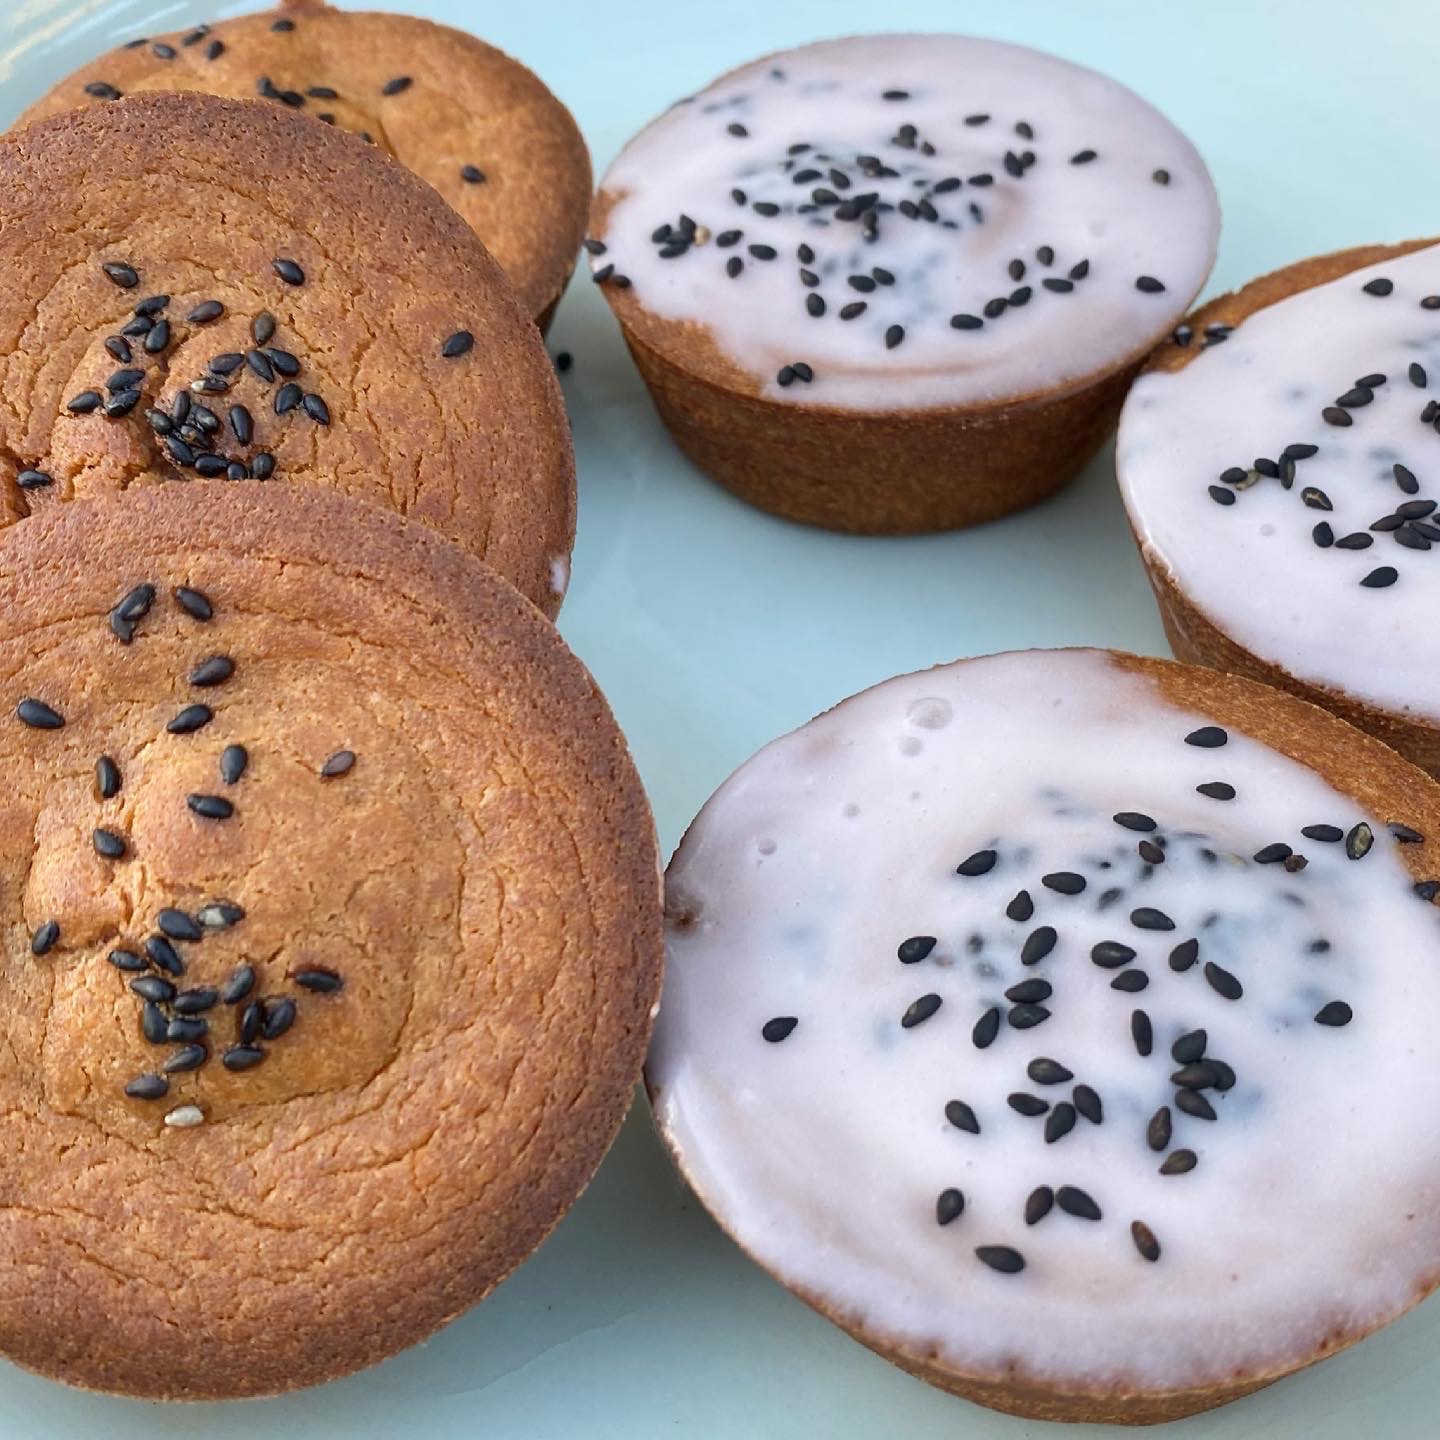
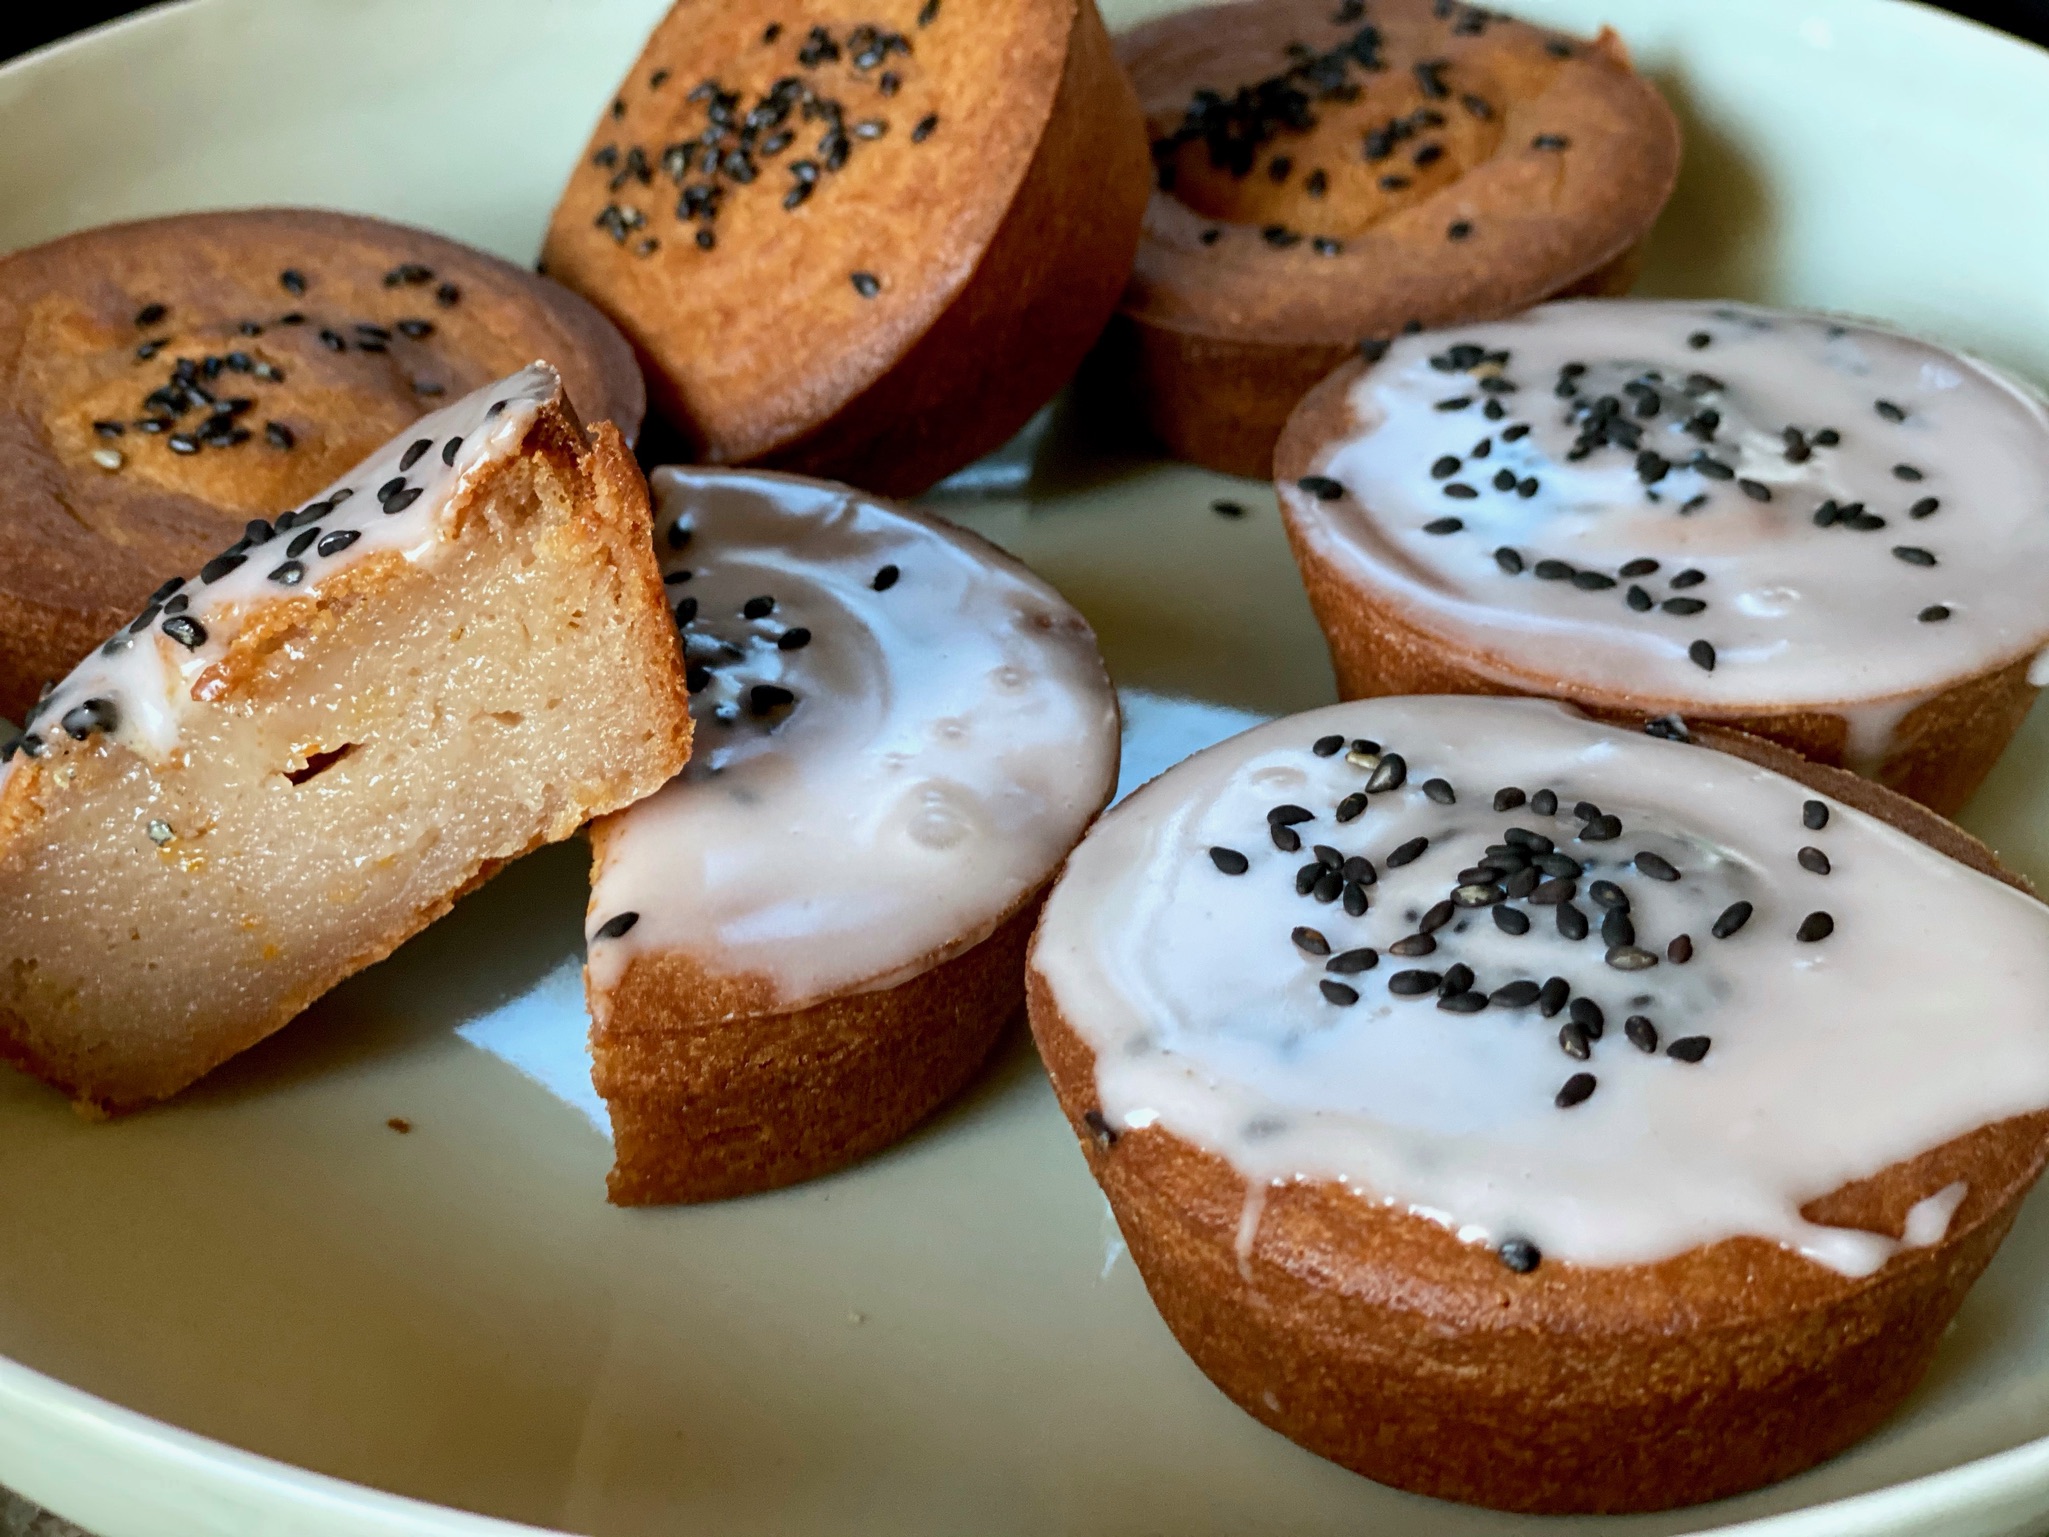
Mochi desserts run the gamut from chewy, bouncy, creamy to moist, a little chewy, and cakey (is that a word?) texture. I wanted a tropical flavor, buttery, crisp on the outside, chewy on the inside treat. A recipe for Blood Orange Mochi Muffins from Cooking Therapyserved as inspiration. In place of blood orange juice, I used Guava Nectar. The muffins were delicious and I plan to try different nectars like Hawaiian Sun’s POG, passionfruit, orange, and guava juice next time.
The batter comes together quickly, this is almost one bowl, one wooden spoon, easy territory. The addition of butter is that Hawaiian tweak that makes it so delicious. Fill well-greased muffin tins about 3/4 full. Bake for 45 minutes, or a little longer for a crispier edge. It will lose that crispness with time though. Store at room temp for 2-3 days max. Pop them in a toaster oven to crisp them a little bit. Do not refrigerate. You can freeze them without the icing. Thaw and crisp in the oven. These muffins are moist, chewy, a little squishy, yummy, and addictive.
Ice, Ice Mochi
Making the icing is easy. Whisk the dry ingredients with coconut milk, vanilla, a pinch of salt, and juice. The icing should be loose enough to dip each muffin top into but thick enough to adhere to the surface with only a bit of dripping. After dipping one muffin you can adjust the sugar or liquid for the right consistency. Sprinkle topping of your choice, coconut shreds, orange zest, sesame seeds, or a bit of flaky salt. Let the muffins sit for a couple of minutes so the icing can set, then serve.
A delicious, gluten-free mochi muffin, chewy, moist, and flavored with guava nectar and citrus.
Course Dessert
Cuisine Asian-American, Hawaiian
Keyword butter mochi, mochi muffin
Prep Time 10 minutesminutes
Ingredients
½cupbutter melted, if using unsalted butter, add 1/4 tsp salt to dry ingredients
¾cupgranulated sugar
1cupcoconut creamor full fat coconut milk
1tspvanilla extract
2eggs room temperature
Zest of 1 orangepreferably Cara Cara oranges
1cupguava nectarsubstitute mango, passion fruit, or tropical fruit blend nectar or orange juice (Cara Cara)
2cupssweet rice flour
2tspbaking powder
Guava Icing
2tbspGuava NectarSubstitute mango, passionfruit, or tropical blend, or orange juice.
2tbspcoconut milk
2cupspowdered sugar
1tspvanilla extract
Zest of 1 orangeoptional
poppy seeds, shredded coconut, black sesame seeds, orange zestgarnish
Instructions
Preheat oven to 350 degrees F. Grease one 12-cup standard muffin tin.
Sift the sweet rice flour and baking powder into a small bowl and set aside.
Add melted butter, sugar, and coconut milk to a large bowl. Mix until combined.
Add the vanilla extract and eggs. Mix until combined.
Add the guava nectar and zest. Mix until combined.
Into the wet ingredients. Mix until a wet batter forms. It should be a pretty loose consistency.
Scoop batter into the muffin pan. Tap the muffin pan 1-2 times on a flat surface to get rid of the air bubbles.
Bake for 40-45 minutes until the edges start to brown. For a crispier edge, bake 45-50 minutes. Don't go much longer as it may make the inside drier and a little tougher.
Cool for 10 minutes in the muffin pan before removing.
Icing
While the muffins cool, make your icing. Place powdered sugar In a small bowl. Add coconut cream or milk, nectar, vanilla, and a pinch of salt. Stir with a whisk until completely blended.
When muffins have cooled, remove from pan. Dip the top of each muffin into the icing and place on a wire rack. Sprinkle with sesame seeds, poppy seeds, shredded coconut. The consistency of the icing should be thin enough to dip but thick enough that it doesn't all run off the muffin top. A little bit will roll down the side of the muffin. That's okay!
The icing is optional. If you don't use it, sprinkle the muffins with sesame seeds or flaked coconut before baking.
Notes
This recipe can be easily halved! Icing is optional. I like using coconut cream instead of milk. I think the muffins are little denser, richer and chewier with cream instead of milk. Don't use lite coconut milk.Play with flavors. Any nectar or juice would work. If you can find Hawaiian Sun Juice Drinks they have a variety of flavors including island favorite, POG (Passionfruit. Orange and Guava).
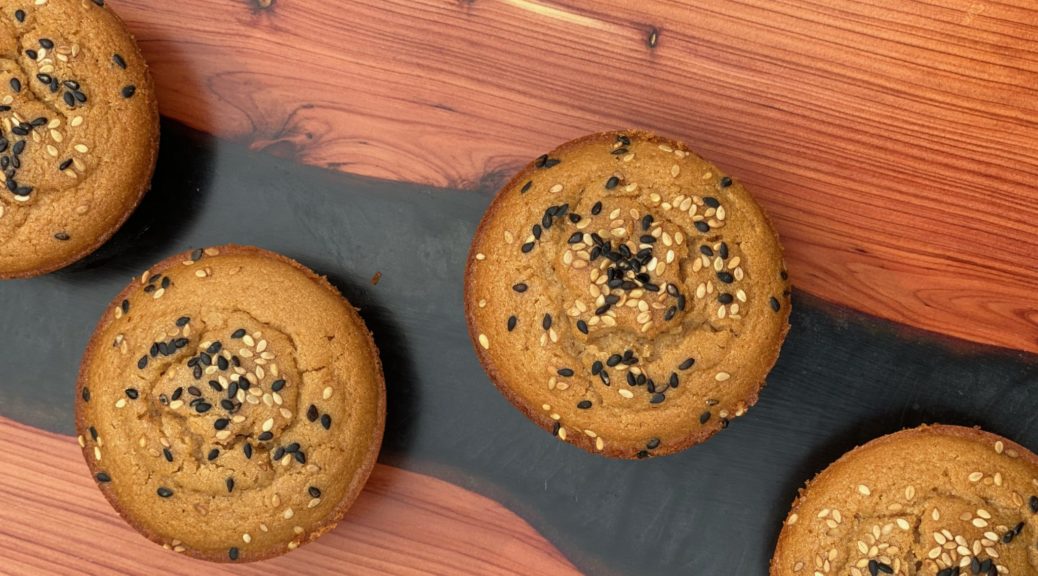
One of the most popular posts on 3Jamigos is Muffin been the Mochi that Caught My Eye (Butter Mochi Muffins) I stumbled upon the original recipe on Snixy Kitchen, a gorgeous site focused on gluten-free baking and cooking. For good reason this recipe is popular, the muffins are chewy, dense, moist and delicious. I decided I needed to expand my horizon and try different flavorings for the mochi muffins. A quick search yielded an array of flavors folks have tried, ube, chocolate, and milk tea.
The Milk Tea Muffins fromMatch Berry Kitchen caught my eye. I love Milk Tea, apparently, so do lots of people judging by the number of Boba places in the South Bay. The proverbial Newton’s apple epiphany popped in my head, tea, mango, coconut, hmmm. I thought Mango Sticky Rice, one of my favorite desserts, could I morph it into a mochi muffin?
Let’s Do This
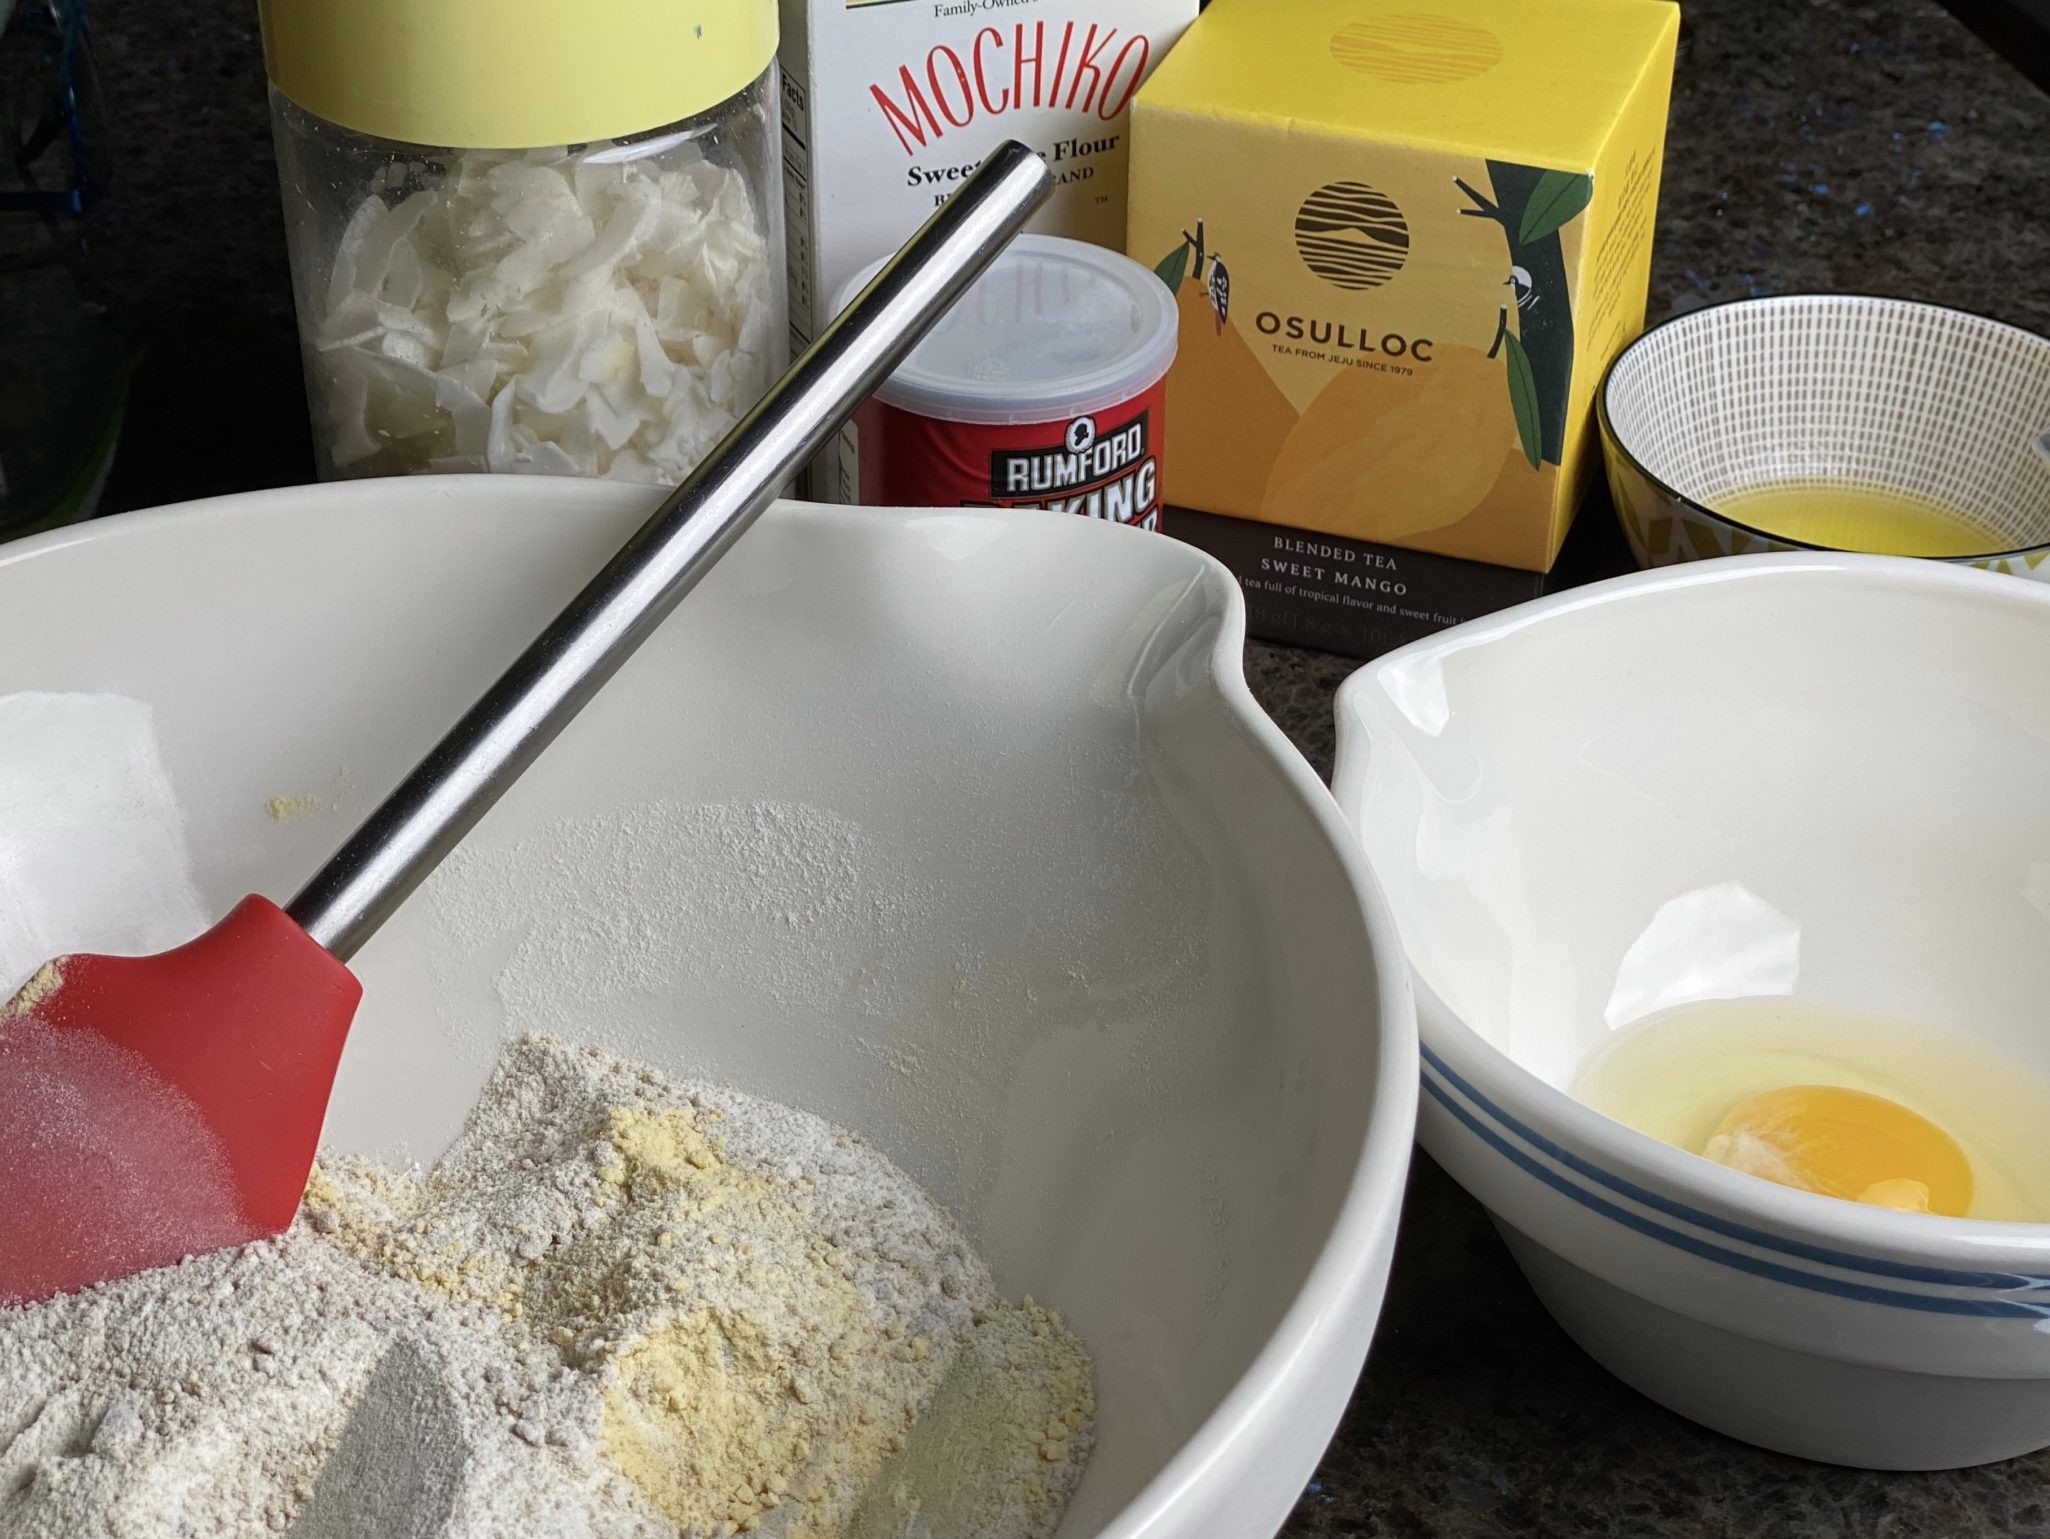
I pulled out a box of Mango Tea I had bought in Seoul, freeze-dried mango chips from TJ’s, coconut milk and a box of Sweet Rice Flour.
The beauty of Mochi Muffins is they are REALLY easy to make. A bowl, a spoon, or spatula, and you are in business. You can crush the mango pieces with a rolling pin or drop it in a mini food processor or blender. If you don’t have coconut milk you can use evaporated milk, or regular milk. I like coconut milk, especially with mango. I brewed a strong cup of mango tea, and combined it with coconut milk, butter, and egg. By using mango tea, the flavor is very subtle, you could use mango juice or puree for a more pronounced flavor or fold in bits of fresh mango (baking time will be on the long side due to moisture from the fruit). Add wet ingredients to the dry, stir a couple of times, done. Literally, 5 minutes of prep and then into the oven.
The batter is pourable, use either a scoop or pour into buttered muffin tin cups. Fill to within 1/8 inch from the top. This will make approximately 8 muffins, not too many. Garnish with coconut or with sesame seeds., both give an extra layer of texture. I used flaked coconut since I did not have shredded which I would have preferred. Baking time is in the range of 32-35 minutes. Shorter baking time insures a gooey, chewy texture while baking the muffins longer would make them cakier and less chewy. Your choice.
2tablespoonsor 1/8 cup of unsalted butterand a bit extra for greasing the muffin pan
3Mango flavored teabags
~ 1/2 cup of coconut milkreg or light
1large egg
1tablespoonof condensed milk
Muffin pan
Instructions
Preheat the oven to 350 degrees Fahrenheit and grease the muffin pan with a little bit of melted butter
Steep tea bags in 1/2 cup of boiling water for 10 minutes then drain excess liquid from the tea bags and take them out
Add coconut milk until you have 3/4 cup of milk+tea.
Combine Mochiko, sugar, ground mango and baking powder in a large mixing bowl
In a separate bowl melt the unsalted butter then stir in the egg, condensed milk and coconut milk tea mixture, blend ingredients thoroughly.
Combine the dry and wet ingredients and whisk till the mixture has no lumps
Scoop or pour the mixture into the wells of the muffin pan
Bake in the oven for 32-35 minutes then remove and let cool for around 30 minutes before taking the muffins out of the pan
Notes
If you want the muffins to be sweeter, add more condensed milk
If you want the muffins to have a stronger tea taste, increase the number of tea bags for the steeping step
For a crispier bottom use a metal muffin pan or bake the muffins for longer
Mochi muffins are best stored at room temperature in an air-tight container or freeze and reheat.
For mango madness, add diced fresh mango to batter
Definitely try different flavors. For milk tea, use black tea bags, omit mango powder. There are an array of freeze-dried fruits available including raspberry, strawberry and blueberry.

 Microwave Magic