
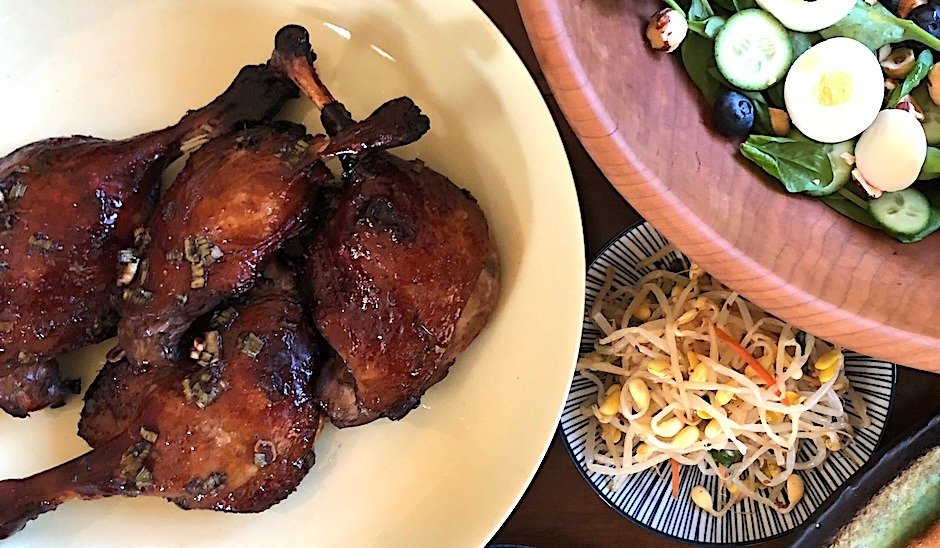
I don’t often cook duck at home. Not because I don’t like duck, actually, I love duck. Growing up, duck graced our dinner table often. …
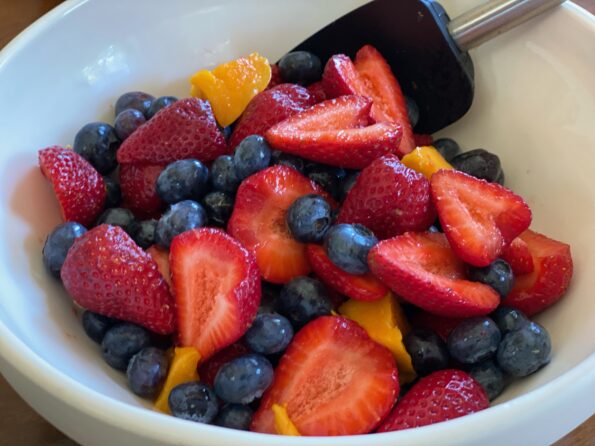
Ventured out, despite the rain, to my local farmer’s market last Sunday, and I’m so glad I did. Berries are back, Babee! My two favorite…

The hubster and I spent the last month or so in New York City. We have spent quite a bit of time there over the…
Happy holidays! Right after Thanksgiving, we hopped on a plane and headed to our 2nd favorite city, NYC. We had never visited before the holidays,…
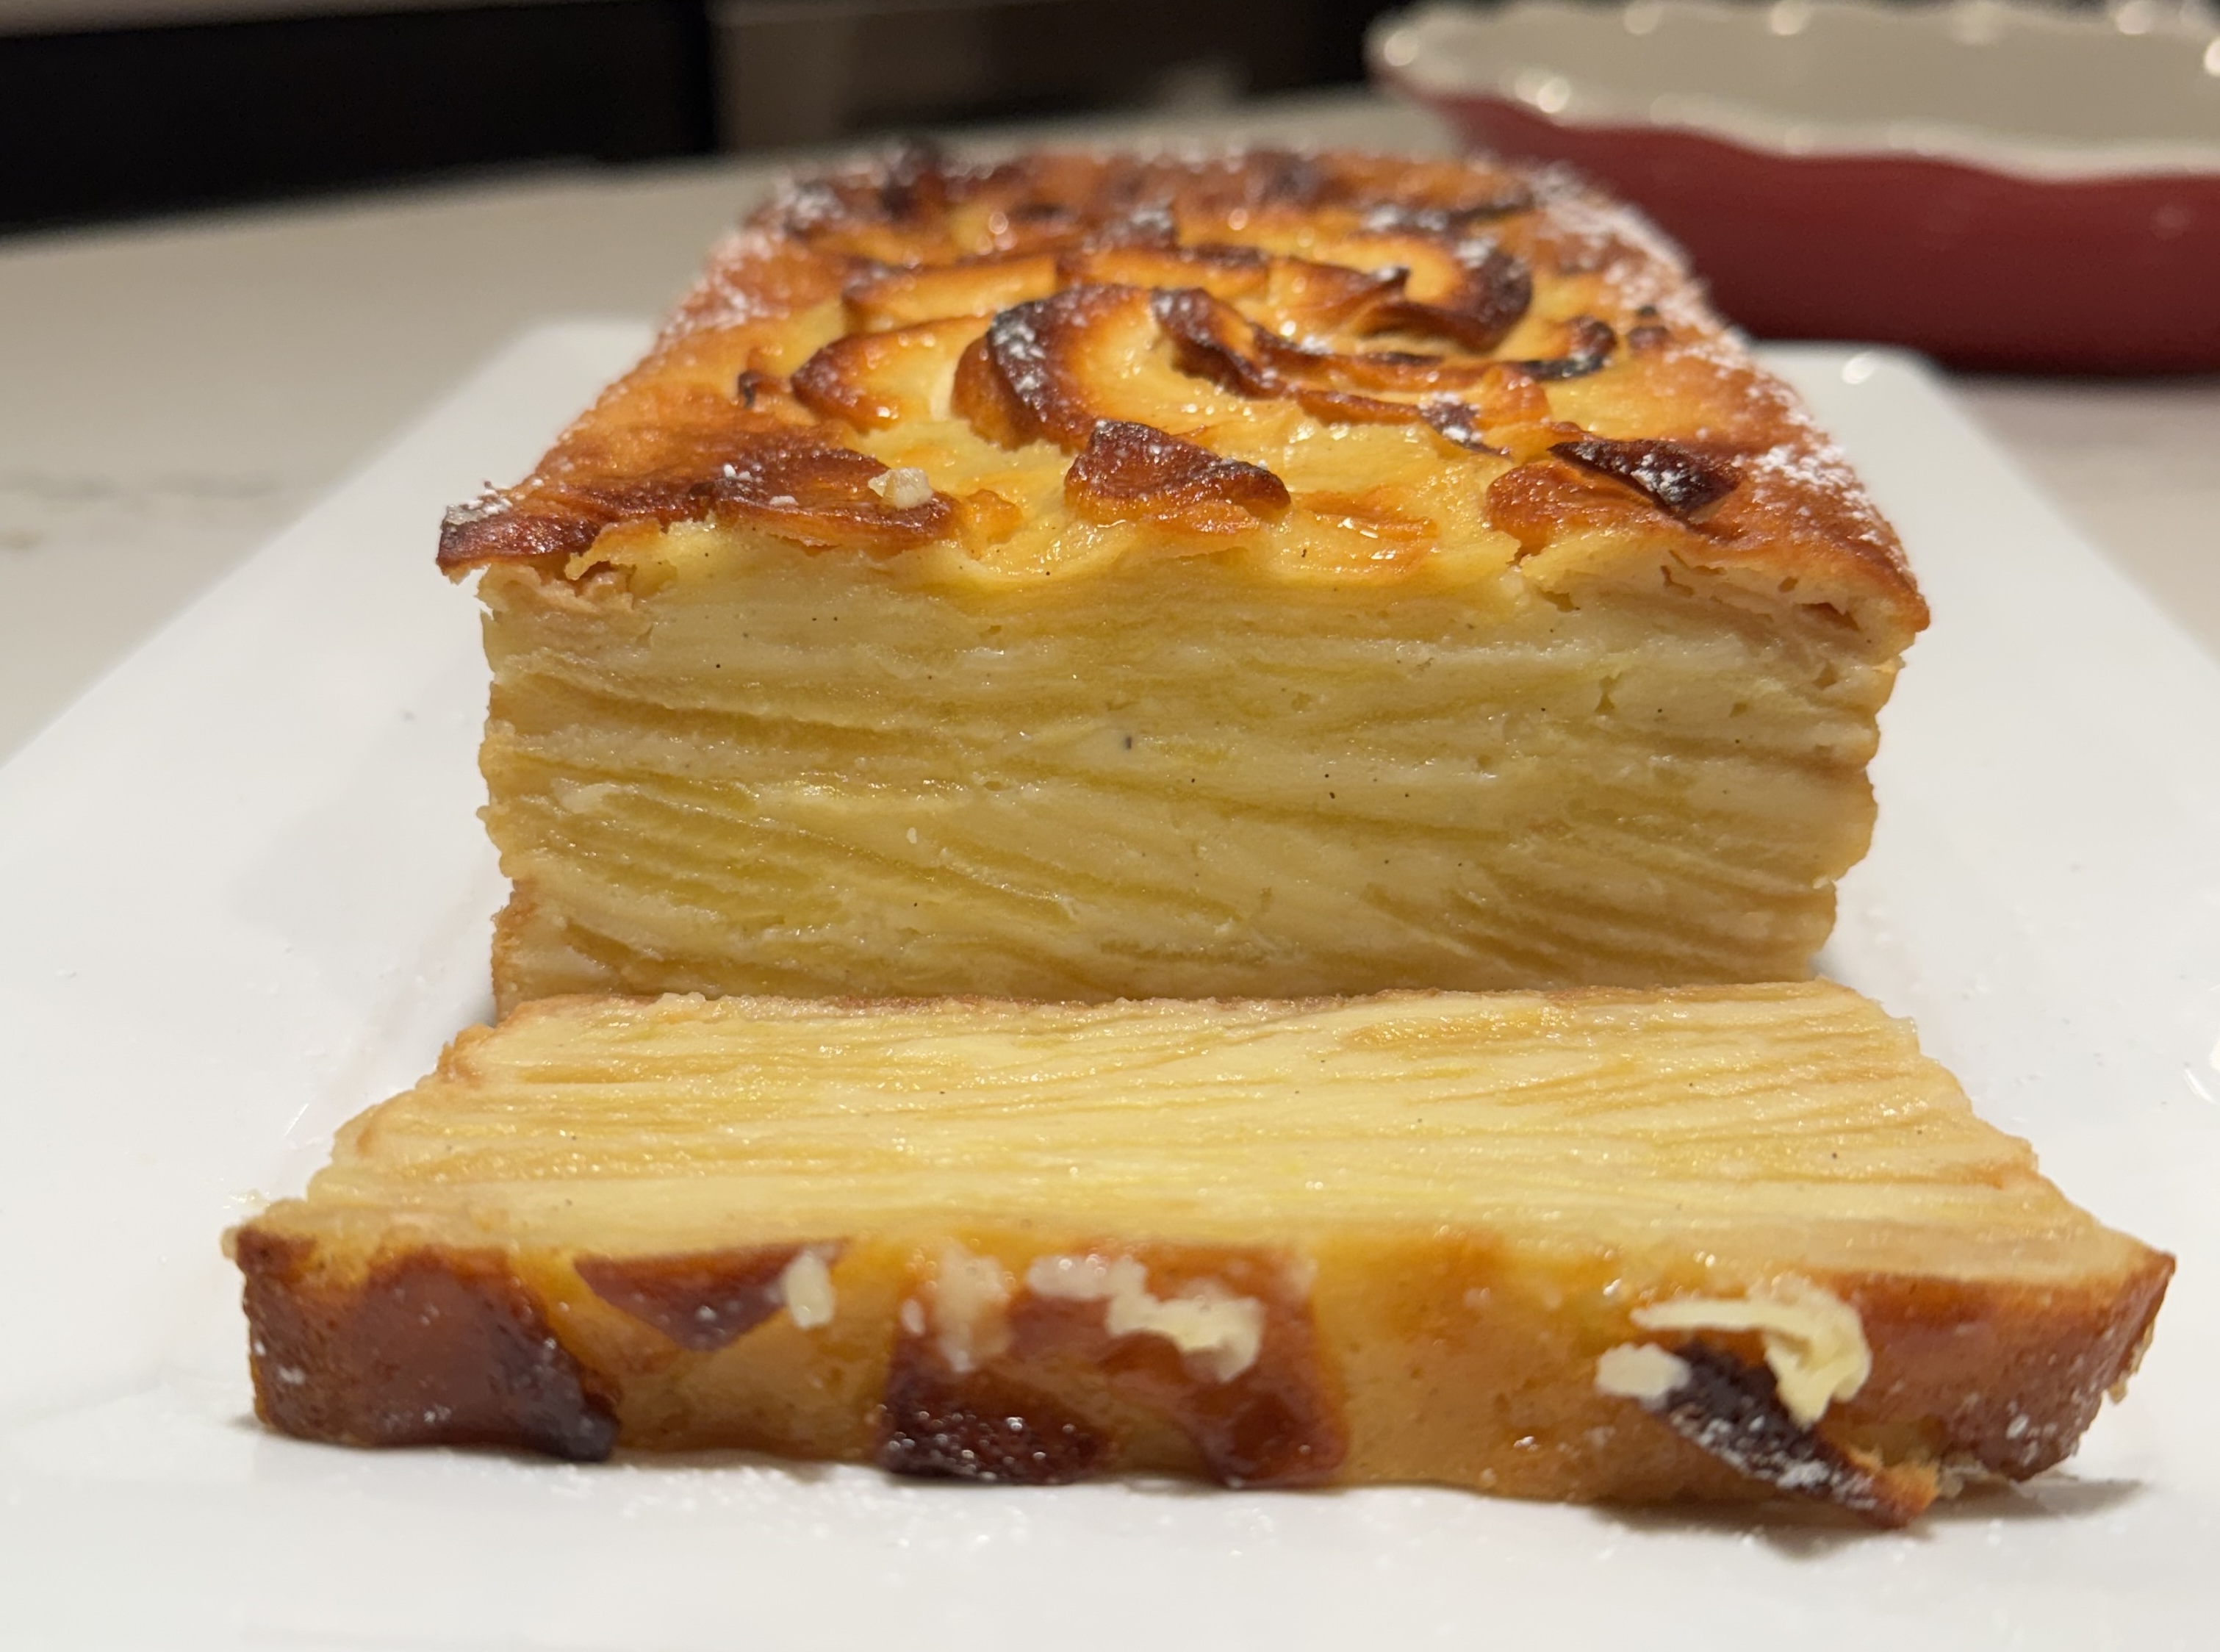
I have been eyeing this cake for a while, the Invisible Apple Cake. No pun intended. It’s layers and layers of thinly sliced apples held…
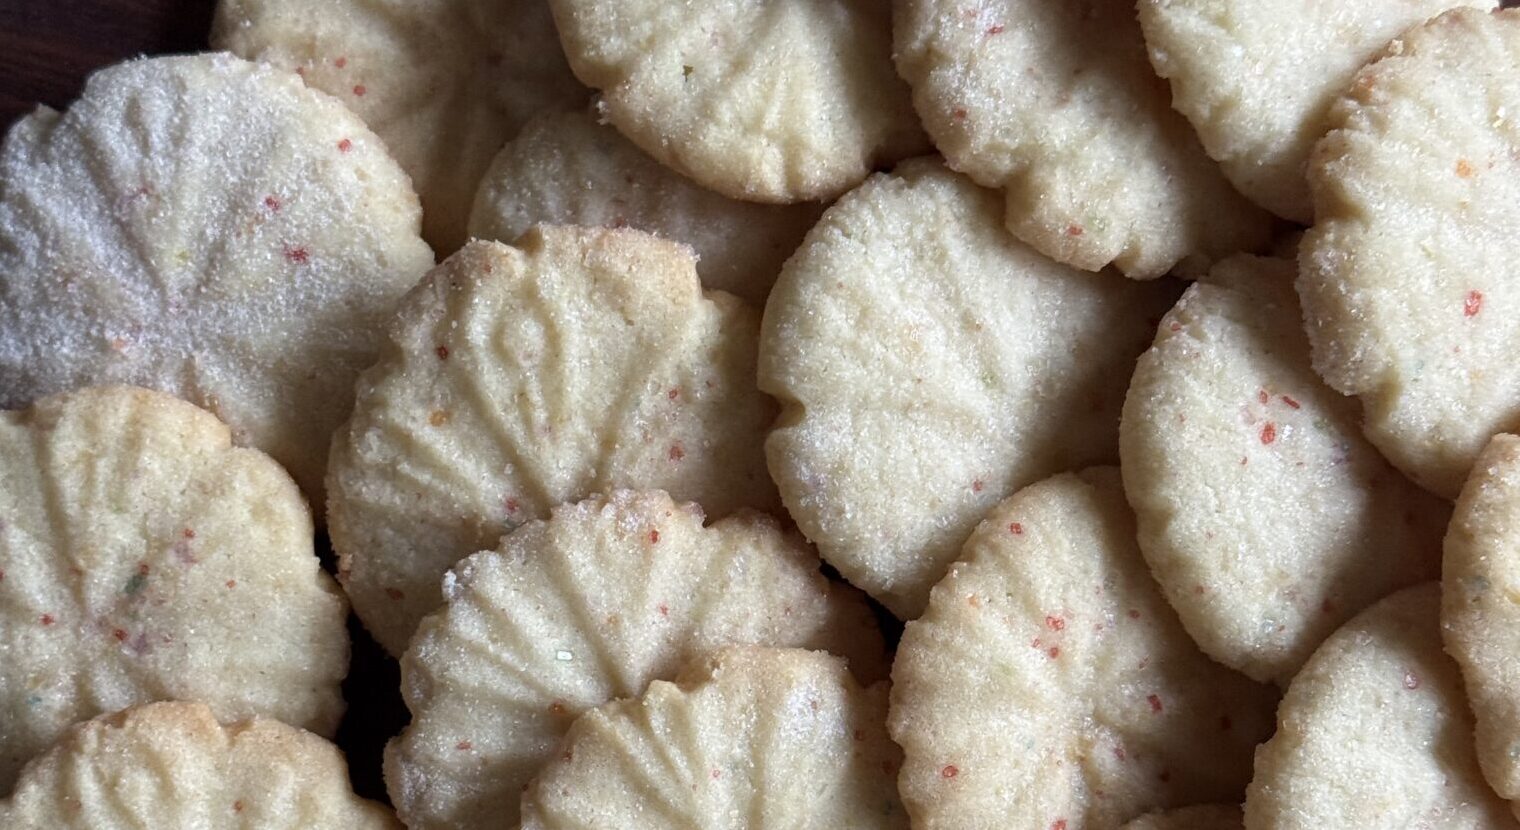
Is it that time already? An Instagram reel popped up for “Sugar Crack Cookies, The most addictive Christmas Cookie you’ll ever make” from @hayherridge, all…
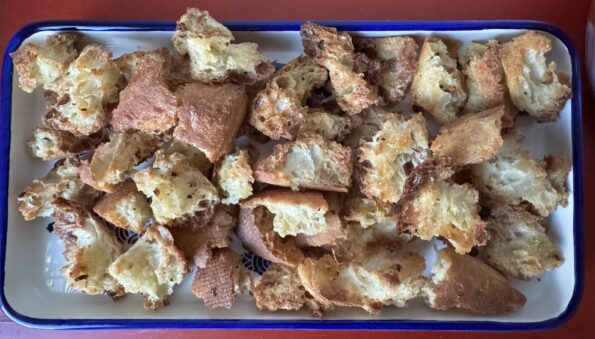
When I am shopping at the grocery store, I usually throw a bag of croutons into my cart. Even though they kinda taste like salted…
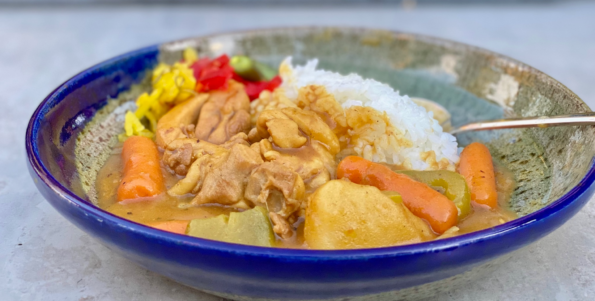
One of my favorite “cheats” are the Japanese curry blocks found in most Asian markets. These little blocks contain the spices and flavorings plus a…
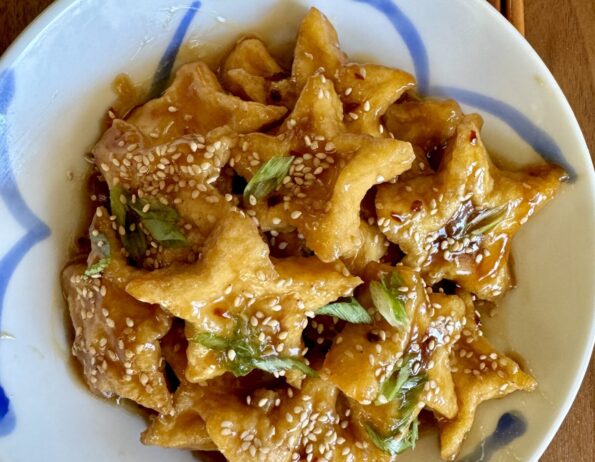
One of my favorite recipes is Kristina Cho’s Honey Sesame Tofu Puffs. She included this easy and delicious recipe in her newsletter several months ago…