Tag: #garlic

Summer Garden Pasta, Tomatoes Everywhere, Except My Garden

Summer Garden Pasta, Tomatoes Everywhere, Except My Garden

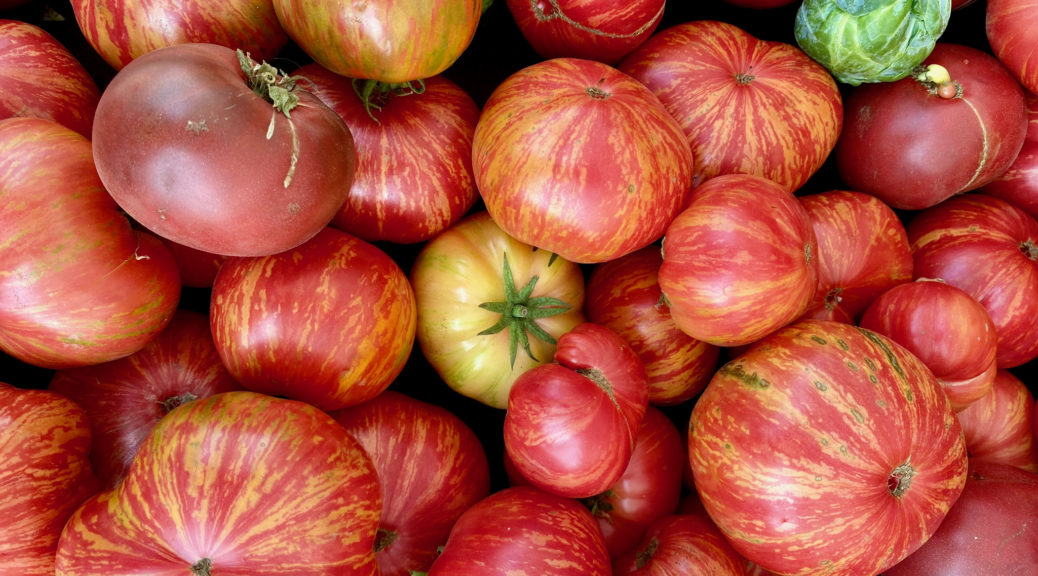
We apparently do not have the veggie garden green thumb.  We planted tomatoes and squash, then fertilized, watered, and even talked to the plants but (“big sigh”) have little to show for it.

The Tomato Tease

Just when I resigned myself to the fact that I am not a tomato whisperer, like a big tease, Ina Garten’s recipe for Summer Garden Pasta popped up on my screen.  It’s the perfect recipe, if your tomato plants yielded tomatoes, damn it.  I consoled myself by buying a basketful of beautiful cherry tomatoes at the Farmers Market.

Ina Garten’s Garden Pasta dish reminds me of a favorite recipe from Silver Palate (totally dating myself), Linguine with Tomato and Basil.  Back in the Day, Silver Palate, a tiny Upper Westside deli in Manhattan, published a whimsical cookbook that took all of us fledgling young cooks by storm. No pics, just cute drawings with how-to-entertain tips and recipe wisdom as side notes.  It was a huge hit, it was our Joy of Cooking.  My favorites included Decadent Chocolate Cake, Sour Cream Apple Pie, and their classic Chicken Marbella.

The Linguine with Tomato Basil is an uncooked sauce of tomatoes, with lots of garlic, basil, and a “hunka” Brie.  Add the hot pasta to the sauce and the cheese gets gooey and the tomatoes and garlic mellow.  Rich, delicious, and extremely decadent.

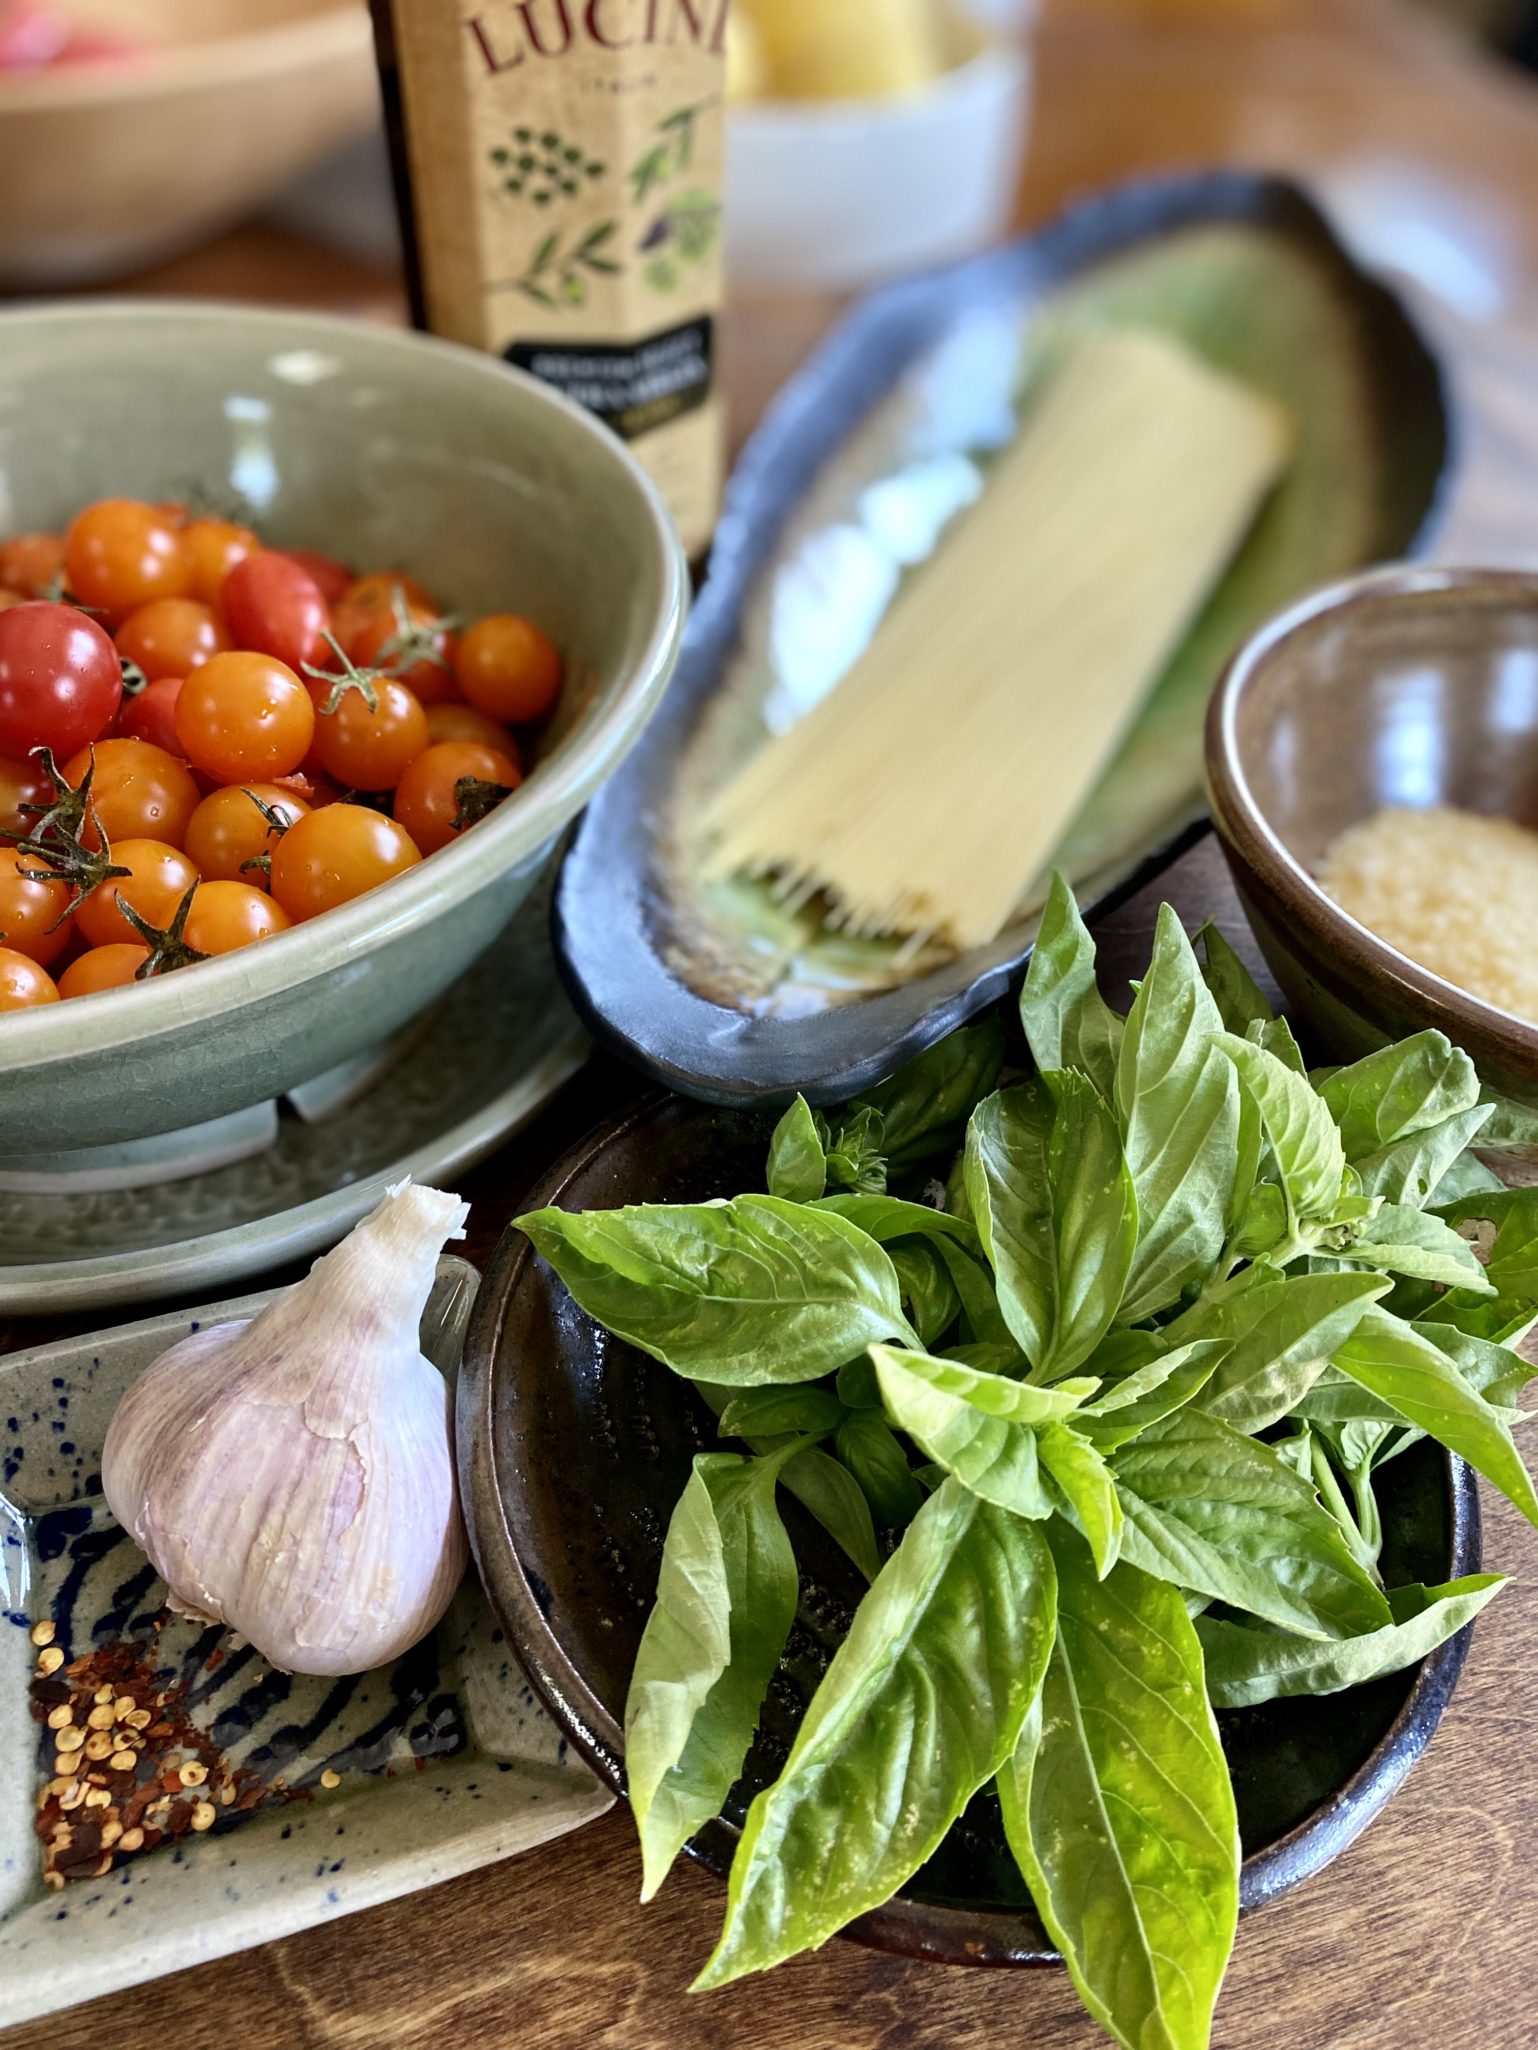
Ina’s version is as delicious, just not quite the caloric overload as the Silver Palate recipe (save it for a special occasion).  The dish is simple and so easy, it’s one I tell my kids to make.

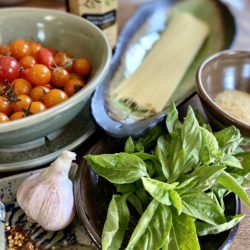
This is How We Do It

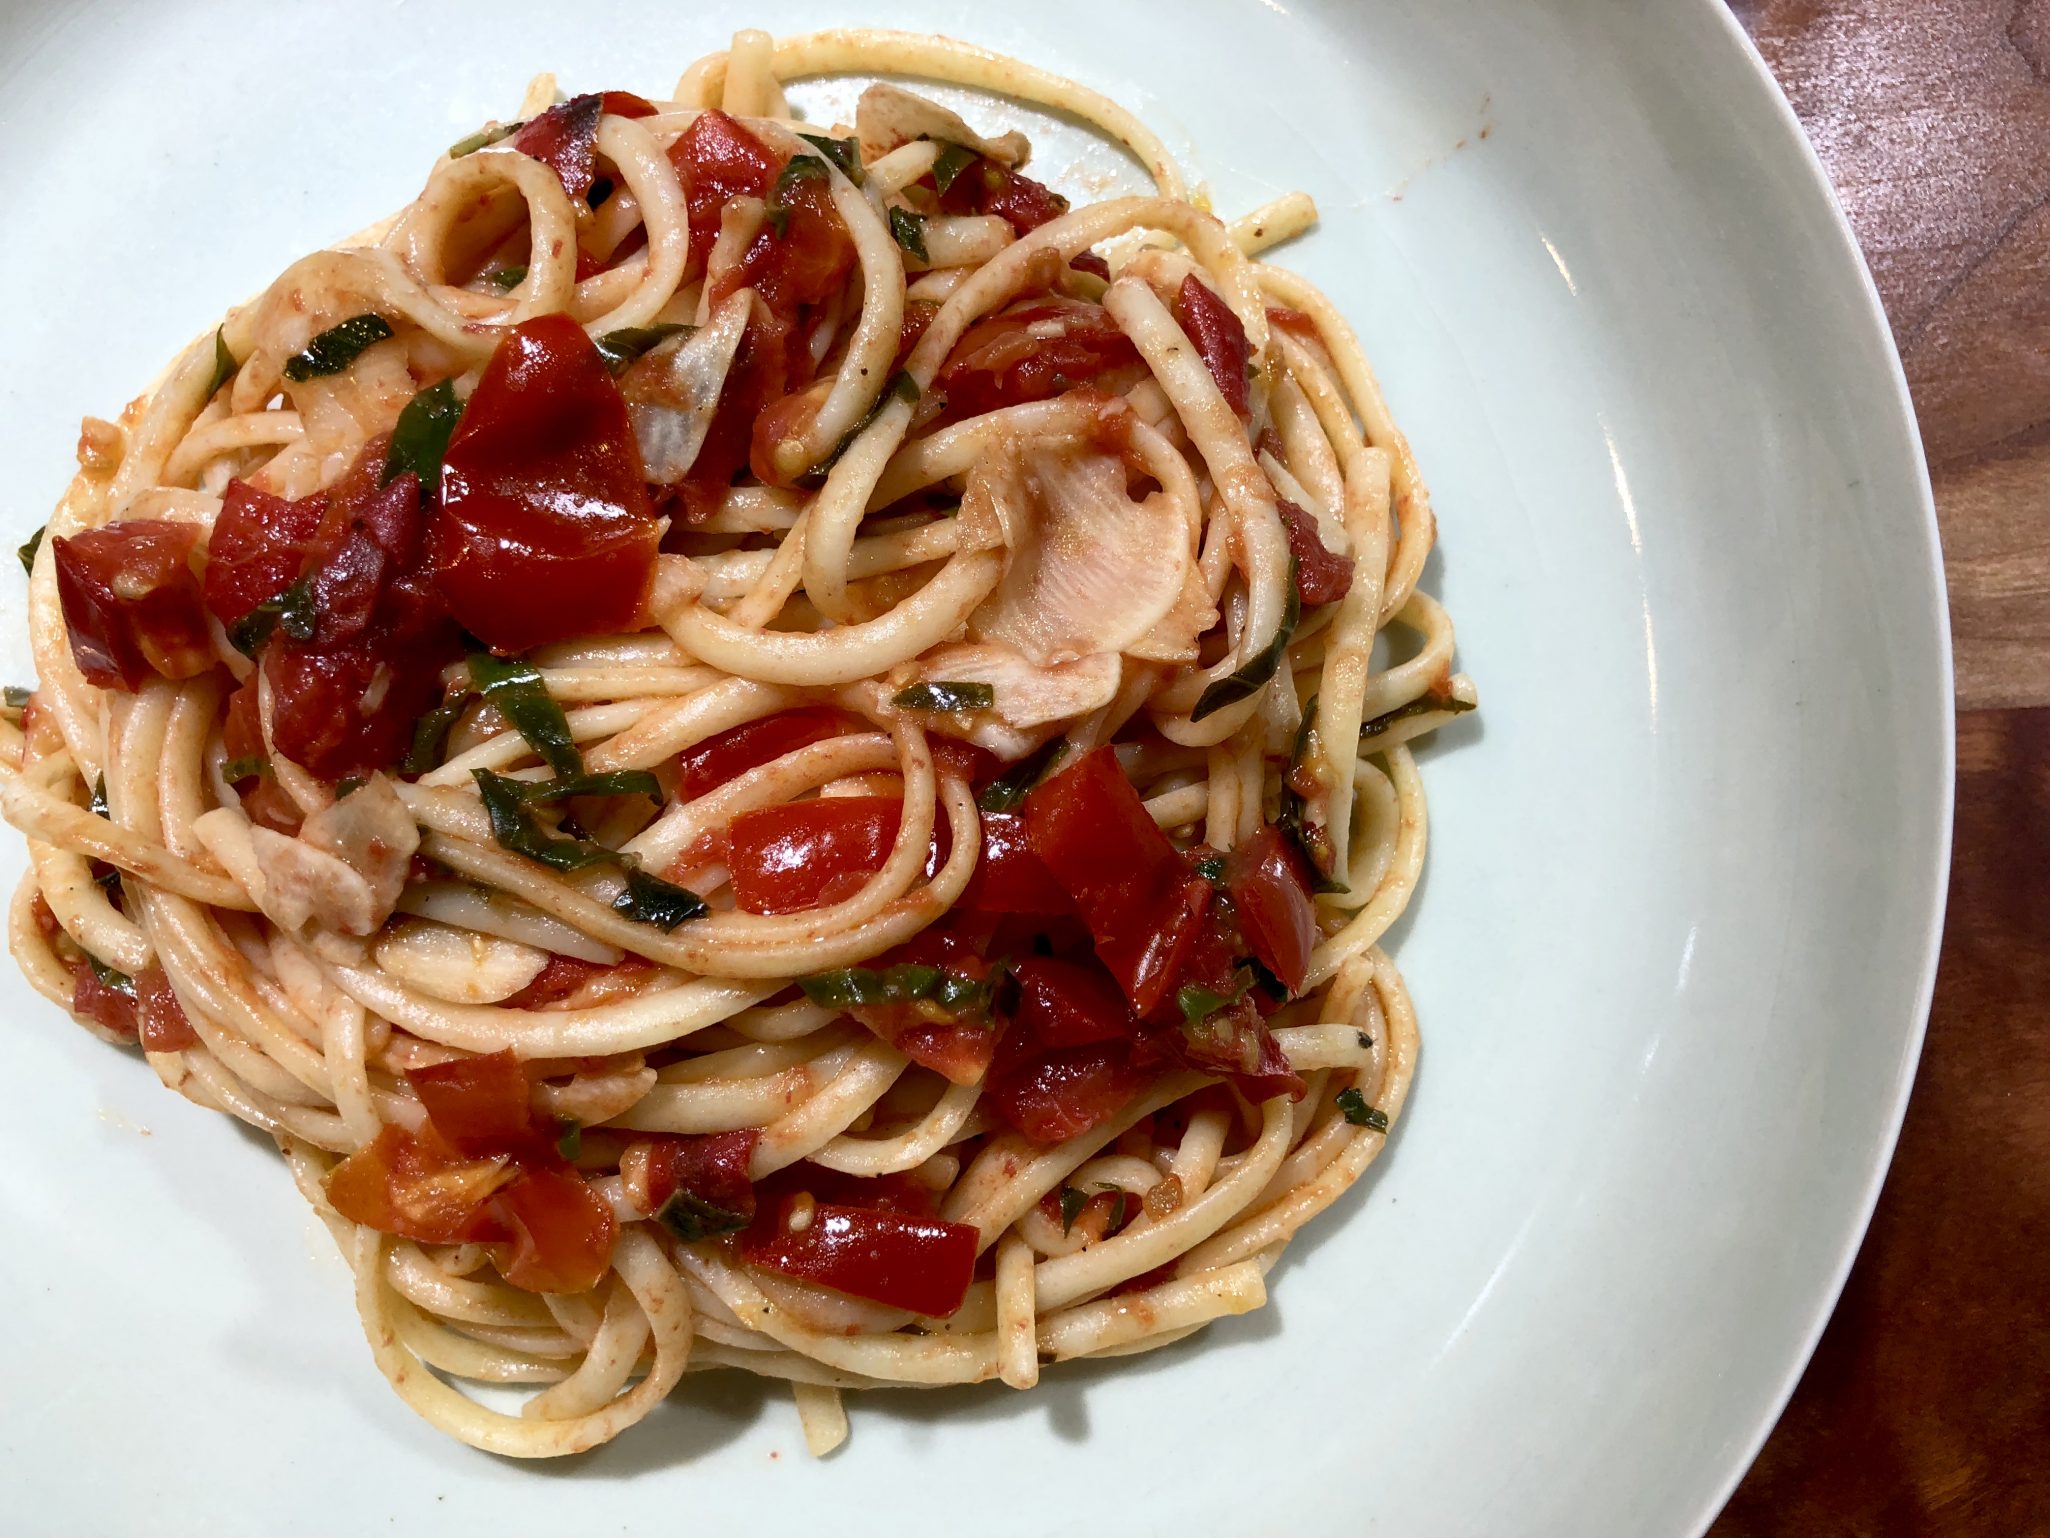
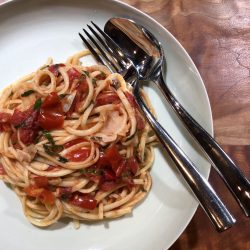
Cut cherry tomatoes in half and toss them into a good-sized bowl. Add garlic, some chili flakes, salt, pepper, and finish with a nice olive oil (EVOO, lol).  Cover and let it sit and marinade for 4 hours. The tomatoes soften, the basil and garlic infuse the oil…it’s like they do a happy dance in the bowl and tango their way into a great sauce.

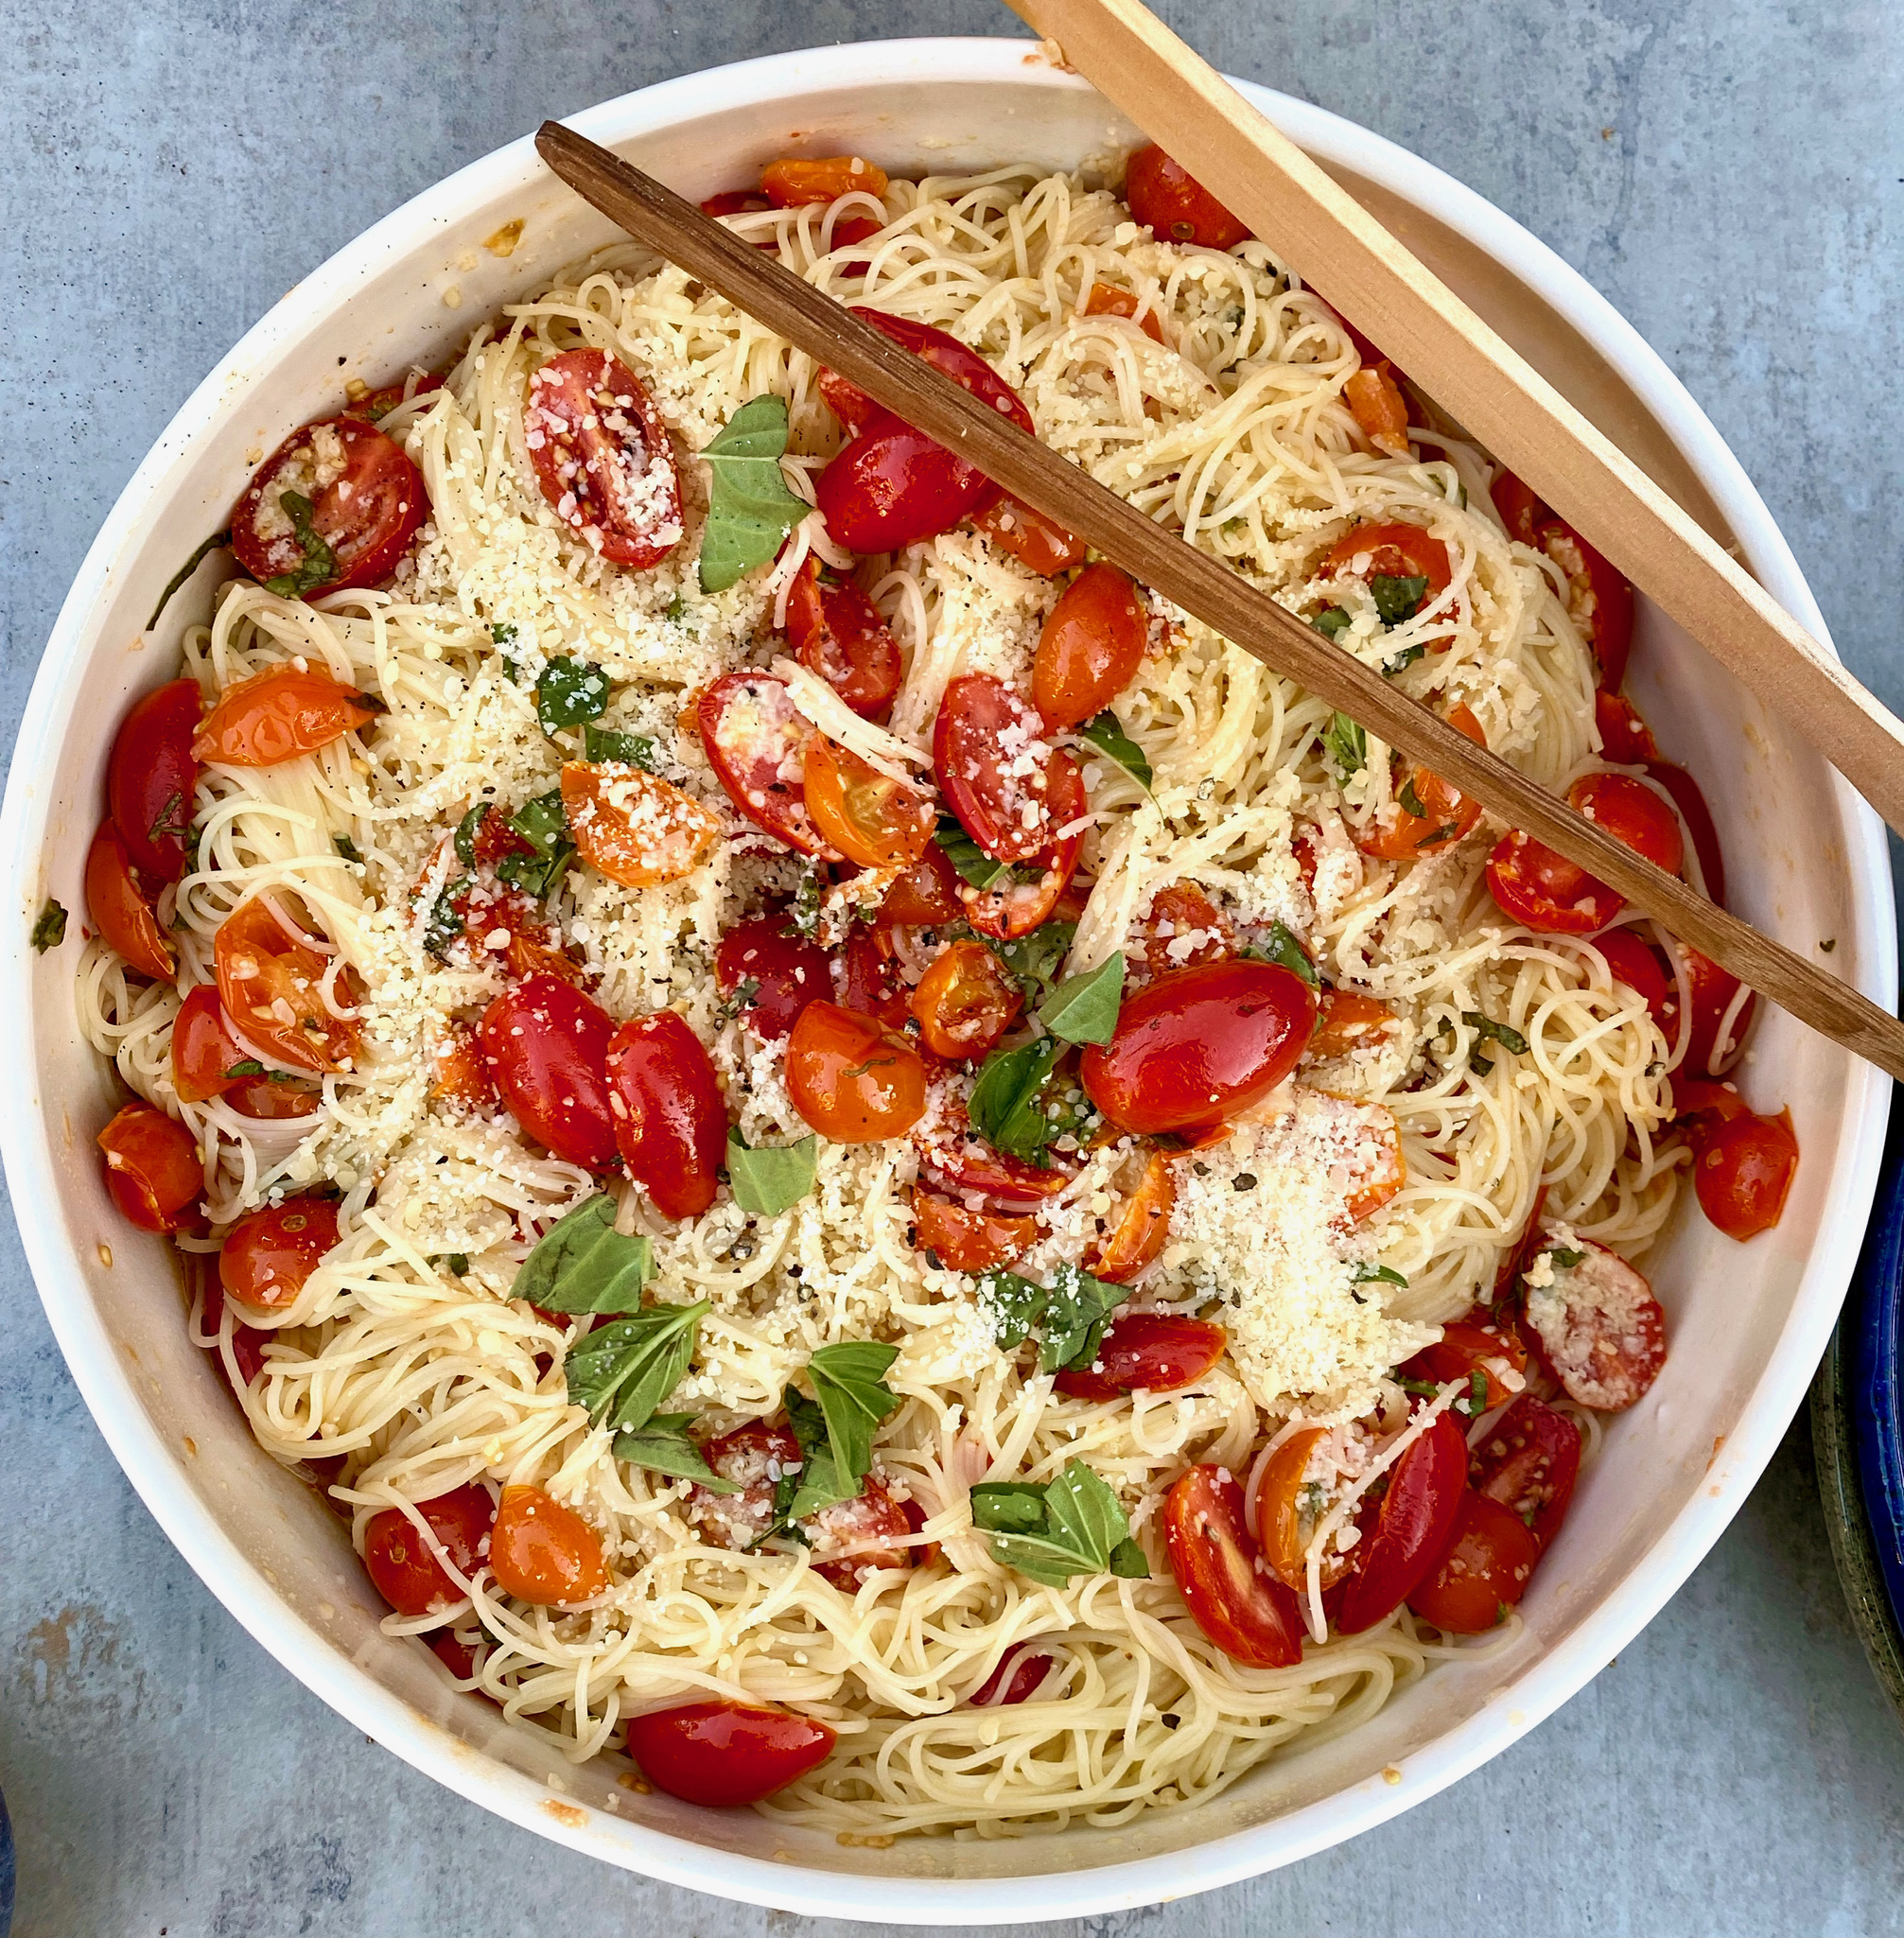
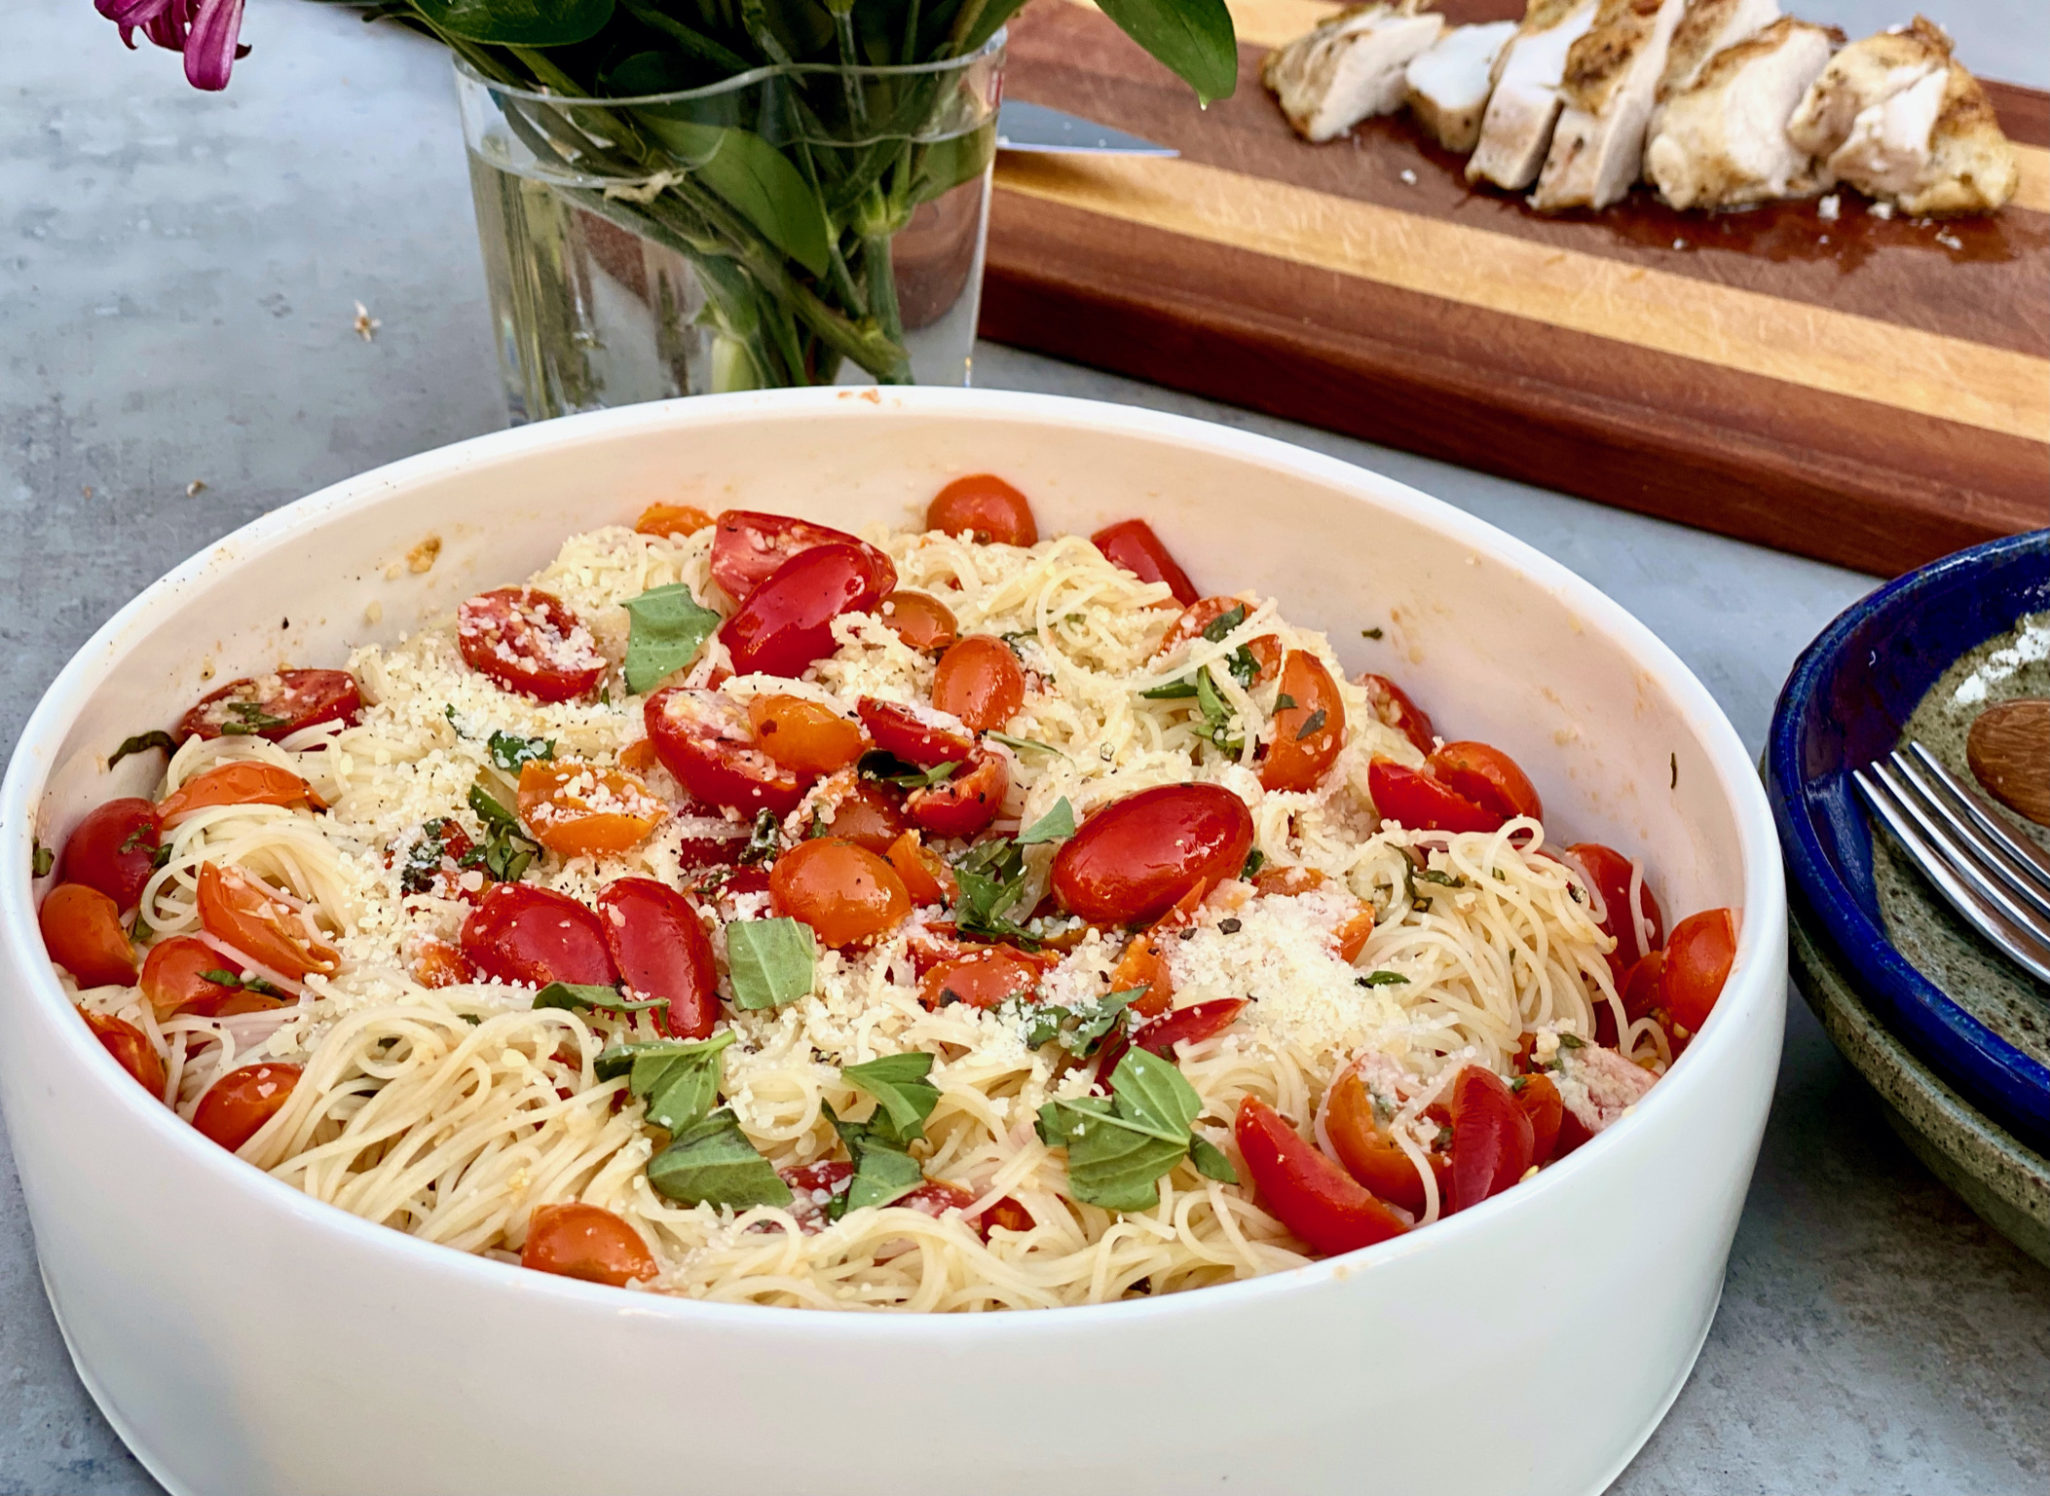
When it is time to eat, cook your Angel Hair Pasta and immediately toss it with the sauce.  Mix, finish with a generous amount of Parmesan Cheese (use the amount you want), garnish with basil leaves, and SERVE.  How easy is that? So, so yummy.

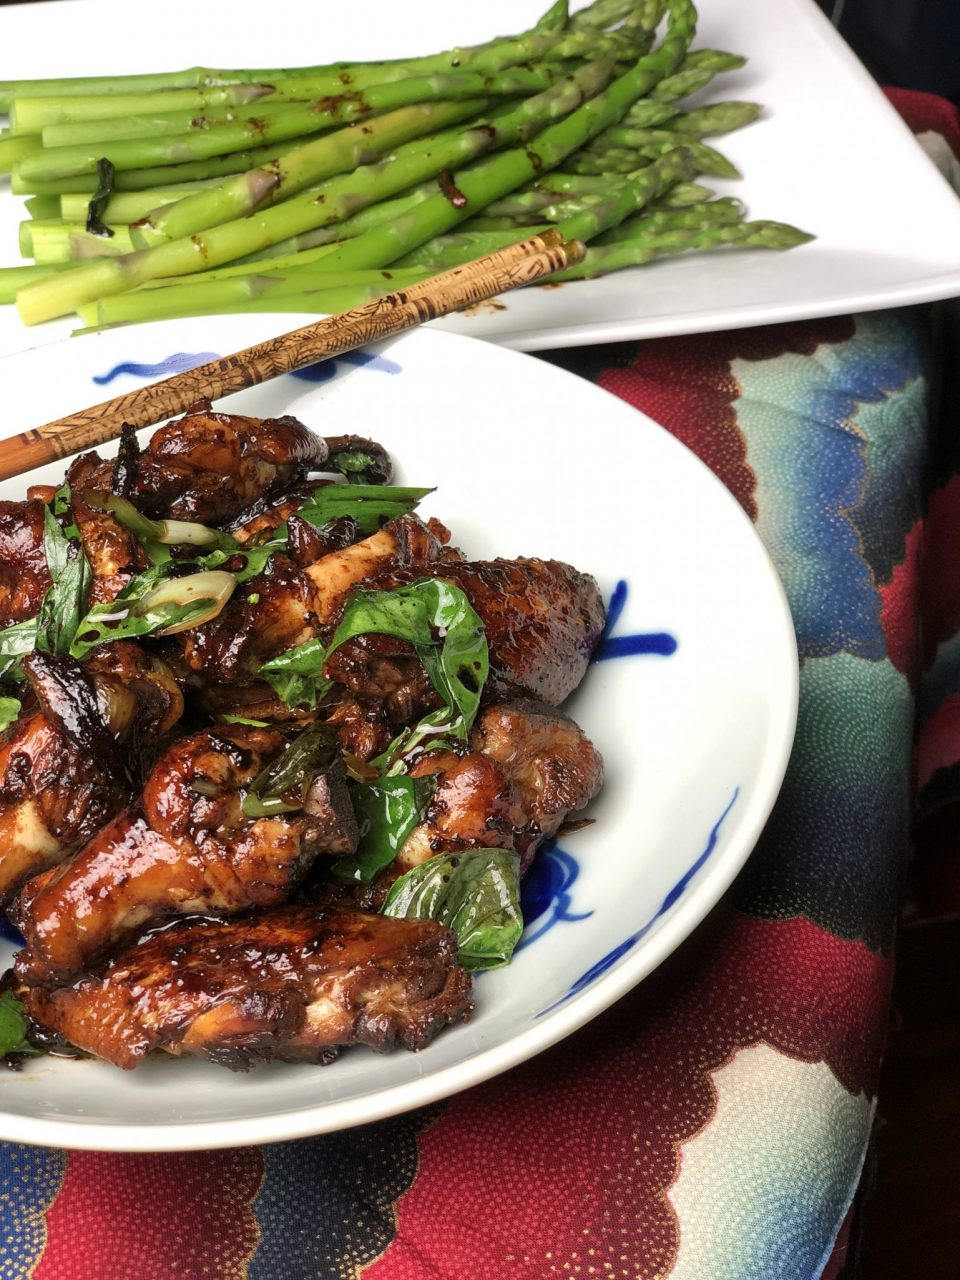
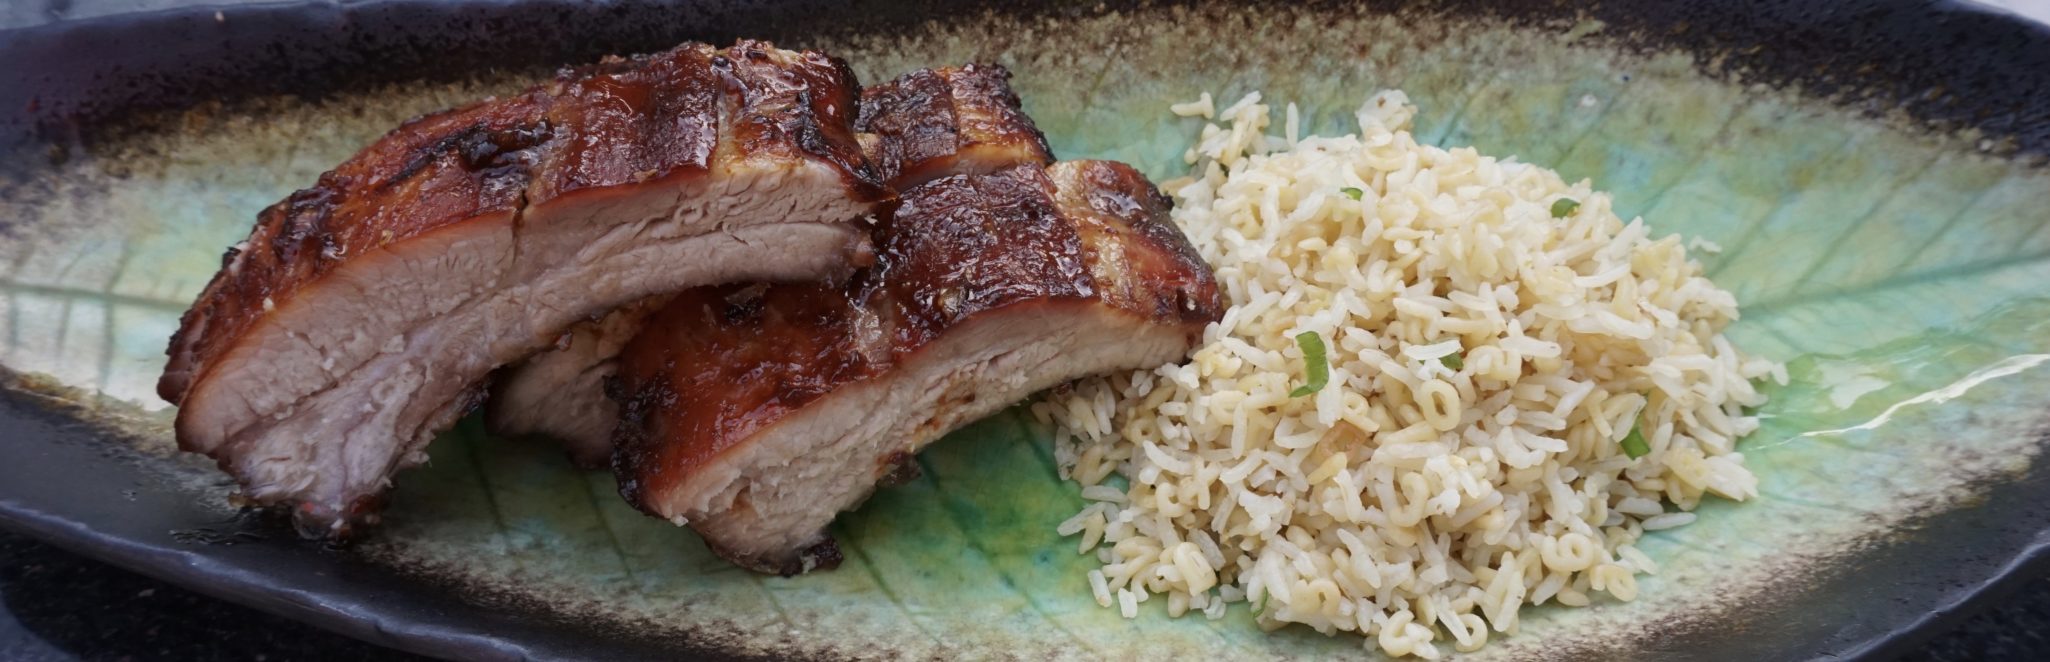
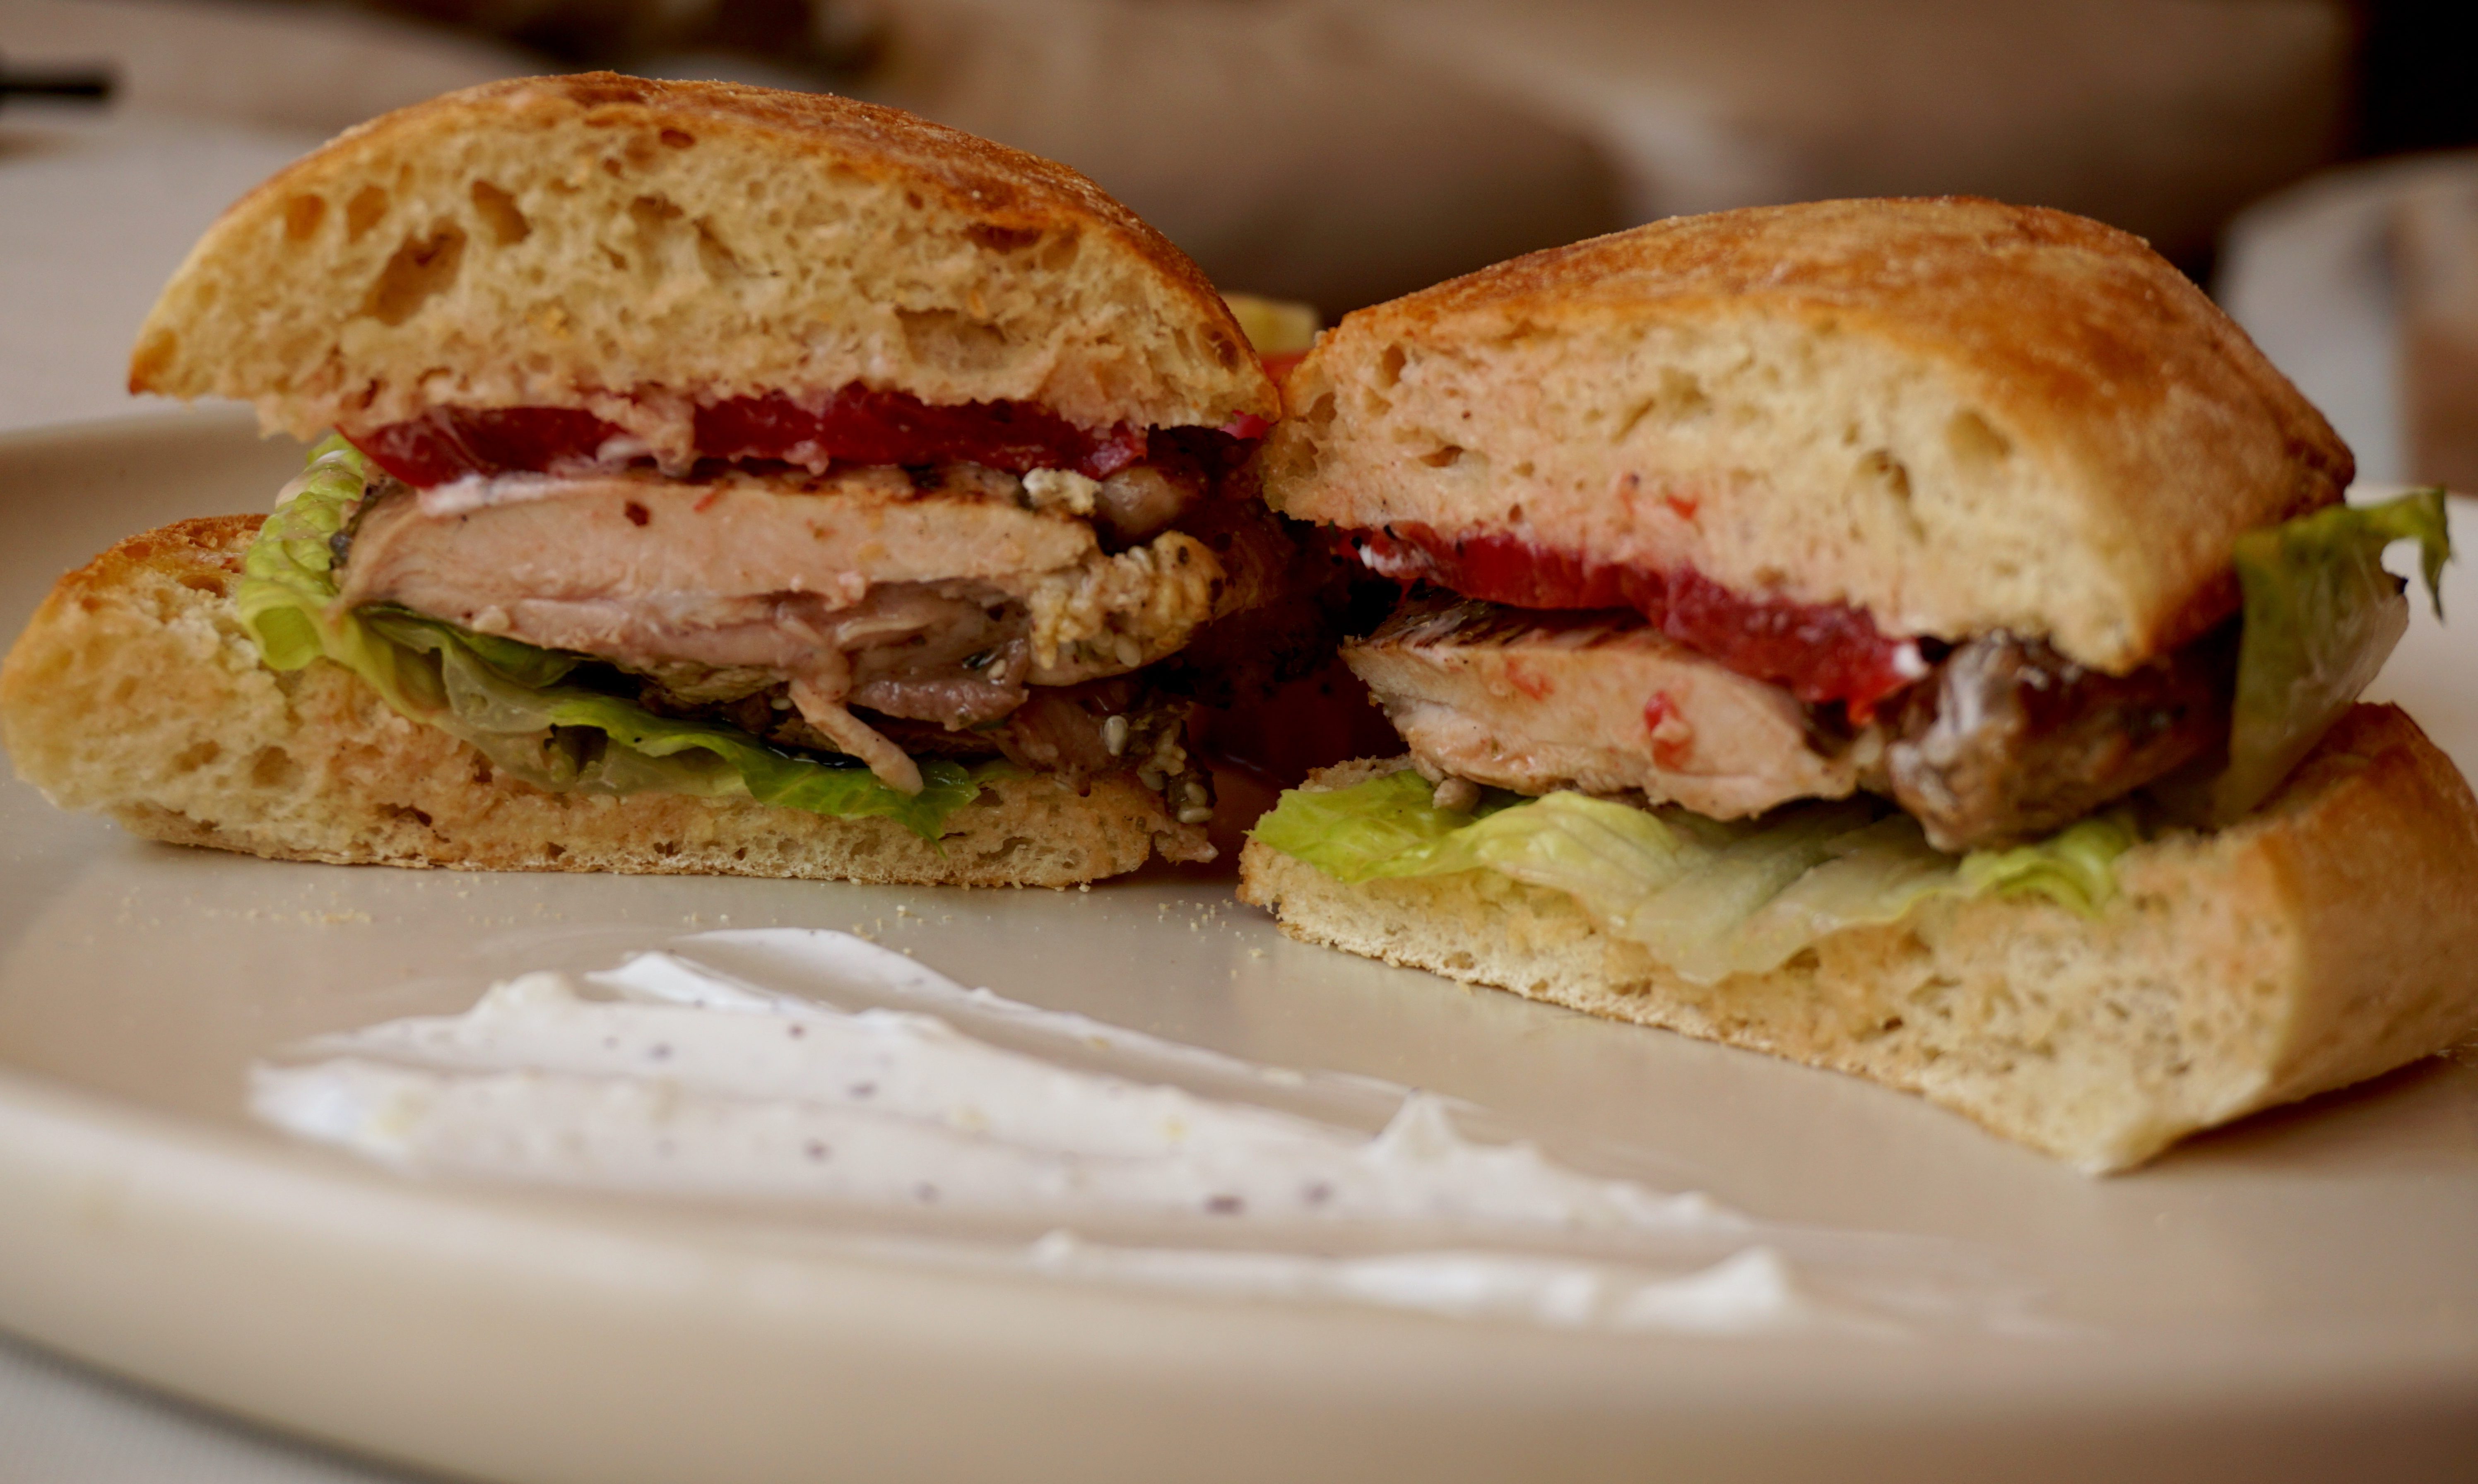
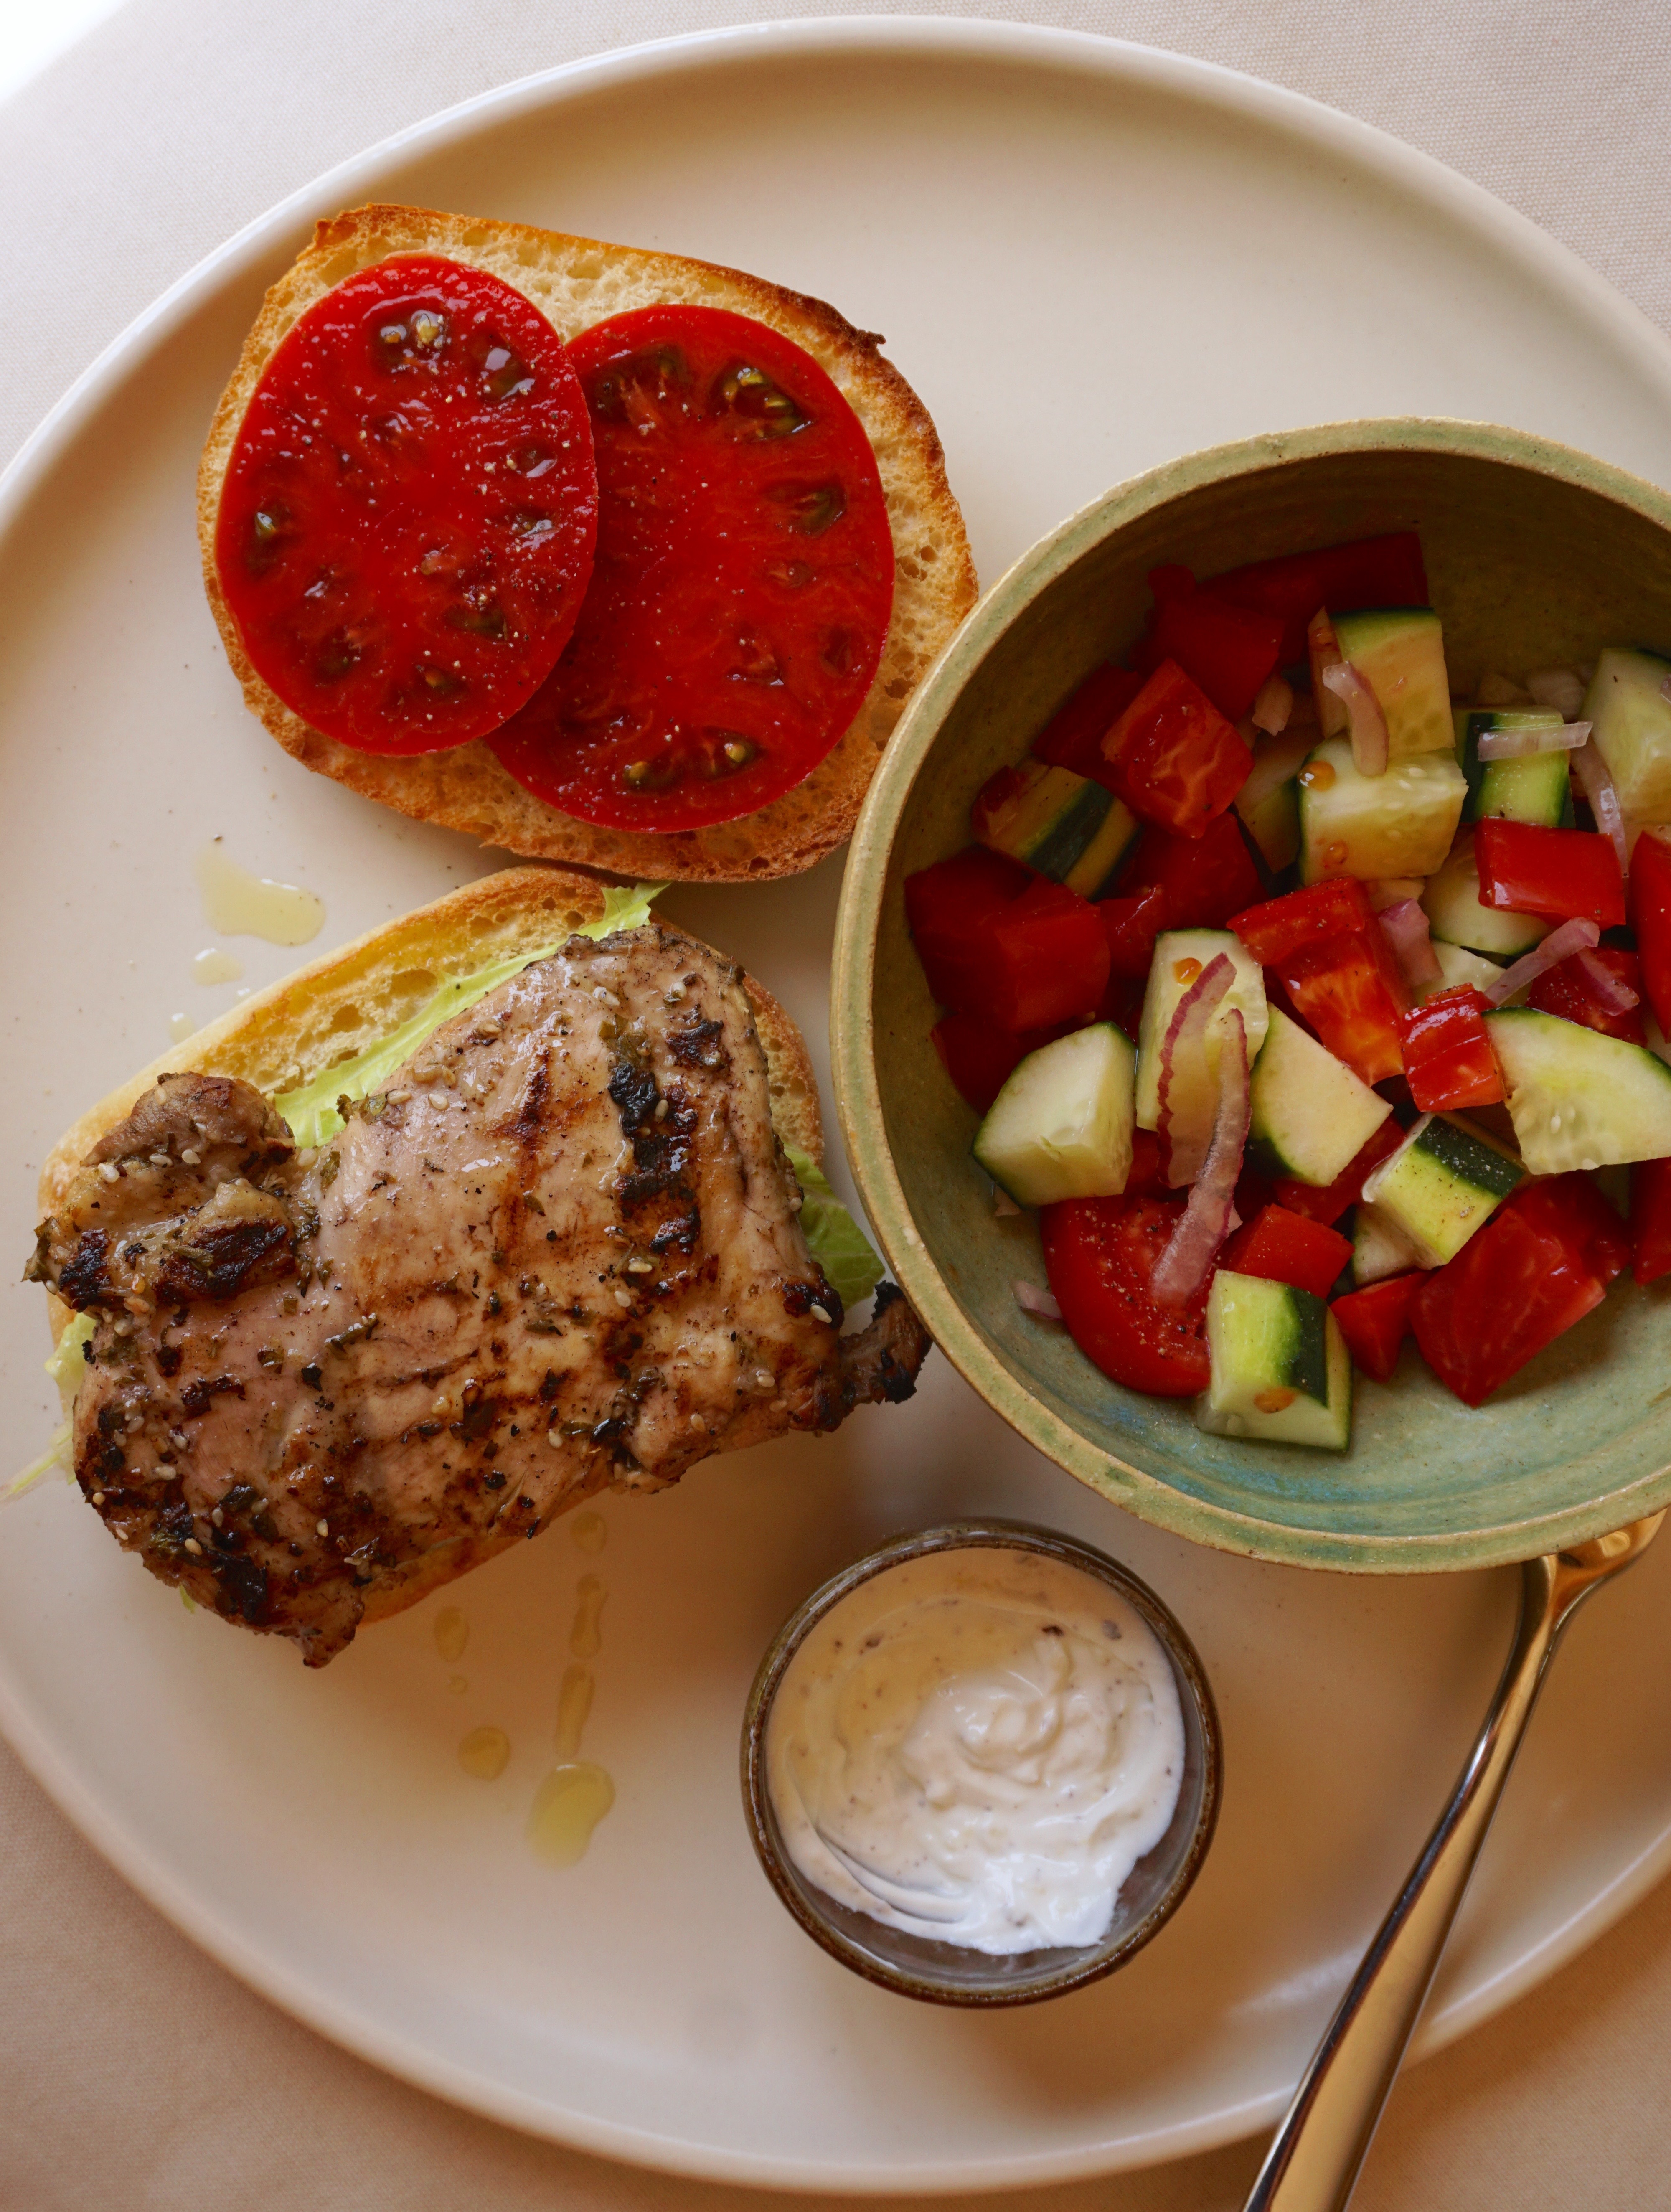
Grilled chicken goes well with the pasta.

Put this on your summer bucket list.  Go get some cherry tomatoes at your local farmers market if you didn’t grow any, it will be worth it.

Print Pin
5 from 1 vote

Summer Garden Pasta

A delicious uncooked tomato sauce that takes advantage of summer tomatoes.
Course noodles, One dish meals, pasta
Cuisine American
Keyword Angel hair pasta, basil, cherry tomatoes, garlic, Uncooked Tomato Sauce
Prep Time 15 minutes
Resting Time 4 hours
Servings 4

Ingredients

  • 4 pints cherry tomatoes
  • Good olive oil extra virgin
  • 2 tablespoons minced garlic 6 cloves
  • 18 large basil leaves julienned, plus extra for serving
  • ½ teaspoon crushed red pepper flakes
  • Kosher salt
  • ½ teaspoon freshly ground black pepper
  • 1 pound dried angel hair pasta or a linguine fini
  • cups freshly grated Parmesan cheese plus extra for serving

Instructions

  • Cut tomatoes in half and place in a large bowl. Add ½ cup olive oil, minced garlic, basil leaves, red pepper flakes, 1 teaspoon salt, and pepper. Cover with plastic wrap, and set aside at room temperature for approximately 4 hours.
  • Just before you’re ready to serve, bring a large pot of water with a splash of olive oil and 2 tablespoons salt of Diamond Kosher salt or 1 generous tablespoon of regular salt. Bring to a boil and add the pasta. Cook al dente according to the directions on the package.
  • Drain the pasta well and add to the bowl with the cherry tomatoes. Add cheese and some extra fresh basil leaves and toss well. Serve immediately.

Notes

If you want a protein to go along, serve with grilled shrimp or grilled chicken.
Fall Into the Porkfect Meal

Fall Into the Porkfect Meal

I walked out this morning and for the first time, there was a slight chill in the air. Is Fall finally here? Hmmm. Let me check.  That crisp feeling in the air, apples instead of stone fruit at the farmer’s market (I found both last weekend) and PUMPKIN SPICE LATTES in every Starbucks.

Fall is coming.

With my postcard posse coming over, I didn’t want something light.  I had a hankering for all things homey and satisfying.  A little chill in the air will do that to you.  I dug through my recipes and found the perfect dish, a Roasted Pork Loin with Garlic and Rosemary from Epicurious.  Yum.  Doing the happy dance, making an easy, delicious pork roast for dinner with friends.

The dish starts with a simple rub of finely chopped fresh rosemary, minced garlic, coarse salt and a couple of grinds of pepper.  I like to smash my garlic and finely chop it but by all means, use a press if you like.  My mom and dad insisted on mincing herbs and meat by hand using their trusty Chinese cleaver.  I have adopted that practice.  Maybe it’s a way to feel connected to them although I do think it improves the texture and flavor of a dish.  Use coarse kosher salt but (I’m gritting my teeth as I write this) in a pinch you could use regular salt.  Make sure to reduce the amount by half if you make the switch.  I add a couple of tablespoons of olive oil to help bind the mixture and adhere to the pork roast.

Time to rub a dub-dub the spice mix onto the pork.

Don’t you love a beat-up looking well-used pan?  This pan is hubby’s and dates back to his single days.  Still going strong after all these years.

Like the Big Fig Newton, here’s the tricky part.  Don’t overcook it!  Pork is pretty lean nowadays so it can end up being dry if it is cooked too long.  The original recipe calls for over an hour of cooking time…which is fine, IF YOU LIKE JERKY.  Back in the day, the final temp for pork was around 160.  The new recommendation is 145 with a 3 minute rest time. A little pink is A-OK.  So, please, invest in an instant thermometer and don’t overcook your pork.  If you come across an older recipe, use the new guidelines or your pork will be like the Sahara Desert.

Roast the pork loin, fat side down, for 25 minutes.  Then flip and roast an additional 10-15 minutes.  Start checking the meat temperature at 10 minutes!  The roast will continue to cook as it rests, so if the temp is around 140, take it out and let it rest.

The tasty bits left in the pan make for a nice au jus so don’t toss it!  Just pour them into a bowl and serve alongside the roast.  You could gussy it up by deglazing the pan with some white wine and throwing in a bit of butter.  Hmmm-killer.

Leftovers?  Grab a loaf of ciabatta and make yourself one b*tchin sammie.

To finish off the meal with a Fall theme, I have a bushel of just-picked pears and apples from my friend Shannon.  Her pears and apples worked perfectly in my go-to apple crisp recipe.  Top with vanilla ice cream for a delicious sweet finale.

Roast Pork with Garlic and Rosemary

Course Main Course
Cuisine Italian
Keyword easy recipe, garlic, pork roast, roast pork loin, roast pork with garlic and rosemary, rosemary
Prep Time 15 minutes
Cook Time 50 minutes
Servings 8 servings
Calories 187kcal
Author Adapted from Epicurious

Equipment

  • roasting or baking pan

Ingredients

  • 4 large garlic cloves pressed or chopped finely
  • 4 teaspoons chopped fresh rosemary or 2 teaspoons dried
  • 1 1/2 teaspoons coarse kosher salt
  • 1/2 teaspoon ground black pepper
  • 1-2 tbsp olive oil
  • 1 2 1/2-pound boneless pork loin roast well trimmed
  • Fresh rosemary sprigs optional

Instructions

  • Preheat oven to 400°Line 13 x 9 x 2-inch roasting pan with foil.
  • Mix first 5 ingredients in a bowl. Rub garlic mixture all over pork.
  • Place pork, fat side down, in a roasting pan. Roast pork 25 minutes. Turn roast fat side up. Roast until thermometer inserted into the center of pork registers 140-145°F., about 15 minutes longer. Remove from oven; let stand 5 minutes.
  • Pour any juices from roasting pan into small saucepan; set over low heat to keep warm. Cut pork crosswise into 1/3-inch-thick slices. Arrange pork slices on a platter. Pour pan juices over. Garnish with rosemary sprigs, if desired.


Bok Bok, Batch…of Three Cup Chicken

Bok Bok, Batch…of Three Cup Chicken

Gung hay fat choy! Happy Lunar New Year! This is the Year of the Pig and in celebration of this, I spent the last week in Hong Kong with my boys-PIGGIN’ out. It has been years since I have been in Hong Kong and with Jordan living in nearby Korea, we decided a rendezvous was in order.
I walked off the plane and took a deep breath and instantly knew I was back in Asia. The scent that wafted through the air and surrounded me immediately transported me back to my first visit to Hong Kong so many years ago. An amalgam of daily life, food, incense, years of humanity all rolled into one.

Before I regale you with our travels in Hong Kong…let me tell you about our flight.  It’s been a while since I have been on a flight that lasts 14 hours.  AUUUGH!  I don’t care if you are in First Class, Business, or Economy…it’s a LONG time to be cooped up in a plane.  I did manage to catch 40 winks, watch a couple of movies, and pick through multiple cafeteria-like meals.  The highlight was a bowl of instant ramen on the last leg of our journey. By then even the K-Movie I was watching knew how I felt.

One of the meal selections was Three Cup Chicken.  I knew of this classic Taiwanese dish but have never had it. This peaked my curiosity so I made a mental note to try this dish when I got home.

A day of vegging out to get over my jet lag and I was ready to hunt down the recipe for Three Cup Chicken.  The first thing I noticed was, though called 3 cup chicken, most recipes did not use those proportions.  Thank goodness since that is a lot of sesame oil.

I decided on a mash-up from two of my go-to blogs, The Woks of Life and No Recipes. You can use bone-in pieces like chicken wings but the next time I think I will try boneless thighs.  This dish is easy to prepare and lands on the dinner table in minutes…my kind of dish.

The soy sauce, sesame oil and rice wine form the braising liquid but the addition of garlic, ginger and Thai basil really sets this dish apart. No wonder it’s a classic that has stood the test of time.  One recipe called for a touch of sugar, sounded good, so I included it. If you like spice, throw in 1-2 Thai chili peppers for good measure.

The aromatics are heated in oil before adding the chicken.  Brown the chicken and add the braising sauce.  Simmer, turning the pieces occasionally.  The sauce will reduce and coat the chicken creating a deep caramel color. Can you say yum?  Finish with the basil and green onions.  Be generous with your basil it adds a ton of flavor to the dish.

The chicken is browned in the ginger, garlic infused oil.
Isn’t that a lovely color?  Serve with steamed rice and veggies. The perfect meal.
So delicious. Don’t tell Cathay Pacific, but this version of 3 Cup Chicken is so much better than theirs!

San Bei Ji(三杯鷄), or Three Cup Chicken

Taiwanese dish made by cooking chicken with sesame oil, soy sauce and rice wine.
Course Main Course
Cuisine Asian
Keyword 3 Cup Chicken
Prep Time 10 minutes
Cook Time 15 minutes
Total Time 25 minutes
Servings 4
Calories 460kcal

Ingredients

  • 1 tablespoon peanut oil or vegetable oil
  • 2 tablespoons toasted sesame oil
  • 1 inch piece ginger sliced then julienned
  • 6-8 cloves of garlic lightly crushed, but left whole
  • 1 thai chili seeded and sliced crosswise optional
  • 1.25 pounds boneless skin-on chicken thighs sub: 1.5 pounds chicken wings
  • 1/4 cup Chinese rice wine mijiu or shaoxing
  • 1 tablespoon dark soy sauce
  • 1 tablespoon light soy sauce
  • 2 teaspoons brown sugar
  • 1 cup loosely packed Thai basil leaves only
  • 1-2 green onions thinly sliced

Instructions

  • Heat a large pan or wok until hot. Add the peanut oil then ginger and garlic (and chili if using).  Fry until fragrant, but don't let it brown.
  • Add the chicken in a single layer, skin-side down and fry until the skin is well browned.
  • Flip the chicken over, and then add the rice wine, dark soy sauce, regular soy sauce, sesame oil and sugar.
  • Cover and simmer over medium low heat for 10-15 minutes, or until the chicken is tender, flipping the chicken over a few times as it cooks.
  • Remove the lid and turn up the heat. Reduce the liquid into a thick sauce.
  • Add the Thai basil leaves and toss to coat.
  • Serve with rice.


Will Cook for Tomatoes (Pasta with Tomatoes, Garlic and Basil)

Will Cook for Tomatoes (Pasta with Tomatoes, Garlic and Basil)

This is going to be a short post.  I wanted to make sure I posted while all of you are harvesting your bushels of homegrown tomatoes (I am so jealous).  Yes, I see your photos on FB and Instagram of all those love apples ripening on the vine in your backyard.  I see the basket on your kitchen counter overflowing with heirloom tomatoes, Sweet 100’s and Early Girls and those gorgeous salads you are making with them. I hate you. Ok, I’m kidding, I don’t really hate you, but I do have tomato envy-so, so jealous.  We just haven’t had much luck with tomatoes lately. After looking at our sad vines, I caved and bought some dry farm tomatoes at the Farmer’s Market, I couldn’t resist.

I made a beeline home and used those tomatoes, and the few I was able to pull off our vines (so few, so sad), to make my favorite pasta dish,  Angel Hair Pasta with Tomato, Garlic, and Basil.  This dish captures the essence of summer, where the star are those vine-ripened, luscious tomatoes.  You know, the ones you grew and I had to buy (auugh, so fixated).  I pulled out my dog-eared copy of Kuleto’s Contemporary Italian Cookbook and flipped to the page for Angel Hair Pasta with Tomato, Garlic and Basil and in barely 30 minutes we were sitting down to the best damn bowl of pasta.  So delicious, so easy and so simple.

Angel Hair Pasta with Tomatoes, Garlic and Basil

All you need for this dish, besides tomatoes, is noodles, olive oil, garlic, and basil. That’s pretty much it.  How simple is that?! In full transparency, I didn’t have angel hair pasta so I used linguine fini.  Normally I would say NBD, but in this case, use angel hair pasta, it is the perfect match for this sauce.

So, yes, despite my tomato envy I’m passing this delicious recipe along to all of you who have that “difficult task” of figuring out what to do with all those homegrown tomatoes.  ALTHOUGH…another option, you could call me, I’ll gladly take some off your hands!

Angel Hair Pasta with Tomatoes, Garlic, and Basil

Fresh summer tomatoes, garlic and basil the building blocks for a classic, delicious pasta dish
Course Main Course
Cuisine Italian
Keyword Angel hair pasta, basil, garlic, tomatoes
Cook Time 15 minutes
Servings 4

Ingredients

  • 1/4 cup garlic thinly sliced
  • 7 tbsp olive oil extra virgin
  • 2 cups fresh tomatoes seeded and diced, ~ 1pound
  • 2/3 cup basil leaves roughly chopped or julienned
  • 3/4 tsp kosher salt or to taste
  • 1/2 TSP black pepper freshly ground
  • 6 ounces Angel Hair Pasta Capellini

Instructions

  • Heat 3 tablespoons of olive oil in sauce pan over medium high heat. Add garlic and cook slowly until garlic is lightly and evenly browned.  Reduce heat   to low add tomatoes, basil, salt and pepper.  Cook just until tomatoes are heated through.  Remove 1/3 sauce from skillet and reserve.
    Meanwhile, cook pasta according to directions in boiling, salted water.  Drain and add pasta and remaining olive oil to skillet.  Toss to coat with oil. Remove to serving bowl or leave in skillet and top with remaining sauce.  Serve with freshly grated parmesan if desired.
Smashed Potatoes, A Smashing Success

Smashed Potatoes, A Smashing Success

Jamie and I love happy hours so whenever she comes home we usually throw together a couple impromptu gatherings.  Drinks and finger foods are part of our MO. Half the fun is perusing cookbooks or the Internet looking for yummies for our casual soirees. Jamie came across a recipe for Smashed Potatoes on the site Damn Delicious…uh-oh, boil em’, mash em’ stick em’ in a stew.  It’s like Pavlov’s Dogs, mention potatoes and I immediately parrot Sam-Wise Gamgee.  Drives my family crazy.

Back to the recipe, very easy and very tasty.  We like getting a variety of potatoes, reds, golds, purple all about 2 inches, you know, not too big, not too small. but just right The potatoes are boiled until tender. Removed and smooshed with a potato masher (you could probably use a fork) until flattened.  The spuds are seasoned with garlic, thyme, salt and pepper then drizzled with olive oil.  Place in oven for about 20 minutes to crisp and voila’, potatoes with soft and creamy centers and crispy edges.  Serve with sour cream if you like.  So, so, good.  So, so, simple.

We had pancetta in the fridge, so we added a generous sprinkle of it over the smooshed potatoes before baking. You can use rosemary in place of thyme, bacon instead of pancetta, butter instead of olive oil, sprinkle with parmesan, whatever your imagination dreams up. A combination I plan to try includes smoky paprika and rosemary with a squeeze of lemon,  Damn Delicious posted a new riff, Crispy Dijon Smashed Potatoes.  Can’t wait to try it!

Smashed potatoes with Garlic and Thyme

So next time you need a tasty bite, try these smashed potatoes.  Added bonus, they’re gluten free, dairy free if you don’t use cheese and a perfect vegetarian dish if you skip the pancetta/bacon.  Delicious!

Smashed Potatoes, with Garlic and Herbs

Course Side Dish, Vegetable
Cuisine American
Keyword fingerling potatotes, Roasted potatotes
Prep Time 15 minutes
Cook Time 20 minutes

Ingredients

  • 18-24 small potatoes yukon, reds, purples or a mix washed and scrubbed clean
  • 2 tablespoons olive oil
  • 3 cloves garlic minced
  • 1 tablespoon fresh thyme leaves
  • Finely diced pancetta or bacon optional
  • Kosher salt and freshly ground black pepper to taste

Instructions

  • Preheat oven to 450 degrees F.
  • Lightly oil a baking sheet or line with parchment. Put a couple of squeezes of oil on the parchment
  • In a large pot of boiling water, cook potatoes until tender, about 15-20 minutes; drain well.
  • Place potatoes onto the prepared baking sheet. Using a potato masher or fork, carefully smash the potatoes until flattened but still in one piece.
  • Top with olive oil, garlic and thyme. (Combine minced garlic and thyme with oil and drizzle on potatoes)
  • Sprinkle with salt and pepper and pancetta!
  • Bake for 18-20 minutes, or until golden brown and crisp.
  • Serve immediately.

Notes

To microwave potatoes.  Wash and place in a microwavable. Cover with a vented lid of plastic wrap with a few holes punched in it. 
Microwave at full power for 8-10 minutes, stopping halfway to stir.  I have a 700 watt microwave so if your microwave's wattage is higher, try 7 - 9 minutes.  Test by piercing with a fork.  
Love Letter to Rice (Garlic Rice)

Love Letter to Rice (Garlic Rice)

On one of our weekend food treks, hubby and I headed to East San Jose in search of egg rolls and banh mi. Right in front of the entrance to the market was a display of different dried pasta on sale including tiny little pasta shaped like letters. Woohoo!  Haven’t seen pasta letters in ages. When the kids were little I would make rice pilaf using alphabet pasta. The kids loved it and called it “letter rice.”  They would spell their names and challenge each other to spell as many words as possible on their plates. We were totally bummed when our market stopped carrying our beloved alphabet pasta. A search of other markets came up empty so  I resorted to using star and rice-shaped pasta. Not the same, but a good life lesson for my kiddies…you can’t always get what you want.

I took a picture of the display with my phone and sent it to the kids with the exclamation “LETTERS!” then I bought a couple of bags (ok, more than a couple) to have on hand for when they come home.

Letter rice is a fusion of rice pilaf and Hainanese Chicken Rice, a Singaporean dish of poached chicken and rice.  The broth from the poached chicken is used to cook the rice for a double flavor whammy.  The rice is first sautéed with the Asian trinity of garlic, ginger and onions, tossed in a rice cooker (because I don’t know how to cook rice any other way), and cooked in the reserved stock.

IT IS STUPID EASY.  Maybe not as easy as making plain rice but with little effort you can jazz up your rice making it delicious and fun to eat.  Kid-tested, kid- approved.

Mains that aren’t “saucey” beg for letter rice as an accompaniment.  Letter rice in our house accompanies barbecued ribs or chicken, grilled fish, and STEAK. Yum.

Like many of the recipes, this one lends itself well to changes.  Tweak the Asian trinity.  Onions can be replaced by shallots, or use only garlic and omit the ginger and onions.  Having steak?  Use beef stock instead of chicken. Vegetarian? Use mushroom or vegetable stock instead.  I throw in dried mushrooms to intensify the flavor.  You can use all rice and skip the letters (auugh, why would you skip the cute shaped pasta), it all works.

The recipe is easy to remember.  For every cup of uncooked rice, use 1 fat clove of garlic (or 2 skinny ones), 1/2 to 1 teaspoon of ginger, and 1/2 shallot.  For each cup of rice or pasta, use 1 tablespoon butter or oil.  Saute’ the aromatics first, and when they begin to brown add the pasta and rice.  Watch your garlic carefully, do not let it burn or it will be bitter.

The quirky part of this recipe is I only know how to cook rice in a rice cooker (I should be embarrassed-I am).  I use the cup that comes with the rice cooker to measure my rice but a standard 1 cup measure for the pasta.  For 2 cups of rice,  use 1 cup of pasta and fill the rice cooker with the stock up to the 3 cup line.  Yep. Easy peasy if you have a rice cooker…

Love Letter to Rice (Garlic Rice)

Ingredients

  • 2 cups long grain or basmati rice (measured in standard cup that comes with the rice cooker its equivalent to 3/4 cup
  • 1 standard measuring cup any small shaped pasta stars, letters, acini de pepe, or orzo
  • 3 tablespoons butter or vegetable oil or 50/50 of each

Aromatics

  • 3 large cloves of garlic finely chopped (garlic lovers or those living among vampires feel free to increase the amount of garlic)
  • 1 shallot finely chopped (or 1/4 yellow onion or 1 green onion green and white parts, finely chopped)
  • 2 teaspoons minced ginger

Liquid

  • Homemade or low sodium chicken broth can substitute beef or vegetable stock approximately 3-4 cups
  • 1/2 to 1 tsp salt
  • 1/4 cup dried sliced shiitakes or dried mushroom mix optional

Garnish:

  • green onions
  • cilantro leaves
  • 1 tsp sesame oil

Instructions

  • Melt butter or oil in pan
  • When butter is fully melted add garlic, shallots and ginger and saute' over medium heat until garlic begins to brown.
  • Add pasta and rice to pan. Stir to coat rice and pasta with oil thoroughly.
  • Put rice and pasta mixture in rice cooker and fill to the three cup line. If using dried mushrooms add them at this point.
  • Set to cook and you're done!

Back from school for the summer, Jordan requested “char Siu” style barbecued ribs and letter rice which prompted this post!  Here is the marinade for the ribs. Grill over indirect heat for 25-30 minutes in a covered bbq.  Flip and baste halfway through, then baste ribs with honey and grill over direct heat to slightly char ribs.

I remember my mom yelling at my brother and me “STOP PLAYING WITH YOUR FOOD, JUST EAT IT!”  Where is the fun in that?

Happy Dance in my Mouth-Middle Eastern Herb & Garlic Chicken

Happy Dance in my Mouth-Middle Eastern Herb & Garlic Chicken

It has been a little while since I posted Ottolenghi’s recipe for Turkey Zucchini Burgers.  A flavor packed dish that uses both fresh and dried herbs not usually found in my kitchen.  Tangy sumac, refreshing mint, thyme and parsley,  a welcome addition to my familiar repertoire of flavors.  Now my only problem is…

I need more recipes that use these lovely herbs and spices.

NYT cooking recently posted a recipe for Middle Eastern Herb and Garlic Chicken.  Woohoo, and wouldn’t you know it, the recipe uses many of the same seasonings as the turkey burgers.  It’s totally delicious.  We were in the mood for sandwiches so I marinaded boneless chicken thighs while Wes fired up the grill. I found some nice crusty rolls and threw together a tomato, cucumber and onion salad to go along with our sandwiches.  I couldn’t wait for the chicken to come off the grill.

dsc04484

The lemon and garlic provide the one two punch and the fresh herbs kick it up another couple of notches, it’s like a party in your mouth.

There is quite bit of lemon juice in the marinade and because of this I opted to marinade the chicken for just a couple of hours.  I don’t think it is necessary to marinade it for much longer than that.

We topped the chicken with a yogurt sauce flavored with lemon zest and garlic.  I threw in a dash of sumac for good measure.  It’s great as a dip or as a spread for our sandwiches. To highlight the sesame seeds I would add a touch of sesame oil (dark) to both the marinade and yogurt sauce.

Before summer ends and we cover the grill for winter,  I plan to make this chicken again.  Lucky for us here in California that won’t be for quite awhile!

Middle Eastern Herb and Garlic Chicken

Course Main Course, Meat
Cuisine Middle Eastern
Keyword MIddle Eastern Herb and Garlic Chicken

Ingredients

This recipe comes from Melissa Clark via the New York Times