Tag: Food52

Easy as 123 Spareribs

Easy as 123 Spareribs

As I was driving home the other day I called the Hubster and asked “What’s for dinner?”.  The retired guy replied, “I thought you were making dinner”.  Excuse me? Moi?  The person driving home after a full day at WORK?

Fine, I’ll make dinner but you are on cleanup…

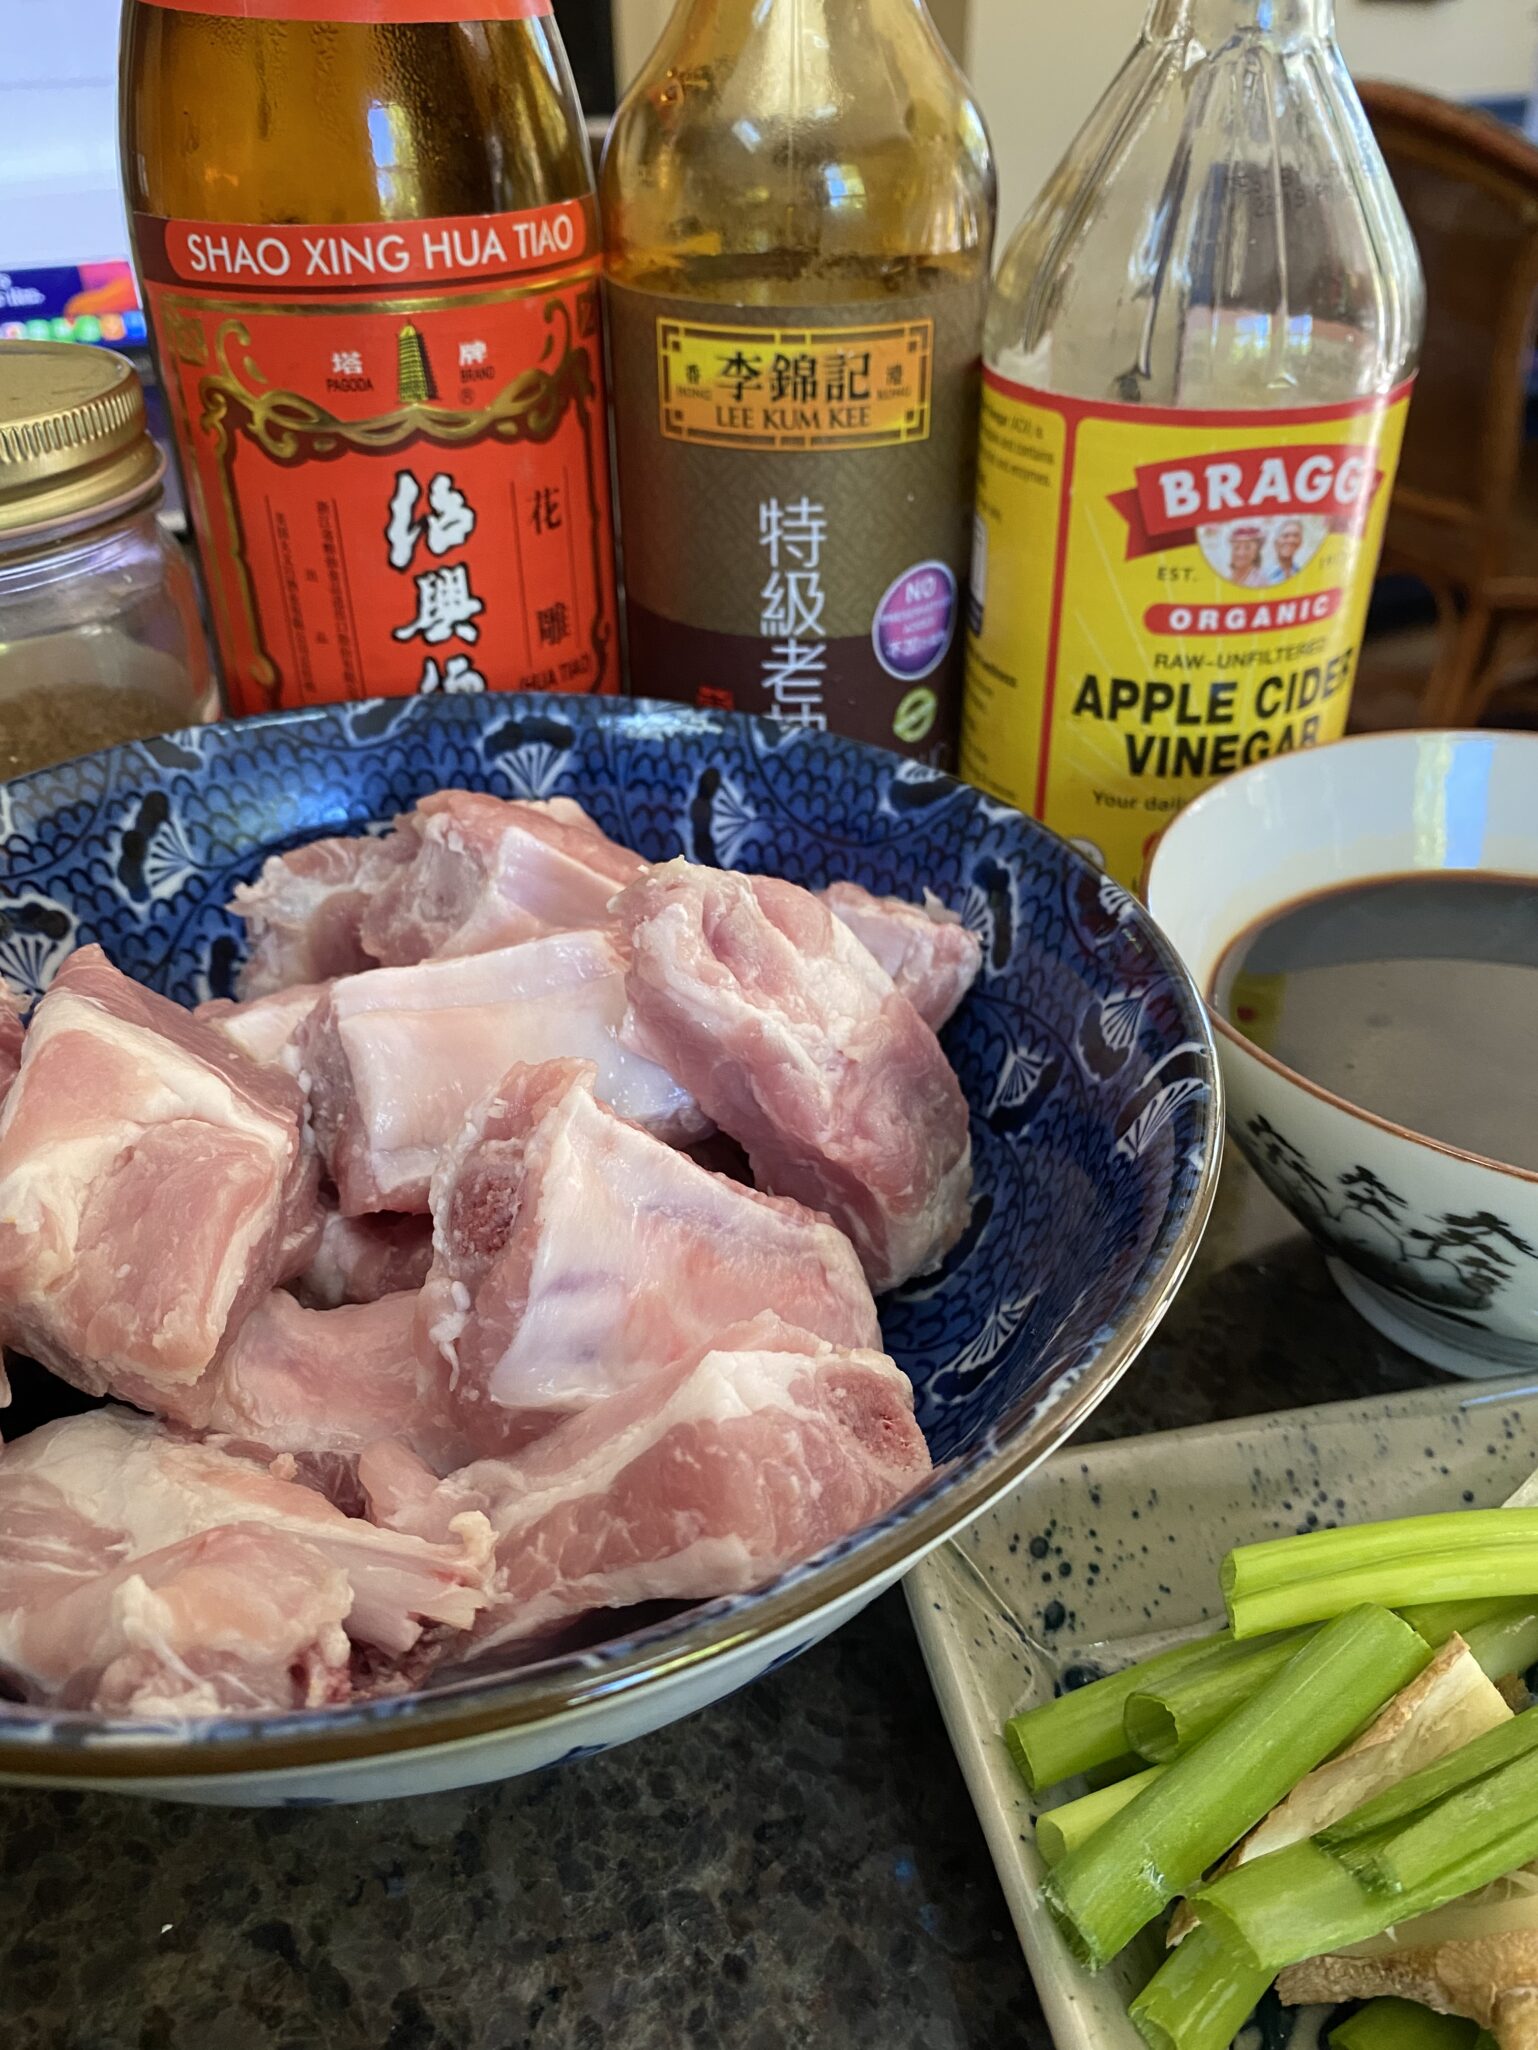
A pack of spareribs, cut crosswise into thirds (thanks Asian market), a knob of ginger and bunch of scallions in the fridge-time to make Irene Kuo’s 12345 Spare Ribs from Food52.  The rest of the ingredients are in my pantry, soy sauce, vinegar, rice wine and sugar, that’s all I need. Oh, and my trusty Instant Pot.

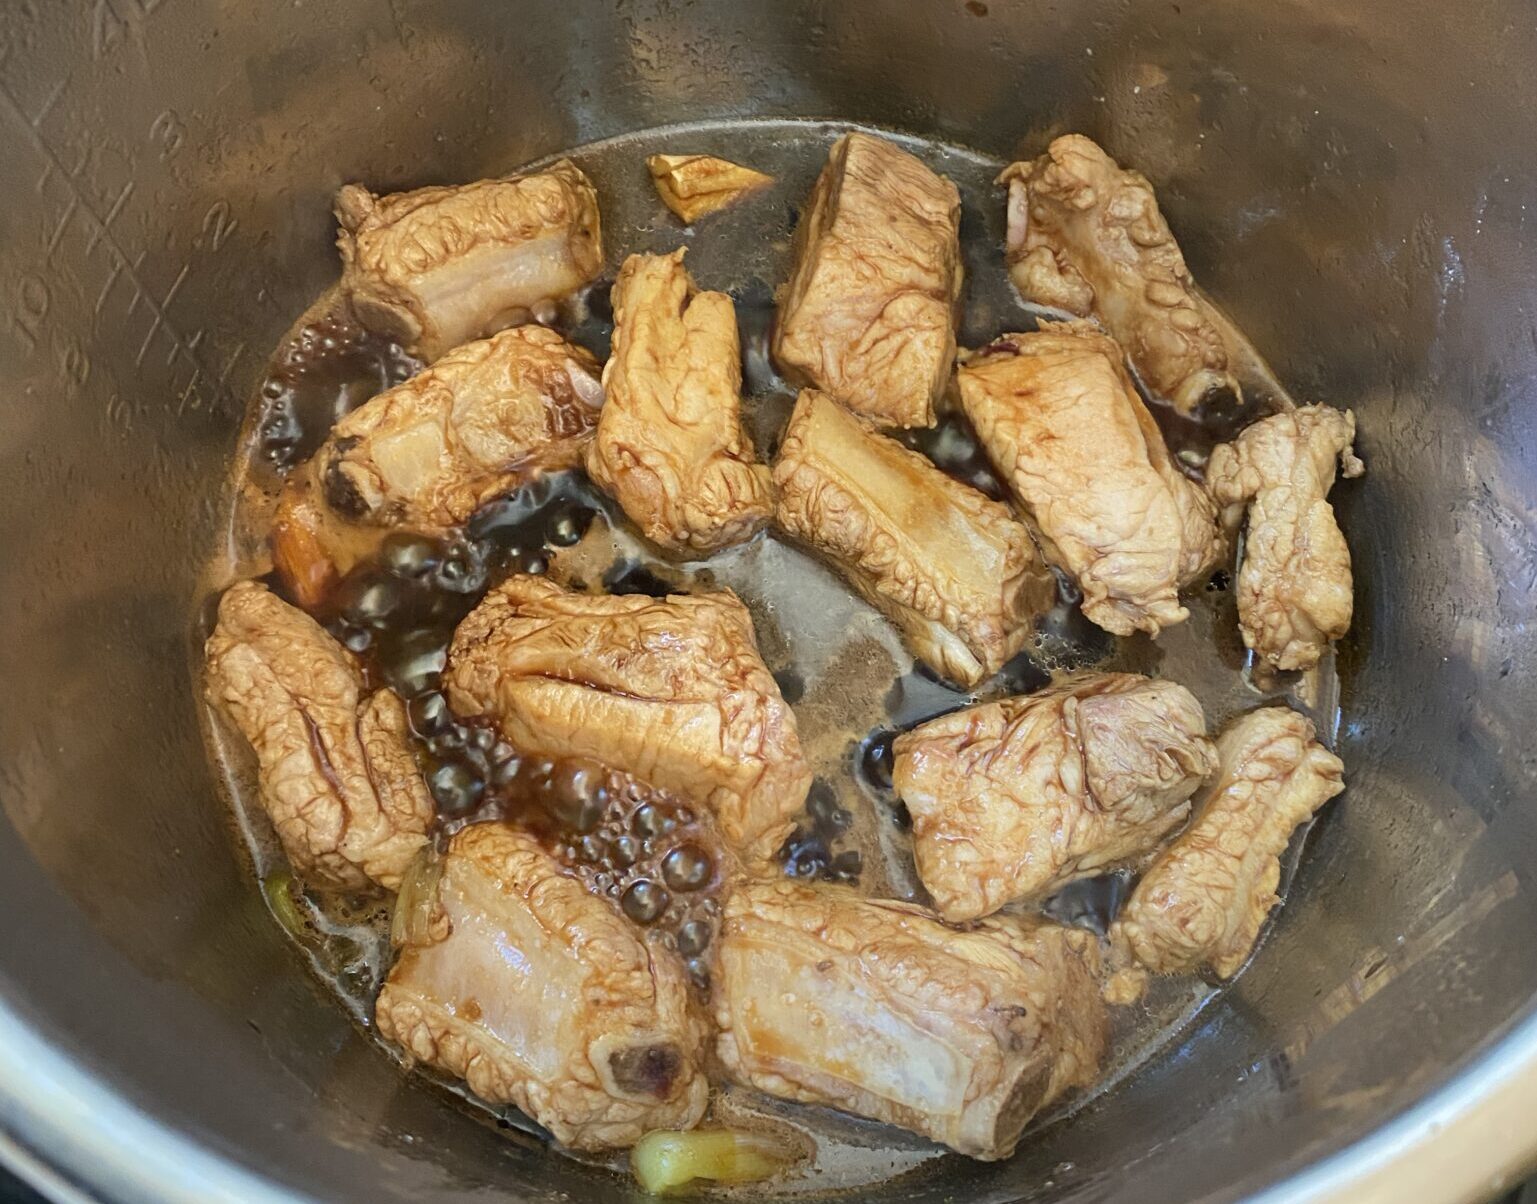
I added the step of browning the ribs with ginger and scallions just to give it a flavor boost. Feel free to skip this step and start by putting the ribs and braising liquid in the instant pot without frying. Add a couple of minutes to the cooking time.

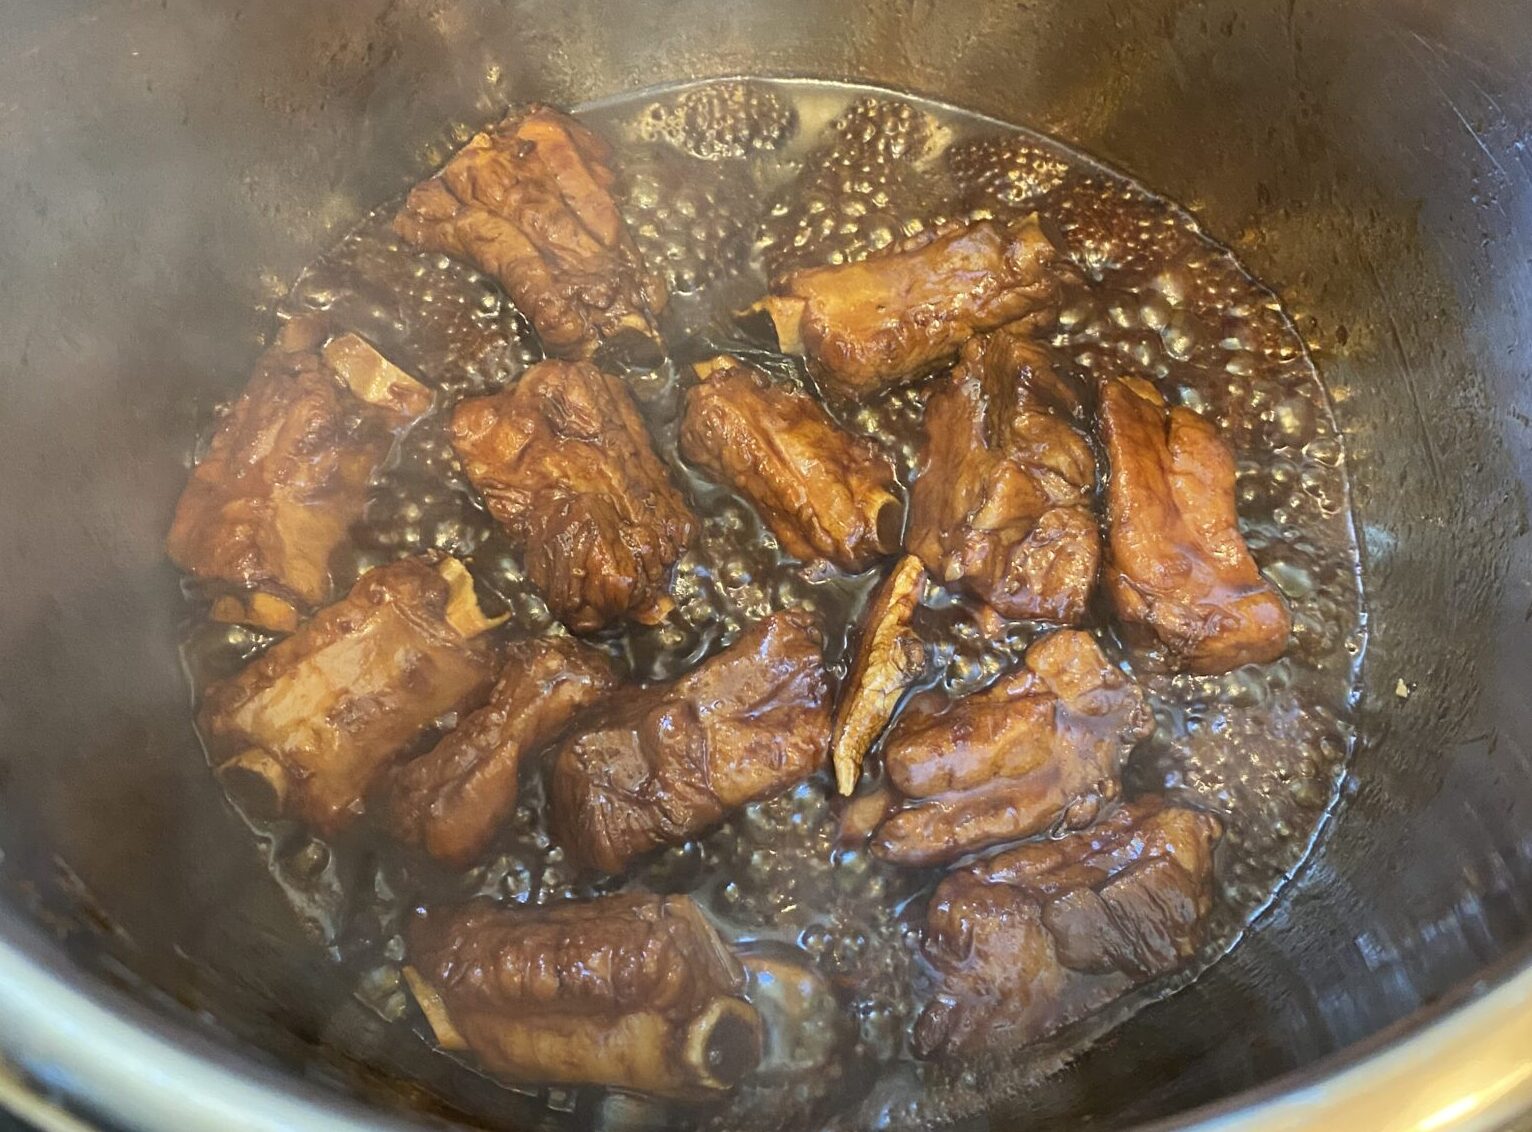
Set time for 15 minutes and let your IP do it’s thing. Meanwhile make some rice and veggies, any greens will do nicely.  Give it a couple of minutes before releasing the pressure on your IP. Remove ribs. switch to sauté and reduce sauce until it thickens to a syrupy consistency.  Add the ribs back in and stir to heat and coat them with sauce.

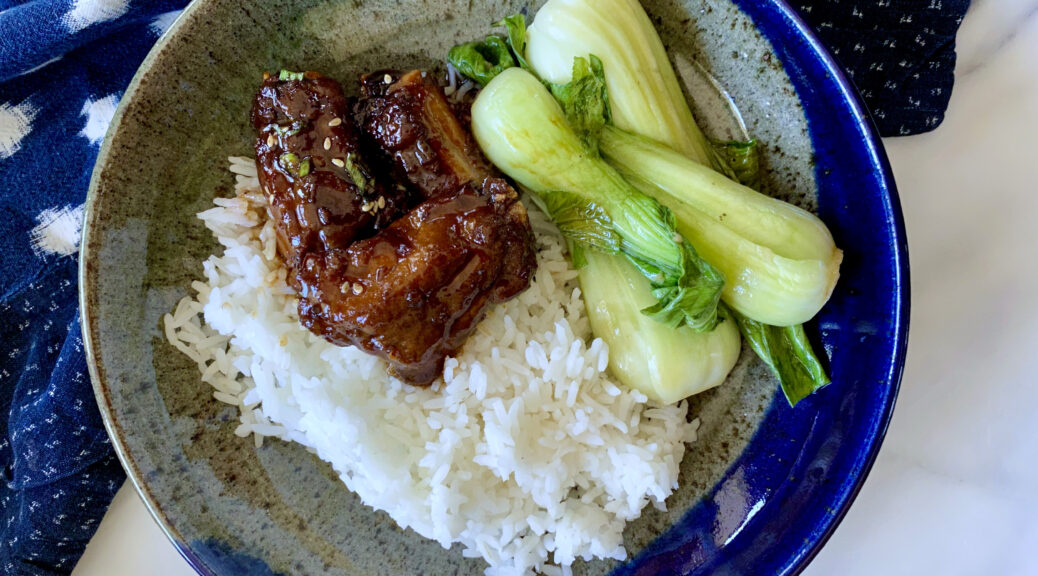
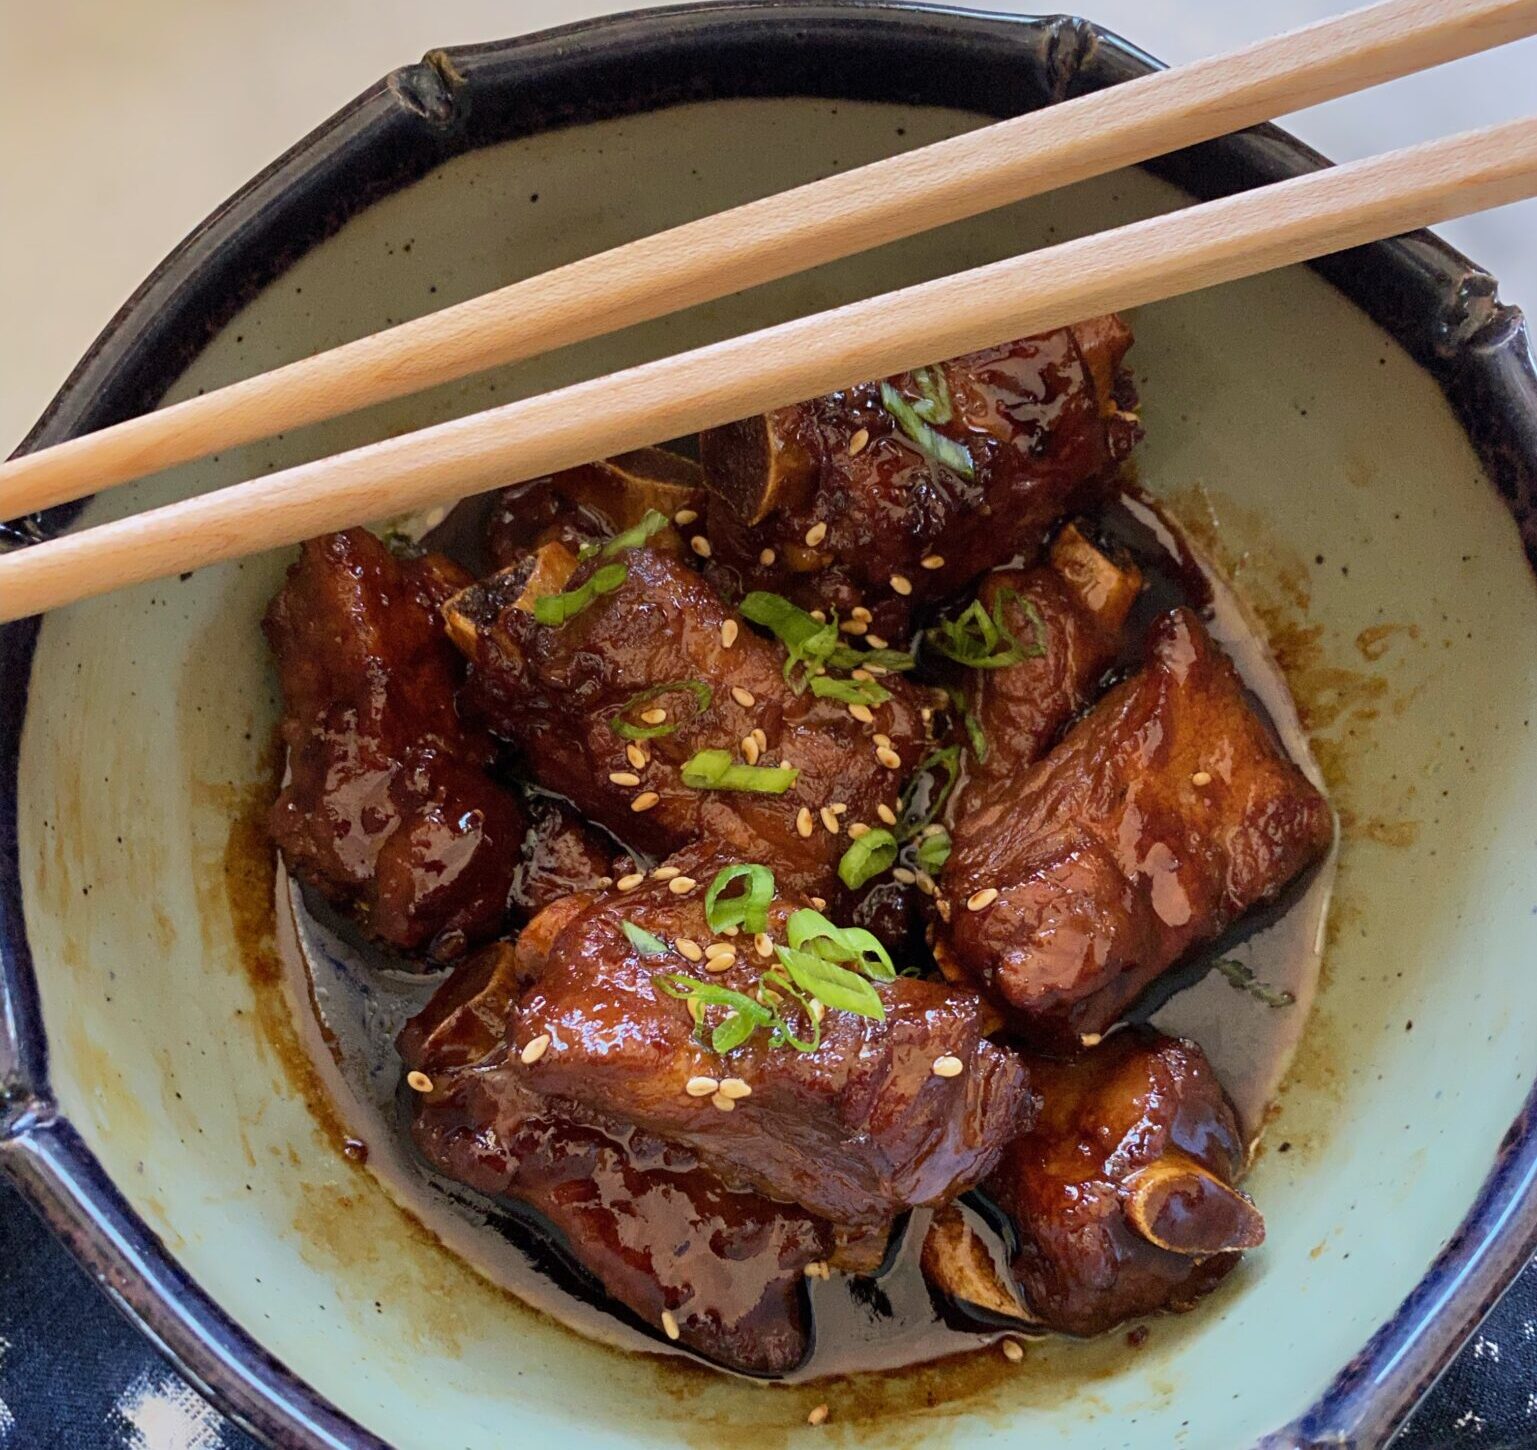
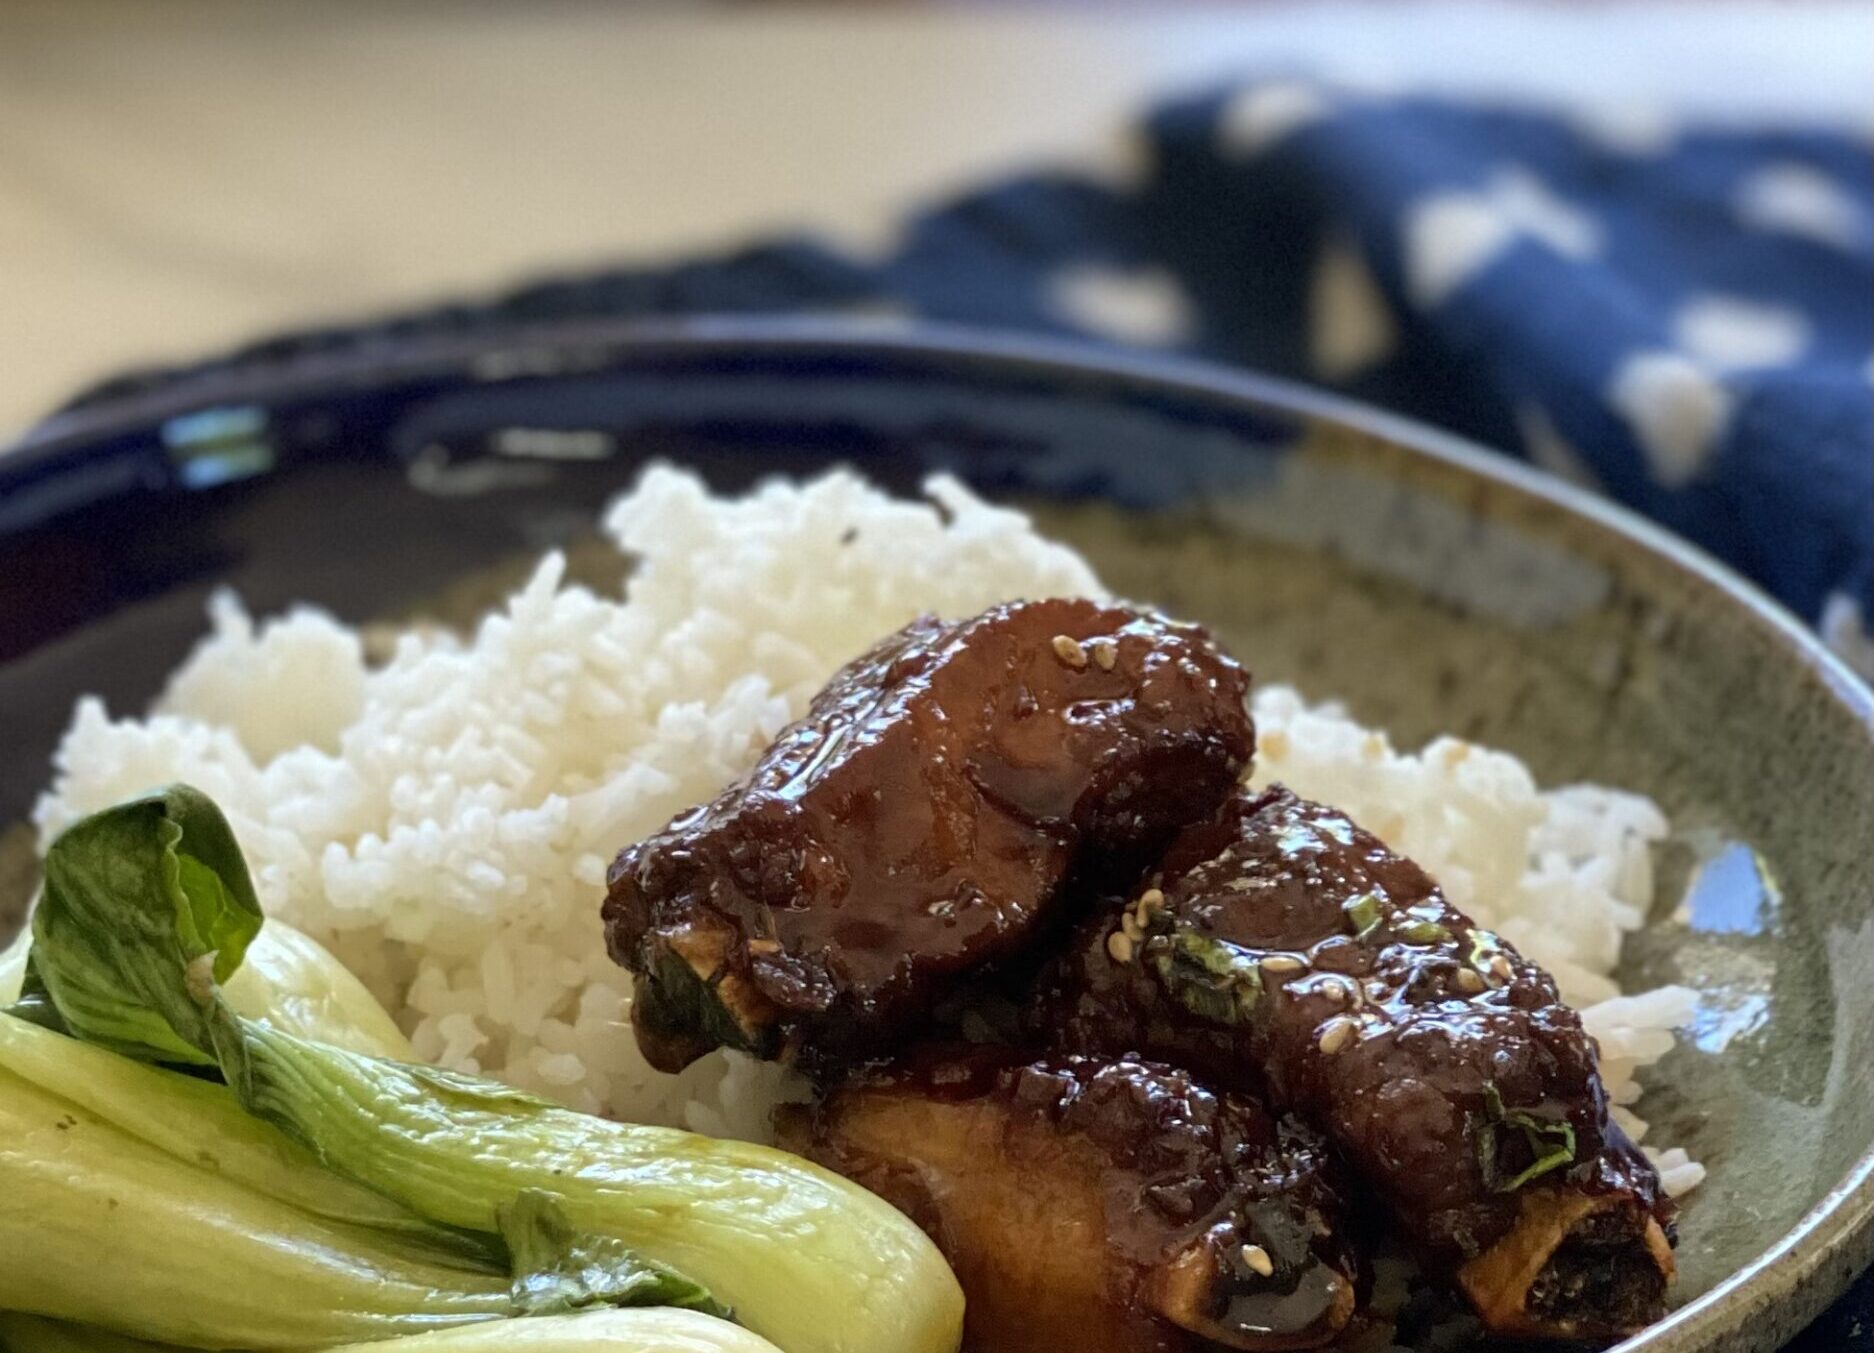
Scoop rice into a bowl, top with the ribs and greens, and garnish with green onions.  Enjoy!

Epilogue

Me? I headed to the couch, turned on the telly, and relaxed while the hubs did the dishes!

The ingredients for these ribs can be found in most Asian markets.  Use Shaoxing Wine (Chinese Sherry) or dry sherry.  Dark soy sauce has added molasses, don’t substitute regular soy sauce which is actually saltier than dark soy.  Favorite brands include Koon Chun or Lee Kum Kee.

Sweet & Sticky Chinese Ribs

Adaptation of Irene Kuo's 1-2-3-4-5 Spare Ribs. Sweet, savory braised ribs, delicious with a bowl of rice. Using a pressure cooker will keep ribs moist and shorten the cooking time.
Course Drinks, Main Course, Meat
Cuisine Asian, Asian-American, Chinese
Keyword Instant Pot, spareribs
Prep Time 10 minutes
Cook Time 18 minutes

Equipment

  • 1 Pressure Cooker I use an Instant Pot

Ingredients

Fry It Up

  • 1 1/2 pounds pork spareribs ask the butcher to cut the slab of ribs crosswise into 3 pieces. You can cut them into individual ribs at home
  • 1 stalk scallion, cut into 3 inch lengths optional
  • 2 slices fresh ginger, smashed optional

Braising Liquid

  • 1 tablespoon dry sherry preferably Shao Xing Wine
  • 2 tablespoons dark soy sauce
  • 3 tablespoons cider vinegar
  • 4 tablespoons sugar
  • 5 tablespoons water

Garnish

  • 1-2 stalks green onions, sliced diagonally in 1/8-1/4" pieces

Instructions

Instant Pot Directions

  • Set Instant Pot on saute'. Once heated add 1 tablespoon of vegetable oil. Toss in ginger and scallions and saute' briefly (30 sec) then add spareribs. Fry until the ribs lose their pinkness.
  • Add braising liquid ingredients. When the liquid comes to a boil, stir well to coat the ribs, turn off saute function, and place lid on Instant Pot.
  • Set IP on high pressure (use Meat setting) and adjust time to 15 minutes. When it is done, wait a couple of minutes before CAREFULLY releasing pressure to your Instant Pot.
  • Remove ribs from pot. Set Instant Pot to saute' and reduce remaining liquid to a thick syrupy sauce. Turn it off and add ribs back into pot, stir to coat the ribs. Spoon ribs onto a serving plate.
  • Garnish with scallions. Serve immediately with rice.

Stovetop Directions

  • Put the ribs in a skillet or saucepan and set it over high heat; add the rest of the ingredients and stir to mingle. When the liquid comes to a boil, adjust heat to maintain a very gentle simmering, and cover and simmer for 40 minutes. Stir and turn the spareribs from time to time.
  • Uncover and turn heat high to bring the sauce to a sizzling boil; stir rapidly until the sauce is all but evaporated. Garnish with scallions. Serve hot with rice.

Notes

Using a pressure cooker not only shortens the cooking time but ensures tender and moist ribs.
Tall Order for a Better Shortbread-Bien Cuit Bakery

Tall Order for a Better Shortbread-Bien Cuit Bakery

I love shortbread and any excuse to bake a batch, I am all there.  So when Amanda Hesser posted an article on a favorite shortbread that graced their office meetings, all I could think was, do I have butter in the fridge?

Duh, of course.

The title of her article, The World’s Best Shortbread Is No Longer Sold-but We Got The Recipe.

Whaat? World’s Best?  This was added incentive to make a batch.  After all, I think I already have the perfect Shortbread.  An essay entitled “My Father’s Shortbread” found long ago in Cuisine magazine was both a tribute to the author’s Scottish father and his recipe for shortbread.  It has been the cornerstone of my annual holiday cookie platter for more years than I can remember.  Bouchon’s Shortbread is similar in texture and flavor to my favorite and is my runner up.  Can Amanda’s best these? I’ll let you be the judge.

Update 10/2023:  Yes, I love shortbread and two additional recipes I have tried that are very similar to this shortbread are Ted Lasso’s Biscuits with the Boss.  Both are delightful, Christina Tosi’s and Apple TV’s (the producer of Ted Lasso).

Let’s get busy…

shortbread dough 1

The dough comes together easily.  The dry ingredients are blended briefly in a mixer and pieces of cold butter are added and mixed at low speed just until the dough comes together.  Do not overmix.

Press the dough evenly into a PARCHMENT lined 9×13 baking pan. The parchment should hang over the sides. Cover the dough and refrigerate overnight.  The parchment will make it easier to remove the cookies after baking.

The dough should be about 3/8 inch thick. Total baking time for my batch was 50 minutes, so start checking early and rotate pan at the halfway mark.  You want a nice golden brown.  Sprinkle the Demerara Sugar on the cookie as soon as the pan comes out of the oven.  It will adhere better.  At the 5 minute mark when I tried removing the shortbread from the pan, it cracked as the parchment gave way.  Next time I might try cutting the cookies in the pan, letting it cool and then removing them.  They’re a bit fragile so you may lose a couple while removing it from the pan.  Lucky you, you get to eat those pieces.

I will admit, they’re pretty good.  The biggest difference is the use of powdered sugar instead of granulated sugar.  Powdered sugar has cornstarch and lowers the protein content of the dough.  This creates a less dense, softer cookie.  It has the prerequisite buttery flavor, but the texture is different.  The sprinkling of sugar (use Demerara or Turbinado) on the top gives these cookies a nice crunch. I love that crisp resistance you get when you bite into a classic shortbread cookie, the sugar gives that crunch. Next time I’ll try European butter to up my butter game.  After rereading Ms. Hesser’s article, with the low baking temperature, I probably could have left the cookies in for a bit longer.  This might have added some crispness and flakiness without the shortbread getting too dark.

A steaming cup of coffee or tea and a few of these biscuits make for a lovely afternoon break.  Turning on Downton Abbey would make it perfect!  Update: 10/2023 If not Downton Abbey, Ted Lasso would be a great watch!

Bien Cuit Shortbread

Course cookies
Cuisine American
Keyword Shortbread
Prep Time 15 minutes

Ingredients

  • 302 grams unsalted butter
  • 93 grams confectioners' sugar
  • 3.5 grams kosher salt
  • 302 grams all-purpose flour
  • 1/8 cup regular or raw sugar for sprinkling

Instructions

  • Line a 13x9-inch baking sheet or baking dish with parchment paper.
  • Cut the cold butter and reserve at room temperature to temper slightly.
  • Mix the confectioners’ sugar, salt, and flour in a mixer fitted with a paddle attachment. Mix for a few seconds to combine the dry ingredients.
  • Add the cubed butter and mix on low speed until a smooth dough is formed and butter is fully incorporated.
  • At first, the dough will look extremely flaky and dry; let it keep mixing and it will eventually come together into a dough.
  • Dump the dough into the baking sheet ordish and spread it evenly to the corners. Cover with plastic wrap and chill overnight.
  • The next day, heat the oven to 300°Dock the dough every inch or so with a fork. Bake until the shortbread is golden brown, 60-75 minutes.
  • Remove the pan from the oven and let cool for 5 minutes. Turn the shortbread out onto a cutting board, and slice into 4-inch x ¾-inch slices. Sprinkle with raw sugar and transfer to a baking rack to cool completely. Store in airtight containers.

Notes

From a commenter on the original recipe:  
I went to King Arthur Flour's website. They have a list of ingredient conversion and I trust them, so here's what they say:
302 grams butter = 1 1/3 cup (2 2/3 sticks)
93 grams unsifted confectioner's sugar = .8 cups (a bit more than 3/4 cup + 1 tablespoon)
3.5 grams diamond crystal salt = 1 tsp on my kitchen scale (Canning salt, which has a very similar texture to table salt, comes out to 1/2 tsp)
302 grams flour = 2 1/2 cups (I'm betting this is sifted but I'm not sure)


Olive Oil Shortbread with Rosemary & Chocolate Chunks, A Tale of Two Wedges

Olive Oil Shortbread with Rosemary & Chocolate Chunks, A Tale of Two Wedges

Last week was a busy week-work and several evening commitments were on my to-do list. One of the realities of living in the Bay Area is the exceptionally ugly commute (up 1.5 hours to go 25 miles-yeah-go figure) so my commute has taught me to ALWAYS VOLUNTEER TO BRING DESSERT since I invariably run late.  So my plan was to make cookies,  I could make them in advance, bring them with me to work, go directly from work to each function, and be forgiven for being late because who gets mad at anyone who brings homemade cookies?!

I needed a vegan option as well as a regular sweet bite for the meetings.  I decided the Grapefruit Thyme Shortbread (it’s my flavor of the month cookie) would be my non-vegan cookie.  The vegan option was going to be a bit trickier, I am a butter-believer.  As luck would have it, a recipe for Olive Oil Shortbread with Rosemary and Chocolate Chunks from Smitten Kitchen Every Day Cookbook popped up on my feed.  Hmmm, now how did Facebook know I needed a vegan dessert recipe?

Not funny?  Too soon?

Olive Oil Shortbread with Rosemary and Chocolate Chunks

Surprisingly (at least to me), the rosemary and chocolate meshed well.  The flavors really stand out and I didn’t think about the no butter factor. The sprinkling of turbinado sugar on top provided a nice crunch while the cookie itself had a nice fine crumbly texture.

Olive Oil Shortbread with Rosemary and Chocolate Chunks

I changed the baking method for the Grapefruit Thyme Shortbread, my non-vegan option.  Wanting a more traditional shortbread and keeping with my wedge theme, I baked it in a round pan and cut it into wedges right out of the oven.  Unlike the first time I made them, this version had a casual, rustic appeal.  While the cutout version had a fine crumb and crisp edges. These are a bit softer, almost cake-like, without the crisp edges. Still delightful, just different.  Putting on my ATK hat, made sense due to the differences in baking methods. I consider this a bonus, 2 cookies for the “dough” of one.

Grapefruit Thyme Shortbread Post

Grapefruit Thyme Shortbread

Olive Oil Shortbread with Rosemary & Chocolate Chunks

Ingredients

  • Smitten Kitchen /every Day by way of Food52
  • 1 1/2 cups 195 grams all-purpose flour
  • 1/2 cup 60 grams powdered sugar
  • 2 tablespoons 25 grams, plus 1 teaspoon (5 grams) turbinado (raw) sugar
  • 1/2 teaspoon fine sea salt
  • 1/2 cup 120 ml mild olive oil
  • 1 teaspoon finely minced fresh rosemary leaves
  • 1/2 cup 85 grams semisweet chocolate, chopped into small chunks
  • 1 egg white beaten until loose (optional not vegan 🙁 )

Instructions

  • Heat the oven to 325° F.
  • In a large bowl, whisk together the flour, powdered sugar, 2 tablespoons turbinado sugar, and the salt.
  • Add the olive oil and rosemary and stir to combine.
  • Add the chocolate chunks and stir again.
  • Gather the dough with your hands into one mass.
  • Roll out the dough to an 8- to 9-inch roundish slab between two sheets of parchment paper. Remove the top sheet and use the bottom to slide the cookie round onto the back of a large baking sheet.
  • If desired—it merely provides a little shine—brush the cookie with the egg white. Sprinkle with remaining 1 teaspoon turbinado sugar. Bake for 20 to 25 minutes.
  • Slide the cookie round carefully onto a cutting board while the cookie is still totally hot. Cut with a sharp, thin knife into desired shape(s). Let cool completely, then separate.
  • Do ahead: This dough keeps well in the freezer. Baked cookies keep for 2 weeks in an airtight tin at room temperature.
  • Note: For a milder flavor, replace half of the oil with a neutral/flavorless one. You can cut this into shapes with cookie cutters, too, but the chocolate provides a little resistance.
A Tale of Two Cookbooks (Coffee Cheesecake Swirled Brownies)

A Tale of Two Cookbooks (Coffee Cheesecake Swirled Brownies)

For those familiar with Food52 Piglet Tournament of Cookbooks, I received two cookbooks this past week that made me feel like one of the judges for the tourney.  In a nutshell, The Piglet is like March Madness, sixteen cookbooks go head to head, winner goes on, loser goes home. Judges are selected by Food52 staff and they are not just from the culinary world, but artists, writers, journalists (no pharmacists yet hint, hint) who read and cook from each book and pick their favorite.  Pairings are eclectic and at times exasperating (Robicelli’s Cupcakes vs.The Persian Table, go figure). But that’s what makes it interesting and so much fun.

Tribute to The Piglet

Which brings me back to the two cookbooks I received, Easy Homemade Cookie Cookbook and Kristen Kish Cooking.  One homey, approachable, familiar and the other dazzling, appealing, intimidating-polar opposites.

I’ll start with the familiar. Miranda Couse’s Easy Homemade Cookie Cookbook (not the catchiest title), is a compendium of standard and favorite cookie recipes.  I know, do I need another cookie book? Nope.  But this one does deserve a spot on my bookshelf and yours. The recipes are well organized, straightforward, and easy to follow.  Helpful tips and recipe tweaks are interspersed throughout the book and each recipe starts with a blurb on how many cookies it makes, baking temperature and time and their shelf life. There are photos but not for every recipe which would have been nice. The book is divided into types of cookies including drop cookies, bars and brownies, and sandwich cookies to name a few.  I have tried two recipes so far and both have passed the taste test.  The first cookie that caught my eye was a Blueberry-Lemon Shortbread which is so good, it deserves its own post.  The second recipe I tried, though brownies are not my thing, was the Coffee Cheesecake Swirled Brownies. Chocolatey and decadent, the cocoa brownie layer provided a dense, gooey base for the luscious coffee spiked cream cheese top.  I made new friends when I showed up to work with these bad boys.

Pour dollop and swirl, the name of the game.

As I flipped through the book a thought kept running through my mind, Jamie would love this book and I plan to get her a copy of her own.

A nod to Kristen Kish’s cookbook which I will save for a weekend to read, drool over and tackle. Stay tuned.

Coffee Cheesecake Swirled Brownies

Ingredients

  • MAKES 9 BROWNIES
  • Prep: 25 minutes
  • Bake: About 35 minutes
  • Shelf Life: 4 to 5 days

For the Brownies:

  • ½ cup all-purpose flour
  • ½ cup unsweetened cocoa powder
  • ½ teaspoon table salt
  • ½ cup 1 stick unsalted butter, melted
  • cups granulated sugar
  • 2 large eggs
  • 1 teaspoon pure vanilla extract
  • ¼ teaspoon instant coffee granules

For the Cheesecake

  • 8 ounces cream cheese at room temperature
  • cup granulated sugar
  • 1 large egg
  • ½ teaspoon instant coffee granules.

Instructions

To make brownie:

  • 1.Preheat the oven to 350ºF. Line an 8-inch square baking pan with aluminum foil and spray it with cooking spray. (or use parchment paper)
  • 2.In a medium mixing bowl, sift or whisk together the flour, cocoa powder, and salt.
  • 3.In a large mixing bowl, using an electric mixer on medium speed or a wooden spoon, beat together the melted butter, sugar, eggs, vanilla, and coffee granules until thick and creamy. This will take about 2 minutes if using an electric mixer or 4 to 5 minutes if creaming by hand. Add the dry ingredients and beat on low speed or by hand until incorporated, about 30 seconds.
  • 4.Reserve about ¼ cup of the brownie batter for the top. Transfer the remaining brownie batter to the prepared pan and smooth it out into an even layer.

To make the cheesecake

  • 1.In a large mixing bowl, using an electric mixer on medium speed or a wooden spoon, beat together the cream cheese and sugar until light and creamy. This will take about 1 minute if using an electric mixer or 2 to 3 minutes if creaming by hand. Add the egg and instant coffee, and beat to incorporate.
  • 2.Using a spoon, dollop the cheesecake batter on top of the brownie mix. Add a dollop of the reserved ¼ cup of the brownie batter in the center of each cheesecake dollop. Using a skewer or butter knife, swirl the batters together.
  • 3.Bake for about 35 minutes, until the top is set.
  • 4.Let the brownies cool to room temperature and then refrigerate for 1 to 2 hours to set.
  • To serve, cut into 9 bars. Serve the bars chilled or let them come to room temperature before serving.
  • Add more chocolate to create a rich, dense brownie. Do so by melting 4 ounces of semisweet baking chocolate with the butter or add 1/2 cup mini semi-sweet chocolate chips to batter.


Soured by Cookies, Saved by Lemon Cake

Soured by Cookies, Saved by Lemon Cake

I tried a couple of new cookie recipes recently and as the saying goes, you win some you lose some.  The first recipe Malted Milk Chocolate Cookies came from a book I received to review, Holiday Cookies.  Decidedly MEH.  The malt flavor was barely discernible and the milk chocolate did not stand out.

Another Cookie Bust

A few days later with the fall season in full swing, a recipe for pumpkin snickerdoodles popped up on my feed. Never get swept up by fall pumpkin fever.  But they looked delicious so I baked a batch.  I waited for the first batch to cool, grabbed one off the rack, and took a bite…MEH.  Noooo, another cookie bust.  Little pumpkin or spice flavor, very nondescript.

It’s Not a Lemon

A new recipe caught my eye, not a cookie but a cake recipe.  Food52 posted a lovely lemon poppy seed cake from Ottolenghi.  I am a sucker for lemon and poppy seeds.  Hoping my luck would change, and having the utmost confidence in Food52 and Ottolenghi, I decided to make the cake.  After all, I can’t have three lemons in a row, even if the last recipe actually calls for lemons.

The cake is quick and easy. The recipe starts with beating eggs and sugar together until thick and frothy. Heavy cream is then added to the egg and sugar blend. I took the heavy whipping cream straight out of the fridge and with the mixer running, added it in a steady stream to the egg mixture. Beat until it has the consistency of pancake batter. The flour is then folded in along with the melted butter, lemon zest, and poppy seeds. The recipe calls for 3 lemons to make 1 tablespoon lemon zest but I only needed two good sized lemons and that’s with really packing the measuring spoon (because I LOVE lemon). The lemon was not overpowering. While the cake was baking, I made the lemon icing.  Easy peasy lemon squeezy.

Spread the icing over the top as soon as you remove the cake from the oven.  Do not even think of forgoing the icing.  It adds that sweet-tart lemony oomph and creates a beautiful glossy sheen.  The cake has a nice crumb and is denser than say a sponge cake but lighter than a traditional pound cake. If you are a poppy seed addict you could increase the amount as you like. Thankfully this cake saved my week of baking.  From cookie bust to cake champ. Sweet success.

Bookmark this cake and make it soon, you’ll thank me.

Lemon Poppy Seed Cake (National Trust)

An easy, absolutely delicious lemon poppy seed cake from Ottolenghi
Course Cake, Dessert
Cuisine British
Keyword banana cake, lemon, poppyseed
Prep Time 20 minutes
Cook Time 1 hour
Cooling time 16 minutes

Equipment

  • 1 standard loaf 9x5 loaf pan

Ingredients

The Dry Stuff

  • 1 1/3 cups all-purpose flour 170 grams
  • 1 1/4 teaspoons baking powder
  • 1/4 teaspoon salt

The Wet Stuff

  • 3 large eggs
  • 1 cup plus 2 tablespoons granulated sugar 225 grams
  • 1/2 cup heavy cream, cold 120 milliliters

Butter Mixture

  • 5 tablespoons 70 grams unsalted butter, cubed, plus extra for greasing
  • 1 -1.5 tablespoon poppy seeds
  • 1 tbsp Finely grated zest of 3 lemons I needed only 2 lemons

The Icing

  • 3/4 cup 90 grams confectioners' sugar, sifted
  • 2 tablespoons lemon juice

Instructions

  • Heat the oven to 350° (180° C).
  • Grease the loaf pan(s) and line with parchment paper, then set aside.
  • Sift the flour, baking powder, and salt together into a bowl, then set aside.
  • Melt the butter in a small saucepan over low heat, stir in the poppy seeds and lemon zest, and set aside.
  • Place the eggs and granulated sugar in the bowl of an electric mixer fitted with the paddle attachment and beat on medium-high speed for about 2 minutes, until pale and frothy.
  • Add the cold whipping cream and continue to beat for about 2 minutes, until the mixture has combined, thickened a little, and turned pale.
  • Use a rubber spatula to fold the dry ingredient mix into the egg mixture. Then fold the melted butter, poppy seeds, and zest mixture in.
  • Spoon the mixture into the loaf pan(s) so that it rises three-quarters of the way up the sides.
  • Place on a baking sheet and bake for about 50 minutes, or until a skewer inserted into the center comes out clean.

The Glaze

  • To make the glaze, whisk the confectioners' sugar with the lemon juice in a bowl. Pour the glaze over the top of the cake as soon as it comes out of the oven, spreading it over the top so that it sinks in and creates a nice coating.
  • Set aside to cool for 30 minutes before removing from the pan.
  • Let it come to room temperature before serving.
What’s for Dessert? Croutons!

What’s for Dessert? Croutons!

Awhile back I reviewed Food52 Mighty Salads. Flipping through the book I found quite a few recipes to try including a tomato pasta salad, a crab and corncake salad and a tomato cucumber salad with lamb kebabs.  At the very end of the book, snuck in on the last page (those sneaky Food52ers) I found a single non-salad recipe.

Better yet, it is a DESSERT recipe.  A tantalizing little tidbit among a sea of greens and grains.  As part of their thank you page and because they couldn’t write a cookbook without a sweet finish, they came up with Berry Salad with Brioche Croutons.  It is simple, yummy and the perfect ending.

….of course I had to try it.

It is STUPID EASY and delicious.  Start with your favorite loaf of brioche.  Cut 4 slices about 3/4 inch thick and then cut into cubes.  Place in a buttered baking dish, throw in a handful of nuts, your choice.  I like walnuts but feel free to use pecans or almonds or a mix of your favorite nuts. Drizzle with 2 tablespoons honey and finish with a sprinkle of sea salt or kosher salt (a little bigger sprinkle).  Bake in a preheated oven (350 degrees) for 7 minutes or until golden brown.  Cool.  Store in an airtight container.

Now you could just munch on these bad boys all by themselves, which I have been known to do, or you could throw them on top of a bowl of berries-strawberries, blackberries, blueberries, raspberries, whateverberries (just checking if you are paying attention) sweetened with some raw sugar as suggested by the folks at Food52.

My favorite option is on top of plain Greek yogurt with a touch of honey and fresh berries..  It adds a nice crunch and makes my breakfast seem deliciously decadent.  Its way too easy not to try.


52 Ways to Have Your Salad

52 Ways to Have Your Salad

Slip out the bowl Joe, toss some new greens, Jean…just get yourself free..to make some satisfying salads.  After quite the wait I received a copy of Food 52 Mighty Salads from Blogging for Books.  I flipped through the book and with my trusty pad of post it notes tagged quite a few recipes I wanted to try.  This is a book of main dish salads, hearty and substantial enough to serve alone.  The book is organized by ingredient, leafy greens, not so leafy greens, grains, pasta and bread, meat and fish and seafood.  The photos are gorgeous and the recipes themselves are laid out well.  Tips and how to’s are interspersed throughout the book.  I am guessing different people submitted various recipes.  Some recipes have explicit directions while others, coincidentally the ones I tried, were a bit looser ie. “blend ingredients together”.  I had to think for a second with what? A food processor, blender, or would a bowl and a whisk suffice?

A closer look at the recipes narrowed down which ones I wanted to try, many were pretty involved or contained ingredients I didn’t have on hand.  I ended up with 4 recipes, Fresh Corn Cakes with Crab-Tomato Salad, Lamb Kebabs Grilled with Tomato Cucumber Salad, Half Blistered Tomato Pasta Salad and the Brioche Croutons (ok, not a salad but a bonus recipe).

Right off hand I would say none of the recipes I tried WOWED me.  With every dish a tweak would pop into my head or I would think this is not bad but it’s missing something.  The Corn Cakes were tasty, a bit heavy but had a nice crunch from the cornmeal and corn. The tomato-crab salad fell flat and needed a bigger hit of acid.  I added a squeeze of lemon trying to give it some pop.  I also would have thrown some fresh corn in with tomatoes and crab for some crunch and sweetness.  Full disclosure, I ended up hitting it with a dollop of Siracha mayo, but that’s me.

The pasta salad was a hit with the hubby but I once again thought it could use a flavor pop.  I julienned my basil and mint to distribute the herbs through the salad more evenly.  It reminded me of a de-constructed pesto.

The grilled lamb kebabs were tender and juicy from the marinade. I only had greek yogurt on hand so the marinade was thick and left the kebabs a bit pale in color.  The sauce of tahini and yogurt was flat so I added a sprinkle of Aleppo pepper, be generous with the salt.  The tomatoes and cucumbers are a classic, I would add slivered red onion for pop and a sprinkling of feta to finish next time.

Brioche toasted with honey and walnuts and sprinkled with sea salt.   Adds a nice touch to yogurt or fresh seasonal fruits-peaches or berries. My new favorite breakfast bowl, Greek yogurt, fresh berries drizzled with honey and topped with the croutons and toasted walnuts.  Stupid easy and a winner.

I don’t think I can give this book a resounding thumbs up but it is a solid book.  If I try more recipes I’ll keep you posted.


You Had Me at Tomato (One Pan Pasta)

You Had Me at Tomato (One Pan Pasta)

Every year Wes, the garden guy in our house, plants tomatoes.  We pick out a mix of cherry tomatoes and heirlooms and usually by this time we are enjoying fresh vine ripened tomatoes. Our jaunts to the weekly farmer’s market include plums, nectarines and berries but we smugly walk by stalls with the expensive heirloom tomatoes.  Not this year, the plants never took off and our yield was small.  The lone bright spot was a variety called Tomato Blush.  A small tomato, golden yellow with a hint of red that salvaged our dismal tomato season.  Sweet and meaty, great in salads  or pastas, it will definitely be in the mix next summer.  If you had a bumper crop this year, suggestions and tomato advice would be appreciated!

DSC02165

This recipe has been making the rounds, first on Martha Stewart and then on some of my favorite blogs including Lottie and Doof and Food52, its quick, easy and yummy.  A great dish to showcase homegrown tomatoes or those pricey tomatoes from the farmer’s market.   I love this, you throw all the ingredients, including dry pasta, into a pan and 12 minutes later, voila’, a tasty dish on the table and only one pan in the sink!

One Pan Pasta

Ingredients

  • Adapted originally from Martha Stewart but found on Food52 and Lottie and Doof!
  • 12 ounces linguine
  • 12 ounces cherry or grape tomatoes halved or quartered if large
  • 1 onion thinly sliced (about 2 cups)
  • 4 cloves of garlic thinly sliced
  • 1/2 teaspoon red pepper flakes
  • 2 teaspoons coarse salt
  • black pepper
  • 2 sprigs basil plus torn leaves for garnish
  • 2 green onions chopped
  • 2 tablespoons extra-virgin olive oil plus more for serving
  • parmesan cheese
  • Coarse salt
  • Freshly ground black pepper
  • 4 1/2 cups water or chicken stock
  • Freshly grated Parmesan cheese for serving

Instructions

  • This is so incredibly easy, it's crazy. Place pasta, tomatoes, onion, garlic, red pepper flakes, salt and pepper, basil and onions in a straight side skillet. Add water or stock and olive oil. Bring to a boil over high heat. Using tongs stir and move pasta around pan as it boils. Cook for additional 9 minutes until pasta is al dente and liquid is reduced. Taste for seasoning. Garnish with basil and serve immediately with lots of parmesan cheese.
  • I use stock for that extra zip. You could add some dried porcini also for added flavor.