Category: Desserts

Muffins de Mochi con Misugaru

Muffins de Mochi con Misugaru

You might be wondering why this post is named Muffins de Mochi con Misugaru.

WELL, let me tell you why…

Apparently, I’m not supposed to use the term Mochi Muffins.  It’s been trademarked.

How crazy is that?

Third Culture Bakery, out of Berkley, has trademarked mochi muffins and has been sending Cease and Desist letters to folks that have used the term mochi muffins, including small mom & pop bakeries, bloggers, Instagrammers, and AAPI-owned businesses.

The term mochi muffins, if you are Asian or Hawaiian, is pretty ubiquitous.  And yet some bozo in the government granted a trademark to Third Culture Bakery in 2018. Shame on the trademark office for not doing their due diligence and shame on Third Culture for trying to trademark a term that is descriptive for a product they did not invent.  Y’all, folks have been making mochi muffins, donuts, and cakes long before they came into existence.

The Happy Ending

It took a little while for me to post these mochi muffins and in the interim much has happened!  After more bad press and focus on the story, Third Culture Bakery re-examined its stand and relinquished the trademark.  Yay! Score one for the little guys and Subtle Asian Baking, a FB group that brought to light the trademark issue.  So now I can go back to using Mochi Muffins!

Best of Both Worlds

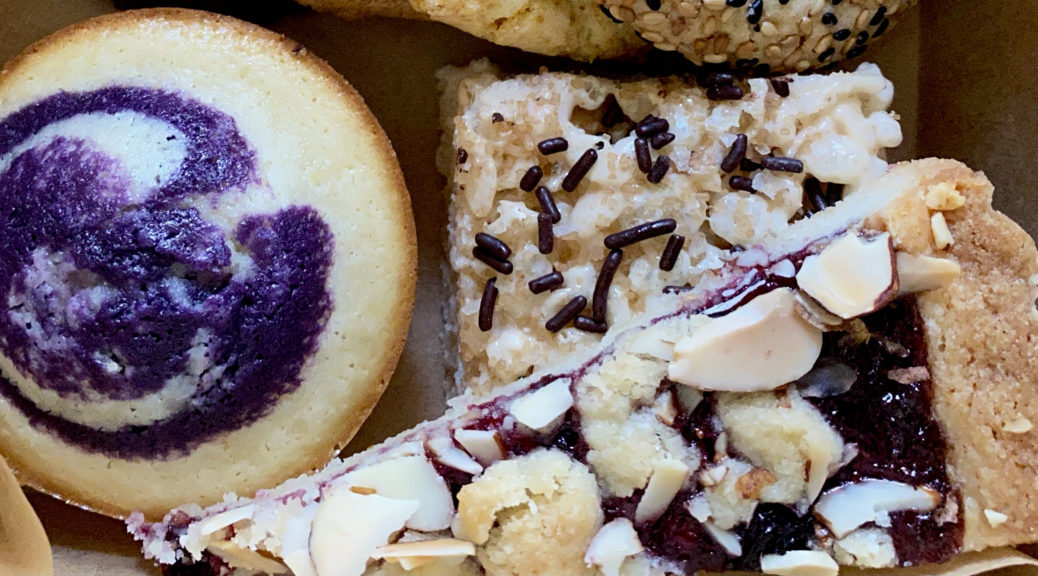
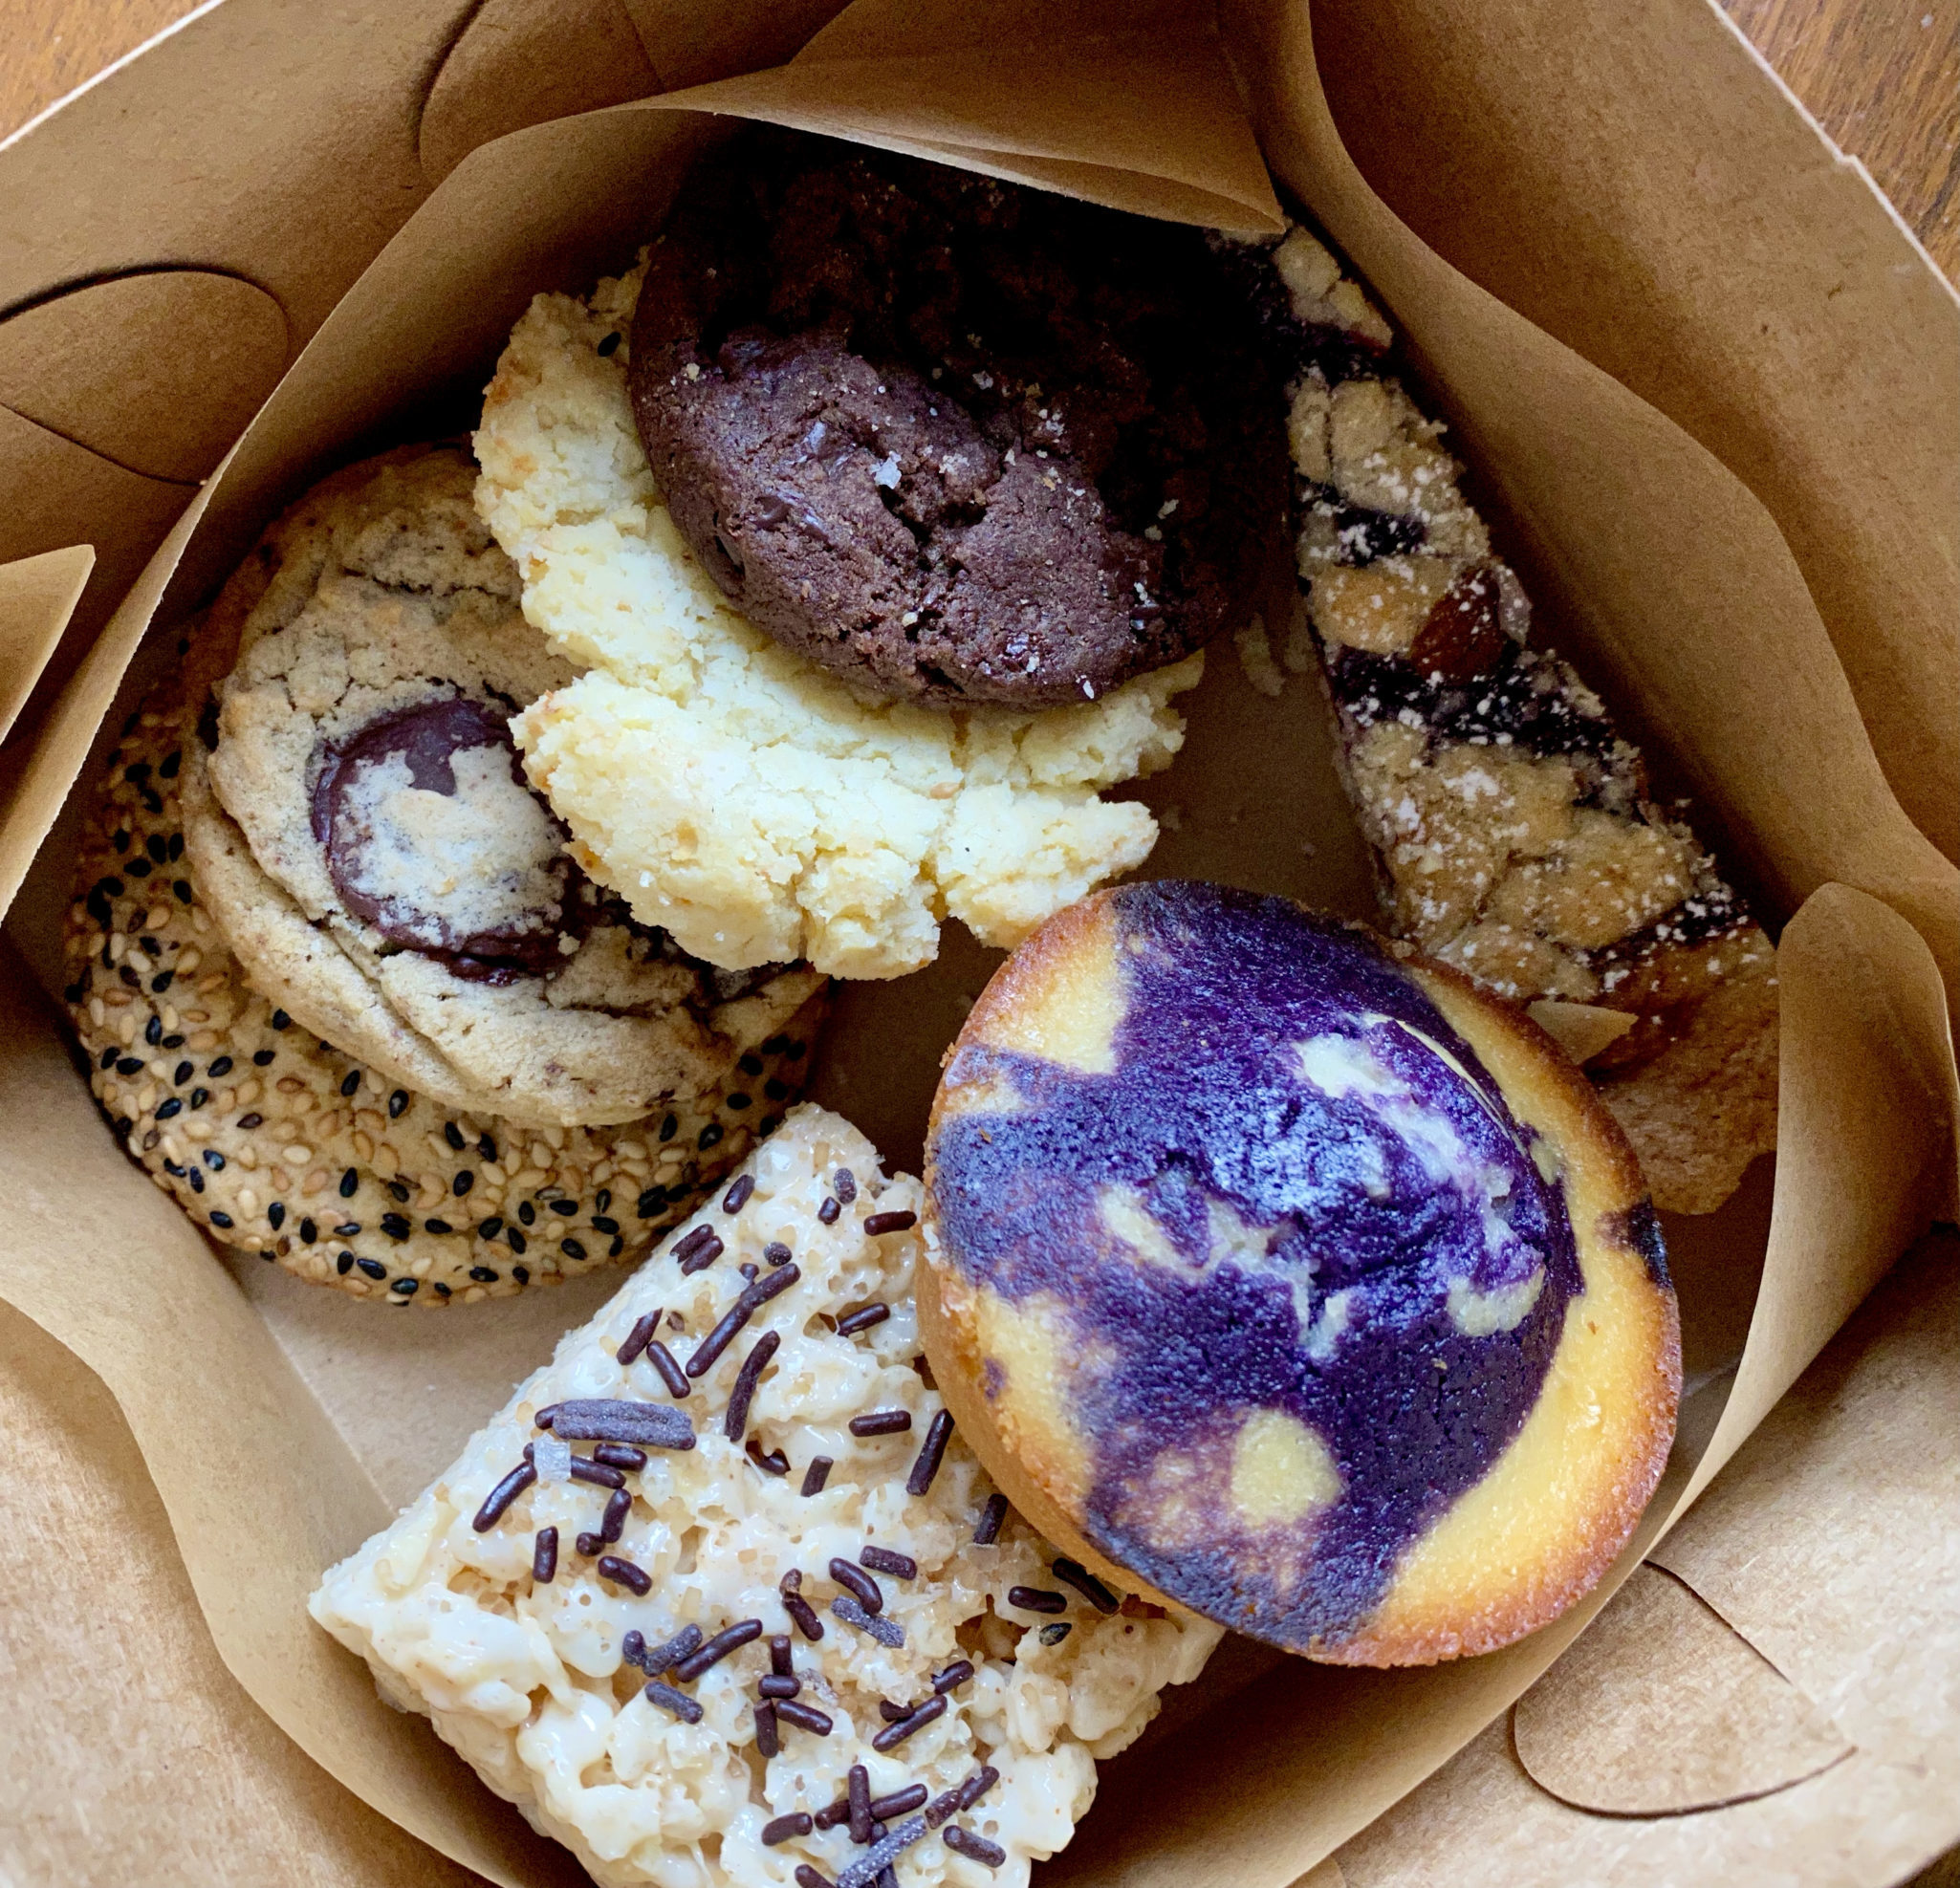
I love how Asian American pastry chefs have been blending Asian ingredients with French techniques and visa versa.  Croissants filled with Chinese BBQ pork or mochi, custard flavored pandan, ube snickerdoodles, I could go on and on.

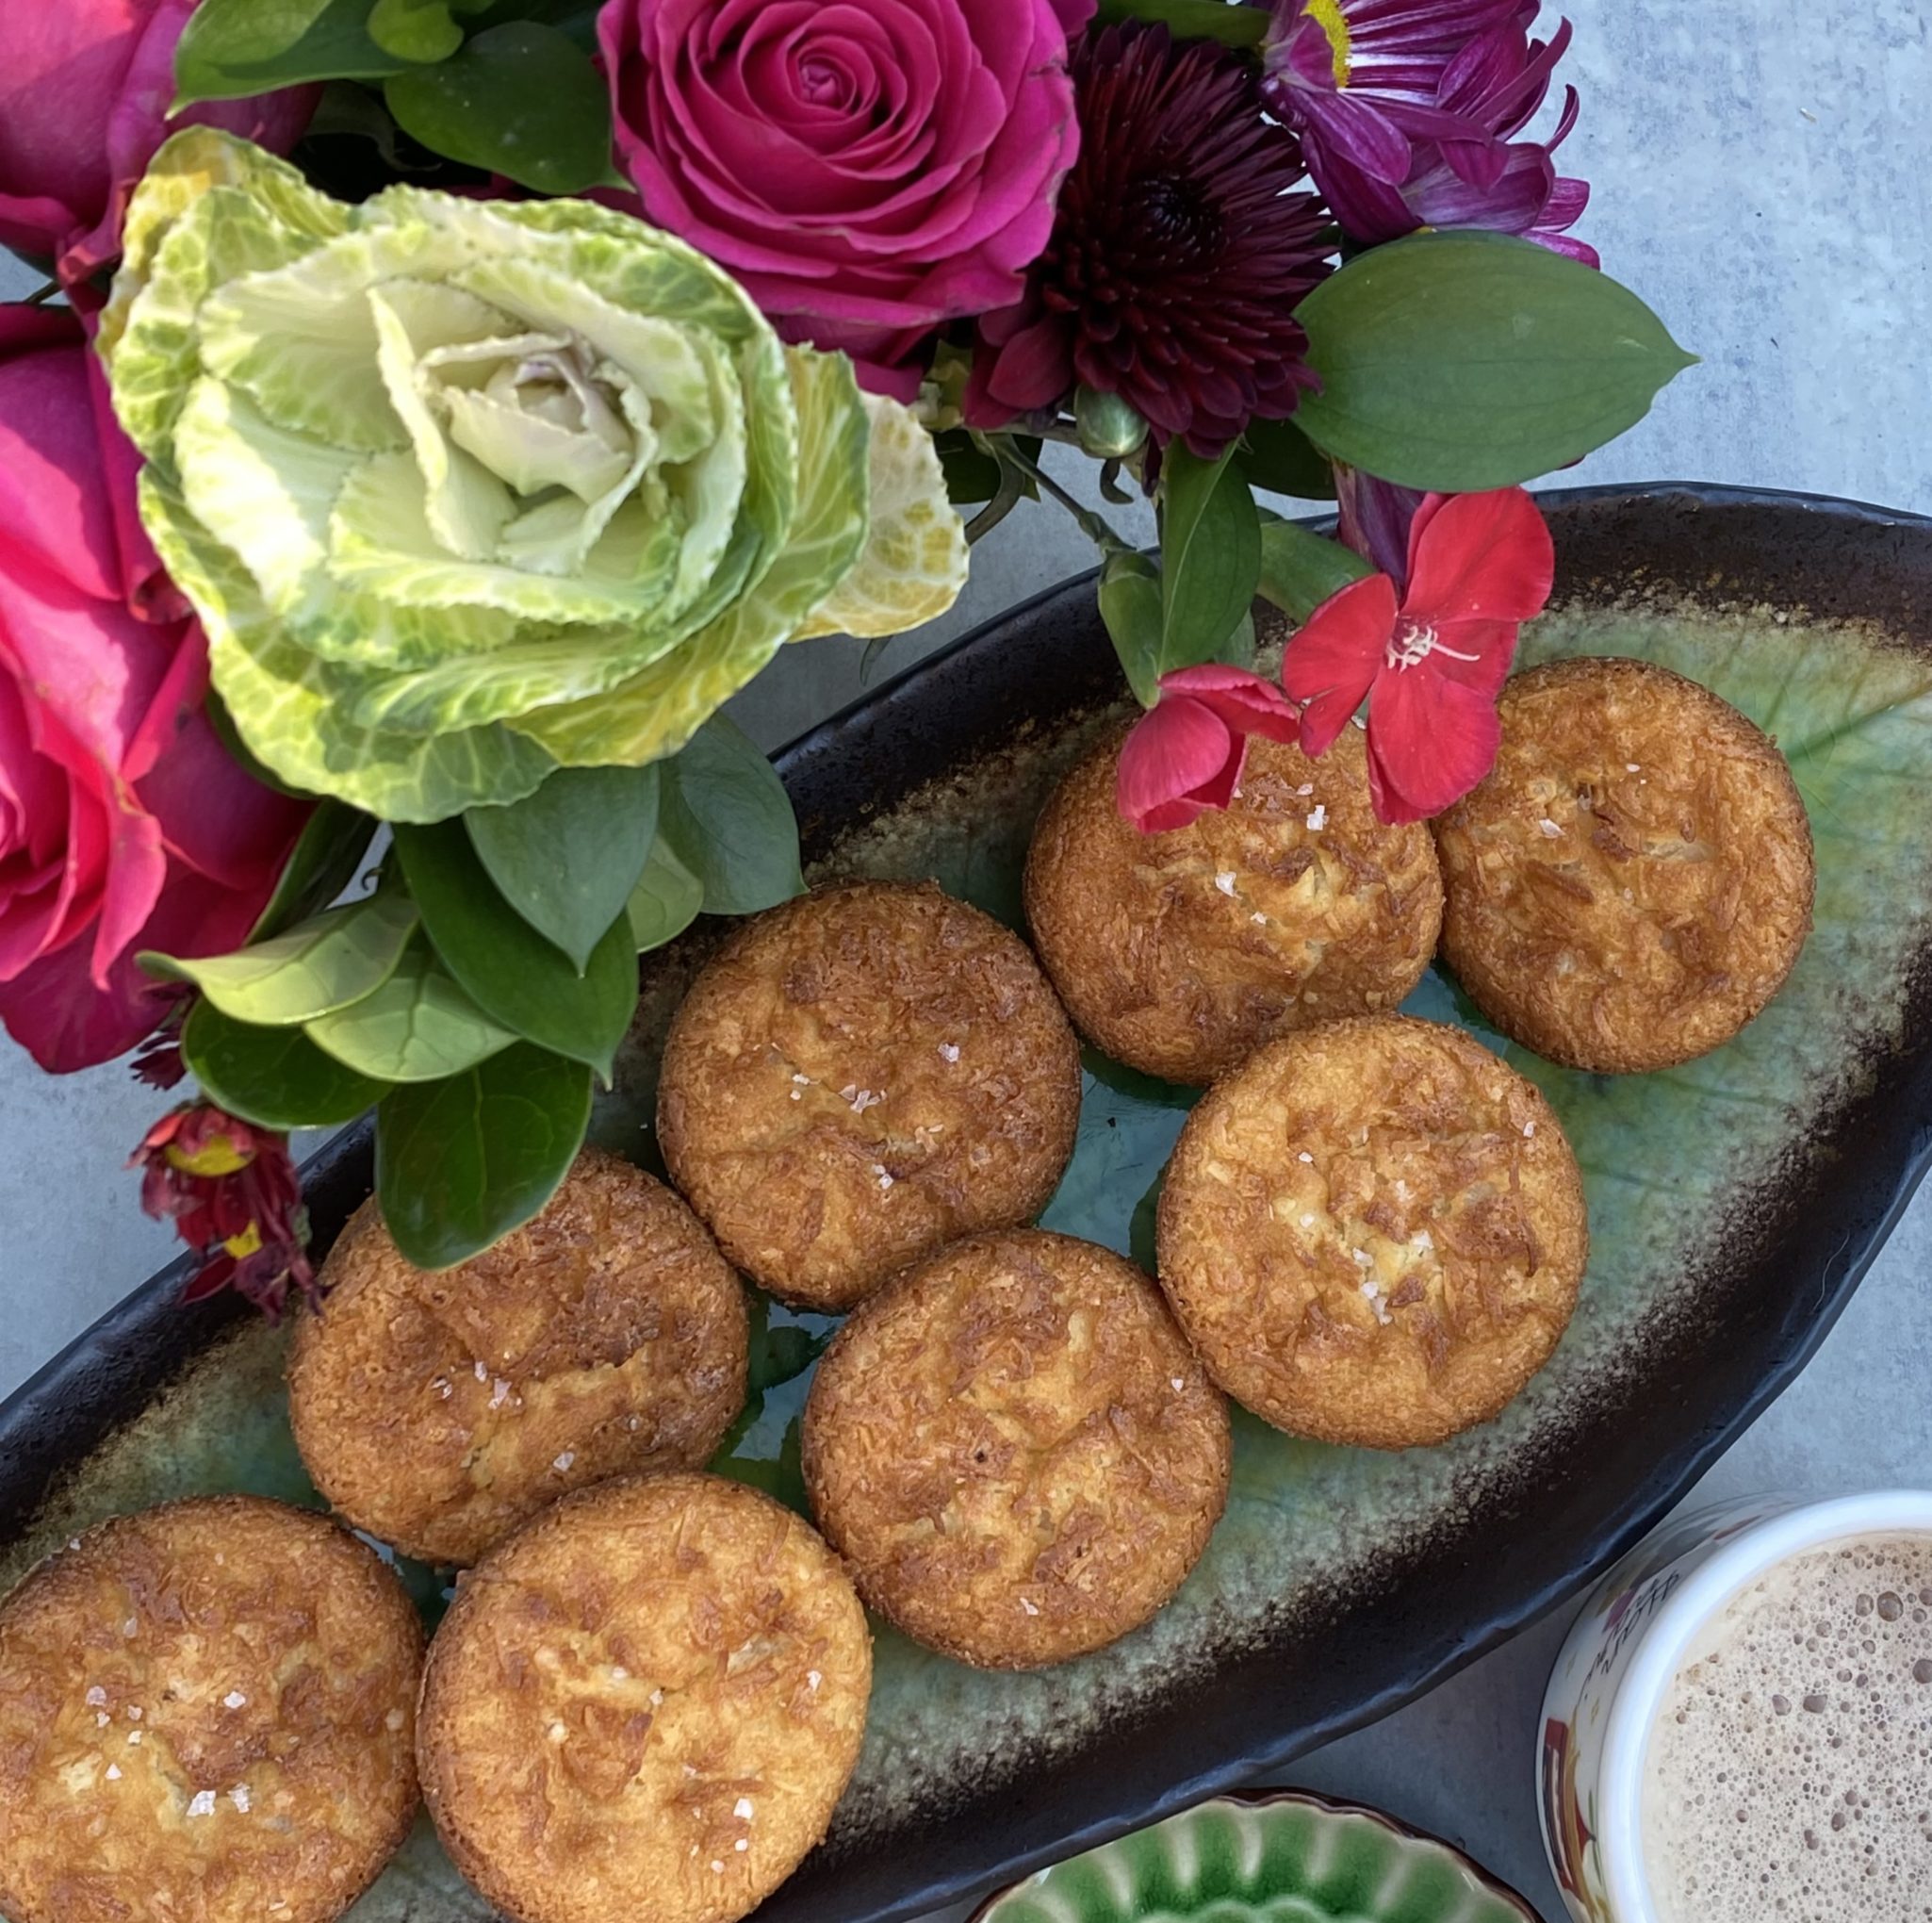
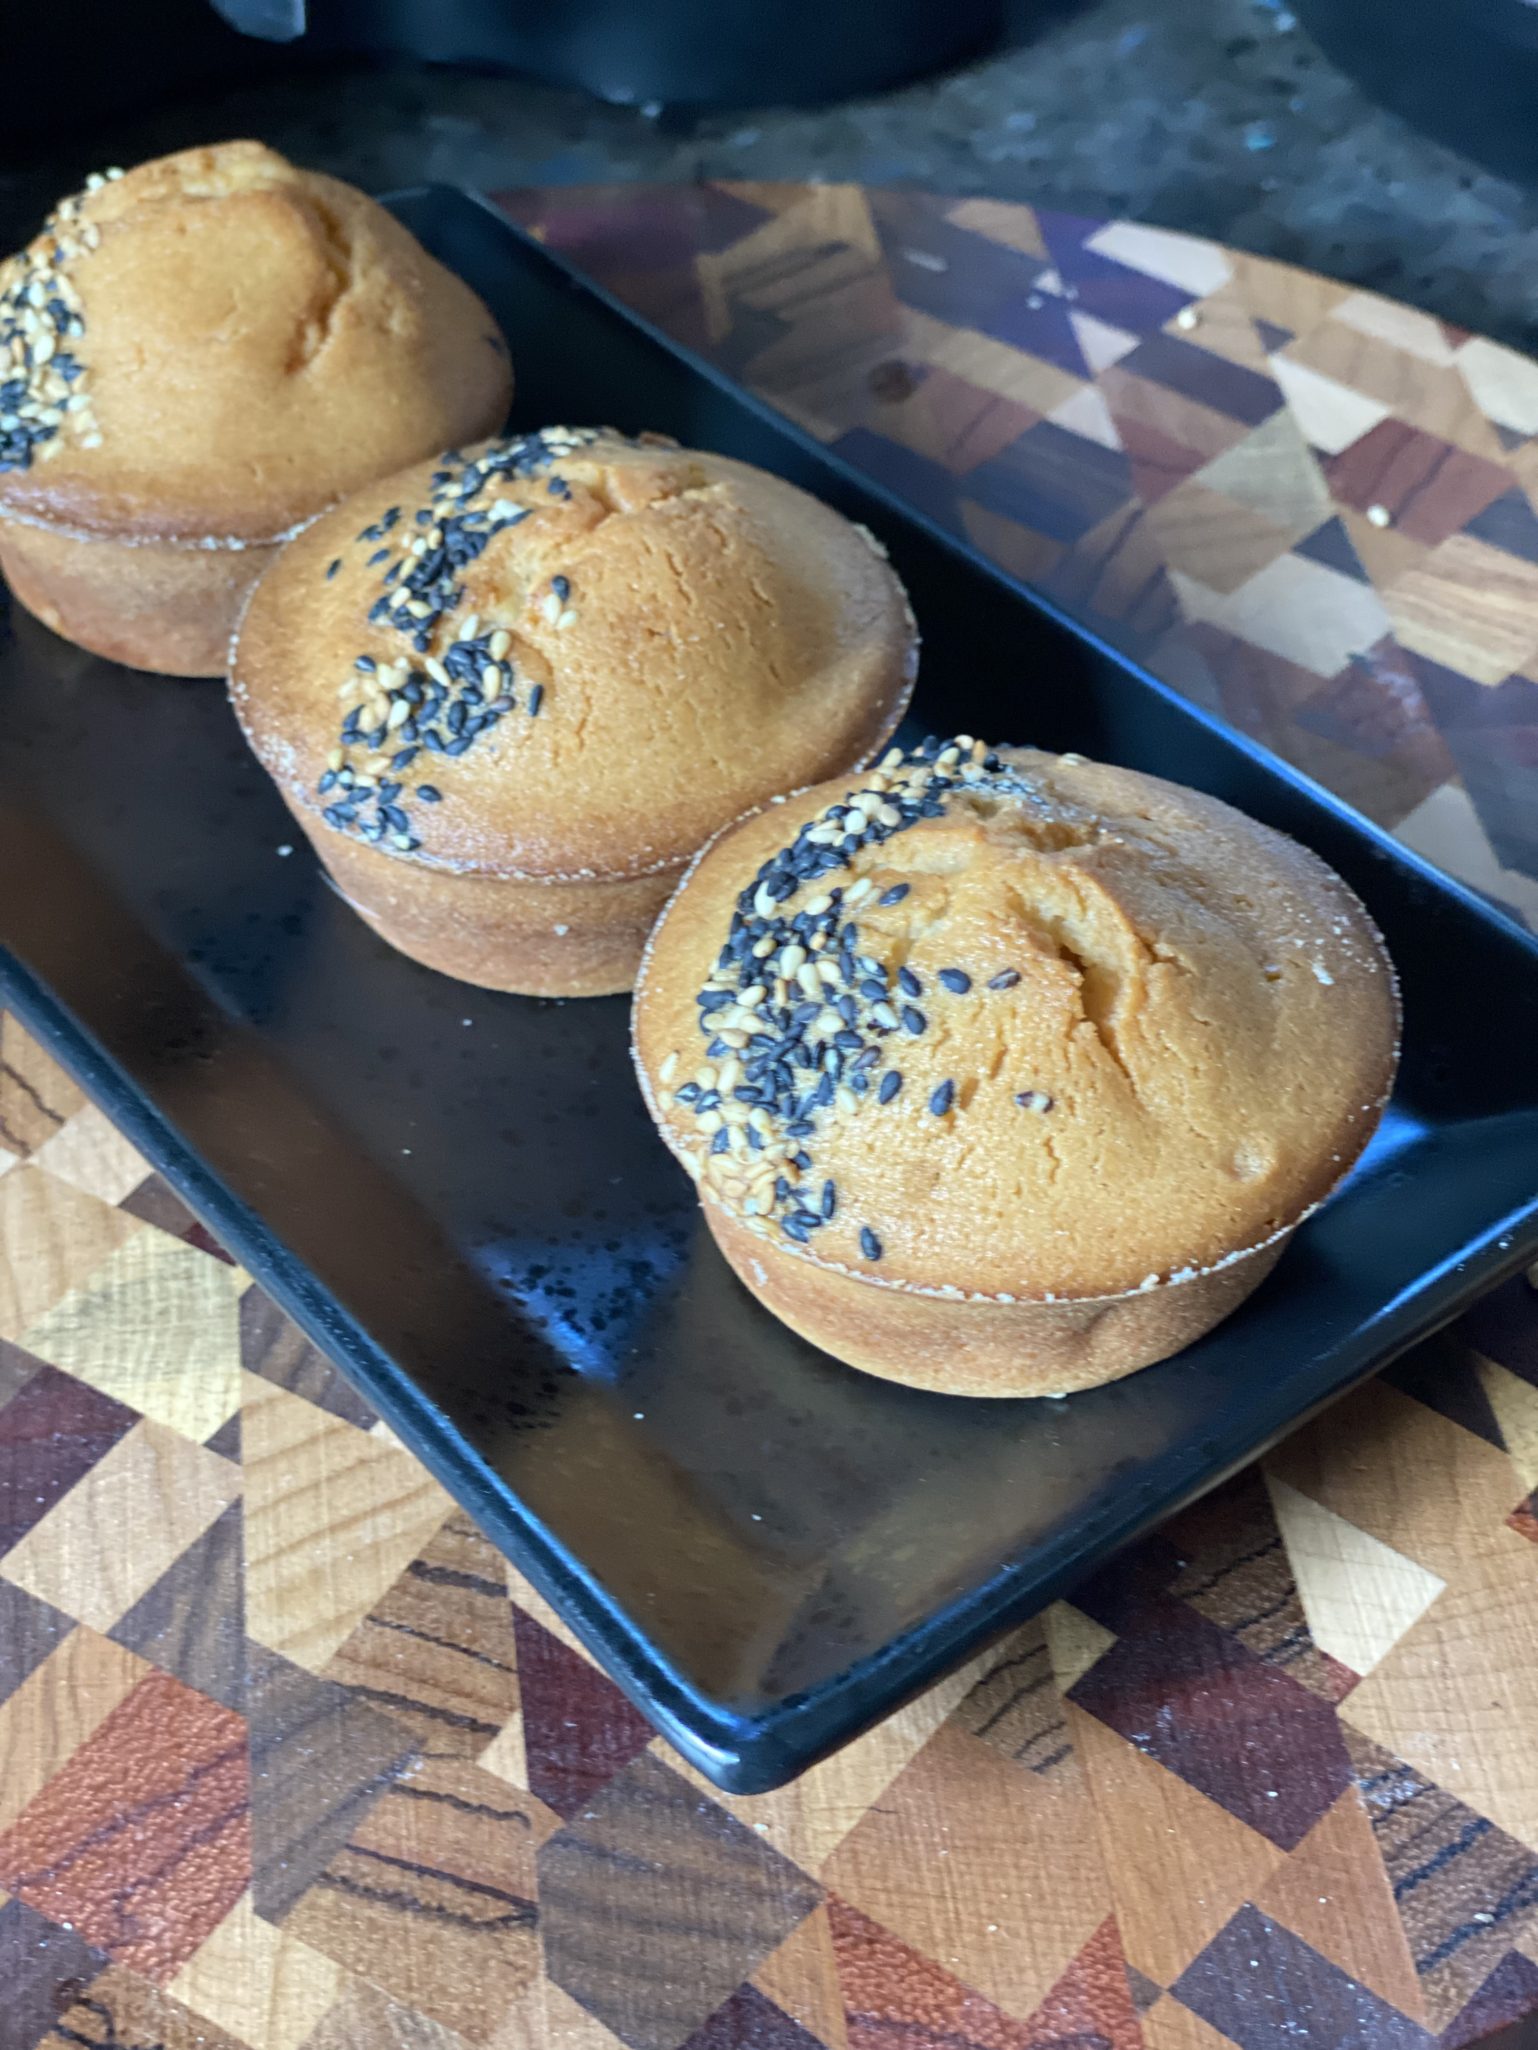
So my contribution? A riff on Butter Mochi Muffins.  I added Misugaru Powder and oat milk (instead of regular milk) to my butter mochi muffins and SHAZAAM, we have a winner.

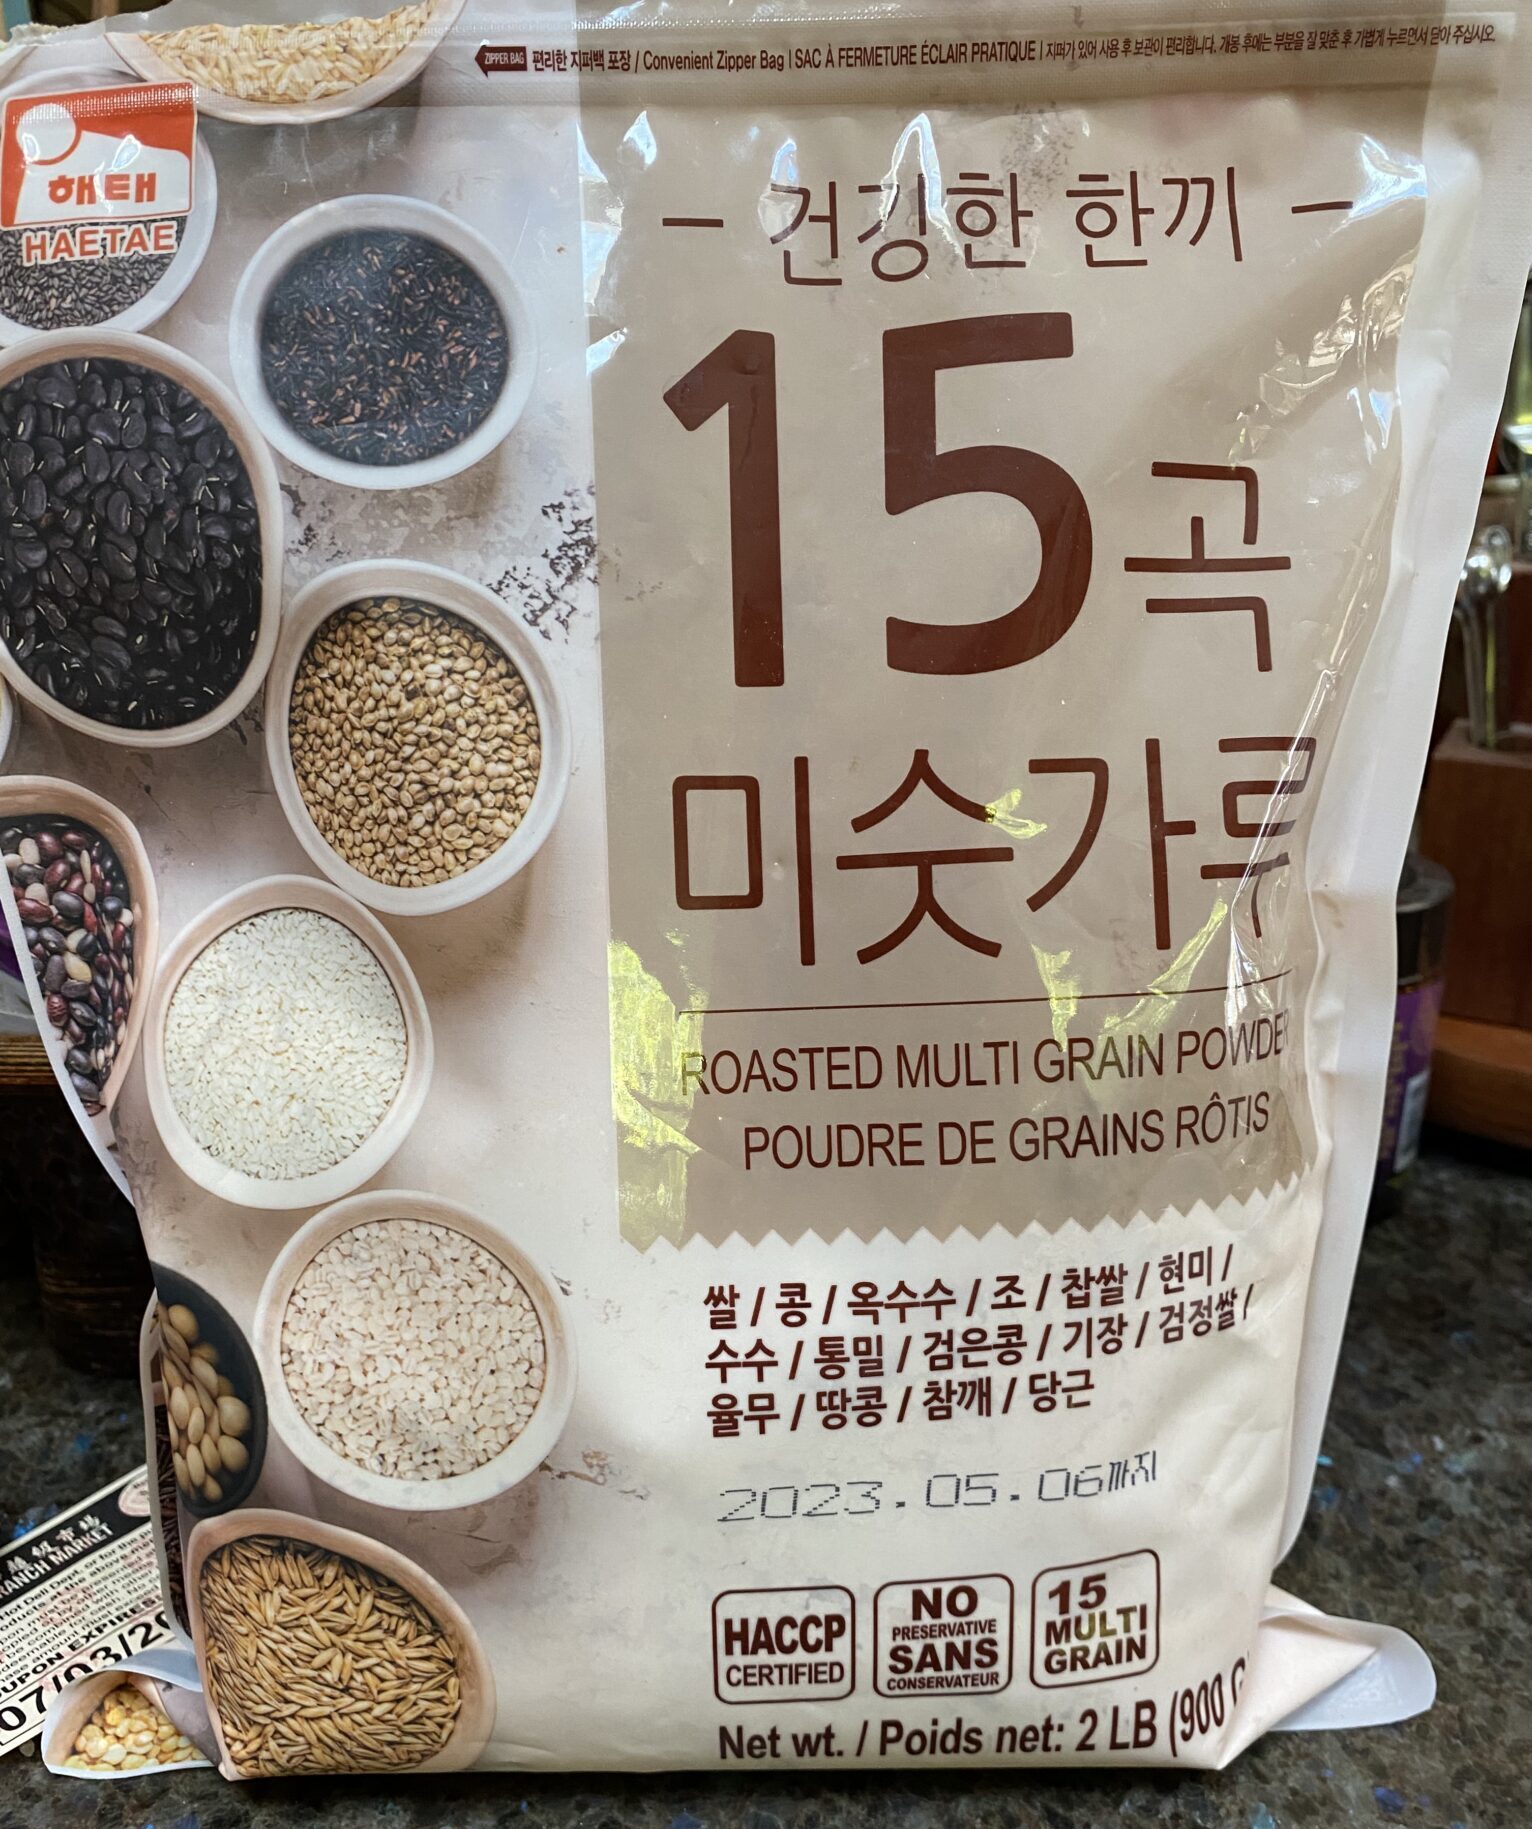
Misugaru Powder is a  Korean multigrain drink that includes different grains, rice, and beans like sweet rice, brown rice, oats, azuki beans, and sesame seeds.   You can find Misugaru at any Korean store or online.  Mixed with milk or water it is a drink with a sweet, nutty, malty flavor. Kind of like Carnation Instant Breakfast, but tastier and healthier.  I found various recipes using the powder in cookies and breads and thought, why not?

For the uninitiated, mochi is glutinous rice flour also known as sweet rice flour.  “Stuff” made with sweet rice flour has a wonderfully chewy, elastic texture, think dense but still soft marshmallows.  My first post on Mochi Muffins is by far the most popular post on 3jamigos. A staple in Asian and Hawaiian desserts,  it was only a matter of time, before it would make its way into mainstream American desserts like muffins, donuts, and brownies.  Besides being delicious and texturally so intriguing, mochi desserts are gluten-free!  Win-win.

Notes on Making Mochi Muffins

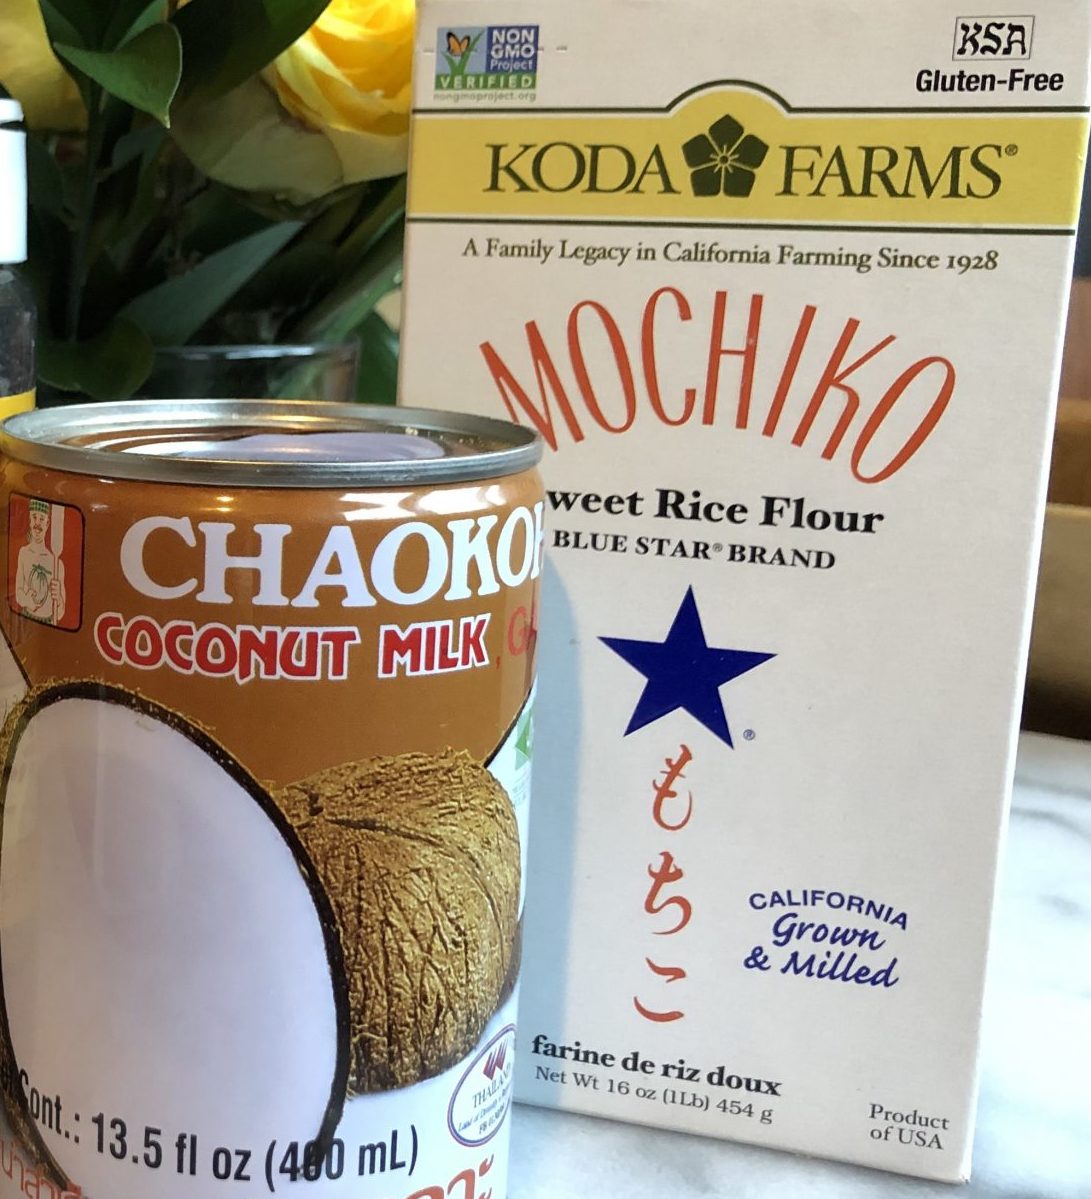
Sweet Rice Flour:  There are different mochi flours available.  Mochiko by Koda Farms is probably the most widely available and works for almost all recipes.  Asian stores will carry Thai and Korean Sweet Rice Flour in addition to Mochiko.

Milk:  Regular or 2% milk can be used in place of the oat milk. Skip the skim.  For Coconut milk, use full fat if possible.  My go-to brands are Arroy-D, Chaokoh, and Trader Joe’s (super convenient).

Butter the muffin tins generously, and use regular rice flour (not the mochi flour) to prep the pans.  If you don’t have any, skip the flour and just butter the pan.

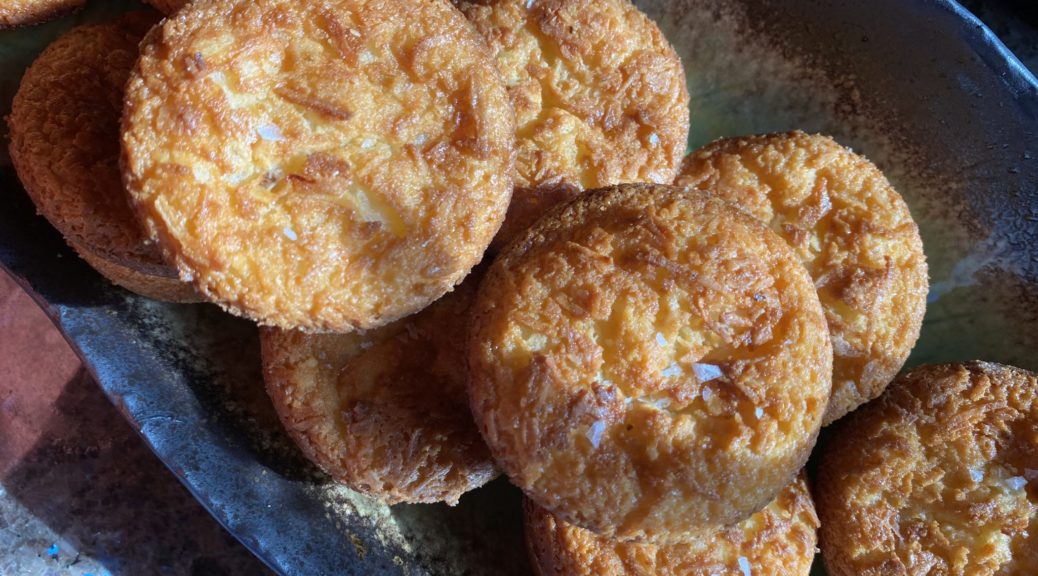
I played with the baking temp to see if I could minimize the pointy top.  I lowered the temperature to 360 degrees on a subsequent batch and it did seem less domed.  This is appearance preference, the muffins tasted the same.

Print
5 from 1 vote

Misugaru Mochi Muffins

Misugaru, is a multigrained Korean beverage that adds a subtle, toasty, malty, nutty flavor to these delicious chewy mochi muffins.
Course Cake, Dessert
Cuisine Asian-American
Keyword butter mochi, Gluten free, hawaiian, misugaru, mochi muffins, muffins
Prep Time 15 minutes
Cook Time 45 minutes
Servings 12 muffins

Ingredients

The Wet Stuff

  • 1/4 Cup Unsalted butter 55gm
  • 3/4 Cup Coconut milk 170gm
  • 1 Cup Oat Milk 240gm, You can use reg 2% milk, do not use skim
  • 2 Large Eggs

The Dry Stuff

  • 1-3/4 Cup Glutinous rice flour 225gm
  • 2 tbsp Misugaru powder
  • 1 Cup Granulated sugar 200gm
  • 1 tsp Baking powder
  • 1/4 tsp salt If not using sprinkling salt, increase this to 1/2 tsp

Wrapping it up

  • Butter for muffin tin
  • Fleur de Sel or Maldon Flake Salt to sprinkle
  • Shredded coconut, sweetened or unsweetened for garnish, optional
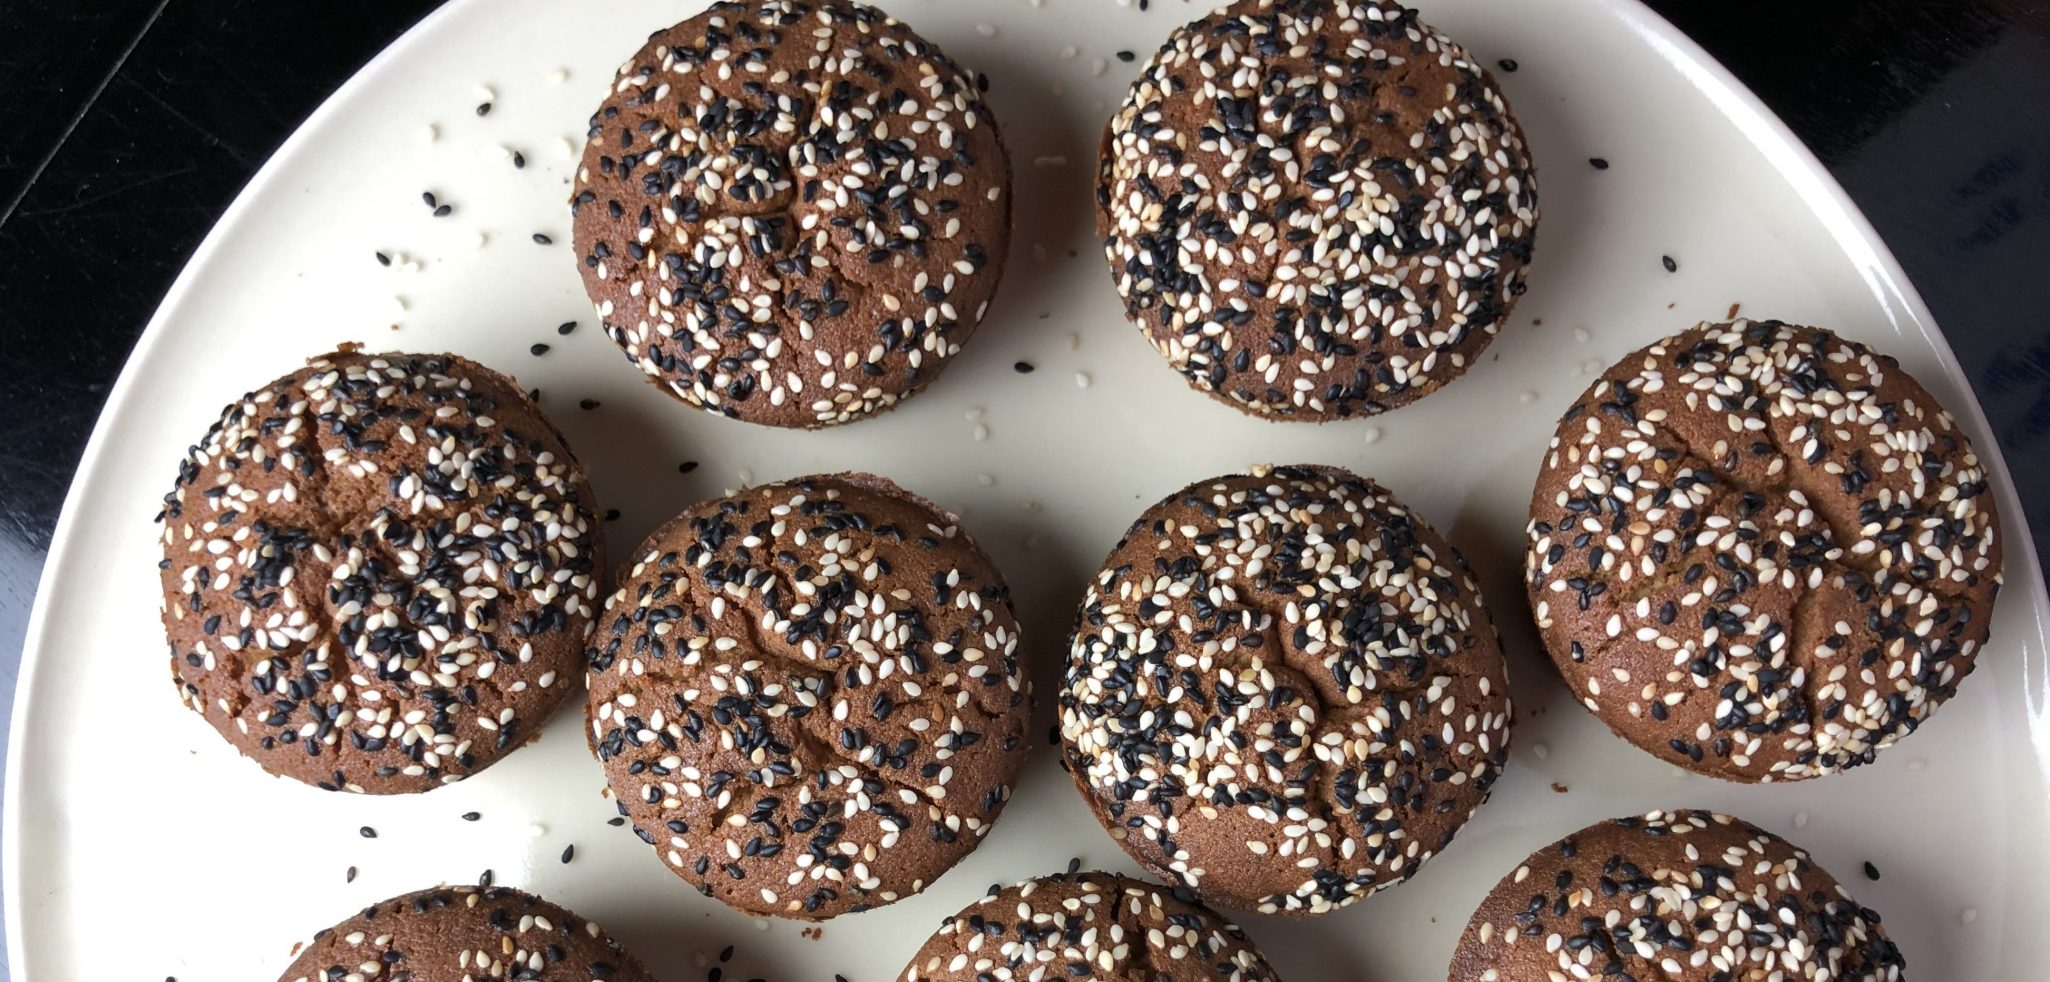
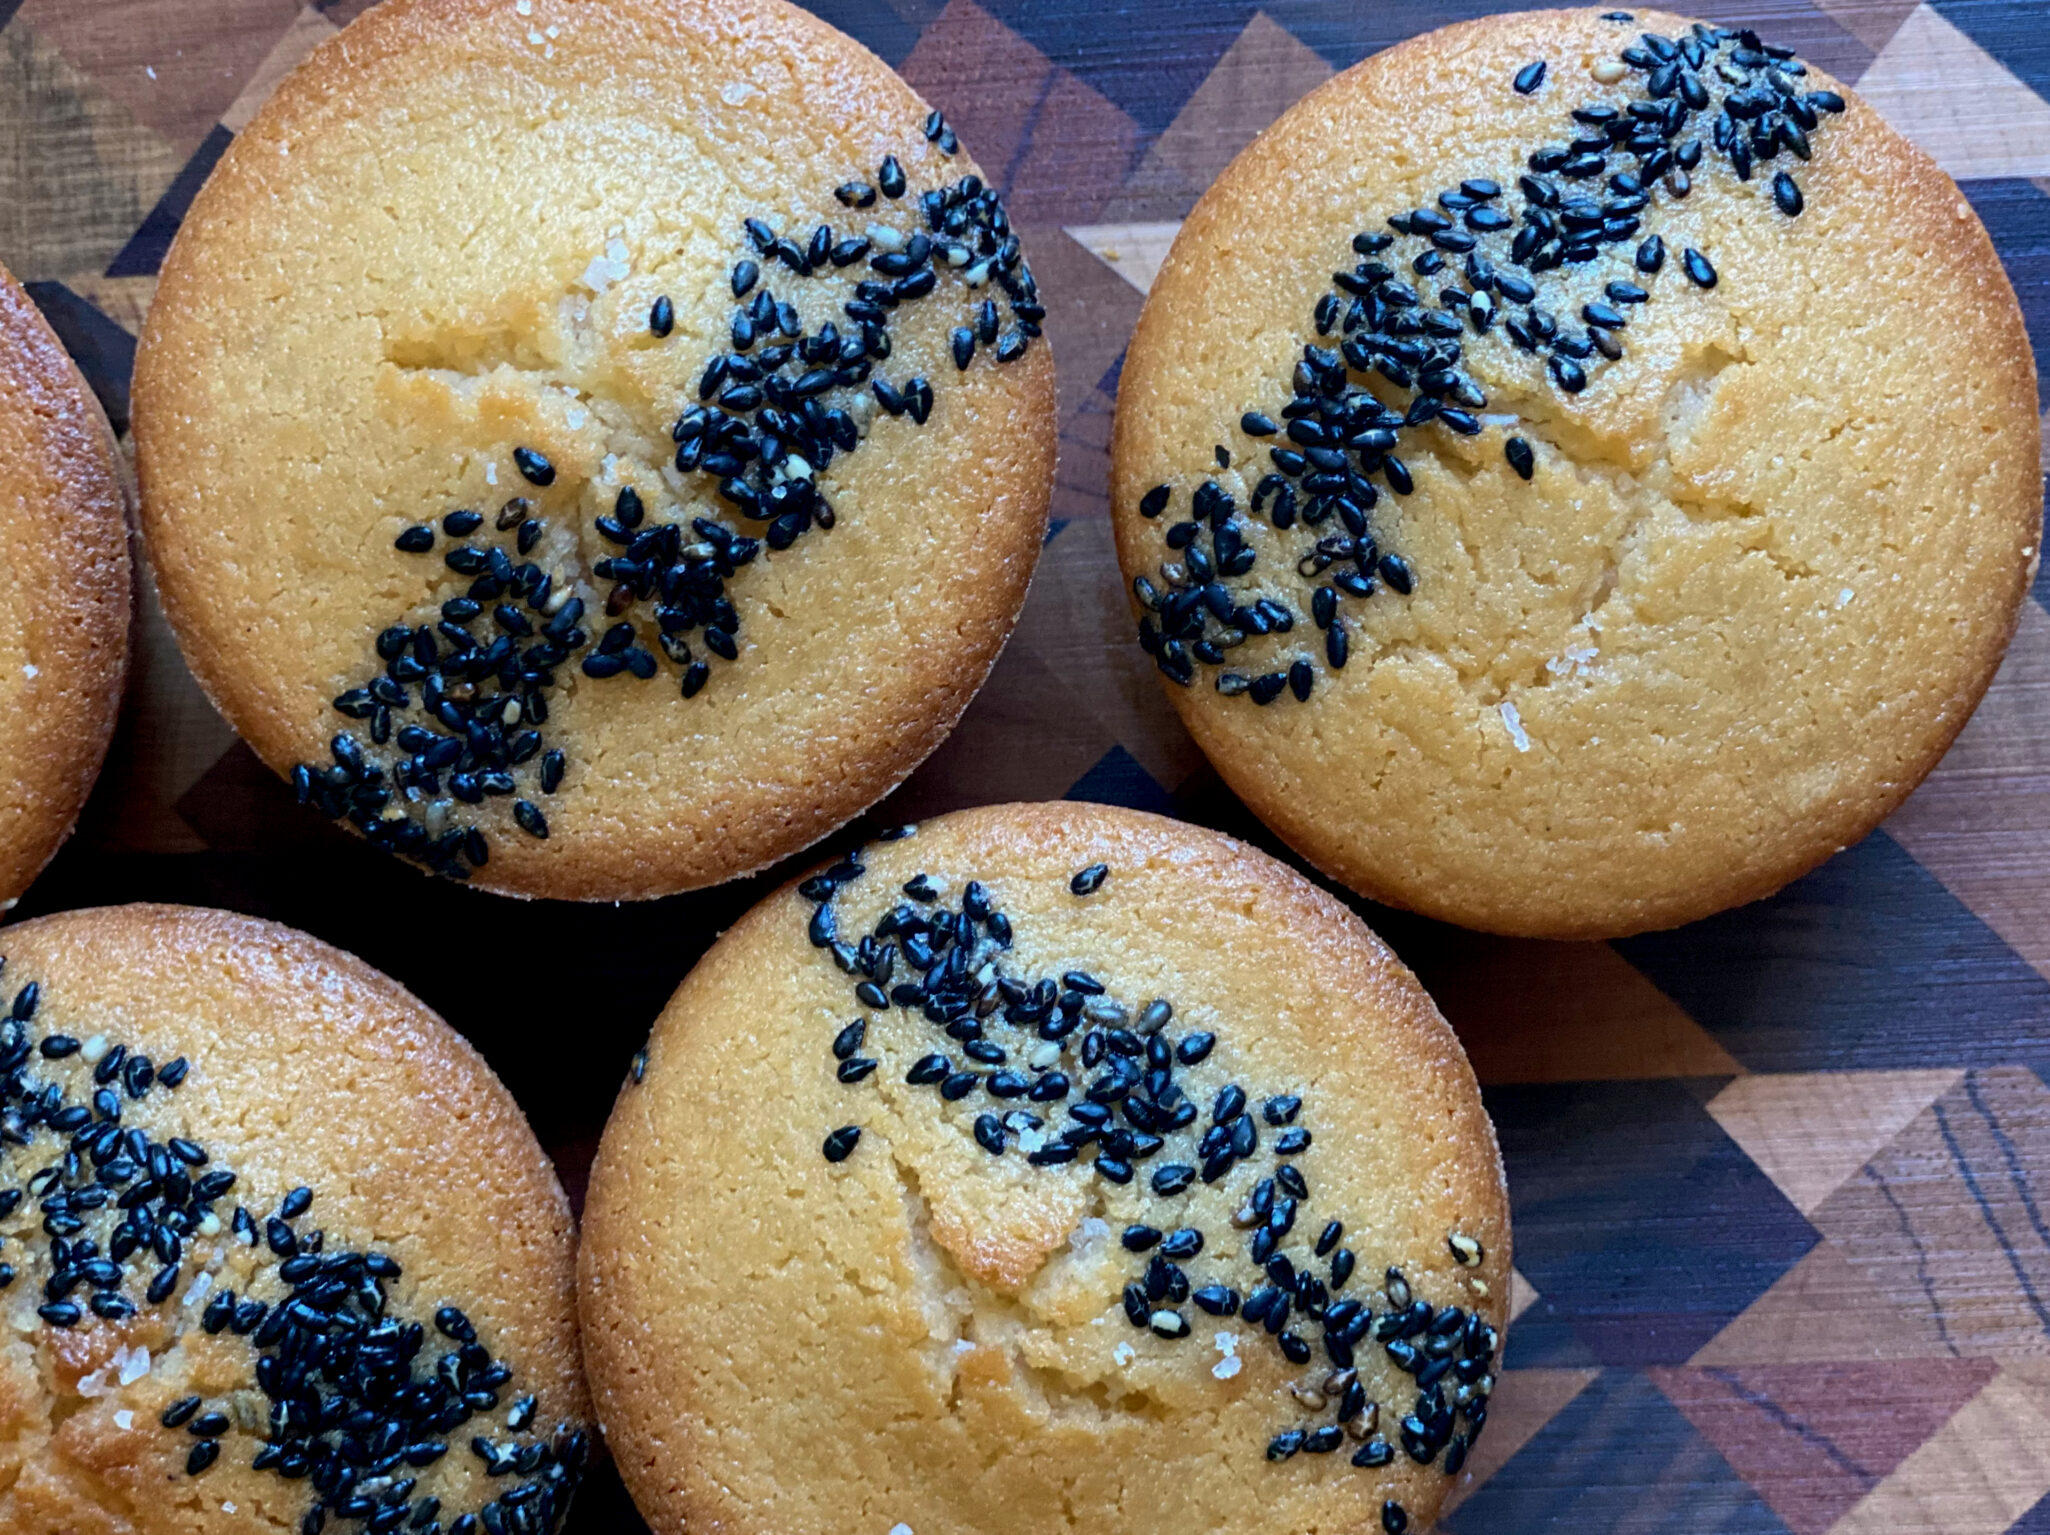
  • Black and white sesame seeds for garnish, optional

Instructions

  • Preheat the oven to 375 degrees
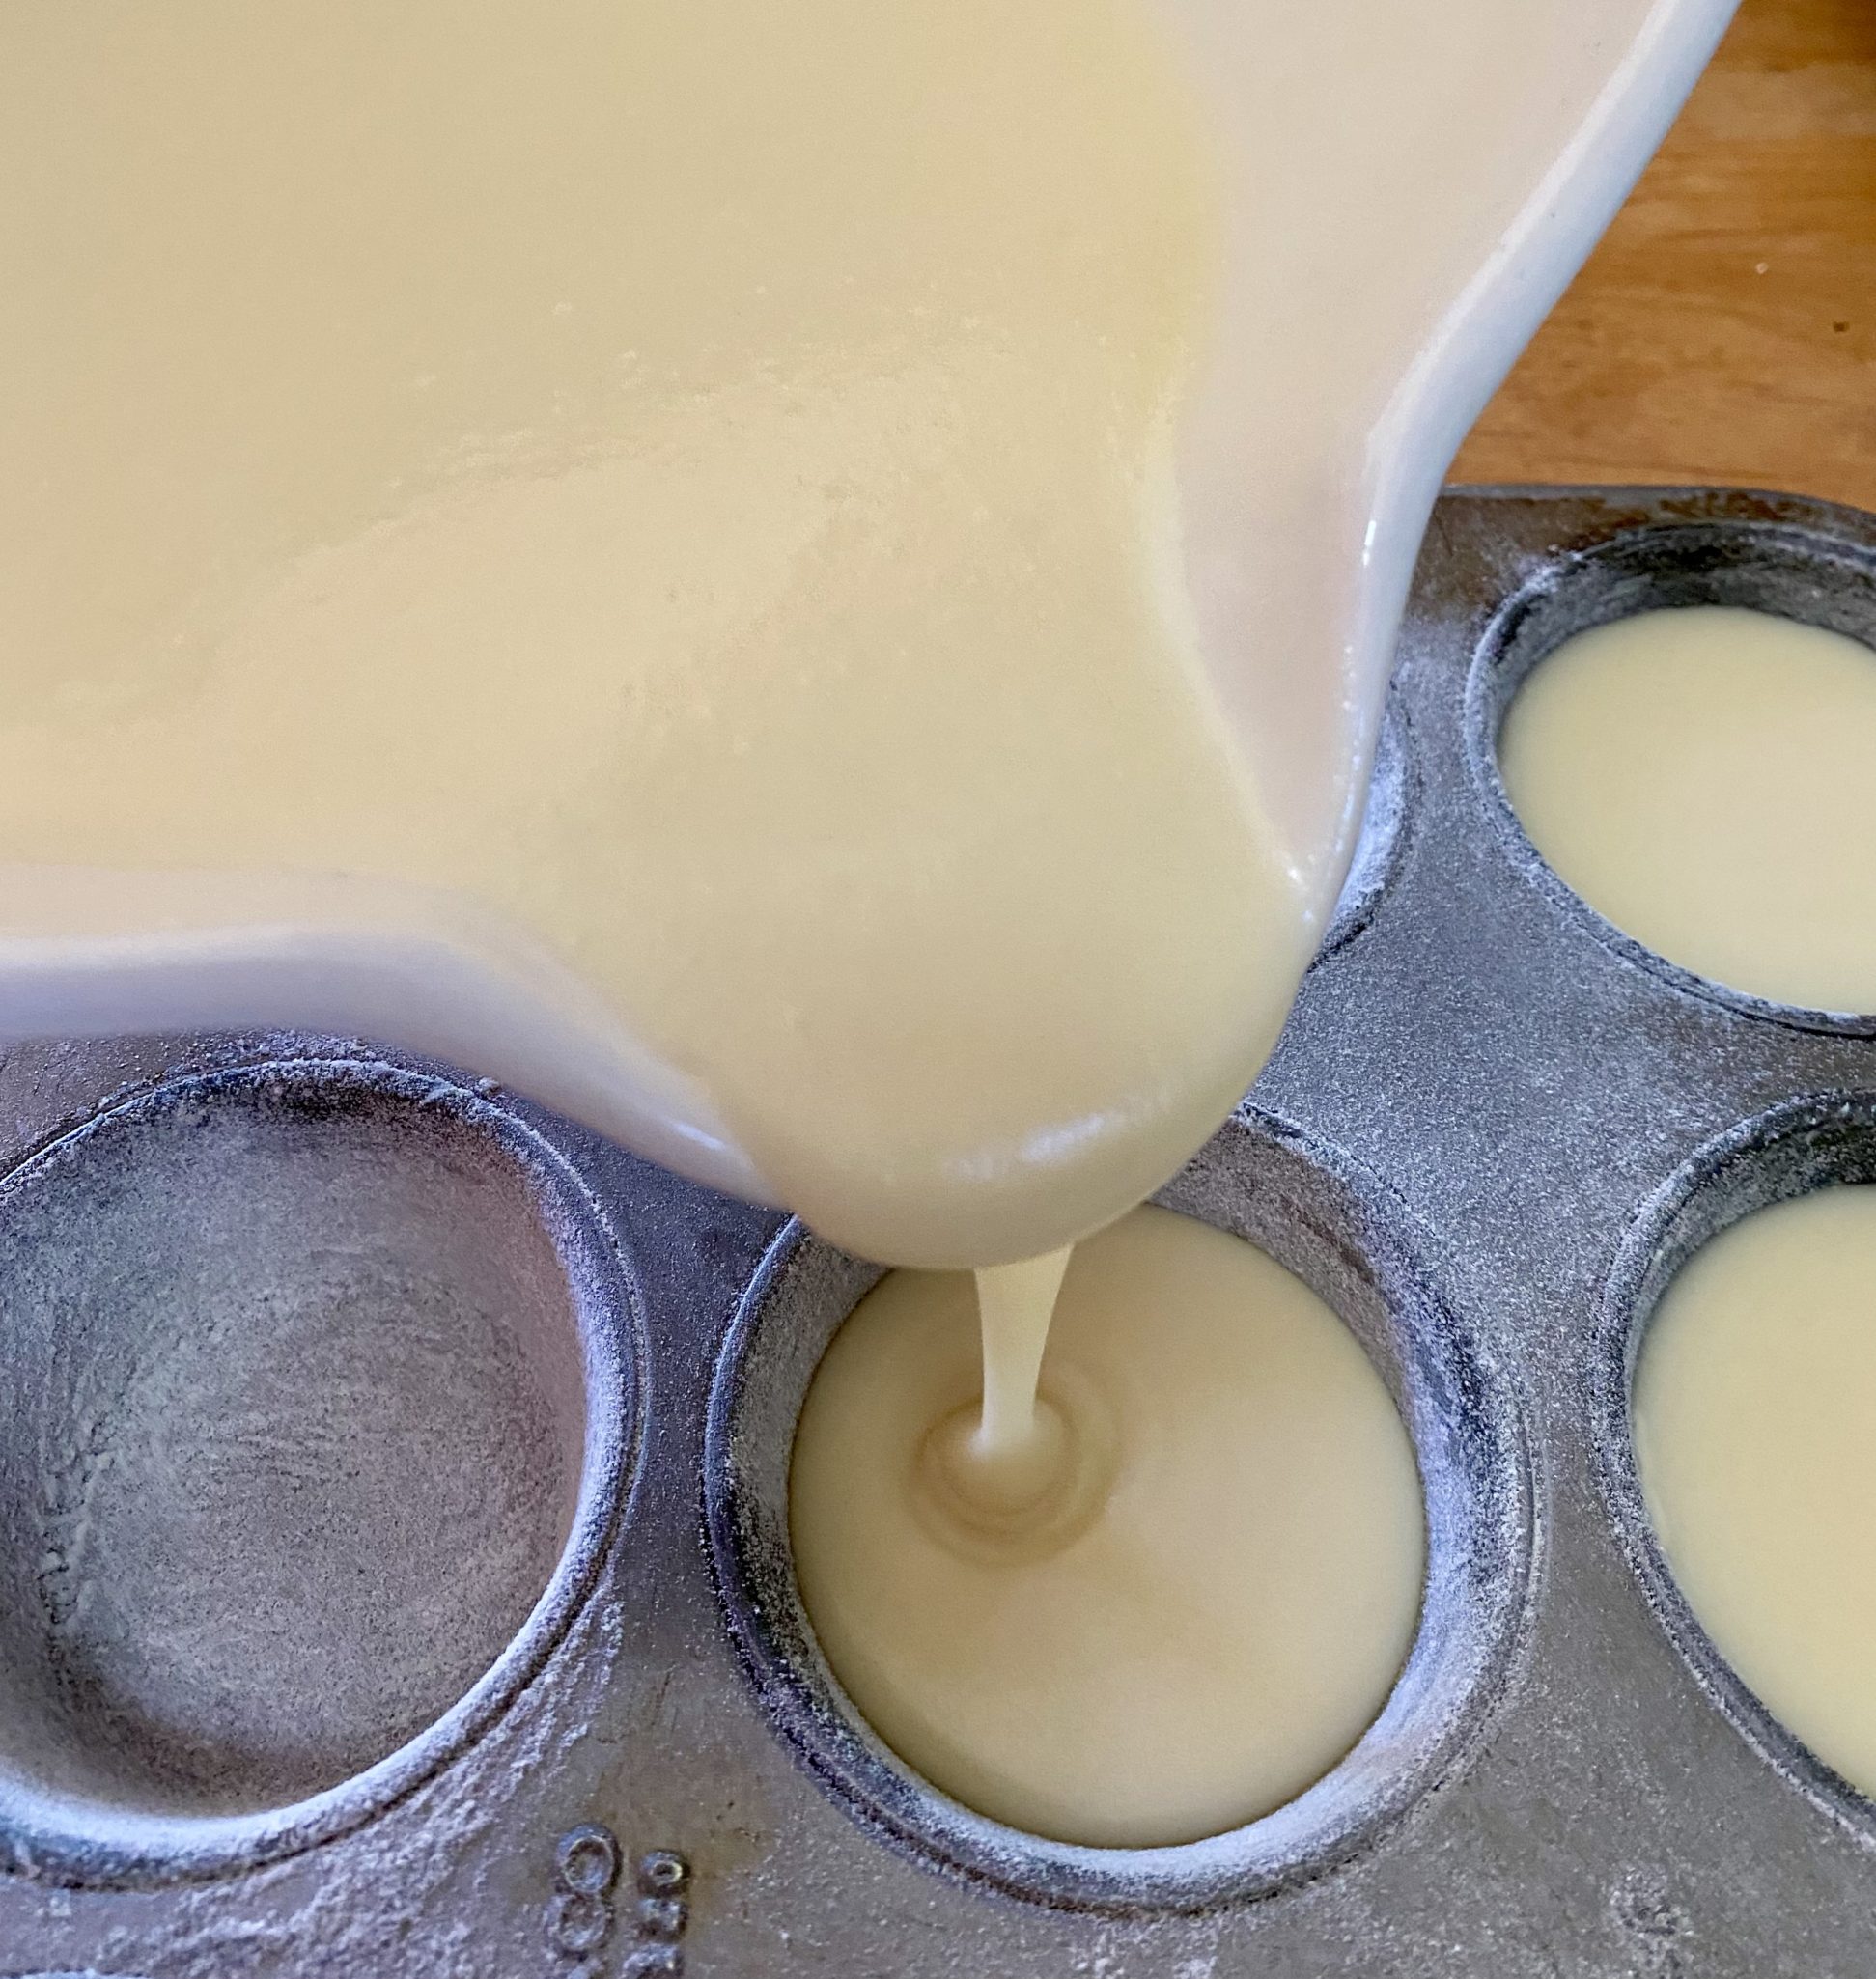
  • Brush the cupcake tins liberally with butter and dust with regular rice flour
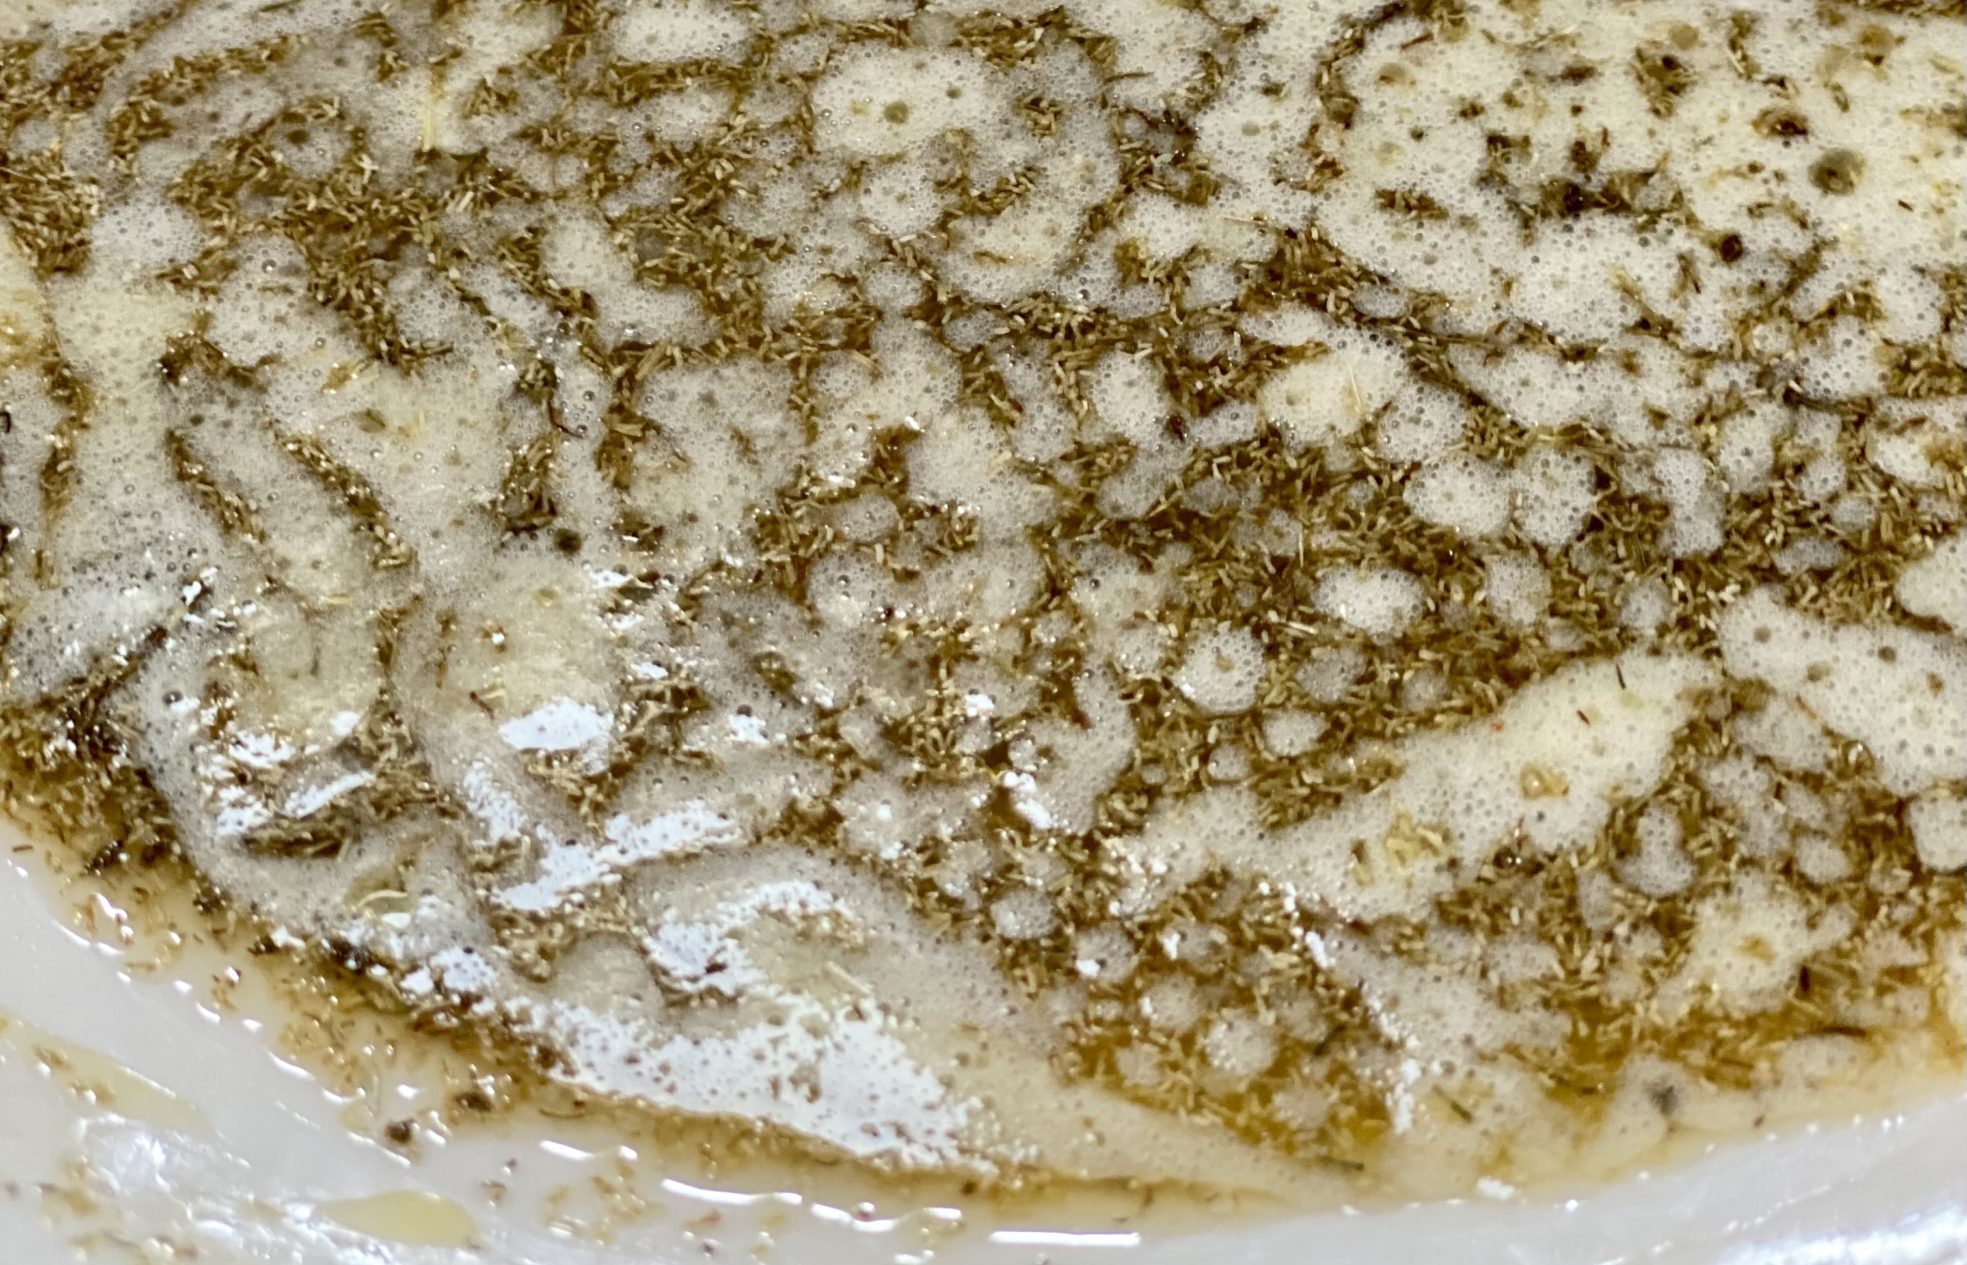
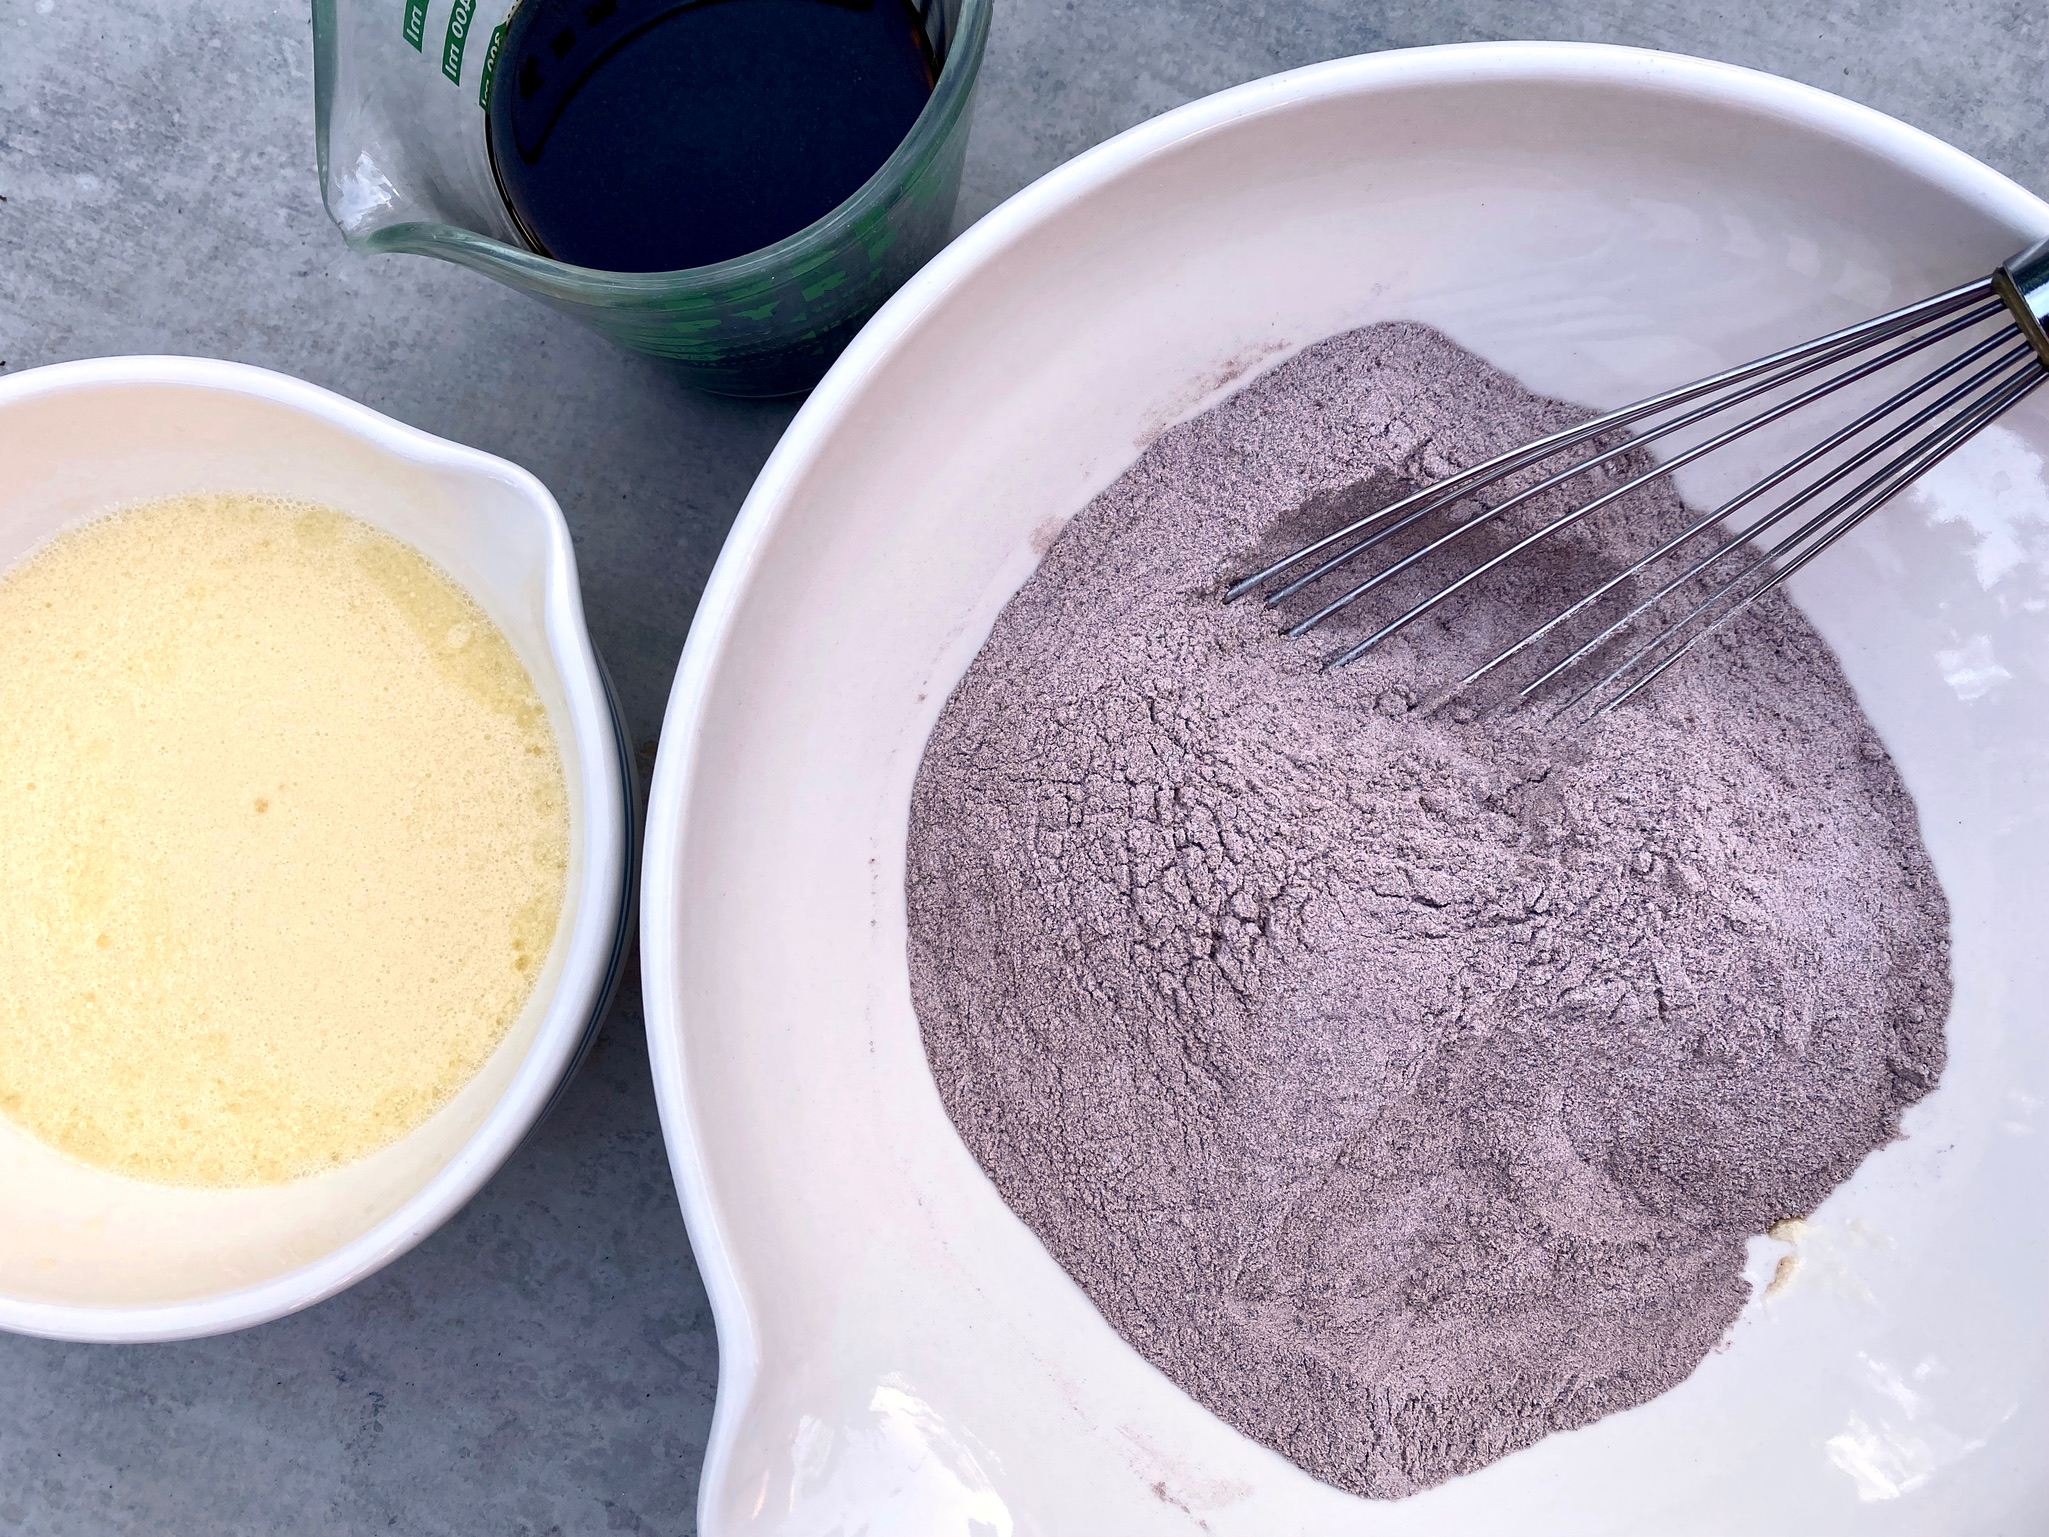
  • Combine coconut milk and butter in a microwavable bowl, nuke for 1 minute on full power
  • Remove and add milk or oat milk and eggs. Whisk until combined.
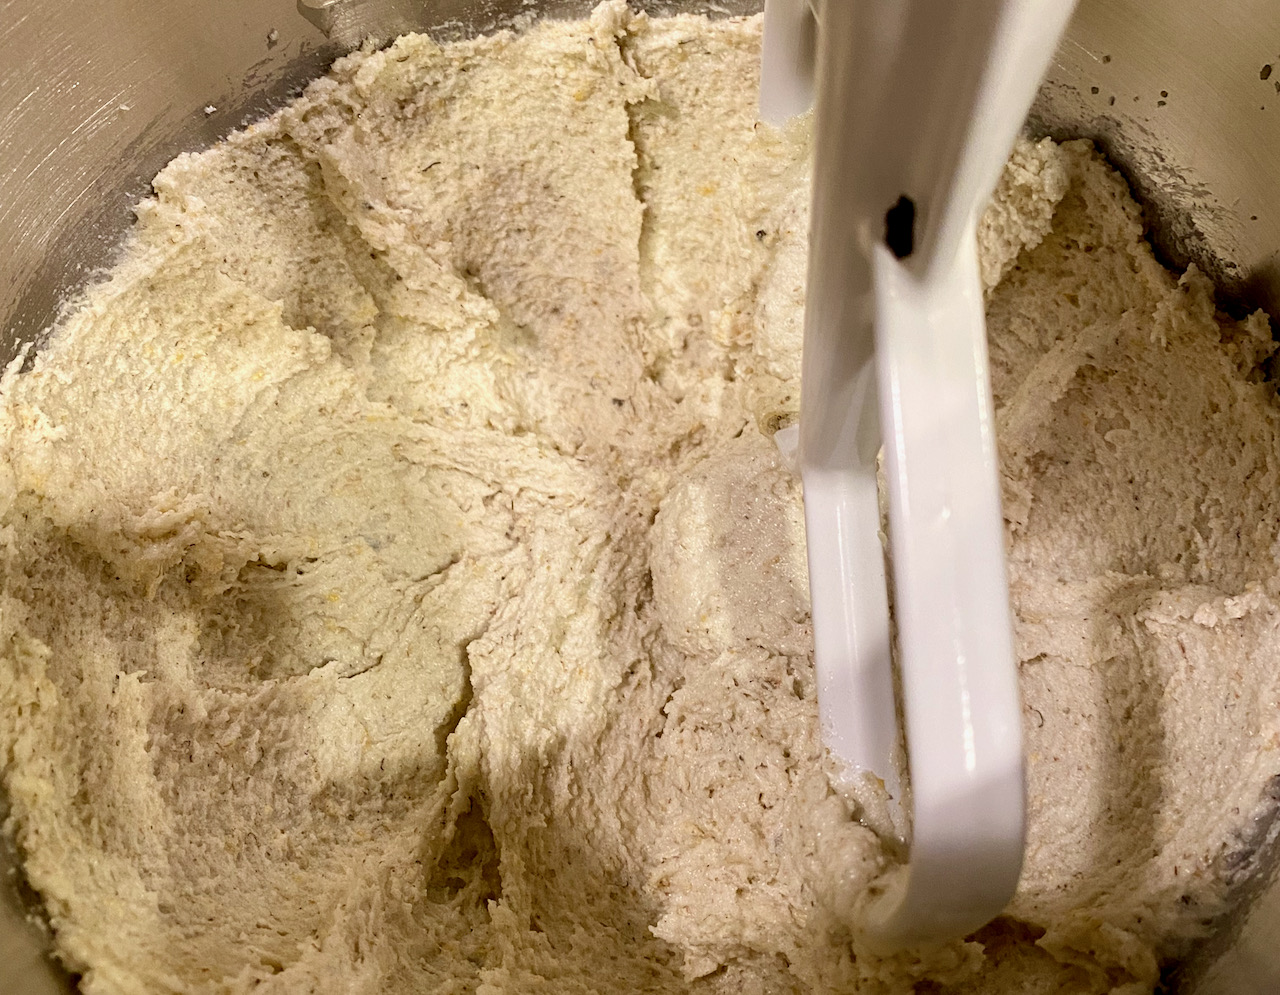
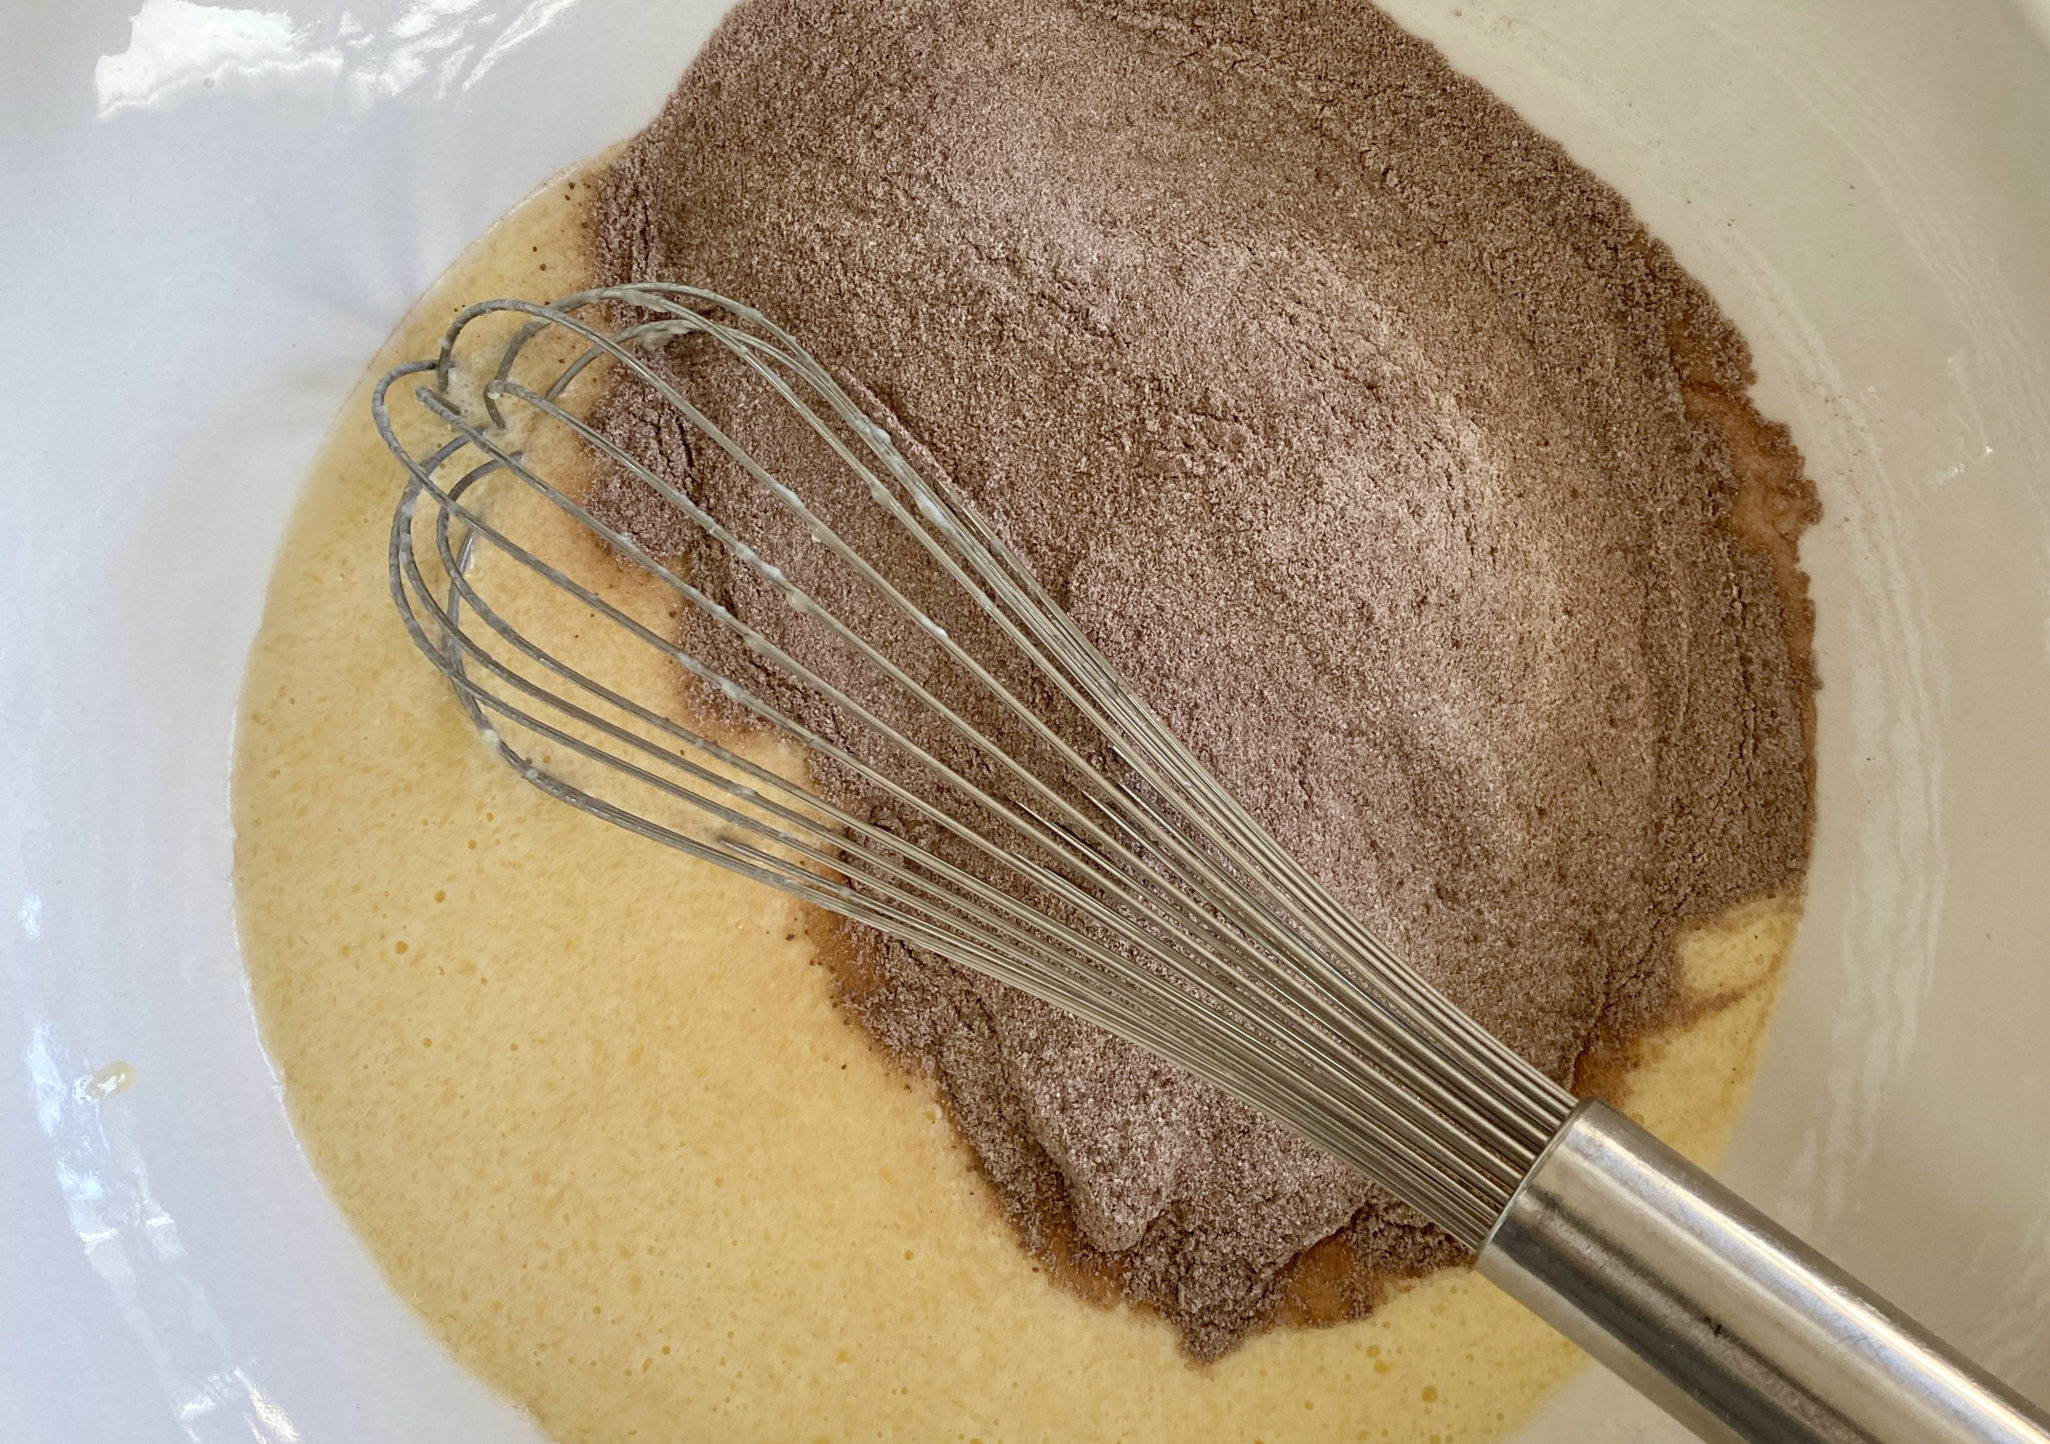
  • In a medium-sized bowl combine the glutinous rice flour, sugar, salt, Misugaru powder and baking powder.
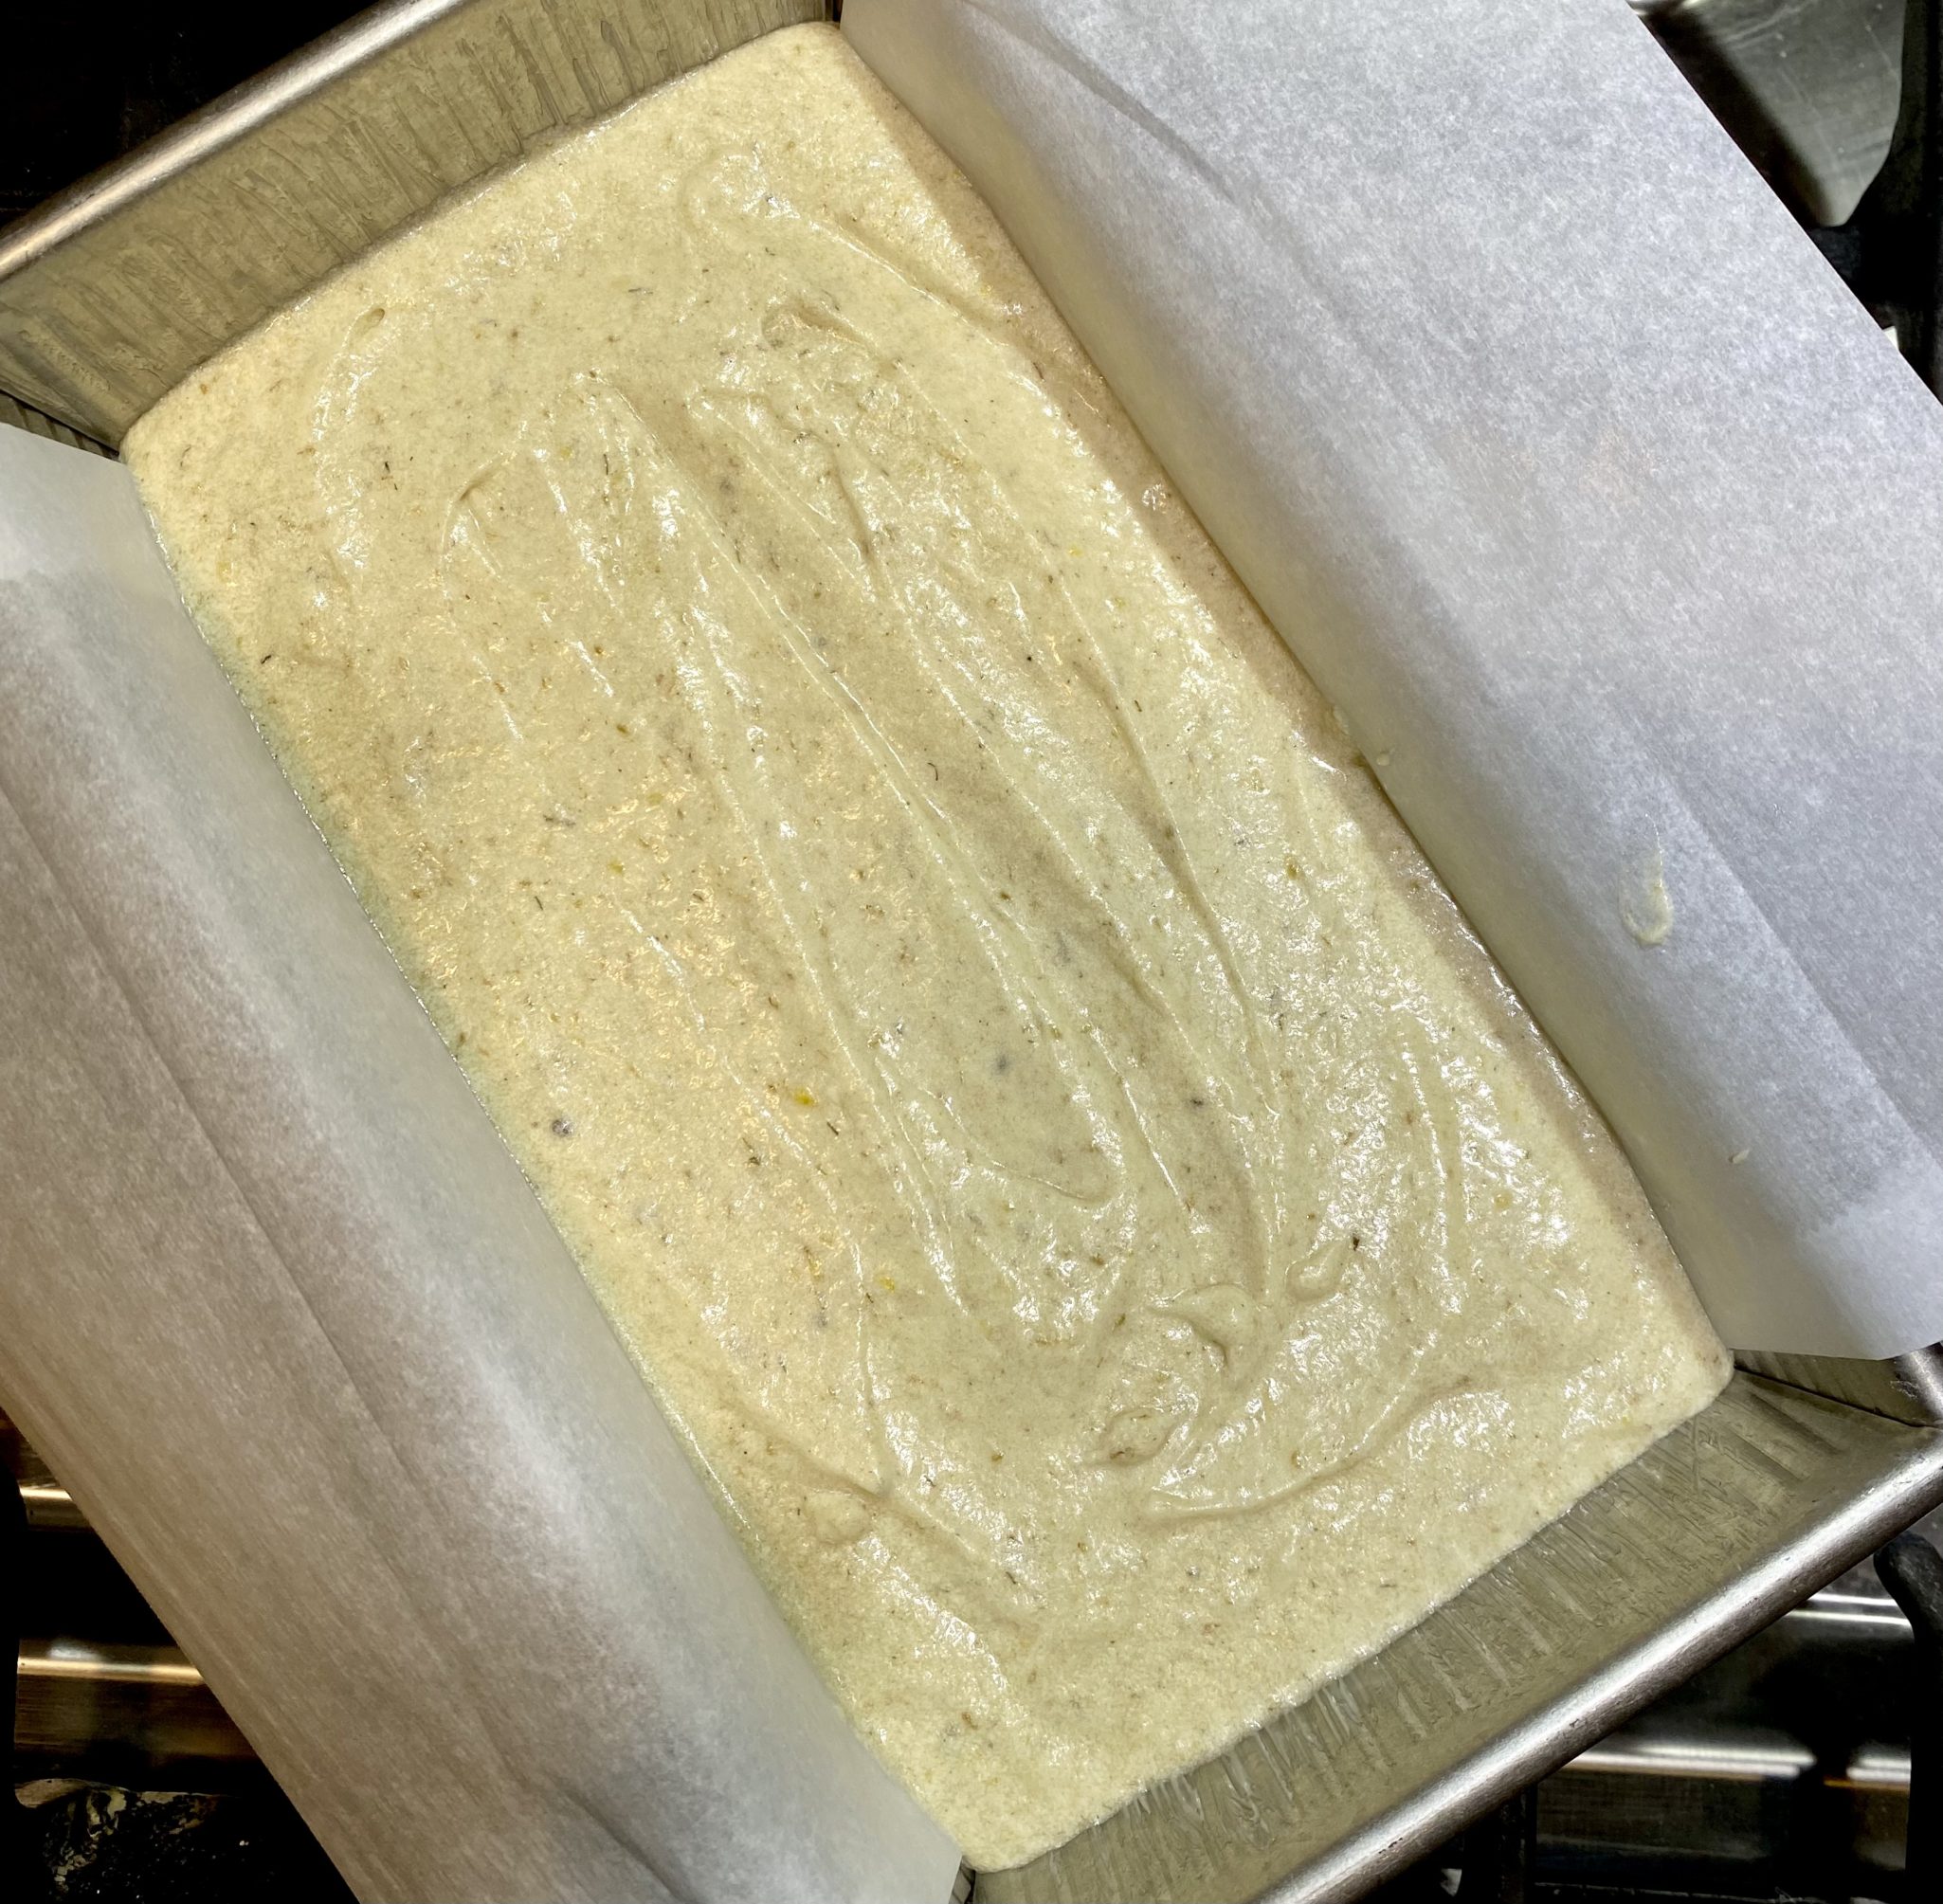
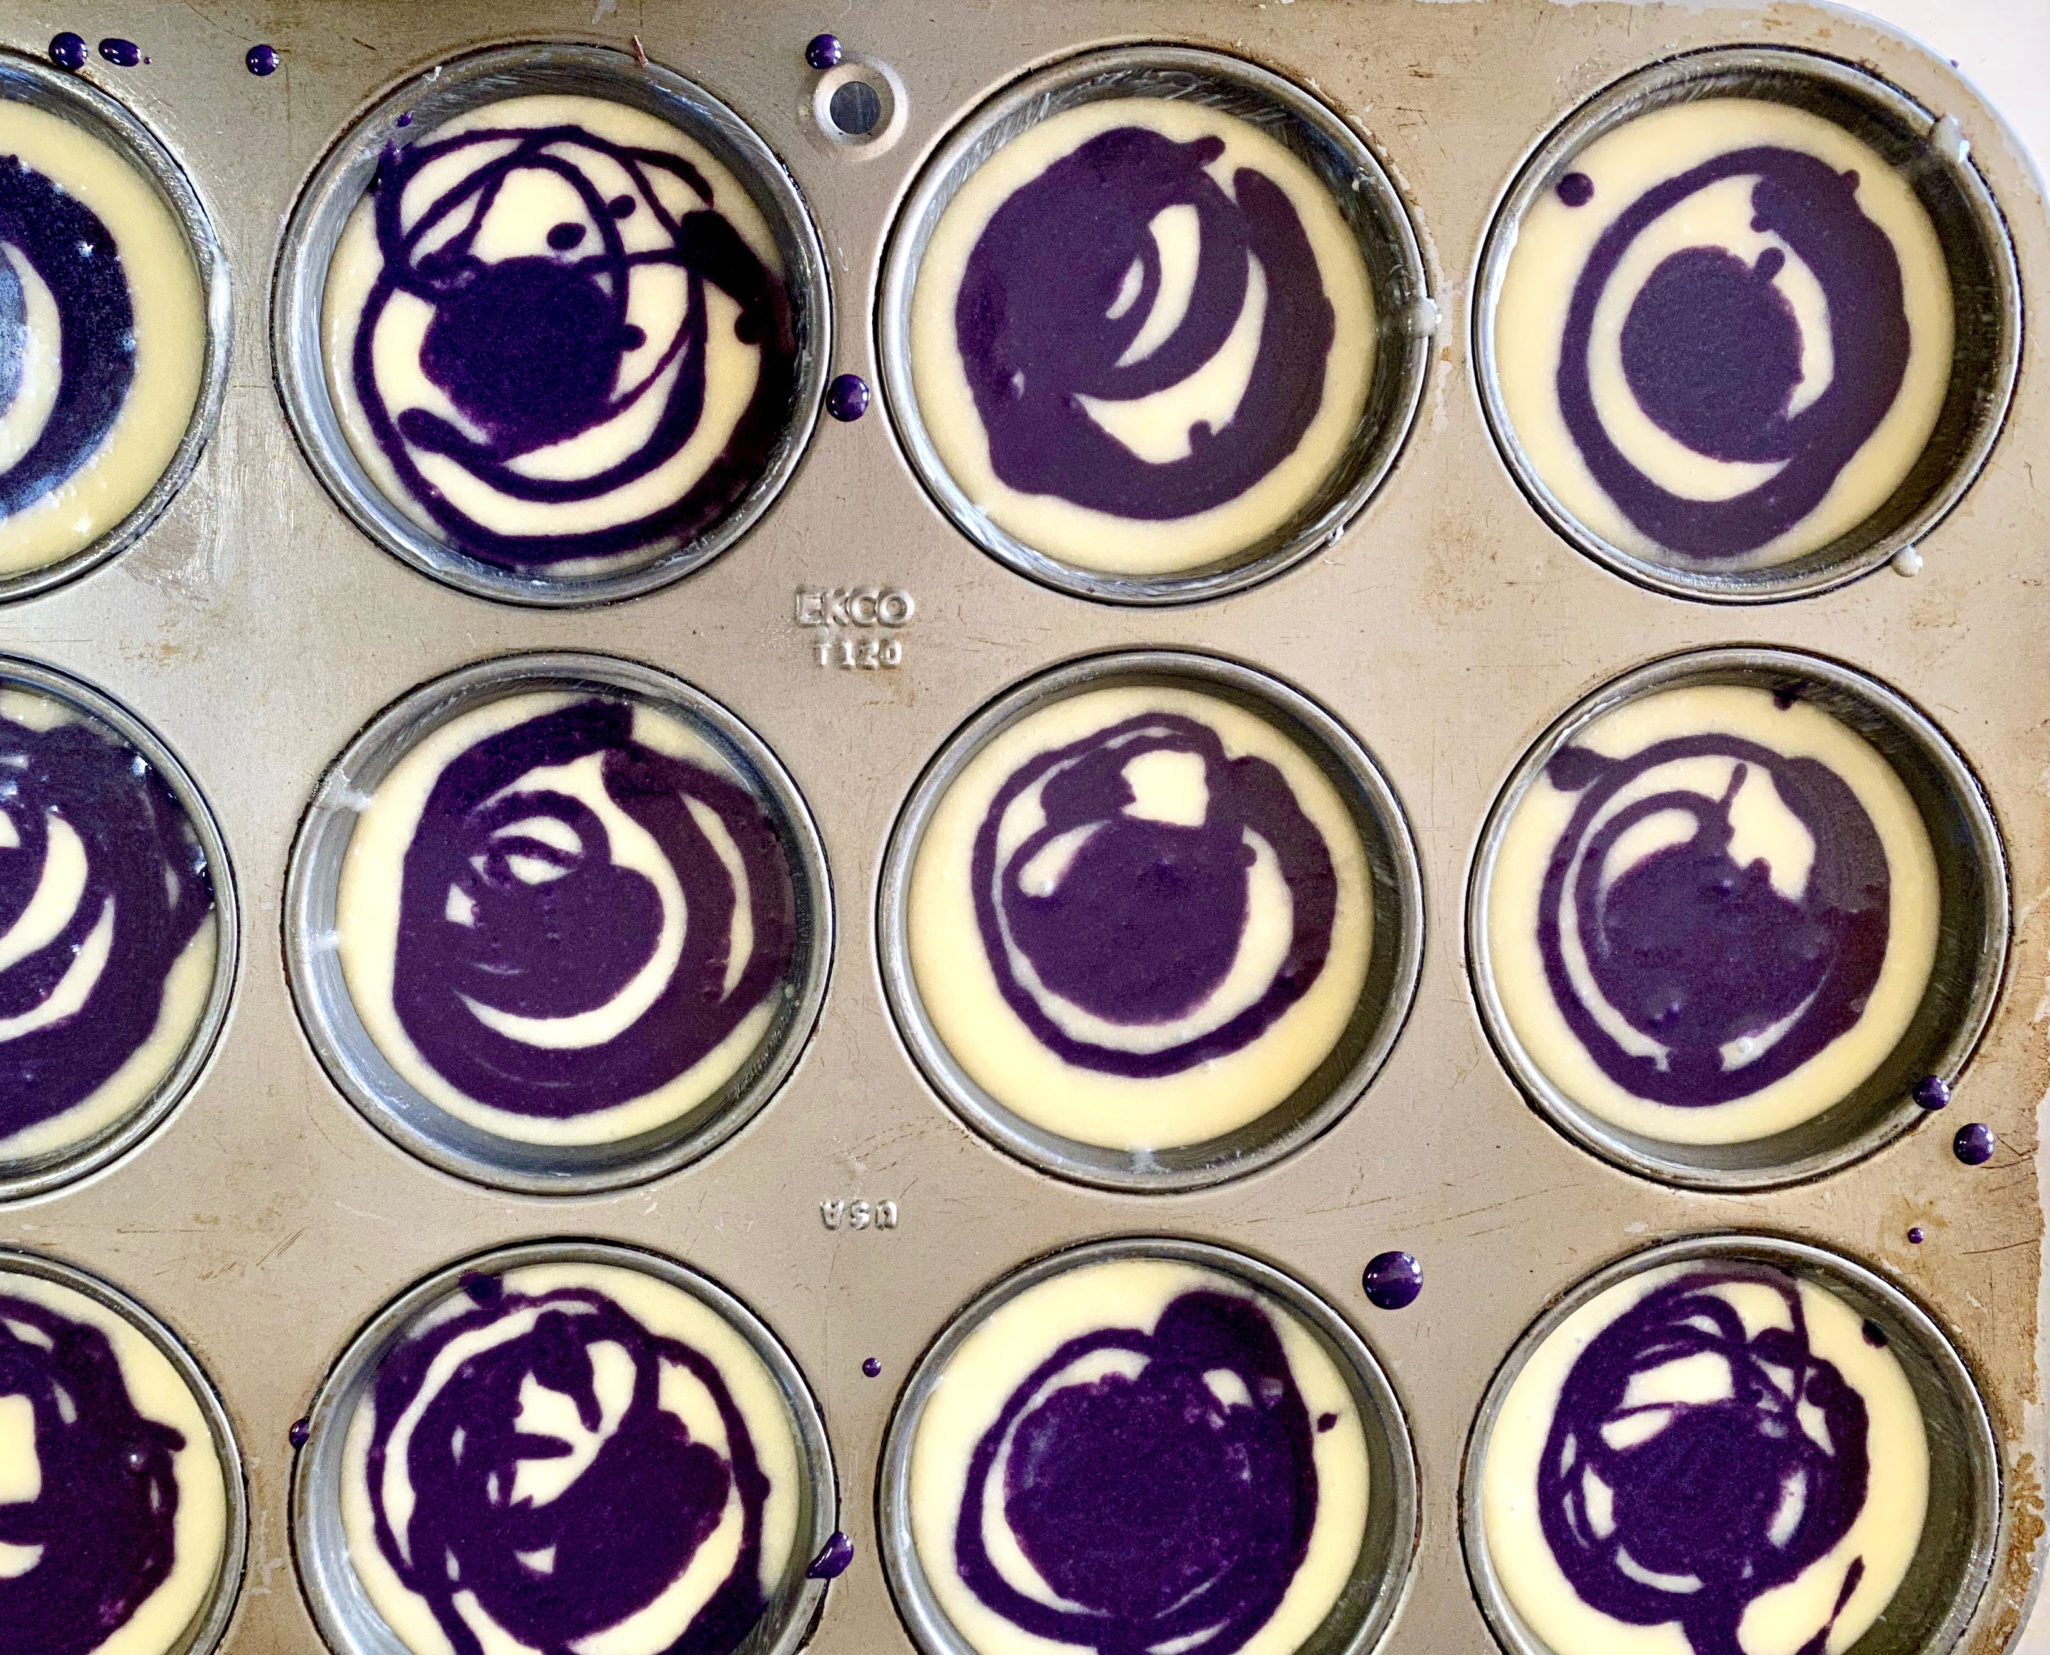
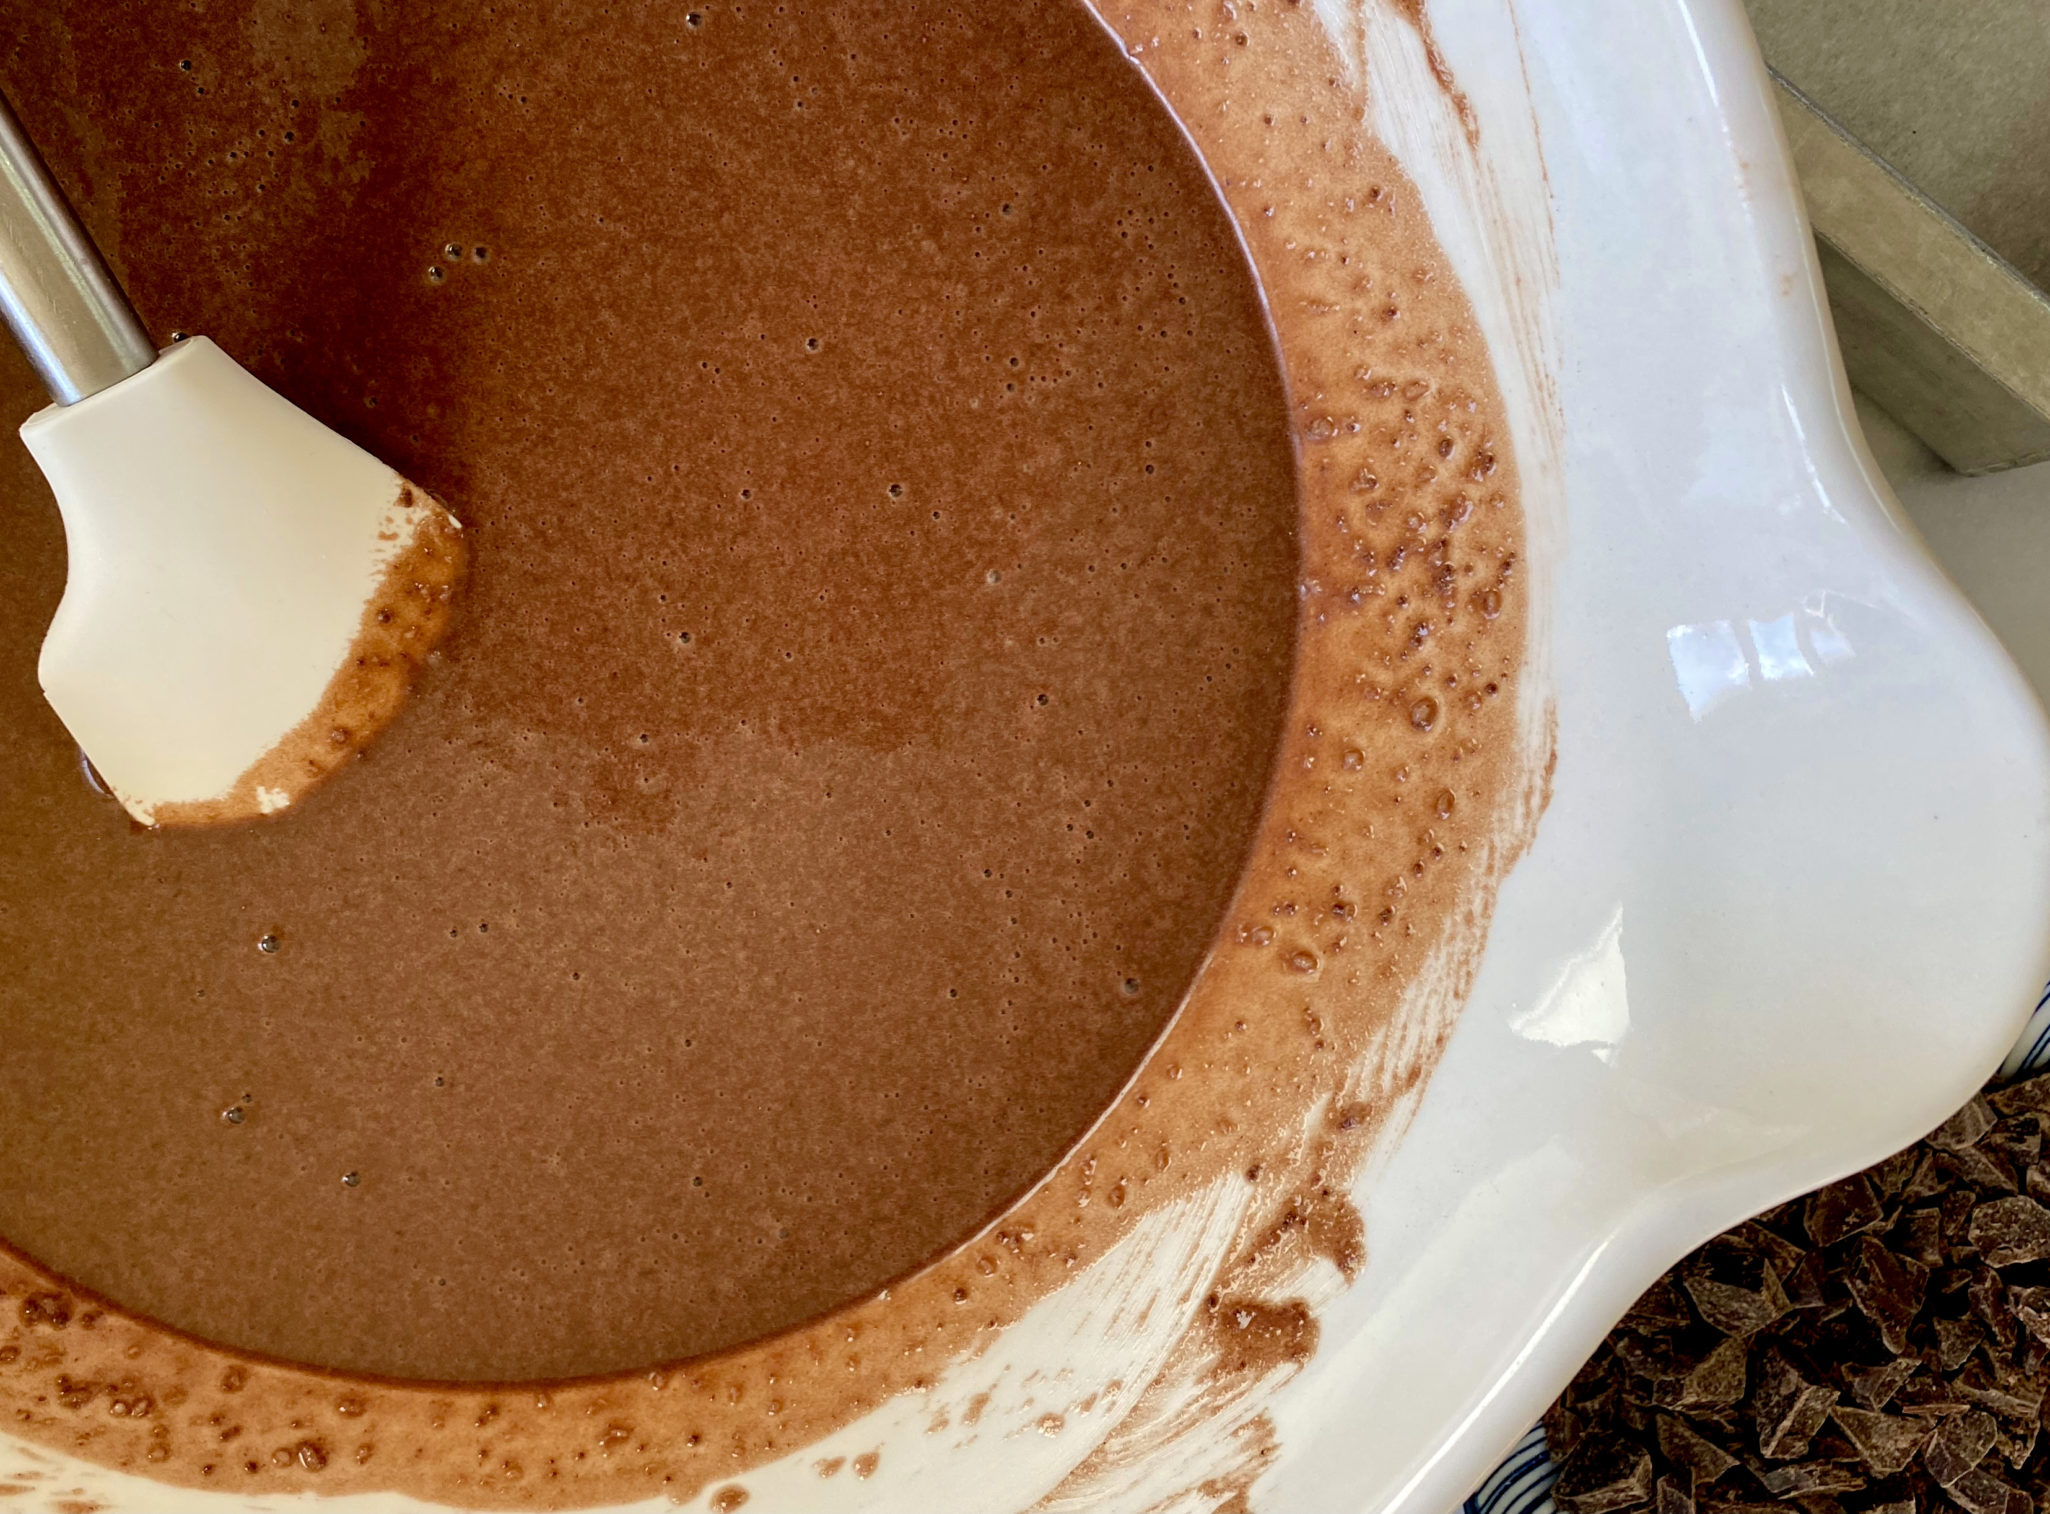
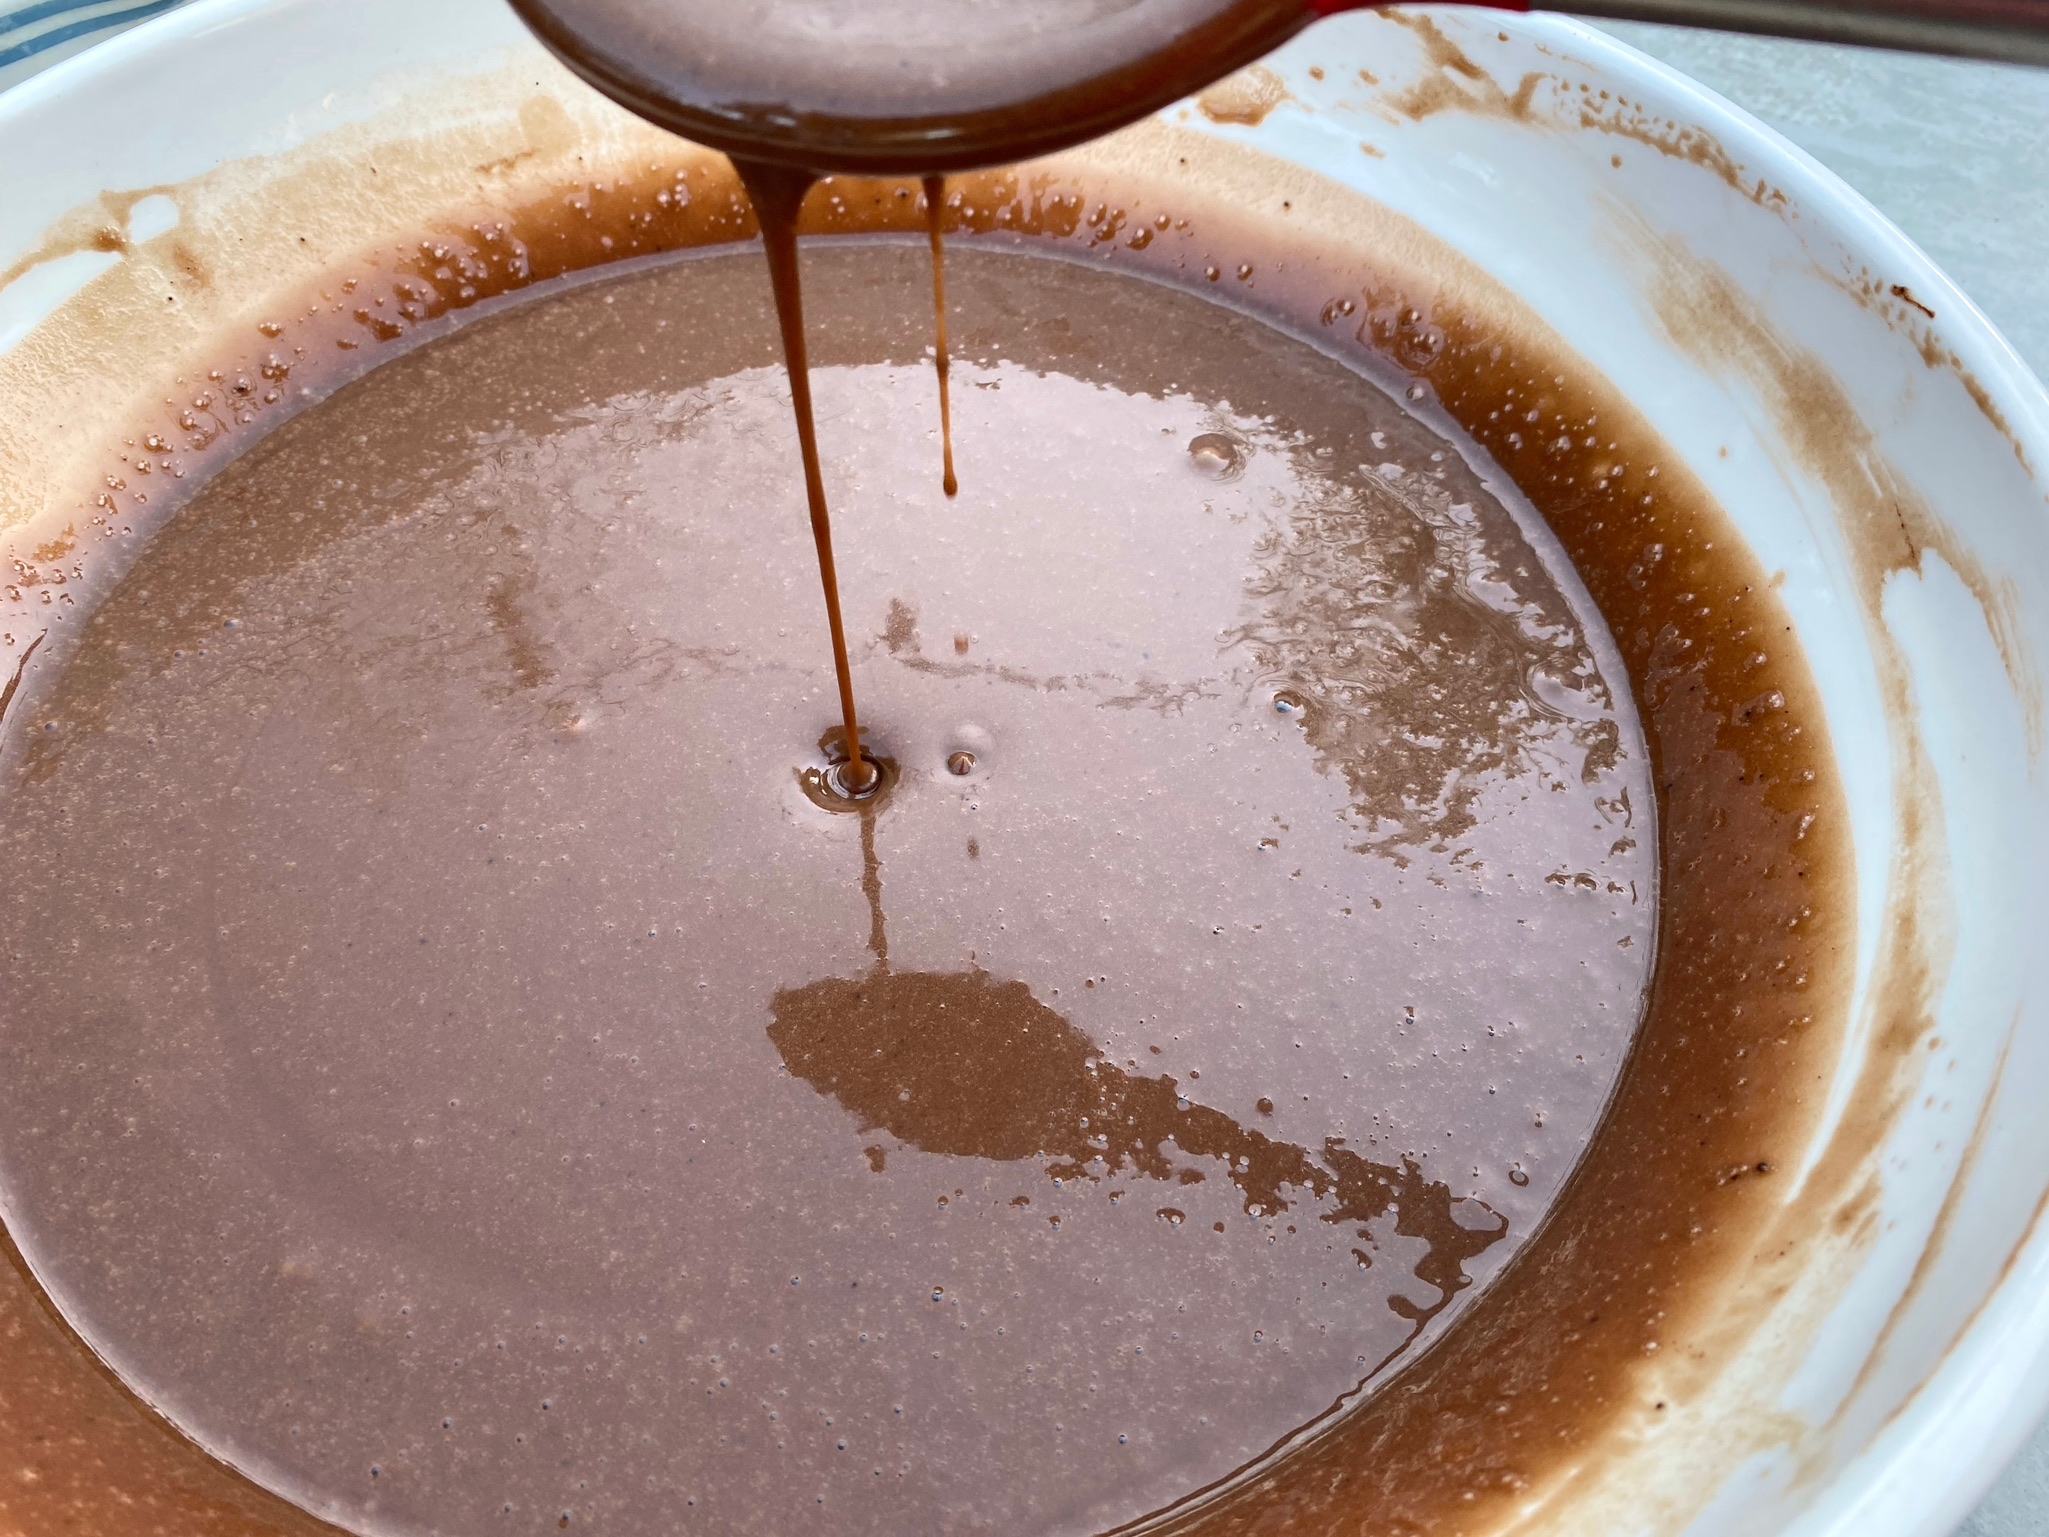
  • Add dry ingredients to wet ingredients and stir until smooth. Use a spoon or spatula instead of a whisk to minimize bubbles. The batter will be the consistency of pancake batter.
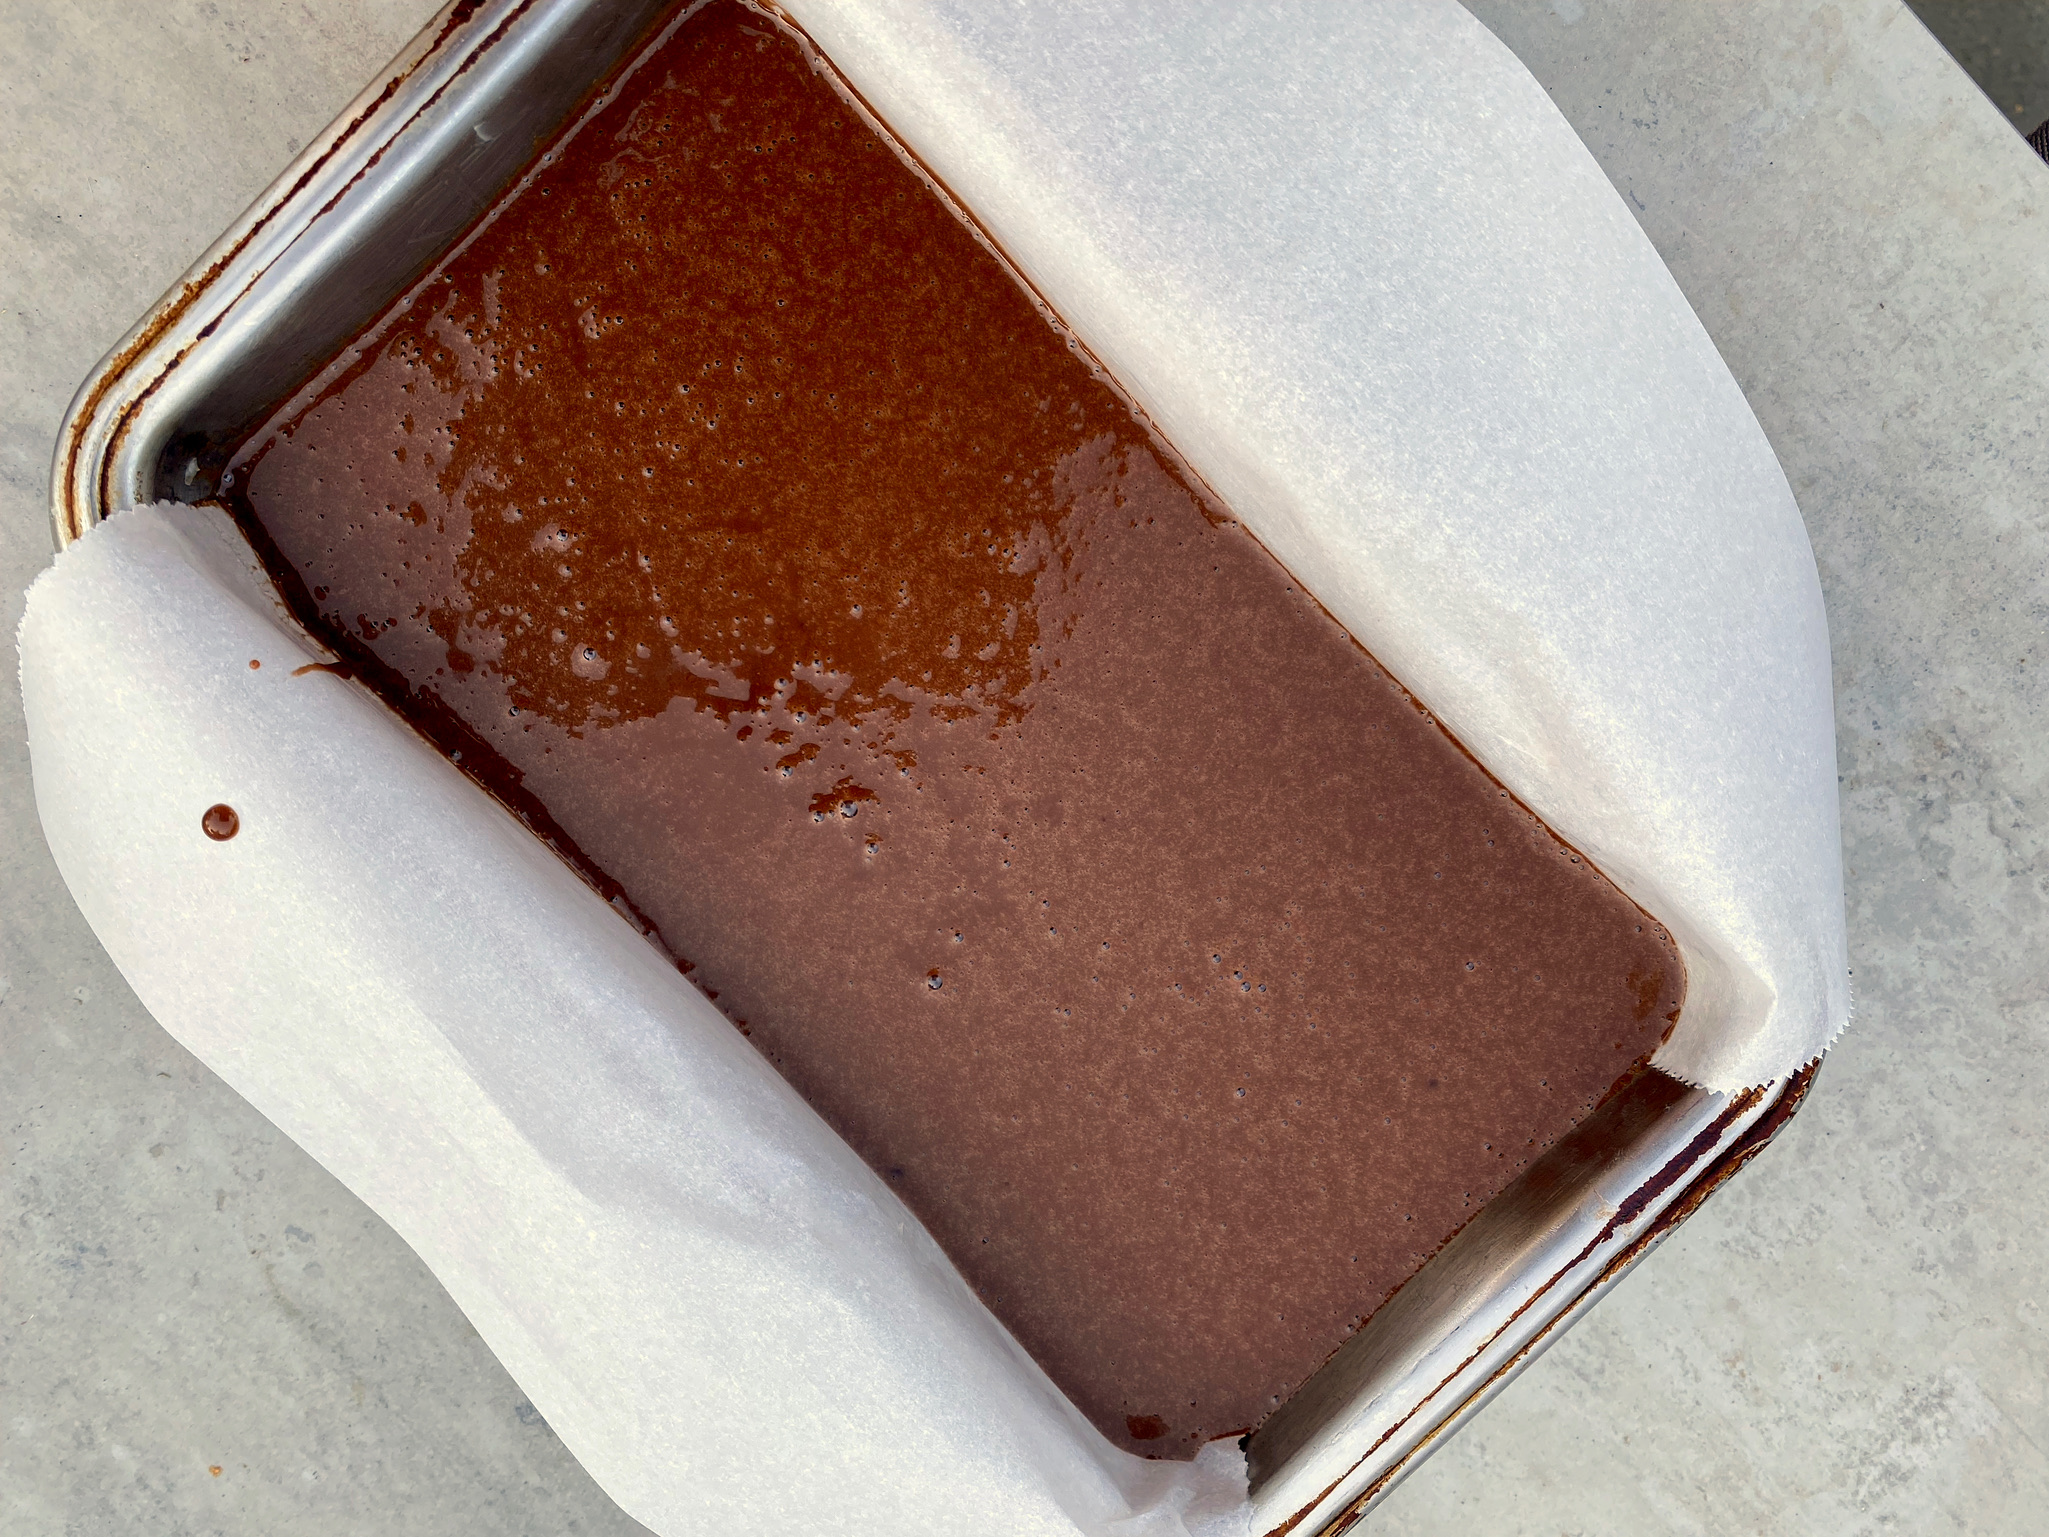
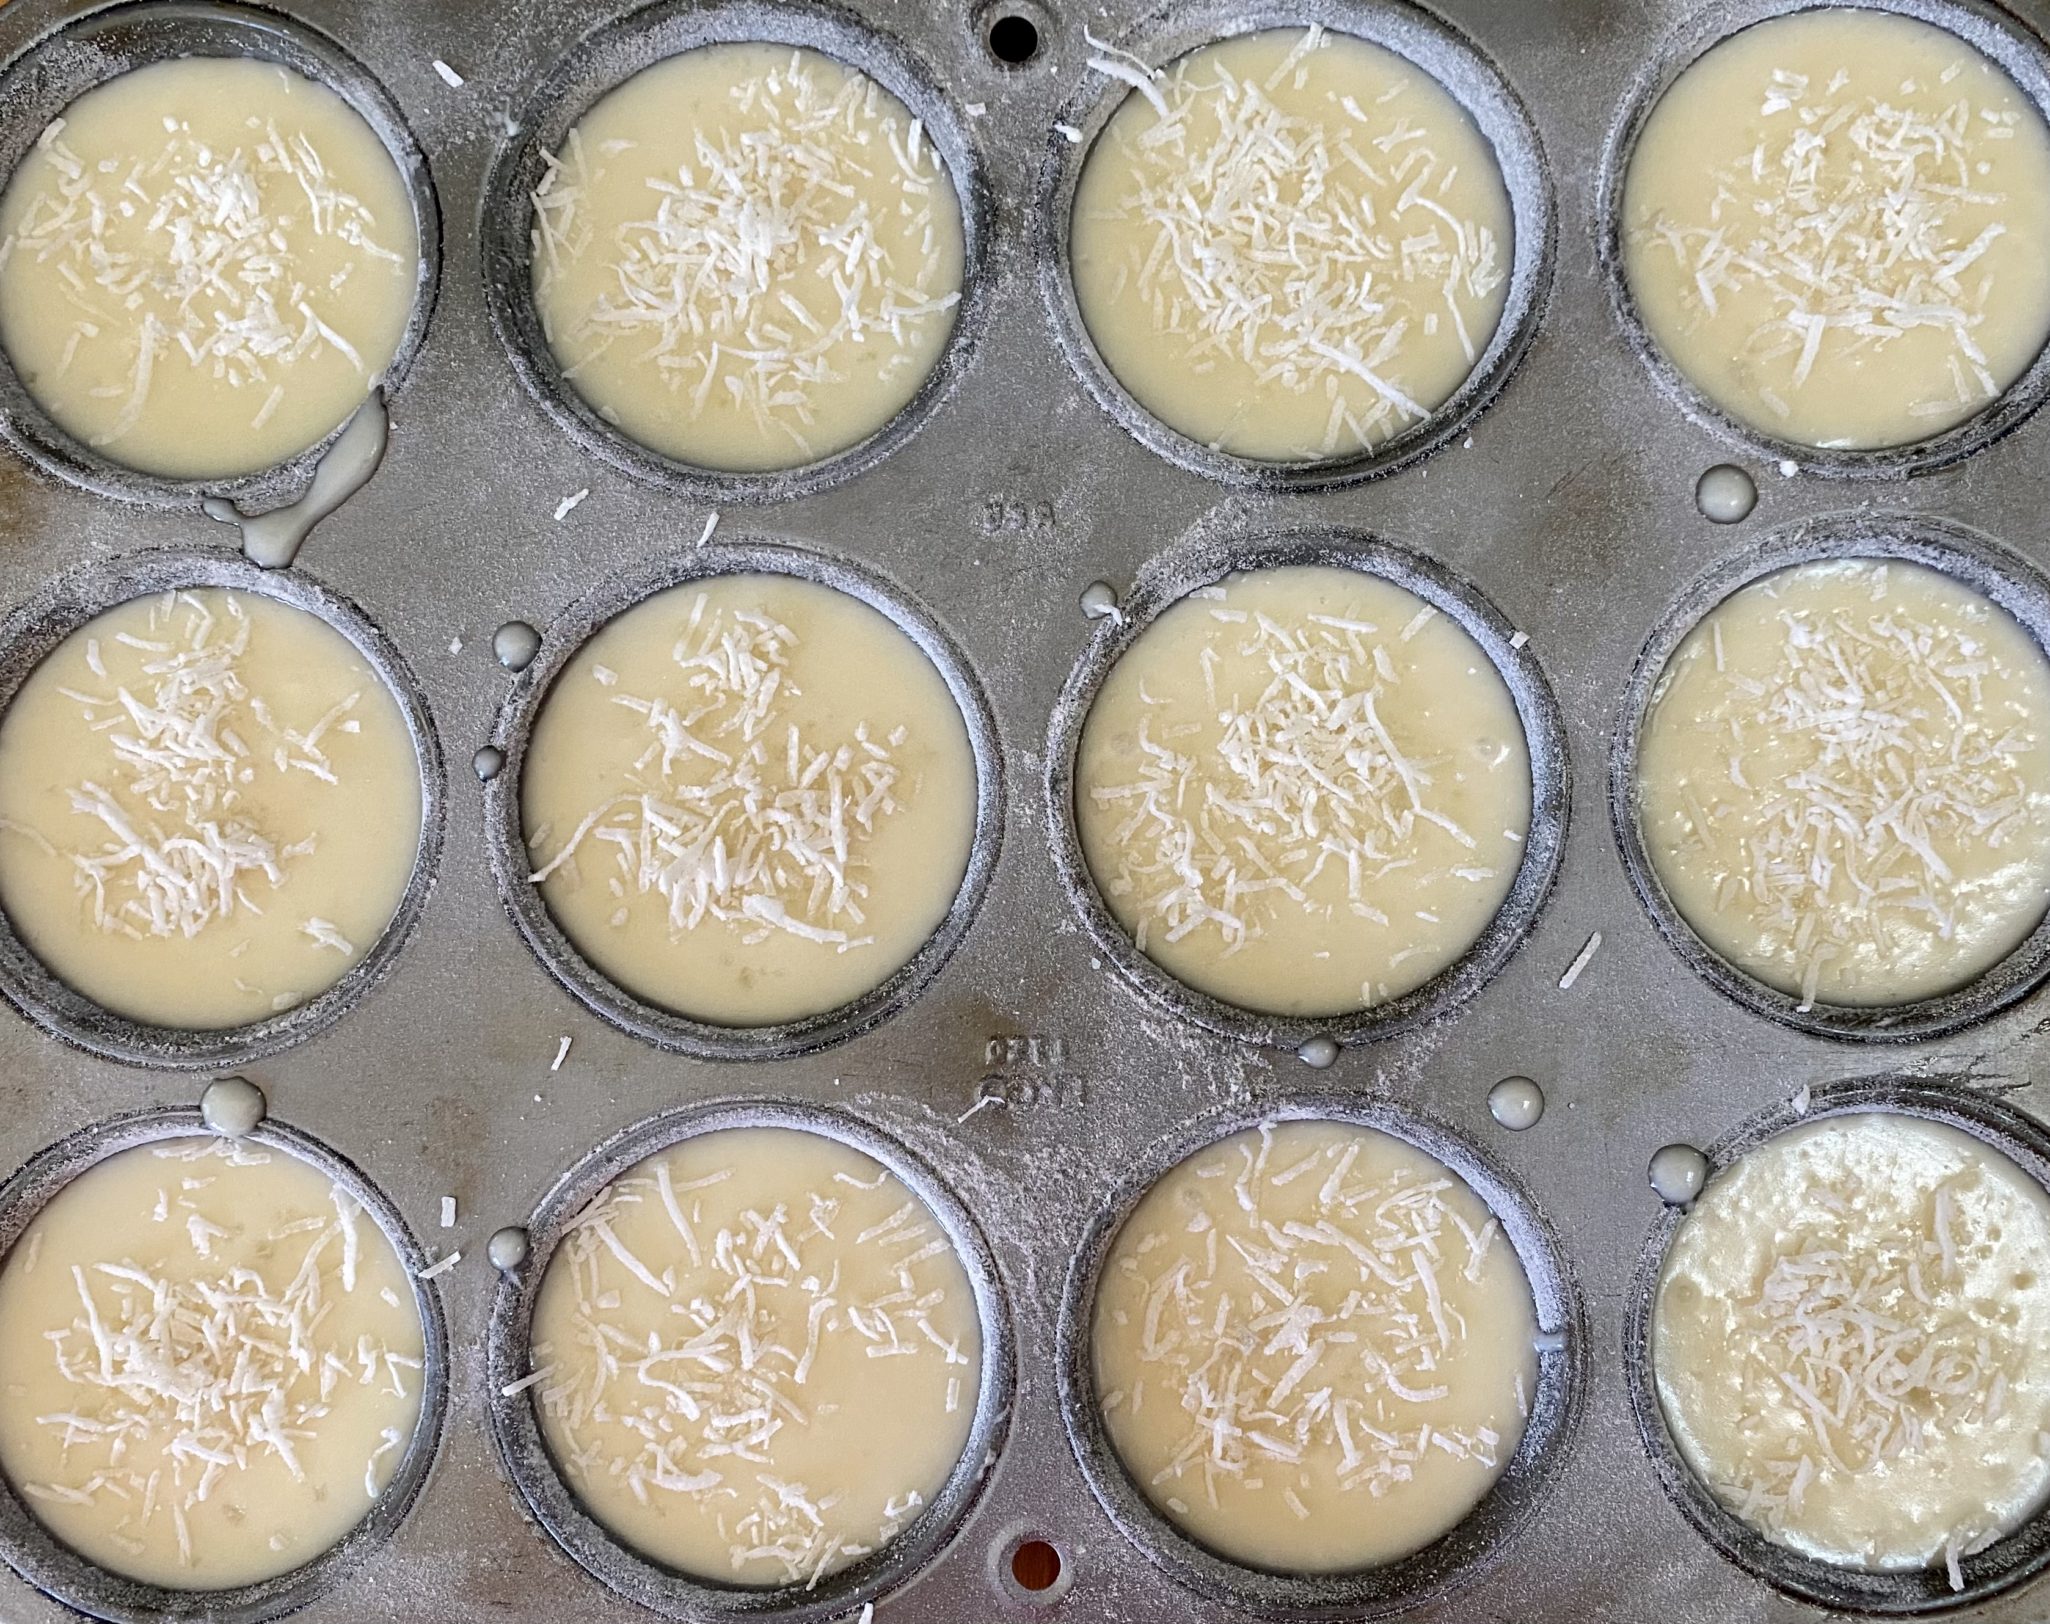
  • Pour the batter evenly into a 12-cup muffin tin. Tap gently on a counter to remove air bubbles. You will have enough batter to fill each cup 7/8 full.
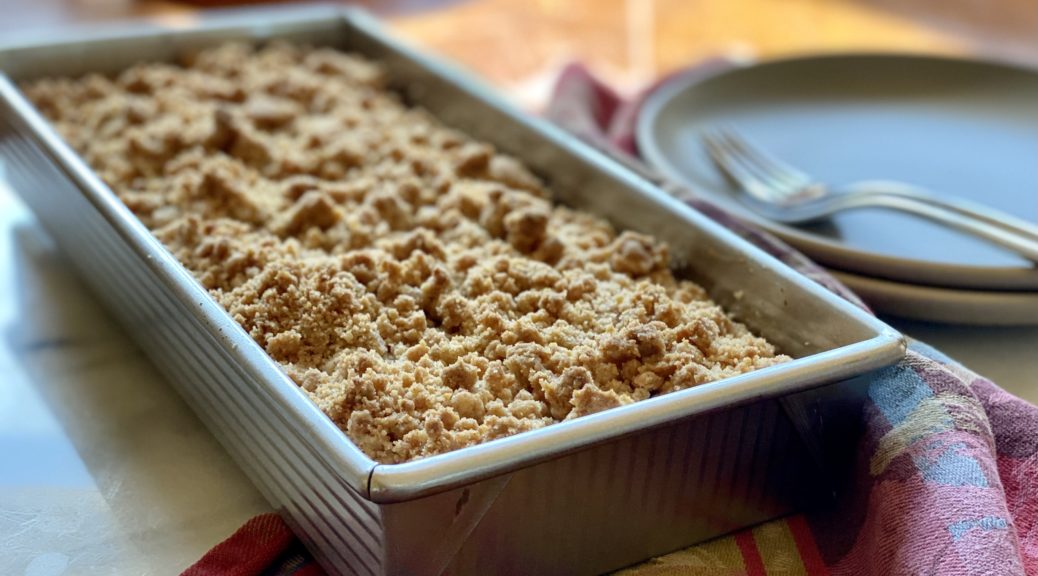
  • Top with black and white sesame seeds or coconut flakes if you like, and sprinkle with Fleur de Sel or any flaked salt, bake for 40-45 minutes, or until golden brown center and dark brown edge.
  • Remove from oven and let sit for 10 minutes in tin, then remove to cookie rack. Allow muffins to cool completely.
  • Muffins will keep at room temp for 2-3 days. They can be frozen for longer storage.
Chamomile Tea Cake with Strawberry Icing (Slice of Tea Cake & A Cuppa Tea)

Chamomile Tea Cake with Strawberry Icing (Slice of Tea Cake & A Cuppa Tea)

He needs to stop.  I would like to dive into Eric Kim’s cookbook, Korean-American but have not been able to and it is all his FAULT.  Yep, the blame lies squarely on his shoulders.

Eric is on staff at the NYT Cooking.  I’m not sure what his obligation is to the venerable paper, a column every week, every couple of days.  Don’t know.  What I do know is he keeps coming up with tasty recipes for the NYT that prevent me from cracking open his book.

Sheesh

So I am asking Eric to please STOP, or at least, slow down with the content for NYT cooking so I can finally try the recipes in your beautiful book.  I’ve only had time to read the stories, which I love, while making your recipes in the NYT.

I’m kidding of course (am I?).  His recent contribution to NYT was a Chamomile Tea Cake with Strawberry Icing.  It looked luscious and sounded delightful …so of course, I made it. His cookbook, Korean-American, will just have to wait a little longer.  Although, in all fairness, many of the recipes printed in the NYT are also in his wonderful book.

But Not This Cake

I adore this cake and I wasn’t sure I was going to.  First, I’ve never had a cup of Chamomile Tea in my life.  I’m Asian…it’s Oolong, Jasmine, Roasted Barley, Green Tea…no herbal teas in my house.  My only non-Asian Tea is Lipton”s Black Tea (I’m not even sure I would call it non-Asian, lol)  and that’s to make Hong Kong-style Milk Tea. But the cake looked luscious, very maker-friendly and is an Eric creation, so my knee-jerk reaction after seeing the recipe was to pull out my loaf pan.

A Cup of Tea

This cake can be made by hand, yep, you don’t need to drag out that 50-pound mixer BUT I was lazy so I pulled mine out. This makes the cake incredibly easy to make.  The key is to not overmix to avoid toughening the cake…this is the universal problem when using your mixer, too much muscle.

I bought a box of Chamomile teabags, and the first thing I did was make a cup of tea and try it.  It was soothing, mild, and refreshing…in other words, perfect for this cake.

Chamomile Tea swimming in a butter bath, the life.  The tea is infused in every step of this cake, the butter, and the milk, so the flavor of the tea really shines. I might try it with different teas in the future, like Jasmine, my favorite.

Back to Cake by the Machine.  The butter will solidify a bit as it sits with the tea.  Beat the butter, sugar, and salt until light and creamy, about 1 minute on medium speed.  It will be light in color and fuller in volume, add your eggs one at a time.  The eggs should be at room temperature which helps minimize curdling or breaking of the batter when liquid is added to your fat mixture.

Creamed butter and sugar

Deb Tip-when adding zest to a recipe. I reserve a couple of tablespoons of sugar from the recipe and run that with the zest in a mini-food processor, then add it back to the original sugar.  No big pieces of zest and the citrus flavor is well distributed.  That’s just me though.

You can add your zest, baking powder, and vanilla as listed in the recipe.  The recipe calls for adding vanilla, and leavening agent into the creamed mixture before adding the flour.  This works since you haven’t added the flour yet, no worries about overmixing and developing gluten.

Flour Power

First, add half the flour, mix on medium just until the flour disappears, then add the milk, mixing just to incorporate.  Finally, add the remaining flour and mix at medium speed.  Mix until you don’t see any streaks of flour, it should look cohesive.  Avoid overbeating which can lead to a tough cake (gluten development) did I already mention that, lol.

The Icing On the Cake

The icing is key. It adds a bit of sweetness and a textural complement to the cake.  I saw a few complaints that the cake was overly sweet.  I didn’t think so although I did use freeze-dried raspberries instead of strawberries which have a bit more tartness.  The raspberries made a vibrant garnet-hued icing that was very eye-catching.

The weight to volume of freeze-dried fruit was off, possibly due to humidity.  I used the half-cup volume measurement, you can adjust the taste and color to your liking.

Print
5 from 1 vote

Chamomile Tea Cake With Strawberry Icing

From Eric KIm, tea cake flavored with Chamomile Tea that is as delicious as it is easy to make!
Course Cake, Dessert
Cuisine American, Asian-American
Keyword chamomile tea, ERic KIm, Strawberry, tea cake
Prep Time 1 hour 25 minutes
Cook Time 50 minutes

Equipment

  • 1 9x5 loaf pan

Ingredients

  • Nonstick cooking spray To prep loaf pan

Steep 2 Tea Blends: butter + tea and milk + tea and set aside

  • 2 tablespoons (6 grams) chamomile tea, divided in half approximately 4 to 6 tea bags, crushed fine if coarse
  • 1⁄2 cup (115 grams) unsalted butter
  • 1 cup (240 milliliters) whole milk

Cream Tea + Butter Mixture

  • 1 cup (200 grams) granulated sugar
  • 2 large eggs

Add to Creamed Tea-Butter Mixture

  • 1 tbsp lemon zest (original recipe calls for zest of 1 large lemon) You can increase or decrease zest to your taste or use combination of orange and lemon zest 1.5 teaspoons of each. Keep the lemon, yiu will use the juice in the icing
  • 1⁄2 teaspoon Morton's coarse kosher salt or increase to 3/4 tsp if using Diamond Kosher Salt
  • 1 teaspoon pure vanilla extract
  • 2 teaspoons baking powder
  • 1 1⁄2 cups (192 grams) all-purpose flour

Icing

  • 2 tbsp Lemon juice from zested lemon
  • 1 cup (124 grams) confectioners’ sugar
  • 1⁄2 cup (8 grams) freeze-dried strawberries

Instructions

  • In a small saucepan, melt the butter over medium heat (or microwave until melted). Add 1 tablespoon chamomile to a large mixing bowl. Pour the hot melted butter over the chamomile and stir. Set aside to steep and cool completely, about 1 hour.
  • Use the same saucepan (without washing it out) to bring the milk to a simmer over medium-high heat, keeping watch so it doesn’t boil over. Remove from the heat, and stir the remaining 1 tablespoon chamomile into the hot milk. Set aside to cool
  • Heat oven to 350 degrees. Grease a 9-by-5-inch loaf pan with the nonstick cooking spray and line with parchment paper so the long sides of the pan have a couple of inches of overhang to make lifting the finished cake out easier.
  • Add the sugar and salt to the bowl with the butter, and whisk until smooth and thick, about 1 minute. Add the eggs, 1 at a time, vigorously whisking to combine after each addition. Zest the lemon into the bowl; add the baking powder and vanilla, and whisk until incorporated. Add the flour and stream in the milk mixture while whisking continuously until no streaks of flour remain.
  • Transfer the batter to the prepared pan and bake until a skewer or cake tester inserted in the center comes out clean (a few crumbs are OK, but you should see no wet batter), 40 to 45 minutes. Cool in the pan on a rack for 30 minutes.
  • While the cake cools, make the icing: Into a medium bowl, squeeze 2 tablespoons juice from the zested lemon, then add the confectioners’ sugar. Place the dehydrated strawberries in a fine-mesh sieve set over the bowl and, using your fingers, crush the brittle berries and press the red-pink powder through the sieve and into the sugar. (The more you do this, the redder your icing will be.) Whisk until smooth.
  • If needed, run a knife along the edges of the cake to release it from the pan. Holding the 2 sides of overhanging parchment, lift the cake out and place it on a plate, cake stand or cutting board. Discard the parchment. Pour the icing over the cake, using a spoon to push the icing to the edges of the cake to encourage the icing to drip down the sides dramatically. Cool the cake completely and let the icing set.
That’s the Way the Strawberry Cake Crumb-les

That’s the Way the Strawberry Cake Crumb-les

Right about now my weekly trip to the farmer’s market starts in the line, 30 minutes before it opens, at the P&K Strawberry stand.  Yep, the strawberries from this family farm in Moss Landing are that good.  As much as I like them out of hand, I can’t resist trying recipes that take advantage of these ruby-colored gems.

This Strawberry Crumb Cake from Cambrea Bakes landed on my “Definitely making this” list the first time I saw it.  Three delectable layers, starting with a fine crumbed cake reminiscent of buttery pound cake that’s topped with a layer of berries, bound by a squeeze of lemon juice, a bit of flour, and a touch of sugar.  The cake is then finished with a generous, crispy, crumb topping.  It’s gorgeous and yummy.

Keys to Success

The crumb topping is classic flour, butter, and sugar.  After mixing the ingredients together, so it looks like a mish-mash of clumps, spread it on a small plate and put it in the freezer for 10-15 minutes or however long it takes to assemble the rest of the ingredients.  Chilling the crumb topping ensures it won’t melt during baking such that you end up with a nice crunchy, buttery top.  If you are nuts about nuts you could throw a handful of chopped pecans or walnuts into the crumb.

Dice the berries and add the sugar and flour.  Use fresh berries, not frozen, which have too much liquid.   I added blueberries to the mix just for a little color pop and because I had some.  My tweak would be to add a little more fruit (I love berries), I would scale up to 2 cups of fruit, I’ll let you know how it goes, it may throw off baking time and cake. *Instead of adding more fresh strawberries add 1-2 tablespoons of strawberry jam to bump up the berry flavor.

Sift together the dry ingredients for the cake and set aside.  Sifting allows for an even distribution of the baking powder and salt in the flour.  Cream butter and sugar until light and fluffy, about 5 minutes.  This adds air that contributes to the rise and tenderness of the cake.

Bring eggs to room temperature before using.  This helps prevent the batter from breaking (where your batter looks curdled and lumpy) when you add eggs or a liquid to the creamed mixture.  A trick to help prevent this is to add the eggs slowly (roughly an egg at a time) and mix until each egg is absorbed into the batter before adding more.

No Curdle Zone

When it starts to look like it is going to curdle (usually when adding the last egg), add a couple of tablespoons of your flour mixture with the remaining egg mixture.  The flour is the mediator preventing the break. Just that little bit helps keep your batter smooth without making the cake tough.

Add remaining flour in two parts alternating with the room temp buttermilk.  The batter will be thick, not pourable.  Use an offset spatula to spread it evenly in a prepared pan.  Layer the berries and then crumb topping.  I like putting the topping in the freezer and then chipping it into pieces to scatter on the fruit.

Crumb Fans Rejoice 😋

Finally, bake the cake.  The first time I made this cake, it was a wee bit overbaked.  I didn’t trust my thermometer.  How goofy is that?  My advice, invest in a good thermometer.  Cakes should be about 205+/- 5 degrees with an instant thermometer.  If you don’t have a thermometer, use a bamboo skewer or toothpick over a metal cake tester. (Nothing sticks to a metal pick unless it is super underbaked).  With fruit and crumb impeding the tester, it’s just hard to get an accurate read.

That rosy pink layer of fruit on top of the buttery yellow cake, this cake is a beauty.  Bake it, bake it now.

Strawberry Crumb Cake

Delicious Crumb cake with a fine crumb and a layer of fresh berries with a buttery, crunchy crumble topping from Cambrea Bakes.
Course Breakfast, Cake, Dessert
Cuisine American
Keyword crumb cake, strawberries
Prep Time 20 minutes
Cook Time 55 minutes

Ingredients

Crumb Topping

  • 6 tbsp unsalted butter, melted
  • 3/4 cup + 1 tbsp all-purpose flour
  • 1/2 cup granulated sugar
  • 1/4 cup light brown sugar

Strawberry Field Forever

  • 1 1/2 cups chopped fresh strawberries or a mix of blueberries and strawberries
  • 1 tbsp granulated sugar
  • 3 tbsp all-purpose flour
  • 1/2 lemon juiced

Da Cake

  • 1 1/2 cups + 2 tbsp all-purpose flour
  • 1 tsp baking powder
  • 1 tsp kosher salt 1/2 tsp sea salt
  • 1 cup unsalted butter at room temperature
  • 1 cup granulated sugar
  • 3 large whole eggs at room temperature whisked together
  • 1 tsp vanilla extract overflowing, you can never have enough vanilla!
  • 1/4 cup buttermilk room temperature

Instructions

  • Butter or lightly spray with cooking spray a square 8x8 baking pan. L ine it with parchment paper on all sides. Preheat the oven to 350 F/180 C.

The Crumb

  • In a medium bowl, mix together the melted butter, flour, sugar, and brown sugar until crumbly. Spread on a plate and place in freezer for 10-15 minutes or for as long as it takes to make the strawberries and cake.

Da Strawberries

  • In a medium bowl, combine the chopped strawberries, sugar, flour, and lemon juice until combined. Set aside.

Da Cake

  • Sift together the flour, baking powder, and salt and set aside.
  • Using a mixer, cream butter and sugar until light and fluffy, about 5 minutes on medium to medium-high speed.
  • Scrape down the bowl. Slowly add in the whisked eggs and vanilla, mixing very well after each addition. Do not do this too quickly or the mixture will curdle.
  • Add half of the dry ingredients and mix on low speed until almost combined. Add buttermilk and mix until combined, add remainder of the dry ingredients, mixing until just combined. The batter will be quite thick.
  • Using an offset spatula, spread the batter evenly into the prepared baking pan, then spread the strawberries evenly over the top. Break up the crumbs and sprinkle for an even layer over the strawberries.
  • Bake for 55-60 minutes, or until a toothpick inserted into the center comes out clean. The berry layer may make it difficult to test leaving residual moisture on tester, try not to overbake.
  • Cool cake for 20 minutes on a wire cooling rack, then remove from the pan and cool completely. Dust with powdered sugar before serving.

Notes

I
Hella Good Ube Mochi Muffins-Mochi Madness

Hella Good Ube Mochi Muffins-Mochi Madness

I have been looking for a dessert/cookie recipe using Ube for a while when I came across a recipe for Butter and Ube Bibingka/Mochi on Mark Hella Cooks.  I adapted his Bibingka/Mochi and made muffins, delicious and gorgeous. Just a bit of ube extract gave the batter a vibrant purple that is so whimsical and appealing.

Did I Get Ahead of Myself?

Are you asking what the heck is Ube?  It just dawned on me this is not your dash to the corner store item.  First, ube is similar to a sweet potato BUT it’s PURPLE, so swag, purple food.  It is used in a lot of Asian desserts, particularly Filipino ones. It is mild-flavored, kinda nutty, kinda vanilla-y.  Aside from fresh purple yams (hard to find), it comes as a powder, jam, and extract.  On a recent visit to the Asian Art Museum in the City, I inhaled a delicious Ube Snickerdoodle from Sunday@  the Museum, cafe.  Ever since I have been perusing the internet for ube cookie recipes.  No cookie yet but luckily I found Mark Hella Cooks Ube Mochi recipe. It is easy, delicious, and eye candy worthy.  I made muffins so everyone could have their own little dessert with crispy edges, yum.

Ube-by, Baby, Making Cookies For A Cause

I wanted to include the muffins in my little box of cookies for Ukraine.  The world is upside down right now and I just can’t sit on the sidelines and watch.  So I do what I can by fighting the things I hate with the things I love.  I baked cookies for donations to World Central Kitchen and Sunflower of Peace. My tiny part. #BakersAgainstRacism, #BakersforUkraine

I put together individual boxes of cookies, a first for me, to share with friends and co-workers.  Everyone was so generous, it reminded me that most folks are decent, kind, and caring.  How is it that just a few are actually responsible for so much hate and suffering in the world?  Most folks just want to live their lives and be happy.

Each box included tried & true cookies, comfort cookies, my family favorites.  Here are the Cookies for Ukraine Box.

Purple Yam All In My Brain

Rounding out the cookie box, are these incredibly easy and delicious Ube Butter Mochi Muffins.  Mochi has become my best friend when I need a gluten-free treat.  Made with glutinous sweet rice flour, the texture is chewy, a bit dense in a good way, and totally addicting.  If you have tried Third Culture Bakery or Mochi Donuts, or Manju, you will love these.  If you like to start with the classic butter mochi muffin try this one.  It is by far the most popular recipe on 3Jamigos.

The muffins can be made in one bowl, that’s how easy they are.  The method in the recipe below is from Mark Hella Cooks. Alternatively, place coconut milk and butter in a microwavable bowl and nuke for 1 minute.  Add evaporated milk, vanilla extract and eggs.  Mix well. Combine mochiko flour and baking powder then add to milk mixture.  Whisk until smooth.  Proceed with the recipe at step 3 as written.

Once you have drizzled the ube batter into the muffin tins, be careful not to shake the tin which would cause the batters to blend too much, You want to retain the marbling.

Butter or spray the muffin tin with PAM REALLY well, it determines the rise and the shape of the top of the muffin.

Enjoy!

Ube Butter Mochi Muffins

More mochi muffins! Purple Yams is in my soul
Course Dessert, Muffins
Cuisine Asian-American
Keyword butter mochi, Gluten free, mochi muffin, ube
Prep Time 20 minutes
Cook Time 50 minutes

Ingredients

  • 4 tablespoons butter (2 ounces) (salted is fine) melted
  • 1 cup sugar baker’s/caster sugar preferable
  • 2 large eggs @ room temperature
  • 1/2 teaspoon vanilla extract
  • 1 teaspoon ube extract Available at Asian Stores, online McCormick's
  • 8 ounces mochiko rice flour (1/2 box) 230gms
  • 1 teaspoon baking powder
  • 6 ounces evaporated milk Sub whole milk
  • 7 ounces full fat coconut milk(Arroy-D or Chakot)

Instructions

  • Preheat your oven to 350 degrees (non-convection), and generously grease a standard 12-cup muffin tin with butter.
  • In a large bowl, whisk together the melted butter and sugar. Add the eggs and vanilla extract and continue to mix until combined. Add the rice flour and baking powder and stir until combined. It might look a little lumpy, it's okay. Stir in the evaporated milk and the coconut milk. Continue whisking until smooth*
  • Remove 3/4 cup of the batter and place in a small bowl. Add the ube extract and mix together.
  • The batter will be pretty runny. Using a large ice cream scoop the remaining batter into each muffin tin. It should fill the entire tin, each cup filled approximately 3/4 full. Gently drizzle ube batter onto each muffin tin. A squeeze bottle with a large opening will work otherwise use a teaspoon. The batter will sink so there is no reason to swirl it. I drizzle in a spiral pattern with a healthy glob in the center.
  • Carefully place the muffin pan in the oven and bake for 20-25 minutes.
Smitten by Big Apple Crumb Cake

Smitten by Big Apple Crumb Cake

Let me rundown the reasons you should make this Apple Crumb Cake…

The original recipe is from Smitten Kitchen, and well, duh, of course, I’m going to make it.

Recommended by Ipso-Fatto, one of my favorite blogs. Her recommendations are SPOT ON. I put any recipe with her ringing endorsement on my bake it, bake it now list.

Apples and a boatload of crumb topping.  What’s Not to Love?

Finally, an excuse to buy yet another baking pan, because everyone knows you absolutely need a 12×5.5 biscotti pan, LOL.

How do you like them apples…in a cake, please

It never ceases to amaze me just how many variety of apples are now available. I snagged a bag of Crimson Crisp apples, along with Pink Ladies, and Jonagolds at the Farmer’s Market.  Back in the day, Red Delicious was the Big Kahuna, the only Kahuna (totally dating myself).  Crimson Crisp are sweet, with just a hint of tartness, an all-around apple good for snacking or baking. Or, feel free to use any apple you like as long as it will hold its shape after baking.

The original recipe calls for 1/2-inch thick slices randomly placed on the batter.  But, I chose to cut my apples in approximately 1/4 to 3/8-inch slices and form two rows of overlapping slices.  Do not cut the apples any thinner as the apple flavor and texture will be lost under the crumbs.  If you use all sweet apples like Golden Delicious, be generous with the lemon juice.

BaBaBaBaBap…Cake On the Bottom

The cake layer is reminiscent of a fine crumb, not quite as dense as pound cake, snack cake  A nice foil for the apples and the topping. The batter is very thick, not really pourable. Scoop it into your pan and use an offset spatula to spread it evenly in the pan.  I used my nifty new biscotti pan (12×5.5 inches) which is equivalent to the called for 8×8 baking pan. The salt and baking powder are sprinkled on the butter, sugar, egg mixture, and blended before adding the flour.  Not sure why, my best guess is to make sure the baking powder and salt are evenly distributed in the batter.

How the Cake Crumb-les

Starting with melted butter makes the crumb topping effortless. I left the crumb in random small pieces which resulted in a pebbly finish which I love.  Squeeze the crumbs together for bigger clumps of topping.  Add nuts, if you like, I tossed in half a cup of chopped pecans for texture and flavor.  It is ALOT of crumble so if that’s not your thang, leave some out.

This is a delicious snack cake that highlights both apples and crumb topping.  Put it on your bucket bake list!

Print Pin
5 from 1 vote

Big Apple Crumb Cake

From Smitten Kitchen, a delicious snacking cake topped with apples and a generous layer of crumb topping.
Course Cake
Cuisine American
Keyword apple, crumb cake
Prep Time 20 minutes
Cook Time 55 minutes

Ingredients

The Apples

  • 1 pound apples, 3 medium or 2 large, peeled, cored, cut into 1/4 -1/2-inch wedges
  • Juice of half a lemon
  • 1 teaspoon ground cinnamon
  • 1 tablespoon granulated sugar

The Crumbs

  • 1/2 cup unsalted butter, melted 4 ounces or 115 grams
  • 1/3 cup light or dark brown sugar 65 grams
  • 1/3 cup granulated sugar 65 grams
  • 1 teaspoon ground cinnamon
  • 1/4 teaspoon kosher salt
  • 1 1/3 cups all-purpose flour 175 grams
  • 1/2 cup coarsely chopped nuts, any kind optional

The Cake

  • 6 tablespoons unsalted butter, softened 85 grams
  • 1/2 cup granulated sugar 100 grams
  • 1 large egg room temperature
  • 1/3 cup sour cream 80 grams
  • 1 teaspoon vanilla extract
  • 1 cup all-purpose flour 130 grams
  • 1 1/4 teaspoon baking powder
  • 3/4 teaspoon kosher salt
  • Powdered sugar for dusting

Instructions

  • Heat oven: To 325°F (165°C). Lightly coat an 8-inch square or 9-inch cake pan with butter or nonstick spray and line with parchment paper that hangs over the long sides. Makes it easy to remove the cake after baking.
  • Slice apples into 1/4 min to 3/8 inch thick slices. Toss apples with lemon juice. Mix cinnamon and sugar together and then add to apples. Mix thoroughly and set aside.
  • Make crumbs: Whisk melted butter, sugars, cinnamon, and salt together until evenly mixed. Add flour and mix until it disappears. Add nuts if using. Set aside.
  • Beat butter with sugar until light and fluffy. Add egg, sour cream, and vanilla and beat until combined. Sprinkle surface of batter with baking powder and salt, beat well to combine. Add flour and mix only until it disappears. The batter will be very thick and not really pourable.
  • Scrape batter into prepared cake pan and smooth it flat. Arrange apples on cake, slightly overlapped. Resist the urge to pile all the apples on, single layer of overlapping apples is good. If you pile extra apples on, the cake may not bake evenly. Pour any cinnamon-apple juices from bottom of bowl over apples. Sprinkle crumbs over apple slices. For bigger crumbs, squeeze the crumbs into small fistfuls and break these up into a couple bigger chunks over the cake.
  • Bake the cake until a toothpick inserted into the apples doesn’t hit any crisp spots and comes out fairly clean, about 50 to 55 minutes.
  • Cool to room temperature, if you can bear it, before cutting into squares or wedges. Dust generously with powdered sugar.
  • Cake keeps at room temperature loosely covered in an airtight container for 3 days or in the fridge.

Notes

PSA: Get yourself a scale, soooo much easier 🙂
Chocolate Mochi Brownies (Rice, Rice, Brownie)

Chocolate Mochi Brownies (Rice, Rice, Brownie)

Mochi Ado about Something.  I tried quite a few mochi recipes this year so it seems fitting that 2021 should end on a sweet rice note.  2021, the year of Mochi muffins, donuts, and now, brownies.  Mochi brownies are delicious!  I found quite a few recipes that were fairly similar and picked one from Kirbie’s Cravings as my starting point.  There are a plethora of recipes out there including one from Fix, Feast, Flair whose cookbook I have and love, Aloha Kitchen.

The Mochi Brownies are not too sweet, have that hallmark stretchy, elastic texture of mochi, intensely chocolate, and just darn delicious.  If you like fudgy, chocolatey brownies, you are going to love these.  Bonus, they’re GLUTEN-FREE and super easy to make.  We are talking spoon, whisk, 2-bowl, done.

Look at that, office clips to hold your parchment in place

Cast of Mochi Characters

Mochi– Sweet Rice Flour aka Glutinous Rice Flour.  NOT to be confused with rice flour.  Go-to brand,  Koda Farms Mochiko Sweet Rice Flour.  Found in most big supermarkets, all Asian Markets and online for an arm and a leg 🤷🏻‍♀️. Bob’s Red Mill also has a Glutinous Rice Flour that can be used.

Cocoa-You can use any kind of cocoa powder in this recipe, natural or dutch-processed.  The Dutch-process cocoa will give you a deeper, darker brownie color.  King Arthur carries both types.  Hershey’s is natural cocoa.

Baking Powder vs. Baking Soda- I used baking powder. I’m not sure it makes a difference.  My logic, since I used  Dutch-processed cocoa which has a neutral pH, I did not have an acid to kick start baking soda.  Baking powder needs heat to activate it not acid.  If you use natural cocoa you could use either baking powder or baking soda.

Liquid- I used whole milk, I haven’t tried it but I’m thinking this recipe would work with milk substitutes, evaporated milk, or coconut milk.  It may change the texture a little.

Chocolate-The brownies are not too sweet and pretty chocolate-y.  Try different chocolates to sprinkle on top, milk chocolate or semi-sweet, chopped from bar form.  Chips don’t melt well and don’t look as nifty as shards of chocolate.  I hit the top at the end with my secret sprinkles, a mix of Maldon Salt, Demerara Sugar and Chocolate Sprinkles.  For a festive look, you can use multi-colored sprinkles!

The Setting: Two Bowls, One Spoon, One Whisk

Literally, the ingredient list is the hard part of this recipe.  Combine the dry ingredients in one bowl and the liquids in another, then add the dry to the wet, mix with a spoon or whisk, bada bing bada-boom, done.  No need to worry about overmixing as Mochiko flour doesn’t have gluten.  The batter will be like a runny pancake batter.  Pour batter into your parchment-lined pan and bake.  That’s it!  An hour later you’re pulling mochi brownies out of the oven.  Cool completely before cutting with a sharp knife.  If it sticks put a little oil or butter on your knife.


Rewarded with delicious ooey-gooey chocolate brownies! Cookie #7

Chocolate Mochi Brownies

A gluten-free alternative that is so good you may never go back to traditional brownies!
Course bar cookies, brownies
Cuisine Asian-American
Keyword chocolate brownies, Dark chocolate, Gluten-free, Dairy-free, Mochi, sweet rice flour
Prep Time 15 minutes
Cook Time 1 hour
Servings 16 servings

Ingredients

  • 1 cup mochiko flour
  • 1/2 cup unsweetened cocoa powder Dutch-processed or Natural is fine. Dutch process will give you a deeper, dark brown color
  • 1/2 tsp Instant espresso powder Optional, highlights chocolate flavor
  • 1 cup granulated white sugar
  • 1 ½ tsp baking powder you could actually use baking soda in equal volume, if using natural cocoa which is acidic and will activate the baking soda
  • 5 tbsp unsalted butter melted If you use low fat milk or milk substitute increase butter to 6 T
  • 2 large eggs
  • 12 oz whole milk
  • 1 tsp vanilla
  • 3 tbsp chopped dark chocolate sweeter brownie, use milk chcolate or semi-sweet chocolate
  • Sprinkles! optional but festive!

Instructions

  • Preheat the oven to 350°F. Line an 8 by 8-inch baking pan with parchment paper.
  • In a medium bowl, add mochiko, cocoa powder, sugar and baking powder and espresso powder (optional). Whisk together until evenly mixed.
  • In a large bowl, add melted butter, eggs, milk, and vanilla extract. Whisk until evenly combined and no egg streaks remain. Add in dry ingredients. Mix until blended.
  • Pour batter into prepared baking pan. Sprinkle surface with chopped chocolate.
  • Bake 60 minutes or until mochi is set, there should be no jiggle. A toothpick inserted should come out mostly clean. Remove from oven and top with sprinkles. Cool completely before cutting.

Notes

You can replace whole milk with other milk substitutes. Keep in mind that different milk substitutes may change the texture of the brownies.
Don't even try to cut the brownies before they cool completely!
Store in a sealed container at room temperature for up to 2-3 days.
If you want to make sure you have a nice layer of sprinkles, sprinkle brownies before baking.  Sprinkle flaky salt and sugar when the brownies come out of the oven.
Devilishly Good Chocolate Cake

Devilishly Good Chocolate Cake

Always on the lookout for inspiration, I read Dorie Greenspan’s post on A Devils Food Cake by Zoe Francois of Zoe Bakes.  My copy of Zoe Bakes Cakes has been languishing on my shelf for a little while, okay, a long while (I got it as soon as it hit the shelves). Leave it to Dorie to provide that nudge to finally bake from it.

Devilishly Delicious

My go-to recipe for chocolate cake comes from my tattered, well-worn copy of The Silver Palate.  Their Decadent Chocolate Cake has been a stalwart in our house forever.  But Dorie’s description and praise for this cake made it impossible for me to ignore.  Glad I didn’t, it’s delicious.  It’s chocolatey, moist, not too sweet, and it is pretty darn easy to make. You don’t even have to drag your mixer out, Drop Mixer moment, boom.

Buttermilk, eggs, oil, and coffee provide the liquid and fat in this recipe.  I brewed up extra coffee in the morning knowing I would need some for this cake.  The coffee cuts the sweetness and adds depth and nuance to the cake.  You don’t taste coffee, it just provides its magic.  Cocoa provides the chocolate mojo.  You can use either natural or Dutch-processed according to Dorie.  I played it safe by using King Arthur’s Triple Blend Cocoa, the best of both worlds.  Use what you like.

Loafing Around

You can make this recipe in a round cake pan, as cupcakes, or in a loaf pan.  I chose the loaf pan. The batter has a super thin consistency and is very pourable.

All you need is a couple of bowls, a whisk, and a rubber spatula.

The cake does develop cracks and crevices while baking.  It also falls a little as it cools.  I remedied the situation by trimming off the top and flipping the cake over.  I opted to go with our tried and true Cream Cheese Frosting from our Carrot Cake Recipe.  DOUBLE it. I barely had enough to cover the cake with a single recipe.  You will thank me, lol.  A Vanilla or Chocolate Frosting would work well also. You can find frosting options and Zoe’s Cream Cheese Frosting on Dorie’s site.

This is an absolutely luscious, beautiful cake as is the book and website for Zoe Bakes Cakes.  Put this Devil’s Food Cake on your bucket list.

CHOCOLATE DEVIL’S FOOD CAKE

Adapted from Zoë Bakes Cakes, by Zoë François (Ten Speed Press) by Dorie Greenspan, my baking muse.
Course Cake, Dessert
Cuisine American
Keyword chocolate cake, Chocolate Devil's Food Cake
Prep Time 20 minutes
Cook Time 1 hour

Ingredients

  • 2 1/3 cups (280 grams) all-purpose flour
  • 2 cups (400 grams) granulated sugar
  • 2/3 cup (50 grams) Dutch-processed cocoa powder (sifted if lumpy)
  • 1 teaspoon baking soda
  • 1 teaspoon kosher salt
  • 1 1/4 cups (300 ml)hot strong coffee
  • 2 tablespoons rum or brandy
  • 2 large eggs at room temperature
  • 1 cup (240 ml) buttermilk
  • 1/2 cup (120 ml) mild-flavored oil (such as vegetable oil)
  • 1 teaspoon pure vanilla extract

Instructions

  • Preheat the oven to 350 degrees F. Generously grease a 9 by 5-inch loaf pan then line with greased parchment paper. Set aside.
  • In a large bowl, whisk together the flour, sugar, cocoa powder, baking soda, and salt until well combined. In a small bowl, stir together the coffee and rum.
  • In a separate bowl, whisk together the eggs, buttermilk, oil, and vanilla until well combined. Add the egg mixture and half the coffee rum to the dry ingredients and mix with a spoon until smooth. Slowly add the remaining coffee mixture and whisk until completely blended and smooth. The batter will be quite thin.
  • Pour the batter into the prepared pan. Gently tap the pan on the counter several times to release excess air bubbles.
  • Bake until a tester comes out clean, about 1 hour 10 minutes (30 minutes for 8-inch rounds). Let the cake cool completely before removing from the pan and inverting it onto a serving plate. (If you want to trim the top of the cake – which will be the base – do it now; see above.)
  • Using a metal offset spatula, cover the cake with an even layer of frosting. Top with chocolate shavings, if you’d like. Serve at room temperature.

Notes

Can be made in 2 8-inch round pans
To make 24 cupcakes, fill the well of a cupcake pan two-thirds full of batter and bake for about 20 minutes, or until a tester comes out clean.
Hawaiian Butter Mochi (Mo Buttah’ Mo Bettah’)

Hawaiian Butter Mochi (Mo Buttah’ Mo Bettah’)

Right before the pandemic hit we capped off a year of traveling by going to Maui.  A celebration for the hubster’s birthday and his early retirement was our excuse to pack our bags and head out for some sun, fun, and food.  Little did we know it would be our last trip for quite a while.

Hawaiian Delights

I am a sucker for Hawaiian food.  A fusion of Native, Chinese, Japanese, Filipino, Portuguese, Korean and all of it tweaked so it taste great and is easy to eat while sitting on a beach!  Our bucket list of food included Spam Musubi, a hunk of rice topped with a fried slice of SPAM and wrapped in seaweed, Poke’ (seasoned raw fish in a bowl with rice), island style bbq, Huli, Huli Chicken. YUM.

Then there are the sweets, Malasadas (best damn donuts), Haupia (coconut jello) and my favorite, Butter Mochi. Hawaiian Butter Mochi is the island’s answer to Blondies or Brownies but better (I know, them is fighting words).  Buttery, gooey, sweet and so satisfying.  Like our Spam Musubi quest, we went out of our way to find all things mochi.

This isn’t my first mochi rodeo, I posted a Butter Mochi Muffin recipe a while back that peeps really like (so says Google analytics, lol).  Since then it has been off to the “rices” trying recipes with Koda Farms Sweet Rice (glutinous rice flour).  Mochi now merits its own category in my recipe index.  These muffins started it all, dense, chewy, with a touch of familiar cakiness, and the perfect amount of sugar. They are a great introduction to mochi-based desserts.  BONUS: Mochi is gluten-free!

Butter Mochi Muffins
The Muffins that started it all!

Mochi Mania-Island Style

Hawaiian Butter Mochi takes mochi back closer to its Japanese roots, lighter, springier, and less cakey.  The recipe calls for coconut milk and regular milk.  The regular milk and less mochi flour are the “denseness” buster and gives the mochi its characteristic texture.  Butter adds flavor.  It is usually baked in a pan and then cut into squares but I decided to bake them in muffin tins.  All for the edges folks.  Each person ends up with their own gooeylicious mini-cake highlighted by a crispy, buttery edge, and finished with toasty shredded coconut and a sprinkle of Fleur de Sel, soooooo yummy.

Inspired by Aloha Kitchen and the website Catherine Zhang, these Butter Mochi Mini-Cakes are onolicious.  I hope you will try them!

The two key ingredients you can find at most Asian stores, sweet rice flour and coconut milk. My go-to brands are Koda Farms Mochiko and Chaokoh or Arroy-D for coconut milk.

The batter will be very pourable due to the use of milk as part of the liquid and less mochi flour.

Don’t be afraid to fill the cups to 7/8.  The mini-cakes will puff up but will fall as they are cooling.  You will end up with a flat top or sometimes even a slight depression, it’s all good.

Enjoy!

Print
5 from 1 vote

Hawaiian Butter Mochi Muffins

This muffin is a mash-up of Hawaiian Butter Mochi and Butter Mochi Muffins! Gooier and less cake-like than my butter mochi muffins. Baked as muffins they have crispy edges and a soft center-onolicious!
Course Dessert, Snack
Cuisine Asian, Fusion
Keyword butter mochi, hawaiian, Mochi, muffin
Prep Time 15 minutes
Cook Time 45 minutes
Total Time 1 hour

Ingredients

Da Wet Stuff

  • 1/4 cup Unsalted butter 55gm
  • 3/4 cup Coconut milk 170gm
  • 1 cup Whole milk 240gm
  • 2 Eggs

Da Dry Stuff

  • 1 3/4 cup Glutinous rice flour 225gm
  • 1 cup Granulated sugar 200gm
  • 1 tsp Baking powder
  • Flaked or shredded coconut for garnish, preferably unsweetened but use what you like

Prep Yo Pan

  • Butter
  • Rice flour optional

Instructions

  • Preheat the oven to 375 degrees
  • Generously grease 12-cup muffin tin with butter and dust with rice flour, if you don't have rice flour, skip it. The flour does help the batter rise in the pan and getting crispy edges.
  • In a large, microwave safe bowl combine the coconut milk and butter, heat in the microwave for 1 minute
  • Add the milk and 2 eggs, whisk until combined. I like whole milk but you can use 2% milk or alternative milk like oat milk.
  • In a medium sized bowl combine the glutinous rice flour, sugar and baking powder
  • Add the dry ingredients to the wet ingredients and whisk until smooth
  • Pour the batter evenly into the 12 muffin cups
  • Sprinkle with coconut and bake for 45 minutes, or until golden brown
  • Remove and cool. Muffins will keep for a couple of days on the counter. Pop them in a toaster oven to re-crisp edges. They also freeze pretty well.
Chocolate Chip Sour Cream Snack Cake-Chip off the Cho Block

Chocolate Chip Sour Cream Snack Cake-Chip off the Cho Block

Rounding out Joy Cho month also known as Cakenado, I made her Chocolate Chip Sour Cream Snack Cake.  It all started with her Mochi Banana Bread, which I adore and have made more than once.  Following on its heel (yes, I know, cakes don’t have heels) I came across this recipe on a Food Network post.  I don’t normally follow Food Network, maybe it was just good karma that it popped up, fortunate since it is delicious, easy to make, and has CHOCOLATE.

Stuck on Sticky Rice Flour

Like the Mochi Banana Bread, it is a combination of all-purpose flour and mochiko or sweet rice flour (sticky rice) that sets this snack cake apart.  You get that wonderful bouncy texture from the sweet rice flour and the tender cake with a nice crumb from the all-purpose flour.  Based on her mom’s chocolate chip bundt cake and tweaked with her signature addition of sweet rice flour, this really is a decadent, delicious, simple cake.  Studded with chocolate chips, this cake will keep chocolate fans happy.  Add nuts if you like and serve it with a BIG SCOOP of VANILLA ICE CREAM.  Doesn’t that sound good?

Looking for something a little different, ran out of Mochiko?  Try her Blueberry Balsamic Glaze Cornbread Cake.  Another amazing snacking cake. Cause you never know when you will have a snack attack!

Chocolate Chip Sour Cream Snack Cake

Ingredients

  • 3/4 cup (105 grams) all-purpose flour
  • 1/2 cup plus 2 tablespoons (105 grams) sweet rice flour such as Mochiko
  • 1 teaspoon baking powder
  • 1/2 teaspoon baking soda
  • 1 teaspoon kosher salt
  • 1/2 cup 1 stick unsalted butter, softened
  • 1 cup (200 grams) granulated sugar
  • 2 large eggs at room temperature
  • 1 teaspoon pure vanilla extract
  • 1/2 cup plus 1 tablespoon, (150 grams) full-fat sour cream at room temperature
  • 2 tablespoons milk at room temperature

Instructions

  • Position an oven rack in the middle of the oven and preheat to 350 degrees
  • Lightly grease an 8-inch square pan with nonstick cooking spray. Line the bottom with parchment, leaving a 2-inch overhang on the sides (to make it easier to remove the cake after baking) and grease the parchment.
  • Combine the all-purpose flour, sweet rice flour, baking powder, baking soda, and salt in a medium bowl and whisk until combined.
  • Beat the butter in a large bowl with an electric mixer until smooth. Add the sugar and cream the mixture until light and fluffy, 2 to 3 minutes.
  • Scrape down the bowl with a rubber spatula. Add in the eggs one at a time, beating after each addition until combined. Scrape the bowl once more, then beat in the vanilla.
  • Sift half of the dry ingredients over the egg mixture and beat just until combined. Beat in the sour cream and milk, then sift in the rest of the dry ingredients and beat just until the batter is smooth.
  • Fold in the chocolate chips.
  • Spread the batter into the prepared pan, smoothing the surface with a small offset spatula.
  • Sprinkle additional chocolate chips on top. Bake the cake, rotating the pan halfway through, for about 40 minutes, or until a toothpick inserted in the center comes out clean.
  • Let the cake cool in the pan for 20 minutes, then gently loosen the edges with a small offset spatula and carefully transfer the cake to a cooling rack.
  • Cut into squares and enjoy!