Tag: soul food

Red Cooked Pork 红烧猪肉, Sweet Relief

Red Cooked Pork 红烧猪肉, Sweet Relief

This post has been sitting on the back burner for a while, the majority of the time because I kept tinkering with the recipe.  The other reason for its relegation, Jamie and I have been on a tear baking cookies and desserts for the holidays.  It was time to circle back to this post-take a breather from all things sweet.  So here it is, a post on one of my favorite dishes, Red Cooked Pork

I grew up eating Chinese food 5-6 days a week.  Every meal more often than not featured pork.  Ground pork was steamed into a delicious patty with salted egg or simmered in soups.  Slices of pork were stir-fried with greens or with tofu and brown bean sauce for a quick meal.  Every Chinatown deli strategically displays a whole pig, slow-roasted to perfection, it’s amazing-crunchy, crackly skin and succulent, juicy, tender meat enticing shoppers into the store.  It goes toe to toe with any southern barbecued pork.  I make my own Crispy Roasted Pork, it’s not hard and not to worry, you don’t have to roast an entire pig! Yes, pork is king in Chinese cuisine.

Why pork?

The pragmatic, economical choice.  Pigs eat almost anything and don’t require grazing land, important in an agrarian society like China.  Pork can be steamed, boiled, baked, braised, fried, roasted-probably the only thing we don’t do is make it into ice cream-not surprising for lactose intolerant Asians.  Almost every part of the pig is used or consumed.  Ears, feet, snout, are pickled, braised, or fried.  The fat is turned into lard, the blood is congealed and eaten…you get the picture.

And the obvious answer, it’s DELICIOUS.

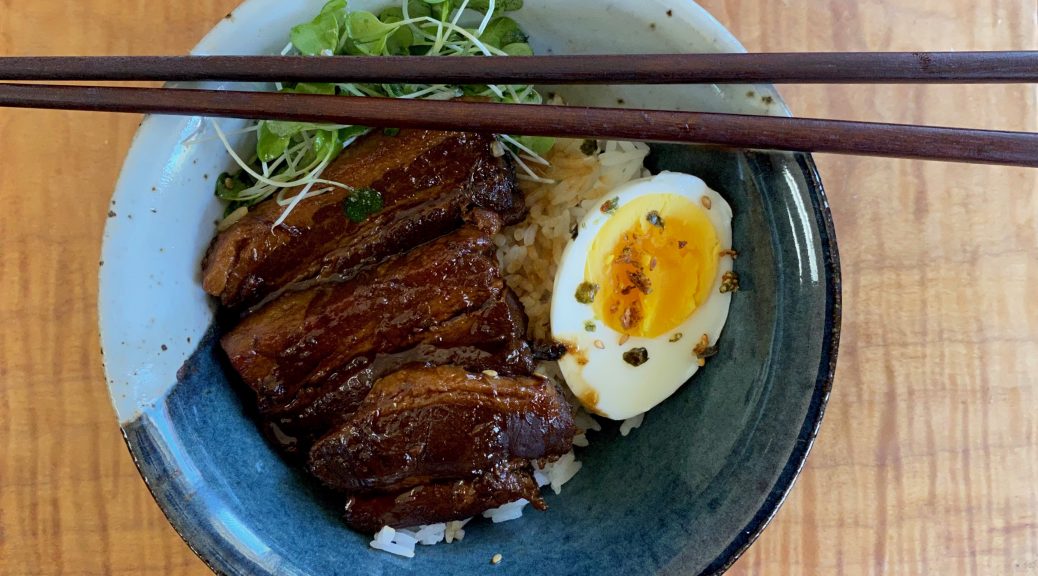
I am hooked on Chinese Red Cooked Pork which uses pork belly.  Now, don’t go Ewww, what do you think bacon is?  Yep, thin slices of pork belly given a nifty name so jillions of people will eat it.  Asian dishes often use pork belly in uncut slabs, in thick slices, cubed or diced.  Red Cooked Pork is a classic dish, every Sichuan family passes down grandma’s recipe for Red Cooked Pork or 红烧猪肉.  My go-to recipe comes from a favorite cookbook, A Common Table.

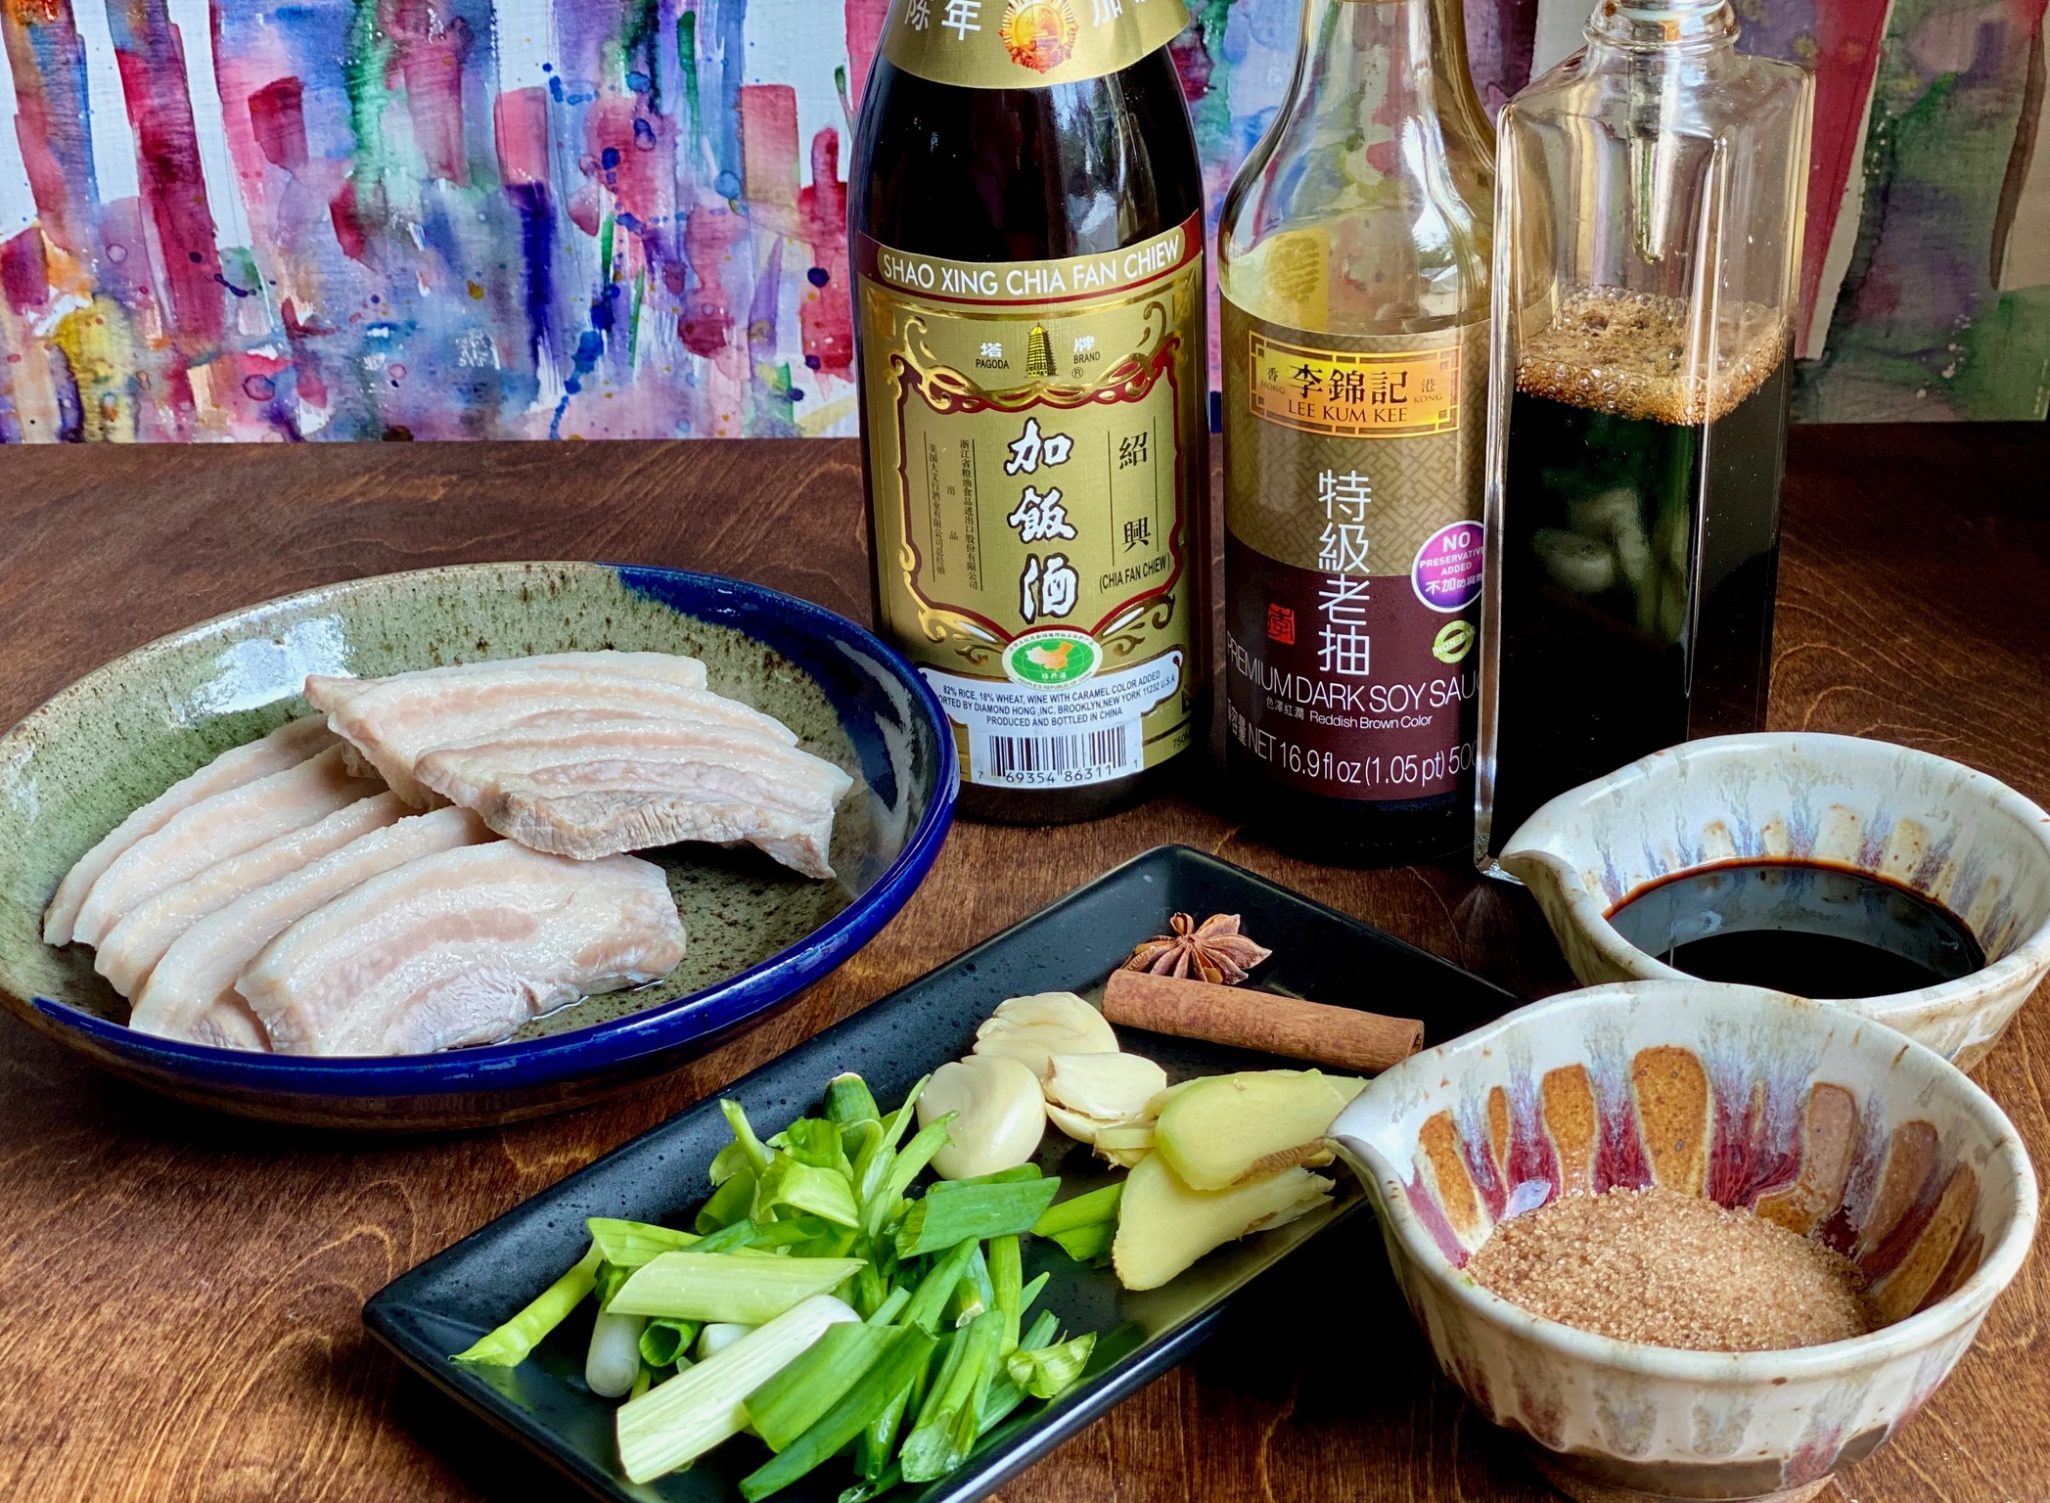
The easiest place to find pork belly is at your local Asian markets.  In particular, Chinese markets carry ALL things pork.  The pork belly is butchered into thick slabs-with or without skin, or into thin, medium, thick, or super thick slices.  Korean markets also offer a variety of pork belly cuts to grill, stir-fry, or braise.

I could be wrong but there really isn’t a Cantonese version of Red Cooked Pork.  Versions of red-cooked pork can be found in  Sichuan,  Shanghai, and Hunan where Chairman Mao’s Red Cooked Pork with chili peppers and aromatics is iconic.
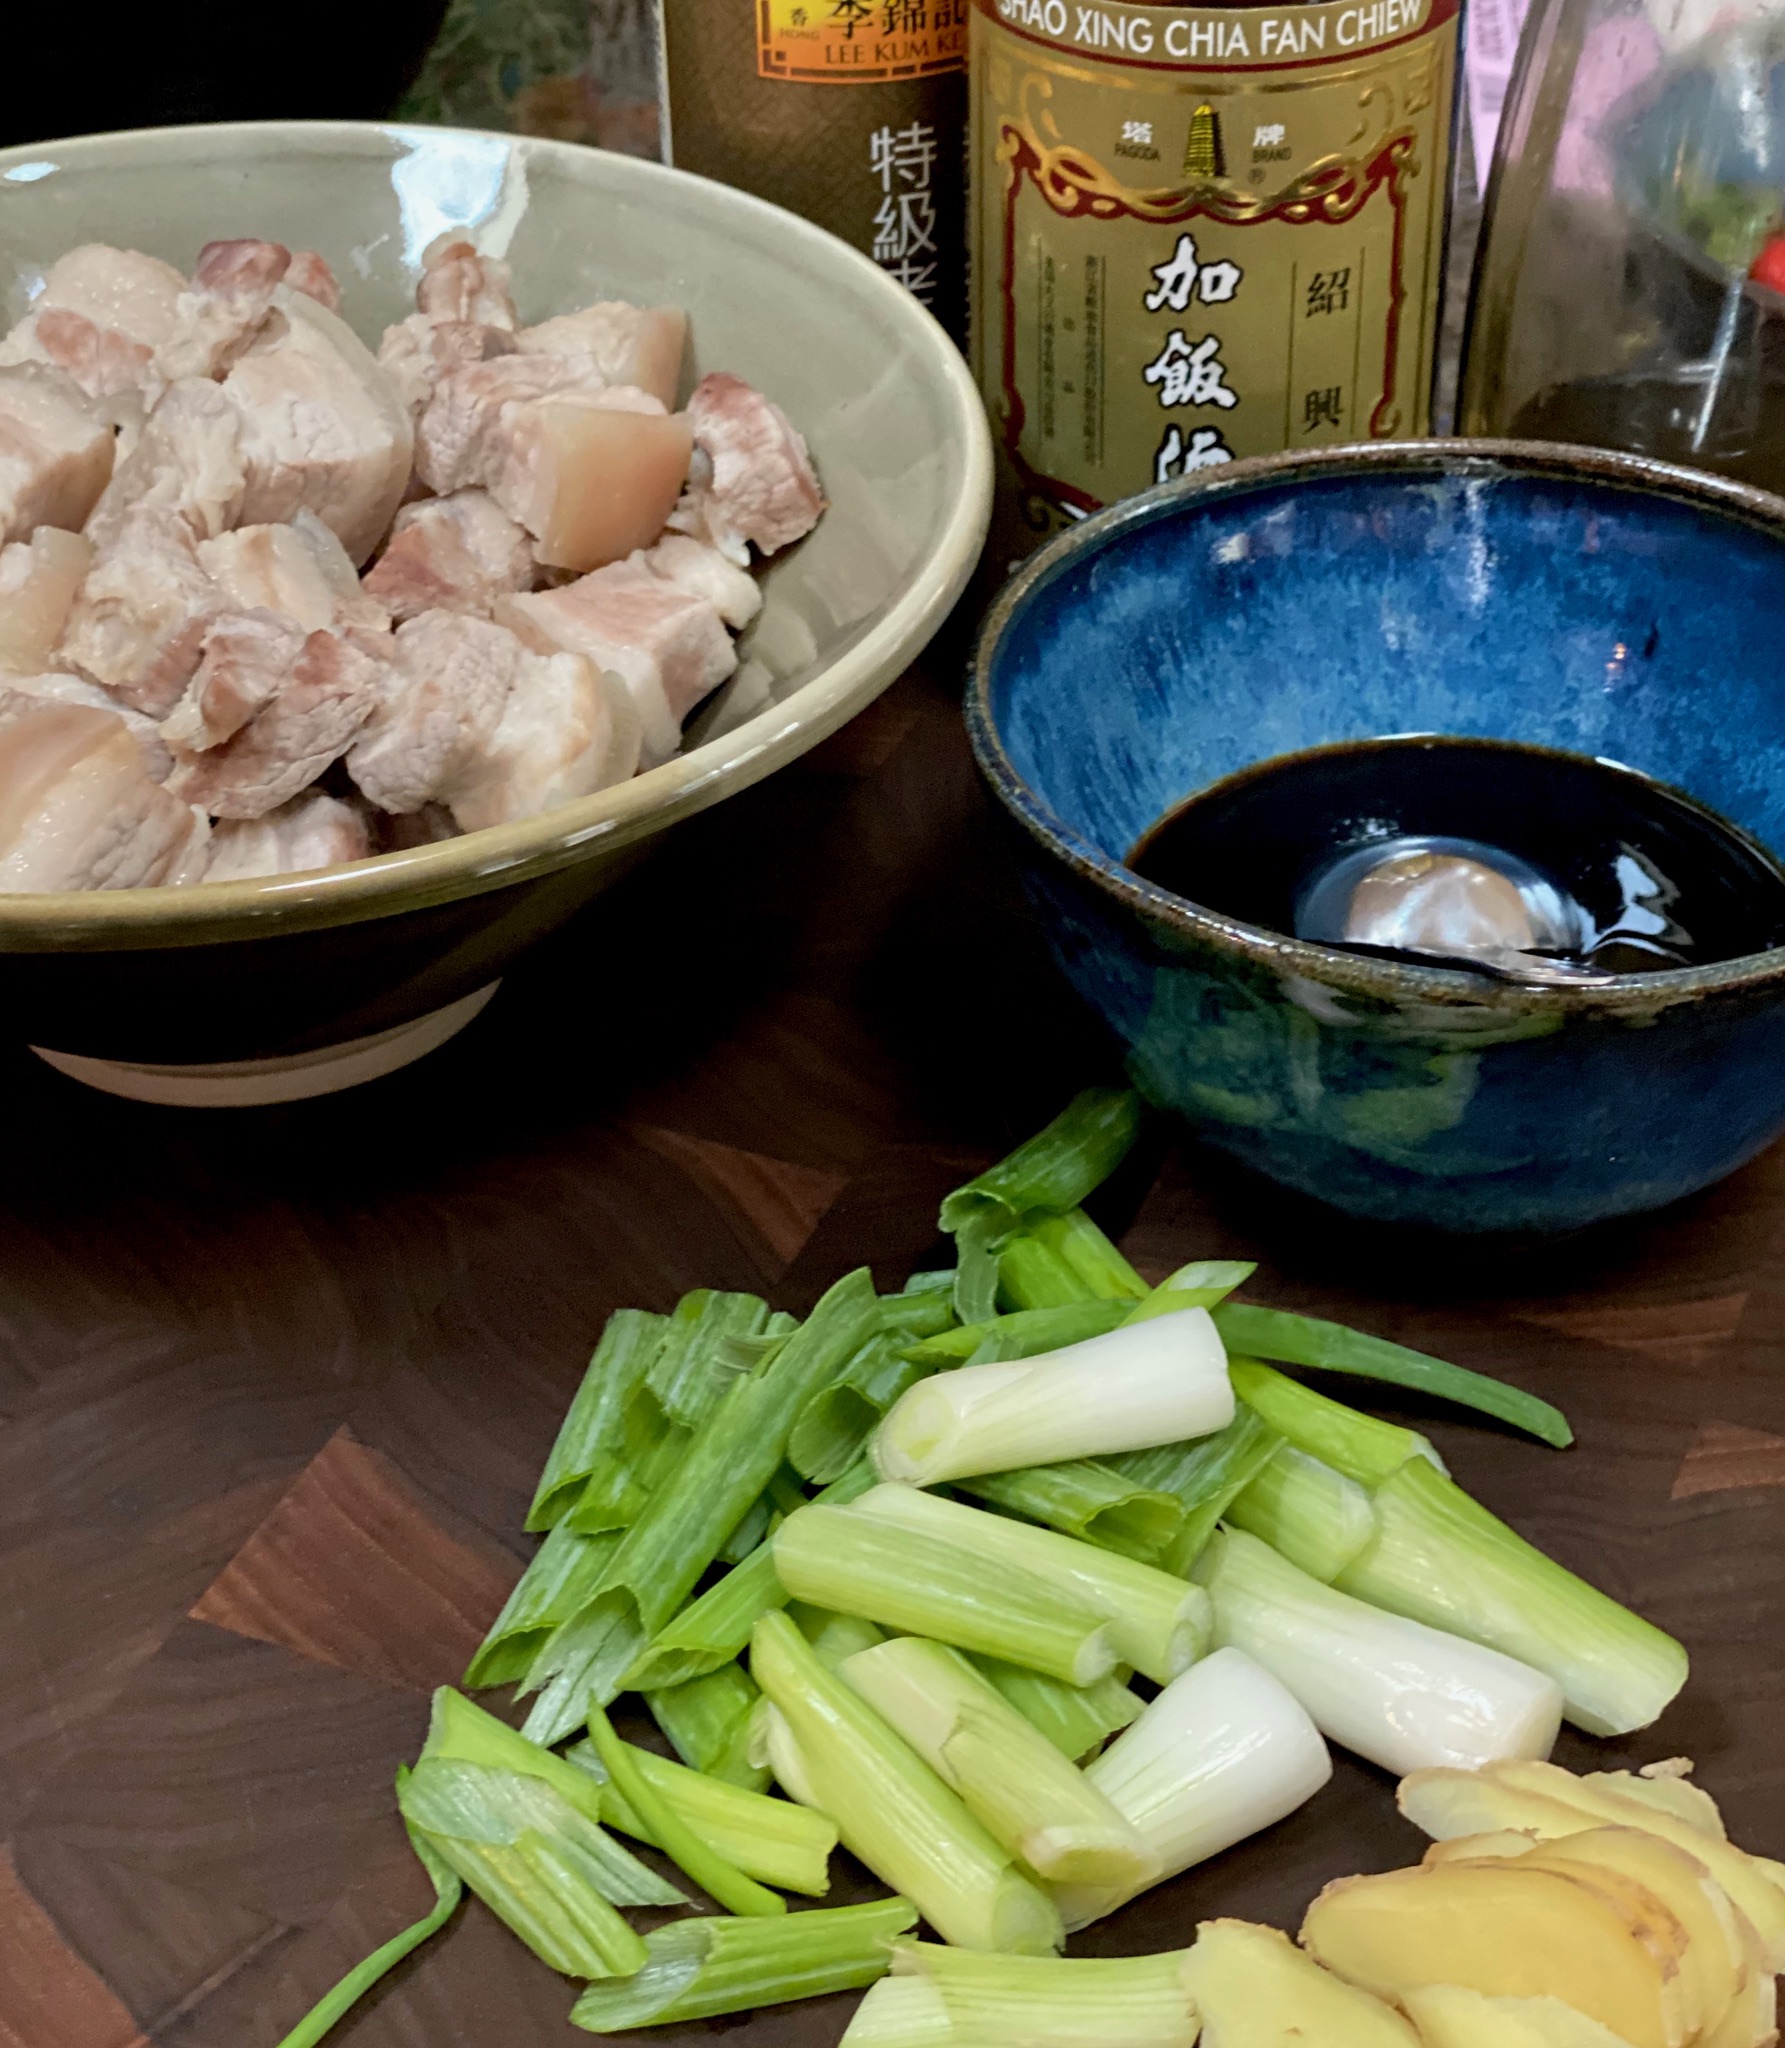
The Tinkering Begins

If I am making Red Cooked Pork for buns (bao) to be eaten like a sandwich, I use the wide thick slices.  For rice bowls and noodle bowls, I like cubed or diced pork belly.  Either way, the KEY is long, slow cooking.  You can’t cut corners or the meat will not be meltingly tender.  Keep vigil over the braising liquid, adding water if needed.  There is a point where the meat will seem tender but dry and paradoxically you need to cook it longer to breakdown the fibers so the meat gives up and becomes this oozy delicious bite. That is pork-fection.

I’m not a big star anise fan, so I only use 1-star anise and add a cinnamon stick in place of additional star anise.  Feel free to play with the amounts.  The recipe calls for granulated or raw sugar, I prefer rock sugar.  I searched for an equivalence and all I found is a one-inch piece of rock sugar is approximately 1 tablespoon of sugar.  Crushed into smaller pieces, that 1 inch chunk was about 1.5 tablespoons of rock sugar.

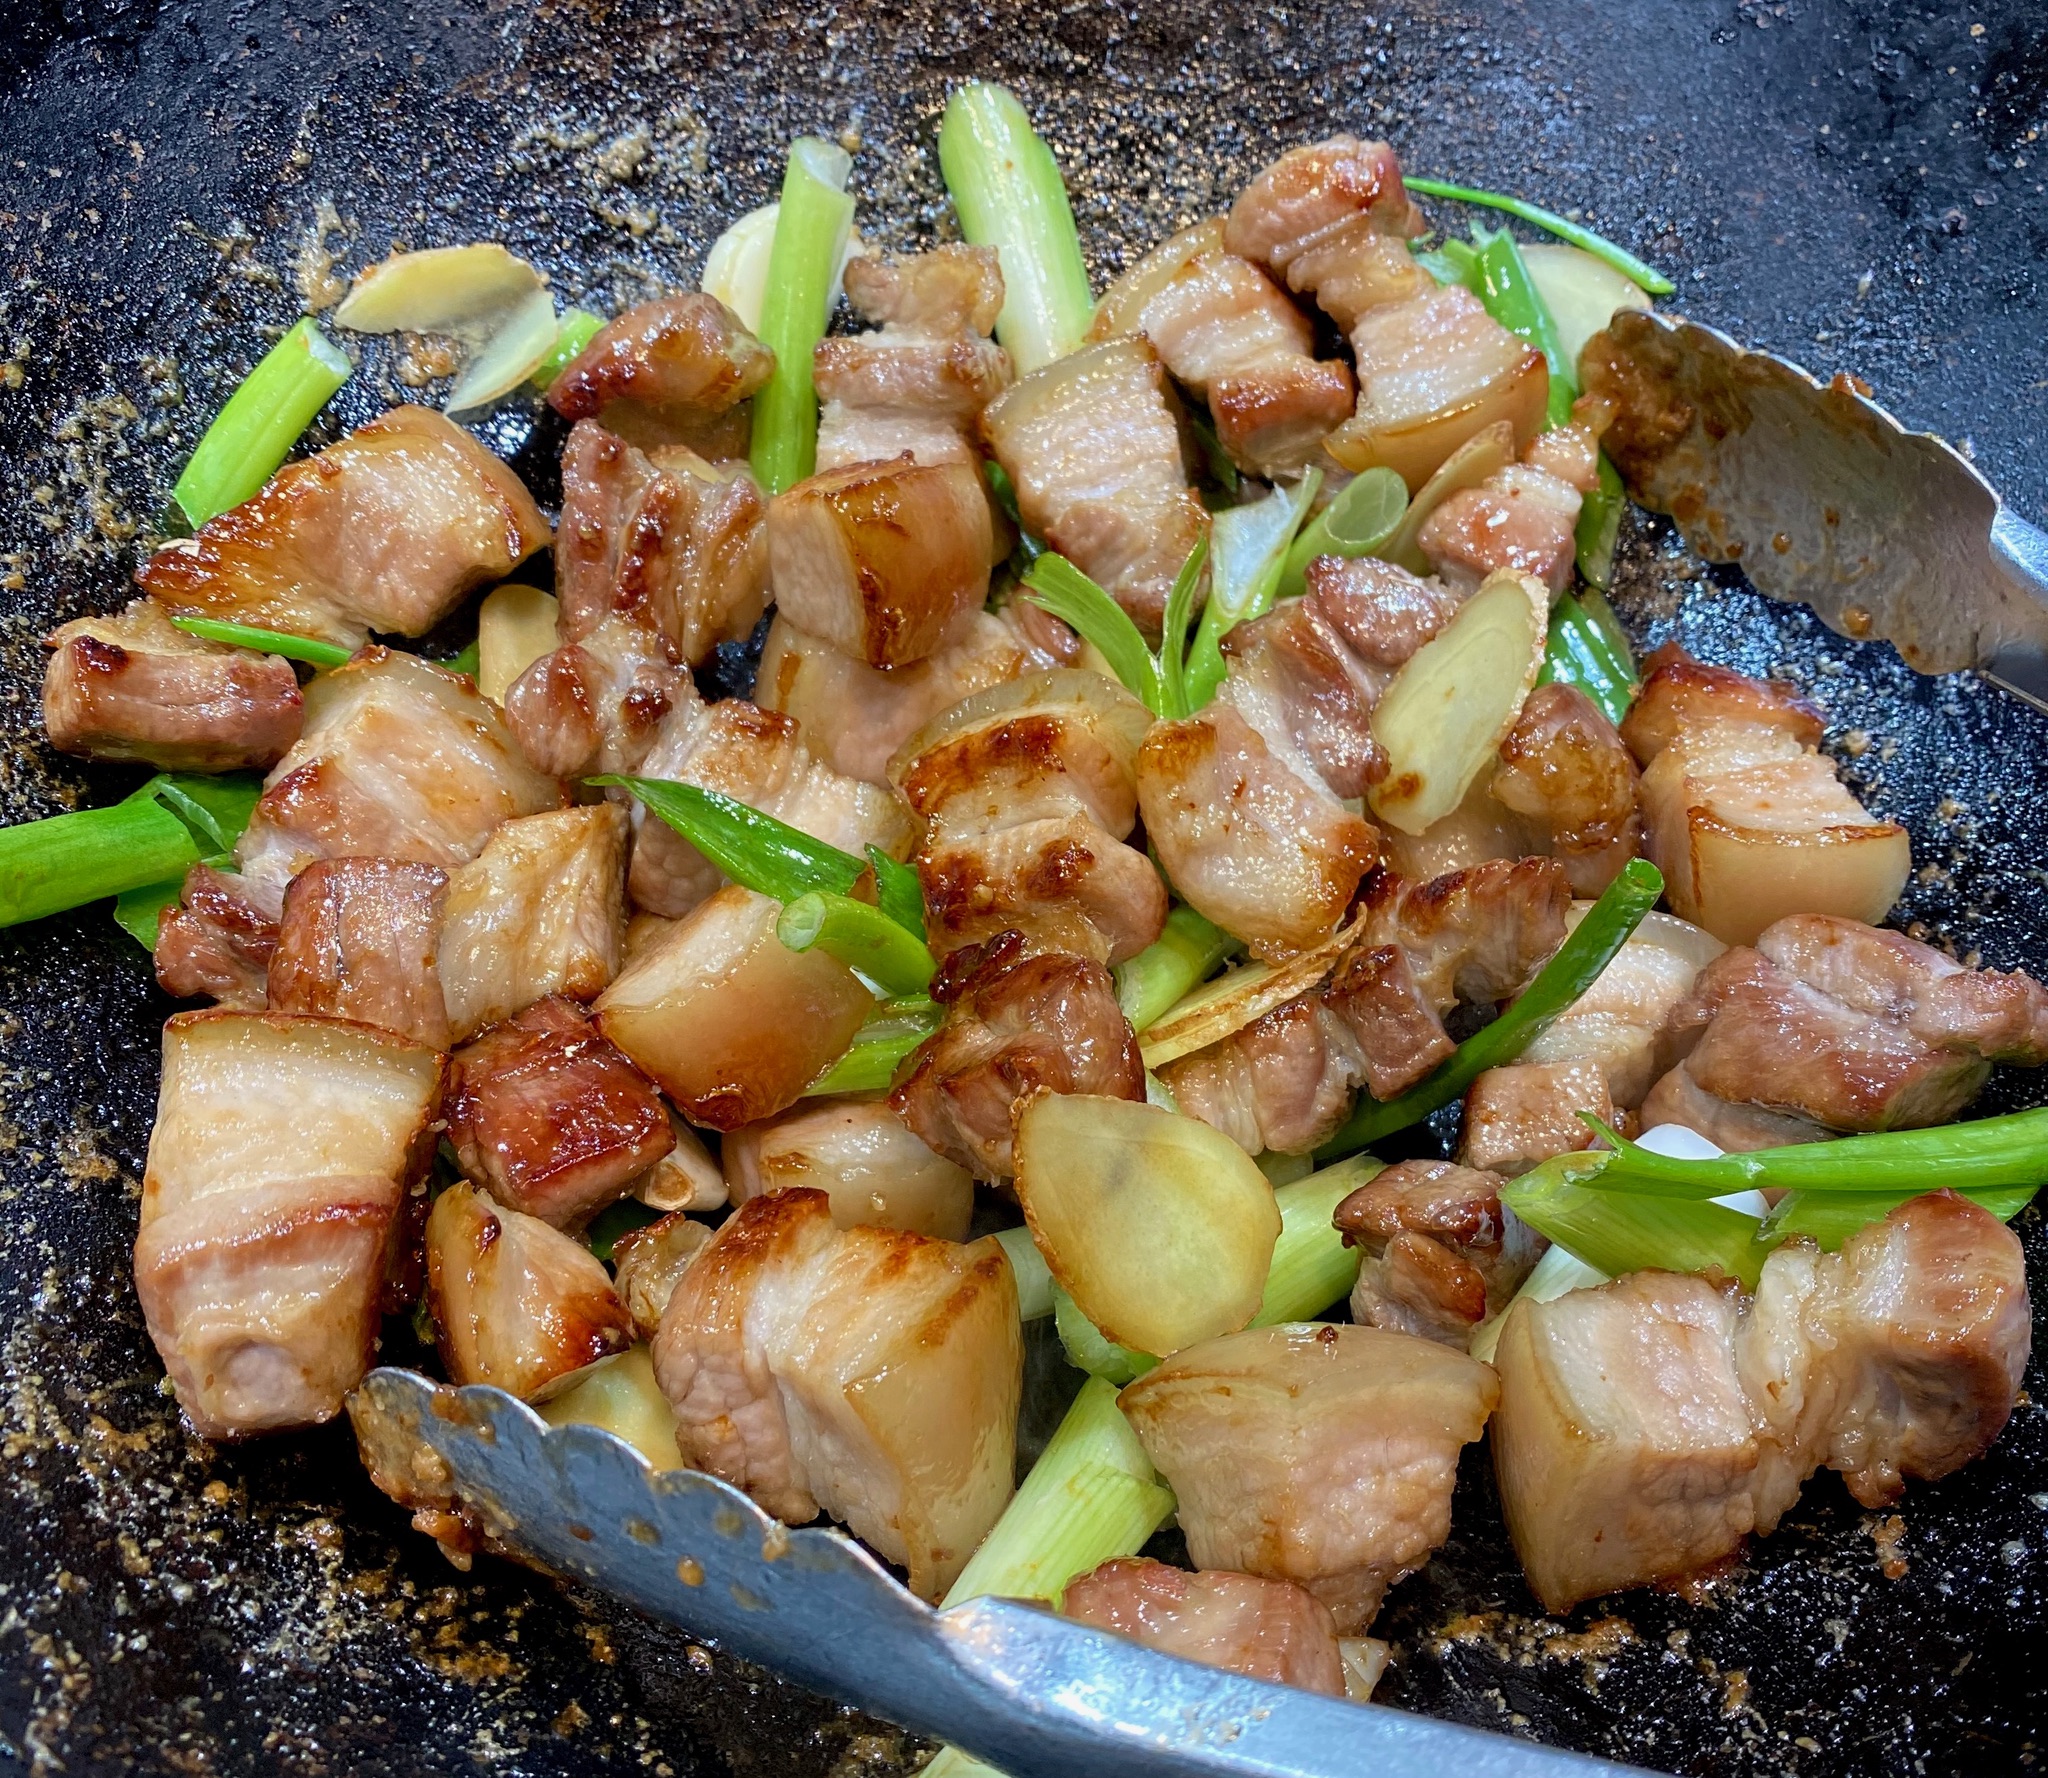
Caramelize the pork in the sugar water mixture.  Add aromatics, soy sauces, water, and braise for 1.5 to 2 hours until pork is tender.

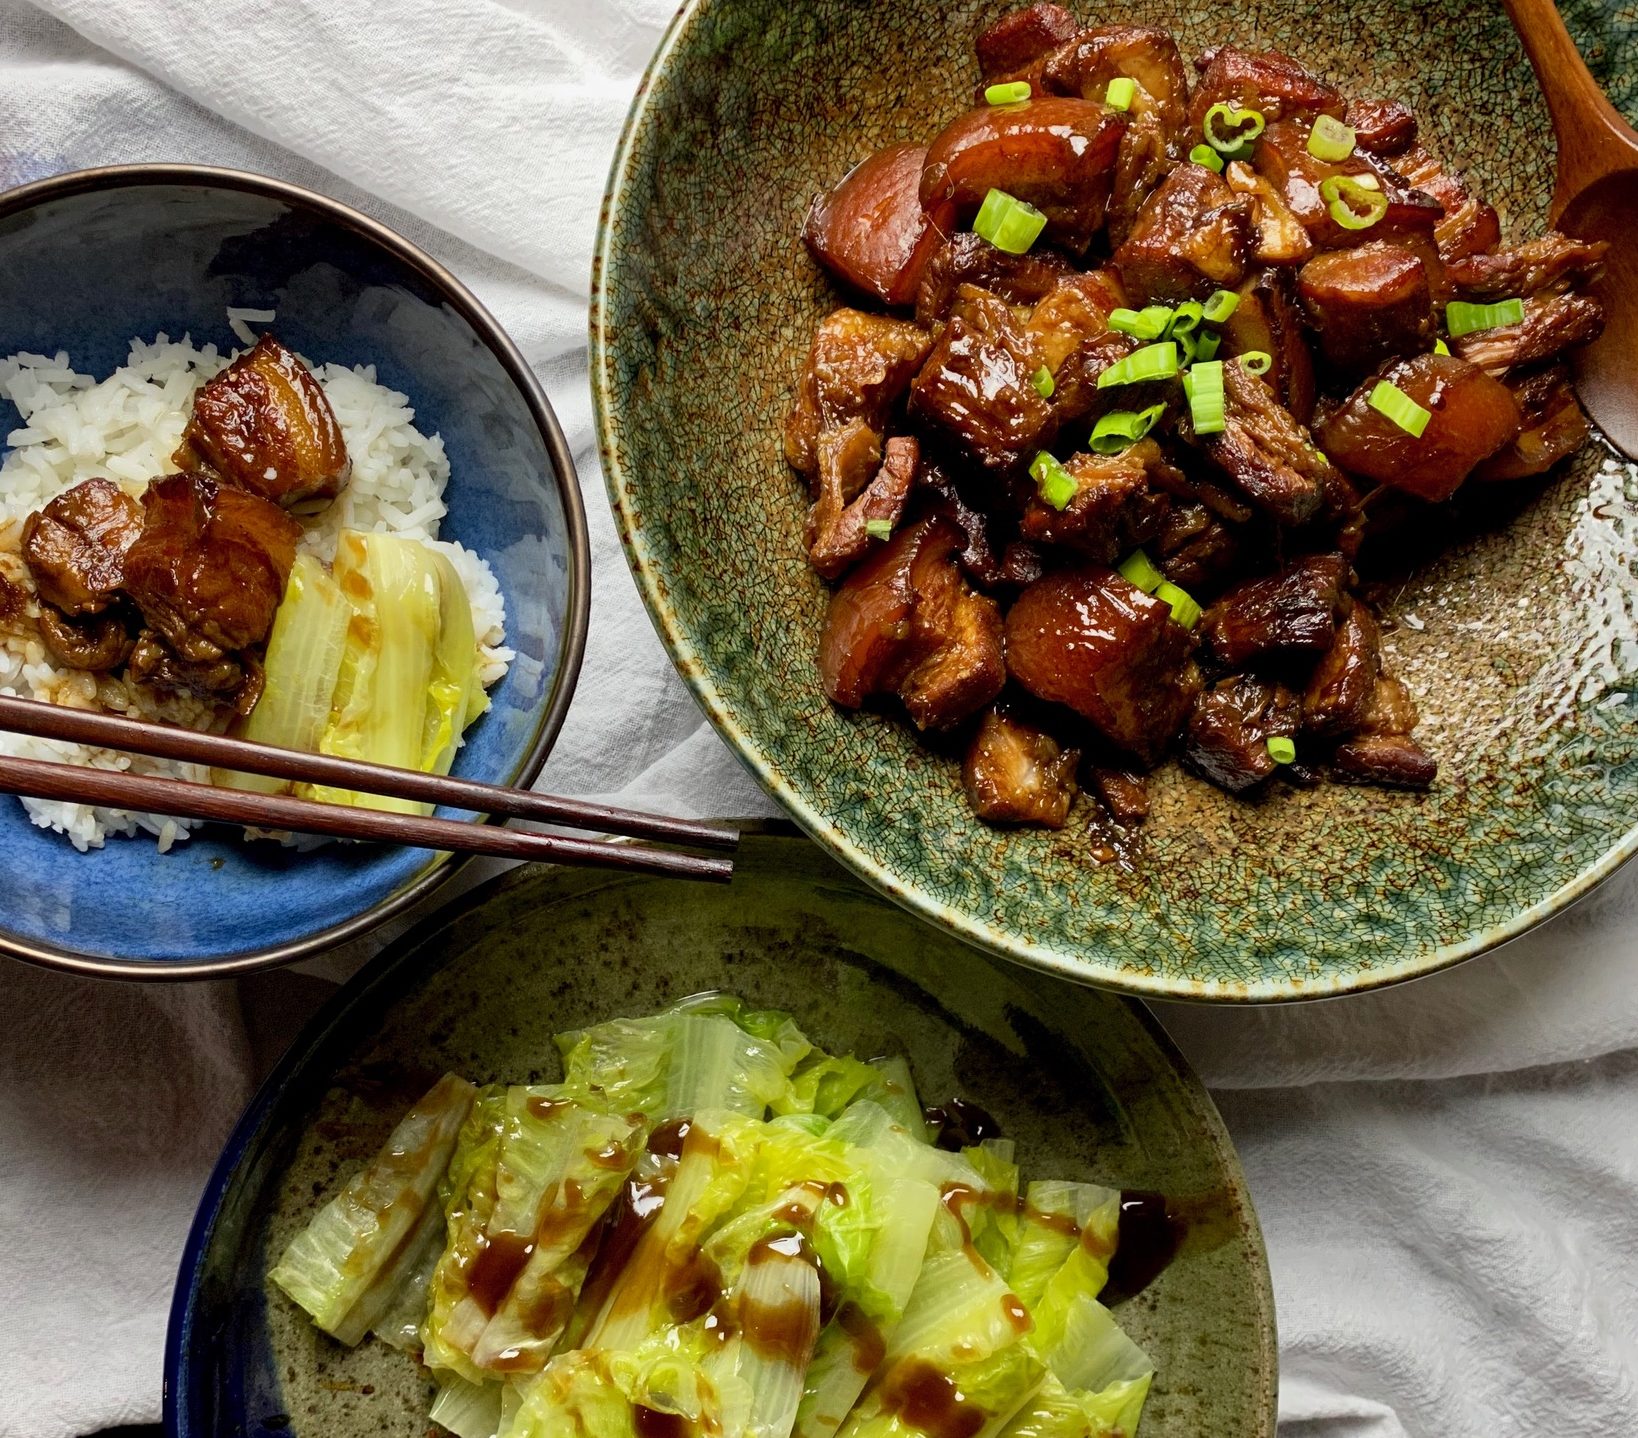
Serve over rice and with greens such as poached lettuce or bok choy.
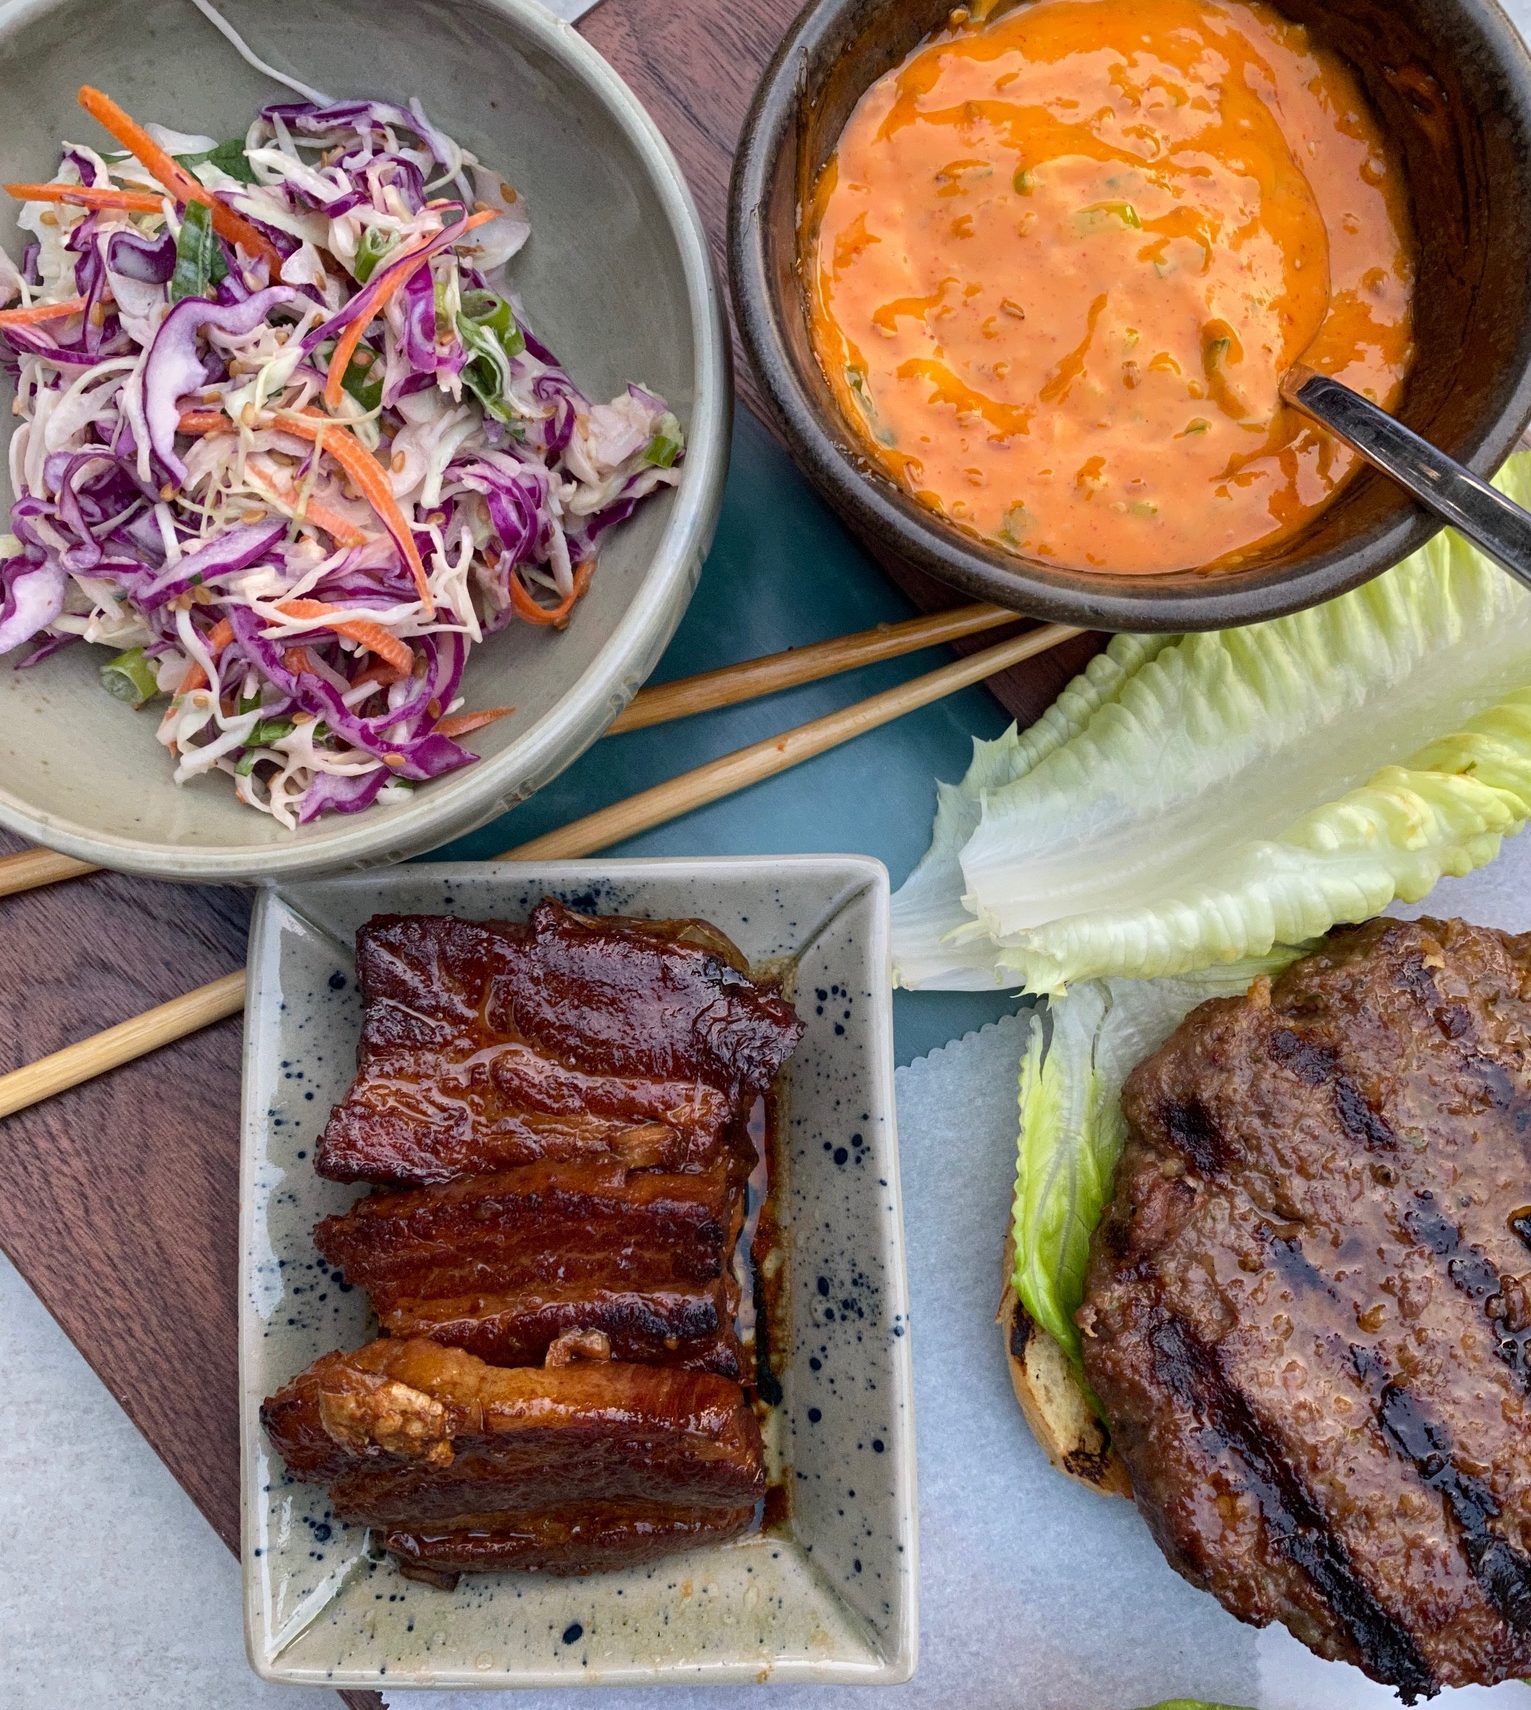
Red Cooked Pork Belly, Sesame Slaw, and Gochujang Mayo for my Asian version of a BLT Burger.  How did I not win our annual burger cook-off?

Print Pin
5 from 1 vote

Red Cooked Pork adapted from A Common Table

Iconic Chinese Dish, Red Cooked Pork is pork belly slowly braised in soy sauce, sugar and aromatics until meltingly tender. Delicious over rice or in bao.
Course Main Course
Cuisine Asian
Keyword braised, Chinese, easy recipe, Pork Belly, red cook pork
Prep Time 20 minutes
Cook Time 3 hours

Ingredients

  • 2 pounds pork belly or pork shoulder cut in 3/4- to 1-inch (2- to 2.5-cm) chunks
  • 1/4 cup granulated sugar substitute rock sugar 3 tablespoons (50-75 gms) or to taste
  • 2 tbsp water to caramelize sugar
  • 2-3 cups water for braising liquid
  • 3 to 4 scallions cut on the diagonal into 2-inch (5-cm) lengths (about 1/4 cup sliced)
  • 3 to 4 garlic cloves smashed, or 1 tablespoon minced garlic
  • 1 inch piece ginger root sliced into 6 to 8 circles
  • 1 whole star anise 0-3 pods, your choice
  • 1 stick cinnamon
  • 1/3 cup Shaoxing rice wine dry sherry, or sake
  • 3 tablespoons light or thin regular soy sauce 生抽, NOT low sodium
  • 3 to 4 teaspoons dark soy sauce 老抽

Instructions

  • Bring a large pot of water to a boil over medium-high heat. Add the pork and gently boil for about 10 minutes, skimming off any scum as it forms on top of the water. Drain the pork and rinse to remove any remaining scum.
  • In a large wok or cast-iron skillet over medium-high heat, combine the sugar and 2 tablespoons water and stir until it dissolves. Tilt the wok or skillet to swirl the mixture, without stirring, just until it bubbles and begins to turn slightly darker in certain spots, 4 to 5 minutes. Be sure to watch it carefully so that the sugar doesn’t burn as the sugar can turn from brown to black in seconds.
  • Add the pork and cook it with the caramelized sugar, stirring frequently, until the pork is browned and smells fragrant, about 4 minutes.
  • Add the scallions, garlic, ginger, star anise and cinnamon, toss for 1 to 2 minutes to give the aromatics a quick cook. Add the rice wine, both soy sauces, and enough water to cover the pork, about 2 to 3 cups. Stir to combine and then cover and ever-so-gently simmer the pork over low heat until tender for approximately 2 hours. Stir every 15 to 20 minutes to prevent scorching and to make sure there is still enough liquid. Add water if the level gets too low.
  • Once the pork is tender, take a look at the cooking liquid. If you prefer a thicker sauce, transfer the pork to a plate, return the heat to medium-high, and simmer, uncovered, until the sauce reduces to the desired consistency, 10 to 15 minutes. Be careful not to reduce the sauce too far as you’re going to want enough sauce to go over the pork and rice. Taste the sauce and, if desired, adjust with more soy sauce or sugar. Spoon the pork and sauce over rice.
  • Serve over rice. Place pork on top of rice and drizzle a small bit of sauce over the cubes.

Pork Buns

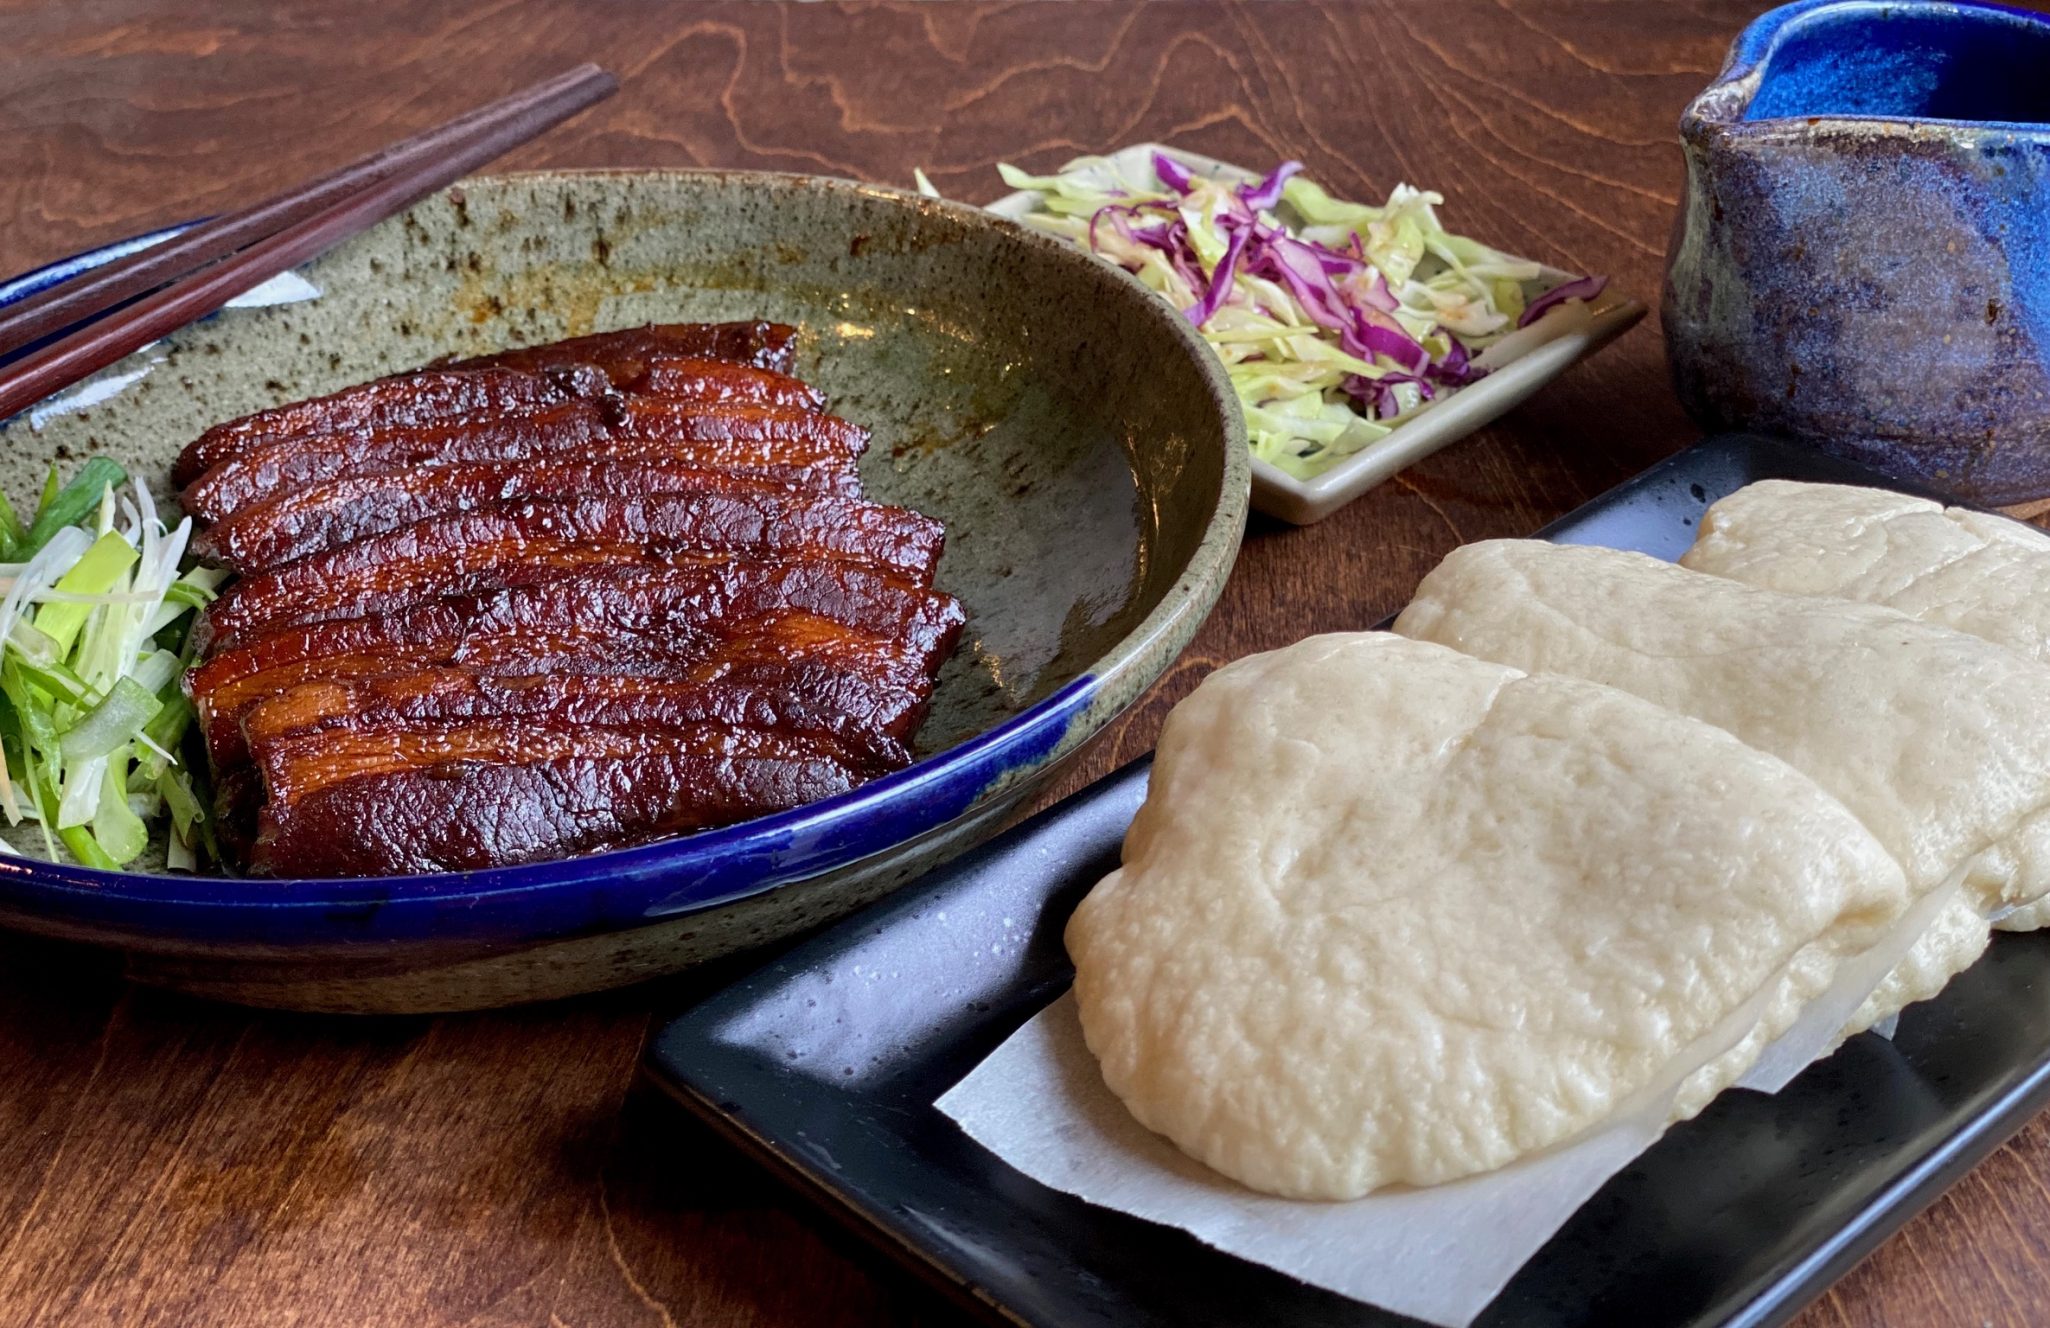
  • Cut pork belly into 1-4 to 1/2-inch thick slices approximately 2-2.5 inches in width instead of cubes. Proceed with braising instructions.
  • Serve sliced pork with steamed Chinese buns. Garnish with green onions and cilantro.
Taiwan Turkey Rice, 嘉義火雞肉飯 Deliciousness in a Bowl

Taiwan Turkey Rice, 嘉義火雞肉飯 Deliciousness in a Bowl

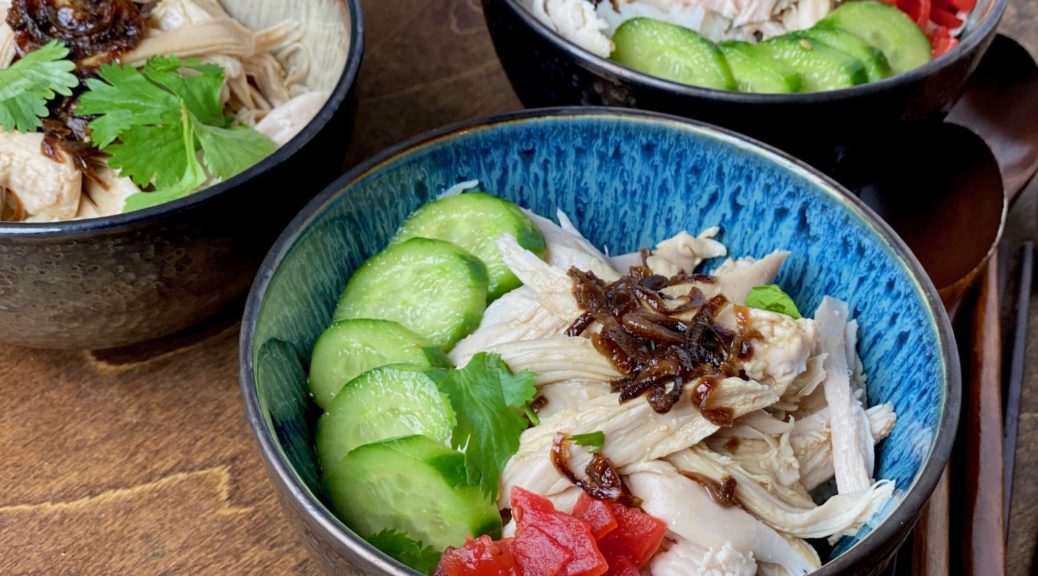
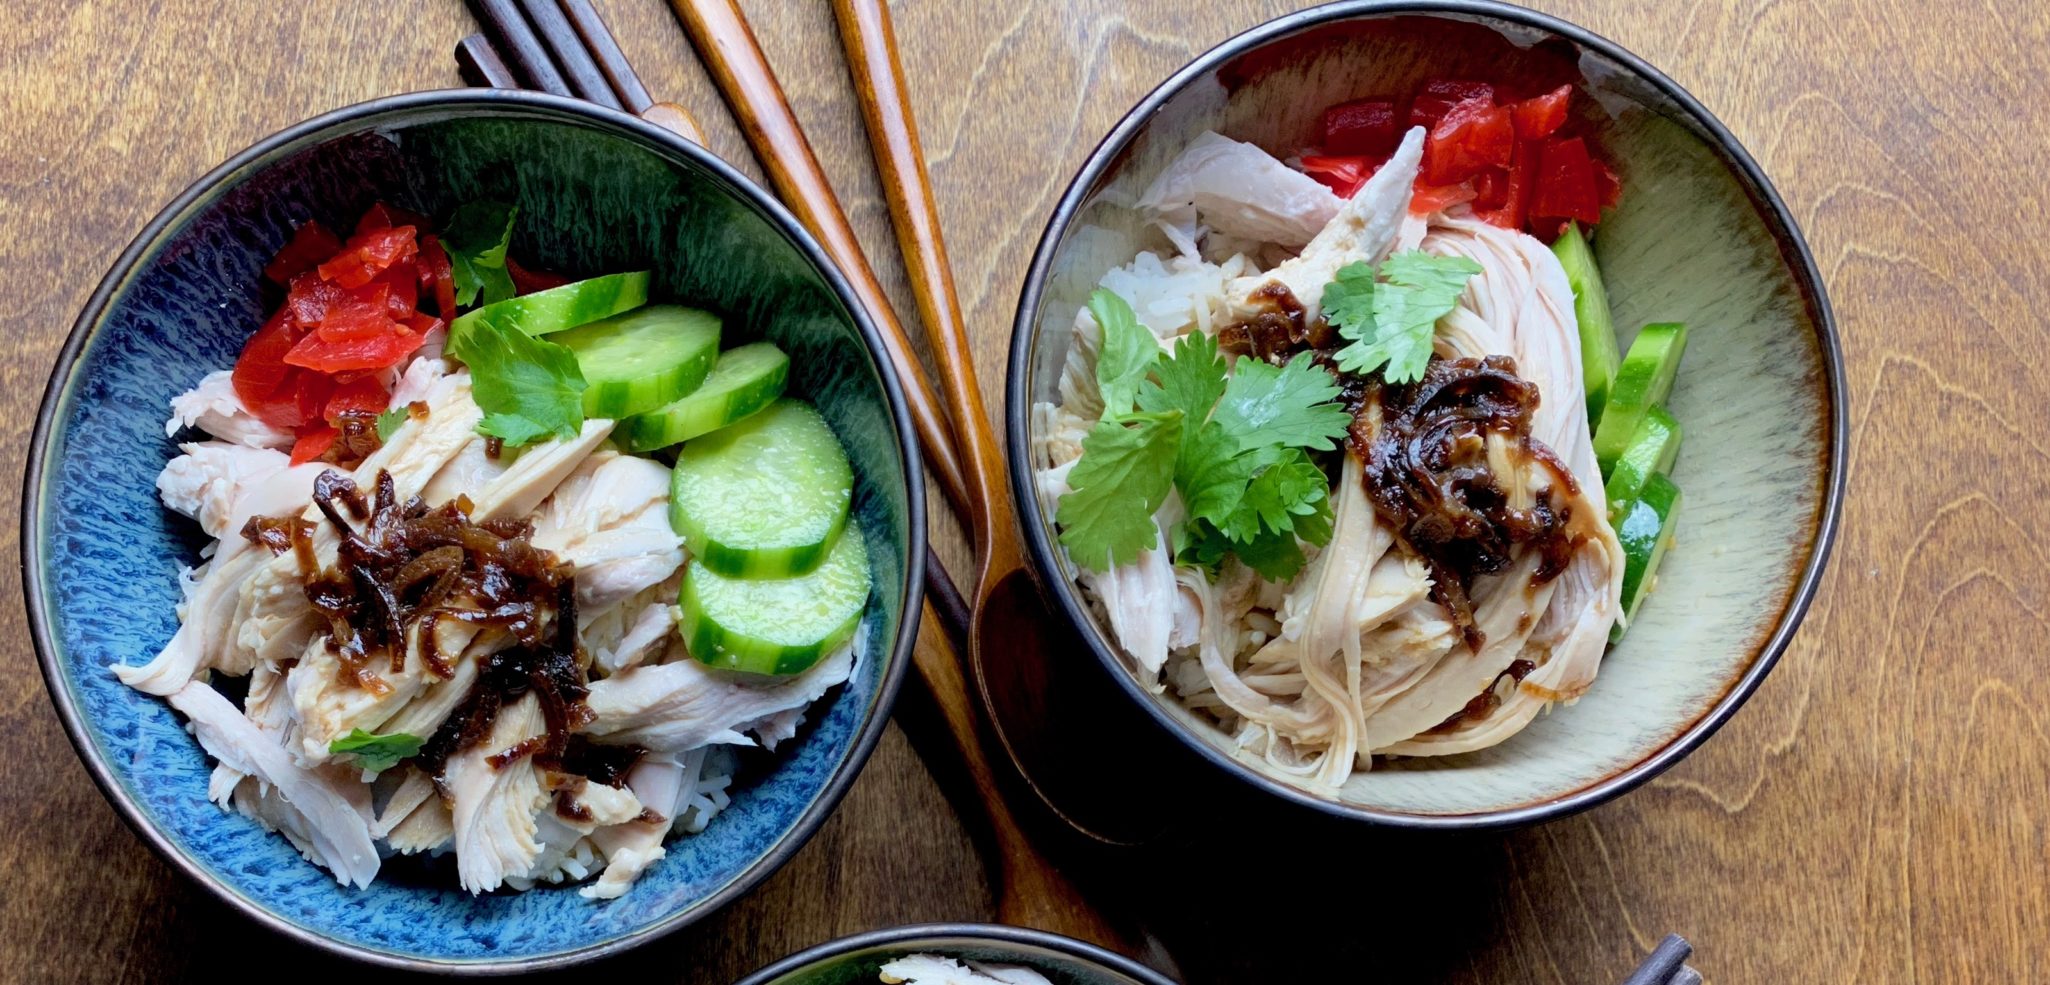
Only a couple of weeks have gone by since Thanksgiving and I have turkey on the brain, again!  Not that I didn’t get my fill of turkey on Thanksgiving but this dish caught my eye as I was roaming around the food-sphere looking for Thanksgiving ideas, Taiwanese Turkey Rice.  What?  Maybe it’s like rice soup? Nope, it is a bowl filled with rice, topped with succulent shreds of turkey, dressed with a soy sauce, fried shallots, turkey dripping emulsion and served with Asian pickles.  Damn, doesn’t that sound delicious?

SIGN ME UP NOW

I was drooling.  If you have perused my IG or blog for recipes you may have noticed that I LOVE one bowl meals like soups and stews.  My comfort zone is curled up on the couch, spoon in hand and a bowl in the other, filled with either rice or noodles topped with anything yummylicious…like THIS.

I did a bit of sleuthing for  this dish.  Turkey is not something you find in the Asian food vernacular.  It turns out, Taiwanese Turkey Rice (嘉義火雞肉飯) hails from southern Taiwan, specifically Jia Yi.  It is a super popular street food and turkeys are grown specifically for this dish.  Originally the turkey was shredded as a garnish for the classic dish, Lu Rou Fan, 魯肉飯, Stewed Pork over Rice, but folks liked the turkey so much, they started making it without the Stewed Pork, thus Taiwanese Turkey Rice was born.

Turkey Rice is similar to Hainan Chicken Rice or Thai Chicken and Rice.  The flavor profile of the sauce sets it apart though, oh yeah, and the turkey, but in a pinch you could use chicken for this dish.  I decided to cook the turkey ala Hainan Chicken style. The turkey is poached so you end up with moist succulent meat plus the stock which serves as the basis for the sauce.  There are a plethora of recipes out there right now that take advantage of turkey leftovers to make this dish including this one from Serious Eatsbut I wanted the real deal so I started with uncooked turkey breast.

Two blogs jumped out and served as the basis for info and recipe for Taiwanese Turkey Rice, Choo Choo-ca-Chew  and The Food Dictator.  A wealth of information and great recipes.

The Turkey

I started with a turkey breast, well, half of a turkey breast and poached it, just like Hainan Chicken.  The poaching liquid is seasoned with salt, ginger, scallion, rice wine and Better Than Bouillon Chicken Base (game changer).  If you have a box of turkey stock from TJ’s, use that and water for a more flavorful stock.  (I think their turkey stock is better than the chicken stock in a box.

When you buy your turkey make sure the skin is still attached***  Remove the skin at home and reserve. Drop the turkey into the boiling poaching liquid (ok, don’t just DROP it, gently place…to avoid 3rd degree burns).  Bring the stock back to a boil and turn the heat down so the stock is simmering.  Cover and let simmer for 10 minutes.  Turn the flame off, NO PEEKING, and let the turkey sit for 25 minutes undisturbed.  Think of it as a spa day for the turkey.  Once it is done take it out of the pot, let it sit until it is cool enough to handle.  Remove meat from bone and shred into bite size pieces.  Reserve in bowl and cover to keep warm.

Gimme Some Skin***

A trip to Minneapolis, back before the time of COVID, we caved into Wes’s penchant for Caesar Salad at the Butcher & The Boar (sadly gone) one night for dinner.  A few tweaks made their Caesar a standout.  The Romaine lettuce was grilled, and in place of croutons, bits of chicken skin baked to a crispy golden finish adorned the salad. ㄹingerlicking good.

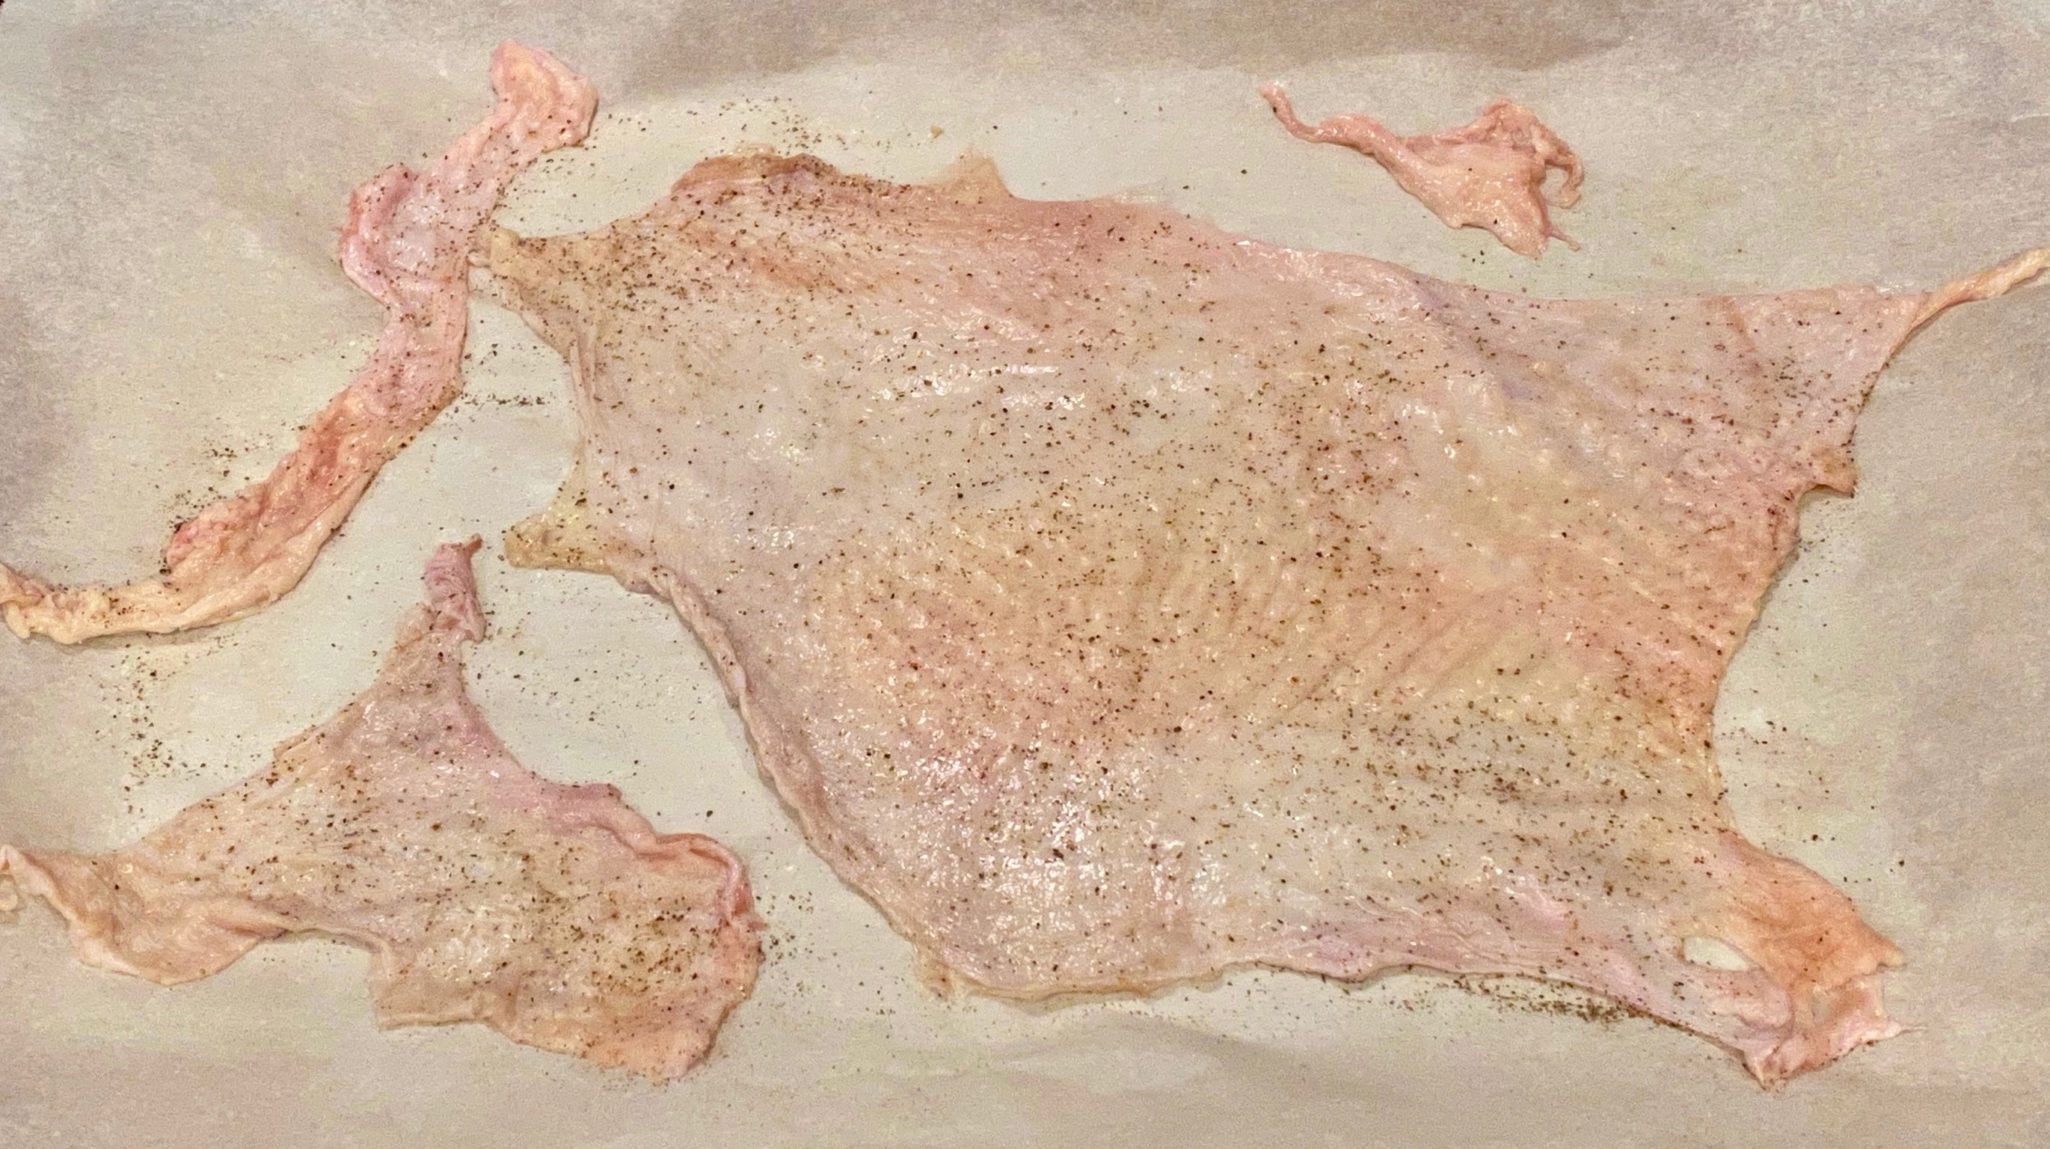
Crispy chicken skin (in this case turkey) is pretty quick and easy to make.  Spread the skin out on a parchment lined rimmed baking sheet.  Salt and pepper.  Cover with a sheet of parchment and top with another baking sheet to keep the skin flat.  Bake at 375 degrees for 20-25 minutes until skins are deep golden.  You should have a nice puddle of oil from this, KEEP the oil.

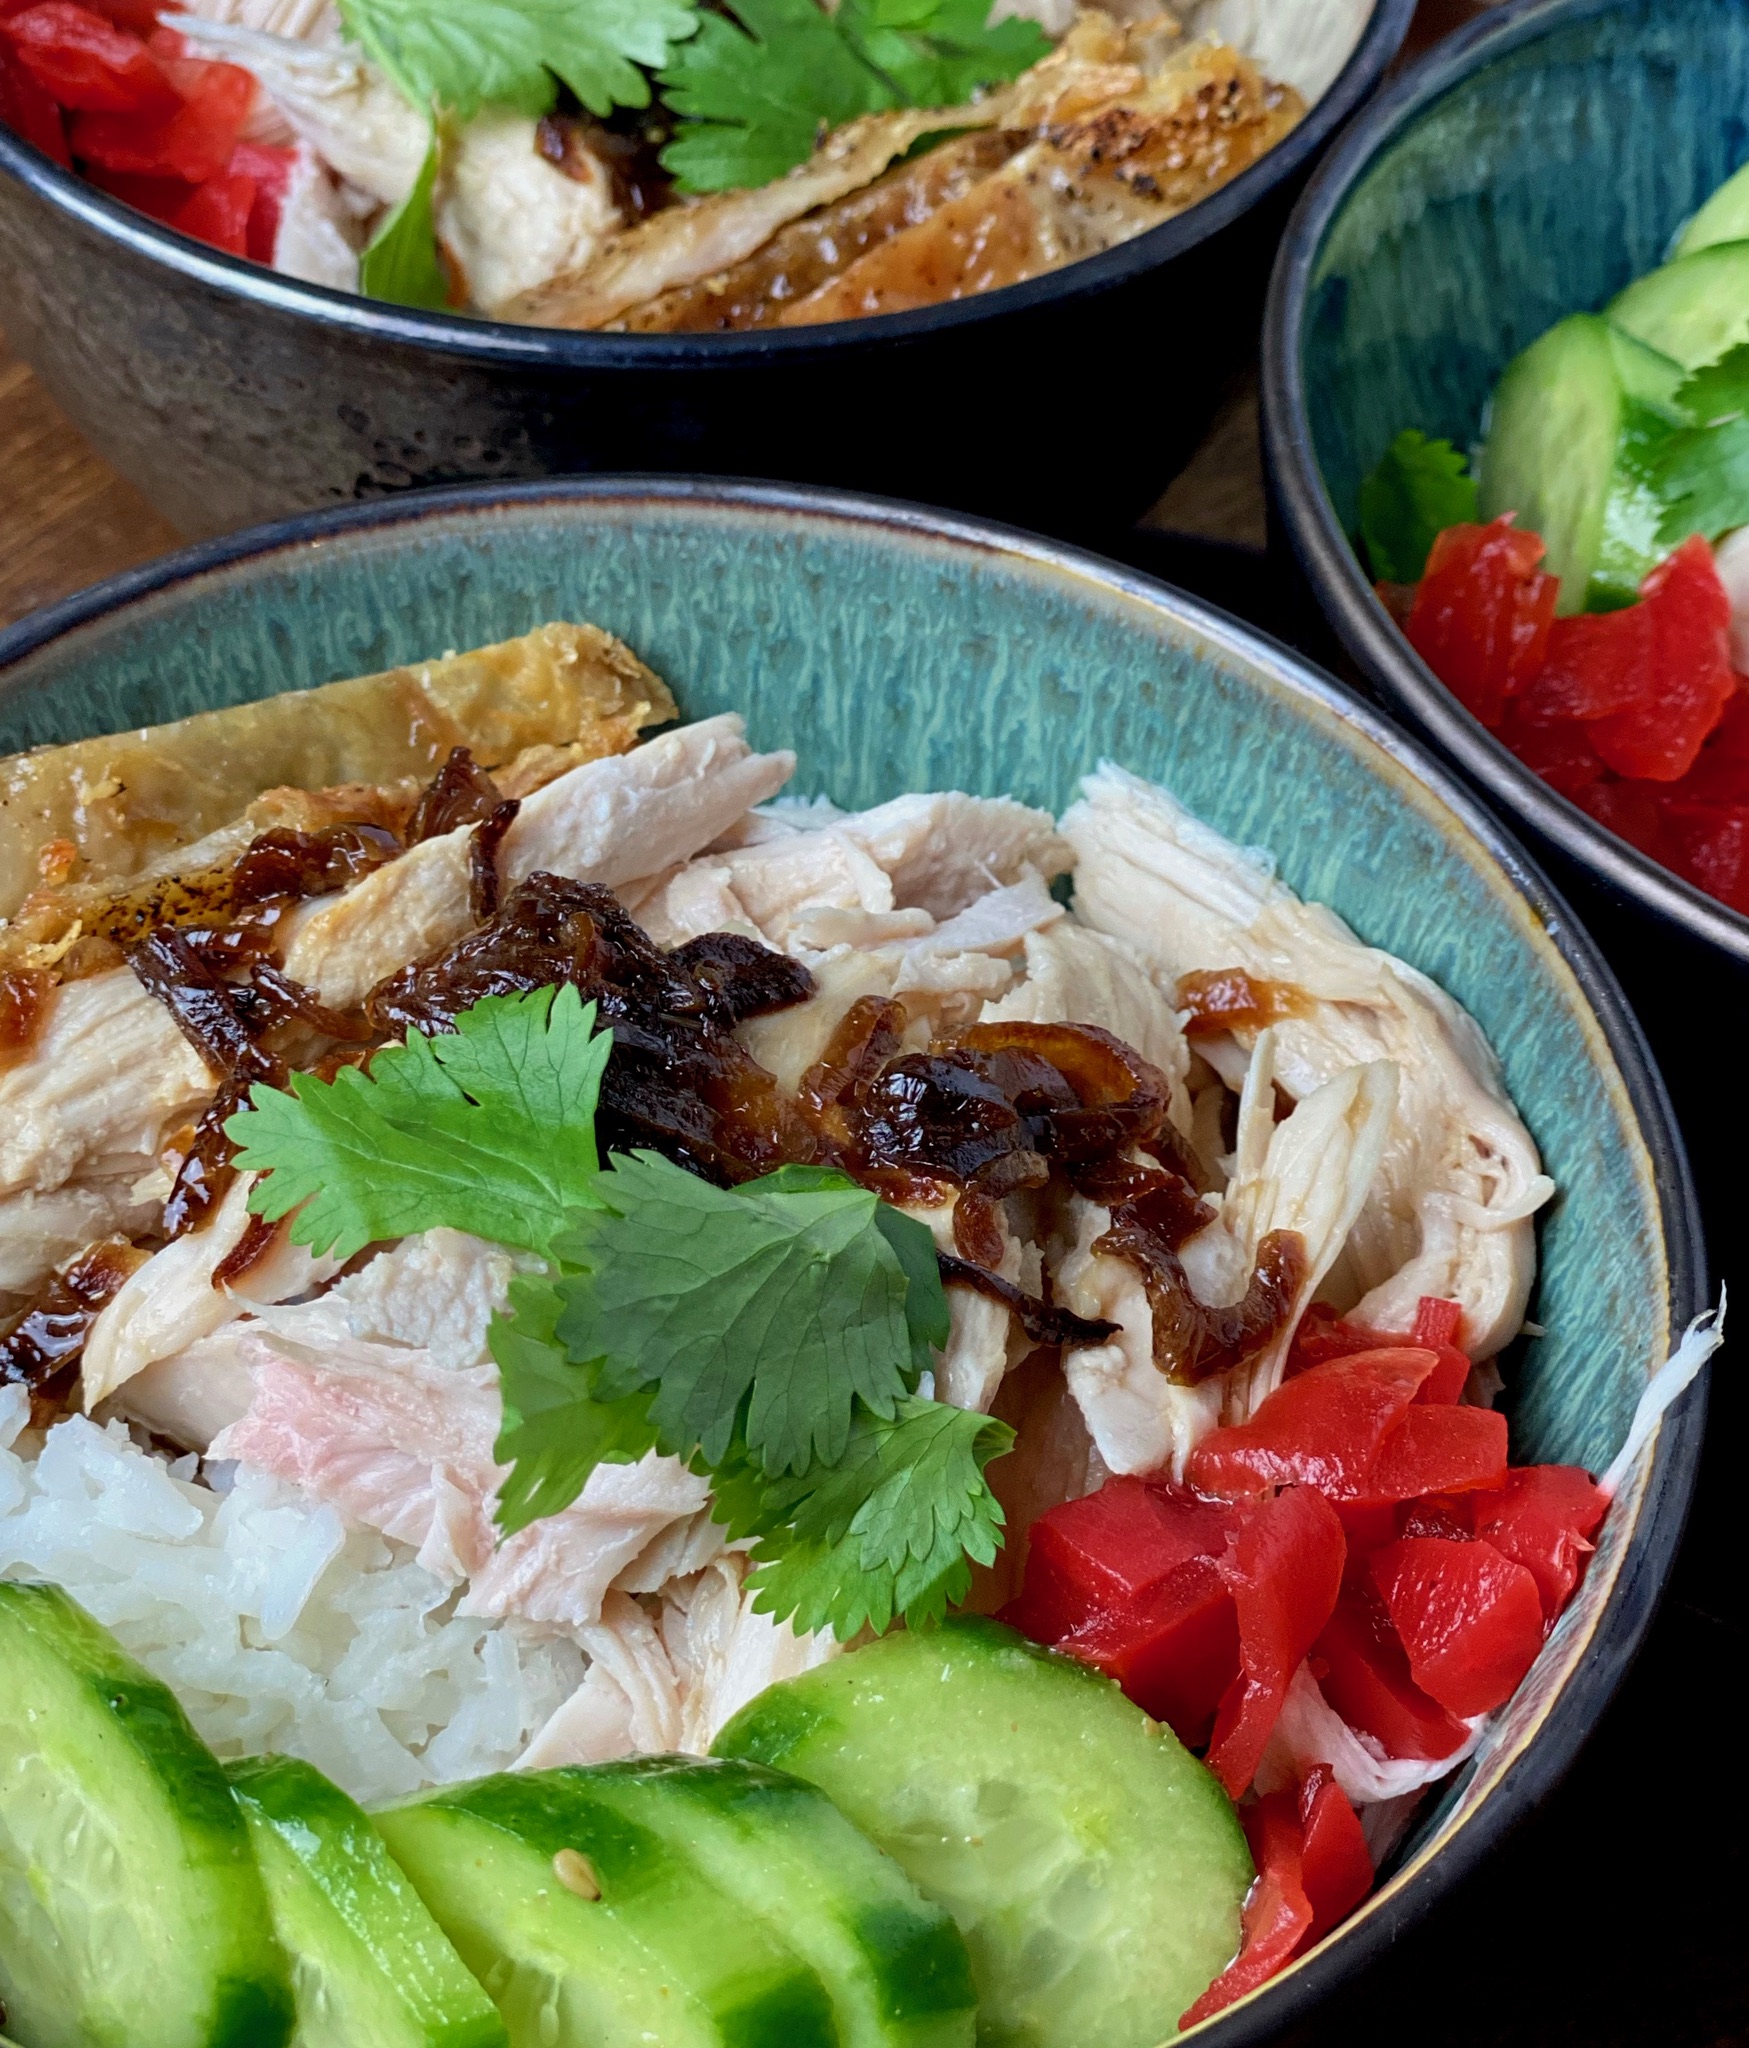
The rendered oil is used in the sauce for the dish.  The crispy skin is a bonus that I use as a garnish for turkey rice.  It provides added crunch and flavor to the dish, its damn delish.

The Sauce

Hainan Chicken or Chinese Poached Chicken is served with a ginger, scallion, sauce with or without slices of chili.  For Taiwanese Turkey Rice, the sauce is made with fried shallots, light soy sauce, a bit of sugar and the rendered oil from the turkey.  It’s deceptively simple for a sauce that is so delicious.  I buy a ton of shallots, thinly slice and fry them. The oil is kept in the fridge and the shallots in a jar on the counter.

Here is a detailed description on how to make fried shallots from Serious Eats.  IN A PINCH, you can buy fried shallots at most Asian markets and avoid frying your own.  IN A DOUBLE PINCH, TJ’s has fried crispy onions in a can during the holidays, (probably for the green bean casserole I hate) that make a pretty good substitute.

The Rice

Traditionally served over plain rice, you can bump it up by using the poaching liquid to cook the rice.  Just reserve enough for the sauce.  For the rice use any long grain or Jasmine Rice.

The Sides

Pickles are often served with Turkey Rice.  I like pickled ginger, takuan (pickled Japanese radish), or Vinegared Chinese pickles.  I love soft boiled eggs (like ramen eggs) and fresh cucumbers lightly dressed as sides. Garnish with scallions or cilantro.  Lip-smackin’ good.
Taiwanese Turkey Rice

Course Main Course, One dish meals
Cuisine Asian
Keyword Rice Bowl, Soul Food, Taiwanese, Turkey Rice
Prep Time 20 minutes
Cook Time 1 hour 15 minutes
Servings 2 servings

Ingredients

  • 2 C Shredded Turkey* You can use Thanksgiving turkey leftovers

Poaching Liquid

  • Water Enough water to cover turkey
  • 2-3 slices ginger
  • 2 scallions
  • 1 tsp salt
  • 1/4 cup rice wine
  • 1 tablespoon Better Than Bouillion Chicken Base

SAUCE

  • 3 Shallots Thinly sliced
  • 1-1/2 TBsp Oil Lard, Vegetable Oil, Chicken Fat or Half and Half
  • 3 TBsp Soy Sauce Light Soy Sauce (Pearl Ridge is good)
  • 1 TBsp Sugar
  • 3/4 C Chicken/Turkey Broth

RICE

  • 2 C Rice Steam or cooked according to instruction. You can also use the chicken stock from boiling the chicken to cook rice if making from scratch. It really enhances the flavor

Instructions

Turkey

  • Start with just enough water to cover the turkey breast in a pot. Add ginger, scallions, rice wine, and stock base and bring to a boil. Add turkey and cook for 10mins then turn the heat off and let it sit in the pot for 25 mins or until cooked through. This method makes silky, tender, turkey.
  • Remove from pot, cool until you can handle and shred into small pieces. Cover and reserve.
  • The poaching liquid can be reduced by 20-30% to concentrate the flavor. Taste.

SAUCE

  • In a frying pan, heat up 1-1/2 TBsp of oil of your choice. I use 1/2 shallot oil and 1/2 rendered fat from turkey
  • Add the sliced shallots to the oil and fry until crispy golden. Remove shallots or you can leave them in the sauce. I like to remove them and sprinkle them on the finished bowl. Or go half and half.
  • Add the turkey stock, soy sauce, and sugar to the pan, careful the oil may splatter
  • Cook on high to slightly reduce the sauce.

The Bowl

  • Layer shredded turkey over steaming rice, pour amount ofsauce you want over the turkey.
  • Garnish with pickles, or green veggies, or cucumbers, fried shallots, scallions, soft boiled egg, or reserved crispy turkey skin.

Notes

Leftover holiday turkey can be used for this dish.  Make sure you keep the pan drippings from the turkey and use this for the oil in the sauce.  You can use turkey stock or water for the sauce.
Asian Soul Food: Steamed Chicken with Chinese Sausage & Mushrooms

Asian Soul Food: Steamed Chicken with Chinese Sausage & Mushrooms

Dinner in the Time of COVID.  I find myself not just cooking more but cooking more of the dishes I grew up eating.  Favorite dishes that my father and grandfather cooked for us.  We all need a little bit of comfort these days, ain’t that the truth.

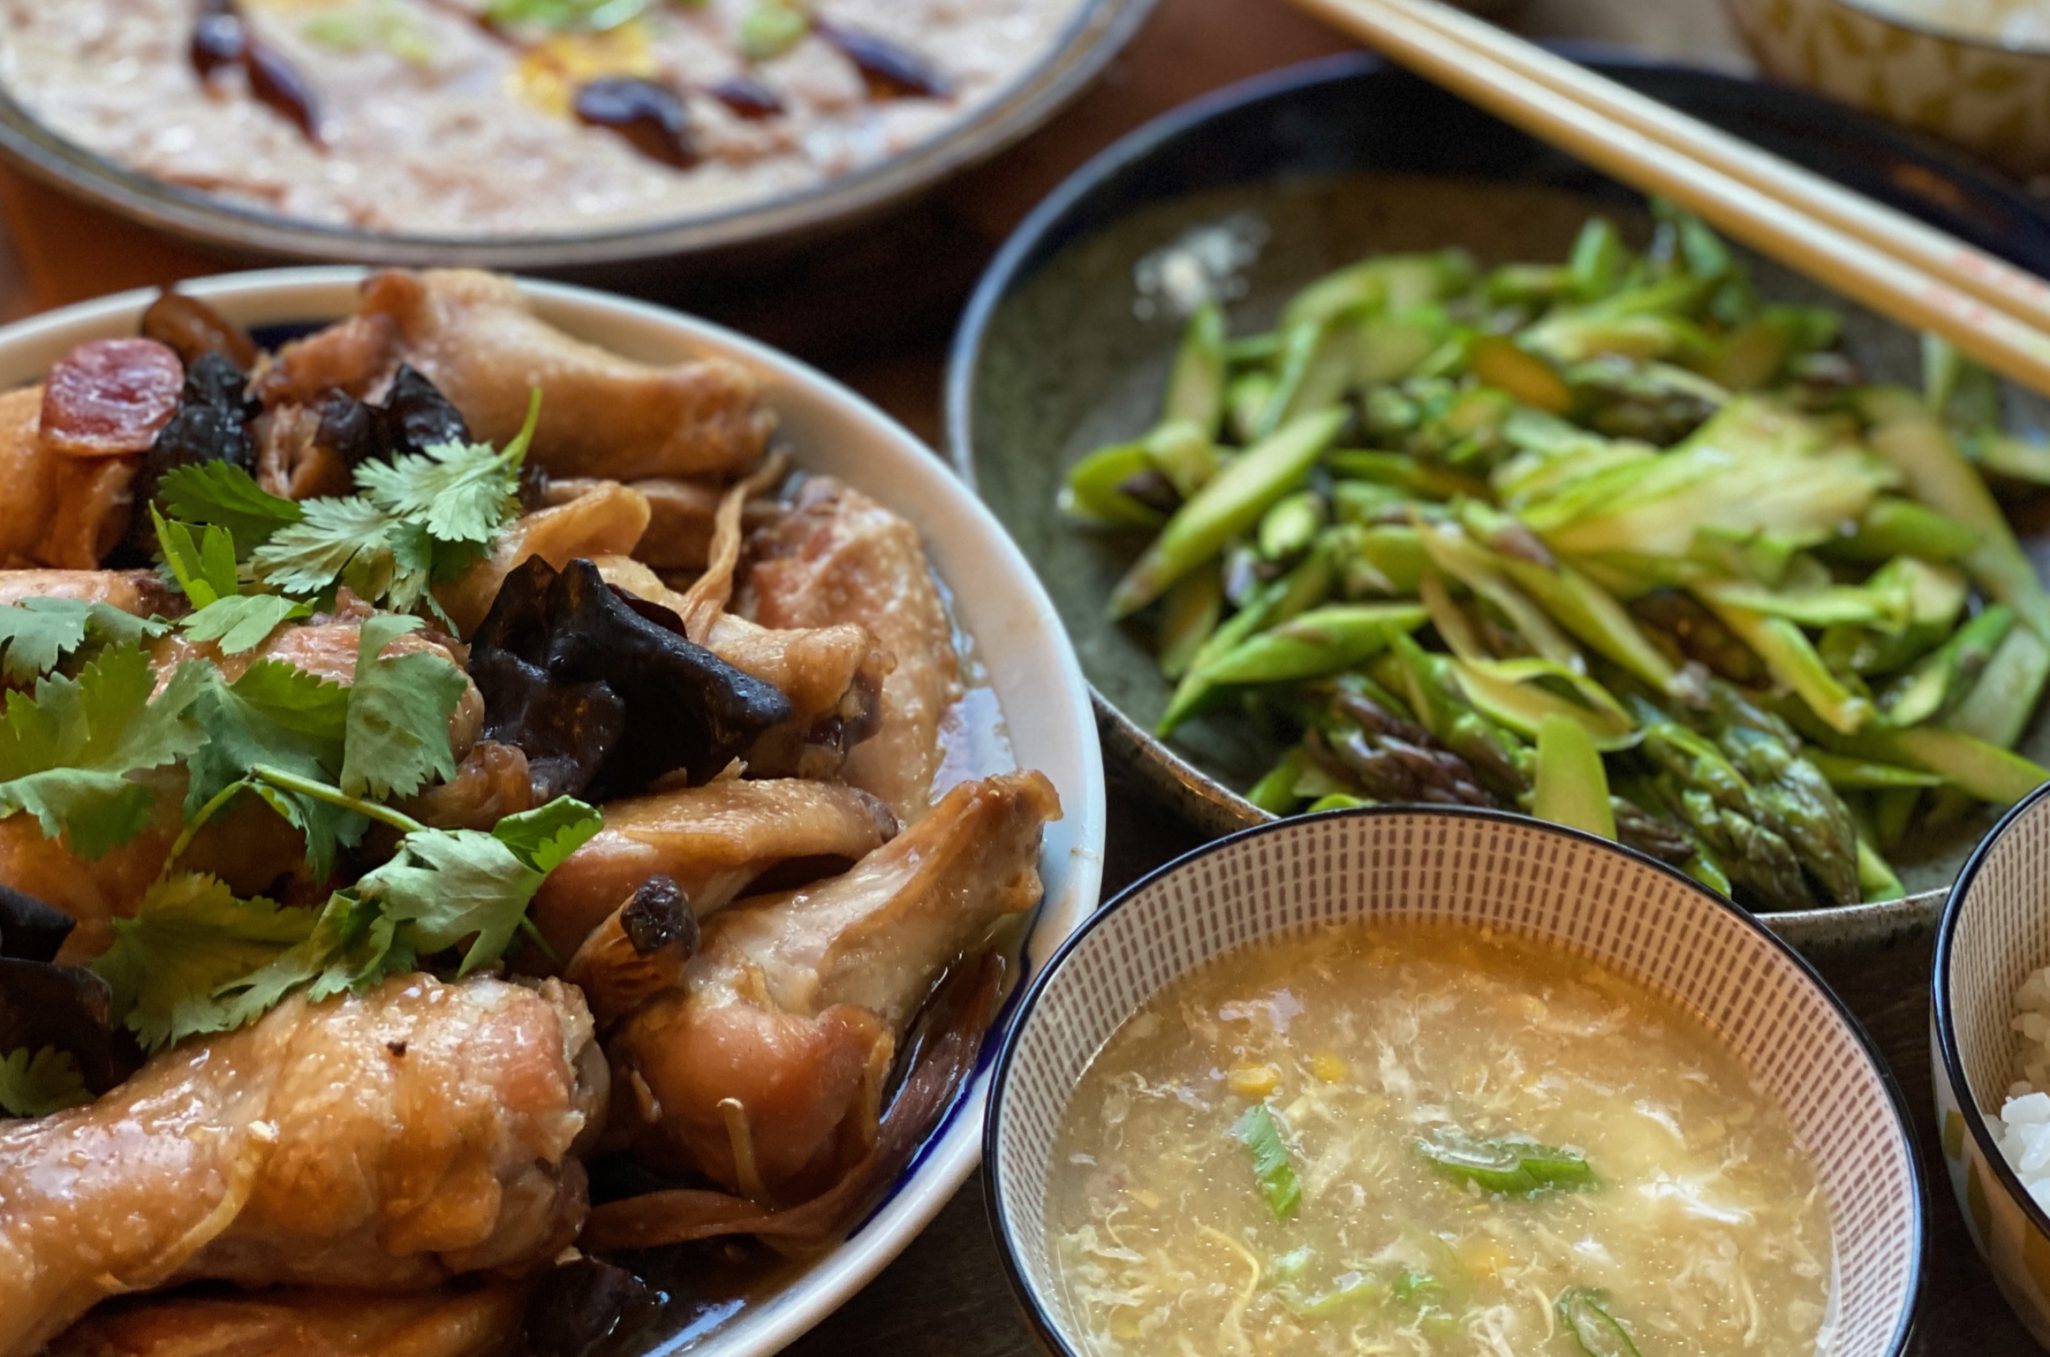
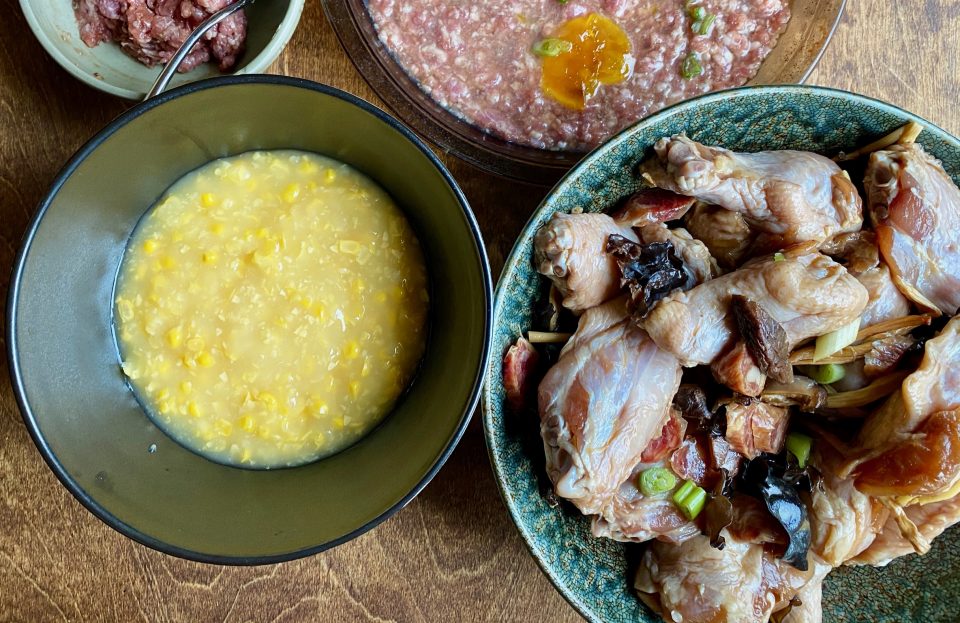
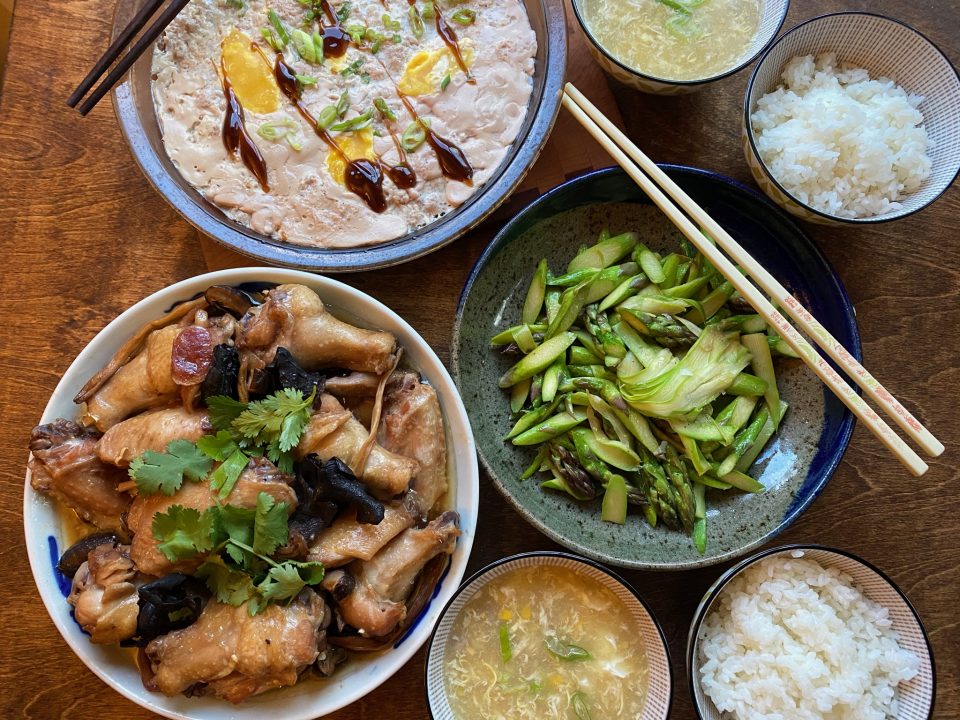
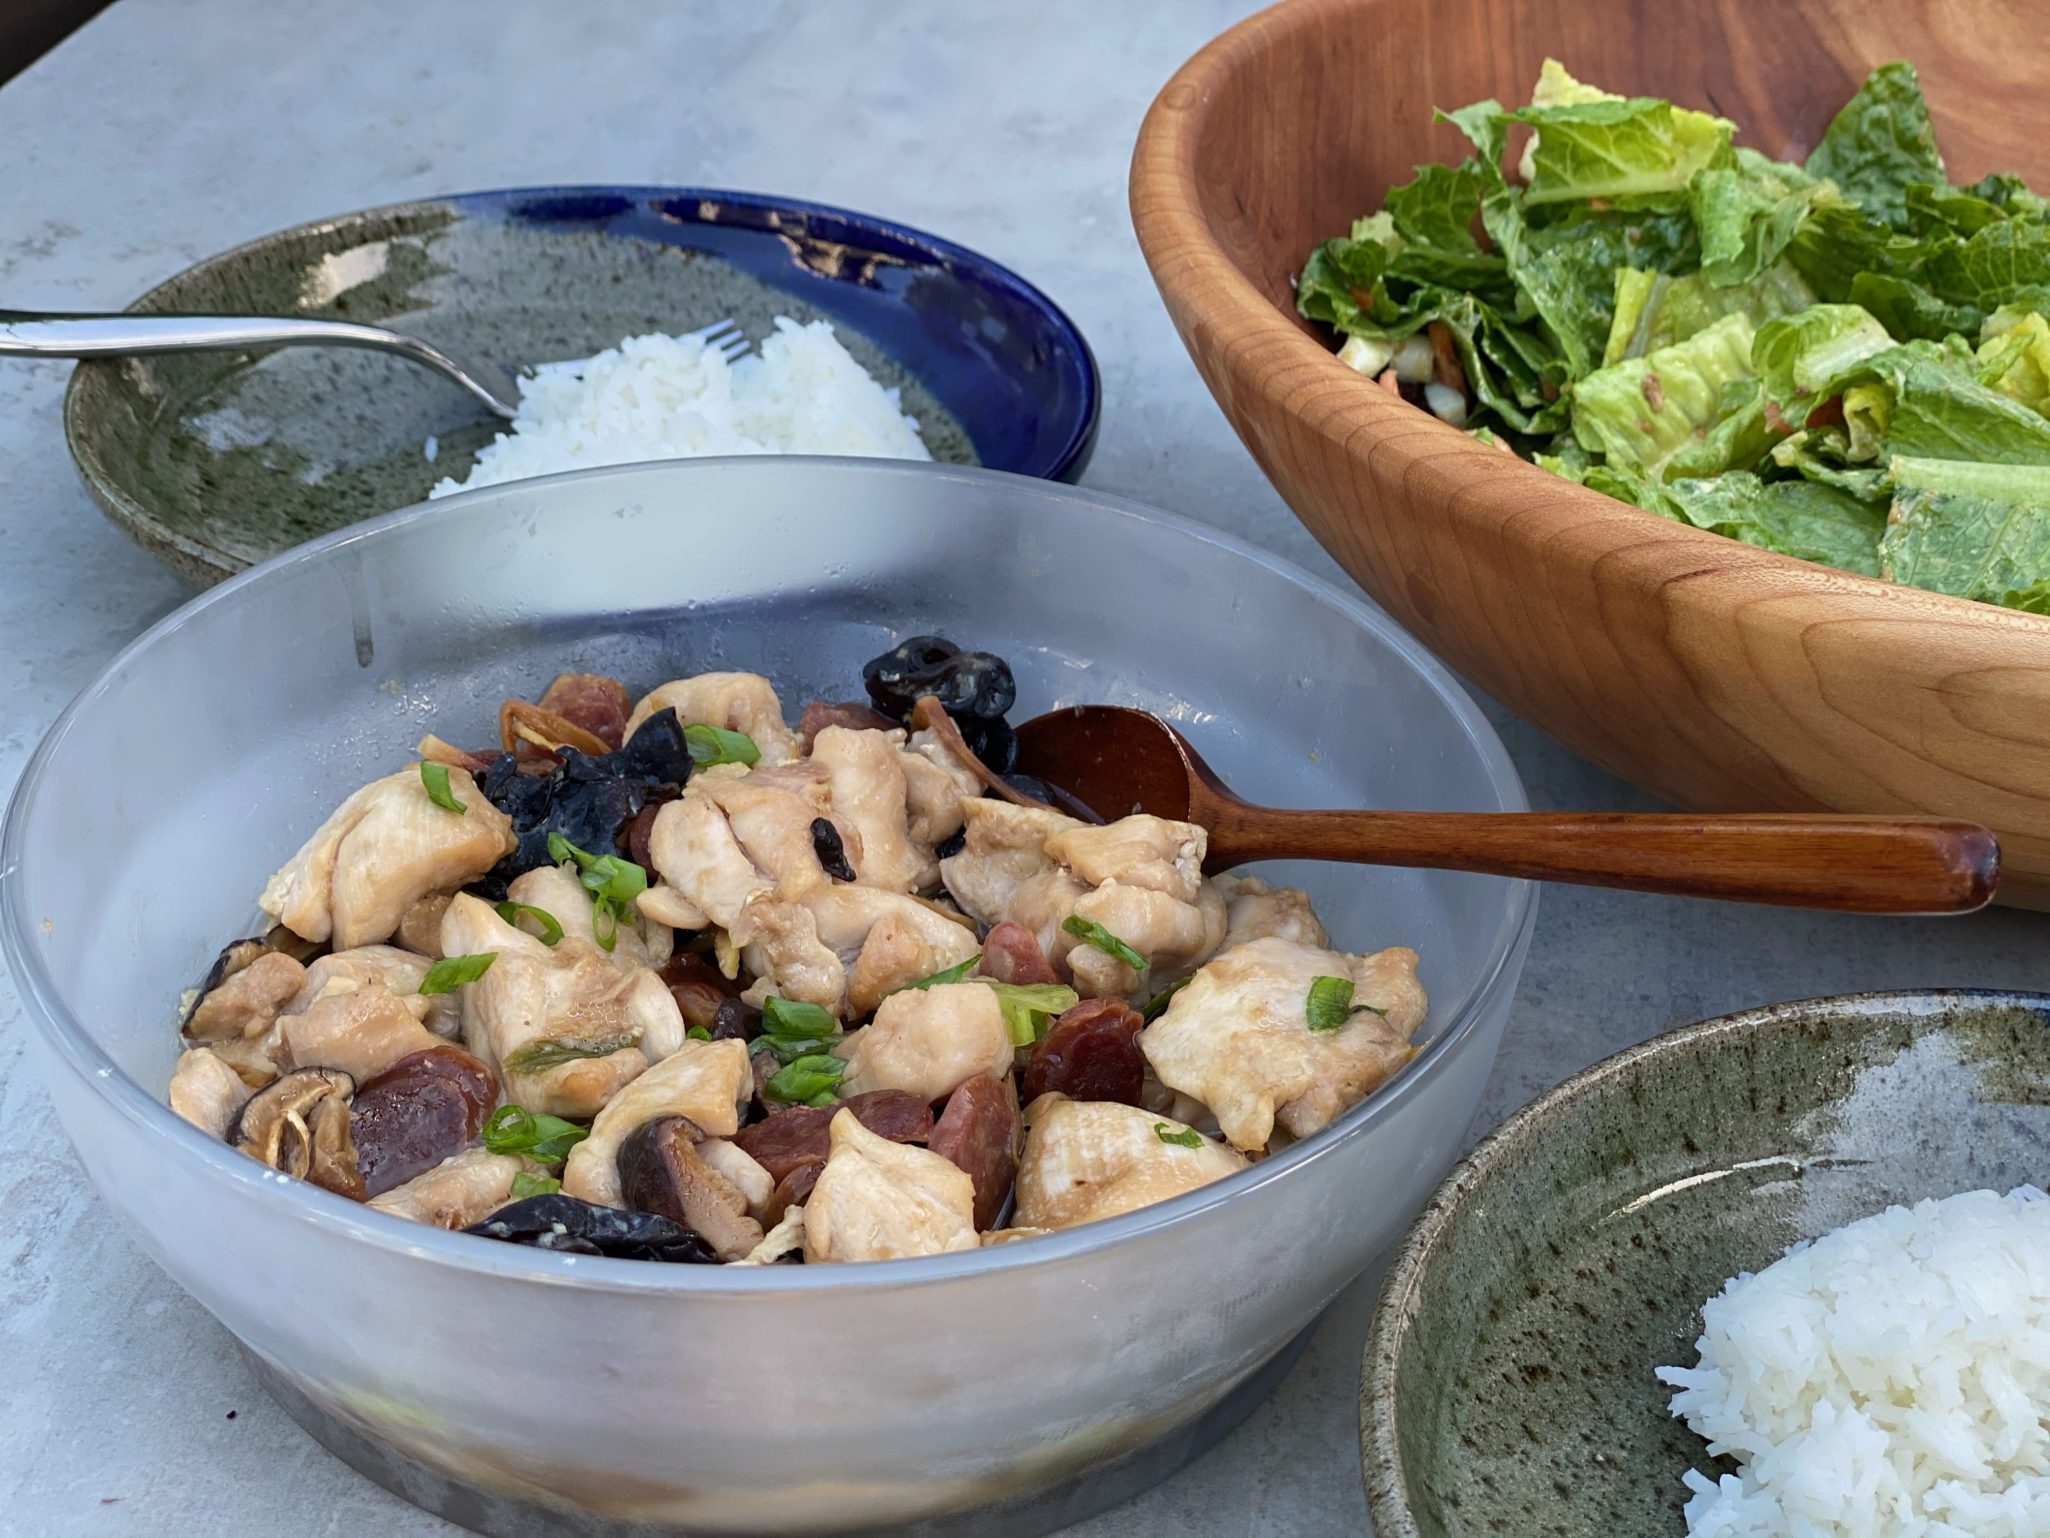
A favorite in our house is Steamed Chicken with Chinese Sausage and Mushrooms.  This time it was part of a meal that is as down-home as it gets.  We started with Kid-favorite Corn Soup Steamed Pork with Salted Egg, and Sauteed AsparagusI was exhausted from all the prep!  How my Dad pulled off dinners like this nightly after a full day’s work, continues to amaze me.

The keys to Delicious Steamed Chicken with Chinese Sausage & Mushrooms

Use bone-in chicken if possible.  The flavor is better when the meat is left on the bone…is there a scientific reason? Who knows, but I’m not about to buck my dad’s advice.  But, don’t let that stop you from making this dish, by all means, if all you have is boneless chicken, use it.  It will still be onolicious.  I like to use wings, but any part of the chicken will work.  Breast meat is a little trickier, it is less forgiving than dark meat and can overcook. 

Chinese Sausage

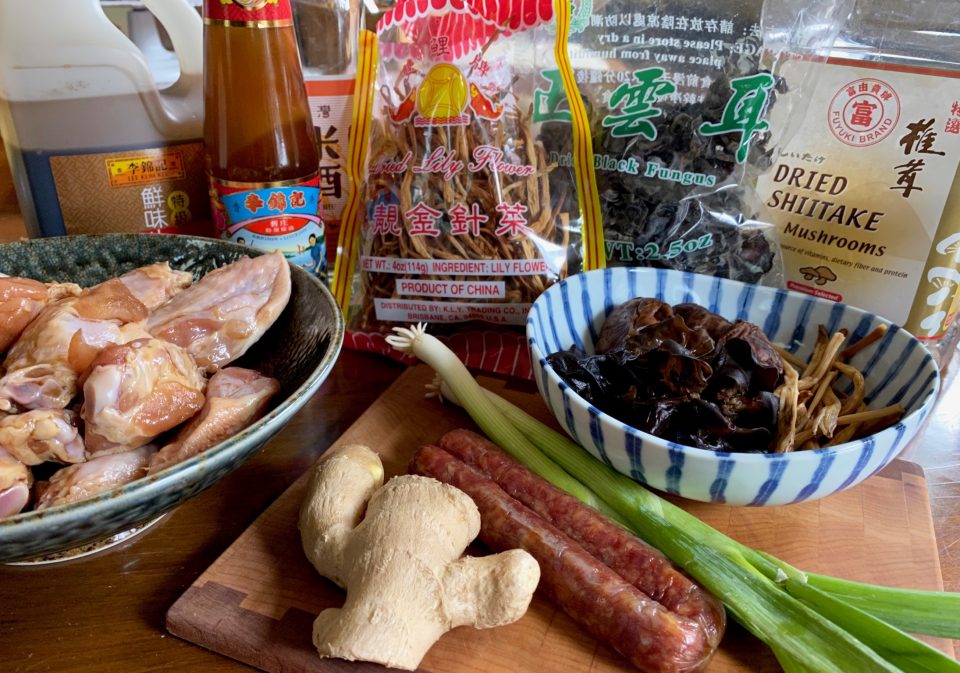
Also known as Lop Cheung, a delicious sweet and slightly savory preserved meat that is found in tons of Chinese dishes.  I love Lop Cheung, when I am craving an easy comfort dish, I’ll throw a couple on top of the rice right before turning on my rice cooker, as the rice cooks so do the Lop Cheung.    You can find Lop Cheung at most Asian markets and at some of the larger supermarkets in the Bay Area.  There are several different varieties including pork, pork & chicken, and pork & liver.  Unless you grew up with Chinese Sausage, stay away from the liver one which is gamier and stronger in flavor.  The meat is marinated, stuffed into casings, set to dry, and then kept cool.  I still head to SF Chinatown to buy my Lop Cheung from Mow Lee or Wycen.   Old School all the way.

I hope they survive COVID19.  

Pre-cook stage

The Dried Stuff

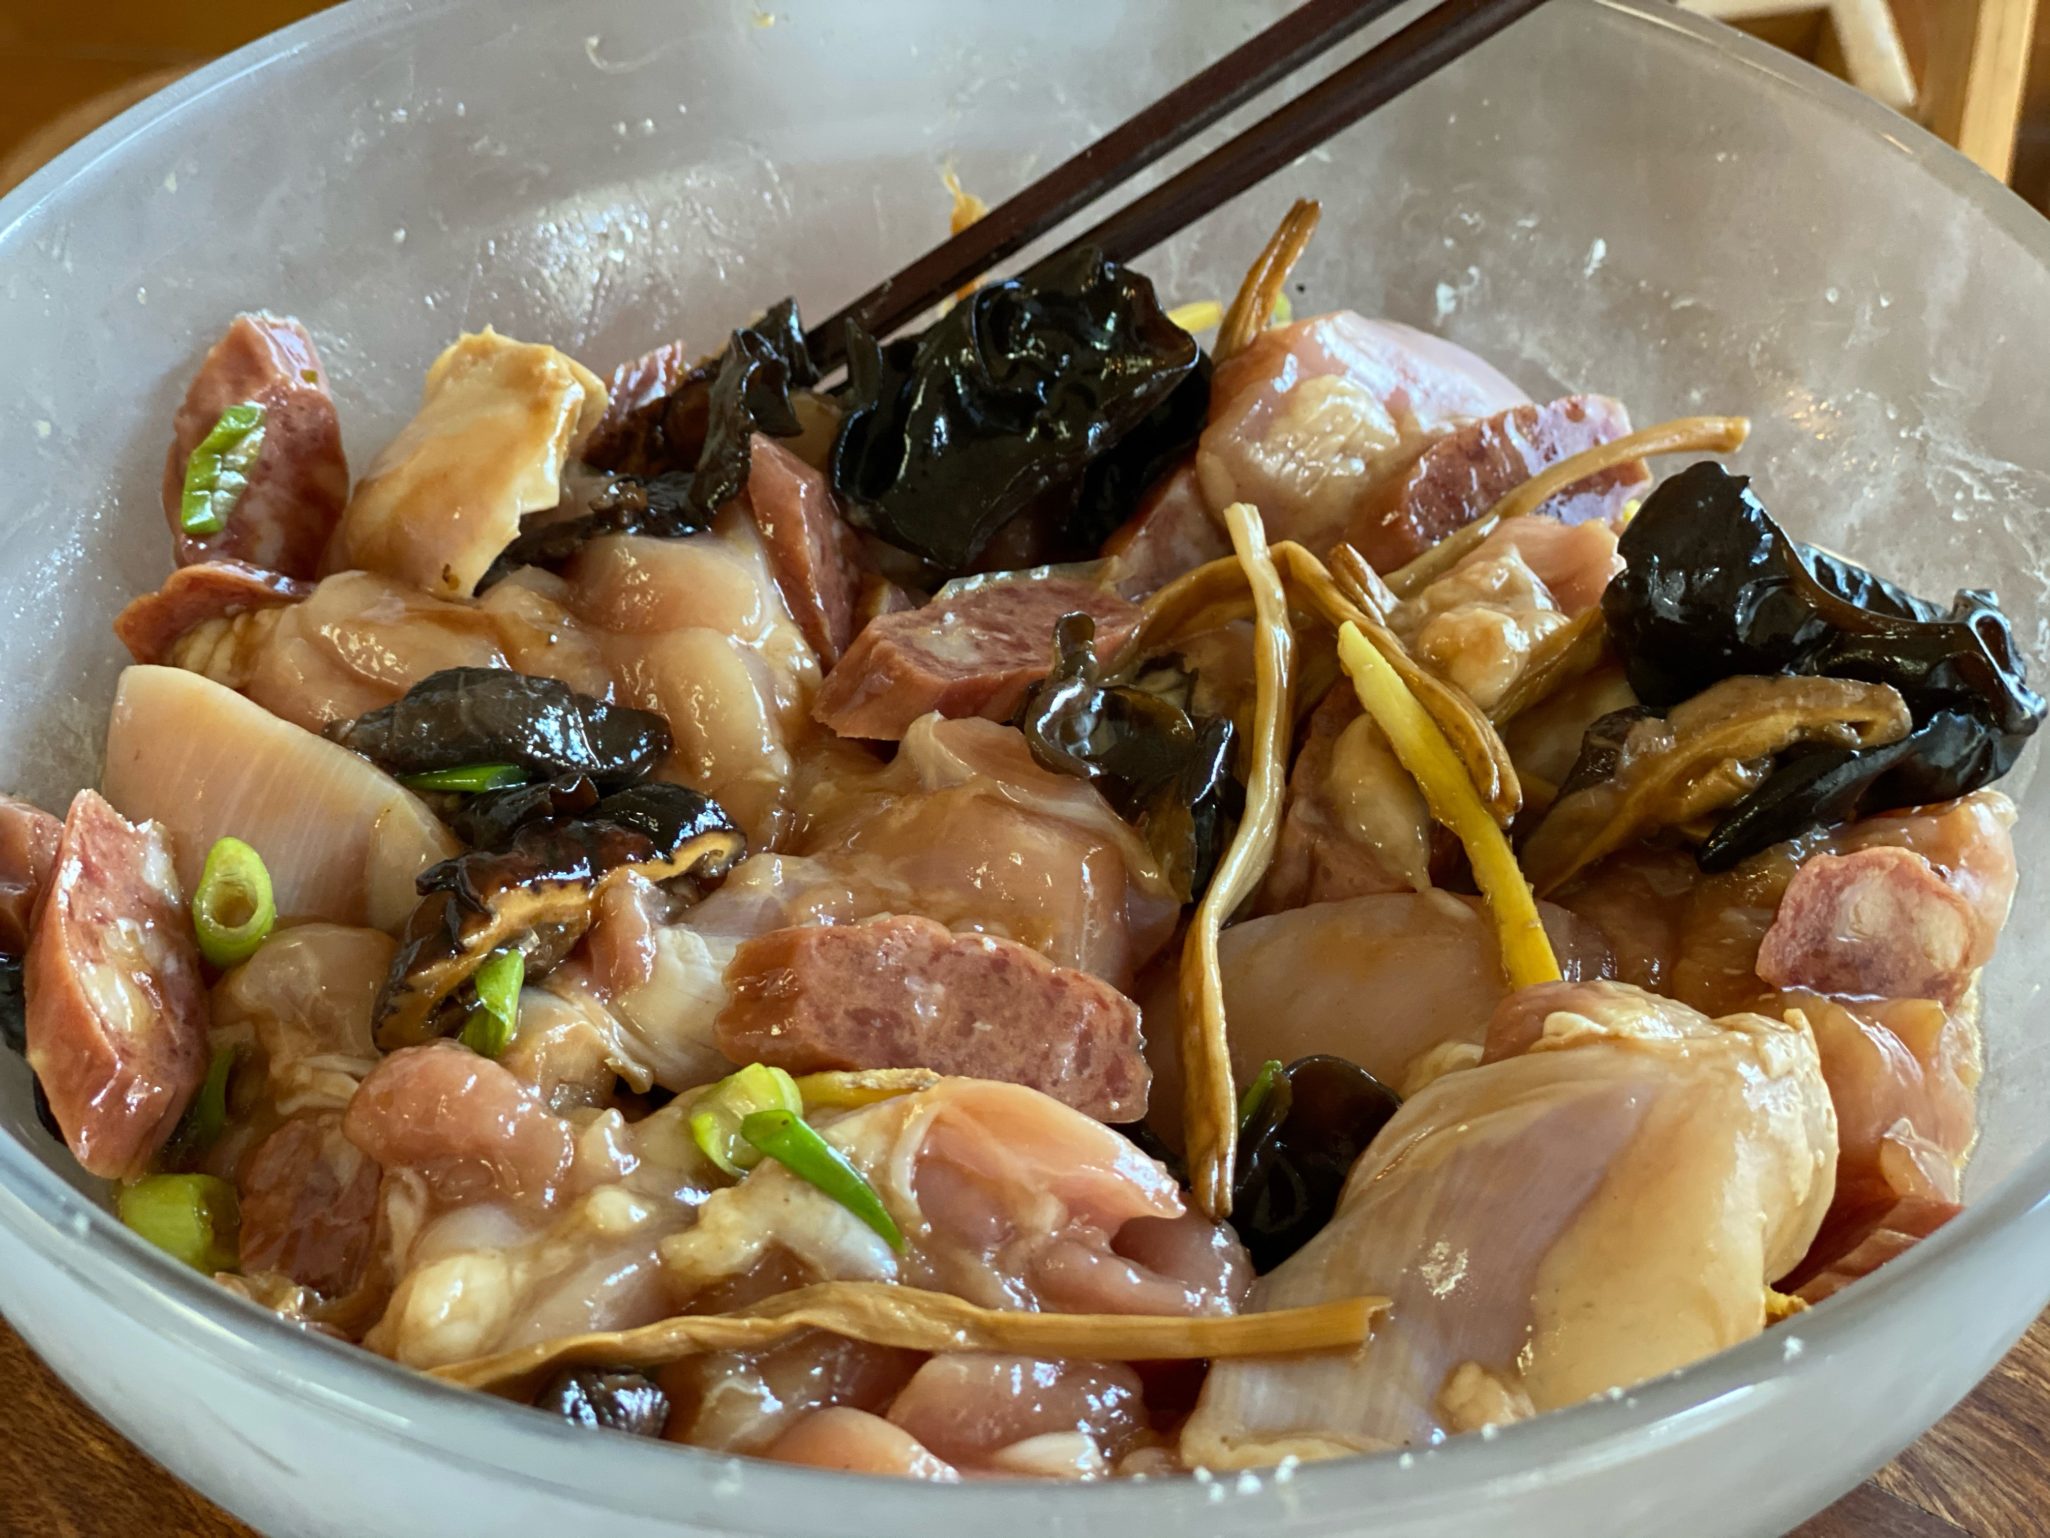
Dried Shiitake or Black Mushrooms, Cloud Ears (Dried Fungus), and Lilly Buds or Golden Needles round out the dish.  Soak the dry ingredients in warm water 15-30 minutes until soft.  Each provides flavor and texture to the dish.

Shiitake Mushrooms  Back in the day, shiitakes only came in dried form.  Nowadays you can get fresh shiitake mushrooms easily, they’re delicious BUT for the most part, in Chinese cooking we use the dried form.  Why? Concentrated flavor.  The flavor of the mushroom is intensified and that flavor is essential to the dish.  Soak the mushrooms first, (keep the soaking liquid for stocks and soups), trim the stems that can be kind of woody, and slice into desired thickness.

Cloud Ears or Black Fungus is just another kind of mushroom.  It doesn’t have a ton of its own flavor but adds texture, in the form of CRUNCH and absorbs the flavor of the marinade-YUM.  After soaking, pinch the stem-tip off.  The tip is where the stem connected to the tree, it’s a little crusty.  

Lily buds add an earthy flavor and texture.  After soaking the lily buds, pinch or cut off the ends (it will look a little darker than the rest of the bud and tie a knot in the middle of each strand.  Yeah, don’t know why, but I do it because my Dad told me to.

Don’t forget to add the green onions and cilantro at the end.

There you go, all the components to a down-home soul food dish.  

Microwave Madness 

Microwave directions

I bought microwave cookware, Anyday Cookware, on Dave Chang’s recommendation (Mr. Momofuku), boy, that guy can sell a product.  Pros and cons? Pros-no steamer set up, no pan with water, hassle-free steam cooking, and one bowl cooking. Cooking time cut by more than half.  Cons?  Finding space to store new bowls plus a major hit on latte money, lol.

Anyways, follow the same steps until you get to the point of putting the dish* in the steamer.  Instead, *put all your ingredients into a microwave cooking container and forget the steamer. 

Cover, vent, and place your dish in the microwave.  My microwave’s power output is 700watts (which is on the low side).  For this dish, I use full power for about 8 minutes.  You will have to adjust according to your microwave wattage.  The Anyday site has an interactive basic guide that allows input of wattage to determine cooking power and time.  In general, if your microwave wattage is higher, shorten the cooking time or reduce the power level and keep the same time.  You will need to experiment a little with your microwave.  I add 1-2 tablespoons of the saved mushroom liquid so I’ll have some sauce in the dish.

Steamed Chicken with Lop Cheung and Mushrooms

Course Main Course
Cuisine Asian
Keyword Steamed Chicken
Prep Time 20 minutes
Cook Time 30 minutes

Ingredients

  • 1.5 pounds chicken breast or combination of chicken pieces, bone-in cut into bite-sized pieces or chicken wings separated into drummettes and flats.
  • 2 Chinese sausages thinly sliced on the diagonal
  • 3-4 black mushrooms soaked in warm water until soft and julienned
  • 2 Tbsp Cloud ears soaked and root ends pinched off
  • 12 Lily buds soaked, ends pinched off and a knot tied in the middle, skip the knot tying if you want
  • 1-2 stalks green onions cut into 1-inch pieces, reserve some of the green part to finish the dish
  • 1/4 bunch cilantro for garnish

Marinade

  • 1 tsp. sugar
  • 1/2 tsp salt
  • 1 tablespoon soy sauce AP Pref chinese LKK Premium Soy Sauce
  • 1 tablespoon oyster sauce LEE KUM KEE with the kid and mom in boat
  • 1 tablespoon Shaoxing Wine or Chinese Rice Wine
  • 2 slices ginger julienned
  • 2 tsp oil I like peanut oil, but any vegetable oil will work
  • 2 tsp cornstarch
  • 1/2-1 tsp sesame oil optional, if you have it, definitely use it
  • 1/4 tsp white pepper

Instructions

  • Combine ingredients for marinade.
  • Add chicken, mushrooms, sausage, cloud ears and lily buds to marinade. Stir to combine well. Marinade for 15- 30 minutes. Place in a heatproof dish such as a shallow bowl or pie plate. Top with some of the diced green onions.
  • In a steamer or a stainless wok, set up steamer rack, fill with water up to but not touching the steamer rack. Place on heat and bring to boil.
  • Place chicken on steamer rack.
  • Steam for 25-30 minutes. Watch water level in pan, do not let it dry out.
  • Garnish with cilantro and extra green onions. Serve with plenty of rice.

Notes

If you don't have lily buds omit, don't make a special trip.  You can also place the ingredients on rehydrated lotus leaves (usually used as a wrap.  It imparts a nice flavor to the chicken.
Other additions dried red dates 2-3 soaked and smashed.  Add with mushrooms.
Kindness of Strangers: Three Amigos Soup (Beef and Vegetable Soup)

Kindness of Strangers: Three Amigos Soup (Beef and Vegetable Soup)

Last week I headed up to the City to run some errands, check on my mom’s house and visit her at the assisted-living home.  We moved mom to a care facility after a couple of health emergencies and declining cognitive ability, sadly she could no longer live independently.

I arrived at her place around lunchtime and it was such a beautiful day, I decided to take her to Los Trinos, a little hole-in-the-wall down the block that serves delicious El Salvadorean food.  Using the walker to steady herself, we slowly made our way to Los Trinos.  The most difficult part of the walk is the Mission Street crossing.  She made it across like a real trooper.

A Hole in the Wall but Not in My Soul

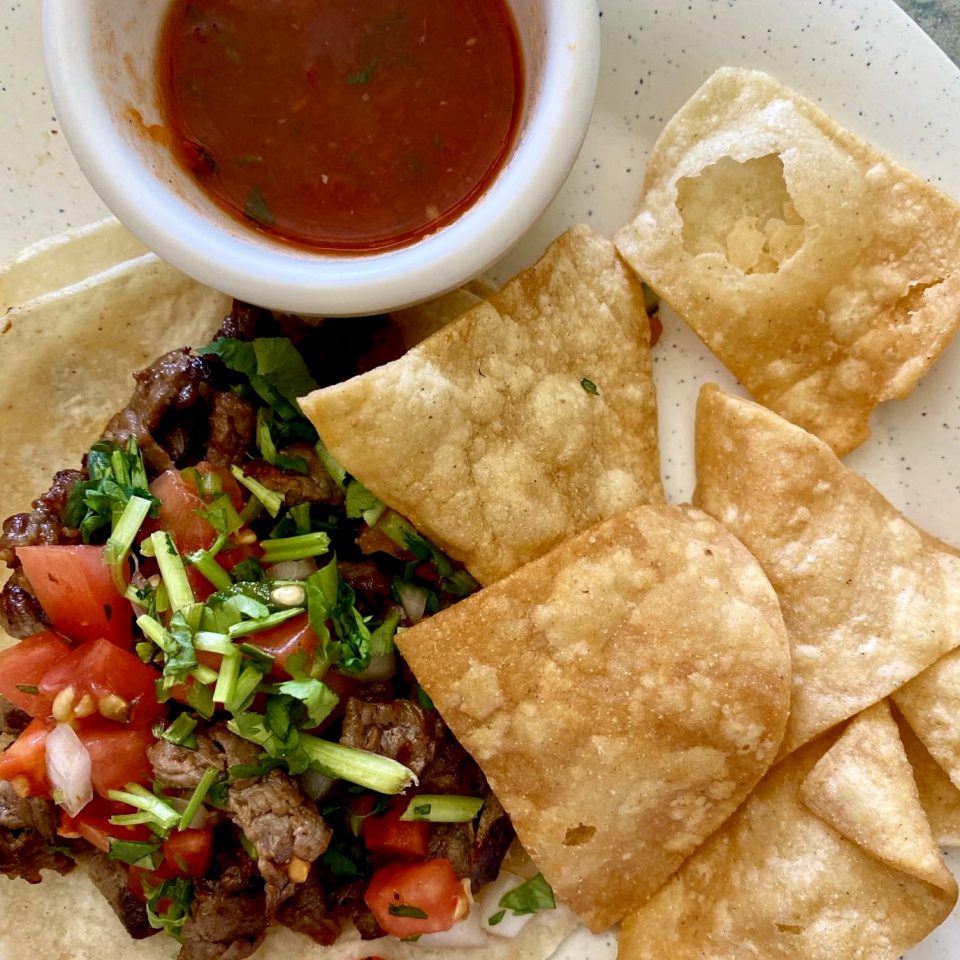
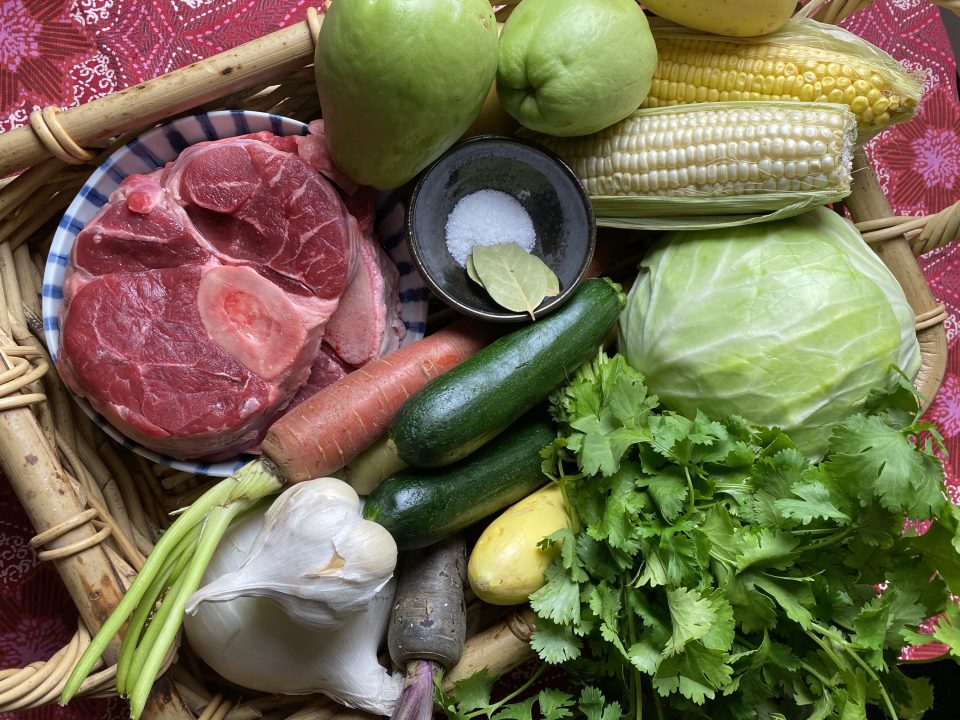
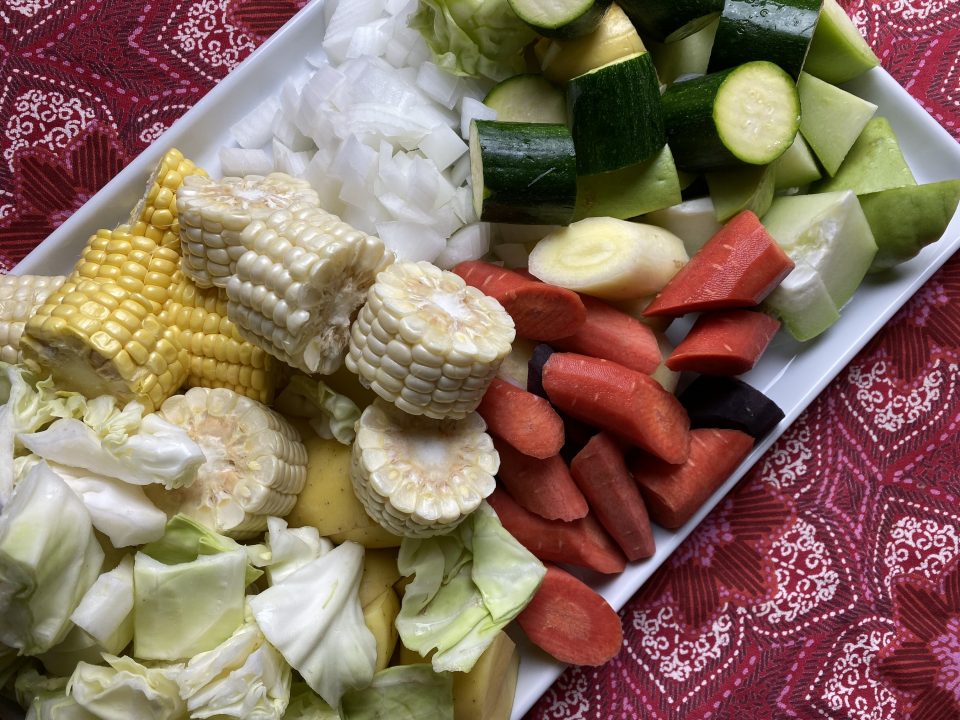
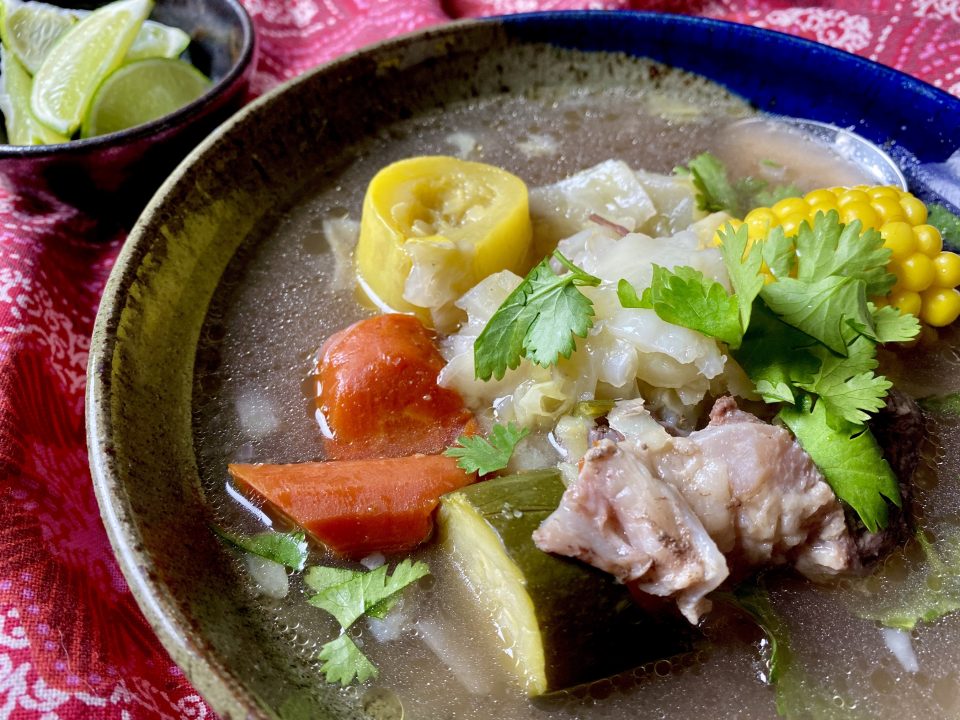
Los Trinos, a tiny unassuming place with about 10 tables, serves the surrounding neighborhood.  It’s down-home cooking-Pupusas, Tacos, Churrasco, Sopa de Res, all made in a tiny family-run kitchen.  We settled on Carne Asada Tacos, pupusas filled with cheese and chicken, and a bowl of their Sopa de Res (beef and vegetable soup).  The soup is the epitome of comfort food, filled with carrots, chayote, zucchini, corn on the cob, and chunks of beef, it nourishes the body and the soul.  Beef shank is part of the leg, the meat is tough, sinewy, and lean (it does a lot of work after all) but with long slow cooking, morphs into tender and flavorful morsels and develops into a tasty stock.  Oxtails would be a good (but pricey) substitute for both flavor and texture.

On the way back, mom’s legs gave out and she collapsed crossing the street (Mission is a big fast street). I frantically tried to pick her up while grabbing her walker.  Immediately 3 guys came running to help us, literally carrying mom to the corner out of harm’s way. Luckily there is a bus stop there with seats. I told her I would run and grab a wheelchair.  One of the guys immediately said he would stay with her until I got back. I was so grateful to them. With all the craziness going on right now its acts of kindness and decency that restore your faith in people. They probably won’t see this but I wanted to thank the three of them who without hesitation jumped in to help us.

I got mom back and settled her in, told her she almost gave me a heart attack, she laughed.  She Was OK

In appreciation of the three guys who helped us, I have named my version of Caldo or Sopa de Res, Three Amigos Soup. It is soul food.  Comfort food made with love and made to be shared with family and friends.  My mom, notorious for not being a great cook (she left the cooking to my dad), somehow could fill a pot with water and like magic turn it into the most delicious soups.  Her beef and veggie soup, one of my favorites, starts like Three Amigos soup with beef shanks but veers Asian with the addition of ginger and shiitake mushrooms.

Inspired by the three gentlemen who helped me it felt right to make a pot of soup.  I made the soup in a pressure cooker and it takes half the amount of time.  If you have a 6-quart pressure cooker like me, half the recipe.  If you have the big Kahuna of Instant Pots, you can make the full recipe.

Confession time, I cheat by adding a heaping tablespoon of Better Than Bouillon Base, totally optional.  Or start with beef broth or stock instead of water for a richer flavor.

Three Amigos Soup (Caldo de Res)

Food for the soul, this beef and vegetable soup is nourishing, comforting, and just plain delicious. Filled with a variety of vegetables, including, carrots, potatoes, chayote and onions it makes a wonderful meal in a bowl.
Course Soup
Cuisine Mexican
Keyword Beef and Vegetable Soup, Beef shank, Caldo de Res, Carrots, chayote, comfort food, food for the soul, onions, potatoes
Prep Time 30 minutes
Cook Time 3 hours
Instant Pot 1 hour
Total Time 1 hour
Servings 10

Equipment

  • Instant Pot

Ingredients

The Stock

  • 10 cups water divided, for a richer stock, use beef stock instead of water or 1:1 water:stock
  • 2 pounds bone-in beef shank Substitute 2-2.5 pounds of oxtails, or a mix of both, chuck roast cut into 2-3 inch chunks would also work
  • 4 cloves garlic peeled
  • 2 bay leaves
  • 1.5 tablespoon coarse kosher salt
  • 1-2 Tbsp Better than Bouillon Beef Base optional, not necessary if using beef stock

The Veggies

  • 1 white or yellow onion Diced
  • 2 potatoes cut into eighths (Idaho, Russet or Yukon Gold)
  • 2-3 medium ears of corn shucked and cut into 2 inch pieces
  • 2 zucchini cut into thick chunks
  • 4 carrots sliced into thick coins
  • 1/2 head cabbage cut into eighths, leave the center stalk to keep cabbage together
  • 2 fresh tomatoes, cut in wedges optional but recommended, adds sweetness

Garnishes

  • 1 cup chopped cilantro for serving
  • 4 limes cut into wedges for serving
  • diced jalapenos, optional for serving

Mom's Beef and Vegetable soup

    Omit bay leaves, chayote, lime and jalapeños

    • 4-6 dried Shiitake Mushrooms, Cleaned and soaked in warm water for 10-15 minutes. reserve soaking liquid to use as stock for soup
    • 4 stalks celery, cut into 2-inch pieces
    • 1 1-inch piece fresh ginger Smashed Or cut into slices, in place of bay leaves
    • 1/4 Cup Rice wine or Shaoxing Wine Add with beef
    • 1-2 Fuzzy melons or piece of winter melon (1.5 pounds) Daikon or Korean radish would also work In place of zucchini and chayote,
    • 1 Tbsp Light soy sauce Just before serving, stir into soup
    • 1-2 Green onions sliced, to add when serving

    Instructions

    • In a large dutch oven or soup pot, add 10 cups of water, beef shanks, garlic, bay leaves, and salt. Bring to a boil, cover, reduce heat to a low simmer and continue cooking for 1 1/2 to 2 hours, or until the meat Is tender.
    • Skim off and discard any white or brown foam floating at the top of the pot as well as the bay leaves and garlic cloves. Transfer the cooked bone-in beef shank to a medium bowl and set aside to cool slightly.
    • Add the onions, potatoes, corn, zucchini, carrots, cabbage and remaining 2 cups of water to the pot.
    • Bring soup to a boil, reduce heat to a low simmer and continue cooking until all the vegetables are tender and cooked through, about 15 minutes.
    • While the vegetables are cooking, remove the bones and any tough sinewy parts from the beef shank and discard. Cut the tender meat into small bite-sized chunks. When the vegetables are fully cooked, add the meat.
    • Stir everything together and taste. Season with salt and pepper, if desired.
    • Ladle soup into large bowls, each bowl should have bit of everything. Garnish each bowl with cilantro, freshly squeezed lime juice and diced jalapeño peppers or a few dashes of Tobasco hot sauce (optional).

    Instant Pot Version

    • Place beef, shiitake, garlic, salt and 1/2 of diced onions in pot. Fill pot to 10 cup line.
    • Seal pot and set to cook at high pressure for 35-40 minutes. NPR for 10 minutes
    • While soup is cooking, prep vegetables. Remove meat from stock and add vegetables to Instant Pot, you might have to leave some out, it’s a lot of veggies. Seal and set cooktime for 15 minutes.
    • Quick release, season with salt and pepper. Ladle soup and goodies into large bowls. Garnish with cilantro and green onions and serve. Enjoy!

    Bowled Over, Udon Want to Miss My Newest Obsession (Udon)

    Bowled Over, Udon Want to Miss My Newest Obsession (Udon)

    Hang on to your hats, imagine Times Square, with all its neon signs and flashing lights dedicated solely to FOOD.  Yep, that’s the only way I can describe the Dotonbori area of Osaka.  Swarms of people, whose sole purpose is to find all things delicious to eat.  A giant 3-D crab, or shrimp or potsticker over the door of a dining establishment making it easy to figure out their specialty.  The delicious aromas swirling around, changing with every step as they walk by tempura houses, ramen joints, crab feasts and yakitori vendors.

    Welcome to Crazy Town for food

    Yep, we bit.  Drawn by the people, hypnotized by the lights, we ate our way down the street.  We tasted Takoyaki, octopus cakes, (not really cakes, I just couldn’t bring myself to call them balls).  Think Ebelskiver with octopus bits.  We munched on skewers of yakitori, sampled matcha and black sesame soft serve and found taiyakis, fish-shaped cakes filled with red beans.

    Udon want to miss the noodles

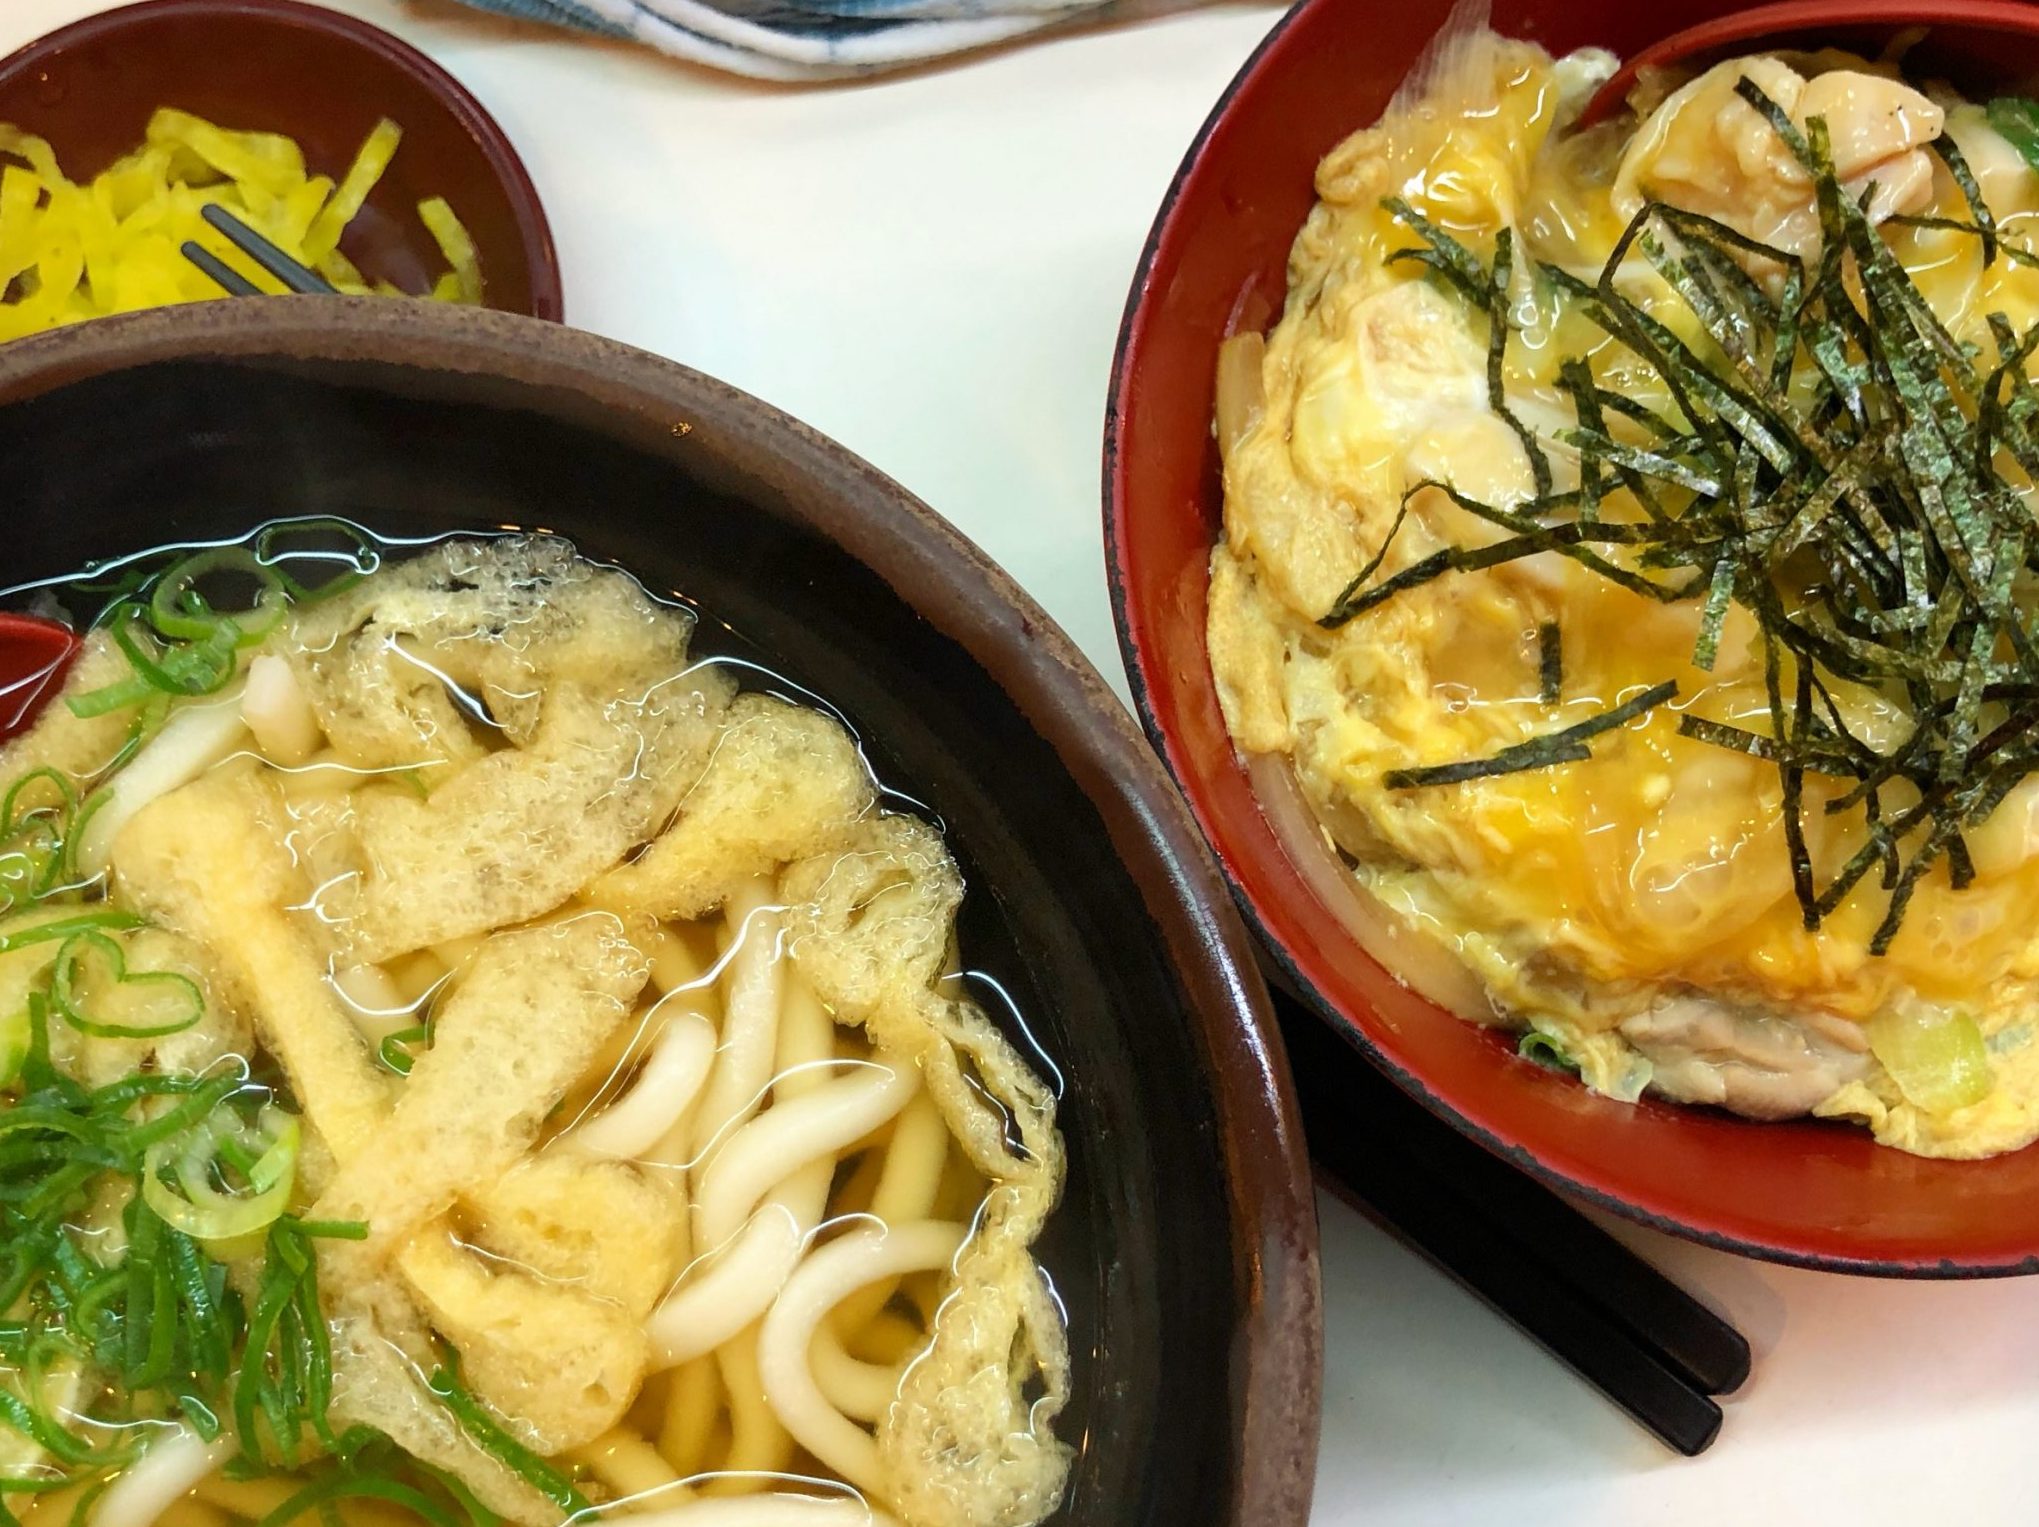
    Our last stop was the perfect cap for the evening.  Walking back to our hotel we found a local shop in Namba with a trio of old cooks serving up delicious udon noodles.  We decided what toppings we wanted on our noodles, slipped our yens (=TWO DOLLARS A BOWL) into the machine, and handed the tickets to the chef.  Minutes later 3 hot steaming bowls of udon were placed in front of us.

    Unlike ramen, the noodles are much thicker with a definite chew.  The broth is flavorful but clear and light, fish-based, different than the rich, heavy broth that you find with ramen.  Toppings are simple-fried tofu (abura-age), a raw egg that cooks in the steaming hot broth, a single tempura shrimp, or a clump of shredded seasoned beef and a sprinkling of green onion.  We slurped our noodles and tipped the bowls to spoon out the last drops of broth.  You’d think we hadn’t eaten all day.  Ha!


    Oyako-Udon combo set

    Thus My Obsession with Udon Began…

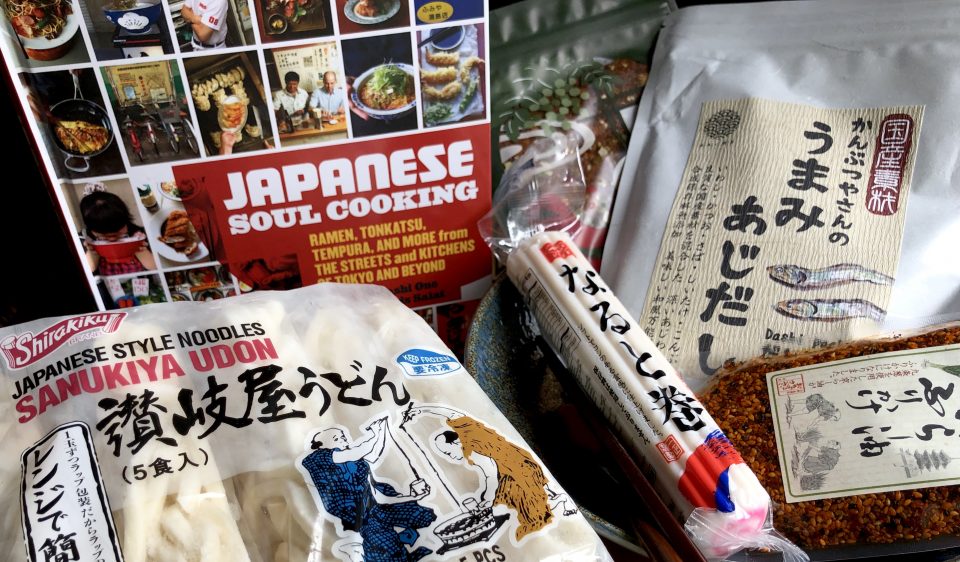
    As soon as I got home plus 12 hours of catch-up sleep, I pulled out my copy of Japanese Soul Cooking by Tadashi Ono.  A gem of a book on homey Japanese comfort food.  I flipped to the udon section and then I was off to the market to look for ingredients.  I had purchased a delicious Dashi base in Tsujiki Market in Tokyo, perfect for my udon.  To make your own Dashi here is a great primer from Just One Cookbook. OR, Kikkoman makes a soup base Hon Tsuyu that makes a pretty good dashi broth base.

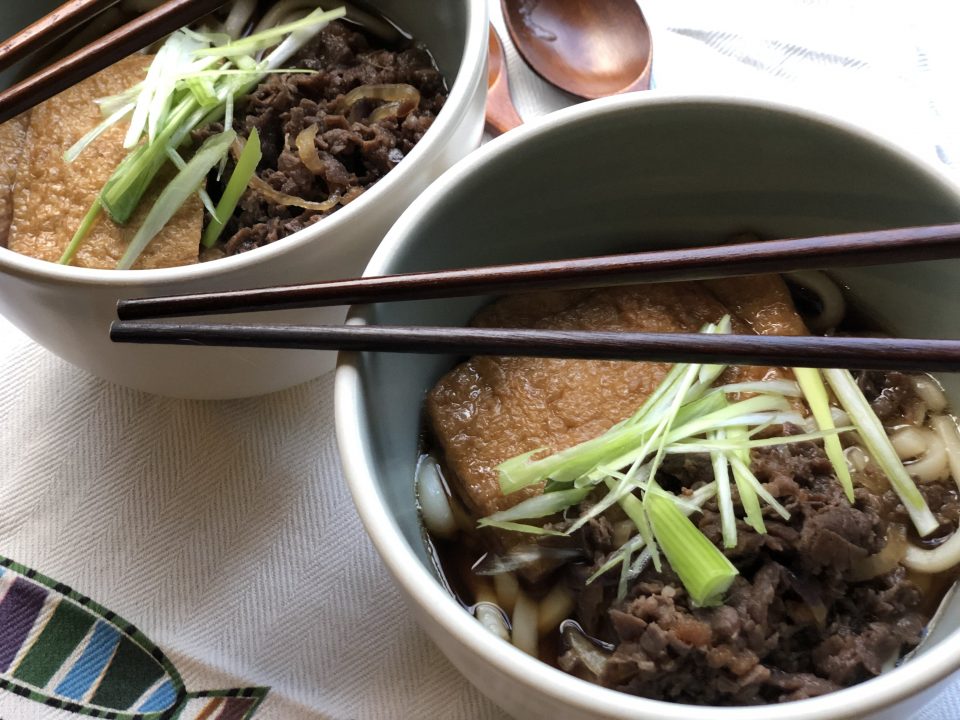
    Working down my list, next the udon noodles. Udon comes fresh, frozen, and (if you can’t find fresh or frozen udon) dried.  Sigh, just not the same.  I also found abura-age or fried tofu skin which is used to make Kitsune Udon. The fried tofu skins are flattened and seasoned with soy sauce and placed on top of the udon.  Really delicious, and substantial enough for a satisfying vegetarian bowl of udon. It can be difficult to find abura-age though and in that case, Inari-age, seasoned deep-fried tofu pouches used to make Sushi Rice balls, is a convenient and easy substitute.  No need to season, just plop them on top of the cooked noodles.  Confused about tofu? Serious Eats’s Tofu primer is your ticket.  The carnivore in me though, bought some thinly sliced beef (sukiyaki beef is perfect) to make Niku Udon, yummo.

    Making udon is very approachable.  It’s perfectly acceptable to start with a broth made from Dashi bags and pre-made noodles.

    Udon Ingredients

    Travel to Eat

    People travel to buy clothes and souvenirs, I buy food, Dashi, Furikake’, Soba Boro cookies…yep, travel driven by food.

    Studying up, here’s the scoop, on udon.

    I used Dashi packets to make the Tsuyu.  This is your base,  add soy sauce and mirin to flavor the Tsuyu.

    Optimally, use Sanukiya noodles, most likely found in the frozen section of your favorite Asian market.  The noodles are a bit firmer and hold up well.  The pre-cooked noodles only take a couple of minutes to separate and heat in hot water, presto-dunzo.  There are Korean versions of Udon noodles too, and they are very good.

    Toppings for udon can be as simple as an egg, gently poached for the raw egg-squeamish, Abura-age, tempura, fishcake, or really ANYTHING you feel like putting on your noodles!

    Kitsune Udon

    Simple, satisfying, soulful, best describes a bowl of Udon, thick, slurpable, noodles, in a clear broth.
    Course noodles, one bowl meal, One dish meals
    Cuisine Asian
    Keyword Kitsune, Udon
    Prep Time 20 minutes
    Cook Time 10 minutes

    Ingredients

    Abura-age (Tofu)

    • 1 package Abura-age or 4 Abura-age

    For Simmering Abura-age:

    • 3/4 cup dashi soup stock
    • 2 Tbsp. sugar
    • 1 Tbsp. soy sauce
    • 1 Tbsp. mirin

    For Soup:

    • 5 cup dashi soup stock
    • 3 Tbsp. mirin
    • 2 Tbsp. soy sauce
    • Salt adjusting the amount of salt to your preference

    Noods and Garnishes

    • 4 packages pre-boiled udon noodles
    • Optional: 4 slices kamaboko fish cake for topping
    • green onions, sliced

    Instructions

    • Heat dashi, mirin, sugar, and soy sauce in a medium pan and bring to a boil. Adjust the flavor with salt as you like.
    • Simmer aburaage in the soup on low heat until the liquid is almost gone. Set aside.
    • Boil water in a large pan and heat udon noodles as indicated in the package.
    • Drain the udon and divide into four bowls.
    • Pour the hot soup over udon noodles.
    • Top with seasoned aburaage and kamaboko slices.
    • Garnish with green onions

    OR buy the more readily available Inari age or seasoned tofu pouches and just plop those straight into your bowl. Inari age is the fried tofu pouches used to make Inari Sushi

      Or the carnivore delight…

      Niku Udon

      Udon Noodles topped with stir fried seasoned beef and onions.
      Course Soup
      Cuisine Asian
      Keyword japanese, Noodle, soup, Udon
      Prep Time 20 minutes
      Cook Time 15 minutes
      Servings 4 servings
      Author Adapted from Japanese Soul Food

      Ingredients

      Niku Ingredients

      • 1/4 cup sake
      • 1/4 cup sugar
      • 1/4 cup soy sauce
      • 1 pound sukiyaki beef or thinly sliced flank steak, ribeye
      • 1/4 yellow onion, thinly sliced optional

      Soup

      • 6 cups udon tsuyu*
      • 4 bricks fresh or frozen udon noodles can substitute dried Sanuki Udon
      • 1-2 green onion thinly sliced
      • Shichimi togarashi

      Udon Tsuyu

      • 6 cups dashi
      • 1/2 cup mirin
      • 1/2 cup Usukuchi soy sauce light soy sauce
      • 1/2 - 1 teaspoon salt or to taste

      Instructions

      Tsuyu

      • Prepare broth and keep warm.

      Beef

      • Combine sake, sugar and soy sauce in a bowl and stir well. Add beef and mix together, coating meat well. Marinade beef for 10 minutes.
      • Preheat dry non-stick skillet or well seasoned wok/iron skillet. If including onion, saute onion slices just until soft before adding the beef. Add beef and marinade to skillet. Spread beef in skillet to cook evenly. Cook over high heat until beef has lost its pinkness and most of liquid has evaporated, approximately 5 minutes. Remove from heat and set aside.

      Udon Noodles

      • Bring large pot of water to a boil. Add each packet of noodles. gently spread noodles out. When water comes back to a boil, the noodles are done. Drain well and divide among bowls.
      • Pour hot broth over noodles. Divide beef among bowls, garnish with green onions and shichimi togarashi. Serve immediately.