Tag: rice

Golden Fried Rice-Sinfully Delicious (黄金炒饭)

Golden Fried Rice-Sinfully Delicious (黄金炒饭)

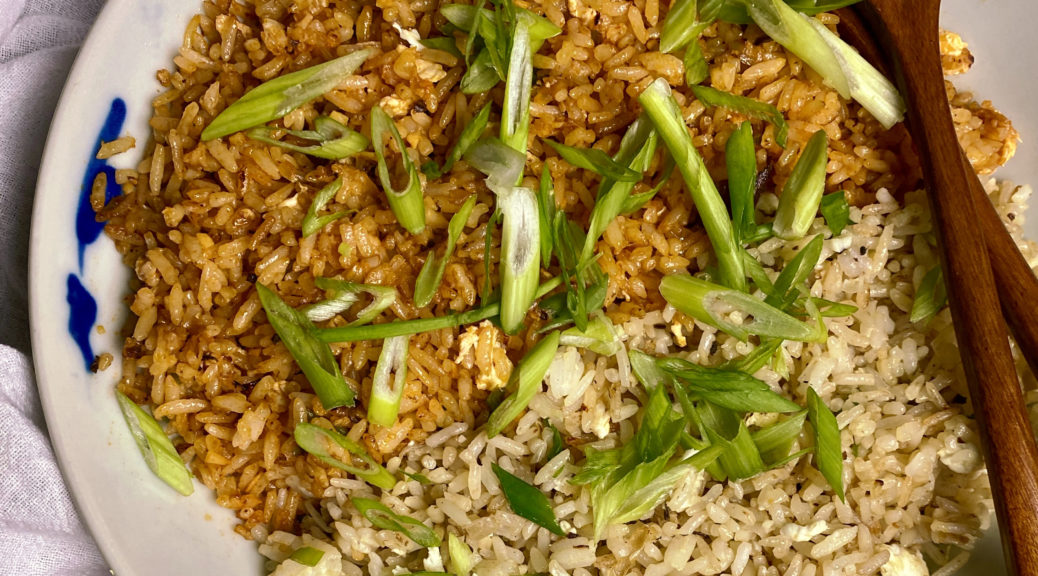
I LOVE fried rice. Posted on 3Jamigos are my favorites,  my Dad’s Fried Rice and Kimchi Fried Rice.  Until now, I was very content with these two recipes until…..I came across a video from Lucas Sin, chef/owner of Junzi’s Kitchen in New York/New Haven for Golden Fried Rice.  Golden Fried Rice? Say what?

The key to this dish and why it is called Golden Fried Rice is uncooked egg yolks are mixed into the rice BEFORE cooking.  The egg yolk surrounds each grain of rice, like a protective rain slicker. When the rice is cooked the grains stay separate, and take on this wonderful satiny loose texture and light golden hue.  It’s nuanced but mind-blowing, and that’s coming from a fried rice freak.

Young Guns Breaking the Mold

I follow more than a couple of Asian-American chefs, cookbook authors, and bloggers on the scene now. I’m so impressed with not just their cooking but their ability to utilize social media and non-traditional avenues to highlight Asian cuisine.  They have found ways to navigate and adapt to the pandemic.  I’ve posted about many of these kids and their work.

The new guard includes Lucas Sin, Deuki Hong, Eric Kim, Brandon Jiu, Cynthia Chen McTiernan, Joy Cho… The old guard, who paved the way, include Roy Choi, David Chang, Eddie Huang, and Joanne Chang.  They are not just making great food but highlighting social and environmental issues that impact all of us. 

It has been a difficult time compounded by the anti-Asian sentiment in this country, it’s good to see Asian Americans use their platforms to support the community and bring to light many of the issues that folks of color, not just Asian American faces.  I’m proud to be Asian-American. #veryasian

Going for the Gold-en

I don’t even need to do a rundown of the recipe if you watch this video! But I will.

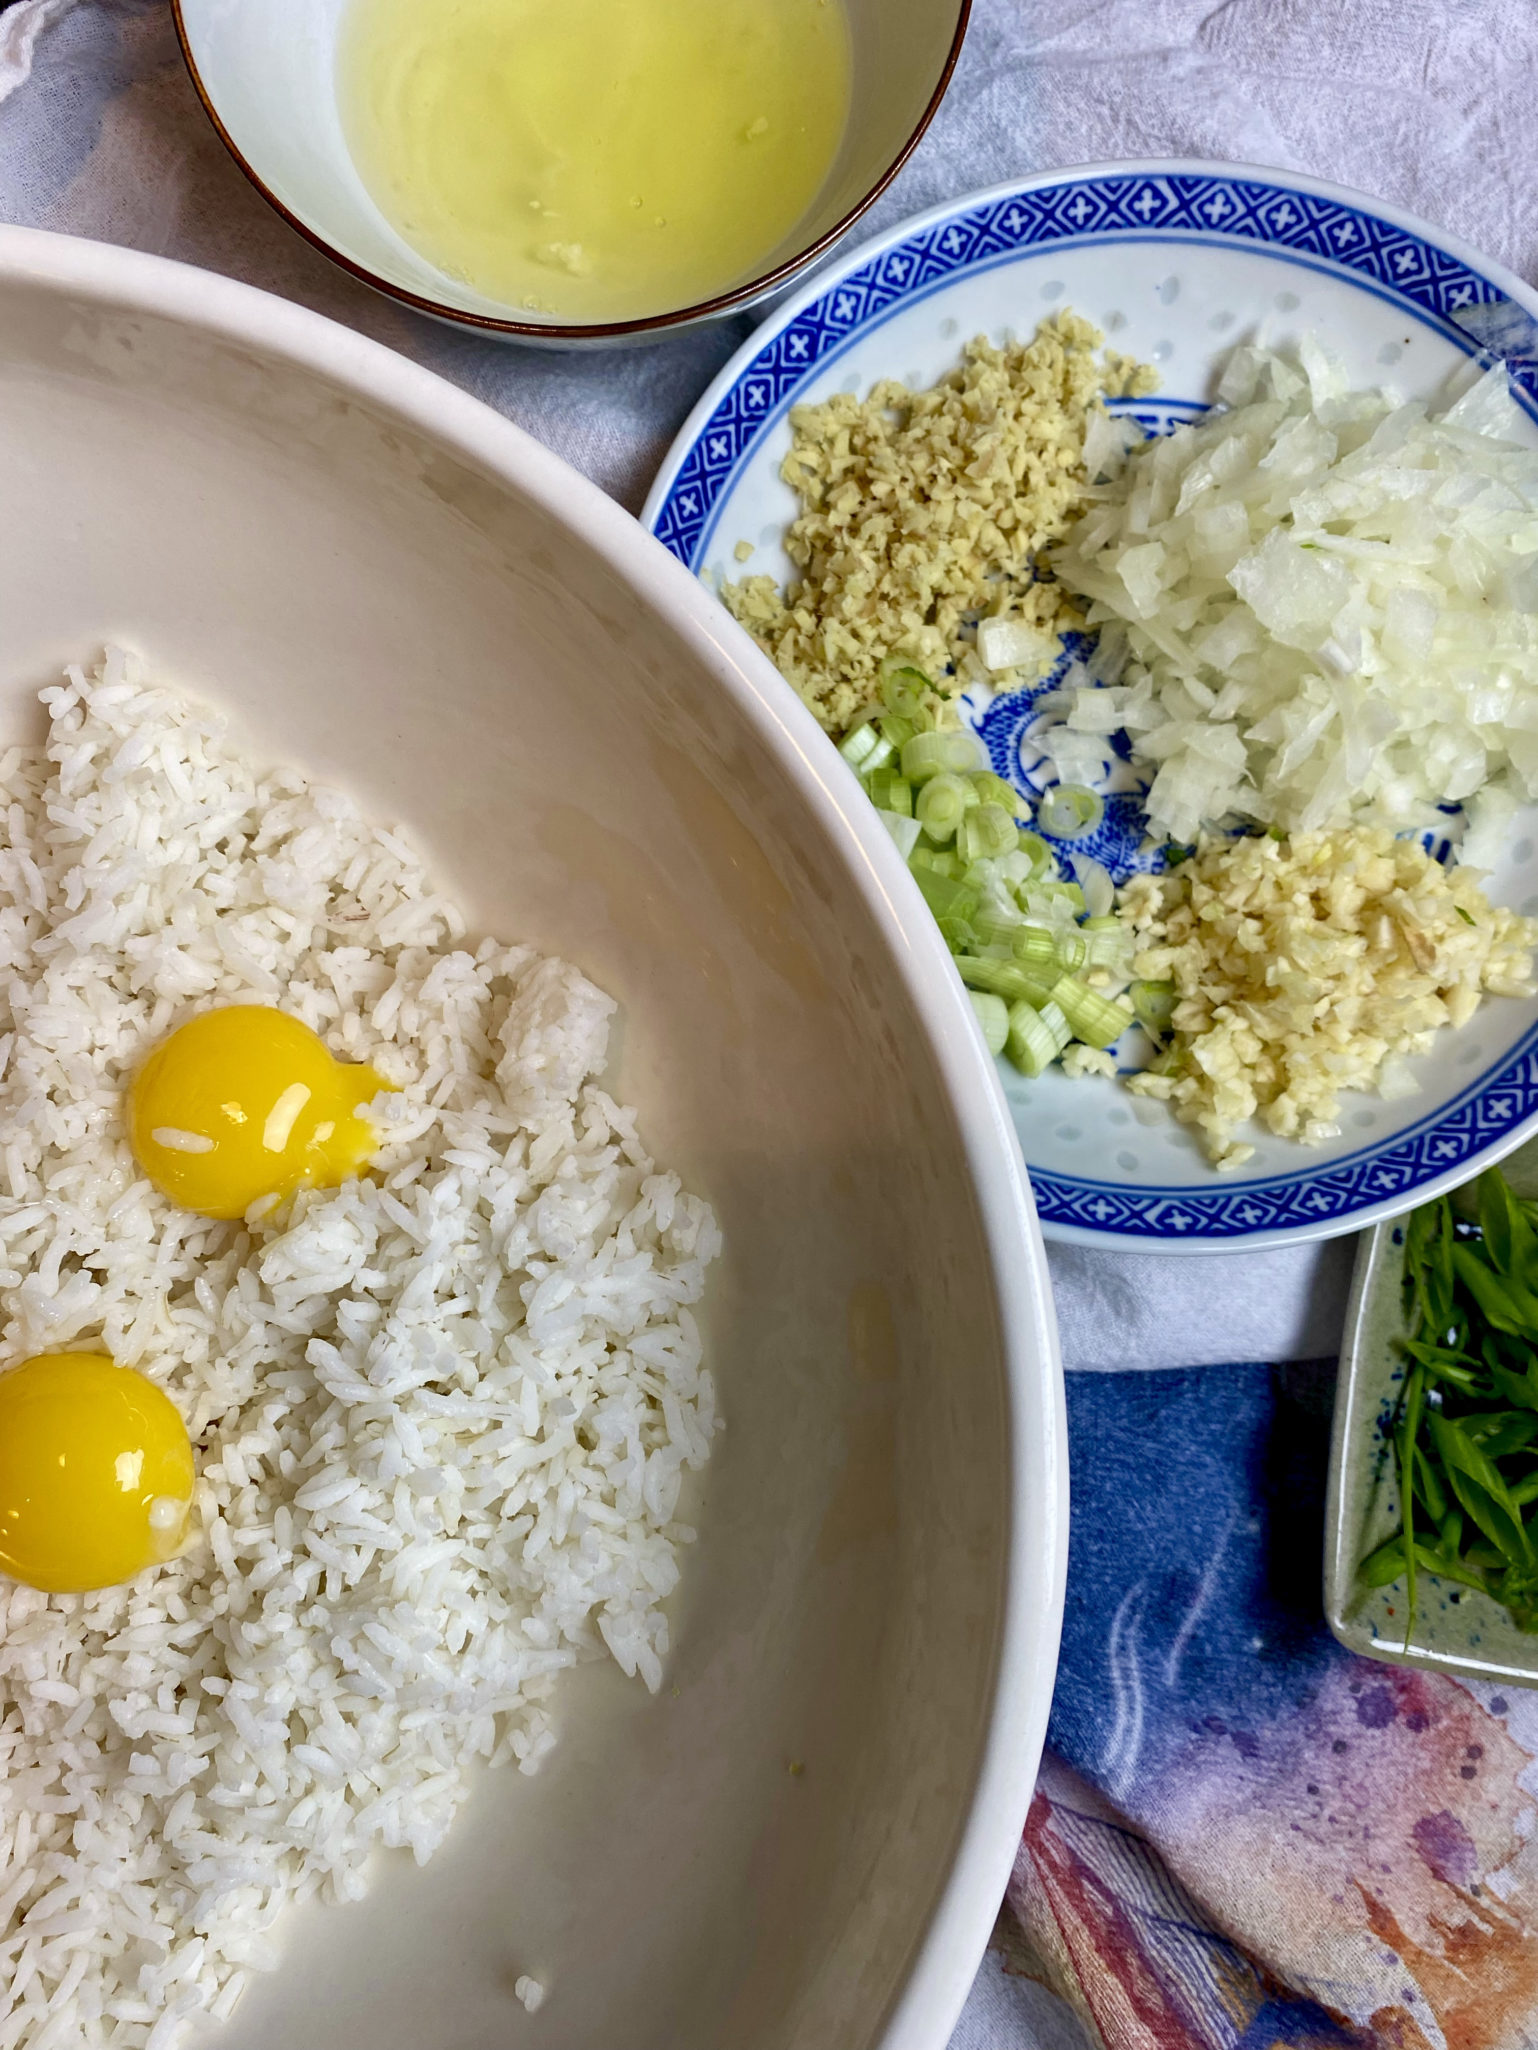
Mise En Place is the name of the game.

Get all your ingredients prepped before you get near your stove.  This holds true for any stir-fried dish.  Make sure you have all your ingredients cut, and prepped, and your seasonings on hand.  Stir-frying is that point of time where Scotty takes us into warp speed.  So you better be ready to go.
Rules of the Game

After Mise En Place.  Use a large, flat-bottomed pan to stir-fry.  Face it, most of us don’t have stoves that generate enough BTUs to do real wok cooking,  a flat-bottom maximizes the surface area in contact with your flame.

The very basic dish is rice, egg, and the flavor trinity of ginger, onions, and garlic. Oh, and of course, salt and peppa.

Add-itionally

Most people aren’t purists, at least not all of the time. Let’s talk adds.  Anything goes with fried rice, any veggie, any protein, any condiment..it’s all good, which tells you just how perfect fried rice is.  I am no exception, my favorite additions to fried rice are Lop Cheung (Chinese sausage), bbq pork, and shiitake mushrooms.  All adds should be at least partially cooked before adding to the rice.  Because you will add your options right before you plate the dish. Your fried rice is just about done and boom, hit it with diced veggies and protein, give it a minute or so of frying to heat everything through, and you’re done.  That is unless you are adding sauce (catsup (my fav), hot sauce, XO Sauce, Buffalo Wing Sauce per Lucas) which you would add NOW.
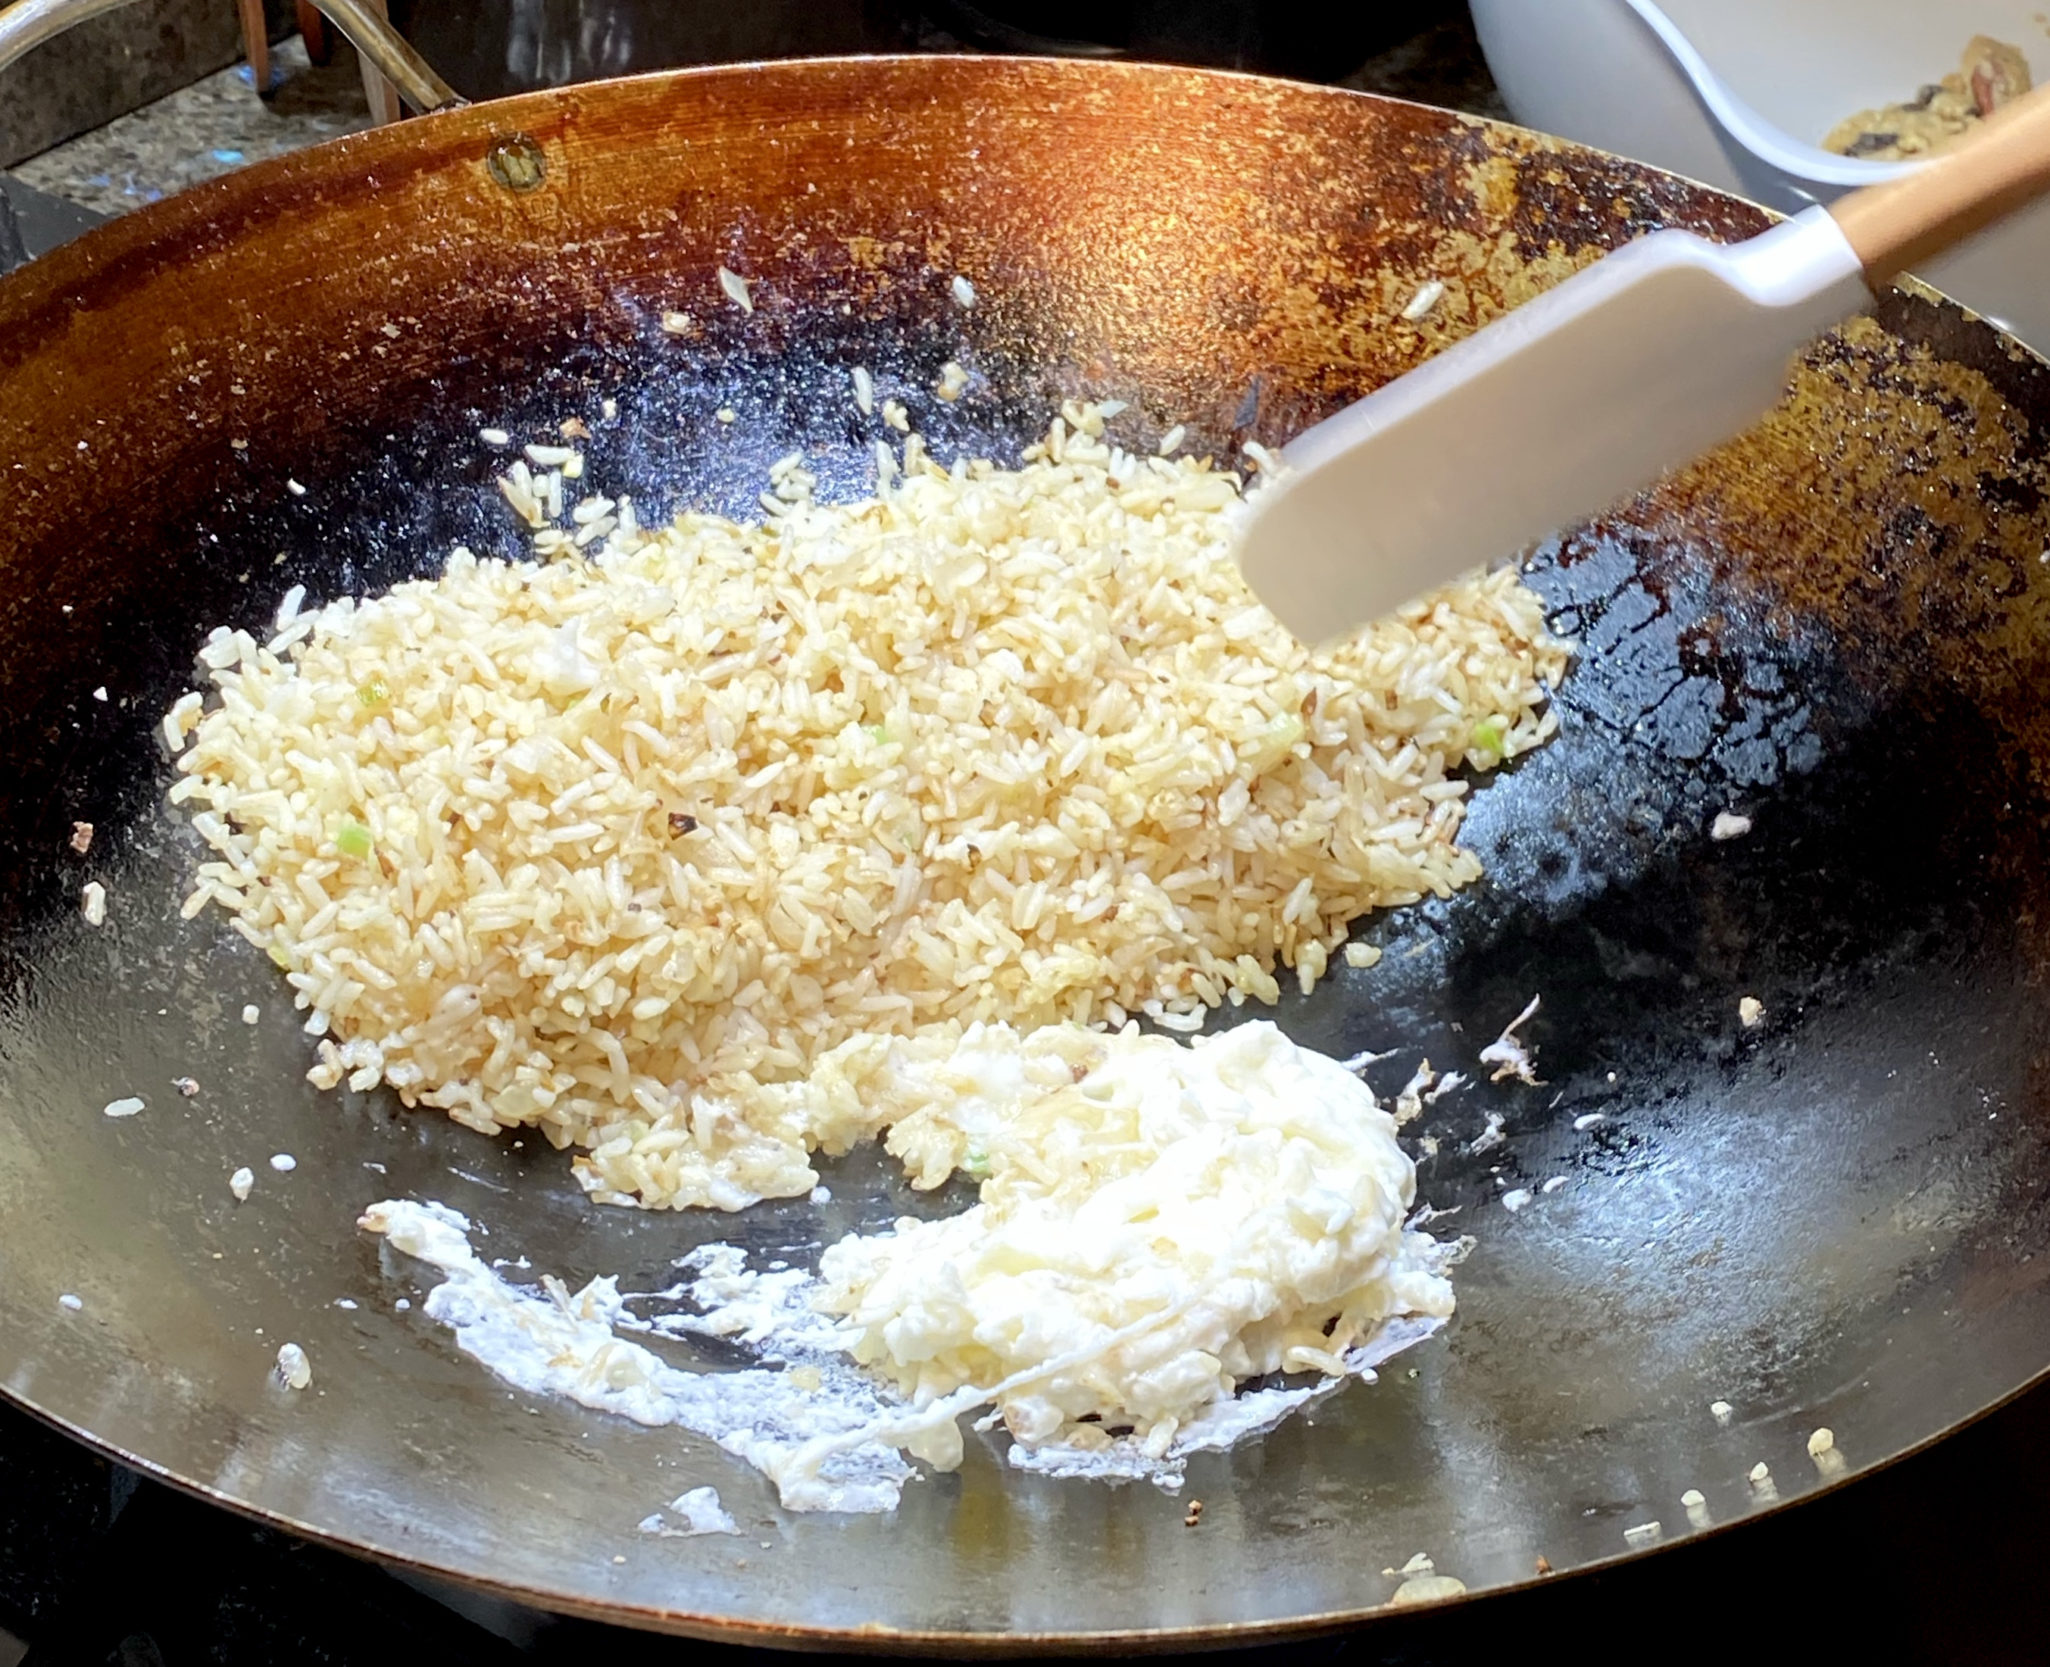
Fried Rice is Soul Food, make a bowl, and enjoy.

Print
5 from 1 vote

Golden Fried Rice

Fried rice taken to a new level with the addition of egg yolks to the rice before it is cooked.
Course One dish meals, Rice
Cuisine Asian, Asian-American
Keyword eggs, Golden Fried Rice, Lucas Sin
Prep Time 20 minutes
Cook Time 7 minutes
Servings 4 servings

Ingredients

  • 4 cups chilled cooked short-grain white rice can use long grain, preferably day-old rice
  • 4 large eggs yolks and whites separated
  • 4 Tbsp. vegetable oil divided, plus more for drizzling

Asian Trinity Plus

  • ½ small yellow or white onion finely chopped
  • 1 inch piece ginger peeled, finely chopped almost minced
  • 3 cloves garlic finely chopped
  • 4 scallions white and pale green parts separated, finely chopped, dark green parts thinly sliced,

Flavor Adds

  • 1 tsp Kosher salt to taste
  • 1 tsp sugar to taste
  • 1/8 tsp tumeric if you want to enhance the golden color of the rice, this is the trick
  • white pepper to taste

The Options: Sky's the Limit

  • 1 cup Bbq pork, shiitake mushrooms, Chinese sausage, shrimp, peas, any diced vegetables-squash. Last night's roast chicken, diced. Any of these should be diced and at least partially cooked. This is your chance to clean out the fridge! Add right before the rice is done and stir fry any adds for a minute to heat and combine distribute evenly in the rice. To preserve the texture of the rice, your additions should not be too wet, which is also why you should use pre-partially cooked items..

Instructions

  • Separate egg yolks from whites, placing yolks in a medium bowl and whites in a small bowl. Add rice to bowl with yolks and mix to break up any clumps and coat each grain with yolks (take your time with this as any clumps will cook together); set aside.
  • Stir 2 Tbsp oil into egg whites and season lightly with salt. Heat a dry large nonstick skillet over high. Add egg white mixture and cook, pushing around constantly with chopsticks or a heatproof rubber spatula, until gently set, about 30 seconds. Transfer to a plate. Wipe out skillet if needed.
  • Heat 2 Tbsp. oil in skillet over medium-high. Add ginger, stirring, until very fragrant, about 20 seconds. Add yellow onion, season with a pinch of salt. Cook, stirring, until onion is translucent, about 1 minute (remove from heat if onion starts to go past golden brown). Add reserved rice mixture, sprinkle with sugar, and season with salt. Toss to combine, then cook, undisturbed, until rice is beginning to warm and crisp underneath, about 1 minute.
  • Push some of the rice to the side to clear a few inches in skillet. Drizzle a bit of oil into the clearing. Add scallion white and pale green parts and garlic and cook, stirring, until just softened and fragrant, about 45 seconds. Toss into rice mixture and cook, tossing occasionally, until warmed through and rice is crisp and chewy, about 3 minutes. Return cooked egg whites to pan and cook, tossing and breaking up with spatula until distributed.
  • Now is when you would add extras...veggies, protein, and then condiments. Stir fry additional minute to combine and heat through.
  • Special Shout Out to my favorite: catsup or ketchup, add it now. Start with at least 2-3 tablespoons and then add to taste. Fry to heat and incorporate catsup throughout the rice.
  • Divide among plates and top with scallion greens.
Notes

Note in the video, Lucas mentions a 2:1 ratio of salt to sugar.  I started with even amounts or a smidge more salt, taste, and season to your preference.
This fried rice does not use soy sauce at all.  Most likely due to the color impact of adding soy sauce.  I grew up with fried rice that was coffee with a bit of milk color. My Dad used soy sauce in his rice, a trick he probably picked up from Chinatown chefs.  A simple variation of fried rice starts with butter or rendered chicken fat with dark and light soy to color and flavor the rice...so, so yummy.
Taiwan Turkey Rice, 嘉義火雞肉飯 Deliciousness in a Bowl

Taiwan Turkey Rice, 嘉義火雞肉飯 Deliciousness in a Bowl

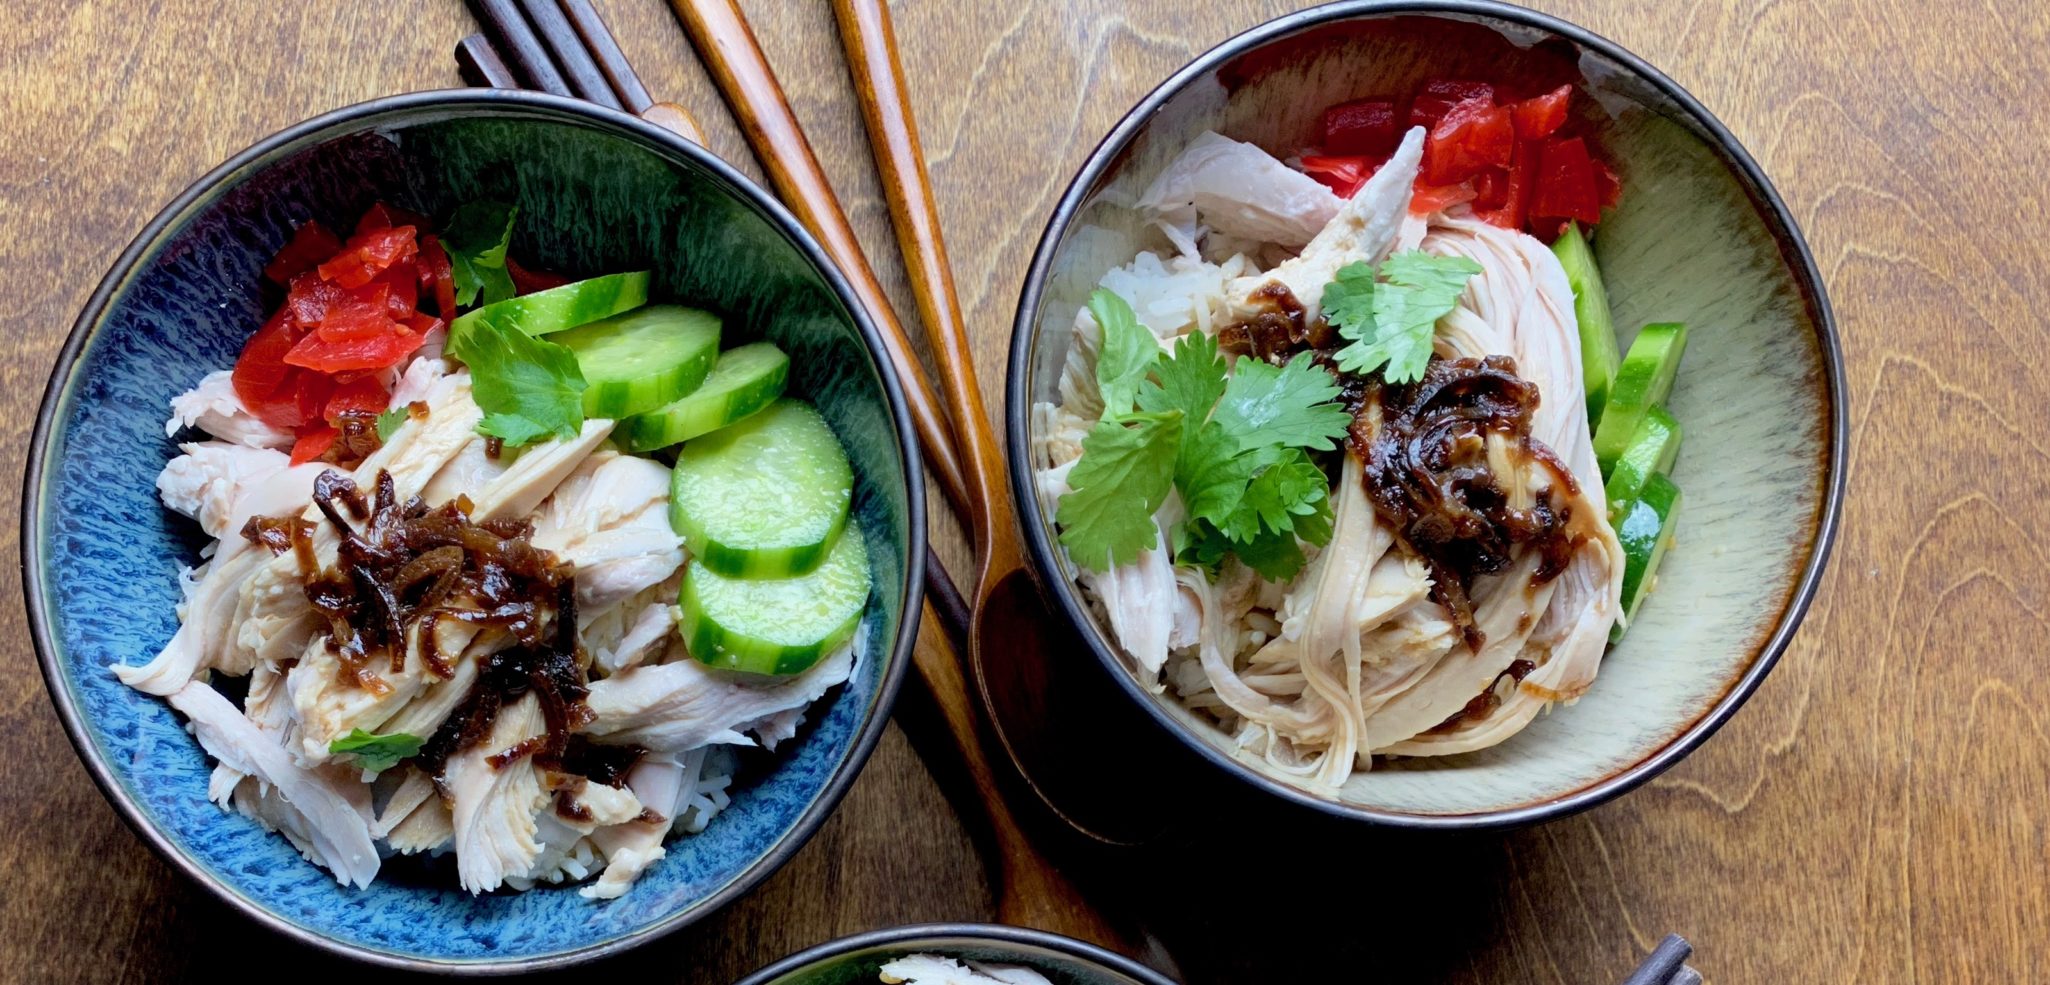
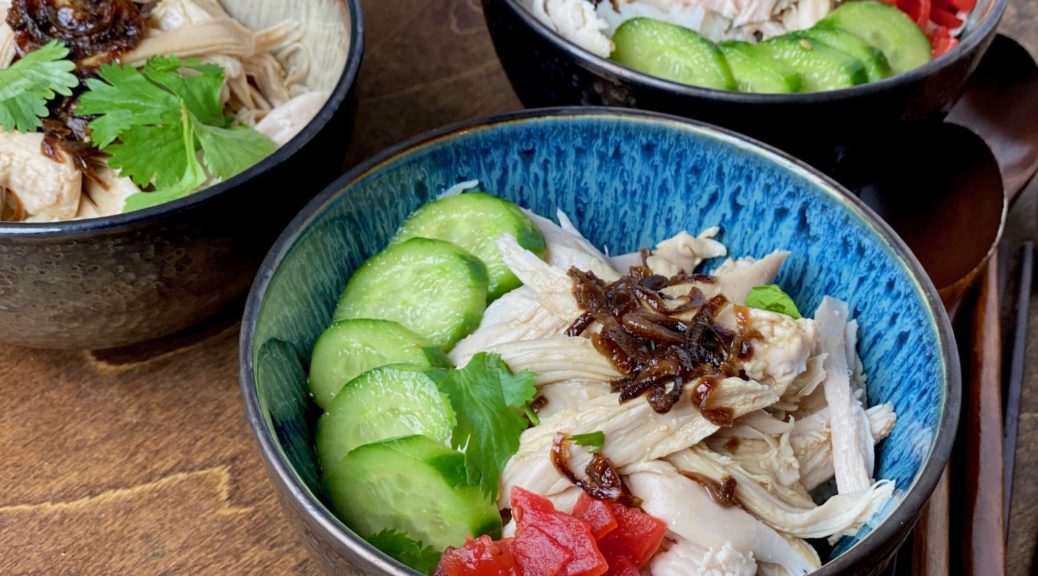
Only a couple of weeks have gone by since Thanksgiving and I have turkey on the brain, again!  Not that I didn’t get my fill of turkey on Thanksgiving but this dish caught my eye as I was roaming around the food-sphere looking for Thanksgiving ideas, Taiwanese Turkey Rice.  What?  Maybe it’s like rice soup? Nope, it is a bowl filled with rice, topped with succulent shreds of turkey, dressed with a soy sauce, fried shallots, turkey dripping emulsion and served with Asian pickles.  Damn, doesn’t that sound delicious?

SIGN ME UP NOW

I was drooling.  If you have perused my IG or blog for recipes you may have noticed that I LOVE one bowl meals like soups and stews.  My comfort zone is curled up on the couch, spoon in hand and a bowl in the other, filled with either rice or noodles topped with anything yummylicious…like THIS.

I did a bit of sleuthing for  this dish.  Turkey is not something you find in the Asian food vernacular.  It turns out, Taiwanese Turkey Rice (嘉義火雞肉飯) hails from southern Taiwan, specifically Jia Yi.  It is a super popular street food and turkeys are grown specifically for this dish.  Originally the turkey was shredded as a garnish for the classic dish, Lu Rou Fan, 魯肉飯, Stewed Pork over Rice, but folks liked the turkey so much, they started making it without the Stewed Pork, thus Taiwanese Turkey Rice was born.

Turkey Rice is similar to Hainan Chicken Rice or Thai Chicken and Rice.  The flavor profile of the sauce sets it apart though, oh yeah, and the turkey, but in a pinch you could use chicken for this dish.  I decided to cook the turkey ala Hainan Chicken style. The turkey is poached so you end up with moist succulent meat plus the stock which serves as the basis for the sauce.  There are a plethora of recipes out there right now that take advantage of turkey leftovers to make this dish including this one from Serious Eatsbut I wanted the real deal so I started with uncooked turkey breast.

Two blogs jumped out and served as the basis for info and recipe for Taiwanese Turkey Rice, Choo Choo-ca-Chew  and The Food Dictator.  A wealth of information and great recipes.

The Turkey

I started with a turkey breast, well, half of a turkey breast and poached it, just like Hainan Chicken.  The poaching liquid is seasoned with salt, ginger, scallion, rice wine and Better Than Bouillon Chicken Base (game changer).  If you have a box of turkey stock from TJ’s, use that and water for a more flavorful stock.  (I think their turkey stock is better than the chicken stock in a box.

When you buy your turkey make sure the skin is still attached***  Remove the skin at home and reserve. Drop the turkey into the boiling poaching liquid (ok, don’t just DROP it, gently place…to avoid 3rd degree burns).  Bring the stock back to a boil and turn the heat down so the stock is simmering.  Cover and let simmer for 10 minutes.  Turn the flame off, NO PEEKING, and let the turkey sit for 25 minutes undisturbed.  Think of it as a spa day for the turkey.  Once it is done take it out of the pot, let it sit until it is cool enough to handle.  Remove meat from bone and shred into bite size pieces.  Reserve in bowl and cover to keep warm.

Gimme Some Skin***

A trip to Minneapolis, back before the time of COVID, we caved into Wes’s penchant for Caesar Salad at the Butcher & The Boar (sadly gone) one night for dinner.  A few tweaks made their Caesar a standout.  The Romaine lettuce was grilled, and in place of croutons, bits of chicken skin baked to a crispy golden finish adorned the salad. ㄹingerlicking good.

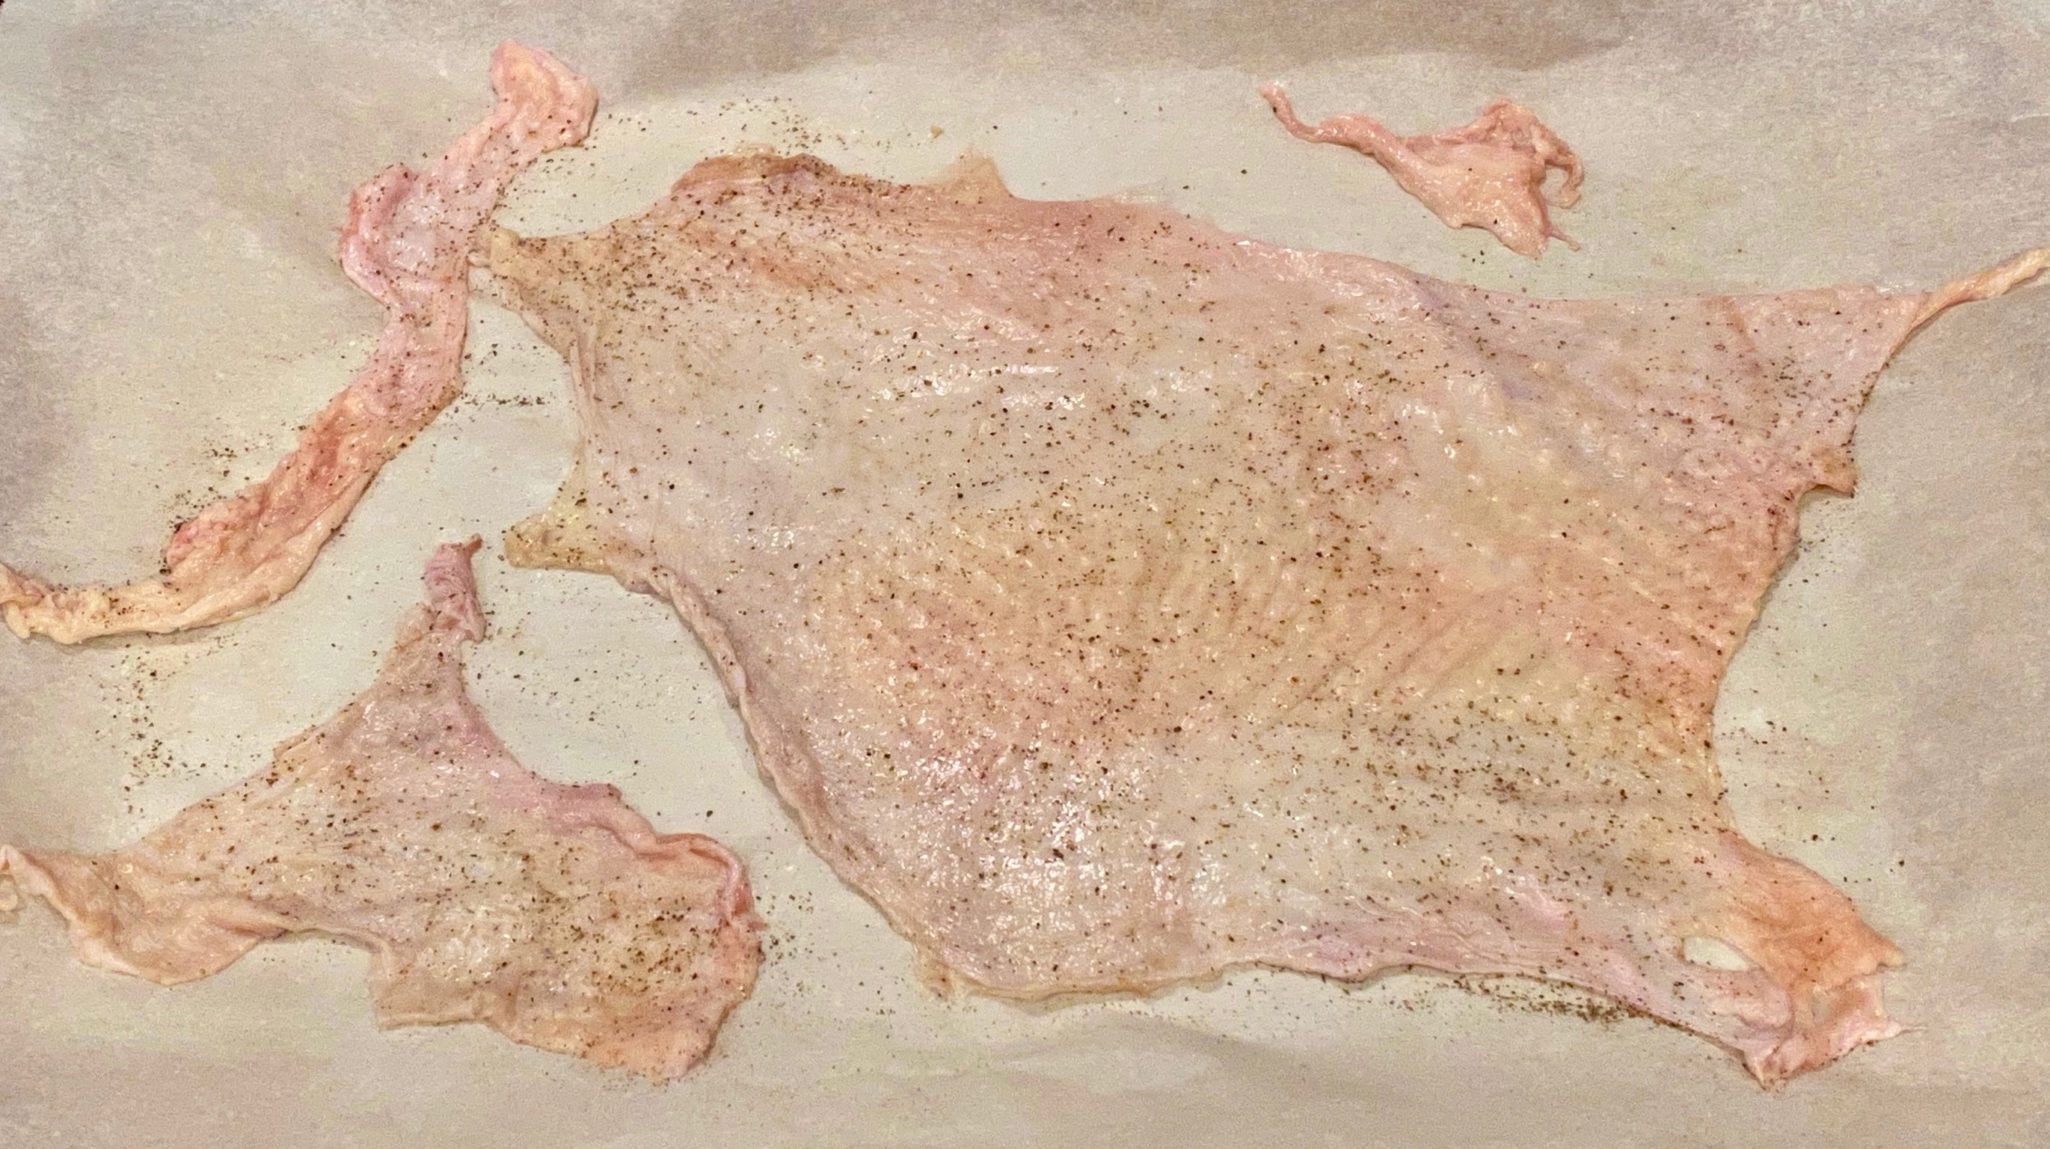
Crispy chicken skin (in this case turkey) is pretty quick and easy to make.  Spread the skin out on a parchment lined rimmed baking sheet.  Salt and pepper.  Cover with a sheet of parchment and top with another baking sheet to keep the skin flat.  Bake at 375 degrees for 20-25 minutes until skins are deep golden.  You should have a nice puddle of oil from this, KEEP the oil.

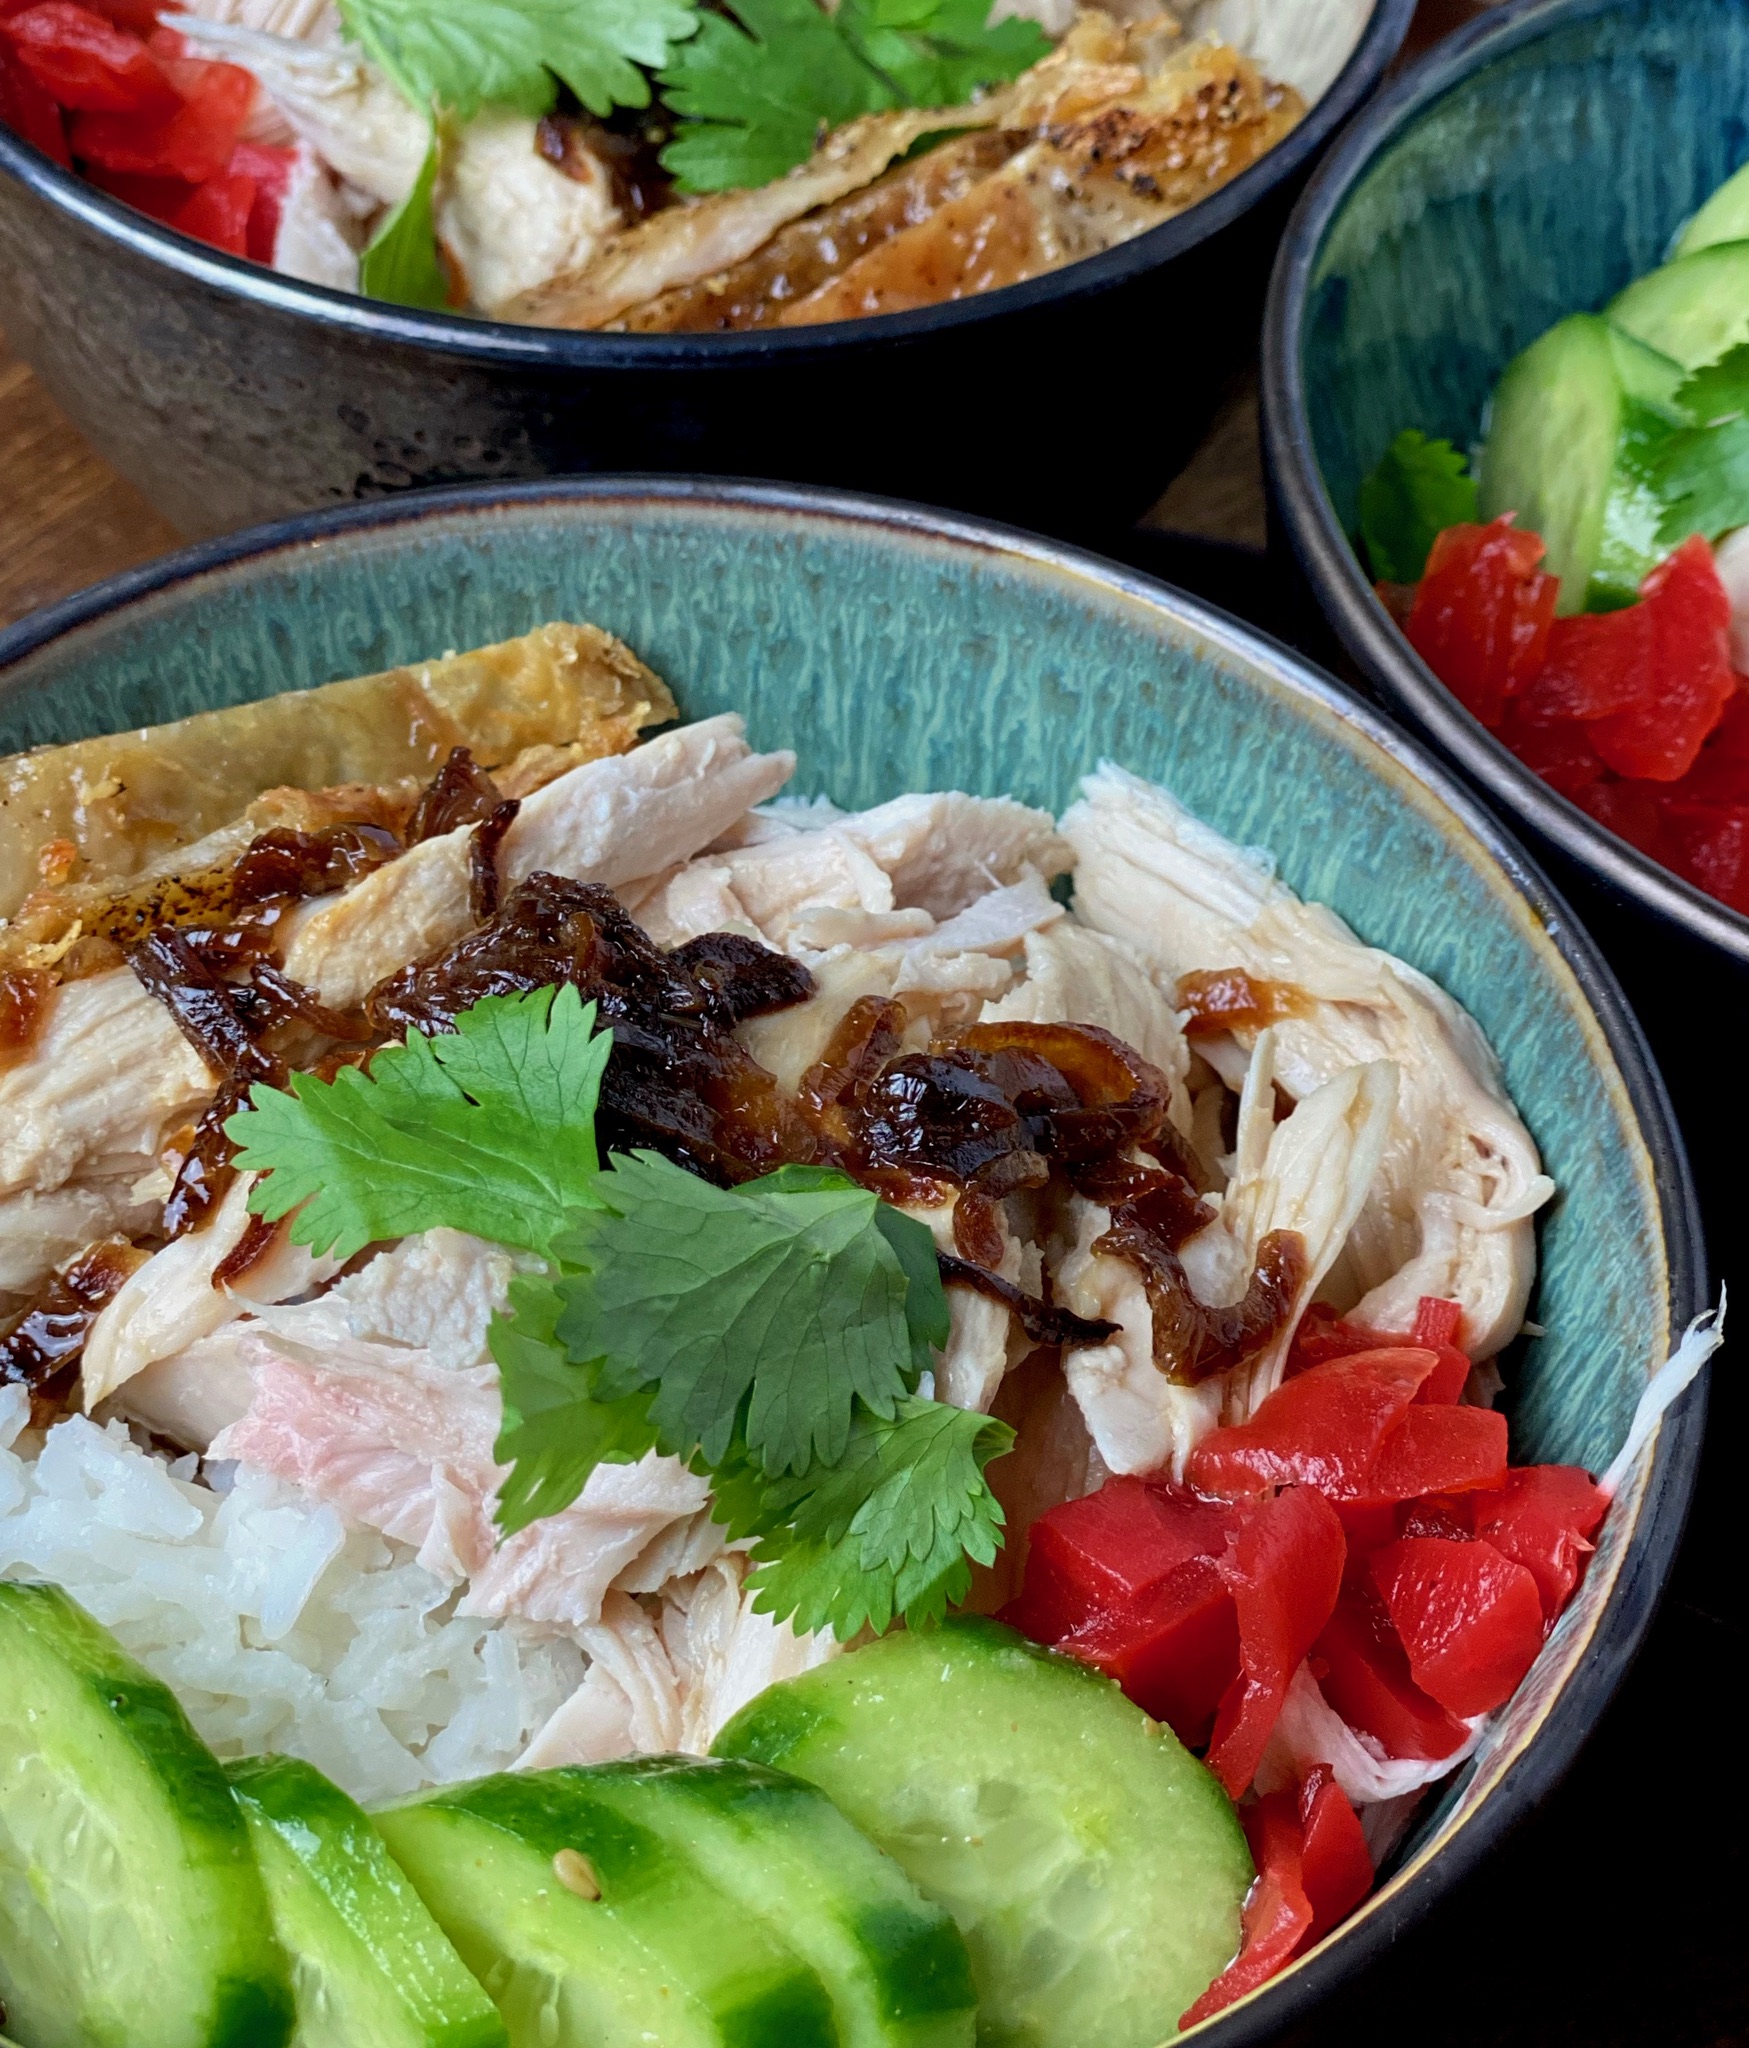
The rendered oil is used in the sauce for the dish.  The crispy skin is a bonus that I use as a garnish for turkey rice.  It provides added crunch and flavor to the dish, its damn delish.

The Sauce

Hainan Chicken or Chinese Poached Chicken is served with a ginger, scallion, sauce with or without slices of chili.  For Taiwanese Turkey Rice, the sauce is made with fried shallots, light soy sauce, a bit of sugar and the rendered oil from the turkey.  It’s deceptively simple for a sauce that is so delicious.  I buy a ton of shallots, thinly slice and fry them. The oil is kept in the fridge and the shallots in a jar on the counter.

Here is a detailed description on how to make fried shallots from Serious Eats.  IN A PINCH, you can buy fried shallots at most Asian markets and avoid frying your own.  IN A DOUBLE PINCH, TJ’s has fried crispy onions in a can during the holidays, (probably for the green bean casserole I hate) that make a pretty good substitute.

The Rice

Traditionally served over plain rice, you can bump it up by using the poaching liquid to cook the rice.  Just reserve enough for the sauce.  For the rice use any long grain or Jasmine Rice.

The Sides

Pickles are often served with Turkey Rice.  I like pickled ginger, takuan (pickled Japanese radish), or Vinegared Chinese pickles.  I love soft boiled eggs (like ramen eggs) and fresh cucumbers lightly dressed as sides. Garnish with scallions or cilantro.  Lip-smackin’ good.

Taiwanese Turkey Rice

Course Main Course, One dish meals
Cuisine Asian
Keyword Rice Bowl, Soul Food, Taiwanese, Turkey Rice
Prep Time 20 minutes
Cook Time 1 hour 15 minutes
Servings 2 servings

Ingredients

  • 2 C Shredded Turkey* You can use Thanksgiving turkey leftovers

Poaching Liquid

  • Water Enough water to cover turkey
  • 2-3 slices ginger
  • 2 scallions
  • 1 tsp salt
  • 1/4 cup rice wine
  • 1 tablespoon Better Than Bouillion Chicken Base

SAUCE

  • 3 Shallots Thinly sliced
  • 1-1/2 TBsp Oil Lard, Vegetable Oil, Chicken Fat or Half and Half
  • 3 TBsp Soy Sauce Light Soy Sauce (Pearl Ridge is good)
  • 1 TBsp Sugar
  • 3/4 C Chicken/Turkey Broth

RICE

  • 2 C Rice Steam or cooked according to instruction. You can also use the chicken stock from boiling the chicken to cook rice if making from scratch. It really enhances the flavor

Instructions

Turkey

  • Start with just enough water to cover the turkey breast in a pot. Add ginger, scallions, rice wine, and stock base and bring to a boil. Add turkey and cook for 10mins then turn the heat off and let it sit in the pot for 25 mins or until cooked through. This method makes silky, tender, turkey.
  • Remove from pot, cool until you can handle and shred into small pieces. Cover and reserve.
  • The poaching liquid can be reduced by 20-30% to concentrate the flavor. Taste.

SAUCE

  • In a frying pan, heat up 1-1/2 TBsp of oil of your choice. I use 1/2 shallot oil and 1/2 rendered fat from turkey
  • Add the sliced shallots to the oil and fry until crispy golden. Remove shallots or you can leave them in the sauce. I like to remove them and sprinkle them on the finished bowl. Or go half and half.
  • Add the turkey stock, soy sauce, and sugar to the pan, careful the oil may splatter
  • Cook on high to slightly reduce the sauce.

The Bowl

  • Layer shredded turkey over steaming rice, pour amount ofsauce you want over the turkey.
  • Garnish with pickles, or green veggies, or cucumbers, fried shallots, scallions, soft boiled egg, or reserved crispy turkey skin.

Notes

Leftover holiday turkey can be used for this dish.  Make sure you keep the pan drippings from the turkey and use this for the oil in the sauce.  You can use turkey stock or water for the sauce.
Instant Pot Easy Kheema Pulao (Spicy Indian Rice Dish)

Instant Pot Easy Kheema Pulao (Spicy Indian Rice Dish)

Sometimes other events dominate your life for a bit…but I’m back!

After weeks of knocking on doors to get out the vote, I was ready for some downtime.  I drove home from Bakersfield (four hours each way, ugh) and wanted to chill and enjoy some home cooked food.  As yummy as it is, (Wo)”Man”(me) cannot live on taqueria fare alone. I arrived home right around the dinner hour so I needed something quick and easy to make, but still comforting and delicious. I pulled out my Instant Pot, clicked on Ministry of Curry “Kheema Pulao” (think Indian version of a mixed rice dish) in my saved links, and voila’ 40 minutes later I was curled up on the couch, watching my favorite K-drama (Goblin), spooning hot, spicy pulao into my mouth.  Ahhh, my reward for doing my part to save Democracy…and that’s all I will say about that (thanks, Forrest).

Kheema Pulao

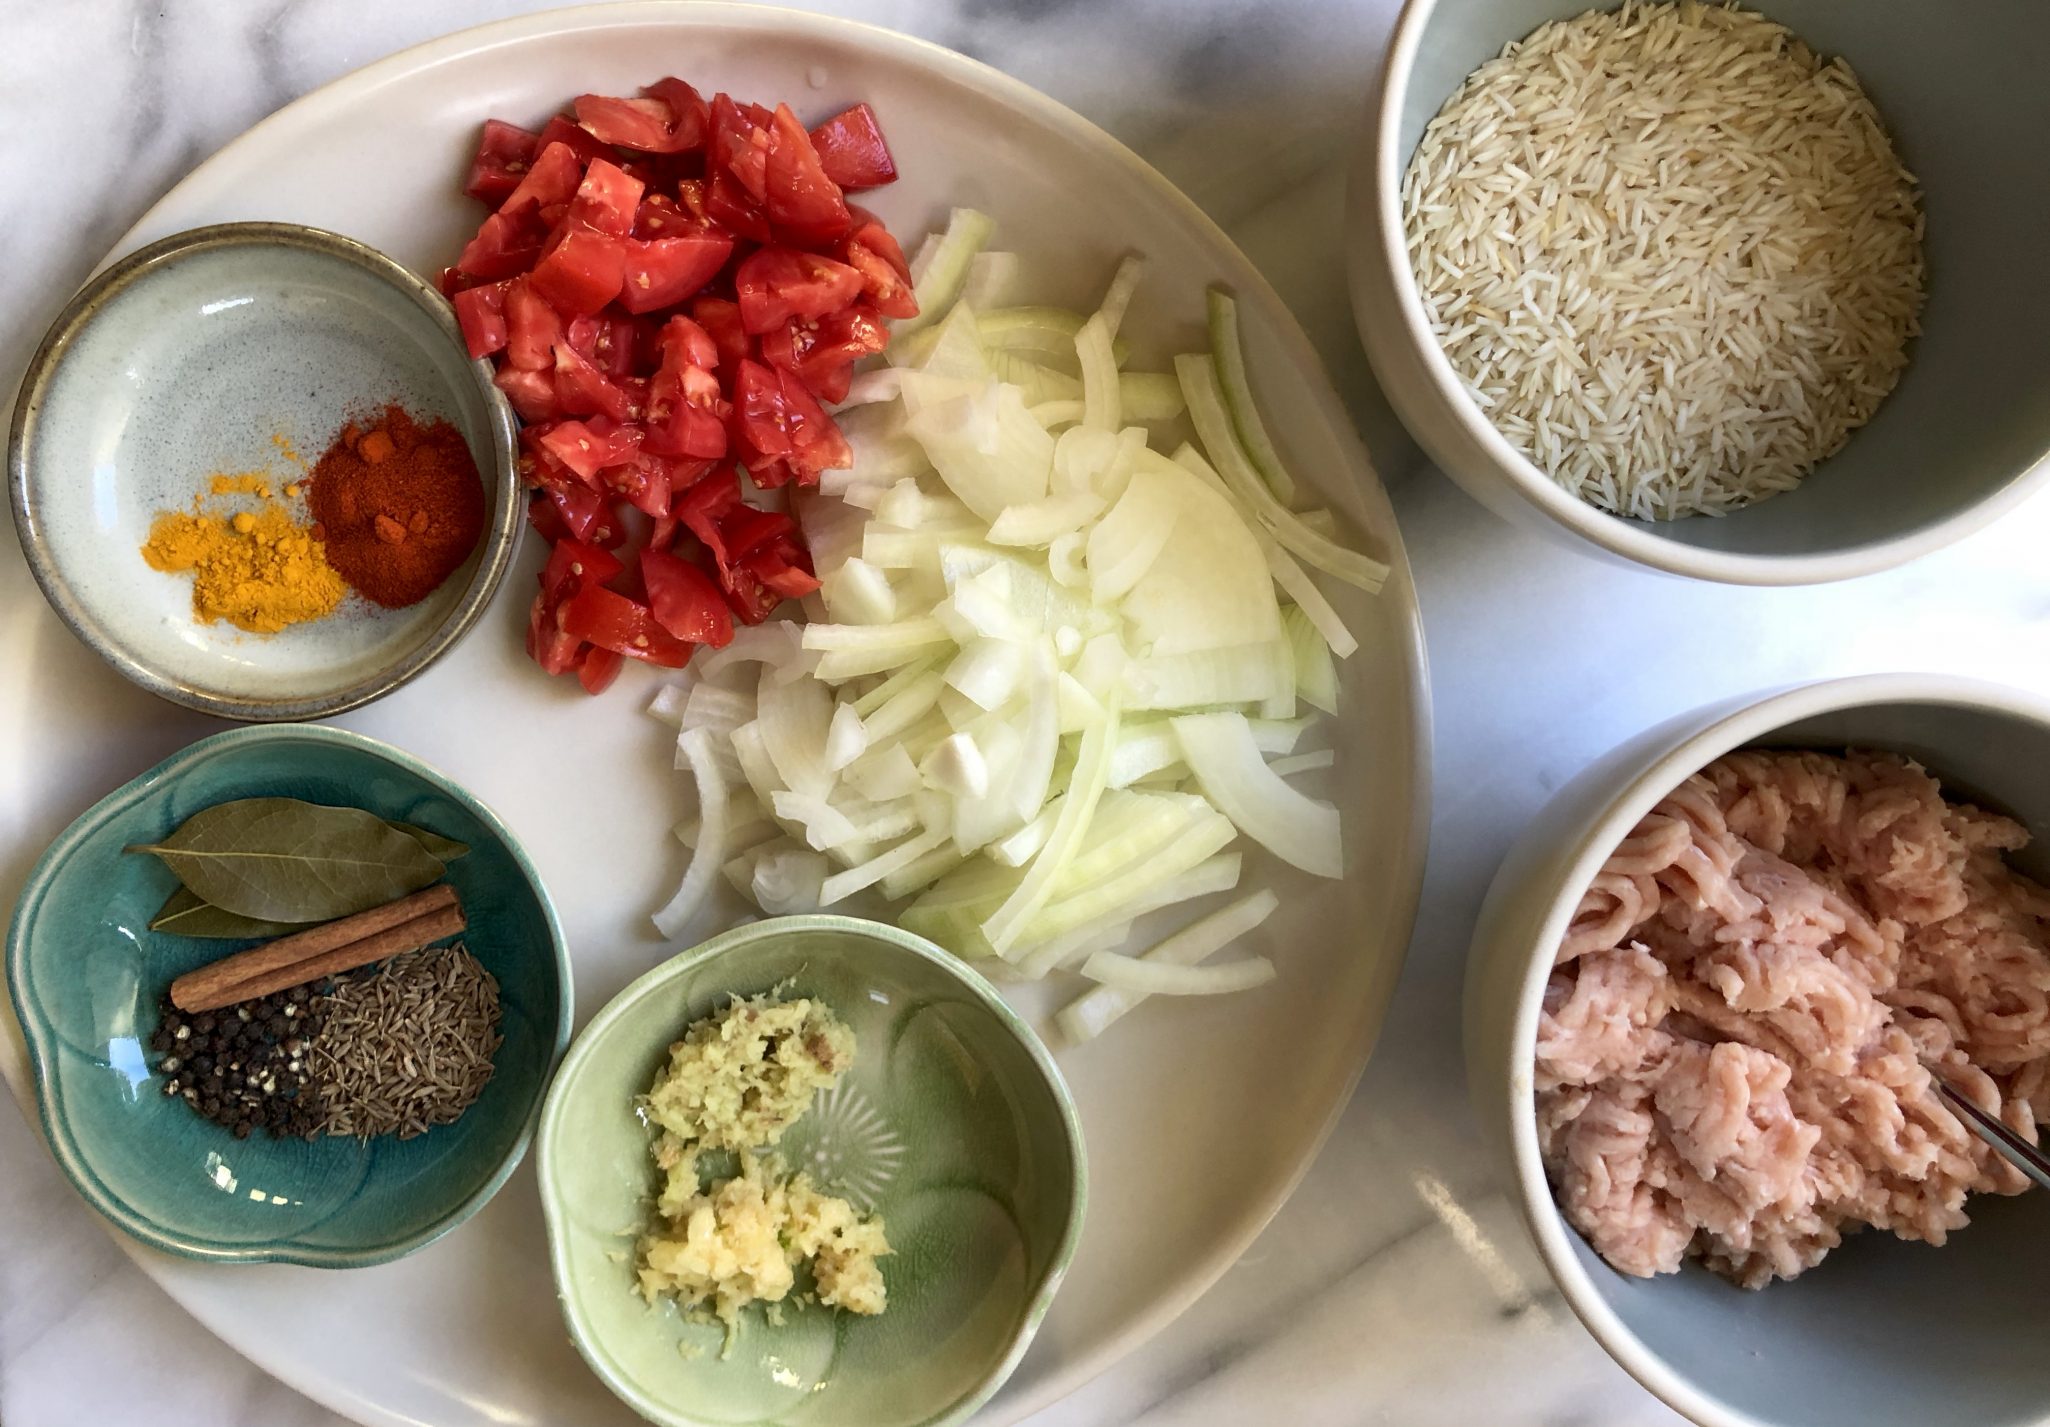
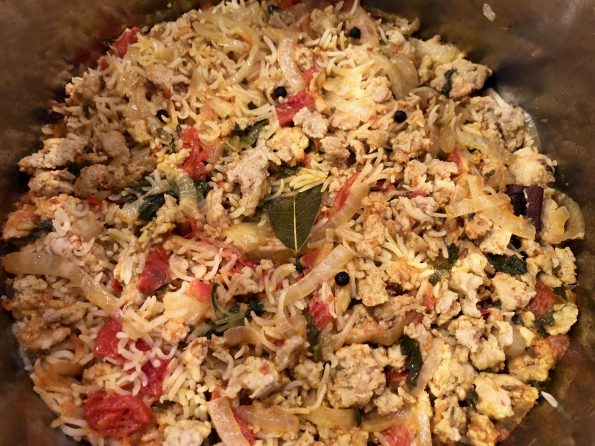
I love Biryani, a spicy Indian Rice dish that is both complex in flavor and in preparation. That means going to a restaurant and letting them make it for me. My job is to enjoy every bite. On the other hand, pulao is a simple version of a biryani, easily made at home and delicious.  Vegetables, ground meat, aromatics, and spices are sauteed, then rice is added along with water or stock. A touch of sweetness from the cinnamon and onions, spicy from the ginger, garlic, and chili, then finished with cilantro and lime.  Welcome to Flavortown.  So good.

Kheema means minced or ground, in this recipe, ground chicken is used but you could use turkey or beef.  The flavors are infused into the meat and the ground chicken cooks quickly, win-win.  The rate-limiting step would be the time it takes for the rice to cook which, ta-da, is shortened by using your Instant Pot, PLUS the entire dish is done in one pot…no muss, no fuss, I’m doing the happy dance now.

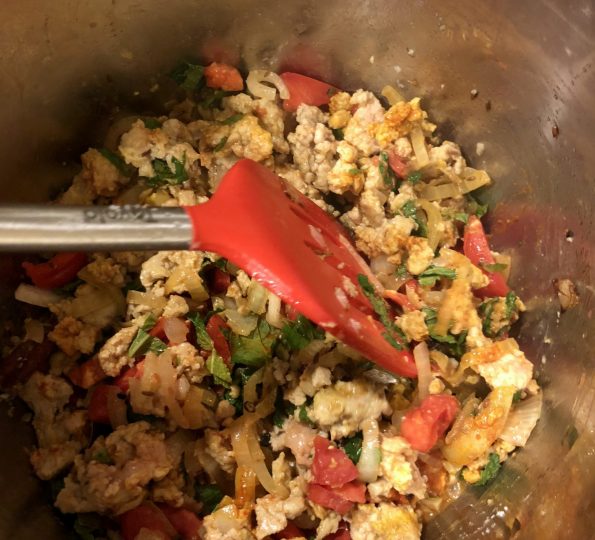
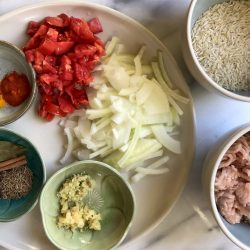
Saute’ ingredients in the pot.


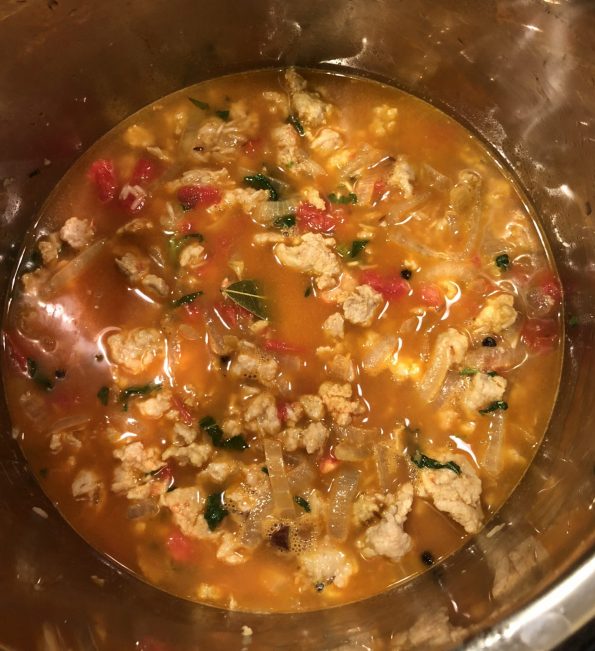
Add liquid and rice, cover, seal, set for 5 minutes, wait 5 minutes then quick release and done.  How easy is that?

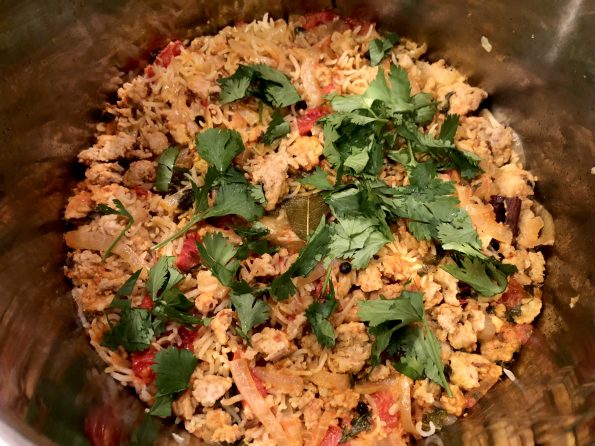
Kheema Pulao finish

Garnish with cilantro and lime to make it pretty.

Add this to your things to make in my Instant Pot.  Really.

Kheema Pulao

A one pot meal made with long grain basmati rice cooked with ground chicken and a host of aromatics ginger, garlic, onions, bay leaves, black pepper, cumin seeds and cinnamon.  A flavor explosion. Adapted from Ministry of Curry
Course Main Course
Cuisine Indian
Keyword Kheema Pulao
Prep Time 15 minutes
Cook Time 30 minutes
Total Time 45 minutes
Servings 4 people
Calories 422kcal

Ingredients

  • 2 tablespoons ghee
  • 1 teaspoon shah jeera or cumin seeds
  • ½ teaspoon black peppercorns
  • 2 inch cinnamon stick
  • 2 bay leaves
  • 1 medium onion thinly sliced
  • 1 teaspoon ginger grated
  • 1 teaspoon garlic grated
  • 1 pound ground chicken can use , beef or turkey
  • 1 tomato, diced
  • 1 teaspoon red chili powder
  • ¼ teaspoon turmeric
  • Handful of mint leaves chopped
  • 2 teaspoon kosher salt
  • 1 cup long grain Basmati rice
  • 1 ½ cups water

Garnish

  • 1 lime
  • ½ cup cilantro chopped
  • 1 teaspoon black pepper freshly ground

Instructions

  • Set the Instant Pot to sauté(more) mode and heat ghee. Add cumin seeds, black peppercorn, cinnamon and bay leaves. Saute for 30 seconds.
  • Add onions and sauté for 5-8 minutes or until the onions start to brown. Add ginger, garlic and chicken. Sauté, breaking the chicken and browning it for a minute. Add tomatoes, red chili powder, turmeric, mint leaves, and salt. Mix well.
  • Add rice and water. Gently mix making sure all the rice is under the liquids. Close the Instant Pot lid with pressure valve to sealing. Cook on Manual /Pressure cook (Hi) 5 mins with 5 min NPR.
  • Open the Instant Pot and gently fluff the top rice (Note, if the rice looks uncooked on the top, just mix it with the rice under and close the Instant Pot for 5 minutes)
  • If rice seems a little wet, let it sit for a couple of minutes, top open.
  • Add lime juice, cilantro and black pepper. Turn the Instant Pot off and take the insert out so the rice does not overcook or get mushy. Enjoy hot.
Pickled Obsession (Pork and Kimchi)

Pickled Obsession (Pork and Kimchi)

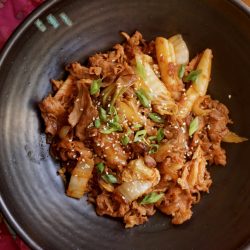
My last trip to the Hankook Korean Supermarket, I took the plunge. Yep, finally bit the bullet and bought a BIG jar of Kimchi.  No more little pint size containers for me.  I didn’t go completely crazy and get the gallon size, although I thought about it for a fleeting moment since it was on sale, lol.  I refrained and prudently bought a quart size jar.

The question running through your brain right now, which Kimchi did she buy? Am I right?  Lucky for you I did the exhaustive, backbreaking, mentally draining research-so you don’t have to.  I stood in the Kimchi section of HMart for an hour, watching which Kimchi customers were buying and then I repeated this at Hankook Market (much to Hubster’s chagrin).  I also “interrogated” my friends and forced them to reveal their favorite Kimchi.  Okay, I just texted them and they replied, consensus was Ocinet or Tobagi brands were good.  So there I was in Hankook Market, upgrading to the quart size jar of Kimchi by Ocinet. 

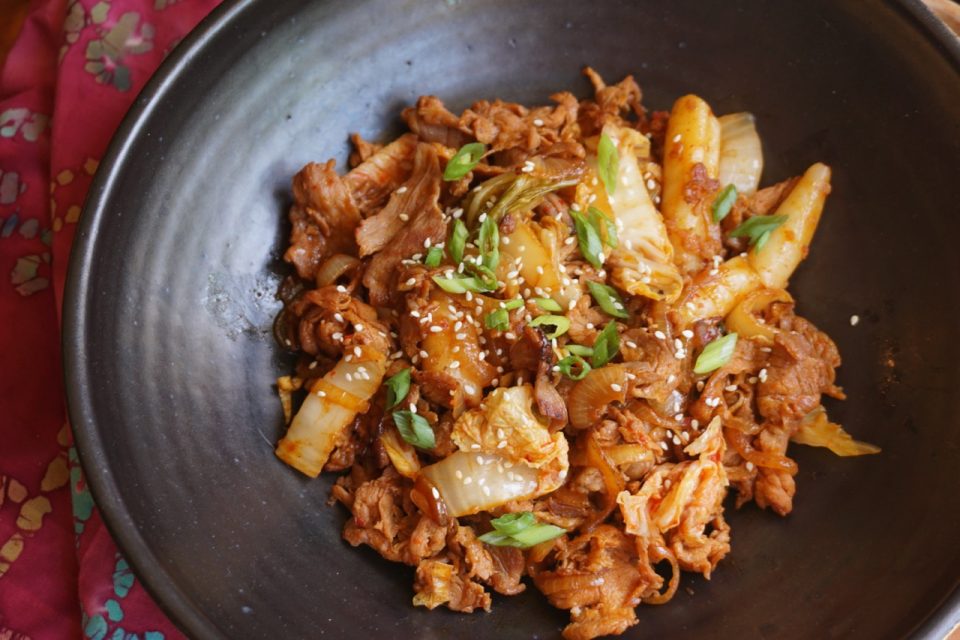
With a large jar of kimchi to consume, I searched for quick and easy Kimchi dishes to try.  I scored big time when I found a Pork Belly Kimchi recipe on the blog, Spice the Plate.  The kitchen gods were smiling on me, I had sliced pork belly, kimchi and Gochujang in the fridge, didn’t even need to make a grocery run.  This dish literally comes together in minutes. While the rice is cooking, you have plenty of time to prep, cook and plate the Pork and Kimchi.

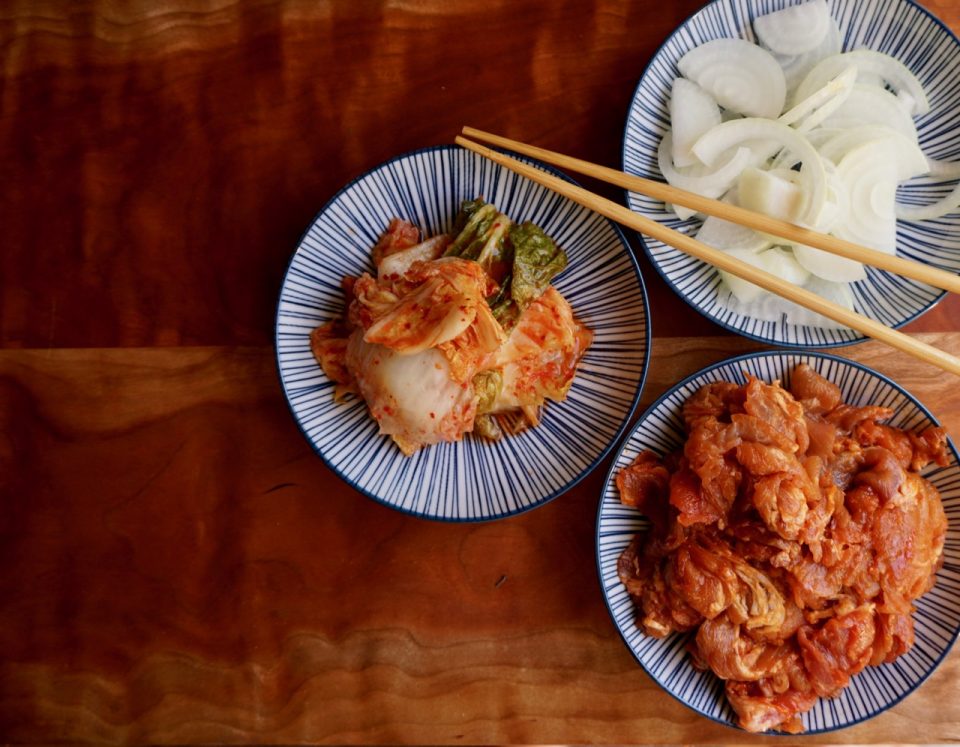
Pork and Kimchi ingredients

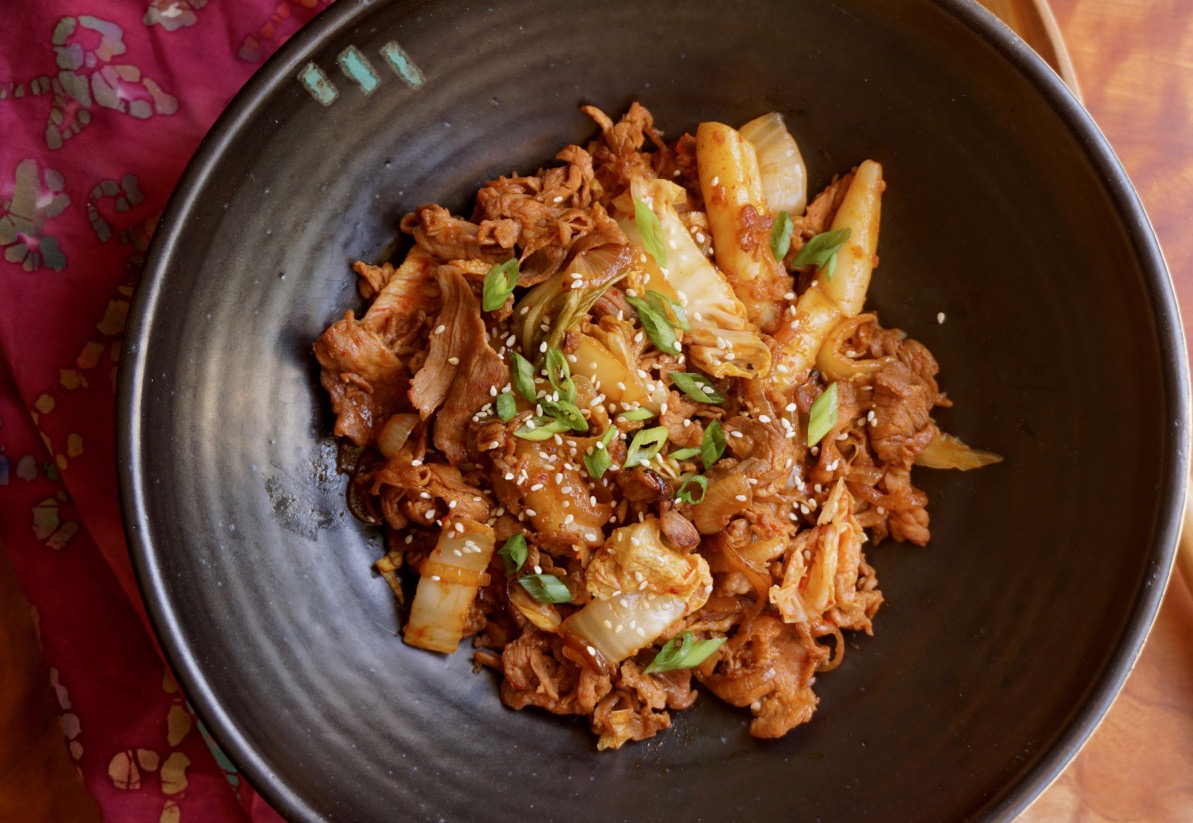
The pork is marinaded in Gochujang, soy sauce and a touch of sugar.  While the pork marinades, thinly slice a yellow onion, grab some kimchi and slice the bigger pieces into strips.  A couple of minutes of stir-frying, garnish with toasted sesame seeds and green onions to make it pretty, voila’ dinner is served.  This pork and kimchi dish hits the spot, spicy with a touch of sweetness from the Gochujang, heat and crunch from the kimchi, and a bit of nuttiness from the sesame oil. This is “party in my mouth” food.  Delicious and soooo easy.

Stir-fried pork and kimchi

I managed to pop a taste in my mouth before heading out for a meeting, pretty yummy.  I foolishly thought I’ll have some when I get home.  When I got home, the bowl was empty and my kid, a sheepish grin plastered on his face, gave me the two thumbs up. Consolation I guess.

Good thing I bought a big jar of Kimchi.  To help you pick your own bottle of pickled goodness, Serious Eats also reviewed Kimchi which you can find here.

Update:

I love this simple, homey dish and it has become part of my regular rotation.  Starting with ingredients like kimchi, Japanese curry blocks or Thai Curry pastes are such a boon to homecooks.  A flavorful meal in minutes!

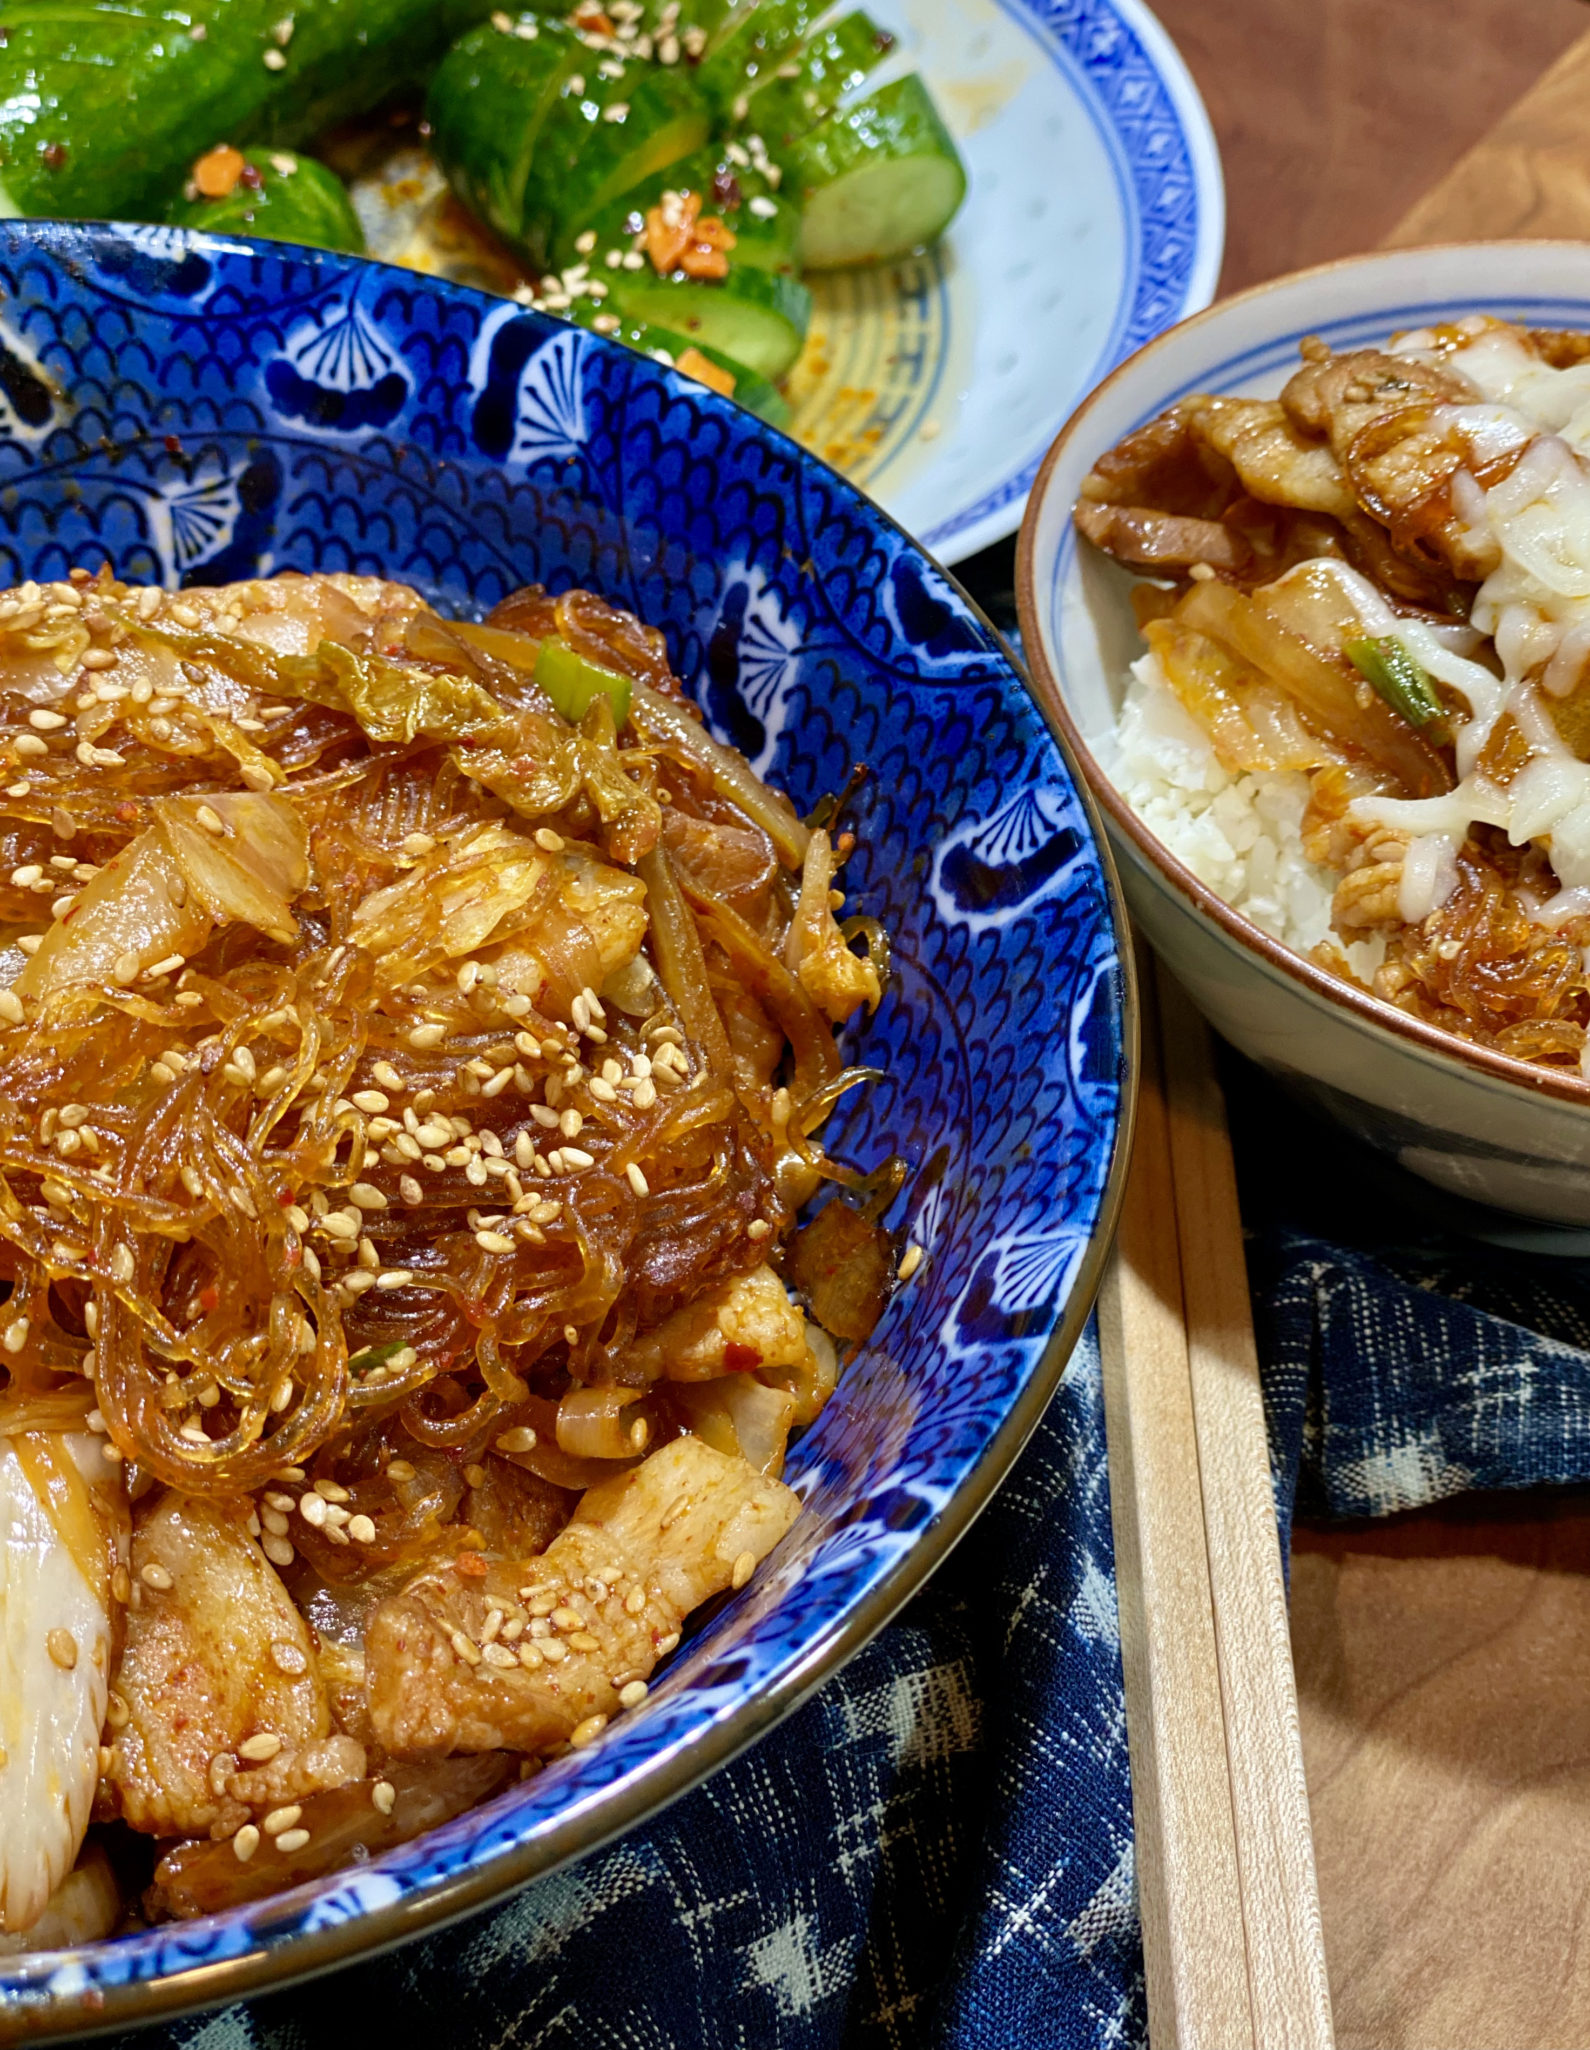
Added cellophane or bean thread noodles to this dish to give it even a little more “oomph” without adding more pork.  Bean thread noodles are made of mung bean and once cooked are transparent, and are absolute flavor magnets.

A Deep Dive On This Thread

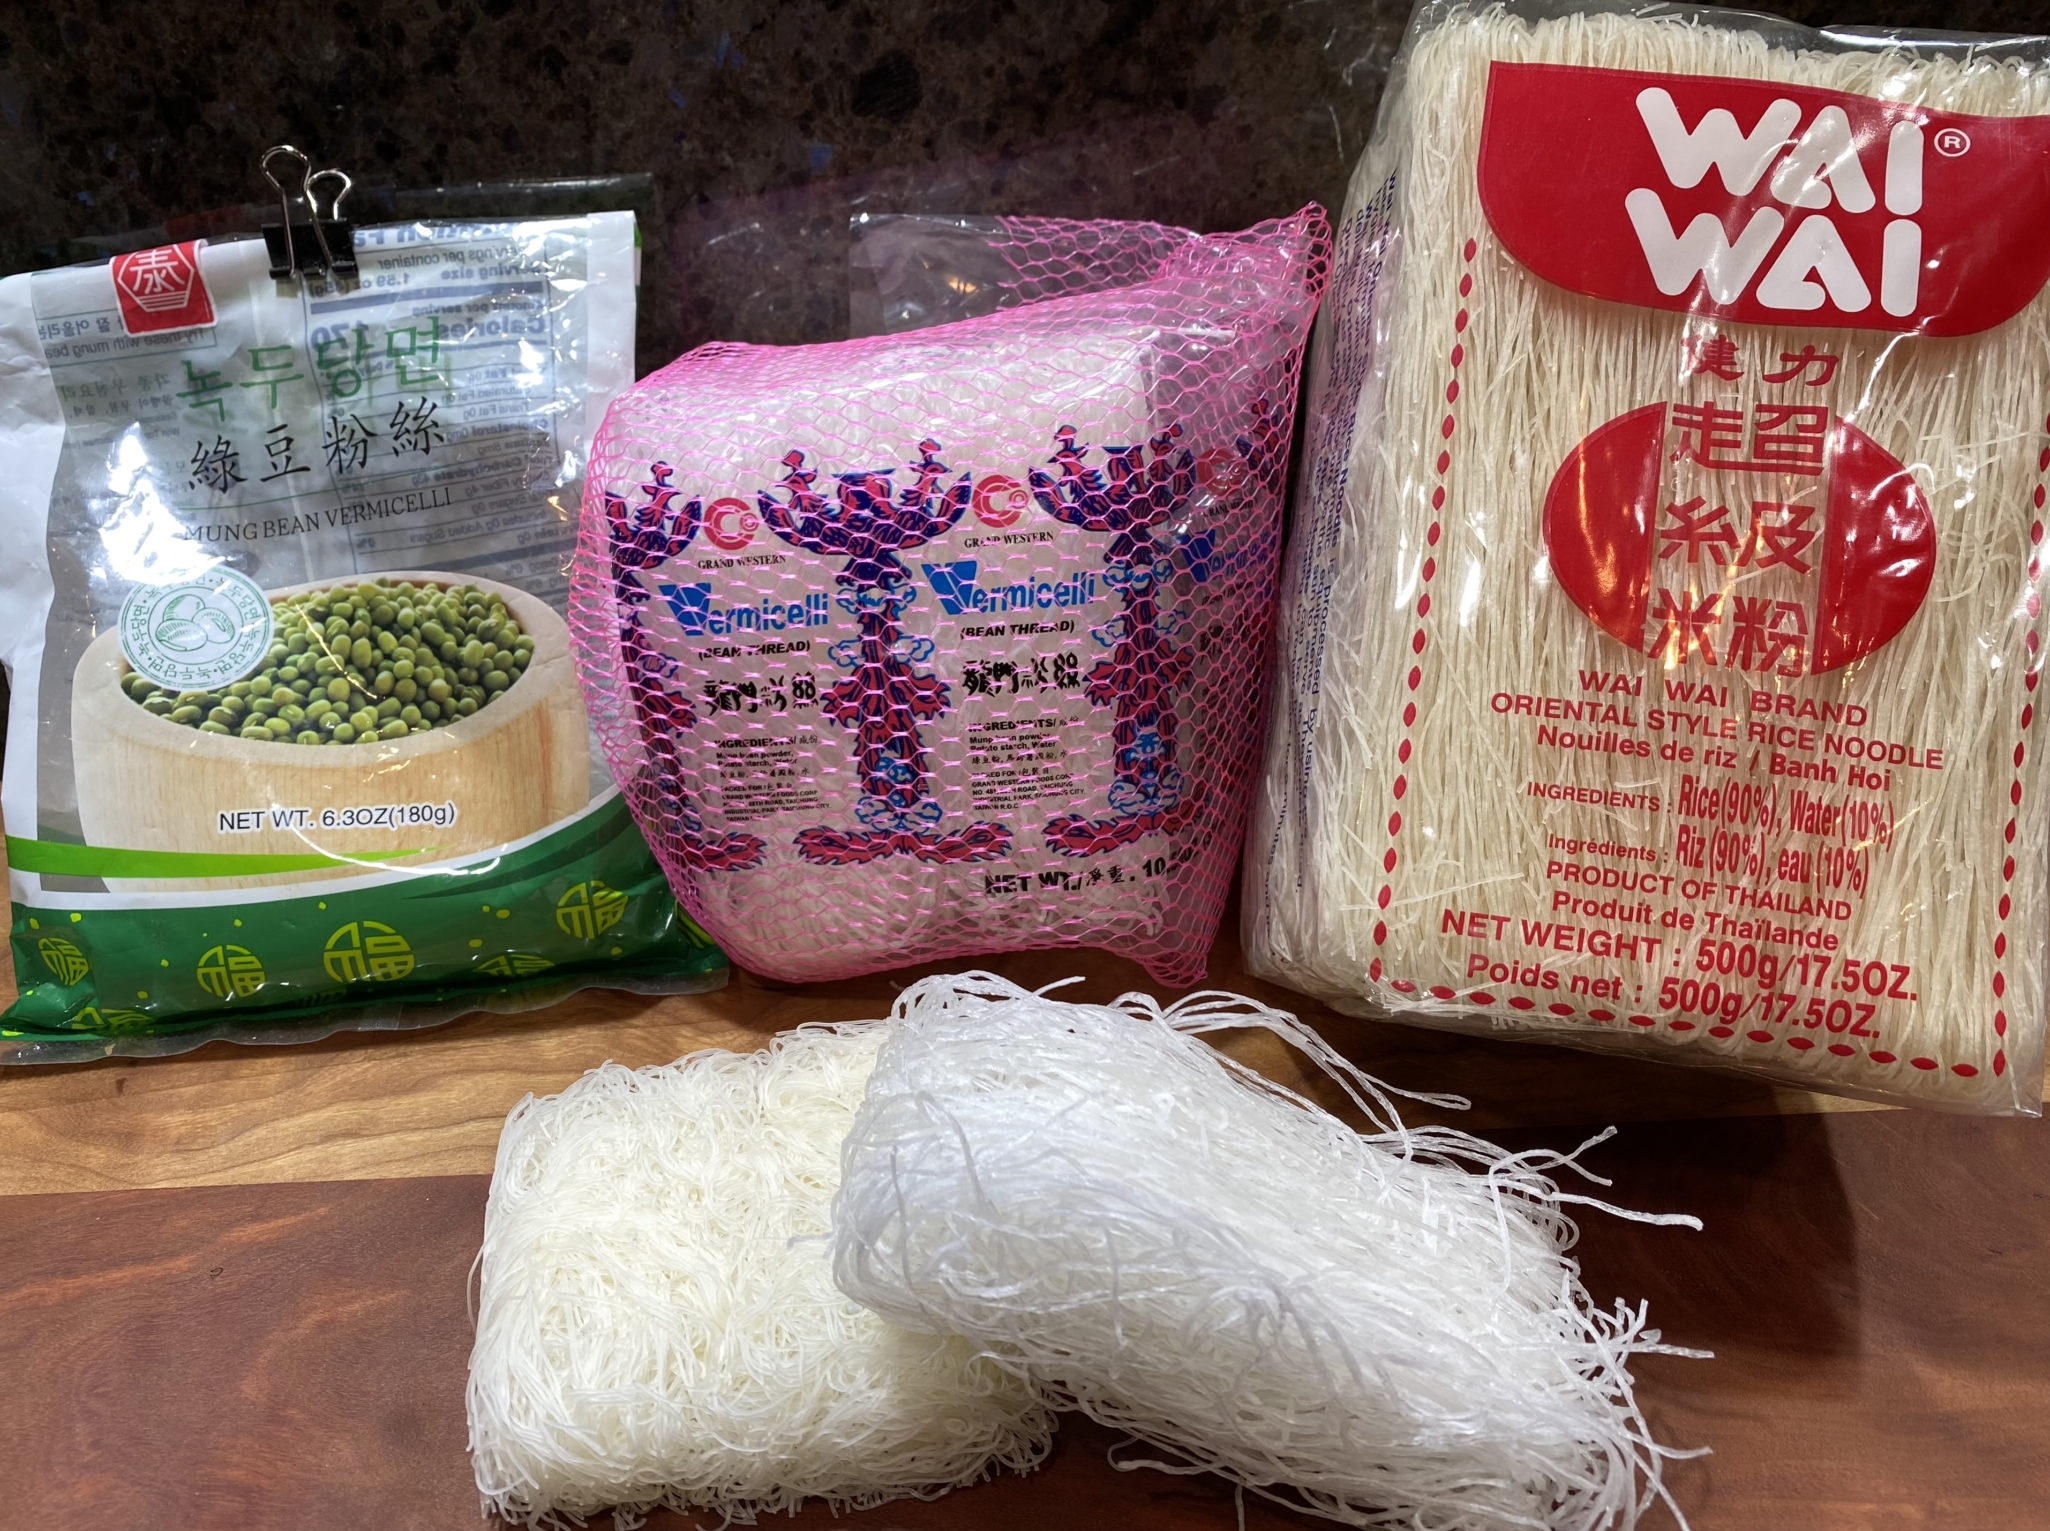
Cellophane Noodles are found in just about every Asian cuisine, Chinese, Korean, Vietnamese, Thai…you get the picture. The confusion begins with labeling. Bean thread noodles, glass noodles, and vermicelli refer to noodles made of mung bean or sweet potato. BUT the term vermicelli noodles are also used for thin rice noodles.    Both come dry and look very similar.

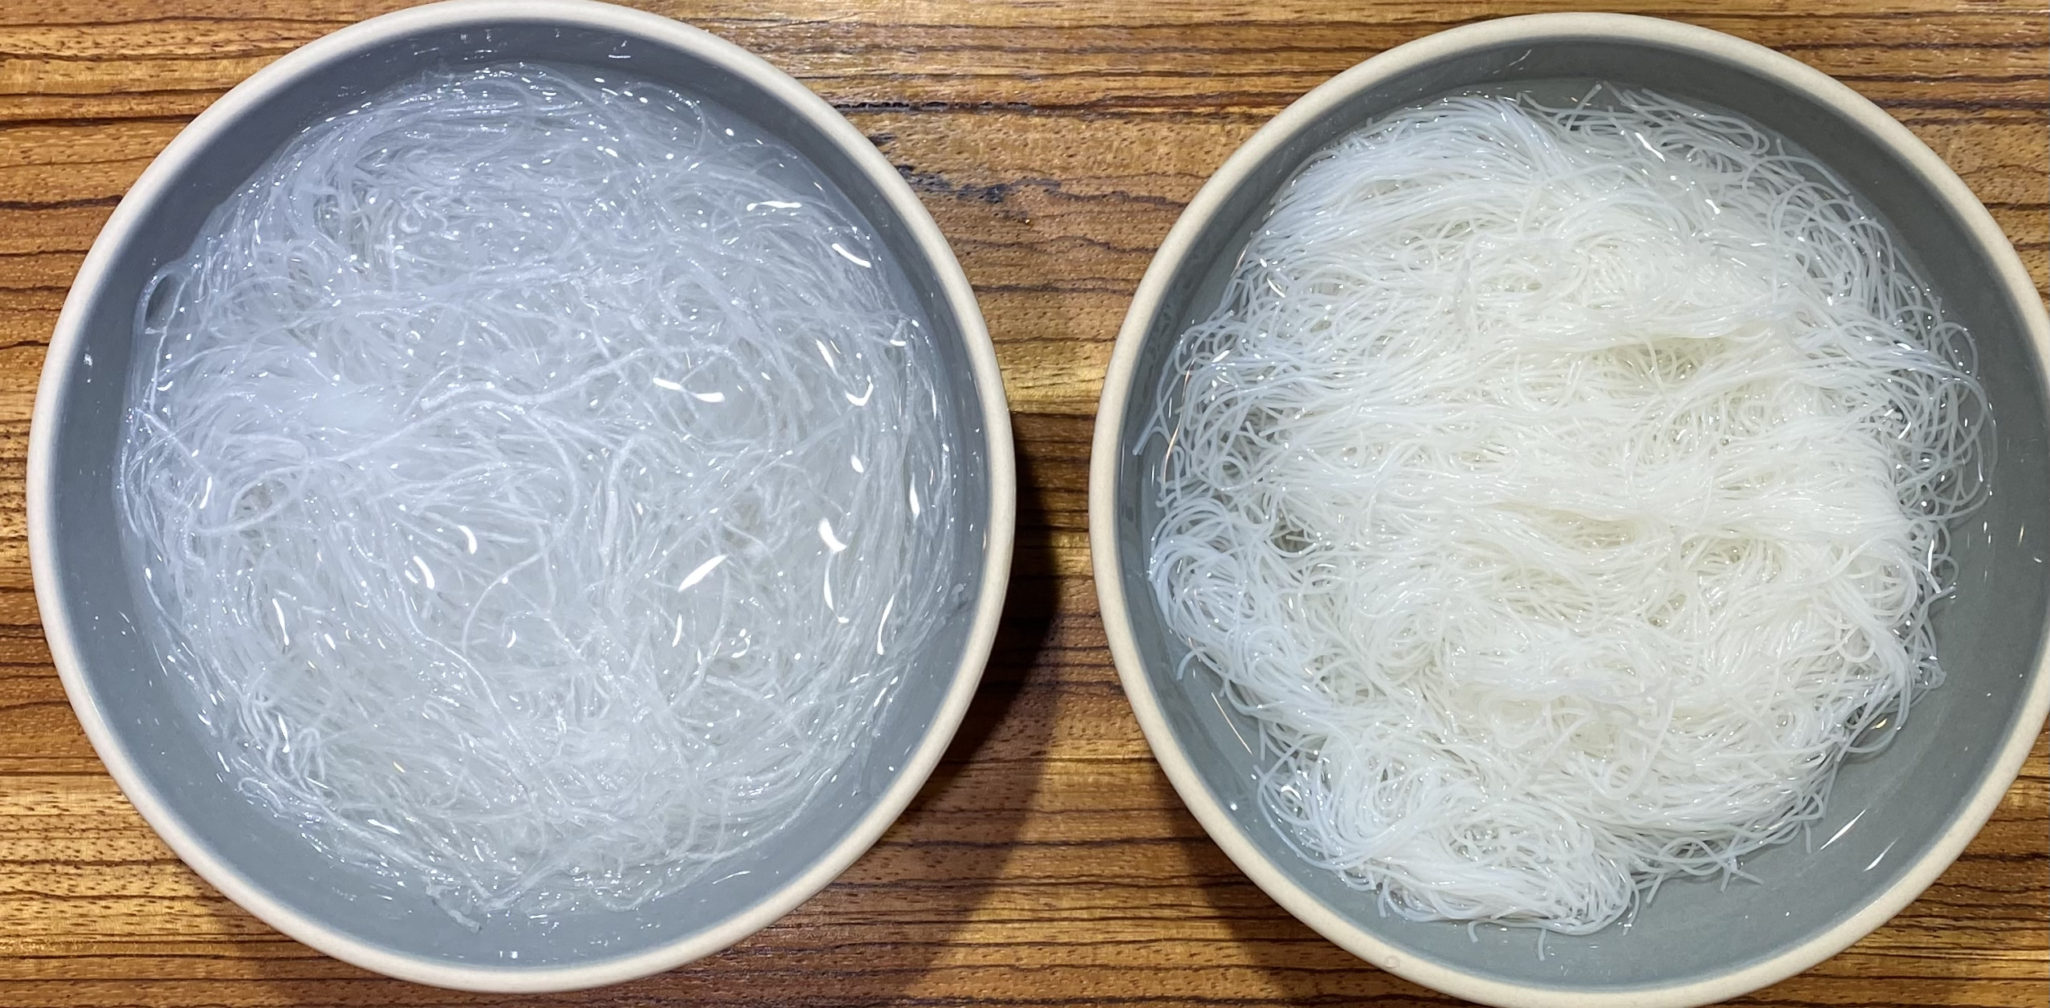
On the left is bean thread noodles made of mung bean.  Hydrate them in water and they turn transparent.  On the right, once hydrated rice noodles or vermicelli are opaque white.  If you have had pho or Pad Thai, the noodles are made of rice.   Hawaiian Long Rice (don’t get me started), or Korean Japchae, the noodles are made of mung bean.  I could be wrong, but most Cantonese dishes use glass noodles not rice noodles.

Stir-Fry Pork and Kimchi

Course Main Course
Cuisine Asian
Keyword stir-fry pork and kimchi
Prep Time 15 minutes
Cook Time 10 minutes
Total Time 25 minutes

Ingredients

  • 1/2 pound kimchi larger pieces cut into strips
  • 1/2 pound pork belly sliced (or pork shoulder or butt would work also)
  • 1/2 yellow onion thinly sliced
  • 1 tablespoon oil
  • 1/2 tablespoon sesame oil
  • Toasted white sesame seeds

Marinade for the pork:

  • 1 tablespoon Korean hot pepper paste Gochujang
  • 1 tablespoon soy sauce Kikkoman is fine
  • ½ teaspoon sugar

Instructions

  • Marinate the pork with Korean hot pepper paste, soy sauce and sugar for about 10 minutes.
  • Heat oil over medium high heat, stir-fry the onion for about 3 minutes until soft and browned.
  • Add the pork and cook for 3-4 minutes until pork loses pinkness.
  • Add in the kimchi and stir fry for another 2 minutes.
  • Drizzle with sesame oil and sprinkle with toasted white sesame seeds and green onions.
  • Serve with rice

Notes

I had some tteobokki (rice cakes)so I threw those in too. Yummy
Garlic Rice-Love Letter to Rice

Garlic Rice-Love Letter to Rice

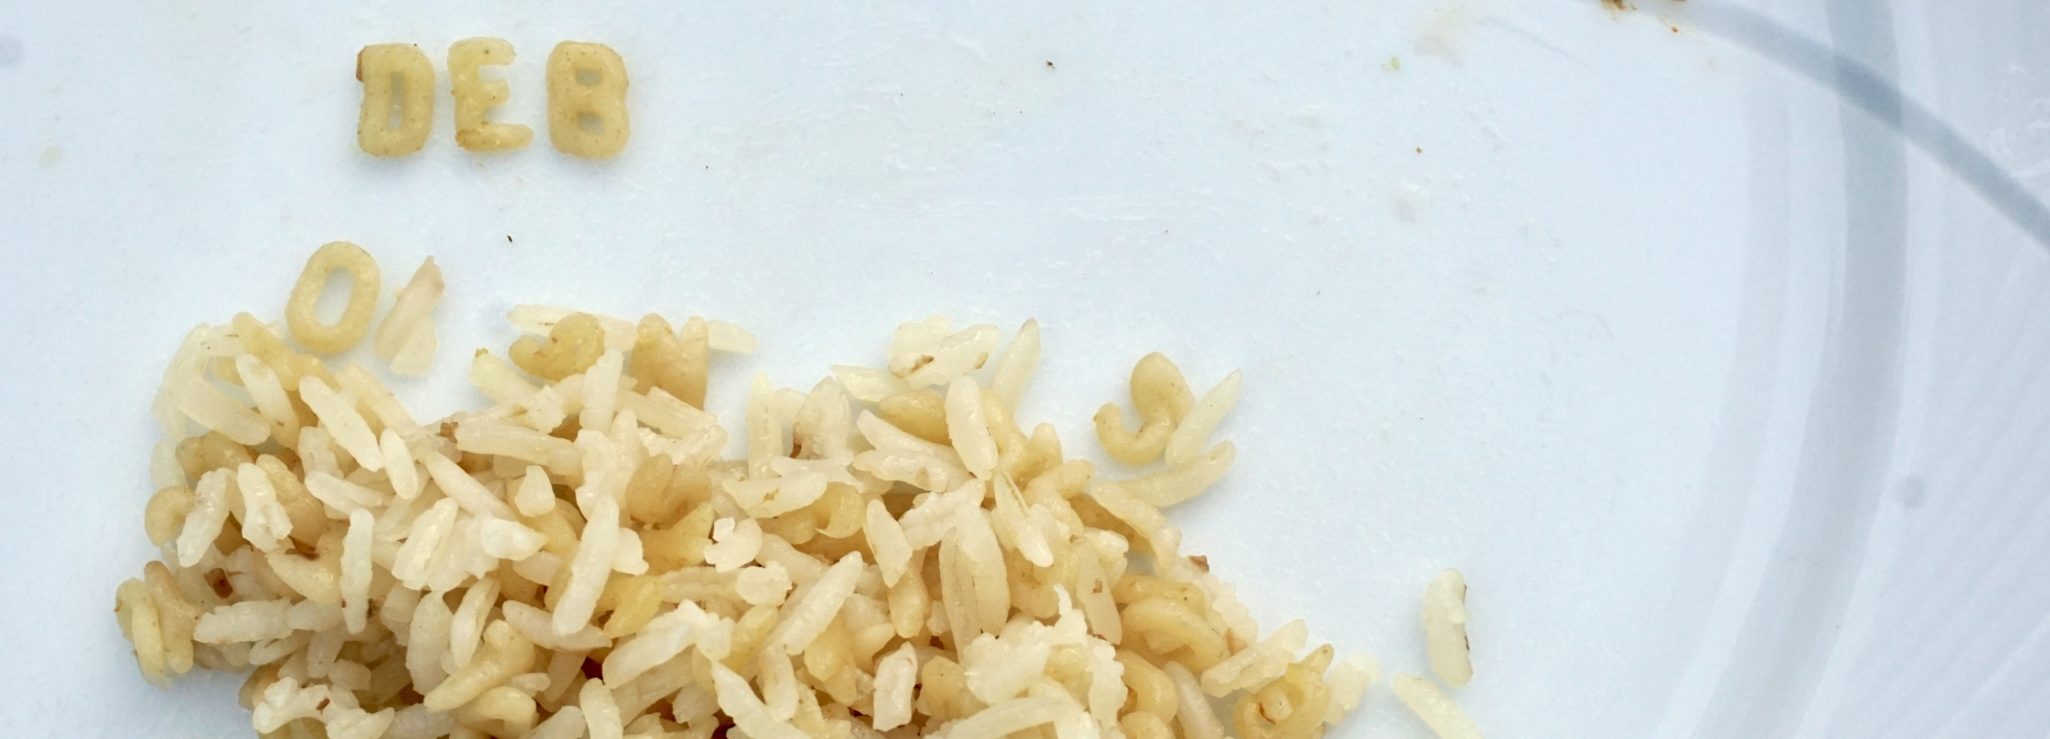
On one of our weekend food treks, hubby and I headed to East San Jose in search of egg rolls and banh mi. Right in front of the entrance to the market was a display of different dried pasta on sale including tiny little pasta shaped like letters. Woohoo!  Haven’t seen pasta letters in ages. When the kids were little I would make rice pilaf using alphabet pasta. The kids loved it and called it “letter rice.”  They would spell their names and challenge each other to spell as many words as possible on their plates. We were totally bummed when our market stopped carrying our beloved alphabet pasta. A search of other markets came up empty so  I resorted to using star and rice-shaped pasta. Not the same, but a good life lesson for my kiddies…you can’t always get what you want.

Alphabet Soup? Nope, Rice

I took a picture of the display with my phone and sent it to the kids with the exclamation “LETTERS!” then I bought a couple of bags (ok, more than a couple) to have on hand for when they come home.

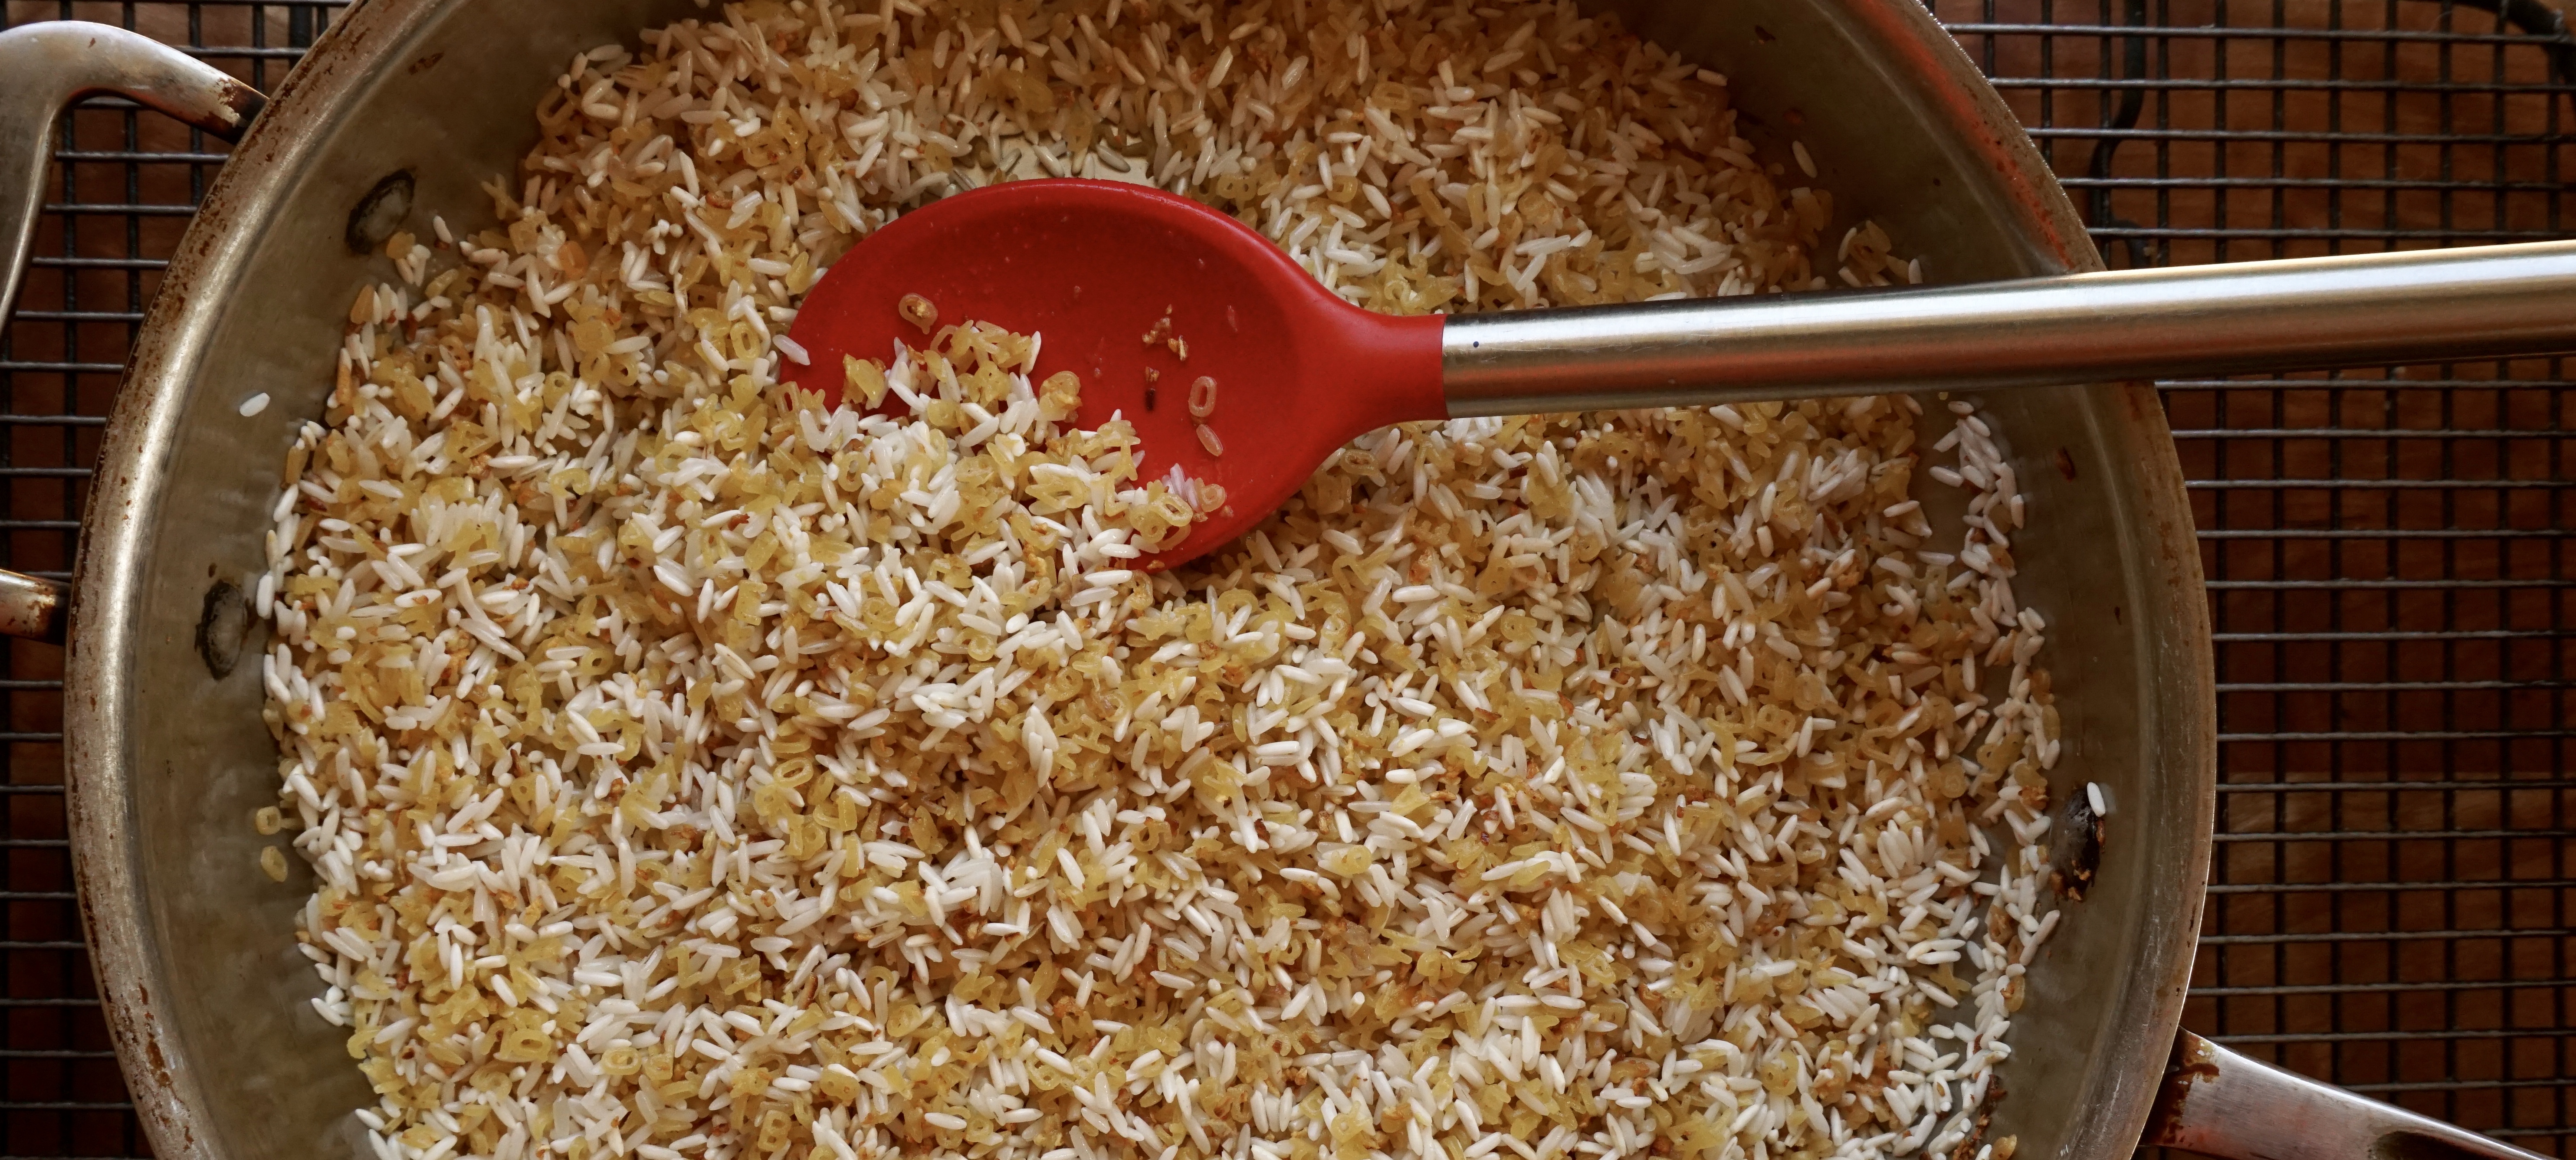
Letter rice is a fusion of rice pilaf and Hainanese Chicken Rice, a Singaporean dish of poached chicken and rice.  Use the broth from the poached chicken to cook the rice for a double-flavored whammy.  First sautéed the rice with the Asian trinity of garlic, ginger and onions, toss it in a rice cooker (because I don’t know how to cook rice any other way), and cook in the reserved stock.

IT IS STUPID EASY

Maybe not as easy as making plain rice but with little effort you can jazz up your rice making it delicious and fun to eat.  Kid-tested, kid- approved.

Mains that aren’t “saucey” beg for letter rice as an accompaniment.  Letter rice in our house accompanies barbecued ribs or chicken, grilled fish, and STEAK. Yum.

Like many of the recipes, this one lends itself well to changes.  Tweak the Asian trinity.  Replace onions with shallots, or use only garlic and omit the ginger and onions.  Having steak?  Use beef stock instead of chicken. Vegetarian? Use mushroom or vegetable stock instead.  I throw in dried mushrooms to intensify the flavor.  You can use all rice and skip the letters but why would you skip the cute-shaped pasta.

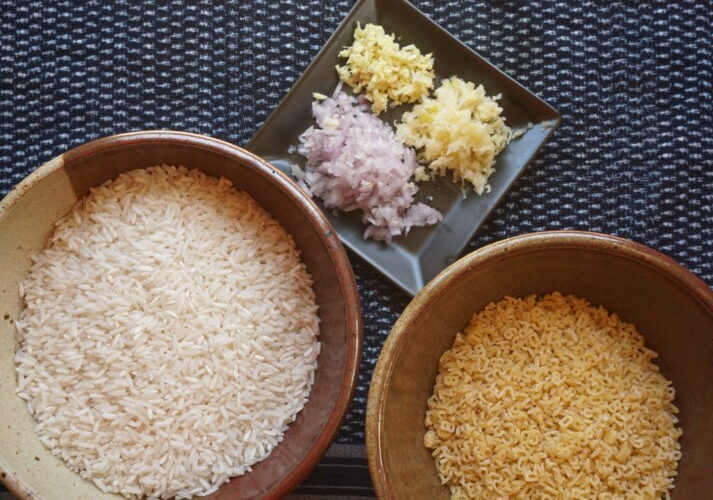
The recipe is easy to remember.  For every cup of uncooked rice, use 1 fat clove of garlic (or 2 skinny ones), 1/2 to 1 teaspoon of ginger, and 1/2 shallot.  For each cup of rice or pasta, use 1 tablespoon butter or oil.  Saute’ the aromatics first, and when they begin to brown add the pasta and rice.  Watch garlic, do not let it burn or it will taste bitter.

The quirky part of this recipe is I only know how to cook rice in a rice cooker (I should be embarrassed-I am).  I use the cup that comes with the rice cooker to measure my rice but a standard 1 cup measure for the pasta.  For 2 cups of rice,  use 1 cup of pasta and fill the rice cooker with the stock up to the 3-cup line.  Yep. Easy peasy if you have a rice cooker…

Love Letter to Rice (Garlic Rice)

asian rice pilaf
Course dinner, Rice, Side Dish
Cuisine Asian-American
Keyword Garlic Ginger Rice, pilaf, rice
Prep Time 10 minutes
Cook Time 45 minutes
Servings 4

Ingredients

  • 2 cups long grain or basmati rice (measured in standard cup that comes with the rice cooker its equivalent to 3/4 cup
  • 1 standard measuring cup any small shaped pasta stars, letters, acini de pepe, or orzo
  • 3 tablespoons butter or vegetable oil or 50/50 of each

Aromatics

  • 3 large cloves of garlic finely chopped (garlic lovers or those living among vampires feel free to increase the amount of garlic)
  • 1 shallot finely chopped (or 1/4 yellow onion or 1 green onion green and white parts, finely chopped)
  • 2 teaspoons minced ginger optional

Liquid

  • Homemade or low sodium chicken broth can substitute beef or vegetable stock approximately 3-4 cups
  • 1/2 to 1 tsp salt
  • 1/4 cup dried sliced shiitakes or dried mushroom mix optional

Garnish:

  • green onions
  • cilantro leaves
  • 1 tsp sesame oil

Instructions

  • Melt butter or oil in pan
  • When butter is fully melted add garlic, shallots and ginger and saute' over medium heat until garlic begins to brown.
  • Add pasta and rice to pan. Stir to coat rice and pasta with oil thoroughly.
  • Put rice and pasta mixture in rice cooker and fill to the three cup line. If using dried mushrooms add them at this point.
  • Set to cook and you're done!

Back from school for the summer, Jordan requested “char Siu” style barbecued ribs and letter rice which prompted this post!  Here is the marinade for the ribs. Grill over indirect heat for 25-30 minutes in a covered bbq.  Flip and baste halfway through, then baste ribs with honey and grill over direct heat to slightly char ribs.

Do Not Play with Your Food, LOL

I remember my mom yelling at my brother and me “STOP PLAYING WITH YOUR FOOD, JUST EAT IT!”  Where is the fun in that?

Rice Rice Baby (Kimchi Fried Rice)

Rice Rice Baby (Kimchi Fried Rice)

Growing up I remember we had one big pot, well worn, dented and it’s bottom darkened from frequent use.  It was my Dad’s favorite cooking utensil and he used it for everything.  He stir-fried, boiled, simmered, stewed and steamed in that pot and everything that came out of that pot was amazing.  I loved his fried rice.  He started with rice leftover from the previous night’s dinner added diced sweet barbecued pork, green peas, bits of scrambled eggs and finished off with shredded lettuce.  He seasoned it with soy sauce, oyster sauce, ginger, and onions it was the epitome of a delicious one pot meal.  As I grew older I would help by stirring and flipping the rice in the pot as he added the ingredients.

Everything comes full circle.  Fried rice is also a favorite of my kids.  Though I often make my Dad’s version, there are infinite variations of the dish.  A down home version with salted fish, bits of chicken and ginger to the Korean version made with spicy pickled kimchi, yum.  As much as I love my Dad’s, my current favorite is kimchi fried rice.  I recently picked up a new cookbook titled Koreatown by Deuki Hong and Matt Rodbard. A glimpse into living, eating and playing in  Koreatown USA.  It starts with a primer on Korean ingredients followed by recipes.  Vignettes are interspersed throughout the book on growing up in K-Town NYC and touring other Koreatowns throughout the country.  Recipes range from traditional to let’s take Mom’s recipe and “tweak” it.  Gorgeous photos of the food, restaurants and K-Town life bring the stories and recipes to life.  You will need two copies of this book.  One in the kitchen to cook from and one on your coffee table to read and enjoy.

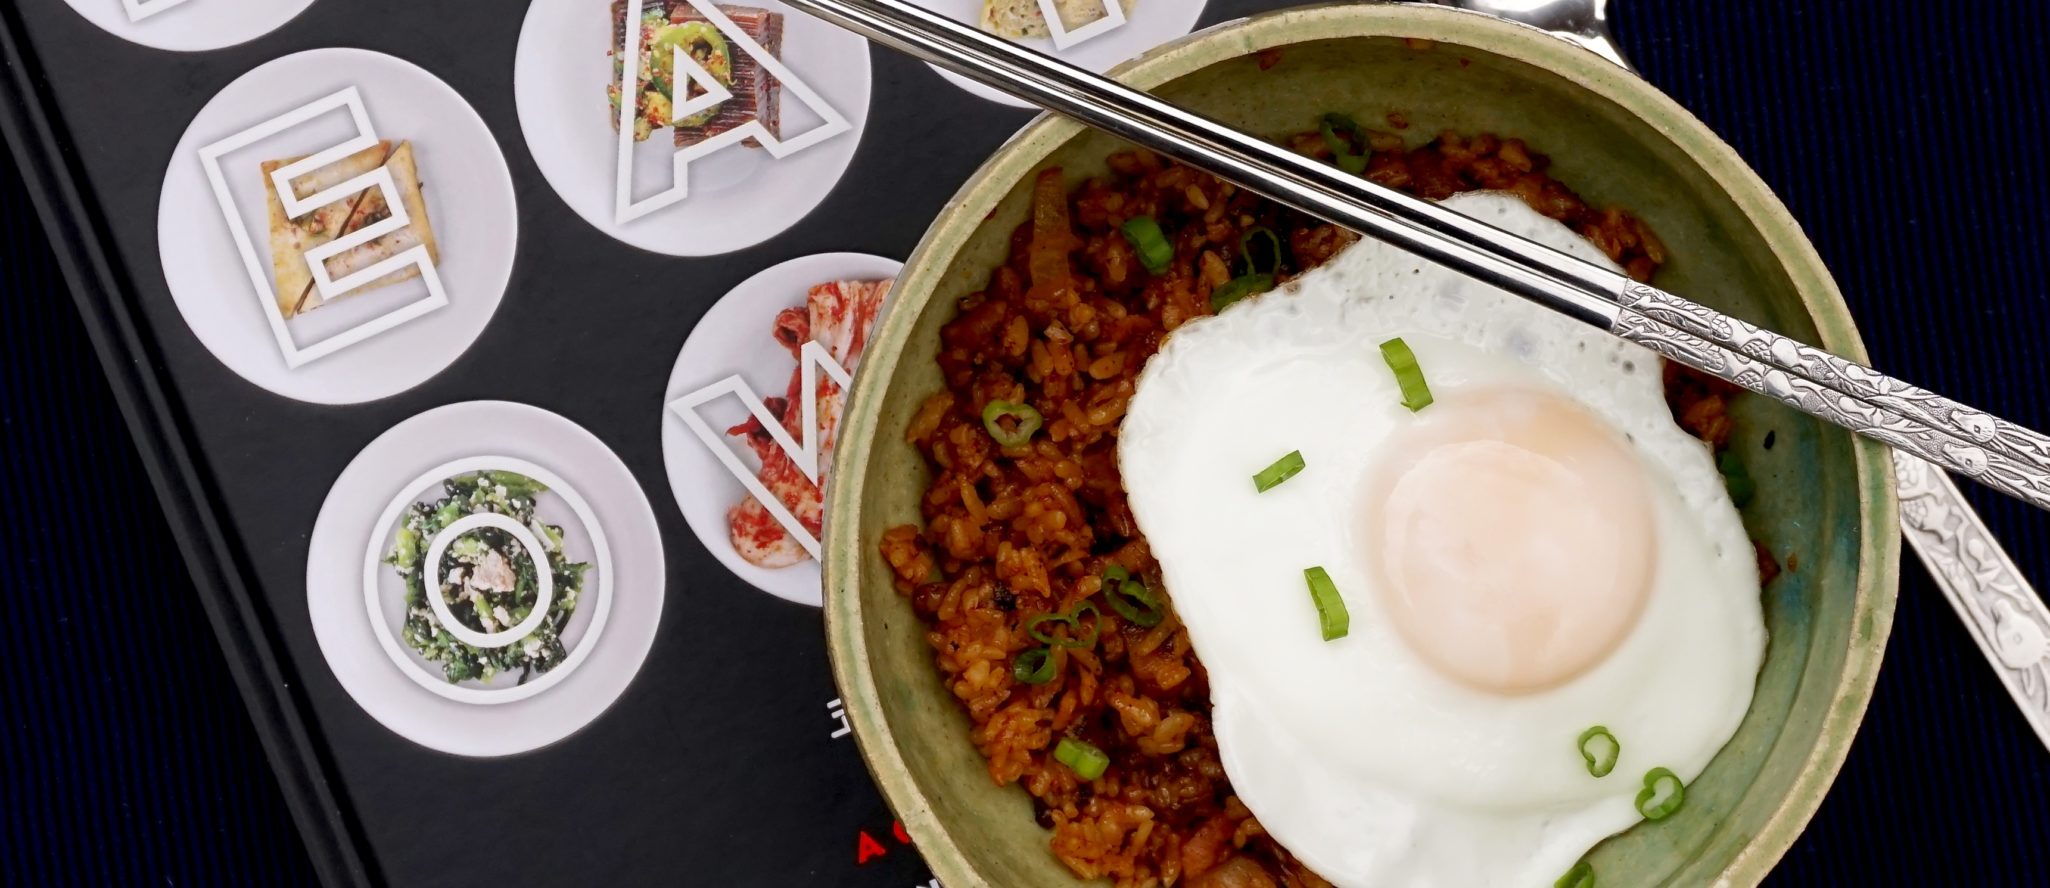
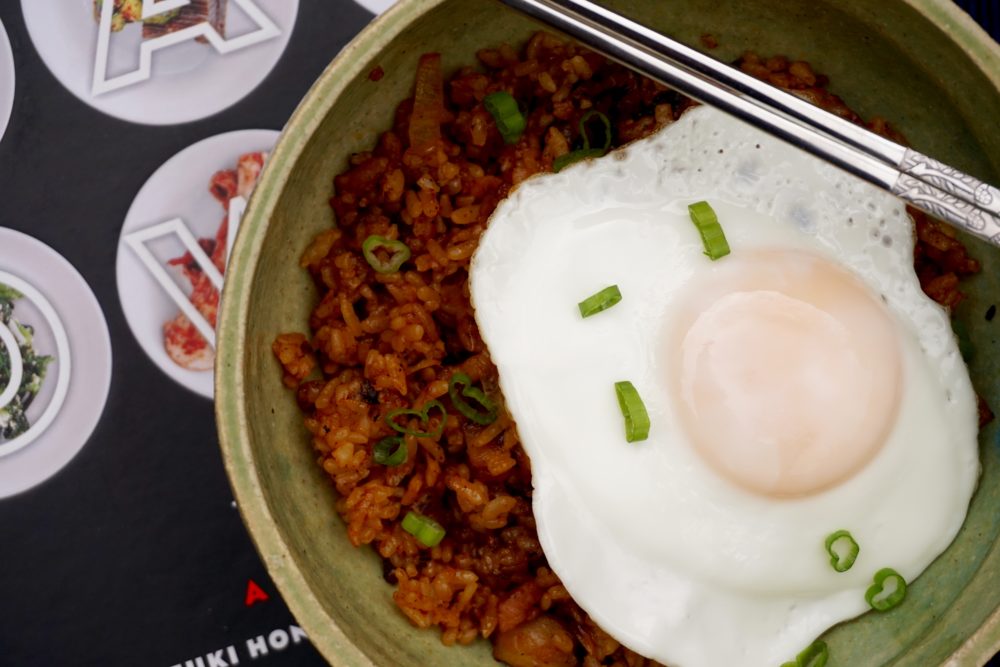
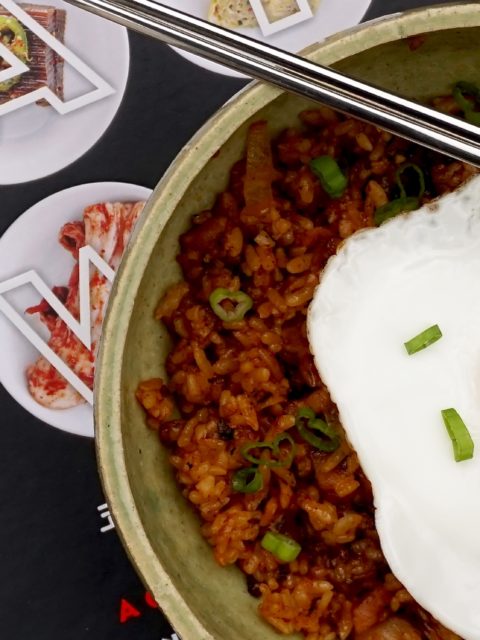
Back to kimchi fried rice.  There are some universal trade secrets when it comes to making great fried rice.  The rice should be day old not freshly made.  Fresh rice contains too much moisture for making fried rice. You can use long grain or short grain rice.  Keep in mind short grain will be a little stickier than long grain but it still works. You can practically put anything into your dish and chances are it will be good.  Pineapple and bbq pork,  shrimp, leeks and pine nuts, or try Hawaiian style with spam (don’t laugh its really good), ono-licious as they say on the islands.   Koreatown’s kimchi fried rice has a secret ingredient, bacon.   Yep, porky goodness to go along with the spicy pickled flavor of the kimchi that gives this fried rice a nice twist. Even though the Koreatown recipe is pretty darn good on its own I tweaked it to my taste.  I love the bacon which added a smoky saltiness but I wanted a little sweetness so in addition to the bacon I added diced chinese sausage (lop cheung).  A touch of soy sauce and sesame oil heightened the flavor of the dish.  I don’t have a refrigerator in my garage with homemade kimchi (every Korean family has one) so my kimchi comes from my neighborhood farmer’s market. You can usually find kimchi and Chinese sausage at most Asian markets.  Top with a perfectly fried egg and you have a delicious easy & quick one pot meal.  I hope you will try it.

Kim Chee Fried Rice-Koreatown

Ingredients

Adapted from Koreatown

  • 8 ounces slab bacon roughly chopped or reduce amount of bacon 4 ounces & add 1-2 chinese sausages that have been diced to 1/4 inch pieces
  • 2 garlic cloves minced
  • 1 medium onion finely chopped
  • One 1-inch piece ginger peeled and minced
  • 2 cups cooked long-grain white rice preferably day-old rice in a pinch short grain will work also
  • cups chopped napa cabbage kimchi I use quite a bit less, approximately 1/2 cup
  • Kosher salt to taste or soy sauce (start with 1 tablespoon)
  • 2 tablespoons butter softened
  • 1-2 teaspoons sesame oil
  • 1 tablespoon gochujang korean pepper paste
  • 4 eggs fried sunny-side up, for serving or if you like you can soft scramble eggs and add to rice at the end of the cooking process.
  • Thinly sliced scallions for garnish

Instructions

  • 1. In a large wok or pot, cook the bacon over medium-high heat until the fat has rendered and the bacon is crisp, about 8 minutes. Add the garlic, onion and ginger, Chinese sausage and cook until aromatic, 1 to 2 minutes.
  • 2. Add the rice and kimchi, and cook, tossing frequently until heated through, 4 to 5 minutes. Season with salt and sesame oil. Taste, add soy sauce if needed. Reduce the heat to medium low and flatten the rice with your spatula. Cook until the rice forms a crust on the bottom of the pan, 4 to 5 minutes.
  • 3. Meanwhile, in a small bowl, mix together the butter and gochujang until smooth. Spoon the gochujang butter over the rice and top with fried eggs and sliced scallions, then serve.


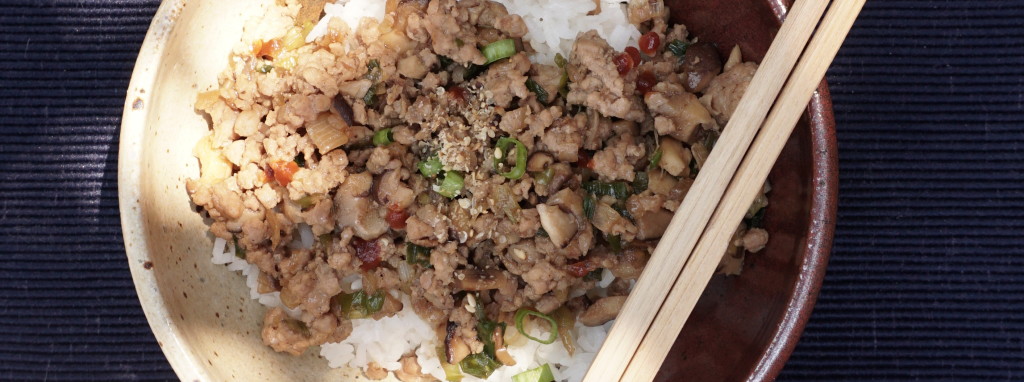
Simple Minced Pork,So Easy Your Kids Could Make This. Mine Can!

Simple Minced Pork,So Easy Your Kids Could Make This. Mine Can!

When I went off to college and moved into an apartment, I would call my Dad (he was the chef in our family) for advice on cooking.  “Dad, what kind of meat do I use for stir fries?  I learned the hard way that beef chuck was not the right choice.  How do I make corn soup, steamed pork patty? Invariably, I wanted to learn how to make dishes I had grown up eating, food that reminded me of home and family.

DSC02049

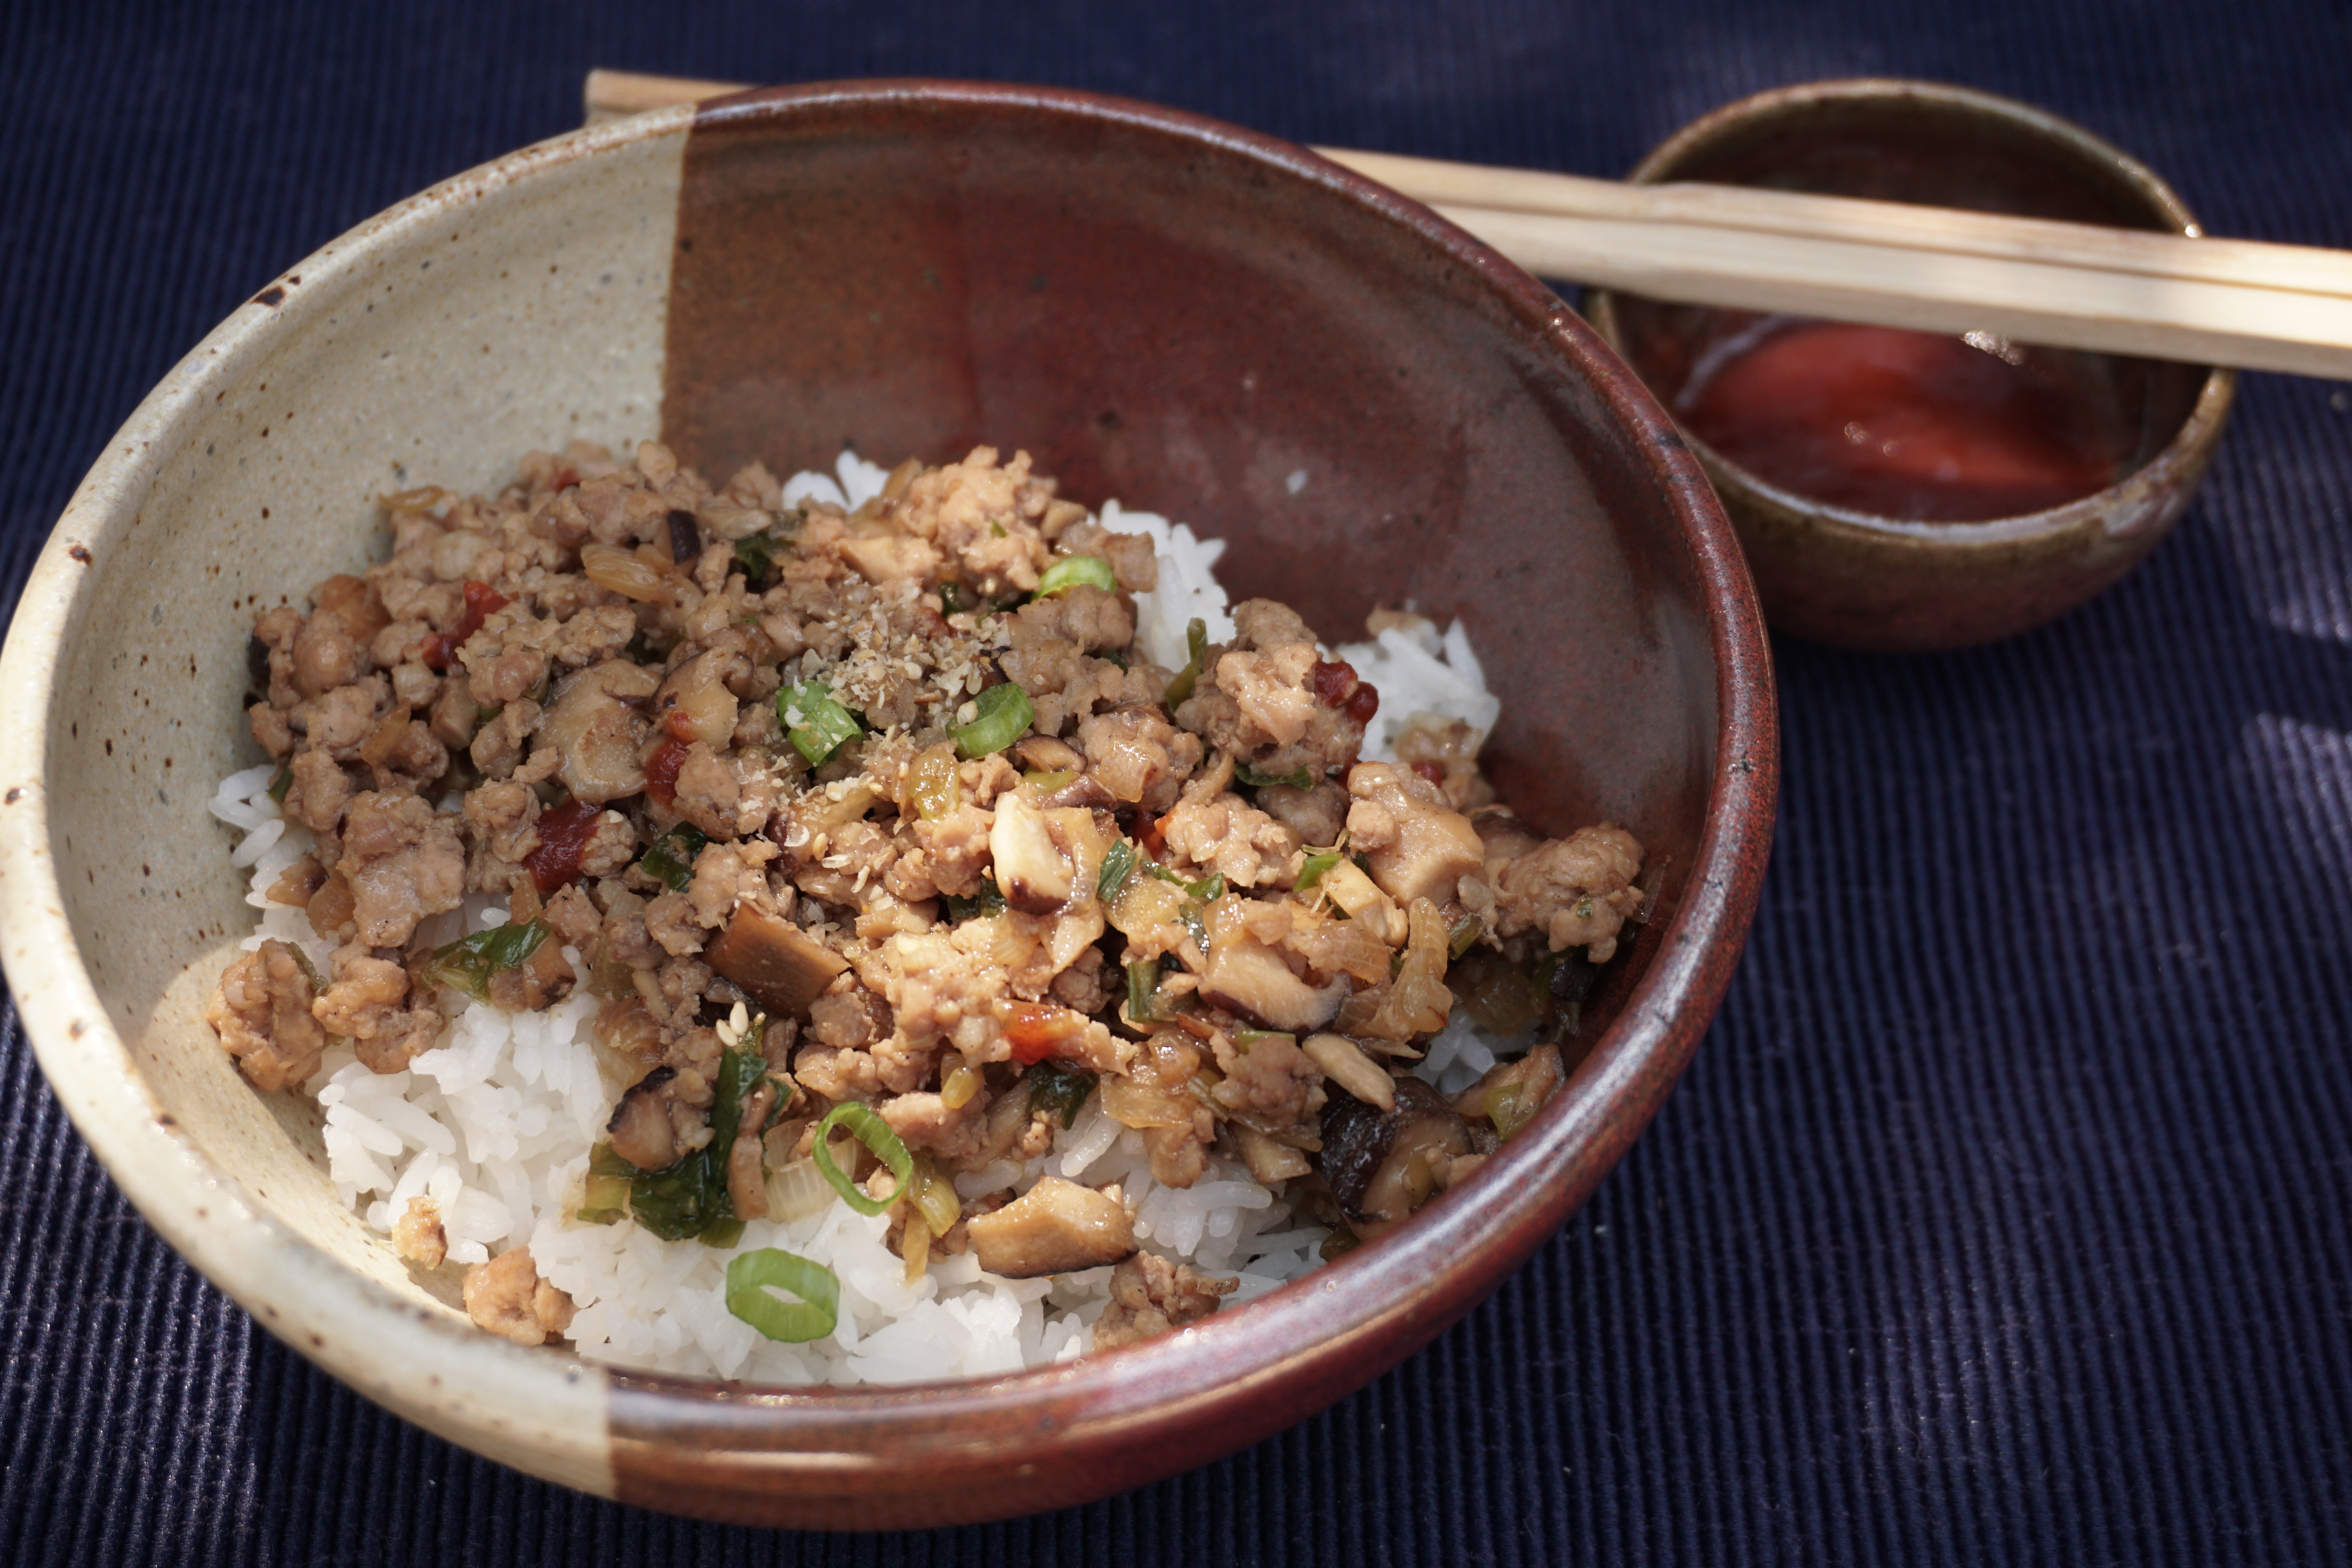
Everything comes full circle, now my kids are calling me for recipes and tips on how to make the dishes they love.  Fortunately, many of the dishes are simple and quick, perfect for a student’s lifestyle not to mention for families always on the go.   This is one such dish, its easy, versatile and inexpensive, ok, cheap.  Adapted from Chubby Hubby, “Simple Minced Pork”  is the Asian version of Sloppy Joes.  You can serve it over rice or noodles, you can make it with ground turkey or chicken instead of pork or use any kind of mushroom, like creminis instead of shiitake…it’s really up to you.  If your going low carb, use it as filling for a wrap made with lettuce or serve it over zucchini noodles (Check out White on Rice blog for noodles) the sky is the limit!

Simple Minced Pork

Prep Time 20 minutes
Cook Time 10 minutes

Ingredients

  • 3 tablespoons vegetable oil
  • 400 g ground pork or chicken or turkey
  • 8 fresh shiitake mushrooms stalks removed, finely chopped or use creminis
  • 4 green onions finely chopped
  • 1/2 of a small yellow onion minced
  • 1 teaspoon minced fresh ginger
  • 2 tablespoons sake
  • 2 tablespoons mirin
  • 4 tablespoons soy sauce
  • 1-2 T chicken stock or broth

Instructions

  • Heat oil in a large frying pan over high heat. Add yellow onion to pan, fry until onion softens and looks translucent. Add mushrooms, ginger and ground pork. Lower heat to medium. Add sake, mirin, soy sauce and chicken broth. As mixture cooks, break up the pork as much as possible. Stir-fry to reduce sauce and brown meat. Add green onions and cook for additional minute. Stir well and serve over rice (brown or white) or noodles.
  • For a more substantial meal, serve with a poached egg or a Japanese style hard boiled egg.
  • Goes well with Asian noodles with similar thickness to linguine or fettucine.