Tag: comfort food

Bowled Over, Udon Want to Miss My Newest Obsession (Udon)

Bowled Over, Udon Want to Miss My Newest Obsession (Udon)

Hang on to your hats, imagine Times Square, with all its neon signs and flashing lights dedicated solely to FOOD.  Yep, that’s the only way I can describe the Dotonbori area of Osaka.  Swarms of people, whose sole purpose is to find all things delicious to eat.  A giant 3-D crab, or shrimp or potsticker over the door of a dining establishment making it easy to figure out their specialty.  The delicious aromas swirling around, changing with every step as they walk by tempura houses, ramen joints, crab feasts and yakitori vendors.

Welcome to Crazy Town for food

Yep, we bit.  Drawn by the people, hypnotized by the lights, we ate our way down the street.  We tasted Takoyaki, octopus cakes, (not really cakes, I just couldn’t bring myself to call them balls).  Think Ebelskiver with octopus bits.  We munched on skewers of yakitori, sampled matcha and black sesame soft serve and found taiyakis, fish-shaped cakes filled with red beans.

Udon want to miss the noodles

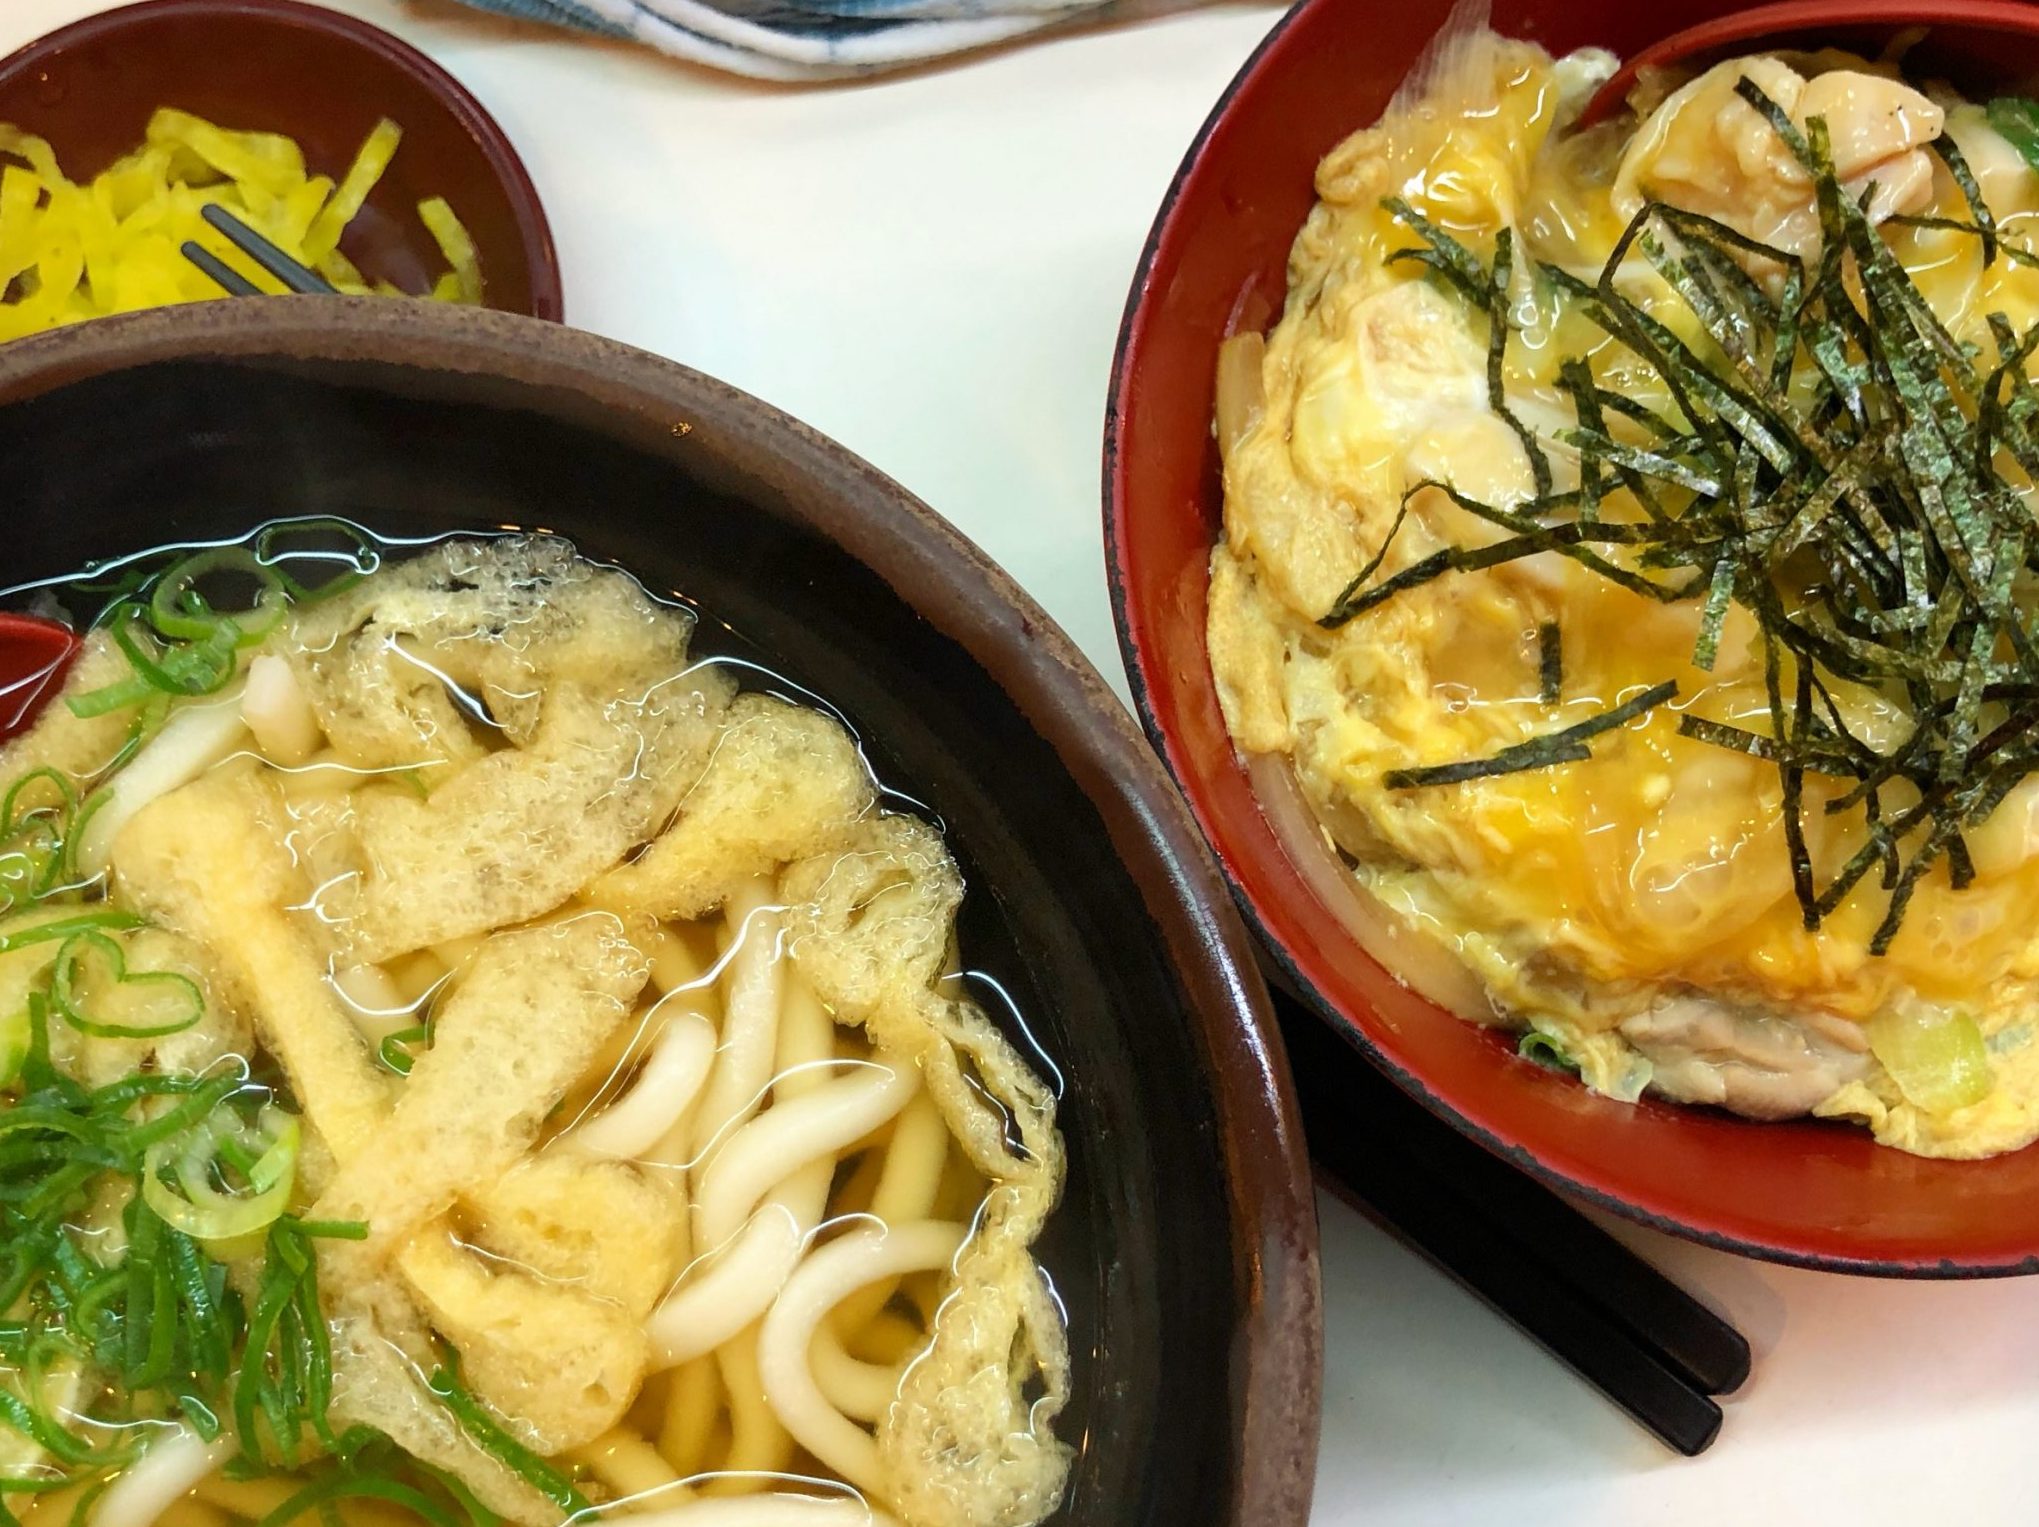
Our last stop was the perfect cap for the evening.  Walking back to our hotel we found a local shop in Namba with a trio of old cooks serving up delicious udon noodles.  We decided what toppings we wanted on our noodles, slipped our yens (=TWO DOLLARS A BOWL) into the machine, and handed the tickets to the chef.  Minutes later 3 hot steaming bowls of udon were placed in front of us.

Unlike ramen, the noodles are much thicker with a definite chew.  The broth is flavorful but clear and light, fish-based, different than the rich, heavy broth that you find with ramen.  Toppings are simple-fried tofu (abura-age), a raw egg that cooks in the steaming hot broth, a single tempura shrimp, or a clump of shredded seasoned beef and a sprinkling of green onion.  We slurped our noodles and tipped the bowls to spoon out the last drops of broth.  You’d think we hadn’t eaten all day.  Ha!


Oyako-Udon combo set

Thus My Obsession with Udon Began…

As soon as I got home plus 12 hours of catch-up sleep, I pulled out my copy of Japanese Soul Cooking by Tadashi Ono.  A gem of a book on homey Japanese comfort food.  I flipped to the udon section and then I was off to the market to look for ingredients.  I had purchased a delicious Dashi base in Tsujiki Market in Tokyo, perfect for my udon.  To make your own Dashi here is a great primer from Just One Cookbook. OR, Kikkoman makes a soup base Hon Tsuyu that makes a pretty good dashi broth base.

Working down my list, next the udon noodles. Udon comes fresh, frozen, and (if you can’t find fresh or frozen udon) dried.  Sigh, just not the same.  I also found abura-age or fried tofu skin which is used to make Kitsune Udon. The fried tofu skins are flattened and seasoned with soy sauce and placed on top of the udon.  Really delicious, and substantial enough for a satisfying vegetarian bowl of udon. It can be difficult to find abura-age though and in that case, Inari-age, seasoned deep-fried tofu pouches used to make Sushi Rice balls, is a convenient and easy substitute.  No need to season, just plop them on top of the cooked noodles.  Confused about tofu? Serious Eats’s Tofu primer is your ticket.  The carnivore in me though, bought some thinly sliced beef (sukiyaki beef is perfect) to make Niku Udon, yummo.
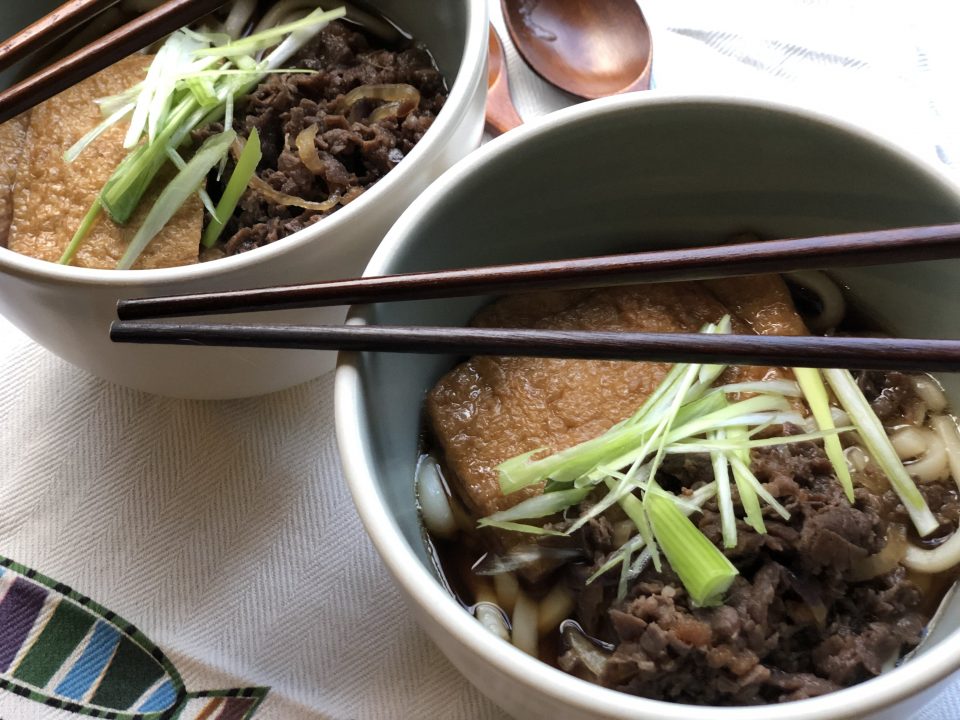
Making udon is very approachable.  It’s perfectly acceptable to start with a broth made from Dashi bags and pre-made noodles.
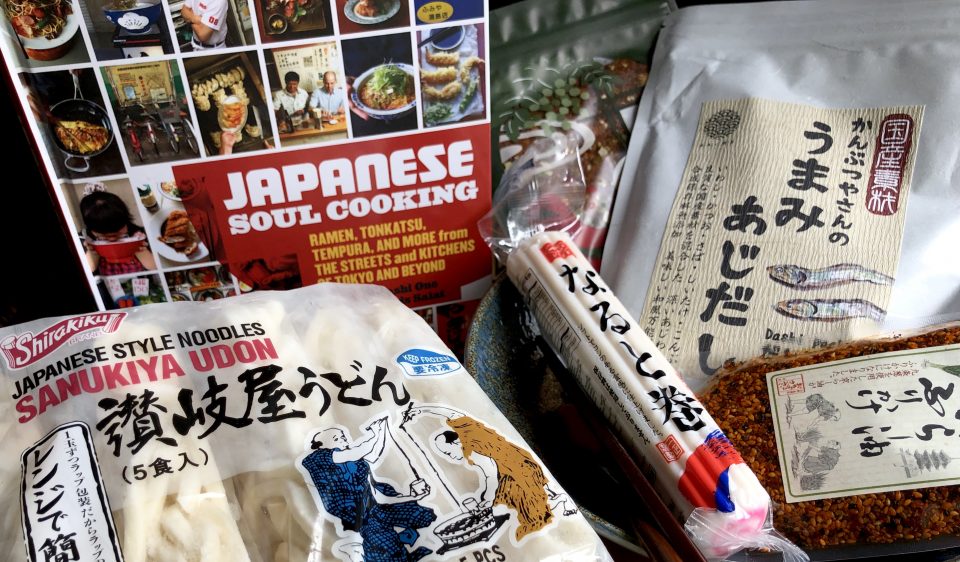
Udon Ingredients

Travel to Eat

People travel to buy clothes and souvenirs, I buy food, Dashi, Furikake’, Soba Boro cookies…yep, travel driven by food.

Studying up, here’s the scoop, on udon.

I used Dashi packets to make the Tsuyu.  This is your base,  add soy sauce and mirin to flavor the Tsuyu.

Optimally, use Sanukiya noodles, most likely found in the frozen section of your favorite Asian market.  The noodles are a bit firmer and hold up well.  The pre-cooked noodles only take a couple of minutes to separate and heat in hot water, presto-dunzo.  There are Korean versions of Udon noodles too, and they are very good.

Toppings for udon can be as simple as an egg, gently poached for the raw egg-squeamish, Abura-age, tempura, fishcake, or really ANYTHING you feel like putting on your noodles!

Kitsune Udon

Simple, satisfying, soulful, best describes a bowl of Udon, thick, slurpable, noodles, in a clear broth.
Course noodles, one bowl meal, One dish meals
Cuisine Asian
Keyword Kitsune, Udon
Prep Time 20 minutes
Cook Time 10 minutes

Ingredients

Abura-age (Tofu)

  • 1 package Abura-age or 4 Abura-age

For Simmering Abura-age:

  • 3/4 cup dashi soup stock
  • 2 Tbsp. sugar
  • 1 Tbsp. soy sauce
  • 1 Tbsp. mirin

For Soup:

  • 5 cup dashi soup stock
  • 3 Tbsp. mirin
  • 2 Tbsp. soy sauce
  • Salt adjusting the amount of salt to your preference

Noods and Garnishes

  • 4 packages pre-boiled udon noodles
  • Optional: 4 slices kamaboko fish cake for topping
  • green onions, sliced

Instructions

  • Heat dashi, mirin, sugar, and soy sauce in a medium pan and bring to a boil. Adjust the flavor with salt as you like.
  • Simmer aburaage in the soup on low heat until the liquid is almost gone. Set aside.
  • Boil water in a large pan and heat udon noodles as indicated in the package.
  • Drain the udon and divide into four bowls.
  • Pour the hot soup over udon noodles.
  • Top with seasoned aburaage and kamaboko slices.
  • Garnish with green onions

OR buy the more readily available Inari age or seasoned tofu pouches and just plop those straight into your bowl. Inari age is the fried tofu pouches used to make Inari Sushi

    Or the carnivore delight…

    Niku Udon

    Udon Noodles topped with stir fried seasoned beef and onions.
    Course Soup
    Cuisine Asian
    Keyword japanese, Noodle, soup, Udon
    Prep Time 20 minutes
    Cook Time 15 minutes
    Servings 4 servings
    Author Adapted from Japanese Soul Food

    Ingredients

    Niku Ingredients

    • 1/4 cup sake
    • 1/4 cup sugar
    • 1/4 cup soy sauce
    • 1 pound sukiyaki beef or thinly sliced flank steak, ribeye
    • 1/4 yellow onion, thinly sliced optional

    Soup

    • 6 cups udon tsuyu*
    • 4 bricks fresh or frozen udon noodles can substitute dried Sanuki Udon
    • 1-2 green onion thinly sliced
    • Shichimi togarashi

    Udon Tsuyu

    • 6 cups dashi
    • 1/2 cup mirin
    • 1/2 cup Usukuchi soy sauce light soy sauce
    • 1/2 - 1 teaspoon salt or to taste

    Instructions

    Tsuyu

    • Prepare broth and keep warm.

    Beef

    • Combine sake, sugar and soy sauce in a bowl and stir well. Add beef and mix together, coating meat well. Marinade beef for 10 minutes.
    • Preheat dry non-stick skillet or well seasoned wok/iron skillet. If including onion, saute onion slices just until soft before adding the beef. Add beef and marinade to skillet. Spread beef in skillet to cook evenly. Cook over high heat until beef has lost its pinkness and most of liquid has evaporated, approximately 5 minutes. Remove from heat and set aside.

    Udon Noodles

    • Bring large pot of water to a boil. Add each packet of noodles. gently spread noodles out. When water comes back to a boil, the noodles are done. Drain well and divide among bowls.
    • Pour hot broth over noodles. Divide beef among bowls, garnish with green onions and shichimi togarashi. Serve immediately.
    Oyako Donburi Hmmm, Maybe the Chicken and the Egg Came Together?

    Oyako Donburi Hmmm, Maybe the Chicken and the Egg Came Together?

    I am soooo excited! We are adding a new category to 3Jamigos!  The kids have flown the coop and are making their own way, Jeff in the City close by (yippee), Jorge in Korea teaching (so far away) and Jams currently working and freezing her tush off in Minneapolis (half of so far away).  Luckily we have FaceTime, phones, texting and when that just won’t do, flights.  Just an airplane ride away.

    A California-Texas kinda gal, winter in Minneapolis is a new experience for Jamie.  Down jackets, scarves and gloves are now a part of her wardrobe vernacular, as is staying indoors. The winter weather has her looking for activities inside to keep her busy.  For Christmas, we gave her knitting needles, yarn and starter lessons from Wes on how to knit.  Big hit, knitting up a storm haha.

    Jamie has always loved to bake and cook.  She’s a natural, and with this weather, she has been doing alot more cooking and baking.

    A recent call went like this:

    Mui (her nickname):  Mom, can you send me your Oyako Donburi recipe?  Is it easy to make?

    Me: Sure.  Yep, it’s pretty easy.  One pan, a couple of eggs, chicken, and onions.

    Mui: That sounds good, I love rice bowls and I can bring the leftovers to work.

    LIGHTBULB MOMENT:  Hey, why don’t we both make Oyako Donburi and then post about it?  You have done spots before on 3Jamigos. We’ll alternate picking recipes to make and blog about!

    THUS a new 3jamigos category was born, M&M which stands for Mom and Mui.  Mui means little sister.  We have been calling Jamie Mui since Day One.

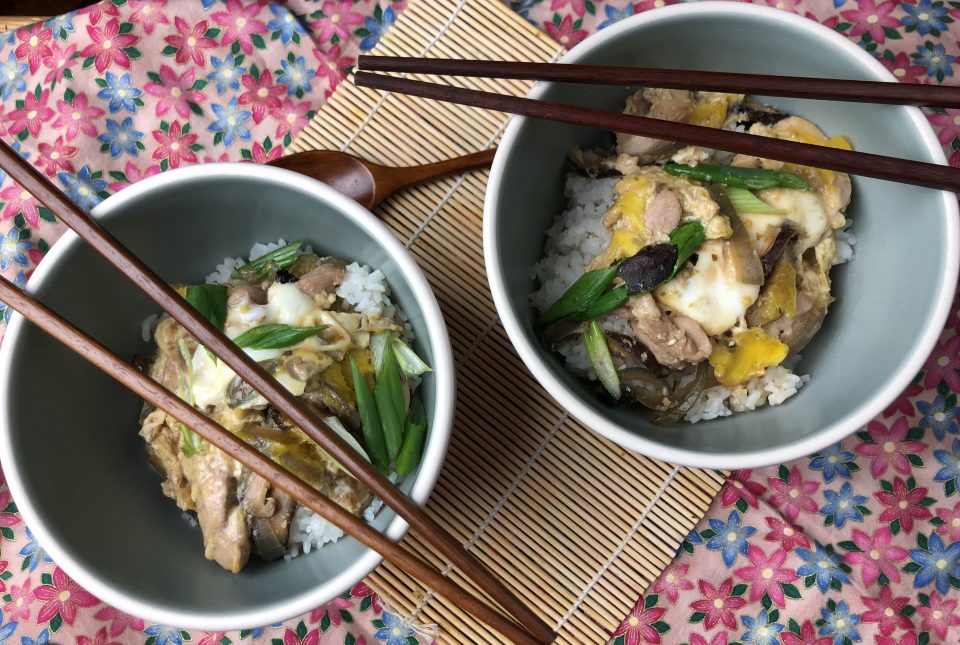
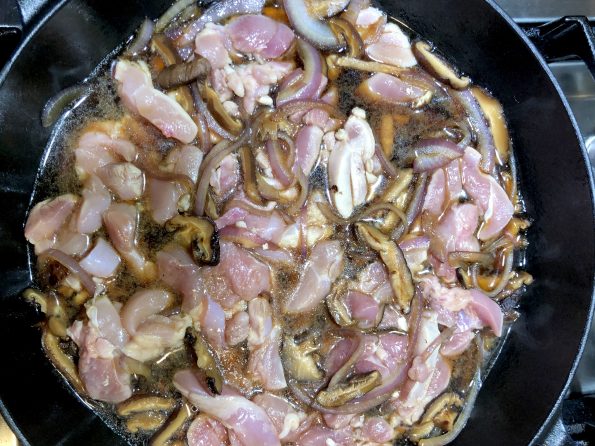
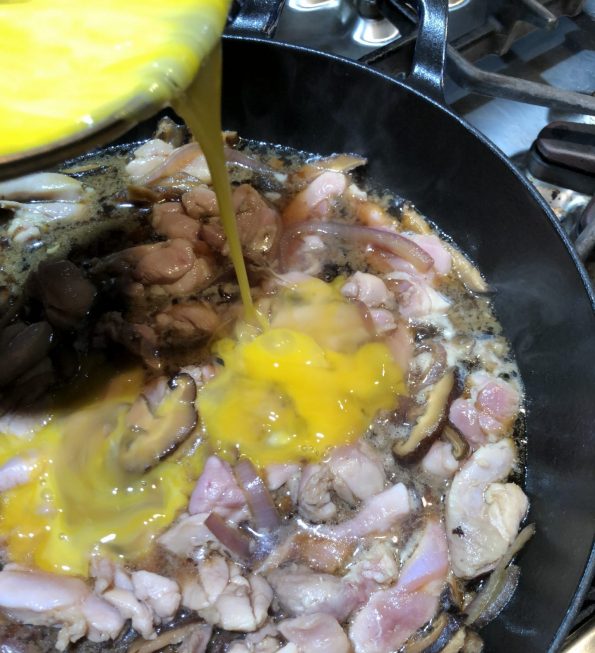
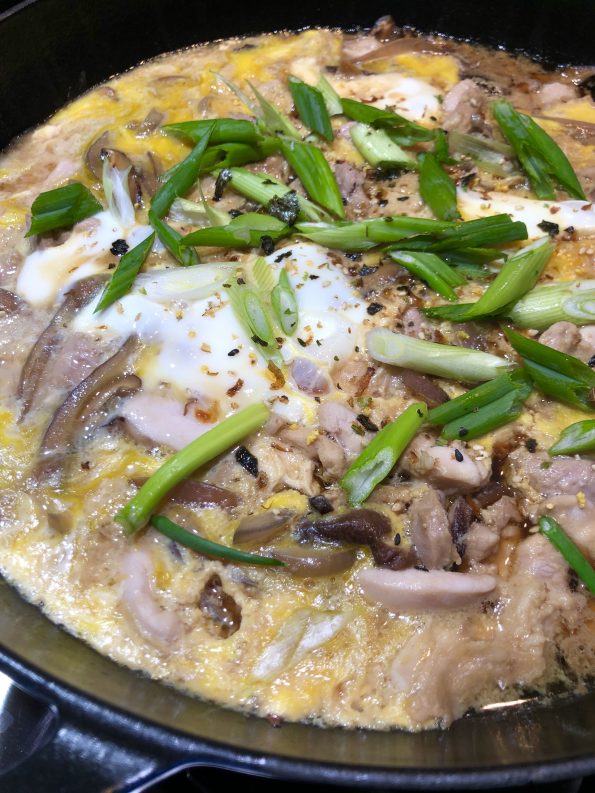
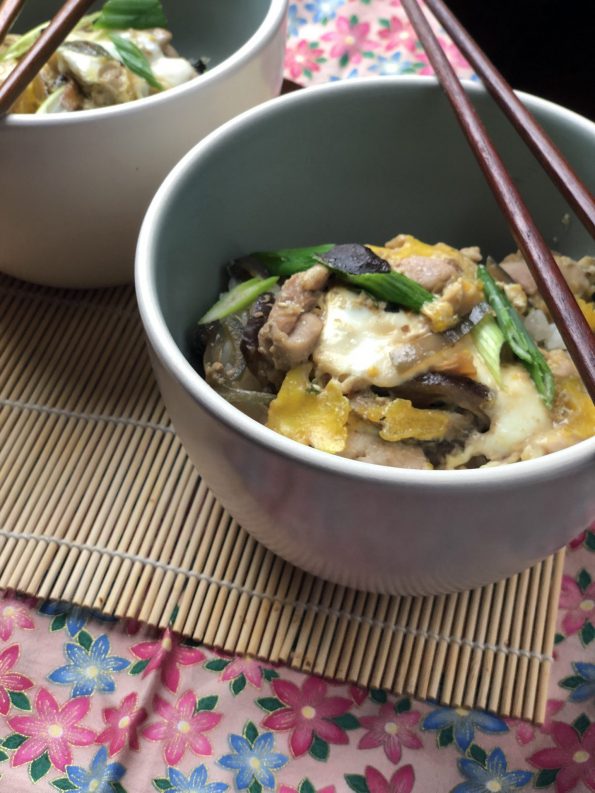
    Oyako Donburi is the perfect dish to launch M&M.  Chicken, sliced shiitake mushrooms, onions are cooked in a savory-sweet sauce of soy sauce, sake, dashi.  Lightly beaten eggs are then poured on top of the chicken and sauce and simmered until just cooked through, then the chicken and egg mixture is placed on top of hot rice.  Watch your kids, hubby, neighbors, everybody gobble it up.  So delicious, classic Japanese soul food.

    So without further adieu, our inaugural M&M post by Jamie on making Oyako Donburi in cold & snowy Minneapolis.

    HELLOOOO WORLD/readers of 3jamigos.com. It’s ME. J A M I E. Ya know, that crazy girl who moved to Minneapolis to live in -30 DEGREE WEATHER. Nope, that wasn’t a typo. It really was NEGATIVE 30 on my drive into work last week.  GLOBAL WARMING IS REAL PEOPLE. (I know that doesn’t really make sense, but global warming is causing polar vortexes normally over THE NORTH POLE to break apart and dip down to lower parts of the globe).  It’s so cold that you can’t stand outside with exposed skin for more than 5 minutes without getting frostbite. FROSTBITE. Schools were closed. The roads were empty. But I still had to go to work. Once I got over that, it really wasn’t bad. They are GREAT about paving and salting the roads, so it was actually a breeze getting to and from work.

    BUT enough about me. Let’s talk about the fact that my mom and I decided to start a mother-daughter blog where we cook the same dish separately and talk about it, AND THE FIRST DISH WE PICKED JUST HAPPENED TO TRANSLATE TO “Parent (chicken) and child (egg).” Damn, we are GOOD, people. You couldn’t even make this stuff up. I mean, I guess you could. It would make a great lifetime/hallmark movie. Ok. Enough interruptions. Let’s get down to the food.

    Okayo Donburi. The ultimate comfort food.  It’s a mix of chicken and eggs (parent and child) with a sweet/salty/chickeny sauce and sautéed onions.  Pour it over some rice, and all the stresses of your day melt away. The best part? It is SO easy to make.

    Chop up some onions, slice some mushrooms, toss it into the pan with some chicken broth, mirin, soy sauce, and sugar, and top it off with some eggs and chicken.  E A S Y and so foolproof even my mom could make it and she suuuuckkss at cooking (if you couldn’t tell). I like to add in extra mushrooms and chicken. Sometimes extra onions. Pretty much extra everything. It is that good.  Mom used to make it all the time when I was little, and it was one of my favorite dishes then too.  So far, I’ve made it 3 times since winter started. That’s how good it is.

    So now, for lack of a better conclusion, stop reading this post and go make it. Go!

    Oyako Donburi

    Course Main Course
    Cuisine Asian
    Keyword Oyako Donburi
    Prep Time 15 minutes
    Cook Time 15 minutes
    Total Time 30 minutes
    Servings 4 servings

    Ingredients

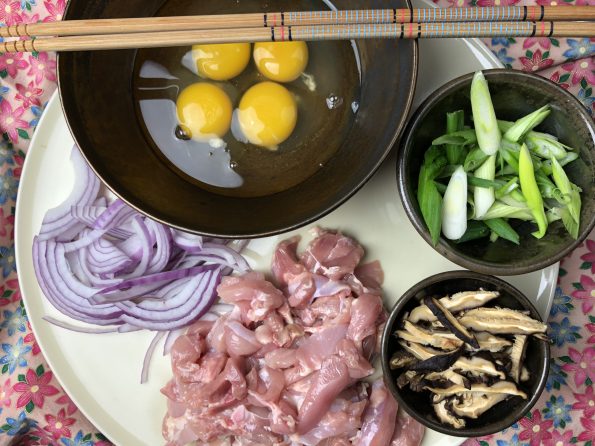
    • 3-4 boneless, skinless chicken thighs cut into bite-sized pieces
    • 4-5 eggs lightly beaten
    • 1/2 yellow onion thinly sliced, red onion can be used
    • 1 green onion sliced on the diagonal
    • 2-3 dried shiitake mushrooms soaked to soften, sliced
    • 1 tablespoon vegetable oil

    Sauce Mixture

    • 1 cup dashi (fish based stock) can substitute low sodium chicken broth
    • 5 T soy sauce
    • 2 1/2 T sugar can cut to 2 T
    • 21/2 T mirin substitute sake to decrease sweetness
    • cilantro garnish if desired

    Instructions

    • In a small bowl, lightly beat eggs and set aside.
      Oyako Prep
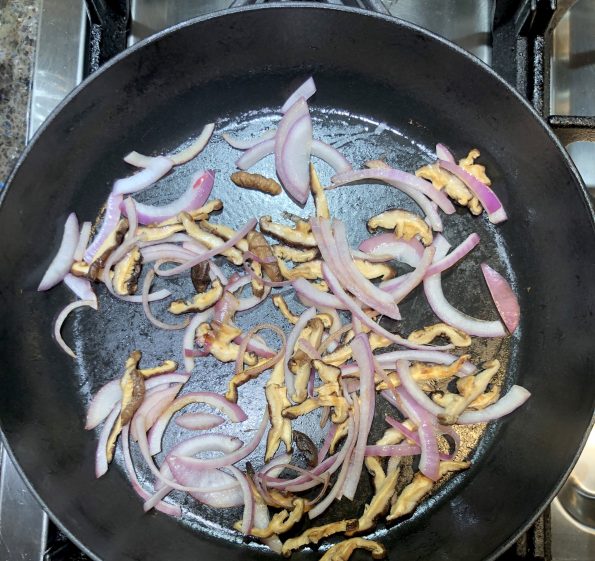
    • Heat saute' pan, add vegetable oil then onions and mushrooms, fry for 1-2 minutes until onions are soft. Add sauce mixture, heat through. 
    • Add chicken and lower flame to medium-low. Cook for 3-4 minutes, turning the chicken over. Cook until chicken loses pinkness
    • Add eggs evenly over top of chicken. Cover and cook over low heat until eggs are just cooked should not be dry. 
    • Garnish with green onions or cilantro and nori strips
    • Divide into portions and serve over rice.  If desired, individual portions can be made.  Quarter ingredients and use a small omelet pan to make.  
    It’s Raining, It’s Pouring the Instant Pot is Not Snoring, it’s Cooking Pot Roast

    It’s Raining, It’s Pouring the Instant Pot is Not Snoring, it’s Cooking Pot Roast

    It’s chilly, it’s raining, it’s just downright dreary.  How to combat this scenario?

    Couch potato:  Snuggle on the couch and watch a movie or read a book. What, couch too far? Ok, stay in bed with a good book and a cup of tea.

    Kitchen Diva: It’s the holidays, you’re supposed to be filling the house with the aroma of butter, cinnamon, sugar and all things delicious.  Let’s get ready to BBAAAKKKKEEEEE.

    Outdoor Warrior:  Put on those stomping boots and raingear and hit those puddles!

    Ok, I’m only feeling Option 1 or 2.

    So, I decided on doing a combo, I spent the day baking cookies, cruising the internet and watching Netflix.  Right around 5pm my stomach grumbled and sent a signal to my brain “what’s for dinner?”

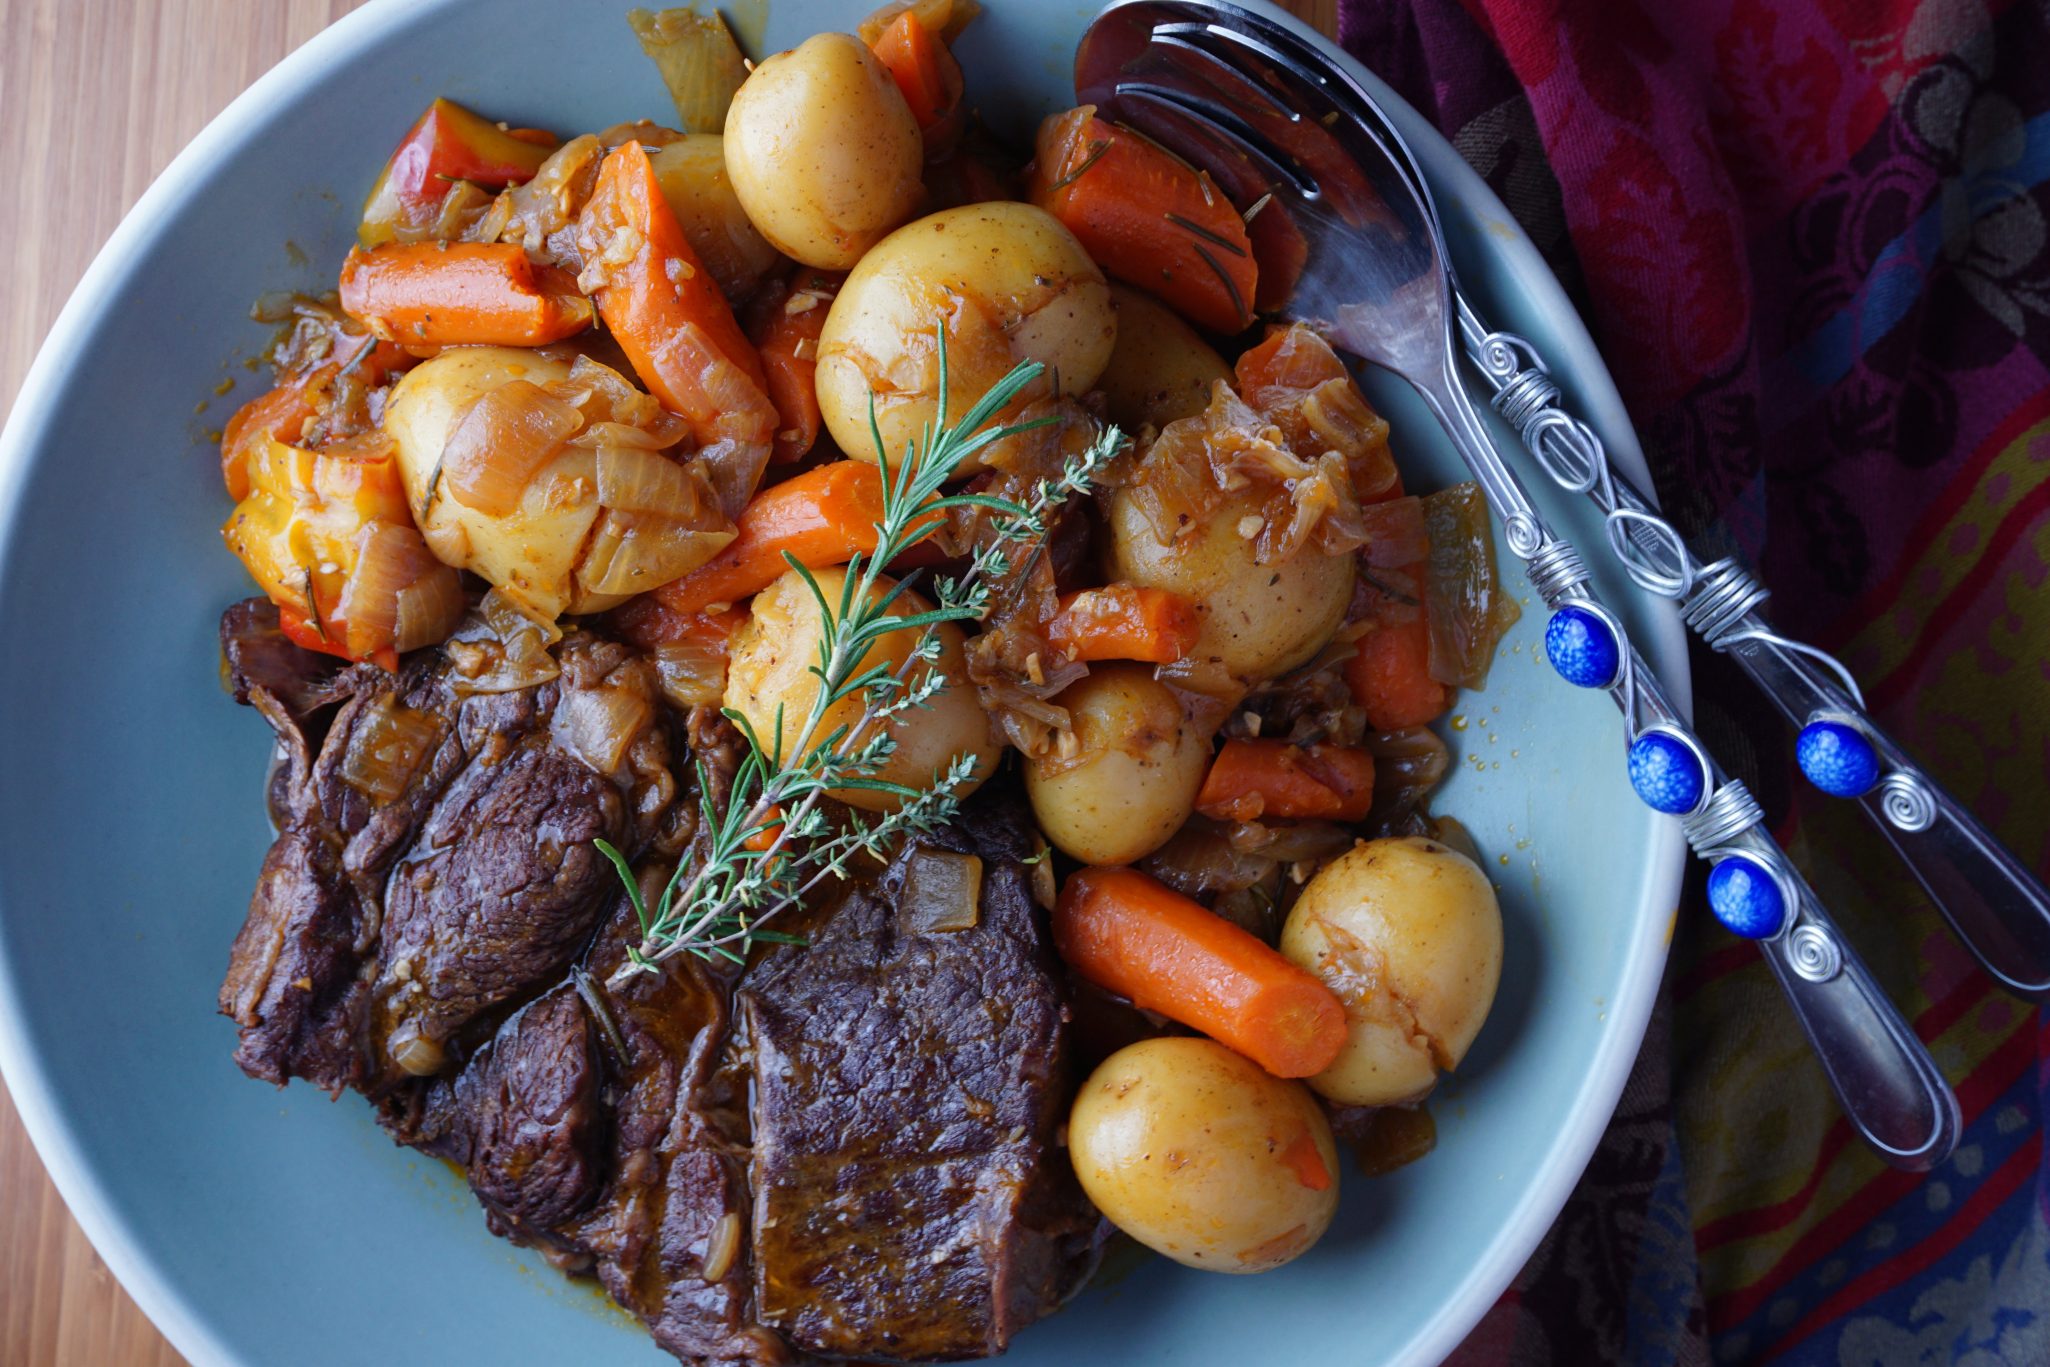
    Here is the criteria for today’s dinner:  it should be easy to make, comforting and of course delicious. I pull out my Instant Pot, check off easy.  Take out the chuck roast I had bought the day before, check off comforting. Rummage through my crisper and pantry and pull out onions, carrots, potatoes, check off delicious.

    Yep, pot roast on a rainy, dreary day…sounds like a plan, Stan. Sitting down at 6:30 to dinner.  Yahoo, thanks Instant Pot.

    Instant Pot Pot Roast

    What’s better than pot roast for dinner? Pot roast the next day!

    Pot Roast a la Instant Pot

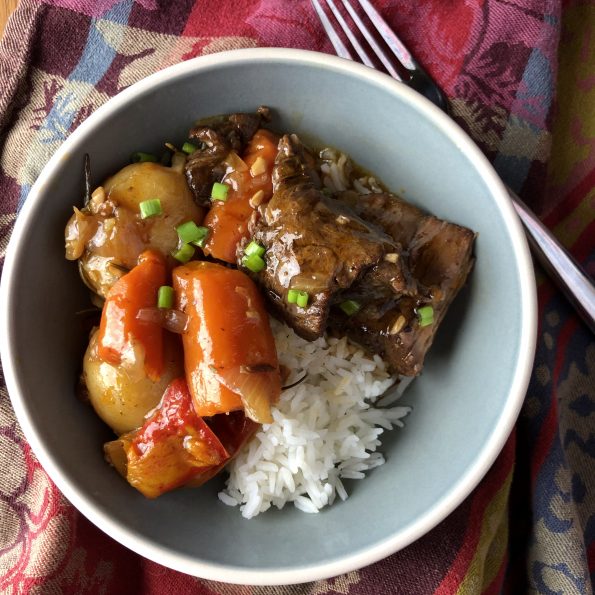
    Decide at 5pm to have Pot Roast for dinner. I know, what am I thinking? Pull out the Instant Pot and damn, by 6:30 I'm sitting down to a delicious bowl of meltingly tender chunks of beef, carrots, and potatoes over steaming hot white rice.  Adapted from Damn Delicious.
    Course Main Course
    Cuisine American
    Prep Time 10 minutes
    Cook Time 1 hour
    Total Time 1 hour 10 minutes
    Servings 4 people

    Ingredients

    • 1 3-pound chuck roast
    • Kosher salt and freshly ground black pepper to taste
    • 1 1/2 tablespoons canola oil
    • 1 yellow onion chopped
    • 3 cloves garlic minced
    • 2 tablespoons tomato paste
    • 1/4 cup dry red wine
    • 3 cups beef stock
    • 2 teaspoons Worcestershire sauce
    • 4 sprigs fresh thyme
    • 1 sprig fresh rosemary
    • 2 bay leaves
    • 1 1/2 pounds baby red potatoes
    • 4 large carrots cut diagonally into 2-inch pieces
    • 1/2 pound fresh assorted mushrooms sliced, optional
    • 2 1/2 tablespoons cornstarch
    • 1-2 tablespoons soy sauce or fish sauce optional kicks up the flavor, check for saltiness before adding

    Instructions

    • Set a 6-qt Instant Pot® to the high saute setting.
    • Season beef with 1 1/2 teaspoons salt and 1 teaspoon black pepper. Heat oil; add beef and cook until evenly browned, about 2-3 minutes per side; set aside.
    • Add onion, and cook, stirring frequently, until translucent, about 2-3 minutes. Stir in garlic and tomato paste until fragrant, about 1 minute.
    • Stir in red wine, scraping any browned bits from the bottom of the pot.
    • Stir in beef stock, Worcestershire, thyme, rosemary, bay leaves, potatoes, carrots and mushrooms. Top with beef. Select manual setting; adjust pressure to high, and set time for 60 minutes. When finished cooking, quick-release pressure according to manufacturer’s directions.
    • Remove beef, potatoes and carrots from the Instant Pot®; shred beef, using two forks.
    • In a small bowl, whisk together cornstarch and 1/4 cup cold water; set aside.
    • Select high sauté setting. Bring to a boil; stir in cornstarch mixture and cook, stirring frequently, until slightly thickened, about 2-3 minutes. If the mixture is too thick, add more beef stock as needed until desired consistency is reached.  If using mushrooms, sauce may be a bit thin, reduce before adding cornstarch slurry.
    • Serve beef, potatoes and carrots with juices immediately accompanied by rice or buttered noodles or a nice crusty bread to sop up the sauce.


    Apple Crisp (How Do You Like Them Apples)

    Apple Crisp (How Do You Like Them Apples)

    My consolation for summer ending is the arrival of Fall, the magical transition that eases us into the coming colder months.  The air is crisp and cool without the icy sting of winter.  I love how the trees drop their leaves creating a carpet of orange and yellow hues.  Yes, I will miss summer’s yummy bounty but the fall season has its rewards. From our weekly trek to the farmer’s market, we will bring home a variety of beautiful apples and pears instead of peaches and plums.  Not a bad trade-off.

    dsc04790Too lazy to make a pie I mulled over what to do with the apples, my aha moment came quickly, APPLE CRISP.
    Let me get straight to the point.

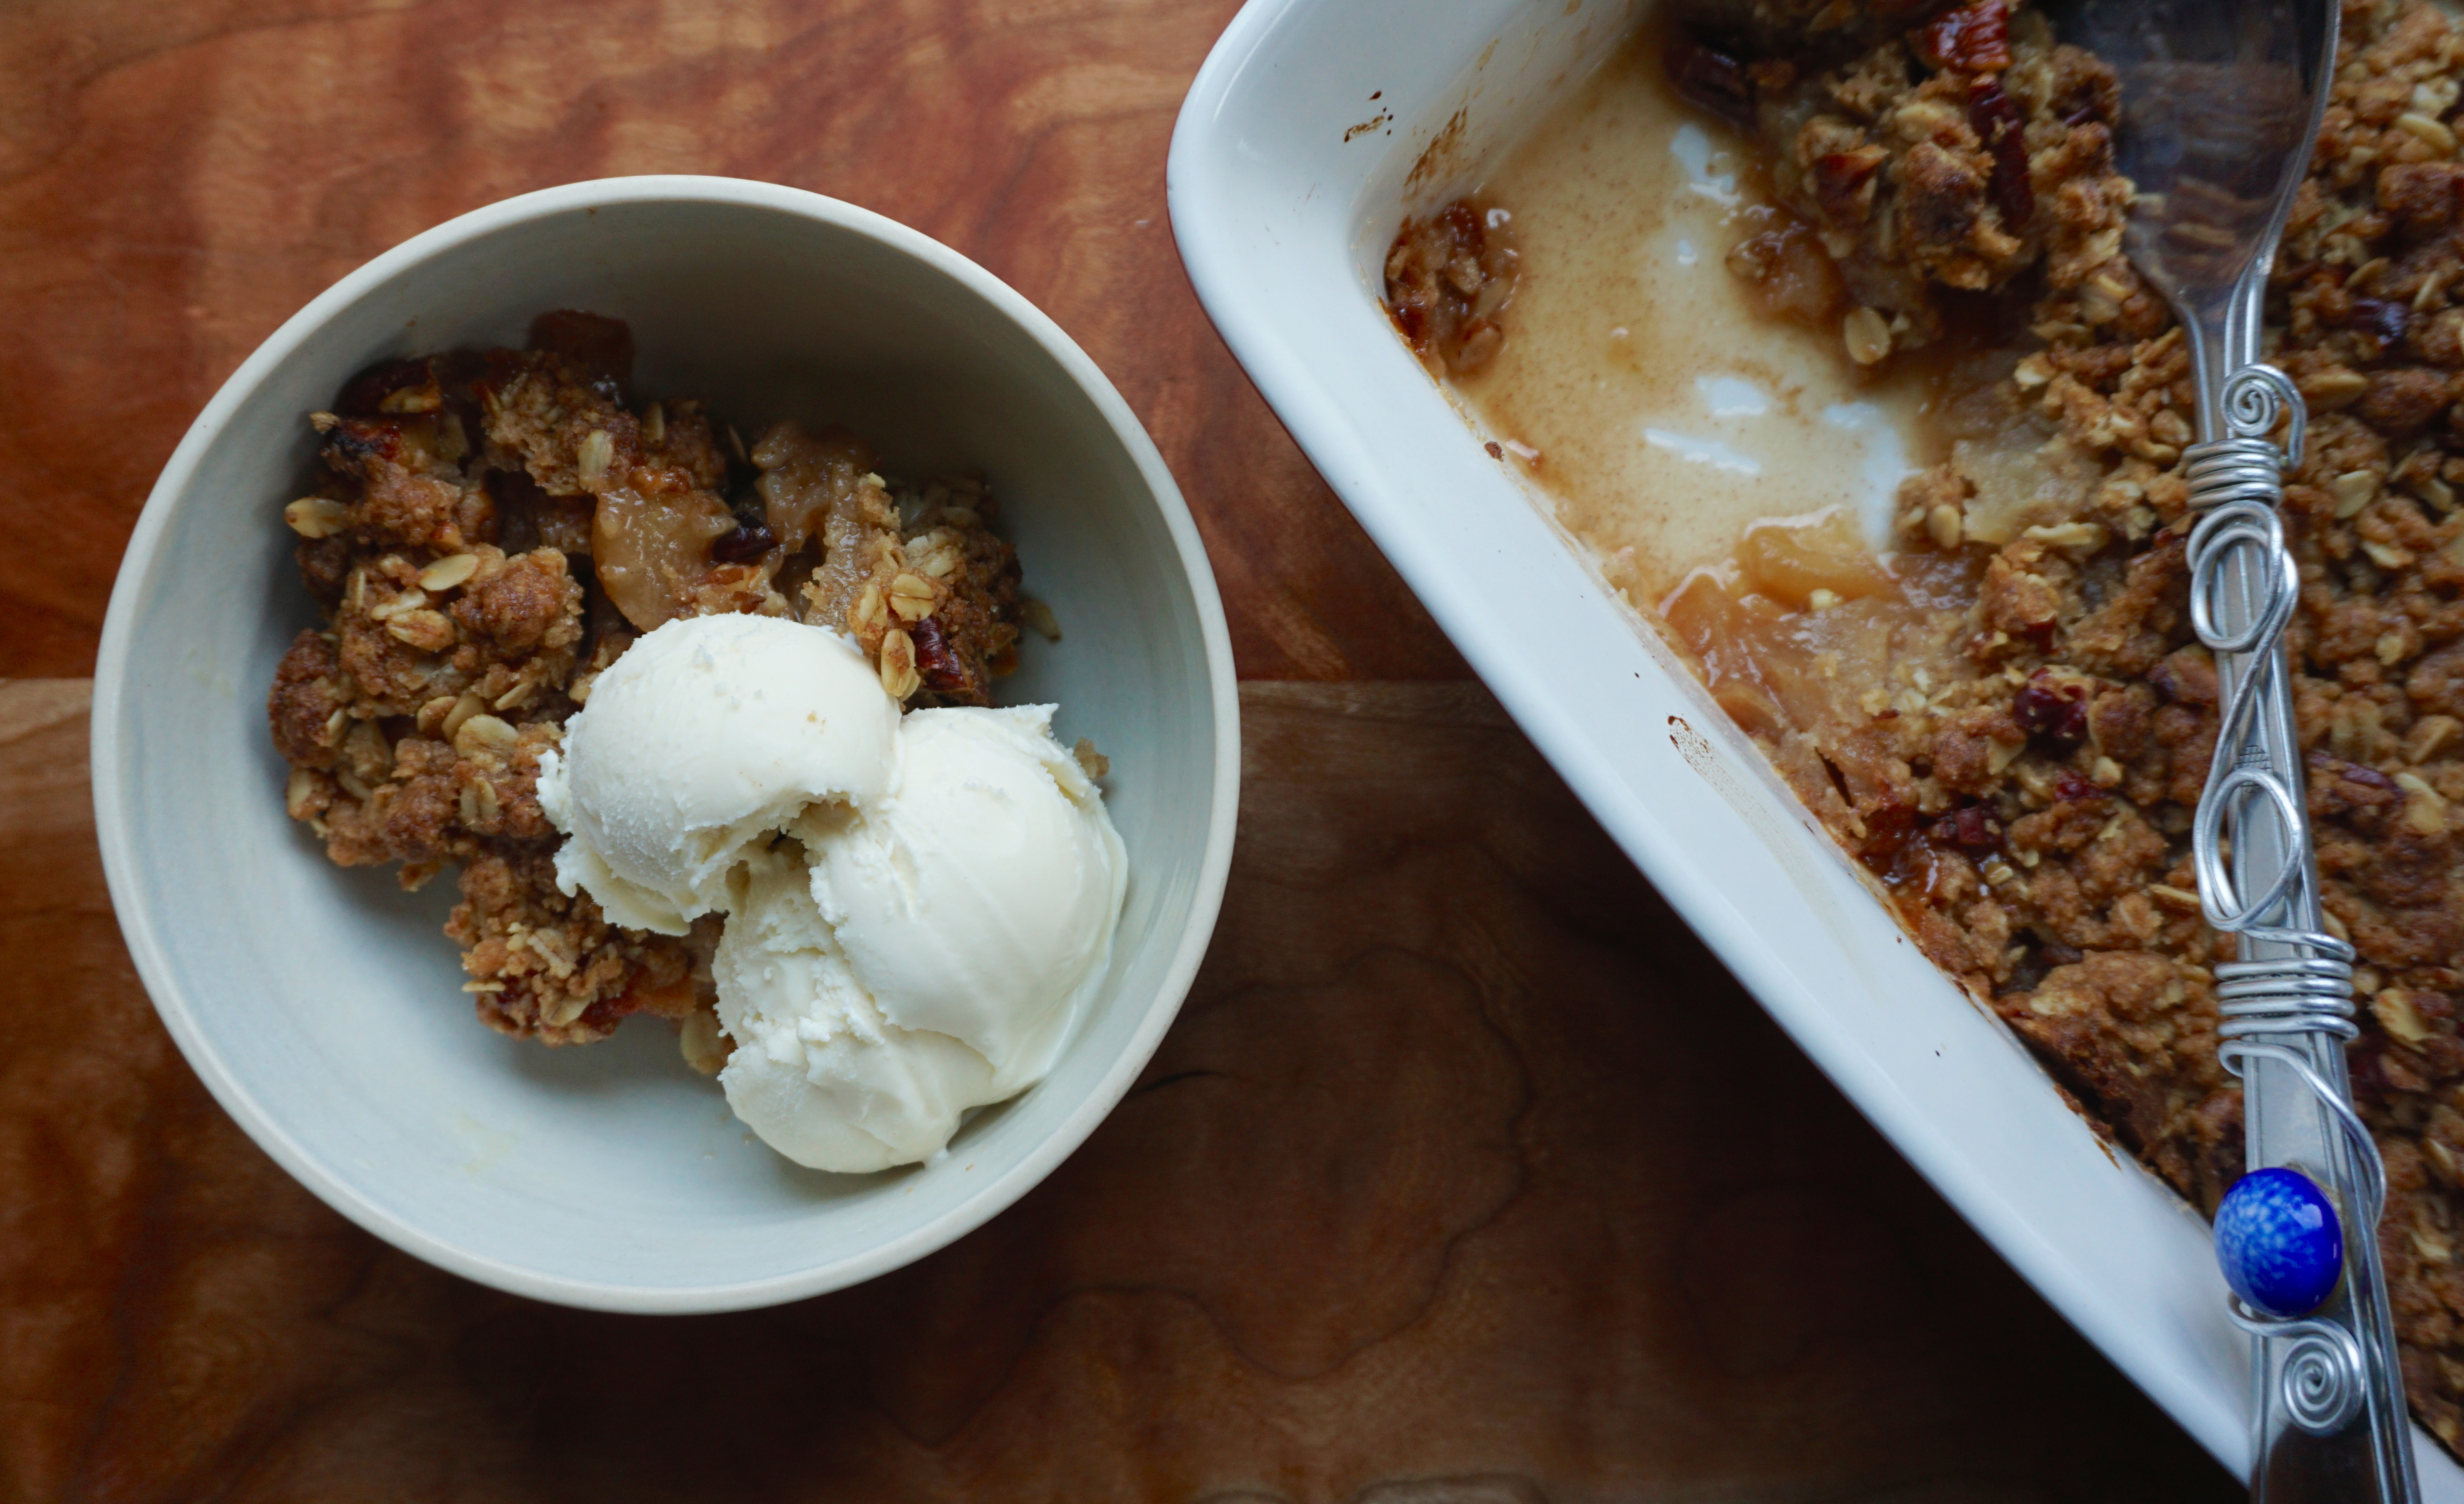
    There is never enough oatmeal, sugar, and buttery goodness blanketing the apples.  Are you with me?  Oh yeah, you are.  More buttery, crunchy, sweet topping, please.  Don’t get me wrong, I love the apple filling-warm, slightly sweet, and spiced with cinnamon and mace.  But I freely admit to being a topping junkie.  My go-to recipe is an adaptation of one I found in The Family Baker by Susan Purdy and yes, she too thinks you can never have enough of the crumble topping.  Feel free to tweak this recipe to your liking. When my kids were little they liked all things sweet. This meant I used only golden delicious apples (sometimes I snuck in a Fuji).

    I use a mix similar to my apple pie such as Pippins, Jonagolds, Mutsus, and Fujis in a 1:1 ratio now.  Explore your farmer’s market, there are so many great apples to try.  Ask your friendly apply purveyor which ones hold up well when baked.  I also add pecans to my crisp, I’m sure walnuts or almonds would work well too.  The original recipe calls for nutmeg, I like to use mace.

    But, whatever you do…

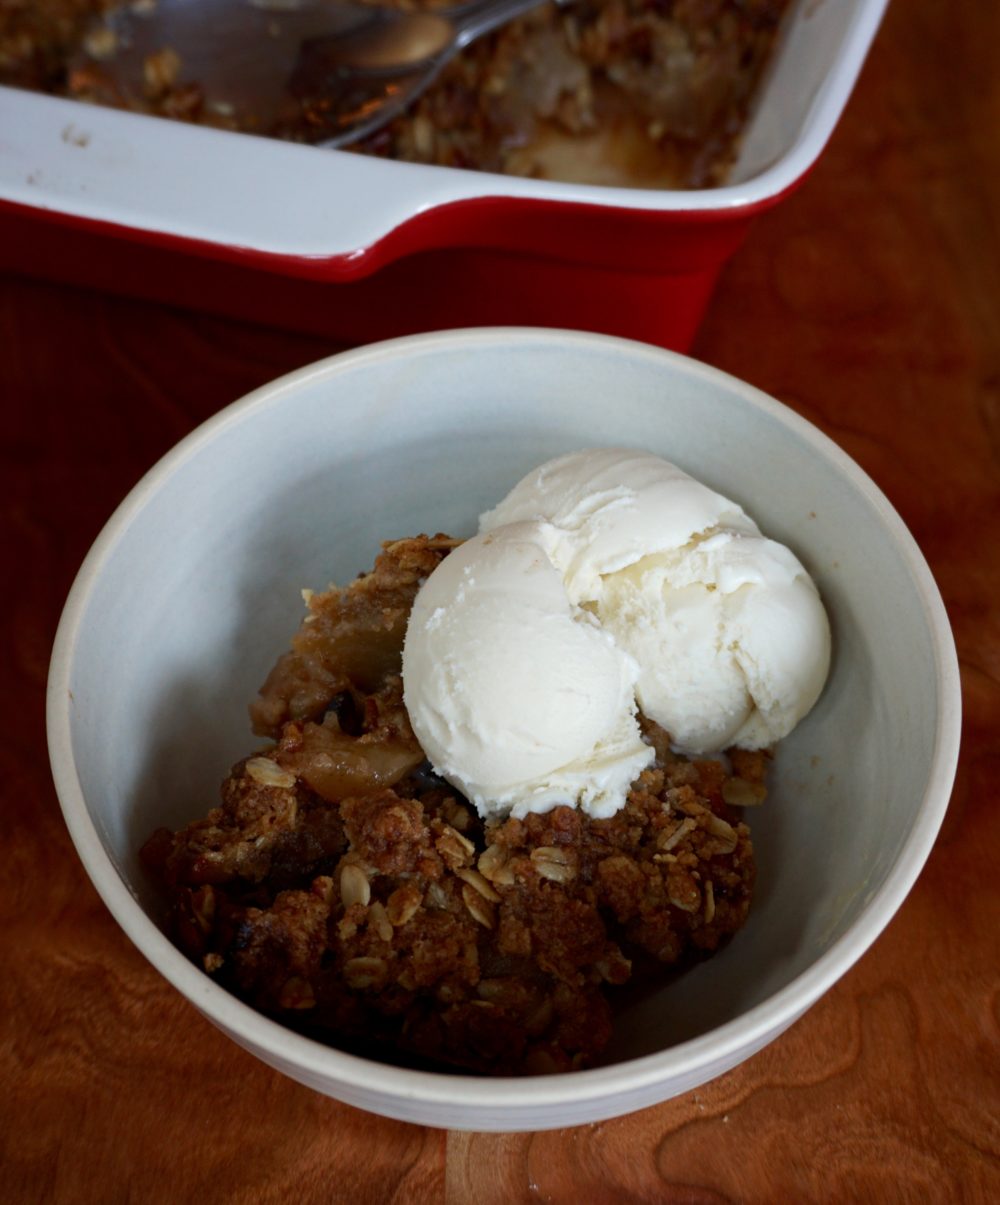
    Don’t forget a scoop or two or three of vanilla ice cream.  That makes it even better!

    How Do You Like Them Apples (Apple Crisp)

    Ingredients

    Filling:

    • 5-6 apples peeled, cored and sliced (~6 cups of apples) any combination of apples. For a more tart filling use Pippins or Granny Smiths. For a sweeter filling use a combination of Fuji's, Golden Delicious and Pippins (approximately 2 of each)
    • 1/4 cup dark brown sugar
    • 1/2 teaspoon cinnamon
    • 1/4 t grated nutmeg or mace
    • juice of 1/2 lemon
    • dash of salt

    Topping (yum)

    • 1/4 cup granulated sugar
    • 1/2 cup brown sugar
    • 1/2 teaspoon cinnamon
    • 3/4 cup all purpose flour
    • 1/2 cup old fashioned oatmeal not instant or quick cook
    • 1 stick of unsalted butter softened
    • 1/4 teaspoon salt
    • Mix topping ingredients with pastry blender or fingers until crumbly.
    • 1/2 cup chopped pecans or walnuts optional

    Instructions

    • Preheat oven to 350 degrees.
    • Butter a 9 inch deep dish casserole or gratin dish.
    • Combine sugar, cinnamon, nutmeg, salt and lemon juice with apples.
    • Pour apple mixture into dish. Top with crumble mixture.
    • Bake for approximately 40-50 minutes until topping is browned and apples are soft when pierced with a knife.
    • Serve warm with vanilla ice cream or custard sauce.
    Cha Cha Char Siu, Chinese BBQ Pork!

    Cha Cha Char Siu, Chinese BBQ Pork!

    The ultimate comfort food is the food you ate as a kid. In our family, my Dad was the cook.  The last 30 minutes of his workday found him running around Chinatown for dinner groceries.  He haggled with the fishmonger for the freshest catch of the day or gossiped with the store clerks as he picked through piles of fresh snap peas.  Some of my favorites included steamed fish with soy, ginger and onions, stir-fried beef with pickled vegetables, and scrambled eggs with bbq pork.

    My Cooking Roots, from Gung Gung and BaBa

    Dad (BaBa) cooked for fun, but for my grandfather (Gung Gung) it was his livelihood.  He worked as a chef at the Original Joe’s on Broadway and also at the legendary Tonga Room at the Fairmont Hotel.  To this day I have no idea what he cooked at these iconic San Francisco restaurants.  Every meal he made for me and my brother was rooted in Chinese comfort food.  We ate dinner with him a couple of times a week right before he went off to work.

    In his tiny room above Jackson Cafe in Chinatown, he would spread the China Daily on the table, pull out chopsticks, rice bowls, and a tiny shot glass.  The shot glass held a “digestive” he would swig right before eating.  He cooked in a communal kitchen down the hall.  A well-worn oval metal tray, a remnant from his restaurant days, sat wedged between the burners and wall at the ready to ferry our meal to his room.

    We usually sat waiting, impatiently, stomachs growling and legs swinging in anticipation, as he made the long trek back to his room.  As we ate he regaled us with stories from his childhood.  We feasted on steamed pompano with black bean sauce, stir-fried greens with garlic and onions,  steamed pork with fermented shrimp paste, or slices of bbq pork (char siu).  My comfort food.

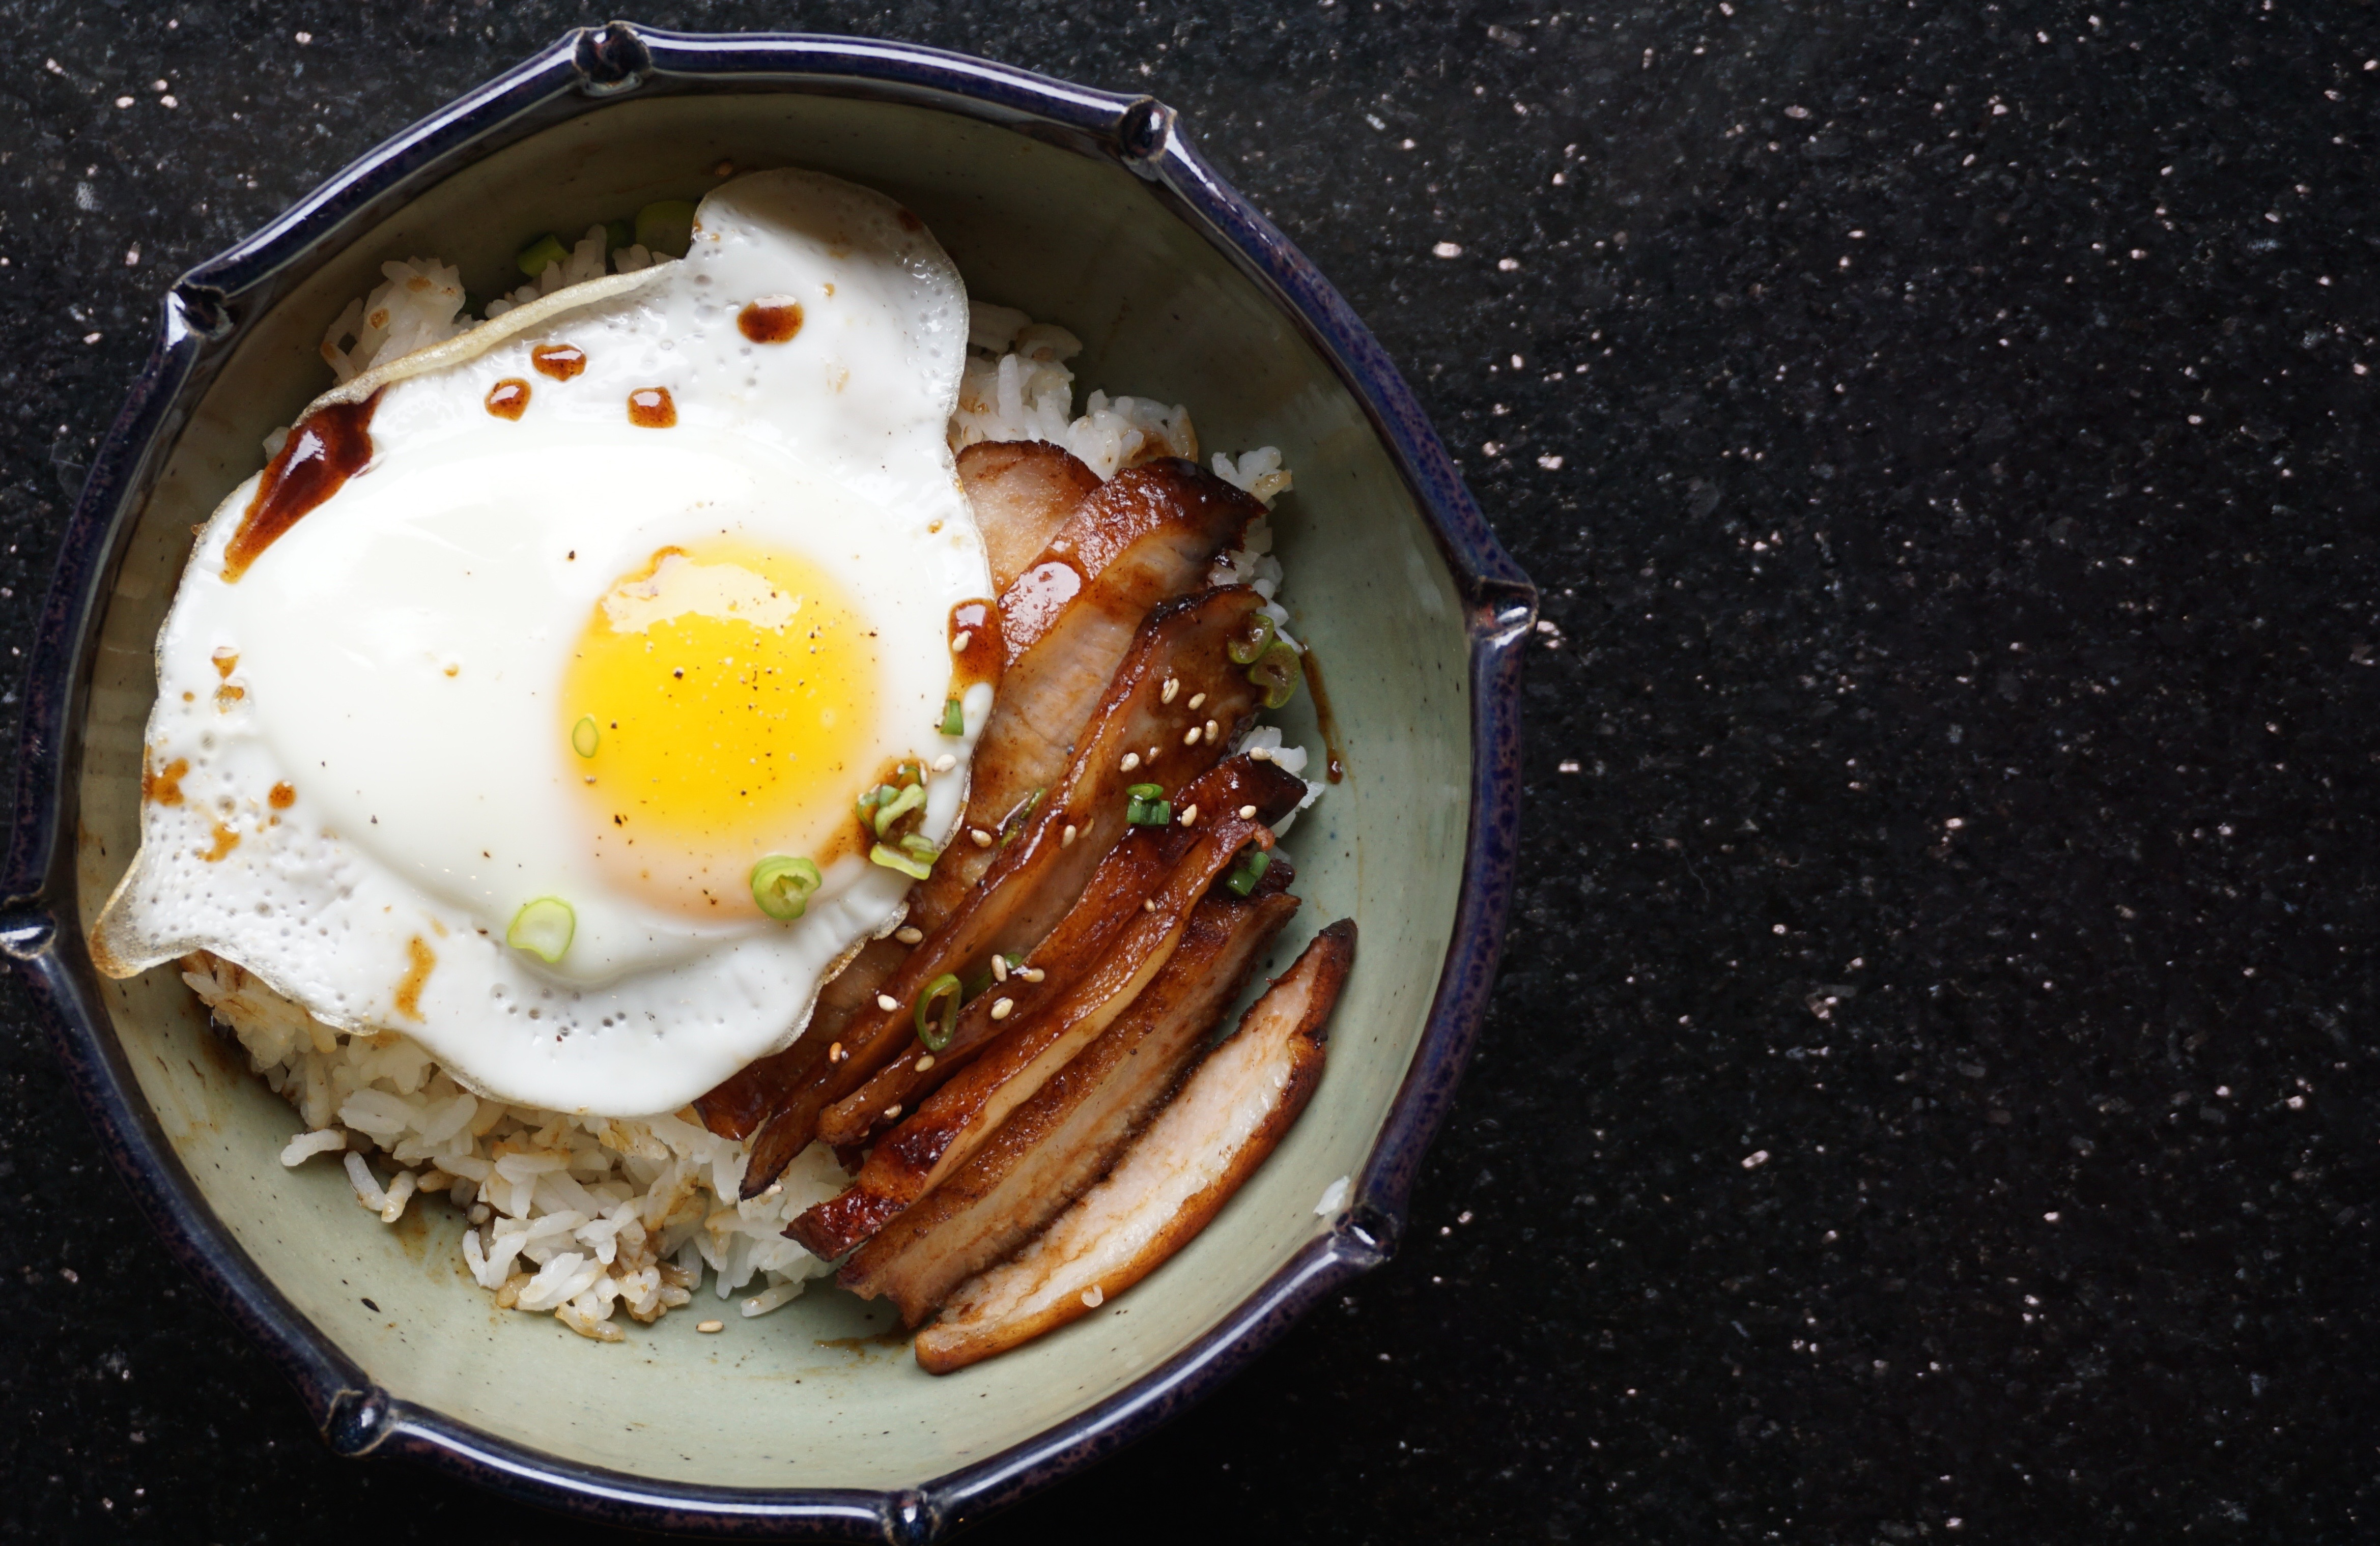
    These days I make my own Char Siu.  The marinade is adapted from a cookbook I found years ago in Chinatown, Authentic Chinese Cooking by Sharon Hoy Wong.  Long out of print, it is my go-to cookbook for the down-home food of my childhood.  Serve Char Siu as an appetizer, stir-fried with greens or eggs, noodle topping, or as a filling in buns.  Our entire family loves the play on the sweet and salty flavor combination.

    The marinade is also delicious for grilled baby back ribs.

    DSC03336

    Char Siu, Chinese BBQ Pork!

    Chinese bbq pork, a staple in every Chinese deli and restaurant, a favorite on its own or as filling in buns, pastries, and dim sum.
    Course Appetizer, Meat
    Cuisine Asian
    Keyword barbecue pork, bbq pork, Grilled Pork Belly
    Prep Time 15 minutes
    Cook Time 1 hour
    Marinate time 4 hours

    Ingredients

    • 2-3 pound piece of pork shoulder cut into strips approximately 1.5 - 2" thick 3" wide, 6-7" long
    • or 2 slabs of baby ribs with membrane removed
    • 1- tsp. Salt 2 T sugar mixed together rub this on ribs or boneless pork shoulder and let sit for 15 minutes while making marinade.

    Marinade:

    • 3 T hoisin
    • 2 T catsup
    • 1 T honey
    • 1 T soy sauce
    • 1 T sherry
    • 1 T oyster sauce or black bean with garlic paste
    • 1/8 t 5 spice powder
    • 1-2 T orange or apple juice
    • 2 cloves of garlic crushed
    • 2 slices ginger 1/4 inch thick each slice

    Instructions

    • Combine marinade ingredients and coat meat. Let marinade for 2-4 hours minimum or overnight in the fridge.
    • Preheat oven to 350 degrees. Place a wire rack over a baking pan. Place strips of pork on the rack and place in oven. Add 1/2 cup hot water to pan, filling to approximately 1 inch depth.
    • Roast for 45-50 minutes. Turn pork over midway through.
    • With about 10 minutes to go, increase temperature to 400 degrees, drizzle pork with honey and roast an additional 10 minutes to glaze the pork or pork can be transferred to a grill for the last 10 minutes.

    Pork Ribs

    • Place ribs on grill (underside of ribs faced down) and cook over indirect heat, (medium heat 350-400 degrees) in a covered grill for 15-20 minutes. Flip ribs over, brush with additional marinade and grill additional 15 minutes.
    • To finish ribs, move ribs over direct heat and continue cooking ribs uncovered. Baste ribs with honey and flip every couple of minutes to avoid burning ribs but you do want a little bit of char for flavor and texture. Grill over medium heat additional 10 minutes. This is for baby back ribs, times will be longer for larger ribs.