Category: Soups & One Dish Meals

Soups, one dish meals, casseroles

Egga-licious Down Home Cooking (Steamed Egg with Shiitake Mushrooms)

Egga-licious Down Home Cooking (Steamed Egg with Shiitake Mushrooms)

There are dishes that with the first bite I am instantly transported back to the dinner table of my childhood.  My dad clanging pots and pans, putting the finishing touches on our meal.  Me or my brother setting the table and my mom cleaning up in my dad’s “kitchen wake” (big job, trust me).  A typical meal would be corn soup, stir-fried greens with oyster sauce and ginger, soy sauce chicken from our favorite Chinese deli, and a steamed dish.  The steamed dish might be minced pork patty with salted duck eggs or steamed eggs with clams.  These are the dishes of my childhood, my soul food.

Asian Soul Food

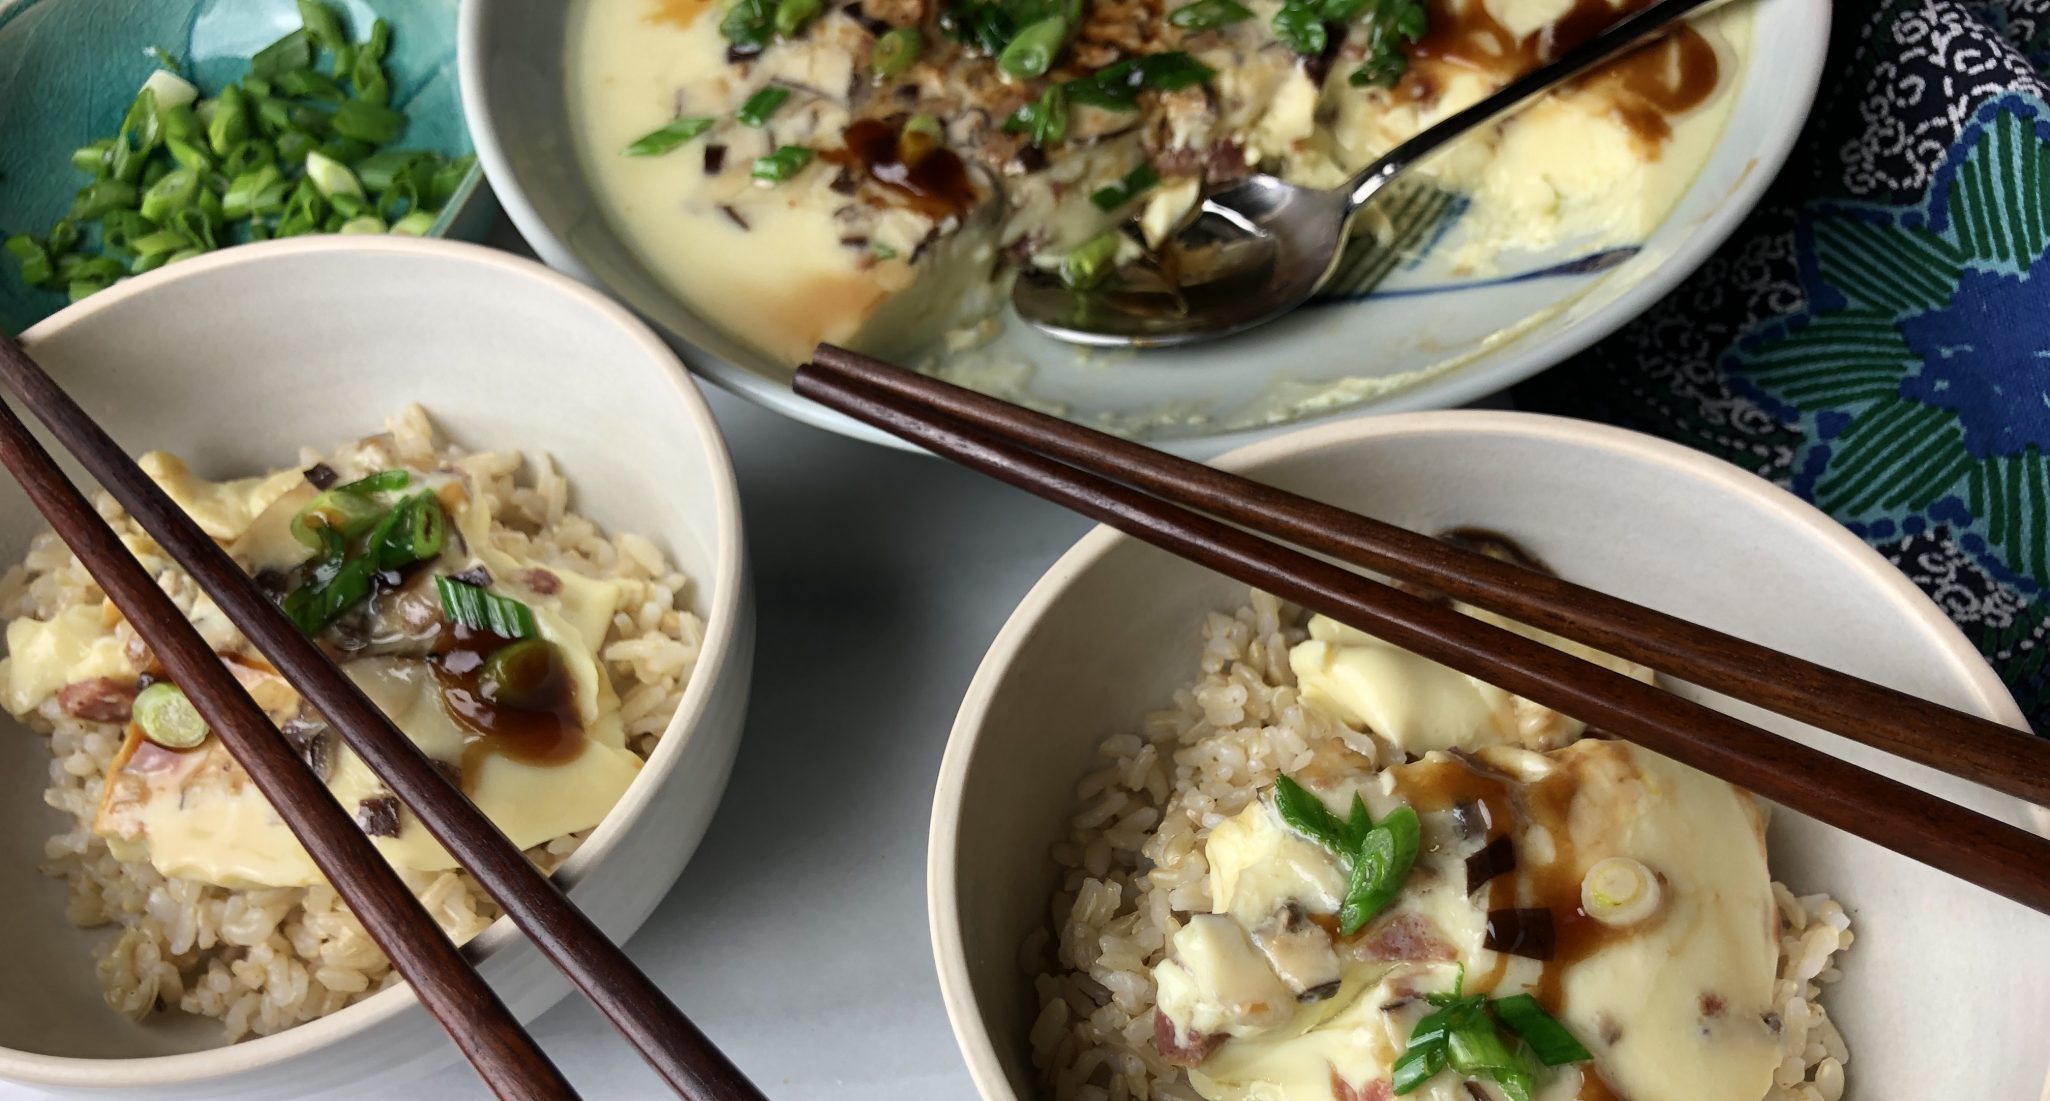
So, this past month, Food 52 featured Fuscia Dunlop’s Every Grain of Rice in their cookbook club.  Listed is a recipe for steamed eggs. Bam, I’m 10 years old again watching my dad cook, hoping he will give me a morsel to “taste-test”.  I flipped to the page with the recipe and hmmm, honestly, her egg dish didn’t look that great. (In her defense I tried a couple of the other recipes in the book and they are delicious). It looked a bit overcooked and bubbly on the top. My dad’s steamed eggs were silky smooth and soft, kind of like silken tofu or Japanese Chawan Mushi.  Both are savory custards with tidbits of shrimp, bbq pork, or clams, indescribably delicious.

Guess what, I have never made this simple, homey, delightful dish and I’m not sure why.  I love it.  My kids love it.  My niece Marisa REALLY loves it. Hello, what was I waiting for?  I reached out to my bro for tips on how to make dad’s steamed eggs, he’s smart, he makes it all the time.

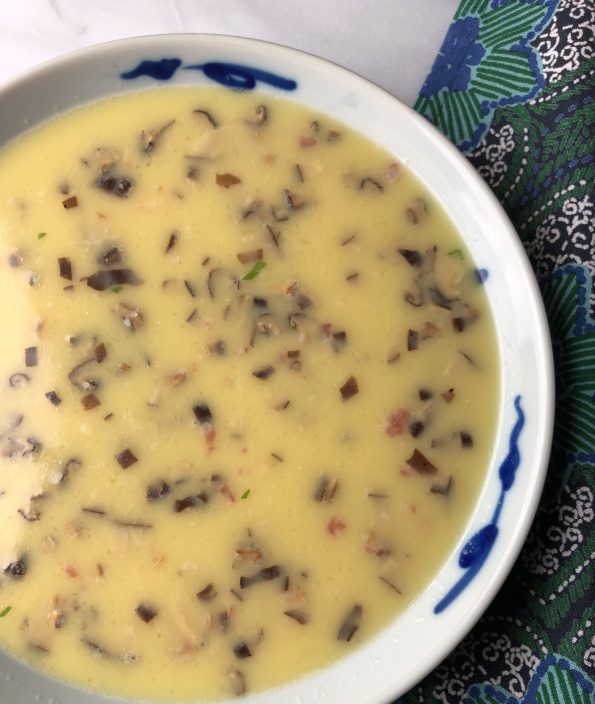
There is some wiggle room to the ratio of egg to liquid in this dish.  Four eggs to one and a quarter to one-half cups of water.  I replaced the water with low sodium chicken stock to amp up the flavor.  The TRICK to mind-boggling silky, smooth custard is to steam the eggs over very low heat.  Low and slow so you don’t get bubbles or overcooked eggs.
Add-Ins

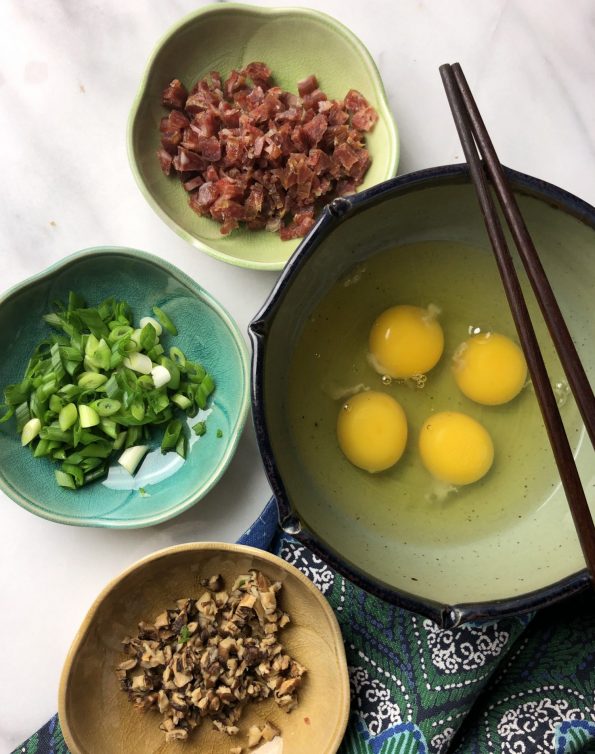
Following Fuscia’s recipe, I added shiitake mushrooms and opted for diced Chinese sausage (lop cheung) instead of ground pork.  The mushrooms add a nice earthiness and the sweet & salty sausage provides both flavor and texture.  My dad liked dried shrimp or bbq pork.  Ham or ground chicken or pork would work well.  I mixed the ‘shrooms and sausage into the egg mixture before pouring it into the bowl.  Next time I will scatter them on the bottom of the steaming bowl and pour the eggs over so they don’t float to the top as much. But really, NBD it will still be delicious.
steamed egg

Remember LOW AND SLOW, the key to a silky, smooth, damn that’s delish, egg custard. WORD.
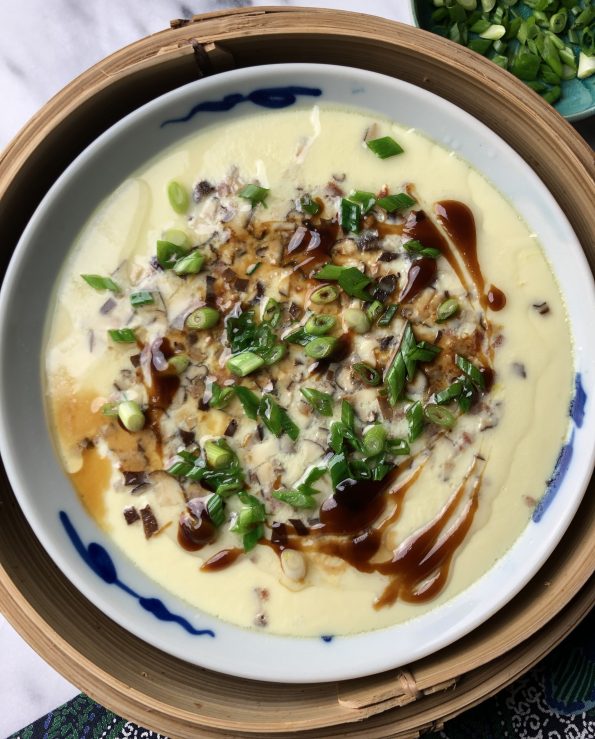
Asian Style Steamed eggs

The dish is done when the center is just set and does not jiggle too much.  Garnish with green onions (mandatory) and cilantro (optional).  Heat the peanut or vegetable oil until you see wisps of smoke, then immediately pour it over the green onions.  This brings out the flavor of the aromatics and gives the eggs a nice sheen.  Drizzle with soy sauce and/or oyster sauce on top. Ready, set, EAT.
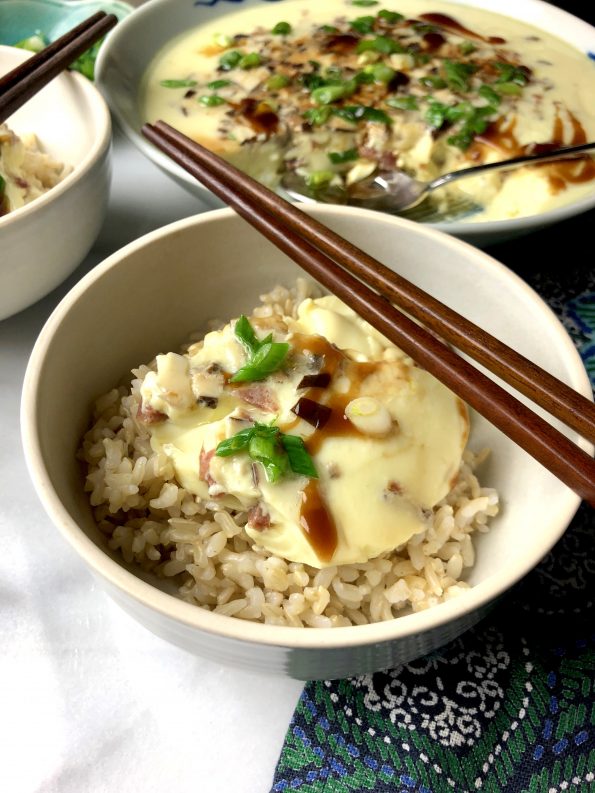
Get out the bowls of rice and then follow my kids’ lead. Stir the eggs into your rice so it’s all smooshed together and goopy, grab a spoon and start shoveling.

Microwave Magic

Now you can make steamed eggs in the microwave!  I recently bought Cook Anyday microwave cookware and whaddya know, the microwave works well for dishes that are steamed!!!

Put your ingredients all in one bowl, zap it, bring it to the table, off chance you don’t eat it all….toss the bowl in the fridge.  Truly one-bowl cooking! I cooked at 300 watts or 50%  power (I have a teeny 600w microwave) for 8 minutes, or until the custard is barely set in the middle, and jiggles gently if shaken. If it’s too runny, add time at 50% power in 30-second increments. Let rest with the lid on for 1-2 minutes to let the egg gently finish steaming.
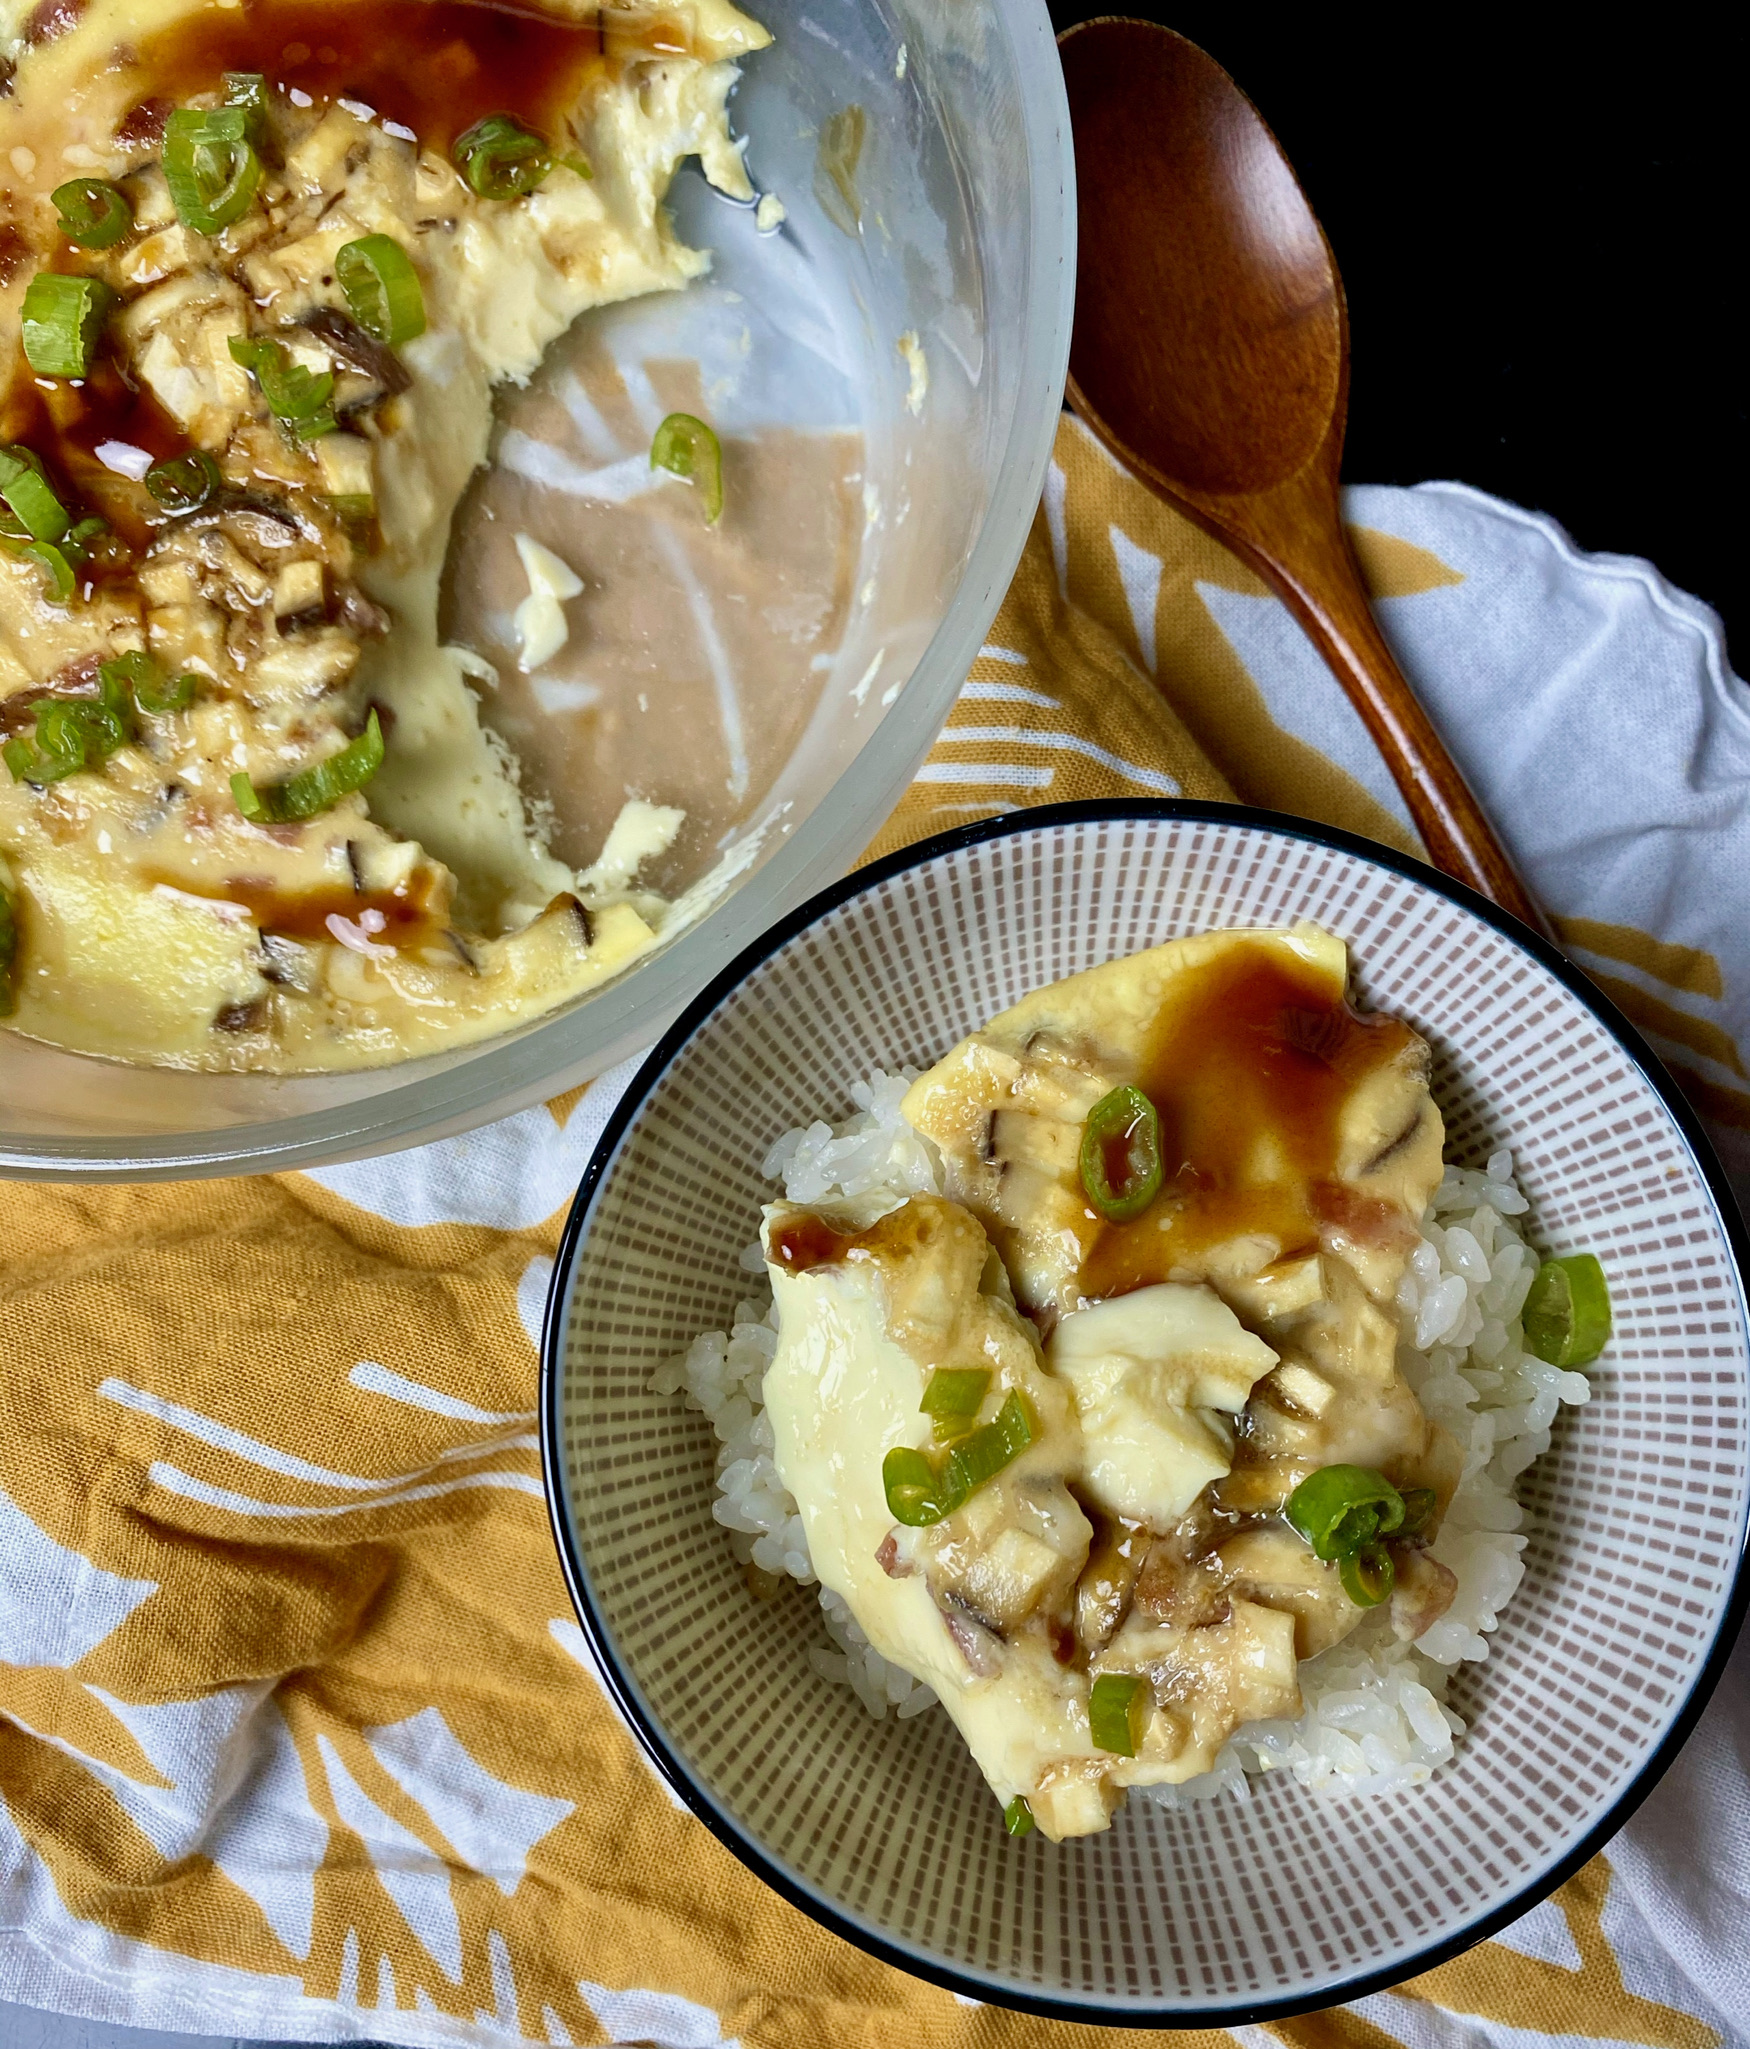
Chinese Steamed Eggs with Shiitake Mushrooms

A silky smooth, soft savory custard flavored with mushrooms.  Perfect with a bowl of rice. this is Asian soul food.
Course Main Course
Cuisine Asian, cantonese
Keyword crispy roasted mushrooms, lop cheung, Steamed eggs
Prep Time 10 minutes
Cook Time 25 minutes
Total Time 35 minutes
Servings 6 servings

Ingredients

  • 4 eggs whisked
  • 1.5 cups warm water substitute all or part with chicken stock. Liquid should be lukewarm
  • 2 dried shiitake mushrooms soften in warm water and diced
  • 1 lop cheung (Chinese sausage) diced, substitutions include ham, little clams, fresh or dried shrimp
  • 2 tsp rice wine
  • 1/4 tsp salt
  • 1 pinch of each white pepper and sugar

Optional (for garnish)

  • 2 tbsp peanut or vegetable oil
  • 1 green onion finely chopped
  • cilantro for garnish
  • 2 teaspoons light soy sauce
  • 2 drops toasted sesame oil optional
  • 2 tsp oyster sauce optional

Instructions

  • Heat water in a wok or large saute pan with a steamer insert. 
    Combine eggs, water or stock, salt, rice wine, and sugar in a medium-sized bowl. Add mushrooms and Chinese sausage to egg mixture.  
    Pour mixture into a shallow heatproof bowl or pyrex pie plate.  Place in steamer and cover.  Steam over low heat for 20-25 minutes. The eggs should look set and not jiggle in the middle but not look dry.
    Heat peanut oil in a small saucepan until wisps of smoke form.  Garnish eggs with green onions and pour hot oil over the green onions and egg.
    Drizzle with soy sauce and/or oyster sauce over top.
    Serve immediately with rice. 

MIcrowave Cook It!

  • Put your ingredients all in one bowl, zap it, bring it to the table, off chance you don't eat it all....toss the covered bowl in the fridge.  Truly one-bowl cooking! I cooked at 300 watts or 50%  power (I have a teeny 600w microwave) for 8 minutes, or until the custard is barely set in the middle, and jiggles gently if shaken. If it’s too runny, add time at 50% power in 30-second increments. Let rest with the lid on for 1-2 minutes to let the egg gently finish steaming.
Oyako Donburi Hmmm, Maybe the Chicken and the Egg Came Together?

Oyako Donburi Hmmm, Maybe the Chicken and the Egg Came Together?

I am soooo excited! We are adding a new category to 3Jamigos!  The kids have flown the coop and are making their own way, Jeff in the City close by (yippee), Jorge in Korea teaching (so far away) and Jams currently working and freezing her tush off in Minneapolis (half of so far away).  Luckily we have FaceTime, phones, texting and when that just won’t do, flights.  Just an airplane ride away.

A California-Texas kinda gal, winter in Minneapolis is a new experience for Jamie.  Down jackets, scarves and gloves are now a part of her wardrobe vernacular, as is staying indoors. The winter weather has her looking for activities inside to keep her busy.  For Christmas, we gave her knitting needles, yarn and starter lessons from Wes on how to knit.  Big hit, knitting up a storm haha.

Jamie has always loved to bake and cook.  She’s a natural, and with this weather, she has been doing alot more cooking and baking.
A recent call went like this:

Mui (her nickname):  Mom, can you send me your Oyako Donburi recipe?  Is it easy to make?

Me: Sure.  Yep, it’s pretty easy.  One pan, a couple of eggs, chicken, and onions.

Mui: That sounds good, I love rice bowls and I can bring the leftovers to work.

LIGHTBULB MOMENT:  Hey, why don’t we both make Oyako Donburi and then post about it?  You have done spots before on 3Jamigos. We’ll alternate picking recipes to make and blog about!

THUS a new 3jamigos category was born, M&M which stands for Mom and Mui.  Mui means little sister.  We have been calling Jamie Mui since Day One.

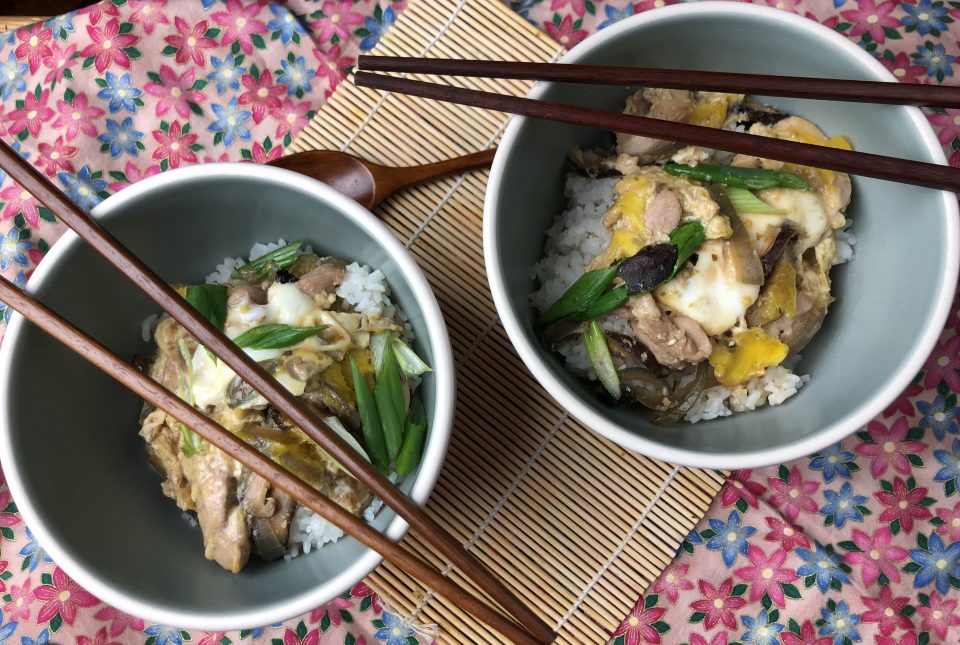
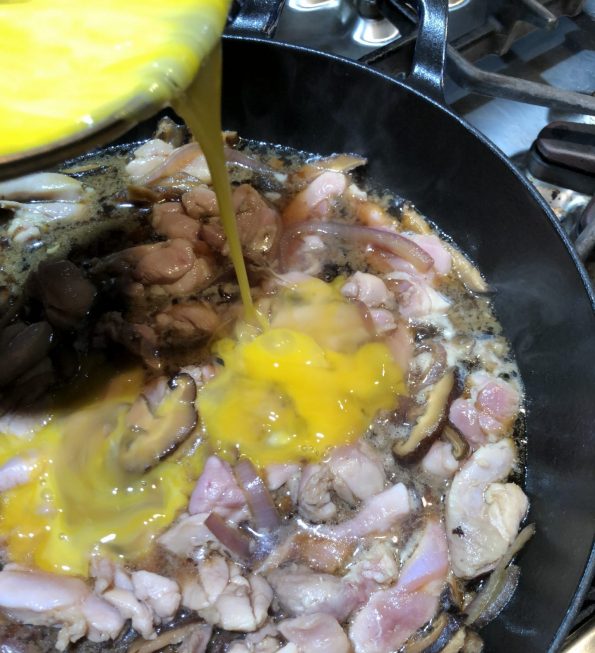
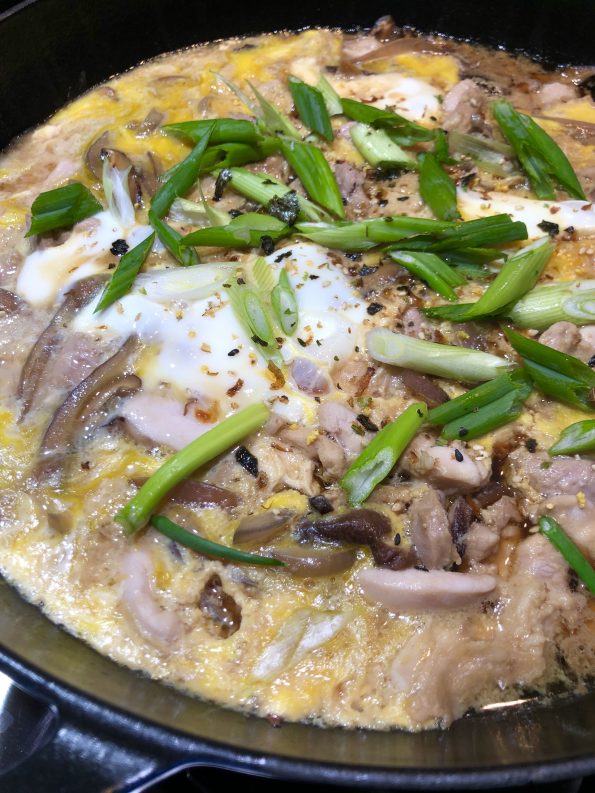
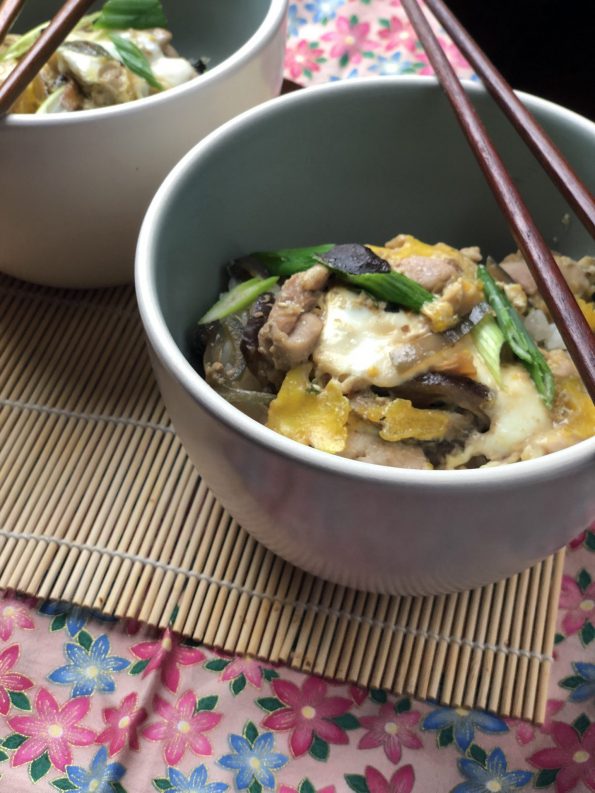
Oyako Donburi is the perfect dish to launch M&M.  Chicken, sliced shiitake mushrooms, onions are cooked in a savory-sweet sauce of soy sauce, sake, dashi.  Lightly beaten eggs are then poured on top of the chicken and sauce and simmered until just cooked through, then the chicken and egg mixture is placed on top of hot rice.  Watch your kids, hubby, neighbors, everybody gobble it up.  So delicious, classic Japanese soul food.

So without further adieu, our inaugural M&M post by Jamie on making Oyako Donburi in cold & snowy Minneapolis.

HELLOOOO WORLD/readers of 3jamigos.com. It’s ME. J A M I E. Ya know, that crazy girl who moved to Minneapolis to live in -30 DEGREE WEATHER. Nope, that wasn’t a typo. It really was NEGATIVE 30 on my drive into work last week.  GLOBAL WARMING IS REAL PEOPLE. (I know that doesn’t really make sense, but global warming is causing polar vortexes normally over THE NORTH POLE to break apart and dip down to lower parts of the globe).  It’s so cold that you can’t stand outside with exposed skin for more than 5 minutes without getting frostbite. FROSTBITE. Schools were closed. The roads were empty. But I still had to go to work. Once I got over that, it really wasn’t bad. They are GREAT about paving and salting the roads, so it was actually a breeze getting to and from work.

BUT enough about me. Let’s talk about the fact that my mom and I decided to start a mother-daughter blog where we cook the same dish separately and talk about it, AND THE FIRST DISH WE PICKED JUST HAPPENED TO TRANSLATE TO “Parent (chicken) and child (egg).” Damn, we are GOOD, people. You couldn’t even make this stuff up. I mean, I guess you could. It would make a great lifetime/hallmark movie. Ok. Enough interruptions. Let’s get down to the food.

Okayo Donburi. The ultimate comfort food.  It’s a mix of chicken and eggs (parent and child) with a sweet/salty/chickeny sauce and sautéed onions.  Pour it over some rice, and all the stresses of your day melt away. The best part? It is SO easy to make.

Chop up some onions, slice some mushrooms, toss it into the pan with some chicken broth, mirin, soy sauce, and sugar, and top it off with some eggs and chicken.  E A S Y and so foolproof even my mom could make it and she suuuuckkss at cooking (if you couldn’t tell). I like to add in extra mushrooms and chicken. Sometimes extra onions. Pretty much extra everything. It is that good.  Mom used to make it all the time when I was little, and it was one of my favorite dishes then too.  So far, I’ve made it 3 times since winter started. That’s how good it is.
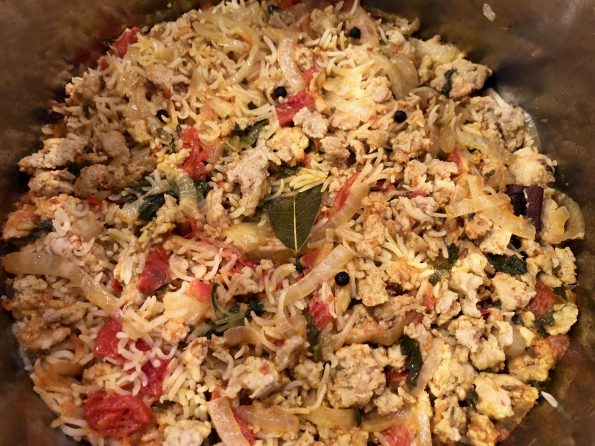
So now, for lack of a better conclusion, stop reading this post and go make it. Go!

Oyako Donburi

Course Main Course
Cuisine Asian
Keyword Oyako Donburi
Prep Time 15 minutes
Cook Time 15 minutes
Total Time 30 minutes
Servings 4 servings

Ingredients

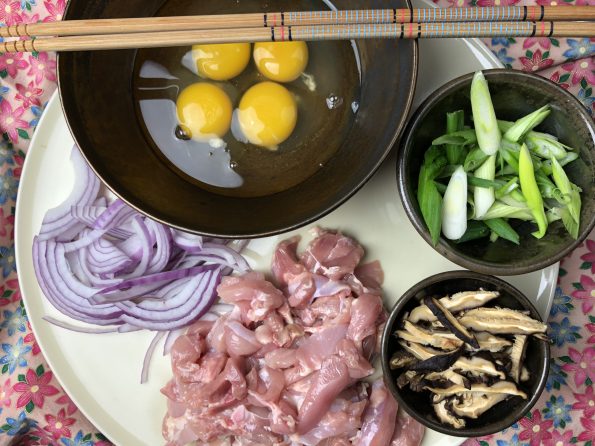
  • 3-4 boneless, skinless chicken thighs cut into bite-sized pieces
  • 4-5 eggs lightly beaten
  • 1/2 yellow onion thinly sliced, red onion can be used
  • 1 green onion sliced on the diagonal
  • 2-3 dried shiitake mushrooms soaked to soften, sliced
  • 1 tablespoon vegetable oil

Sauce Mixture

  • 1 cup dashi (fish based stock) can substitute low sodium chicken broth
  • 5 T soy sauce
  • 2 1/2 T sugar can cut to 2 T
  • 21/2 T mirin substitute sake to decrease sweetness
  • cilantro garnish if desired

Instructions

  • In a small bowl, lightly beat eggs and set aside.
    Oyako Prep
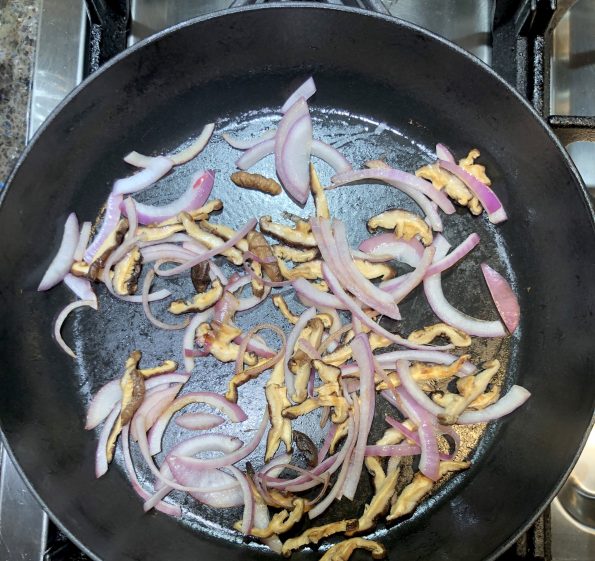
  • Heat saute' pan, add vegetable oil then onions and mushrooms, fry for 1-2 minutes until onions are soft. Add sauce mixture, heat through. 
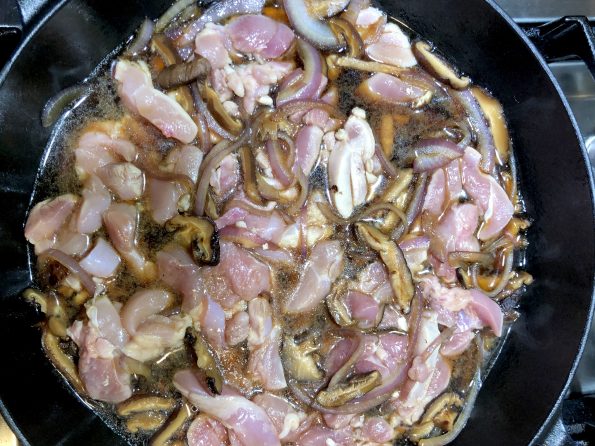
  • Add chicken and lower flame to medium-low. Cook for 3-4 minutes, turning the chicken over. Cook until chicken loses pinkness
  • Add eggs evenly over top of chicken. Cover and cook over low heat until eggs are just cooked should not be dry. 
  • Garnish with green onions or cilantro and nori strips
  • Divide into portions and serve over rice.  If desired, individual portions can be made.  Quarter ingredients and use a small omelet pan to make.  
Bok Bok, Batch…of Three Cup Chicken

Bok Bok, Batch…of Three Cup Chicken

Gung hay fat choy! Happy Lunar New Year! This is the Year of the Pig and in celebration of this, I spent the last week in Hong Kong with my boys-PIGGIN’ out. It has been years since I have been in Hong Kong and with Jordan living in nearby Korea, we decided a rendezvous was in order.
I walked off the plane and took a deep breath and instantly knew I was back in Asia. The scent that wafted through the air and surrounded me immediately transported me back to my first visit to Hong Kong so many years ago. An amalgam of daily life, food, incense, years of humanity all rolled into one.

Before I regale you with our travels in Hong Kong…let me tell you about our flight.  It’s been a while since I have been on a flight that lasts 14 hours.  AUUUGH!  I don’t care if you are in First Class, Business, or Economy…it’s a LONG time to be cooped up in a plane.  I did manage to catch 40 winks, watch a couple of movies, and pick through multiple cafeteria-like meals.  The highlight was a bowl of instant ramen on the last leg of our journey. By then even the K-Movie I was watching knew how I felt.

One of the meal selections was Three Cup Chicken.  I knew of this classic Taiwanese dish but have never had it. This peaked my curiosity so I made a mental note to try this dish when I got home.

A day of vegging out to get over my jet lag and I was ready to hunt down the recipe for Three Cup Chicken.  The first thing I noticed was, though called 3 cup chicken, most recipes did not use those proportions.  Thank goodness since that is a lot of sesame oil.

I decided on a mash-up from two of my go-to blogs, The Woks of Life and No Recipes. You can use bone-in pieces like chicken wings but the next time I think I will try boneless thighs.  This dish is easy to prepare and lands on the dinner table in minutes…my kind of dish.

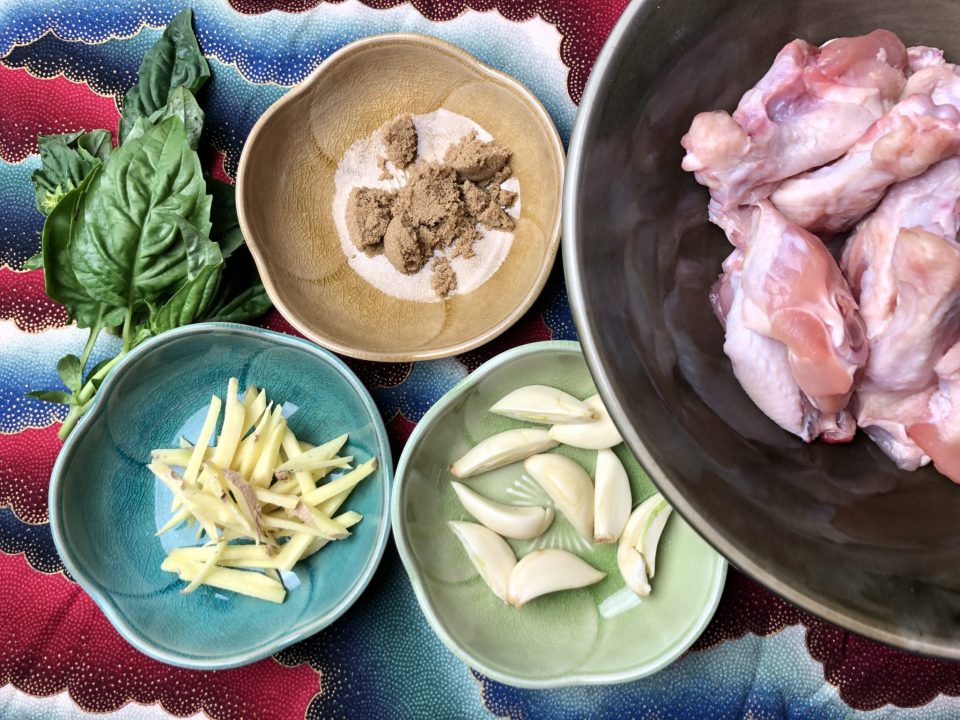
The soy sauce, sesame oil and rice wine form the braising liquid but the addition of garlic, ginger and Thai basil really sets this dish apart. No wonder it’s a classic that has stood the test of time.  One recipe called for a touch of sugar, sounded good, so I included it. If you like spice, throw in 1-2 Thai chili peppers for good measure.

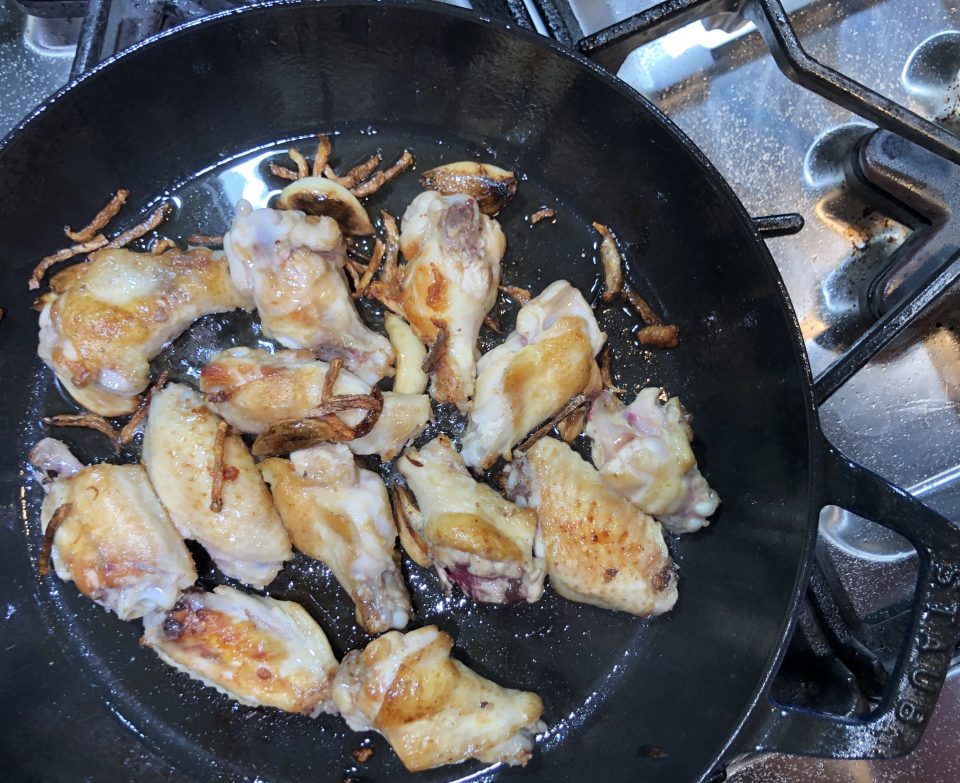
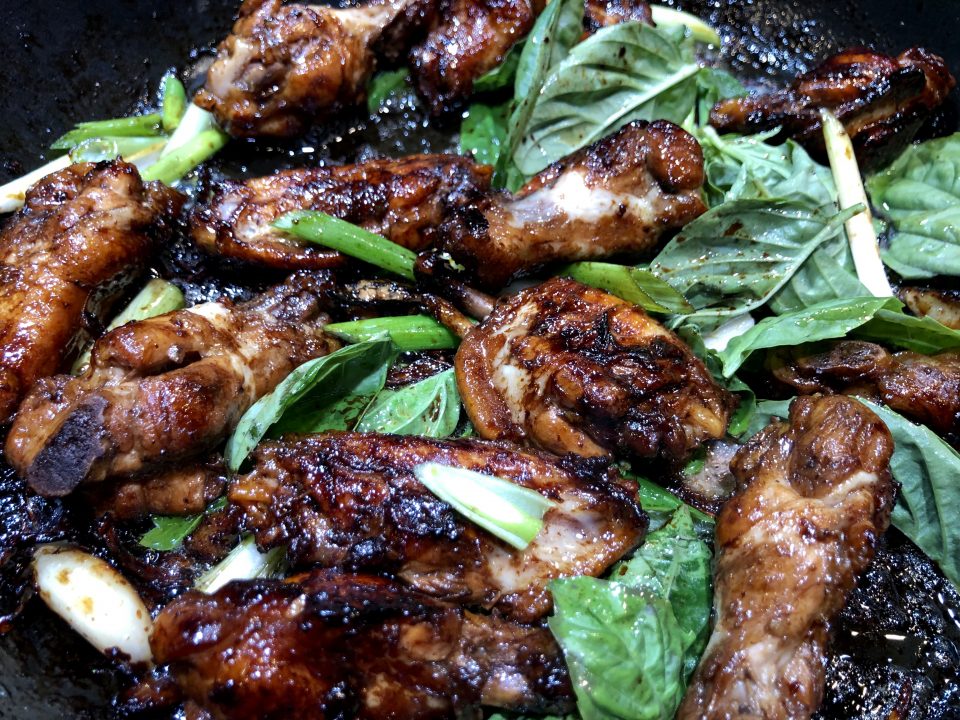
The aromatics are heated in oil before adding the chicken.  Brown the chicken and add the braising sauce.  Simmer, turning the pieces occasionally.  The sauce will reduce and coat the chicken creating a deep caramel color. Can you say yum?  Finish with the basil and green onions.  Be generous with your basil it adds a ton of flavor to the dish.

The chicken is browned in the ginger, garlic infused oil.
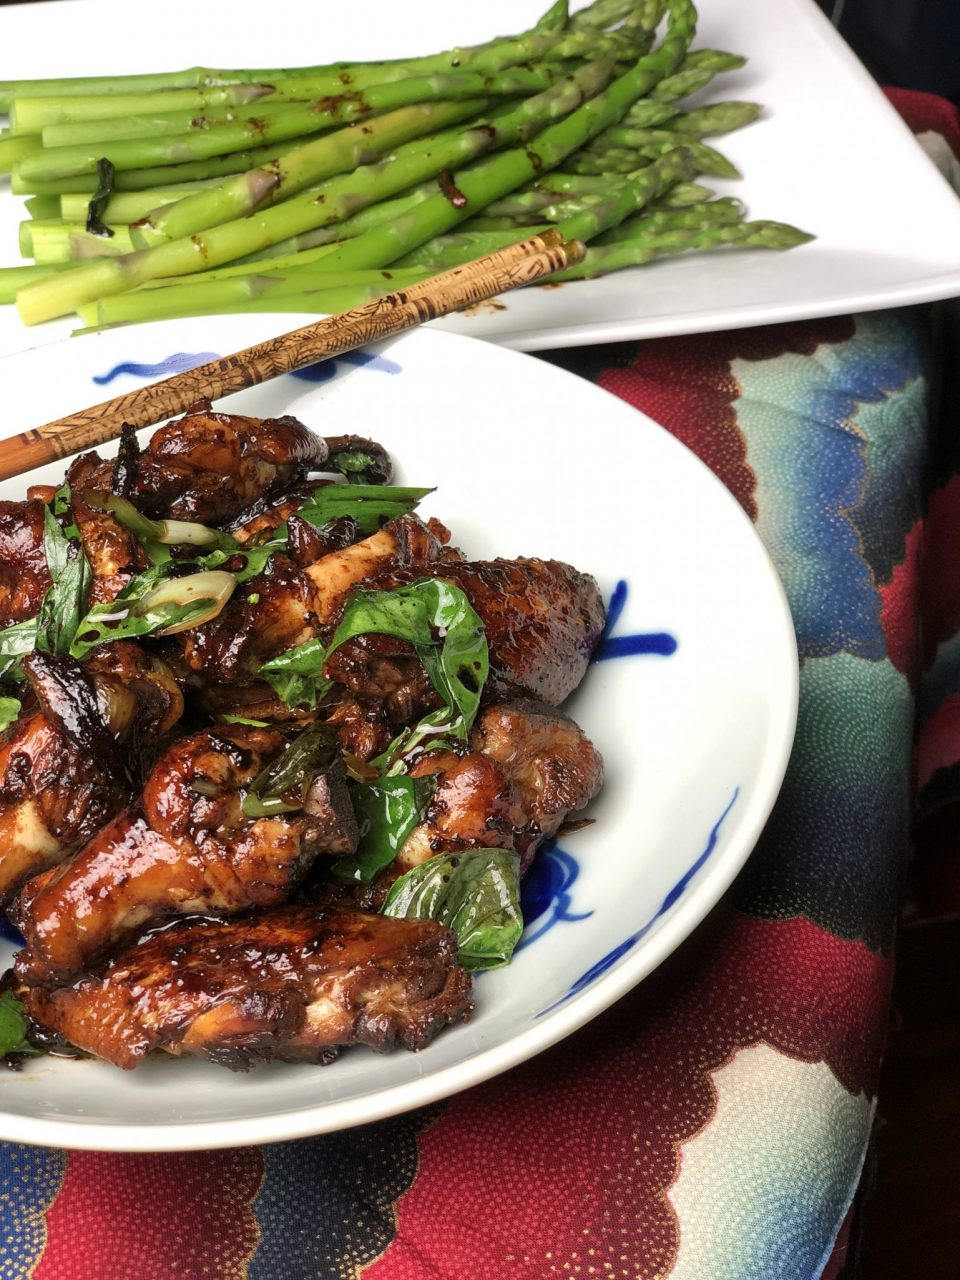
Isn’t that a lovely color?  Serve with steamed rice and veggies. The perfect meal.
So delicious. Don’t tell Cathay Pacific, but this version of 3 Cup Chicken is so much better than theirs!

San Bei Ji(三杯鷄), or Three Cup Chicken

Taiwanese dish made by cooking chicken with sesame oil, soy sauce and rice wine.
Course Main Course
Cuisine Asian
Keyword 3 Cup Chicken
Prep Time 10 minutes
Cook Time 15 minutes
Total Time 25 minutes
Servings 4
Calories 460kcal

Ingredients

  • 1 tablespoon peanut oil or vegetable oil
  • 2 tablespoons toasted sesame oil
  • 1 inch piece ginger sliced then julienned
  • 6-8 cloves of garlic lightly crushed, but left whole
  • 1 thai chili seeded and sliced crosswise optional
  • 1.25 pounds boneless skin-on chicken thighs sub: 1.5 pounds chicken wings
  • 1/4 cup Chinese rice wine mijiu or shaoxing
  • 1 tablespoon dark soy sauce
  • 1 tablespoon light soy sauce
  • 2 teaspoons brown sugar
  • 1 cup loosely packed Thai basil leaves only
  • 1-2 green onions thinly sliced

Instructions

  • Heat a large pan or wok until hot. Add the peanut oil then ginger and garlic (and chili if using).  Fry until fragrant, but don't let it brown.
  • Add the chicken in a single layer, skin-side down and fry until the skin is well browned.
  • Flip the chicken over, and then add the rice wine, dark soy sauce, regular soy sauce, sesame oil and sugar.
  • Cover and simmer over medium low heat for 10-15 minutes, or until the chicken is tender, flipping the chicken over a few times as it cooks.
  • Remove the lid and turn up the heat. Reduce the liquid into a thick sauce.
  • Add the Thai basil leaves and toss to coat.
  • Serve with rice.


Potato Leek-i-ty Split Soup (Instant Pot Potato Leek Soup)

Potato Leek-i-ty Split Soup (Instant Pot Potato Leek Soup)

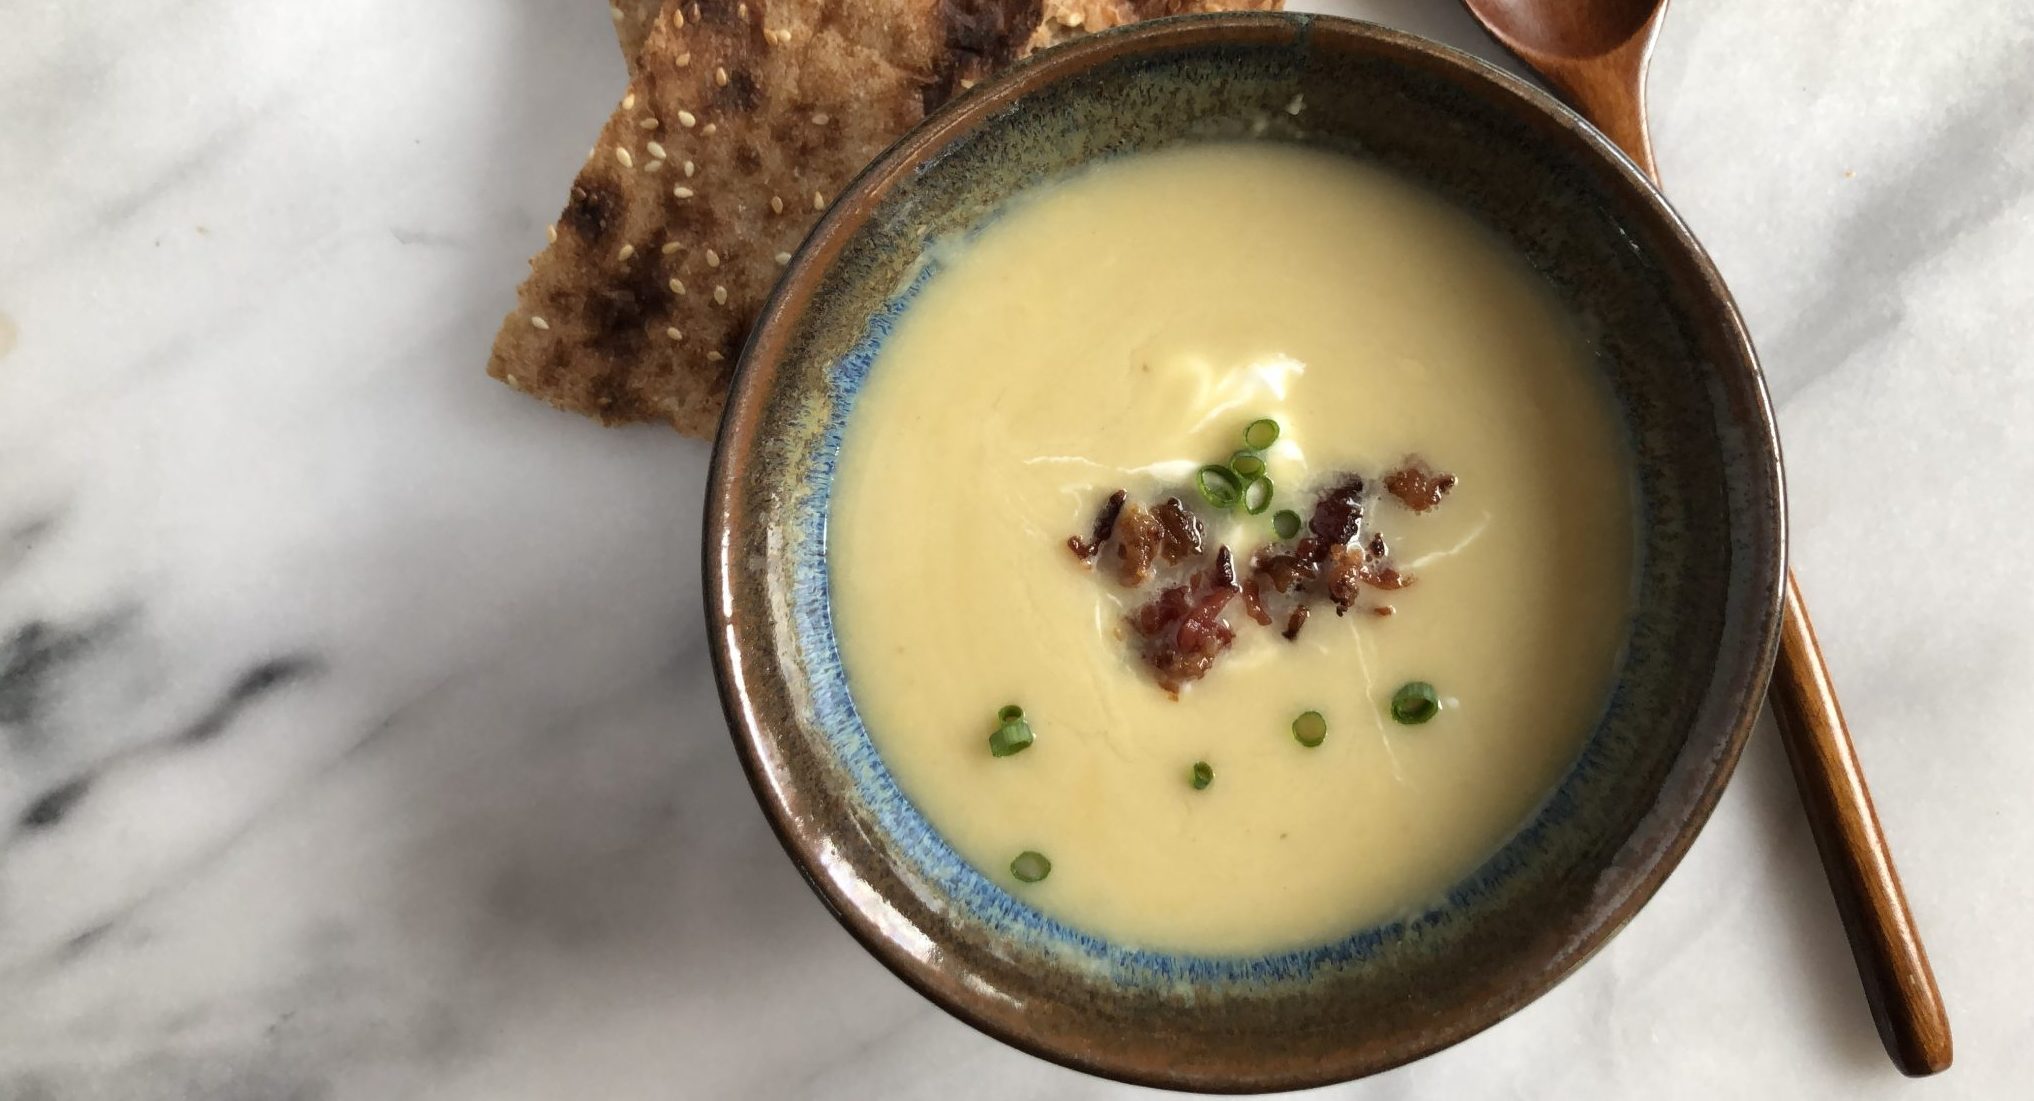
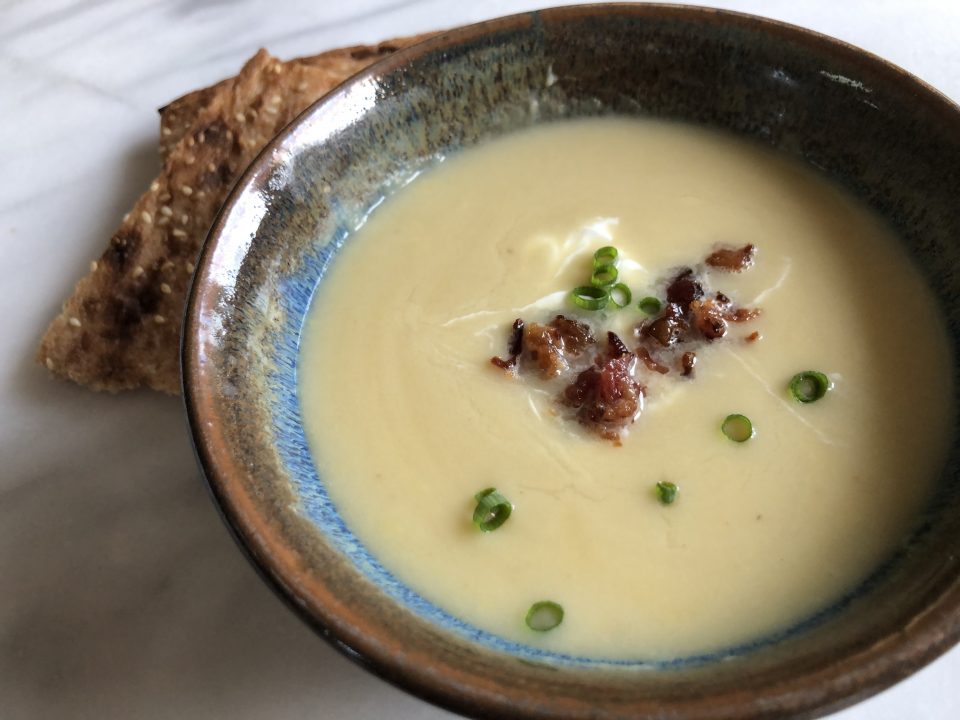
I love Potato Leek Soup. If you dig into the 3jamigos archive this soup pops up a couple of times.  This is my go-to soup.  In the winter, I make a hearty, rustic version with lots of potatoes, smokey bacon, and heavy cream, perfect for a chilly evening.  The summer version is lightened with a bit more stock and light cream, pureed so it is silky smooth, and served at room temperature. Both are crazy delicious and proof of the “Versatility of Vichyssoise”.


The hubs called me at work one afternoon last week with that age old question, “What’s for dinner?”. With my long commute, I knew it had to something quick and easy. A salad? stir fry? Quick pasta dish? As ideas popped up in my brain (including restaurant names), I heard Wes say, how about potato leek soup?

Crusty French bread, glass of wine, bowl of soup..I was all in.  But, silly, soup takes awhile…wait, hmmm.

Enter the Instant Pot.  I have made other soups in my IP.  Why not?  A quick Google search landed on quite a few recipes for Potato Leek in an Instant Pot. Why didn’t I think of this before?

Dinner is served

I saute’ the vegetables in the Instant Pot, added the stock, set the timer to 7 minutes and forgot about it until I heard the beep-beep-beep.  Finish with cream and garnish…DONE.  How easy is that?  Ahhh dinner on the table in less than an hour and only 1 pot to clean.  Perfect.

Instant Pot Potato Leek Soup

A delicious, quick and easy recipe for Potato Leek Soup made in your pressure cooker
Course Soup
Cuisine French
Keyword Instant Pot, Potato Leek Soup
Prep Time 15 minutes
Cook Time 15 minutes
Resting time 10 minutes
Total Time 30 minutes
Calories 244kcal

Ingredients

  • 1 Tbsp Olive Oil
  • 2 Tbsp Butter
  • 3 large Leeks white part only, cleaned and sliced into rounds(1/8")
  • 1 yellow onion diced
  • 2 cloves Garlic minced
  • 2 Tbsp Flour
  • 5-6 cups Chicken Broth
  • 1 Bay Leaf
  • 1 tsp Salt
  • 1/4 tsp White Pepper
  • 1 lb Gold Potatoes (4-5 spuds if using Yukon Gold, 3 russets) peeled and diced
  • 1/2 cup heavy cream or half and half
  • Garnish
  • Chopped Chives
  • Sour Cream
  • Anything your little heart desires

Instructions

  • Press the Sauté button on the Instant Pot. When hot, add the oil and butter.
  • Add the onion. Cook until soft, stirring occasionally, approximately 5 minutes. Try not to let it brown. Add leeks, cook for additional 3-4 minutes until the leeks are soft.
  • Add garlic and cook for about 30 seconds, until fragrant, stirring frequently.
  • Sprinkle the flour over the onion-leeks mixture and stir. Cook for a minute to get the raw taste out of the flour.
  • Stir in the broth. Be sure to dissolve the flour and scrape the bottom of the pot. The Instant Pot senses particles on the bottom and will shut off to prevent burning.
  • Add the bay leaf, salt, pepper, and the potatoes. Stir.
  • Put the lid on the pot and set the steam release knob to the Sealing position.
  • Press the Manual (or Pressure Cook) button, and the + or - button to choose 7 minutes. then forget about it until the timer goes off.
  • When the cooking cycle has ended, let the pot naturally release pressure for 10 minutes. Then manually release the remaining steam.
  • 10. When the pin in the lid drops, open it and stir the soup. Remove the bay leaf. Then use an immersion blender to puree it. If you don't have an immersion blender, you can use a blender, pureeing the soup in small batches very carefully.
  • 11. Stir in the cream or half and half.
  • 12. Taste and adjust salt, if needed.

Garnish with chopped chives, sour cream, bacon...just about anything you like, corn, shrimp, crab.

    Notes

    Blend soup just a bit leaving chunks of potatoes for a more rustic soup. Blend until completely smooth for a classic version.  Reserve part of the soup, before adding the cream, to freeze for a rainy day.  Rainy day instructions-heat soup slowly and add cream once it is warmed.  
    This soup serves as a wonderful base for a vegetable soup.  Add chopped spinach at the end and heat and stir occasionally until spinach wilts.   
    Use clam juice as part of the stock for a seafood twist.  Garnish with shrimp or crab. yummos.
    Rainy Day Eats: Braised Pork Belly ala Instant Pot

    Rainy Day Eats: Braised Pork Belly ala Instant Pot

    I am a sucker for rice bowls and noodle soups, especially when the weather turns cold and dreary. There is something comforting about eating out of a bowl. I love sitting by the window watching the falling rain and listening to the blustering wind while holding a bowl of deliciousness.  My Dad’s stew, my Mom’s won ton soup, spicy Thai curry or gooey mac and cheese all come to mind.

    Yep, living life one bowl at a time.

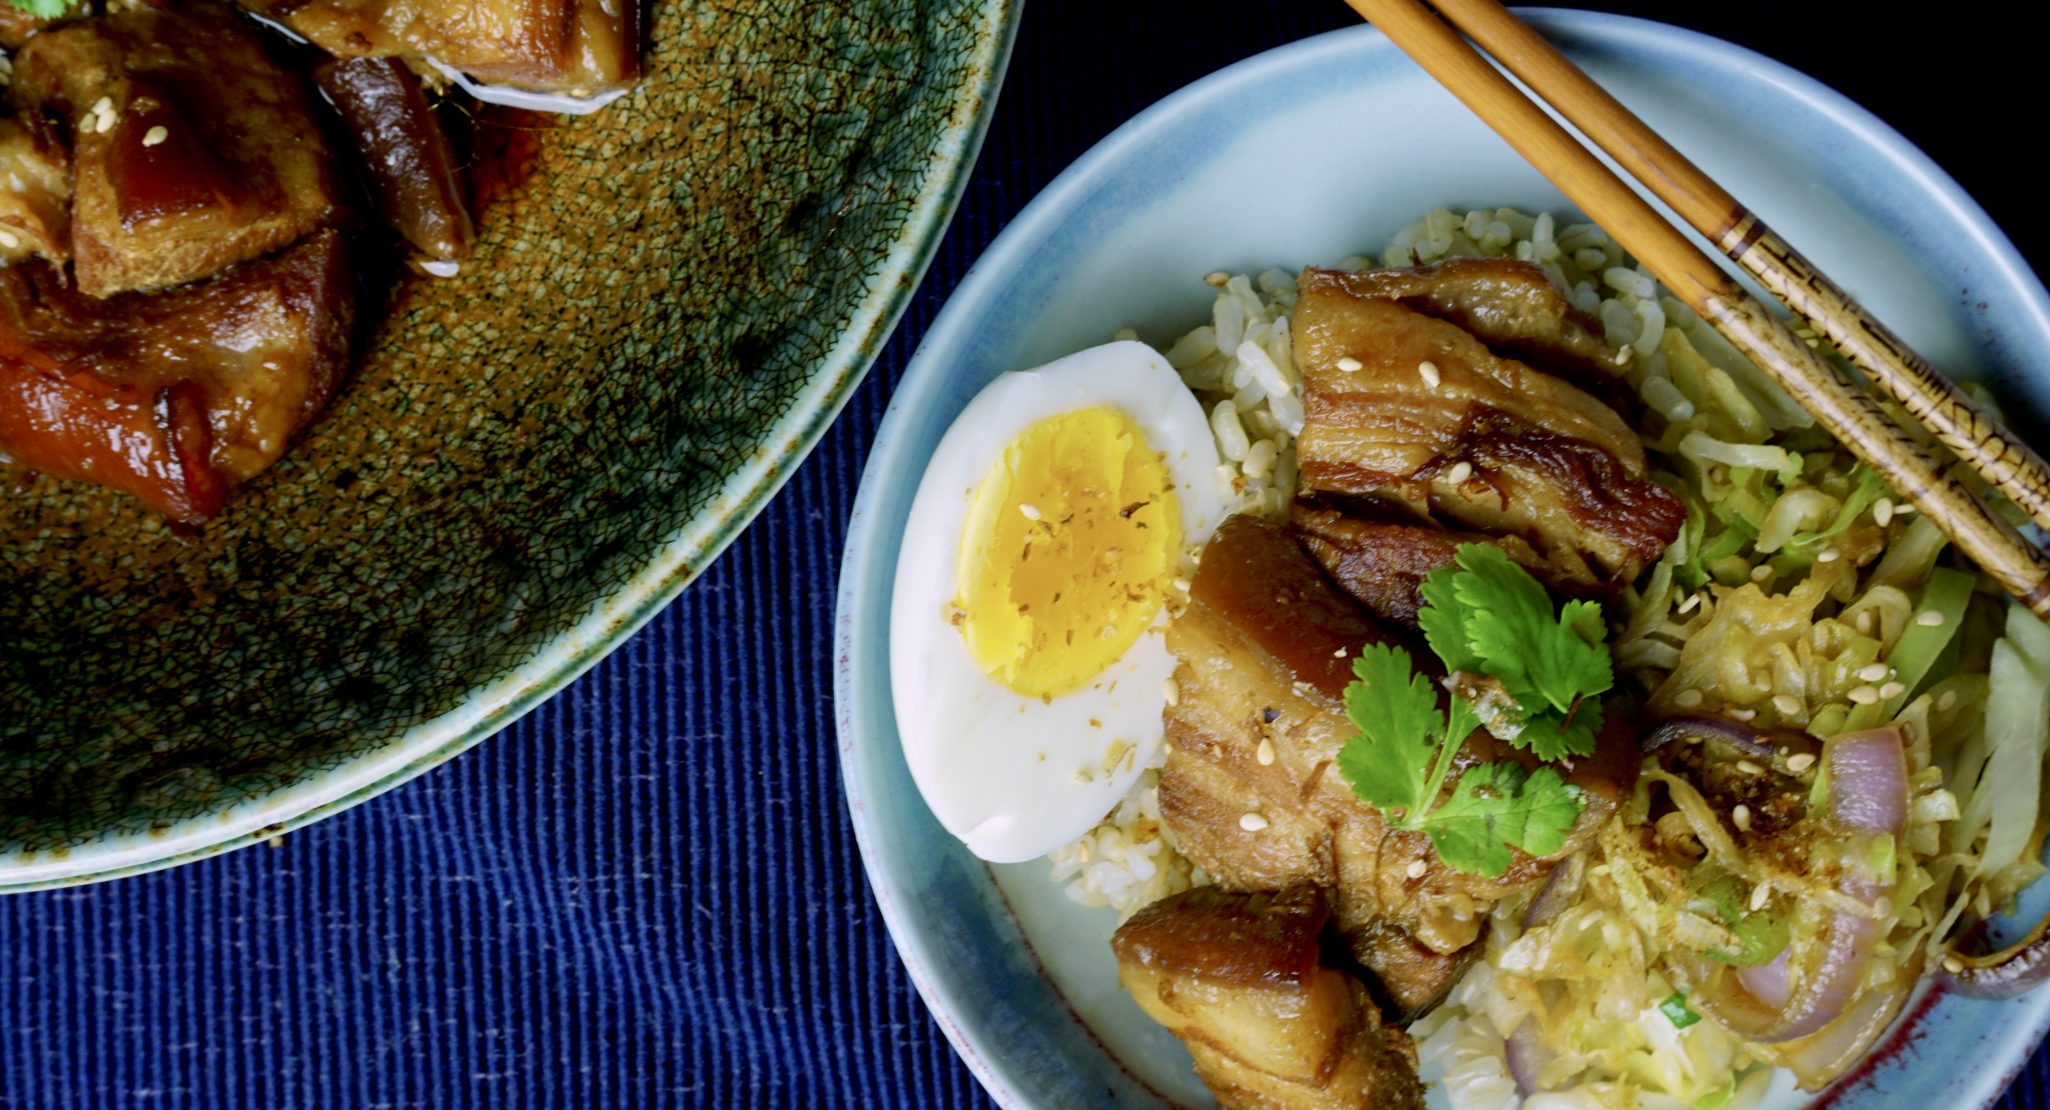
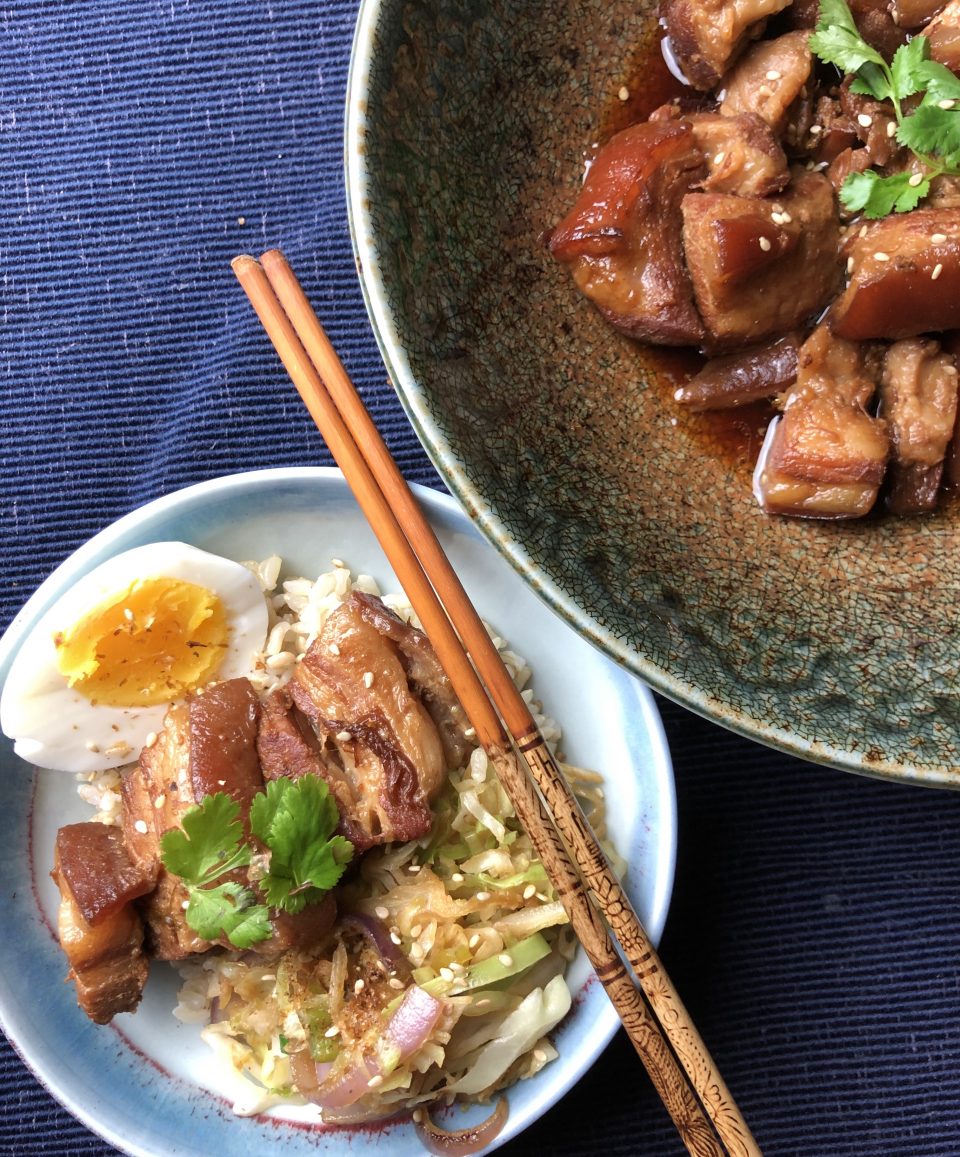
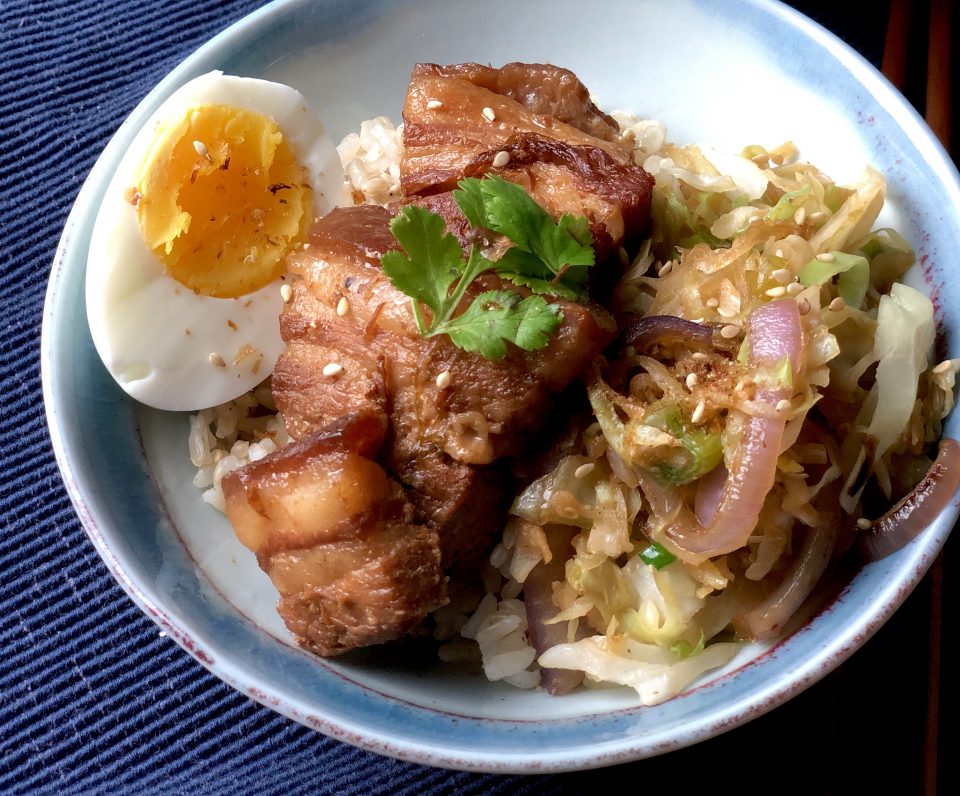
    Japanese braised pork belly, Buta Kakuni falls neatly into this scenario.  Simmered in soy sauce, sake and sugar, the pork becomes so tender it melts in your mouth and has that sweet salty flavor that I love.  It is rich and flavorful, so a little goes a long way.  Grab a good sized bowl, add a big scoop of steamy hot rice, lay 2-3 pieces of the pork on top and drizzle the braising liquid over it.  Serve with a ramen style soft boiled egg and vegetables.  Yep, a bowl of rockin’ goodness.

    Normally, this dish takes a couple of hours to make, but thanks to the Instantpot, you’ll be sitting down to eat in less than an hour.

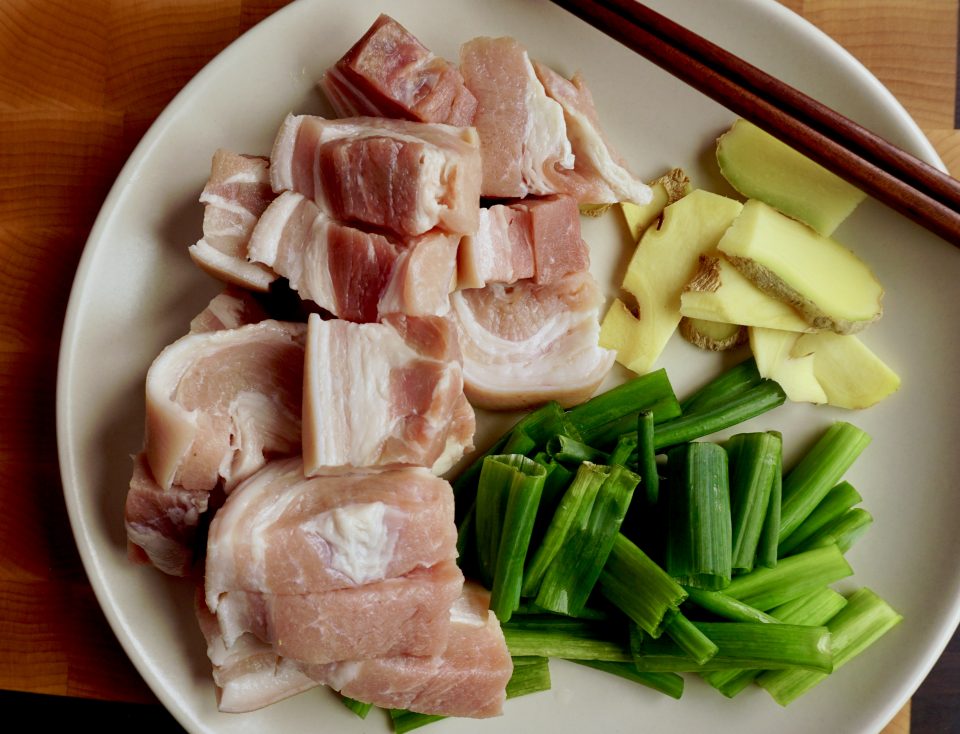
    pork belly ingredients

    This recipe is adapted from the blog Just One Cookbook, another favorite for Asian recipes. Slab pork belly can be found in most Asian markets or ask your butcher to save you a piece.  If time is tight, you can forego browning the pork, but I think it does add flavor and color.  Reduce the Mirin to 1/4 cup and increase the sake to 1/2 cup to cut the sweetness. The recipe calls for adding soft boiled eggs to the pork to finish cooking.  Instead, cool the braising liquid and put the peeled soft boiled eggs in to seep overnight a la ramen style eggs. Love oozy runny egg yolks.  Feel free to follow the recipe or try Serious Eats’s recipe for ramen eggs, both are delicious!

    This is classic comfort food.  I stir-fried some shredded cabbage and onions with the braising liquid as an accompaniment.  Another option is a super simple Asian Cucumber Salad. The crisp cucumbers provide a nice contrast to the soft pork. Plus, it’s nice to get some veggies in for a “well-rounded” bowl.

    Enjoy!

    PRESSURE COOKER PORK BELLY (KAKUNI)

    Braised Pork Belly in a fraction of the time with an Instant Pot.  Delicious with a bowl of rice or ramen. 
    Course Main Course
    Cuisine Asian
    Keyword Instant Pot, Pork Belly

    Equipment

    • Instant Pot or pressure cooker

    Ingredients

    • 3 green onions/scallions use only the green parts
    • 1 inch ginger
    • 1 Tbsp neutral flavor oil vegetable or canola
    • 2 lb pork belly block 2 lb = 907 g
    • Water for cooking pork belly
    • 4 soft/hard boiled eggs See Notes
    • Shichimi Togarashi Japanese seven spice (for taste, optional)
    • Chinese Mustard

    Seasonings

    • 1/2 cup sake 1/2 cup = 120 ml
    • ½ cup water ½ cup = 120 ml
    • 1/4 cup mirin 1/4 cup = 60 ml
    • ½ cup soy sauce ½ cup = 120 ml
    • ¼ cup sugar ¼ cup = 50 g

    Instructions

    • Cut pork into 1-inch pieces
    • Peel and cut ginger into slices.  Using the green part only, cut scallions into 2 inch segments
    • Switch Instant Pot to Saute' function and add oil to pot.  When the oil is hot, add pork and brown (3-5 minutes).  Add water to pot to cover the pork.  Add green onions and ginger to pot.
    • Cover Instant Pot and seal, make sure the knob is set to sealing.  Cancel saute' function and set function on stew/meat (35 minutes)
    • When the pork is finished, carefully vent to quick release pressure.  Drain pork.  Add seasoning ingredients to the Instant Pot and return pork to pot.  Add soft boiled eggs to pot unless seasoning them separately.  See notes.
    • Seal and set pot on stew/meat function and set time to 10 minutes.  When finished, quick release vent pot.  
    • Remove pork and eggs from pot. Taste the seasoning liquid, if it seems to dilute, set pot on saute' and reduce.  Reserve sauce for serving.
    • Serve pork and eggs over rice or ramen. Garnish with Shichimi Togarashi.  Drizzle sauce over rice and serve with mustard. Enjoy.

    Notes

    If you don't have Mirin, increase Sake to 3/4 cup and add 1 tablespoon sugar.  If you like a soft runny egg, do not put it in the Instant Pot to cook.  Cook your eggs separately. You can cool the cooking liquid and place the peeled soft boiled eggs in the liquid to seep for a couple of hours or overnight.  You do not have to seep the eggs.  You can serve the eggs in your rice bowl drizzled with the cooking liquid and sprinkled with seaweed seasonings (furikake) if you want.
     

    Instant Pot White Chicken Chili? Yes We CAN!

    Instant Pot White Chicken Chili? Yes We CAN!

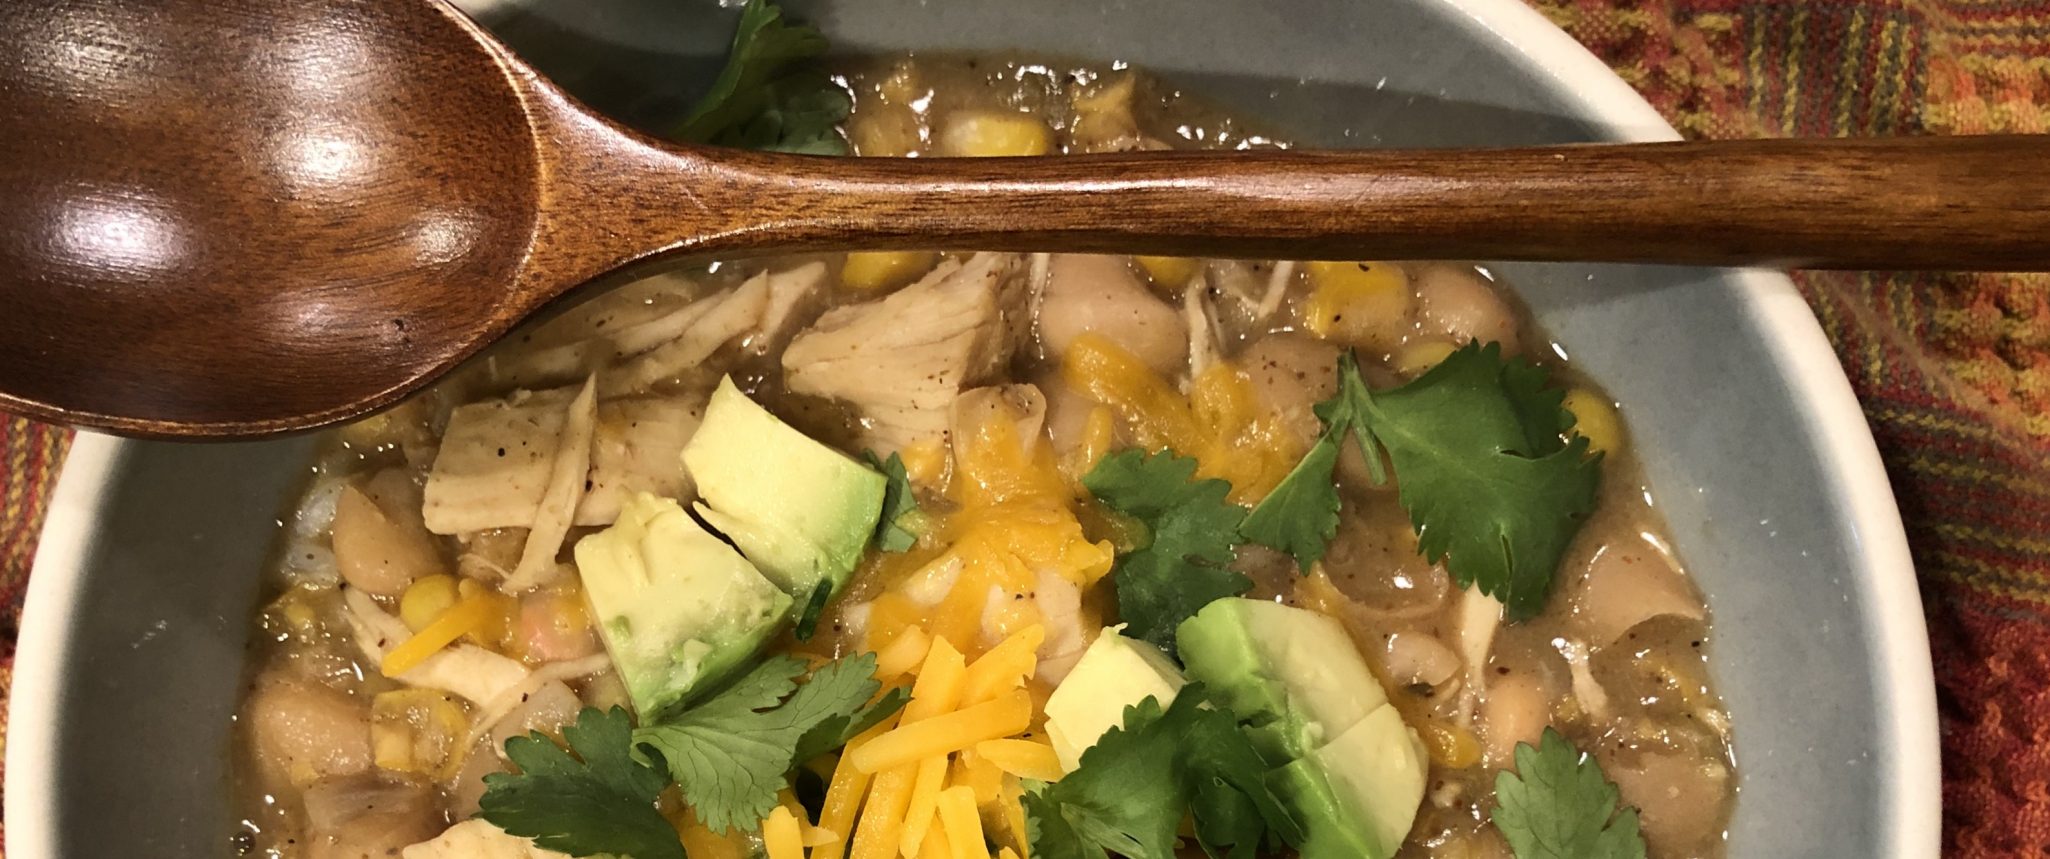
    Ramping up for the holidays?  Here is a recipe that is easy, delicious and thanks to your handy dandy Instant Pot, ready in minutes.  You will need, first and foremost, a can opener.  Yep, a can opener, indispensable. You’ll also need, chicken, white beans (can), chicken stock or broth (can), roasted peppers (can), corn (yes, a can) and spices. Everything except the chicken, you’ll need a can opener.  Stupid easy.

    I couldn’t let sleeping dogs lie, the original recipe from the blog Eat.Drink.Love. calls for onion powder and garlic powder.  I decided to use chopped onions and garlic cloves instead.  It adds a couple of minutes, but I like the texture and flavor of the onions and garlic.  Feel free to stick with the original if you like.

    This really is quick and easy, perfect for a busy weekday night.  Ready in minutes, good the next day, and very kid friendly.

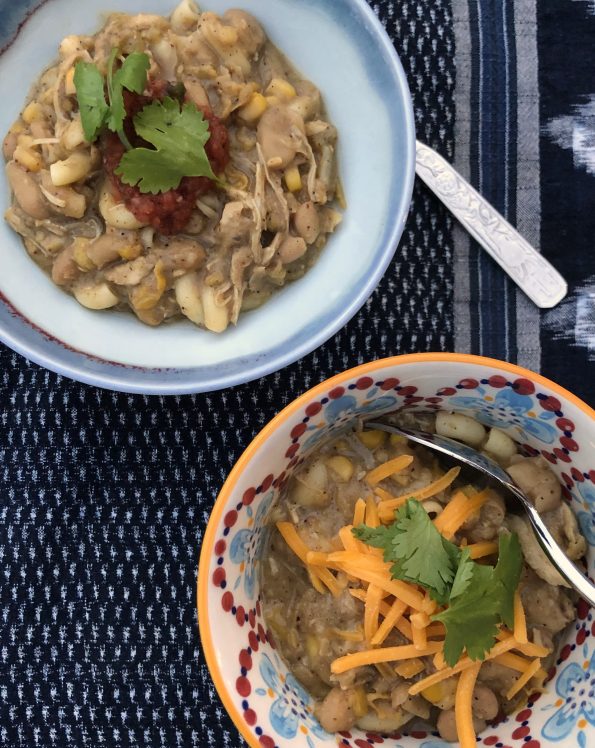
    The recipe calls for chicken breast, you can use thighs instead if you prefer dark meat.  Any white bean will work, Kidney, Great Northern, Navy or Cannellini.  The recipe calls for a can of corn, which I misread and thought it was a can of creamed corn. I went with it and I actually liked it.  It adds a bit of sweetness and creaminess to the chili.  Consider decreasing the broth if you use creamed corn.  I also added a finely diced jalapeño pepper to give the chili an extra kick.  If the sauce seems a bit thin at the end, remove chicken and continue to cook sauce on saute’ function to reduce to desired thickness then add the shredded chicken back to the pot.

    Between you and me, I love eating chili over macaroni or rice.   From Epicurious, favorite ways to eat chili.

    INSTANT POT WHITE CHICKEN CHILI

    Course Main Course
    Cuisine American
    Keyword White Chicken Chili
    Prep Time 15 minutes
    Cook Time 20 minutes
    Total Time 35 minutes
    Servings 4

    Ingredients

    • 1 1/2 pounds boneless skinless chicken breasts halved lengthwise
    • 2 15-ounce cans white navy beans rinsed and drained
    • 1 15-ounce canned corn, drained or 1 15 ounce canned creamed corn + 1 cup frozen corn
    • 1 4-ounce can roasted diced green chiles
    • 2 cups low sodium chicken broth 1-1/2 cups if using creamed corn
    • 3 teaspoons ground cumin
    • 2 teaspoons chili powder
    • 1/2 teaspoon garlic powder*
    • 1/2 teaspoon onion powder*
    • 1 teaspoon kosher salt

    *Substitute 1 chopped yellow onion and 4 cloves of garlic finely chopped

    • 1 jalapeno pepper seeded and veined, finely diced (optional)

    Toppings

    • shredded cheddar or jack cheese
    • diced avocado
    • sour cream
    • cilantro or sliced green onions

    Instructions

    • *If using onions and garlic, on saute', add 1 tablespoon oil to Instant Pot. Add onions and garlic and saute' until soft. Proceed with recipe, omit garlic powder and onion powder
    • Place the chicken into the pressure cooker.
    • Pour in the beans, corn, chiles, and the broth. Then stir in the seasonings*
    • Cover with the lid and set valve to sealing position.
    • Cook on poultry setting for 15 minutes followed by a quick pressure release.
    • Shred the chicken with a fork and serve with desired toppings.
    • Can add additional seasonings if desired.
    • Garnish with toppings, serve immediately

    Instant Pot Easy Kheema Pulao (Spicy Indian Rice Dish)

    Instant Pot Easy Kheema Pulao (Spicy Indian Rice Dish)

    Sometimes other events dominate your life for a bit…but I’m back!

    After weeks of knocking on doors to get out the vote, I was ready for some downtime.  I drove home from Bakersfield (four hours each way, ugh) and wanted to chill and enjoy some home cooked food.  As yummy as it is, (Wo)”Man”(me) cannot live on taqueria fare alone. I arrived home right around the dinner hour so I needed something quick and easy to make, but still comforting and delicious. I pulled out my Instant Pot, clicked on Ministry of Curry “Kheema Pulao” (think Indian version of a mixed rice dish) in my saved links, and voila’ 40 minutes later I was curled up on the couch, watching my favorite K-drama (Goblin), spooning hot, spicy pulao into my mouth.  Ahhh, my reward for doing my part to save Democracy…and that’s all I will say about that (thanks, Forrest).

    Kheema Pulao

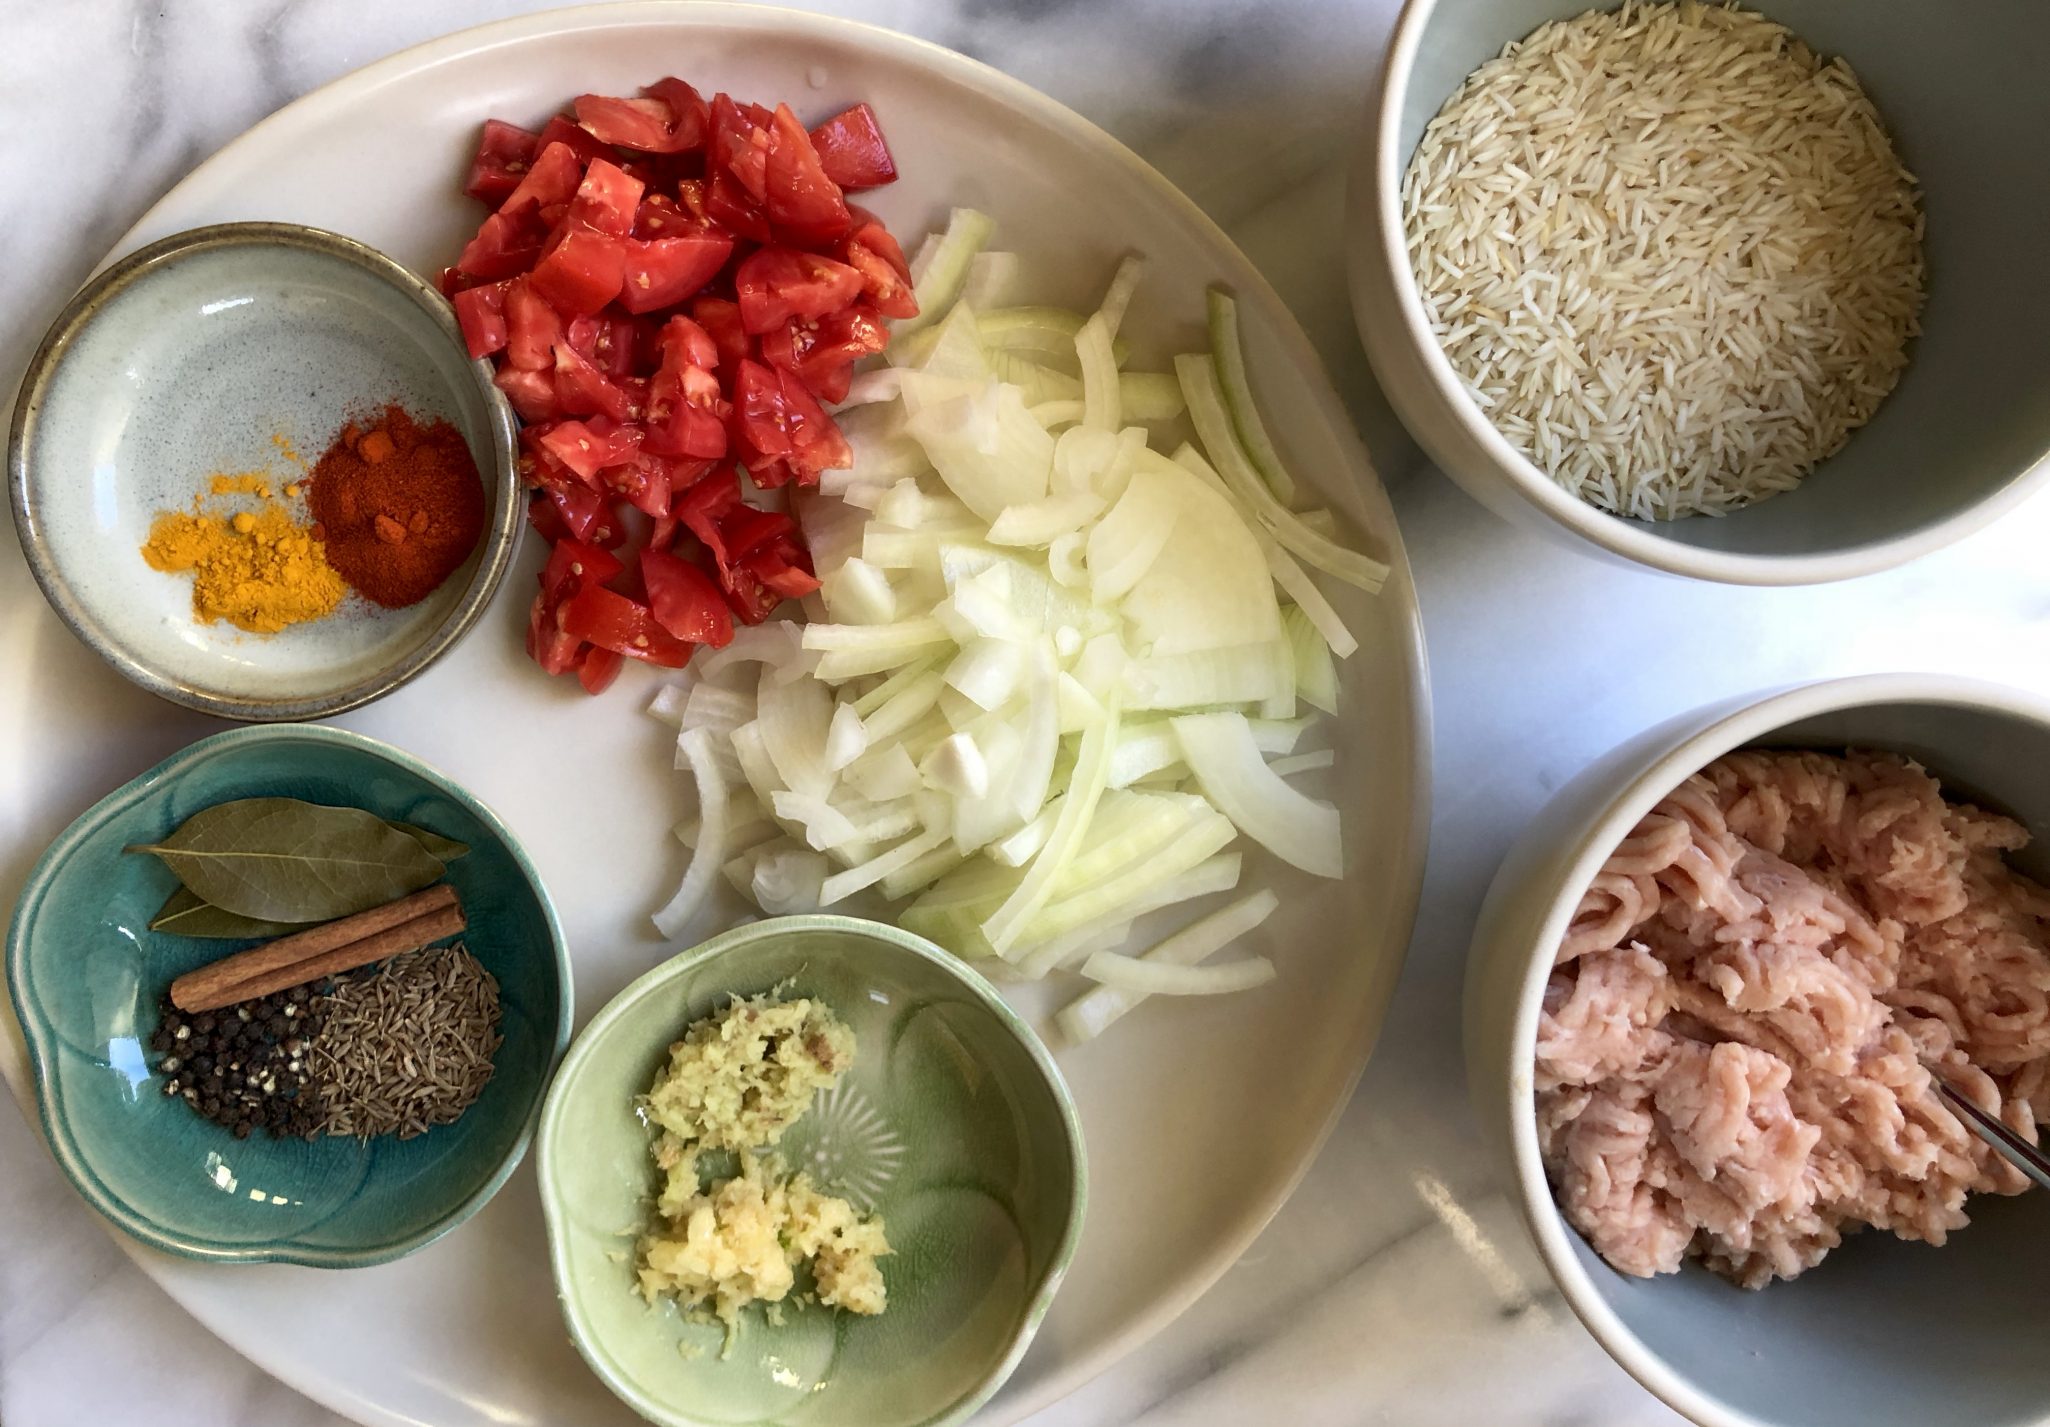
    I love Biryani, a spicy Indian Rice dish that is both complex in flavor and in preparation. That means going to a restaurant and letting them make it for me. My job is to enjoy every bite. On the other hand, pulao is a simple version of a biryani, easily made at home and delicious.  Vegetables, ground meat, aromatics, and spices are sauteed, then rice is added along with water or stock. A touch of sweetness from the cinnamon and onions, spicy from the ginger, garlic, and chili, then finished with cilantro and lime.  Welcome to Flavortown.  So good.

    Kheema means minced or ground, in this recipe, ground chicken is used but you could use turkey or beef.  The flavors are infused into the meat and the ground chicken cooks quickly, win-win.  The rate-limiting step would be the time it takes for the rice to cook which, ta-da, is shortened by using your Instant Pot, PLUS the entire dish is done in one pot…no muss, no fuss, I’m doing the happy dance now.

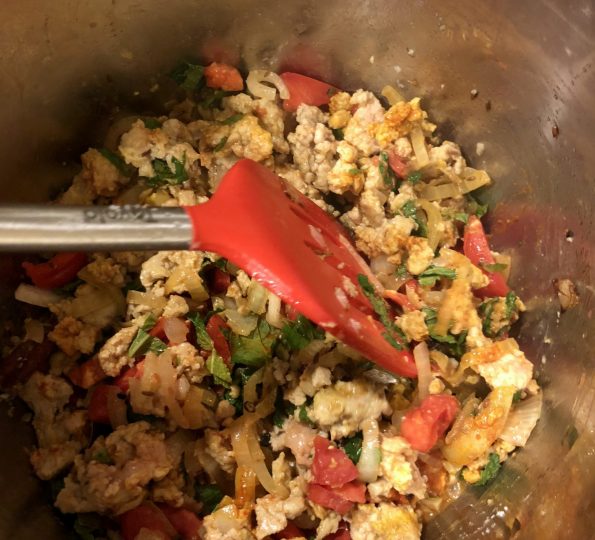
    Saute’ ingredients in the pot.


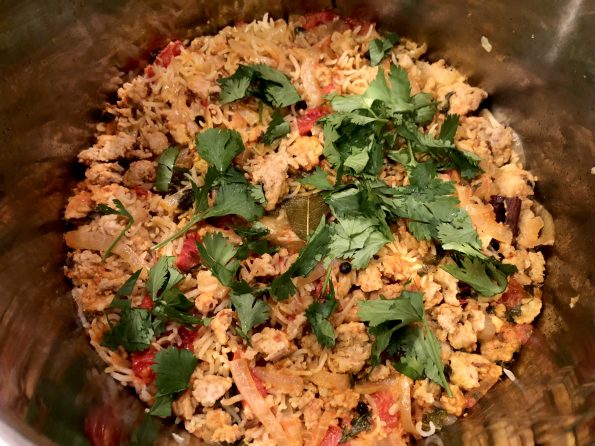
    Add liquid and rice, cover, seal, set for 5 minutes, wait 5 minutes then quick release and done.  How easy is that?

    Kheema Pulao finish

    Garnish with cilantro and lime to make it pretty.

    Add this to your things to make in my Instant Pot.  Really.

    Kheema Pulao

    A one pot meal made with long grain basmati rice cooked with ground chicken and a host of aromatics ginger, garlic, onions, bay leaves, black pepper, cumin seeds and cinnamon.  A flavor explosion. Adapted from Ministry of Curry
    Course Main Course
    Cuisine Indian
    Keyword Kheema Pulao
    Prep Time 15 minutes
    Cook Time 30 minutes
    Total Time 45 minutes
    Servings 4 people
    Calories 422kcal

    Ingredients

    • 2 tablespoons ghee
    • 1 teaspoon shah jeera or cumin seeds
    • ½ teaspoon black peppercorns
    • 2 inch cinnamon stick
    • 2 bay leaves
    • 1 medium onion thinly sliced
    • 1 teaspoon ginger grated
    • 1 teaspoon garlic grated
    • 1 pound ground chicken can use , beef or turkey
    • 1 tomato, diced
    • 1 teaspoon red chili powder
    • ¼ teaspoon turmeric
    • Handful of mint leaves chopped
    • 2 teaspoon kosher salt
    • 1 cup long grain Basmati rice
    • 1 ½ cups water

    Garnish

    • 1 lime
    • ½ cup cilantro chopped
    • 1 teaspoon black pepper freshly ground

    Instructions

    • Set the Instant Pot to sauté(more) mode and heat ghee. Add cumin seeds, black peppercorn, cinnamon and bay leaves. Saute for 30 seconds.
    • Add onions and sauté for 5-8 minutes or until the onions start to brown. Add ginger, garlic and chicken. Sauté, breaking the chicken and browning it for a minute. Add tomatoes, red chili powder, turmeric, mint leaves, and salt. Mix well.
    • Add rice and water. Gently mix making sure all the rice is under the liquids. Close the Instant Pot lid with pressure valve to sealing. Cook on Manual /Pressure cook (Hi) 5 mins with 5 min NPR.
    • Open the Instant Pot and gently fluff the top rice (Note, if the rice looks uncooked on the top, just mix it with the rice under and close the Instant Pot for 5 minutes)
    • If rice seems a little wet, let it sit for a couple of minutes, top open.
    • Add lime juice, cilantro and black pepper. Turn the Instant Pot off and take the insert out so the rice does not overcook or get mushy. Enjoy hot.
    Instant Pot Easy Jook (Rice Soup) Soul Food Breakfast

    Instant Pot Easy Jook (Rice Soup) Soul Food Breakfast

    Last weekend Jamie played her version of NYT’s 36 Hours. We picked her up at the airport (SFO NOT SJC, grrrr) at 1:00 am Friday night (ok Saturday morning, delays) and dropped her off Sunday at 11:00 AM.  Her first words upon seeing her bleary-eyed parents? DID YOU BRING MY SUSHI WITH YOU?  I AM STARVING!  Lucky we like her.

    Happy Hour Any Hour

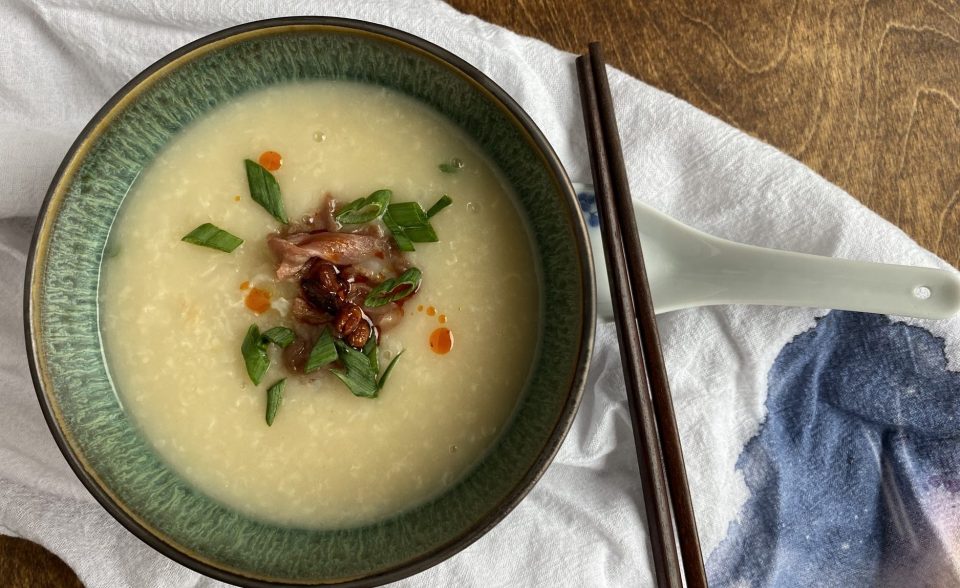
    With Jamie coming home, the call went out for a happy hour, which, due to schedules, morphed into a Saturday morning breakfast happy hour.  Any time of day is Happy Hour when it involves friends, food, and fun.  It just means tweaking the menu that’s all. We decided on a bowl of fresh strawberries and summer peaches, Belgium Waffles, candied bacon, Jule’s Granola and yogurt.  Jamie chimed in with “I want Jook (rice soup) too”  Rice Soup is soul food, comfort food, each bite reminds one of being home.  With its addition and the various toppings like shredded chicken, assorted sweet and salty pickles, and slivers of green onions to go along, our breakfast menu was complete.

    A small stumbling block to this plan, who was going to make Jook (Rice Soup) in the morning? Ugh, the last thing I wanted to do was get up early after a late-night airport pickup.  Then it hit me, hello…you have an INSTANT POT, Deb.  A quick Google search yielded plenty of recipes so I decided on a mash-up of my Dad’s Jook and a couple of Instant Pot recipes I found online.  Yay, I’ll get forty winks and have rice soup ready for breakfast.

    Jook in an Instant Pot is so stupid easy it’s a crime.  Saute a couple of slices of ginger in the Instant Pot add the washed rice, give it a few good stirs, add skinned chicken drumsticks, fill the pot with water and seasonings, seal it and set the timer for 20 minutes. That’s it.  Jook Time.  If you have chicken stock, use it for an extra rich and flavorful soup.

    I have a confession, if I don’t have homemade stock or even low-sodium commercial chicken broth, I’ll add a tablespoon of a chicken stock base such as Better Than Boullion, or Chicken Powder by LKK or Knorr (a Chinese kitchen staple) just to kick it up a notch.  It’s not necessary but it will add some depth of flavor.  The soup will look thin when you first take off the lid.  Stir it a couple of times to combine the rice and stock, hit the saute’ function, and bring it to a boil. Cook for an additional 5-10 minutes or until the Jook is the consistency you want.

    *Notes from a Thanksgiving Table

    My favorite post-Thanksgiving meals aka “What to do with your leftovers”.

    Turkey Rice Soup (Congee or Jook)

    DON’T THROW AWAY THE BONES AND CARCASS. 

    Get out your stockpot (or any really, really big pot).  Throw the carcass, wings, drumsticks (sans stuffing) in and fill with water. Add a smashed chunk of ginger (2-inch piece) 1/2 cup of rice wine, a bunch of scallions, a large pinch of salt and bring it to a boil.  Once it boils, reduce heat to a nice energetic simmer.  Cover and fuggetaboutit for a couple of hours.  You will end up with liquid gold to make any delicious soup you want.  For a non-Asian bent, omit ginger and scallions and throw in carrots, celery, yellow onions instead.  But honestly, it doesn’t matter, you could make jook with either stock.

    I do make the stock separately so that I can strain the stock and remove all those little nasty bone fragments and seasoning vegetables.  They have all done their job and can now exit stage left.

    The stock will keep in the fridge for about a week or longer in the freezer.

    Now go back to the top or to the bottom for the recipe on how to make jook….you’ll thank me, so so good.

    Hello….Turkey Sammies a la Dagwood style which means all your Thanksgiving leftovers in between two slices of bread.  Yep, turkey, stuffing, cranberry sauce, gravy, and a couple of slices of cheese from the appetizer plate.  Don’t forget the leftover greens from the salad no one ate because WHO eats salad on Thanksgiving-puulease.  Oh man-so good.

    Instant Pot Chicken Congee Recipe (Jook)

    Jook or congee, the ultimate comfort food, when its cold outside, when you have a cold, anytime.
    Course Soup
    Cuisine Asian, Asian-American
    Prep Time 10 minutes
    Cook Time 20 minutes
    Total Time 45 minutes
    Calories 140kcal

    Ingredients

    For the Soup:

    • 1 cup long grain Jasmine rice honestly you can use any kind of rice, long, medium or short grain
    • 1.5 Tsp vegetable oil
    • 3 Slices thinly sliced fresh ginger size of quarters
    • 1 tsp salt
    • 3-4 skinless chicken drumsticks or thighs or 2 whole chicken legs, can also add pork such as pork butt 2-3 2 inch pieces
    • 8 to 10 cups water, fill to the 10-cup mark on your IP or use stock and water 1:1
    • 1/8 cup rice wine
    • 1 tbsp Better Than Bouillon (optional) Skip if you are starting with stock

    At the Finish Line

    • 2 tsp sesame oil toasted, Asian sesame oil
    • 1/3-1/2 cup scallions-sliced on the bias garnish
    • 1/8 Cup finely shredded fresh ginger garnish
    • Salt and pepper to taste preferably white pepper

    Instructions

    • Wash rice. Add the rice to a bowl, and add enough water to cover the rice. Swirl the rice around. Drain and repeat a few times until the water is clear. Let drain and dry.
    • Turn on Instant Pot with Saute function.  When hot, add 1 -1/2 teaspoon vegetable oil and ginger.  Saute for 30 seconds, add rice and 1 teaspoon salt.  Stir to coat rice with oil approximately 1 minute.
    • Add chicken pieces, bouillon, and rice wine to the pot . **If you are in a rush or feeling lazy, skip sauteing the rice and ginger.  Just throw them into the pot, fill with enough water until it reaches the 10 cup mark in the Instant Pot.
    • Turn off saute, close the lid and make sure the knob is on "Sealing". Choose the "Porridge" button and set the time to 20 minutes.
    • While congee is cooking, shred ginger and slice scallions and place in small bowls for serving.
    • When the time is up on the timer, turn the Instant Pot off. Wait 15 minutes natural release before turning the knob from 'Sealing' to 'Venting'. Rice soup tends to splatter a lot, do not do a quick release.
    • Remove the chicken from the pot, when it is cool enough to handle, shred the meat and discard the bones. If the jook seems thin, turn saute' function on (without the lid on) and cook until desired consistency.  If it is too thick, add water or broth.
    • Add the chicken back into the congee or put it in a bowl and let folks add at the table. Taste, add salt if necessary.
    • Ladle into bowls and top with desired amount of ginger, white pepper, sesame oil and scallions. Let folks add their own.

    Toppings and Fixins'

    • My Dad's Jook calls for potatoes, I love them in my soup. Any kind of potato will work, peeled and quartered for large potatoes. Add at the same time as the chicken when making the soup.
    • For meatballs, follow instructions under Dad's Jook. This can be added at the end after pressure cooking.  Remove lid and press saute function.  When the rice soup comes to a boil, add meatballs and cook until done 2-3 minutes.
    • Additional toppings include cilantro leaves, fried garlic slivers, shredded fresh ginger, salted peanuts, shredded lettuce (iceberg works well)...the list goes on. Anything you eat with rice can be added.  NO Rules!
    Asian Bolognese “Zha Jiang Mian”

    Asian Bolognese “Zha Jiang Mian”

    When I lived in Los Angeles my favorite place to eat was a tiny dumpling shop in Chinatown.  Before entering I would stop and watch the woman in the window folding dumplings, it was mesmerizing.  She would roll the dough into a long rope, deftly cut it into pieces and then with a small rolling pin, flatten each piece into a thin round disc.  A spoonful of filling plopped in the center of the wrapper, a couple of turns, and a perfectly pleated potsticker was born.

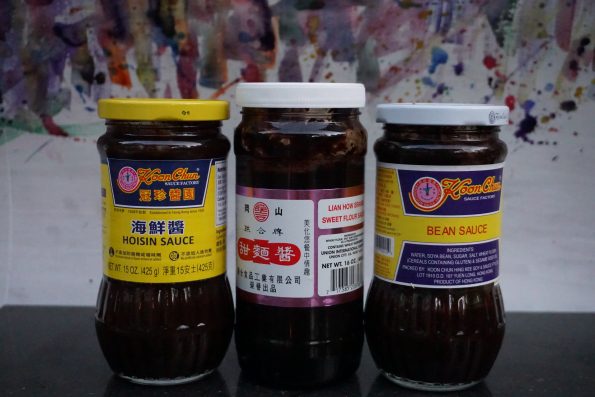
    Bean Sauce
    Hoisin-sweet sauce, Sweet Bean flour is a bit more pronounced in flavor, Bean Sauce is salty with a fermented flavor-umami central. If you don’t have an Asian market near you, I have posted product links in the 3Jamigos Shop for Hoisin Sauce and Bean Sauce-but it would be WAY cheaper at an Asian market!

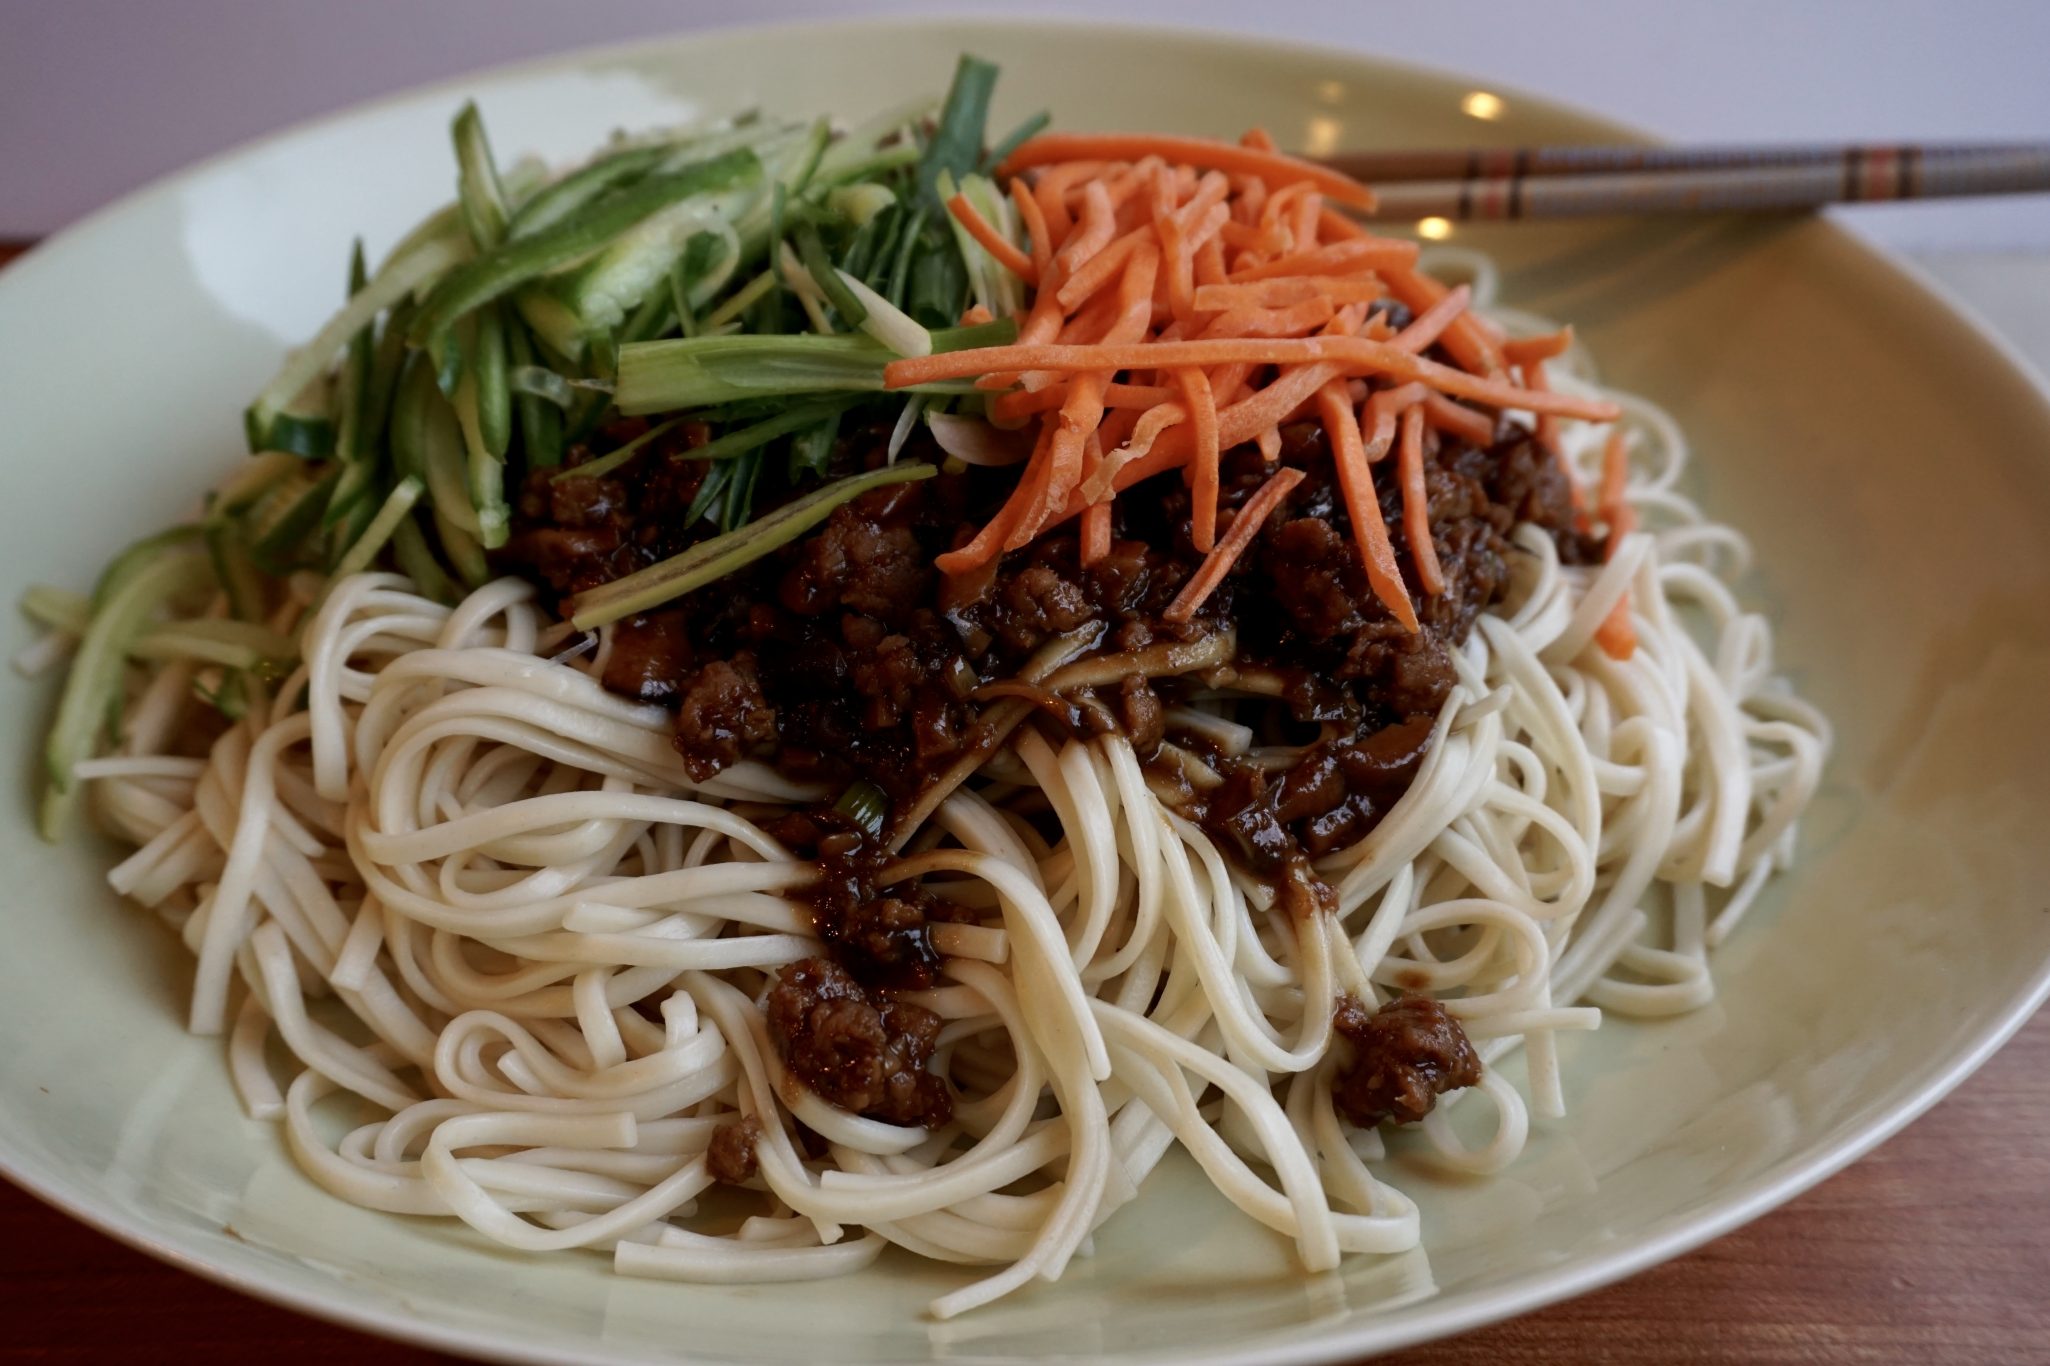
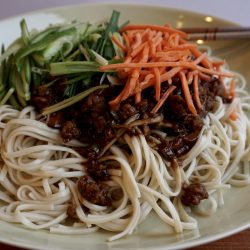
    As delicious as the dumplings were, I actually went for the noodles. Their Zha Jiang Mian was “drop the mic” delicious. The literal translation is fried bean sauce noodles.  Stir fry ground pork or chicken with shiitake mushrooms, garlic, ginger, sweet bean paste, and ground bean sauce-throw in some water and simmer.   Toss with the warm noodles and top with slivers of green onions, crisp carrots, and refreshing cucumbers, it is really yummy.

    If a celestial chef decided to create the perfect bowl of noodles-this would be in the running.

    Beijing Meat Sauce Noodles

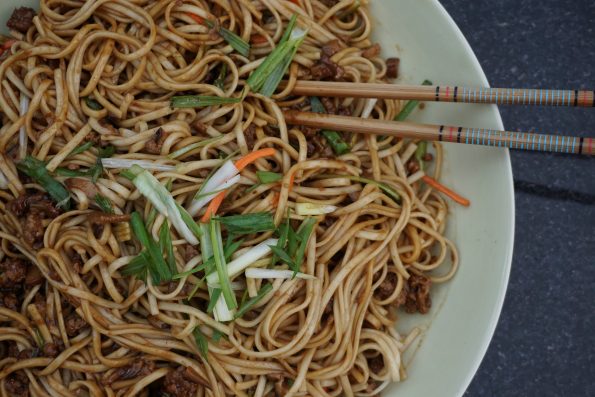
    My quest to make my own perfect bowl of noodles started with the recipe on the blog “The Woks of Life” (mom, dad & 2 sisters blogging from different parts of the world, check it out). The recipe calls for ground bean sauce and either sweet flour sauce or Hoisin. I like Zha Jiang Mian with a touch of sweetness so I used Sweet Bean Paste and Hoisin with the Bean Sauce.  Stir fry the pork, seasonings, and mushrooms and add  water to create the sauce. Reduce the sauce until it has thickened and has a nice sheen.  Pour over noodles, add your veggies, dunzo. A little bowl of goodness ready to eat. Sadly, the little shop is gone and it’s a long drive to LA just for noodles anyways.  It’s a good thing I can  make my own Zha Jiang Mian.

    Zha Jiang Mian

    Zha Jiang Mian 2 Ways

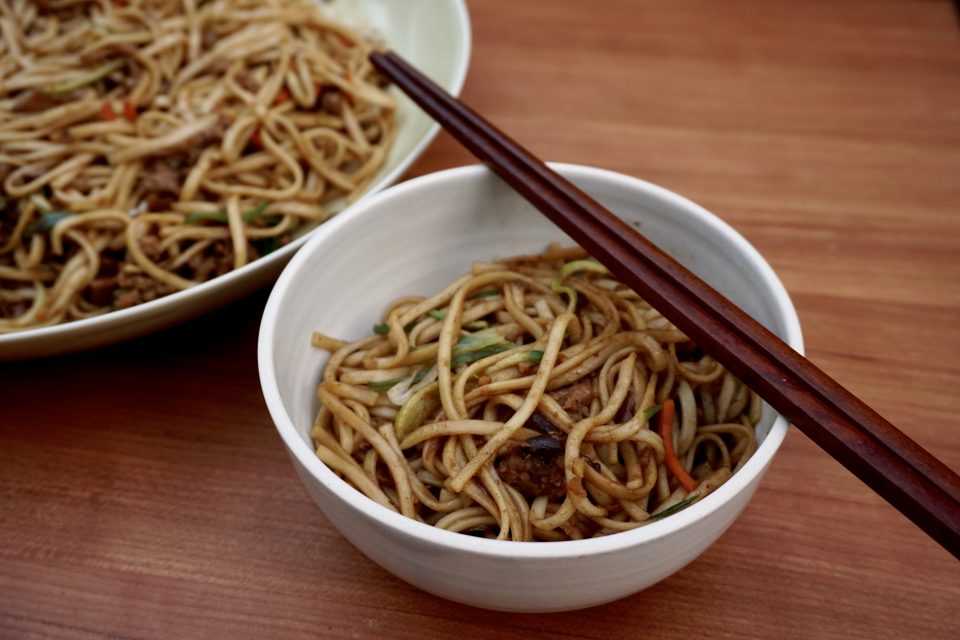
    Zha Jiang Mian Korean style and Chinese Style, both delicious!
    Course Main Course
    Cuisine Asian
    Keyword Zha Jiang Mian
    Prep Time 10 minutes
    Cook Time 20 minutes
    Total Time 30 minutes

    Ingredients

    • 6 oz. ground pork
    • ¼ teaspoon salt
    • 1 teaspoon cornstarch
    • ½ teaspoon oil plus 1 tablespoon
    • teaspoon white pepper
    • 3 slices ginger minced finely
    • 4 cloves garlic minced
    • 2 tablespoons sweet bean sauce I used 2 T Hoisin/1 T Sweet Ben Sauce
    • 3 tablespoons ground bean paste Reduce to 2 T
    • 1 tablespoon dark soy sauce
    • 1 cup water
    • 8 oz. fresh noodles flour-based noodle. Fresh or dry. I've used udon and a combination of spinach and plain

    Additional Chinese Ingredients

    • 4-6 fresh shiitake mushrooms* finely chopped
    • 1 cup julienned carrots
    • 1 cup julienned cucumbers
    • ½ cup julienned scallions garnish

    Additional Korean Ingredients

    • 3 fresh shiitake mushrooms diced
    • 1 medium Yukon Gold Potato* 1/2 inch dice for Korean version
    • 1 small zucchini 1/2 inch dice for Korean version
    • 1/2 cup carrots 1/2 inch dice for Korean version
    • 1/2 small yellow onion diced
    • 1/4 head cabbage shredded, optional
    • 1/2 cup green onions chopped
    • 1/2 cup cucumbers diced

    Instructions

    • Marinade the pork with the following for 15 minutes: ¼ teaspoon salt, 1 teaspoon cornstarch, ½ teaspoon oil, ⅛ teaspoon white pepper.
    • Heat a tablespoon oil in your wok over medium heat, add the marinated ground pork to the wok. Cook for a minute to brown it, and then add the ginger, garlic, and mushrooms* Stir fry everything together for another 2-3 minutes.
    • **Add the Hoisin, sweet bean sauce, bean paste, dark soy sauce, and water, stirring everything together well. Lower the heat and cover the wok. Simmer the sauce for 15-20 minutes, stirring occasionally to prevent sticking.
    • Meanwhile, cook the noodles according to the package directions.
    • Top noodles with the sauce and garnish with the julienned carrots, cucumbers, and scallions.

    Korean Style*

    • Stir fry pork, ginger, and garlic for 30 seconds add diced vegetables.  Stir fry for 2-3 minutes. Continue with recipe**
    •  If you like, add shredded cabbage in the last couple of minutes of cooking.  
    • Place a mound of noodles in your bowl, top with sauce and garnish with cucumber and green onions.  Plop yourself down in front of the telly and enjoy!