Category: Bowl Food Soul Food

Taiwan Turkey Rice, 嘉義火雞肉飯 Deliciousness in a Bowl

Taiwan Turkey Rice, 嘉義火雞肉飯 Deliciousness in a Bowl

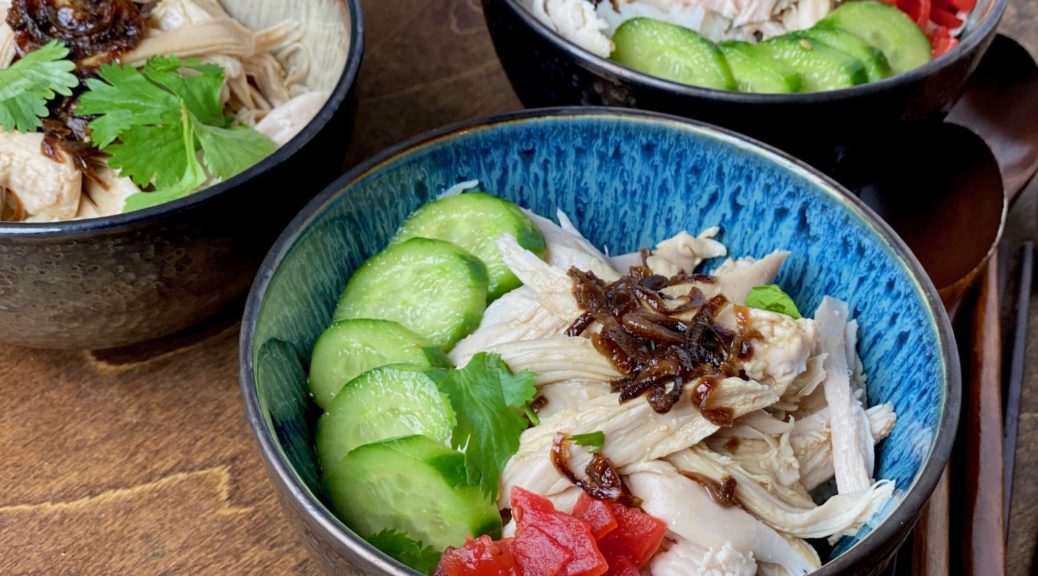
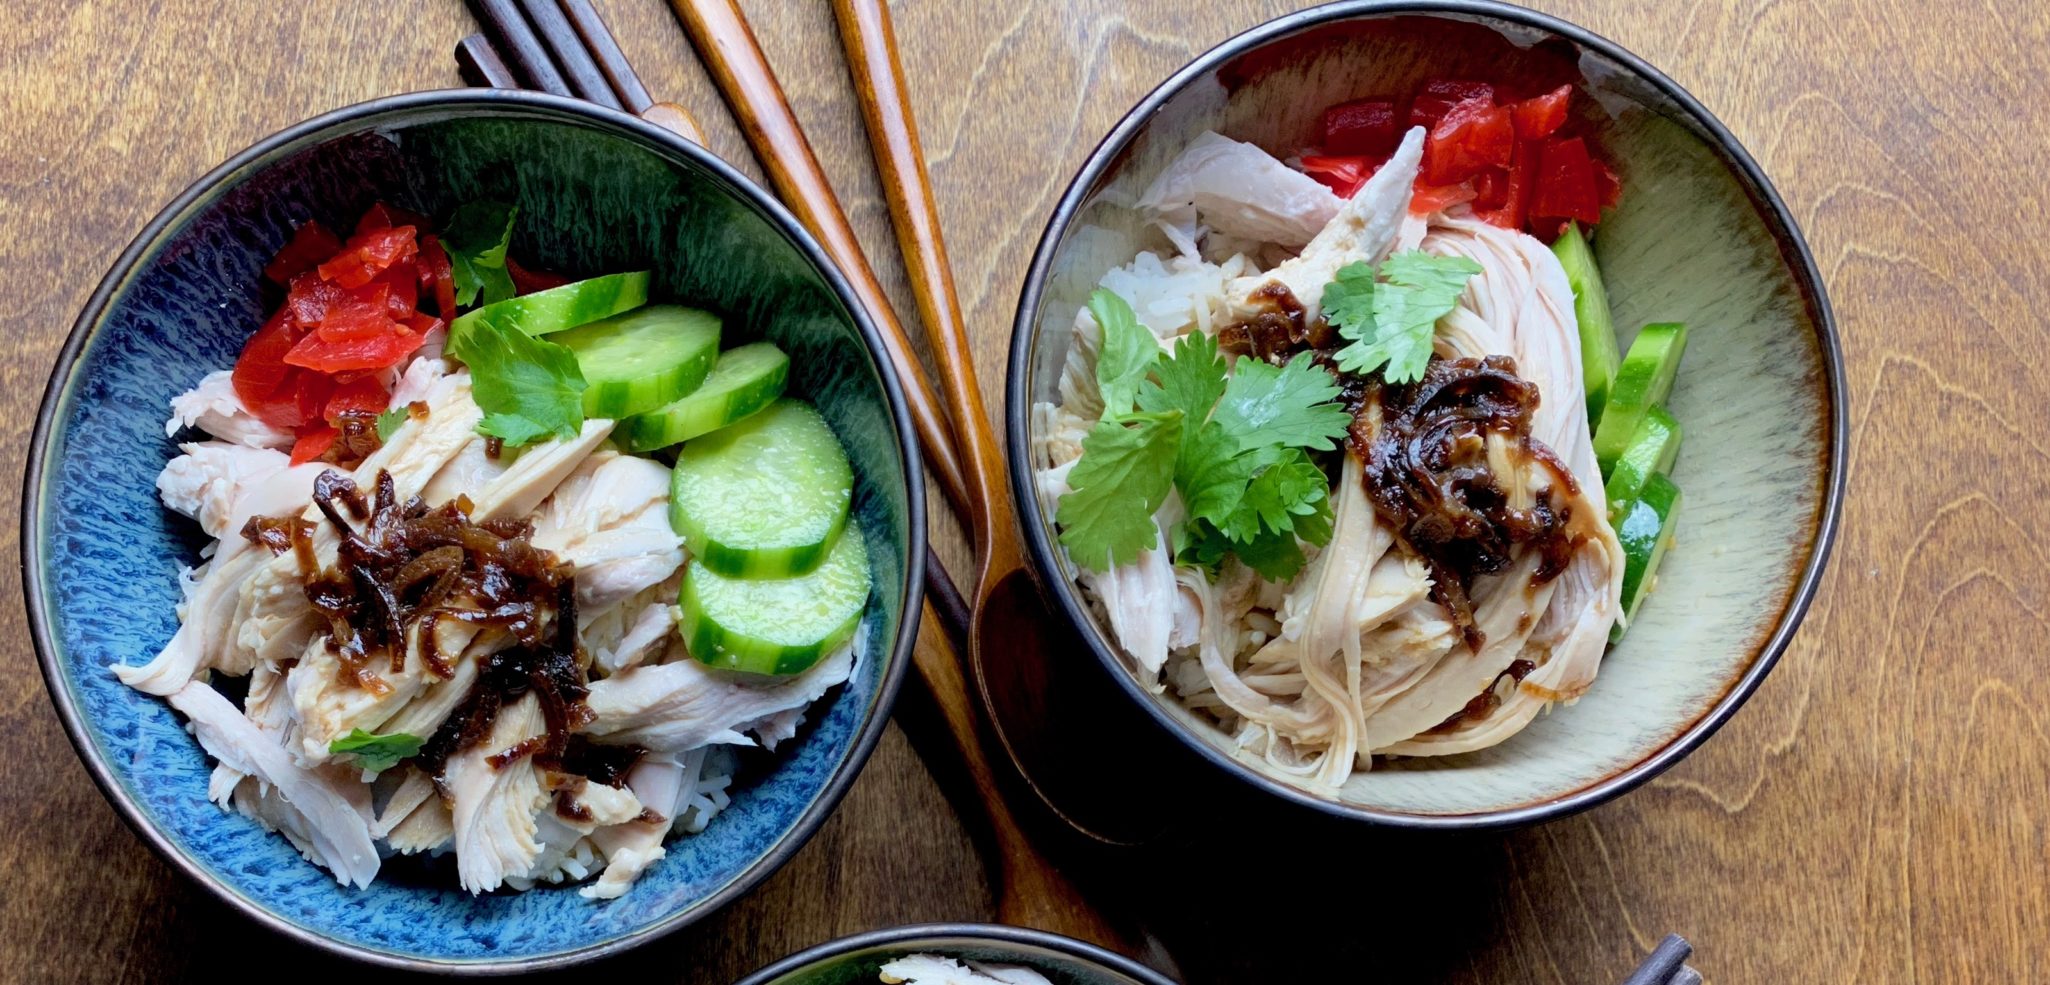
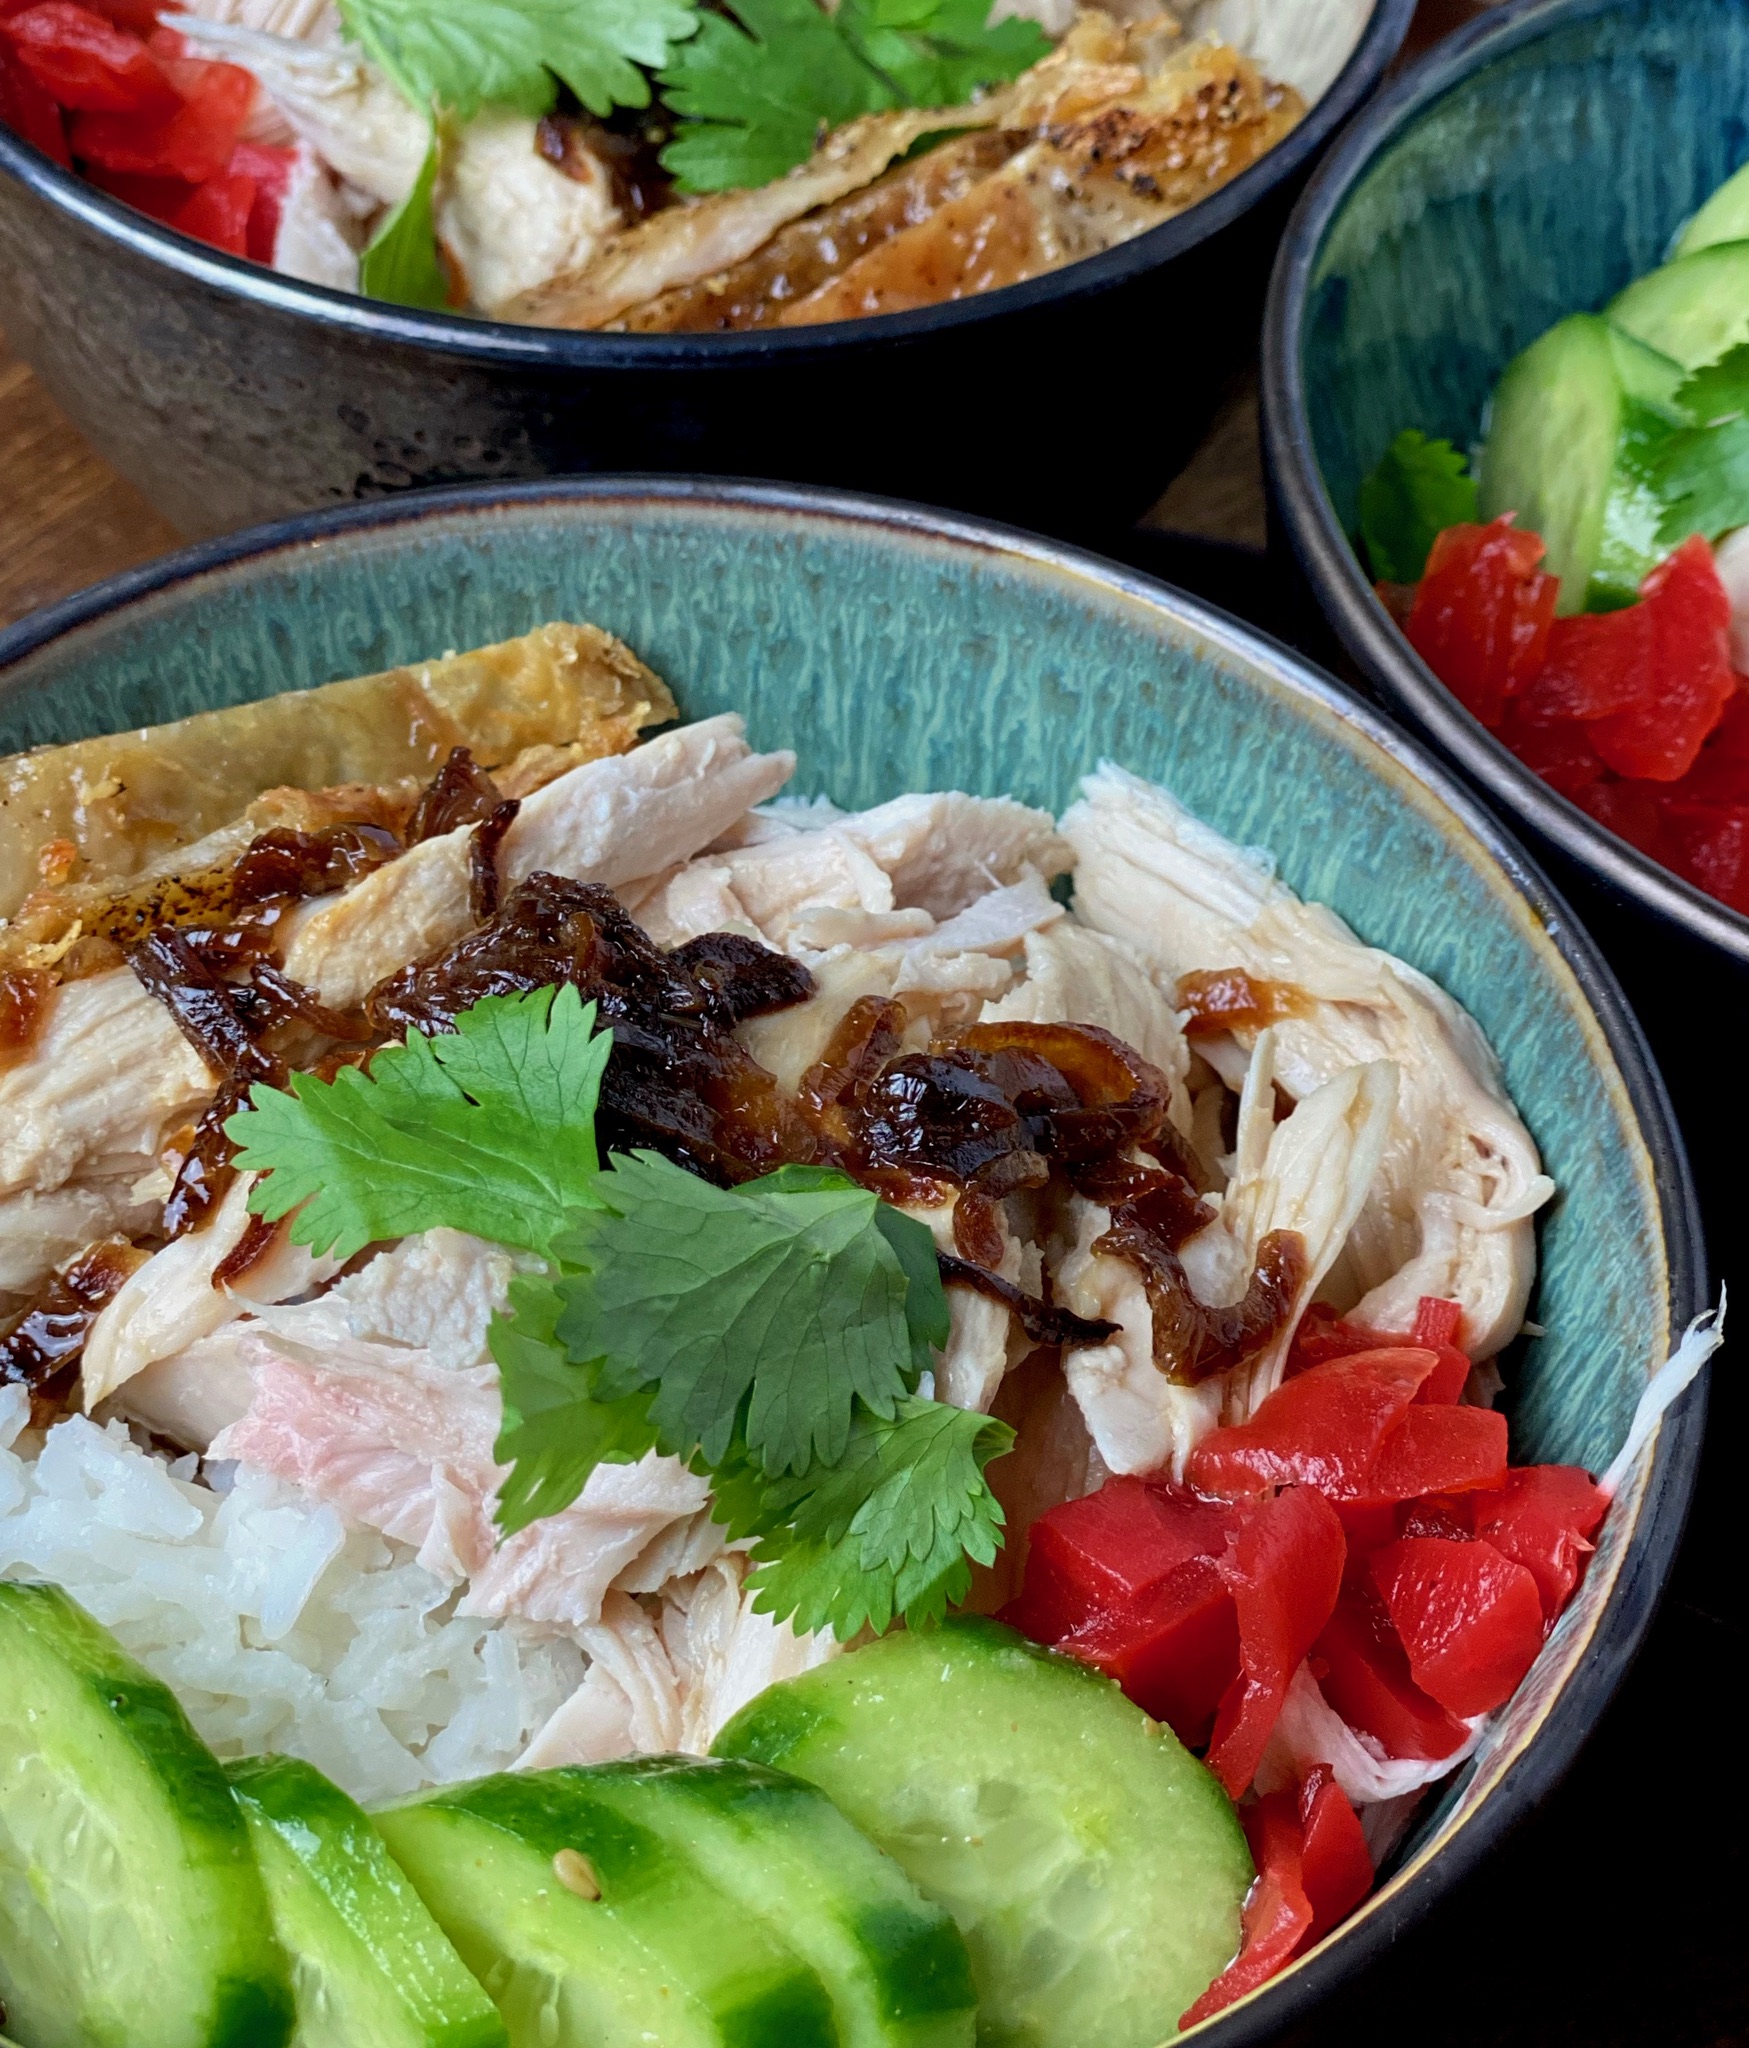
Only a couple of weeks have gone by since Thanksgiving and I have turkey on the brain, again!  Not that I didn’t get my fill of turkey on Thanksgiving but this dish caught my eye as I was roaming around the food-sphere looking for Thanksgiving ideas, Taiwanese Turkey Rice.  What?  Maybe it’s like rice soup? Nope, it is a bowl filled with rice, topped with succulent shreds of turkey, dressed with a soy sauce, fried shallots, turkey dripping emulsion and served with Asian pickles.  Damn, doesn’t that sound delicious?

SIGN ME UP NOW

I was drooling.  If you have perused my IG or blog for recipes you may have noticed that I LOVE one bowl meals like soups and stews.  My comfort zone is curled up on the couch, spoon in hand and a bowl in the other, filled with either rice or noodles topped with anything yummylicious…like THIS.

I did a bit of sleuthing for  this dish.  Turkey is not something you find in the Asian food vernacular.  It turns out, Taiwanese Turkey Rice (嘉義火雞肉飯) hails from southern Taiwan, specifically Jia Yi.  It is a super popular street food and turkeys are grown specifically for this dish.  Originally the turkey was shredded as a garnish for the classic dish, Lu Rou Fan, 魯肉飯, Stewed Pork over Rice, but folks liked the turkey so much, they started making it without the Stewed Pork, thus Taiwanese Turkey Rice was born.

Turkey Rice is similar to Hainan Chicken Rice or Thai Chicken and Rice.  The flavor profile of the sauce sets it apart though, oh yeah, and the turkey, but in a pinch you could use chicken for this dish.  I decided to cook the turkey ala Hainan Chicken style. The turkey is poached so you end up with moist succulent meat plus the stock which serves as the basis for the sauce.  There are a plethora of recipes out there right now that take advantage of turkey leftovers to make this dish including this one from Serious Eatsbut I wanted the real deal so I started with uncooked turkey breast.

Two blogs jumped out and served as the basis for info and recipe for Taiwanese Turkey Rice, Choo Choo-ca-Chew  and The Food Dictator.  A wealth of information and great recipes.

The Turkey

I started with a turkey breast, well, half of a turkey breast and poached it, just like Hainan Chicken.  The poaching liquid is seasoned with salt, ginger, scallion, rice wine and Better Than Bouillon Chicken Base (game changer).  If you have a box of turkey stock from TJ’s, use that and water for a more flavorful stock.  (I think their turkey stock is better than the chicken stock in a box.

When you buy your turkey make sure the skin is still attached***  Remove the skin at home and reserve. Drop the turkey into the boiling poaching liquid (ok, don’t just DROP it, gently place…to avoid 3rd degree burns).  Bring the stock back to a boil and turn the heat down so the stock is simmering.  Cover and let simmer for 10 minutes.  Turn the flame off, NO PEEKING, and let the turkey sit for 25 minutes undisturbed.  Think of it as a spa day for the turkey.  Once it is done take it out of the pot, let it sit until it is cool enough to handle.  Remove meat from bone and shred into bite size pieces.  Reserve in bowl and cover to keep warm.

Gimme Some Skin***

A trip to Minneapolis, back before the time of COVID, we caved into Wes’s penchant for Caesar Salad at the Butcher & The Boar (sadly gone) one night for dinner.  A few tweaks made their Caesar a standout.  The Romaine lettuce was grilled, and in place of croutons, bits of chicken skin baked to a crispy golden finish adorned the salad. ㄹingerlicking good.

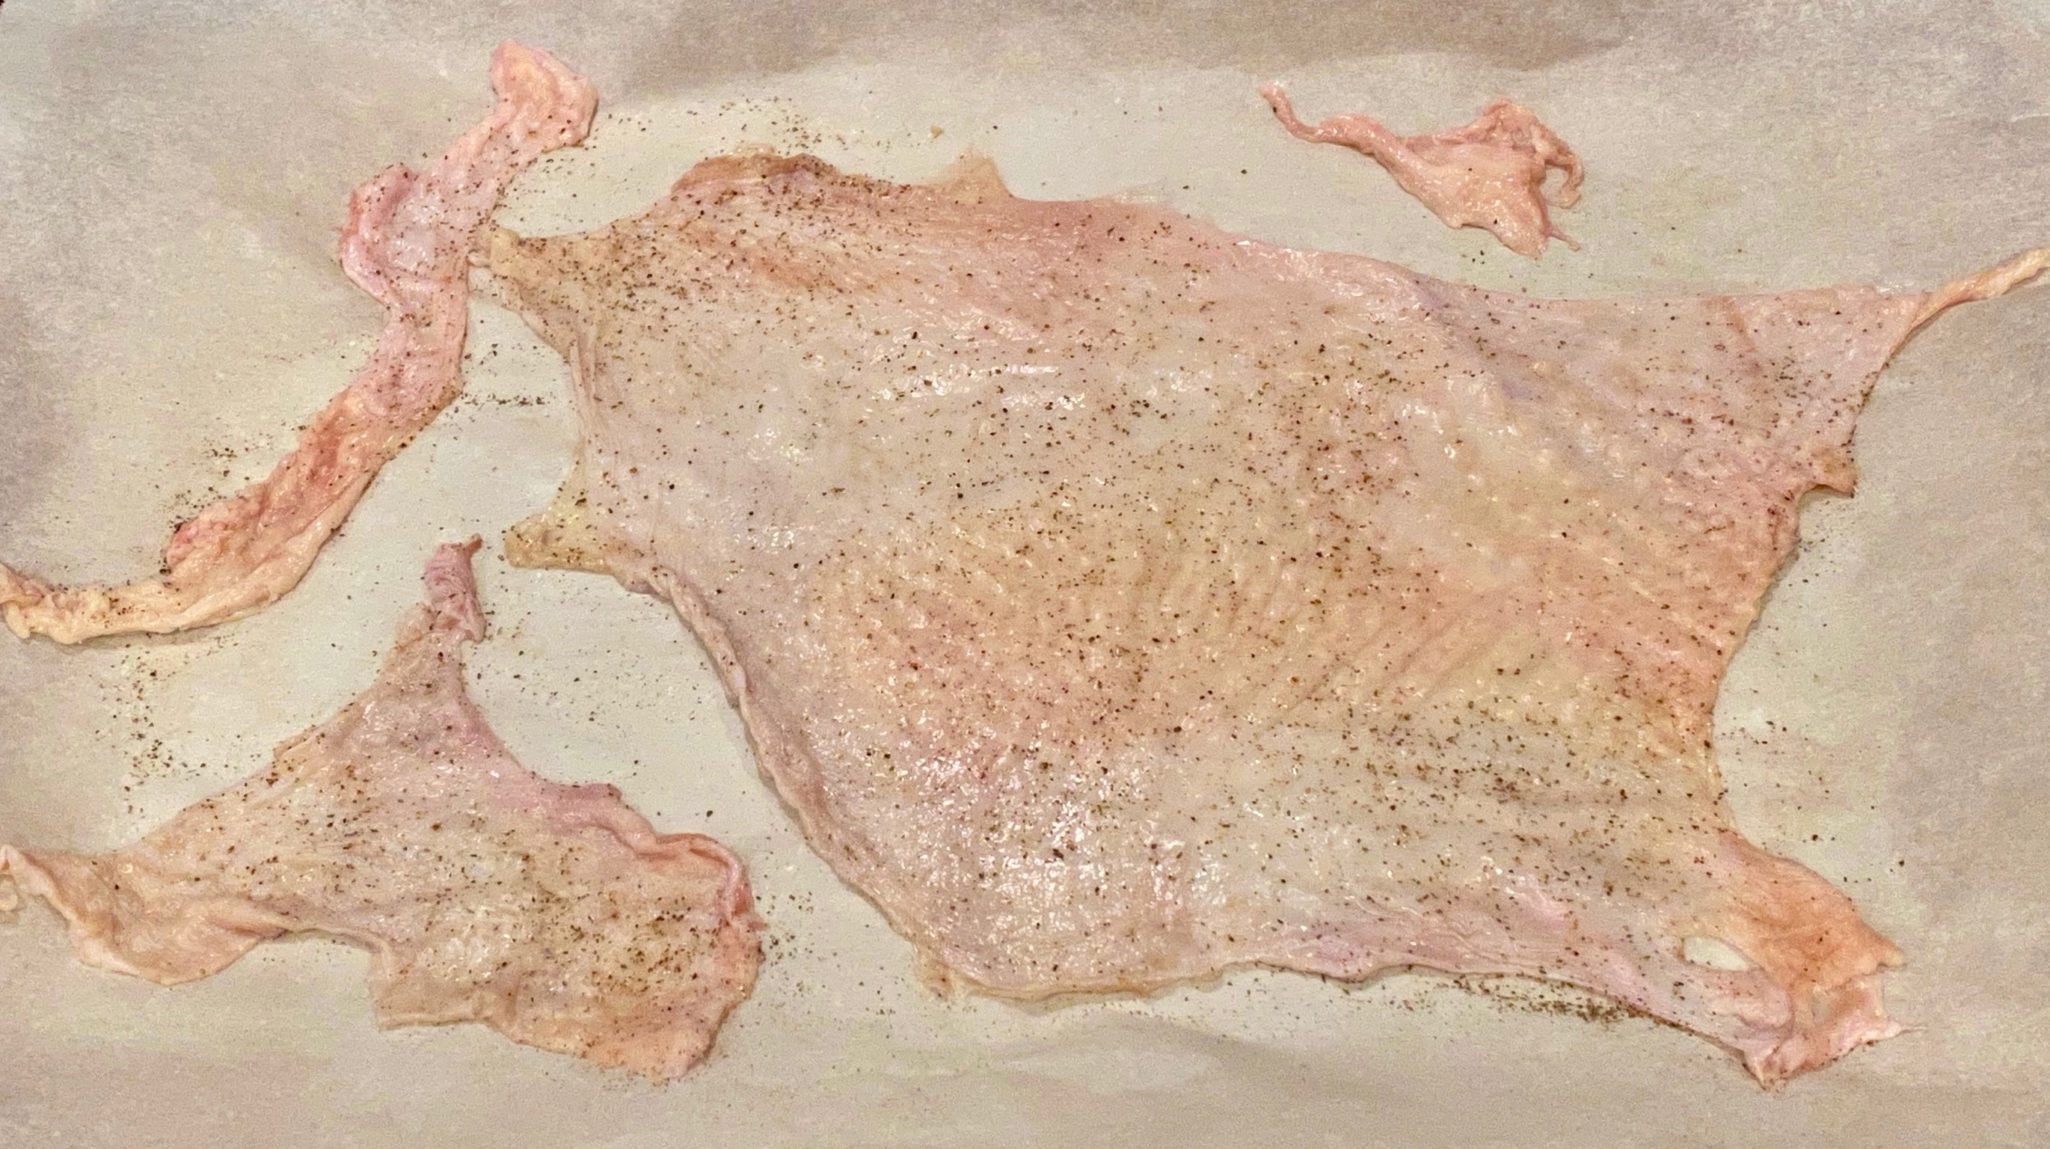
Crispy chicken skin (in this case turkey) is pretty quick and easy to make.  Spread the skin out on a parchment lined rimmed baking sheet.  Salt and pepper.  Cover with a sheet of parchment and top with another baking sheet to keep the skin flat.  Bake at 375 degrees for 20-25 minutes until skins are deep golden.  You should have a nice puddle of oil from this, KEEP the oil.

The rendered oil is used in the sauce for the dish.  The crispy skin is a bonus that I use as a garnish for turkey rice.  It provides added crunch and flavor to the dish, its damn delish.

The Sauce

Hainan Chicken or Chinese Poached Chicken is served with a ginger, scallion, sauce with or without slices of chili.  For Taiwanese Turkey Rice, the sauce is made with fried shallots, light soy sauce, a bit of sugar and the rendered oil from the turkey.  It’s deceptively simple for a sauce that is so delicious.  I buy a ton of shallots, thinly slice and fry them. The oil is kept in the fridge and the shallots in a jar on the counter.

Here is a detailed description on how to make fried shallots from Serious Eats.  IN A PINCH, you can buy fried shallots at most Asian markets and avoid frying your own.  IN A DOUBLE PINCH, TJ’s has fried crispy onions in a can during the holidays, (probably for the green bean casserole I hate) that make a pretty good substitute.

The Rice

Traditionally served over plain rice, you can bump it up by using the poaching liquid to cook the rice.  Just reserve enough for the sauce.  For the rice use any long grain or Jasmine Rice.

The Sides

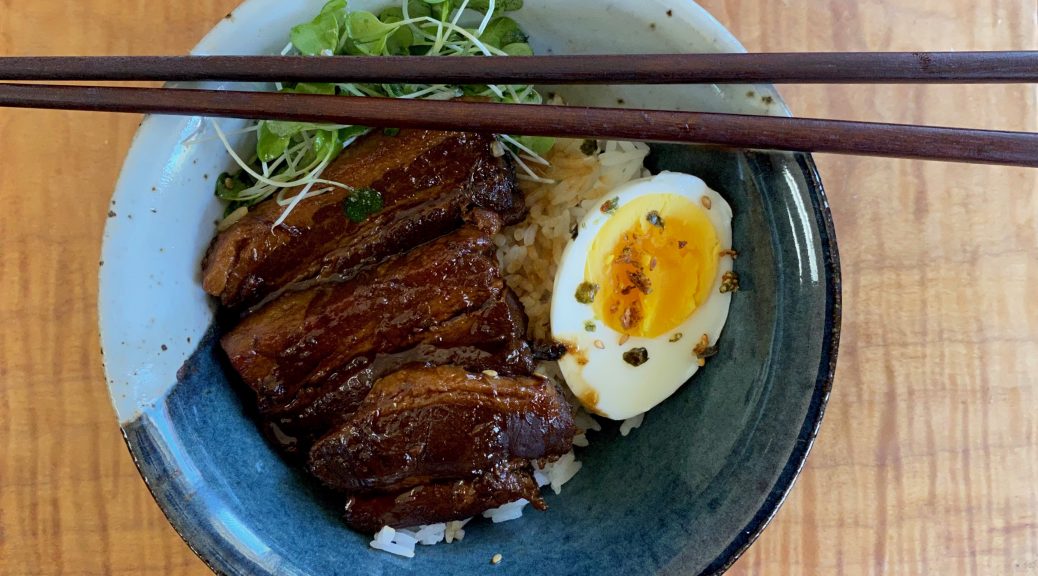
Pickles are often served with Turkey Rice.  I like pickled ginger, takuan (pickled Japanese radish), or Vinegared Chinese pickles.  I love soft boiled eggs (like ramen eggs) and fresh cucumbers lightly dressed as sides. Garnish with scallions or cilantro.  Lip-smackin’ good.

Taiwanese Turkey Rice

Course Main Course, One dish meals
Cuisine Asian
Keyword Rice Bowl, Soul Food, Taiwanese, Turkey Rice
Prep Time 20 minutes
Cook Time 1 hour 15 minutes
Servings 2 servings

Ingredients

  • 2 C Shredded Turkey* You can use Thanksgiving turkey leftovers

Poaching Liquid

  • Water Enough water to cover turkey
  • 2-3 slices ginger
  • 2 scallions
  • 1 tsp salt
  • 1/4 cup rice wine
  • 1 tablespoon Better Than Bouillion Chicken Base

SAUCE

  • 3 Shallots Thinly sliced
  • 1-1/2 TBsp Oil Lard, Vegetable Oil, Chicken Fat or Half and Half
  • 3 TBsp Soy Sauce Light Soy Sauce (Pearl Ridge is good)
  • 1 TBsp Sugar
  • 3/4 C Chicken/Turkey Broth

RICE

  • 2 C Rice Steam or cooked according to instruction. You can also use the chicken stock from boiling the chicken to cook rice if making from scratch. It really enhances the flavor

Instructions

Turkey

  • Start with just enough water to cover the turkey breast in a pot. Add ginger, scallions, rice wine, and stock base and bring to a boil. Add turkey and cook for 10mins then turn the heat off and let it sit in the pot for 25 mins or until cooked through. This method makes silky, tender, turkey.
  • Remove from pot, cool until you can handle and shred into small pieces. Cover and reserve.
  • The poaching liquid can be reduced by 20-30% to concentrate the flavor. Taste.

SAUCE

  • In a frying pan, heat up 1-1/2 TBsp of oil of your choice. I use 1/2 shallot oil and 1/2 rendered fat from turkey
  • Add the sliced shallots to the oil and fry until crispy golden. Remove shallots or you can leave them in the sauce. I like to remove them and sprinkle them on the finished bowl. Or go half and half.
  • Add the turkey stock, soy sauce, and sugar to the pan, careful the oil may splatter
  • Cook on high to slightly reduce the sauce.

The Bowl

  • Layer shredded turkey over steaming rice, pour amount ofsauce you want over the turkey.
  • Garnish with pickles, or green veggies, or cucumbers, fried shallots, scallions, soft boiled egg, or reserved crispy turkey skin.

Notes

Leftover holiday turkey can be used for this dish.  Make sure you keep the pan drippings from the turkey and use this for the oil in the sauce.  You can use turkey stock or water for the sauce.
Instant Pot Meets Ragu’ Sauce-A Meat Cute?

Instant Pot Meets Ragu’ Sauce-A Meat Cute?

In these tenuous times, I find myself making comfort food-homey dishes that surround your soul like a warm blanket.  One of my family’s all-time favorites is a long, slow-simmered ragu’ spooned over a bowl of pasta.  This usually requires a little forethought, prepping the ingredients, followed by hours of simmering on the stove.  Yes, it is so worth it but…

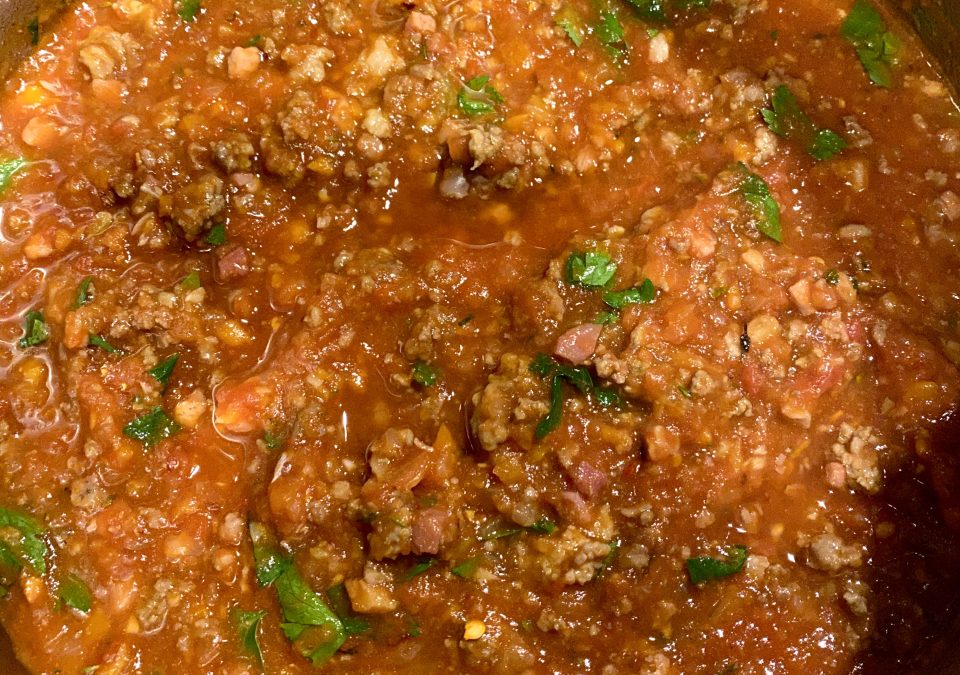
Well, whaddya know, I can make a rich, luxurious, delicious ragu’ in a fraction of the time with an Instant Pot.  I adapted a recipe I found on Chunky Chef and badabing-badaboom, a meat sauce that would win the approval of the Old Stoves in North Beach. Yay, I don’t have to start the sauce in the wee hours of the morning.

Winner, Winner, Pasta for Dinner

A ragu’ is essentially a meat sauce, this version is best described as a Ragu Alla Bolognese since it includes tomatoes.  Purists probably would omit the seasonings and require only meat and sofrito (onion, celery and carrot trinity) for the sauce. I like the flavor boosters.  You can add a bay leaf too if you like. DON’T ASK ME WHY.  I googled in vain for a definitive description of the flavor a bay leaf adds, you’ll just have to trust me.  Just remember to remove it at the end, along with the thyme sprigs.

No Mincing Here

The Instant Pot isn’t the only time saver.  Prep for the onions, carrots, and celery means pulling out your food processor.  This makes quick work of mincing the veggies.  Really, who wants to stand there chopping veggies into itty bitty pieces for a sauce.  Not me.  Yep, dust off that food processor and put it to work.  I also use it to puree the tomatoes.  Don’t wash it out after the veggies, just run the tomatoes by pulsing a couple of times and add.

Mantra:  Scrape the Bottom of Your Pot

Saute’ the meats and the soffritto making sure to scrape the bottom of the instant pot A LOT.  Twofold purpose:  One-Those little brown bits are flavor bombs so you want to keep them. Two-If left on the bottom of the pot, they will trigger the scorch-safety feature on the pot and turn OFF.  Ugh.  Make SCRAPE your mantra any time you saute’ in the Instant Pot.

Other than that, it’s pretty straightforward.  The sauce needs only 20 minutes (well, with pressure up time count on 30-35 minutes).  In about an hour you will be at the table saucing your pasta, passing the Parmesan, and enjoying a nice bottle of  Chianti (no fava beans please). Nom, nom, nom.

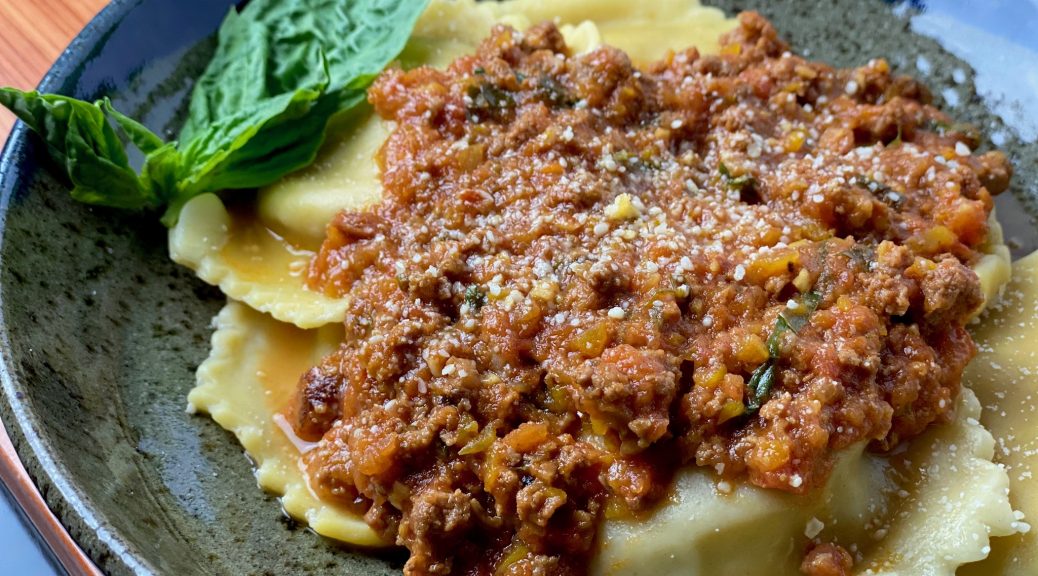
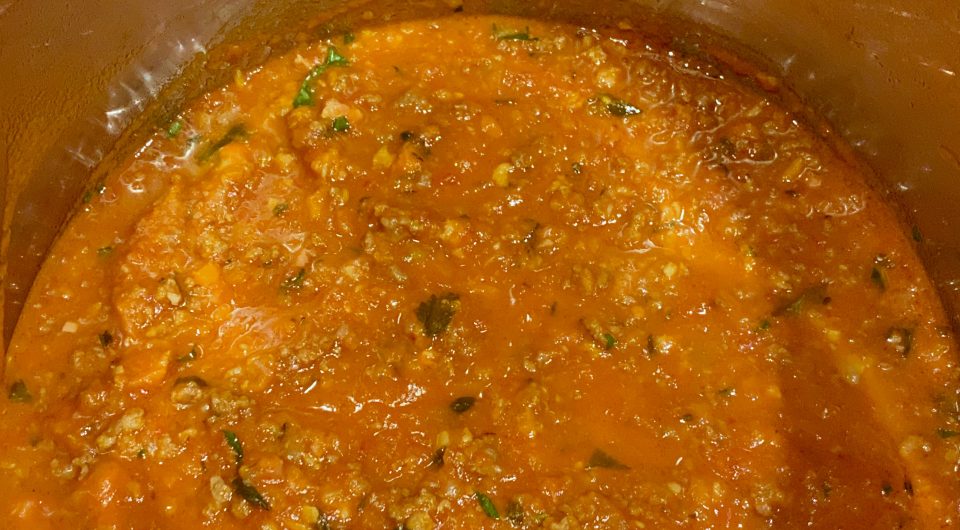
After adding the cream and basil you will have the voluptuous, unctuous sauce. Yes, I had to spell check both words.  Perfect on a bowl of pappardelle or tagliatelle or plate of ravioli.  Just dreaming of the pastabilities.

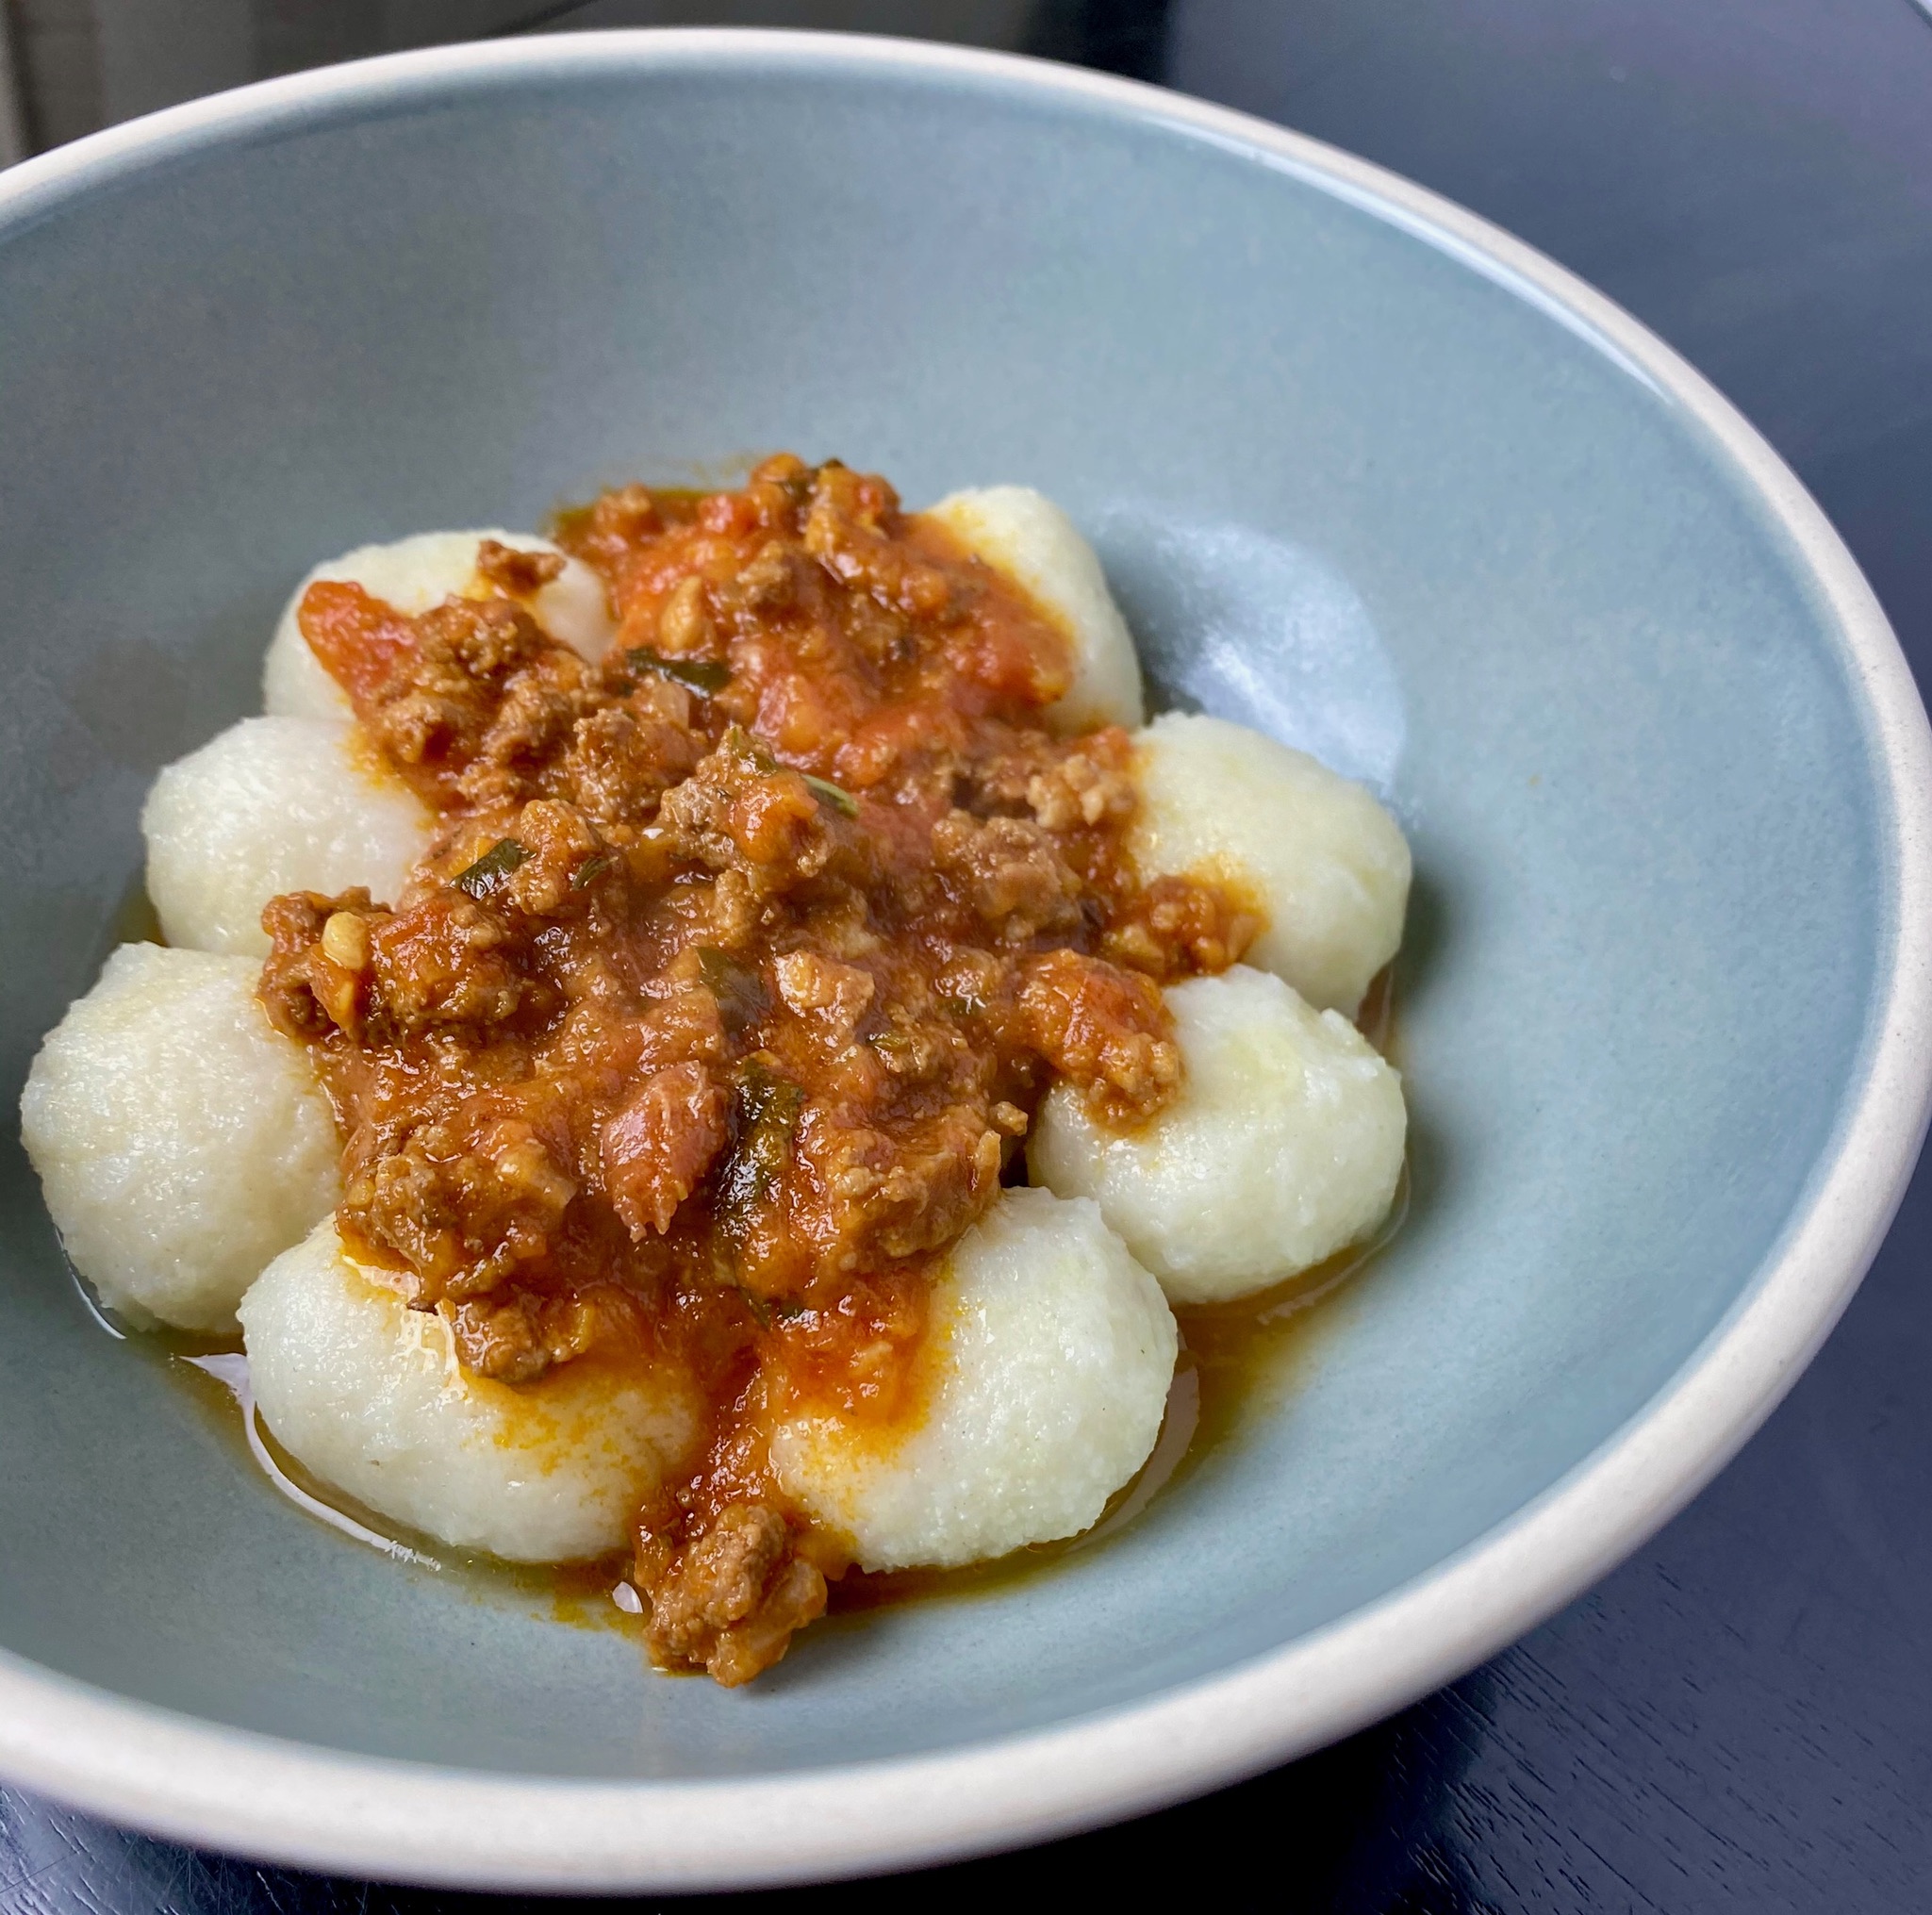
On a recent jaunt into the City, I headed to my favorite Italian Deli in the Marina, Lucca, to grab a meatball sammie for lunch. I also stocked up on their housemade ravioli and gnocchi from their freezer.  I came away with mushroom gnocchi and veal ravioli that were PERFECT with this ragu’.  The sauce and pasta freeze beautifully so a quick dinner is always at hand.

Lucca has been a favorite stop for a long, long time.  As a kid, I would get a sammie and chips before walking down to Hunt’s for an Icee and donut.  Those were the days.

All smiles digging into my bowl of mushroom gnocchi topped with amazingly quick to make Ragu’.

Instant Pot Ragu Bolognese Sauce

A delicious ragu made in your pressure cooker that taste like it has simmered all day!
Course Main Course
Cuisine Italian-American
Keyword Instant Pot, pasta, Ragu'
Prep Time 30 minutes
Cook Time 45 minutes
Servings 8

Equipment

  • Instant Pot
  • food processor

Ingredients

  • 1 Tbsp olive oil
  • 1 lb. lean ground beef I use 85/15
  • 1/2 lb. Italian sausage mild or spicy or use ground pork
  • 4 oz pancetta diced Feeling lazy? TJ's carries diced pancetta in a 4 oz package!
  • 1 medium yellow onion minced
  • 2 medium carrots peeled and minced
  • 1 stalk celery minced
  • 7 cloves garlic minced
  • 1/2 cup dry red wine Ok, in a pinch you could use white wine
  • 28 oz whole tomatoes pureed
  • 1/4 cup tomato paste
  • 2/3 cup beef broth - reduced sodium preferred or the mushroom soaking liquid
  • 1 ounce dried porcini mushrooms, rehydrated and chopped Soaked in 3/4 cup warm water until soft,
  • 1 Tbsp balsamic vinegar
  • 1 tsp kosher salt
  • 1 tsp granulated sugar
  • 1 tsp dried oregano or 1 tablespoon fresh, chopped
  • 1/2 tsp dried thyme or 2 sprigs fresh thyme
  • 1/4 tsp crushed red pepper flakes omit if using spicy Italian Sausage
  • 1/4 tsp black pepper
  • 1/4 cup heavy cream or 1/2 cup whole milk or BUTTER a good chunk
  • 1/4 cup chopped fresh Italian parsley
  • 1/4 cup chopped fresh basil or more if you like basil, use additional to sprinkle on top of dish
  • freshly grated parmesan cheese at the table

Instructions

  • Use the "Saute" function on Instant Pot. Add olive oil to the pot. Add the beef, Italian sausage, and pancetta and cook until browned, breaking up the meat with a wooden spoon or spatula as it cooks. Drain the liquid into a bowl, leaving the meat mixture in the pot, skim off the oil and reserve. Return it to pot when the tomatoes and broth are added. It's all flavor babee.
  • Add onion, carrot and celery and cook for 4 more minutes, or until softened. Make sure to scrape the bottom of the pot as the onions and peppers cook and give off liquid, this will prevent scorching and the auto-shut off feature.
  • Add garlic and cook until fragrant, ~30 seconds. Add red wine and cook, stirring often, until reduced, about 2 minutes.
  • Add remaining ingredients, except basil, fresh parsley and cream. Stir, once again scraping the bottom of the pot to ensure no browned bits remain.
  • Cancel the saute, and place lid on Instant Pot, making sure the valve is set to "SEALING", DO AS I SAY NOT AS I DO, lol. Press the Pressure Cook or Manual button and use the +/- buttons to set the timer for 20 minutes.
  • Once the timer beeps, use quick pressure release and vent. When the pin drops, remove lid. Remember, ITS HOT so be careful.
  • Select "saute" and select LOW. Stir in heavy cream or milk, parsley and basil. Simmer, uncovered, stirring often, until desired consistency is reached, about 5 minutes.
  • Taste and adjust seasoning if necessary. Serve over pasta with grated Parmesan cheese and additional chopped basil if desired.

Notes

  • Make sure you scrape the bottom of your Instant Pot while sauteing FREQUENTLY! If any particles are stuck on the bottom the pot will turn off to prevent burning.
  • You can omit the mushrooms, I like the earthiness it adds. Substitute the mushroom soaking liquid for beef broth if desired. Or for the double whammy, heat the beef broth and use it as the soaking liquid for the mushrooms.
  • If you do not want to add dairy, drop a hunk of unsalted butter (4-5 T) into the sauce. The cream or milk is added to cut the acidity of the tomatoes and mellow the sauce, the butter kind of does the same.
  • I love this sauce over rigatoni or pappardelle. Also on gnocchi, it is divine!
Roasted Tomato & White Bean Stew (Bean Craving a Good Stew)

Roasted Tomato & White Bean Stew (Bean Craving a Good Stew)

Friday night…my mind was thinking about the upcoming Memorial Day weekend.

The plan, grilling on Monday.  Something classic, burgers, potato salad, strawberry shortcake, the “Summer is finally here” meal.  Saturday’s dinner was taken care of, take-out and delivery from one of the legacy restaurants in SF Chinatown, Kam Po.  A fundraiser for Chinatown Community Development Center combined with helping a Chinatown mom and pop business.  A win-win, I ordered roast duck, crispy skinned pork and bbq pork plates…can’t wait.

What’s for Dinner Tonight?

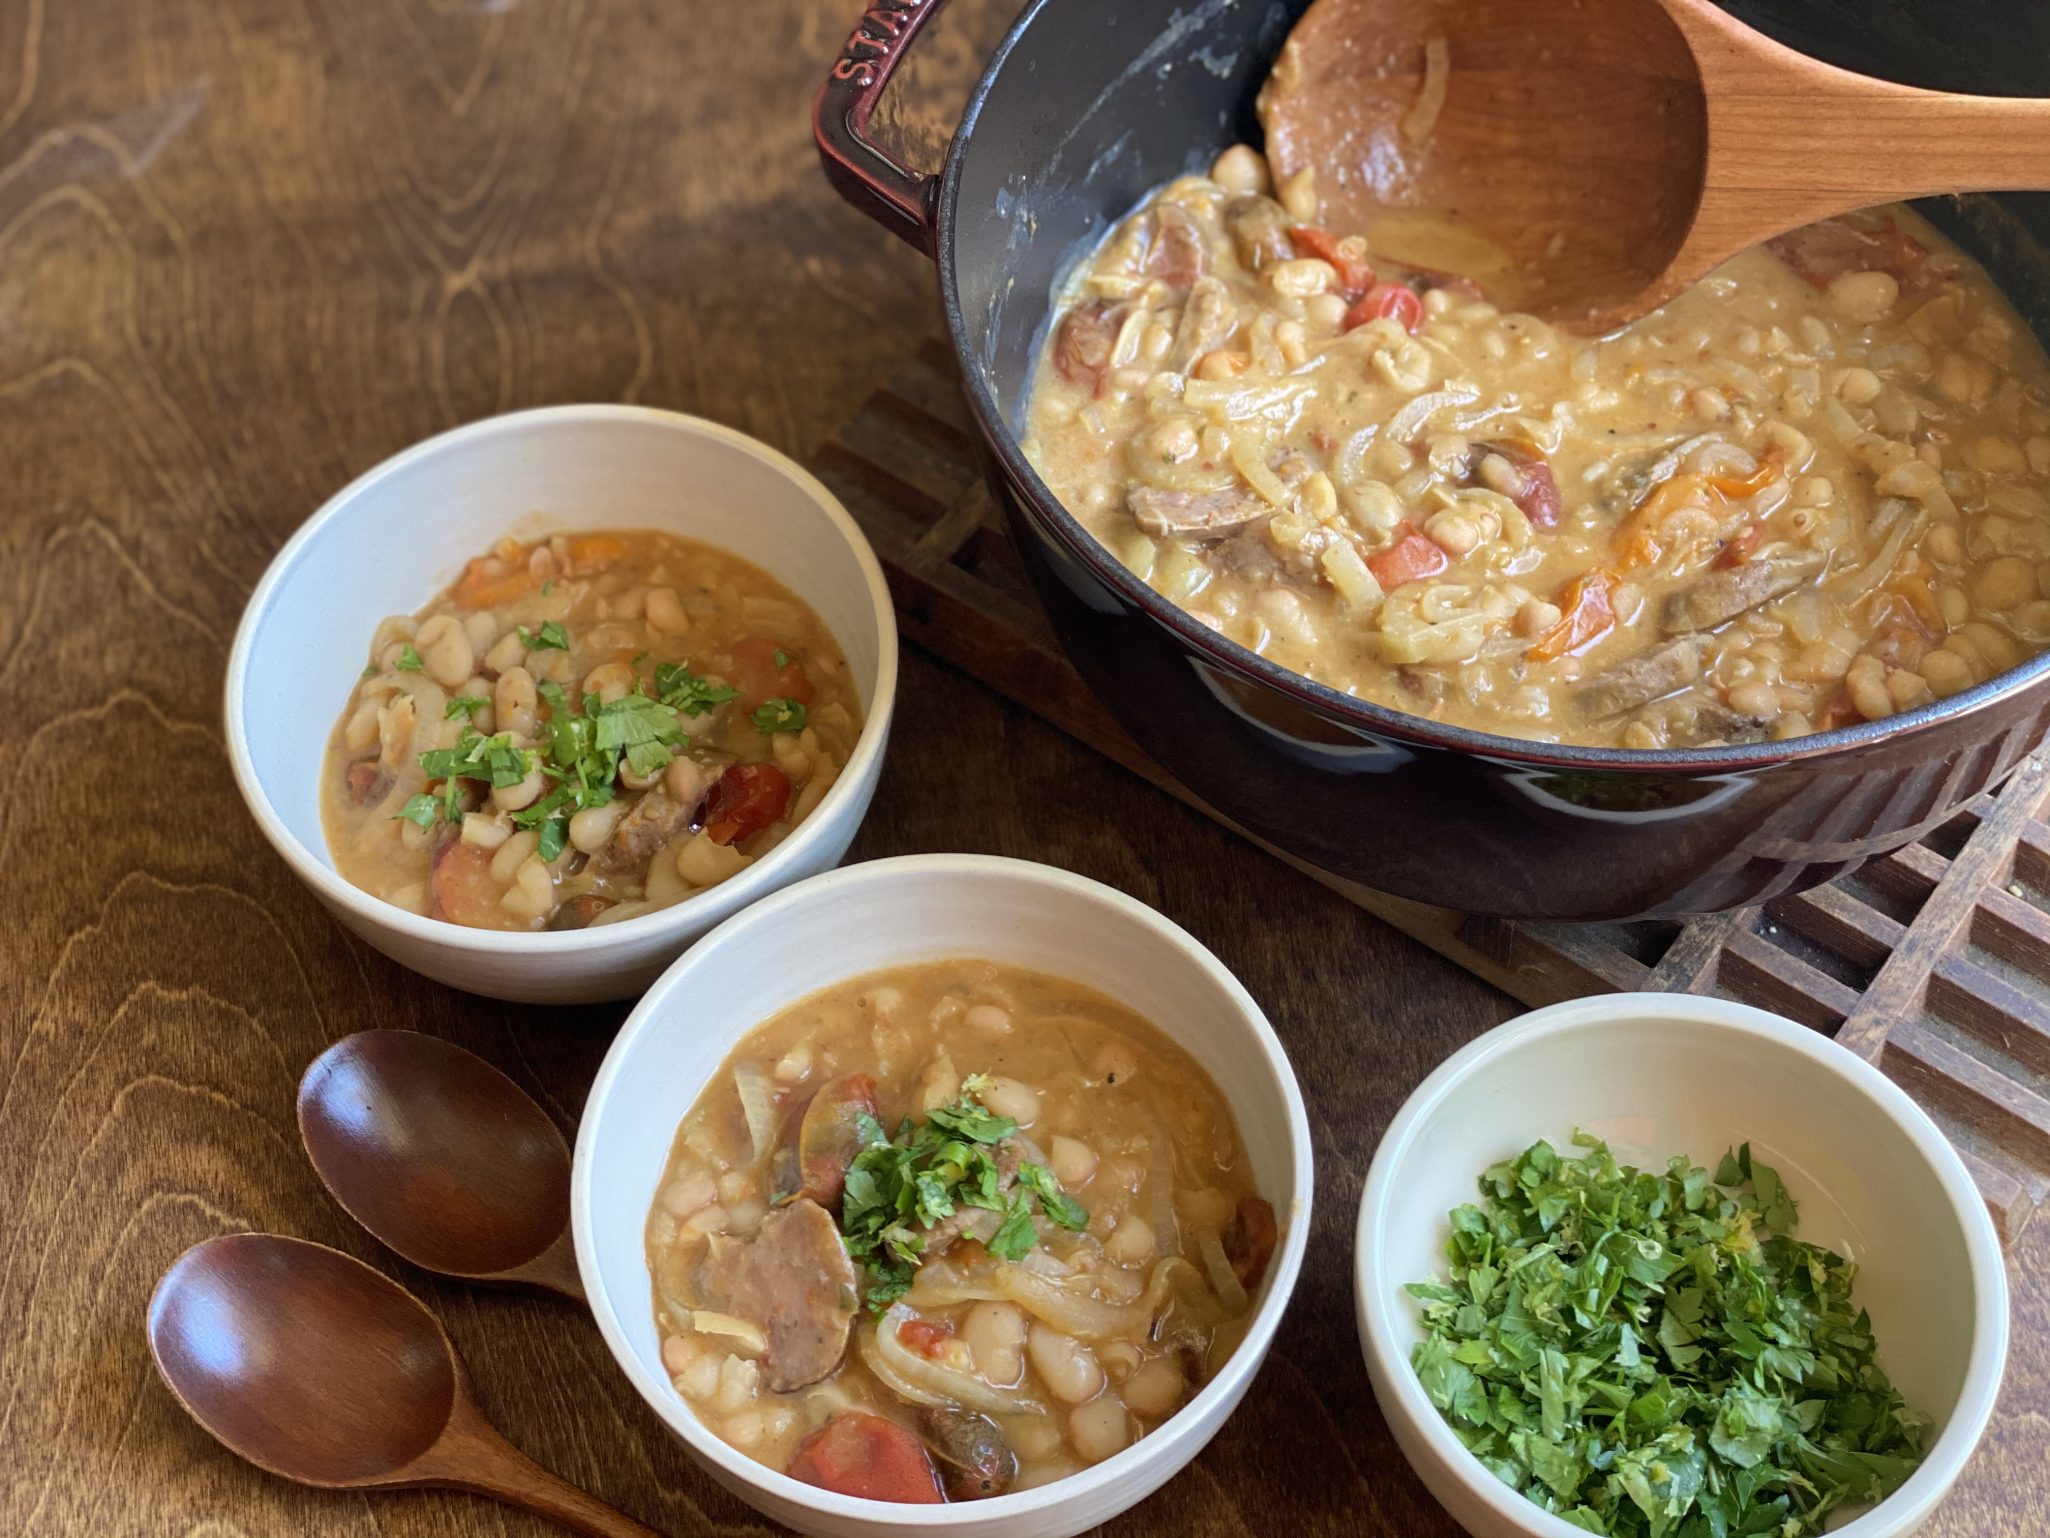
But it was Friday and I still hadn’t started dinner.  I cooked quite a bit during the week and was admittedly ready for an easy cook meal.   I peered into the pantry hunting for inspiration…hmmm, a couple of cans of white beans. Further rummaging around the kitchen produced cherry tomatoes, a couple of Italian sausages, one lonely onion. Jamie had recently tried a recipe from the NYTimes, Roasted Tomato and White Bean Stew that she gave a hearty thumbs up to on all counts-ease of prep and deliciousness.

I Was In Business

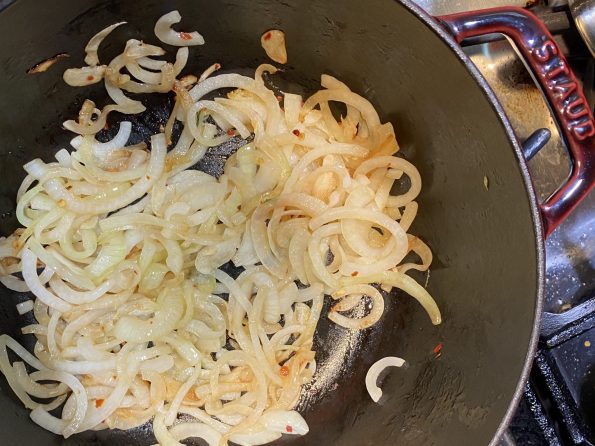
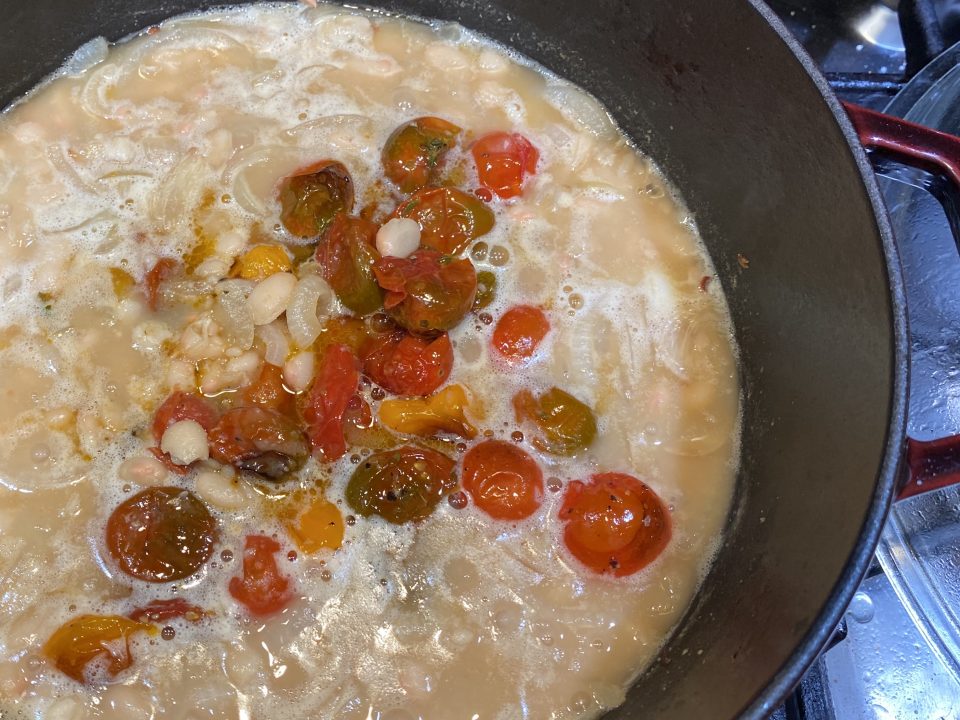
Winner winner beanie dinner.  This dish is simple, quick and so satisfying.  Roast tomatoes in olive oil and thyme which intensifies their flavor and sweetness.  I used a medley of gold and red cherry tomatoes, use whatever you like. While they are roasting, saute’ the onions, garlic, and pepper flakes. Add beans-reserve the liquid from the cans just in case to adjust the consistency of the sauce.  Give the stew a couple of stirs and mash some of the beans with a big spoon to thicken it.  Make sure to scrape all the tasty bits from roasting the tomatoes and add them to the beans along with the tomatoes and their liquid.

Home Stretch

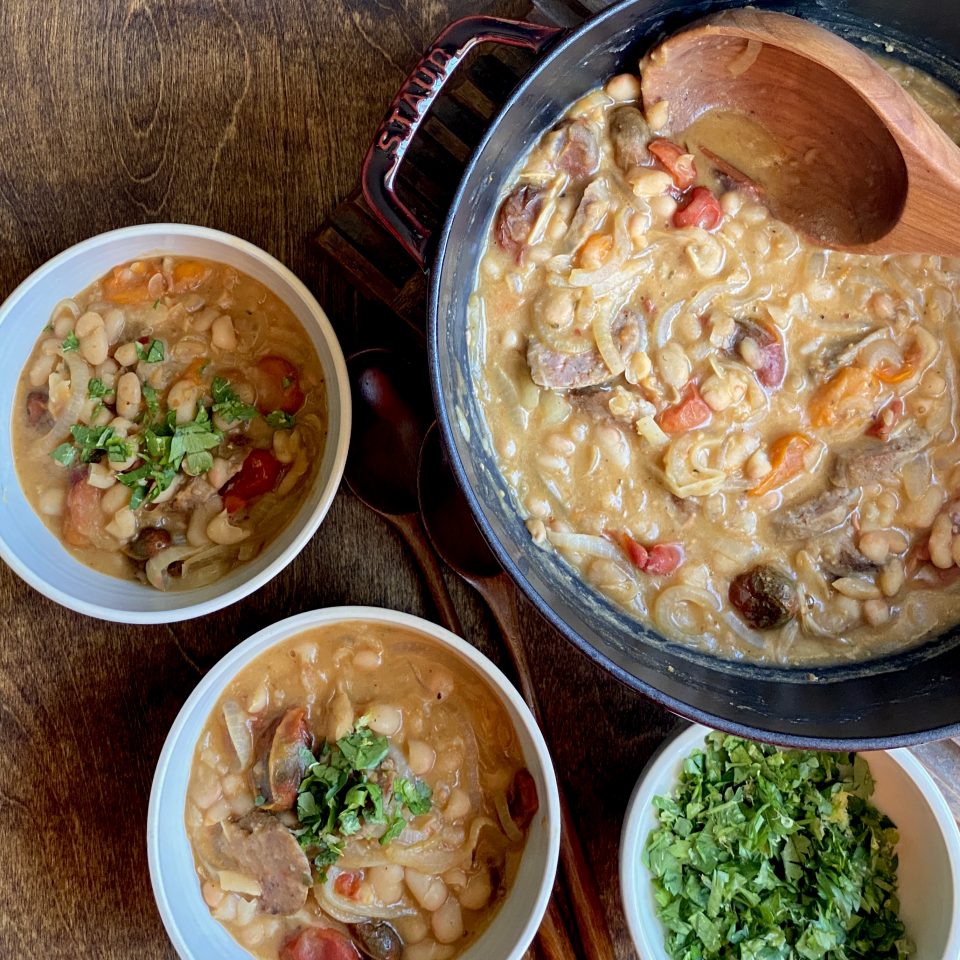
Simmer a couple of minutes and voila’, dinner is served.  This stew is really, really good, the sweetness of the tomatoes and onions, the nice mouthfeel from the beans, yummy, YUMMY, yummy.  I love the garlic and thyme, but I’m wondering if rosemary would work too.  We grilled a couple of Italian sausages, sliced, and added them to the pot right before serving.  You could also just serve them on the side. Grilled shrimp or cod would be a lovely match too.  OR, keep it vegetarian, this stew is so flavorful and satisfying you won’t even miss the protein.  Top it with the parsley and lemon gremolata which adds a herby-citrus zing and you are in business. The Hubs and Jorge don’t like beans but they both admitted that this was delicious.  Now that’s a strong recommendation!

Make this stew the next time you need a quick, easy, hearty meal.  It’s just so tasty!

Looking for other meatless recipes?  This Red Lentil Soup from NYTimes is delicious~~

Print Pin
5 from 2 votes

Roasted Tomato and White Bean Stew

Course Main Course
Cuisine European
Keyword easy, roasted tomato, stew, vegan, White Bean, white bean stew
Prep Time 30 minutes

Ingredients

Garnish

  • ½ cup roughly chopped Italian parsley leaves and tender stems
  • 2 teaspoons lemon zest from 1 large lemon

Stew

  • 2 10-ounce containers cherry or grape tomatoes
  • ¼ cup olive oil plus 2 tablespoons and more for drizzling (optional)
  • 1 tablespoon fresh thyme leaves
  • Kosher salt and black pepper
  • 1 medium yellow onion thinly sliced
  • 3-4 large garlic cloves thinly sliced
  • ½ teaspoon red-pepper flakes
  • 2 15-ounce cans white beans (such as butter or cannellini), rinsed
  • 1 ½ cups vegetable or chicken broth or water
  • 2 Italian sausage optional mild or spicy, your choice

Serve with

  • Flaky salt for serving (optional)
  • Toasted bread for serving

Instructions

  • Heat the oven to 425 degrees. In a small bowl, gently toss together the parsley and lemon zest with your hands until well combined; set aside.
  • In a large baking dish or on a sheet pan, toss the tomatoes with 1/4 cup oil and thyme; season well with salt and pepper. Roast tomatoes until they have collapsed and begin to turn golden around the edges, 20 to 25 minutes.
  • When the tomatoes are almost done roasting, heat 2 tablespoons oil in a large (12-inch), deep skillet or Dutch oven over medium. Add the onion, garlic and red-pepper flakes and cook until the onion is softened and the garlic is fragrant, 4 to 5 minutes. Stir in the rinsed beans and broth and bring to a simmer. With the back of a spoon or spatula, gently smash about ½ cup of the beans so they slightly thicken the broth. If you want a thicker stew, crush some more of the beans. Season with salt and pepper.
  • When the tomatoes are finished roasting, add them directly to the stew along with any juices that have been released. Simmer for 5 to 10 minutes more so the flavors meld; season to taste with salt.
  • Ladle into shallow bowls. Top each serving with some of the lemon-parsley mixture and drizzle with some more olive oil, and season with flaky salt, if you like. Serve with toasted bread.
Bi Bim Bap It! Homecoming in Seoul

Bi Bim Bap It! Homecoming in Seoul

Off to see Jorge in Korea!

Do you have a bucket list of things to do when traveling, if so, what’s yours? I’d love to know.  Here’s ours when we travel:

FIRST DAY- a tour of the city on bikes.  It’s a great way to get an overview of the city you are visiting and get a bit of exercise (guilt-free eating for the day, yay!)  It does have it’s heartbeat quickening moments when you ride in traffic and every big city in the world has traffic.  But we have biked in Rome, London, Boston, DC, Paris, and Seoul without mishap, just a couple of choice words from drivers.  But hey, I get that here too.

SPORTS:  We have watched rowing on the Thames, soccer in Italy, and now baseball in Korea and Japan.  BOSS, so much fun and gives you a taste of the folks that live there.

EATS:  Street food, hole-in-the-walls, local joints, my kinda food.  Ok, occasionally, a meal that breaks the bank.

I push the envelope sometimes with my search for local food.  I have waited in line for 90 minutes for Egg Tarts in Macau, meandered down small alleys looking for Won Ton Soup in Hong Kong or Okonomiyaki in Osaka.  Unfortunately, the combination of spotty maps and my non-existent sense of direction means a lot of wandering around and spewing expletives at my phone when looking for those food gems. Good thing my family loves me, or at least I think they do.

HOME COOKING:  Do you get tired of eating in restaurants?  Miss your kitchen? Take a cooking class!  We have made pasta and gelato in Florence and now homemade kimchi, seafood pancake-pajeon and Bi Bim Bap in Seoul.

Early morning at a local street market

Our cooking class with Joungy began with a visit to the market to buy ingredients, a Korean Veggie primer!

I was mesmerized watching this gentleman grind chili peppers into Gochugaro powder.
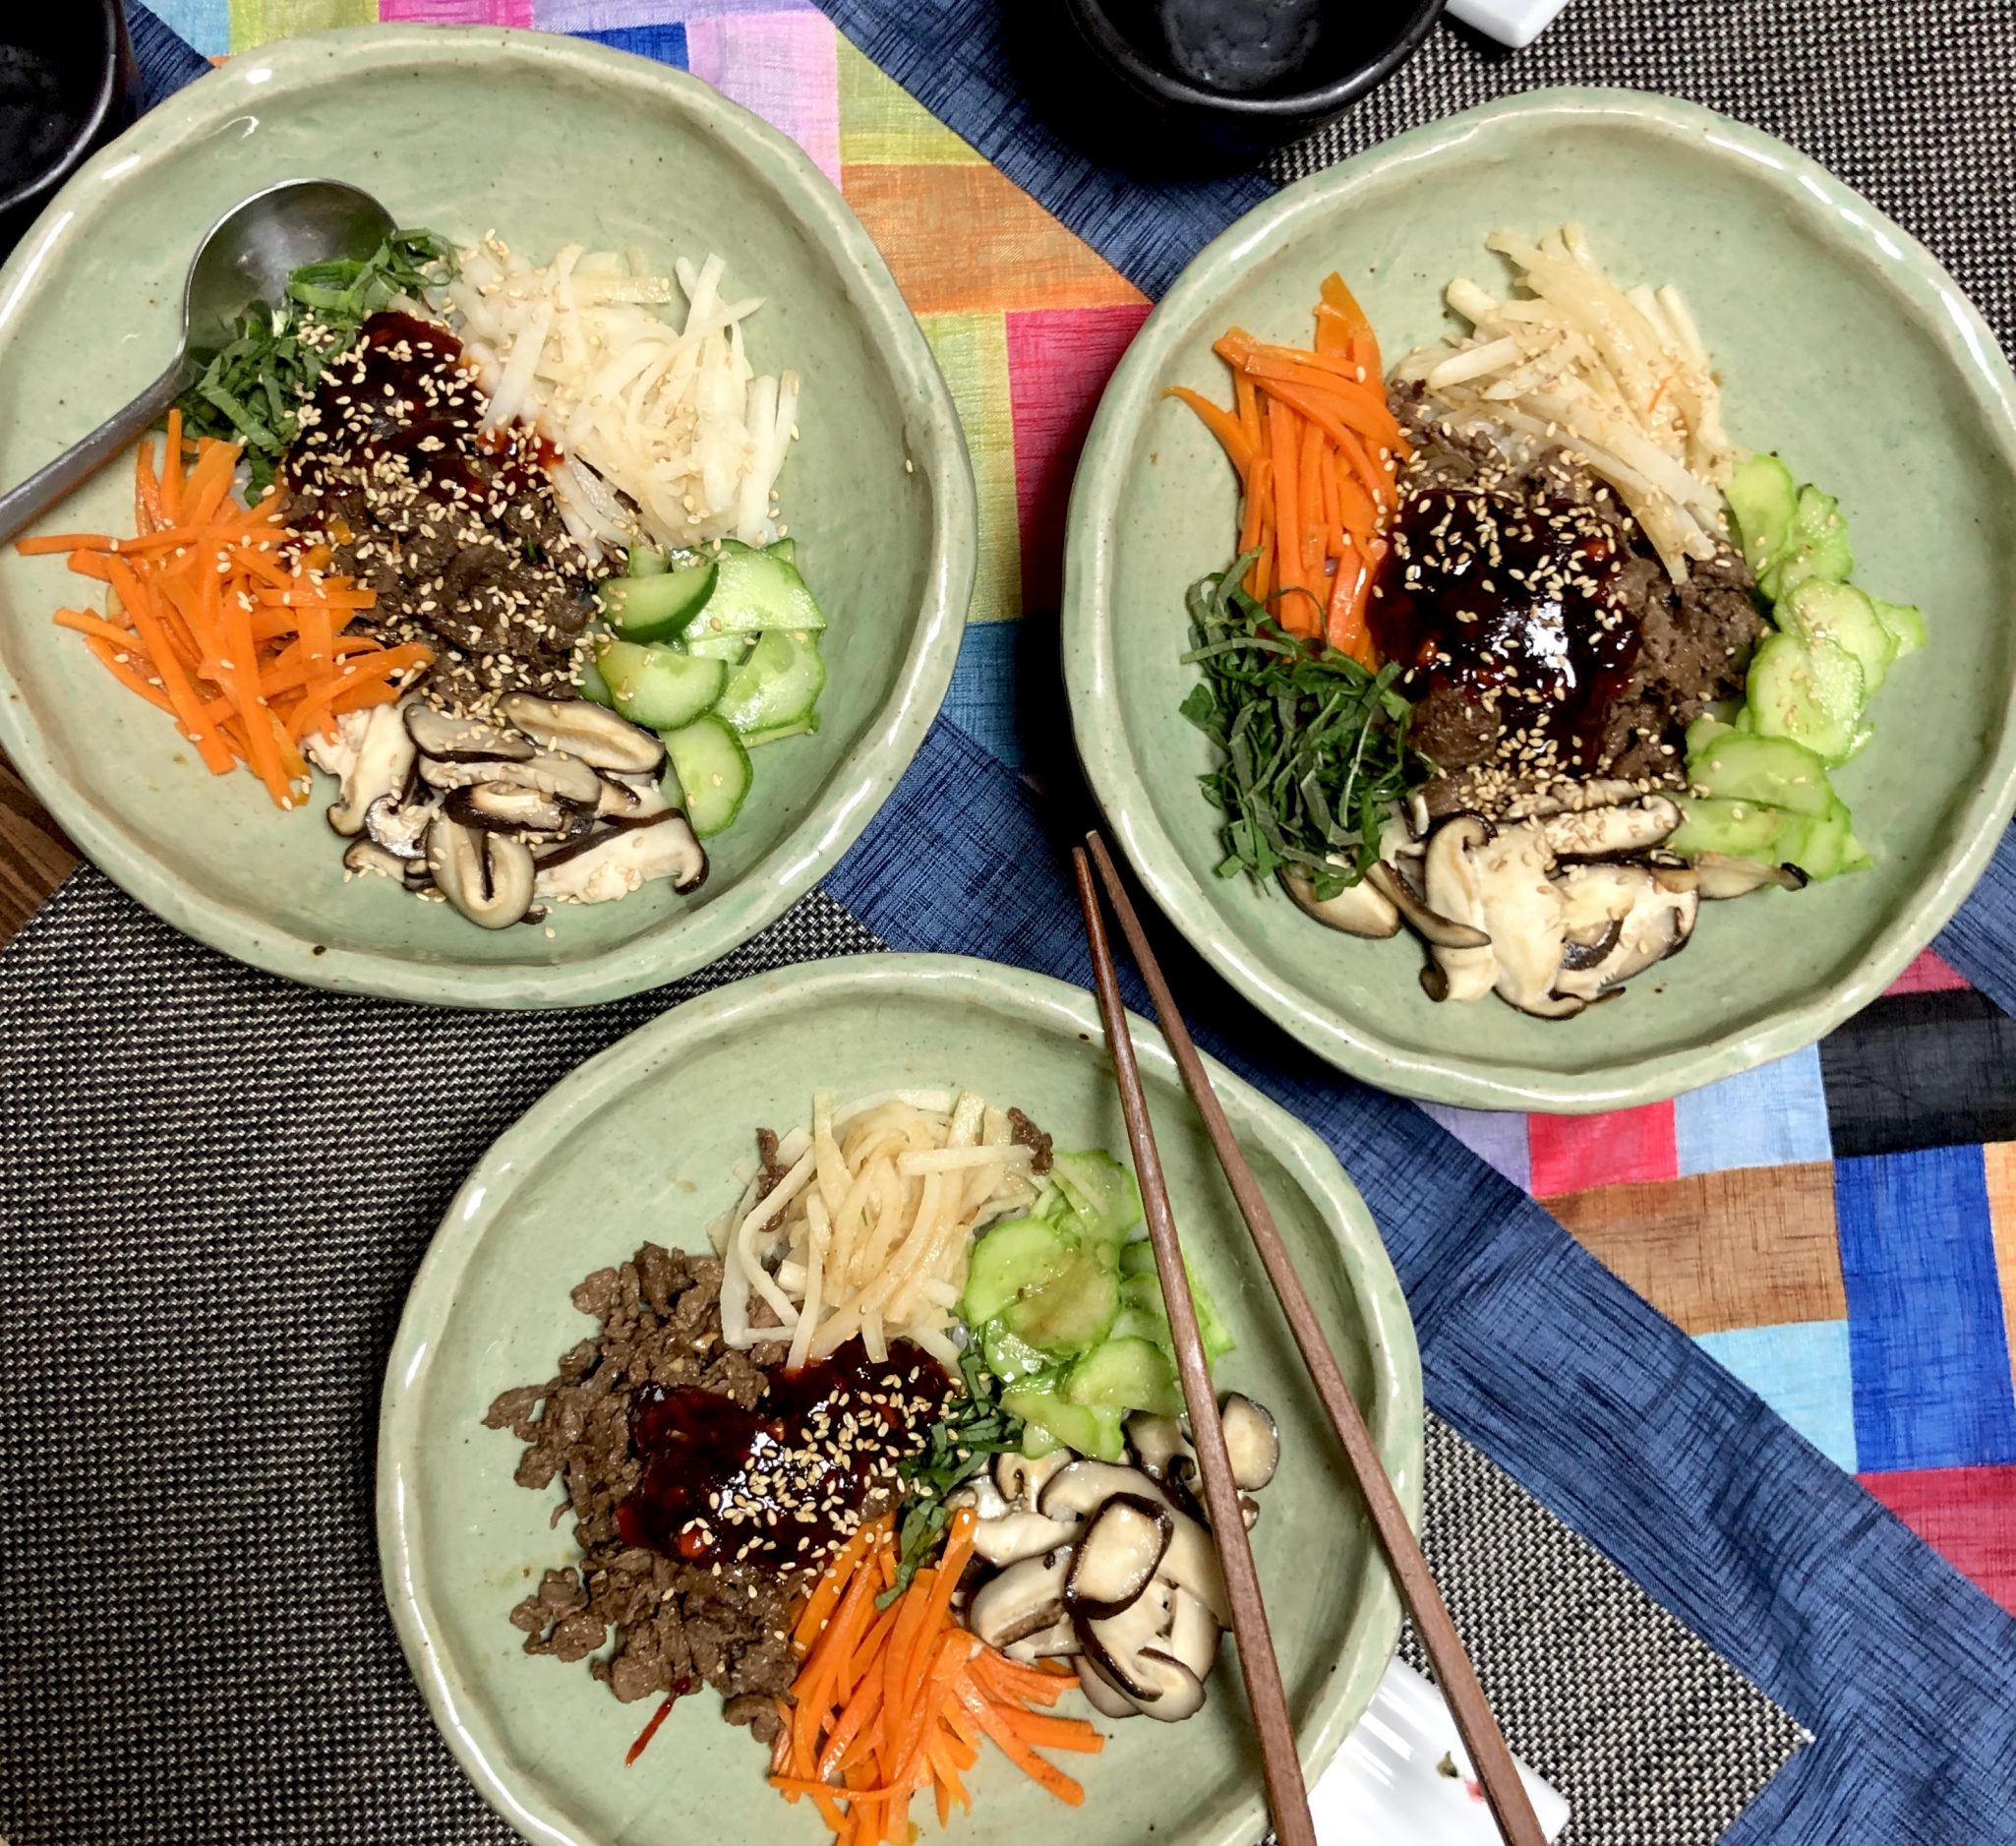
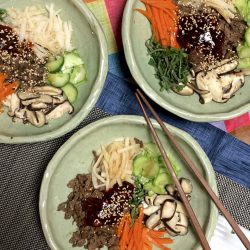
We made Seafood Pancakes or Pajeon, fresh kimchi, and my favorite bowl meal, Bi Bim Bap.  Bi Bim Bap starts with a pile of fluffy, warm rice and topped with julienned carrots, cucumbers, squash, spinach, mushrooms, yesterday’s banchan, seasoned beef or chicken.  You get the picture, you can use anything you desire for toppings.  For Joungy’s class, we had a wonderful array of veggies, carrots, cucumbers, daikon, shiitake mushrooms, shredded beef and a chiffonade of Perilla leaves.  Delicious!

The secret to her Bi Bim Bap is the extra attention given to the sauce.  Her Gochujang paste included corn syrup, a bit of soy sauce, and chopped garlic, stir-fried briefly. This brought the sauce to a new level.

Season each component, stir-fry, and place on top of the rice in neat little separate piles-kid-friendly, lol.  Top your masterpiece with a sprinkling of sesame seeds and a dollop of sauce.  It’s colorful, delicious, easy to prepare, flexible…what more could you ask for?  If you can’t find Perilla leaves, garnish with chopped green onions are good too.

A great primer for Bi Bim Bap can be found at My Korean Kitchen which has instructions to season the blanched bean sprouts and spinach.

Bi Bim Bap (Korean Mixed Rice)

Korean Rice Bowl, Easy to Make and Delicious!
Course Main Course
Cuisine Asian
Keyword Bi Bim Bap, Korean, Rice Bowl
Prep Time 20 days
Cook Time 45 days
Servings 1 serving

Ingredients

Bi Bim Bap Rice (proportions for 1 bowl)

  • 50 gm thinly sliced beef
  • 1 clove garlic finely chopped
  • 1/2 t brown sugar
  • 1 t corn syrup
  • 1/2 t salt
  • 1 T soy sauce
  • 1/2 t sesame oil
  • 2 fresh shiitake mushroomes, thinly sliced
  • 1/2 carrot, julienned
  • 1/4 c daikon, julienned or bean sprouts
  • 1/8 t pepper powder Gochugaru
  • 1 handful spinach leaves or sub 1/4 cup thinly sliced zuchinni or Persian cucumber
  • 5 perilla leaves aka sesame leaves can sub shiso leaves, julienned
  • vegetable oil for frying, 1/2 T for each vegetable
  • 2 cups Cooked white rice I use a rice cooker, its your call how to cook the rice!

Ingredients for Sauce for servings

  • 5 T Gochujang chili paste
  • 2 T Corn syrup light
  • 3 cloves garlic
  • 1 T brown sugar
  • 1/2 T vegetable oil

Instructions

For Sauce

  • In a nonstick skillet, add oil and chopped garlic. Turn heat onto medium high. Saute until garlic is brown color, don't burn!
  • Add remaining ingredients for sauce and stir over medium low heat for approximately 5 minutes. Set aside.

For Vegetables and Rice

  • Cooked medium grain white rice
  • In a small bowl combine soy sauce, brown sugar, corn syrup, pepper powder and chopped garlic. Add beef and stir to combine.
  • Stir fry each vegetable-mushroom, carrot, daikon, separately until tender crisp. Season with salt to taste. Place each vegetable on a platter, keep separate. Stir fry mushrooms in 1/2 T sesame oil, remaining vegetables can be saute in 1/2 T vegetable oil or a blend of sesame oil and vegetable oil
  • If using bean sprouts or spinach, blanch in hot water until tender crisp about 1 minute
  • Stir fry beef until cooked through.

Building Your Bowl

  • Divide hot rice between 3-4 bowls
  • Place vegetables in bundles around the bowl in a radial pattern. Place beef in the center.
  • Garnish with sesame seeds and perilla leaves and approximately 1 T sauce for each bowl. Place extra sauce in a bowl and serve along side bowls.
  • Optional (mandatory for me): Fry an egg for each serving, sunnyside up, and place on top of beef

Notes

Bi Bim Bap and creative expression.  The only absolutes for Bi Bim Bap is the rice and the sauce.  You could sub brown rice in place of white rice, but you need rice. The recipe from Joungy's class goes the extra mile by sautéing the red pepper paste with garlic and seasonings.  You could use Gochujang straight out of the jar, but the cooked sauce is really tasty.
Use whatever vegetables your little heart desires.  Great way to use extra Banchan you boxed from K-bbq the night before.  Why not? 

So good!  Bowled over by Bi Bim Bap!

Bowled Over, Udon Want to Miss My Newest Obsession (Udon)

Bowled Over, Udon Want to Miss My Newest Obsession (Udon)

Hang on to your hats, imagine Times Square, with all its neon signs and flashing lights dedicated solely to FOOD.  Yep, that’s the only way I can describe the Dotonbori area of Osaka.  Swarms of people, whose sole purpose is to find all things delicious to eat.  A giant 3-D crab, or shrimp or potsticker over the door of a dining establishment making it easy to figure out their specialty.  The delicious aromas swirling around, changing with every step as they walk by tempura houses, ramen joints, crab feasts and yakitori vendors.

Welcome to Crazy Town for food

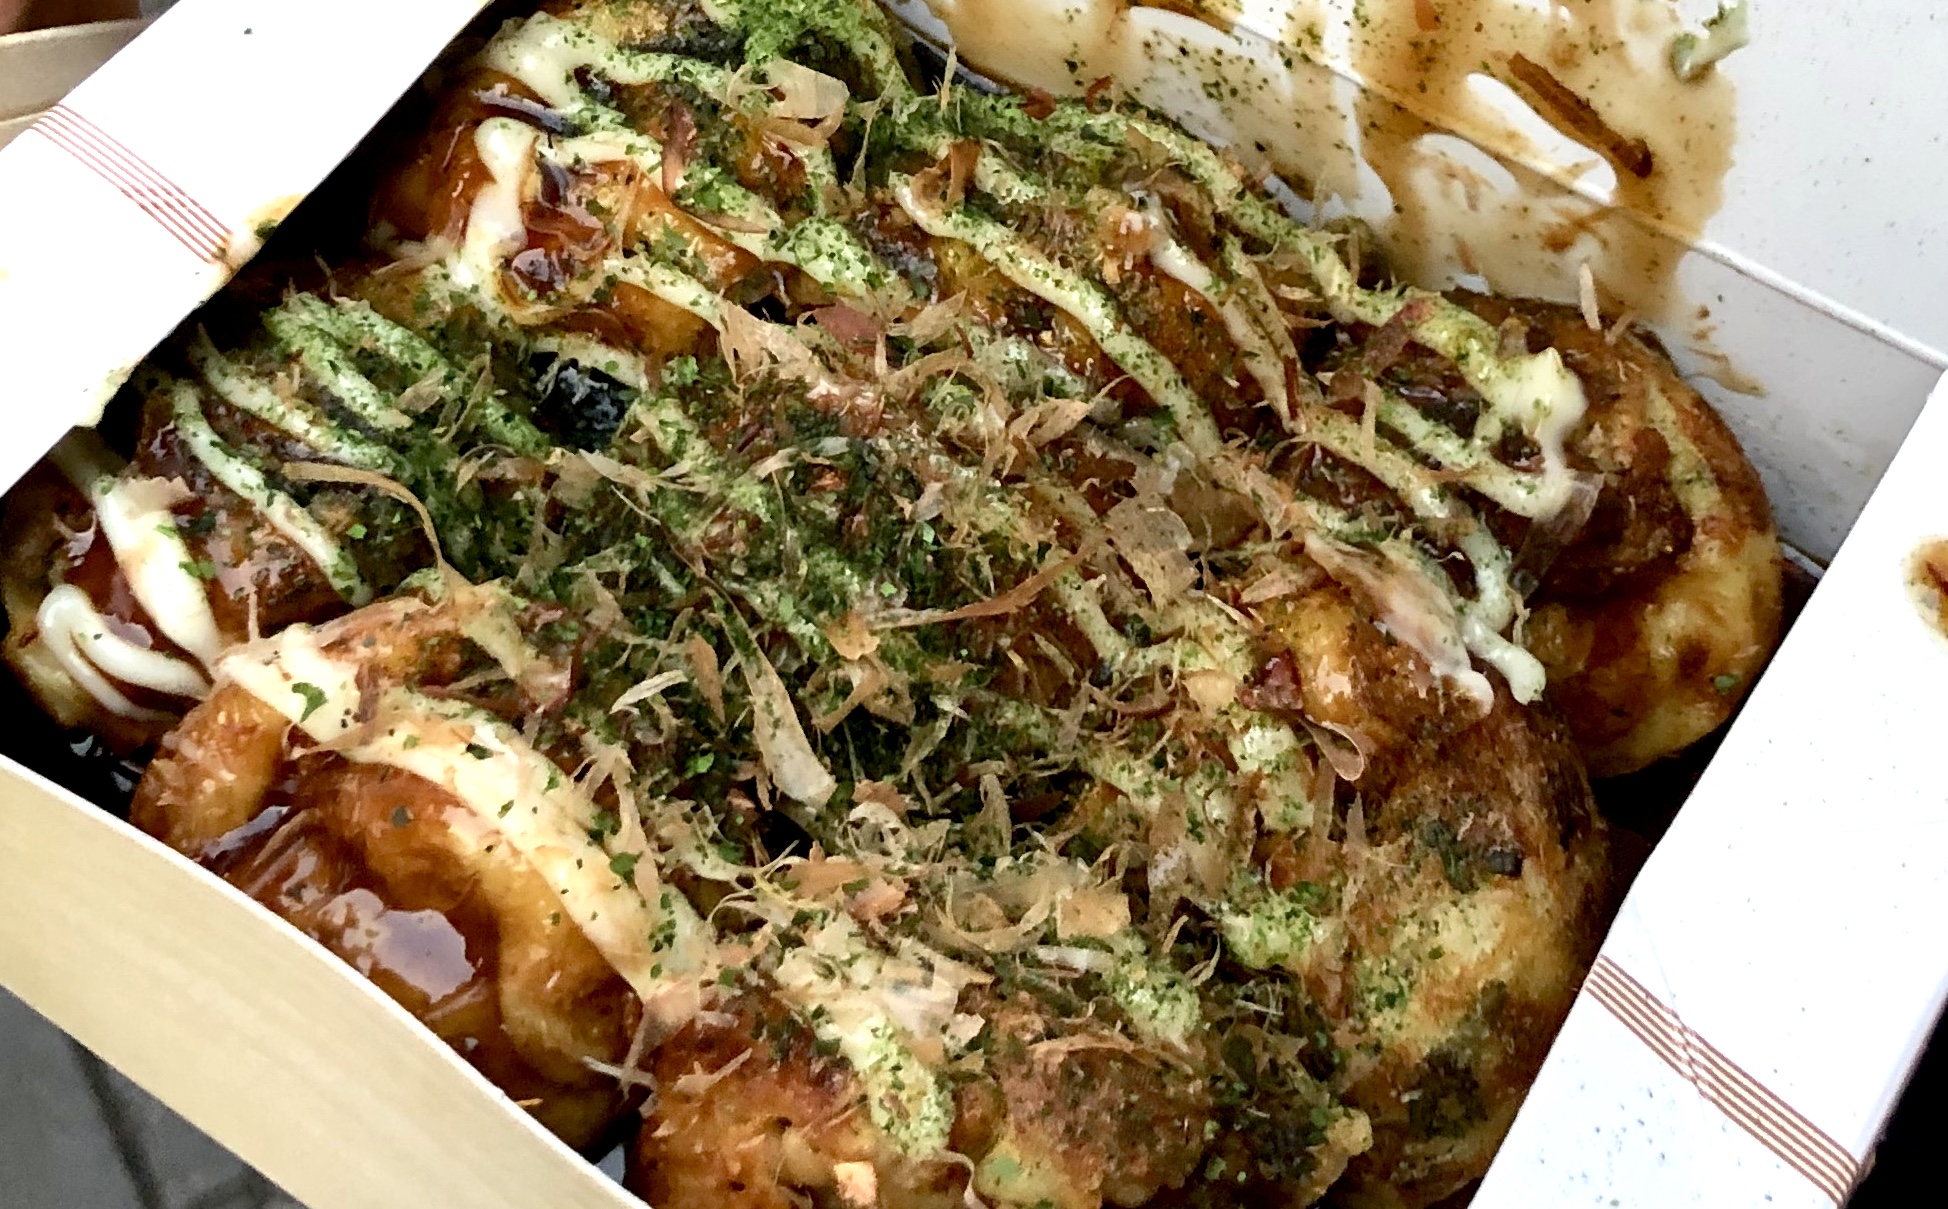
Yep, we bit.  Drawn by the people, hypnotized by the lights, we ate our way down the street.  We tasted Takoyaki, octopus cakes, (not really cakes, I just couldn’t bring myself to call them balls).  Think Ebelskiver with octopus bits.  We munched on skewers of yakitori, sampled matcha and black sesame soft serve and found taiyakis, fish-shaped cakes filled with red beans.

Udon want to miss the noodles

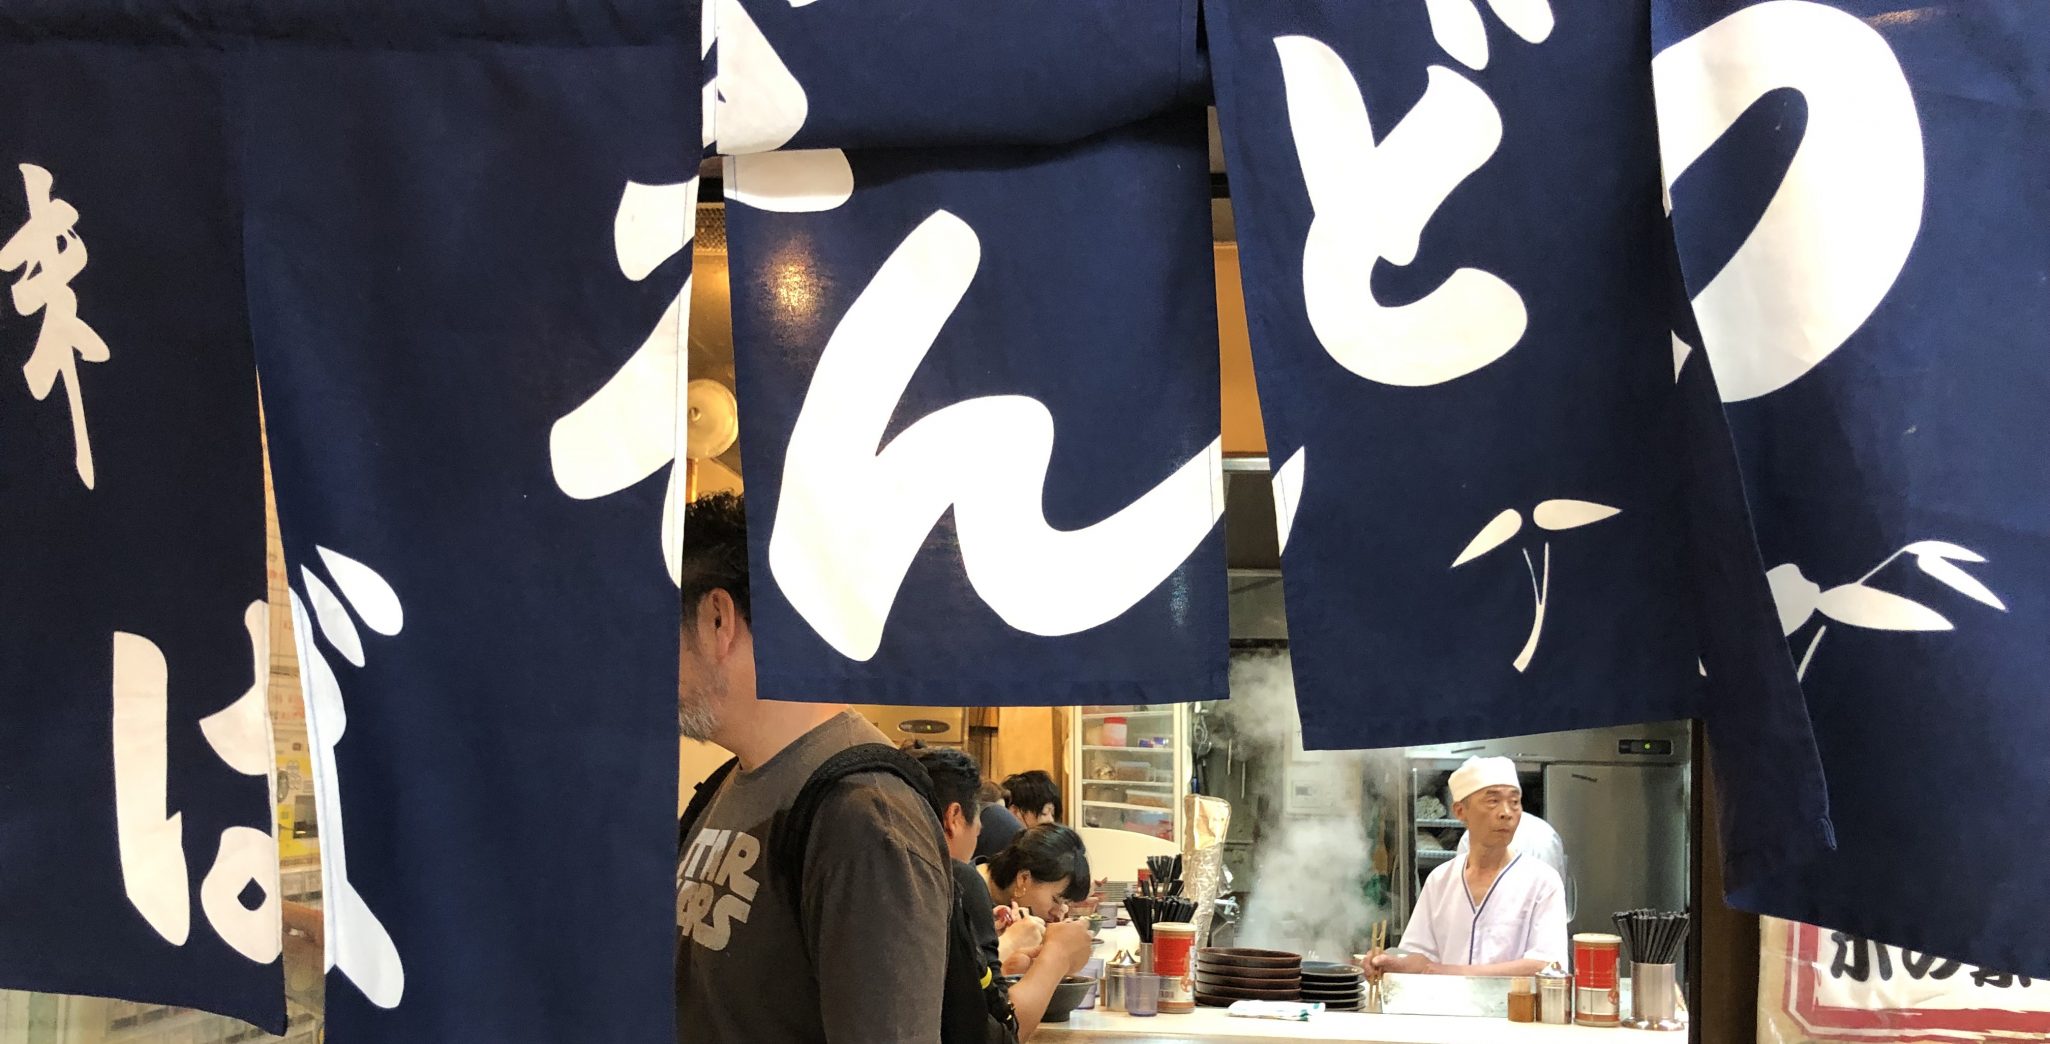
Our last stop was the perfect cap for the evening.  Walking back to our hotel we found a local shop in Namba with a trio of old cooks serving up delicious udon noodles.  We decided what toppings we wanted on our noodles, slipped our yens (=TWO DOLLARS A BOWL) into the machine, and handed the tickets to the chef.  Minutes later 3 hot steaming bowls of udon were placed in front of us.

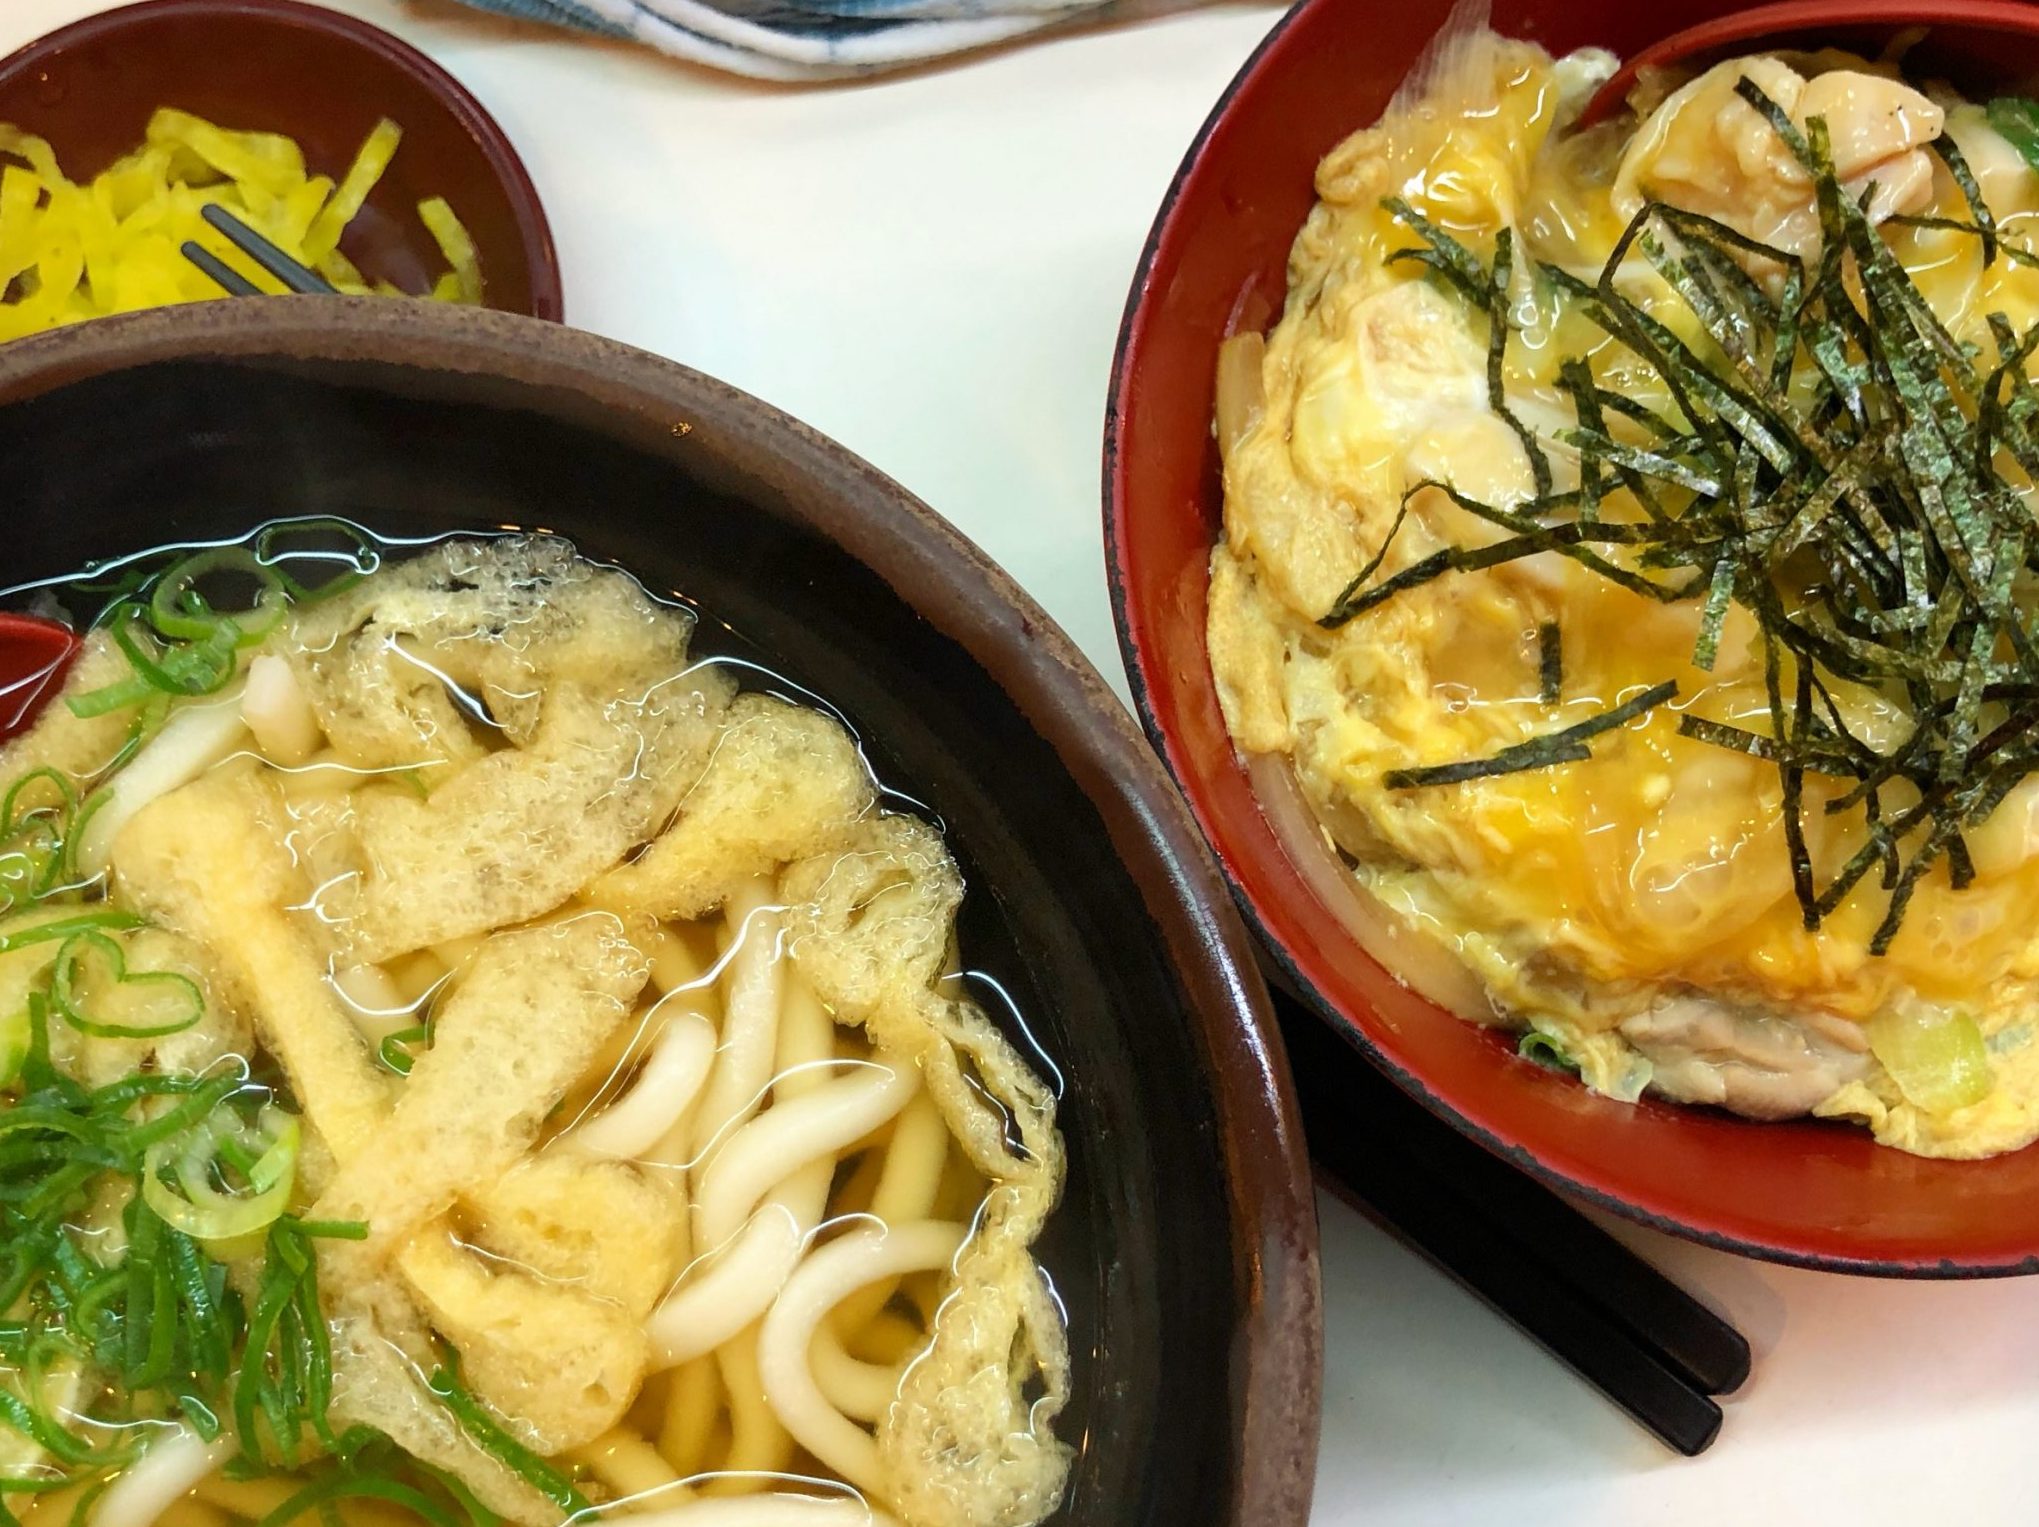
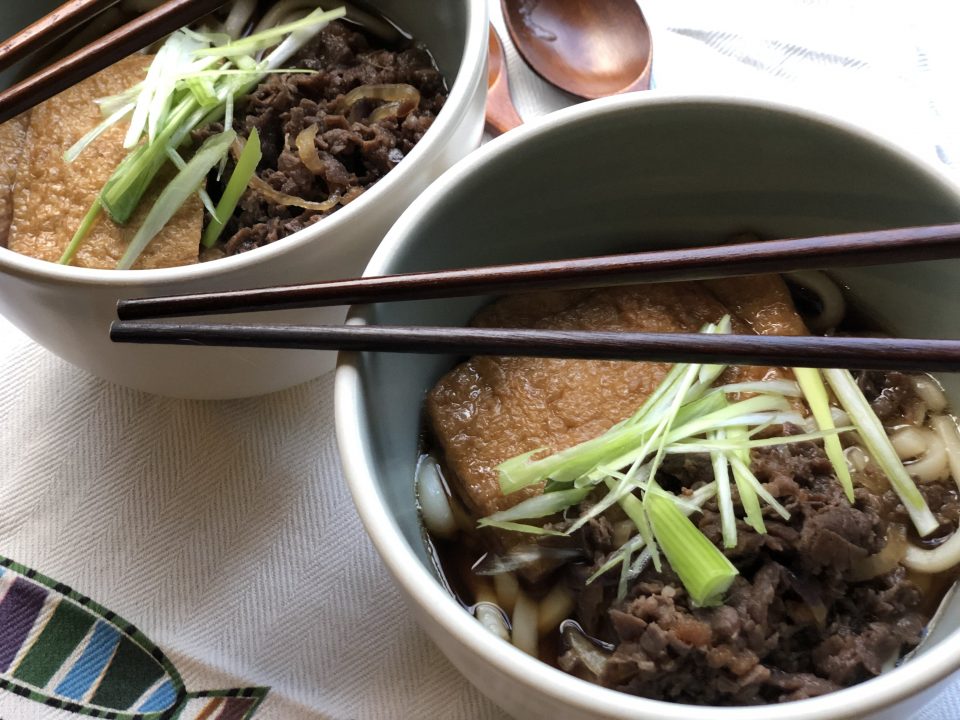
Unlike ramen, the noodles are much thicker with a definite chew.  The broth is flavorful but clear and light, fish-based, different than the rich, heavy broth that you find with ramen.  Toppings are simple-fried tofu (abura-age), a raw egg that cooks in the steaming hot broth, a single tempura shrimp, or a clump of shredded seasoned beef and a sprinkling of green onion.  We slurped our noodles and tipped the bowls to spoon out the last drops of broth.  You’d think we hadn’t eaten all day.  Ha!


Oyako-Udon combo set

Thus My Obsession with Udon Began…

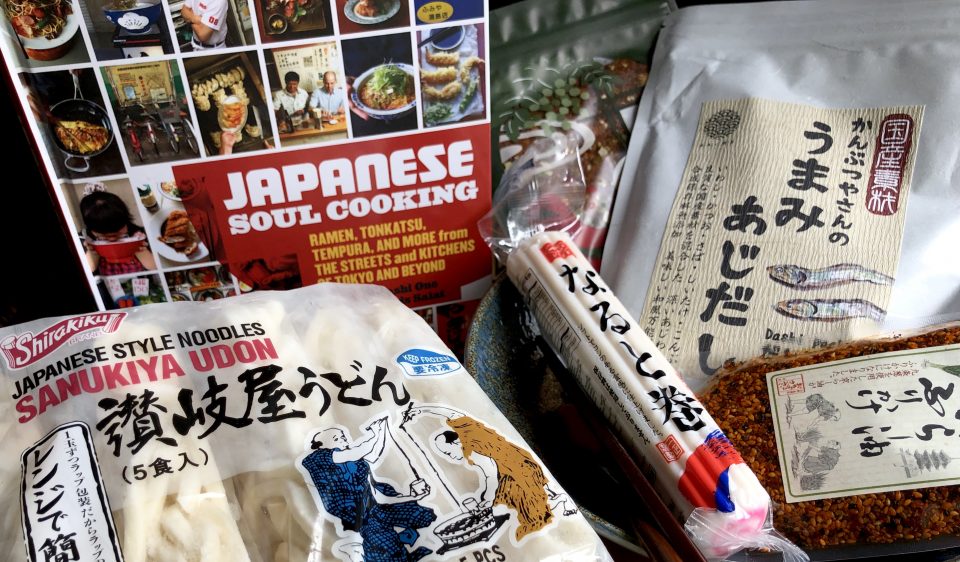
As soon as I got home plus 12 hours of catch-up sleep, I pulled out my copy of Japanese Soul Cooking by Tadashi Ono.  A gem of a book on homey Japanese comfort food.  I flipped to the udon section and then I was off to the market to look for ingredients.  I had purchased a delicious Dashi base in Tsujiki Market in Tokyo, perfect for my udon.  To make your own Dashi here is a great primer from Just One Cookbook. OR, Kikkoman makes a soup base Hon Tsuyu that makes a pretty good dashi broth base.

Working down my list, next the udon noodles. Udon comes fresh, frozen, and (if you can’t find fresh or frozen udon) dried.  Sigh, just not the same.  I also found abura-age or fried tofu skin which is used to make Kitsune Udon. The fried tofu skins are flattened and seasoned with soy sauce and placed on top of the udon.  Really delicious, and substantial enough for a satisfying vegetarian bowl of udon. It can be difficult to find abura-age though and in that case, Inari-age, seasoned deep-fried tofu pouches used to make Sushi Rice balls, is a convenient and easy substitute.  No need to season, just plop them on top of the cooked noodles.  Confused about tofu? Serious Eats’s Tofu primer is your ticket.  The carnivore in me though, bought some thinly sliced beef (sukiyaki beef is perfect) to make Niku Udon, yummo.

Making udon is very approachable.  It’s perfectly acceptable to start with a broth made from Dashi bags and pre-made noodles.

Udon Ingredients

Travel to Eat

People travel to buy clothes and souvenirs, I buy food, Dashi, Furikake’, Soba Boro cookies…yep, travel driven by food.

Studying up, here’s the scoop, on udon.

I used Dashi packets to make the Tsuyu.  This is your base,  add soy sauce and mirin to flavor the Tsuyu.

Optimally, use Sanukiya noodles, most likely found in the frozen section of your favorite Asian market.  The noodles are a bit firmer and hold up well.  The pre-cooked noodles only take a couple of minutes to separate and heat in hot water, presto-dunzo.  There are Korean versions of Udon noodles too, and they are very good.

Toppings for udon can be as simple as an egg, gently poached for the raw egg-squeamish, Abura-age, tempura, fishcake, or really ANYTHING you feel like putting on your noodles!

Kitsune Udon

Simple, satisfying, soulful, best describes a bowl of Udon, thick, slurpable, noodles, in a clear broth.
Course noodles, one bowl meal, One dish meals
Cuisine Asian
Keyword Kitsune, Udon
Prep Time 20 minutes
Cook Time 10 minutes

Ingredients

Abura-age (Tofu)

  • 1 package Abura-age or 4 Abura-age

For Simmering Abura-age:

  • 3/4 cup dashi soup stock
  • 2 Tbsp. sugar
  • 1 Tbsp. soy sauce
  • 1 Tbsp. mirin

For Soup:

  • 5 cup dashi soup stock
  • 3 Tbsp. mirin
  • 2 Tbsp. soy sauce
  • Salt adjusting the amount of salt to your preference

Noods and Garnishes

  • 4 packages pre-boiled udon noodles
  • Optional: 4 slices kamaboko fish cake for topping
  • green onions, sliced

Instructions

  • Heat dashi, mirin, sugar, and soy sauce in a medium pan and bring to a boil. Adjust the flavor with salt as you like.
  • Simmer aburaage in the soup on low heat until the liquid is almost gone. Set aside.
  • Boil water in a large pan and heat udon noodles as indicated in the package.
  • Drain the udon and divide into four bowls.
  • Pour the hot soup over udon noodles.
  • Top with seasoned aburaage and kamaboko slices.
  • Garnish with green onions

OR buy the more readily available Inari age or seasoned tofu pouches and just plop those straight into your bowl. Inari age is the fried tofu pouches used to make Inari Sushi

    Or the carnivore delight…

    Niku Udon

    Udon Noodles topped with stir fried seasoned beef and onions.
    Course Soup
    Cuisine Asian
    Keyword japanese, Noodle, soup, Udon
    Prep Time 20 minutes
    Cook Time 15 minutes
    Servings 4 servings
    Author Adapted from Japanese Soul Food

    Ingredients

    Niku Ingredients

    • 1/4 cup sake
    • 1/4 cup sugar
    • 1/4 cup soy sauce
    • 1 pound sukiyaki beef or thinly sliced flank steak, ribeye
    • 1/4 yellow onion, thinly sliced optional

    Soup

    • 6 cups udon tsuyu*
    • 4 bricks fresh or frozen udon noodles can substitute dried Sanuki Udon
    • 1-2 green onion thinly sliced
    • Shichimi togarashi

    Udon Tsuyu

    • 6 cups dashi
    • 1/2 cup mirin
    • 1/2 cup Usukuchi soy sauce light soy sauce
    • 1/2 - 1 teaspoon salt or to taste

    Instructions

    Tsuyu

    • Prepare broth and keep warm.

    Beef

    • Combine sake, sugar and soy sauce in a bowl and stir well. Add beef and mix together, coating meat well. Marinade beef for 10 minutes.
    • Preheat dry non-stick skillet or well seasoned wok/iron skillet. If including onion, saute onion slices just until soft before adding the beef. Add beef and marinade to skillet. Spread beef in skillet to cook evenly. Cook over high heat until beef has lost its pinkness and most of liquid has evaporated, approximately 5 minutes. Remove from heat and set aside.

    Udon Noodles

    • Bring large pot of water to a boil. Add each packet of noodles. gently spread noodles out. When water comes back to a boil, the noodles are done. Drain well and divide among bowls.
    • Pour hot broth over noodles. Divide beef among bowls, garnish with green onions and shichimi togarashi. Serve immediately.
    Jajangmyeon: K-C & The Sunshine Noodle Bowls

    Jajangmyeon: K-C & The Sunshine Noodle Bowls

    Another cold and rainy day in normally sunny California. To combat the soggy blues I pulled out my favorite therapy tools. A pot, a bowl, and a package of NOODLES. When you think comfort food, don’t tell me a fork, a knife, and a plate pop up in your mind.  Me? A bowl, a big spoon, and a pair of chopsticks, that’s what I reach for.
    The plan was to make a bowl of yummylicious noodles, curl up on the sofa and watch the new episode of Romance is a Bonus Book on Netflix. Yes, my current favorite Korean series.
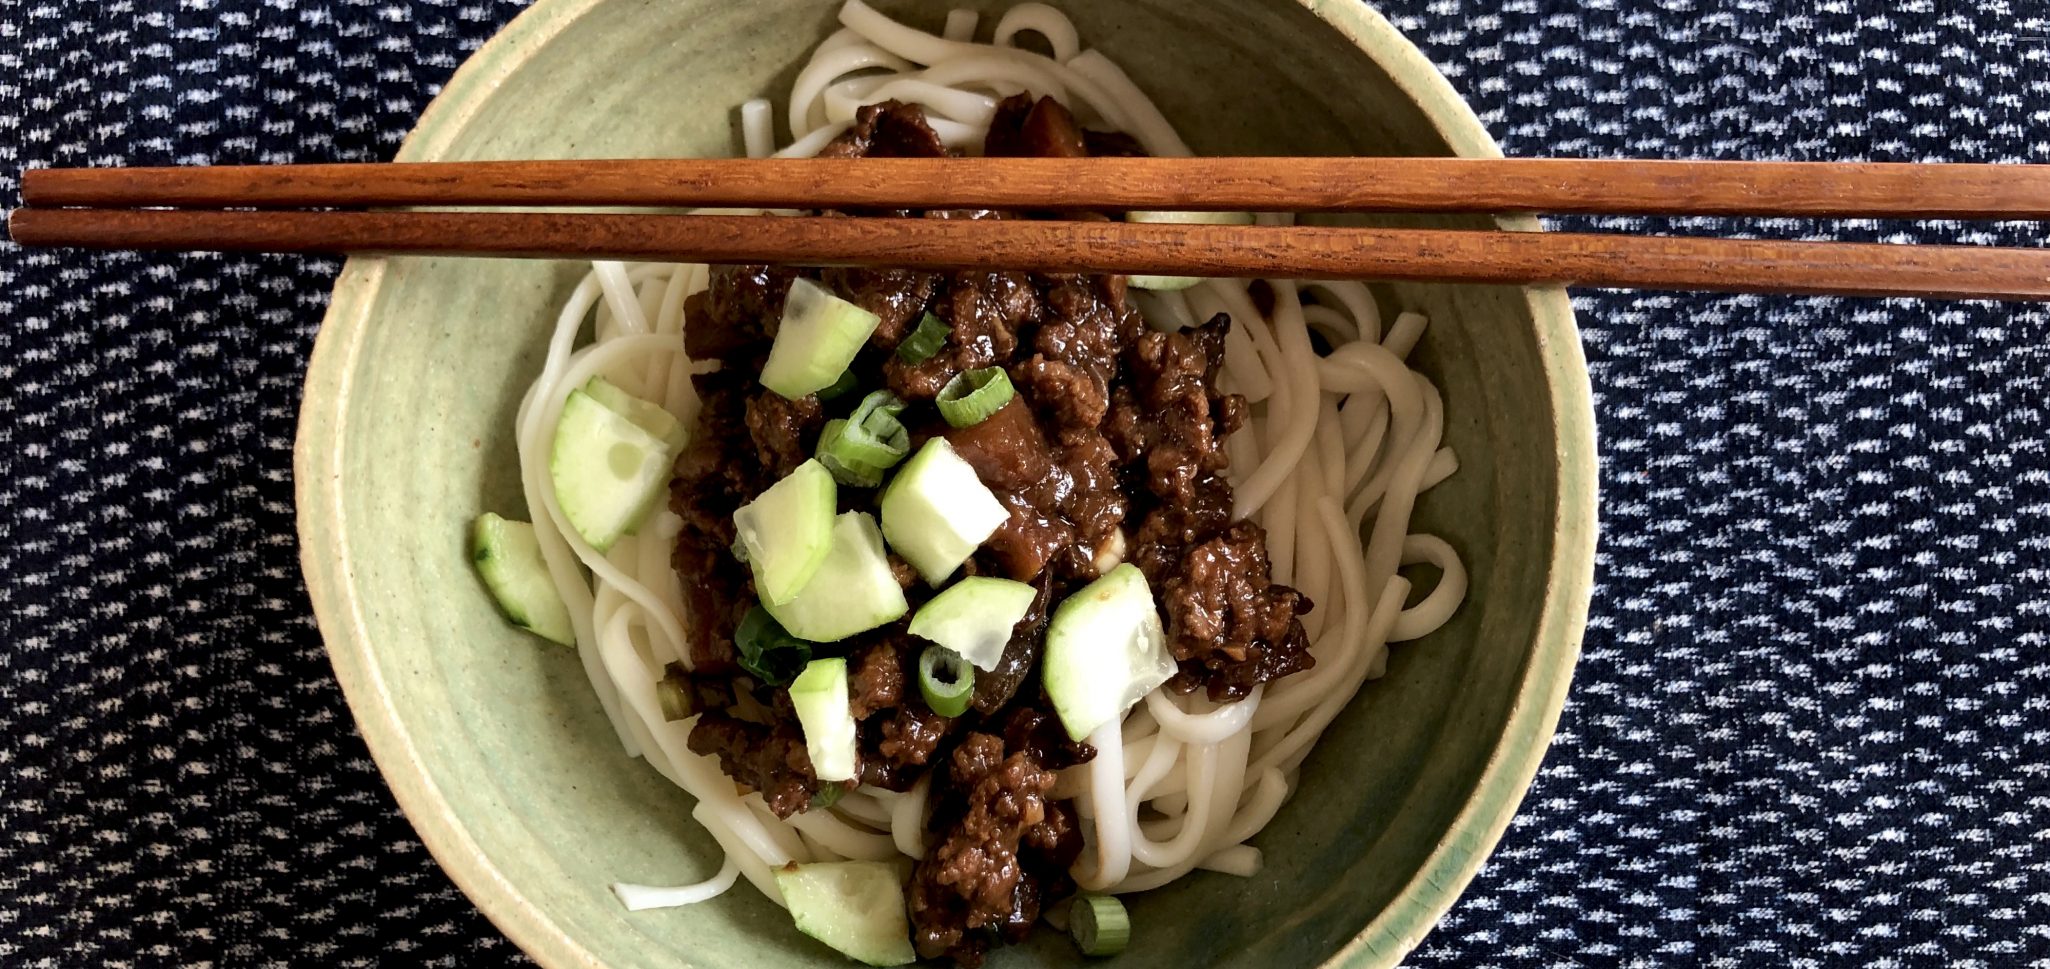
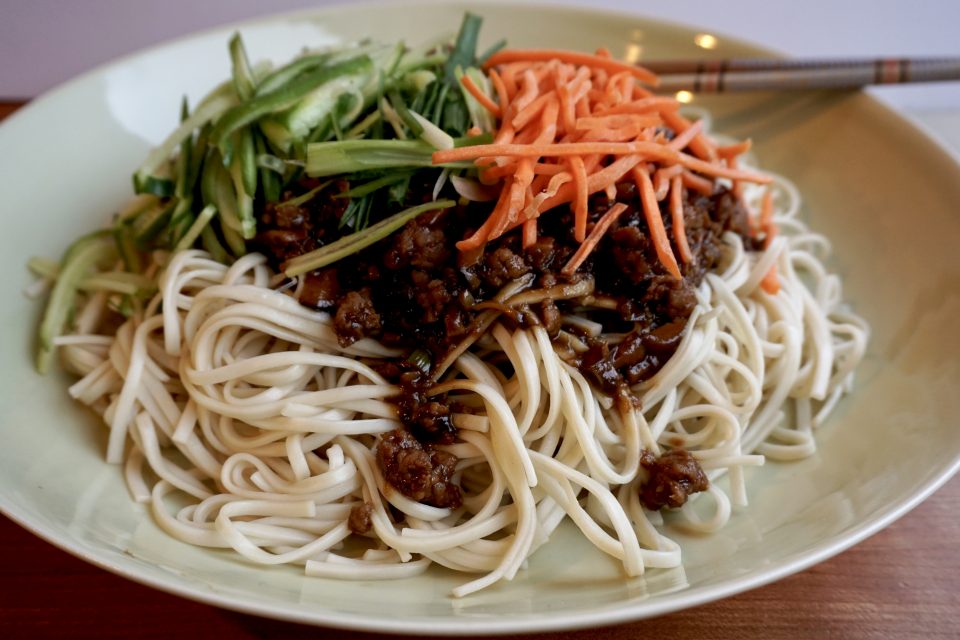
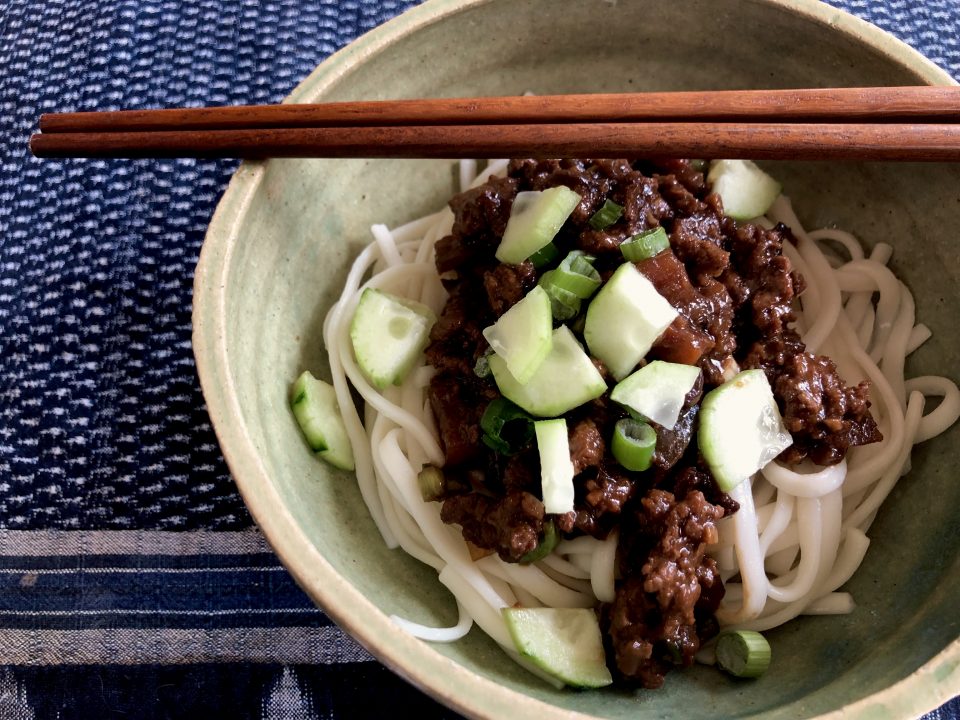
    I had a hankering for Zha Jiang Mian for my “TV dinner”  which got me thinking why not a mash-up of the Korean & Chinese versions of Zha Jiang Mian?  I started with my recipe for Zha Jiang Mian, I didn’t want to re-invent the wheel, I just wanted to tweak it.  The sauce for my original recipe contains pork, aromatics, and the bean pastes.  Veggies are julienned and added to the finished dish.  I love the play on textures, the crunch of the cucumbers and carrots with the soft noodles and flavor-packed sauce filled with chunks of ground pork, it’s delicious.

    Contrast this with the Korean version 짜장면 where a variety of veggies are cooked in the sauce.  The play on textures is much more subtle but just as yummy.  A variety of veggies went into my K-bowl version.  I used diced zucchini, carrots, and potatoes. The carrots added some bite, the zucchini added moisture and that characteristic melt-y center and crispness from the skin.  But my favorite addition is the diced potatoes (Yukon, don’t use Russets, too starchy).  Potatoes have a characteristic dense, yet creamy feel, so good-like the center of perfectly cooked potato wedges.  I used ground pork in my K-version, but often the pork is diced like the vegetables.  Your choice.

    Try both versions and tell me which one you like best although I think you’ll find both are equally delicious!

    Zha Jiang Mian 2 Ways

    Zha Jiang Mian Korean style and Chinese Style, both delicious!
    Course Main Course
    Cuisine Asian
    Keyword Zha Jiang Mian
    Prep Time 10 minutes
    Cook Time 20 minutes
    Total Time 30 minutes

    Ingredients

    • 6 oz. ground pork
    • ¼ teaspoon salt
    • 1 teaspoon cornstarch
    • ½ teaspoon oil plus 1 tablespoon
    • teaspoon white pepper
    • 3 slices ginger minced finely
    • 4 cloves garlic minced
    • 2 tablespoons sweet bean sauce I used 2 T Hoisin/1 T Sweet Ben Sauce
    • 3 tablespoons ground bean paste Reduce to 2 T
    • 1 tablespoon dark soy sauce
    • 1 cup water
    • 8 oz. fresh noodles flour-based noodle. Fresh or dry. I've used udon and a combination of spinach and plain

    Additional Chinese Ingredients

    • 4-6 fresh shiitake mushrooms* finely chopped
    • 1 cup julienned carrots
    • 1 cup julienned cucumbers
    • ½ cup julienned scallions garnish

    Additional Korean Ingredients

    • 3 fresh shiitake mushrooms diced
    • 1 medium Yukon Gold Potato* 1/2 inch dice for Korean version
    • 1 small zucchini 1/2 inch dice for Korean version
    • 1/2 cup carrots 1/2 inch dice for Korean version
    • 1/2 small yellow onion diced
    • 1/4 head cabbage shredded, optional
    • 1/2 cup green onions chopped
    • 1/2 cup cucumbers diced

    Instructions

    • Marinade the pork with the following for 15 minutes: ¼ teaspoon salt, 1 teaspoon cornstarch, ½ teaspoon oil, ⅛ teaspoon white pepper.
    • Heat a tablespoon oil in your wok over medium heat, add the marinated ground pork to the wok. Cook for a minute to brown it, and then add the ginger, garlic, and mushrooms* Stir fry everything together for another 2-3 minutes.
    • **Add the Hoisin, sweet bean sauce, bean paste, dark soy sauce, and water, stirring everything together well. Lower the heat and cover the wok. Simmer the sauce for 15-20 minutes, stirring occasionally to prevent sticking.
    • Meanwhile, cook the noodles according to the package directions.
    • Top noodles with the sauce and garnish with the julienned carrots, cucumbers, and scallions.

    Korean Style*

    • Stir fry pork, ginger, and garlic for 30 seconds add diced vegetables.  Stir fry for 2-3 minutes. Continue with recipe**
    •  If you like, add shredded cabbage in the last couple of minutes of cooking.  
    • Place a mound of noodles in your bowl, top with sauce and garnish with cucumber and green onions.  Plop yourself down in front of the telly and enjoy!
    Oyako Donburi Hmmm, Maybe the Chicken and the Egg Came Together?

    Oyako Donburi Hmmm, Maybe the Chicken and the Egg Came Together?

    I am soooo excited! We are adding a new category to 3Jamigos!  The kids have flown the coop and are making their own way, Jeff in the City close by (yippee), Jorge in Korea teaching (so far away) and Jams currently working and freezing her tush off in Minneapolis (half of so far away).  Luckily we have FaceTime, phones, texting and when that just won’t do, flights.  Just an airplane ride away.

    A California-Texas kinda gal, winter in Minneapolis is a new experience for Jamie.  Down jackets, scarves and gloves are now a part of her wardrobe vernacular, as is staying indoors. The winter weather has her looking for activities inside to keep her busy.  For Christmas, we gave her knitting needles, yarn and starter lessons from Wes on how to knit.  Big hit, knitting up a storm haha.

    Jamie has always loved to bake and cook.  She’s a natural, and with this weather, she has been doing alot more cooking and baking.

    A recent call went like this:

    Mui (her nickname):  Mom, can you send me your Oyako Donburi recipe?  Is it easy to make?

    Me: Sure.  Yep, it’s pretty easy.  One pan, a couple of eggs, chicken, and onions.

    Mui: That sounds good, I love rice bowls and I can bring the leftovers to work.

    LIGHTBULB MOMENT:  Hey, why don’t we both make Oyako Donburi and then post about it?  You have done spots before on 3Jamigos. We’ll alternate picking recipes to make and blog about!

    THUS a new 3jamigos category was born, M&M which stands for Mom and Mui.  Mui means little sister.  We have been calling Jamie Mui since Day One.

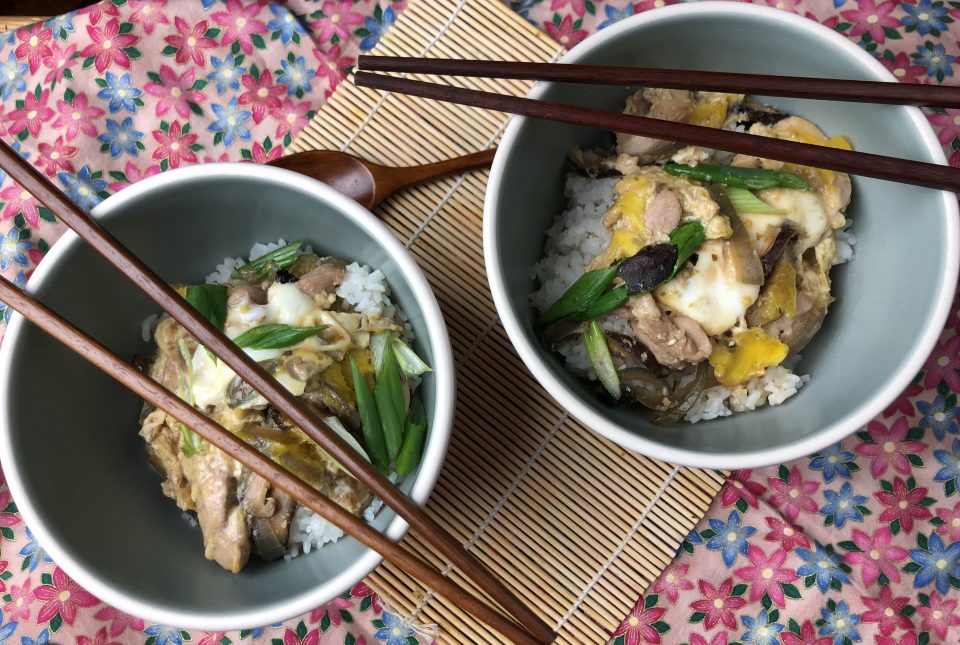
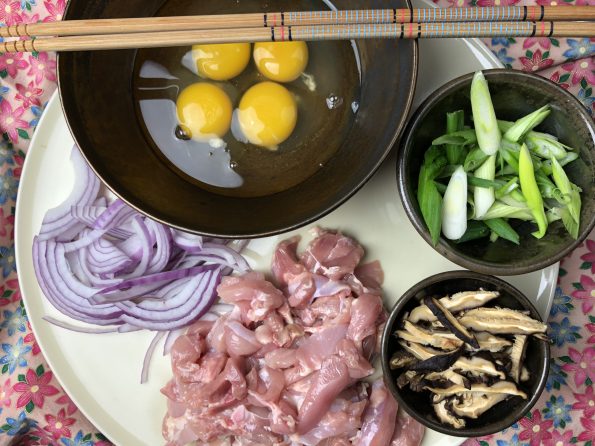
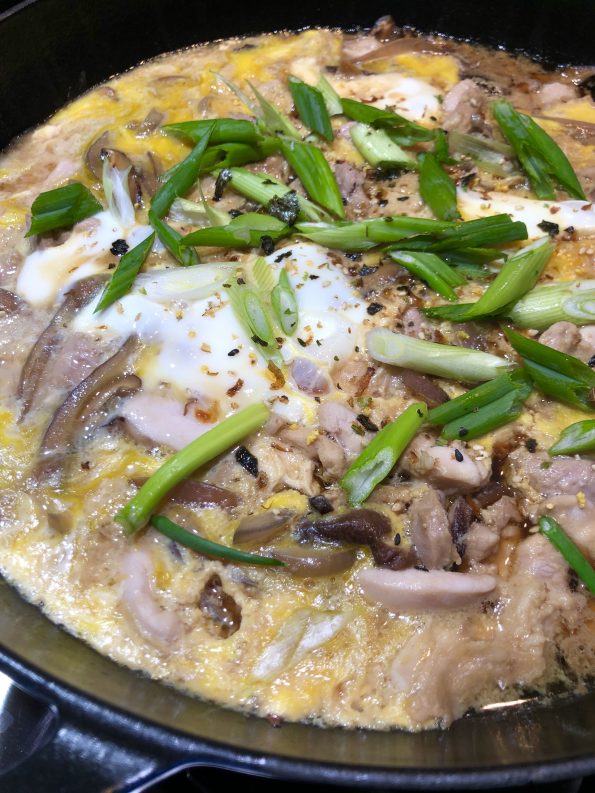
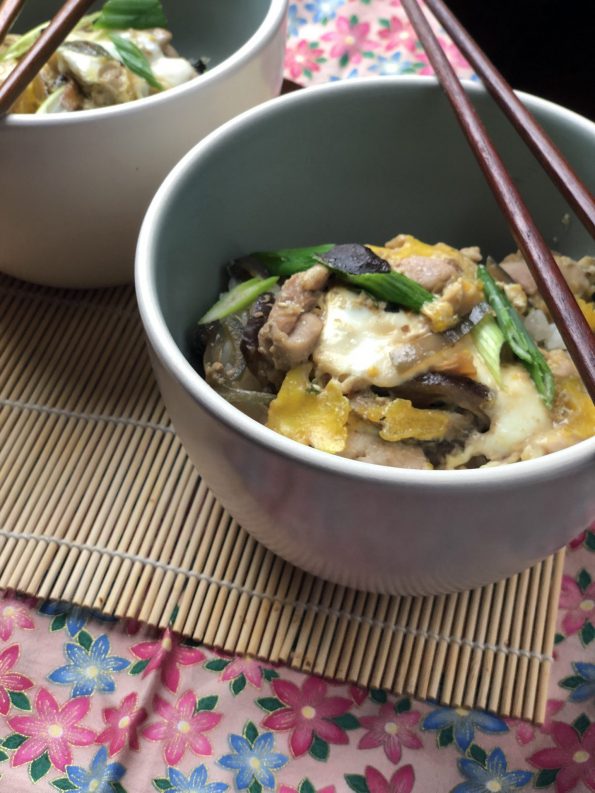
    Oyako Donburi is the perfect dish to launch M&M.  Chicken, sliced shiitake mushrooms, onions are cooked in a savory-sweet sauce of soy sauce, sake, dashi.  Lightly beaten eggs are then poured on top of the chicken and sauce and simmered until just cooked through, then the chicken and egg mixture is placed on top of hot rice.  Watch your kids, hubby, neighbors, everybody gobble it up.  So delicious, classic Japanese soul food.

    So without further adieu, our inaugural M&M post by Jamie on making Oyako Donburi in cold & snowy Minneapolis.

    HELLOOOO WORLD/readers of 3jamigos.com. It’s ME. J A M I E. Ya know, that crazy girl who moved to Minneapolis to live in -30 DEGREE WEATHER. Nope, that wasn’t a typo. It really was NEGATIVE 30 on my drive into work last week.  GLOBAL WARMING IS REAL PEOPLE. (I know that doesn’t really make sense, but global warming is causing polar vortexes normally over THE NORTH POLE to break apart and dip down to lower parts of the globe).  It’s so cold that you can’t stand outside with exposed skin for more than 5 minutes without getting frostbite. FROSTBITE. Schools were closed. The roads were empty. But I still had to go to work. Once I got over that, it really wasn’t bad. They are GREAT about paving and salting the roads, so it was actually a breeze getting to and from work.

    BUT enough about me. Let’s talk about the fact that my mom and I decided to start a mother-daughter blog where we cook the same dish separately and talk about it, AND THE FIRST DISH WE PICKED JUST HAPPENED TO TRANSLATE TO “Parent (chicken) and child (egg).” Damn, we are GOOD, people. You couldn’t even make this stuff up. I mean, I guess you could. It would make a great lifetime/hallmark movie. Ok. Enough interruptions. Let’s get down to the food.

    Okayo Donburi. The ultimate comfort food.  It’s a mix of chicken and eggs (parent and child) with a sweet/salty/chickeny sauce and sautéed onions.  Pour it over some rice, and all the stresses of your day melt away. The best part? It is SO easy to make.

    Chop up some onions, slice some mushrooms, toss it into the pan with some chicken broth, mirin, soy sauce, and sugar, and top it off with some eggs and chicken.  E A S Y and so foolproof even my mom could make it and she suuuuckkss at cooking (if you couldn’t tell). I like to add in extra mushrooms and chicken. Sometimes extra onions. Pretty much extra everything. It is that good.  Mom used to make it all the time when I was little, and it was one of my favorite dishes then too.  So far, I’ve made it 3 times since winter started. That’s how good it is.

    So now, for lack of a better conclusion, stop reading this post and go make it. Go!

    Oyako Donburi

    Course Main Course
    Cuisine Asian
    Keyword Oyako Donburi
    Prep Time 15 minutes
    Cook Time 15 minutes
    Total Time 30 minutes
    Servings 4 servings

    Ingredients

    • 3-4 boneless, skinless chicken thighs cut into bite-sized pieces
    • 4-5 eggs lightly beaten
    • 1/2 yellow onion thinly sliced, red onion can be used
    • 1 green onion sliced on the diagonal
    • 2-3 dried shiitake mushrooms soaked to soften, sliced
    • 1 tablespoon vegetable oil

    Sauce Mixture

    • 1 cup dashi (fish based stock) can substitute low sodium chicken broth
    • 5 T soy sauce
    • 2 1/2 T sugar can cut to 2 T
    • 21/2 T mirin substitute sake to decrease sweetness
    • cilantro garnish if desired

    Instructions

    • In a small bowl, lightly beat eggs and set aside.
      Oyako Prep
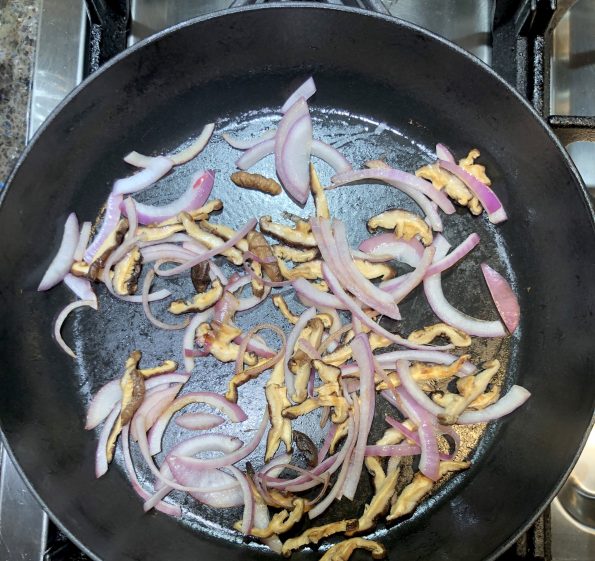
    • Heat saute' pan, add vegetable oil then onions and mushrooms, fry for 1-2 minutes until onions are soft. Add sauce mixture, heat through. 
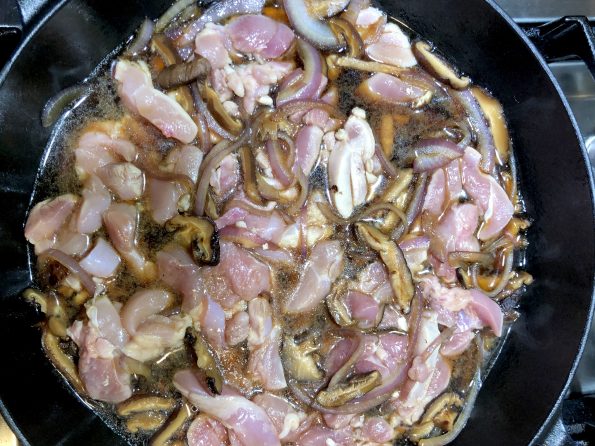
    • Add chicken and lower flame to medium-low. Cook for 3-4 minutes, turning the chicken over. Cook until chicken loses pinkness
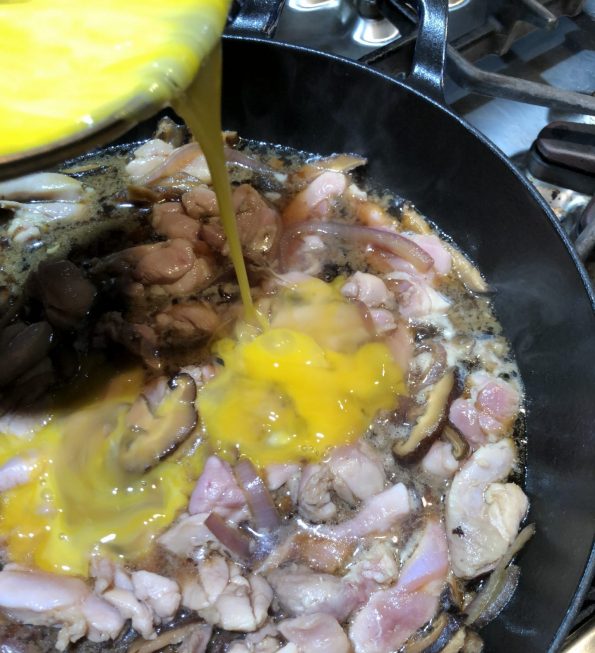
    • Add eggs evenly over top of chicken. Cover and cook over low heat until eggs are just cooked should not be dry. 
    • Garnish with green onions or cilantro and nori strips
    • Divide into portions and serve over rice.  If desired, individual portions can be made.  Quarter ingredients and use a small omelet pan to make.  
    Bok Bok, Batch…of Three Cup Chicken

    Bok Bok, Batch…of Three Cup Chicken

    Gung hay fat choy! Happy Lunar New Year! This is the Year of the Pig and in celebration of this, I spent the last week in Hong Kong with my boys-PIGGIN’ out. It has been years since I have been in Hong Kong and with Jordan living in nearby Korea, we decided a rendezvous was in order.
    I walked off the plane and took a deep breath and instantly knew I was back in Asia. The scent that wafted through the air and surrounded me immediately transported me back to my first visit to Hong Kong so many years ago. An amalgam of daily life, food, incense, years of humanity all rolled into one.

    Before I regale you with our travels in Hong Kong…let me tell you about our flight.  It’s been a while since I have been on a flight that lasts 14 hours.  AUUUGH!  I don’t care if you are in First Class, Business, or Economy…it’s a LONG time to be cooped up in a plane.  I did manage to catch 40 winks, watch a couple of movies, and pick through multiple cafeteria-like meals.  The highlight was a bowl of instant ramen on the last leg of our journey. By then even the K-Movie I was watching knew how I felt.

    One of the meal selections was Three Cup Chicken.  I knew of this classic Taiwanese dish but have never had it. This peaked my curiosity so I made a mental note to try this dish when I got home.

    A day of vegging out to get over my jet lag and I was ready to hunt down the recipe for Three Cup Chicken.  The first thing I noticed was, though called 3 cup chicken, most recipes did not use those proportions.  Thank goodness since that is a lot of sesame oil.

    I decided on a mash-up from two of my go-to blogs, The Woks of Life and No Recipes. You can use bone-in pieces like chicken wings but the next time I think I will try boneless thighs.  This dish is easy to prepare and lands on the dinner table in minutes…my kind of dish.

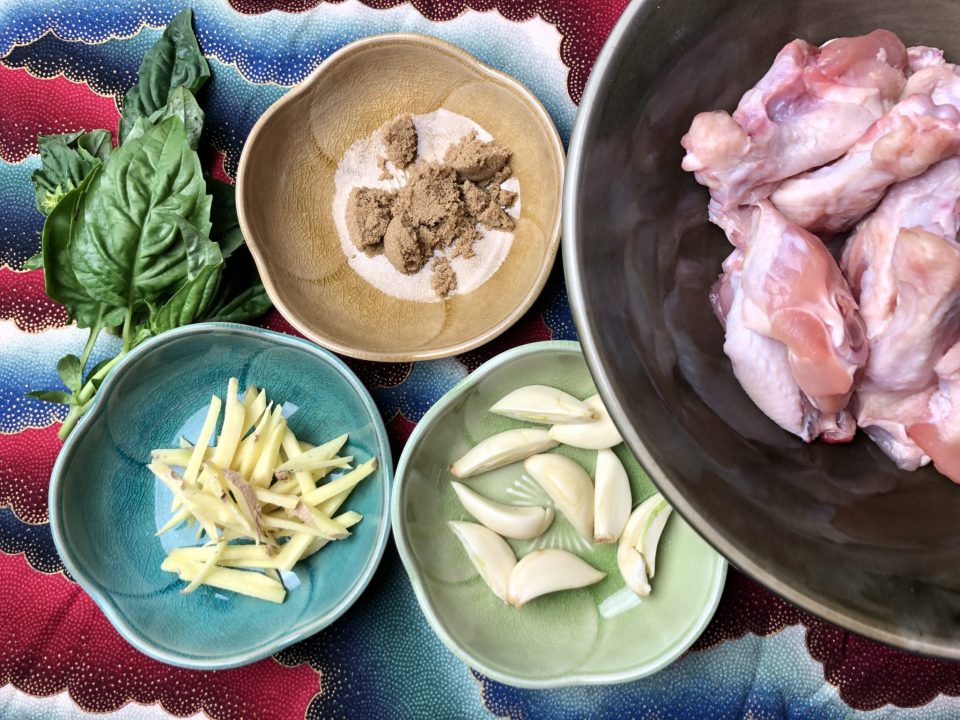
    The soy sauce, sesame oil and rice wine form the braising liquid but the addition of garlic, ginger and Thai basil really sets this dish apart. No wonder it’s a classic that has stood the test of time.  One recipe called for a touch of sugar, sounded good, so I included it. If you like spice, throw in 1-2 Thai chili peppers for good measure.

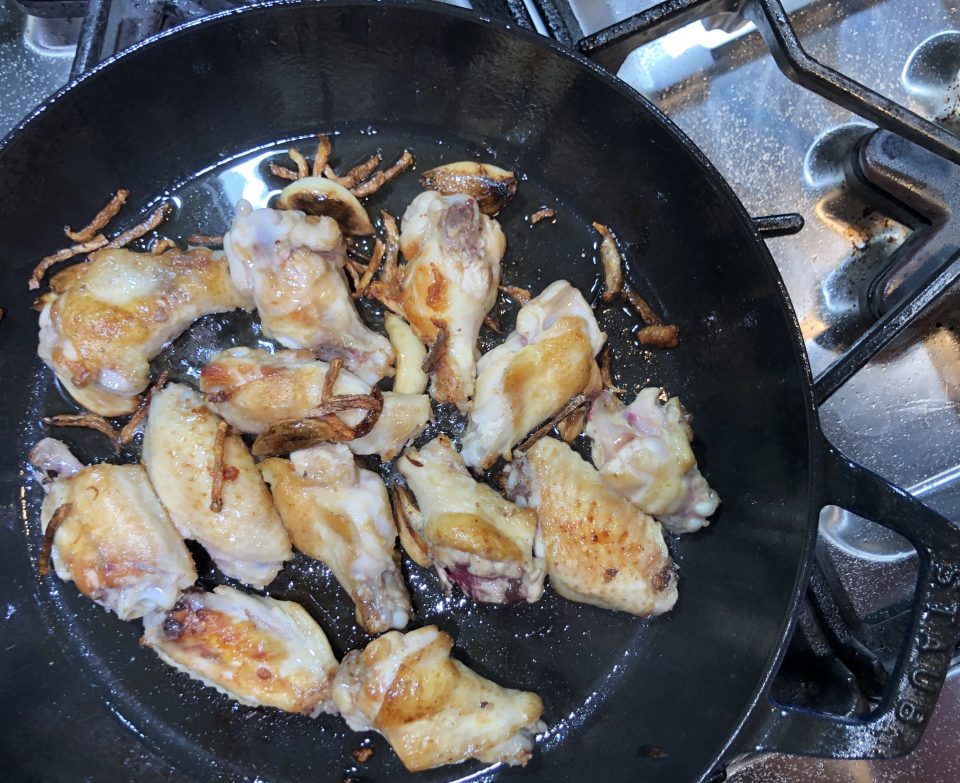
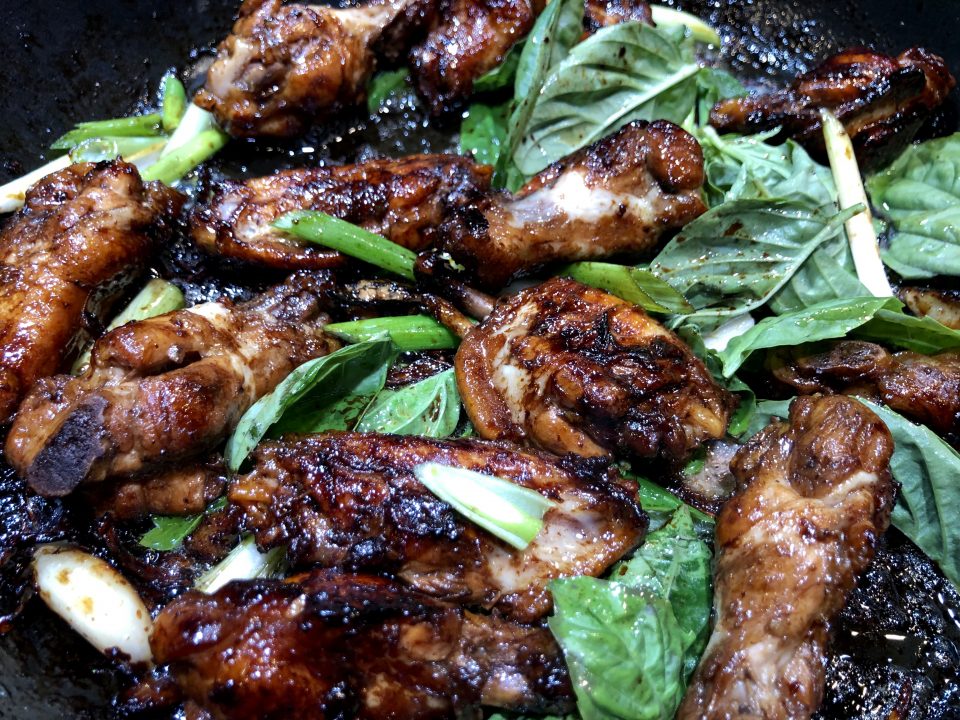
    The aromatics are heated in oil before adding the chicken.  Brown the chicken and add the braising sauce.  Simmer, turning the pieces occasionally.  The sauce will reduce and coat the chicken creating a deep caramel color. Can you say yum?  Finish with the basil and green onions.  Be generous with your basil it adds a ton of flavor to the dish.

    The chicken is browned in the ginger, garlic infused oil.
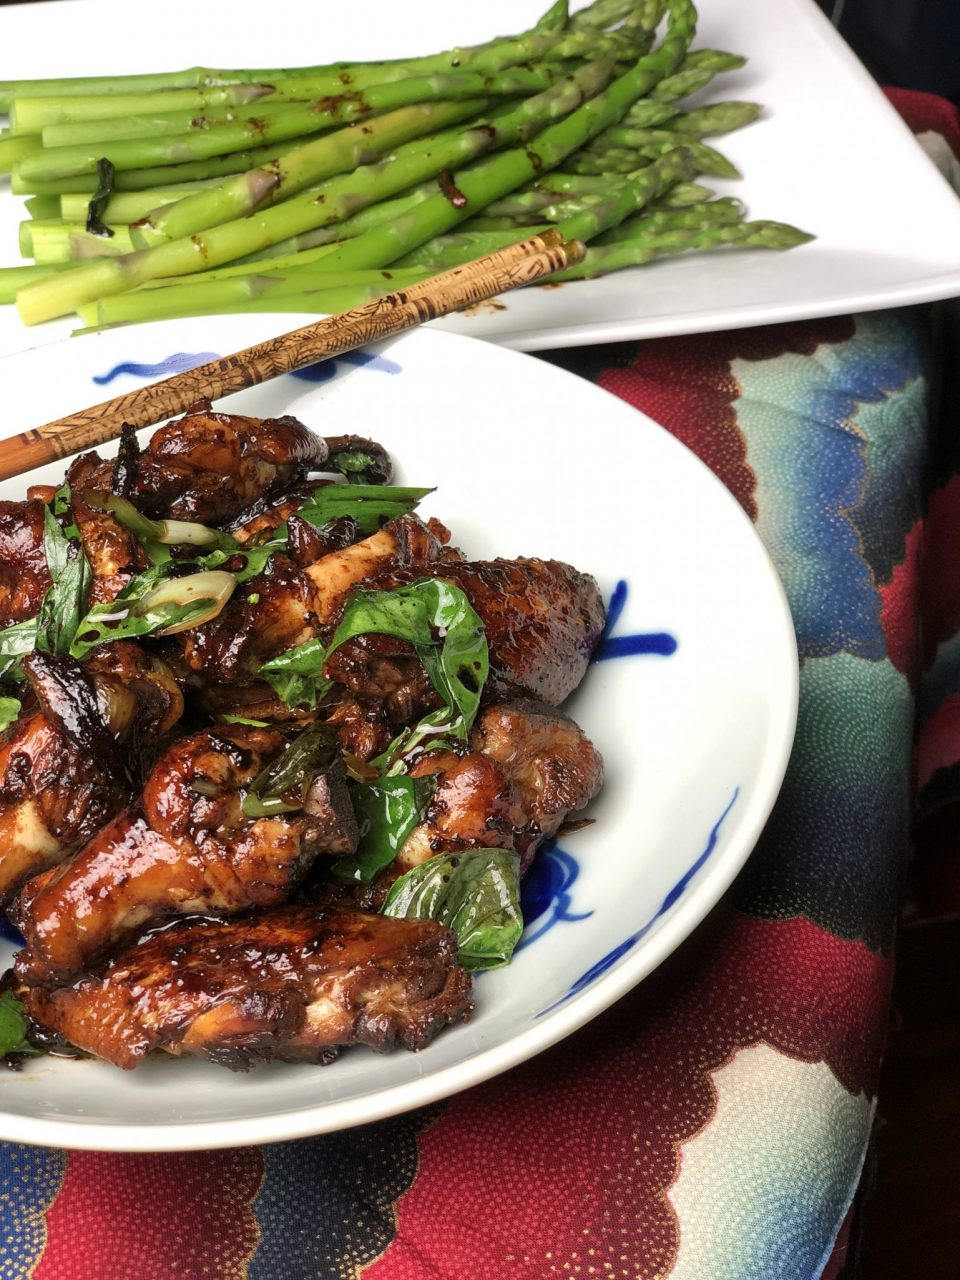
    Isn’t that a lovely color?  Serve with steamed rice and veggies. The perfect meal.
    So delicious. Don’t tell Cathay Pacific, but this version of 3 Cup Chicken is so much better than theirs!

    San Bei Ji(三杯鷄), or Three Cup Chicken

    Taiwanese dish made by cooking chicken with sesame oil, soy sauce and rice wine.
    Course Main Course
    Cuisine Asian
    Keyword 3 Cup Chicken
    Prep Time 10 minutes
    Cook Time 15 minutes
    Total Time 25 minutes
    Servings 4
    Calories 460kcal

    Ingredients

    • 1 tablespoon peanut oil or vegetable oil
    • 2 tablespoons toasted sesame oil
    • 1 inch piece ginger sliced then julienned
    • 6-8 cloves of garlic lightly crushed, but left whole
    • 1 thai chili seeded and sliced crosswise optional
    • 1.25 pounds boneless skin-on chicken thighs sub: 1.5 pounds chicken wings
    • 1/4 cup Chinese rice wine mijiu or shaoxing
    • 1 tablespoon dark soy sauce
    • 1 tablespoon light soy sauce
    • 2 teaspoons brown sugar
    • 1 cup loosely packed Thai basil leaves only
    • 1-2 green onions thinly sliced

    Instructions

    • Heat a large pan or wok until hot. Add the peanut oil then ginger and garlic (and chili if using).  Fry until fragrant, but don't let it brown.
    • Add the chicken in a single layer, skin-side down and fry until the skin is well browned.
    • Flip the chicken over, and then add the rice wine, dark soy sauce, regular soy sauce, sesame oil and sugar.
    • Cover and simmer over medium low heat for 10-15 minutes, or until the chicken is tender, flipping the chicken over a few times as it cooks.
    • Remove the lid and turn up the heat. Reduce the liquid into a thick sauce.
    • Add the Thai basil leaves and toss to coat.
    • Serve with rice.


    Instant Pot Easy Jook (Rice Soup) Soul Food Breakfast

    Instant Pot Easy Jook (Rice Soup) Soul Food Breakfast

    Last weekend Jamie played her version of NYT’s 36 Hours. We picked her up at the airport (SFO NOT SJC, grrrr) at 1:00 am Friday night (ok Saturday morning, delays) and dropped her off Sunday at 11:00 AM.  Her first words upon seeing her bleary-eyed parents? DID YOU BRING MY SUSHI WITH YOU?  I AM STARVING!  Lucky we like her.

    Happy Hour Any Hour

    With Jamie coming home, the call went out for a happy hour, which, due to schedules, morphed into a Saturday morning breakfast happy hour.  Any time of day is Happy Hour when it involves friends, food, and fun.  It just means tweaking the menu that’s all. We decided on a bowl of fresh strawberries and summer peaches, Belgium Waffles, candied bacon, Jule’s Granola and yogurt.  Jamie chimed in with “I want Jook (rice soup) too”  Rice Soup is soul food, comfort food, each bite reminds one of being home.  With its addition and the various toppings like shredded chicken, assorted sweet and salty pickles, and slivers of green onions to go along, our breakfast menu was complete.

    A small stumbling block to this plan, who was going to make Jook (Rice Soup) in the morning? Ugh, the last thing I wanted to do was get up early after a late-night airport pickup.  Then it hit me, hello…you have an INSTANT POT, Deb.  A quick Google search yielded plenty of recipes so I decided on a mash-up of my Dad’s Jook and a couple of Instant Pot recipes I found online.  Yay, I’ll get forty winks and have rice soup ready for breakfast.

    Jook in an Instant Pot is so stupid easy it’s a crime.  Saute a couple of slices of ginger in the Instant Pot add the washed rice, give it a few good stirs, add skinned chicken drumsticks, fill the pot with water and seasonings, seal it and set the timer for 20 minutes. That’s it.  Jook Time.  If you have chicken stock, use it for an extra rich and flavorful soup.

    I have a confession, if I don’t have homemade stock or even low-sodium commercial chicken broth, I’ll add a tablespoon of a chicken stock base such as Better Than Boullion, or Chicken Powder by LKK or Knorr (a Chinese kitchen staple) just to kick it up a notch.  It’s not necessary but it will add some depth of flavor.  The soup will look thin when you first take off the lid.  Stir it a couple of times to combine the rice and stock, hit the saute’ function, and bring it to a boil. Cook for an additional 5-10 minutes or until the Jook is the consistency you want.

    *Notes from a Thanksgiving Table

    My favorite post-Thanksgiving meals aka “What to do with your leftovers”.

    Turkey Rice Soup (Congee or Jook)

    DON’T THROW AWAY THE BONES AND CARCASS. 

    Get out your stockpot (or any really, really big pot).  Throw the carcass, wings, drumsticks (sans stuffing) in and fill with water. Add a smashed chunk of ginger (2-inch piece) 1/2 cup of rice wine, a bunch of scallions, a large pinch of salt and bring it to a boil.  Once it boils, reduce heat to a nice energetic simmer.  Cover and fuggetaboutit for a couple of hours.  You will end up with liquid gold to make any delicious soup you want.  For a non-Asian bent, omit ginger and scallions and throw in carrots, celery, yellow onions instead.  But honestly, it doesn’t matter, you could make jook with either stock.

    I do make the stock separately so that I can strain the stock and remove all those little nasty bone fragments and seasoning vegetables.  They have all done their job and can now exit stage left.

    The stock will keep in the fridge for about a week or longer in the freezer.

    Now go back to the top or to the bottom for the recipe on how to make jook….you’ll thank me, so so good.

    Hello….Turkey Sammies a la Dagwood style which means all your Thanksgiving leftovers in between two slices of bread.  Yep, turkey, stuffing, cranberry sauce, gravy, and a couple of slices of cheese from the appetizer plate.  Don’t forget the leftover greens from the salad no one ate because WHO eats salad on Thanksgiving-puulease.  Oh man-so good.

    Instant Pot Chicken Congee Recipe (Jook)

    Jook or congee, the ultimate comfort food, when its cold outside, when you have a cold, anytime.
    Course Soup
    Cuisine Asian, Asian-American
    Prep Time 10 minutes
    Cook Time 20 minutes
    Total Time 45 minutes
    Calories 140kcal

    Ingredients

    For the Soup:

    • 1 cup long grain Jasmine rice honestly you can use any kind of rice, long, medium or short grain
    • 1.5 Tsp vegetable oil
    • 3 Slices thinly sliced fresh ginger size of quarters
    • 1 tsp salt
    • 3-4 skinless chicken drumsticks or thighs or 2 whole chicken legs, can also add pork such as pork butt 2-3 2 inch pieces
    • 8 to 10 cups water, fill to the 10-cup mark on your IP or use stock and water 1:1
    • 1/8 cup rice wine
    • 1 tbsp Better Than Bouillon (optional) Skip if you are starting with stock

    At the Finish Line

    • 2 tsp sesame oil toasted, Asian sesame oil
    • 1/3-1/2 cup scallions-sliced on the bias garnish
    • 1/8 Cup finely shredded fresh ginger garnish
    • Salt and pepper to taste preferably white pepper

    Instructions

    • Wash rice. Add the rice to a bowl, and add enough water to cover the rice. Swirl the rice around. Drain and repeat a few times until the water is clear. Let drain and dry.
    • Turn on Instant Pot with Saute function.  When hot, add 1 -1/2 teaspoon vegetable oil and ginger.  Saute for 30 seconds, add rice and 1 teaspoon salt.  Stir to coat rice with oil approximately 1 minute.
    • Add chicken pieces, bouillon, and rice wine to the pot . **If you are in a rush or feeling lazy, skip sauteing the rice and ginger.  Just throw them into the pot, fill with enough water until it reaches the 10 cup mark in the Instant Pot.
    • Turn off saute, close the lid and make sure the knob is on "Sealing". Choose the "Porridge" button and set the time to 20 minutes.
    • While congee is cooking, shred ginger and slice scallions and place in small bowls for serving.
    • When the time is up on the timer, turn the Instant Pot off. Wait 15 minutes natural release before turning the knob from 'Sealing' to 'Venting'. Rice soup tends to splatter a lot, do not do a quick release.
    • Remove the chicken from the pot, when it is cool enough to handle, shred the meat and discard the bones. If the jook seems thin, turn saute' function on (without the lid on) and cook until desired consistency.  If it is too thick, add water or broth.
    • Add the chicken back into the congee or put it in a bowl and let folks add at the table. Taste, add salt if necessary.
    • Ladle into bowls and top with desired amount of ginger, white pepper, sesame oil and scallions. Let folks add their own.

    Toppings and Fixins'

    • My Dad's Jook calls for potatoes, I love them in my soup. Any kind of potato will work, peeled and quartered for large potatoes. Add at the same time as the chicken when making the soup.
    • For meatballs, follow instructions under Dad's Jook. This can be added at the end after pressure cooking.  Remove lid and press saute function.  When the rice soup comes to a boil, add meatballs and cook until done 2-3 minutes.
    • Additional toppings include cilantro leaves, fried garlic slivers, shredded fresh ginger, salted peanuts, shredded lettuce (iceberg works well)...the list goes on. Anything you eat with rice can be added.  NO Rules!