Category: Pasta, Rice & Grains

pasta, grains, rice recipes

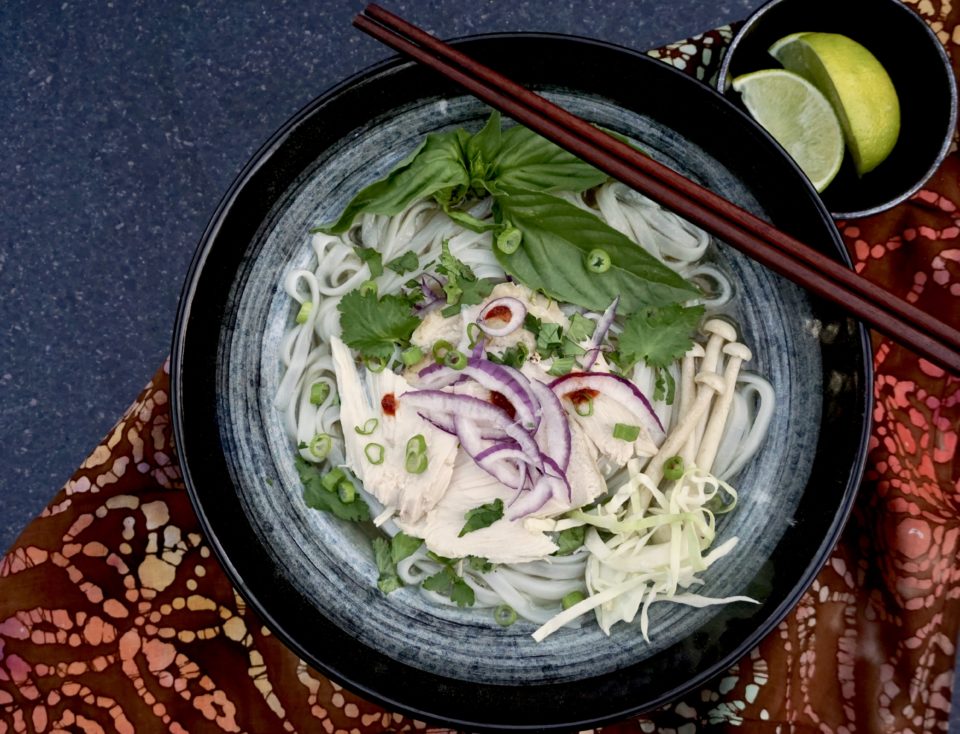
Fast, Flavorful, Pho-tastic(Instant Pot Pho Ga, Vietnamese Chicken Noodle Soup )

Fast, Flavorful, Pho-tastic(Instant Pot Pho Ga, Vietnamese Chicken Noodle Soup )

I can’t think of anything more comforting than a steaming bowl of noodle soup.   If marooned on an island, what would you eat and what 3 books would you want to have with you.  My response would be immediate, a no-brainer, noodle soup.  The caveat being noodle soup would include Pho, Ramen, Udon, Won Ton Noodle Soup, Guksu, Laksa….  and one of my 3 books would be Andrea Nguyen’s The Pho Cookbook.

I have always wanted to try my hand at making Pho. But the stock for this popular Vietnamese Noodle Soup is a labor of love.  Hours of simmering on the stove coaxing the flavors out of chicken, beef, and aromatics like ginger, onions, and cilantro. Intimidating to say the least.  Andrea’s recipe for Pho Ga (Chicken Pho) made in a pressure cooker was the “kick in the pants” I needed.  Pho in less than an hour?  I immediately headed to the store for ingredients. Slurp City here I come. Thanks to Andrea Nguyen and Instant Pot, I was about to make Pho in a fraction of the time.  Ms. Nguyen has written quite a few cookbooks on the cuisine of Vietnam and I snapped up her ode to soup noodles after an interview on KQED.

Instant Pot Pho Ga

This makes homemade Pho eminently doable. One pot cooking, woohoo.  Increase the cooking time if you have an Instant Pot.  It works at a slightly lower pressure (11.5psi) than a conventional pressure cooker.   Remove the cilantro and ginger after the cooking process as both herbs continue to flavor the stock and may overpower the flavor of the broth. Modify the natural pressure release by letting your Instant Pot sit for 5 minutes before venting and opening. Once you remove the chicken, place it in a cold water bath.  This keeps the chicken tender and moist. If you like your chicken a bit more done, leave it in the pot for about 15 minutes before removing. The chicken can be shredded or sliced whatever your preference.

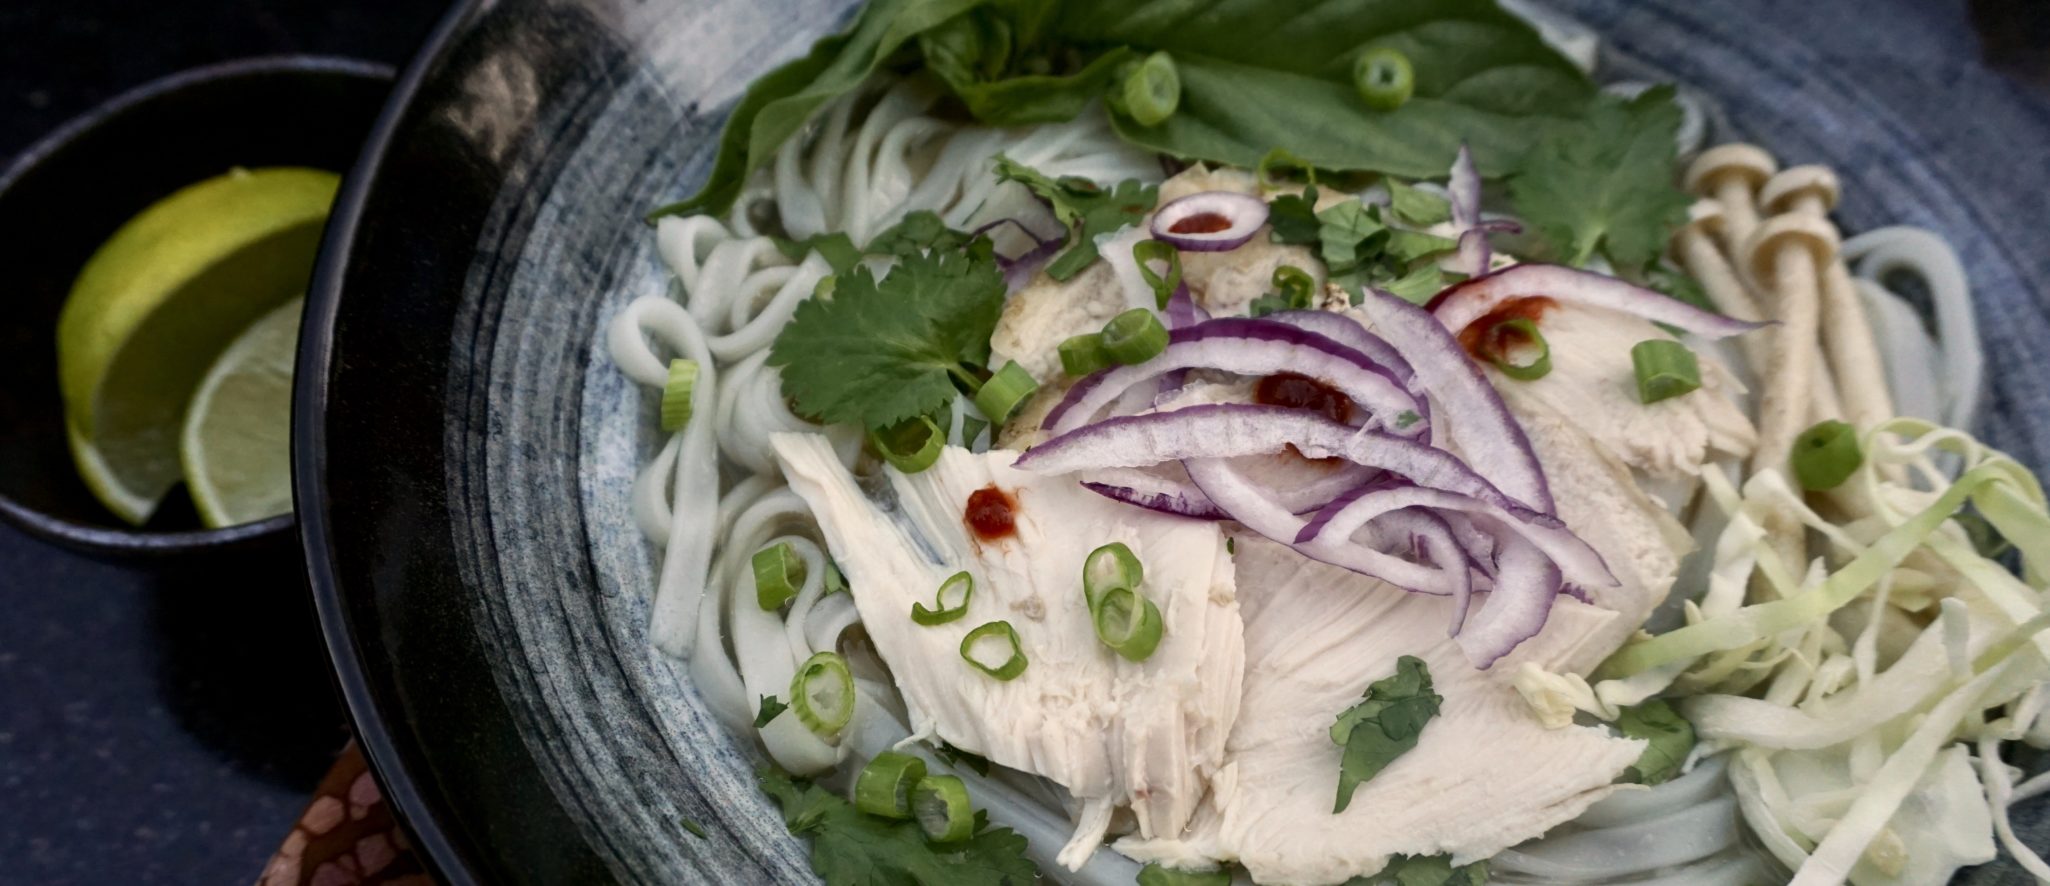
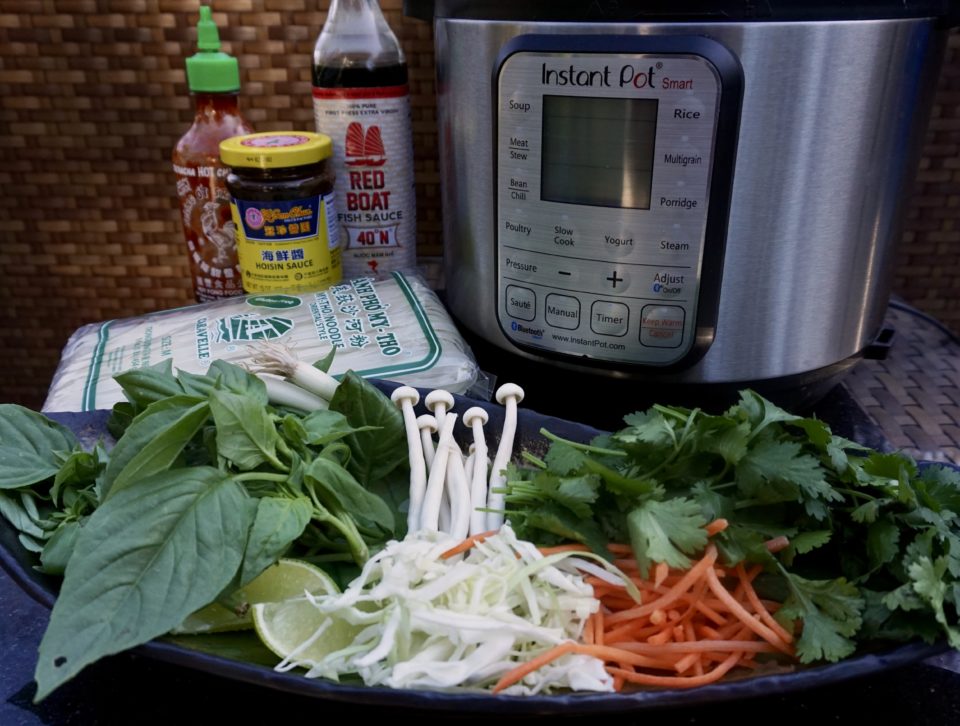
With your broth done, your noodles softened.  It is now Topping Time!  Toppings, toppings, toppings galore. You can be traditional and top your pho with basil, mint, and bean sprouts or you can keep going and add ABSOLUTELY ANYTHING YOU WANT.  I didn’t have bean sprouts so I used shredded carrots and cabbage. Thinly sliced red onions add a nice bite.  Delicious.  Mushrooms, let those fungus fly..into your bowl.  Condiments include Siracha for spice, Hoisin for a bit of sweetness and a squeeze of lime.  S cubed-sweet, salty, spicy and so good!

Now you and I can make our own bowls of deliciousness.

Instant Pot Pho Ga

Fast, Flavorful, Pho-tastic (Instant Pot Pho Ga)

A faster and simpler way to make a tasty bowl of Pho!
Course comfort food, noodles, one bowl meal, Soup
Cuisine Asian, Vietnamese
Keyword Chicken, Pho, Pho Ga, rice noodles, soup
Prep Time 15 minutes
Cook Time 1 hour 45 minutes

Equipment

  • 1 Pressure Cooker or Instant Pot

Ingredients

BROTH

  • 1 whole chicken 4 lbs.
  • 1 rounded tbsp. coriander seeds
  • 3 whole cloves
  • 1 medium yellow onion peeled, halved, and sliced 1/2 in. thick
  • 1 3- in. piece ginger peeled and thickly sliced
  • 1 small Fuji apple peeled, cored, and cut into thumbnail-size chunks
  • 1/2 cup coarsely chopped cilantro sprigs
  • 2 1/4 tsp fine sea salt
  • 1 1/2 tbsp fish sauce
  • 1 tsp About. organic sugar* or 2 tsp. maple syrup if needed to round out flavor

Noods and Bowls

  • 10 ounce dried narrow flat rice noodles*
  • About half of cooked chicken from the broth
  • 1/2 small red onion halved lengthwise, then thinly sliced and soaked in water 10 minutes
  • 1/4 cup thinly sliced green onion green parts only
  • 1/4 cup chopped fresh cilantro leaves
  • white or black pepper

Garnishes & Condiments

  • Vietnamese Herb Garnish Plate
  • Vietnamese Ginger Dipping Sauce
  • Siracha Sauce, Hoisin Sauce, lime wedges

Instructions

  • Make broth: Rinse chicken and set aside to drain. Put coriander seeds and cloves in a dry 6- to 8-qt. pressure cooker. Over medium heat, toast until fragrant, shaking, several minutes. Add onion and ginger and cook, stirring, until browned on edges, 2 to 3 minutes.
  • Add 4 cups water, then the chicken, breast side up. Add apple, cilantro, salt, and another 4 cups water. Lock the lid in place.
  • Following your cooker's instructions, bring to low pressure (8 psi) over high heat. Lower heat to maintain pressure. Cook 15 minutes, or a few minutes longer if your cooker's low setting is less than 8 psi. If your cooker has only a high-pressure (15 psi) setting, cook 12 minutes. The Instant Pot setting is approximately 12 psi so I increased the time to 14 minutes. If you like your chicken falling off the bone leave the chicken in the Instant Pot for 20 minutes before pressure release. I waited 5 minutes and then did a quick release. The chicken was tender much like white cut chicken.
  • Transfer the chicken to a bowl; if parts fall off in transit, don’t worry. Add cold water to cover the chicken and soak for 10 minutes to cool and prevent drying. Pour off the water, partially cover, and set the chicken aside to cool.
  • Skim some fat from the broth before straining it through a muslin-lined mesh strainer positioned over a medium pot. Discard the solids. You should have about 8 cups. Taste and season the broth with the fish sauce, extra salt, and perhaps a bit of sugar.
  • Use a knife to remove the breast halves and legs from the chicken. Set aside half of the chicken for another use. Reserve the remaining chicken for pho bowl assembly.

Prep and assemble the bowls

  • About 30 minutes before serving, ready the ingredients for the bowls. Soak the noodles in hot tap water until pliable and opaque. Drain, rinse, and drain well.
  • Step 7
  • Cut or tear the chicken breast and leg into pieces about 1⁄4 inch thick. Place the onion, green onion, and cilantro in separate bowls and line them up with the noodles, chicken, and pepper for a pho assembly line.
  • Bring the broth to a simmer over medium heat as you are assembling the bowls. At the same time, fill a pot with water and bring to a rolling boil for the noodles.
  • For each bowl, use a noodle strainer or mesh sieve to dunk a portion of the noodles in the boiling water. When the noodles are soft, 5 to 60 seconds, pull the strainer from the water, shaking it to drain excess water back into the pot. Empty the noodles into a bowl.
  • Top with chicken, then garnish with onion, green onion, cilantro, and pepper and any toppings you want.
  • Check the broth flavor once more, raise the heat, and bring it to a boil. Ladle about 2 cups broth into each bowl. Enjoy immediately.
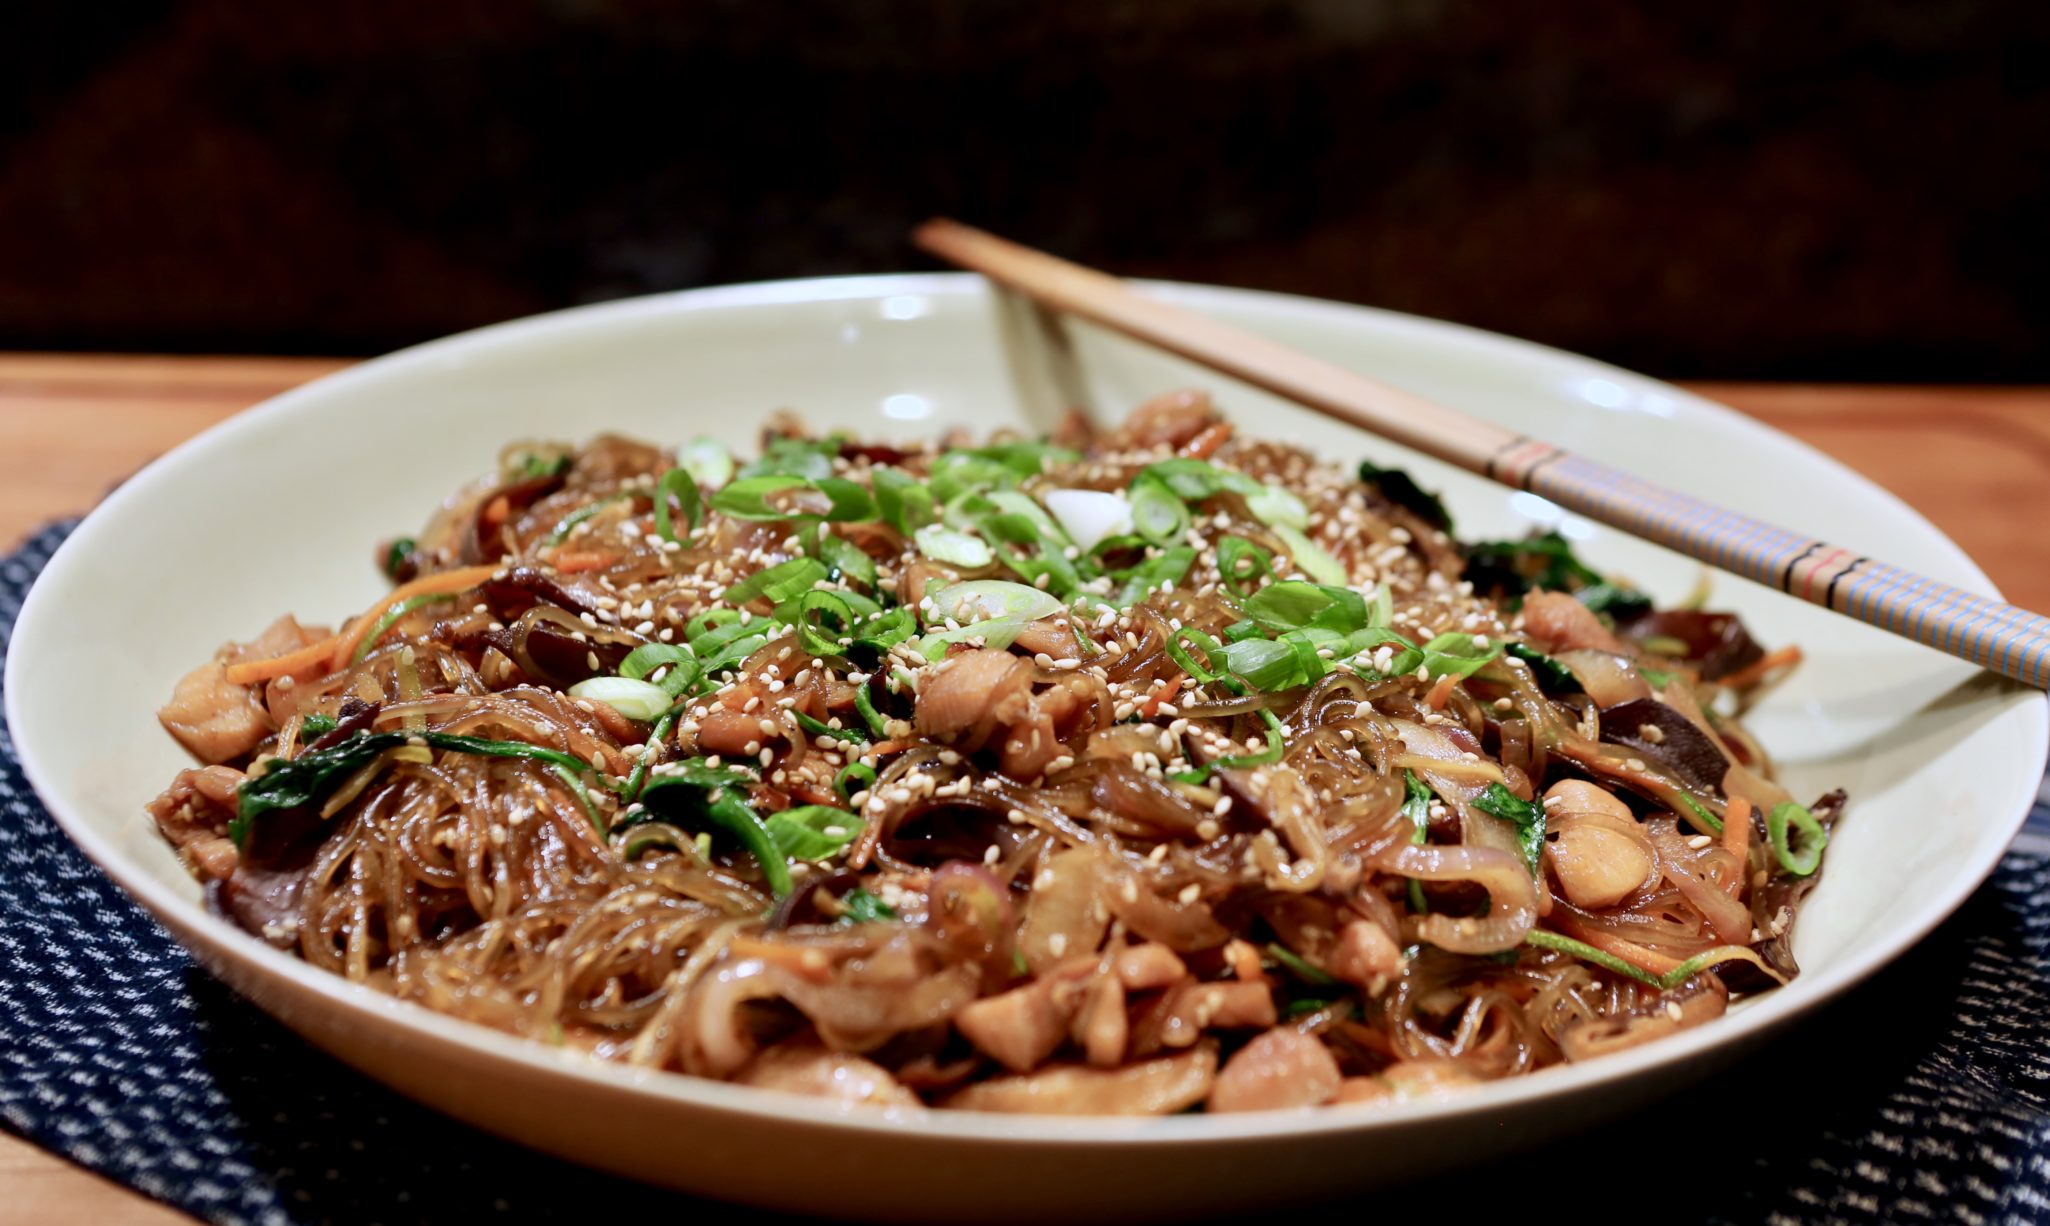
Japchae-Oppa! Korean-Style, Sexy Noodles, Op Op

Japchae-Oppa! Korean-Style, Sexy Noodles, Op Op

I decided to throw a surprise birthday party for the hubby. Since it was an impromptu event, I kept it simple. Just a handful of friends on a Friday night to help him celebrate another year.  The menu included his favorites, cheesecake, apple pie, and sushi from our favorite place. Badabing, easy peasy-done.  Then I started to worry, what if folks don’t eat fish?  Then I thought, what if I don’t have enough food?  A cardinal sin…so I added a few more of his favorites, Korean short ribs, Galbi, Ceasar Salad, and Japchae, a delicious Korean noodle dish.

The Skinny on the Noods

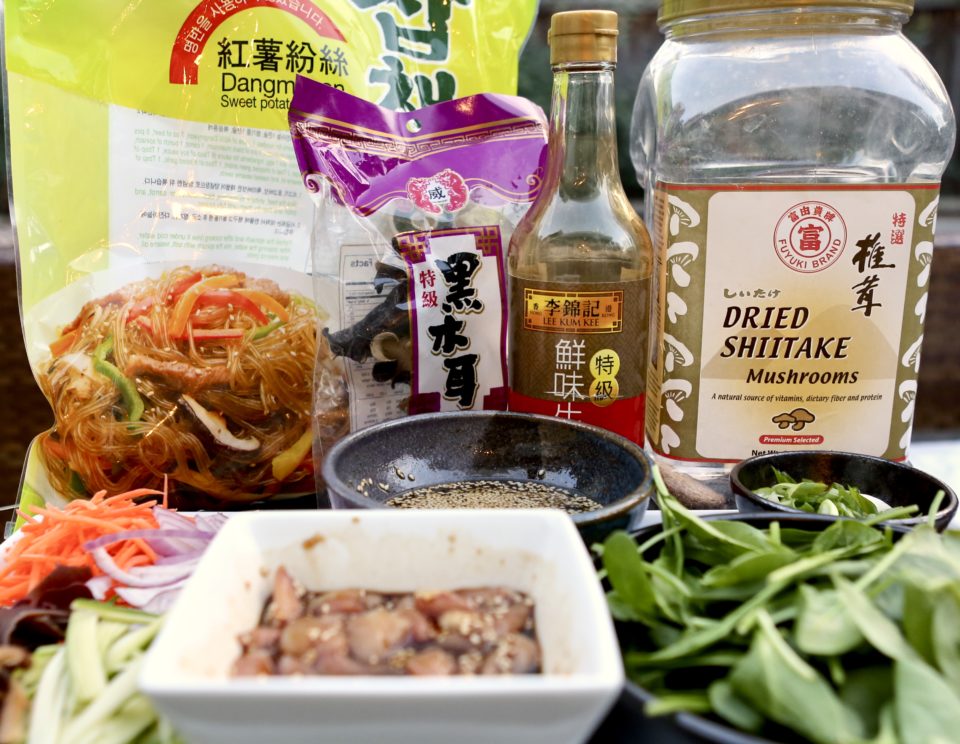
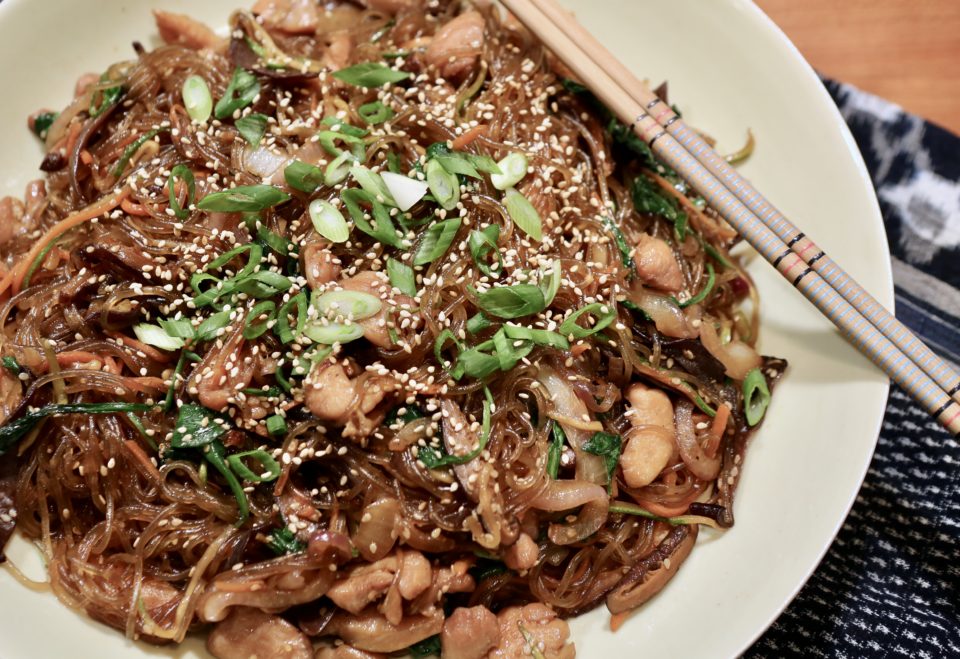
Japchae is Wes’s favorite noodle dish.  It starts with sweet potato noodles also called glass noodles (당면 Dangmyeon) for their transparency.  The noodles have a bit more elasticity and bite than wheat pasta and absorb seasonings well.  Season the noodles with soy sauce, sesame oil, garlic, and sugar, which gives the noodles that characteristic delicious garlicky, sweet-salty flavor.

The beauty of this dish is its flexibility.  Serve Japchae as a simple side dish, banchan, or as a main dish made with protein and vegetables.  Vary the kinds of vegetables and protein, but always include shiitake mushrooms, yellow or red onions, and secret sauce (ok, not really a secret just the Korean quadfecta of soy, garlic, sugar, and sesame).

Beyond that, go CRAZY!

Add wood ears-fungi for crunch, carrots, spinach, zucchini, or watercress for veggies and chicken or beef for protein. Other additions include slices of fishcake and strips of scrambled egg.  Knock yourself out.

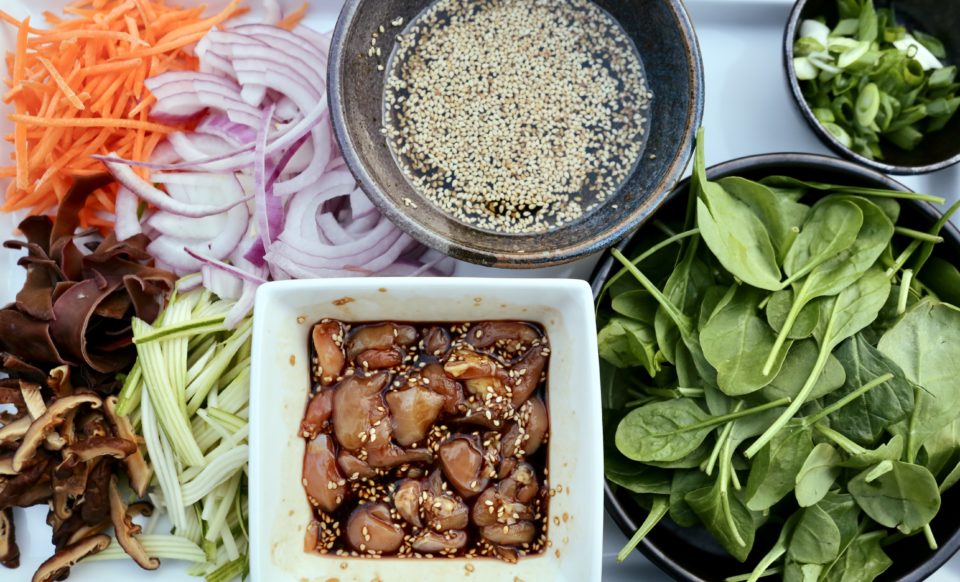
Wes’s birthday version included chicken, carrot, zucchini, wood ear mushrooms, and spinach.  Yummo.

The key to this dish is advanced prep work.  Julienne vegetables, cut chicken into bite-sized strips, and make the sauce.  Soak the noodles, shiitake mushrooms, and black fungus in water. The noodles should be soaked in room temp water for an hour or two, so start your prep early.  You could make this a vegetarian dish by omitting the protein and marinating sliced shiitake mushrooms or pressed tofu.

Korean Jap Chae

My go-to recipe for Japchae is from a favorite cookbook called Hawaii’s Aloha Recipes published by The Japanese Women’s Society of Honolulu.  My copy is food-stained, pages tattered, filled with handwritten notes.  In short, well worn and well-used.  It’s my favorite cookbook for down-home Hawaiian/Asian cooking. Wirebound with few photos, but filled with treasured family recipes and stories-books like this one were created by folks to raise money for their church, temple, or community.  A reflection of who we are and the foods we have eaten for generations.

Aggie's Japchae, Oppa Korean-Style, Sexy Noodles Op Op

Classic Korean Noodle Dish, Japchae a family favorite
Course noodles, Side Dish
Cuisine Asian, Korean
Keyword japchae

Ingredients

  • 1 pack of glass noodles sweet potato noodles
  • 1/2 pound flank steak or chicken cut into strips
  • 1 cup carrots julienned
  • 1 cup string beans French cut or zucchini strips
  • 1/2 cup yellow onions sliced
  • 6 dried shiitake mushrooms soak in hot water until soft. Squeeze excess water, remove stem and julienned
  • 1/2 bunch watercress or spinach
  • 1/2 cup black fungus soaked and cut into strips
  • green onions

Seasoning for noodles:

  • 4 T soy sauce
  • 2 T sesame oil
  • 1.5 T granulated sugar
  • 1 T roasted sesame seeds
  • 1/8 tsp black pepper

Marinade for protein

  • 1/2 tsp fresh garlic minced
  • 2 T soy sauce
  • 3/4 tsp sugar
  • 2 tsp prepared sesame seeds

Instructions

  • Soak noodles in room temp water for 1-2 hours until soft then drain. Alternatively boil for 7 minutes, drain and cool. Cut into 3-4 inch lengths. Set aside.
  • Cut beef or chicken or pork into strips. MIx seasonings and combine with protein. Set this aside too.
  • In a frying pan or wok, heat 1-2 T oil, add shredded carrots and fry just until tender. Don't overcook. Sprinkle with a little salt. Remove to plate.
  • Follow same procedure with zucchini or string beans. Add to plate with carrots.
  • In same wok, add 1 T oil and 1 tsp sesame oil, heat and add yellow onions, sir fry for approximately 1-2 minutes. Add chicken (beef), fry until half done, add mushrooms and wood ears and spinach, fry until meat is completely cooked.
  • Add noodles and sauce to wok, add carrots and zucchini to pan. Mix to combine.
  • Garnish with green onions and eggs.

Optional:

  • Fry 1 well beaten egg in an oil pan. Tilt pan to spread egg mixture into a thin sheet. Turn once. Remove and cool. Cut egg into thin strips.
  • Dish can be served warm or room temperature.
Stuck on Sticky Rice (Gnaw Mai Fan)

Stuck on Sticky Rice (Gnaw Mai Fan)

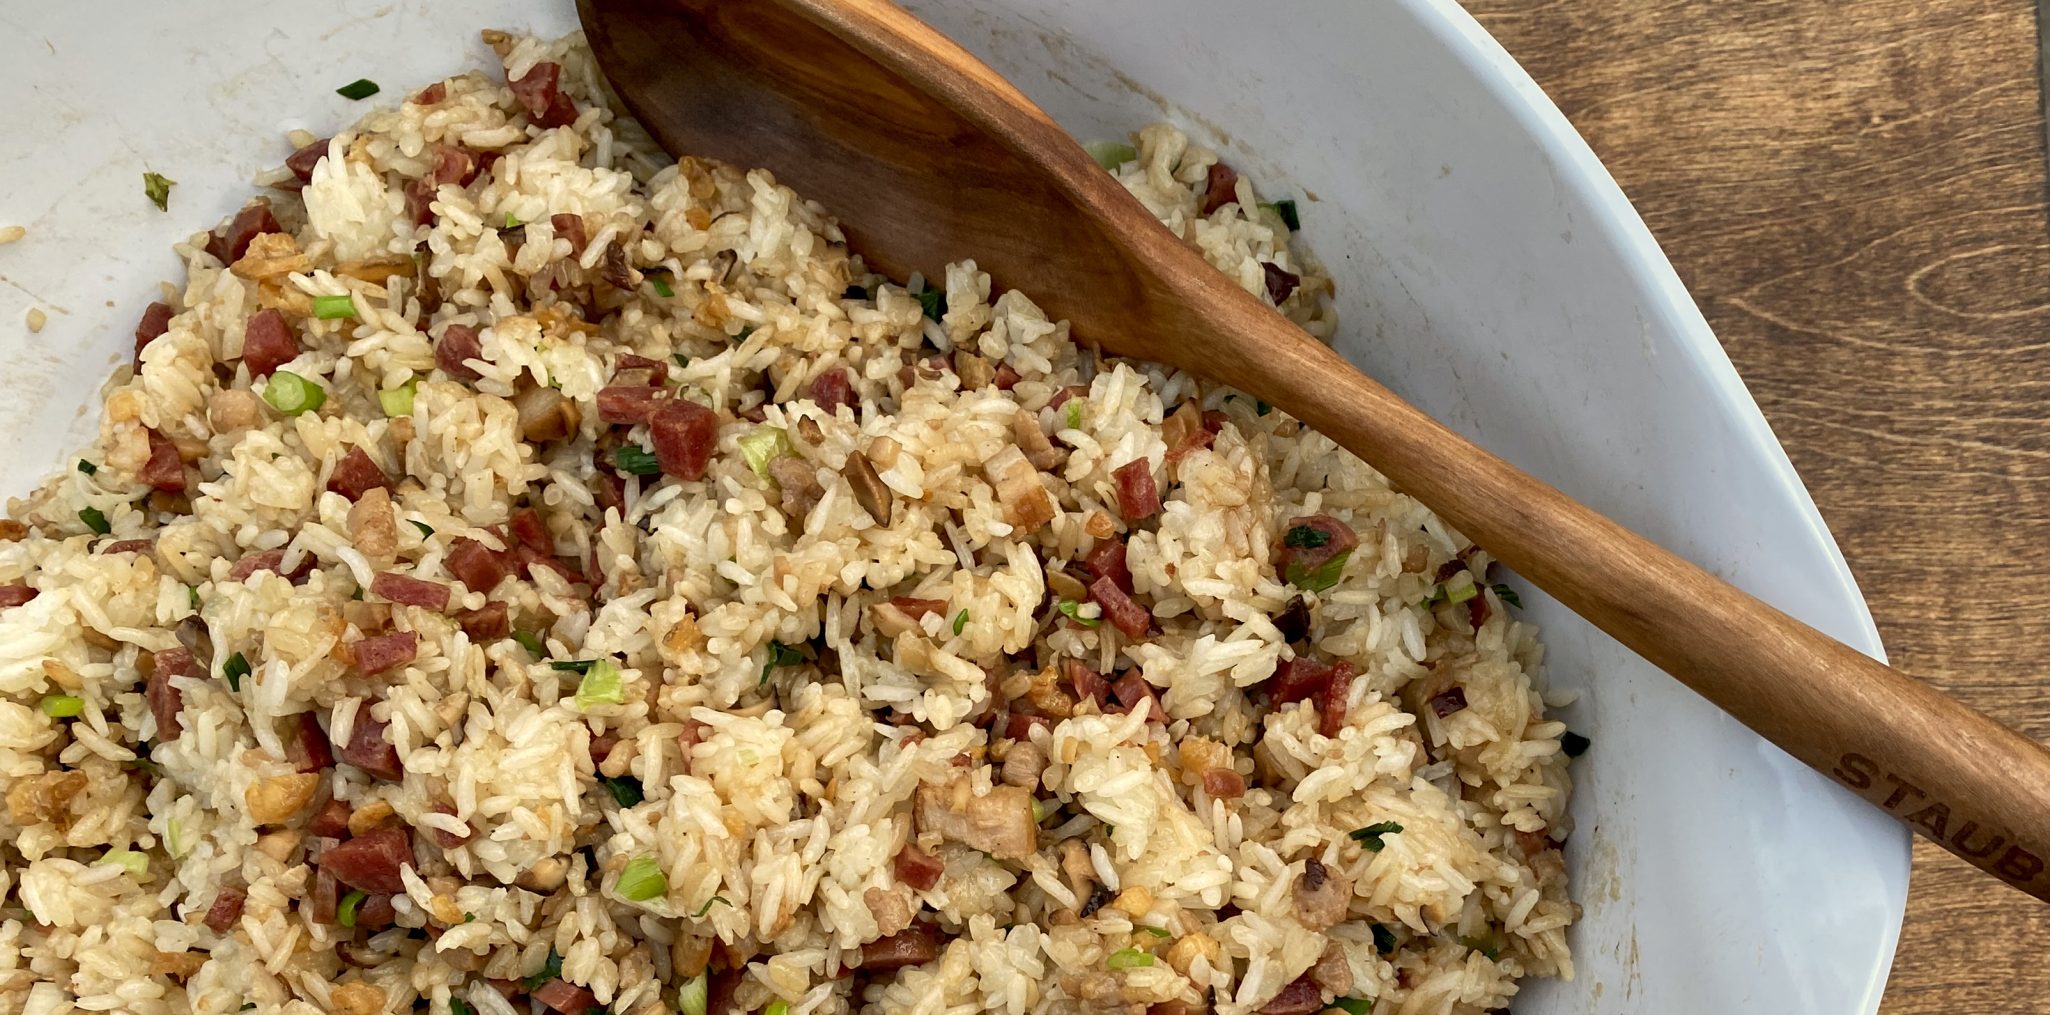
When the holidays roll around and the feasting begins, you can find me eyeing the array of side dishes on the table.  Yep, scoop me some sweet potatoes, pour on the creamed spinach, and pile high the mashed potatoes. While everyone oohs and ahs over the turkey, I’ll be laser focused on the sides, like the STUFFING.  I adore stuffing, especially my mom’s bread stuffing, but my second favorite is a Chinese rice dish.  It’s called Gnaw Mai Fan. Sounds delicious right? No? Also known as Sticky Rice Dressing, it is the Asian contribution to the Thanksgiving table.

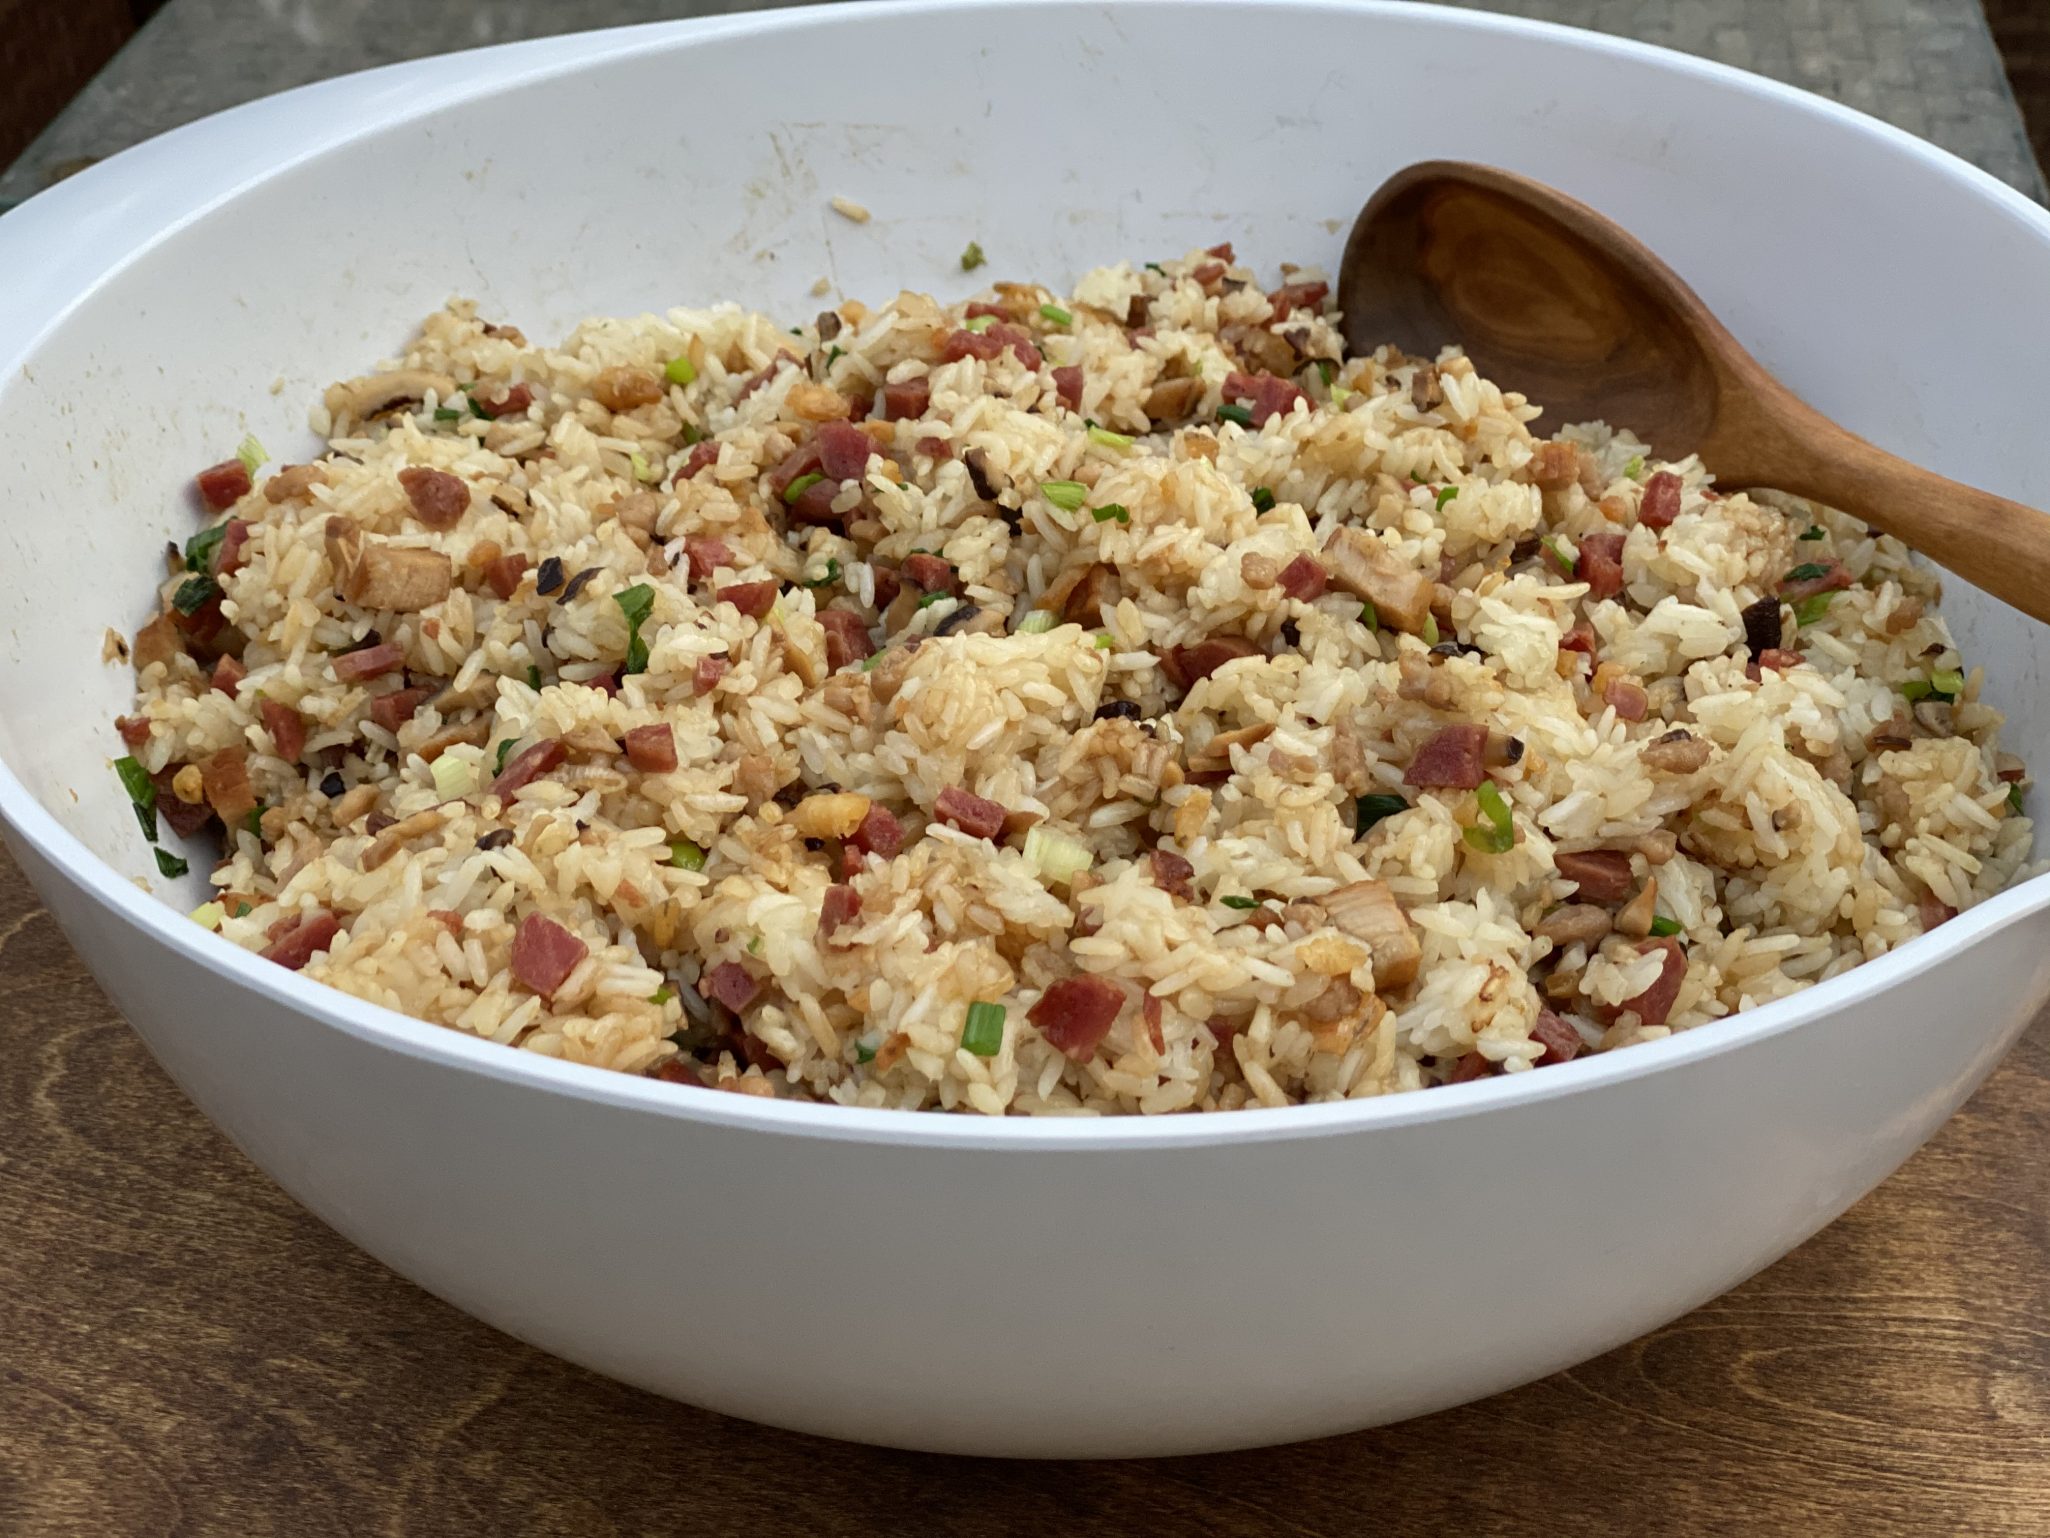
You start with sweet (glutinous) rice, add fragrant shiitake mushrooms, sweet & salty Chinese sausage aka Lop Cheung, dried shrimp, and finish with a generous amount of green onions.  Sounds easy right? It is, but the hurdle is getting the ingredients, unless you have an Asian market nearby.

Primer for Sweet Rice Dressing

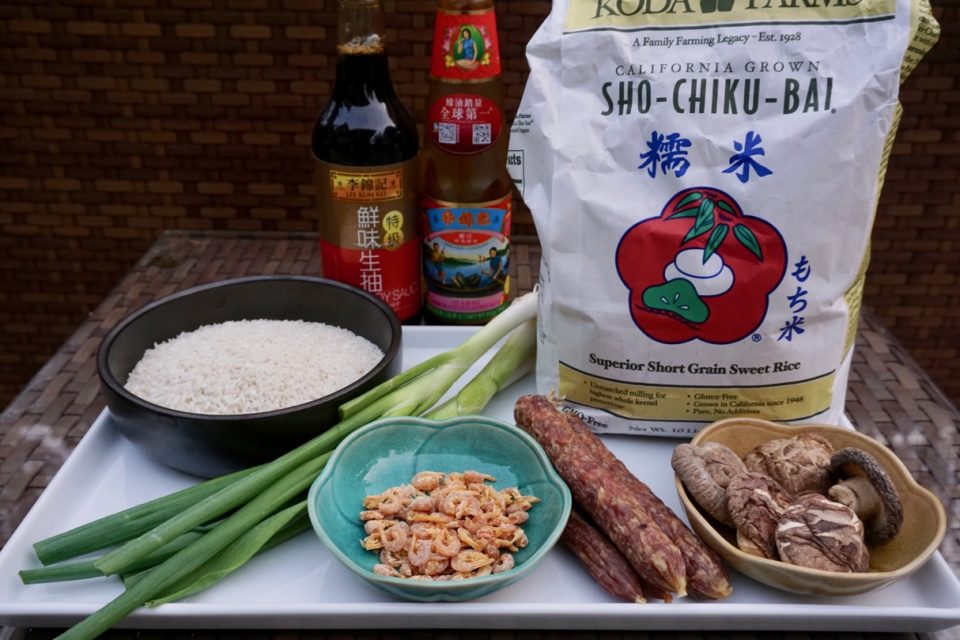
Moving from left to right; long-grain rice, green onions, dried shrimp, Chinese sausage, and dried shiitake or black mushrooms. Behind the mushrooms is the short grain sweet rice (or glutinous rice) and in the back are bottles of oyster sauce and soy sauce used to season the rice. Yep, two kinds of rice.  I mix the glutinous rice with regular long-grain rice to lighten the rice mixture.  All of these ingredients can be found in most Asian markets.  The dried shrimp and sausage can be found in the refrigerator case.  Sauces to use?  the following two are key.  I swear by Lee Kum Kee Oyster Sauce and Lee Kum Kee’s Premium Soy Sauce are my go-tos, but Pearl Ridge and the Korean brand Sempio 501 are good too.

Soak, Soak, Baby

Soak the dried mushrooms and shrimp in warm water for approximately 15 minutes or until soft.  Drain and reserve the soaking water from the mushrooms and shrimp. Wash your long grain rice and drain.  Add the glutinous rice and long grain to your rice cooker.  Yes, your rice cooker.  I have absolutely no idea how to cook rice in anything else but a rice cooker (use the measuring cups that come with your rice cooker).  Strain and add reserved liquid from mushrooms and shrimp to the pot, add chicken broth to make up the difference. Place Chinese sausage on top of the rice and turn on the rice cooker.

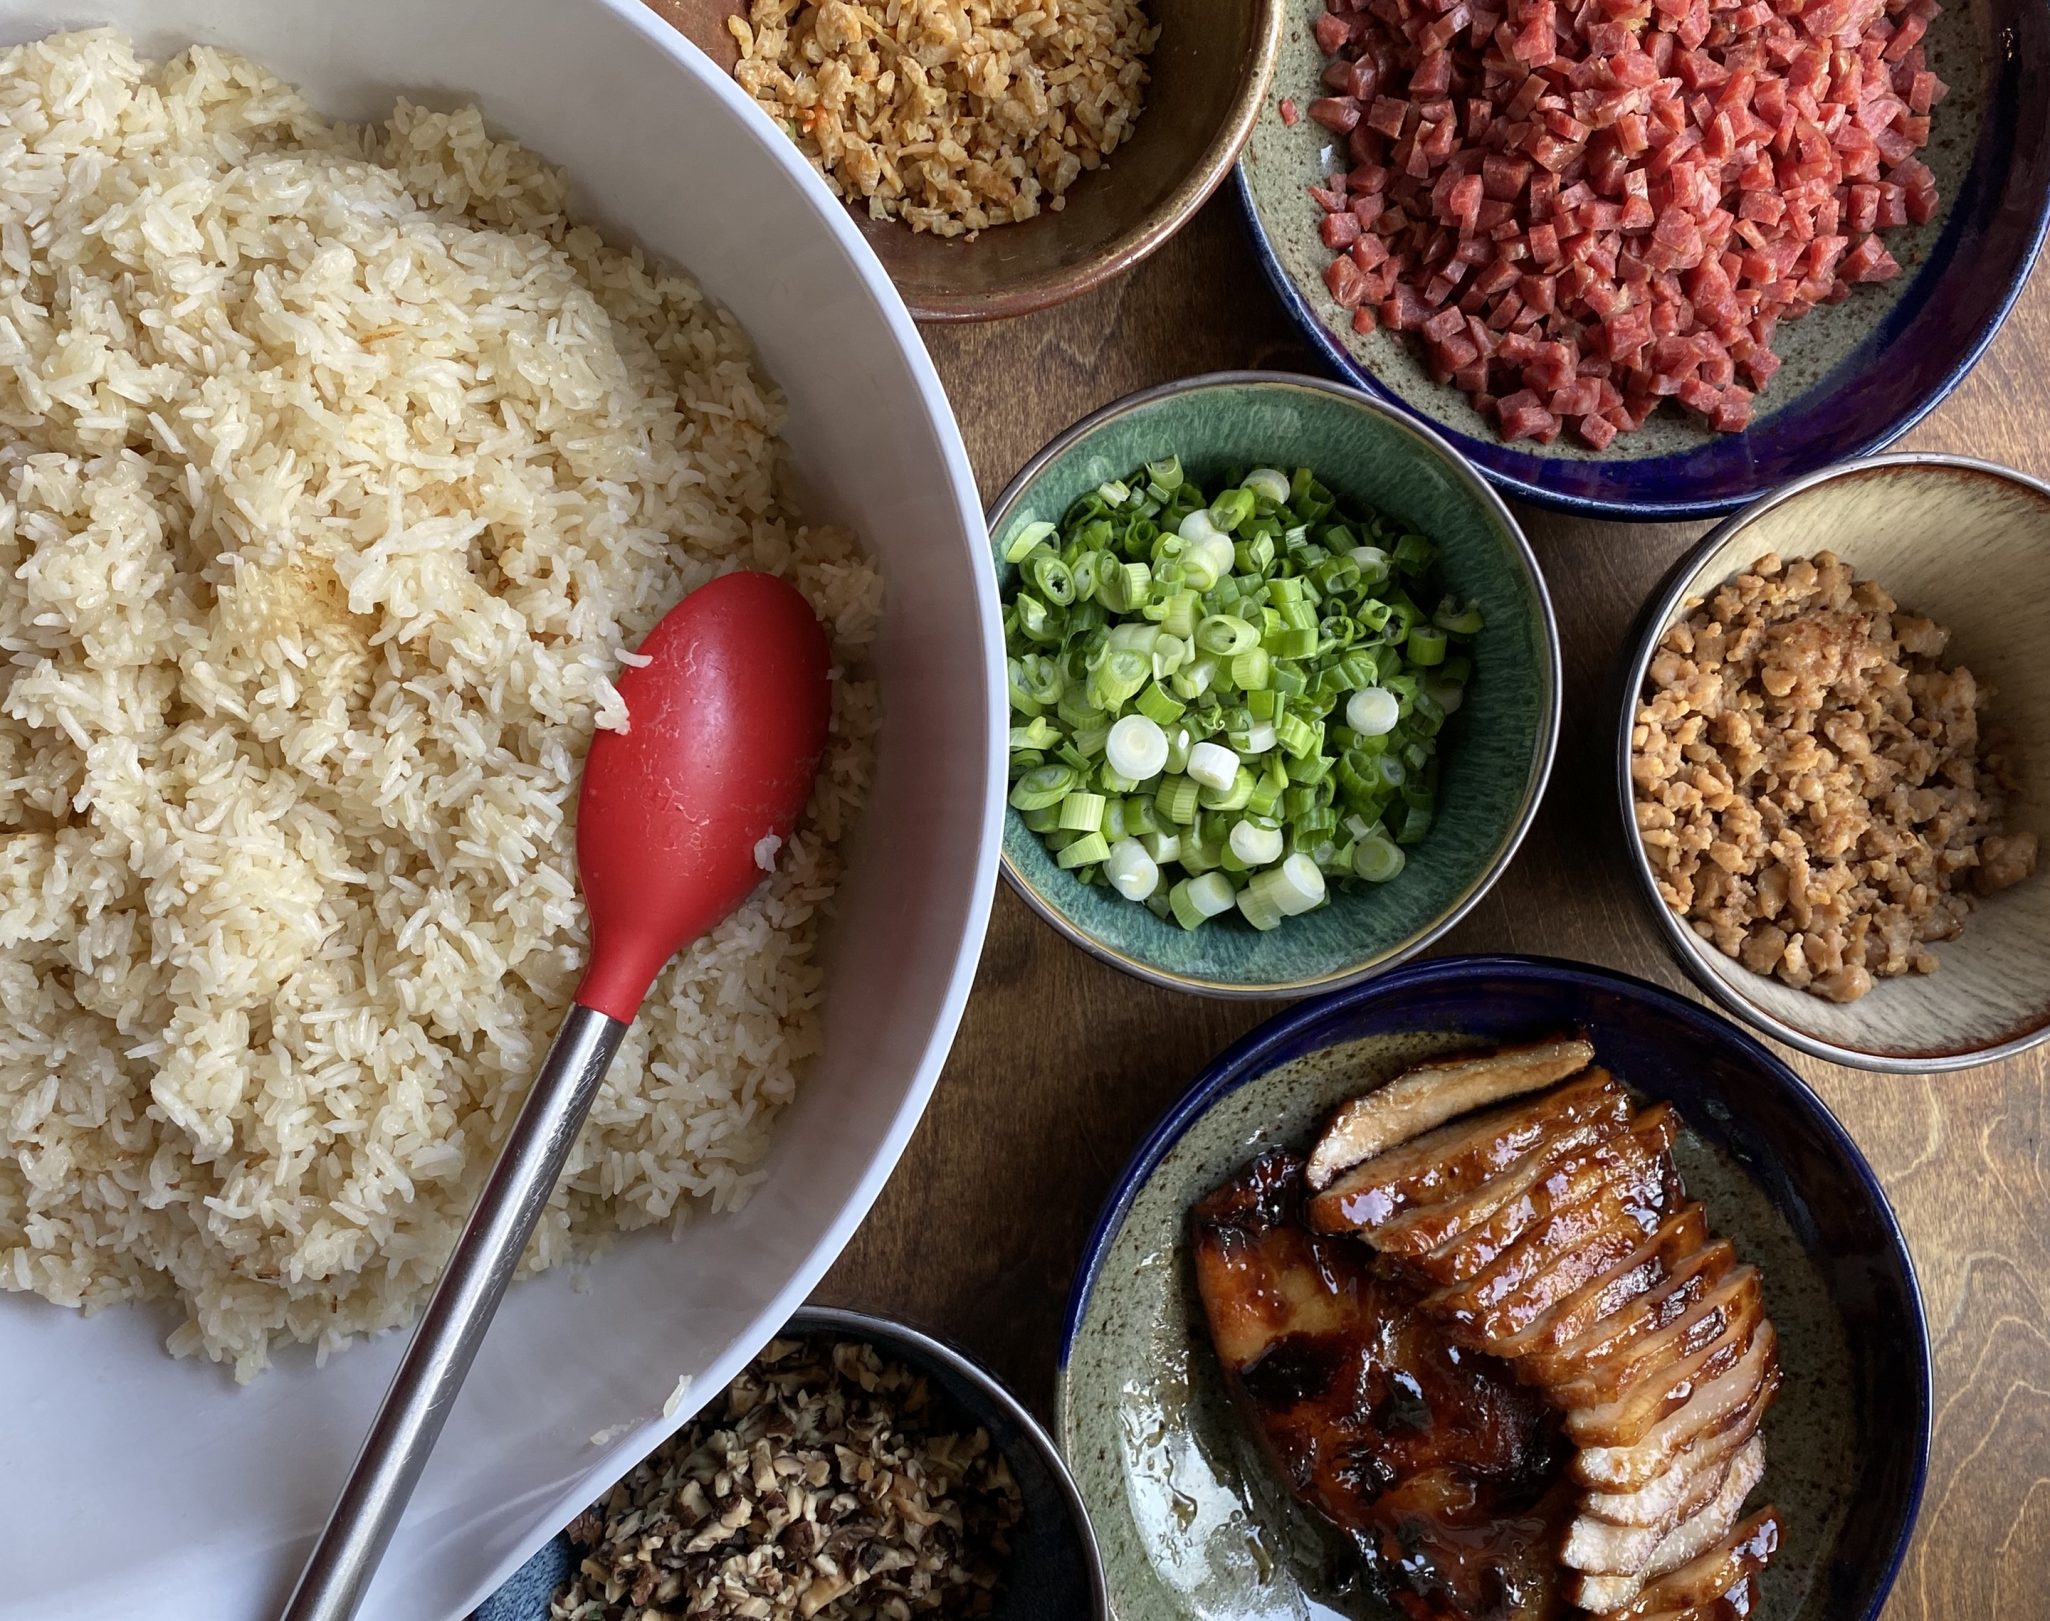
Prep the other ingredients while the rice is cooking.  Optional additions include ground seasoned pork, char siu (bbq pork), bacon, and roasted chestnuts.  It’s your rice dish, go crazy.  I usually add seasoned ground pork or chicken.

In a pickle, I have used Japanese short-grain or sushi rice in place of the glutinous and long grain rice combination.  Shhh, don’t tell my Mom!  My kid has made this for his Friendsgiving celebration to rave reviews.

This dressing works well as stuffing for turkey or chicken, use it just like any bread stuffing.  If served on the side, add the pan drippings to the rice for a flavor boost.

Garnish with cilantro and scallions.

And It’s Gluten Free!

Gnaw Mai Fan-Chinese Sweet Rice Stuffing

A traditional Cantonese Rice dish to use in place of stuffing during Thanksgiving!
Course Main Course, One dish meals
Cuisine Asian
Keyword gnaw mai fan, Sweet Rice Stuffing
Prep Time 30 minutes
Cook Time 45 minutes

Equipment

  • Rice Cooker

Ingredients

  • 2 cups long grain rice using the rice cooker mesuring cup
  • 2 cups sweet rice using the rice cooker measuring cup
  • 4 lop cheung steamed with rice, removed and diced
  • 1/2 cup char siu (bbq pork) Reduce lop cheung to 3 and substitute diced barbecue pork
  • 4 dried black mushrooms (shitake mushrooms) soaked in warm water until soft, diced, reserve soaking liquid (use 1-1.5 cups of water)
  • 1/4 cup small dried shrimp soaked in warm water with black mushrooms
  • 2 slices fresh ginger size of a quarter
  • 3-4 cups chicken stock you can use commercial low sodium chicken broth
  • 3 green onions chopped

Ground pork and marinade

  • 1/3 cup ground pork or chicken
  • 1 tsp each sherry, oyster sauce, soy sauce
  • 1/4 tsp sugar
  • dash of salt
  • 1 pinch white pepper
  • 1 slice ginger

Seasonings

  • 1-2 Tbsp Soy Sauce Premium LKK Chinese Soy Sauce or Korean Soy Sauce (Sempio)
  • 1-2 Tbsp Oyster sauce Lee Kum Kee brand-Lady, boy in boat label

Garnish

  • Cilantro
  • Green onion

Instructions

  • Cook rice in rice cooker with reserved soaking liquid from mushrooms and shrimp and chicken broth.
  • Marinade ground pork for 10-15 minutes.
  • Heat pan, add 1 T oil, when hot, add ginger and fry 30 seconds, add drained dried shrimp and 1 t water, sauté 30 seconds then add ground pork, saute just until pork is no longer pink.
  • Add mushrooms and lop cheung. Sauté additional minute or two.
  • Add green onions, saute' another 30 seconds and remove from heat.
  • Pour rice into large mixing bowl. Fold in sautéed ingredients, mix soy sauce and oyster sauce together and add to rice. You will probably need more, just use a 1:1 ratio of soy sauce to oyster sauce.
  • Mix thoroughly.

Notes

Leftovers can be pressed and shaped into rice balls for a tasty portable snack-thumbs up from my kids!

Ketchup Noodles

Ketchup Noodles

One of my favorite shows on Netflix is the Japanese production Samurai Gourmet. I LOVE this show. I’m crossing my fingers that they will produce more episodes.  It follows newly retired exec Kasumi as he rediscovers the simple pleasures of life (most of which involve food of course).  Timid by nature, he has an alter ego, a confident, bravado-filled Samurai, who appears when Kasumi is faced with an awkward situation.  Its funny, sweet, poignant and filled with FOOD PORN.

Each episode features a meal that Kasumi savors over.  My favorite episode finds him searching for a favorite dish from his youth. The first bite immediately transports him back to his childhood.  To really make you drool, there are close-ups of each dish being prepared or eaten followed by Kasumi exclaiming “oishi!” (delicious!). If you have Netflix, this is must-see TV.  If you don’t, call me.  We’ll do a marathon session and go out for ramen afterward.

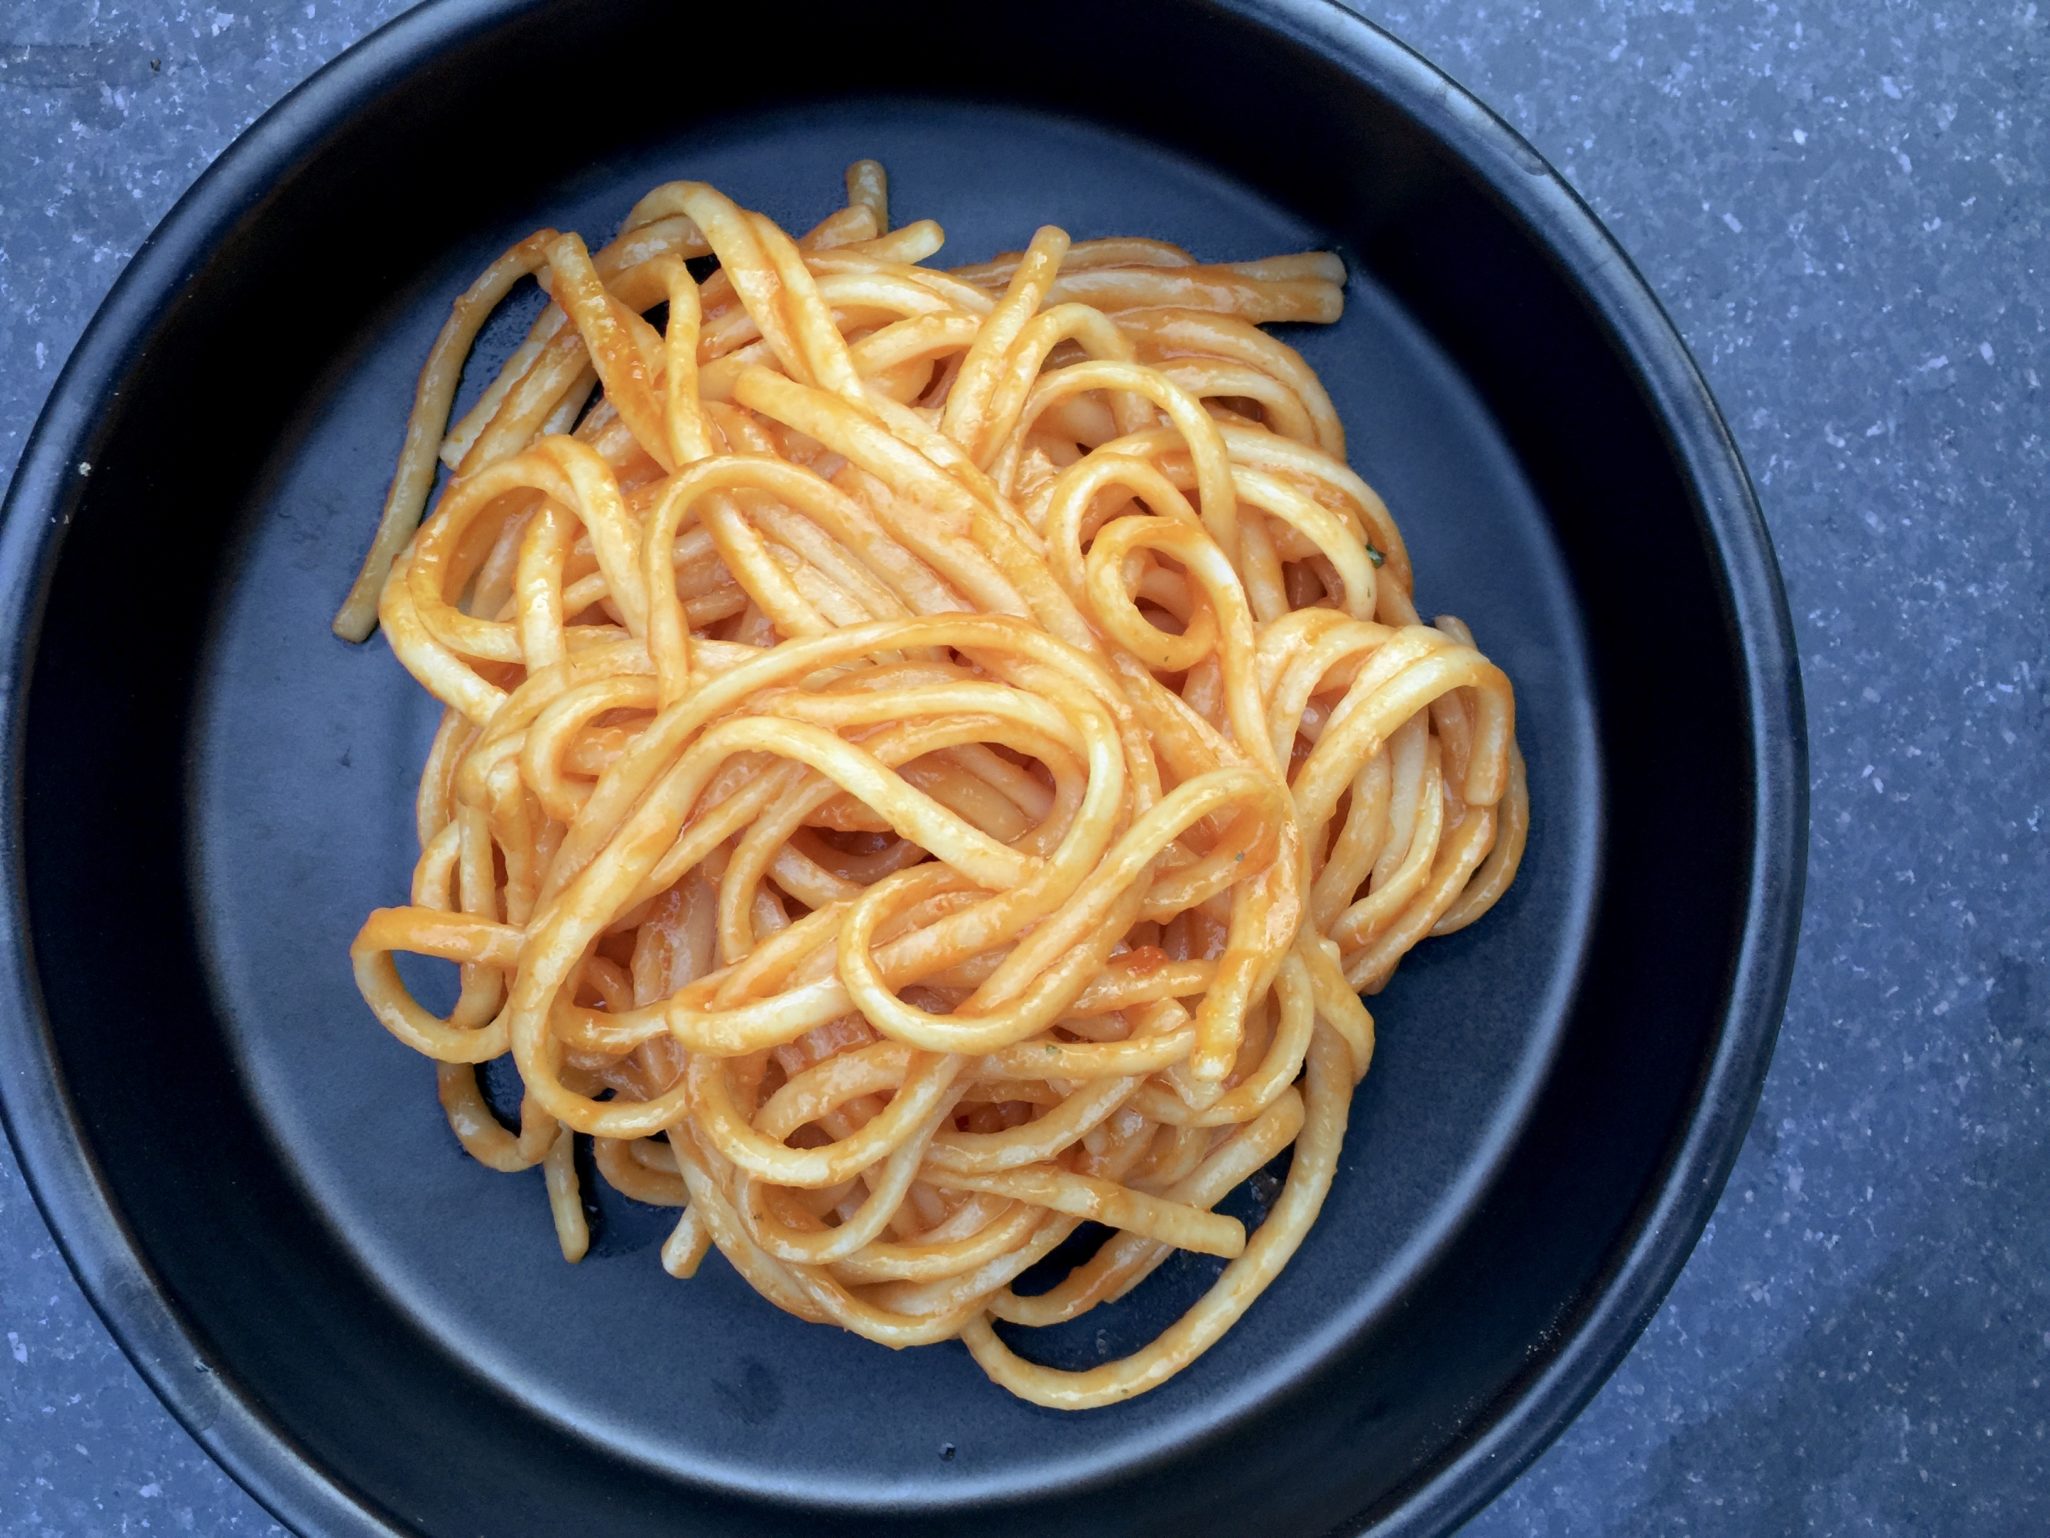
So I arrived home after a particularly long commute and needed to unwind.  Not wanting to watch the news I popped on Netflix and found my favorite episode of Samurai Gourmet.  Big mistake, before the end credits ran I was ravenous. Watching Kasumi slurp up a plate of pasta had me salivating for a bowl of noodles.  I hopped up, headed to the fridge, and luckily found a tiny portion of linguine left from last night’s dinner.  I grabbed it, the butter, and the bottle of ketchup.

Yep, you read that right.  Butter and ketchup.  Did you laugh when you read that? When I was a kid my Mom would make us Ketchup noodles for an after-school snack.  It was quick and easy and held us over until dinner.  I continued the tradition with my kids and would have a plate waiting for them as they came running in from school.  Jamie, our noodle girl loved them.

You can add anything you want to this dish.  Saute some onions and minced garlic before adding the noodles to the pan.  Spice it up with a dash of chili flakes…use your imagination!  Here is a refined version from Just One Cookbook, a Japanese blog post.  See, I’m not alone, ketchup and noodles are a Japanese thing too.

Mom's Ketchup Noodles!

Yes, you read that right, ketchup noodles, delicious
Course One dish meals
Cuisine Asian-American
Keyword butter, ketchup, noodles
Prep Time 5 minutes
Cook Time 15 minutes
Servings 2

Ingredients

  • 8 oz spaghettini or angel hair or linguine fini or 12 ounces Chinese Egg Noodles
  • 2-3 tbsp butter salted, unsalted whatever floats your boat
  • 2-3 tbsp ketchup or to taste
  • Parmesan Cheese, freshly grated OR To be true to my mom, you should use the pre-grated parmesan cheese in the green can by Kraft!
  • salt and pepper garlic salt is nice too, not a mom ingredient but it works

Instructions

  • Cook noodles according to directions on package, drain and reserve
  • Melt butter in a skillet over medium heat. When it starts to bubble, add noodles, increase heat to medium high.
  • Toss to coat noodles with butter. Add ketchup and continue to toss to mix thoroughly while frying. Season with salt and pepper. Serve immediately. Pass the cheese in the little green can. Does that still exist?
  • ENJOY!!!!

Notes

If you want to go crazy, you could saute' some minced garlic in the butter before adding the noodles.  You can use garlic salt also.
A riff on ketchup noodle:  Replace the ketchup with Oyster Sauce which is just as delicious..salty, briny, buttery....hmmm yum

Hi Mui, Claire, Jorge, Jeffy

Sesame Noodles (Ancient Family Secret)

Sesame Noodles (Ancient Family Secret)

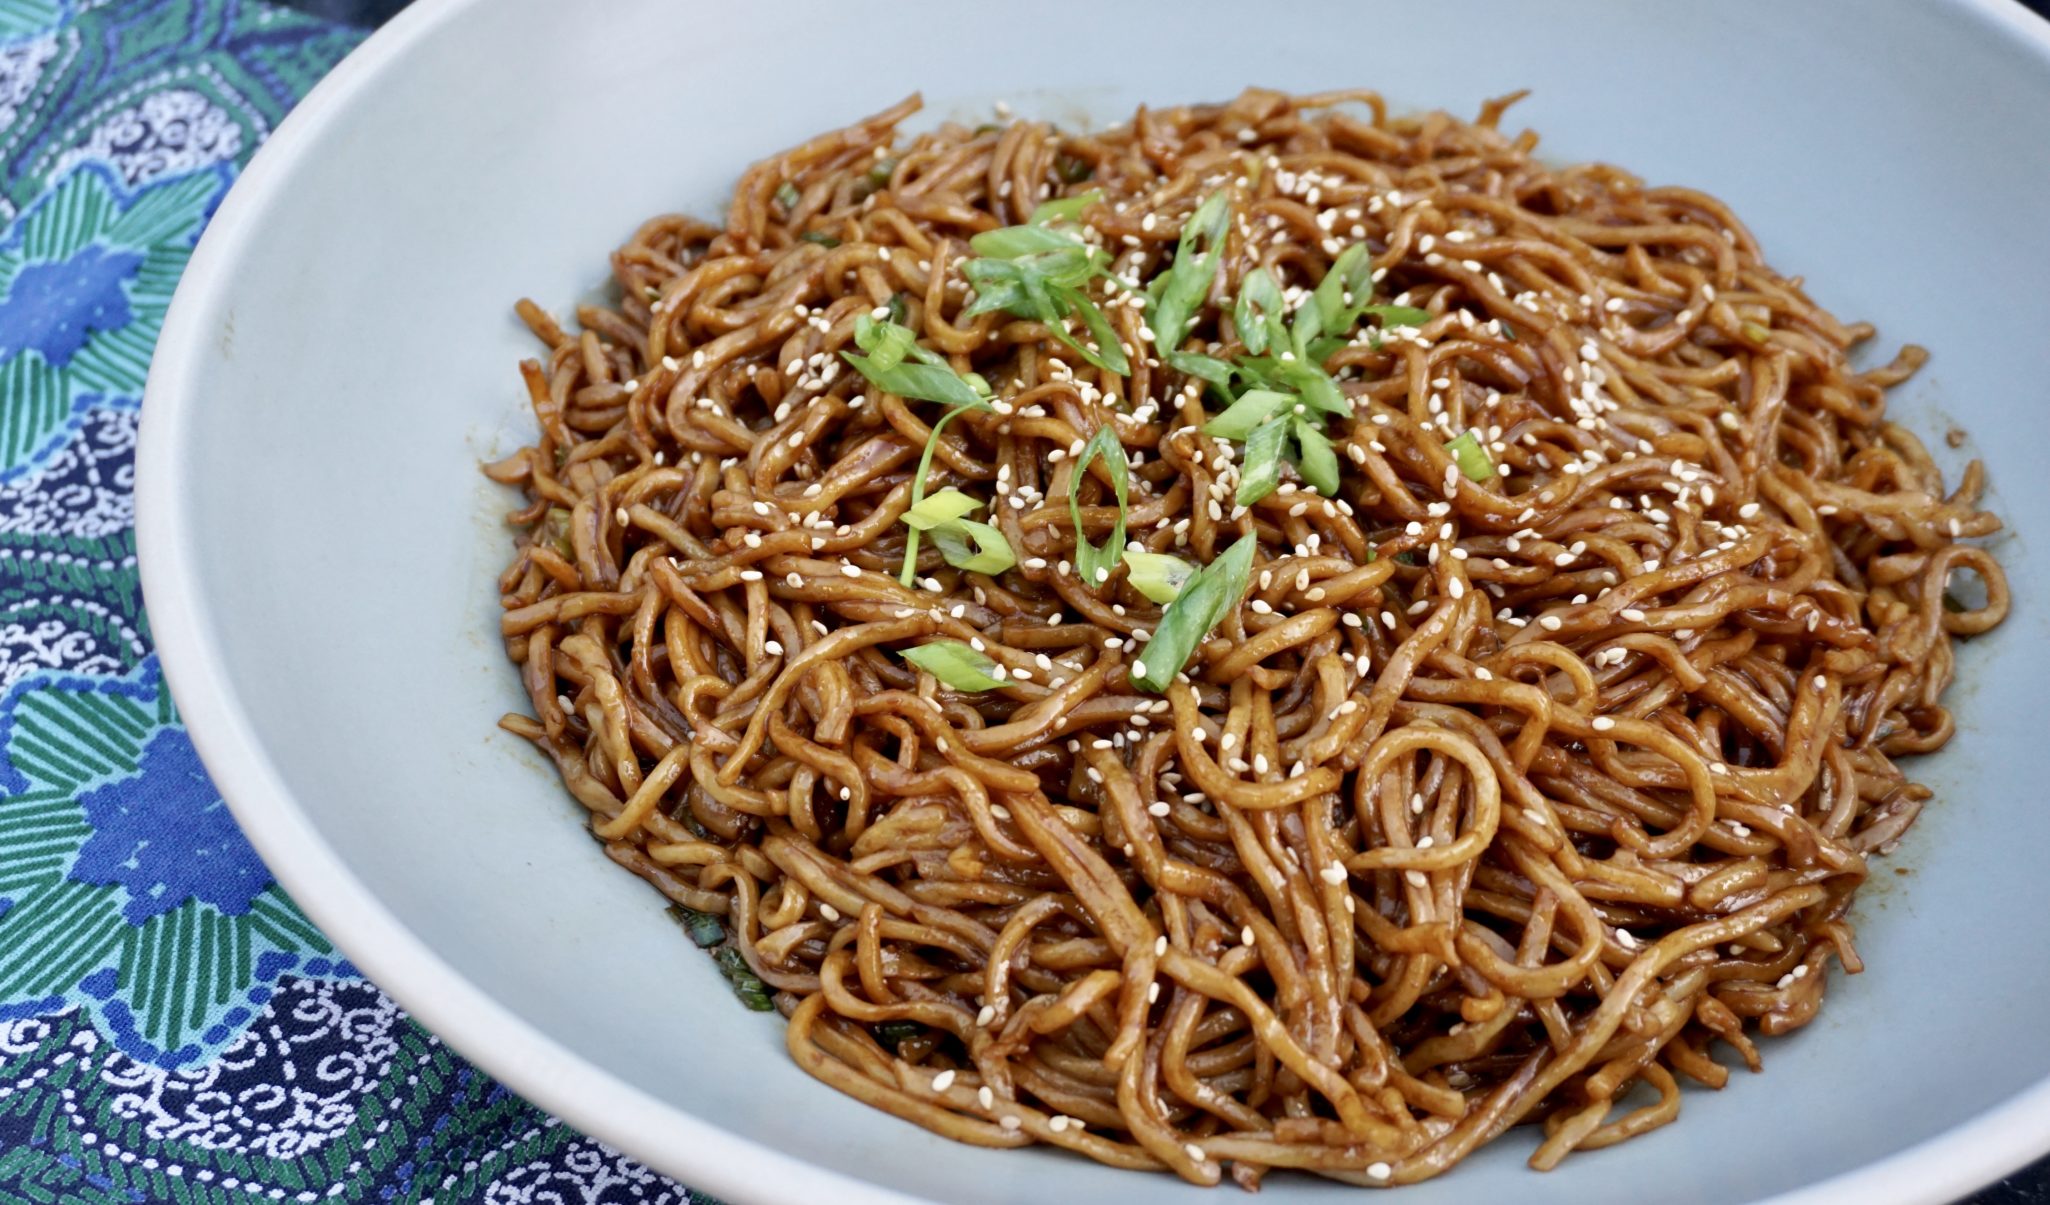
Jamie was home for the week so of course, we pulled out the party plates and hosted a happy hour at our house. Though we usually stick to finger foods, we broke out the forks and chopsticks for a delicious, perfect for hot weather dish, Sesame noodles.  A combination of soy, vinegar, sesame oil in the dressing packs a flavor punch followed by a spicy kick courtesy of chili oil.  The dish is prepped in advance and left to sit overnight for the flavors to meld.  Just before serving, give the noodles a last toss, a sprinkle of green onions and sesame seeds on top, and then watch friends gobble it up.  Really, that good.

My friend Sarah asked for the recipe for these tasty noodles to which I teasingly replied “it’s an old family recipe”.  I had her for a second until I finished with “from my dear Aunt, Martha Stewart”.  Yep, the recipe is from Martha Stewart’s Entertaining.  An iconic tome filled with delicious recipes and the ABCs on “how to host” a fabulous party. It changed the way my generation viewed “The good life”.  I was on a student’s budget when Entertaining was published so the best I could do was pour over the pages of her book and dream. An elegant Manhattan penthouse cocktail party or Hawaiian Luau in the Hampton’s were not within reach but her recipes were.  A girl can dream, and eat delicious tasty food.

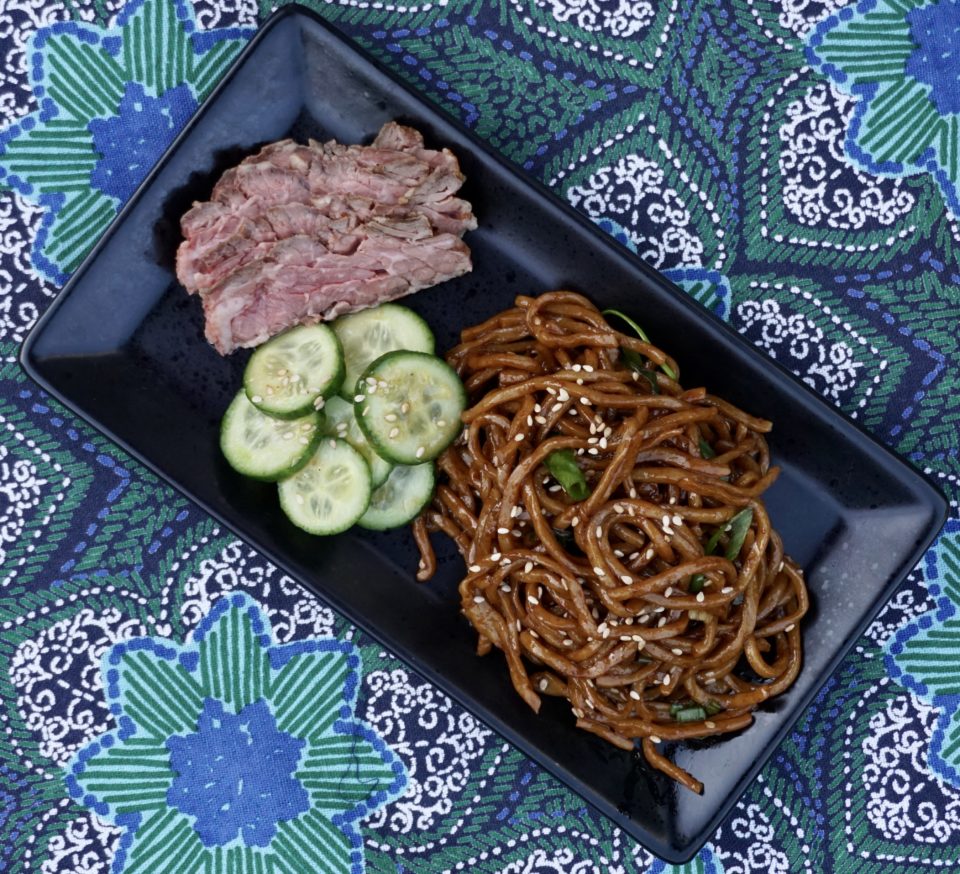
We served the noodles with grilled flank steak and a cucumber salad.  A big hit!  The recipe is simple and easy.  The hard part happens way before you start making this delicious dish.

FINDING THE INGREDIENTS

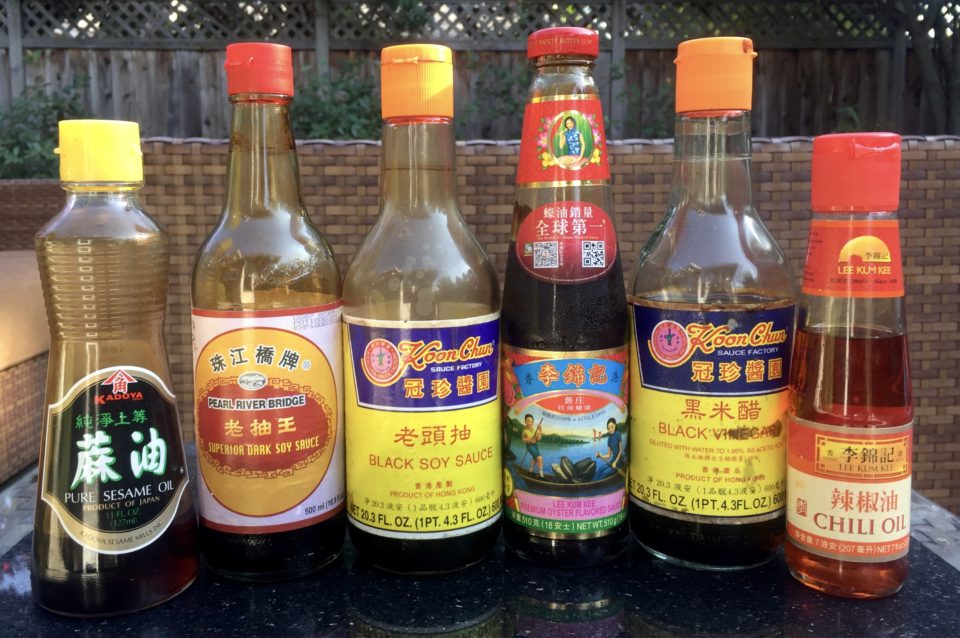
The dressing calls for Chinese Black Vinegar and Dark Soy Sauce.  Whaat? Isn’t there just one soy sauce to rule them all?  Nope.  Chinese dark or black soy sauce is actually thicker and less salty than regular Chinese Soy Sauce or Kikkoman Soy Sauce.  It is fermented a little longer and contains either molasses or sugar which adds a bit of sweetness.

The other ingredient is Black Chinese Vinegar.  Chinese Black Vinegar, also known as Chiankiang Vinegar, is best described as a slightly less sweet Balsamic Vinegar.  I did painstaking intensive research (googled it) and found the best substitution (from America’s Test Kitchen) equal parts red wine vinegar and balsamic vinegar blended together.  I did my own taste test and it did seem to be pretty close in flavor, maybe a touch sweeter than black vinegar.

The Line-up

A picture is worth a whole lotta words so here are my bottles of the different sauces.  I prefer Pearl River Dark Soy, it is a little mellower and not quite as salty as Koon Chun.  For those of you in my neck of the woods, I will gladly point you in the right direction for where and which ones to buy.

I have added my own twists to this dish of course.

Decrease the amount of salt (the original seemed like a ton) and use kosher salt.

Add 1 -2 tablespoons of oyster sauce to add umami (I know what your thinking noooo, not another sauce. This is optional but everyone should have a bottle of this miracle sauce in their pantry.  Make sure it is made by the Lee Kum Kee one with the kid and mom in the boat.  Cut chili oil amount by half.  I’m a wimp.

Add blanched asparagus, sugar snap peas, snow pears, fresh corn, and-or shredded chicken for a more substantial dish.  The sky’s the limit.  Garnish with green onions and cilantro (if you like cilantro) and toasted sesame seeds.  Voila’ KILLER NOODLE SALAD ready to go!

Old Family Secret (Sesame Noodles)

Course Main Course, Side Dish
Cuisine Asian, Asian-American
Keyword Sesame Noodles
Prep Time 30 minutes
Cook Time 6 minutes

Ingredients

  • Make this dish the night before
  • 2 pounds chinese egg noodles
  • 1/2 cup sesame oil
  • 1/2 cup black soy sauce
  • 3 T black Chinese vinegar
  • 3 T sugar
  • 1 1/2 T salt kosher coarse
  • 2 T hot pepper oil chili oil (start with 1 T it is really spicy with 2)
  • 1/2 cup finely sliced scallions white and green part
  • Recipe can easily be halved**

Instructions

  • In a large pot of boiling water, cook the noodles 1 pound at a time. Boil 4-5 minutes, until just tender.
  • Drain, rinse well under cold running water until chilled, and drain again. Put in a large bowl.
  • Combine remaining ingredients. Reserve approximately 1/4 of the dressing. Stir the rest into cold noodles, mixing well.
  • Chill overnight.
  • Just before serving toss with reserved dressing. Garnish with toasted sesame seeds and additional green onions.
  • Variations: Reduce salt to 1 T kosher, add 1-2 T oyster sauce. Add blanched asparagus or snow peas or sugar snap peas or cucumbers.
  • For a more substantial dish add shredded chicken or cooked shrimp.
52 Ways to Have Your Salad

52 Ways to Have Your Salad

Slip out the bowl Joe, toss some new greens, Jean…just get yourself free..to make some satisfying salads.  After quite the wait I received a copy of Food 52 Mighty Salads from Blogging for Books.  I flipped through the book and with my trusty pad of post it notes tagged quite a few recipes I wanted to try.  This is a book of main dish salads, hearty and substantial enough to serve alone.  The book is organized by ingredient, leafy greens, not so leafy greens, grains, pasta and bread, meat and fish and seafood.  The photos are gorgeous and the recipes themselves are laid out well.  Tips and how to’s are interspersed throughout the book.  I am guessing different people submitted various recipes.  Some recipes have explicit directions while others, coincidentally the ones I tried, were a bit looser ie. “blend ingredients together”.  I had to think for a second with what? A food processor, blender, or would a bowl and a whisk suffice?

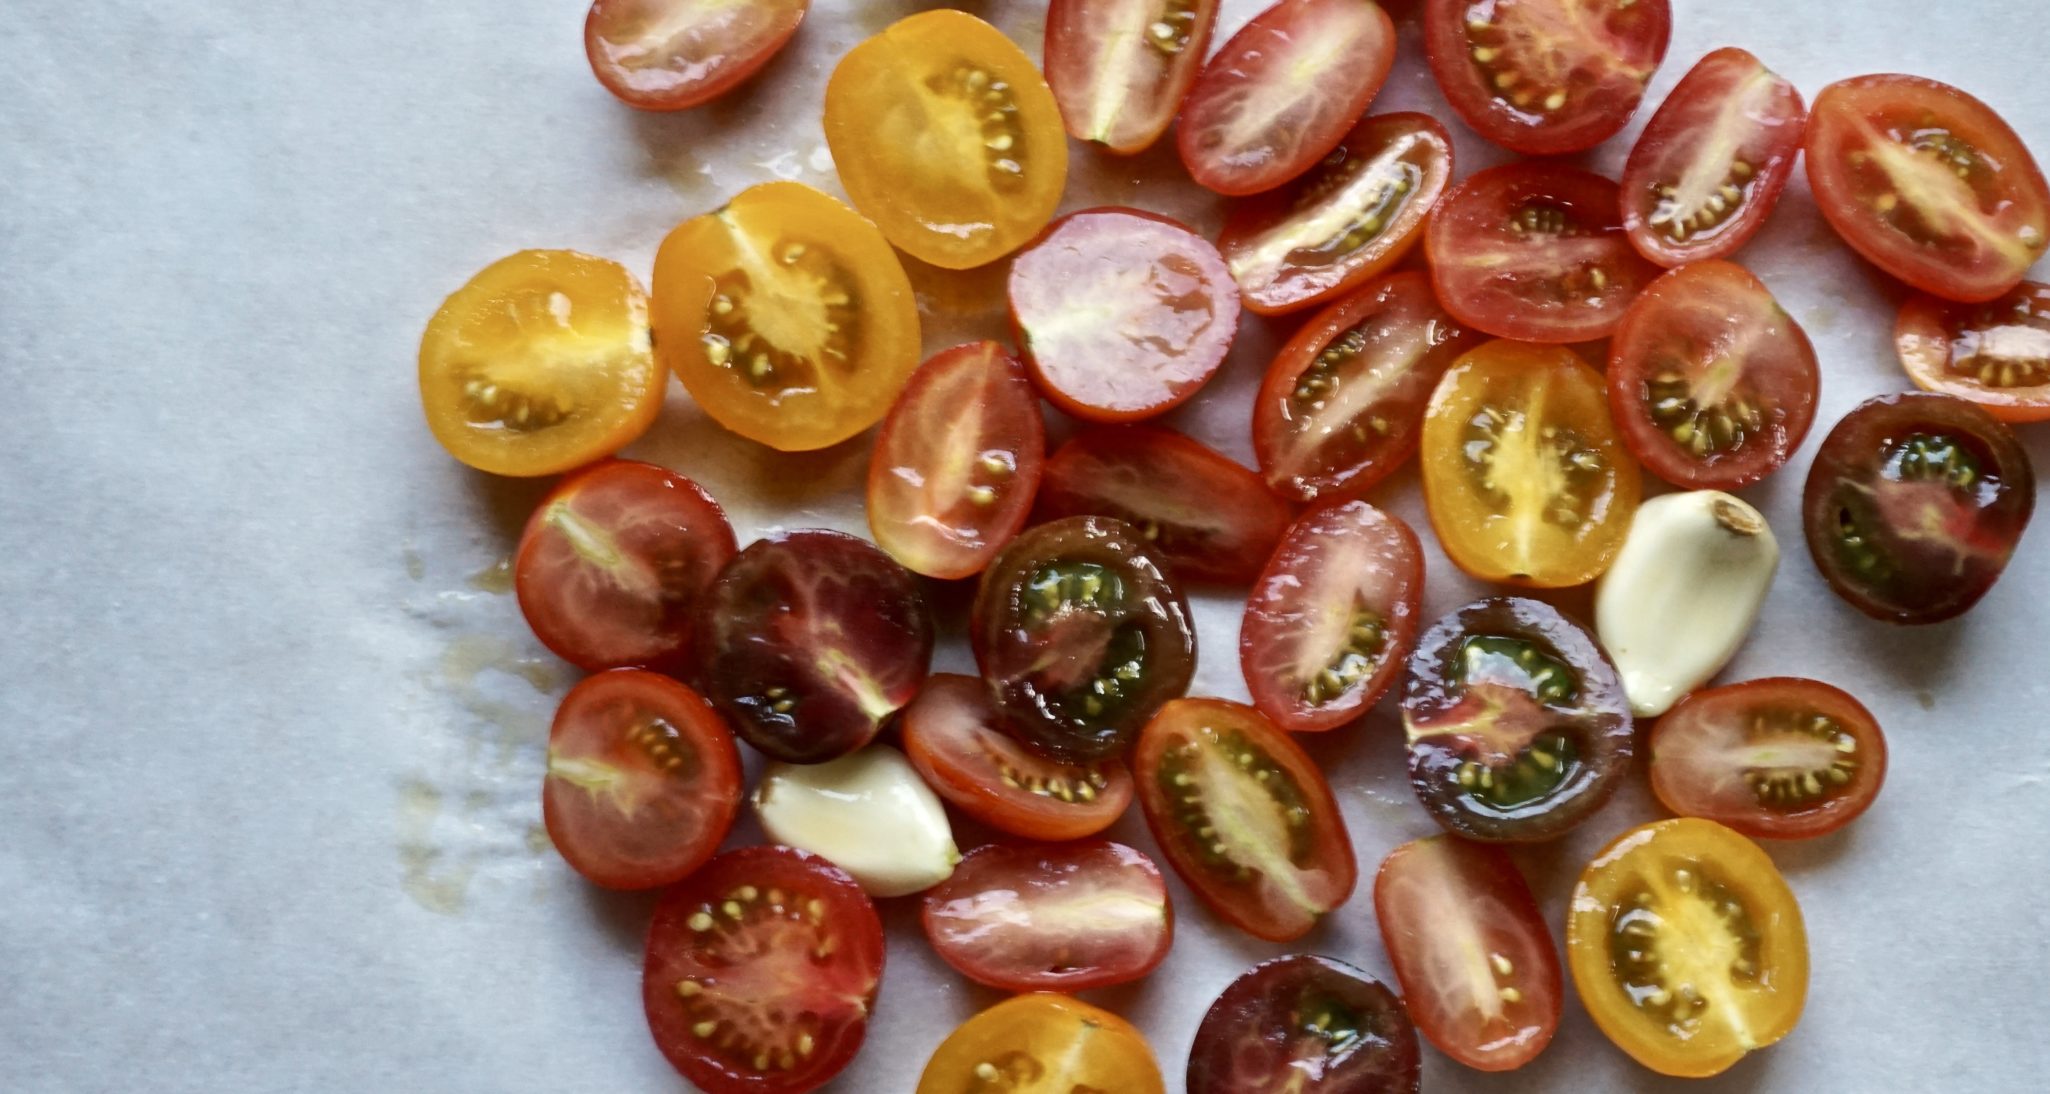
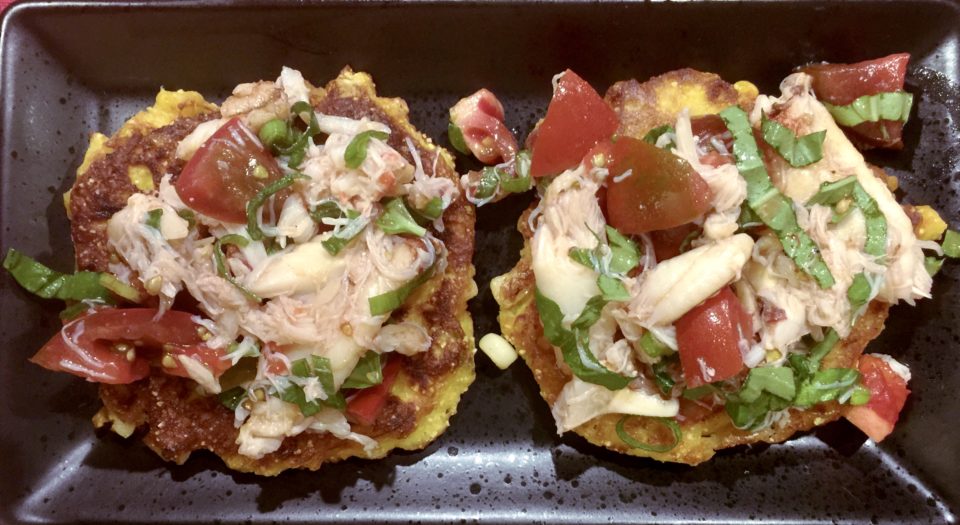
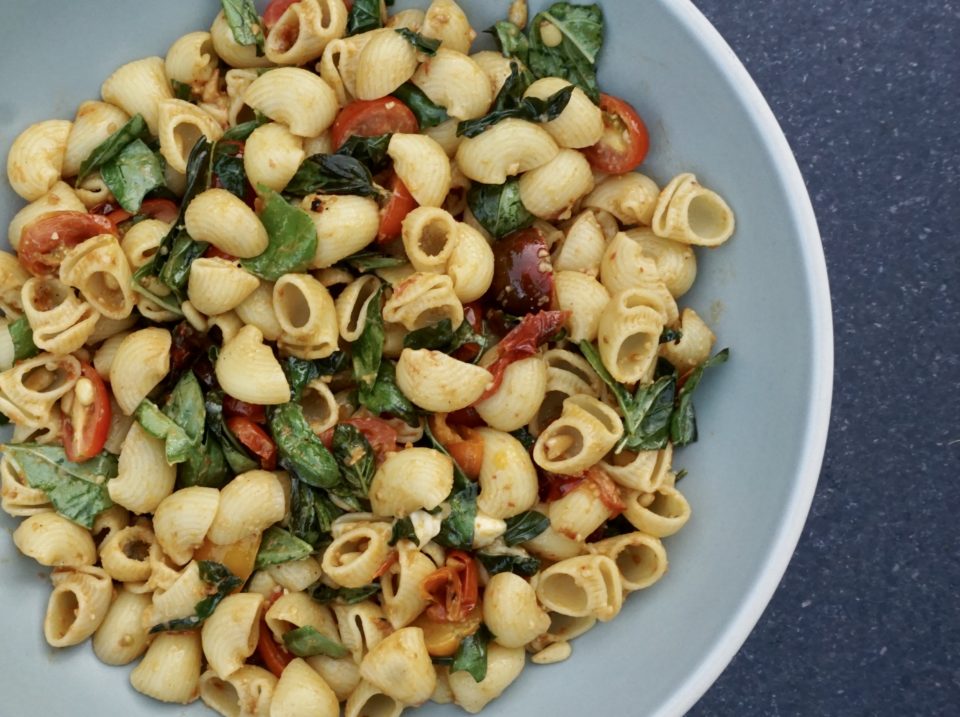
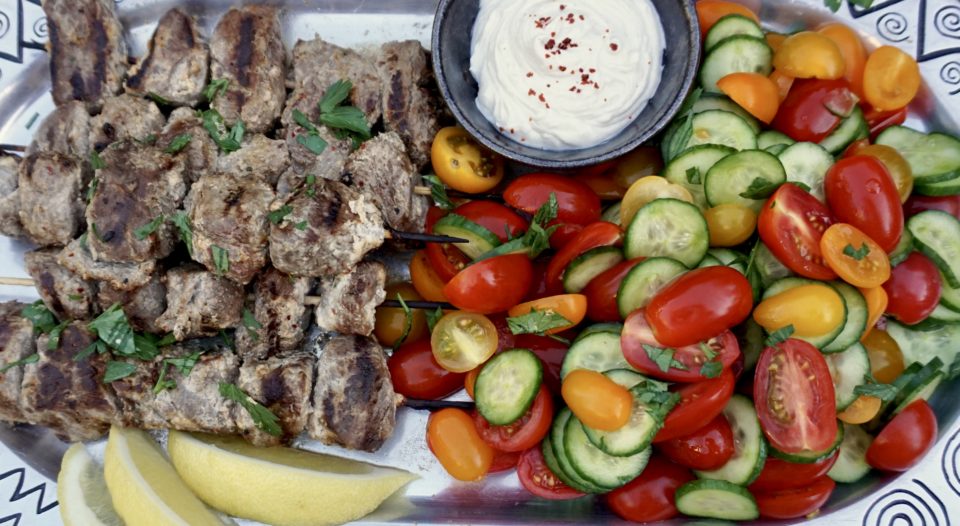
A closer look at the recipes narrowed down which ones I wanted to try, many were pretty involved or contained ingredients I didn’t have on hand.  I ended up with 4 recipes, Fresh Corn Cakes with Crab-Tomato Salad, Lamb Kebabs Grilled with Tomato Cucumber Salad, Half Blistered Tomato Pasta Salad and the Brioche Croutons (ok, not a salad but a bonus recipe).

Right off hand I would say none of the recipes I tried WOWED me.  With every dish a tweak would pop into my head or I would think this is not bad but it’s missing something.  The Corn Cakes were tasty, a bit heavy but had a nice crunch from the cornmeal and corn. The tomato-crab salad fell flat and needed a bigger hit of acid.  I added a squeeze of lemon trying to give it some pop.  I also would have thrown some fresh corn in with tomatoes and crab for some crunch and sweetness.  Full disclosure, I ended up hitting it with a dollop of Siracha mayo, but that’s me.

The pasta salad was a hit with the hubby but I once again thought it could use a flavor pop.  I julienned my basil and mint to distribute the herbs through the salad more evenly.  It reminded me of a de-constructed pesto.

The grilled lamb kebabs were tender and juicy from the marinade. I only had greek yogurt on hand so the marinade was thick and left the kebabs a bit pale in color.  The sauce of tahini and yogurt was flat so I added a sprinkle of Aleppo pepper, be generous with the salt.  The tomatoes and cucumbers are a classic, I would add slivered red onion for pop and a sprinkling of feta to finish next time.

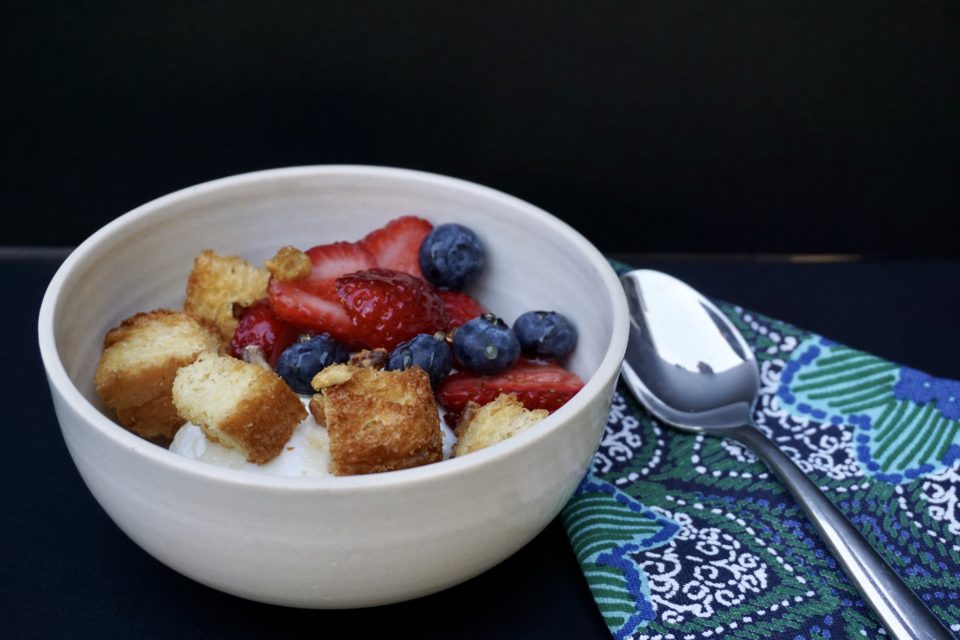
Brioche toasted with honey and walnuts and sprinkled with sea salt.   Adds a nice touch to yogurt or fresh seasonal fruits-peaches or berries. My new favorite breakfast bowl, Greek yogurt, fresh berries drizzled with honey and topped with the croutons and toasted walnuts.  Stupid easy and a winner.

I don’t think I can give this book a resounding thumbs up but it is a solid book.  If I try more recipes I’ll keep you posted.


Garlic Rice-Love Letter to Rice

Garlic Rice-Love Letter to Rice

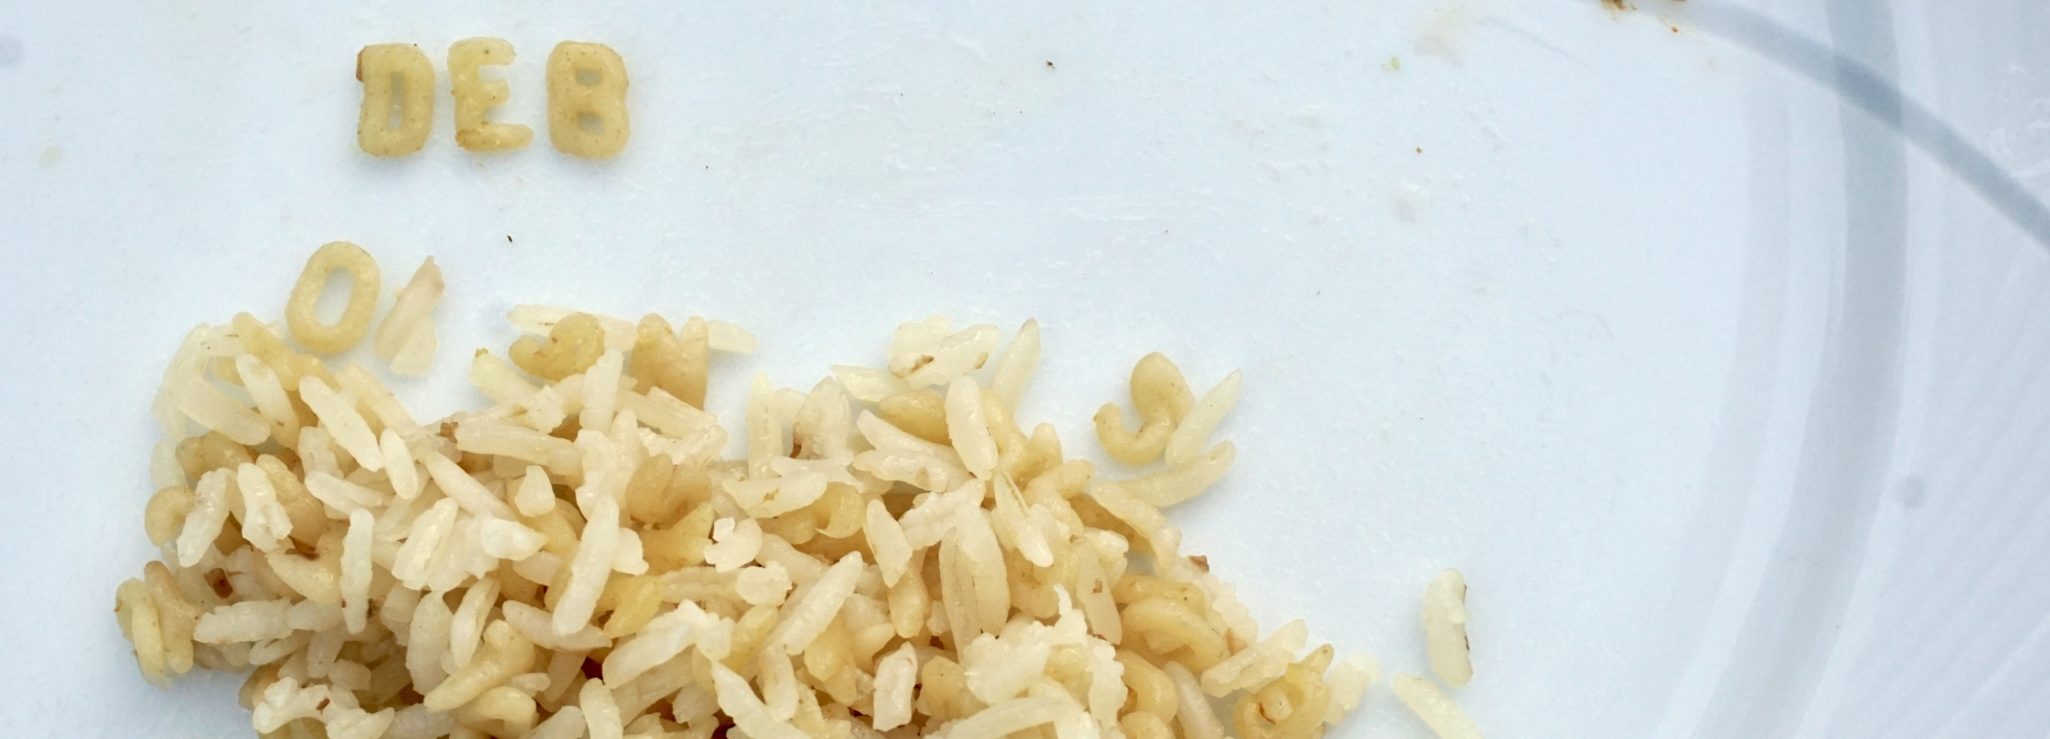
On one of our weekend food treks, hubby and I headed to East San Jose in search of egg rolls and banh mi. Right in front of the entrance to the market was a display of different dried pasta on sale including tiny little pasta shaped like letters. Woohoo!  Haven’t seen pasta letters in ages. When the kids were little I would make rice pilaf using alphabet pasta. The kids loved it and called it “letter rice.”  They would spell their names and challenge each other to spell as many words as possible on their plates. We were totally bummed when our market stopped carrying our beloved alphabet pasta. A search of other markets came up empty so  I resorted to using star and rice-shaped pasta. Not the same, but a good life lesson for my kiddies…you can’t always get what you want.

Alphabet Soup? Nope, Rice

I took a picture of the display with my phone and sent it to the kids with the exclamation “LETTERS!” then I bought a couple of bags (ok, more than a couple) to have on hand for when they come home.

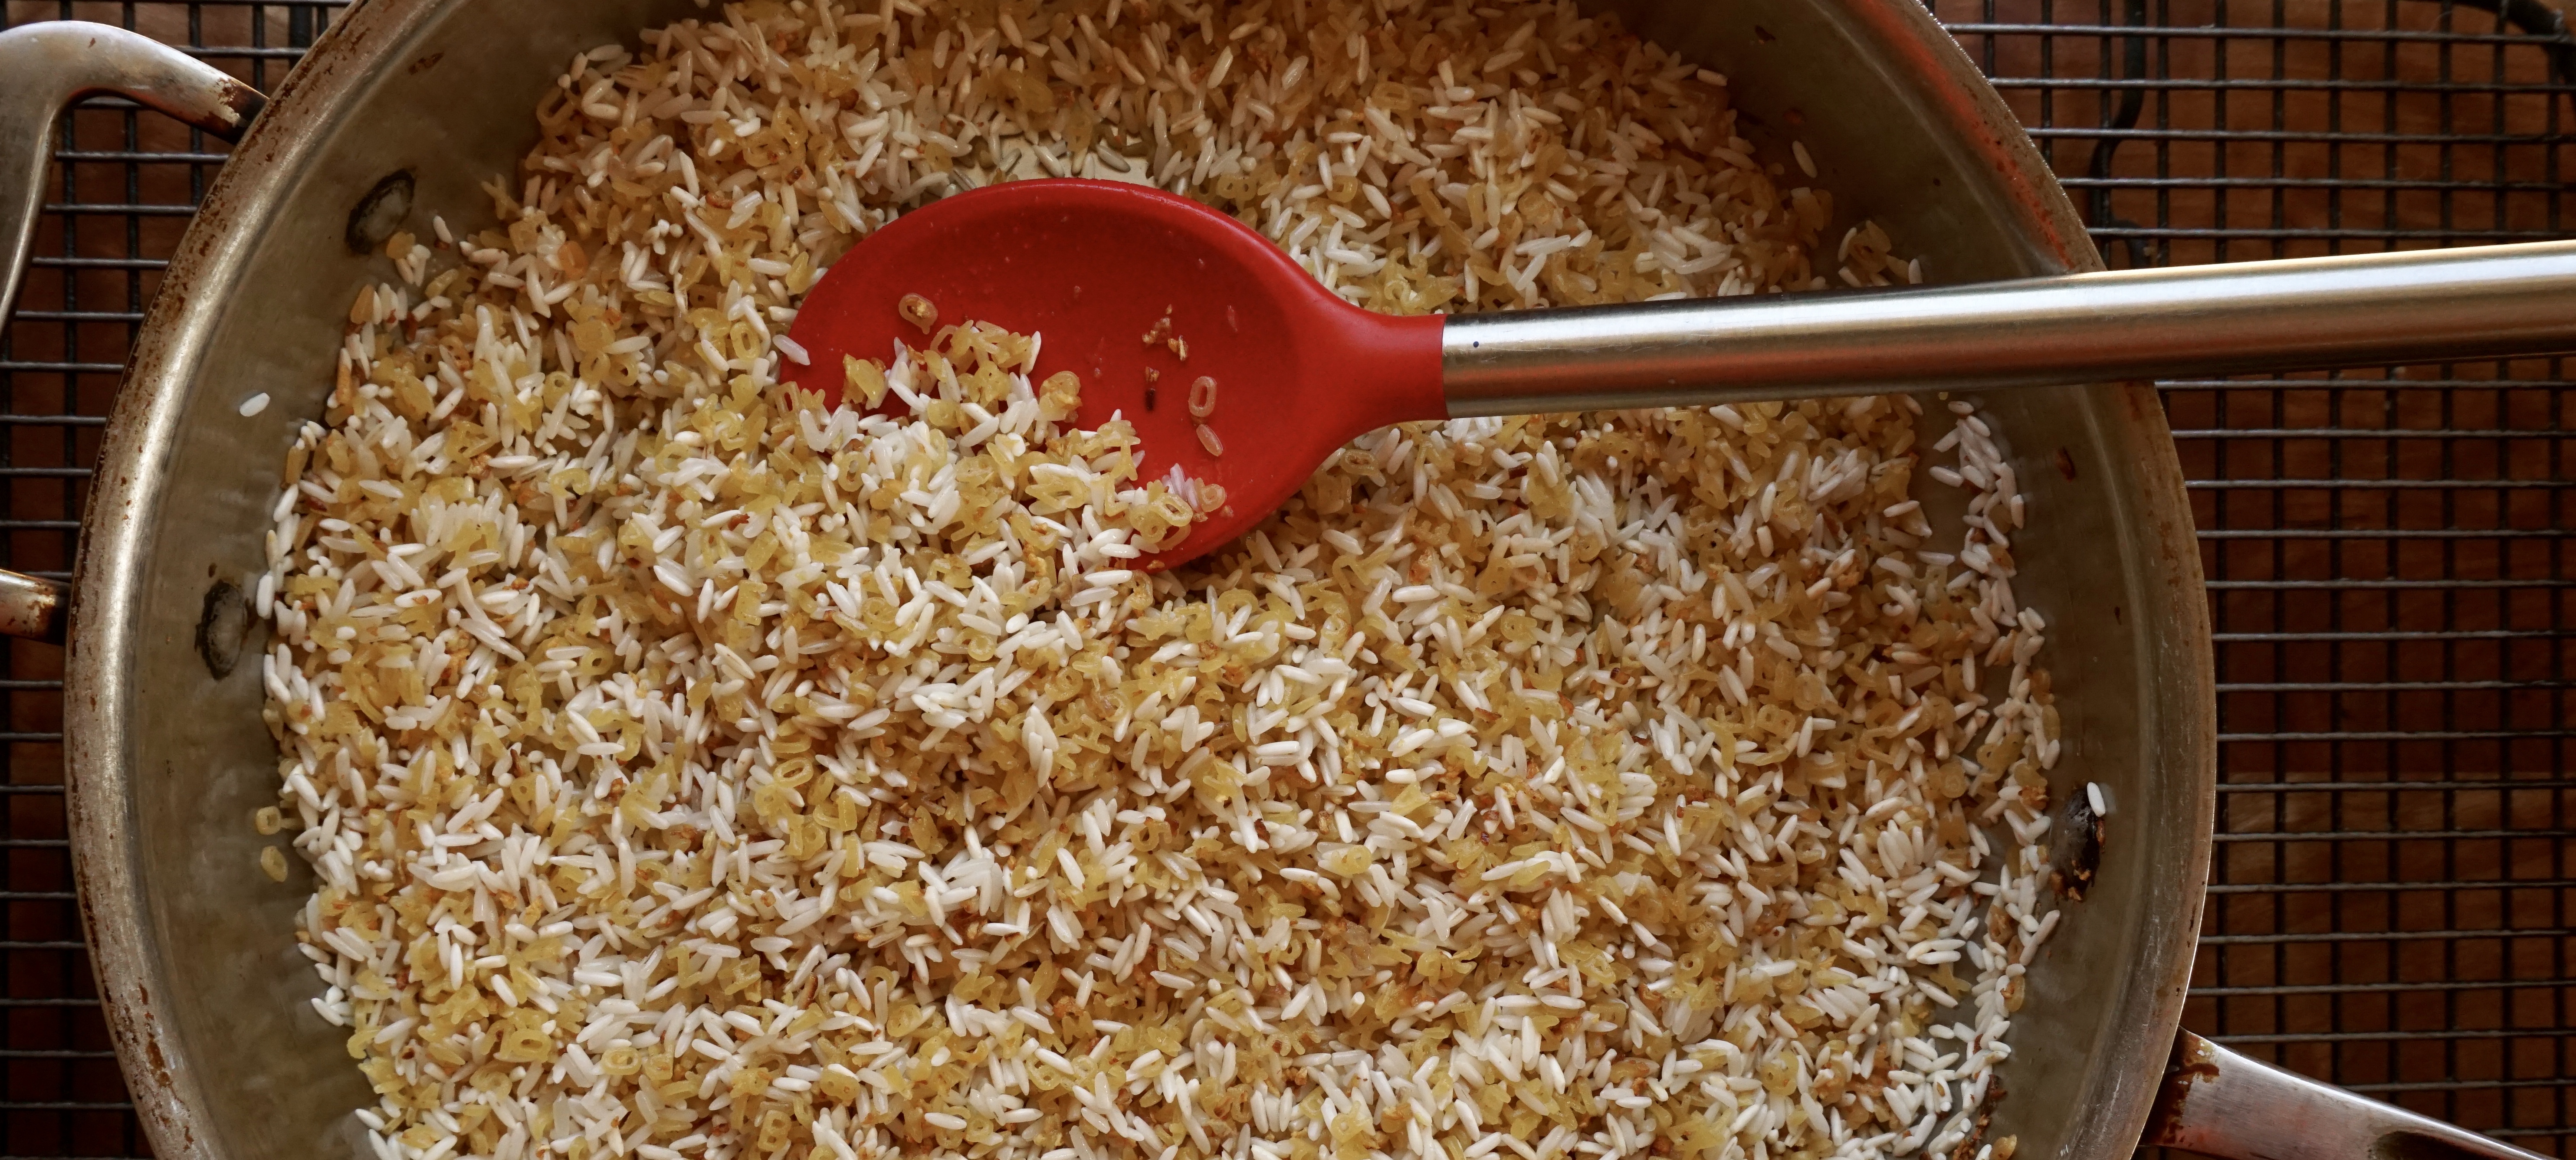
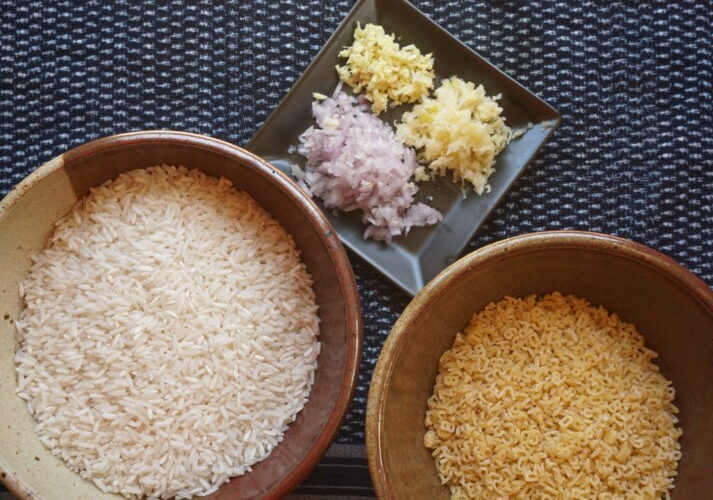
Letter rice is a fusion of rice pilaf and Hainanese Chicken Rice, a Singaporean dish of poached chicken and rice.  Use the broth from the poached chicken to cook the rice for a double-flavored whammy.  First sautéed the rice with the Asian trinity of garlic, ginger and onions, toss it in a rice cooker (because I don’t know how to cook rice any other way), and cook in the reserved stock.

IT IS STUPID EASY

Maybe not as easy as making plain rice but with little effort you can jazz up your rice making it delicious and fun to eat.  Kid-tested, kid- approved.

Mains that aren’t “saucey” beg for letter rice as an accompaniment.  Letter rice in our house accompanies barbecued ribs or chicken, grilled fish, and STEAK. Yum.

Like many of the recipes, this one lends itself well to changes.  Tweak the Asian trinity.  Replace onions with shallots, or use only garlic and omit the ginger and onions.  Having steak?  Use beef stock instead of chicken. Vegetarian? Use mushroom or vegetable stock instead.  I throw in dried mushrooms to intensify the flavor.  You can use all rice and skip the letters but why would you skip the cute-shaped pasta.

The recipe is easy to remember.  For every cup of uncooked rice, use 1 fat clove of garlic (or 2 skinny ones), 1/2 to 1 teaspoon of ginger, and 1/2 shallot.  For each cup of rice or pasta, use 1 tablespoon butter or oil.  Saute’ the aromatics first, and when they begin to brown add the pasta and rice.  Watch garlic, do not let it burn or it will taste bitter.

The quirky part of this recipe is I only know how to cook rice in a rice cooker (I should be embarrassed-I am).  I use the cup that comes with the rice cooker to measure my rice but a standard 1 cup measure for the pasta.  For 2 cups of rice,  use 1 cup of pasta and fill the rice cooker with the stock up to the 3-cup line.  Yep. Easy peasy if you have a rice cooker…

Love Letter to Rice (Garlic Rice)

asian rice pilaf
Course dinner, Rice, Side Dish
Cuisine Asian-American
Keyword Garlic Ginger Rice, pilaf, rice
Prep Time 10 minutes
Cook Time 45 minutes
Servings 4

Ingredients

  • 2 cups long grain or basmati rice (measured in standard cup that comes with the rice cooker its equivalent to 3/4 cup
  • 1 standard measuring cup any small shaped pasta stars, letters, acini de pepe, or orzo
  • 3 tablespoons butter or vegetable oil or 50/50 of each

Aromatics

  • 3 large cloves of garlic finely chopped (garlic lovers or those living among vampires feel free to increase the amount of garlic)
  • 1 shallot finely chopped (or 1/4 yellow onion or 1 green onion green and white parts, finely chopped)
  • 2 teaspoons minced ginger optional

Liquid

  • Homemade or low sodium chicken broth can substitute beef or vegetable stock approximately 3-4 cups
  • 1/2 to 1 tsp salt
  • 1/4 cup dried sliced shiitakes or dried mushroom mix optional

Garnish:

  • green onions
  • cilantro leaves
  • 1 tsp sesame oil

Instructions

  • Melt butter or oil in pan
  • When butter is fully melted add garlic, shallots and ginger and saute' over medium heat until garlic begins to brown.
  • Add pasta and rice to pan. Stir to coat rice and pasta with oil thoroughly.
  • Put rice and pasta mixture in rice cooker and fill to the three cup line. If using dried mushrooms add them at this point.
  • Set to cook and you're done!

Back from school for the summer, Jordan requested “char Siu” style barbecued ribs and letter rice which prompted this post!  Here is the marinade for the ribs. Grill over indirect heat for 25-30 minutes in a covered bbq.  Flip and baste halfway through, then baste ribs with honey and grill over direct heat to slightly char ribs.

Do Not Play with Your Food, LOL

I remember my mom yelling at my brother and me “STOP PLAYING WITH YOUR FOOD, JUST EAT IT!”  Where is the fun in that?

Thai-rrific Noodles

Thai-rrific Noodles

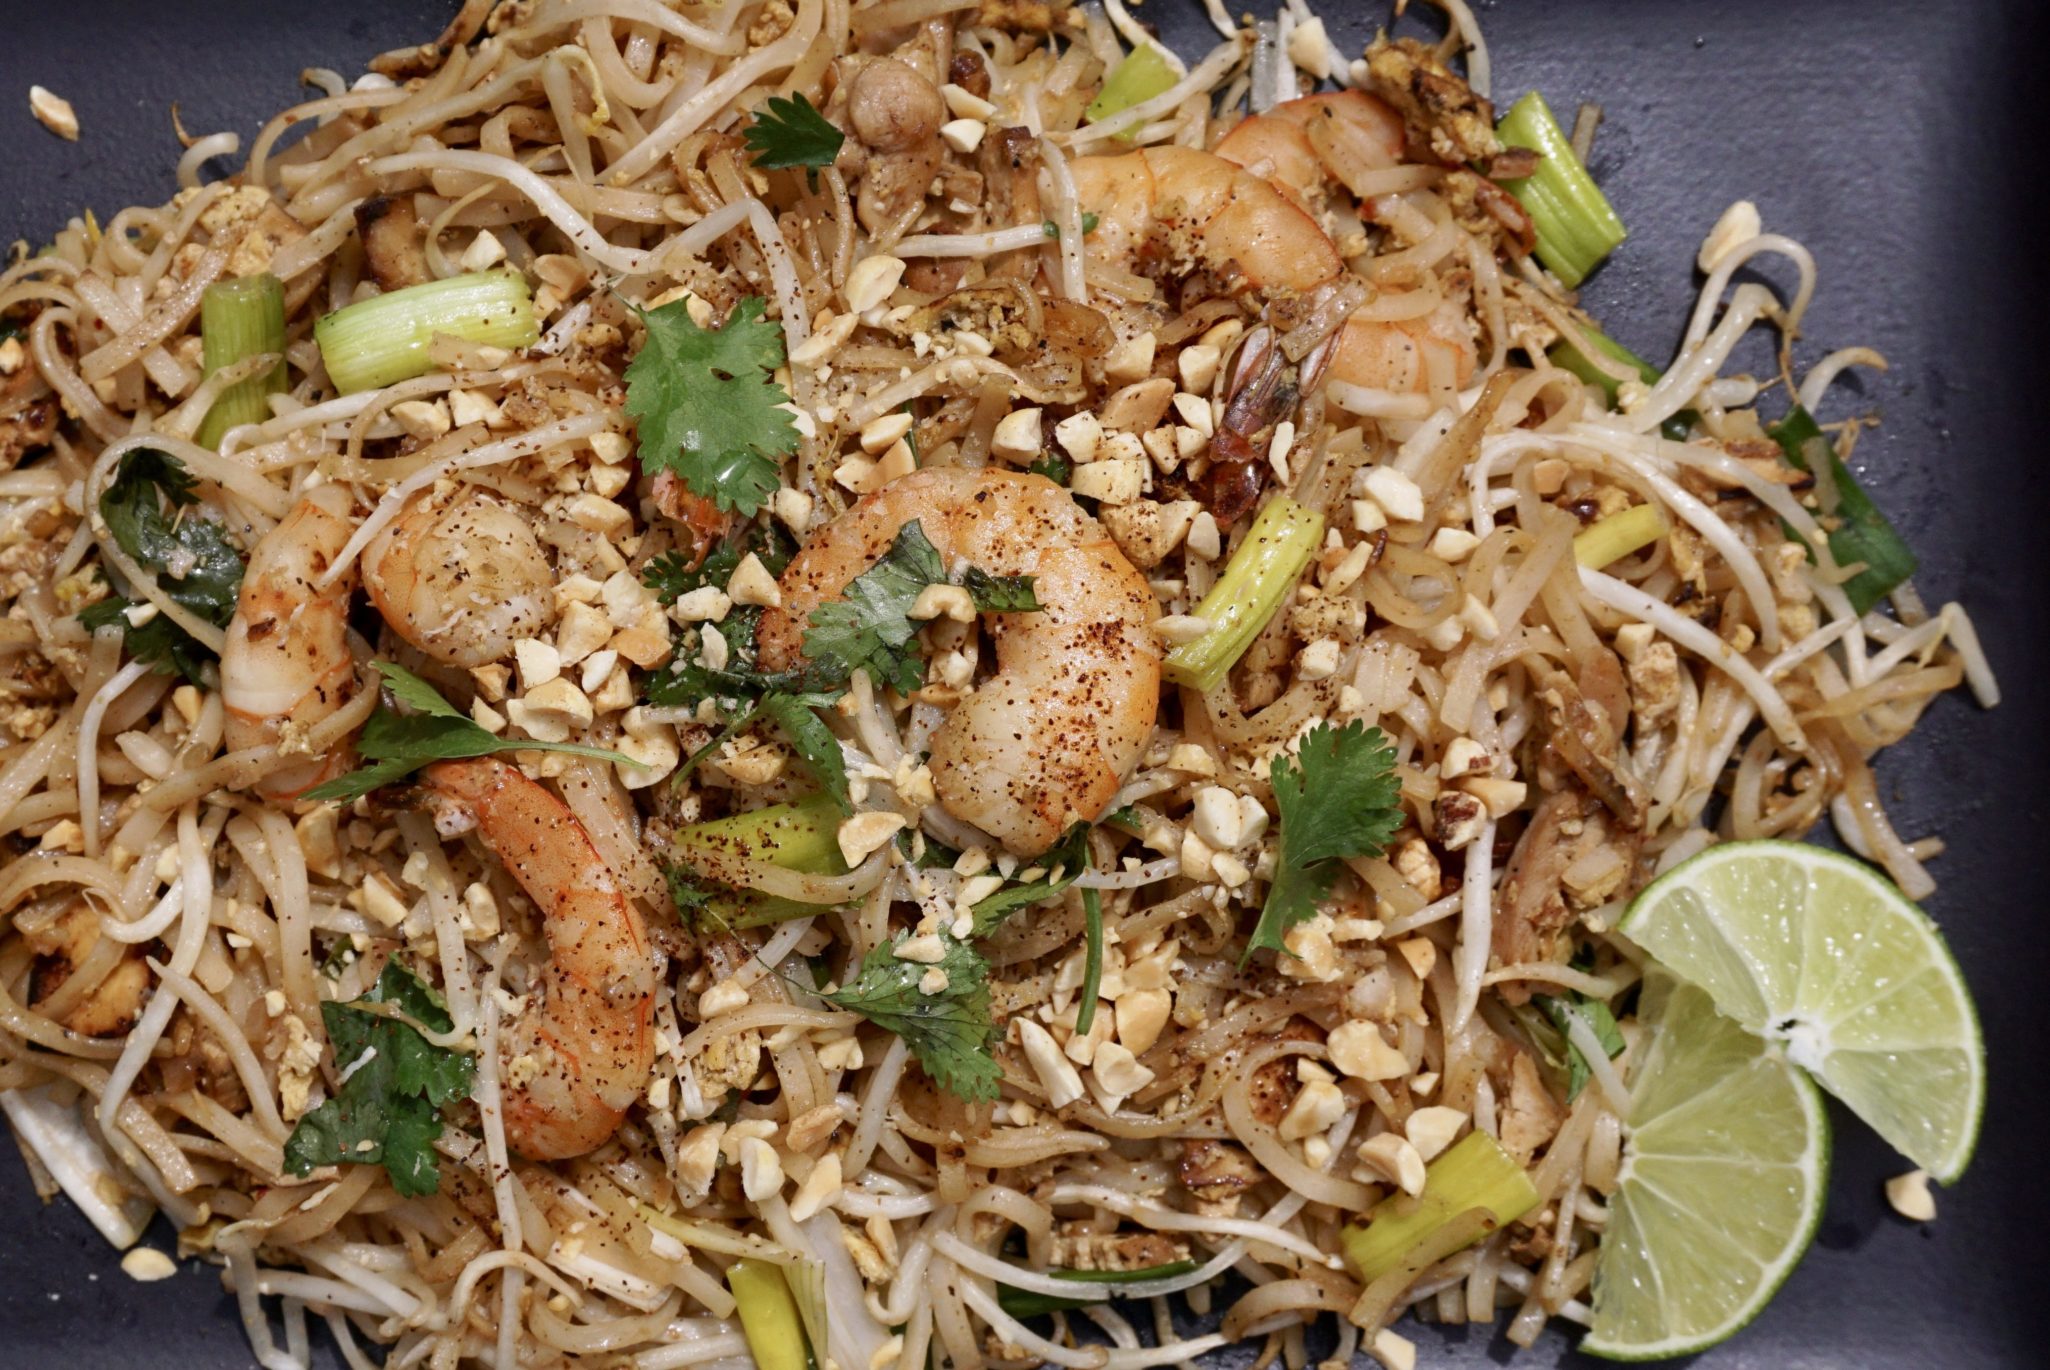
My hubby has a certain MO when it comes to food.  Over the years he has become a much more adventurous eater but for the most part he sticks to what he likes and when he likes something, he will eat it all the time.  Well, not all the time but pretty darn regularly.  I think of it as phase eating.  There was his pizza phase, which thankfully was during his training days-before me.  Currently he is in a Thai food phase. Favorite dish, Pad Thai of course.  Which is alright with me, I love Pad Thai. What’s not to like? Rice noodles stir fried with shrimp, bean sprouts, onions, tofu, flavored with fish sauce, tamarind and chilis.  Sweet, spicy, tangy, a flavor explosion.

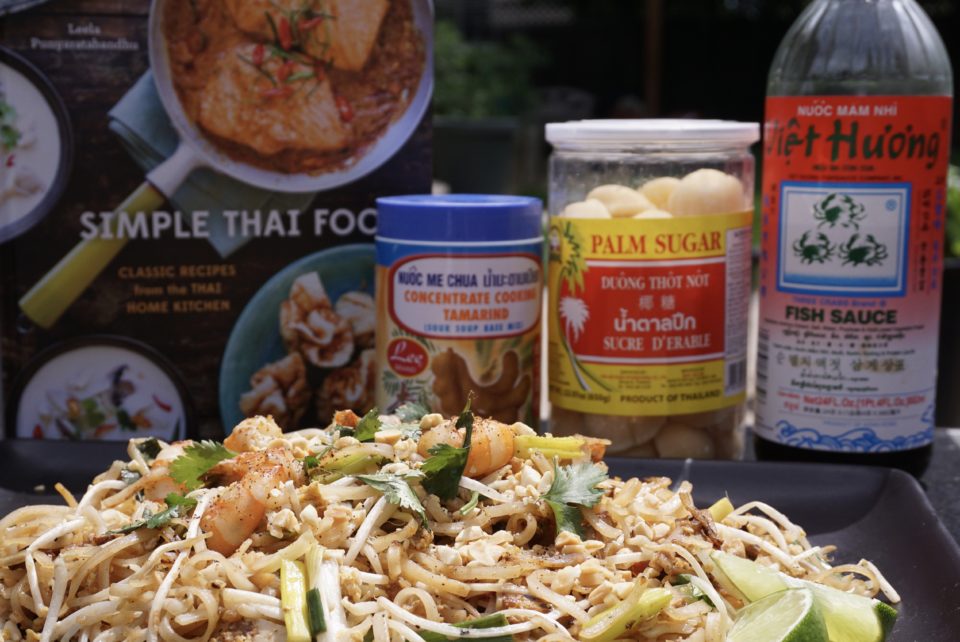
After Wes came home for the umpteenth time with take out Pad Thai I decided I should try my hand at making Pad Thai. I pulled out my copy of Simple Thai Food (YES I have a Thai cookbook) and flipped to the recipe for Pad Thai.  I scanned the ingredients and much to my chagrin all I had on hand was the fish sauce.  Off to the market.

Tamarind paste-check, Palm sugar-check, radish-check, rice noodles-check.  Grab some shrimp, bean sprouts, cilantro, limes and onions, let’s go home and make a plate of deliciousness.

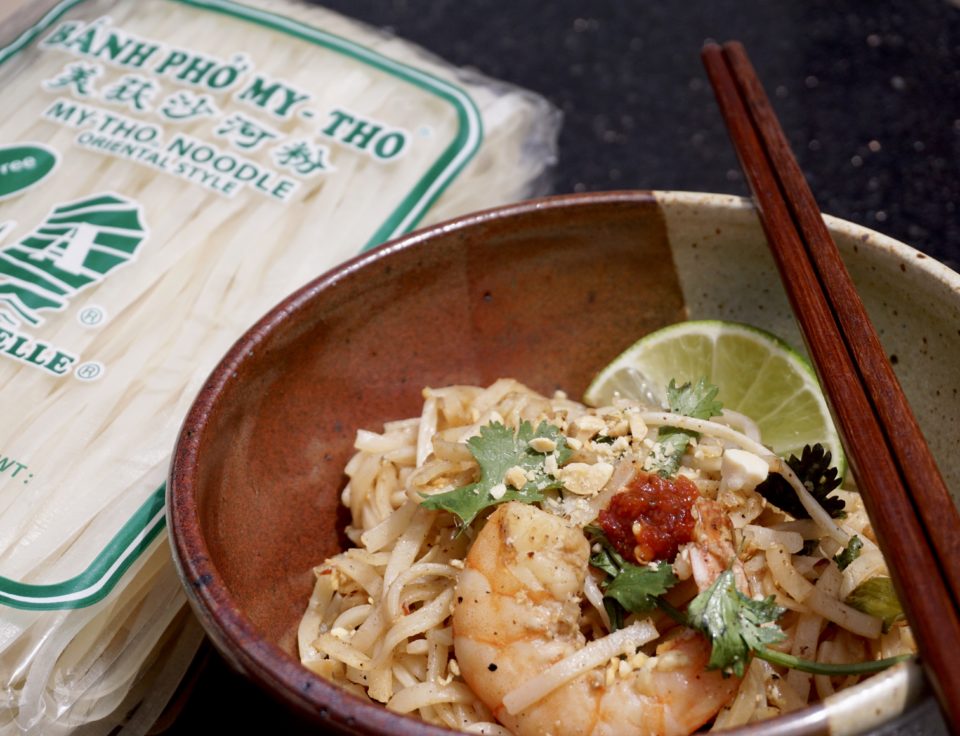
There is a bit of prep to be done.  Making the sauce, cutting the vegetables, shelling the shrimp and soaking the noodles.  The rice noodles, like pasta come dried but you don’t need to cook it.  You do need to soften the noodles though.  You can either soak them in cool water for 30-40 minutes or if you are in a hurry, soak them for 3 minutes in HOT water.  Drain the noodles and set them aside.  Don’t leave them in the hot water for any longer as the noodles will get mushy.

Not feeling shrimp? You can use beef, chicken or pork in place of the shrimp.  I used a combination of chicken and shrimp in my Pad Thai.  Cut the chicken, beef or pork into bite size pieces that will cook quickly.  Think stir fry.  You can omit the animal protein all together for a vegetarian version.


Pad Thai (Adapted from Simple Thai Food)

Iconic Thai rice noodle dish, Pad Thai you can make at home!
Course dinner, lunch, noodles, One dish meals
Cuisine Thai
Keyword pad thai, rice noodle dish, rice noodles, Thai
Prep Time 45 minutes
Cook Time 7 minutes

Ingredients

  • 4 ounces dried rice noodles 1/8 to 1/4 inch wide

Sauce

  • 2 tablespoons tamarind pulp
  • 2 tablespoons fish sauce I like 3 Crabs brand
  • 3 Tablespoons palm sugar grated or 2 tablespoons brown sugar
  • 1/4 to 1/2 teaspoon chili flakes

Aromatics

  • 1 shallot finely chopped
  • 2 medium cloves garlic minced
  • 1/4 cup finely chopped preserved relish* optional
  • 2 tablespoons tiny dried shrimp soaked in hot water for 15 minutes and drained*
  • 5 tablespoons vegetable oil divided
  • 6 ounces skinless boneless chicken breast trimmed of visible fat and sliced into 1/4-inch thick strips or 6- 8 ounces large raw shrimp, peeled and deveined or a combination of both
  • 6 ounces extra firm tofu cut into matchsticks 1" long, 1/4 inch wide
  • 2 eggs lightly beaten
  • 6 Chinese chives or green part of 3 green onions cut into 1 inch lengths
  • 2 cups bean sprouts or 1 cup bean sprouts + 1cup shredded red cabbage

Condiments:

  • 1/3-1/2 cup roasted peanuts finely chopped
  • 1 lime cut into wedges for garnish
  • Fish sauce
  • Red Chile powder
  • Sugar
  • Cilantro sprigs

Instructions

  • Place dried noodles in room temp water and cover for 30-40 minutes until soft enough and pliable enough to wrap around finger without breaking. Drain and set aside.
  • Or bring enough water to a boil to cover noodles. Place noodles in bowl and put heated water over noodles. Let stand for 3 minutes, drain and set aside.
  • In small bowl, stir together sugar, tamarind, fish sauce and chili flakes. If using palm sugar make sure to crush or grate the sugar to help it dissolve. Set aside.
  • Heat 3 tablespoons of oil in a flat bottom wok or large frying pan (non-stick), add noodles and stir fry for about 1 min making sure the noodles are soft and coated with the oil.
  • Add sauce mixture to pan, stir fry for additional minute to coat noodles with sauce.
  • Push noodles to one side of pan, add & heat remaining oil. Add shallot, garlic, radish, tofu and dried shrimp to open side of pan. Stir fry additional minute.
  • Add shrimp or protein to shallot mixture side of pan and cook until the shrimp or chicken is almost cooked through 1-2 minutes.
  • Clear center of pan and pour eggs in, stir the eggs similar to cooking scrambled eggs.
  • Once eggs are cooked and most of moisture from noodles has evaporated, stir everything together.
  • Just before removing pan from the heat, fold in half the sprouts, green onions or chives and/or cabbage. AS soon as the vegetables are mixed in remove from heat and plate.
  • Garnish with remaining sprouts, peanuts, cilantro and condiments as desired. Place lime wedges on plate to squeeze on noodles.
  • Serve immediately YUM
Instant Pot Adventures-Mushroom Risotto

Instant Pot Adventures-Mushroom Risotto

You can disregard this post if you do not have an Instant Pot. Well, you may want to do a quick read to see if it convinces you to add yet another appliance to your kitchen. After all you can never have too many kitchen gadgets.
My first try in the Instant Pot was a Spicy Pork Shoulder dish from Melissa Clark and then Corned Beef for St. Paddy’s Day.  Let’s face it…cuts of meat like pork shoulders or briskets lend themselves well to pressure cookers. But how versatile is the Instant Pot? Upon the recommendation of my sister-in-law I decided to try my luck at making risotto. The time savings was not super significant, what was boss WAS NOT HAVING TO STAND OVER THE STOVE STIRRING CONSTANTLY.  For those who have made risotto in the traditional way, it is like a dance. Stir, stir, stir, broth, stir, stir, stir, more broth… Step, step, step together, pause, step, step, step together pause….see just like doing the tango.

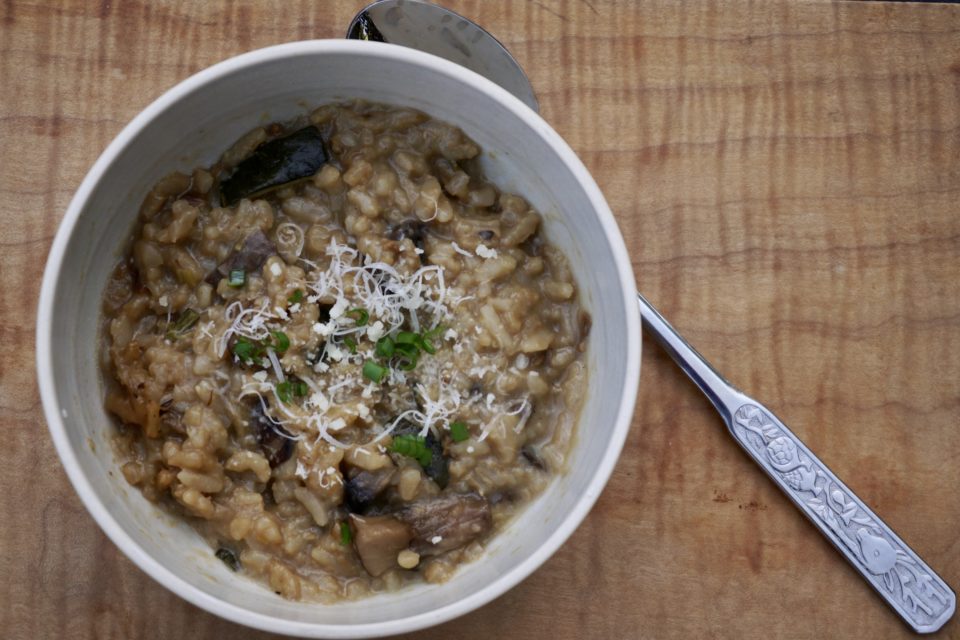
First saute’ your aromatics and rice as usual in the Instant Pot (one pot cooking yay!).  Add entire amount of stock called for in the recipe and any vegetables (in this case mushrooms), slap the lid on your Instant Pot, set it for 4 minutes and WALK AWAY.  Yes, you read that right, walk away.  The Instant Pot takes a couple of minutes to come to pressure and then cooks for the 4 minutes.  All you need to do is listen for the beep that signals its done.  Do a quick release (careful, don’t burn yourself), take the lid off, set your pot to saute’ and finish the risotto.  Finishing requires a minute or two of stirring to create the creamy texture and to finish off the risotto.  Test the risotto for doneness after removing the lid, you don’t want to overcook the rice.  I did not use the full 2 ounces of dried mushrooms, probably closer to 1 ounce and found it a bit overpowering.  I would use approximately 1/2 ounce of dried mushrooms soaked in broth to soften. You can adjust the amount of parmesan to taste.  A nice addition would be crispy, crumbled pancetta or prosciutto.

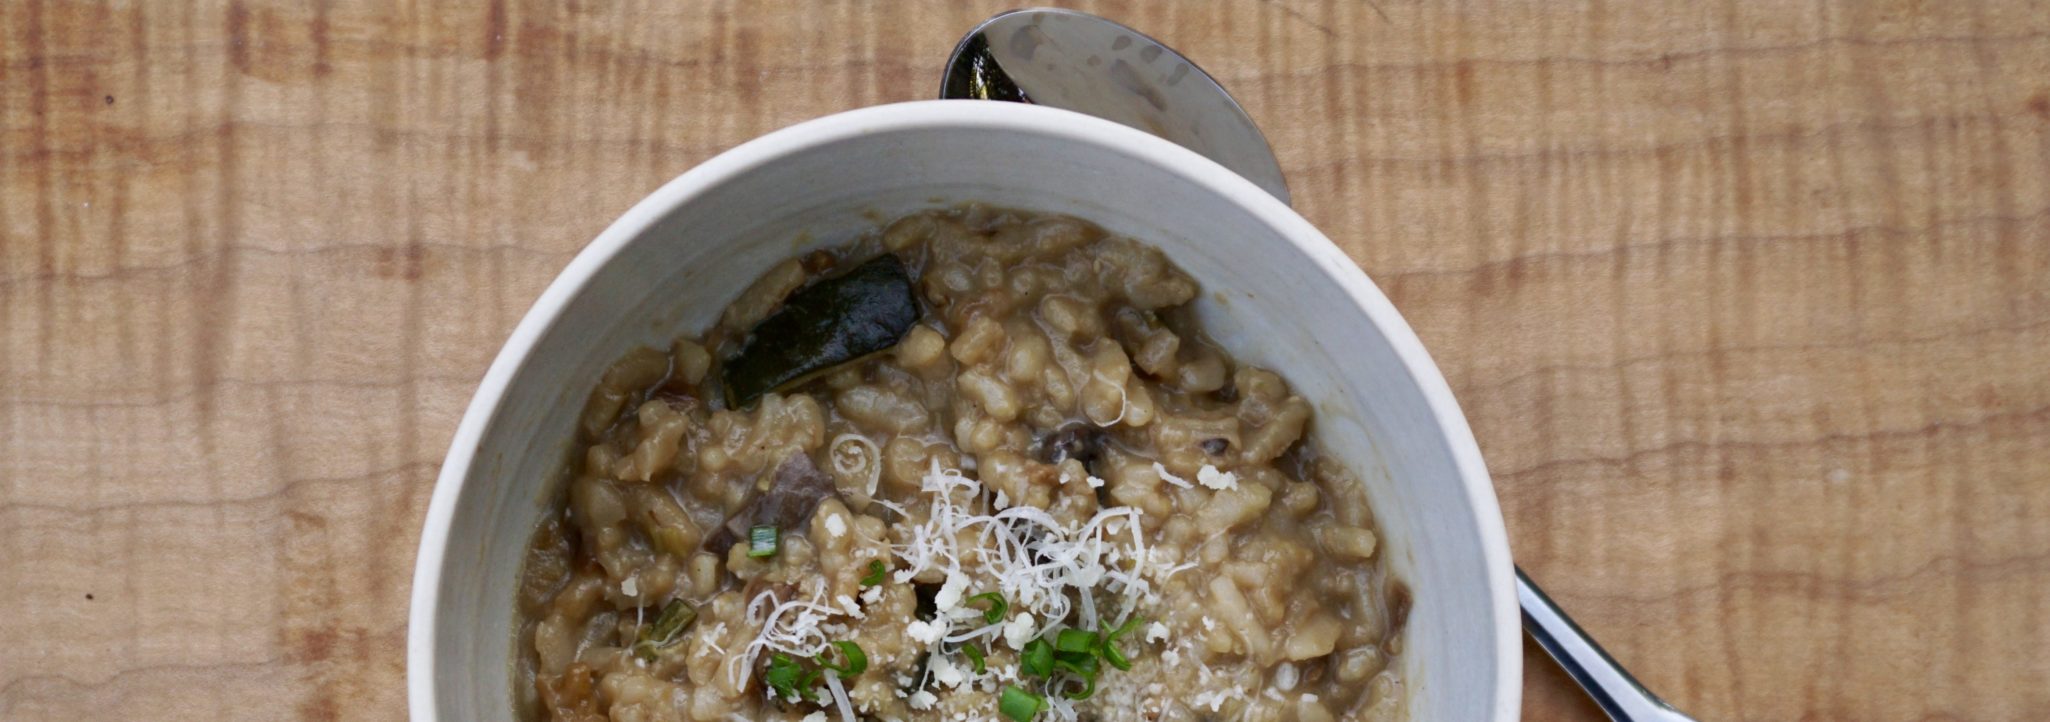
The risotto was pretty darn good if I say so myself.  It could have perhaps used a smidge less time so it was truly al dente but it was surprisingly good and so easy!  I am definitely going to give risotto made in an Instant Pot another whirl.  I will miss the arm workout I get from stirring risotto though…life’s little sacrifices.

Instant Pot Adventures-Mushroom Risotto

Ingredients

  • Adapted from This Old Gal Blog
  • 1 ounce Porcini/Wild Mushrooms/shiitakes dried soaked in warm water to soften
  • 6-8 oz Fresh Crimini Mushrooms roughly chopped or mix of fresh mushrooms such as shiitakes or oysters
  • 1 Tablespoon Butter
  • 1 Tablespoon Olive Oil
  • 1 1/2 cups 9oz Arborio Rice (or medium-grain white rice)
  • 3 Large Shallots chopped or 2 cloves of garlic and 1/2 finely chopped yellow onion
  • 1 Teaspoon Fennel Seeds crushed or 1 tsp. fresh thyme leaves
  • 1/2 cup Dry White Wine
  • 2 cups Chicken Broth
  • 1.5 cups Mushroom water or Water or Broth reserved from soaking dried mushrooms
  • 1/2 teaspoon Sea Salt
  • 1/2-1 cup 3 oz Parmesan
  • 2 Tablespoons Fresh Parsley chopped or chives
  • 1 T Butter to finish

Instructions

  • Dried Mushrooms, bring 2 cups water to boil in heavy small saucepan. Add mushrooms.
  • Cover and let stand until mushrooms soften, about 10 minutes.
  • Transfer mushrooms to cutting board and chop coarsely, reserve liquid.
  • Select Sauté or Browning on your Pressure Cooker and allow to heat.
  • Add oil and butter to Instant Pot and shallots or garlic/onion mixture, fennel seeds or thyme, stir and then add rice cook for three minutes.
  • Add wine and cook until almost evaporated, stirring frequently, about 1 minute.
  • Mix in 3.5 cups broth (or 2 cups broth/1.5 cups reserved mushroom soaking liquid), salt and mushrooms.
  • Lock lid in place and close Pressure Valve. Press manual and adjust time to 4 minutes. Cook at High Pressure for 4 minutes. After beep, do a Quick Release (careful its hot).
  • Turn Pot off and select sauté. Stir rice until creamy and tender but still firm to the bite, approximately 2 minutes.
  • If more liquid is needed, stir in a little more broth or reserved mushroom liquid. Add more until desired creaminess is achieved.
  • Mix in cheese and butter. Season risotto with salt & pepper to taste.
  • Transfer to heated plates or serving bowl.
  • Garnish with parsley or chives and serve while hot!