Tag: #corn

Cheesy Corn, Are You Ready for Some Football Food?

Cheesy Corn, Are You Ready for Some Football Food?

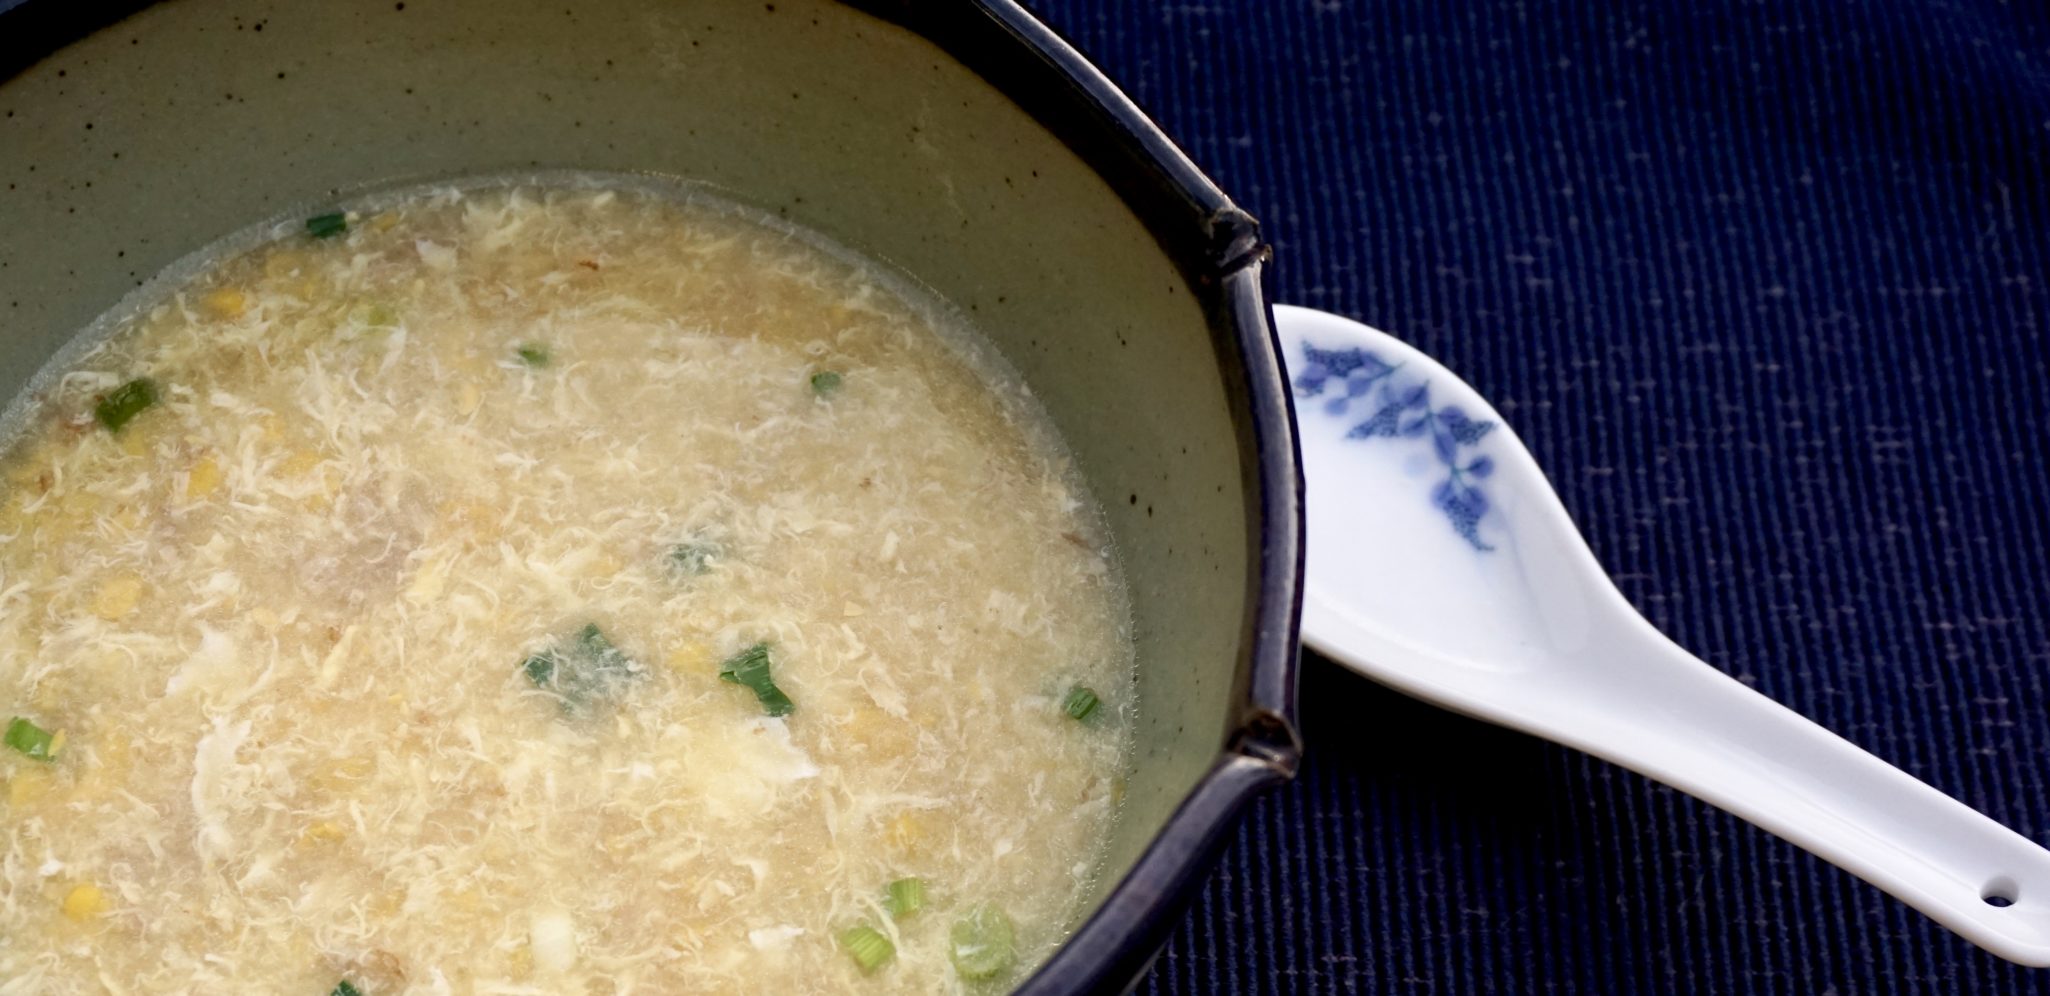
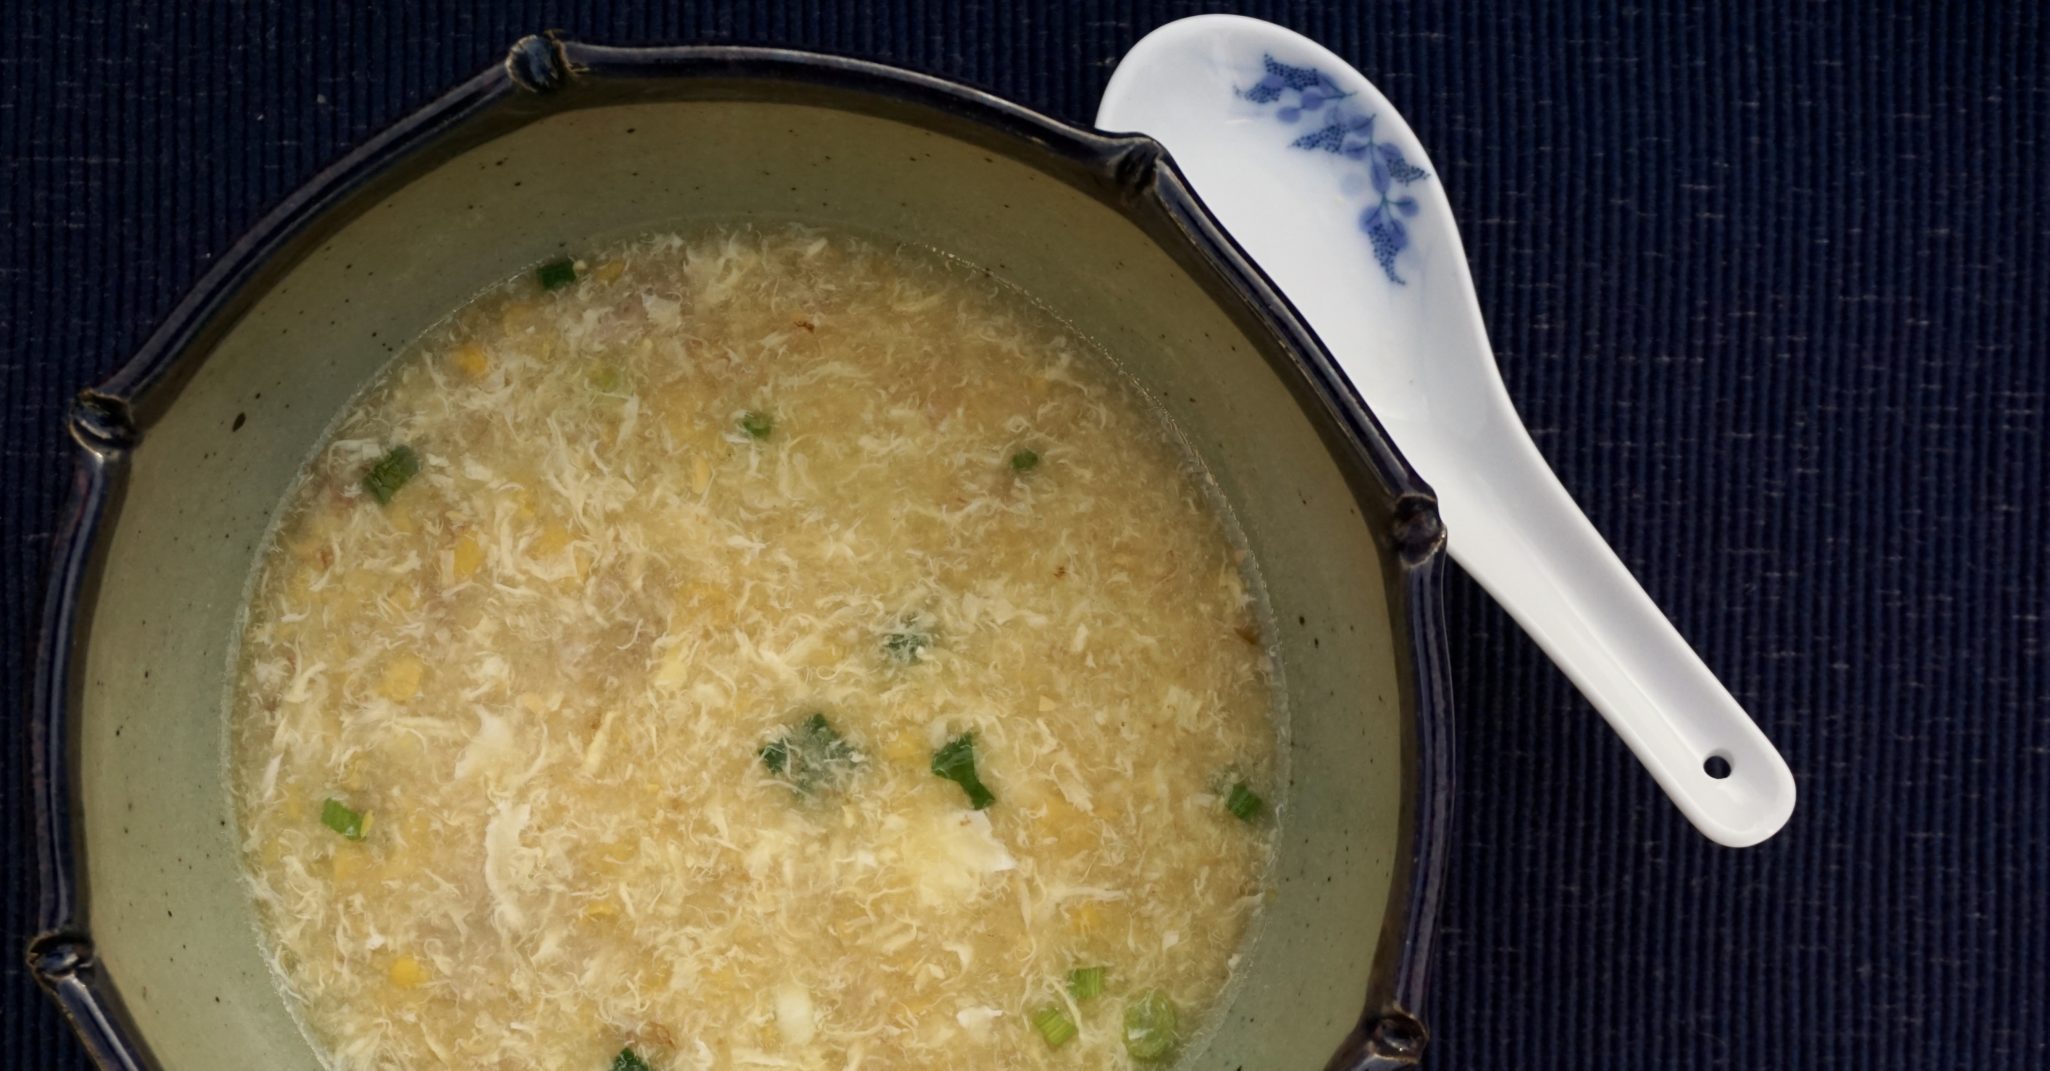
I love the fall season. Aside from all things pumpkin and apples, I start thinking about foods that go hand in hand with watching football.  My dad was a sport’s junkie and he definitely passed the sports-watching gene to my brother and me.  He also liked to cook.  Every Sunday he would have a big pot of Rice Soup or Congee simmering just for the 49er game. I’m not sure what I looked forward to more, the Rice Soup (Instant Pot) filled with bits of chicken, potatoes, tiny pork meatballs, topped with green onions and cilantro, or the football game.  

Football Food

In addition to the soup, football watching requires yummy totally bad for you snack food and I just discovered one that would fit in perfectly with a sport-watching spread.  One of my favorite cookbooks this year, A Common Table, has a popular Korean snack that must have been created to go with beer and fried chicken and therefore football.  Korean Cheesy Corn. Yep, the best thing since sliced bread. Okay, I’m kidding but it is good and stupid easy.

Start with fresh corn from the Farmer’s Market.  It is so good right now.  Frozen corn or canned corn (lots of Korean recipes start with canned corn) would work, but, come on, go fresh and support your local farms.

And now a public service announcement, a video on how to take corn off the cob from Saveur using a bundt pan! It works like a charm!

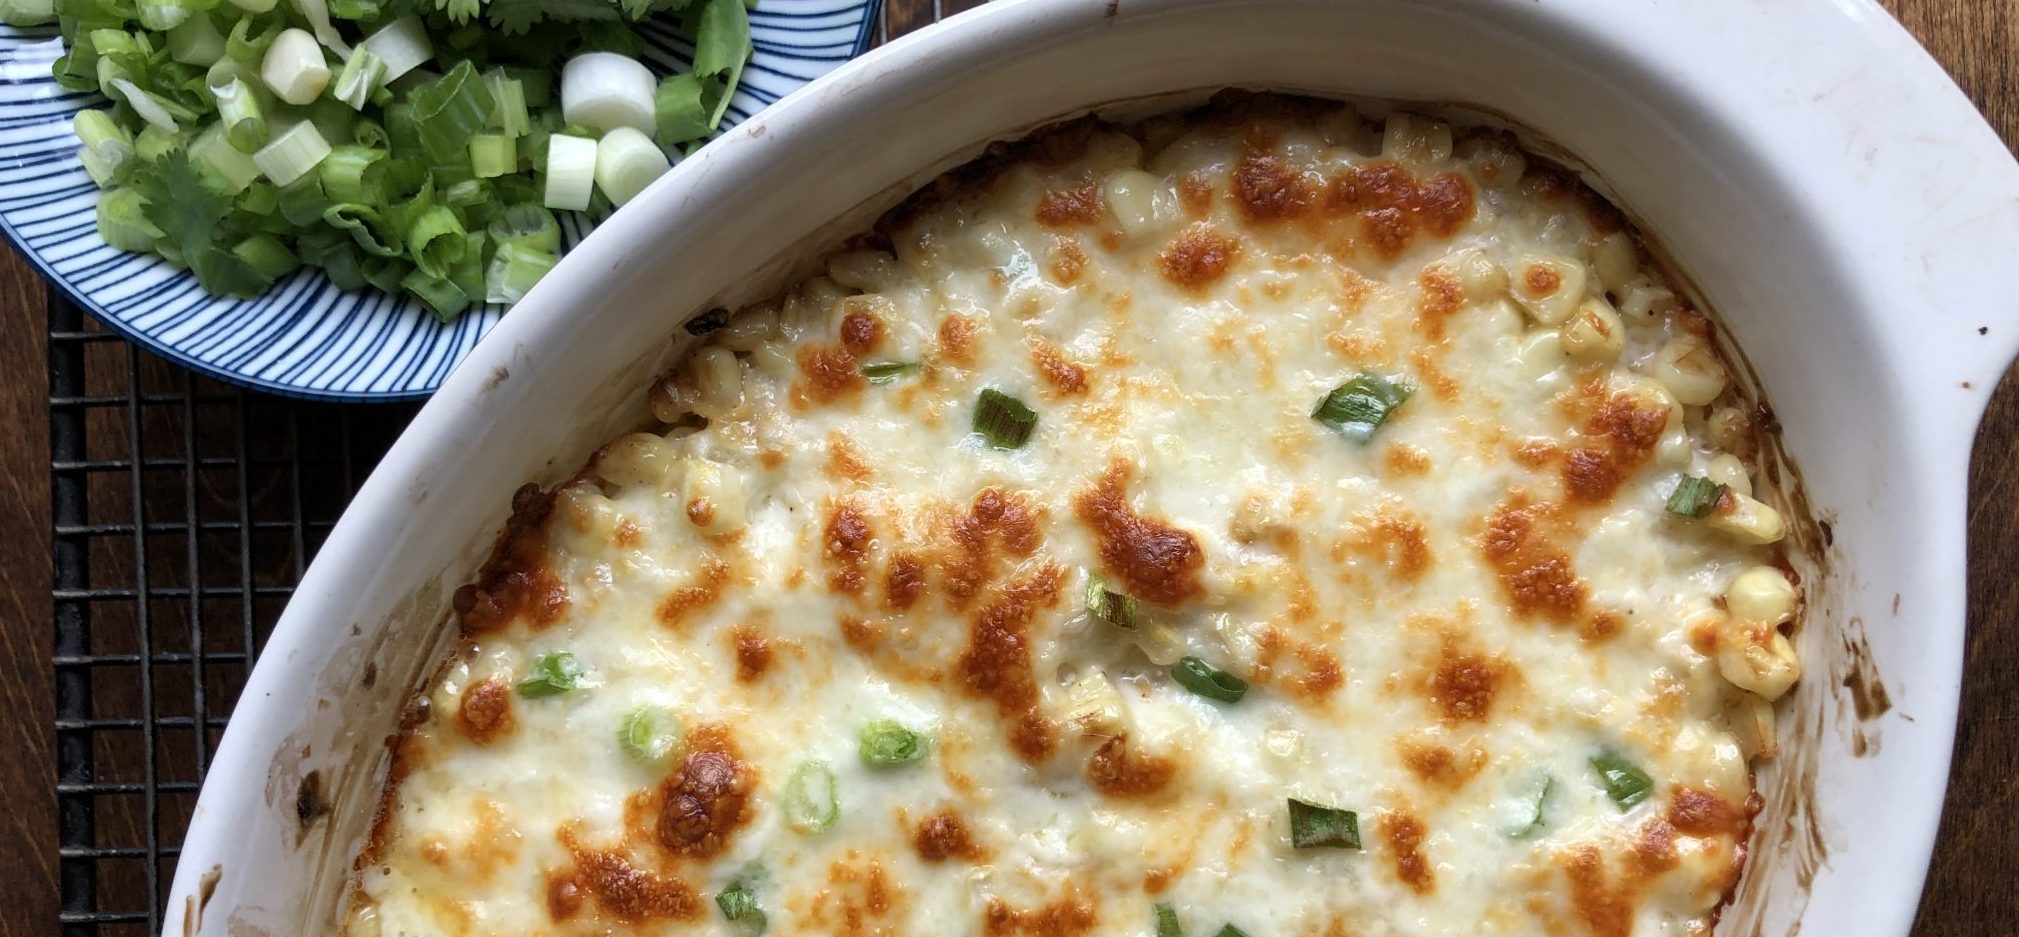
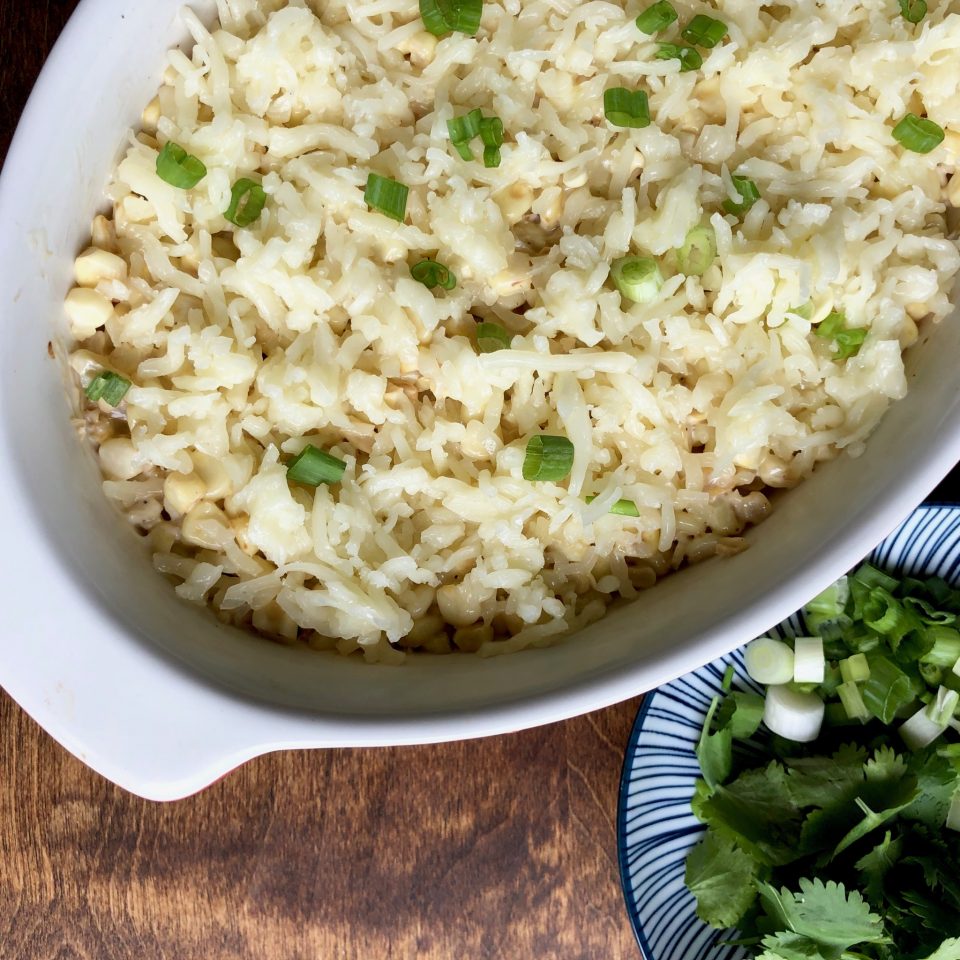
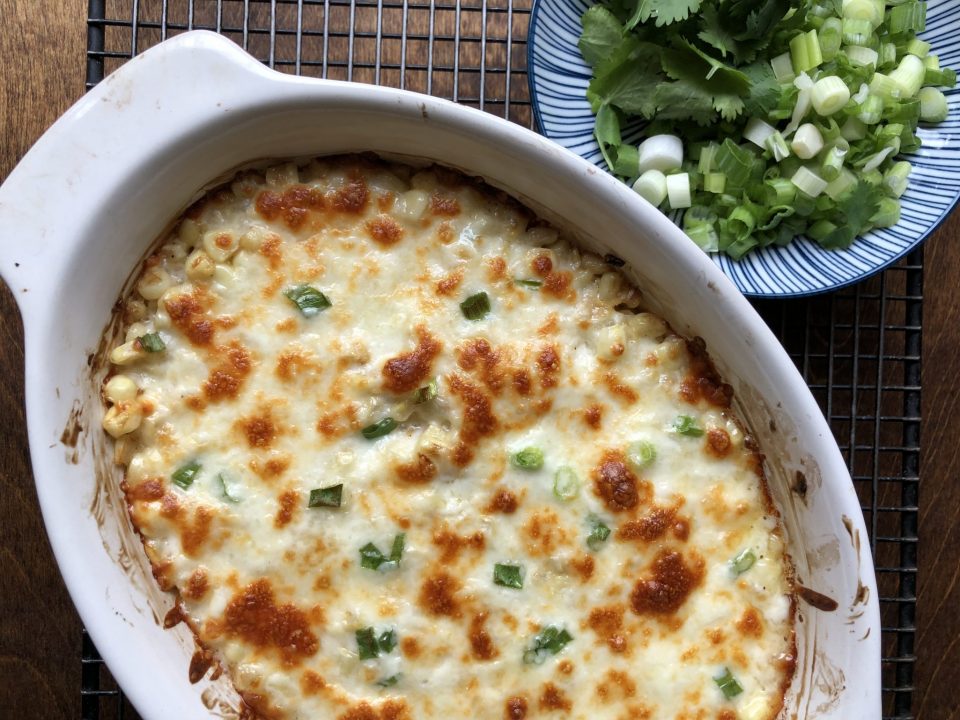
From here on in it’s a downhill slide.  Stir-fry corn in oil or butter until it is soft.  Combine corn with mayonnaise and place in an ovenproof dish. I use Kewpie Mayo which is slightly sweet but use whatever mayo (better be Best Foods) you have in the fridge.  Sprinkle a crap ton of Mozarella cheese on the corn and bake at 500 until the cheese is browned, gooey and melty. So delicious.  Versions of Korean Cheesy Corn add sugar.  If your corn is sweet you won’t need to, but if you like it sweeter add 1-2 teaspoons of sugar.  If you use Best Foods or Hellman’s add 1 tsp of sugar.

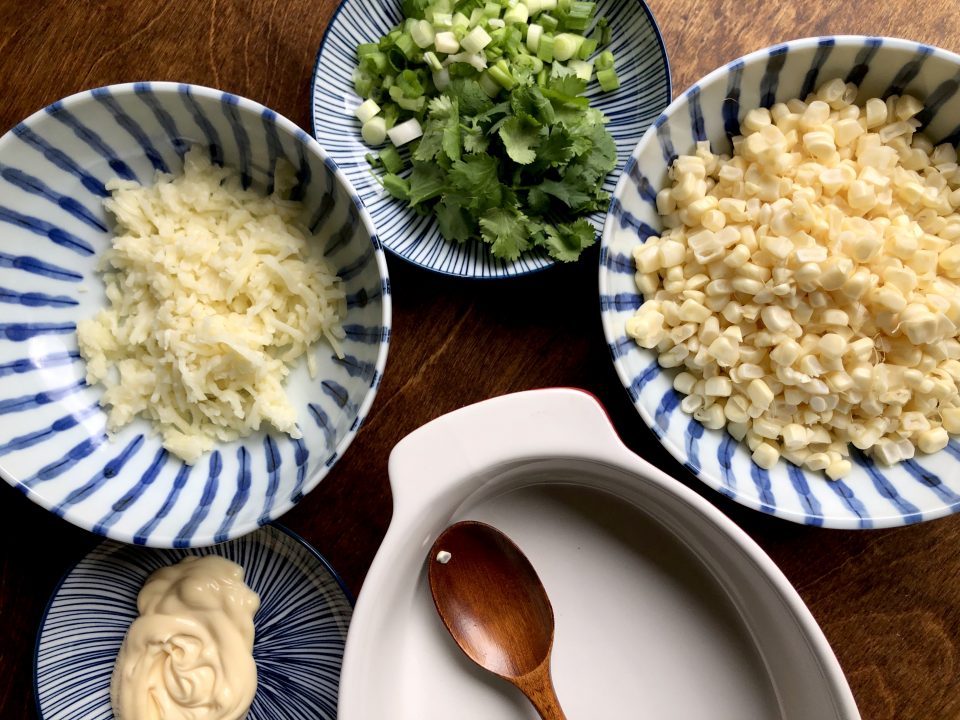
The corn, mozzarella, mayo, green onions, and cilantro are the basic ingredients for this yummy super easy dish.  Of course, you can go CRAZY and add extra fixings to bring it to a whole new level.  A bucket list of add-ons includes bell pepper, red onion, jalapeno peppers, or crumble in bacon (cuz everything is better with bacon).   You can also add cut-up rice cakes cause what’s a few more calories in a totally not-on-your diet dish.
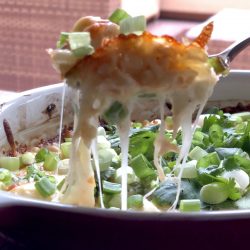
Ready set, dig in!

Korean Cheesy Corn

Delicious, decadent and easy. Korean Cheesy Corn a popular Korean dish. Perfect as a side dish or snack.
Course Side Dish
Cuisine Asian
Keyword cheese, Corn, Korean, Korean Cheesy Corn, snack
Prep Time 15 minutes
Cook Time 5 minutes
Servings 4 servings

Ingredients

  • 1-1/2 cups fresh corn about 2 ears, canned or frozen can be used
  • 2 tbsp mayonnaise, preferably Kewpie add 1-2 teaspoons sugar if using regular mayo
  • 1 tbsp unsalted butter or vegetable oil
  • 1/4 tsp salt
  • 1/4 tsp fresh ground pepper
  • 1/2 cup shredded mozzarella or more if you are a cheese freak. Additional 1/4 cup stirred into corn with mayo.
  • 1/4 cup sliced green onions
  • 1/4 cup cilantro coarsely chopped
  • 1/8-1/4 cup additions ie. bell pepper, diced red onions, bacon, optional

Instructions

  • Preheat oven to 500 degrees
  • In a large non-stick skillet, heat butter or oil. Over medium heat, add corn and if using bell peppers, jalapeno or onions. Cook, stirring frequently until soft about 4-5 minutes. Season with the salt and pepper.
  • Transfer corn to an ovenproof dish, stir in mayo and sugar if using.
  • Sprinkle cheese evenly over the surface and bake for 5-7 minutes until cheese is melted, bubbling and starts to brown. Like a pizza!
  • Garnish with green onions and cilantro and serve immediately.
Corn Soup (玉米湯) Chinese Soul Food

Corn Soup (玉米湯) Chinese Soul Food

Though I was only gone for 4 days, I’m glad I am back. Even paradise doesn’t compare to home.  As much as I like trying new restaurants and not having to do dishes, I love getting in the kitchen and cooking.  My go-to “I’m home!!” meal?  SOUP. The ultimate comfort food that tells me I’m back where I belong.

Our plane touched down in the evening so a long-simmered pot of soup was not in the cards. I needed something quick, easy and yummy. I looked in the pantry and fridge to see what I could rustle up and what do you know, perched front and center on the shelf, a can of Del Monte Creamed Corn.  A sign, obviously.

Does It Sound Corny?

What? I thought you were making soup Deb? I am, trust me. Chinese Style Corn Soup starts with a can of creamed corn. It’s the secret weapon to a quick and delicious soup.  My kids love it, hands down one of their favorite soups.  It’s sweet and savory, made with corn, seasoned ground pork, (you could use chicken or turkey) and egg.  Best way to enjoy it?  Ladle the soup over rice, stir to combine, and eat it piping hot with a big ole’ spoon-this is soul food, bowl food.

I learned how to make corn soup from my mom and if you have read my blog, you know my Mom did not cook much.  It was my Dad’s domain, but she makes a mean corn soup.  If you peruse the menu of any legit (lol) Chinese restaurant, you will find Corn Soup. THAT’S HOW YUMMY IT IS.

Chinese Corn Soup

Max Flavor, Min Effort

My mom started with just a pot of water.  I cheat and start with chicken stock, homemade or a commercially available low salt chicken stock, this adds another level of cheating, I mean flavor.  Quick soups generally start with minced or thin strips of pork, chicken or beef. This extracts the maximum amount of flavor in a minimum amount of time. The meat is marinated for a couple of minutes in soy sauce, rice wine, salt, and sugar then sautéed briefly before adding the water or stock. Cook over medium heat to keep the soup at a nice rolling boil (not crazy boil) for 15-20 minutes. Add the creamed corn, cook for another few minutes and voila’ ALMOST DONE (gotcha).

The last step, whisk a barely beaten egg into the soup. This adds flavor and body to the soup. It’s very similar to egg drop soup. It’s important to remember never boil the soup after adding the egg. You want the eggs to have wispy strand look. I actually turn the heat off when whisking in the egg. Whisk the soup continuously so the egg doesn’t sit and clump or curdle. NO BUENO.

If you like a thicker soup consider adding cornstarch to both the soup and the eggs before adding it to the soup.  A trick from Serious Eats-For tender shards of egg, blend 1 teaspoon of cornstarch into the eggs before adding them to the soup. I am old school, I just add the barely beaten egg to the soup, the yolk thickens it and the whites turn into wispy tendrils in the soup-just like my mom’s.

Soul Food: Chinese Corn Soup

An easy delicious soup that starts with canned corn!
Course soul food, Soup
Cuisine Asian, Asian-American
Keyword Cantonese cooking, Corn, soup
Prep Time 15 minutes
Cook Time 15 minutes

Ingredients

  • 14.5 ounce can of creamed style corn Del Monte is my go-to
  • 1/2 cup ground pork or thinly sliced pork

Marinade for Pork

  • 1 tsp soy sauce
  • 1 tsp oyster sauce
  • 1-1/2 tsp rice wine
  • dash of white pepper
  • 1/4 tsp salt and sugar

To finish the Soup

  • 3-4 cups water or low sodium chicken broth or half and half water & broth
  • 1-2 eggs
  • 1 green onion sliced on the diagonal
  • salt and pepper to taste

Instructions

  • Combine marinade ingredients with pork in a small bowl, set aside, let it sit for 10-15 minutes.
  • Heat 1 T oil in a 3-4 quart saucepan. When oil is hot, add ginger and cook for 1 minute to flavor the oil.
  • Add pork to pot and sauté until it is no longer pink.
  • Add water and/or stock and bring to a boil, immediately lower heat to a simmer for 10-15 minutes.
  • Add creamed corn. Bring to a boil and turn down heat to low. Simmer for 5 minutes.
  • As the soup simmers, break eggs into a small bowl. Lightly beat, no need for the eggs to be completely blended.
  • Turn heat off or set to very low and add eggs to soup in a steady stream, all the while stirring the soup with a fork or chopsticks in one direction. If the flame is too high the egg will curdle!
  • Season with salt and white pepper to taste. Garnish with green onions.

Options:

  • 1 tsp sesame oil
  • ¼ - ½ cup corn kernels ( I use frozen) add with canned creamed corn
  • Substitute ground chicken or turkey for pork

For a thicker soup:

  • Mix ½ tablespoon of cornstarch with 1 tablespoon water or stock. Add this slurry to the soup, heat until soup thickens. Turn heat down and add egg. I find if you use 2 eggs in this soup this will create enough body in the soup such that cornstarch is not necessary.
Corn Cookies If You Bake It, They Will Come (Momofuku)

Corn Cookies If You Bake It, They Will Come (Momofuku)

Tried and True

Two cookies have shown up in photos in previous posts that have never been given their just due, Christina Tosi’s Corn Cookies and Brown Butter Salted Rice Krispy Treats from Smitten Kitchen. After trying a couple of new cookie recipes that were not up to snuff, I decided to make one of these tried and true recipes to help get my cookie mojo back. The hubster lobbied for Corn Cookies so I pulled the cornflour and freeze-dried corn kernels out of the pantry, the combo that gives these cookies their one-two corn punch, and got busy.

Summer Sunshine in a Cookie

I adore these cookies. Each bite tastes like buttery, sweet-salty corn on the cob.  I imagine myself baking a batch of these at the end of every summer to soften the blow of NO MORE fresh corn at my local farmer’s market.

These cookies require beating the butter, sugar, and eggs for 7-8 minutes. Don’t skimp!
I used a 1/4 cup ice cream scoop to measure out the dough. This gives you uniform cookies.
Lightly press cookie dough to approximately 1/3-1/2 inch thickness and refrigerate for at least 3 hours.

Yep, I love these cookies. So good and yet people seem to gravitate toward that plate of chocolate chip cookies.  These corn cookies are deceptively unassuming and often get passed up for cookies with bling (chips, candy bar pieces, the kitchen sink).  Sometimes I don’t say anything so I can take the cookies home for myself.  Most of the time I say “Try it, you’ll like it!”, and invariably I end up going home with an empty platter.

Corn-y Tips

The original recipe calls for bread flour but all-purpose flour can be used.  My theory is all-purpose flour causes the cookie to spread a little more and flatten out.  Bread flour has more protein giving the cookie more structure.  Corn Flour (Bob’s Red Mill) as well as the freeze-dried corn (Just Tomatoes), can be found at Whole Foods and online at Amazon. Grind the freeze-dried corn in a food processor or crush it with a rolling pin.  I make my cookies smaller using a scant 1/4 cup scoop which shortens the baking time to 10-12 minutes.  These cookies are like that ray of sunshine that warms your face and makes you smile.  Put them on your cookie bucket list! 🍪🍪🍪🍪/☀️☀️☀️☀️

Fabulous Ferry Building- I Left my Tastebuds in San Francisco

On a weekly Farmer’s Market foray, I headed to the City (yes, San Francisco) to the Farmer’s Market at the Ferry Building.  A typical visit to the Ferry Building includes:

  • Momos (Nepalese dumplings) from Bini’s Kitchen
  • Coffee from Red Bay and enjoying the fantastic view
  • A quick peruse of books at Book Passage, a small but mighty outpost of this Indie book store.  They know their books!
  • Empanadas from El Porteno Get ready to wait in line.
  • Cookies from Batter Bakery Their Sand Angel Cookie is glorious. So sad they don’t have their store on Polk now 😢
  • Getting whatever produce is in season, any gorgeous fruits and vegetables!
  • Miso & Shio Koji from Aedan which now has a grocery store with her delicious bentos in the Mission

But I digress, my latest find at the Ferry Building is a local farm, Tierra Vegetables in Winsor that mills cornmeal from its own dried corn crops.  Omgoodness, the array of cornmeals in a rainbow of colors is amazing.  The aroma of toasted corn explodes as soon as you open the bag.  Simply the best.  I’ve tried their toasted black cornmeal which has a fine texture and toasty flavor, really dynamite in these cookies.

My latest batch uses their Hopi Pink Cornmeal, lighter and more subtle in flavor, if you’re lucky you’ll get one with ruby pink flecks.  Their cornmeals are milled fine so I use it in place of the corn flour. The corn varietals also have varying hardness. Talk to them, they’ll tell you which one is best for cornbread or cookies.

Momofuku Corn Cookies

Chewy, buttery, crispy edges, a cookie that taste like corn on the cob
Course cookies, Dessert, Snack
Cuisine American
Keyword christina tosi, corn cookies, momfuku
Prep Time 15 minutes
Cook Time 9 minutes

Ingredients

  • 16 tablespoons 2 sticks unsalted butter (225gm)
  • 1 1/2 cups granulated sugar 300 gm
  • 1 large egg
  • 1 1/3 cups bread flour or all-purpose flour 225 gm
  • 1/4 cup corn flour 45gm
  • 2/3 cup freeze-dried corn 65 gm finely ground
  • 3/4 teaspoon baking powder 3gm
  • 1/4 teaspoon baking soda 1.5 gm
  • 1 1/2 teaspoons kosher salt 6gm or half the amount of table salt

Instructions

  • Combine the butter and sugar in the bowl of a stand mixer fitted with the paddle attachment and cream together on medium-high for 2 to 3 minutes.
  • Scrape down the sides of the bowl, add the egg, and beat for 7 to 8 minutes.
  • Reduce the mixer speed to low and add the flour, cornflour, corn powder, baking powder, baking soda, and salt.
  • Mix just until the dough comes together, no longer than 1 minute. Scrape down the sides of the bowl.
  • Using a 2 3/4-ounce ice cream scoop (or a 1/3-cup measure), portion out the dough onto a parchment-lined sheet pan. Pat the tops of the cookie dough domes flat. Wrap the sheet pan tightly in plastic wrap and refrigerate for at least 1 hour, or up to 1 week. Do not bake your cookies from room temperature they will not bake properly.
  • Heat the oven to 350°F.
  • Arrange the chilled dough a minimum of 4 inches apart on parchment- or Silpat-lined sheet pans. Bake for 18 minutes. The cookies will puff, crackle, and spread. After 18 minutes, they should be faintly browned on the edges yet still bright yellow in the center; give them an extra minute if not.
  • Cool the cookies completely on the sheet pans before transferring to a plate or to an airtight container for storage. At room temp, the cookies will keep fresh for 5 days; in the freezer, they will keep for 1 month.