Tag: easy

A Photastic Chicken Noodle Salad (Pho Ga Tron)

A Photastic Chicken Noodle Salad (Pho Ga Tron)

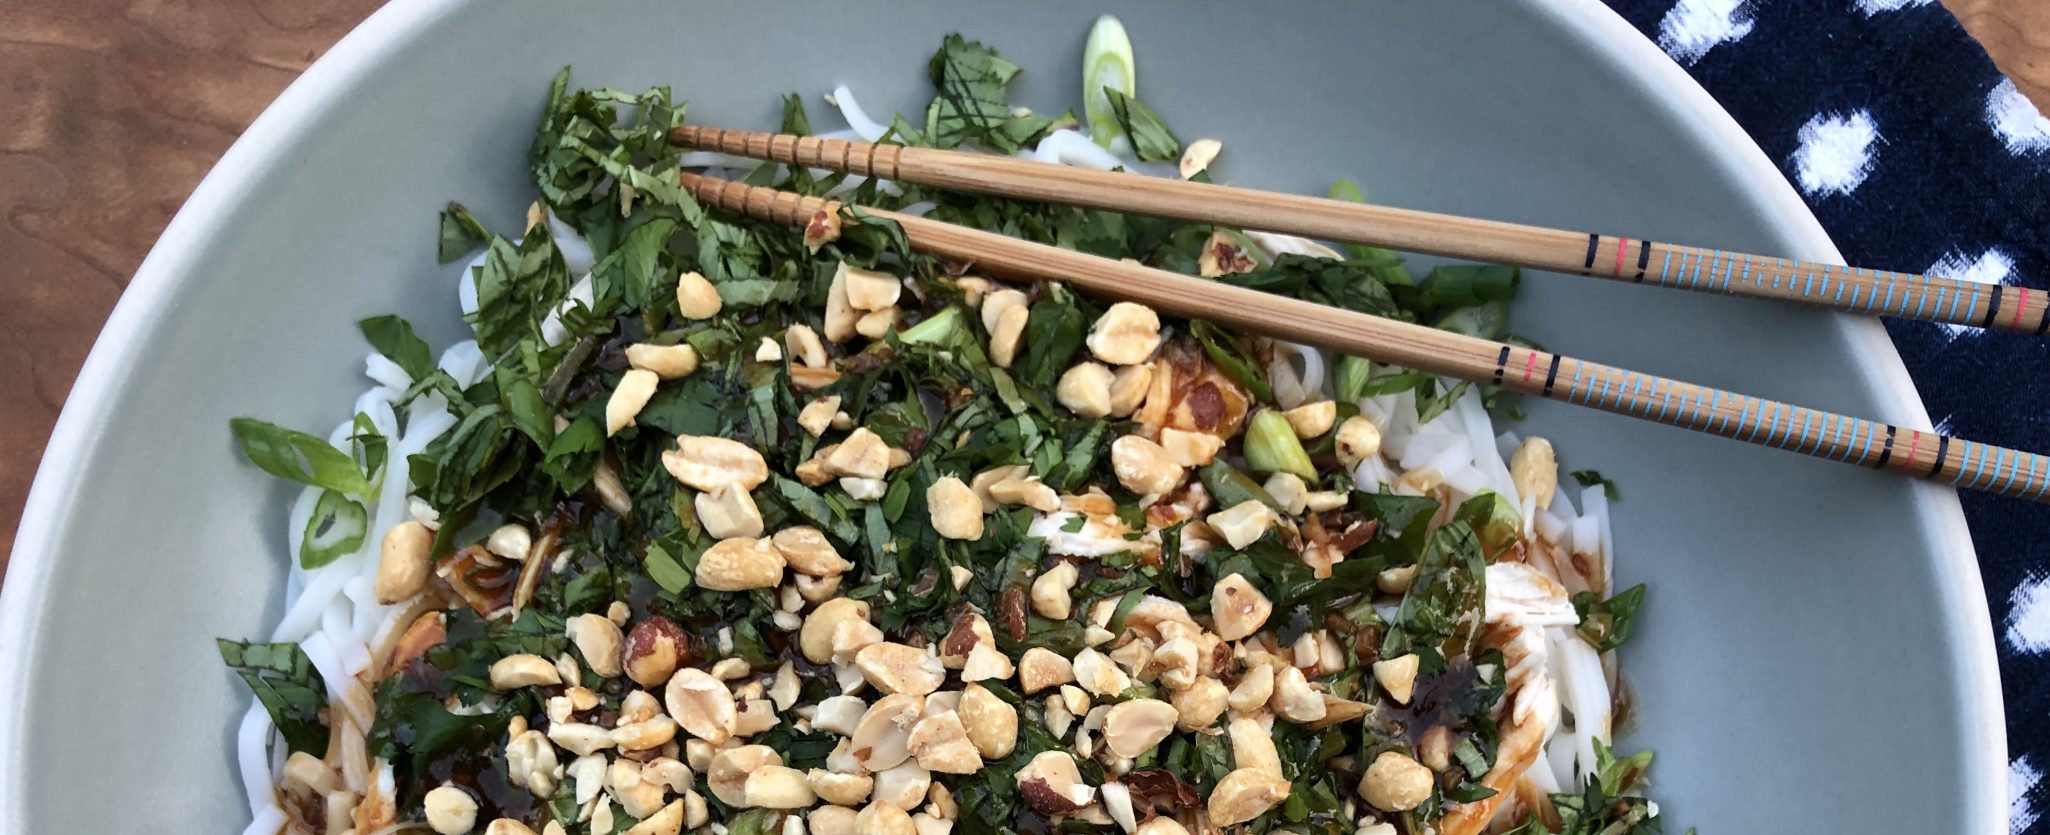
I found a recipe in the Los Angeles Times for a quick delicious Vietnamese Chicken Noodle Soup, Pho Ga.  The author, Andrea Ngyuen also tacked on a second recipe, Pho Ga Tron, or Chicken Pho Noodle Salad.  The broth from the Pho Ga is a building block for the sweet and spicy dressing for the salad. The salad contains rice noodles, herbs, and greens, and is topped with crispy fried onions and roasted peanuts.  It’s lip-smacking good! Andrea actually makes the quick broth just for this dish and serves bowls of the broth alongside the salad.   Make the soup for Pho Ga one day, and reserve the extra broth to make the dressing for the salad another day.  I julienned romaine lettuce for added crunch. I bet napa cabbage or iceberg would also work.

Chicken Pho Noodle Salad

Course Salad
Cuisine Asian
Keyword Pho Ga Tron, Vietnamese Chicken Pho Salad
Prep Time 20 minutes
Cook Time 25 minutes
Total Time 45 minutes
Servings 4

Ingredients

Quick Chicken Pho broth, divided. See Quick Pho Ga recipe

  • 1/2 cup chicken pho broth
  • 1⁄2 teaspoon fine sea salt
  • 2 1⁄2 tablespoons sugar
  • 1 tablespoon sriracha sauce plus more for serving
  • 2 tablespoons unseasoned Japanese rice vinegar
  • 3 tablespoons regular soy sauce
  • 1 1⁄2 tablespoons canola or other neutral oil
  • 2 teaspoons finely chopped garlic
  • 1 1⁄2 teaspoons cornstarch dissolved in 2 teaspoons water
  • 10 ounces dried medium flat rice noodles
  • About 8 ounces cooked chicken from Quick Chicken Pho
  • 2 cups butter lettuce or soft leaf lettuce cut into narrow ribbons, with spines intact
  • 1⁄4 cup coarsely chopped fresh cilantro leafy tops only
  • 1/3 cup coarsely chopped fresh mint or Thai basil leaves
  • 1/3 cup unsalted roasted peanuts, coarsely chopped
  • 1/3 cup fried shallots or onion homemade or purchased
  • Thinly sliced green onions for garnish

Instructions

  • Combine 1⁄2 cup of the broth with the salt, sugar, chile sauce, vinegar and soy sauce. Set this sauce mixture near the stove.
  • Put the oil and the garlic in a small saucepan. Heat over medium-low heat until the garlic sizzles and is light blond, 3 to 4 minutes. Remove the pan from heat for about 15 seconds to cool slightly, then add the sauce mixture. Place the pan over high heat and bring to a boil. Stir the cornstarch slurry, then swirl into the bubbly sauce. Once thickened, about 15 seconds, remove from heat and set aside for at least 10 minutes before using. This makes about 1/2 cup sauce.
  • Meanwhile, boil the noodles in a pot of water until tender chewy following the package instructions, about 5 to 7 minutes. Drain, cool quickly under running water, then set aside to fully drain and cool.
  • Reheat the remaining broth in a saucepan over medium heat. Meanwhile, cut or shred the chicken into bite-size pieces and, if needed, warm in a microwave oven to remove the chill and refresh; ideally the chicken has some succulence. Set aside.
  • To assemble, have 4 rice bowls for broth and 4 noodle-soup-size bowls for the salad. Put a little green onion into each rice bowl (use the rest for the noodle salad). Set near the broth.
  • Divide the lettuce among the noodle soup bowls. Add a portion of noodles and chicken, then drizzle over the sauce to taste. Top with the remaining green onion, cilantro, mint (or basil), peanut, and fried shallots (or onion).
  • Ladle the hot broth into the rice bowls. Serve immediately with the noodle salad bowls. Invite guests to wield spoons and chopsticks to toss their salads and enjoy the broth as soothing interludes. If the noodles seem too heavy with sauce, mix in a spoonful of broth. 

Each serving:

  • Calories 613; Protein 33 grams; Carbohydrates 82 grams; Fiber 3 grams; Fat 18 grams; Saturated fat 3 grams; Cholesterol 72 mg; Sugar 10 grams; Sodium 1,795 mg
Potato Leek-i-ty Split Soup (Instant Pot Potato Leek Soup)

Potato Leek-i-ty Split Soup (Instant Pot Potato Leek Soup)

I love Potato Leek Soup. If you dig into the 3jamigos archive this soup pops up a couple of times.  This is my go-to soup.  In the winter, I make a hearty, rustic version with lots of potatoes, smokey bacon, and heavy cream, perfect for a chilly evening.  The summer version is lightened with a bit more stock and light cream, pureed so it is silky smooth, and served at room temperature. Both are crazy delicious and proof of the “Versatility of Vichyssoise”.


The hubs called me at work one afternoon last week with that age old question, “What’s for dinner?”. With my long commute, I knew it had to something quick and easy. A salad? stir fry? Quick pasta dish? As ideas popped up in my brain (including restaurant names), I heard Wes say, how about potato leek soup?

Crusty French bread, glass of wine, bowl of soup..I was all in.  But, silly, soup takes awhile…wait, hmmm.

Enter the Instant Pot.  I have made other soups in my IP.  Why not?  A quick Google search landed on quite a few recipes for Potato Leek in an Instant Pot. Why didn’t I think of this before?

Dinner is served

I saute’ the vegetables in the Instant Pot, added the stock, set the timer to 7 minutes and forgot about it until I heard the beep-beep-beep.  Finish with cream and garnish…DONE.  How easy is that?  Ahhh dinner on the table in less than an hour and only 1 pot to clean.  Perfect.

Instant Pot Potato Leek Soup

A delicious, quick and easy recipe for Potato Leek Soup made in your pressure cooker
Course Soup
Cuisine French
Keyword Instant Pot, Potato Leek Soup
Prep Time 15 minutes
Cook Time 15 minutes
Resting time 10 minutes
Total Time 30 minutes
Calories 244kcal

Ingredients

  • 1 Tbsp Olive Oil
  • 2 Tbsp Butter
  • 3 large Leeks white part only, cleaned and sliced into rounds(1/8")
  • 1 yellow onion diced
  • 2 cloves Garlic minced
  • 2 Tbsp Flour
  • 5-6 cups Chicken Broth
  • 1 Bay Leaf
  • 1 tsp Salt
  • 1/4 tsp White Pepper
  • 1 lb Gold Potatoes (4-5 spuds if using Yukon Gold, 3 russets) peeled and diced
  • 1/2 cup heavy cream or half and half
  • Garnish
  • Chopped Chives
  • Sour Cream
  • Anything your little heart desires

Instructions

  • Press the Sauté button on the Instant Pot. When hot, add the oil and butter.
  • Add the onion. Cook until soft, stirring occasionally, approximately 5 minutes. Try not to let it brown. Add leeks, cook for additional 3-4 minutes until the leeks are soft.
  • Add garlic and cook for about 30 seconds, until fragrant, stirring frequently.
  • Sprinkle the flour over the onion-leeks mixture and stir. Cook for a minute to get the raw taste out of the flour.
  • Stir in the broth. Be sure to dissolve the flour and scrape the bottom of the pot. The Instant Pot senses particles on the bottom and will shut off to prevent burning.
  • Add the bay leaf, salt, pepper, and the potatoes. Stir.
  • Put the lid on the pot and set the steam release knob to the Sealing position.
  • Press the Manual (or Pressure Cook) button, and the + or - button to choose 7 minutes. then forget about it until the timer goes off.
  • When the cooking cycle has ended, let the pot naturally release pressure for 10 minutes. Then manually release the remaining steam.
  • 10. When the pin in the lid drops, open it and stir the soup. Remove the bay leaf. Then use an immersion blender to puree it. If you don't have an immersion blender, you can use a blender, pureeing the soup in small batches very carefully.
  • 11. Stir in the cream or half and half.
  • 12. Taste and adjust salt, if needed.

Garnish with chopped chives, sour cream, bacon...just about anything you like, corn, shrimp, crab.

    Notes

    Blend soup just a bit leaving chunks of potatoes for a more rustic soup. Blend until completely smooth for a classic version.  Reserve part of the soup, before adding the cream, to freeze for a rainy day.  Rainy day instructions-heat soup slowly and add cream once it is warmed.  
    This soup serves as a wonderful base for a vegetable soup.  Add chopped spinach at the end and heat and stir occasionally until spinach wilts.   
    Use clam juice as part of the stock for a seafood twist.  Garnish with shrimp or crab. yummos.
    “Bacon Up” Some Savory Scones

    “Bacon Up” Some Savory Scones

    It is not surprising that I love scones.  Scones are the British version of biscuits and as you all know, I am obsessed with biscuits.  I will go in search of two things on my travels, BISCUITS and PIE. Yep, I have been known to detour far and wide for either.  I may not go out of my way for a scone (who am I kidding, yes I will), but if I happen on a bakery and they have scones, that’s what will be sitting next to my cup of joe.  At home, my favorite scone recipe is from Dorie Greenspan.  Tender, crumbly, buttery, a touch of sweetness-downright delicious.  Make it with currants for a classic cream scone, or change it up and add orange zest and dried cranberries or my personal favorite, lemon and wild blueberries.

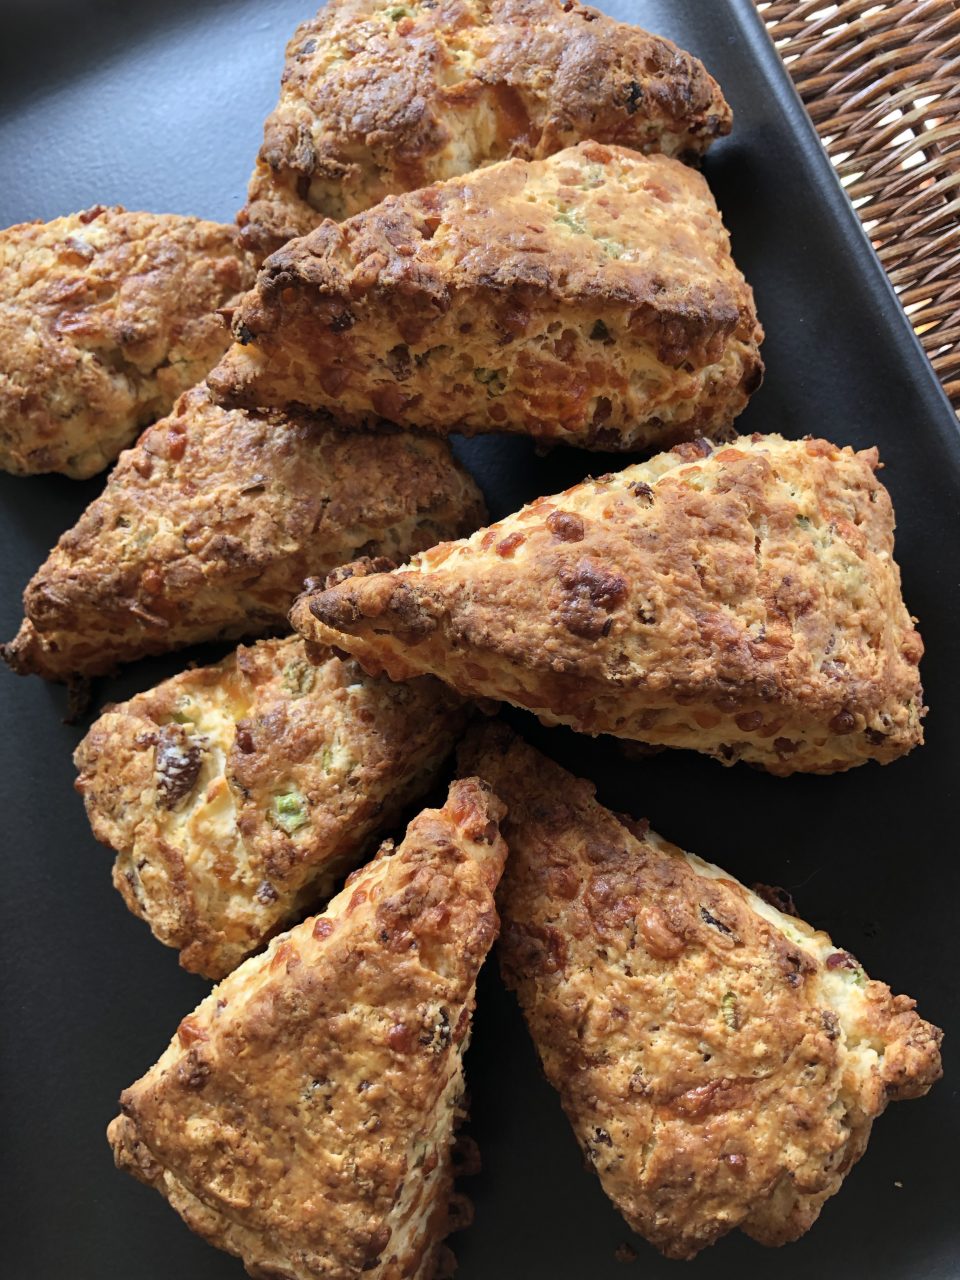
    But this post takes a walk on the savory side.  Recommended by my friend Mary, baker extraordinaire-Bacon, Cheddar, Chive Scones from King Arthur Flour are seriously addicting.  That first bite fills your mouth with buttery crumbs, chunks of golden cheese, flecks of green chives, and then…wait for it..sweet, salty, crispy, bits of BACON.  Hello?  Are you smacking your lips right now?  You should be.

    bacon cheddar chive scone

    These are quick and easy to make and you can freeze the unbaked scones, take them out in the morning, throw them in the oven and voila, 30 minutes later, you are enjoying freshly baked warm scones.

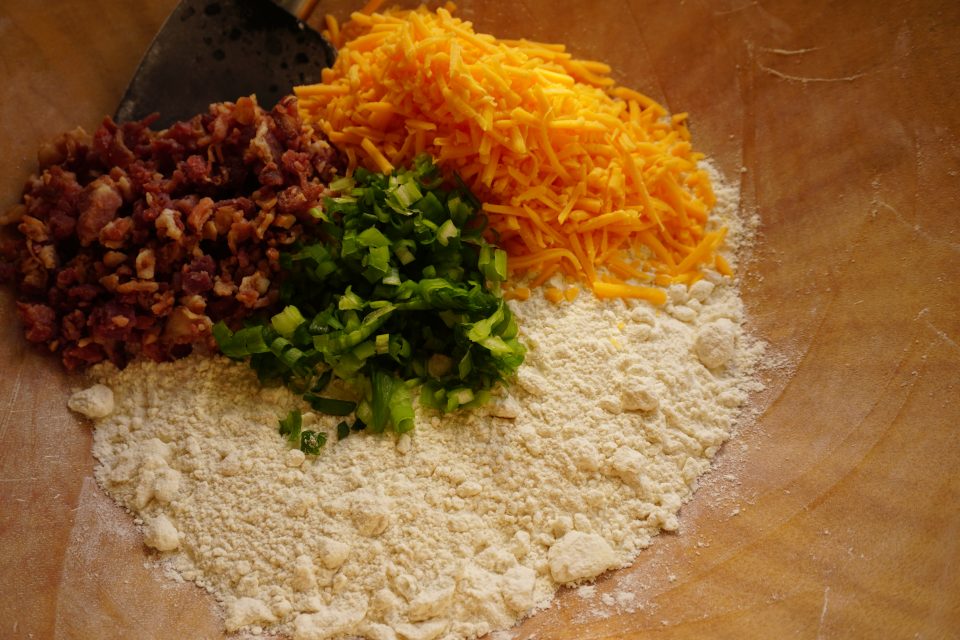
    After cutting the butter into the flour mixture, add your flavor bombs.

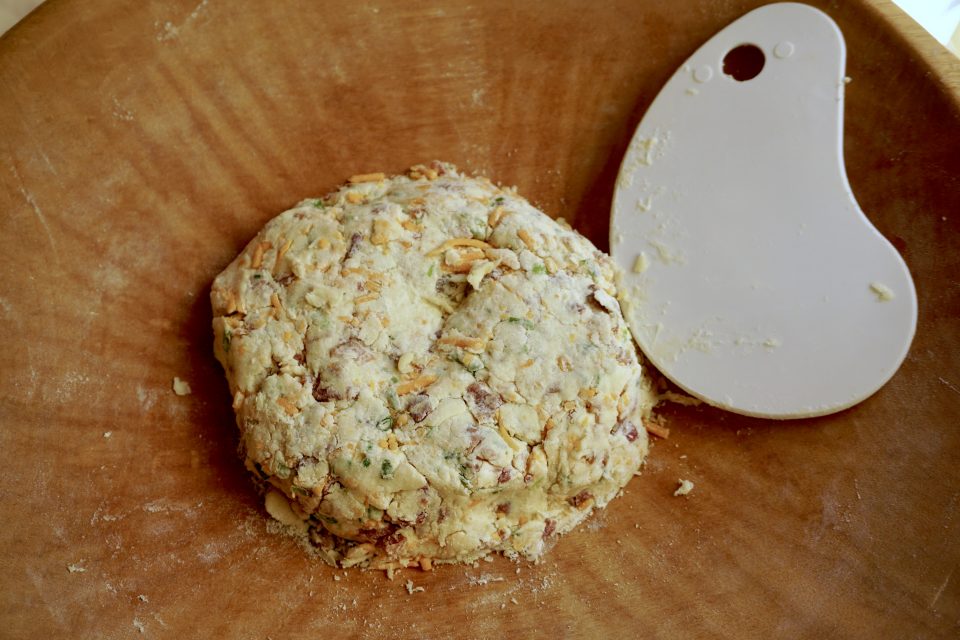
    Add cream and fold, smoosh the dough together and form a disc approximately 1 inch thick, cut into wedges.  Do not overmix, but the dough should come together when pinched.  Add cream in tablespoon increments if necessary.

    Confession.  The first time I made these was on a whim.  I opened the door to my fridge, hmmm, no chives, scallions will have to do.  What? No heavy cream, you’re kidding… well, I do have half & half, why not?  The trifecta of substitutions, I had a medley of cheese, Monterey Jack, Cheddar, and Mozzarella no cheddar.

    Last minute bakers cannot be choosy.

    The scones turned out fine. Light, great bacon flavor, definitely a keeper and I saved all those calories using half-half. Not bad!

    The next time I was prepared-heavy cream, pastry flour, chives, sharp cheddar cheese…you betcha’.  This scone was a bit denser and moister, I could taste the sharp cheddar and overall the scone seemed richer.

    Both scones were delicious.  So I leave it to you.  For a richer scone use heavy cream, for a lighter scone use half & half but definitely use sharp cheddar cheese for flavor.  I might even add some chopped jalapeno next time to spice it up a bit.  Woohoo!

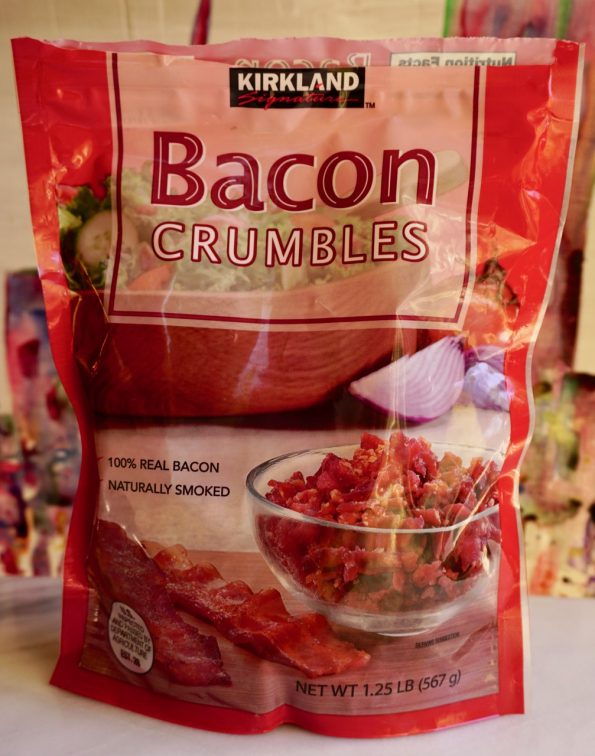
    **Alert** If you are a purist do not read the next paragraph.  The recipe calls for approximately a cup of chopped bacon.  That’s a lot of bacon.  You COULD oven-bake or pan-fry (all that splatter, ugh) the half pound of bacon and crumble it into bits, OR you could go to Costco and buy ready to use REAL bacon bits.  We are not talking imitation Bacobits but real bacon.  Snap, So EASY.


    Bacon-Cheddar-Chive Scones

    Course Breakfast, Snack
    Cuisine American, British
    Keyword scone
    Prep Time 20 minutes
    Cook Time 25 minutes
    Total Time 55 minutes
    Servings 8

    Ingredients

    • 2 cups King Arthur Unbleached All-Purpose Flour or Pastry Flour Blend either works fine
    • 1/2 teaspoon salt
    • 1 tablespoon baking powder
    • 2 teaspoons sugar
    • 4 tablespoons cold butter
    • 1 cup very coarsely grated or diced cheddar cheese grated works well
    • 1/3 cup snipped fresh chives or finely diced scallion tops the green part
    • 1/2 pound bacon cooked, cooled, and crumbled (about 1 cup)* see text above
    • 3/4 cup + 2 tablespoons heavy cream or whipping cream or enough to make the dough cohesive

    Instructions

    • Preheat the oven to 425°F with a rack in the middle to upper third. Lightly grease a baking sheet, or line it with parchment.
    • Whisk together the flour, salt, baking powder, and sugar. Work the butter into the flour until the mixture is unevenly crumbly, with some of the butter remaining in larger pieces.
    • Mix in the cheese, chives, and bacon until evenly distributed.
    • Add 3/4 cup of the cream, stirring to combine. Try squeezing the dough together; if it's crumbly and won't hang together, or if there are crumbs remaining in the bottom of the bowl, add cream until the dough comes together. Transfer the shaggy dough to a well-floured work surface.
    • Pat the dough into a smooth 7" disk about 3/4" thick. Transfer the disk to the prepared baking sheet. Use a knife or bench knife to cut the disk into 8 wedges, spreading the wedges apart a bit on the pan.
    • Brush the scones with a bit of cream; this will help their crust brown.
    • Bake the scones in the middle or upper third of the oven for 22 to 24 minutes, until they're golden brown. Remove them from the oven, and cool right on the pan.If they brown too quickly, cover loosely with foil.   Serve warm, or at room temperature.
    • Refrigerate any leftover scones, well wrapped, for several days; reheat before serving. Freeze for longer storage.

    Notes

    Want to make scones now, freeze and bake later?
    Make scones up to the point they're on the baking sheet, cut and ready to bake; don't brush them with cream. Freeze, then remove from the sheet, and wrap airtight in a plastic bag. When you're ready to bake, remove however many you want to bake from the freezer, place on a baking sheet, brush with cream, and bake in a preheated 425°F oven for 35 to 40 minutes, until golden brown.
    Make mini-scones: Divide the dough in half, and roll each half into a 5" round. Cut each round into 8 wedges. Bake in a preheated 425°F oven till golden brown, 18 to 20 minutes; or for about 25 minutes if frozen.
    Olive Oil Shortbread with Rosemary & Chocolate Chunks, A Tale of Two Wedges

    Olive Oil Shortbread with Rosemary & Chocolate Chunks, A Tale of Two Wedges

    Last week was a busy week-work and several evening commitments were on my to-do list. One of the realities of living in the Bay Area is the exceptionally ugly commute (up 1.5 hours to go 25 miles-yeah-go figure) so my commute has taught me to ALWAYS VOLUNTEER TO BRING DESSERT since I invariably run late.  So my plan was to make cookies,  I could make them in advance, bring them with me to work, go directly from work to each function, and be forgiven for being late because who gets mad at anyone who brings homemade cookies?!

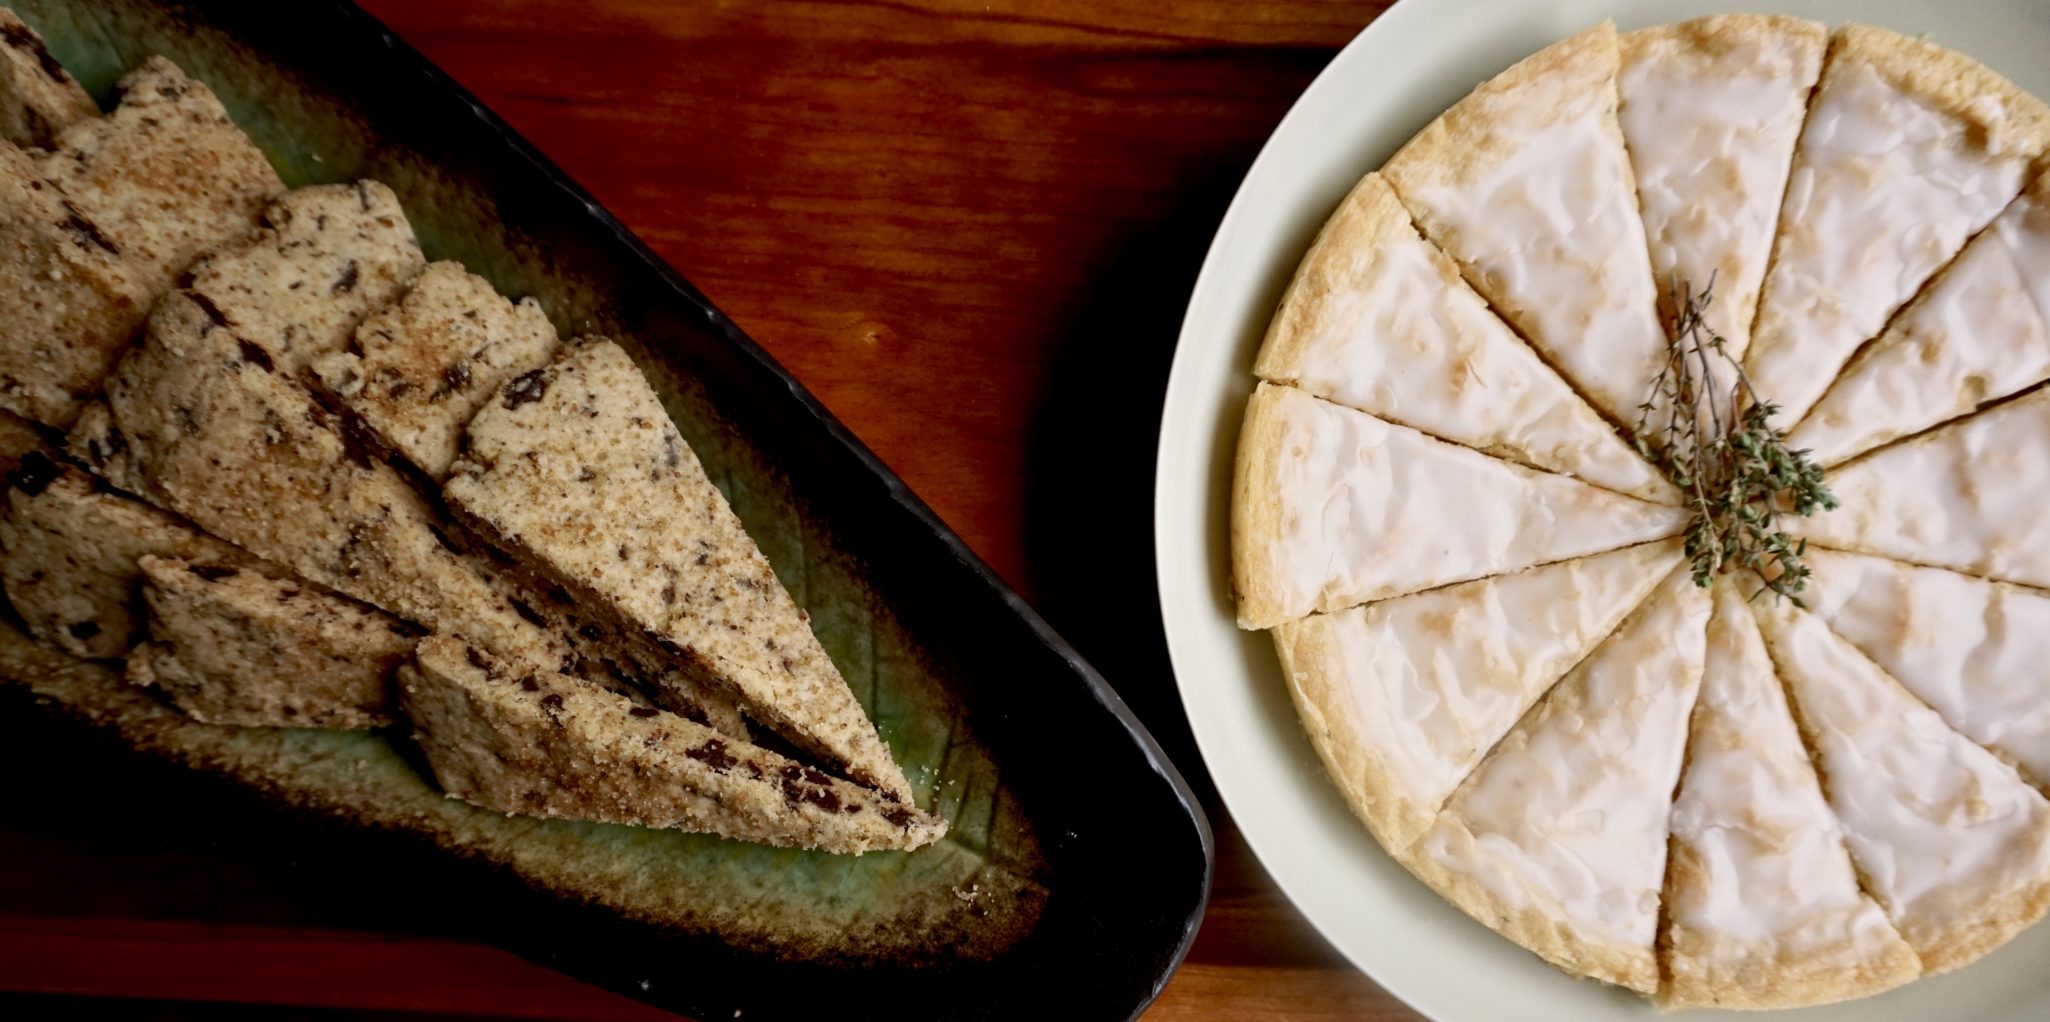
    I needed a vegan option as well as a regular sweet bite for the meetings.  I decided the Grapefruit Thyme Shortbread (it’s my flavor of the month cookie) would be my non-vegan cookie.  The vegan option was going to be a bit trickier, I am a butter-believer.  As luck would have it, a recipe for Olive Oil Shortbread with Rosemary and Chocolate Chunks from Smitten Kitchen Every Day Cookbook popped up on my feed.  Hmmm, now how did Facebook know I needed a vegan dessert recipe?

    Not funny?  Too soon?

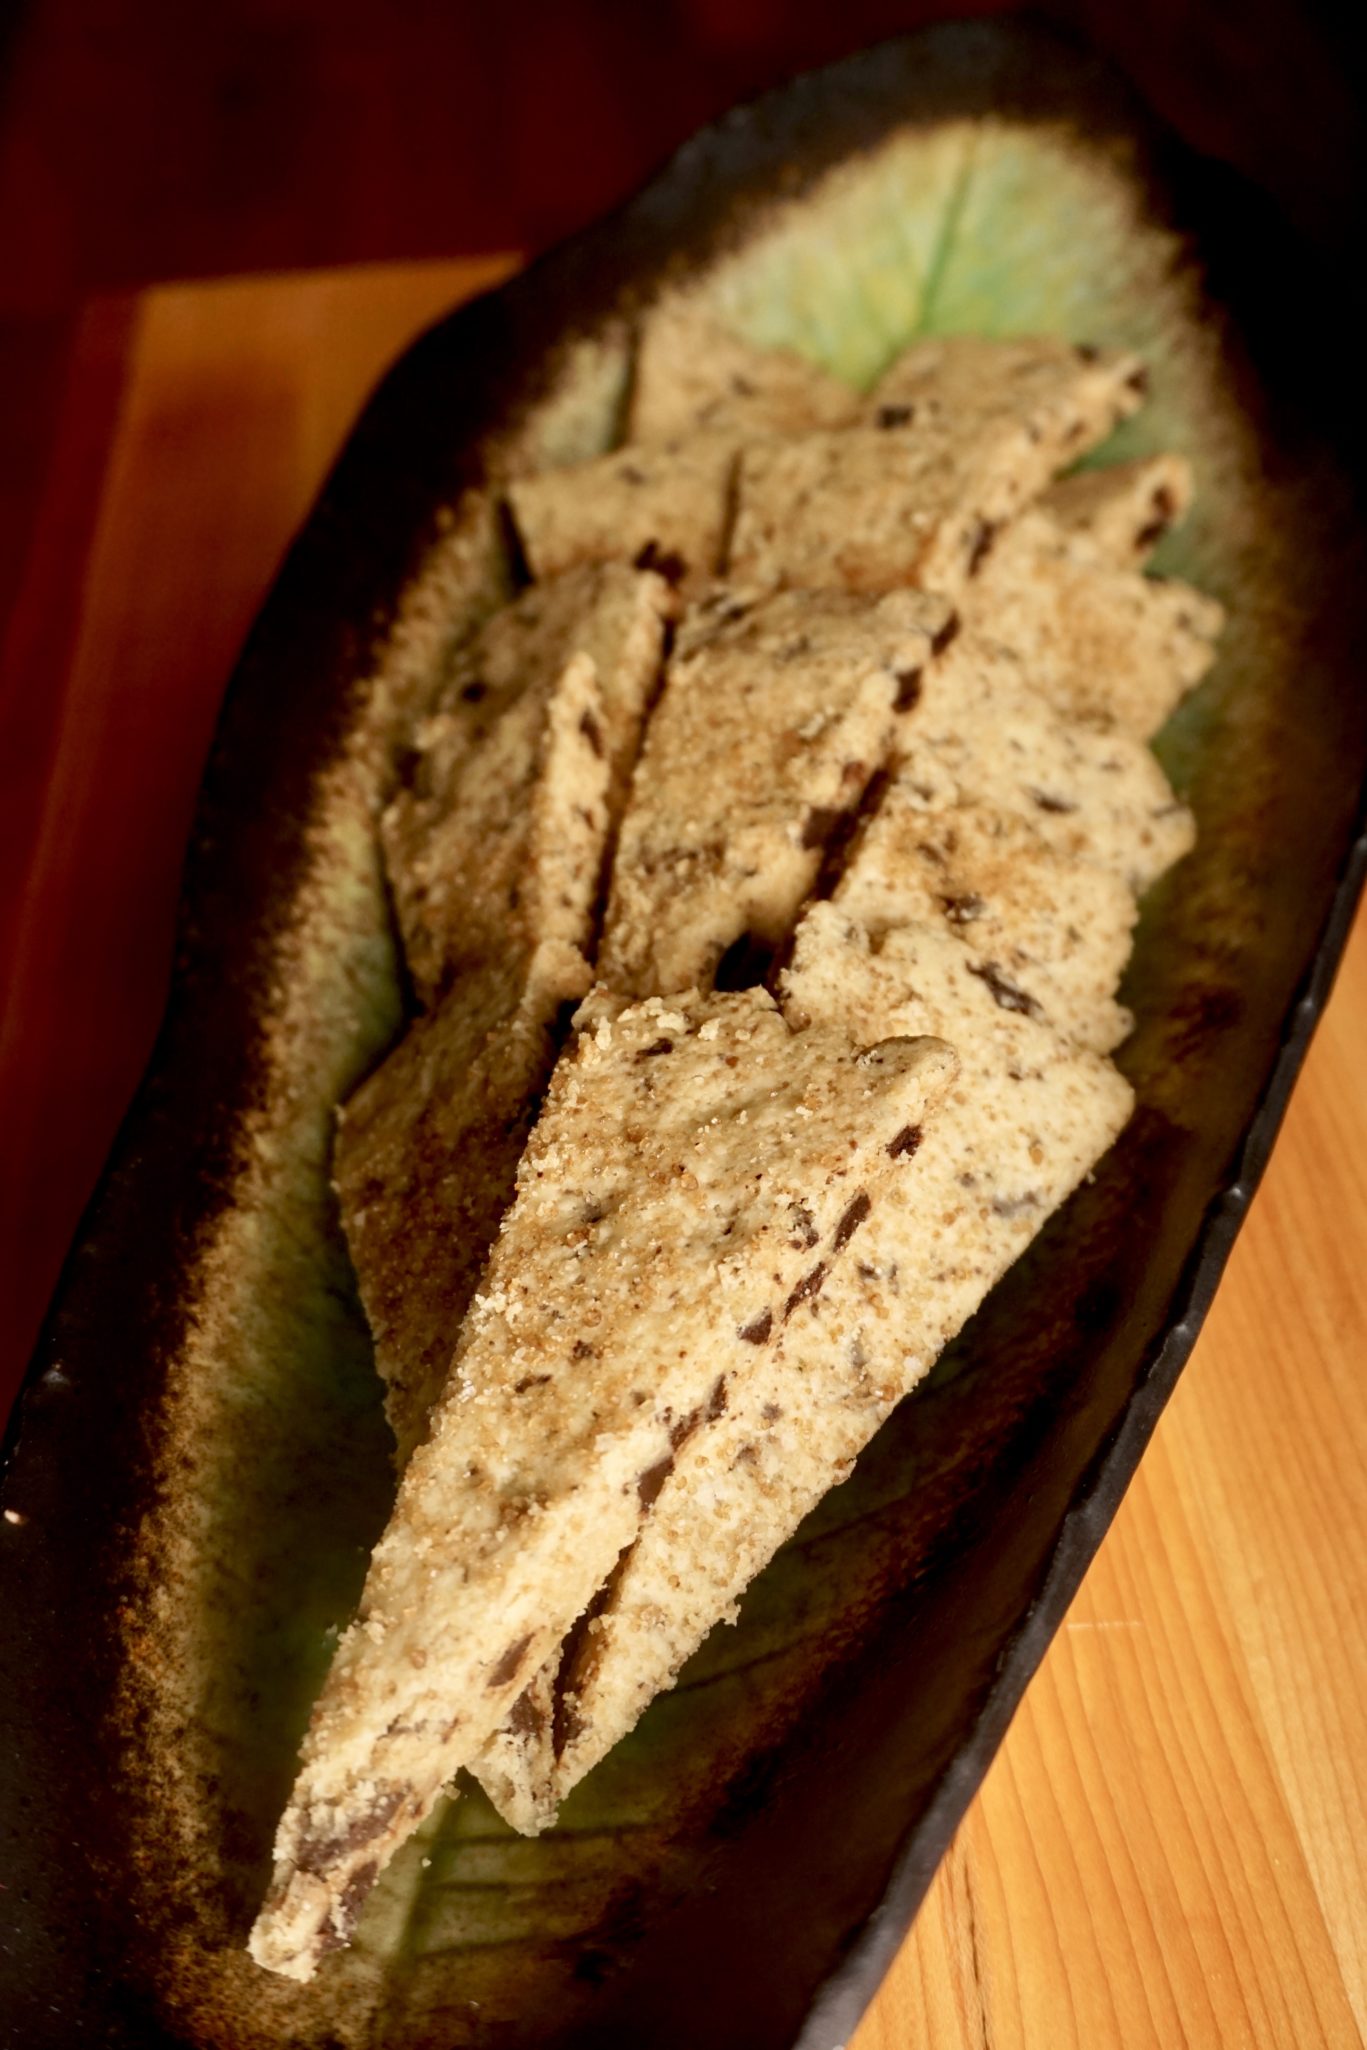
    Olive Oil Shortbread with Rosemary and Chocolate Chunks

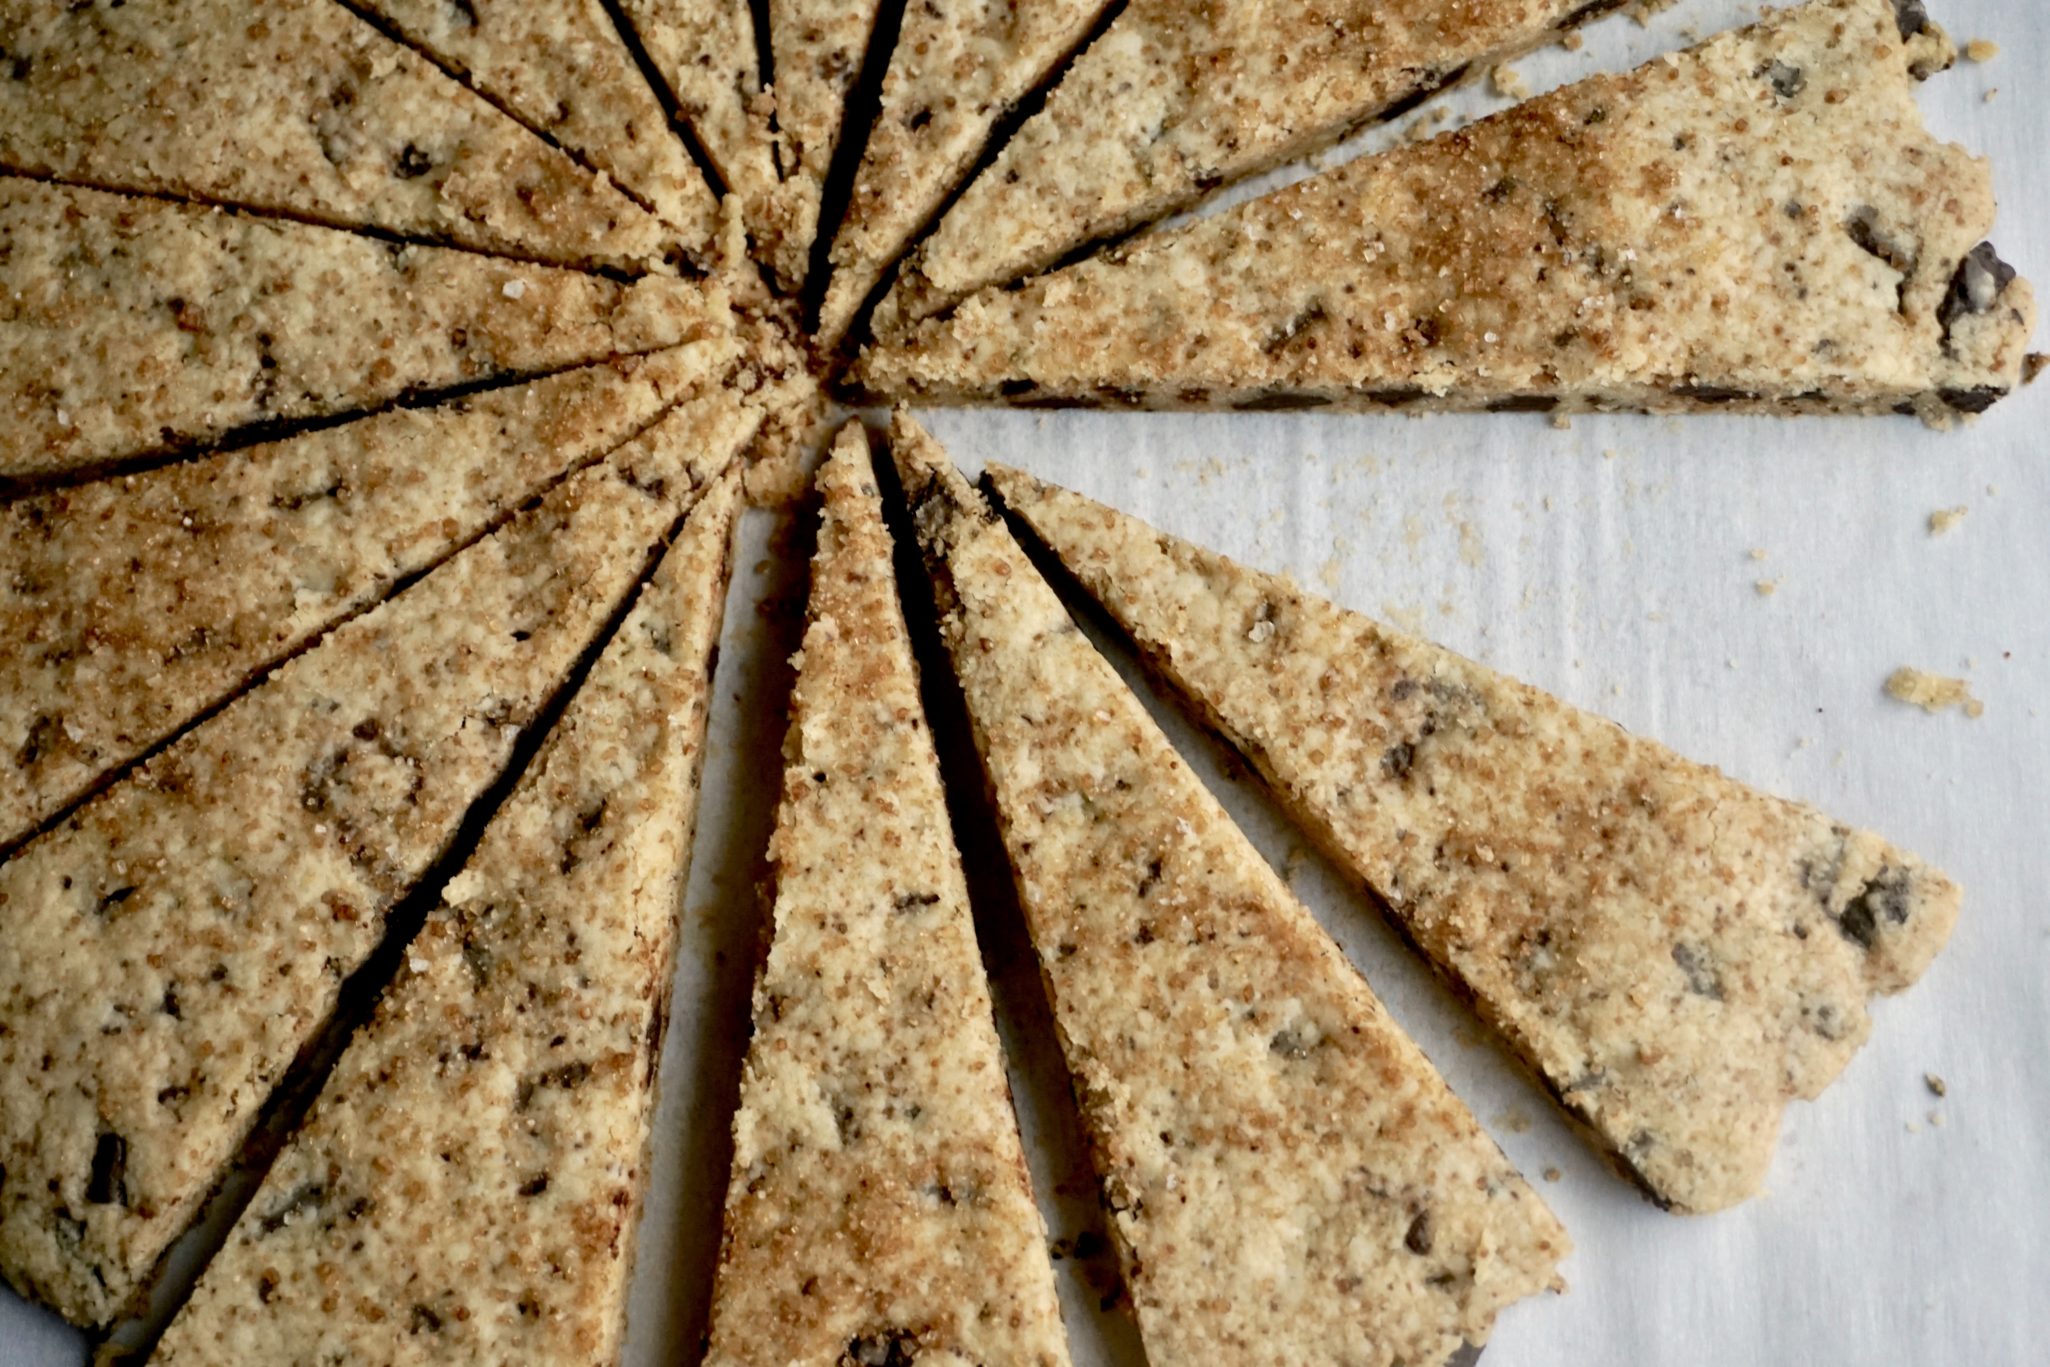
    Surprisingly (at least to me), the rosemary and chocolate meshed well.  The flavors really stand out and I didn’t think about the no butter factor. The sprinkling of turbinado sugar on top provided a nice crunch while the cookie itself had a nice fine crumbly texture.

    Olive Oil Shortbread with Rosemary and Chocolate Chunks

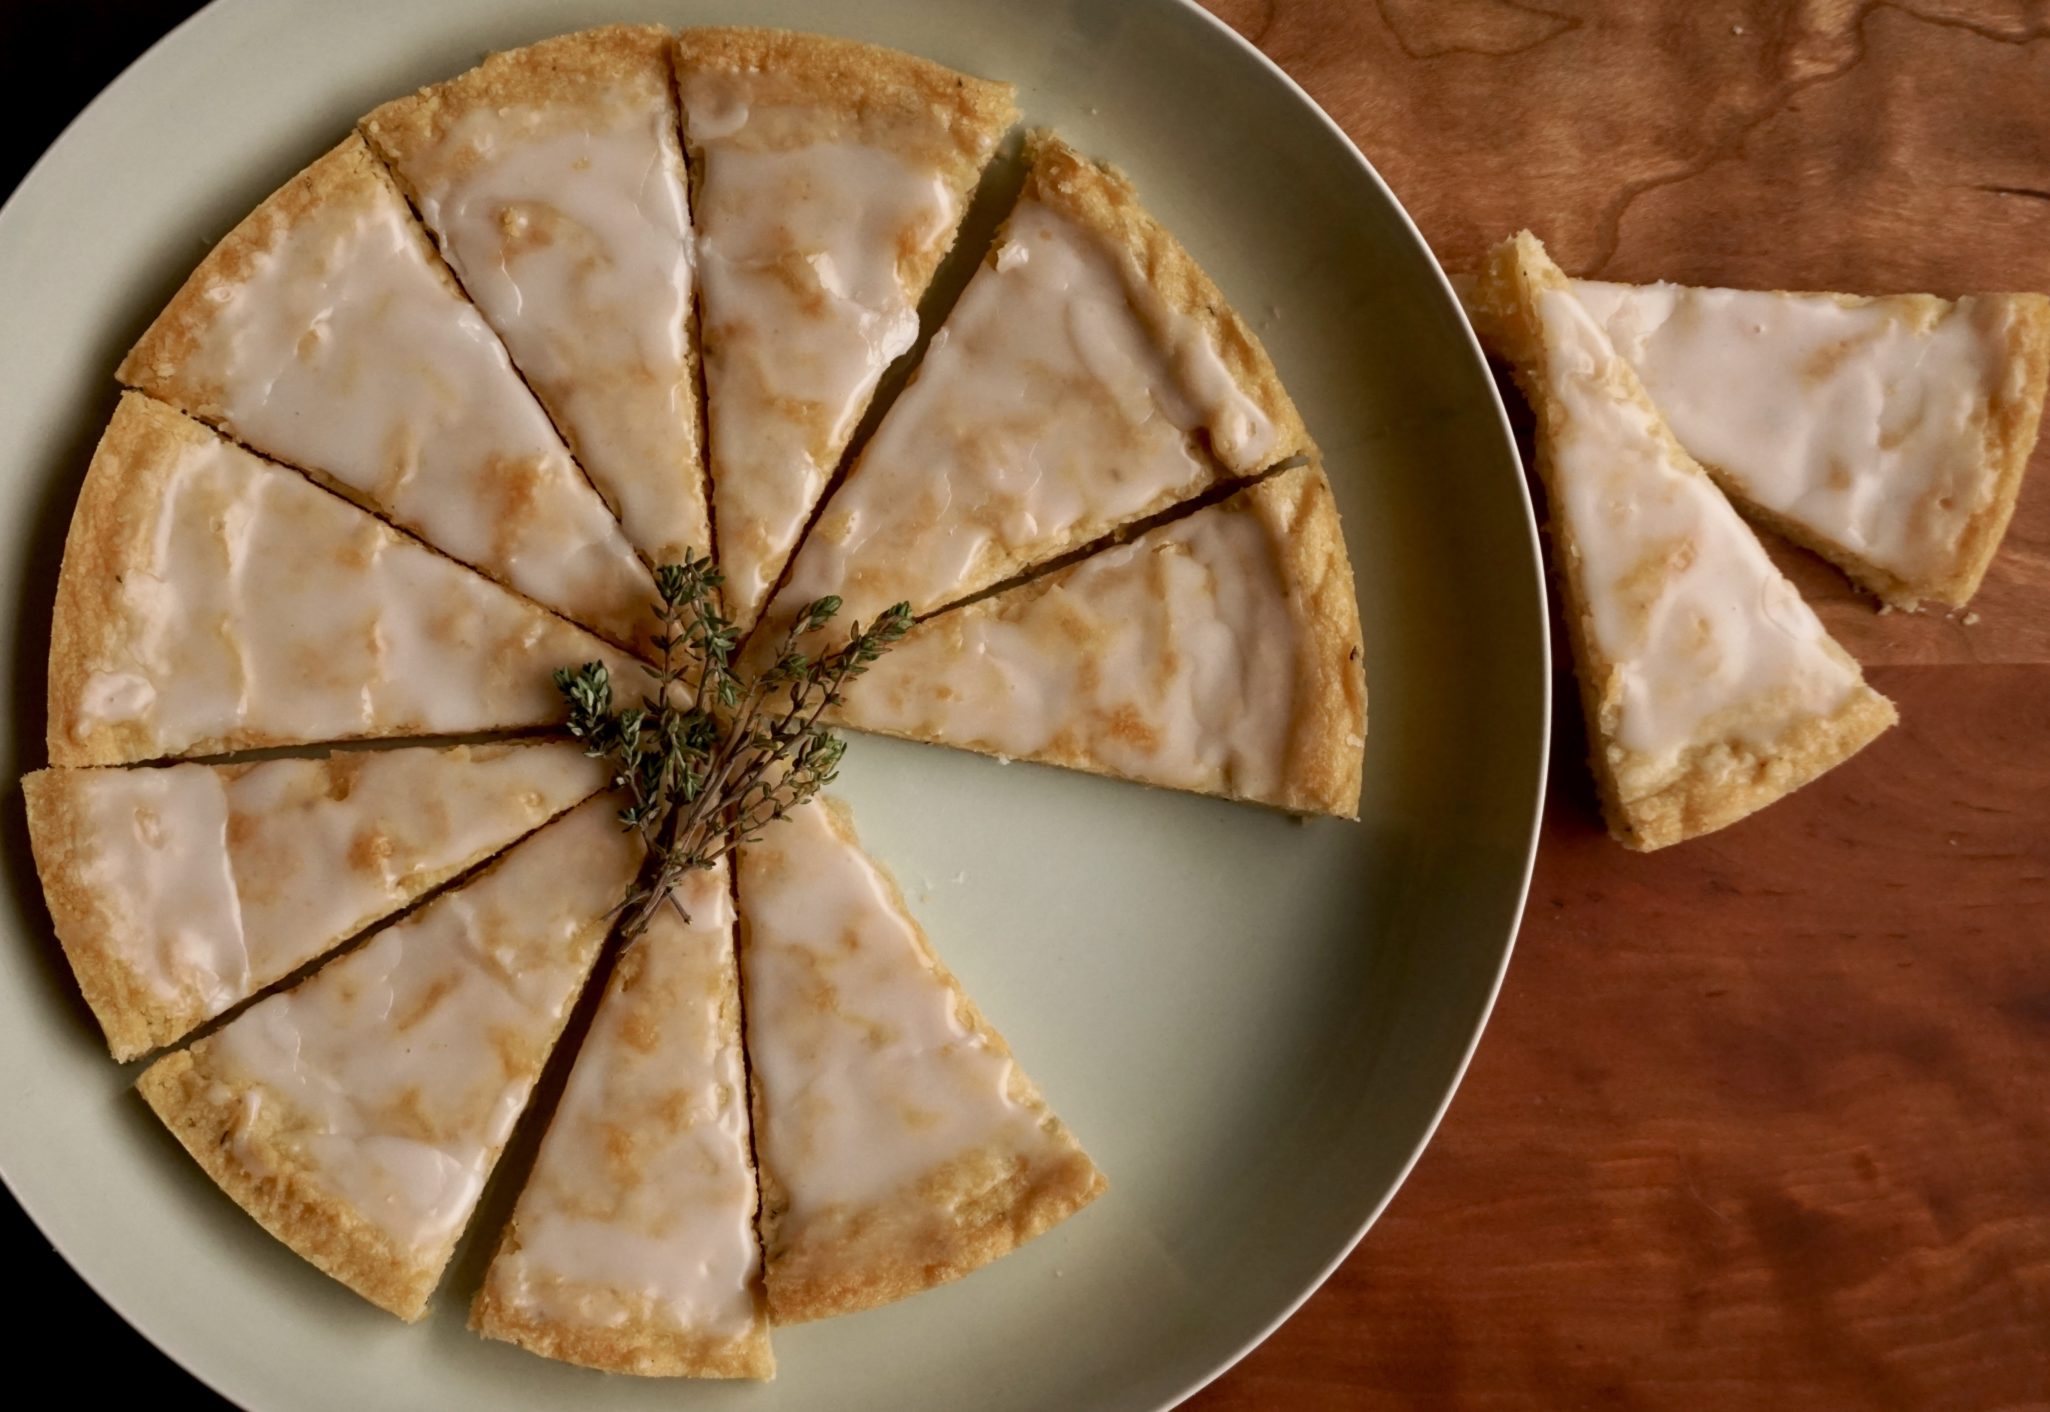
    I changed the baking method for the Grapefruit Thyme Shortbread, my non-vegan option.  Wanting a more traditional shortbread and keeping with my wedge theme, I baked it in a round pan and cut it into wedges right out of the oven.  Unlike the first time I made them, this version had a casual, rustic appeal.  While the cutout version had a fine crumb and crisp edges. These are a bit softer, almost cake-like, without the crisp edges. Still delightful, just different.  Putting on my ATK hat, made sense due to the differences in baking methods. I consider this a bonus, 2 cookies for the “dough” of one.

    Grapefruit Thyme Shortbread Post

    Grapefruit Thyme Shortbread

    Olive Oil Shortbread with Rosemary & Chocolate Chunks

    Ingredients

    • Smitten Kitchen /every Day by way of Food52
    • 1 1/2 cups 195 grams all-purpose flour
    • 1/2 cup 60 grams powdered sugar
    • 2 tablespoons 25 grams, plus 1 teaspoon (5 grams) turbinado (raw) sugar
    • 1/2 teaspoon fine sea salt
    • 1/2 cup 120 ml mild olive oil
    • 1 teaspoon finely minced fresh rosemary leaves
    • 1/2 cup 85 grams semisweet chocolate, chopped into small chunks
    • 1 egg white beaten until loose (optional not vegan 🙁 )

    Instructions

    • Heat the oven to 325° F.
    • In a large bowl, whisk together the flour, powdered sugar, 2 tablespoons turbinado sugar, and the salt.
    • Add the olive oil and rosemary and stir to combine.
    • Add the chocolate chunks and stir again.
    • Gather the dough with your hands into one mass.
    • Roll out the dough to an 8- to 9-inch roundish slab between two sheets of parchment paper. Remove the top sheet and use the bottom to slide the cookie round onto the back of a large baking sheet.
    • If desired—it merely provides a little shine—brush the cookie with the egg white. Sprinkle with remaining 1 teaspoon turbinado sugar. Bake for 20 to 25 minutes.
    • Slide the cookie round carefully onto a cutting board while the cookie is still totally hot. Cut with a sharp, thin knife into desired shape(s). Let cool completely, then separate.
    • Do ahead: This dough keeps well in the freezer. Baked cookies keep for 2 weeks in an airtight tin at room temperature.
    • Note: For a milder flavor, replace half of the oil with a neutral/flavorless one. You can cut this into shapes with cookie cutters, too, but the chocolate provides a little resistance.
    A-Looo? Anybody there? It’s Gobi time! (Cauliflower and Potato Curry)

    A-Looo? Anybody there? It’s Gobi time! (Cauliflower and Potato Curry)

    Do you remember Bend It Like Beckham?  A little movie about soccer and following your dreams that launched a couple of careers (Kira Knightly for one) and was a sleeper hit.  Though a certified sports nut I really loved the scenes of the family gatherings and delicious food.  It reminds me of my own crazy family gatherings where down home food and “sage advice” from elders are the order of the day.  In between bites of fried noodles or dumplings my cousins and I nod in respectful agreement at our aunties and uncles then turn our heads to each other and roll our eyes when the inquisition begins.  Boyfriend? Girlfriend? When you getting married?  The food and their good intentions make the interrogation worth it.

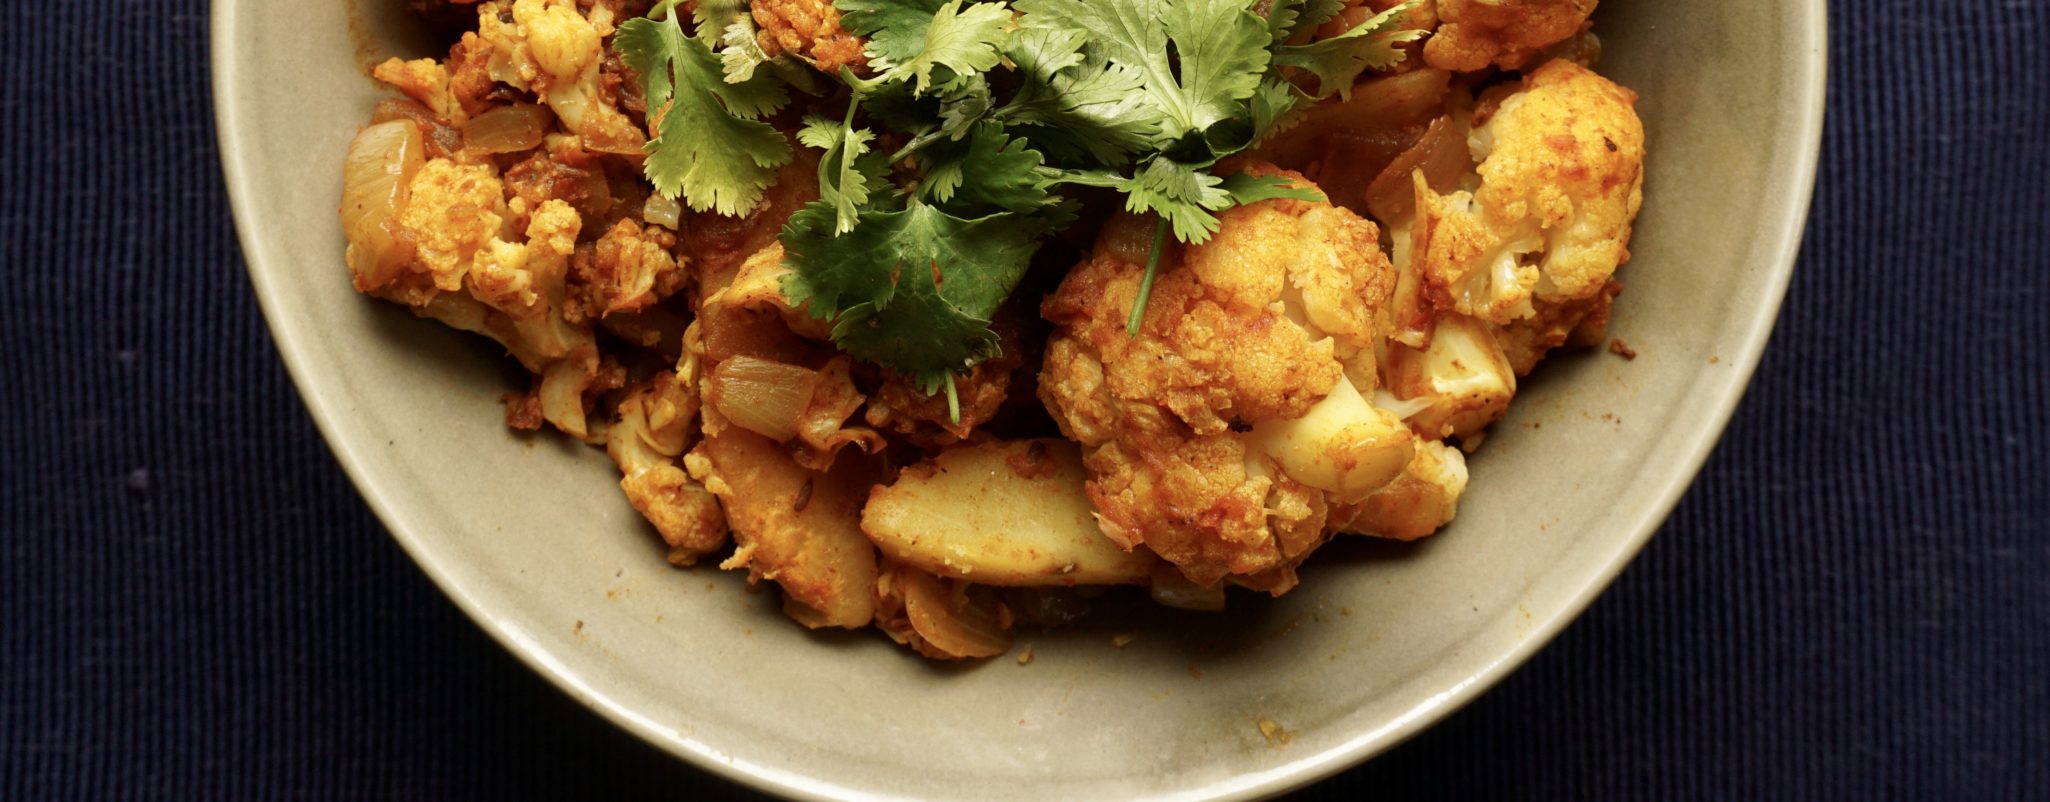
    Hidden in the DVD of the movie I found an entertaining bonus clip of the mom and auntie demonstrating how to make Aloo Gobi. A cauliflower and potato curry flavored with onions and tomatoes and spiced with garam masala, chili, ginger, garlic and cumin.  Inspired by the clip I made their version but this time went searching for another recipe.

    So I turned to a favorite blog, Ministry of Curry and typed in Aloo Gobi. BINGO, up popped not just a recipe for Aloo Gobi but an Instant Pot version.  The pressure cooker makes short work of the dish.  Perfect for a quick weekday meal.

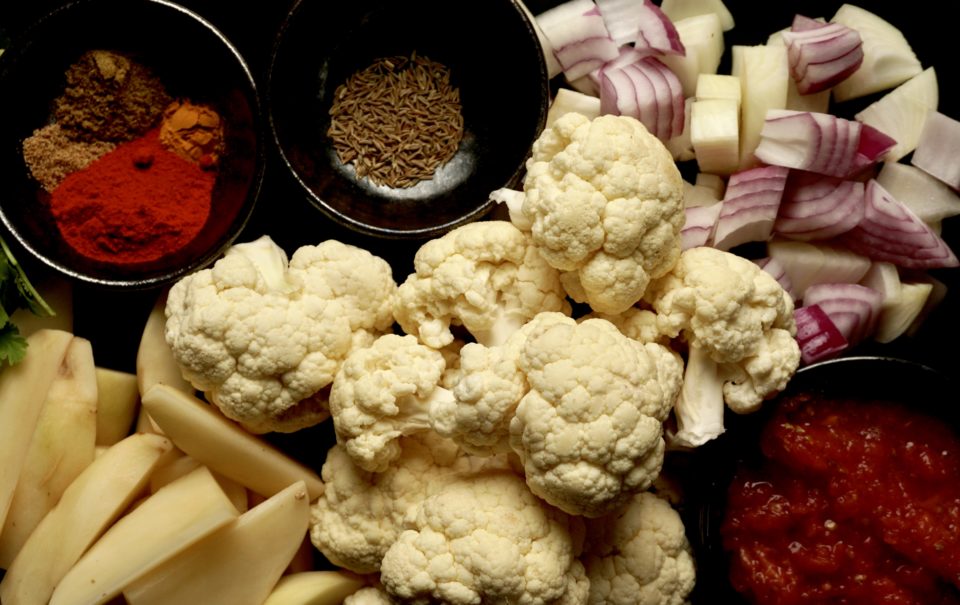
    Prep the ingredients and have them ready to go into your pot.  I cut the cauliflower in good sized chunks and sliced the potato into wedges.  If you are a spice wimp like me use half the amount of garam masala.  Saute’ the spices and vegetables in the pot, cover, pressure cook for a couple of minutes. Voila’ dinner is on the table in the blink of an eye.  If you like your cauliflower with a bit of bite cook for 2 minutes.  I prefer them softer so I use 3 minutes.   Quick release the pressure or the veggies will be too soft.  Tasty dishes like this make it so much easier to focus on eating more vegetables and less meat.  Good for us and for the planet.

    This dish can also be cooked on the stovetop.  Saute the onions, garlic, ginger and tomatoes. Add spices except salt and garam masala just like the IP recipe.  Stir in the cauliflower and potatoes, add water and  reduce heat to medium. Cook for 6-8 minutes stirring occasionally.  Add garam masala and salt, stir, cover and continue to cook until potatoes and cauliflower are at desired doneness approximately 10 minutes.  Stir in cilantro reserving some for garnish.  For conventional cooking cut the vegetables smaller or par-boil them halfway this will shorten the cooking time.

    A shortcut to peeling and cutting your tomatoes, grating!

    A-Looo? Anybody there? It’s Gobi time! (Cauliflower and Potato Curry)

    Ingredients

    • 1 medium onion thinly sliced
    • 1-2 cloves of garlic minced
    • 1 tsp fresh ginger minced
    • 2 plum tomatoes grated
    • 4 cups cauliflower florets cut into 2 inch pieces
    • 1 medium russet potato peeled and cut into wedges
    • 1 tbsp cooking oil or ghee
    • ½ tsp cumin
    • ½ tsp turmeric
    • 1 tbsp mild Kashmiri red chili powder Less if using a spicier chili powder
    • 1 tbsp cumin-coriander powder spice blend
    • 1-1/2 tsp garam masala Add 1/2 to 3/4 tsp for a mild to medium spicy curry
    • 1 tsp salt
    • cilantro for garnish lots

    Instructions

    • Turn Instant Pot to Saute mode.
    • Once the hot sign displays add oil and cumin seeds. Sauté for 30 secs.
    • Add onions and mix well. Cook covered with a glass lid on for 3-4 min.
    • Add ginger and garlic, stir and cook for additional minute.
    • Add tomatoes, mix and cook covered for 2 minutes.
    • Add turmeric, red chili powder, cumin-coriander powder, garam masala and salt. Mix well.
    • Add potatoes and cauliflower florets. Add ¼ cup of water. Mix well.
    • Put Instant Pot lid on with pressure valve to sealing. Cook on Manual(Hi) for 3 mins. Note: Cook for only 2 mins if you like cauliflower to be more firm.
    • Quick Release and stir gently. Garnish with cilantro.
    • Serve hot with naan. I like mine with rice.


    Biscuits! Love, American Style

    Biscuits! Love, American Style

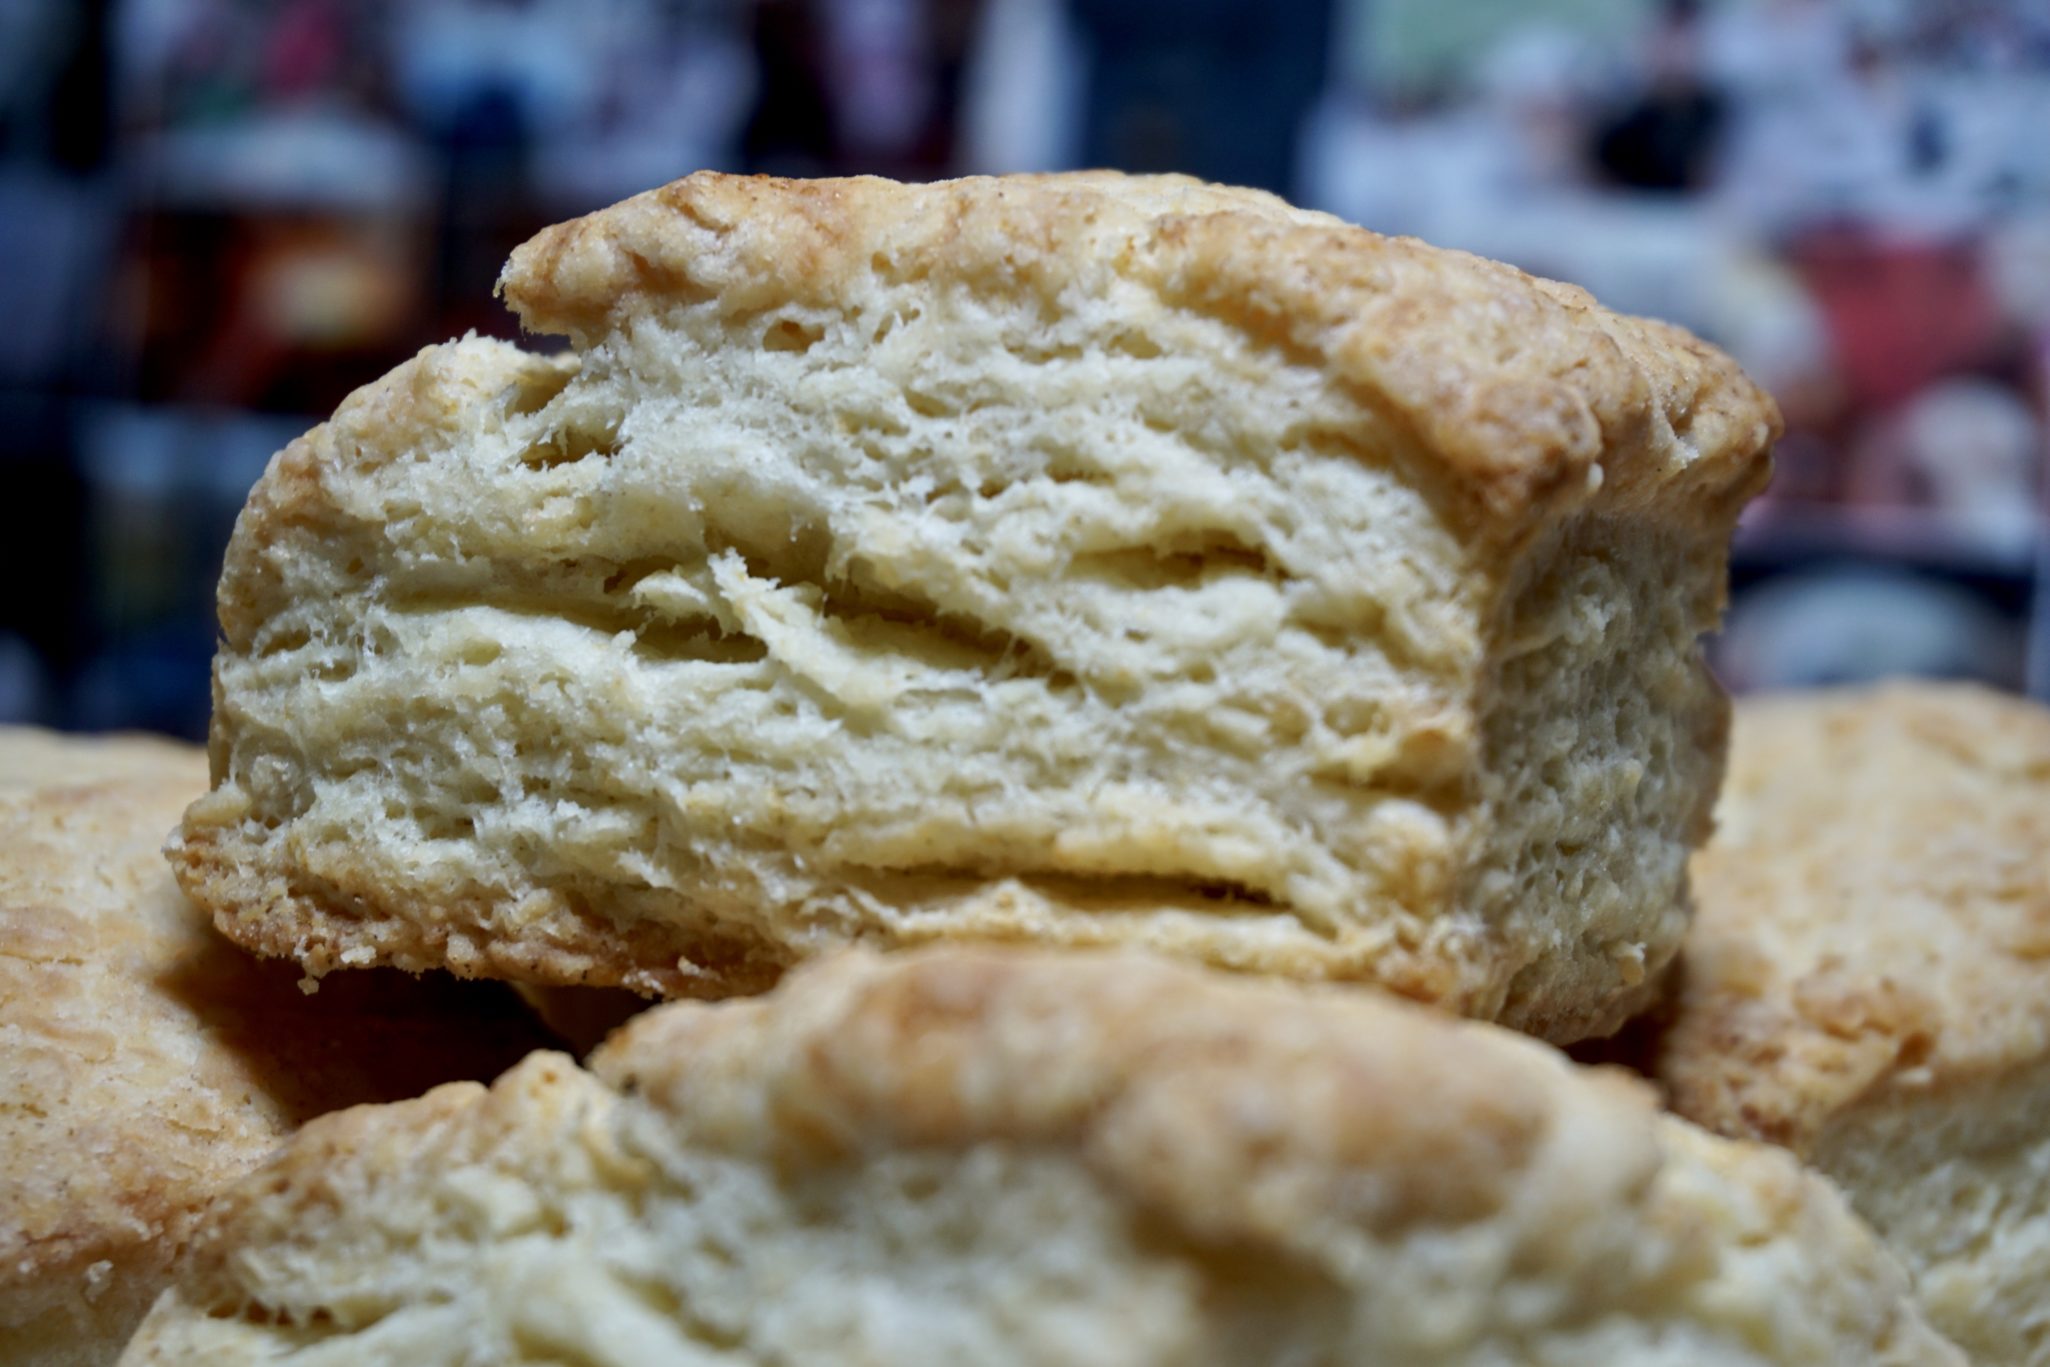
    The NYT recipe for spicy pork shoulder made quite a bit so to keep things fresh and interesting (the classic leftover dilemma), we looked for different ways to enjoy our Instant Pot Pulled Pork.  We quickly discovered all that pure porky goodness goes well with just about anything.  Like…BISCUITS.  I pulled out Bon Appetit’s recipe, BA’s BEST Buttermilk Biscuit, which had caught my eye during one of my many biscuit quests.  The leftover pulled pork gave me an excuse to make biscuits (as if I needed an excuse to make biscuits, who am I kidding?) and it proved to be a winning combination.

    Verdict:  These are pretty damn good biscuits.  Don’t wait until you have pulled pork to make these.  They are fabulous with just butter and honey.  But when you do make that spicy pork shoulder, make a batch of these bad boys to go along!

    Variation 1: Good Morning! Biscuits slathered with butter and honey on a plate next to a mound of pulled pork and 2 eggs, scrambled, soft, runny..breakfast plate ecstasy.

    Variation 2: Lunch anyone? Biscuit, still warm, split in half and piled with pulled pork and a perfectly cooked sunny side up egg.  The first bite, egg yolk oozes down and all over the pork and biscuit making it even yummier (yep)..ultimate biscuit sandwich.

    Variation 3: For the home team!  A yummy slider-biscuit, pork, slaw, Q-sauce, football/basketball on TV..GAME DAY food at its finest.

    Bon Appetit's Best Buttermilk Biscuits

    Buttery, flaky, just what a biscuit should be...
    Course Biscuits and scones, Breakfast
    Cuisine American
    Keyword biscuits, buttermilk biscuits, homemade
    Prep Time 15 minutes
    Cook Time 30 minutes

    Ingredients

    • teaspoons baking powder
    • 2 teaspoons kosher salt
    • 2 teaspoons sugar
    • ¼ teaspoon baking soda
    • cups all-purpose flour plus more for surface
    • 1 cup 2 sticks chilled unsalted butter, cut into ½-inch pieces, plus more, melted, for brushing
    • 1 cup chilled buttermilk

    Instructions

    • Preheat oven to 425°.
    • Place baking powder, salt, sugar, baking soda, and 3½ cups flour in a food processor and pulse to combine. Add chilled butter and pulse until largest pieces of butter are the size of a pea.
    • Transfer to a large bowl and gradually drizzle buttermilk over top, tossing with a fork as you go to incorporate. Knead mixture a few times in bowl until a shaggy dough forms (mixture will look a little dry), then turn out onto a clean surface and pat into a 1"-thick square.
    • Using a knife or bench scraper, cut dough into 4 pieces. Stack pieces on top of one another, sandwiching any loose dry bits of dough between layers, and press down to flatten.
    • Lift up dough with bench scraper and dust surface with flour. Roll dough into a 1"-thick rectangle and trim a thin border around sides of dough to create clean edges.
    • Cut into a 4x3 grid to make 12 biscuits (don’t reroll scraps). Transfer to a parchment-lined baking sheet, spacing 2" apart; freeze 10 minutes.
    • Brush tops of biscuits with melted butter and place in oven. Reduce oven temperature to 400° and bake biscuits until deep golden brown on bottom and golden on top, 20–25 minutes.

    Notes

     
    BA's best buttermilk biscuits
    There is a video on how to make these biscuits at the end of the recipe. If you are a biscuit making newbie, it is well worth watching.
    Pumpkin Apple Bread-Here, There, Everywhere

    Pumpkin Apple Bread-Here, There, Everywhere

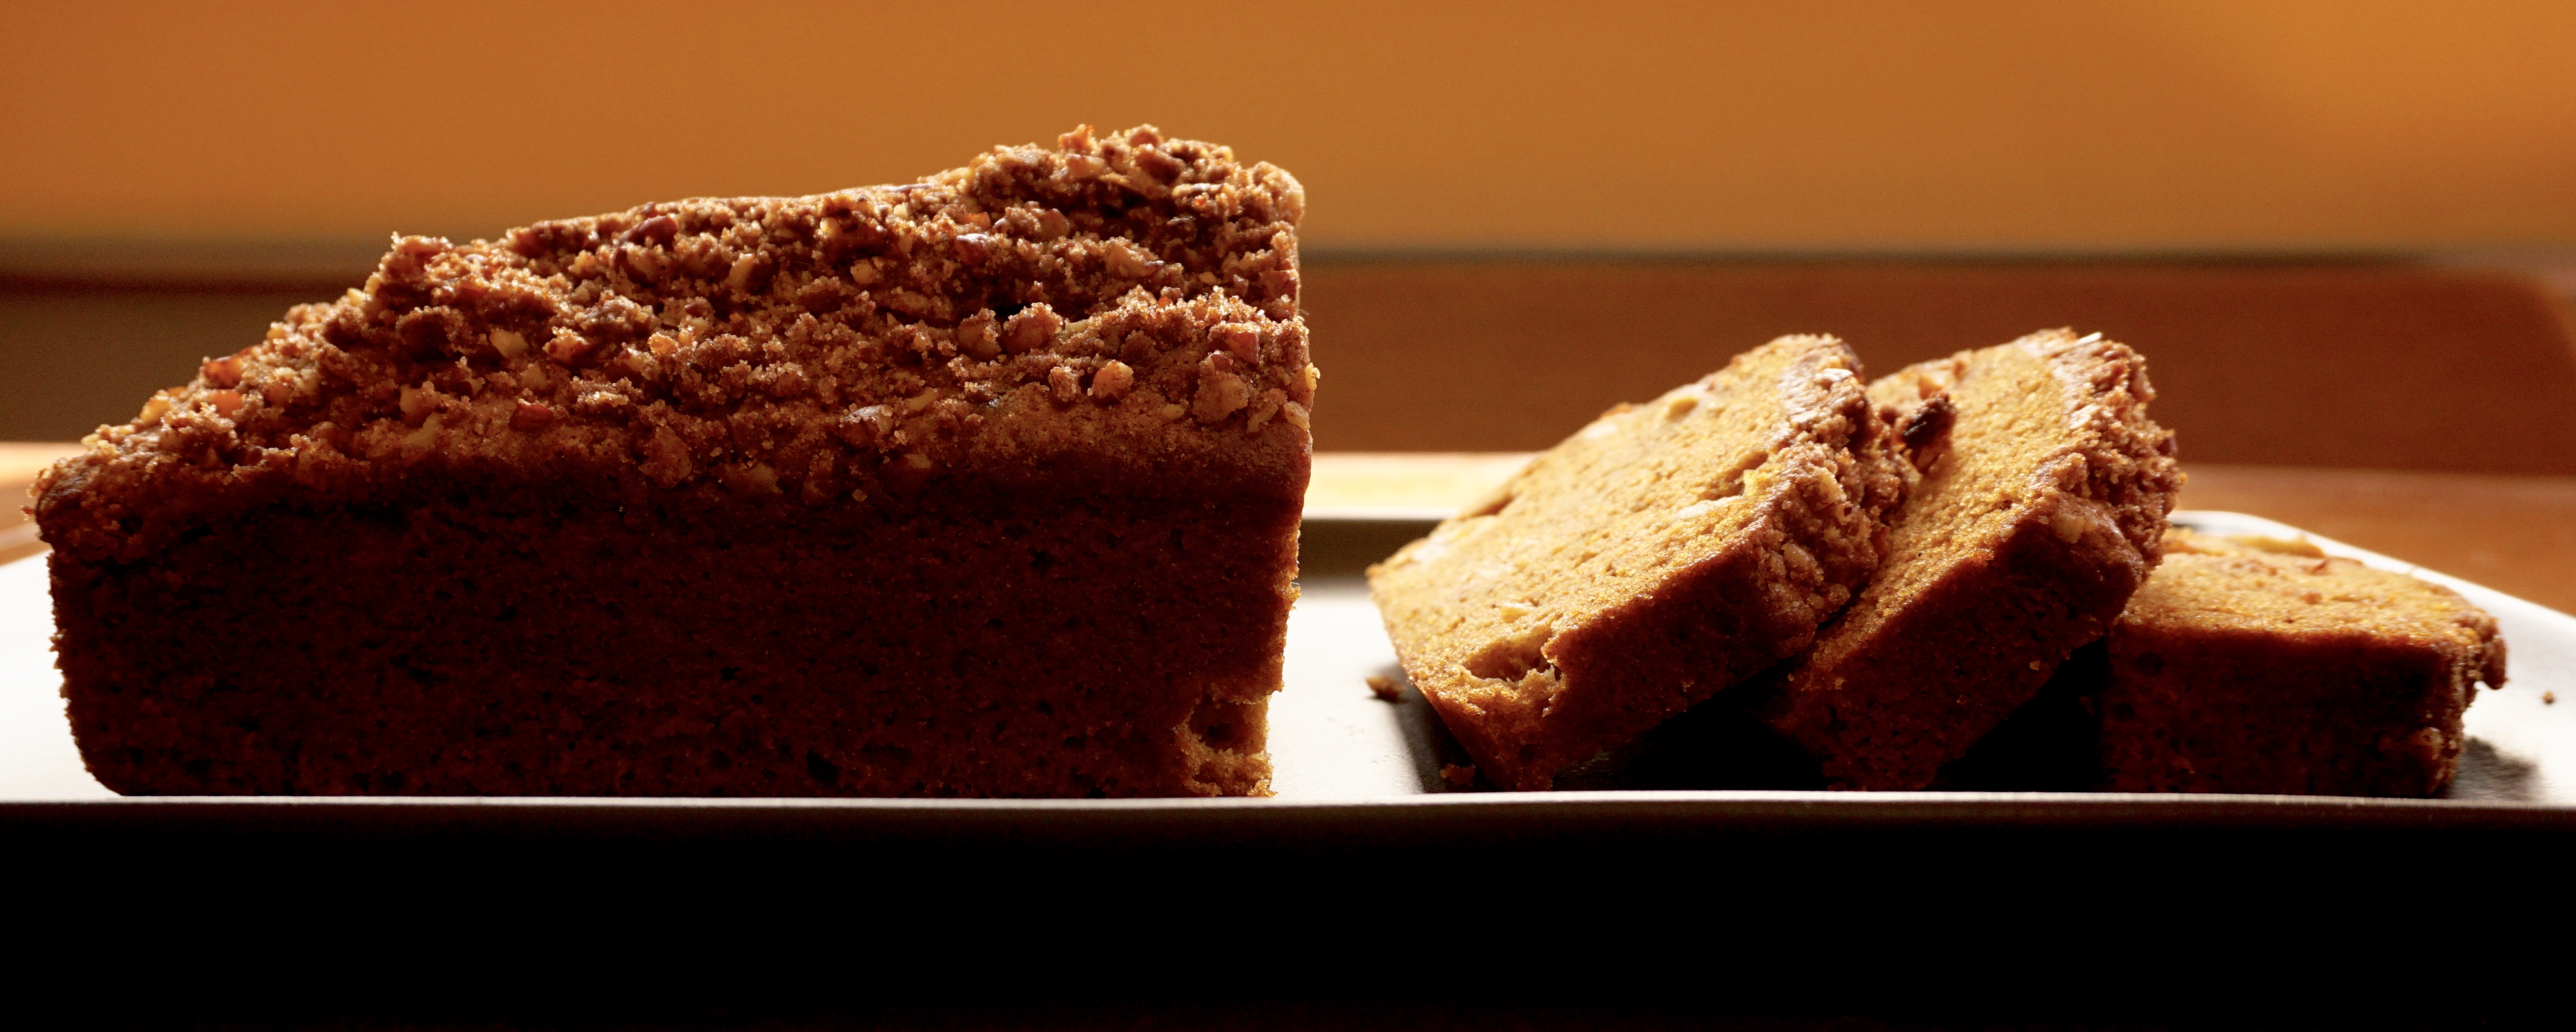
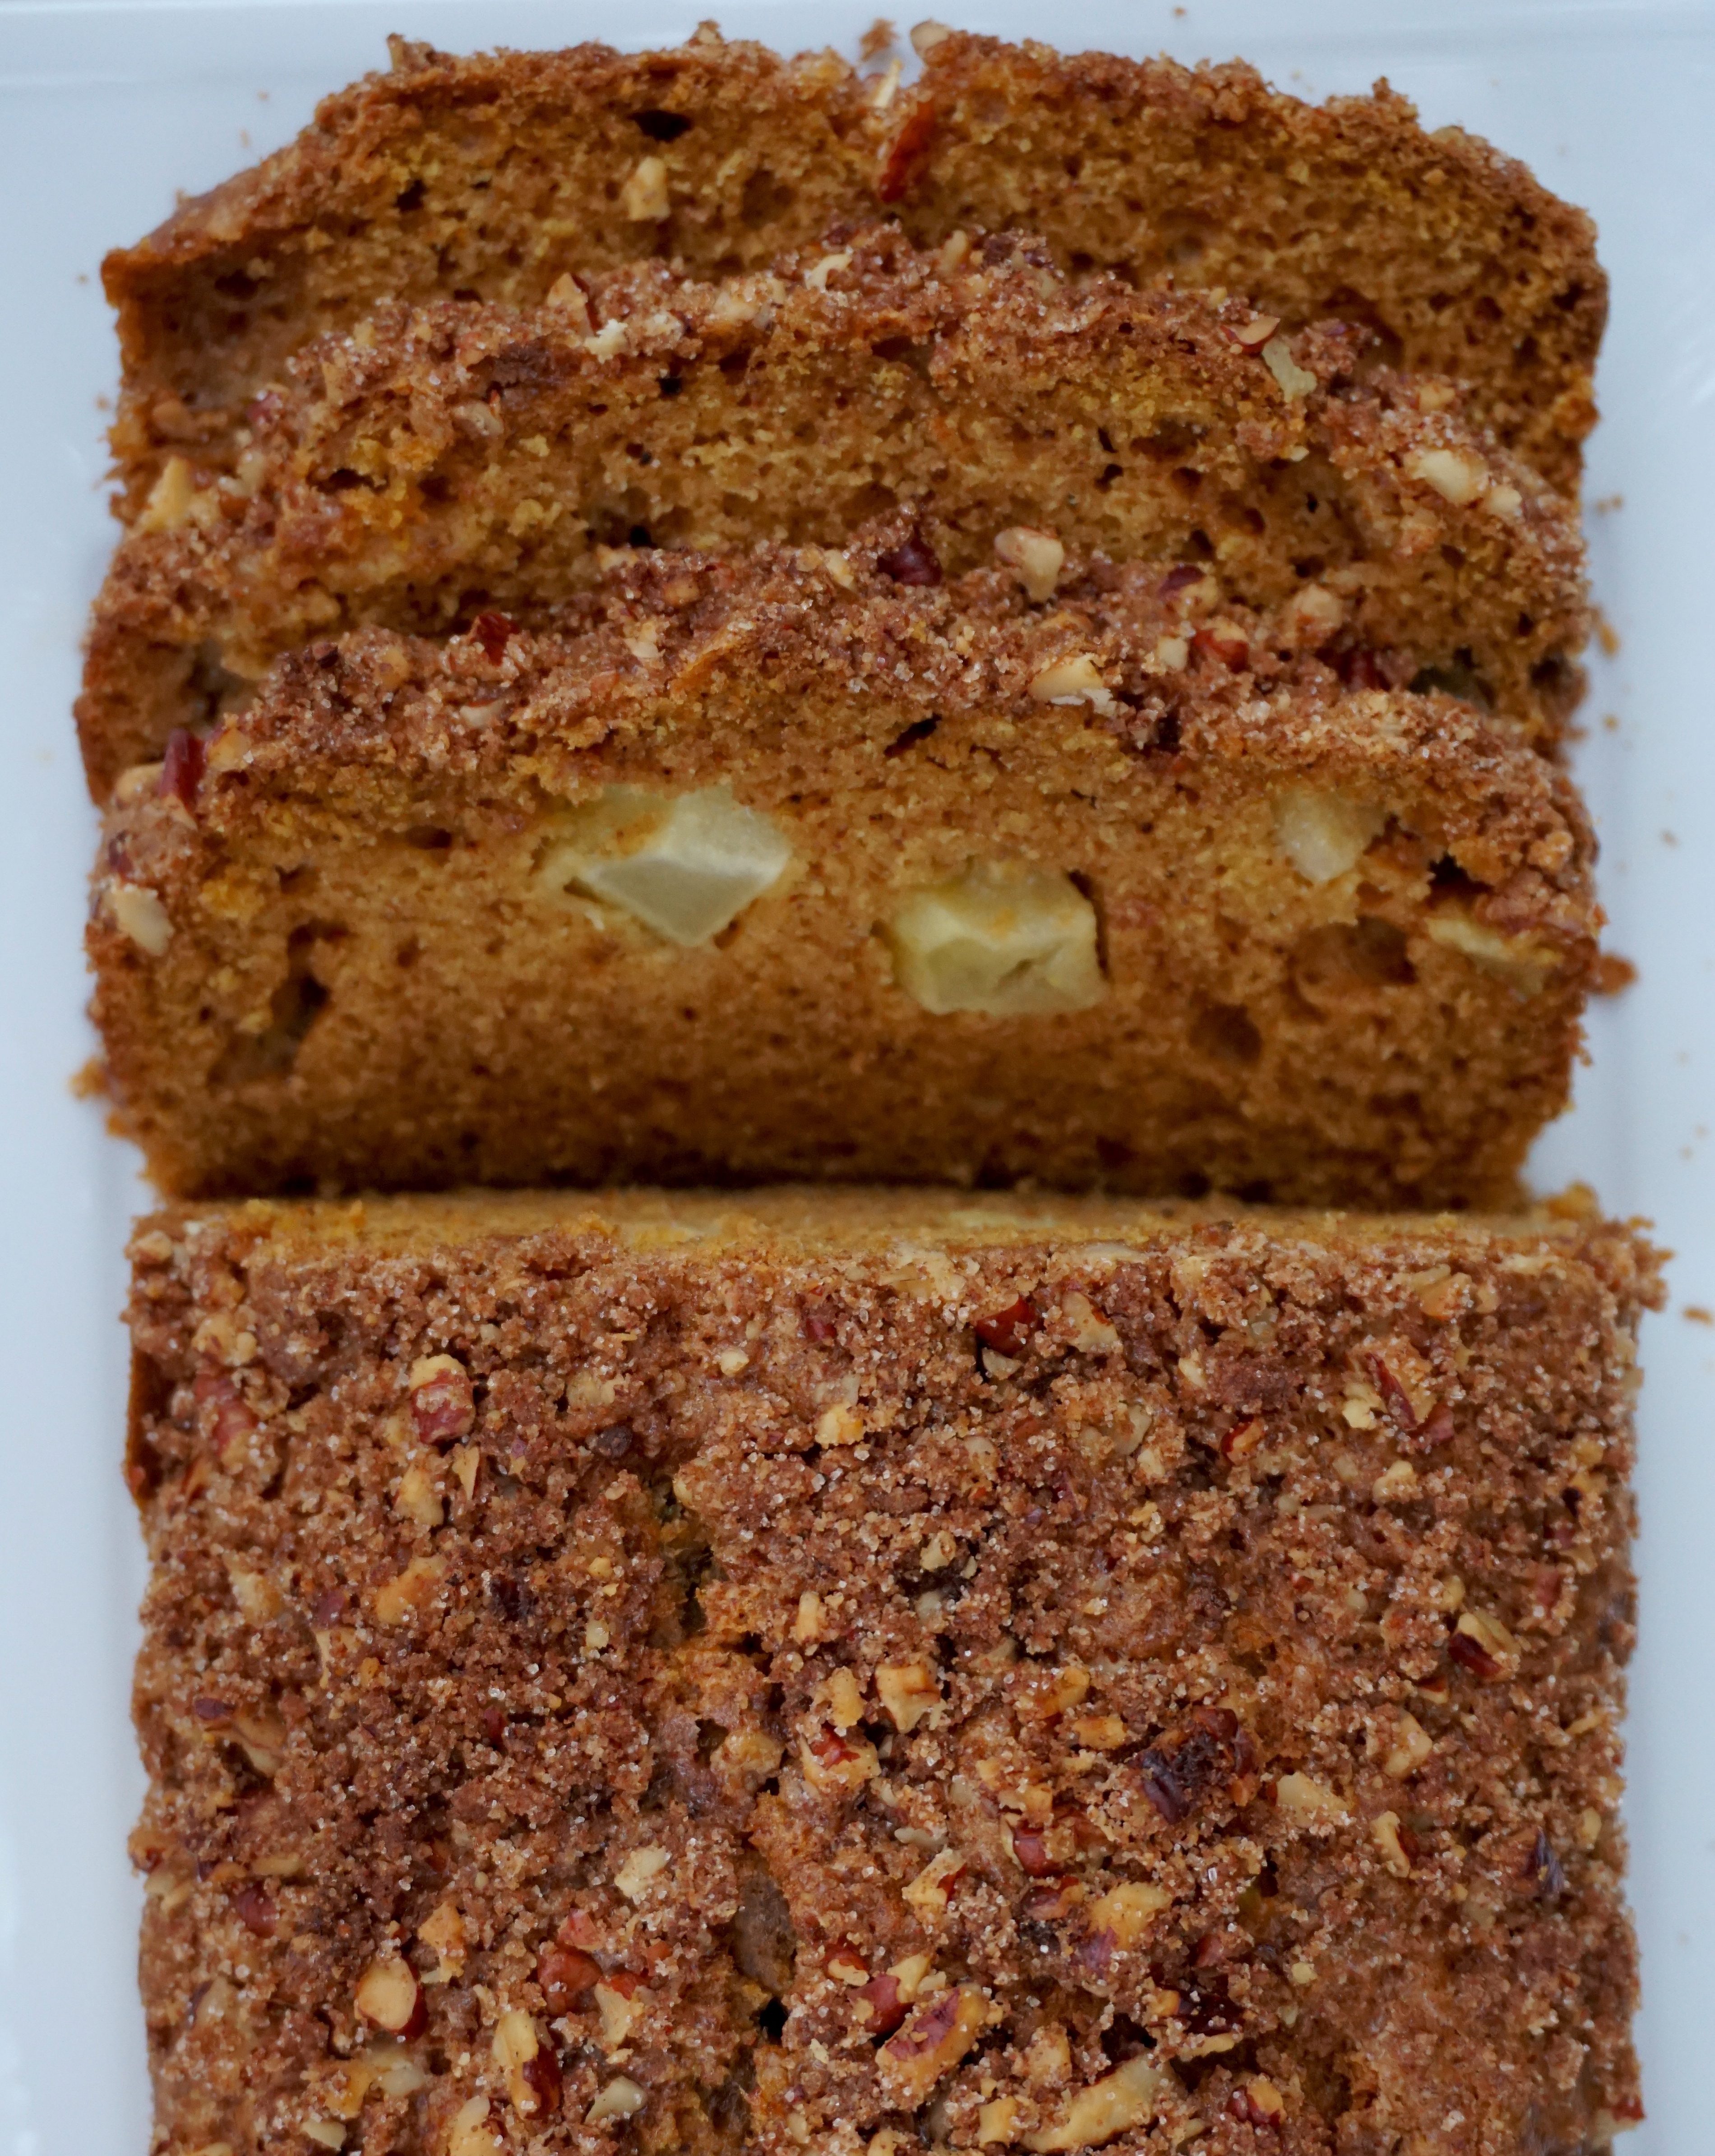
    Everywhere I turn I am reminded that Fall is upon us.  Shorter days, cooler nights, falling leaves blanketing the ground….and pumpkin in EVERYTHING!  Pumpkin spice lattes, pumpkin muffins, pumpkin bars, cake, cookies, cheesecake, pancakes…augh!  It is endless.  But as much as the pumpkin onslaught has tempered my enthusiasm for all things pumpkin I still find myself wanting to pull out my loaf pans and bake some pumpkin bread.  Today was the perfect day to do so.  With rain in the forecast, it was time to hunker down at home in my jammies and bake.  I pulled out a favorite recipe, Rebecca’s Apple and Pumpkin Bread from Gourmet magazine’s You Asked For It column. Moist and flavorful, spiced with cloves, cinnamon, nutmeg, chunks of apples peppered throughout plus a crunchy cinnamon-sugar topping. It is a slice of yumminess.  Perfect with a steaming cup of tea or coffee, especially on a wet, chilly day.

    dsc04717

    TWEAKS

    I add chopped toasted pecans to the streusel topping to add some crunch and substitute brown sugar for part of the sugar in the topping.  If you like the contrast of tart and sweet, use Granny Smiths or Pippins. I have used Golden Delicious, Fuji, and Mutsu apples with great results.  Really, any apple that doesn’t break down works well.  At times I use mace instead of nutmeg for a milder, subtle flavor and I add ginger to up the spice.  The recipe makes two loaves of bread, one for now and one you can wrap and freeze for another day.  Enjoy!

    Apple Pumpkin Bread

    Delicious, moist, spiced pumpkin bread with apples added.
    Course Breads
    Cuisine American
    Keyword apple, crumb topping, Pumpkin Bread
    Prep Time 20 minutes
    Cook Time 1 hour

    Ingredients

    For topping

    • 1 tablespoon all-purpose flour
    • 5 tablespoons granulated sugar I use 3 T granulated sugar + 2 T brown sugar
    • 1 teaspoon ground cinnamon
    • 1 tablespoon unsalted butter softened
    • 1/2 cup chopped pecans

    For bread

    • 3 cups all-purpose flour
    • 3/4 teaspoon salt
    • 2 teaspoons baking soda
    • 1-1/2 teaspoons ground cinnamon
    • 1 teaspoon freshly grated nutmeg or mace
    • 1/4 teaspoon ground cloves
    • 1/4 teaspoon ground allspice
    • 1/4 teaspoon ginger
    • 1 15-oz can solid-pack pumpkin (original recipe calls for 16 ounce, add 1/4 cup applesauce if desired)
    • 3/4 cup vegetable oil
    • 2-1/4 cups granulated sugar
    • 4 large eggs lightly beaten
    • 2 apples peeled, cored, and chopped (2 cups) I use Pippen and Fuji, your choice

    Instructions

    • For topping: Blend together flour, sugar, cinnamon, and butter in a small bowl with your fingertips until mixture resembles coarse meal. Add nuts. Set aside.
    • For bread: Put a rack in middle of oven and preheat oven to 350 degrees F. Butter two 9 X 5 inch loaf pans. Set aside.
    • Sift together flour, salt, baking soda, cinnamon, nutmeg or mace, cloves, ginger and allspice into a medium bowl.
    • Whisk together pumpkin oil, sugar, and eggs in a large bowl.
    • Add flour mixture, stirring until well combined.
    • Fold in apples.
    • Divide batter between buttered loaf pans. Sprinkle half of topping evenly over each loaf.
    • Bake until a wooden pick or skewer inserted in center of bread comes out clean, 50 to 60 minutes. Cool loaves in pans on a rack for 45 minutes, then turn out onto rack and cool completely, about 1 hour.
    • Yield: two loaves.