Category: Musings

Thoughts about life, kids, sports and politics

Chocolate Chip Cookies as Stress Busters

Chocolate Chip Cookies as Stress Busters

Whoa, Nellie, it has been a crazy 12 weeks. I knew with a second Trump term, the guardrails that were in place during his first term would be gone, but did I think we would get to Def Con 5 so quickly? Nope.  TFG has brought out the absolute worst in folks.  I underestimated how many sycophants and folks there are willing to sell democracy down the river for a fist full of dollars and a pocket full of power.

Apolitical-Smaypolitcal

I know a few of you are probably thinking, Gurl, stay in your lane; this is supposed to be a food, travel, and sports blog.  We can’t ignore what is happening in our country. Has there ever been a person more woefully unqualified to be a president?  Devoid of the temperament, decency, and intellect it takes to be in public office, any office for that matter, even dog catcher.  At this moment,  he and Elon Musk, I’ve coined them the Douche and Doge Bro, are taking a sledgehammer to everything we hold dear, public education, public libraries, National Parks, Public Lands, and federal agencies like the NIH, FDA, FBI, DOJ, and Homeland Security.  He has fired career non-partisan civil servants and replaced them with hacks.  A complicit GOP Senate has installed woefully unqualified and corrupt nominees to lead all our institutions.

What a nightmare.  All under the guise of waste and fraud in the government and an anti-DEI policy (racism).  Tell me how firing Inspector Generals who oversee waste and fraud works to eliminate…waste and fraud 🤦🏻‍♀️.  They are dismantling our system to privatize it and put money into their grubby little hands.  Not to mention the cruel, illegal, indiscriminate mass deportation of folks to El Salvador, which is basically like sending folks to hell. NO due process?

Gettin’ Judgey With It

Though the SCOTUS has been bought and paid for, there are still judges, even Republican-appointed ones, who are trying to stem the tide.  They know these outrageous, unjustified firings are illegal.  This is how unserious the current administration is.  50 years of progress is being dismantled under the guise of anti-wokeness and anti-DEI.  A vindictive slash-and-burn policy is not tool of governance.  It is wielding power with a scepter of cruelty.

Hands Off Protest New York City

What Can I Do?

There is a sense of helplessness that has come from this massive attack by the rich on everyday Americans.  There are steps we can all take to hopefully stem the tide, save Democracy, and counter that feeling of hopelessness.  Taking action, knowing that all of us are the ones who will save democracy, is empowering. So let’s get to it.

Engage in our political process and do some research and reading on your own.  Join grassroots political organizations in your area.  Create a network of folks to whom you can bounce things off and who will provide sanctuary for you.  Start with Indivisible and find your local chapter. Fight the fight you are passionate about. If you are in Los Gatos, check out TWW Los Gatos, a local group under the Indivisible banner.

Call your representatives.  Use 5calls.org app to find your reps by your address and provide scripts and guidance on issues to call on.  They need to hear from you.  Go to their Town Hall meetings or demand that they have one during their recess.  All we have is our voice and our vote; use them both.

Rallies, Protests, and Marches.  A single voice is not heard, a hundred voices are barely a whisper, but a million voices are loud and clear.  Show up.  Do it for your family and friends.  Bring them along.

These are stressful times. Don’t forget to take time for yourself, your family, and your friends.  We are in this for the long haul, so breaks are required to rejuvenate.  Balance is necessary.

Who You Gonna Call? Stressbusters

In between calling reps, attending rallies and political meetings, I de-stress by BAKING, cooking, rowing, and venting.  The perk of letting me vent to you in a post,  a recipe to make something to delicious nosh on while having to listen to me.  I recently picked up the cookbook from the team at Republique in LA; it was on sale and contained their amazing Buko Pie (Coconut Cream Pie) recipe.  Before tackling the pie, though, I made her Chocolate Chip Cookies.  I’ll get to the pie yet.

Chocolate Chip Cookies AKA Constitutional Crisis Cookies

The instructions are clear, and the photos of the finished cookies and other recipes in the book are gorgeous. These fall into the category of classic chocolate chip cookies.  No nuts, just chocolate pieces surrounded by a buttery, crisp-edged, slightly chewy, soft, center cookie.

That’s enough, the batter should not get to the fluffy, light stage.

The key to these cookies is not creaming your butter and sugar too much to avoid a cakey cookie.  My mantra for these cookies is don’t overmix and don’t overbake!  Err on the side of less time in the oven.

More Tips

I used my big-ass Kitchen Aid mixer to make these cookies, trust me, you don’t need to.  Less is more.  The problem with my behemoth mixer, it is way too easy to overmix.  I find this true for quick breads and cakes, too.  The theory is all that horsepower inadvertently leads to beating too much air into the batter, causing it to deflate and sink.  It screws with the structural integrity and weakens it.  Try making these cookies by hand or with a portable hand mixer to avoid over beating.

This dough is ready to be scooped.

The Process

The recipe specifies a #40 scoop.  I love details like that.  Conversely, if you don’t have one, it is equivalent to 2 tablespoons of dough, roughly 30- 35 grams in weight.  Finally, err on the lighter side if you reserved chocolate pieces to press into each dough ball.

Make sure to chill the dough thoroughly.  These will spread and result in a pretty thin cookie; chilling stops too much spreading.  For a thicker cookie, add a tablespoon of flour to the recipe, but try the recipe as is first.

Pull out your hand-dandy round cookie cutter or a glass.  Some of the cookies will spread unevenly while baking.  As soon as the cookies come out of the oven, use the round cutter to corral the cookie into a circle…this is for y’all with ORCD (obsessive round cookie disorder).

Watch the cookies like a hawk; the edges should be golden brown, and the middle should not look shiny.  It will look soft and slightly underdone.  Take the cookies out and let them rest on the sheet until cooled.  This is subjective; cooled can mean still warm but easy to handle cause who can wait till they are absolutely cool?  Then devour.  Everyone needs a cookie in the middle of a hostile government takeover.

These are thin and delicious cookies.  If you like thicker cookies, reminiscent of Mrs. Fields, try theseSoft and chewy? I swear by these.

République’s Chocolate Chip Cookies

Another Chocolate chip cookie recipe, cause you can never have too many. From the Republique in LA, a crispy-edged, tender, chewy center cookie with dark chocolate pieces-that is it, no nuts, no nothing else, just plain delicious.
Course cookies
Cuisine American
Keyword buttery, chocolate chip cookie, chocolate pieces, drop cookies, Republique
Prep Time 15 minutes
Cook Time 10 minutes

Ingredients

Dry Ingredients

  • 1-1/3 cups plus 1 Tbsp all-purpose flour 175gms
  • 3/4 tsp baking soda 5 gms
  • 1/4 tsp fine sea salt

Creamed Mixture

  • 1/2 cup unsalted butter 110gms pliable but still cold
  • 3/4 cup plus 1 Tbsp light brown sugar 130 gms
  • 1/2 cup granulated sugar 100 gm
  • 1 large egg

The Star

  • 1 cup plus 2 Tbsp chopped dark chocolate 150 gms 60% to 72% cacao

Instructions

  • Preheat the oven to 350°F. Line a baking sheet with parchment paper.
  • Sift the flour into a bowl and set aside.
  • Place the butter and both sugars in the bowl of a stand mixer fitted with the paddle attachment. Cream the mixture on medium speed until just incorporated—but no longer. Scrape down the bowl, add the baking soda, salt and egg, and mix until just incorporated. Feel free to make the dough by hand or using a portable mixer, less chance of over mixing.
  • Add the flour to the butter mixture all at once. Again mix until just incorporated. Fold in the chocolate just until evenly distributed. Reserve ~12 pieces of chocolate to press into the top of each cookie dough ball. This insures you will have a nice piece of chocolate showcased in each cookie.
  • Using a #40 (2 oz) ice cream scooper, scoop the dough onto a small baking sheet lined with parchment, press a piece of chocolate in each one, then wrap with plastic wrap, and chill overnight. This helps prevent cookie spread, it is still a pretty thin cookie.,
  • Remove the cookie balls from the refrigerator and bake until the edges are crispy and golden, 8 to 10 minutes. (Bake for less time if you like your cookies chewy and longer if you like them crispier.) Cool on the baking sheet or serve warm. The cookies will keep in an airtight container for up to 5 days.

Notes

The scooped dough can be frozen until solid and then transfer to a resealable plastic bag and kept in the freezer for up to 2 weeks. Bake straight from the freezer adding a minute or two/


Mrs. Singer’s Eggnog, The Real Deal

Mrs. Singer’s Eggnog, The Real Deal

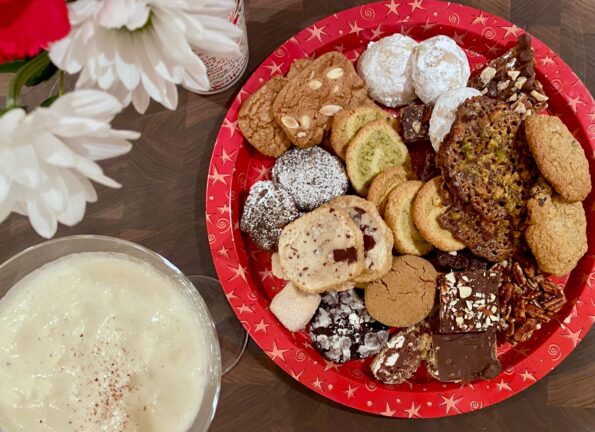
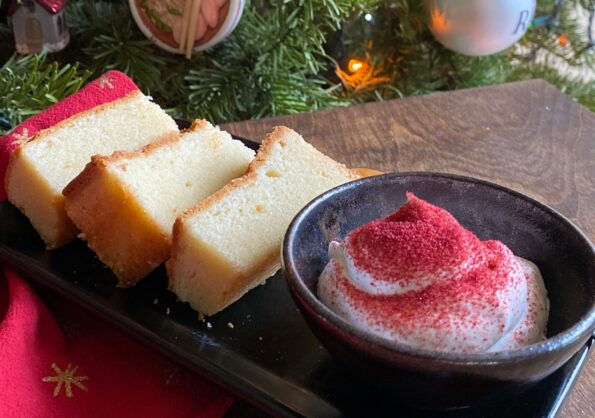
How many of you have had REAL eggnog?  Not the ultra-pasteurized, homogenized version of eggnog found in every supermarket during the holidays.  Who drinks that stuff?

Context

I did a bit of sleuthing on the origins of eggnog.  It has been around since medieval England (1300s), that’s a LONG time.  Its lineage starts as a posset, a milky, warm ale-like drink.   Fast forward to the 1700s, eggnog came along for the ride to the new colonies in America. Farmland was plentiful for cows and chickens which in turn provided lots of milk and eggs.  Rum, the inexpensive alcohol of the time, rounded out the nog.  Thus, eggnog became the festive drink of choice for the everyday man.

Unlucky for us,  the advent of supermarkets and technology led to the eggnog so many of us know.  As soon as pumpkin lattes disappear after Thanksgiving,  red and green cartons of super sweet, weirdly thick (like slime) non-alcoholic eggnog pop up in its place on supermarket shelves.  Whenever I volunteer to make eggnog for a holiday soiree’ I am invariably met with a chorus of yucks and eewwws.

The Eggnog Caper

To which I launch into my oratory, on the much-maligned REAL eggnog.  It starts with the story of Mrs. Ethel Singer.

When my brother and I were babies we were taken care of by a family out in the Sunset, the Singer Family.  Mrs Ethel Singer was the sweetest, most amazing woman, who ran a nursery for babies.  A friendship was born from our stay there and it became a tradition for us to visit them every Christmas.  As I admired their gorgeous Christmas tree with an entire miniature town around the base, she brought out her homemade cookies and eggnog.

Not Your Mama’s Eggnog

We would sit sipping our eggnog merrily chatting away. Much to my chagrin, I often started nodding off while listening to the conversation. I fought hard to keep my eyes open. How could I be so rude?!  Finally, during one visit, I asked for her eggnog recipe.  Not only did she gift me her recipe, but she went over the recipe step by step,  “A quart of milk, 12 eggs (my arteries spasmed), sugar, heavy whipped cream, milk, and make sure to use a generous CUP of GOOD brandy, like Christian Brothers, lol.   My dear Dr. Watson, the mystery is solved regarding my annual, ill-timed bouts of narcolepsy.  Blame it on the alcohol, the alcohol…

Yes, roughly 15% alcohol, masked by sugar, milk, heavy whipping cream, and eggs. A smooth, creamy, sweet, calorie-laden, festive, delicious, diabolical drink.

Our Annual Cookie Swap

So, for our annual preschool holiday cookie swap, I pulled out Mrs. Singer’s Eggnog recipe.  Martini glasses filled with eggnog seemed a fitting way to toast 25 years of cookie swaps that began with toddlers in tow. Back then we were new moms who could not imagine those toddlers becoming adults making their way in the world.  It seems like in the blink of an eye we have arrived at that point.

Remember When…

2000

2001

2002

2015

2023

Happy Holidays!

Feel free to HALF this recipe

Print
5 from 1 vote

Ethel Singer's Eggnog

(from an ad for Yellowstone Whiskey in SF Chronicle, circa 1952)   Note: You should prepare at least 12 hours before serving
Course Drinks
Cuisine American, English
Keyword brandy, Eggnog, eggs, holiday drink, whipped cream
Prep Time 20 minutes
Chill Time 12 hours

Equipment

  • 1 stand mixer
  • 3 large bowls, 1 should be your serving bowl, like a punch bowl

Ingredients

  • 1 dozen eggs 12 eggs
  • 1 pint heavy whipping cream 2 cups
  • 1 cup sugar
  • 1 cup brandy / bourbon/rum original recipe has 1-2 cups lol
  • 1 quart milk 4 cups
  • 1 tsp vanilla extract
  • Nutmeg for garnish

Instructions

  • Need 3 mixing bowls (2 chilled), and one punchbowl
  • Separate egg whites into 1 chilled bowl, and yolks into room-temp bowl (make sure no yolk is in the egg whites or they won’t beat!).
  • Using a stand mixer with wire whisk attachment (infinitely easier) or hand mixer, beat egg whites until they are firm and peaked. Do not overbeat. Set aside (or put in fridge).
  • Start whisking egg yolks and gradually add 1 cup sugar. Whisk until light and frothy, slightly thickened. Add 1 cup brandy/bourbon to the egg yolk mixture. Whisk to blend completely.
  • Pour 1 pint (2 cups) of heavy cream into 2nd chilled mixing bowl, using whisk attachment, start at medium and gradually increase speed to beat cream. When it starts to thicken, add vanilla. Continue to beat until cream is thick and has firmed peaks when stirred with a spatula.
  • Pour egg yolk mixture into a serving bowl or punch bowl, add milk stirring to blend. Add egg whites and whipped cream and mix thoroughly with a spatula or wooden spoon (fold egg mixture over cream and egg whites. Garnish with nutmeg, and chill overnight.
  • Enjoy! Ladle eggnog into martini glasses or small bistro glasses. Garnish with nutmeg and a cinnamon stick.

Notes

1/2 recipe
6 eggs.                                                        3 eggs
1 cup whipping cream.                            1/2 c whipping cream
1/2 cup (100gm) sugar                            1/4 c sugar      
1/2 cup brandy, or rum, or Bourbon    1/4 c brandy
2 cups whole milk                                       1 cup milk
1/2 tsp vanilla extract                                 1//4 tsp vanilla
Nutmeg for garnish
Cream Cheese Pound Cake-Eric Kim Makes Sara Lee Proud

Cream Cheese Pound Cake-Eric Kim Makes Sara Lee Proud

I am seriously thinking about adding a new category to 3Jamigos. I’m going to call it “Everything Everywhere All at Eric”.  Serving a dual purpose, a nod to the movie EEAAO and its amazing cast, and of course to Eric.  For those of you not “in the know”, I am referring to Eric Kim, food writer, cookbook author (Korean American: Food that Tastes Like Home), Food52 alum, and current columnist of lots of yummy stuff at the New York Times.

I’ve been following him since his days at Food52 where he wrote a column, Cooking for One.  His writing and recipes are gorgeous, simple, straightforward, and delicious.  I have a backlog of the recipes I have made but haven’t had the time to do them justice in a post.  I will get to them soon.  During the holidays I made his Cream Cheese Pound Cake, it’s divine. Posting about it is long overdue! So here is the list of Eric recipes I have made and love—links to the ones I have posted. I hope you will try them!

Savory

Sweet

Well, the list of savory is overwhelming at this point so I am going to finish off the Sweet category with his Cream Cheese Pound Cake.  It’s delicious and something you should bake right now. It will fill your home with the aroma of butter and sugar and help keep the house warm since our cold, wet, weather is back.  This is the perfect antidote.

Does it bother you when you make something from scratch and the person eating it says, “Wow this tastes just like the one in the grocery store!” Unless it is your hubby, who you would slug, you politely smile, laugh, and let it go.  This cake is reminiscent of the Sara Lee Poundcake we all grew up with.  Don’t be surprised if someone exclaims “This is like Sara Lee’s” and take it as a compliment.

Let’s Get Baking

Make sure your butter and cream cheese are at room temperature (about 68 degrees).  Cream cheese adds moisture, richness, and flavor to the cake. Three cups of sugar is pretty typical for a pound cake although this cake may be a little sweeter since it has a smaller amount of flour.  Cream the butter, cream cheese, sugar, salt, and vanilla.  Then add the eggs, one at a time, beating until smooth.  Finally, add the dry ingredients at low speed.  Do not overbeat after adding the flour, this would toughen the cake.

I cut the recipe in half using weights to split it and baked it in an 8×8 square pan. The cake dipped in the middle despite being fully baked. Looking at a couple of recipes for pound cake, for the equivalent amount of butter and sugar, most used 3 cups of flour. Using less flour, in this case, 2.5 cups, may make a softer cake with less structure and therefore lower in the center.   It was still delicious and nothing a nice dollop of whipped cream couldn’t hide.

The whipped cream, jam, and raspberry dust are nice additions to the cake but not absolutely necessary.  I skipped the jam and the cake was delicious with just whipped cream and a dusting of ground freeze-dried raspberry.  Fresh berries instead of jam would be lovely too.

Cream Cheese Pound Cake

Just like Sara Lee's Pound Cake! Buttery, slightly dense but tender with a fine crumb. From Eric Kim and the NYT, an absolutely delicious pound cake that will transport you to your childhood.
Course Dessert
Cuisine American
Keyword buttery, Dessert, ERic KIm, freeze-dried raspberries, NYT Cooking, pound cake, whipped cream
Prep Time 20 minutes
Cook Time 1 hour 5 minutes

Ingredients

It's All About the Cake

  • cups all-purpose flour (320 grams)
  • 1 teaspoon baking powder
  • cups unsalted butter (345 grams) at room temperature
  • 8 ounces cream cheese (226 grams) at room temperature
  • 3 cups granulated sugar (600 grams)
  • 1 tablespoon vanilla extract
  • teaspoons fine sea salt
  • 5 large eggs at room temperature

The Bling Finish

  • 2 cups cold heavy whipping cream (473 milliliters)
  • 2 tablespoons granulated sugar
  • ½ teaspoon fine sea salt
  • 1 cup raspberry preserves (305 grams) see notes
  • cups freeze-dried raspberries (34 grams)

Instructions

Make the cake:

  • Position a rack in the center of the oven and heat the oven to 325 degrees. Grease a 9-by-13-inch baking pan; line the bottom and long sides with parchment.
  • In a medium bowl, add the flour and baking powder. Whisk to combine and to break up any lumps. Set aside.
  • Add the butter,cream cheese, sugar, vanilla and salt to the bowl of a stand mixer fitted with the paddle attachment. Mix on medium-low speed to combine. Increase the speed to medium-high and beat until fluffy, almost white, and the sugar is mostly dissolved about 5 to 7 minutes. With the mixer on medium speed, add the eggs one at a time, mixing until smooth after each addition. Use a flexible spatula to scrape the bowl, then beat over medium speed for another minute.
  • With the mixer on low speed, gradually add the dry ingredients and mix until most of the flour streaks have disappeared. Using the spatula, scrape the bowl and gently stir until you eliminate the flour streaks. Scrape the batter into the prepared pan, then smooth out the top.
  • Bake, rotating the pan halfway through, until golden brown and a skewer or cake tester inserted in the center comes out clean, 60 to 65 minutes. When you gently press on the center of the cake with your fingertip, you shouldn’t leave a dent. The internal temperature of the cake should be about 205 degrees. Let cool completely in the pan. (The cooled cake can be covered and kept at room temperature for up to 3 or 4 days.)

Putting it all together

  • If using the jam, spread layer on top of the cake. You could use strawberry or a mixed berry jam also.
  • In the bowl of a stand mixer, whisk the heavy whipping cream, sugar and salt over medium-high until billowy soft peaks form. When you lift the whisk out of the bowl and turn it upside-down, a peak of cream should flop over slightly like a Santa hat. Evenly spread the whipped cream over the jam-topped cake.
  • Add the freeze-dried raspberries to a fine-mesh sieve and hold it over the cake. Using your fingers, pass them through until most of the magenta powder rests atop the frosting like fresh snow and most of the seeds are left behind in the sieve. The entire surface of the whipped cream should be covered in pink dust. Discard the raspberry seeds. Serve immediately.

Notes

Personally, the cake is so damn good, I don't think it needs the jam.  The whipped cream is great and the sprinkling of raspberry dust is more than enough. YOu could also substitute strawberry for raspberry.
This is from the original recipe
Look for a brand of raspberry preserves with minimal ingredients: They should consist of only raspberries, sugar, pectin and some kind of citrus. That will taste more tart and less artificial than one with, say, high-fructose corn syrup and other fruit juices that muddy the natural raspberry flavor. If your preserves taste especially sweet, you can stir in up to 3 teaspoons of fresh lemon juice for added tartness.
Chicken Wings and Daikon Nimono + TV for Rainy Days

Chicken Wings and Daikon Nimono + TV for Rainy Days

It’s raining once again in California.  Which is the best excuse to stay home (in sweats), watch a lot of TV, bake, and cook.  I started the weekend on a carb bender. First, I made No-Knead Focaccia from Bon Appetit, it gets a big thumbs up, pillowy, springy, and delicious.  Caveat:  You have to start a day earlier for said focaccia, since there is 8 hours of resting time. Then I started on Kristina Cho’s Milk Bread from Mooncakes and Milk Bread, also extremely delicious.  Think of it as the Asian version of Brioche, slightly sweet, buttery, rich, and soft.

THEN, I needed a Bread Bake Break

Well, actually, my hips needed a break.  The combination of being a couch potato and baking is, to say the least, lethal.  I had to pick one, couch or carbs. Couch won.  Mainly because I started watching a cute, sweet Japanese show on Netflix called Makanai:  Cooking for the Maiko House. In a nutshell, two BFFs go off to Kyoto to become geishas.  One becomes a geisha while the other is a total washout but a fabulous cook (thanks to her grandmother), and becomes the Makanai or resident chef for the house, a role usually held by an older woman.  Each episode features something yummy, often a comforting, homestyle dish, made by Kiyo.

Well, you can’t sit there watching without a bowl of something delicious.  The cold, wet, weather and The Makanai put me in the mood for Nimono.  Nimono, a family-style dish usually contains protein, vegetables, or tofu simmered in a seasoned dashi (stock).  I scoured my fridge and found chicken wings and daikon (radish) perfect for Nimono.

Start by browning the wings.  I got fancy and grilled them, don’t bother, one more pan to clean. Then add your dashi, seasonings, and sliced daikon and bring to a boil. Cover the Nimono with a piece of parchment.  This keeps everything submerged so it cooks evenly.  Lower the heat and simmer for 15-20 minutes or until the daikon is soft. Pierce daikon with a knife to test, if it pierces easily, it’s done.   Korean radish would work well also.

Meanwhile, as the chicken and daikon are simmering, make your eggs.  Use the ramen egg recipe for a soft center yolk.  Cool the eggs and peel.  Place eggs in cold water to chill (so it doesn’t overcook when you put it in the Nimono).

When the radish is soft, Place eggs in Nimono.  Try to submerge them so they absorb the flavor of the broth.  Simmer an additional 5 minutes.

Garnish with green onions, and or sesame seeds.  Serve with rice and eat while sitting in front of the telly watching Makanai, Midnight Diner, or Julie and Julia…

Print
5 from 1 vote

Chicken Wings and Daikon Nimono and Netflix

Simple and quick Japanese braised dish of chicken wings and radish
Course One dish meals
Cuisine Asian, Japanese
Keyword Chicken, daikon, ninono, one pot meal
Prep Time 15 minutes
Cook Time 20 minutes

Ingredients

Ingredients:

  • 8-12 Chickin wings
  • 6-8 Ounce Daikon radish can use Korean radish cut into 1/2 inch rounds
  • 4 Eggs boiled till the yolk is still jammy, see ramen eggs post

Seasonings and stock:

  • 1 Clove Garlic
  • 2 tsp Instant Japanese soup stock (you will need 1 cup of dashi) or make dashi with packet or Shiro dashi
  • 2 tbsp Sugar
  • 1 tbsp Soy sauce if using dashi packet, increase to 2 T
  • 4 Tbsp Sake
  • 2 Tbsp Mirin

Options

  • Add mushrooms or sliced carrots with daikon if you like

Instructions

  • Make dashi and set aside. You can use the powder Hondashi, or dashi bags, or Shiro Dashi concentrate. For concentrate dilute 1:12 Make 1-1.5 cups
  • Peel and cut the daikon into 1/2 inch slices. Set aside.
  • Sauté the chicken wings approximately 2 minutes a side in a 3-4 quart saucepan. They should be light brown.
  • Add dashi to pot followed by soy sauce, mirin and sake. Add daikon on top. Bring to a boil then lower heat to a simmer. Use an otoshibuta (dropped or parchment lid) while simmering although you can forego this step. Simmer for 15-20 minutes or until radish is soft when pierced with a knife.
  • While chicken is simmering, make ramen eggs or hard boil the eggs just until the yolk is barely set. Peel and place eggs in an ice bath. When nimono is done, add peeled eggs to it and let it simmer another 5 minutes. Make sure the eggs are submerged in the broth.
  • Ladle the Nikon into bowls, garnish with green onions and sesame seeds. Serve with rice and a half or whole egg per person. It's worthwhile making nimono in advance, since it tastes better the next day. Or just make a larger quantity to keep. Reheat before eating at home, or reheat then let cool down again if using for bento. Can be stored in the fridge for 2-3 days.
Mandu-Welcome to MDU-Marvel-ous Dumpling Universe

Mandu-Welcome to MDU-Marvel-ous Dumpling Universe

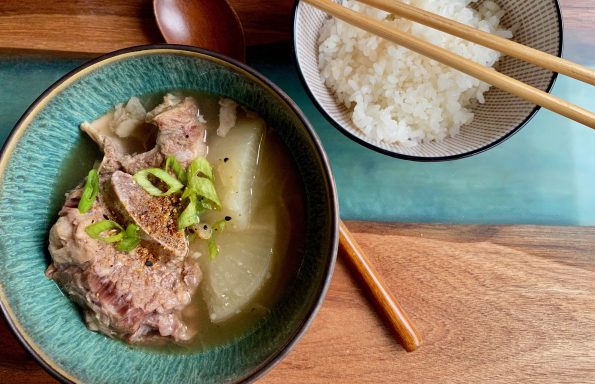
I love dumplings, right up there with bowl food, soul food.  In my world, Jeopardy has a couple of categories including “Things You Eat with a BOWL and SPOON” and “Dumplings of the World”.  It seems every culture has a dumpling that defines comfort, soul food.  Ravioli, Momos, Mandu, Gyoza, Pelmeni, Pierogi…the list is endless.  Dumplings are a labor of love, and labor-intensive.  Maybe that’s why dumpling making is a joint effort with family and friends on occasions that bring us all together.  Despite Covid, we did manage to have a small dumpling-making session to usher in the Lunar Year of the Ox (immediate family only and outside).

Bittersweet Gathering

Every year for the past too many to count years I look forward to New Year’s Day celebrations with family and friends.  I pack up a tray of holiday cookies and head to my brother’s for their annual New Year’s celebration which includes making mandu of course.

The kitchen table is set up with bowls (more like vats) of mandu filling and stacks of wrappers surrounding the bowls.  Everyone takes a shift wrapping mandu.   It’s a lively table, as everyone chatters away while folding mandu.  The folded mandu are lined on trays sprinkled with cornstarch, like little sentinels waiting for their marching orders on a winter’s day.  Some are destined for the pot of boiling water on the stove-immediate gratification, while the rest are loaded into freezer containers for everyone to take home.

I look forward to seeing family and friends that I don’t see very often.  We pick up right where we left off the previous year.  Catching up on the comings and goings, the kids, vacation highlights, reconnecting as if it were only yesterday we last saw each other.  This is what I miss most from this past holiday season due to COVID isolation.

My brother canceled their annual New Year’s Day celebration due to COVID and then my sister-in-law’s mother passed away.  It was during the holidays we would normally see her.  My kids affectionately called her Halmoni (grandmother in Korean) mimicking their cousins.  Born in Seoul, she came here to complete her medical training to be a pediatrician.  She was part of a generation of remarkable woman that defied the odds and norms of her time.  What I will remember most was her kindness and generosity of spirit.  She always greeted you with a warm embrace and a beautiful smile.  Her soft-spoken demeanor and gentleness belied the tenacity and determination she must have had to accomplish all that she did.

I thought of her as I prepped the filling for our own little New Year’s Dumpling-making session.  I was immediately transported to my brother’s kitchen table, sitting with her and my mom, laughing, talking, and of course, wrapping mandu.  She will be sorely missed.

We made two fillings, Mom’s Won Tons and Kimchi Mandu in the morning before our designated wrappers arrived (my kid).  I started with mom’s tried and true wonton filling, a delicious mixture of shrimp, pork, water chestnuts, scallions, shiitake mushrooms, and seasonings.  We use it not only for wontons but for fried egg dumplings, and as a filling for steamed squash or tofu. Skip the wonton wrapper and make meatballs for a tasty addition to soup or congee.  Mom’s universal filling, the best.

I adapted the recipe for Kimchi Mandu from Korean Bapsang (my go-to Korean food site).  I wanted a vegetable-centric filling that still had a bit of meat in it.  This one was perfect.  Not gonna lie, the filling is not a walk in the park and requires time to make.  My advice is to make the mandu filling the day before.

For Kimchi Mandu, you will need the following:  Firm tofu, dried sweet potato noodles, ground beef or pork or combo, onions, scallions, kimchi, bean sprouts and seasonings. Gather the ingredients and then the “fun” begins.  Blanch bean sprouts, drain & smoosh tofu, rehydrate & cut noodles, dice green & yellow onions, mince ginger and garlic, shred kimchi and THEN, add to meat.

WHEW, lots of prep but so WORTH IT.  Wontons and mandu freeze beautifully so all this work will give you a freezer full of quick, last-minute, delicious meals.

Folding Mandu in the Cartoon Universe

That’s a Wrap

Most of the time (and I mean MOST), we use commercial wrappers for our dumplings.  Look for round wrappers for potstickers or mandu at Asian markets.  A link to the Oregonian shows 6 ways to fold dumplings!  If you are feeling ambitious do try to make your own.  It’s pretty easy and requires only 4 ingredients.  The wrappers are flavorful, tender with a nice snap like hand-pulled or knife-cut noodles.  Totally worth the effort (homemade wrappers get the “nood” here).

Serve mandu, steamed with a dipping sauce, fried, or boiled.  A steaming hot bowl of Galbitang  (Beef Short Rib Soup) with mandu and rice cakes ushered in the new year for us.  Delish!

Kimchi Mandu (Kimchi Dumplings)

Delicious dumplings made with ground pork or beef, kimchi, noodles, tofu and onions.
Course Appetizer, One dish meals, Soup
Cuisine Asian
Keyword dumplings, mandu
Prep Time 1 hour
Cook Time 15 minutes

Ingredients

Filling:

  • 2 ounces dangmyeon sweet potato starch noodles soaked in warm water for about 30 min or until soft
  • 1 cup packed finely chopped kimchi
  • 8 ounces tofu firm
  • 10 ounces mung bean sprouts sukju namul (숙주나물)
  • 1/2 medium yellow onion minced
  • 2 to 3 scallions diced, or use garlic chives
  • 10 ounces ground pork or beef or blend of both meats

Seasonings for Filling:

  • 1 tablespoon minced garlic
  • 1 teaspoon finely grated ginger or juiced
  • 1 tablespoon sesame oil
  • 2 tablespoon soy sauce
  • 1 tablespoon gochugaru adjust to taste
  • salt to taste about 1/4 teaspoon
  • pepper to taste about 1/8 teaspoon

Wrappers

  • 40 dumpling wrappers slightly thick

Instructions

  • Drain and squeeze water out of tofu. Using a cheesecloth or kitchen towel to squeeze water out.
  • Finely chop the kimchi and squeeze out excess liquid by hand. Use older kimchi which has more flavor.
  • Blanch the bean sprouts in boiling salted water (2-3 min) should still be crisp, drain, chop and squeeze out water.
  • Finely chop the noodles. Finely chop the onions and drain off excess water. Finely chop the scallions or garlic chives.
  • Combine all the filling ingredients in a large bowl. Mix well by hand. Stir in one direction to filling feels a littlle sticky.
  • Place one heaping teaspoonful to a tablespoon of the filling on a wrapper. Wet the edges of the wrapper with water or egg wash and seal tightly, push the air out with your fingers. shape into a half-moon shape. Then, bring the two ends together, apply water or egg wash to one end and press tightly to create a round shape. Repeat this process until all the filling/wrappers are used.
  • Kimchi mandu can be steamed for about 10 minutes in a steamer (12 minutes if frozen). Make sure to line the steamer with parchment paper or cabbage leaves to prevent mandu from sticking. You can also boil the mandu. Place dumplings in boiling water, bring it back to boil, adjust heat so it keeps a nice boil. When the dumplings float to the surface they are almost ready, boil another 30 seconds and remove from pot.
  • Note, you can cook a tablespoon of filling by boiling or frying to taste for seasonings.

Notes

Tips for freezing: Freeze the dumplings on a tray with the pieces not touching for about an hour, and then store them in a freezer bag.
Galbitang-Korean Rib Soup-Finding Comfort In Souper Ways

Galbitang-Korean Rib Soup-Finding Comfort In Souper Ways

The fires in California have cast an apocalyptic haze to our skyline.  We actually hit the water for an early morning row, but coming off the water we noticed we were the only ones left at the reservoir.  The pic confirmed, maybe rowing this morning wasn’t such a good idea. Bad for the body, but good for the mind and soul.  My trade-off.

That being my biggest problem means I consider myself pretty fortunate during these unprecedented times.  I try to do the little things, we order take-out from hole-in-the-walls. I buy from independent bookstores (for cookbooks, check out this post), talk to people, stay informed, advocate, and DONATE both time and money.

Another gut-punch

I started writing this post awhile ago already in a somber mood, not knowing that we would suffer more bad news, RBG had passed away.  Inspirational, amazing, tenacious, persistent, brilliant, a fighter to the end.  In this year of turmoil and devastating loss, we have yet more to endure.  Icons and role models we have lost, John Lewis, Chadwick Boseman, and now Ruth Bader Ginsburg.  Dedicated to their chosen paths, dignified, courageous, filled with conviction, compassion, and honor.  Fighters…for all of us.  I am devastated.  All I can do is keep up the fight in whatever small way I can.

In times like these, I find myself longing for comfort food (making a ton lately).  Tonics to heal the heart.  Foods that nourish and renew the soul.  Dishes that say “hey, it’s okay, it’ll be better tomorrow”.

I decided to make a traditional Korean beef rib soup, Galbitang.  Similar to some of my father’s soups, they usually require love and time.  Lucky for me, I found a recipe for Galbitang from Korean Bapsang (a favorite site) made in an Instant Pot.  Yay, delicious, comforting soup in a fraction of the time.

The star of this soup is the short rib of course 

I used a combination of short rib and beef chuck, yummy.  But really, the supporting cast is just as important-onion, ginger, garlic, Korean radish, and soup soy sauce that add layers of flavor.

Soup soy sauce is specifically made for soups and stews, lighter in color and saltier than regular soy sauce, it adds umami to the soup.  In a pinch add a little bit of salt and regular soy sauce (which is too dark to use as a straight replacement).  I like Chung Jung One or Sempio for soy sauce.  Korean radish is sweeter and milder than regular radish, it’s delicious and refreshing in the soup.  You can find both at any Korean market. or online for the soy sauce. I am a food gadget and product junkie…if you live near me and want to try the soup soy sauce-call me. I’ve got lots.

The first, quick run through the pressure cooker is to remove the “scuzz” from the meat, you know impurities and gunk, so you have a nice clear broth. But keep the liquid from that initial go-around. It can be strained and used as your cooking stock-flavor bump starter.  Then just dump everything in your Instant Pot, except the radish, set it for 35 minutes and sit back and relax.  A ten-minute natural pressure release and you are ready for the last step.  Use the saute function, add the cut radish to the soup and cook for approximately 10 minutes or until the radish looks translucent.  Dunzo.  Skim any oil off the top, garnish with green onions and serve immediately.  Serve with rice or with nangmyeon (noodles). It will make you feel all warm and happy.

Instant Pot Galbitang (Beef Short Rib Soup)

Equipment

  • 6 qt pressure cooker

Ingredients

  • 3 to 4 pounds short ribs
  • 1 medium onion cut into halves
  • 2 large scallions white parts
  • 8 plump garlic cloves or 1 whole bulb If using bulb, cut into halves crosswise
  • 3 thin ginger slices 1-inch rounds
  • 2 Tablespoons soup soy sauce
  • salt and pepper
  • 1 pound Korean radish cut into bite size pieces about 1.5-inch square, 1/3-inch thick
  • 3 ounces starch noodles nangmyeon soaked in warm water for 30 minutes - optional
  • 2 scallions finely chopped garnish

Instructions

  • Trim off any thick layer of surface fat. In the pot, rinse the ribs with cold water a couple of times to remove impurities. Drain, and fill the pot with enough water to cover the ribs.
  • Close the lid tightly. Press the “Manual” function and High Pressure, and using the “-” button, adjust the time to 2 minutes. Make sure the pressure switch is turned to “sealing”. When finished, carefully release the pressure.
  • Pour cooking liquid through a fine strainer and reserve. Thoroughly rinse the ribs and clean the pot.
  • Return the ribs to the pot, and add the onion, garlic, ginger and soup soy sauce. Add reserved cooking liquid and enough water to bring it to 10 cups, making sure the water level stays below the max line for the pot. Close the lid tightly. Pressure cook the ribs for 35 to 40 minutes, depending on how big the pieces of meat are. NPR 10 minutes.
  • Open pot and remove meat and aromatic vegetables with a strainer. Skim off the fat.
  • Put the ribs back in the pot along with the cut radish. Change the Instant Post setting to “Saute-normal”, and boil until the radish turns translucent, about 10 minutes-15 minutes. Add the optional noodles a couple of minutes before turning the Instant Pot off.
  • Salt and pepper to taste. Remove any remaining fat by skimming surface or chill the soup and discard solidified fat and reheat gently. Garnish with chopped scallions and serve. Typical, my kids love putting their rice in the soup. Ono!

Notes

You can use chuck roast cut in chunks for 1/3-1/2 of meat but do keep at least half of the bone-in ribs in the soup.  
The radish can be either scrubbed or peeled, I prefer peeled. Korean radish is delicious, sweeter, milder without that bite radishes can have.


What a Difference a Week Makes

The wind shifted and the weather got better.  I know the fires rage on as does the pandemic and our political travails, but this day was a good day to row.  We all need a little respite from time to time.  I am rejuvenated..back to text banking, phone banking, and stress relief baking.

Thin Crispy Chocolate Chip Cookies, In Search of Grandma’s Cookie

Thin Crispy Chocolate Chip Cookies, In Search of Grandma’s Cookie

My grandmother, who we called Pau Pau, was the classic iron fist in the velvet glove.  She was outspoken and strong-willed, bossy, pragmatic, the protector of her family.  

Not gonna lie. She was kind of scary.  I see where my mom gets her strength, her willfulness, and her disciplinarian streak.  When my brother and I got in trouble, it was mom we answered to, not dad, Mr. Marshmallow.  

This isn’t surprising about my grandmother. After all, you have to pretty tough to be a new bride, leave your family, get on a boat (pregnant), and travel thousands of miles to a place where you don’t speak the language and nobody knows your name.

She Was a Bad Ass

My mom next to Pau Pau and Auntie Jessie on Granpa’s lap, four more kids followed.

It was a tough life, six kids, my grandfather working different jobs-farmer, grocery store clerk, restaurant worker, and moonshine maker.  Ultimately, they settled in Chinatown and Pau Pau ran a sewing factory, all the kids pitched in and worked the factory.  She employed other Chinese women struggling to make ends meet and care for their families.  Her six kids grew up to serve in the military, become business owners, a chemist at Stanford, an elementary school teacher, and the first Chinese woman real estate broker in the City. 

Ours is the story of the immigrant dream of America

Growing up we spent a lot of time at my grandmother’s house in Chinatown. We usually migrated to the dining room while she cooked up a storm in the kitchen.  In one corner of the dining room was a memorial to my grandfather complete with his picture, incense, banners to ward off spirits, and dishes of food. Food is such an integral part of life, like so many Asian parents, feeding us was her way of showing that she cared for and loved us.  She cooked mainly Chinese food.  Two exceptions, both sweets, were fruitcake (amazingly good, no one used her fruitcake for a doorstop) and Chocolate Chip Cookies.

Pau Pau’s Chocolate Chip Cookies were thin, crispy, and buttery.  I could eat a zillion of them, I’m sure I tried.  She always kept a tin of cookies on her dining table to tempt everyone that visited. 

I remember watching her make cookies.  She flattened each ball of dough and carefully placed 3 chocolate chips on each cookie then finished with a sprinkle finely chopped walnuts. When I asked her for the recipe she rummaged through her cabinet, pulled out a package of Nestle’s Semi-Sweet Chocolate Morsels, and tossed it to me.  I was incredulous, no way were her cookies the same as the Nestle’s Toll House Cookies.  Years later I asked my Aunt if she had Pau Pau’s recipe, nope, but she did recall Grandma would melt chicken fat if she didn’t have enough butter.  

So armed with bits and pieces of info, I set out to replicate those darn cookies.  I found a recipe on Serious Eats by Stella Parks for “Thin, Crispy CCC, just like Tate’s (never had em).  They were buttery, caramelized, sweet, but only the very edges were crispy while the center was a bit chewy.  Not the cookies of my childhood.  Disappointed I threw the cookies in a Tupperware and left them on the table.

My kids inhaled them.  In fact, my nieces, my moms’ coffee group (which met practicing COVID guidelines) loved these cookies.  It’s all about expectations.  I wanted crisp, buttery, light, and just a couple of chips just like Grandma’s.  

But if I didn’t compare these to the cookies of my childhood, they’re really darn good.  The best analogy, thanks to my kid is as follows.  It’s like you’re going crazy looking for your lost keys…and you find your lost wallet.  Yay!  But damn it, you still haven’t found your keys.  

Here are my notes and the recipe for Stella Park’s Thin, Crispy, Chewy Chocolate Chip Cookies.  Make them soon. 

The recipe calls for a moderate protein flour like Gold Medal AP Flour.  Do not use King Arthur or Bob’s Red Mill both of which have a higher protein content.  It will throw off the texture and the spread.  Stella’s recipes are tested with Gold Medal, readily available, and easy to find, that is unless there is a pandemic.  I tried these with White Lily, a low protein Southern flour.  The cookies were soft and barely held their shape.  My kids liked them (lifetime members of the ooey-gooey cookie club), I thought they were too soft.  I used GM for the second batch, the extra protein provided needed structure and crispness, a winner.

Make the dough in a food processor which Stella says is key. Place dry ingredients into the processor and whirl to combine.

Pulse butter into the dry mix until crumbly, add chips, and process 1-2 short pulses.  Pour the dough into a bowl and add egg and vanilla, knead until it comes together. Put the soft dough in the fridge to firm it up so it is easier to scoop.  With a tablespoon scoop, I measured out over 60 cookies, more than the expected yield.  The cookies took 10-11 minutes to bake to a deep rich caramel brown.

The search continues for Grandma’s cookies but I will gladly make another batch of these.

Thin Crispy Chocolate Chip Cookies

Stella Parks version of Tate's thin Crispy Chocolate Chip Cookies. Crispy, buttery studded with chips, delicious and easy to make!
Course cookies
Cuisine American
Keyword chocolate chip cookies, Crispy, stella parks, tates, thin
Prep Time 15 minutes
Cook Time 12 minutes

Ingredients

  • 8 ounces med protein all-purpose flour such as Gold Medal blue label or Whole Foods 365 blue label (about 1 3/4 cup, spooned; 225g)
  • 8 ounces light brown sugar not dark brown (about 1 cup, firmly packed; 225g)
  • 3 1/2 ounces raw cane sugar not white (about 1/2 cup; 100g)
  • 2 teaspoons Diamond Crystal kosher salt; 8g or table salt, use about half as much by volume or the same weight
  • 1 1/2 teaspoons 8g baking soda 8g
  • 8 ounces cold unsalted butter, cut into 1-inch chunks (about 16 tablespoons; 225g)
  • 8 ounces assorted chocolate chips preferably no darker than 70%, see note (about 1 1/3 cups; 225g)
  • 1 large egg straight from the fridge, well beaten (1 3/4 ounces; 50g)
  • 1/2 ounce vanilla extract about 1 tablespoon; 15g

Instructions

  • Adjust oven rack to middle position and preheat oven to 350°F (180°C). In the bowl of a food processor, combine flour, light brown sugar, raw cane sugar, salt, and baking soda. Process until well-combined; add cold butter and pulse to form a dry and powdery mix; comparable results cannot be produced by hand or with a stand mixer. Add chocolate chips and pulse once or twice to combine.* Chill to make it easier to handle dough.
  • Transfer the cookie "mix" to a large bowl; add egg and vanilla, stir well; the mixture will seem alarmingly crumbly and dry at this stage. Once the wet ingredients have been absorbed, knead mixture by hand until it comes together like classic soft dough.
  • Divide into about 56 portions with a 1-tablespoon scoop. If you like, these can be transferred to a zipper-lock bag and refrigerated for up to 1 week or frozen for up to 3 months; soften to about 68°F (20°C) before baking.
  • Arrange portions on a parchment-lined half-sheet pan (do not use a silicone mat), leaving about 2 or 3 inches between cookies to account for spread. Bake until thin and golden brown, with an even color from edge to center, about 16 minutes (check earlier). I used a tablespoon scoop, yield over 60 cookies that took 10-11 minutes to bake.
  • Cool cookies directly on the baking sheet until room temperature. Transfer to an airtight container and continue cooling an hour more; the cookies will not be fully crisped until then. At cool room temperature, the cookies will keep at least six weeks in an airtight container.

Notes

*The mixture can be refrigerated up to one week in an airtight container or used immediately in the next step.

Protest In The Time of Upheaval

Protest In The Time of Upheaval

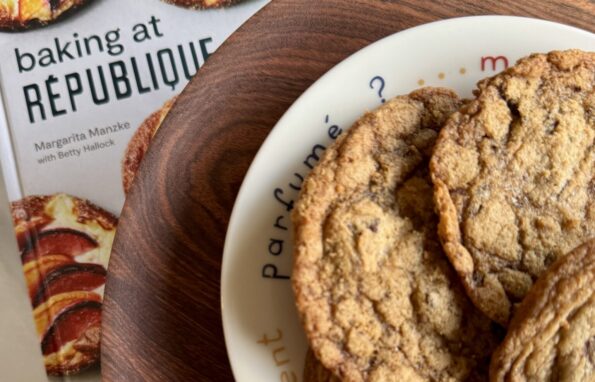
Time at home has led to much more cooking, baking, and eating than usual.  Sadly, my expanding hips and waistline are definitive proof.  The term freshman-15 has morphed into the quarantine-15 at this stage of my life.   But, cooking and baking are comforting, an escape from the outside world.

And I have the Luxury of Being able to Escape to this Sanctuary

As I sit here penning this post I can’t help but feel guilty that I am privileged and secure enough to do this.  During the pandemic, I am one of the lucky ones that can weather staying home.  But the events of the past few weeks, (I had promised no politics On my little blog, yeah, NO…) go beyond politics and call into question our compassion, empathy, and decency towards each other.  This compelled me to venture out of my stay-at-home cocoon to voice my dissent over the actions of our government and institutions.

Our Country at a Breaking Point

The pandemic, the police & military action against Americans, the protests, a president not capable of empathy or compassion.  One that fuels the fire of division and has put us all on edge.  Shelter in place due to COVID-19 has isolated us from friends and family, our community, and exacerbated our anxiety.  This past week has been unnerving, events that I view as an attack on Americans by Americans.  How can this possibly be happening?  This has gone beyond a political divide, it is a fight for the soul of our country.

Jamie and I went to the protest rally in San Jose the other day.  A far cry from any Women’s March or Science March we have attended, this one was predominantly made up of younger folks and POC,  and a whole lot of police.

The police presence was intimidating. Dressed in full riot gear, they looked ready for a military invasion.   For the most part, the protest was peaceful, at one point some rubber bullets were fired at the crowd in response to a tossed water bottle.  I kept social distancing in mind, (after all, I am in a different demographic than most who attended) and left well before curfew.  I applaud the grassroots engagement but the overwhelming police presence was more than concerning.  The police formed a barricade with vehicles on both ends of the boulevard and, as you can see formed a single line of police in riot gear that stretched for well over a block.  They ignored chants of “Take a knee”.  I can’t help but agree that police reform is needed.  A good site for information and action for police reform is Campaign Zero, I hope you will check it out.

These kids are witnesses to the injustice happening around them and to them.  If you are not registered, please register to vote.  As you raise your voice at these rallies, remember, your vote is your voice and that will effect change.  Vote to save your future and democracy.  Vote to change the trajectory of this country.

Hope

Feeling down I retreated home.  We decided to go to a protest march planned by our local high school students the following day. I arrived a few minutes before to a crowd of hundreds.  Students, young parents with kids in strollers, old parents (like me) sporting our POD Save America or Tie-Dye Back in the Day shirts, most wearing masks, came out in full force to demonstrate in support of Black Lives Matter and police reform.

This

We walked to the grassy knoll in front of our town library, over a thousand strong. The police blocked off traffic and gave the community space for peaceful protest.  The change will hopefully follow when awareness, empathy, and moral outrage erupt across social, ethnic, and economic lines.

Now let’s continue the protest by voting for change in November.  We owe it to our kids.

Ties That Bind and Give Us Comfort

So, back to my little blog.  I hope you don’t think it is disingenuous of me to go back to blogging about food, or musing about things that may seem mundane or trivial at the moment.  I will continue to protest and work for a better world outside of this page. But I do want to get back to food-centric posts.  In some small way I view this as activism, food brings people together. It’s hard to spew angry words at someone when breaking bread together or sharing family recipes.  We share stories about food that provide insight into who we are and how we view the world.

There are those in the public eye who have managed to combine food with a glimpse into people’s lives from all corners of the globe.  Anthony Bourdain comes to mind first with Parts Unknown, if you have Netflix you can view all episodes (June 1). Roy Choi’s Broken Bread produced by KCET can be found on Hulu which combines social activism and food (I love this series).  David Chang of Momofuku touches upon issues in his podcast The Dave Chang Show. Check out this list of food policy podcasts that explore food in terms of public policy, the environment, and climate change, Food Policy Podcasts to listen to.

Thanks for reading.

Knot Your Average Bunz (Sweet Chocolate and Cinnamon Knots)

Knot Your Average Bunz (Sweet Chocolate and Cinnamon Knots)

Hello my fellow social distancers

It is I again, your resident baking aficionado (J A M I E). I hope you all are staying away from other humans. Queue the joke about how that’s how I normally live my life!!!! The other day (or whenever my mother decides to post the recipe) I wrote a post about no-knead bread that is AMAZING (if you have tried it please post a pic on IG-you might win a prize!)

Today, I am here to write a piece about kneaded bread.

In times of great stress, I turn to TV and baking. I had a particularly tough week at work a few months back, and I showed up on Friday with two pies in hand. One of the most calming shows I watch is Great British Bake Off. Honestly, if you are reading this blog, you don’t need an introduction. Anyways, after a  l o n g week of WFH and meetings, I decided to combine my two stress relievers and try a recipe from one of the GBB contestants. I chose Steven’s sweet chocolate and cinnamon knots because

1) Steven is great

2) They looked amazing

3) Who doesn’t like cinnamon and chocolate?

4) Here is the link to Steven’s post, he is British.  Lucky for you I’ve watched a lot of GBB so I can help with the Queen’s English, lol. Steven’s Sweet Chocolate and Cinnamon Knots

Here are some of my thoughts below:

W O W. This bread is beautiful. I think it might be the prettiest thing I’ve baked. AND the best part—it also tastes DELICIOUS. Definitely worth the trip or TWO (thnx Whole Foods for turning me away) grocery stores at 7 am this morning. Side note: Whole Foods is actually doing this cool thing where they only let 60 year-olds and up (where is my mom when I need her, lol) shop from 7 am – 8 am. I think it’s really great, except for the fact that the Whole Foods employee told un-caffeinated, at 7 am me that I looked like I was 16. Rude.

The dough is light and sweet, with just enough texture to it that I don’t feel like I’m eating air. On its own, it’s great. The perfect bread to drizzle with honey. But even better yet, the recipe calls for stuffing chocolate and cinnamon sugar into the center of the dough before you bake it off. After proofing and baking, the chocolate melts into spirals throughout the bread, permeating every bite with a rich flavor. I know, not a great job of describing this—hey, it’s been a long week of WFH—so just trust me on this one.

One thing that was a bit hard for me was getting the proofing time correct. The recipe calls for dividing the dough into 4 equal pieces; each piece is woven separately into its own knot. As you can guess, it takes a bit of time to finagle the dough into place, so the amount of time the first knot was proofed was about 15-20 min longer than the last. If you are going to try these, I might suggest baking the knots in 2 batches, so you can optimize the proof for each bun. (Lol, can you tell that I’ve been writing too many work emails? “I might suggest…” Just do it, people.

Another difficult thing about these bunz was—you guessed it—the weave pattern. When I first looked at this recipe, I was a bit intimidated by the intricate pattern of the dough.

Don’t be discouraged, trust me.

While the recipe’s instructions are clear as mud, there are a lot of resources online that are helpful. Just google Winston knots, and you will find a lot of sites that show you a step by step process for braiding dough. The difficult thing about this was getting enough chocolate and cinnamon sugar in the buns. After weaving the dough together, you flip over the bun and place your filling in the center. Then use the ends of the strands to seal the filling into the bun, making sure to pinch any holes in the dough that might allow the filling to leak out during the bake. When I was stuffing my dough, I was worried about disrupting/flattening the pattern on the top, so I went pretty conservative with the chocolate. WRONG.

Stuff that bad boi UP.

Proofing the dough the second time will unflatten the buns.
Ok, this post is now way too long. Make this bread, you’ve got the time.

For your viewing pleasure and to help with the process, PICS and a video I found on YouTube that is PRICELESS

The Jamie Way of tying Knots Bunz

Knead dough for 7-10 minutes until smooth and elastic. Place it in a bowl and cover it with saran. Set for 1 hour (double in size) then punch it down and turn it out onto a floured board.

Divide dough into 4 equal pieces. Cover three pieces, take the remaining piece and divide it into 6 equal pieces. Roll each piece into strands approximately 12.5 inches long. They should be equal in size.  To shape the knots: Place 3 strands of dough in a line on the worktop in front of you, at a minus 45-degree angle and fairly close together. Gently pinch the 3 together in the middle. Now place the other 3 strands on top at a 45-degree angle – to form an ‘X’ shape – and pinch together in the middle as before.

Fold the 3 strands at the top left down over the center point and onto the counter to the far right of the strands already there. Lightly shift the 3 strands at the top right downwards so they sit alongside the other strands.

Fold the 3 strands at the top left down over the center point and onto the counter, to the far right of the strands already there. Gently shift the 3 strands at the top right downwards so they sit alongside the other strands.

Pass the set on the far left under the 2 middle ones then back over the last one it went under and into line again. Then take the far-right set and put it under the twisted 2 in the middle then back over the last one it went under and into line.

The last photo, flip knot over and place on the counter. Scatter a quarter of the chocolate chunks down the center of the knot. Mix the sugar with the cinnamon and sprinkle a quarter on top of the chocolate. Bring the long ends of the strands up and over the filling and pinch them together, then gently fold in the sides (try to keep the knot as neat as possible) and pinch the dough together to seal in the filling. Turn it over again, right side up, and gently shape into a neat ball with your hands. Transfer to the lined baking sheet. OMG, okay its super yummy. WORTH trying. REPEAT with the rest of dough.

FINALLY, HERE IS THE RECIPE., You’re welcome

STEVEN’S SWEET CHOCOLATE & CINNAMON KNOTS

These Winston-knot bread rolls are made by braiding together three strands of a soft, sweet enriched dough – filled with dark chocolate and cinnamon sugar.
Course Breads
Cuisine British
Keyword Sweet Chocolate and Cinnamon Knots
Servings 8 servings

Ingredients

For the dough:

  • 500 g strong white bread flour plus extra for dusting (Bread Flour)
  • 5 g fast-action dried yeast from a 7g sachet (Instant)
  • 60 g unsalted butter softened, diced
  • 40 g caster sugar granulated sugar
  • 7 g salt
  • 2 medium eggs at room temperature, beaten
  • About 225ml full-fat milk lukewarm (whole milk)

For the filling:

  • 50 g dark chocolate broken into chunks
  • 4 tsp light muscovado sugar sub light brown sugar
  • 1 tsp ground cinnamon
  • 1 medium egg beaten, for glazing, use any size egg

Instructions

  • Step 1 To make the dough: weigh the flour into a large mixing bowl, or the bowl of a stand mixer, and mix in the yeast with your hand. When thoroughly combined, add the butter and rub into the flour with the tips of your fingers until the mixture resembles fine crumbs. Mix in the sugar and salt then make a well in the centre of the mixture.
  • Step 2 Pour the beaten eggs and 3⁄4 of the lukewarm milk into the well. Using your hands or the dough hook attachment of the mixer on its slowest speed, gradually work the flour into the liquids to make a soft but not sticky dough – slowly adding as much of the remaining milk as needed.
  • Step 3 Knead the dough thoroughly – for 10 minutes by hand on a lightly floured worktop, or for 7 minutes if using the dough hook (on its slowest speed) – until very smooth and elastic. Return the dough to the bowl (if you kneaded by hand) then cover with cling film or a snap-on lid and leave on the worktop to prove for about an hour or until doubled in size.
  • Step 4 Uncover then punch down the risen dough with your knuckles to deflate it. Turn out onto the worktop, very lightly dusted with flour, and knead into a ball. Then weigh the dough and divide into 4 equal portions. Cover 3 portions loosely with cling film and divide the other portion into 6 equal pieces. Using your hands, roll each piece on the worktop into a neat, even sausage 12.5 inches long. Try to use as little extra flour as possible for dusting your hands and the worktop – adding too much extra flour will make the dough tough and dry.
  • Step 5 To shape the Winston knots: arrange 3 sausages of dough in a line on the worktop in front of you – at a minus 45-degree angle and fairly close together. Gently pinch the 3 together in the middle. Now place the other 3 strands on top at a 45-degree angle – to form an ‘X’ shape – and pinch together in the middle as before. Fold the 3 strands at the top left down over the centre point and onto the worktop – to the far right of the strands already there. Gently shuffle the 3 strands at the top right downwards so they sit alongside the other strands.
  • Step 6 Arrange the 4 sets of strands closer together so they are lying side by side and slightly apart, so you can plait them. Pass the set on the far left under the 2 middle ones then back over the last one it went under and into line again. Then take the far-right set and put it under the twisted 2 in the middle then back over the last one it went under and into line.
  • Step 7 Flip the knot over on the worktop. Scatter a quarter of the chocolate chunks down the centre of the knot. Mix the sugar with the cinnamon and sprinkle a quarter on top of the chocolate. Bring the long ends of the plait up and over the filling and pinch them together, then gently fold in the sides (try to keep the plait as neat as possible) and pinch the dough together to seal in the filling. Turn the plait over again, right side up, and gently shape into a neat ball with your hands. Transfer to the lined baking sheet.
  • Step 8 Repeat with the other 3 portions of dough to make 4 neatly plaited round loaves – these knots take a lot of practise and patience to get right! Set them well apart on the baking sheet, slip the sheet inside a large plastic bag and slightly inflate the bag so the plastic doesn’t stick to the dough. Leave on the worktop to prove for about 1 hour, until doubled in size – take care not to over-prove the dough, or let the temperature become too hot, as the breads will lose their shape. Towards the end of the rising time, heat the oven to 425°F
  • Step 9 Uncover the loaves and carefully brush with beaten egg to glaze. Bake in the heated oven for about 20–23 minutes until a good golden brown. Transfer to a wire rack and leave to cool.