Category: Desserts

Fall-in for Apple Cider Donuts

Fall-in for Apple Cider Donuts

Yes, fall is upon us. Amazing how a year can go so quickly and yet feel interminable.  Jamie came home yesterday from work and pronounced “We need to make something sweet today” to which I replied, “Sounds good to me but NO PUMPKIN”.  Pumpkin lattes, desserts, all things pumpkin are popping up everywhere, its way too early if you ask me.  Luckily Jamie did not have pumpkin on the brain either.

Our favorite fall fruit is undoubtedly APPLES.  As the fall season comes into swing, I dust off the peeler and pie pans knowing that any day now Wes will say, “Are there apples at the farmers market yet? Is it PIE time?”  For me, I will invariably think about making apple crisp, homey, delicious and a little easier than making apple pie.

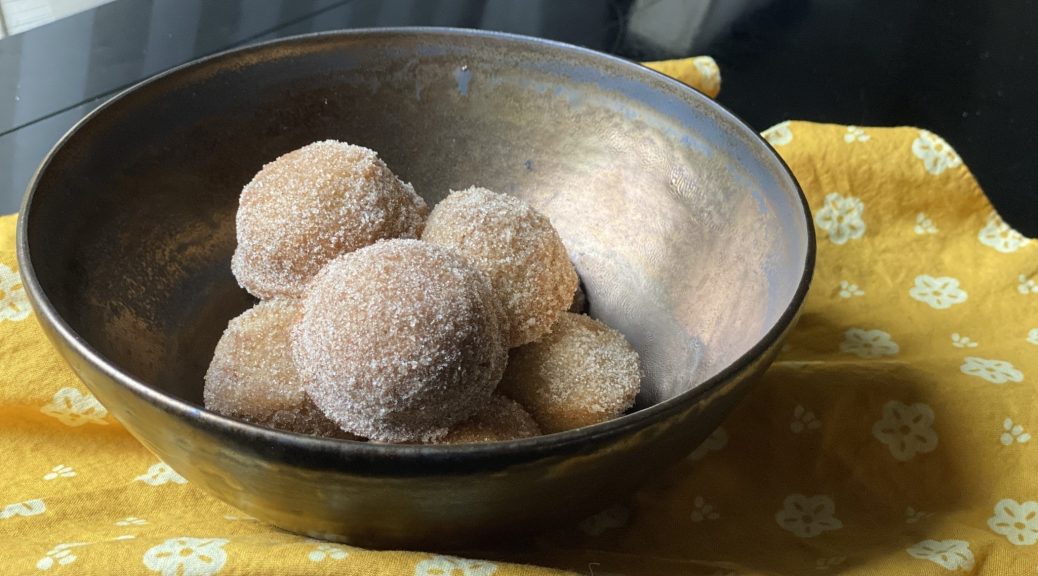
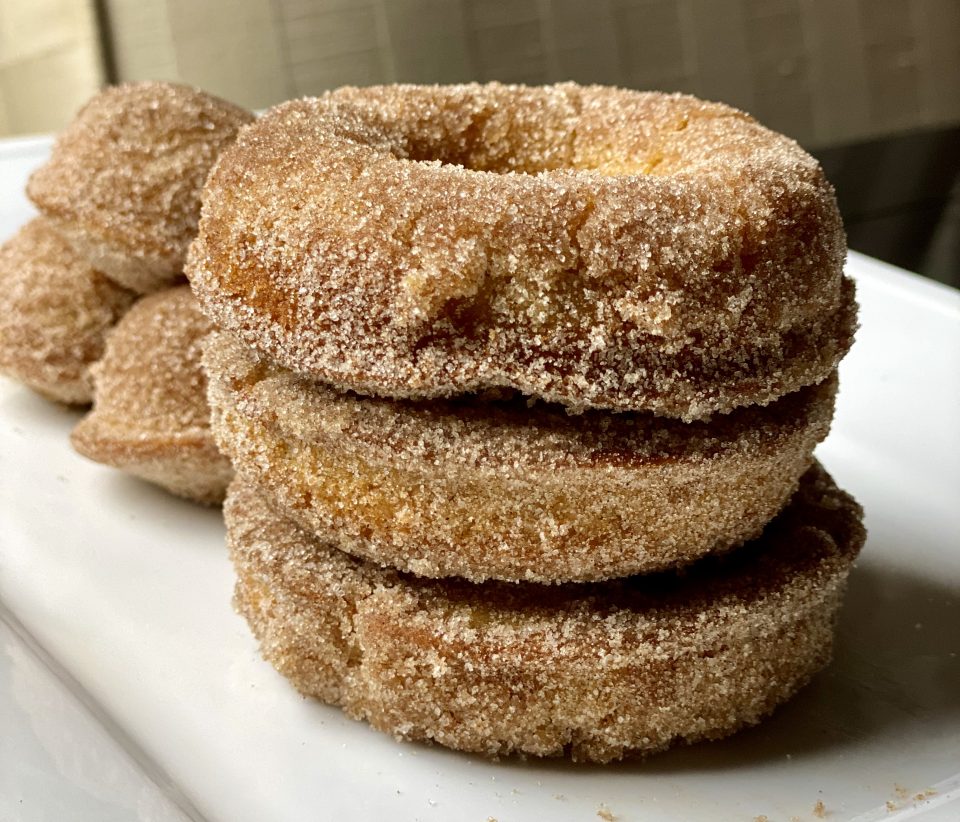
But, none of the usuals made the cut yesterday.  Jamie had spied a recipe on NYTcooking for baked Apple Cider Donuts.  I was all in.  Not a west coast thing, apple cider donuts are a tradition in the northeast and marks the start of the fall harvest season. The donuts are tasty and easy to make providing you have a donut pan (duh, of course, I do), and are a little easier on the waistline than fried donuts.  They are tender, with a nice spiciness from the cinnamon in the batter and cinnamon-sugar topping.  If you aren’t a gadget freak like yours truly, these can be made in muffin tins.  Jamie added diced apples bits to the batter that made them even better, a BOSS tweak.
These are delicious, perfect with a cup of coffee or tea on a brisk autumn day or a warm fall evening, or ANYTIME.

Baked Apple Cider Donuts

Welcome the fall season with these delicious BAKED Apple Cider Donuts!
Course Dessert
Cuisine American
Keyword Baked Apple Cider Donuts
Prep Time 20 minutes
Cook Time 15 minutes
Calories 333kcal

Equipment

  • donut tin or muffin tin, regular or mini

Ingredients

Batter

  • 1 ¾ cup all-purpose flour 225 grams
  • 1 ¼ teaspoon baking powder
  • ¾ teaspoon fine sea salt
  • 1 teaspoon ground cinnamon
  • ½ teaspoon freshly grated nutmeg
  • 10 tbsp unsalted butter 140gm *2 sticks, at room temperature* 10 tablespoons for the batter and 6 tablespoons for the cinnamon sugar coating
  • ¾ cup light brown sugar 165gm
  • 1/4 cup granulated sugar
  • 2 large eggs at room temperature
  • 1 teaspoon vanilla extract
  • ½ cup apple cider 120 ml
  • 1 small apple, cored, peeled and diced 1/4 inch Use any kind you like, Jonagold, Fuji, Golden Delicious for sweeter apple or Pippin for a tart apple

Cinnamon Sugar Coating

  • 6 tbsp unsalted butter melted
  • 1/2 cup granulated sugar
  • 1 tsp cinnamon

Instructions

  • Heat the oven to 350 degrees. Lightly grease 2 6-cavity doughnut pans (or a 12-cup muffin tin) with nonstick spray.
  • In a medium bowl, add the flour, baking powder, salt, cinnamon and nutmeg and whisk to combine. Set aside.
  • In the bowl of a stand mixer fitted with the paddle attachment, cream butter, brown sugar and granulated sugar on medium speed until light and fluffy, 3 to 4 minutes. Add the eggs one at a time and mix until well incorporated after each addition, scraping the bowl as necessary. Beat in the vanilla extract.
  • Add the flour mixture and mix on low speed until incorporated. With the mixer running, add the apple cider in a slow, steady stream and mix to combine. Scrape the bowl well to make sure the batter is homogeneous.
  • Spoon the batter into prepared doughnut pans, filling them about 2/3 of the way full (you can also do this using a disposable piping bag or a resealable plastic bag with a 1/2-inch opening cut from one corner).
  • Bake until evenly golden brown and a toothpick inserted into the center of the thickest portion comes out clean, 12 to 15 minutes. Rotate the pans halfway through baking. (If you are making muffins, divide batter evenly between the prepared cups and bake for 15 to 20 minutes, rotating halfway through.)
  • While the doughnuts bake, whisk the granulated sugar and 1 teaspoon cinnamon together in a small bowl to combine. In a separate small bowl, melt the remaining 6 tablespoons of butter in the microwave.
  • Let the doughnuts cool for 5 minutes after baking, then unmold them from the pans, brush with the melted butter and dredge them in the cinnamon sugar while they are still warm. Serve immediately, or let cool to room temperature.

Notes

If you don't use the apple you can reduce the cider for more apple flavor.  Start with 1-1/2 cups cider and reduce over medium to 1/2 cup.  It will be sweeter so you can reduce the sugar by 20% in recipe.  It's more work, up to you.
Or you can add 1 Tablespoon of Boiled Cider, I use King Arthur Boiled Cider to amp up apple flavor.  To be really picky, substitute this for 1 tablespoon of the apple cider
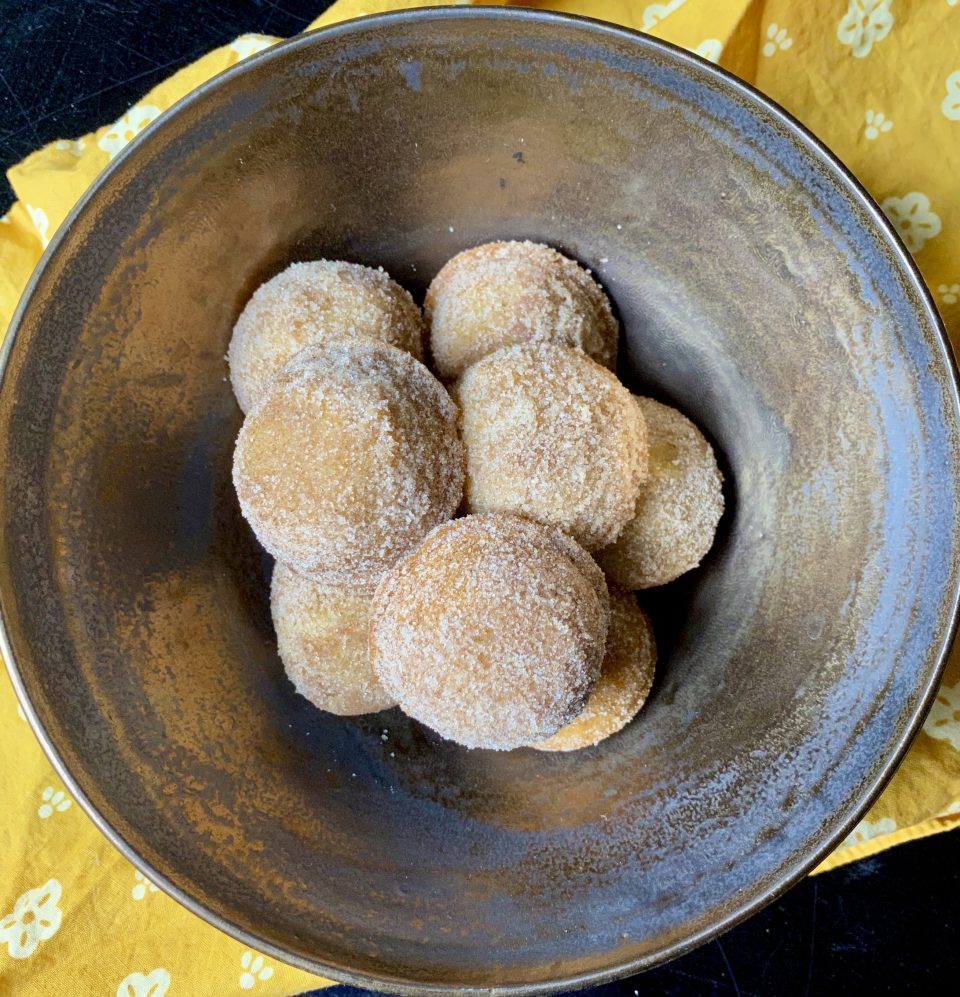
We made mini muffins and donut holes, fill the donut hole pan only half so it creates a round top.  Reduce baking time to 12-15 minutes.
 
Piece of Cake, Chocolate Cake

Piece of Cake, Chocolate Cake

Surprise!  You are going to love this.  Did you click on CAKE-TWO from Vanilla Cake Pan Cake just out of curiosity?  The shameless two for one plug?

The Vanilla Cake Pan Cake is actually a riff on the Original Cake Pan Cake, a chocolate cake. It’s just as easy to make and just as delicious.  During WWII butter and eggs were rationed which led to the fortuitous creation of this moist, chocolatey cake. After all, necessity is the mother of invention, and chocolate cake IS a necessity.

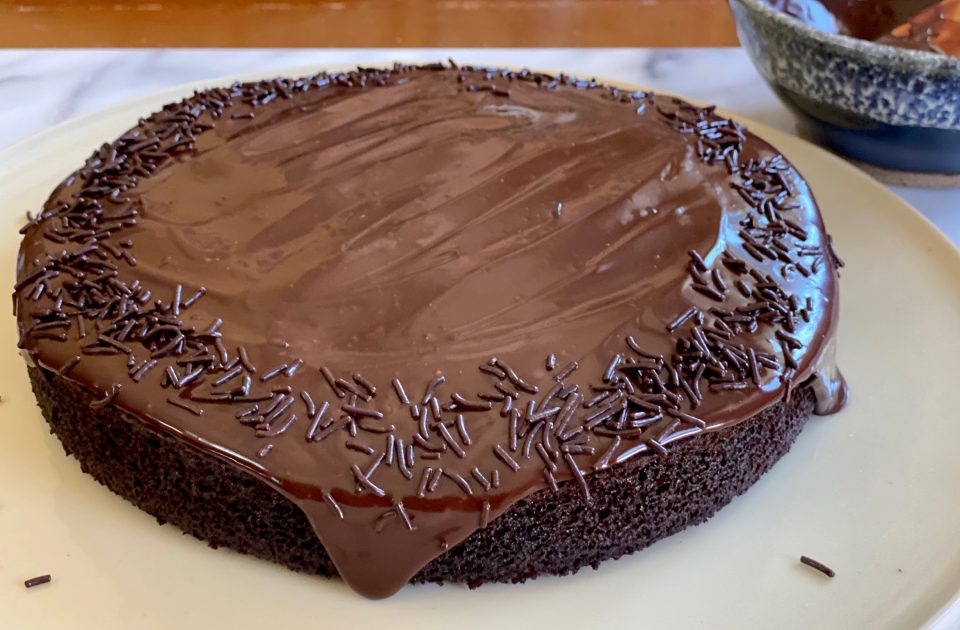
Can you imagine a more quintessential, comforting American dessert than a chocolate cake topped with a luscious chocolate frosting?  Didn’t think so.  AND IT IS SO EASY TO MAKE!!!! Five minutes of prep and then into the oven, that’s it.  Thirty -five minutes later a rich, chocolatey, sweet, scrumptious cake is cooling on the rack.

Going Loco over Cocoa (Primer)

The cake is so easy I thought I’d talk about cocoa powder which is the foundation of this cake. For a deep dive into cocoa, here is the link to King Arthur Flour,  Here is my highlight reel on cocoa:

Cocoa powder is the powder created from dry roasted cocoa beans, grinding them to create a paste (there’s still cocoa butter in the beans). The butter or oil is extracted from the paste leaving solids that are then pulverized into a powder, cocoa powder, ta-da!

The end product is Natural Cocoa Powder which is acidic.  Good examples are Ghiradelli, Scharffenberger, and Hersey’s.

Dutch-processed is a procedure that alkalizes that natural cocoa powder (neutralizes it) so it is no longer acidic. In the process, this mellows out the flavor and makes the powder darker.  Think Oreo Cookies! Since it is no longer acidic, but has a neutral pH.  Right about now you should be having flashbacks to freshman chemistry.

Confused?  You are not alone.  The best rule of thumb, use whatever the recipe calls for, sorry not much help.  Not to worry, let’s keep going…

Recipes without Leavening Agents

Use whatever cocoa powder you like, end of story. So simple.

Recipes with Leavening Agents ie. baking powder or baking soda

If a recipe calls for baking powder and cocoa, chances are you can use Dutch-processed cocoa. This is because you don’t need an acidic medium for baking powder to work. In a pinch,  you could use natural cocoa powder since you don’t need an acid to trigger baking powder.  Flavor and color will be different but your dessert will still rise.

Recipes with only baking soda will need acid to get it going, use natural cocoa. Stay away from Dutch-process cocoa since baking soda needs an acidic medium to work.  BUT, if your recipe also has an acid like buttermilk, citrus, fruit purees, brown sugar, molasses, you might be able to use Dutch-process, all these ingredients are acidic.

You can use Natural Cocoa for Dutch-process because if you need an acidic environment you are covered.  You can’t use neutral Dutch-process for Natural cocoa without an acidifier.

So, you have Grandma’s recipe for brownies or chocolate cake that calls for cocoa powder (unspecified).  Chances are what she had available in her day was Hersey or maybe Ghiradelli.  Use a natural cocoa powder.  If the recipe calls for baking soda, definitely use natural cocoa.

To the Rescue

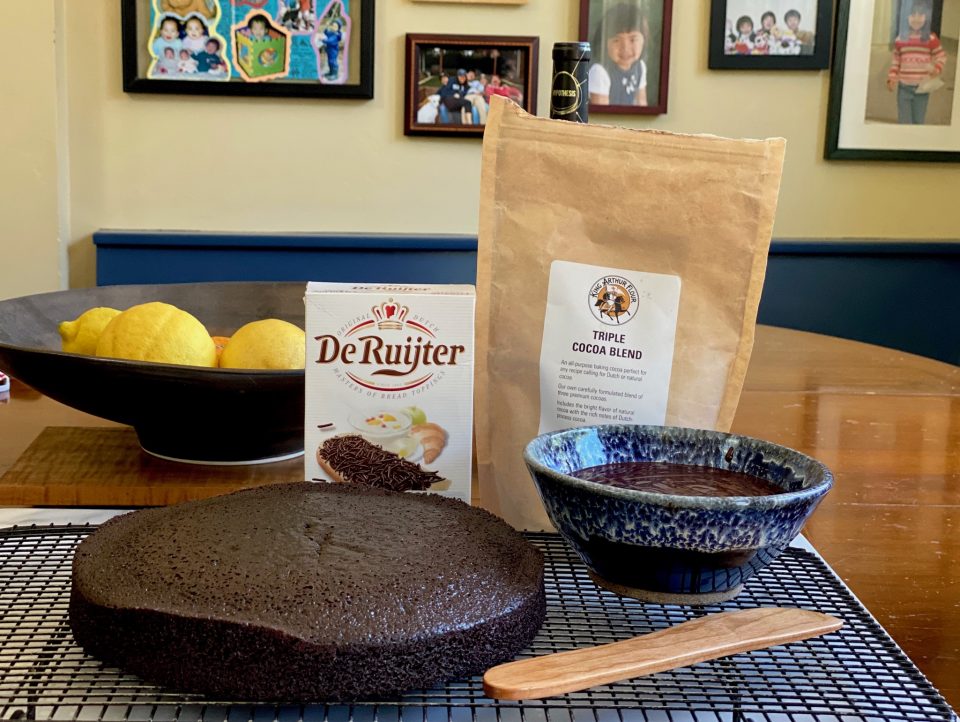
King Arthur flour makes the Triple Cocoa Blend which is natural and Dutch-processed combined.  YEP, doing the happy dance cause I can use this for almost any recipe that calls for cocoa powder.  No thinking involved.

I used it for this cake.  Although it doesn’t matter because the cake also has vinegar, thus creating an acidic environment.  You can use any cocoa you want for this cake. The triple cocoa created a beautiful deep brown, moist, flavorful cake-delish.

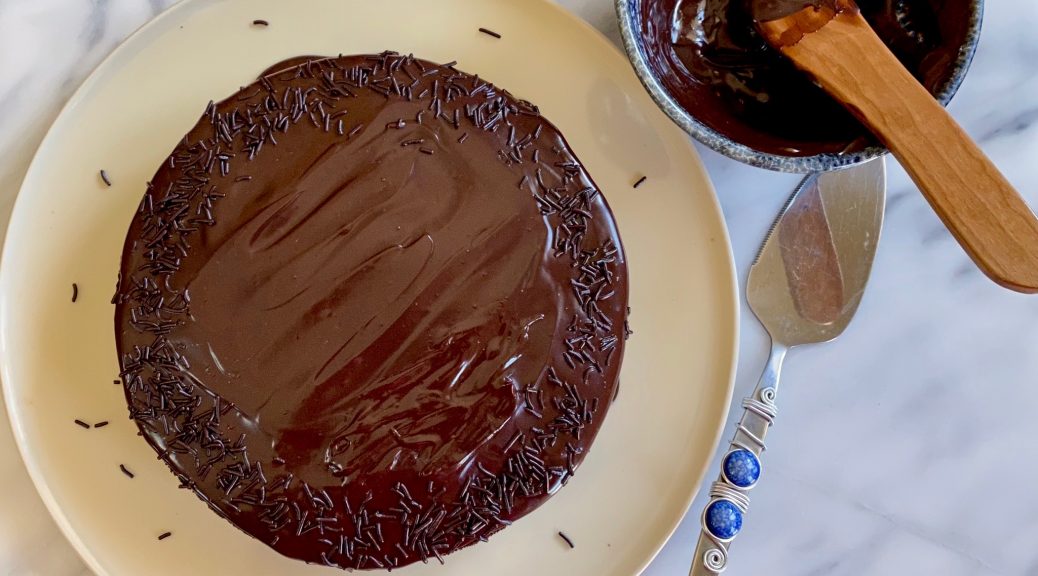
The cake is ridiculously easy.  If you need a quick dessert, add sprinkles or jimmies and you have yourself a very fine celebration cake.

King Arthur's Original Cake Pan Cake

Course Cake
Cuisine American
Keyword chocolate cake, easy recipe, king arthur flour, One pan cake
Prep Time 5 minutes
Cook Time 35 minutes

Ingredients

Cake

  • 1 1/2 cups King Arthur Unbleached All-Purpose Flour 177g
  • 1 cup sugar 198g
  • 1/4 cup unsweetened cocoa, Dutch-process or natural 21g
  • 1/2 teaspoon salt
  • 1/2 teaspoon espresso powder substitute and instant coffee powder
  • 1 teaspoon baking soda
  • 1 teaspoon vanilla extract
  • 1 tablespoon vinegar, cider or white 14g
  • 1/3 cup vegetable oil 67g
  • 1 cup cold water 227g

Icing

  • 1 1/2 cups semisweet chocolate chips 255g
  • 1/2 cup half-and-half 113g

Instructions

  • Preheat your oven to 350°F. Lightly grease an 8" square or 9" round pan that's at least 2" deep.
  • Whisk the dry ingredients together in a medium-sized bowl.
  • Combine the vanilla, vinegar, vegetable oil, and water in a separate bowl.
  • Pour the wet ingredients into the bowl of dry ingredients, stirring until thoroughly combined. Pour the batter into the prepared pan.
  • Bake the cake for 30 to 35 minutes, until a toothpick inserted into the center comes out clean, or with a few moist crumbs clinging to it.
  • Serve the cake right from the pan; warm from the oven, it's wonderful with a big glass of milk. This is a great VEGAN by accident recipe! Dust with powdered sugar and serve with berries.

Chocolate Icing

  • Or, once cool, frost the cake with chocolate frosting:
  • Heat the chocolate chips with the half-and-half until the chips melt. Microwave or doubleboiler. Stir until smooth, and pour/spread over the cake. For a non-dairy icing, substitute 1/3 cup cold-brewed coffee (or water) for the half-and-half.
  • Store cake, well covered, at room temperature for several days; freeze for longer storage.
Vanilla Cake Pan Cake, ABC-Easy as 123, That’s How Easy Cake Can Be

Vanilla Cake Pan Cake, ABC-Easy as 123, That’s How Easy Cake Can Be

This is your lucky day!  This post is a twofer.  That is I will be posting two recipes today! Ok, maybe not so lucky as we are smack dab in the middle of a smokefest alternating with a heatwave and this post is about baking.  Although, the upside is both cakes are INCREDIBLY easy to make so your time in the kitchen will be minimal.  You can wait until it cools down if you are in a hot zone, either way, these should be in your “need a quick homemade dessert right now” file.

But Why a Twofer?

Funny you should ask.  I sat down to write a post on CAKE-TWO, thinking I had already posted this Vanilla Cake Pan Cake recipe.  Nope, not to be found.  It is on my Instagram (shameless plug) but apparently I had yet to wax poetically about that cake on my blog.  My bad.

Both recipes are from King Arthur Flour and are INCREDIBLY EASY TO MAKE.  This is one bowl baking territory.

Without further ado, CAKE-ONE.

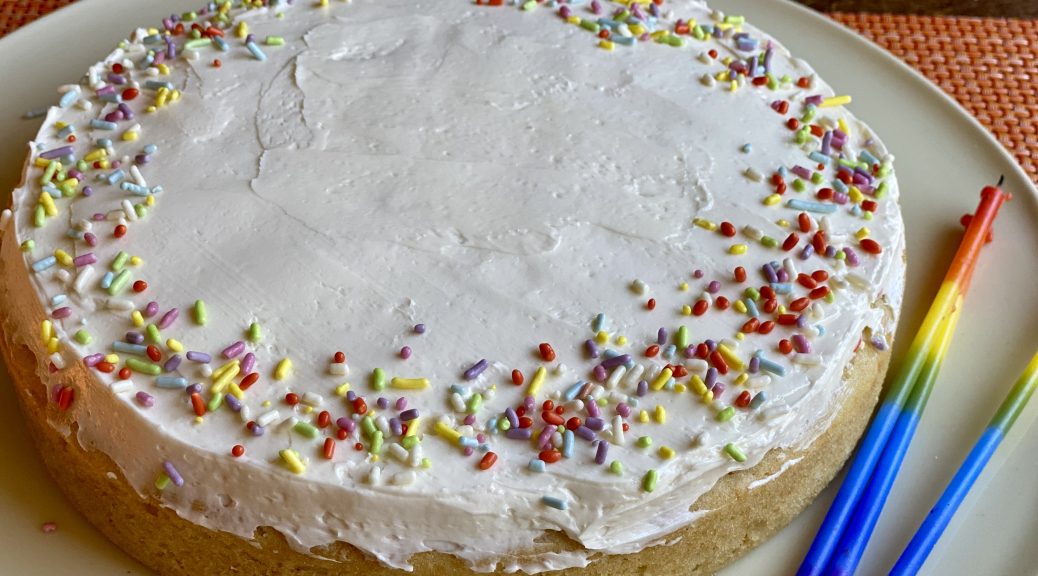
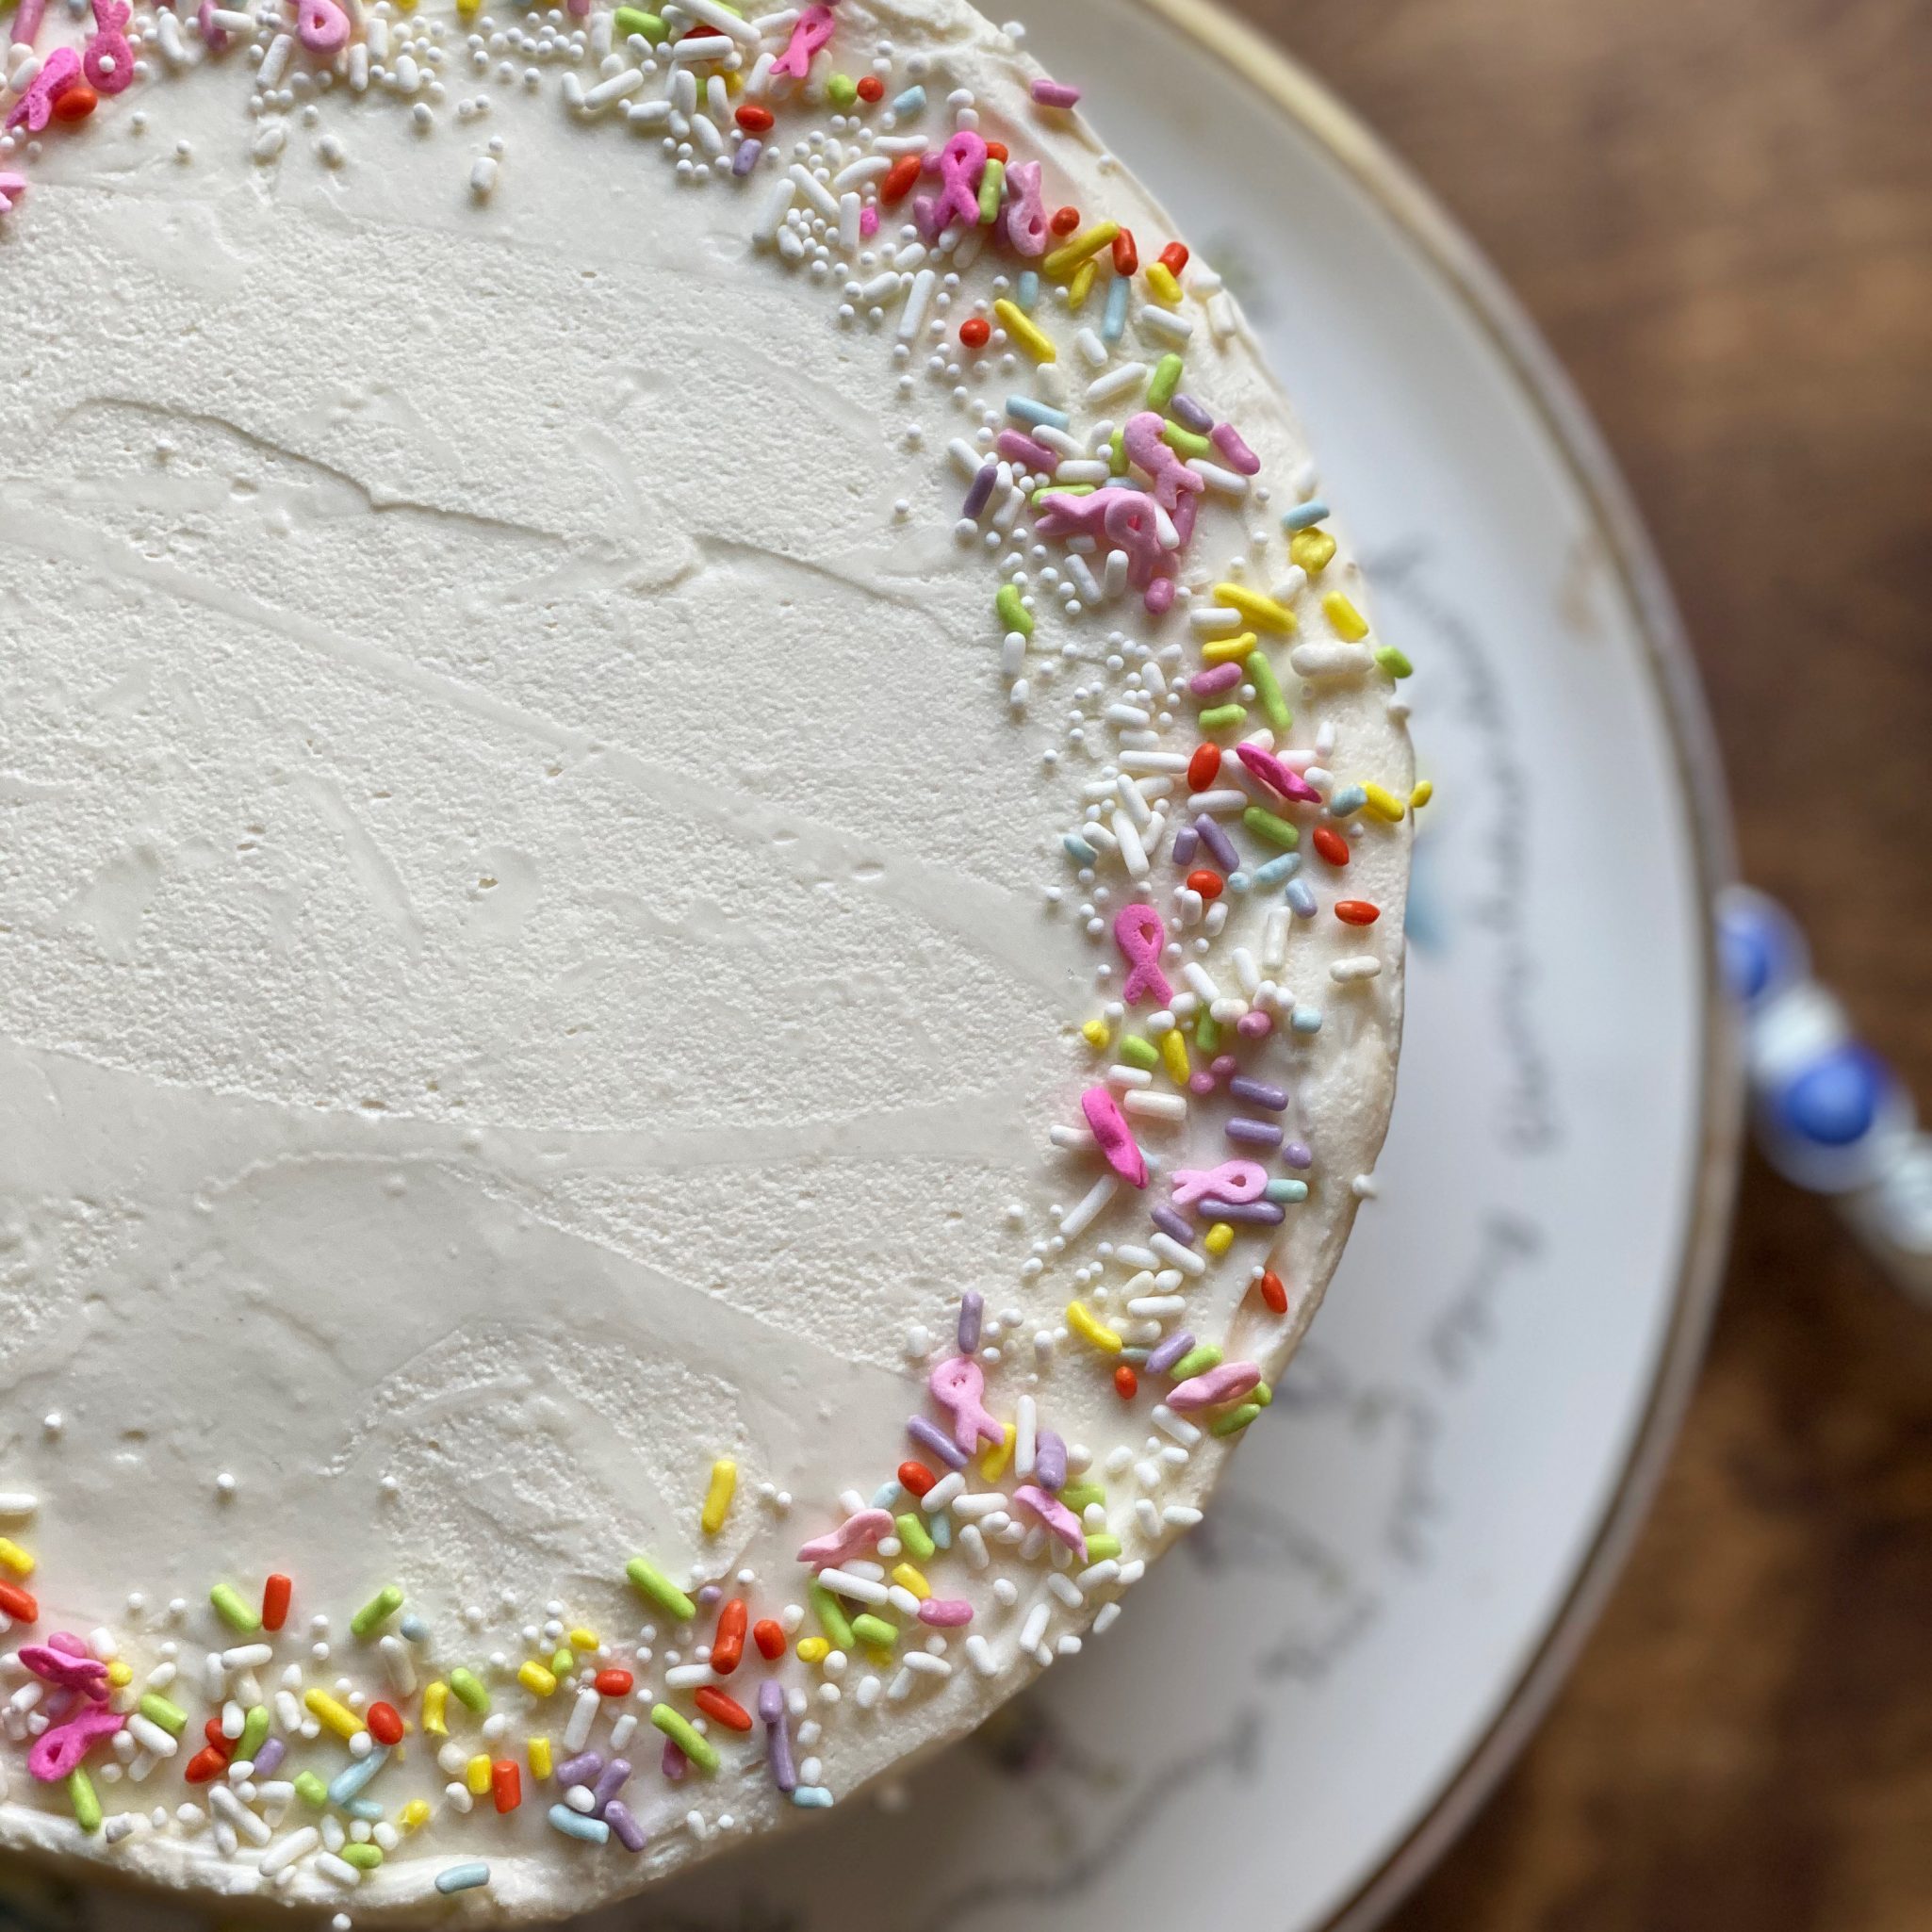
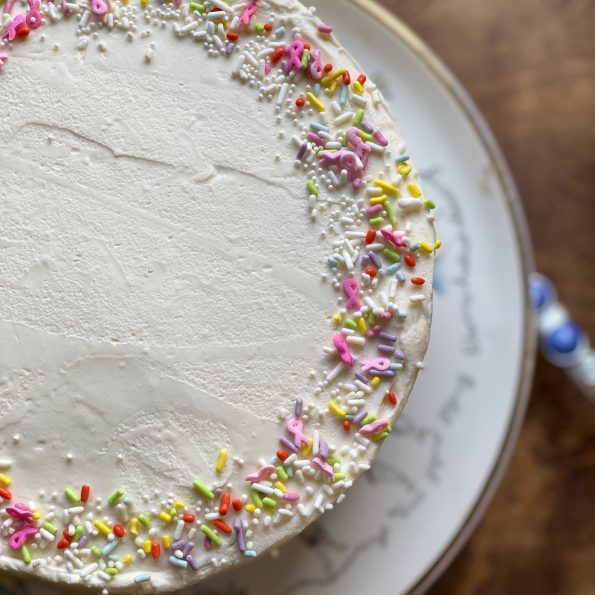
A couple of months back,  at the start of COVID, I needed a simple cake for a virtual birthday celebration for a friend.  Since it was virtual, the fam and I would be eating most of it, so quick, easy, and small were my guidelines.  Vanilla Cake Pan Cake on King Arthur Flour fits the bill.  Get this, no butter and no eggs.  Not gonna lie, I was dubious, no butter, no eggs?  It works!  Oil as the fat, baking soda and baking powder as the leavening agents, and vanilla for flavor.  A nice little tasty cake. The cake itself is vegan, if you use a butter sub for the frosting, the entire cake can be vegan.  This cake falls in the stupid easy category.  The frosting is a classic buttercream.  You could forego the frosting for a generous dusting of powdered sugar and some berries.  But if you need a festive cake, frosting with sprinkles or jimmies is the ticket.

So, need a quick dessert?  Here’s your answer. Now, onto the second post. Heh, heh, heh.  CAKE-TWO

Vanilla Cake Pan Cake

Ingredients

Cake

  • 2 cups King Arthur Unbleached All-Purpose Flour 241g
  • 3/4 teaspoon salt
  • 1 1/2 teaspoons baking powder
  • 1/2 teaspoon baking soda
  • 3/4 cup + 2 tablespoons water 198g
  • 1/2 cup vegetable oil 99g
  • 3/4 cup granulated sugar 149g
  • 4 1/2 teaspoons cider vinegar or white vinegar 21g
  • 1 tablespoon vanilla extract 14g
  • 1/2 teaspoon almond extract

Frosting Ingredients

  • 4 tablespoons butter, regular at room temperature 57g
  • 2 1/2 cups confectioners' sugar, sifted if lumpy 283g
  • 1/8 teaspoon salt
  • 1/2 teaspoon vanilla extract
  • 2 tablespoons water about 28g

Instructions

  • Preheat the oven to 350°F. Lightly grease an 8” square or 9” round pan that’s at least 2” deep.

To make the cake:

  • In a medium-sized bowl, whisk together the flour, salt, baking soda, and baking powder. Set aside.
  • In a separate bowl or large measuring cup, whisk together the water, vegetable oil, sugar, vinegar, vanilla, and almond extract. Add the wet ingredients to the dry and stir to combine. It's OK for a few small lumps to remain. Pour the batter into the prepared pan.
  • Bake the cake for 30 to 35 minutes, until the top feels set, the edges are beginning to pull away from the sides of the pan, and a toothpick inserted into the center comes out clean.
  • Remove the cake from the oven and either serve the cake warm from the oven or allow it to cool completely in the pan before frosting.

Frosting

  • To make the frosting: Beat together the butter, confectioners’ sugar, and salt until no large pieces of butter remain. Add the vanilla and 1 tablespoon of the water, beating to incorporate. Add enough additional water, a teaspoon at a time, to make a spreadable frosting.
  • Leaving the cake right in the pan, if desired, use a spatula or flat knife to apply the frosting.
  • Store the cake, well wrapped, at room temperature for several days. Freeze for longer storage.
Strawberries Fields for…Cake (Strawberry Buttermilk Cake with Lemon Cream)

Strawberries Fields for…Cake (Strawberry Buttermilk Cake with Lemon Cream)

The Life of a Strawberryholic

Since strawberries returned to our local farmers market our Sunday mornings start with a run to the market.  As soon as we arrive home, the first couple of baskets of strawberries go into a colander, given a quick rinse, and placed on the counter for immediate consumption.  The rest of the berries are placed in paper towel-lined containers and enjoyed throughout the week.  Somewhere in the middle of the week, we start thinking of different ways to serve those little red gems.  Luckily, both the internet and cooking mags are filled with recipes that highlight berries.  While thumbing through the latest issue Baking from Scratch, Jamie came across a mouthwatering recipe for a Strawberry Buttermilk Cake with Lemon Cream.  She immediately set upon making it.
Another Strawberry Cake, Deb?  Why?

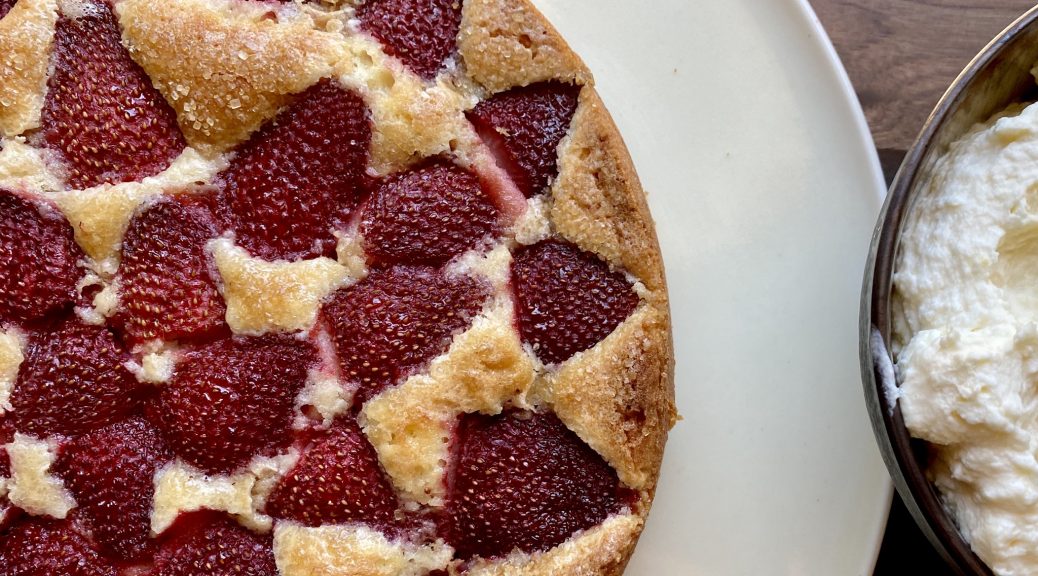
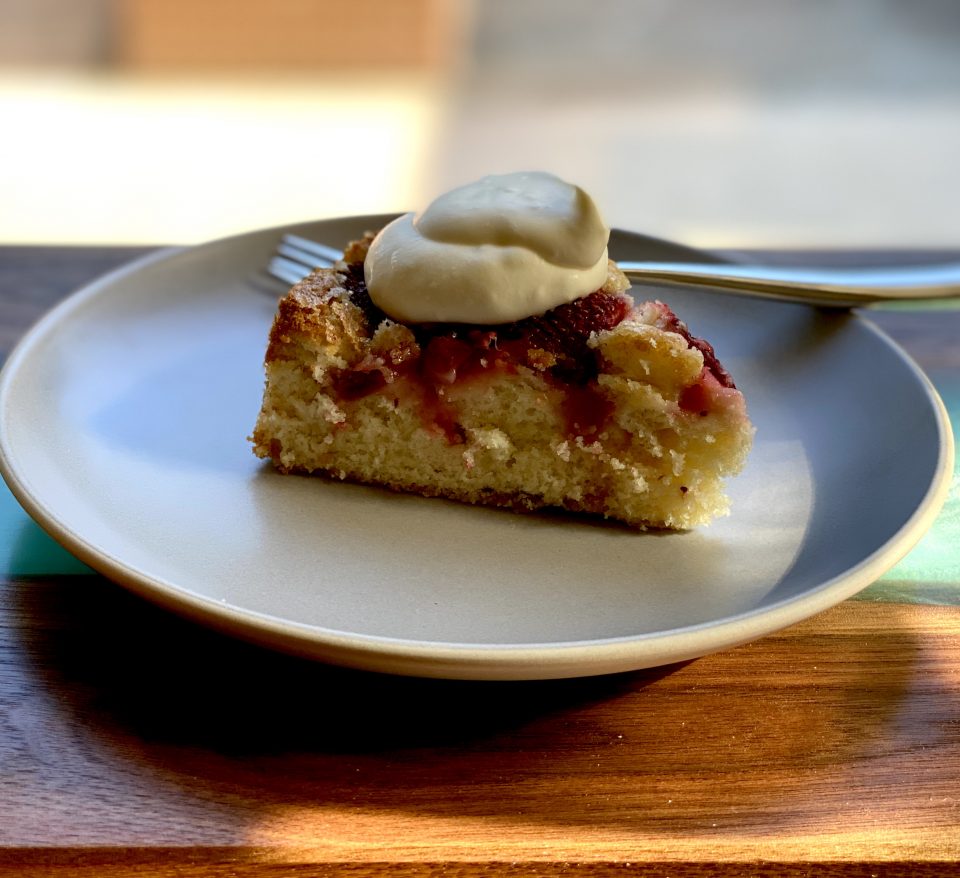
I had previously posted a recipe just for that “save me from all the strawberries I bought” moment, Summer Strawberry Cake from Smitten Kitchen A delish, jam-packed full of strawberries cake. So why another strawberry cake recipe?  This one is easy to make and pretty darn delicious too, but the smile, fist bump the guy next to you moment is the Lemon Cream. Sure, a simple dusting of powdered sugar would be fine, BUT, oh, that Lemon Cream takes it over the top. It is creamy, sweet with a lemony zing, and adds the wow factor.  Do not skip it.

To make the cake batter, cream softened butter with sugar and lemon zest until light and fluffy. Add the dry ingredients mixture alternating with the buttermilk always starting and ending with the dry ingredients.  Jamie baked it in a regular cake pan although the recipe calls for either a cast iron pan or cake pan.  I imagine a cast iron pan would result in crispy edges. I leave it to you to decide what pan to use.

The cake is not quite as dense as a coffee cake and has a nice crumb. The strawberries provide the flavor punch and the sprinkle of Turbinado Sugar adds a nice finishing crunch.

The next time you go to your local farmer’s market, pick up an additional pint or two of strawberries, and make this cake. It’s berry delicious and don’t skip the Lemon Cream!

Print Pin
5 from 1 vote

Strawberry Buttermilk Cake

From Bake from Scratch, a delicious buttery cake topped with strawberries and a killer lemon cream!
Course Cake, Dessert
Cuisine American
Keyword buttermilk, lemon cream, Strawberry
Prep Time 20 minutes
Cook Time 1 hour

Ingredients

Creamed Mixture

  • 6 tablespoons (84 grams) unsalted butter, softened
  • 1 cup (200 grams) granulated sugar
  • 2 large eggs
  • 1 tablespoon lemon zest

Dry Stuff

  • 1⅔ cups (209 grams) all-purpose flour
  • 1 teaspoon (5 grams) baking powder
  • ½ teaspoon (1.5 grams) kosher salt

Finish

  • ½ cup whole buttermilk
  • 1 teaspoon vanilla extract
  • 8 ounce fresh strawberries, halved
  • 2 tablespoons (24 grams) turbinado sugar

Lemon Cream

  • cups heavy whipping cream
  • 2/3 cup (80 grams) confectioners’ sugar
  • 2 teaspoons lemon zest
  • 1 tablespoon fresh lemon juice
  • 1 teaspoon vanilla extract
  • ¼ teaspoon (0.75 gram) kosher salt

Instructions

The Cake

  • Preheat oven to 325°F. Spray a 9-inch cast-iron skillet or cake pan with baking spray with flour.
  • In the bowl of a stand mixer fitted with the paddle attachment, beat butter, granulated sugar, and lemon zest at medium speed until fluffy, 3 to 4 minutes. Add eggs, one at a time, beating well after each addition.
  • In a medium bowl, whisk together flour, baking powder, and salt. Gradually add flour mixture to butter mixture alternately with buttermilk, beginning and ending with flour mixture, beating just until combined after each addition. Beat in vanilla.
  • Pour batter into prepared pan, using an offset spatula to smooth top. Top with strawberries, and sprinkle with turbinado sugar.
  • Bake until golden brown and a wooden pick inserted in center comes out clean, 45 minutes to 1 hour. Serve warm with Lemon Cream.

Lemon Cream

  • In the bowl of a stand mixer fitted with the whisk attachment, beat cream and confectioners’ sugar at medium speed until soft peaks form. Add lemon zest and juice, vanilla, and salt, beating to combine. Makes about 3 cups
A Dish For All Seasons (Bread Pudding)

A Dish For All Seasons (Bread Pudding)

The What

I LOVE bread pudding.  Sweet or savory, made with almost any kind of bread-from bagels to brioche, enveloped in a custard of eggs and milk, the epitome of comfort food.  Each spoonful is a revelation, crispy, crunchy outside and meltingly soft custard-like inside, YUM, it’s so good.

The Why

I’m guessing bread pudding was born out of economics, a way to not waste day-old bread. Who was that frugal genius?  It’s everything a dish should be-comforting, multi-textured, versatile, simple, and most of all amazingly delicious.

The Who

My favorite recipe is a mash-up of a Mark Bittman recipe in The New York Times and one from Bon Appetit, Apple-Raisin Bread Pudding.  That’s the beauty of bread pudding, it lends itself well to additions and changes.  Play with this recipe and make it your own.  I even have a rift for a Tres Leches Bread Pudding, yep, so many variations, so little time.

The How

It’s super versatile, I have used french bread, challah, brioche, or ciabatta.  If I want a richer dish I replace part of the milk with half-half (25-50%) or add 1-2 additional eggs for a more custard-like pudding.  I have added apples in the fall, berries, or peaches in the summer, dried fruit when my fruit basket is empty or folded in homemade preserves …  For you chocoholics, throw in a handful of chocolate chips.  You get the picture, this is a slam dunk.  For Thanksgiving,  a savory bread pudding with mushrooms, peppers, and Parmesan will grace our table, it has become an annual holiday tradition.

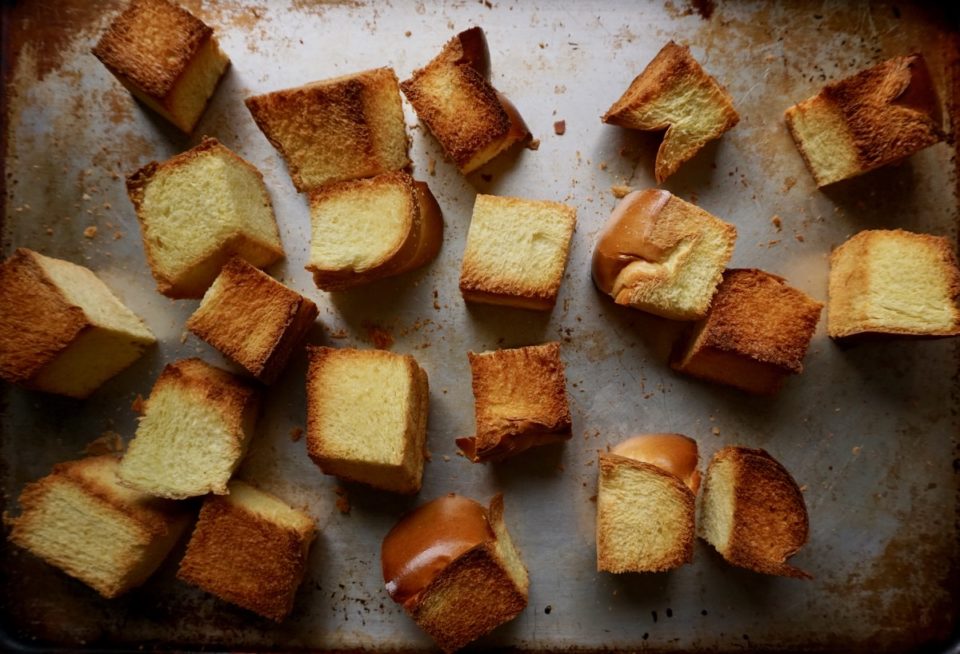
Toast the cubes in the oven at 350 degrees for 7-10 minutes

The Pay-Off

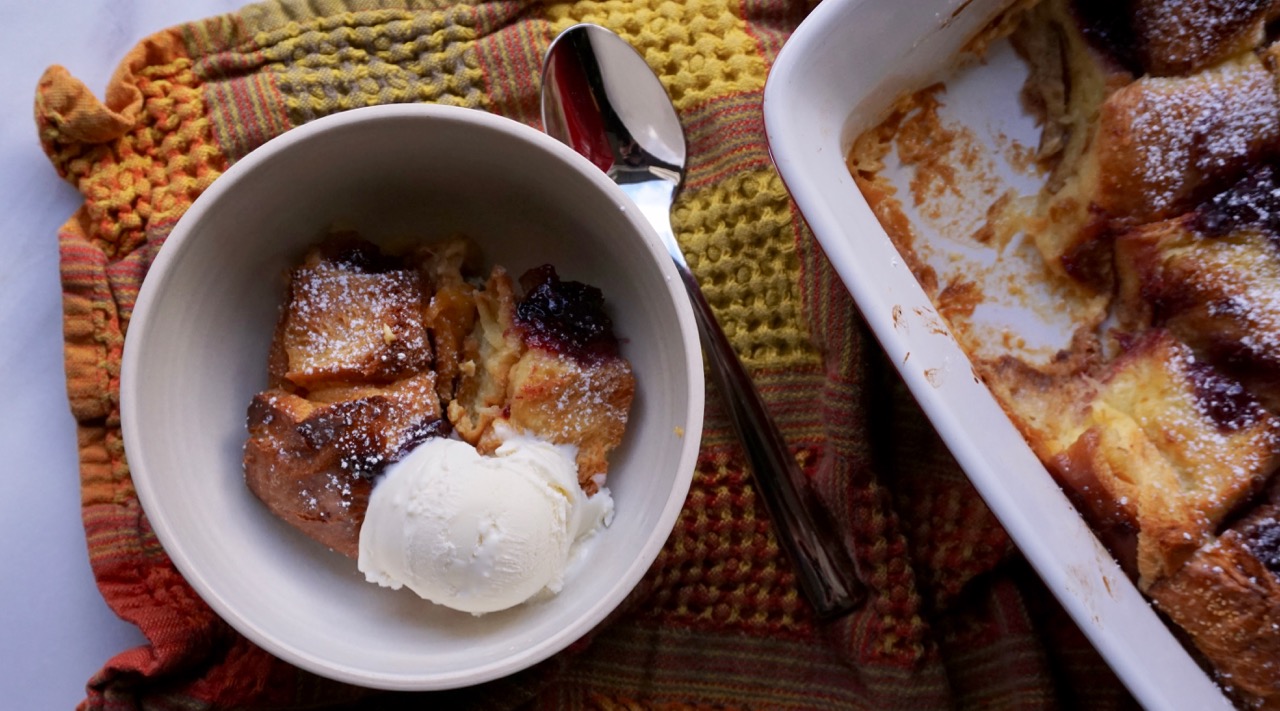
My kids would clean their rooms and do their chores for bread pudding, especially if I added a scoop of vanilla ice cream on top. Yep, a fam-favorite for many reasons.

Adapted from Simple Bread Pudding by Mark Bittman

Who doesn't love a simple, comforting dessert-bread pudding!
Course Breakfast, Dessert
Cuisine American
Keyword bread., eggs, Simple Bread Pudding
Prep Time 10 minutes
Cook Time 35 minutes
Total Time 45 minutes

Ingredients

  • 2 cups milk replace 1/2 with half-half for a richer pudding
  • 2 tablespoons unsalted butter (1/4 stick) more for greasing pan
  • 1/2 cup sugar for a sweeter pudding use 3/4 cup
  • 1 teaspoon vanilla extract
  • Pinch salt
  • 1/2 loaf sweet egg bread like challah or brioche cut into 1.5-2-inch cubes (about 5 to 6 cups)
  • 2 eggs, beatened Like itt custardy? Add an extra egg

Optional Fruit Add-Ins Replace 1/2 cup of bread with any of the following

  • 1 apple peeled and cored, cut into 1/2 inch dice. Granny Smith for tart, Golden Delicious for sweet.
  • 1 cup fresh blueberries

Instructions

  • Heat oven to 350 degrees.
  • Butter a 2-quart baking dish and fill it with cubed bread (8x8 or 9x9 square pan will work)
  • Toast cubed bread pieces in 350 degrees oven for 10 minutes. This is an optional step. If you do toast bread, definitely soak the cubes before baking.
  • In a small saucepan over low heat, warm milk, butter, vanilla, sugar and salt. Continue cooking just until butter melts; cool.
  • Add eggs to cooled milk mixture and whisk; pour mixture over bread. Let sit for abot 30 minutes so the bread can soak up the egg mixture. This makes a more custard like pudding.
  • Bake for 30 to 45 minutes, or until custard is set but still a little wobbly and edges of bread have browned. Serve warm or at room temperature.

Tweaks

  • Like cinnamon add 1/4 teaspoon to egg mixture.
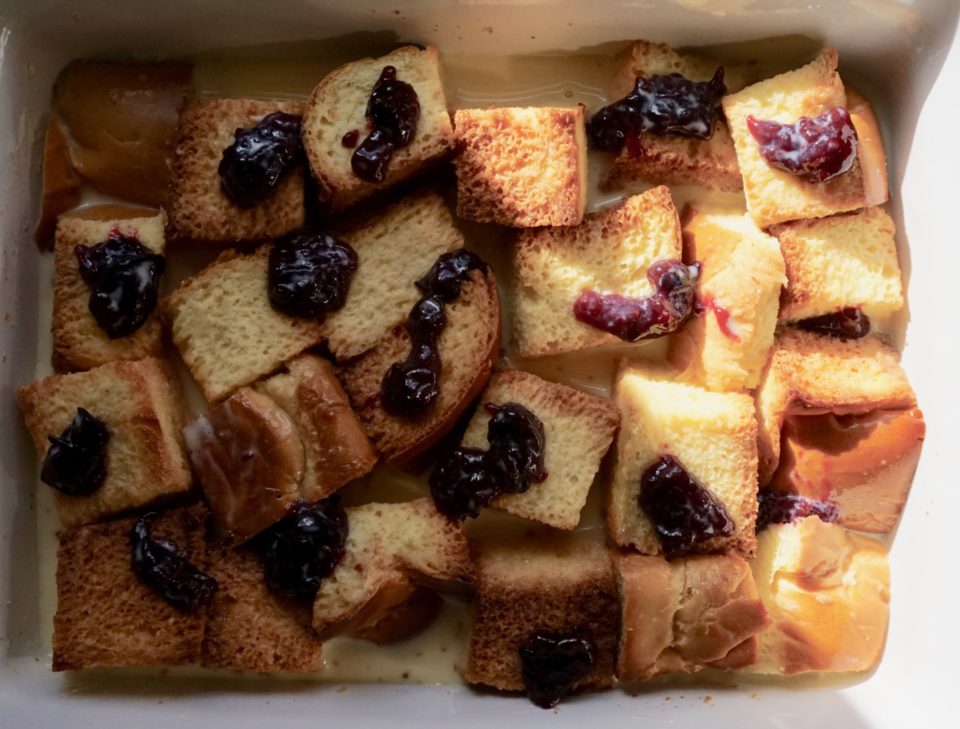
  • In place of fruit use 1/4-1/2 cup jam or preserves, dot pudding, distributing evenly
  • Sprinkle bread pudding with cinnamon before baking. For a crunchy top, sprinkle top with 2 tablespoons cinnamon sugar before baking. (To make your own cinnamon sugar, combine 1/2 cup granulated sugar with 2 T cinnamon)
  • Golden raisins work well in this bread pudding too!
Cake Got to Be Gluten-Free (Rice Flour Pound Cake)

Cake Got to Be Gluten-Free (Rice Flour Pound Cake)

I am always looking for gluten free desserts and Vegan treats for my friends. This is a cataclysmic mind-shift for a person who has always been in the “All butter, Cream-filled, No holds Barred, Is there another flour besides AP wheat” camp.

Years ago we headed to a regatta in Sac.  During a break in the action, my friend Judaaay, convinced me to check out a bakery nearby that specialized in gluten-free and vegan products.  We made the SHORT drive (45 minutes away-auugh) to try their breads and pizza-all gluten-free.  They looked pretty darn good.  We both ordered slices of pizza and as we sat there eating, Judah remarked, Not bad, huh.  I replied…

Girl, You have obviously not had a real pizza in a LONG time.

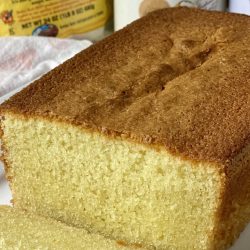
Fortunately, the tide has turned and due to the demand for gluten-free food, more than just palatable” pastries are being created every day.  The photo of a luscious pound cake in The NY Times caught my eye and lo and behold it is made with rice flour.  Gluten-free!  With my friend Judaayh in mind, I got busy.

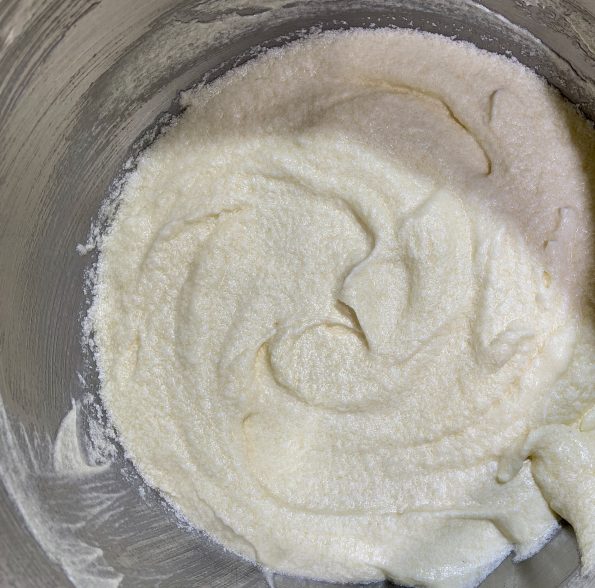
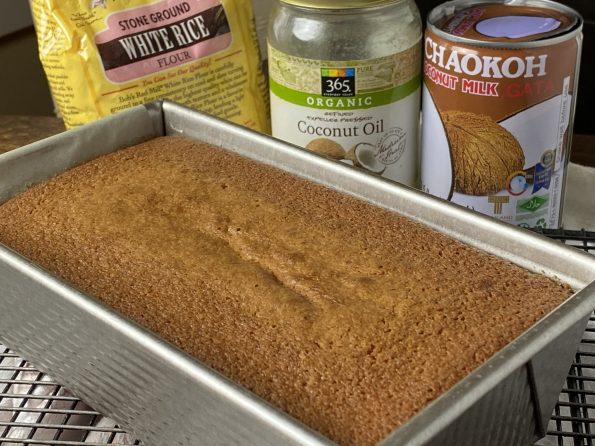
The cake starts with creaming butter, sugar, and melted coconut oil until light and fluffy.  There’s no overbeating this batter…no gluten!  But you don’t want to go crazy and break down the butter.  I used refined coconut oil which is essentially tasteless.  You could use a less processed, unrefined coconut oil which would give your cake a hint of coconut flavor or nuttiness. Never used coconut oil to bake?  Here is a  primer from SF Gate.  Note, this recipe uses regular rice flour NOT Sweet Rice Flour which is a glutinous rice product.  You will end up with a dense mess if you use sweet rice flour.  I found rice flour at Whole Foods made by Bob’s Red Mill.  Last note, this recipe does use BOTH coconut oil and coconut milk.

The finished batter before baking

I used 2 teaspoons of vanilla because I don’t have Tequila and I still can’t find my Rum 🤔.  Rum would be lovely.  I’m sure this batter could handle the addition of lemon or orange zest or poppy seeds.  After adding the liquids it will look like a lot of batter relative to the pan.  This cake does not rise a lot so not to worry, no overspill.

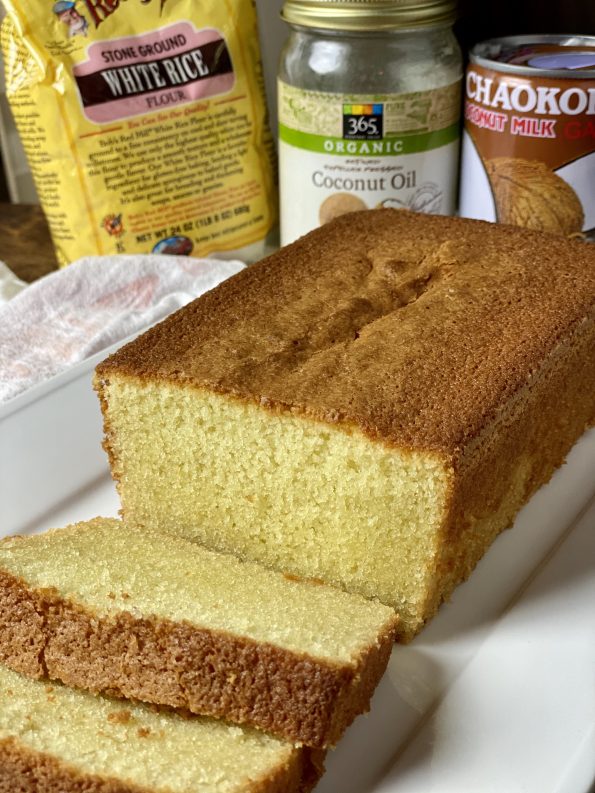
This cake is delicious.  It’s tender, buttery, moist with a nice crumb.  I’d make it again in a heartbeat…regardless if Judaay was coming over or not!  I can’t wait for shelter in place to be over so she can come over for a cup of coffee and a slice of this cake.  So good!

Print Pin
5 from 1 vote

Rice Flour Poundcake

Gluten free, buttery, delicious pounc cake!
Course Cake
Cuisine American
Keyword coconut, Gluten free, poundcake, Rice flour
Prep Time 20 minutes
Cook Time 55 minutes

Equipment

  • 8-by-4-inch loaf pan

Ingredients

Dry Ingredients

  • 1 ½ cups (200 grams) white rice flour not sweet rice flour
  • ¼ teaspoon baking powder
  • ¼ teaspoon baking soda
  • ¼ teaspoon fine sea salt
  • ¼ teaspoon freshly ground black pepper optional

Wet Stuff and Creamed Mixture

  • 4 tbsp (55 grams) unsalted butter at room temperature, plus more for greasing
  • 4 tbsp (60 milliliters) coconut oil
  • 1 cup plus 1 tablespoon (225 grams) granulated sugar
  • 2 large eggs at room temperature
  • cup (80 milliliters) sour cream
  • cup (160 milliliters) unsweetened coconut milk full fat
  • 1 teaspoon mezcal, tequila, or rum, vanilla or 2 teaspoons vanilla extract if not using alcohol
  • 2 tbsp poppy seeds if using rum, optional
  • zest 1 lemon, or lime if using tequila or mezcal finely grated

Instructions

  • Heat oven to 350 degrees. Lightly butter an 8-by-4-inch loaf pan. Melt coconut oil in small saucepan over low heat. Bring oil back to room temperature before baking. In a medium mixing bowl, combine rice flour, baking powder, baking soda, salt and pepper, if using.
  • Using an electric mixer, whisk together coconut oil, butter and sugar at high speed until light and fluffy, 2 to 3 minutes. With the motor still running, add eggs and combine until creamed and very fluffy. Reduce to low speed and whisk in a third of the flour mixture. Once combined, add sour cream. Whisk in another third of the dry ingredients, then half of the coconut milk. Add the remaining flour mixture. At a medium speed, whisk in the rest of the coconut milk, and mezcal, until smooth and completely combined.
  • Scrape batter into pan and smooth the top with the spatula. Bake until the cake is golden and a toothpick inserted into the center comes out clean, about 45 to 55 minutes. Let cake cool in pan for 10 minutes, then turn on a wire rack to cool completely.


Banana Cake with Cream Cheese Frosting (Coop-vid Up and Going Bananas)

Banana Cake with Cream Cheese Frosting (Coop-vid Up and Going Bananas)

I bought WAY TOO many bananas on my COVID reconnaissance to the grocery store last week.  Luckily, too many bananas is a happy problem.  Eat em’, freeze em’, bake em’ in a cake.

Banana Bread was out. I had just baked a loaf of banana bread from Shauna Severs’ latest book, Midwest Made.  These overripe bad boi bananas were destined for a banana cake with CREAM CHEESE FROSTING. After all, calories don’t count during the time of COVID-19.  That’s right, zippo calories.

Let them eat CAKE

My favorite Banana Cake recipe comes from Clementine Bakery in Los Angeles. I found it on the blog site, Ipso Fatto (love, love, love). How good is it?  It’s our 2nd most favorite birthday cake, right after Wes’s Carrot Cake.  It’s really good.  Mui just made one and took it to another level by adding a layer of chocolate ganache in the middle and gorgeous sprinkles on the top. Just for little, OLD, me for my birthday.  Time to find another banana cake recipe to add to my evergrowing “all things banana” arsenal of recipes.  I went back to Ipso Fatto (she loves all things bananas as much as I do) and whaddya know, this popped up on her site.

Best Banana Cake I’ve Ever Had

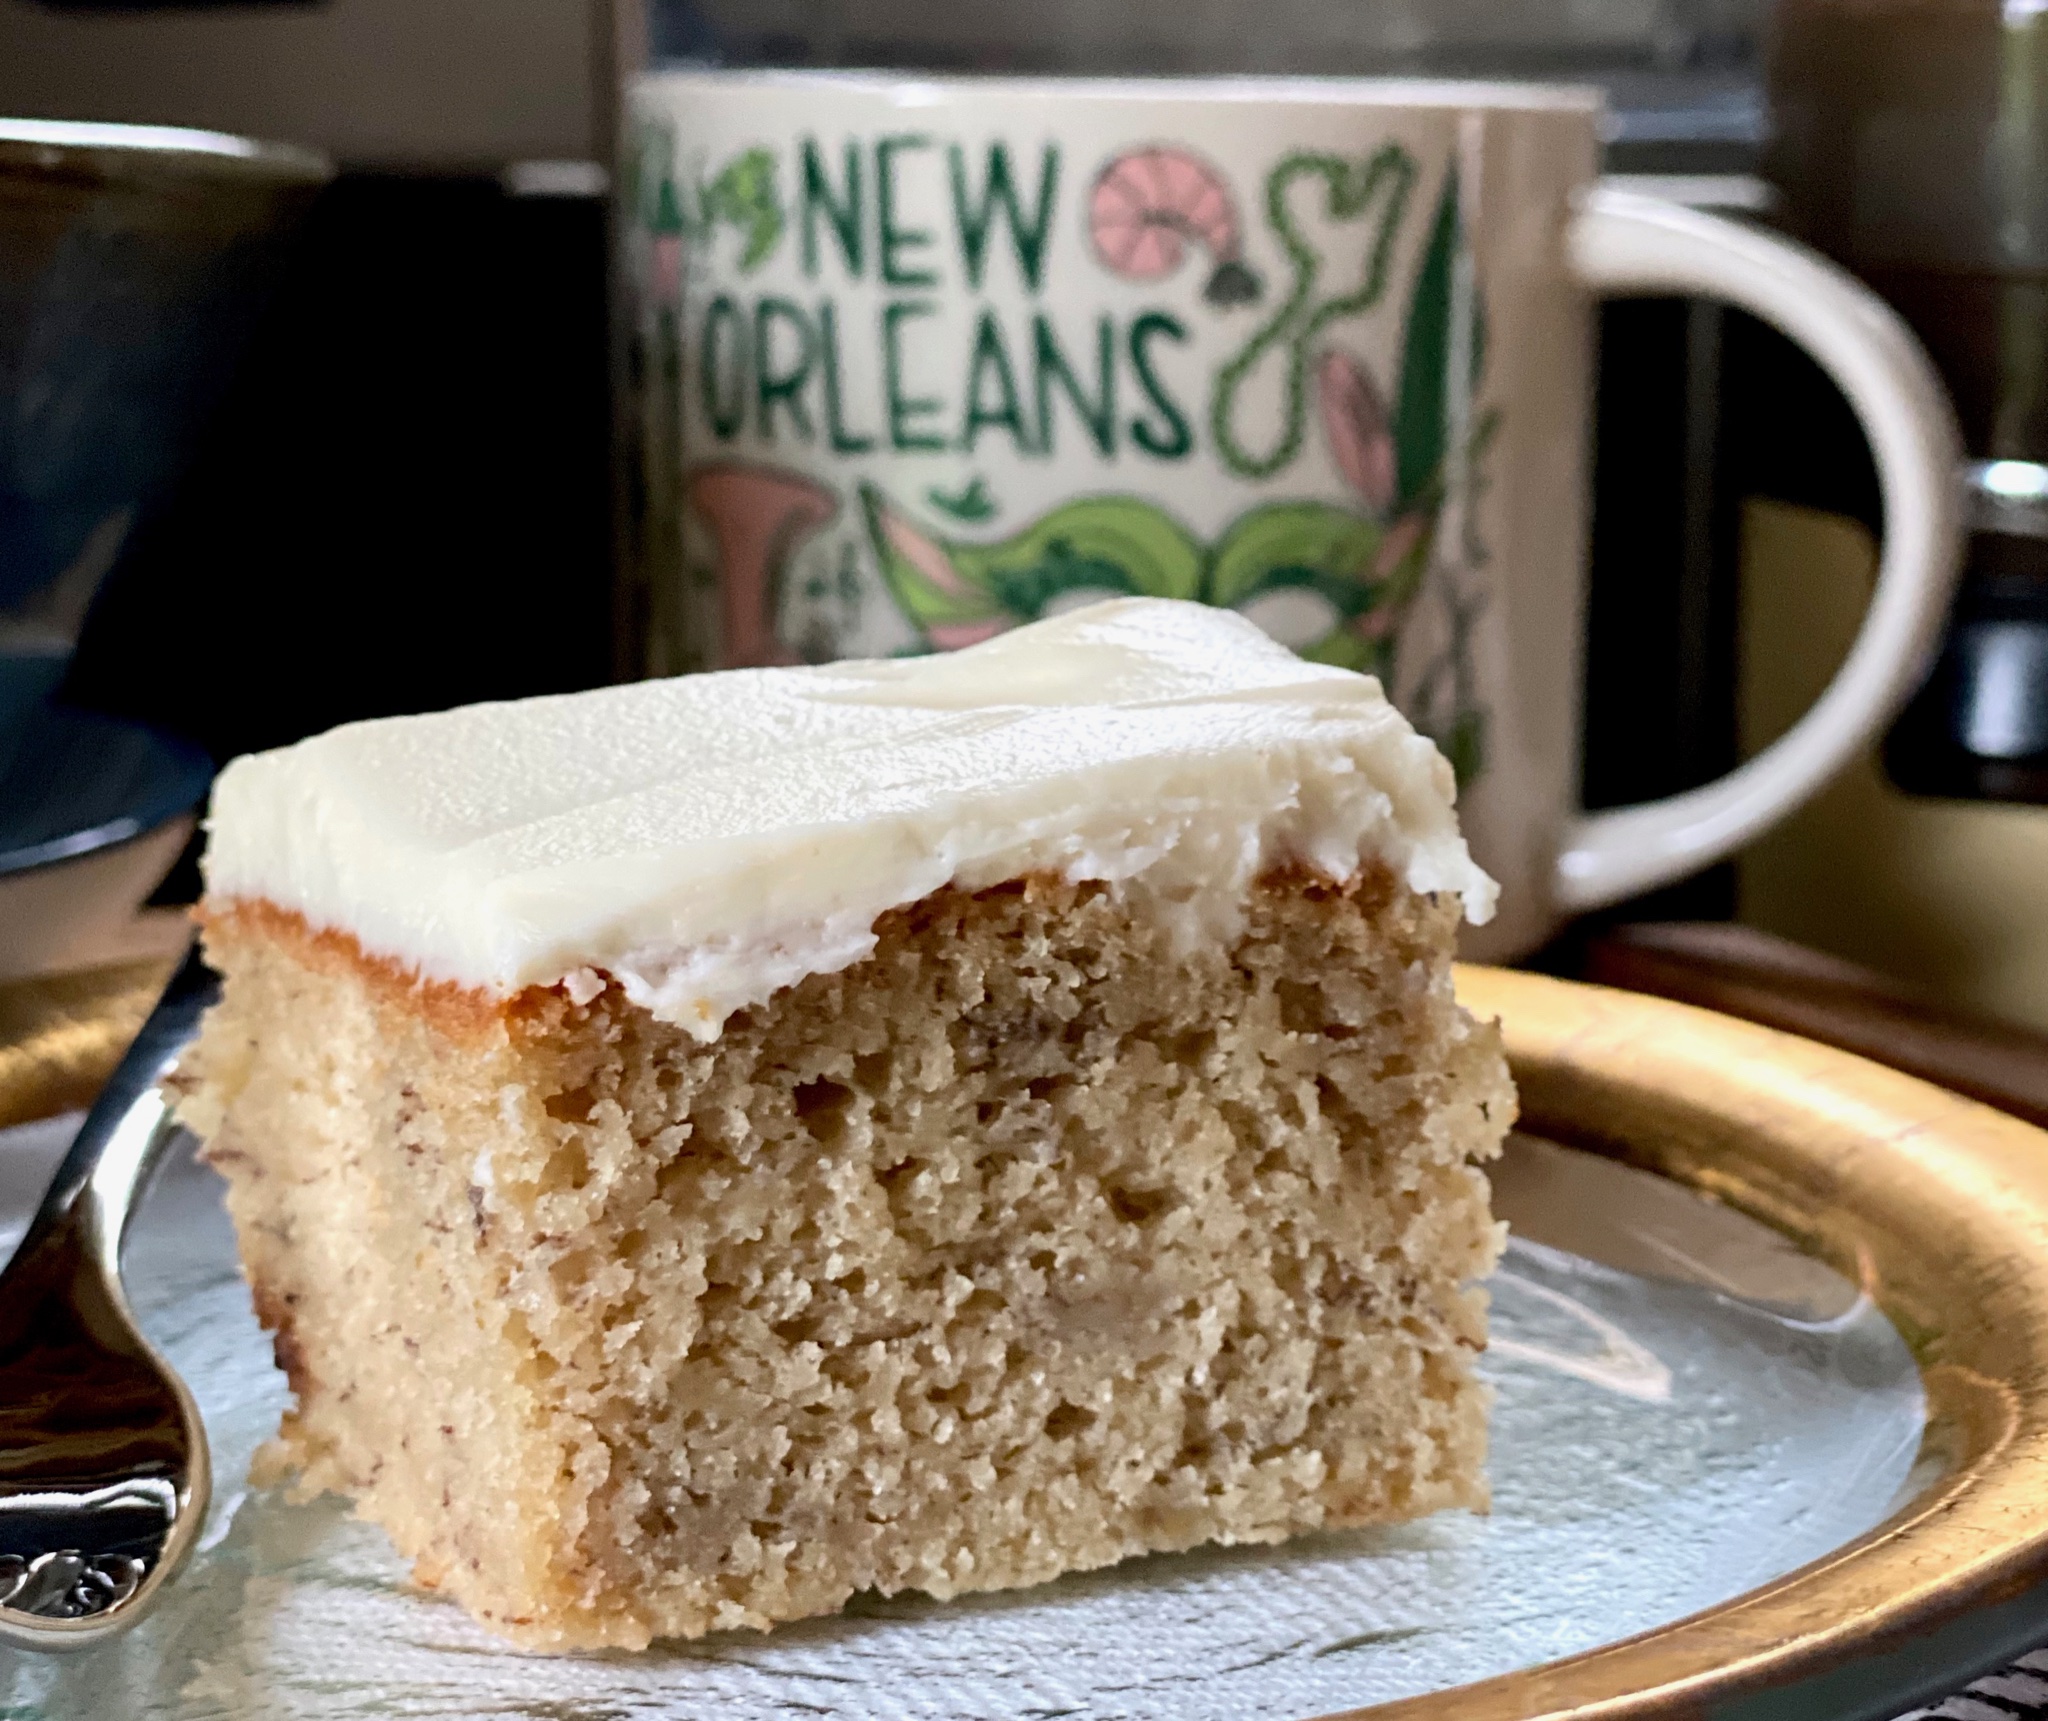
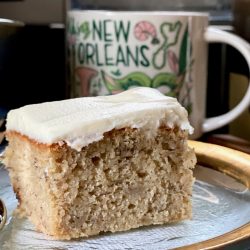
Ever had?  That sounds like a challenge.  Game on. The recipe comes from Sally’s Baking Addiction.  It’s straightforward and comes together easily.  I made this late at night so no process pics. Classic cake instructions-cream the butter, add the sugars (in this case dark brown sugar-sweet and caramel-ly), eggs, and mashed bananas. Then alternate the dry ingredients with buttermilk (nice little tang).  Don’t worry if at various points the mixture looks curdled, it will come together as you add the dry ingredients.  The batter will be lumpy-looking but pourable at the end.  While it’s baking, start the best part of any cake, the frosting, in this case, my favorite, cream cheese frosting.

I used hubby’s cream cheese frosting recipe, I think it’s perfect but then again I am biased. Sally’s recipe calls for 3 cups of powdered sugar, while hubby’s calls for only 3/4 cup to 1 cup at most, plenty for my taste.  Beat the cream cheese and butter until creamy and smooth BEFORE adding the powdered sugar.  This is key, once you add the sugar, mix just until blended and to the consistency you like.  Don’t overbeat as the sugar will break down the frosting.  You’ll end up with runny, loose frosting.  Spread the frosting on the cake and then lick the spatula-perks of being the baker.  The cake is yummy at room temperature or chilled, straight out of the fridge.

Texture-wise this cake reminds me of a snack cake, springy, with a little density, and a compact crumb. You want a tall glass of cold milk to go along.  I still like the Clementine Banana Cake more, but that’s probably my personal preference.  Clementine’s cake has a looser crumb and isn’t quite as dense, perfect for a layer cake.  But both are delicious.

That’s it folks…enjoy!

Banana Cake (Sally's Baking Addiction)

Best Banana Cake with Cream Cheese Frosting from Sallys Baking Addiction
Course Cake, Dessert
Cuisine American
Keyword Banana Cake with Cream Cheese Frosting
Prep Time 30 minutes
Cook Time 50 minutes
Servings 10

Ingredients

The Cake

Dry Ingredients

  • 3 cups all-purpose flour (spoon & leveled) 375g
  • 1 teaspoon baking powder
  • 1 teaspoon baking soda
  • 1/2 teaspoon ground cinnamon
  • 1/2 teaspoon salt

Wet Ingredients

  • 3 large ripe bananas about 1 and 1/2 cups mashed
  • 3/4 cup unsalted butter, softened to room temperature 170g
  • 1 cup granulated sugar 200g
  • 1/2 cup packed light or dark brown sugar 100g
  • 3 large eggs at room temperature
  • 2 teaspoons pure vanilla extract
  • 1-1/2 cups buttermilk, at room temperature 360ml

Sally's Cream Cheese Frosting

  • 8 ounces full-fat block cream cheese, softened to room temperature 224g
  • 1/2 cup unsalted butter, softened to room temperature 115g
  • 3 cups confectioners’ sugar, plus an extra 1/4 cup if needed 360g
  • 1 teaspoon pure vanilla extract
  • 1/8 teaspoon salt

Hubby's Cream Cheese Frosting

  • 1 brick Philadelphia Cream Cheese 8 ounces
  • 1 stick salted butter 4 ounces
  • 3/4-1 cup powdered sugar
  • 2 tsp vanilla extract

Instructions

  • Preheat the oven to 350°F (177°C) and grease a 9×13 inch pan. I always use parchment on the bottom of my pan, makes it easier to remove the cake.
  • Make the cake: Mash the bananas. I use a potato masher. Set mashed bananas aside.
  • Whisk the flour, baking powder, baking soda, cinnamon, and salt together. Set aside.
  • Using a mixer fitted with a paddle attachment, beat the butter on high speed until smooth and creamy – about 1 minute. Add both sugars and beat on high speed for 2 minutes until creamed together. Scrape down the sides and up the bottom of the bow. Add the eggs and the vanilla. Beat on medium-high speed until combined, then beat in the mashed bananas. Scrape down the sides and the bottom of the bowl as needed. With the mixer on low speed, add the dry ingredients in three additions alternating with the buttermilk and mixing each addition just until incorporated. Always start and finish with the dry ingredients. Do not overmix. The batter will be slightly thick, a few lumps is OK.
  • Spread batter into the prepared pan. Bake for 45-50 minutes. Baking times vary, so start checking at 40 minutes. Keep an eye on it. The cake is done when a toothpick inserted in the center comes out clean. If you find the top of the cake is browning too quickly in the oven, loosely cover it with aluminum foil.
  • Remove the cake from the oven and set on a wire rack. Allow to cool completely. After about 45 minutes, I usually place it in the refrigerator to speed things up.
  • Make the frosting: In a large bowl using a handheld or stand mixer fitted with a paddle or whisk attachment, beat the cream cheese and butter together on high speed until smooth and creamy.
  • Add 3 cups confectioners’ sugar, vanilla, and salt. Beat on low speed for 30 seconds, then switch to high speed and beat for 2 minutes. If you want the frosting a little thicker, add the extra 1/4 cup of confectioners sugar (I add it). Spread the frosting on the cooled cake.
  • Refrigerate for 30 minutes before serving. This helps sets the frosting and makes cutting easier.
  • Cover leftover cake tightly and store in the refrigerator for 5 days.

Hubby's Cream Cheese Frosting

  • Beat butter to soften before adding the cream cheese, 15-30 seconds. This helps prevent lumps. Add cream cheese and beat on medium high speed until smooth, light, and creamy. Beat on high if using a handheld mixer.
  • Add vanilla and beat on medium to blend. Add powdered sugar and beat on low speed to blend in and then increase to medium speed to incorporate, at most 1 minute. Do not OVERBEAT!!! Taste the frosting, add additional 1/4 cup of sugar if you want it sweeter. If it seems a little flat, add a pinch of salt.
  • Spread on the cooled cake. For special occasions flip the cake out of the pan and frost top and sides. You may need to make a recipe and a half of frosting in that case.

Notes

Make Ahead Instructions: Prepare cake through step 5. Cover the cake tightly and refrigerate for up to 2 days or freeze up to 3 months. Bring to room temperature, make the frosting, frost, and serve. Frosted cake freezes well, up to 3 months. Thaw overnight in the refrigerator, bring to room temperature or serve cold.
Buttermilk: If you don’t have buttermilk, you can add 1 Tablespoon fresh lemon juice or white vinegar to a large liquid measuring cup. Then add enough regular room temperature milk (whole milk is recommended) to make 1 and 1/2 cups total. Stir and let sit for 5 minutes. This soured milk can be used in the recipe instead of buttermilk.
Cupcakes: I’ve gotten a few questions about turning this cake into cupcakes. For about 2 dozen cupcakes, fill the cupcake liners halfway and bake for about 20-22 minutes. Same oven temperature.
Bundt Cake: You can bake this batter in a 10-12 cup bundt pan, but I find it’s not quite as moist when baked in the bundt shape. Bake for 50-65 minutes, give or take. Use a toothpick to determine doneness. Same oven temperature.
Layer Cake: I use this recipe to make my banana layer cake. If you want to make a 2 layer cake, divide batter between 2 greased 9-inch cake pans, and bake at 350°F (177°C) for 26-30 minutes or until a toothpick inserted in the center comes out clean.
Corn-ered in the House, Chili-n, Bakin’ Muffins (Corn Muffins)

Corn-ered in the House, Chili-n, Bakin’ Muffins (Corn Muffins)

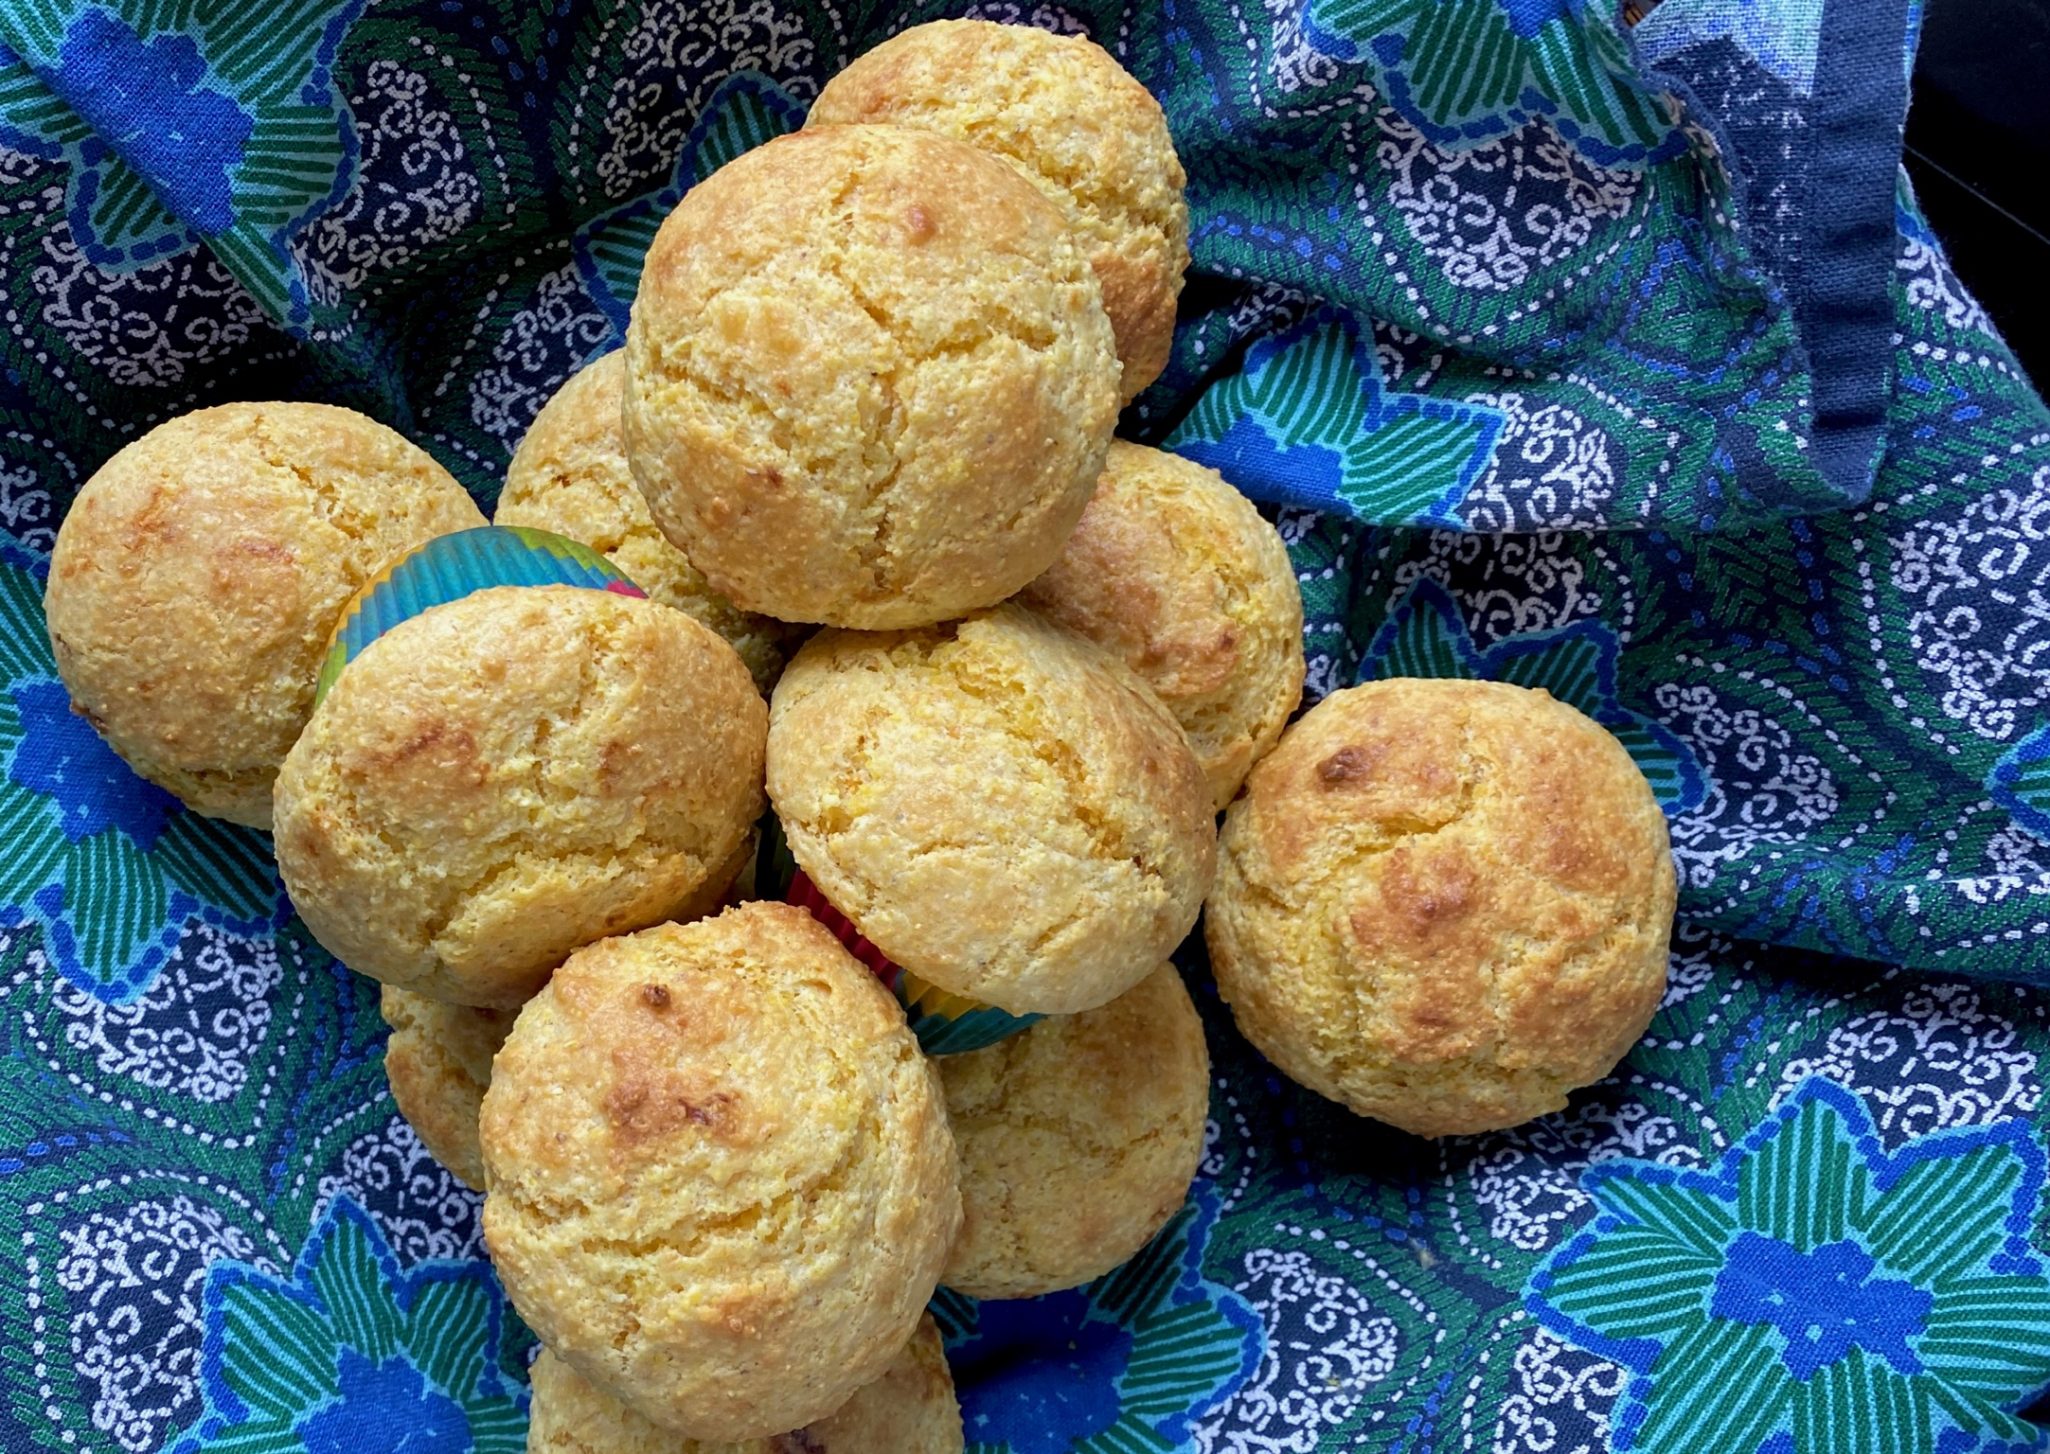
Shhhh…please don’t tell Chef H I messed up his cornbread recipe.  I’m not sure what I did wrong but I’m way too embarrassed to ask him so I went hunting for another cornbread recipe. I’m a Californian, I’m pretty wimpy when it comes to cornbread.  True cornbread is NOT cake-y and sweet, too bad that’s the way I like it.  Another reason I couldn’t call him.  What if he said, “that’s the way southern cornbread is, silly”.  So I tapped my delete key, d-a-e-r-b and pecked m-u-f-f-i-n in on my keyboard hoping to land on a sweet, cakey, cornbread recipe. I hit return and…

…landed on an old friend, Smitten Kitchen.  Her post for Perfect Corn Muffins popped up on my screen. Her post adapts the recipe from Cook’s Illustrated. Uh-oh.  I love CI but it probably means a couple of extra steps.

Yes, it did.

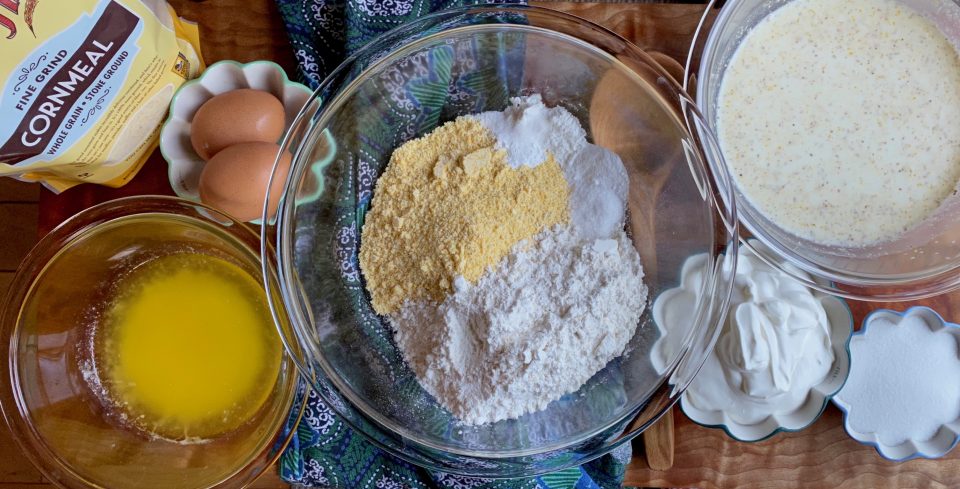
A lot of the recipes I looked at for corn muffins called for proportionally more regular flour than cornmeal, yep-cakey.  Not this one. The cornmeal is divided and much of it is combined with milk to make something akin to cornmeal mush. This keeps the corn muffins moist.  Okay, I went with it.  I used the microwave method included in the recipe to make it, worked like a charm.

Y’all know what goes into cornbread, flour, butter, flour, baking soda, powder, eggs, sour cream or buttermilk.  So what do I want to talk about?

CORNMEAL

There are a plethora of cornmeal products out there.  Stone-ground, Machine grind, Which are then furthered divided by grade- coarse, medium, and fine.  If you get any product that says stone-ground, you’re going to get a bit of grit as it contains both the bran and germ of the kernel.  This recipe calls for medium grind cornmeal, preferably stone-ground.  I used Bob’s Red Mill fine stone-ground cornmeal and there was still some bite to the muffins. Why? I am not a big fan of grittiness in my cornbread or muffins. If you like that coarse “toothy” texture, use the medium grind.  If you hate that grittiness, don’t use stone-ground. Use the stuff you get at the supermarket, either Quaker Oats or Argo cornmeal-no germ, no bran, no grit.  If you want a light and airy cake-like muffin or cornbread (should we call it cornbread?) use cornflour (superfine grind).

You can find corn flour at Whole Foods (probably Bob’s Red Mill) along with the gamut of cornmeal.  A couple of recipes that use cornflour include Blueberry Cobbler with a Cornmeal-Sugar Cookie Crust from Vivian Howard and Momofuku’s Christina Tosi recipe for KILLER Corn Cookies.  Both amazing.

Then there’s Polenta, Grits, Masa Harina. Polenta or Grits is essentially cornmeal mush.  You can use coarse or medium grind cornmeal.  Bob’s Red Mill makes a Grits or Polenta Cornmeal (yes I fell for it) which makes it easy, it’s just coarse grind.  Masa Harina is corn treated with ash or lime solution (called nixtamalized, now you can file that word away) dried, and ground into masa.  Think delicious tamales and tortillas NOT cornbread, polenta or grits.

I use stone-ground, even though I don’t like grittiness, it’s a compromise.  I love the flavor and the “it’s healthier for you” aspect.

N.B. Cornstarch is not cornflour, cornmeal, polenta, grits, masa, popcorn.  Don’t even go there.  It’s just a thickener made from corn endosperm-see, that doesn’t even sound good.  I use it all the time in Chinese cooking as a thickener, that’s it.

Back to the Corn Muffins

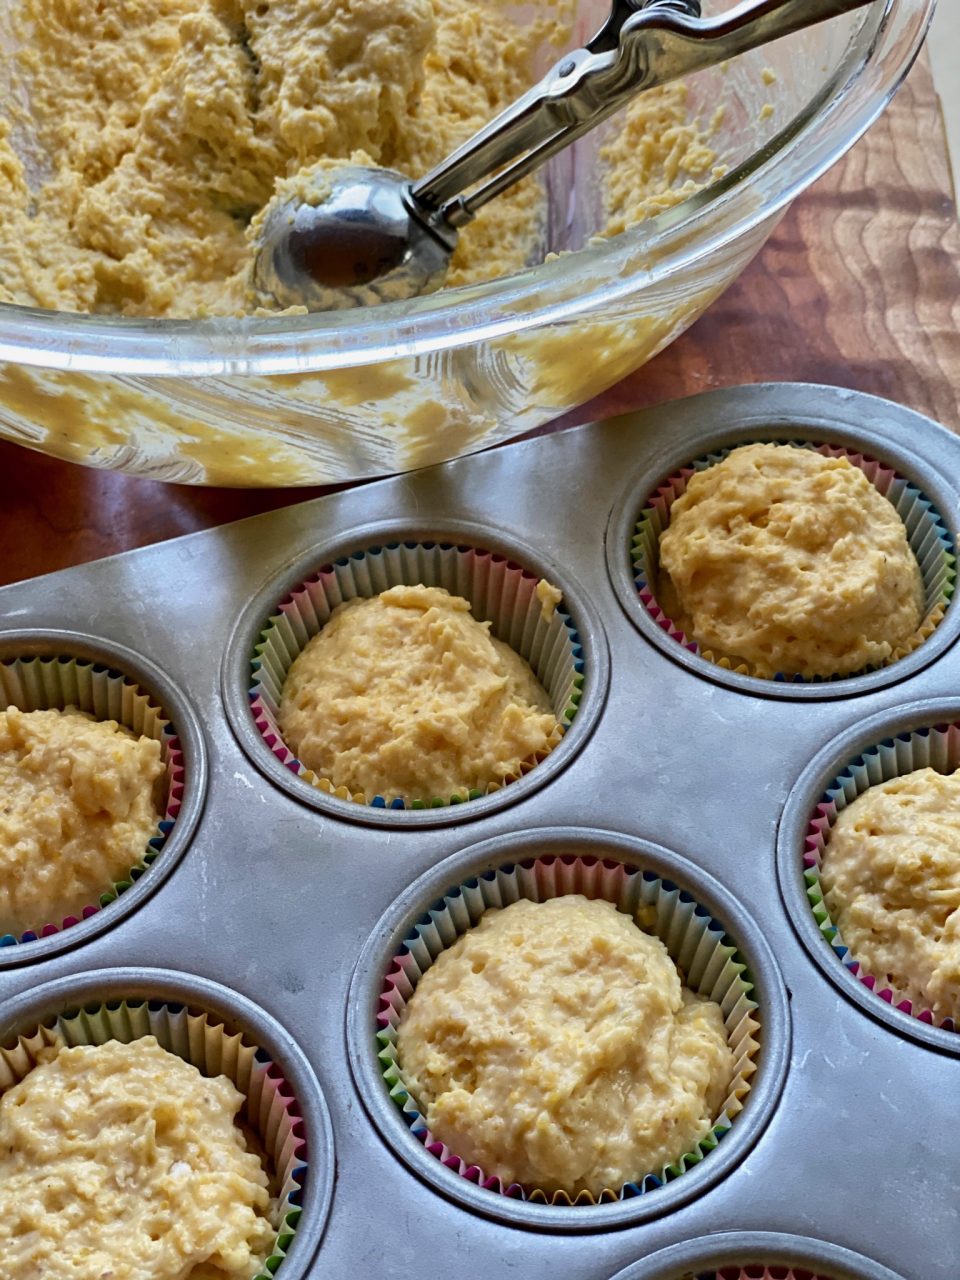
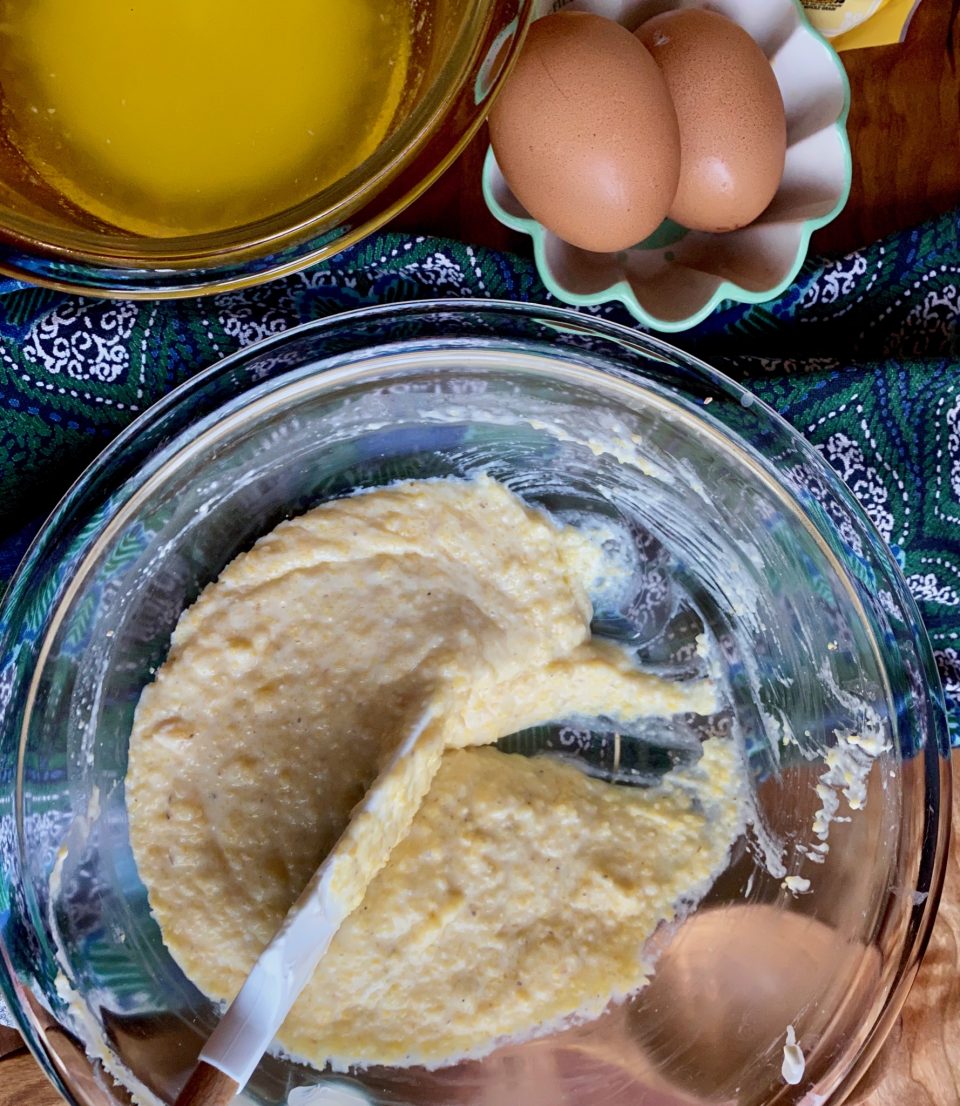
Yes, this is the cornmeal mush that goes into the batter along with dry cornmeal.  Cook until it thickens and you can draw a spatula through it.  Add wet ingredients to the cornmeal mush and then add the dry ingredients.  Your batter will be pretty thick.  Use an ice cream scoop to fill your muffin tin.  Easy peasy.

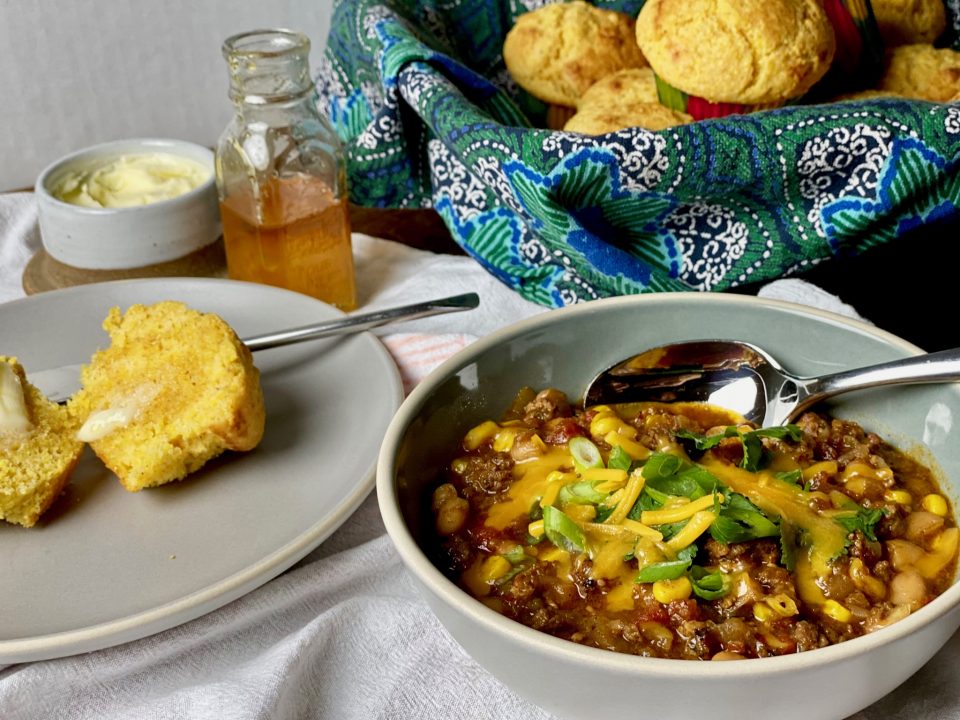
Finally, what to serve with your corn muffins…CHILI of course!  Lucky you, I have two chili recipes, Firemen’s Chili from Friends (yes the TV show) and a super-duper easy Chicken Chili  Both would go perfectly with these corn muffins.

Ok, we have come to the end of this post and I have a confession to make.  These muffins are delicious and I would make them all the time if it weren’t for one thing.

TRADER JOE’S CORNBREAD MIX

It’s that’s good. Throw away the box and tell your friends and family you made them from scratch.  Yep, that good.

Perfect Corn Muffins

Cook's Illustrated Corn Muffins the perfect cross of a cake-like sweet corn muffin and down home cornbread.
Course Muffins
Cuisine American
Keyword Cook's Illustrated, Corn Muffin
Prep Time 30 minutes
Cook Time 20 minutes

Equipment

  • 12-cup standard muffin tin

Ingredients

  • 2 cups (280 grams) yellow cornmeal, to be divided Use stone ground for that characteristic grittiness that cornbread can have.
  • 1 cup (130 grams) all-purpose flour
  • 1 1/2 teaspoons baking powder
  • 1 teaspoon baking soda
  • 1 1/4 teaspoons fine sea or table salt
  • 1 1/4 cups (300 ml) milk, whole is best here
  • 1 cup (240 grams) sour cream (full-fat plain yogurt should work here too)
  • 8 tablespoons (115 grams) unsalted butter, melted and cooled slightly
  • 1/3 cup granulated sugar.
  • 2 large eggs

Instructions

  • Heat oven to 425°F (220°C). Either grease or line a 12-cup standard muffin tin with liners.
  • Whisk 1 1/2 cups cornmeal, flour, baking powder, baking soda and salt together in a medium bowl.

Cornmeal Mush

  • In a large bowl (if you have a microwave) or a medium saucepan (if you do not), combine milk and remaining 1/2 cup cornmeal. In a microwave, cook cornmeal–milk mixture for 1 1/2 minutes, then whisk thoroughly, and continue to microwave in 30-second increments, mixing between them, until it’s thickened to a batter-like consistency, i.e. the whisk will leave a clear line across the bottom of the bowl that slowly fills in. This will take 1 to 3 minutes longer.
  • On the stove, cook cornmeal mixture over medium heat, whisking constantly, until it thickens as described above, then transfer to a large bowl.

Put the batter together

  • Whisk butter, then sugar, then sour cream into cooked cornmeal until combined. At this point, the wet mixture should be cool enough that adding the eggs will not scramble them, but if it still seems too hot, let it cool for 5 minutes longer. Whisk in eggs until combined.
  • Fold in flour mixture until thoroughly combined and the batter is very thick. Divide batter evenly among prepared muffin cups; it will mound slightly above the rim.
  • Bake until tops are golden brown and toothpick inserted in center comes out clean, 13 to 17 minutes, rotating muffin tin halfway through baking to ensure even cooking. Let muffins cool in muffin tin on wire rack for 5 minutes, then remove muffins from tin and let cool 5 minutes longer. Serve warm with honey butter or just honey if you feel guilty.
  • Eat by themselves, with Chili, with just about anything.
I Tried To Buy Some Flour, They Said No, No, No (Not Your Mama’s Rice Krispy Treats)

I Tried To Buy Some Flour, They Said No, No, No (Not Your Mama’s Rice Krispy Treats)

Day 2 of Shelter in Place.  I receive a text from a friend that the supermarkets are a little calmer than yesterday.  That’s my cue to head to the market to pick up a few items.  Nope, not gonna go crazy, just need a few staples like flour, yeast, butter, and milk.  Since we will be “cocooning” I wanted to do some baking.  Sounds like a plan, right?

Apparently, everyone else wants to too.

Not a bag of flour of any kind on any shelf in the 3 grocery stores I tried.  Wow.  I’m dumbfounded.  I couldn’t find yeast either.  I feel like we are in pioneer living mode.  All good, time to improvise.

So I grab the next best thing, a bag of marshmallows.  I have Rice Krispies at home, just got more butter, and maybe I’ll make them happy Rice Krispies with some sprinkles.  A little bit of fun and cheeriness to offset our Coronavirus blues.

I know what you are thinking…oh please, a recipe for Rice Krispy Treats?

Not just Rice Krispy Treats.  Nope, not the “look on the side of the cereal box recipe” but Smitten Kitchen’s version which a friend from Tennessee renamed “Damn good, Double Buttah R-aah-ce Krispy Treats”.

Adapted from Smitten Kitchen. In the 3jamigos archives find it here.

Like the Big Fig Newton….here’s the hard part BROWN BUTTER  This added step elevates Snap, Crackle and Pop’s version to a whole new level.  That…and oh, twice the amount of butter.  Just trying to be transparent folks.

Melt butter over medium heat, keep an eye on it.  The butter will foam and as it gets hotter the milk particles will brown.  Keep a close eye so it doesn’t burn and stir constantly.

Look at those nice brown bits that are just flavor bombs!  So delicious!

I added happy sprinkles but sadly, they melted.  My advice is to wait until you pour the mixture into the pan to shape and cool, then go crazy scattering sprinkles on top.

BRAG ALERT!

Upside to shelter at home…Hubby just made me a cookie box to transport goodies to friends and family functions after we get through this!  So excited, box has a sliding lid and dividers for different kinds of cookies. Hmmm,not my birthday but I’ll take it.

Stay safe, stay healthy!