Category: 12 Days of Cookies

My annual 12 days of Cookies for the Holidays!

Soft Gingerbread Tiles with Rum Butter Glaze: Day 6, 12 Days of Cookies!

Soft Gingerbread Tiles with Rum Butter Glaze: Day 6, 12 Days of Cookies!

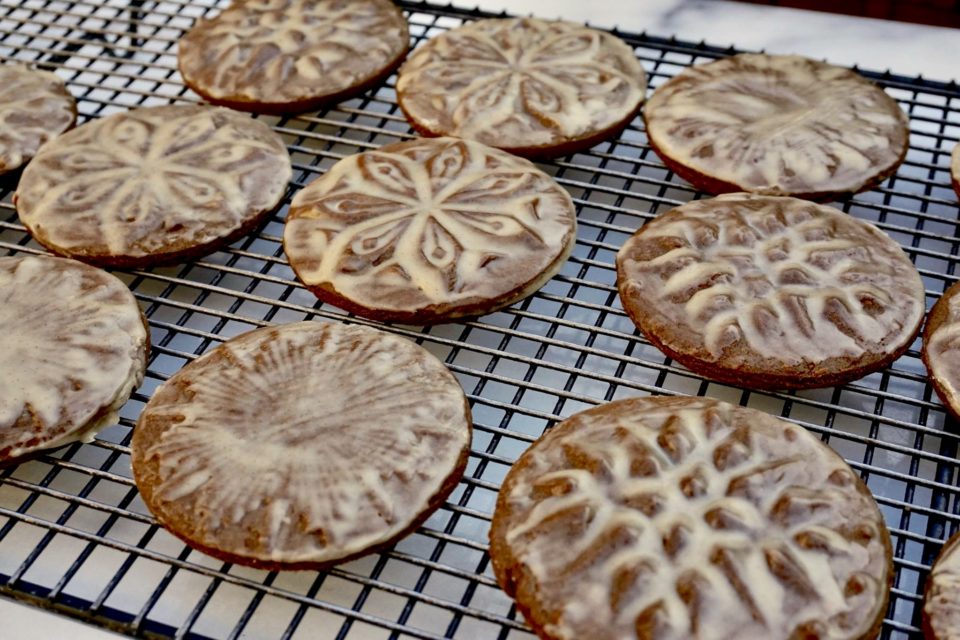
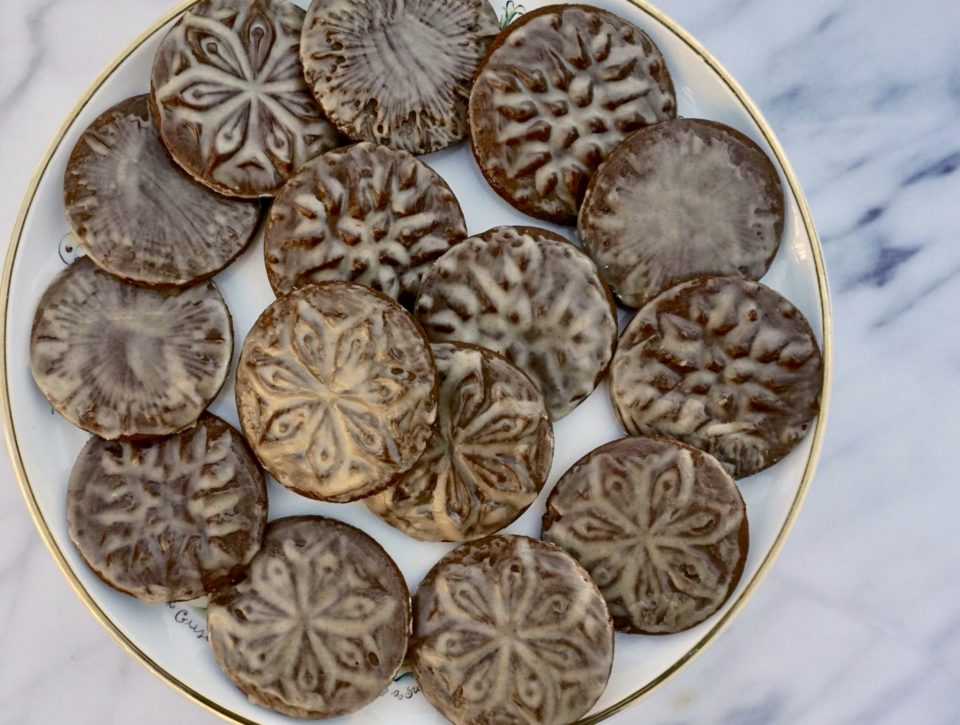
My kitchen gadget addiction got the best of me yet again. The culprit? A beautiful holiday cookie from Ottolenghi’s latest book, Sweet, Soft Gingerbread Tiles with Rum Butter Glaze. The cookies are made with either an embossed rolling pin (which I purchased to make graham crackers not so long ago) or cookie stamps holiday or all season, which I had to have.  After my cookie stamps arrived I immediately set out to make these.

Soft Gingerbread Tiles

The dough is a snap to make. The aroma that filled my kitchen while they baked made me smile. The cookies are soft, cakey and spicy.  Just like a classic gingerbread cookie.

The recipe calls for blackstrap molasses which is the last extraction of sugar from sugarcane.  It’s pretty bitter.  The first extraction produces cane syrup (like Golden Syrup), the next produces molasses and the final extraction, with even less sugar left, produces blackstrap molasses.  I wanted to be faithful to the recipe so I used blackstrap molasses.  The cookies are not very sweet at all. I learned that regular molasses is about 70% sugar whereas blackstrap is about 40%, BIG difference.  I plan on trying this recipe with both cane syrup and regular molasses just for the added sweetness.

The most difficult part of the recipe is stamping the cookies.  During baking, the cookies will rise and the pattern blurs a bit so be sure to press the cookies well so the imprint is really bold and defined in the dough.

I tried two methods for stamping the cookies. For the first method, the dough is rolled into a sheet about 1/4 inch thick, stamped and cut out with a round cookie cutter.  For the second method, the do/ugh is rolled into a ball (about 1.5-2 tablespoons of dough) which is then pressed with the stamp to create a cookie.  Both methods worked well.

I love the rum butter glaze. It was really easy to put together and added a sheen and sweetness/flavor to the cookie.  Though I brushed the glaze on, I think dipping the cookie or spreading the glaze with a spatula would make a nicer finish.  The cookie does need to be warm when glazing.

These cookies are a showstopper.  I can’t wait to bake another batch.

Gingerbread Tiles with Butter Rum Icing: Day 6, 12 Days of Cookies!

A delicious and festive gingerbread with rum glaze from Ottolenghi
Course cookies, sweets
Cuisine American, British
Keyword gingerbread, holidays, ottolenghi, Peanut and Bittersweet Chocolate Cookie
Prep Time 30 minutes
Cook Time 10 minutes

Ingredients

Dough: Da Wet Mix

  • 6 tbsp 85 g unsalted butter, at room temperature
  • 1/3 packed cup plus 2 tbsp 90 g dark brown sugar
  • 1/4 cup 100 g blackstrap molasses (can substitute golden syrup or reg molasses 1:1 for sweeter cookie)
  • 1 large egg yolk*

Da Dry MIx

  • 1 3/4 cups plus 2 tbsp all-purpose flour (235 gms) plus extra for pressing
  • 1 tbsp Dutch-processed cocoa powder
  • 1/2 tsp baking soda
  • 1 tsp ground ginger
  • 1/2 tsp ground cinnamon
  • 1/8 tsp ground cloves
  • 1/4 tsp salt
  • 1/4 tsp freshly ground black pepper

Rum-Butter Glaze:

  • 2/3 cup 80 g confectioners' sugar
  • 1/8 tsp ground cinnamon
  • 1 tbsp 15 g unsalted butter, melted and warm
  • 1 tbsp dark rum or lemon juice
  • 1 tsp warm water

*On Food52 it was suggested to use extra-large egg yolk or add 1 teaspoon-1 tablespoon of water to dough if it doesn't come together. I added about 1 teaspoon water. It won't come together until you knead it). Makes 12–14 depending on the size of stamp and cutter

Instructions

  • Preheat the oven to 375°F/190°C.
  • Place the butter, sugar and molasses in the bowl of an electric mixer with the paddle attachment in place.
  • Beat on medium speed until smooth and incorporated. Add the egg yolk and continue to beat until fully combined.
  • Sift the flour, cocoa powder, baking soda, ginger, cinnamon, cloves, salt and pepper into a bowl. Turn the speed of the mixer to low, and add the dry ingredients to the butter and molasses. Once the mix comes together, tip the dough onto a lightly floured work surface and knead gently.
  • Line two baking sheets with parchment paper and set aside.

Forming Cookies: Rolling dough

  • Roll out the dough so that it is about 1/4 inch/ 0.5 cm thick. If the dough is very soft, you will need to chill it.*
  • Dip cookie stamp in a small bowl of flour, shake off any excess, then press them firmly into the dough, one at a time to create a deep imprint. How far you need to press to get an imprint will depend on your stamp; the patterns on some are more deeply cut than others. Bear in mind that the cookies rise a little when cooked, so any soft imprints will disappear.
  • Using a round cookie cutter that is slightly larger than the pattern, cut out the pieces of imprinted gingerbread. Transfer the cookies to the lined baking sheets, spaced about 3/4 inch/2 cm apart. Reroll the dough and continue to stamp and cut cookies until all the dough is used up.

Stamping Cookies: No Rolling

  • I also tried instructions from the cookie stamps, roll 2 tablespoons of dough into a ball and flatten with cookie stamp. With both methods, make sure you press firmly enough to create a bold definite pattern in dough!
  • Bake for 9–10 minutes, rotating the sheets halfway through, until firm to the touch. They will continue to firm up as they cool, so don’t be tempted to bake them for any longer.

Rum Glaze

  • Make the rum butter glaze while the gingerbreads are in the oven, as the glaze needs to be brushed onto the cookies while they are still warm.
  • Sift the confectioners’ sugar and cinnamon into a small bowl. Add the melted butter, rum (or lemon juice) and water and mix with a spoon until smooth. The glaze will thicken slightly if it sits around, if so stir a little more warm water in if you need—it should be the consistency of runny honey.
  • Remove the cookies from the oven, leave them to cool for 5 minutes, then brush or dab the glaze all over with a pastry brush. Transfer to a wire rack to cool completely.

Notes

If you want to keep the glaze booze-free, the rum in the icing can be replaced with lemon juice.
Make-Ahead: Once the dough is made, it can be covered in plastic wrap and kept in the fridge for up to 2 days before baking.
Storage:  These will keep for up to 5 days in an airtight container. The glaze will discolor and crack a little, but this will not affect how they taste.
Mighty Mouse? No, Mighty Jamie To Save the Day (12 Days of Cookies)

Mighty Mouse? No, Mighty Jamie To Save the Day (12 Days of Cookies)

My Christmas present arrived early this year.  The twins are home!  Lucky for me Jamie is in a baking mood and immediately tackled one of our favorite cookie books, Dorie’s Cookies.  So, without further ado…

Heeeeeere’s Jamie with Day 3, 4, and 5 of our 12 Days of Cookies

Hey everyone! Jamie here. Home for the holidays!  I got home Thursday night, so naturally, I have already baked three different kinds of cookies.  I decided that mom needed some help with completing her “12 Days of Cookies” blog posts. Between you and me, she gets MAJORLY stressed when she bakes during the holidays, so knocking out three different cookies for her is really just me trying to make my holidays a lot more pleasant. But don’t tell her I said that.

To be honest, I’m really not a cookie person. I’d much rather eat a slice of super dense chocolate cake than a gooey chocolate chip cookie. Call me crazy, I know. I will say that baking cookies is a little more enjoyable than baking cakes.  It’s SO easy! They take a 3rd of the time to bake, and once you bake them you don’t have to spend extra time making more frosting or fillings which really means I only have to do dishes once. (HUGE).  

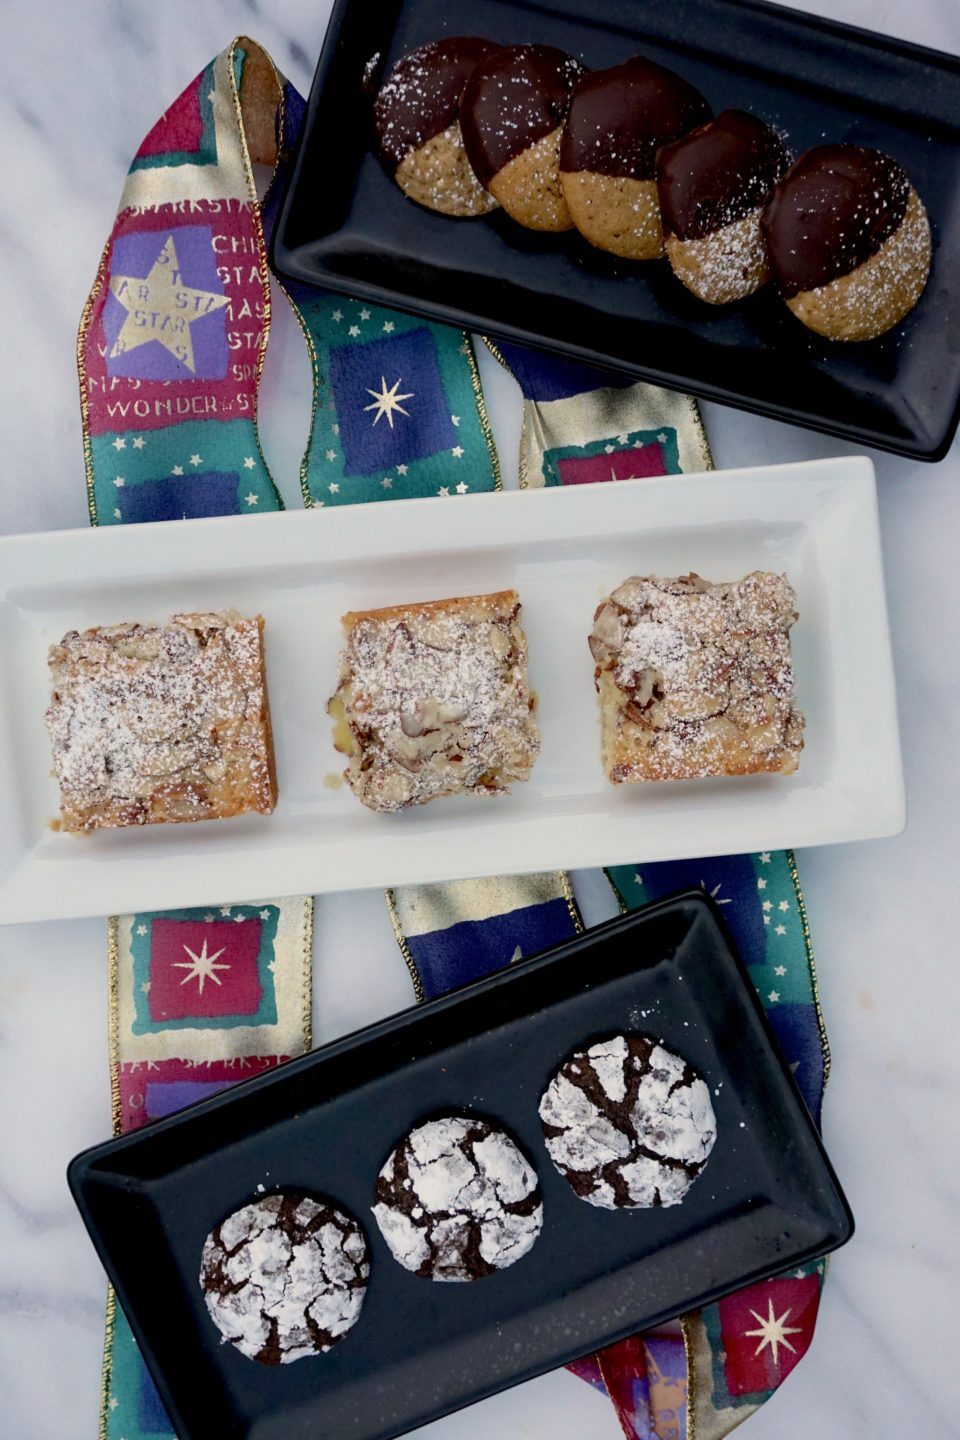
I picked these three cookies because they looked pretty easy to me, and their pictures in the cookbook looked pretty good.  The Swedish Visiting Cake Bars are better cold and almost have a custard-like taste to them.  My dad wasn’t super thrilled about all the almonds on top, but I think they add a nice crunch.  They are more cake-like than you would expect, but they have an awesome almond flavor that I am a huge sucker for. These cookie-cake bars definitely grew on me. The Snowy Topped Brownie Drops are basically small lumps of brownies with a ton of powdered sugar on them–what’s not to like??? Unless you don’t like chocolate.  My least favorite part of these cookies is that the dough must be chilled for at least 3 hours. I tend to get impatient and want to finish baking all in one fell swoop.  But my dad did say that they are his favorite of the three, so maybe it’s worth it. Last but not least, the Coffee Malteds cookies.  I made a tiny mistake (or a huge mistake if you talk to my mom) when I didn’t sift the malted milk powder before mixing it into the wet ingredients, so my cookies have some weird lumps of malted milk powder in them. But other than that, they taste pretty good (ps. you can’t even taste the weird lumps so w/e). I dipped them in chocolate, which in my opinion makes them 10000000 times better. We are taking the cookies to our annual pre-school cookie exchange tomorrow, so we’ll see which one is everyone’s favorite!

HI CLAIRE

Ho Ho Ho! Yo-Yo’s are here! Day 2 Holiday Cookies

Ho Ho Ho! Yo-Yo’s are here! Day 2 Holiday Cookies

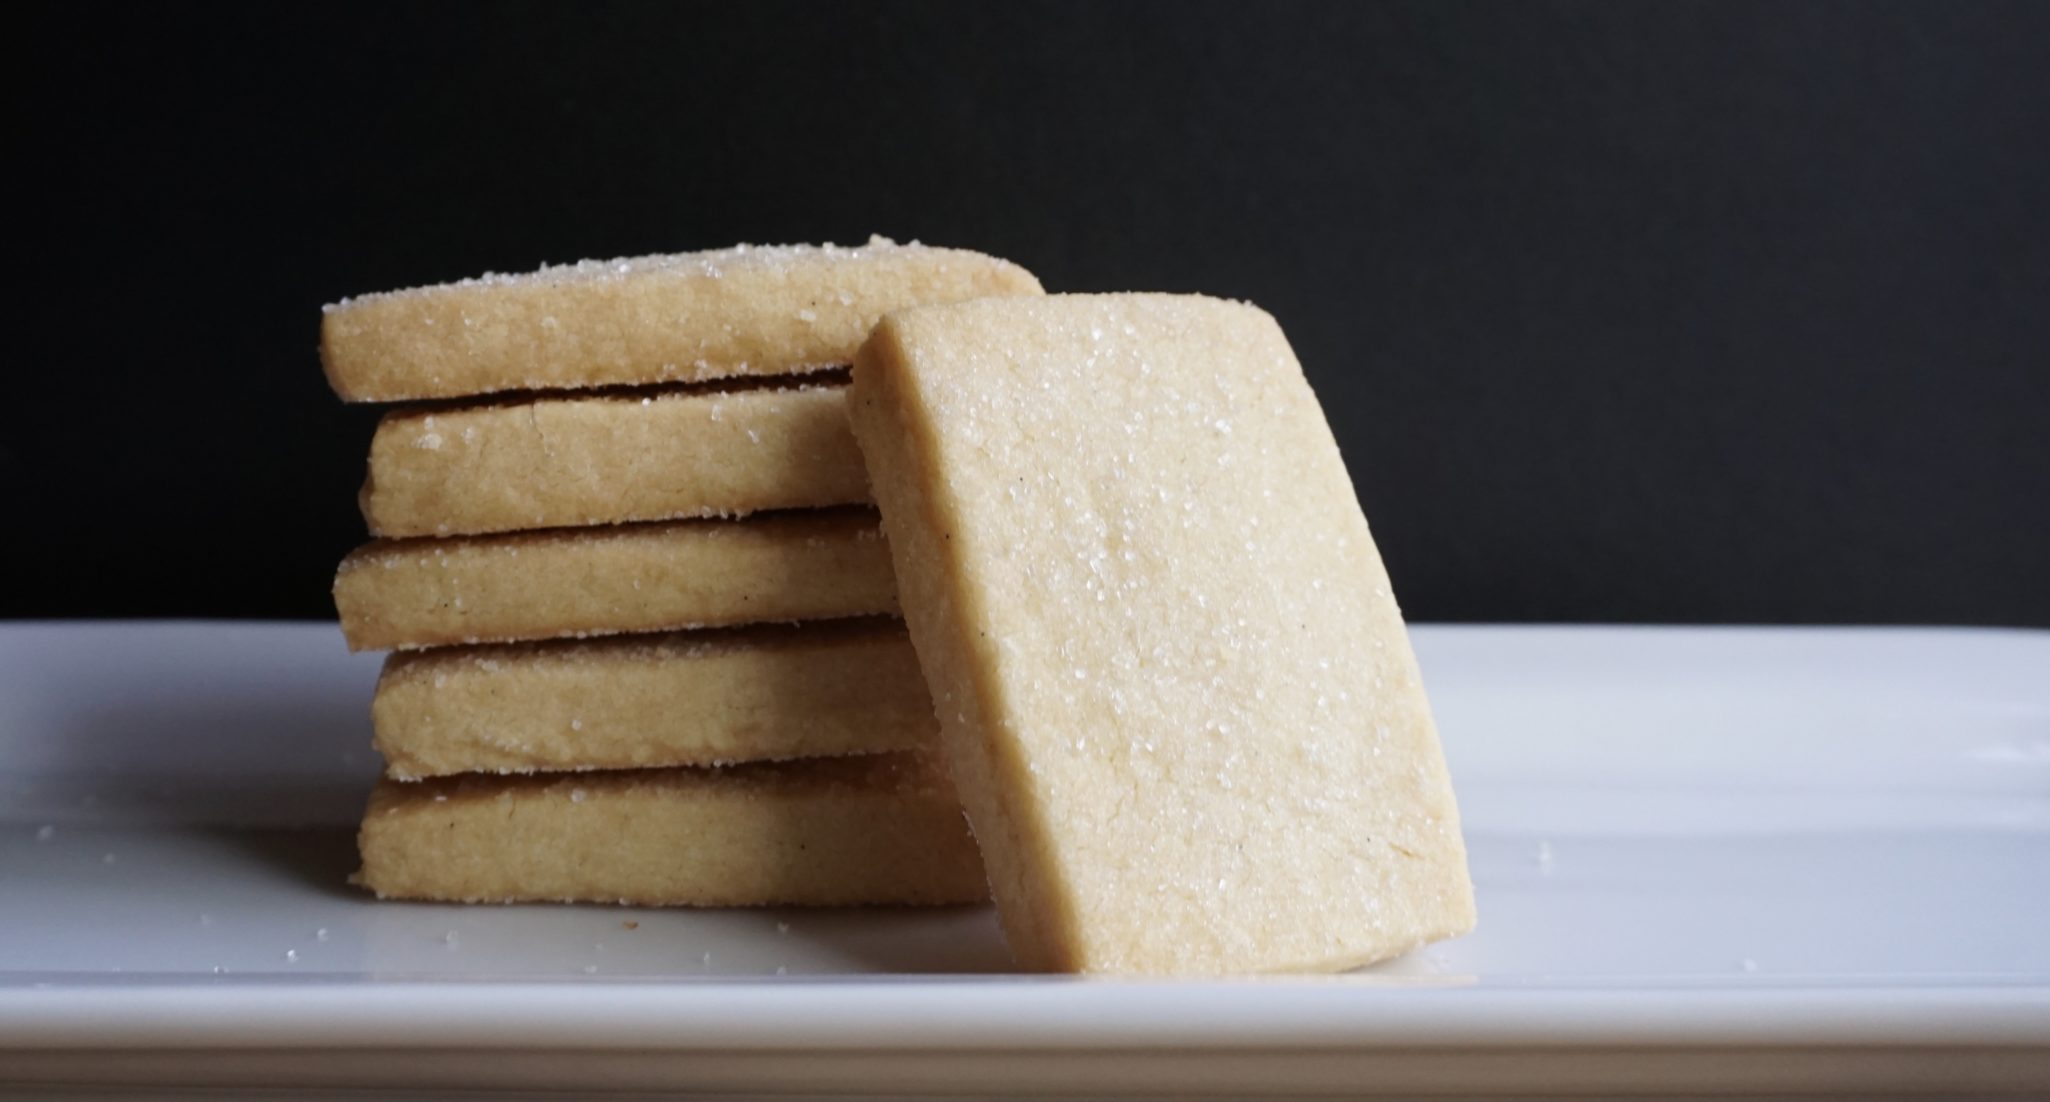
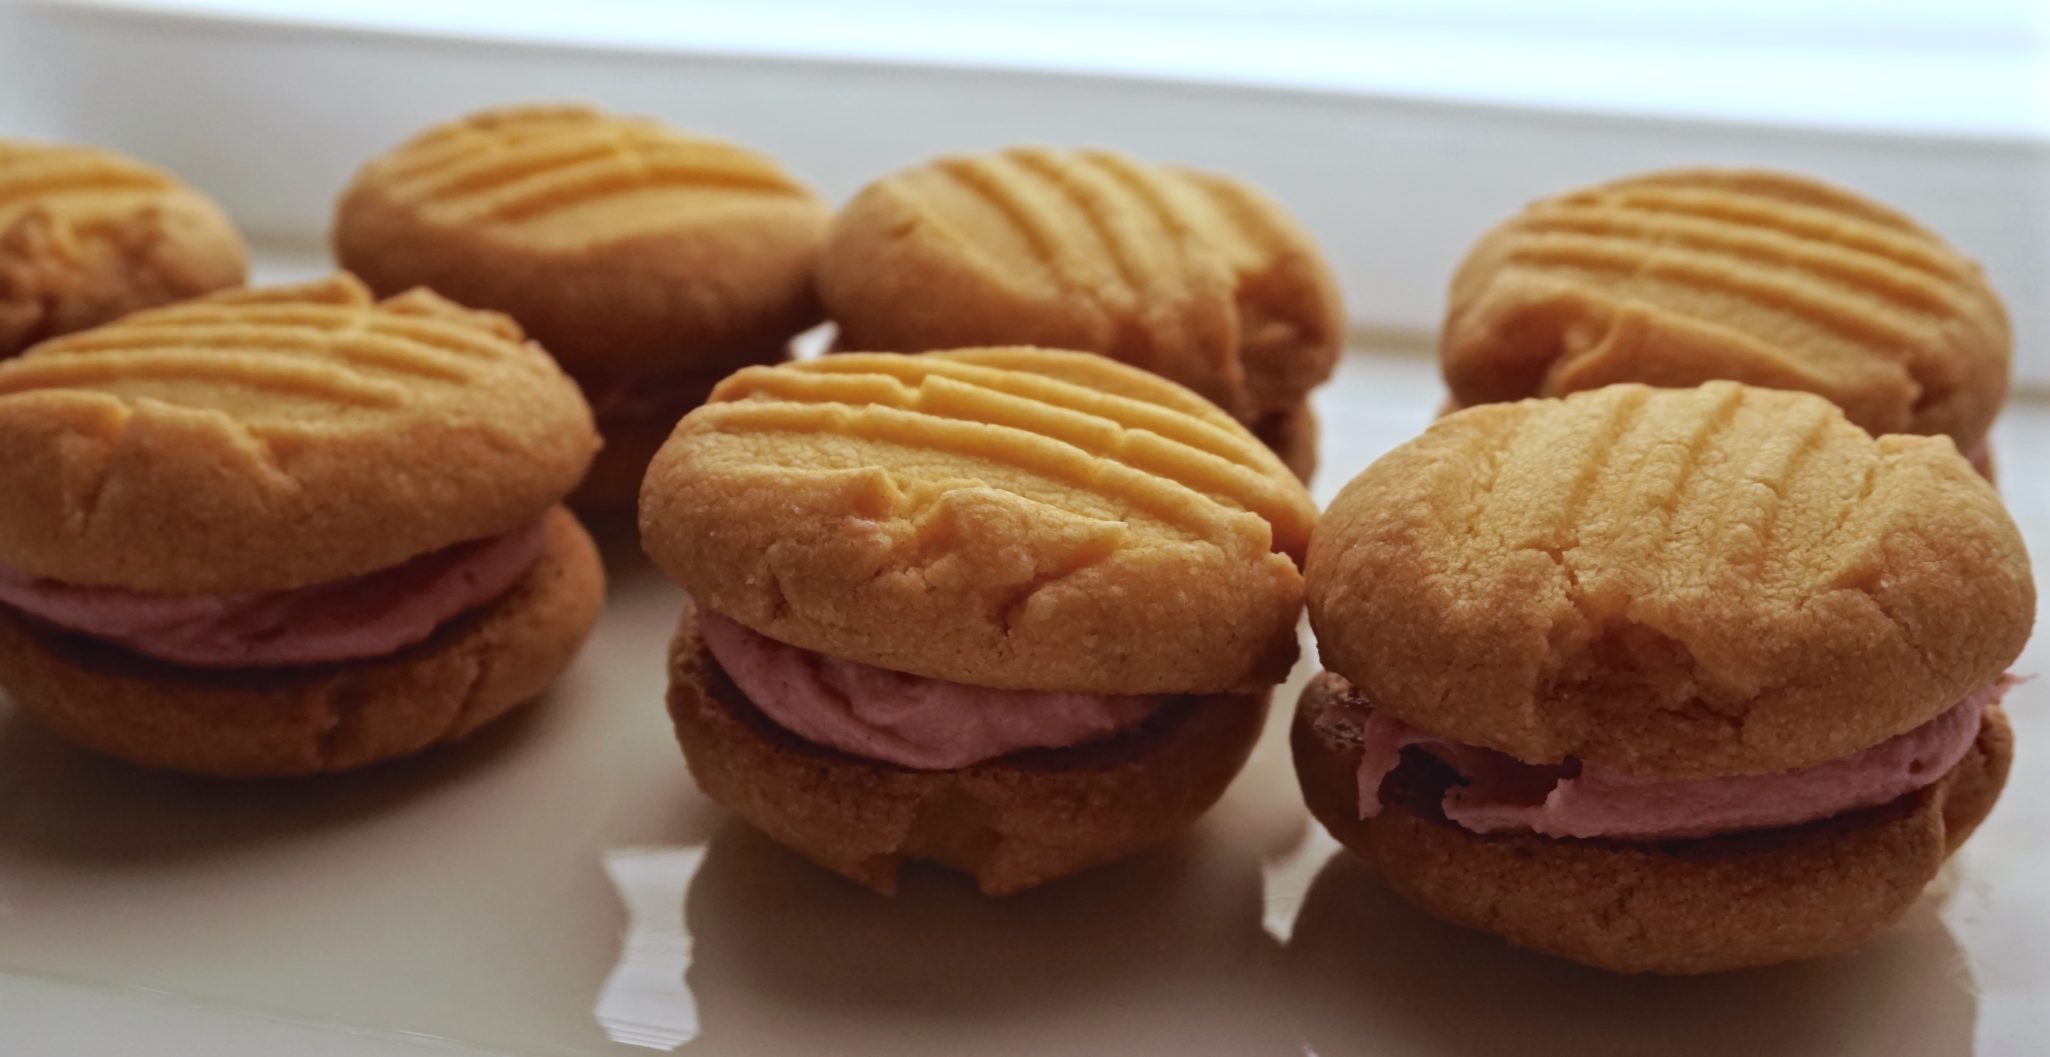
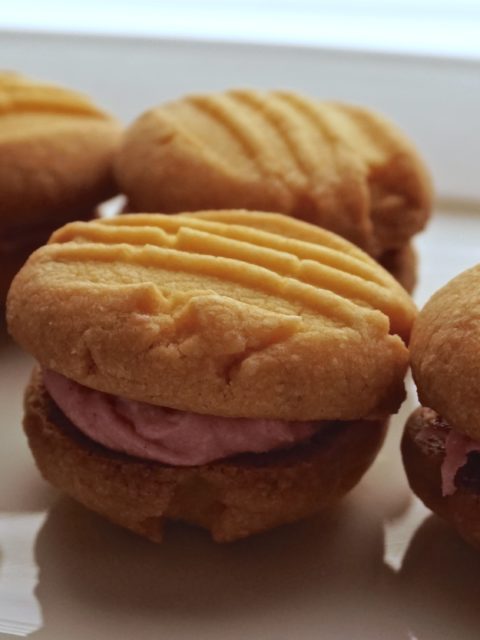
Day 2 of 12 days of Cookies.  I am off to a slow start having posted the first cookie days ago.  But I promise, this cookie will make up for the wait.  Once again I found a delicious treat in Ottolenghi’s dessert book, Sweet. Yep, my new fav. I am a sucker for shortbread and their Yo-Yos are just that, buttery, melt in your mouth shortbread cookies. They didn’t stop there, the cookies are then paired with a luscious buttercream to make an absolutely delicious sandwich cookie. Perfect for a holiday cookie platter.

The cookies are made with custard powder, an English invention.  A thickening agent like cornstarch, the custard powder gives the cookies their sandy texture. The addition of annatto to the powder creates that lovely yellow-orange hue.  I found Bird’s Custard Powder at a local Indian supermarket, cornstarch can be used instead but I love the color from the Bird’s Custard.

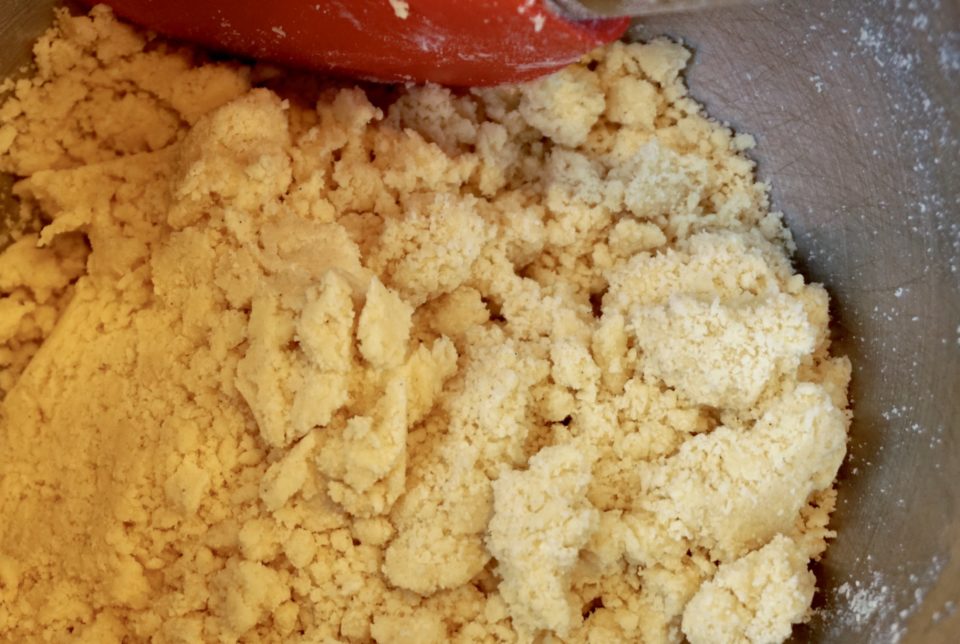
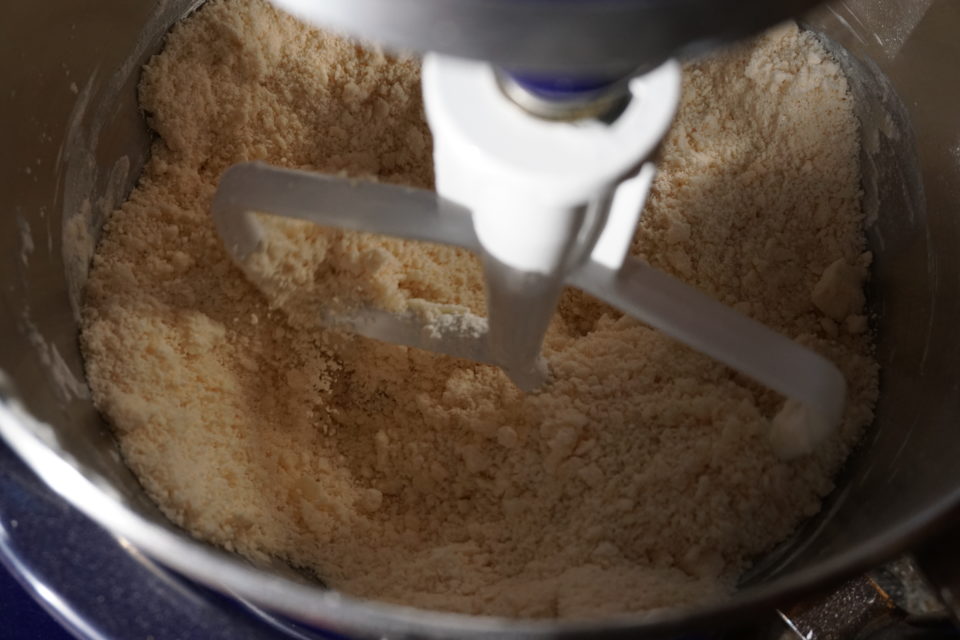
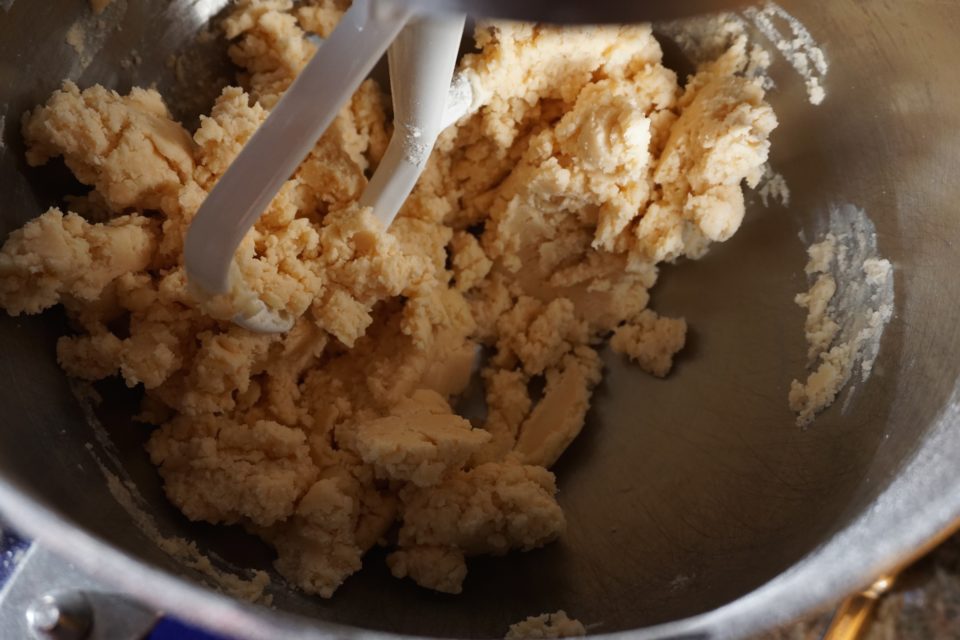
The dough comes together quickly.  Dry ingredients are sifted into a bowl and butter cut into it. The mixture starts out very dry and crumbly but after adding the vanilla and increasing the speed of the mixer the dough comes together nicely.

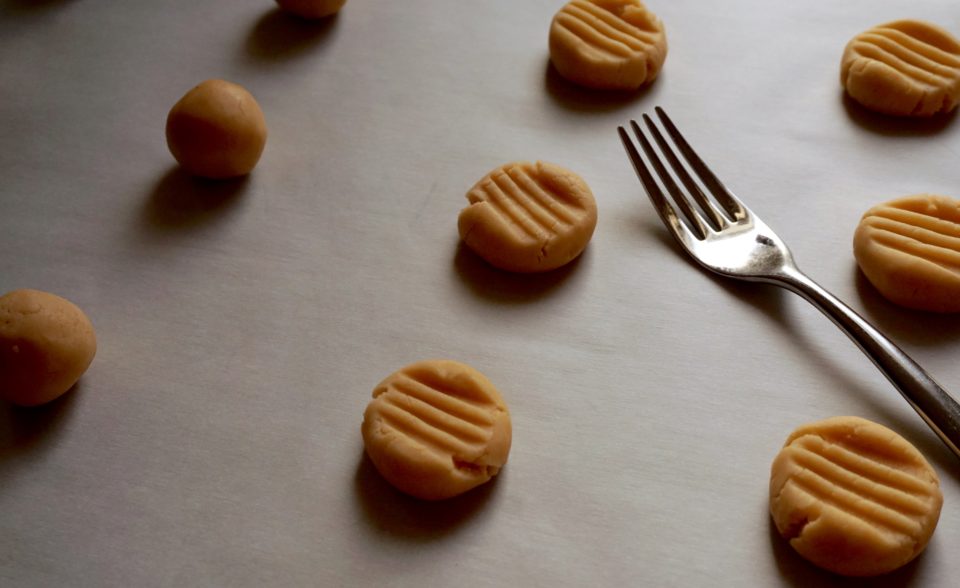
Use a tablespoon ice cream scoop to measure out portions of dough. Roll each scoop into a smooth round ball and then smoosh each with a fork.

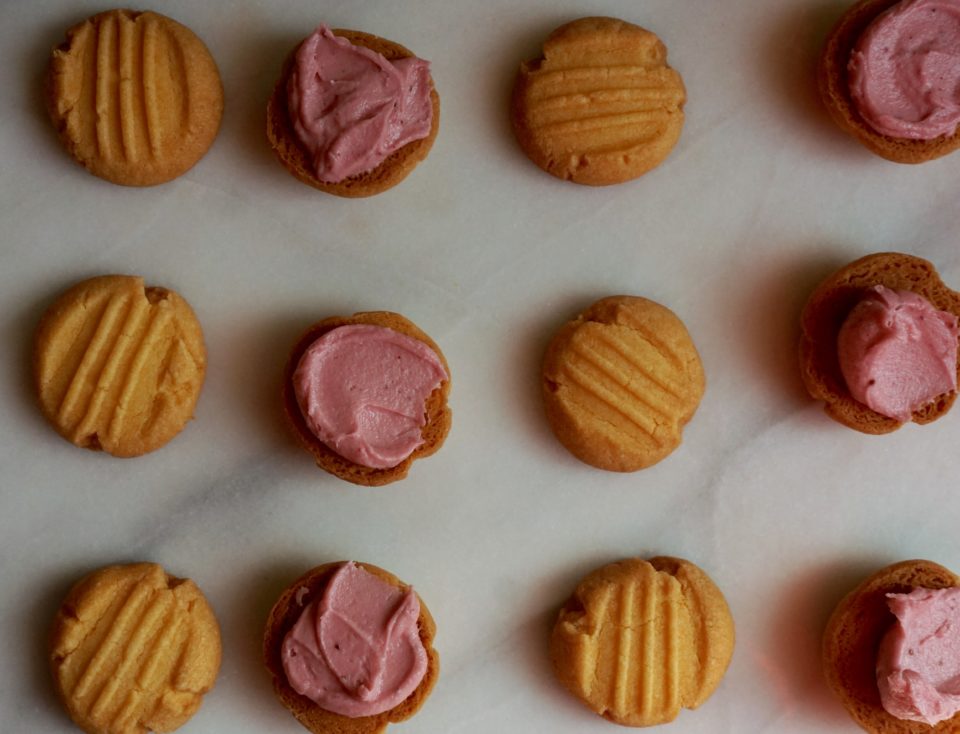
I have a confession to make.  I couldn’t find rhubarb so I substituted strawberries instead to make the buttercream.  The berries give the buttercream both flavor and color and make very striking sandwich cookies.  No wonder they call these cookies Yo-Yos.  Can’t wait until rhubarb is in season.

and to get you into the holiday baking mood….Mariah

Ho Ho Ho! Yo-Yo’s are here! Day 2 Holiday Cookies

Ingredients

  • 1 small stalk rhubarb trimmed, washed and cut into 1-inch lengths
  • 4 1/2 tbs unsalted butter room temperature, cubed
  • 1 cup plus 2 tbs confectioner's sugar
  • 1/2 tsp lemon juice

Dough

  • 1 1/3 cups plus 2 tbs all-purpose flour Plus 1 tbs for dusting
  • 1/2 cup custard powder can use cornstarch
  • 1/2 cup plus 1 tbs confectioner's sugar
  • 1/8 tsp salt
  • 3/4 cup unsalted butter room temperature, cubed
  • 1/4 tsp vanilla extract use 1/2 tsp if using cornstarch

Instructions

Holiday Cookies, Already? (Book Review-Holiday Cookies)

Holiday Cookies, Already? (Book Review-Holiday Cookies)

I love cookies and every year I look forward to baking holiday cookies to share with family and friends. The process for which cookies end up in my annual holiday platter starts..well, the day after Christmas. Throughout the year I keep an eye out for new cookie recipes to go along with my tried and true traditional shortbread and Jan Hagels that I make every year.
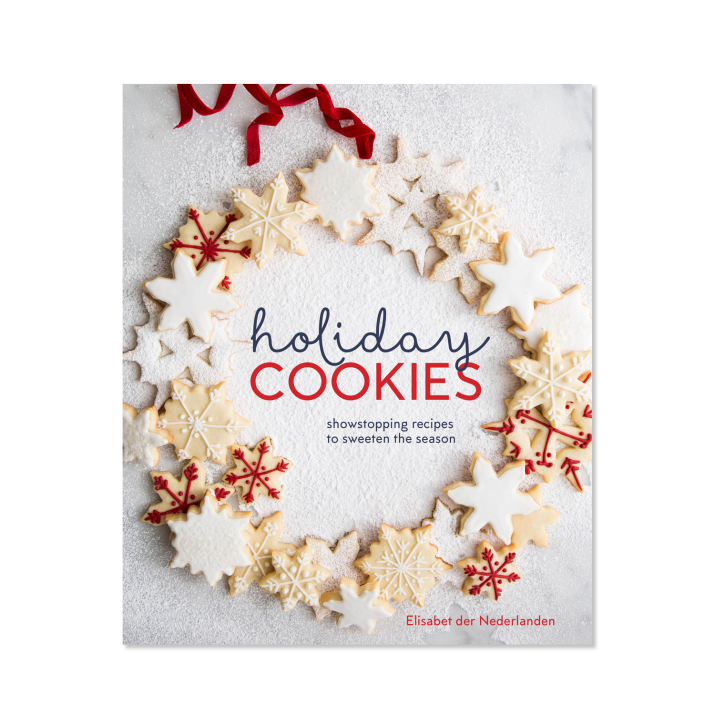
So of course I jumped at the chance to review a new book from Blogging for Books aptly titled Holiday Cookies by Elisabet Der Nederlanden. The collection is filled with classic, traditional cookies like Spritz cookies, green and red pinwheels and gingerbread. She does add a twist to many by varying the spices and flavors-eggnog madeleines, saffron biscotti or fig and cardamon rugelach which definitely add interest.  I chose the Malted Milk Chocolate Cookies to try. It called to the kid in me and conjured up images of Malt-o-meal, Ovaltine and Whoppers. This is the only recipe I have tried so far and unfortunately the cookie was pretty nondescript. Neither the malt flavor or chocolate were stood out. The cookies did not spread or crack as much as the cookies pictured, perhaps too much flour on my part (weights people). I will try other cookies in the book hope I find one for my annual holiday assortment. l’ll update my review when I do.  The recipes depend solely on volume measurements and not weights, bummers. I love cookbooks that contain both weight and volume measurements. I am a big fan of having a scale it is much more accurate and reliable.
The book starts with a section on how to pack cookies and decorate your cookies with a festive flair. Chapters are organized by classics, exchange cookies, spice and around the world. She also includes a chapter on candy and decorating. The recipes are organized with ingredients in the column on the left and directions on the right, very easy to follow. THE PHOTOS ARE GORGEOUS and the book is worth its weight in presentation ideas. Can’t wait to try a couple more recipes.

Chocolate Sprinkle Cookies (Everything Is Better With Sprinkles)

Chocolate Sprinkle Cookies (Everything Is Better With Sprinkles)

Is anyone else feeling like me?  Where did the year go? I can’t believe it’s almost summer!   My kids are in the homestretch at school and finals are just around the corner.  We just dropped their care packages off at the post office, nothing like some sugar and munchies for those late-night study sessions.  I remember those days well.

Care Package Contest

Wes made his Good Cookies which truly are the study cookie of choice for our kids (I’m not jealous in the least bit, nope not at all….brats).  We packed homemade granola, Hawaiian-style sweet bread buns, and dried mangos.  I almost made the usual CCC but decided to change it up.  Back in the recesses of my mind, I remembered Jordan remarking how much he liked Chocolate Sprinkles Cookies.  Just maybe I could knock Wes’s Good Cookies off that number one spot in the care package derby….as you can tell I am not the least bit competitive.

The recipe for these kid-friendly cookies comes from Bake or Break, an absolutely wonderful site with easy, delicious recipes for all things baked.

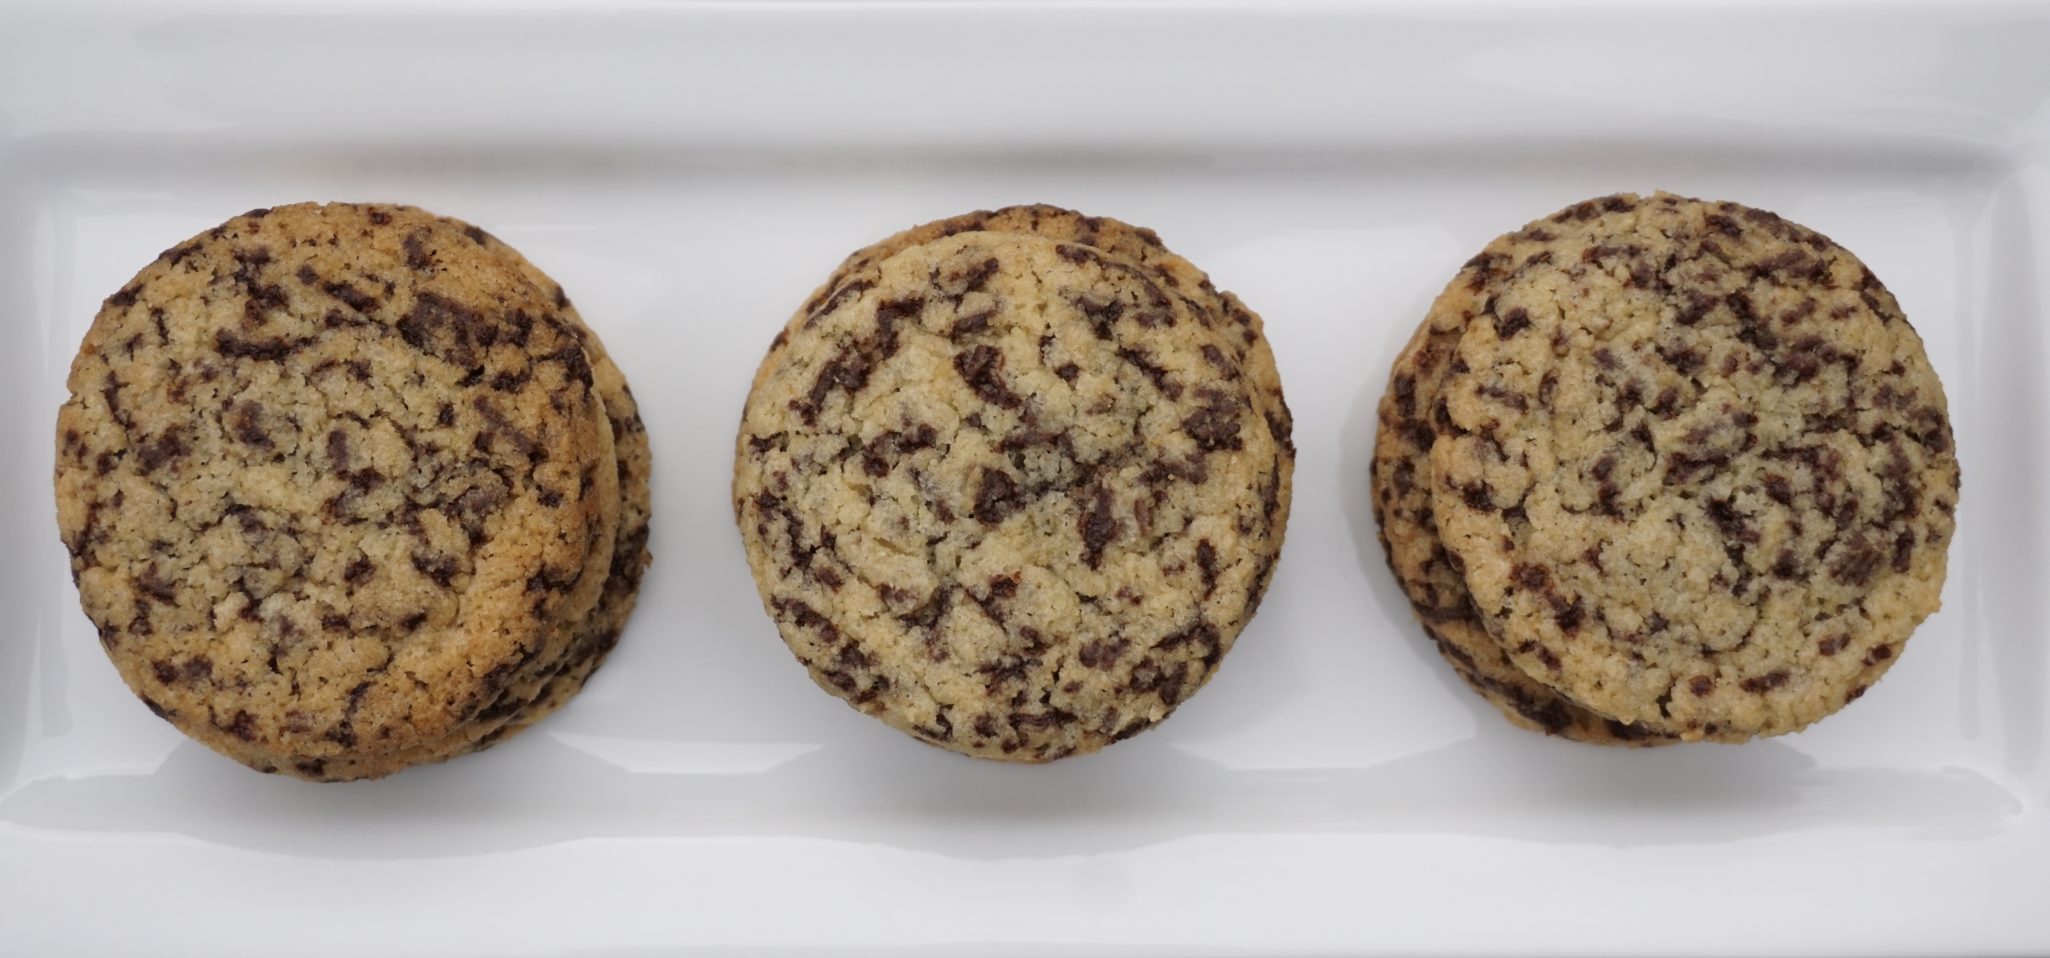
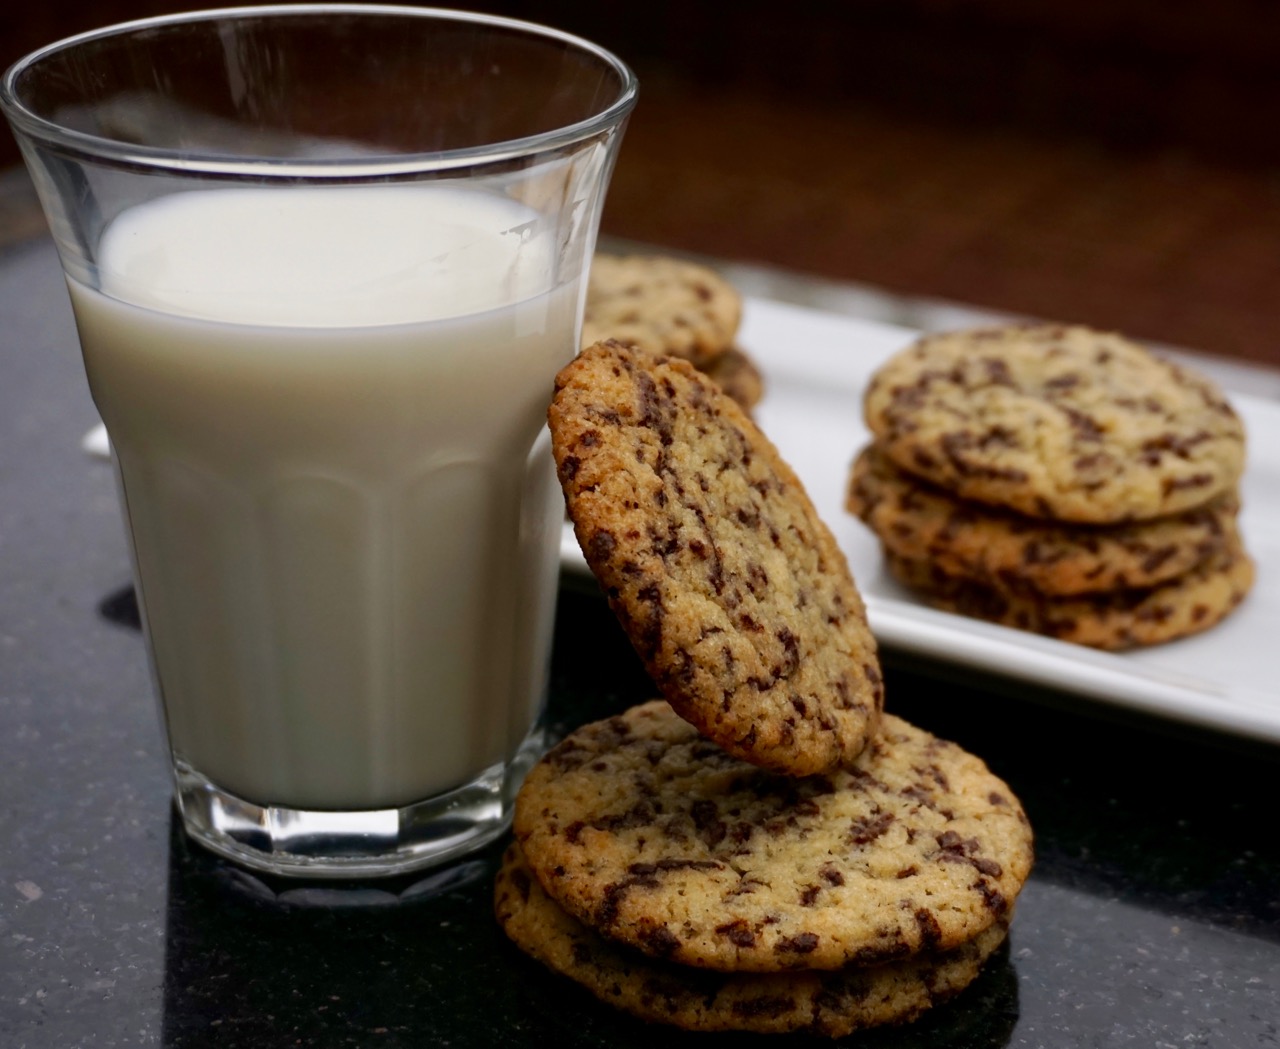
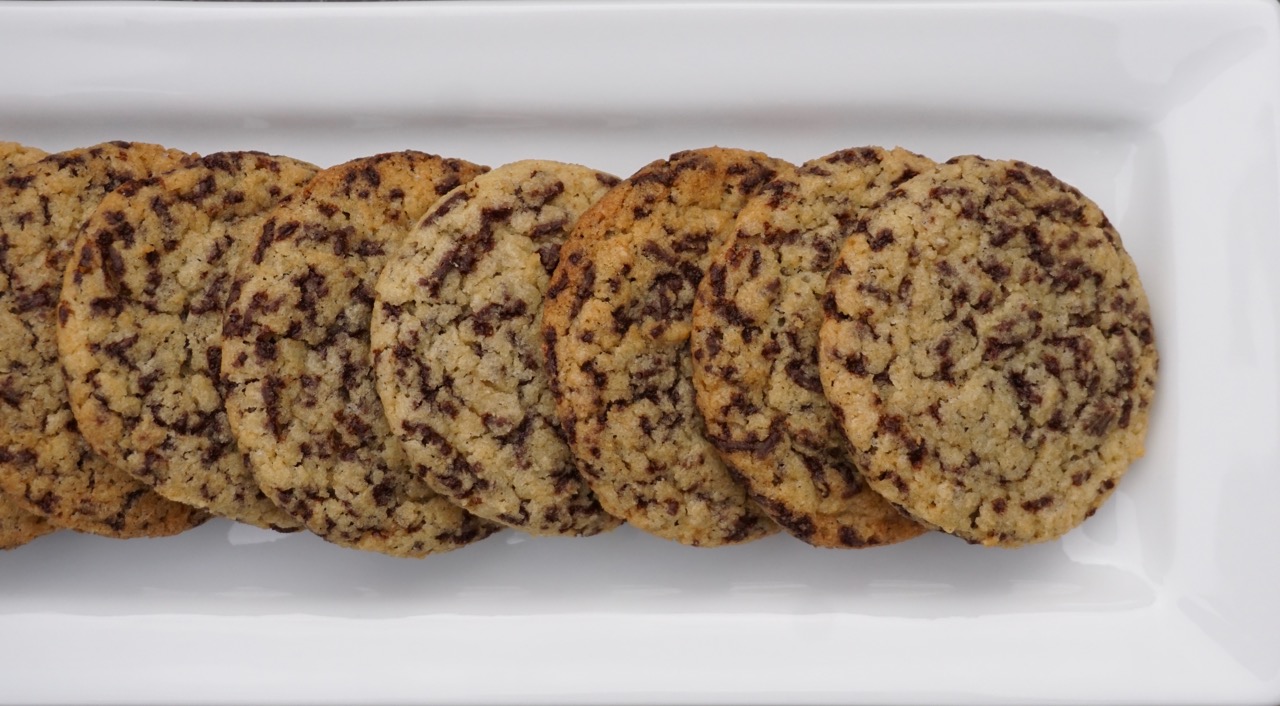
Swap chocolate sprinkles for the chips for this riff on chocolate chip cookies. This transforms both the taste and texture of the cookie.  Chocolate flavor permeates the entire cookie rather than that burst of chocolate you get when you bite into a chip.  The edge of the cookie is crisp while the center is just a tad chewy.  Those in the No Nuts camp will be happy…not a nut to be found in this cookie.

NO Faux Sprinkles Please

The star of this cookie is the sprinkles, so please make sure you use good quality chocolate sprinkles. You know, real chocolate sprinkles not waxy pretend wanna-be sprinkles.  Guittard makes delicious chocolate sprinkles that can be ordered from King Arthur Flour or if you have an Asian market or a market that carries Dutch products, DeRuijter has a line of chocolate sprinkles that are very good.

Make these cookies soon and sprinkle some happiness and yumminess on your kids!

Everything Is Better With Sprinkles

Chocolate sprinkle cookies for the kid in all of us. Crispy edges, chewy center and chocolate everywhere
Course cookies, Dessert
Cuisine American
Keyword Chocolate Sprinkle Cookies
Prep Time 15 minutes
Cook Time 15 minutes

Ingredients

  • 2 & 1/2 cups all-purpose flour
  • 1 teaspoon baking powder
  • 1/2 teaspoon salt
  • 1 cup unsalted butter softened
  • 1 cup granulated sugar
  • 1 cup packed light brown sugar
  • 2 large eggs
  • 1 & 1/2 teaspoons vanilla extract
  • 1 cup chocolate sprinkles

Instructions

  • Preheat oven to 350°. Grease or line baking sheets.
  • Whisk together flour, baking powder, and salt. Set aside.
  • Using an electric mixer, beat butter, sugar, and brown sugar until fluffy. Add eggs, one at a time, beating just until combined after each addition.
  • Mix in vanilla.
  • Gradually add flour mixture, mixing until almost combined. Stir in chocolate. Do not over mix.
  • Using a small ice cream or cookie scoop (2 T) scoop and place dough onto lined pans.
  • Bake 10-12 minutes until edges are golden brown. Adjust cooking time for a chewy cookie decrease baking time ~1 minute for a crispier cookie increase baking time ~1 minute
  • Transfer from pan to wire racks to cool completely.
Bailey’s Irish Cream Stands In for Day 5 Holiday Cookies:

Bailey’s Irish Cream Stands In for Day 5 Holiday Cookies:

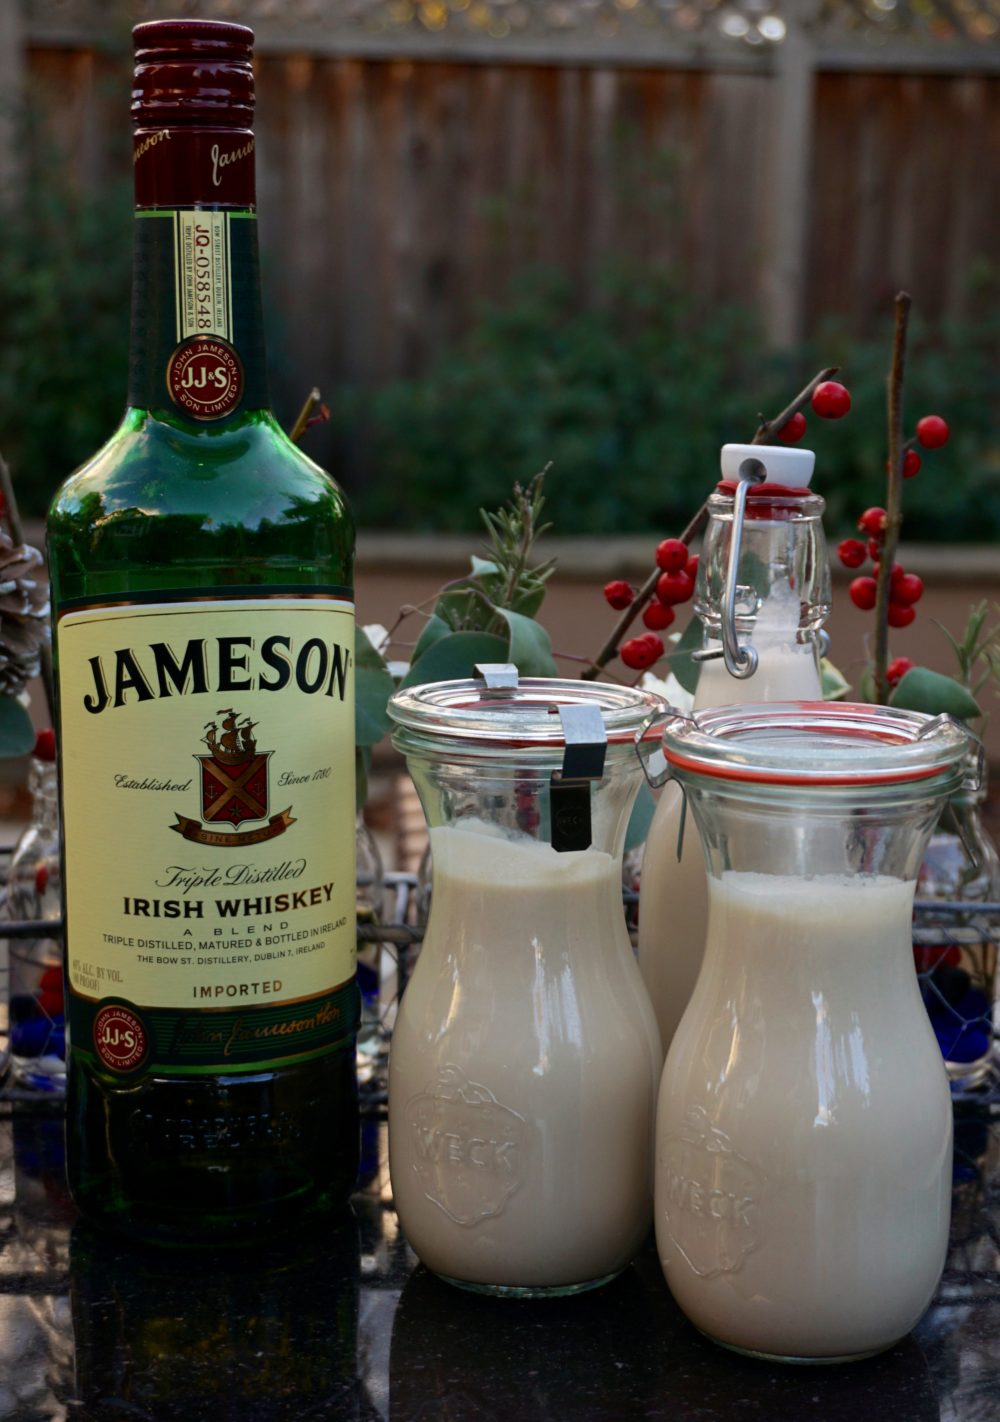
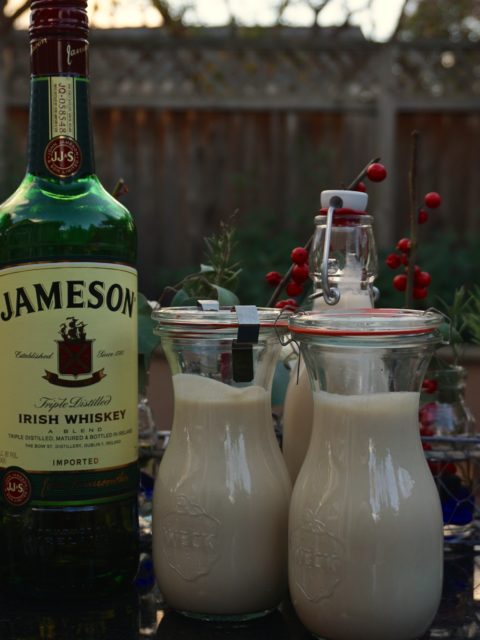
.I was going to stop at homemade Kahlua but a super simple recipe caught my eye in one of my all time favorite blogs, Smitten Kitchen.  I trust her implicitly so I knew I was going to make this.  This is a knockoff of Baily’s Irish Cream. Yep. Super simple and delicious.  I waited until the last minute to make this as it will probably not keep very long.  As I was perusing recipes for coffee liqueur I would come across recipes for a homemade irish cream.  Most called for eggs, which made me reticent to try.  Smitten Kitchen’s contains just cocoa powder, heavy whipping cream, sweetened condensed milk and vanilla.  THAT’S IT!!!  You should be really excited right now  Oh darn, one more ingredient, Irish Whiskey.  Had you for a moment didn’t I?  Unlike the Kahlua, I did spring for a bottle of Jameson’s Irish Whiskey. It’s so incredibly simple it’s nuts.  You whisk the cocoa powder with a bit of cream until it forms a paste, then you gradually add the rest of the cream, stir in the vanilla and sweetened condensed milk and Irish Whiskey, DUNZO.  Pour into cute little bottles and refrigerate.  Good for 2 weeks.  Perfect for New Year’s!  I am also going to make one with a bit of instant coffee.  Doesn’t that sound delish?  Serve it in coffee, on the rocks…yumo.

That’s it!  Please enjoy the holidays with loved ones.  That’s what matters.  Happy Holidays!

Day 5 Holiday Cookie List: Homemade Irish Cream

Knock off of Bailey's Irish Cream. It's delicious and guaranteed to warm you right down to your toes!
Course Drinks
Cuisine American
Keyword Bailey's Irish Cream

Ingredients

  • 1 teaspoon unsweetened cocoa powder
  • 1 cup 235 ml heavy or whipping cream
  • 1 14-ounce or 415 ml can sweetened condensed milk
  • 1/2 teaspoon vanilla extract
  • 1 cup 235 ml Irish whiskey (I used Jameson)

Instructions

  • In the bottom of a pitcher, whisk cocoa powder and a spoonful of cream into a paste. Slowly, whisking the whole time, add more cream a spoonful at a time until the paste is smooth and loose enough that you can whisk the rest of the cream in larger splashes. Once all of the cream is in, whisk in condensed milk, whiskey and vanilla.
  • Cover with lid or plastic wrap and keep in fridge for up to two weeks, possibly longer.
  • Serve in a tiny tumbler filled with ice, or splashed into coffee.

Notes

This is not for the faint-hearted.  Packs a nice punch.  If you would like to make it a little less boozy, add heavy whipping cream and the condensed milk 1 tablespoon each at a time, until desired taste.
 
Epic Fail: Homemade Kahlua 12 Days of Cookies: Day 4

Epic Fail: Homemade Kahlua 12 Days of Cookies: Day 4

I have been in a funk this holiday season.  Every time I go to bake cookies I get de-railed.  I thought I would make a final push and get a few done, but I was struck by the flu bug which put the big kabash on any last minute baking. This effectively ended all hope of any more scrumptious cookies.  I have the dough for these wonderful crescents from Rose’s Christmas Cookies and for Mrs. Sugaya’s pecan tartlets chilling in the fridge. But they will have to wait until after Christmas.

But all is not loss.  I did manage to make some homemade goodies that I hope you will try.  I made favorite breakfast munchies, Juli’s granola and my cousin Bonnie’s spicy pecans. Cookies are little gifts of love, peace and hope and I just couldn’t bring myself to bake many.  I wish everyone love and joy with family and friends during this holiday season even if a few of us are on opposite sides of the political spectrum.

So, what did I make instead of cookies? Who guessed booze?  You would be right!  I started a couple of weeks ago after searching for a homemade Kahlua recipe. Big mistake, there must be a thousand recipes for something so simple!  So I came up with my own concoction that I think is pretty darn good and very easy.  Couple of tips, you are using a boat load of sugar and coffee, DO NOT break the bank on the vodka or rum.  I used the same vodka I used to make vanilla extract with last year, a brand from TJ’s. I picked it cause the bottle was cool looking.  I had some Meyer’s rum so I used that too.

I started with 1/4 cup instant expresso (Medaglia D’Oror) and my first batch didn’t have enough coffee flavor so I made a second batch using 1/2 cup and mix the two batches.  So I leave it to you to decide how much coffee flavor you want.  I will keep you posted on the feedback!

Homemade Coffee Liqueur

Make your own coffee liqueur aka Kahlua, easy and sure to impress your friends and family!
Course Drinks
Cuisine Mexican
Keyword coffee liquer, easy to make, kahlua

Ingredients

Adapted from Creative Culinary

  • 4 cups water
  • 2 cups brown sugar
  • 2 cups white sugar
  • 1/3-1/2 cup dried espresso
  • 500 ml vodka
  • 250 ml Rum
  • 2 vanilla beans split
  • 2 shots of chocolate liqueur or 1 tablespoon cocoa nibs

Instructions

  • Combine the water, sugars and dried espresso in a large saucepan over medium-high heat.
  • Bring to a boil; turn the heat to low and simmer for a minimum of 1 hour.to reduce the mixture and make a more syrupy consistency. I had a final volume of approximately 3 cups.
  • Watch constantly and stir occasionally. It will boil over if not watched!!!
  • Remove from heat and let cool.
  • Add vodka, rum, vanilla beans and chocolate liqueur or cocoa nibs
  • Pour everything into a clean storage container. I love these Ball Jars.
  • Age for 3-4 weeks in a cool, dark location; stirring once or twice a week.
  • When ready to bottle, remove vanilla beans, bottle mixture and store. I strained the mixture into the bottle.
  • How easy is that?
  • Serve straight, over ice cream, mixed drinks
Variations on a Thumbprint Day 2: 12 Days of Cookies

Variations on a Thumbprint Day 2: 12 Days of Cookies

Who doesn’t like thumbprints? Not me, my kids, my hubby, nor Santa (the thumbprints were always gone from Santa’s cookie plate on Christmas morning).  While perusing the internet for holiday cookie recipes I came across the blog, Chew Out Loud.  Their most requested cookie recipe (hands down winner)  is for Buttery Jam Thumbprint Cookies. Really, is it so surprising?  A buttery meltingly tender cookie filled with a “thumbleful” (get it? thumb + thimble) of sweet jam in the center, finished with a dusting of powder sugar.  Heavenly.

So of course I included thumbprints in this year’s 12 Days of Cookies.    My favorite recipe comes from an old copy of Ladie’s Home  Journal (yes, I am that old).  I have made these every year for as long as I have been baking Christmas cookies.  The addition of ground walnuts to the dough gives these cookies a nutty edge and a slightly sandier texture.  I like filling the centers with raspberry jam, its rich ruby red color playing off the surrounding cookie. The sweet and tart flavor of the jam compliments the cookie perfectly.  You can substitute pecans for the walnuts although I prefer walnuts which have a bit of a bite that works really well.   Did I mention they are super easy to make?  Run, don’t walk to your kitchen and make these cookies now.

Over the years I have found little tricks that help when making cookies.  Ice cream scoops are the secret to uniform sized cookies and definitely speed up the process of scooping out the dough.  I make the indentation for the jam with my wine opener (nifty huh) and creates the perfect sized circle in the middle of the cookie, much better than my thumb!

You can use any flavor jam you like.  Put jam in a squeeze bottle and shoot approximately 1/4 teaspoon of jam into each indentation made. As the cookies are cooling, you can add a spot more jam in the center if you wish.  Sprinkle with powdered sugar.  I use a wire mesh tea strainer for my powdered sugar, works like a charm.


And for your listening pleasure the King-Blue Christmas

Variations on a Thumbprint Day 2: 12 Days of Cookies

Classic thumbprint cookie made with ground walnuts. Sandy, buttery absolutely delish!
Course cookies, Dessert
Cuisine American
Keyword Berry jam, cookies, jam, thumbprints
Prep Time 15 minutes
Cook Time 15 minutes

Ingredients

Ladies' home journal 12/93

Prep time: 20 minutes

Baking time: 10-12 minutes

  • 1 1/2 cup coarsely chopped walnuts
  • 1 cup butter at room temperature
  • 3/4 cup granulated sugar
  • 2 1/4 cups all-purpose flour
  • 1/4 cup seedless raspberry preserves
  • Powdered sugar
  • Dash of salt

Instructions

  • Preheat oven to 350 degrees.
  • Chop nuts in food processor until very fine. Beat butter, nuts, salt and granulated sugar in mixer bowl until light. Beat in flour into blended.
  • Shape dough into 1 inch balls.
  • Place 2 inches apart on ungreased cookie sheets and flatten to 1 1/2 inch circle.
  • Press into centers with a fingertip.
  • Fill each indentation with 1/4 teaspoon preserves.
  • Bake 10-12 minutes, until golden.
  • Cool.
  • Sift confectioner's sugar over cookies.
  • Makes 6 dozens.


Dutch Almond Cookies (It’s Crunch Time ) Day 1 Holiday Cookies

Dutch Almond Cookies (It’s Crunch Time ) Day 1 Holiday Cookies

One hundred and twenty-ish

Remember that number. Way back in January we took an impromptu trip to New York for my cousin’s birthday.  My cousin’s wife Kathy, baker, crafter, home chef extraordinaire made all of the scrumptious desserts – birthday cake, lemon parfaits, and an amazing assortment of cookies for the shindig.  We ate, we danced, we laughed.  Not surprisingly I was enamored with all of the desserts Kathy made, one in particular, stood out.  A cinnamon-y, crispy-crunchy cookie with almonds scattered throughout.

When we returned home from our NY jaunt I fired off an e-mail to Kathy.

Me:  Hey Kathy, Great party!  As usual delicious food, great company, and so much fun!  Loved those crunchy almond cookies!  Mind sending me the recipe?

Kathy:  Still recovering from the party.  Yep, those are good cookies.  The recipe is from Nick Malgieri’s Cookies Unlimited, they’re called Dutch Almond Cookies.

Me: Wait, I think I have that book (surprise, surprise)

…I scurry off to find said book

Seize the Dough

The first time I made them was a total disaster.  The recipe is actually pretty simple.  Butter, brown sugar, granulated sugar, and a touch of water are heated until the sugar is melted.  Once the sugar has dissolved toss in the whole blanched almonds.  The almond mixture is then combined with the dry ingredients.  All was fine until I stirred in the flour and bam!  It seized and instantly transformed into a crumbly dry mess. Ugh.  Disappointing.  I tried to salvage it by pressing it into a baking pan and chilling it.  Unfortunately, even after chilling, it was not workable and it ended up in my compost bin.  Where did I go wrong?

I turned to my trusty laptop, googled Nick Malgieri, and fired off an e-mail lamenting my disaster.  True to form and further validating how nice bakers are, I received a response from him shortly.  After some mulling, he concluded that I had probably used too much flour.  

One hundred and twenty-ish

When you try these bundles of crispy crunchy goodness use a scale if you have one. It may save you from the “un-malleable mess” I had the first time. If you don’t have a scale, be gentle with your flour, don’t pack it in the cup when you measure.

I revisited these cookies for the holidays 2021.  This time I decided to go with the standard weight of 122gms for a cup of flour.  Worked like a charm.  I think anywhere between 120-125gms of flour should work for these cookies.  If you don’t have a scale, fluff your flour and lightly scoop it into your measuring cup with a spoon. Don’t pack it.

Sugar, butter, almonds, mixture on the stove before adding the flour.

Added the flour, this is the step I always approach with trepidation…and where I implore you to get a scale!

This batch actually has a smidge to much flour…see the dry parts?  But no seizing of the dough, Yay! Use parchment or heavy-duty foil with plenty of excess to grab, it was a b*tch trying to remove it, the regular-weight, too-short foil kept ripping.

Ready for the oven, be generous with the cinnamon sugar.

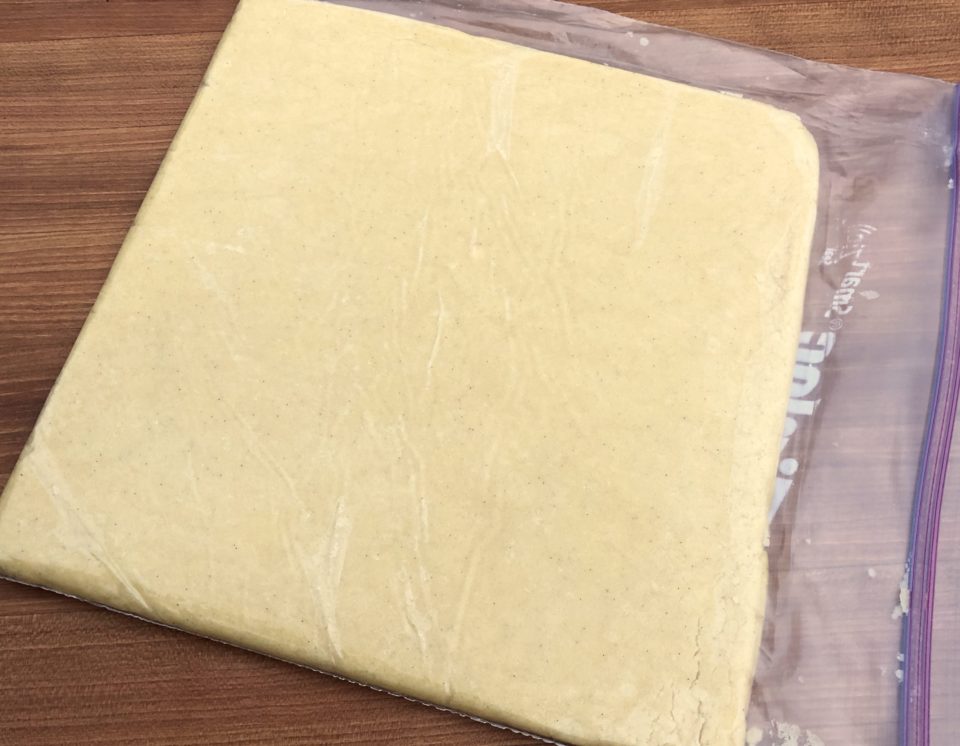
This time the dough did not turn into a chalky brick, instead, it was very thick and almost pourable.  I put it in an 8×8 pan lined with foil (very important) covered it with plastic wrap and chilled the dough overnight.  Once chilled it hardens and becomes easy to cut.  Divide dough into 3 logs.  Cut 1 log at a time leaving the remaining logs in the fridge. If it crumbles while cutting, just smoosh (a technical term used by all serious chefs) it back together.  The recipe calls for 1/4″ inch slices.  These are really crunchy cookies I would slice them a smidge thinner than 1/4 inch rather than more.  Place the cookies on a parchment-lined sheet about 1 inch apart and sprinkle generously with cinnamon sugar.  Bake for 15 minutes.  Make sure to bake the cookies until they are a rich golden brown and firm to touch.  Once cooled the slices will be crispy-crunchy similar to biscotti. If under-baked the cookies will be chewy instead of crisp.

This recipe makes a ton of cookies, perfect for that upcoming holiday cookie swap. Delightful cookies, crunchy, airy, perfect with tea or coffee.

Added bonus, a holiday tune to go along with these scrumptious cookies.  From  Peanuts Christmas- Linus and Lucy


Dutch Almond Cookies Day 1: 12 Days of Cookies

Light, crispy, crunchy, almond cookies
Course cookies, Dessert, Snack
Cuisine American
Keyword Dutch Almond Cookies
Prep Time 25 minutes
Cook Time 12 minutes

Ingredients

From Nick Malgieri's Ultimate Cookies

Butter for greasing pan

Da Dry Stuff-Combine and set aside

  • 3 cups all-purpose flour 120-125gms/cup
  • 1 teaspoon baking soda
  • 1 teaspoon ground cinnamon

Da Wet Stuff

  • 3/4 cup 1 1/2 sticks unsalted butter, cut into 12 pieces
  • 1 cup firmly packed light brown sugar
  • 1 cup granulated sugar
  • 6 tablespoons water
  • 2 cups whole blanched almonds

Topping:

  • 1/2 cup granulated sugar
  • 1 teaspoon ground cinnamon

Instructions

  • Line an 8-inch square pan with aluminum foil; butter foil. Line 2 or 3 baking sheets with parchment paper.
  • In a large bowl, whisk together the flour, baking soda and cinnamon. Set aside.
  • Melt butter in large saucepan over medium heat. Remove from heat and stir in brown sugar, granulated sugar and water. Return to heat and bring to boil, stirring occasionally, until sugar melts. Remove from heat and stir in almonds.
  • Pour sugar-almond mixture into a large bowl and stir in dry ingredients. Press dough into prepared square pan, cover with plastic wrap and chill overnight or until firm.
  • About 20 minutes before you are ready to bake cookies, set racks in the upper and lower thirds of the oven and preheat to 350 degrees.
  • Prepare topping: thoroughly combine 1/2 cup granulated sugar and 1 teaspoon cinnamon; set aside.
  • Unmold the "brick" of cookie dough from the pan and place on cutting board. Cut brick into three bars, each 8-by-2 1/2-by- 1 1/4 inches (bars will be just a little more than 2 1/2-inches wide). Wrap 2 bars in parchment paper, wax paper or plastic wrap and refrigerate. Cut remaining brick into 1/4-inch thick slices. As you cut cookies, place them on prepared sheets 1 inch apart in all directions.
  • Just before putting sheets in oven, sprinkle tops of cookies generously with the cinnamon sugar. Bake cookies for about 15 minutes, or until they are golden and firm. Slide the parchment with the cookies on top onto cooling racks. Cookies will crisp as they cool. Repeat with remaining bars of dough.
  • Store cookies between sheets of parchment or wax paper in a tin or plastic container with a tight-fitting lid. If freezing the bar(s), it is best to thaw dough overnight in the refrigerator before slicing and baking.
  • Happy baking!