Category: Breads, Biscuits, Scones

“Lassoed” Into Making “Biscuits” (Shortbread)

“Lassoed” Into Making “Biscuits” (Shortbread)

In the Queen’s Language, Cookies are Biscuits

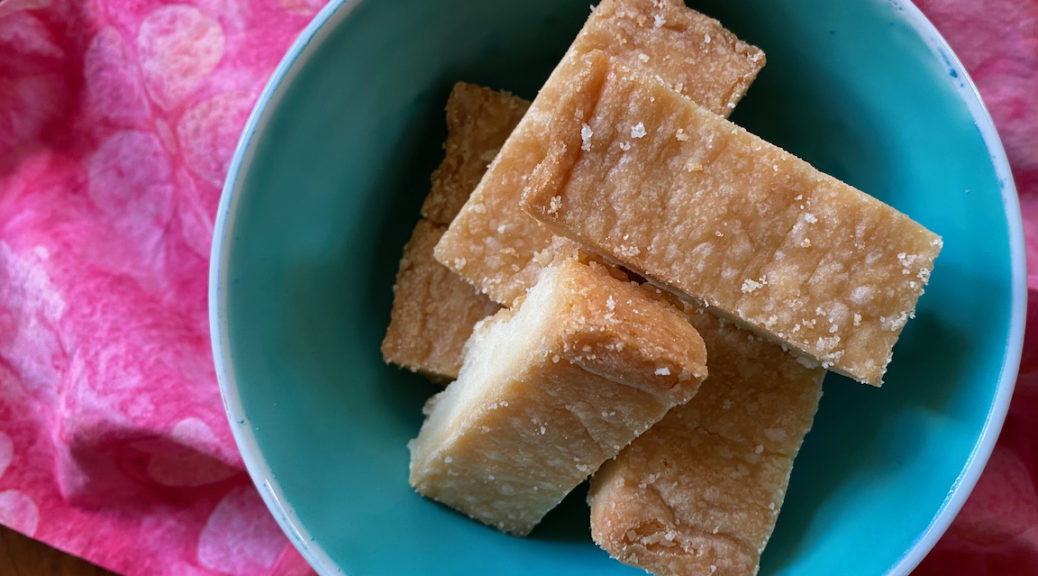
I LOVE Shortbread cookies and have quite a few recipes on 3jamigos that are shortbread-centric.  I live by the motto “more butter, more better”.   Food52 shared the recipe for biscuits from the Ted Lasso show, of course I made them. It was a no-brainer, an automatic cookie bucket list entry.  In fact, it was The “biscuits” that enticed me to watch the show.  Up to that point, Ted Lasso was not even on my radar despite friends and family buzzing about it.   Well, I started watching Ted Lasso and the buzz is justified.  Optimistic, empathetic, decent and endearing, qualities we seemed to be in short supply of these days.  Ted Lasso is the perfect escape and the biscuits are pretty darn good too.

The Premise

American football coach goes to England to coach FOOTBALL. LOL

Biscuits with the Boss

Each day Ted brings a box of biscuits (cookies) to his boss, Rebecca.  A  tiny pink box filled with buttery goodness.  Scrumptious biscuits, solid acting, a funny storyline, and Jason Sudekis, 🍿🍿🍿🍿.

The recipe is the “official one” provided by Apple TV, the distributor of Ted Lasso.  There are other “me too” recipes out there (that of course I am going to try) like Christina Tosi’s version, but I figured this was a good place to start. These are essentially shortbread cookies.  Did I like them?  Yes.  Do I think they are the be-all-end-all?  Probably not.

My absolute favorite Shortbread is from an essay in Cuisine Magazine (sadly gone), “My Father’s Shortbread”.   A Classic Scottish Shortbreadbuttery, sandy texture, nice crumb, melts in your mouth and yet has some substance to the bite.  It is the cornerstone of every holiday box of cookies we give out at Christmas. It is my be-all-end-all shortbread.
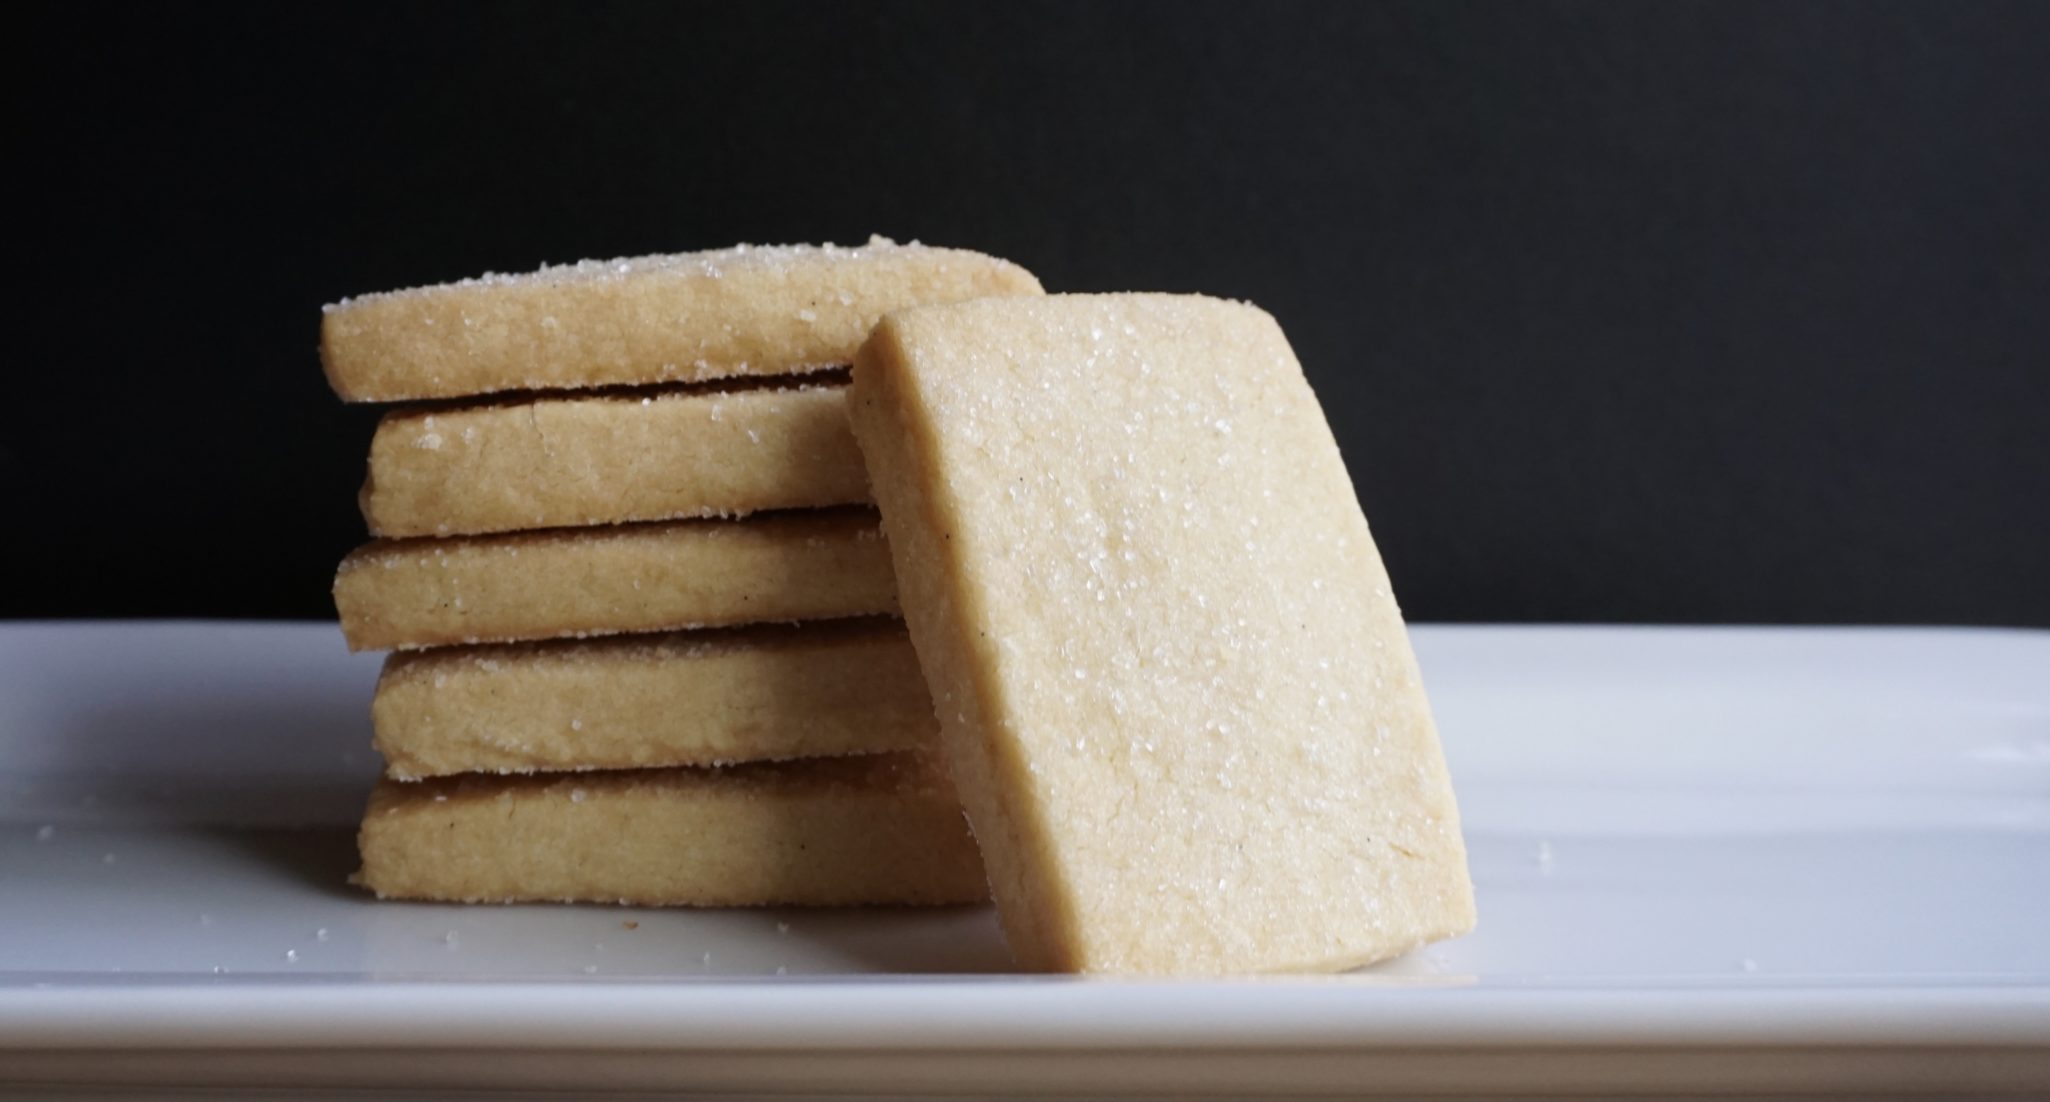
My second favorite is Bouchon’s Shortbread, tender, melt in your mouth, screams butter.  It is a beautiful cookie.  A little sweeter from the dusting of sanding sugar on the cookie.

Back to Ted

Don’t get me wrong.  I will make Ted’s Biscuits again.  They have a smoother texture than classic shortbread and a softer bite.  I’m guessing it has to do with beating the butter much longer than the other shortbread recipes, the addition of powdered sugar and baking at a higher temperature than classic shortbread.  The crumb is much more uniform so you don’t get that same sandy texture.

The cookies are baked in an 8 inch pan and cut after they are cooled.  Start checking at about 40 minutes during baking.  My batch turned a nice golden brown at 45 minutes.  Cool cookies on a rack.  The cookies are cut after they cool.  Use a sharp serrated knife to keep the cuts clean and minimize breaking.  I’m not sure why they aren’t cut warm, I might try that next time.

The cookie tastes better the next day, the butter flavor shines when given the chance to sit.  Patience has its rewards.
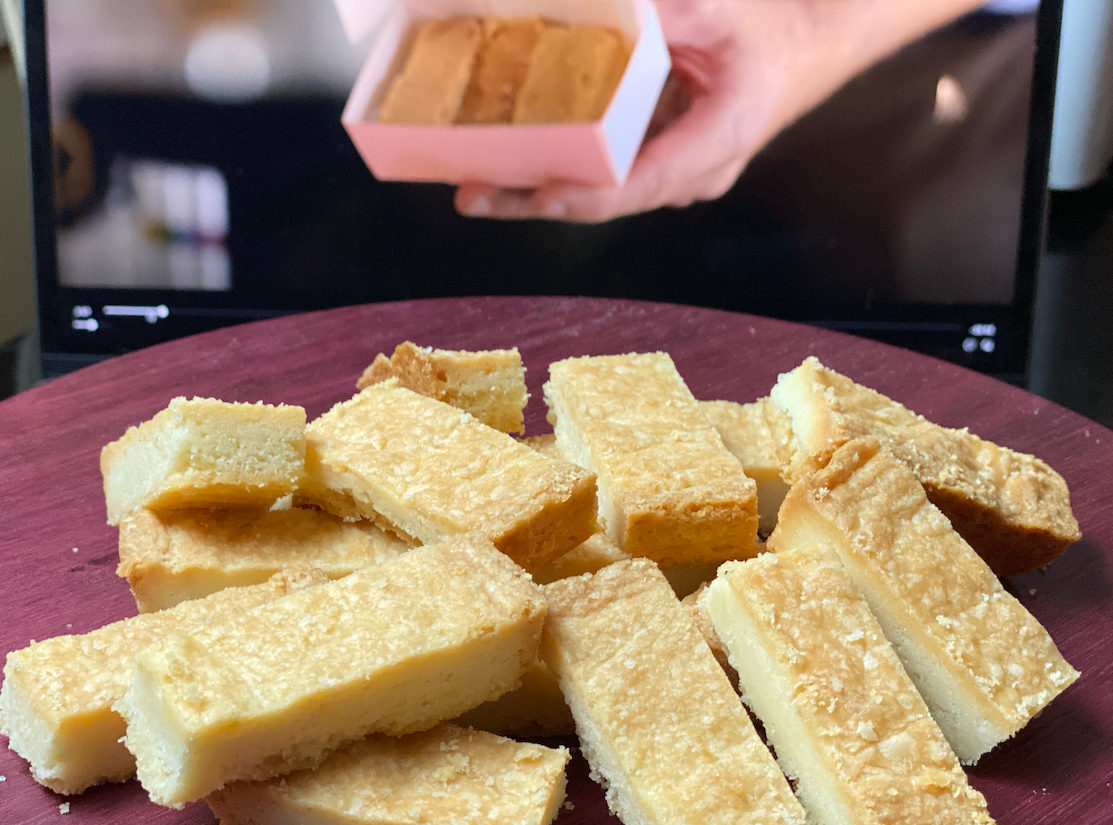
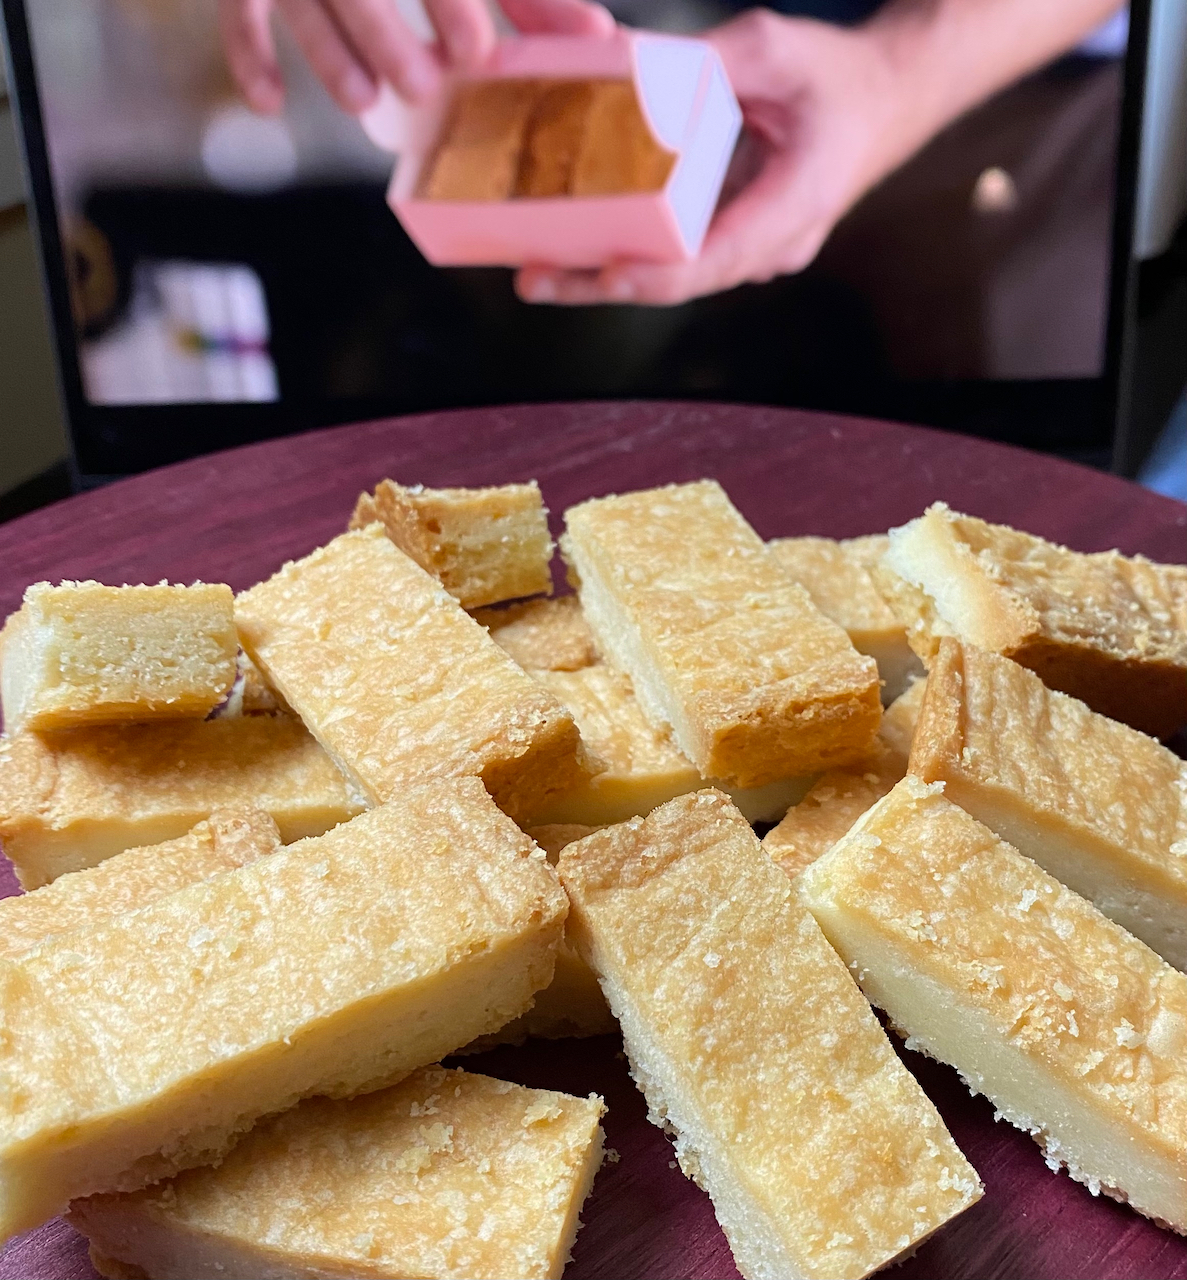
So if you are sitting down to watch Ted Lasso, make a batch of any of these biscuits.  It will make the show that much more fun and enjoyable.  If you are like Ted, have a cup of coffee not a cup of garbage water (according to Ted).  Me, I would love a steaming hot cup of tea.

Ted Lasso's Biscuits (Shortbread)

Ted’s a simple man as are his biscuits. A classic, buttery shortbread.
Course biscuits, cookies
Cuisine American, European
Keyword butter, cookies, Shortbread, ted lasso
Prep Time 15 minutes

Ingredients

  • 2 cups all-purpose flour sifted
  • ¾ cup powdered sugar
  • 1 cup unsalted butter softened
  • ¼ teaspoon kosher salt
  • Sanding sugar optional

Instructions

  • Preheat the oven to 300℉
  • Butter an 8-inch square baking pan and set it aside
  • Using a stand mixer or hand mixer, beat the butter for three to five minutes until it’s light and fluffy. Slowly add the powdered sugar.
  • Add flour and salt and mix until the dough comes together. Do not overmix.
  • Press into baking pan, keeping the dough as even as possible. I use an offset spatula and a tamper to even out the dough. Chill for a minimum of 30 minutes in the refrigerator before baking.
  • Bake for 45 to 50 minutes, or until it looks golden-brown but is still a little soft to the touch. Take the pan out of the oven. Sprinkle with sanding sugar now if using. Let it cool completely on a rack before cutting them.
  • Remove from pan and use a serrated knife to cut slices to the dimensions you like. Ted cut his into squares, I cut mine into rectangle shape like Walker Shortbread. Go find some cute pink boxes too!
Game of Scone: The Tea Wedding

Game of Scone: The Tea Wedding

My go-to scone recipe is an adaptation of Dorie Greenspan’s Cream Scone.  I love these and have made countless of variations using dried fruit, fresh fruit, citrus peel.  It is my go-to scone recipe.  Her scones are buttery, sweet, and tender.  I often throw in dried wild blueberries and lemon zest or during the summer, bits of fresh ripe peaches.  Scrumptious.  There is enough sweetness and moisture that these scones can be eaten without accouterments. But feel free to slather a bit of butter and jam on them if you like.  They are little triangles of buttery perfection, but…

They’re just not English Tea Scones

I love High Tea, almost as much as I love having a hot dog with all the fixings at a Giant’s baseball game.  The boys and I went to Hong Kong before COVID and High Tea at the Peninsula Hotel in Hong Kong (think Crazy Rich Asians) was on our bucket list.

I savored the entire experience-the surroundings, the impeccable service, fine china, my boys in jackets and slacks, an array of delicious bite-sized morsels, and of course dainty tea scones with clotted cream and jam.  It was scrumptious.

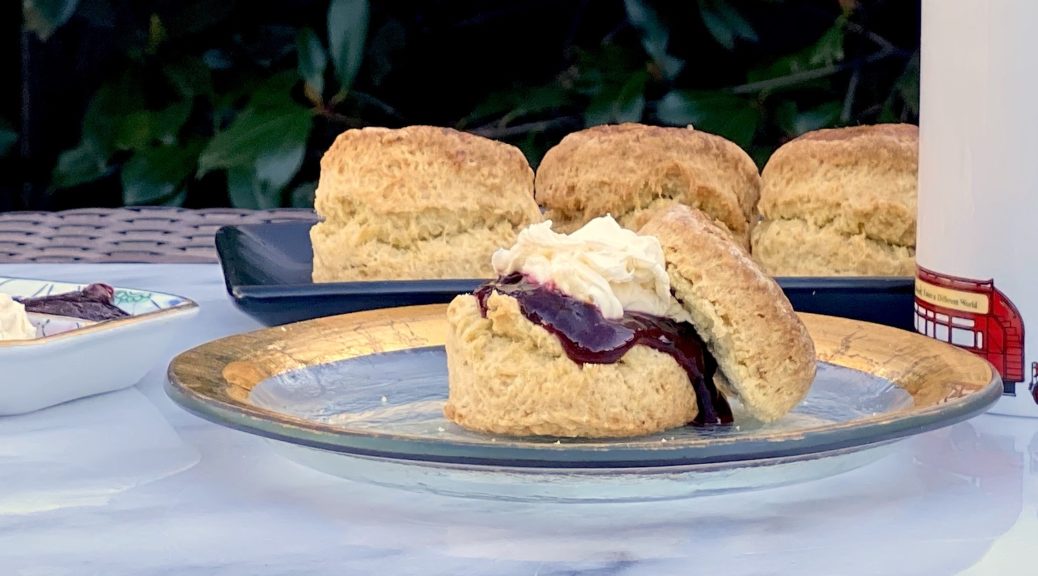
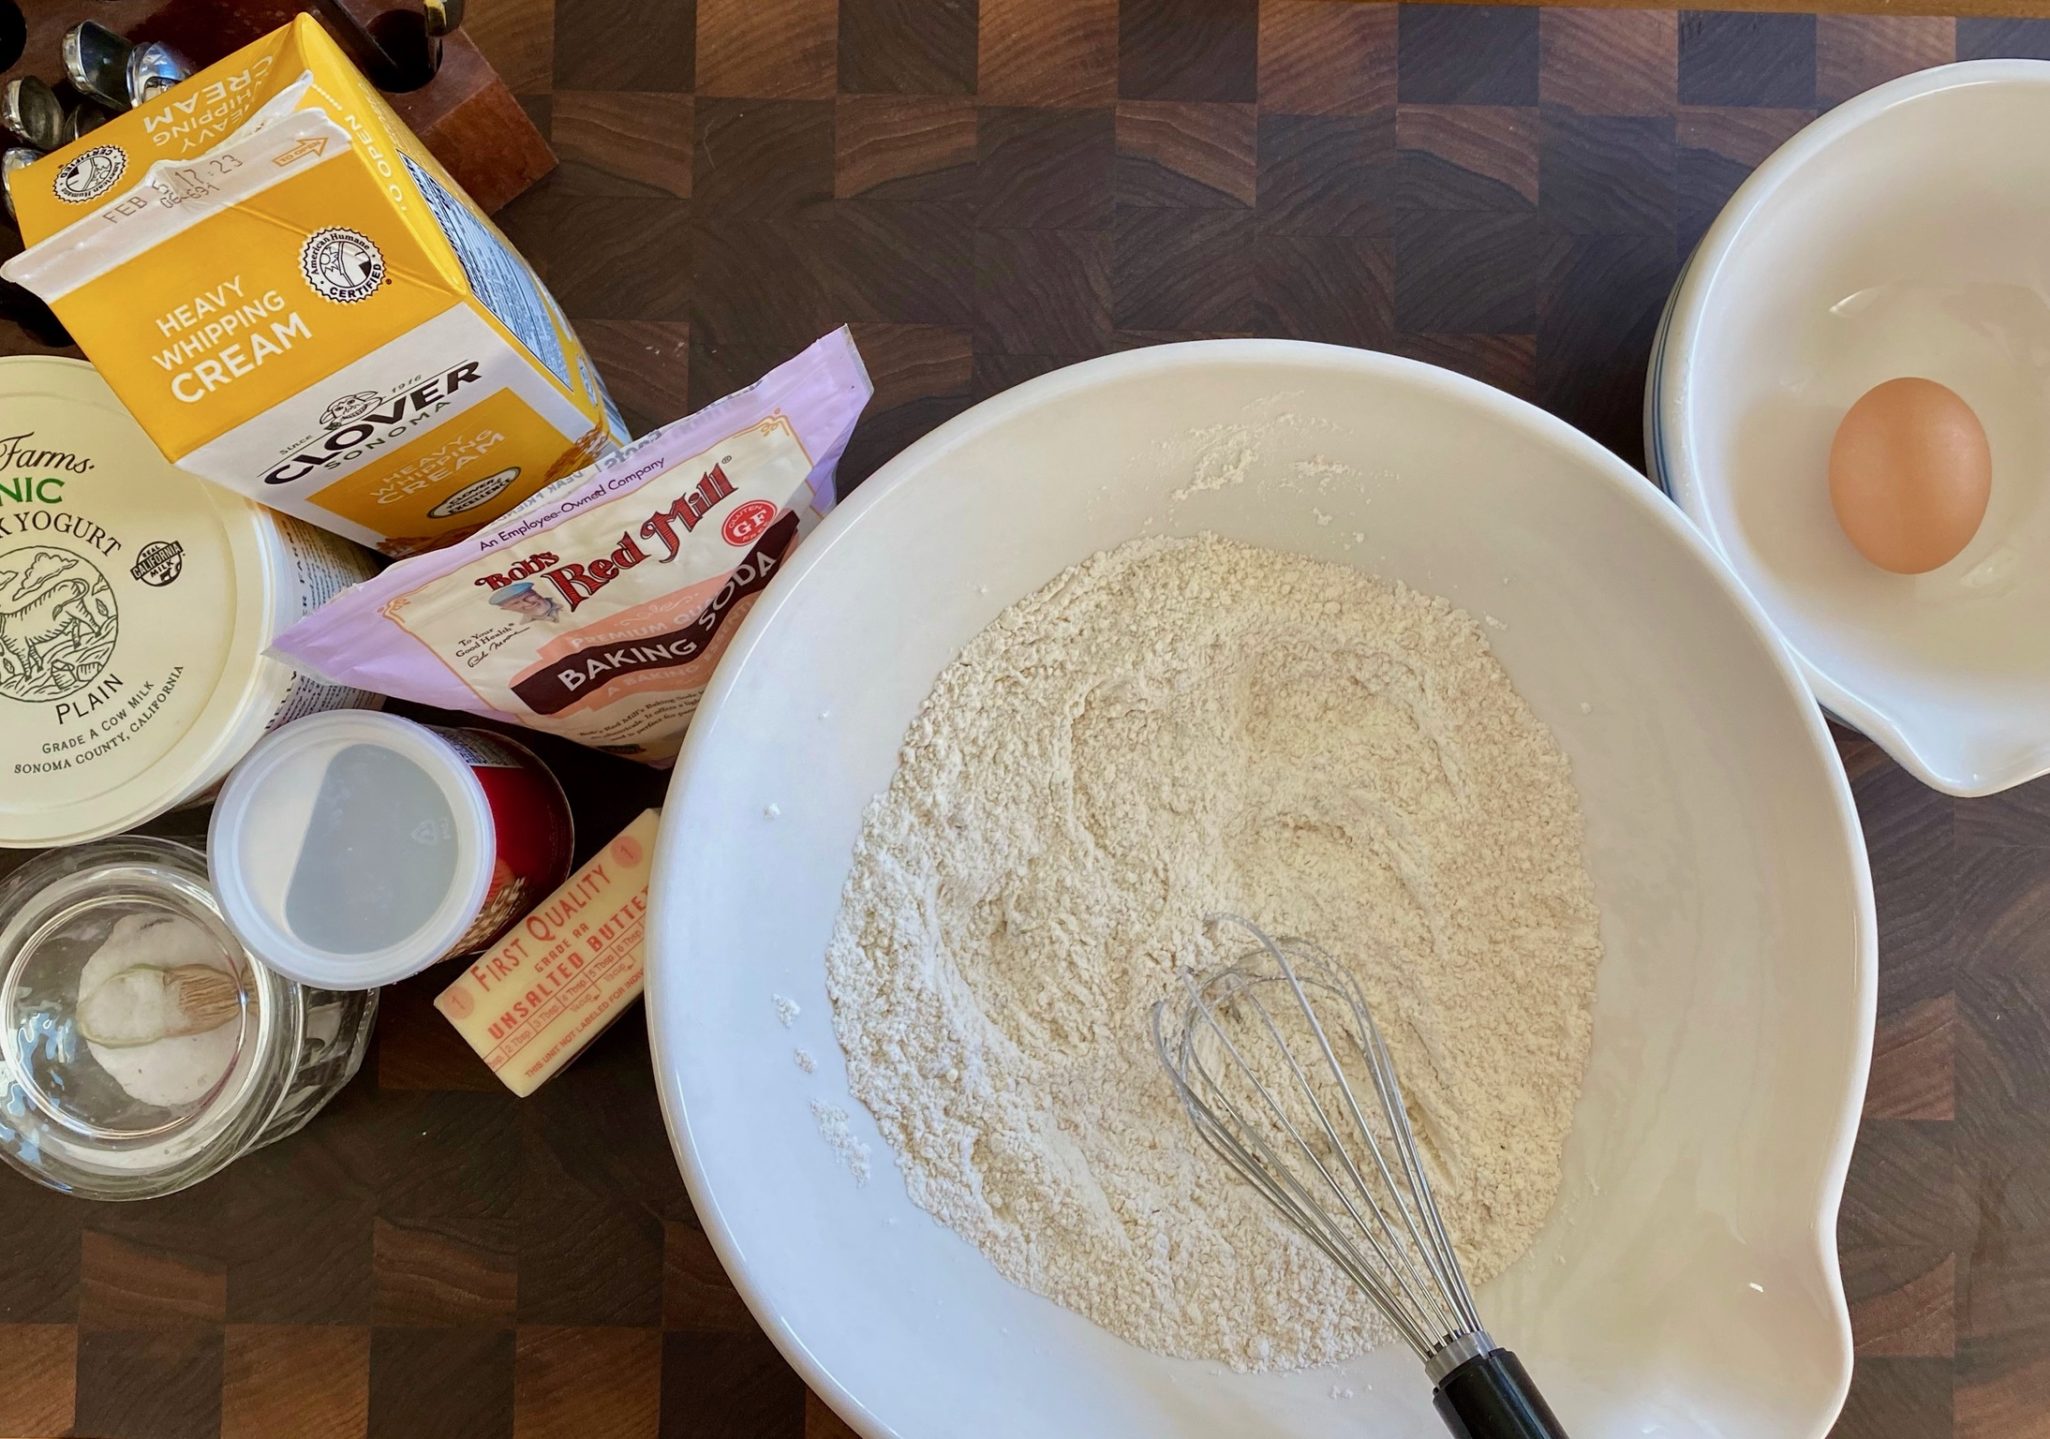
Lady and Her Pups’ meticulous recipe for Classic English Scones popped up on my feed, I knew I had to try them.  Her video and blog post for her scones are so detailed, you can’t go wrong.  The texture of her scones is spot-on, light, and crumbly the perfect foil for clotted cream and jam.  With that first bite, I found myself sitting at the Peninsula with the boys leisurely sipping on a cup of hot Darjeeling Tea, savoring my scone with clotted cream and strawberry preserves.Ingredients for English Tea Scones

Game of Scones: The Rules

I encourage everyone to watch the video on how to make these scones but if you don’t…here are the highlights…

English scones are not as buttery and a little drier than American scones.  Why? Because you are going to slather copious amounts of clotted cream or butter, jam, or lemon curd on your English scones, Silly.

Brown sugar adds both flavor and color.  Substitute granulated sugar for the brown sugar for a lighter-colored scone.

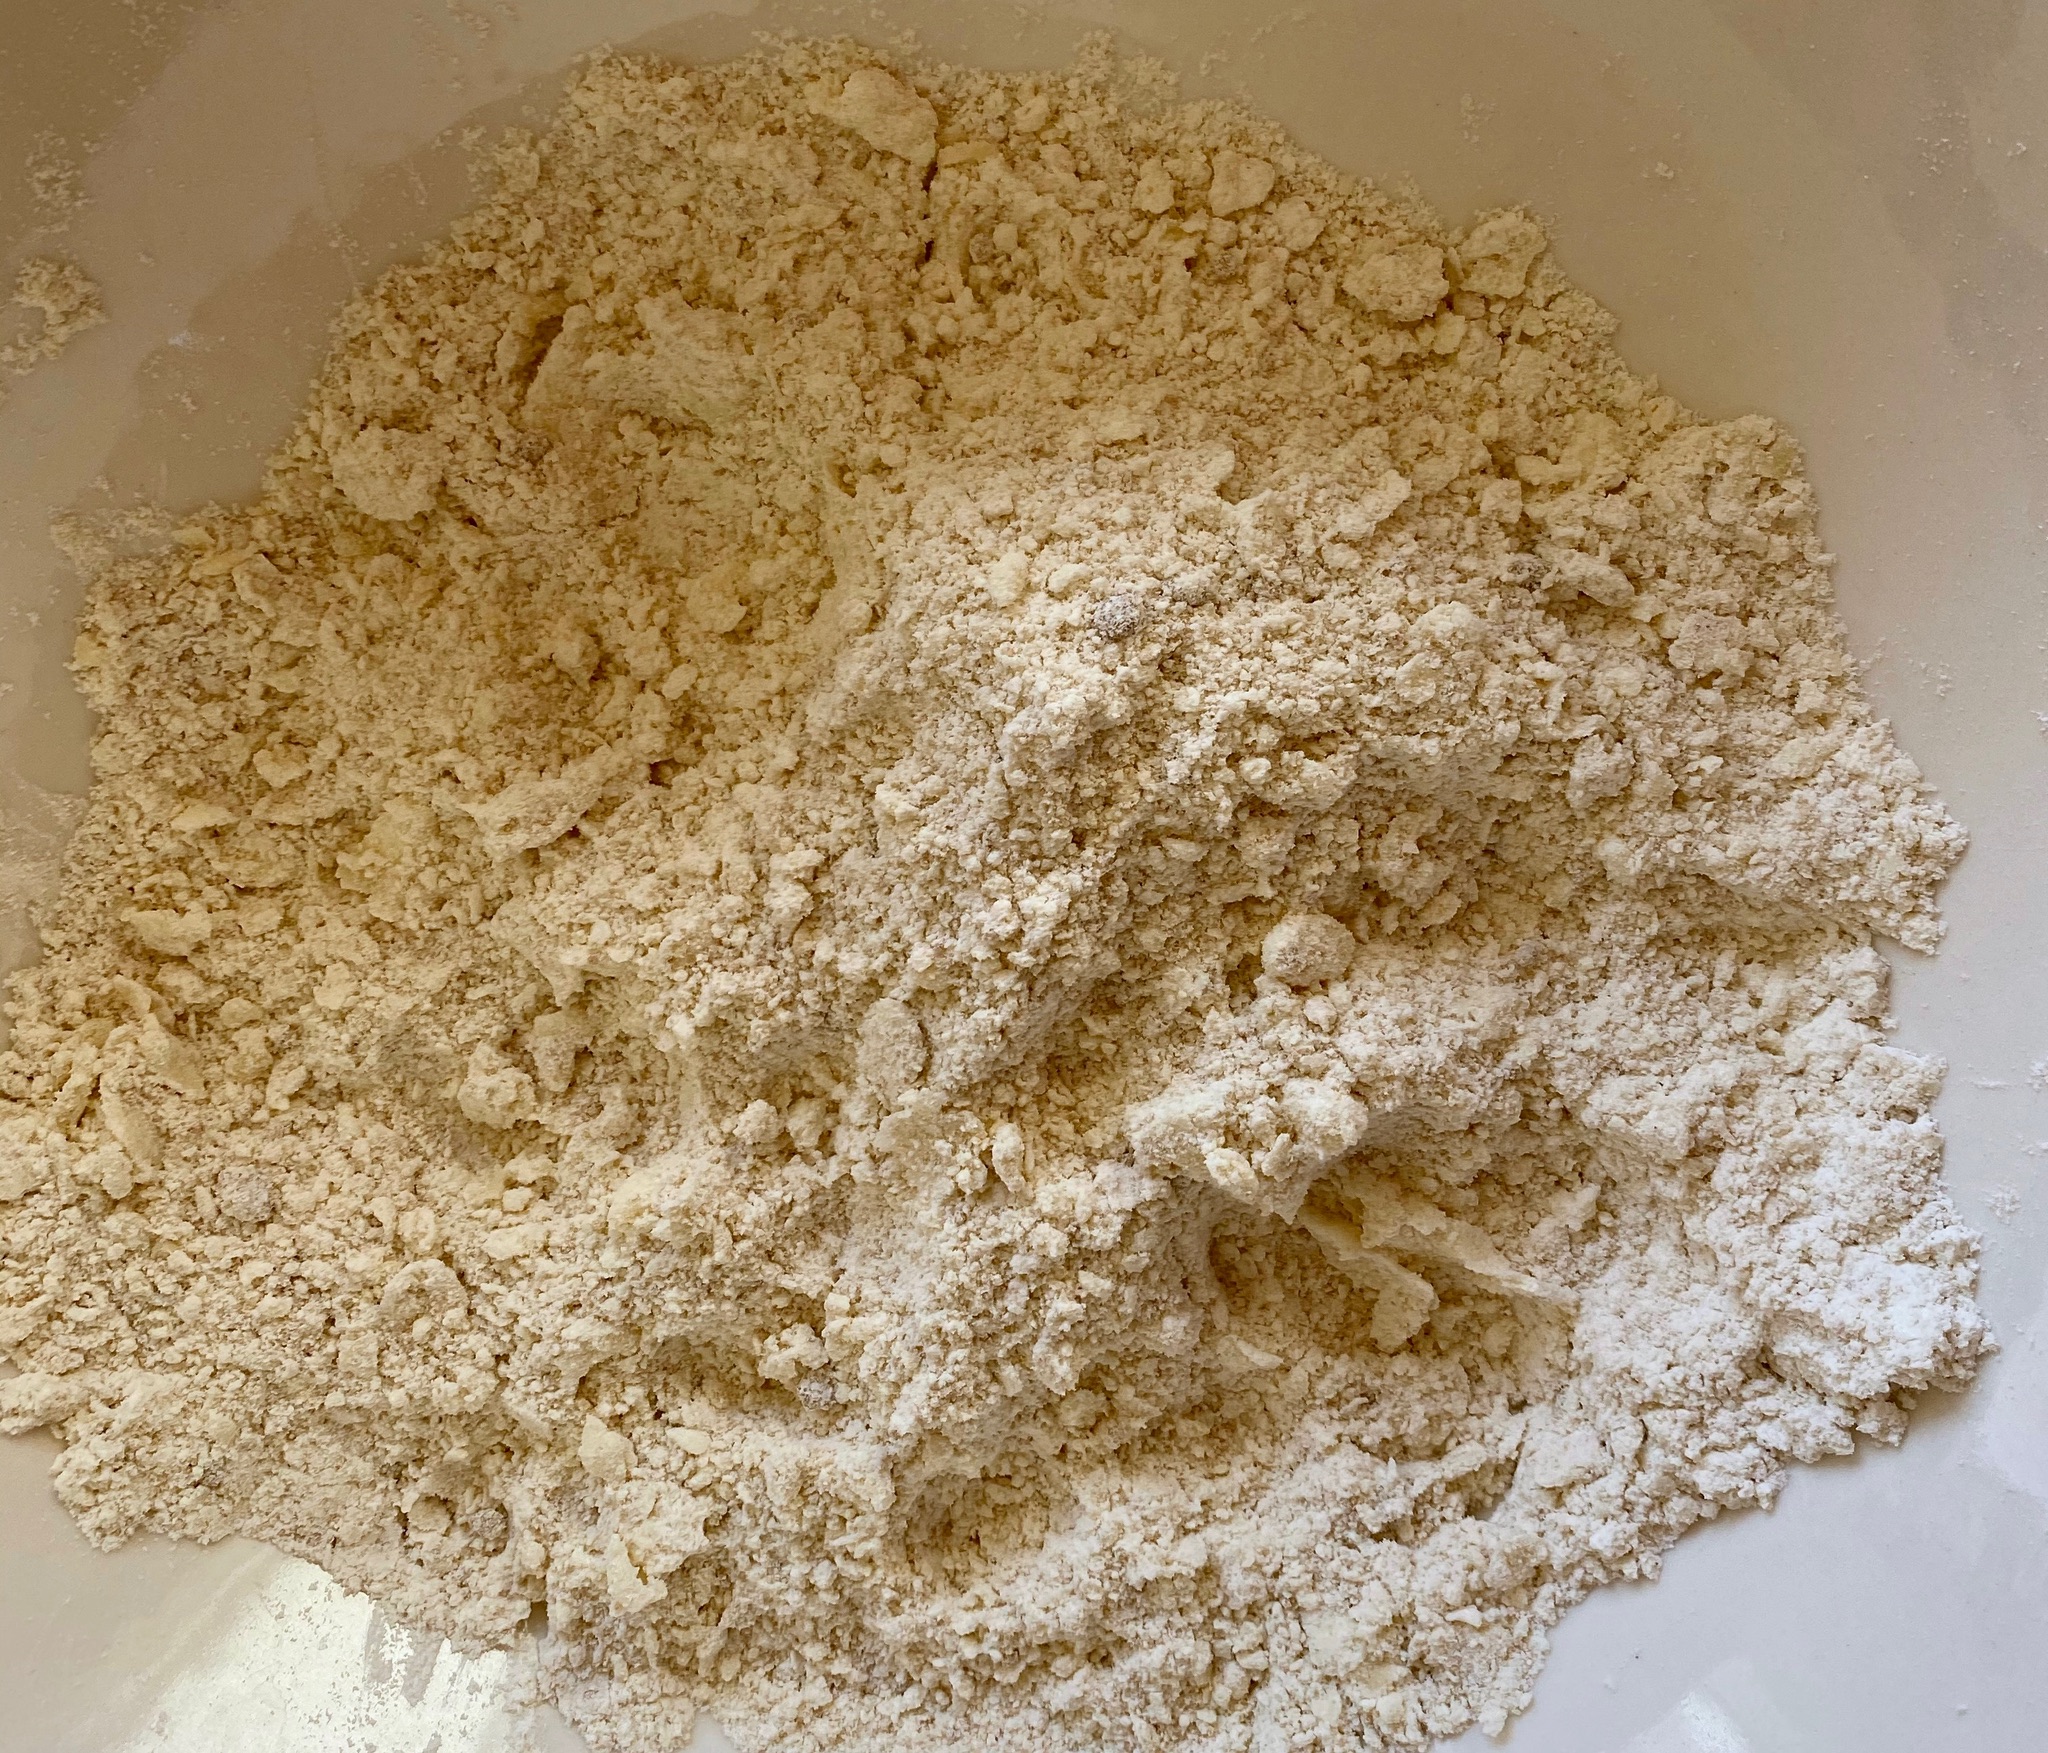
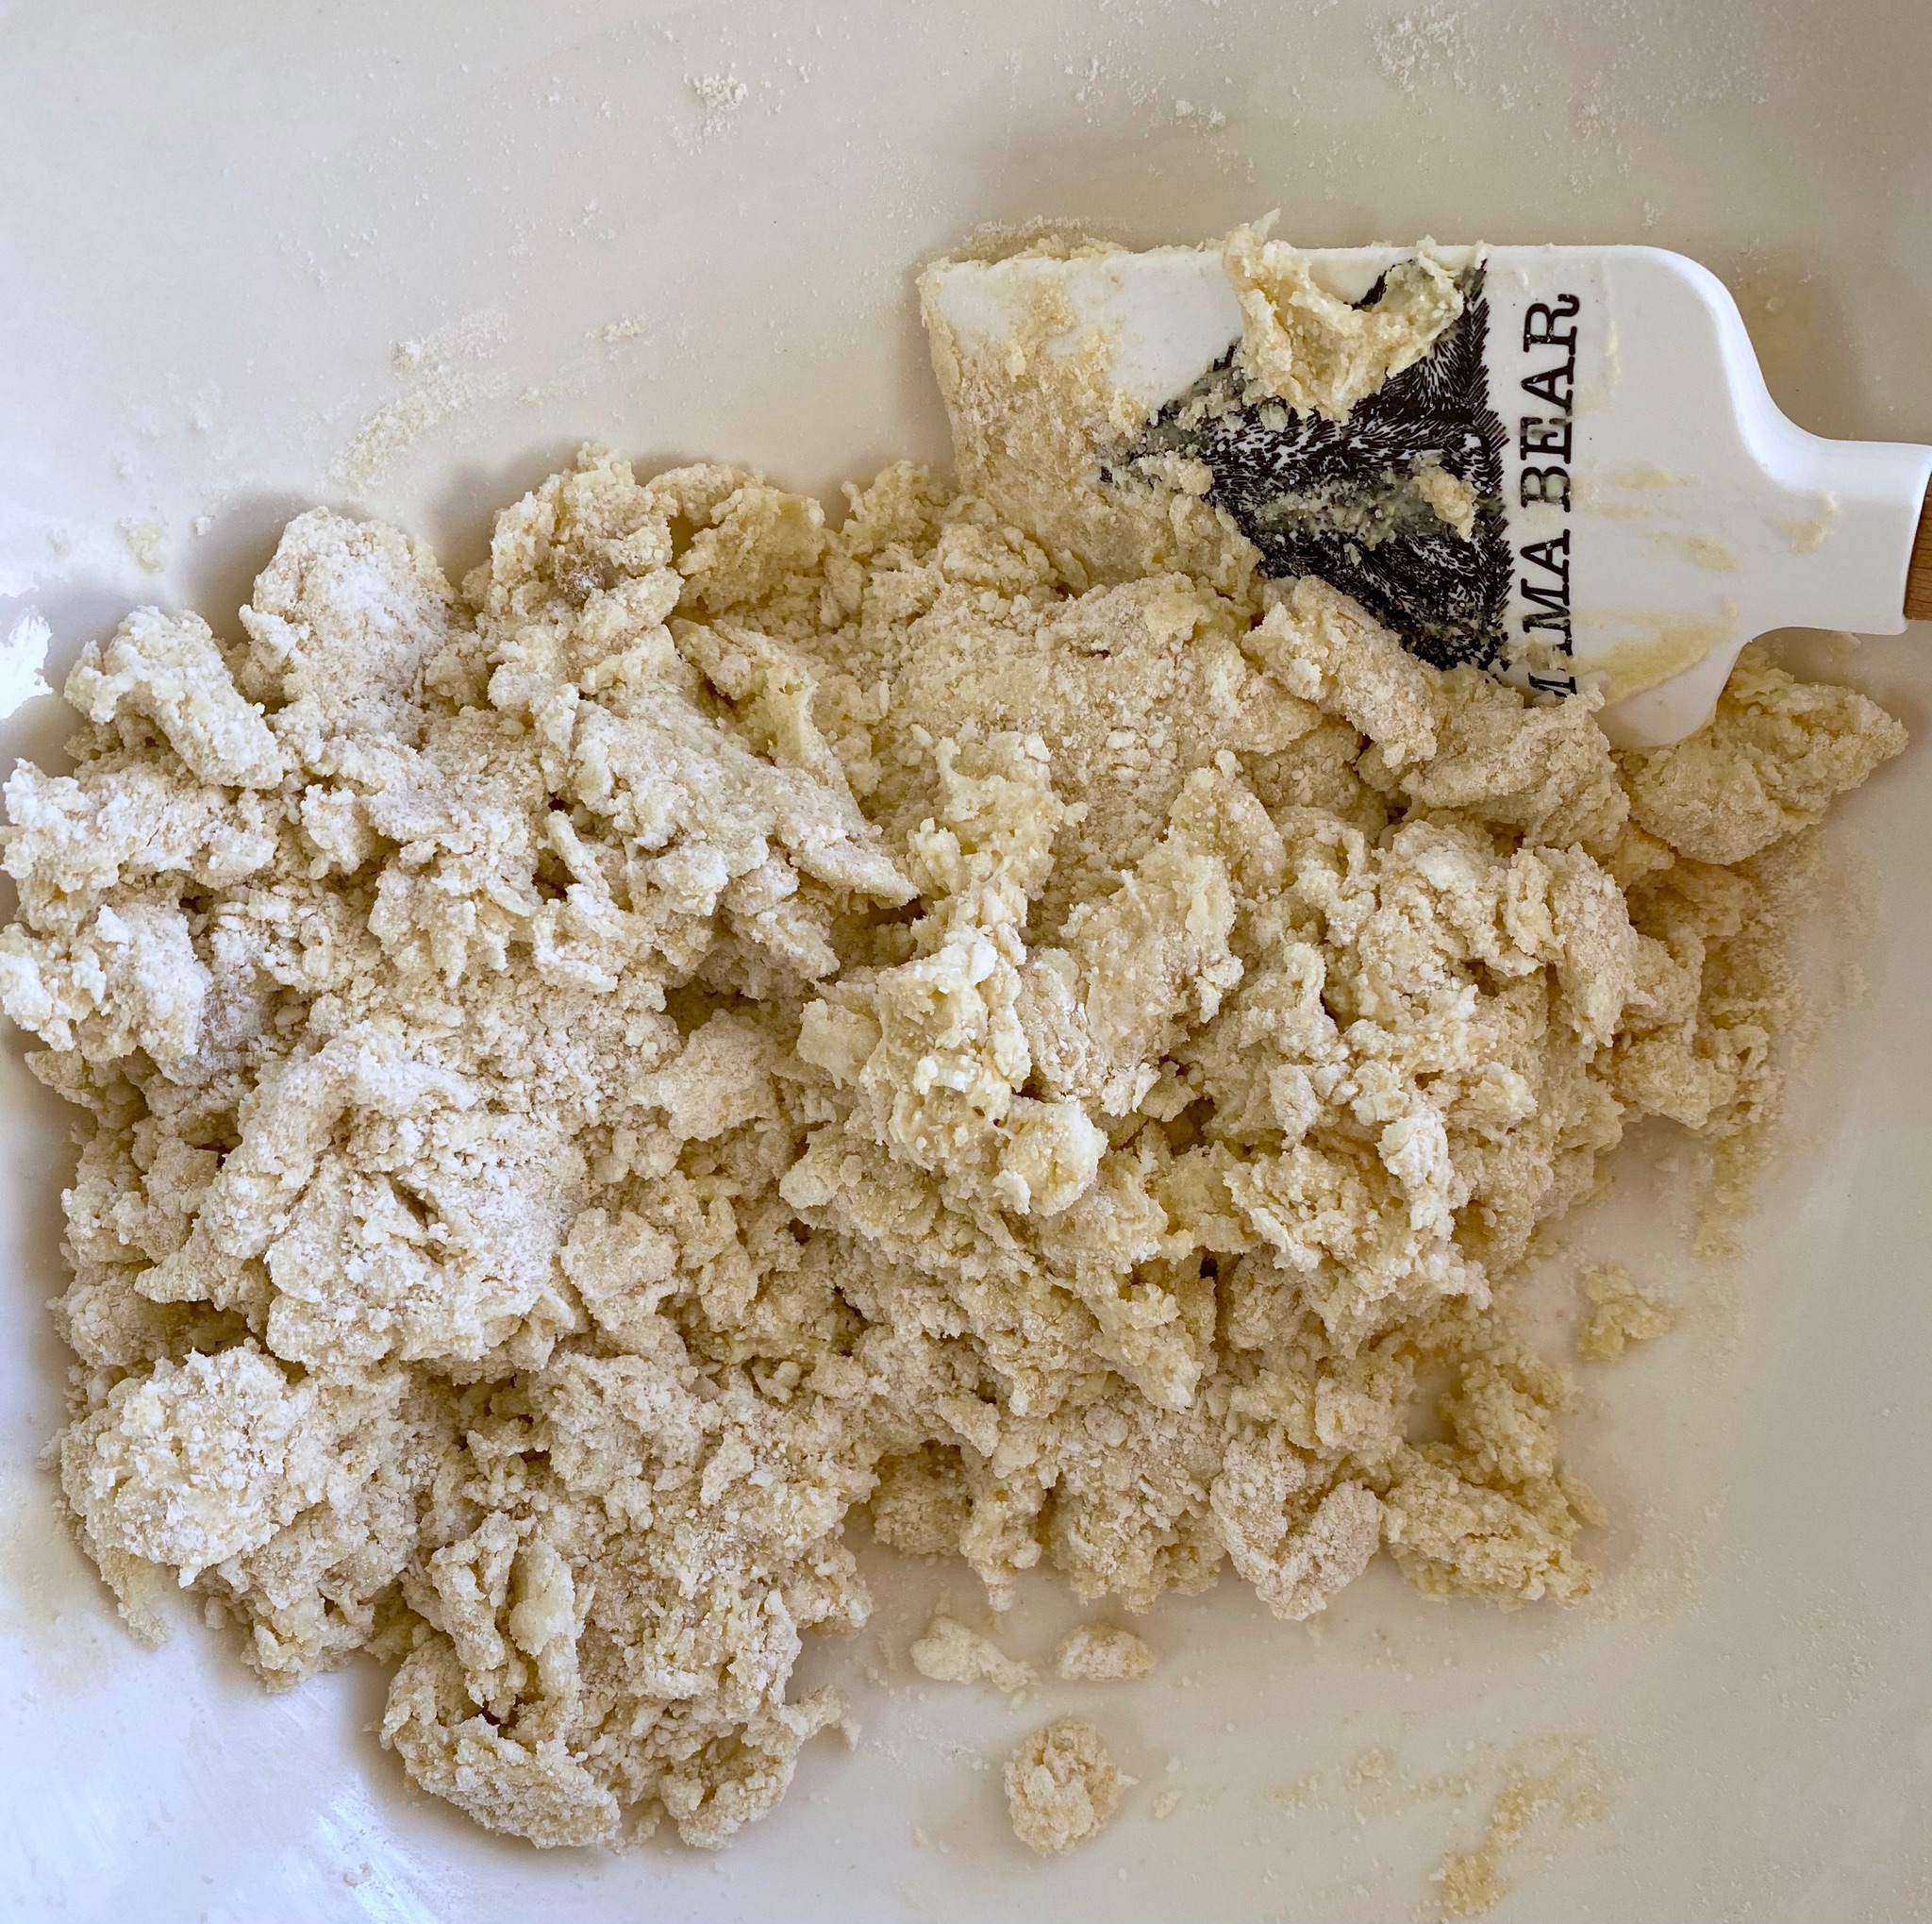
Work in the butter, you should not have any pea-size bits of butter, mixture should resemble a coarse meal.

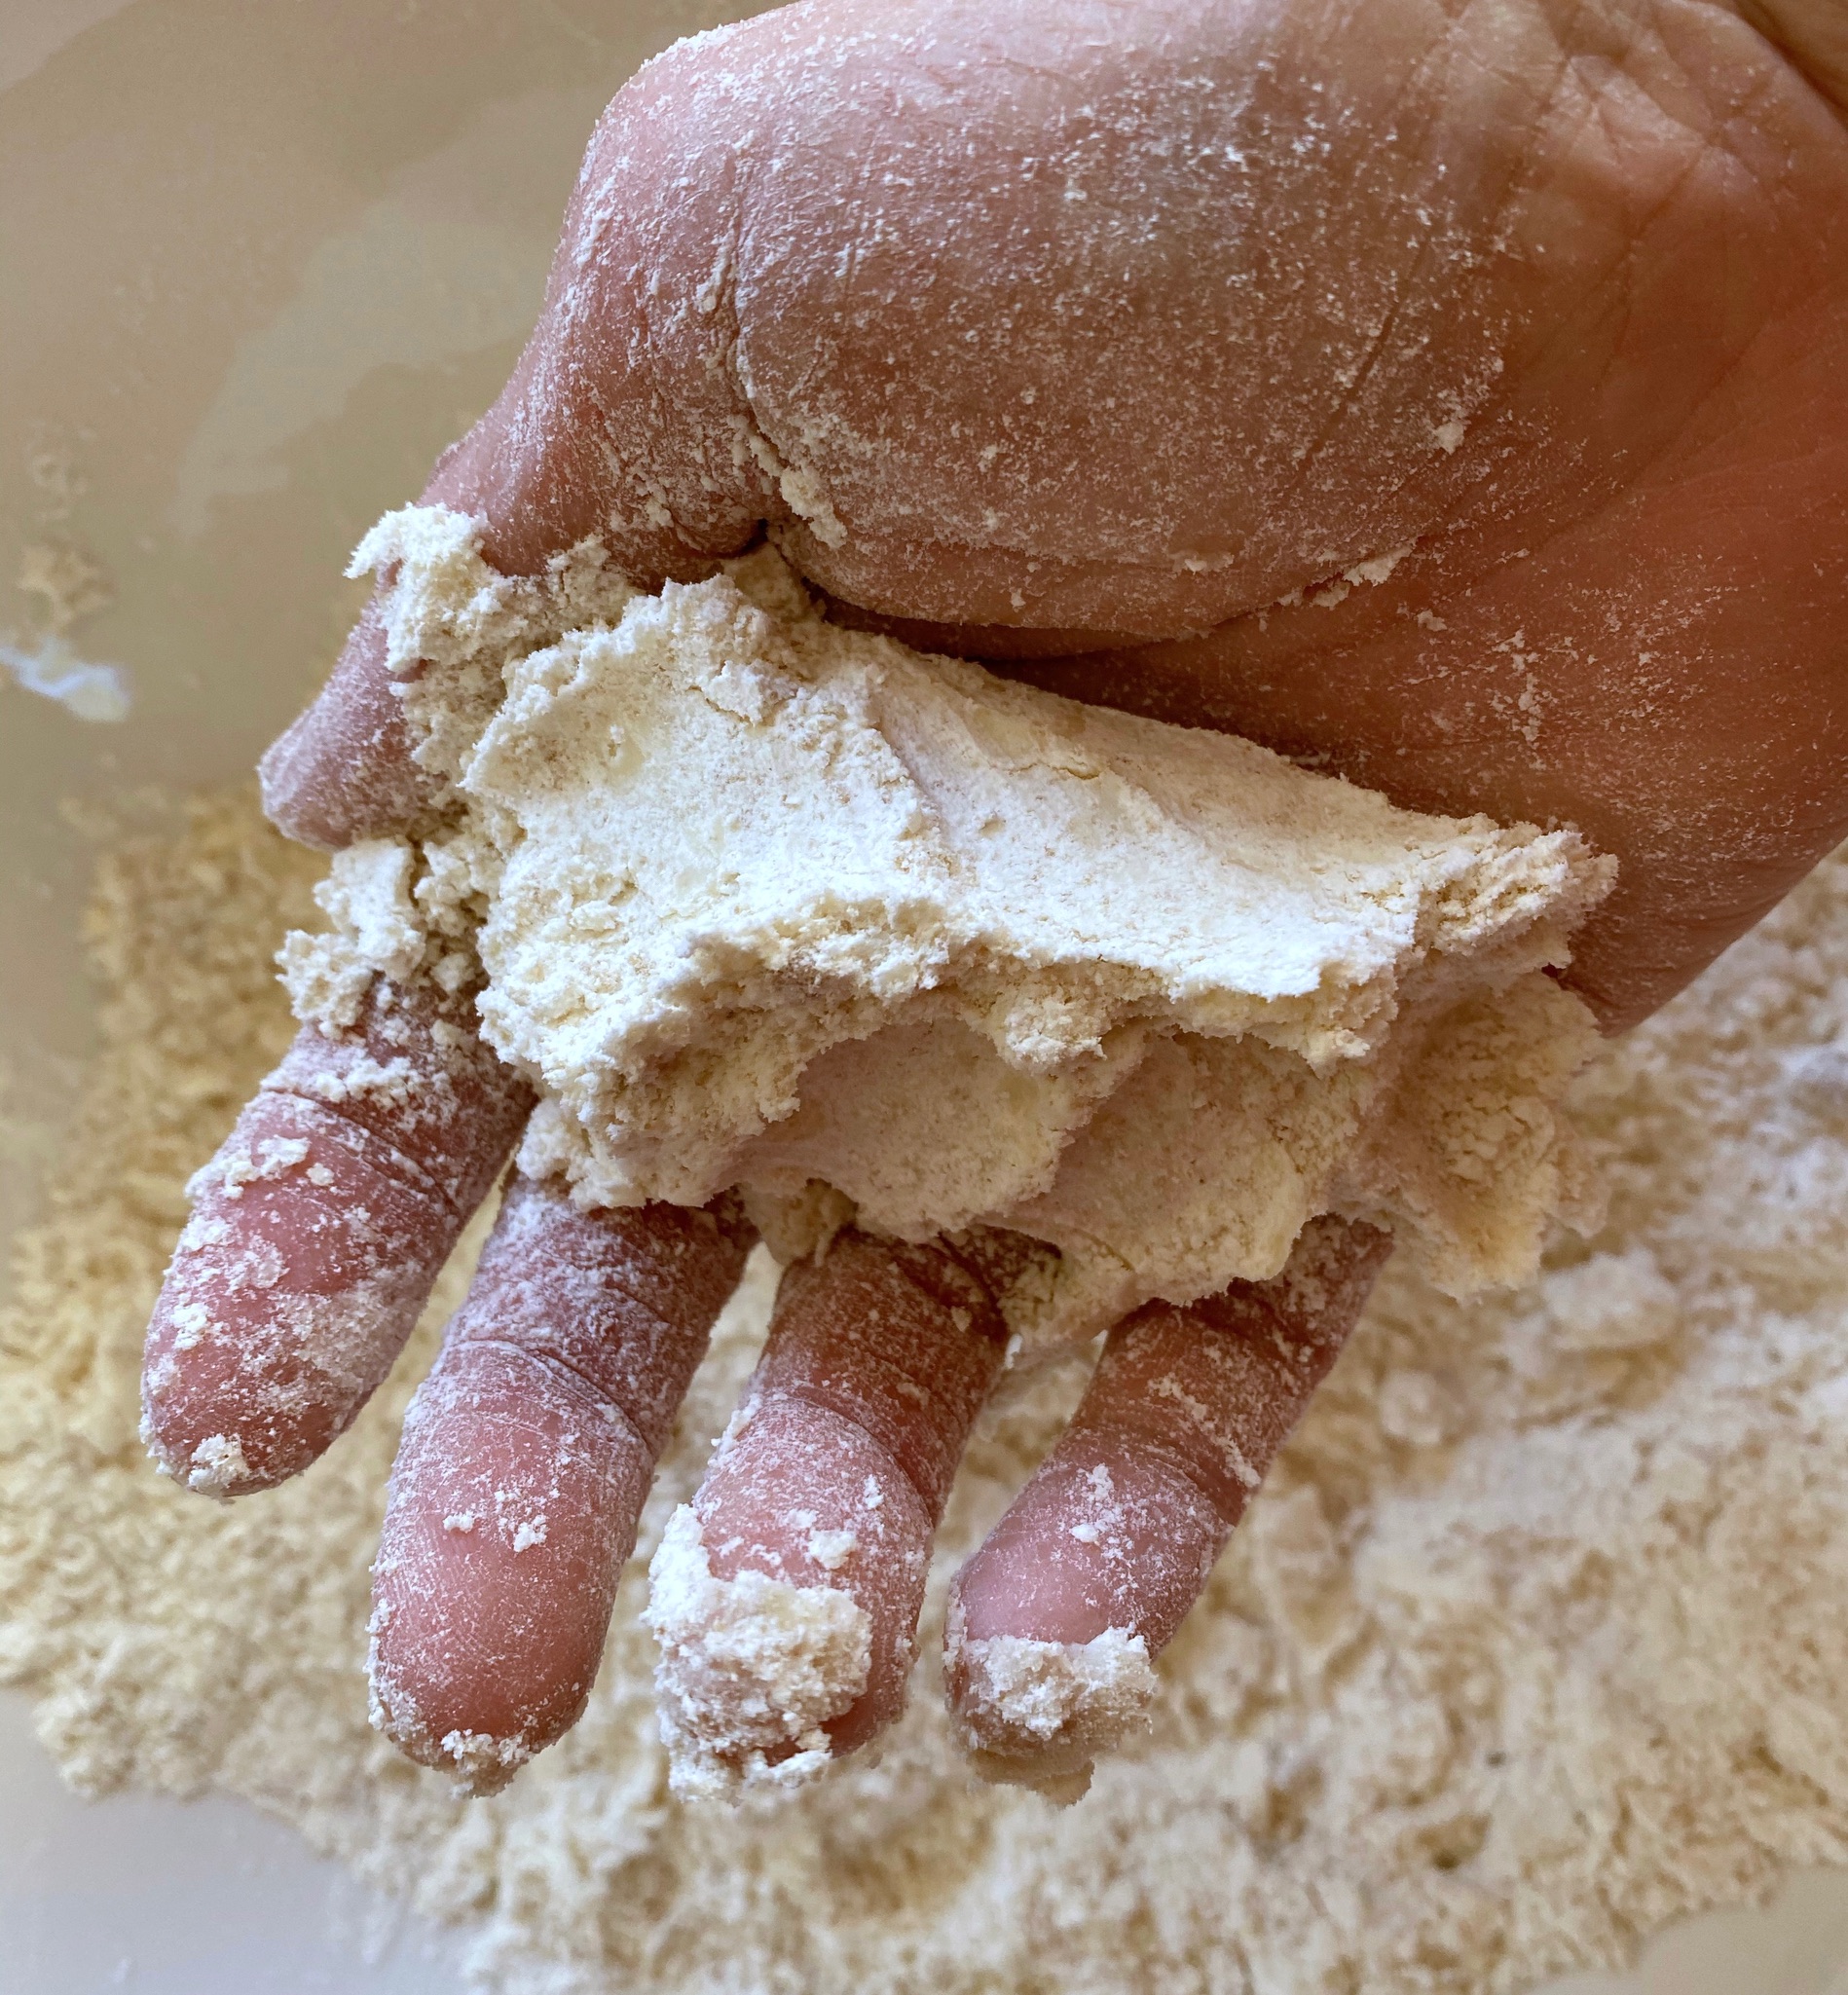
Squeeze the flour-butter mixture together, if it clumps you are ready to add the liquid.

A combination of heavy cream and yogurt is used as the liquid this provides moisture and fat.  More butter would weigh down the dough.  The dough will be shaggy after adding the liquid ingredients.  It’s ok, it will come together as you knead the dough.

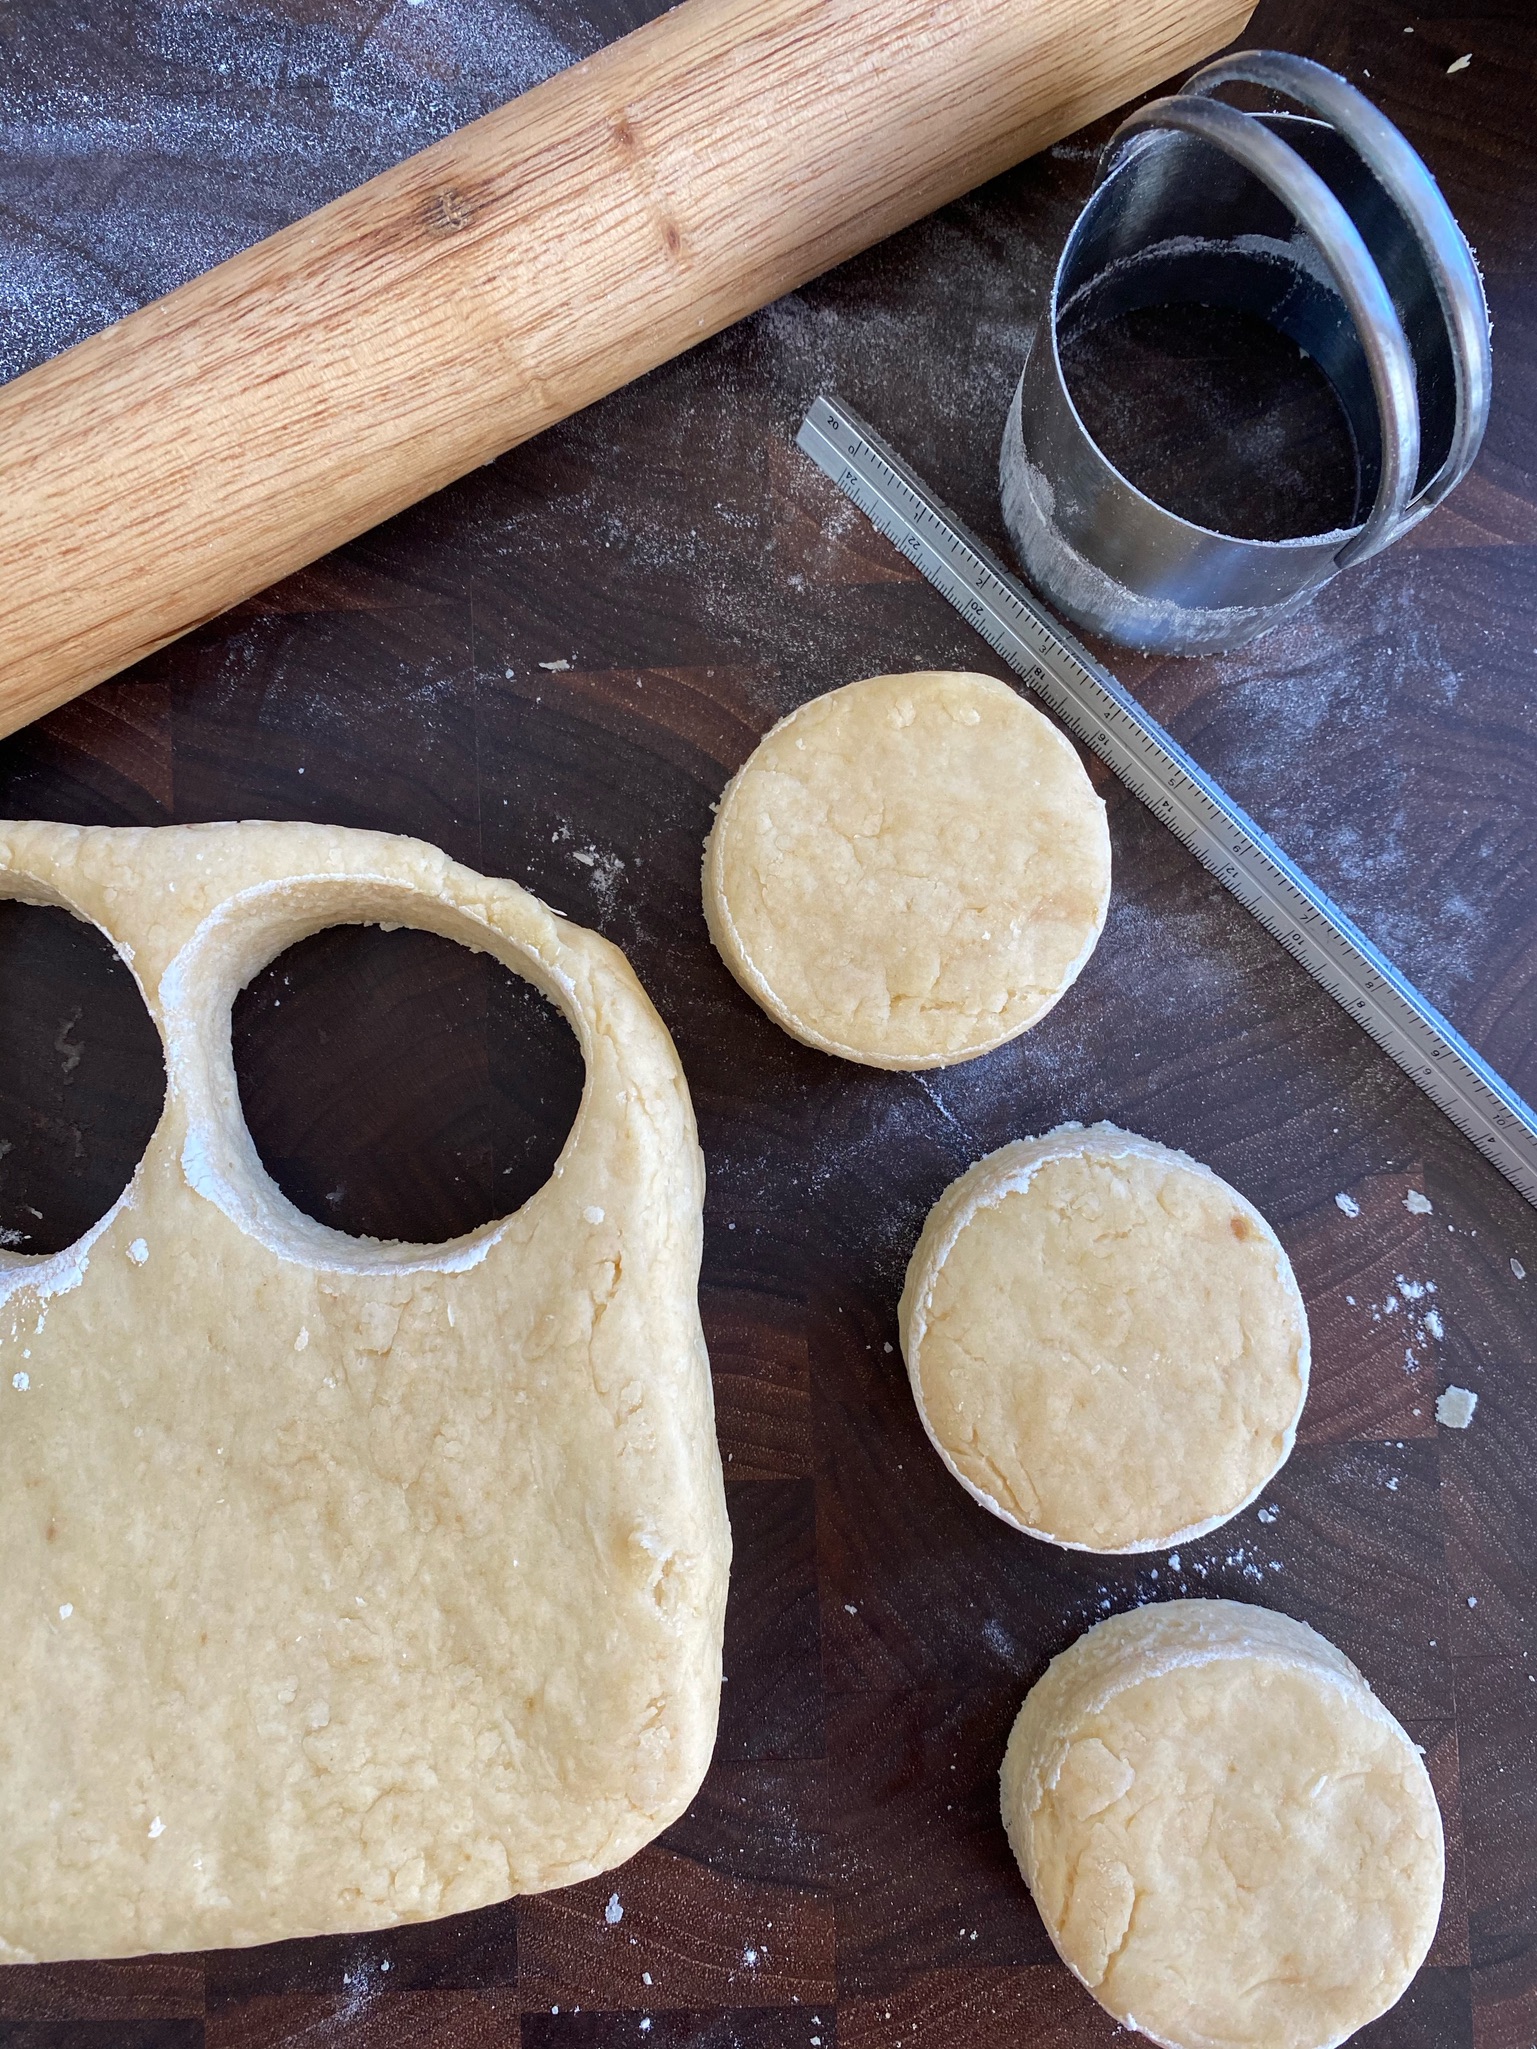
Roll dough to 1.125 inches thickness, any less and the scones will be too flat.

Keep scones small and dainty, use a cookie cutter no more than 2 inches in diameter.  When cutting, press down without twisting as that would cause the scone to rise unevenly.

The dough will need to rest before baking so the flour has time to absorb the liquid.

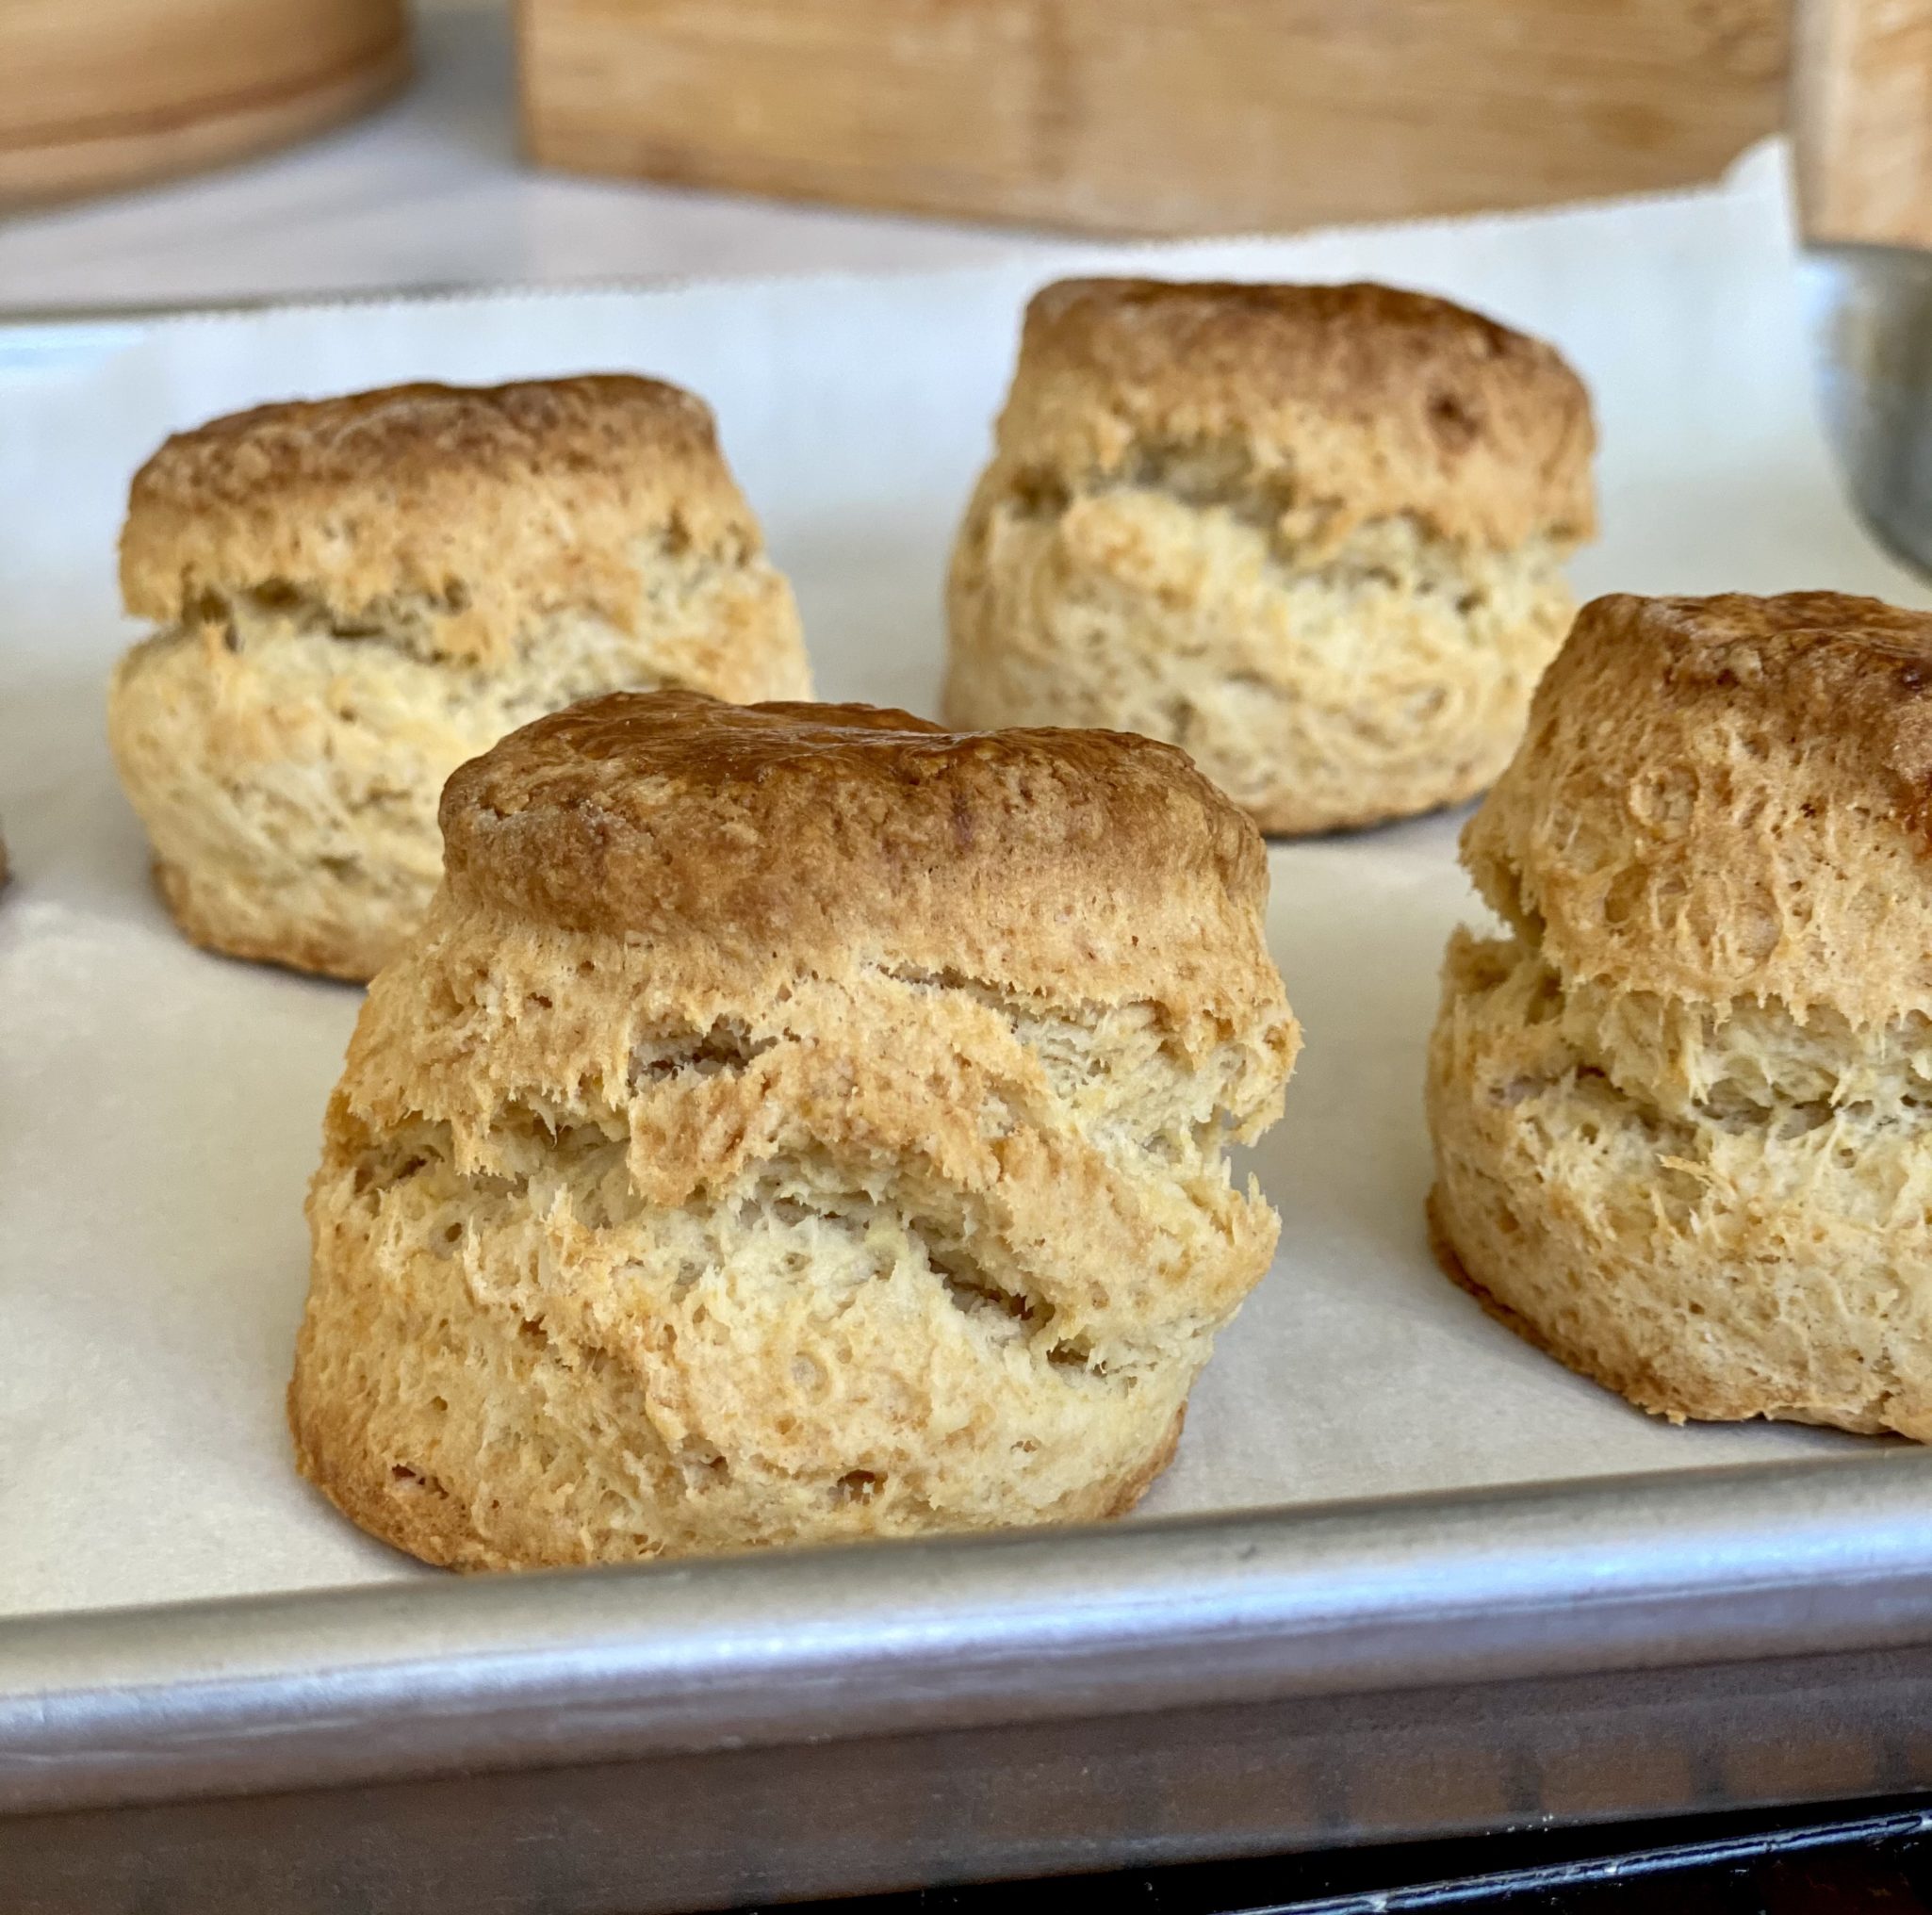
Double egg wash, the secret to shiny tops.

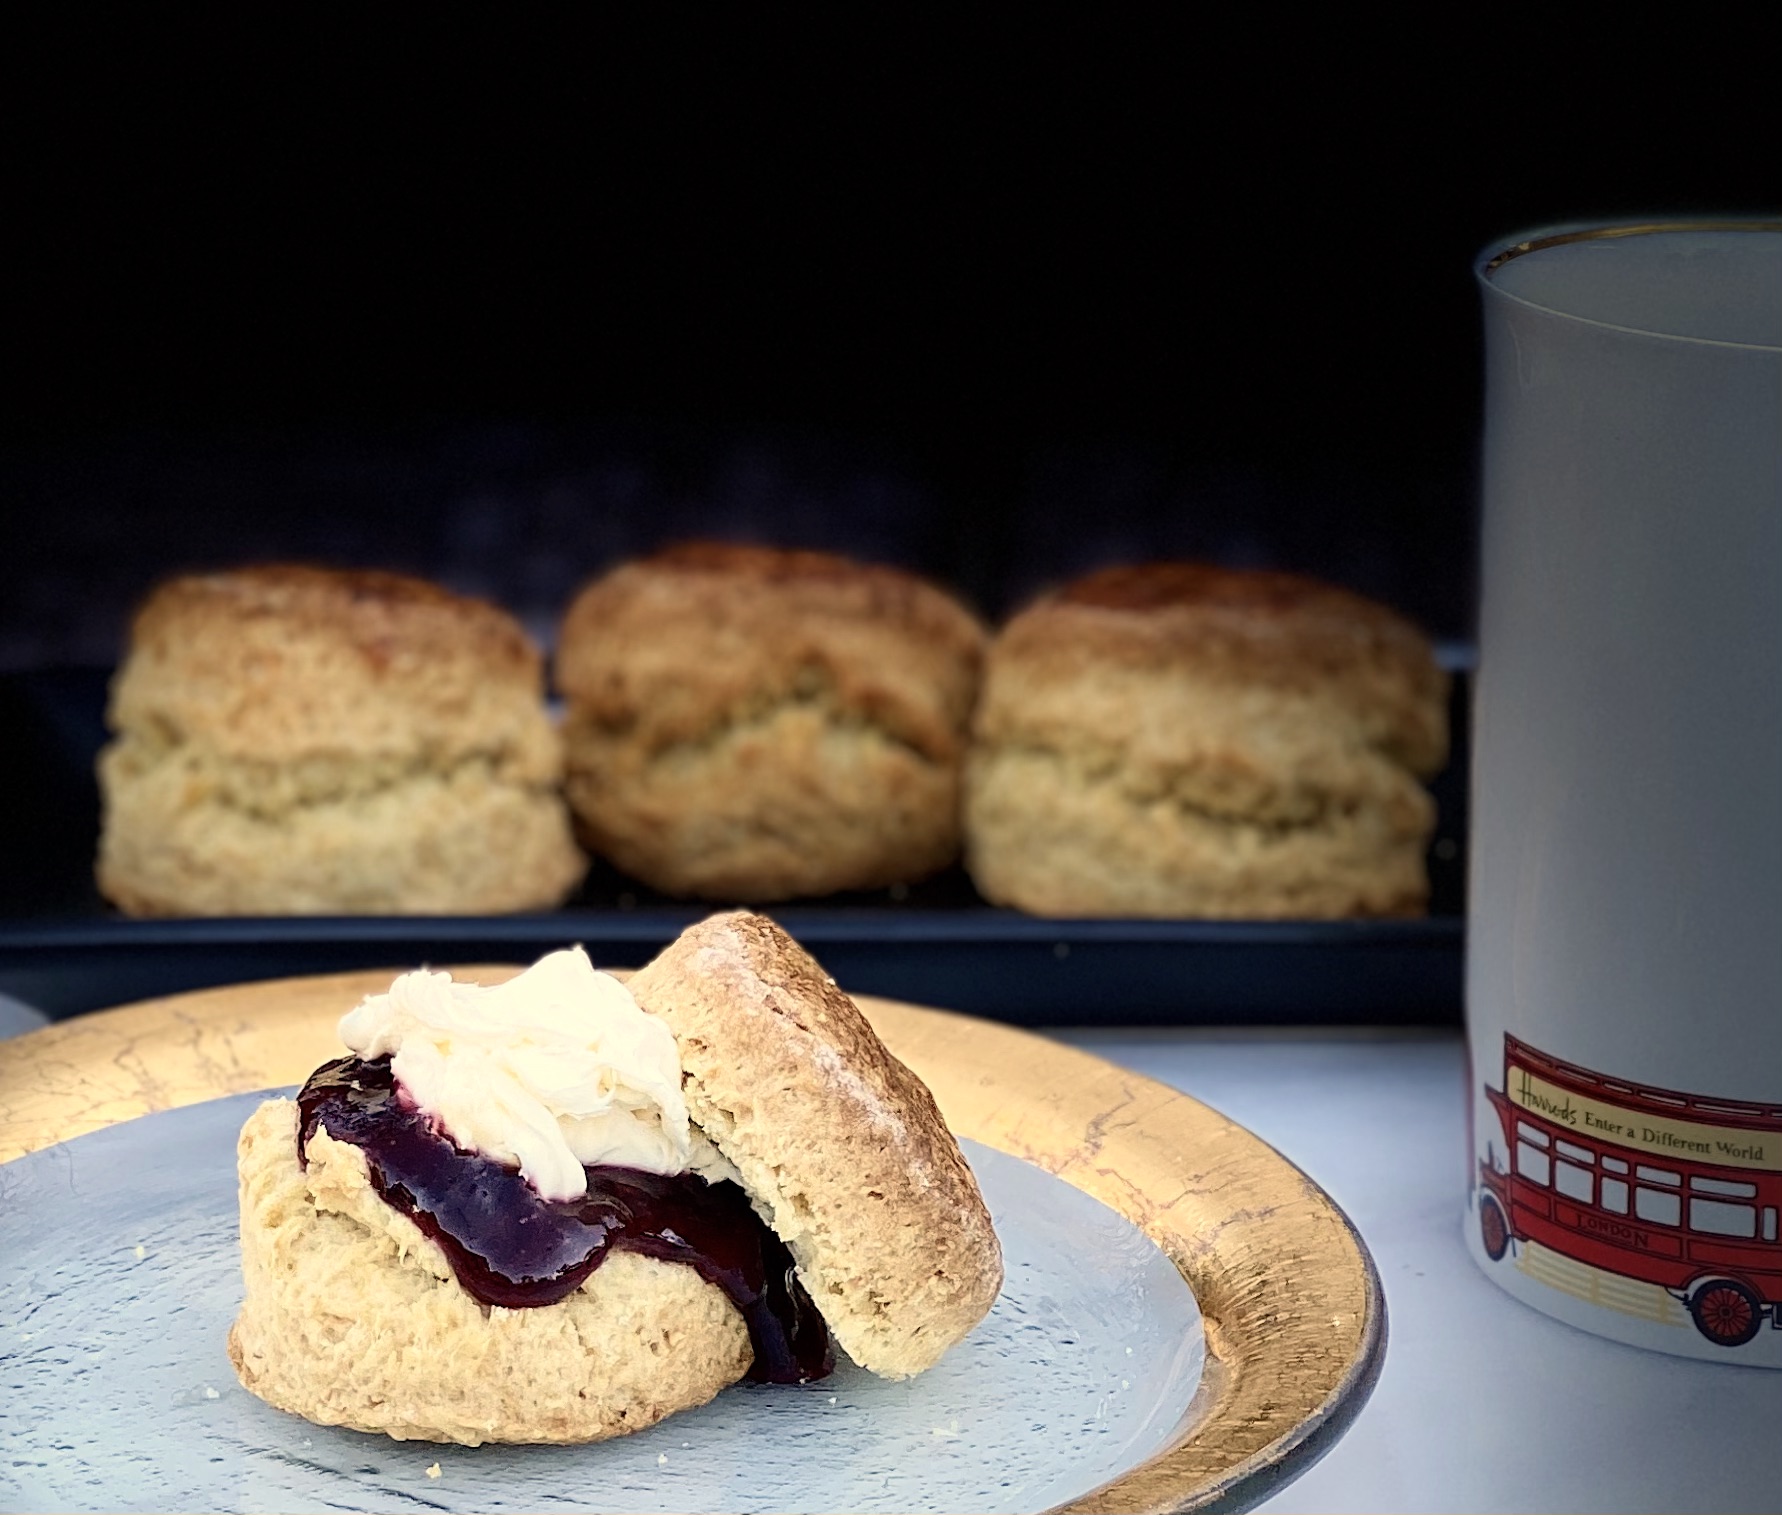
These scones should have a crack around the circumference (classic).  This is the perfect spot to split your scone.  Then get ready to spread the clotted cream and jam on both halves!  Yum!

Now go bake some scones!

English Tea Scones

Classic English Tea Scones from Lady and Her Pups
Course Biscuits and scones
Cuisine British
Keyword English Tea Scone, scone, Tea
Prep Time 30 minutes
Cook Time 15 minutes

Ingredients

WET INGREDIENTS

  • 1 large egg
  • 3 tbsp plain yogurt 45 grams, not Greek-style, regular
  • 3 tbsp heavy cream 44 grams

DRY INGREDIENTS

  • 2 cups AP flour 240 grams
  • 1 tsp baking powder
  • 1/4 tsp baking soda
  • 3 tbsp light brown sugar 40 grams. You can substitute granulated sugar
  • 1/2 tsp fine sea salt
  • 5 tbsp unsalted butter, diced 70 grams

Instructions

  • Crack the egg into a small bowl and whisk until smooth. Transfer 1 tbsp of the beaten egg into another cup and set aside. This will be the egg wash (do not add water). Then whisk the plain yogurt and heavy cream with the remaining egg until even. Set aside.
  • In a large bowl, whisk together flour, baking powder, baking soda, light brown sugar and fine sea salt. Add the unsalted butter, use your fingers to rub the butter evenly into the flour until NO SMALL LUMPS OF BUTTER ARE LEFT, and the flour resembles yellow cornmeal.
  • Add all the wet ingredients into the flour mixture. Use a spatula to fold and mix everything together until no loose flour are left in the bowl, then use your hands to knead the dough a few times until everything comes into a ball.
  • Transfer the dough onto the counter, no need to dust with flour. Continue to knead the dough a few more times until it is on just until the dough has a TINY BIT OF RESISTANCE WHEN YOU PUSH IT DOWN. If the dough sticks to the counter, use a pastry cutter to scrape it off, do not flour board. The dough should look even but not as smooth as a bread dough.
  • Now dust the dough with a little flour to prevent sticking, and roll it out into 1-1/8 inch thickness. Press the flat side of the dough scraper on top of the dough to make sure it's flat and level. Use a 2 inch round cutter to press down into the dough. DON'T twist, then gently push the dough out onto a parchment-lined baking sheet without making large dents or making the dough too lopsided. Dip the cutter into some flour and tap on the edge to get rid of excess flour, and cut again.
  • Squeeze the remaining dough back together into a ball without big cracks, roll and cut again. Repeat until you use all of the dough. You should have 7 to 9 scones.
  • Brush the reserved egg wash on the top surface of the biscuits, save the egg wash. Place sheet in the fridge for 30 to 40 minutes UNCOVERED. Meanwhile, preheat the oven on 420 F. Right before baking, brush a second layer of egg wash on the top of the scones. This double layer gives the scones a shiny finish.
  • Bake on the middle rack of the oven for 10 minutes, then turn OFF the oven, and leave the biscuits inside for another 5 minutes to finish cooking. Transfer onto a cooling rack and serve warm with clotted cream and jam-required. In a pinch, you can serve with lemon curd in place of the cream and jam.
Fall-in for Apple Cider Donuts

Fall-in for Apple Cider Donuts

Yes, fall is upon us. Amazing how a year can go so quickly and yet feel interminable.  Jamie came home yesterday from work and pronounced “We need to make something sweet today” to which I replied, “Sounds good to me but NO PUMPKIN”.  Pumpkin lattes, desserts, all things pumpkin are popping up everywhere, its way too early if you ask me.  Luckily Jamie did not have pumpkin on the brain either.

Our favorite fall fruit is undoubtedly APPLES.  As the fall season comes into swing, I dust off the peeler and pie pans knowing that any day now Wes will say, “Are there apples at the farmers market yet? Is it PIE time?”  For me, I will invariably think about making apple crisp, homey, delicious and a little easier than making apple pie.

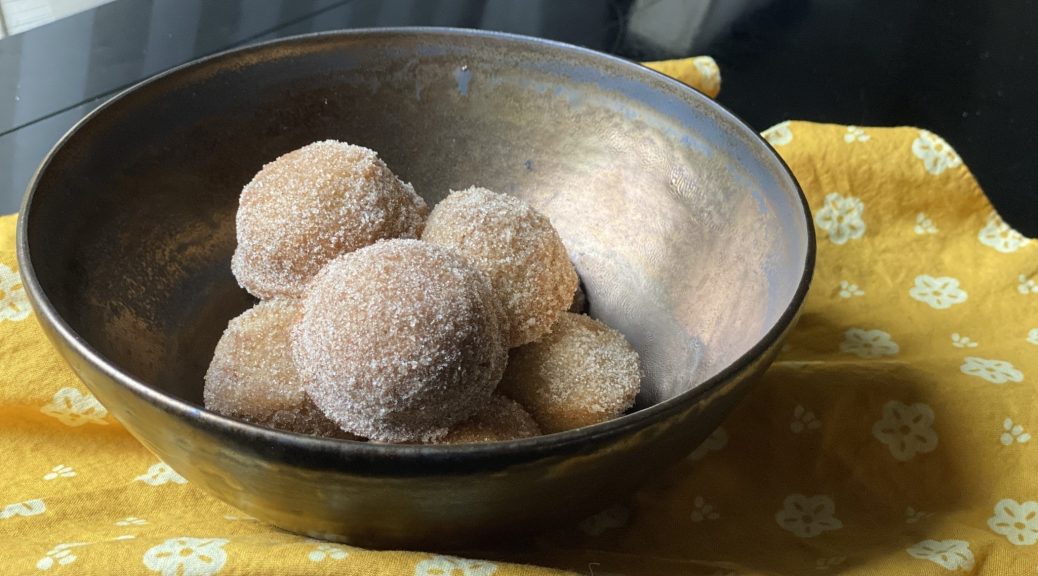
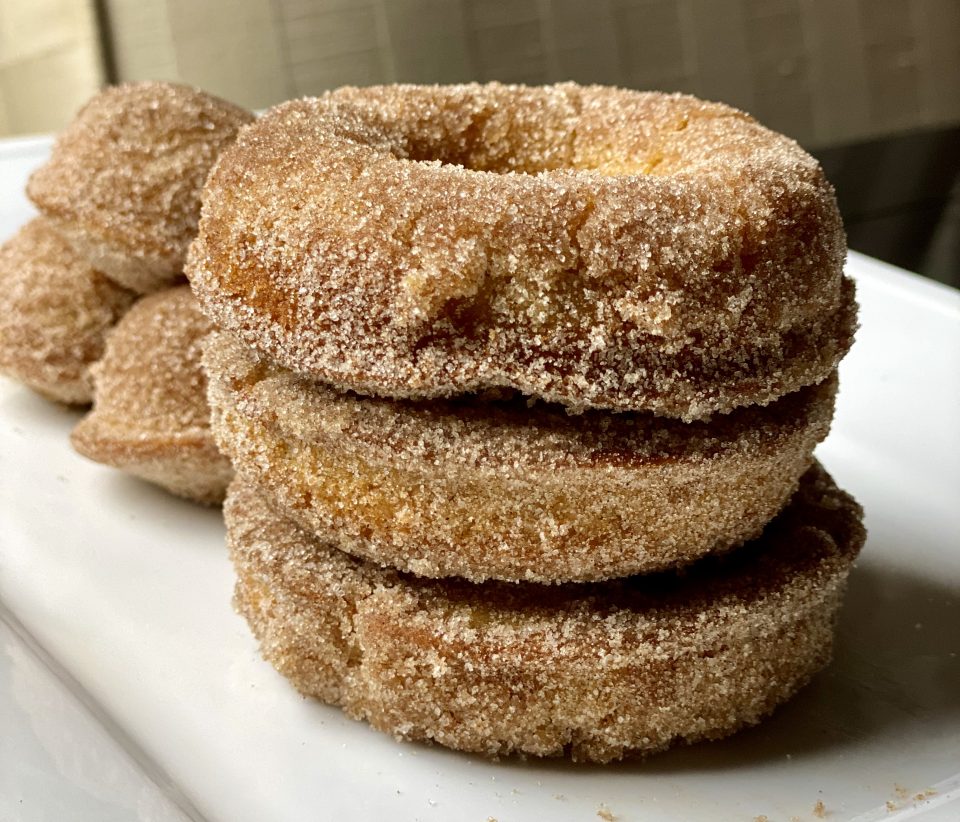
But, none of the usuals made the cut yesterday.  Jamie had spied a recipe on NYTcooking for baked Apple Cider Donuts.  I was all in.  Not a west coast thing, apple cider donuts are a tradition in the northeast and marks the start of the fall harvest season. The donuts are tasty and easy to make providing you have a donut pan (duh, of course, I do), and are a little easier on the waistline than fried donuts.  They are tender, with a nice spiciness from the cinnamon in the batter and cinnamon-sugar topping.  If you aren’t a gadget freak like yours truly, these can be made in muffin tins.  Jamie added diced apples bits to the batter that made them even better, a BOSS tweak.

These are delicious, perfect with a cup of coffee or tea on a brisk autumn day or a warm fall evening, or ANYTIME.

Baked Apple Cider Donuts

Welcome the fall season with these delicious BAKED Apple Cider Donuts!
Course Dessert
Cuisine American
Keyword Baked Apple Cider Donuts
Prep Time 20 minutes
Cook Time 15 minutes
Calories 333kcal

Equipment

  • donut tin or muffin tin, regular or mini

Ingredients

Batter

  • 1 ¾ cup all-purpose flour 225 grams
  • 1 ¼ teaspoon baking powder
  • ¾ teaspoon fine sea salt
  • 1 teaspoon ground cinnamon
  • ½ teaspoon freshly grated nutmeg
  • 10 tbsp unsalted butter 140gm *2 sticks, at room temperature* 10 tablespoons for the batter and 6 tablespoons for the cinnamon sugar coating
  • ¾ cup light brown sugar 165gm
  • 1/4 cup granulated sugar
  • 2 large eggs at room temperature
  • 1 teaspoon vanilla extract
  • ½ cup apple cider 120 ml
  • 1 small apple, cored, peeled and diced 1/4 inch Use any kind you like, Jonagold, Fuji, Golden Delicious for sweeter apple or Pippin for a tart apple

Cinnamon Sugar Coating

  • 6 tbsp unsalted butter melted
  • 1/2 cup granulated sugar
  • 1 tsp cinnamon

Instructions

  • Heat the oven to 350 degrees. Lightly grease 2 6-cavity doughnut pans (or a 12-cup muffin tin) with nonstick spray.
  • In a medium bowl, add the flour, baking powder, salt, cinnamon and nutmeg and whisk to combine. Set aside.
  • In the bowl of a stand mixer fitted with the paddle attachment, cream butter, brown sugar and granulated sugar on medium speed until light and fluffy, 3 to 4 minutes. Add the eggs one at a time and mix until well incorporated after each addition, scraping the bowl as necessary. Beat in the vanilla extract.
  • Add the flour mixture and mix on low speed until incorporated. With the mixer running, add the apple cider in a slow, steady stream and mix to combine. Scrape the bowl well to make sure the batter is homogeneous.
  • Spoon the batter into prepared doughnut pans, filling them about 2/3 of the way full (you can also do this using a disposable piping bag or a resealable plastic bag with a 1/2-inch opening cut from one corner).
  • Bake until evenly golden brown and a toothpick inserted into the center of the thickest portion comes out clean, 12 to 15 minutes. Rotate the pans halfway through baking. (If you are making muffins, divide batter evenly between the prepared cups and bake for 15 to 20 minutes, rotating halfway through.)
  • While the doughnuts bake, whisk the granulated sugar and 1 teaspoon cinnamon together in a small bowl to combine. In a separate small bowl, melt the remaining 6 tablespoons of butter in the microwave.
  • Let the doughnuts cool for 5 minutes after baking, then unmold them from the pans, brush with the melted butter and dredge them in the cinnamon sugar while they are still warm. Serve immediately, or let cool to room temperature.

Notes

If you don't use the apple you can reduce the cider for more apple flavor.  Start with 1-1/2 cups cider and reduce over medium to 1/2 cup.  It will be sweeter so you can reduce the sugar by 20% in recipe.  It's more work, up to you.
Or you can add 1 Tablespoon of Boiled Cider, I use King Arthur Boiled Cider to amp up apple flavor.  To be really picky, substitute this for 1 tablespoon of the apple cider
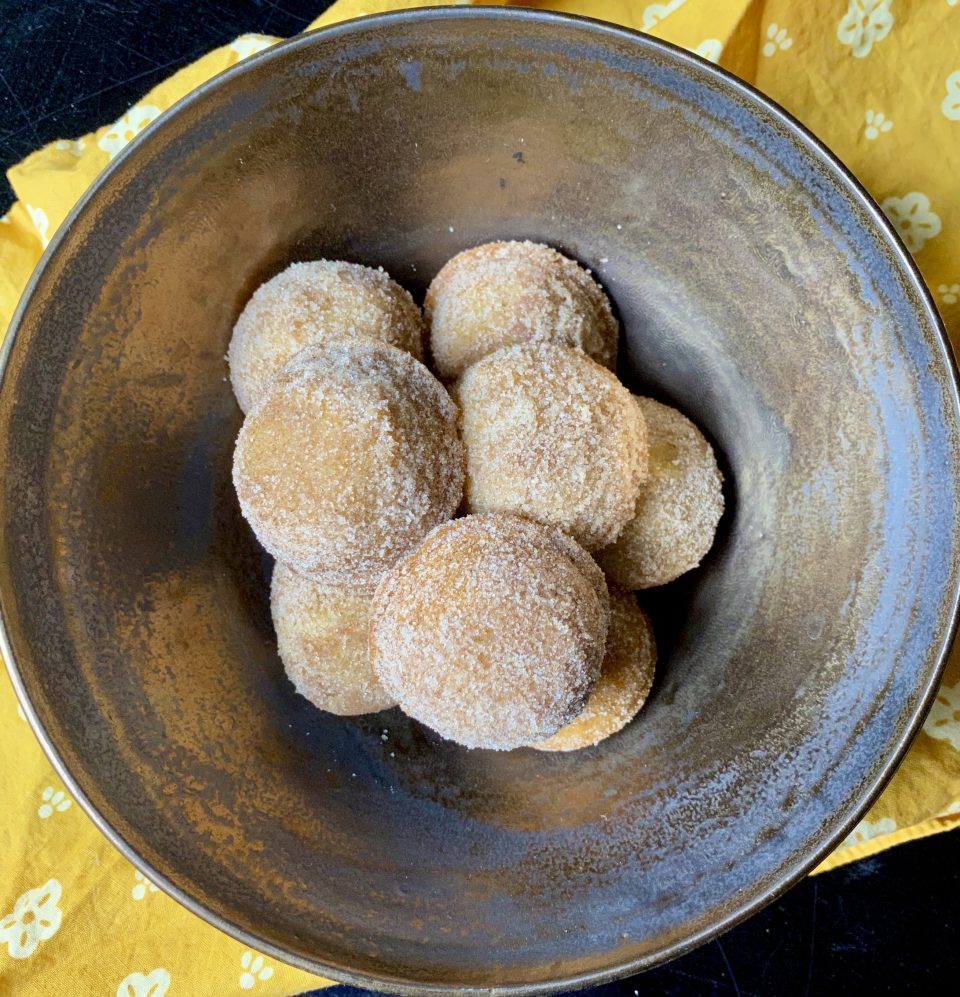
We made mini muffins and donut holes, fill the donut hole pan only half so it creates a round top.  Reduce baking time to 12-15 minutes.
 
Best Damn Banana Bread-Slipping in A New One

Best Damn Banana Bread-Slipping in A New One

There are things you take for granted, things that are constants within your own universe.

For example, I have made the same banana bread forever.  A recipe from my kids’ pre-school teacher WAY BACK in the day.  Every time I strayed and tried a different recipe my family’s response was “it’s not bad, but it’s not Teacher Heidi’s banana bread”.  Convinced,  I boldly titled it “Best Damn Banana Bread” on 3Jamigos.

So, there I am, sitting on the can this morning, taking in all the bad news of the day, fires, hurricanes, pandemic, political craziness, when Wes slides the door open (please, don’t tell me you lock your bathroom door at home)  and says…

”I like this banana bread more than your usual”

Say What?

Thus proving we are living in crazy times, I almost fell off my “throne”.  I had just received a copy of Dominique Ansel’s new baking book, Everyone Can Bake.  (Now, that is a constant in my universe-buying cookbooks) and had yet to make anything from it. Fortunately, while perusing the blogosphere, I found My Baking Addiction’s (Boss Blog) post on Ansel’s Banana Bread.  Rave reviews all around.  Never one to shy away from a banana bread challenge, I decided to have a go of it.

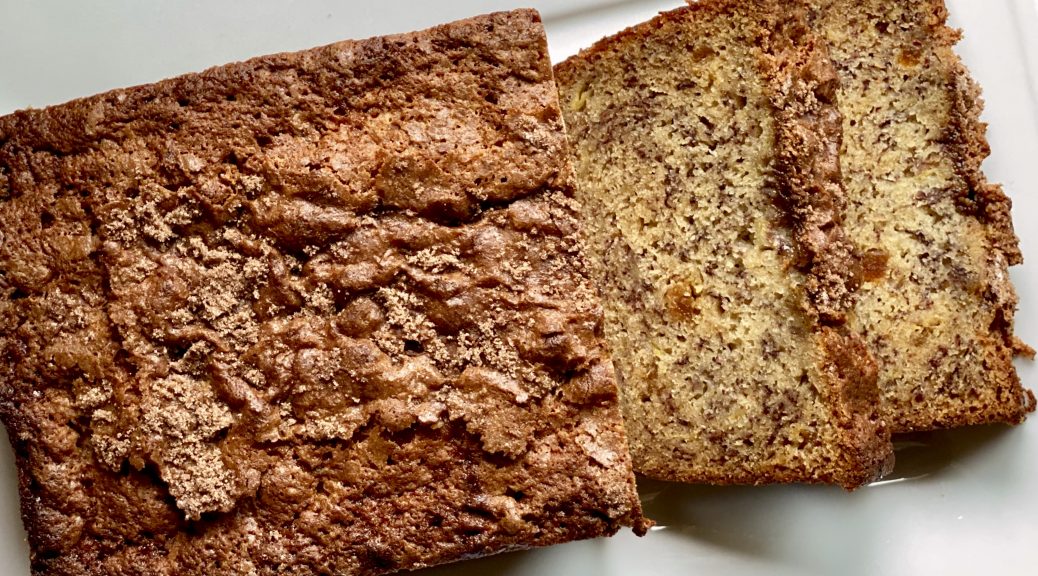
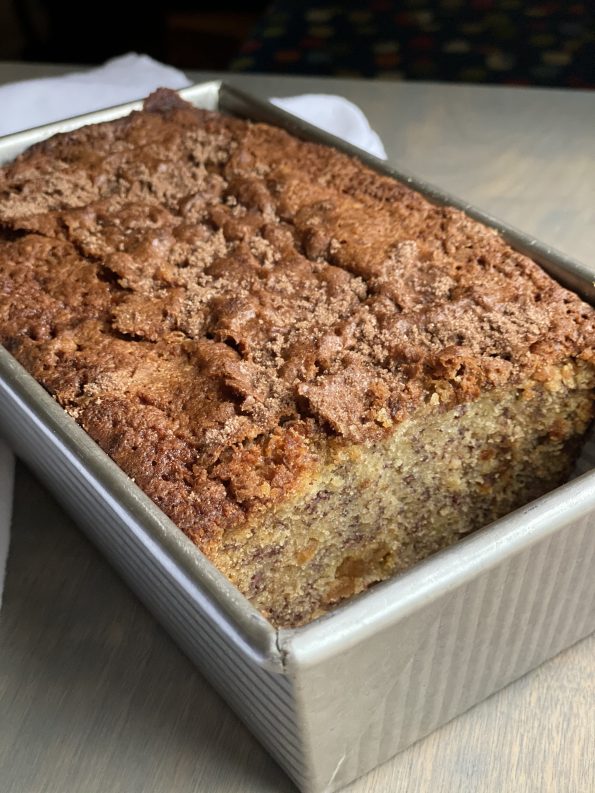
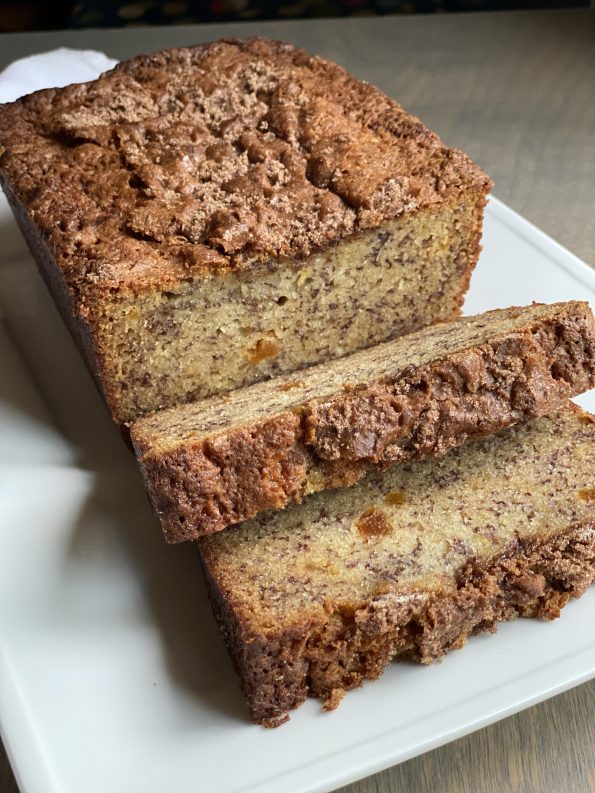
The recipe comes together quickly. It calls for melted butter, 4 bananas, eggs, flour…pretty standard although it is quite generous with the butter and bananas.  I decided to tweak the recipe so I added diced apricots, substituted mace for nutmeg, and finished with Midwest Made’s crunchy sugar topping with a touch of cinnamon. (Technique for sugar from Midwest Made Banana Bread)  

Nota Bene

Ansel’s book calls for an 8 x 4.5 loaf pan.  NOPE.  I used a 9×5 loaf pan and had extra batter for 3 muffins. Don’t try to pour all the batter into an 8 x 4.5 pan, it will overflow creating havoc in your oven.  My Baking Addiction used a 10 x 5 pan.  I filled my loaf pan to approximately 3/4-inch below the top edge.  Baking time was around 1 hour and 15 minutes, halfway through I covered the top with foil so it wouldn’t get too dark.

It’s everything banana bread should be-dense, moist, and banana-y.  The bits of apricot gave the bread a tart, sweet, component. My bet is dried strawberries, blueberries, or a tropical fruit medley would work too.  If you like nuts, toss a handful of chopped walnuts in with the apricots or sprinkle on top of the loaf before baking.

Nota Nota Bene

The beauty of this recipe is you can make it by hand…and you absolutely should!  I was befuddled (omg, who uses that word), a couple of times I have made this bread it sinks in the middle.  I now think it is because I used a mixer and inadvertently beat too much air into the bread causing it to fall in the center.  This is truly a one-bowl recipe to make by hand.

So, I now have two Best Damn Banana Bread recipes but as they say, variety is the spice of life.  Try both, tell me which one reigns supreme.


Banana Bread, Yet Another Best Damn BB

Banana Bread by Dominic Ansel. Easy and delicious!
Course quick breads
Cuisine American
Keyword Banana Bread, dominic ansel
Prep Time 15 minutes
Cook Time 1 hour 15 minutes

Ingredients

Dry Ingredients

  • 2 cups sugar 400grams
  • 2 cups flour 250 grams
  • ¾ teaspoon baking soda 3 grams
  • ¾ teaspoon nutmeg 2 grams can substitute mace
  • 1 teaspoon salt 5 grams
  • 1 teaspoon baking powder 5 grams

The Wet Ingredients

  • 3 eggs 150 grams
  • 4 overripe bananas, mashed 400 grams, approx 2 cups
  • 14 tablespoons unsalted butter, melted, 200 grams
  • 1/2 cup dried apricots, diced substitute dried berries, or tropical fruit medley, optional
  • 1/4 cup chopped walnuts or pecans optional

Instructions

  • Preheat the oven to 350°. Grease a 10" x 5" x 3 ½" loaf pan and set aside. If you use a smaller pan, fill until the batter reaches 3/4-1 inch below the top edge. Excess batter can be used for muffins or mini-loaves.
  • In a large bowl, whisk together the sugar, flour, baking soda, nutmeg, salt and baking powder.
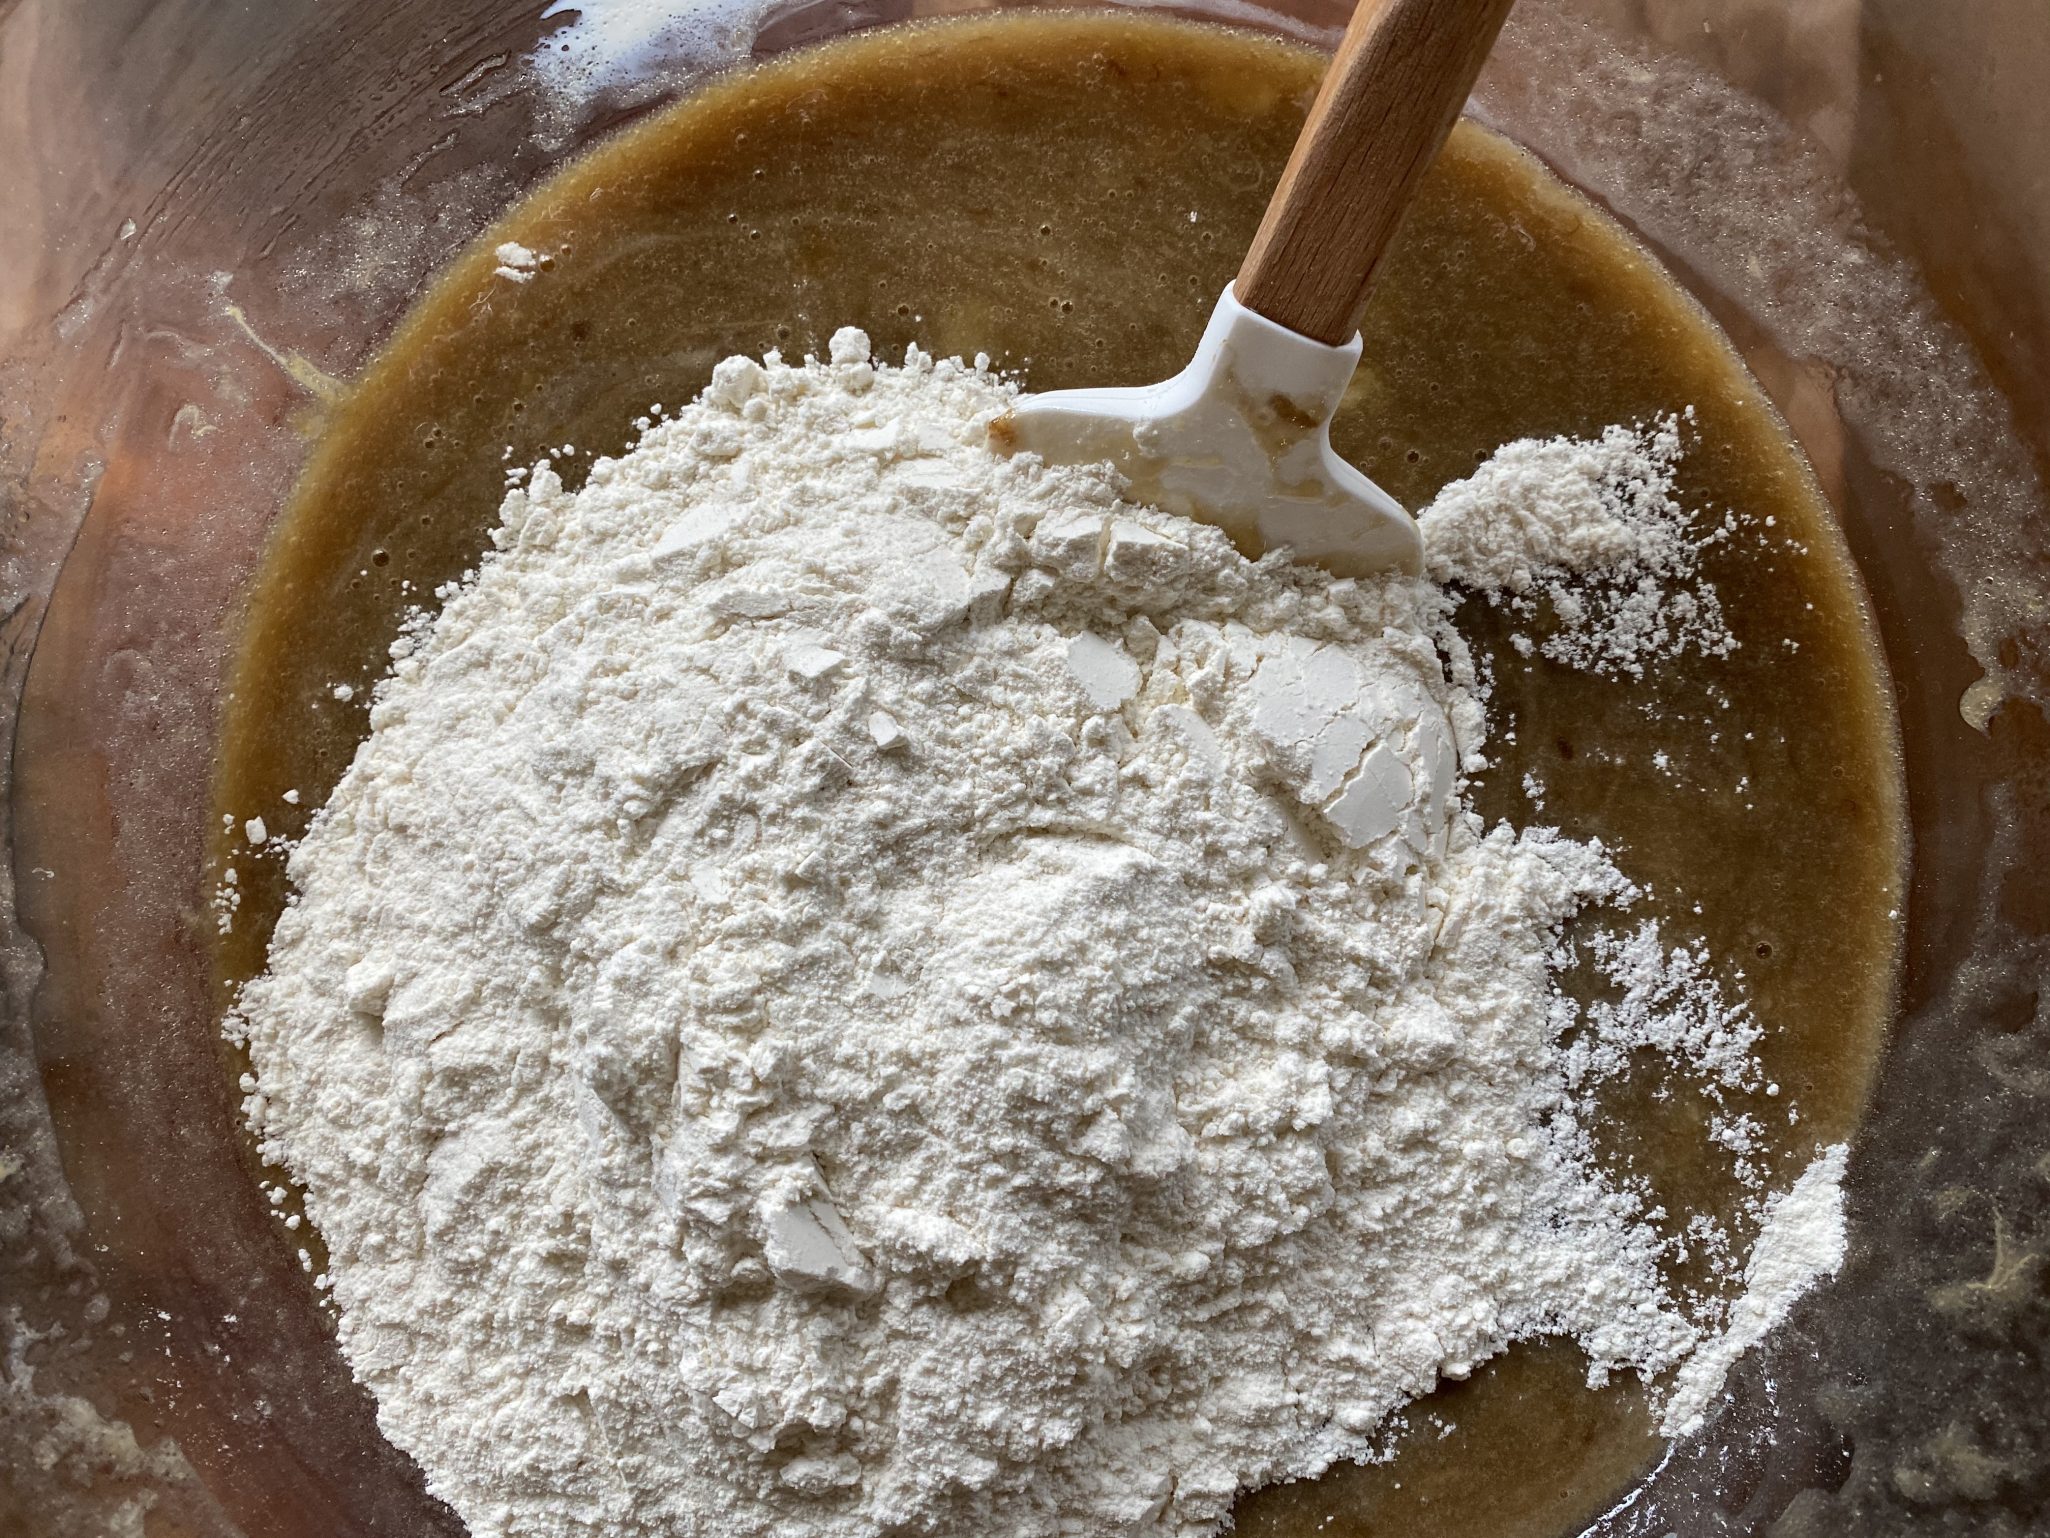
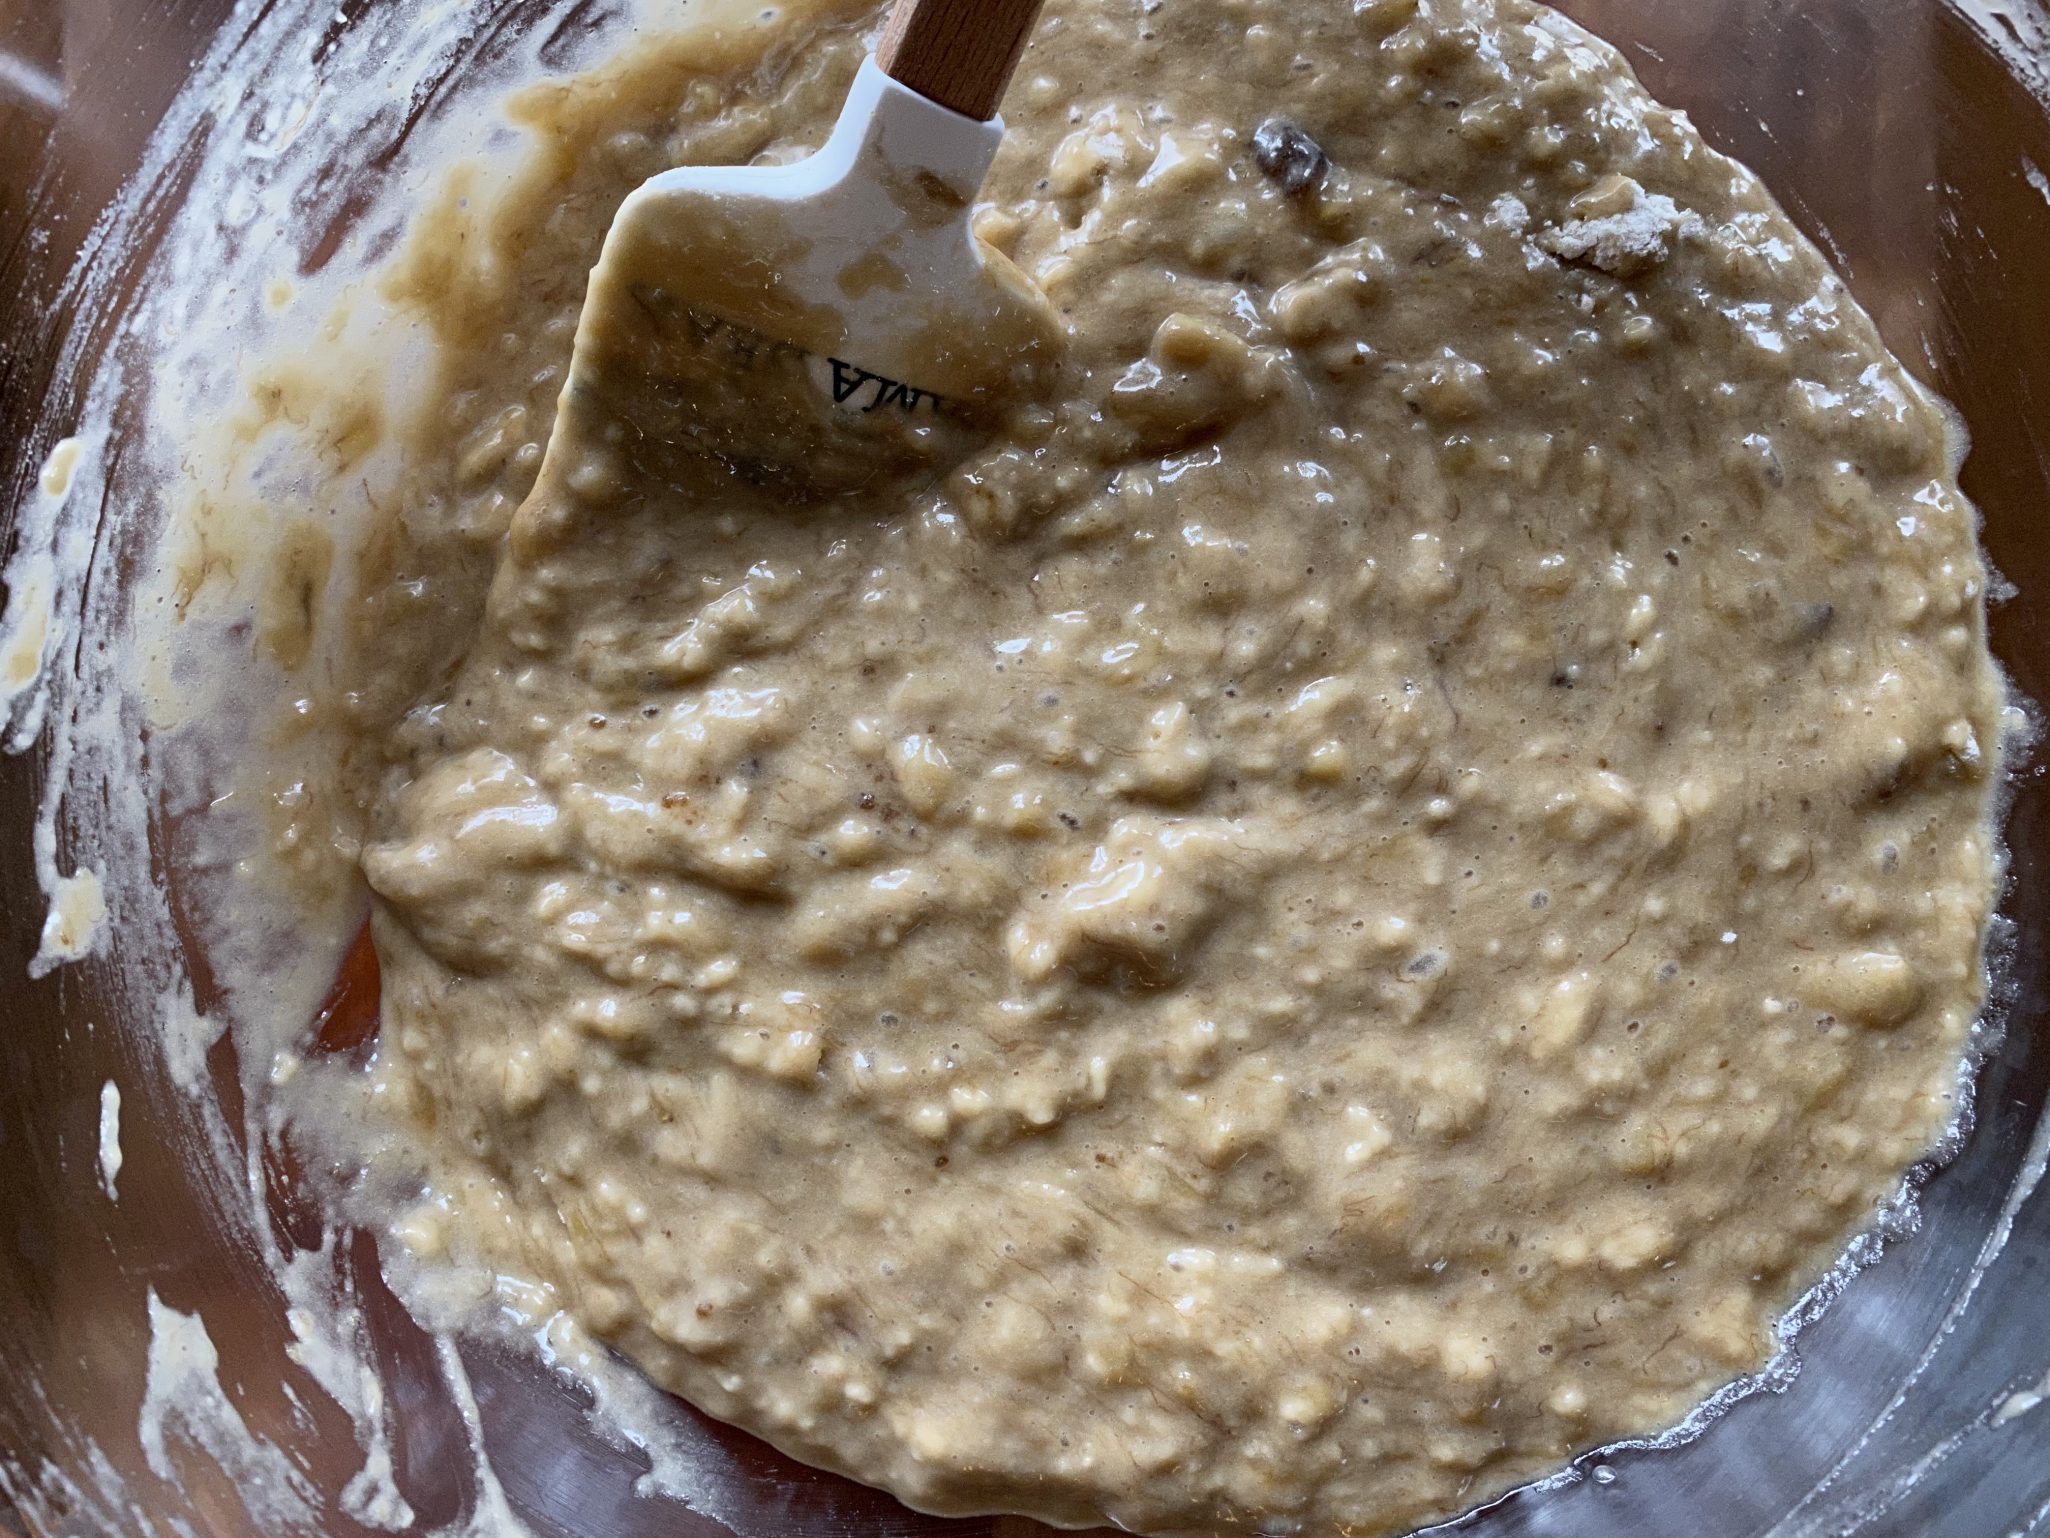
  • In a medium bowl, beat the eggs and the mashed bananas together. Pour the wet ingredients over the dry ingredients and mix together until the dry ingredients disappear. Stir in the melted butter until fully incorporated. If using, fold in dried fruit and nuts.
  • Pour the batter into prepared pan* Bake until golden brown and a cake tester inserted in the center of the loaf comes out clean, about 1 hour and 10 minutes. Check loaf halfway through, if the crust is browning too quickly, cover with foil. Allow to cool for 20 minutes before slicing.
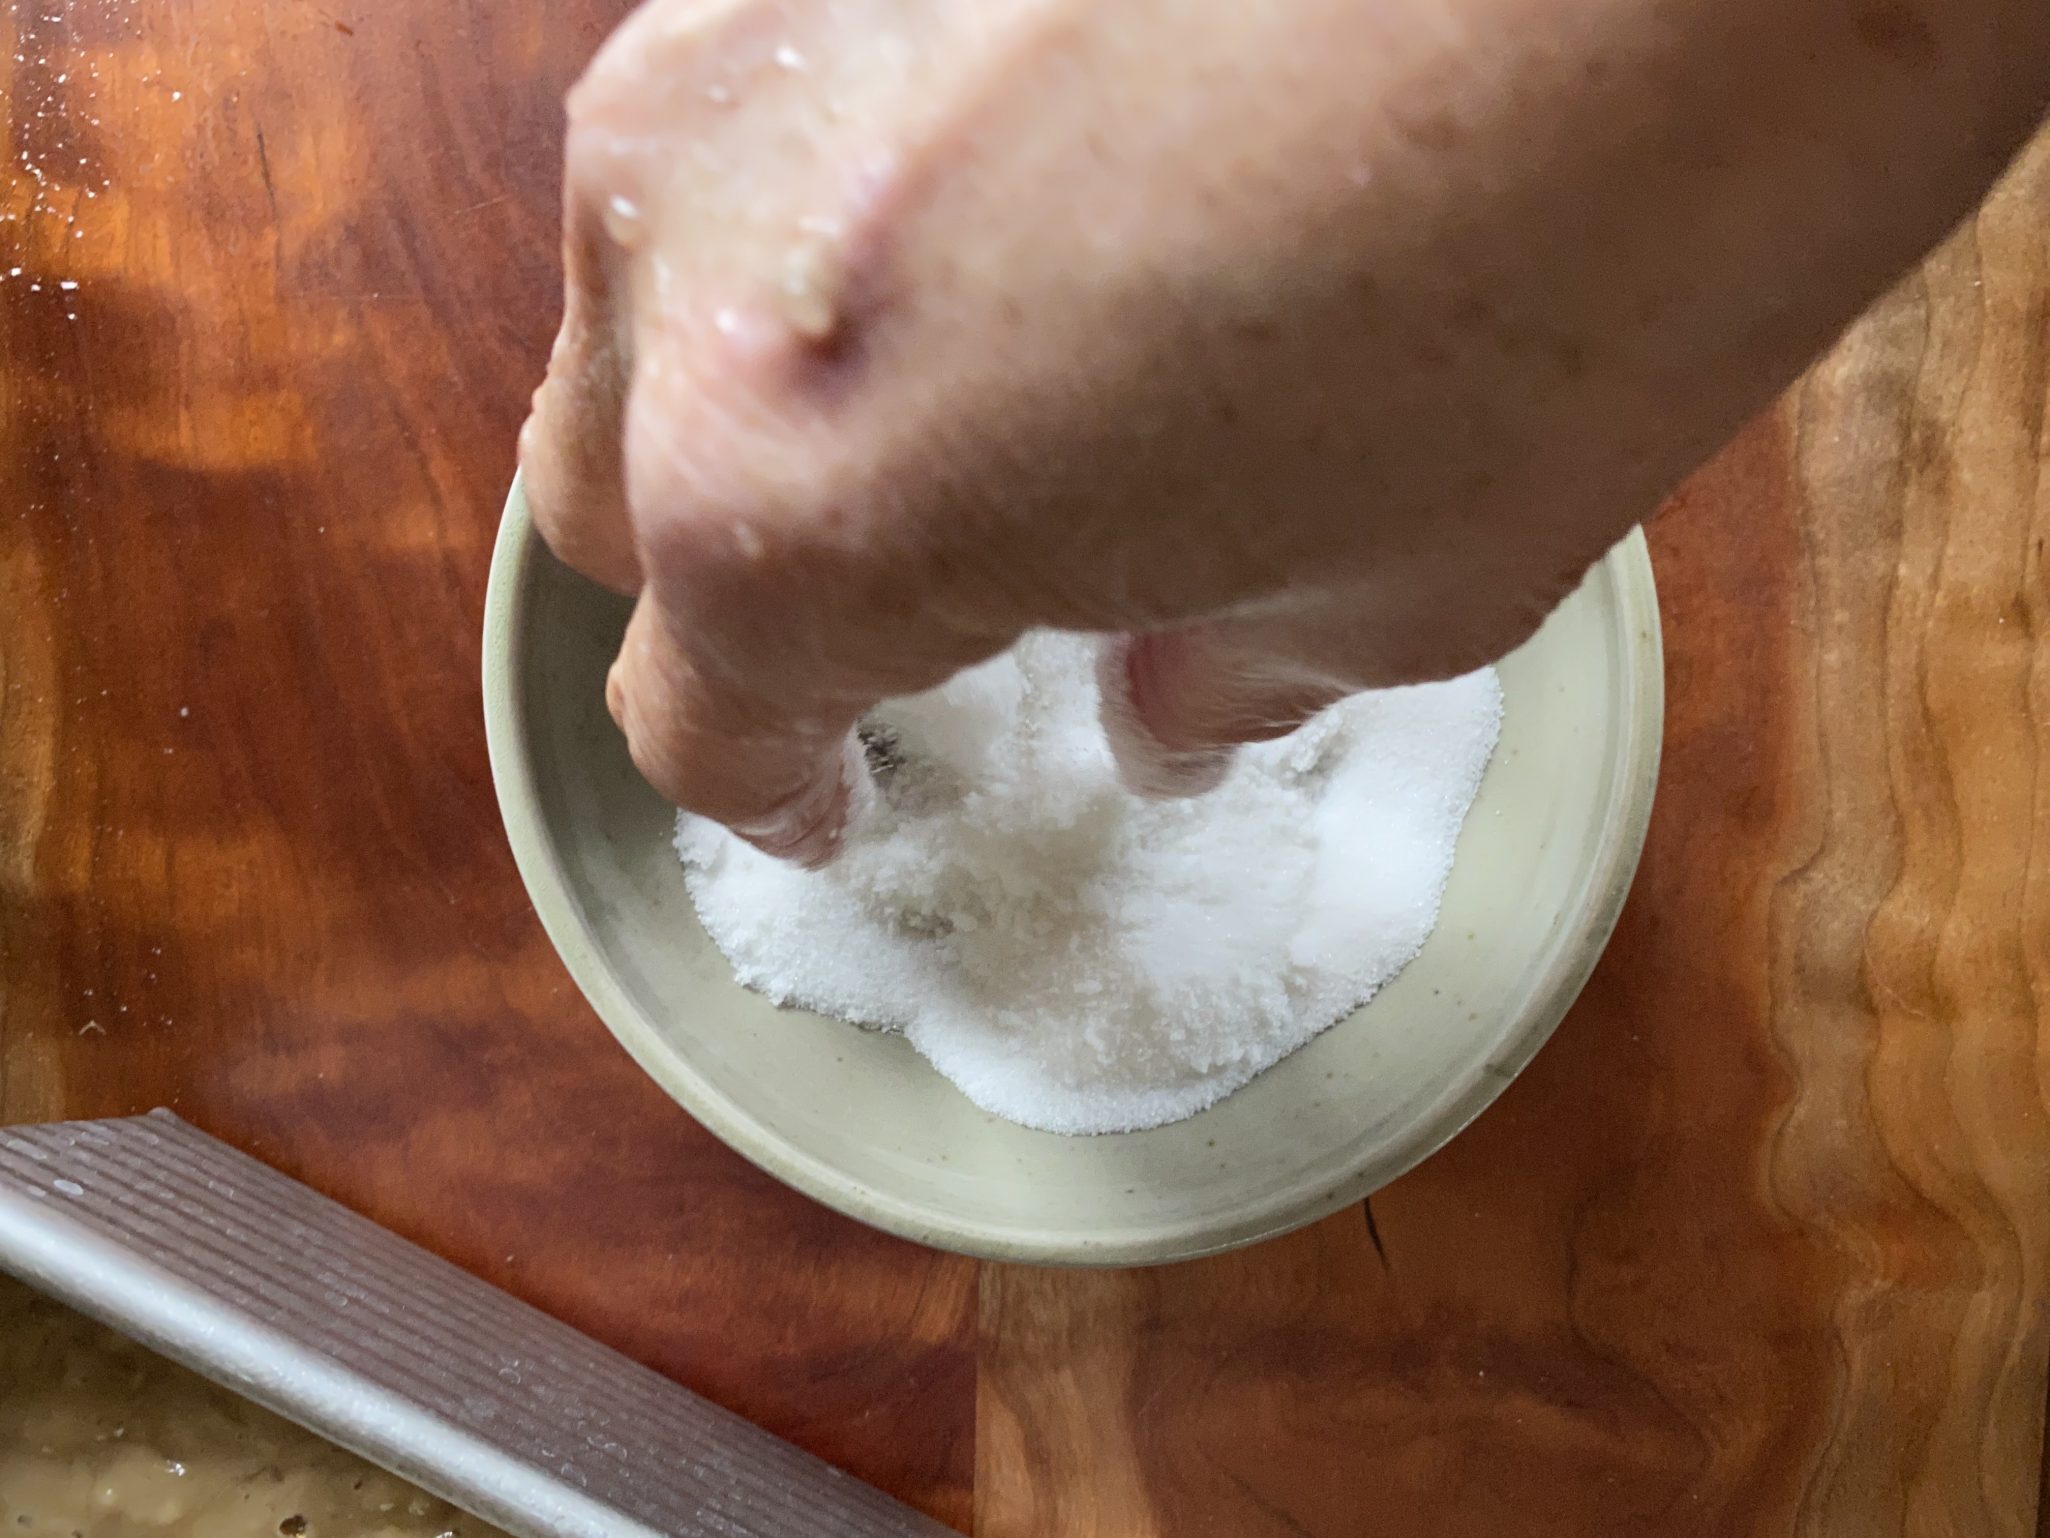
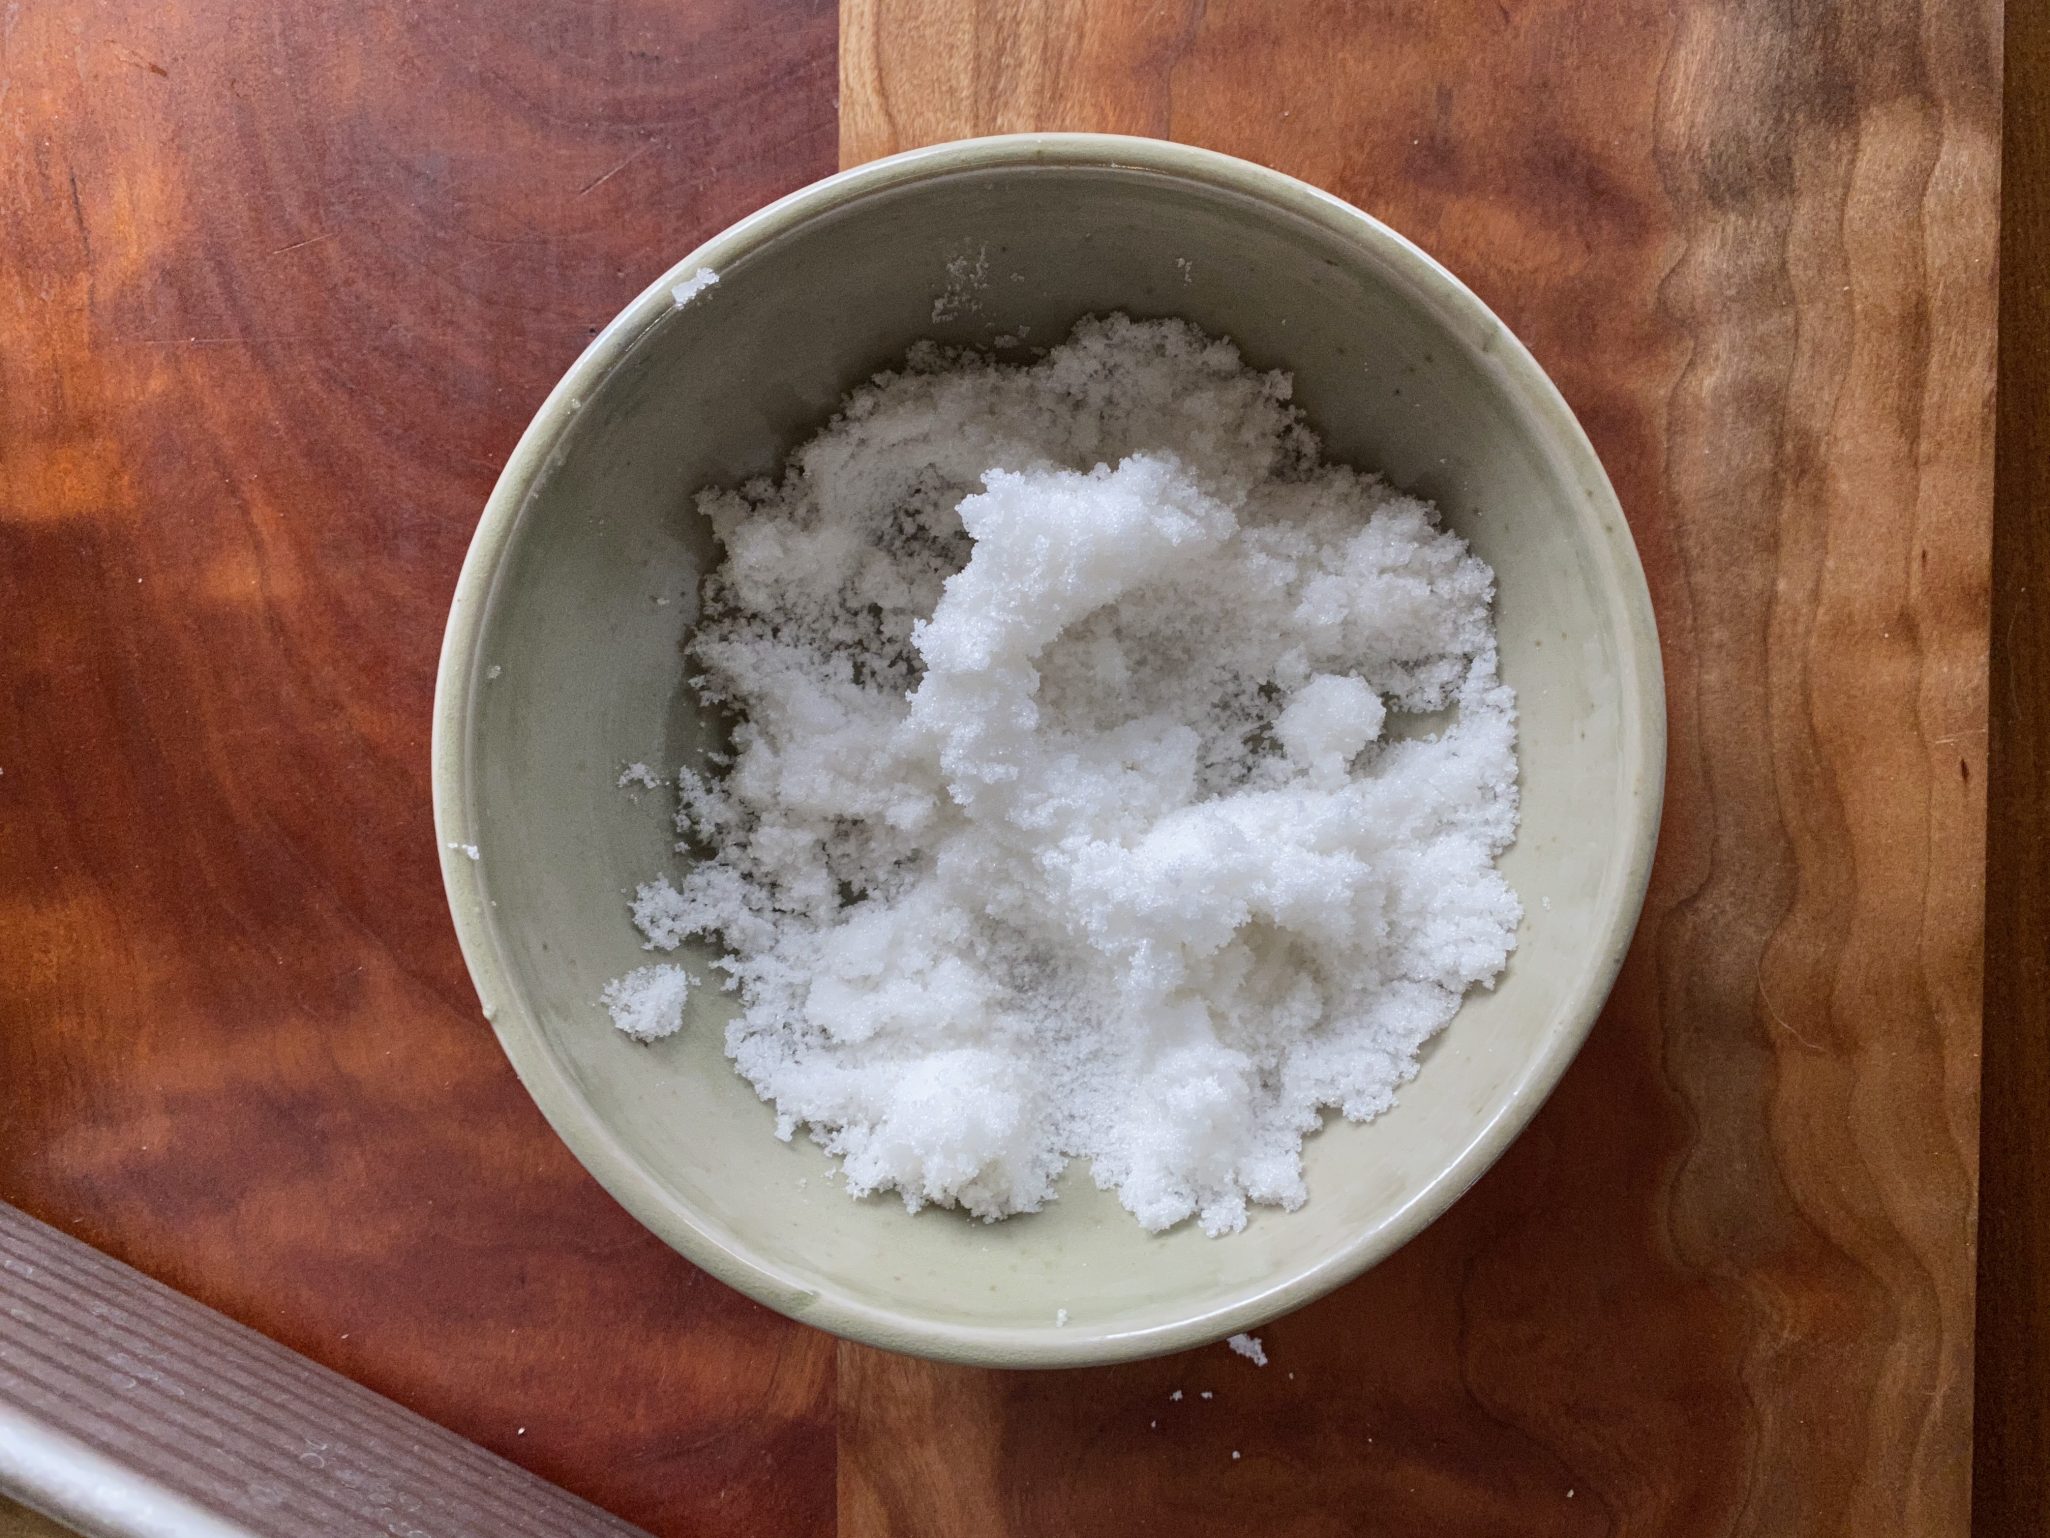
  • *Optional: Mix 1 teaspoon cinnamon with 2 tablespoons granulated sugar. Wet finger tips and mix sugar mixture until it clumps. Sprinkle evenly over top of batter. Or use your favorite streusel topping.
Crispy Cheesy Pan Pizza, Knighted by King Arthur… Flour That Is

Crispy Cheesy Pan Pizza, Knighted by King Arthur… Flour That Is

In this topsy turvy year, where flour has been in short supply since the COVID crisis, King Arthur Flour selected a pizza as their recipe of the year.  It’s easy to make with the caveat it does require a good amount of time, so plan in advance.  But it is so worth the time, it’s delicious.  

Years of pizza filled kids’ events-birthday parties, sports parties, playdates at Chuckie Cheese, and school functions, have left me with an aversion to pizza.  But the kids have grown up, no more bad pizza, only pizza by choice, my choice.  

During quarantine, our daily routine always includes someone asking, what’s for lunch?  To which Wes has lately been replying, how about pizza?  A couple of friends have raved about King Arthur’s 2020 recipe, Crispy Cheesy Pan Pizza which meant, pizza time baby.

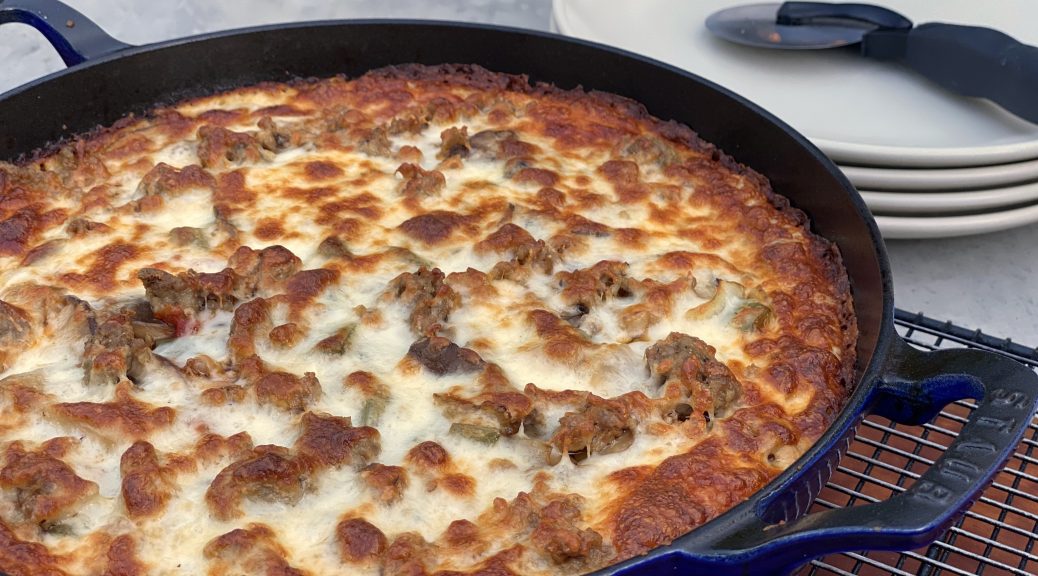
Crispy Cheesy Pan Pizza-Doing the Happy Dance

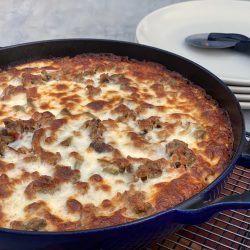
If you haven’t ever made your own bread, this is a great place to start.  This is one of those insanely popular, deservedly so, no-knead bread recipes.  Zero intimidation, a little bit of folding and lots of raves at the end, yep, it’s a keeper. The extended rest time gives rise (lol) to a crispy, airy, yummy crust.  The center is soft and pillowy and as you move to the perimeter it takes on a nice crunch.  

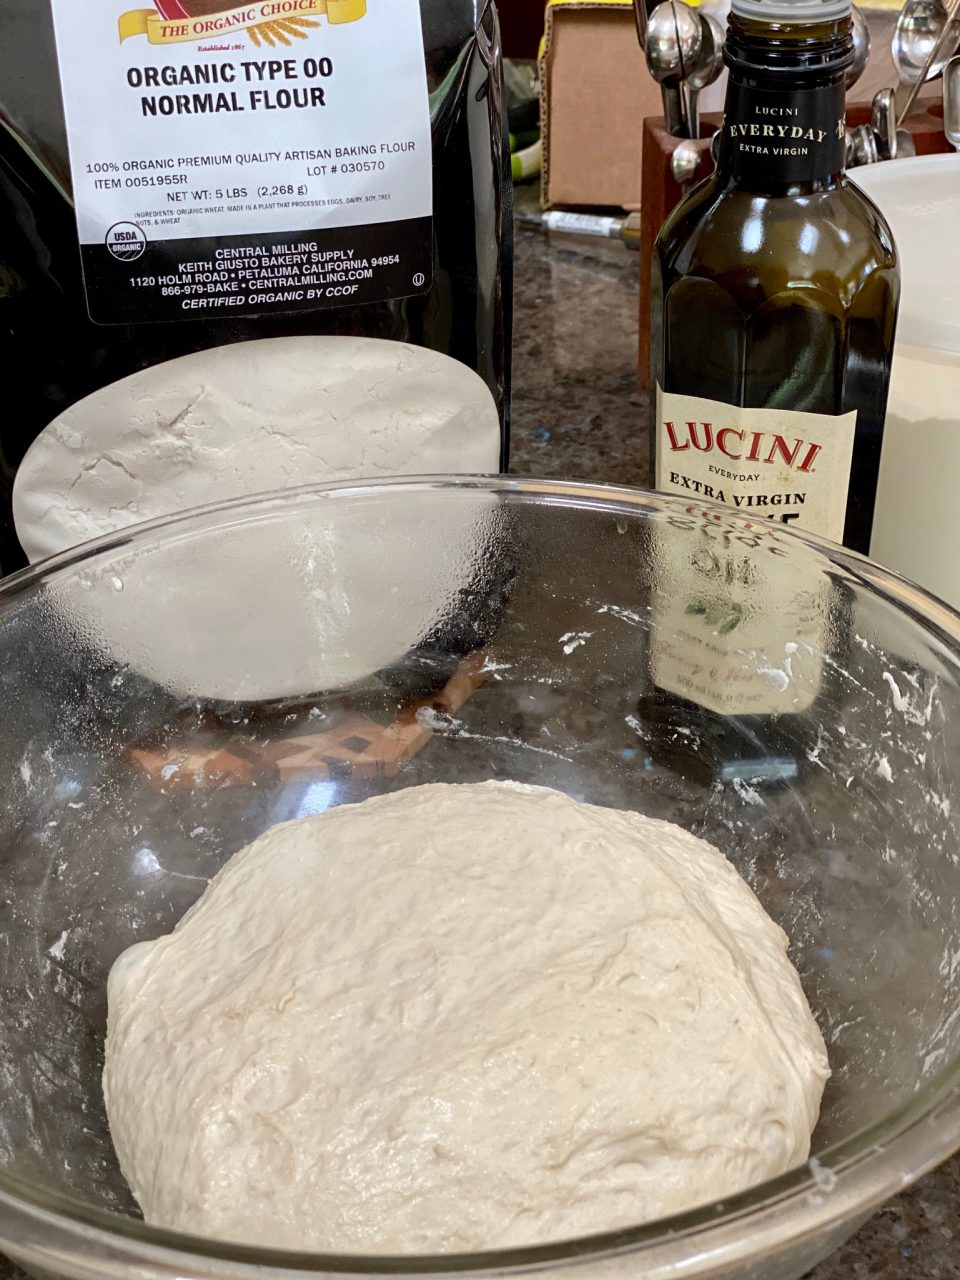
I’m sure the flour shortage during the time of COVID was pushed to new heights with this recipe. I used a 00 flour from Central Milling, I was out of KA AP flour.  You could sub bread flour by Gold Medal of Pillsbury as the protein content is a little higher and closer to King Arthur AP flour.  You make the dough, let it rest overnight in the fridge before putting on the final touches, TOPPINGS and then baking.

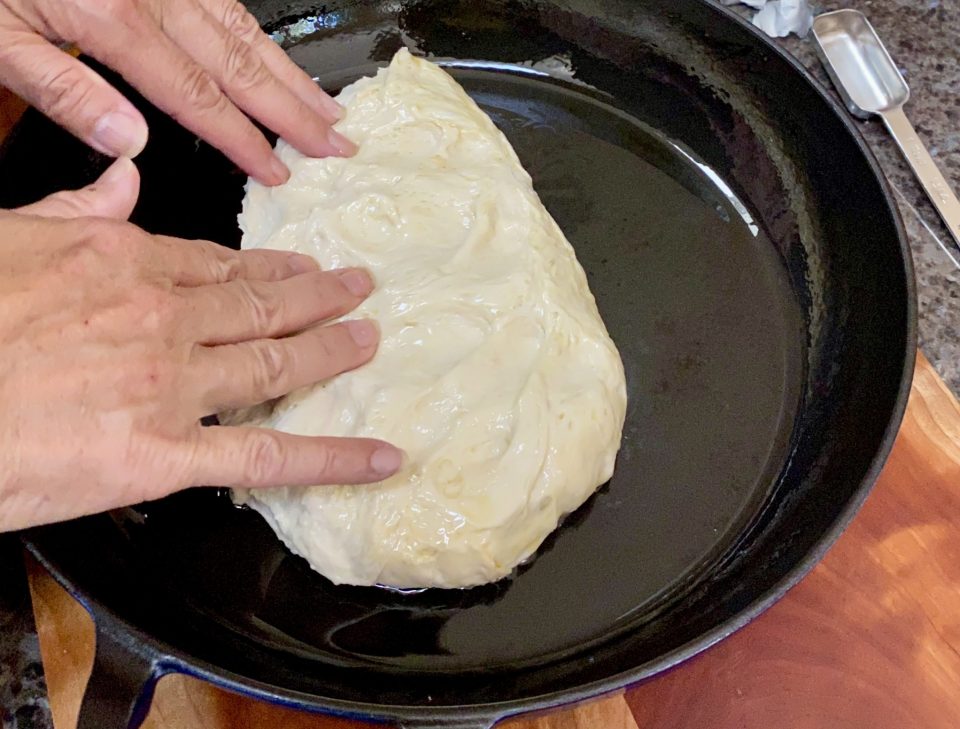
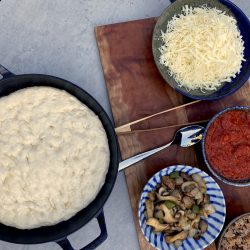
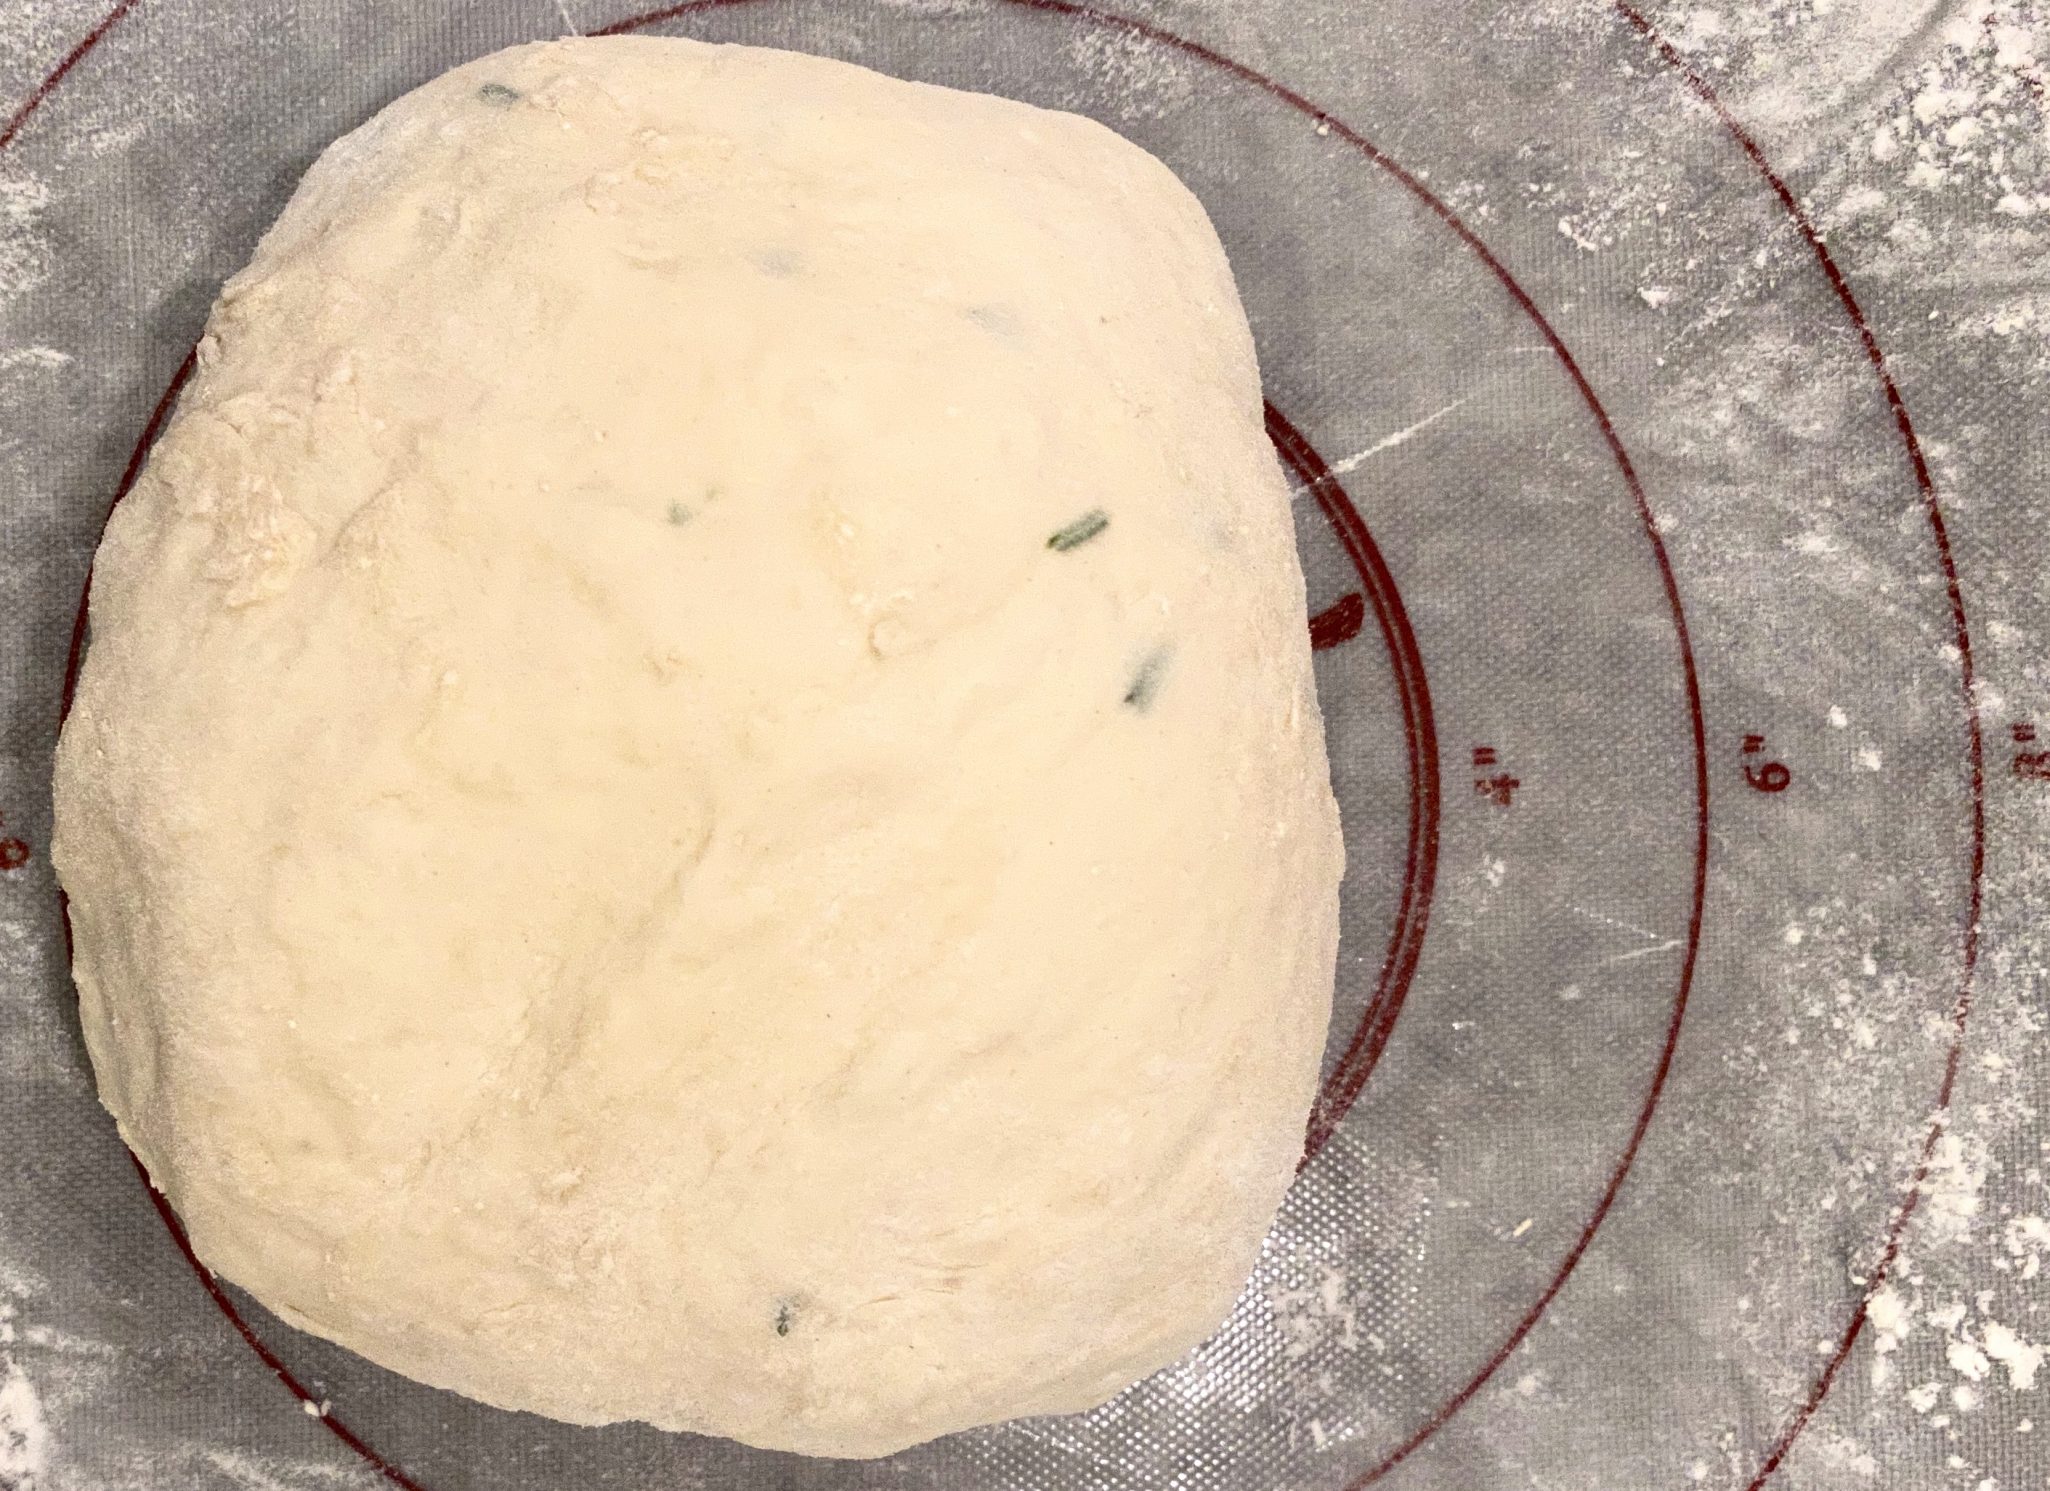
So a day later, take the dough out of the fridge and  smoosh it into a cast-iron skillet, I used my Staub pan or a 9-inch cake pan would work too.  But, keep in mind a heavy bottom skillet, especially cast-iron, enhances the crispiness.

Toppings

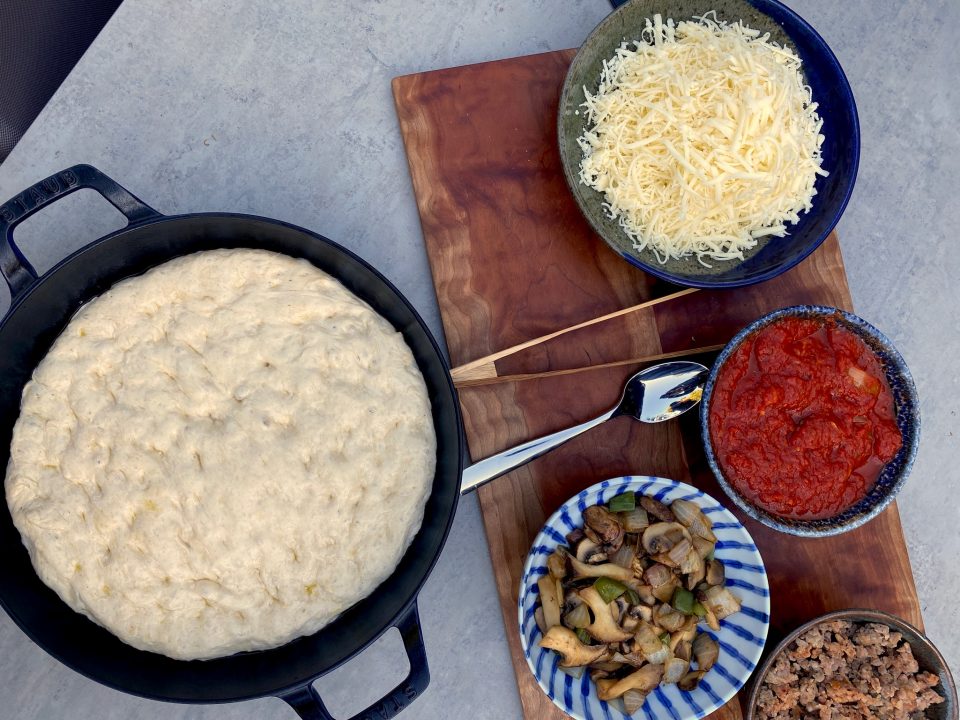
The King Arthur Flour recipe is all about the crust, no toppings so I went in search of a BOSS tomato sauce for the pizza.  First and last stop, Serious Eats.  New York Style Pizza Sauce, easy, tasty, a little spicy, a little sweet, a touch of basil, onion, and oregano, the perfect match.  Then the killer, butter is added to the sauce, which accentuates the crust.  OMGoodness, make this pizza.

Toppings are whatever your heart desires.  Our usual includes sausage and the triple-play of mushrooms, onions, and peppers.  Pre-cook toppings first.  My latest kick is adding arugula or micro-greens to the finished pizza.

Let me reiterate…Make this pizza, SOON.

Crispy Cheesy Pan Pizza

King Arthur Flour 2020 Recipe of the Year Crispy Cheesy Pan Pizza
Course Main Course
Cuisine Italian-American
Keyword Crispy Cheese Pan Pizza
Prep Time 30 minutes
Cook Time 25 minutes
Resting Time 1 day
Servings 6

Equipment

  • Cast-iron skillet or heavy bottom pan

Ingredients

Crust

  • 2 cups King Arthur Unbleached All-Purpose Flour 240g I used 00 flour from Central MIlling
  • 3/4 teaspoon salt
  • 1/2 teaspoon instant yeast or active dry yeast
  • 3/4 cup lukewarm water 170g
  • 1 tablespoon olive oil 13g
  • 1 1/2 tablespoons olive oil for the pan 18g

Toppings

  • 6 ounces mozzarella, grated about 1 1/4 cups, loosely packed* 170g
  • 1/3 to 1/2 cup tomato sauce or pizza sauce 74g to 113g homemade or storebought
  • freshly grated hard cheese and fresh herbs for sprinkling on top after baking optional
  • handful of fresh greens like arugula optional
  • toppings of choice

Tomato Sauce from Serious Eats

Instructions

  • Weigh your flour; or measure it by gently spooning it into a cup, then sweeping off any excess. I really like using a scale.  Place the flour, salt, yeast, water, and 1 tablespoon (13g) of the olive oil in a medium-large mixing bowl.
  • Stir everything together to make a shaggy, sticky mass of dough with no dry patches of flour, about 1 minute by hand, using a spoon or spatula. Scrape down the sides of the bowl to gather the dough into a rough ball; cover the bowl.
  • After 5 minutes, uncover the bowl and reach a bowl scraper or your wet hand down between the side of the bowl and the dough, as though you were going to lift the dough out. Instead of lifting, stretch the bottom of the dough up and over its top. Repeat three more times, turning the bowl 90° each time. This process of four stretches, which takes the place of kneading, is called a fold.
  • Re-cover the bowl, and after 5 minutes do another fold. Wait 5 minutes and repeat; then another 5 minutes, and do a fourth and final fold. Cover the bowl and let the dough rest, undisturbed, for 40 minutes. Then refrigerate it for a minimum of 12 hours, or up to 72 hours. It'll rise slowly as it chills, developing flavor; this long rise will also add flexibility to your schedule.
  • Refrigerate it for a minimum of 12 hours, or up to 72 hours. It'll rise slowly as it chills, developing flavor.
  • About 3 hours before you want to serve your pizza, prep pan. Pour 1 1/2 tablespoons (18g) olive oil into a well-seasoned cast iron skillet that’s 10” to 11” diameter across the top, and about 9” across the bottom. Heavy, dark cast iron will give you a superb crust; but if you don’t have it, use another oven-safe heavy-bottomed skillet of similar size, or a 10” round cake pan or 9” square pan. Tilt the pan to spread the oil across the bottom, use a brush to spread some oil up the edges, as well.  
  • Transfer the dough to the pan and turn it once to coat both sides with the oil. After coating the dough in oil, press the dough to the edges of the pan, dimpling it using the tips of your fingers in the process. The dough may start to resist and shrink back; that’s OK, just cover it and let it rest for about 15 minutes, then repeat the dimpling/pressing. At this point the dough should reach the edges of the pan; if it doesn’t, give it one more 15-minute rest before dimpling/pressing a third and final time. 
  • Cover the crust and let it rise for 2 hours at room temperature. The fully risen dough will look soft and pillowy and jiggle when you gently shake the pan.
  • About 30 minutes before baking, place one rack at the bottom of the oven and one toward the top (about 4" to 5" from the top heating element). Preheat the oven to 450°F.
  • When you’re ready to bake the pizza, sprinkle about three-quarters of the mozzarella (a scant 1 cup) evenly over the crust. Cover the entire crust completely for those crispy, caramelized edges. Spread small spoonfuls of the sauce over the cheese. The first cheese layer helps prevent sogginess from the sauce. Sprinkle on the remaining mozzarella.
  • Bake the pizza on the bottom rack of the oven for 18 to 20 minutes, until the cheese is bubbling and the bottom and edges of the crust are a rich golden brown (use a spatula to check the bottom). If the bottom is brown but the top still seems pale, transfer the pizza to the top rack and bake for 2 to 4 minutes longer. On the other hand, if the top seems fine but the bottom's not browned to your liking, leave the pizza on the bottom rack for another 2 to 4 minutes. Home ovens can vary a lot, so use the visual cues and your own preferences to gauge when you’ve achieved the perfect bake.
  • Remove the pizza from the oven and place the pan on a heatproof surface. Run a table knife or spatula between the edge of the pizza and side of the pan to prevent the cheese from sticking as it cools. Let the pizza cool a little then transfer to a cooling rack or cutting surface. No soggy crusts.

New York-Style Pizza Sauce

Perfect sauce for King Arthur Crispy Chessy Pan Pizza
Course Main Course
Cuisine Italian-American
Keyword New York Style Pizza Sauce
Prep Time 15 minutes
Cook Time 1 hour

Equipment

  • Food mill, food processor, or hand blender

Ingredients

  • 1 28-ounce can whole peeled tomatoes
  • 1 tablespoon extra-virgin olive oil
  • 1 tablespoon unsalted butter
  • 2 medium cloves garlic grated on microplane grater (about 2 teaspoons)
  • 1 teaspoon dried oregano
  • Pinch red pepper flakes
  • Kosher salt to taste
  • 2 6-inch sprigs fresh basil with leaves attached
  • 1 medium yellow onion peeled and split in half
  • 1 teaspoon sugar

Instructions

  • Combine butter and oil in medium saucepan and heat over medium-low heat until butter is melted. Add garlic, oregano, pepper flakes, and large pinch salt and cook, stirring frequently, until fragrant but not browned, about 3 minutes.
  • Add tomatoes, basil sprigs, onion halves, and sugar. Bring to a simmer, reduce heat to lowest setting (bubbles should barely be breaking the surface), and cook, stirring occasionally, until reduced by 1/2, about 1 hour.
  • Discard onions and basil stems. Season to taste with salt. Allow to cool and store in a covered container in the refrigerator for up to 2 weeks.

Notes

The sauce makes enough for 2 12 inch pizzas so you will have plenty.  Keep the onion, don't discard it.  This sauce would probably work over some pasta too, with that onion!

Just Peachy Cream Scones

Just Peachy Cream Scones

Ripe for the Picking

Peaches and nectarines are showing up at the farmer’s market in full force now. Summer is in full swing and the delicious scent of summer fruits-peaches, melons, and berries permeate the air. Even with my COVID mask on I catch whiffs of the heady aroma of vine-ripened fruit.  

I came home with way too many peaches and nectarines of course. After eating more than a couple out of hand I decided it was time to change it up.  I saw a recipe in the NYT for a peach loaf bread but that would mean having the oven on for a very long time, way too hot for that.  How about scones?  I can make Dorie’s Cream Scones and throw in peaches in place of currants and fortunately, they bake in a jiffy. 

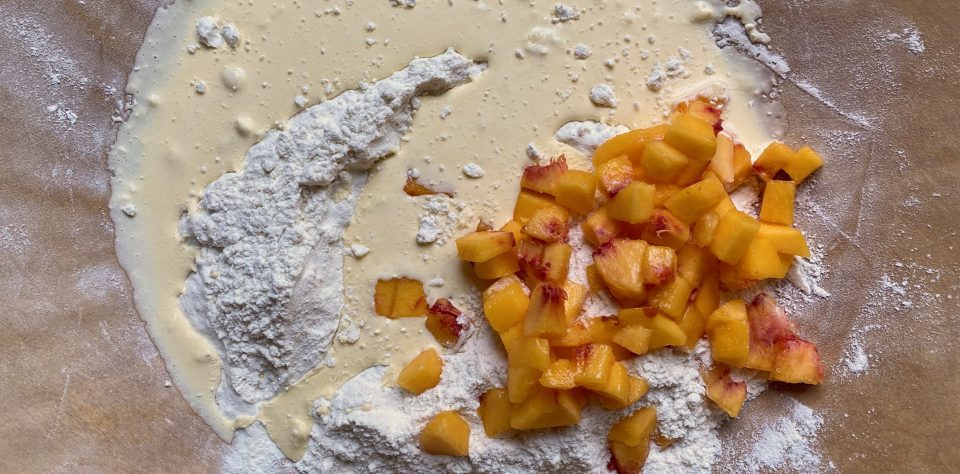
Dorie’s Cream Scones is my go-to recipe, I have made it with dried cranberries and orange zest, dried blueberries and lemon, or freeze-dried strawberries.  It lends itself well to variations. But fresh fruit?  A little trickier.  I diced the skinned peach and placed it in the freezer while I made the dough.  I used one cup of diced peaches which is conveniently about 1 peach. 

Partially freezing the peaches (don’t use commercially frozen peaches, those have too much liquid), prevents the peaches from getting smooshed when you fold them into the dough.  I tossed them in when I added the liquid to the dry ingredients but it would be better to add the liquid, blend it to a shaggy mess, then add the peaches as you bring the dough together.

Pearls of Sconedom

Fresh fruit is less focused in sweetness and flavor than dried fruit.  I liked the peaches but they would benefit from a couple of “flavor amplifiers”.  Next time I will add a teaspoon of vanilla or 1/2 teaspoon of almond extract to the dough.  I was lazy so I did not put a wash on the scones.  My bad, do not skip this. Brush an egg-wash or heavy cream on the scones before baking and sprinkle them generously with turbinado or sparkling sugar.  This adds both crunch and sweetness.  Another variation to jazz these scones up, finely diced candied or crystallized ginger would be ah-mazing, use about 2 tablespoons.  

Make these scones an hour or two before you serve them. I like them at room temperature, the flavor, and texture set up nicely.  They are often served warm too, just not my preference.  Scones are drier than biscuits which means they are perfect with a spoon of jam and dollop of clotted cream-scone heaven.  If you don’t have clotted cream, you can use creme fraiche, mascarpone, or butter.

Whaddya waiting for, go make some scones!

Dorie Greenspan's Cream Scones

Dorie's classic cream scones with fresh peaches
Course Biscuits and scones, Breakfast, Dessert
Cuisine American, British
Keyword Cream Scones, Dorie Greenspan, Scones
Prep Time 20 minutes
Cook Time 22 minutes

Ingredients

Dry Ingredients:

  • 2 cups all-purpose flour
  • 2 Tablespoons granulated white sugar
  • 1 Tablespoon baking powder
  • 1/2 teaspoon salt
  • 5 Tablespoons unsalted butter chilled & cut into small pieces

Wet Ingredients:

  • 1 large egg
  • 2/3 cup heavy whipping cream
  • 1 tsp vanilla extract optional

Adds:

  • 3/4-1 cup fresh fruit-peaches, nectarines, strawberries, berries larger fruit-diced and left to drain on a paper towel while making dough.

Egg wash:

  • 2 tbsp heavy cream or egg wash
  • turbinado or sparkling sugar

Accompaniments

  • jam or preserves serving
  • clotted cream substitute creme fraiche or mascarpone

Instructions

  • Center a rack in the oven and preheat the oven to 400°F.
  • Line a baking sheet with parchment
  • In a small bowl, stir the egg, cream and vanilla (if using) together.
  • Whisk the flour, sugar, baking powder and salt together in a large bowl.
  • Drop in the butter and, using your fingers, toss to coat the pieces of butter with flour. Quickly, working with your fingertips or a pastry blender, cut and rub the butter into the dry ingredients until the mixture is pebbly.
  • Pour the egg, cream and currants over the dry ingredients and stir with a fork just until the dough, which will be wet and sticky, come together. Don't overdo it. Still in the bowl, gently knead the dough by hand, or turn it with a rubber spatula 8 to 10 times.
  • You can also use a food processor. Place dry ingredients in bowl, pulse 1-2 twice to mix. Add butter and pulse 5-6 times until mixture looks like crumbs. Add egg/cream and pulse to dough just begins to clump. Do not overmix! Take mixture out of processor bowl, fold in peaches and shape dough into circles, proceed as below.
  • Lightly dust a work surface with flour and turn out the dough. Divide it in half. Working with one piece at a time, pat the dough into a rough circle that's about 5 inches in diameter, cut it into 6 wedges and place it on the baking sheet.
  • Brush scones with heavy cream and sprinkle with sugar
  • Bake the scones for 20 to 22 minutes (start checking at 15 min) or until their tops are golden and firm. Transfer them to a rack and cool for 10 minutes before serving, or wait for them to cool to room temperature.
  • The scones can be frozen on the baking sheet as the cut wedges, then wrapped airtight. Don't defrost before baking- just add about 2 minutes to the baking time.
  • Serve with jam and clotted cream or butter

Notes

Great combinations include:
Sub dried blueberries and lemon, add 1 tsp lemon zest
Sub dried cranberries and orange add 1-2 tsp orange zest
Sub fresh fruit for currants:
blueberries, strawberries
cut fruit-partially freeze diced fruit before adding to dough

Lemon Icing

  • 1 cup (120gconfectioners’ sugar
  • 3 Tablespoons fresh lemon juice (about 1 large lemon)

A Dish For All Seasons (Bread Pudding)

A Dish For All Seasons (Bread Pudding)

The What

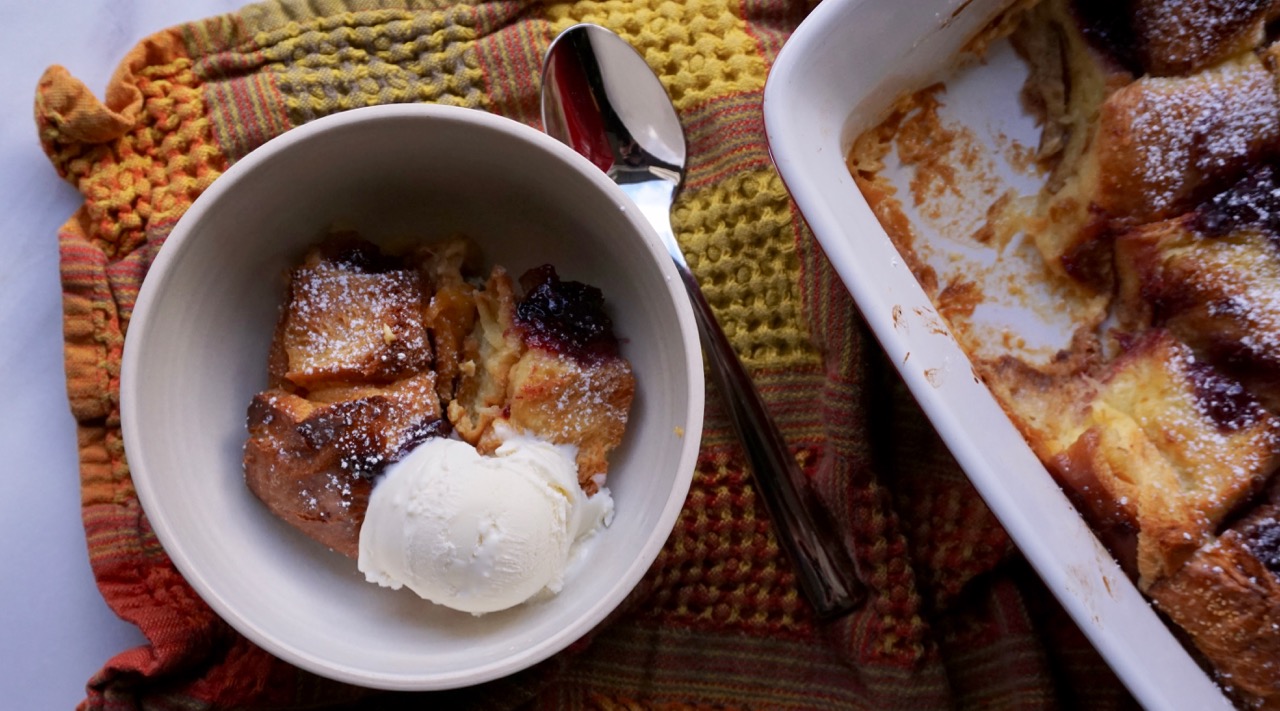
I LOVE bread pudding.  Sweet or savory, made with almost any kind of bread-from bagels to brioche, enveloped in a custard of eggs and milk, the epitome of comfort food.  Each spoonful is a revelation, crispy, crunchy outside and meltingly soft custard-like inside, YUM, it’s so good.

The Why

I’m guessing bread pudding was born out of economics, a way to not waste day-old bread. Who was that frugal genius?  It’s everything a dish should be-comforting, multi-textured, versatile, simple, and most of all amazingly delicious.

The Who

My favorite recipe is a mash-up of a Mark Bittman recipe in The New York Times and one from Bon Appetit, Apple-Raisin Bread Pudding.  That’s the beauty of bread pudding, it lends itself well to additions and changes.  Play with this recipe and make it your own.  I even have a rift for a Tres Leches Bread Pudding, yep, so many variations, so little time.

The How

It’s super versatile, I have used french bread, challah, brioche, or ciabatta.  If I want a richer dish I replace part of the milk with half-half (25-50%) or add 1-2 additional eggs for a more custard-like pudding.  I have added apples in the fall, berries, or peaches in the summer, dried fruit when my fruit basket is empty or folded in homemade preserves …  For you chocoholics, throw in a handful of chocolate chips.  You get the picture, this is a slam dunk.  For Thanksgiving,  a savory bread pudding with mushrooms, peppers, and Parmesan will grace our table, it has become an annual holiday tradition.

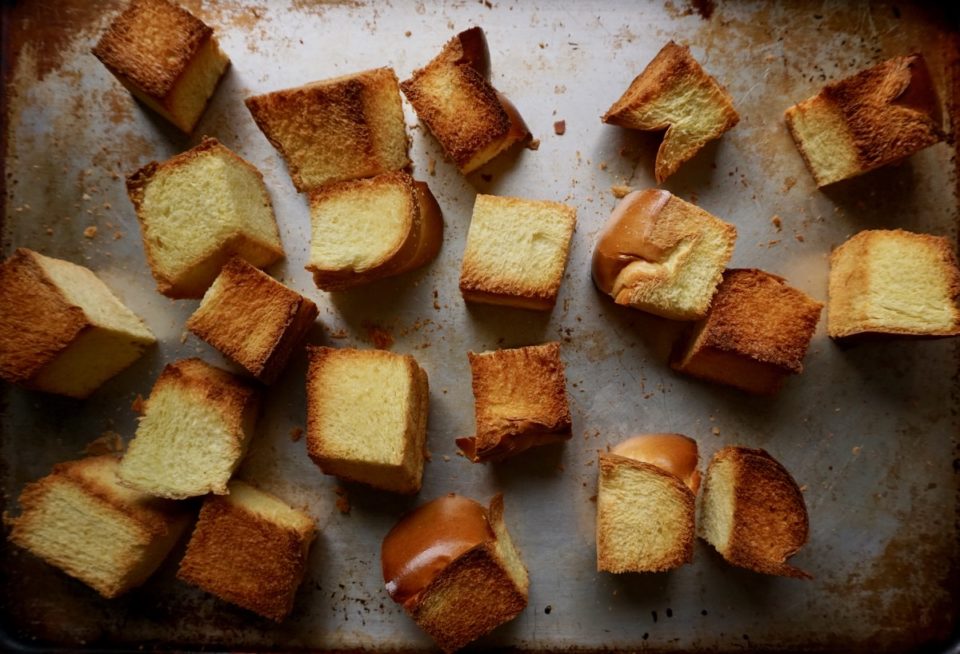
Toast the cubes in the oven at 350 degrees for 7-10 minutes

The Pay-Off

My kids would clean their rooms and do their chores for bread pudding, especially if I added a scoop of vanilla ice cream on top. Yep, a fam-favorite for many reasons.

Adapted from Simple Bread Pudding by Mark Bittman

Who doesn't love a simple, comforting dessert-bread pudding!
Course Breakfast, Dessert
Cuisine American
Keyword bread., eggs, Simple Bread Pudding
Prep Time 10 minutes
Cook Time 35 minutes
Total Time 45 minutes

Ingredients

  • 2 cups milk replace 1/2 with half-half for a richer pudding
  • 2 tablespoons unsalted butter (1/4 stick) more for greasing pan
  • 1/2 cup sugar for a sweeter pudding use 3/4 cup
  • 1 teaspoon vanilla extract
  • Pinch salt
  • 1/2 loaf sweet egg bread like challah or brioche cut into 1.5-2-inch cubes (about 5 to 6 cups)
  • 2 eggs, beatened Like itt custardy? Add an extra egg

Optional Fruit Add-Ins Replace 1/2 cup of bread with any of the following

  • 1 apple peeled and cored, cut into 1/2 inch dice. Granny Smith for tart, Golden Delicious for sweet.
  • 1 cup fresh blueberries

Instructions

  • Heat oven to 350 degrees.
  • Butter a 2-quart baking dish and fill it with cubed bread (8x8 or 9x9 square pan will work)
  • Toast cubed bread pieces in 350 degrees oven for 10 minutes. This is an optional step. If you do toast bread, definitely soak the cubes before baking.
  • In a small saucepan over low heat, warm milk, butter, vanilla, sugar and salt. Continue cooking just until butter melts; cool.
  • Add eggs to cooled milk mixture and whisk; pour mixture over bread. Let sit for abot 30 minutes so the bread can soak up the egg mixture. This makes a more custard like pudding.
  • Bake for 30 to 45 minutes, or until custard is set but still a little wobbly and edges of bread have browned. Serve warm or at room temperature.

Tweaks

  • Like cinnamon add 1/4 teaspoon to egg mixture.
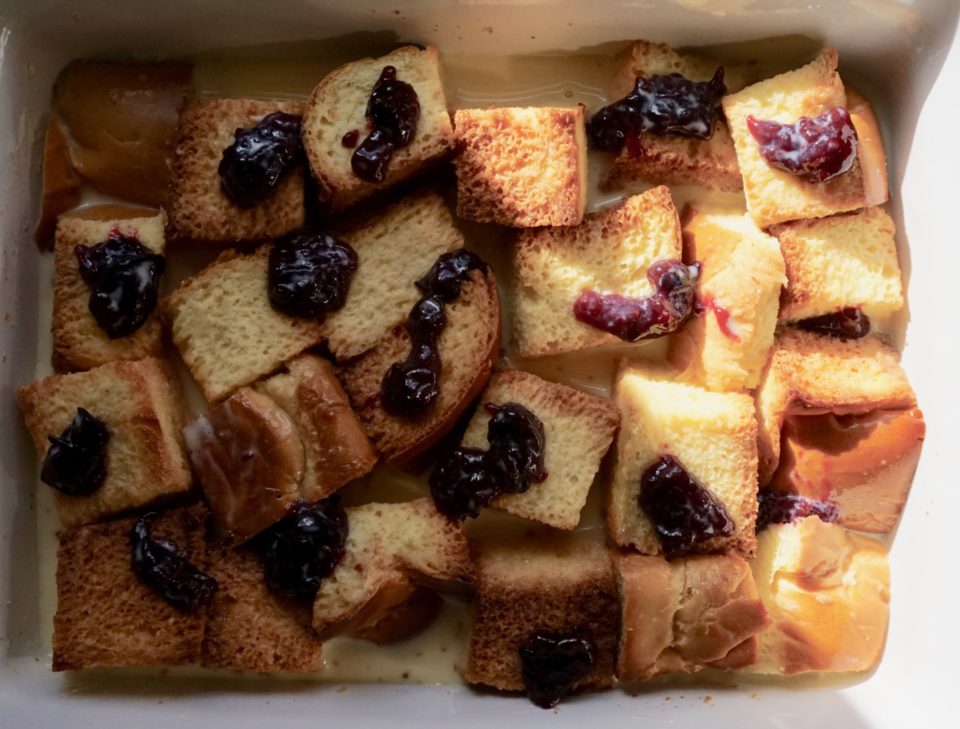
  • In place of fruit use 1/4-1/2 cup jam or preserves, dot pudding, distributing evenly
  • Sprinkle bread pudding with cinnamon before baking. For a crunchy top, sprinkle top with 2 tablespoons cinnamon sugar before baking. (To make your own cinnamon sugar, combine 1/2 cup granulated sugar with 2 T cinnamon)
  • Golden raisins work well in this bread pudding too!
Focaccia: The Deb Breadbake Trio-Take Three

Focaccia: The Deb Breadbake Trio-Take Three

Yes. In the Time of COVID, where the staple shelves at the supermarket look like a scene out of Mad Max, I still have flour and yeast.  Now don’t get your Hot Crossed Buns in a bunch, in all fairness, I normally have lots of flour and yeast on hand.  I love to bake.  Although, after 3 batches of Focaccia, I find myself perusing my King Arthur Flour wishlist to see if yeast or flour have made it back on their virtual shelves.  Bread has become an obsession for me and so many others.  The result of staying home and harkening to a simpler time.

The trio of Focaccia I tried were all pretty good but one stood out, Serious Eats No-Knead Olive-Rosemary Focaccia with Pistachios.  But they’re all excellent.  I’ve included links to the two “runner-ups” since they are both totally worth making.  My favorite is the finale of this post along with the full recipe.  Enjoy!
Foccacia Number One

From Kitchn, a recipe for No-Knead Focaccia that takes the least amount of time of the three we tried.  It does start with a food processor which makes quick work of making the dough.  The dough needs to sit for only 2-3 hours before spreading the dough in a 10-inch iron skillet, letting it rest for 30-40 minutes before baking.

I put the dough in the fridge overnight before proceeding.  The dough did not rise as much as expected, operator error?  Overzealous pressing it into the skillet?  Too long in the fridge?  Dense and chewy, reminiscent of pizza crust with a nice flavor from the garlic and rosemary.  I’d like to try this recipe again, wondering if I had compressed it too much or inadvertently used water that was too hot.  If it didn’t rise any more I’d just use it to make mindbogglingly good pizza.  Oh, and my skillet is probably wider than the classic 10″ inch iron skillet, did I pat down my dough too much?  My inquiring mind wants to know.

Guess I’ll have to bake more Focaccia


Focaccia Number Two

Back In the day, Jenny Jones was a singer, comedian and talk show host…now she does cooking and baking videos from home.  Go figure. How I stumbled upon her site, I don’t know, but her No-Knead Focaccia Bread is pretty darn good.  Easy to make, the end result leans towards a pizza-like consistency, chewy inside with nice air bubbles with an exterior that was a wonderful toasty brown and so crispy.  She describes her Focaccia aptly, “This is no ordinary focaccia. It’s not the soft kind that you bake in a pan. This is focaccia the way I like it: thin and crispy. It’s like a slice of pizza without the pizza stuff”  The search was still on for that soft, pillowy texture of classic Focaccia.  Still, this was so good, I’d make it again in a heartbeat (if it wasn’t for my hipspread, lol)  You will need a pizza stone or steel to bake this on.

Above is what the dough looks like after resting in the bowl.  It doubled in size.

Below is after tucking (folding) the dough under a couple of times

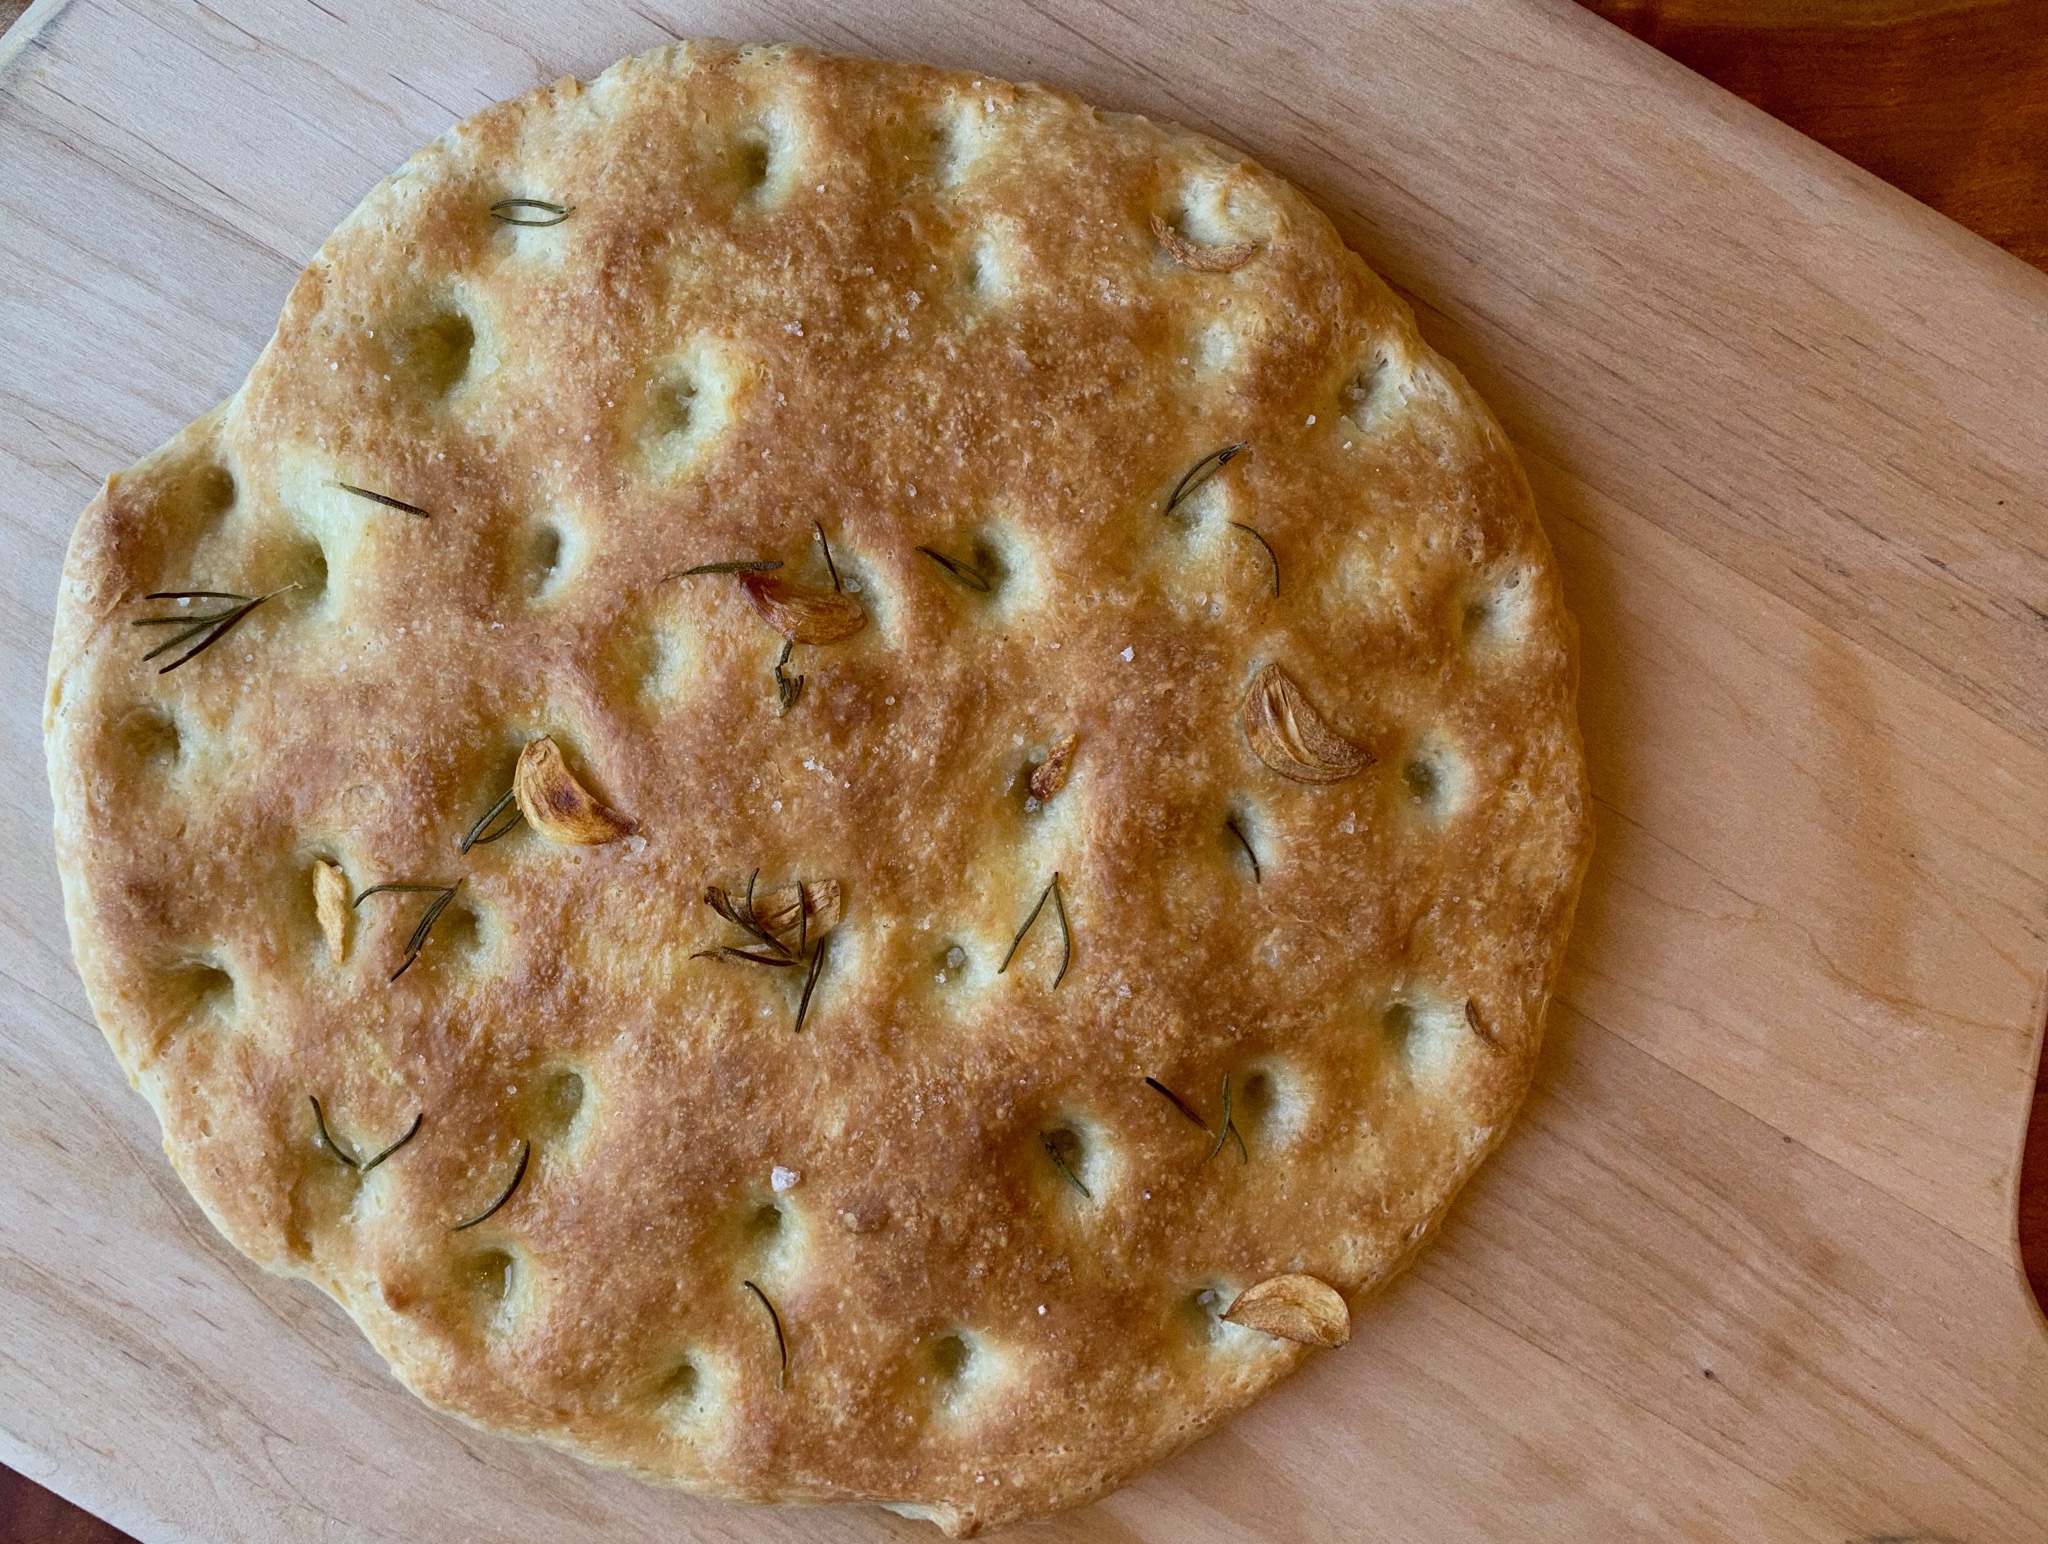
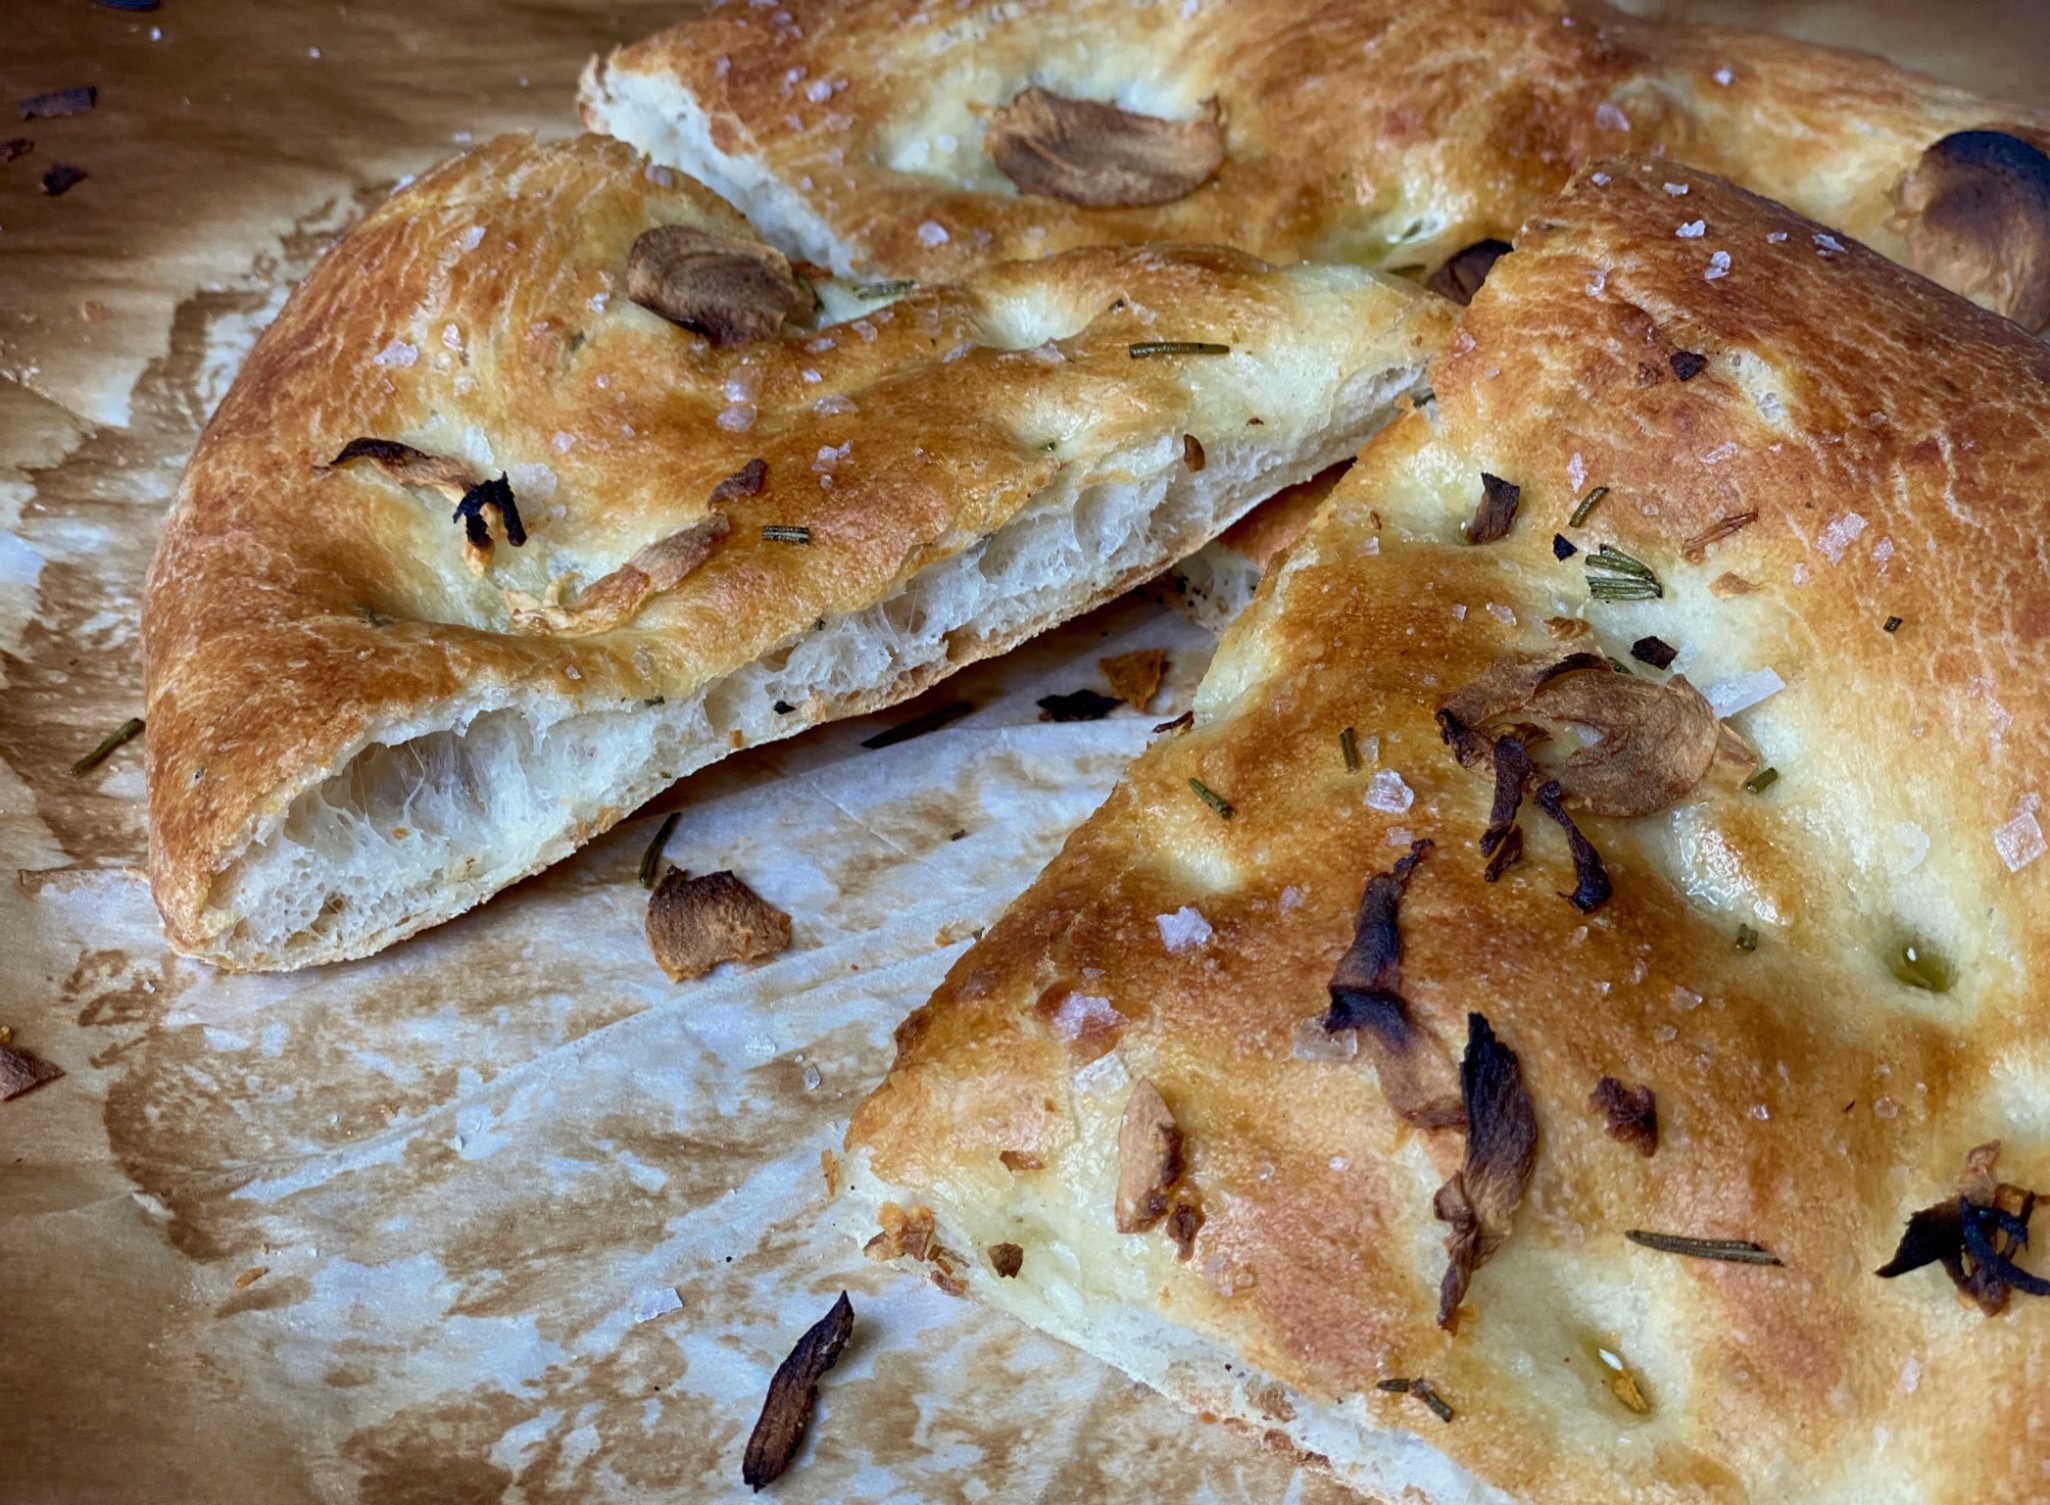
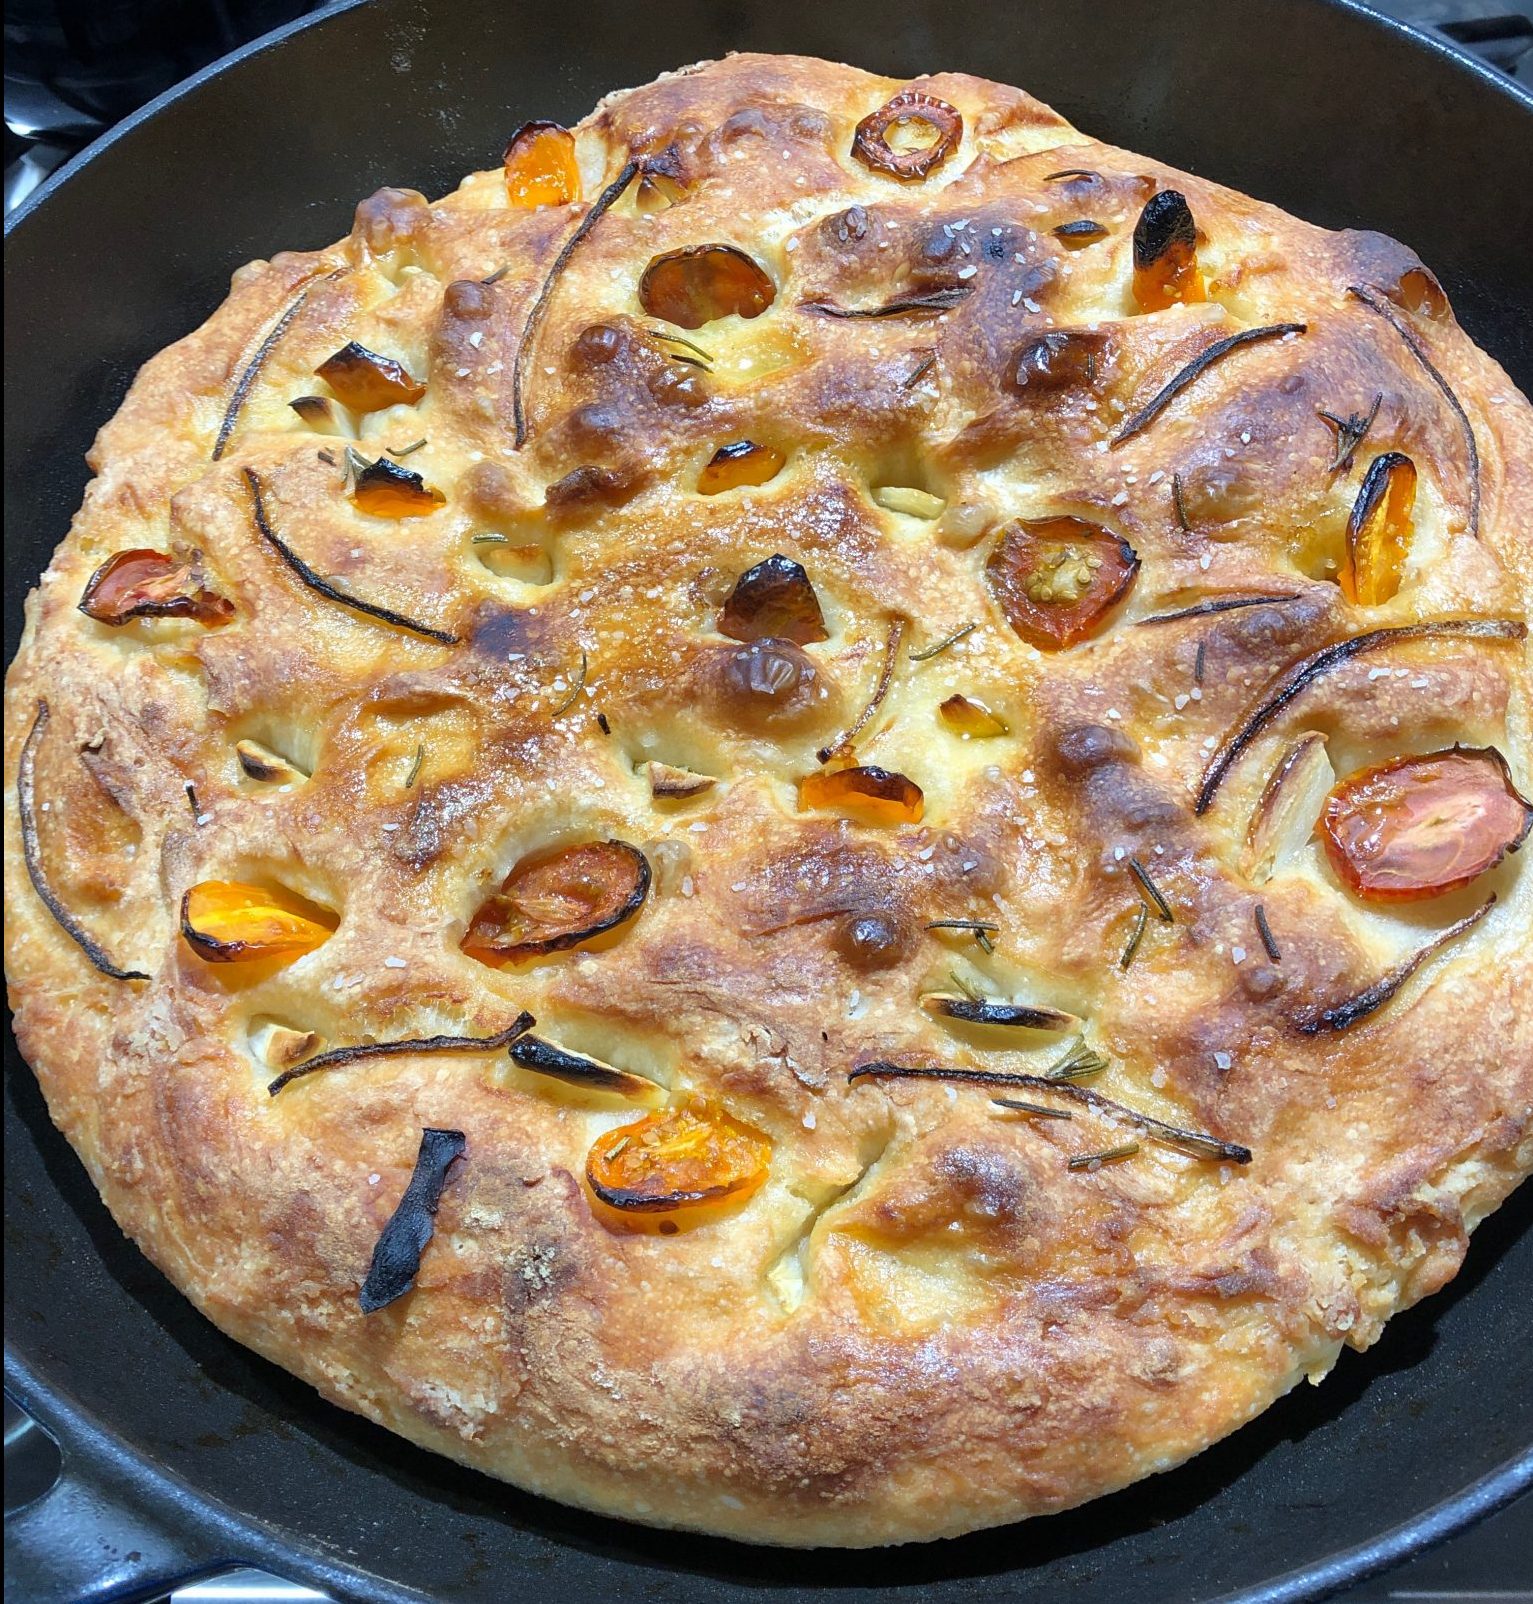
The finished Focaccia! Airy and springy and soft inside, crispy and chewy on the outside, it’s delicious.

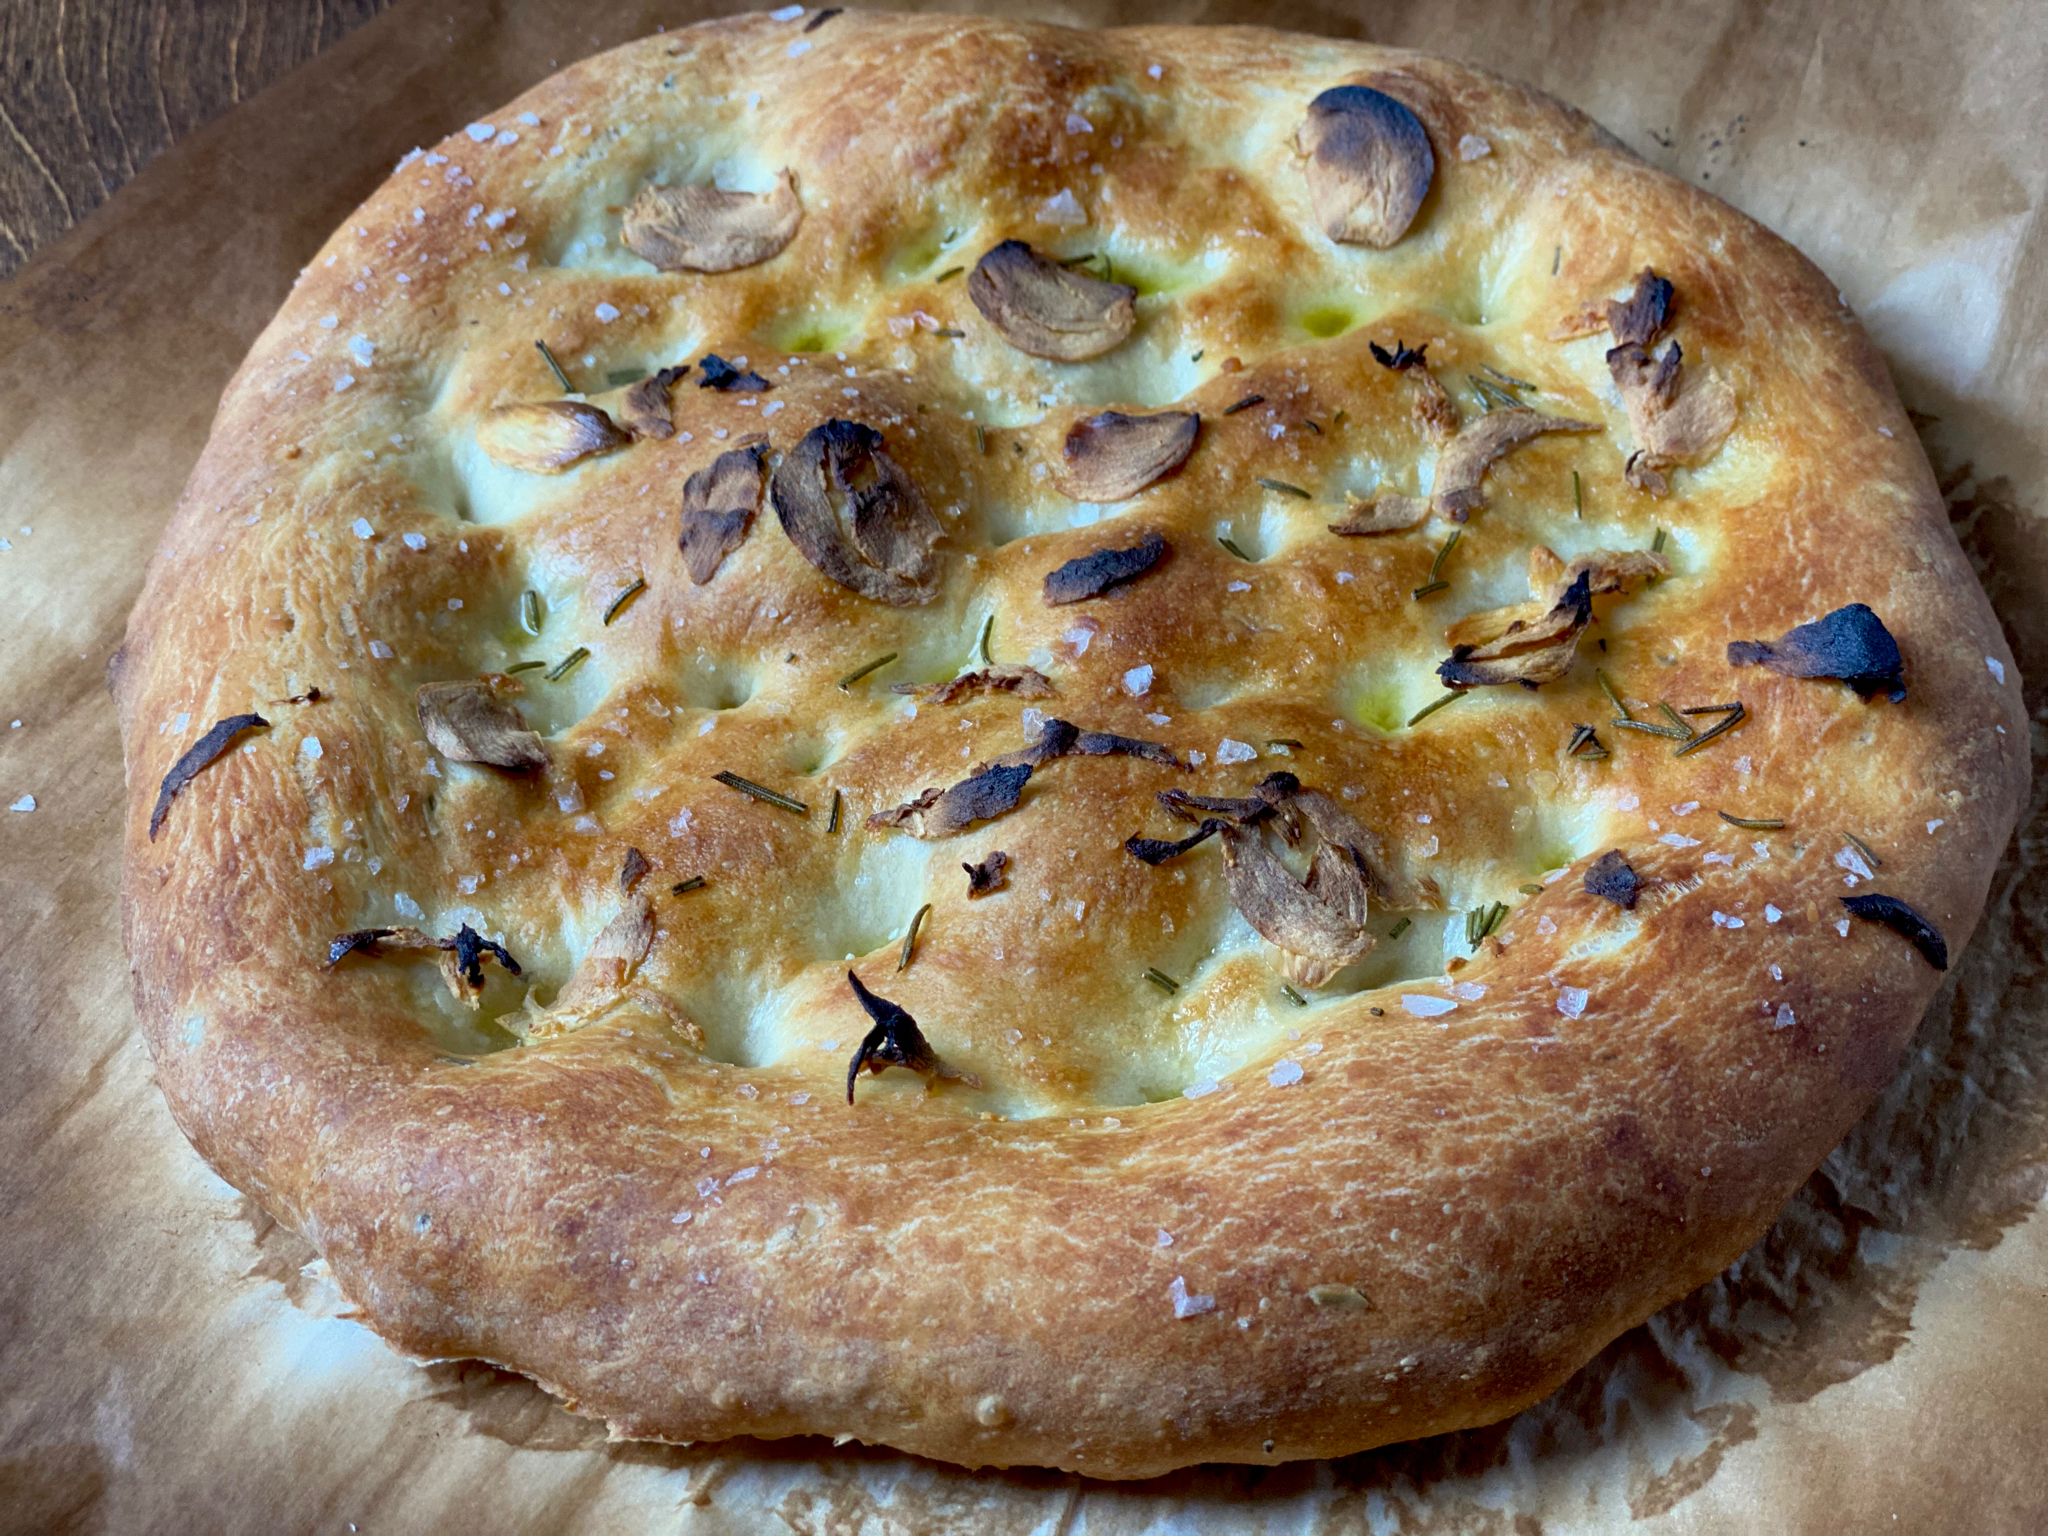
And the winner is…Serious Eats No-Knead Olive Rosemary Focaccia with Pistachios

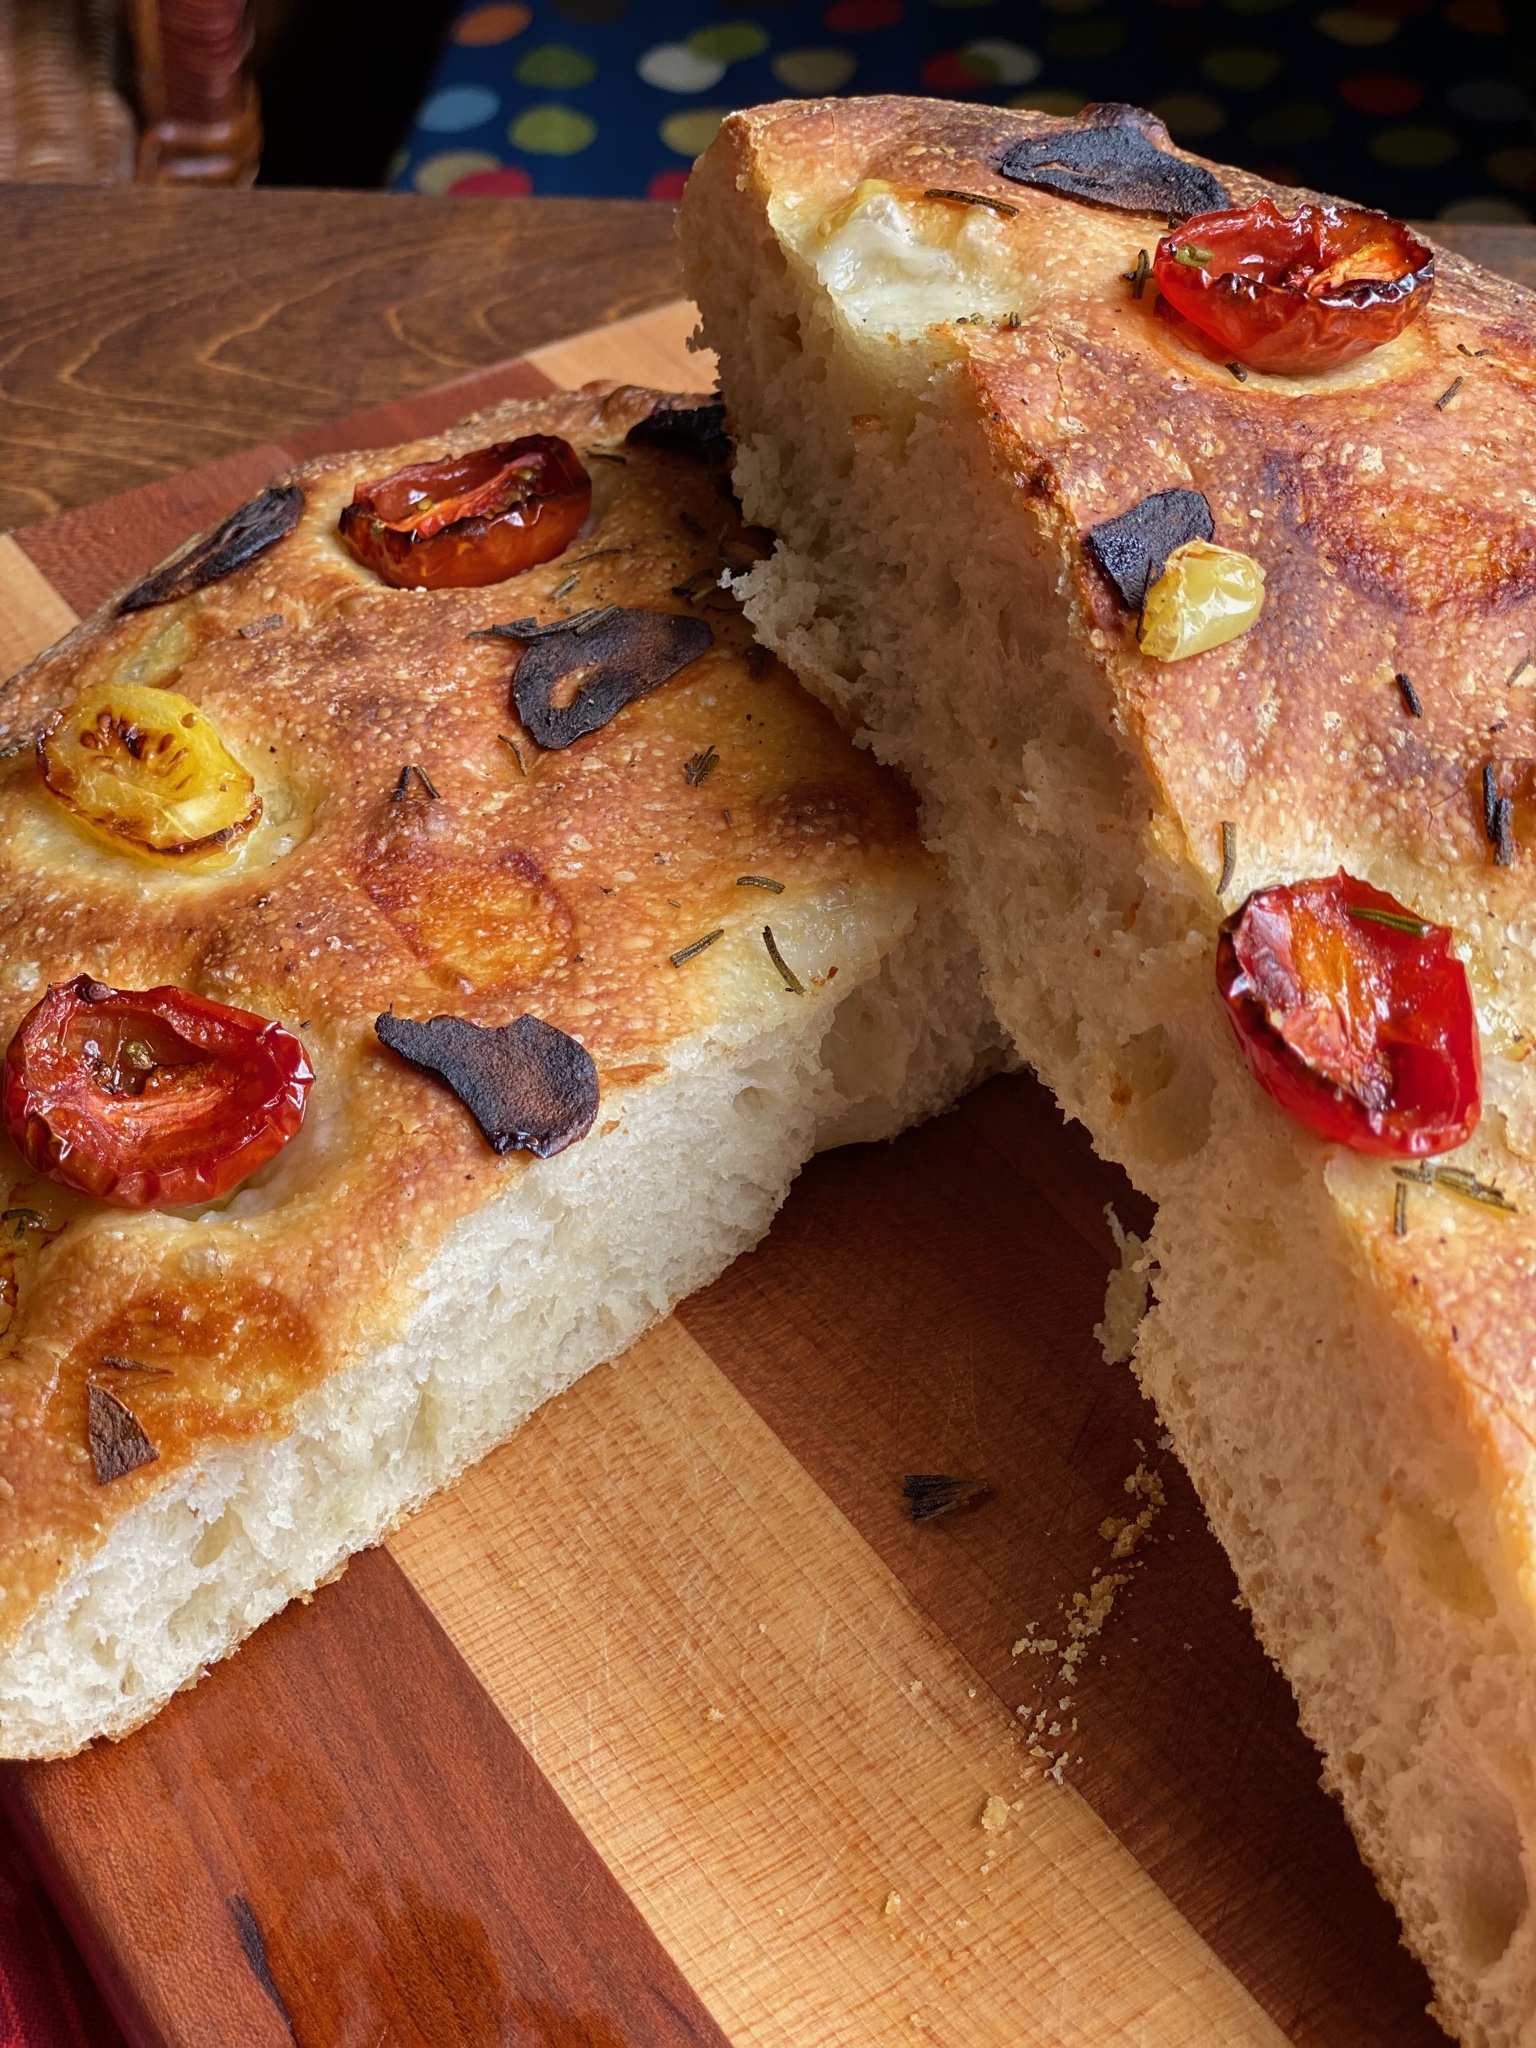
I think we have found a Focaccia recipe that my entire quarantined family likes!  Serious Eats Focaccia by Kenji-Alt Lopez has that soft, pillowy texture inside like traditional Focaccia and a nice crispy outside.  With that first bite, we were all nodding our heads-this is it!  Not a moment too soon as my bread flour supply is dangerously low.

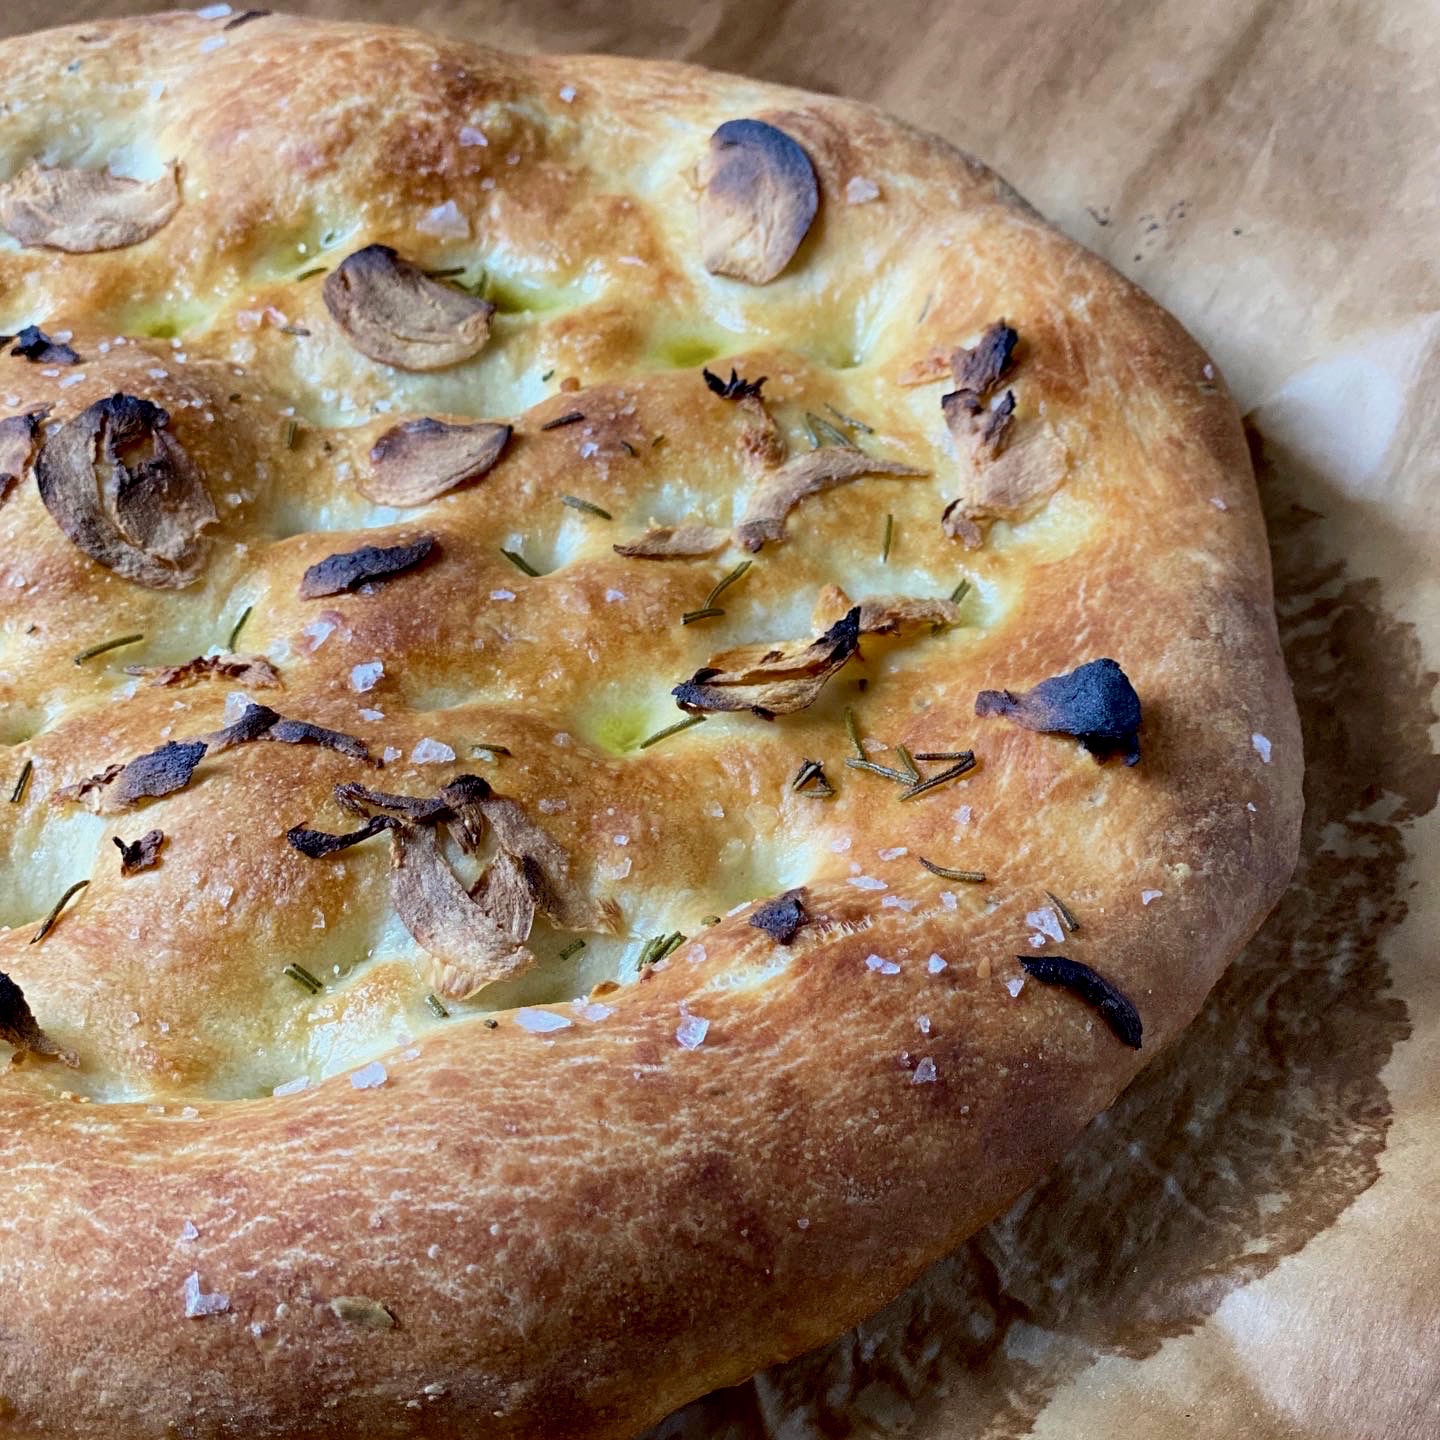
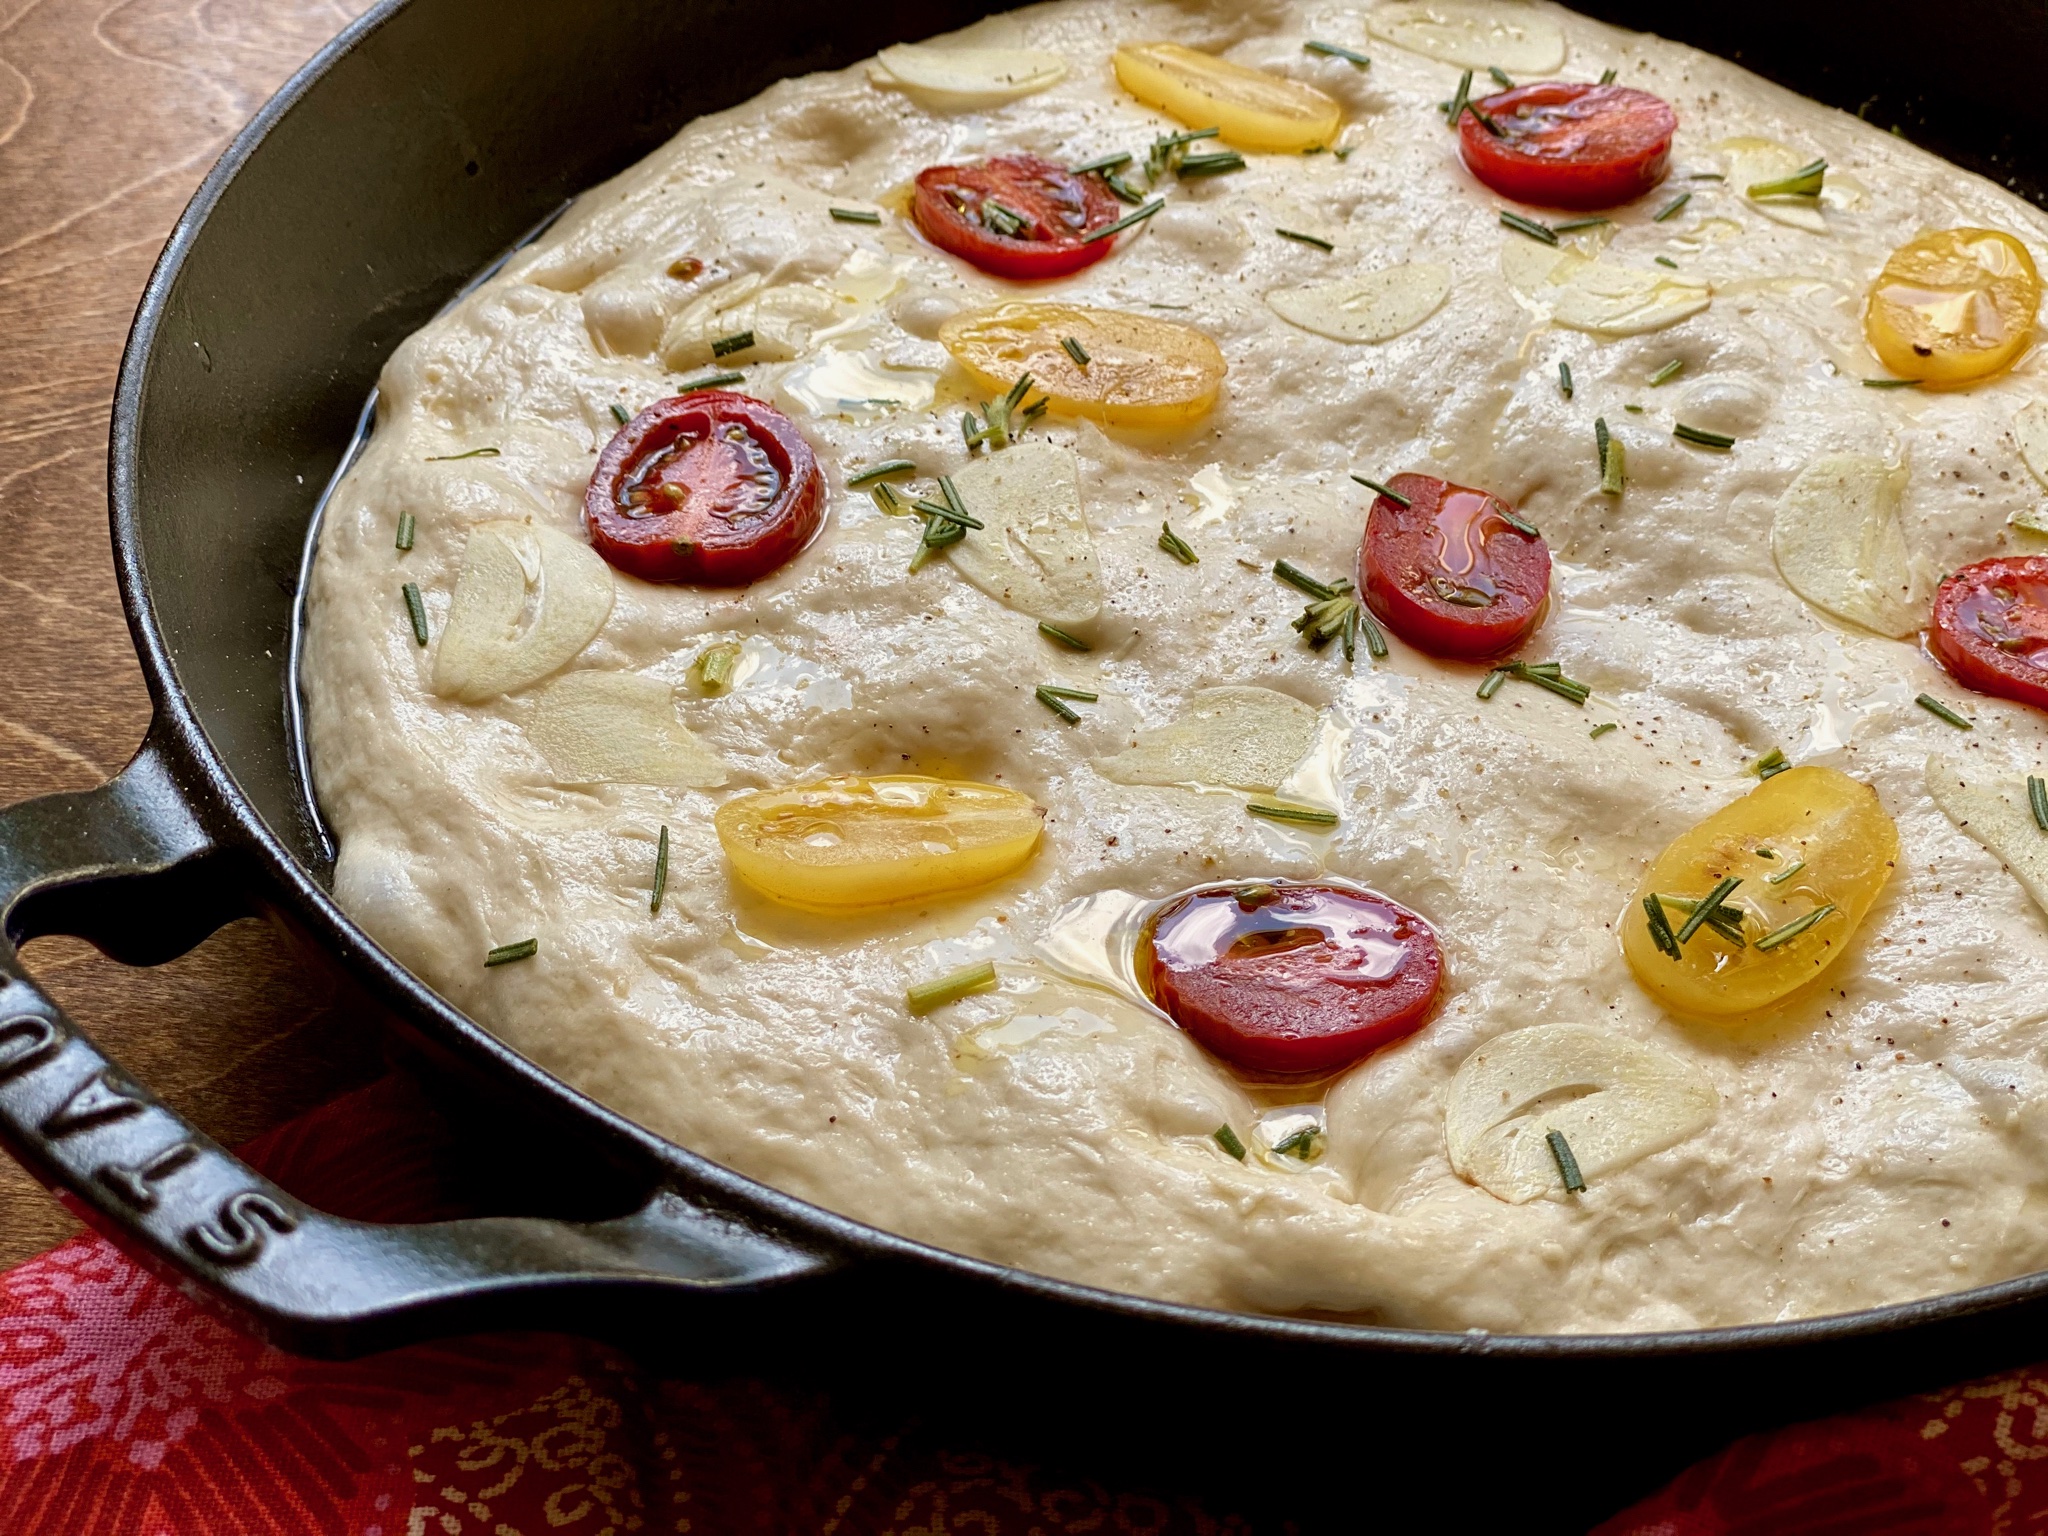
Start the day BEFORE you want bread on the table, like all no-knead bread, time takes the place of kneading.  We did not use olives or pistachios.  Quarantine forces improvisation, instead, we used cherry tomatoes, garlic, red onions, and rosemary from our herb box.  A tasty combination.  Feel free to add your own toppings! #Lunchleftovers found me making Ottolenghi’s Charred Tomatoes with Labneh to dip into with my focaccia-absofrigginlutely delish.

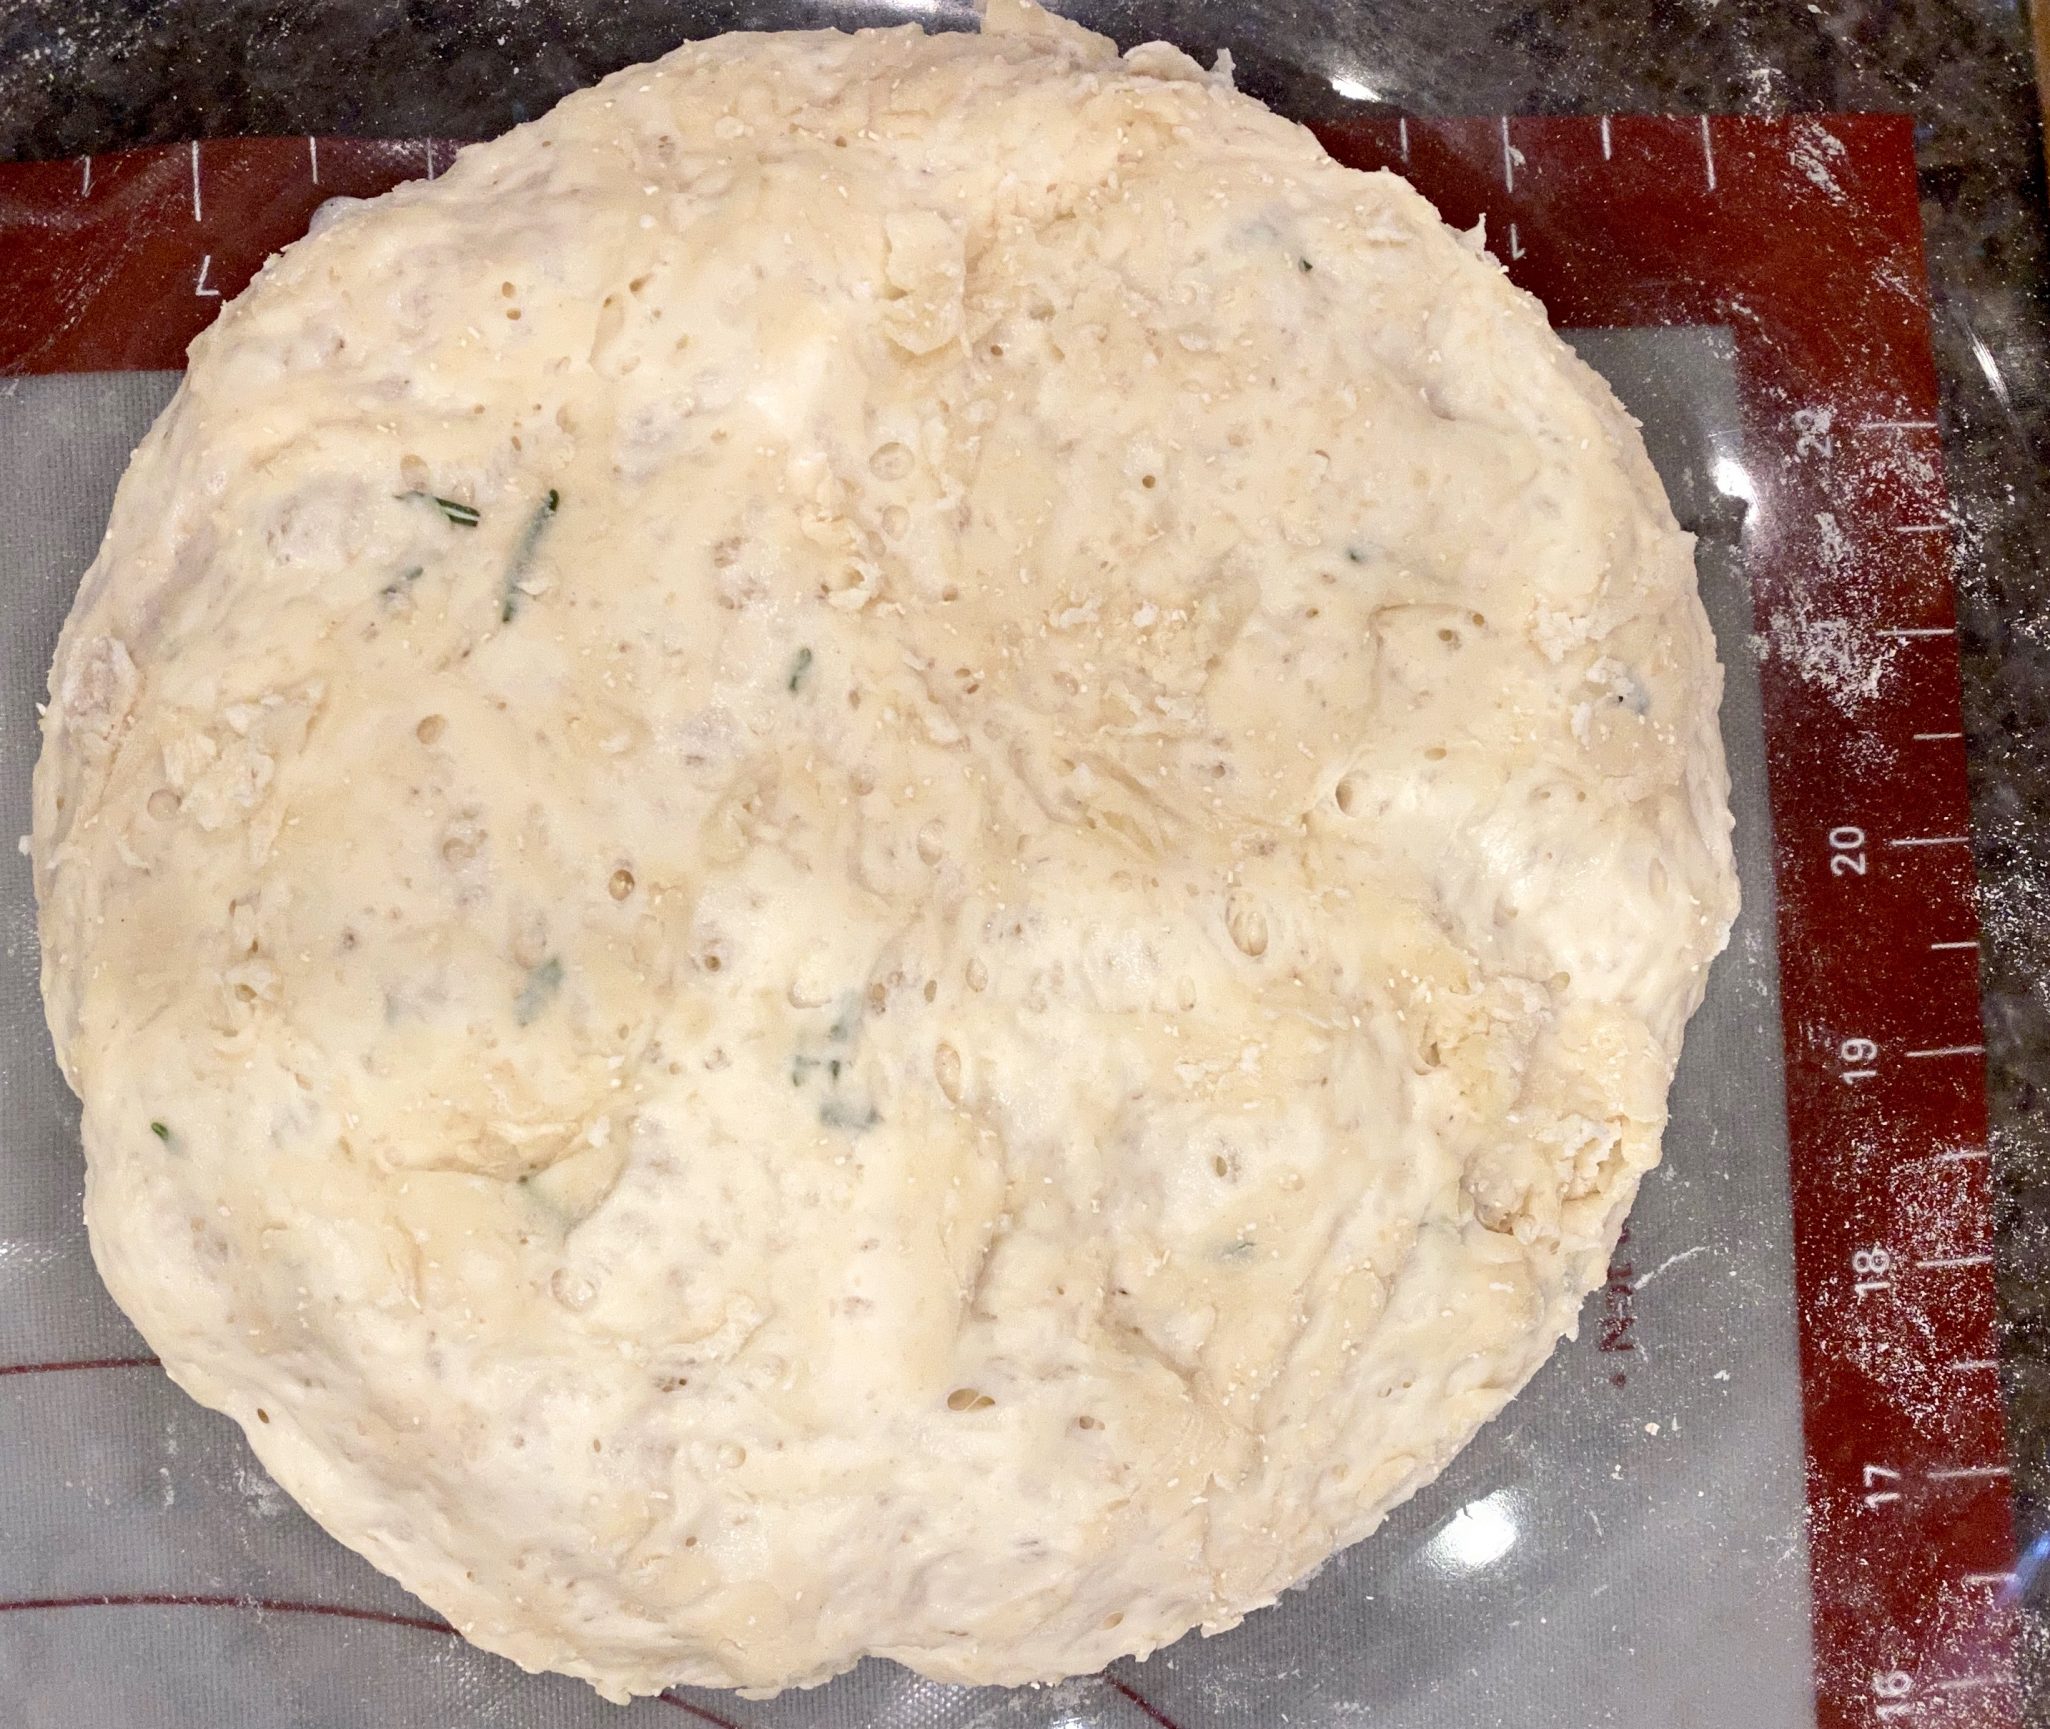
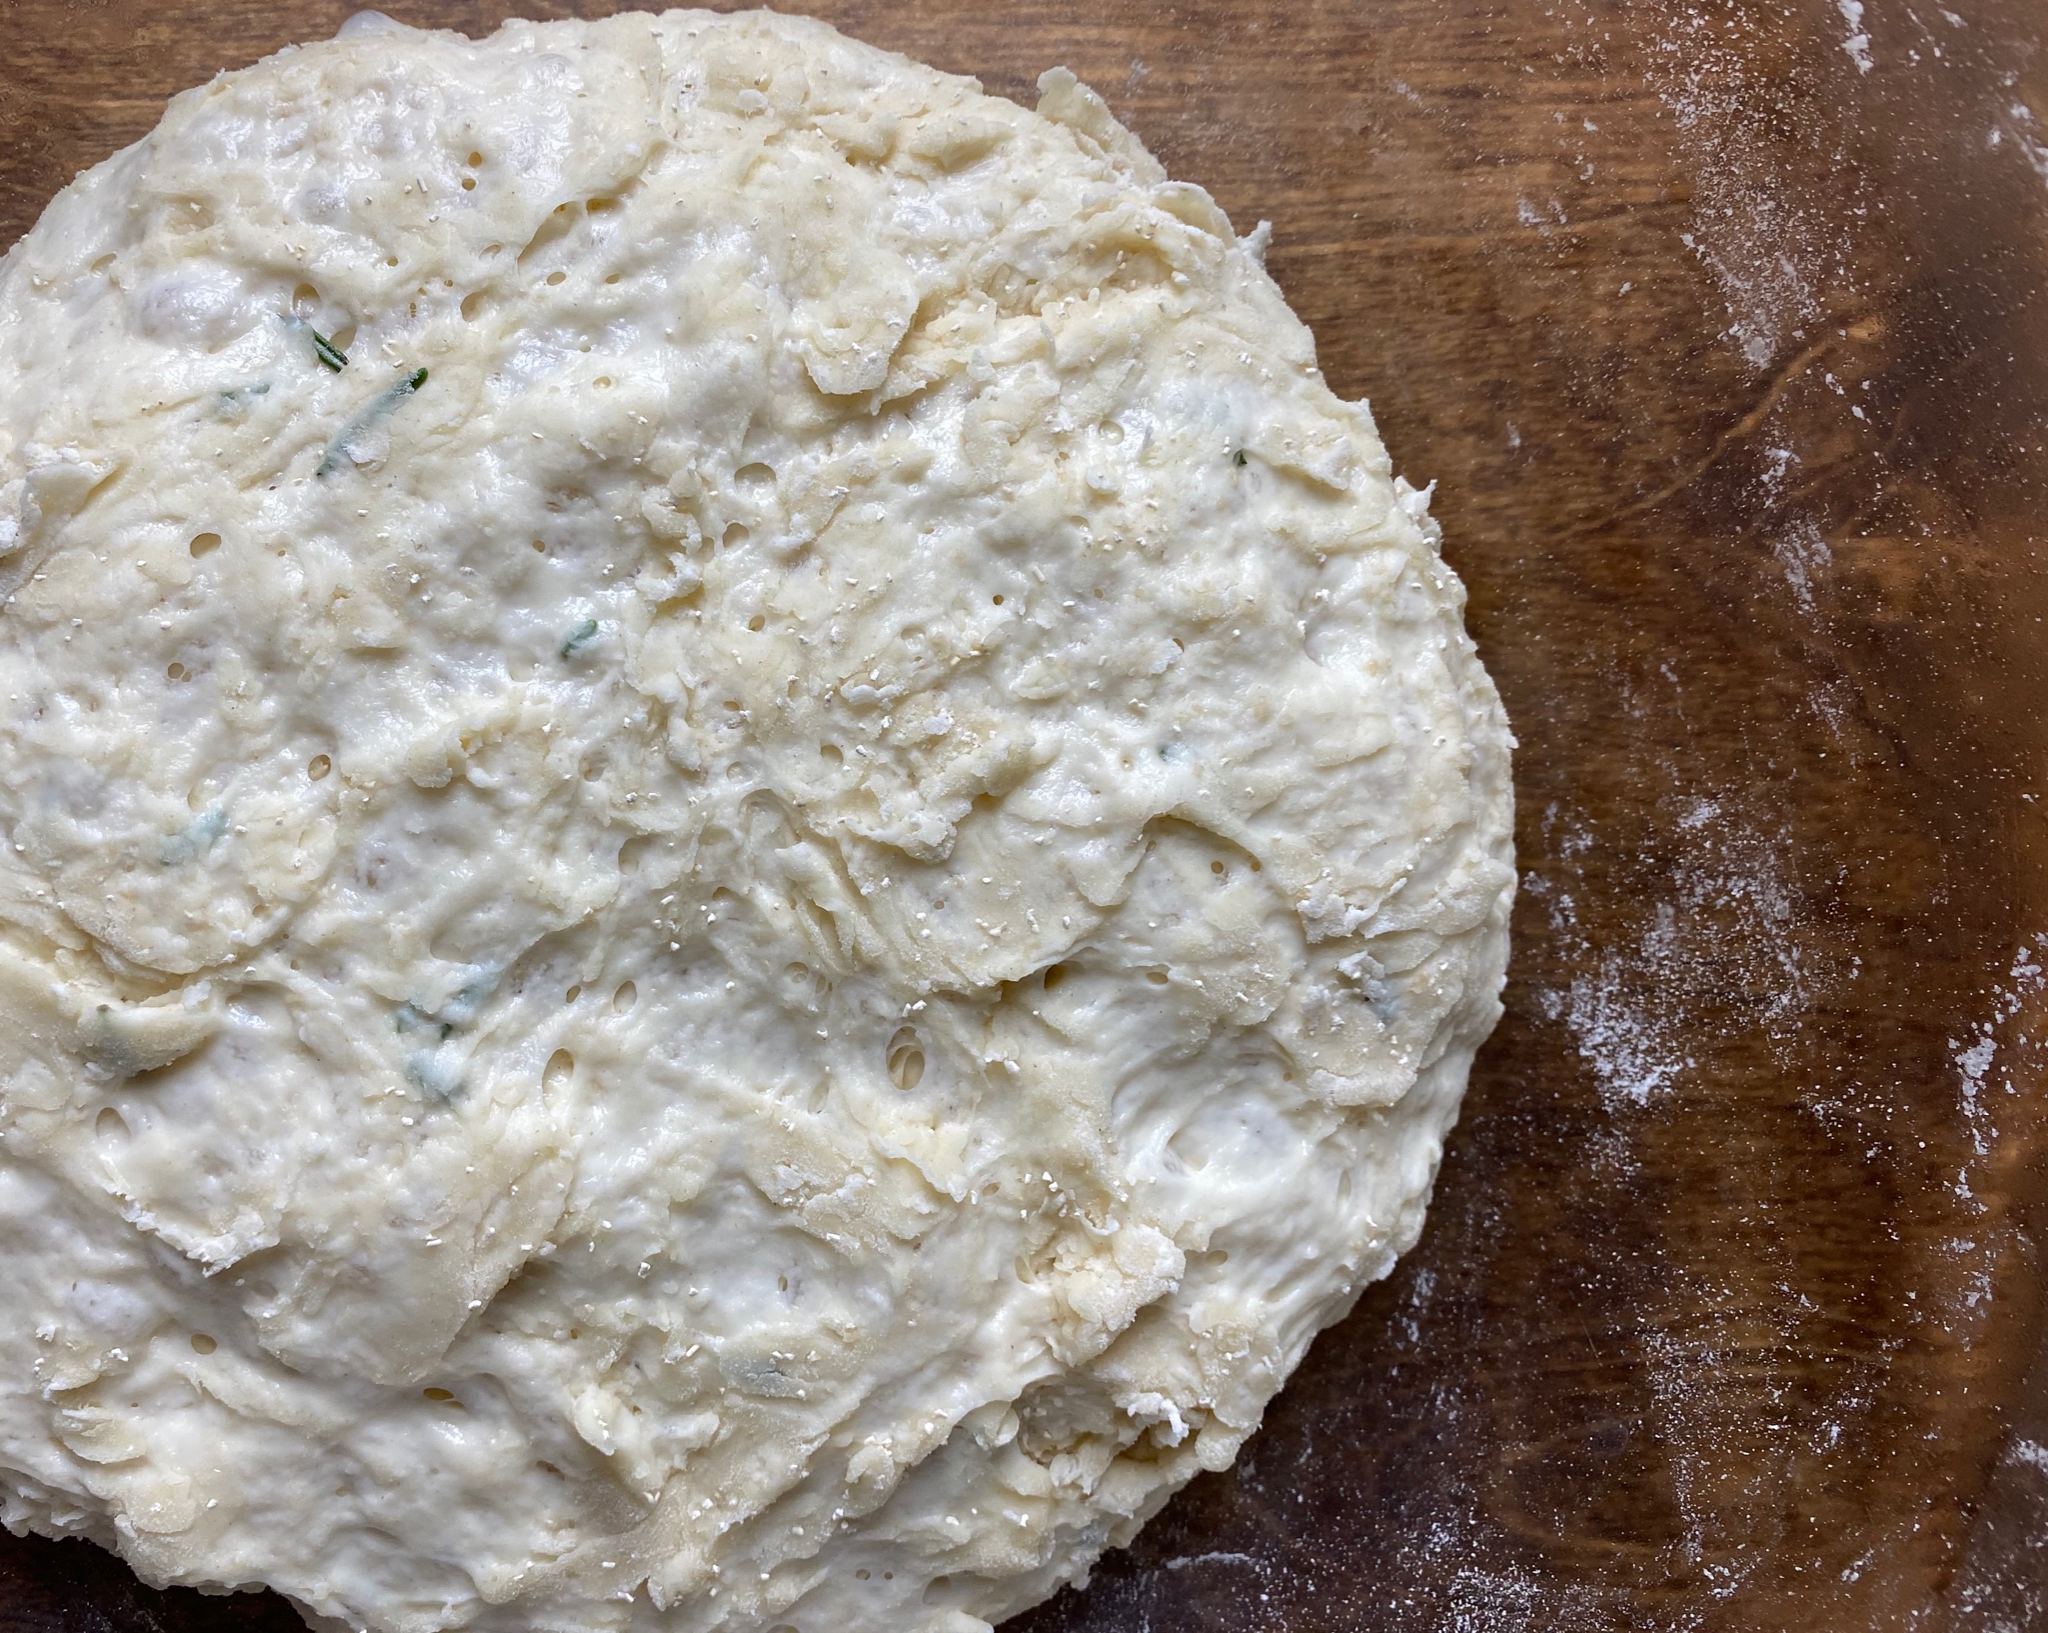
This is the Serious Eats dough after resting 12 hours, at most, it tripled in size but more like two and half times (pure eyeball measurement).  My bowl was plenty big enough.  I thought it would rise more and was a bit worried, but the Focaccia turned out beautifully.  Sorry, I will not doubt the master Kenji Alt-Lope again!


Olive Rosemary Focaccia with Pistachios

Delicious, easy to make No-Knead Focaccia from Serious Eats
Course Breads
Cuisine American, Italian
Keyword Homemade No-knead focaccia
Prep Time 15 minutes
12 hours
Servings 10

Equipment

  • iron skillet

Ingredients

  • 500 grams all-purpose or bread flour 17 1/2 ounces, about 3 1/4 cups, prefer bread flour
  • 15 grams kosher salt .5 ounces, about 1 tablespoon Diamond brand) reduce by a third if using Mortons
  • 4 grams instant yeast .15 ounces, about 1 teaspoon
  • 325 grams water 11 1/2 ounces, about 1 1/2 cups minus 1 tablespoon
  • 1/4 cup extra-virgin olive oil divided
  • 4 ounces pitted green olives sliced
  • 1/4 cup roasted pistachios roughly chopped or lightly pounded in a mortar and pestle
  • 2 tablespoons fresh rosemary leaves very roughly chopped
  • Coarse sea salt

Alternate Toppings

  • thinly sliced red onion
  • fresh thyme leaves
  • cherry tomatoes, halved
  • garlic, slivers

Instructions

  • Place flour, salt, yeast, and water in a large bowl. Mix with hands or a wooden spoon until no dry flour remains. The bowl should be at least 4 times the volume of the dough to account for rising.
  • Cover bowl tightly with plastic wrap, making sure that edges are well-sealed, then let rest on the countertop for at least 8 hours and up to 24 hours. Dough should rise dramatically and fill bowl, although mine did not rise that dramatically, it spread more than rise.
  • Sprinkle the top of the dough lightly with flour, then transfer it to a lightly-floured work surface. With well-floured hands, form into a ball by tucking the dough underneath itself.
  • Pour half of oil (1/8 cup)in the bottom of a 12-inch cast iron skillet or large cake pan (your Le Creuset or Staub pan would be perfect)Transfer dough to pan, turn to coat in oil, and position seam-side-down. Using a flat palm, press the dough around the skillet, flattening it slightly and spreading oil around the entire bottom and edges of the pan.
  • Cover tightly with plastic wrap and let the dough stand at room temperature for 2 hours. After the first hour, adjust an oven rack to the middle position and preheat oven to 550°F. My oven only goes to 500 degrees, this works fine. It actually baked in about the same amount of time, but you may need to go at least the full 24 minutes at 500 degrees.
  • At the end of the 2 hours, dough should mostly fill the skillet up to the edge. Use your fingertips to press it around until it fills every corner, popping any large bubbles that appear. Lift up one edge of the dough to let any air bubbles underneath escape and repeat, moving around the dough until there are no air bubbles left underneath and the dough is evenly spread around the skillet.
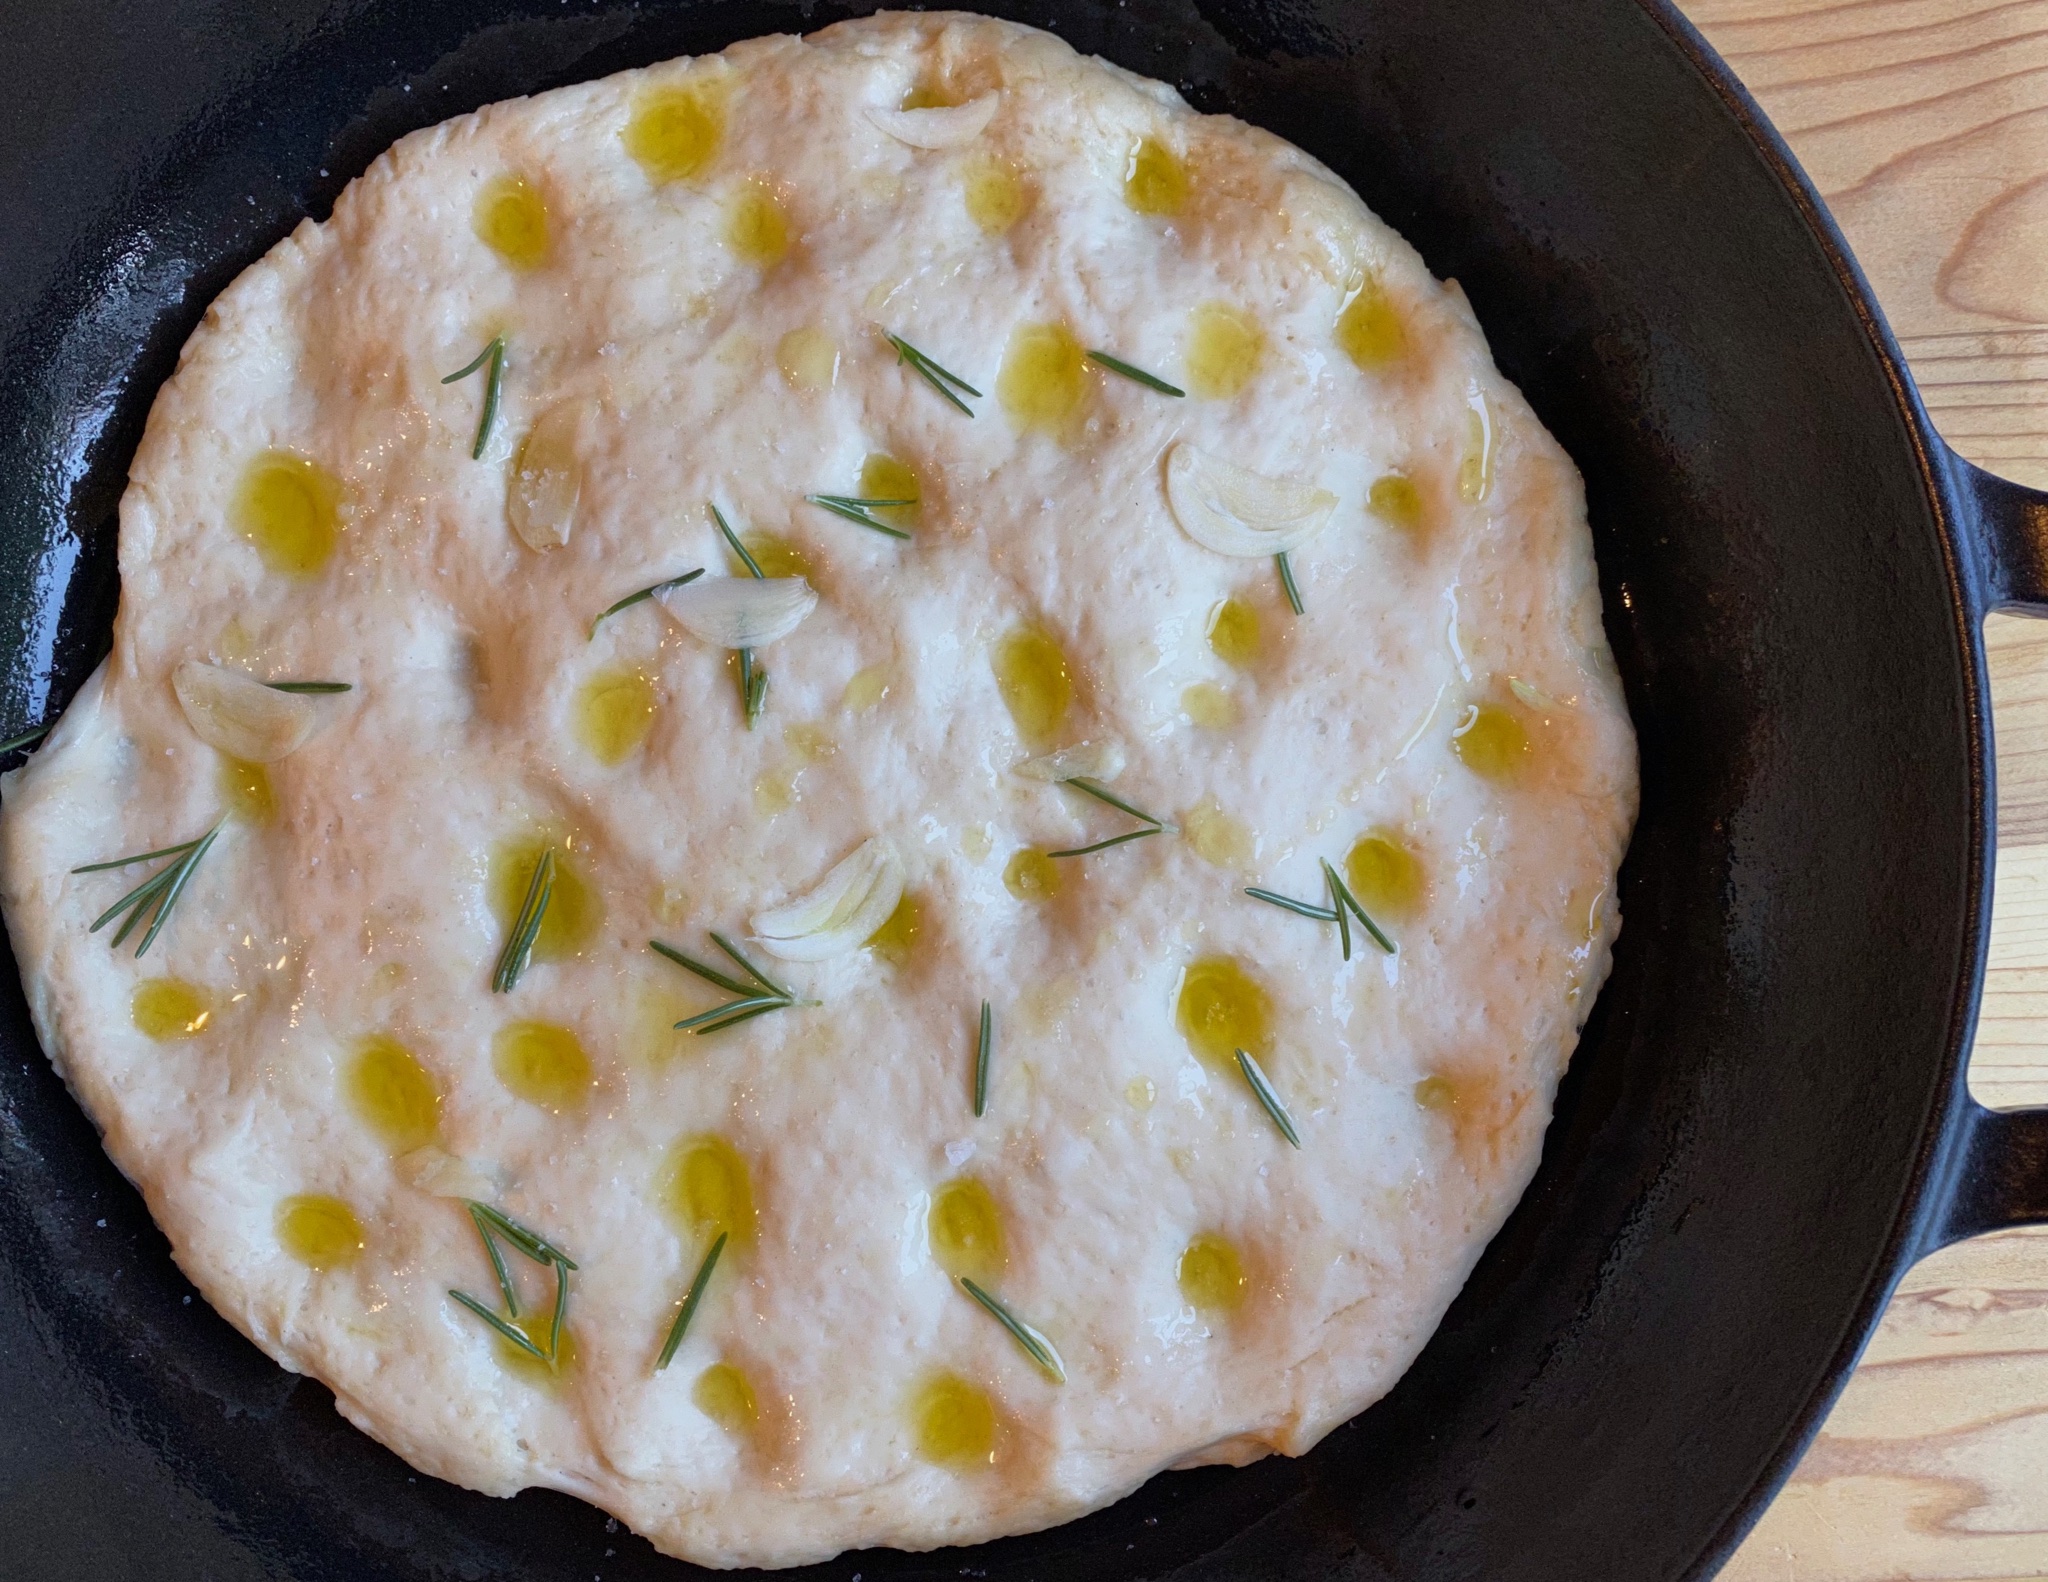
  • Spread olives and pistachios or your choice of toppings, over the surface of the dough and press down on them with your fingertips to embed slightly. Drizzle with remaining olive oil. Sprinkle with rosemary and coarse salt.
  • Transfer skillet to oven and bake until top is golden toasty brown and bottom is golden brown and crisp when you peek underneath, 16 to 24 minutes. Using a thin spatula, loosen focaccia and peek underneath.
  • Transfer to a cutting board, allow to cool slightly, slice, and serve. Serve with cheesy butter or Ottolenghis tomatoes and Labneh, so good.
  • Extra bread can be stored in a brown paper bag at room temperature for up to 2 days. Reheat in a 300°F oven for about 10 minutes.

Midwest Made Banana Bread

Midwest Made Banana Bread

Yes, I tried yet another banana bread recipe.  Unlike biscuits, I am not in search of the best banana bread in the universe.  I LIKE the recipe I have for banana bread.  AND yet, like Pavlov’s Dogs, I see a banana bread recipe and I get an overwhelming urge to try it.  Go figure.  Such was the case with Shauna Sever’s banana bread recipe from her book Midwest Made.

In my defense, her BB (please, can I just abbreviate for expedience) was getting rave reviews on Food52 and I did have overripe bananas. I have baked a couple of goodies from the book and all were pretty darn good.  Her Donut Loaf was a big hit with family and friends as were the jam bars.  The book is filled with recipes that are familiar, comforting, and delicious. Treats we have all grown up with, brownies, cookie jar gems, cobblers, and pies-desserts with roots in the Heartland. Right now that’s what it is all about…

Comfort in the Time of COVID-19

The book is a gem and perfect for the times.  If you would like a copy, I have links to Indie Bookstores that could really use your patronage.  In Los Angeles please order from Now Serving LA, and in the Bay Area, Books Inc. (Free delivery!).  A little further away, the iconic institution, Powells City of Books is also delivering (free shipping).  I’m not sure if Omnivore Books in the City has it in stock, but they have a fantastic selection of cookbooks, check it out.  They are also taking orders, shipping, or curbside pick-up.

Back to Banana Bread

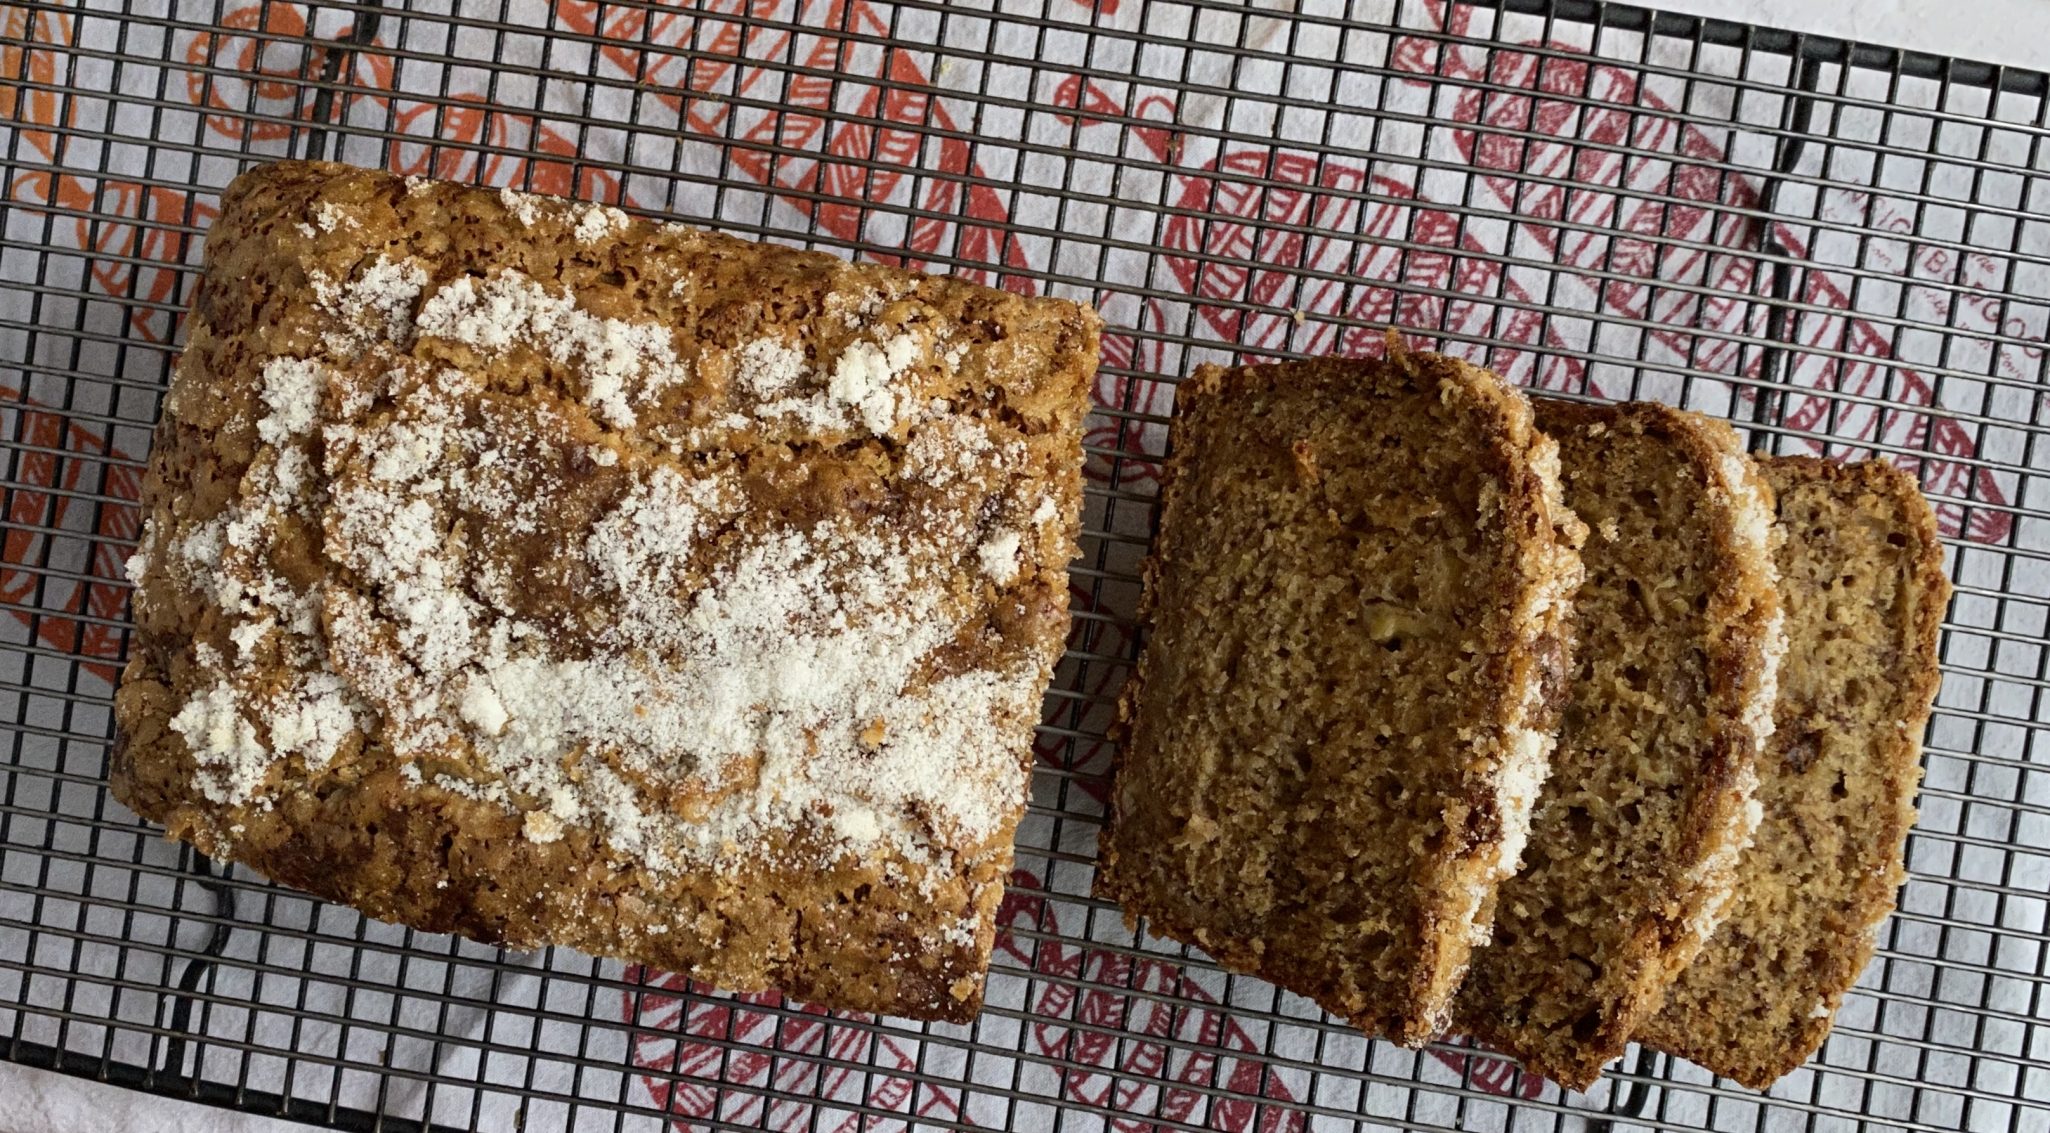
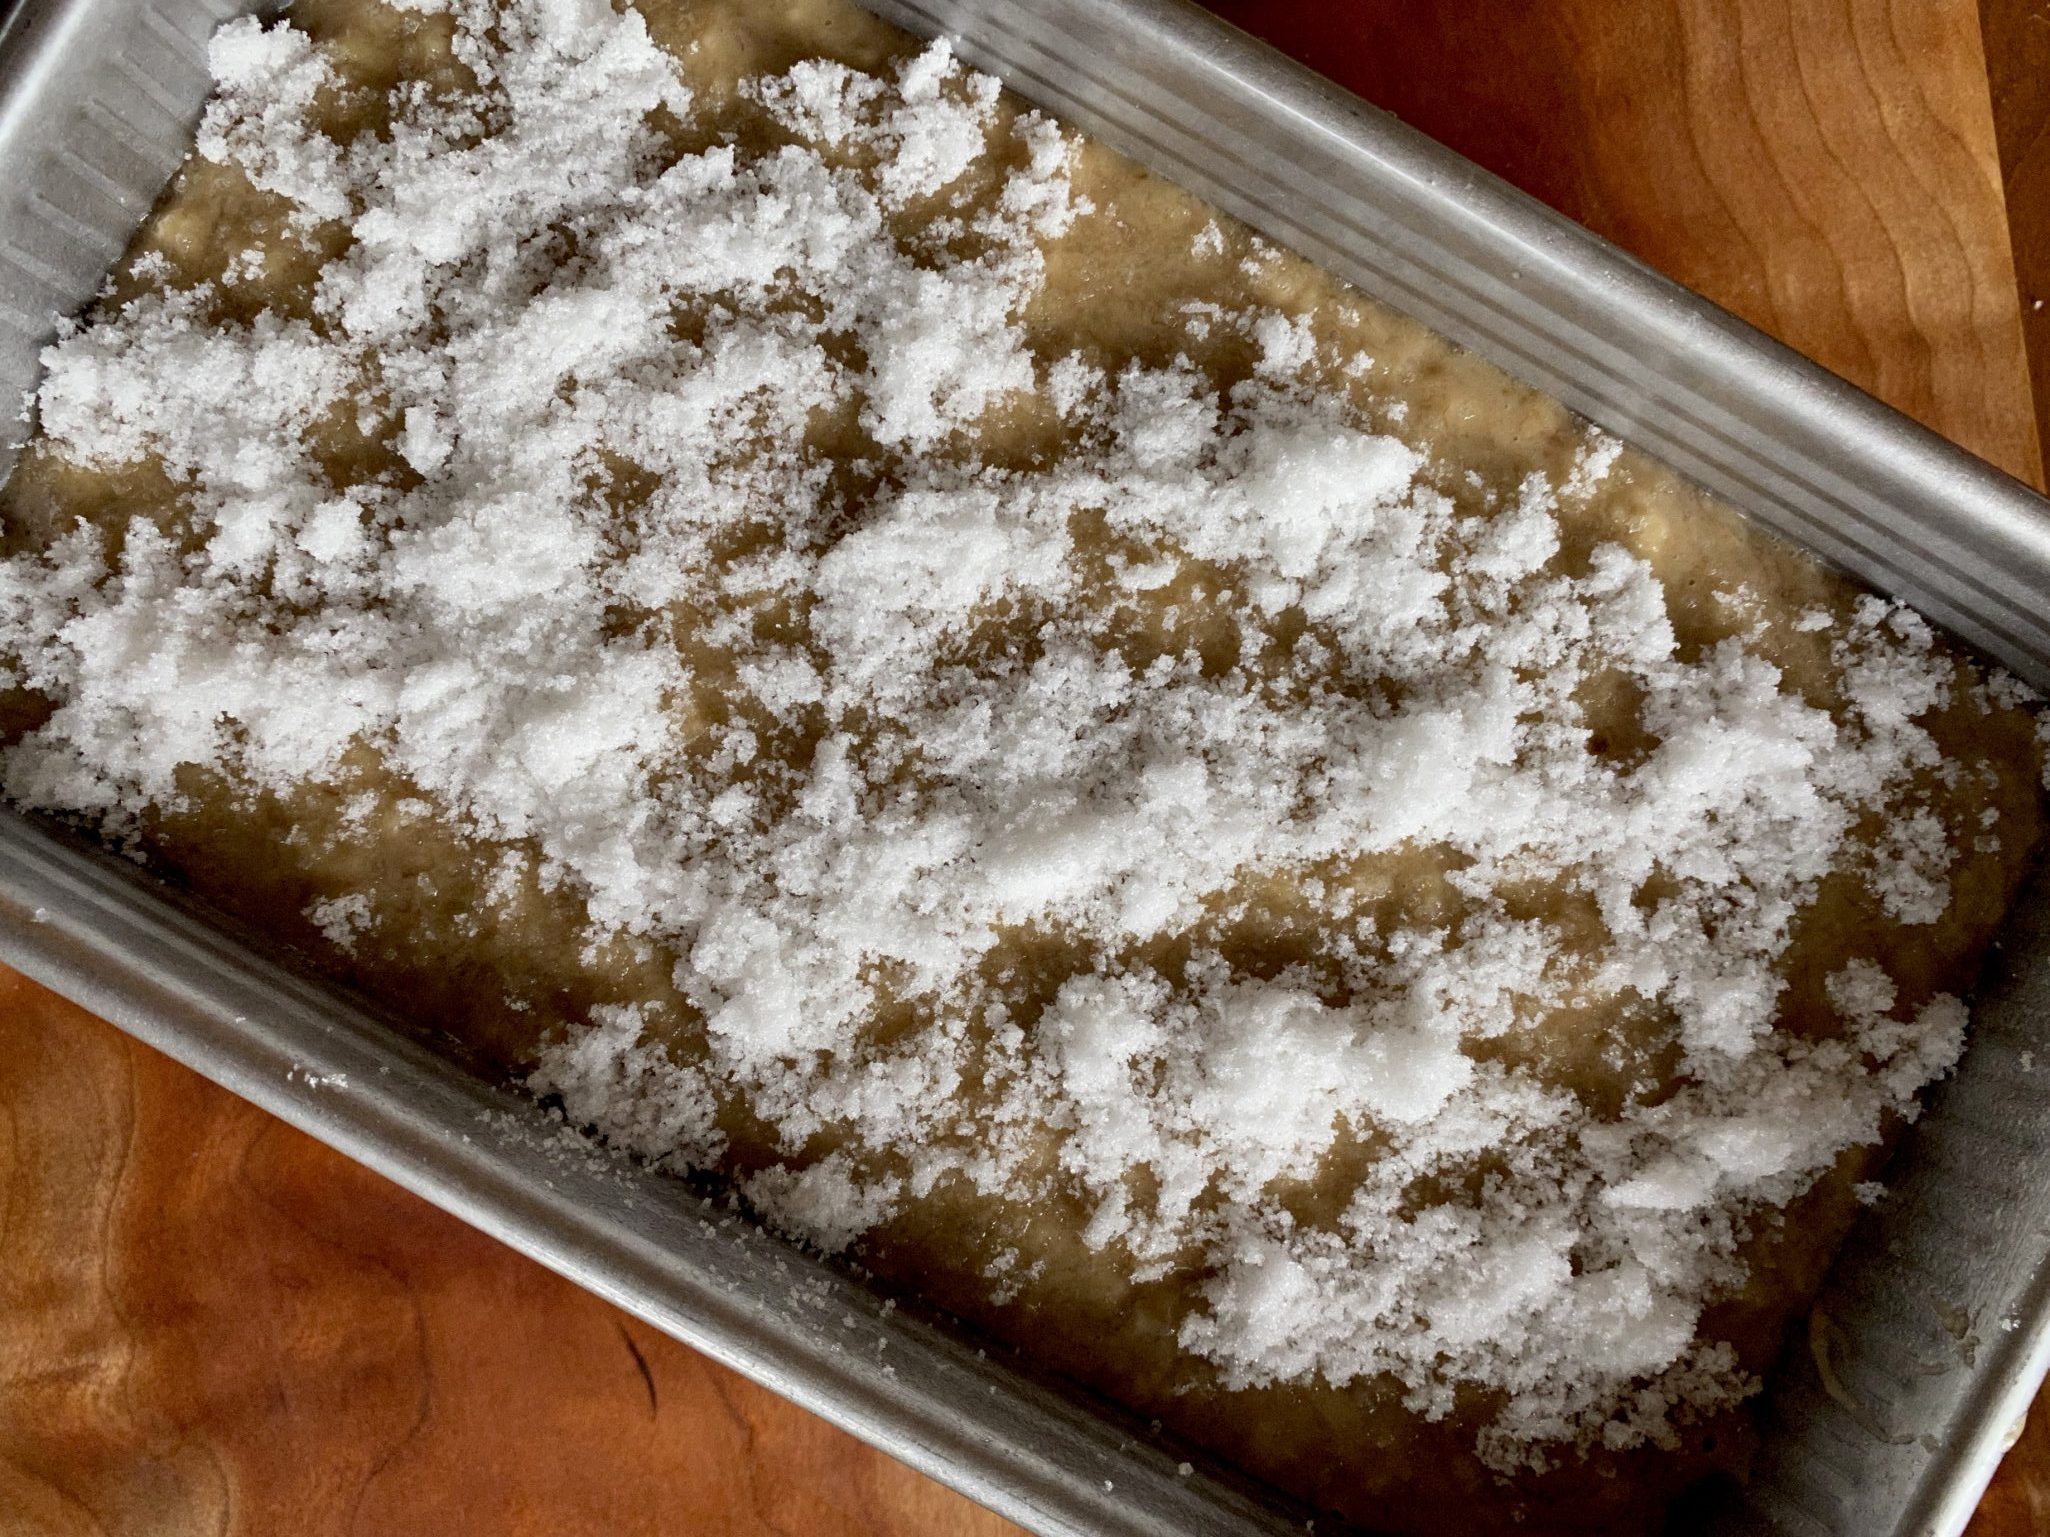
What sets Midwest Made’s BB is a crunchy, sweet, coat of sugar on the top of the bread.  Novel.  You wet your fingers and rub the sugar around until it gets clumpy and scatter them on the BB batter.  This creates the crunchy top of the bread, genius.

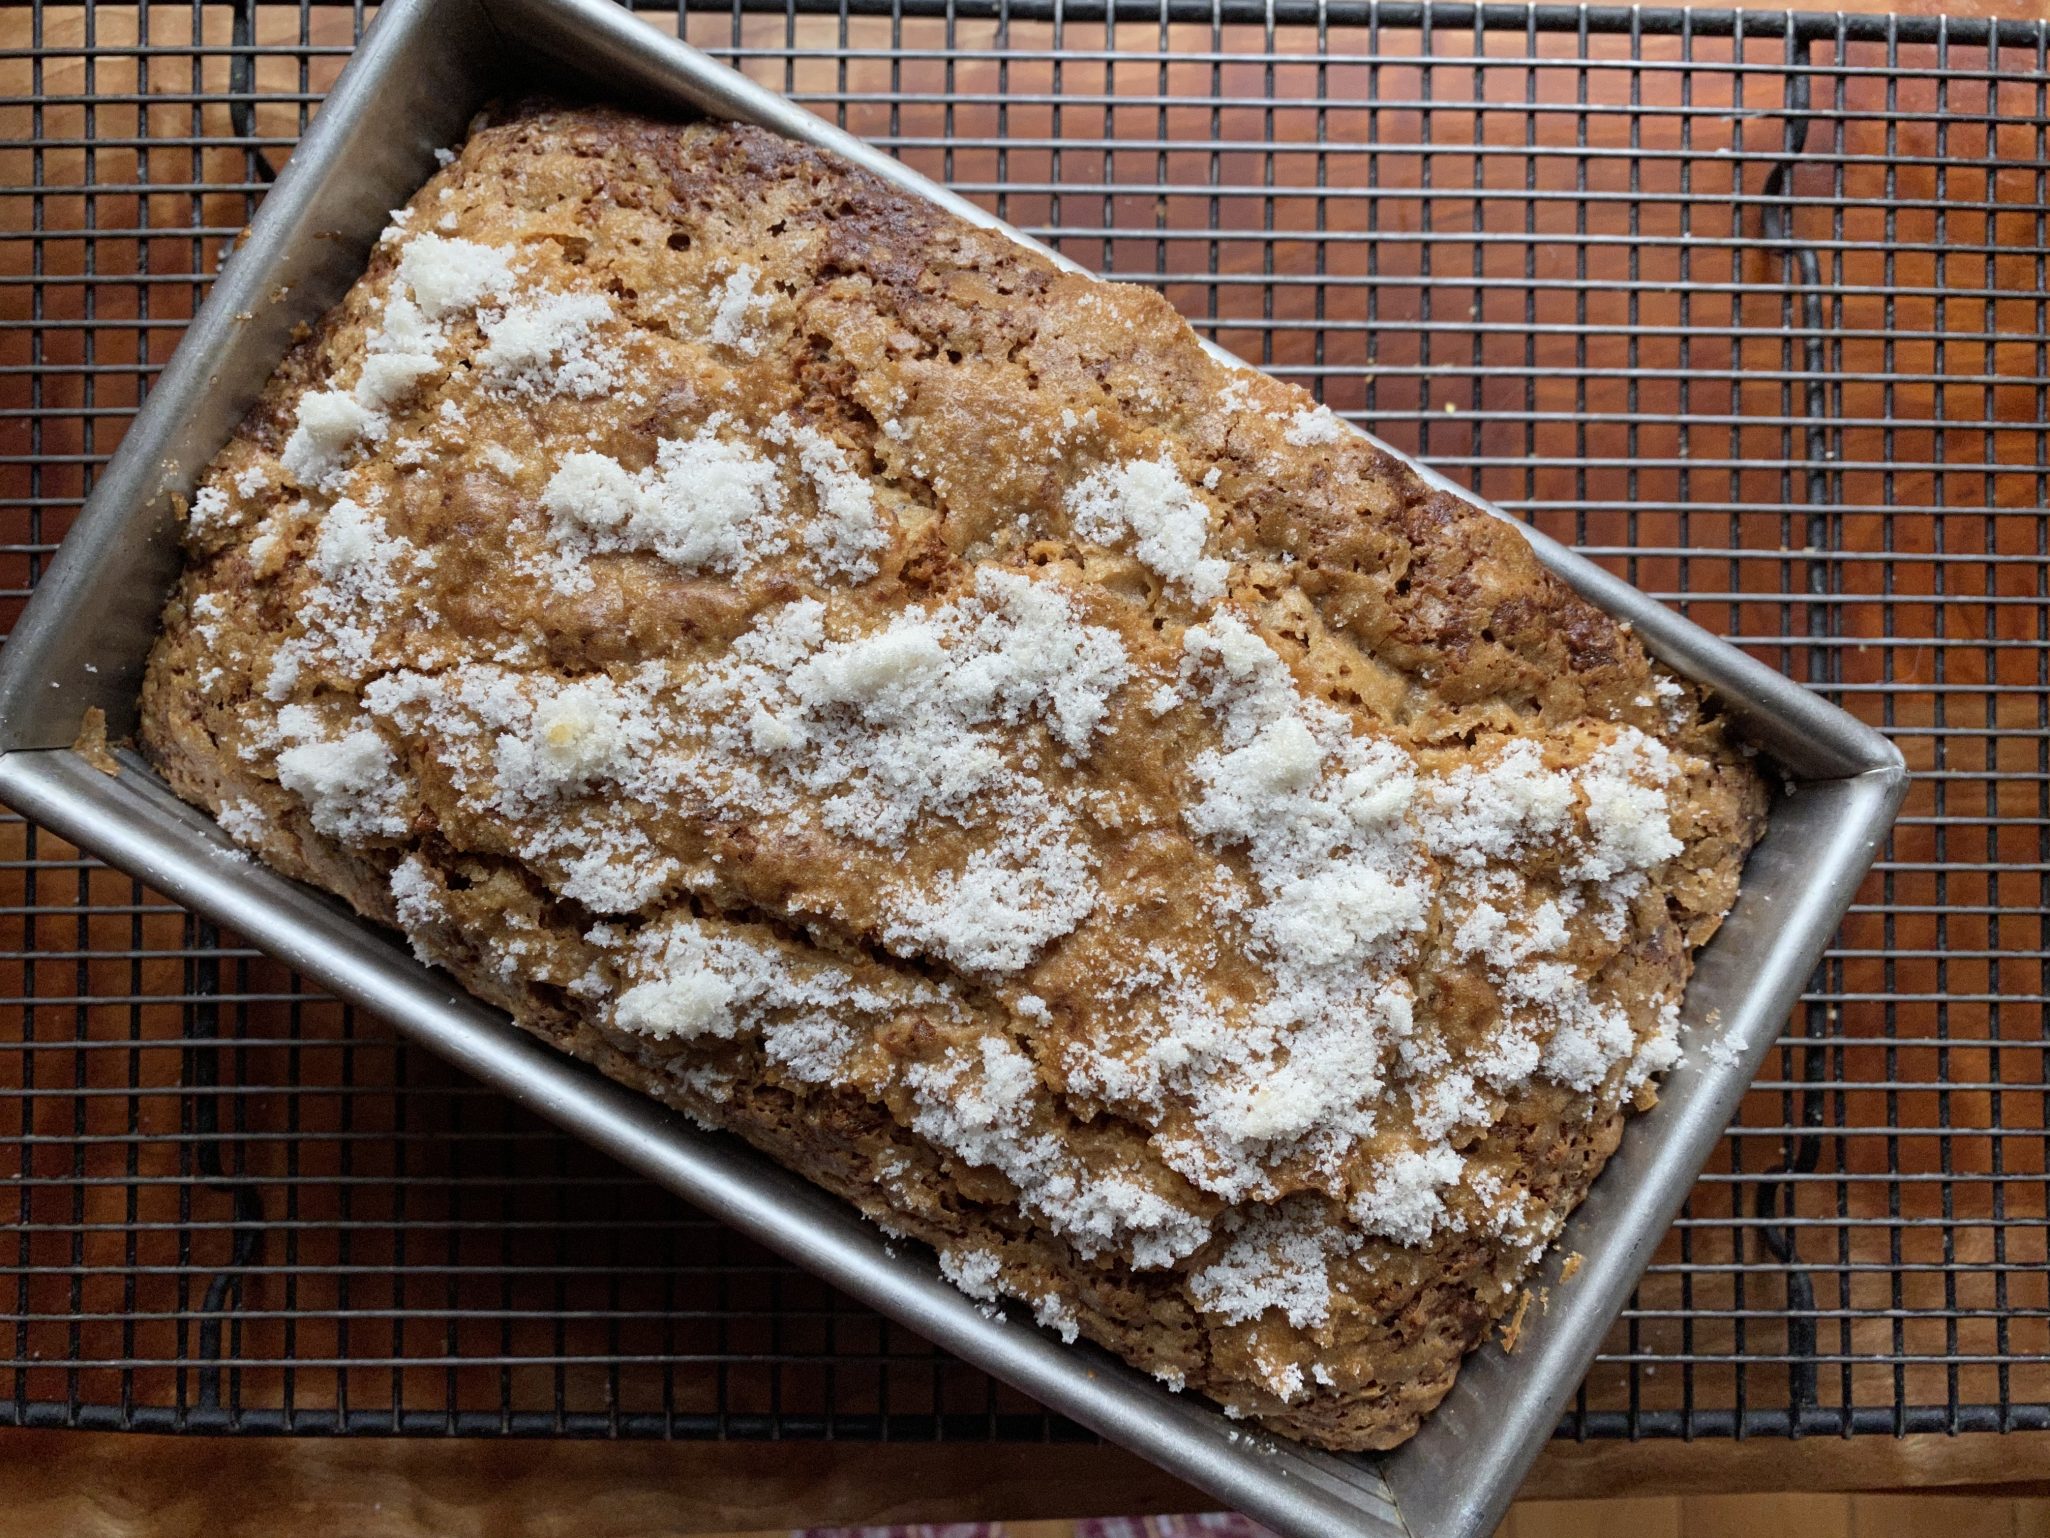
The loaf comes out of the oven picture-perfect.  The bread has a nice texture with the added crunch of sweet topping.  My bottle of rum was missing in action, a victim of Shelter In Place perhaps, too bad,  the Rum might have cut some of the sweetness or made the flavor a little more complex.  Next time I would add Rum or nuts to the recipe to balance the sweetness.

The recipe uses oil as the fat which makes it super easy and quick to throw together.  The dry ingredients are combined and folded into the wet.  Try not to overmix (mantra), the batter will be lumpy and pourable.  This is essentially a one-bowl, one spoon or spatula, recipe.  How easy is that?

Pour the batter into a 9×5 loaf pan and make the sugar topping.

I would add chopped pecans or walnuts to the batter or the sugar topping.  The sugar is the kicker.

I was amazed that the sugar didn’t melt into the batter but remained formed and crunchy.

I liked this recipe and would make it again but does it replace my Best Damn Banana Bread recipe, probably not.

The Only Banana Bread You’ll Ever Need from Midwest Made

Course quick breads
Cuisine American
Keyword Banana Bread
Prep Time 15 minutes
Cook Time 1 hour 10 minutes
Servings 10 servings

Ingredients

  • 1 3/4 cups mashed very ripe bananas
  • 3/4 cup plus 2 tablespoons firmly packed dark brown sugar
  • 1/2 cup vegetable oil
  • 1/3 cup well-shaken buttermilk at room temperature
  • 2 large eggs
  • 1 tablespoon dark rum optional
  • 1 teaspoon pure vanilla extract
  • 2 cups plus 2 tablespoons unbleached all purpose flour spooned and leveled
  • 1 teaspoon baking powder
  • 1 teaspoon baking soda
  • 1/2 teaspoon fine sea salt
  • 3 tablespoons granulated sugar for sprinkling
  • 1/2 cup pecans or walnuts chopped

Instructions

  • Position a rack in the lower third of the oven and preheat it to 325-degrees F. Spray a 9x5-inch loaf pan with nonstick cooking spray and line it with parchment paper with a couple of inches overhang on 2 opposite sides.
  • In a large bowl, stir together the mashed bananas, brown sugar, oil, buttermilk, eggs, rum (if using) and vanilla.
  • In a medium bowl, whisk together the flour, baking powder, baking soda, and salt. Pour the dry ingredients into the wet and fold until just blended. Pour the batter into the prepared pan.
  • Place the granulated sugar in a small bowl. Dampen your fingertips with water and work them into the sugar until it just begins to look like snow-if you pinch some, it should just barely hold together. Sprinkle the dampened sugar over the batter, aiming to get it clumped up together in spots.
  • Bake until a toothpick inserted into the center of the cake comes out clean, 60 to 70 minutes. Let cool for twenty minutes in the pan, then use the parchment paper to help lift the loaf out of the pan and cool completely on a wire rack. Store any leftovers in an airtight container for up to 5 days.