Category: Asian Dishes

Stuck on Sticky Rice (Gnaw Mai Fan)

Stuck on Sticky Rice (Gnaw Mai Fan)

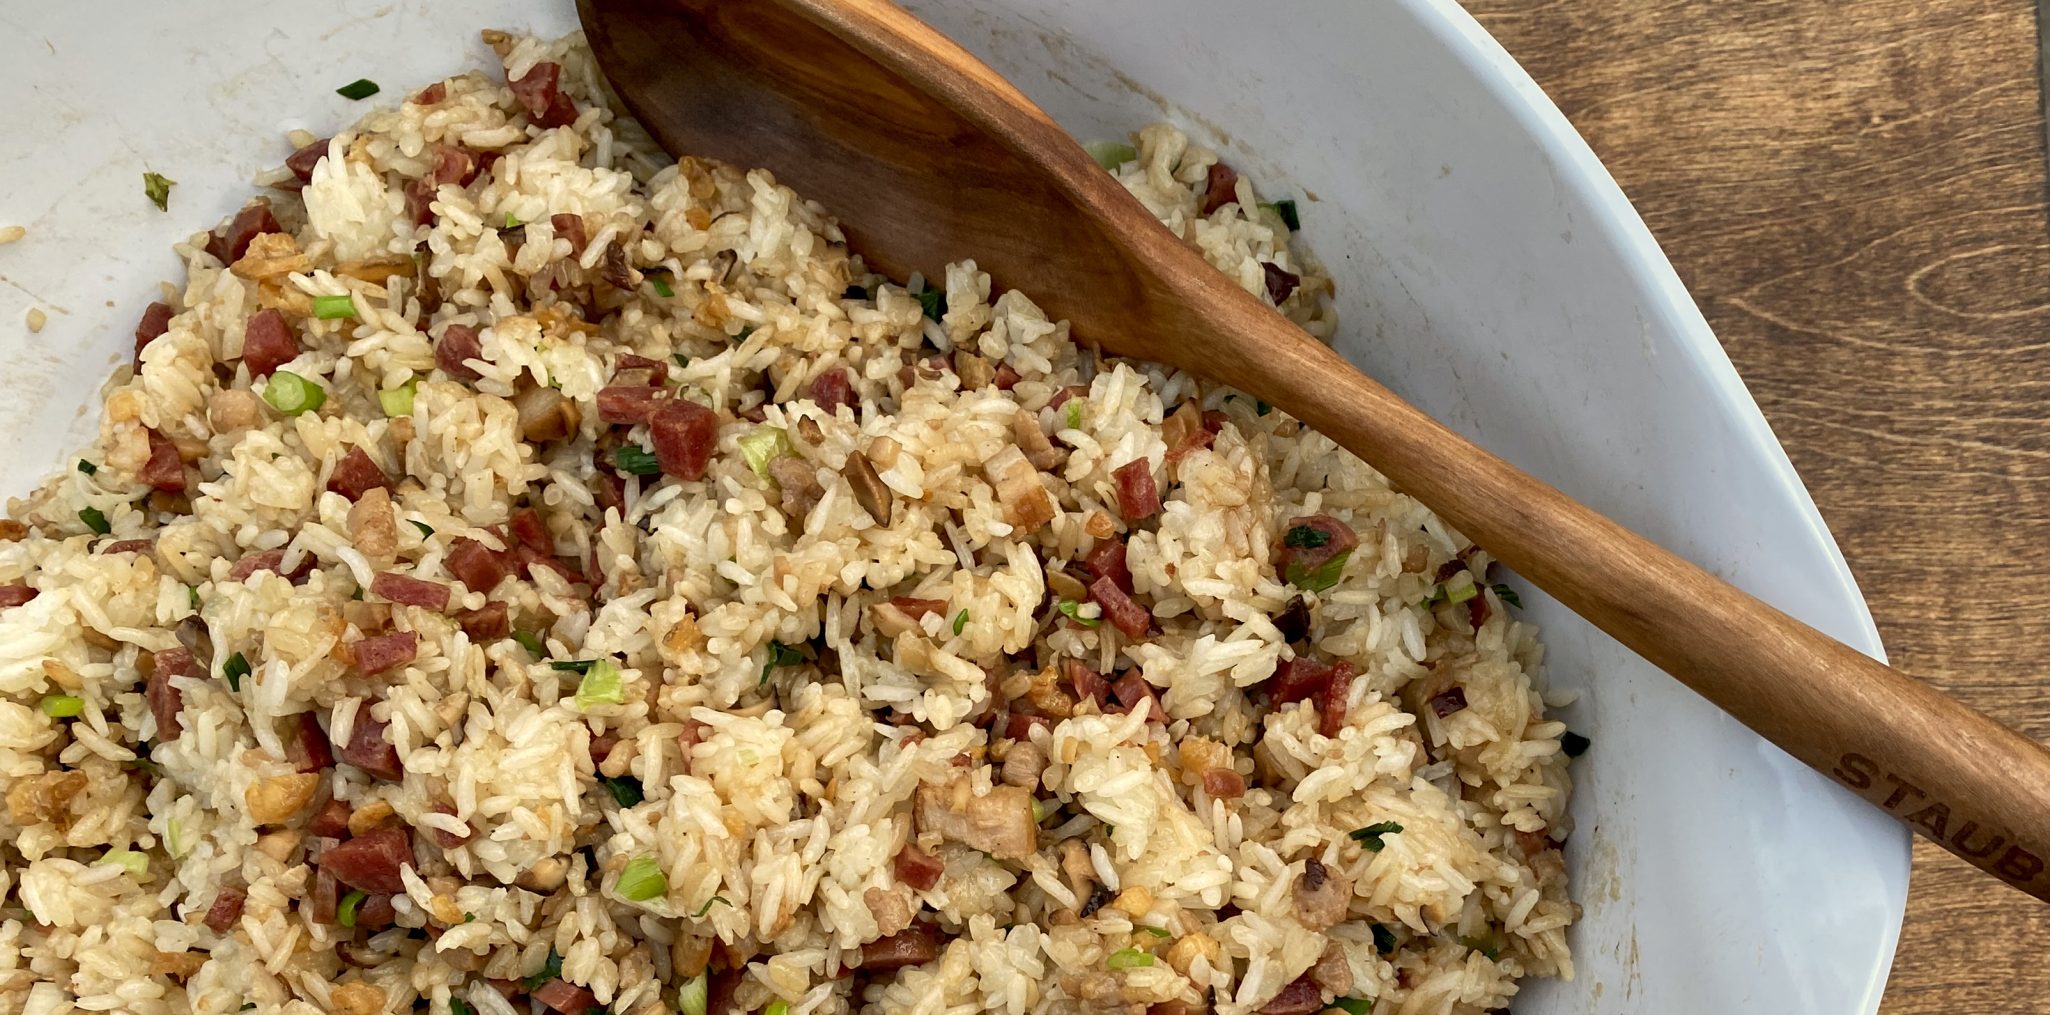
When the holidays roll around and the feasting begins, you can find me eyeing the array of side dishes on the table.  Yep, scoop me some sweet potatoes, pour on the creamed spinach, and pile high the mashed potatoes. While everyone oohs and ahs over the turkey, I’ll be laser focused on the sides, like the STUFFING.  I adore stuffing, especially my mom’s bread stuffing, but my second favorite is a Chinese rice dish.  It’s called Gnaw Mai Fan. Sounds delicious right? No? Also known as Sticky Rice Dressing, it is the Asian contribution to the Thanksgiving table.

You start with sweet (glutinous) rice, add fragrant shiitake mushrooms, sweet & salty Chinese sausage aka Lop Cheung, dried shrimp, and finish with a generous amount of green onions.  Sounds easy right? It is, but the hurdle is getting the ingredients, unless you have an Asian market nearby.

Primer for Sweet Rice Dressing

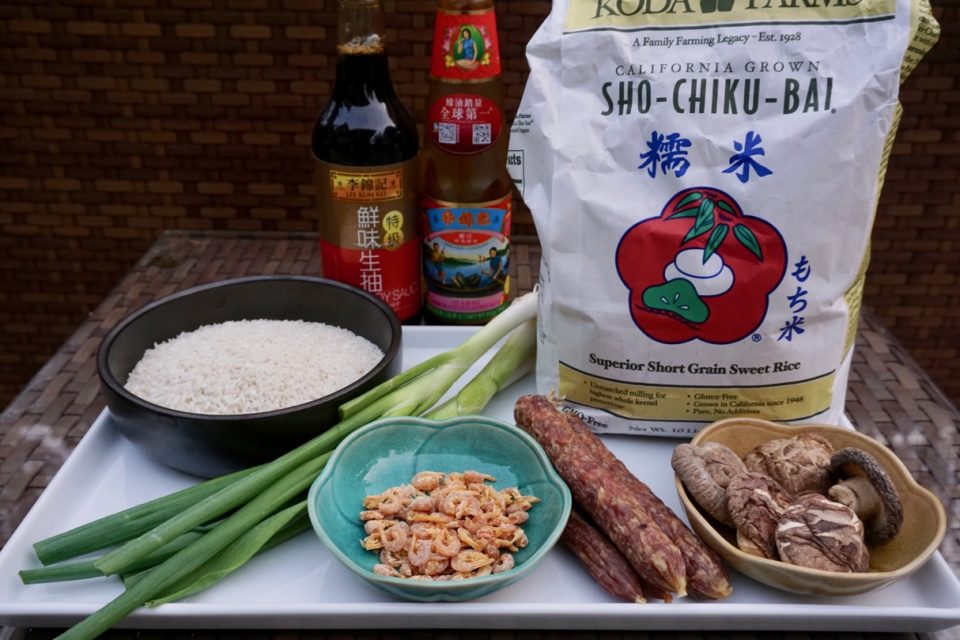
Moving from left to right; long-grain rice, green onions, dried shrimp, Chinese sausage, and dried shiitake or black mushrooms. Behind the mushrooms is the short grain sweet rice (or glutinous rice) and in the back are bottles of oyster sauce and soy sauce used to season the rice. Yep, two kinds of rice.  I mix the glutinous rice with regular long-grain rice to lighten the rice mixture.  All of these ingredients can be found in most Asian markets.  The dried shrimp and sausage can be found in the refrigerator case.  Sauces to use?  the following two are key.  I swear by Lee Kum Kee Oyster Sauce and Lee Kum Kee’s Premium Soy Sauce are my go-tos, but Pearl Ridge and the Korean brand Sempio 501 are good too.

Soak, Soak, Baby

Soak the dried mushrooms and shrimp in warm water for approximately 15 minutes or until soft.  Drain and reserve the soaking water from the mushrooms and shrimp. Wash your long grain rice and drain.  Add the glutinous rice and long grain to your rice cooker.  Yes, your rice cooker.  I have absolutely no idea how to cook rice in anything else but a rice cooker (use the measuring cups that come with your rice cooker).  Strain and add reserved liquid from mushrooms and shrimp to the pot, add chicken broth to make up the difference. Place Chinese sausage on top of the rice and turn on the rice cooker.

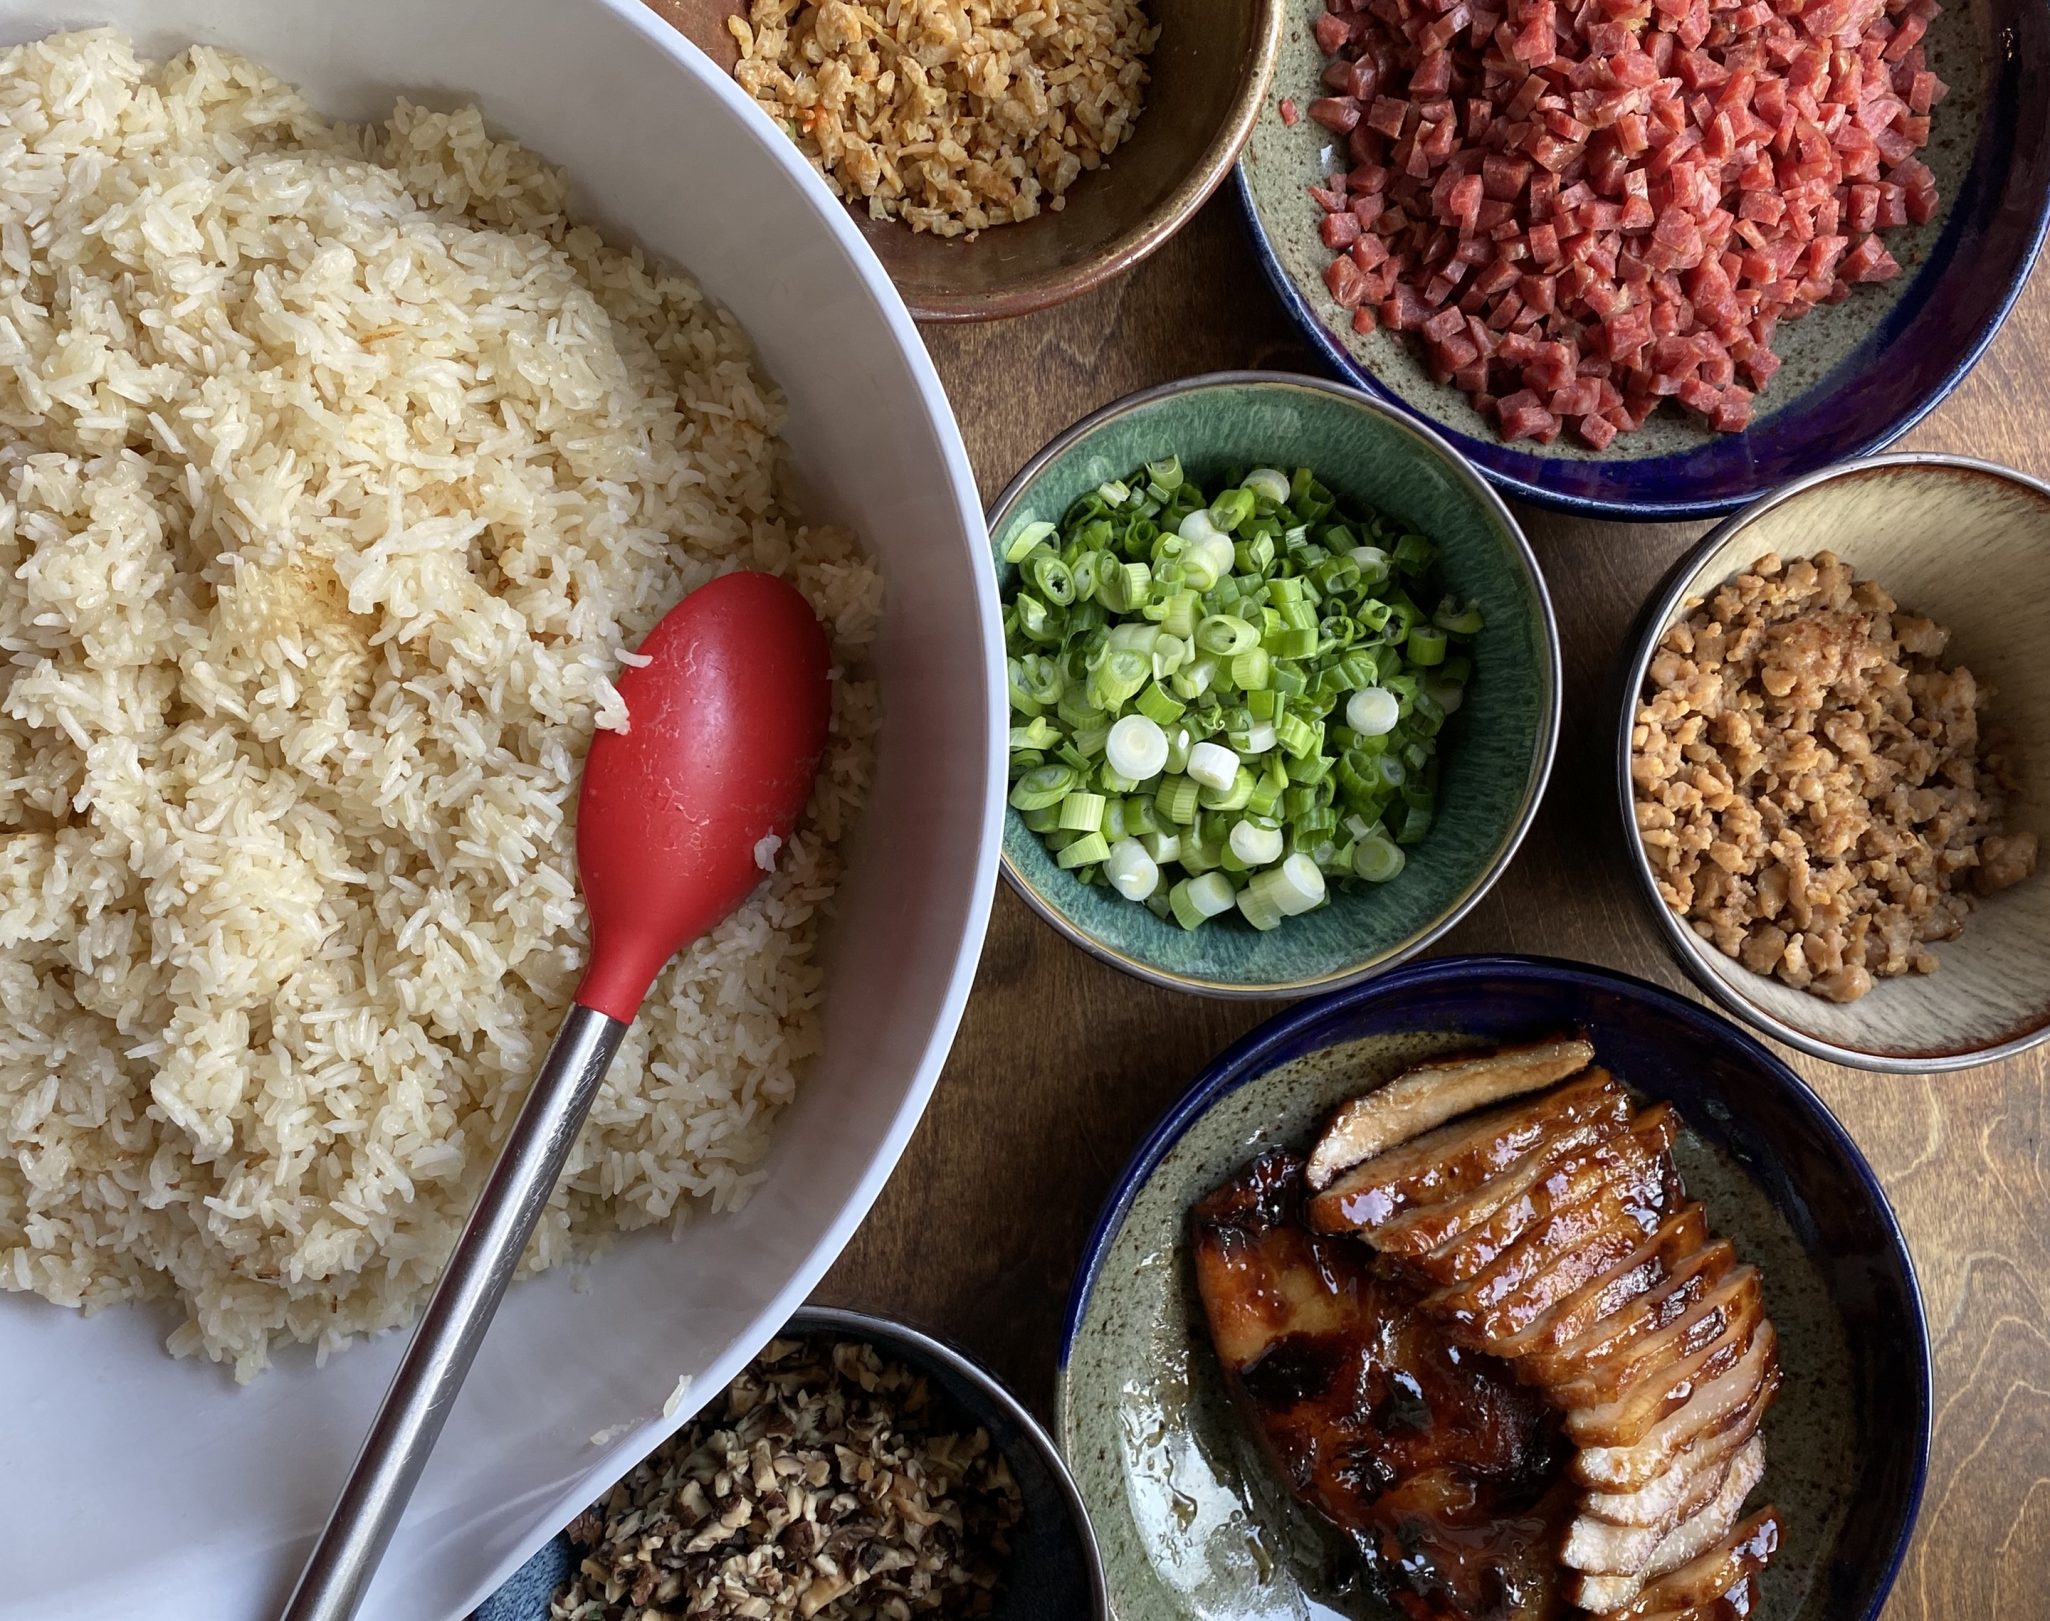
Prep the other ingredients while the rice is cooking.  Optional additions include ground seasoned pork, char siu (bbq pork), bacon, and roasted chestnuts.  It’s your rice dish, go crazy.  I usually add seasoned ground pork or chicken.

In a pickle, I have used Japanese short-grain or sushi rice in place of the glutinous and long grain rice combination.  Shhh, don’t tell my Mom!  My kid has made this for his Friendsgiving celebration to rave reviews.

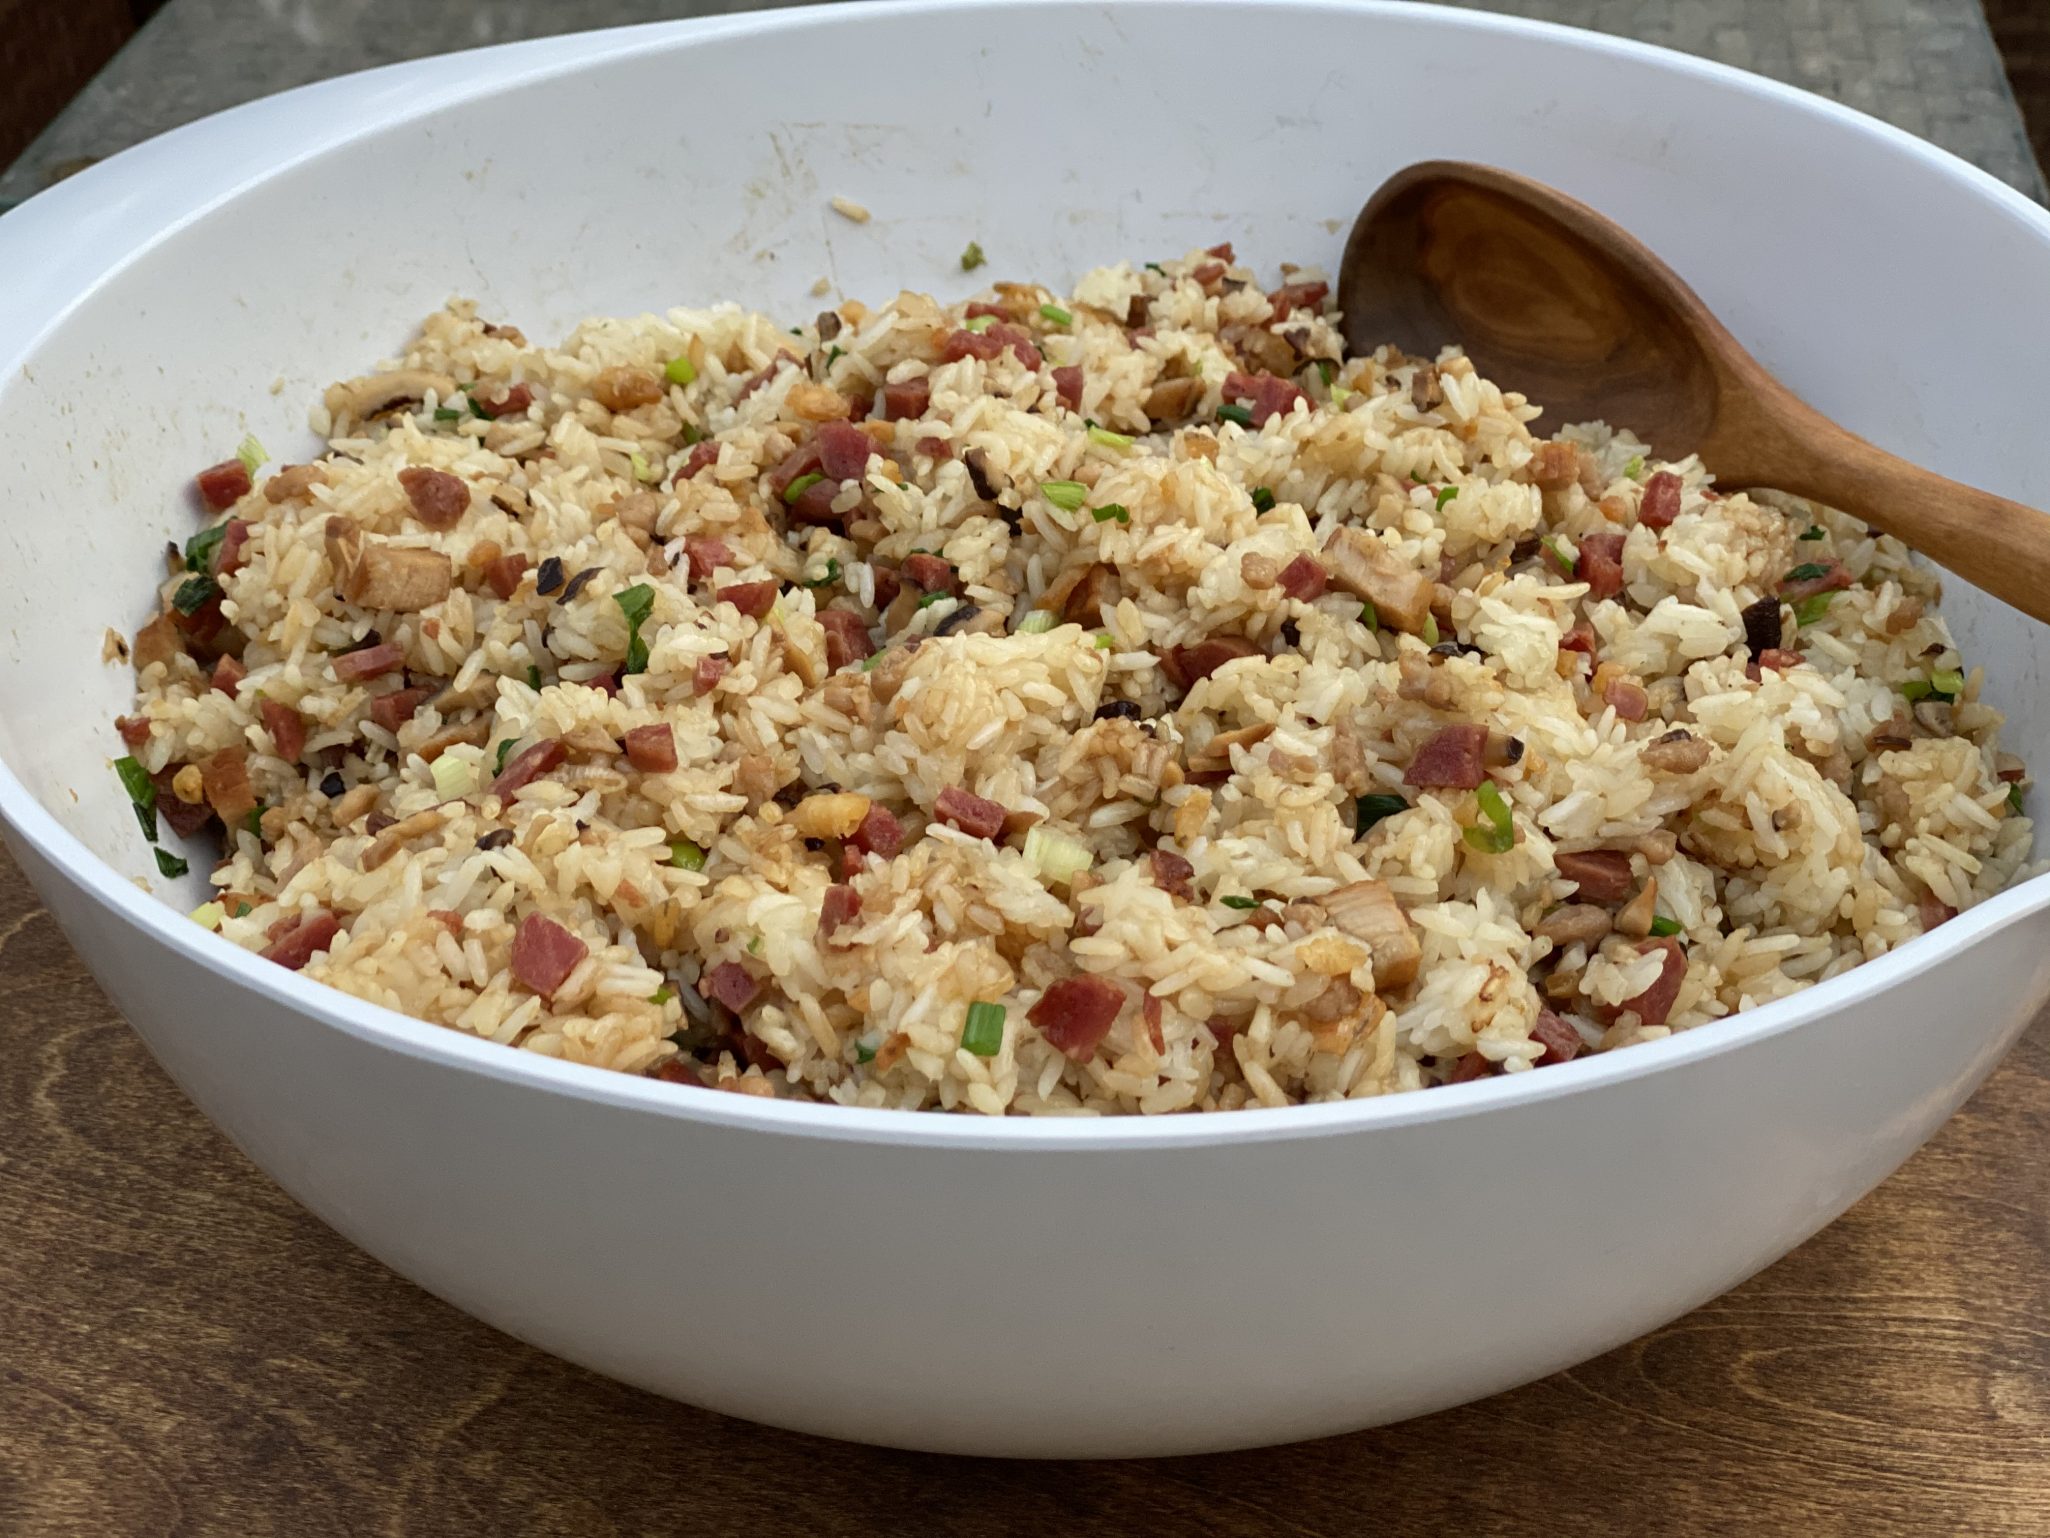
This dressing works well as stuffing for turkey or chicken, use it just like any bread stuffing.  If served on the side, add the pan drippings to the rice for a flavor boost.

Garnish with cilantro and scallions.

And It’s Gluten Free!

Gnaw Mai Fan-Chinese Sweet Rice Stuffing

A traditional Cantonese Rice dish to use in place of stuffing during Thanksgiving!
Course Main Course, One dish meals
Cuisine Asian
Keyword gnaw mai fan, Sweet Rice Stuffing
Prep Time 30 minutes
Cook Time 45 minutes

Equipment

  • Rice Cooker

Ingredients

  • 2 cups long grain rice using the rice cooker mesuring cup
  • 2 cups sweet rice using the rice cooker measuring cup
  • 4 lop cheung steamed with rice, removed and diced
  • 1/2 cup char siu (bbq pork) Reduce lop cheung to 3 and substitute diced barbecue pork
  • 4 dried black mushrooms (shitake mushrooms) soaked in warm water until soft, diced, reserve soaking liquid (use 1-1.5 cups of water)
  • 1/4 cup small dried shrimp soaked in warm water with black mushrooms
  • 2 slices fresh ginger size of a quarter
  • 3-4 cups chicken stock you can use commercial low sodium chicken broth
  • 3 green onions chopped

Ground pork and marinade

  • 1/3 cup ground pork or chicken
  • 1 tsp each sherry, oyster sauce, soy sauce
  • 1/4 tsp sugar
  • dash of salt
  • 1 pinch white pepper
  • 1 slice ginger

Seasonings

  • 1-2 Tbsp Soy Sauce Premium LKK Chinese Soy Sauce or Korean Soy Sauce (Sempio)
  • 1-2 Tbsp Oyster sauce Lee Kum Kee brand-Lady, boy in boat label

Garnish

  • Cilantro
  • Green onion

Instructions

  • Cook rice in rice cooker with reserved soaking liquid from mushrooms and shrimp and chicken broth.
  • Marinade ground pork for 10-15 minutes.
  • Heat pan, add 1 T oil, when hot, add ginger and fry 30 seconds, add drained dried shrimp and 1 t water, sauté 30 seconds then add ground pork, saute just until pork is no longer pink.
  • Add mushrooms and lop cheung. Sauté additional minute or two.
  • Add green onions, saute' another 30 seconds and remove from heat.
  • Pour rice into large mixing bowl. Fold in sautéed ingredients, mix soy sauce and oyster sauce together and add to rice. You will probably need more, just use a 1:1 ratio of soy sauce to oyster sauce.
  • Mix thoroughly.

Notes

Leftovers can be pressed and shaped into rice balls for a tasty portable snack-thumbs up from my kids!

There’s Always Room for J-E-L-L-O

There’s Always Room for J-E-L-L-O

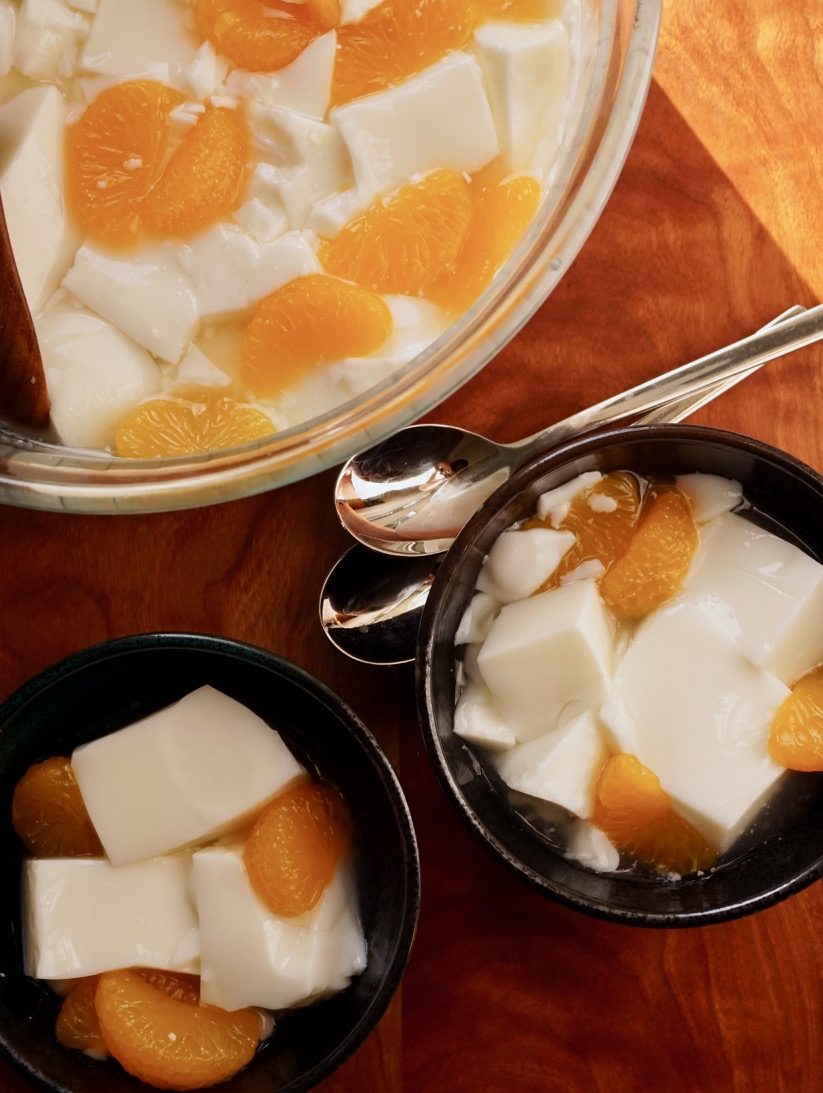
Do Not Laugh.  Yes, this is a recipe for jello, not the boxed Jello you made with your mom when you were a kid (your job-pour the contents into a big bowl), oh no. The Asian version of Jello, Almond Jello. So good, it brings a whole new dimension to Jello. It’s delicious, light and refreshing.

If you have ever had a meal in a Chinese restaurant which served dessert other than fortune cookies, it might have been Almond Jello.  Unfortunately, much of the Almond Jello served in restaurants isn’t very good.  I have a theory, LOTS of Asians are lactose intolerant so milk is used sparingly.  Well, that’s what makes Almond Jello YUMMY, the addition of milk-like the white layers of finger jello or the cream cheese in that funky but delicious Lime and Pineapple Jello Ring that everyone’s aunt (who couldn’t cook) brought to every potluck. Jello with Moo-magic.

When I was a kid the fanciest restaurant in Chinatown was The Empress of China. In its heyday celebrities and politicians clamored there.  My folks would take us there for very special occasions-birthday dinners for grandparents, wedding banquets and Chinese New Year. High on the 6th floor, it had the most breathtaking views of the City and the East Bay.  I loved the Green Jade Mist Almond Delight, their version of Almond Jello.  Served in a goblet with a touch of Creme de Menthe it was the glitzy ending to a fancy meal.

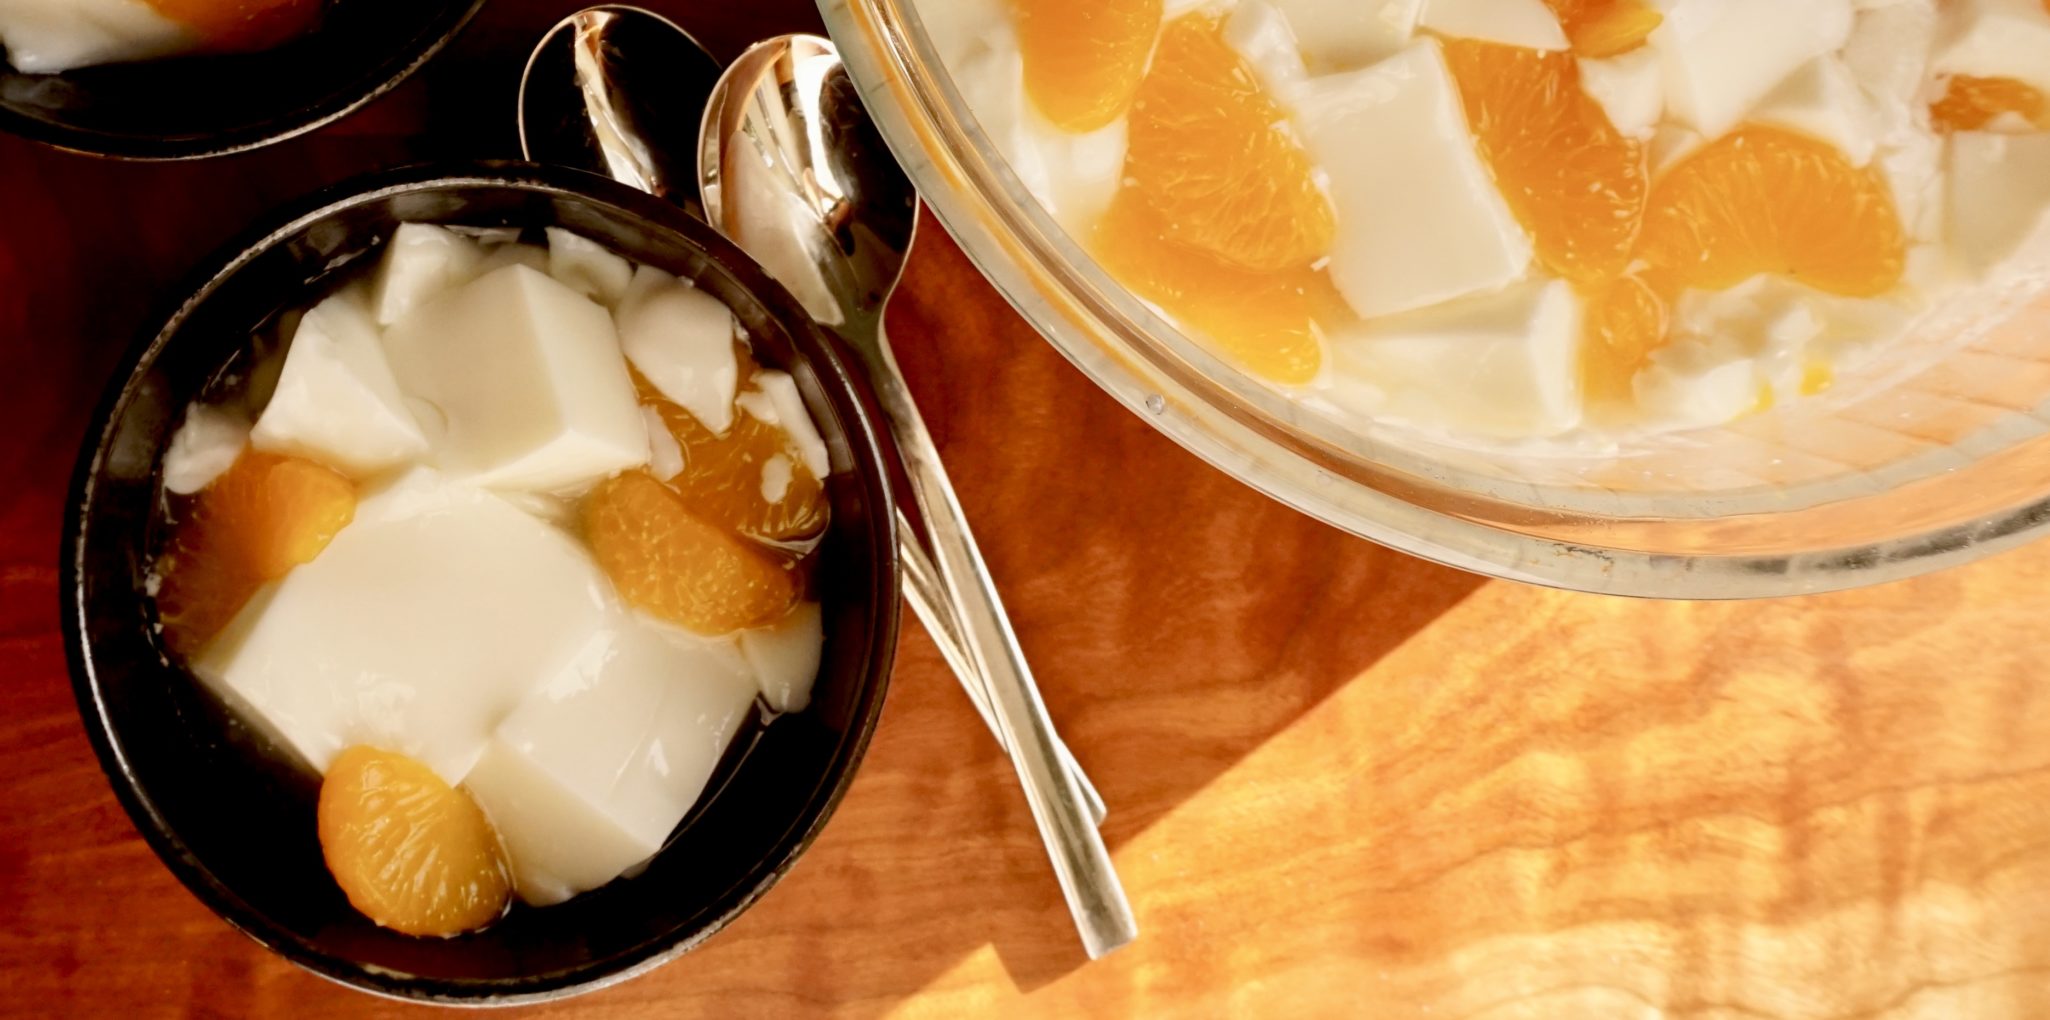
Typically Almond Jello is topped with fruit, not creme de menthe.  You can use mandarin oranges or fruit cocktail (when is the last time you had fruit cocktail out of a can, strictly nostalgic choice) or Lychees. Use fruit packed in light syrup or its own juice.  I add the syrup or juice to the jello so it just slides down your throat, like having jello soup. Confession, I loved pouring milk on my jello, same effect. Canned fruit makes it a great winter dessert when fresh fruit can be hard to find. You could jazz it up seasonally by adding fresh strawberries or blueberries.  This recipe makes soft jello which I happen to like. If you like jello that has the consistency of finger jello, reduce the amount of the water in the recipe to 3/4 cup of each and the milk to 2 cups.

When I was pregnant with my oldest, my craving was Almond Jello.  I made vats of it, doubling, tripling, even quadrupling the recipe. Seriously, it was like gestational crack.

These days I make Almond Jello when my oldest kid comes home.  He loves it. If I don’t steal a couple of scoops before I let him know there is a bowl in the fridge, I will have lost my window of opportunity to have some.

It’s stupid easy, so delicious.   Try it, who doesn’t like jello?
Almond Jello

Almond Jello

Course Dessert
Cuisine Asian-American
Keyword almond, almond jello, Dessert
Prep Time 10 minutes

Ingredients

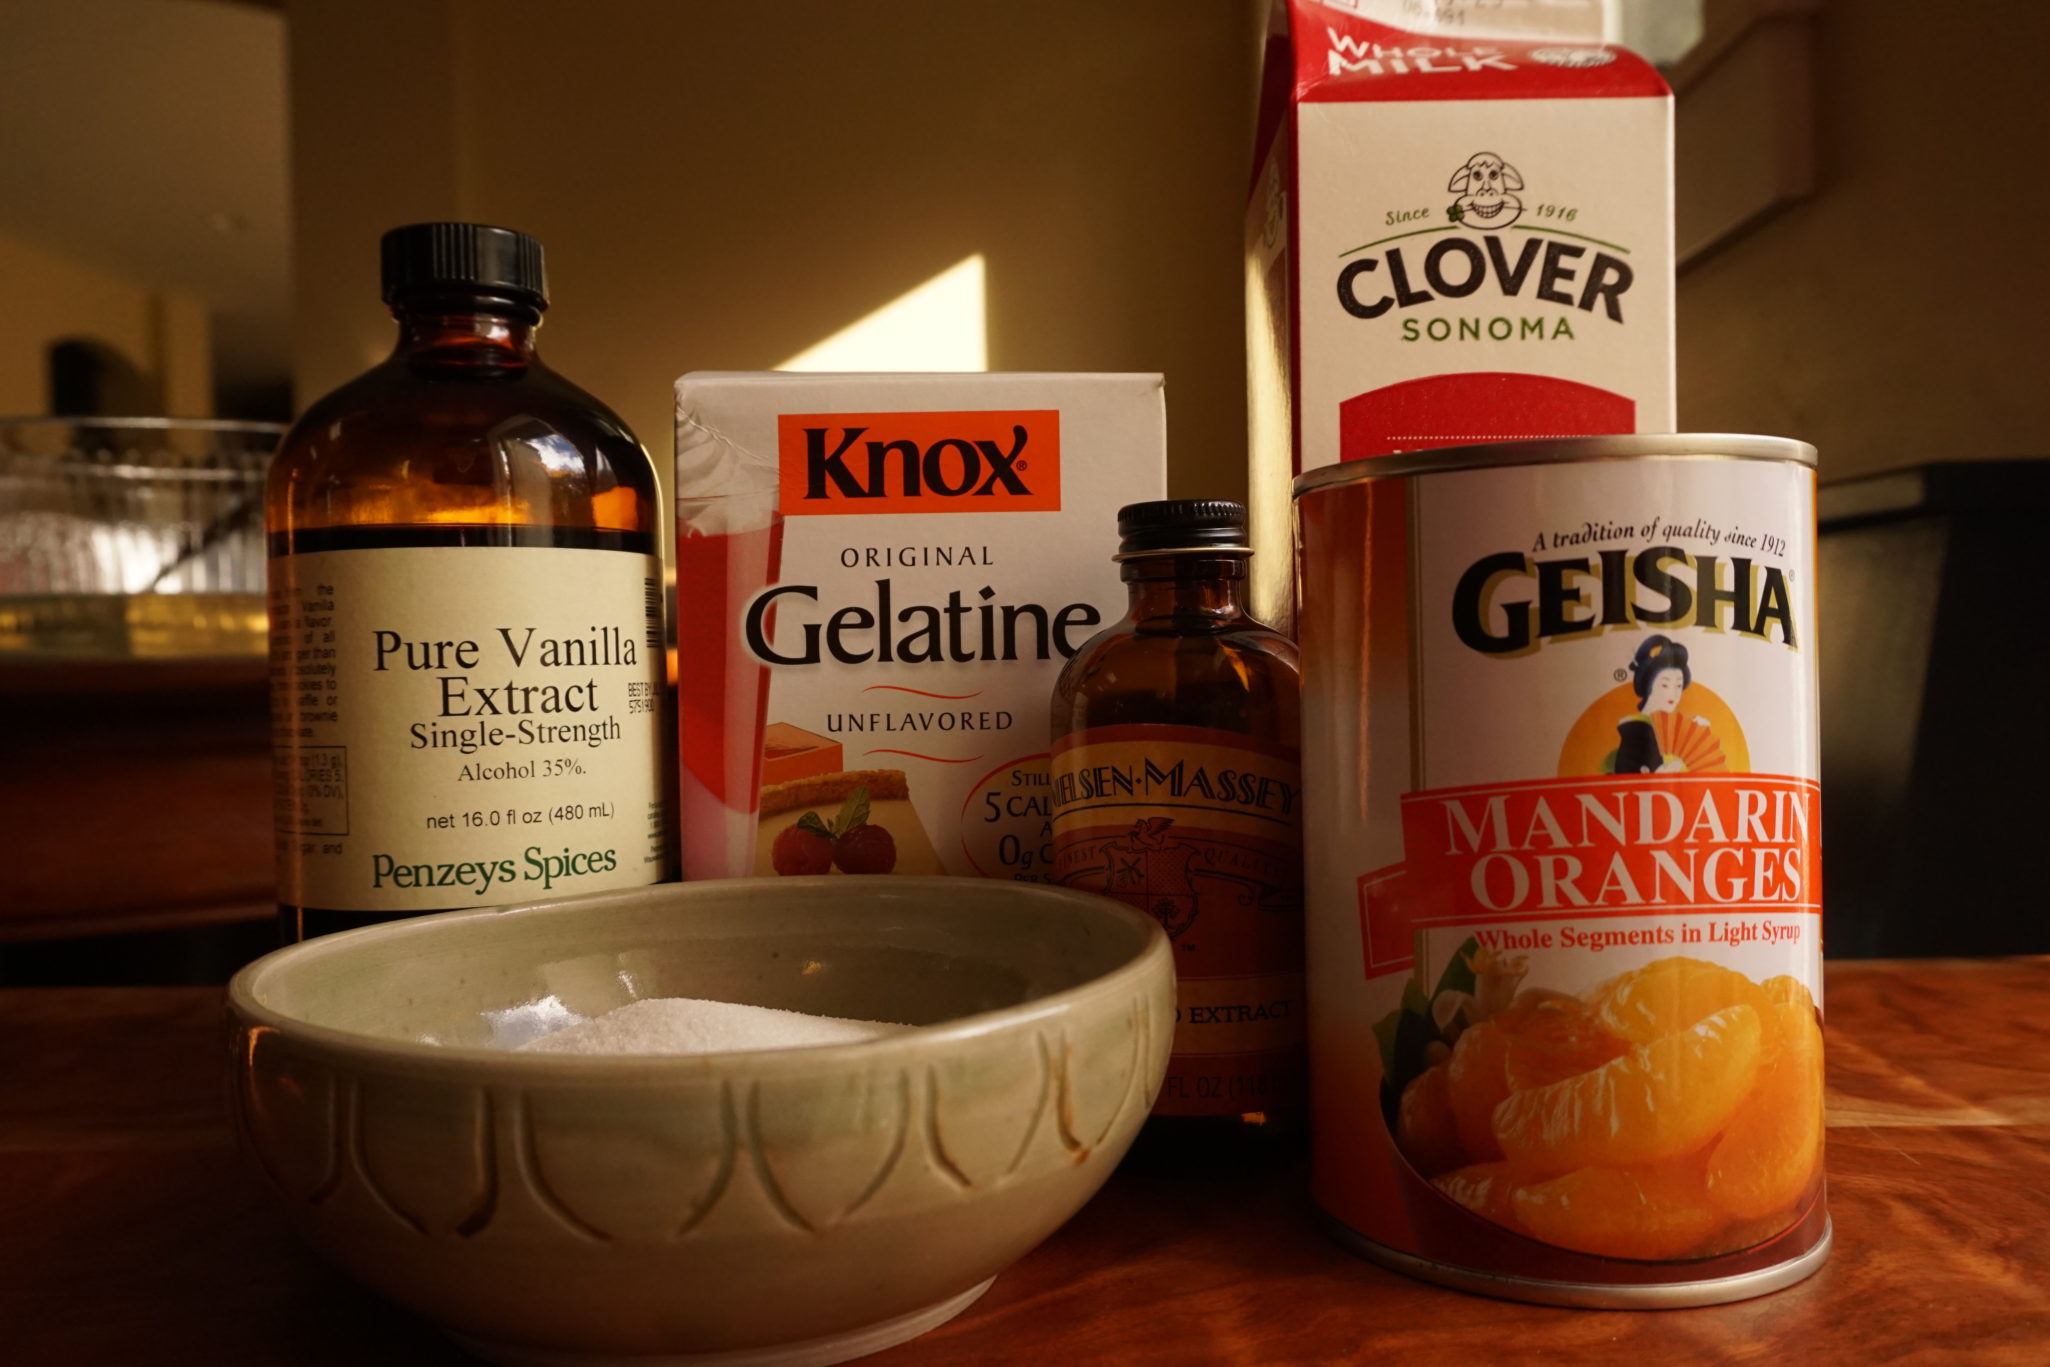
  • 2 packets gelatin
  • 1 cup cold water
  • 1 cup hot water
  • 3/4 cup granulated sugar you can adjust the sugar to the sweetness of your liking
  • 2 1/4-2 1/2 cups whole milk
  • 2 teaspoons almond extract
  • 1/2 teaspoon of vanilla extract
  • 1 15 ounce can of Mandarin oranges packed light syrup

Instructions

  • Put cold water in a mixing bowl.
  • Sprinkle gelatin on surface of cold water. Let it sit for one minute
  • Add sugar and stir.
  • Add hot water and stir until completely dissolved. (I cheat, if it doesn't look fully dissolved, zap it for 15 seconds in the microwave)
  • Stir in milk and extracts. Pour mixture into individual serving bowls or 1 large glass bowl such as a souffle dish
  • Chill until firm (at least 2-3 hours)
  • Cut jello into cubes if desired. Top with mandarin oranges
Steamed Pork Patty with Salted Duck Egg-This is My Soul Food

Steamed Pork Patty with Salted Duck Egg-This is My Soul Food

In Asian speak, this is how we say I love you…

“Have You Eaten Yet?”

When my kids come home I get busy in the kitchen making EVERY SINGLE DISH they love. Their favorites, from soup to dessert/ I usually have a pot of chili or spaghetti sauce simmering on the stove while they’re home and I pull out my Dad’s recipes for down-home Chinese dishes. Wes makes short rib stew and carrot cake. It’s 24-7 cooking and eating.  What can I say?  The Asian language of love is food.

Like Father Like Son

My dad and grandfather were the cooks in my family.  My grandfather cooked for a living.  Before going off to work we would often have early dinner with him. Always Chinese food,  I was surprised when I found out later he was a line chef at Original Joe’s on Broadway and also at the famed Tonga Room at the Fairmont Hotel. For my Dad cooking was his passion.

Both of them made down-home dishes like Steamed Pork Patty with Salted Duck Egg, Fuzzy Melon soup, Steamed Chicken with Lop Cheung (Chinese sausage) and Black Mushrooms, or whole fish (yes,that means the head too) with green onions and ginger.  I loved watching them cook and savored eating these dishes even more.  When I went off to school in Los Angeles, I would often call home to ask my Dad how to cook a favorite childhood dish. It was my connection with home and family and a way to keep them close.

A flurry of cooking this past week while the boys were home and the multiple “how do you make” calls from Jamie (who was stuck in Houston) prompted me to add a new section to 3Jamigos. I call it Soul Food.  It’s down-home cooking, cherished recipes to share with family and friends.  Take a peek, it might bring back some great memories.  Or share a family favorite, I would love to post it on my blog.

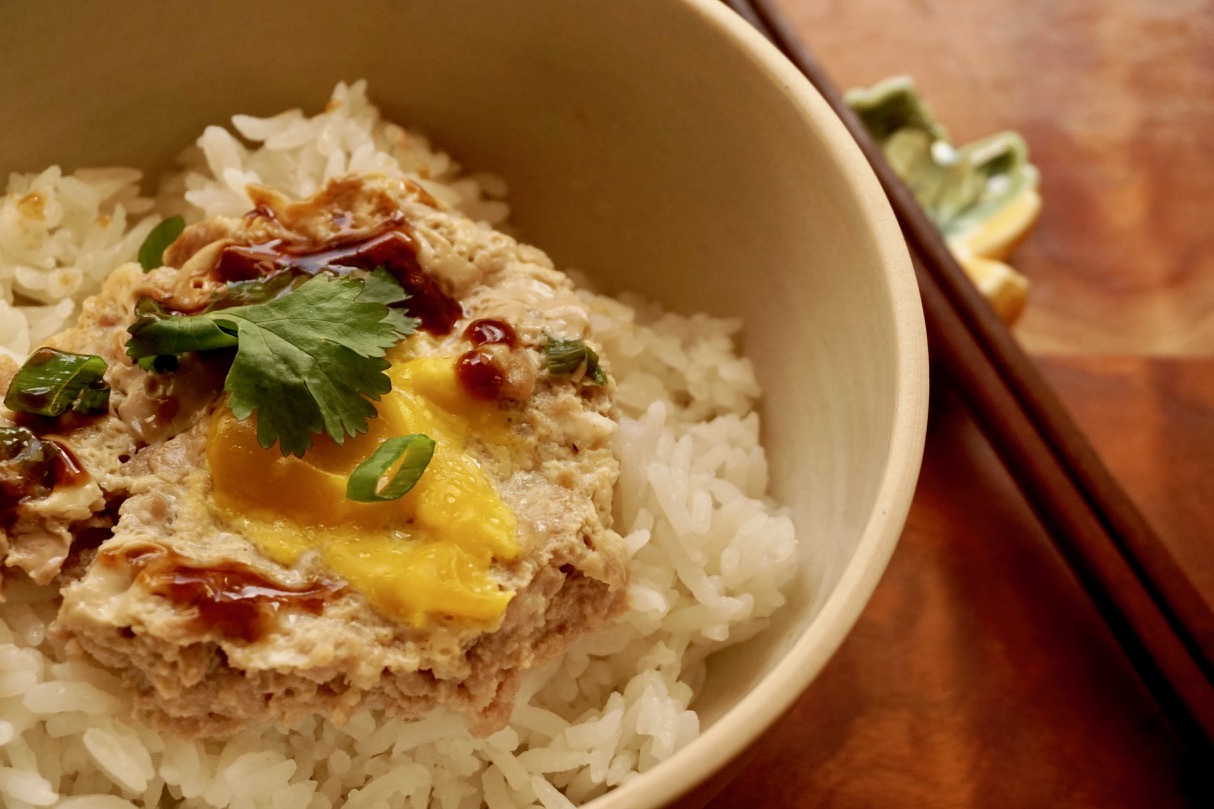
My inaugural post for Soul Food is a down-home favorite, savory Steamed Pork Patty with Salted Duck Egg (咸蛋蒸肉饼). You can find it in hole-in-the-wall Cantonese (southern China) restaurants or if you get invited over for family dinner at any of your Cantonese friends’ homes. In Chinatown, the best place for this dish was Sun Tai Sam Yuen on Jackson Street in my humble opinion, lol.

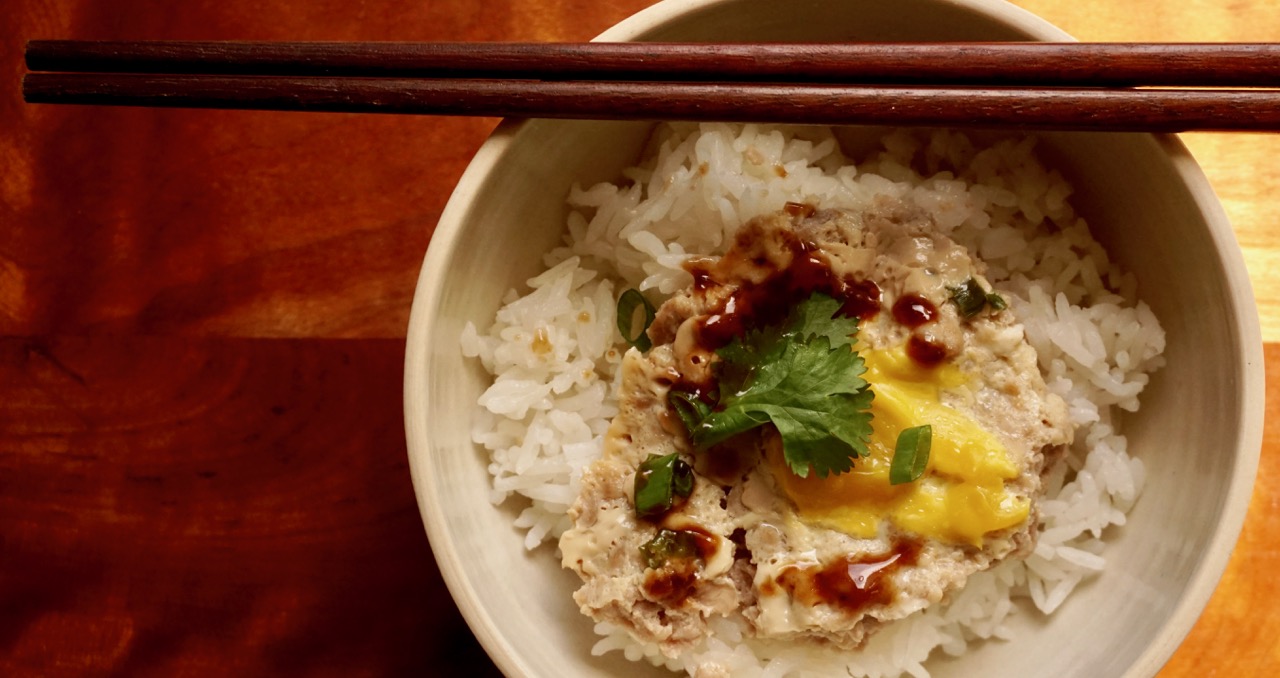
The ground pork is seasoned with soy sauce, oyster sauce and topped with the salted duck egg. Think of this as a version of a sausage patty topped with a fried egg.  See, not so strange after all.  My kids scoop up chunks of the patty and egg and mix it into their rice. Yum.

Things They Don’t Tell You in Cookbooks

Although simple to make, there are pearls of kitchen wisdom on how to prepare this dish.  First, the pork. My mom would tell me to buy pork butt or shoulder and hand-chop the pork at home, better texture.  The pork itself should not be too lean as the fat adds flavor and keeps it from drying out.  This primer on pork pretty much holds for any dish that requires ground pork-don’t buy pre-ground (ok, sometimes I cheat-there is a coarse ground version in Chinese markets), and ask for “bun fei sau-half fat, half lean” (半肥半瘦).  This is not a health-conscious choice, lol.

Duck, Duck, Go…get Chicken, it’s Ok

Raw salted duck eggs are hard to find.  I was really excited when I found local salted duck eggs at Marina Foods from Metzer Farms.  Great quality. The eggs are brined in a salt solution for approximately a month. At the end of the month, the yolk has hardened, the white has a gelatin-like consistency, and the egg has a wonderful briny flavor that goes well with pork.  You are more likely to find salted chicken eggs which are perfectly acceptable.

When mixing the seasonings and egg into the pork, stir in ONE DIRECTION only.  So pick, clockwise or counter-clockwise and stick with it.  DON’T ASK ME WHY (ok, I googled it, supposedly it keeps the meat tender).  My Dad told me to do it this way.

This is How We Do It

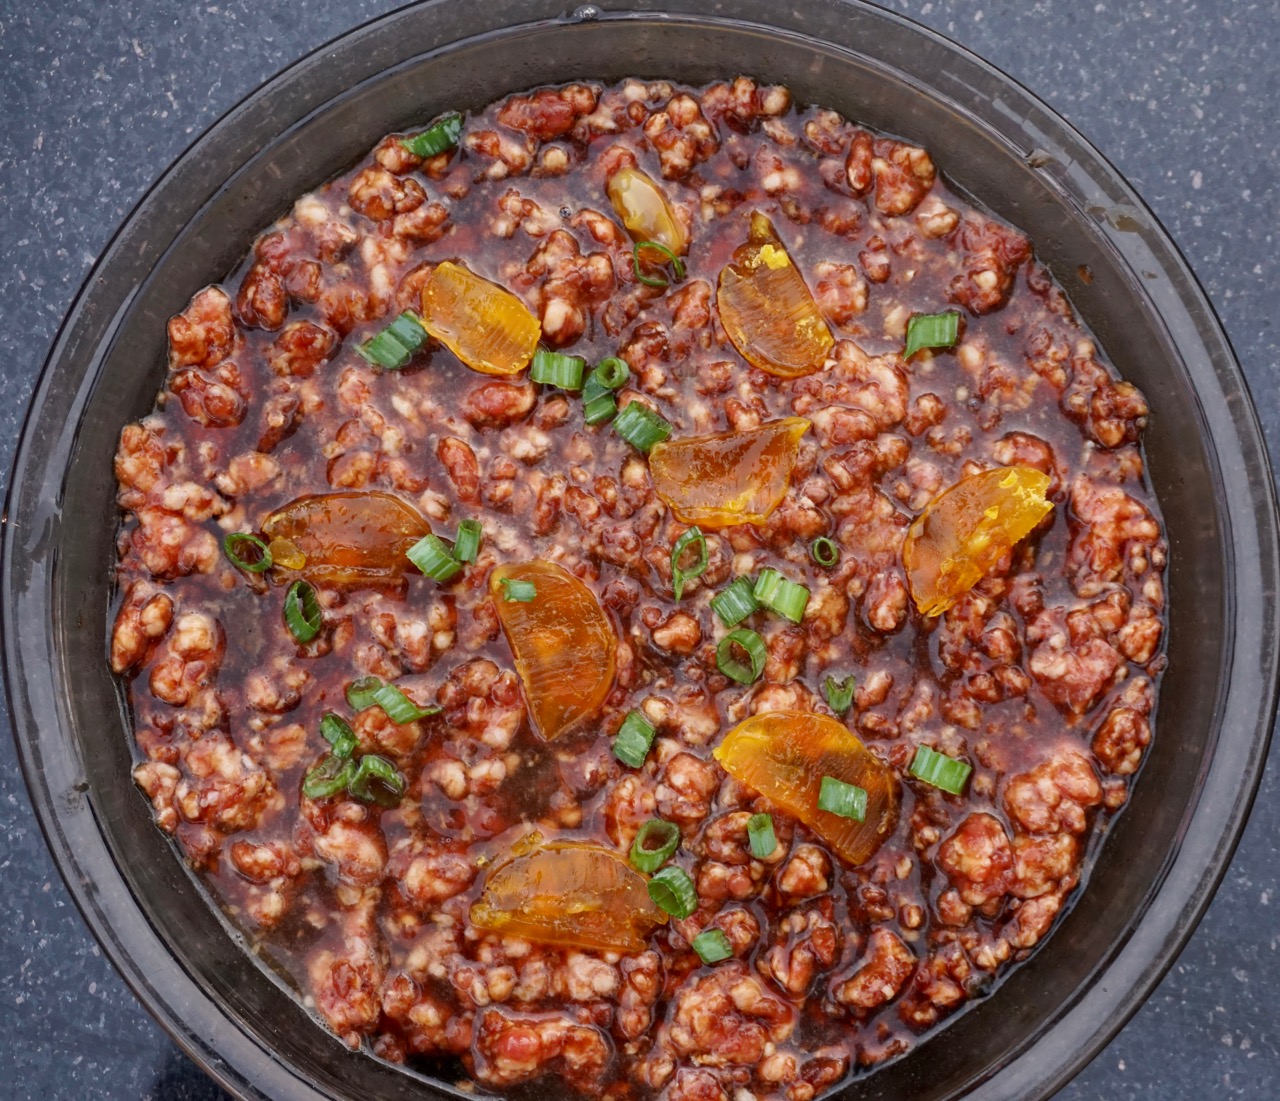
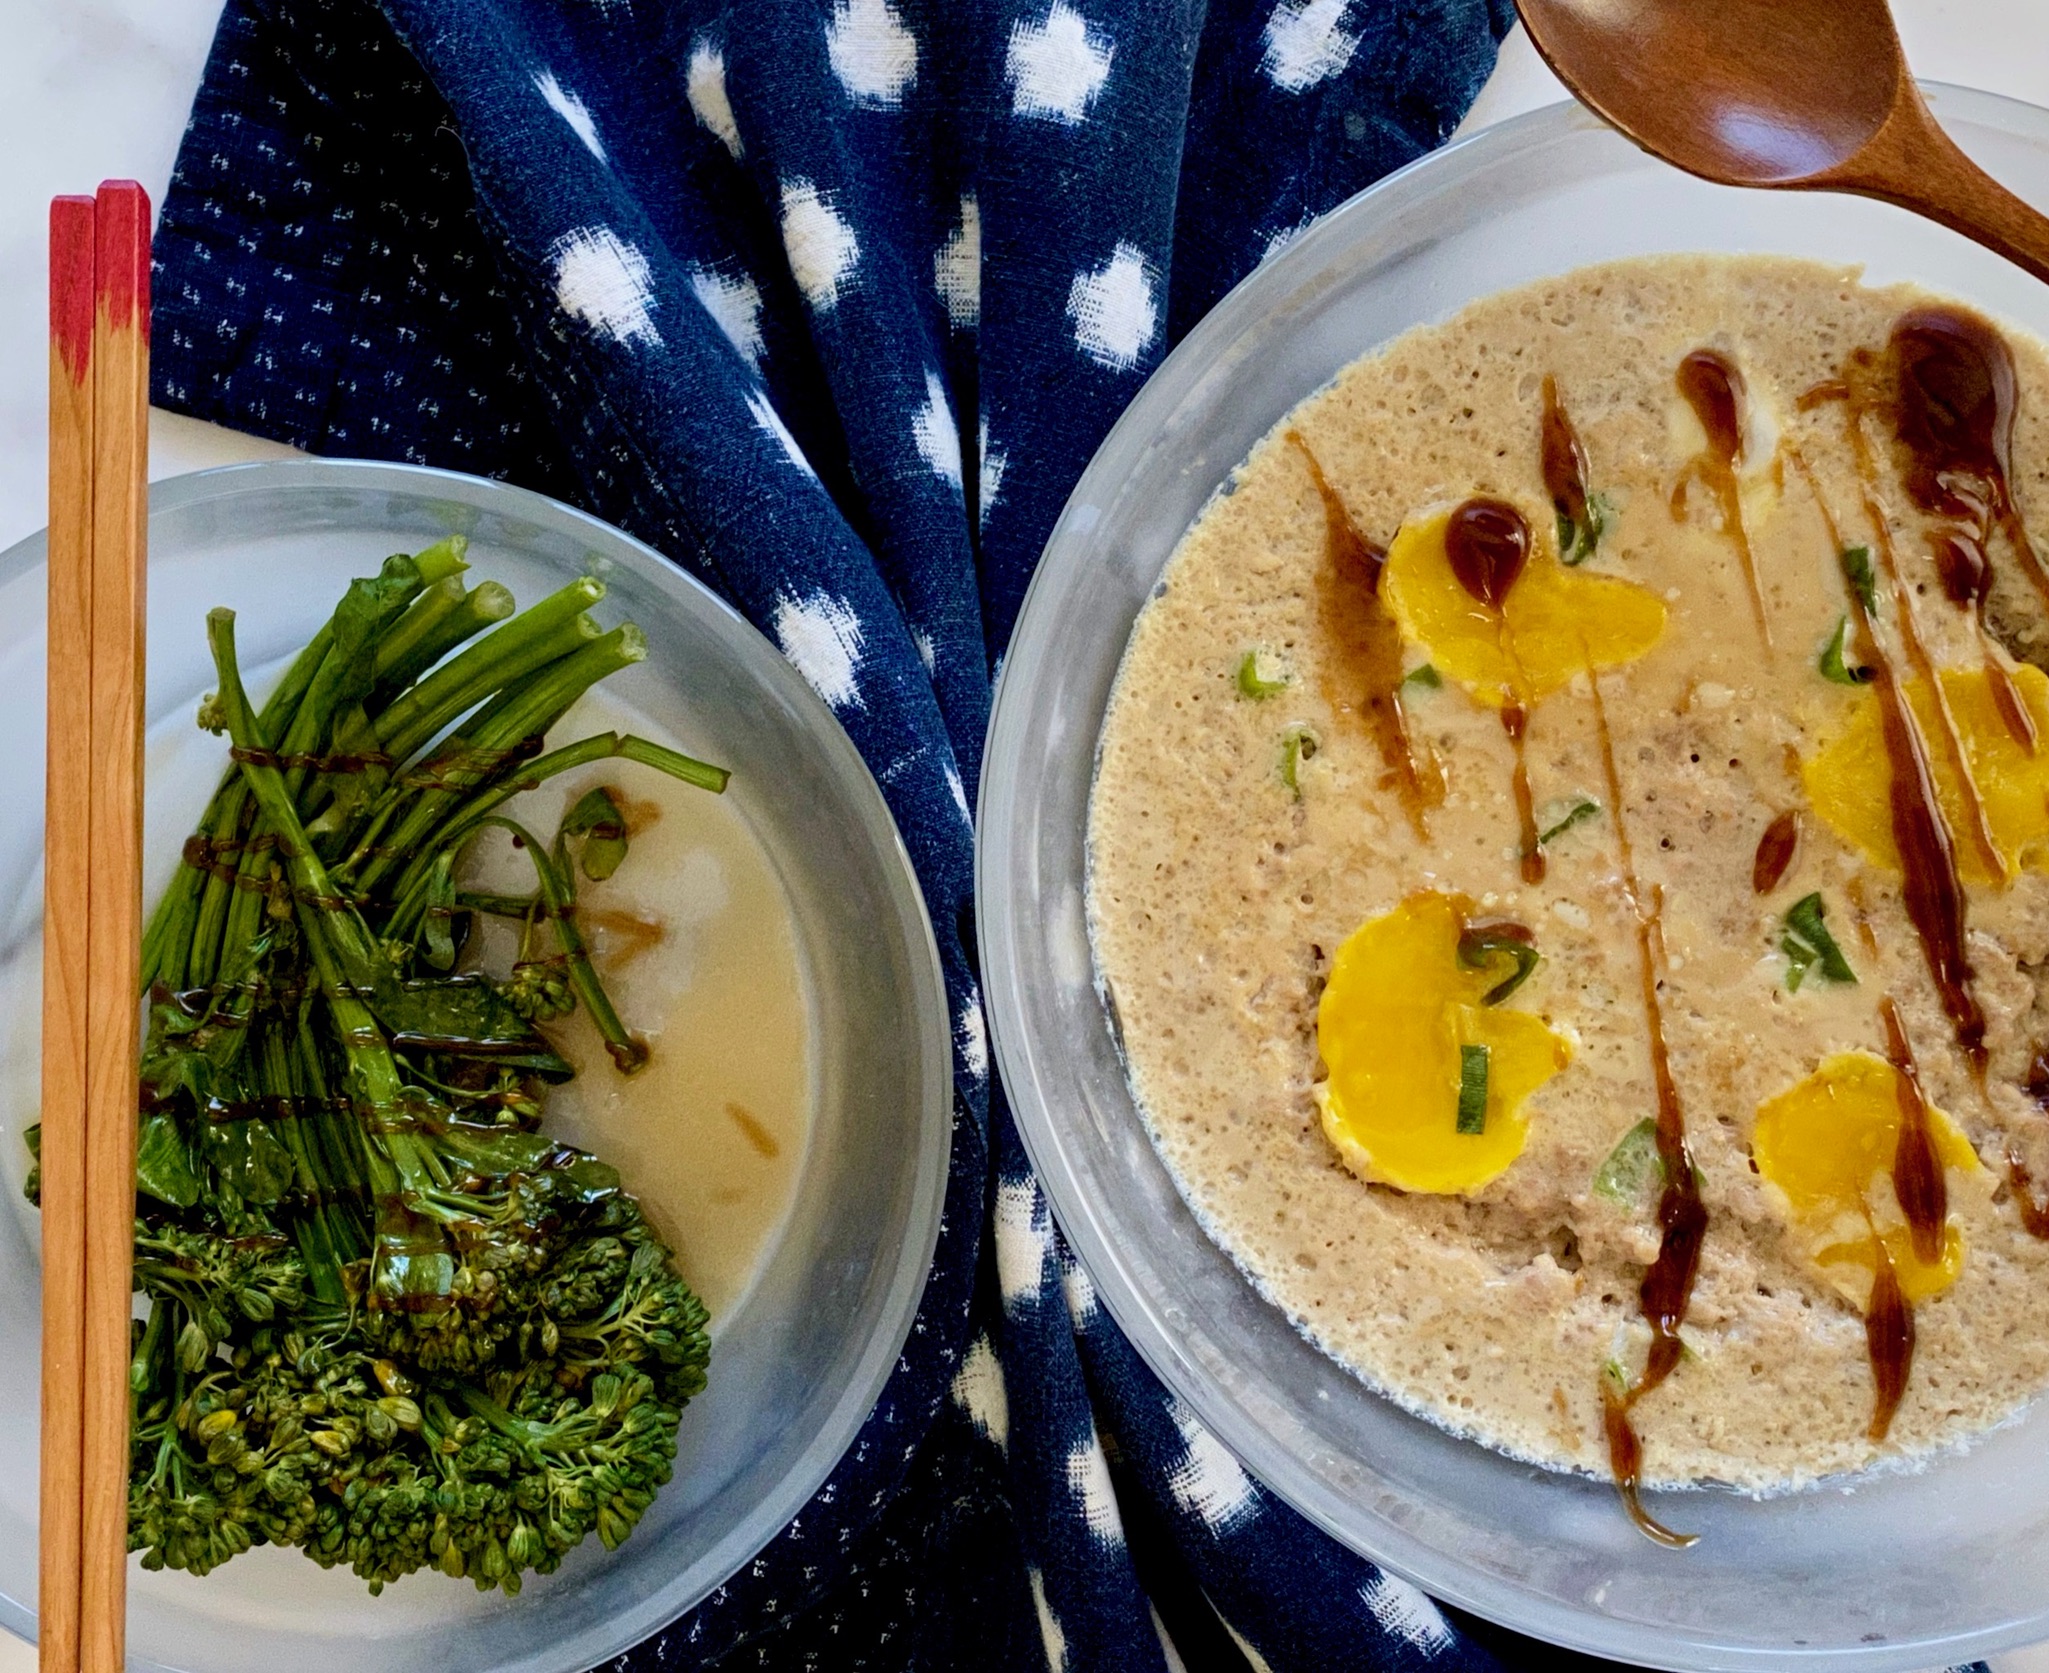
Place seasoned pork in a glass pie plate, smooshing it around the plate.  Fill a Chinese rice bowl 1/3-1/2 full with HOT water.  Slowly pour the hot water into the pork, stirring and breaking up the pork further.  The final mixture will be loose and wet looking. Slice the yolk of the duck egg into quarters or 4 slices.  A word of warning, it will be a little slimy feeling.  Flatten the pieces of yolk with the side of the knife.  Place the flattened pieces of yolk on top of the pork distributed evenly around the patty.  Top with green onions.  Place in steamer and steam over medium-high heat for about 15 minutes or until the juice runs clear when pierced with a knife or chopstick.

Just before serving, garnish with more green onions or cilantro and a drizzle of oyster sauce.  Serve with a big ass bowl of rice!

Microwave Magic

You can also cook this dish in the microwave instead of steaming it!  I have Cook Anyday microwave cookware now, but if you have a vented microwave dish use that.  I have a teeny 600-watt microwave.  Cook at full power for 8 minutes, done!  Adjust for your microwave, for example, a 1000-watt microwave, I might just use 70% power and nuke it for the 7-8 minutes.  For foods that are traditionally steamed, you don’t want to zap it quickly as much as gently cook it   All in one bowl, no messing with a steamer contraption.  Mind-blown microwave cookin’.

Easy peasy, microwave easy!

Steamed Pork Patty with Salted Duck Egg

Classic Cantonese Homestyle dish, steamed minced pork and salted eggs, bowl of steaming white rice is essential!
Course homestyle, Main Course, pork
Cuisine Asian
Keyword cantonese cuisine, salted duck eggs, Steamed pork patty
Prep Time 15 minutes
Cook Time 20 minutes
Microwave time 8 minutes

Ingredients

  • 3/4 Pound Ground Pork
  • 1/4-1/3 Chinese rice bowl of hot water approximately 1/3 cup of water
  • 1 Egg large
  • 1 Salted Duck Egg Found in Chinese Groceries in refridgerator section or with egg, should be uncooked.

Seasonings

  • 2 tsp. Soy Sauce
  • 1 tsp oyster sauce
  • 2 tsp rice wine or sherry or sake
  • 1/2 Tsp. Sugar
  • 1/4 tsp Salt
  • Dash of white pepper

Garnish

  • Green Onions And Cilantro chopped or sliced to look pretty

Instructions

  • Separate duck egg yolk from the egg white. Reserve the yolk.
  • Place pork in a shallow bowl or glass pie plate that you will end up using to steam/microwaving it in. Scramble the salted duck egg white with the whole egg, add to the pork.
  • Stir pork with egg mixture and seasonings, stir in one direction!
  • Slowly add hot water to the pork mixture, and scrambling the mixture as you add the water. This will make it will look soupy.
  • Garnish with reserved egg yolk that has been cut Into slices. This is a process. The egg yolk is sticky and ok, kind of slimy (like an egg-duh). Since it has been brined it will be solid. I cut it into quarters and then gently smash it with the side of a knife to flatten each piece. Sprinkle half of the sliced green onions on top.
  • Steam for approximately 15-20 minutes, when pierced with a chopstick or knife the juices should run clear not pink.
  • Drizzle with oyster sauce and top with cilantro and the rest of the green onions. If you want a nice sheen, hit it with a little hot oil. (This will also bring out the flavor of the cilantro and green onions when you pour the oil over it.
  • Serve with rice, lots of rice, copious amounts of rice. Really.
FALL Into One Pot Meals (Instant Pot Korean Beef Stew)

FALL Into One Pot Meals (Instant Pot Korean Beef Stew)

As summer winds down I head to the back of my closet to pull out my sweaters and jeans. I also start yearning for comfort foods like stews and hearty soups. Over the weekend we made the rounds to our favorite food marts. We find short ribs for a delicious hearty Korean stew called Khal Bi Jim and right next to the short ribs…oxtails!

Are you thinking what? Oxtails?  Are they really swish, swish, in the back of the …yep, they are. Haven’t tried them?  The meat is rich and flavorful. It has a bit more texture than short ribs and if you like chomping on bones, you’ll love oxtails. There is another reason to give this recipe a whirl…

INSTANT POT

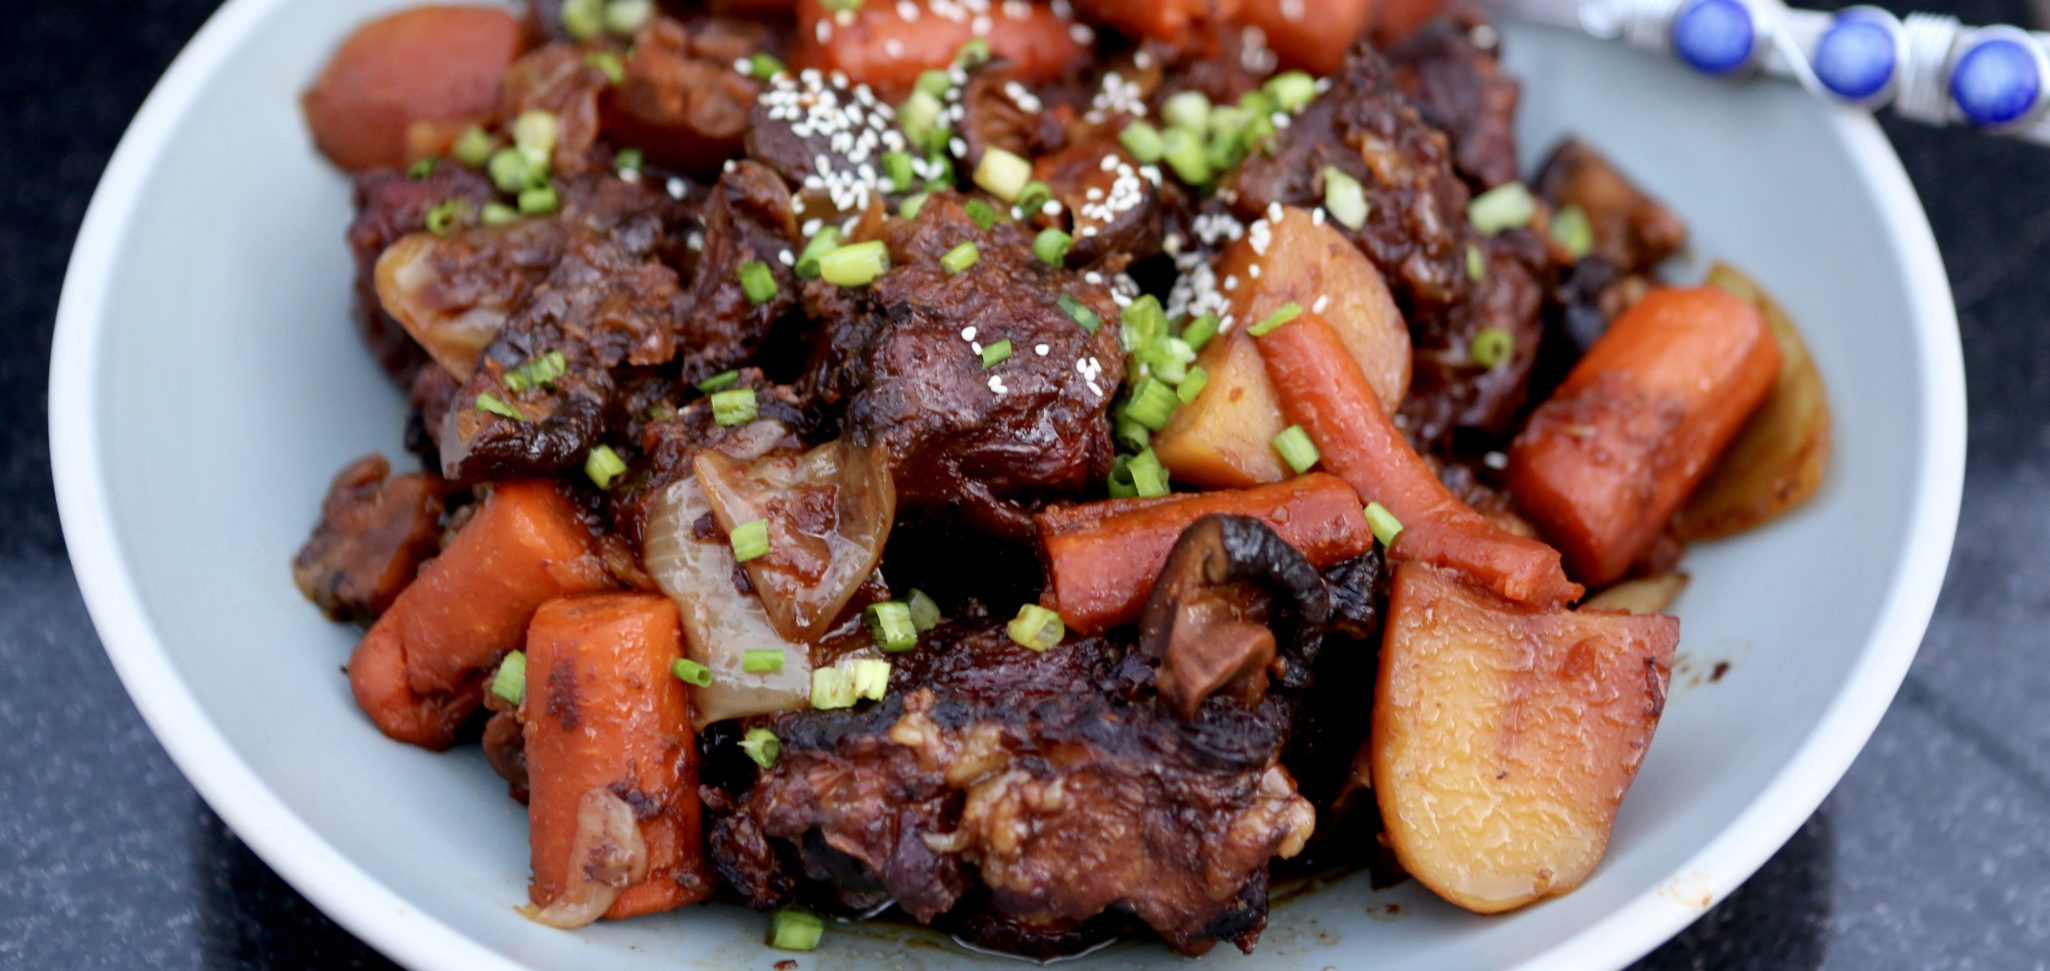
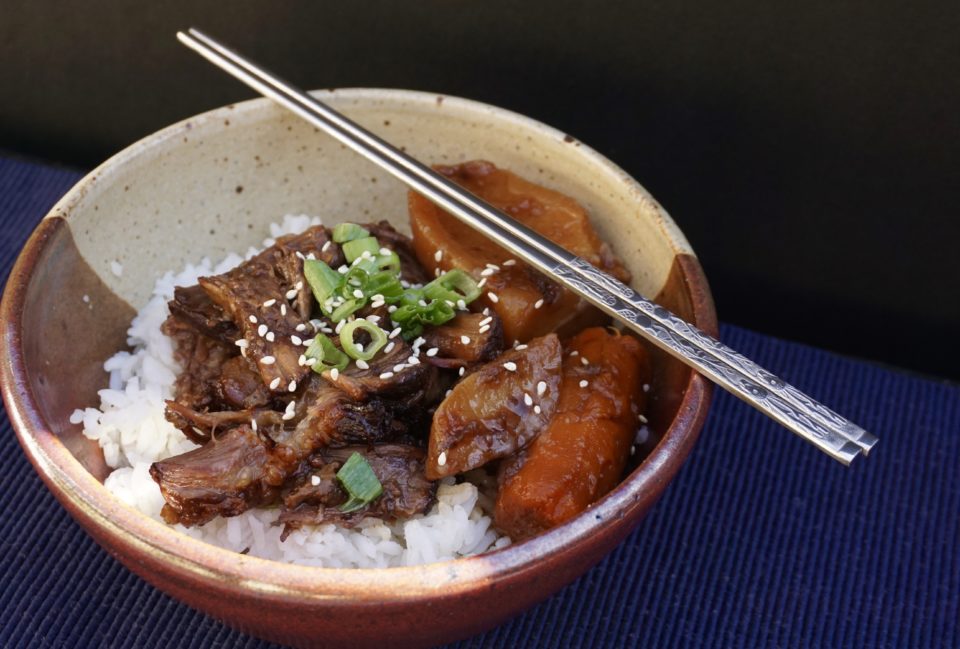
I google oxtails, pressure cooker and the blog Korean Bapsang pops up with a recipe for Koriijim or braised oxtails. Bingo. Normally oxtails need quite a bit of time braising to get to the tender fall-off-the-bone stage (which is generally around 3 hours). This means starting pretty darn early in the day to have dinner on the table at a decent time. This time?  Brown the oxtails, pour the marinade/sauce over the meat, top it with carrots, potatoes, and onions.  Then, twist the lid on and set the cooking time to 45 MINUTES. Yep, not a typo-45 MINUTES. Whoa, less than half the time to cook this dish. WOOHOO.

The recipe calls for onions, mushrooms, and carrots. I like lots of vegetables so I added potatoes and extra carrots.  I might even add squash or another root vegetable like parsnips next time. If you don’t have dried shiitakes you can use fresh mushrooms. The recipe calls for a Korean plum sauce, maesil cheong, a sweet-sour sauce often used as a sweetener.  Not having any I used Chinese plum sauce, which may be totally off base but it’s what I have and it is sweet and a bit tart. You can skip it altogether and use sugar and honey, 1 tablespoon of each.

Classic Asian flavors-soy sauce, sesame, garlic, ginger, and onions in a hearty, down-home stew. Delicious. As the weather starts to cool try this dish. If you are really not thrilled with oxtails try this with bone-in short ribs cut into 2-3 inch pieces (ask your butcher) just as tasty.  I love autumn.

FALL Into One Pot Meals (Korean Beef Stew)

Ingredients

Adapted from Korean Bapsang

  • 3 to 4 pounds oxtail
  • 1 medium onion cut into large chunks
  • 2-3 carrots cut into large chunks
  • 1 white potato cut into large chunks Yukon Golds for a less starchy, russets for starchy
  • 3 to 4 dried shiitake mushrooms briefly soaked and quartered (use fresh mushrooms if not available)

Braising liquid

  • 1/2 cup soy sauce
  • 1/2 cup rice wine or mirin a sweet Japanese cooking wine
  • 1/2 medium Asian pear or 1 bosc pear or apple, grated
  • 2 tablespoons minced garlic
  • 1 inch ginger grated (about 1 teaspoon)
  • 3 tablespoons honey or sugar
  • 3 tablespoons maesil cheong or 1 more tablespoon honey or sugar
  • pepper to taste

Garnishes

  • 1 tablespoon sesame oil
  • 2 scallions roughly chopped (and some finely sliced for optional garnish)
  • sesame seeds-toasted

Instructions

  • Trim off excess fat. Rinse the oxtail pieces and let them sit in cold water for 10 to 20 minutes to draw out excess blood. Drain well, and pat dry with paper towels.
  • Press the “Saute” button on the Instant Pot. When the pot is hot, add 1 tablespoon of canola or vegetable oil. Sear the oxtail pieces in two batches, browning all sides. Or sear in separate pan and place in Instant Pot
  • Combine ingredients for braising liquid and pour the braising liquid over oxtails. Add the vegetables.
  • Close the lid tightly. Press the “Meat” function, and using the “+” button, increase the time to 45-48 minutes. 48 minutes for softer meat. When finished, the Instant Pot will automatically turn to the “Keep Warm” mode. Leave the pressure cooker alone for about 10 minutes before opening the lid.
  • Stir in the scallion and the sesame oil. Remove the meat and vegetables from the pressure cooker. Strain the cooking liquid into a bowl to skim off the fat. Pour sauce over the ribs.
  • Garnish with the optional scallions and sesame seeds. Serve with hot rice.
Ginger Scallion Sauce Poultry in Motion

Ginger Scallion Sauce Poultry in Motion

DI went to the city to grab a bite to eat with my kid Jeffrey and my Mom. Jeffrey suggested a joint that serves poached chicken and rice. Loves it, goes there all the time.

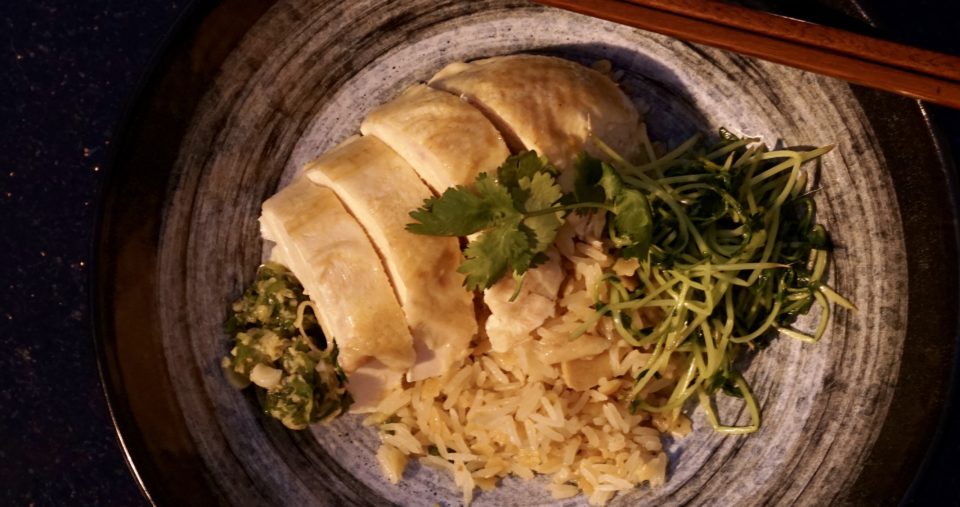
I said, you’re KIDDING, right?  Not that I don’t like chicken but this sounds a whole lot like Chinese White Cut Chicken or Singaporean Hainan Chicken which I make ALL the TIME. Yep, same dish, but served in a hipster space with people willing to wait in line and pay gobs of money to have. REALLY?

Down-home comfort food made by grandma although you can get it at a hole-in-the-wall Asian restaurants or buy it at a Chinese deli to take home (usually hanging in the windows by the neck, lol).  But to become the star of a menu and served in a cool space in the middle of Hipsterville? Who would have thought something as simple as poached chicken would become all the rage. Recently opened in the Marina, Rooster and Rice is my kid’s go-to place. Chicken, white rice (ok, you can probably get brown rice) and a dipping sauce. It comes with a bit of broccoli or cucumbers and if you want, a bowl of chicken soup. BUT that’s all. Sheesh.

Why didn’t I think of that?

My version of Chicken and Rice

I did a bit of sleuthing (hello Google) and concluded that ground zero for poached chicken rising to rock star status might have been Portland at Nong’s Khao Man Gai Food Truck. Nong P. got her start as a line chef at the popular Thai restaurant Pok Pok.  She left to literally go on the road with a food truck serving her chicken and rice. It was wildly popular and she was able to open a brick and mortar place of the same name. Rooster and Rice also serves the Thai version.  It’s dipping sauce is bean-based and is sweet, salty and spicy.  Delicious. The dipping sauce for Hainan or Chinese white cut chicken is based on salt or soy sauce, includes ginger and scallions and is finished with oil. Yummmmmmm.

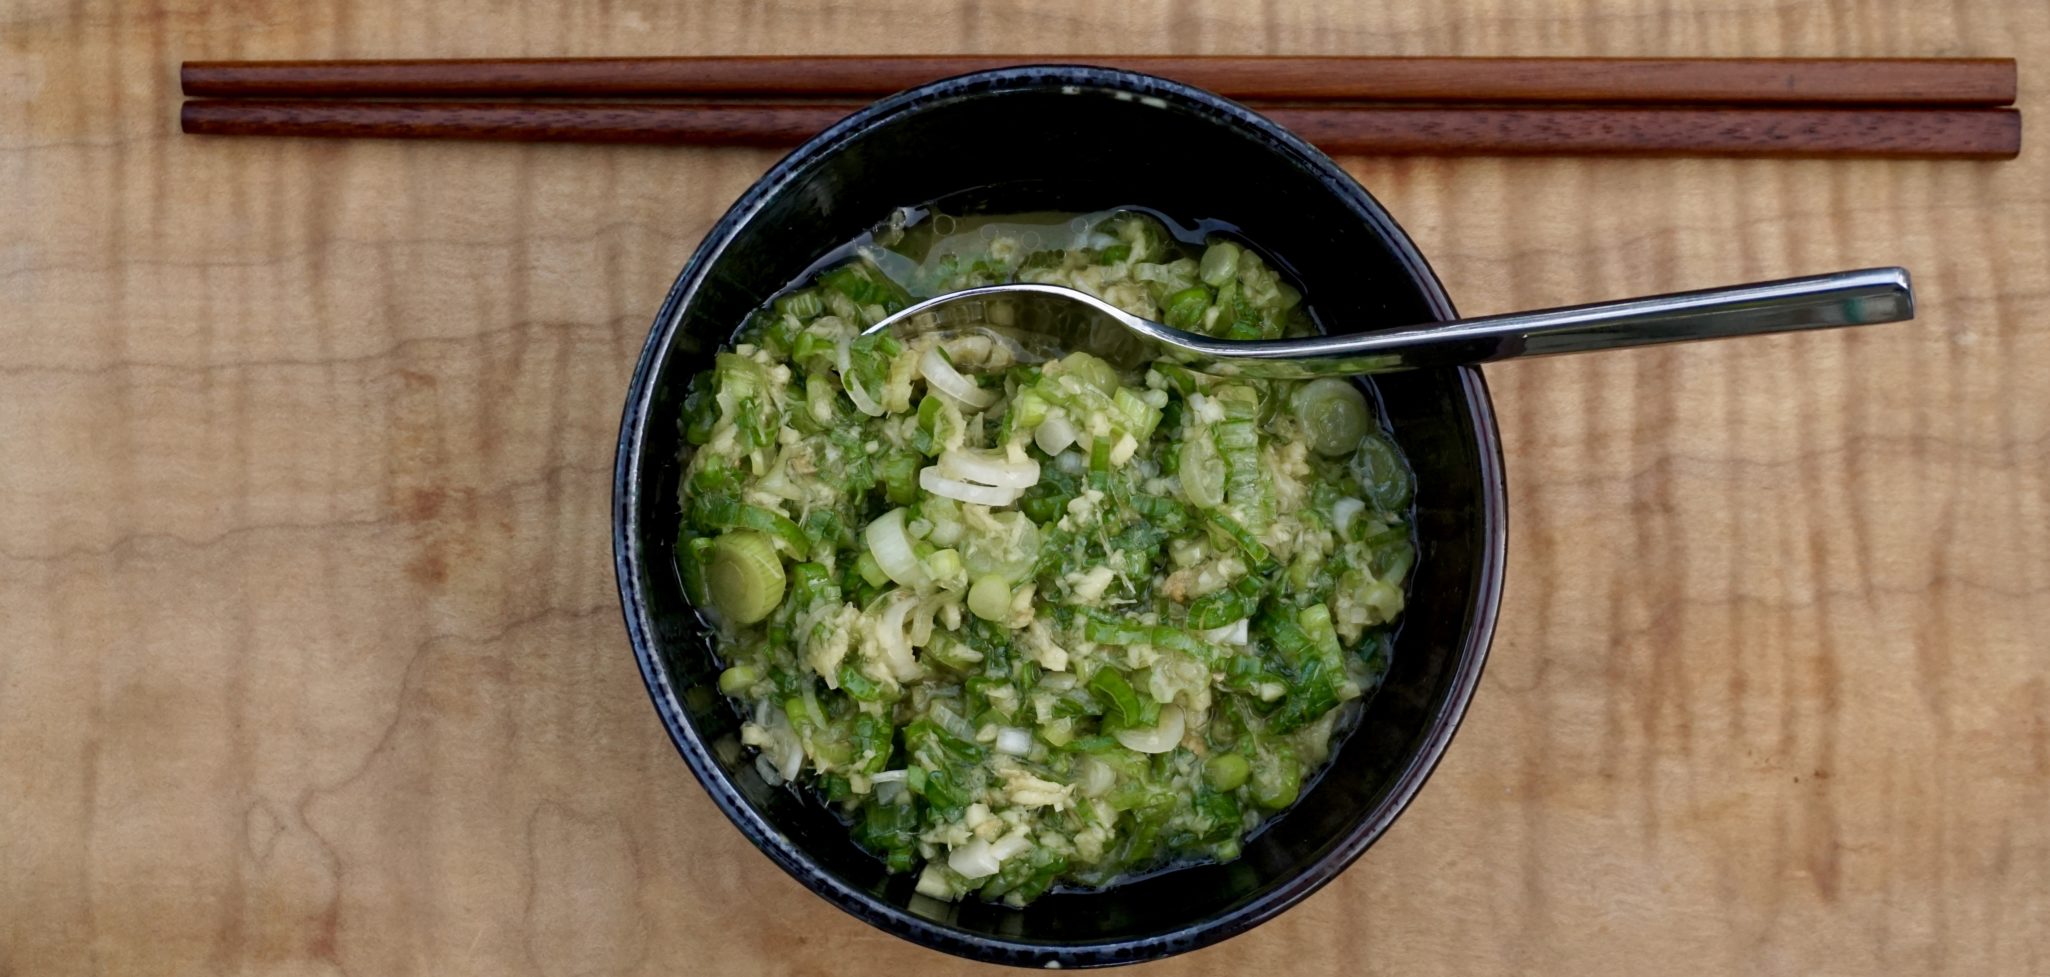
I am partial to the ginger scallion sauce which I have posted with my Simple Poached Chicken recipe but I did want to try David Chang’s (Momofuku) Ginger Scallion Sauce. His recipe has made the rounds on  Epicurious, Saveur, Bon Apetit’ website, your auntie’s blog, EVERYWHERE.  All wax poetically about it. Its good on everything even slathered on your skin apparently. So, I made it and it’s good alright but is it Nirvana?  Hm.  It is ridiculously easy and extremely versatile.  It is lovely on noodles, fish, your kids if they forget their sunblock (I’M KIDDING), on grilled tofu or mushrooms (yay for vegetarians) and of course CHICKEN. It’s the perfect pairing like Fred and Ginger (my fav). Similar to the sauce for Hainan Chicken or White Cut Chicken it starts with ginger, scallions, and salt and soy sauce but unlike mine, the oil is not heated and it includes a touch of vinegar. I leave it to you to pick which is your favorite. Definitely make the chicken (it’s incredibly delicious and easy) and try the different sauces.  Love to know which is your favorite.

Mother of All Sauces Momofuku Ginger Scallion Sauce

All purpose delicious sauce for chicken,
Course condiment, Sauce
Cuisine Asian
Keyword ginger, poached chicken, scallions
Prep Time 15 minutes
Cook Time 5 minutes

Ingredients

  • 2 1/2 cups thinly sliced scallions greens and whites; from 1 to 2 large bunches
  • 1/2 cup finely minced peeled fresh ginger
  • 1/4 cup grapeseed or other neutral oil
  • 1 1/2 teaspoons usukuchi light soy sauce
  • 3/4 teaspoon sherry vinegar
  • 3/4 teaspoon kosher salt or more to taste

Instructions

  • Mix together the scallions, ginger, oil, soy, vinegar, and salt in a bowl.
  • Taste and check for salt, adding more if needed.
  • Best after 15 or 20 minutes of sitting, ginger scallion sauce is good from the minute it's stirred together up to a day or two in the fridge.
  • Use as directed, or apply as needed.
Sunny with a Plate of Meatballs

Sunny with a Plate of Meatballs

FB started out as a way to connect with my friends, especially with those that don’t live close by but it has morphed into a way to connect with people with shared interests.  Earlier in the year I stumbled across Food52’s  (awesome website, check it out) Cookbook Club.  My cynical side thought wow, what a great marketing ploy.  A cookbook club that features a different book each month where members can make any recipe from the book and post pics of it on the site.  Nice try to get me to buy yet another cookbook.  My rational side thought, I should call the hubby immediately..intervention time.  I’m about to buy a cookbook every month forever, stop me.  He could then say in a soft calm voice; have you checked the library?  Or called a friend who might have a copy? …Or a tough love line like “You can’t buy another cookbook unless you get rid of one you already have..and I get to pick which one goes.”

Nooooooo….

I was able to resist for a little while but yummy photos of recipes from this month’s selection, Melissa Clark’s Dinner: Changing the Game kept popping up on my timeline and got the best of me.  I took a look at the table of contents and wouldn’t you know it a chapter called Grind filled with recipes for MEATBALLS caught my eye.  I LOVE meatballs.  I searched for a recipe from the book to try and found Ginger Pork Meatballs with Cilantro and Fish Sauce (on blog site A Modest Feast).  Made with green onions, cilantro, fish sauce, garlic, lime and spiced with ginger and Serrano chilis these meatballs were delicious.  Resistance was futile.

Ugh, what cookbook will I have to give up?

The recipe calls for pork next time (and there will be a next time) I plan on trying a 50-50 mix of pork and ground chicken or turkey.

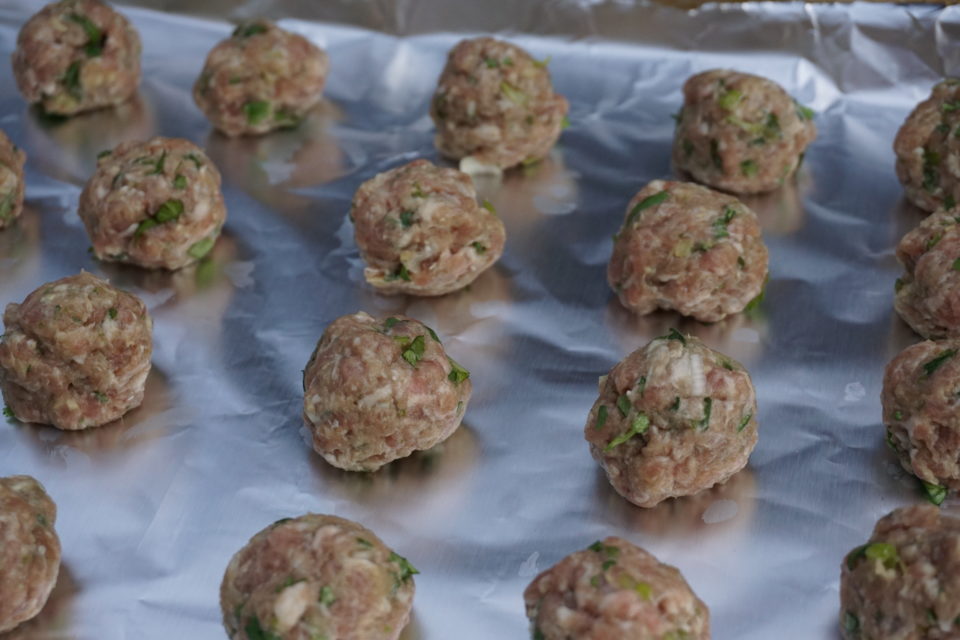
I used a 1 inch ice cream scoop to mold the meatballs, perfect for appetizer sized portions but a little small for a main dish.  I’d make them bigger next time.

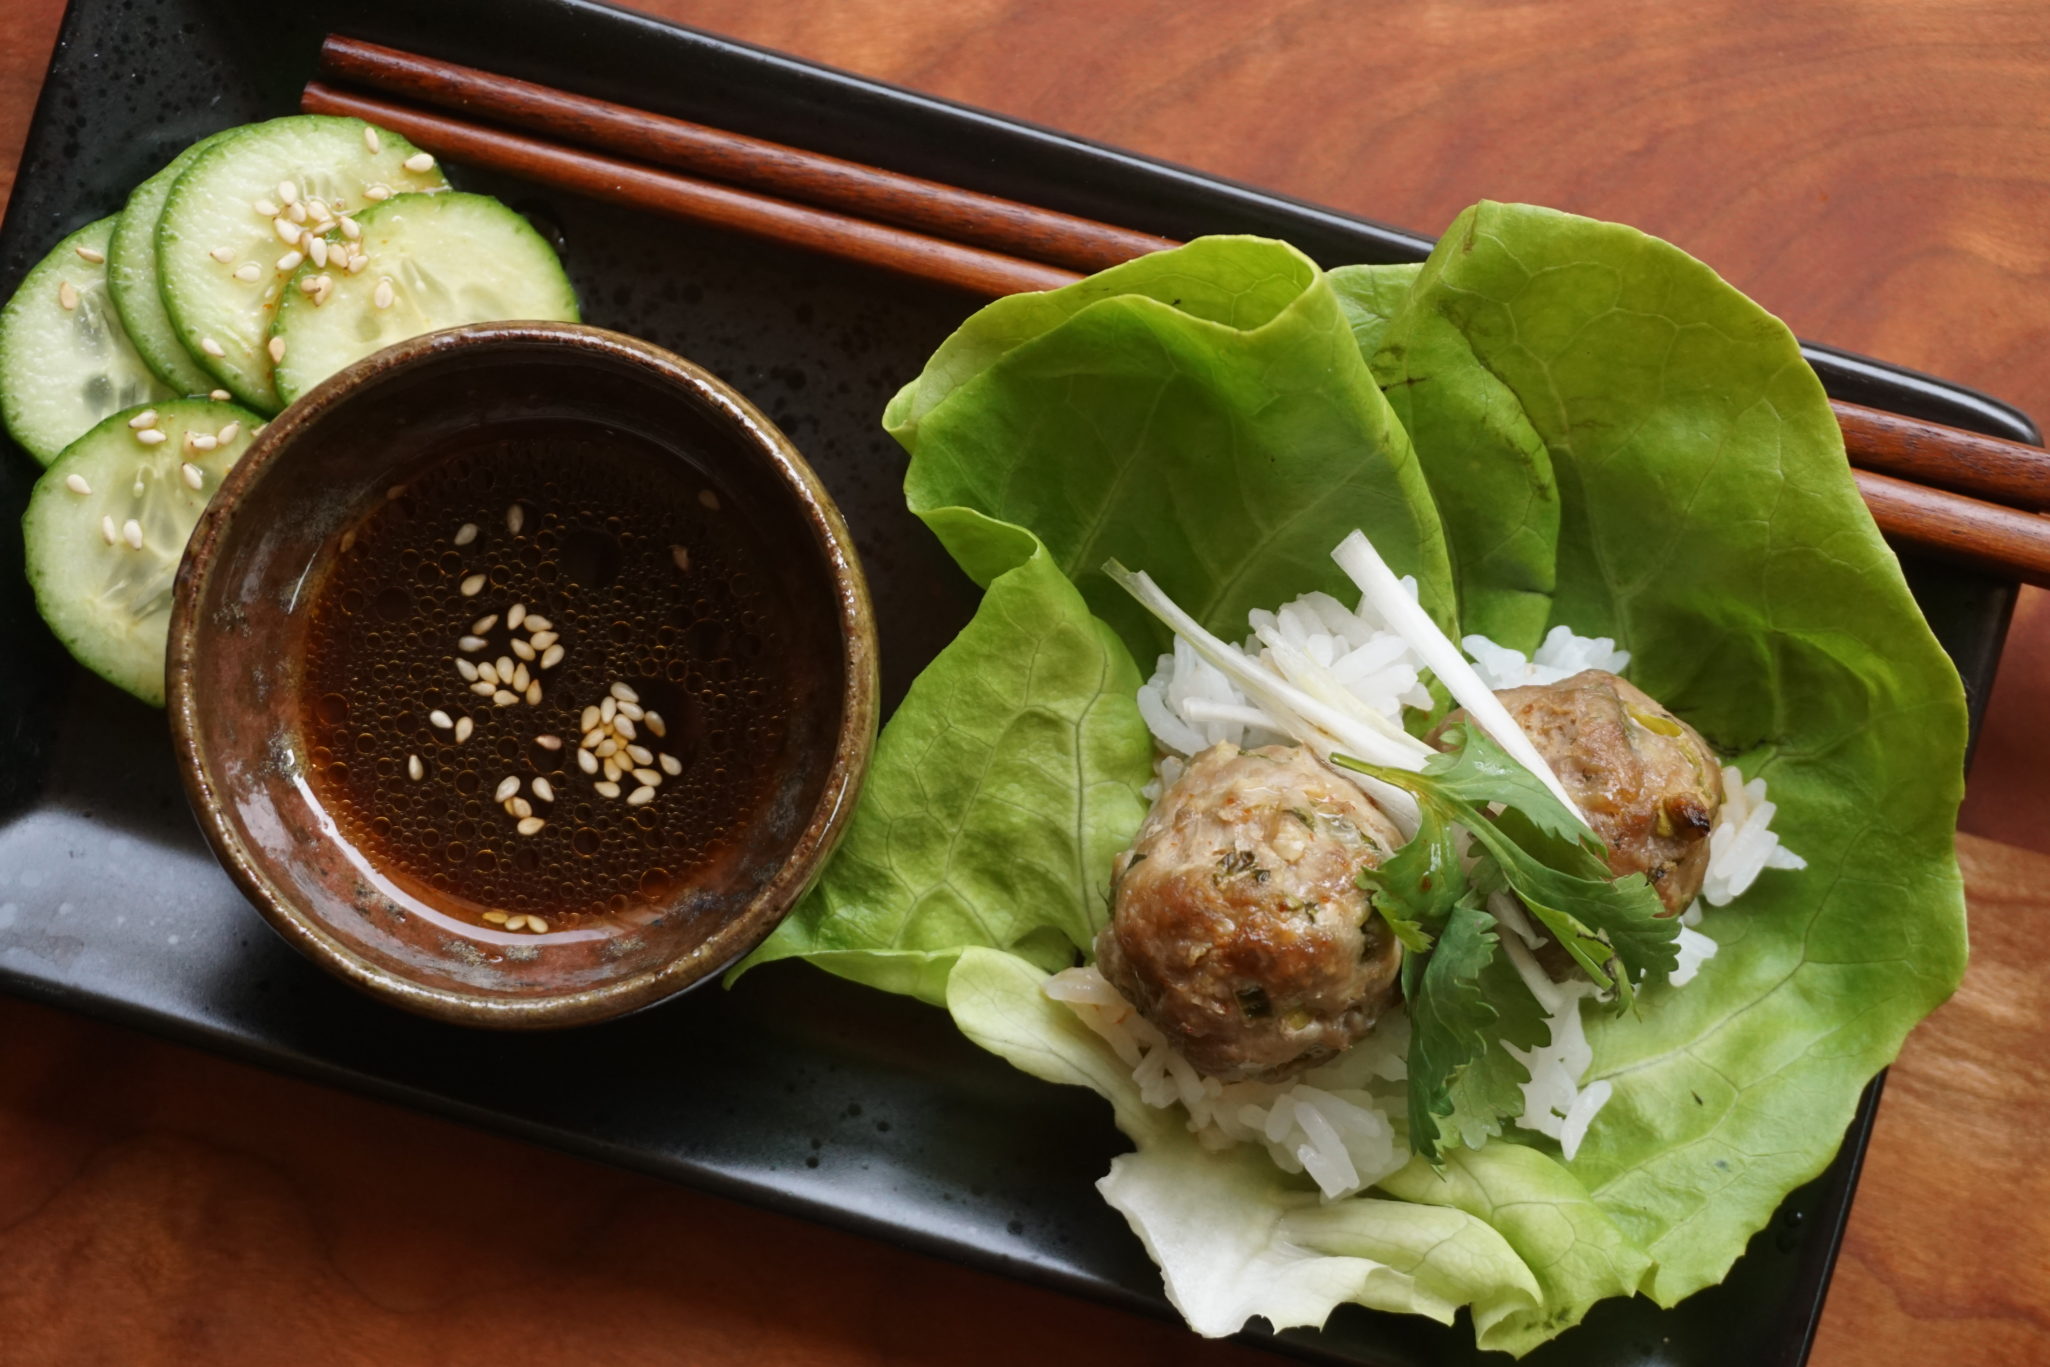
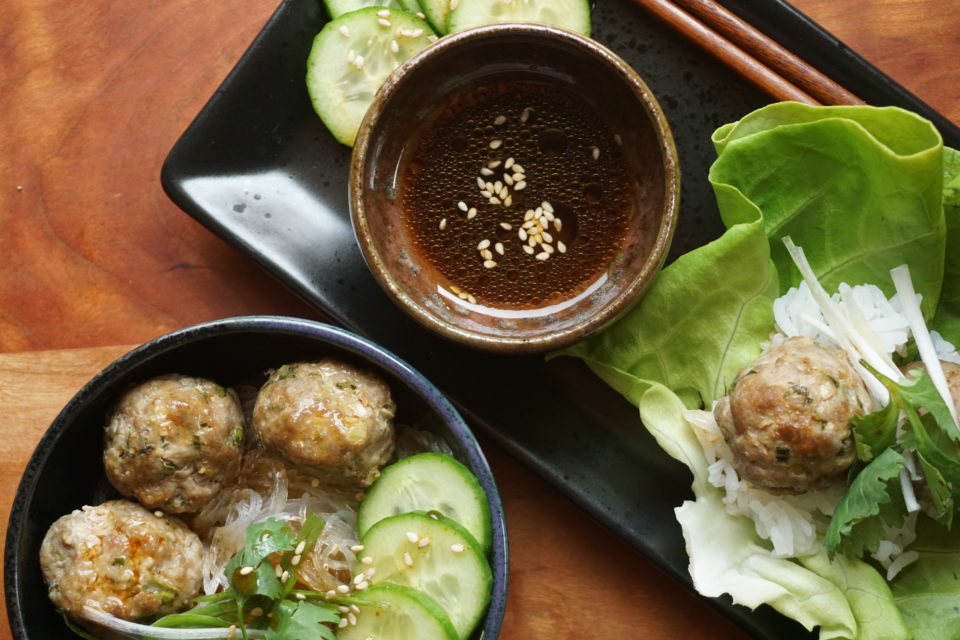
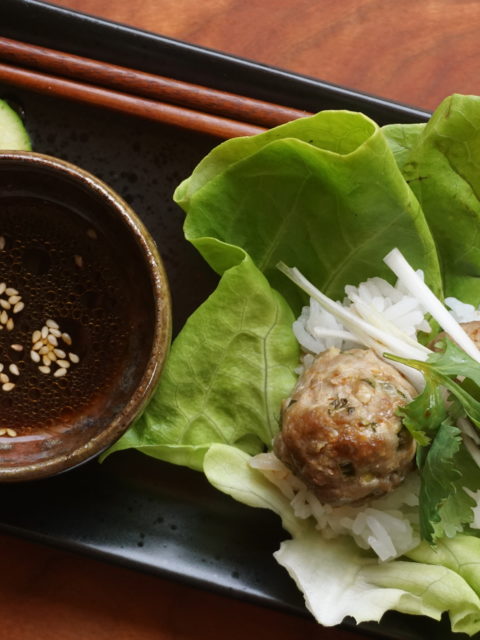
I served the meatballs two ways as a lettuce wrap with a bit of jasmine rice and dipping sauce and on top of a bowl of bean thread noodles garnished with crispy slices of cucumbers, scallions and cilantro. NOm nom nom…


Sunny with a Plate of Meatballs

Ingredients

For the meatballs:

  • 1 pound ground pork or 1/2 pound ground pork:1/2 pound ground chicken
  • 1/3 cup finely-chopped fresh cilantro leaves
  • 1/4 cup finely-chopped scallions white and green parts
  • 1 serrano chile seeded and chopped
  • 1 tablespoon finely-chopped peeled fresh ginger or ginger juice
  • 3 garlic cloves grated on a Microplane or minced
  • Finely-grated zest of 1 lime
  • 2 teaspoons freshly-squeezed lime juice
  • 2 teaspoons soy sauce or tamari
  • 1 teaspoon fish sauce
  • 1/2 teaspoon kosher salt

For the dipping sauce:

  • 3 tablespoons rice wine vinegar
  • 2 tablespoons soy sauce or tamari
  • 1 tablespoon Sriracha or other hot sauce
  • 2 teaspoons toasted sesame oil
  • 1 teaspoon dark brown sugar

For serving:

  • 1 head Boston or bibb lettuce
  • 1/4 English cucumber thinly-sliced
  • 2-3 scallions white and light green parts, julienned
  • A large handful of cilantro sprigs
  • Bean thread noodles or rice noodles soaked until soft. Drain and set aside
  • Jasmine rice cooked

Instructions

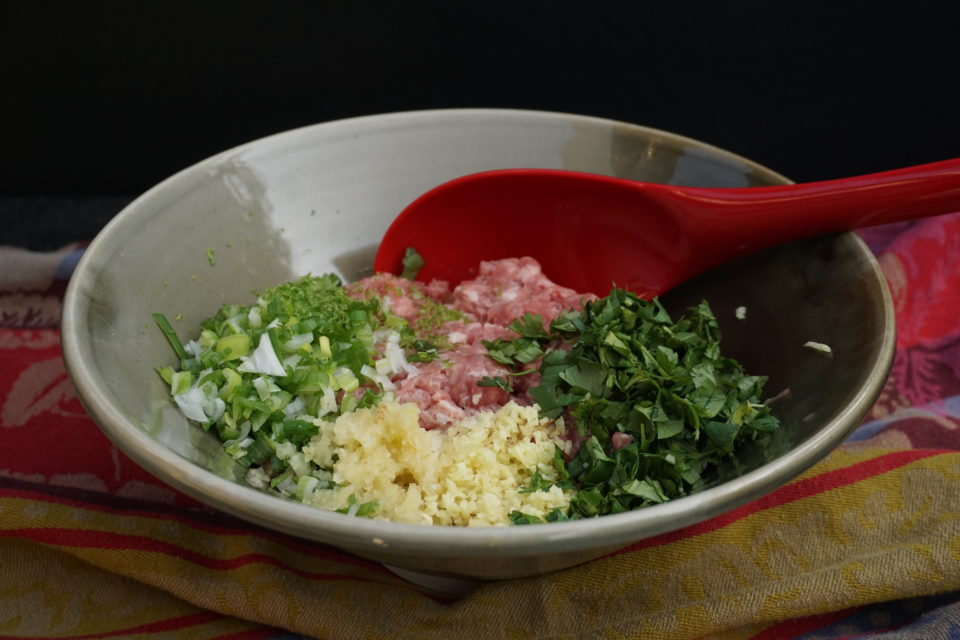
  • In a large bowl, gently combine the pork, cilantro, scallions, chile, ginger, garlic, lime zest and juice, soy sauce, fish sauce, and salt.
  • Roll mixture into 1-inch balls
  • Heat the broiler. Set the rack at least 4 inches from the heat source.
  • Arrange the meatballs in a single layer, not touching, on one or two rimmed sheet pans.
  • Broil the meatballs, turning the pan halfway through, until they are golden all over and just cooked through, 8 to 10 minutes.
  • Prepare the dipping sauce: In a small bowl, whisk together the vinegar, soy sauce, Sriracha, sesame oil, and brown sugar.
  • For lettuce wraps: Place a bit of rice or noodles in lettuce leaf. Top with 2 meatballs, cilantro, green onion shreds. fold and dip into sauce. Enjoy!
  • Or serve as a rice or noodle bowl.

NOTES

  • For consistency of size and even cooking, use a spring-loaded scoop to portion out the meatballs; I used the middle-sized scoop in this set (#50), which is 1 1/2 tablespoons. To make gluten-free, use tamari instead of soy sauce.


Miso Honey Ribs, To BBQ Or Bake That Is The Question

Miso Honey Ribs, To BBQ Or Bake That Is The Question

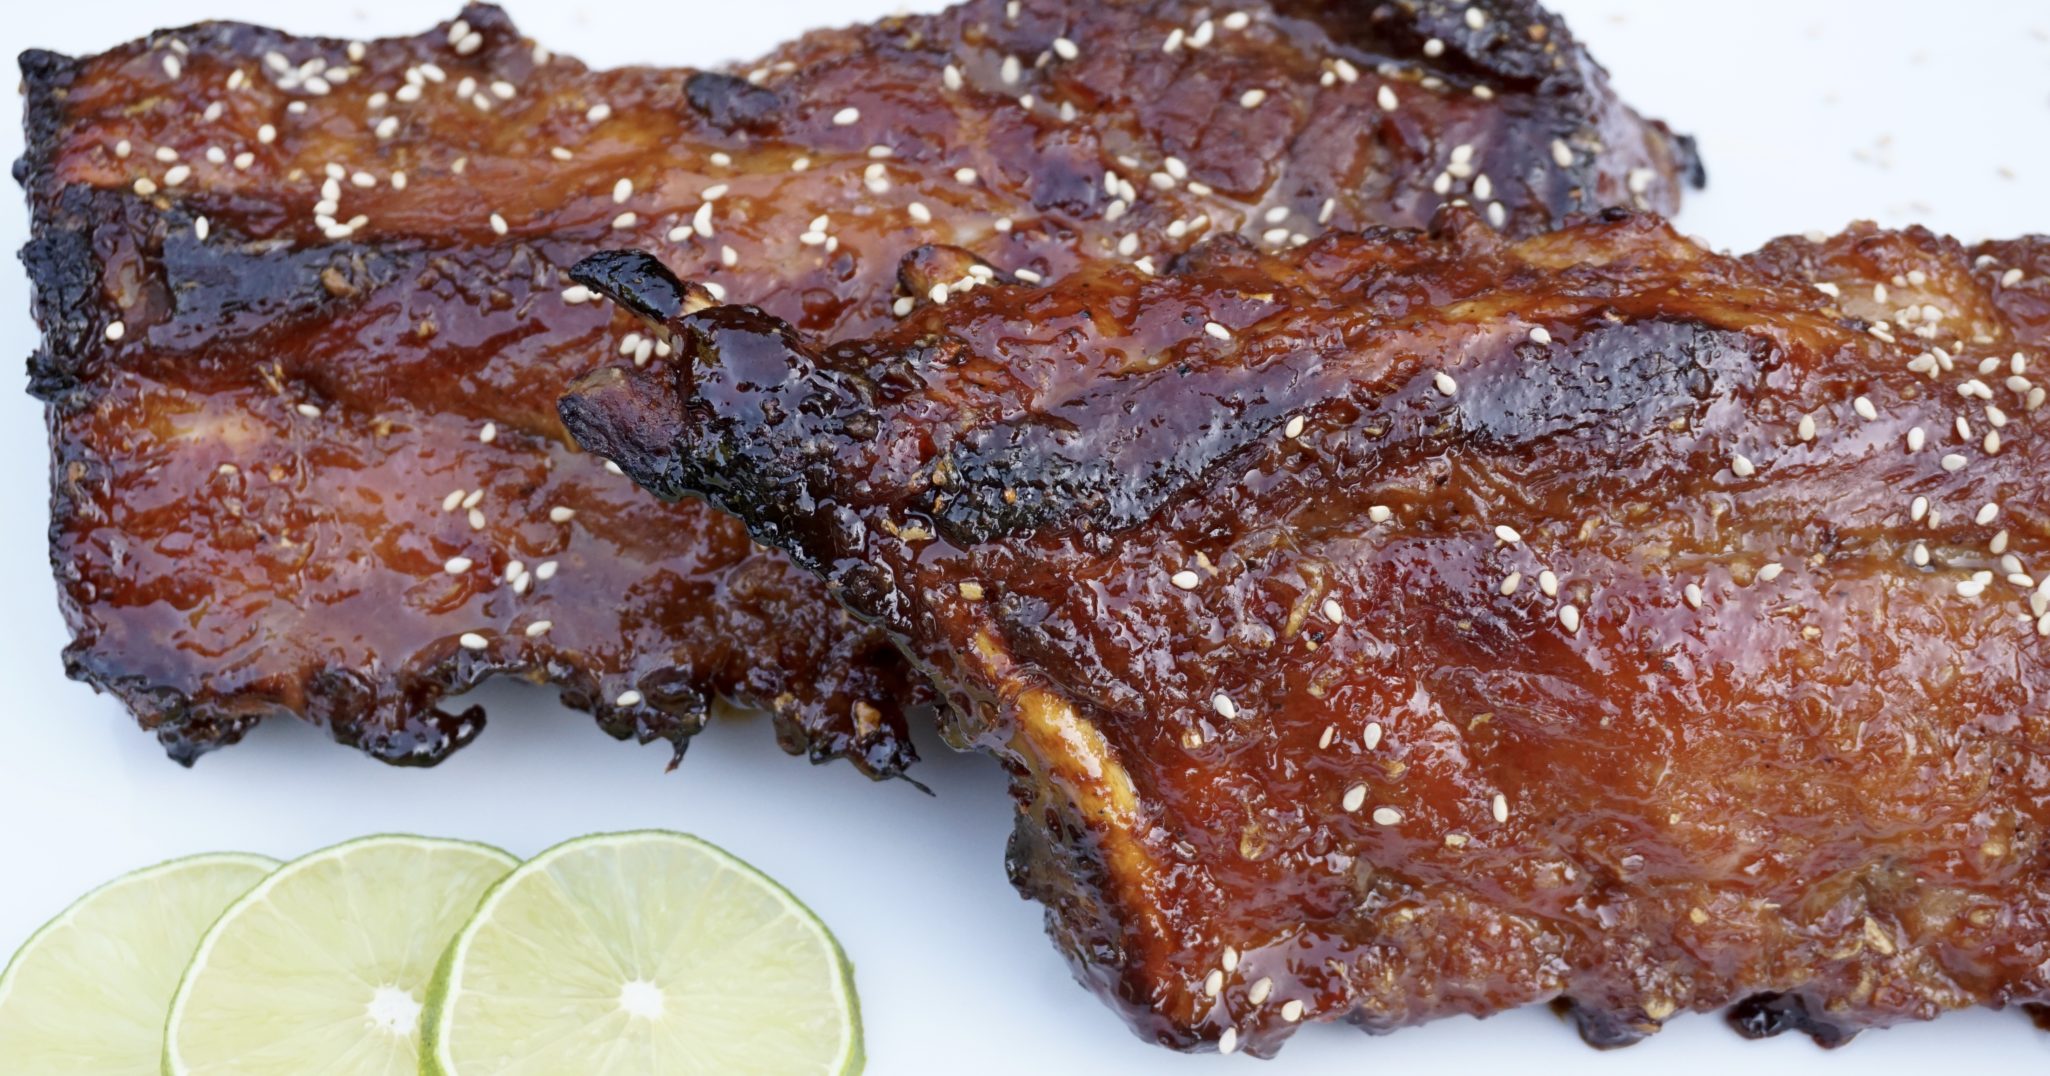
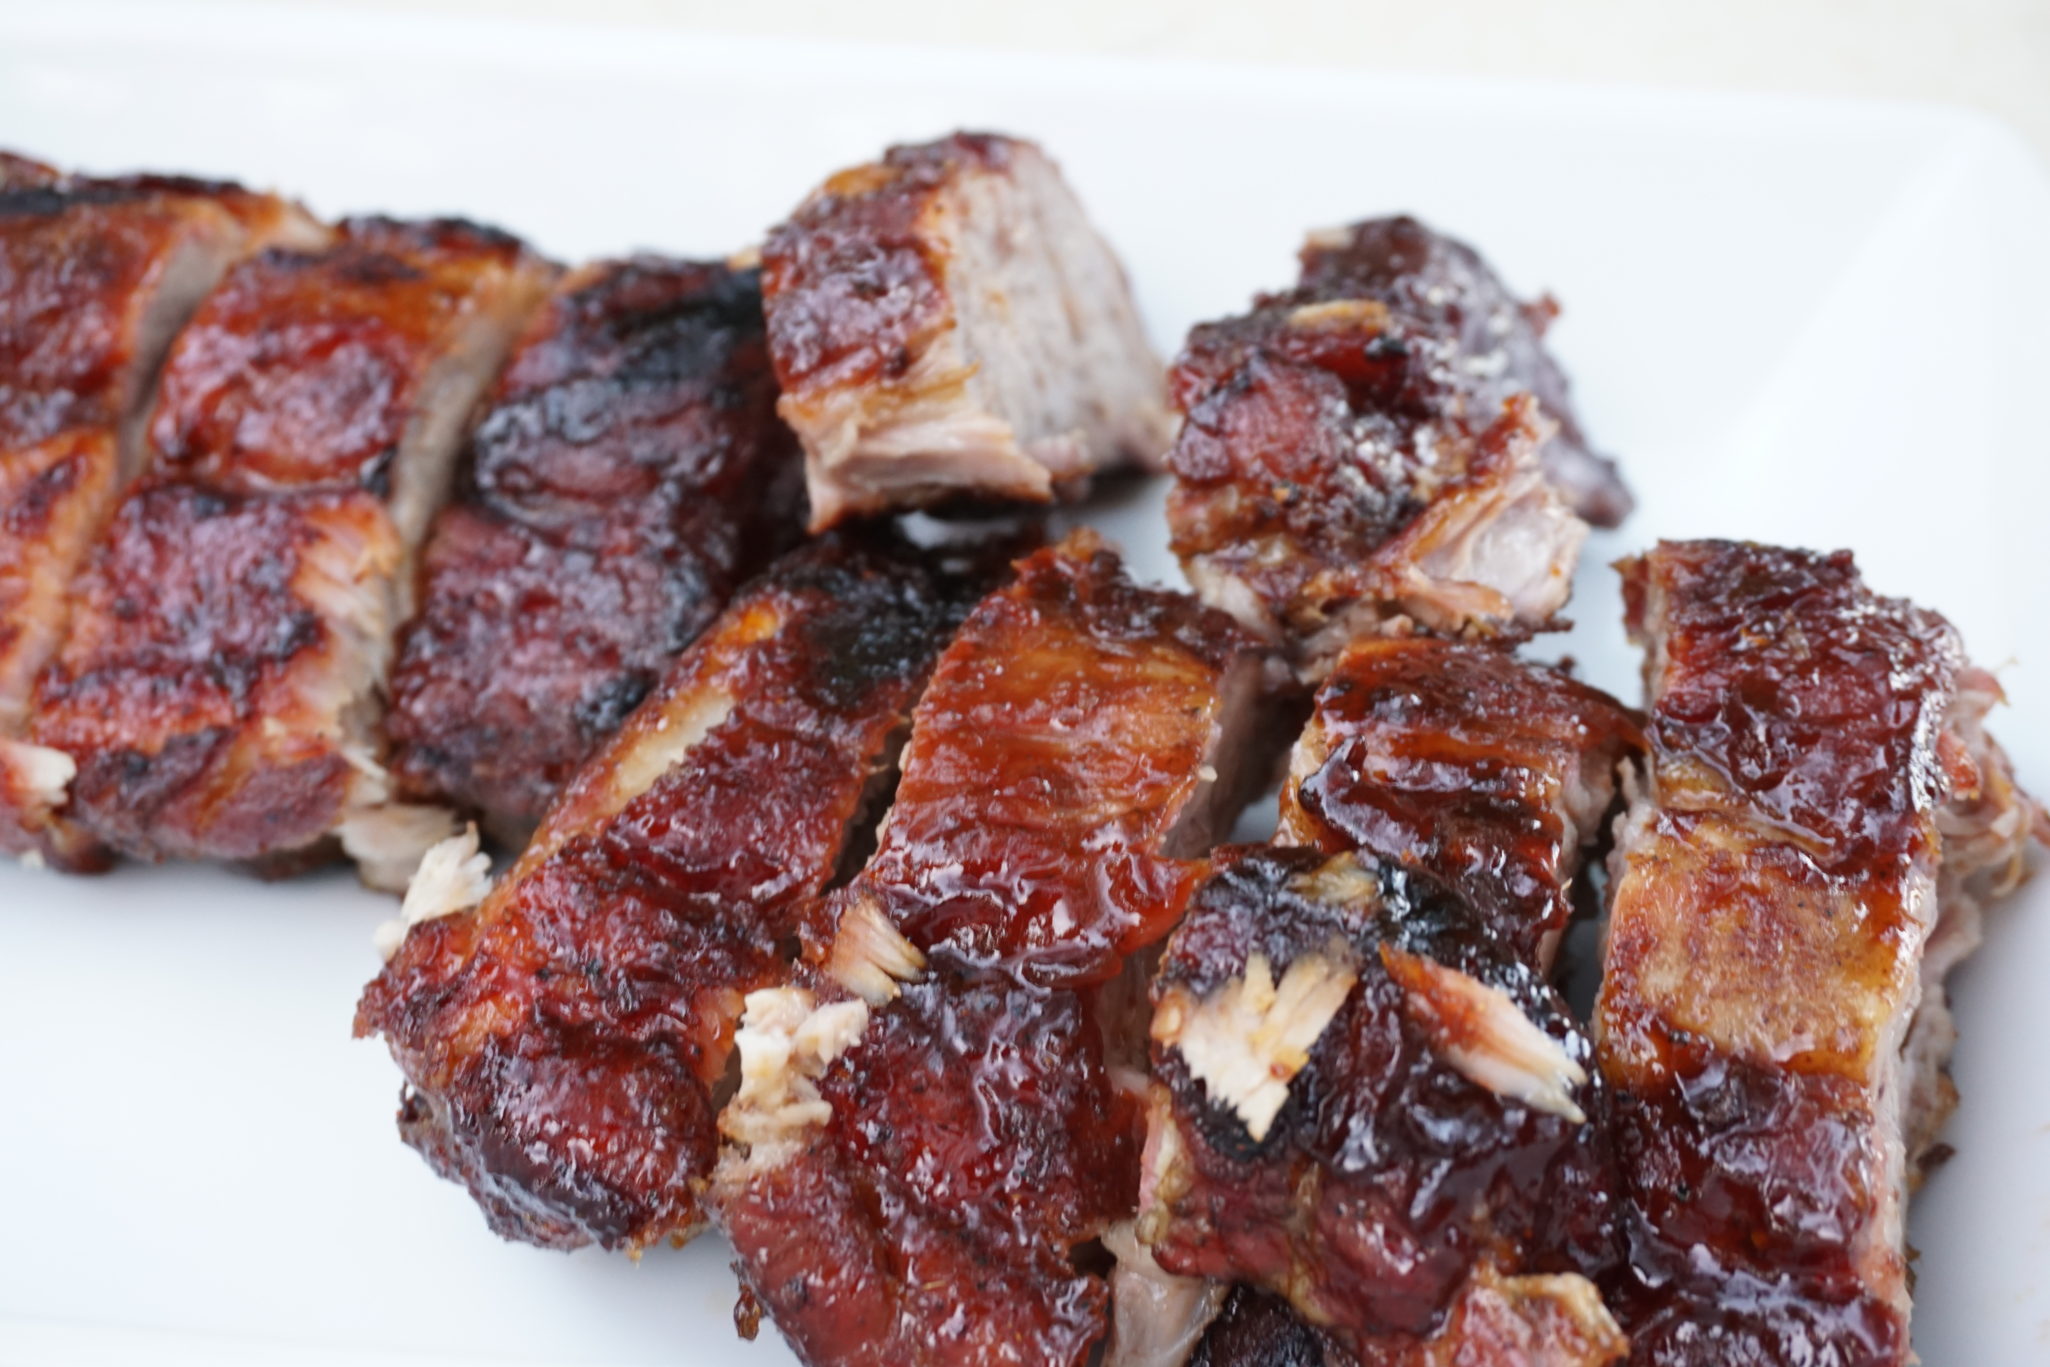
The kids were home for about a week but we were so busy running around we never got around to our annual summer burger cook-off.  Disappointing but little did I know the chance to flex my culinary muscle would happen anyways.  Each year Saveur magazine presents awards for the Best Food Blog. While perusing the finalists I found a recipe for Honey Miso Ribs on the blog  Son of a Southern Chef. They looked mouthwateringly delicious.  Lazurus Lynch, a 23-year-old, cute as a button, southern chef, is the creator.  It is filled with energy, whimsy, and fun.  He oozes so much personality it practically slaps you in the face.  Look out Guy Fieri, this kid is the real deal and a natural for TV.

A tub of organic miso from the Ferry Plaza Farmer’s Market and a 3-pack of ribs from Costco in the fridge meant I was destined to make his rib recipe. Dinner was set, and off to rowing.  I came home and 2 racks of ribs were sitting on the counter coated with a dry rub.  Hubs casually says I used a couple of racks, what do you want to do with the last rack?

WHAAT?  ARE YOU CHALLENGING ME TO A RIB COOK-OFF?

GAME ON DUDE

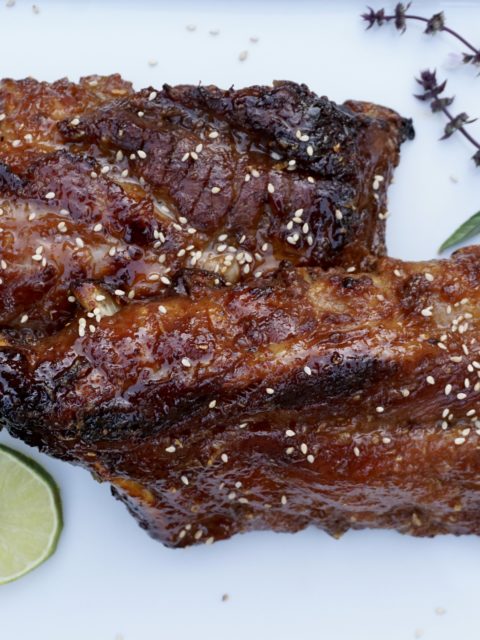
Laz’s recipe called for oven-baking the ribs, painting on the glaze, and then baking the ribs for an additional 30 minutes.  The glaze is comprised of Japanese miso ( a soybean paste that is salty and flavorful), ginger, garlic, soy, lime, and sesame.  I wanted a touch more acid so I increased the lime juice and rounded up the soy sauce to a tablespoon.  Baste the ribs a couple of times during the last half hour of cooking, done. Serve em’ up.  Pretty darn easy.

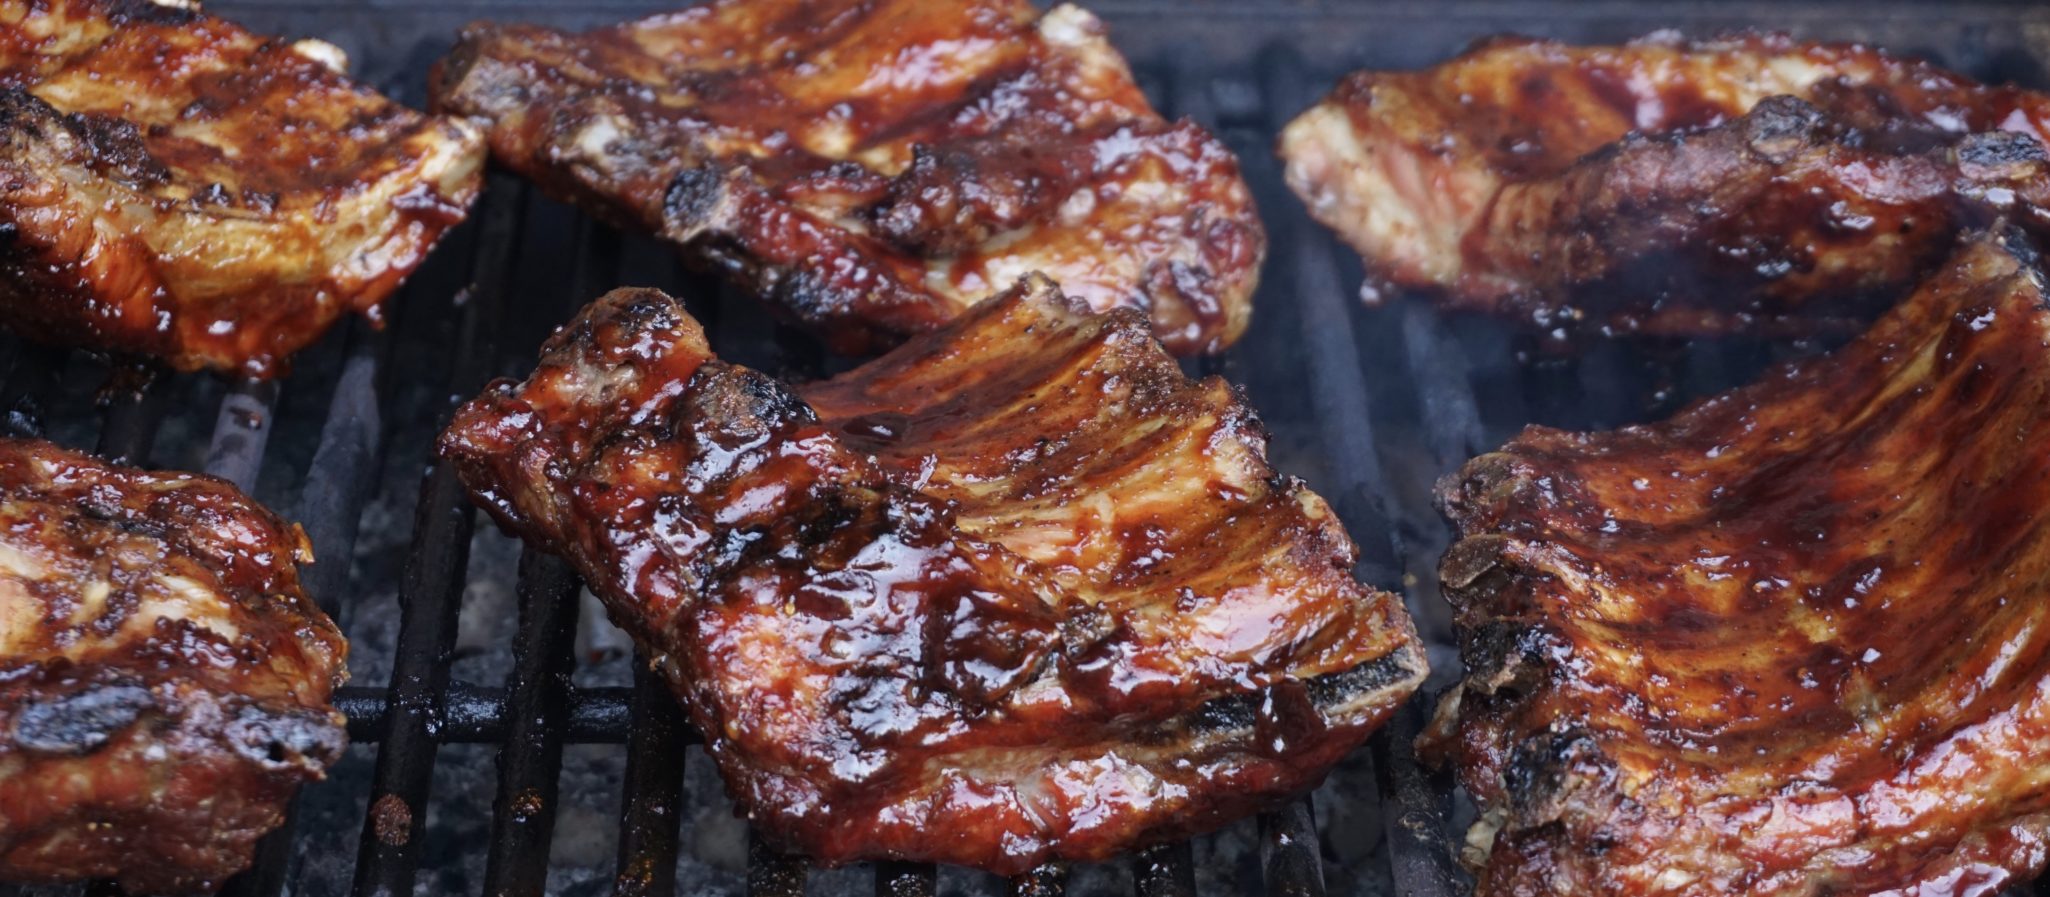
On the other hand, Wes’s ribs call for PAINSTAKINGLY smoking them for hours and hours and rotating them on the grill CONSTANTLY.  His BBQ sauce contains about a million ingredients and needs to be cooked on the stovetop and then brushed on his ribs about 50 times for the last 2,700 seconds of cooking (makes it sound like a long time right?).

I’m not trying to create bias or anything…

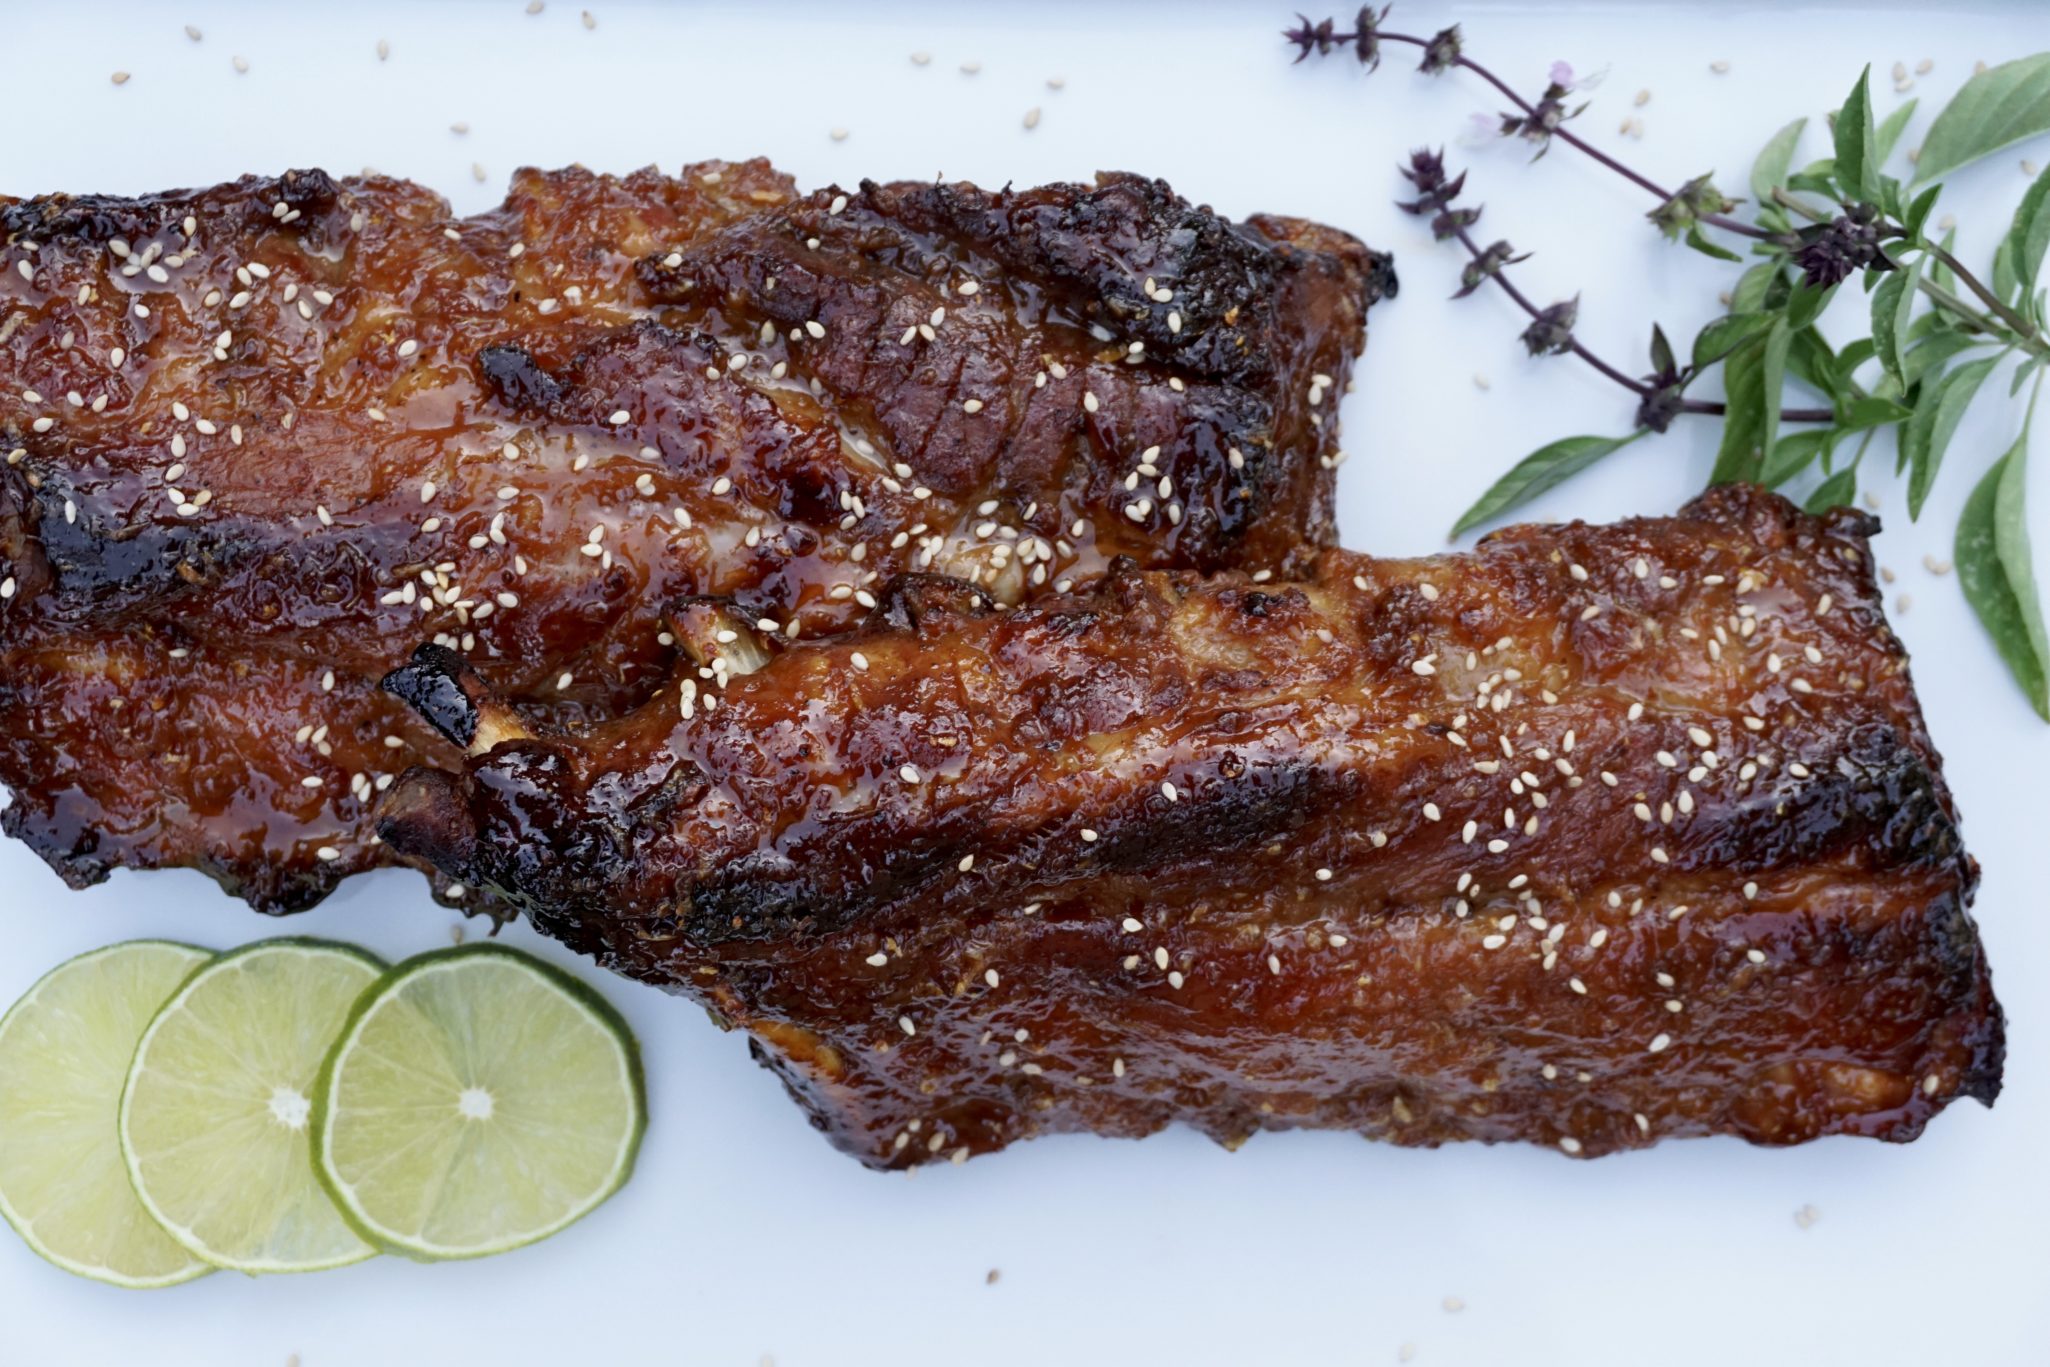
Miso Ribs above ready to eat – classic BBQ Ribs below still cooking on the grill. You be the judge.

So off we went to our friends Paul and Pam’s, ribs in hand.  After all we needed help eating 3 slabs of ribs.

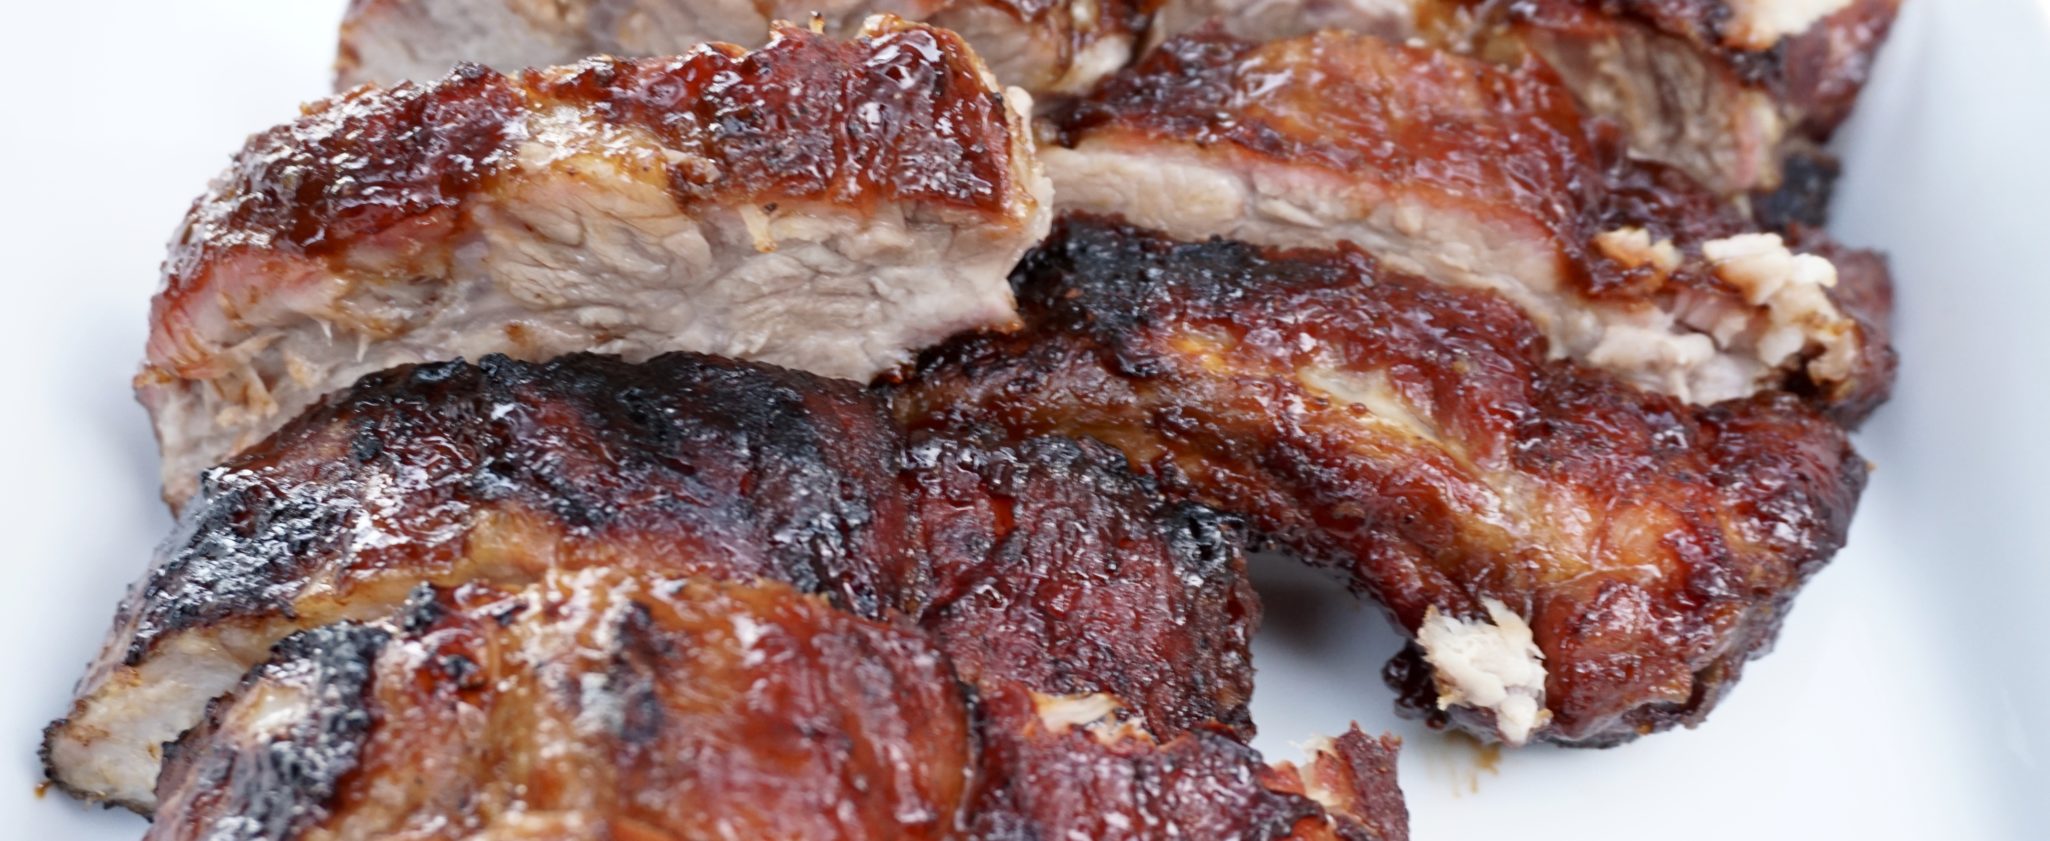
In the end, in a diplomatic fashion, a tie was declared…both equally finger-licking delicious.

Wait, someone just got ribbed-off.

Miso Honey Ribs (Son of a Southern Chef)

Delicious ribs made in the oven!
Course bbq, dinner
Cuisine American, Asian-American
Keyword bbq ribs, Miso, oven-baked, pork ribs
Prep Time 15 minutes
Cook Time 1 hour 30 minutes

Ingredients

  • Miso Honey Ribs
  • 1 rack baby back ribs
  • Kosher salt and freshly ground black pepper

Marinade/Sauce

  • 2 tablespoons white miso paste
  • 2 cloves garlic grated
  • 2 teaspoons ginger grated
  • ½ cup honey mild
  • ¼ cup brown sugar golden or dark is fine
  • 1 tablespoon sesame oil
  • 2 teaspoons soy sauce
  • ½ tablespoon freshly squeezed lime juice

Garnish

  • sliced green onions
  • white sesame seeds, roasted

Instructions

  • 1. Preheat oven to 375ºF.
  • 2. Cut the ribs, dividing into two racks. Season ribs with salt and pepper on both sides. Transfer seasoned ribs to a tray lined with foil. Pour ½ cup of water into the tray and cover foil. Cook in the oven for 45 minutes to an hour.
  • 3. In a small bowl whisk together the miso, garlic, ginger, honey, brown sugar, sesame oil, soy sauce, and lime juice.
  • 4. Take ribs out of the oven and remove foil on the top. If there is a lot of liquid in the pan drain some off.
  • 5. Baste both sides of ribs with the glaze and cook for an additional 30 to 45 minutes, basting top of ribs every 10 to 15 minutes, until golden brown.
  • 5. Remove from oven, slice, and serve. Garnish with sliced green onions and toasted sesame seeds

Hi Mui.

Sesame Noodles (Ancient Family Secret)

Sesame Noodles (Ancient Family Secret)

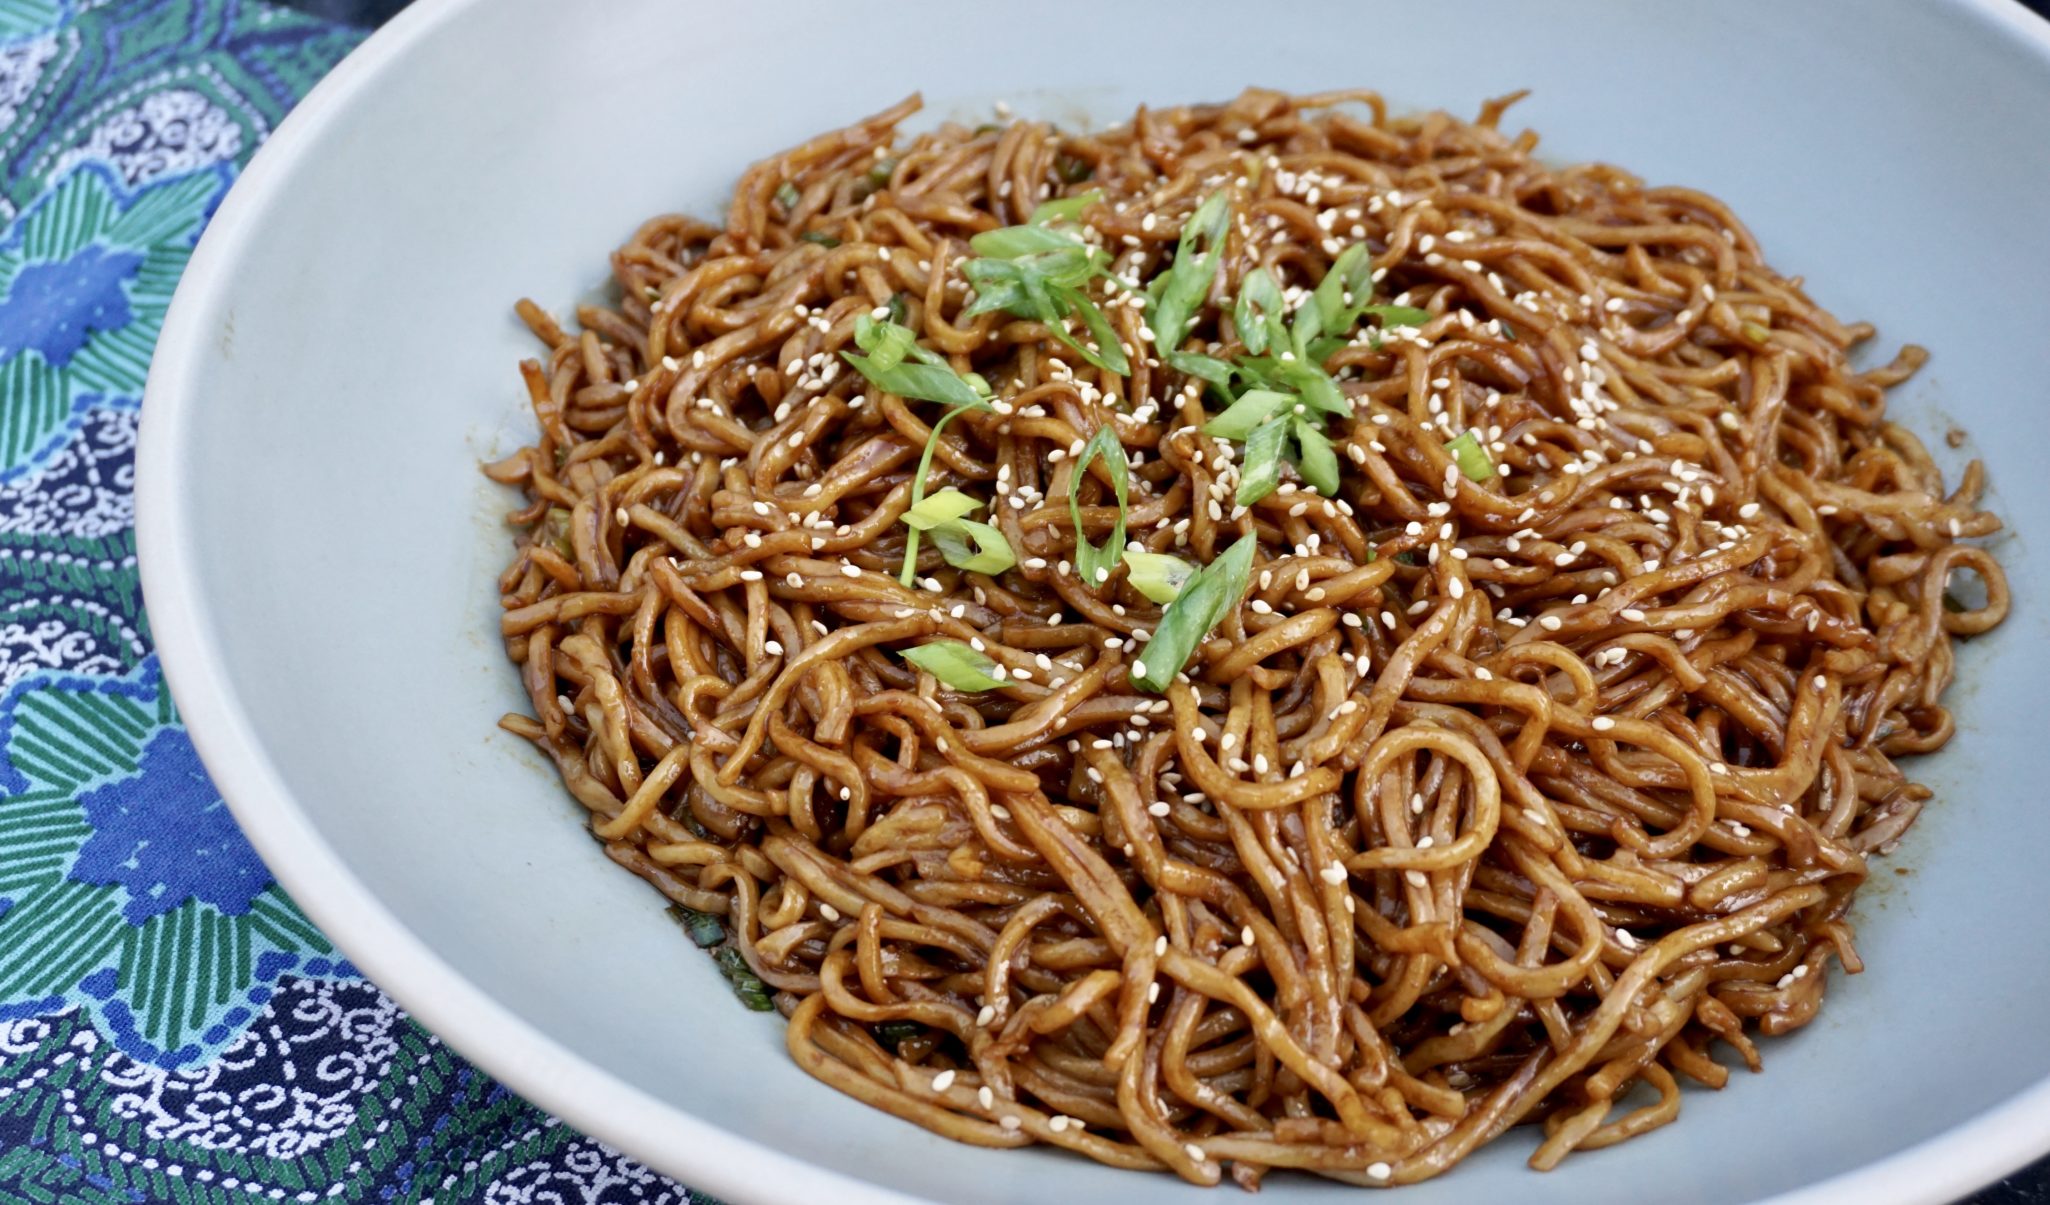
Jamie was home for the week so of course, we pulled out the party plates and hosted a happy hour at our house. Though we usually stick to finger foods, we broke out the forks and chopsticks for a delicious, perfect for hot weather dish, Sesame noodles.  A combination of soy, vinegar, sesame oil in the dressing packs a flavor punch followed by a spicy kick courtesy of chili oil.  The dish is prepped in advance and left to sit overnight for the flavors to meld.  Just before serving, give the noodles a last toss, a sprinkle of green onions and sesame seeds on top, and then watch friends gobble it up.  Really, that good.

My friend Sarah asked for the recipe for these tasty noodles to which I teasingly replied “it’s an old family recipe”.  I had her for a second until I finished with “from my dear Aunt, Martha Stewart”.  Yep, the recipe is from Martha Stewart’s Entertaining.  An iconic tome filled with delicious recipes and the ABCs on “how to host” a fabulous party. It changed the way my generation viewed “The good life”.  I was on a student’s budget when Entertaining was published so the best I could do was pour over the pages of her book and dream. An elegant Manhattan penthouse cocktail party or Hawaiian Luau in the Hampton’s were not within reach but her recipes were.  A girl can dream, and eat delicious tasty food.

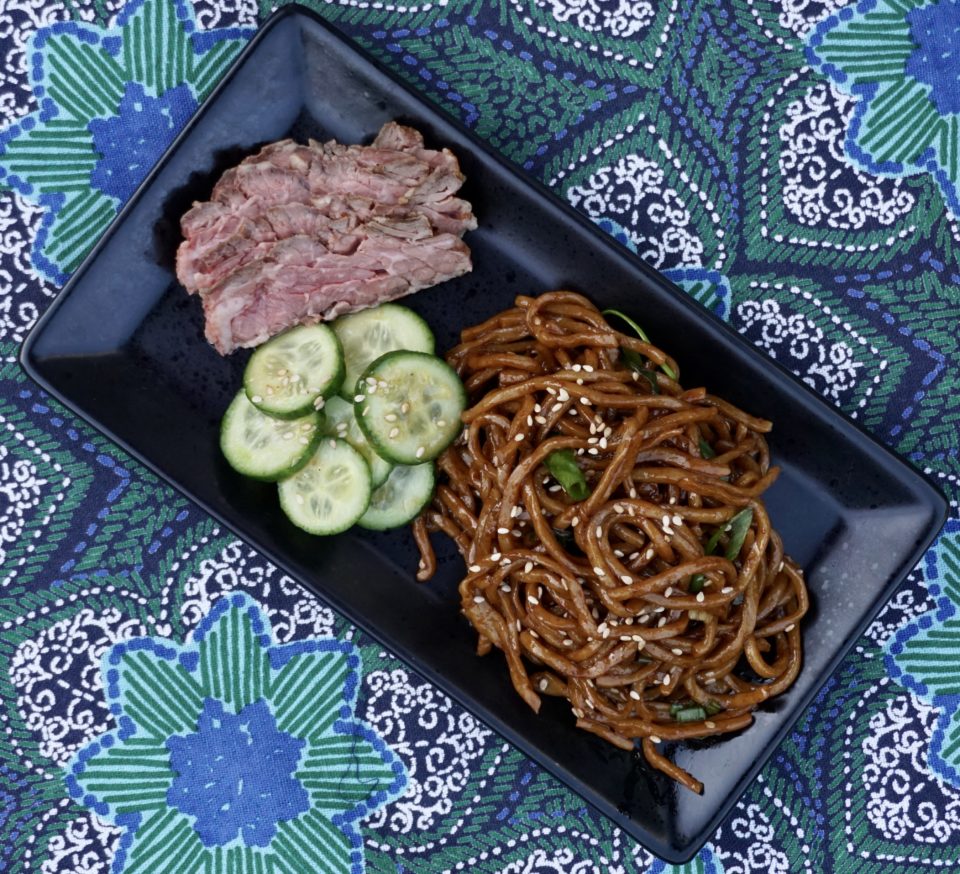
We served the noodles with grilled flank steak and a cucumber salad.  A big hit!  The recipe is simple and easy.  The hard part happens way before you start making this delicious dish.

FINDING THE INGREDIENTS

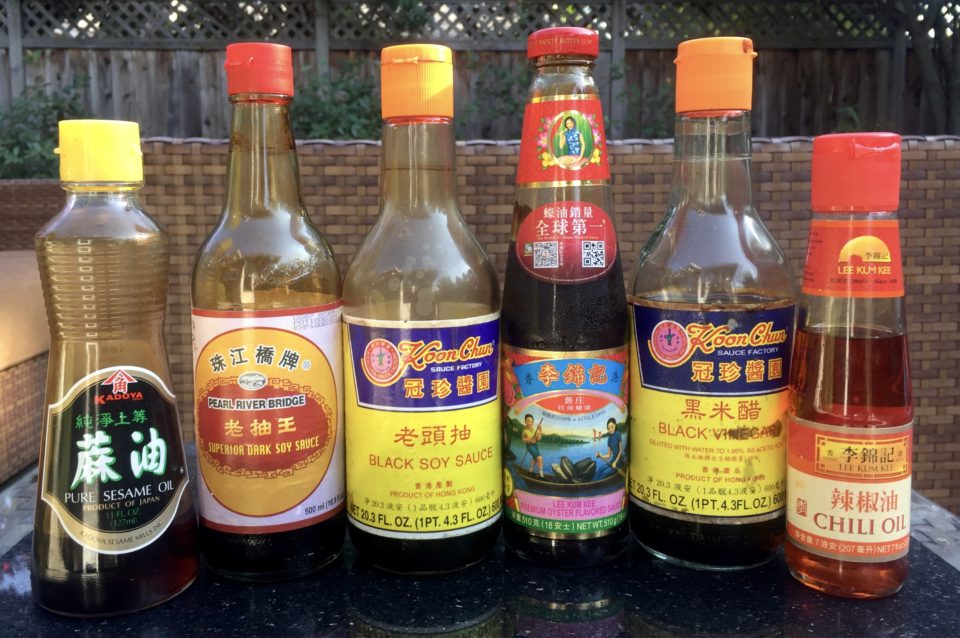
The dressing calls for Chinese Black Vinegar and Dark Soy Sauce.  Whaat? Isn’t there just one soy sauce to rule them all?  Nope.  Chinese dark or black soy sauce is actually thicker and less salty than regular Chinese Soy Sauce or Kikkoman Soy Sauce.  It is fermented a little longer and contains either molasses or sugar which adds a bit of sweetness.

The other ingredient is Black Chinese Vinegar.  Chinese Black Vinegar, also known as Chiankiang Vinegar, is best described as a slightly less sweet Balsamic Vinegar.  I did painstaking intensive research (googled it) and found the best substitution (from America’s Test Kitchen) equal parts red wine vinegar and balsamic vinegar blended together.  I did my own taste test and it did seem to be pretty close in flavor, maybe a touch sweeter than black vinegar.

The Line-up

A picture is worth a whole lotta words so here are my bottles of the different sauces.  I prefer Pearl River Dark Soy, it is a little mellower and not quite as salty as Koon Chun.  For those of you in my neck of the woods, I will gladly point you in the right direction for where and which ones to buy.

I have added my own twists to this dish of course.

Decrease the amount of salt (the original seemed like a ton) and use kosher salt.

Add 1 -2 tablespoons of oyster sauce to add umami (I know what your thinking noooo, not another sauce. This is optional but everyone should have a bottle of this miracle sauce in their pantry.  Make sure it is made by the Lee Kum Kee one with the kid and mom in the boat.  Cut chili oil amount by half.  I’m a wimp.

Add blanched asparagus, sugar snap peas, snow pears, fresh corn, and-or shredded chicken for a more substantial dish.  The sky’s the limit.  Garnish with green onions and cilantro (if you like cilantro) and toasted sesame seeds.  Voila’ KILLER NOODLE SALAD ready to go!

Old Family Secret (Sesame Noodles)

Course Main Course, Side Dish
Cuisine Asian, Asian-American
Keyword Sesame Noodles
Prep Time 30 minutes
Cook Time 6 minutes

Ingredients

  • Make this dish the night before
  • 2 pounds chinese egg noodles
  • 1/2 cup sesame oil
  • 1/2 cup black soy sauce
  • 3 T black Chinese vinegar
  • 3 T sugar
  • 1 1/2 T salt kosher coarse
  • 2 T hot pepper oil chili oil (start with 1 T it is really spicy with 2)
  • 1/2 cup finely sliced scallions white and green part
  • Recipe can easily be halved**

Instructions

  • In a large pot of boiling water, cook the noodles 1 pound at a time. Boil 4-5 minutes, until just tender.
  • Drain, rinse well under cold running water until chilled, and drain again. Put in a large bowl.
  • Combine remaining ingredients. Reserve approximately 1/4 of the dressing. Stir the rest into cold noodles, mixing well.
  • Chill overnight.
  • Just before serving toss with reserved dressing. Garnish with toasted sesame seeds and additional green onions.
  • Variations: Reduce salt to 1 T kosher, add 1-2 T oyster sauce. Add blanched asparagus or snow peas or sugar snap peas or cucumbers.
  • For a more substantial dish add shredded chicken or cooked shrimp.
A-Looo? Anybody there? It’s Gobi time! (Cauliflower and Potato Curry)

A-Looo? Anybody there? It’s Gobi time! (Cauliflower and Potato Curry)

Do you remember Bend It Like Beckham?  A little movie about soccer and following your dreams that launched a couple of careers (Kira Knightly for one) and was a sleeper hit.  Though a certified sports nut I really loved the scenes of the family gatherings and delicious food.  It reminds me of my own crazy family gatherings where down home food and “sage advice” from elders are the order of the day.  In between bites of fried noodles or dumplings my cousins and I nod in respectful agreement at our aunties and uncles then turn our heads to each other and roll our eyes when the inquisition begins.  Boyfriend? Girlfriend? When you getting married?  The food and their good intentions make the interrogation worth it.

Hidden in the DVD of the movie I found an entertaining bonus clip of the mom and auntie demonstrating how to make Aloo Gobi. A cauliflower and potato curry flavored with onions and tomatoes and spiced with garam masala, chili, ginger, garlic and cumin.  Inspired by the clip I made their version but this time went searching for another recipe.

So I turned to a favorite blog, Ministry of Curry and typed in Aloo Gobi. BINGO, up popped not just a recipe for Aloo Gobi but an Instant Pot version.  The pressure cooker makes short work of the dish.  Perfect for a quick weekday meal.

Prep the ingredients and have them ready to go into your pot.  I cut the cauliflower in good sized chunks and sliced the potato into wedges.  If you are a spice wimp like me use half the amount of garam masala.  Saute’ the spices and vegetables in the pot, cover, pressure cook for a couple of minutes. Voila’ dinner is on the table in the blink of an eye.  If you like your cauliflower with a bit of bite cook for 2 minutes.  I prefer them softer so I use 3 minutes.   Quick release the pressure or the veggies will be too soft.  Tasty dishes like this make it so much easier to focus on eating more vegetables and less meat.  Good for us and for the planet.

This dish can also be cooked on the stovetop.  Saute the onions, garlic, ginger and tomatoes. Add spices except salt and garam masala just like the IP recipe.  Stir in the cauliflower and potatoes, add water and  reduce heat to medium. Cook for 6-8 minutes stirring occasionally.  Add garam masala and salt, stir, cover and continue to cook until potatoes and cauliflower are at desired doneness approximately 10 minutes.  Stir in cilantro reserving some for garnish.  For conventional cooking cut the vegetables smaller or par-boil them halfway this will shorten the cooking time.

A shortcut to peeling and cutting your tomatoes, grating!

A-Looo? Anybody there? It’s Gobi time! (Cauliflower and Potato Curry)

Ingredients

  • 1 medium onion thinly sliced
  • 1-2 cloves of garlic minced
  • 1 tsp fresh ginger minced
  • 2 plum tomatoes grated
  • 4 cups cauliflower florets cut into 2 inch pieces
  • 1 medium russet potato peeled and cut into wedges
  • 1 tbsp cooking oil or ghee
  • ½ tsp cumin
  • ½ tsp turmeric
  • 1 tbsp mild Kashmiri red chili powder Less if using a spicier chili powder
  • 1 tbsp cumin-coriander powder spice blend
  • 1-1/2 tsp garam masala Add 1/2 to 3/4 tsp for a mild to medium spicy curry
  • 1 tsp salt
  • cilantro for garnish lots

Instructions

  • Turn Instant Pot to Saute mode.
  • Once the hot sign displays add oil and cumin seeds. Sauté for 30 secs.
  • Add onions and mix well. Cook covered with a glass lid on for 3-4 min.
  • Add ginger and garlic, stir and cook for additional minute.
  • Add tomatoes, mix and cook covered for 2 minutes.
  • Add turmeric, red chili powder, cumin-coriander powder, garam masala and salt. Mix well.
  • Add potatoes and cauliflower florets. Add ¼ cup of water. Mix well.
  • Put Instant Pot lid on with pressure valve to sealing. Cook on Manual(Hi) for 3 mins. Note: Cook for only 2 mins if you like cauliflower to be more firm.
  • Quick Release and stir gently. Garnish with cilantro.
  • Serve hot with naan. I like mine with rice.