Category: Food

Guilt Free Shopping- Farmer’s Market Soup

Guilt Free Shopping- Farmer’s Market Soup

My guilty pleasure during the time of COVID has been Sunday morning outings to our local farmer’s market. A chance to get out of the house and meet a friend.  Not to worry we are adhering to the CDC guidelines for masks, distance, and handwashing.  For the most part fellow shoppers at the market are doing the same.  We do a quick perusal of the market, decide what we want, shop, and then go and sit on the retaining wall to chat and drink our coffee, all in our six-foot bubble.

As winter fades and the market blossoms with an array of beautiful fruits and vegetables…

I Can’t Resist

I’m like a kid in a candy store, I want everything I see, I end up with way too many fruits and veggies for the week.  Friday rolled around and I still had a crisper full of fruits and veggies from last Sunday’s market.  If I wanted a guilt-free excursion to the market this coming weekend I had better empty that fridge now.

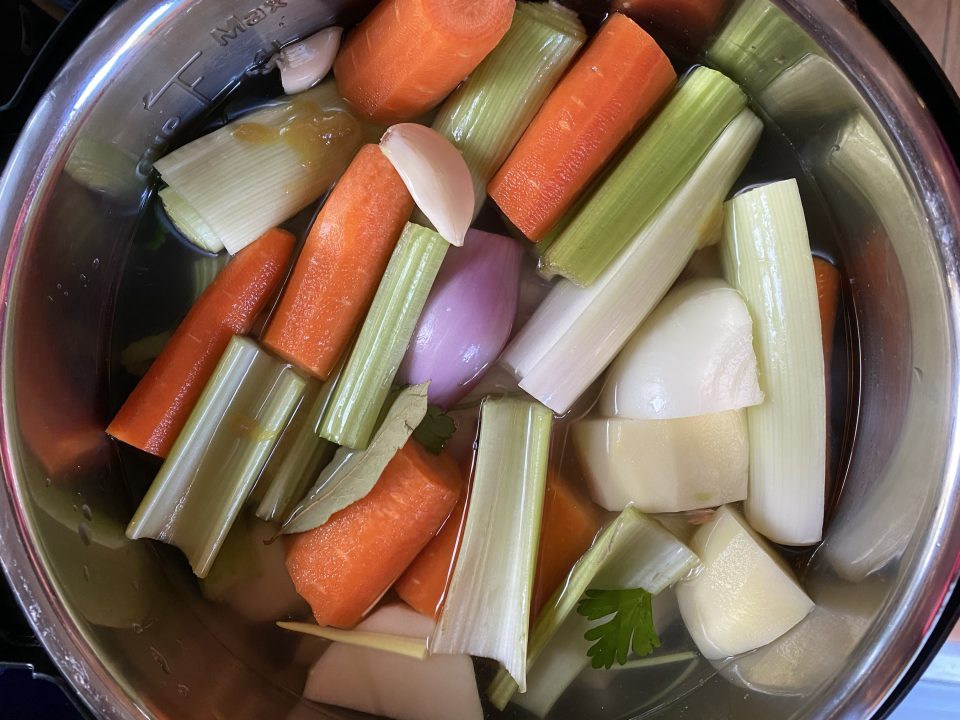
I took inventory-a bunch of broccoli, a couple of florets of cauliflower, half an onion, a lonely leek, two potatoes, hmmm this has the makings of delicious soup.  I pulled out the frozen homemade chicken stock I had squirreled away a couple of weeks ago and I was in business.

Farmer’s Market Soup

This soup starts much like my favorite soup, Potato Leek Soup.  I dice the onions, leeks, potatoes, smash a couple of cloves of garlic, and separate the broccoli and cauliflower into manageable florets.  I heat my pot, add a knob of butter and a swig of olive oil, and sauteed my onions and leeks until soft.  Season with salt, add garlic cloves and saute for a couple of minutes before adding the stock.  Pile your broccoli, cauliflower. and potatoes into the stock, bring to a boil, reduce the heat and simmer for 30 minutes or until the veggies or super tender.  If I had seen the half bag of spinach left in the fridge, I would have thrown that in too. How easy is that?

At the Finish Line

Once it is finished simmering, puree the soup either by carefully transferring the soup to a blender or using a hand blender.  Make sure the head of your hand blender is fully immersed in the soup or you will end up painting your walls or worse, splattering yourself with hot soup, nooooo.  Blend to desired consistency, less for a chunky country soup or more until “souper” smooth-your choice.

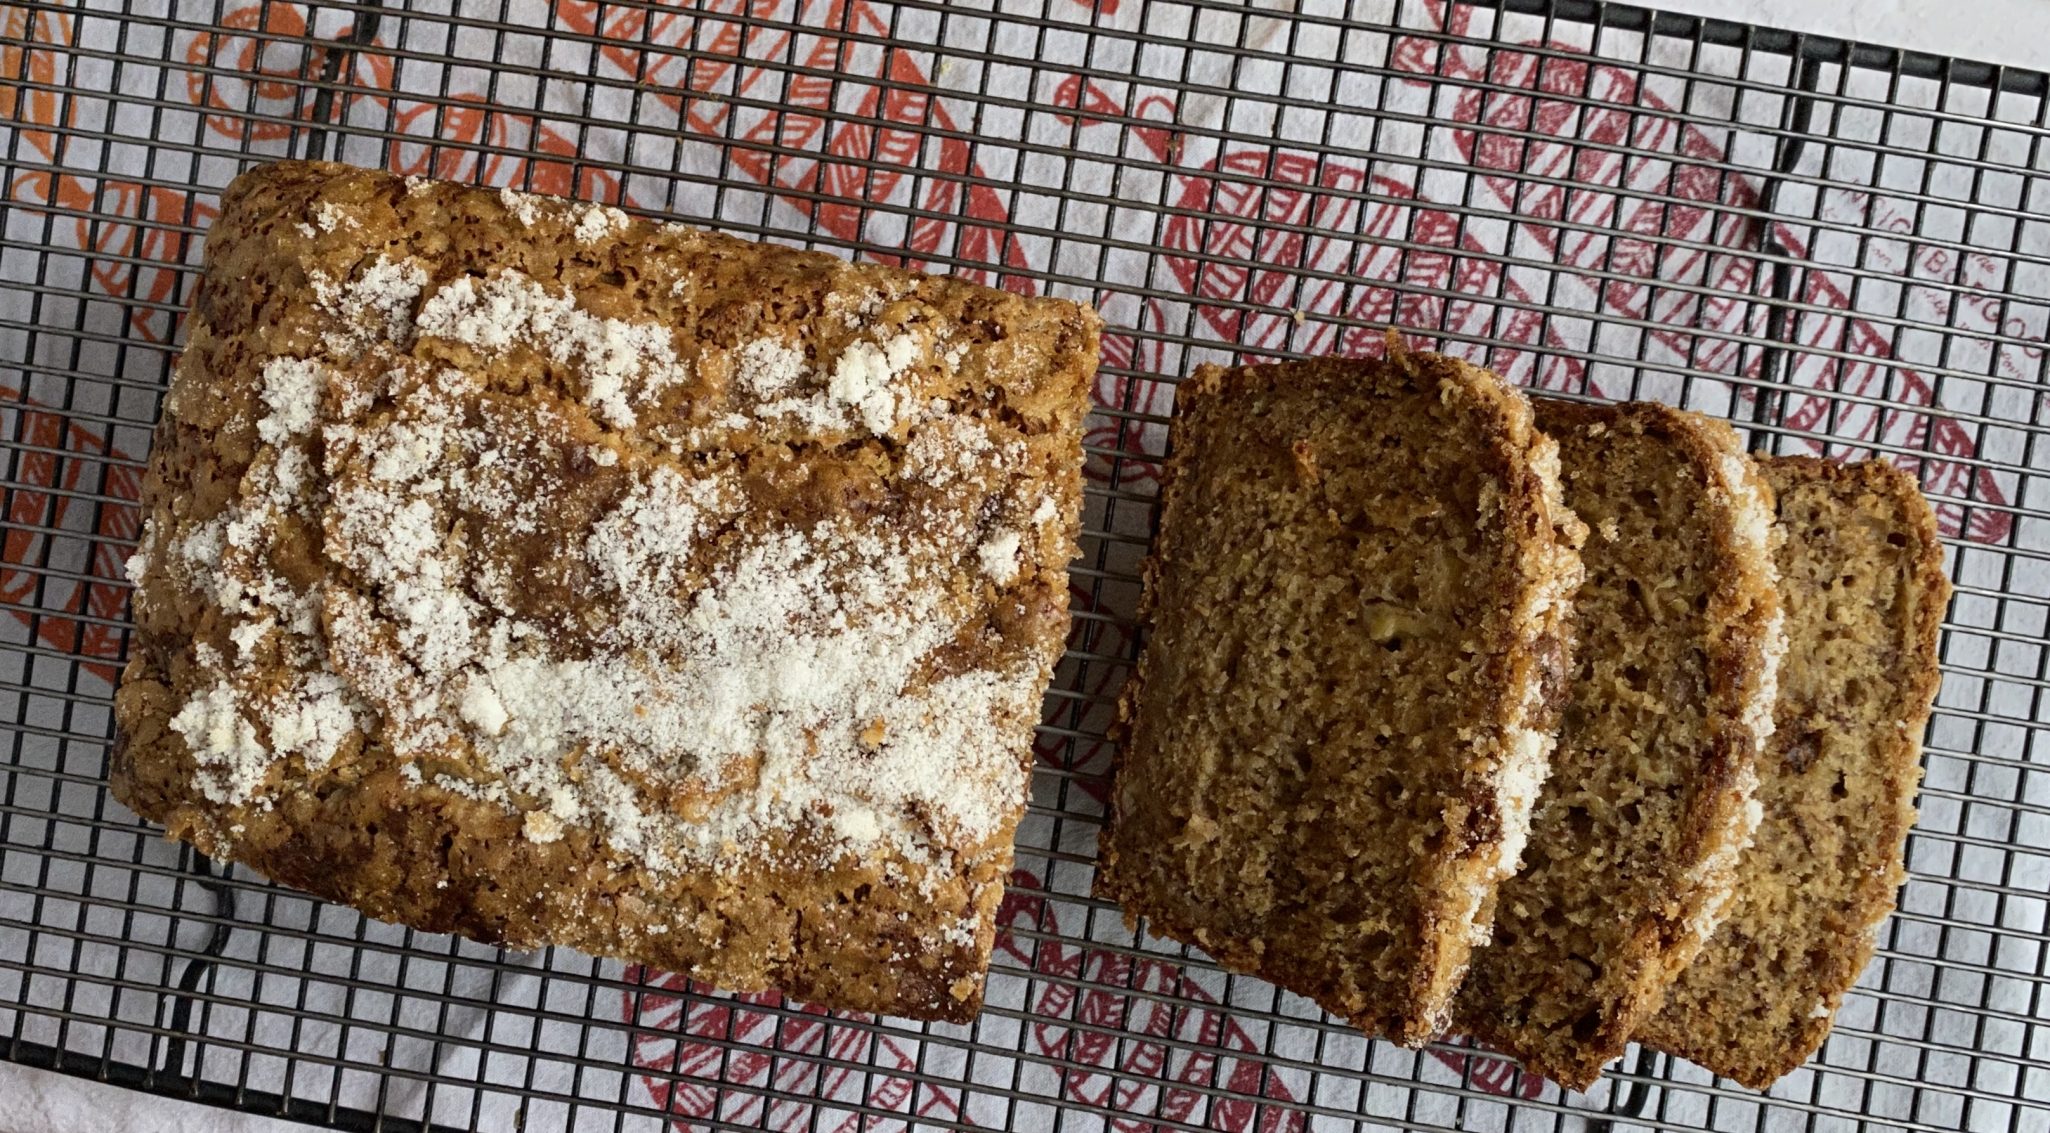
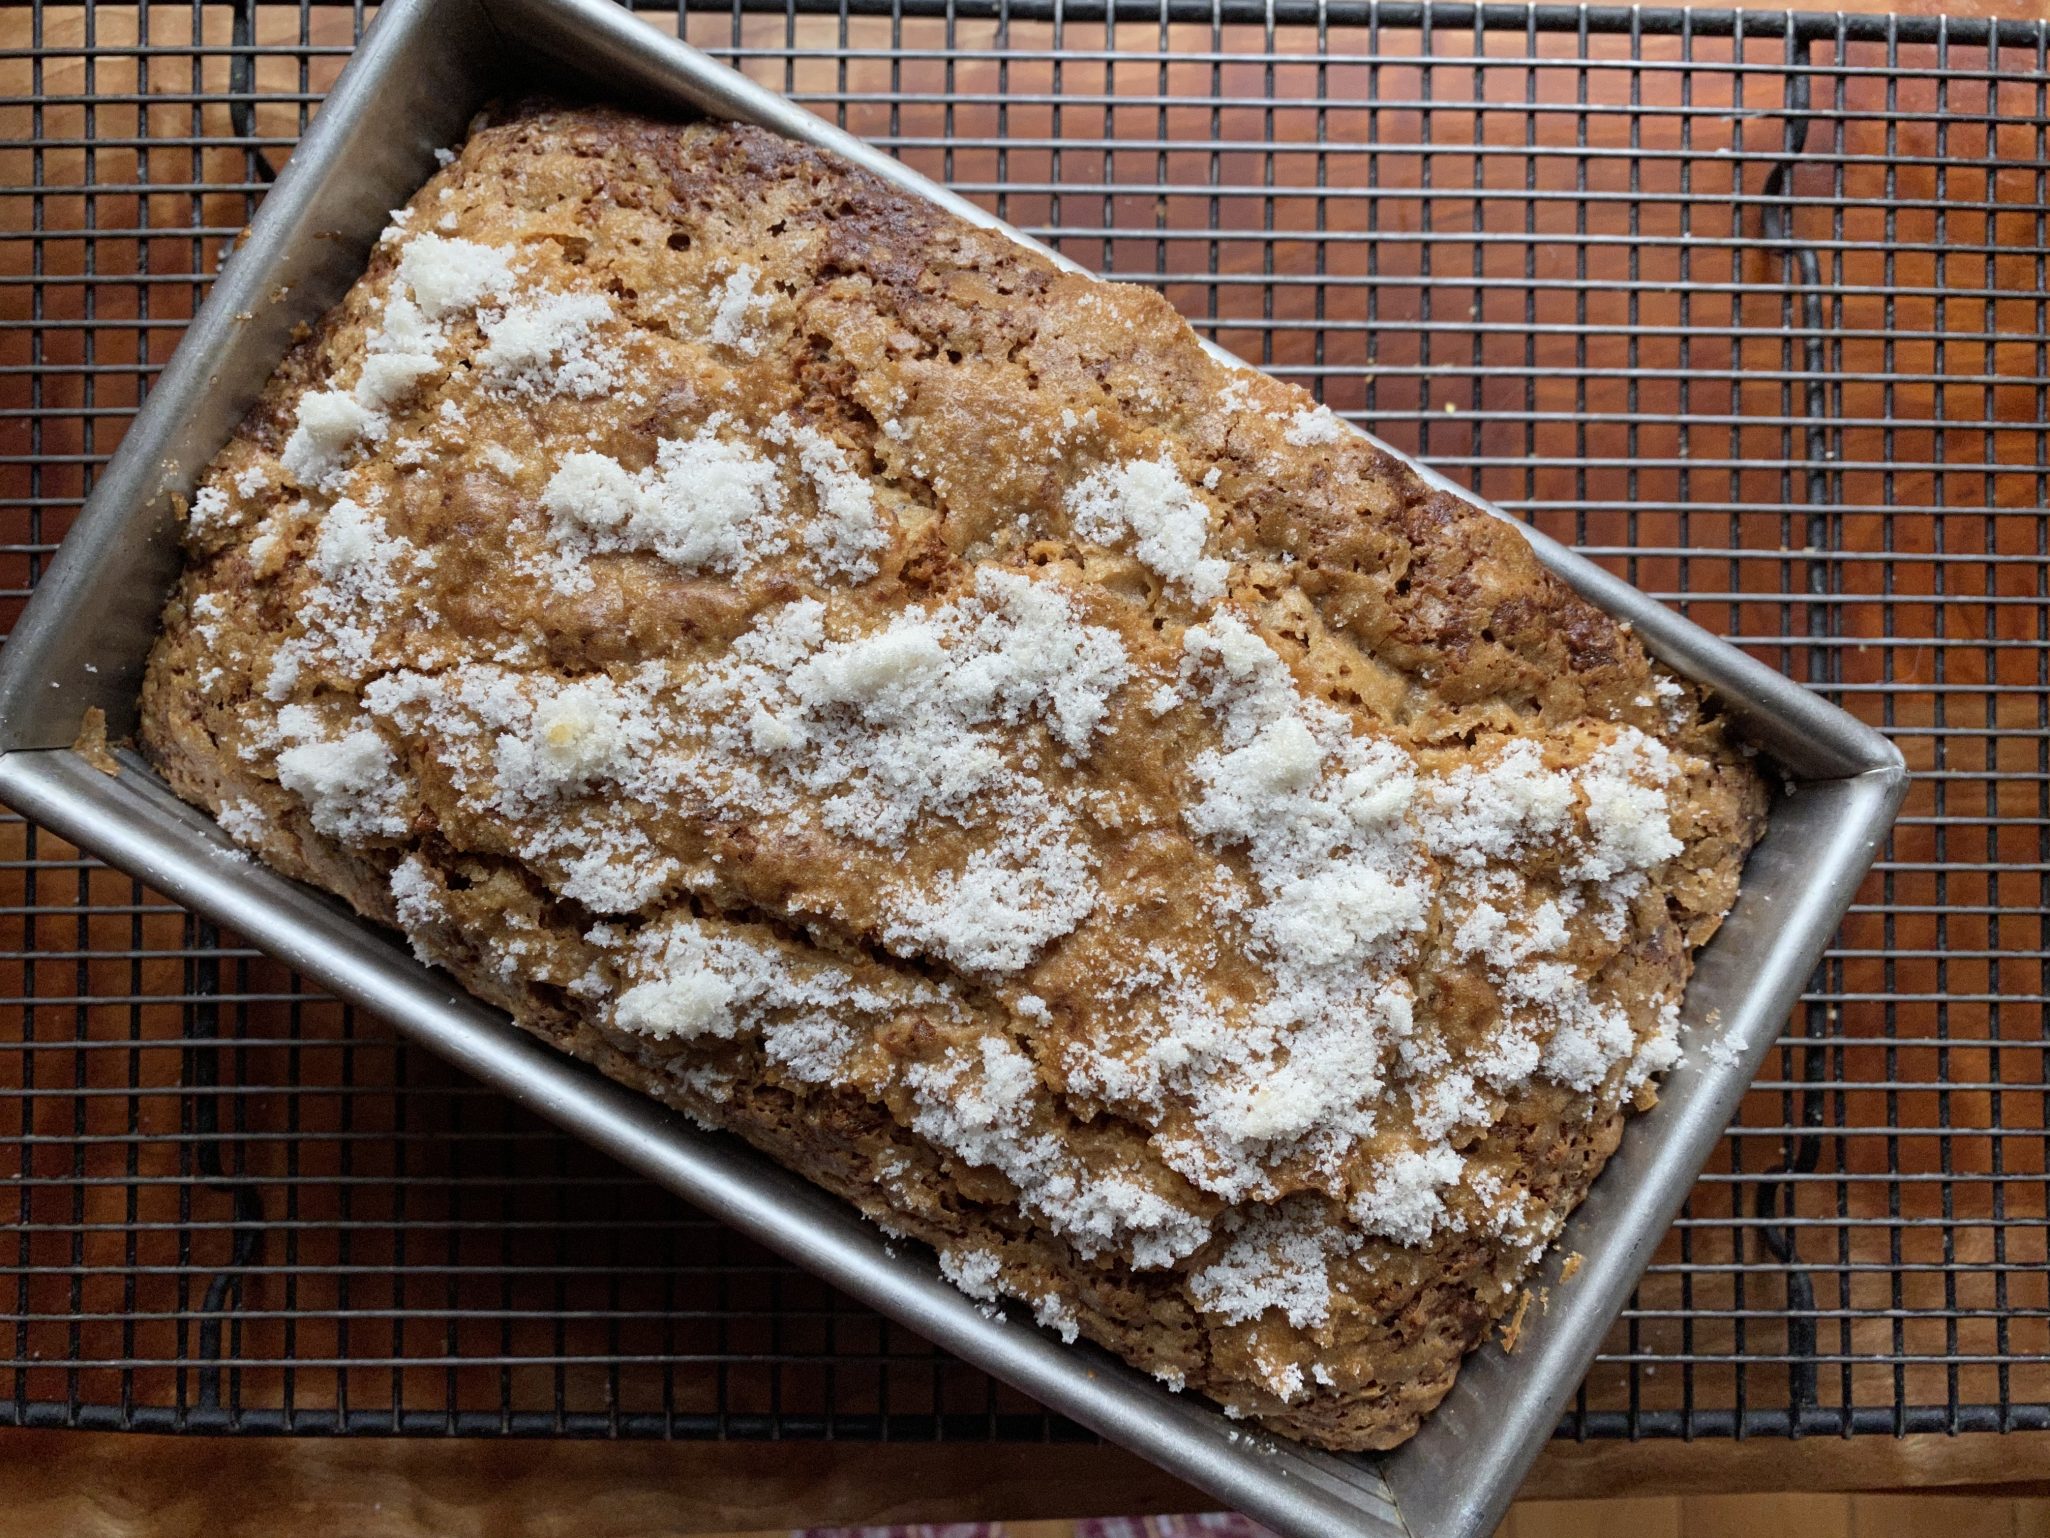
Season with salt and pepper to taste, throw it in a bowl and you’re done.  The potatoes thicken the soup naturally but you could still add some heavy whipping cream (the taste bump is self-explanatory) or even yogurt/sour cream.  Stir in some shredded cheese for a Broccoli and Cheese Soup.  You’re done!  Assemble a nice cheese board, grab a glass of wine, your loaf of No-Knead Bread, and ENJOY.

Dress the Soup, Toppings a Bowl

Hello?!  Of course, you need toppings on your soup.

A swirl of yogurt or sour cream and some chives or green onions.

A sprinkling of shredded cheese, especially if you have added cheese to your soup.

Toasted croutons or a baguette slice with melted cheese.

I garnish with a little lemon zest too, just for a little zing.

Everyone’s fav, crispy CRUMBLED BACON.  So good.

And that’s how you get ready for guilt-free shopping at the Farmer’s Market this coming weekend!

Farmer's Market Soup

An easy, tasty soup made from the veggies in your fridge! Healthy and delicious
Course Soup
Cuisine American
Keyword Broccoli Soup, soup, Vegetable Soup
Prep Time 15 minutes
Cook Time 30 minutes
Servings 6 servings

Equipment

  • Hand blender

Ingredients

  • 1 tbsp butter
  • 1 tbsp olive oil
  • 2 cloves garlic minced
  • 1 onion diced or 1/2 onion if you using leeks
  • 1 leek white part only, washed and thinly sliced
  • 4 cups chicken broth or stock homemade or low sodium commercial broth
  • 1-1/2 cups water
  • 1-1/2 pounds broccoli florets ~2 bunches of broccoli, cauliflower works too
  • 2 potatoes, any kind peeled and diced into large cubes
  • 3/4 tsp salt
  • 1/4 tsp black pepper
  • 1 cup cheddar cheese shredded (or other cheese of choice)
  • 1/2 cup cream or milk

Instructions

  • Heat butter and olive oil in a large pot over medium-high heat. Add onion and leeks saute for 2-3 minutes until softened. Add garlic and saute for additional minute
  • Add broth/water, broccoli, potato, salt and pepper. Bring just to a boil, turn the heat down to medium, cover and cook for 20-30 minutes, until the broccoli is soft.
  • Turn heat off (but leave on stove). Puree using a stick blender until desired consistency
  • Stir in cream or milk then or add cheese, stirring to melt. All optional, all good.
  • Taste and add more salt and pepper if needed
  • Ladle into bowls.

Garnishes

  • Sour cream or yogurt
  • Chopped Chives
  • Shredded cheese
  • Crispy crumbled bacon (family favorite)
  • Serve with nice crusty bread and glass of wine.
Do You Tteokbokki? Spicy Korean Rice Cakes

Do You Tteokbokki? Spicy Korean Rice Cakes

‘My fondest memories of traveling abroad, not surprisingly, revolve around food.  It started when my parents sent me on a summer exchange program in Taiwan for Chinese American college kids.  While our parents envisioned us hard at work learning Mandarin and Chinese culture, we were sneaking out to the night markets to eat, hooking up with newfound friends, and in general, having a good time.  A documentary made about the program says it all, Love Boat Taiwan.  My introduction to a whole new world of food, culture, and fun.

From the food stalls in Taipei long ago to the markets in Seoul and Osaka most recently; I have feasted on oyster omelets and dumplings (Xiao Lung Bao), Gimbap (Korean rice rolls), Galguksuk (hand-cut noodles), Hotteok (rice pancakes with sweet or savory fillings) and tteokbokki (rice cakes in a sweet and spicy sauce).  I have sampled Takoyaki (Fried Octopus fritters), Kaarage (fried chicken), Gyoza (Potstickers), and Manju (rice cakes) from tiny makeshift kiosks, so delicious.  A trip after college found me relishing the variety of Hawker Fare food in Singapore. Nonya, Indian, Muslim, Chinese dishes all in one spot. Who hasn’t drooled over the Hainanese Chicken enjoyed by Rachel and Nick in Crazy Rich Asians, all cheap and delicious.  Street markets are soul food.  Homey, simple, flavorful dishes remind me of family gatherings around the dinner table.

But, it’s not just about the food, it’s about getting a taste of daily life and culture-sitting next to that businessman as he hurriedly slurps his noodles down before going back to work  Watching the vendors entice their next customer with their hand-pulled noodles or steaming dumplings. Or amusedly watching school children clamoring for their afterschool snack of gimbap or bao from the corner vendor.

That’s My Favorite Part of Traveling

Dreaming about our travels last year has me hungry for the delicious street food we discovered. We took in a baseball game in Incheon and in place of traditional fries and hot dogs, we enjoyed Tteokbokki and KFC (Korean Fried Chicken).  The Tteokbokki, spicy, sweet, and chewy was served on sticks with cute little hot dogs.  I love watching baseball, it reminded me of watching a minor league game, lots of zaniness, fans with broomsticks, and cheerleaders to egg them on.  The icing on the “rice”cake was the food and walk-up music for each batter.

Crazy Fun Baseball Game in Korea

I’ve taken to hunting for recipes to make these tasty tidbits and I found, Korean Bapsang, an absolutely great site with a treasure trove of Korean recipes that are easy to follow and 정말 맛있다 (really delicious)!

You can buy rice cakes and fish cakes in most Asian markets as well as the other needed spices. I didn’t have fish cakes for a batch, so I chose the next best thing in my pantry, SPAM.  Don’t laugh, it was pretty good!  Cook the rice cakes in an anchovy stock or water seasoned with Gochugaru (chili powder), Gochujang (chili paste), and corn syrup.  Fish cakes, cabbage, and onions round out the dish.   It takes all of 15 minutes to make.  A perfect snack while watching a Giants game or my favorite K-drama.

The Recipe

Tteokbokki - Sweet & Spicy Rice Cakes

Tteokbokki, a popular Korean snack, are rice cakes in a spicy-sweet sauce found at street markets, fast food kiosks and baseball games!
Course Appetizer
Cuisine Asian
Keyword Korean Snack, Rice Cakes, Tteokbokki
Prep Time 5 minutes
Cook Time 15 minutes
Servings 4

Ingredients

  • 1 pound tteokbokki tteok 떡볶이 떡 about 24 3-inch long rice cake pieces - See note.
  • 1 sheet eomuk 어묵 fish cake - aka oden or SPAM! or Japanese fishcake
  • 4 ounces green cabbage yangbaechu 양배추
  • 1 - 2 scallions optional
  • 3 cups anchovy broth or water or any fish broth/dashi
  • 3 tablespoons Korean red chili pepper paste gochujang 고추장
  • 1-2 teaspoons Korean red chili pepper flakes gochugaru 고추가루 preferably finely ground)
  • 1 tablespoon soy sauce
  • 2 tablespoons sugar or use 1 tablespoon if you like it less sweet
  • 1 tablespoon corn syrup
  • 1 tablespoon minced garlic

Instructions

  • Make fish broth if using. Soak the rice cakes for about 20 minutes if hardened or refrigerated. Cut the fish cake, cabbage, and scallions into about 2-inch long pieces.
  • Add the anchovy broth (or water) to a large pan. Stir in the sauce ingredients. Bring it to a boil over medium high heat, stirring to dissolve the red chili pepper paste (gochujang).
  • Add rice cakes, boil until the rice cakes become very soft and the sauce is thickened, about 8 - 10 minutes. Stir frequently so the rice cakes don't stick to the bottom of the pan.
  • Add cabbage, green onions (optional) and fish cakes. Continue to boil, stirring constantly, for an additional 4 - 6 minutes. Depending on your rice cakes, it may need more time to reach a desired level of softness. Add more broth or water as necessary. Taste the sauce, and adjust the seasoning if needed. Serve immediately.

Notes

You can find tteokbokki rice cakes fresh, refrigerated, or frozen at Korean markets. Locally made fresh rice cakes are the best ones to use, but good quality refrigerated ones are okay too. Try avoiding frozen ones if you have other options.
 Tteokbokki doesn't reheat well in the microwave. Reheat any leftovers, along with a little bit of broth or water, in a small pan over low heat.
Don't have eomuk use the Japanese fish cakes-kamaboko or even surimi (imitation crab legs).
Focaccia: The Deb Breadbake Trio-Take Three

Focaccia: The Deb Breadbake Trio-Take Three

Yes. In the Time of COVID, where the staple shelves at the supermarket look like a scene out of Mad Max, I still have flour and yeast.  Now don’t get your Hot Crossed Buns in a bunch, in all fairness, I normally have lots of flour and yeast on hand.  I love to bake.  Although, after 3 batches of Focaccia, I find myself perusing my King Arthur Flour wishlist to see if yeast or flour have made it back on their virtual shelves.  Bread has become an obsession for me and so many others.  The result of staying home and harkening to a simpler time.

The trio of Focaccia I tried were all pretty good but one stood out, Serious Eats No-Knead Olive-Rosemary Focaccia with Pistachios.  But they’re all excellent.  I’ve included links to the two “runner-ups” since they are both totally worth making.  My favorite is the finale of this post along with the full recipe.  Enjoy!

Foccacia Number One

From Kitchn, a recipe for No-Knead Focaccia that takes the least amount of time of the three we tried.  It does start with a food processor which makes quick work of making the dough.  The dough needs to sit for only 2-3 hours before spreading the dough in a 10-inch iron skillet, letting it rest for 30-40 minutes before baking.

I put the dough in the fridge overnight before proceeding.  The dough did not rise as much as expected, operator error?  Overzealous pressing it into the skillet?  Too long in the fridge?  Dense and chewy, reminiscent of pizza crust with a nice flavor from the garlic and rosemary.  I’d like to try this recipe again, wondering if I had compressed it too much or inadvertently used water that was too hot.  If it didn’t rise any more I’d just use it to make mindbogglingly good pizza.  Oh, and my skillet is probably wider than the classic 10″ inch iron skillet, did I pat down my dough too much?  My inquiring mind wants to know.

Guess I’ll have to bake more Focaccia


Focaccia Number Two

Back In the day, Jenny Jones was a singer, comedian and talk show host…now she does cooking and baking videos from home.  Go figure. How I stumbled upon her site, I don’t know, but her No-Knead Focaccia Bread is pretty darn good.  Easy to make, the end result leans towards a pizza-like consistency, chewy inside with nice air bubbles with an exterior that was a wonderful toasty brown and so crispy.  She describes her Focaccia aptly, “This is no ordinary focaccia. It’s not the soft kind that you bake in a pan. This is focaccia the way I like it: thin and crispy. It’s like a slice of pizza without the pizza stuff”  The search was still on for that soft, pillowy texture of classic Focaccia.  Still, this was so good, I’d make it again in a heartbeat (if it wasn’t for my hipspread, lol)  You will need a pizza stone or steel to bake this on.

Above is what the dough looks like after resting in the bowl.  It doubled in size.

Below is after tucking (folding) the dough under a couple of times

The finished Focaccia! Airy and springy and soft inside, crispy and chewy on the outside, it’s delicious.

And the winner is…Serious Eats No-Knead Olive Rosemary Focaccia with Pistachios

I think we have found a Focaccia recipe that my entire quarantined family likes!  Serious Eats Focaccia by Kenji-Alt Lopez has that soft, pillowy texture inside like traditional Focaccia and a nice crispy outside.  With that first bite, we were all nodding our heads-this is it!  Not a moment too soon as my bread flour supply is dangerously low.

Start the day BEFORE you want bread on the table, like all no-knead bread, time takes the place of kneading.  We did not use olives or pistachios.  Quarantine forces improvisation, instead, we used cherry tomatoes, garlic, red onions, and rosemary from our herb box.  A tasty combination.  Feel free to add your own toppings! #Lunchleftovers found me making Ottolenghi’s Charred Tomatoes with Labneh to dip into with my focaccia-absofrigginlutely delish.

This is the Serious Eats dough after resting 12 hours, at most, it tripled in size but more like two and half times (pure eyeball measurement).  My bowl was plenty big enough.  I thought it would rise more and was a bit worried, but the Focaccia turned out beautifully.  Sorry, I will not doubt the master Kenji Alt-Lope again!


Olive Rosemary Focaccia with Pistachios

Delicious, easy to make No-Knead Focaccia from Serious Eats
Course Breads
Cuisine American, Italian
Keyword Homemade No-knead focaccia
Prep Time 15 minutes
12 hours
Servings 10

Equipment

  • iron skillet

Ingredients

  • 500 grams all-purpose or bread flour 17 1/2 ounces, about 3 1/4 cups, prefer bread flour
  • 15 grams kosher salt .5 ounces, about 1 tablespoon Diamond brand) reduce by a third if using Mortons
  • 4 grams instant yeast .15 ounces, about 1 teaspoon
  • 325 grams water 11 1/2 ounces, about 1 1/2 cups minus 1 tablespoon
  • 1/4 cup extra-virgin olive oil divided
  • 4 ounces pitted green olives sliced
  • 1/4 cup roasted pistachios roughly chopped or lightly pounded in a mortar and pestle
  • 2 tablespoons fresh rosemary leaves very roughly chopped
  • Coarse sea salt

Alternate Toppings

  • thinly sliced red onion
  • fresh thyme leaves
  • cherry tomatoes, halved
  • garlic, slivers

Instructions

  • Place flour, salt, yeast, and water in a large bowl. Mix with hands or a wooden spoon until no dry flour remains. The bowl should be at least 4 times the volume of the dough to account for rising.
  • Cover bowl tightly with plastic wrap, making sure that edges are well-sealed, then let rest on the countertop for at least 8 hours and up to 24 hours. Dough should rise dramatically and fill bowl, although mine did not rise that dramatically, it spread more than rise.
  • Sprinkle the top of the dough lightly with flour, then transfer it to a lightly-floured work surface. With well-floured hands, form into a ball by tucking the dough underneath itself.
  • Pour half of oil (1/8 cup)in the bottom of a 12-inch cast iron skillet or large cake pan (your Le Creuset or Staub pan would be perfect)Transfer dough to pan, turn to coat in oil, and position seam-side-down. Using a flat palm, press the dough around the skillet, flattening it slightly and spreading oil around the entire bottom and edges of the pan.
  • Cover tightly with plastic wrap and let the dough stand at room temperature for 2 hours. After the first hour, adjust an oven rack to the middle position and preheat oven to 550°F. My oven only goes to 500 degrees, this works fine. It actually baked in about the same amount of time, but you may need to go at least the full 24 minutes at 500 degrees.
  • At the end of the 2 hours, dough should mostly fill the skillet up to the edge. Use your fingertips to press it around until it fills every corner, popping any large bubbles that appear. Lift up one edge of the dough to let any air bubbles underneath escape and repeat, moving around the dough until there are no air bubbles left underneath and the dough is evenly spread around the skillet.
  • Spread olives and pistachios or your choice of toppings, over the surface of the dough and press down on them with your fingertips to embed slightly. Drizzle with remaining olive oil. Sprinkle with rosemary and coarse salt.
  • Transfer skillet to oven and bake until top is golden toasty brown and bottom is golden brown and crisp when you peek underneath, 16 to 24 minutes. Using a thin spatula, loosen focaccia and peek underneath.
  • Transfer to a cutting board, allow to cool slightly, slice, and serve. Serve with cheesy butter or Ottolenghis tomatoes and Labneh, so good.
  • Extra bread can be stored in a brown paper bag at room temperature for up to 2 days. Reheat in a 300°F oven for about 10 minutes.
Midwest Made Banana Bread

Midwest Made Banana Bread

Yes, I tried yet another banana bread recipe.  Unlike biscuits, I am not in search of the best banana bread in the universe.  I LIKE the recipe I have for banana bread.  AND yet, like Pavlov’s Dogs, I see a banana bread recipe and I get an overwhelming urge to try it.  Go figure.  Such was the case with Shauna Sever’s banana bread recipe from her book Midwest Made.

In my defense, her BB (please, can I just abbreviate for expedience) was getting rave reviews on Food52 and I did have overripe bananas. I have baked a couple of goodies from the book and all were pretty darn good.  Her Donut Loaf was a big hit with family and friends as were the jam bars.  The book is filled with recipes that are familiar, comforting, and delicious. Treats we have all grown up with, brownies, cookie jar gems, cobblers, and pies-desserts with roots in the Heartland. Right now that’s what it is all about…

Comfort in the Time of COVID-19

The book is a gem and perfect for the times.  If you would like a copy, I have links to Indie Bookstores that could really use your patronage.  In Los Angeles please order from Now Serving LA, and in the Bay Area, Books Inc. (Free delivery!).  A little further away, the iconic institution, Powells City of Books is also delivering (free shipping).  I’m not sure if Omnivore Books in the City has it in stock, but they have a fantastic selection of cookbooks, check it out.  They are also taking orders, shipping, or curbside pick-up.

Back to Banana Bread

What sets Midwest Made’s BB is a crunchy, sweet, coat of sugar on the top of the bread.  Novel.  You wet your fingers and rub the sugar around until it gets clumpy and scatter them on the BB batter.  This creates the crunchy top of the bread, genius.

The loaf comes out of the oven picture-perfect.  The bread has a nice texture with the added crunch of sweet topping.  My bottle of rum was missing in action, a victim of Shelter In Place perhaps, too bad,  the Rum might have cut some of the sweetness or made the flavor a little more complex.  Next time I would add Rum or nuts to the recipe to balance the sweetness.

The recipe uses oil as the fat which makes it super easy and quick to throw together.  The dry ingredients are combined and folded into the wet.  Try not to overmix (mantra), the batter will be lumpy and pourable.  This is essentially a one-bowl, one spoon or spatula, recipe.  How easy is that?

Pour the batter into a 9×5 loaf pan and make the sugar topping.

I would add chopped pecans or walnuts to the batter or the sugar topping.  The sugar is the kicker.

I was amazed that the sugar didn’t melt into the batter but remained formed and crunchy.

I liked this recipe and would make it again but does it replace my Best Damn Banana Bread recipe, probably not.

The Only Banana Bread You’ll Ever Need from Midwest Made

Course quick breads
Cuisine American
Keyword Banana Bread
Prep Time 15 minutes
Cook Time 1 hour 10 minutes
Servings 10 servings

Ingredients

  • 1 3/4 cups mashed very ripe bananas
  • 3/4 cup plus 2 tablespoons firmly packed dark brown sugar
  • 1/2 cup vegetable oil
  • 1/3 cup well-shaken buttermilk at room temperature
  • 2 large eggs
  • 1 tablespoon dark rum optional
  • 1 teaspoon pure vanilla extract
  • 2 cups plus 2 tablespoons unbleached all purpose flour spooned and leveled
  • 1 teaspoon baking powder
  • 1 teaspoon baking soda
  • 1/2 teaspoon fine sea salt
  • 3 tablespoons granulated sugar for sprinkling
  • 1/2 cup pecans or walnuts chopped

Instructions

  • Position a rack in the lower third of the oven and preheat it to 325-degrees F. Spray a 9x5-inch loaf pan with nonstick cooking spray and line it with parchment paper with a couple of inches overhang on 2 opposite sides.
  • In a large bowl, stir together the mashed bananas, brown sugar, oil, buttermilk, eggs, rum (if using) and vanilla.
  • In a medium bowl, whisk together the flour, baking powder, baking soda, and salt. Pour the dry ingredients into the wet and fold until just blended. Pour the batter into the prepared pan.
  • Place the granulated sugar in a small bowl. Dampen your fingertips with water and work them into the sugar until it just begins to look like snow-if you pinch some, it should just barely hold together. Sprinkle the dampened sugar over the batter, aiming to get it clumped up together in spots.
  • Bake until a toothpick inserted into the center of the cake comes out clean, 60 to 70 minutes. Let cool for twenty minutes in the pan, then use the parchment paper to help lift the loaf out of the pan and cool completely on a wire rack. Store any leftovers in an airtight container for up to 5 days.


Melting Pot, Instant Pot, Matzo Ball Soup

Melting Pot, Instant Pot, Matzo Ball Soup

In the time of COVID-19 seems like we are all craving comfort food.  I find myself yearning for dishes like soups, stews, foods from my childhood, and all things carb seems to be my mantra.  Apparently, I’m not the only one, bread baking has become a national pastime making it really difficult to find flour and yeast.

My cooking and baking reflect my Californian roots. A typical day “in the life of” will find us having an All-American breakfast of bacon and eggs, followed by a Carne Asada Burrito or lamb shawarma for lunch, and sushi or pho for dinner.  I’m lucky to live in such a diverse community-a melting pot.

Hmmm, ultimate comfort food.  Let the Soup Games begin

On an overcast, gray day last week, I had a hankering for a big steamy bowl of soup.  I had just wished friends a Happy Passover so I had matzo ball soup on the brain. I pulled out a fresh chicken from the Korean grocery store, a variety of vegetables I had picked up at the Farmer’s Market, and my Instant Pot.

Insta-Matzo Ball Soup-Pot

The recipe from Spruce Eats (another great site!) for Instant Pot Matzo Ball Soup served as the basis for my soup.  I started with a small fresh whole chicken 2.5-3 pounds and lots of vegetables including onions, carrots, celery, leeks, garlic, and potatoes, feel free to use whatever vegetables you like.  Add the chicken, cut vegetables, and seasonings to your Instant Pot, turn the lid and close the vent. Set the timer to 25 minutes.  Voila, that’s it, easy-peasy.  Note, it will take a while to get to pressure, approximately 20-25 minutes in addition to the cooking time of 25 minutes.  Once it is done, let the pot natural release for 15 minutes.  You can also use cut-up chicken for the stock, I prefer a whole chicken.  Don’t limit yourself to Matzo Ball soup. This is killer chicken soup, throw in a handful of rice or pasta instead of matzo balls-delicious alternatives.

Put chicken in first and pile veggies on top. Fill pot with water.

Two Schools

Do you like your matzo ball soup with just broth and matzo balls?  When I was a student in LA, a LONG time ago, I loved going to Canter’s Deli on Fairfax. An iconic joint, a classic Jewish deli, with great sammies (Killer Reuben) and traditional matzo ball soup-just rich savory broth and a giant matzo ball.  After a long night of studying, a bowl of soup at Canter’s was always a treat.

BUT, if you like lots of STUFF in your soup (which I am a big fan), remove the chicken and veggies when the stock is done.  Let the chicken cool so you don’t burn your tootsies when shredding it.  Cut the reserve veggies into bite-sized pieces. Set the shredded chicken and cut veggies aside to add to the stock later. This transforms your soup into a substantial meal. A glass of wine, a slice of homemade bread to go along…now you’re talking.

While the Instant Pot is doing its thing, make your matzo balls.  I could lie and post a recipe for homemade matzo balls but I won’t…..I USE A BOX MIX and I’m not afraid to admit it.  A tweak I learned from a friend is to use one whole egg and two egg whites in place of two whole eggs-lighter, fluffier matzo balls. Use an ice cream scoop to portion your matzo balls.  To shape each ball and make the outside smooth, roll each one by hand.  Wet your hands so the matzo balls don’t stick to them while rolling.

Remove the chicken and vegetables when the stock is done.  Switch the Instant Pot to saute’, and bring it to a boil.  Add your matzo balls, bring it back to a boil then reduce the heat to low.  Cover and cook for an additional 20 minutes.  Add reserved shredded chicken and vegetables to warm.  Ladle out all that goodness into bowls and enjoy!

Instant Pot Matzo Ball Soup

Delicious and comforting, Matzo Ball Soup made in an Instant Pot!
Course Soup
Cuisine Jewish
Keyword Chicken, Instant Pot, matzo ball soup
Prep Time 15 minutes
Cook Time 55 minutes

Equipment

  • Pressure Cooker

Ingredients

Chicken Stock

  • 1 whole chicken about 3 pounds with bone and skin, sub 2.5 pounds of chicken thighs
  • 8 cups water
  • 4 ribs celery with leaves, cut into 2-inch lengths
  • 1 onion, large, chopped or use a combination of leeks and onions
  • 4 carrots peeled, cut into 1-inch chunks
  • 1 potato, peeled and cut into quarters Yukon Gold
  • 4 cloves garlic peeled and smashed
  • 4 sprigs parsley
  • 1 bay leaf large, or 2 small leaves
  • 2 teaspoons kosher salt or to taste
  • Black pepper freshly ground, to taste or as desired

Matzo Balls

  • 3 large eggs divided 1 whole egg, 2 egg whites
  • 2 tablespoons vegetable oil use chicken schmaltz or duck fat
  • 1 pkg matzo ball mix manischewitz matzo ball mix

Instructions

  • Place the chicken in Instant Pot, followed by the water, celery, onions, carrots, potato, garlic, parsley, bay leaf, kosher salt and pepper. Lock the lid in place and turn the valve to the sealing position.
  • Select the manual setting, high pressure, and set the timer for 25 minutes. When the time is up, let the pressure release naturally for 15 minutes. Carefully release the remaining pressure.
  • Meanwhile, prepare the matzo ball mixture as the chicken and vegetables are cooking.
  • In a large bowl, whisk the 1 egg and 2 egg whites until slightly beaten. Add eggs, vegetable oil or fat to matzo mix and stir to combine. Refrigerate mix for 15 minutes.
  • Use an ice cream scoop to portion out matzo balls. With moistened hands, further shape the matzo mixture into small balls. You should have about 10-12 matzo balls. Refrigerate until ready to cook.
  • Carefully remove the chicken and vegetables to a large bowl and set aside. Strain the broth through a fine mesh strainer, discarding the solids (garlic pieces, leaves, etc.) keep carrots, potatoes and onions.
  • Pour the broth back into the Instant Pot; set it on sauté and bring to a boil.
  • Drop the matzo balls into the boiling broth, add additional veggies at this point. Turn the sauté function to the low setting. Cover the pot and simmer the matzo balls for 20 minutes.
  • As the matzo balls cook, dice the reserved cooked vegetables. Remove the chicken from the bones and discard the skin and bones. You don't need all of the chicken for the soup. You could reserve breast meat for chicken salad or a pasta dish.
  • Shred the chicken. Return the chopped vegetables and chicken to the broth with the matzo balls and heat through.
  • Ladle soup into bowls. Include two to three matzo balls to each serving.
  • Remove leftover matzo balls from the soup and refrigerate them in a separate container.

Notes

When planning this soup, make sure you factor in enough time for the buildup and release of pressure. It will take about 25 to 30 minutes for the soup to reach pressure.  
Chicken fat, or schmaltz, is a popular fat for matzo balls, but vegetable oil or duck fat are fine alternatives.  A way to get rendered chicken fat is to make the broth and then refrigerate it until the fat solidifies on top. Skim fat to use for matzo balls.
Cake Got to Be Gluten-Free (Rice Flour Pound Cake)

Cake Got to Be Gluten-Free (Rice Flour Pound Cake)

I am always looking for gluten free desserts and Vegan treats for my friends. This is a cataclysmic mind-shift for a person who has always been in the “All butter, Cream-filled, No holds Barred, Is there another flour besides AP wheat” camp.

Years ago we headed to a regatta in Sac.  During a break in the action, my friend Judaaay, convinced me to check out a bakery nearby that specialized in gluten-free and vegan products.  We made the SHORT drive (45 minutes away-auugh) to try their breads and pizza-all gluten-free.  They looked pretty darn good.  We both ordered slices of pizza and as we sat there eating, Judah remarked, Not bad, huh.  I replied…

Girl, You have obviously not had a real pizza in a LONG time.

Fortunately, the tide has turned and due to the demand for gluten-free food, more than just palatable” pastries are being created every day.  The photo of a luscious pound cake in The NY Times caught my eye and lo and behold it is made with rice flour.  Gluten-free!  With my friend Judaayh in mind, I got busy.

The cake starts with creaming butter, sugar, and melted coconut oil until light and fluffy.  There’s no overbeating this batter…no gluten!  But you don’t want to go crazy and break down the butter.  I used refined coconut oil which is essentially tasteless.  You could use a less processed, unrefined coconut oil which would give your cake a hint of coconut flavor or nuttiness. Never used coconut oil to bake?  Here is a  primer from SF Gate.  Note, this recipe uses regular rice flour NOT Sweet Rice Flour which is a glutinous rice product.  You will end up with a dense mess if you use sweet rice flour.  I found rice flour at Whole Foods made by Bob’s Red Mill.  Last note, this recipe does use BOTH coconut oil and coconut milk.

The finished batter before baking

I used 2 teaspoons of vanilla because I don’t have Tequila and I still can’t find my Rum 🤔.  Rum would be lovely.  I’m sure this batter could handle the addition of lemon or orange zest or poppy seeds.  After adding the liquids it will look like a lot of batter relative to the pan.  This cake does not rise a lot so not to worry, no overspill.

This cake is delicious.  It’s tender, buttery, moist with a nice crumb.  I’d make it again in a heartbeat…regardless if Judaay was coming over or not!  I can’t wait for shelter in place to be over so she can come over for a cup of coffee and a slice of this cake.  So good!

Print Pin
5 from 1 vote

Rice Flour Poundcake

Gluten free, buttery, delicious pounc cake!
Course Cake
Cuisine American
Keyword coconut, Gluten free, poundcake, Rice flour
Prep Time 20 minutes
Cook Time 55 minutes

Equipment

  • 8-by-4-inch loaf pan

Ingredients

Dry Ingredients

  • 1 ½ cups (200 grams) white rice flour not sweet rice flour
  • ¼ teaspoon baking powder
  • ¼ teaspoon baking soda
  • ¼ teaspoon fine sea salt
  • ¼ teaspoon freshly ground black pepper optional

Wet Stuff and Creamed Mixture

  • 4 tbsp (55 grams) unsalted butter at room temperature, plus more for greasing
  • 4 tbsp (60 milliliters) coconut oil
  • 1 cup plus 1 tablespoon (225 grams) granulated sugar
  • 2 large eggs at room temperature
  • cup (80 milliliters) sour cream
  • cup (160 milliliters) unsweetened coconut milk full fat
  • 1 teaspoon mezcal, tequila, or rum, vanilla or 2 teaspoons vanilla extract if not using alcohol
  • 2 tbsp poppy seeds if using rum, optional
  • zest 1 lemon, or lime if using tequila or mezcal finely grated

Instructions

  • Heat oven to 350 degrees. Lightly butter an 8-by-4-inch loaf pan. Melt coconut oil in small saucepan over low heat. Bring oil back to room temperature before baking. In a medium mixing bowl, combine rice flour, baking powder, baking soda, salt and pepper, if using.
  • Using an electric mixer, whisk together coconut oil, butter and sugar at high speed until light and fluffy, 2 to 3 minutes. With the motor still running, add eggs and combine until creamed and very fluffy. Reduce to low speed and whisk in a third of the flour mixture. Once combined, add sour cream. Whisk in another third of the dry ingredients, then half of the coconut milk. Add the remaining flour mixture. At a medium speed, whisk in the rest of the coconut milk, and mezcal, until smooth and completely combined.
  • Scrape batter into pan and smooth the top with the spatula. Bake until the cake is golden and a toothpick inserted into the center comes out clean, about 45 to 55 minutes. Let cake cool in pan for 10 minutes, then turn on a wire rack to cool completely.


Banana Cake with Cream Cheese Frosting (Coop-vid Up and Going Bananas)

Banana Cake with Cream Cheese Frosting (Coop-vid Up and Going Bananas)

I bought WAY TOO many bananas on my COVID reconnaissance to the grocery store last week.  Luckily, too many bananas is a happy problem.  Eat em’, freeze em’, bake em’ in a cake.

Banana Bread was out. I had just baked a loaf of banana bread from Shauna Severs’ latest book, Midwest Made.  These overripe bad boi bananas were destined for a banana cake with CREAM CHEESE FROSTING. After all, calories don’t count during the time of COVID-19.  That’s right, zippo calories.

Let them eat CAKE

My favorite Banana Cake recipe comes from Clementine Bakery in Los Angeles. I found it on the blog site, Ipso Fatto (love, love, love). How good is it?  It’s our 2nd most favorite birthday cake, right after Wes’s Carrot Cake.  It’s really good.  Mui just made one and took it to another level by adding a layer of chocolate ganache in the middle and gorgeous sprinkles on the top. Just for little, OLD, me for my birthday.  Time to find another banana cake recipe to add to my evergrowing “all things banana” arsenal of recipes.  I went back to Ipso Fatto (she loves all things bananas as much as I do) and whaddya know, this popped up on her site.

Best Banana Cake I’ve Ever Had

Ever had?  That sounds like a challenge.  Game on. The recipe comes from Sally’s Baking Addiction.  It’s straightforward and comes together easily.  I made this late at night so no process pics. Classic cake instructions-cream the butter, add the sugars (in this case dark brown sugar-sweet and caramel-ly), eggs, and mashed bananas. Then alternate the dry ingredients with buttermilk (nice little tang).  Don’t worry if at various points the mixture looks curdled, it will come together as you add the dry ingredients.  The batter will be lumpy-looking but pourable at the end.  While it’s baking, start the best part of any cake, the frosting, in this case, my favorite, cream cheese frosting.

I used hubby’s cream cheese frosting recipe, I think it’s perfect but then again I am biased. Sally’s recipe calls for 3 cups of powdered sugar, while hubby’s calls for only 3/4 cup to 1 cup at most, plenty for my taste.  Beat the cream cheese and butter until creamy and smooth BEFORE adding the powdered sugar.  This is key, once you add the sugar, mix just until blended and to the consistency you like.  Don’t overbeat as the sugar will break down the frosting.  You’ll end up with runny, loose frosting.  Spread the frosting on the cake and then lick the spatula-perks of being the baker.  The cake is yummy at room temperature or chilled, straight out of the fridge.

Texture-wise this cake reminds me of a snack cake, springy, with a little density, and a compact crumb. You want a tall glass of cold milk to go along.  I still like the Clementine Banana Cake more, but that’s probably my personal preference.  Clementine’s cake has a looser crumb and isn’t quite as dense, perfect for a layer cake.  But both are delicious.

That’s it folks…enjoy!

Banana Cake (Sally's Baking Addiction)

Best Banana Cake with Cream Cheese Frosting from Sallys Baking Addiction
Course Cake, Dessert
Cuisine American
Keyword Banana Cake with Cream Cheese Frosting
Prep Time 30 minutes
Cook Time 50 minutes
Servings 10

Ingredients

The Cake

Dry Ingredients

  • 3 cups all-purpose flour (spoon & leveled) 375g
  • 1 teaspoon baking powder
  • 1 teaspoon baking soda
  • 1/2 teaspoon ground cinnamon
  • 1/2 teaspoon salt

Wet Ingredients

  • 3 large ripe bananas about 1 and 1/2 cups mashed
  • 3/4 cup unsalted butter, softened to room temperature 170g
  • 1 cup granulated sugar 200g
  • 1/2 cup packed light or dark brown sugar 100g
  • 3 large eggs at room temperature
  • 2 teaspoons pure vanilla extract
  • 1-1/2 cups buttermilk, at room temperature 360ml

Sally's Cream Cheese Frosting

  • 8 ounces full-fat block cream cheese, softened to room temperature 224g
  • 1/2 cup unsalted butter, softened to room temperature 115g
  • 3 cups confectioners’ sugar, plus an extra 1/4 cup if needed 360g
  • 1 teaspoon pure vanilla extract
  • 1/8 teaspoon salt

Hubby's Cream Cheese Frosting

  • 1 brick Philadelphia Cream Cheese 8 ounces
  • 1 stick salted butter 4 ounces
  • 3/4-1 cup powdered sugar
  • 2 tsp vanilla extract

Instructions

  • Preheat the oven to 350°F (177°C) and grease a 9×13 inch pan. I always use parchment on the bottom of my pan, makes it easier to remove the cake.
  • Make the cake: Mash the bananas. I use a potato masher. Set mashed bananas aside.
  • Whisk the flour, baking powder, baking soda, cinnamon, and salt together. Set aside.
  • Using a mixer fitted with a paddle attachment, beat the butter on high speed until smooth and creamy – about 1 minute. Add both sugars and beat on high speed for 2 minutes until creamed together. Scrape down the sides and up the bottom of the bow. Add the eggs and the vanilla. Beat on medium-high speed until combined, then beat in the mashed bananas. Scrape down the sides and the bottom of the bowl as needed. With the mixer on low speed, add the dry ingredients in three additions alternating with the buttermilk and mixing each addition just until incorporated. Always start and finish with the dry ingredients. Do not overmix. The batter will be slightly thick, a few lumps is OK.
  • Spread batter into the prepared pan. Bake for 45-50 minutes. Baking times vary, so start checking at 40 minutes. Keep an eye on it. The cake is done when a toothpick inserted in the center comes out clean. If you find the top of the cake is browning too quickly in the oven, loosely cover it with aluminum foil.
  • Remove the cake from the oven and set on a wire rack. Allow to cool completely. After about 45 minutes, I usually place it in the refrigerator to speed things up.
  • Make the frosting: In a large bowl using a handheld or stand mixer fitted with a paddle or whisk attachment, beat the cream cheese and butter together on high speed until smooth and creamy.
  • Add 3 cups confectioners’ sugar, vanilla, and salt. Beat on low speed for 30 seconds, then switch to high speed and beat for 2 minutes. If you want the frosting a little thicker, add the extra 1/4 cup of confectioners sugar (I add it). Spread the frosting on the cooled cake.
  • Refrigerate for 30 minutes before serving. This helps sets the frosting and makes cutting easier.
  • Cover leftover cake tightly and store in the refrigerator for 5 days.

Hubby's Cream Cheese Frosting

  • Beat butter to soften before adding the cream cheese, 15-30 seconds. This helps prevent lumps. Add cream cheese and beat on medium high speed until smooth, light, and creamy. Beat on high if using a handheld mixer.
  • Add vanilla and beat on medium to blend. Add powdered sugar and beat on low speed to blend in and then increase to medium speed to incorporate, at most 1 minute. Do not OVERBEAT!!! Taste the frosting, add additional 1/4 cup of sugar if you want it sweeter. If it seems a little flat, add a pinch of salt.
  • Spread on the cooled cake. For special occasions flip the cake out of the pan and frost top and sides. You may need to make a recipe and a half of frosting in that case.

Notes

Make Ahead Instructions: Prepare cake through step 5. Cover the cake tightly and refrigerate for up to 2 days or freeze up to 3 months. Bring to room temperature, make the frosting, frost, and serve. Frosted cake freezes well, up to 3 months. Thaw overnight in the refrigerator, bring to room temperature or serve cold.
Buttermilk: If you don’t have buttermilk, you can add 1 Tablespoon fresh lemon juice or white vinegar to a large liquid measuring cup. Then add enough regular room temperature milk (whole milk is recommended) to make 1 and 1/2 cups total. Stir and let sit for 5 minutes. This soured milk can be used in the recipe instead of buttermilk.
Cupcakes: I’ve gotten a few questions about turning this cake into cupcakes. For about 2 dozen cupcakes, fill the cupcake liners halfway and bake for about 20-22 minutes. Same oven temperature.
Bundt Cake: You can bake this batter in a 10-12 cup bundt pan, but I find it’s not quite as moist when baked in the bundt shape. Bake for 50-65 minutes, give or take. Use a toothpick to determine doneness. Same oven temperature.
Layer Cake: I use this recipe to make my banana layer cake. If you want to make a 2 layer cake, divide batter between 2 greased 9-inch cake pans, and bake at 350°F (177°C) for 26-30 minutes or until a toothpick inserted in the center comes out clean.
Corn-ered in the House, Chili-n, Bakin’ Muffins (Corn Muffins)

Corn-ered in the House, Chili-n, Bakin’ Muffins (Corn Muffins)

Shhhh…please don’t tell Chef H I messed up his cornbread recipe.  I’m not sure what I did wrong but I’m way too embarrassed to ask him so I went hunting for another cornbread recipe. I’m a Californian, I’m pretty wimpy when it comes to cornbread.  True cornbread is NOT cake-y and sweet, too bad that’s the way I like it.  Another reason I couldn’t call him.  What if he said, “that’s the way southern cornbread is, silly”.  So I tapped my delete key, d-a-e-r-b and pecked m-u-f-f-i-n in on my keyboard hoping to land on a sweet, cakey, cornbread recipe. I hit return and…

…landed on an old friend, Smitten Kitchen.  Her post for Perfect Corn Muffins popped up on my screen. Her post adapts the recipe from Cook’s Illustrated. Uh-oh.  I love CI but it probably means a couple of extra steps.

Yes, it did.

A lot of the recipes I looked at for corn muffins called for proportionally more regular flour than cornmeal, yep-cakey.  Not this one. The cornmeal is divided and much of it is combined with milk to make something akin to cornmeal mush. This keeps the corn muffins moist.  Okay, I went with it.  I used the microwave method included in the recipe to make it, worked like a charm.

Y’all know what goes into cornbread, flour, butter, flour, baking soda, powder, eggs, sour cream or buttermilk.  So what do I want to talk about?

CORNMEAL

There are a plethora of cornmeal products out there.  Stone-ground, Machine grind, Which are then furthered divided by grade- coarse, medium, and fine.  If you get any product that says stone-ground, you’re going to get a bit of grit as it contains both the bran and germ of the kernel.  This recipe calls for medium grind cornmeal, preferably stone-ground.  I used Bob’s Red Mill fine stone-ground cornmeal and there was still some bite to the muffins. Why? I am not a big fan of grittiness in my cornbread or muffins. If you like that coarse “toothy” texture, use the medium grind.  If you hate that grittiness, don’t use stone-ground. Use the stuff you get at the supermarket, either Quaker Oats or Argo cornmeal-no germ, no bran, no grit.  If you want a light and airy cake-like muffin or cornbread (should we call it cornbread?) use cornflour (superfine grind).

You can find corn flour at Whole Foods (probably Bob’s Red Mill) along with the gamut of cornmeal.  A couple of recipes that use cornflour include Blueberry Cobbler with a Cornmeal-Sugar Cookie Crust from Vivian Howard and Momofuku’s Christina Tosi recipe for KILLER Corn Cookies.  Both amazing.

Then there’s Polenta, Grits, Masa Harina. Polenta or Grits is essentially cornmeal mush.  You can use coarse or medium grind cornmeal.  Bob’s Red Mill makes a Grits or Polenta Cornmeal (yes I fell for it) which makes it easy, it’s just coarse grind.  Masa Harina is corn treated with ash or lime solution (called nixtamalized, now you can file that word away) dried, and ground into masa.  Think delicious tamales and tortillas NOT cornbread, polenta or grits.

I use stone-ground, even though I don’t like grittiness, it’s a compromise.  I love the flavor and the “it’s healthier for you” aspect.

N.B. Cornstarch is not cornflour, cornmeal, polenta, grits, masa, popcorn.  Don’t even go there.  It’s just a thickener made from corn endosperm-see, that doesn’t even sound good.  I use it all the time in Chinese cooking as a thickener, that’s it.

Back to the Corn Muffins

Yes, this is the cornmeal mush that goes into the batter along with dry cornmeal.  Cook until it thickens and you can draw a spatula through it.  Add wet ingredients to the cornmeal mush and then add the dry ingredients.  Your batter will be pretty thick.  Use an ice cream scoop to fill your muffin tin.  Easy peasy.

Finally, what to serve with your corn muffins…CHILI of course!  Lucky you, I have two chili recipes, Firemen’s Chili from Friends (yes the TV show) and a super-duper easy Chicken Chili  Both would go perfectly with these corn muffins.

Ok, we have come to the end of this post and I have a confession to make.  These muffins are delicious and I would make them all the time if it weren’t for one thing.

TRADER JOE’S CORNBREAD MIX

It’s that’s good. Throw away the box and tell your friends and family you made them from scratch.  Yep, that good.

Perfect Corn Muffins

Cook's Illustrated Corn Muffins the perfect cross of a cake-like sweet corn muffin and down home cornbread.
Course Muffins
Cuisine American
Keyword Cook's Illustrated, Corn Muffin
Prep Time 30 minutes
Cook Time 20 minutes

Equipment

  • 12-cup standard muffin tin

Ingredients

  • 2 cups (280 grams) yellow cornmeal, to be divided Use stone ground for that characteristic grittiness that cornbread can have.
  • 1 cup (130 grams) all-purpose flour
  • 1 1/2 teaspoons baking powder
  • 1 teaspoon baking soda
  • 1 1/4 teaspoons fine sea or table salt
  • 1 1/4 cups (300 ml) milk, whole is best here
  • 1 cup (240 grams) sour cream (full-fat plain yogurt should work here too)
  • 8 tablespoons (115 grams) unsalted butter, melted and cooled slightly
  • 1/3 cup granulated sugar.
  • 2 large eggs

Instructions

  • Heat oven to 425°F (220°C). Either grease or line a 12-cup standard muffin tin with liners.
  • Whisk 1 1/2 cups cornmeal, flour, baking powder, baking soda and salt together in a medium bowl.

Cornmeal Mush

  • In a large bowl (if you have a microwave) or a medium saucepan (if you do not), combine milk and remaining 1/2 cup cornmeal. In a microwave, cook cornmeal–milk mixture for 1 1/2 minutes, then whisk thoroughly, and continue to microwave in 30-second increments, mixing between them, until it’s thickened to a batter-like consistency, i.e. the whisk will leave a clear line across the bottom of the bowl that slowly fills in. This will take 1 to 3 minutes longer.
  • On the stove, cook cornmeal mixture over medium heat, whisking constantly, until it thickens as described above, then transfer to a large bowl.

Put the batter together

  • Whisk butter, then sugar, then sour cream into cooked cornmeal until combined. At this point, the wet mixture should be cool enough that adding the eggs will not scramble them, but if it still seems too hot, let it cool for 5 minutes longer. Whisk in eggs until combined.
  • Fold in flour mixture until thoroughly combined and the batter is very thick. Divide batter evenly among prepared muffin cups; it will mound slightly above the rim.
  • Bake until tops are golden brown and toothpick inserted in center comes out clean, 13 to 17 minutes, rotating muffin tin halfway through baking to ensure even cooking. Let muffins cool in muffin tin on wire rack for 5 minutes, then remove muffins from tin and let cool 5 minutes longer. Serve warm with honey butter or just honey if you feel guilty.
  • Eat by themselves, with Chili, with just about anything.
Soy Sauce Chicken (See Yao Gai-s Soon)

Soy Sauce Chicken (See Yao Gai-s Soon)

Growing up in Chinatown I took for granted that everyone had access to fresh vegetables, fish, poultry and meat.  If only I had an iPhone back in the day to capture the pictures of daily life in my Chinatown.  I’d have pictures of crates filled with live chickens sitting on the sidewalk, tanks filled with live fish and crabs, and baskets filled with just picked greens.

Many of the markets had delis, their counters loaded with trays of fried noodles, stir-fried vegetables, and stews. Storefront windows filled with roasted ducks, chickens and different sausages hung to entice passersby.   Whole roasted pig hanging on a hook with its skin roasted to a crispy rich caramel brown. Shoppers clamored in line while the butcher sliced off chunks to dole out. 

Fifteen minutes before my parents closed their office for the day, Dad would hurry down to the shops to buy fixings for that night’s dinner.  What he cooked was always predicated on what was fresh in the markets.

Our dinners consisted of my Dad’s dishes-squash soup, stir fried beef and greens or steamed fish with green onions and ginger and pre-made dishes bought from one of the many delis in Chinatown.  Dad would survey the window at Ping Yuen Market and select a roast duck or chicken, or pick a piece of Crispy Skin Pork or bbq pork .  Luckily many of these deli delights like Whole Poached Chicken and bbq pork, even crispy skin roasted pork can be made at home.  I gave it a try with a small piece of pork belly, and was surprised by the results.  Now I can make it at home.

Soy Sauce Chicken

It never occurred to me to make Soy Sauce Chicken at home, it was too easy to head to my favorite Chinese deli and pick one up.  Staying at home has made me rethink “what can I make at home?” Time to tackle Soy Sauce Chicken.  The good news is it’s easy!  I googled Soy Sauce Chicken and found a recipe on The Woks of Life (an amazing Asian family cooking blog).  A few tweaks to their recipe and boom, no need to head to that Chinese deli anymore.  Delicious homemade Soy Sauce Chicken made by yours truly

Here’s the hard part.  Ingredients

The seasonings include dark and regular soy sauce, star anise, sugar, cinnamon, rice wine.  Dark soy sauce has molasses which makes it sweeter than regular soy sauce.  Pictured in the left, back is rock sugar which I used along with granulated sugar.  You could use just granulated sugar or a combination of white and brown sugar.   Star anise is not my favorite so I cut back to 1-2 pieces and added half of a cinnamon stick instead.  Next time I will throw in 1-2 cloves in the poaching liquid.  Feel free to play around with the spices to make it your own, although stick to the spices in Five Spice Powder as a guide -Cinnamon, Star Anise, Fennel, Clove, Sichuan Peppercorns.  Keep in mind that all of these spices are pretty assertive, a little goes a long way.

The dark soy adds not only sweetness but color.  The skin turns a beautiful mahogany brown.  The regular soy sauce adds saltiness and flavor.  The original recipe calls for green onions, I didn’t have any, so I used shallots instead.  You definitely need a member of the allium family.

The result is tender, juicy, chicken that is sweet, salty, and spicy from the star anise and cinnamon.  It’s delicious.  Serve the chicken with simply prepared greens and either rice or noodles.  Drizzle with the poaching liquid and BOOM dinner is served.  Enjoy!

Soy Sauce Chicken (See Yau Gai)

Course Main Course
Cuisine Asian
Keyword Soy Sauce Chicken
Prep Time 15 minutes
Cook Time 1 hour 30 minutes

Ingredients

  • 1 whole chicken ~4 pounds; fresh
  • 1 T oil
  • 7 slices ginger smash lightly to release flavor
  • 2 scallions cut into 3-inch pieces and smashed flat
  • 3 star anise I use 1-2 only
  • 1 ½ cups Chinese Rice Wine aka shaoxing wine
  • 1 ½ cups soy sauce reg Kikkoman would work
  • 1 1/4 cup dark soy sauce or dark mushroom soy sauce
  • 1 cup sugar plus 2 tablespoons Can substitute rock sugar or brown sugar for 1/2 of amount
  • 2 teaspoons salt Kosher salt, if using diamond increase to 1 T
  • 10 cups water
  • 1-2 cloves optional

Optional spices

  • 2 cloves garlic peeled and smashed
  • 1/2 stick cinnamon
  • 1/4 tsp fennel seeds reduce star anise to 1 piece if using
  • 1-2 large shallots, sliced in place of green onions and garlic, sheltering in place-mother of invention!

Instructions

  • Take your chicken out of the refrigerator before you plan to cook, let it come to room temperature. Remove the giblets, and thoroughly rinse the chicken inside and out.
  • In a tall, narrow stock pot, that will just fit the chicken, (the chicken should be totally submerged in the cooking liquid) Heat pot over medium low heat add the oil. Add ginger when the oil is hot.
  • Fry ginger for about 30 seconds until it begins to brown. Then add the scallions and cook another 30 seconds. Add the star anise and rice wine, and bring to a simmer to let some of the alcohol cook off. Add the soy sauce, dark soy sauce, sugar, salt, and water. Bring to a simmer again and cook on low heat for another 20 minutes.
  • Increase the heat to bring the liquid to a slow boil (i.e. a little stronger than a simmer, but not a rolling boil). Lower the chicken slowly into the pot breast side up. Make sure any air pockets in the cavity fill up completely with liquid. The chicken should be entirely submerged at this point.
  • Bring the cooking liquid back to a boil and cook for about 5 minutes at medium heat, a nice rolling simmer. Next, carefully with tongs or a serving fork, lift the chicken out of the water and empty the liquid inside the cavity, which will be cooler than the liquid surrounding the chicken. Lower the chicken back into the pot, making sure once again to fill the cavity. If the chicken is not completely submerged, periodically baste the exposed area with cooking liquid.
  • Bring the liquid back up to a simmer, which should take about 10 minutes. Keep it at this slow simmer (the liquid will be about 210 degrees F) for 25 minutes. Turn off the heat, cover the pot, and let the chicken sit in the pot for another 15 minutes. Transfer the chicken to a cutting board. You can test the chicken, should be about 165 degrees F.
  • Use the sauce from the pot to occasionally baste the chicken and keep the skin moist as it cools. Serve over rice with some sauce from the pot!

Chicken Pieces

  • Don't want to poach an entire chicken?
  • This is enough poaching liquid to poach 4 chicken breast or 4 whole legs or 6 thighs. Follow directions up until putting the chicken into the liquid. Place chicken pieces in liquid. Bring it back to a boil. Lower heat so you have a nice energetic simmer going.. Cover and simmer for 10 minutes. Turn heat off and allow the chicken to sit covered for 20-25 minutes depending on size of pieces.
    That's it, enjoy!

Notes

Once you're done cooking the chicken, you can actually freeze the sauce/cooking liquid for use again later (though you may have to re-season the sauce)