Tag: #easyanddelicious

Twelve Days of Cookies Starts… NOW (Saffron, Orange and Honey Madeleines)

Twelve Days of Cookies Starts… NOW (Saffron, Orange and Honey Madeleines)

This holiday season I am determined to post a Twelve Days of Cookies list and I will only stand a chance if I start now. This month Food 52 Baking Club is featuring Ottolenghi’s book Sweet authored with Helen Goh, his dessert partner in crime. As with all Ottolenghi books, this one is beautiful, worthy of your coffee table, but more importantly, worthy of use in your kitchen.

A long long time ago in a kitchen somewhere far away, I tried to make madeleines.  I flopped, and since then my madeleines pans have been relegated to the back of a kitchen cabinet.  Looking for a recipe to try for National Cookie Day (yesterday, hope you made a batch) I came across Ottolenghi’s Saffron, Orange and Honey Madeleines.  They looked and sounded so delicious I decided to pull out my forgotten pans and give it the old college try.

I’m glad I did.  The madeleines are buttery, cakey, tender, everything a madeleine should be and more.

The batter is made in a food processor (oh snap). Eggs and sugar are whirled in the processor, flour and leavening added, pulse a couple more times and then add the saffron infused melted butter. The batter is poured into a WELL BUTTERED AND FLOURED pan (trust me on this) and baked for 7-9 minutes.  In those short minutes, your entire kitchen will be blanketed by the aroma of vanilla, butter, and orange, heavenly.

The cooled madeleines are popped out of their shells (haha, get it?) painted with heated honey (watch your fingers, the honey is hot) and one end rolled in ground pistachios.

So good.  If you don’t have a madeleine pan you could probably use a mini-muffin tin…they’ll still be delicious but they just won’t be the same (sigh).

You can find the recipe on Bon Apetit but without weight measurements (boohoo). If I were you I’d splurge and get the book, totally worth it!

[amd-yrecipe-recipe:150]


Cookiefinity-Triple Play (Triple Oatmeal Cookies from BraveTart)

Cookiefinity-Triple Play (Triple Oatmeal Cookies from BraveTart)

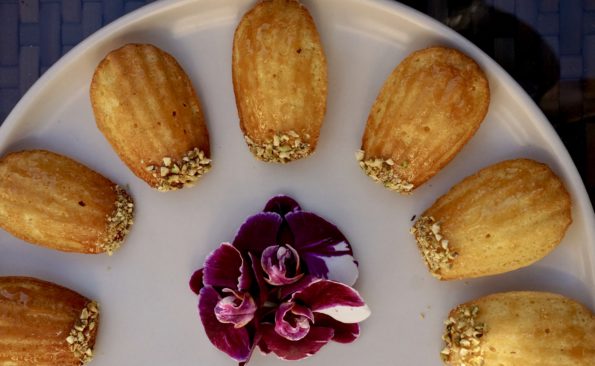
This month’s Food52 Baking Book Club features Stella Park’s BraveTart.  You may remember I previously blogged about her delicious Honey Roasted Peanut Butter Cookies and the debacle of using the printed version in People magazine.  BIG MISTAKE. About a month ago, Omnivore Books hosted Ms.Parks, being a cookbook junkie, I jumped in my car and headed to the City to attend. Got my very own SIGNED copy, uh-huh, uh-huh..doing the happy dance.

Talented dessert chef, blogger, and author of Marbled, Swirled and Layered, Irvin Lin was on hand to moderate the conversation.  Which just proves there is a conspiracy going on as I was FORCED to buy not just one new cookbook but two. Now I have to find shelf-room for his book too. Aiyah!

After her talk, I waited patiently while one woman monopolized the Q&A session (sheesh-some people), they finally picked me and I blurted out “I’m the one who tweeted about processing the honey roasted nuts” and recounted the horrible editing job of her recipe in People magazine. I think of it as a cautionary public service tale for everyone.

And with her great southern drawl (she is from Kentucky) she said: “Oh I know, I hate when they edit recipes and get it wrong!”

I was vindicated.

The book is a reflection of her, warm, friendly and gracious.  BraveTart is a love tome to iconic American treats. The book works due to her attention to detail and thoroughness.  She has reworked recipes such as Oreos and Nutter Butters and transformed them into delicious homey treats while retaining the essence of the original dessert that you remember so well from childhood. With the first bite of her Triple Oatmeal Cookie, I was immediately transported back to my 12-year-old self, reaching into the familiar pink-purple bag of Mother’s Oatmeal Cookies.

Her Triple Oatmeal Cookies are delicious, chewy, toothy cookies. The cookies contain old-fashioned oatmeal, steel cut oats and oat flour, the triple whammy of Oatsville.  Cranberries and pecans are added and provide sweetness and crunch, a scrumptious cookie. Feel free to substitute different dried fruit. Interestingly enough Stella posted that raisins will cause or allow the cookies to spread more than cranberries so keep that in mind.  Dried cherries or diced apricots would be amazing also.  Chocolate chips would, of course, work well also.

I made the dough and followed the instructions to bake the cookies on a foil-lined sheet.  To my surprise, the cookie spread was more than expected.  The first batch was thin, almost like lace cookies. Channeling America’s Test Kitchen I baked subsequent batches on parchment and then on a Silpat.  Here are the results, everyone knows a picture is worth a thousand words.

So, the cookies on the left were baked on Silpat, center- parchment, right-foil. An Ah-ha moment.  Like the story of Goldilocks and the Three Bears, “This cookie (right) is too thin, this one (left) is too thick, the center cookie is JUST RIGHT!” Note to self, bake these cookies on parchment.

In the end, they were all good, chewy, buttery, crispy edges and full of oat goodness. They were gobbled up.

Cookiefinity-Triple Play (Triple Oatmeal Cookies from BraveTart)

Ingredients

  • 1 cup 2 sticks unsalted butter, room temperature (not too soft)
  • cup 5 ounces packed light brown sugar
  • ½ cup 3 ½ ounces granulated sugar
  • 1 ½ teaspoons Diamond Crystal kosher salt a bit less if you use Morton’s kosher salt, half the amount if it’s regular table salt plus additional salt (if you wish) for sprinkling
  • 1 ¼ teaspoons baking soda
  • ½ teaspoon ground cinnamon
  • 1 tablespoon vanilla extract
  • 1 large egg
  • cup 3 ounces all-purpose flour
  • ¾ cup 2 ½ ounces oat flour (alternatively, grind old-fashioned rolled oats in a blender)
  • 1 ⅔ cups 6 ounces old-fashioned rolled oats (not quick-cooking)
  • ¼ cup 1 ½ ounces steel-cut oats
  • 1 ¼ cups 5 ounces toasted pecan pieces
  • 1 cup 6 ounces dried cranberries or cherries, if you use raisins the cookies will spread a bit more

Instructions

  • Preheat oven to 350 degrees.
  • In bowl of a stand mixer, combine butter, brown sugar, granulated sugar, salt, baking soda, cinnamon and vanilla. Beat until combined. Add egg and continue beating until light and creamy.
  • Whisk together flour, oat flour and both oatmeal types. Stir in pecans and cranberries. Add dry ingredients to wet and mix until just combined. Batter will be stiff.
  • Arrange portions of dough (about 1 ounce or 2 tablespoons each) onto lined baking sheets. Flatten into disks and optionally sprinkle each with a bit of kosher salt.
  • Bake in preheated oven 10 to 12 minutes, until golden brown on edges but still pale in the middle.
  • Let cool on baking sheet a few minutes and then move to a cooling rack.

Pictures from a cookbook groupie! When will I learn to hold my phone higher?

Lemon Cookie Very Pretty & The Cookie Is So Sweet (Blueberry-Lemon Shortbread)

Lemon Cookie Very Pretty & The Cookie Is So Sweet (Blueberry-Lemon Shortbread)

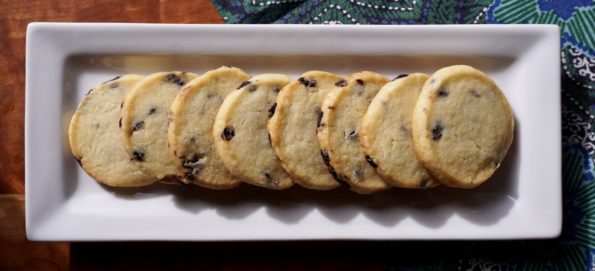
Blueberry-Lemon Shortbread from Miranda Couse’s  Easy Homemade Cookie Cookbook is a winner.  These cookies remind me of my favorite scones which have dried blueberries and lemon zest in them. As soon as I spied the recipe I knew I had to try it. The cookies are made with powdered sugar which helps to create a tender cookie. A combination of lemon juice and lemon zest give the cookies their tart, lemony flavor.  Want less pucker? Substitute Meyer lemon or a combination of lemon and orange juice in the cookie.  The use of dried blueberries in these delicious morsels intensifies the berry flavor and provides a foil to the lemon.  Trader Joe’s carries wild dried blueberries that work perfectly.

The dough is rolled out to approximately 3/8-1/2 inch thickness.  I’m sure the dough if chilled, would be firm enough to shape into a log for slice and bake cookies.  As I sat munching on one the thought occurred to me that dried cranberries and orange would also be delicious.  Can’t wait to make my next batch.  If you try a different flavor combination, let me know!

Lemon Blueberry Shortbread from Easy Homemade Cookie Cookbook

Delicious citrus-berry, buttery cookie!
Course cookies
Cuisine American
Keyword blueberry, cookies, lemon, Lemon blueberry shortbread, Shortbread

Ingredients

  • MAKES ABOUT 12 COOKIES
  • Prep: 15 minutes Chill: 30 minutes
  • Bake: 14 to 15 minutes
  • Shelf Life: 4 to 5 days
  • ½ cup 1 stick unsalted butter, at room temperature
  • 7 tablespoons confectioners’ sugar
  • 2 tablespoons granulated sugar
  • 2 teaspoons grated lemon zest
  • tablespoons freshly squeezed lemon juice
  • 1 cup all-purpose flour
  • ¼ teaspoon table salt
  • ¼ cup chopped dried blueberries Feel free to substitute other dried fruit, great combo would be orange and dried cranberries, use your imagination, like lime and strawberry

Instructions

  • In a large mixing bowl, using an electric mixer on medium speed or a wooden spoon, beat together the butter and both sugars until light and creamy. This will take about 3 minutes if using an electric mixer or 5 to 6 minutes if creaming by hand. Add the lemon zest and lemon juice and beat to combine. Add the flour and salt, and beat on low speed or by hand until the dough comes together about 1 minute. Using a rubber spatula, fold in the blueberries until incorporated.
  • Place the dough between two sheets of wax paper or parchment paper. Using a rolling pin, roll out the dough to an even ½-inch thickness. Wrap the dough in the paper and refrigerate until firm, about 30 minutes.
  • Preheat the oven to 350ºF. Line a cookie sheet with parchment paper.
  • Using a 2-inch round cookie cutter, cut out the cookies and place them 2 inches apart on the prepared cookie sheet. Rechill if they seem soft.
  • Bake 14-15 minutes until edges are golden brown. Start checking at 12 minutes!
  • Let the cookies rest on the sheet for 5 minutes before transferring to a wire rack to finish cooling.
  • Like many shortbread, flavors will develop and the cookie will be even better the next day!
Good Morning Mr. Phoods (Cilantro Chutney Chicken Curry)

Good Morning Mr. Phoods (Cilantro Chutney Chicken Curry)

Good morning Mr. Phoods:

The dish you are about to take-on requires that you answer the following questions.  Your answers will determine whether you should proceed with this post or not.

Do you like cilantro?

What does cilantro taste like to you?

If you answered NO and it tastes like soap exit NOW by clicking on MII consolation 

If you answered yes and yumminess, I LOVE cilantro…your mission, should you decide to accept it, will be to run to the store for cilantro, boneless chicken, peanuts, garlic, and onions and make this dish. As usual, if you or any other MII fans (Made In India) should be caught while making this dish you will be required to….invite me over for dinner. If not, the secretary (again me) will disavow any knowledge of you.

Yes, Meera Sodha’s Cilantro Chutney Chicken from her book Made In India is that good.  It inspired me to create this homage to one of my all-time favorite TV shows.

Start by making the chutney.  It’s sweet from the brown sugar, aromatic from the cilantro and tangy from the lemon juice. The peanuts give it body.  If you have extra after making the chicken, spread it on some naan or crackers. Delicious. the chutney can be made in a blender.  If it seems too thick thin it with a bit of water.

This cilantro chicken curry is very user-friendly. Despite being a newbie at cooking Indian cuisine, this dish was not intimidating, it was in fact very “doable” and takes just minutes to prepare. Saute boneless chicken with onions and a paste made of peppers, garlic, and ginger.  Add the cilantro chutney and simmer until the chicken is tender. Top with the reserved onions that have been caramelized to a deep rich toasty brown. This dish is absolutely delightful.  Every bite is a flavor explosion.  Served on top of fragrant basmati rice and garnished with cilantro leaves, its a great one pot meal perfect for a weekday dinner.

Quick, easy…Mission Possible…completed.  Signing off.


Good Morning Mr. Phoods (Cilantro Chutney Chicken Curry)

Ingredients

Cilanto Chutney Chicken Curry

  • 2- inch piece of ginger peeled and roughly chopped
  • 6 cloves of garlic roughly chopped
  • 3/4 fresh green chili roughly chopped (seeded if you prefer less heat)
  • salt
  • 2 tablespoons canola oil
  • 2 onions finely sliced
  • 1 3/4 pounds skinless boneless chicken thighs, chopped into 3/4 x 1-inch pieces
  • 6 tablespoons cilantro chutney recipe follows

Cilantro Chutney

  • 4 ounces cilantro
  • 2 ounces peanuts unsalted and unroasted
  • 4 tablespoons lemon juice
  • 1 teaspoon salt
  • 4 teaspoons brown sugar
  • 1/4 teaspoon ground turmeric
  • 2 to 3 small fresh green chilis roughly chopped (seeded if you prefer less heat)

Instructions

Chicken Curry

  • Throw the ginger, garlic, and green chili into a mortar and pestle, along with a pinch of salt, and bash up to a coarse paste.
  • Put the oil into a wide-bottomed, lidded frying pan on a medium heat. When it’s hot, add the onions and fry, stirring occasionally, for 6 to 8 minutes, until they are starting to turn golden. Transfer half of the onions to a bowl and put to one side.
  • Add the ginger, garlic, and green chili paste and cook for around 3 minutes. Put the chicken pieces into the pan, sear them on all sides and add the chutney. Stir the chutney, pop the lid on, and turn the heat down to medium-low. Cook for around 15 minutes until the chicken is cooked through and tender.
  • In the meantime, transfer the onions from the bowl into a small frying pan and continue to cook them on a medium heat for another 10 to 15 minutes, until they are dark brown, soft, and sweet, then take them off the heat.
  • Add 1/2 teaspoon of salt (or to taste) to the chicken little by little, until it tastes just right, then take it off the heat.
  • Scatter the caramelized onions over the top of the curry just before serving. Serve alongside some steaming hot basmati rice or a pile of hot, homemade chapatis.

Chutney recipe instructions:

  • To wash the cilantro, fill a bowl full of cold water and put the cilantro in it. Move the cilantro around in the water, then take it out and shake off the excess water.
  • Roughly chop the stems and leaves and put them in a blender. Add the peanuts, lemon juice, salt, sugar, turmeric, and 2 small chilis, and pulse them in the blender until the mixture has a smooth, almost pesto-like consistency. Add some water to help the mixture to blend if necessary. The result should be a smooth cilantro chutney which is equally sweet, fiery, and lemony. Add the remaining chili, or more lemon juice, salt, and sugar to balance it to your taste, then spoon it into your clean jar.


EmBOSSed Grahams

EmBOSSed Grahams

I love graham crackers and recently shared the recipe to make homemade grammies.  Easy and infinitely better than the blue box of cookies that shall not be named.  Well, I got my embossed rolling pin. Check out my fancy-schmancy graham crackers.  Takes these bad boys to a whole new level.

I found embossed rolling pins on both Etsy and Amazon.  I like geometrics but there are a bazillion designs available including cartoon characters, flowers, hearts, just about anything you can imagine.

My pin is approximately 6 inches in width.  My method is to roll the dough to 1/4 inch thickness, chill for a couple of minutes and then use the embossed pin for the last roll.  Cut the dough into 6 inches strips or the approximate width of the pin.  Press firm enough to create the embossed pattern and roll just once. STAMPTASTIC!

Strawberries and Lemon Ricotta Tarts- Smitten Kitchen

Up your graham cracker game! Homemade graham crackers topped with ricotta and strawberries, the bomb!
Course cookies, desserts
Cuisine American
Keyword graham crackers, ricotta cheese, strawberries
Prep Time 30 minutes

Ingredients

Perfect way to showcase your graham crackers. Use cracker as base, top with lemon ricotta cheese and sliced strawberries. Easy Peasy!

  • 3/4 pound strawberries thinly sliced
  • 1 1/2 tablespoons fresh lemon juice
  • 1 1/4 cups ricotta 10 ounces, fresh if you can find it, a full-fat store bought if you cannot
  • 2 tablespoons confectioners’ sugar
  • 1 teaspoon finely grated lemon zest

Instructions

Strawberry-Ricotta Graham Tartlets

  • Adapted — barely, as the recipe was just about perfect — from Food & Wine
  • Make toppings: In a bowl, toss the strawberries with the remaining 3 tablespoons of sugar and the lemon juice. Let stand until syrupy, 20 minutes. In a medium bowl, mix the ricotta, confectioners’ sugar and lemon zest.
  • Assemble tartlets: Spread about 1 tablespoon of the ricotta mixture on each graham. Arrange the strawberries over the ricotta, drizzle with the syrup and serve.
  • The strawberries are also delicious over ice cream or yogurt.
Strawberry Trio- Shortcake, dipped in Kahlua Chocolate Sauce and Strawberry Lemon Ricotta Tarts. You can never have too many strawberry desserts!


Grams eating grahams! Giving them the “stamp” of approval!
Instant Pot Adventures-Mushroom Risotto

Instant Pot Adventures-Mushroom Risotto

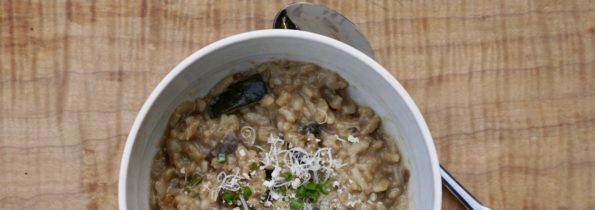
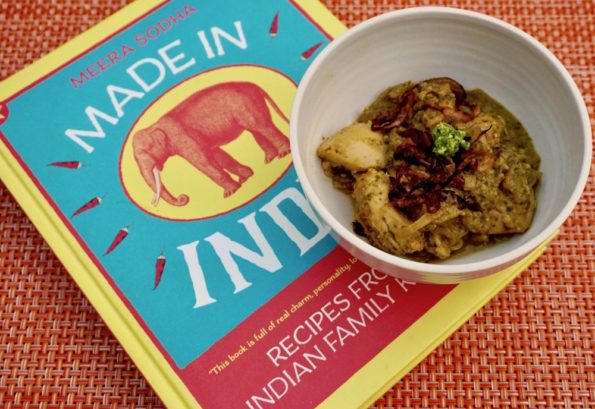
You can disregard this post if you do not have an Instant Pot. Well, you may want to do a quick read to see if it convinces you to add yet another appliance to your kitchen. After all you can never have too many kitchen gadgets.
My first try in the Instant Pot was a Spicy Pork Shoulder dish from Melissa Clark and then Corned Beef for St. Paddy’s Day.  Let’s face it…cuts of meat like pork shoulders or briskets lend themselves well to pressure cookers. But how versatile is the Instant Pot? Upon the recommendation of my sister-in-law I decided to try my luck at making risotto. The time savings was not super significant, what was boss WAS NOT HAVING TO STAND OVER THE STOVE STIRRING CONSTANTLY.  For those who have made risotto in the traditional way, it is like a dance. Stir, stir, stir, broth, stir, stir, stir, more broth… Step, step, step together, pause, step, step, step together pause….see just like doing the tango.

First saute’ your aromatics and rice as usual in the Instant Pot (one pot cooking yay!).  Add entire amount of stock called for in the recipe and any vegetables (in this case mushrooms), slap the lid on your Instant Pot, set it for 4 minutes and WALK AWAY.  Yes, you read that right, walk away.  The Instant Pot takes a couple of minutes to come to pressure and then cooks for the 4 minutes.  All you need to do is listen for the beep that signals its done.  Do a quick release (careful, don’t burn yourself), take the lid off, set your pot to saute’ and finish the risotto.  Finishing requires a minute or two of stirring to create the creamy texture and to finish off the risotto.  Test the risotto for doneness after removing the lid, you don’t want to overcook the rice.  I did not use the full 2 ounces of dried mushrooms, probably closer to 1 ounce and found it a bit overpowering.  I would use approximately 1/2 ounce of dried mushrooms soaked in broth to soften. You can adjust the amount of parmesan to taste.  A nice addition would be crispy, crumbled pancetta or prosciutto.

The risotto was pretty darn good if I say so myself.  It could have perhaps used a smidge less time so it was truly al dente but it was surprisingly good and so easy!  I am definitely going to give risotto made in an Instant Pot another whirl.  I will miss the arm workout I get from stirring risotto though…life’s little sacrifices.

Instant Pot Adventures-Mushroom Risotto

Ingredients

  • Adapted from This Old Gal Blog
  • 1 ounce Porcini/Wild Mushrooms/shiitakes dried soaked in warm water to soften
  • 6-8 oz Fresh Crimini Mushrooms roughly chopped or mix of fresh mushrooms such as shiitakes or oysters
  • 1 Tablespoon Butter
  • 1 Tablespoon Olive Oil
  • 1 1/2 cups 9oz Arborio Rice (or medium-grain white rice)
  • 3 Large Shallots chopped or 2 cloves of garlic and 1/2 finely chopped yellow onion
  • 1 Teaspoon Fennel Seeds crushed or 1 tsp. fresh thyme leaves
  • 1/2 cup Dry White Wine
  • 2 cups Chicken Broth
  • 1.5 cups Mushroom water or Water or Broth reserved from soaking dried mushrooms
  • 1/2 teaspoon Sea Salt
  • 1/2-1 cup 3 oz Parmesan
  • 2 Tablespoons Fresh Parsley chopped or chives
  • 1 T Butter to finish

Instructions

  • Dried Mushrooms, bring 2 cups water to boil in heavy small saucepan. Add mushrooms.
  • Cover and let stand until mushrooms soften, about 10 minutes.
  • Transfer mushrooms to cutting board and chop coarsely, reserve liquid.
  • Select Sauté or Browning on your Pressure Cooker and allow to heat.
  • Add oil and butter to Instant Pot and shallots or garlic/onion mixture, fennel seeds or thyme, stir and then add rice cook for three minutes.
  • Add wine and cook until almost evaporated, stirring frequently, about 1 minute.
  • Mix in 3.5 cups broth (or 2 cups broth/1.5 cups reserved mushroom soaking liquid), salt and mushrooms.
  • Lock lid in place and close Pressure Valve. Press manual and adjust time to 4 minutes. Cook at High Pressure for 4 minutes. After beep, do a Quick Release (careful its hot).
  • Turn Pot off and select sauté. Stir rice until creamy and tender but still firm to the bite, approximately 2 minutes.
  • If more liquid is needed, stir in a little more broth or reserved mushroom liquid. Add more until desired creaminess is achieved.
  • Mix in cheese and butter. Season risotto with salt & pepper to taste.
  • Transfer to heated plates or serving bowl.
  • Garnish with parsley or chives and serve while hot!
Bam! Raspberry Lemon Thumbprints

Bam! Raspberry Lemon Thumbprints

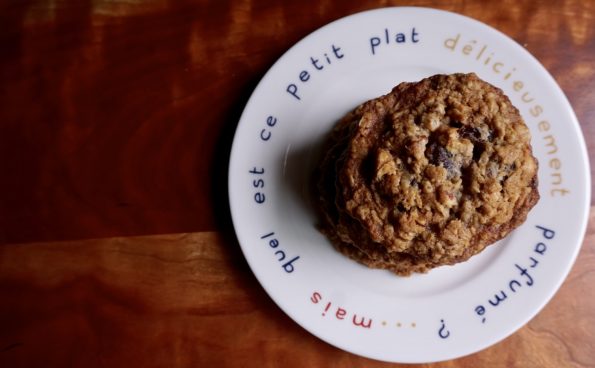
The kids are home!  These cookies disappeared crazy fast (which makes me happy).  Who doesn’t like a buttery, crumbly, tender shortbread-like cookie with a hint of citrus and filled with sweet, tart jam? Bah humbug if that’s you!

Here is Mariah Carey’s All I Want for Christmas to launch this post!


DSC02824

Bam, I LOVE Jam

I have a weakness for toast with butter and jam, PBJs and day-after-Thanksgiving turkey sandwiches with stuffing and cranberry jam.  Ok, so I’m cheating, it’s cranberry sauce but if it’s between slices of bread it’s jam to me.  My first-holiday cookie post highlighted Dorie Greenspan’s Jammers.  While they are worth the effort, there are times when you just need to bust out a batch of yummy cookies.  These thumbprint cookies fit the bill.  The recipe comes from Food Network, Emeril’s Holiday cookies.  Yes, THAT Emeril, BAM! Delicious cookie.  The original recipe calls for raspberry jam surrounded by a tender buttery cookie kicked up with lemon zest and juice.  Like many recipes, this one lends itself well to “alterations”.  I used orange zest and juice.   I’m sure just about any citrus juice and zest will work.   Dancing in my head?  Not sugarplums but visions of thumbprints made with lime + strawberry jam and lemon + blueberry jam .  Let me know if you come up with a winning combination.  Use your “jamagination”.

Jest Jammin’

The original recipe mixes liqueur with the jam, I skipped this step.  But a Chambord or Framboise would work well.  Just stir the liqueur, 1 tablespoon, into the jam before filling the cookies.  Chill the dough for 30 minutes to 1 hour before forming cookies.  Form the cookies, place them on a cookie sheet, and chill again for approximately 10 minutes so that the sheets are cold and the dough is firm.  This helps the cookie from spreading too much.  I used a 1-ounce ice cream scoop to measure out the dough.  I might make them a little smaller for holiday gift-giving.  The cookies did not need the full 20 minutes of baking time.  Start checking at 13-15 minutes.  They will brown quickly.

Raspberry Lemon Thumbprints

Bam! Raspberry Lemon Thumbprints adapted from Emeril!
Course cookies, Dessert
Cuisine American
Keyword Almond Cookies, emeril, jam, thumbprints
Prep Time 15 minutes
Cook Time 8 minutes

Ingredients

Recipe adapted from Emeril Lagasse

    Dry Ingredients

    • 2 1/4 cups all-purpose flour
    • 1 teaspoon baking powder
    • 1/4 teaspoon salt

    Wet Ingredients

    • 2 sticks 1 cup butter, at room temperature
    • 2/3 cup sugar
    • 2 large egg yolks
    • 1 tablespoon finely grated lemon zest feel free to substitute orange zest
    • 1 tablespoon fresh lemon juice
    • 1 teaspoon pure vanilla extract

    Jam Finish

    • 1/2 cup raspberry jam or jam of choice, anything works

    Instructions

    • Preheat the oven to 350 degrees F.
    • Line baking sheet with parchment or silpat sheets
    • In a small bowl, combine the dry ingredients, whisk to blend.
    • Using a mixer, beat butter and sugar until light and creamy. Add egg yolks, lemon zest, lemon juice and vanilla and beat until well combined.
    • Add the flour mixture in 2 additions and beat just until moist clumps form.
    • Gather the dough together into a ball and wrap in plastic wrap.
    • Chill for 30 min-1 hour until dough firms up.
    • Pinch off the dough to form 1-inch balls. Place on the prepared baking sheets, spacing 1-inch apart. Use your floured index finger or 1/2 teaspoon measuring spoon press center of each ball making a depression. I use the end of a wooden spoon.
    • Fill each indentation with about 1/2 teaspoon of the jam mixture.
    • Bake until golden brown, about 20 minutes.
    • Transfer the cookies to wire racks to cool completely.