Category: M&M

M&M stands for Mom and Mui. Our excellent food and travel adventures! We try and share recipes and places we travel to and blog about it. Join us!

Knot Your Average Bunz (Sweet Chocolate and Cinnamon Knots)

Knot Your Average Bunz (Sweet Chocolate and Cinnamon Knots)

Hello my fellow social distancers

It is I again, your resident baking aficionado (J A M I E). I hope you all are staying away from other humans. Queue the joke about how that’s how I normally live my life!!!! The other day (or whenever my mother decides to post the recipe) I wrote a post about no-knead bread that is AMAZING (if you have tried it please post a pic on IG-you might win a prize!)

Today, I am here to write a piece about kneaded bread.

In times of great stress, I turn to TV and baking. I had a particularly tough week at work a few months back, and I showed up on Friday with two pies in hand. One of the most calming shows I watch is Great British Bake Off. Honestly, if you are reading this blog, you don’t need an introduction. Anyways, after a  l o n g week of WFH and meetings, I decided to combine my two stress relievers and try a recipe from one of the GBB contestants. I chose Steven’s sweet chocolate and cinnamon knots because

1) Steven is great

2) They looked amazing

3) Who doesn’t like cinnamon and chocolate?

4) Here is the link to Steven’s post, he is British.  Lucky for you I’ve watched a lot of GBB so I can help with the Queen’s English, lol. Steven’s Sweet Chocolate and Cinnamon Knots
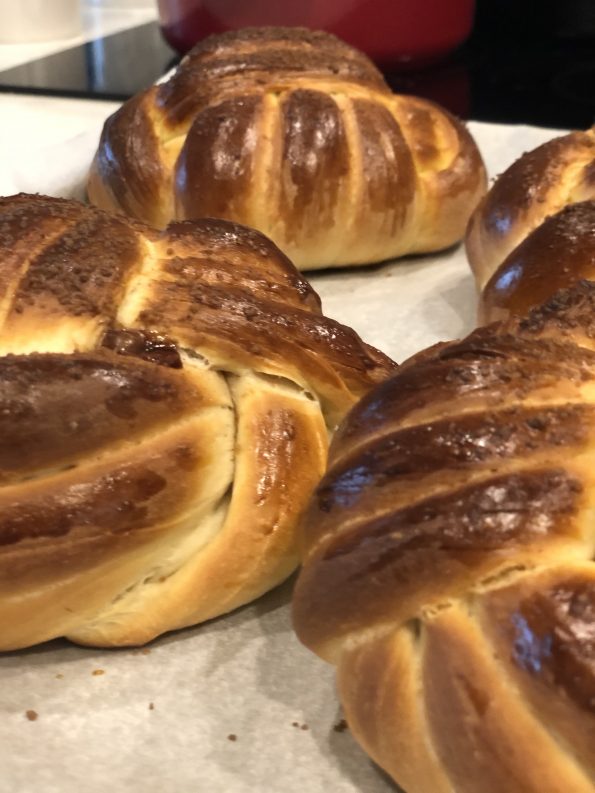
Here are some of my thoughts below:

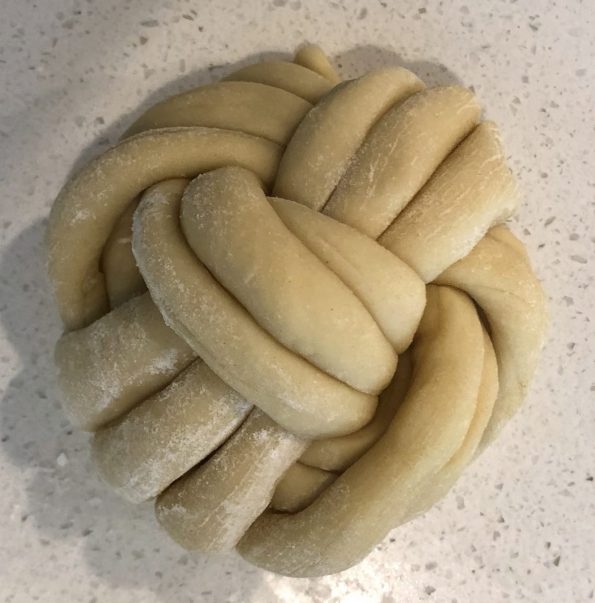
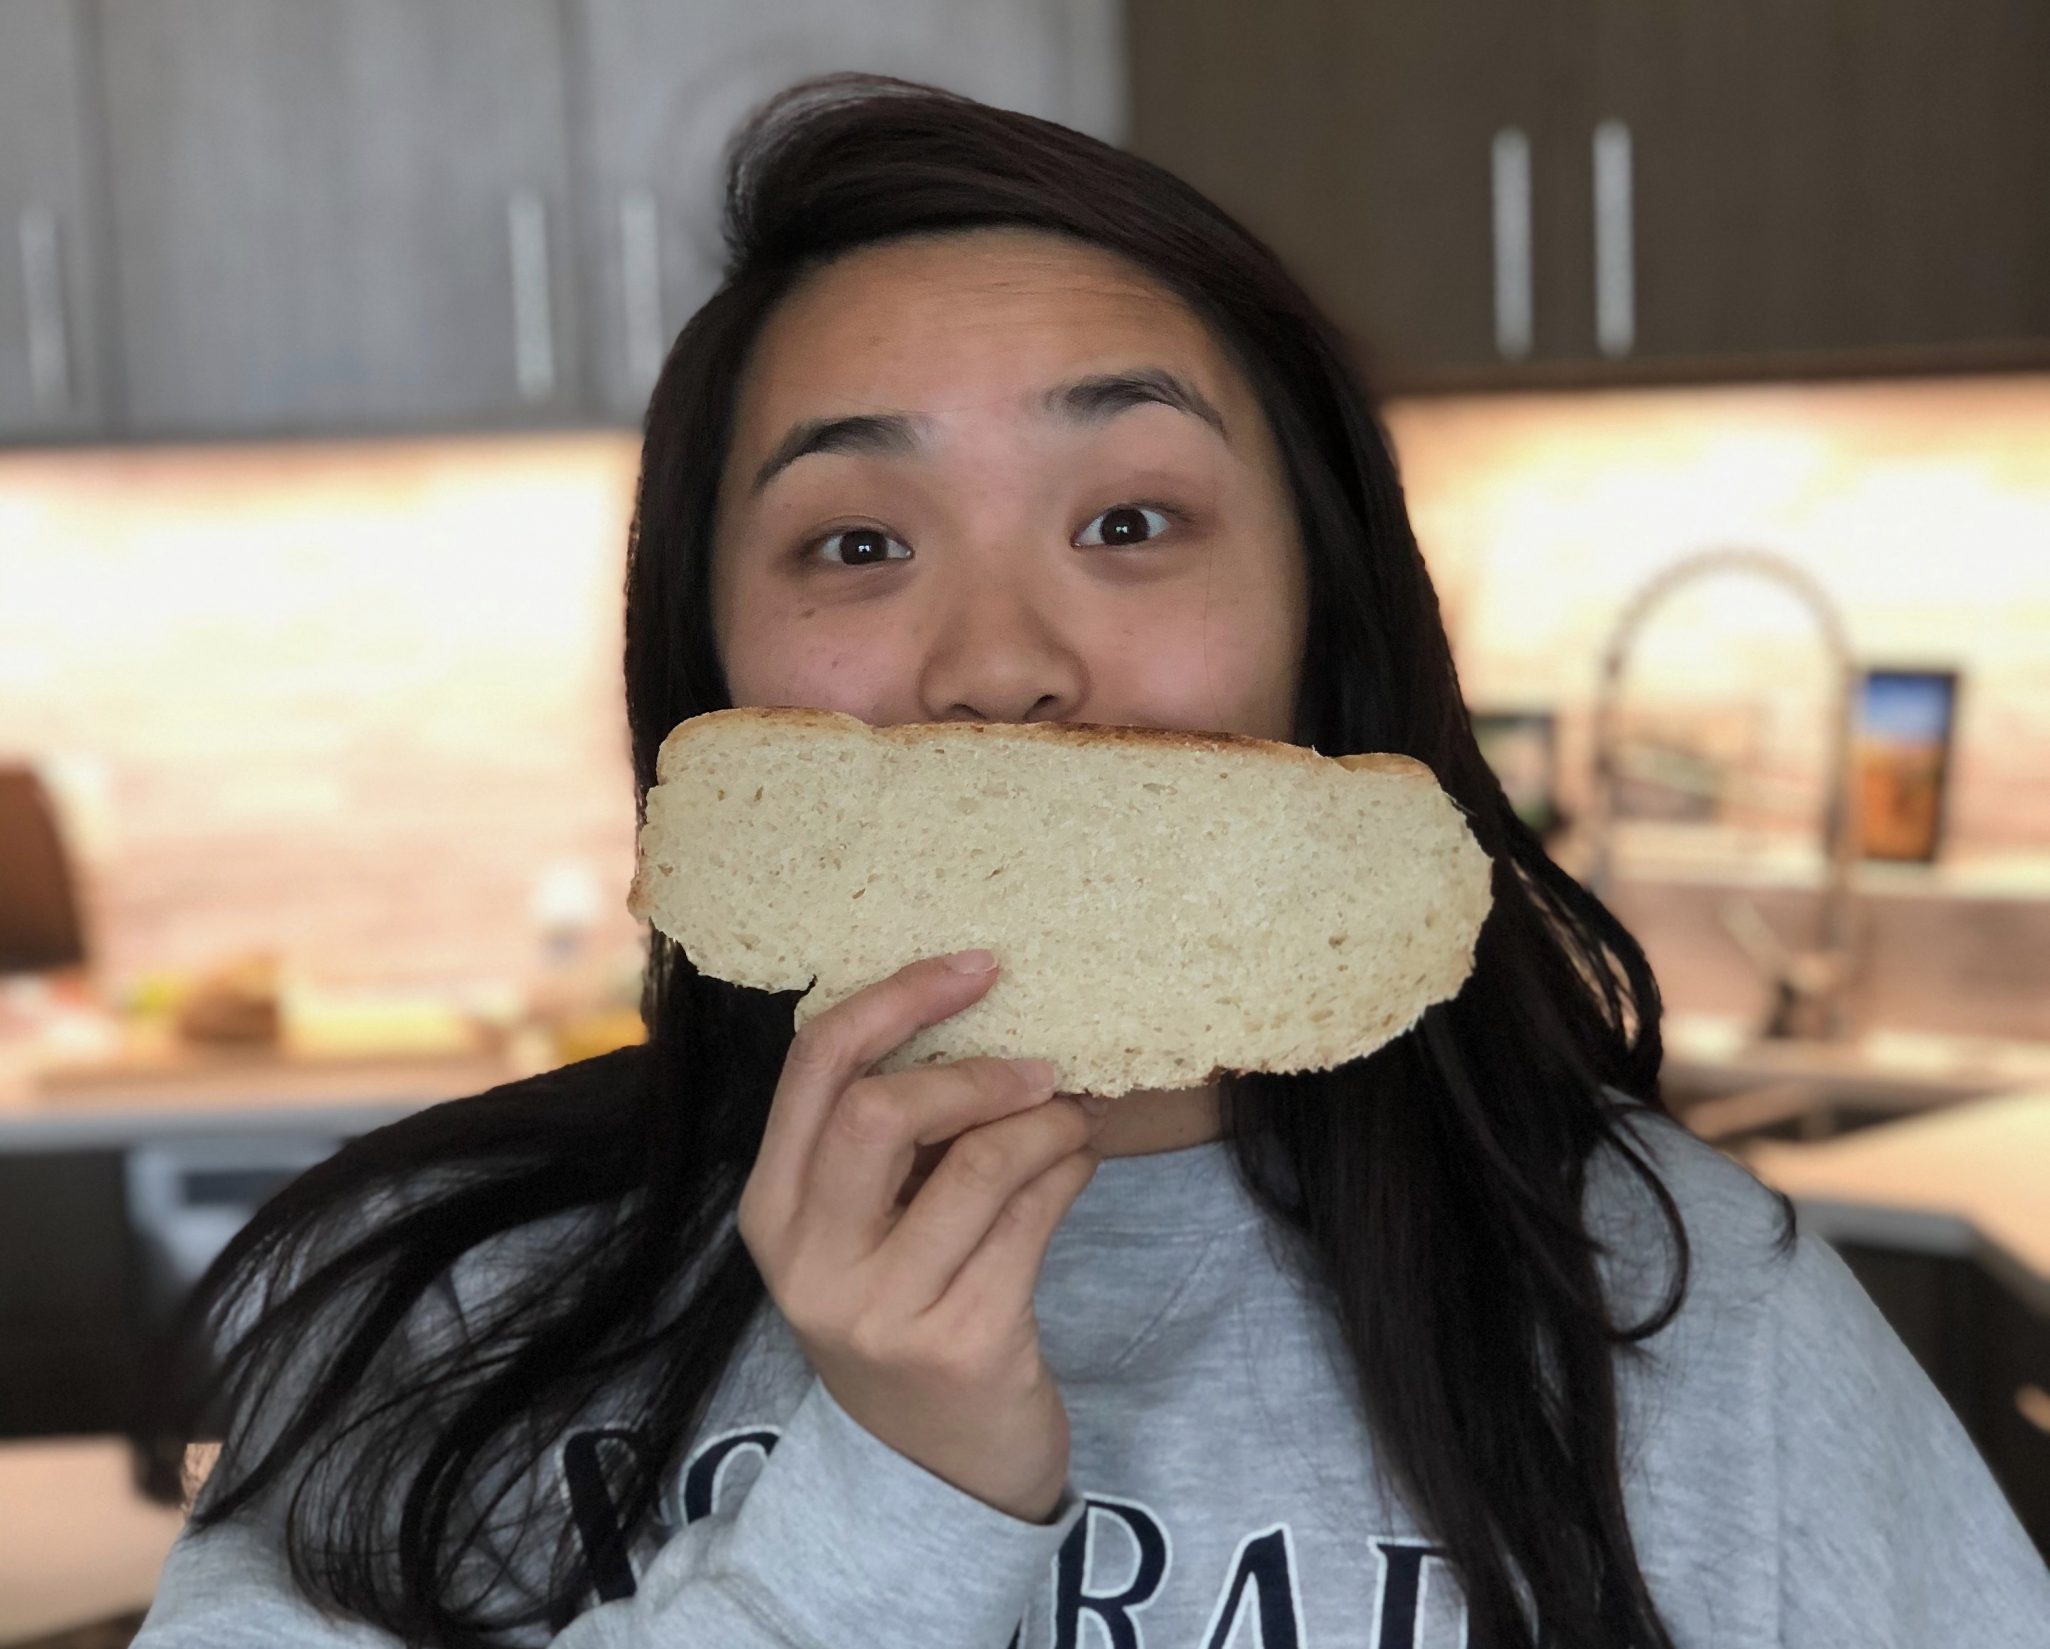
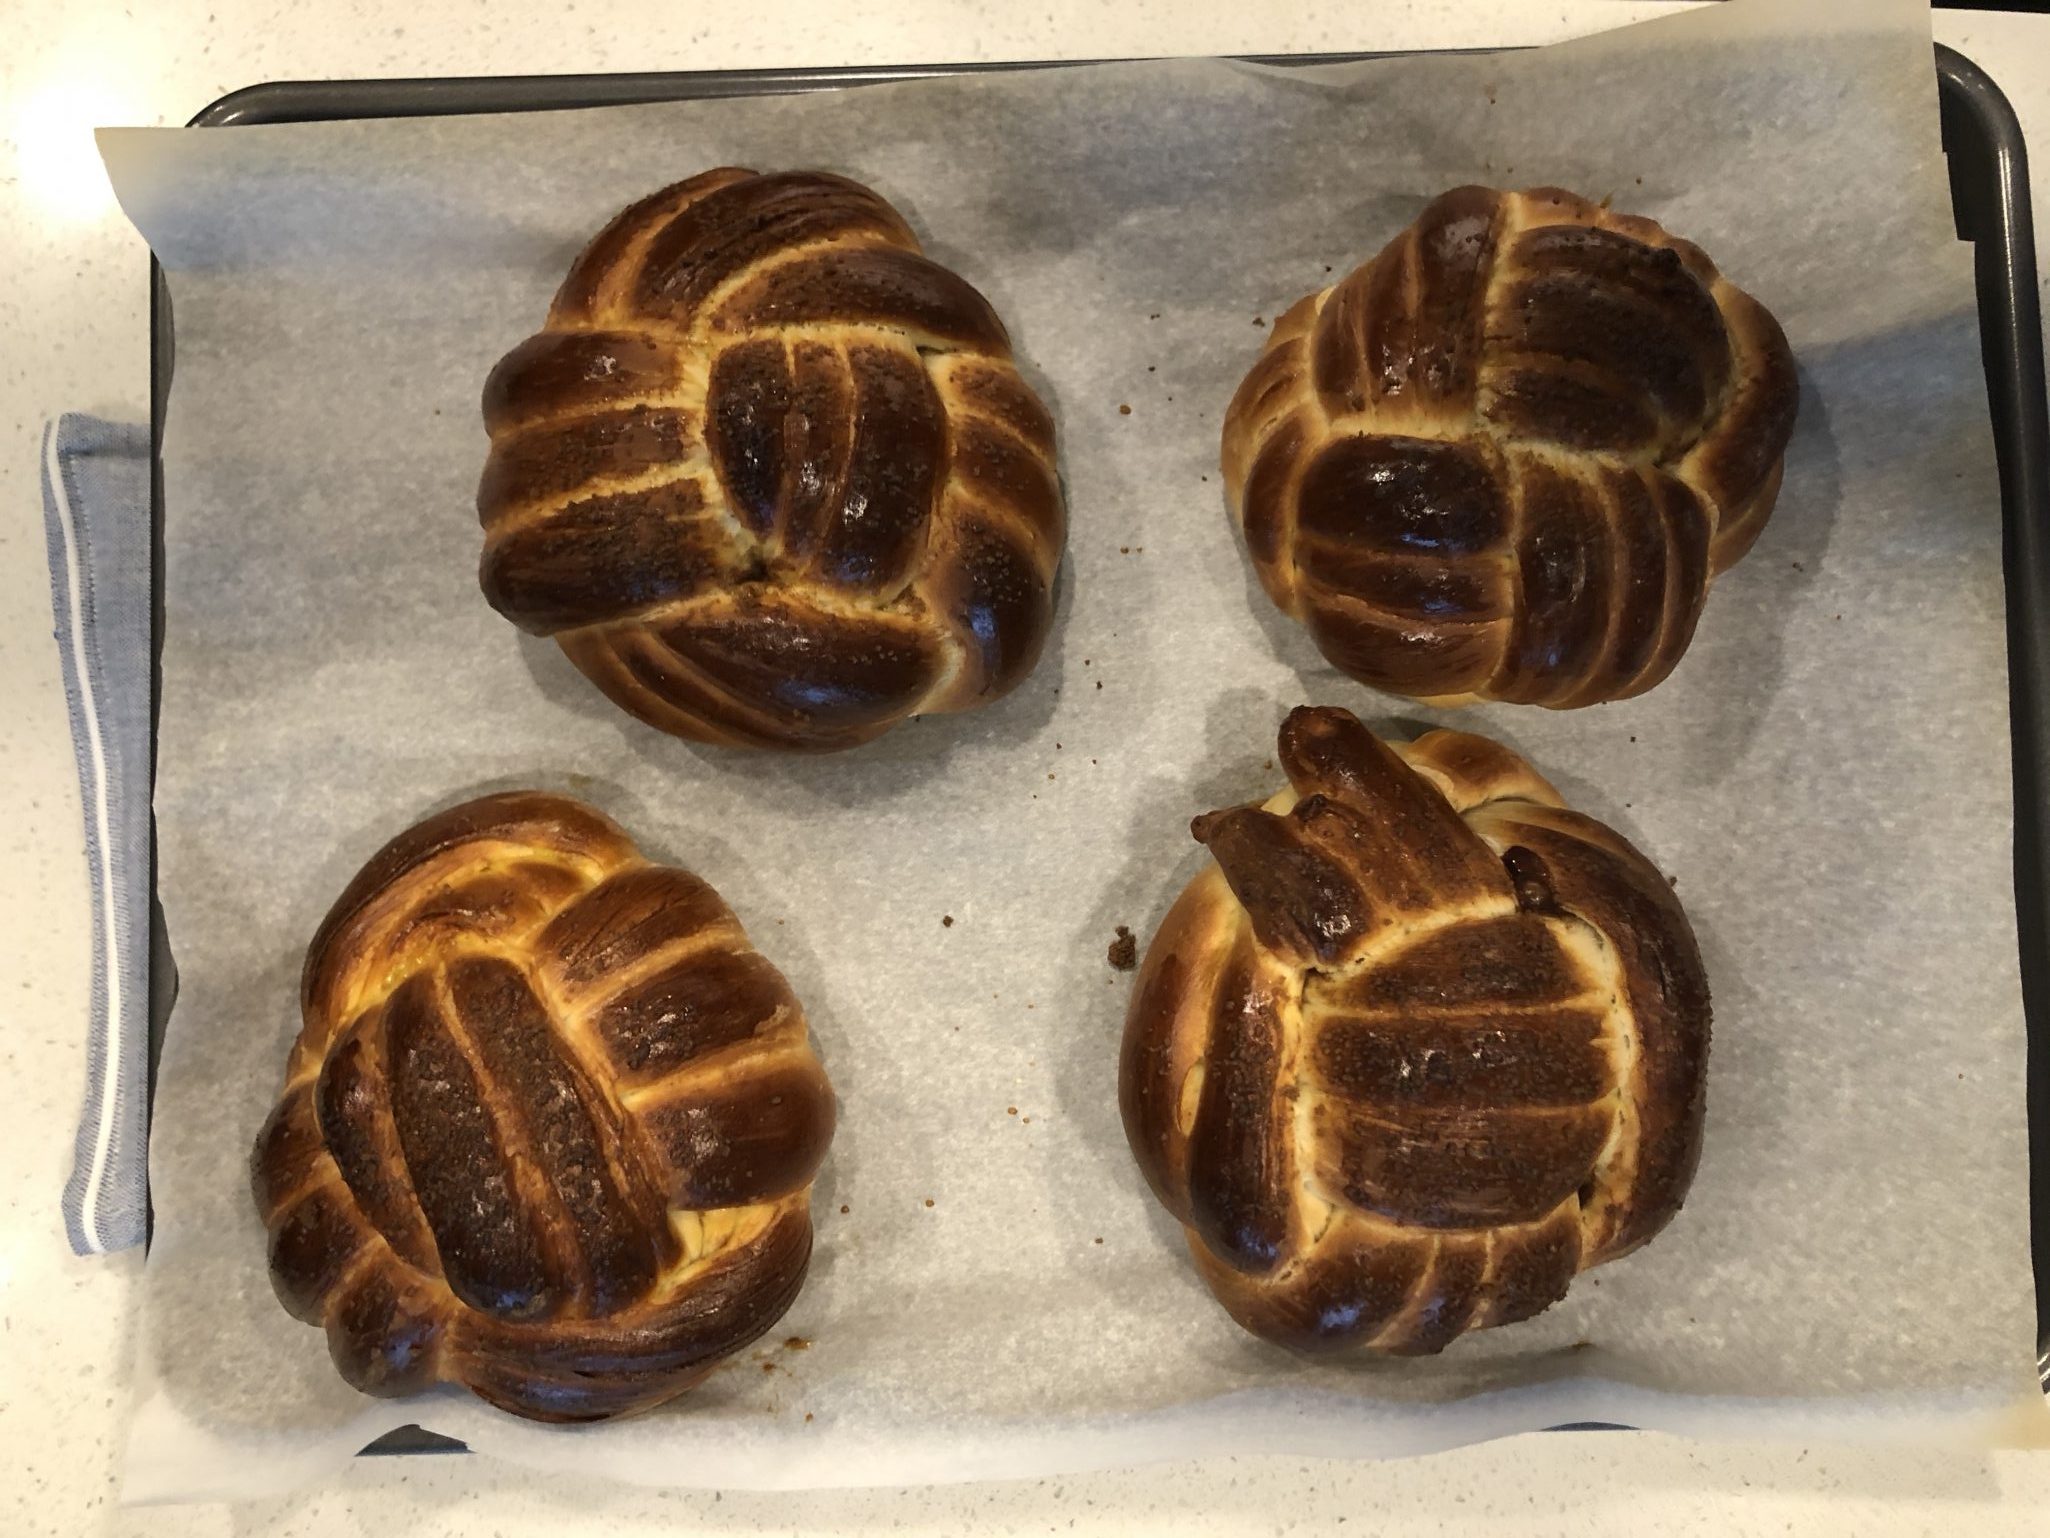
W O W. This bread is beautiful. I think it might be the prettiest thing I’ve baked. AND the best part—it also tastes DELICIOUS. Definitely worth the trip or TWO (thnx Whole Foods for turning me away) grocery stores at 7 am this morning. Side note: Whole Foods is actually doing this cool thing where they only let 60 year-olds and up (where is my mom when I need her, lol) shop from 7 am – 8 am. I think it’s really great, except for the fact that the Whole Foods employee told un-caffeinated, at 7 am me that I looked like I was 16. Rude.

The dough is light and sweet, with just enough texture to it that I don’t feel like I’m eating air. On its own, it’s great. The perfect bread to drizzle with honey. But even better yet, the recipe calls for stuffing chocolate and cinnamon sugar into the center of the dough before you bake it off. After proofing and baking, the chocolate melts into spirals throughout the bread, permeating every bite with a rich flavor. I know, not a great job of describing this—hey, it’s been a long week of WFH—so just trust me on this one.

One thing that was a bit hard for me was getting the proofing time correct. The recipe calls for dividing the dough into 4 equal pieces; each piece is woven separately into its own knot. As you can guess, it takes a bit of time to finagle the dough into place, so the amount of time the first knot was proofed was about 15-20 min longer than the last. If you are going to try these, I might suggest baking the knots in 2 batches, so you can optimize the proof for each bun. (Lol, can you tell that I’ve been writing too many work emails? “I might suggest…” Just do it, people.

Another difficult thing about these bunz was—you guessed it—the weave pattern. When I first looked at this recipe, I was a bit intimidated by the intricate pattern of the dough.

Don’t be discouraged, trust me.

While the recipe’s instructions are clear as mud, there are a lot of resources online that are helpful. Just google Winston knots, and you will find a lot of sites that show you a step by step process for braiding dough. The difficult thing about this was getting enough chocolate and cinnamon sugar in the buns. After weaving the dough together, you flip over the bun and place your filling in the center. Then use the ends of the strands to seal the filling into the bun, making sure to pinch any holes in the dough that might allow the filling to leak out during the bake. When I was stuffing my dough, I was worried about disrupting/flattening the pattern on the top, so I went pretty conservative with the chocolate. WRONG.

Stuff that bad boi UP.

Proofing the dough the second time will unflatten the buns.
Ok, this post is now way too long. Make this bread, you’ve got the time.

For your viewing pleasure and to help with the process, PICS and a video I found on YouTube that is PRICELESS

The Jamie Way of tying Knots Bunz
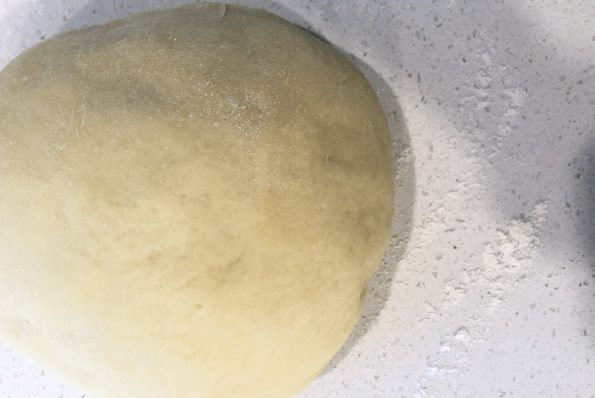
Knead dough for 7-10 minutes until smooth and elastic. Place it in a bowl and cover it with saran. Set for 1 hour (double in size) then punch it down and turn it out onto a floured board.
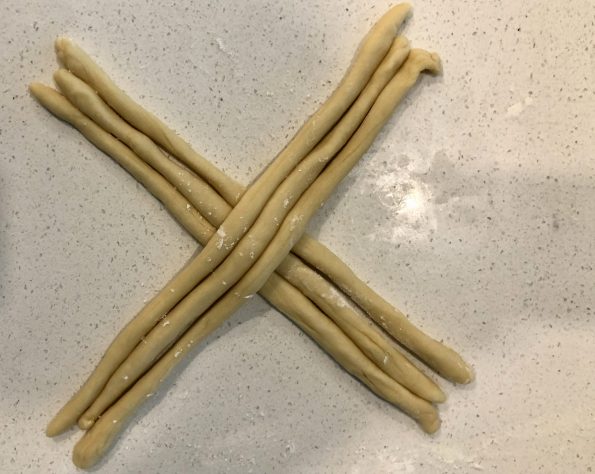
Divide dough into 4 equal pieces. Cover three pieces, take the remaining piece and divide it into 6 equal pieces. Roll each piece into strands approximately 12.5 inches long. They should be equal in size.  To shape the knots: Place 3 strands of dough in a line on the worktop in front of you, at a minus 45-degree angle and fairly close together. Gently pinch the 3 together in the middle. Now place the other 3 strands on top at a 45-degree angle – to form an ‘X’ shape – and pinch together in the middle as before.
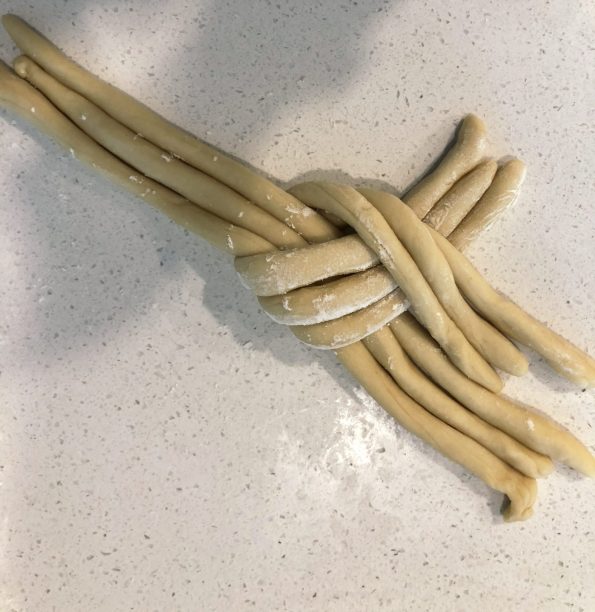
Fold the 3 strands at the top left down over the center point and onto the counter to the far right of the strands already there. Lightly shift the 3 strands at the top right downwards so they sit alongside the other strands.
Fold the 3 strands at the top left down over the center point and onto the counter, to the far right of the strands already there. Gently shift the 3 strands at the top right downwards so they sit alongside the other strands.
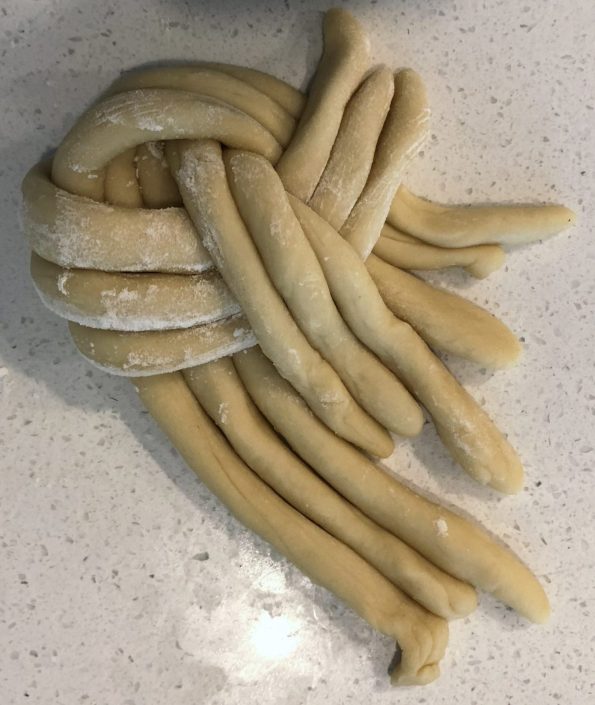
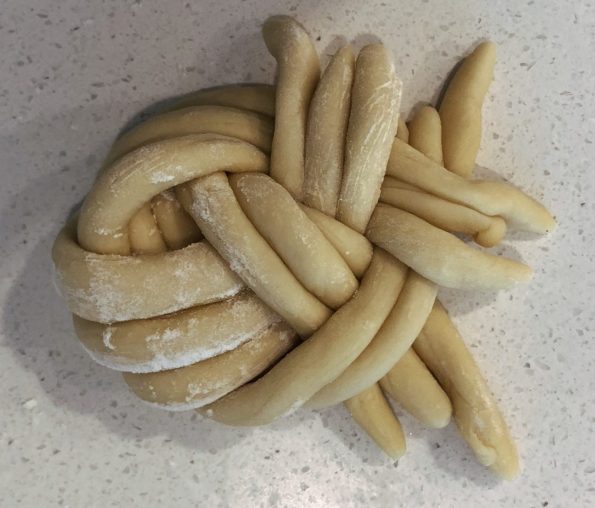
Pass the set on the far left under the 2 middle ones then back over the last one it went under and into line again. Then take the far-right set and put it under the twisted 2 in the middle then back over the last one it went under and into line.
The last photo, flip knot over and place on the counter. Scatter a quarter of the chocolate chunks down the center of the knot. Mix the sugar with the cinnamon and sprinkle a quarter on top of the chocolate. Bring the long ends of the strands up and over the filling and pinch them together, then gently fold in the sides (try to keep the knot as neat as possible) and pinch the dough together to seal in the filling. Turn it over again, right side up, and gently shape into a neat ball with your hands. Transfer to the lined baking sheet. OMG, okay its super yummy. WORTH trying. REPEAT with the rest of dough.

FINALLY, HERE IS THE RECIPE., You’re welcome

STEVEN’S SWEET CHOCOLATE & CINNAMON KNOTS

These Winston-knot bread rolls are made by braiding together three strands of a soft, sweet enriched dough – filled with dark chocolate and cinnamon sugar.
Course Breads
Cuisine British
Keyword Sweet Chocolate and Cinnamon Knots
Servings 8 servings

Ingredients

For the dough:

  • 500 g strong white bread flour plus extra for dusting (Bread Flour)
  • 5 g fast-action dried yeast from a 7g sachet (Instant)
  • 60 g unsalted butter softened, diced
  • 40 g caster sugar granulated sugar
  • 7 g salt
  • 2 medium eggs at room temperature, beaten
  • About 225ml full-fat milk lukewarm (whole milk)

For the filling:

  • 50 g dark chocolate broken into chunks
  • 4 tsp light muscovado sugar sub light brown sugar
  • 1 tsp ground cinnamon
  • 1 medium egg beaten, for glazing, use any size egg

Instructions

  • Step 1 To make the dough: weigh the flour into a large mixing bowl, or the bowl of a stand mixer, and mix in the yeast with your hand. When thoroughly combined, add the butter and rub into the flour with the tips of your fingers until the mixture resembles fine crumbs. Mix in the sugar and salt then make a well in the centre of the mixture.
  • Step 2 Pour the beaten eggs and 3⁄4 of the lukewarm milk into the well. Using your hands or the dough hook attachment of the mixer on its slowest speed, gradually work the flour into the liquids to make a soft but not sticky dough – slowly adding as much of the remaining milk as needed.
  • Step 3 Knead the dough thoroughly – for 10 minutes by hand on a lightly floured worktop, or for 7 minutes if using the dough hook (on its slowest speed) – until very smooth and elastic. Return the dough to the bowl (if you kneaded by hand) then cover with cling film or a snap-on lid and leave on the worktop to prove for about an hour or until doubled in size.
  • Step 4 Uncover then punch down the risen dough with your knuckles to deflate it. Turn out onto the worktop, very lightly dusted with flour, and knead into a ball. Then weigh the dough and divide into 4 equal portions. Cover 3 portions loosely with cling film and divide the other portion into 6 equal pieces. Using your hands, roll each piece on the worktop into a neat, even sausage 12.5 inches long. Try to use as little extra flour as possible for dusting your hands and the worktop – adding too much extra flour will make the dough tough and dry.
  • Step 5 To shape the Winston knots: arrange 3 sausages of dough in a line on the worktop in front of you – at a minus 45-degree angle and fairly close together. Gently pinch the 3 together in the middle. Now place the other 3 strands on top at a 45-degree angle – to form an ‘X’ shape – and pinch together in the middle as before. Fold the 3 strands at the top left down over the centre point and onto the worktop – to the far right of the strands already there. Gently shuffle the 3 strands at the top right downwards so they sit alongside the other strands.
  • Step 6 Arrange the 4 sets of strands closer together so they are lying side by side and slightly apart, so you can plait them. Pass the set on the far left under the 2 middle ones then back over the last one it went under and into line again. Then take the far-right set and put it under the twisted 2 in the middle then back over the last one it went under and into line.
  • Step 7 Flip the knot over on the worktop. Scatter a quarter of the chocolate chunks down the centre of the knot. Mix the sugar with the cinnamon and sprinkle a quarter on top of the chocolate. Bring the long ends of the plait up and over the filling and pinch them together, then gently fold in the sides (try to keep the plait as neat as possible) and pinch the dough together to seal in the filling. Turn the plait over again, right side up, and gently shape into a neat ball with your hands. Transfer to the lined baking sheet.
  • Step 8 Repeat with the other 3 portions of dough to make 4 neatly plaited round loaves – these knots take a lot of practise and patience to get right! Set them well apart on the baking sheet, slip the sheet inside a large plastic bag and slightly inflate the bag so the plastic doesn’t stick to the dough. Leave on the worktop to prove for about 1 hour, until doubled in size – take care not to over-prove the dough, or let the temperature become too hot, as the breads will lose their shape. Towards the end of the rising time, heat the oven to 425°F
  • Step 9 Uncover the loaves and carefully brush with beaten egg to glaze. Bake in the heated oven for about 20–23 minutes until a good golden brown. Transfer to a wire rack and leave to cool.
Knead A Little Comfort in These Trying Times? (King Arthur Flour No-Knead Bread)

Knead A Little Comfort in These Trying Times? (King Arthur Flour No-Knead Bread)

Hi everyone! Hope you are all staying sane out there sheltering in place! It is me, Jamie, your favorite blogger. As I am clearly the superior baker in our family, I have decided to grace your feeds with a quick lil’ post about my latest baking passion:

BREAD

Now, I know what you are thinking: “bread is the last thing I should bake if I am stuck at home all day with nothing to do except move my mouse around my work computer every five minutes” WRONG. Sorry, I should not invalidate your feelings, but let me tell you why your feelings are misguided and sad.

The smell of baking bread will 100% make your home much homier.

Picture this: You are in hour 2 of a 3 hour pointless meeting, and Karen is going on and on about whether or not you are considered “business critical” (newsflash, you probably aren’t if Karen can take up 3 hours of your time to talk about nothing). You are sitting at your uncomfortable kitchen table, hunched over because it is NOT ergonomically sound, with the smell of Clorox and lemon encroaching into your six feet of space. Not fun, right? Actually, the exact opposite of fun.

Now, picture this: you just popped a loaf into the oven, and the smell of baking bread is slowly permeating through the house. You hang up on Karen because life is too short to listen to people droning on and on (sry Karen).  You improvise by using a couple of boxes to set up your very own standing desk on your kitchen table (hey, I am an engineer). While  standing there, admiring your ergonomic handiwork…

What’s that? Beep, beep, beep. Aha, your timer is going off—your bread is READY.  You pull it out, mouth-watering from the delicious, tantalizing smell.  After a few minutes, you cut into that steaming loaf, trying not to burn your fingers (Auugh, I couldn’t wait!). Smear on a slab of butter, plop a dollop of jam on it and you are in heaven. Nothing can stop you now. You are invincible, winning WFH. All your sad coworkers are at their desks having a miserable time, and here you are, a queen, eating literal carbo gold. 

In all seriousness, baking bread is definitely a vibe right now, especially with the Coronavirus pandemic.  Ask my Mom, she’s still scavenging for flour. While I was intimidated to try my hand at baking bread, it is actually pretty simple and very relaxing. Stressed about taking too much time away from work? Bread has an average of about 4 ingredients in it, and 99% of the time to make bread is for proofing and baking it. Stressed in general? Some breads can require 10-15 minutes of kneading time, which really just entails you pounding the shit out of it on a counter. Get your angst OUT.

Concerned about being buried in bread? One of the best parts about bread is that it is freezer friendly. If you can’t eat an entire loaf in two days like me, you can slice that bad boy up and freeze it in a Ziploc bag (or a reusable environmentally friendly product that I can’t get right now because I’m sheltering in place) and eat it anytime you want.

I threw together one of my favorite recipes, No-knead Crusty White Bread, from King Arthur Flour. The recipe calls for 7 ½ cups of flour, but I halved it to make just one loaf. The recipe also calls for regular flour, but I used bread flour (higher protein content). Whole foods and HEB were out of flour, so I improvised. My mom is probably cringing while reading this (she hates when I substitute. I normally would not do this, but you gotta do what you gotta do). I extended the proofing time a bit longer to compensate. 

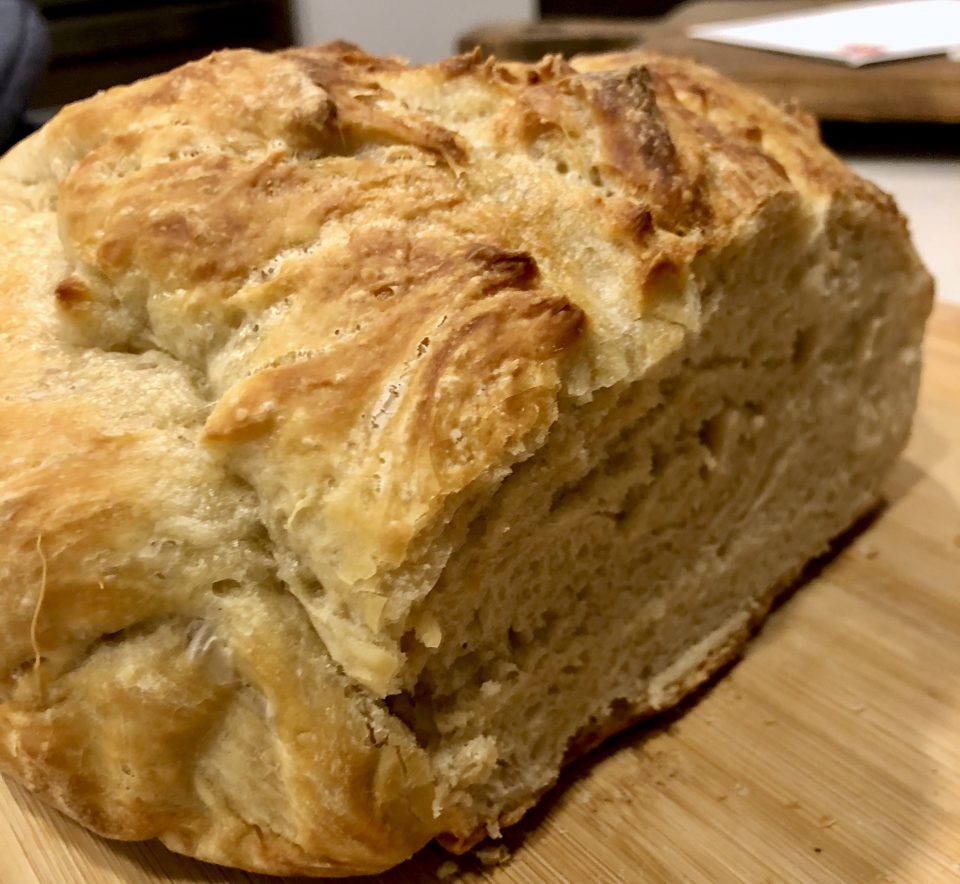
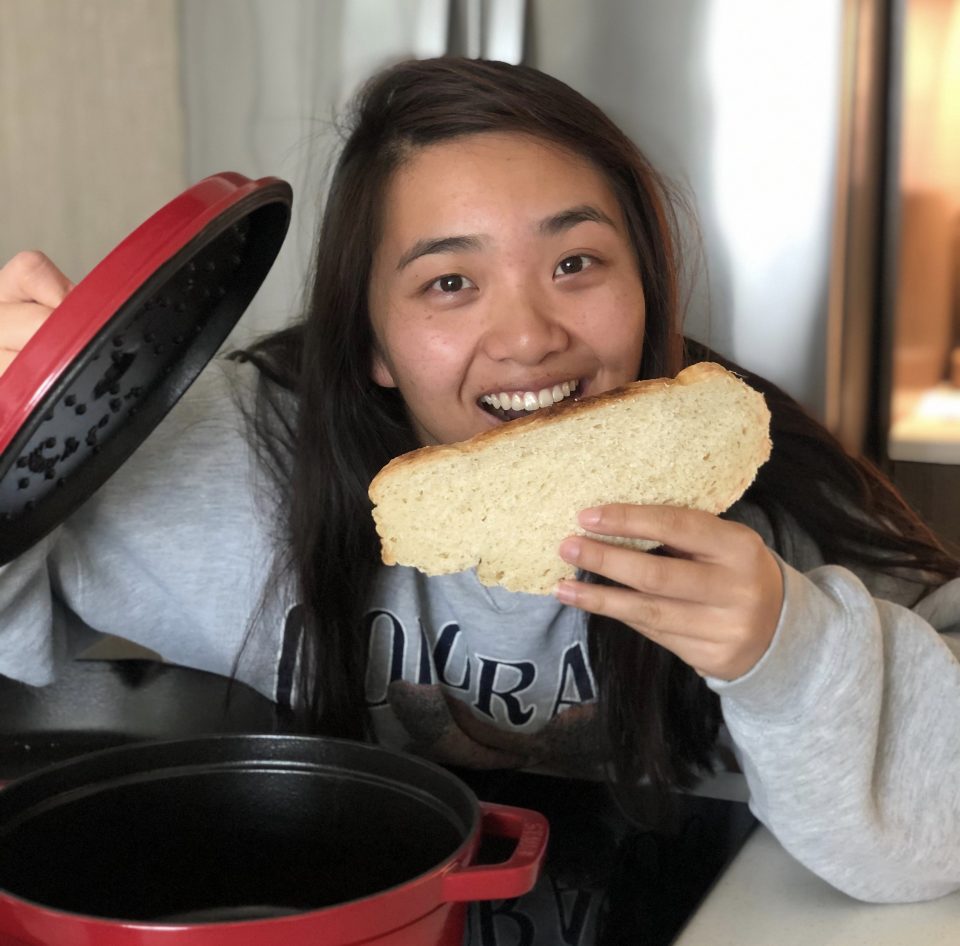
This bread is SO easy. It took me 10 minutes to put it together initially, and I proofed it for 3 hours at room temp, then 3 hours in the refrigerator. I used a dutch oven to bake it, and I baked it for the full amount of time.  I removed the lid for the last 5 minutes just to give the top a bit more color. The CRUNCH that you get from baking it in a dutch oven kicks this bread into the top 10% of breads to bake.  I made a pot of Senate Bean Soup to go along, but this bread was the star of the meal.

Easy, versatile, delicious—the perfect recipe to make in times like these.

Hope everyone is staying safe—and sane!  Happy baking 😊

Here is the link to the recipe I used, so so tasty..not the recipe, the bread, lol.

No-Knead Bread from King Arthur Flour

Oyako Donburi Hmmm, Maybe the Chicken and the Egg Came Together?

Oyako Donburi Hmmm, Maybe the Chicken and the Egg Came Together?

I am soooo excited! We are adding a new category to 3Jamigos!  The kids have flown the coop and are making their own way, Jeff in the City close by (yippee), Jorge in Korea teaching (so far away) and Jams currently working and freezing her tush off in Minneapolis (half of so far away).  Luckily we have FaceTime, phones, texting and when that just won’t do, flights.  Just an airplane ride away.

A California-Texas kinda gal, winter in Minneapolis is a new experience for Jamie.  Down jackets, scarves and gloves are now a part of her wardrobe vernacular, as is staying indoors. The winter weather has her looking for activities inside to keep her busy.  For Christmas, we gave her knitting needles, yarn and starter lessons from Wes on how to knit.  Big hit, knitting up a storm haha.

Jamie has always loved to bake and cook.  She’s a natural, and with this weather, she has been doing alot more cooking and baking.

A recent call went like this:

Mui (her nickname):  Mom, can you send me your Oyako Donburi recipe?  Is it easy to make?

Me: Sure.  Yep, it’s pretty easy.  One pan, a couple of eggs, chicken, and onions.

Mui: That sounds good, I love rice bowls and I can bring the leftovers to work.

LIGHTBULB MOMENT:  Hey, why don’t we both make Oyako Donburi and then post about it?  You have done spots before on 3Jamigos. We’ll alternate picking recipes to make and blog about!

THUS a new 3jamigos category was born, M&M which stands for Mom and Mui.  Mui means little sister.  We have been calling Jamie Mui since Day One.

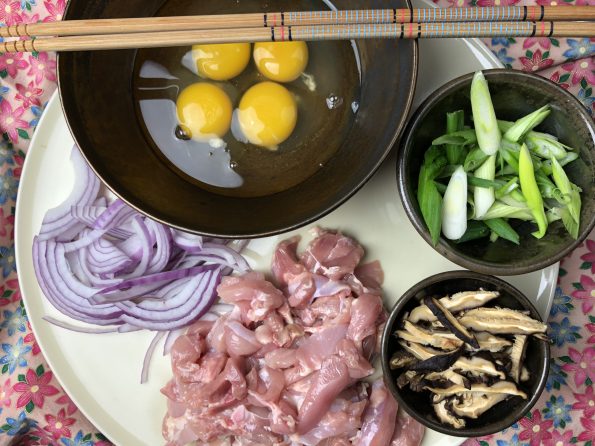
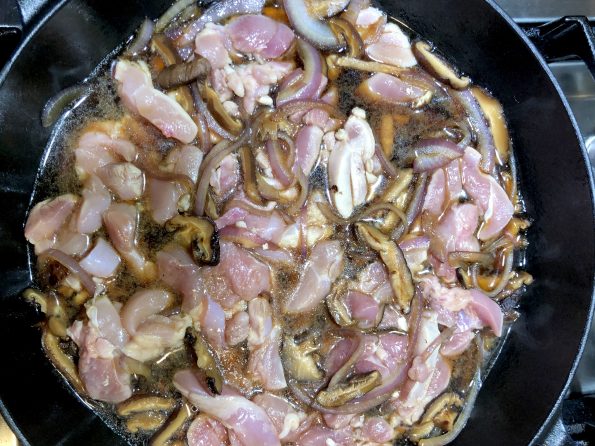
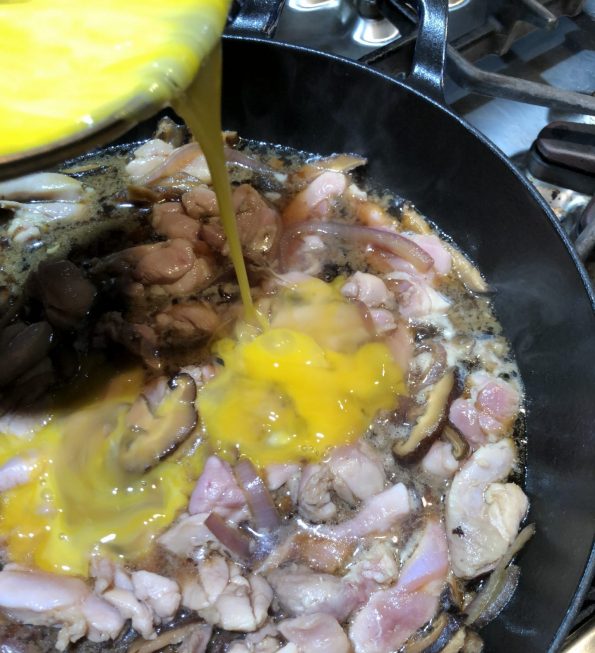
Oyako Donburi is the perfect dish to launch M&M.  Chicken, sliced shiitake mushrooms, onions are cooked in a savory-sweet sauce of soy sauce, sake, dashi.  Lightly beaten eggs are then poured on top of the chicken and sauce and simmered until just cooked through, then the chicken and egg mixture is placed on top of hot rice.  Watch your kids, hubby, neighbors, everybody gobble it up.  So delicious, classic Japanese soul food.

So without further adieu, our inaugural M&M post by Jamie on making Oyako Donburi in cold & snowy Minneapolis.

HELLOOOO WORLD/readers of 3jamigos.com. It’s ME. J A M I E. Ya know, that crazy girl who moved to Minneapolis to live in -30 DEGREE WEATHER. Nope, that wasn’t a typo. It really was NEGATIVE 30 on my drive into work last week.  GLOBAL WARMING IS REAL PEOPLE. (I know that doesn’t really make sense, but global warming is causing polar vortexes normally over THE NORTH POLE to break apart and dip down to lower parts of the globe).  It’s so cold that you can’t stand outside with exposed skin for more than 5 minutes without getting frostbite. FROSTBITE. Schools were closed. The roads were empty. But I still had to go to work. Once I got over that, it really wasn’t bad. They are GREAT about paving and salting the roads, so it was actually a breeze getting to and from work.

BUT enough about me. Let’s talk about the fact that my mom and I decided to start a mother-daughter blog where we cook the same dish separately and talk about it, AND THE FIRST DISH WE PICKED JUST HAPPENED TO TRANSLATE TO “Parent (chicken) and child (egg).” Damn, we are GOOD, people. You couldn’t even make this stuff up. I mean, I guess you could. It would make a great lifetime/hallmark movie. Ok. Enough interruptions. Let’s get down to the food.

Okayo Donburi. The ultimate comfort food.  It’s a mix of chicken and eggs (parent and child) with a sweet/salty/chickeny sauce and sautéed onions.  Pour it over some rice, and all the stresses of your day melt away. The best part? It is SO easy to make.

Chop up some onions, slice some mushrooms, toss it into the pan with some chicken broth, mirin, soy sauce, and sugar, and top it off with some eggs and chicken.  E A S Y and so foolproof even my mom could make it and she suuuuckkss at cooking (if you couldn’t tell). I like to add in extra mushrooms and chicken. Sometimes extra onions. Pretty much extra everything. It is that good.  Mom used to make it all the time when I was little, and it was one of my favorite dishes then too.  So far, I’ve made it 3 times since winter started. That’s how good it is.

So now, for lack of a better conclusion, stop reading this post and go make it. Go!

Oyako Donburi

Course Main Course
Cuisine Asian
Keyword Oyako Donburi
Prep Time 15 minutes
Cook Time 15 minutes
Total Time 30 minutes
Servings 4 servings

Ingredients

  • 3-4 boneless, skinless chicken thighs cut into bite-sized pieces
  • 4-5 eggs lightly beaten
  • 1/2 yellow onion thinly sliced, red onion can be used
  • 1 green onion sliced on the diagonal
  • 2-3 dried shiitake mushrooms soaked to soften, sliced
  • 1 tablespoon vegetable oil

Sauce Mixture

  • 1 cup dashi (fish based stock) can substitute low sodium chicken broth
  • 5 T soy sauce
  • 2 1/2 T sugar can cut to 2 T
  • 21/2 T mirin substitute sake to decrease sweetness
  • cilantro garnish if desired

Instructions

  • In a small bowl, lightly beat eggs and set aside.
    Oyako Prep
  • Heat saute' pan, add vegetable oil then onions and mushrooms, fry for 1-2 minutes until onions are soft. Add sauce mixture, heat through. 
  • Add chicken and lower flame to medium-low. Cook for 3-4 minutes, turning the chicken over. Cook until chicken loses pinkness
  • Add eggs evenly over top of chicken. Cover and cook over low heat until eggs are just cooked should not be dry. 
  • Garnish with green onions or cilantro and nori strips
  • Divide into portions and serve over rice.  If desired, individual portions can be made.  Quarter ingredients and use a small omelet pan to make.  
Chicken Tortilla Soup from The #2 Jamigo-Jamie

Chicken Tortilla Soup from The #2 Jamigo-Jamie

Hello! Before you get all excited to read what cool new post this blog has to offer, let me stop you right there.  It’s time to get really excited because, yes, this is not Debbie writing.  Fortunately, good ‘ol Deb here decided to let her daughter, Jamie, (that’s me!) take a whack at blogging.  So buckle up readers and followers (all 3 of you?) for an exciting glimpse of what it’s like to be a 19 year old girl living all alone for the first time, a good 2,000 miles away from her family in the—rather stormy—city of Houston, Texas.  

Whenever I tell people that I’m living in Houston for the summer, they always ask…..why..?  Why would you ever leave the great state that is California, equipped with superb weather surrounded by mountains and beaches and awesome food? And for a second, I nod and smile, and in my head wonder if I am, in fact, a crazy person for doing such a thing. Houston definitely is different from Los Gatos.  It rains here, a lot.  And I’m not talking just a light drizzle every now and then.  I’m talking hurricanes and tropical storms(whaddup trop storm Bill?) that DUMP rain and wind onto Houston and cause flash floods and rattle the windows in my room. 

Did I mention that it’s a constant 90-plus degrees, too?

I also am not in possession of a car, which is quite inconvenient to get around Houston, and if it weren’t for my 8-5 job, I would probably stay holed up in my room watching Netflix all day—which is what I do after I get home from work.  But after that second is over, I realize that I wouldn’t trade it for the world. Houston is an awesome city, once you get out and about.  It’s diverse and fast-paced and always fun to explore.  For once in my life I’m earning a steady paycheck, paying rent, buying my own food, navigating through a completely new city, and making my own decisions.  I feel like a grown-up, and I’m pretty darn proud of myself.

Have You Eaten Yet?

But what you never realize before you start living on your own is how much you’ll miss your mom.  I never notice until I go home and follow her around like a puppy dog.  So, on days when I especially miss her, I like to cook recipes that she always makes me.  The other day, I decided to make her chicken tortilla soup—a slightly spicy, warm, and cheesy bowl of goodness that reminds me of home.

Note:  Skip the tortillas and serve tortilla chips on the side for folks to add with other garnishes, Or fry tortilla strips and serve them on the side instead of adding to the soup. Yes, they thicken the soup but sometimes I’m going for a lighter soup.

Sometimes my mom will add corn or black beans to the soup transforming the soup into a hearty meal in a bowl!  It is a super flexible soup, add any veggies you like, chayote, and squash would go well.  Think of this as a yummy version of Stone Soup.

Chicken Tortilla Soup

A delicious South of the Border Chicken Soup!
Course soul food, Soup
Cuisine Mexican, tex-mex
Keyword Chicken Tortilla soup
Prep Time 20 minutes
Cook Time 45 minutes
Servings 6

Ingredients

The Soup

  • 1/2-1 cup chopped yellow onion Oh for goodness sakes, 1 medium onion, use the whole thing
  • 3 cloves garlic peeled and finely chopped
  • 3/4 teaspoon ground cumin like cumin? Add more
  • 3/4 teaspoon dried oregano
  • 1/4 teaspoon chili powder spicier? Add more
  • 1/4 teaspoon pepper
  • 8 cups fat-skimmed chicken broth
  • 14 ounces fire-roasted tomatoes (canned) diced canned tomatoes can be substituted
  • 4 ounce can of Dice Green Chilis or use any fresh pepper, green bell pepper, Anaheim pepper, saute' with onions. Or you can char-grill them and peel and dice and add to soup.
  • 1 1/2 pounds boned, skinned chicken breasts or start with bone-in chicken breasts, bones add flavor. Allow to simmer a little longer,~ 15-20 minutes.
  • Salt
  • 6 corn tortillas 6 in. wide See notes for substitute

The Garnishes

  • 1 firm-ripe avocado cubed or thinly sliced
  • 2 tablespoons fresh cilantro chopped
  • 8 ounces Any cheese that melts would work Cheddar, Monterey Jack, Mozarella, Cotija
  • Diced green onions or white onions
  • Tortilla strips or chips
  • 1 lime cut into wedges

Adds-feel free to add more veggies or beans to this soup!

  • 1 cup Corn, canned or frozen
  • 1 15 ounce can Black Beans, drained
  • 1 chayote, zuchinni-diced and added to soup during simmer

Instructions

  • In a 5- to 6-quart nonstick pan over medium heat, stir onion, garlic, cumin, oregano, chili powder, and pepper until spices are fragrant, about 1 minute. Add broth, tomatoes (including juice), and green chilies. Cover and bring to a boil over high heat.
  • Add chicken breasts to the broth and return it to a boil over high heat then reduce heat immediately and simmer until chicken is cooked through (cut to test), about 10 minutes. Remove chicken and set aside to cool.
  • Meanwhile, stack tortillas and cut into 1/8-inch-wide strips. Add to boiling broth. Reduce heat, cover, and simmer for 15 minutes, stirring occasionally. This is the traditional way of making tortilla soup. Add optional vegetables, corn or beans at this point also. See notes for blasphemous shortcuts, lol...
  • Shred chicken. Cut the avocado in half, remove the pit and peel it. Thinly slice or cube and place in a shallow bowl. Shred cheese and place in a bowl.
  • Before serving, season soup to taste with salt and pepper. Ladle into soup bowls, garnish with cilantro, avocado, green onions and cheese. I usually leave all these fixings in bowls for folks to help themselves!