Category: Test

Meat & Tofu Patties Wanja-Jeon

Meat & Tofu Patties Wanja-Jeon

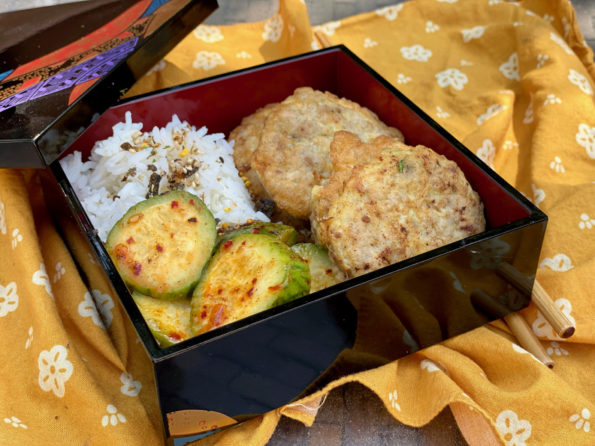
From a historical perspective, who was the OG that took a hunka meat and decided to grind it up?

It was GENIUS

I mean, think of all the foods you love that start with ground meat?  Top of the list, duh, BURGERS.  Followed by Italian SAUSAGES, Spaghetti and MEATBALLS,  Sloppy Joes, ragú, chili, and meatloaf…  In Asian cuisine you have,  Steamed Pork Patty, Japanese Soboro, potstickers, momos…toppings for rice bowls, quick soups, dumplings…I could grind on but you get the meat of it.

Dinners were always delicious at my Auntie Lil and Uncle Stan’s house.  A blend of Korean and Hawaiian dishes that made my mouth water.  My favorite dish was Auntie Lil’s Beef and Tofu Patties, her version of Wanja-jeon, 완자전.  Kind of like bite-sized flattened meatballs she called mini-burgers.   Add tofu and carrots to make the jeon moist and tender. Then season with sesame, onions, garlic, and soy sauce and finally dip in flour and egg then fry to a light golden color. Freakin’ delicious.

Ultimately, consumed at a torrid pace by…me.  Unfortunately, I never asked her for the recipe so to re-create Auntie Lil’s Wanj-jeon, I turned to a couple of my favorite Korean food sites, Korean Bapsang and Maanchi.

Where’s the Beef…Patty

Wanja-jeon can be made with beef or a combination of beef and pork. I might try some ground chicken in place of the pork, but for now let’s stick to the OG version, BEEF. I did try 50:50 beef: pork and didn’t feel there was a big difference. Finely dice or mince the carrots, onions, garlic, and scallions.  Drain and press the excess water from the tofu (very important, no soggy patties for us) and smoosh it up.  Add soy sauce and sesame seeds and oil. Lightly mix the ingredients together.

Set aside two bowls, fill one with the flour and the other for the eggs.  Beat the eggs in a shallow bowl and set them aside. Use a two-tablespoon ice cream scoop to make balls and lightly flatten each.  Dip each patty into the flour and place it on a pan or platter.  When you have floured all of the patties, it’s fry time. Heat a non-stick pan over medium heat and add the oil.  Place your bowl of beaten eggs near the pan.  When the pan is hot, dip each patty into the egg mixture and carefully place it in the pan.

Fry over medium-low heat, the patties should be a light golden brown and firm to touch.

Serve Wanja-jeon warm or room temperature.  I like to serve the patties with a dipping sauce that has a little sweetness and kick.  Enjoy!

Wanjajeon (Pan-fried Beef and Tofu Patties)

Korean Beef and Tofu Patties, known as Wanja-jeon are delicious two bite morsels that are delicious as an appetizer, and perfect for Bento box lunches. Kids love them!
Course Appetizer
Cuisine Asian
Keyword beef and tofu patties, Korean Snack, wanjajeon
Prep Time 30 minutes
Cook Time 20 minutes
Servings 4 servings

Ingredients

The Patty

  • ½ pound ground beef or mixture of pork and beef
  • 4 ounces of tofu squeeze out excess water and smoosh
  • 3 tablespoons chopped onion, yellow or white ~1/4 of an onion
  • 1-2 garlic cloves (1 tsp) minced
  • 1 green onion finely chopped
  • 2 tablespoons chopped carrot minced or finely chopped
  • 1 large egg slightly beatened

The Patty Seasonings

  • 1 tsp kosher salt
  • ½ teaspoon soy sauce
  • ¼ teaspoon ground black pepper
  • teaspoons toasted sesame oil

The Dredge & Fry

  • 2 eggs
  • 2 to 3 tablespoons all purpose flour
  • 3 tablespoons vegetable oil
  • 1 tsp roasted white sesame seeds, crushed optional

Dipping Sauce

  • 2 tbsp soy sauce
  • 1 tbsp rice vinegar
  • 1 tsp granulated sugar
  • 1/2-1 tsp Gochugaru or crushed chili flakes
  • 1 tsp sesame oil
  • 1 tsp green onions, finely diced
  • 1/2 tsp garlic, minced
  • 1 tsp toasted sesame seeds

Instructions

Patties

  • Combine ground beef, pressed tofu, onion, garlic, green onion, carrot, 1 teaspoon kosher salt, soy sauce, ground black pepper, sesame oil, sesame seeds if using, and 1 egg in a bowl.
  • Mix well by hand until the mixture gets a little sticky.
  • Divide the mixture into ~16 equal pieces. A 2-tablespoon ice cream scoop makes easy work of this. Shape each into a ball between your palms, then flatten into 2-inch patty about ¼ inch thick.
  • Dip each patty into flour, coat well but shake off the excess. Set each aside on a platter. Dredge all the patties at once and place on a platter or tray.

Fry Time

  • In a bowl beat 2 eggs, add a pinch of salt.
  • Heat a large nonstick pan over medium-low heat. Add some oil and tilt the pan to spread it around.
  • Working in batches, dip each patty in the beaten egg, making sure to coat all of the patty, and place in the hot pan, one by one.
  • Cook for about 1-2 minute until the bottom part turns light golden brown. Flip it over and cook for a few more minutes until the bottom part turns a little crunchy and light golden brown.
  • Patties should be firm to touch when done. I cook the patties in two batches in a 12-inch pan. Clean the pan between batches. Serve the patties warm or at room temperature. Leftover patties are perfect in bento boxes.

Dipping Sauce

  • Combine all ingredients, stir well.
  • This is an all-purpose dipping sauce that can be used with dumplings, meat patties, Korean pancakes and jeon.
Steamed Black Bean Spareribs-Microwave Magic

Steamed Black Bean Spareribs-Microwave Magic

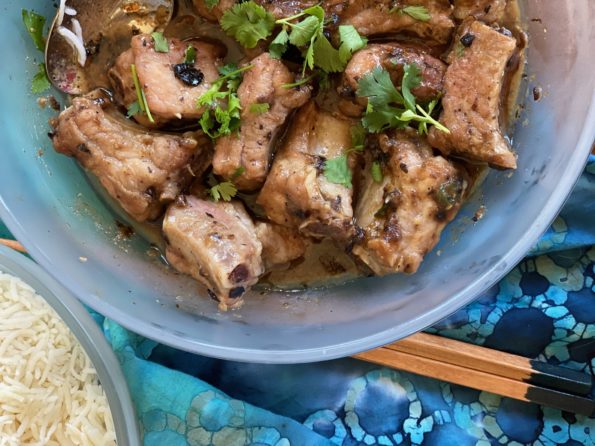
I am the happy owner of Anyday Cookware, a set of bowls designed for the microwave.  A podcast junkie, I am hooked on “All Things Chang”.  That is Dave Chang, chef, restauranteur, face, and creator of the Momofuku Empire.  He has waxed poetically about microwave cooking and I figure if it is good enough for him…why not?

What I really wanted to do was adapt well-loved dishes to the microwave.  Lucky me, dishes that I normally steam,  microwave beautifully.  Bonus, not only is the cooking time shortened, but the process is simplified.  No messing with steamer racks, or a large wok or pan to steam in.  You cook in the same bowl you use to prep the dish. How cool is that?  If you hate washing dishes like me, this is a HUGE.

I started with Steamed Eggs with Chinese Sausage and Mushrooms and was rewarded with a silky smooth custard in minutes.  A parade of down-home Chinese steamed dishes followed, Steamed Pork Patty, Steamed Chicken, Lop Cheung, and Mushrooms, and now, Steamed Black Bean Spareribs.

I adapted a recipe from the site Made with Lau.  Inspired to archive his chef father’s cooking, Randy Lau created Made with Lau featuring videos of his chef-father cooking classic Chinese dishes, in particular Cantonese dishes.

The Lowedown on Lau

His are the dishes of my childhood. The videos are easy to follow and more importantly, the recipes work.  His father speaks in Cantonese, so I get to brush up on my Chinese skills, while learning how to make a great dish, win-win!  My family is from the same region in China and listening to him feels like being home with my grandparents, aunties, and uncles.  Randy does a yeoman’s job translating his Dad’s cooking wisdom and his recipes into English.

The Wrap

After each cooking session, the family gathers around the table to enjoy the fruits of Daddy Lau’s labor.  They give the background and history of the dish and additional cooking tips.  It is the perfect way to round out each segment.  Made with Lau is a gem and I hope you check out their site.

The Dish

Black Bean Spareribs is a family favorite which until now, we only have when we are out for Dim Sum.  The spareribs are steamed with chilis, fermented black beans, which have lots of umami, and seasonings.   As soon as Made with Lau posted the video recipe I jumped at the chance to try it.  My biggest deviation was cooking it in the microwave instead of steaming.  Worked like a charm.

Use pork spareribs cut into bite-size pieces or you can cheat and use boneless pieces of pork.  Both are equally tasty.  Chinese markets carry ribs cut into 1-inch segments so if you are close to an Asian market go for it…don’t cut them yourself.  It’s a lot of trouble and invariably you will have shards of bone in the cut ribs-no fun. For boneless, use pork belly or pork butt for this dish.  It shouldn’t be too lean, the fat contributes both flavor and tenderness to the dish.

Fermented black beans can be found in Chinese grocery stores.  Salted and fermented black soybeans are pungent and full of umami.  A little goes a long way but it does keep well in the fridge.  There is a black bean sauce in a jar that might be a suitable sub, you would need to adjust for salt and some of the seasonings.  I haven’t tried it yet.

This is Cantonese soul food.  Serve with steaming bowls of rice and a green veggie dish like stir-fried pea sprouts.


Steamed Black Bean Spareribs-Microwaved

Cantonese dish generally served at teahouse for Dim Sum. Microwaved instead of steamed! Fast, easy and delicious.
Course dim sum, Main Course, Muffins
Cuisine Asian
Keyword Black beans spareribs, Cantonese cooking, dim sum, steamed pork with black beans
Prep Time 15 minutes
Cook Time 10 minutes

Ingredients

  • 1 lb spare ribs (baby back ribs) cut into 1-1.5 inch pieces or sub 1 lb. pork belly or pork butt cut into bite-sized pieces.
  • 1 tbsp cornstarch for rinsing ribs

Bowl 1

  • 0.50 tbsp light soy sauce
  • 1 tbsp oyster sauce
  • 1/2 tbsp Shaoxing wine
  • 1/4 tsp salt
  • 1 tsp sugar
  • 1-2 tbsp water or low sodium chicken stock Add if using microwave to cook

Bowl 2

  • 1 tsp dried mandarin orange peel optional, small thumbnail sized piece
  • 1 clove garlic minced
  • 1 tsp ginger minced

Bowl-3

  • 1 tbsp fermented dried black beans rinsed and dried, smooshed
  • 1 tsp sesame oil
  • 1 tbsp cornstarch for pork
  • 0.50 tsp vegetable oil

Garnish

  • red chili pepper, deseeded and deveined a few slices, optional
  • 2 green onions sliced

Instructions

  • Place our fermented black beans in a bowl, and rinse them under running water for 15-20 seconds. Gently massage the beans as you do this. Drain the water, and set the bowl aside to let the beans rehydrate for a couple of minutes then smoosh them with the back of a spoon. Set aside
    Soak orange peel in warm water, set aside for 10-15 min. Once soft, dice.
  • Slice red chili pepper and green onions. Set aside
  • Rinse and dry ribs and place in bowl. Add cornstarch to the ribs, and massage the ribs around to evenly mix the cornstarch around the surface of each rib.
  • Rinse the ribs in running water for 1 to 2 minutes, massaging the ribs as you go. Pour out all of the water, and press and squeeze the ribs against a colander to get rid of excess water.
  • Wrap the ribs in a thick paper towel, pressing and patting to absorb moisture.
  • Place ribs in a large microwavable bowl. Make marinade.
  • Combine salt, sugar, light soy sauce, oyster sauce, Shaoxing wine in a small bowl. Mince garlic, ginger, orange peel, and add to a second bowl.
  • Add soy mixture and ginger-garlic mixture to bowl of ribs. Mix and massage the bowl of ribs well. Approximately 45-60 seconds to blend.
  • Add black beans to the bowl of ribs, mix well.
  • Add sesame oil and cornstarch. Mix the ribs to evenly coat each rib with cornstarch. Spread out evenly in bowl. Sprinkle chilis on top and drizzle with remaining 1/2 tbsp of oil. Cover with lid, open the vent on lid if it has one, or leave lid slightly ajar on bowl.
  • Microwave on full strength for 5 minutes. Remove, careful it's hot and stir mixture. If it seems dry or the sauce is too thick add 1-2 tablespoons of water or stock. Scatter green onions on top. Place lid back on and microwave for anouther4-5 minutes.
  • Remove from microwave and allow to stand for 30-60 seconds. Serve with lots of rice.

Notes

Heat wok on stove, placing a steamer rack in the center of the wok. Add enough boiled water so that it just barely covers the entire steamer rack.  Transfer the ribs into the plate you'll be steaming with, being careful not to let any ribs be covered by one another. Add the chili pepper slices, and pour vegetable oil on the ribs.
Cover the wok, set the stove to its highest heat setting, and steam the spare ribs for 20 minutes.
After 20 minutes, turn the heat off, uncover the wok, garnish with the green onions and serve.
Mango Sticky Rice-Nuked!

Mango Sticky Rice-Nuked!

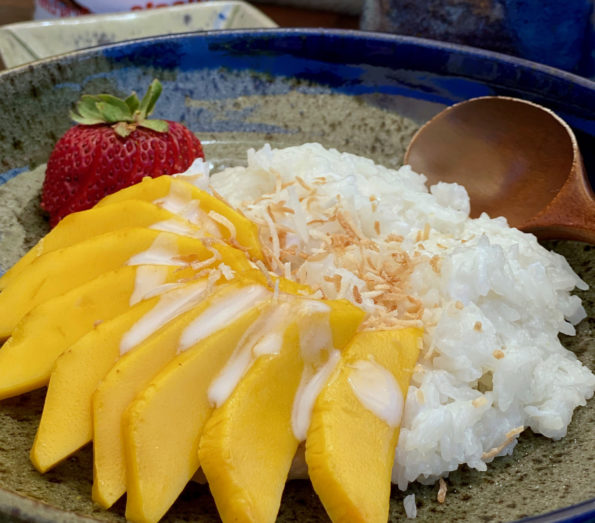
Raise your hand if you have had Mango Sticky Rice.  Just trying to gauge in the pantheon of delicious desserts, where Mango Sticky Rice lands.  I live in a bubble in the Bay Area where you can be in an Asian restaurant or supermarket be it Thai, Chinese, Japanese, Korean, in minutes.  Mango Sticky Rice is a mainstay dessert.  I use to think it was intimidating to make at home but it really isn’t.  Now, making the rice in the microwave takes any trepidation down to zero!

The ultimate mango dessert, Mango Bingsoo from UDessert Story

Vegan and Gluten-Free, Shazam!

Asian desserts generally are not too sweet.  If I had to pick predominant flavors, I’d say mango, coconut, almond, and sesame are pretty popular.  Sticky rice is a cornerstone, as is Tapioca (hello, boba).  Many Asians are lactose intolerant so dairy is not a major player in Asian cuisine.  Mango Sticky Rice is a win-win-win, coconut milk is used for the sauce and flavoring component, sticky rice-the base, so, no butter, eggs or wheat.  Vegan, gluten-free, and dairy-free-mindblowing.

Stuck on Sticky Rice

The foundation of this dessert is sticky or glutinous rice which can be found in most Asian stores.  I use either Sweet Rice from Koda Farms or Thai Three Ladies Sweet Rice (the OG for this dessert).  Normally, the rice is steamed, which is a long process, and then flavored with sweetened coconut milk.

I came across an article on Epicurious that featured Chrissy Teigen’s Mom and her cookbook.  One of the recipes included is Mango Sticky Rice made easy, and not to mention quicker, in the microwave.  This recipe is a mash-up of her recipe and my own recipe.  My original post also has tips on what rice to buy and coconut milk, call it a mango sticky rice primer.

I used my Anyday Microwave Cookware, which worked like a charm-one bowl cooking, very convenient.  Soak the rice for 10 minutes or up to 60 minutes in the same container you will use in the microwave.  I inadvertently soaked the rice longer than 60 minutes (chatting with a neighbor) and the rice was a bit soft.  I tried it again and soaked the rice for only 20 minutes and I washed the rice first (which isn’t in the Epicurious version), definitely recommend washing your rice.

Microwave Magic

Once the rice has soaked, cover the bowl with a vented lid or plastic wrap and place it in the microwave.

Cook for 3 minutes on high power, take it out, and stir the rice bringing the bottom rice up to the top, like a scooping motion.

There was still quite a bit of liquid left and the color of the grains was still opaque.  So I placed it back in the microwave and cooked for another 3 minutes.  After the additional 3 minutes, the liquid had been absorbed in the rice.  The grains were a mix of translucent and opaque and had a bit of a bite, so I stuck it in for another minute.

This was 30 seconds too long along, the grains were a little too soft, the combination of a too-long soak and overzealous nuking.

I have a 700-watt Spacesaver GE Microwave, it’s on the low-end power-wise.  Adjust time and power level based on the wattage of your microwave.  The key is to get to know your microwave and how it cooks.  Just keep in the back of your mind that the dish will only take 6-8 minutes so start fine-tuning the amount of time you microwave the rice at the 5-6 minute mark.

The Sauce

The coconut milk sauce is quick and easy to prepare.  Use full-fat coconut milk, for the best flavor and consistency. Don’t let the milk boil, you just need it hot enough to dissolve the sugar.  I hold some of the sauce back to serve on the side.  Pepper’s recipe calls for 1-1/2 teaspoons of salt, I couldn’t bring myself to put that much salt.  I used 1 teaspoon of Kosher salt which I thought was fine. I added 2 tablespoons of sugar which brought it more in line with my original post.

Pour the hot coconut milk over the cooked rice.  Don’t be alarmed if it looks like a wet gloppy mess, stir well and let it sit for 10-15 minutes so the rice absorbs the milk.

So time savings? The original recipe calls for soaking the rice for 2-8 hours and steaming for 25 minutes.  The microwave recipe calls for soaking the rice for 10-60 minutes and nuking it for 7-8 minutes.  Hmm, don’t need to be a CPA to figure out the time savings.  Enjoy!

Microwave Mango Sticky Rice

A delicious dessert with its roots in Southeast Asia, Mango Sticky Rice is both gluten-free and dairy free. Made quick and easy in the microwave.
Course Dessert
Cuisine Asian, Asian-American
Keyword coconut, Gluten-free, Dairy-free, Mango Sticky Rice, Thai Dessert
Prep Time 45 minutes
Cook Time 7 minutes

Ingredients

  • ½ cup unsweetened shredded coconut Toast and reserve for garnish.
  • cups Thai sticky rice Three Ladies Thai Glutinous Rice or Sweet (Glutinious) Rice from Koda Farms
  • 1 can 13.5-ounce full-fat coconut milk
  • ¼ cup sugar + 1-2 tablespoons Sweeten to taste, if you have a sweet tooth, add additional 1 tablesppon of sugar.
  • 1 teaspoon kosher salt or 1/2 teaspoon reg salt
  • 2 large ripe mangoes peeled, pitted, and thinly sliced
  • Toasted sesame seeds for garnish (optional)
  • Mint leaves for garnish (optional)

Instructions

  • In a dry skillet, toast the coconut over medium-low heat, stirring, until lightly browned and fragrant, 4 to 5 minutes. Transfer to a small dish and set aside.
  • Wash rice to remove excess starch, rinse twice. Drain well and place sticky rice in a microwave-safe bowl and cover with 1¾ cups warm water. Let sit for 20 minutes.
  • Cover bowl with an upside-down plate or plastic wrap. Microwave on high for 3 minutes. Carefully stir the rice from top to bottom, then cover and cook the rice for another 3 minutes. Repeat the process, stirring and microwaving 3 minutes at a time*, until all the water has been absorbed and the rice has turned translucent (this means it’s cooked). Set aside to cool slightly.
  • In a medium saucepan, heat coconut milk just until it starts to bubble. Reduce the heat to a simmer, add the sugar and salt, and stir until they dissolve. Remove from the heat, pour 1-1/4 cups of hot sweetened coconut milk over the warm sticky rice, and stir to combine. Let sit for 5-10 minutes so the rice can absorb the coconut milk. Pour rest of coconut milk into a serving container.
  • Place a scoop of rice in a shallow bowl or plate. Top with slices of mango. Serve with reserved coconut sauce on the side. Garnish with toasted coconut, sesame seeds and mint leaf.
  • This is a substantial dessert, serve small portions or sharable portions. I often garnish with sliced strawberries too.

Notes

This makes quite a bit of rice, the recipe can be halved.