Category: Desserts

Do You Mandango? Mango Sticky Rice

Do You Mandango? Mango Sticky Rice

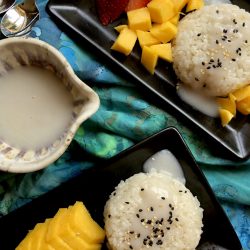
I recently posted a pic on Instagram of this luscious dessert I had up in San Francisco at U Dessert Story, Mango Sticky Rice Bingsoo.  A generous layer of fresh sweet mango precariously perched on a mound of superfine shave ice drenched in sweetened condensed milk, and finely shredded coconut.  This mega bowl of bingsoo is flanked by an array of sticky rice, housemade coconut crumble, more sweetened condensed milk, and fresh mango puree.  It was mind-bogglingly delicious.
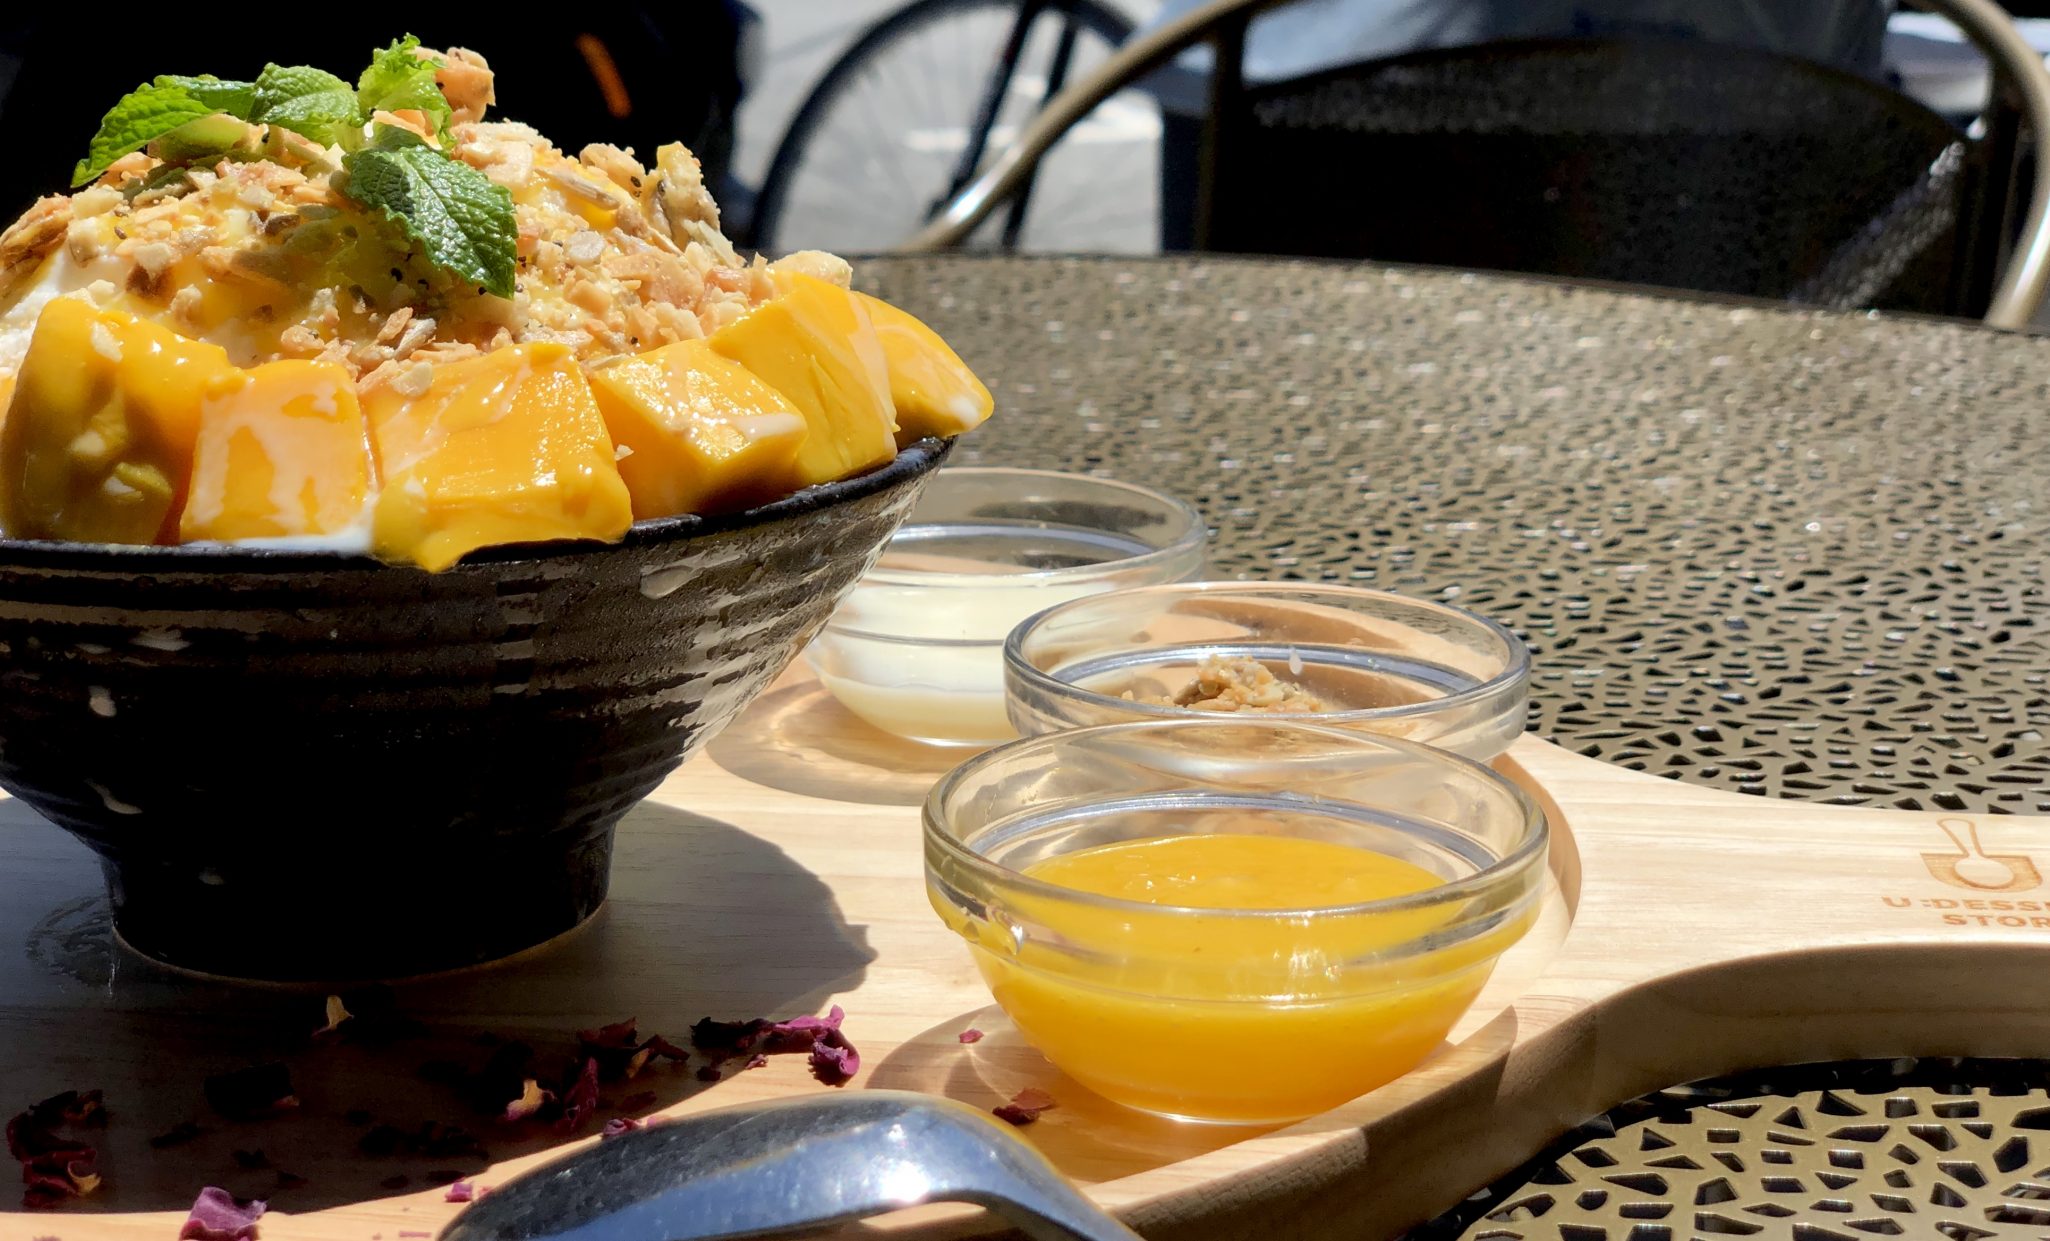
mango sticky rice bingsoo
Cubes of fresh mango, powder-like ice, tender but chewy sticky rice and the crunchy crumble, a veritable smorgasbord of textures and flavors.

Since that day I have had mango on the brain.  I picked up a bunch of Manila mangos, because you can’t just buy one, because I had decided I had to make Mango Sticky Rice.  It’s sweet, filling, refreshing, and gluten-free.  A classic fixture at Thai restaurants, you’ll be surprised at how easy it is to make at home.

WARNING: Dissertation Ahead + The Ulitmate Rice Guide

The biggest hurdle is probably tracking down the ingredients.  Mango Sticky Rice calls for Sweet or Glutinous Rice.  This is not regular rice, it is not arborio or risotto rice, and it is not to be confused with sushi rice (short grain) which is stickier than long-grain rice but not actually sticky rice.  Sweet rice, also known as sticky rice or glutinous rice, is low in amylose, and high in amylopectin (starches) which allows it to absorb liquids and create that trademark stickiness.

To add to the confusion-sweet rice also comes as short grain or long grain.  Thai cuisine uses long-grain sticky rice, while Chinese and Japanese dishes generally use short grain.  I used short-grain sweet (glutinous) rice from Koda Farms (Sho-Chiku-Bai) which is a little easier to find (most Chinese, Japanese and Korean markets will carry this) and it’s what I have on hand.  I’ll be looking for Thai long grain Sticky rice the next time I’m at an Asian market.  I foresee an America’s Test Kitchen session soon.

Glutinous rice absorbs liquids well, so the traditional, easy method for cooking it is to soak the rice for a good couple of hours (2-8 hours) and then steam it.  You COULD buy a special bamboo steamer for sticky rice or you could improvise.  I lined my steamer with cheesecloth to spread the rice on.
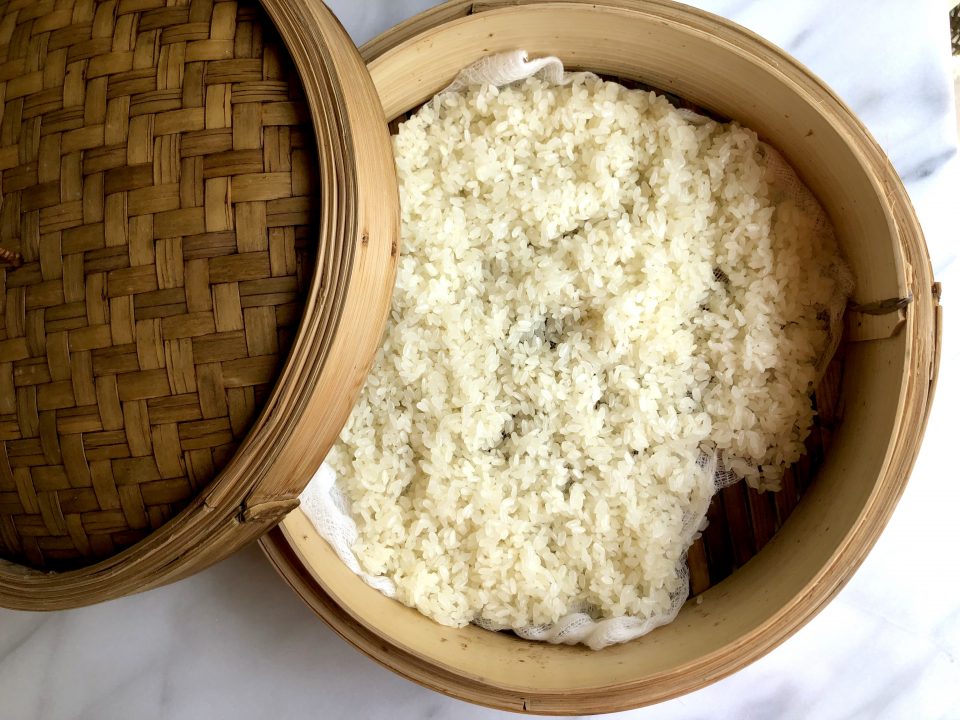
sticky rice

The rice steams for approximately 25 minutes.  It will look translucent and should not be chalky in the center.  Pull out a couple of kernels and taste them.

While the rice is steaming, prepare the coconut milk that will be used in the rice and as a sauce alongside.  Warm coconut milk and add sugar, stir to dissolve.  Remove 1 1/4 cups to use in the rice.  Add 1 teaspoon of cornstarch, dissolved in 2 teaspoons of cold water, to the coconut milk remaining in the pot. Stir constantly until the sauce begins to thicken.  Set aside.
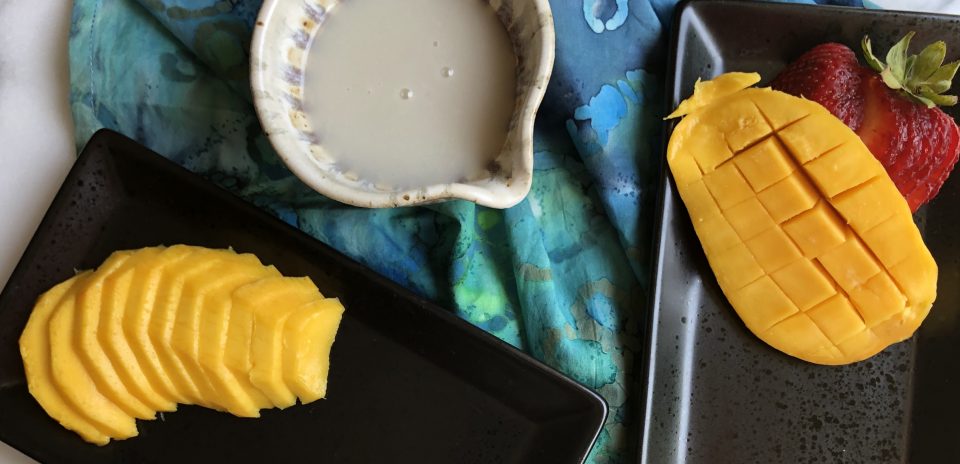
To cut mango, slice in half lengthwise, as close to the seed as possible. For cubes, score mango in grid pattern and scoop flesh away from skin. Or flip the mango inside out to expose flesh making it easy to cut it away from skin.

When the rice is done, pour it into a bowl, add the 1 1/4 cups of coconut milk and stir to combine. Cover the bowl and let it sit for 20 minutes so the milk is absorbed by the rice.  Stir rice again, cover, and let it sit for a few more minutes.
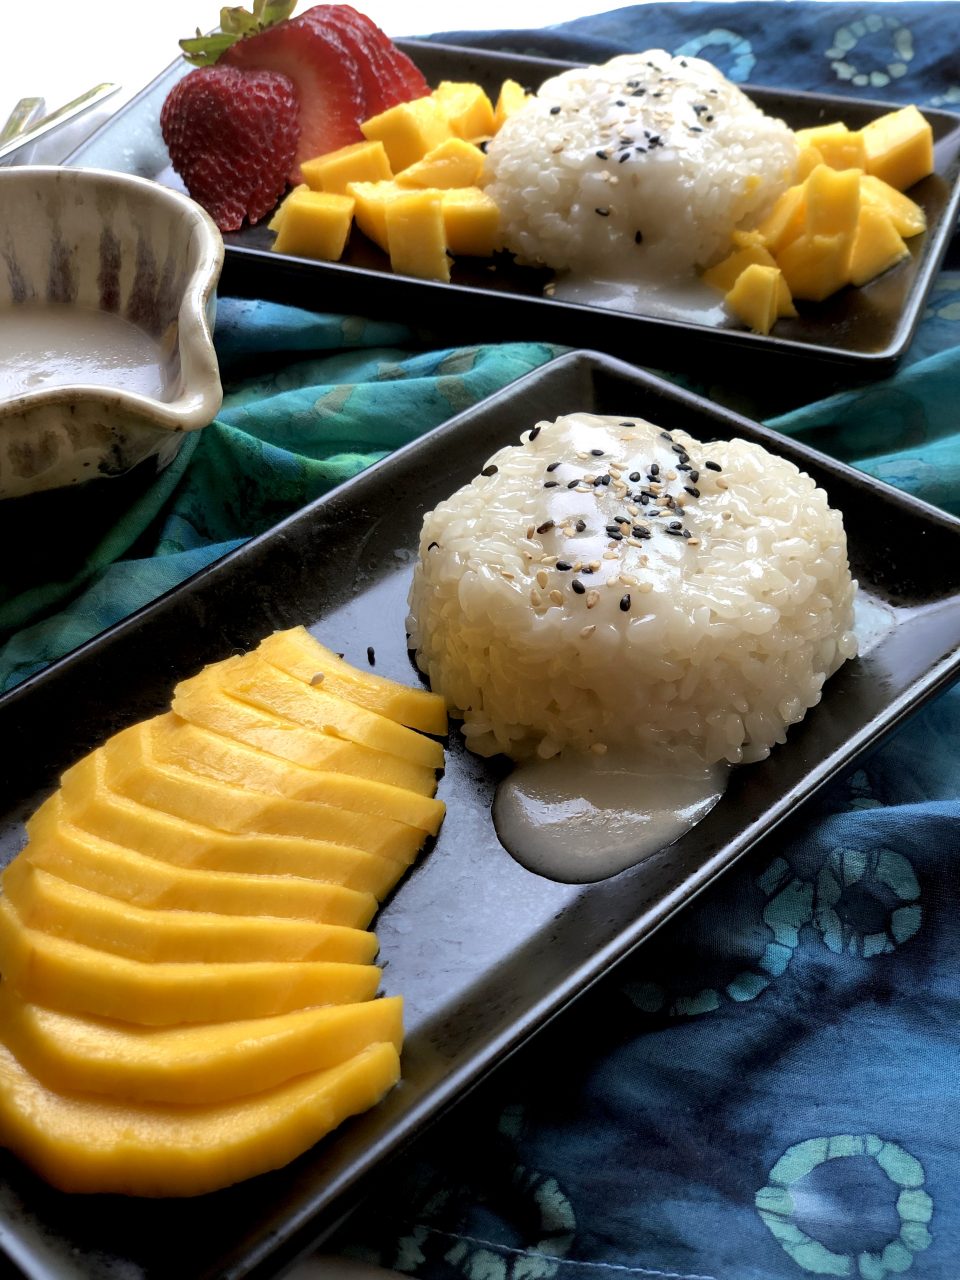
mango sticky rice

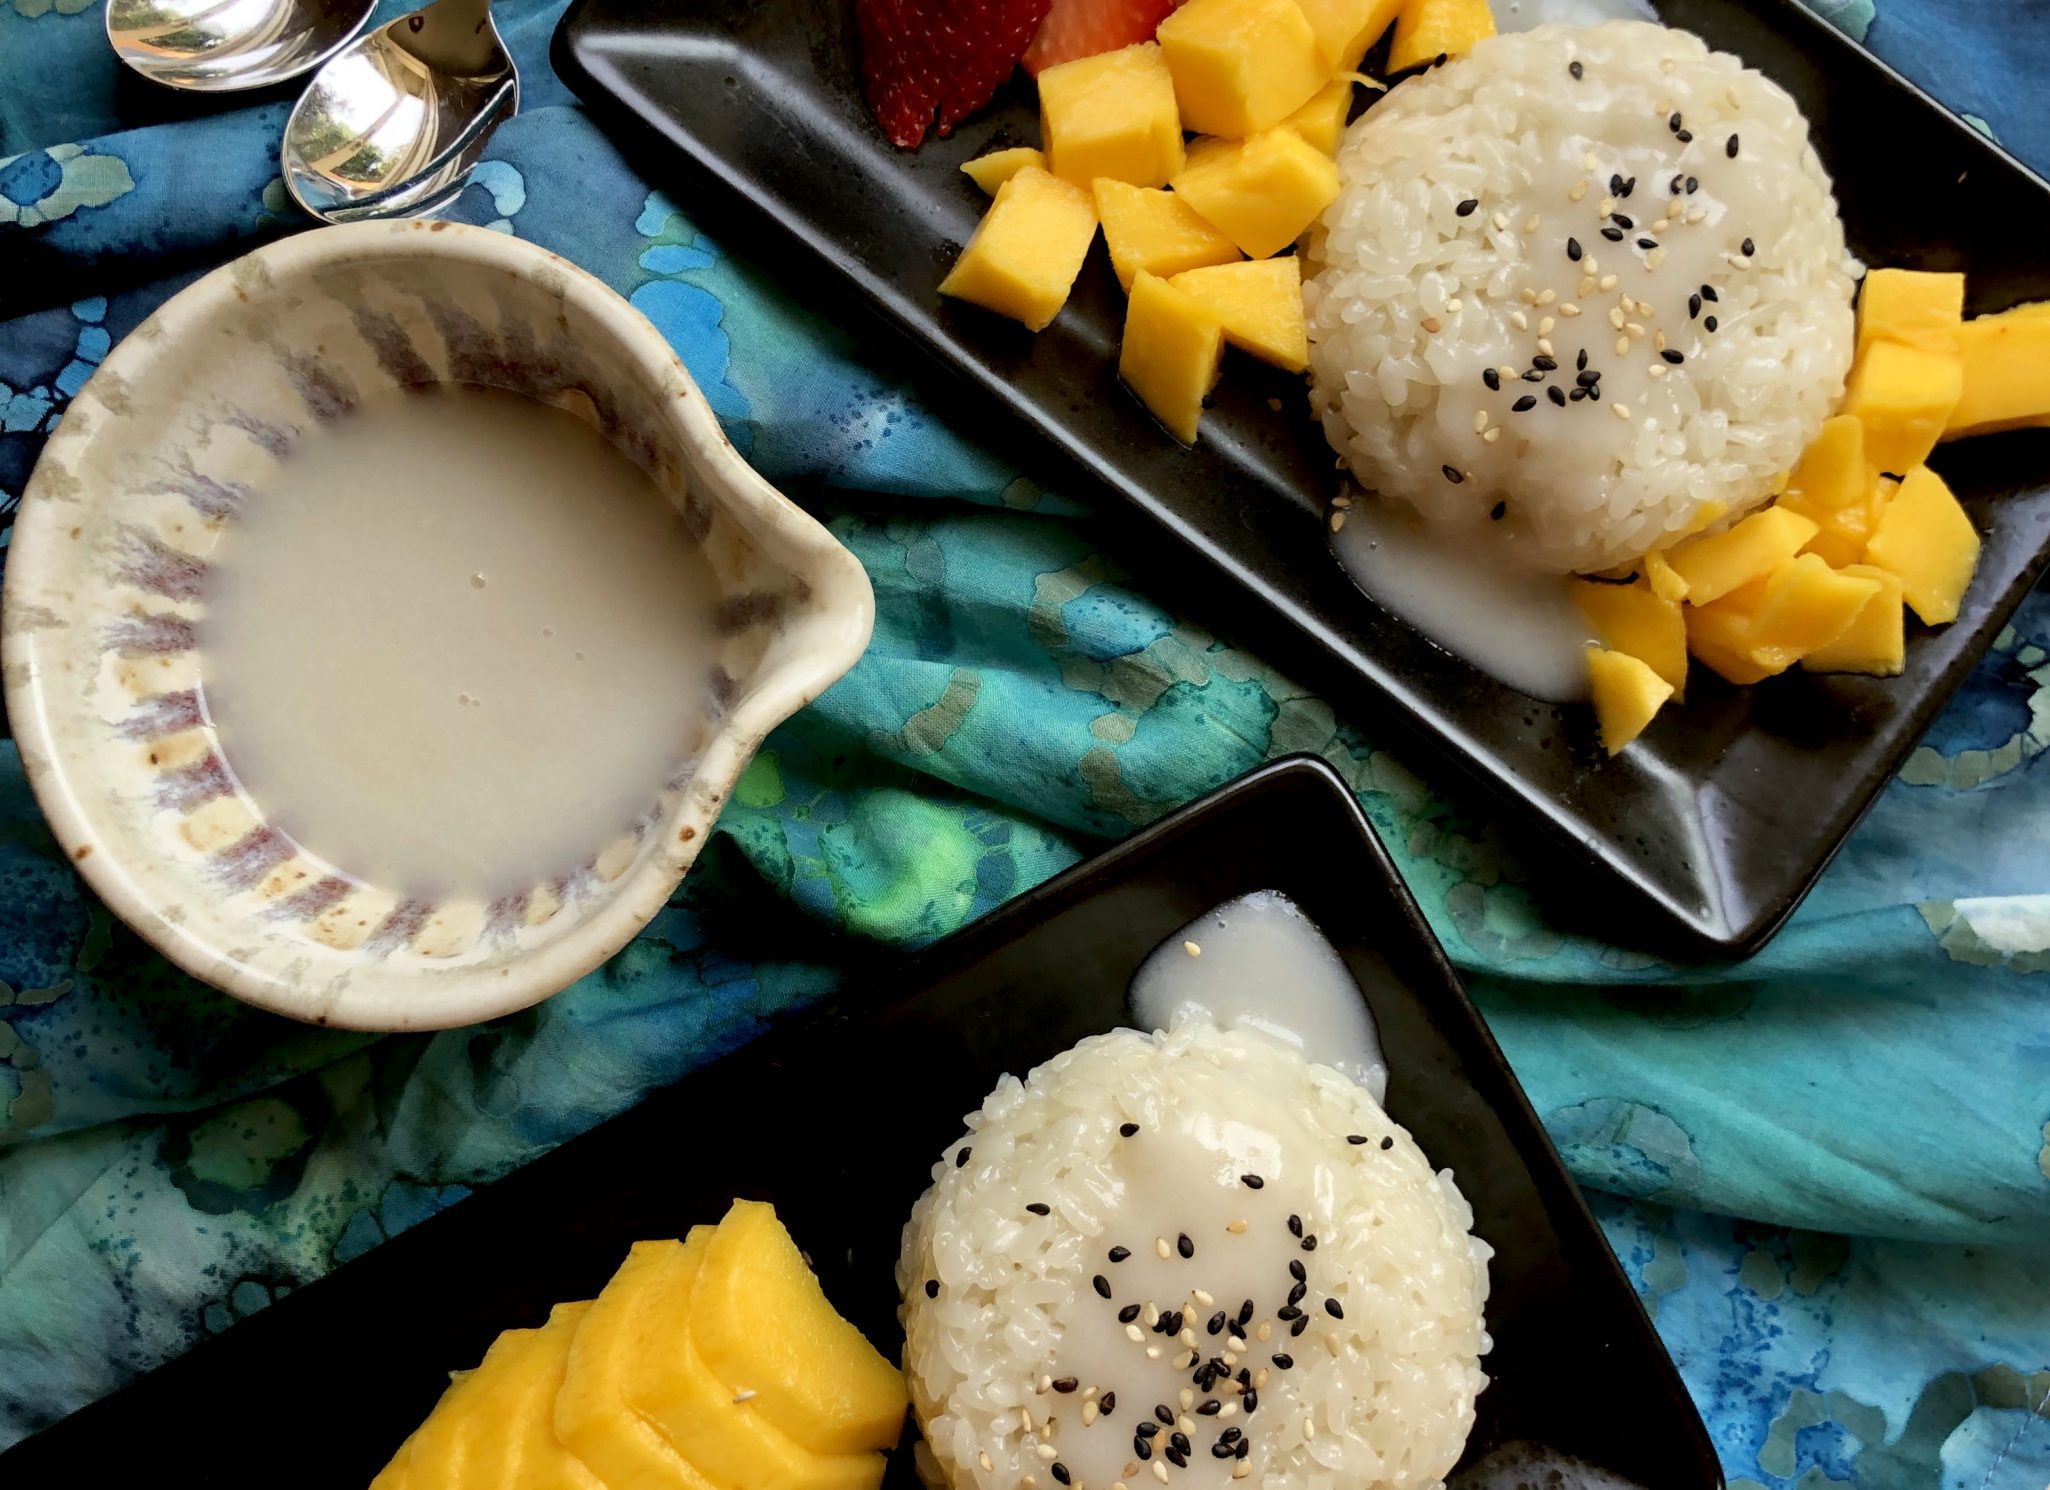
Slice or cube mango and serve alongside a scoop of sticky rice.  Drizzle coconut sauce on rice and garnish with sesame seeds.  Enjoy!

Mango Sticky Rice

Gluten-free delicious Thai dessert
Course Dessert
Cuisine Asian
Keyword mango, sticky rice, Thai
Prep Time 6 hours
Cook Time 20 minutes
Servings 4 Servings

Ingredients

  • 1.5 cups Long-grain Sticky Rice (aka sweet or glutinous) can use short grain
  • 1 can coconut milk 13.5 ounces, like Chaokoh
  • 1/4 cup sugar + 2-4 Tablespoons
  • 1/2 teaspoon salt
  • 1 teaspoon cornstarch dissolved in 2 t cold water
  • 1 big ripe mango or 2 Manila mangoes peeled and sliced or cubed
  • Toasted sesame seeds for garnish black or white
  • fresh strawberries for garnish optional

Instructions

  • Rinse the sticky rice with tap water and use your hand to gently stir it. Drain the water to remove the excess starch. Repeat once, then add water to cover. Soak the sticky rice for a minimum of 2 hours, up to 8 hours. Rinse again and drain the water.
  • Transfer the rice to a heatproof bowl, add about 2 inches of water to your steamer (not into the rice), place the heatproof rice bowl on the steaming rack in the steamer, and cover the steamer. Turn to medium-high heat to bring the water to a boil. When the steam starts to come out of the pot, turn to medium heat. Steam for 20 to 25 minutes, until the rice is cooked through, with no hard raw bits in the middle. Or use a steamer rack lined with cheesecloth. Spread rice evenly over cloth and steam as directed above.
  • While rice is steaming, add can of coconut milk, 1/4 cup + 2 T of sugar, and salt to a saucepan. Cook over medium heat until the mixture is hot and the sugar is melted. Do not bring the coconut sauce to a boil. Taste for sweetness, if it needs more sugar, add another 1-2 tablespoons. Remove 1-1/4 cups sauce to be used with the rice.
  • Carefully remove the sticky rice bowl from the steamer with your oven mitts on. Pour the 1-1/4 cups of sauce over the bowl of rice. Stir to mix well. Allow to stand covered for 20 minutes. Remove cover and stir the rice again. Allow mixture to sit another few minutes.
  • For the remaining sauce, combine the cornstarch and 2 teaspoons water in a small bowl. Stir to completely dissolve the cornstarch. Over medium-low heat, remaining sauce to a small saucepan. Add half of the slurry to the sauce. Stir immediately to thicken the sauce. You can adjust the thickness of the sauce by slowly adding a bit more water or cornstarch slurry, if needed. The sauce shouldn’t be too thick, but should coat the back of a spoon.
  • Serve when the rice mixture and the sauce cool to room temperature. You can serve it or store the extra sauce and the sauce-rice mixture separately in the fridge until ready to serve, up to 3 days. The sauce will further thicken when cooled.
  • To serve, transfer the coconut rice into serving bowls or plates. Place the sliced mango on the side. Pour a few spoonfuls of the extra coconut sauce on top of the rice. Garnish with toasted sesame seeds and fresh sliced strawberries if desired.

Notes

  • If you use refrigerated sticky rice, you can gently heat it in the microwave to bring it to room temperature before serving, for a better texture. However, it’s highly recommended to serve the rice when it’s fresh, for best results. Do not freeze the sticky rice, as it will create a very tough texture.
  • Use a small ramekin to mold sticky rice and place on the plate.
Summer Strawberry Cake, Farmer’s Market: A Midsummer Day’s Dream

Summer Strawberry Cake, Farmer’s Market: A Midsummer Day’s Dream

Get thee to a Farmer’s Market now. It is the perfect time to visit your local market, all things fruit and vegetable are at its peak.  You can hardly walk through the market without becoming intoxicated by the aroma of vine-ripened tomatoes, peaches, and strawberries.

At my local farmer’s market, we are lucky enough to have strawberries from P&K Farms, a family run farm in the Monterey area.  I can remember a couple of years ago when I first noticed their stand at the market.  Actually, it was hard not to notice, a line easily 10 people deep had formed in front of their kiosk.  Being a true skeptic, I thought, come on, are their berries really worth the wait?

Flash forward to this past weekend.  Like an idiot, I stopped for coffee BEFORE heading to the market which then meant waiting in the “way more than 10 people” line for my 3-pack of ruby perfection.  Yes, it is worth the wait.  Their strawberries are sweet, full of flavor, and remarkably hardy.

Let Them Eat Cake!…with Strawberries

I reserved part of my strawberry treasure trove for a friend’s July 4th BBQ.  I could take the easy way out and just throw them in a bowl, serve them straight up which would be perfectly fine, but what fun would that be?  Time to try that recipe from Smitten Kitchen for a cake that showcases strawberries.  A simple butter cake LOADED with berries.  The 9-inch cake calls for a pound of strawberries which means with every bite, you sink your teeth into sweet, oozy strawberries and really that’s what it is all about.

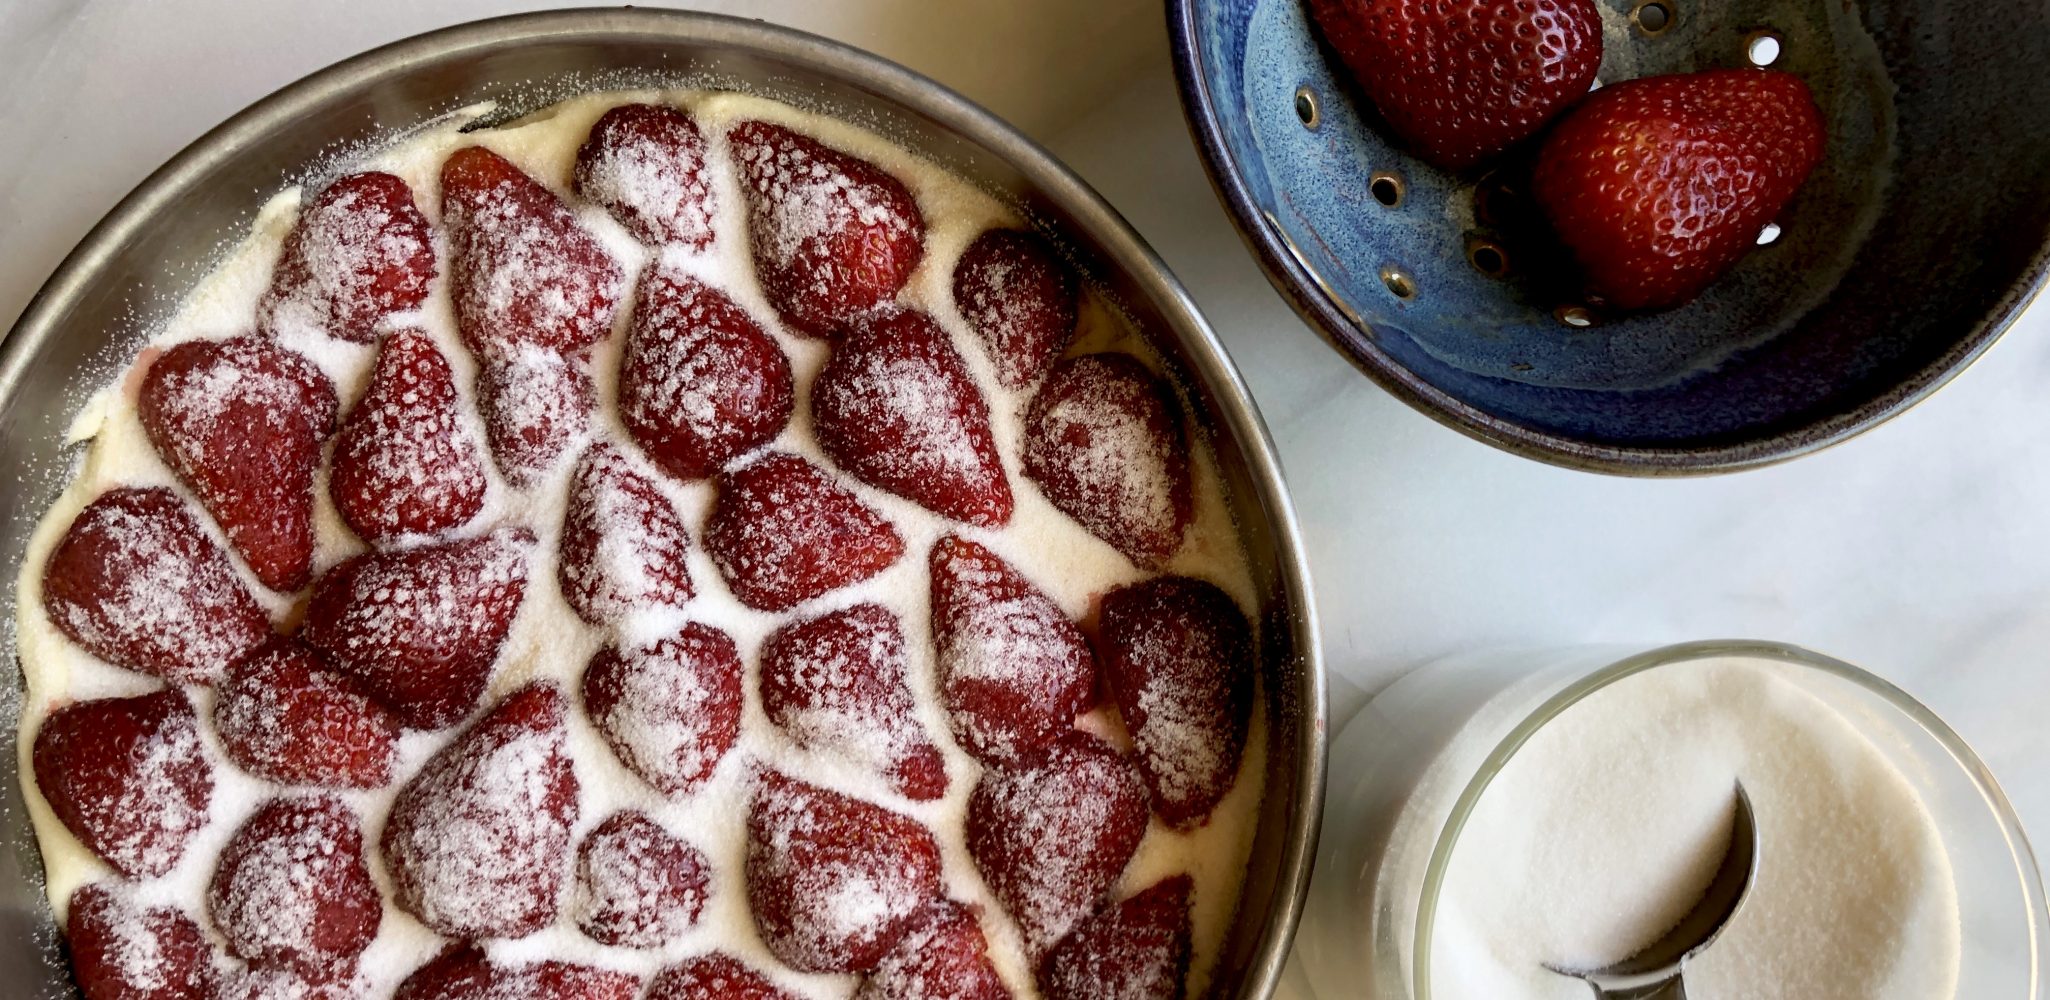
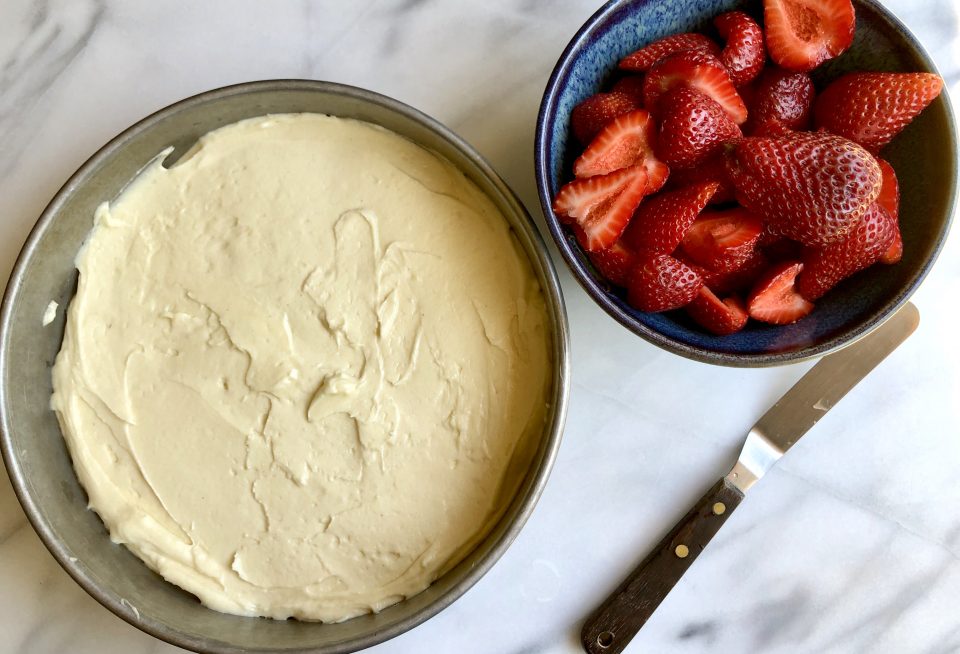
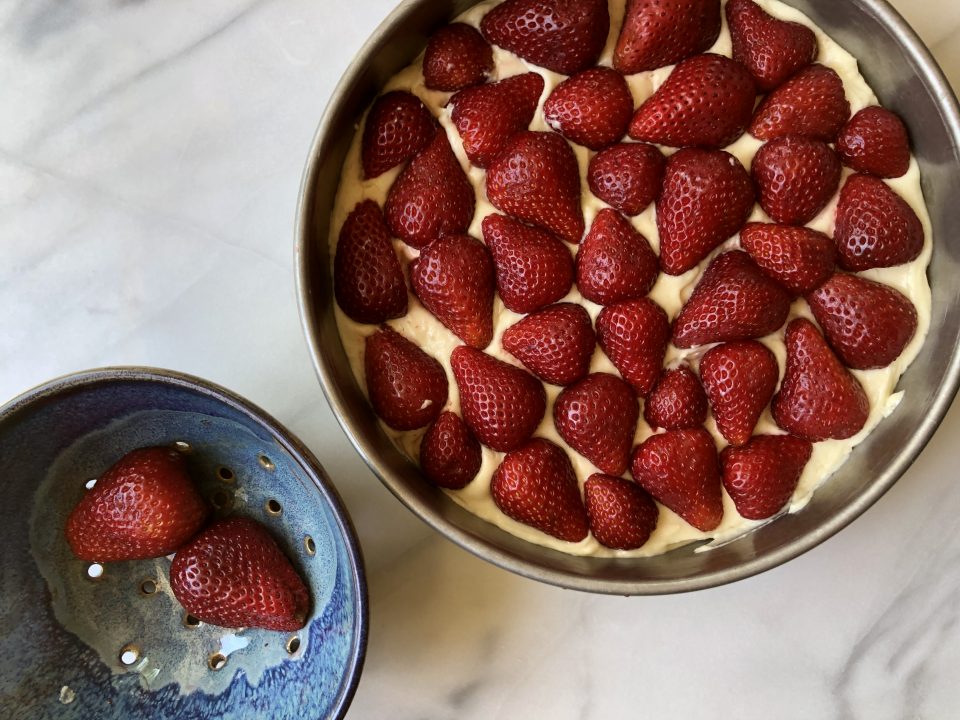
The original recipe is from Martha Stewart and tweaked by Smitten Kitchen.  The recipe calls for combining the egg, milk, and vanilla and then adding it to the creamed mixture.  Adding all the liquid at once made for a very curdled-looking mixture.  I added the dry ingredients and the batter came together.  I found a trick, when the batter looks like it is about to curdle as you are adding the milk, toss 1 tablespoon of the flour mix into the batter.  This small amount of flour prevents the curdling but won’t toughen the cake.  Voila’.  The hulled and halved strawberries are placed cut side down in the batter.

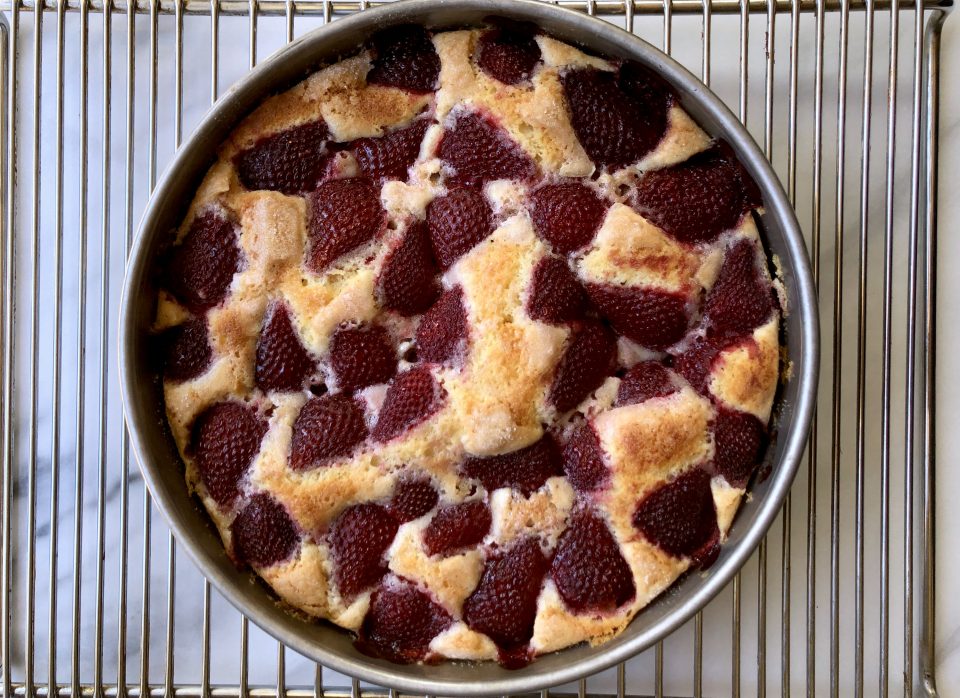
A sprinkling of sugar to finish and into the oven for about an hour.  Bake this cake in a deep dish pie plate or a cake pan lined with parchment.  It will overflow in a traditional 9-inch pyrex pie plate.  Smitten Kitchen recently adjusted the recipe to make a 9×13 cake (two pounds of strawberries!) because let’s face it, everyone is going to want seconds.
Serve this with softly whipped cream or vanilla ice cream.  Make it earlier in the day so the cake can sit. The strawberries will marry with the cake even more.  Sooo luscious.  Sooo good.

So what are you doing this weekend?  Yep, picking up strawberries at the Farmer’s Market, baking this cake, and looking appropriately sheepish as your friends and family shower you with compliments and RAVE about this cake.

Repeat after me, “Aww shucks. It was nothing.”

Strawberry Summer Cake

An easy cake that screams summer is here. Loads of strawberries baked in a buttery sweet tender cake.
Course Cake, Dessert
Cuisine American
Keyword cake, strawberries, strawberry cake, Summer Cooler
Prep Time 20 minutes
Cook Time 1 hour 10 minutes
Servings 8

Equipment

  • 9-inch cake pan or 9-inch deep dish pie plate
  • Mixer

Ingredients

Dry Stuff

  • 1 1/2 cups (188 gram) all-purpose flour
  • 1 1/2 teaspoons baking powder
  • 1/2 teaspoon table salt

Buttah & Sugar

  • 1 cup (200 gram) plus 2 tablespoons (25 gram) granulated sugar
  • 6 tablespoons (85 gram)unsalted butter at room temperature, plus extra for pie plate

The Wet Stuff

  • 1 large egg
  • 1/2 cup 118 ml milk
  • 1 teaspoon vanilla extract

The Top

  • 1 pound 450 grams strawberries, hulled and halved

Instructions

  • Preheat oven to 350°F (180°C). Butter a 9-inch cake pan and line with parchment or 9-inch deep-dish pie pan. Don't use a regular 9-inch pie plate which is too small.
  • Whisk flour, baking powder, and salt together in a small bowl. In a larger bowl, beat butter and 1 cup sugar until pale and fluffy with an electric mixer, about 3 minutes. Add egg and beat to combine. Add milk and vanilla until just combined. The mixture may look a little curdled. It's okay, once you add dry ingredients it will come together* see post for tip. Add dry ingredients gradually, mixing until just smooth but well combined.
  • Pour into prepared cake pan. Arrange strawberries, cut side down, on top of batter, as closely as possible in a single layer, don't be afraid to really squish them together. Sprinkle remaining 2 tablespoons sugar over berries.
  • Bake cake for 10 minutes then reduce oven temperature to 325°F and bake cake until golden brown and a tester comes out free of wet batter, about 50 minutes to 60 minutes. (Gooey strawberries on the tester are a given.)
  • Let cool in pan on a rack.
  • Remove cake from pan by flipping it onto a plate and inverting it onto another. Thank goodness for parchment paper.
  • Serve with lightly whipped cream. Or Lemon Cream from another recipe, see note!

Notes

The cake can be stored at room temperature for up to 2 days, loosely covered. It really won't last that long though.
Lemon Cream
 
Birthday Cake: A Labor of Love (Farmhouse Buttermilk Cake)

Birthday Cake: A Labor of Love (Farmhouse Buttermilk Cake)

We celebrated a couple of family birthdays in June.  Most notably my kid’s and my brother’s.  They share the same day, just different year, different decade, but at least not a different century.  The day my kid was born I had actually invited my brother down for dinner, a birthday bbq, since I was not allowed to travel too far from home.  As we, I should say “they”, my brother, his wife, my mom and hubby enjoyed a dinner of rib eye steaks and the fixings, I sat on the couch, trying to regulate my breathing and ignore the pain.  I finally couldn’t take it anymore and unceremoniously shoved the chocolate birthday cake I had made into his chest; wished him a happy birthday, and told him (with clenched teeth), eat the cake at home, I was headed to the hospital.

Whenever possible, we celebrate their birthdays together.  An excuse for a family get together and to retell (ad nauseam) to unknowing guests, the “birth”day story.  This year’s celebration was a bit more significant, the kid turns 25 and the bro signs up for Medicare, lol. Time marches on.

The request came through from the birthday boys for Wes’s Carrot Cake.  Good choice, it was delicious and I was off the hook.  But what to do with the extra buttermilk in the fridge?

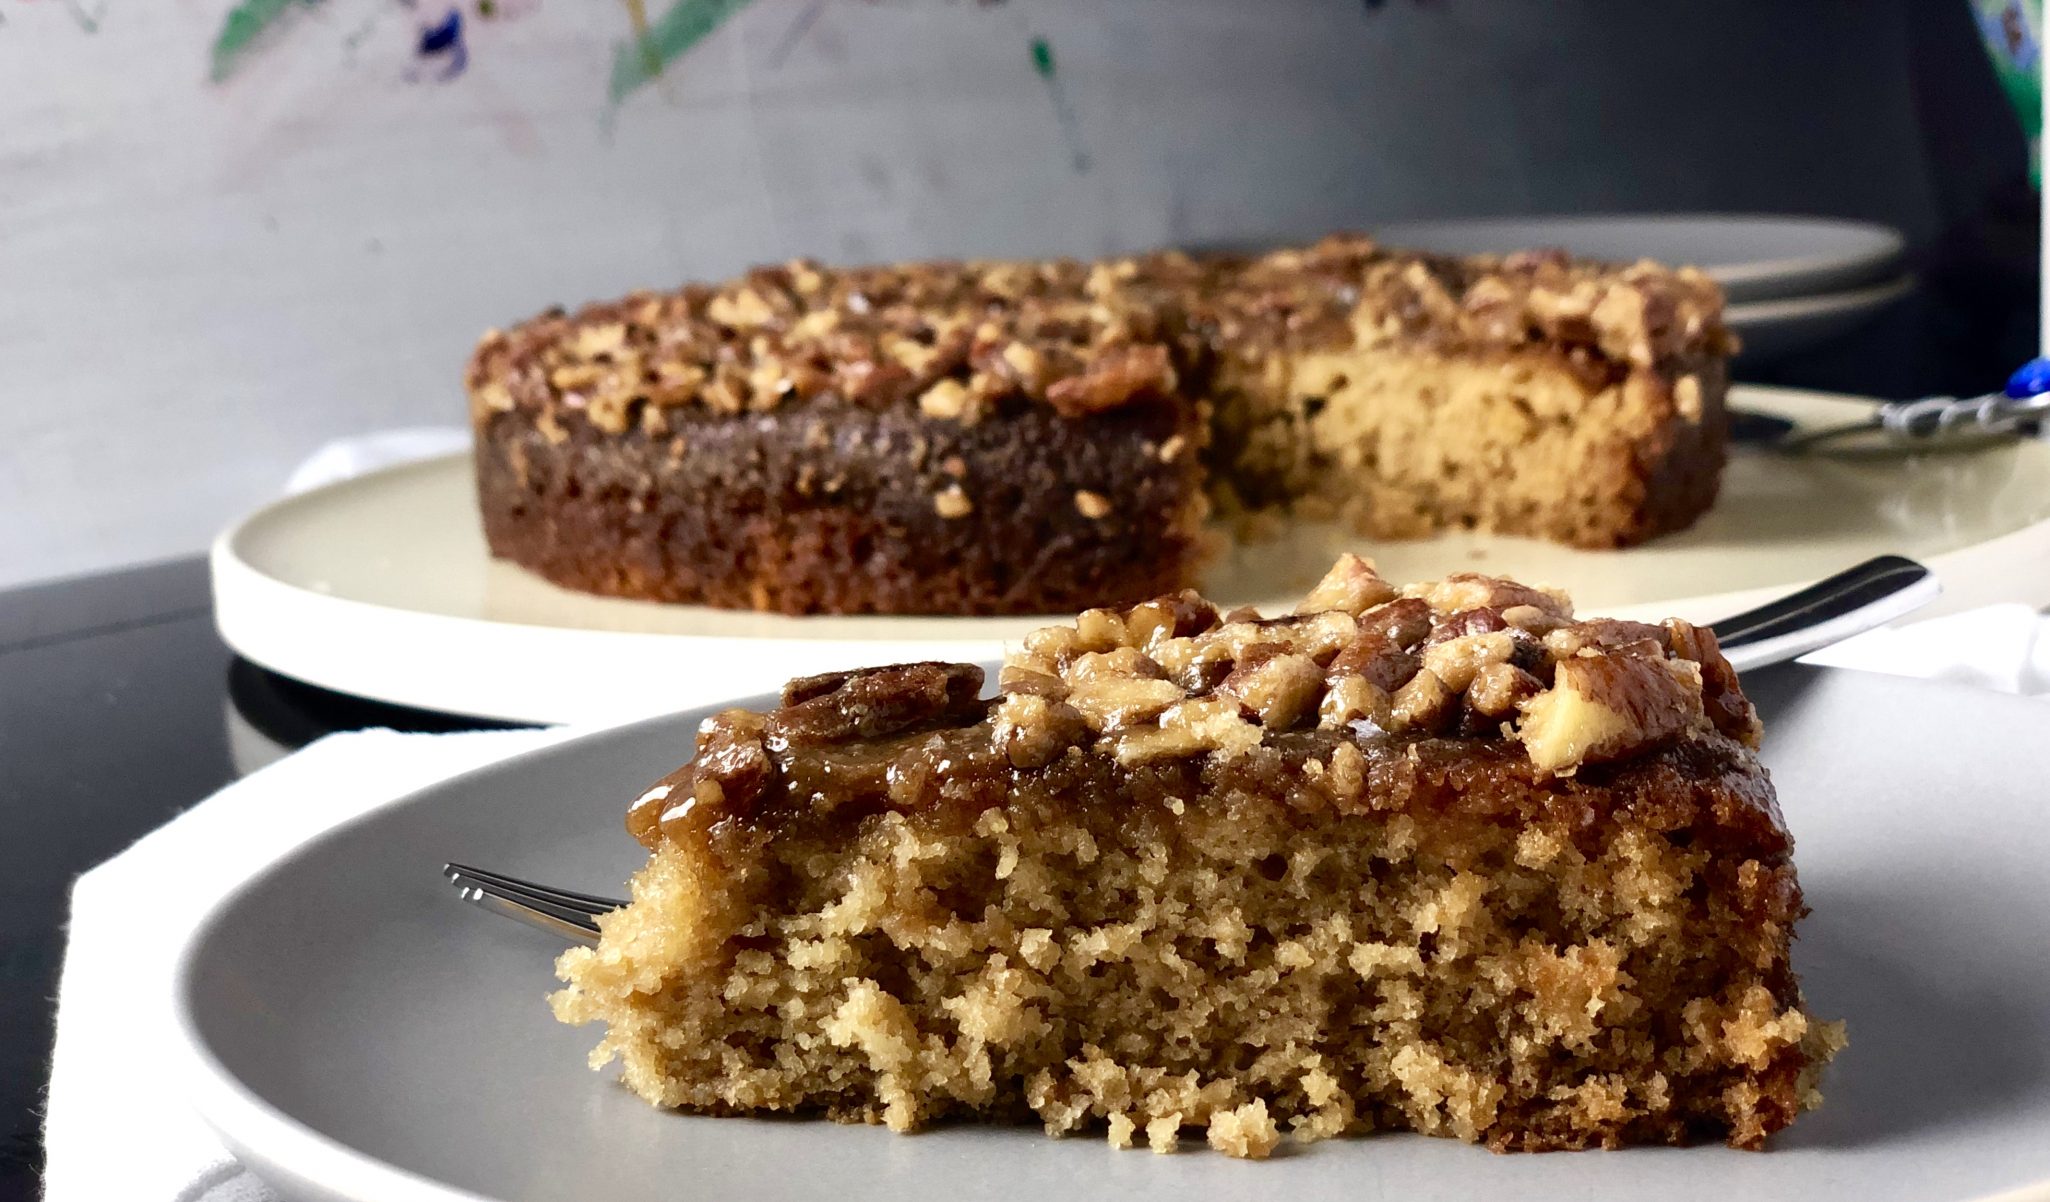
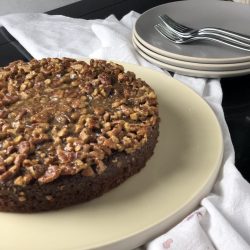
I think my FB page has ESP, smack dab in the middle of my newsfeed,  a recipe popped up for Farmhouse Buttermilk Cake.  Not only did the recipe have buttermilk, it included my favorite nut, pecans, in a caramel-like topping on top of a tender, tangy, buttermilk cake.

Pulling out my cake pan now.

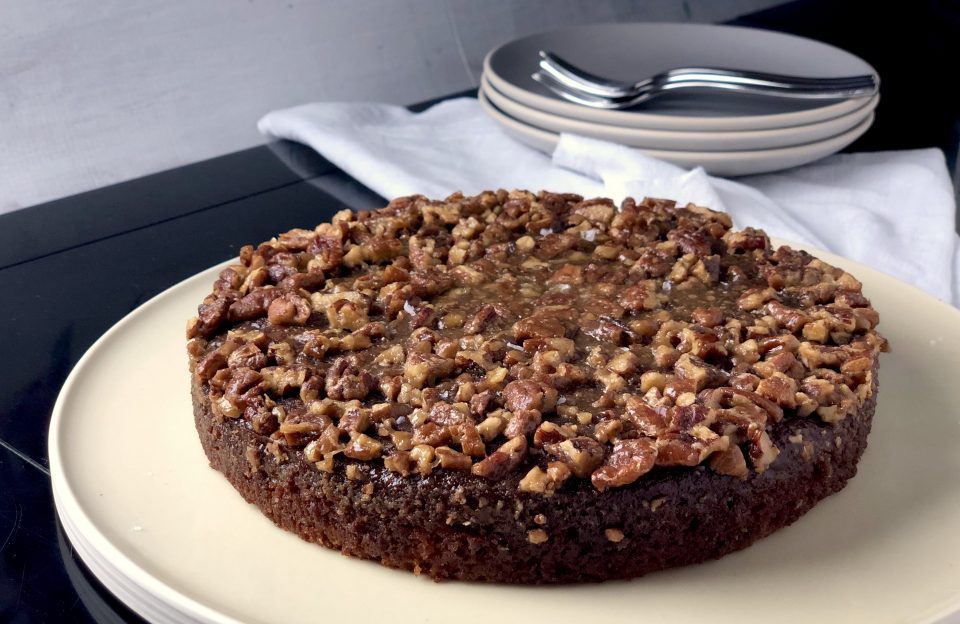
The recipe, originally from King Arthur Flour, and then tweaked by The Cafe Sucre Farine is a winner. A tender crumb cake topped with a caramel-like nutty topping is sweet, salty, and buttery, everything a little slice of heaven should be.

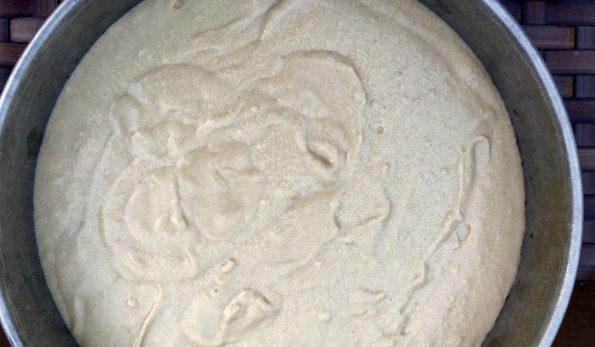
The cake is a snap to make.  You could easily make this with a bowl and a wooden spoon.  Taking the lazy way out, I used my mixer.  Classic directions, cream butter and sugar, add wet then dry, pour into pan and bake.  See, how easy is that?   I used the proportions from Cafe Sucre Farine to make a 9-inch round cake. King Arthur Flour’s recipe makes a 9×13 cake, so if you are feeding a crowd, go to KA site for the recipe.

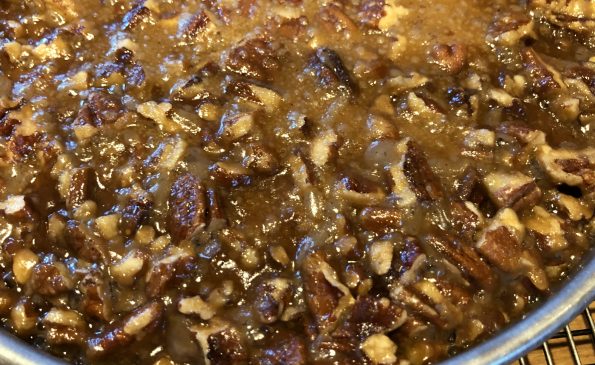
While the cake is baking, make the topping.  Don’t make it too soon as it will cool and thicken.  You want it warm so it is pourable.  You could easily substitute any nut you like, almonds, walnuts or even a mix of nuts would work.  I followed CSF’s lead and sprinkled some flake salt at the end to really pump up that play on sweet and salty.  YUM.

Bake the cake for approximately 30 minutes, top with the pecan-sugar mixture and bake an additional 10 minutes.  Remove from oven and sprinkle with flake salt.  Not TOO much, just a hint.  Let cool.  The cake can be served warm but I think the flavors come out when the cake is allowed to cool and rest.  The topping hardens a bit as it cools.

Perfect with coffee, tea or an ice cold glass of milk!

Farmhouse Buttermilk Cake

Tender buttermilk cake topped with a caramel like pecan mixture
Course Dessert
Cuisine American
Keyword Pecan Topped Buttermilk Cake
Prep Time 15 minutes
Cook Time 40 minutes
Total Time 1 hour
Servings 12 servings
Calories 289kcal

Equipment

  • Mixer
  • 9" cake pan

Ingredients

For the cake:

  • ¼ cup butter soft
  • 1 cup light brown sugar
  • 1 large egg
  • 1 cup buttermilk
  • 1 teaspoon vanilla extract
  • 1 teaspoon baking soda
  • ½ teaspoon salt
  • 1 ½ cups all-purpose flour

For the topping:

  • 3 tablespoons melted butter
  • ½ cup light brown sugar
  • 2 tablespoons half and half
  • teaspoon salt
  • ¾ cup diced pecans

Instructions

For the cake:

  • Preheat the oven to 350°Spray a 9" round cake pan with baking spray and line with parchment paper. Set aside.
  • Combine flour, baking soda and salt in a small bowl and set aside.
  • Combine the butter and brown sugar in mixer bowl on medium-low speed until smooth
  • Add the egg, beating again till smooth.
  • Stir in the buttermilk and vanilla extract.
  • Sprinkle dry ingredient mix evenly over the top and stir until well combined.
  • Pour the batter into prepared pan.
  • Bake the cake for 30 minutes or until a toothpick inserted in the center comes out clean and/or the cake springs back when lightly touched in the center.
  • During the last 10-15 minutes of baking time, prepare topping. Stir the butter and the sugar together. Add the milk, pecans, and salt. The glaze will be thick, but pourable.
  • After the cake has baked for 30 minutes, pour the topping over the cake and return it to the oven for another 10 minutes (for a total baking time of 40 minutes). Remove cake from the oven and allow to cool for 20 minutes in the pan. Sprinkle lightly with flaky sea salt, if desired and serve warm or at room temperature. Topping firms up as the cake cools.
  • Cake can be served with ice cream, well that's my suggestion, vanilla ice cream-nom,nom.

Notes

Adapted from King Arthur Flour and Cafe Sucre Farine


Not a Cinco Minute Too Soon! Tres Leches Bread Pudding

Not a Cinco Minute Too Soon! Tres Leches Bread Pudding

Invariably when faced with several choices for dessert I gravitate towards buttery, bready, moist, saucey (new word alert).  Everyone generally clamors for the chocolate-centric desserts.  I am a sucker for a warm, gushy on the inside, crisp on the outside bread pudding.  I love a  fruit cobbler or Sticky Toffee Pudding? Oh yeah, right up my dessert alley.

Two of my favorite desserts can be found in Houston.  At Kileen’s BBQ, where brisket is the bomb, their dessert, a bread pudding made with croissants, literally melts in your mouth.  A warm custard surrounds buttery, moist shards of croissants. YUM.

My other favorite, The Tres Leches Cake at Chuy’s, a Tex-Mex institution found everywhere in Texas and beyond.  Yellow cake drenched with 3 kinds of milk, whole,evaporated, and sweetened condensed milk then topped with whipped cream and garnished with fresh berries.

Wouldn’t you know it, some ingenious person decided to combine my two favorite desserts for a delightful Tres Leches Bread Pudding. I came across the recipe in the NYT, JUST in TIME for Cinco de Mayo.  Perfect!

So let someone else mix the Margaritas or tend the taco bar.  You make the dessert.

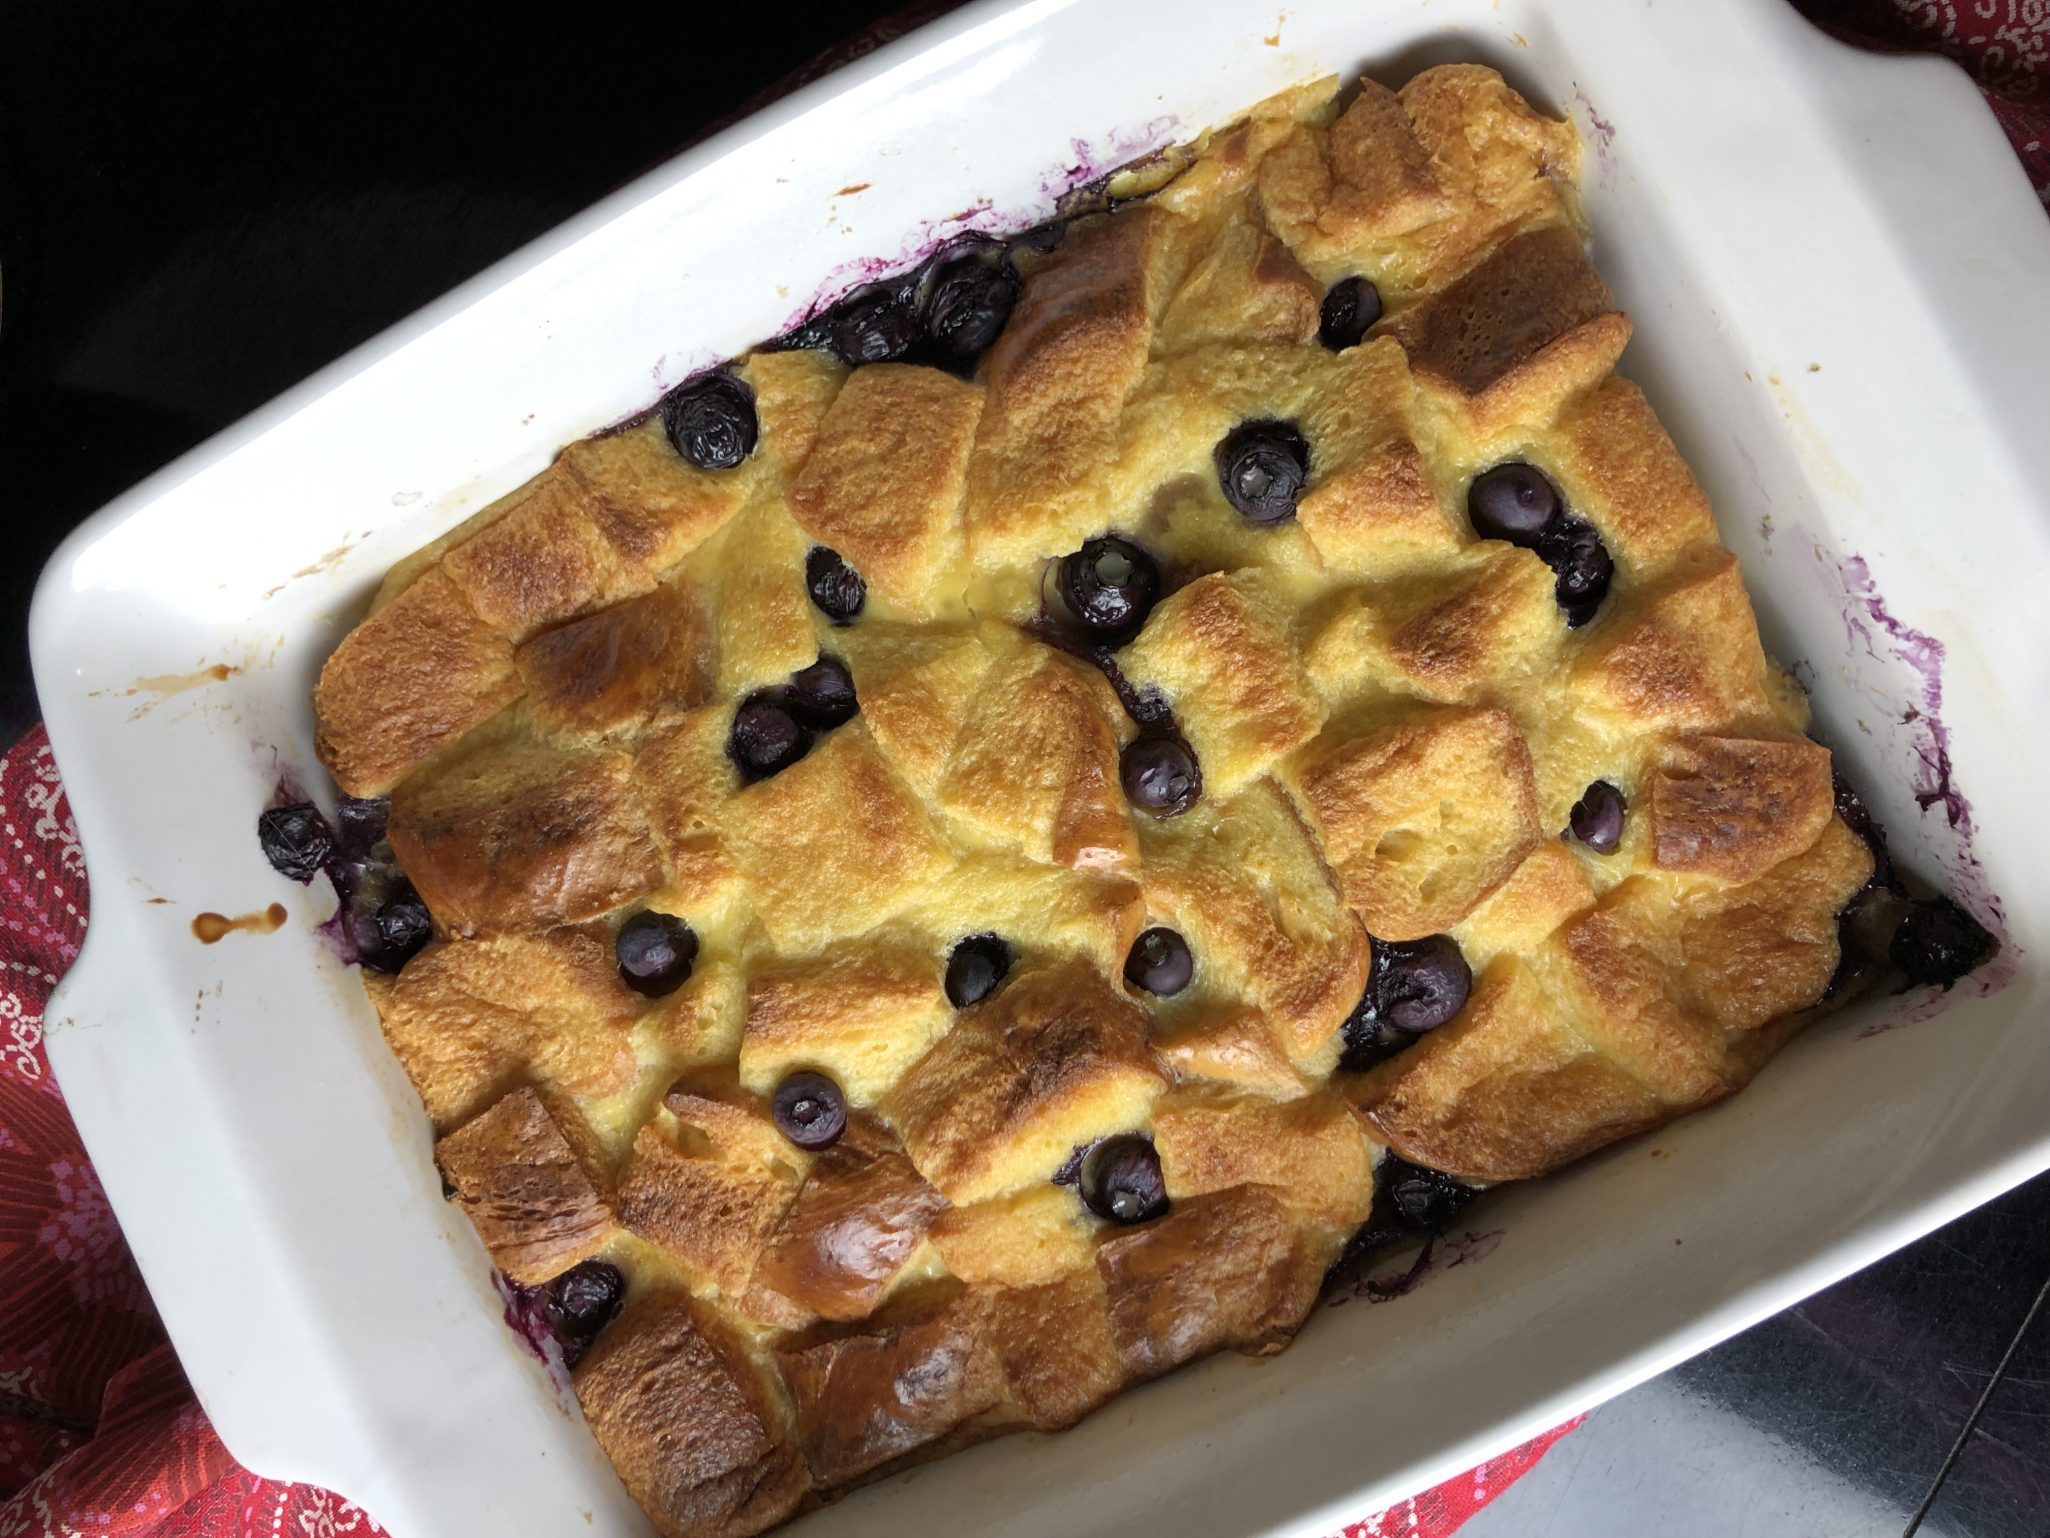
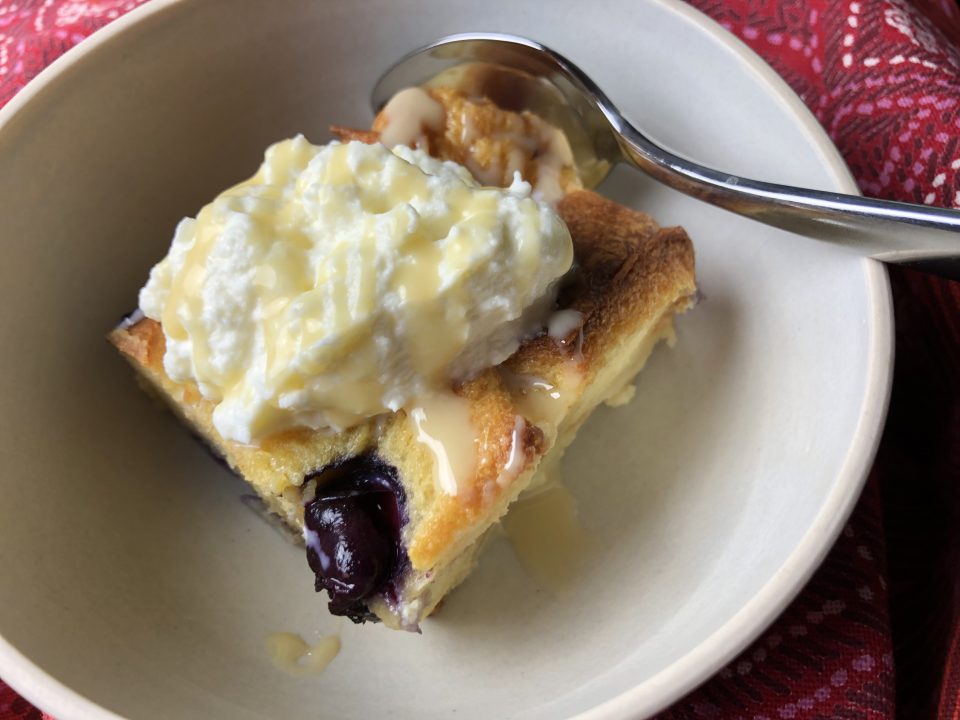
The recipe calls for whole milk, evaporated milk and sweetened condensed milk.  The sweetened condensed milk provides the sugar so don’t substitute for it. I used TJ’s Brioche Loaf to make the bread pudding.  For a softer, more custard like pudding, use croissants instead. Both are delicious. Festive twist? Before sliding that puppy into the oven, sprinkle it with cinnamon sugar along with the condensed milk.  Serve with a big drizzle of sweetened condensed milk and a dollop of whipped cream.

You’ll thank me…

Tres Leches Bread Pudding

Tres Leches Bread Pudding

Ingredients

Butter, for greasing the baking dish

  • 3 large eggs
  • 4 large egg yolks
  • 2 Cups heavy cream
  • 1 Cup Sweetened condensed milk
  • 1 Cup whole milk
  • 1 12-ounce can evaporated milk
  • 2 teaspoons vanilla extract
  • ½ teaspoon kosher salt
  • 12 Ounces brioche or challah or croissants cut into 1 1/2-inch cubes (about 8 cups)

Instructions

  • Heat the oven to 350 degrees. Butter a 9-inch square baking dish.
  • In a large bowl, beat together the eggs and egg yolks until completely combined. Whisk in 1 cup/240 milliliters heavy cream, 3/4 cup/180 milliliters condensed milk, (reserve remainder of heavy cream and condensed milk ) 1 cup whole milk, 1 cup evaporated milk, vanilla and salt.
  • Set the bread in the prepared dish and pour the egg mixture on top. Press the bread down gently with a spatula to make sure all the pieces are immersed and soak up the liquid. Let stand at room temperature for 10 minutes.
  • Meanwhile, bring a kettle of water to a boil. Drizzle 2 tablespoons condensed milk over the pudding. Cover the baking dish tightly with aluminum foil then set it inside a large roasting pan. Pour the boiling water into the roasting pan until it reaches about halfway up the sides of the baking dish.
  • Bake until the center of the custard is almost set but still slightly wet, about 25 minutes. Carefully remove the foil and continue to bake until the custard is set in the center and the top is golden, about 30 minutes longer. Carefully remove the roasting pan from the oven and let the pudding cool in the water for about 20 minutes.
  • Whip the remaining 1 cup/240 milliliters heavy cream to soft peaks. Serve the pudding warm, room temperature or cold with a dollop of whipped cream. Drizzle with the remaining 2 tablespoons condensed milk.


Peanut Butter Mochi, that’s my Jam

Peanut Butter Mochi, that’s my Jam

My cookbook addiction continues unabated. One of my new favorites is A Common Table by Cynthia Chen McTernan.  It’s a beautiful cookbook filled with not only mouthwatering photographs of her food but wonderful stories about her family and friends. Her recipes are approachable and her writing inviting.  In contrast to the cookbooks of yesteryear, today’s cookbooks, like A Common Table, breathe life, warmth, and a personal connection into each recipe.  It makes me want to call my Mom, my kids, my aunties and uncles and say, “Hey, come on over we gonna cook, eat, and talk story”.

Have You Eaten Yet? (code for I ❤️ you)

This is not a cookbook that strives to teach one to cook, it’s more like a series of love letters, first and foremost to her family and friends, and then to all of us.  Her soulful, homey food reflects her southern upbringing, her Chinese heritage, her hubby’s Hawaiian-Korean-Irish roots, and their lives together. These are recipes I imagine are passed down from grandmother to mother and mother to daughter.  Each generation adding its own personal stamp.

Two Red Bowls is Cynthia’s blog, ground zero for her food and family tales.  She has managed to juggle a toddler, a newborn, a blog, and a book, no small feat.  Wow!

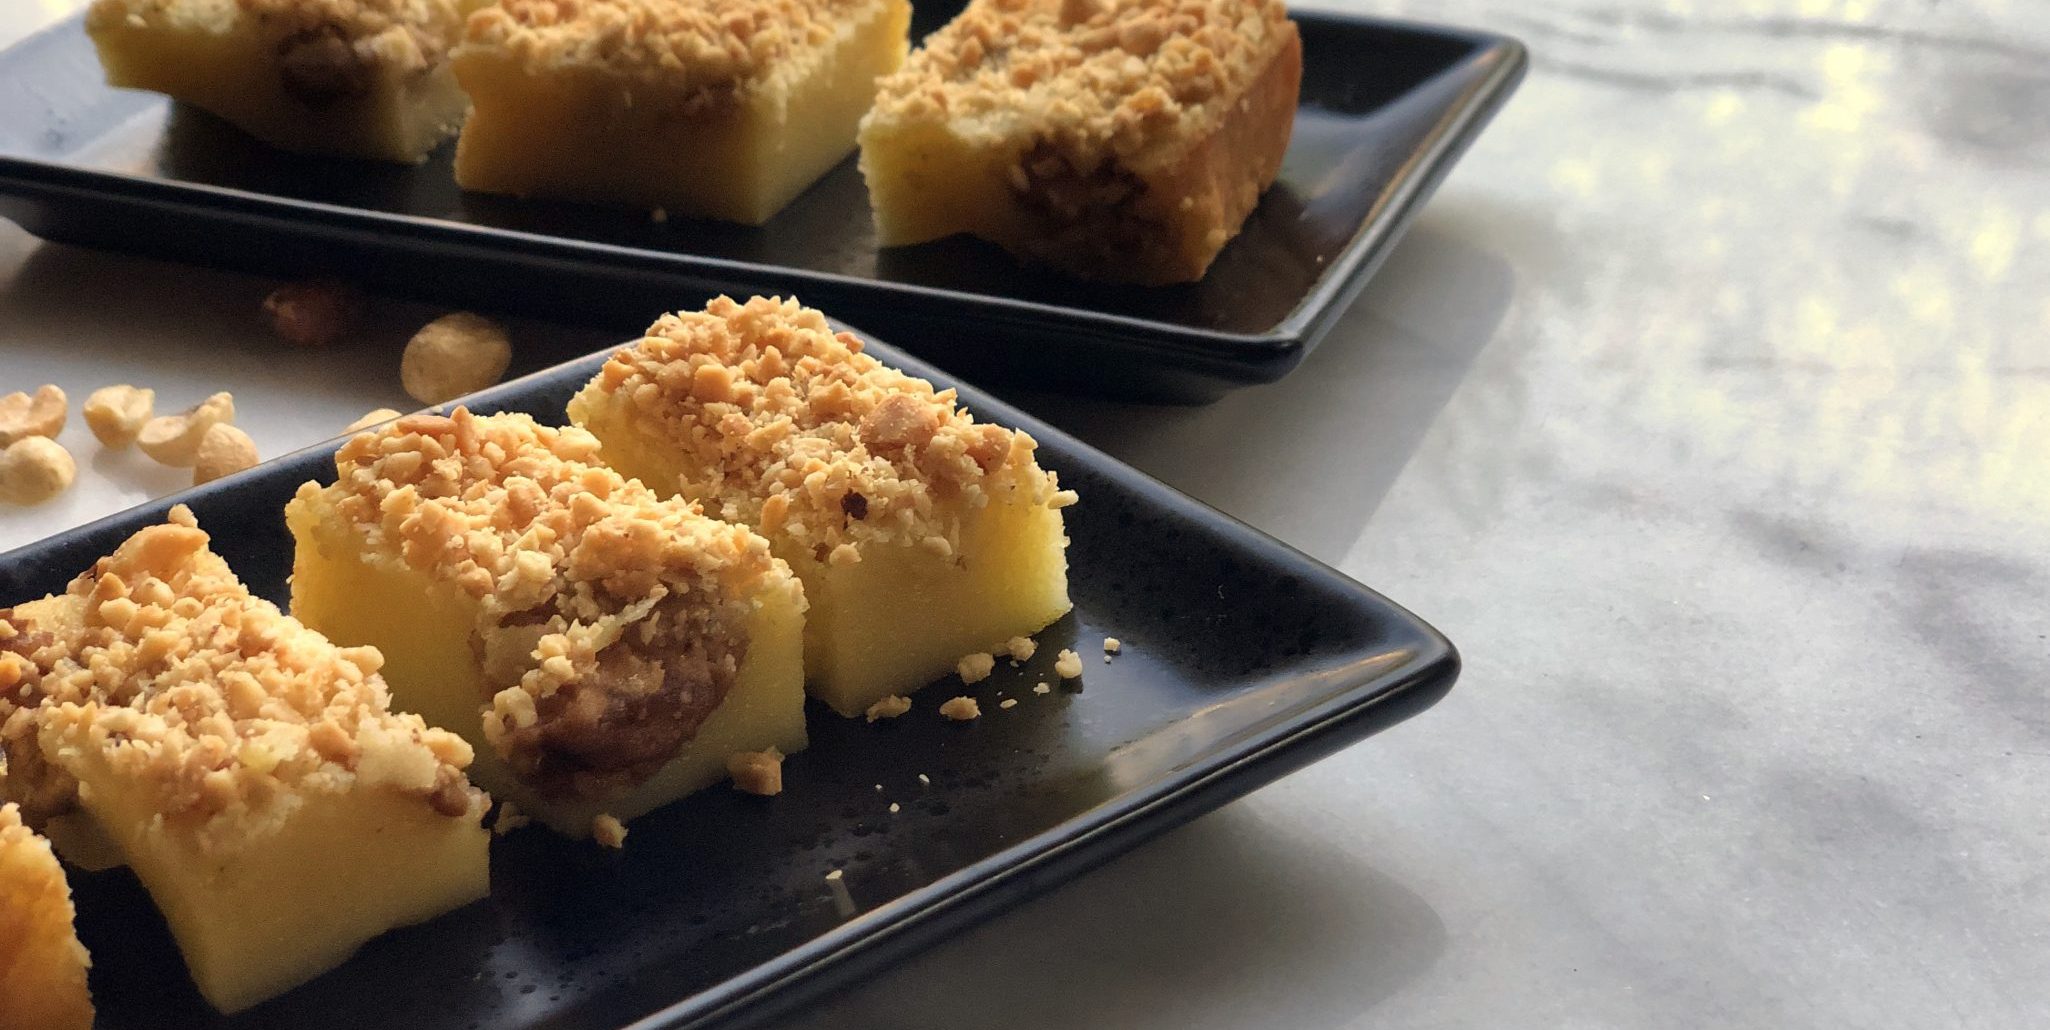
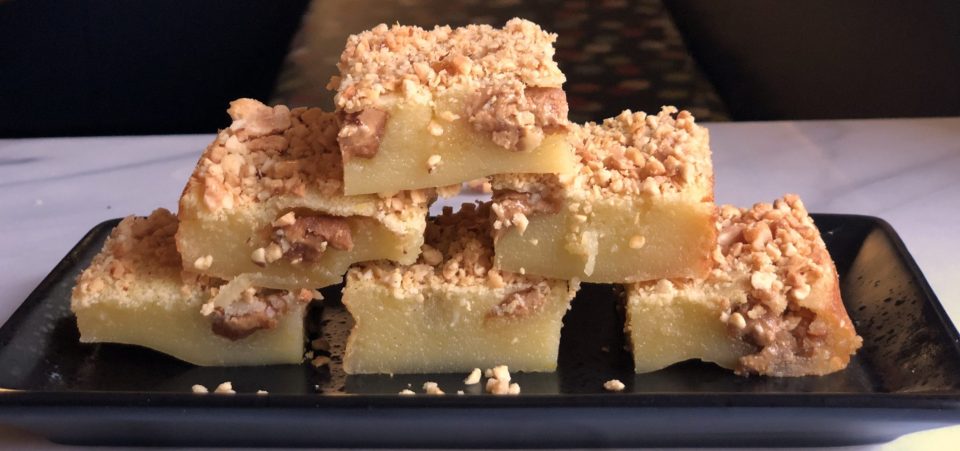
Onto her delicious food.  Needing a gluten-free dessert to bring to a potluck, I instantly thought of the peanut butter mochi in her book.  Mochi, made of glutinous rice flour, is chewy, dense, and all the craze right now.  Imagine a marshmallow but dense, chewy, and only slightly sweet. Mallows on roids.  To top it off, soooo easy to make.  Literally, one bowl plus a wooden spoon. The addition of peanut butter brings a familiar flavor and texture to the mochi, a great intro for the uninitiated.  Did I mention GLUTEN FREE?

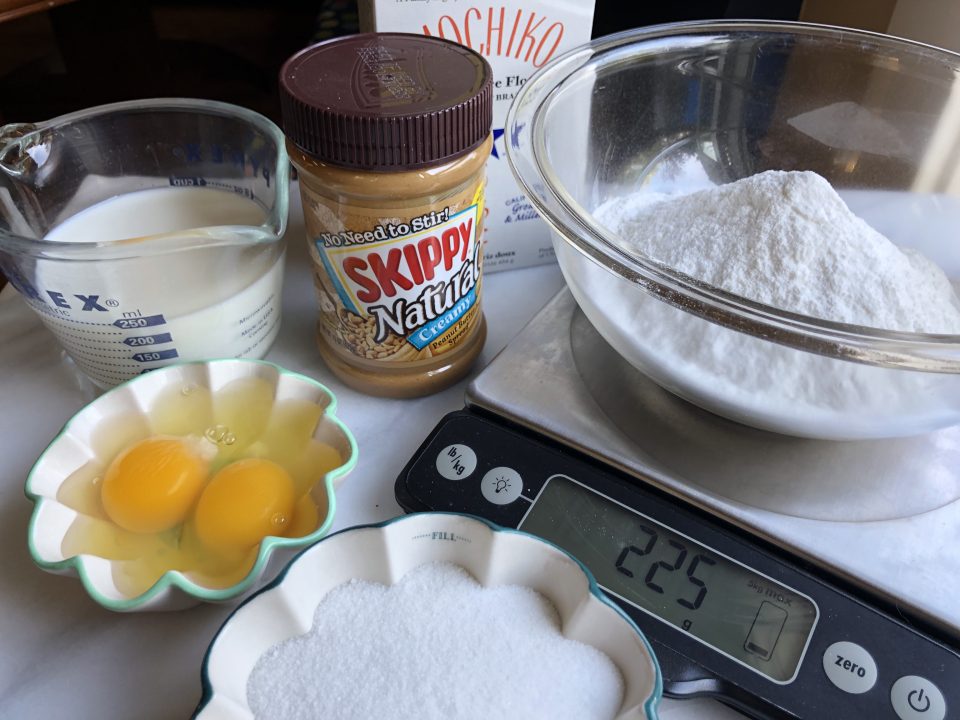
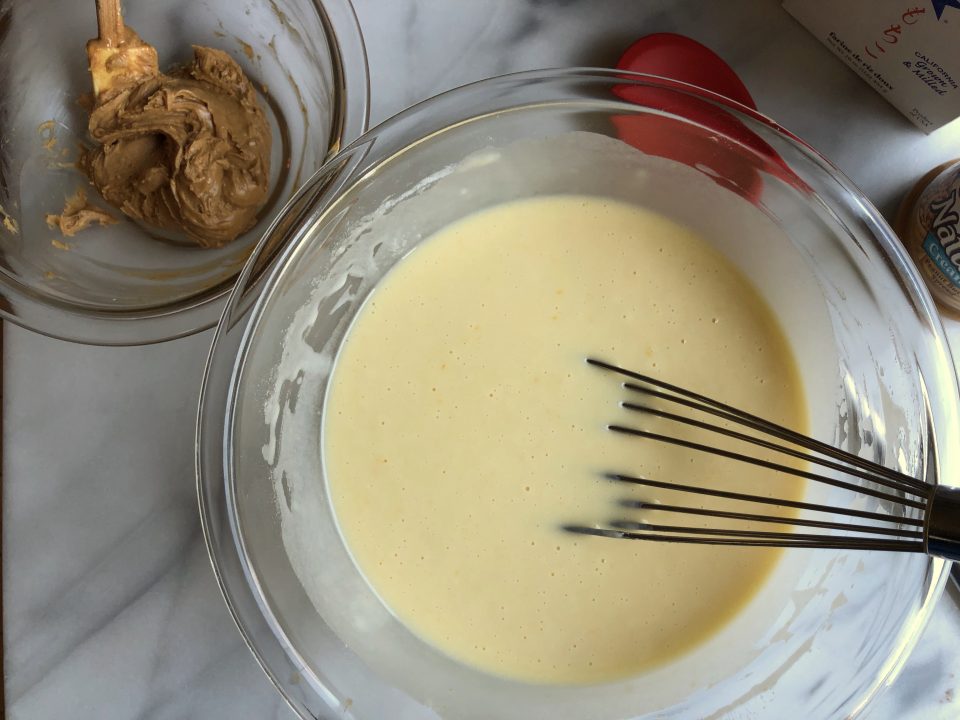
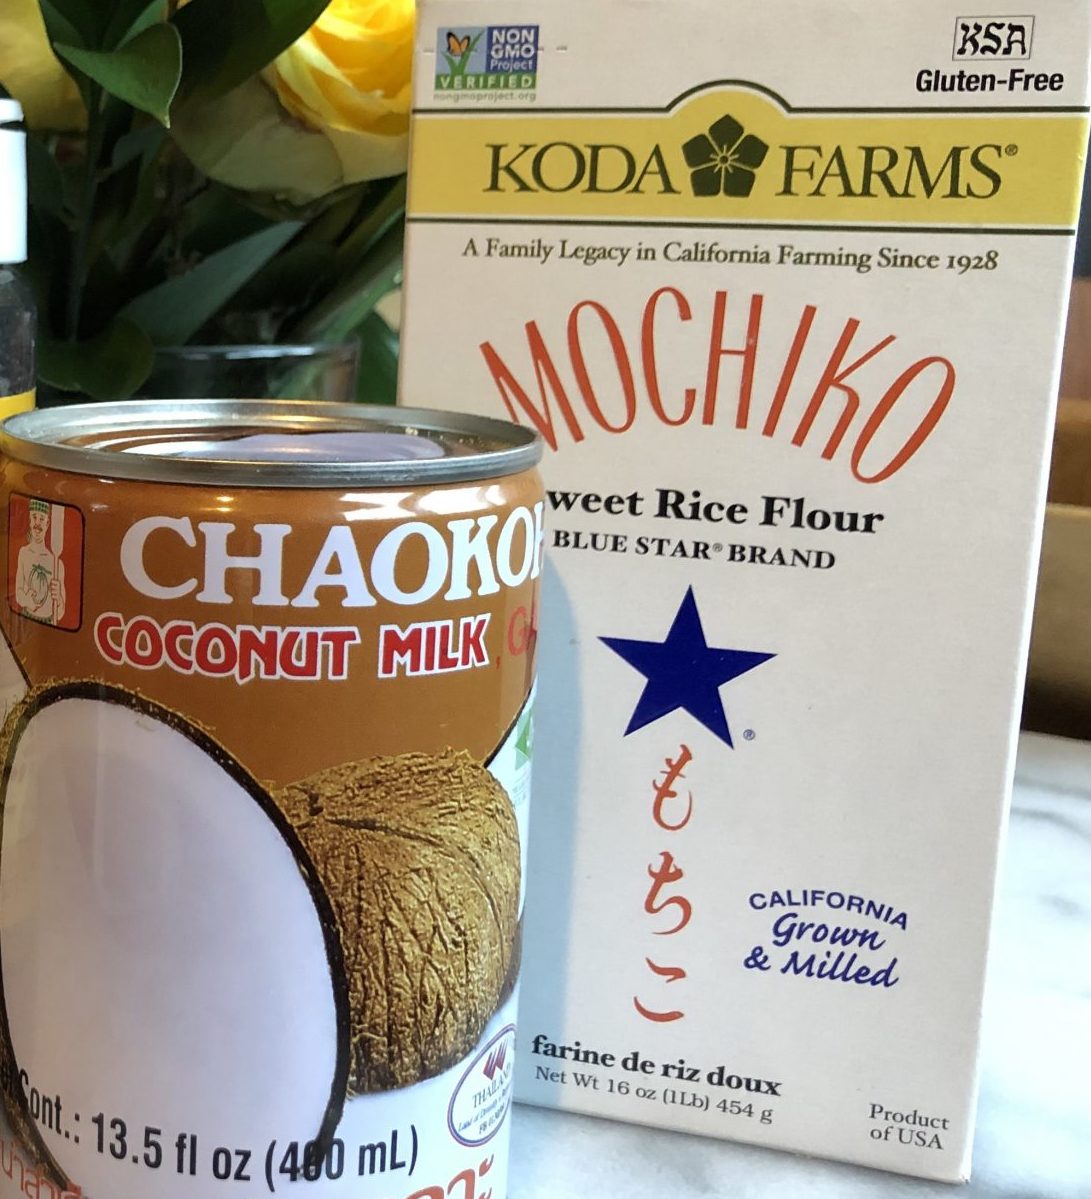
The gold standard for rice flour and readily available is Koda Farms Blue Star Mochiko.  Ground into a fine powder, it blends quickly and is easy to work with. Throw the flour, sugar, eggs, and milk in a bowl.  Stir, don’t worry about overmixing (no gluten), pour, and bake.  The batter will resemble a thick, elastic pancake batter.

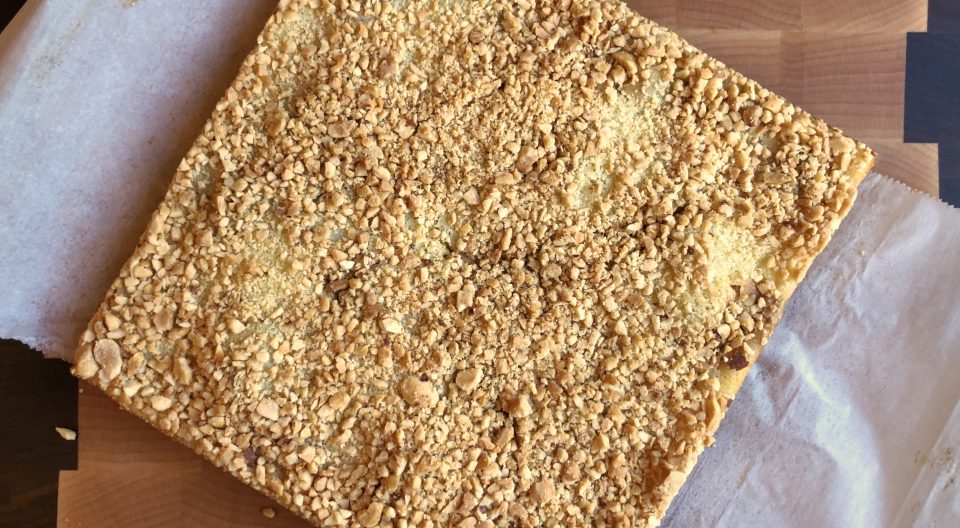
Plop the peanut butter evenly into the batter so that everyone gets a bite of peanut butter, and then it’s oven time.  Midway through baking, sprinkle crushed peanuts on top.  Next time I am thinking of using honey-roasted peanuts, to really accentuate the play on sweet and salty.  The batter will puff while baking, not to worry, it will flatten as the mochi is cooling.

Once it has cooled a bit, dig in, warm mochi is yummy.  I cut mine into squares and then further divided half of the squares into rectangular bars.  Just so delicious, the combo of chewy mochi, pockets of oozy soft peanut butter, and the crunchy peanut topping-the trifecta of yum.  It’s hard to resist and eat just one. It’s dense in texture and calories but so worth it!

I think you could make this milk-free by using coconut milk in place of milk. I have yet to try it.  Andrea Nguyen, Asian cookbook author extraordinaire created a riff by adding black sesame paste, Black Sesame Peanut Butter Mochi, which looks delish, I am so going to make her version soon.

Peanut Butter Mochi
Print Pin
5 from 2 votes

Peanut Butter Mochi

Gluten free and delicious.  Made with sweet rice flour a dense, chewy, a totally addicting treat! A quick and easy recipe!
Course Dessert, Snack
Cuisine Asian, Asian-American
Keyword Mochi, peanut butter, sweet rice flour
Prep Time 10 minutes
Cook Time 50 minutes
Total Time 1 hour
Servings 16 Servings

Ingredients

Filling

  • 6 Tbsp Peanut butter Natural, creamy or chunky
  • 2 Tbsp Powdered sugar

Cake

  • 1-1/2 Cups Sweet rice flour 225gm
  • 3/4 Cup Granulated sugar
  • 1/8 Tsp Salt
  • 1 Cup Whole milk
  • 1/2 Cup Vegetable oil
  • 2 Eggs
  • 1 Tsp Vanilla
  • 1/2 Cup Roasted peanuts Or substitute honey roasted peanuts
  • 1 Tbsp Brown sugar Optional, to be added to plain roasted peanuts,

Instructions

  • For the peanut butter filling, whisk together the peanut butter and confectioner’s sugar until smooth. Set aside.
  • Preheat the oven to 350F. Line an 8-inch square baking dish with parchment paper, letting the paper go up the sides so you can easily lift the cake out later on.
  • In a medium bowl, combine the sweet rice flour, sugar, milk, oil, eggs, and vanilla, whisk until smooth. Don’t worry about overworking the batter when making the cake, sweet rice flour is GLUTEN FREE.
  • Pour half the batter into the prepared baking dish. Used 2 small spoons or small teaspoon ice cream scoop to drop spoonfuls of the filling evenly across the batter, then pour the remaining batter over the filling. Bake, uncovered, for 20 minutes.
  • While the mochi is baking, place the peanuts in a food processor or blender and pulse until finely chopped. Remove the mochi cake from the oven, sprinkle of the crushed peanuts across the top. The cake maybe puffy so spread nuts as evenly as you can. The cake will fall as it cools.  
  • Return the cake to the oven and bake until the center bounces back when pressed, an additional 15 to 20 minutes. Let cool about 20 minutes before trying to lift the parchment paper to remove the cake from the pan. 
  • Enjoy warm or at room temperature. The mochi slices cleanly when cool, but is delish warm.
  • Store in an airtight container and keep at room temp if cool, or refrigerate. Microwave pieces on high with 15-second blasts to refresh.
All I Want for Christmas is…PIE (Pecan Pie)

All I Want for Christmas is…PIE (Pecan Pie)

Well, this is embarrassing.  I was supposed to post this during the holidays but instead, it has been languishing in my drafts file.  What better day than Pi Day to post it.

Desserts for the holidays are a no-brainer. Pies or tarts are the order of the holi-DAY. The only sticky wicket in our house is what kind of pie will grace the table. Hubster is a traditionalist; he votes for Apple Pie every time. Jorge loves Pumpkin Pie. Jamie loves Peach Pie, and Jeffrey would like cheesecake to be added to the pie category. Me?  I dream about the Key Lime Pie at Poorhouse Pies or Tartine’s Lemon Cream Tart (still a pie, right?).

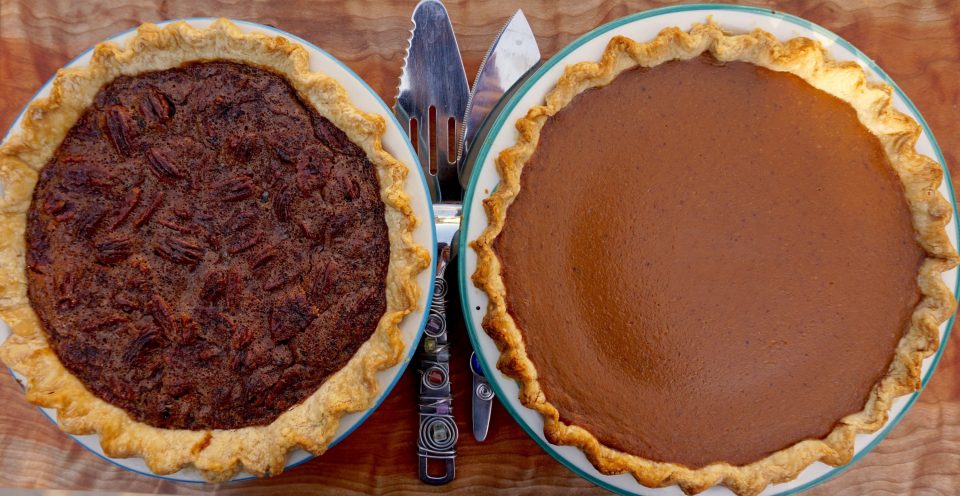
But the one holiday pie we all agree on is Pecan Pie.  There is some wiggle room though, sometimes it shows up as a traditional pie or more often than not, it shows up as bite-sized tartlets. I love the little tartlets–I don’t have to share.

But the tartlets will have to wait for another day. This is all about pie, baby–pecan pie.

My favorite recipe comes from way back in the day from Michael Bauer’s book “Recipe for Success”.  It’s a collection of recipes from his Chronicle column.  The Butter Pecan Pie from Restaurant Chow in the City is a winner.  You can call this post “a tip of my cap” to Mr. Bauer, who recently retired as the restaurant reviewer for the Chronicle.

Unlike most Pecan Pie recipes, there is an extra step in this one.  The filling requires cooking on the stove before baking. This helps to make the filling smooth

I included the original crust recipe, but I normally use my tried and true. Your choice, but you are reading MY blog so….. 😛 Make sure to freeze the crust for 10-15 minutes before adding the filling and baking.  The warmth of the filling can melt the crust before it properly bakes so don’t skip this step.

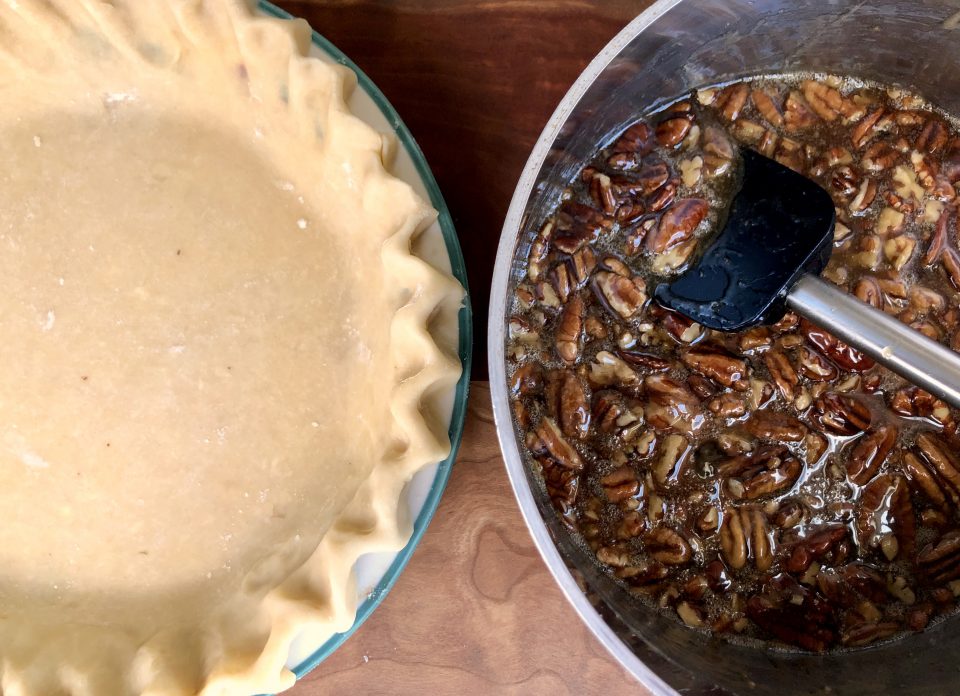
pecan pie filling and crust

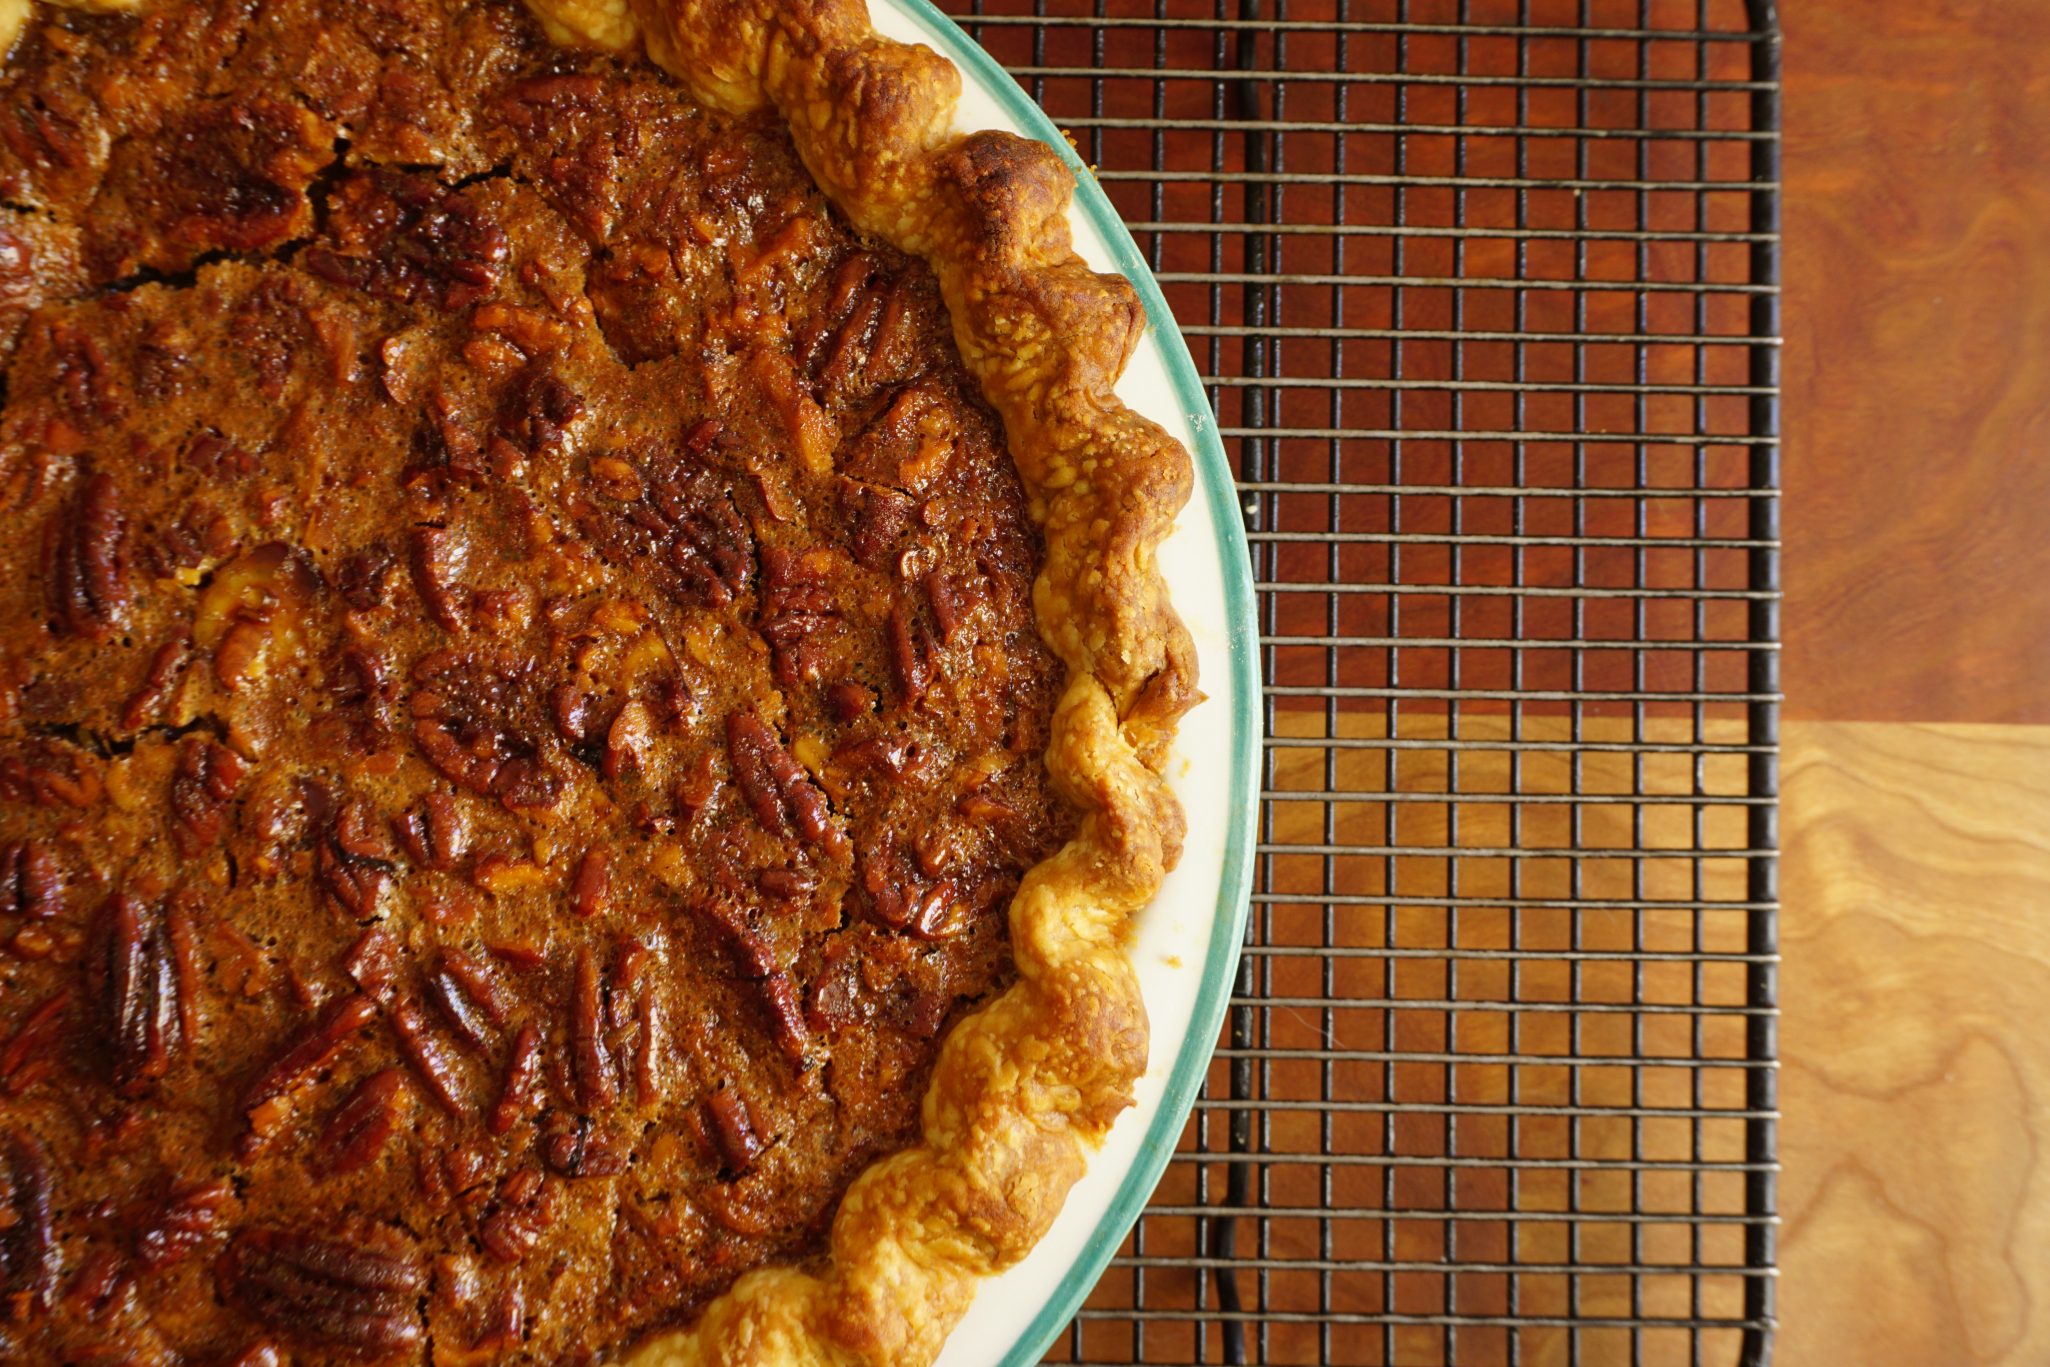
Though the recipe calls for pecan halves, I chop the nuts into pieces. Why? There is less smooshing of the pie as you cut into it with the smaller pieces. I opted for function over form.  The recipe calls for light corn syrup, but I have used a mix of light and Lyle’s Golden Syrup or all Golden Syrup.  The knock on pecan pie is it can be pretty sweet.  The amount of butter in this recipe helps temper the sweetness.  The original recipe calls for 1 teaspoon vanilla, but you can add up to 1 tablespoon. That also helps cut the sweetness.  Another option is 1 tablespoon of bourbon if you’re feeling boozy.

Try not to overbake it.  I know…what the heck does that mean?!  The will pie continue to cook after it is taken out of the oven so try to remove the pie when it is set but the center still has a little jiggle left.

Life’s major decisions…

Pecan or Pumpkin Pie?

BUTTER PECAN PIE

Course Dessert
Cuisine American
Keyword PecanPie
Servings 1 serving
Calories 695kcal

Ingredients

The Crust

  • -- 1 1/2 cups unbleached all- purpose flour + additional flour for rolling pastry
  • -- 1 teaspoon sea salt
  • -- 3/4 cup 6 ounces chilled unsalted butter, cut into cubes
  • -- 1/4 cup ice water

The Filling

  • -- 1 1/2 cups pecans halves and pieces
  • -- 1 cup C & H golden brown sugar
  • -- 1 scant cup light corn syrup or substitute Lyle's Golden Syrup
  • -- 1/2 cup unsalted butter
  • -- 1 tablespoon all-purpose flour
  • -- 1/4 teaspoon sea salt
  • -- 3 eggs lightly beaten
  • -- 1 teaspoon vanilla can use up 1 tablespoon, or add 1 tablespoon bourbon
  • -- Vanilla ice cream or lightly whipped cream

Instructions

To make the crust:

  • Combine the 1 1/2 cups flour and the salt in a food processor and mix briefly. Gradually add the butter to the flour mixture while pulsing the processor on and off, until the butter is cut into pieces the size of small peas. With the processor running, gradually add the ice water and process until large clumps form. 
  • Remove the dough from the processor, shape into a ball, and flatten into a disk. Wrap in plastic and refrigerate 1 hour. 
  • Let the dough soften slightly at room temperature. Roll the dough on a lightly floured surface into a 13-inch round. Carefully transfer the dough to a 9-inch pie pan. Trim any dough hanging over the edge. Crimp the edges decoratively. Freeze for 10 minutes.

To make the filling:

  •  Preheat the oven to 425 degrees.  Place rack in lowest position possible in oven.
  • Combine the pecans, brown sugar, corn syrup, butter, flour and salt in a heavy saucepan over medium heat. Bring to a boil, stirring constantly. Remove from heat. Cool 15 minutes. 
  • Whisk together the eggs and vanilla. Stir about 1/2 cup of the hot sugar mixture into the eggs to temper them, then stir this mixture into the hot sugar mixture. 
  • Pour the filling into the pie shell. Bake 10 minutes. Reduce the oven temperature to 325 degrees. Bake until the custard has set and the nuts rise to the top, about 30 to 40 minutes. If the crust browns too quickly, cover with foil.  Transfer to a rack and let cool. 
  • Serve with ice cream or whipped cream. Serves 8.


Muffin been the Mochi that Caught My Eye (Butter Mochi Muffins)

Muffin been the Mochi that Caught My Eye (Butter Mochi Muffins)

Always searching for new and different treats, I came across an article that spotlighted Third Culture Bakery in Berkeley.  The baker is an alum of Cal (Go Bears) who chose food over toxicology (good choice) and thus Mochi Muffins made with sweet rice flour were put on the map.  Though I haven’t made it to Berkeley to try one, I found a couple of recipes online that sounded scrumptious, so it was off to the rices!  Update: I just posted a new mochi muffin recipe, Mango Mochi Muffins made with mango tea and freeze-dried mangos!  It’s small-batch baking, only 8 regular size delicious muffins.

My Sweet Rice, Oh My Rice

For the uninitiated, mochi (sweet rice flour) is a cornerstone of Asian treats.  Sweet rice is PULVERIZED into flour to which water and flavorings are added.  It ends up looking like the BLOB, really.  It can be flavored, baked, steamed, fried and made into countless delicious treats both sweet and savory.  During New Year’s, Japanese families gather to pound mochi in a tradition called Mochitsuki. Just for your viewing pleasure here is Mitsuo Nakatani, Japanese Mochi Master.  Enjoy

Traditional mochi starts with steamed rice and is pounded and shaped into sweet or savory rice cakes.  Mochi muffins and Hawaiian Butter Mochi start with sweet rice flour, mixed with liquids, and baked.  Since I don’t foresee any of us pounding mochi, let’s make muffins and Hawaiian Mochi. Infinitely easier and pretty darn tasty.

Back on the Muffin Trail

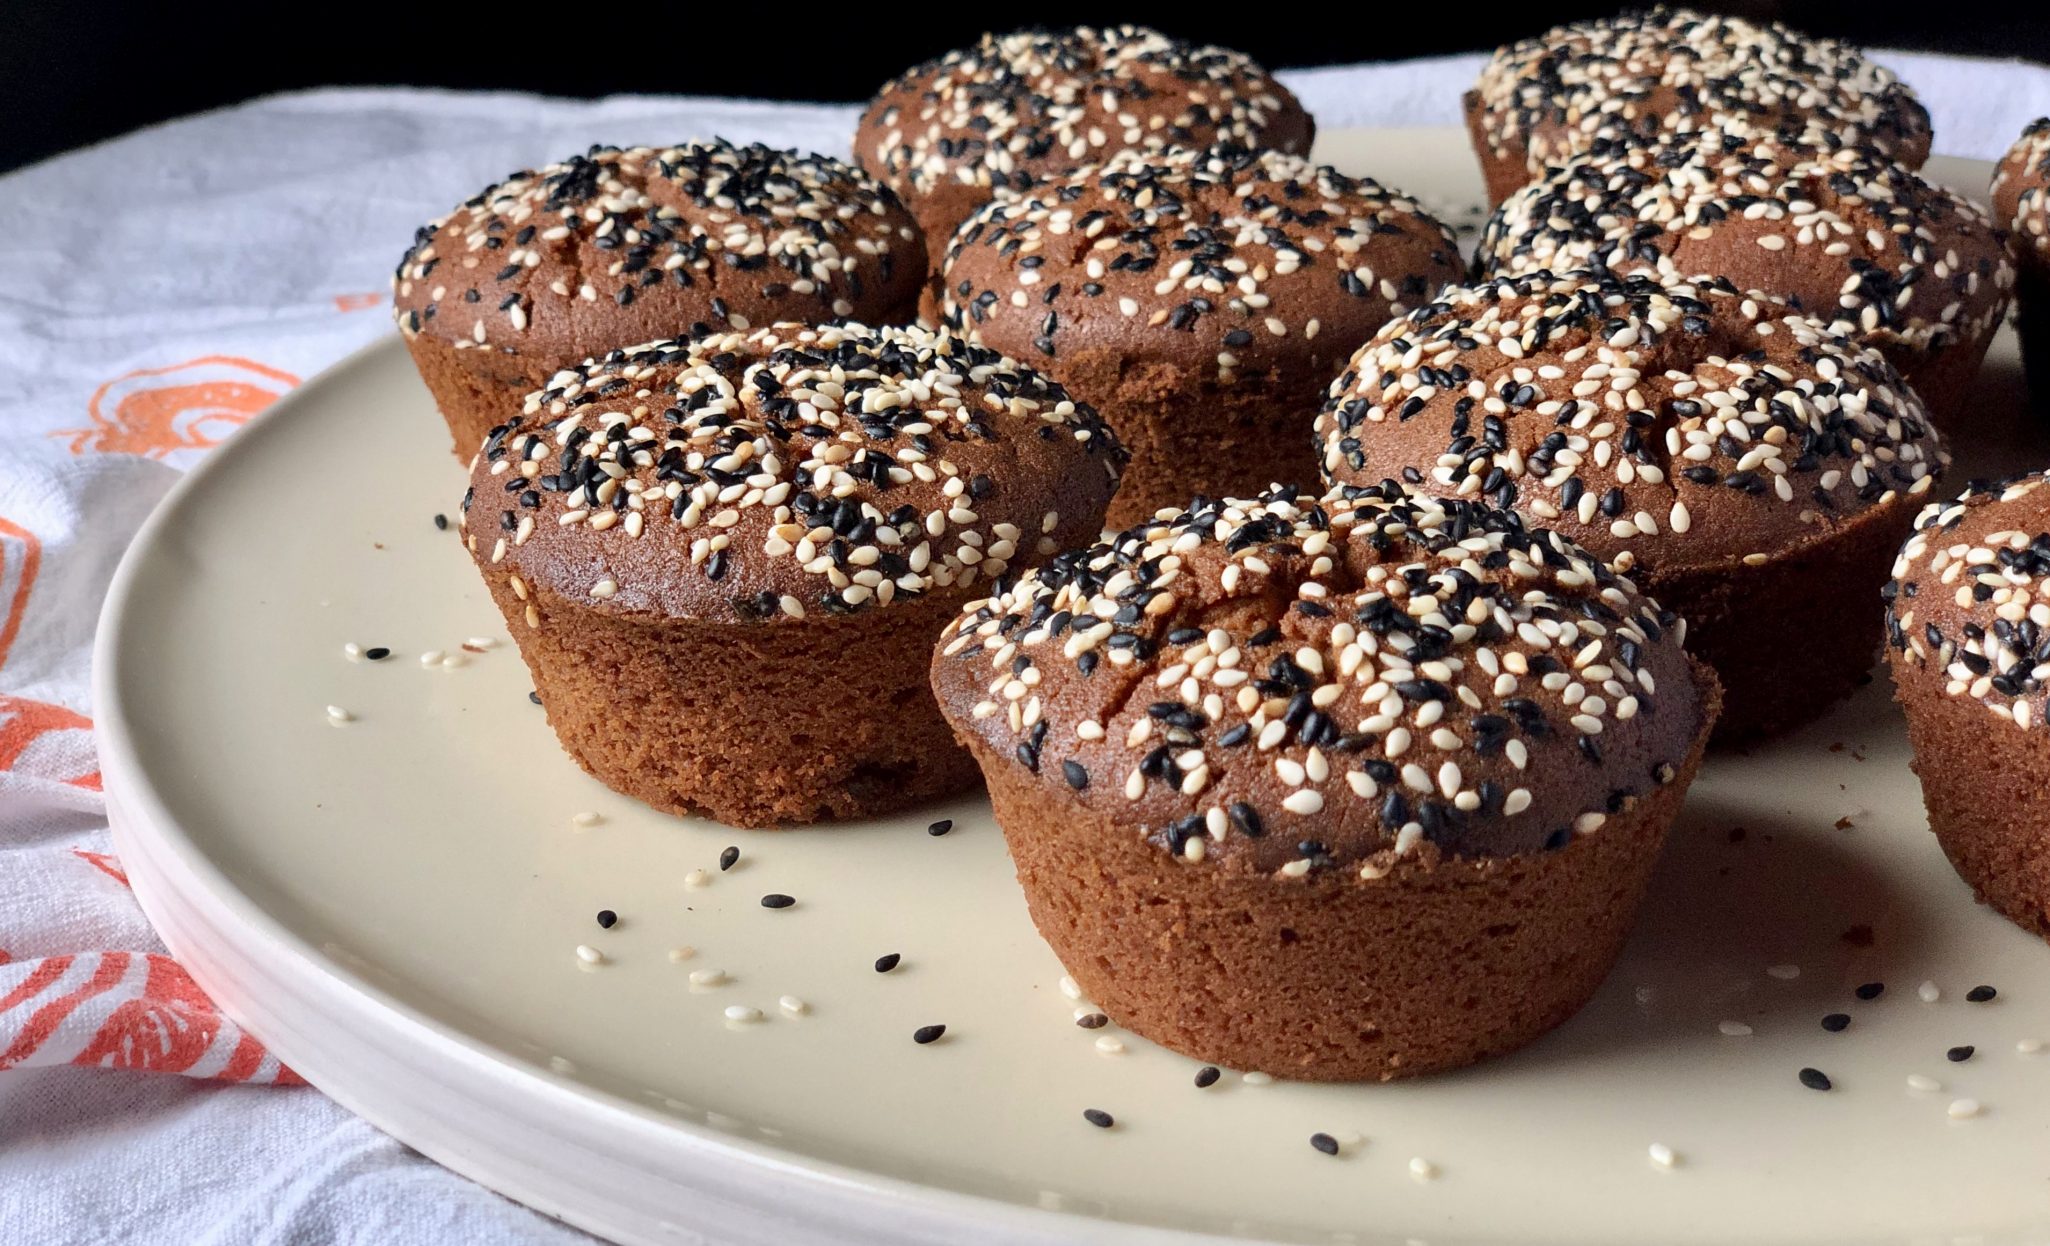
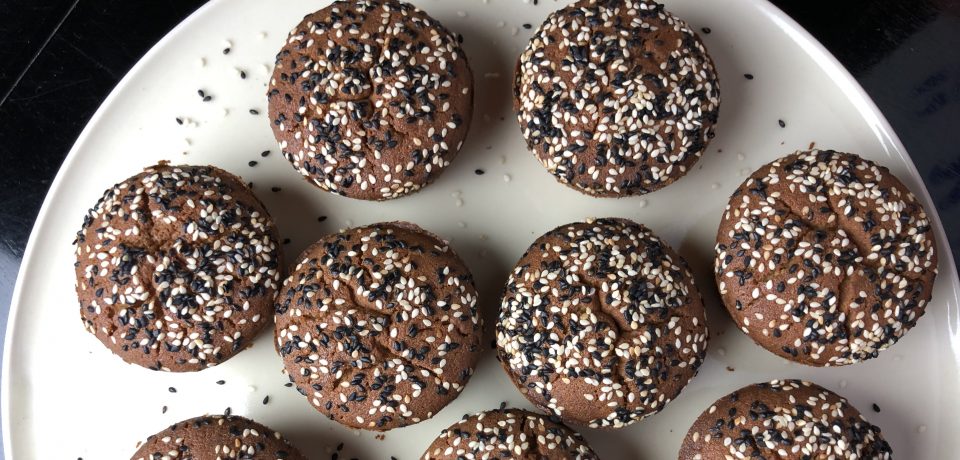
If you have ever had Manju from Shuei-Do Sweet Shop in Japantown in San Jose, or Butter Mochi from Hawaii and liked it…you’re going to love these.  If you haven’t had mochi, this is a good introduction.  Not quite as gooey as Manju and definitely not cakey like a muffin, it’s a delicious hybrid of the two.  A touch of sweetness, crispy on the outside, dense and chewy on the inside, and crunchy from the generous sprinkle of sesame seeds on top.  It’s different but delicious.  If that wasn’t enough, they are GLUTEN-FREE.  You’re welcome.

Rice, Rice, Baby

The most important item in the pic is the Mochiko Sweet Rice Flour by Koda Farms.  This is the go-to brand.  You can definitely find it in any Asian store (along with the sesame seeds), and if you’re lucky, at some of your larger local markets.  Take a walk down the international/ethnic food aisle.

I found quite a few recipes for Mochi Muffins online and finally settled on one from a beautiful blog called Snixy Kitchen.  Her batch made 12 muffins, which made her recipe the frontrunner as most made 24.  As yummy as they are, what am I going to do with 24 muffins?!

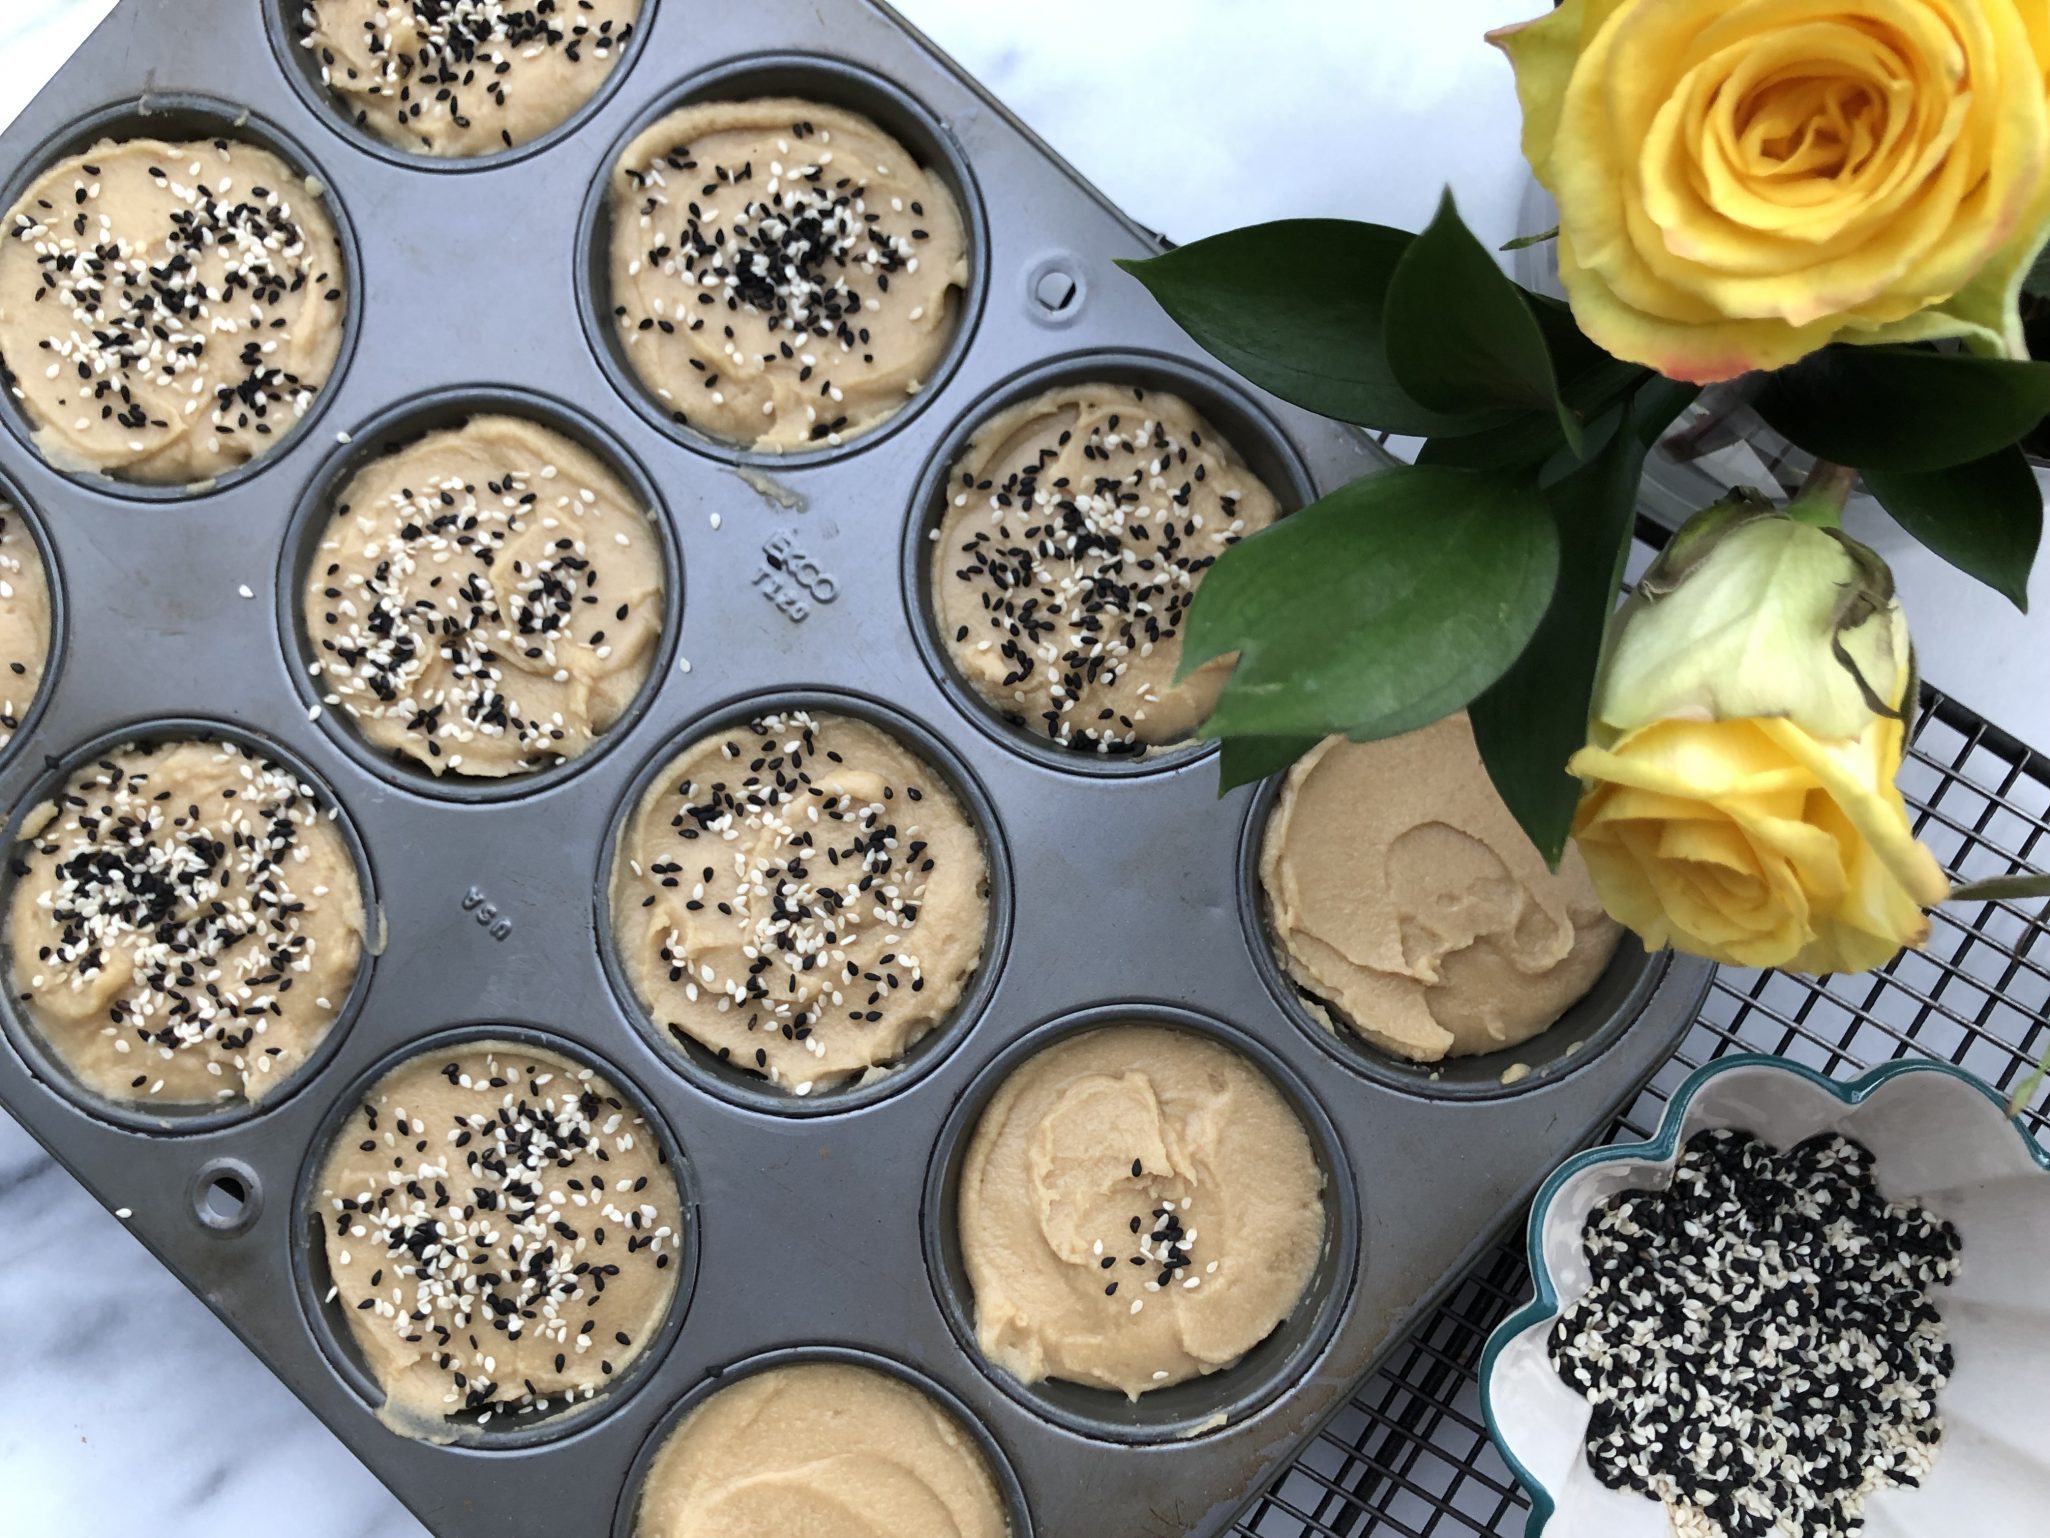
Mochi muffin batter

The batter comes together in a snap:  melted butter, coconut milk, egg, brown sugar, and rice flour.  Stir together and pour into a muffin tin.  Boom, done.  My batter was thicker than some of the posts I’ve seen.  This may account for the slight dome mine had.  I also found a recipe from Saimin Noshrat in the NYT.  I think I may try a couple of her tweaks the next time I make these.  Trust me, there will be a next time.  I will use light brown sugar, substitute evaporated milk for some of the coconut milk, and brown my butter.  Not to worry, a full report will follow.  Hmmm, can’t wait to make another batch.

The longer you leave these in the oven, the less gooey and more cake-like they will be.  The first batch was baked for 60 minutes.  I think I should have pulled them out sooner, I like gooey.  Now I check at 40 minutes and pull them out around 45 minutes.  To test them, use a knife to poke the center of a muffin.  It should come out fairly clean with a bit of crumb.

More Mochi Madness

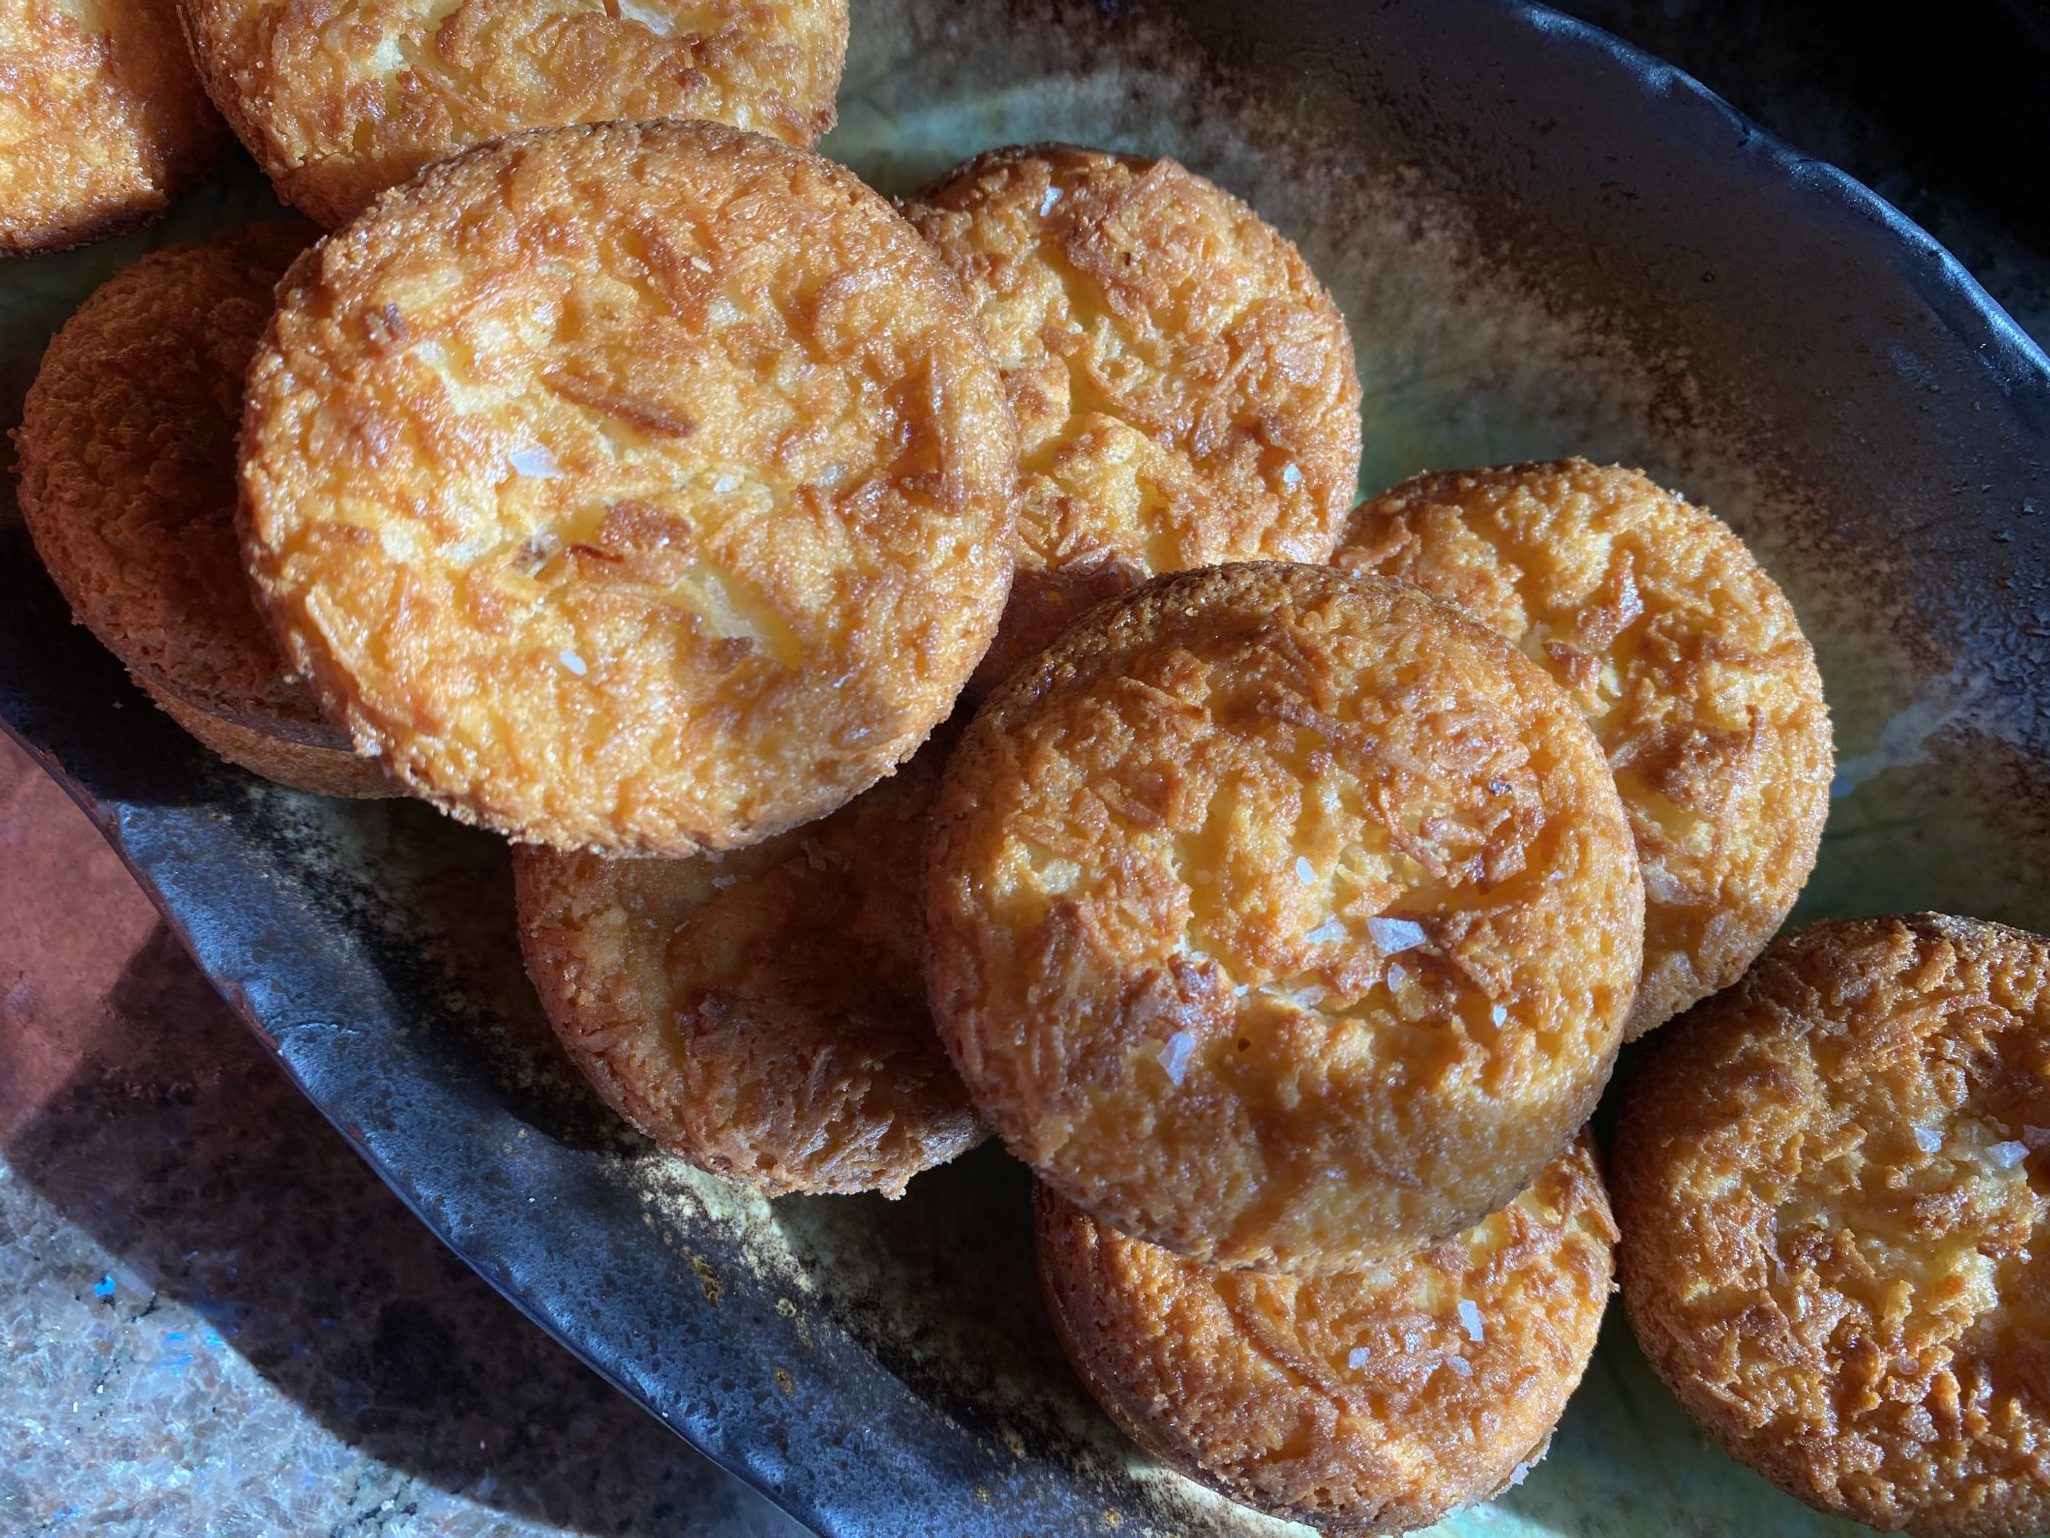
After making these muffins if you like the chewiness, definitely try the Hawaiian Butter Mochi Muffins, inspired by Aloha Kitchen by Alana Kysar.  A little less flour and a bit more liquid kick up the gooey, buttery, lusciousness of these bites.  Bake them in a muffin tin for crispy edges.  I ADORE both of these muffins.

These are soooo good, a little more squishy, very buttery, topped with shredded coconut.

Also check out Peanut Butter Mochi from A Common Table by Cynthia Chen McTernan. Delish! LOVE, love, LOVE

If you would like to try traditional Japanese Mochi, here are my recommendations:  Fugetsu-Do in Little Tokyo in LA, the oldest family-owned Japanese Shop in the US, Shuei Do Manju Shop in San Jose, and in my hometown of SF, Benkyodo Company in Japantown (now closed😢😢😢 )All family-owned artisan shops.

Mochi Muffins
Print Pin
4.53 from 19 votes

Butter Mochi Muffins

Course Dessert
Cuisine Asian-American
Keyword coconut milk, Gluten free, mochi muffin
Prep Time 15 minutes
Cook Time 45 minutes

Ingredients

  • 1/4 cup (2 ounces )unsalted butter, melted and cooled, plus more for greasing pans sub brown-butter
  • 2 cups (320 grams) mochiko sweet rice flour Koda Farms
  • 1 cup (200 grams) organic dark brown sugar* light or dark brown sugar will work
  • 2 teaspoons baking powder
  • 1/2 teaspoon kosher salt 1/4 tsp sea salt
  • 1 13 ounce can full-fat coconut milk Sub evaporated milk, half to all
  • 2 large eggs room temperature
  • teaspoons vanilla extract
  • 1 teaspoon molasses optional, added for flavor or use Golden Syrup or honey
  • tablespoons each black and toasted sesame seeds, for garnish

Instructions

  • Preheat oven to 350°F and place the oven rack in the middle of the oven.
  • Grease the sides and top of a 12-cup muffin tin well with soft butter.
  • In a medium bowl, whisk together the sweet rice flour, brown sugar, baking powder, and salt.
  • In the bowl of a stand mixer fitted with the whisk attachment or a large mixing bowl, whisk together the melted butter, coconut milk, eggs, vanilla, and molasses.
  • With the mixer on low speed, slowly add the dry ingredients to the wet ingredients and mix until completely combined.
  • Divide the batter among the prepared muffin tin, filling each cup all the way to the top.
  • Sprinkle the tops with black and white sesame seeds.
  • Bake 45-50 minutes until the top is brown and crispy and the muffin springs back when poked with a finger.  Bake for less time. for muffins that are chewier and less cakey. Muffins are done when a skewer comes out relatively clean and the tops are brown.
  • Let cool 10 minutes in the pan, then transfer to a wire rack to cool completely.
  • Store in an airtight container for up to 3 days.  Can be frozen and thawed at room temp.

Notes

Organic dark brown sugar is richer and more caramel-y than conventional, but you can use regular brown sugar.
Any muffin tin will do, but for ultimate crispy exterior, use a dark non-stick muffin tin.
If using a light muffin tin, you may have to bake the muffins a little bit longer.
If keeping them for longer, they'll lose their crispiness after a day or two in storage, put them in the oven for a few minutes to crisp again before eating.

Butter Mochi Muffins

Go Big or Go Home Day 10 of 12 Days of Cookies (CCC Skillet Style)

Go Big or Go Home Day 10 of 12 Days of Cookies (CCC Skillet Style)

The best thing about cruising the internet right now is the plethora of Top Ten or Best Eats of the Year lists that are popping up everywhere. In between furiously publishing holiday recipes, everyone digs into their 2018 archives and comes up with The Best of 2018.
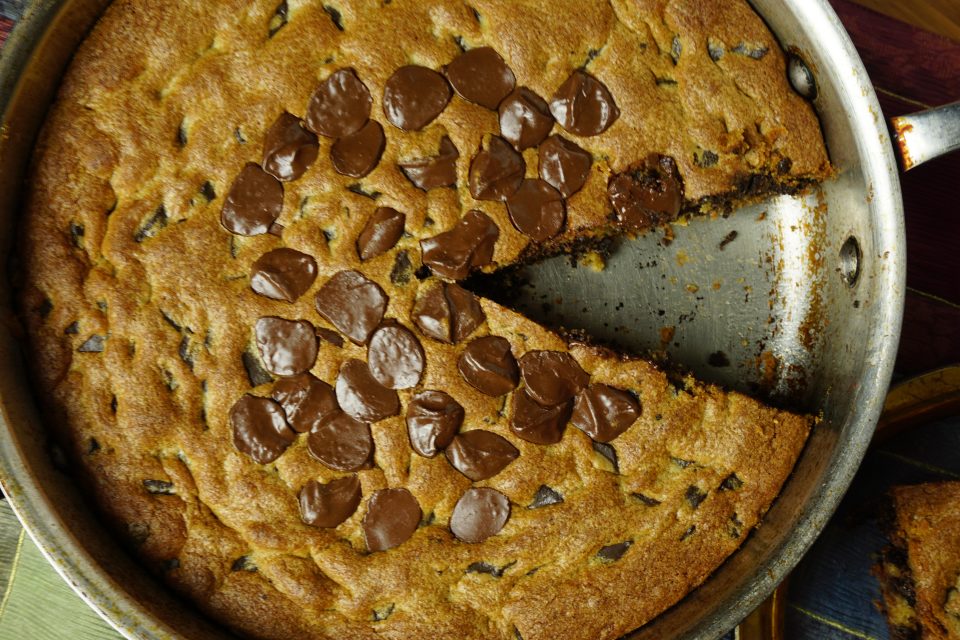
I scrolled through Favorite Desserts of 2018 on Ktchn and landed on a cookie recipe and I mean A cookie. My stomach grumble meter went into overdrive, a ginormous chocolate chip cookie baked in an iron skillet.

It’s New Year’s Eve. I need a dessert that’s EASY to make, a show stopper, sharable, and has universal appeal.

This pops into my head.

Enter the Skillet Zone.  Julia Child in a suit and tie, sans glass of wine, starts to speak, she’s a bit stiffer than normal but hey, this is a mash up…she starts to speak…

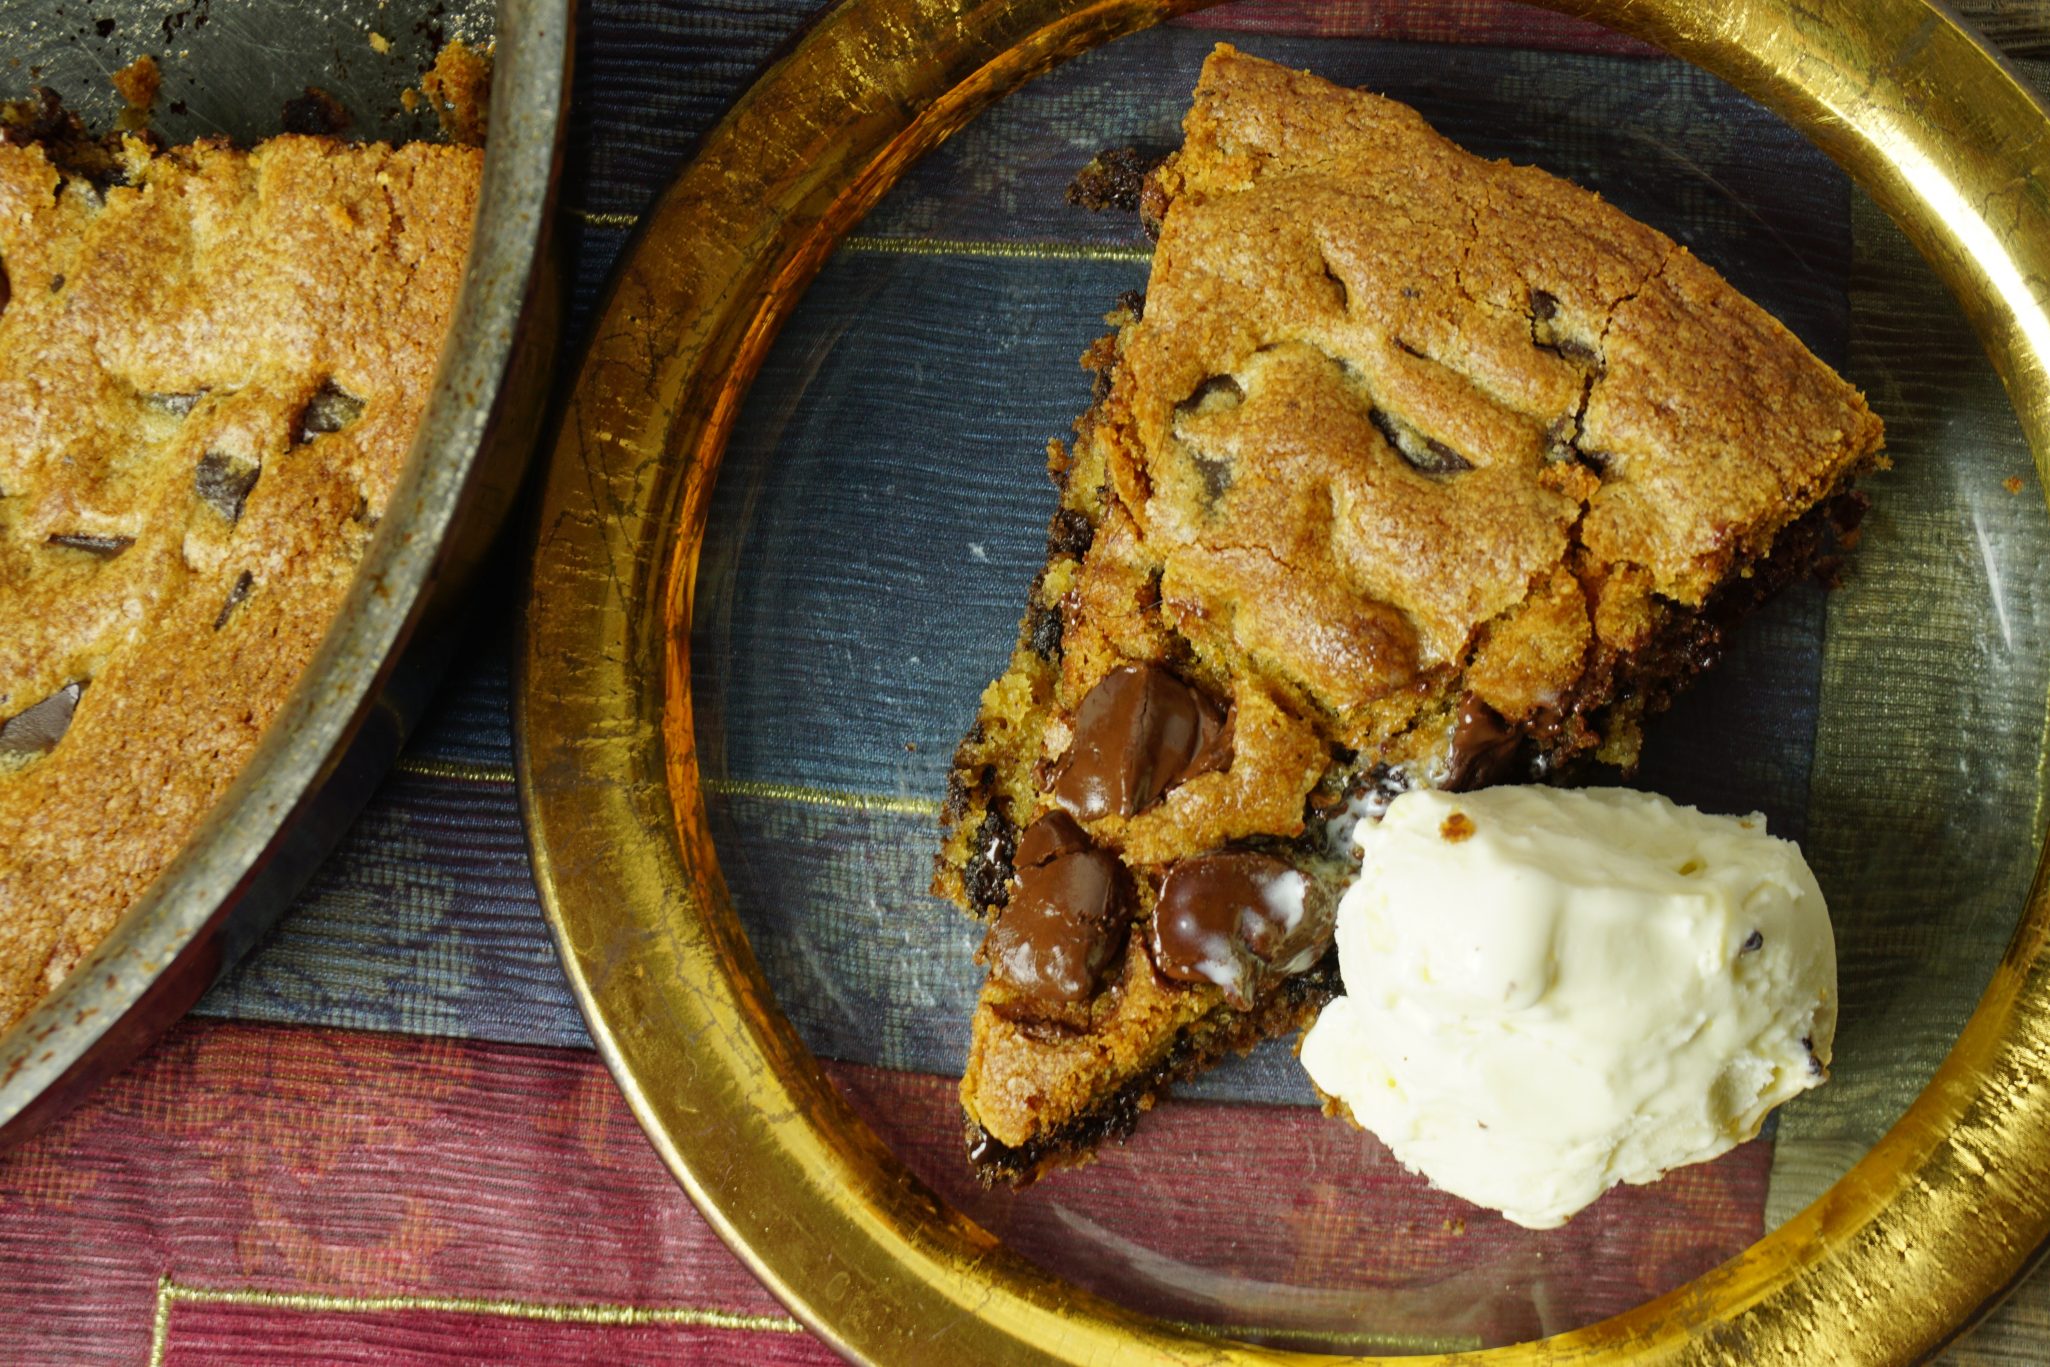
Imagine if you will, a Cast Iron Skillet, ebony from years of cooking and love.  A warm GIANT Chocolate Chip Cookie cooked in the aforementioned skillet and a quart (or more) of Vanilla Ice Cream.

The Oohs and Aahs as you bring this to the dinner table.  Cause who doesn’t succumb to the aroma of a freshly baked chocolate chip cookie?

You cut into the cookie-the chocolate chips are gooey, melted perfection, the cookie is soft, cakey in the middle, you work your way to the edge, the texture changes to that of a cookie with a crisp, caramelized edge.  You place the wedge of cookie on a plate.
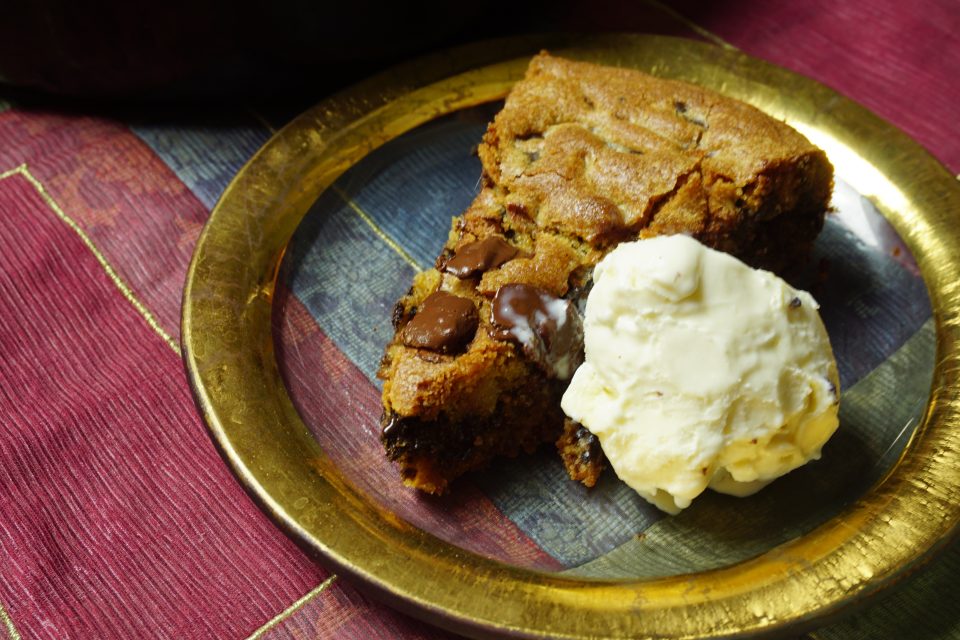
Everyone is holding their breath in anticipation, mesmerized by the chocolate oozing and the aroma of the cookie and then…

BAM! You hit it with a scoop of vanilla ice cream which immediately begins to melt over the cookie.

Everyone goes crazy.

Yes, you have entered the Skillet Zone.

Unfortunately, I do not have a cast iron skillet.  Lost, in one of the many moves we have made.  I used an All-Clad skillet.  My cookie was relatively even in height.  I think that if baked in a cast iron skillet, the additional heat of the black pan would cause the sides to bake quicker, rise a little higher than mine, possibly be a bit crisper.  Hmmm, yummy.  Feel free to add nuts if you like.  I CHEATED, I used chocolate chunks and pistoles instead of chopping chocolate.  Definitely try to find chunks and not use regular sized chips.
Deep-Dish Chocolate Chip Skillet Cookie

Ingredients

  • 2 1/2 cups all-purpose flour
  • 1 teaspoon baking soda
  • 1/2 teaspoon salt
  • 1 cup 2 sticks unsalted butter at room temperature
  • 1 cup packed light brown sugar
  • 1/2 cup granulated sugar
  • 2 large eggs
  • 2 teaspoons vanilla extract
  • 12 ounces dark chocolate coarsely chopped, divided
  • 1/2 cup pecans pieces

Instructions

  • Arrange a rack in the middle of the oven and heat to 375°F.
  • Place the flour, baking soda, and salt in a medium bowl and whisk to combine; set aside.
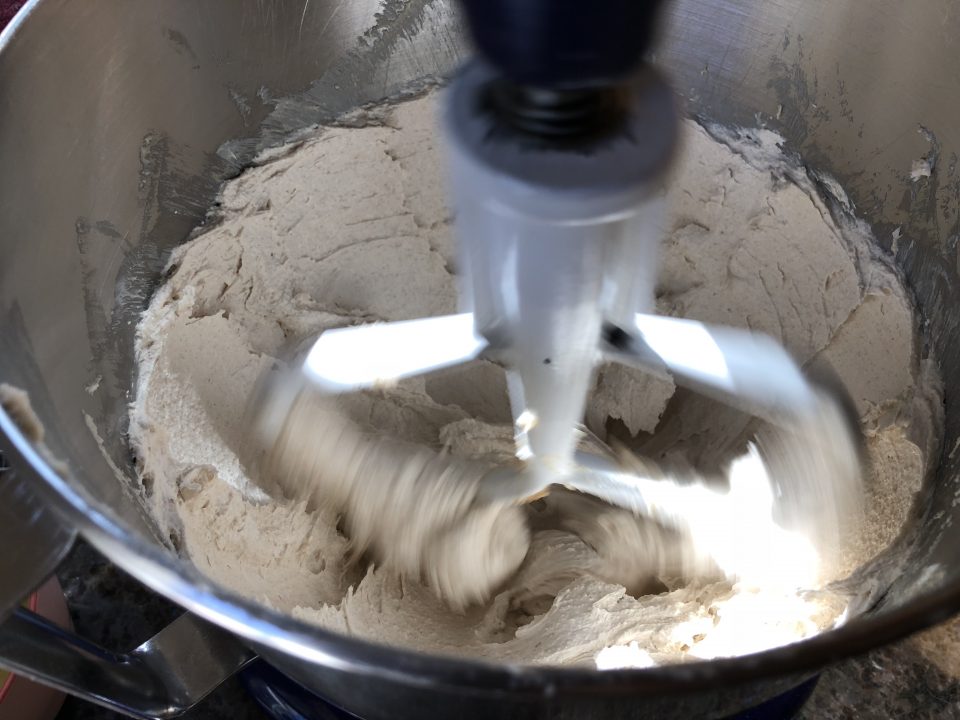
  • Place the butter, brown sugar, and granulated sugar in the bowl of a stand mixer fitted with the paddle attachment. (Alternatively, use an electric hand mixer and large bowl.) Beat at medium speed until lightened in color and creamy, about 2 minutes. With the mixer on low speed, beat in the eggs and vanilla. Scrape down the side of the bowl. Beat in the flour mixture on low speed until just combined.
  • Set aside 1/3 cup of the chopped chocolate. Add the remaining chocolate and nuts if using, to the dough and fold to combine. Transfer the dough to a 10-inch cast iron or oven-safe skillet. With damp hands, press the dough in an even layer to the edges of the skillet. Sprinkle the reserved 1/3 cup chocolate over top and gently press into the dough.
  • Bake until the center is set and the edges are golden-brown and slightly pull back from the skillet, about 25 minutes. Set aside to cool for at least 30 minutes before cutting into wedges and serving.

Notes

Add nuts if you like.  I use pecans.  Ok, I cheated, I didn't chop chocolate but used chocolate chunks and pistoles I found.  I am all about the path of least resistence.
Will keep for up to 4 days in an airtight container at room temperature.
Use only vanilla ice cream. NO bubblegum flavor, peppermint or anything else but Vanilla...just saying.


Do You Really Want to Feed Me? Food52 Club Blueberry Cake with Almond & Cinnamon

Do You Really Want to Feed Me? Food52 Club Blueberry Cake with Almond & Cinnamon

For all you Boy George Fans, my title nod to the 80’s.  Have I mentioned the Food52 Cookbook Club?  I’m sure I have.  From the geniuses at Food52, a Facebook group that features a cookbook each month.  A cynic might say “what a great marketing idea!”.  Ok, it is, but it is actually a wonderful way to share insights and critiques on a book.  By the end of each month, you have a pretty darn good idea which recipes are winners and which are not so great or need some tweaking. Photos for each recipe and a comment or two posted by members…invaluable.  I literally have cookbooks I have never made a single thing from but when Food52 features it, I’m trying recipes from the book like a crazy person.

This month’s selection is Dining In by Alison Roman.  I had picked up a copy awhile back at a cute indie bookstore, Leigh’s Favorite Books in Sunnyvale.  Aside from one fantabulous cookie recipe (click on the link to find out which cookie, I’m so evil) I already have thanks to Bon Appetit’. I didn’t see anything I felt compelled to try.  I shoved the book on a shelf and forgot about it.

Until, of course, it became this month’s featured Food52 Cookbook Club book.

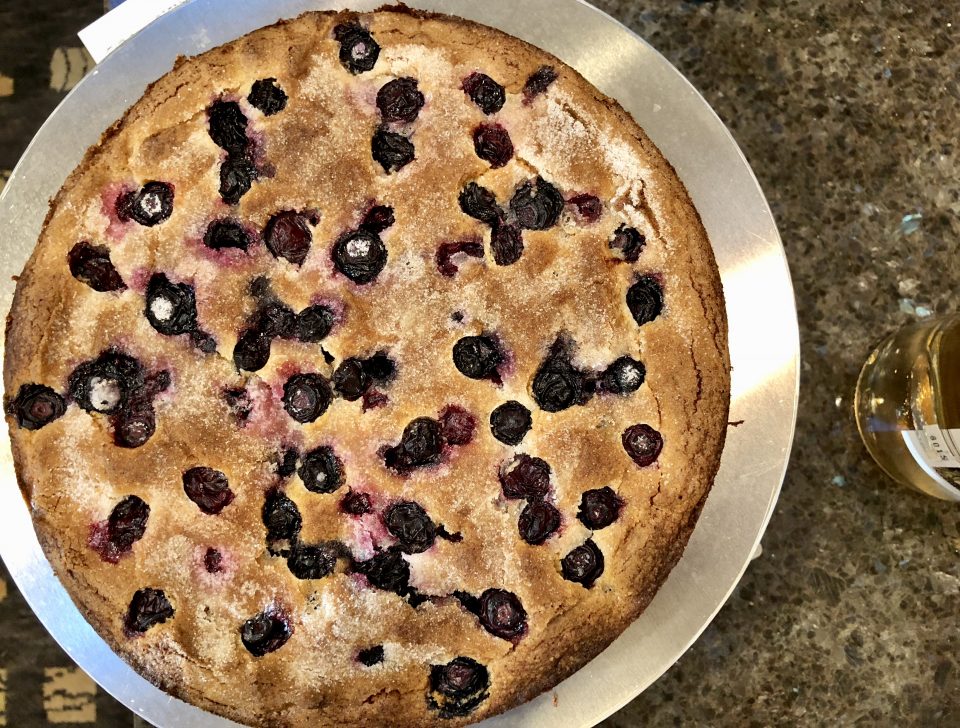
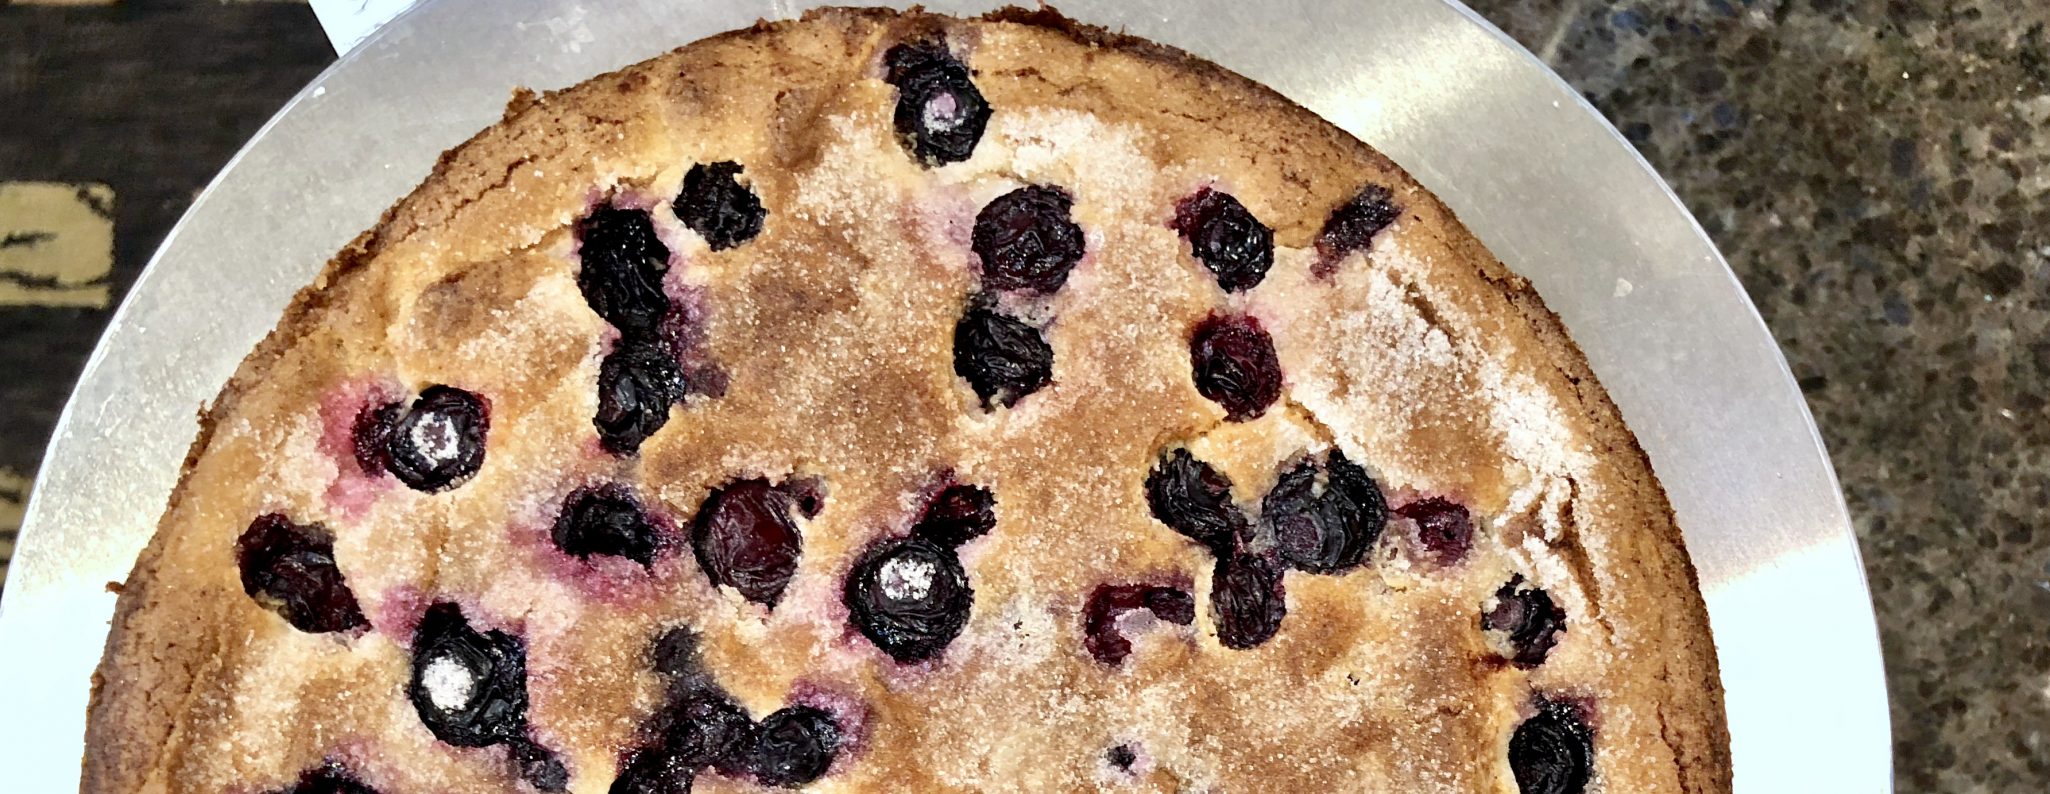
My pictures don’t do justice to this Blueberry Cake with Almond and Cinnamon, but the requests for the recipe had me expediting this post.  Made for a happy hour postcard writing session (democracy in action), this cake was the star of the evening. Make it now while sweet, plump, blueberries can still be found at the Farmer’s Market.

This cake is hands down delicious.  Buttery, tender, not too sweet with a nice crunch from the sprinkling of sugar on top and a hint of spice from the cinnamon.  Hmmm, it’s dreamy. The recipe calls for both almond flour and all-purpose flour.  Despite not having any liquid the cake is very tender, actually surprisingly so.  I’m thinking its the almond flour.  Costco has a nice, reasonably priced almond flour.  Whole Foods has Bob’s Red Mill, nice, not so reasonably priced.  Don’t confuse it with almond meal which is not ground fine enough.

Another key to this recipe, beating the butter until it is nice and fluffy.  This aerates the batter adding to its tenderness.  I was surprised at how difficult it was to incorporate the flour mixture into the batter.  I dumped all of it in at once.  Next time I might try dividing the flour mixture and mixing it in a portion at a time.  The almond flour is a bit heavier than reg flour so use the fold method, like folding egg whites into a batter.  Don’t overdo it. The book has a teeny eeny mistake, it lists 2 cups of blueberries in the ingredients but calls for only 1-1/2 cups in the directions.  Just use 1-1/2 cups of berries, that’s plenty. If you are a blueberry-holic, toss the remaining 1/2 cup berries on top of the batter before sprinkling the sugar on top.

The cake does not rise significantly.  I baked it in a springform, but you could use a tart pan.  But in all honesty, I didn’t want to chance it…too many overflow experiences have caused me to be rather cautious.  I also tried a Honey Yogurt Pound Cake with Raspberries-yummy-ga-nummies. TBP (To be posted) soon.

So, get thee to the Farmer’s Market or grocers, buy some berries and bake this cake.  You’re welcome.  This book is not just a dessert book and judging by the posts on the Food52 page, I’ll be diving into the savory recipes soon.  I’ll get back to you when I do.

By the way, there is a Food52 Baking Club too, if you’re wondering…

Blueberry Cake with Almond and Cinnamon

Blueberry Cake with Almond and Cinnamon

Ingredients

  • Nonstick spray for the pan
  • 1 cup almond flour
  • ¾ cup all-purpose flour
  • 1 tsp baking powder
  • tsp ground cinnamon
  • ¾ tsp kosher salt
  • ¾ cup 1½ sticks unsalted butter, at room temperature
  • ½ cup light brown sugar
  • ¼ cup plus 3 tbsp granulated sugar
  • 2 large eggs
  • 1 tsp vanilla extract
  • 1 ½ cups blueberries

Instructions

  • Preheat the oven to 375°F. Spray a 9-inch fluted tart pan or round cake pan with nonstick spray.
  • Whisk together the almond flour, all-purpose flour, baking powder, cinnamon, and salt in a medium bowl.
  • Using an electric mixer, in a medium bowl, beat the butter, brown sugar, and ¼ cup of the granulated sugar together on medium-high speed until the mixture is super light and fluffy, 3 to 4 minutes.
  • Scrape down the sides of the bowl and with the mixer on medium, add the eggs one at a time, beating until each one is incorporated, followed by the vanilla. Increase the speed to medium-high and beat until the mixture is pale and nearly doubled in volume, 4 to 5 minutes. Fold in the almond mixture until no dry spots remain. Gently add 1½ cups of the blueberries by hand, making sure you don’t totally smush them.
  • Transfer the batter to the prepared tart pan and, using a spatula or the back of a spoon, smooth the top. Sprinkle the remaining 3 tablespoons granulated sugar on top and bake until the cake is deeply golden brown and pulls away from the edges slightly, 30 to 35 minutes. It should start to crackle a bit on top (what you’re looking for).
  • Remove from the oven and let cool completely before slicing.

Notes

The cake can be baked 4 days ahead, wrapped tightly in plastic wrap, and stored at room temperature.