Category: Quick & Easy

Easy Dishes

So Eat It, Just Eat it (Roasted Cauliflower with Cumin, Turmeric and Lemon)

So Eat It, Just Eat it (Roasted Cauliflower with Cumin, Turmeric and Lemon)

When I was a kid there was a definite hit list of vegetables we absolutely hated.  My brother and I had all sorts of tricks to avoid eating them.  We would stuff our mouths full of peas, run to the bathroom and spit them out.  We weren’t too big on brussels sprouts or cauliflower either, we would drop them in our napkins and again run to the bathroom to toss them out.  In defense of these veggies, our vitriol came not from the veggies themselves, but from the method of preparation.  Peas were often from a can (uh-huh, how many of you remember canned peas, greenish-gray mush balls-bleah). Cabbage and cauliflower were boiled-just the smell emanating from the kitchen would make us run and hide.  Brussels sprouts were absolutely horrible, bitter, sulfurous, and barely edible.

These days the quality of today’s produce is so much better. We can go to our local farmer’s market and find just picked brussels sprouts and cauliflower, vine-ripened tomatoes or corn that was still on the stalk that morning.  We have also discovered new ways to cook said vegetables that are INFINITELY better than boiling or steaming.

FOR EXAMPLE. I love roasted vegetables.  Roasting brings out the sweetness in veggies like cauliflower or brussels sprouts, making them absolutely delicious. Perusing Meera Sodha’s Made in India I came across a recipe for Roasted Cauliflower with Cumin, Turmeric, and Lemon. My first thought? Oh yeah, SO making that.

The recipe, like many in the book, calls for a mortar and pestle to grind the spices.  I know what you are thinking, oh please, you don’t have a mortar and pestle do you?  Way back when I graduated from pharmacy school I received a set of spatulas from Eli Lily (pharmaceutical gorilla) and a mortar and pestle.  They have served me well…just not in my profession.  The spatulas and the mortar and pestle were long ago re-purposed and added to my culinary gadget collection.  The mortar and pestle proved to be the perfect tool for grinding spices and making the spice paste for this dish.

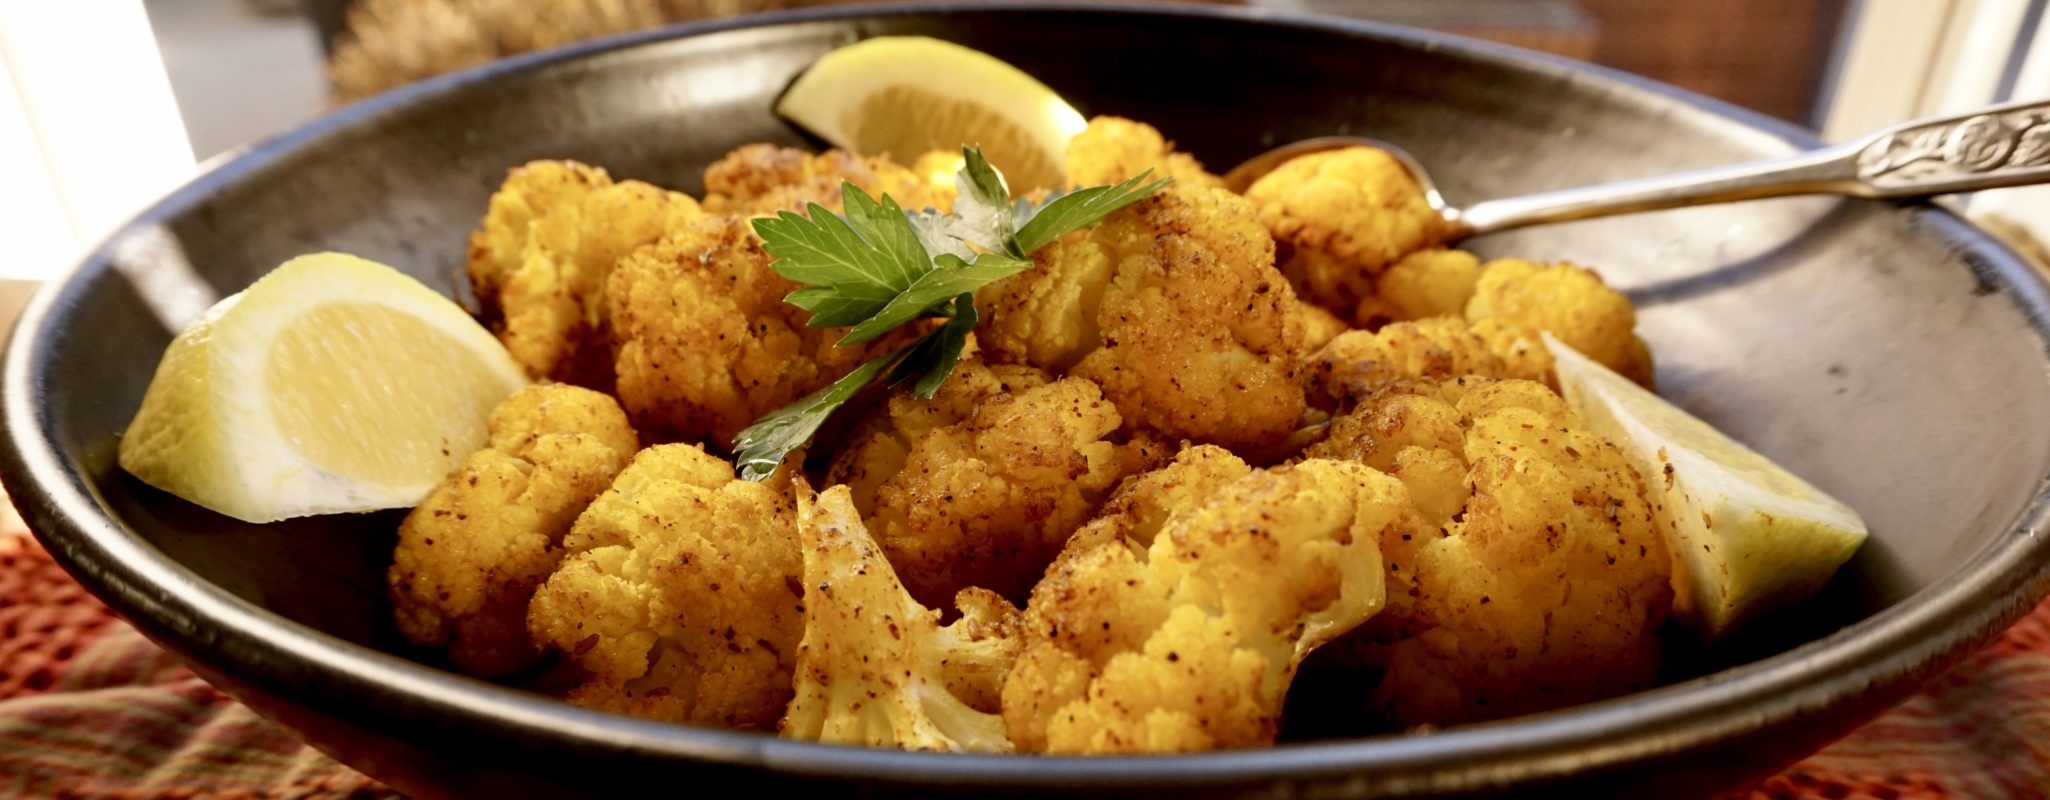
The cauliflower is blanched for a quick minute, seasoned with the spice oil which gives it a vibrant golden yellow hue.  Pop it in the oven for a quick roast and yep, dunzo, dinner is ready.  A bowl of warm cauliflower, crispy on the edges, creamy in the center seasoned with cumin and turmeric in just thirty minutes.  I am thinking about adding cubed potatoes the next time I make this, a riff on Aloo Gobi.

Excuse me it’s time for me to run TO the dinner table.

Roasted Cauliflower with Cumin, Turmeric and Lemon

Ingredients

  • 1 large head of cauliflower around 1 1/4 pounds
  • 2 teaspoons cumin seeds
  • 1 to 1 1/4 teaspoons salt
  • 1 teaspoon chili powder
  • 1/2 teaspoon ground turmeric
  • 5 tablespoons canola oil
  • 1 lemon

Instructions

  • Preheat the oven to 350 degrees. Line two oven trays with foil and bring a deep-sided pan of water to a boil.
  • Wash the cauliflower, pull off the leaves from around the side, and discard. Break the cauliflower into small, fairly even-sized florets and set aside.
  • Put the cauliflower into the saucepan of boiling water and blanch for 1 minute, then drain really well. Let it dry for around 5 minutes in its own steam; if it is waterlogged it won’t crisp up nicely in the oven.
  • Using a mortar and pestle, grind the cumin along with the salt, then add the chili powder and turmeric, followed by the oil. Mix it all together really well.
  • Lay the cauliflower out onto trays in one layer and drizzle the spicy oil over it. Make sure the cauliflower is well coated
  • Put trays in the oven for around 30 minutes, shaking them every 10 minutes or so to ensure the florets roast and brown evenly. If they start to burn, loosely cover them with foil.
  • Put the roasted cauliflower in a dish or bowl, and squeeze the lemon over the top before serving.
  • Adapted From “Made in India” by Meera Sodha

Happy birthday Claire!

Good Morning Mr. Phoods (Cilantro Chutney Chicken Curry)

Good Morning Mr. Phoods (Cilantro Chutney Chicken Curry)

Good morning Mr. Phoods:

The dish you are about to take-on requires that you answer the following questions.  Your answers will determine whether you should proceed with this post or not.

Do you like cilantro?

What does cilantro taste like to you?

If you answered NO and it tastes like soap exit NOW by clicking on MII consolation 

If you answered yes and yumminess, I LOVE cilantro…your mission, should you decide to accept it, will be to run to the store for cilantro, boneless chicken, peanuts, garlic, and onions and make this dish. As usual, if you or any other MII fans (Made In India) should be caught while making this dish you will be required to….invite me over for dinner. If not, the secretary (again me) will disavow any knowledge of you.

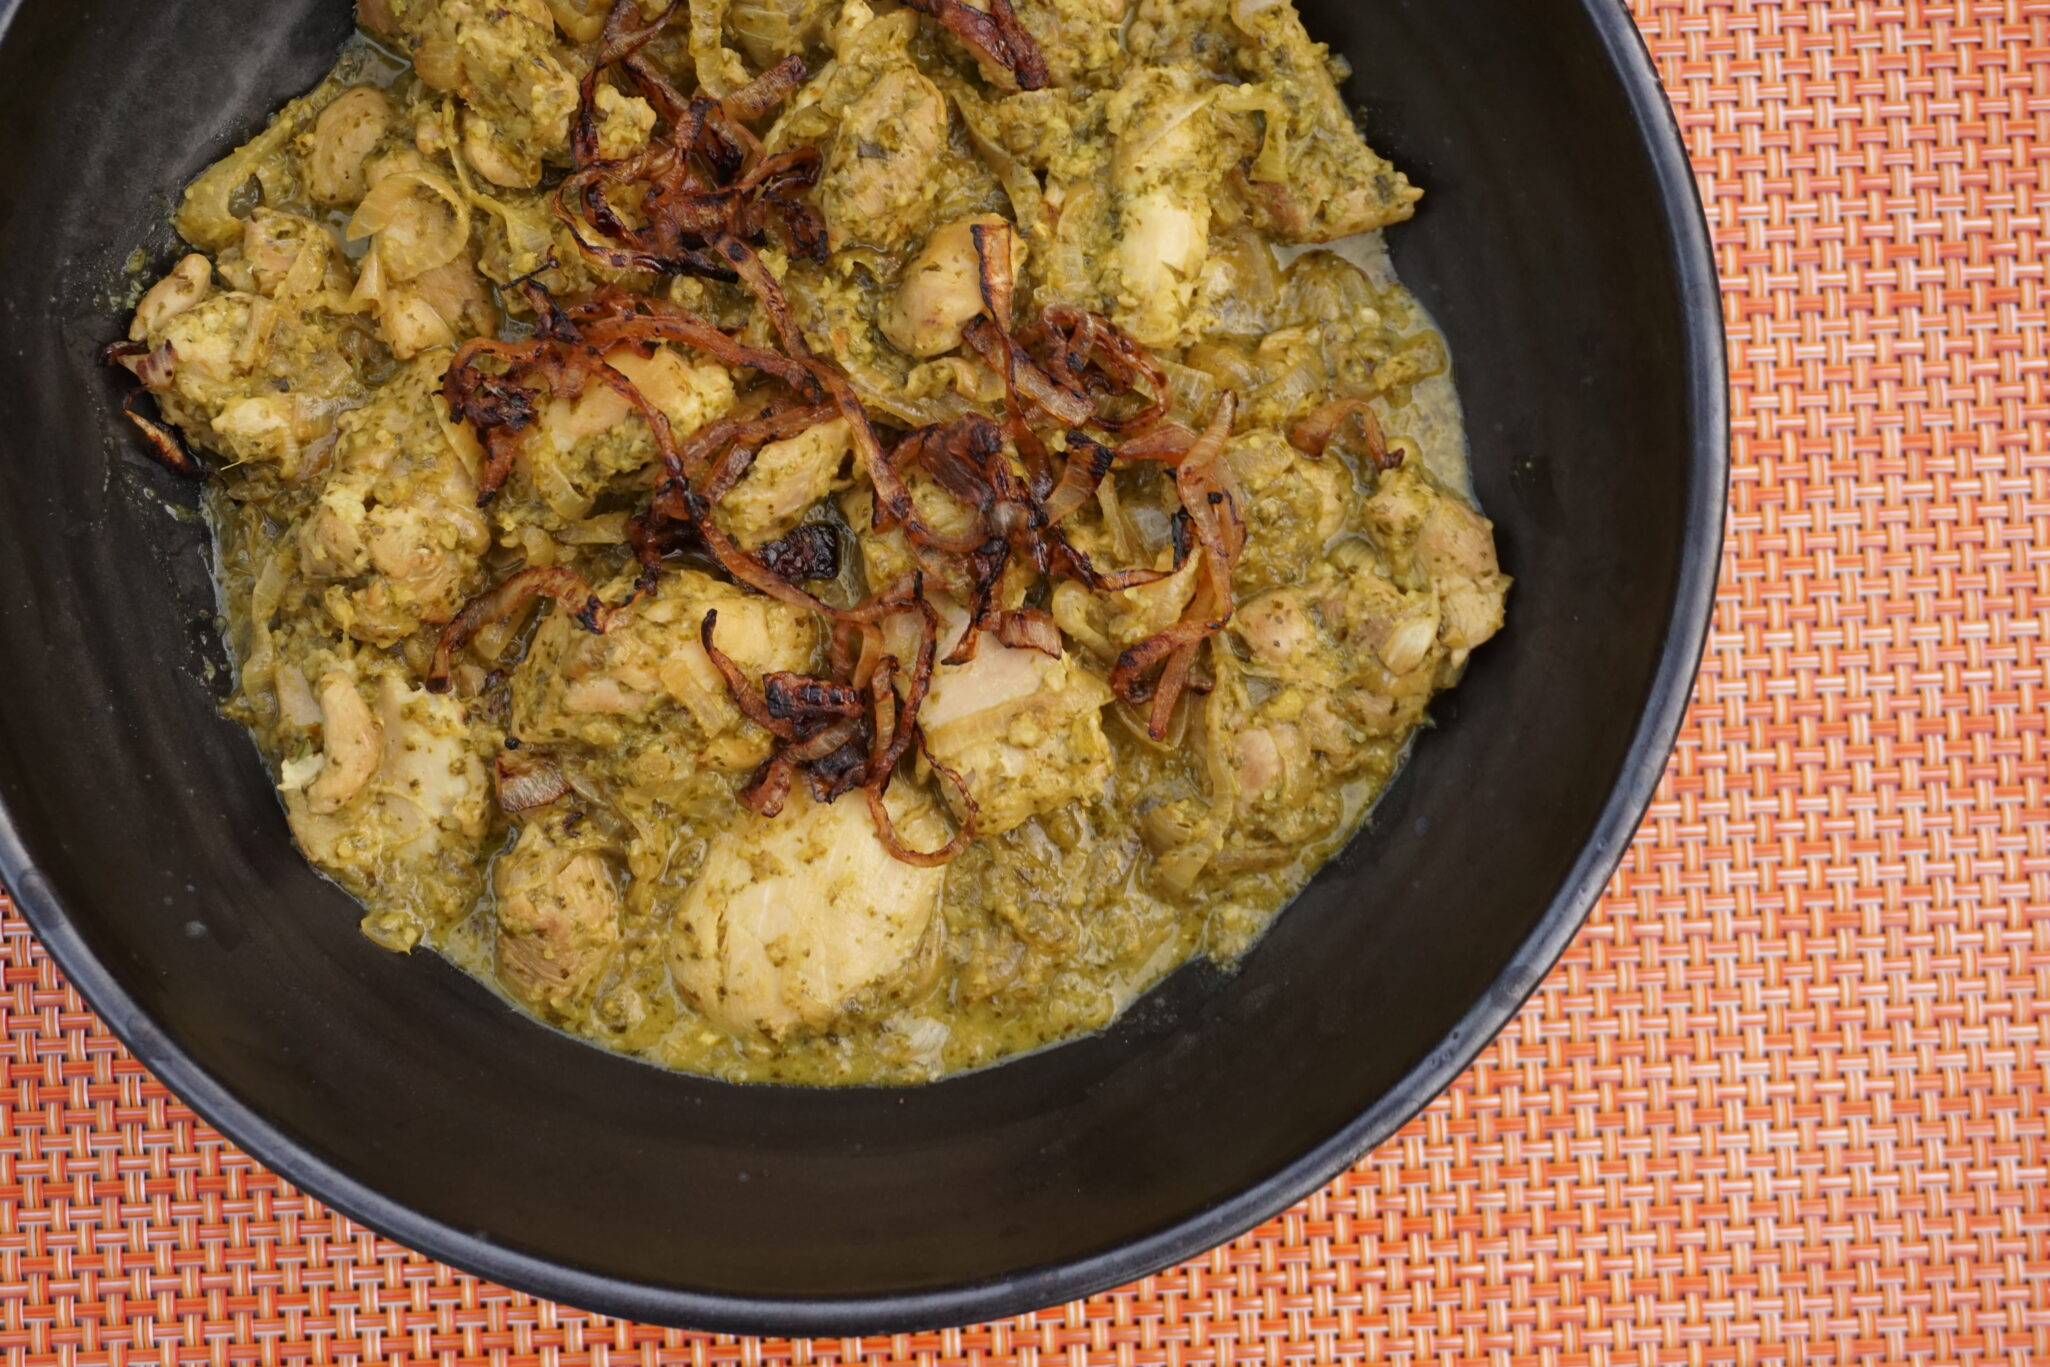
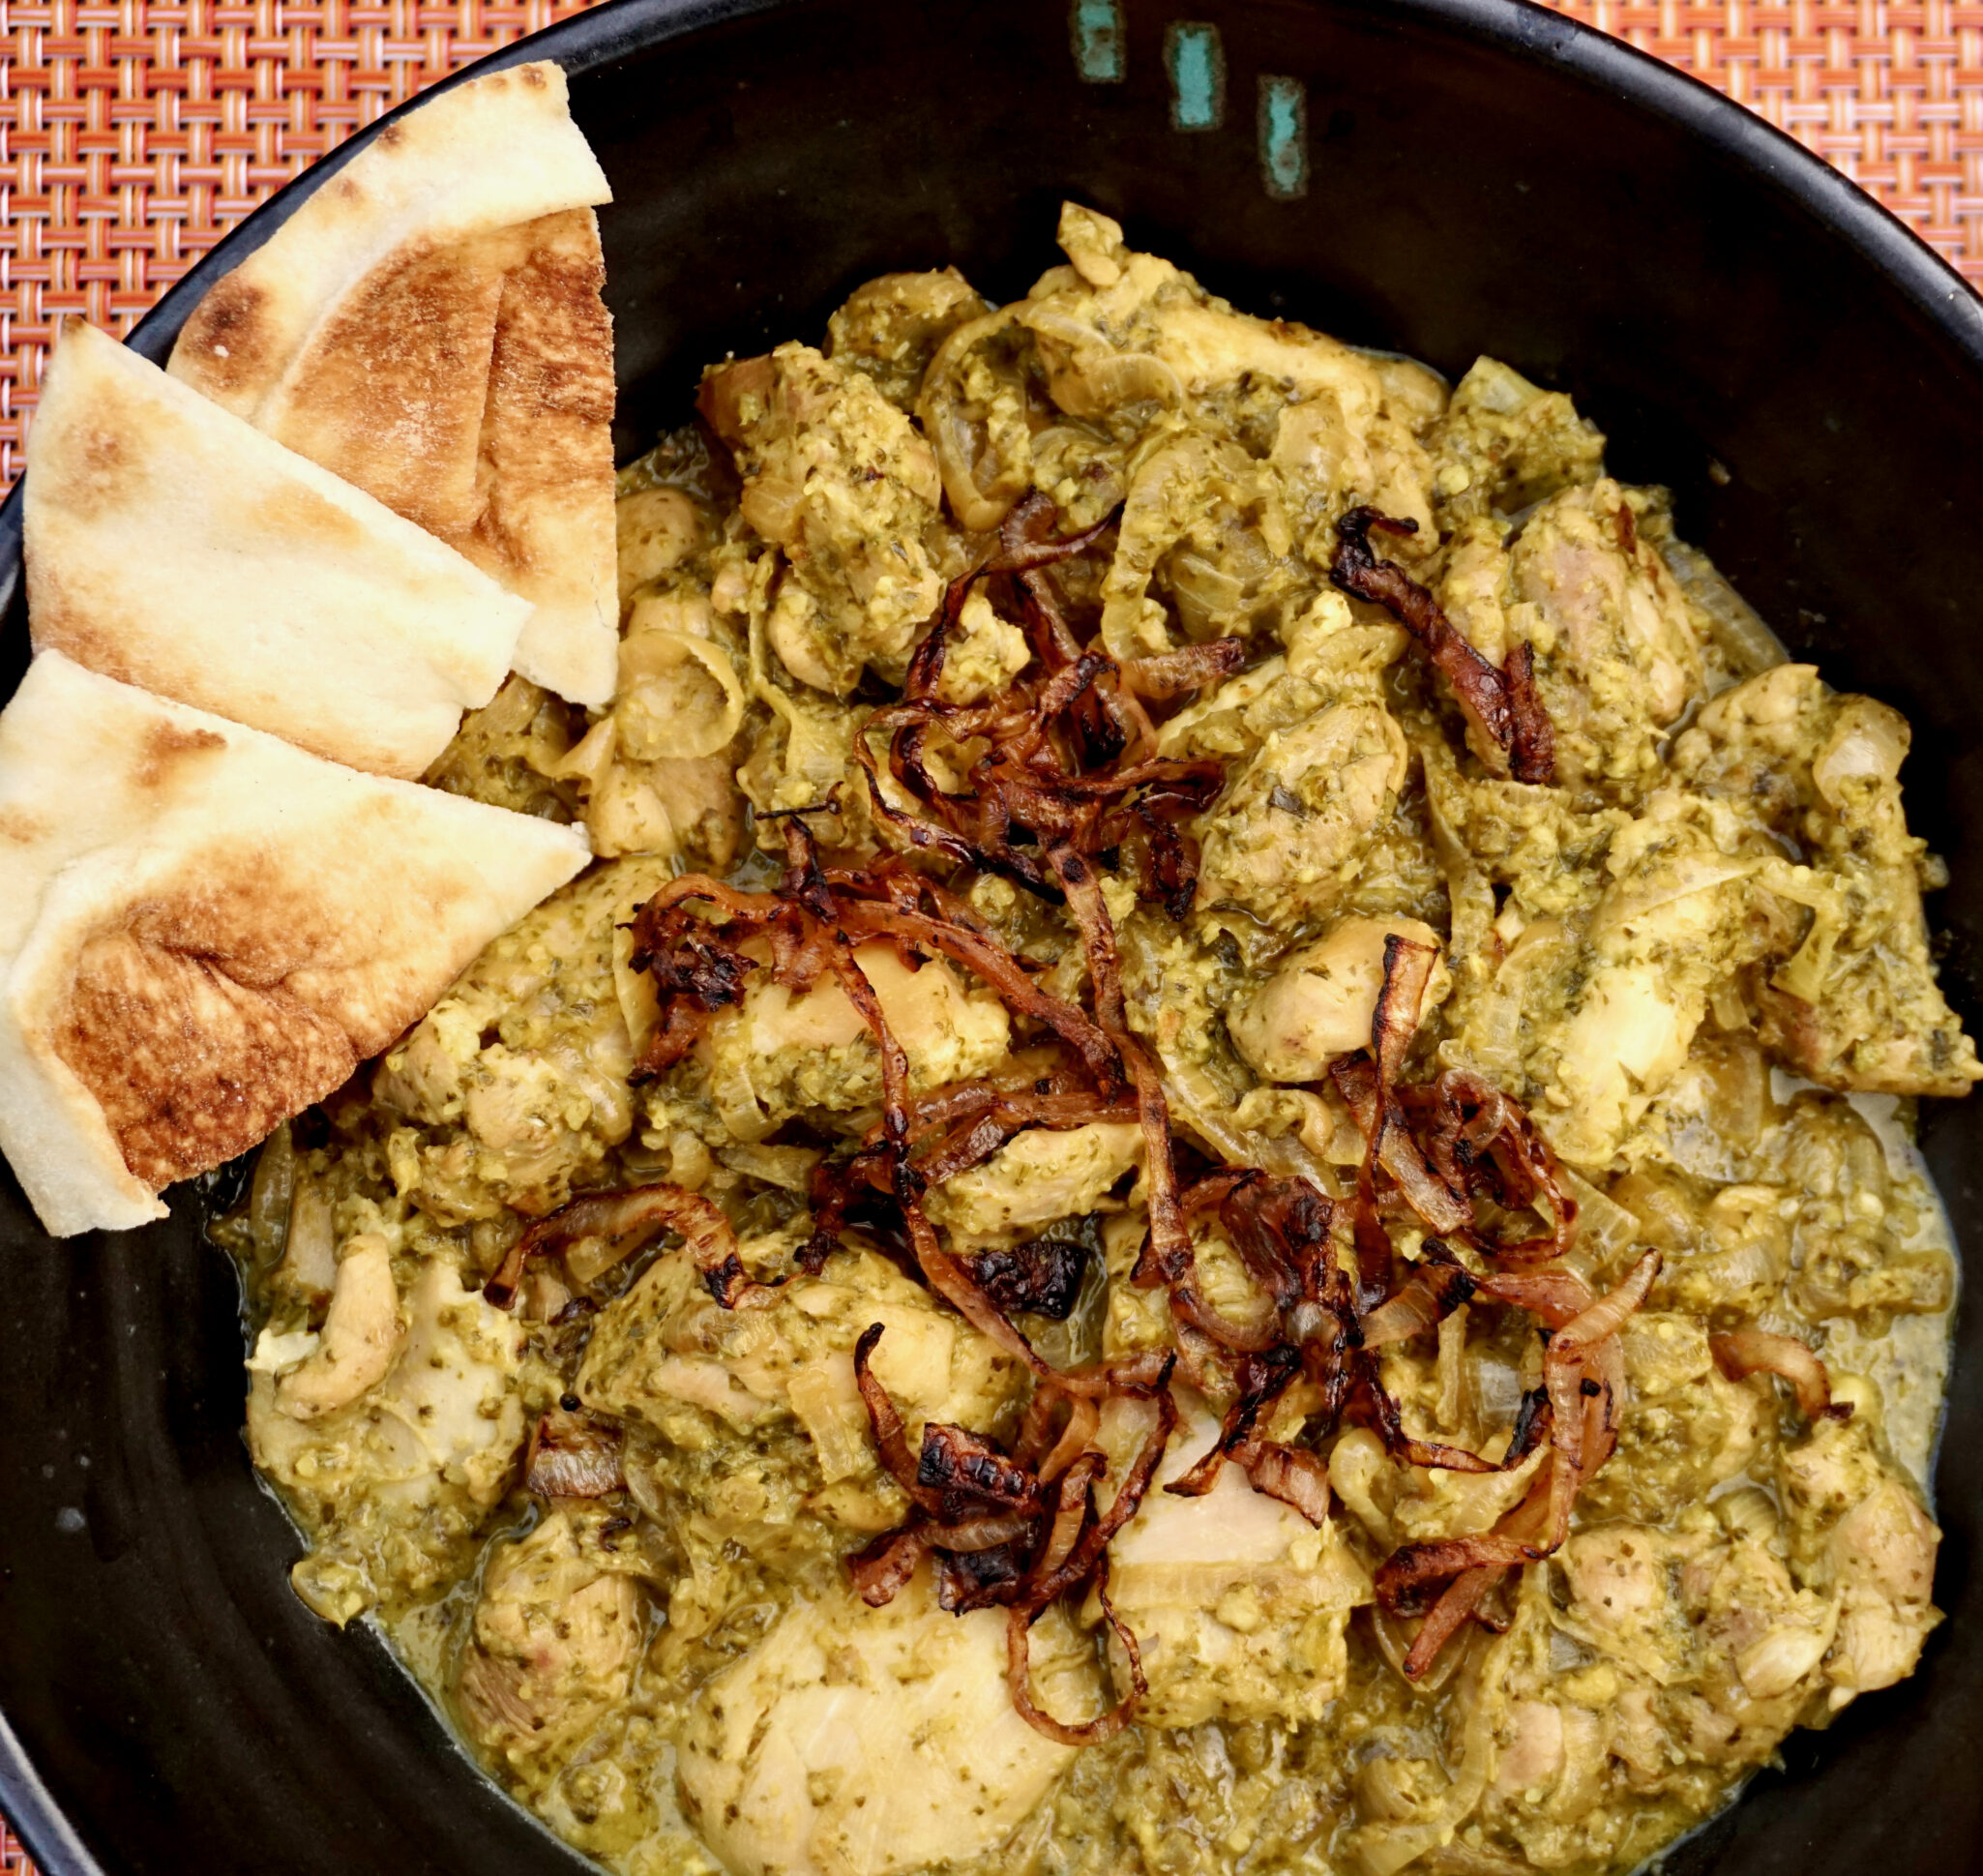
Yes, Meera Sodha’s Cilantro Chutney Chicken from her book Made In India is that good.  It inspired me to create this homage to one of my all-time favorite TV shows.

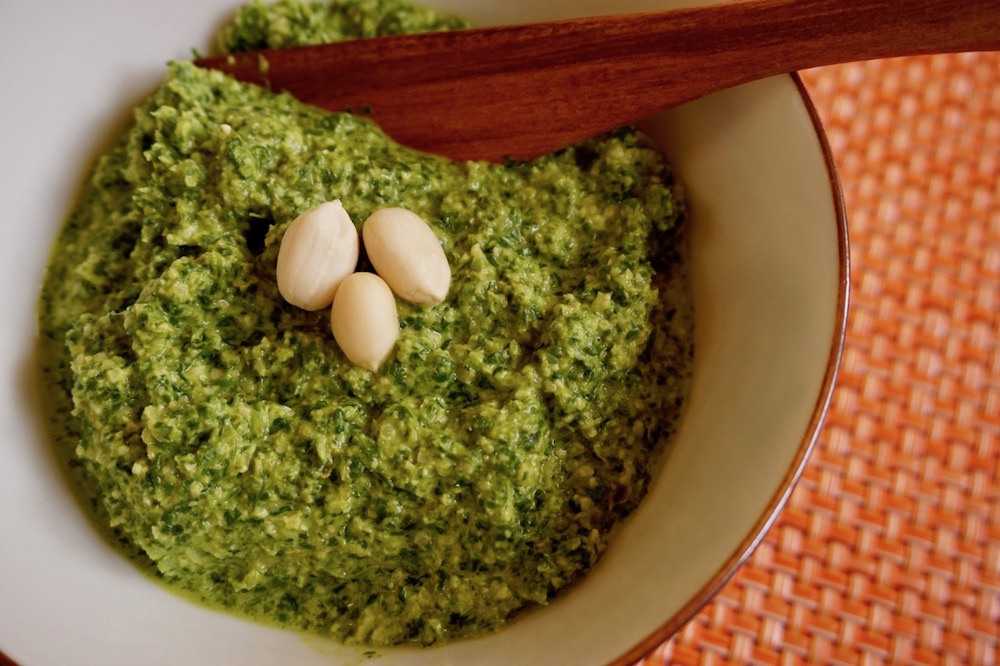
Start by making the chutney.  The chutney is sweetened with brown sugar, umami filled from the cilantro, and tangy from the lemon juice. The peanuts give it body. The green chili adds a spicy finish.  If you can’t find Indian green chilis, you can use jalapenos or serranos, not quite the same but will work in a pinch.  If you have extra chutney after making the chicken, spread it on some naan or crackers. Make it in a blender or food processor.  thin the chutney with a bit of water if it seems too thick.

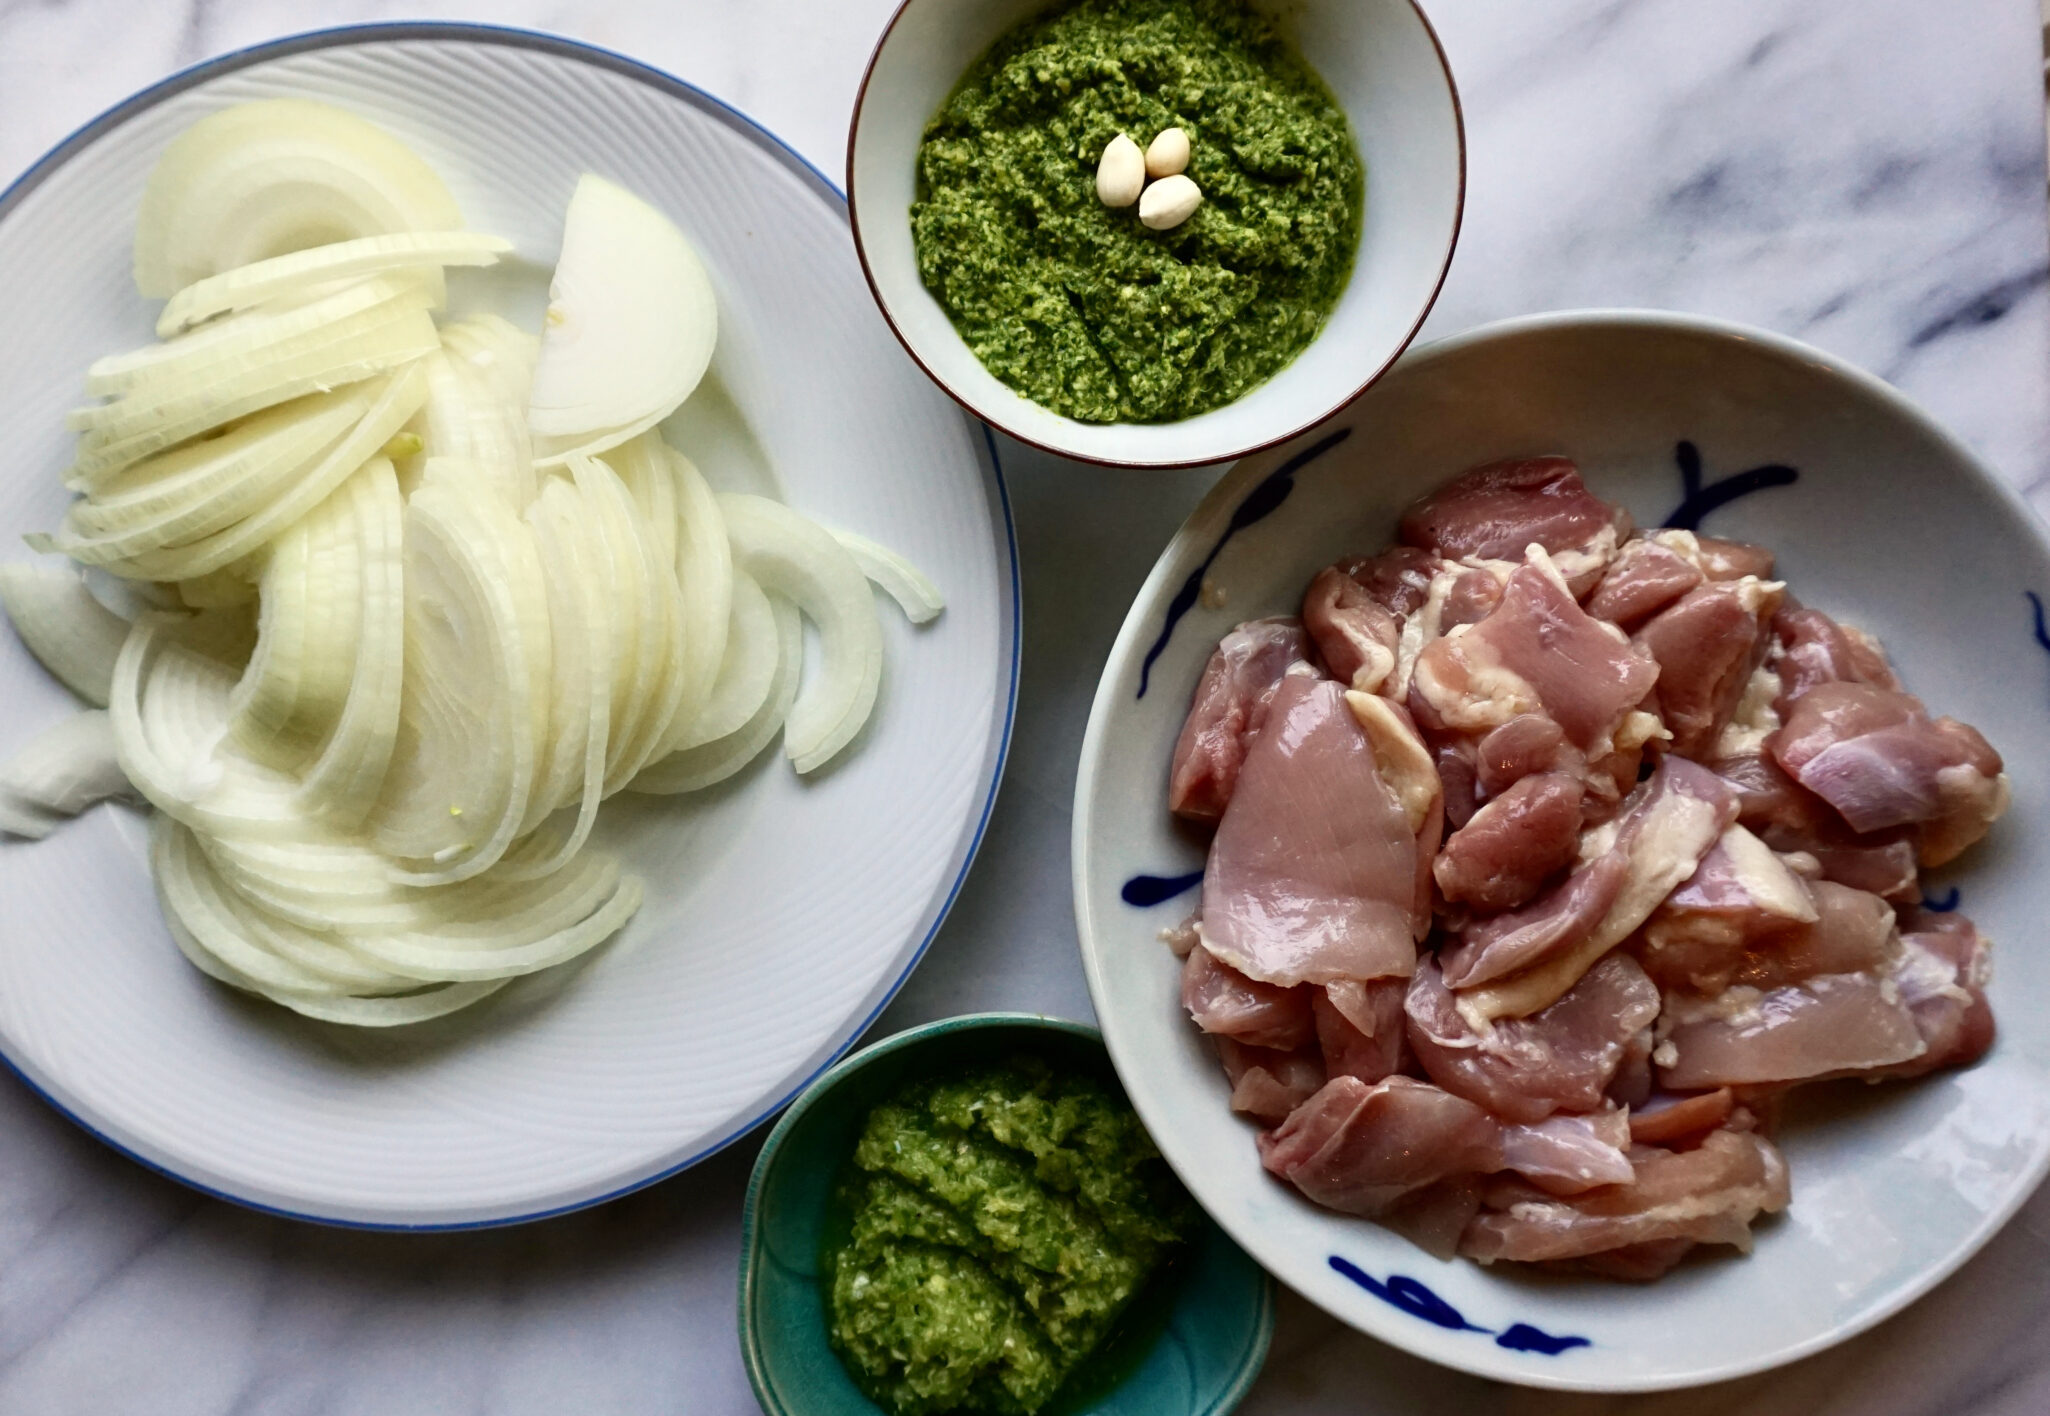
This cilantro chicken curry is very user-friendly. Despite being a newbie at cooking Indian cuisine, this dish was not intimidating and very “doable” and took just minutes to make.  First, saute boneless chicken with onions and the garlic-ginger paste, then add the cilantro chutney and simmer until the chicken is tender. That’s it!

Top with the reserved caramelized onions. This dish is delightful.  Every bite is a flavor explosion.    It’s a great one-pot meal perfect for a quick weekday dinner.

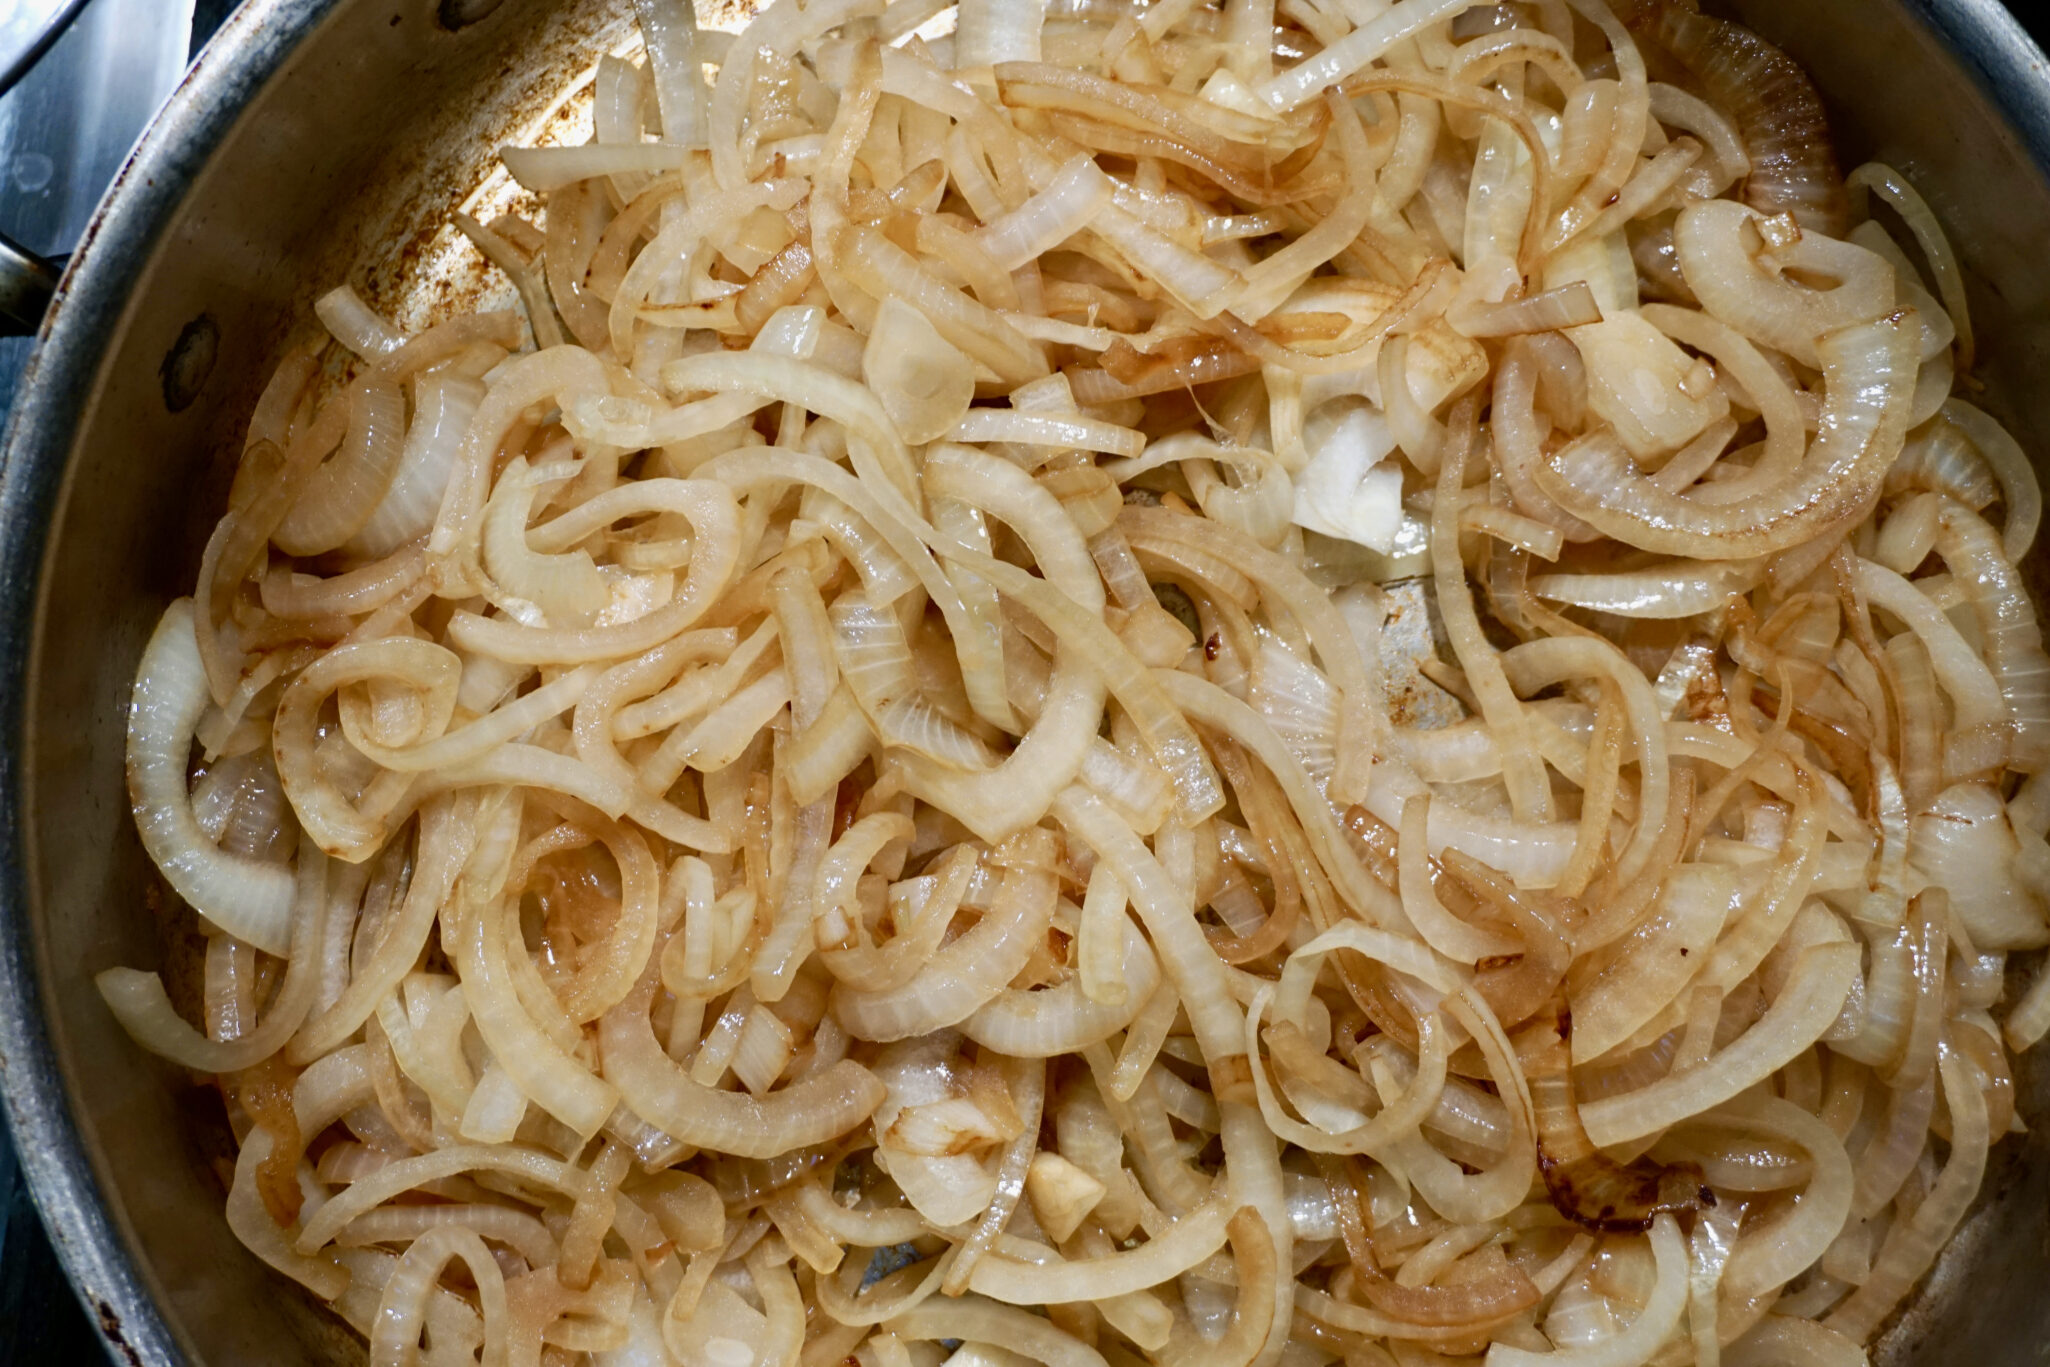
On its way to becoming caramelized onions, yum.

Quick and easy…if you should decide to accept this Mission Possible, you’ll be handsomely rewarded.

Garnish with the onions and cilantro.  Serve with warm Naan and fragrant Basmati Rice.

Enjoy!

Good Morning Mr. Phoods (Cilantro Chutney Chicken Curry)

Prep Time 17 minutes

Ingredients

Ginger Garlic Chili Paste

  • 2- inch piece of ginger peeled and roughly chopped
  • 6 cloves of garlic roughly chopped
  • 3/4 fresh green chili roughly chopped (seeded if you prefer less heat)
  • salt

Chicken

  • 1 3/4 pounds skinless boneless chicken thighs, chopped into 3/4 x 1-inch pieces
  • 6 tablespoons cilantro chutney recipe follows

Caramelized Onions

  • 2 tablespoons canola oil
  • 2 onions finely sliced

Cilantro Chutney

  • 4 ounces cilantro
  • 2 ounces peanuts unsalted and unroasted
  • 4 tablespoons lemon juice
  • 1 teaspoon salt
  • 4 teaspoons brown sugar
  • 1/4 teaspoon ground turmeric
  • 2 to 3 small fresh green chilis roughly chopped (seeded if you prefer less heat)

Instructions

Chicken Curry

  • Throw the ginger, garlic, and green chili into a mortar and pestle, along with a pinch of salt, and bash up to a coarse paste.
  • Put the oil into a wide-bottomed, lidded frying pan on a medium heat. When it’s hot, add the onions and fry, stirring occasionally, for 6 to 8 minutes, until they are starting to turn golden. Transfer half of the onions to a bowl and put to one side.
  • Add the ginger, garlic, and green chili paste and cook for around 3 minutes. Put the chicken pieces into the pan, sear them on all sides and add the chutney. Stir the chutney, pop the lid on, and turn the heat down to medium-low. Cook for around 15 minutes until the chicken is cooked through and tender.
  • In the meantime, transfer the onions from the bowl into a small frying pan and continue to cook them on a medium heat for another 10 to 15 minutes, until they are dark brown, soft, and sweet, then take them off the heat.
  • Add 1/2 teaspoon of salt (or to taste) to the chicken little by little, until it tastes just right, then take it off the heat.
  • Scatter the caramelized onions over the top of the curry just before serving. Serve alongside some steaming hot basmati rice or a pile of hot, homemade chapatis.

Chutney recipe instructions:

  • To wash the cilantro, fill a bowl full of cold water and put the cilantro in it. Move the cilantro around in the water, then take it out and shake off the excess water.
  • Roughly chop the stems and leaves and put them in a blender. Add the peanuts, lemon juice, salt, sugar, turmeric, and 2 small chilis, and pulse them in the blender until the mixture has a smooth, almost pesto-like consistency. Add some water to help the mixture to blend if necessary. The result should be a smooth cilantro chutney which is equally sweet, fiery, and lemony. Add the remaining chili, or more lemon juice, salt, and sugar to balance it to your taste, then spoon it into your clean jar.


TGI Friday: Dinner and A Movie (Picadillo)

TGI Friday: Dinner and A Movie (Picadillo)

Do you remember TBS’s Dinner and A Movie Night on Friday nights?  During each commercial break hosts Paul and Janet and their resident chef would prep and cook a dish that thematically went along with the movie being aired (prime example-Russell’s Mussels for the movie Gladiator).  Silly banter, fun factoids about the movie and cooking tips plus a movie…pretty nifty?  Fast forward a lot of years-babies, kids, teens, gray hair, thinning hair, expanding waistlines, empty-nest and our Monday mom’s coffee klatch has resurrected Friday night Dinner and a Movie.

We started with Big Little Lies, best described as the Housewives of Monterey gone batsh*t crazy and moved on to The Handmaid’s Tale. Based on Margaret Atwood’s book it takes intensity and darkness to a new level.  Luckily cocktails and dinner after each airing helps lighten the mood.  A combination of factors including work and not being able to stomach a dystopian world (it hits a little too close to real life) I show up, along with the hubbies, just in time to enjoy drinks, dinner and conversation.  I rationalize my absence from watching with the feeble excuse “I read the book once upon a time”.

Dinners are potluck and lucky for me Stephanie brought one of her favorite dishes, Picadillo. Its roots are Latin, regional versions can be found from Mexico to Cuba. It’s a delicious mixture of ground beef, sautéed with tomatoes, seasoned with bay leaves and raised to flavor-town by, drum roll please, olives and raisins. The briny tartness from the olives and that little pop of sweetness from the raisins makes this dish a stand out.

Mind blown…never dreamed I would be enamored with a savory dish that included raisins and olives.  Not only is it delicious it is also easy to prepare.  Served with steamed coconut or brown rice and fried plantains this is a simple, beautiful meal.

Stephanie’s recipe is adapted from Cooking Light that includes generous amounts of finely diced carrots and bell peppers not always found in traditional Picadillo. Think of this as Picadillo Light. The dish can be lightened even more by substituting ground turkey or chicken for part of the beef (I would definitely keep it at least 50% beef though).

I perused other recipes for Picadillo and found some included other spices including cumin, oregano, cinnamon, chili, and cloves.  I enjoy the simplicity and the clean bright flavors of Steph’s recipe but I love cumin and cinnamon.  Next time.

Picadillo

Ingredients

  • 2 pounds ground beef or a combination of ground beef and turkey or chicken
  • 1 tablespoon olive oil
  • 1 1/2 cups thinly sliced onion
  • 1 garlic clove minced
  • 1 1/2 cups 1/4-inch-thick slices yellow bell pepper, each slice cut in half
  • 1 1/2 cups 1/4-inch-thick slices red bell pepper, each slice cut in half
  • 1 cup finely chopped carrot
  • 3/4 cup golden raisins
  • 1/2 cup dry white wine
  • 1/4 cup sliced pimento-stuffed manzanilla or green olives about 15 olives
  • 2 tablespoons balsamic vinegar
  • 1 1/2 teaspoons salt
  • 1/8 teaspoon black pepper
  • 2 bay leaves
  • 1 14.5-ounce can no-salt-added stewed tomatoes, undrained
  • 1 8-ounce can no-salt-added tomato sauce

Instructions

  • Cook beef in a large nonstick skillet over medium-high heat until browned; stir to crumble. Remove from pan; drain well.
  • Add oil to pan. Add onion and garlic; sauté 3 minutes. Add bell peppers and carrot; sauté 3 minutes. Return beef to pan. Stir in raisins and remaining ingredients; bring to a boil. Reduce heat; simmer for 15 minutes, stirring occasionally. Discard bay leaves.


Strawberry Squared (Strawberry Bread)

Strawberry Squared (Strawberry Bread)

The problem with going to the Farmer’s Markets is I end up with way more than we will be able to finish.  As I walk through the market everything looks so delicious and smells so good. The aroma of sun ripened fruit is intoxicating, the variety of greens and tomatoes are mind boggling, every where I turn I see or smell something that I just have to try.

The old adage “my eyes are too big for my stomach” fits me perfectly.  I return home from my market excursion, bag brimming with way too many things and in quantities that make me slap my forehead and wonder “what was I thinking”.  I don’t just have one basket of strawberries (the perfect amount for Wes and me) but a three pack (way too many).

By mid-week I am hunting for recipes that contain strawberries.

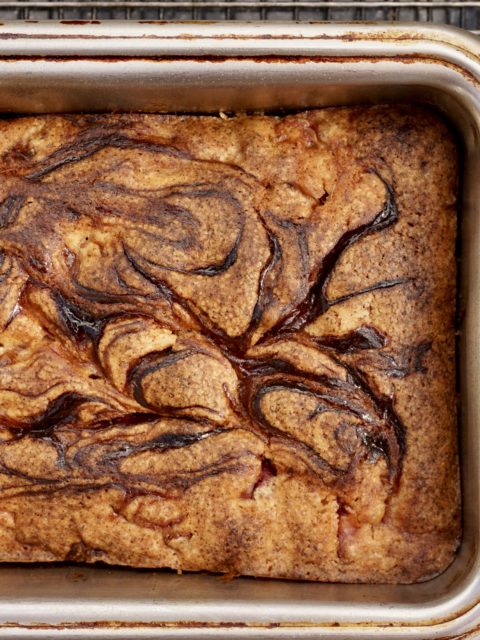
I came across this Strawberry Bread recipe in Saveur magazine.  A luscious quick bread that called for not only fresh strawberries but strawberry jam.  Strawberry squared!  It looked and sounded heavenly so I quickly pulled out my loaf pans, my baskets of strawberries and set to work making this bread.  In a wink I had the batter made (the beauty of quick breads) and I was sliding the pans into the oven.

I no longer have to worry about buying too many berries at the market.  This bread is delicious.  It is moist, slightly tart from the fresh berries, sweet from the jam that I swirled into the batter and bursting with strawberry flavor. The cinnamon adds just a hint of spice. I imagine this bread would lend itself well to other fruits. I have plans to try this with the nectarines currently sitting on my counter.

This bread is great warm just out of the oven but it’s also wonderful with a cup of tea or coffee, toasted and spread with a bit of butter.

Boy I love summer.


Strawberry Loaf Cake

Ingredients

  • MAKES 2 LOAVES
  • Ingredients
  • Unsalted butter for greasing pans
  • 3 cups flour plus more for dusting
  • 1 tsp. baking powder
  • 1 tsp. ground cinnamon
  • 1 ⁄2 tsp. kosher salt
  • 2 cups sugar
  • 1 1 ⁄4 cups canola oil
  • 4 eggs
  • 4 cups roughly chopped strawberries substitute peaches or nectarines
  • 1 ⁄2 cup strawberry jam optional or peach jam

Instructions

  • Heat oven to 350°. Grease 2 (9" x 5" x 2¾") loaf pans with butter and dust with flour; set aside. Whisk flour, baking powder, cinnamon, and salt in a large bowl; set aside.
  • In a separate bowl, whisk sugar, oil, and eggs.
  • Pour wet ingredients over dry ingredients and whisk until just combined.
  • Stir in strawberries and pour batter into prepared pans. If using jam, spoon ¼ cup over each loaf and using a knife, swirl jam into batter.
  • Bake until golden brown and a toothpick inserted in the middle of the loaves comes out clean, about 1 hour.
  • Let cool for 30 minutes before slicing and serving.
Red Lentil Soup with Lemon (Just Another Meatless Monday…)

Red Lentil Soup with Lemon (Just Another Meatless Monday…)

In an effort to eat healthier, we have cut back on animal proteins and upped our veggie game.  Don’t get me wrong, we still enjoy a good steak for special occasions and I am not giving up those slices of succulent pork belly in my bowl of ramen-no, not EVER.  Meat is our splurge.  But we have made a conscious decision to eat more vegetables and legumes on a daily basis.  Our search for tasty and different ways to prepare them has led to a virtual trip around the world through food.

World Food Tour In Our Own Backyard

Luckily we live in the Bay Area where Korean and Southeast Asian stores, Middle Eastern bazaars, Mexican Pandarias, and Indian markets are a short drive away.  Now that we are empty-nesters, Wes and I find ourselves tootling around on weekends stocking up on goodies from the various stores. As an added bonus, many of the stores have pre-cooked food, delis, and SAMPLES (lol) to try.  We come home not just with bags of groceries but with crispy KFC (Korean Fried Chicken Wings),  samosas, fried tofu flavored with bonito flakes, spicy garlic-chili eggplant, and fresh warm naan.

I do love going to the markets but at the same time, it’s a little (ok, a lot) intimidating.  I spend half my time standing in aisles Googling stuff or calling friends for advice.  My friend Namrata (whom we affectionately call the professor at work) is on speed dial whenever I go to the Indian Market.

Phone a Friend

Me: Uh, Namrata I’m at the store, HELP.  I want to make dal and I am looking at a rainbow spectrum of lentils, black, red, yellow, and green..which am I supposed to get?

Namrata: Well, what kind of Dal are you making?

Me:  Hmm, let me look (as I fumble with my phone trying to get to the net and carry on a conversation with her), it says Red Lentil Dal.

Namrata:  Buy the masoor dal, the yellow ones are moong dal, the black ones are for special occasions…….Namrata begins to sound like the grown-ups in a Peanuts cartoon.  I scan the shelves overwhelmed,  I think I have Dal overload.

Me: Hmm, this package says masoor or split red lentils, is that right?

Namrata: yes that’s the one.

Me: In my defense, the word “split” threw me off.  I come from “The World According to Rice”.

Next, I ask her about spices and chiles.  I have learned when I ask her “how spicy will that be?”  is a relative term.  If she says not too spicy, that means a glass of water close by and a napkin to blot the sweat off my face.  If she says a bit spicy that means running around with my “HAIR ON FIRE” screaming in an exorcist-like voice “I NEED WATER NOW”.  But she has been my go-to source for ingredients and spices and I’ve learned a lot.

Follow the ClarkBar

I wanted to make dal but I found a recipe for a red lentil soup in the New York Times.  So, I decided it would be a good first foray into using lentils. The recipe is by Melissa Clark whose posts in the New York Times are wonderful.  So wonderful, my brother has made her his cooking muse.  Which is amusing, I haven’t seen him go this gaga over anyone since the days when he ripped out pictures of Cybil Shepard from my Seventeen magazines.

Soup, What’s for Dinner or Lunch

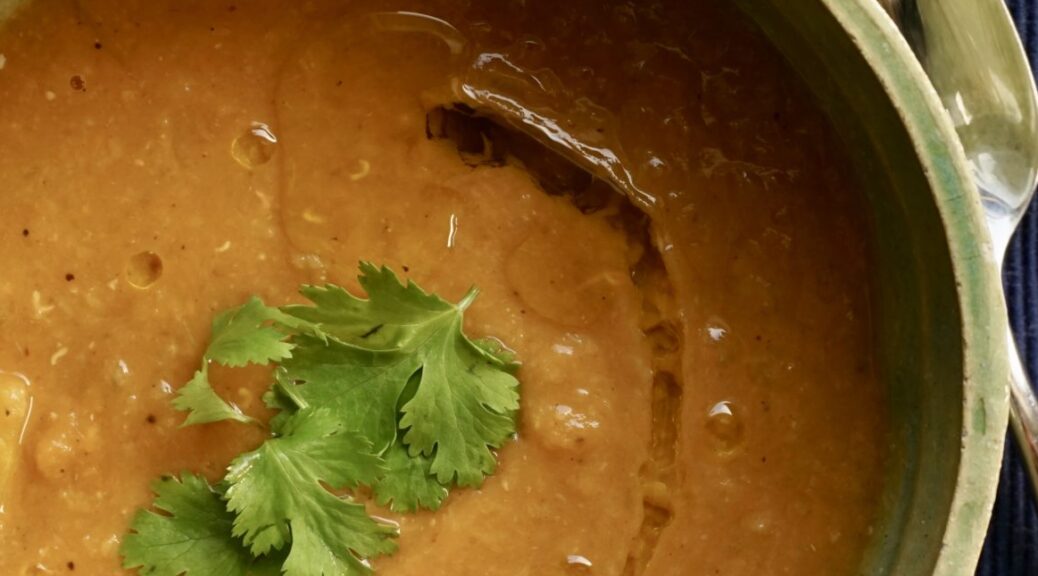
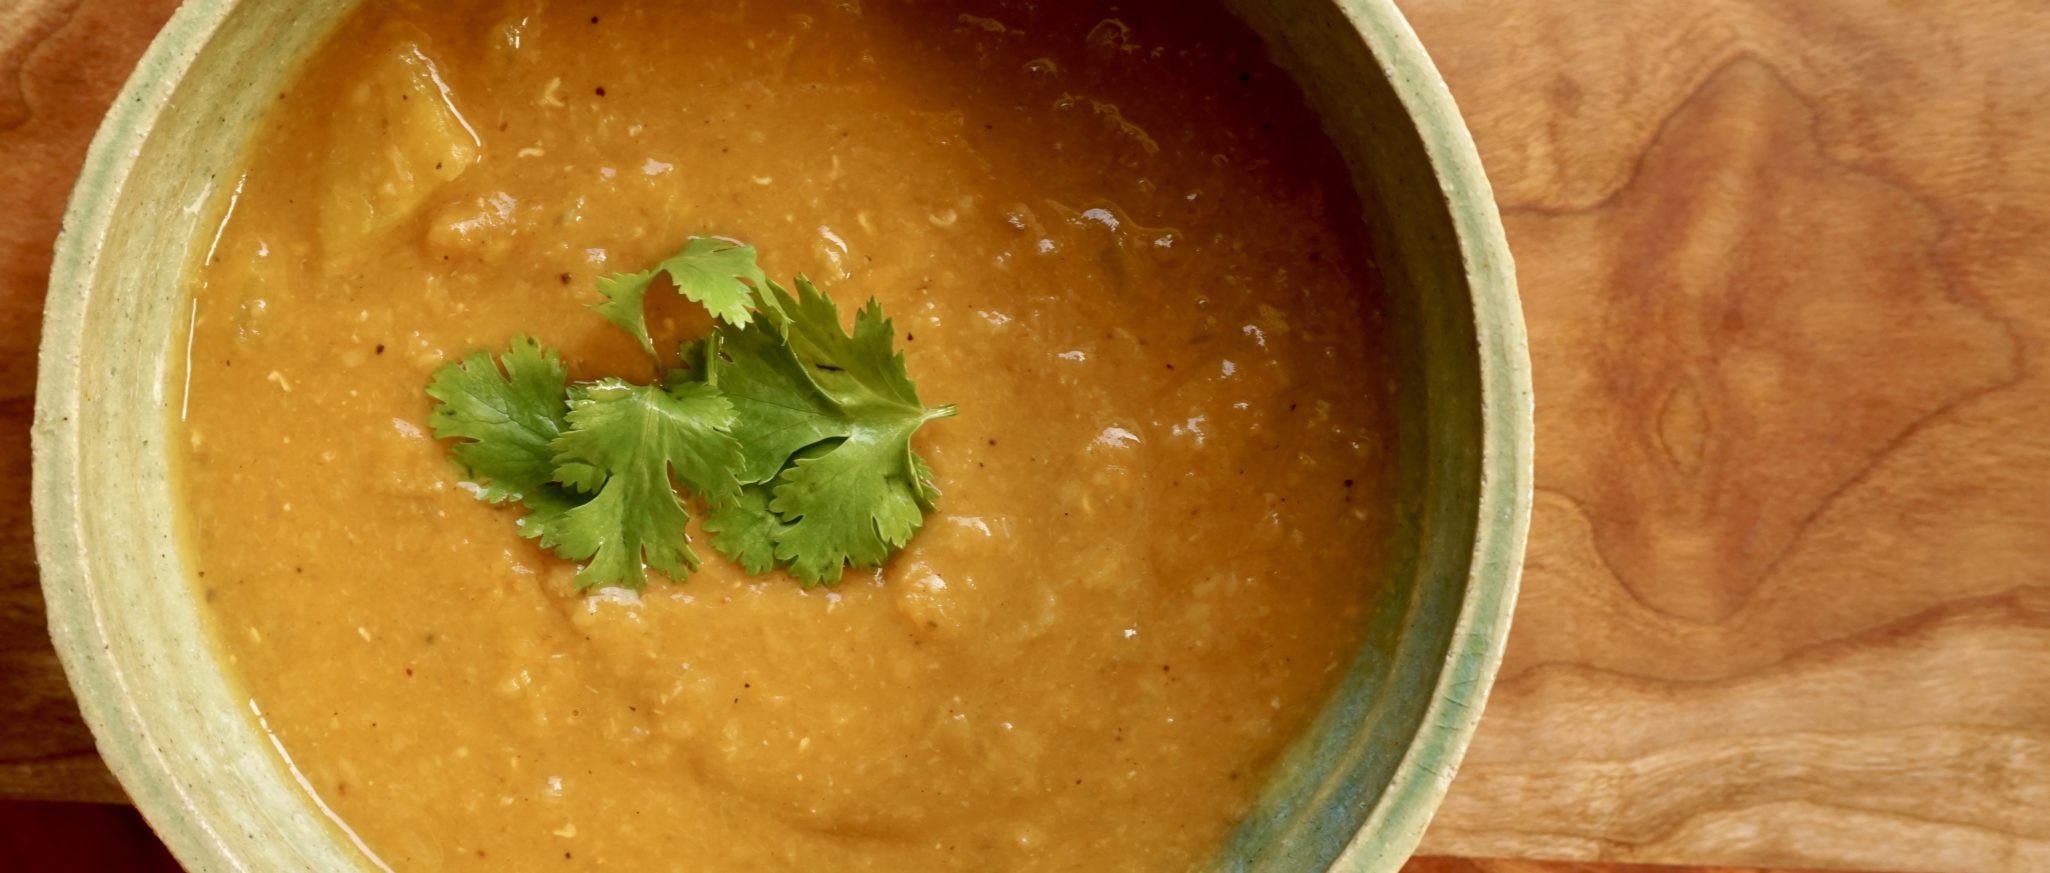
This soup is delicious.  Wes is not overly fond of soups unless it is clam chowder but this one had him asking for seconds.  We love how the lentils absorb much of the liquid to create a thick substantial soup.  In addition, the flavor kick from chile powder and cumin is delish. A squeeze of lemon brightens the soup and adds a slight yummy tang.  You can tweak it by using ghee instead of olive oil and adding a pinch of garam masala. Dollop a bit of yogurt at the end.  This gives it an Indian flair.

For a tasty, filling dish that comes together in less than an hour (less time in an Instant Pot) try this soup.  Invite me over for a bowl, please.  Don’t forget the naan to go along!

Print Pin
5 from 2 votes

Just Another Meatless Monday… Lentil Soup with Lemon

A delicious lentil soup from Melissa Clark and the NYT.
Course dinner, lunch, Soup
Cuisine Mediterranean
Keyword Melissa Clark, NYT Cooking, Red Lentils
Prep Time 15 minutes
Cook Time 30 minutes

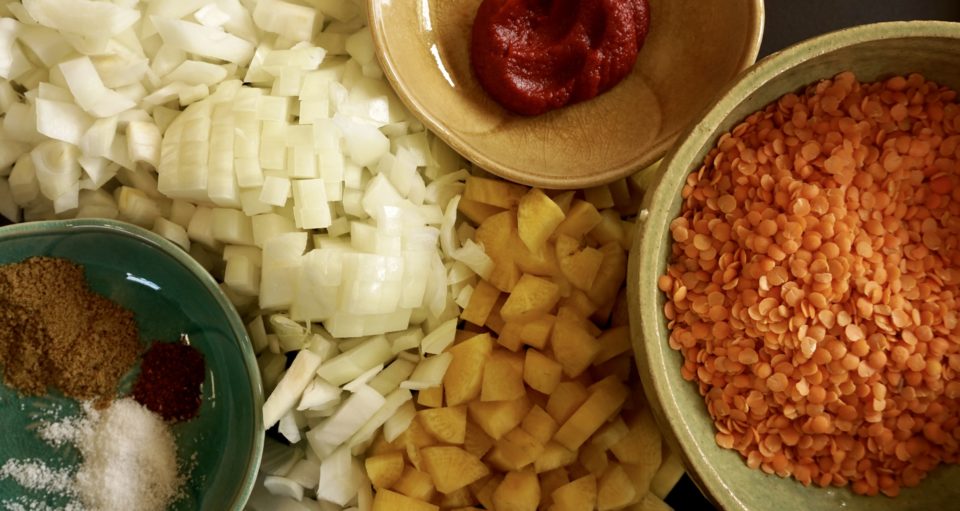
Ingredients

Adapted from NYTCooking Melissa Clark

The Aromatics

  • 3 tablespoons olive oil or ghee
  • 1 large onion chopped
  • 2 garlic cloves minced
  • 1 tablespoon tomato paste

The Spices

  • 1 teaspoon ground cumin
  • 1 teaspoon kosher salt more to taste
  • ¼ teaspoon ground black pepper
  • Pinch of ground chile powder or cayenne more to taste

The Rest

  • 1 quart chicken or vegetable broth
  • 2 cups water
  • 1 cup red lentils
  • 1 large carrot peeled and diced
  • Juice of 1/2 lemon more to taste

The Finishing Touches

  • 3 tablespoons chopped fresh cilantro
  • Olive oil for drizzling optional
  • yogurt for drizzling optional instead of olive oil

Instructions

  • In a large pot, heat 2-3 tablespoons oil or ghee over high heat until hot and shimmering**
  • Add onion and garlic, and sauté until golden, about 4 minutes.
  • Stir in tomato paste, cumin, salt, black pepper and chili powder or cayenne, sauté for 2 minutes longer.
  • Add broth, 2 cups water, lentils and carrot. For a thicker soup only 1 cup of water. Note the soup will thicken the longer it sits after cooking.
  • Bring to a simmer, then partially cover pot and turn heat to medium-low.
  • Simmer until lentils are soft, about 30-40 minutes.
  • Salt and pepper to taste.
  • Using an immersion or regular blender or a food processor, purée half the soup then add it back to pot. Soup should be somewhat chunky.
  • Reheat soup if necessary, then stir in lemon juice and cilantro and garam masala if using
  • Serve soup drizzled with good olive oil and dusted lightly with chili powder if desired.
  • Instead of olive oil finish with a dollop of yogurt and garnish with additional cilantro

And YOU CAN MAKE THIS IN AN INSTANT POT OR PRESSURE COOKER=STUPID EASY **If using an Instant Pot or pressure cooker:

  • Saute vegetables in the bowl of the Instant Pot using the sauce function. This will take longer than stove top due to lower cooking temp of pot around 5-7 minutes.
  • Add all other ingredients, according to recipe. Cover and lock lid in place. Set cooking to manual for 10 minutes.
  • When timer goes off do a quick release.
  • Proceed with recipe, season and use a hand blender to puree soup in Instant Pot bowl.
  • Dunzo.
Weekend Warrior-Weekend Baker (Toasted Almond Cookies)

Weekend Warrior-Weekend Baker (Toasted Almond Cookies)

My New Year’s resolution every year is to make a concerted effort to try recipes out of the gazillions of cookbooks I own.  I generally cook or bake from only a handful of books I have, my go-tos.  One of my favorite blogs, Ipso Fatto, also collects cookbooks the difference being she actually uses hers.  Lucky for me we seem to have similar taste in cookbooks. My hubby is convinced its not so much that we have similar taste,  its because I buy every cookbook published so of course we would have the same books.  Her recent post featured a scrumptious almond cookie from Abigail Dodge’s Weekend Baker.  After reading it I spent the next hour rummaging through my bookshelves and mumbling to myself “I know I have that book, where is it”.  Eureka, finally found it.  Time to make some Toasted Almond Cookies, uh-huh.

Thanks to Ipso Fatto I am now making good on my annual new year’s resolution.

I love these cookies.  Not the prettiest cookies on the block but it was love at first bite. They’re buttery with a touch of sweetness and a nice crunch from the toasted almond slivers.  I had to stop myself from eating the whole batch. In all fairness the recipe only makes 20 cookies.  Yep, just a measly 20 cookies.

Note to self..double the recipe.

These are a snap to make.  Toasting the almonds adds flavor and crunch so don’t skip this step.  Throw the almonds on a baking sheet and toast in a 350 degree oven for approximately 5 minutes.  Easy peasy.  As the almonds cool make the dough. The cookies do not spread much so don’t forget to flatten the dough before baking.  I used a fork dipped in sugar and pressed each cookie with a criss cross pattern much like the classic peanut butter cookie.  I did not flatten the dough enough with the first batch resulting in the edges and bottoms browning before the center was completely baked.  The second pan of cookies turned out perfectly, golden crisp edges surrounding a sable’ like cookie and crunchy almonds.  Yums.

Weekend Warrior-Weekend Baker

Ingredients

  • 12 tablespoons unsalted butter at room temperature
  • ½ cup granulated sugar
  • Pinch of table salt
  • 1 yolk from large egg
  • ¾ teaspoon pure vanilla extract
  • 1/8 teaspoon pure almond extract
  • 1 ½ cups all-purpose flour
  • ½ cup slivered almonds toasted

Instructions

  • 1. Position an oven rack in the middle. Heat the oven to 350˚F.
  • Line 2 cookie sheets with parchment paper or nonstick baking liners.
  • 2. In a large bowl, combine the butter, sugar and salt. Beat with an electric mixer (stand mixer fitted with the paddle attachment or handheld mixer) on medium speed until well blended. Add the egg yolk and vanilla and almond extracts and beat until combined. Pour in the flour and toasted almonds and beat on low speed until the dough begins to clump together. The nuts will break up a bit, but that’s okay.
  • 3. Using a small ice-cream scoop or 2 tablespoons, shape rounded mounds of about 2 tablespoons dough on the prepared cookie sheets, spacing them about 1 ½”. Using your fingers, press down on each mound to flatten.
  • 4. Bake 1 sheet at a time until the cookies look dry on top and the edges are golden brown, about 17 minutes. Transfer the cookie sheet to a rack to cool for about 10 minutes. Using a spatula, lift the cookies from the sheet onto a rack and let cool completely.


Thai Curry in a Hurry-Thanks to Instant Pot

Thai Curry in a Hurry-Thanks to Instant Pot

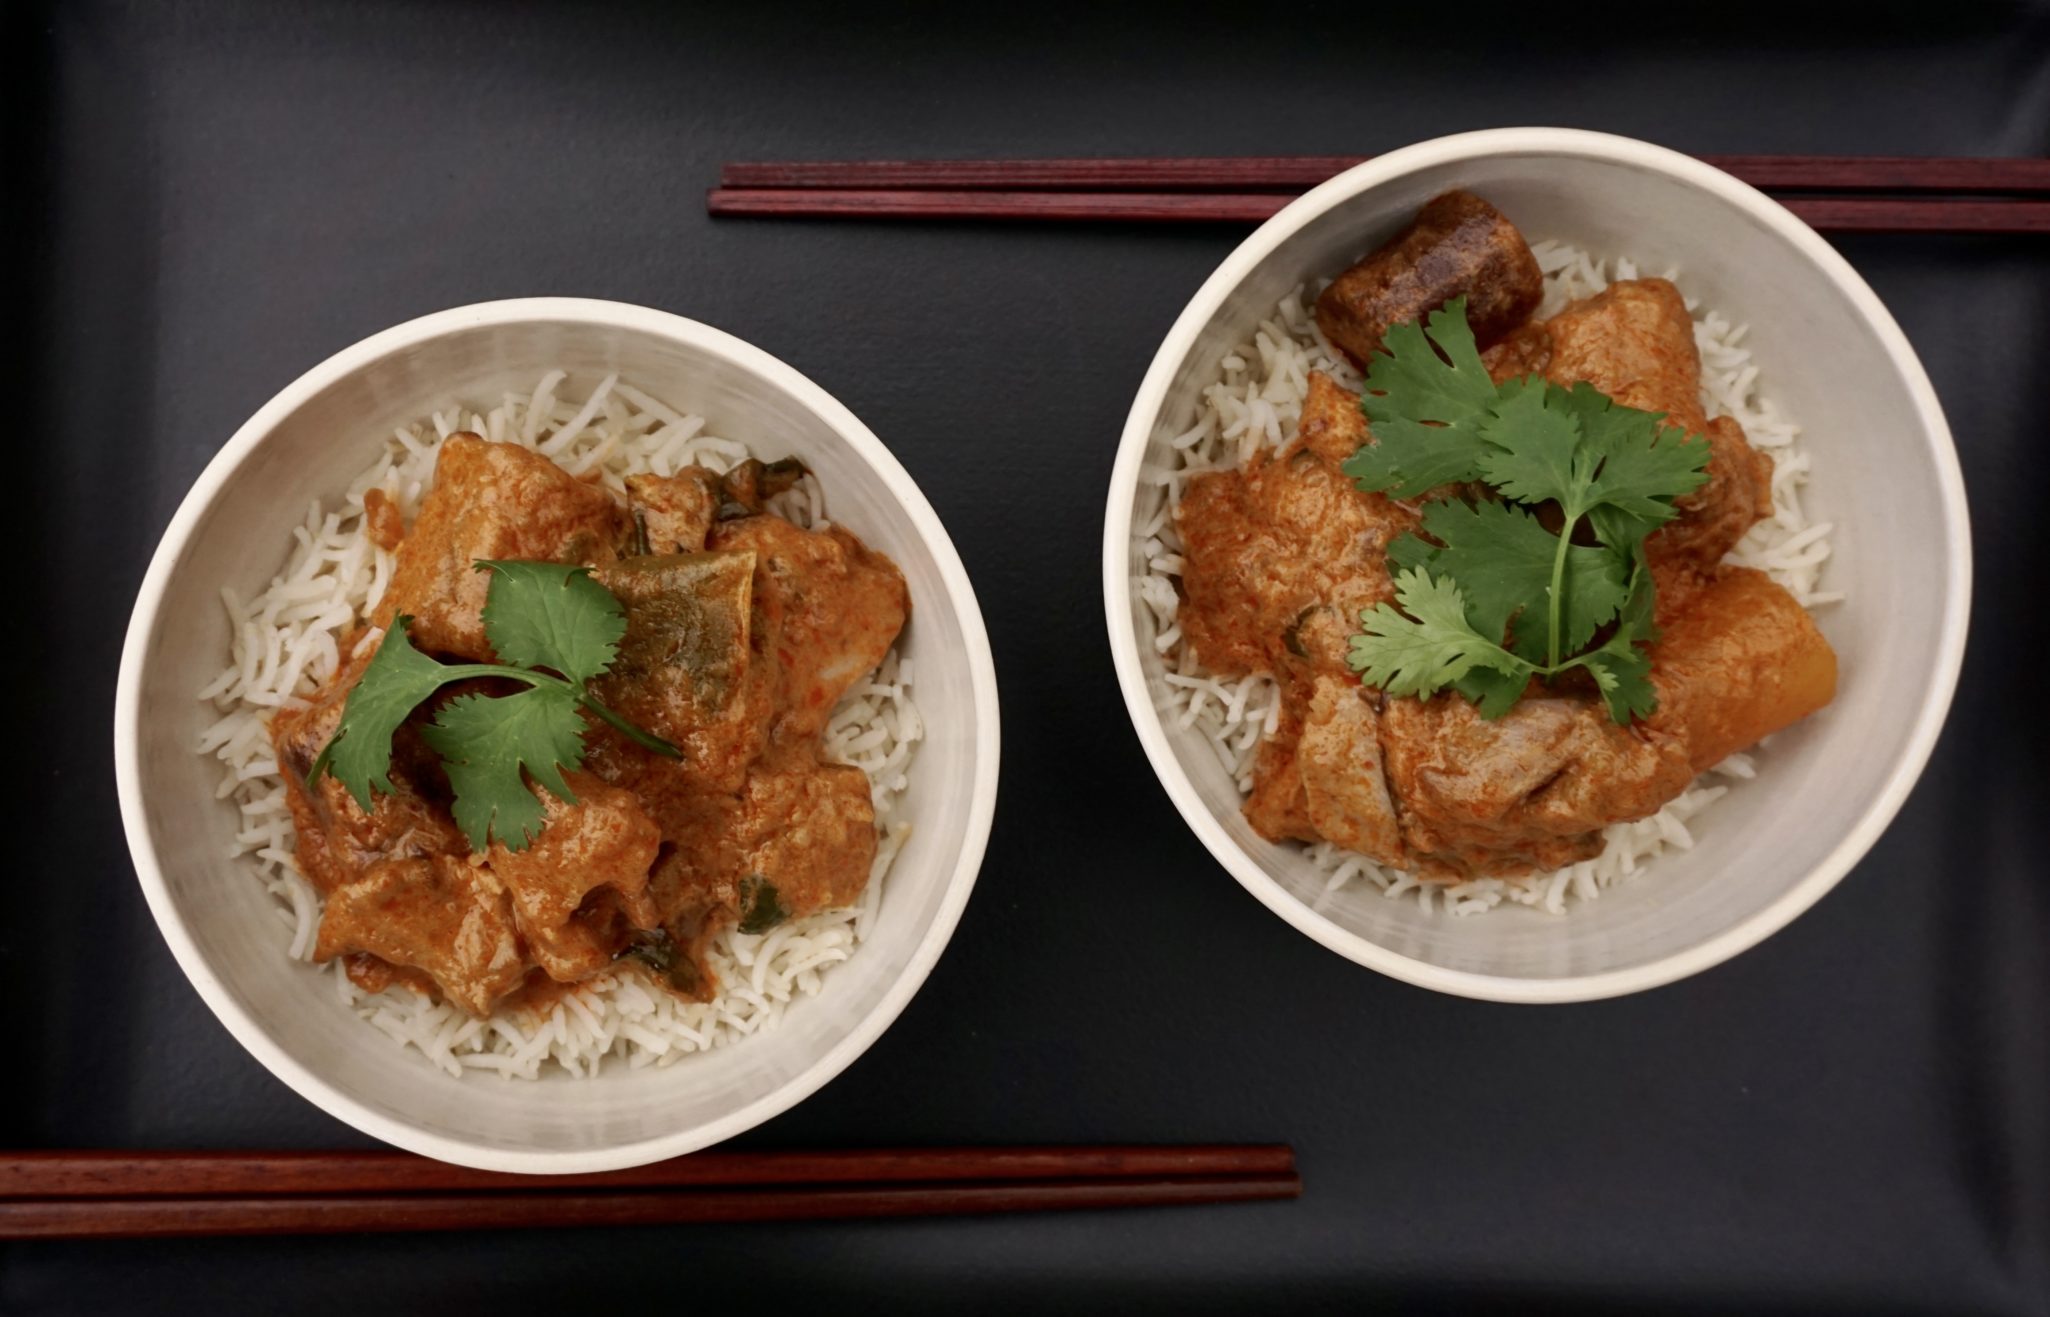
Have I convinced you to try an Instant Pot yet?  If not, here is the recipe that may just tip the scales in favor of that new kitchen gadget.  I came home after a long day at work and pulled out my pot.  Threw in sliced chicken, chopped veggies, coconut milk, curry paste and 30 minutes later we were sitting down for dinner.  Yep, thirty minutes to fragrant bowls of Massaman Curry Chicken over rice.  A complete meal, a party in a bowl and my mouth.  Chunks of cauliflower, peppers, potatoes, eggplant, and chicken surrounded by a rich autumn orange hued curry sauce that is creamy, spicy and sweet.

Curry On

Despite being somewhat of a purist (no box cake mixes or frozen pre-formed pie crusts in this house, nope) the key to this meal, besides the Instant Pot, is the pre-made curry paste.  I vow (lol, not) to one day make my own curry paste but for now I’m wimping out, life’s full of compromises.  Find my favorite curry pastes, either Mae Ploy and Aroy-D, at your neighborhood Asian market or on Amazon.  There are quite a few different ones you can pick from so I thought I would give you the quick and dirty on curries.

Green-Spiciest of the Thai curries, fresh green chilis, kaffir lime leaves, basil, shallots, ginger, garlic and coconut milk for sweetness

Red-Red chilis, lemongrass, shallots, ginger and fish paste and coconut milk. Not quite as spicy as green curry and a work horse for curries. Goes well with chicken, seafood, beef and a variety of vegetables

Yellow-Mildest of the curries.  It is a combination of kaffir lime leaves, turmeric, cumin, mustard seeds and coconut cream. Great with vegetables

Massaman- Finds its roots in Indian curries and is made of red chilies, galangal, shallots, garlic, lemongrass, turmeric, cumin, nutmeg, cardamom, coriander,  cloves, and cinnamon.  Coconut milk and kaffir lime leaves are then added to create the sauce.  Peanuts and potatoes finish off this delicious curry.  I used Massaman curry for the dish in this post

Panang-Found its way to central Thailand by way of Laos  It is milder and subtle, spicier than Thai curries.  It is made from dried chilies, kaffir lime leaves, coconut milk, lemongrass, cilantro, cumin, garlic, ginger, shallots.  Peanuts are often used in this curry

I am sure there are rules for what vegetables or meats and which you should use with each type of curry you should use but my motto is experiment.  Try different vegetables and meats with any of the curries and create your own favorites.

This recipe is an adaptation from Paint the Kitchen Red, a wonderful site devoted to Instant Pot recipes.  The OG recipe calls for sautéing the vegetables after the curry is cooked in the pot. I like my vegetables on the soft side so I cooked them with the chicken in the Instant Pot. Use your favorite veggies, or whatever is in the fridge. So good and so easy.

Thai Curry in a Hurry-Thanks to Instant Pot

Course Main Course, one bowl meal
Cuisine Thai
Keyword 3 Cup Chicken, Carnitas in an Instant Pot, Thai Curry

Equipment

  • 1 Pressure Cooker

Ingredients

  • 3 Tbsp Thai red curry paste or Massaman curry paste preferably Maesri or Mae Ploy brand
  • 1 14- oz can regular-fat coconut milk
  • 1 lb boneless chicken thighs sliced into good bite size pieces
  • 1/4 cup chicken broth

Vegetables

  • The vegetables will cook along with the chicken so don't make the pieces too small
  • 1 cup red and/or green bell pepper cubed
  • 1-2 carrots cut into 4-5 pieces (only 1 if using potato)
  • 1/2 cup onion cubed
  • 1 small eggplant cut into cubes
  • 1 russet potato cut into chunks
  • Really any vegetable of your choice-squash cauliflower

Seasonings

  • 2 Tbsp fish sauce more to taste
  • 2 tsp brown sugar or to taste
  • 1 Tbsp lime juice
  • 4 Kaffir lime leaves slightly bruised (I have a calamansi tree so I used the zest)
  • 12 Thai basil leaves or regular basil leaves in a pinch
  • Cilantro

Instructions

  • Press ‘Saute’ and stir fry onions and curry paste for 1-2 minutes, add 1/2 can of coconut milk until mixture is bubbly, about 1-2 minutes.
  • Press 'Keep Warm/Cancel'.
  • Stir in chicken, remaining coconut milk and chicken broth and add your fresh vegetables
  • Close Instant Pot and make sure steam release handle is in the ‘Sealing’ position.
  • Cook on 'Manual' mode for 4 minutes.
  • Do a Quick Release of pressure and open the Instant Pot.
  • Add in fish sauce, brown sugar, lime juice and Kaffir lime leaves.
  • Press saute' and stir curry, bring to a bubble and cook for additional 2-3 minutes
  • Taste and adjust with more fish sauce, brown sugar or lime juice.
  • Stir in the Thai basil leaves.
  • Serve over rice, garnish with cilantro
Got Dough? (Tasties)

Got Dough? (Tasties)

In life there are two sides to everything.  The yin and yang of the universe.  There are those that twist their Oreos apart, lick the frosting off the cookie and then eat each cookie (seems kind of silly to me) versus those that absolutely never take Oreos apart but eat the cookie and frosting together.  Or how about vanilla or chocolate?  Coke or Pepsi?

Crust or filling? ……….CRUST OF COURSE, DUH.

So, what does one do with the scraps of dough left from the pie that’s baking in the oven?  It would be a shame to let it go to waste. Not quite enough for another pie but enough to make you feel guilty if you toss all that buttery, flaky goodness out.

Tasties to the rescue.  One of the many delightful recipes from The Art of the Pie by Kate McDermott.  This is my new bible on pie.  Detailed instructions on everything you ever wanted to know about pie crusts and fillings written in a warm easy style.  The majority of recipes are fruit based and pretty classic, apple, blueberry, strawberry rhubarb.  A small section on hand pies, mini pies and savory pies. Photos are gorgeous.  As a bonus, stories by the author add a very personal feel to the book.  Plus…she has a blog  The Art of the Pie, definitely worth checking out.

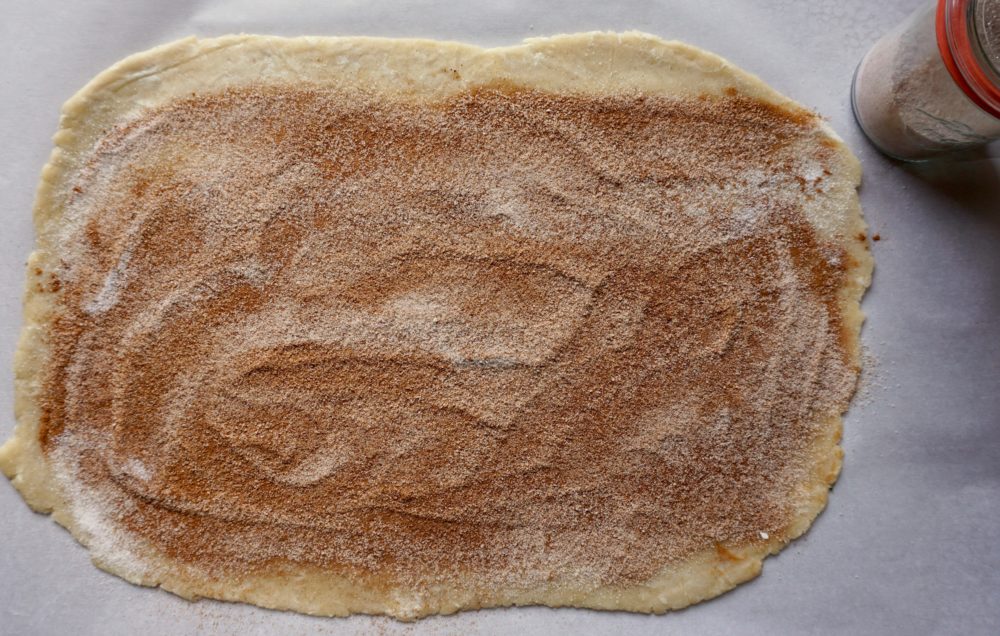
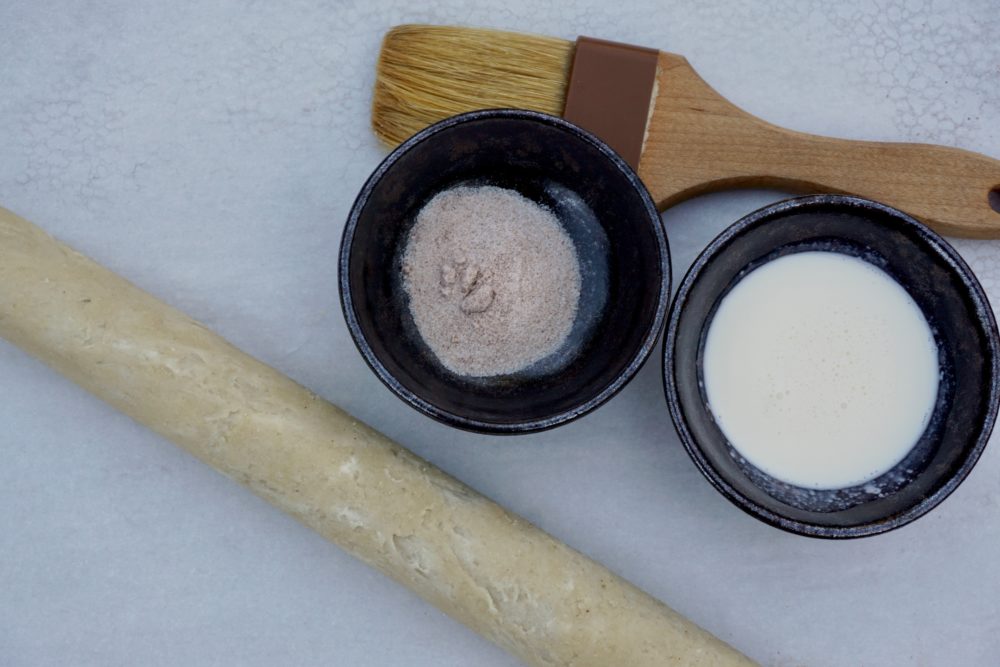
Back to the Tasties. The dough is formed into a rectangle and sprinkled with generous amounts of cinnamon & sugar.  It is then rolled into a log and sliced into 1 inch thick segments.  Sprinkled with more sugar and baked.  So simple, why didn’t I think of that?  I’m already dreaming of the next time I have leftover dough, maybe I’ll add nuts or use  jam instead.

Sprinkle generously with cinnamon sugar, add nuts if you like.


Parchment underneath pastry makes rolling into a log much easier.


Bake on parchment for easier clean-up


Tasties from The Art of the Pie

Ingredients

  • Leftover Pie dough
  • Cinnamon
  • Sugar
  • egg white + 1T water
  • jam
  • finely chopped nuts

Instructions

  • Preheat oven to 425 degrees
  • Gather up extra dough trimmings and smoosh together gently
  • Roll dough on parchment paper into a rectangle approximately 1/8" thick
  • Generously sprinkle dough with sugar leaving a 1/2 inch border along one long side
  • Liberally top sugar with cinnamon (see photo) use a lot of cinnamon don't be shy!
  • Sprinkle finely chopped nuts on this if desired
  • Brush border without cinnamon sugar with a bit of water.
  • Using the parchment paper as a support to roll dough into a log starting with edge opposite of the brushed water border. Like a jelly-roll.
  • Turn log over so that seam side is down to help seal it.
  • Brush roll with egg wash or milk or cream
  • If roll seems soft, chill for 15-30 minutes before cutting.
  • Slice roll into 1 inch pieces and place on parchment lined baking sheet.
  • Bake for approximately 15 minutes until golden brown.
  • Remove from oven and sprinkle with additional granulated sugar.
  • Options: I would like to try using jam instead. Make sure you use parchment for ease of clean up.


An Easy “Egg”cellent Dish (Stir-Fried Tomato and Eggs)

An Easy “Egg”cellent Dish (Stir-Fried Tomato and Eggs)

I grew up running the streets of Chinatown.  My parents had a mom-and-pop business right in the heart of Chinatown on Grant Ave. (Yep, Grant Ave…San Francisco…California…USA made quasi-famous by the musical Flower Drum Song).  There are a gazillion restaurants to eat at or take out, but the trick is knowing where to go for the best of whatever you crave.  The best egg tarts? Golden Gate Bakery. BBQ Pork Buns and dim sum? Yung Kee (sadly gone now), or Good Luck Dim Sum.  Best stuffed rice noodles? Sam Wo. Best fried chicken Wings?  Golden Daisy or Capitol Restaurant.  Call me for the 411.

Down Home, My Home, Chinatown

My favorite down-home dishes were and are found in the quirky little hole-in-the-wall places.  Many of these joints are a fusion of Asian and American food-you will find beef stew, apple pie, stir-fried beef with bitter greens, and wonton soup all on the same menu.  I love going to Kam Po next to the Broadway Tunnel where rice plates are a mainstay.  A mountain of rice covered with crispy roast duck or soy sauce chicken with a side of stir-fried garlicky greens, my go-to quick meal.

A couple of weeks ago I was perusing the NYT cooking site and a recipe for stir-fried tomatoes and eggs by Francis Lam caught my eye.  This immediately transported me back to my days in Chinatown.  This Cantonese soul food dish is quick, simple, and perfect after a long day at work and slow commute home.

As soon as you walk in the door make a pot of rice.  This will be the rate-limiting step of the entire meal.  In fact, you will have a couple of minutes to kick back and relax before starting on the eggs.  Yes, it’s that easy.

A little music to cook by, Grant Ave. from Flower Drum Song- Pat Suzuki and Ensemble

Quick stir fry, do not overcook, keep em’ runny! Eggs will be added to the tomato mixture.

The eggs are flavored with sesame oil and salt and then whisked lightly so that there are still streaks of egg white left. For fluffier (technical term) uniform color eggs, whisk them thoroughly.  Scramble eggs quickly until barely set and remove from heat and pour into a dish.  Stir fry the tomatoes to the desired doneness.  Add the eggs to the tomatoes and cook just long enough to stir the tomatoes and eggs together.

That’s It.

A word of caution, I am THAT person who orders scrambled eggs, very soft and runny.  In fact, the runnier the better, so cook the eggs to your taste.  Scoop steaming hot rice into a bowl or on a plate, top with the tomato-egg mixture and garnish with green onions.  Turn on the tube, plop yourself down on the couch and watch your favorite reruns while you gobble up your eggs and rice.  You deserve it, there’s nothing better.

If you need protein, throw in bite-sized pieces of chicken, beef, or shrimp while cooking the green onions. I had a bit of ground beef left, so in it went.  Don’t have green onions?  Use thinly sliced yellow or red onions.

Stir Fried Eggs and Tomatoes

Down home Cantonese Dish
Course Main Course, One dish meals
Cuisine Asian
Keyword egg, scrambled, tomatoes
Prep Time 15 minutes
Cook Time 5 minutes
Servings 4 servings

Ingredients

From New York Times Cooking Francis Lam

  • 4 tablespoons vegetable oil

Eggs

  • 6 eggs
  • 1 tsp Kosher salt or 1/2 teaspoon sea salt
  • ½ teaspoon sesame oil
  • 1 tablespoon Shaoxing rice wine or dry sherry
  • 2-3 scallions sliced, reserve 1/3 of green portion for garnish

Tomatoes

  • 1 pound beefsteak tomatoes in season, any juicy tomato would work or 1 14.5-ounce can of diced tomatoes in juice-DON'T EVEN-its here because its in the original recipe-bleah
  • 1 teaspoon minced ginger from about 1/4-inch nub

Sauce

  • 1 teaspoon cornstarch
  • 1 teaspoon sugar can subtitute light brown sugar
  • 2 tablespoons ketchup YES, ketchup
  • 2 tablespoons water or stock (chicken or veggie stock will work)

To Serve

  • Steamed rice for serving

Instructions

  • In a bowl, beat the eggs with 1 teaspoon salt, sesame oil and rice wine or sherry.
  • In a small bowl, stir together the cornstarch and 2 tablespoons water until well combined, then stir in the sugar (can substitute brown sugar) and ketchup.
  • Core and cut tomatoes into 1/2-inch wide wedges.
  • Heat a wide nonstick skillet over high heat with 2-3 tablespoons of vegetable oil. When the oil shimmers, add most of the scallions, saving some to garnish. If adding protein or another vegetable, add now. Cook, stirring, until very aromatic, about 20 seconds.
  • Add the eggs, and cook, stirring well with a spatula or chopsticks, until just set but still runny, about 45 seconds.
  • Remove eggs to a plate and wipe out the pan.
  • Reheat the pan over high heat with the remaining tablespoon of oil. When it is hot, add the ginger and cook until aromatic, about 15 seconds. Add the tomatoes and salt to taste; cook, stirring occasionally, until the flesh has softened but still has some shape and the juices have begun to form a sauce, 2-3 minutes. (If using canned tomatoes, add the juice as well and cook about 4 minutes, to reduce it to a saucelike consistency.)
  • Reduce the heat to medium. Give the cornstarch-ketchup mixture a stir in its bowl, then stir it into the pan. Cook, stirring, until the sauce returns to a boil and thickens. Taste and adjust seasoning with salt, sugar or more ketchup — you want a savory, tart-sweet sauce. Stir the eggs in the bowl to cut up the curds a bit, then return them to the pan. Cook, stirring, for a few seconds to finish cooking the eggs and to combine. Top with the reserved scallions, and serve with steamed rice.