Category: Quick & Easy

Easy Dishes

(Grilled Peppers and Torn Mozzarella Panzanella) Smittened Again

(Grilled Peppers and Torn Mozzarella Panzanella) Smittened Again

This past weekend we had dinner with our “Gourmet Club”. A group of us, 5 couples, started the club when our kids were in preschool. It was a way of committing to a grown-up event, enjoying a nice meal and great conversation, sans kids, balloons, and crayons.
Initially, our goal was once a month, and we would each take a turn at hosting. The host picked the menu and made the main dish. The other couples provided the rest.

Well, with baseball, hockey, soccer practices, piano lessons, homework, not to mention work…monthly became every couple of months.  As the kids went in different directions, so did we, and our dinners became much more sporadic. The old adage, time flies rings true. It has been at least 8 years since our last get-together 🤦🏻‍♀️. Our kids are now all in their twenties…I gotta chew on that for a minute, so it was time to have another dinner. We were long overdue.

Good Food, Great Friends

We talked, laughed, bragged, and complained about our kids, parent’s prerogative. We drank way too many Mai Tais and ate way too much food. Besides Glen’s traditional toast, the best part of the evening was just being together again and enjoying each other’s company.

The days of “gourmet” meals are long gone, perhaps a reflection of where we are in our lives now, the food is unfussy, delicious, and comforting.  We were such blowhards back in the day, now, if we want a fancy-schmancy meal, we’re going out.  Casual is probably not quite accurate as our buffet included a platter of warm Roasted Cauliflower with a Raisin Caper Sauce from Serious Eats, a classic Greek Salad of garden tomatoes, cucumbers, feta, and onions, and a delicious stuffed pork roast.

I know, y’all are thinking, ok Deb…What did you bring to the table?
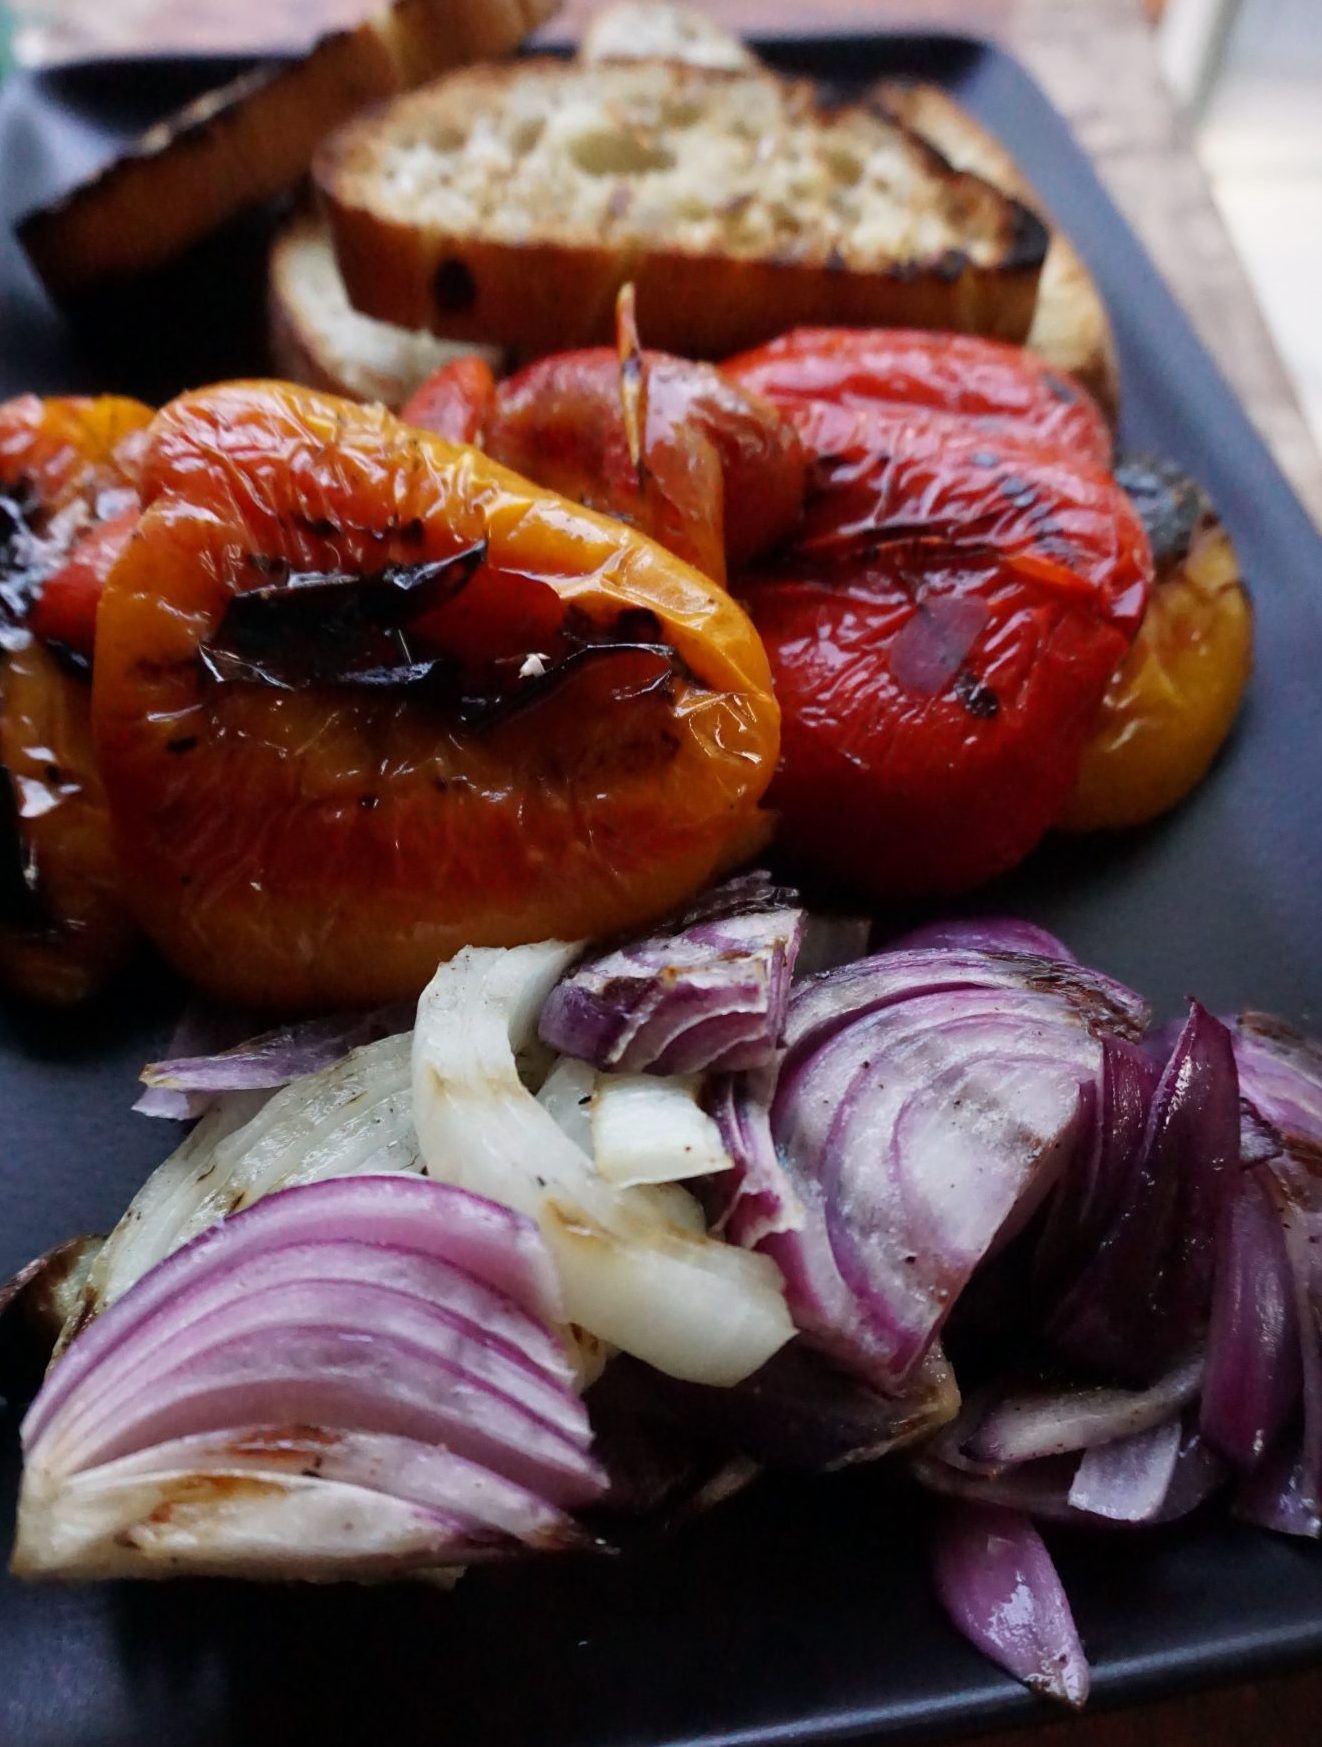
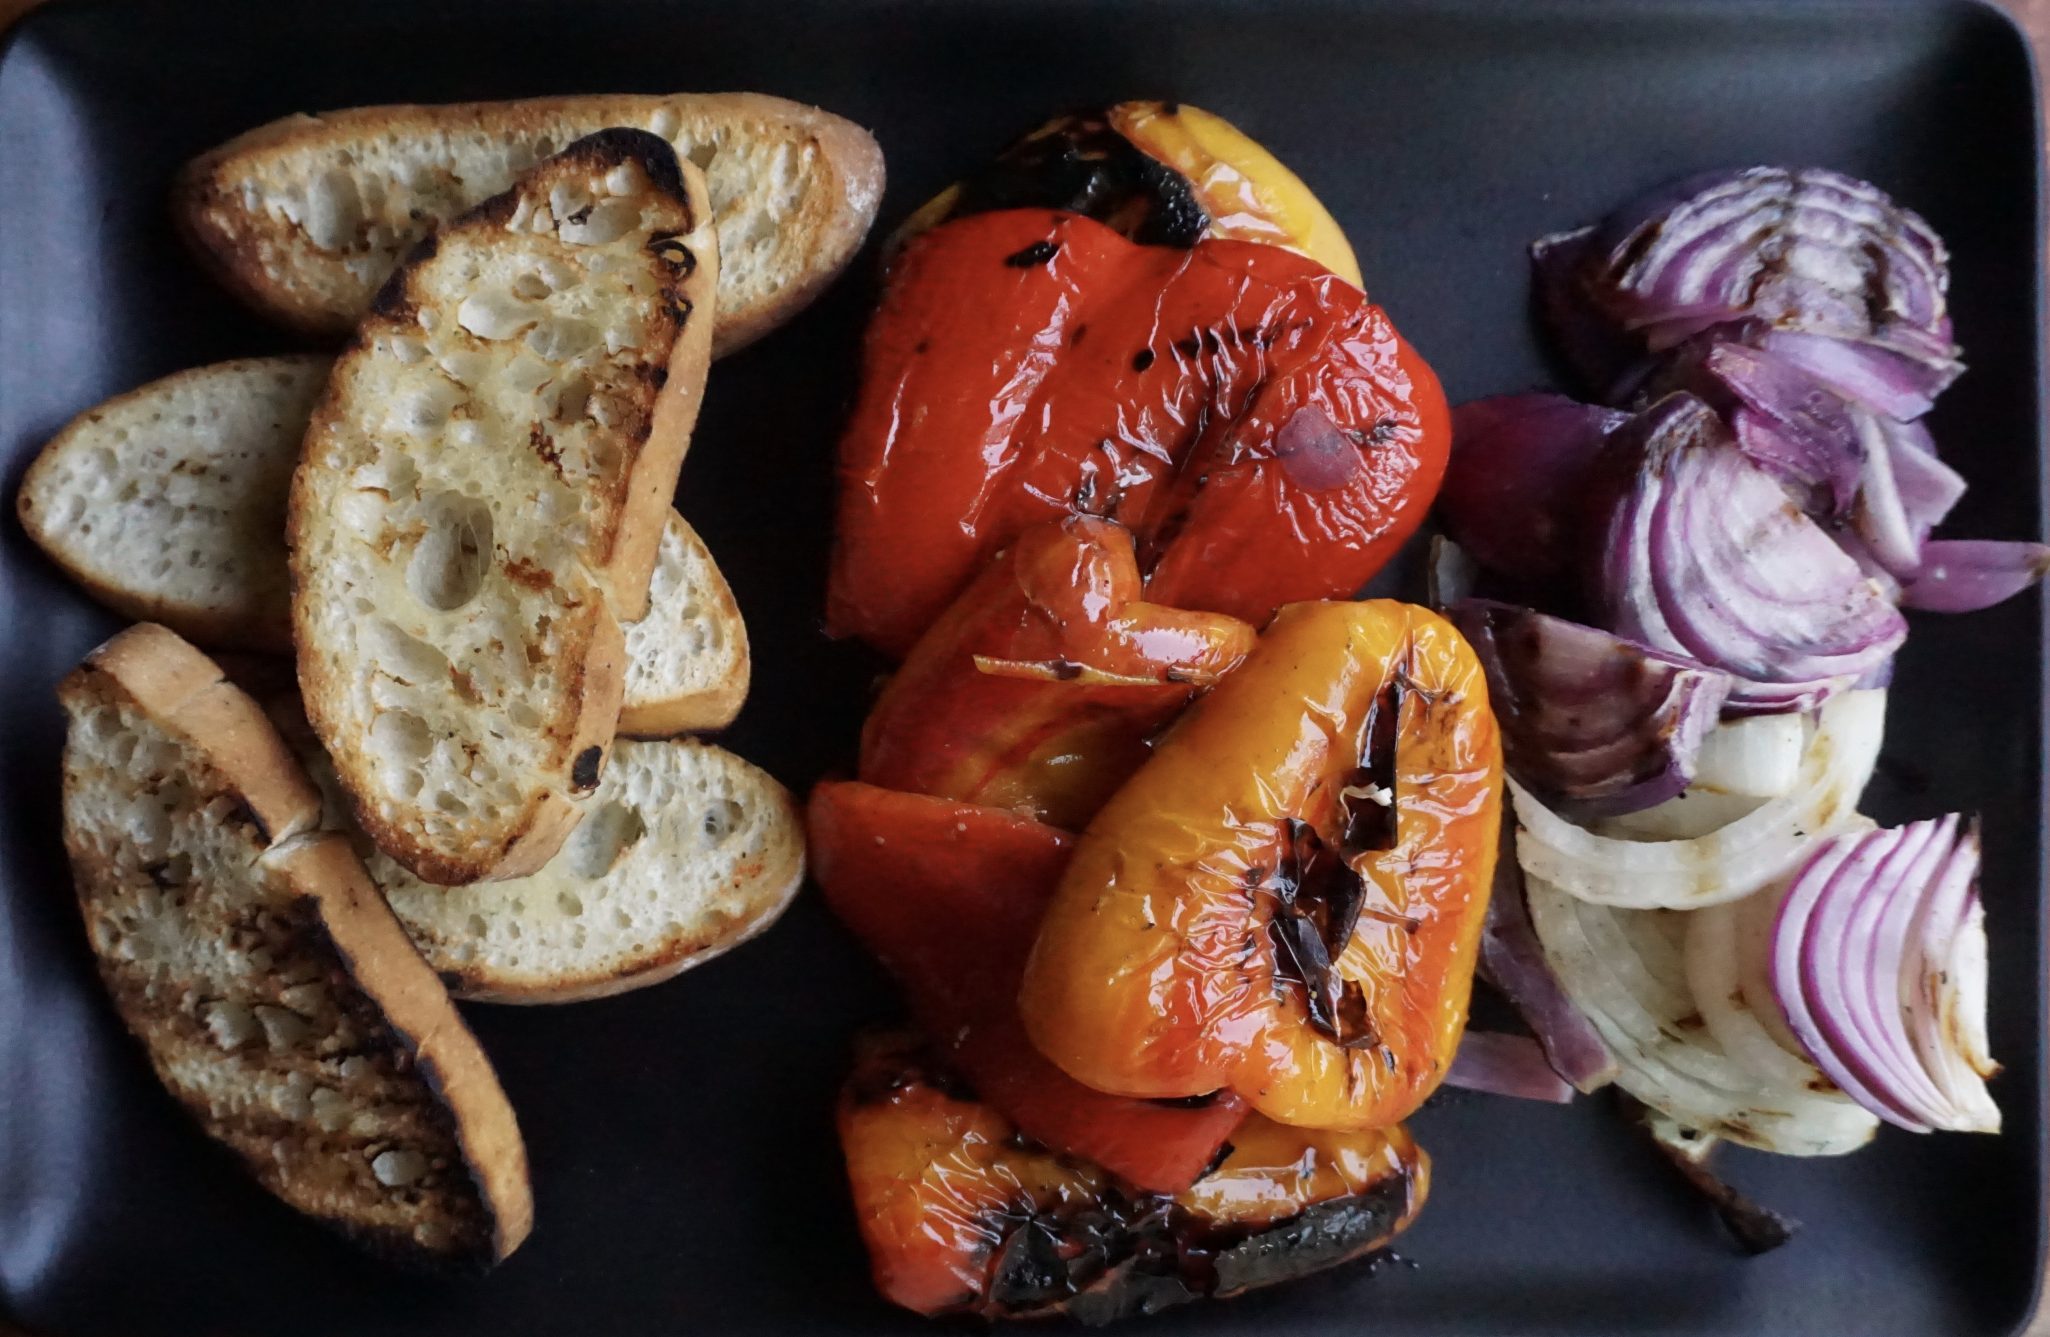
Grilled peppers and onions

As I was looking for inspiration, a mouthwatering Grilled Peppers and Torn Mozzarella Panzanella popped up on my feed from Smitten Kitchen.  Deb Perelman rocks.  Maybe it’s a Deb connection, but this isn’t the first time a Smitten Kitchen recipe has popped up when I needed something delicious.

This dish couldn’t be easier. Why?  Peppers, red onions, and a nice crusty bread are tossed in garlic, oil and GRILLED and…yay for me, hubby does ALL the GRILLING in our house. Yep. I prepped the veggies and bread and handed them off to Wes. Just like magic, while I was eating Bon Bons (jk), they came back perfectly grilled.  Call it the grillin’ and chillin’ method.  He grills while I chill-perfect!  All I had to do was make a simple vinaigrette, let the peppers soften, tear up the bread and mozzarella, and toss it all in a bowl with the dressing, fini, and Panzanella ready to go.  So good, so easy.  Folks, you need to file this under “so gonna make this”.
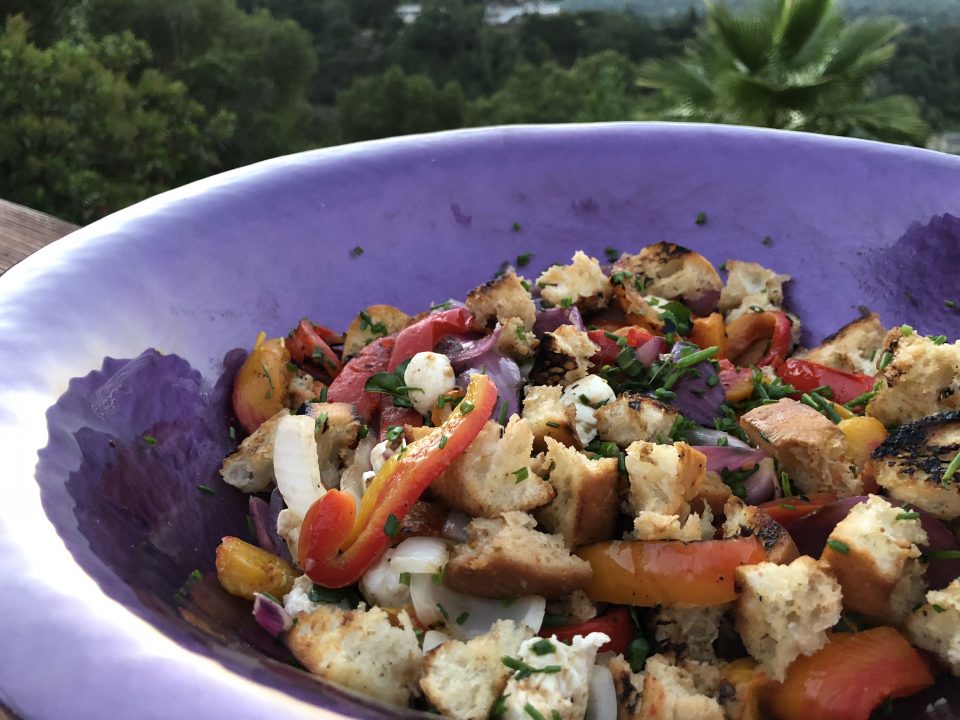
Grilled Peppers and Torn Mozzarella Panzanella

Course Salad
Cuisine Italian
Keyword Panzanella
Prep Time 20 minutes
Cook Time 20 minutes
Total Time 40 minutes
Servings 6 people

Ingredients

Hubby's Part:

  • 4 1- inch slices bread country-style
  • 3 large red bell peppers halved, seeds removed
  • 1 medium red onion peeled and cut into 1/2-inch wedges
  • 3 tablespoons olive oil
  • Kosher salt and freshly ground black pepper

My Part:

  • 2 tablespoons sherry vinegar
  • 1 garlic clove minced
  • 1/2 teaspoon sugar
  • 1 tablespoon olive oil
  • 1 tablespoons capers drained (rinsed if salted)
  • 4 ounces mozzarella torn into bite-sized pieces, or 4 ounces bocconcini
  • Fresh herbs — snipped chives basil, or parsley or a mix thereof — to finish (optional)

Instructions

  • First Part is Mine: Place bread, pepper halves, and onion wedges in a large bowl and drizzle with 3 tablespoons olive oil, then sprinkle 1 teaspoon kosher salt and many grinds (or about 1/4 teaspoon) black pepper. Use your hands to toss everything together until oil coats everything.
  • Part I Get to Ignore: Heat your grill to medium-high. Spread peppers and onions across grill grates and grill, lid down, flipping as needed until onions are charred in spots (they’ll be done first) and peppers are blistered and blackened in many spots and beginning to soften. Transfer onions to a plate as they’re done; transfer peppers to a bowl. Use bread in bowl to swipe up any excess salt, pepper, and/or oil in it and place slices on grill. Grill until toasted on both sides. Transfer to plate with onions.
  • Back to Me: Place foil or a lid over peppers in bowl to trap heat. Once they’re cool enough to handle, remove as much of the skin as you can. Cut peppers into 1/2- to 1-inch wide strips.
  • In the bottom of a large bowl, whisk together sherry vinegar, remaining 1 tablespoon olive oil, sugar, about 1/4 teaspoon kosher salt (and more to taste), and garlic. Add capers. Add peppers to the bowl and let them marinate for as little as 5 minutes or up to a day, even. The longer they souse, the more pickled they’ll taste. After 5 minutes, however, they still have plenty of flavor.
  • To assemble and serve: Right before you’re ready to serve the salad, add onions to the bowl with the peppers. Tear bread into chunks and add to bowl, along with mozzarella. Mix gently, making sure the dressing coats the bread. Taste and add more seasoning if needed. Finish with basil and chives.
Blueberry Avocado Spinach Salad (It’s Gettin Hot In Here, So Take Out All Your Salad Greens)

Blueberry Avocado Spinach Salad (It’s Gettin Hot In Here, So Take Out All Your Salad Greens)

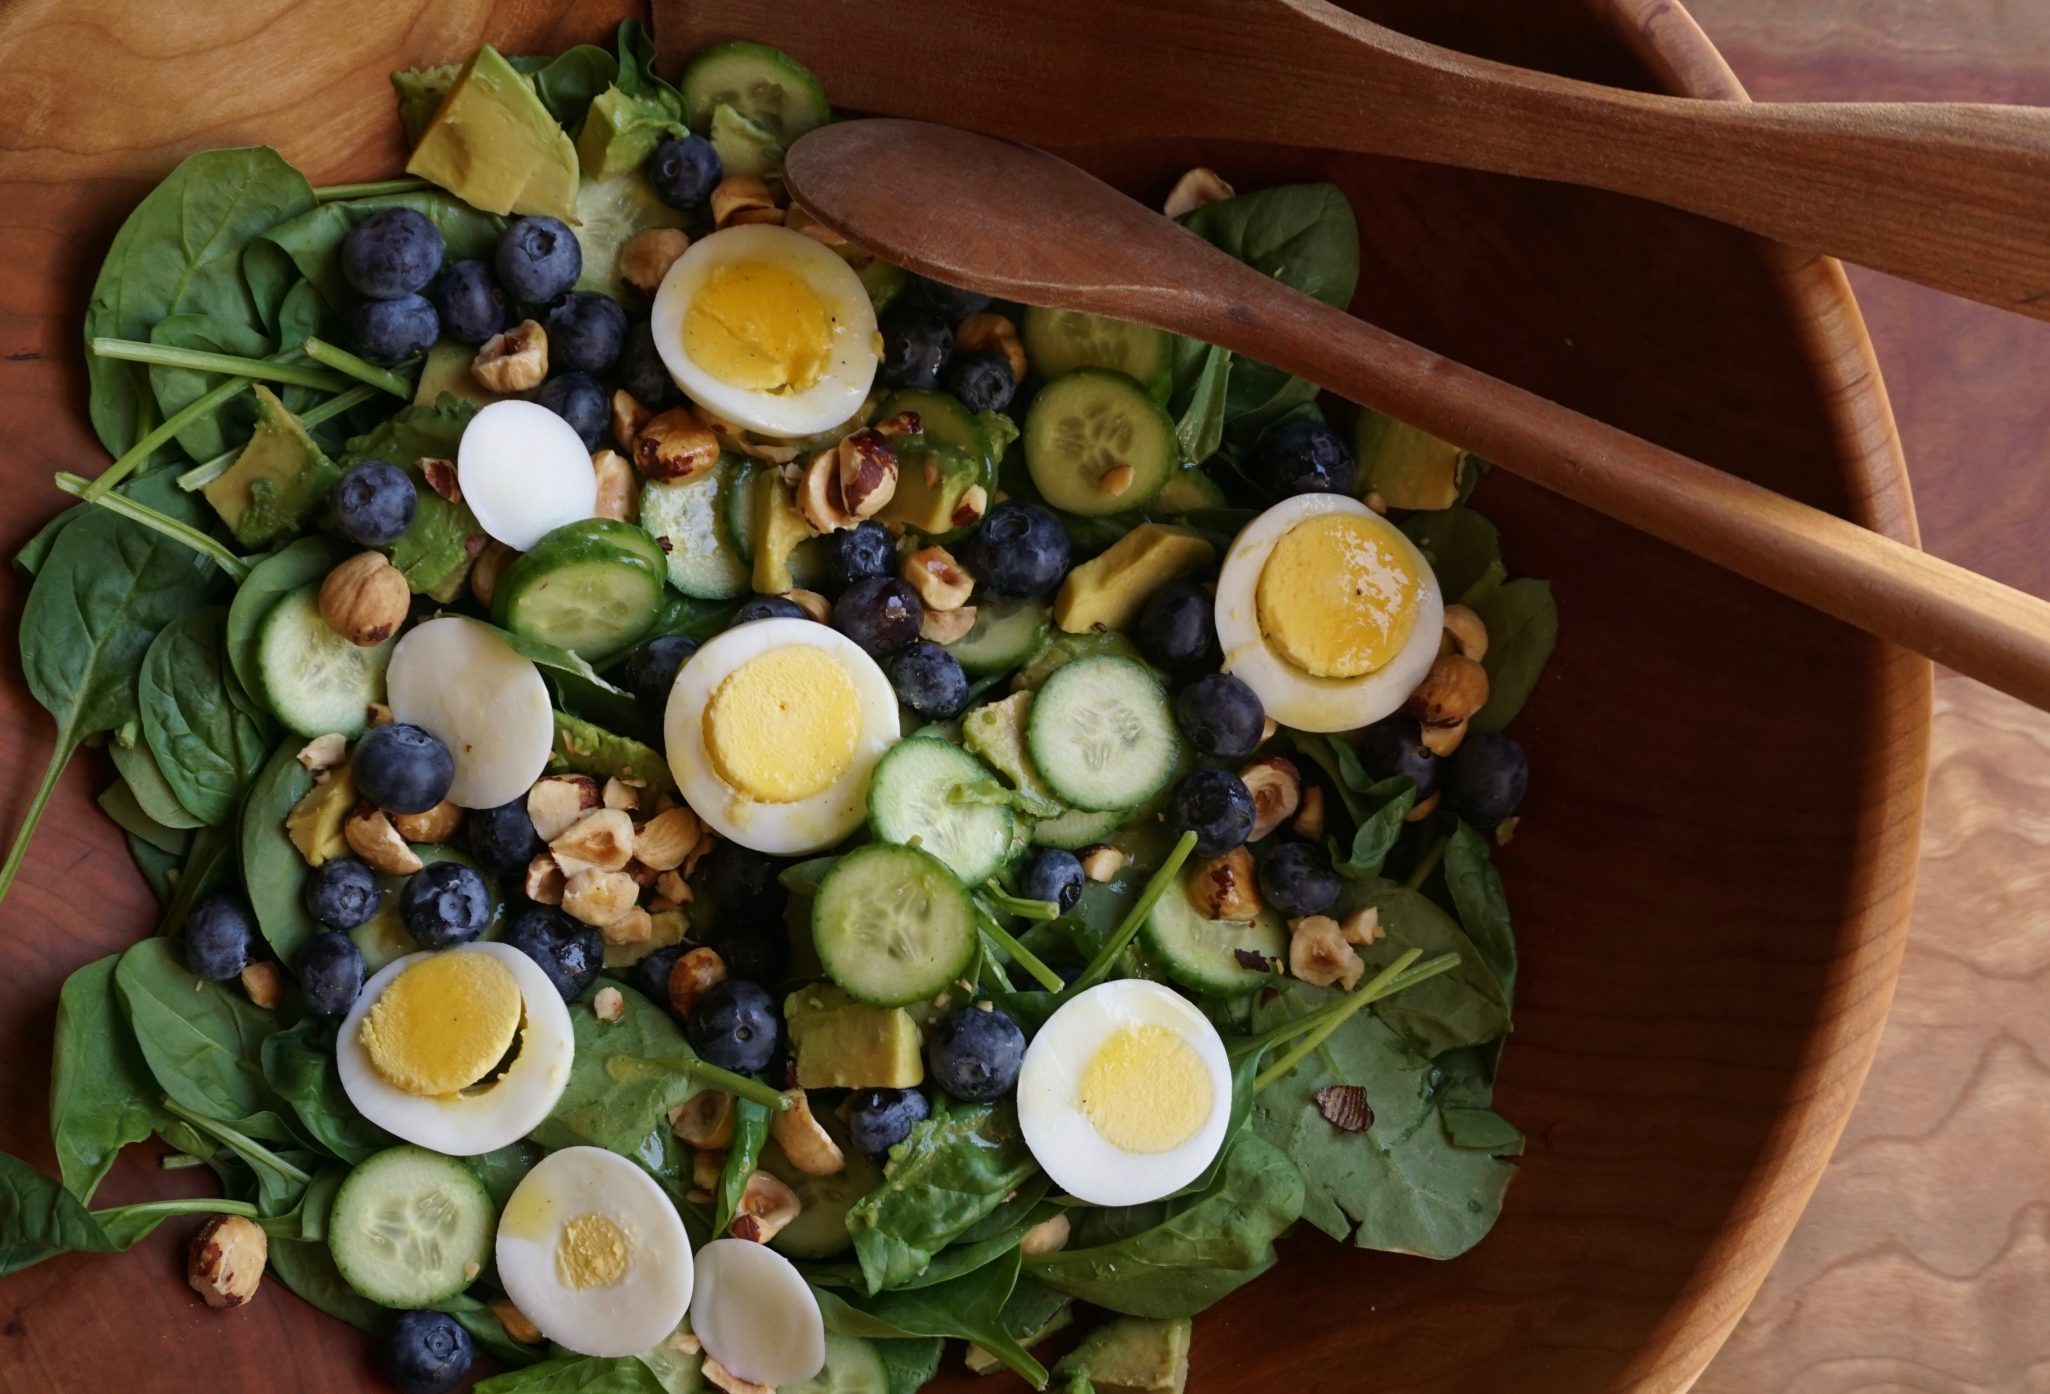
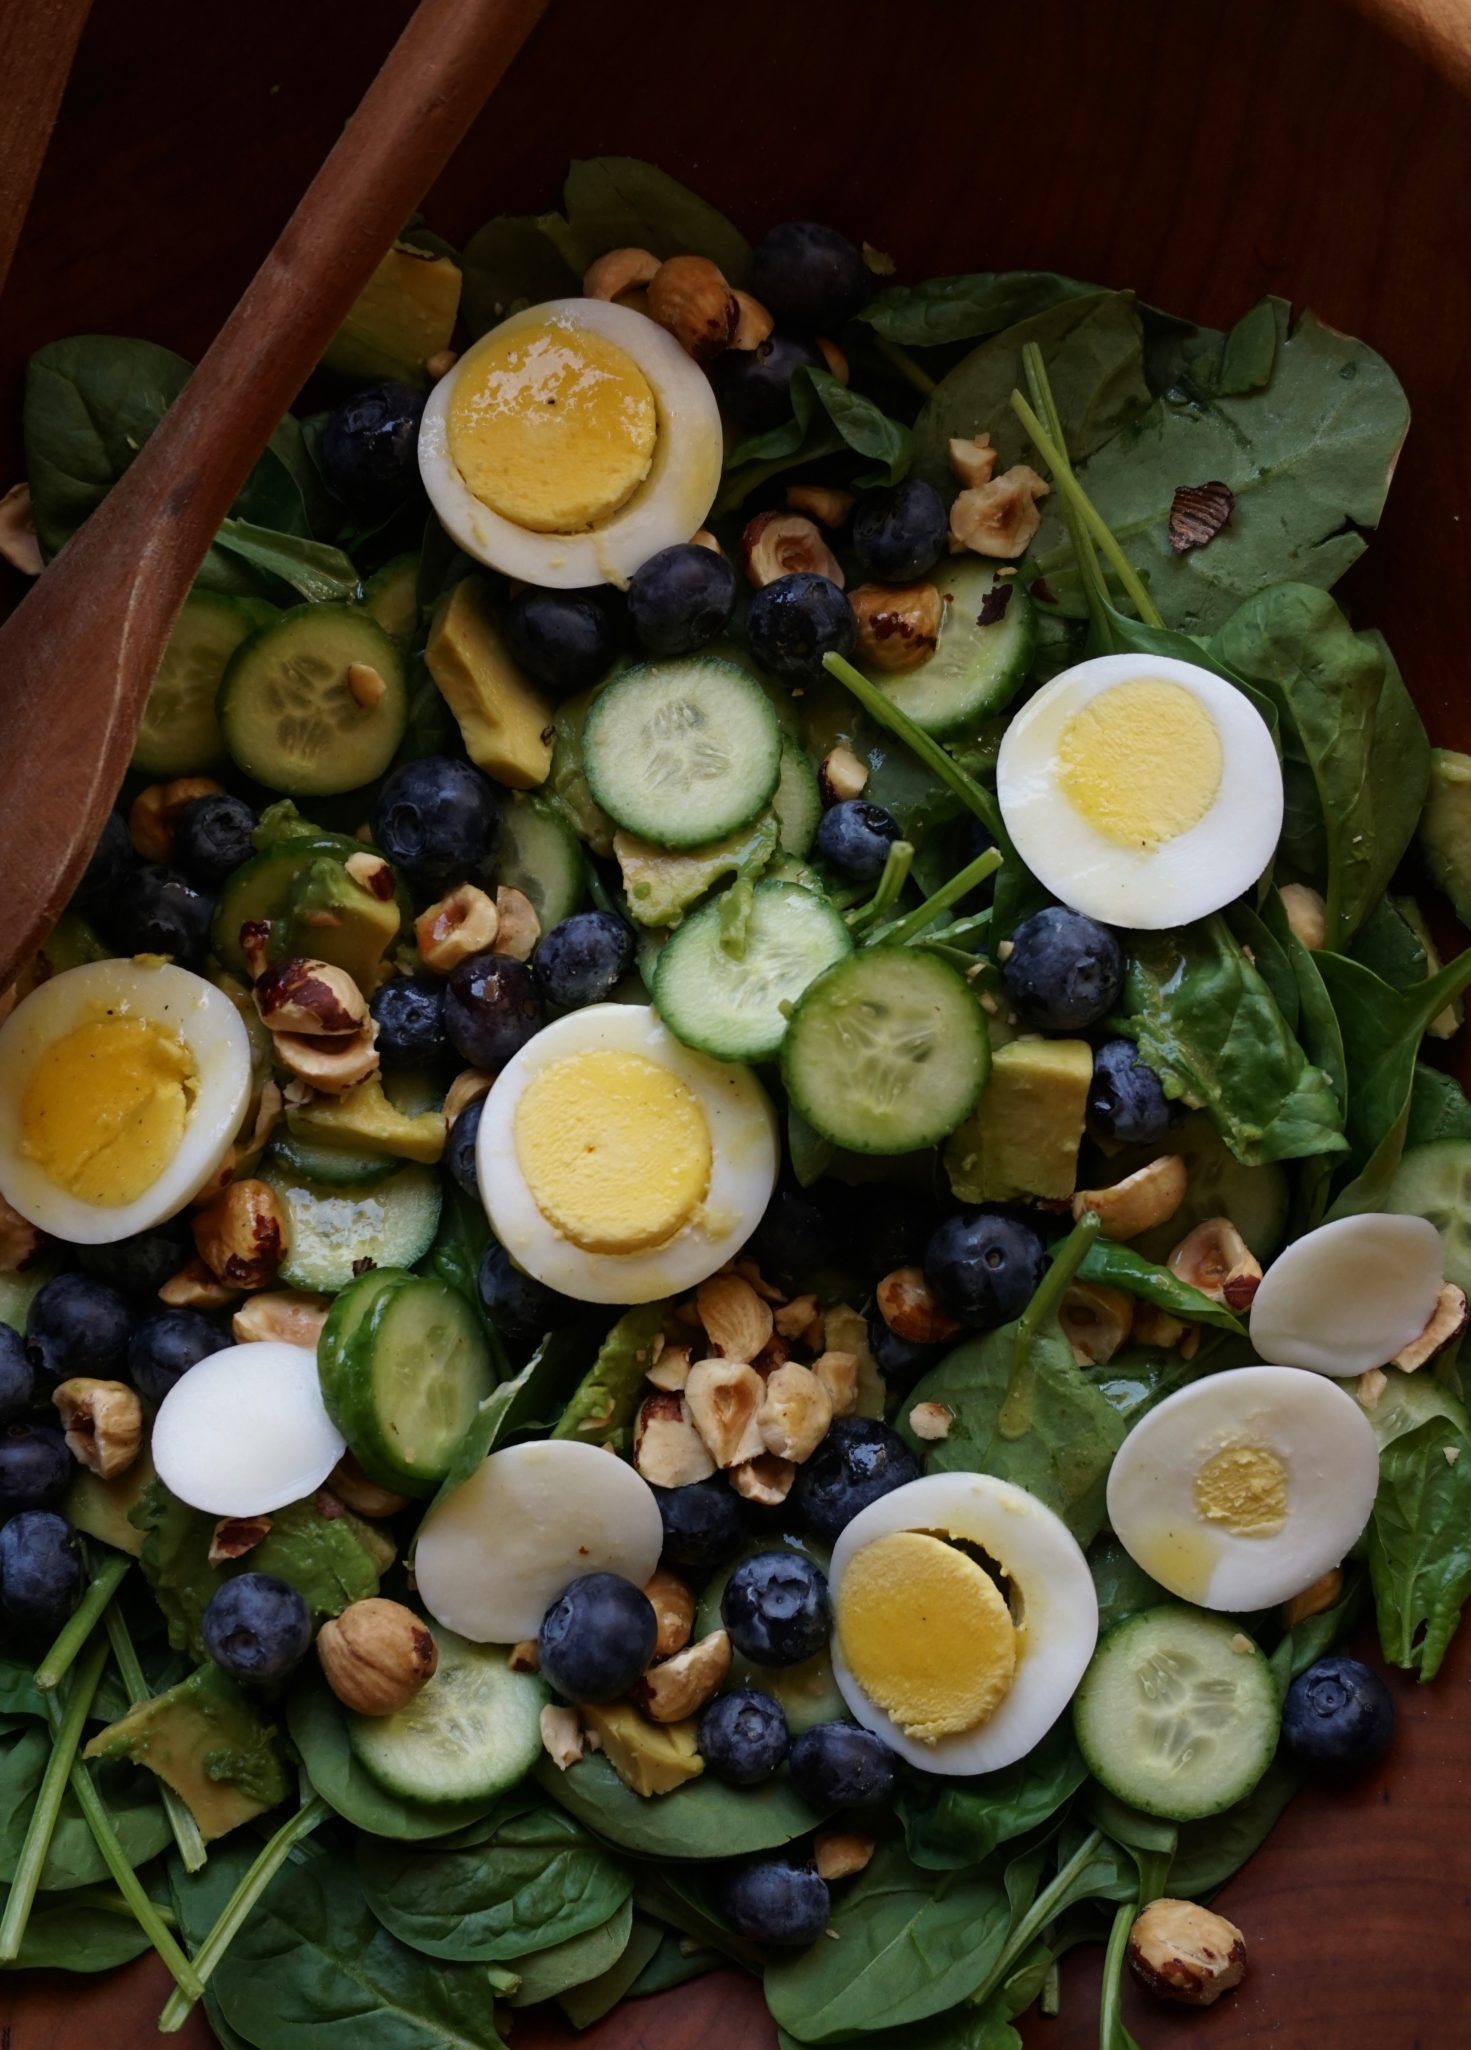
Woohoo, it is going to get really hot this weekend! When the temperature hits 3 digits it’s time to get out of the kitchen as fast as you can. Time for al fresco dining-cool, refreshing salads, sweet and juicy summer fruits along with an array of cheeses. A pitcher of thirst quenching Sangria…just maybe we can get through this heatwave.  I found a tasty and eye-catching salad from Over Easy by Joy the Baker (latest book and amazing blog) that I love. It’s my salad of the season, specifically, blueberry season, Blueberry Avocado Spinach Salad. The list of star-studded ingredients includes toasted hazelnuts, blueberries, avocados, and cucumbers. Dressed with a sweet, slightly tart dressing, it reminds me of the classic Spinach Salad with Poppy Seed Dressing from back in the day, it’s dee-licious.

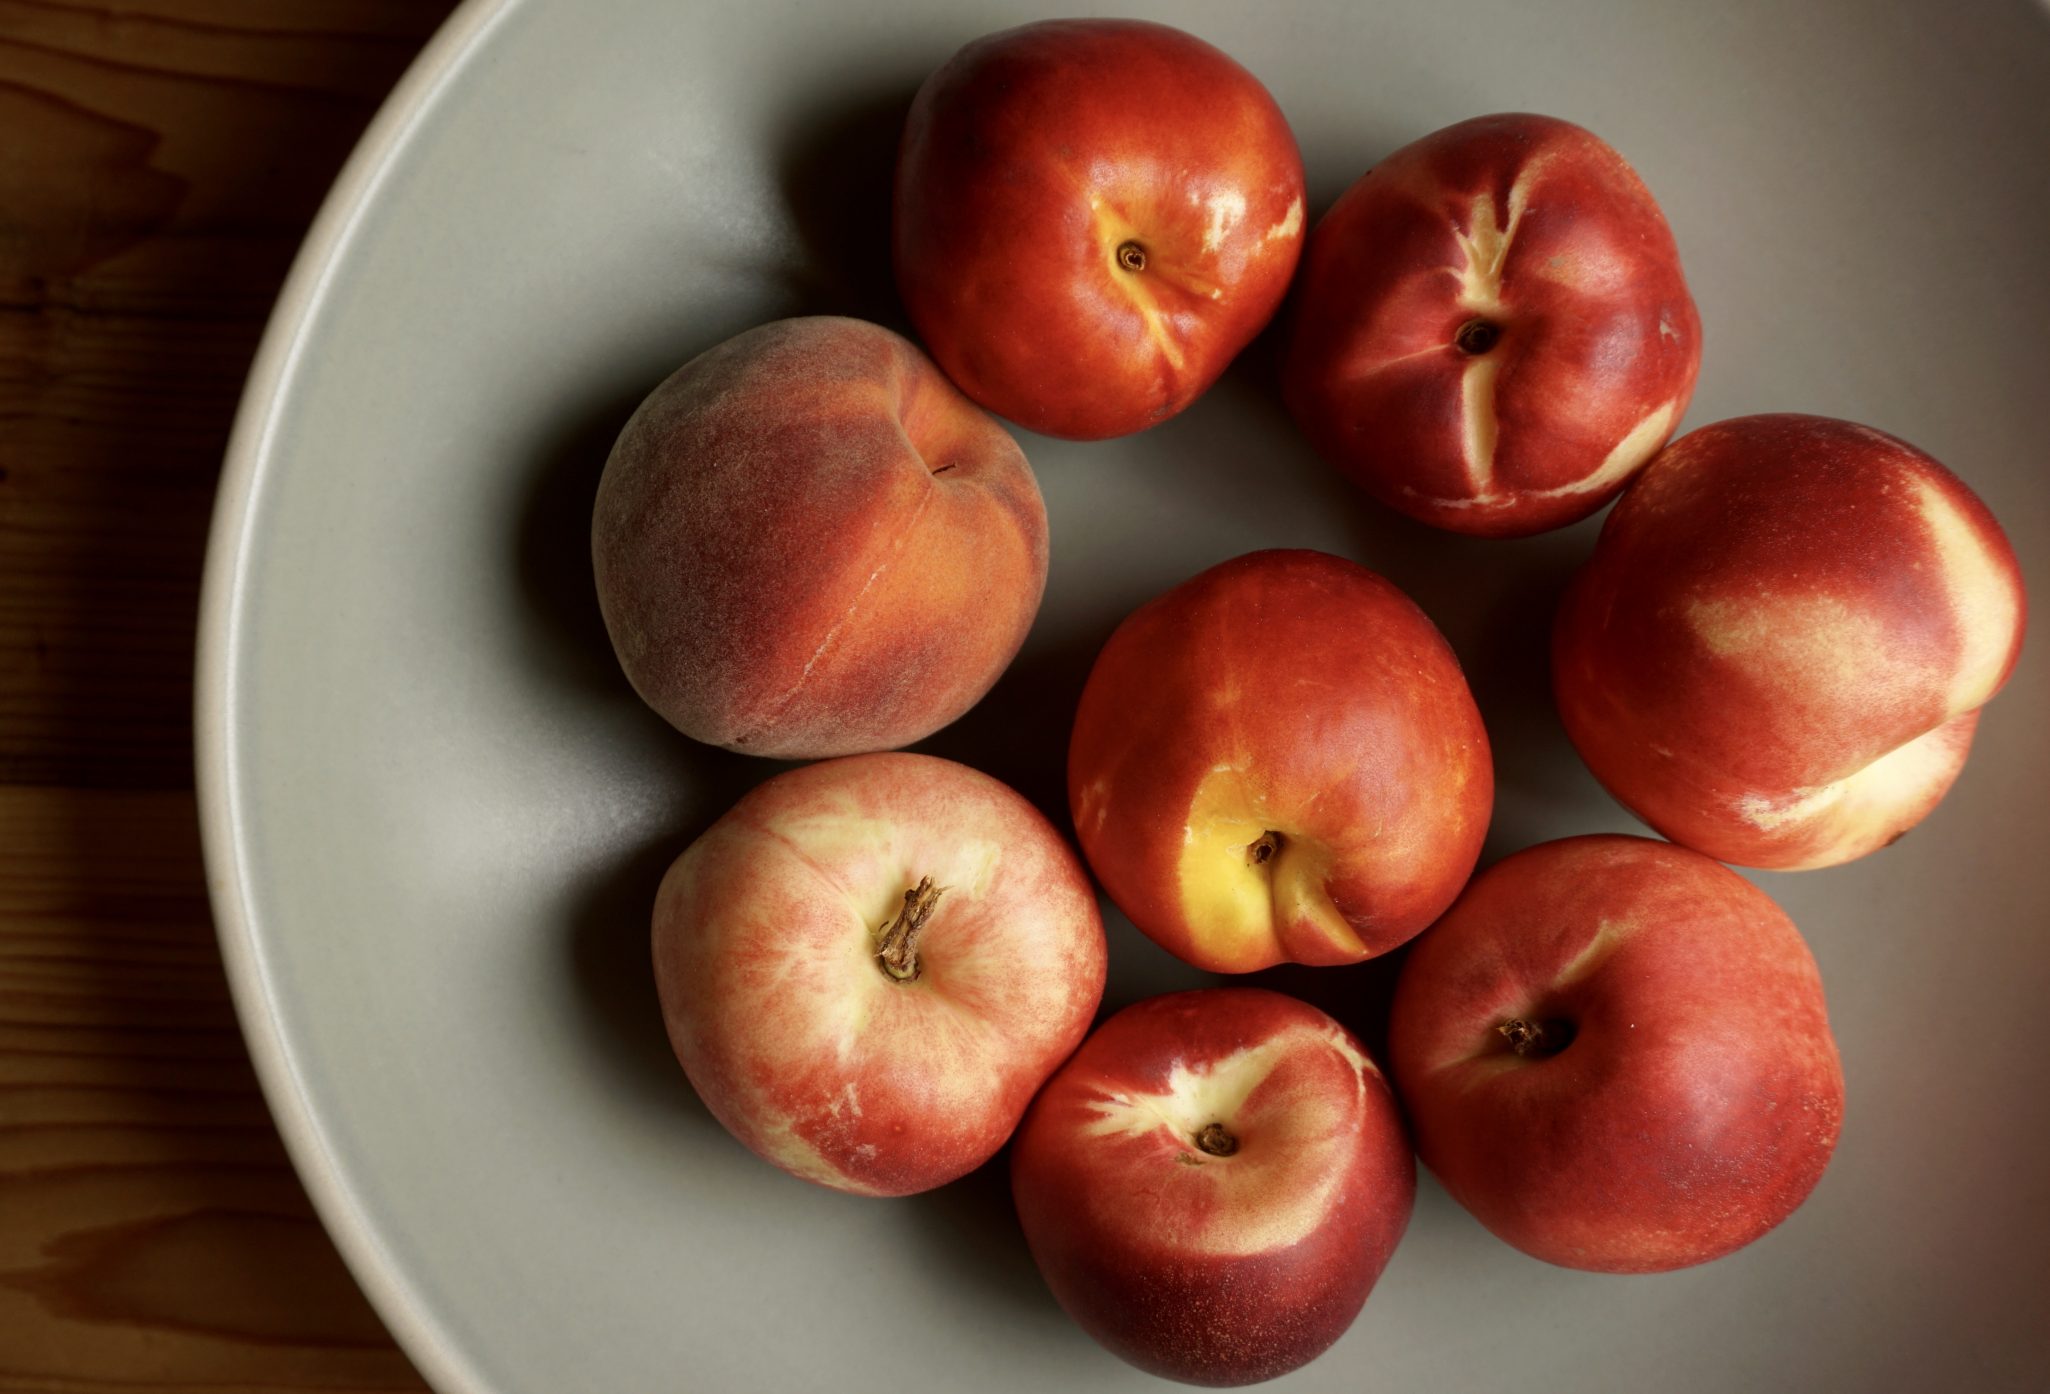
Get to the farmer’s market now and pick up sweet, juicy peaches and nectarines along with your salad fixins!

I have gone crazy with this salad with additional yummies like pancetta “cracklins” or crispy bacon bits, thinly sliced red onions for some bite, or sliced hard-boiled eggs for protein, YUM.  The toasted hazelnuts have no substitute, their crunch and flavor are hard to beat in this salad and they go so well with blueberries, like Fred and Ginger.

The dressing is easy and quick.  Start with a squeeze of lemon juice, a dollop of dijon mustard, glop of honey and whisk in some EVOO.  Alternative easy method: throw it all in a bottle and shake, shake shake. Season with salt and pepper to taste and that’s it.  You don’t need no stinkin’ supermarket bottle stuff, nope.

This is a lovely salad, I hope you will try it. Share it with friends and family.

Blueberry Avocado Spinach Salad

Blueberry Avocado Spinach Salad

Perfect during blueberry season, a spinach salad with avocado, slices of hard-boiled egg and hazelnuts all of which compliments blueberries dressed with honey mustard dressing.
Course dinner, first course, lunch, Salad
Cuisine American
Keyword avocado, blueberry, Caesar Salad, hazelnuts, honey mustard dressing, spinach
Prep Time 15 minutes
Cook Time 15 minutes
Total Time 30 minutes

Ingredients

The Dressing

  • 2 tbsp Honey
  • 1 tbsp. Dijon mustard
  • ¼ tsp. sea salt
  • ¼ tsp. black pepper
  • 4 tbsp. fresh lemon juice
  • ¼ cup olive oil

The Fixings

  • 6 cups Baby spinach (generous cups) washed, rinsed and dried
  • 1 cup fresh blueberries
  • 1 cup English or Persian cucumber thinly sliced
  • 1/3 cup toasted hazelnuts coarsely chopped
  • 1 ripe avocado thinly sliced
  • 1-2 hard-boiled eggs sliced

Instructions

  • Whisk together honey, mustard, salt and pepper in a small bowl. Whisk in lemon juice. Add olive oil in a slow, steady stream, whisking constantly, until mixture is emulsified and thick. Taste, and season with additional salt and pepper as desired.
  • Toss together spinach, blueberries, cucumber and 1/2 of the hazelnuts in a large bowl. Drizzle dressing over the salad, and toss to combine. Sprinkle with remaining hazelnuts. Top with avocado.

Notes

Optional adds:
2 hard boiled eggs, sliced, Bacon or pancetta bits fried crisp, as little or as much as you like,
1/4 small red onion, thinly sliced, or
2 green onions, sliced


Squash-O-Rama (Zucchini Bread)

Squash-O-Rama (Zucchini Bread)

We returned home from our road trip to Minneapolis to the first zucchini of the season. Yay! Of course by the end of the season I’m not sure I will still be cheering but for now, it is a welcome sight. Grilled and roasted tops the list in our house, BUT you can only roast or grill so many zucchinis.  At the height of the season, we need to expand our repertoire on what the heck to do with all that squash.

1001 Ways to Use Your Squash, just kidding but I do have a couple that will keep you from pulling your hair out and screaming “Noooooo!” at the sight of another green courgette.

Zoodles! Replace a portion of noodles in your favorite pasta dishes with julienned zucchini. This cuts down all those dreaded carb calories and adds flavor and texture to summertime pasta dishes, a WIN-WIN if you ask me. Julienned zucchini ribbons don’t require much cooking,  I toss zoodles in with just-drained pasta.  The heat from the noodles is enough to cook the zucchini. Try this Tomato, Bacon and Arugula Pasta/Zoodle dish, quick, easy and delicious.

From Ottolenghi’s Jerusalem cookbook, a recipe for Turkey Zucchini Burgers can put a dent in any bounty of squash.  Make em’ big and use them for burgers, make em’ small for a perfect happy hour appetizer.

simple zucchini bread

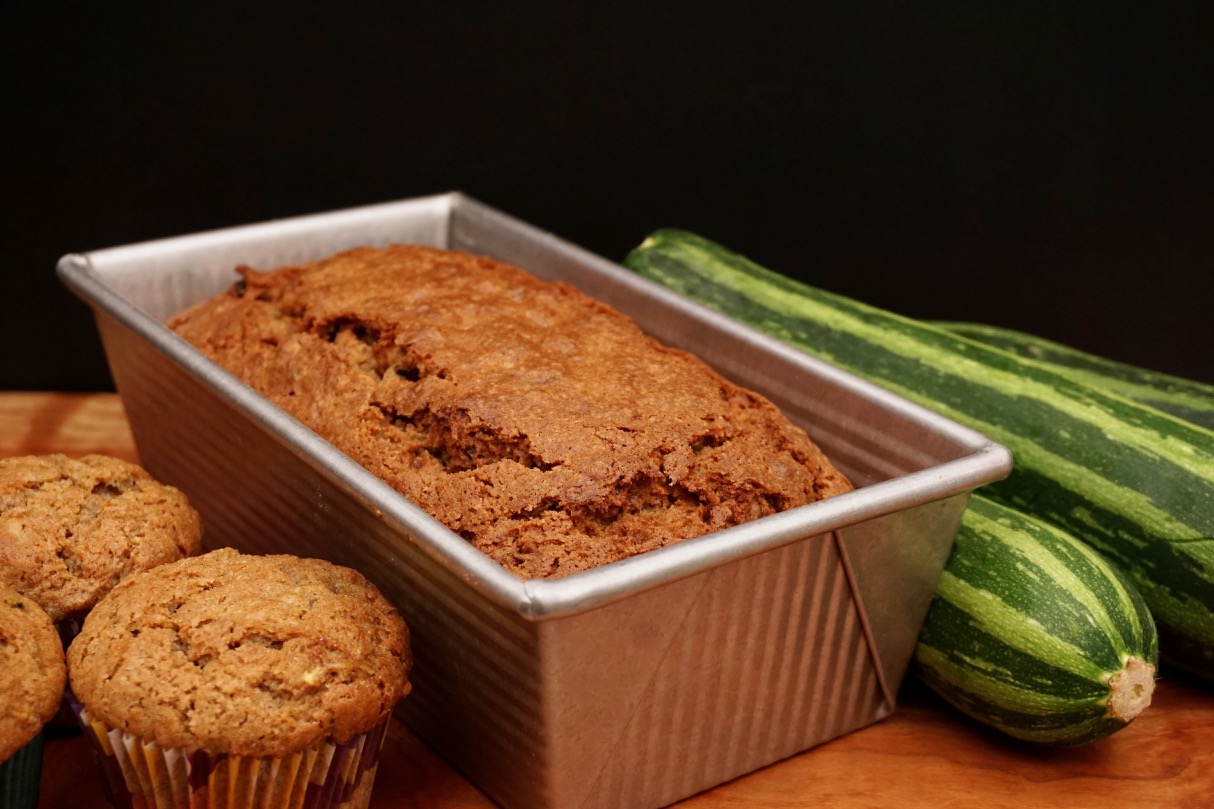
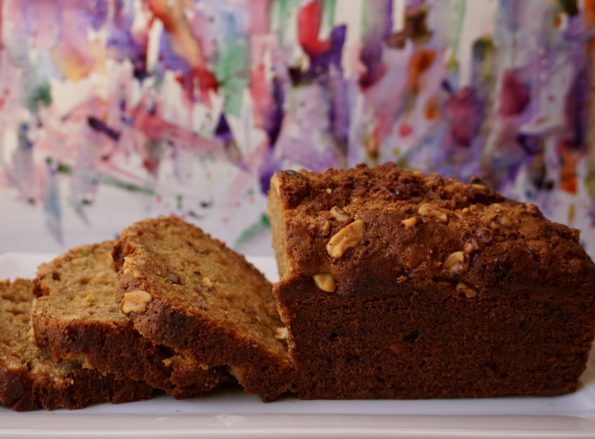
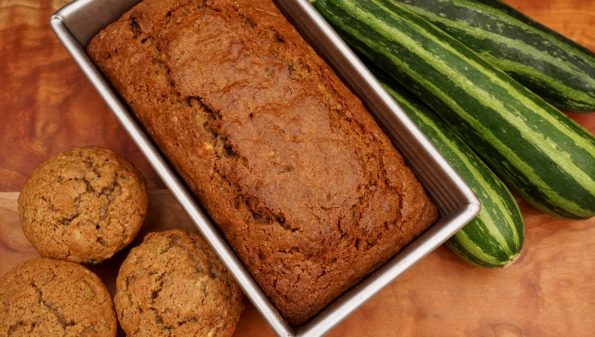
Zucchini bread!!!  When everyone is really tired of eating all that squash, this is the sneaky way to use up your store without your family knowing they are eating MORE zucchini.

There are thousands of zucchini bread recipes out there, not quite rock star banana bread numbers but enough to make your head spin.  I’m going to make it easy for you…King Arthur Flour Zucchini Bread is moist, flavorful and damn delicious.  Lightly spiced with cinnamon, sweetened with brown sugar, and finished with walnuts and golden raisins it’s a winner. Its so easy the title is Simple Zucchini Bread.  You can substitute or add just about anything but the kitchen sink. I didn’t have raisins so I used KA’s Jammy Bits (little fruit flavor bombs), or you could use any dry fruit, like cranberries or apples.  Don’t like walnuts? Use pecans or almonds. Instead of a loaf of bread, make muffins, just remember to decrease the baking time to approximately 20-25 minutes. Whatever you do, keep this recipe in mind the next time you are looking at a bushel of squash and wondering what to do with it.

simple zucchini bread

Simple Zucchini Bread

A delicious, easy quick bread
Course Snack
Cuisine American
Keyword zucchin bread
Prep Time 10 minutes
Cook Time 55 minutes
Total Time 1 hour 5 minutes

Ingredients

  • 3/4 cup brown sugar
  • 2 tablespoons boiled cider apple juice, orange juice, milk, water, or the liquid of your choice
  • 1/2 cup vegetable oil
  • 2 large eggs
  • 1 teaspoon vanilla extract
  • 1/4 teaspoon baking powder
  • 1/2 teaspoon baking soda
  • 1 teaspoon salt
  • 1 1/2 teaspoons ground cinnamon optional
  • 1 3/4 cups King Arthur Unbleached All-Purpose Flour
  • 2 cups grated or shredded zucchini somewhere between firmly and lightly packed
  • 3/4 cup chopped walnuts toasted until golden
  • 3/4 cup raisins or currants golden raisins preferred
  • 2 tablespoons brown sugar for sprinkling on top optional

Instructions

  • Preheat the oven to 350°F. Lightly grease an 8 1/2" x 4 1/2" loaf pan.
  • In a medium-sized bowl, beat together the brown sugar, boiled cider or other liquid, vegetable oil, eggs, and vanilla until smooth.
  • Whisk the baking powder, baking soda, salt, and cinnamon into the flour, then add the dry ingredients to the liquid ingredients in the bowl, stirring or beating gently until smooth.
  • Stir in the zucchini, walnuts, and raisins or currants.
  • Scoop the batter into the prepared pan, smoothing it if necessary. Sprinkle with brown sugar, if desired.
  • Bake the bread for 55 to 65 minutes, until a toothpick inserted into the center comes out clean. The top (just under the crust) may seem a bit sticky; but so long as the toothpick doesn't reveal wet batter, it's done.
  • Remove the bread from the oven, and cool it in the pan for 10 minutes. Turn it out of the pan onto a rack to cool completely. For best results, don't slice until it's cool.
  • Store the bread at cool room temperature, well wrapped, for several days; freeze for longer storage.

Notes

  • Shredded zucchini varies a lot in weight, depending on the season, the freshness of the vegetable, the fineness of the shred, and how firmly you pack it into the cup. Measure your zucchini by volume in this recipe, not weight; don't fret if your weight doesn't match the weight in the recipe.
  • To toast chopped walnuts, spread them in a single layer in a baking pan, and toast in a preheated 350°F oven for about 6 minutes, or until they're golden brown and smell "toasty.


Grilled Pork #2 Belly up to the Table for Some Delicious Pork and Conversation

Grilled Pork #2 Belly up to the Table for Some Delicious Pork and Conversation

The kids were all home for a couple of days, which is a miracle in itself, so we threw a party! Really, it was to celebrate the twins’ graduation from college (boy that went fast) and the end of tuition days. I polled the kids to see what they wanted for eats, after all, that’s the Asian mom way of saying I love you…” what would you like to eat?” and the response was “anything, Mom”. Ugh, no help.
Maybe I needed a theme? Comfort foods? Where they have been and where they are going? Hmm, that had potential. So I went with it.

Where they have been: Where they are going

Houston, Texas for Jamie….Queso!!! You need munchies at a party so Queso and tortilla chips would be perfect. Besides, she is moving to Minneapolis and cheese is HUGE there too right? Anyone care for some cheese curds?
Nashville, Tennessee for Jordan, hmmm…bbq! To combine it with where Jordan is going, Korea, I decided on Grilled Pork Belly and Khal Bi (marinated Beef cross-cut ribs). I just killed two birds with one stone! I’m a genius, lol.

Spicy Grilled Pork Belly

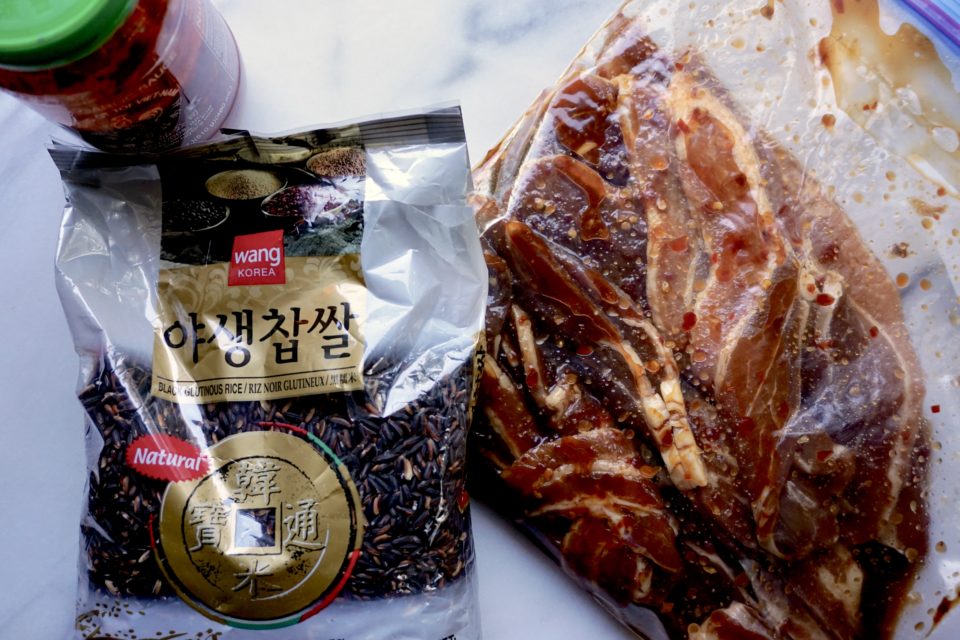
Black Rice and Marinated Pork Belly waiting for the grill to fire up.

The food was casual, friendly, and easy, mostly family favorites.  I pulled out my Somen Salad recipe, perfect for a crowd and the warm weather.  We fired up the grill for the Khal bi (marinated beef ribs) and Spicy Grilled Pork Belly.  Jorge put out the tortilla chips with the Queso Dip, salsa, and Wes’s famous tuna dip.  Bowls of fresh berries from the Farmer’s Market rounded out the menu.  For the grand finale, Jamie made a DELICIOUS banana cake (nooo, forgot to take a photo of it) filled with a chocolate ganache and covered with Cream Cheese Frosting.

We all gathered around the table to eat, gab, laugh and enjoy each other’s company. Isn’t that what it is all about?

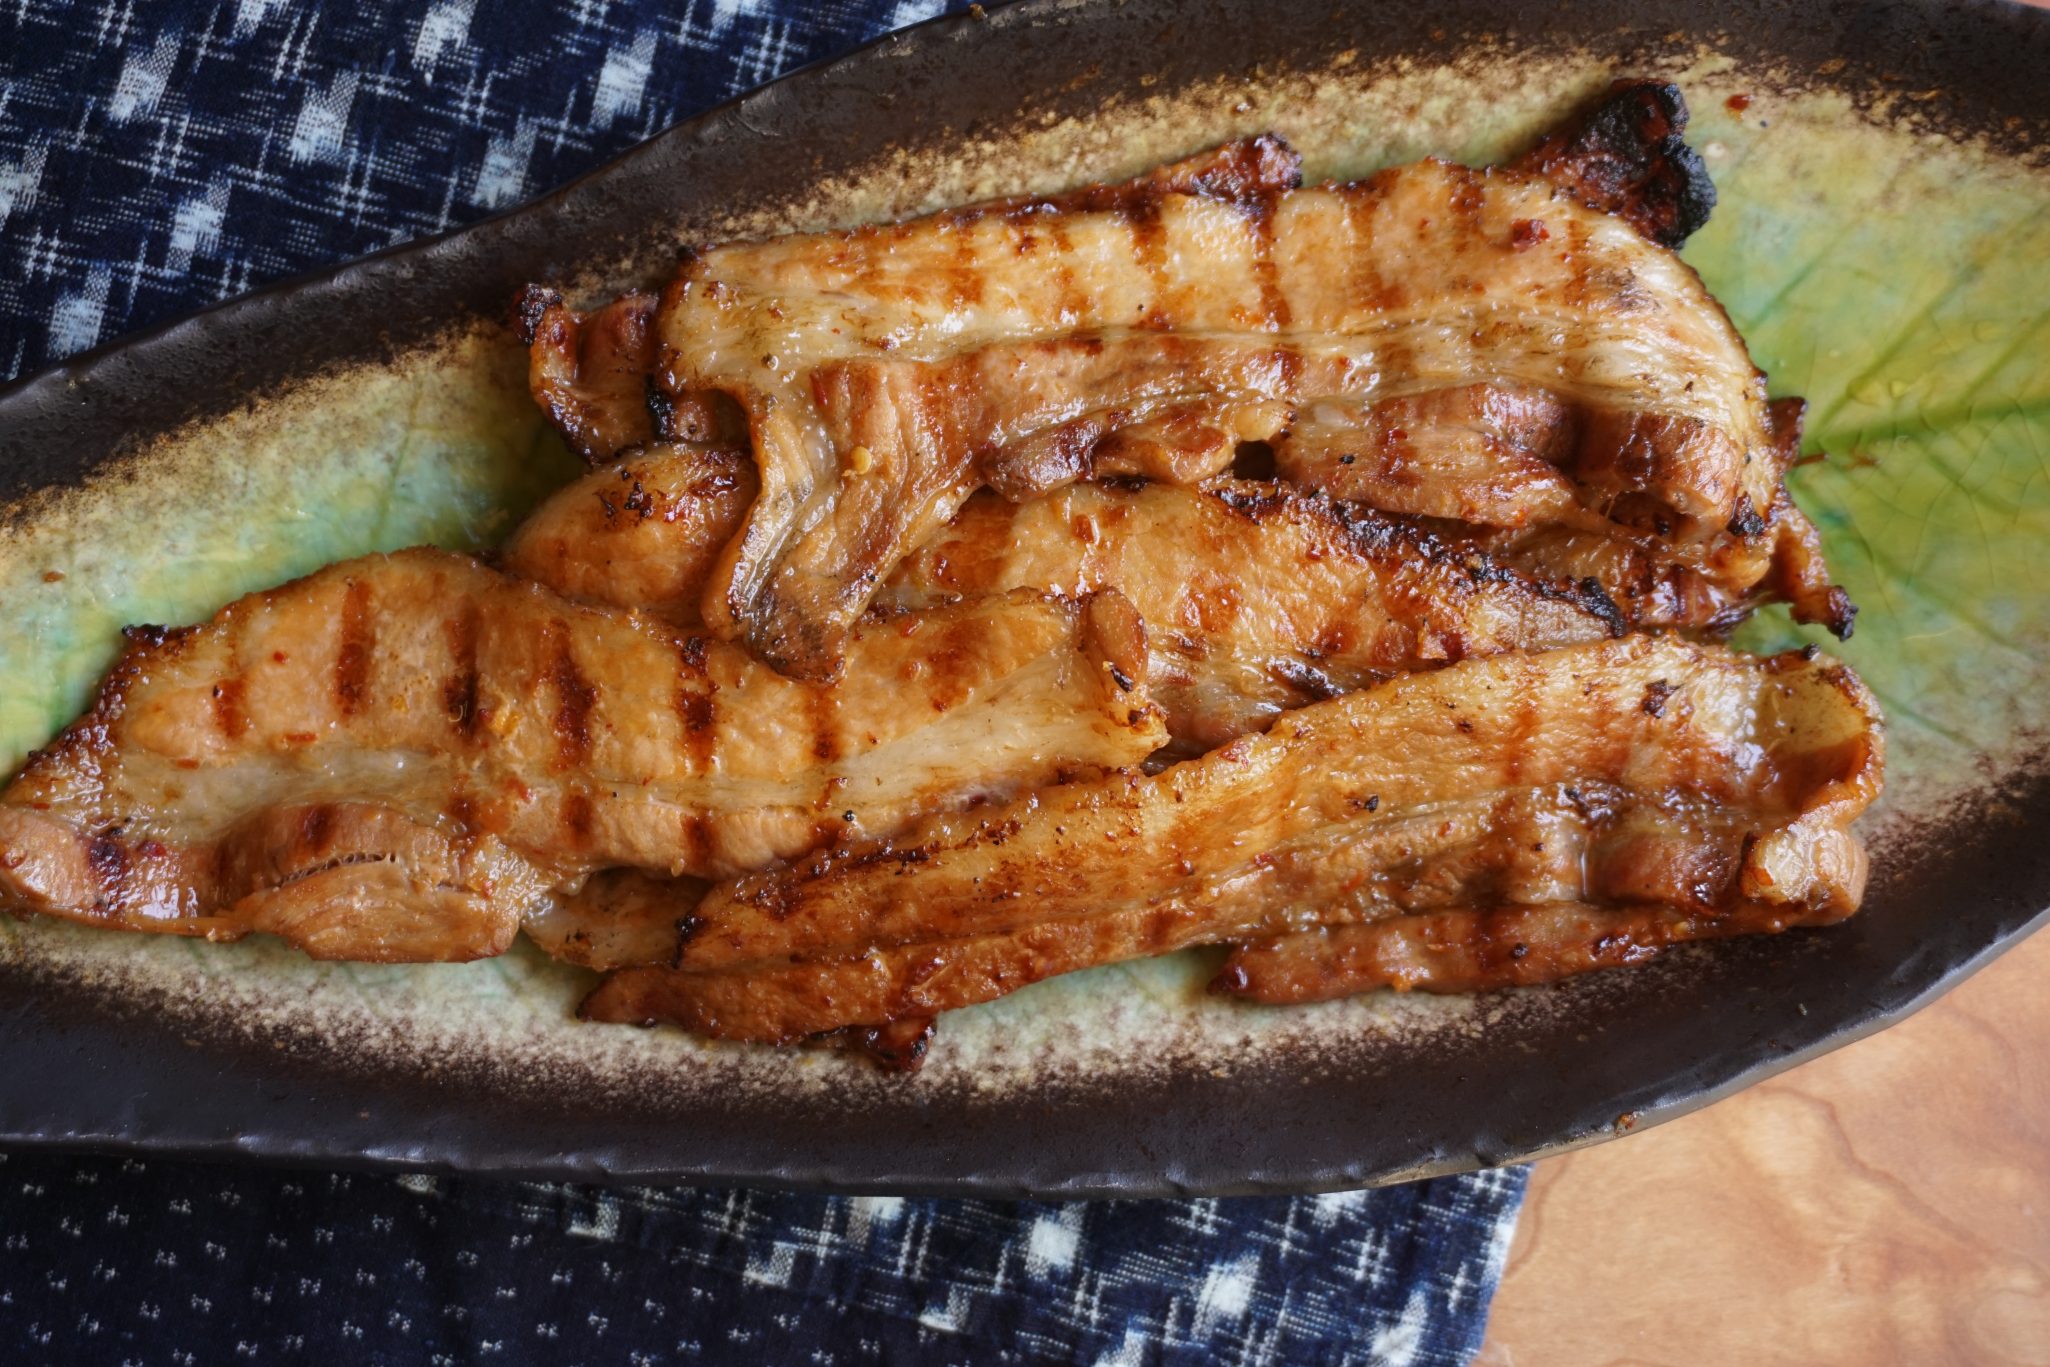
The Spicy Grilled Pork Belly was a hit.  The pork is cut into thick slices similar to thick-cut bacon and marinated in chili sauce, brown sugar and soy sauce. I adapted the recipe from the blog Barefoot in the Kitchen and it is SUPER SIMPLE and delicious!  We served it with purple rice, Gochuchang (Korean chili paste) and lettuce to be wrapped like a taco.

Purple Rice, Purple Rice

The purple rice is novel and fun and requires nothing extra except for 2 tablespoons of black rice mixed with your regular rice.  As it cooks the rice turns a really cool shade of purple. Your friends will think exotic and fancy, take the credit with a smile.  Regular short grain rice would work and for carb haters, cauliflower rice is a great sub. The pork would also make a screamin’ slider.  Top sliders with Siracha mayo and an Asian slaw of cabbage, onions, and pickled ginger. YUM.

SpicyGrilled Pork Belly

Spicy Grilled Pork Belly

Grilled Pork belly, sweet, salty, spicy and delicious!
Course Main Course, Meat, pork
Cuisine Asian, Fusion
Keyword bbq, gochujang, Pork Belly
Prep Time 15 minutes
Cook Time 10 minutes
Total Time 25 minutes
Servings 4

Ingredients

  • 1 pound pork belly thick sliced (you can find it at most Asian markets)

Marinade

  • 2 tablespoons soy sauce pref Sempio 707
  • 2 tablespoons olive oil
  • 3 large garlic cloves minced
  • 2 tablespoons chili paste use either Siracha with garlic or Gochuchang chili pepper paste
  • 3 tablespoons light brown sugar
  • 1/2 -1 tablespoon sesame oil
  • 1 teaspoon kosher salt
  • 1/4 teaspoon freshly ground black pepper

The Finish

  • 1 head of red lettuce or butter lettuce
  • Chili pepper paste Gochuchang
  • Toasted Sesame seeds
  • Green onions
  • Rice

Instructions

  • Remove the skin from the pork belly and slice the meat into 1/8" - 1/4" wide strips. If you don't have access to already cut pork belly.
  • Stir together the soy sauce, olive oil, garlic, chili paste, sugar, sesame oil, pepper and salt in a mixing bowl.
  • Place the meat in the bowl with the marinade and toss to coat thoroughly. Marinate for 1 hour.
  • Preheat the grill to HIGH. Grill the strips of pork belly for 2 minutes, flip and grill another 2-3 minutes.
  • When the pork has cooked through, remove from the grill and place it on a paper towel lined tray.
  • Sprinkle green onions and sesame seeds to garnish
  • Serve with rice, lettuce and pepper paste for wraps or in a roll as a sandwich or tortilla as a taco with an Asian slaw and siracha mayo.
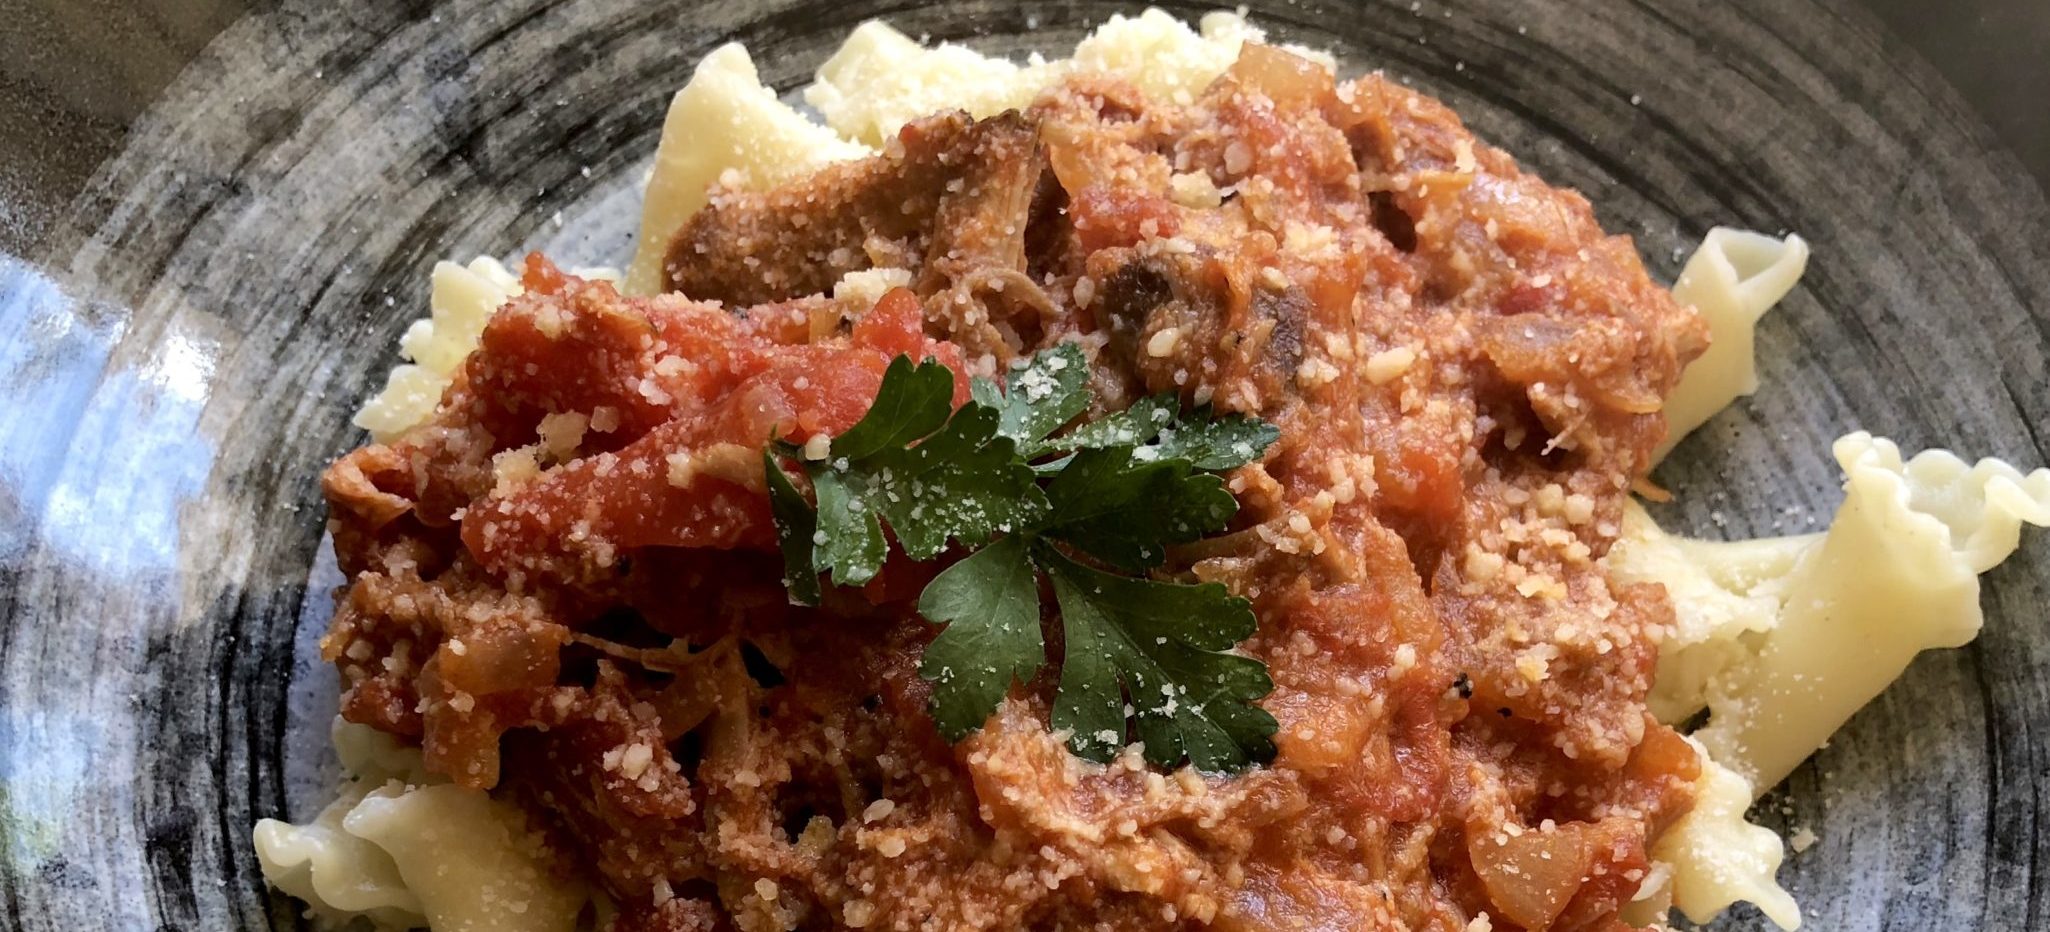
“The Triple P” Pulled Pork Pasta (Rigatoni with Pork Ragu)

“The Triple P” Pulled Pork Pasta (Rigatoni with Pork Ragu)

If you are like me, an empty nester still transitioning from cooking for a family of 5 to cooking for 2, you probably still have some (ok, alot) of that luscious roast pork left.  As much as I love tacos, I can eat only so many.  Back to Sam Kass’s book, Eat A Little Better, to try one of the many recipes that makes use of that delicious roasted pork.

BINGO. Found another winner. Rigatoni with Pork Ragu.

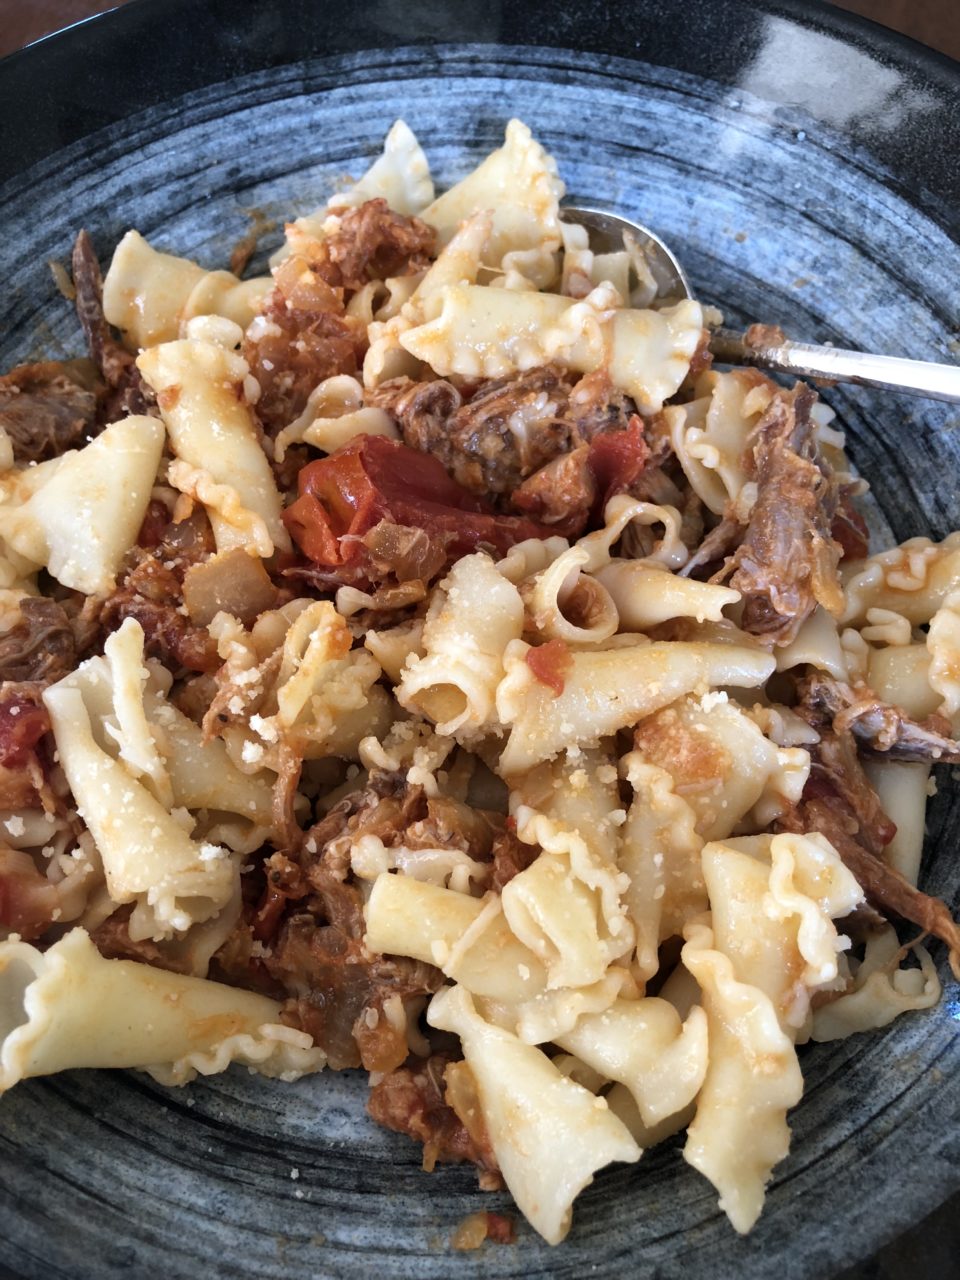
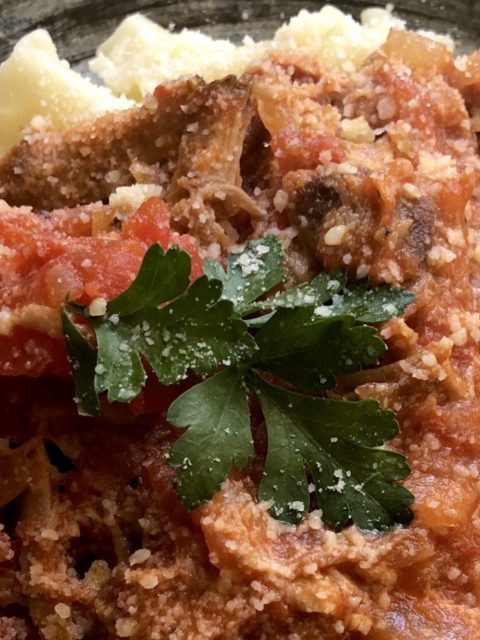
The ragu’ comes together in minutes.  Chopped onion, garlic, are sautéed before adding the tomatoes and roasted pork.  Simmer until it is reduced to a lovely thick, rich sauce.  Voila’, a comforting, warm and homey lunch or dinner on the table. I added a pinch of chili pepper flakes, as suggested, for a little kick.  Make a big batch, this sauce is better a day or two later after the flavors really come together.

Better yet, it freezes beautifully.  Luckily, I threw the remaining sauce in the freezer on the way out of town.  We arrived home a week later, travel weary and hungry but happy with one of two new college graduates in tow.  I pulled out the sauce, boiled some pasta and minutes later we were all standing around the kitchen island enjoying our bowls of pasta.  Yummy eats and no more tuition.  Life is good.  Hmmm, Jordan comes home tomorrow, hope I have enough sauce left until then.

Rigatoni with Pork Ragu

“The Triple P” Pulled Pork Pasta (Rigatoni with Pork Ragu)

Ingredients

  • 3 tablespoons EVOO
  • 1 medium yellow onion finely chopped
  • 3 garlic cloves smashed
  • Kosher salt
  • 1/4-1/2 teaspoon chili pepper flakes
  • 3 pounds ripe tomatoes cored and chopped or one 28 ounce can tomatoes in juice
  • 1 tablespoon tomato paste
  • 2-3 cups coarsely shredded cooked pork shoulder I used 2 cups, its a lot of meat
  • 1 pound rigatoni or pasta of your choice should be a thick pasta thats holds up well to the sauce
  • Grated Parmesan Cheese
  • Italian parsley for garnish

Instructions

  • Heat oil in large heavy pot over medium high heat until it shimmers. Add onion, garlic, chili pepper flakes and 1/2 teaspoon salt. Cook stirring occasionally until the onion turns a nice golden brown ~6-8 minutes.
  • Stir in tomatoes, tomato paste and pork. Let the mixture come to a simmer, while stirring, break up tomatoes. Continue to simmer over low heat until sauce has thickened. This will take approximately 25 minutes with fresh tomatoes and 15 minutes with canned tomatoes.
  • Season to taste with salt.
  • Cook the pasta according to directions. Drain well, toss with sauce and sprinkle with parmesan.
  • Garnish with parsley. Serve immediately. Have additional parmesan on table.


A Toast to Bostock (Brioche aux Amandes)

A Toast to Bostock (Brioche aux Amandes)

Our weekend ritual of going to the Farmer’s Market is a two-pronged mission.  After stocking up on fresh seasonal fruits and vegetables we turn our attention to the artisanal products that are peppered throughout the market.  Smoked salts, leaf lard from the meat guy, olive oils from family orchards, bread, and fresh tofu.  I invariably stop at the Manresa bread stall. I have a weak spot for their Kouign Aman and their Bostock.

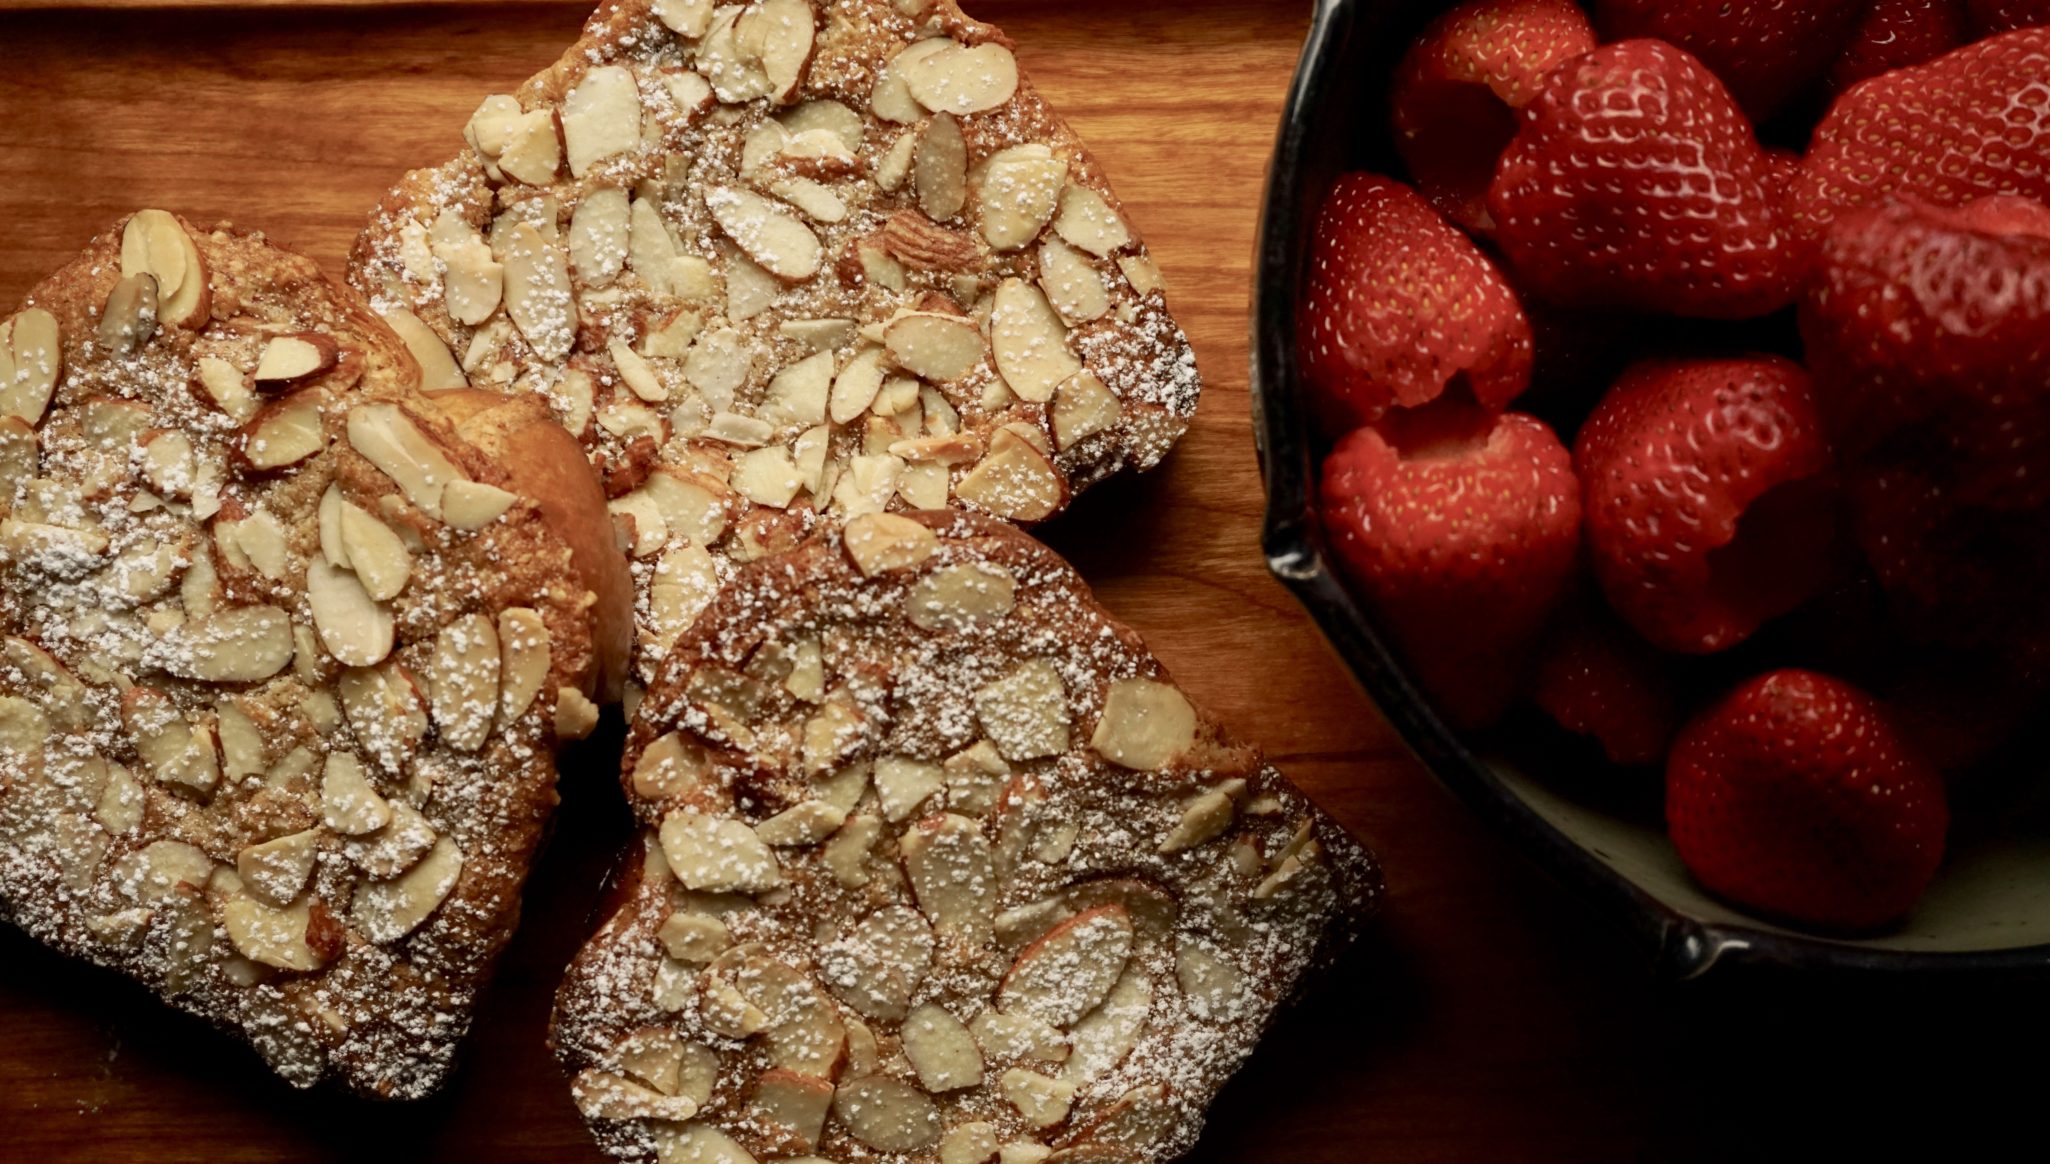
Bostock?  Yep, glorified TOAST, 4-5 bucks a slice. Call it a guilty pleasure.  A slice of buttery brioche with a layer of orange marmalade or strawberry rhubarb jam, topped with an almond frangipane and a generous sprinkle of sliced almonds.  Baked, finished with a blanket of powdered sugar.  So good.

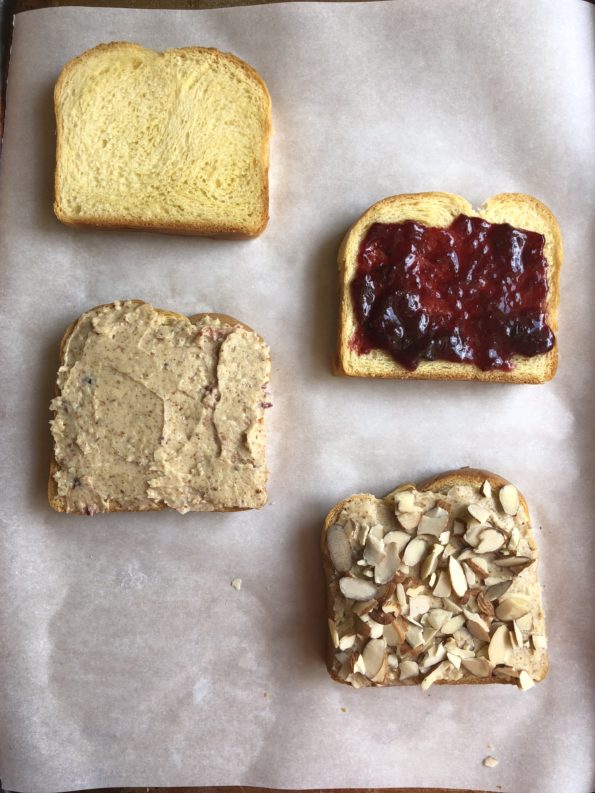
I probably won’t attempt to make Kouign Aman but Bostock, that’s a different story.  It’s toast on steroids when you think about it.  A recipe for Bostock from the blog The Little Epicurean looked delicious and sounded very doable.  Time to stop the 5 dollar toast madness and make my own. I love her photo and as they say, imitation is the highest form of flattery.  Making Bostock pictogram starts with brioche, slather with preserves, coat with almond frangipane and top with sliced almonds. Pop it in the oven. Badabing, badaboom, done.

Bostock

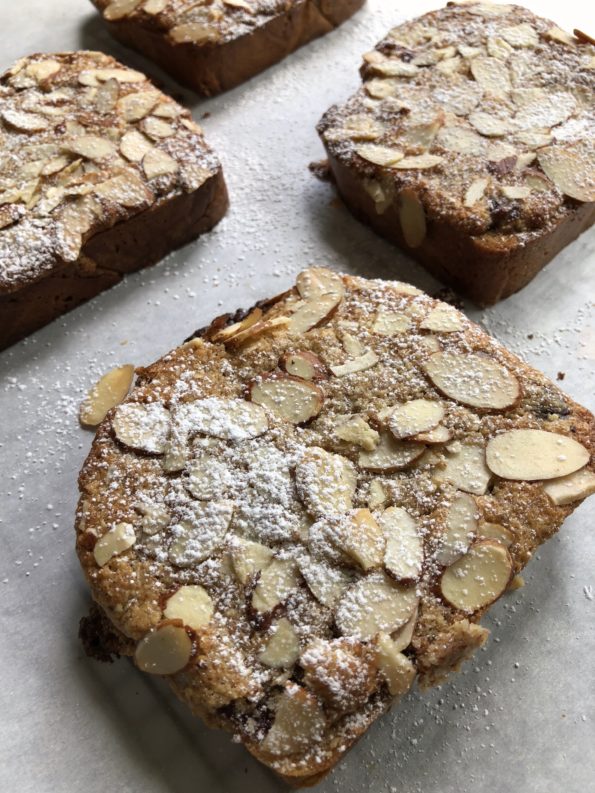
Ok, I did cheat a little, store-bought brioche (Trader Joe’s Brioche-thumbs up) makes this a quick and easy recipe.  I used a homemade strawberry-blueberry jam but feel free to use any jam you like. The almond frangipane is made of butter, almonds, sugar and an egg whirled to a smooth creamy paste in a food processor.  As I pulled the slices out of the oven the aroma of butter, sugar and almond filled the kitchen.  Life is good, especially if you have fresh baked Bostock.

A Toast to Bostock (Brioche aux Amandes)

Glorified toast which you should definitley make!
Course Breads, Breakfast
Cuisine French
Keyword Bostock
Prep Time 20 minutes
Cook Time 15 minutes

Ingredients

  • 6 thick slices of brioche challah, or enriched milk bread
  • 6 Tablespoons orange marmalade or your choice of jam
  • Almond frangipane spread recipe follows
  • Sliced almonds as needed
  • Confectioners' sugar to dust

Almond Frangipane Spread:

  • 1 cup almonds sliced or whole
  • 1/2 cup granulated sugar
  • 2/3 cup unsalted butter room temperature, softened
  • 1/4 teaspoon fine sea salt
  • 1 teaspoon pure vanilla extract
  • 1/2 teaspoon pure almond extract
  • 1 large egg
  • 2 Tablespoons whole milk or heavy cream

Instructions

  • Preheat oven to 350 degrees F. Line baking sheet with parchment paper or nonstick silicone mat. Arrange bread on baking sheet. Spread 1 tablespoon of orange marmalade over bread. Top with 3 tablespoons of almond frangipane spread. Sprinkle sliced almonds on top.
  • Bake for 12-15 minutes until almonds are golden and bread is toasted.
  • Transfer bread to cool rack to prevent bottom from getting soggy. Dust warm bostock with sifted confections' sugar. Serve warm or at room temperature.

Almond Frangipane Spread:

  • In a food processor, pulse together almonds and half of sugar until nuts are finely ground. Transfer to a small bowl.
  • In same food processor, process together butter, remaining sugar, salt, vanilla, almond extract, egg, and cream until smooth.
  • Scrape down bowl as needed to ensure thorough mixing. Add ground nut mixture and pulse until thoroughly combined.
  • Use almond frangipane spread immediately, or store in an airtight container in the fridge for up to a week. Allow to soften to room temperature before use.
Karma’s a Batch…of Meyer Lemon Scones

Karma’s a Batch…of Meyer Lemon Scones

I got up this morning with scones on the brain.  A while ago I had come across a recipe on the blog Dessert for Two for Small Batch Meyer Lemon Scones. They looked delicious.  I filed it away under the “I should try these cause they look yummy” recesses of my mind.  This past weekend my goal was to clean and reorganize the fridge (inspired by Sam Kass’s new book). As luck would have it, squirreled away in the back of the crisper drawer I found a forgotten bag of Meyer Lemons from my baking buddy, Kathy.

Karma, I was Meant to Make These Scones.

The recipe makes four more-than-generous scones so my first change was to make six instead.  A nice size to accompany a breakfast plate or on its own as an afternoon tea treat. You can whip up a batch in no time flat and that’s without using a mixer. The keys are to keep everything as cold as possible and to not overwork the dough.  The mantra for any scone, biscuit, or pie dough.

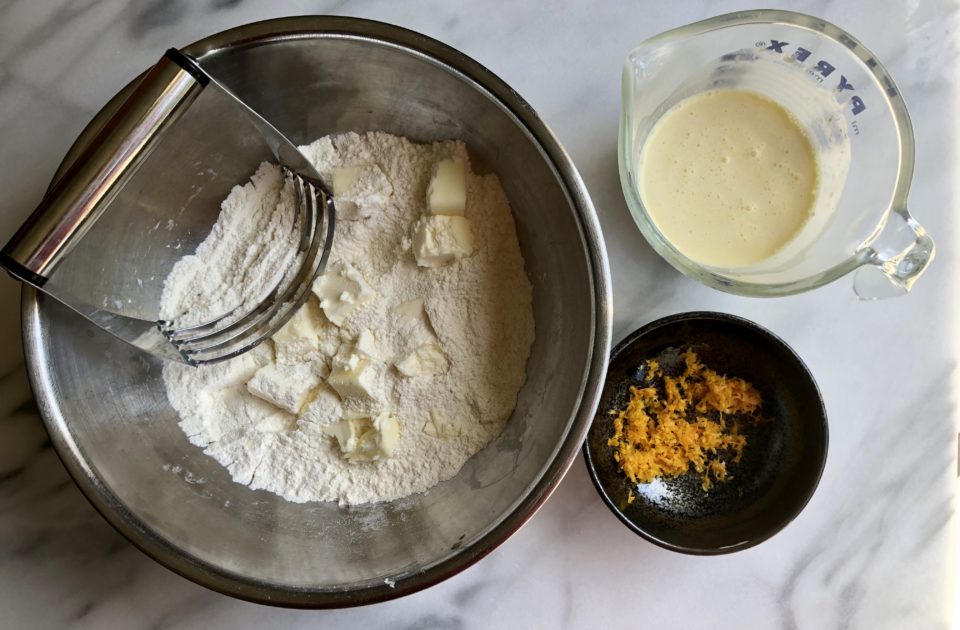
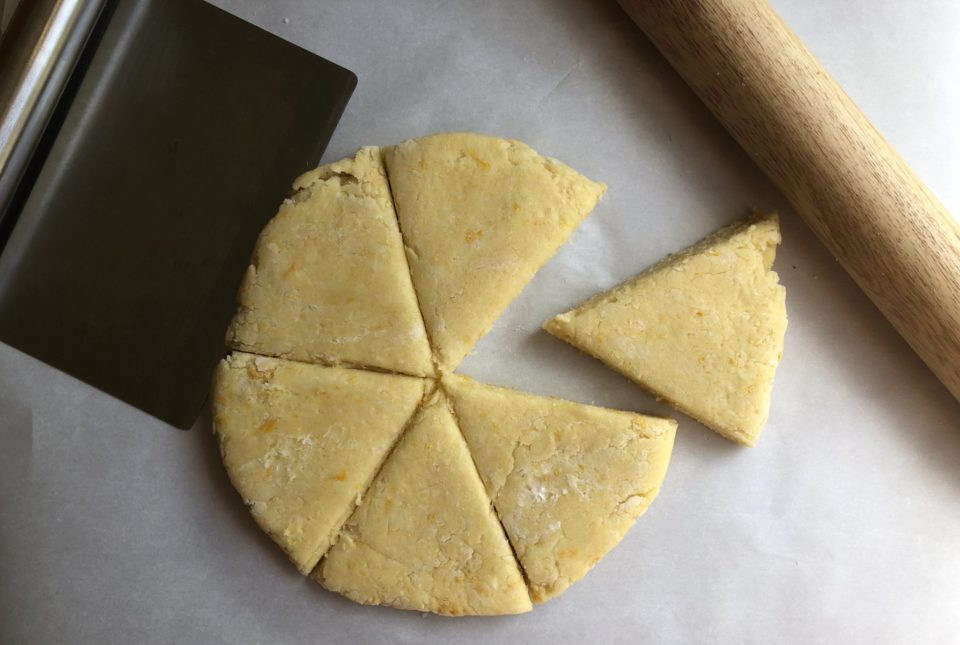
I used a pastry cutter to mix the butter in the flour.  The butter should be in small pieces no bigger than petite peas.  Add the wet ingredients and blend together.  The mixture will not hold together but will be shaggy.  Pour onto a parchment-lined cookie sheet.  Fold and compress the dough to form a disc.  The heat of your hands will help the dough clump together.  Cut the disc into four to six pieces.

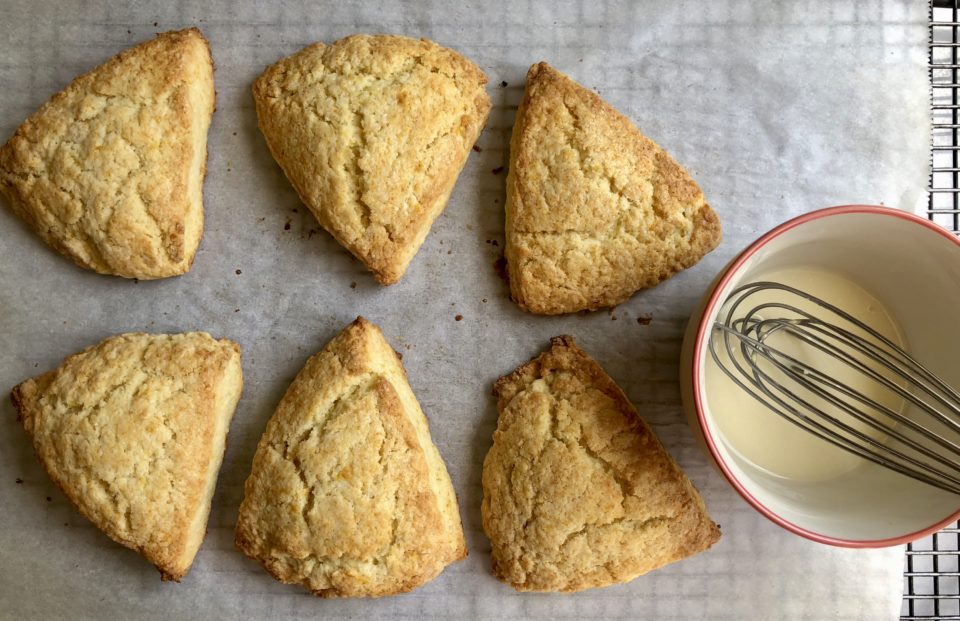
Separate the scones and paint the tops with heavy cream.  Bake until golden.  I made the icing but it didn’t stand out on the scones. It did add a nice sweet-tart finish though.

Meyer Lemon Scones

These scones are tender, buttery, and lemony sweet.  The perfect beginning or ending to a day.  It’s a good thing this is a small batch recipe…I’d be tempted to eat them all.

Karma’s a Batch…of Meyer Lemon Scones

A lovely buttery, light, lemony scone from Dessert for Two that is easy to make, a perfect weekend morning pick me up.
Course Biscuits and scones, Breakfast
Cuisine American
Keyword Cream Scones, meyer lemon scones, Meyer lemons
Prep Time 15 minutes
Cook Time 15 minutes

Ingredients

Dry Ingredients

  • 1 1/4 cup all-purpose flour
  • 1/4 cup sugar
  • 1/4 teaspoon salt
  • 1/4 teaspoon baking soda
  • 1 teaspoon baking powder

Wet Ingredients

  • 4 tablespoons unsalted butter cold
  • 1/3 cup + 2 tablespoons heavy cream plus extra for brushing
  • 1 large egg yolk
  • zest of 2 Meyer lemons* I'm thinking grapefruit or reg lemons would work well too.

For the optional glaze: Try not to skip it, it is a nice finish.

  • 1/3 cup powdered sugar
  • 1 teaspoon heavy cream
  • 2 teaspoons freshly squeezed Meyer lemon juice

Instructions

  • Preheat the oven to 400 degrees
  • In a medium bowl, stir together the flour, sugar, salt, baking soda, and baking powder.
  • Dice the butter and add it to the flour mixture. Work the butter into the flour mixture until it's evenly distributed and smaller than peas. Use two knives, a pastry cutter, or your fingertips (quickly squeeze the butter pieces between your fingers pressing them into little flakes.
  • Whisk heavy cream, egg yolk and lemon zest in a small bowl. Pour ontothe flour mixture and stir until a shaggy dough forms. Don't overmix, but incorporate things well.
  • Scoop the dough out, place it on the baking sheet, and use the warmth of your hands to fold and press dough together until it sticks together into a round disc form.
  • Cut the dough circle into 4-6 even pieces. Brush each piece with extra heavy cream. (Cut by pressing knife in one downward motion, don't use a sawing motion which will cause uneven rising)
  • Bake for 13-15 minutes, until a toothpick inserted comes out clean and they lightly brown on the edges.
  • While the scones bake, whisk together the glaze ingredients.
  • Glaze the scones when cool.
Olive Oil Shortbread with Rosemary & Chocolate Chunks, A Tale of Two Wedges

Olive Oil Shortbread with Rosemary & Chocolate Chunks, A Tale of Two Wedges

Last week was a busy work week and several evening commitments were on my to-do list. One of the realities of living in the Bay Area is the exceptionally ugly commute (up 1.5 hours to go 25 miles-yeah-go figure) so my commute has taught me to ALWAYS VOLUNTEER TO BRING DESSERT since I invariably run late.  So my plan was to make cookies,  I could make them in advance, bring them with me to work, go directly from work to each function, and be forgiven for being late because who gets mad at anyone who brings homemade cookies?!

I needed a vegan option as well as a regular sweet bite for the meetings.  I decided the Grapefruit Thyme Shortbread (it’s my flavor of the month cookie) would be my non-vegan cookie.  The vegan option was going to be a bit trickier, I am a butter-believer.  As luck would have it, a recipe for Olive Oil Shortbread with Rosemary and Chocolate Chunks from Smitten Kitchen Every Day Cookbook popped up on my feed.  Hmmm, now how did Facebook know I needed a vegan dessert recipe?

Not funny?  Too soon?

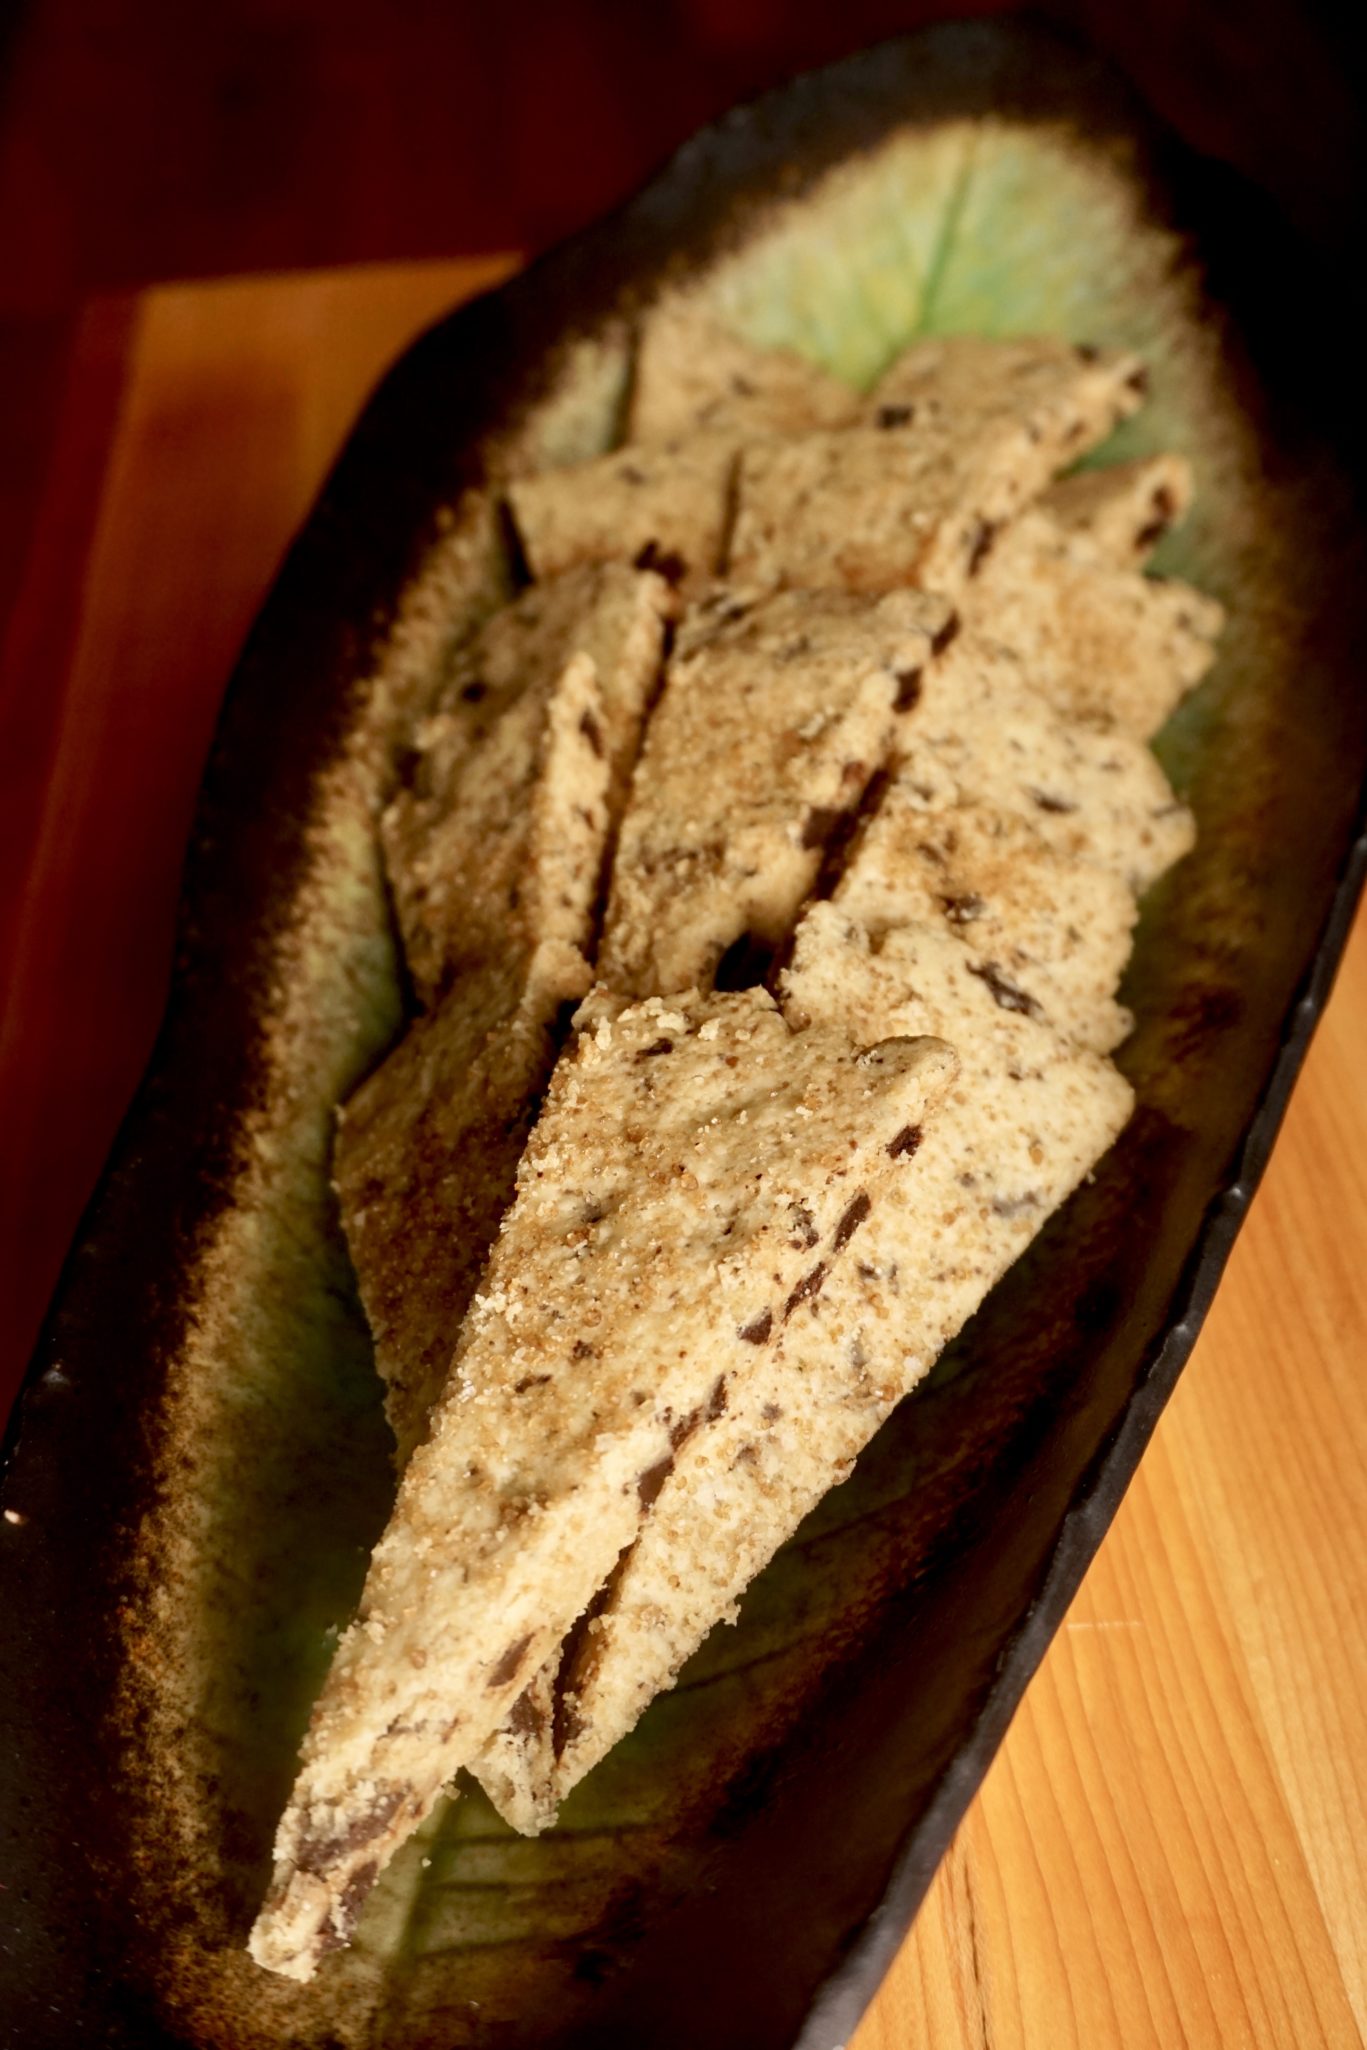
Olive Oil Shortbread with Rosemary and Chocolate Chunks

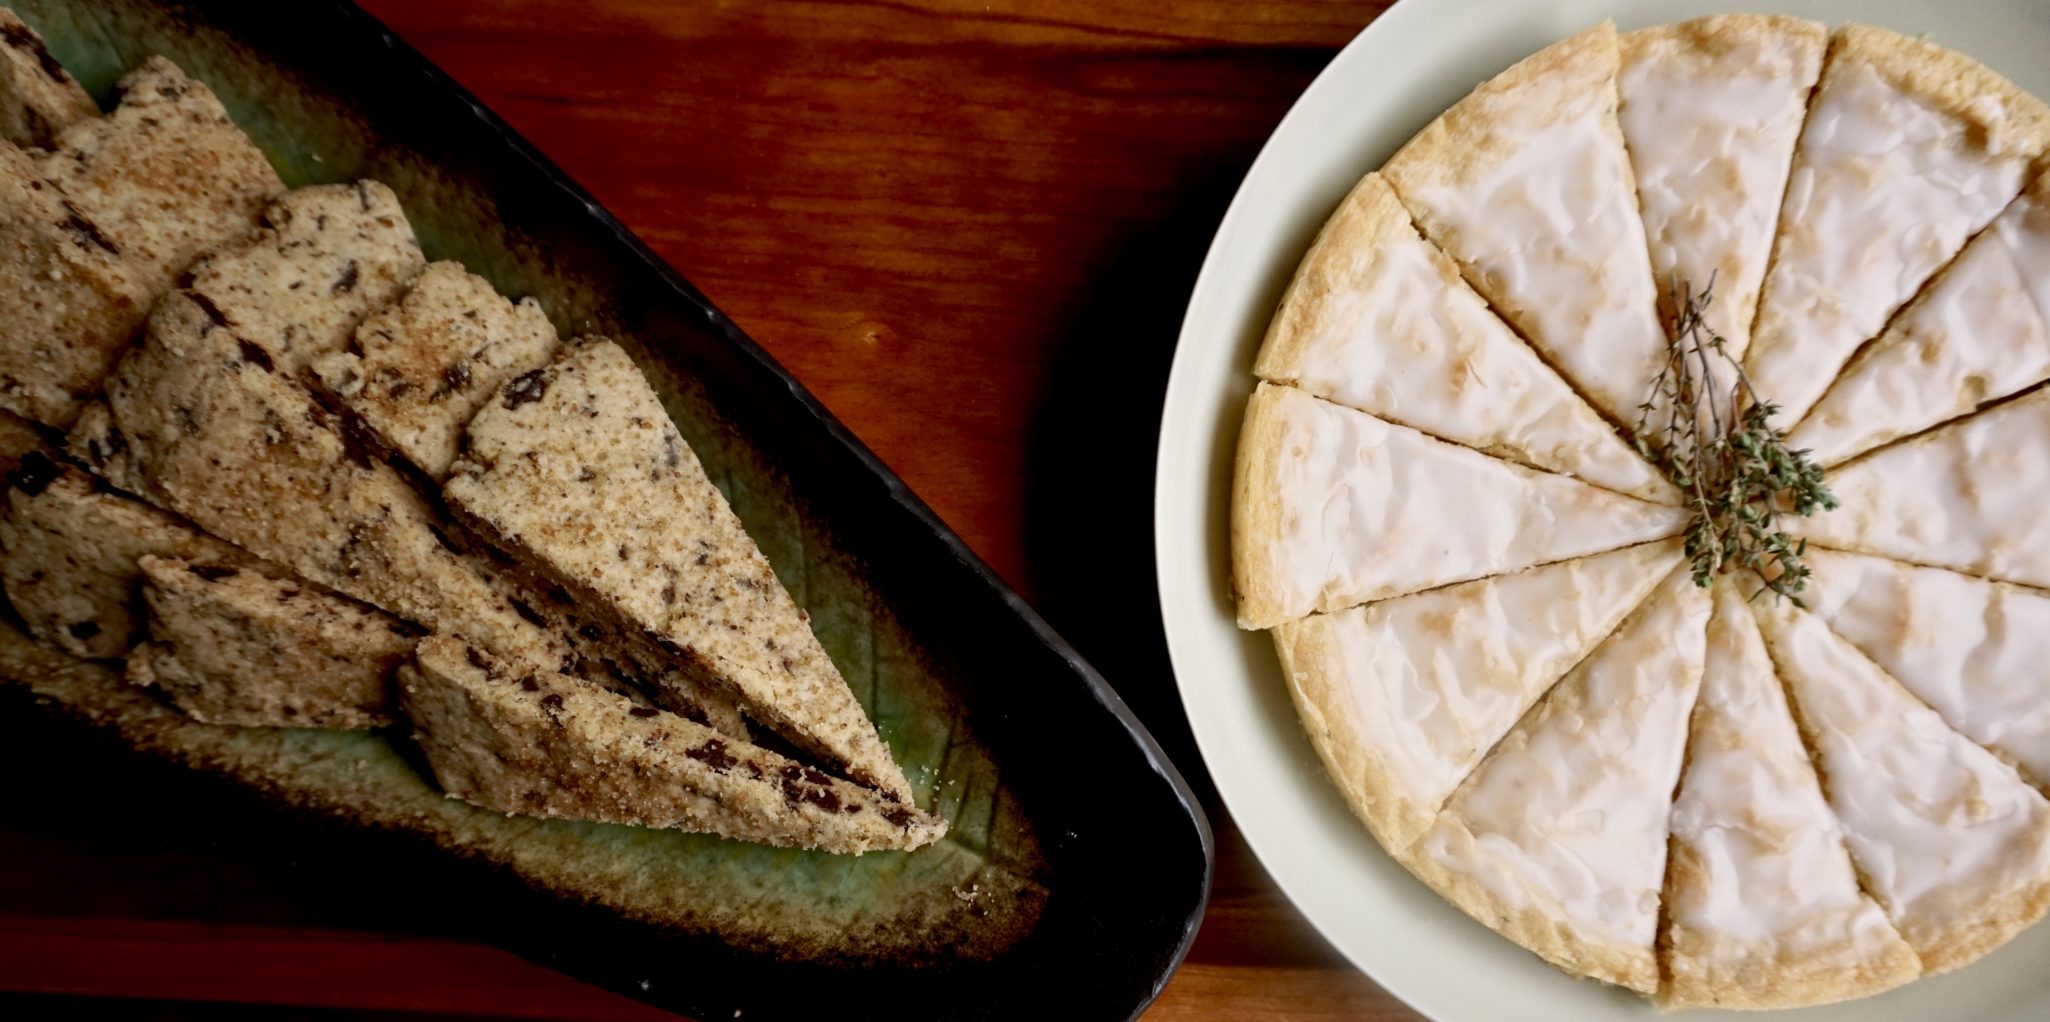
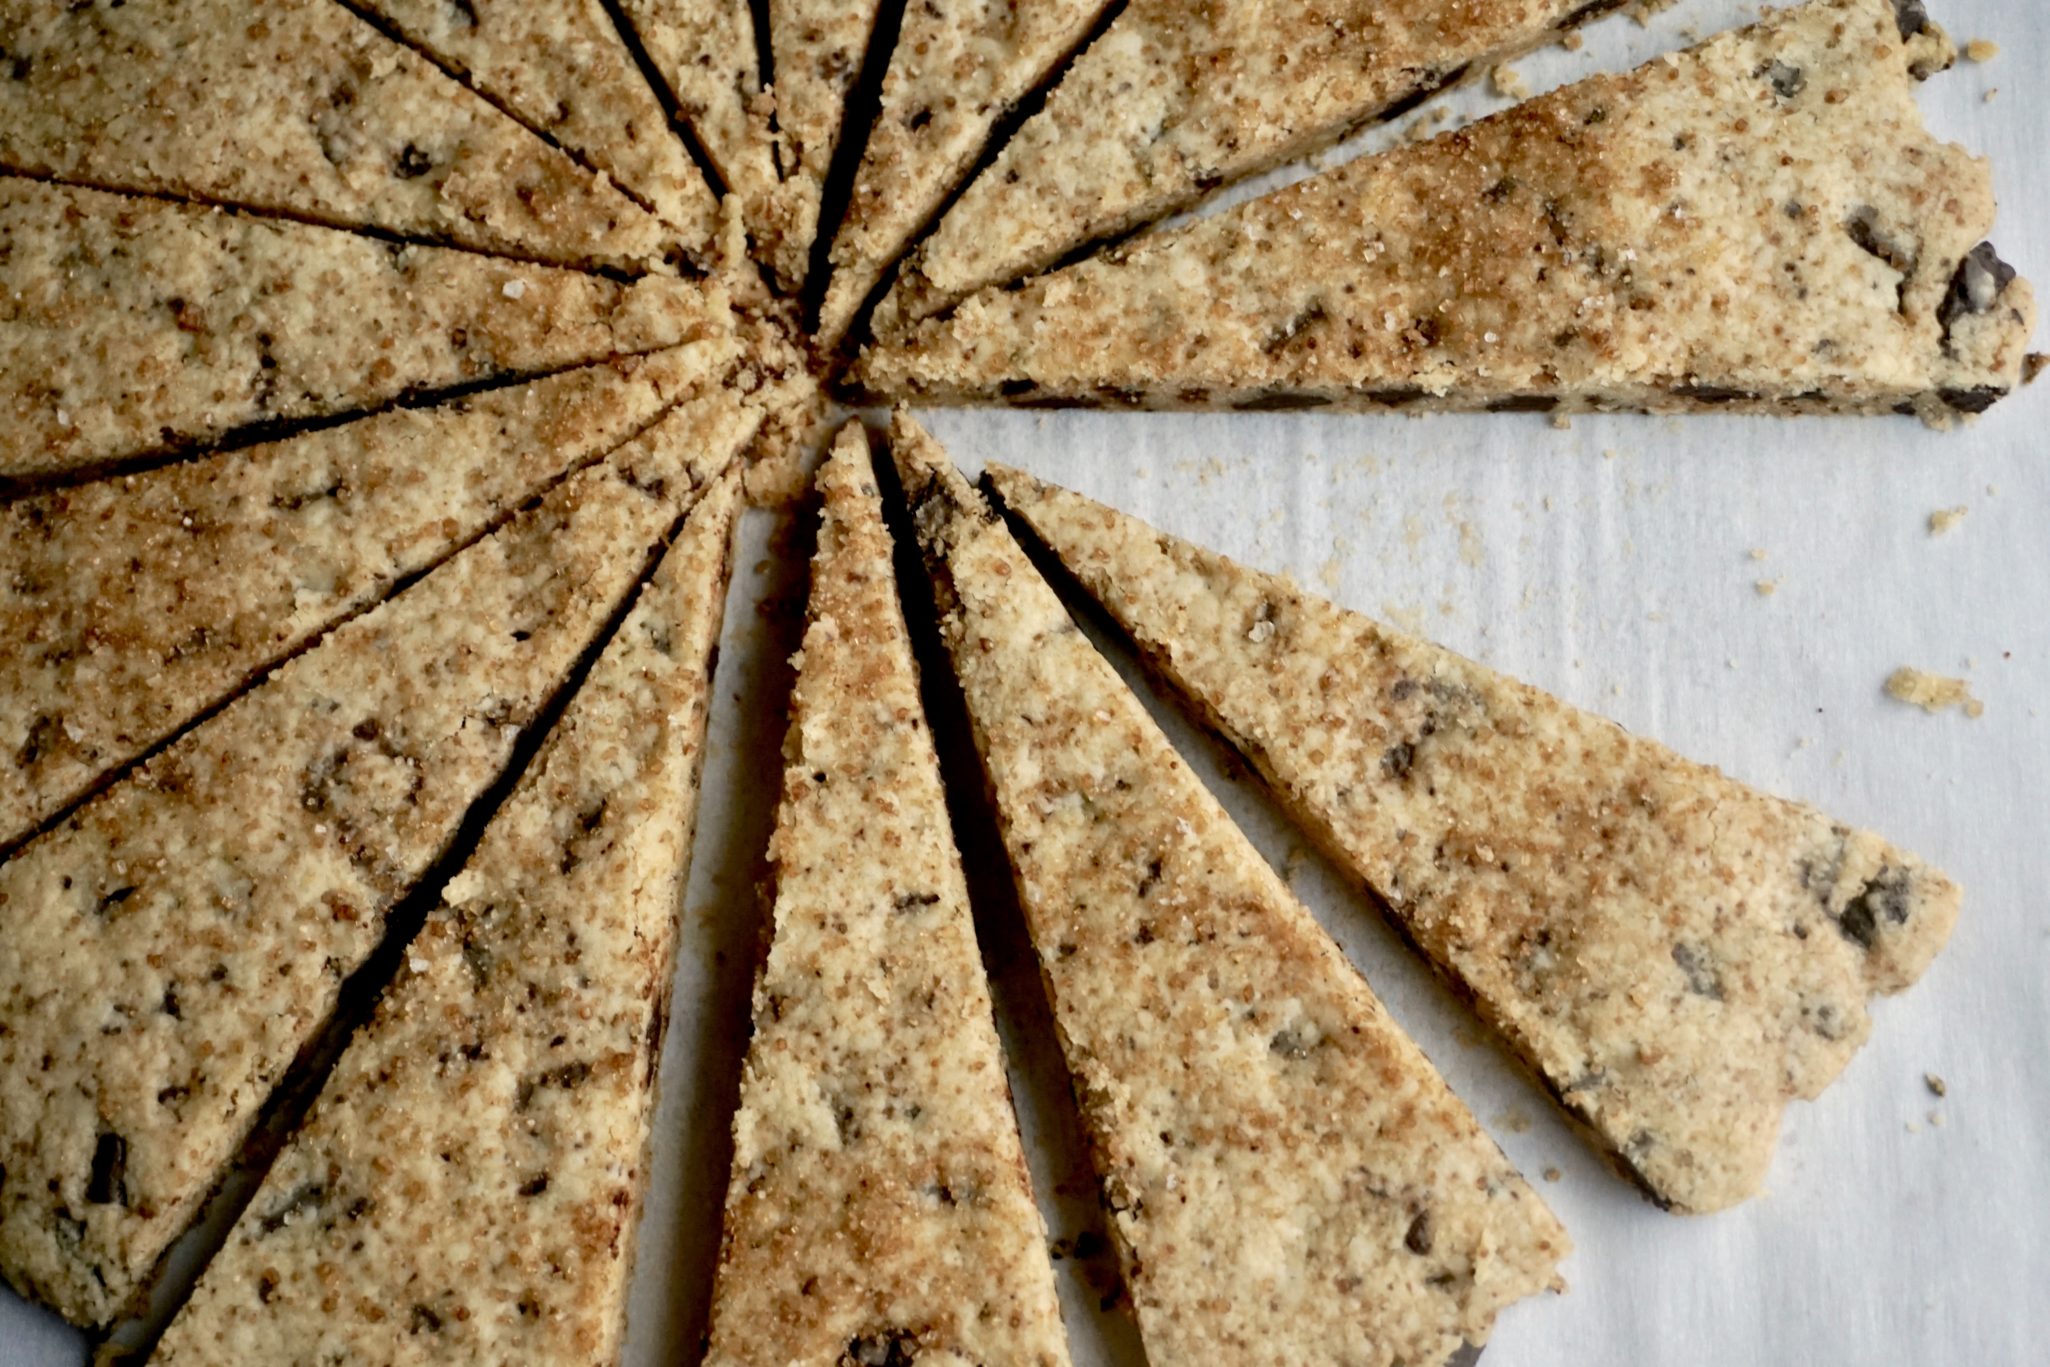
Surprisingly (at least to me), the rosemary and chocolate meshed well.  The flavors really stand out and I didn’t think about the no butter factor. The sprinkling of turbinado sugar on top provided a nice crunch while the cookie itself had a nice fine crumbly texture.

Olive Oil Shortbread with Rosemary and Chocolate Chunks

I changed the baking method for the Grapefruit Thyme Shortbread, my non-vegan option.  Wanting a more traditional shortbread and keeping with my wedge theme, I baked it in a round pan and cut it into wedges right out of the oven.  Unlike the first time I made them, this version had a casual, rustic appeal.  While the cutout version had a fine crumb and crisp edges. These are a bit softer, almost cake-like, without the crisp edges. Still delightful, just different.  Putting on my ATK hat, made sense due to the differences in baking methods. I consider this a bonus, 2 cookies for the “dough” of one.

Grapefruit Thyme Shortbread Post

Grapefruit Thyme Shortbread

Olive Oil Shortbread with Rosemary & Chocolate Chunks

Ingredients

  • Smitten Kitchen /every Day by way of Food52
  • 1 1/2 cups 195 grams all-purpose flour
  • 1/2 cup 60 grams powdered sugar
  • 2 tablespoons 25 grams, plus 1 teaspoon (5 grams) turbinado (raw) sugar
  • 1/2 teaspoon fine sea salt
  • 1/2 cup 120 ml mild olive oil
  • 1 teaspoon finely minced fresh rosemary leaves
  • 1/2 cup 85 grams semisweet chocolate, chopped into small chunks
  • 1 egg white beaten until loose (optional not vegan 🙁 )

Instructions

  • Heat the oven to 325° F.
  • In a large bowl, whisk together the flour, powdered sugar, 2 tablespoons turbinado sugar, and the salt.
  • Add the olive oil and rosemary and stir to combine.
  • Add the chocolate chunks and stir again.
  • Gather the dough with your hands into one mass.
  • Roll out the dough to an 8- to 9-inch roundish slab between two sheets of parchment paper. Remove the top sheet and use the bottom to slide the cookie round onto the back of a large baking sheet.
  • If desired—it merely provides a little shine—brush the cookie with the egg white. Sprinkle with remaining 1 teaspoon turbinado sugar. Bake for 20 to 25 minutes.
  • Slide the cookie round carefully onto a cutting board while the cookie is still totally hot. Cut with a sharp, thin knife into desired shape(s). Let cool completely, then separate.
  • Do ahead: This dough keeps well in the freezer. Baked cookies keep for 2 weeks in an airtight tin at room temperature.
  • Note: For a milder flavor, replace half of the oil with a neutral/flavorless one. You can cut this into shapes with cookie cutters, too, but the chocolate provides a little resistance.
NOM-NOM-licious Chicken and Gravy (Instant Pot Chicken and Gravy)

NOM-NOM-licious Chicken and Gravy (Instant Pot Chicken and Gravy)

AN HOUR AND A HALF commute home from work left me cranky and hungry.  I slammed my stuff down on the kitchen table and headed to the fridge, yanked the door open and searched for something quick to make for dinner.  I found a whole chicken I had bought the day before and thought ugh, that will take a while…I WANT TO EAT NOW.

Lightbulb moment

I remembered I had saved an Instant Pot recipe for Chicken and Gravy from NOM NOM Paleo.  Quick and easy, the perfect solution for my dinner dilemma. Though not a strict Paleo diet follower, I like the NOM NOM cookbook and blog and have an affinity for the NOM NOM author (plus I love saying NOM NOM).  Like me, she is a pharmacist by trade, a fellow drug pusher-legit one, lol.  The natural crossover between being a pharmacist and being a cook or baker.  Numbers, measurements, proportions, being a bit OCD- all part of both professions.

A few easy steps and dinner is on the table in 44 minutes and 37 seconds at most.  See, pharmaceutical precision.  While the chicken is cooking, make some rice or egg noodles to go along or if you want to keep this a paleo meal, make cauliflower rice or potatoes (Po-ta-toes! Boil them, mash them, stick them in a stew. Lovely big golden chips with a nice piece of fried fish-that line pops in my head every time). The sauce is so yummy you will want something to soak up every drop.

The recipe calls for browning the chicken in your pressure cooker, taking it out and sautéing onions, garlic and a bit of tomato paste, putting the chicken back in the pot, on top of the onions, adding a bit of broth and setting the pot timer to 20 minutes cooking.  Yep, that’s it.

Saute onions and garlic until soft.

Add tomato paste and broth to pot. Place a wire rack on top to hold the chicken.  You can add a bit of herb for additional flavors such as a sprig of thyme, oregano or rosemary. Just to kick it up a bit.

After removing the chicken (and fresh herb sprigs), use a hand blender to puree the onion-garlic mixture which becomes the luscious gravy-yum yum. The original recipe calls for thickening the sauce but I didn’t bother.  I wanted to dig in!  So delicious!!!!!

Dinner is served and elevated my mood to happy, happy, happy.

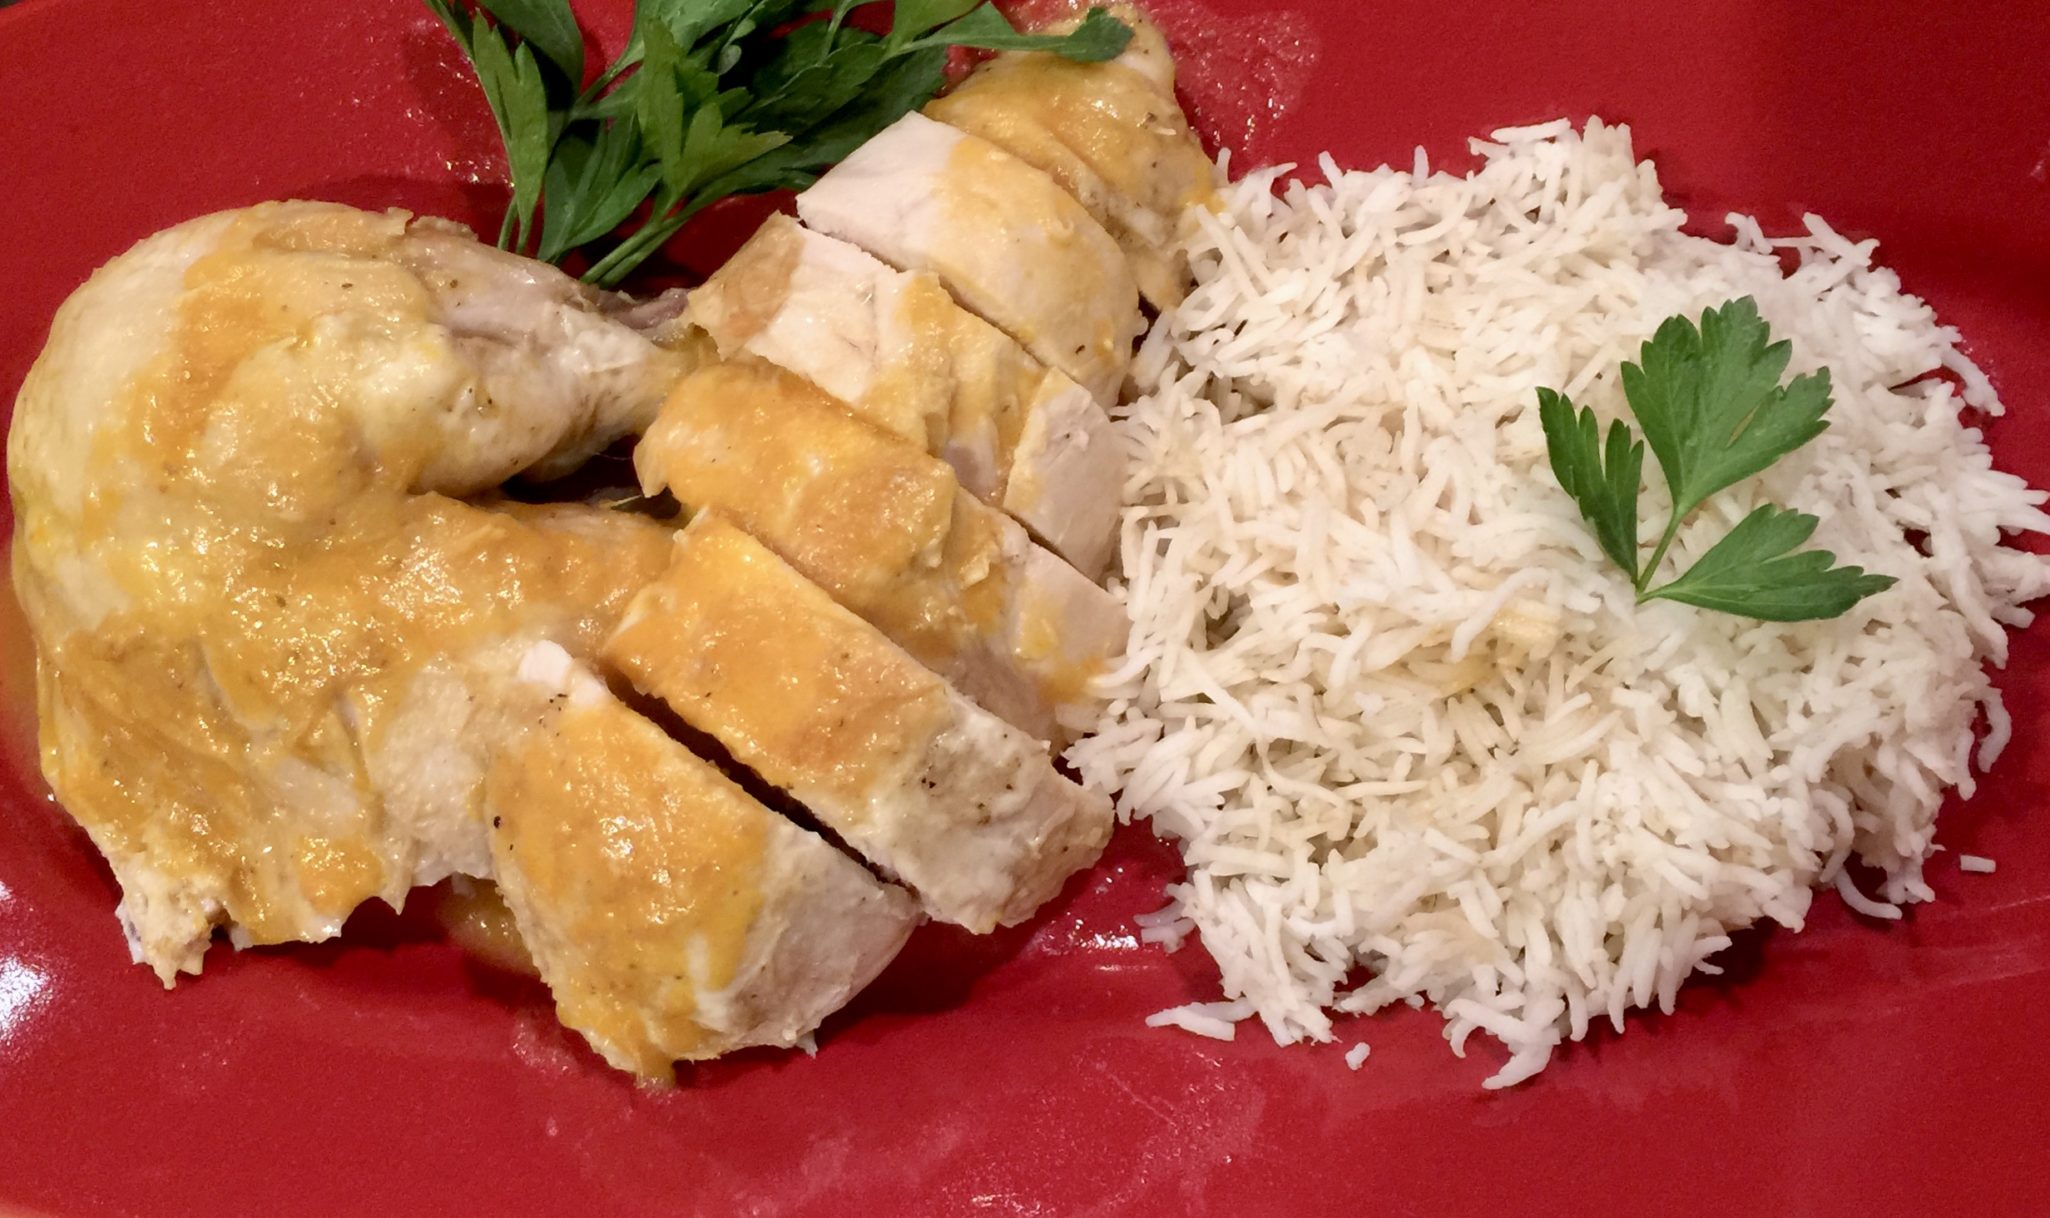
NOM-NOM-licious Chicken and Gravy

delicious, easy, pretty darn quick, Instant Pot Chicken and Gravy
Course dinner
Cuisine Asian-American
Keyword Chicken, gravy, Instant Pot, nomnom
Prep Time 20 minutes
Cook Time 37 minutes

Ingredients

  • Adapted from Nom Nom Paleo
  • 1 4-pound organic chicken (a bigger chicken won’t fit in a 6-quart Instant Pot)
  • 1.5-2 teaspoons kosher salt if using table salt, cut amount to 1 teaspoon
  • ¼ teaspoon freshly ground black pepper
  • 2 tablespoons of ghee or vegetable oil divided
  • 2 large yellow onions diced (or use 1 yellow, 1 red)
  • 6 garlic cloves peeled
  • 2 teaspoons tomato paste
  • ½ cup chicken stock
  • 1 tablespoon cornstarch mixed with 2 T water

Instructions

  • Sprinkle 2 teaspoons salt and ¼ teaspoon pepper all over the chicken, inside and out. Tuck the wings behind the back.
  • Add 1 tablespoon of ghee or oil to the pressure cooker, press “Sauté” function on your electric pressure cooker.
  • When the fat is shimmering, sear the chicken breast-side down in the center of the pot for approximately 5 minutes or until lightly browned.
  • Flip the bird breast-side up. Cook for another 5 minutes or until browned on the back. Don’t worry if the skin sticks and tears—the skin won’t be crispy when you’re done cooking anyway. You’re just browning the skin to deepen the flavor of the gravy.
  • Transfer the chicken to a plate and add the remaining tablespoon of ghee or oil to the pot. Once it is heated, toss in the chopped onions, 6 garlic cloves, and a sprinkle of salt.
  • Cook for 1 to 2 minutes or until softened.
  • Stir in 2 teaspoons tomato paste and cook for about 30 seconds.
  • Turn off the sauté function. Pour in ½ cup broth, scraping up any browned bits.
  • Add steamer insert to the bottom of the pressure cooker, and lay the bird on top of it, breast-side up. Cover and pressure-cook on high for 20 minutes).
  • Turn off the electric pressure cooker, and immediately release the pressure manually. Open the lid and transfer the chicken to a plate or carving board. Tent the cooked bird with foil, and rest it for 10 minutes.
  • Use an immersion blender to purée the contents of the insert to make a smooth gravy. Season to taste with salt and pepper.
  • If you want to thicken the gravy, mix 1 tablespoon cornstarch with 2 tablespoons water. Then, turn on the sauté function and bring the contents to a simmer. Stir in the arrowroot powder slurry and cook until thickened.
  • Carve the chicken and top with gravy. Garnish with parsley if desired.
  • Make sure to have a ginormous bowl of rice or buttered noodles to serve along side..just for the extra gravy!