Category: Recipes

Recipes I’ve tried and sometimes modified that I think you should try!

Tomato Egg Soup (Souper Easy, Soul Food)

Tomato Egg Soup (Souper Easy, Soul Food)

My favorite category for foods is not dessert.  Nope, its soup. I LOVE soup. To the age-old question if you were stranded on a desert island and could only have three things…soup would most definitely be on my list.

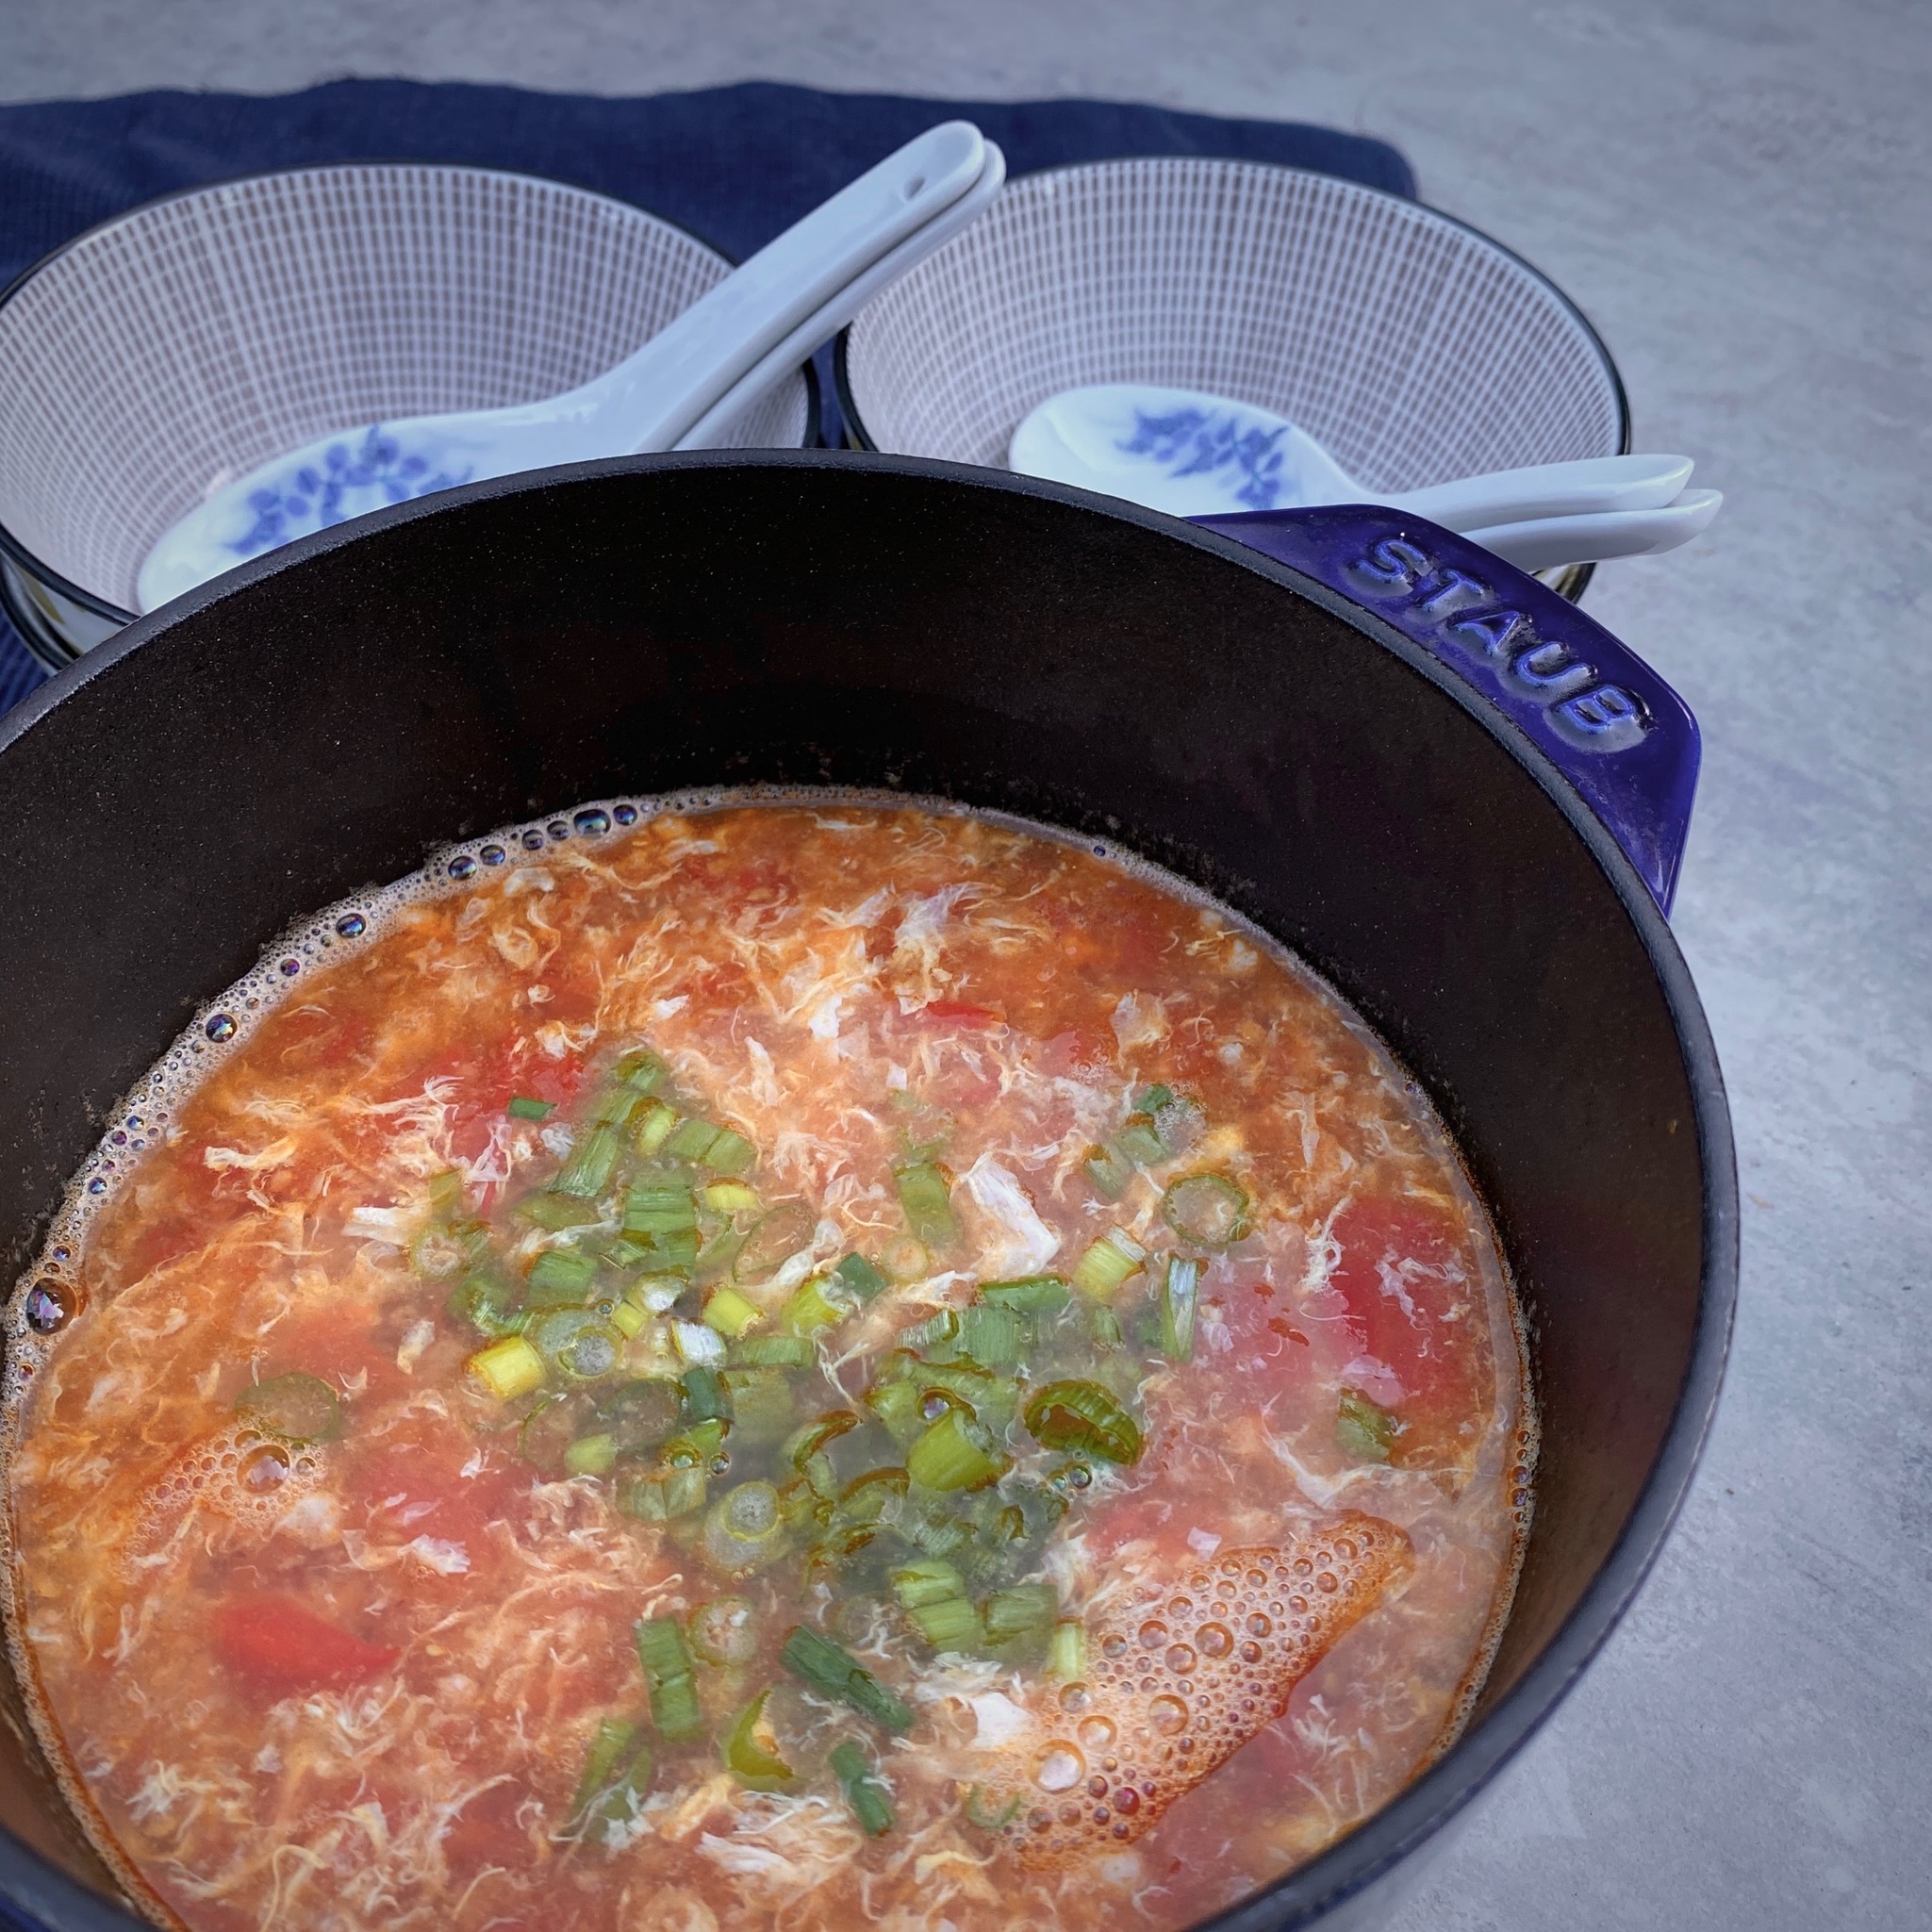
Growing up, my dad almost always made soup with dinner.  Weeknight dinners meant a quick soup like Corn Soup or Egg Drop Soup.  This is a twist on egg drop soup. With tomato season in full swing, this is the perfect time to make Tomato Egg Drop Soup.

I adapted a recipe I found on The Woks of Life, a fabulous blog/website for Asian recipes and stories.  My version includes a bit of ground meat for flavor and texture because that’s how my Dad made it.  The cornstarch slurry gives the soup a bit of body, you can leave it out if you wish.  This is great as a noodle soup also.  Delicious with rice noodles, and hand-pulled noodles.

The Key

The key to this recipe is not just great tomatoes, but how to create the egg ribbons in the soup. The direct translation of the name is actually Egg Flower Soup as the egg resembles a flower.  When adding the egg, make sure the soup is on low heat so that the soup is at a gentle simmer.  Add the egg in a slow steady stream as you swirl the soup in ONE DIRECTION with either chopsticks or a spoon. If you move your utensil in different directions you will not get the ribbons of egg.  You can hold the soup at a gentle simmer, do not boil the soup as that can curdle the egg. Garnish with green onions or cilantro, I like both.

Try this quick and easy homey soup, I think you’ll like it.

Tomato Egg Drop Soup

A delicious quick and easy soup, Tomato Egg Drop Soup is a rift on the classic Egg Drop Soup
Course Soup
Cuisine Asian, cantonese
Keyword soup, Tomato Egg Drop Soup
Prep Time 15 minutes
Cook Time 15 minutes
Servings 4

Ingredients

  • 2 tablespoons oil
  • 10 ounces tomatoes, peeled 1 large or 3-4 small, about 280g; cut into small chunks

Stock

  • 2 cups chicken stock 480 ml
  • 1 cup water

Seasoning

  • 2 teaspoons light soy sauce or soup soy sauce
  • 1/2 teaspoon sesame oil
  • 1/4 teaspoon white pepper
  • salt to taste
  • 1 egg beaten

Thickener

  • 1 1/2 teaspoons cornstarch mixed with 2 tablespoons cold water or broth optional

Garnish

  • 1 scallion finely chopped
  • 2 tablespoons cilantro chopped, optional

Protein Option

  • 1 Tbsp Vegetable oil
  • 1/2 Cup Ground beef preferably can substitute ground pork or chicken

Marinade

  • 1 Tsp Soy sauce regular or light
  • 1 Tsp Oyster sauce
  • 1 Tsp Rice wine
  • 1 slice fresh ginger smash to release flavor
  • 1/4 Tsp Granulated sugar
  • 1/4 Tsp Salt
  • dash White pepper

Instructions

  • Combine seasonings for meat mixture, mix with ground meat Let sit for 10 minutes. Heat 1 tablespoon oil in 3-4 qt pot over medium heat. Add ground beef and sauté’ just until meat loses pinkness. Remove from pot and reserve.
  • In the same pot, heat 2 T oil over medium-low heat. Add the tomato chunks and stir-fry for 5 minutes until the tomatoes are softened and fall apart.
  • Add chicken stock, water, seasonings, and salt to taste*. Bring to a boil, then lower the heat so soup is just at a simmer with the lid on. Allow soup to simmer for 10 minutes.
  • *Add meat, if using, with the stock and water. Bring back to a boil and immediately lower heat so soup is at a simmer. Taste soup and add salt or soy sauce if needed. Do add the sesame oil and ground pepper. Then allow soup to simmer for 10 minutes.
  • Beat the egg in a small bowl and set aside.
  • Make the cornstarch slurry in a small bowl. If the soup is for noodles omit cornstarch slurry. If serving as a soup, increase heat to medium and add cornstarch slurry to soup. Bring soup to a soft boil to allow the cornstarch to thicken the soup. Once it thickens turn the heat back down to low.
  • Pour a thin stream of egg into the soup. Let it sit for a couple of seconds just to set the egg a bit, then, with chopsticks or a spoon, gently swirl the soup in a whirlpool motion in one direction. This creates the ribbons of egg characteristic of egg drop soup.
  • Ladle soup into bowls and garnish with green onions and cilantro. Serve immediately

Notes

Blanch tomatoes in boiling water to remove the skin before cutting into quarters.  Once added to soup the skin separates from the rest and you are left with fibrous skin in your soup. It's better to remove the skin despite being more work.  Or remove skin when frying tomatoes.  As tomatoes soften, use tongs to pull the skin off.  Then add stock and water.
Sprinkles Instead of Sparklers (Vanilla Sprinkle Cookies)

Sprinkles Instead of Sparklers (Vanilla Sprinkle Cookies)

Happy July Fourth

Despite the current turmoil we pause to celebrate us, the United States of America.  A time to reflect on what this holiday means to each of us.  For me, this country offered a way out of chaos, opportunity and hope for my father and I am the direct recipient of his escape and struggles.  I am forever grateful and cognizant of that fact and if not for this country my family’s trajectory would have been far different.

And yet it is painfully obvious we have much work to do in order to create a more perfect union where all men and women are created equal.  How do we ensure that life, liberty and the pursuit of happiness is along the same road for each and everyone of us.

Proud to be an American

Since Election Day November 2016 I have felt a sense of obligation to my family, my kids and my country.  I marched, attended rallies, canvassed, I needed to be more invested in our political process to effect change.  When you are comfortable living your life it is easy to become complacent about what is happening around you.  You wake up one morning and realize the crap has hit the fan while you were living your life.  If you dislike politics or no matter what side of the political divide you fall on-human decency, kindness, and compassion knows no party and we can all work towards a kinder, more inclusive nation.  Above all I would like the definition of being American to include compassion, empathy, decency, equality.

I Still Want to Celebrate

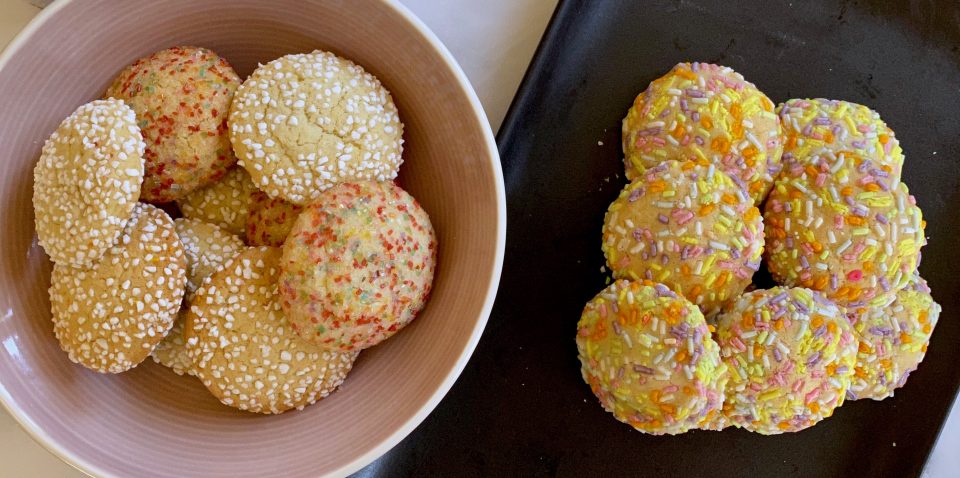
COVID-19 and the state of our nation means a much more subdued celebration of July 4th in our house.  We are grilling hot dogs and making a delicious white bean stew  (my twist on Frank and Beans) to mark the holiday.  Dessert will be colorful Vanilla Sprinkle Cookies, also known as Sugar Saucers.  I found the recipe on Serious Eats, a favorite go-to site for me.  Reminiscent of the cookies found in Italian-American bakeries, they are light, with a cakey center and crisp edges laced with vanilla flavor.  The sprinkles provide a nice crunch to the cookies.  I think of the sprinkles as edible sparklers and fireworks-yummy, safe ones.  I should have used red, white and blue sprinkles, but could not find any, maybe next year.

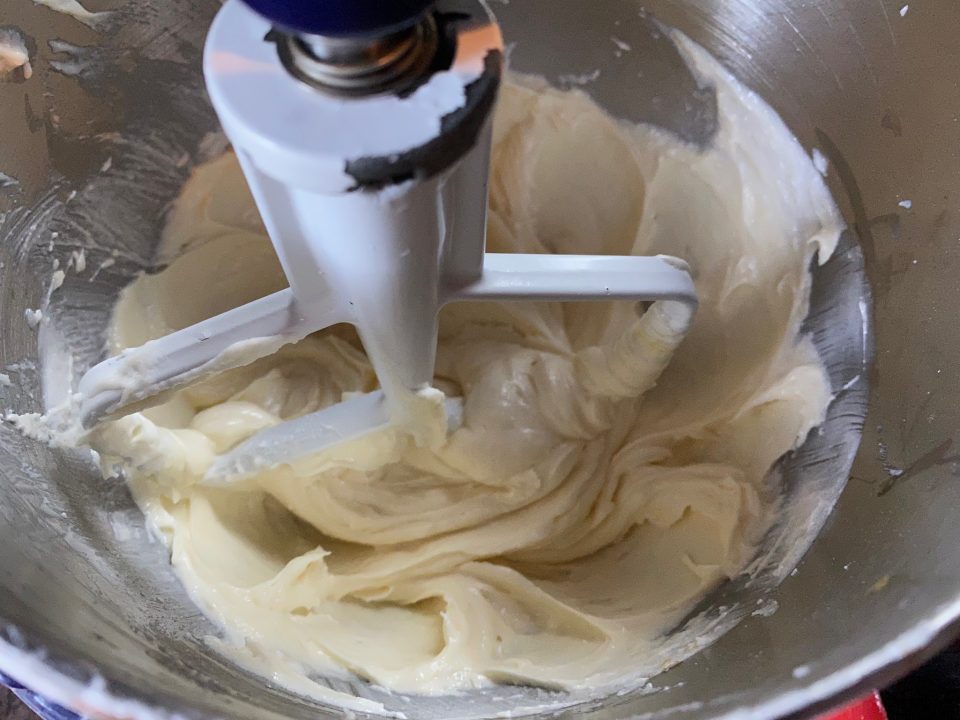
Before flour is added

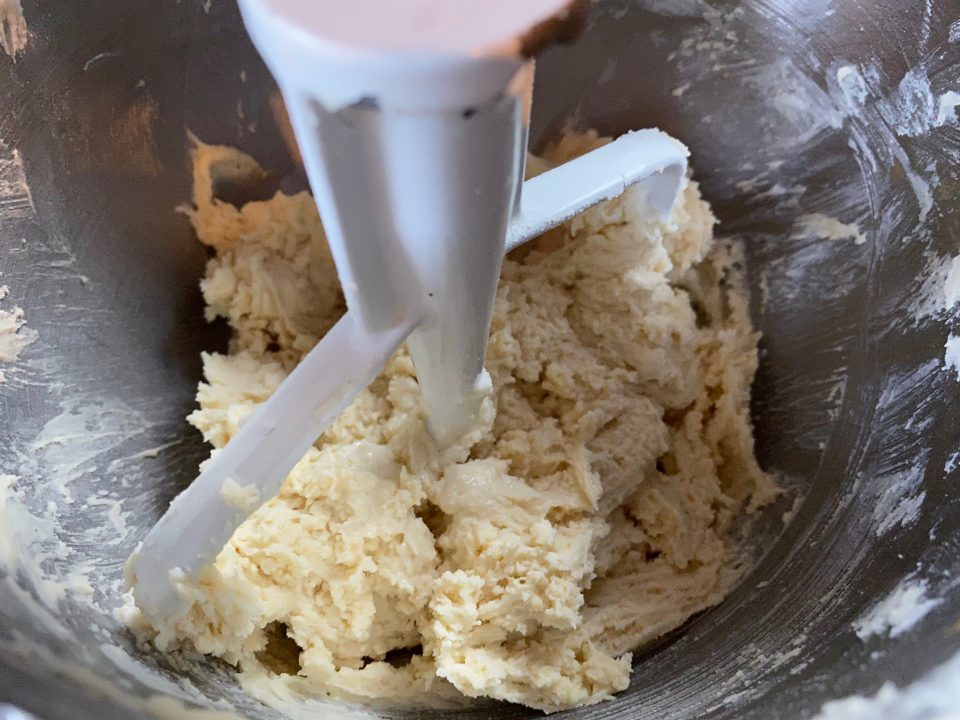
The dough includes oil and butter creamed with a combination of sugar and powdered sugar.  The recipe states to beat until light and fluffy but it is pretty soft almost liquid in consistency, don’t worry too much about fluffy.  The dough will still be soft after adding the flour mixture. Refrigerate for at least one hour.

After flour is added

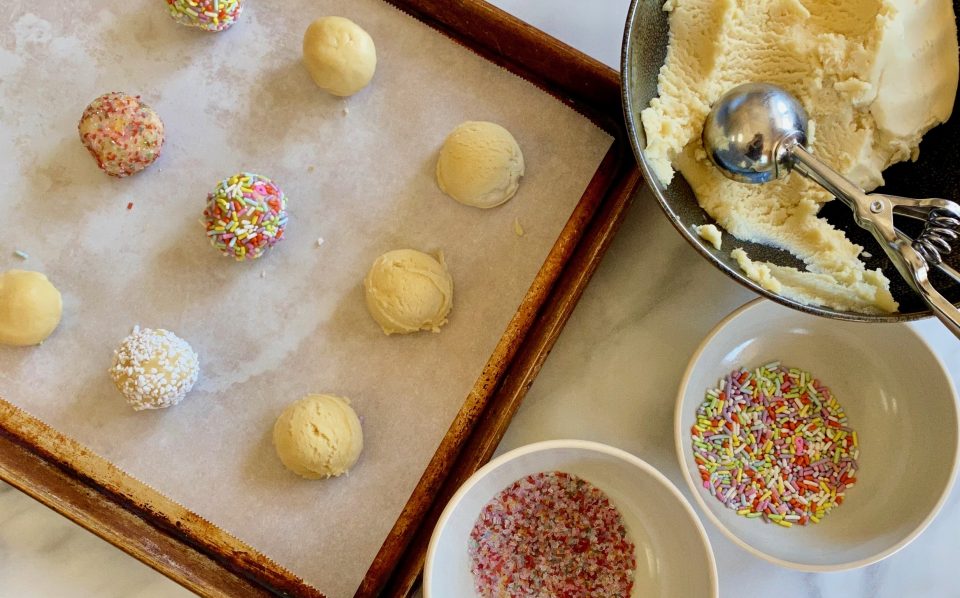
I used my handy dandy ice cream scoop to portion out the dough which I then shaped into balls.  Use a 2 tablespoon scoop for smaller cookies and drop the balls into the sprinkles.  The baking time was about 12 minutes for smaller cookies.

The hot dogs are ready as is the white bean stew.  As we enjoy our 4th of July dinner we’ll be watching Hamilton.  A good way to celebrate our country and reflect on what it means to be an American.

Vanilla Sprinkle Cookies

A vanilla flavored sugar cookie with crisp edges and a tender cake-like center. The perfect celebration cookie made festive with colorful sprinkles.
Course cookies
Cuisine American
Keyword Vanilla Sprinkle Cookies
Prep Time 20 minutes
Cook Time 40 minutes

Ingredients

  • 2 cups (10 ounces) all purpose flour
  • 1/2 teaspoon baking soda
  • 1/2 teaspoon salt
  • 3/4 cup (1 1/2 sticks) unsalted butter, at room temperature
  • 1/2 cup sugar
  • 1/2 cup confectioners sugar
  • 1/4 cup canola oil
  • 1 egg
  • 2 teaspoons vanilla
  • About 1 cup rainbow sprinkles can use pearl sugar, sparkling crystals, orchocolate sprinkles

Instructions

  • In a medium bowl, combine flour, baking soda, and salt; set aside. In the bowl of a stand mixer fitted with a paddle attachment, cream together butter, oil, sugar, and confectioners sugar until light, about 3 minutes. The batter will be on the soft, wet side.
  • Add egg and vanilla and beat to combine. Add dry ingredients and mix just until dough comes together. Dough will be very soft but wrap it in plastic wrap and refrigerate for at least one hour.
  • Preheat oven to 350°F. Line two baking sheets with parchment paper.
  • Fill a shallow bowl with sprinkles of choice. Use a 1-ounce cookie scoop (or a rounded tablespoon) to form cookies into balls. Roll each ball in sprinkles to cover and place on parchment lined baking sheet.
  • Bake until cookies are golden at the edges, about 12 minutes. Let cool 5 minutes then transfer to a wire rack to finish cooling. Cookies will keep in an airtight container for up to 3 days.

Notes

These cookies can be made larger, up to 4 ounces.  Adjust baking time accordingly, estimated 20 minutes to bake for larger cookies.
 
Rolling for a Good Cause Lumpia Shanghai

Rolling for a Good Cause Lumpia Shanghai

Our action group is hosting a fundraiser for one of only two Filipino-Asian American Representatives in the House, TJ Cox.  Normally we would have finger food at an event and Filipino spring rolls, Lumpia, would be perfect.  BUT, due to COVID, our event will be a virtual one.  The next best thing? How about an online tutorial on how to make Lumpia so people could make their own to enjoy during the event. Sounds like a plan.

I was given 5 minutes for my “how to make Lumpia” video.  I’ve watched a ton of Tasty videos, I can do this, uh-huh. Lumpia is the Filipino version of an Egg Roll.  Filled with meat and vegetables and wrapped in a thin sheath made of flour, water, and salt.  The rolls are fried to a crispy, golden finish.  Crunchy, light, with a savory filling, in a word they are delicious.

Let’s Roll

The filling for Lumpia is made with ground beef or pork or a combination, I use 50:50.  You can substitute ground chicken or turkey.  Add to this, minced onions, grated carrots, shredded cabbage, and egg and seasonings.  I like a combination of salt and soy sauce, minced garlic, ginger for a hint of sweetness, and a couple of grinds of pepper.  The recipe can be halved.

That’s a Wrap

Vietnamese wrappers are made of rice paper while Chinese Egg Rolls are made with egg in the skin, are thicker, and when fried will have a bubbly surface. Lumpia are made with wheat flour, water, and salt and are super thin, resulting in a smooth surface, incredibly light and crispy roll.

The video shows two ways to wrap your Lumpia.  The key is to wrap them tightly.  This is done by tucking and pulling the wrapper taut while rolling.  Seal the egg roll with egg wash and that’s it.  Now repeat 50 times!

Added Bonus

Lumpia freezes beautifully.  Lay the Lumpia on a baking sheet in a single layer and place in the freezer.  When the lumpia is frozen, transfer to a zip lock bag and toss it back in the freezer.  No need to defrost before frying, just add a couple of minutes onto the cooking time.

You can fry the Lumpia in a pan with approximately 1 inch of oil, flip them when they are golden brown to cook the top half, 2-3 minutes per side. They can also be deep-fried.  Serve with your choice of dipping sauce such as Thai Chili Sauce, Vinegar-Soy dipping Sauce, or Banana Ketchup.  Enjoy!

Lumpia Shanghai

Course Appetizer
Cuisine Asian
Keyword Filipino Eggroll, Lumpia Shanghai, springroll
Prep Time 1 hour
Cook Time 4 minutes

Ingredients

  • 4 garlic cloves finely grated
  • 1 tbsp minced ginger
  • 1 medium onion very finely chopped, about 1 cup
  • 2 medium carrots grated on the large holes of a box grater, about 1 cup
  • 4 scallions white and light green parts, very finely chopped
  • 1 cup cabbage very thinly sliced
  • 2 eggs 1 whole, 1 white and yolk separated
  • 1 pound ground pork can substitute ground chicken
  • 1 pound ground beef
  • 2 teaspoons kosher salt
  • 2 tbsp soy sauce
  • 1 teaspoon freshly ground black pepper
  • 2 11-ounce packages lumpia wrapper or spring roll shells Recommend Menlo Wrappers found in freezer section in Asian markets

Changes and optional ingredients

  • 1/4 pound raw shrimp, peeled and deveined Chop finely and add to ground meat mixture
  • 1/2 cup water chesnuts substitute 1:1 for grated carrots

Instructions

  • Combine garlic, onion, carrots, scallion, cabbage, salt, pepper, 1 egg and 1 egg yolk in a large bowl and mix until well blended. Add beef, pork, salt, and pepper and using a wooden spoon or your hands, mix until everything is evenly distributed.
  • In a small bowl, whisk a splash of water into remaining egg white. Working one at a time, place lumpia wrapper on a work surface with 1 corner facing you. Place 1 heaping tablespoon of filling in center of wrapper and shape into a thin horizontal 5-inch long log. Dip your fingers in remaining egg white mixture and lightly brush edges of wrapper. Roll bottom corner up and snugly over filling, then tuck under filling. Fold left and right corners tightly over filling to enclose, use your fingers to crease the wrapper, then continue to roll bundle away from you. Both sides should be as close to sealed as possible; use a little egg wash to seal, as necessary.
  • In a large nonstick pan, fill bottom of pan until oil comes up 1 inch. Oil should cover lumpia at least halfway when frying; adjust amount if needed. Heat pan over medium-high heat. You’ll know oil is hot enough if you place the tip of lumpia into oil and it bubbles immediately. Cook lumpia, until deep golden brown and crisp, 2 to 3 minutes per side. Remove to a wire rack lined with paper towels. You can serve whole or cut in half. Serve with Vinegar-Soy Dipping Sauce or sweet chili sauce.
Notes

Vinegar-Soy Dipping Sauce:
1/4 cup plus 2 tablespoons rice wine vinegar
1/4 cup soy sauce
2 garlic cloves, thinly sliced or finely chopped
1 Thai chile, thinly sliced
1 scallion, thinly sliced
Stir all ingredients together and decant into a small dish.
Cool Dad, Cool Summer Cooler, Sangria

Cool Dad, Cool Summer Cooler, Sangria

Father’s Day this past Sunday meant Hubby’s Choice.  We did whatever he wanted to do, eat, and play. Here is my Haiku for Father’s Day

He walked in the morn

Ate fried chicken Played Fortnite

She drank Sangria

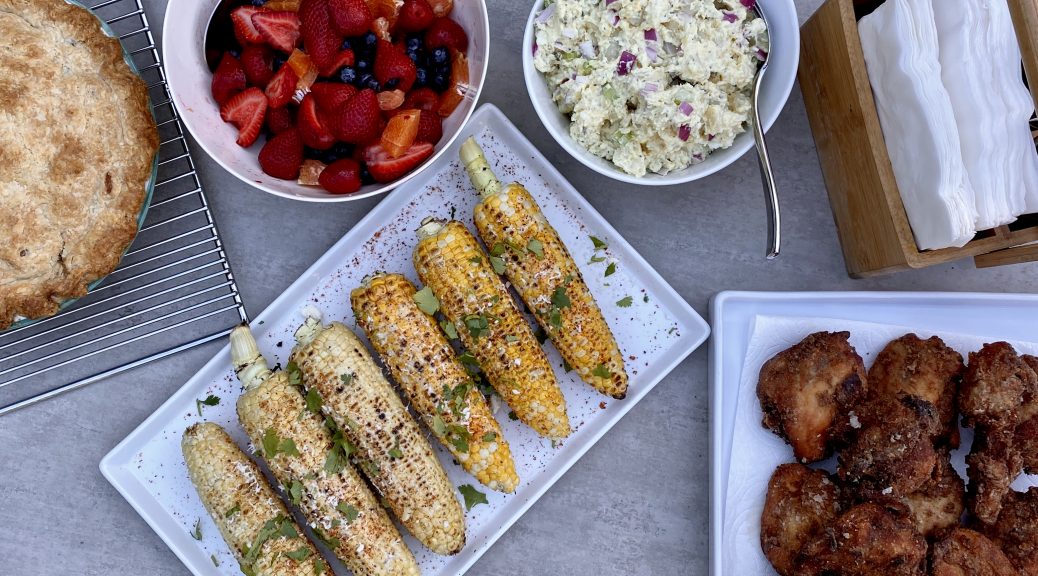
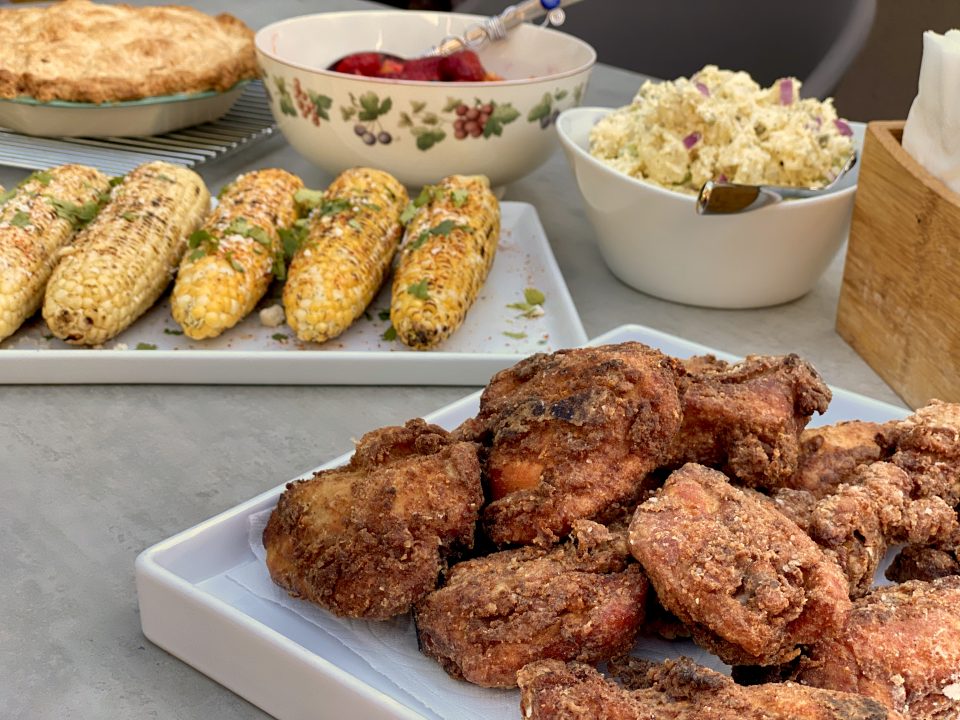
Yep,  the Sangria was for me.  Sangria was the perfect complement to our Dad Driven Dinner of fried chicken, potato salad, fresh corn on the cob grilled, served as Elote (my latest obsession), and a berry melange with oranges.  AmIRite?

So I pulled out a bottle of red wine, not the pricey stuff, and made a large pitcher of Sangria. It’s light, it’s festive, it’s refreshing and delicious, one of my favorite drinks.  Perfect for hot summer days and alfresco dining.

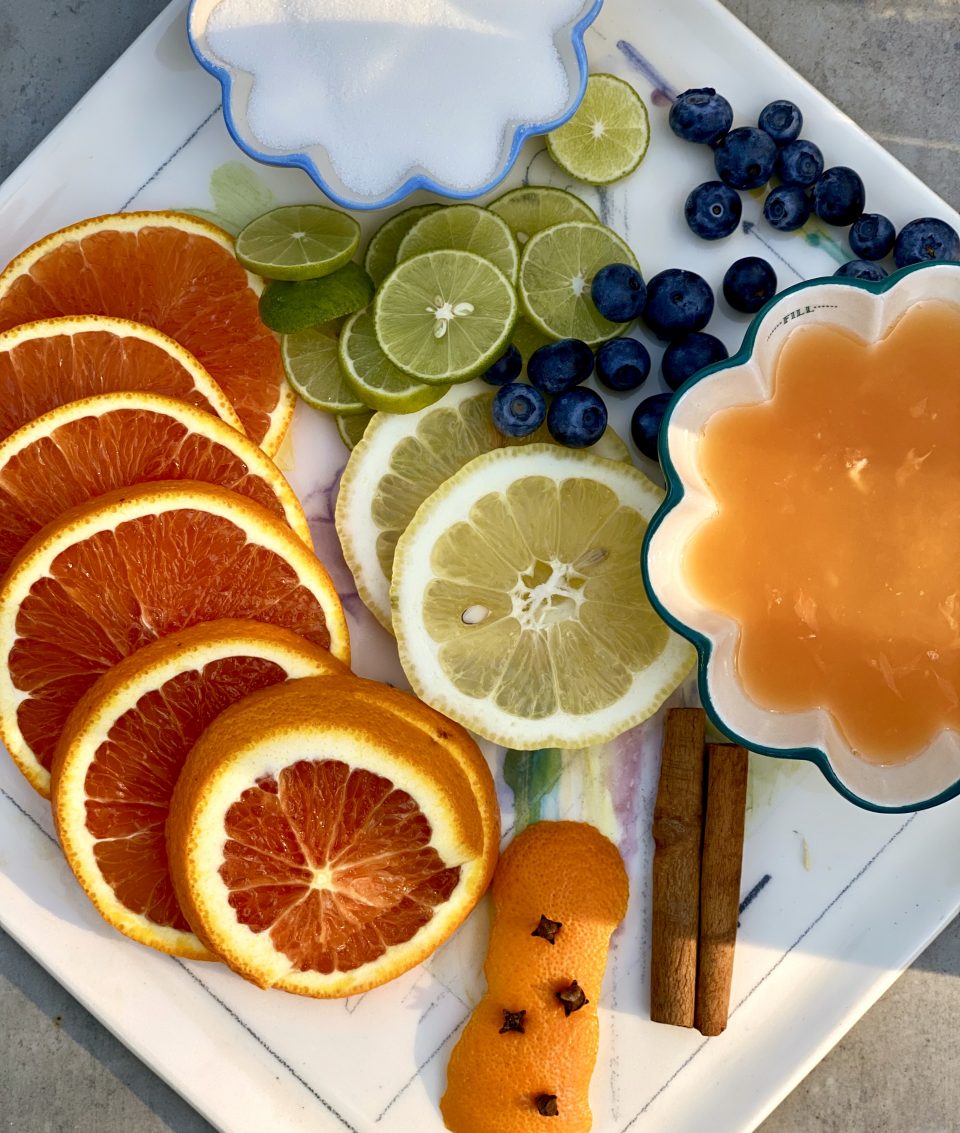
Over the years I have tweaked a recipe I first found in Cooking Light magazine.  The tweaks entail adding more alcohol, imagine that.  Feel free to add your favorite fruits, the sky’s the limit.  I added blueberries and lime slices to this batch.  Apples would also be great, or other berries.  To bring out the flavors of the fruit, when you add the fruit to the wine mixture, muddle them lightly.  Totally optional.  Get fancy by garnishing the glass with a wedge of citrus or a strawberry.  If you’re in party mode, hit it with a splash of Brandy.

Did I mention we finished with homemade apple pie?  Happy Father’s Day!

Sangria

Take red wine, add a little bit of sugar, oranges, lemons, cinnamon, and cloves. Then take it over the top with a splash of Triple Sec, Brandy and Club Soda, that’s Sangria!
Course Drinks
Cuisine Spanish
Keyword Red Wine, Sangria, Summer Cooler
Prep Time 30 minutes
Servings 4 servings

Ingredients

  • 750 ml bottle of red wine, inexpensive but drinkable Riojas would be lovely, low tannin, younger wine
  • 1 cup fresh orange juice
  • 1/4 cup Triple Sec or Brandy
  • 1/3 cup granulated sugar
  • 1 strip orange peel 4” long
  • 4 cloves
  • 2 cinnamon sticks
  • 1 lemon thinly sliced & seeded
  • 1 orange thinly sliced & seeded
  • Splash brandy
  • 2 cups Club Soda or Sparkling Water

Garnish

  • any fresh fruit

Instructions

  • Combine the first 4 ingredients in a large pitcher, stirring mixture until the sugar dissolves.
  • Press cloves into the rind strip.  Add strip, cinnamon, and fruit to wine mixture. 
  • Chill for at least 30 minutes.  Stir in club soda just before serving.  Serve over ice.
  • Garnish with additional fruit.
Strawberries Fields for…Cake (Strawberry Buttermilk Cake with Lemon Cream)

Strawberries Fields for…Cake (Strawberry Buttermilk Cake with Lemon Cream)

The Life of a Strawberryholic

Since strawberries returned to our local farmers market our Sunday mornings start with a run to the market.  As soon as we arrive home, the first couple of baskets of strawberries go into a colander, given a quick rinse, and placed on the counter for immediate consumption.  The rest of the berries are placed in paper towel-lined containers and enjoyed throughout the week.  Somewhere in the middle of the week, we start thinking of different ways to serve those little red gems.  Luckily, both the internet and cooking mags are filled with recipes that highlight berries.  While thumbing through the latest issue Baking from Scratch, Jamie came across a mouthwatering recipe for a Strawberry Buttermilk Cake with Lemon Cream.  She immediately set upon making it.

Another Strawberry Cake, Deb?  Why?

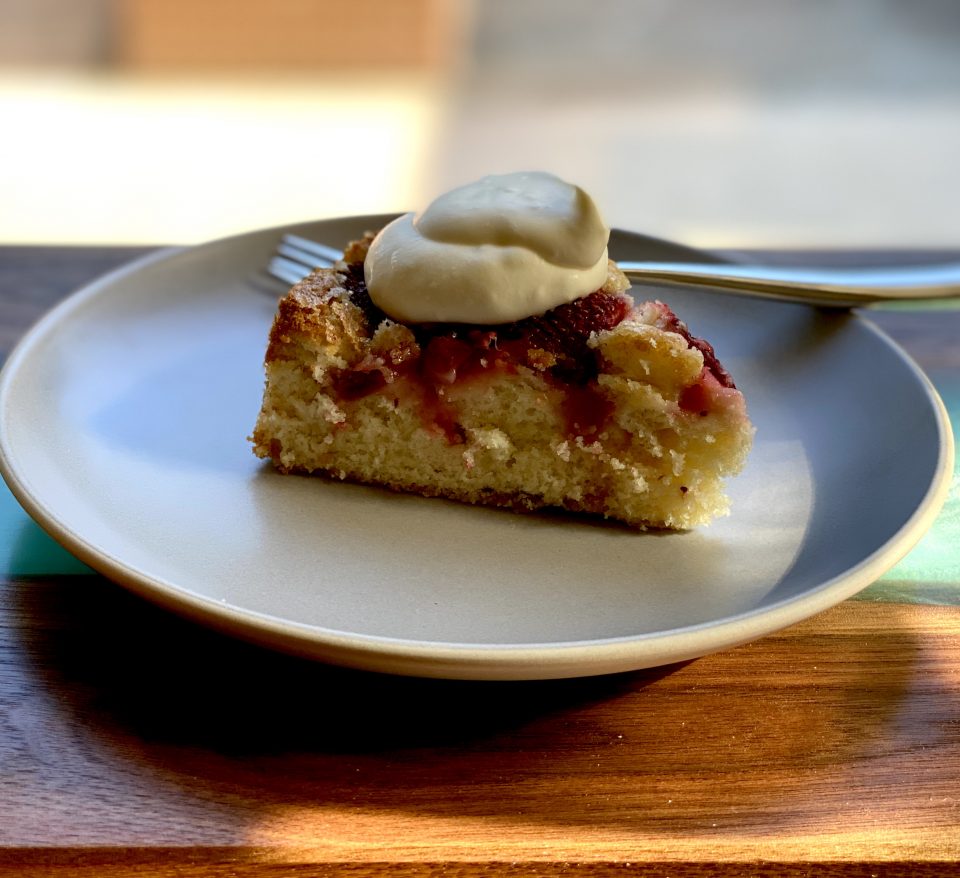
I had previously posted a recipe just for that “save me from all the strawberries I bought” moment, Summer Strawberry Cake from Smitten Kitchen A delish, jam-packed full of strawberries cake. So why another strawberry cake recipe?  This one is easy to make and pretty darn delicious too, but the smile, fist bump the guy next to you moment is the Lemon Cream. Sure, a simple dusting of powdered sugar would be fine, BUT, oh, that Lemon Cream takes it over the top. It is creamy, sweet with a lemony zing, and adds the wow factor.  Do not skip it.

To make the cake batter, cream softened butter with sugar and lemon zest until light and fluffy. Add the dry ingredients mixture alternating with the buttermilk always starting and ending with the dry ingredients.  Jamie baked it in a regular cake pan although the recipe calls for either a cast iron pan or cake pan.  I imagine a cast iron pan would result in crispy edges. I leave it to you to decide what pan to use.

The cake is not quite as dense as a coffee cake and has a nice crumb. The strawberries provide the flavor punch and the sprinkle of Turbinado Sugar adds a nice finishing crunch.

The next time you go to your local farmer’s market, pick up an additional pint or two of strawberries, and make this cake. It’s berry delicious and don’t skip the Lemon Cream!

Print Pin
5 from 1 vote

Strawberry Buttermilk Cake

From Bake from Scratch, a delicious buttery cake topped with strawberries and a killer lemon cream!
Course Cake, Dessert
Cuisine American
Keyword buttermilk, lemon cream, Strawberry
Prep Time 20 minutes
Cook Time 1 hour

Ingredients

Creamed Mixture

  • 6 tablespoons (84 grams) unsalted butter, softened
  • 1 cup (200 grams) granulated sugar
  • 2 large eggs
  • 1 tablespoon lemon zest

Dry Stuff

  • 1⅔ cups (209 grams) all-purpose flour
  • 1 teaspoon (5 grams) baking powder
  • ½ teaspoon (1.5 grams) kosher salt

Finish

  • ½ cup whole buttermilk
  • 1 teaspoon vanilla extract
  • 8 ounce fresh strawberries, halved
  • 2 tablespoons (24 grams) turbinado sugar

Lemon Cream

  • cups heavy whipping cream
  • 2/3 cup (80 grams) confectioners’ sugar
  • 2 teaspoons lemon zest
  • 1 tablespoon fresh lemon juice
  • 1 teaspoon vanilla extract
  • ¼ teaspoon (0.75 gram) kosher salt

Instructions

The Cake

  • Preheat oven to 325°F. Spray a 9-inch cast-iron skillet or cake pan with baking spray with flour.
  • In the bowl of a stand mixer fitted with the paddle attachment, beat butter, granulated sugar, and lemon zest at medium speed until fluffy, 3 to 4 minutes. Add eggs, one at a time, beating well after each addition.
  • In a medium bowl, whisk together flour, baking powder, and salt. Gradually add flour mixture to butter mixture alternately with buttermilk, beginning and ending with flour mixture, beating just until combined after each addition. Beat in vanilla.
  • Pour batter into prepared pan, using an offset spatula to smooth top. Top with strawberries, and sprinkle with turbinado sugar.
  • Bake until golden brown and a wooden pick inserted in center comes out clean, 45 minutes to 1 hour. Serve warm with Lemon Cream.

Lemon Cream

  • In the bowl of a stand mixer fitted with the whisk attachment, beat cream and confectioners’ sugar at medium speed until soft peaks form. Add lemon zest and juice, vanilla, and salt, beating to combine. Makes about 3 cups
CORNfirmation, Summer is Here! (Elote-Grilled Mexican Street Corn)

CORNfirmation, Summer is Here! (Elote-Grilled Mexican Street Corn)

I consider my weekly trip to our local Farmer’s Market as my sanity break from COVID-19.  As the weather warms not only are more folks coming out but the variety of fruits and vegetables at the market has also blossomed.  As the apples and pears bid us goodbye-cherries, stone fruits, and berries have slid into those same spots without missing a beat.

My usual routine on Sundays is to head over to our local farmers market.  I line up around 8:30, before the market opens at 9:00, to grab my half flat of strawberries.  All my “ducks” are in a row so I then hop over to the next kiosk for microgreens and mushrooms, veggies at Live Earth Farm, and then cherries on the corner along with my Asian veggie fix.  I wrap up my shopping at the fresh blueberries stand and then sit on a bench with my buds to catch up.

This past Sunday, I added a stop.

Fresh Corn is Back Baby!

There I was, waiting in the strawberry line when I noticed a new stall next to the strawberries, FRESH CORN.  This signals the beginning of summer.  Everybody have corn tonight, uh-huh, uh-huh.

The Paint

Most of the time we boil or steam the corn and happily munch on them unadorned, a sprinkle of salt perhaps.  My new favorite way to serve fresh corn is as Grilled Mexican Street Corn called Elote.  Shuck the corn and throw them on a hot grill until they are nicely charred.  Remove and slather corn with mayonnaise or a 50:50 blend of mayonnaise and sour cream or Mexican Crema.   If you have an aversion to mayo, you could use just sour cream or melted butter.  I use a brush to “fine-tune” how much mayo I spread on each cob to appease my guilt about the calories.

The Sprinkles

The essential ingredient for corn sprinkles (cute, eh) is chili powder.  A purist will get specific chili powders like ancho or guajillo, which can be purchased online or at any Hispanic market.  These are specifically dried chilis ground into powder.  Chili Powder found in most supermarkets is actually a blend of chilis and other spices like cumin, oregano, garlic powder, and cayenne.  ANY of these work for Elote.

AND THEN…You can try commercial products made to mimic the flavors of Elote and enhance your “street food” dish.  I like Tajin, a blend of chilis, lime, and salt.  Think of it as the granddaddy of the Mexican spice blend.  Lately, TJ’s has jumped on the bandwagon and has a Chili Lime seasoning blend and in their Everything But The…line, an Elote blend that contains Parmesan, Chipotle, cumin, and cilantro, which sounds pretty darn delicious.

The Fixins’

The finishing trifecta for your Elote.  Sprinkle fresh chopped cilantro and crumbled Cotija Cheese or in a pinch, Parmesan cheese, and finally a squeeze of lime all over the corn.

Done, so good.

For those of you who just can’t stand corn between your teeth, after grilling, scrape the corn off the cob. Put the corn in a bowl and add the sprinkles and fixins’ on top, voila, a delicious, colorful Corn Salad, and no flossing.  Check out Serious Eats’s Esquites-Mexican Street Corn Salad.

Enjoy

Elote (Mexican Street Corn)

Fresh corn on the cob marks the summer season. Elote or Mexican Street Corn, a delicious way to highlight fresh corn, grill and top with mayo, chili, cheese and lime.
Course Side Dish, Vegetable
Cuisine Hispanic, Mexican
Keyword Corn on the cob, Elote, Fresh corn
Prep Time 5 minutes
Cook Time 10 minutes
Servings 6 servings

Ingredients

  • 6 ears corn shucked and cleaned
  • 1/3-1/2 cup mayonnaise or use a blend of Mayo and sour cream or Crema
  • Chili powder See post for variations
  • 1/3 c. crumbled cotija cheese or Parmesan in a pinch
  • Freshly chopped cilantro
  • Lime wedges for serving

Instructions

  • Preheat grill or grill pan to medium-high. Grill corn, turning often, until slightly charred all over, about 10 minutes.
  • Brush corn with a layer of mayonnaise and sprinkle with chili powder, cotija, and cilantro. Serve warm with lime wedges.
A Dish For All Seasons (Bread Pudding)

A Dish For All Seasons (Bread Pudding)

The What

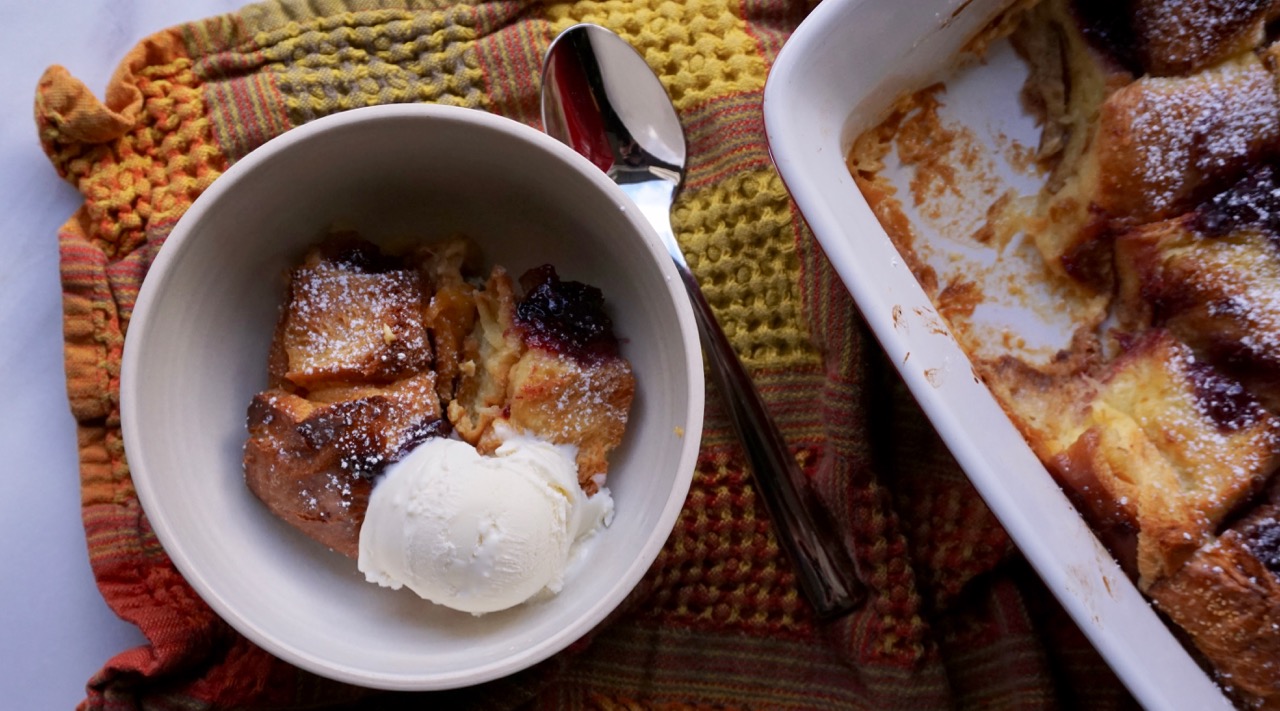
I LOVE bread pudding.  Sweet or savory, made with almost any kind of bread-from bagels to brioche, enveloped in a custard of eggs and milk, the epitome of comfort food.  Each spoonful is a revelation, crispy, crunchy outside and meltingly soft custard-like inside, YUM, it’s so good.

The Why

I’m guessing bread pudding was born out of economics, a way to not waste day-old bread. Who was that frugal genius?  It’s everything a dish should be-comforting, multi-textured, versatile, simple, and most of all amazingly delicious.

The Who

My favorite recipe is a mash-up of a Mark Bittman recipe in The New York Times and one from Bon Appetit, Apple-Raisin Bread Pudding.  That’s the beauty of bread pudding, it lends itself well to additions and changes.  Play with this recipe and make it your own.  I even have a rift for a Tres Leches Bread Pudding, yep, so many variations, so little time.

The How

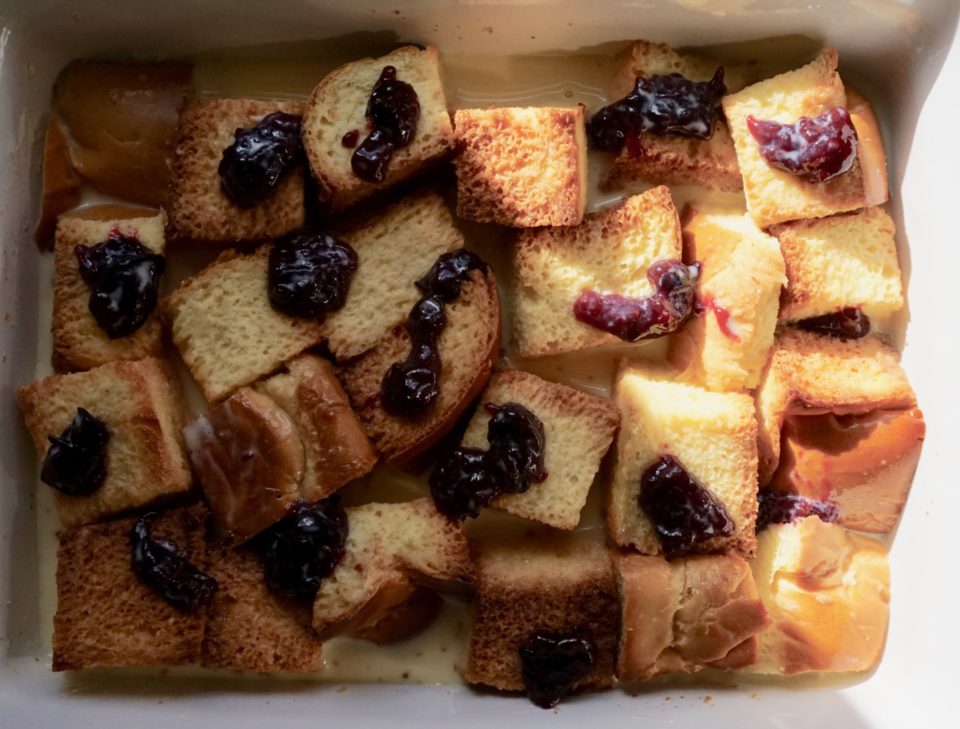
It’s super versatile, I have used french bread, challah, brioche, or ciabatta.  If I want a richer dish I replace part of the milk with half-half (25-50%) or add 1-2 additional eggs for a more custard-like pudding.  I have added apples in the fall, berries, or peaches in the summer, dried fruit when my fruit basket is empty or folded in homemade preserves …  For you chocoholics, throw in a handful of chocolate chips.  You get the picture, this is a slam dunk.  For Thanksgiving,  a savory bread pudding with mushrooms, peppers, and Parmesan will grace our table, it has become an annual holiday tradition.

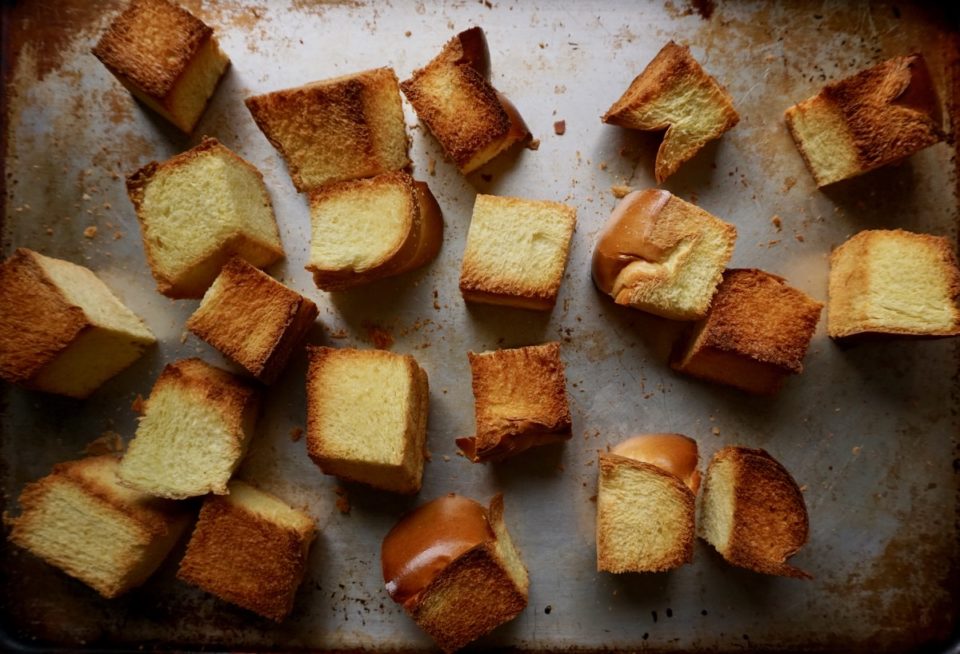
Toast the cubes in the oven at 350 degrees for 7-10 minutes

The Pay-Off

My kids would clean their rooms and do their chores for bread pudding, especially if I added a scoop of vanilla ice cream on top. Yep, a fam-favorite for many reasons.

Adapted from Simple Bread Pudding by Mark Bittman

Who doesn't love a simple, comforting dessert-bread pudding!
Course Breakfast, Dessert
Cuisine American
Keyword bread., eggs, Simple Bread Pudding
Prep Time 10 minutes
Cook Time 35 minutes
Total Time 45 minutes

Ingredients

  • 2 cups milk replace 1/2 with half-half for a richer pudding
  • 2 tablespoons unsalted butter (1/4 stick) more for greasing pan
  • 1/2 cup sugar for a sweeter pudding use 3/4 cup
  • 1 teaspoon vanilla extract
  • Pinch salt
  • 1/2 loaf sweet egg bread like challah or brioche cut into 1.5-2-inch cubes (about 5 to 6 cups)
  • 2 eggs, beatened Like itt custardy? Add an extra egg

Optional Fruit Add-Ins Replace 1/2 cup of bread with any of the following

  • 1 apple peeled and cored, cut into 1/2 inch dice. Granny Smith for tart, Golden Delicious for sweet.
  • 1 cup fresh blueberries

Instructions

  • Heat oven to 350 degrees.
  • Butter a 2-quart baking dish and fill it with cubed bread (8x8 or 9x9 square pan will work)
  • Toast cubed bread pieces in 350 degrees oven for 10 minutes. This is an optional step. If you do toast bread, definitely soak the cubes before baking.
  • In a small saucepan over low heat, warm milk, butter, vanilla, sugar and salt. Continue cooking just until butter melts; cool.
  • Add eggs to cooled milk mixture and whisk; pour mixture over bread. Let sit for abot 30 minutes so the bread can soak up the egg mixture. This makes a more custard like pudding.
  • Bake for 30 to 45 minutes, or until custard is set but still a little wobbly and edges of bread have browned. Serve warm or at room temperature.

Tweaks

  • Like cinnamon add 1/4 teaspoon to egg mixture.
  • In place of fruit use 1/4-1/2 cup jam or preserves, dot pudding, distributing evenly
  • Sprinkle bread pudding with cinnamon before baking. For a crunchy top, sprinkle top with 2 tablespoons cinnamon sugar before baking. (To make your own cinnamon sugar, combine 1/2 cup granulated sugar with 2 T cinnamon)
  • Golden raisins work well in this bread pudding too!
Roasted Tomato & White Bean Stew (Bean Craving a Good Stew)

Roasted Tomato & White Bean Stew (Bean Craving a Good Stew)

Friday night…my mind was thinking about the upcoming Memorial Day weekend.

The plan, grilling on Monday.  Something classic, burgers, potato salad, strawberry shortcake, the “Summer is finally here” meal.  Saturday’s dinner was taken care of, take-out and delivery from one of the legacy restaurants in SF Chinatown, Kam Po.  A fundraiser for Chinatown Community Development Center combined with helping a Chinatown mom and pop business.  A win-win, I ordered roast duck, crispy skinned pork and bbq pork plates…can’t wait.

What’s for Dinner Tonight?

But it was Friday and I still hadn’t started dinner.  I cooked quite a bit during the week and was admittedly ready for an easy cook meal.   I peered into the pantry hunting for inspiration…hmmm, a couple of cans of white beans. Further rummaging around the kitchen produced cherry tomatoes, a couple of Italian sausages, one lonely onion. Jamie had recently tried a recipe from the NYTimes, Roasted Tomato and White Bean Stew that she gave a hearty thumbs up to on all counts-ease of prep and deliciousness.

I Was In Business

Winner winner beanie dinner.  This dish is simple, quick and so satisfying.  Roast tomatoes in olive oil and thyme which intensifies their flavor and sweetness.  I used a medley of gold and red cherry tomatoes, use whatever you like. While they are roasting, saute’ the onions, garlic, and pepper flakes. Add beans-reserve the liquid from the cans just in case to adjust the consistency of the sauce.  Give the stew a couple of stirs and mash some of the beans with a big spoon to thicken it.  Make sure to scrape all the tasty bits from roasting the tomatoes and add them to the beans along with the tomatoes and their liquid.
Home Stretch

Simmer a couple of minutes and voila’, dinner is served.  This stew is really, really good, the sweetness of the tomatoes and onions, the nice mouthfeel from the beans, yummy, YUMMY, yummy.  I love the garlic and thyme, but I’m wondering if rosemary would work too.  We grilled a couple of Italian sausages, sliced, and added them to the pot right before serving.  You could also just serve them on the side. Grilled shrimp or cod would be a lovely match too.  OR, keep it vegetarian, this stew is so flavorful and satisfying you won’t even miss the protein.  Top it with the parsley and lemon gremolata which adds a herby-citrus zing and you are in business. The Hubs and Jorge don’t like beans but they both admitted that this was delicious.  Now that’s a strong recommendation!

Make this stew the next time you need a quick, easy, hearty meal.  It’s just so tasty!

Looking for other meatless recipes?  This Red Lentil Soup from NYTimes is delicious~~

Print Pin
5 from 2 votes

Roasted Tomato and White Bean Stew

Course Main Course
Cuisine European
Keyword easy, roasted tomato, stew, vegan, White Bean, white bean stew
Prep Time 30 minutes

Ingredients

Garnish

  • ½ cup roughly chopped Italian parsley leaves and tender stems
  • 2 teaspoons lemon zest from 1 large lemon

Stew

  • 2 10-ounce containers cherry or grape tomatoes
  • ¼ cup olive oil plus 2 tablespoons and more for drizzling (optional)
  • 1 tablespoon fresh thyme leaves
  • Kosher salt and black pepper
  • 1 medium yellow onion thinly sliced
  • 3-4 large garlic cloves thinly sliced
  • ½ teaspoon red-pepper flakes
  • 2 15-ounce cans white beans (such as butter or cannellini), rinsed
  • 1 ½ cups vegetable or chicken broth or water
  • 2 Italian sausage optional mild or spicy, your choice

Serve with

  • Flaky salt for serving (optional)
  • Toasted bread for serving

Instructions

  • Heat the oven to 425 degrees. In a small bowl, gently toss together the parsley and lemon zest with your hands until well combined; set aside.
  • In a large baking dish or on a sheet pan, toss the tomatoes with 1/4 cup oil and thyme; season well with salt and pepper. Roast tomatoes until they have collapsed and begin to turn golden around the edges, 20 to 25 minutes.
  • When the tomatoes are almost done roasting, heat 2 tablespoons oil in a large (12-inch), deep skillet or Dutch oven over medium. Add the onion, garlic and red-pepper flakes and cook until the onion is softened and the garlic is fragrant, 4 to 5 minutes. Stir in the rinsed beans and broth and bring to a simmer. With the back of a spoon or spatula, gently smash about ½ cup of the beans so they slightly thicken the broth. If you want a thicker stew, crush some more of the beans. Season with salt and pepper.
  • When the tomatoes are finished roasting, add them directly to the stew along with any juices that have been released. Simmer for 5 to 10 minutes more so the flavors meld; season to taste with salt.
  • Ladle into shallow bowls. Top each serving with some of the lemon-parsley mixture and drizzle with some more olive oil, and season with flaky salt, if you like. Serve with toasted bread.
Candy or Cookie? You Be the Judge (Chocolate Chip Cookie Brittle)

Candy or Cookie? You Be the Judge (Chocolate Chip Cookie Brittle)

Hello? Why didn’t someone tell me it was National Chocolate Chip Cookie Day…a couple of days ago? Yep, I missed it. Well, I almost missed it. As I was doing my late-night perusal of Instagram, what should pop up on my feed? A luscious-looking pic of chocolate chip cookies with the banner shouting out “Happy National Chocolate Chip Cookie Day!”.

WHAAT?

Damn it. If I had just gone to sleep instead of taking that last look at my feed. So there I was at midnight, guilted into making chocolate chip cookies. I envisioned myself staying up another couple of hours, baking off sheets of cookies one at a time (yes, I can’t bring myself to bake two sheets at once). UGH.

Then I remembered a recipe I had been wanting to try from Shauna Sever’s Midwest Made. Chocolate Chip Cookie Brittle. It starts with melted butter, yay, no waiting for butter to come to room temp. The batter can be made in one bowl with a wooden spoon (ok, and a whisk), the finished dough is then spread on a baking sheet and popped in the oven. ONE SHEET, that’s it.

I Am So Making Them

Surprisingly, the recipe calls for granulated sugar and no eggs. I double-checked the recipe, yep, no eggs, and no brown sugar. Hmmm, interesting, I apprehensively plowed on.  It also started with melted butter, yay, no creaming.

I gathered the dry ingredients as the butter cooled and got out my 12×17 sided cookie sheet (classic 1/2 sheet pan).  Added sugar to the cooled melted butter and beat until it formed a loose paste.  Poured in the flour and vanilla, stirred to combine and followed with the toasted nuts (don’t skip toasting, 5-6 minutes in a 350-degree oven) and chocolate.

Not Gonna Lie

The worse part was spreading the dough in the pan.  Don’t do what I did, which was plop all the dough in the center of the sheet pan.  Spread it out a little so it is easier to cover the pan.  You want the dough to be as even and thin as possible.  The dough will be approximately the same thickness as the chips.  I used Guittard’s Semi-Sweet Chocolate (ginormous) chips but almost any chip would work in this cookie, bittersweet, milk chocolate, or a combination.  Likewise, walnuts would work in place of pecans.

The cookie baked in 22 minutes.  Be extra vigilant towards the end as they brown pretty quickly.  The recipe does not have brown sugar and calls for only granulated sugar.  It’s important to bake it to nice toasty brown which results in a crisp, toffee flavored cookie.  It’s addictive.  Crunchy cookie base, oozy chocolate, and toasted nuts.  It straddles the line between cookie and candy, another winner from Shauna Sever.

Chocolate Chip Cookie Brittle

Is it a cookie? Is it a candy? You decide! Chocolate Chip Cookie Brittle is delicious.
Course cookies
Cuisine American
Keyword Chocolate Chip Cookie Brittle
Prep Time 20 minutes
Cook Time 9 minutes

Ingredients

  • 1 cup (225 g) unsalted butter melted and cooled
  • 2 teaspoons pure vanilla extract
  • 1 cup (200 g) granulated sugar
  • 1 teaspoon fine sea salt
  • 2 cups (256 g) all-purpose flour spooned and leveled
  • 1 cup (170 g) chopped pecans lightly toasted, can sub walnuts
  • 1 cup (170 g) bittersweet or semi-sweet chocolate chips 60% cacao

Instructions

  • Position a rack to the center of the oven and preheat it to 350°F Have ready a 12 x 17-inch rimmed baking sheet. You do not need to grease or cover with parchment.
  • In a large bowl, whisk together the melted butter and vanilla. Add the sugar and salt and continue to whisk until the mixture thickens and appears pastelike. Switch to a wooden spoon or spatula and mix in the flour. Stir in the nuts and chocolate chips.
  • Press the mixture into the ungreased pan in a thin, even layer (use the chocolate chips as your height barometer—try to get them in as close to a single layer as possible throughout the dough, and you’ll have the right thickness). Alternatively, spread the dough in the pan, scatter chocolate chips and nuts on top and press into dough, leaing someexposed on top.
  • Bake for 23 to 25 minutes (start checking at 20 minutes), or until light golden brown and the edges a bit darker than the center (mine were pretty uniformly brown ), rotate the pan 180 degrees every 7 to 8 minutes during baking. Let cool completely before breaking into irregular pieces. Store in an airtight container at room temperature for up to 1 week.