Category: 12 Days of Cookies

My annual 12 days of Cookies for the Holidays!

Jan Hagels, Anyway You Slice It, That’s the Way I Want It

Jan Hagels, Anyway You Slice It, That’s the Way I Want It

Bah Humbug, for some reason I have not been able to get into holiday “drive”.  Maybe I’m still jet lagged from our trip to New Orleans or I am still in a Creole butter coma.

The Cookie Cure

Gotta Snap Out Of It. Maybe baking tried and true recipes might work.  I dug out my Christmas cookie journal to peruse and get in the cookie mood.  A binder filled with cookie recipes from magazines, photocopies of recipes from books along with my own notes, and pictures drawn by my kids when they were little.   It’s my cookie bible.
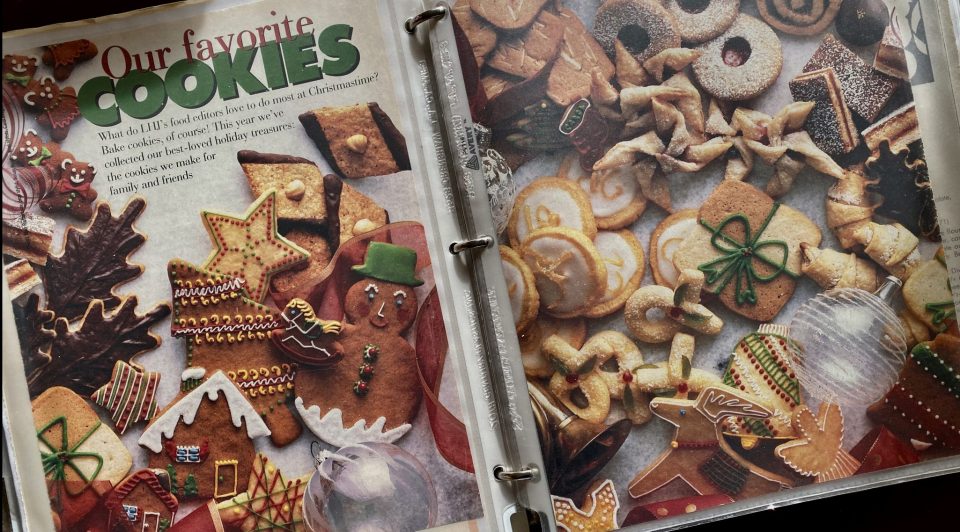
I flipped to “Our Favorite Cookies”, from an old issue of Ladies Home Journal.  Ninety percent of you are thinking, what? It’s a Women’s magazine, think, Better Homes and Garden with dresses and makeup tips. Raise your hand if you remember it (seriously dating yourself now). This is the epicenter of my annual holiday cookie extravaganza.

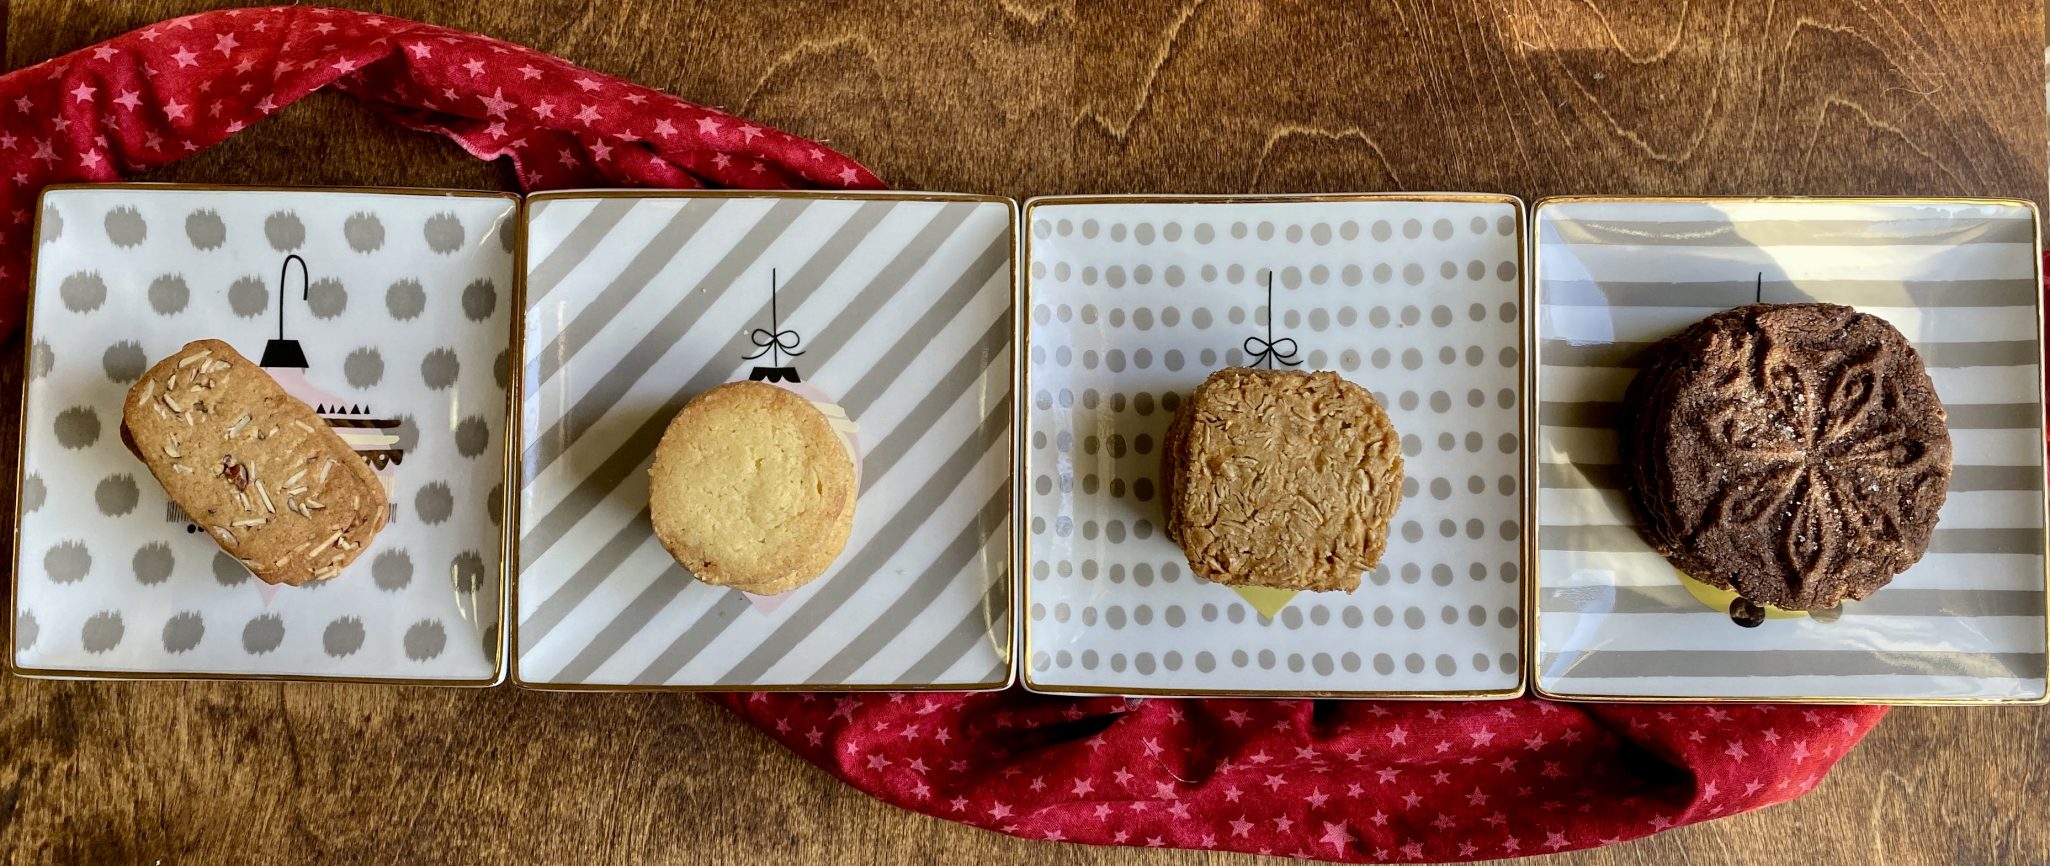
Jan Hagels are on the “gotta make them every year” part of the list.  Which is always a good way to start to find your cookie groove.  These little Dutch gems are thin and crispy, spiced with cinnamon, ginger, and allspice, and flecked with sliced almonds.  They are my mom’s favorite and the first one she will reach for on the cookie platter.  How can I not start with these?

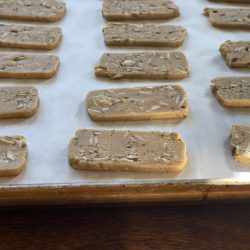
Options, roll out the Jan Hagel dough and emboss the dough for traditional Jan Hagel OR form the dough into a log, chill, slice, and bake.  Yeah, picking option #2.  Chill the dough well, which makes it much easier to slice into the prerequisite 1/8-inch slices.  Bake on parchment as the cookies will stick to the pan as they cool.  Trust me on this one.

This recipe makes quite a few cookies and the finished cookie keeps very well.  Stash a log in the fridge or freezer for freshly baked cookies at a moment’s notice.

Just Can’t Put My Finger On It

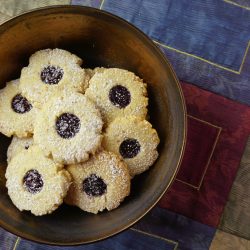
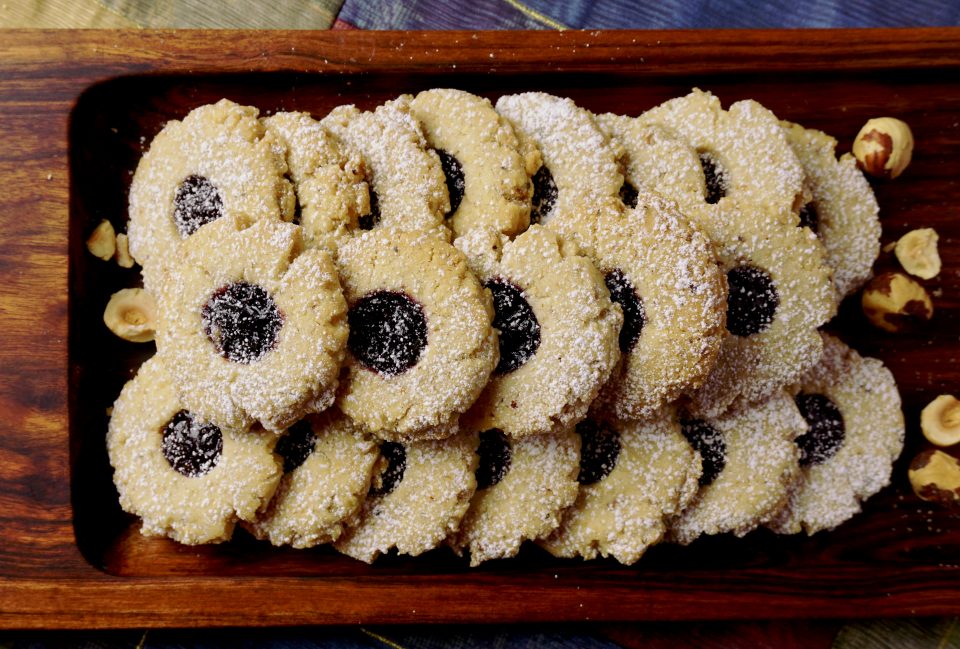
The Walnut Thumbprints from the same article also find their way onto my annual baking list.  They’re buttery, nutty, tender, a little bit crumbly, and absolutely delicious. Last year I switched hazelnuts for the walnuts, a genius move.  Find toasted hazelnuts at TJ’s, which makes life infinitely easier.  As much as I love pecans, they aren’t a good choice, they don’t have that pronounced bite walnuts and hazelnuts have.
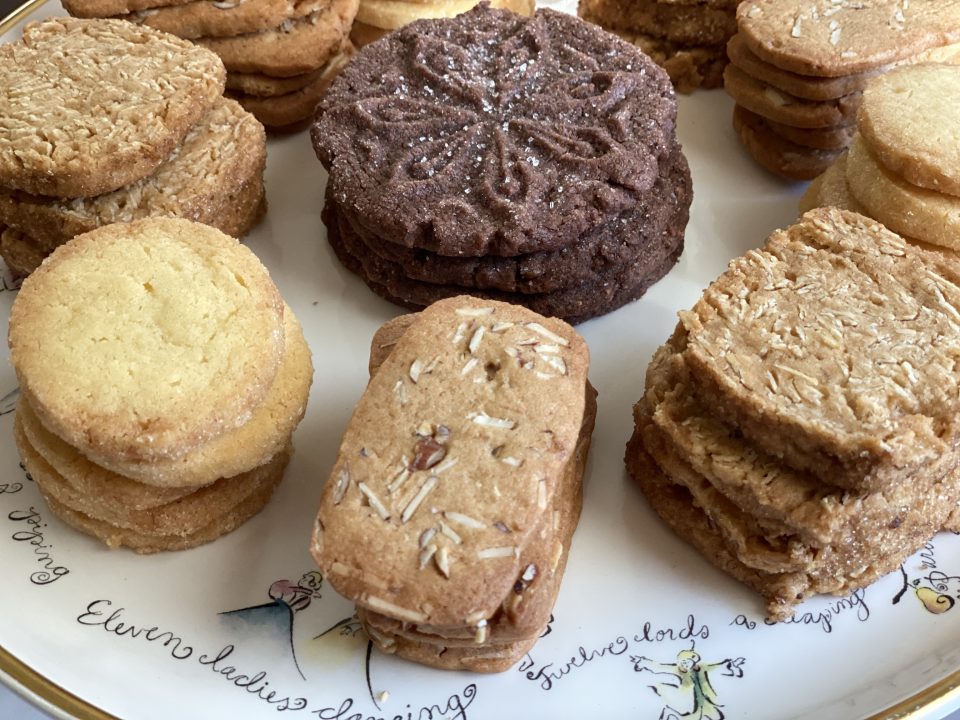
Slice, Slice Baby

On a roll with slice and bake cookies.  Next up, Ginger Oaties from Grand Central Bakery cookbook, a book that has languished on my shelf for years.

Jan Hagels

Lovely slice and bake Dutch cookie made with almonds, butter, and brown sugar. Flavored with allspice, cinnamon, and ginger. Sweet, spicey, crisp, perfect with a cup of tea.
Course cookies
Cuisine Dutch
Keyword Dutch Almond Cookies, holidays, Jan Hagel
Prep Time 20 minutes
Cook Time 10 minutes

Ingredients

Da Dry Stuff

  • 1-1/2 cup All purpose flour
  • 1 tsp baking powder
  • 1 tsp cinnamon
  • 1/2 tsp ginger
  • 1/4 tsp salt
  • 1/8 tsp allspice

Cream the Following:

  • 1/2 cup butter reg salted (its an old recipe), if using unsalted increase salt to 1/2 tsp, 1 stick or cube
  • 1/2 cup dark brown sugar
  • 1/4 cup granulated sugar

Da Wet Stuff

  • `1 large egg
  • 1 tsp vanilla extract

Adds

  • 3/4 cup sliced almonds

Instructions

  • Combine flour, baking powder, cinnamon, ginger, salt, and allspice in medium bowl. Beat butter and sugars in mixing bowl until light and fluffy. Beat in egg and vanilla. Gradually add flour mixture until blended. Stir in almonds.
  • Gather and shape dough into 8x2-1/2 -1-12 inch brick. Wrap in wax paper or parchment and chill for at least 4 hours or overnight.
  • Preheat oven to 350 F. Cut brick crosswise into 1/8-inch thick slices. Line cookie sheet with parchment and bake 8-10 minutes until firm.
  • Cool on wire rack. Makes 3-1/2 dozen
Beta Testers (Lemon Poppy Seed Shortbread, Mexican Hot Chocolate Shortbread, Pistachio Shortbread Cookies)

Beta Testers (Lemon Poppy Seed Shortbread, Mexican Hot Chocolate Shortbread, Pistachio Shortbread Cookies)

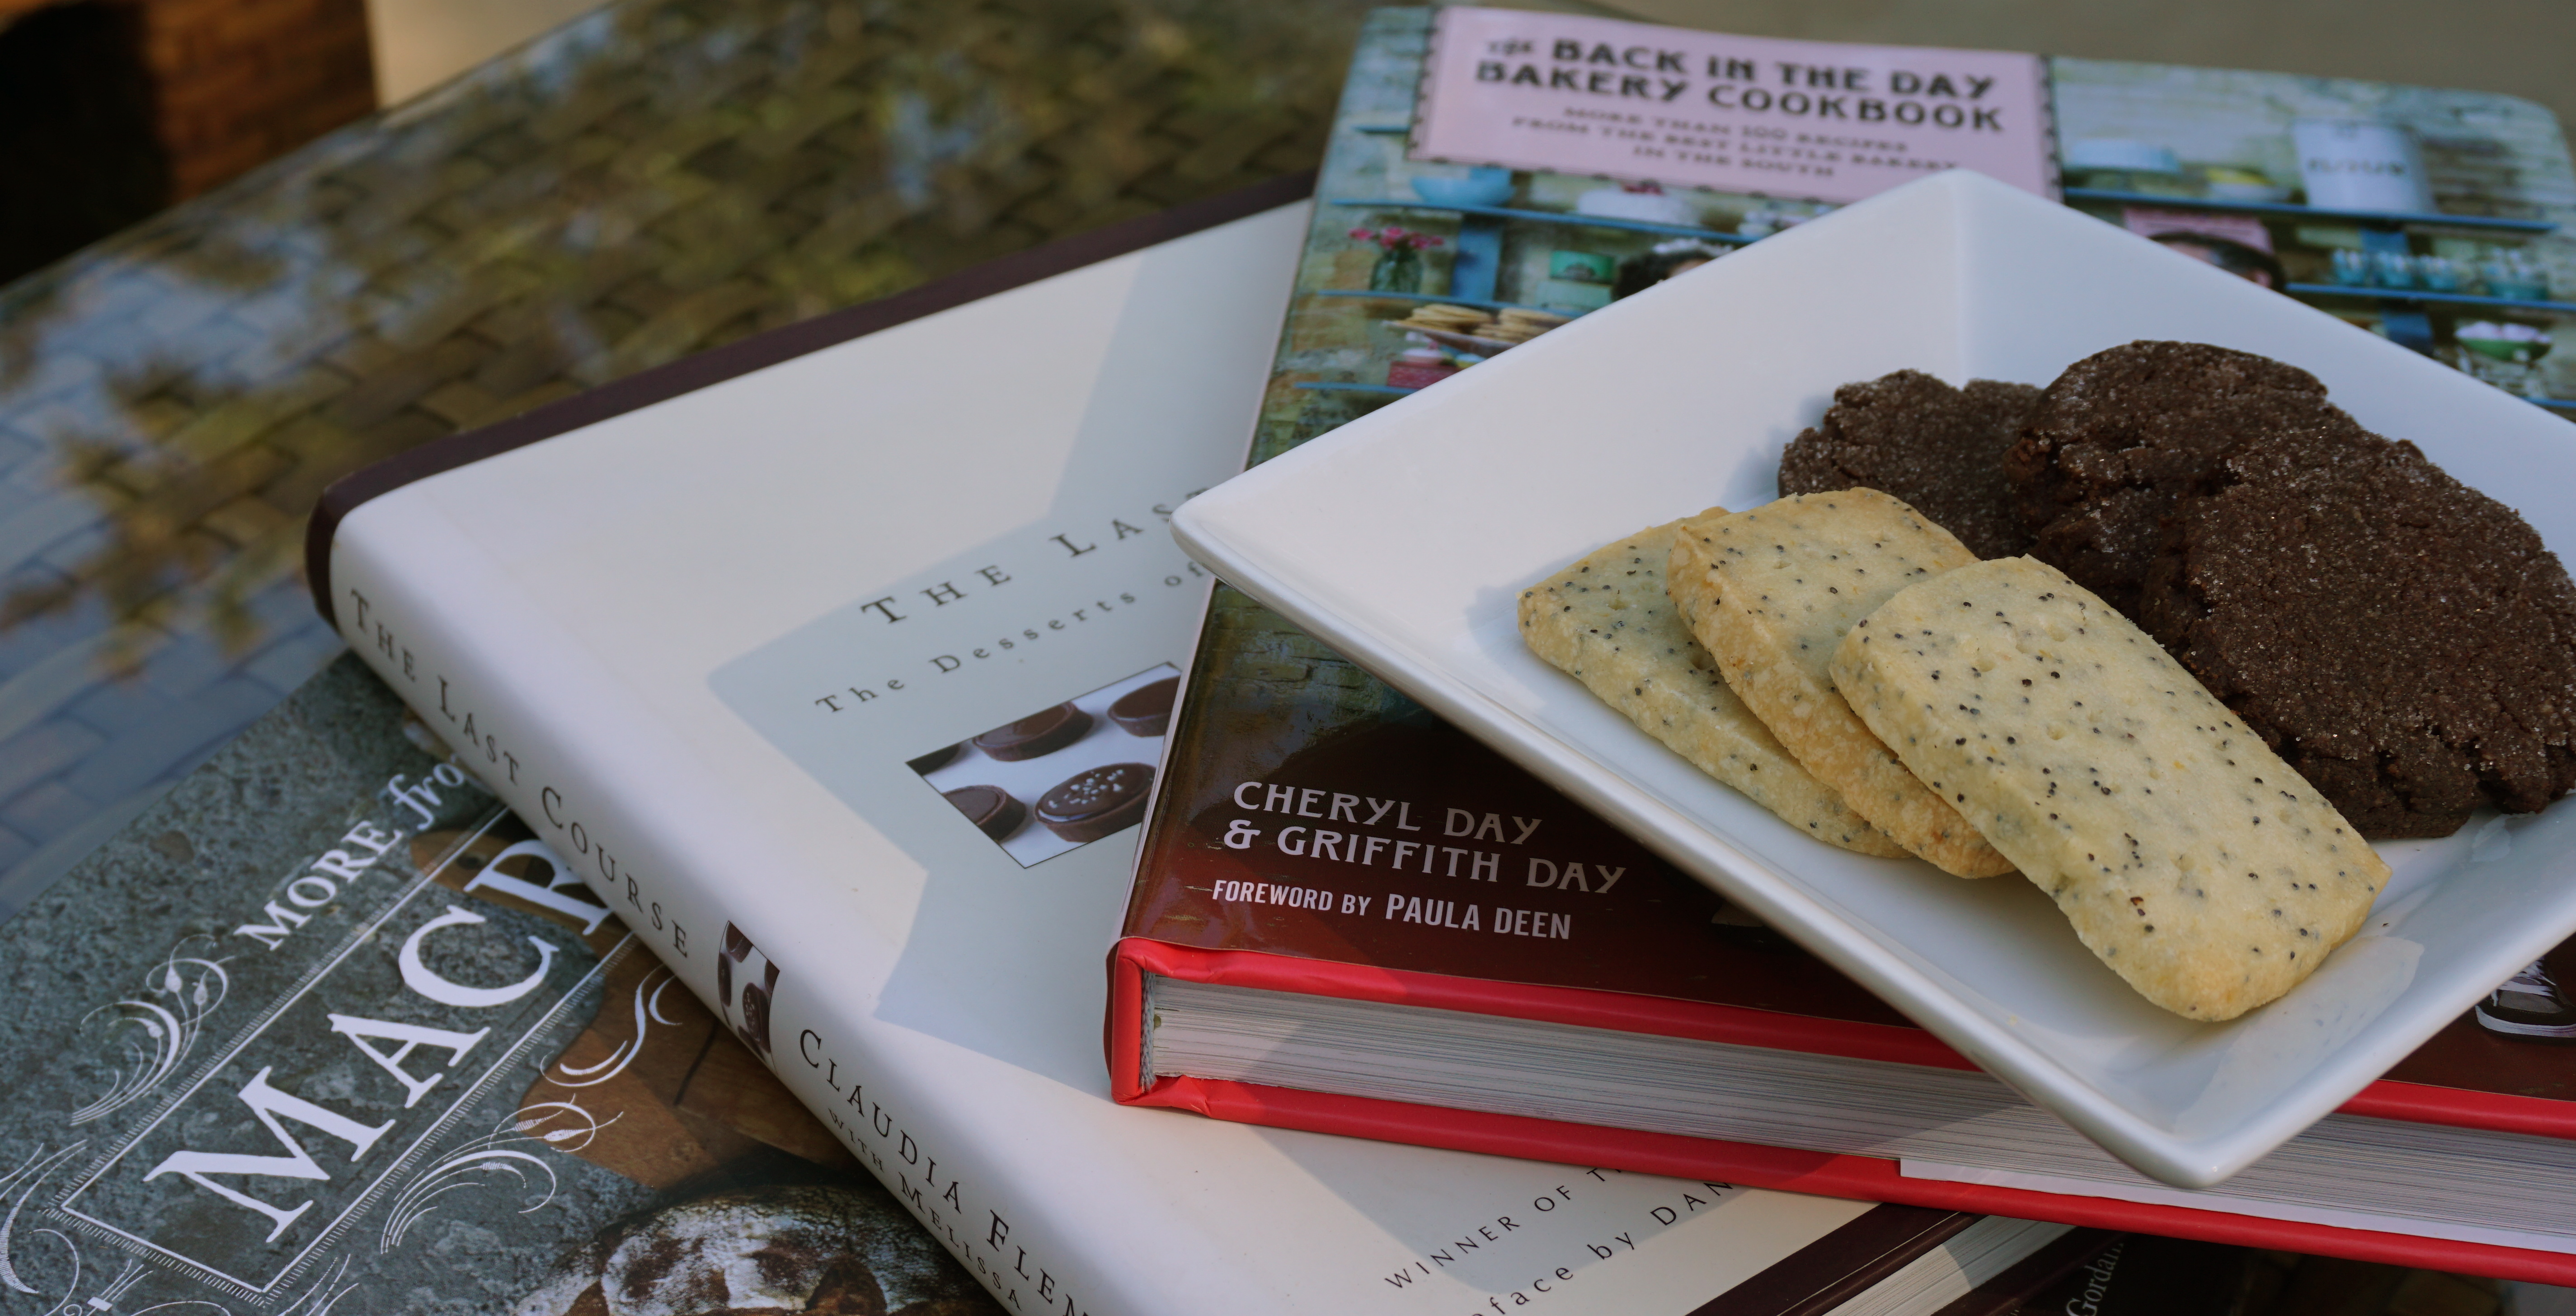
With the reprint of Claudia Fleming’s “The Last Course”, I reached into the archives for a post on a trio of shortbread I “tested” on friends and family.  A delectable triple play of cookies that would be lovely in a holiday cookie tin or a festive platter for the annual swap.  Fleming’s Lemon Poppy Seed cookies are buttery, tender, lemony with a crunch from the poppy seeds while Back in the Day’s  Mexican Hot Chocolate Shortbread are rich, chocolatey, and spicy.  Bake em’ TODAY.  I love pistachios for their color and flavor, both shine in Macrina Bakery’s Pistachio Shortbread.

Without further ado, a trio of tasty cookie bites from “back in the day” that you should bake today!

Human nature always prevails and I am no exception.  Every New Year’s Day I make a couple of resolutions…lose weight, get more sleep, test more cookie recipes for next year’s holiday box, one out of three ain’t bad!  If I were a major leaguer with a 333 batting average I’d be batting clean up.

DSC01290

So from my collection of cookbooks, I pulled out Back in the Day Bakery Book and made the Mexican Hot Chocolate Shortbread,  Lemon Poppyseed Shortbread from Claudia Fleming’s The Last Course (re-issued!) and Pistachio Shortbread from More From Macrina Bakery.  I don’t like to rely on my taste buds only, so my trusty crew friends, nieces, & family were my “beta testers”.  Consensus was there was no consensus!  Although I might have to give the edge to the Mexican Hot Chocolate shortbread, me and Joe Biden..here to cast the final vote.

A successful beta test since these three recipes would all make the cut for the holiday cookie basket.

Mexican Hot Chocolate Shortbread

These cookies taste like a mug of rich hot chocolate. The deep mocha-flavor is followed by a kick of cayenne pepper. Don't let the heat put you off; it only enhances the flavor.
Prep Time 15 minutes
Cook Time 10 minutes
Author Back In the Day Bakery

Ingredients

Dry Ingredients #1

  • 1 3/4 cups unbleached all-purpose flour
  • 1/2 cup almond flour

Creamed Mixture

  • 1/2 pound 2 sticks unsalted butter, at room temperature
  • 1/2 teaspoon pure vanilla extract
  • 1/2 teaspoon pure almond extract

Dry Ingredients #2

  • 1 cup packed light brown sugar
  • 1/2 cup Dutch-processed cocoa powder
  • 1/2 teaspoon ground cinnamon
  • 1/4 teaspoon espresso powder or finely ground coffee
  • 1/2 teaspoon fine sea salt
  • 1/4 teaspoon cayenne pepper

The Finishers

  • 1/2 cup mini semisweet chocolate chips
  • 1/4 cup granulated sugar for dusting

Instructions

  • Line two cookie sheets with parchment.
  • Whisk the flours together in a medium bowl and set aside.
  • In the bowl of a stand mixer fitted with the paddle attachment (or in a large mixing bowl, using a handheld mixer), cream the butter, vanilla, and almond extract until the mixture is pale in color, 1 to 2 minutes. Turn the speed down to low, add the brown sugar, cocoa, cinnamon, espresso, salt, and cayenne pepper, and continue to mix until the mixture is smooth, 2 to 3 minutes. Add the flour mixture in thirds until just combined. With the mixer running, sprinkle in the chocolate chips, mixing until just combined.
  • Transfer the dough to another bowl and finish mixing by hand to make sure no bits of flour or butter are hiding on the bottom of the bowl and the dough is thoroughly mixed.
  • Use a small ice cream scoop to form the cookies, about 1 rounded tablespoon each, and place on the prepared cookie sheets, leaving 1 inch between the cookies to allow for spreading.
  • Flatten each cookie with a cookie stamp dusted with granulated sugar, or gently flatten each cookie with the palm of your hand and then dust the tops with sugar. They will have little cracks in the top. Refrigerate the cookies for at least 1 hour, or up to 5 hours. Position a rack in the lower third of the oven and preheat the oven to 350°F. Bake the cookies, one sheet at a time, for 8 to 10 minutes, rotating the pan halfway through the baking time for even doneness (see Tip). Cool the cookies completely on wire racks. Store the cookies in an airtight container for up to 3 days at room temperature.
  • Tip: It is really difficult to tell when dark chocolate cookies are done. Pull them out when they are firm to the touch on the edges and the sweet smell of chocolate has begun to fill your kitchen.

Lemon-Poppy Seed Shortbread (Claudia Fleming, The Last Course)

Ingredients

  • 1 cup 2 sticks unsalted butter, softened
  • 3/4 cup confectioners’ sugar
  • 1 1/2 teaspoons fresh lemon juice
  • 1 1/2 teaspoons grated lemon zest
  • 1/2 teaspoon vanilla extract
  • 2 cups all-purpose flour sifted
  • 1 1/2 tablespoons poppy seeds
  • 1/2 teaspoon salt

Instructions

  • Using an electric mixer, beat the butter and sugar until creamy and smooth, about two minutes. Add the lemon juice, zest and vanilla and beat well.
  • In a bowl, combine the flour, poppy seeds, and salt. Add the dry ingredients to the butter mixture and mix until combined. Form the dough into a disk and, wrap in plastic wrap and chill for at least 3 hours and up to 3 days or freeze for up to 2 months.
  • Preheat oven to 300° F. Roll the dough between two sheets of wax paper to a 1/4-inch-thick rectangle. return dough to refrigerator for an additional 30 minutes. Cut the shortbread into shapes with a two-inch cookie cutter, or use a knife, and place 1 inch apart on parchment-lined baking sheets. Do not reroll scraps, if using cookie cutter. Prick shortbread with a fork and bake until pale golden all over, 23 to 25 minutes. Cool on a wire rack.

PISTACHIO SHORTBREAD COOKIES

Ingredients

  • 1 cup unbleached all-purpose flour plus more for the work surface
  • 1/4 cup granulated sugar
  • 1/2 teaspoon kosher salt
  • 1/2 cup shelled raw or roasted pistachios
  • 1/2 teaspoon vanilla extract
  • 1 stick 4 ounces unsalted butter, cold, cut into 1/4-inch pieces
  • 1 to 2 tablespoons granulated sugar sanding sugar, or raw sugar, for garnish

Instructions

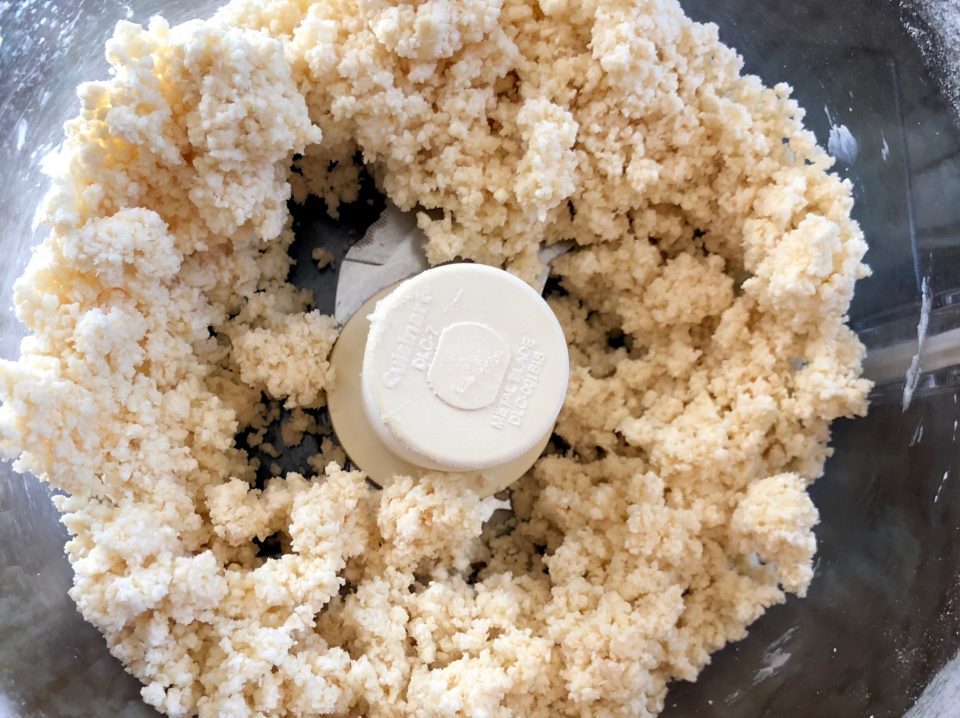
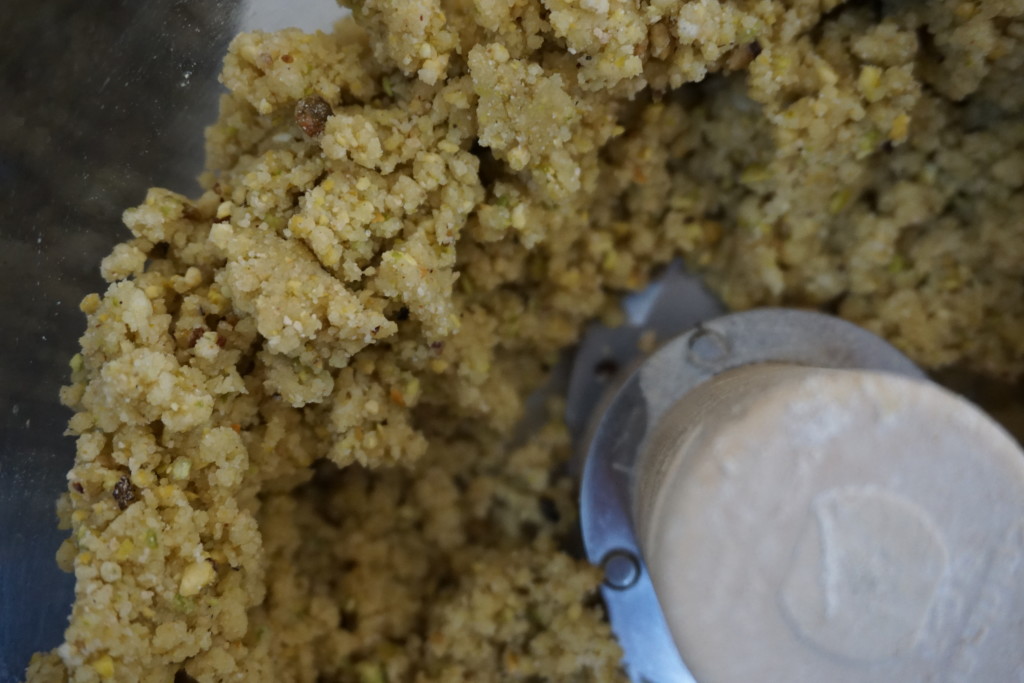
  • Pulse the flour, granulated sugar, salt, pistachios, and vanilla in the bowl of a food processor for 1 to 2 minutes, until the pistachios are finely ground. Scatter the butter pieces in the food processor and pulse several times to cut the butter into the flour. Stop pulsing when the ingredients just come together and cling to one another. (Watch carefully, as food processors work very fast and can easily overmix the dough. At first the mixture will have a coarse, crumbly texture, but then if you’re not careful it will quickly turn into a paste.)
  • Turn the dough onto a lightly floured work surface and shape it into a log about 2 inches in diameter and 10 inches long. (If the dough is too sticky, toss it in the fridge for 10 or so minutes to make it easier to work with. Dampening your hands ever so slightly with cold water also helps.) Place the log on a piece of plastic wrap or parchment paper. Tightly roll the wrap around the log and twist the ends to seal them securely. Refrigerate for at least 2 hours or up to 5 days. (This dough also freezes well for up to 3 weeks if wrapped tightly in plastic.)
  • Position 2 racks in the center of the oven and preheat to 325ºF (163ºC). Line 2 rimmed baking sheets with parchment paper and set aside.
  • Cut the chilled cookie dough into 1⁄2-inch-thick coins and place about 2 inches apart on the prepared baking sheets. Lightly brush the top of each shortbread cookie with water and sprinkle with sugar. Bake for 15 to 18 minutes, or until the cookies are lightly golden brown on both top and bottom. Let the cookies cool on the baking sheet for 5 minutes, then transfer to a wire rack to cool completely. Store the pistachio shortbread cookies in an airtight container at room temperature for up to 2 weeks.


Pecan Tartlets-The Perfect Little Nutty Bite

Pecan Tartlets-The Perfect Little Nutty Bite

We were invited to Rosh Hashanah dinner the other night and I volunteered to bring dessert.  It’s usually a no brainer since our host LOVES Lemon Bars.  But then I remembered I had promised to post Mrs. S’s Pecan Tartlet recipe.  The Lemon Bars would have to wait for another occasion.

Mrs. S, for all of you that have not read my Toffee Bars post (hint, hint), is my baking muse and mom of my BFF, Joy.  Every Christmas, since I met Joy in middle school, I have been the lucky recipient of a plate of Mrs. S’s holiday cookies.  They were delicious and beautiful.  She was meticulous and something of a control freak (I can SO relate) so she would shoo us out of the kitchen when she started her holiday baking.  Occasionally she would let us help with just the finishing touches, placing the pecan halves in her chocolate thumbprints or rolling her meltingly tender almond crescents in powdered sugar.  But mixing the cookie dough itself, nope, that was her domain.

My Favorites

Her Toffee Bars and Pecan Tartlets.  When I became interested in cooking and baking and not just eating, I asked for her cookie recipes and she was gracious enough to share them with me.  For Mrs. S making these cookies became second nature.  Details and how-to’s were committed to memory, not to paper.  Over the years I have figured out the little extra steps she took that elevated her cookies, especially her Pecan Tartlets, above the rest.  I’ve also added my tweaks to make the process easier and faster.

How-Tos:

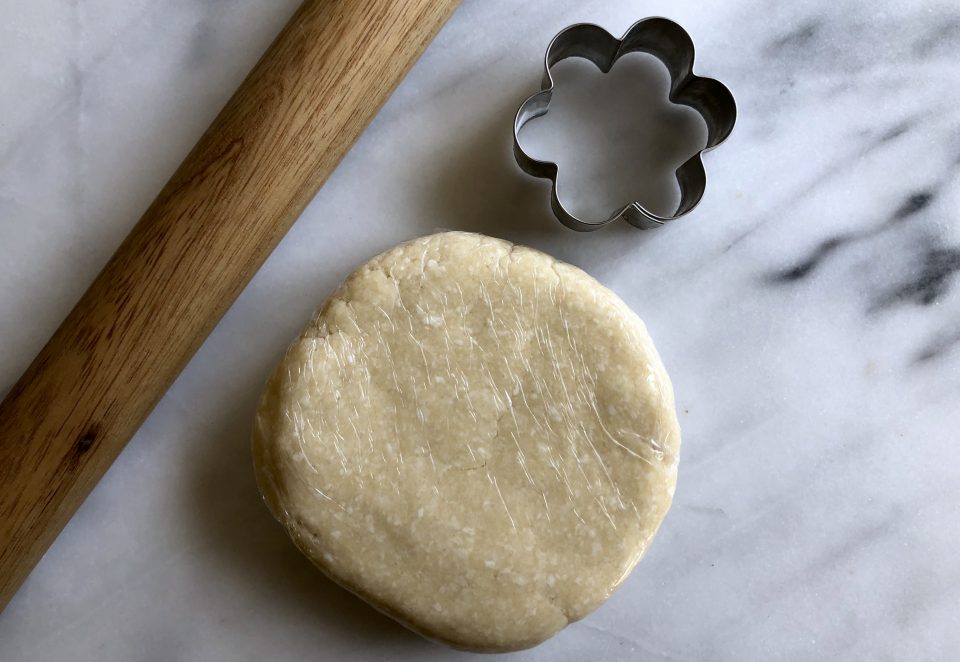
The tart crust is butter and cream cheese-based and similar to a cookie dough.  It does not include any liquids so it won’t shrink much.  I make the dough in a food processor, much like tart dough.  The dry ingredients are placed in the food processor bowl and pulsed a couple of times to combine.  The original recipe includes up to half a cup of sugar in the dough, way too much.  I often don’t add any sugar but if you like a sweeter crust, add a MAX of 1/4 cup.  Note that the more sugar you add, the quicker you will need to roll out the dough as the sugar makes the dough stickier and tougher to work with.  Add the butter and cream cheese and pulse until the dough just starts to clump.  Do not overprocess.  Gather the dough and chill for approximately 2 hours. 

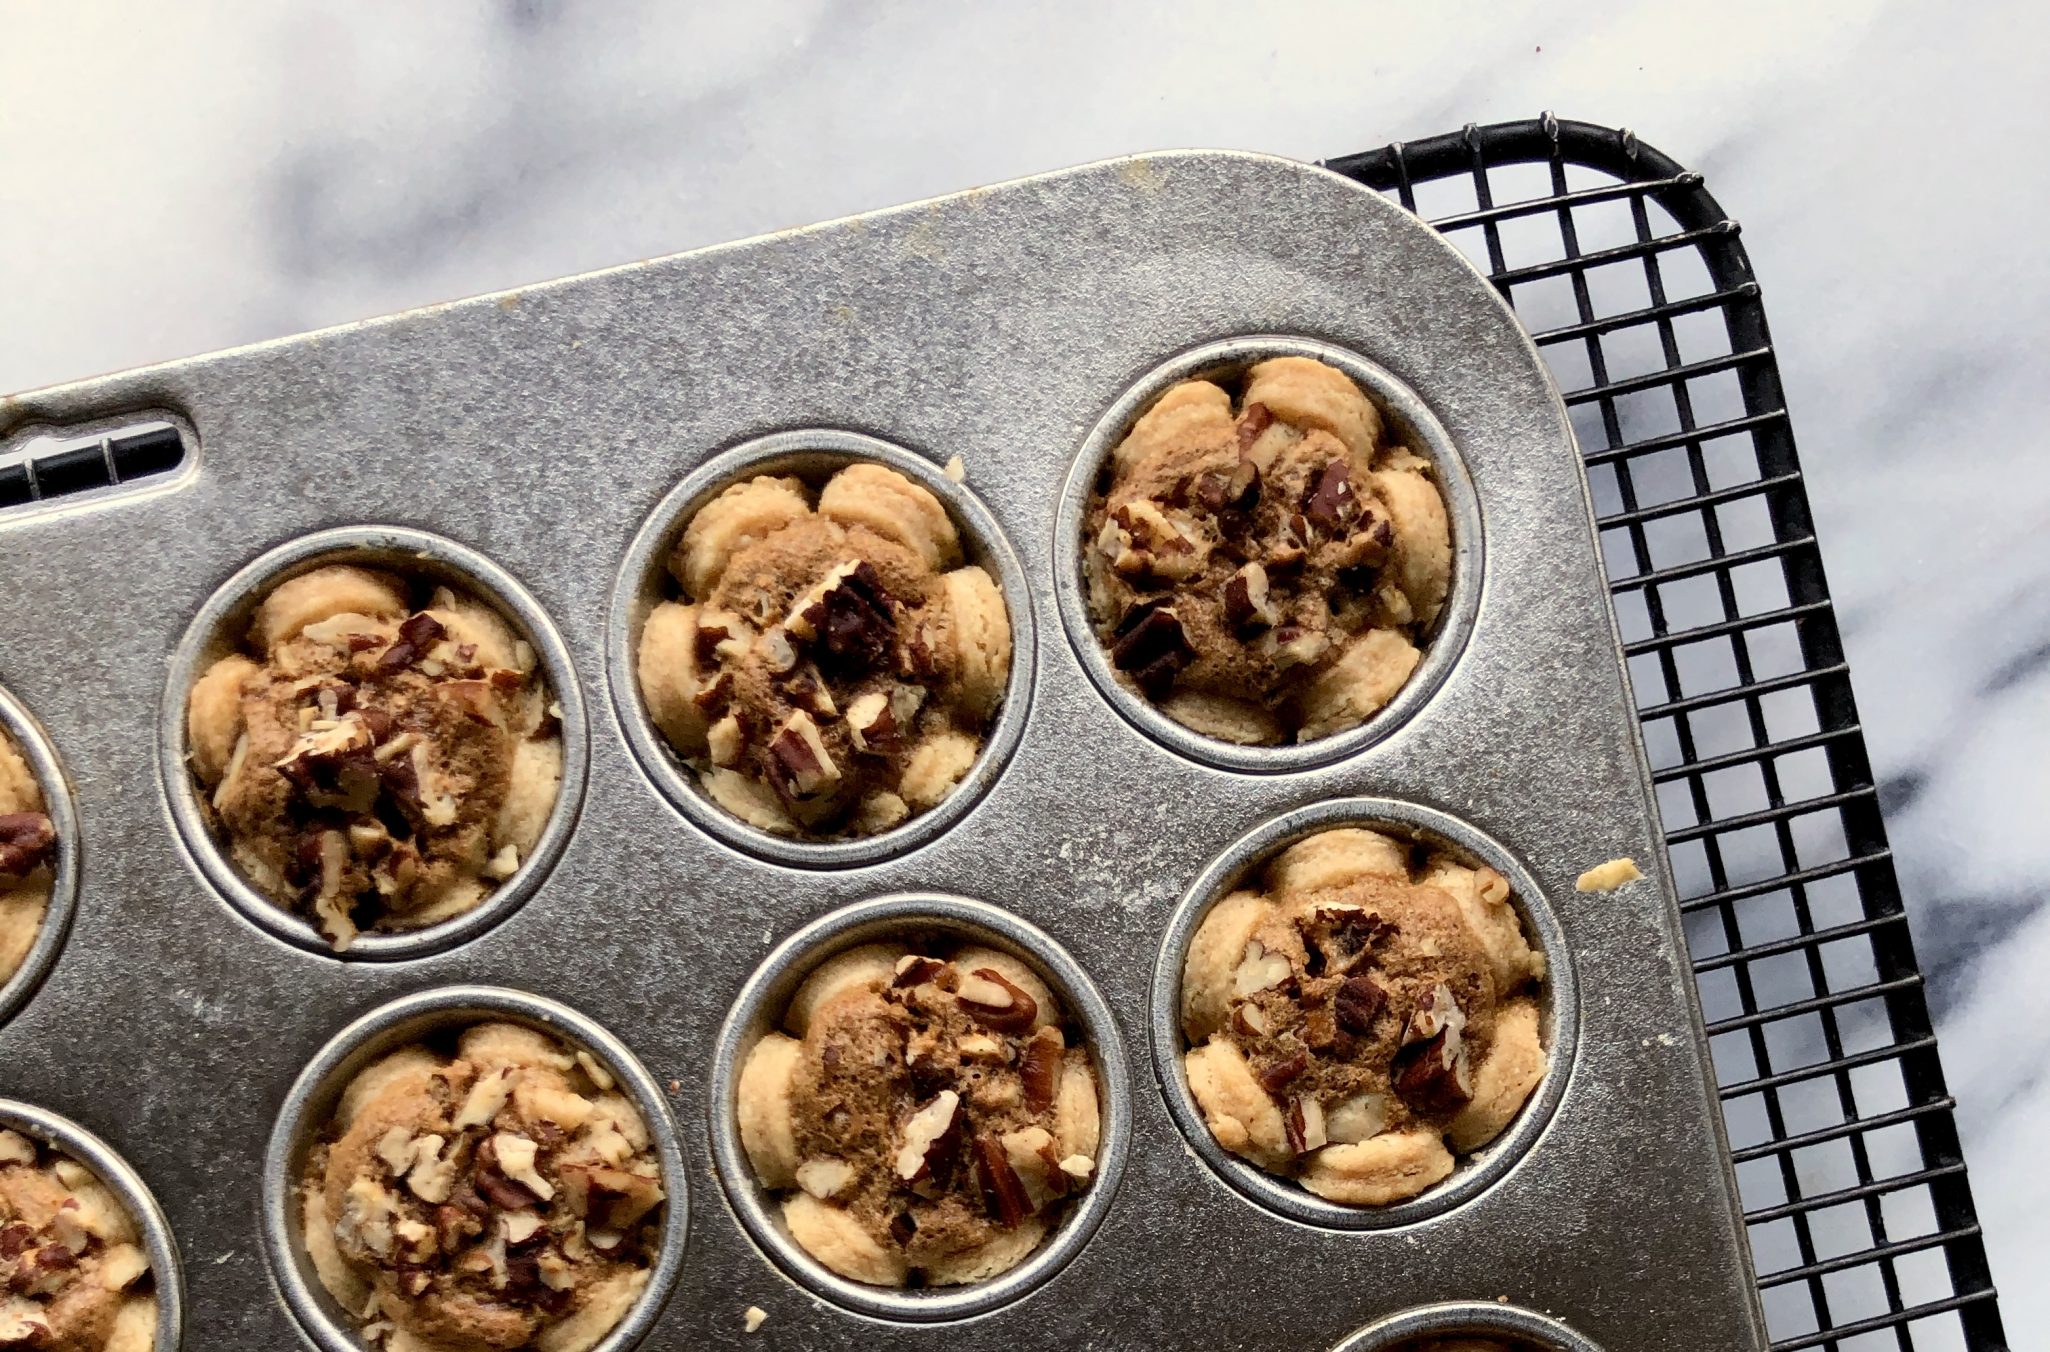
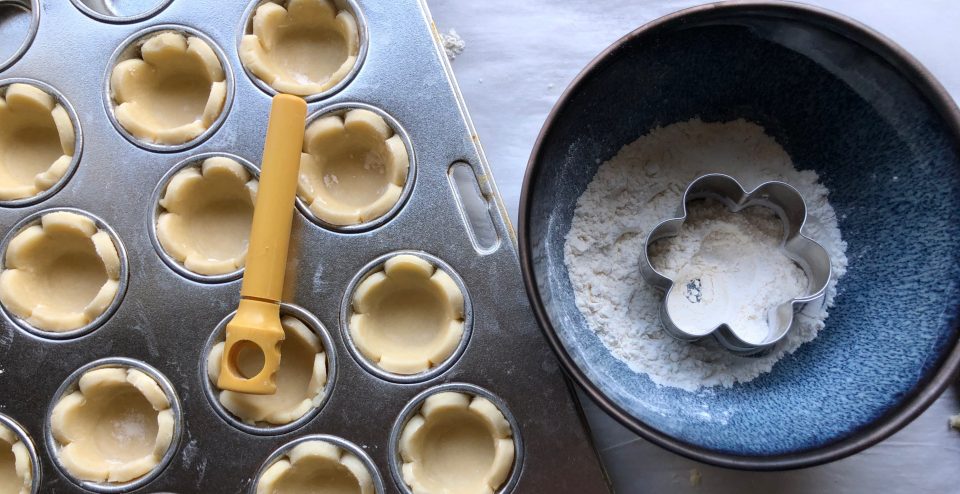
You could scoop out dough, roll it into balls and press each into tiny muffin tins which is pretty easy, but then you wouldn’t get those cute scalloped edges.  Mrs. S’s method was to roll the dough out approximately 3/16 inch thick and cut it with a flower petal cookie cutter.  I know, lots of work but, look at how nice they look.  The genius of using the petal cutter is the shape makes it very easy to press the dough into the muffin tins.

Next Step:

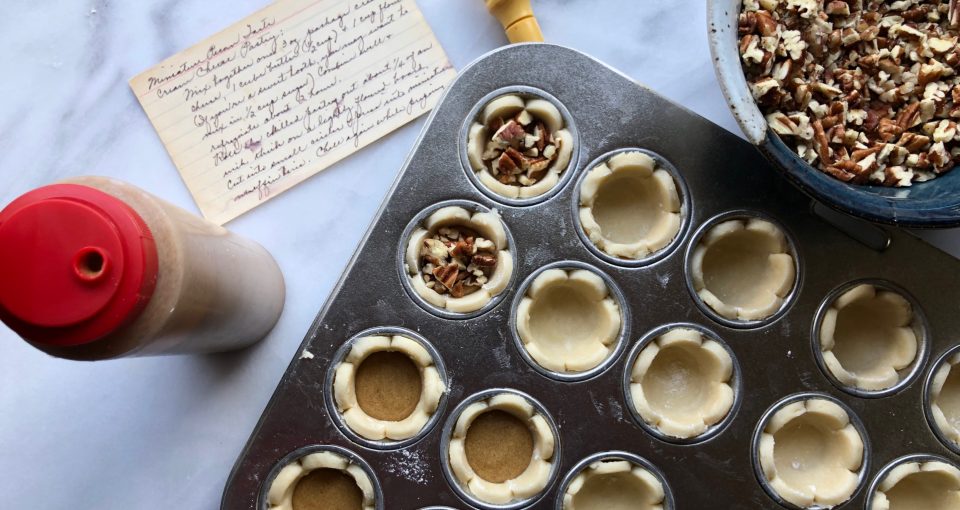
Make the filling while the dough chills in the fridge.  Here’s the cheat.  Pour the filling into a squeeze bottle.  I replace the top with the lid from the honey I buy at TJ’s.  The spout is bigger which allows the filling to flow easily…a nice squirt into each muffin cup.  How EASY is that?  Ingenuity being the mother of invention, my cheapie wine opener works perfectly for pressing the dough evenly into the muffin tin.

Fill the tarts to where the petals meet and sprinkle the pecans on top.  Walnuts or a mix of different nuts would be delicious too.  Follow the baking instructions.  When slightly cooled, dust the tarts with a nice layer of powdered sugar.

Enjoy these little bites of bliss.  Don’t wait until the holidays to make them!

MINIATURE PECAN TARTS

Bite-sized pecan tarts, sweet, nutty and delicious!
Course cookies, Dessert
Cuisine American
Keyword cookies, holiday baking, Mini Pecan Tarts, pecans
Prep Time 45 minutes
35 minutes

Equipment

  • mini-muffin tin
  • 2 inch petal cookie cutter optional

Ingredients

Cream Cheese pastry

Mix together:

  • 3 ounce cream cheese
  • 1 stick butter salted, or if using unsalted add 1/4 tsp salt
  • 1 cup all-purpose flour  preferably Gold Medal but any will work

Filling

Blend together:

  • 1 tablespoon softened butter
  • 1 cup firmly packed brown sugar light brown sugar
  • 1 egg large
  • 1 teaspoon vanilla
  • 1 cup chopped pecans substitute mixed nuts if you like, walnuts

Instructions

Dough

  • Original instructions: Combine well and refrigerate. Cut into small circles and press into mini-muffin tin.
  • My instructions: Mix the dough in a food processor. Place flour in fp bowl. Add butter and cream cheese to flour. Pulse mixture just until it begins to clump. Do not overprocess. Pour onto wax paper or plastic wrap and pat into a disc shape. Chill for at least 2 hours.
  • On a lightly floured surface, roll pastry out to 3/16-1/4 inch thickness. Cut into small circles. I use a petal cutter 2.5-inch or a plain round 2-inch cutter. Press circles into ungreased muffin tins. Chill muffin tins while making the filling.

Filling

  • Blend filling ingredients well. Pour into a squeeze bottle. I use a plastic TJ honey container that has an opening about 1/8inch. This is a quick way to fill the muffin tins. You could use a spoon.
  • Fill prepared muffin tins about 3/4 full.  Allow filling to settle slightly.  Fill each muffin tin to the top with finely chopped pecans (about 1 cup)  Chill.
  • Bake in a preheated oven at 350 degrees for 15 minutes.  Reduce temperature to 250 degrees and bake 20 minutes longer. Allow tarts to cool and carefully remove from tins.
  • Sprinkle lightly with powdered sugar while still warm.  Allow to cool before removing from tins.

Notes

There aren't instructions for the prepared muffin tins.  I'm guessing at lightly greased.  I generally don't grease the tins and occasionally I lose a tartlet to sticking but for the most part a little pry with a thin bladed knife and the tarts come out of the pan.
The Joy of Cookies (Toffee Bars)

The Joy of Cookies (Toffee Bars)

Joy is one of my oldest friends.  We went to school together and I mean that literally.  We lived a few blocks from each other, every day we would meet on the street corner halfway between our houses to walk and talk the final mile to school.  Sometimes, on the walk home, we wouldn’t be done talking so we would walk to one of our houses, turn around and walk back to the meeting point together before parting ways.  Silly, huh.  Yep, BFFs.

Holiday Highlight

Every Christmas I eagerly awaited her mom’s plate of holiday cookies.  Joy’s mom, whom I affectionately called Mrs. S, was an amazing baker (and a marvelous cook too). During the holidays, you could find her holed up in her kitchen busy baking no less than 6-8 different kinds of cookies.  Almond Crescents, Spritz Cookies shaped into wreaths decorated with red and green sugar, Chocolate Pecan Thumbprints, Pecan Tartlets, Chocolate Chippers, and Lemon Bars.  Her crescents were perfect, her scalloped-edged Pecan Tartlets were the gold standard of bite-sized pies.

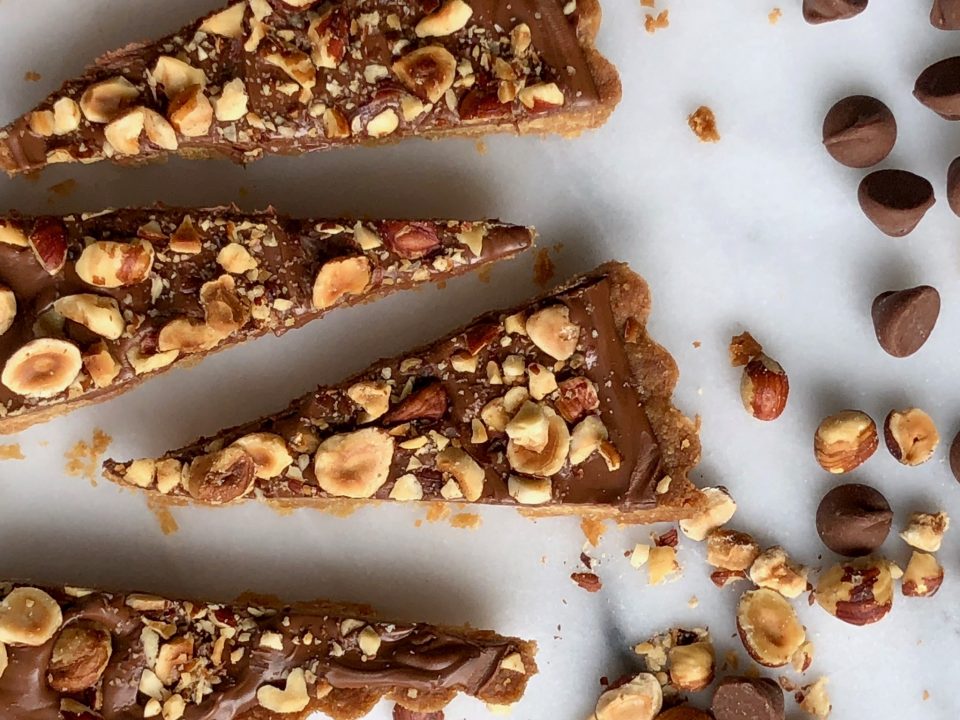
In short, she was my muse for holiday cookies.  I love all of her cookies, but my favorite?  Hands down, her Toffee Bars.  A shortbread crust, buttery and sweet, painted with milk chocolate and finished with a sprinkling of chopped almonds.  Cookie Nirvana.

Attention to Detail

I have most of Mrs. S’s recipes.  Her Pecan Tartlets find their way into every holiday cookie box.  The Hubster considers it blasphemous if they are not included.  I am religious about following her recipes, I mimic each step.  I cut out each tiny pie crust with a flower petal cookie cutter. How else do you get cute scalloped edges?  I meticulously shape each ball of almond-infused dough into crescent-shaped moons. Warm from the oven, I roll each cookie in powdered sugar and place it on a cooling rack.  Then, sift powdered sugar over the cookies for that snow-capped look.  Yep, that little extra step.  Her attention to detail was what set her cookies apart and that’s what I learned from her.

It’s been a few years since she left us.  Every Christmas since, as I am perusing recipes and pulling out my butter, flour, and sugar- I think of her.  I imagine her scurrying around her kitchen churning out tray after tray of her delicious cookies.  Then I hear her voice prodding me, it’s time to get busy and bake.

A Fine Understudy

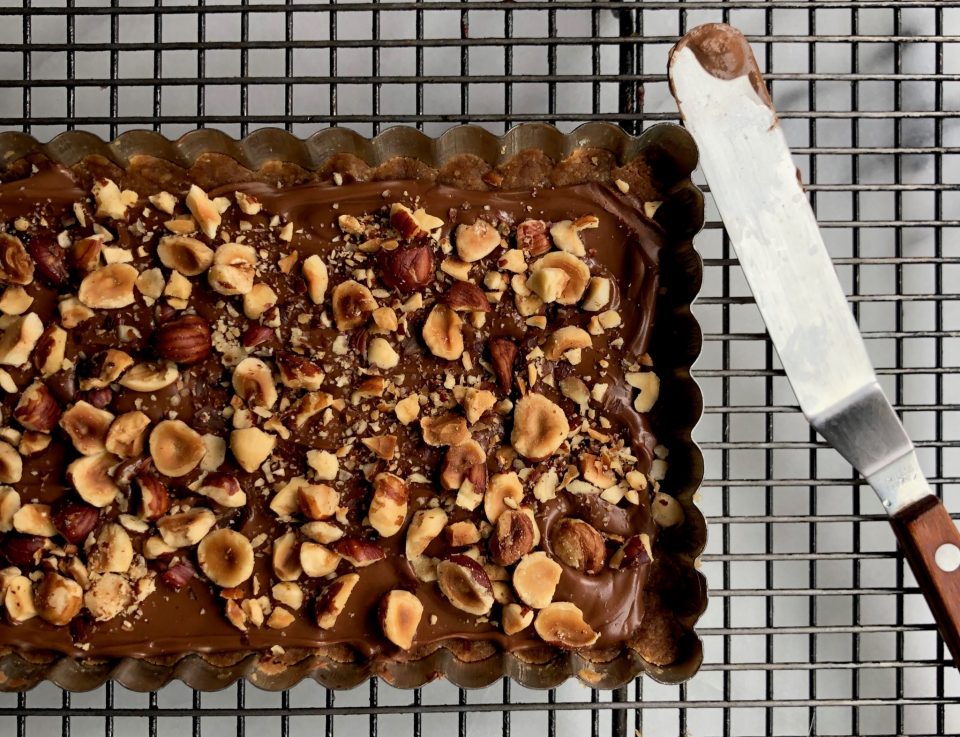
Unfortunately, I don’t have Mrs. S’s recipe for those Toffee Bars that I love so much. (Update: Found it! Mrs. S’s Toffee Squares) But Alice Medrich does.  Her Cookies and Brownies book contains toffee bars that are so good, they would make Mrs. S proud.  The crust starts with melted butter making these incredibly easy to make. Stir together brown sugar and flour with the butter, press into a pan and bake to a golden brown.  For this batch, I scattered a combo of semi-sweet and milk chocolate chips on the warm crust, let them melt, and ice the melted chips over the crust.  For the final touch, sprinkle toasted hazelnuts over the chocolate.  Next batch?  Endless possibilities, limited only by your imagination.

Kid version:  Use all milk chocolate and either toasted almonds or pecans.  Got milk?

Adult version:  Use semi-sweet chocolate or dark chocolate and toasted hazelnuts, finish with Maldon Salt.  Serve with some bubbly.

Sporty twist version:  Perfect during a ballgame, your choice of chocolate and salted or honey-roasted peanuts.  Play ball!

Allow bars to cool on a rack.  Use a serrated knife to cut the pan into bars or wedges.

Toffee Bars

A buttery, brown sugar crust topped with chocolate and hazelnuts. A riff on Alice Medrich's Toffee Bars.
Course cookies, Dessert
Cuisine American
Keyword toffee, toffee bar recipe, Toffee Bars
Prep Time 15 minutes
Cook Time 30 minutes

Equipment

  • 8x8 inch square pan or 9' tart pan with removable bottom. Any pan with roughly same area I like to use a 12x5 rectangular tart pan and cut the cookies into wedges.

Ingredients

Shortbread base

  • 8 tbsp unsalted butter
  • 1/2 cup light brown sugar packed
  • 1 tsp vanilla
  • 1/8 tsp salt
  • 1 cup all-purpose flour

Topping

  • 6 ounces milk or semisweet chocolate chopped, if bar or block or use chips
  • 1/2 cup toasted nuts your choice!

Instructions

  • Preheat oven to 350 degrees. Position rack in lower third of oven

Shortbread base

  • Cut butter into chunks and melt in a saucepan over medium heat or place in heatproof glass bowl, loosely cover and microwave at 40% power for 15 seconds, repeat if necessary.
  • Remove from heat and stir in brown sugar, salt and vanilla. Add flour and mix just until combined.
  • Press dough into a lined (parchment or foil) 8x8-inch pan or a tart pan with a removable bottom
  • Bake for 20-25 minutes or until well browned at the edges and golden brown in the center

Topping

  • Scatter chocolate evenly on top of warm crust. Let stand to allow the chocolate to melt. If necessary, place in the oven for a minute to help melt the chocolate. Spread chocolate evenly over the crust with an offset spatula or the back of a spoon.
  • Sprinkle toasted chopped nuts over chocolate. Set on rack to cool.
  • Lift and transfer bar to cutting board. Use a sharp knife (I like using a serrated knife)and cut into 2x2" squares or wedges. If necessary chill in fridge to set chocolate.
  • See story above for variations.
Snickerdoodles (Alice in Cookiewonderland)

Snickerdoodles (Alice in Cookiewonderland)

It has been 1610 days since I sat down and penned my inaugural post, Jamigos 2.0 to launch 3jamigos.  As I reflect on that number all I can think is WHAT TOOK ME SO LONG TO INCLUDE MY FAVORITE COOKIE?  I mean, sheesh, of the 100 cookie recipes I have posted, it doesn’t include my all-time favorite non-shortbread cookie (notice how I slipped in that qualifier, shortbread=cookie perfection).  Unbelievable, and how did I discover this faux pas?

I was tasked with making cookies for an End of Summer Party for our political action group (sanity saver).   I automatically went to my blog and typed in S N I C K E R D O O D L E S in the search box and waited, NOTHING popped up.  A quick search of my cookie index revealed, what the heck, no Snickerdoodles.

Are you kidding?

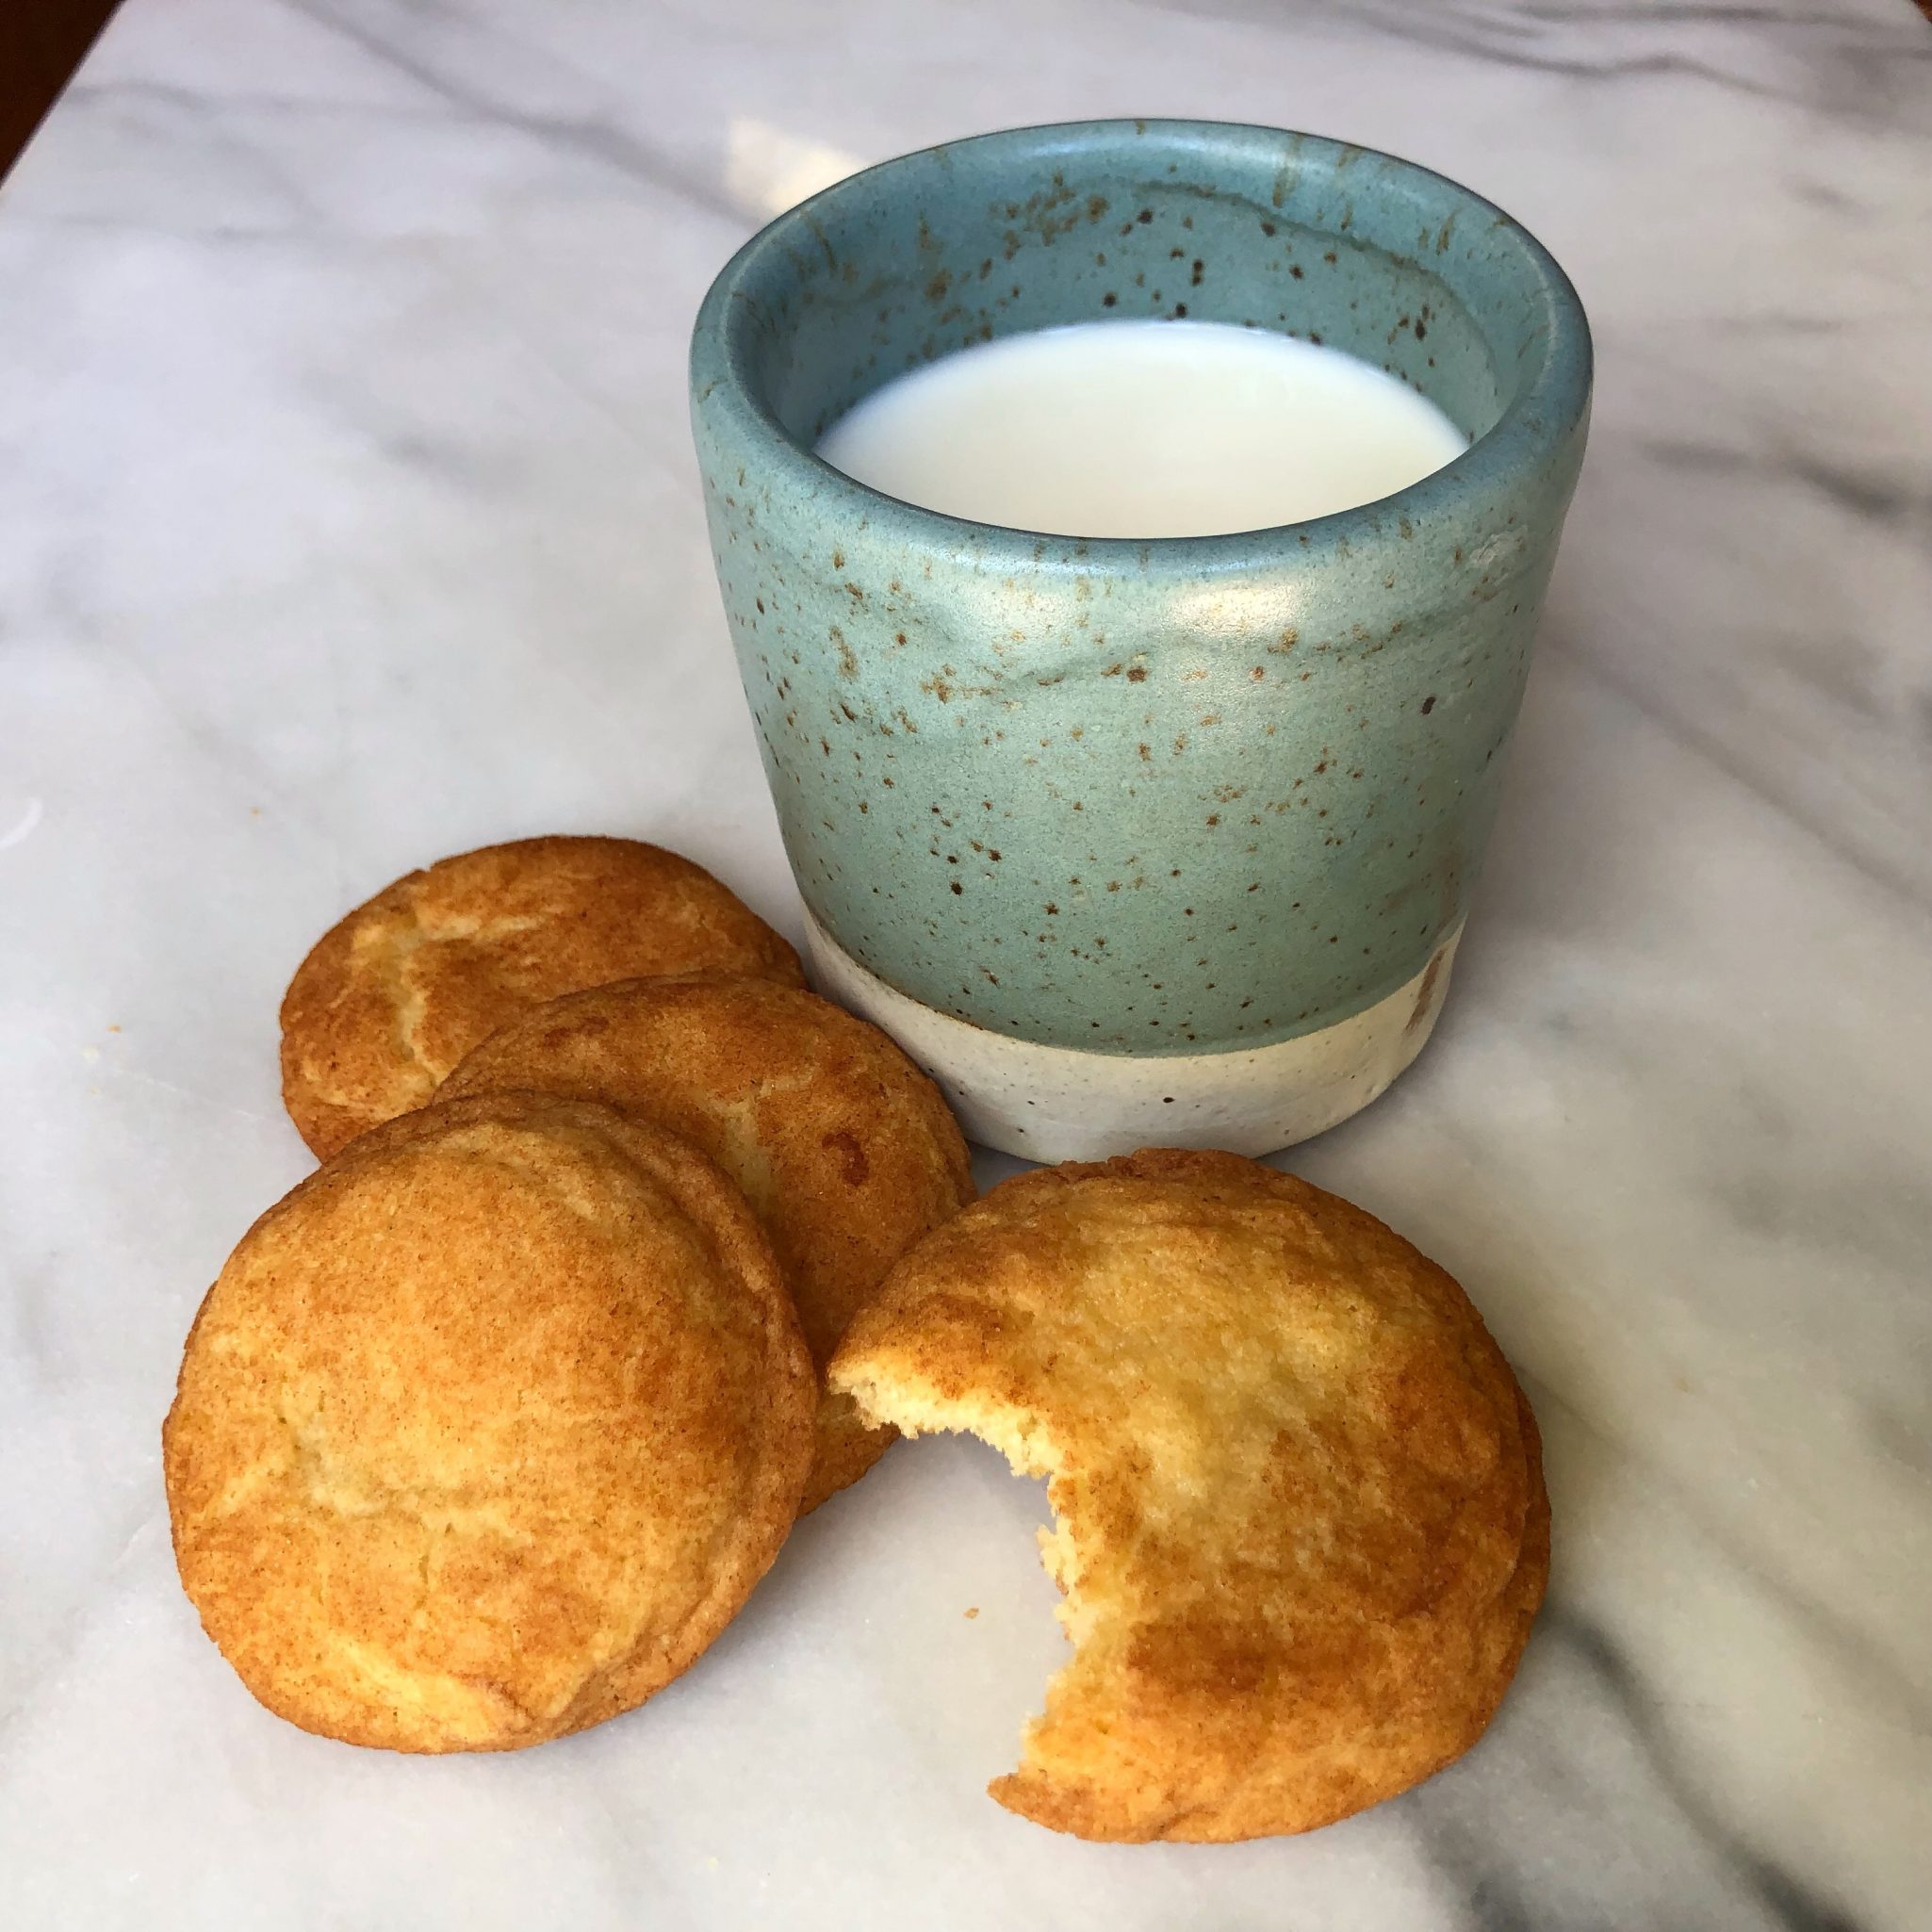
I’ve never posted Snickerdoodles on my blog?  Hellooo, time to fix that.  I got busy, made a batch for the meeting, snitched a couple to have with an ice-cold glass of milk, and sat down to write this post.

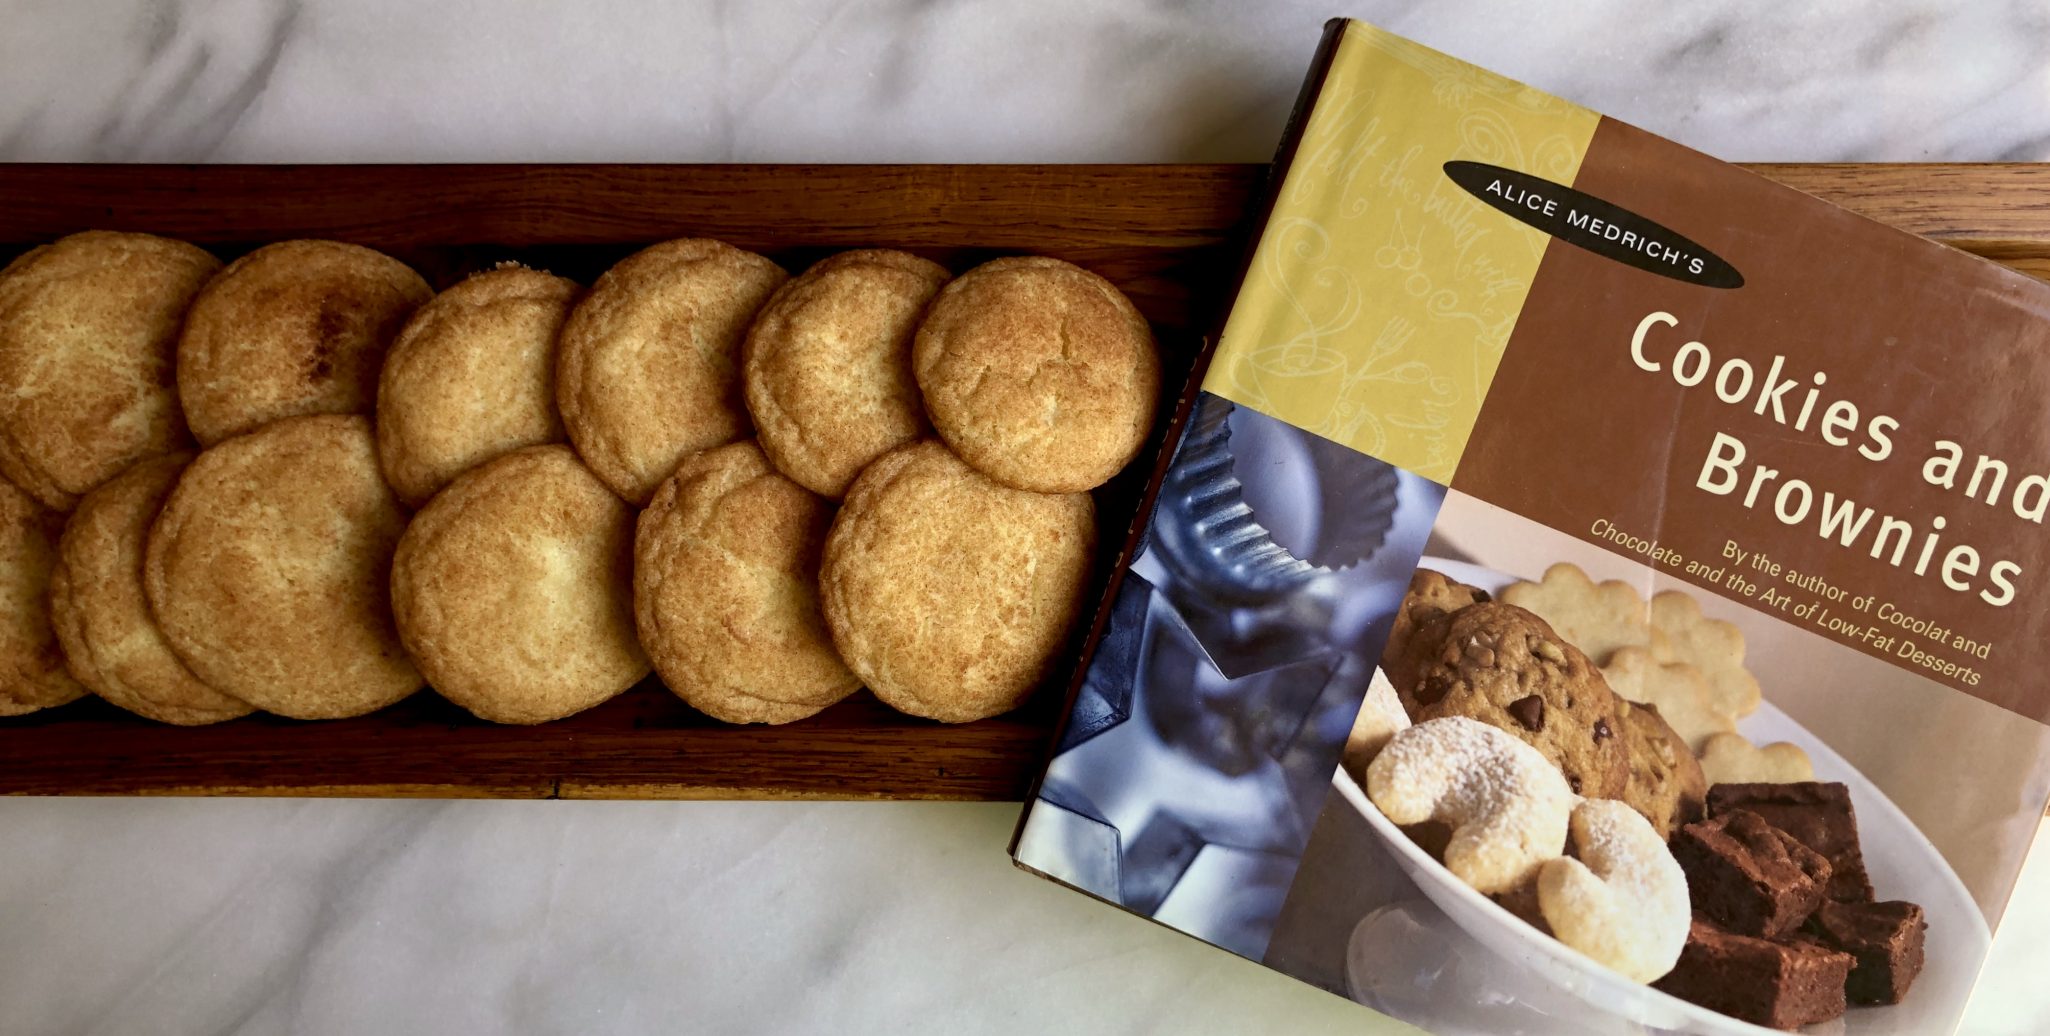
EVERYONE needs a scrumptious recipe for Snickerdoodles.  Buttery, sweet and spicy, crispy edges, soft chewy center,  finished with cinnamon sugar.  The quintessential cookie.  My favorite recipe comes from the cookie maven, Alice Medrich.  Unlike other recipes I have seen, hers are made with just butter. Yep, no shortening in these bad-boy bites of sweet cinnamon bliss.  The recipe is from her small but mighty book, Cookies and Brownies, long out of print but available on the secondary market. The book is worth getting just for this and her Lemon Bar recipe. Well written with easy-to-follow directions, it’s a keeper.  My copy is frayed and tattered, well worn from use.

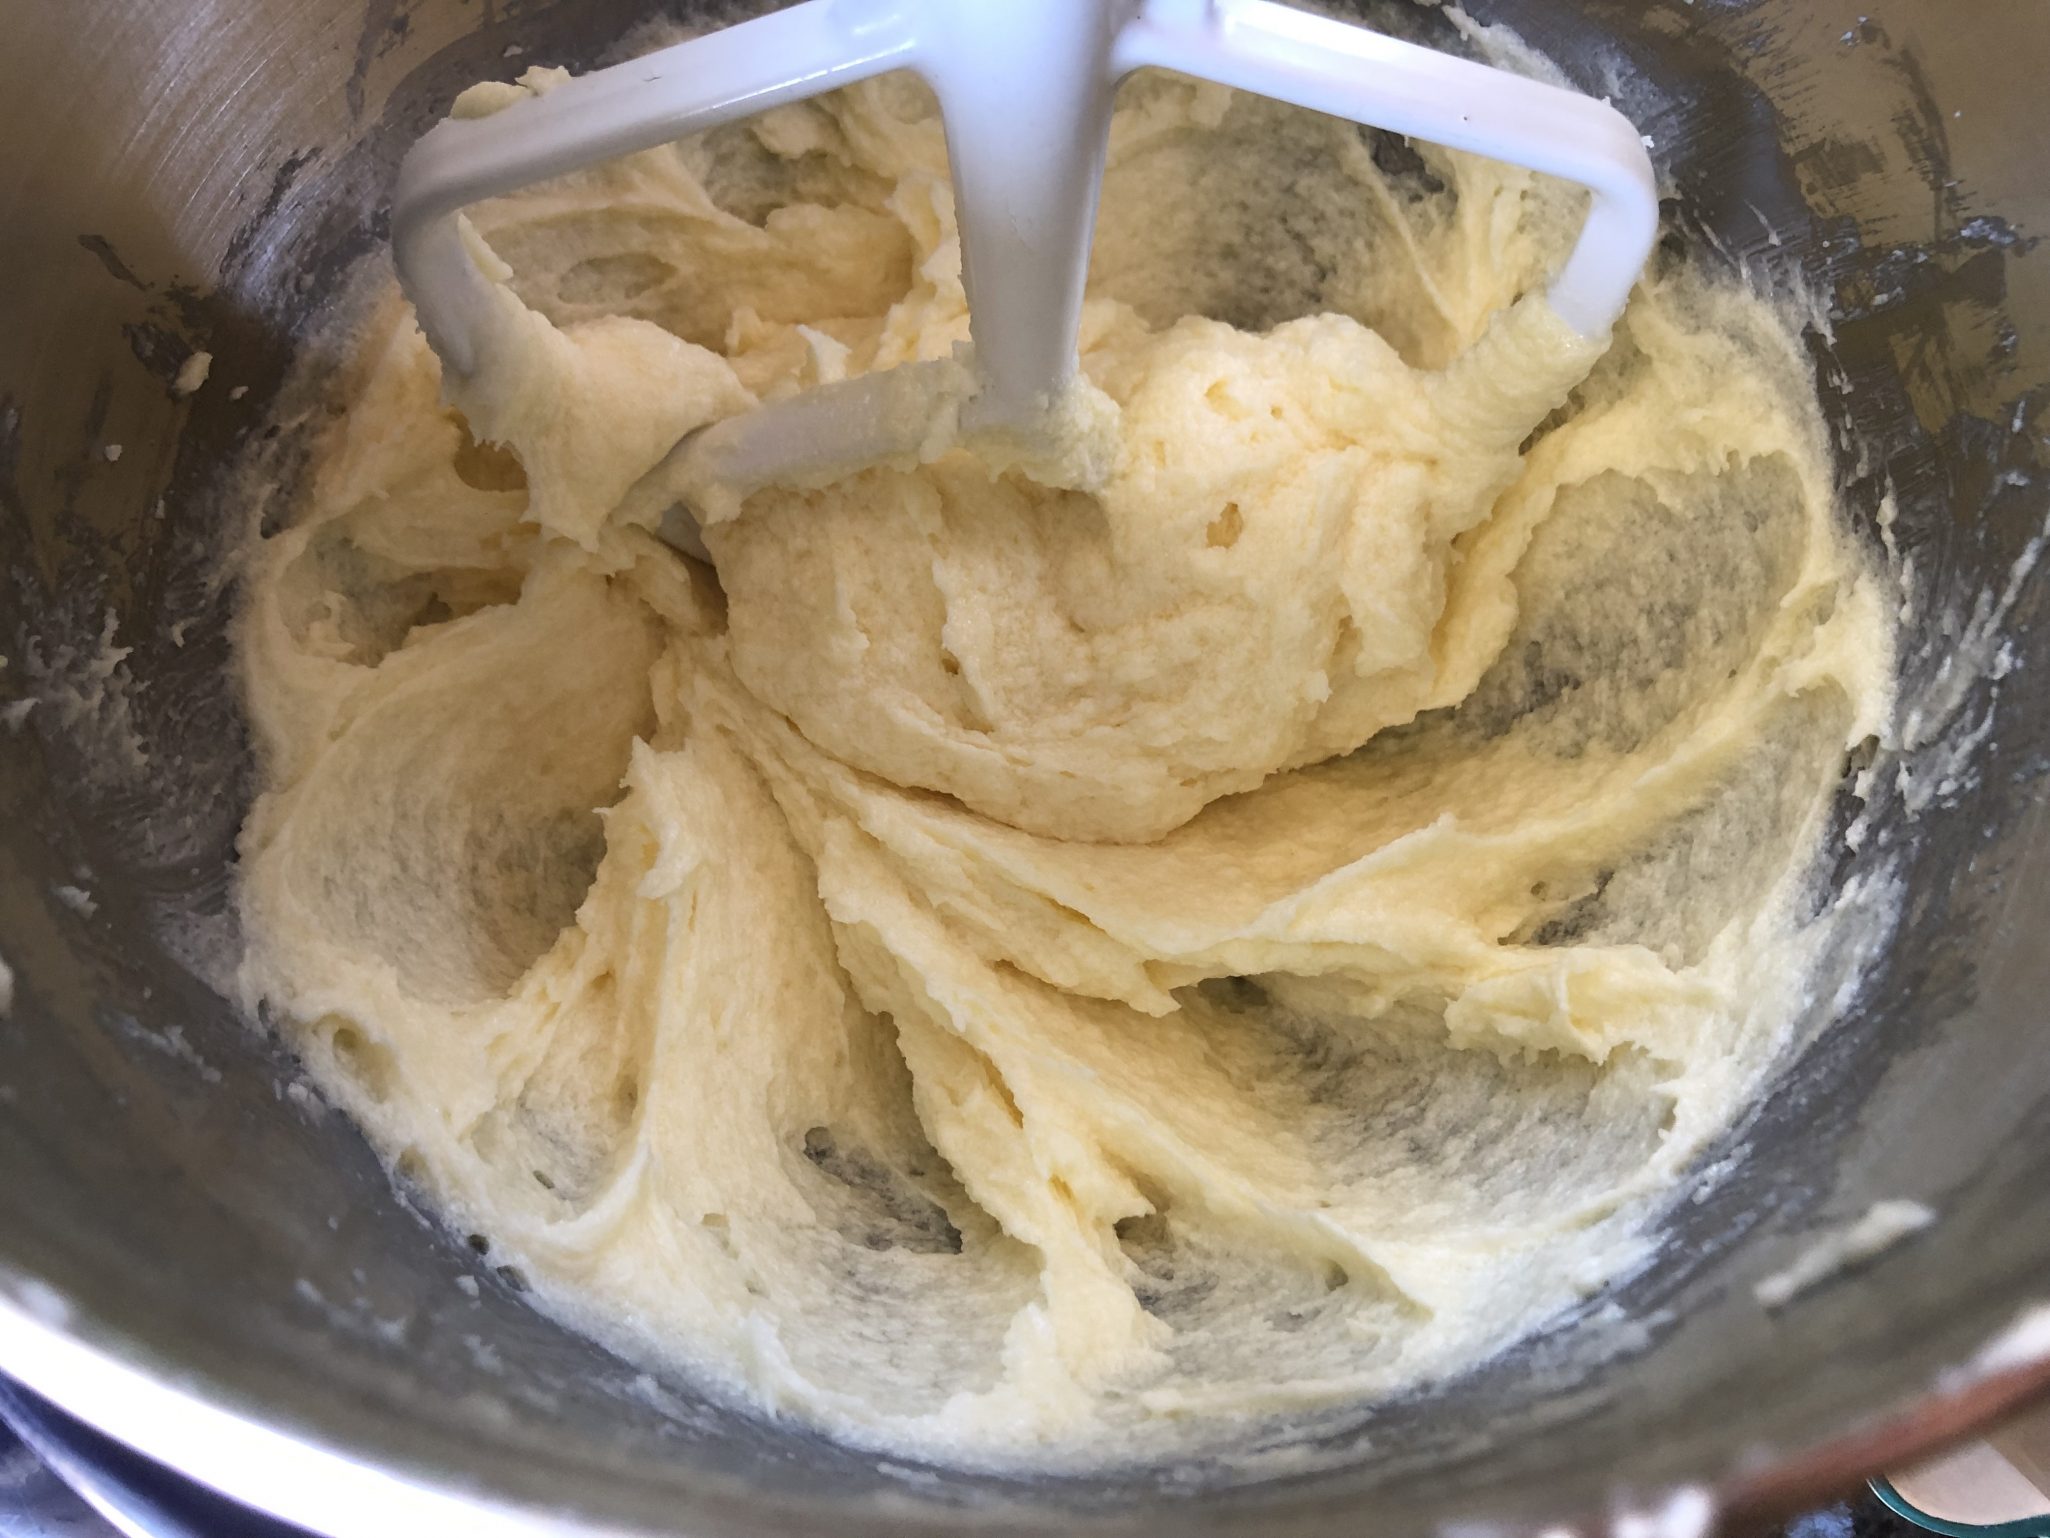
Cream butter and sugar together to smooth but NOT fluffy.  Add eggs, beat until blended.

Add flour and stir just until combined.  Don’t overmix.  The mixing changes the consistency of the cookie.  Fluffy butter-sugar mixture gives a cakier cookie, go for smooth and creamy.  After adding the flour mixture do not beat the dough too much or you will end up with a tough cookie.

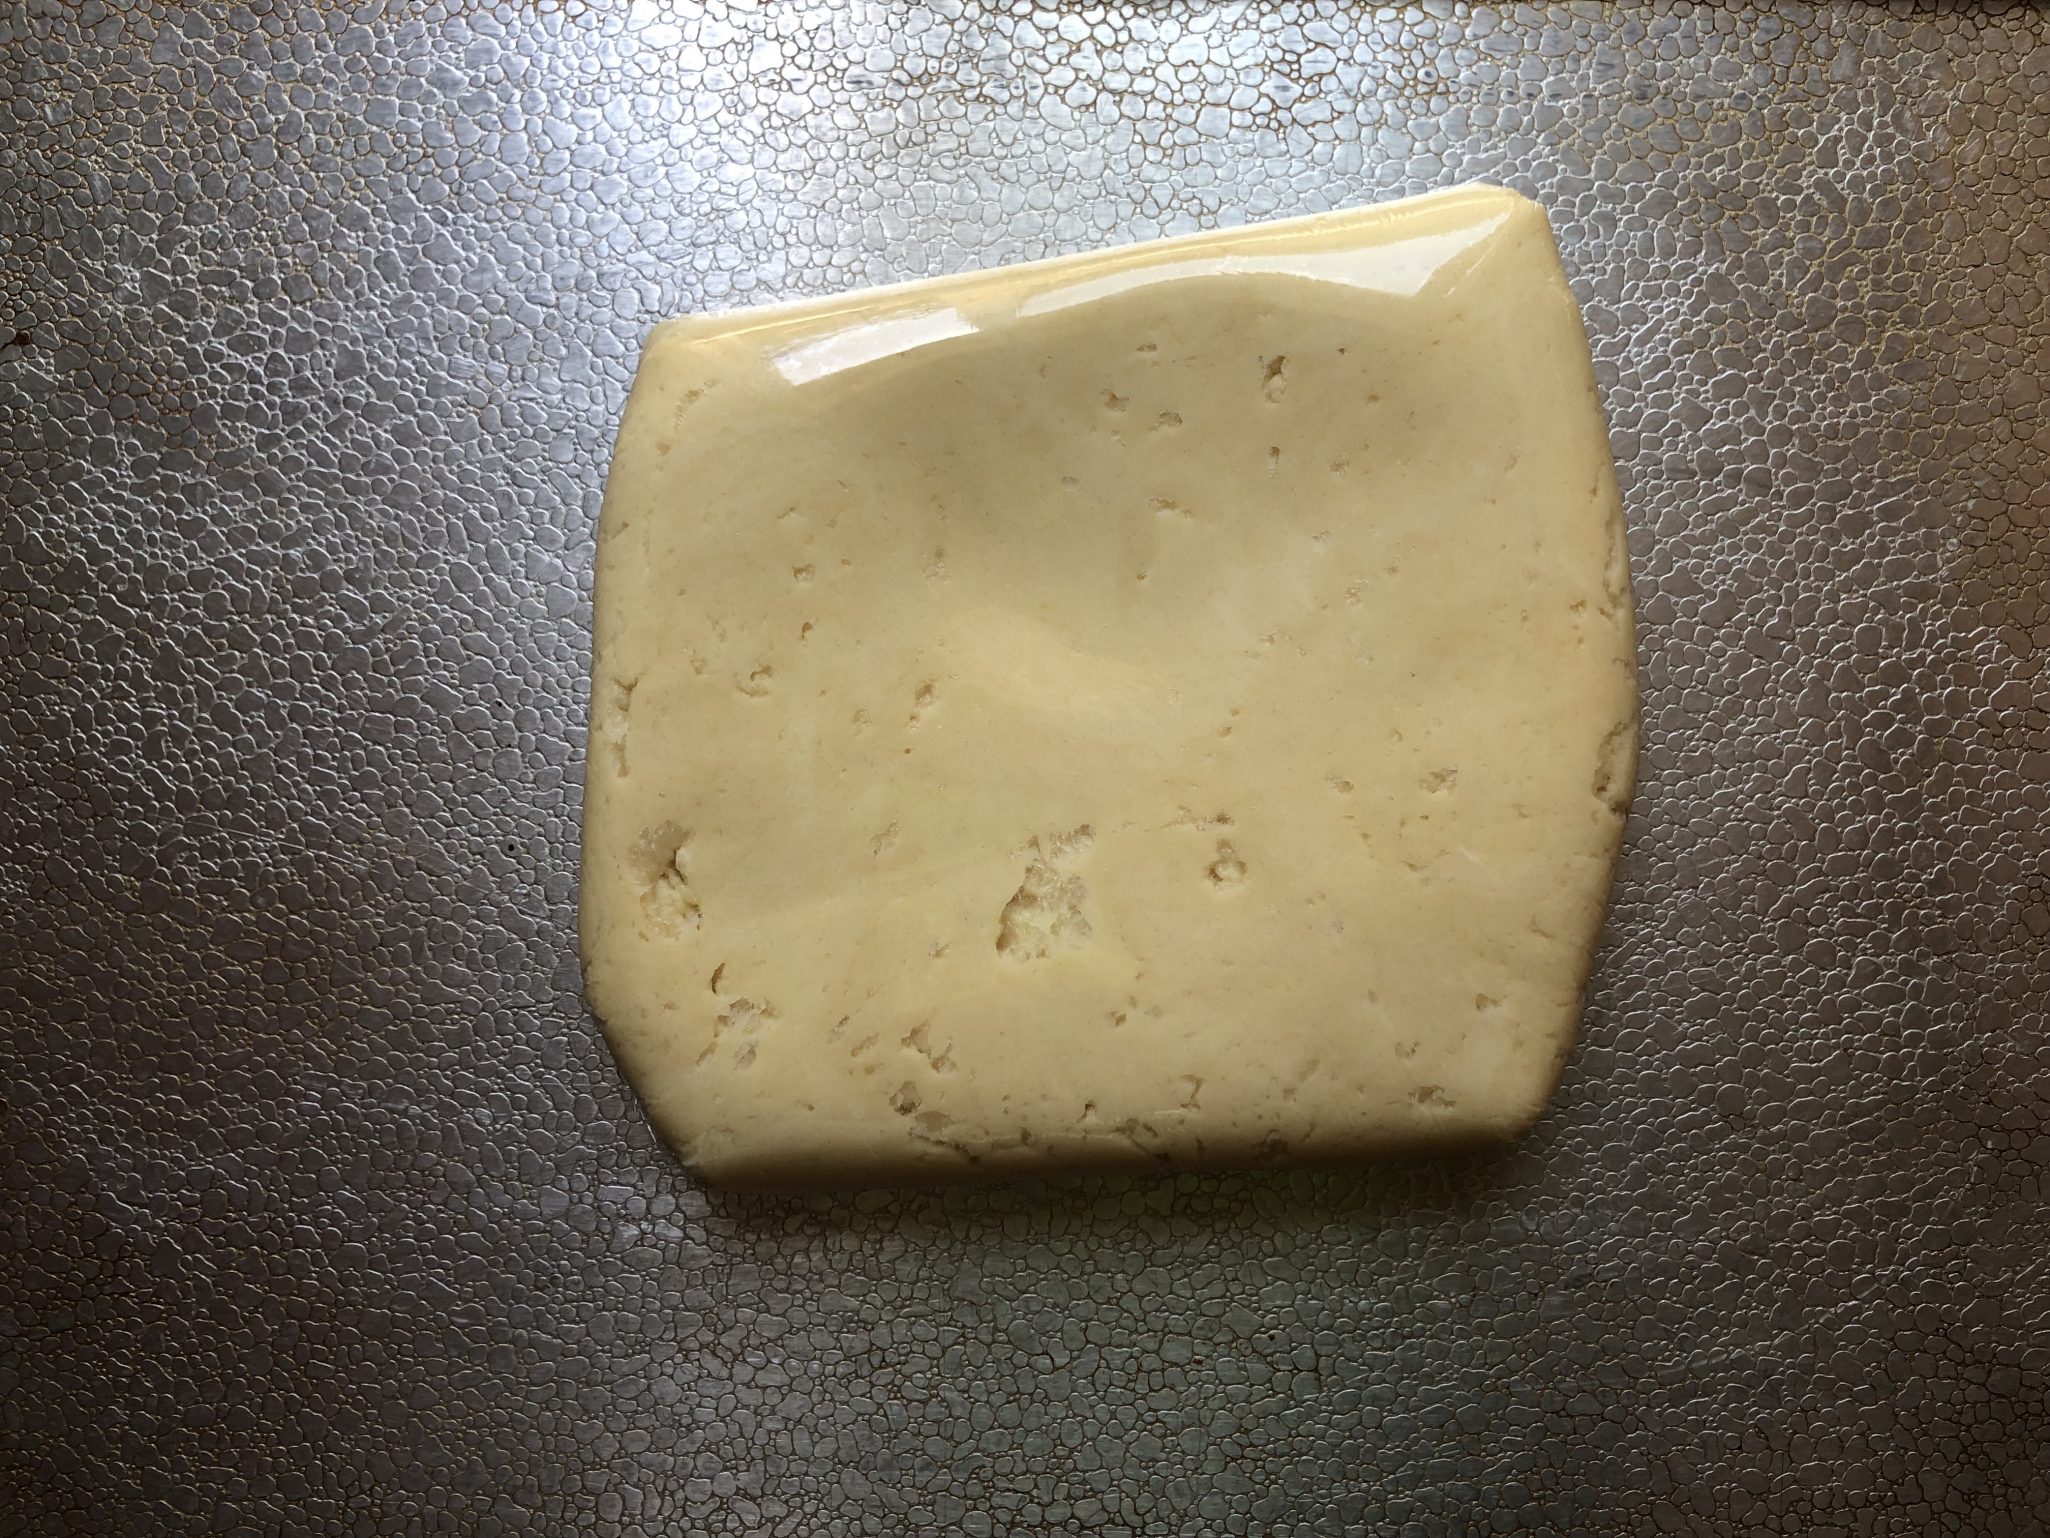
Gather dough into a disc, shape doesn’t matter.  Keep the thickness to about an inch.  This will make it easier to scoop and form the cookies after chilling.

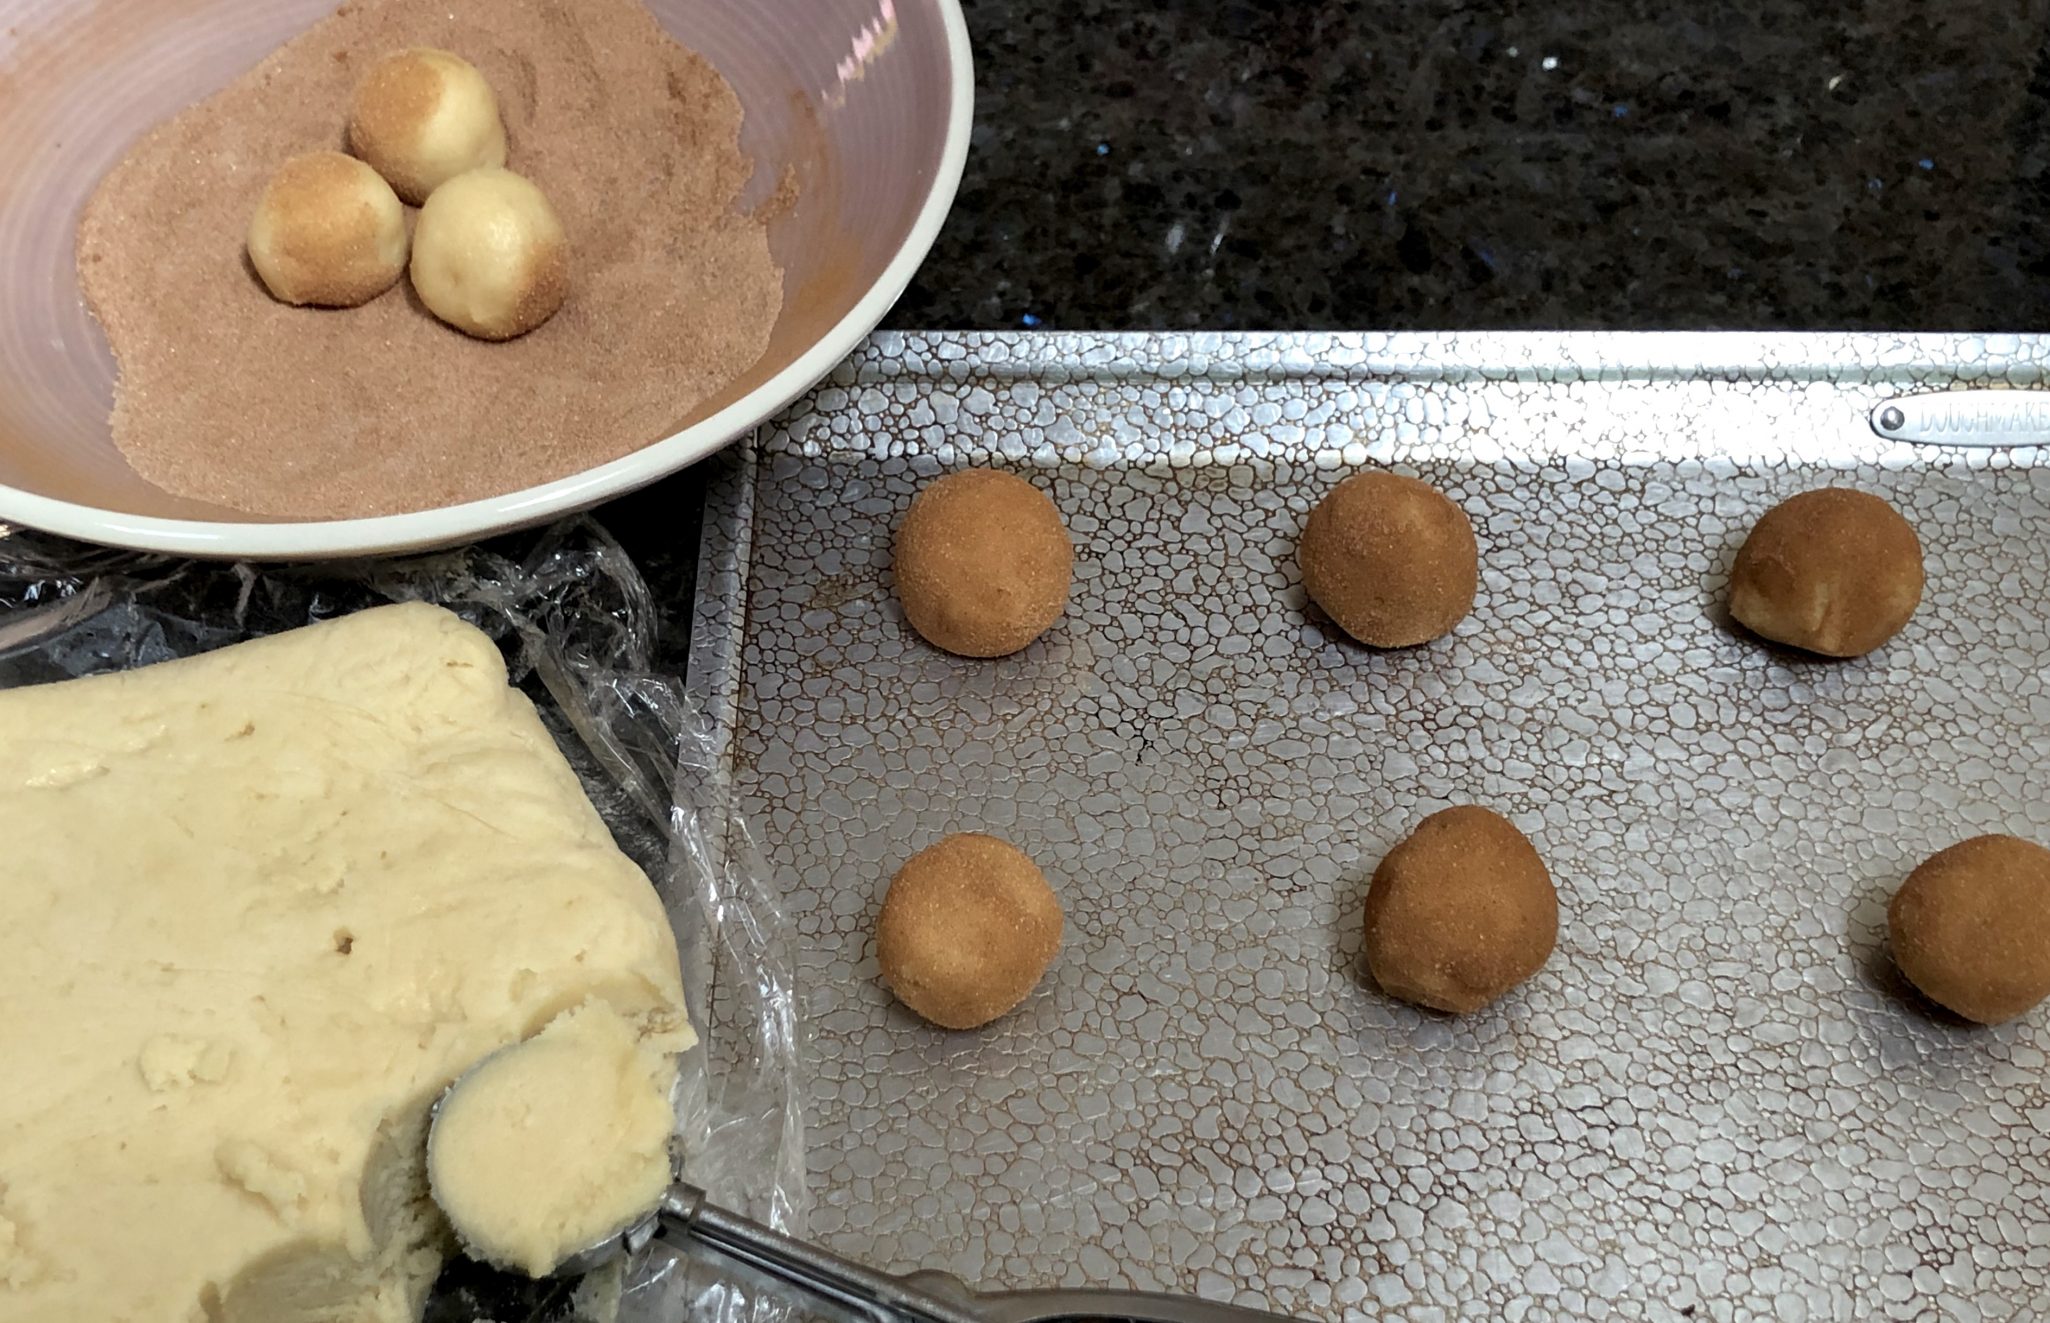
After chilling the dough,  use a 1 tablespoon ice cream scoop (#70) to form balls.  Shape the scoops into smooth balls and roll in cinnamon sugar.  Use a good quality cinnamon, like Penzey’s . This is a great cookie to make with the kids or grandkids, never met a kid that didn’t like to roll balls of cookie dough in copious amounts of cinnamon sugar all the while licking their fingers.

The one tablespoon scoop yields a cookie about 2 inch in diameter.  All well and good, BUT, the smaller you make the cookie the harder it is to end up with a cookie that has crisp edges and a soft center.  If that is what you are looking for, try making bigger cookies. Increase your baking time by a couple of minutes.

Bake cookies 8-10 minutes until the edges are golden brown.  I like the centers soft, if you like crunchy cookies, bake them a bit longer.  How long?  Don’t know, I don’t like them that way.

Snicker Doodles

Course cookies
Cuisine American
Keyword Snickerdoodles
Prep Time 20 minutes
Cook Time 10 minutes

Equipment

  • Cookie sheets, lined with parchment paper or greased

Ingredients

  • 3 cups unbleached all-purpose flour (13.5 ounces)
  • 2 teaspoons cream of tartar
  • 1 teaspoon baking soda
  • ½ teaspoon salt
  • ½ pound unsalted butter, softened (2 sticks)
  • cups sugar 10.5 ounces
  • 2 large eggs
  • 2 teaspoons ground cinnamon
  • 2 tablespoons granulated sugar

Instructions

  • Preheat the oven to 400° Position rack in the middle of the oven.
  • Combine the flour, cream of tartar, baking soda, and salt in a bowl and mix thoroughly with a whisk or fork.
  • In a medium mixing bowl with an electric mixer, beat the butter with the 1½ cups sugar until smooth and creamy, not fluffy. Beat in the eggs just until blended. Add the flour mixture and stir or beat on low speed just until incorporated. Gather the dough into a disc and wrap in plastic wrap. Refrigerate until firm, at least 30 minutes.
  • Mix the remaining 2 tablespoons sugar and the cinnamon in a small bowl. Form level tablespoons of dough with an ice cream scoop, into 1-inch balls. Roll the balls in the cinnamon sugar and place 2 inches apart on the lined or ungreased cookie sheets.
  • Bake for 8 to 11 minutes, until the cookies puff and begin to settle down. To create crevices, when cookies puff, tap cookie sheet on rack. This causes the cookie to sink, creating crinkles. Rotate the cookie sheet from front to back halfway through the baking time to ensure even baking. Bake until the edges are golden. Remove from oven and allow to cool for a couple of minutes. Remove cookies with a spatula to a wire rack. Don't let them cool completely or the cookies will stick to the sheet. I bake on ungreased sheets to minimize spreading.
  • Cool the cookies completely before stacking or storing. May be kept in an airtight container for several days.
Nutty for Almond Meltaways

Nutty for Almond Meltaways

I contemplated using the tiniest font size possible when I typed “cookie #12 of my 12 days of cookies” when I realized I actually can’t change the font size. Damn! It’s the second week in January and here I am finally posting the last holiday cookie.

At least it is a good one, Almond Meltaways.

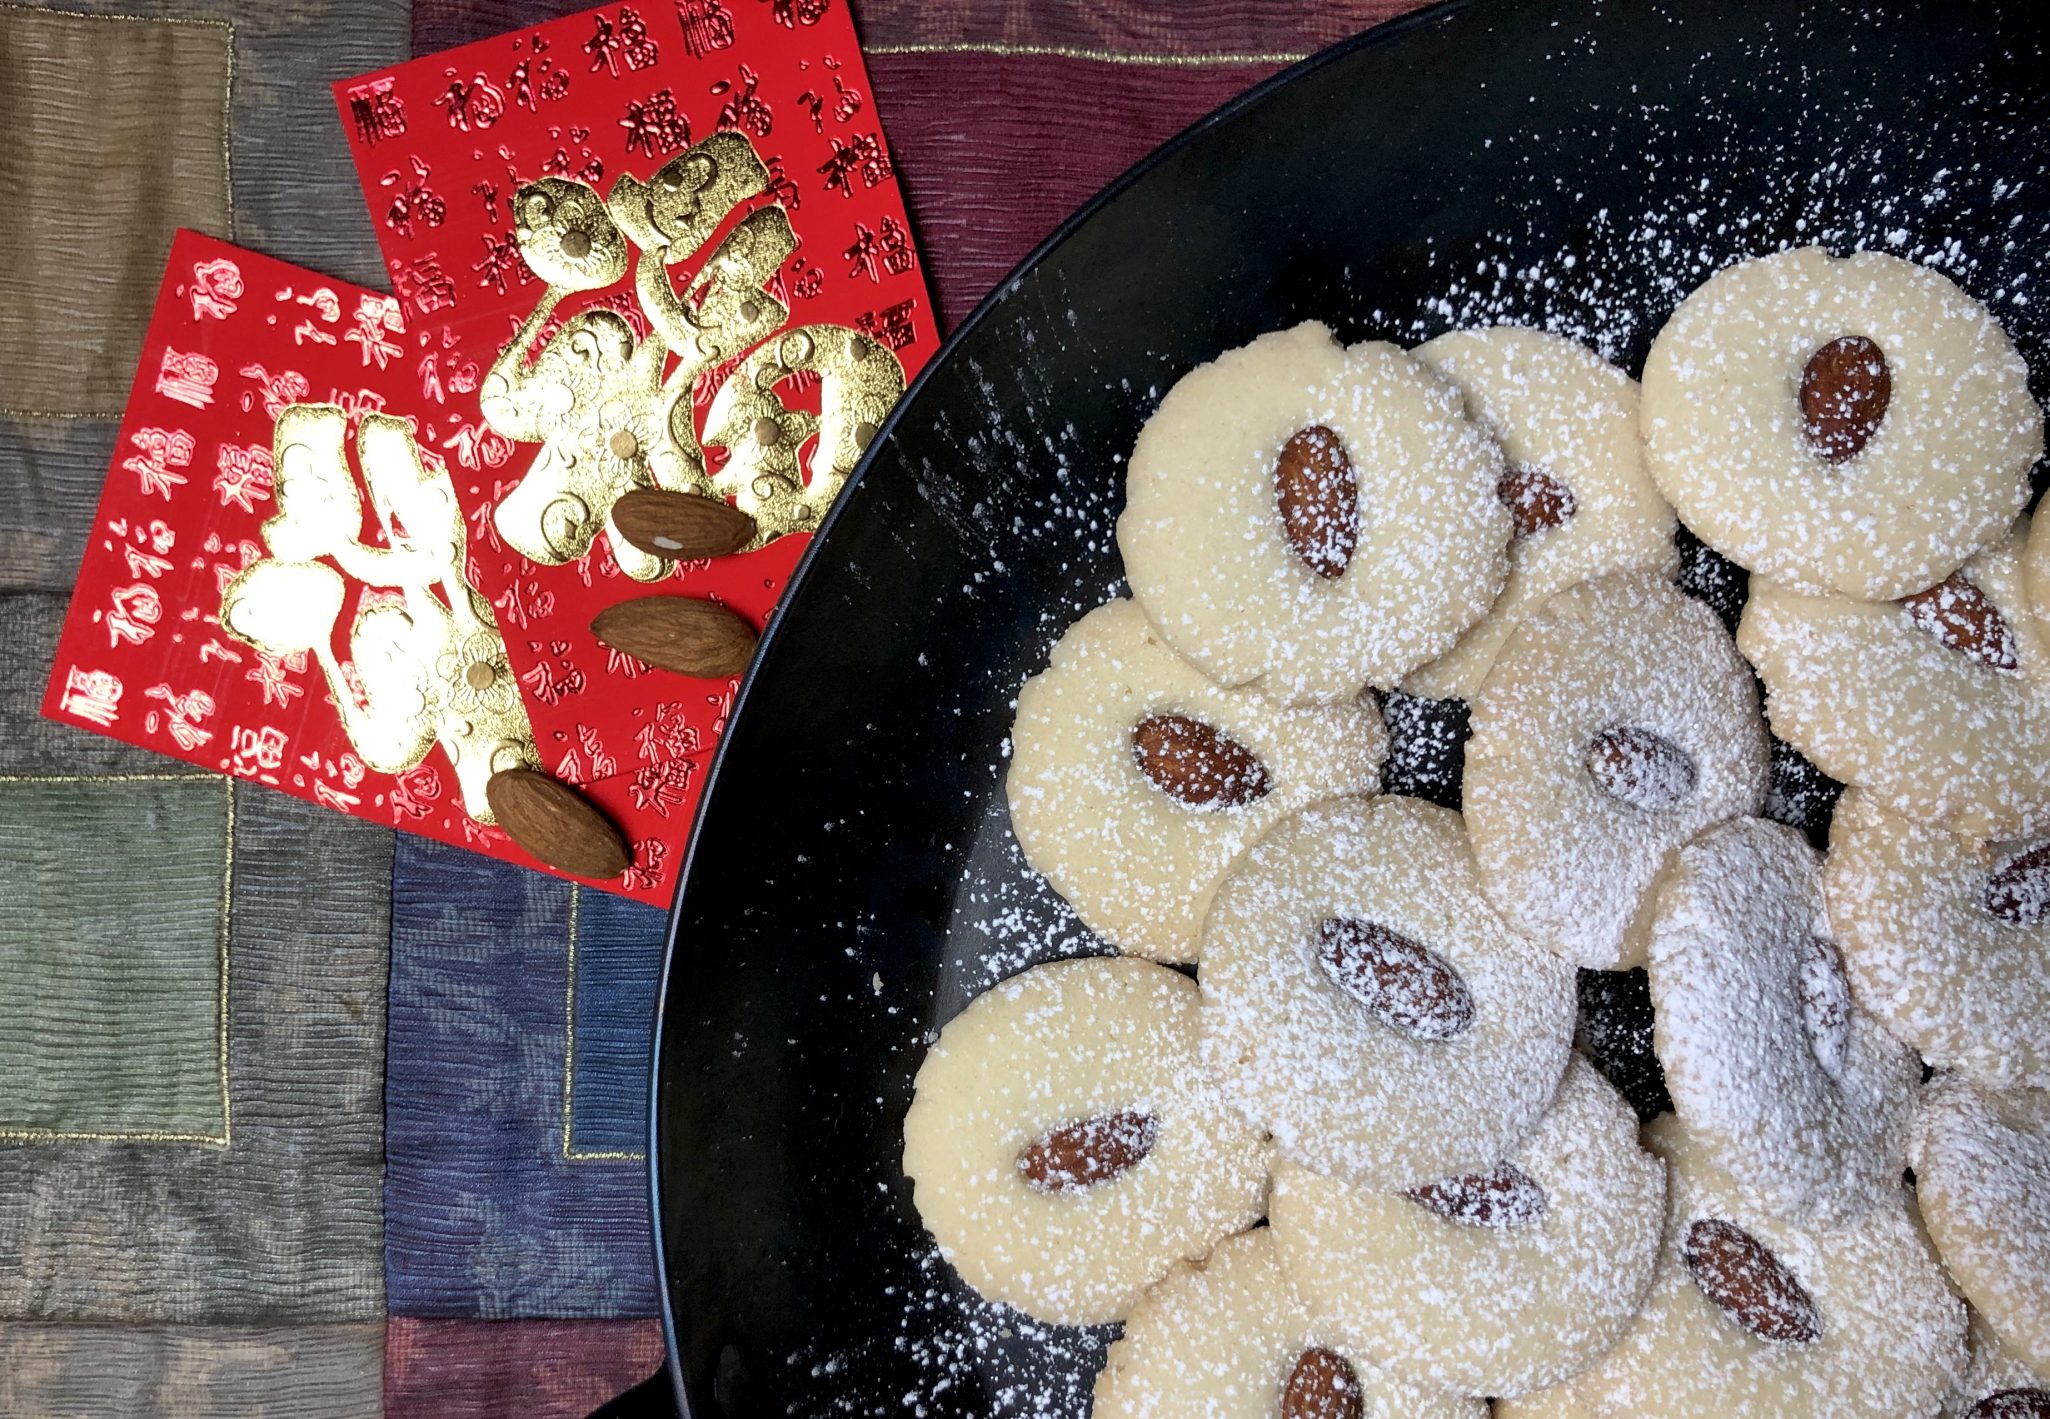
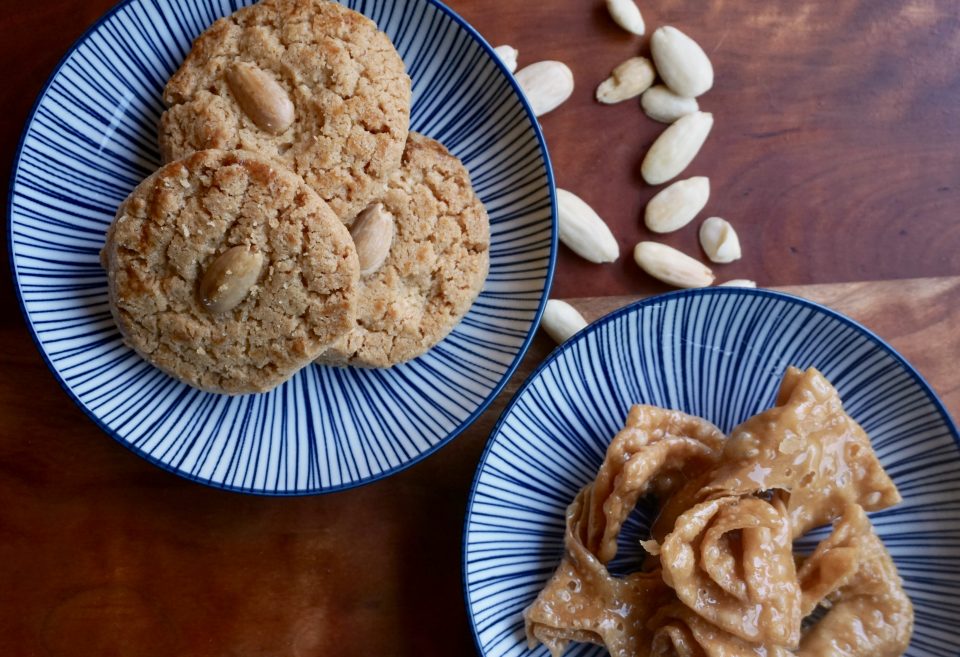
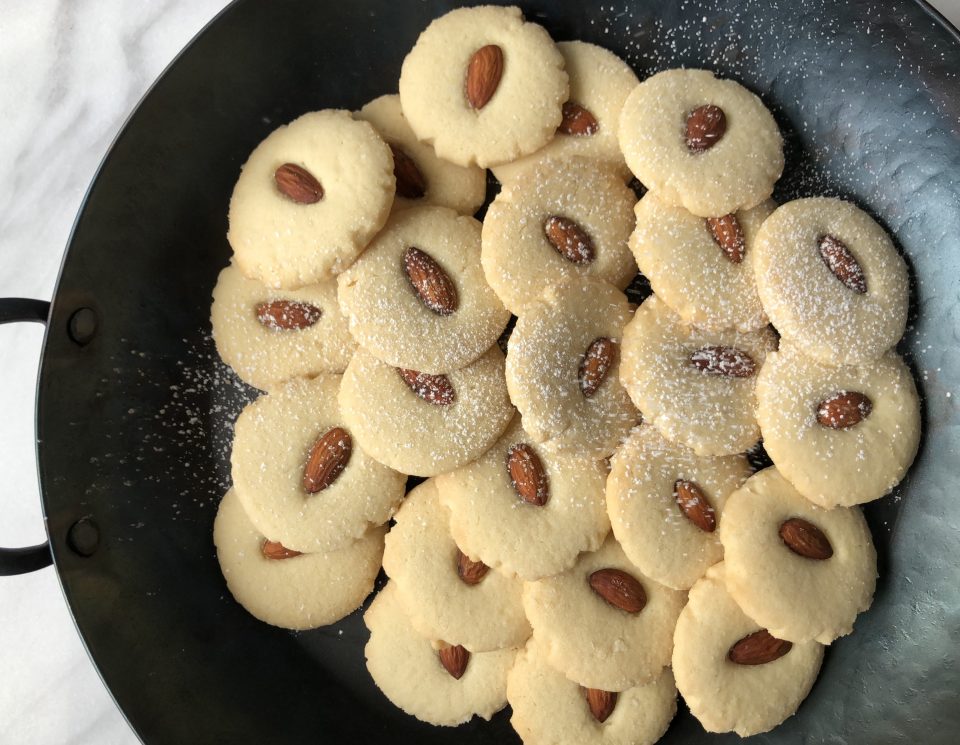
I would not be surprised if one of the first cookies I ever nibbled on was an almond cookie.   Every bakery in Chinatown makes a version of the egg-washed, crinkly cookie with a hallmark whole almond pressed in the center of each.  Made with lard or shortening these cookies are crumbly, sandy, crisp, and redolent of almonds. In a nutshell-yummy.  While friends pulled out sugar or chocolate chip cookies from their lunch bags, I pulled out almond cookies from mine.  Those days are a distant memory but I still love eating almond cookies.

On my last jaunt to Los Angeles, I made a quick pitstop at a family favorite in Chinatown, Phoenix Bakery.  When we were kids, my mom, distantly related to the owners, always made it a point to stop there when we were in LA.  After catching up with the latest news of our families, they would pack boxes of Almond Cookies and Butterflies for us to bring home.  I love their Butterflies, a bow-shaped sheet of dough deep-fried to make them shatteringly crisp and covered with a sweet, sticky, gooey syrup-a dentist’s dream.  If you are ever in LA, do yourself a favor and pick up a box.  The bakery just celebrated its 80th anniversary, no small feat for a family-run business and a testament to their delicious sweets.

I enjoy almond cookies anytime. But almond cookies are a must during New Year and an integral part of any New Year’s celebration.  Symbolizing coins, they represent good fortune and prosperity in the New Year.

Although it would be hard to beat the almond cookie of my youth, I am always trying new recipes for almond cookies. I’m glad I tried this one.  They’re delicious.  The recipe comes from the blog The Beach House Kitchen and is a wonderful stand-in for Chinese Almond Cookies. The fine grain texture and tenderness come from the use of cornstarch, confectioners’ sugar, and shortening while the butter and almond extract provide the flavor.

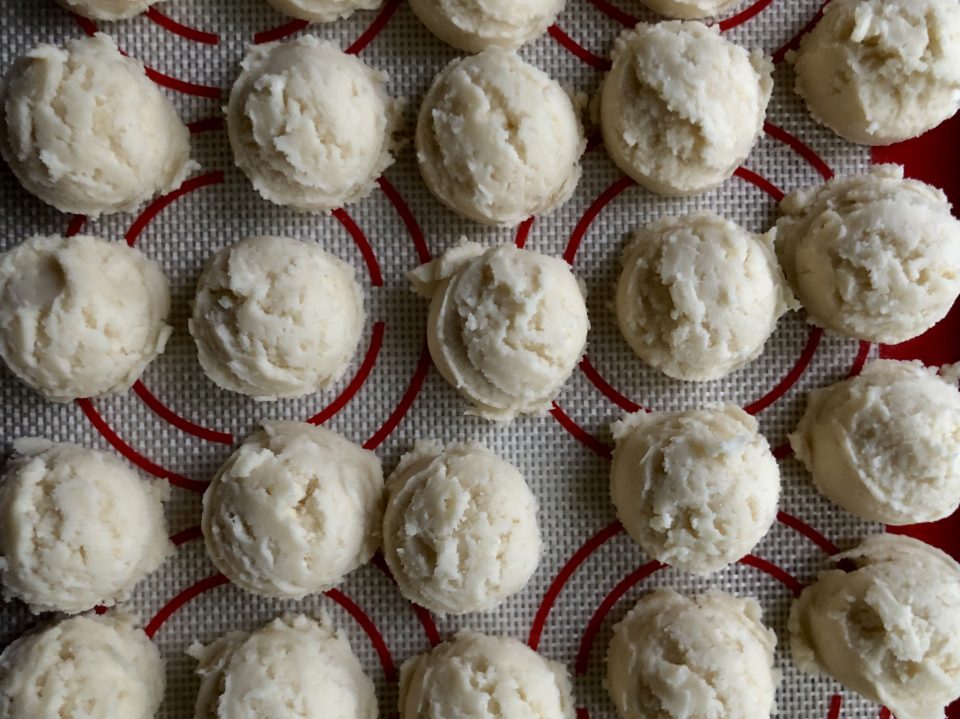
The dough comes together in a snap. Use a tablespoon ice cream scoop (#70 scoop) to portion out the dough.

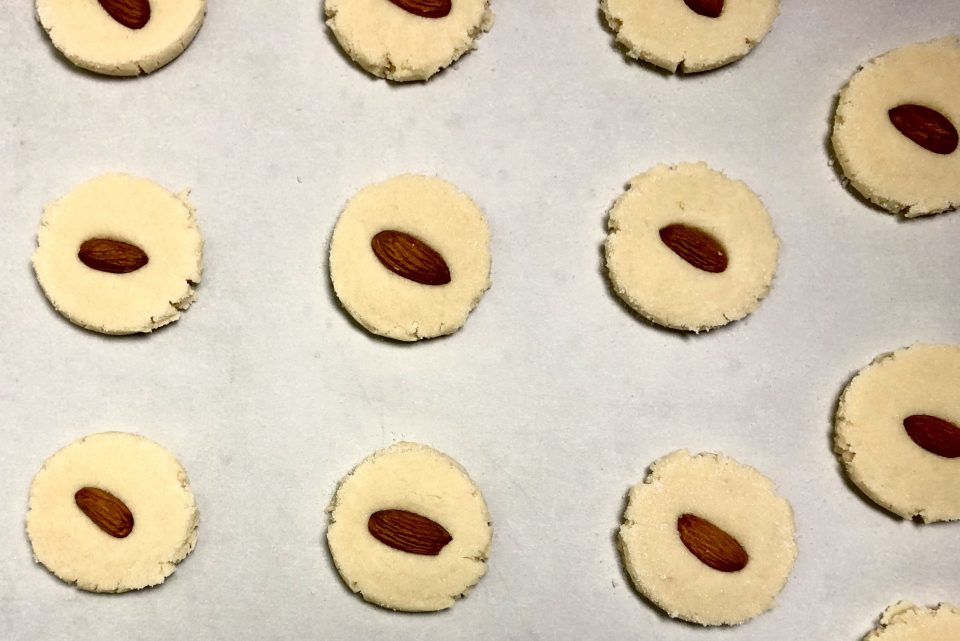
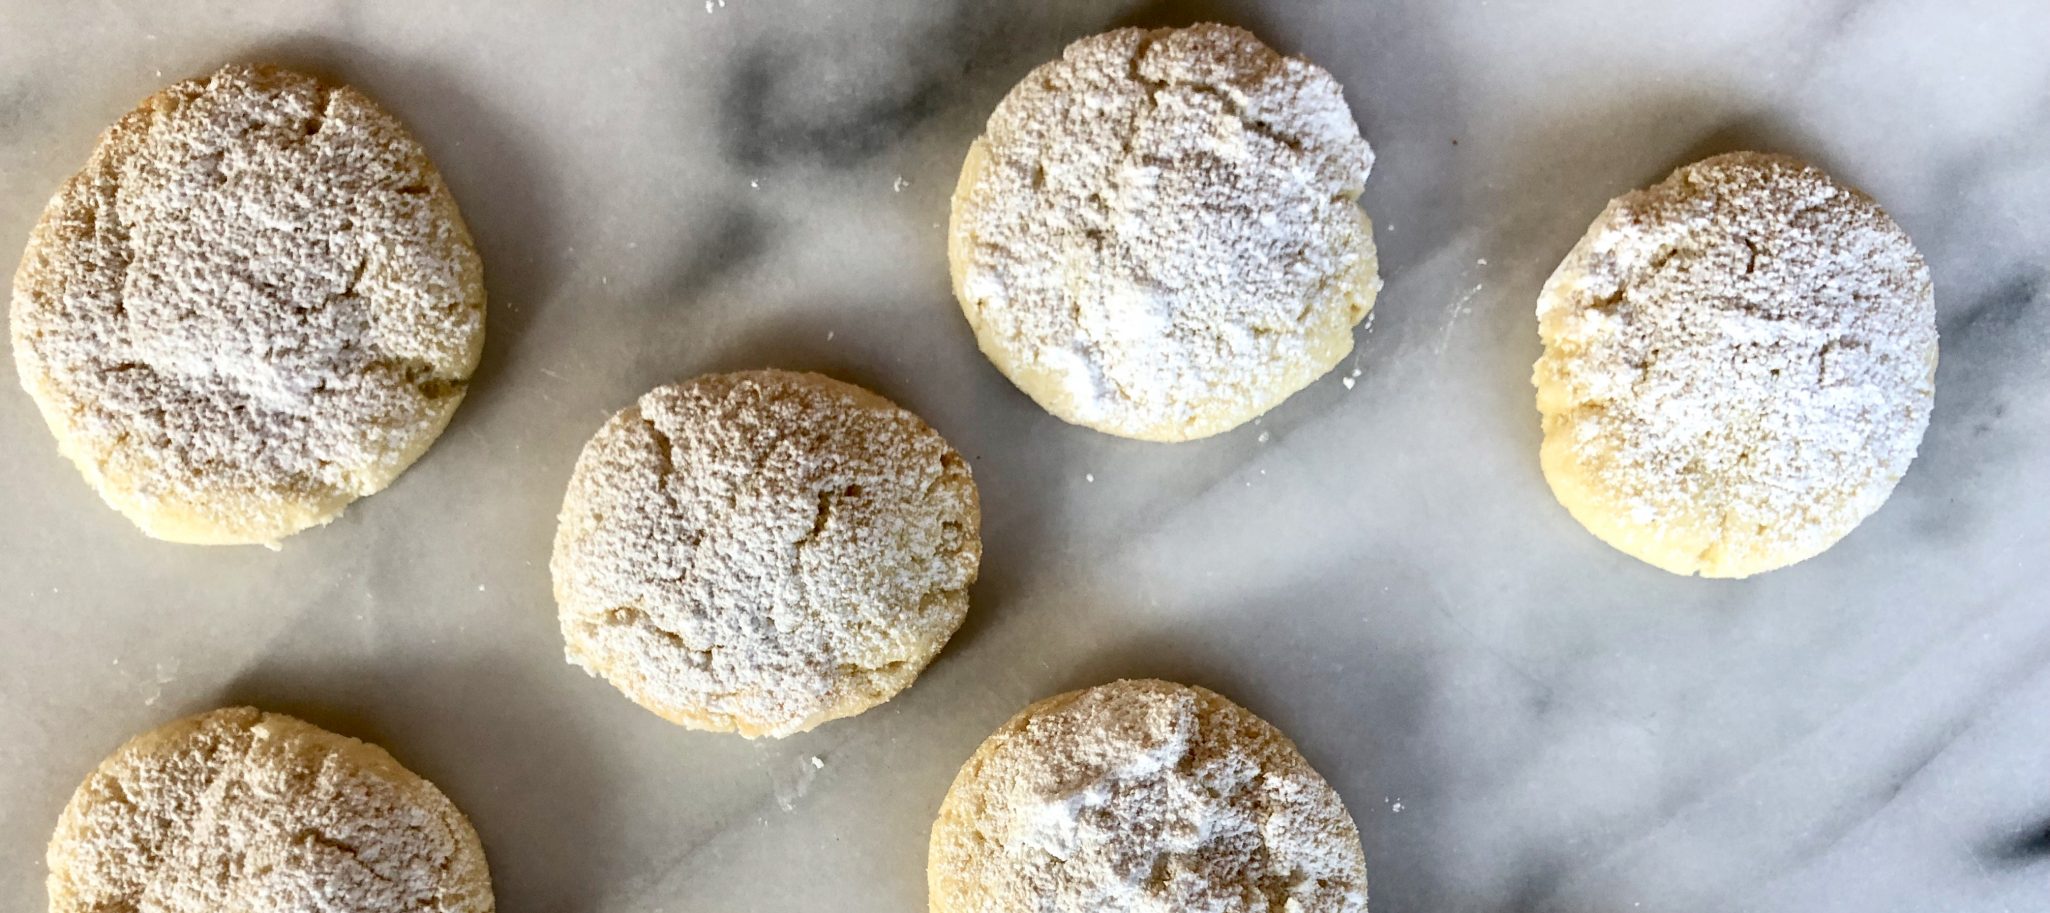
The dough is flattened with a glass dipped in sugar and a whole almond pressed in the center.  After baking, a quick dusting of powdered sugar is the final touch before serving these gorgeous cookies.

I can’t wait to bring these to this year’s celebration, Happy Year of the Pig!

Like Almond Cookies?  Here are  a couple of other favorites, Almond Clouds from King Arthur’s Flour and Almond Cookies from B’s Patisserie in San Francisco.

Almond Meltaways


Course cookies
Cuisine American
Keyword Almond Cookies
Prep Time 16 minutes
Cook Time 14 minutes
Total Time 30 minutes

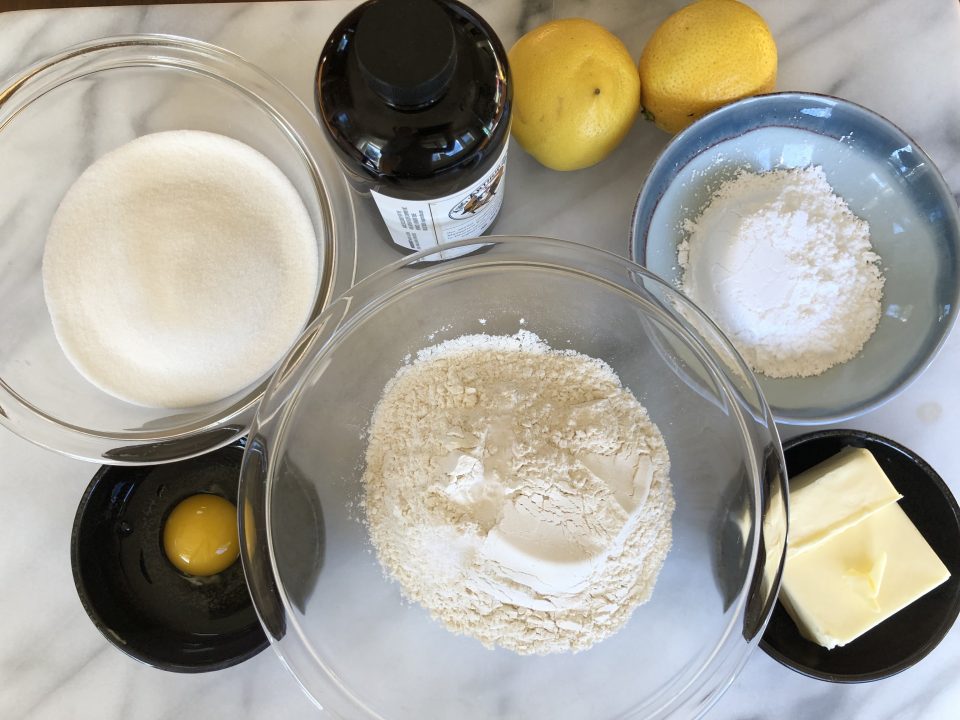
Ingredients

  • 1 1/3 cup all­ purpose flour 167 gm
  • 1/2 cup whole almonds finely ground 75gms
  • 2/3 cup confectioners' sugar 71gm
  • 1/2 cup cornstarch 56gm
  • 1/8 tsp. salt
  • 1/2 cup unsalted butter, room temperature one stick
  • 1/2 cup shortening room temperature
  • 2 tsp. almond extract
  • whole almonds for garnish
  • granulated sugar for dipping
  • confectioners' sugar for garnish

Instructions

  • Preheat oven to 325 degrees. Line a large baking sheet with parchment paper. Set aside.
  • In a large bowl, whisk together flour, almonds, confectioners' sugar, corn starch and salt until well combined. Set aside. 
  • Combine butter and shortening in the bowl of a stand mixer fitted with paddle attachment, on medium speed beat until fluffy, about 2 minutes. Add almond extract. 
  • Turn the mixer to low and slowly add the flour mixture, beating until the dough begins to clump and form a ball around the paddle.
  • Shape the dough into balls, about one tablespoon each and place on baking sheet, about 2 inches apart. Flatten each cookie with the bottom of a glass that has been dipped in some granulated sugar and then press a whole almond into the center of each cookie.
  • Bake for 12­-14 minutes, until just lightly browned and firm when gently touched. Let stand on baking sheet for 5 minutes, before transferring to wire rack to cool completely.
  • Shake confectioners' sugar on tops of cookies
A Crinkle Just In Time: Cookie #11 Lemon Crinkles

A Crinkle Just In Time: Cookie #11 Lemon Crinkles

Jamie is home and decided it was time to bake and bail me out, as she always does, on my attempt to post 12 Days of Cookies.  I’m soooo close, this is cookie number 11.  If it wasn’t for “being under the weather”, I would have posted this yesterday. We definitely needed a citrus cookie so she picked a Lemon Crinkles.  The recipe comes from Fresh April Flours by Lynn.  I think it was karma that Jamie picked this recipe, Lynn is a scientist by trade and a field hockey player. Imagine that?  Fate.

A riff on Chocolate Crinkle Cookies, these gems are bursting with lemon flavor, a delightfully refreshing cookie that’s easy to make and sure to appeal to any citrus lover.

If you are a lemon FREAK.  You could up the amount of zest or play with the amount of lemon juice (just a bit since adding liquid can effect the texture).  Remember, adding zest ups the lemon flavor while adding lemon juice will increase the tartness.  Baking soda also tempers sourness (which is why I add baking soda to my buttermilk biscuits, I don’t want the tang).  You could play around with leaving out the baking soda and adding more baking powder…but this is speculation on my part, so you are entering the change at your own risk zone.

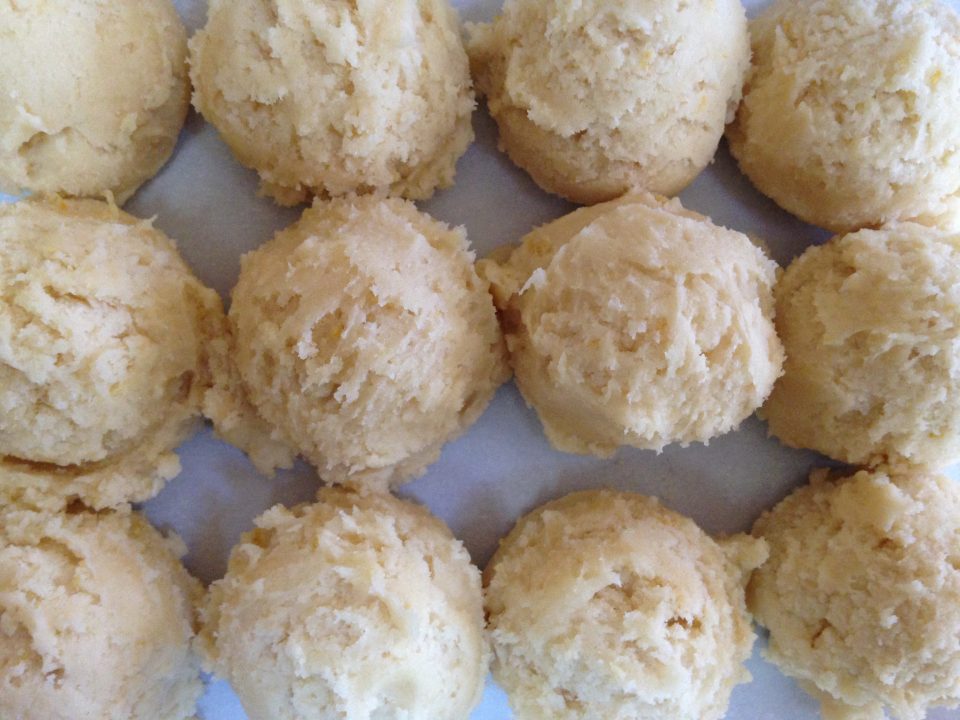
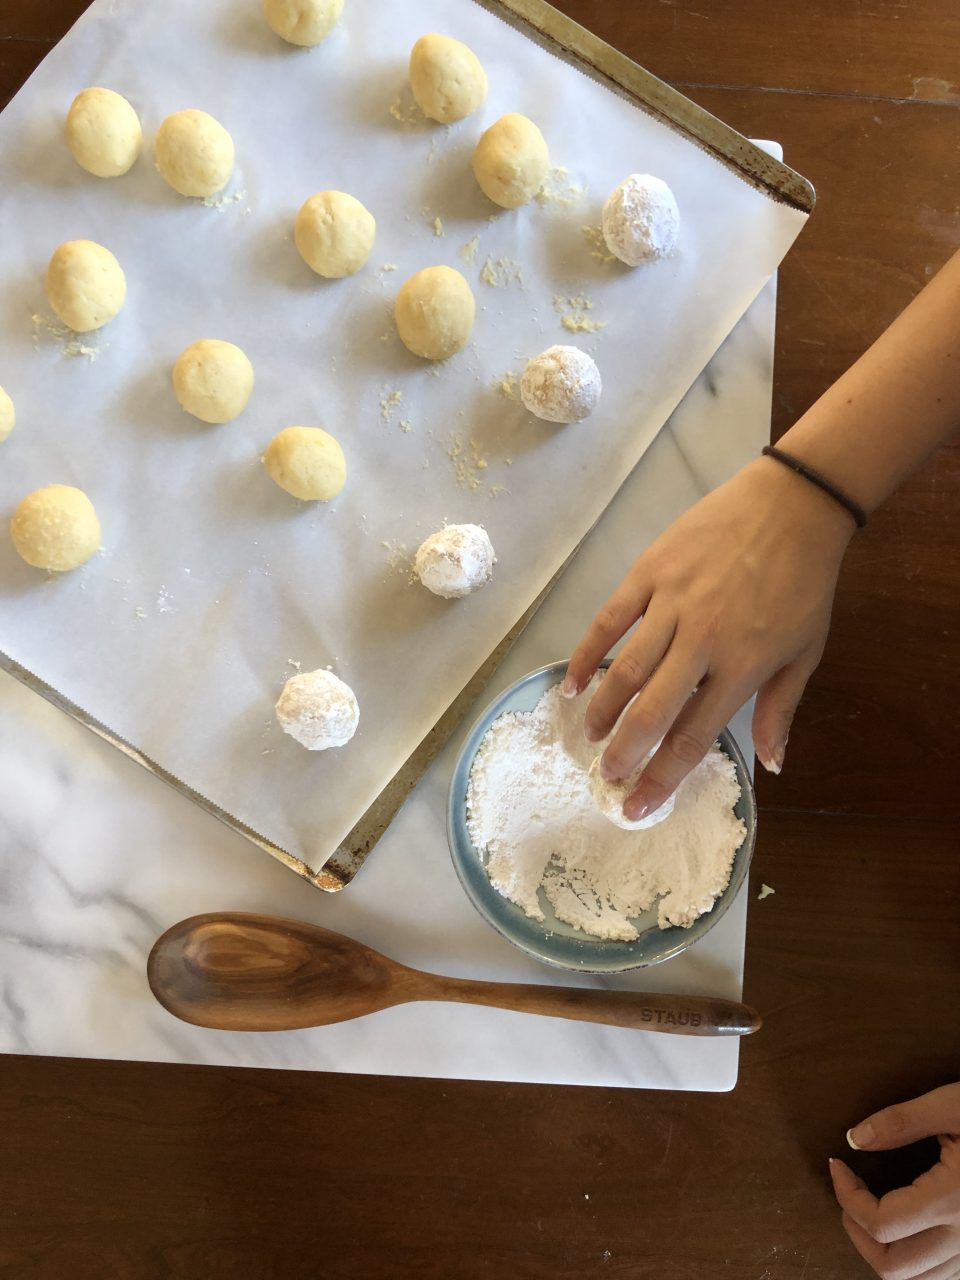
Using you handy dandy ice cream/cookie scoops.  Use a 1.5 tablespoon scooper for a good size cookie.  Roll the scoops into smooth uniform balls before LIBERALLY rolling in the powdered sugar.  Some of the sugar will be absorbed by the moisture in the dough.  For that nice white jagged snowy cap, keep on rollin’.

Cookies spreading too much?  Chill-out and chill the dough well.  This means on warm days, chill the dough, scoop out the balls, if they are soft, chill again.

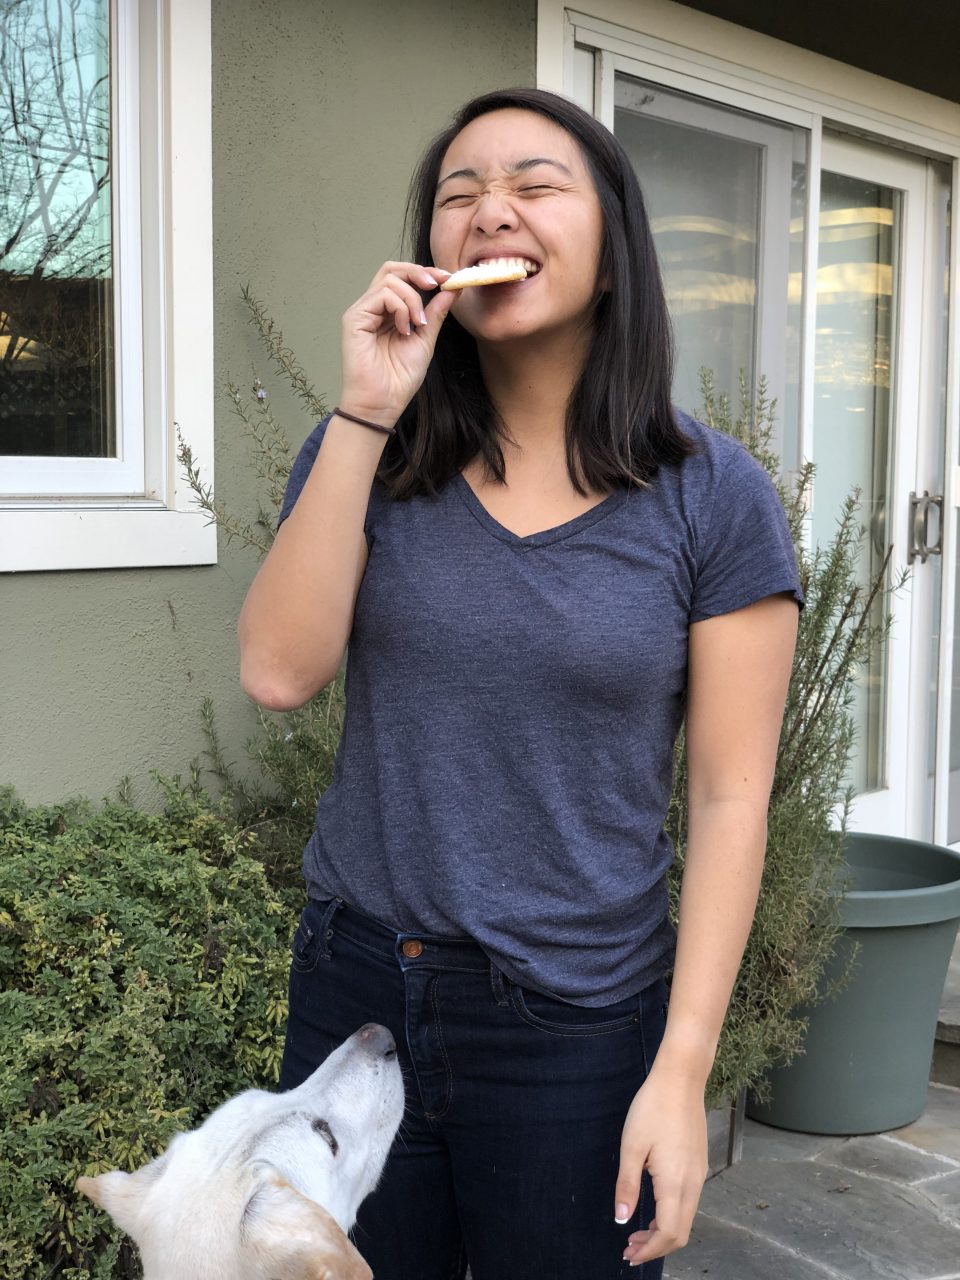
Bake these bad boys off and sit down with a nice cup of tea and enjoy! Or tease your Dog…

Lemon Crinkle Cookies

A citrus riff on the classic chocolate crinkle cookie.  A refreshing change of pace.
Course cookies
Cuisine American
Keyword Crinkles
Prep Time 10 minutes
Cook Time 15 minutes
1 hour
Total Time 25 minutes
Servings 18 cookies
Author April Fresh Flours

Ingredients

  • 1.5 cups all purpose flour
  • ¼ teaspoon salt
  • ¼ teaspoon baking powder
  • teaspoon baking soda
  • ½ cup unsalted butter, softened to room temperature = 1 stick
  • 1 cup granulated sugar
  • 1 teaspoon vanilla extract
  • 1 large egg room temperature*
  • 1.5 tablespoons fresh lemon juice 2 T for more tartness
  • zest of one lemon can increase for more lemon flavor

Instructions

  • In a medium size bowl, toss together the flour, salt, baking powder, and baking soda. Set aside.
  • In a large bowl with a hand mixer or the bowl of a stand mixer fitted with the paddle attachment, cream the butter and sugar together until light and fluffy (approximately 2-3 minutes). Beat in vanilla, egg, lemon juice, and lemon zest. Scrape down the sides of the bowl with a spatula as necessary.
  • Reduce mixer speed to low and gradually add flour mixture. Mix until just combined. Cover bowl and chill in the refrigerator at least 1 hour and up to 3 days. If chilling longer than 1 hour, allow to sit at room temperature about 15 minutes before rolling into balls.
  • When you are ready to bake the cookies, preheat the oven to 350ºF. Line a baking sheet with parchment paper or a silicone baking mat. Set aside.
  • Pour the powdered sugar onto a large plate. Using a large cookie scoop, scoop the dough out of the bowl and roll into a ball with your hands. Dough ball does not need to be perfect. Roll the ball of dough generously in the powdered sugar. Place no more than 8 balls of dough on a baking sheet at one time (4 rows of 2). Chill dough you are not using.
  • Bake cookies for 13-14 minutes or until cookies look mostly matte (not wet or shiny). Remove from oven and cool on the baking sheet for 3 minutes before transferring to cooling rack to cool completely. Store cookies in an airtight container at room temperature up to 10 days. Baked cookies freeze well, up to 2 months. Rolled cookie dough can be frozen up to 3 months. Roll in powdered sugar before baking and bake frozen. Add another 1-2 minutes to baking time.
Forward Progress…courtesy of Jamie….an Instagram Story on making Lemon Crinkles! It gets a little loss in translation on the blog but it’s a start..onto 2019!

Go Big or Go Home Day 10 of 12 Days of Cookies (CCC Skillet Style)

Go Big or Go Home Day 10 of 12 Days of Cookies (CCC Skillet Style)

The best thing about cruising the internet right now is the plethora of Top Ten or Best Eats of the Year lists that are popping up everywhere. In between furiously publishing holiday recipes, everyone digs into their 2018 archives and comes up with The Best of 2018.
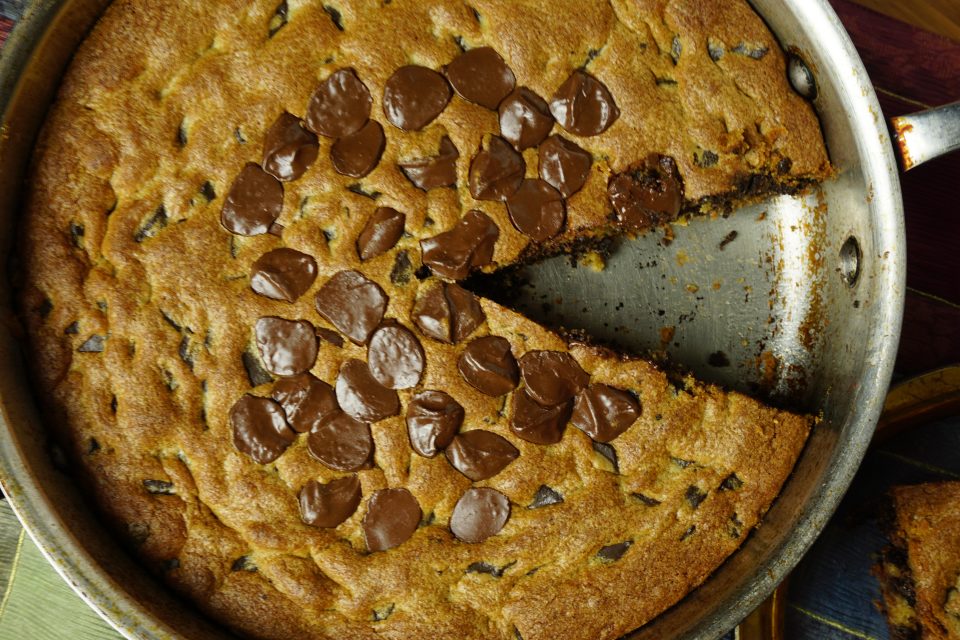
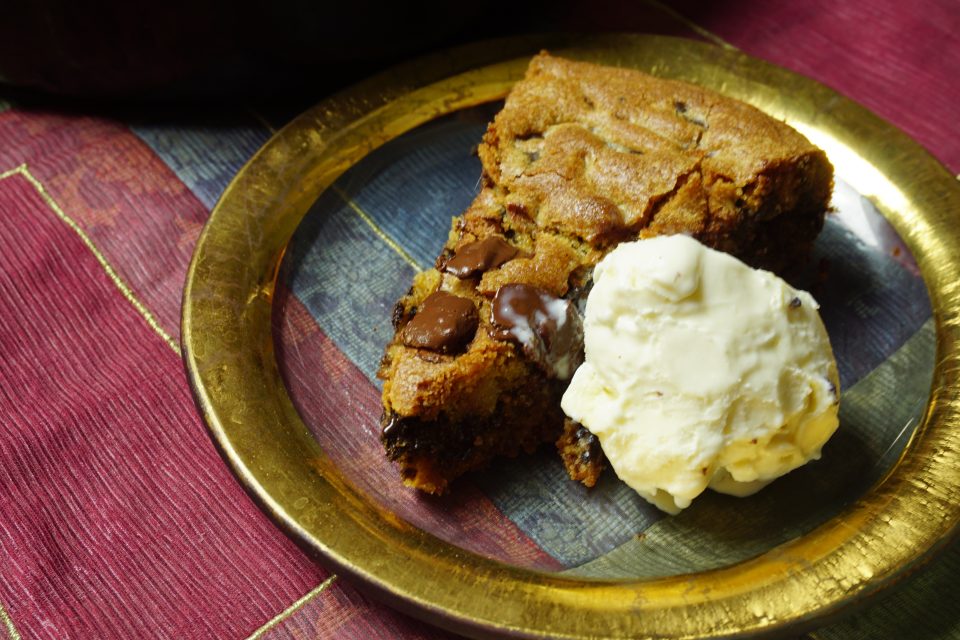
I scrolled through Favorite Desserts of 2018 on Ktchn and landed on a cookie recipe and I mean A cookie. My stomach grumble meter went into overdrive, a ginormous chocolate chip cookie baked in an iron skillet.

It’s New Year’s Eve. I need a dessert that’s EASY to make, a show stopper, sharable, and has universal appeal.

This pops into my head.

Enter the Skillet Zone.  Julia Child in a suit and tie, sans glass of wine, starts to speak, she’s a bit stiffer than normal but hey, this is a mash up…she starts to speak…

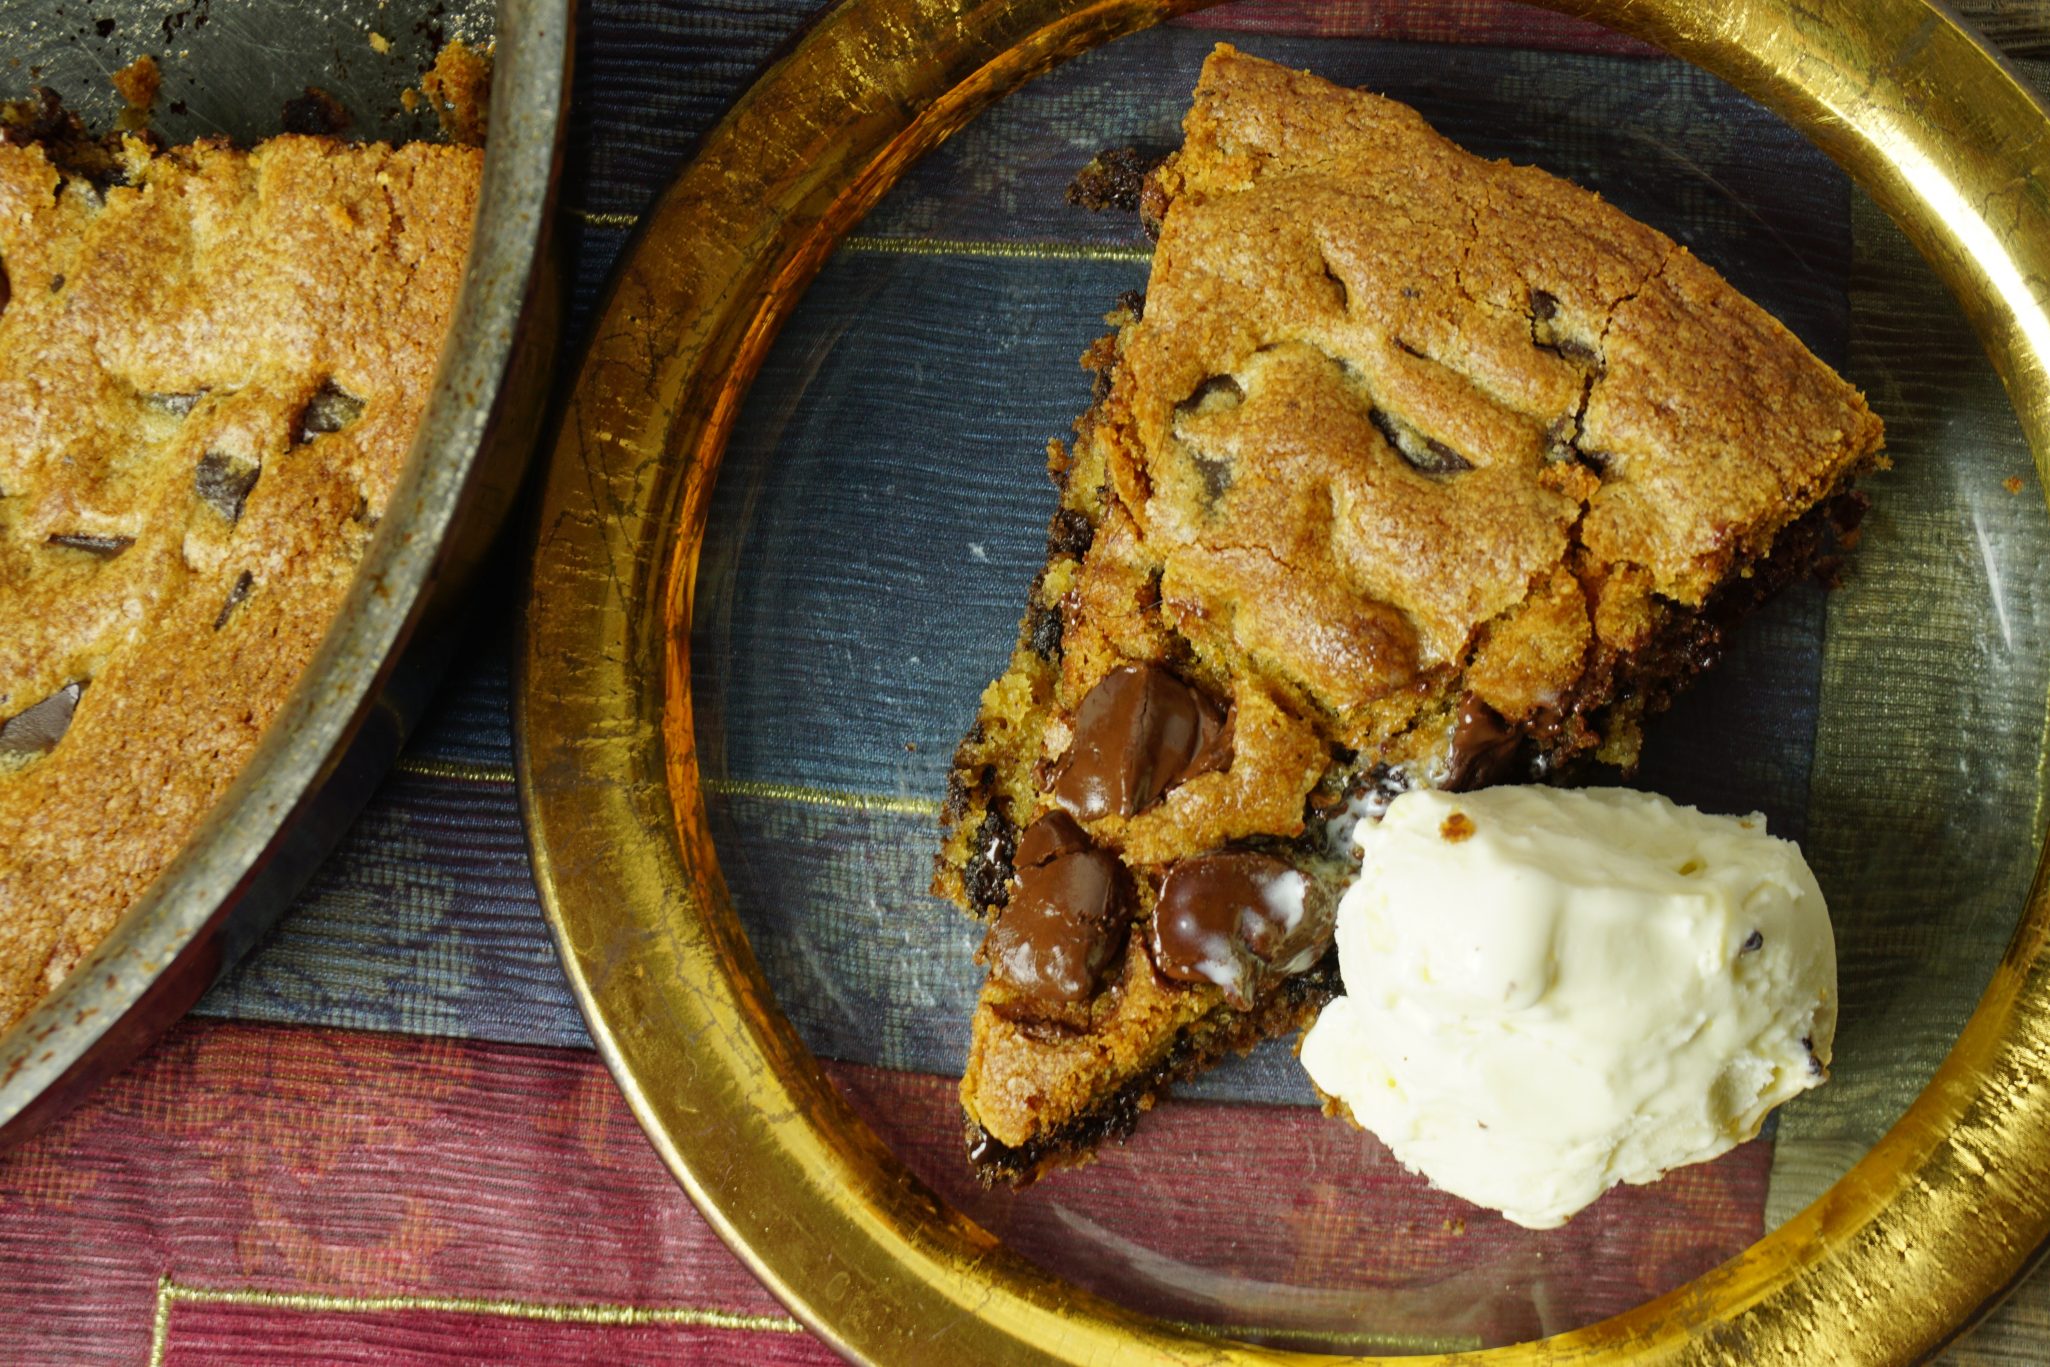
Imagine if you will, a Cast Iron Skillet, ebony from years of cooking and love.  A warm GIANT Chocolate Chip Cookie cooked in the aforementioned skillet and a quart (or more) of Vanilla Ice Cream.

The Oohs and Aahs as you bring this to the dinner table.  Cause who doesn’t succumb to the aroma of a freshly baked chocolate chip cookie?

You cut into the cookie-the chocolate chips are gooey, melted perfection, the cookie is soft, cakey in the middle, you work your way to the edge, the texture changes to that of a cookie with a crisp, caramelized edge.  You place the wedge of cookie on a plate.

Everyone is holding their breath in anticipation, mesmerized by the chocolate oozing and the aroma of the cookie and then…

BAM! You hit it with a scoop of vanilla ice cream which immediately begins to melt over the cookie.

Everyone goes crazy.

Yes, you have entered the Skillet Zone.

Unfortunately, I do not have a cast iron skillet.  Lost, in one of the many moves we have made.  I used an All-Clad skillet.  My cookie was relatively even in height.  I think that if baked in a cast iron skillet, the additional heat of the black pan would cause the sides to bake quicker, rise a little higher than mine, possibly be a bit crisper.  Hmmm, yummy.  Feel free to add nuts if you like.  I CHEATED, I used chocolate chunks and pistoles instead of chopping chocolate.  Definitely try to find chunks and not use regular sized chips.

Deep-Dish Chocolate Chip Skillet Cookie

Ingredients

  • 2 1/2 cups all-purpose flour
  • 1 teaspoon baking soda
  • 1/2 teaspoon salt
  • 1 cup 2 sticks unsalted butter at room temperature
  • 1 cup packed light brown sugar
  • 1/2 cup granulated sugar
  • 2 large eggs
  • 2 teaspoons vanilla extract
  • 12 ounces dark chocolate coarsely chopped, divided
  • 1/2 cup pecans pieces

Instructions

  • Arrange a rack in the middle of the oven and heat to 375°F.
  • Place the flour, baking soda, and salt in a medium bowl and whisk to combine; set aside.
  • Place the butter, brown sugar, and granulated sugar in the bowl of a stand mixer fitted with the paddle attachment. (Alternatively, use an electric hand mixer and large bowl.) Beat at medium speed until lightened in color and creamy, about 2 minutes. With the mixer on low speed, beat in the eggs and vanilla. Scrape down the side of the bowl. Beat in the flour mixture on low speed until just combined.
  • Set aside 1/3 cup of the chopped chocolate. Add the remaining chocolate and nuts if using, to the dough and fold to combine. Transfer the dough to a 10-inch cast iron or oven-safe skillet. With damp hands, press the dough in an even layer to the edges of the skillet. Sprinkle the reserved 1/3 cup chocolate over top and gently press into the dough.
  • Bake until the center is set and the edges are golden-brown and slightly pull back from the skillet, about 25 minutes. Set aside to cool for at least 30 minutes before cutting into wedges and serving.

Notes

Add nuts if you like.  I use pecans.  Ok, I cheated, I didn't chop chocolate but used chocolate chunks and pistoles I found.  I am all about the path of least resistence.
Will keep for up to 4 days in an airtight container at room temperature.
Use only vanilla ice cream. NO bubblegum flavor, peppermint or anything else but Vanilla...just saying.


Thumbprints: Thumbs Up for Day 9 of 12 Days of Cookies

Thumbprints: Thumbs Up for Day 9 of 12 Days of Cookies

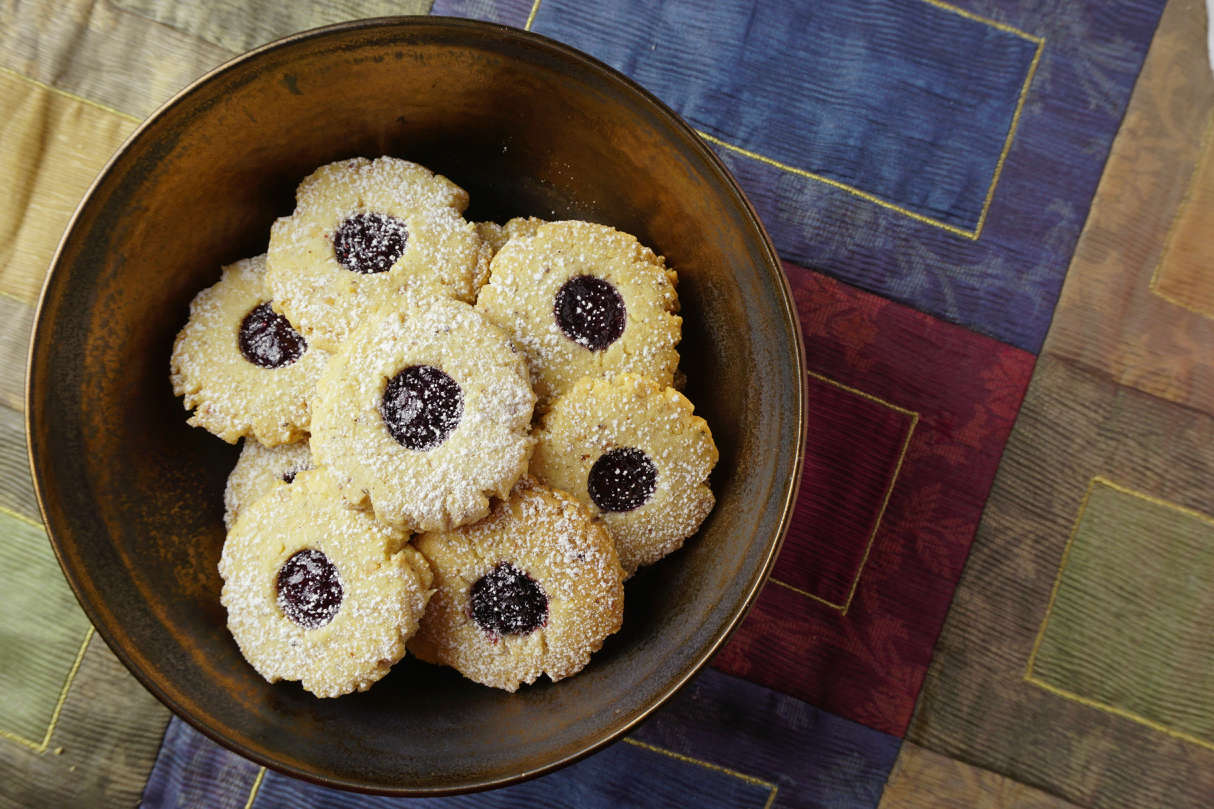
Only 3 more cookies to bake for my 12 days of cookies 2018.  Cookie no. 9 is a riff on my go-to thumbprint cookie.  I decided to use toasted hazelnuts in place of walnuts.  Ok, not earth-shattering but enough of a twist that the hubster noticed (he is a thumbprint afficionado) and loved the nuanced change. The hazelnut MO?  More assertive than other nuts such as almonds or pecans, buttery and sweet.  It’s flavor shines in these thumbprint cookies. I filled the center with a berry-lime jam I had made at the end of summer and added a tease of vanilla to the dough to complement the jam.  Yummy!

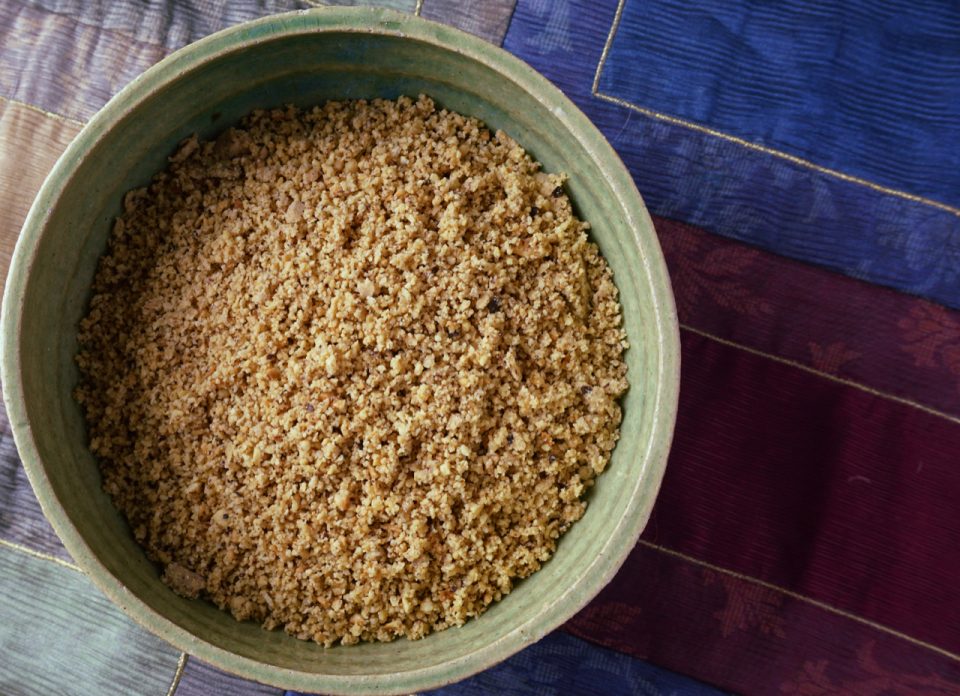
Measure the amount of  nuts needed before grinding them.  You want the nuts to be finely ground but not to the point  where it starts to get pasty.

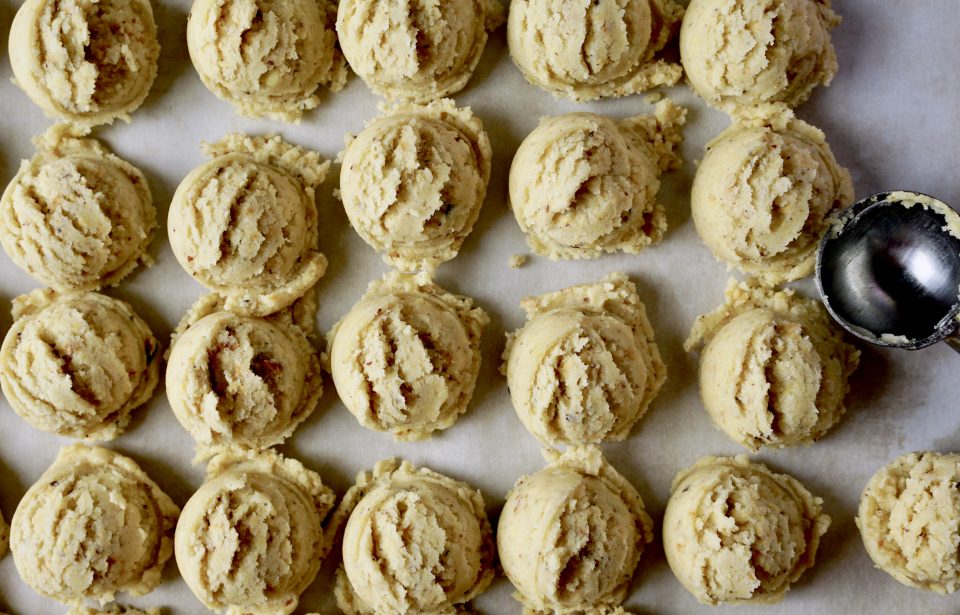
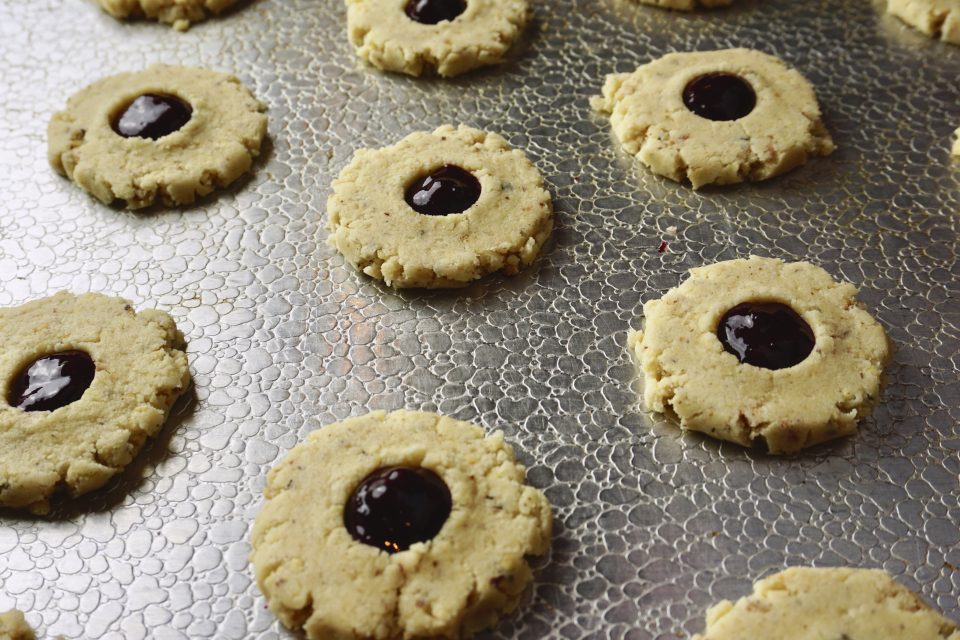
Take out your trusty ice cream/cookie scoop. I use a tablespoon scoop and line up the cookie dough balls, assembly line mentality, on a sheet.  Place dough balls on a cookie sheet approximately 1.5-2 inches apart. Press each one to flatten to 1/4-3/8 inch thick (thicker if larger).  Use the end of a wooden spoon or utensil of similar size, to create a depression in the center of each cookie.  I use a hand blender to puree my jam (no fruit lumps!) and a squeeze bottle to squirt the jam into the center of each cookie. How easy is that?

This turned out to be a delish version of thumbprint cookies.  Perfect during the holidays and especially nice with a bit of the bubbly to bring in the new year!

Riff on Thumbprint Cookies

Course cookies
Cuisine American
Keyword thumbprints
Prep Time 10 minutes
Cook Time 20 minutes
Total Time 30 minutes

Ingredients

  • 1 1/2 cup coarsely chopped toasted hazelnuts
  • 1 cup butter at room temperature
  • 3/4 cup granulated sugar
  • 2 1/4 cups all-purpose flour
  • 1/2 teaspoon vanilla extract
  • 1/4 cup seedless berry-lime preserves or your choice
  • Dash of salt
  • Powdered sugar

Instructions

  • Preheat oven to 350 degrees.
  • Chop nuts in food processor until very fine. Beat butter, nuts, salt and granulated sugar in mixer bowl until light. Beat in flour into blended.
  • Shape dough into 1 inch balls.
  • Place 2 inches apart on ungreased cookie sheets and flatten to 1 1/2 inch circle.
  • Press into centers with a fingertip.
  • Fill each indentation with 1/4 teaspoon preserves.
  • Bake 10-12 minutes, until golden.
  • Cool.
  • Sift confectioner's sugar over cookies.

Notes

Substitute your favorite jam, I plan to use a pineapple-orange jam for the next batch.