Category: Korean

That’s a WRAP! Manduvision (Homemade Dumpling Wrappers)

That’s a WRAP! Manduvision (Homemade Dumpling Wrappers)

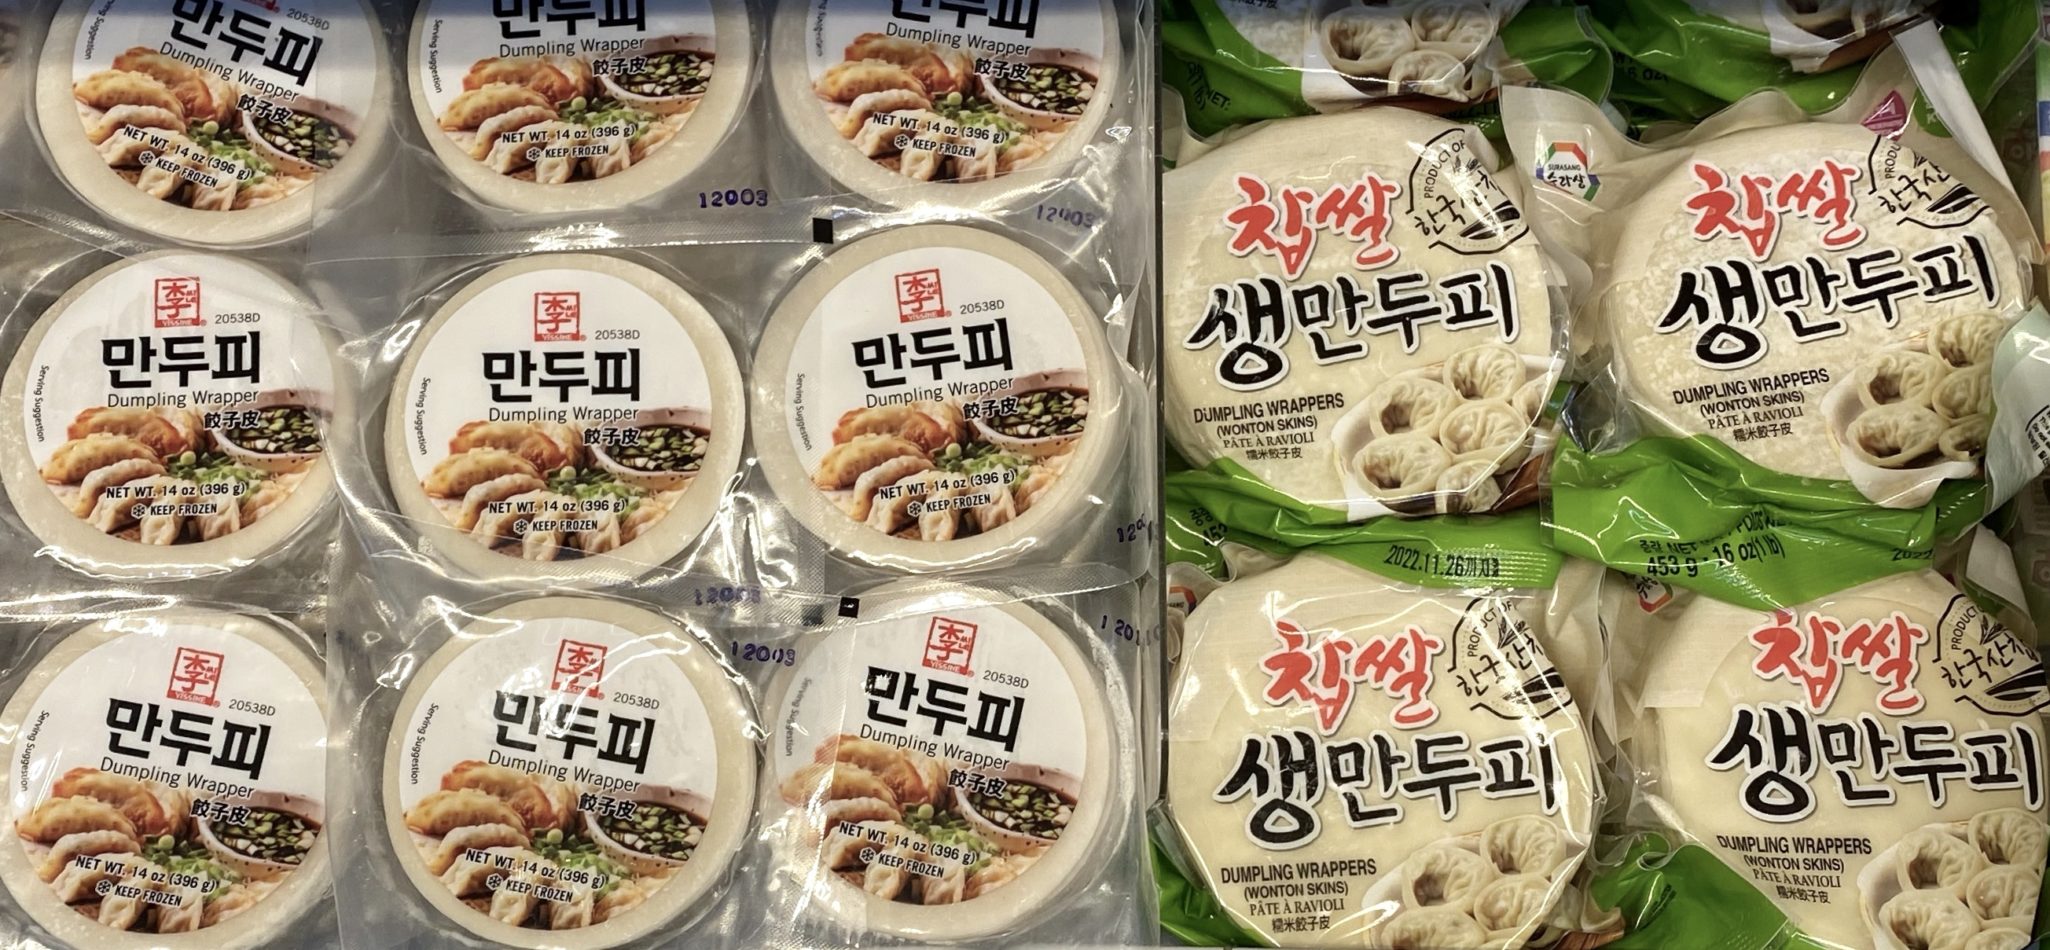
I cannot tell a lie. Most of the time, (we are talking 99.99 percent of the time) we use commercially available wrappers when making dumplings.  Wrappers can be found in most Asian stores and your larger supermarkets.  Asian markets will have a plethora of choices,  you will have to sift through the different kinds of wrappers by shape- round versus square, thickness-depends on what dumpling you are making, and by brands.  At non-Asian markets, I have seen Dynasty, Azumaya, and Nasoya. I would go with Nasoya (potsticker) and Dynasty (wonton) first.

Whichever brand is available, do the test.  Pick up a package and bend the wrappers at a corner.  They should separate and not break.  This is a freshness test.  If they break, put them back, go home and make your own…really.

That’s A Wrap

At Asian markets, there is no shortage of wrappers to choose from.  Choose round wrappers for mandu and potstickers. For mandu I would use a medium thickness, generally labeled as dumpling wrappers.  Potsticker wrappers are thicker, good for frying and then steaming but too thick for soup dumplings.  I tend to stay away from potsticker wrappers, they are super thick.

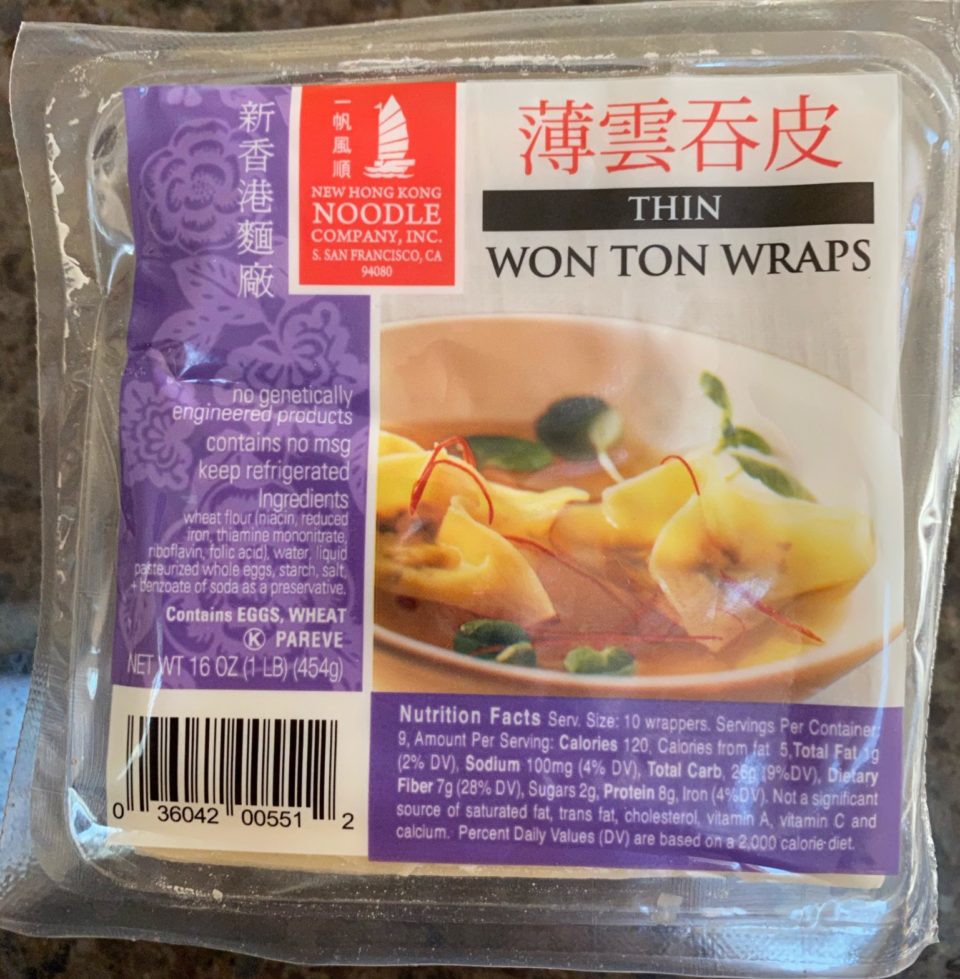
Wonton wrappers are square and come in different degrees of thickness.  From pretty darn thick to Hong Kong-style which is extra thin.  My preference is Hong Kong Noodle Co. Thin Wraps. Not too thin, not too thick, just right.  Great for soup or fried wontons.

Yep, my go-to wrappers.  But do the freshness test on these too cause you just never know.

But I Digress

This post is supposed to be out making your OWN dumpling wrappers.  It’s pretty easy, it might take a little practice to get them right and to get speedy.  But doesn’t everything worth doing take practice?  I’ll be candid, probably not making my own wonton wrappers, the commercial ones are bomb.  But potstickers and mandu? You betcha.

YES, You Can!

I perused some of my favorite sites and decided to try a recipe that used AP flour, potato starch, salt and water.  That’s it.  Alot of recipes call for just flour, water and salt.  I wanted to see if the potato starch texturally made a difference, I think it adds a bit of chew and tenderness to the wrapper.  Nothing scientific to my conclusion but I can say the wrapper is delicious and just what I was looking for.

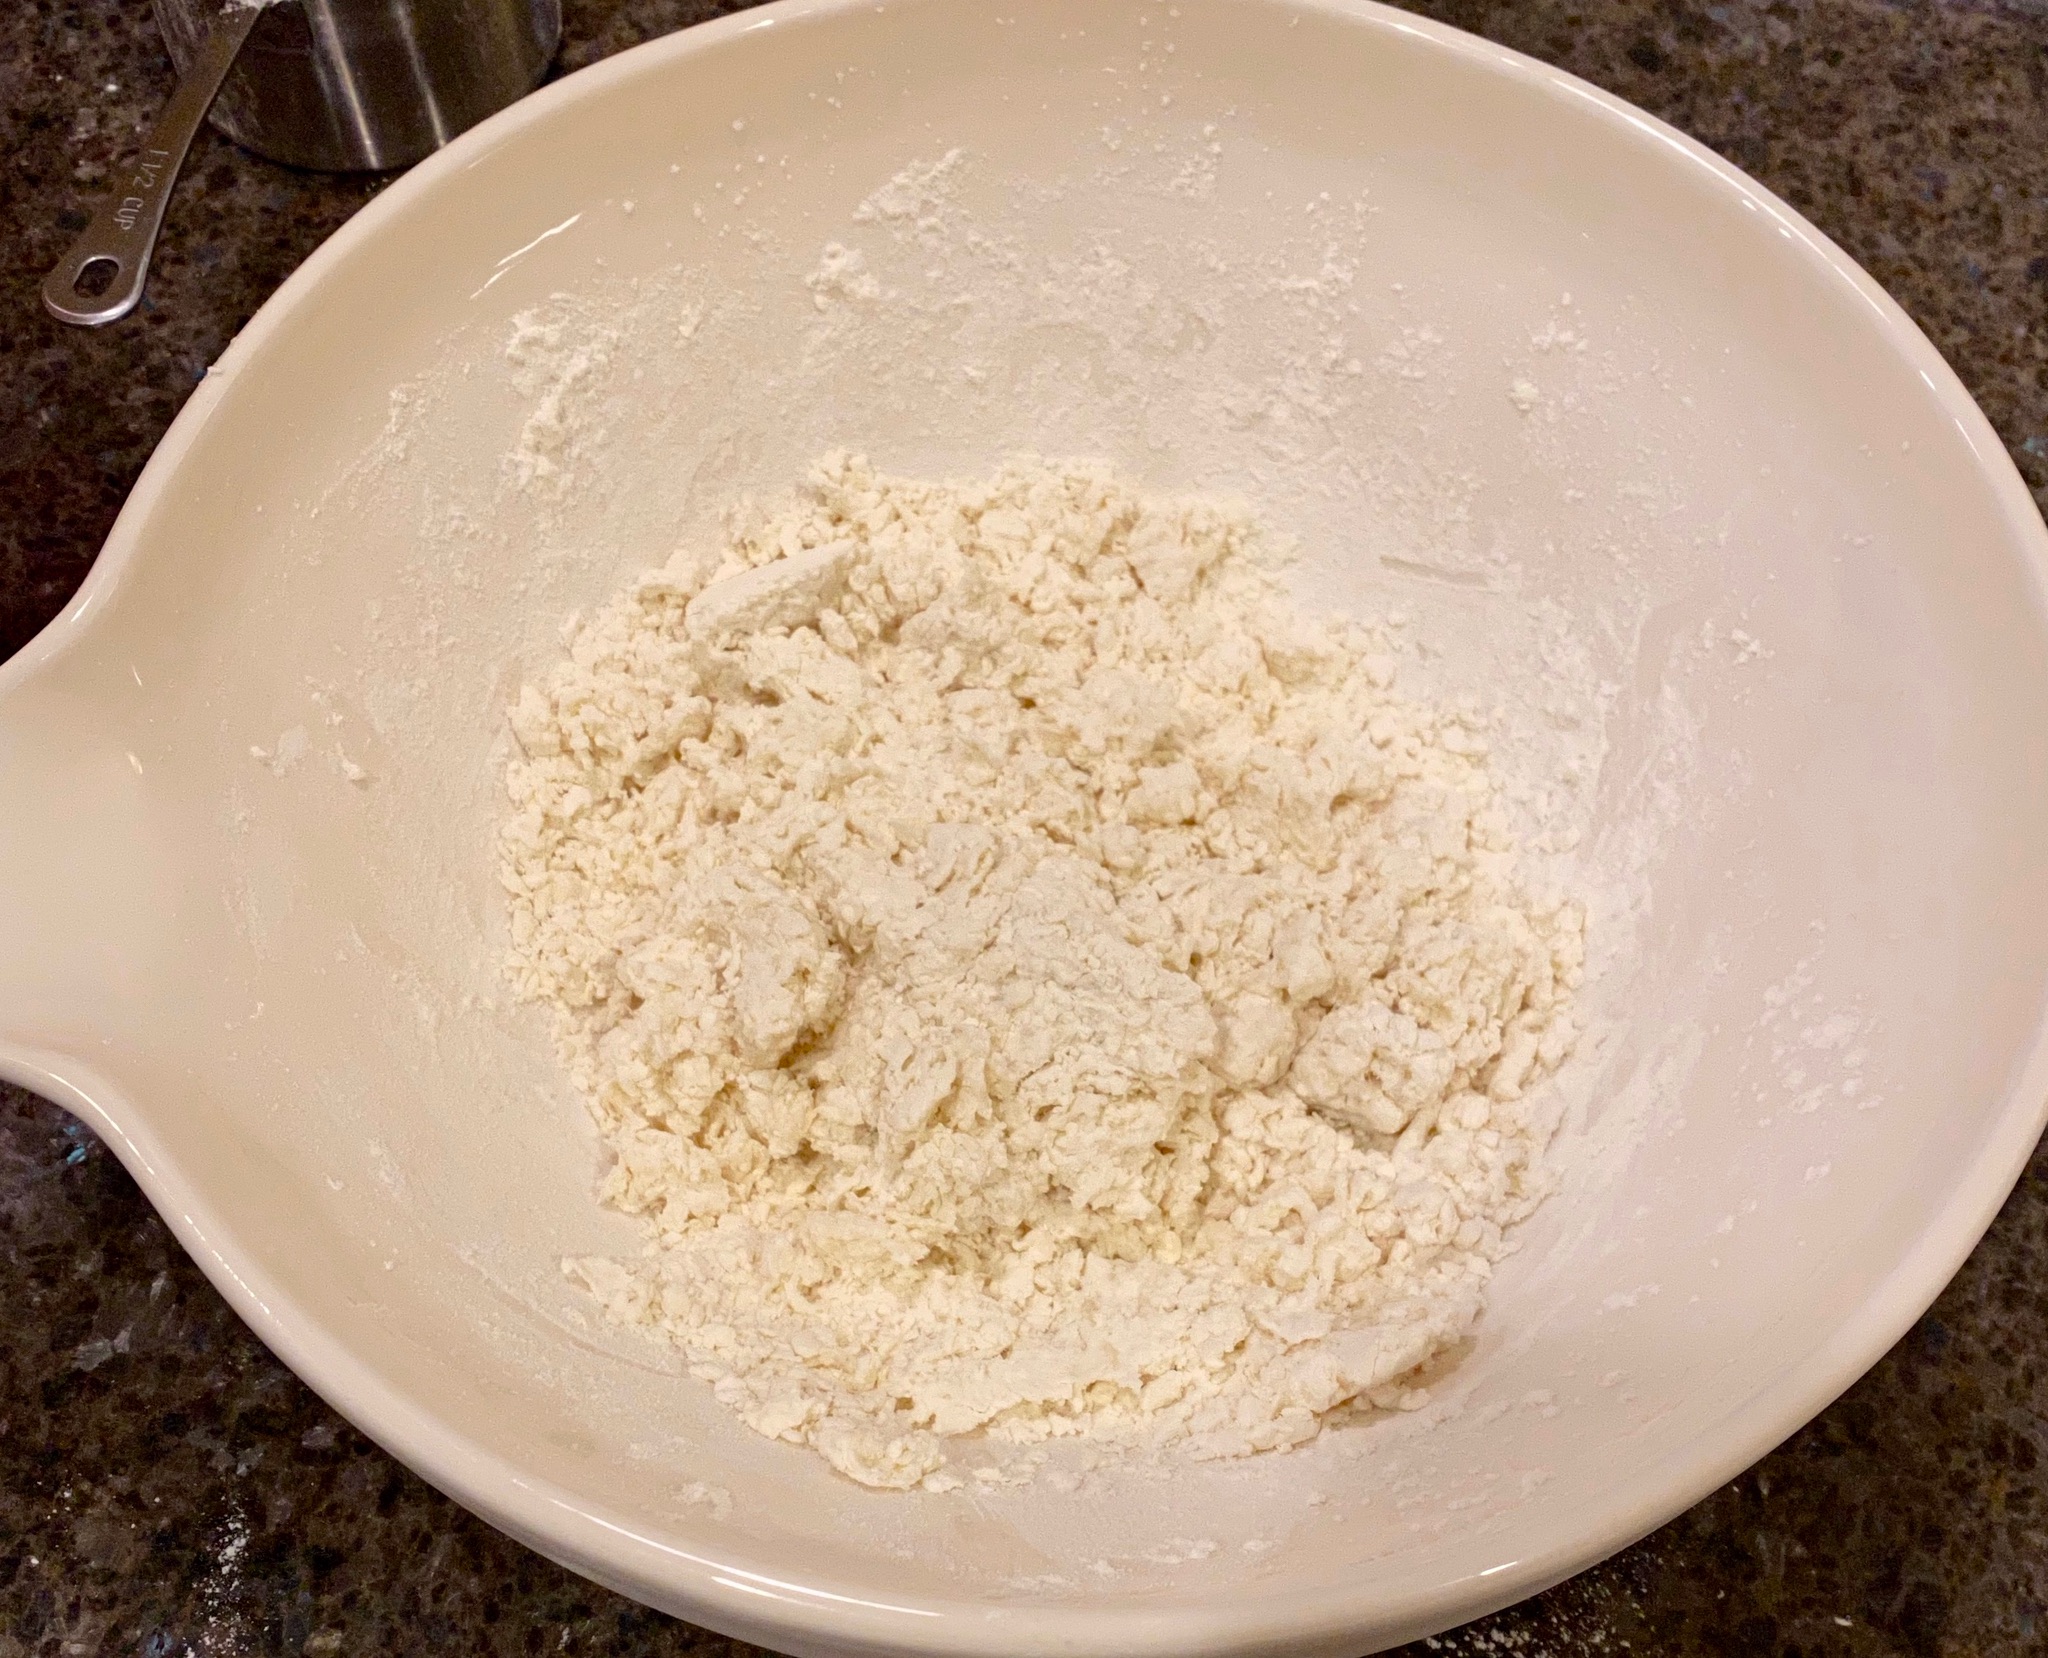
Super easy to put together. This is a hot water dough, which helps speed up the process.  Throw the dry ingredients in a large bowl, stir to combine, and then add the hot water.  Use a dough whisk or wooden spoon to stir the water into the dry mix.  It may seem like too little water but just be patient, it will come together.
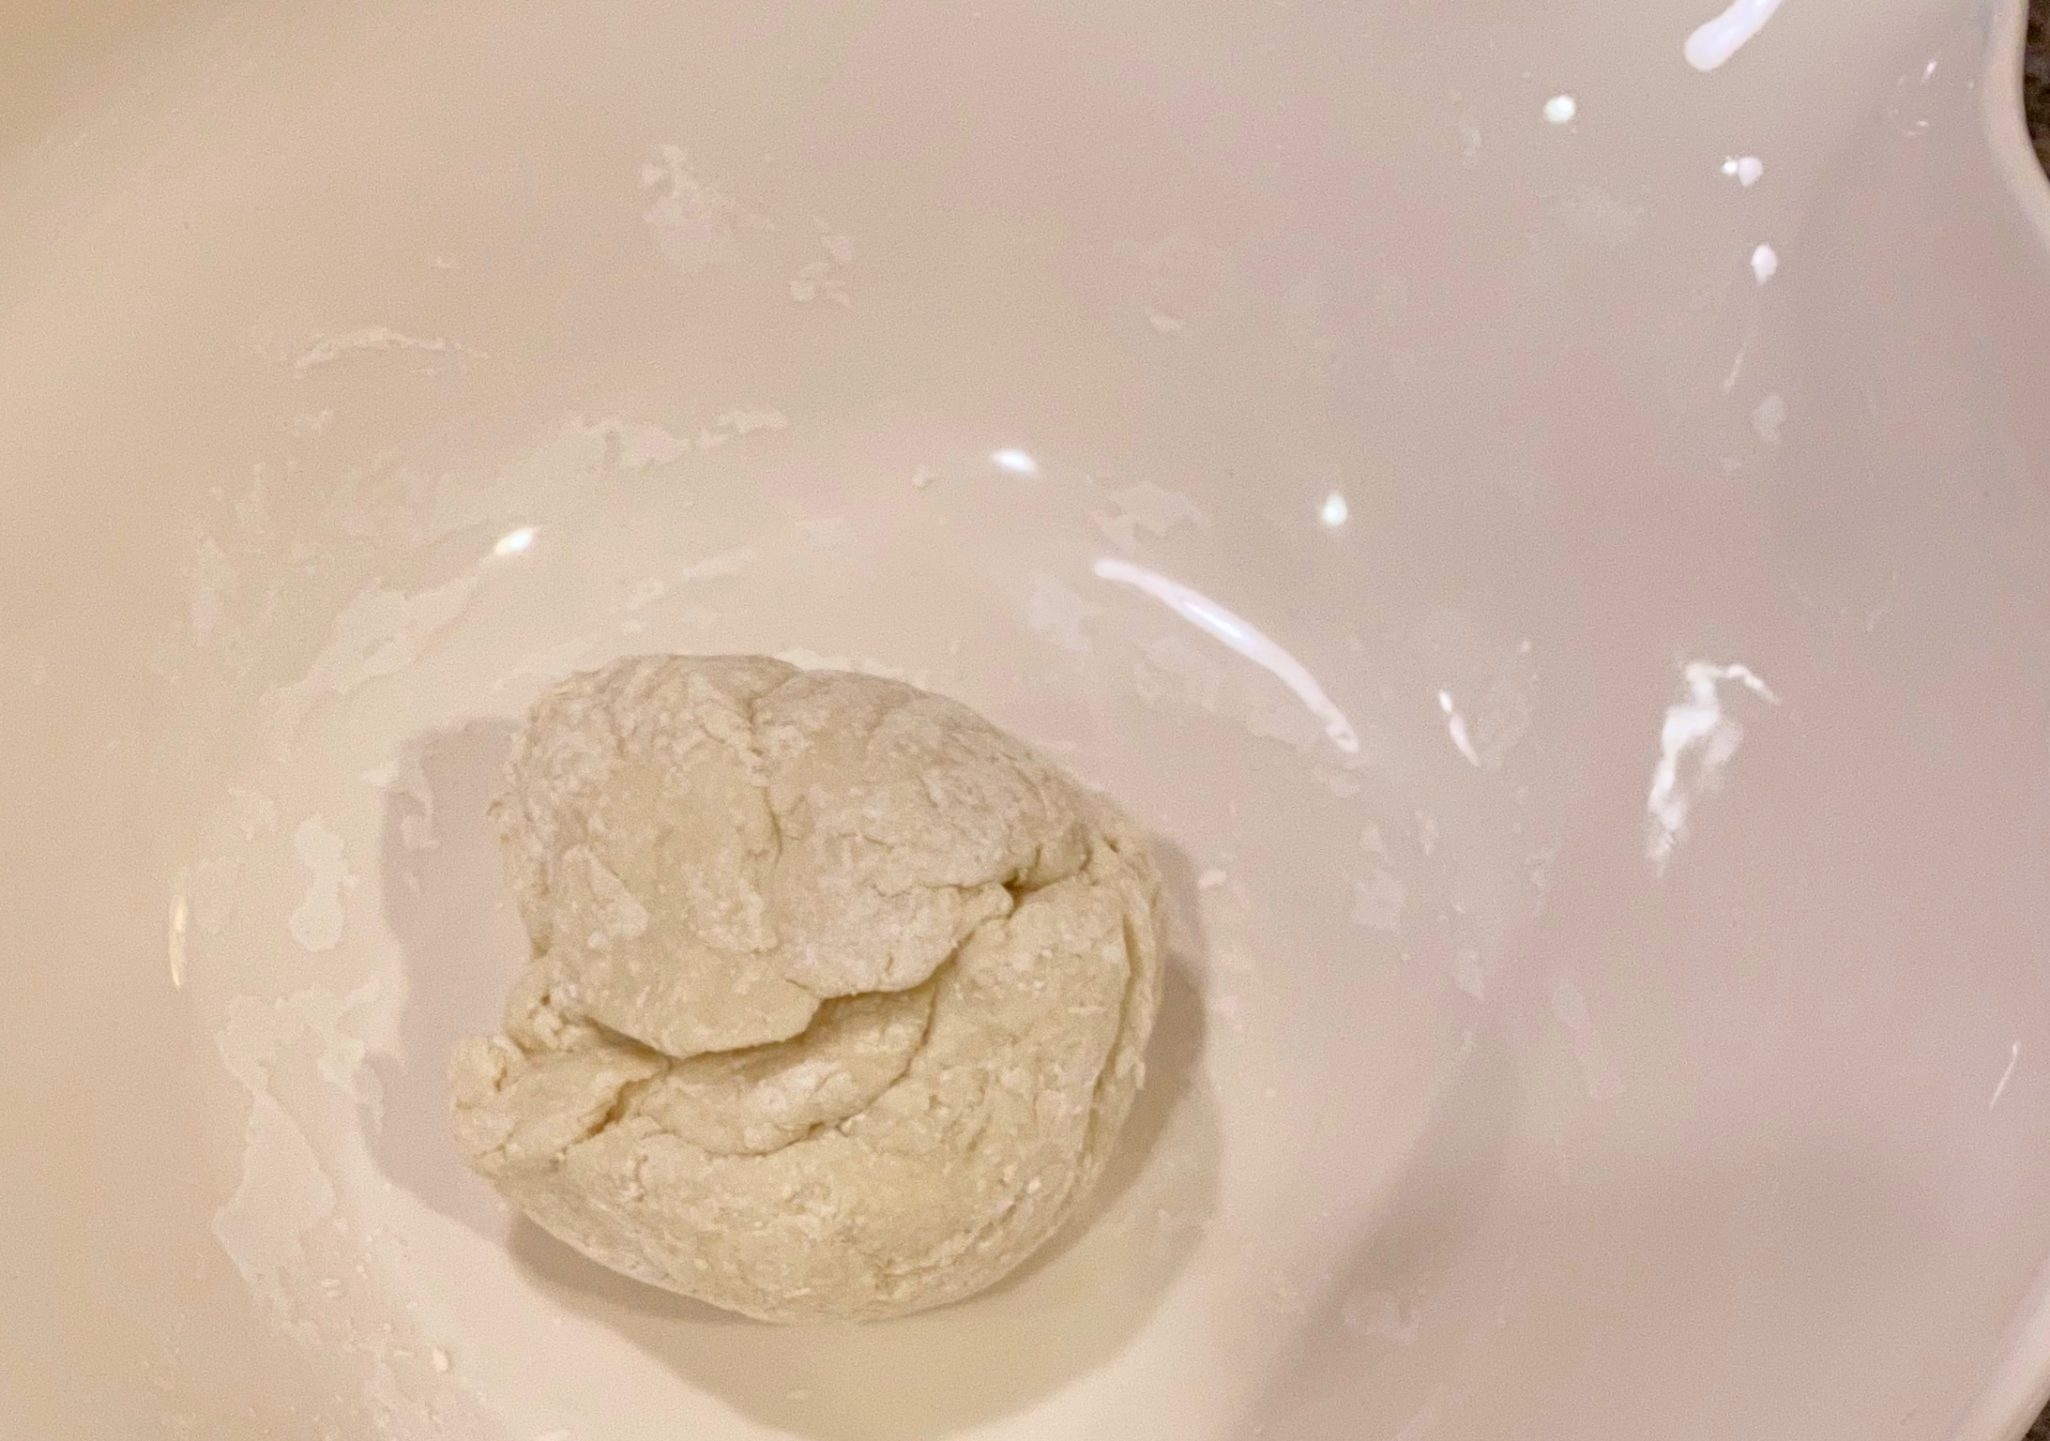
Switch to using your hands to smoosh the shaggy stuff together to form a ball.  Don’t worry, it will look rough.  Remove the dough from the bowl and knead the dough on your counter.  Knead until the dough becomes smooth, soft, and pliable.
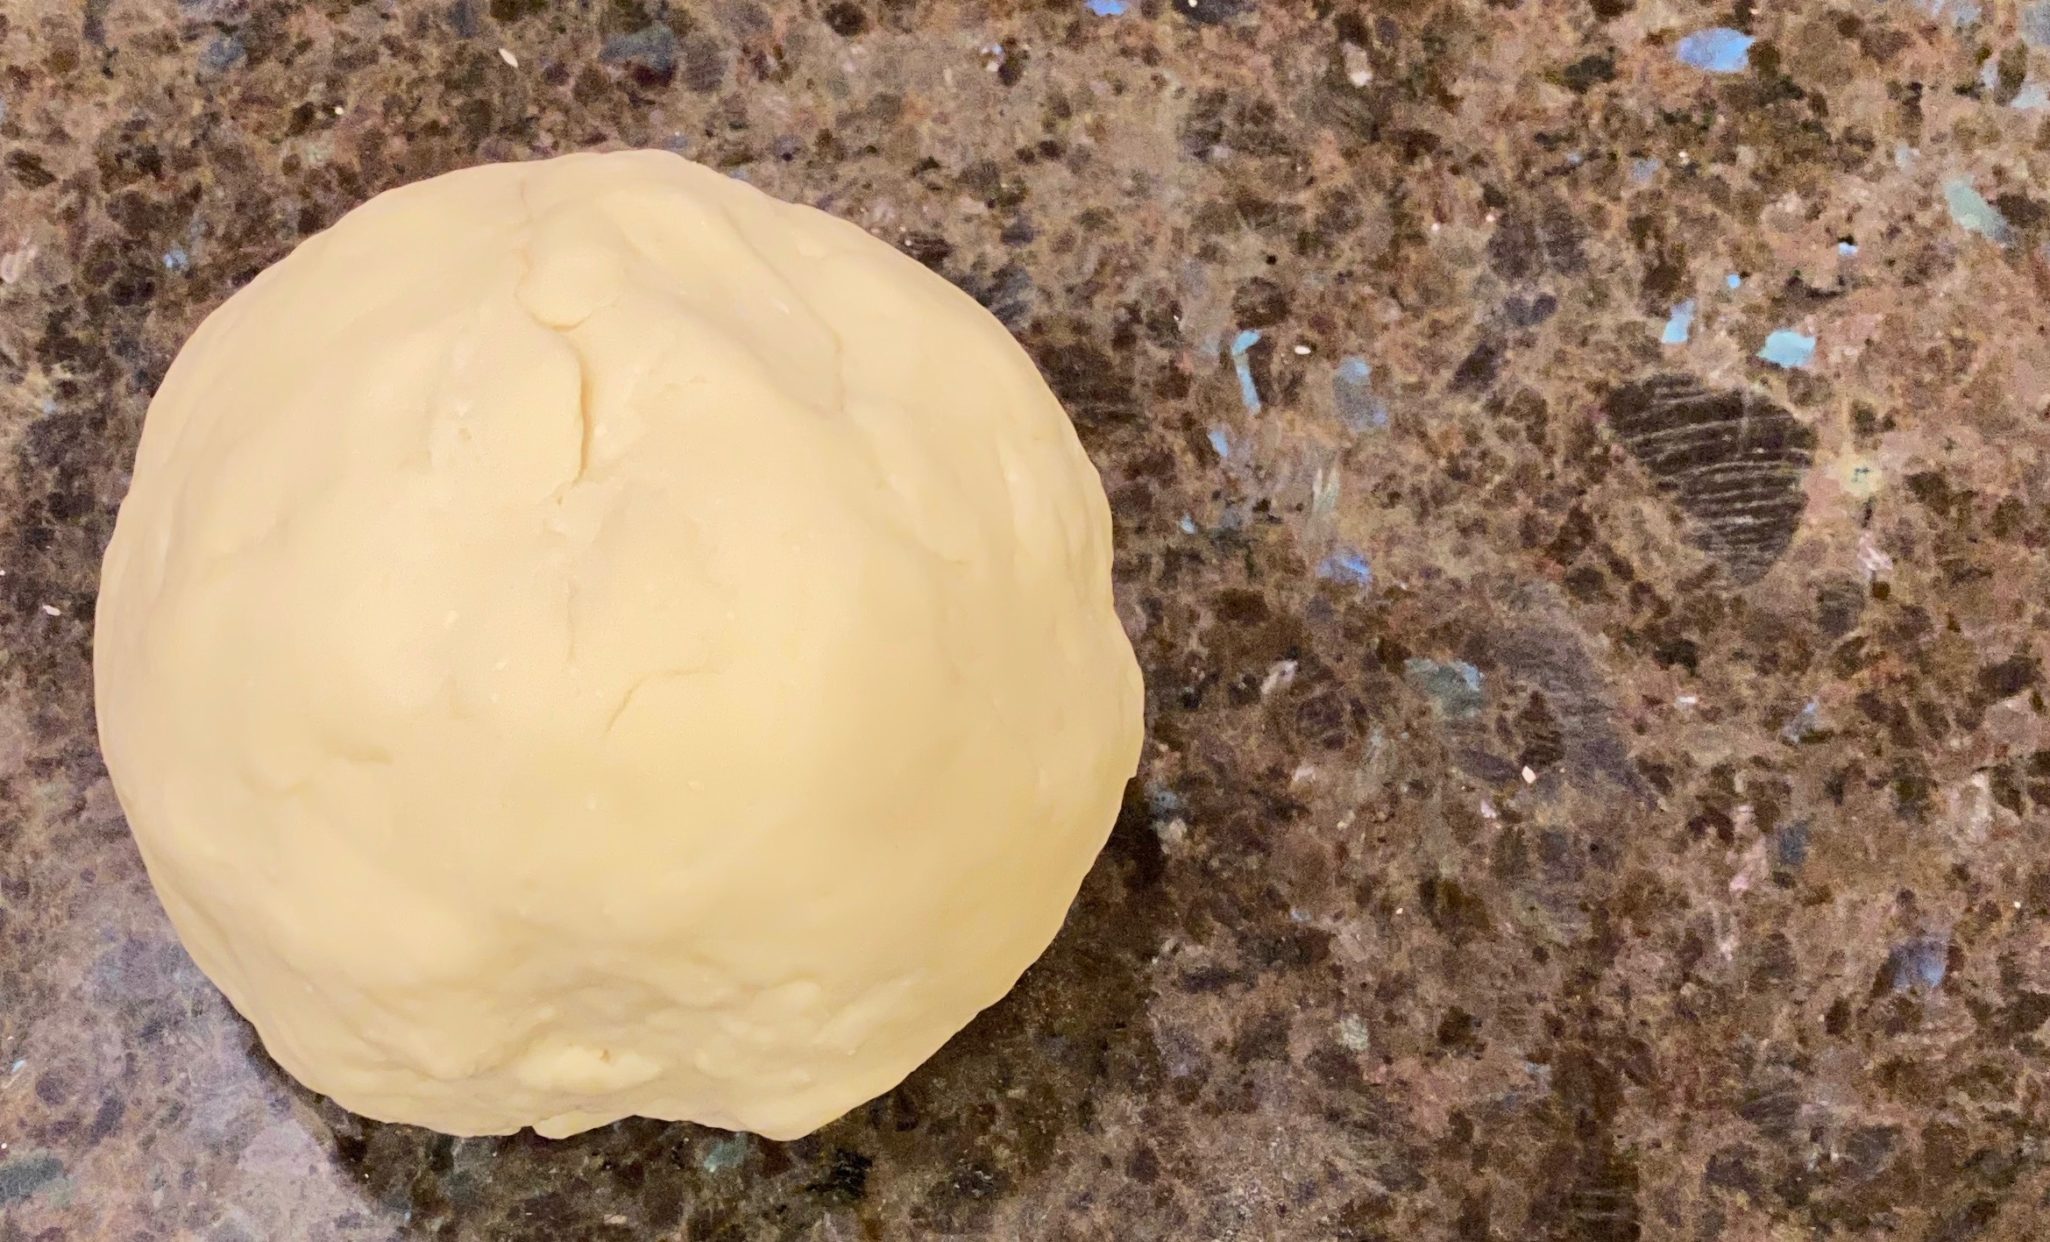
See? Smooth, pretty dough after about 5 minutes of kneading.  Put the dough ball back in the bowl and cover it with plastic wrap.  Let the dough sit for 40-45 minutes.  This allows the gluten to relax so it won’t contract when you roll the wrappers out.

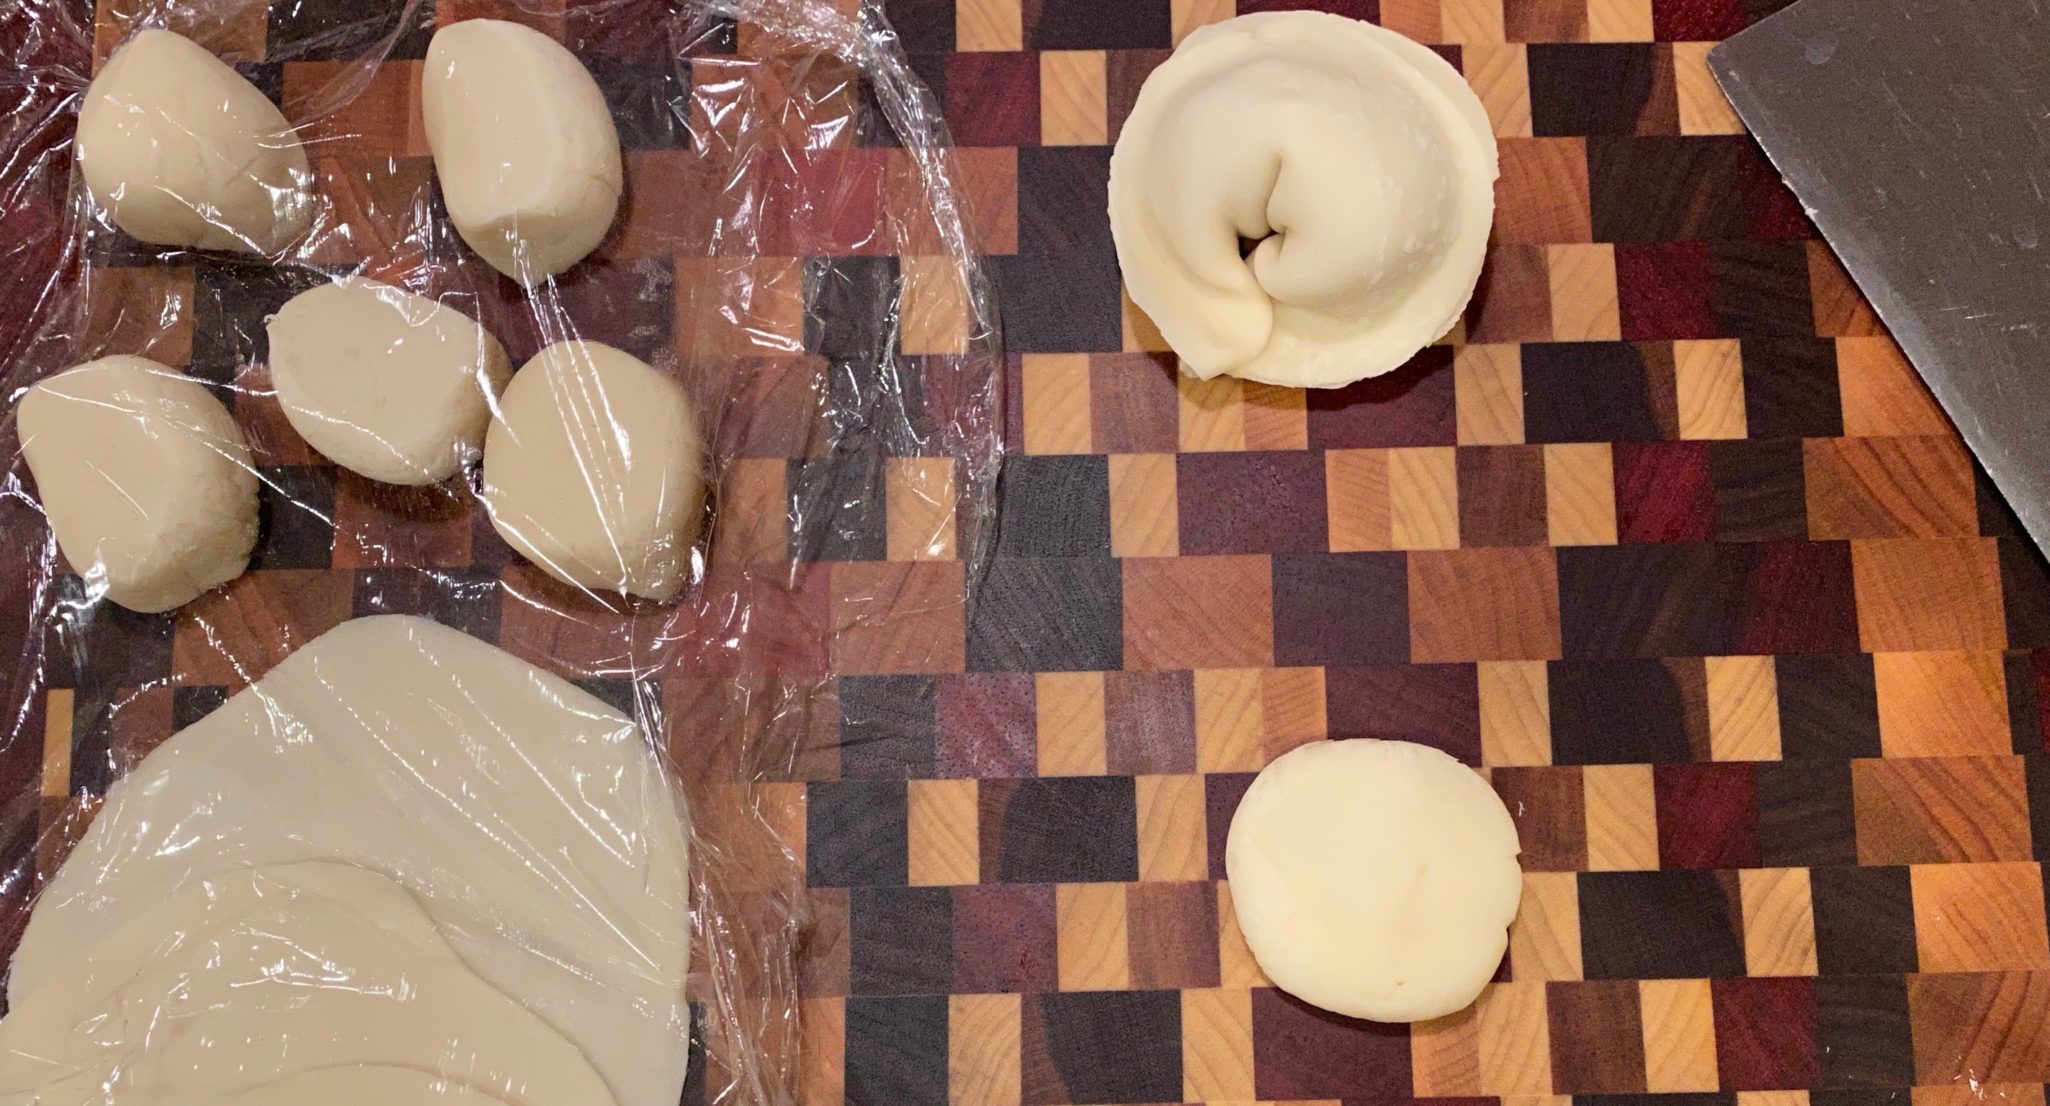
Divide the dough into two and shape each into logs around 6-8 inches long.  Work with one log at a time.  Cover the rest of the dough so it doesn’t dry out.  OR, a neat trick to making your logs -> Take the ball of dough and poke your thumb through the center creating a center hole, like a donut.  Gently pull out from the center hole creating a bigger hole so it forms a ring.  Keep stretching and pulling until the ring is around 1.25 inches in thickness and stop.  Cut crosswise through the dough creating two logs.  Ta-da!

Let’s Roll!

Cut each log into 10 equal pieces approximately 1/2 inch thick.  For regular size dumplings, you are looking for pieces that weigh about 12-14 gms each.  The pieces will look like little discs.  Working with a piece at a time, covering the rest, flatten the disc with your hand.  Then, using a small rolling pin roll the dough once, give it a quarter turn and roll again.  You should have a rough circle.  Pick up the outside edge further away from you and elevate it slightly, push the rolling pin onto the wrapper towards the center of it. Rotate the dough another quarter turn and roll again.  Repeat going around the entire wrapper.  Essentially you are flattening the wrapper, making it thinner especially on the edges.  You should end up with a circle about 3.5 inches in diameter.

To make dumplings like Kimchi Mandu.  Place a heaping tablespoon of filling in the center on a wrapper.  Fold into a semicircle and pressing the air out of the inside of each dumpling and sealing the edges.  If you are using fresh dough you won’t need to wet the edges much if at all.  Commercial wrappers will need some moisture, use water or an egg wash on the edges to seal.  Rolling and wrapping video!

Proceed to Filling!  My mom’s wontons here.  Kimchi Mandu here

Dumpling Wrappers (Potstickers or Mandu)

Fresh, amazing potsticker or mandu wrappers need only 4 ingredients and a bit of practice to master. Homemade wrappers have a nice chew and thickness that you don;t get with commercial ones. Try it, it's fun!
Course Appetizer, Main Course, One dish meals
Cuisine Asian
Keyword Wrappers for potstickers and mandu
Prep Time 30 minutes
Resting time 45 minutes
Total Time 1 hour 15 minutes

Equipment

  • 6-10 inch small diameter rolling pin

Ingredients

  • 1 1/2 cup All-purpose flour AP like Gold Medal will work or Asian AP Flour for dumplings and noodles. Moderate protein content
  • 1 Tbs. Potato starch sub cornstarch
  • 1/4 tsp. Salt
  • 1/2 cup Hot water not boiling, approximately 105-110 degres,

Instructions

  • In a large mixing bowl, combine flour, potato starch, and salt. Make a well in the middle of dry ingredients mixture, pour in hot water. Slowly incorporate with a dough whisk or wooden spoon.
  • As you mix, the flour-water will begin to look shaggy. At this point switch and use your hands to form a dough ball.
  • When there are no dry bits left in mixing bowl, take the dough out of the mixing bowl and start kneading thewith both hands on a flat surface.
  • Knead dough 3-5 minutes until it’s soft and smooth.
  • Place dough back in the bowl and cover with plastic wrap. Let it rest for 40-45 minutes.
  • Divide dough in half and shape each piece into a 6” to 7” log. Cut logs in half and then cut into 1/2” wide pieces, you should end up with 10 equal pieces from each log and 20 equal pieces total.
  • Work with one piece of dough at a time, cover the remaining pieces with a damp towel to prevent it from getting too dry. Slightly flatten each disc with your palm.
  • Using a rolling pin, flatten dough by rolling once, then turn the dough a quarter turn and roll.
  • The next step is creating the final 3 1/2” circle that is slightly thinner around the edges and thicker in the middle. Keep your pin on the surface and roll towards the center of the circle and back. Rotate dough as you are rolling to create an even circle.
  • Place dumpling wrapper on a flour dusted plate and dust each dumpling wrappers so they won’t stick together. Cover dumpling wrapper with a plastic wrapper to prevent drying.
  • Repeat with remaining rounds.

Notes

Fresh wrappers are very pliable and moist and require minimal moisture to seal. The wrappers can be frozen but it is easier to fold dumplings with fresh wrappers and freeze the dumplings.
Enjoy!
Mandu-Welcome to MDU-Marvel-ous Dumpling Universe

Mandu-Welcome to MDU-Marvel-ous Dumpling Universe

I love dumplings, right up there with bowl food, soul food.  In my world, Jeopardy has a couple of categories including “Things You Eat with a BOWL and SPOON” and “Dumplings of the World”.  It seems every culture has a dumpling that defines comfort, soul food.  Ravioli, Momos, Mandu, Gyoza, Pelmeni, Pierogi…the list is endless.  Dumplings are a labor of love, and labor-intensive.  Maybe that’s why dumpling making is a joint effort with family and friends on occasions that bring us all together.  Despite Covid, we did manage to have a small dumpling-making session to usher in the Lunar Year of the Ox (immediate family only and outside).

Bittersweet Gathering

Every year for the past too many to count years I look forward to New Year’s Day celebrations with family and friends.  I pack up a tray of holiday cookies and head to my brother’s for their annual New Year’s celebration which includes making mandu of course.

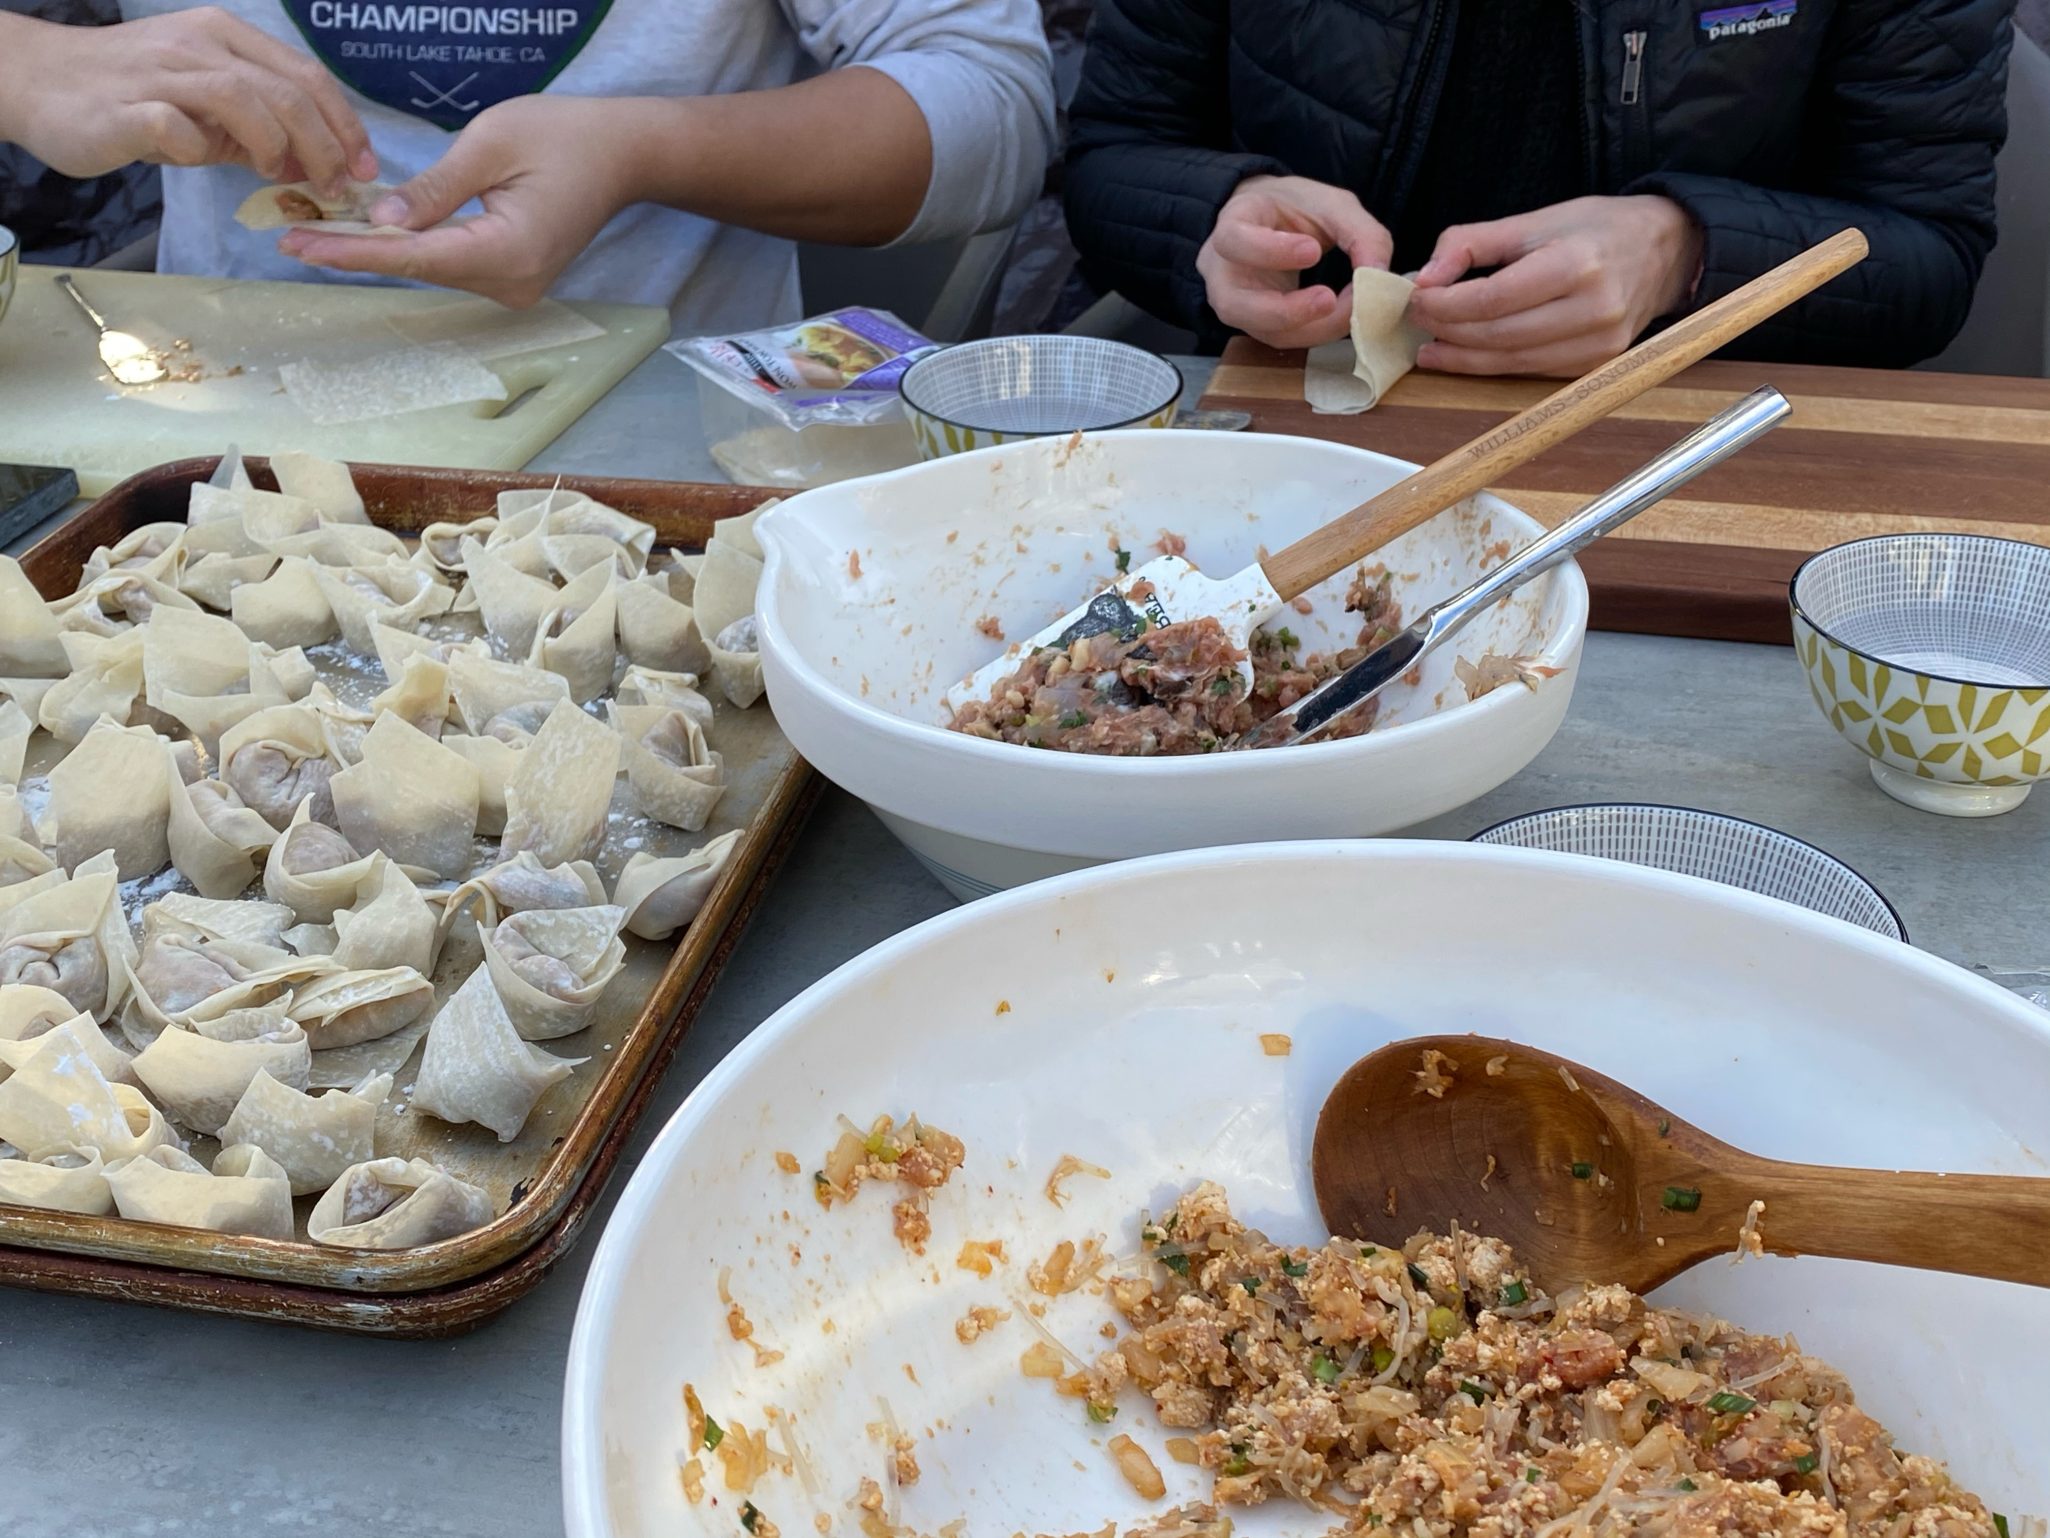
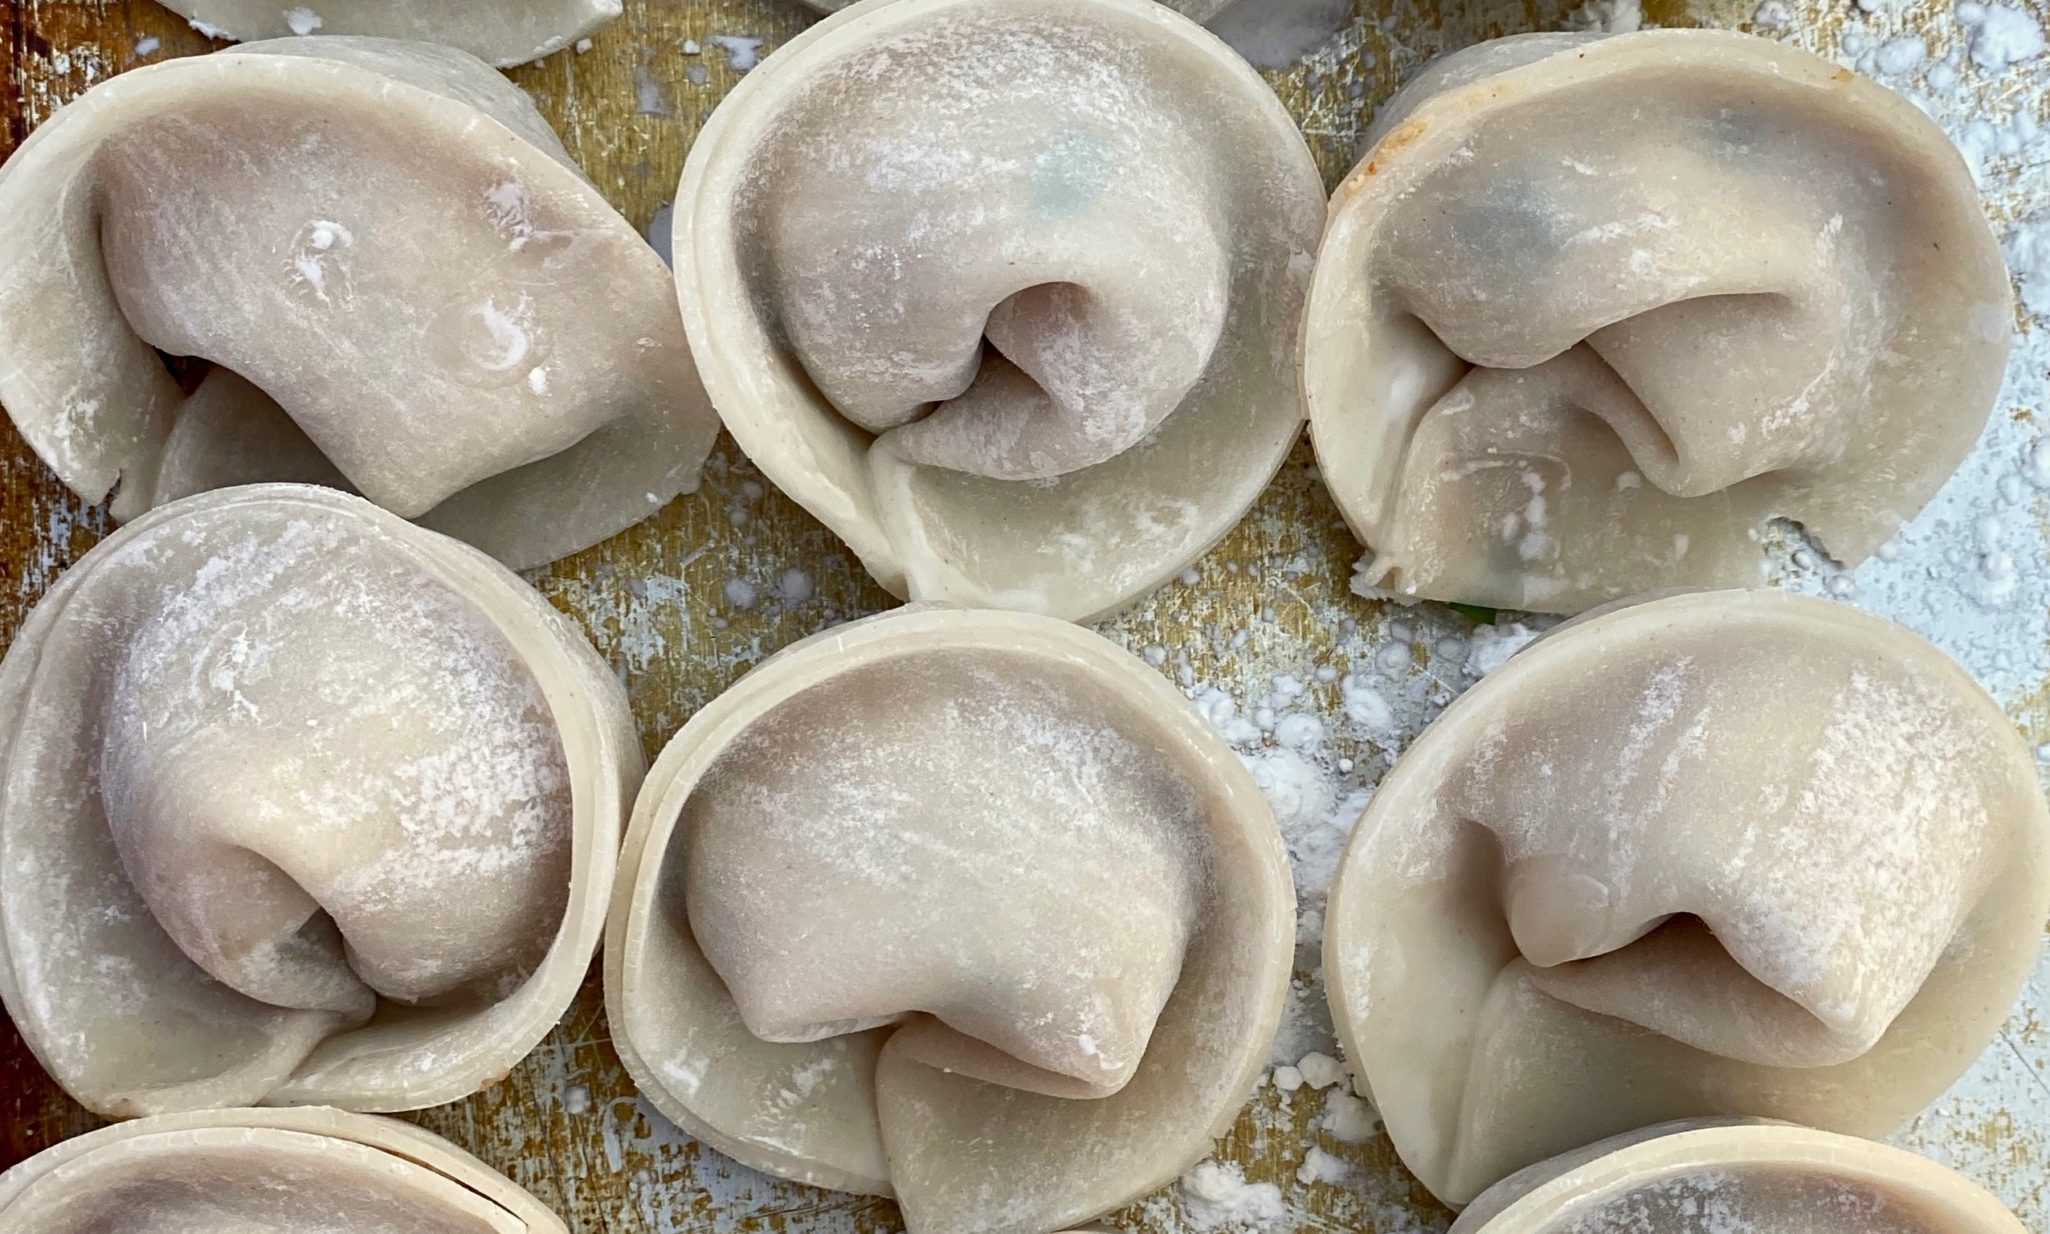
The kitchen table is set up with bowls (more like vats) of mandu filling and stacks of wrappers surrounding the bowls.  Everyone takes a shift wrapping mandu.   It’s a lively table, as everyone chatters away while folding mandu.  The folded mandu are lined on trays sprinkled with cornstarch, like little sentinels waiting for their marching orders on a winter’s day.  Some are destined for the pot of boiling water on the stove-immediate gratification, while the rest are loaded into freezer containers for everyone to take home.

I look forward to seeing family and friends that I don’t see very often.  We pick up right where we left off the previous year.  Catching up on the comings and goings, the kids, vacation highlights, reconnecting as if it were only yesterday we last saw each other.  This is what I miss most from this past holiday season due to COVID isolation.

My brother canceled their annual New Year’s Day celebration due to COVID and then my sister-in-law’s mother passed away.  It was during the holidays we would normally see her.  My kids affectionately called her Halmoni (grandmother in Korean) mimicking their cousins.  Born in Seoul, she came here to complete her medical training to be a pediatrician.  She was part of a generation of remarkable woman that defied the odds and norms of her time.  What I will remember most was her kindness and generosity of spirit.  She always greeted you with a warm embrace and a beautiful smile.  Her soft-spoken demeanor and gentleness belied the tenacity and determination she must have had to accomplish all that she did.

I thought of her as I prepped the filling for our own little New Year’s Dumpling-making session.  I was immediately transported to my brother’s kitchen table, sitting with her and my mom, laughing, talking, and of course, wrapping mandu.  She will be sorely missed.

We made two fillings, Mom’s Won Tons and Kimchi Mandu in the morning before our designated wrappers arrived (my kid).  I started with mom’s tried and true wonton filling, a delicious mixture of shrimp, pork, water chestnuts, scallions, shiitake mushrooms, and seasonings.  We use it not only for wontons but for fried egg dumplings, and as a filling for steamed squash or tofu. Skip the wonton wrapper and make meatballs for a tasty addition to soup or congee.  Mom’s universal filling, the best.

I adapted the recipe for Kimchi Mandu from Korean Bapsang (my go-to Korean food site).  I wanted a vegetable-centric filling that still had a bit of meat in it.  This one was perfect.  Not gonna lie, the filling is not a walk in the park and requires time to make.  My advice is to make the mandu filling the day before.

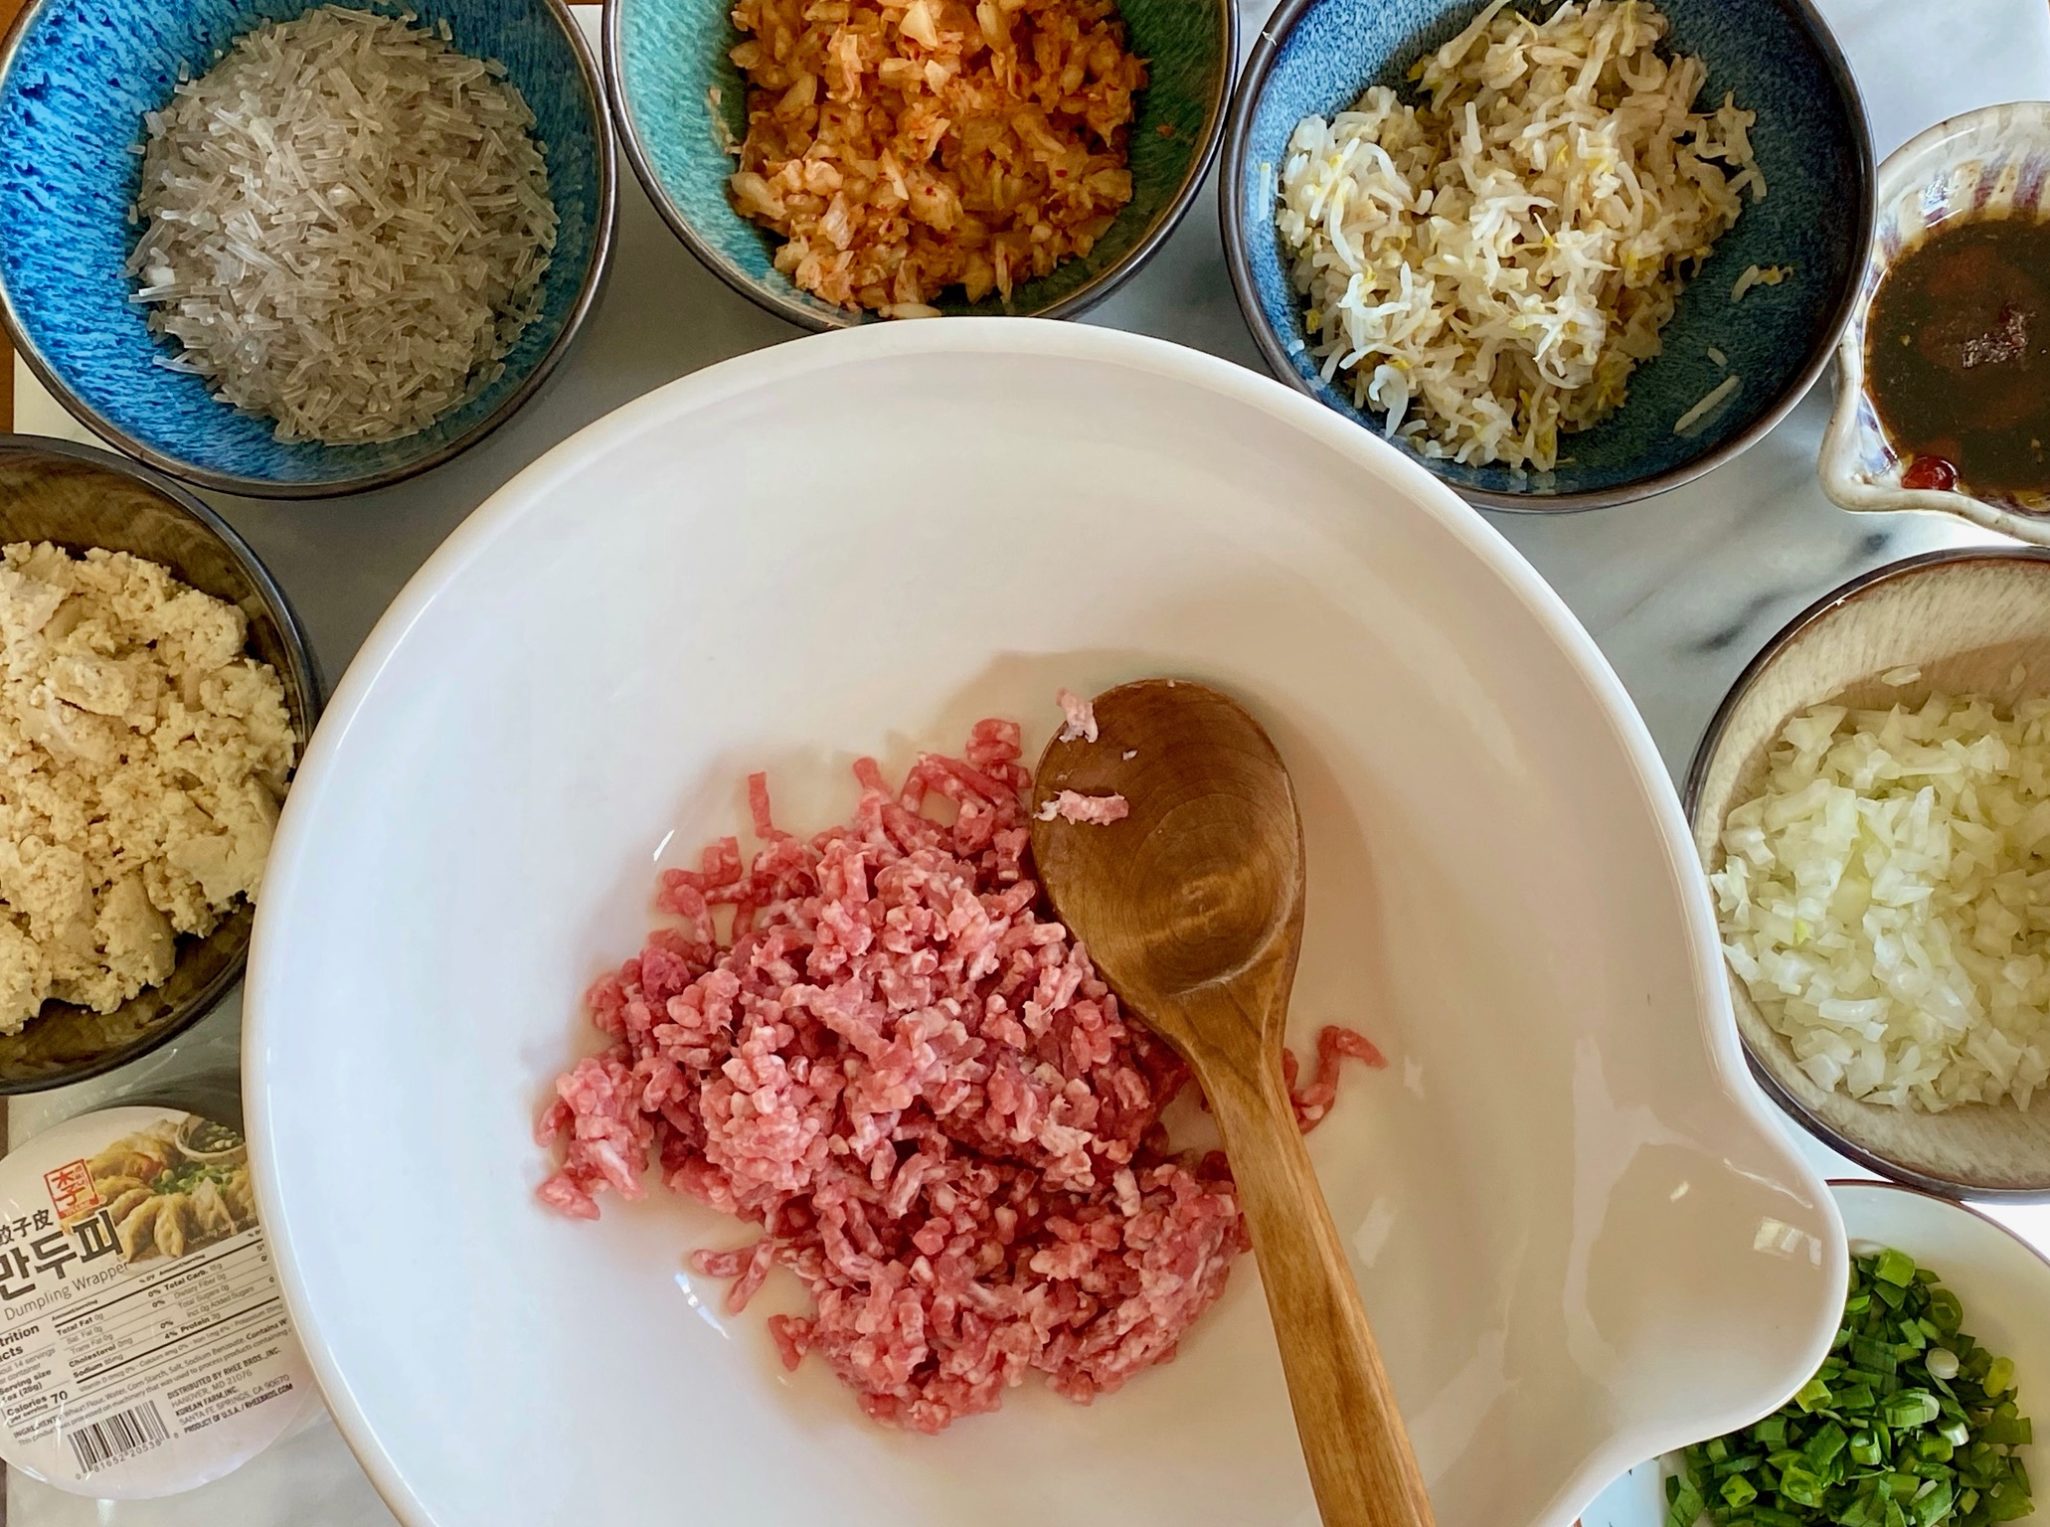
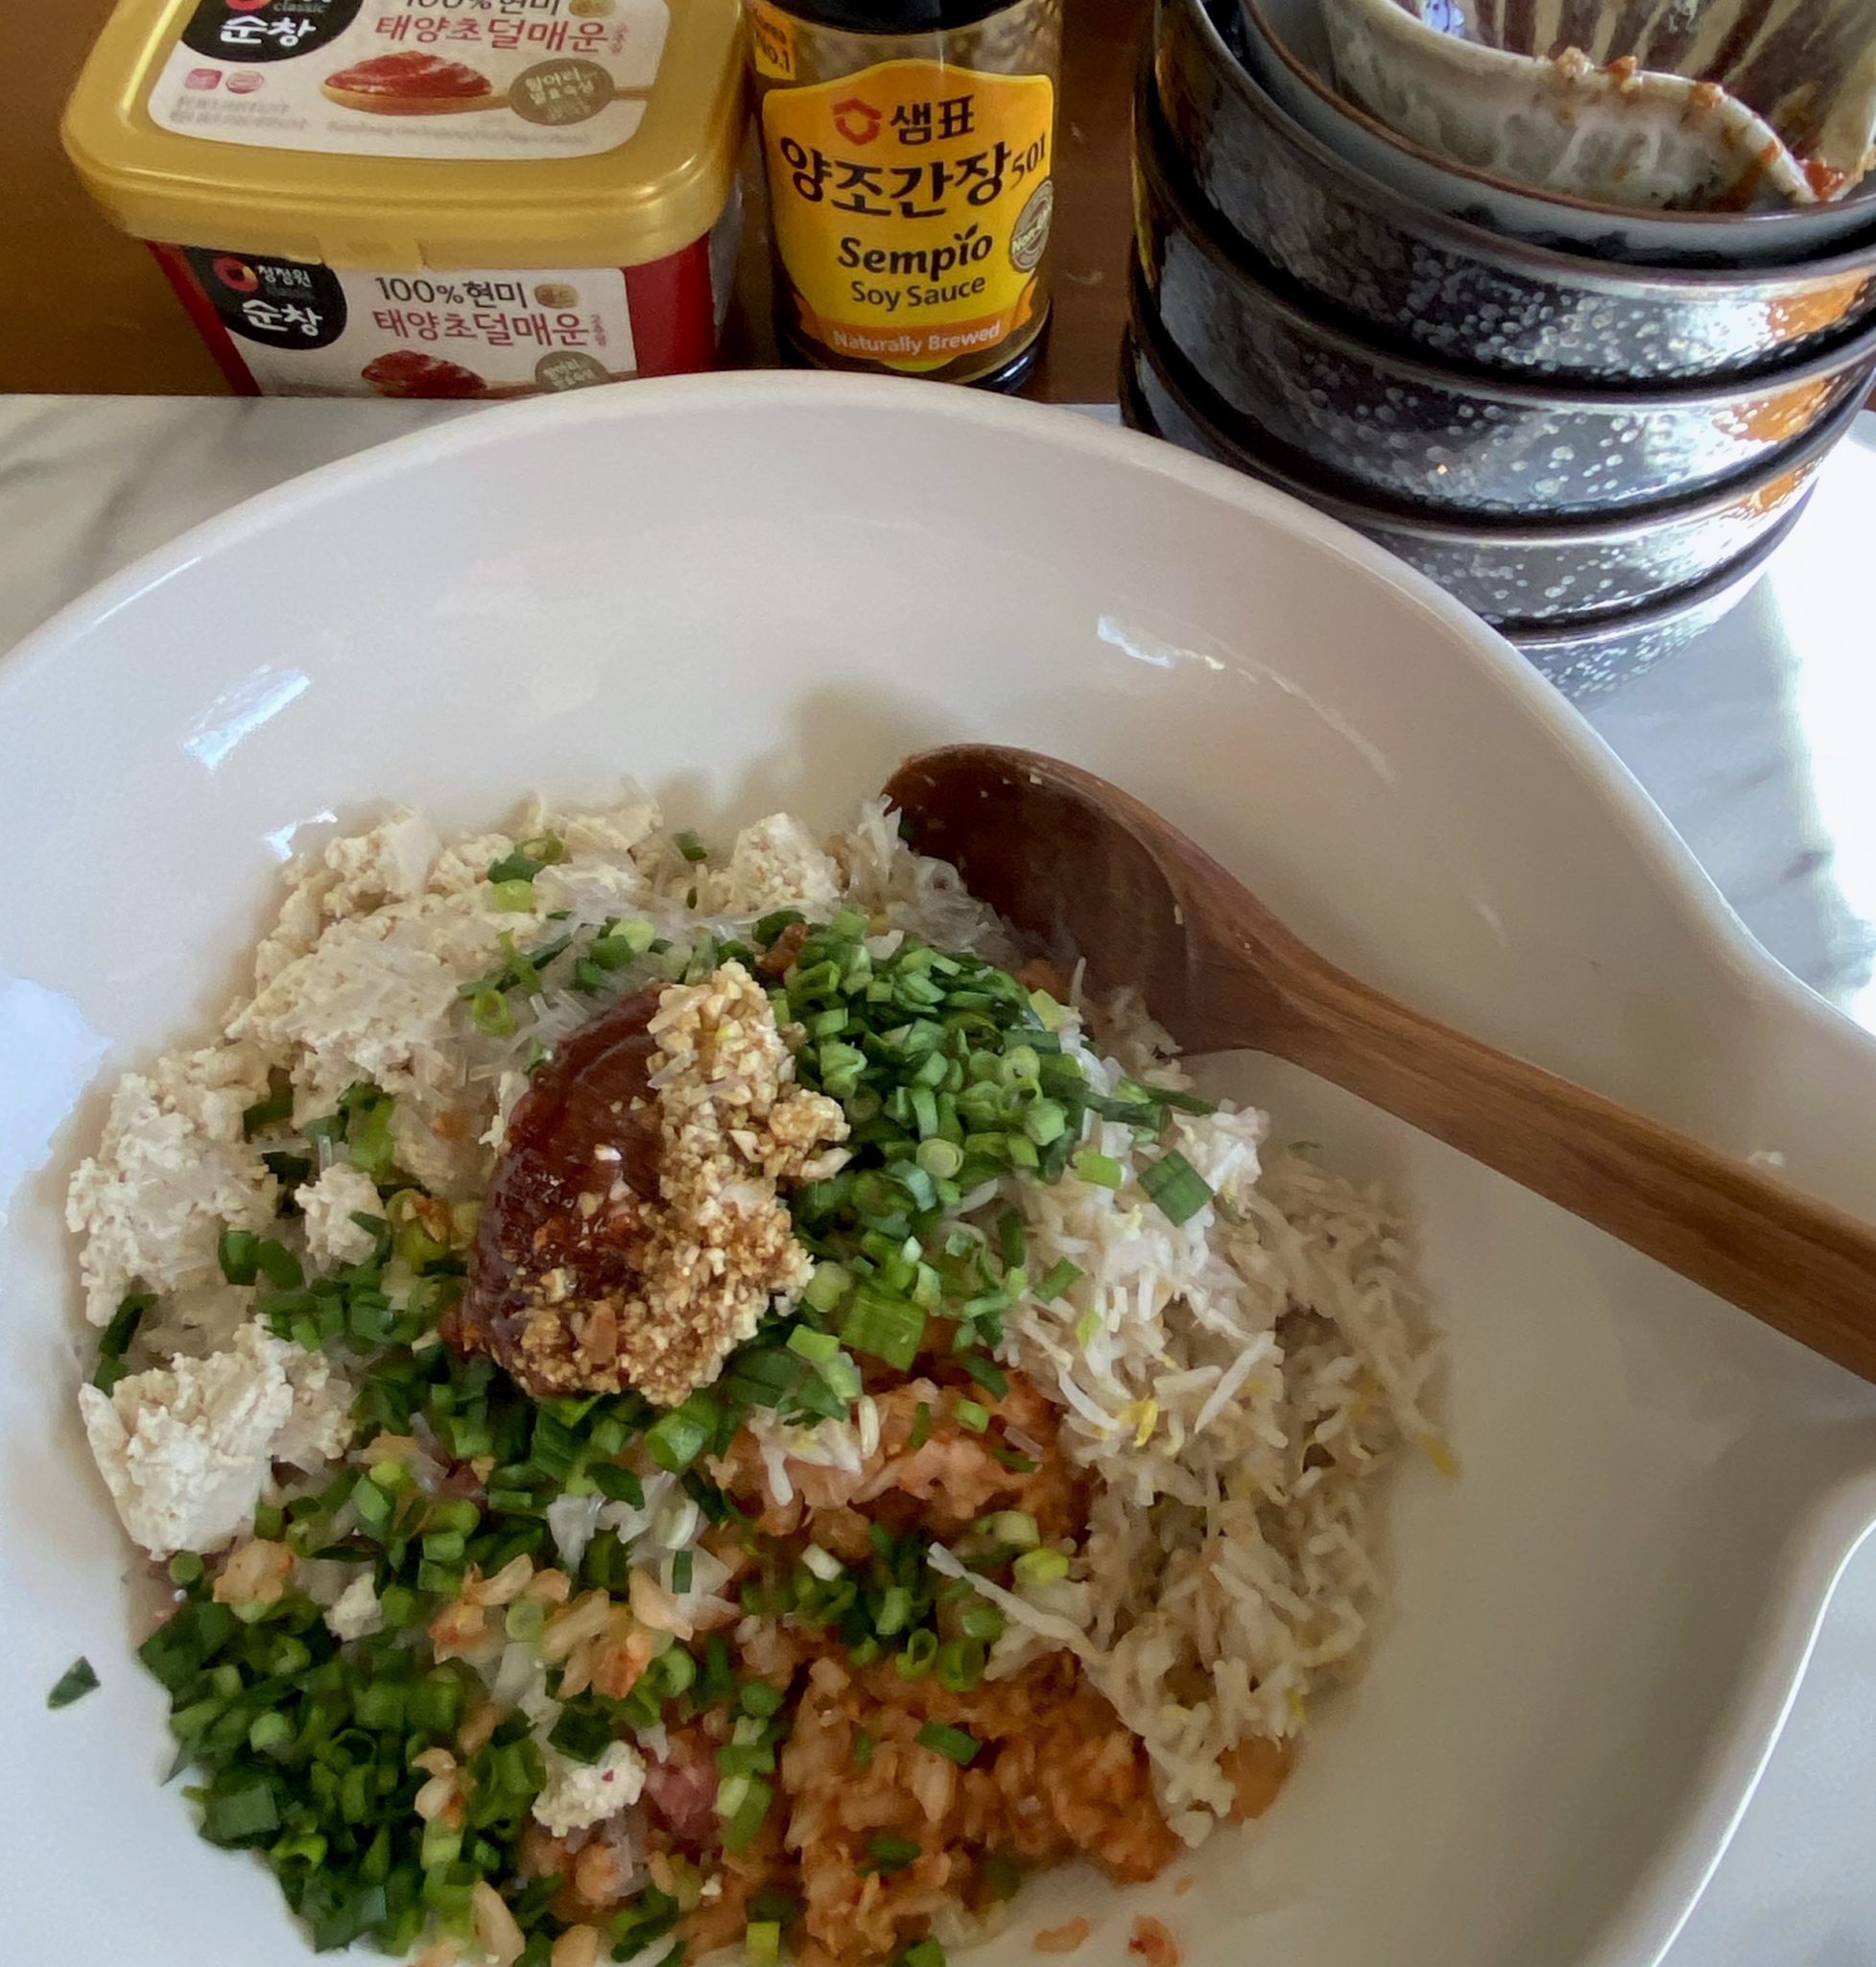
For Kimchi Mandu, you will need the following:  Firm tofu, dried sweet potato noodles, ground beef or pork or combo, onions, scallions, kimchi, bean sprouts and seasonings. Gather the ingredients and then the “fun” begins.  Blanch bean sprouts, drain & smoosh tofu, rehydrate & cut noodles, dice green & yellow onions, mince ginger and garlic, shred kimchi and THEN, add to meat.

WHEW, lots of prep but so WORTH IT.  Wontons and mandu freeze beautifully so all this work will give you a freezer full of quick, last-minute, delicious meals.

Folding Mandu in the Cartoon Universe

That’s a Wrap

Most of the time (and I mean MOST), we use commercial wrappers for our dumplings.  Look for round wrappers for potstickers or mandu at Asian markets.  A link to the Oregonian shows 6 ways to fold dumplings!  If you are feeling ambitious do try to make your own.  It’s pretty easy and requires only 4 ingredients.  The wrappers are flavorful, tender with a nice snap like hand-pulled or knife-cut noodles.  Totally worth the effort (homemade wrappers get the “nood” here).

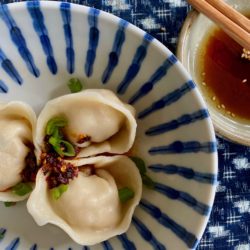
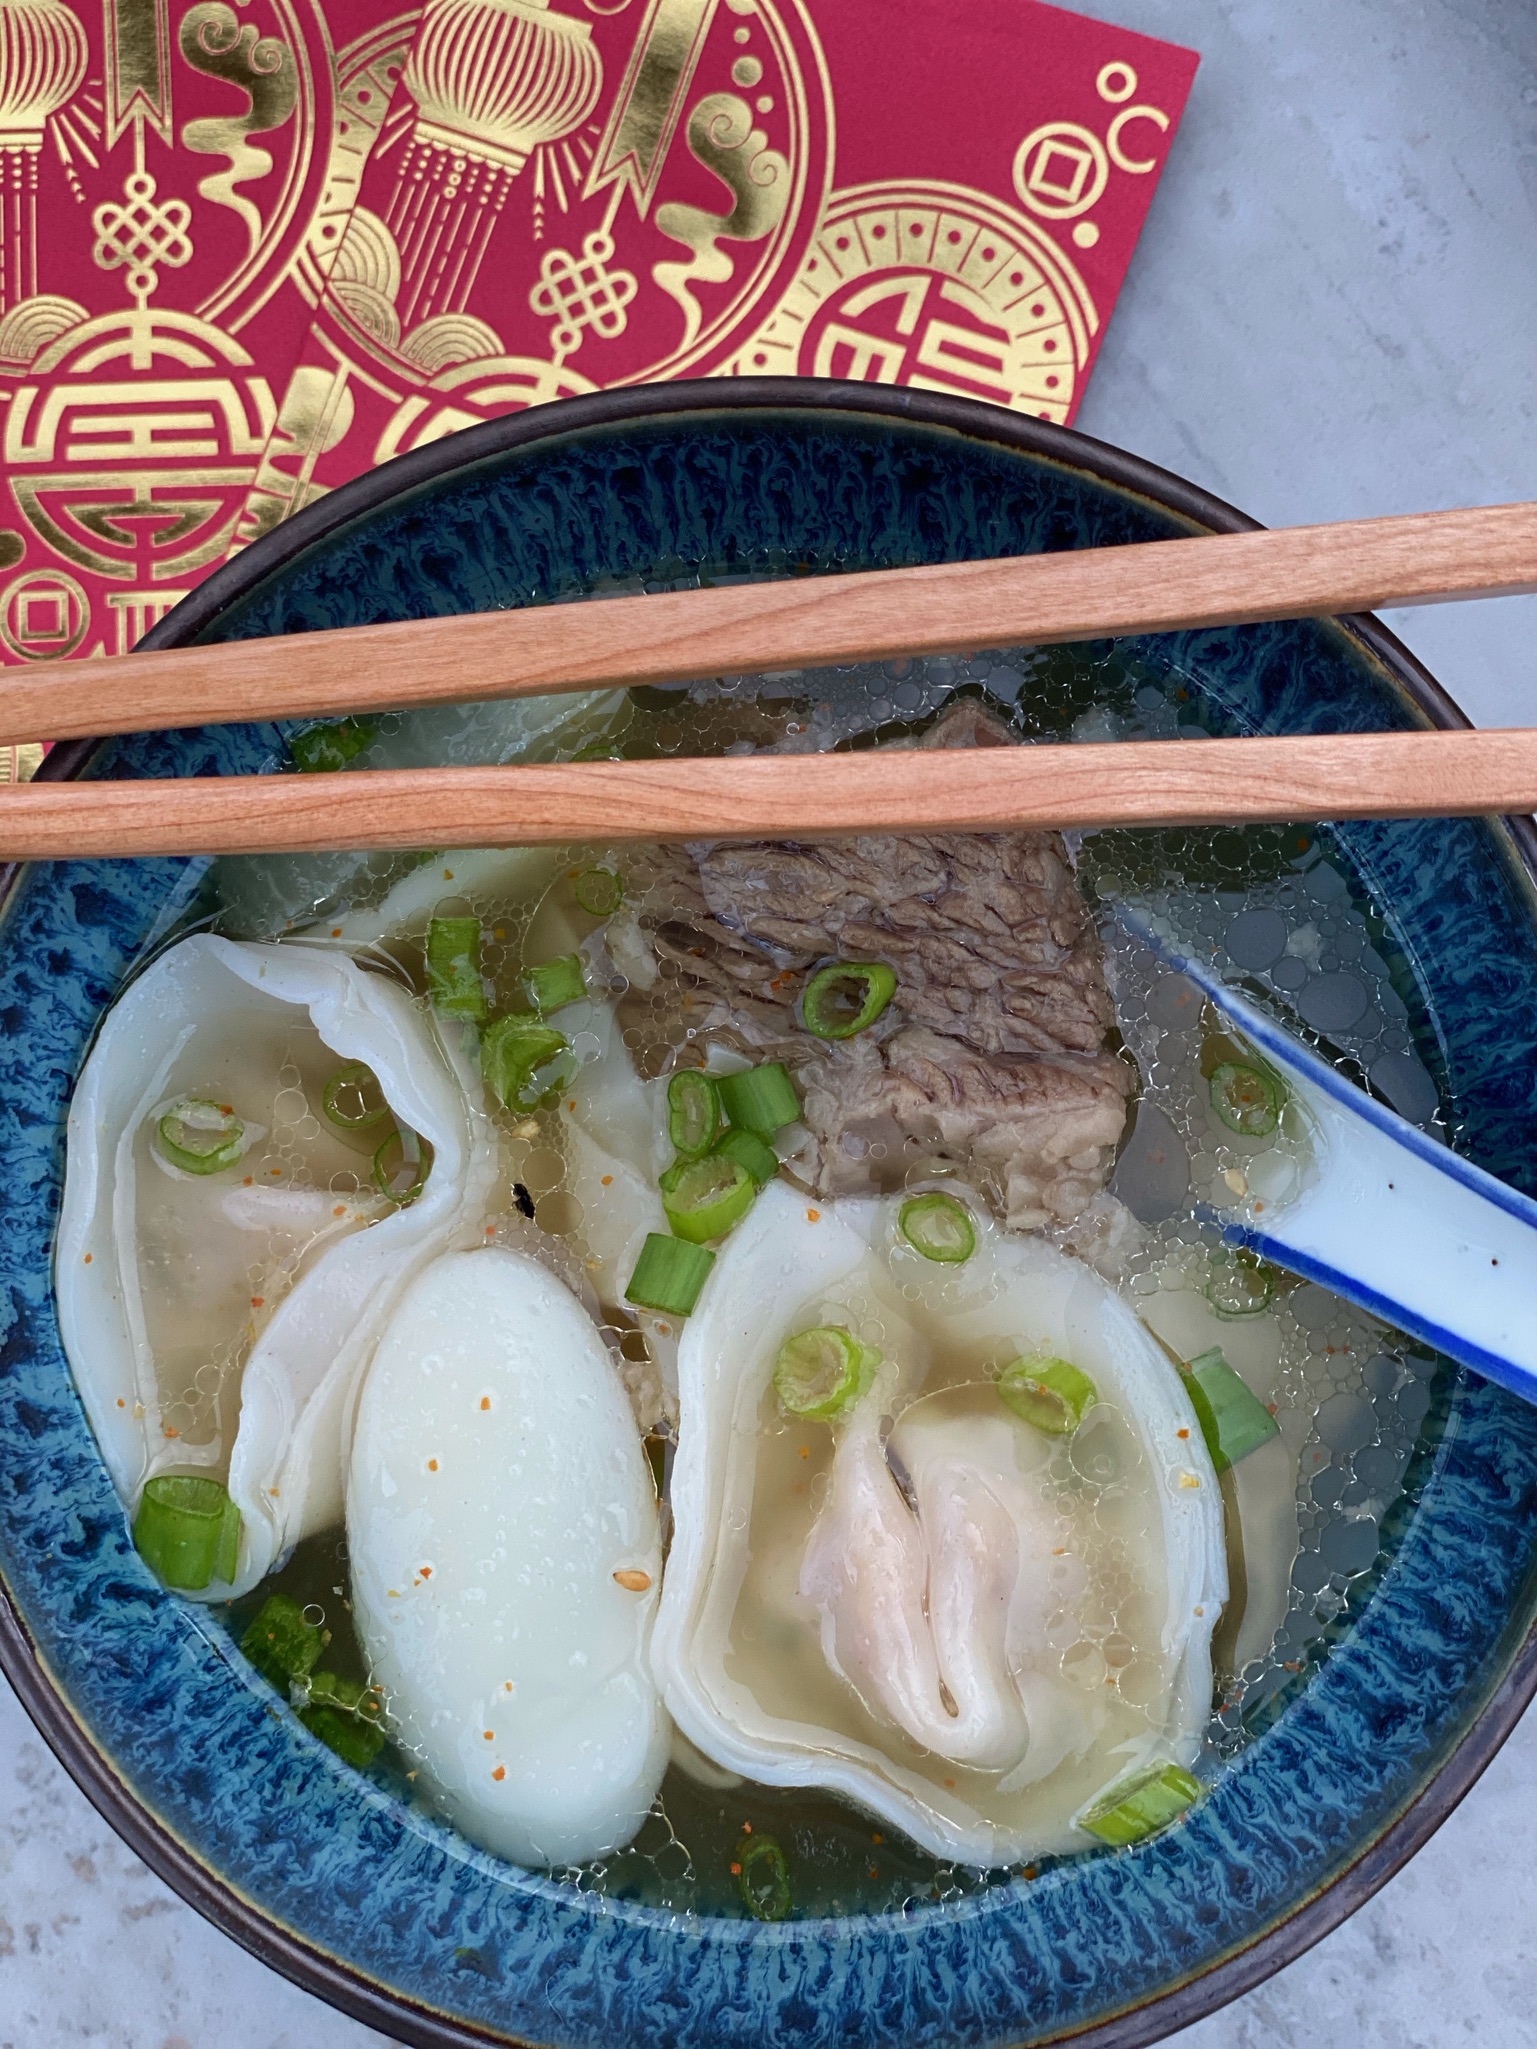
Serve mandu, steamed with a dipping sauce, fried, or boiled.  A steaming hot bowl of Galbitang  (Beef Short Rib Soup) with mandu and rice cakes ushered in the new year for us.  Delish!

Kimchi Mandu (Kimchi Dumplings)

Delicious dumplings made with ground pork or beef, kimchi, noodles, tofu and onions.
Course Appetizer, One dish meals, Soup
Cuisine Asian
Keyword dumplings, mandu
Prep Time 1 hour
Cook Time 15 minutes

Ingredients

Filling:

  • 2 ounces dangmyeon sweet potato starch noodles soaked in warm water for about 30 min or until soft
  • 1 cup packed finely chopped kimchi
  • 8 ounces tofu firm
  • 10 ounces mung bean sprouts sukju namul (숙주나물)
  • 1/2 medium yellow onion minced
  • 2 to 3 scallions diced, or use garlic chives
  • 10 ounces ground pork or beef or blend of both meats

Seasonings for Filling:

  • 1 tablespoon minced garlic
  • 1 teaspoon finely grated ginger or juiced
  • 1 tablespoon sesame oil
  • 2 tablespoon soy sauce
  • 1 tablespoon gochugaru adjust to taste
  • salt to taste about 1/4 teaspoon
  • pepper to taste about 1/8 teaspoon

Wrappers

  • 40 dumpling wrappers slightly thick

Instructions

  • Drain and squeeze water out of tofu. Using a cheesecloth or kitchen towel to squeeze water out.
  • Finely chop the kimchi and squeeze out excess liquid by hand. Use older kimchi which has more flavor.
  • Blanch the bean sprouts in boiling salted water (2-3 min) should still be crisp, drain, chop and squeeze out water.
  • Finely chop the noodles. Finely chop the onions and drain off excess water. Finely chop the scallions or garlic chives.
  • Combine all the filling ingredients in a large bowl. Mix well by hand. Stir in one direction to filling feels a littlle sticky.
  • Place one heaping teaspoonful to a tablespoon of the filling on a wrapper. Wet the edges of the wrapper with water or egg wash and seal tightly, push the air out with your fingers. shape into a half-moon shape. Then, bring the two ends together, apply water or egg wash to one end and press tightly to create a round shape. Repeat this process until all the filling/wrappers are used.
  • Kimchi mandu can be steamed for about 10 minutes in a steamer (12 minutes if frozen). Make sure to line the steamer with parchment paper or cabbage leaves to prevent mandu from sticking. You can also boil the mandu. Place dumplings in boiling water, bring it back to boil, adjust heat so it keeps a nice boil. When the dumplings float to the surface they are almost ready, boil another 30 seconds and remove from pot.
  • Note, you can cook a tablespoon of filling by boiling or frying to taste for seasonings.

Notes

Tips for freezing: Freeze the dumplings on a tray with the pieces not touching for about an hour, and then store them in a freezer bag.
Do You Tteokbokki? Spicy Korean Rice Cakes

Do You Tteokbokki? Spicy Korean Rice Cakes

‘My fondest memories of traveling abroad, not surprisingly, revolve around food.  It started when my parents sent me on a summer exchange program in Taiwan for Chinese American college kids.  While our parents envisioned us hard at work learning Mandarin and Chinese culture, we were sneaking out to the night markets to eat, hooking up with newfound friends, and in general, having a good time.  A documentary made about the program says it all, Love Boat Taiwan.  My introduction to a whole new world of food, culture, and fun.

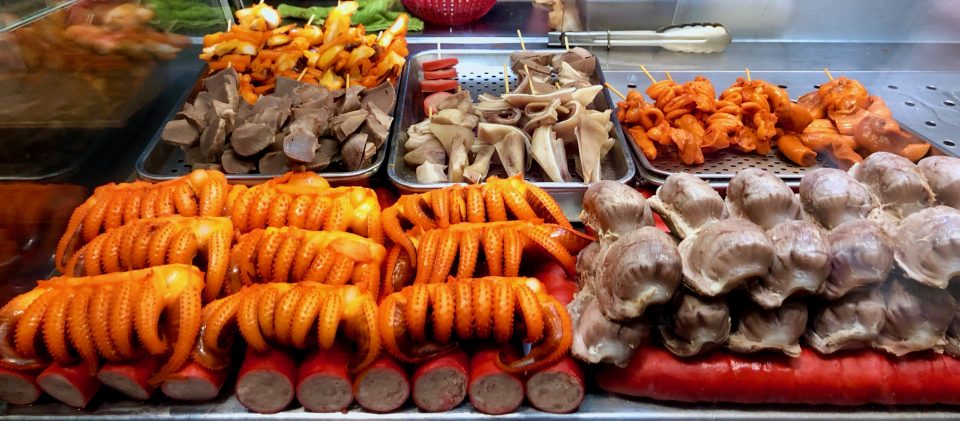
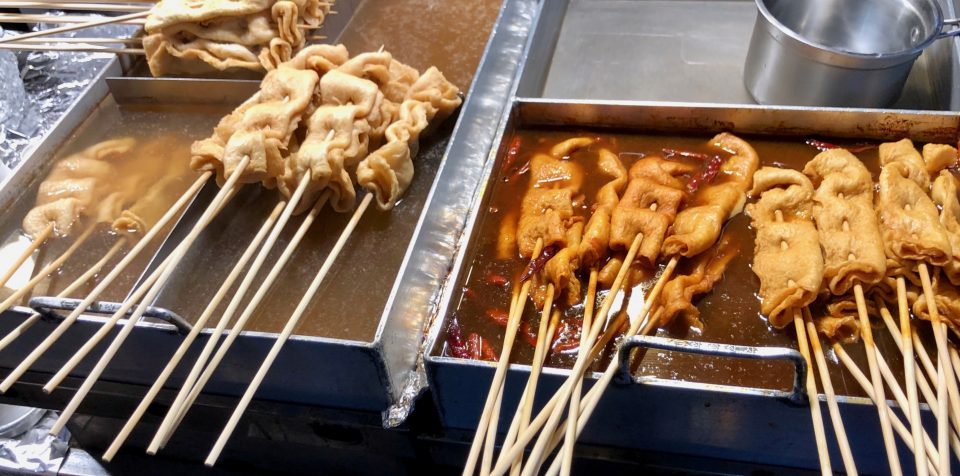
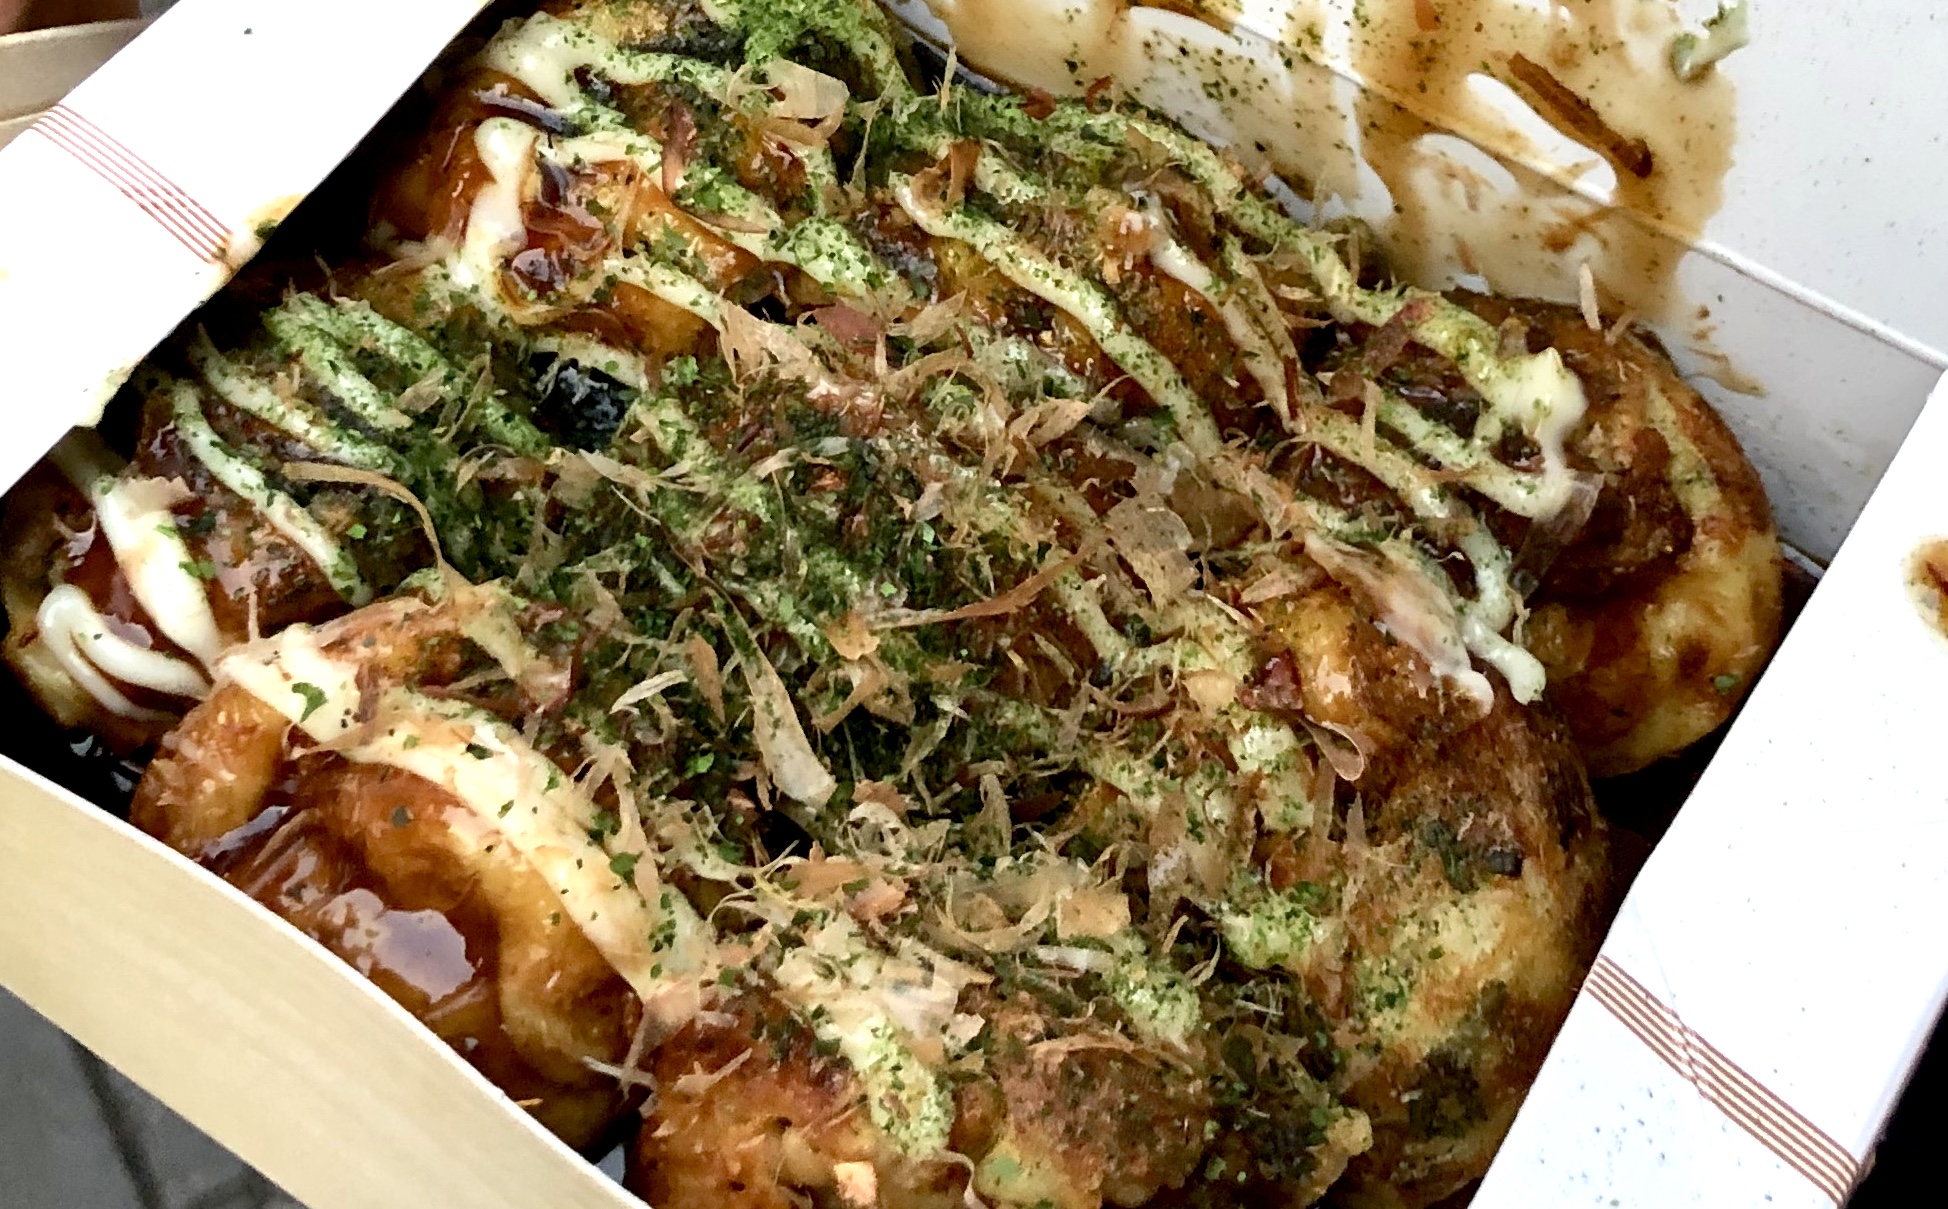
From the food stalls in Taipei long ago to the markets in Seoul and Osaka most recently; I have feasted on oyster omelets and dumplings (Xiao Lung Bao), Gimbap (Korean rice rolls), Galguksuk (hand-cut noodles), Hotteok (rice pancakes with sweet or savory fillings) and tteokbokki (rice cakes in a sweet and spicy sauce).  I have sampled Takoyaki (Fried Octopus fritters), Kaarage (fried chicken), Gyoza (Potstickers), and Manju (rice cakes) from tiny makeshift kiosks, so delicious.  A trip after college found me relishing the variety of Hawker Fare food in Singapore. Nonya, Indian, Muslim, Chinese dishes all in one spot. Who hasn’t drooled over the Hainanese Chicken enjoyed by Rachel and Nick in Crazy Rich Asians, all cheap and delicious.  Street markets are soul food.  Homey, simple, flavorful dishes remind me of family gatherings around the dinner table.

But, it’s not just about the food, it’s about getting a taste of daily life and culture-sitting next to that businessman as he hurriedly slurps his noodles down before going back to work  Watching the vendors entice their next customer with their hand-pulled noodles or steaming dumplings. Or amusedly watching school children clamoring for their afterschool snack of gimbap or bao from the corner vendor.

That’s My Favorite Part of Traveling

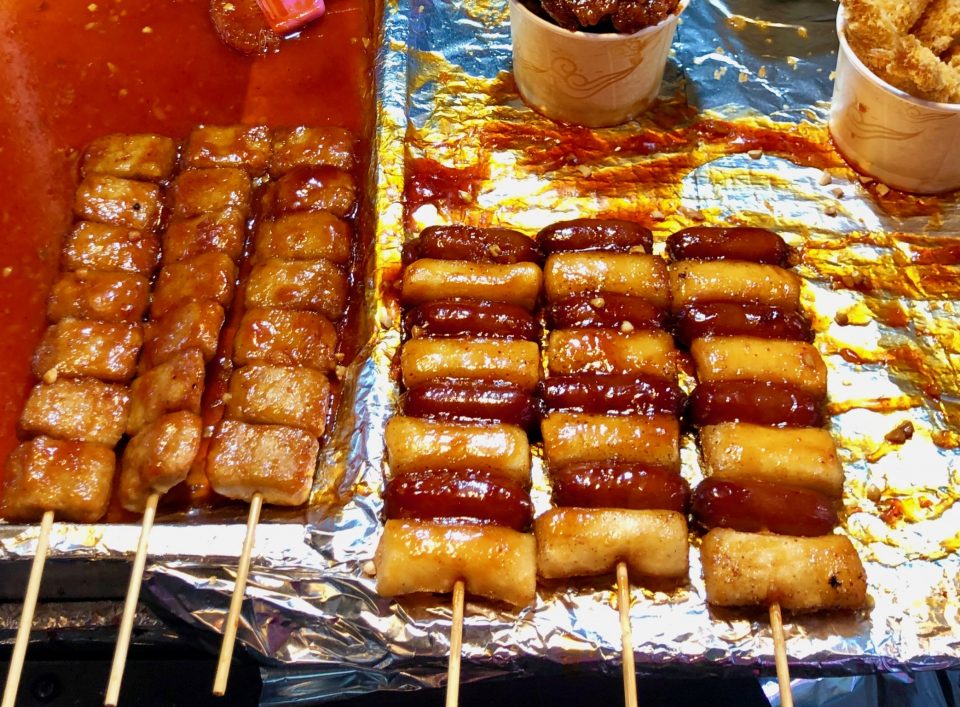
Dreaming about our travels last year has me hungry for the delicious street food we discovered. We took in a baseball game in Incheon and in place of traditional fries and hot dogs, we enjoyed Tteokbokki and KFC (Korean Fried Chicken).  The Tteokbokki, spicy, sweet, and chewy was served on sticks with cute little hot dogs.  I love watching baseball, it reminded me of watching a minor league game, lots of zaniness, fans with broomsticks, and cheerleaders to egg them on.  The icing on the “rice”cake was the food and walk-up music for each batter.

Crazy Fun Baseball Game in Korea

I’ve taken to hunting for recipes to make these tasty tidbits and I found, Korean Bapsang, an absolutely great site with a treasure trove of Korean recipes that are easy to follow and 정말 맛있다 (really delicious)!

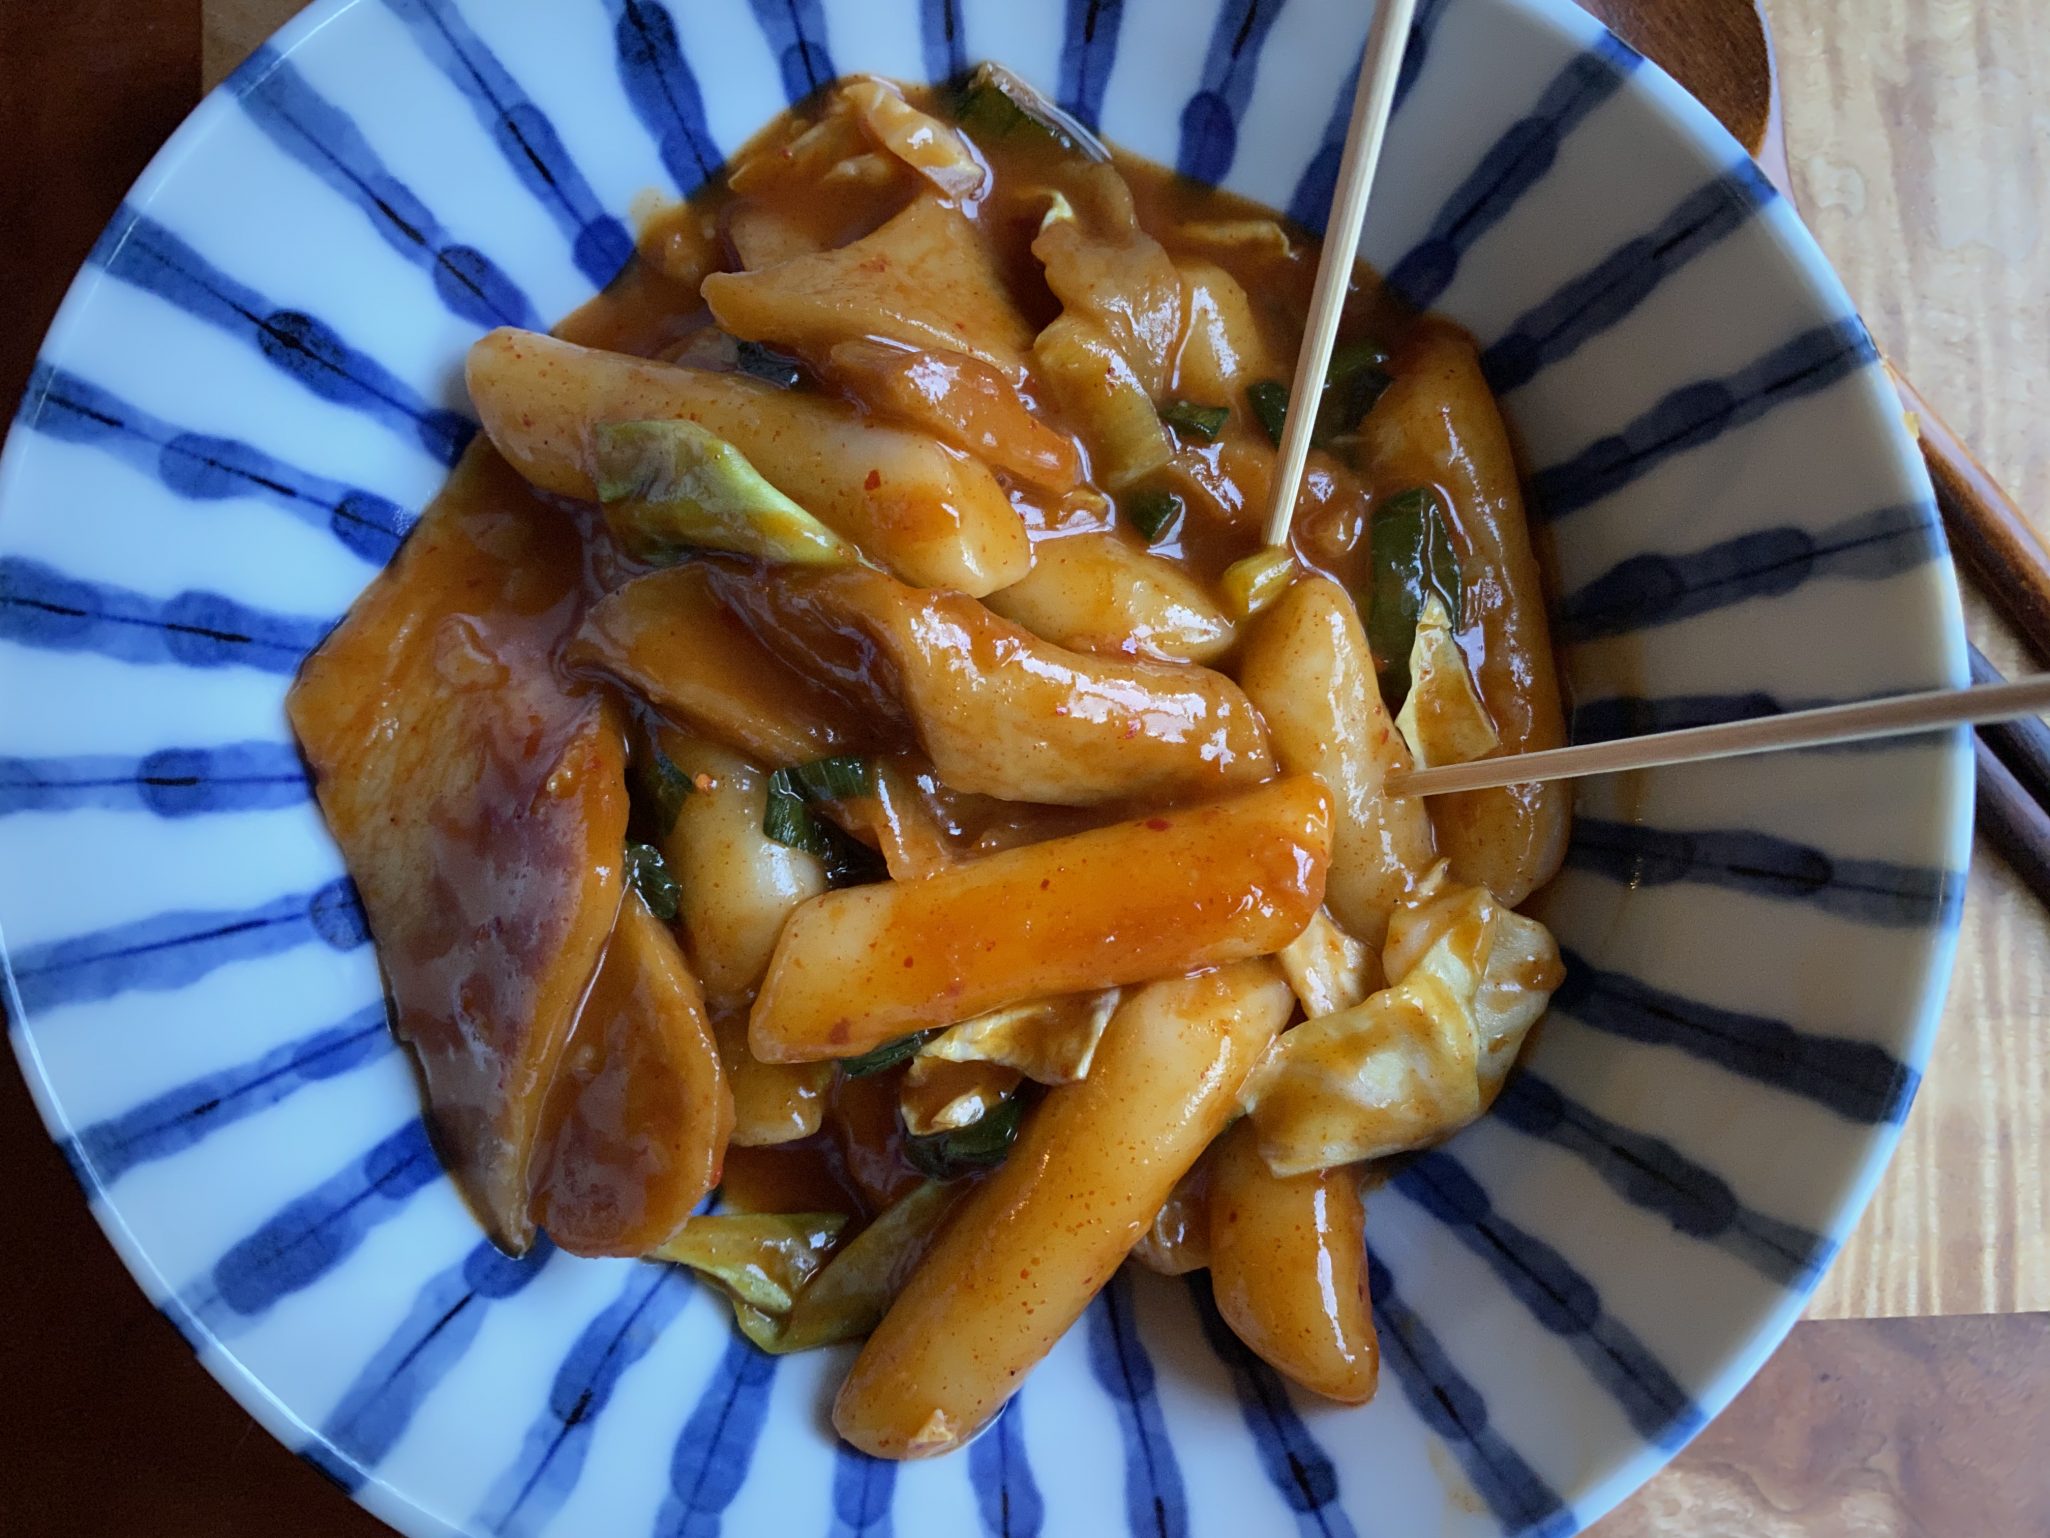
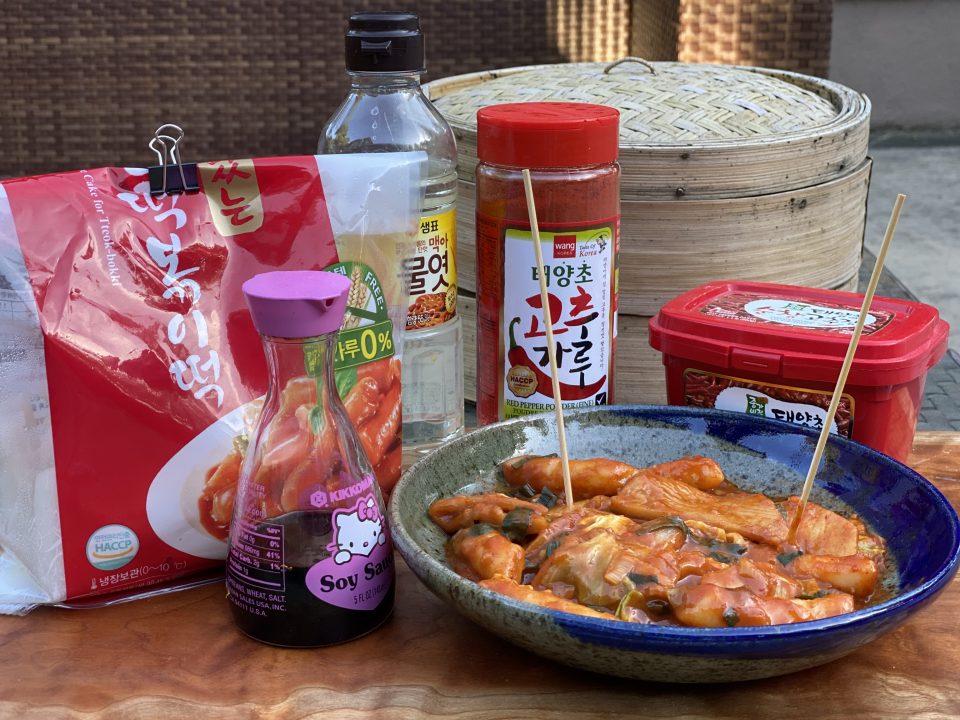
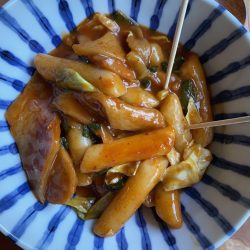
You can buy rice cakes and fish cakes in most Asian markets as well as the other needed spices. I didn’t have fish cakes for a batch, so I chose the next best thing in my pantry, SPAM.  Don’t laugh, it was pretty good!  Cook the rice cakes in an anchovy stock or water seasoned with Gochugaru (chili powder), Gochujang (chili paste), and corn syrup.  Fish cakes, cabbage, and onions round out the dish.   It takes all of 15 minutes to make.  A perfect snack while watching a Giants game or my favorite K-drama.

The Recipe

Tteokbokki - Sweet & Spicy Rice Cakes

Tteokbokki, a popular Korean snack, are rice cakes in a spicy-sweet sauce found at street markets, fast food kiosks and baseball games!
Course Appetizer
Cuisine Asian
Keyword Korean Snack, Rice Cakes, Tteokbokki
Prep Time 5 minutes
Cook Time 15 minutes
Servings 4

Ingredients

  • 1 pound tteokbokki tteok 떡볶이 떡 about 24 3-inch long rice cake pieces - See note.
  • 1 sheet eomuk 어묵 fish cake - aka oden or SPAM! or Japanese fishcake
  • 4 ounces green cabbage yangbaechu 양배추
  • 1 - 2 scallions optional
  • 3 cups anchovy broth or water or any fish broth/dashi
  • 3 tablespoons Korean red chili pepper paste gochujang 고추장
  • 1-2 teaspoons Korean red chili pepper flakes gochugaru 고추가루 preferably finely ground)
  • 1 tablespoon soy sauce
  • 2 tablespoons sugar or use 1 tablespoon if you like it less sweet
  • 1 tablespoon corn syrup
  • 1 tablespoon minced garlic

Instructions

  • Make fish broth if using. Soak the rice cakes for about 20 minutes if hardened or refrigerated. Cut the fish cake, cabbage, and scallions into about 2-inch long pieces.
  • Add the anchovy broth (or water) to a large pan. Stir in the sauce ingredients. Bring it to a boil over medium high heat, stirring to dissolve the red chili pepper paste (gochujang).
  • Add rice cakes, boil until the rice cakes become very soft and the sauce is thickened, about 8 - 10 minutes. Stir frequently so the rice cakes don't stick to the bottom of the pan.
  • Add cabbage, green onions (optional) and fish cakes. Continue to boil, stirring constantly, for an additional 4 - 6 minutes. Depending on your rice cakes, it may need more time to reach a desired level of softness. Add more broth or water as necessary. Taste the sauce, and adjust the seasoning if needed. Serve immediately.

Notes

You can find tteokbokki rice cakes fresh, refrigerated, or frozen at Korean markets. Locally made fresh rice cakes are the best ones to use, but good quality refrigerated ones are okay too. Try avoiding frozen ones if you have other options.
 Tteokbokki doesn't reheat well in the microwave. Reheat any leftovers, along with a little bit of broth or water, in a small pan over low heat.
Don't have eomuk use the Japanese fish cakes-kamaboko or even surimi (imitation crab legs).
Everybody Have Jjigae Tonight (Kimchi Jjiggae-Korean Kimchi Tofu Soup)

Everybody Have Jjigae Tonight (Kimchi Jjiggae-Korean Kimchi Tofu Soup)

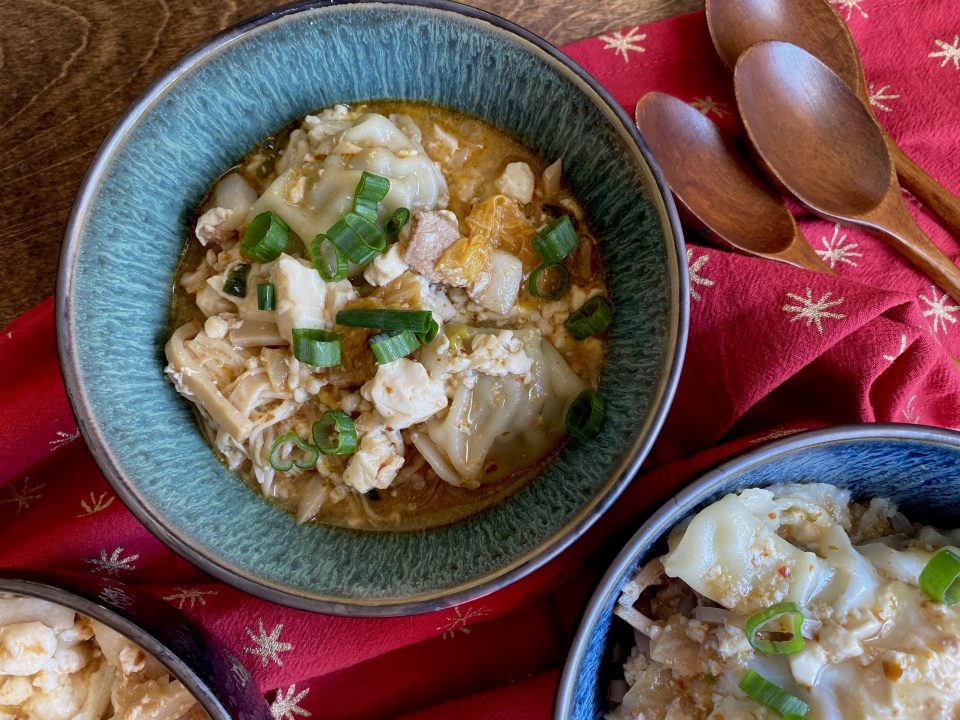
Y’all know I love soup, right?  I have about a dozen recipes for different soups on 3jamigos and now I am adding one more, Kimchi Jjigae or Kimchi Tofu Soup.  It is easy to make, super delicious and something a little different.  It’s a hearty soup with lots of yummy stuff. Along with kimchi, the soup has beef, or pork, tofu, mushrooms, onions, cabbage, basically, anything your little heart desires.  Jamie and I collaborated on this recipe (she made it, I ate it).  It is a mash-up of various recipes we found online.  If you like Korean food and would like to try making it at home, there are some really good blogs and Instagrammers you can check out, Korean Bapsang, and My Korean KitchenInstagrammer @Christy_l_kitchen’s video for kimchi tofu soup served as ground zero for Jamie’s delicious soup.

First, let’s run through the ingredients for Kimchi Jjigae.  If you live in the Bay Area, it will be easy to find the ingredients for this tasty pot.  Actually, any major metropolitan area probably has an Asian market and there are online sources. (Or call me, happy to take anyone Asian food shopping)  Once you have assembled the ingredients, putting the soup together is a SNAP.

Let’s start at the very beginning, a very good place to start…

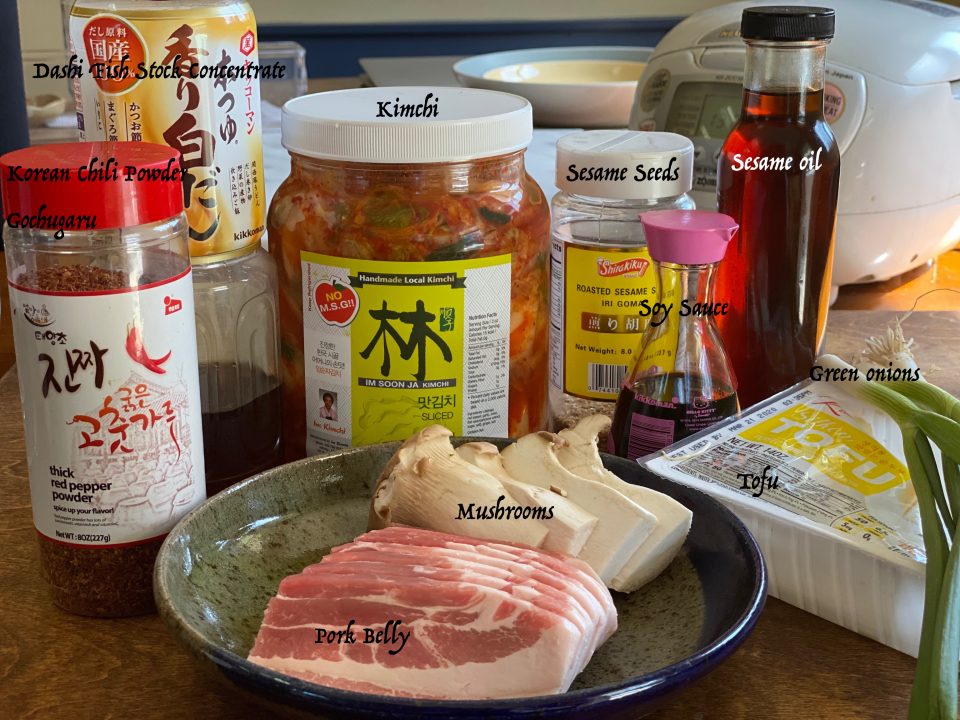
Kimchi, or fermented cabbage, is essential to the soup.  It is the cornerstone of the soup providing umami, texture, and spice. Asian stores and larger supermarkets often carry Kimchi in their cold boxes.  My favorite brands are Ocinet and Im Soon Ja.  Use the one you like.

Tofu-made from soybean comes in various densities from super soft to extra firm.  Normally, SoonDubu Jjigae uses a very soft “silken” tofu. PERFECTLY acceptable to use firmer tofu if you like.  Tofu in tubes by Pulmone is a great choice. Kithcn has a nice primer on tofu that helps sort out the different varieties.

For protein, we used pork belly but again you can substitute beef or seafood such as shrimp or clams. Mushrooms are amazing and if you pull out the protein, the perfect vegetarian version.  Jamie added King Mushrooms (pictured) and Enoki Mushrooms (teeny tiny mushrooms), very tasty.

Gochugaru, Korean red pepper adds sweet, spicy, fruity, smoky-irreplaceable, look for it at Korean markets or online.  I like to use Gochujang (spicy sweet chili paste) along with the powder.

The soup can be made with water but if you want depth of flavor, use stock.  Traditionally an anchovy stock is used but we improvised by using a Japanese Shiro Dashi (fish-based stock) concentrate which I love.  In a pinch use chicken broth or a mushroom broth.  The recipe calls for 1 cup of liquid, I LOVE soup so I usually increase the amount of liquid 1.5-2 cups.  If you do too, taste for seasoning, you may want to increase the chili powder.

There you have it, all the ingredients for a pot of yumminess.

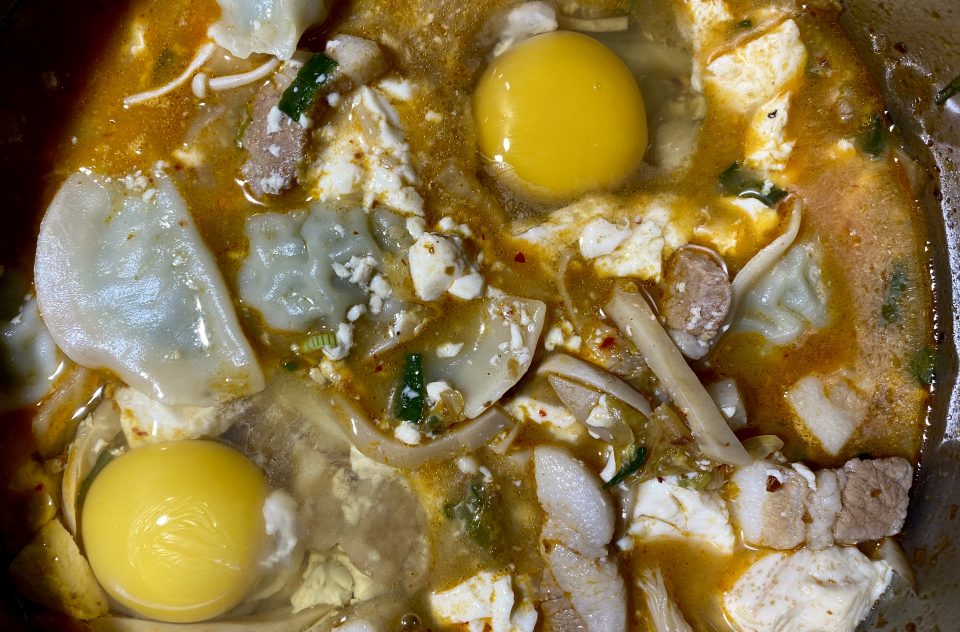
The hard part is over!  It’s downhill from here.  Saute’ your onions and pork, add kimchi and seasonings, stock, shrooms, and then the tofu. Top with green onions, Badda bing Badda boom, done.  Just a couple of minutes of work and dinner is served!  Koreans have a special little pot to cook Tofu Soup in, it retains heat, when you bring it to the table the soup is still bubbling furiously. Drop a raw egg in and let it cook in the piping hot broth.  We don’t have a special pot so we dropped the egg on top before taking the saucepan off the stove.

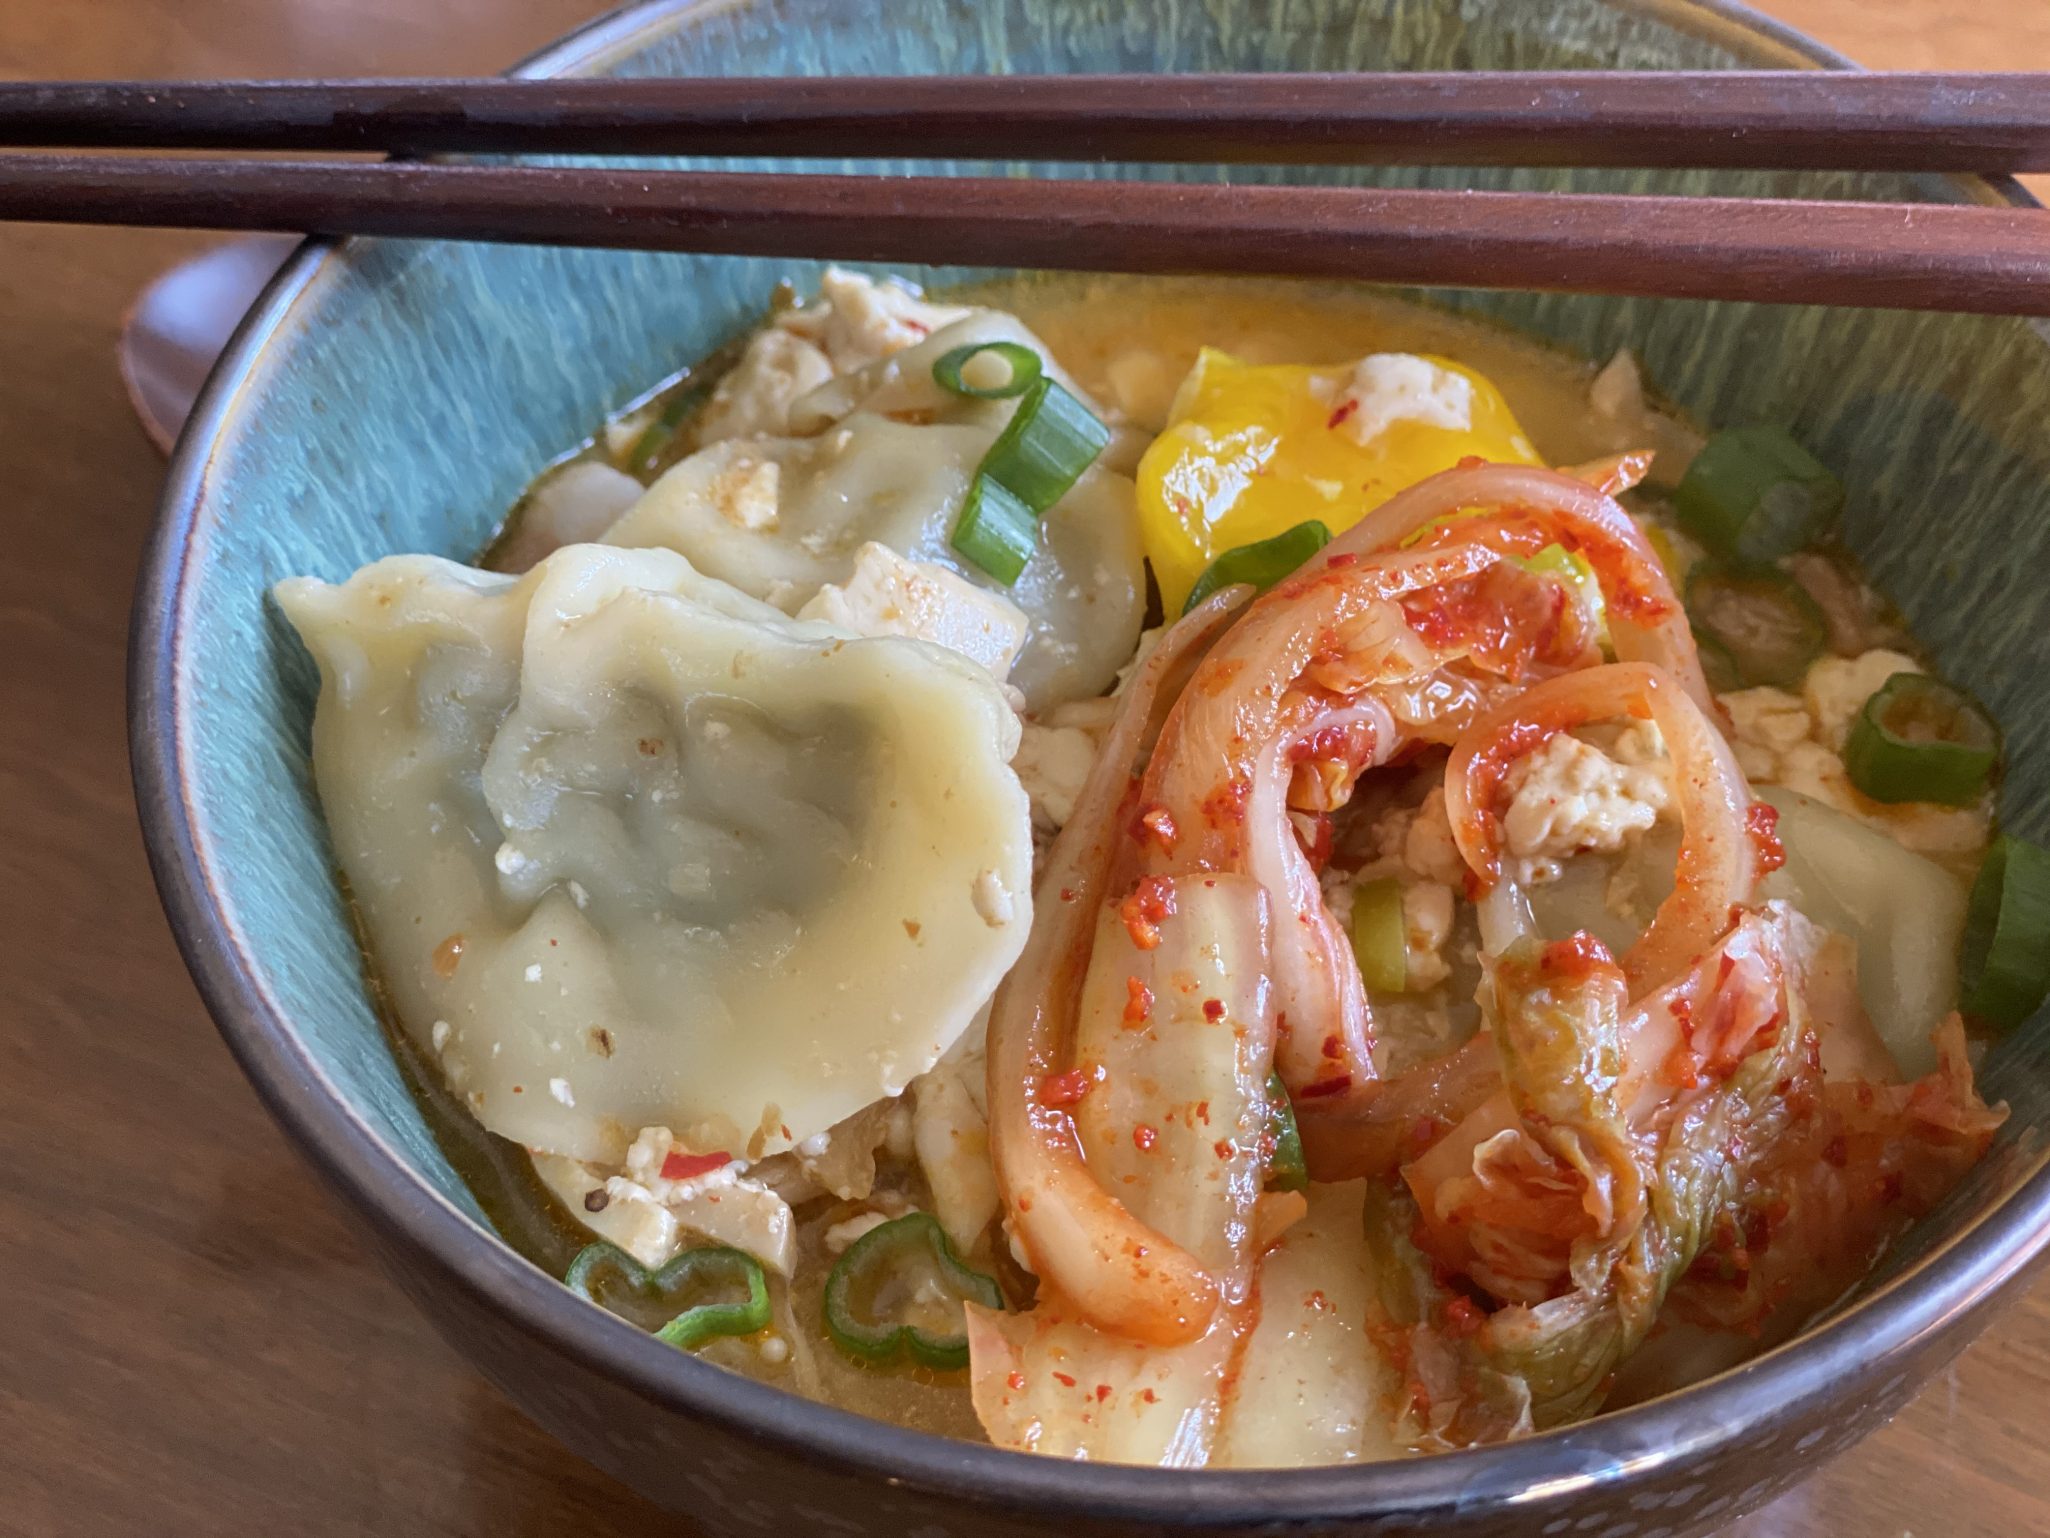
Variations on a Jjigae theme.  Did I mention we threw in mandu for good measure?  Because who doesn’t love dumplings!  To increase the veggie content without adding more kimchi, add sliced fresh cabbage or more mushrooms.

Korean Tofu Soup Kimchi Jjigae

Korean comfort food, Soondubu Jjigae or Tofu Soup. Tofu, pork, beef or seafood and Kimchi are the building blocks for this delicious, easy to make soup.
Course Main Course, Soup
Cuisine Asian
Keyword kimchij jigae, tofu soup
Prep Time 15 minutes
Cook Time 15 minutes

Ingredients

  • 1/4 yellow onion, thinly sliced
  • 1/2 cup thinly sliced pork belly or beef can sub seafood, shrimp or clams.
  • 1/2-3/4 cup thinly sliced kimchi
  • 2-3 shiitake mushrooms, thinly sliced or enoki mushrooms, 1 small pkg
  • 1-2 T red chili pepper flakes gochugaru add more for a spicier stew
  • 1 T Gochujang (chili paste)
  • 1 teaspoon minced garlic
  • 1/2 tablespoon sesame oil use a little more if using more gochugaru
  • 10 ounces soondubu extra soft/silken tofu, 1/2 carton of tofu
  • 1 cup anchovy broth can use water, dashi or chicken broth
  • 1/2-1 T soy sauce
  • 2 to 3 tablespoons juice from kimchi
  • pinch black pepper, dash of salt
  • 2 scallions divide white and green parts, finely chopped, add white part to yellow onion mix saute', reserve green part for garnish
  • 1 egg

Instructions

  • Heat 1 tsp oil in a small saucepan over medium heat. Add diced onion, scallions (white part) and pork or . Stir-fry until the meat is almost cooked, 3 - 4 minutes.
  • Add the kimchi, chili paste, garlic, soy sauce and sesame oil to pot. Stir to combine and saute for 1-2 minutes.
  • Pour in broth, juice from the kimchi and pepper flakes. Bring it to a boil, add mushrooms and continue to boil for 3 - 4 minutes.
  • Add the soft tofu in big chunks. Stir in salt to taste (I rarely add salt), start with 1/4 teaspoon, and black pepper.
  • Cook for 4 -5 minutes. Add chopped scallions just before removing the pot from the heat.
  • If desired, crack an egg into the soup to serve while it’s still boiling hot.
  • Serve with rice.

Notes

Shiro dashi concentrate is seasoned, reduce salt and/or soy sauce if used.
Hit Me With Your Bo Ssam, Fire Away (Momofuku’s Bo Ssam Slow Roasted Pork)

Hit Me With Your Bo Ssam, Fire Away (Momofuku’s Bo Ssam Slow Roasted Pork)

Need a dish to feed a big crowd?  A dish that is easy to make and requires little attention?  I have just the dish!

Bo Ssam

Whaat?  The best description I can give you is Korean Pulled Pork.

I have been meaning to try David Chang’s (Da Momofuku Man) recipe for Bo Ssam.  His Momofuku Cookbook is hands down one of my favorites. I actually like curling up in a chair and reading his cookbook.  Great narrative and I can relate to his use of “colorful” vernacular in the book.  When I had my kids I FORCED myself to limit the expletives that normally flowed through my lips.  I did a pretty darn good job until they were all ensconced in high school (or was it middle school?).  Then the flood gates reopened.  Am I proud of this? No, but for me, a verbal flurry of choice words is very cathartic.  I like to think of them as adjectives with emphasis NOT directed verbs.

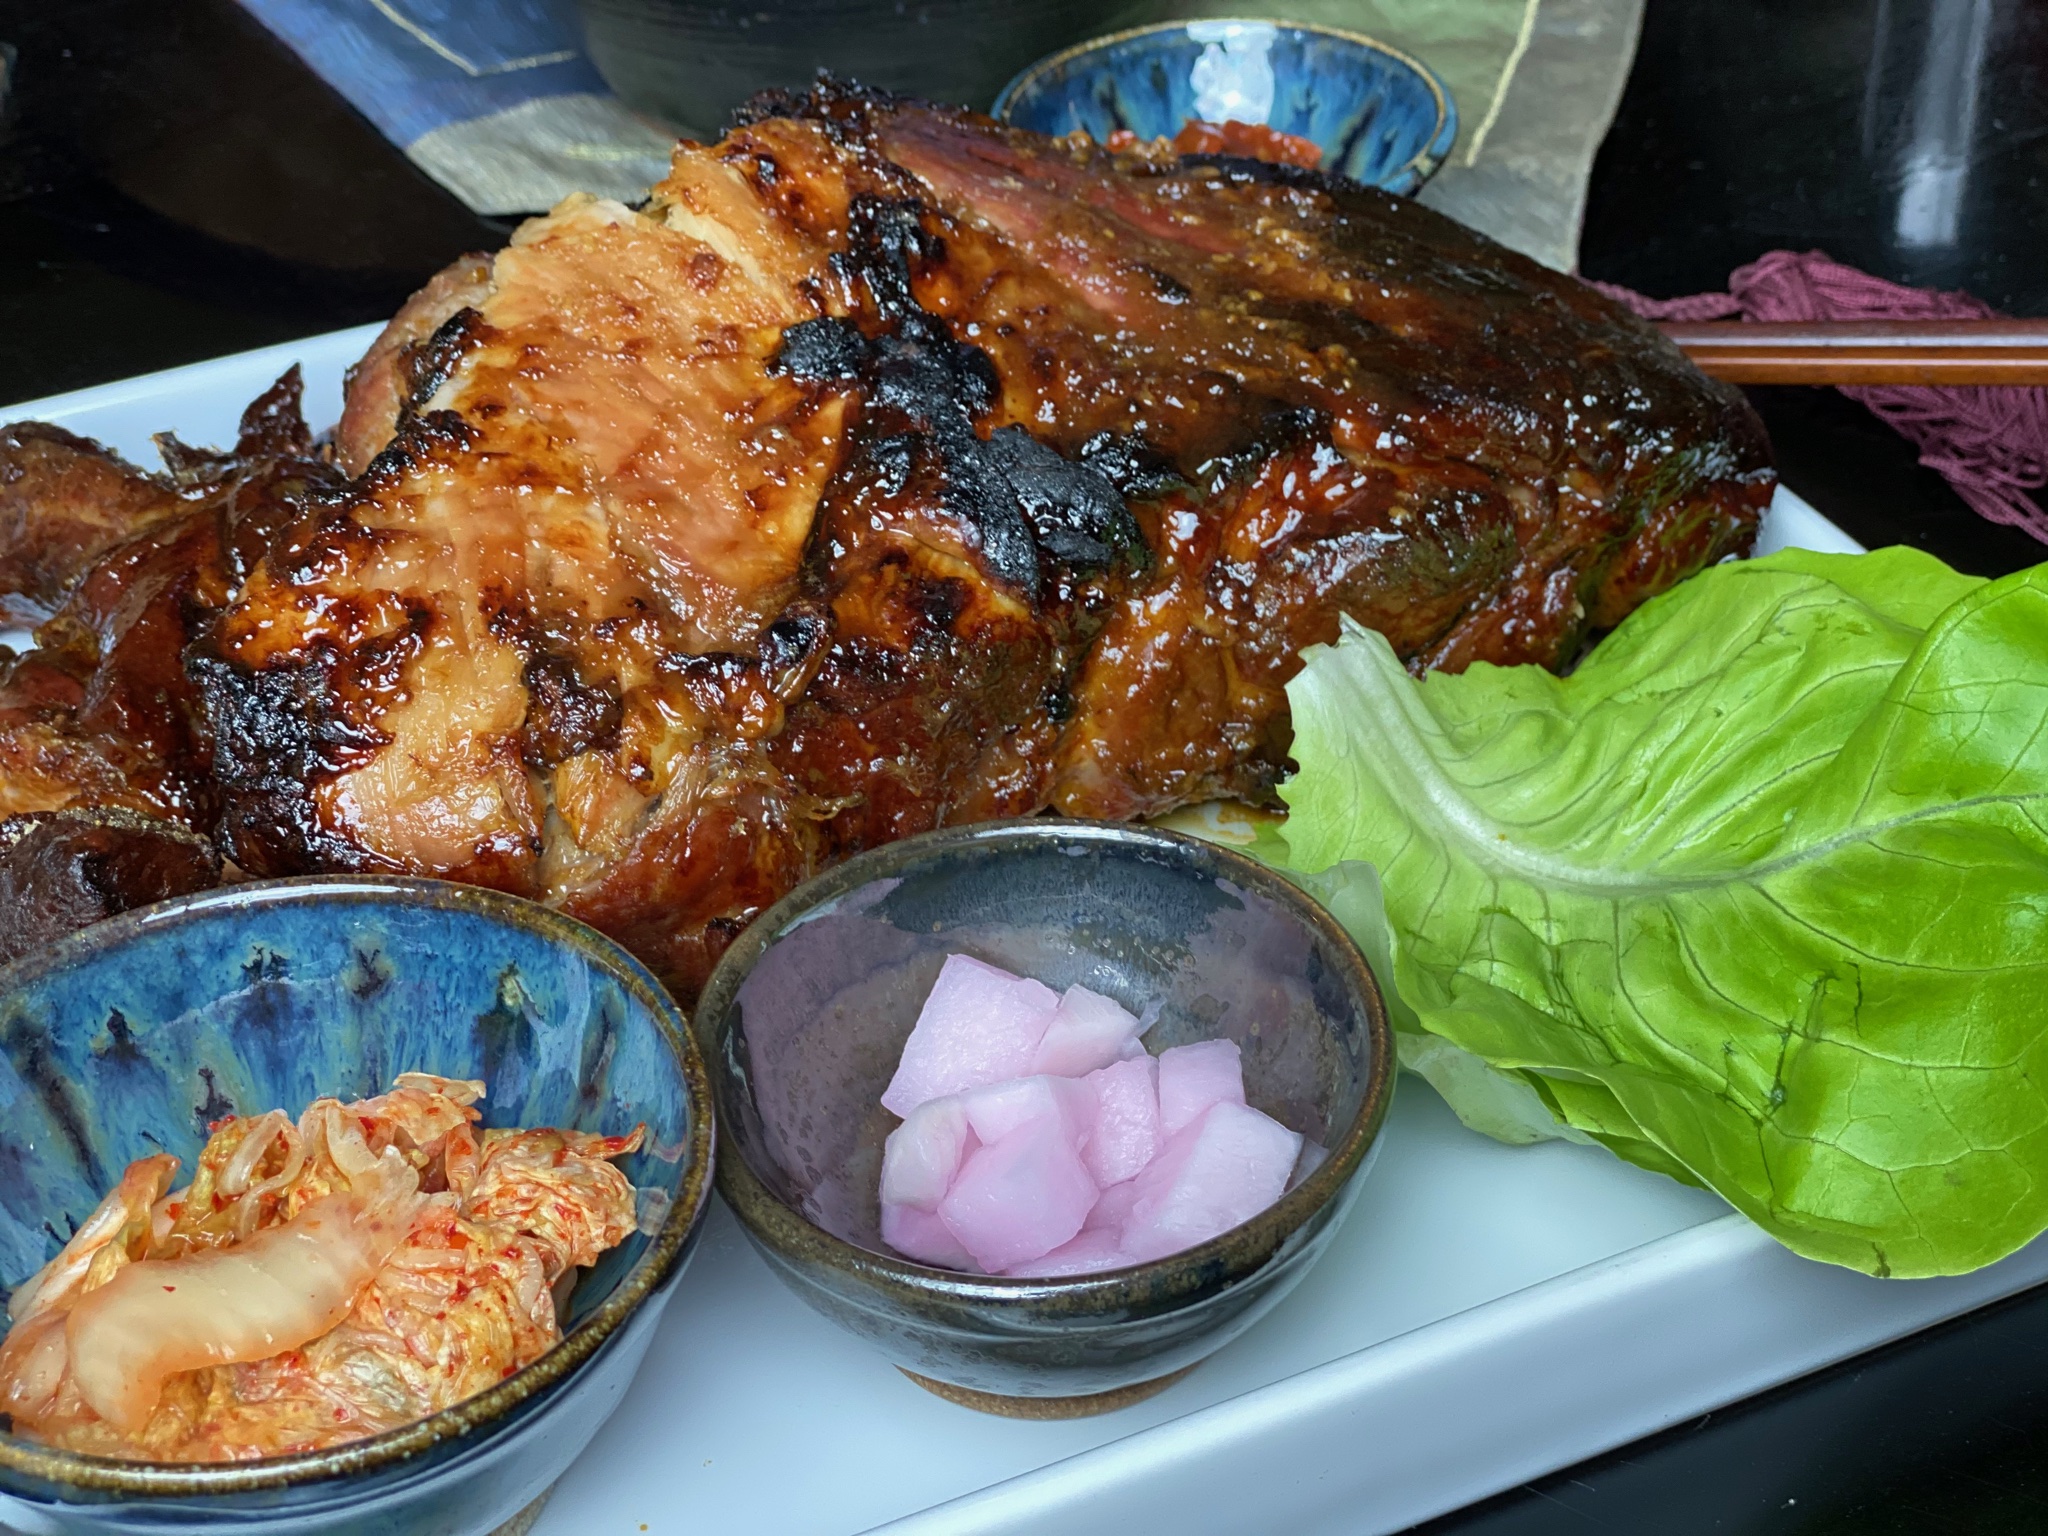
Back to Bossam.  Actually, traditional Bossam is pork belly boiled not roasted.  The Momofuku twist?  Slow roasting the pork.  Start with a nice FATTY Pork Butt roast (aka Boston butt or shoulder).  Make a rub of Kosher salt and sugar and rub this all over the roast. Discard any excess rub.  Let the roast sit for 6-24 hours in the fridge. Use coarse Kosher Salt Coarse made by Diamond.  Don’t use regular table salt or sea salt, it will be way too salty.  Morton’s also has a Kosher salt but it is actually saltier than Diamond.

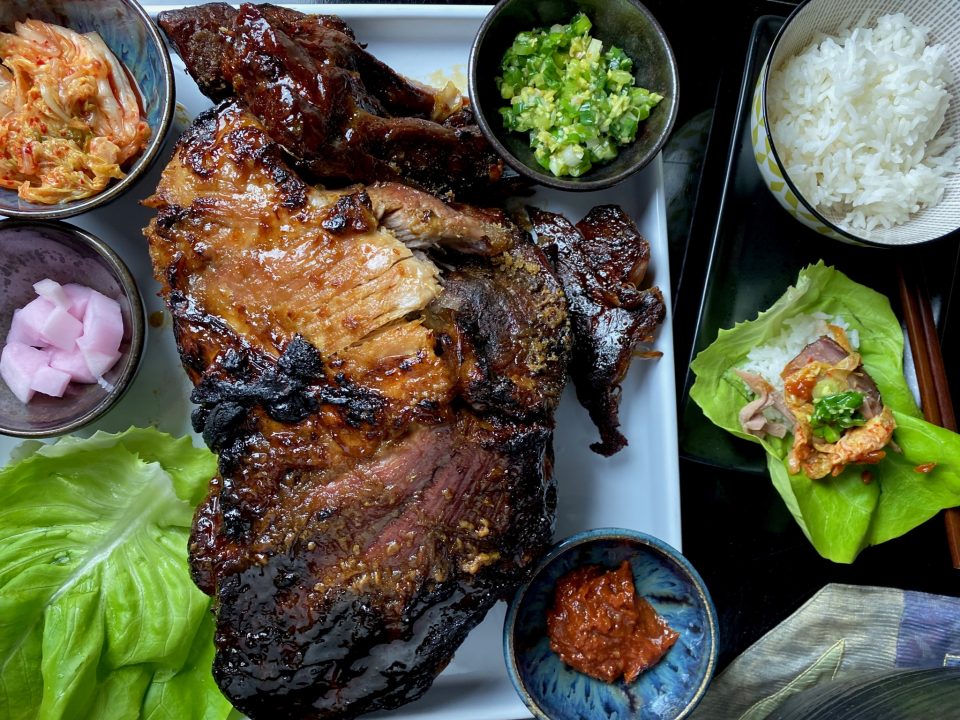
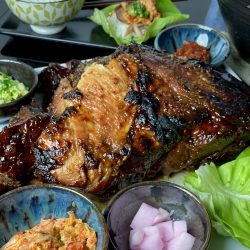
Remove the pork from the brine, put it in a pan and roast for oh…SIX HOURS.  I know a long time, but that’s what gives you tender, melt in your mouth bites of pork that you eat with all the trimmings-kimchi, rice, Momofuku’s ginger scallion sauce or ssamjang, and raw oysters (optional) wrapped in lettuce.  A brown sugar, salt and vinegar paste is painted on the roast and broiled for a caramelized, crispy, crust.  Yum.  Its a fun and incredibly delicious.  Perfect to share with family and friends.

I tweaked the Ginger Scallion Sauce a bit.  I actually heated the oil before adding it to the sliced scallions and minced ginger and rounded the soy sauce to 2 teaspoons.  I took the lazy way out and used commercial Ssamjang Sauce and added some sesame oil and seeds.  Ssamjang is made with of doenjanggochujangsesame oiloniongarlic, green onions, and optionally brown sugar.  Packs a flavor punch and is perfect with grilled foods.

Set everything on the table, condiments, veggies and that big beautiful pork butt.  Let everyone make their own wraps.  Take a piece of lettuce add a bite of rice, a dollop of sauce (ginger-scallion or ssamjang or both), a bit of kimchi and of course a nice little chunk of the meltingly tender, pork.

Serve with banchan on the side-cucumbers, potatoes, seaweed, whichever ones you prefer even a nice simple green salad would be wonderful.

Enjoy.

MOMOFUKU BO SSAM

Delicious slow-roasted pork served with traditional Korean sides, kimchi, ssamjang, rice, and wrapped in lettuce leaves
Course Main Course
Cuisine Fusion, Korean
Keyword Bo Ssam, Slow Roasted Pork
Prep Time 45 minutes
Cook Time 7 hours

Ingredients

Pork Roast

  • 8 to 10 pounds 1 piece pork butt, ideally bone-in with some fat ok lots of fat
  • 1 cup granulated sugar
  • 1 cup coarse Kosher salt preferably Diamond

Topping

  • 1 Tbsp coarse kosher salt
  • 7 Tbsp brown sugar
  • 2 tsp apple cider vinegar

Sides:

  • 1 dozen raw oysters shucked optional
  • 1 cup Napa Cabbage Kimchi plus 1 cup puréed
  • 1 cup Ginger Scallion Sauce see link in post
  • Ssämjang
  • Cooked Short-Grain Rice Count on a bowl of cooked rice per person
  • 3 to 4 heads Bibb lettuce leaves separated, well washed, and spun dry
  • Maldon or other high-quality coarse sea salt

Instructions

  • Place the pork in a roasting pan or baking dish. It should fit snugly. Combine 1 cup of sugar and 1 cup of the salt in a bowl and mix them well. Rub the mixture all over the meat. Cover it with plastic wrap then refrigerate it at least 6 hours or overnight. discard an excess sugar salt mix.
  • Heat the oven to 300 F. Cover the roasting pan with cooking foil. Wrap it around at least twice covering all the gaps. Remove the pork from the fridge and discard any juice. Leave the rub on the pork.
  • Place the pork in a roasting pan (fatty side up), set in the oven and cook it for about 6 hours. (This can vary depending on the size of the pork. See note below) Once cooked, the pork should be very easy to pull apart with tongs and forks. Remove the pork from the oven.
  • Combine the remaining salt, brown sugar and vinegar in a small bowl. Mix well. Gently rub the mixture all over the cooked pork (mainly the top of the pork). Use the back of a spoon to rub paste on pork since the roast will be pretty hot.
  • Turn the oven to 500 F. Place the pork in the oven and cook it until a dark caramel crust develops on the meat. It takes 5 to 10 mins. Serve hot, with the accompaniments.
  • When you first pull off the pork, it’s very moist and tender, but it dries out fairly fast (like within 20 mins)! So serve immediately and eat up. It still tastes good though!
  • For an easy ssam sauce, buy the ssamjang tub instead of making it from scratch. Add a couple of drops of sesame oil and a sprinkle of sesame seeds to the ssamjang if you like.

Notes

If you’re using a smaller piece of pork, reduce the rub ingredients (e.g. sugar, salt) and the cooking time. As a guideline it takes about 4 hours to 4.5 hours to roast 2 kg / 4.4 pounds bone-in pork shoulder.


Goblin-g Up Some Delicious Short Ribs

Goblin-g Up Some Delicious Short Ribs

Greetings from rainy Quebec City!  Hubby and I decided to take a quick trip to Montreal and Quebec City.  Our last trip to the eastern side of Canada was for a hockey tournament for Jeffrey quite a few years ago.  We made it as far as Toronto that time.  This time we were off to Montreal.  W (the hubs) has decided that his criteria for traveling is “what sporting event can I go to”.  The Sharks versus the Montreal Canadians met this criteria.  Hmmm, would I go along?  I am a sports junkie too, but maybe not to the same extent.  BUT, (picture me looking very sheepish as I type this), I am a HUGE Korean drama fan.  It’s my escape. Even though their political dramas do hit a little too close to home, I am hooked.  Every politician in the K-Drama World is corrupt, all the way up to the top banana (or should I say orange?). Imagine that.

So, besides going to a hockey game in Montreal, I bartered for a couple of days in Quebec City.  My favorite K-Drama, Goblin-The Great and Lonely God, features this beautiful city.  So, like a drama groupie, I wanted to visit the different sites featured in Goblin. Think I’m crazy?  At least I’m not alone, check this out Asian Tourism to Quebec City.  Curious about the door?  Wait for my Quebec City post!

Just before heading to Canada, I went to my favorite little cookbook store in the City, Omnivore Books for a book signing event.  Ivan Orkin and Chris Ying stopped by to introduce their new book, The Gaijin Cookbook-Japanese Recipes from a Chef, Eater, Father, and Lifelong Outsider.

While his ramen book can be intimidating, this book is very user friendly and kid friendly, win-win.  Food you feed your family everyday, from classic Japanese recipes to off-beat recipes that are definitely mash-ups from his life in New York and Japan.

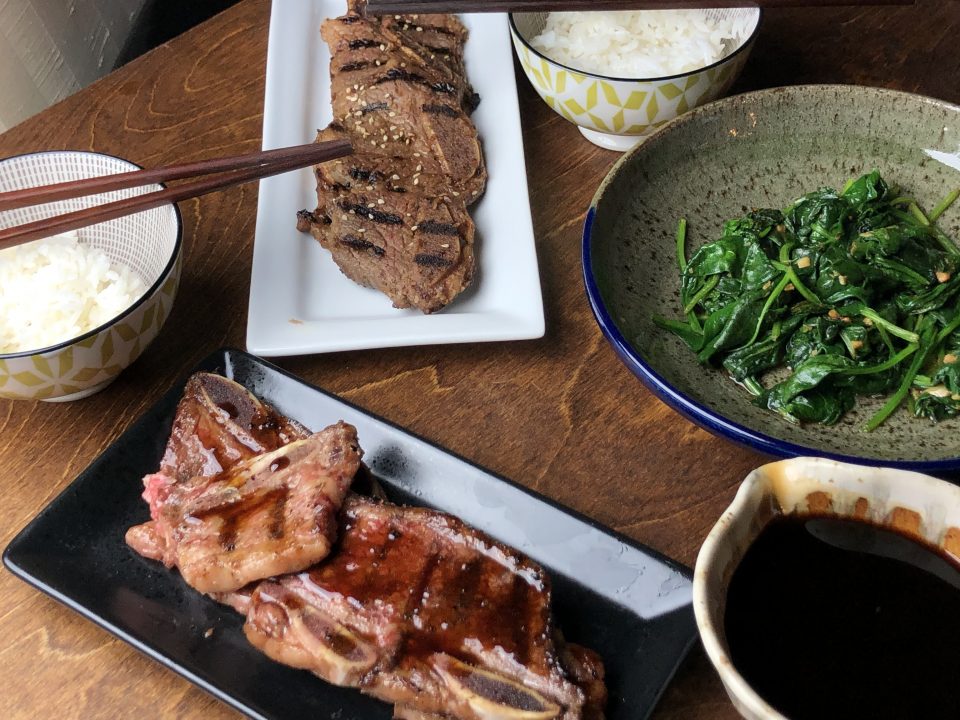
I pulled Korean style short ribs out of the fridge and decided to marinade half in my go-to Kalbi recipe and for the other half, I made the Teriyaki Sauce recipe from Ivan Orkin’s book.  Incredibly easy with just 5 ingredients (so user friendly-amirite?).  His tweak is genius, he adds oyster sauce to his recipe, so good.  Yep, short rib, two ways, perfect for the Goblin who only eats meat, and perfect for the rest of us who love Teriyaki.

The Teriyaki Sauce can be made ahead of time and keeps in the fridge.  It is delicious on not just beef, but chicken, salmon or pork.  I mean, really, what isn’t tasty with Teriyaki sauce on it.

Teriyaki Sauce from Ivan Orkin

A stupid easy, incredibly tasty Teriyaki Sauce that goes well with beef, chicken, fish and pork. From Ivan Orkin‘s new book, The Gaijin Cookbook.
Course Main Course
Cuisine Asian
Keyword beef, ivan orkin, japanese food, teriyaki sauce
Prep Time 10 minutes
Cook Time 4 minutes

Ingredients

  • 1/4 Cup Sake
  • 1/4 Cup Mirin Sweet cooking wine
  • 1/4 Cup Soy sauce Kikkoman is perfect, but any all-purpose soy sauce will work
  • 1/4 Cup Oyster Sauce Repeat after me Lee Kum Kee, woman and little boy in a boat on the label
  • 1 Tbsp sugar Granulated or raw

Instructions

  • Combine all ingredients in a small bowl. Whisk together until sugar dissolves. Store in refrigerator. Keeps for min of a couple of weeks.
  • This sauce is not a marinade. Cook protein by your method of choice. Cook your steak or chicken using your favorite method.
  • Pour teriyaki sauce until a small skillet. Over medium heat cook sauce until it reduces and seems syrupy. Approximately 4-5 minutes.
  • Drizzle sauce over your main and enjoy! Serve sauce on the side for anyone who needs to help.
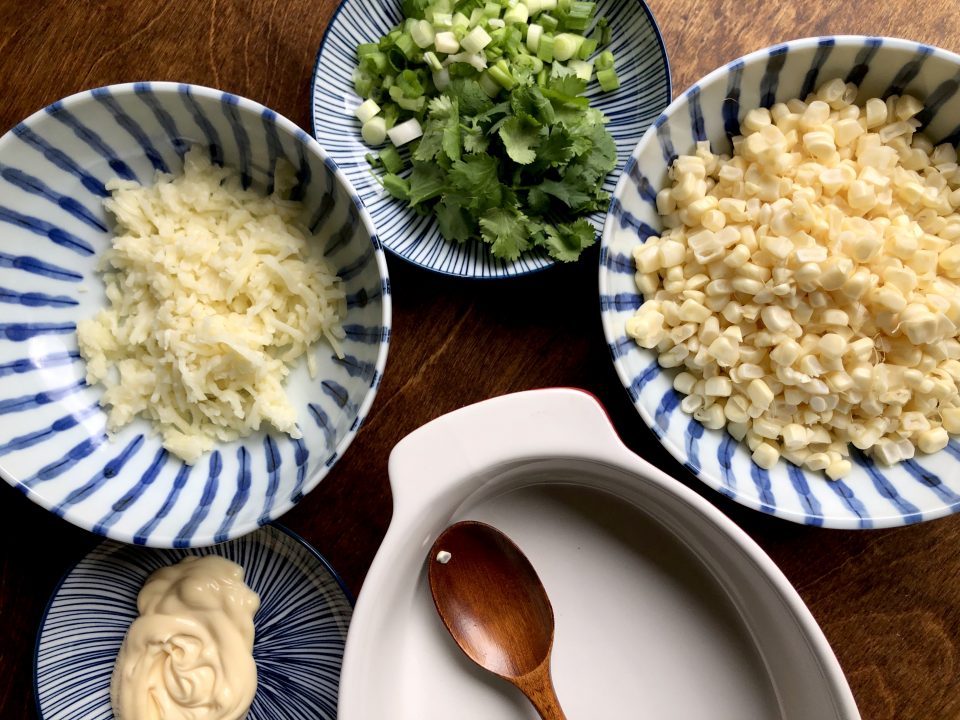
Thinking about checking out Montreal and Quebec City?  My post on these two fabulous cities is coming soon!
Cheesy Corn, Are You Ready for Some Football Food?

Cheesy Corn, Are You Ready for Some Football Food?

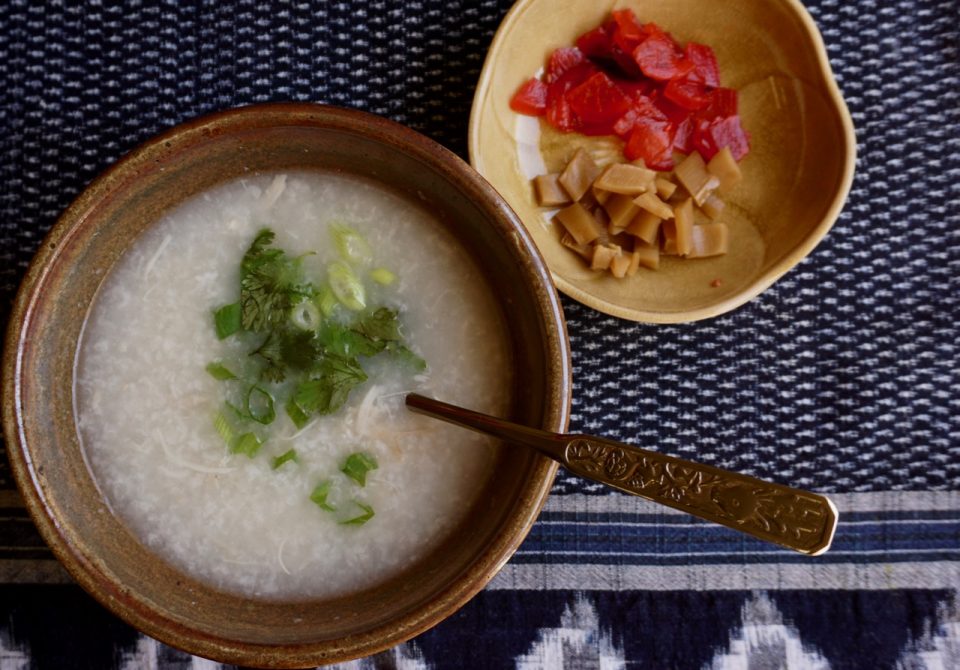
I love the fall season. Aside from all things pumpkin and apples, I start thinking about foods that go hand in hand with watching football.  My dad was a sport’s junkie and he definitely passed the sports-watching gene to my brother and me.  He also liked to cook.  Every Sunday he would have a big pot of Rice Soup or Congee simmering just for the 49er game. I’m not sure what I looked forward to more, the Rice Soup (Instant Pot) filled with bits of chicken, potatoes, tiny pork meatballs, topped with green onions and cilantro, or the football game.  

Football Food

In addition to the soup, football watching requires yummy totally bad for you snack food and I just discovered one that would fit in perfectly with a sport-watching spread.  One of my favorite cookbooks this year, A Common Table, has a popular Korean snack that must have been created to go with beer and fried chicken and therefore football.  Korean Cheesy Corn. Yep, the best thing since sliced bread. Okay, I’m kidding but it is good and stupid easy.

Start with fresh corn from the Farmer’s Market.  It is so good right now.  Frozen corn or canned corn (lots of Korean recipes start with canned corn) would work, but, come on, go fresh and support your local farms.

And now a public service announcement, a video on how to take corn off the cob from Saveur using a bundt pan! It works like a charm!

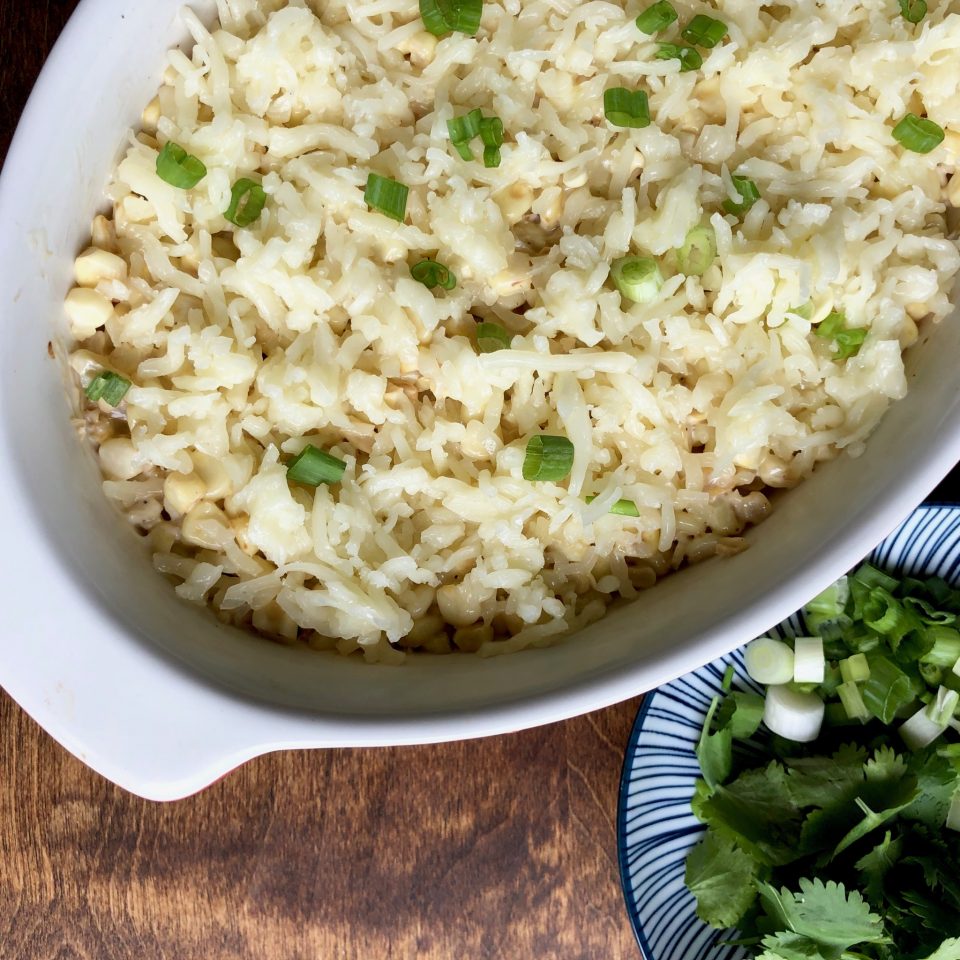
From here on in it’s a downhill slide.  Stir-fry corn in oil or butter until it is soft.  Combine corn with mayonnaise and place in an ovenproof dish. I use Kewpie Mayo which is slightly sweet but use whatever mayo (better be Best Foods) you have in the fridge.  Sprinkle a crap ton of Mozarella cheese on the corn and bake at 500 until the cheese is browned, gooey and melty. So delicious.  Versions of Korean Cheesy Corn add sugar.  If your corn is sweet you won’t need to, but if you like it sweeter add 1-2 teaspoons of sugar.  If you use Best Foods or Hellman’s add 1 tsp of sugar.

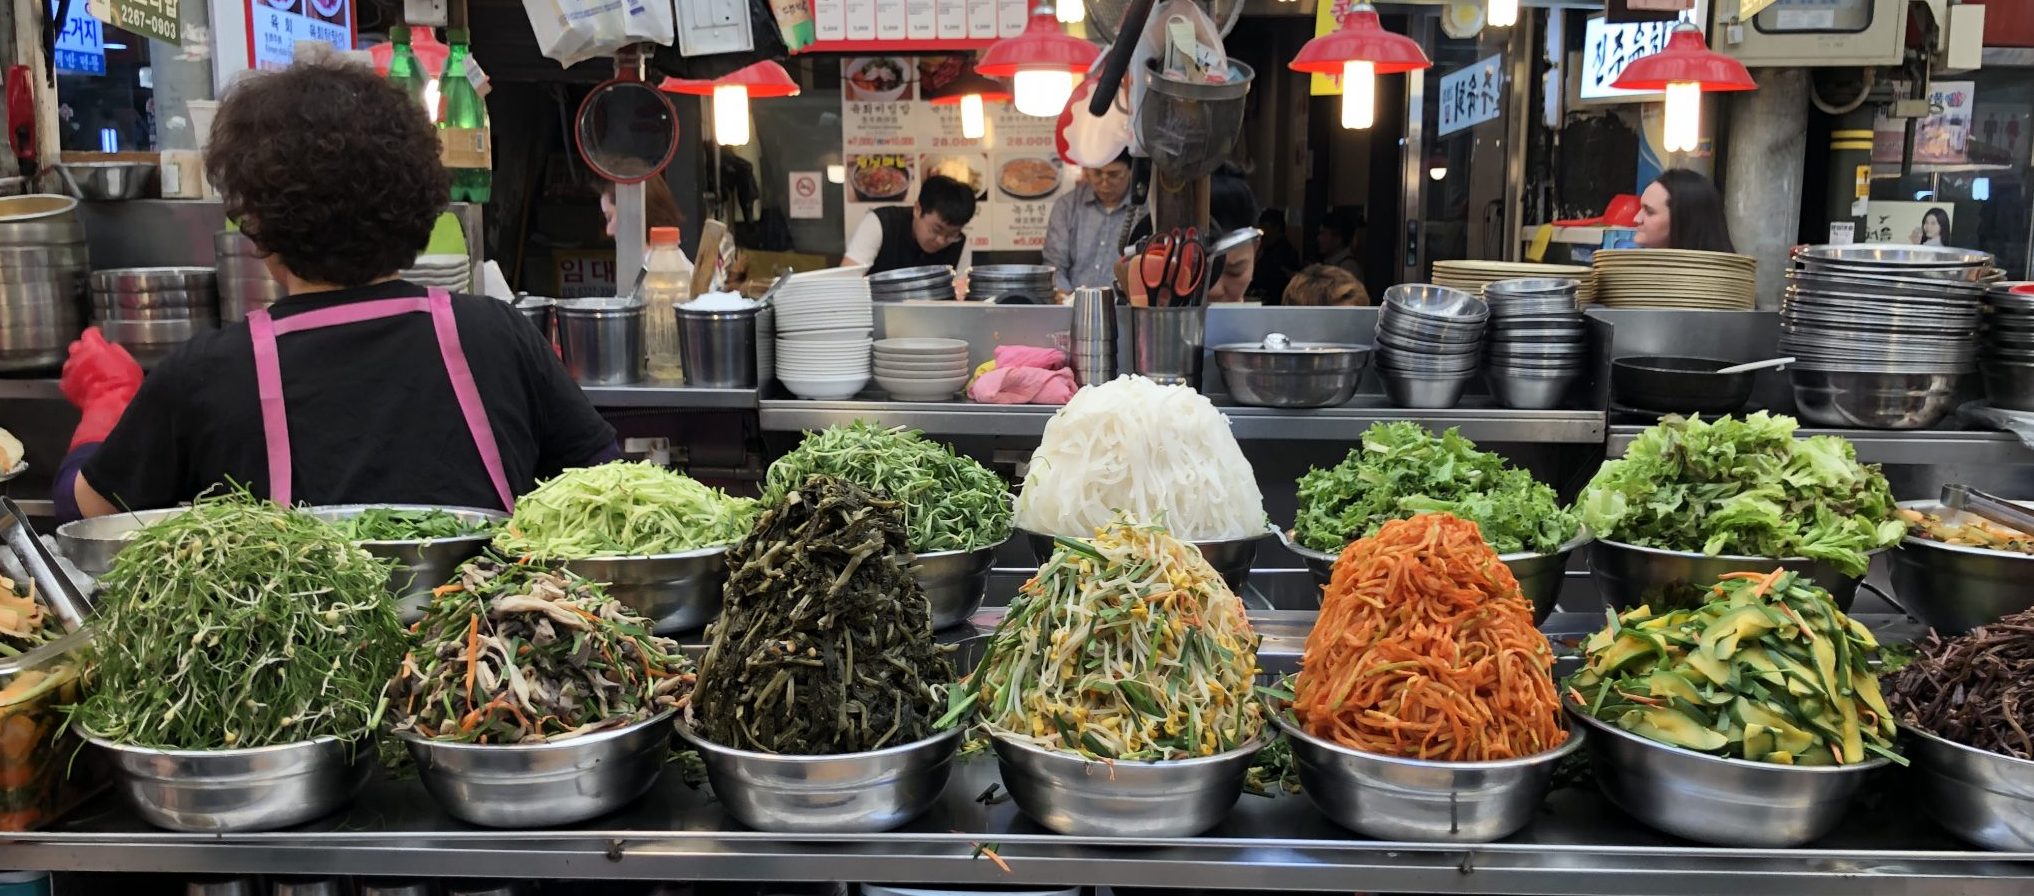
The corn, mozzarella, mayo, green onions, and cilantro are the basic ingredients for this yummy super easy dish.  Of course, you can go CRAZY and add extra fixings to bring it to a whole new level.  A bucket list of add-ons includes bell pepper, red onion, jalapeno peppers, or crumble in bacon (cuz everything is better with bacon).   You can also add cut-up rice cakes cause what’s a few more calories in a totally not-on-your diet dish.

Ready set, dig in!

Korean Cheesy Corn

Delicious, decadent and easy. Korean Cheesy Corn a popular Korean dish. Perfect as a side dish or snack.
Course Side Dish
Cuisine Asian
Keyword cheese, Corn, Korean, Korean Cheesy Corn, snack
Prep Time 15 minutes
Cook Time 5 minutes
Servings 4 servings

Ingredients

  • 1-1/2 cups fresh corn about 2 ears, canned or frozen can be used
  • 2 tbsp mayonnaise, preferably Kewpie add 1-2 teaspoons sugar if using regular mayo
  • 1 tbsp unsalted butter or vegetable oil
  • 1/4 tsp salt
  • 1/4 tsp fresh ground pepper
  • 1/2 cup shredded mozzarella or more if you are a cheese freak. Additional 1/4 cup stirred into corn with mayo.
  • 1/4 cup sliced green onions
  • 1/4 cup cilantro coarsely chopped
  • 1/8-1/4 cup additions ie. bell pepper, diced red onions, bacon, optional

Instructions

  • Preheat oven to 500 degrees
  • In a large non-stick skillet, heat butter or oil. Over medium heat, add corn and if using bell peppers, jalapeno or onions. Cook, stirring frequently until soft about 4-5 minutes. Season with the salt and pepper.
  • Transfer corn to an ovenproof dish, stir in mayo and sugar if using.
  • Sprinkle cheese evenly over the surface and bake for 5-7 minutes until cheese is melted, bubbling and starts to brown. Like a pizza!
  • Garnish with green onions and cilantro and serve immediately.
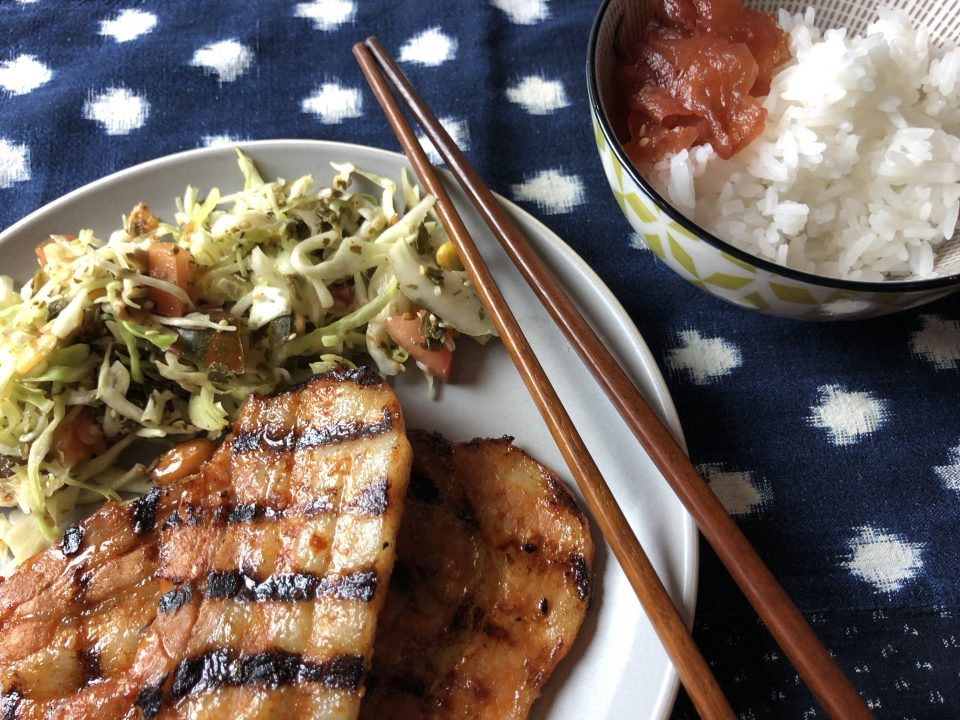
(Grilled Pork Belly) It’s Gettin’ Hot Out Herre, So Take Out All Your BBQ Toys

(Grilled Pork Belly) It’s Gettin’ Hot Out Herre, So Take Out All Your BBQ Toys

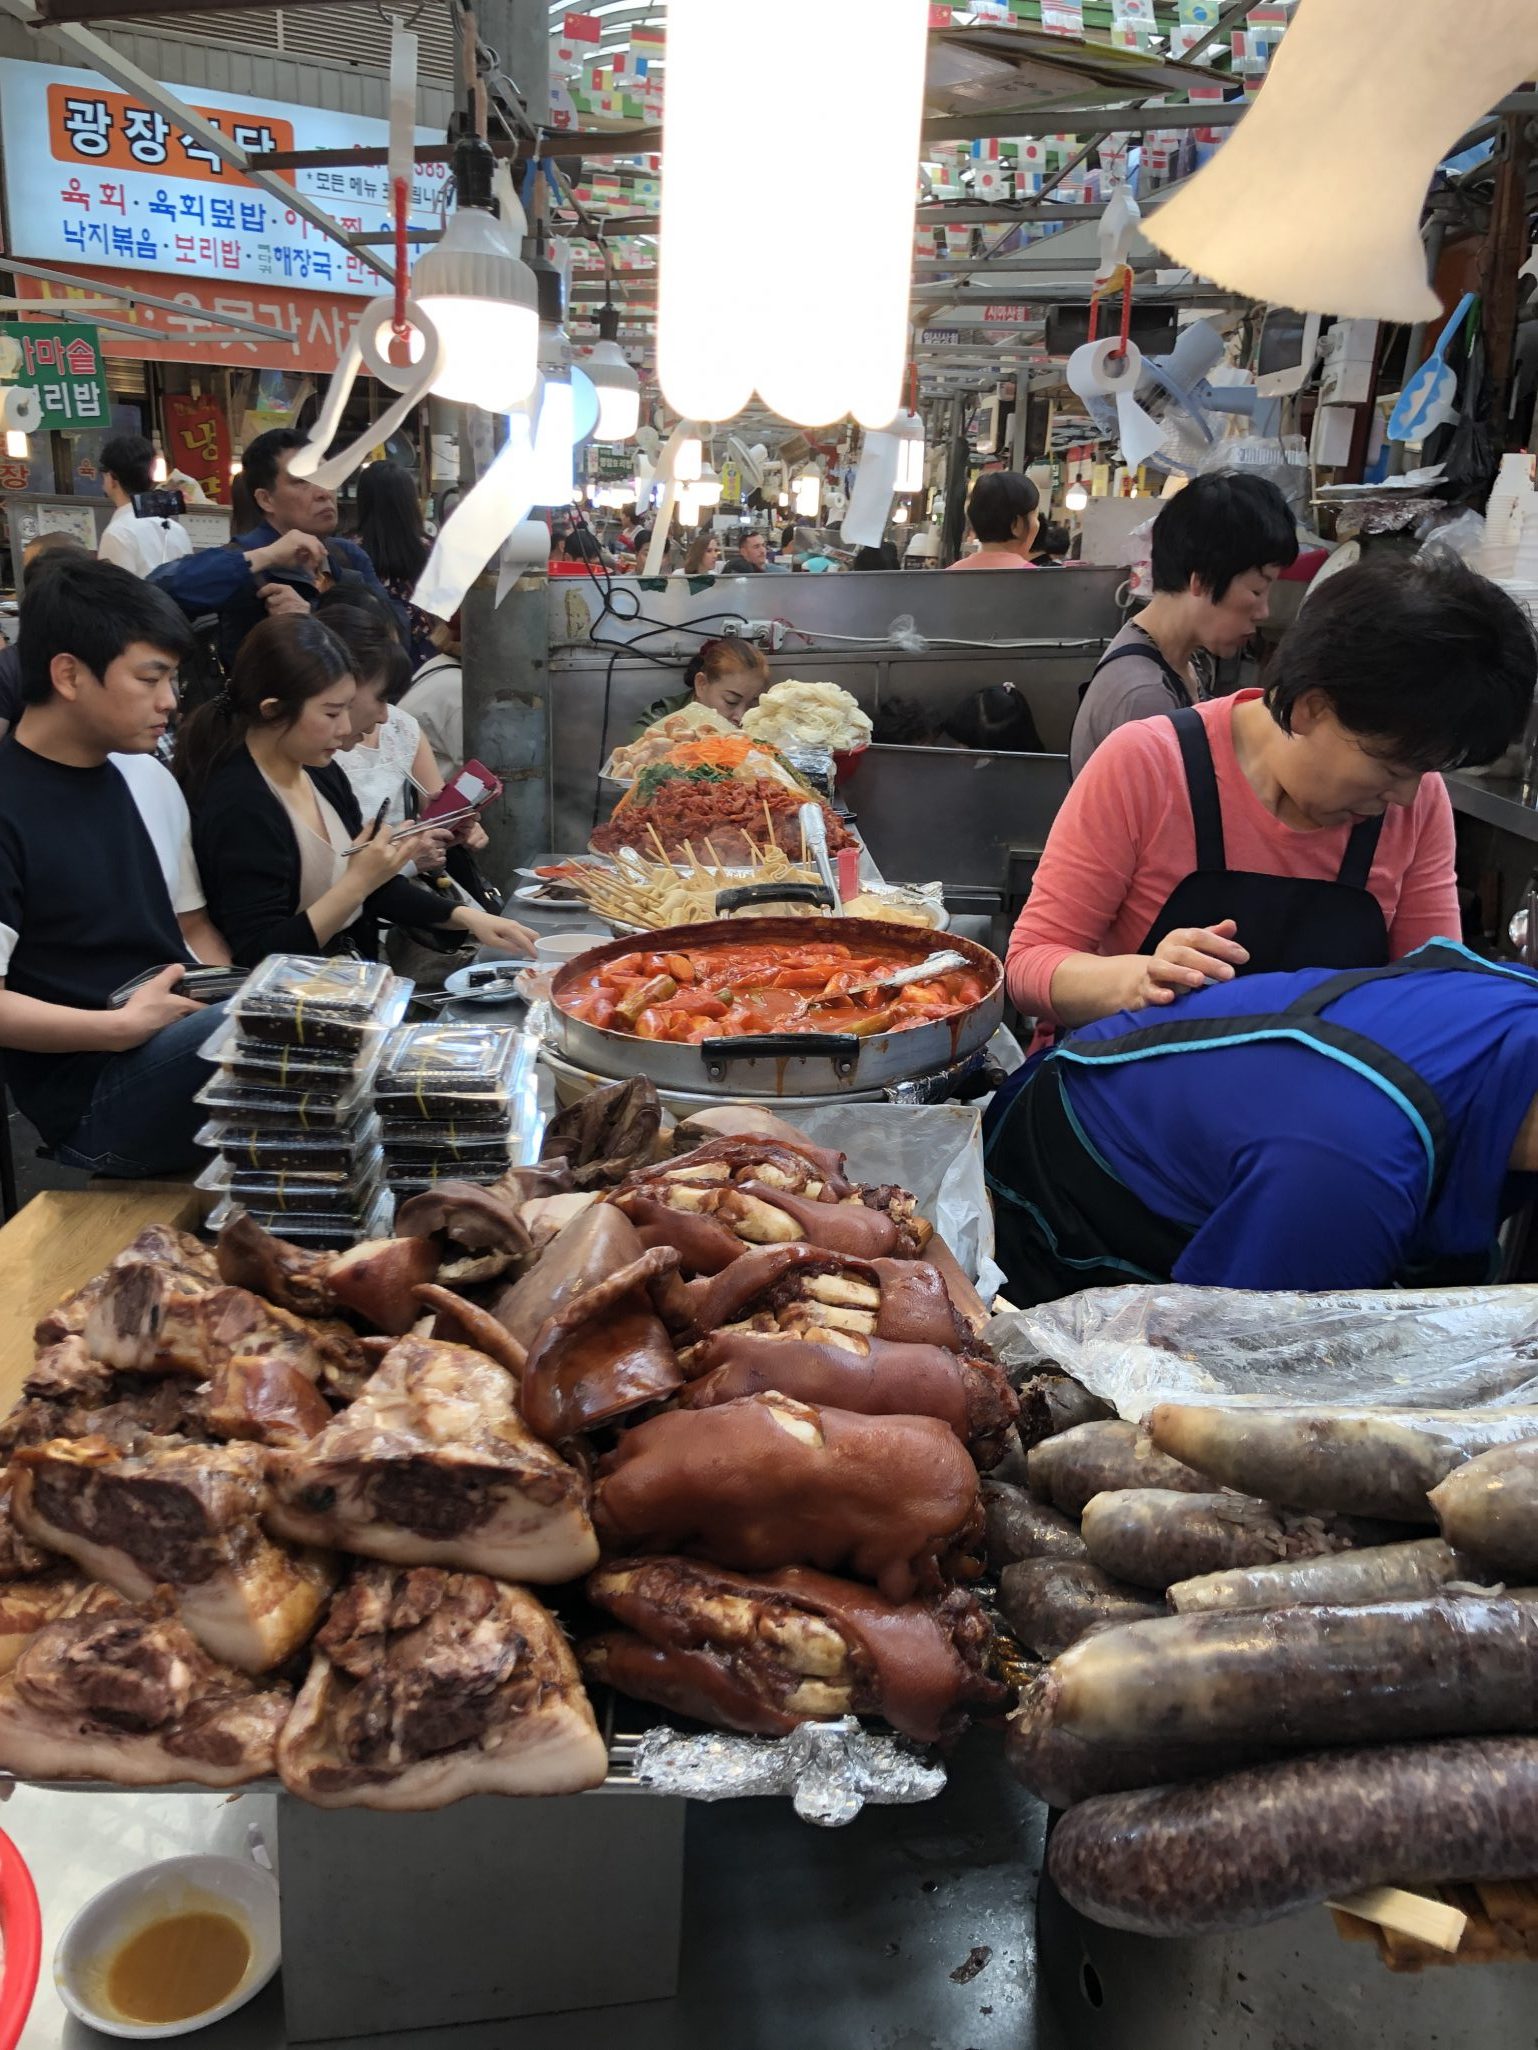
On our trip to South Korea, we spent a lot of time roaming around the various street markets in Seoul.  Rows of stalls filled with hand-cut noodles in light flavorful anchovy broth, crispy mung bean cakes, fishcake, mountains of pickled vegetables and banchan (side dishes), and skewers of chicken, beef, shrimp, and pork grilled to order.  This is the tip of the iceberg for all things yummy.  Leading to sensory overload on all fronts, smell, sight, touch, and taste.

At Gwanjang Market we stopped for Mandu and delicious noodles at the very stall featured in Netflix’s Street Food.  If you ever visit Seoul, put this on your gotta-visit list, Gwanjang Market is the Disneyland of street food.

Grillin and Chillin

Summer has arrived in California, and with temps rising it is time to take cookin’ outside.  Inspired by the street food on our recent trip.  I head to the Korean market to grab some sliced pork belly and banchan, the perfect antidote for the heat.

Thick-cut pork belly is readily available in Asian markets.  If you can’t find it, opt for pork shoulder or butt, sliced into 1/4-inch thick pieces.  The marinade is a mash-up of two recipes, one from A Common Table (current fan fav!) for Pork Bulgogi, and the other from the blog, Spice the Plate, for Korean Pan-Fried Pork Belly.

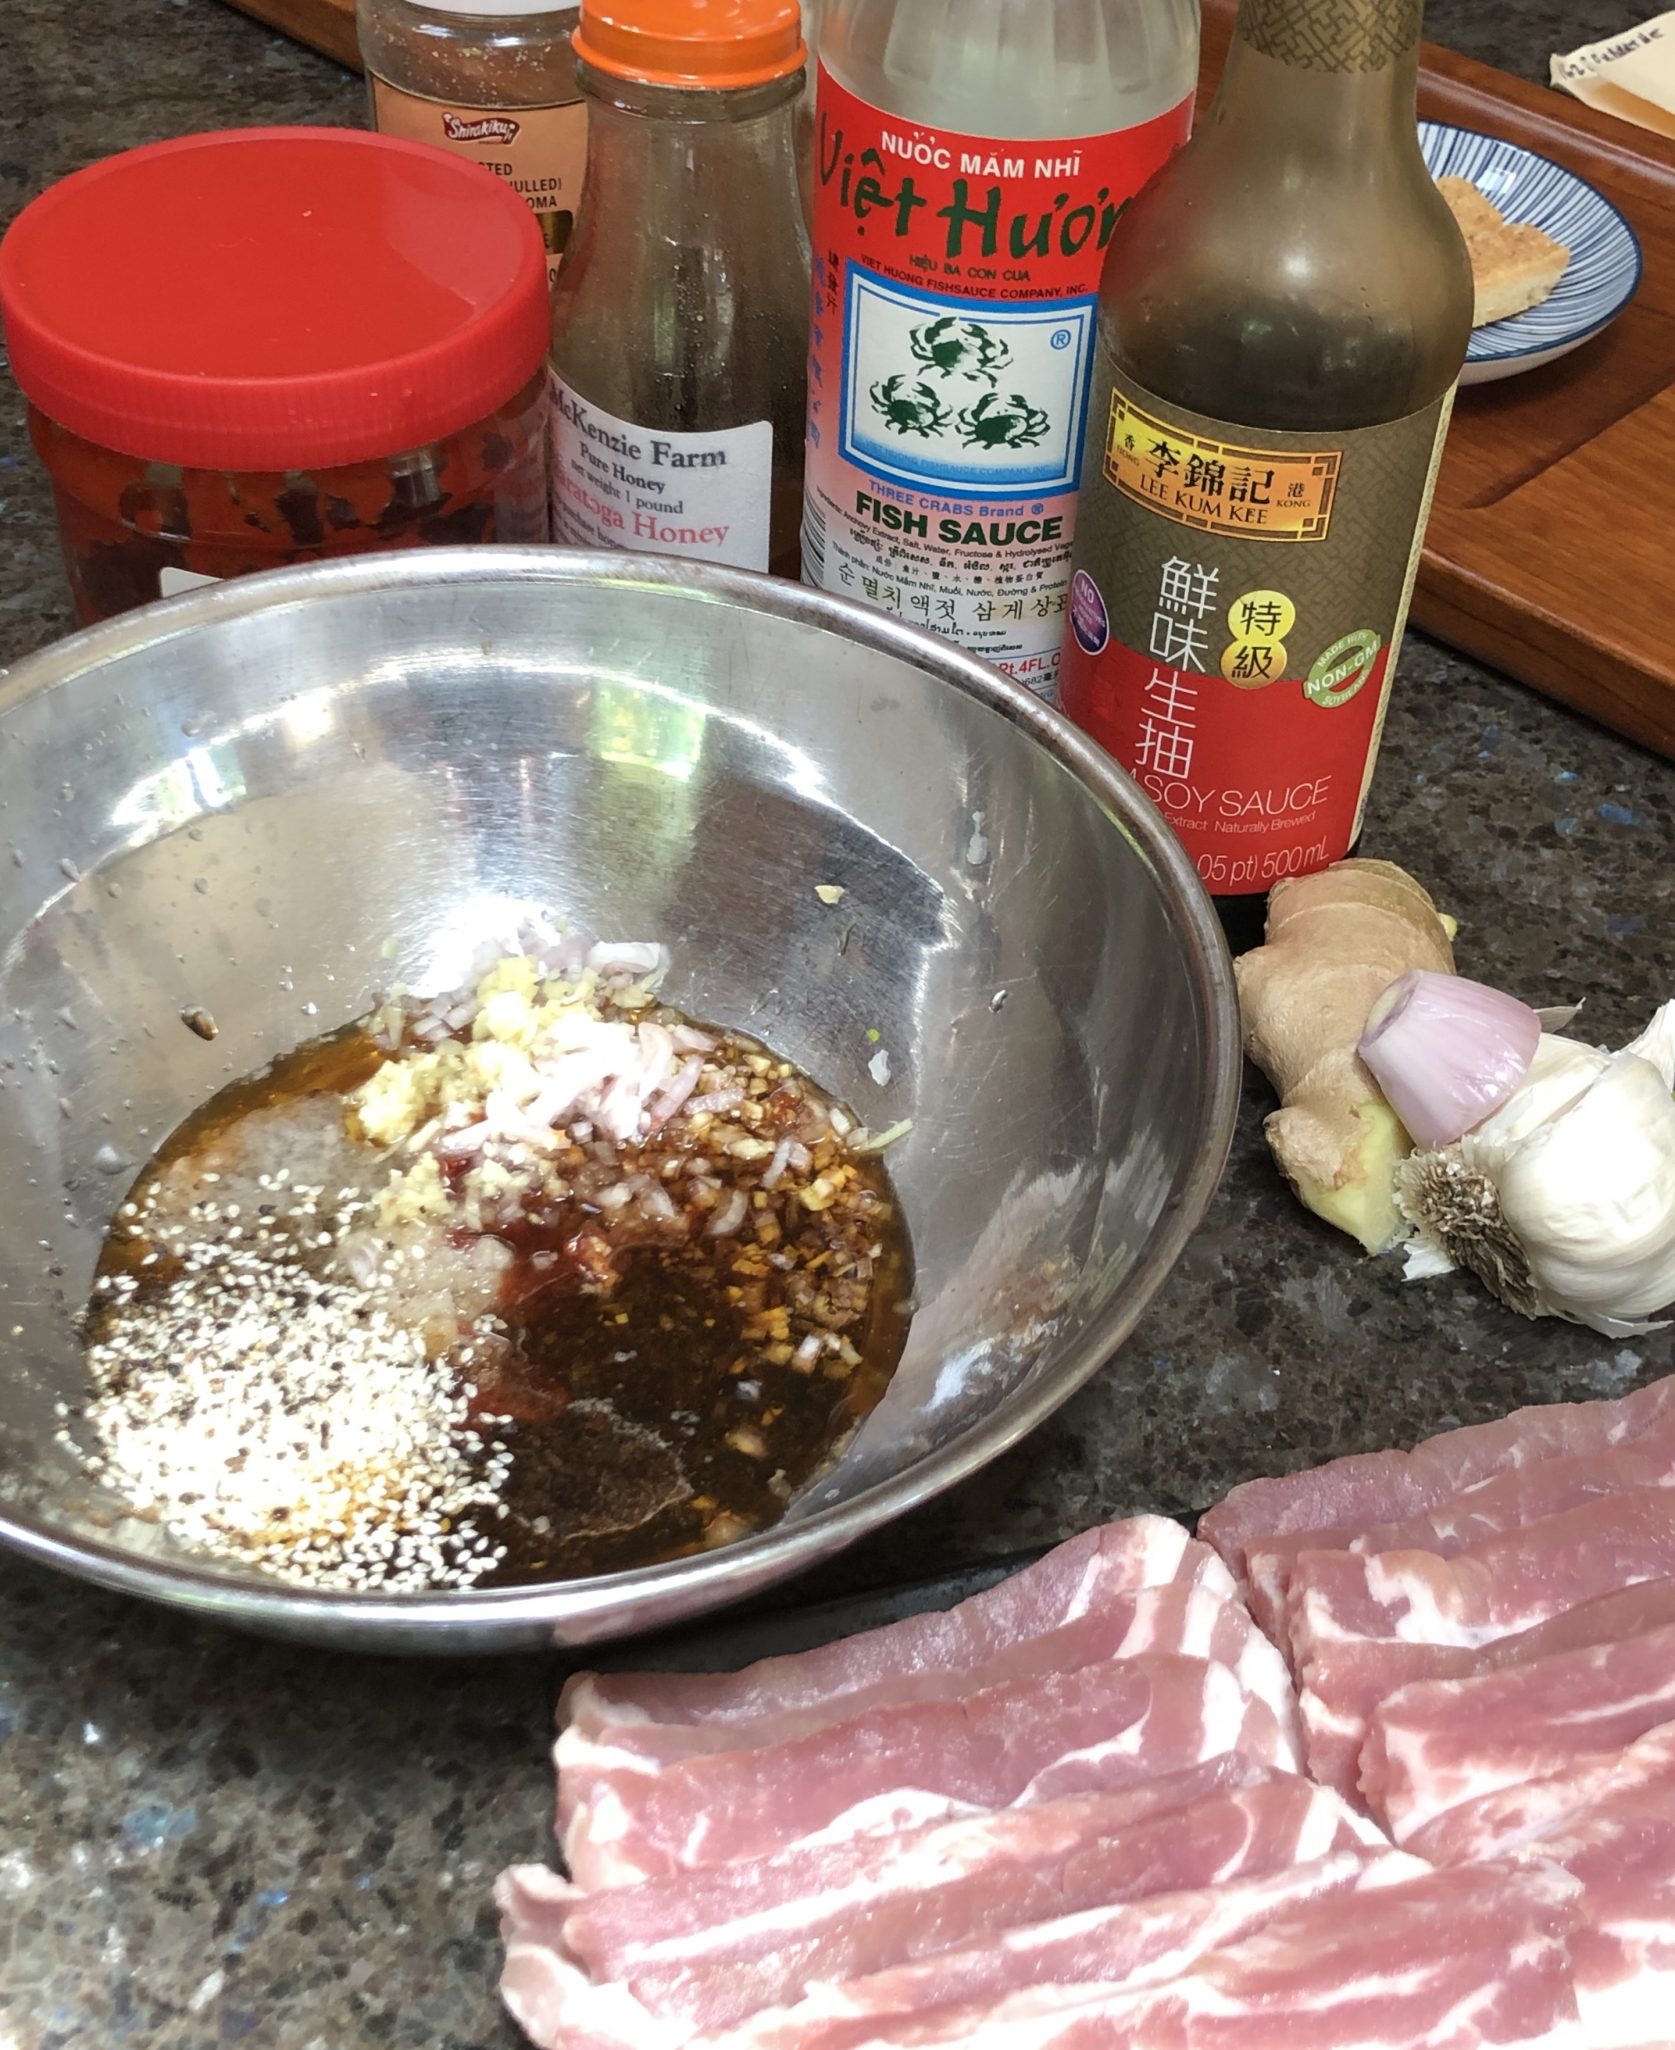
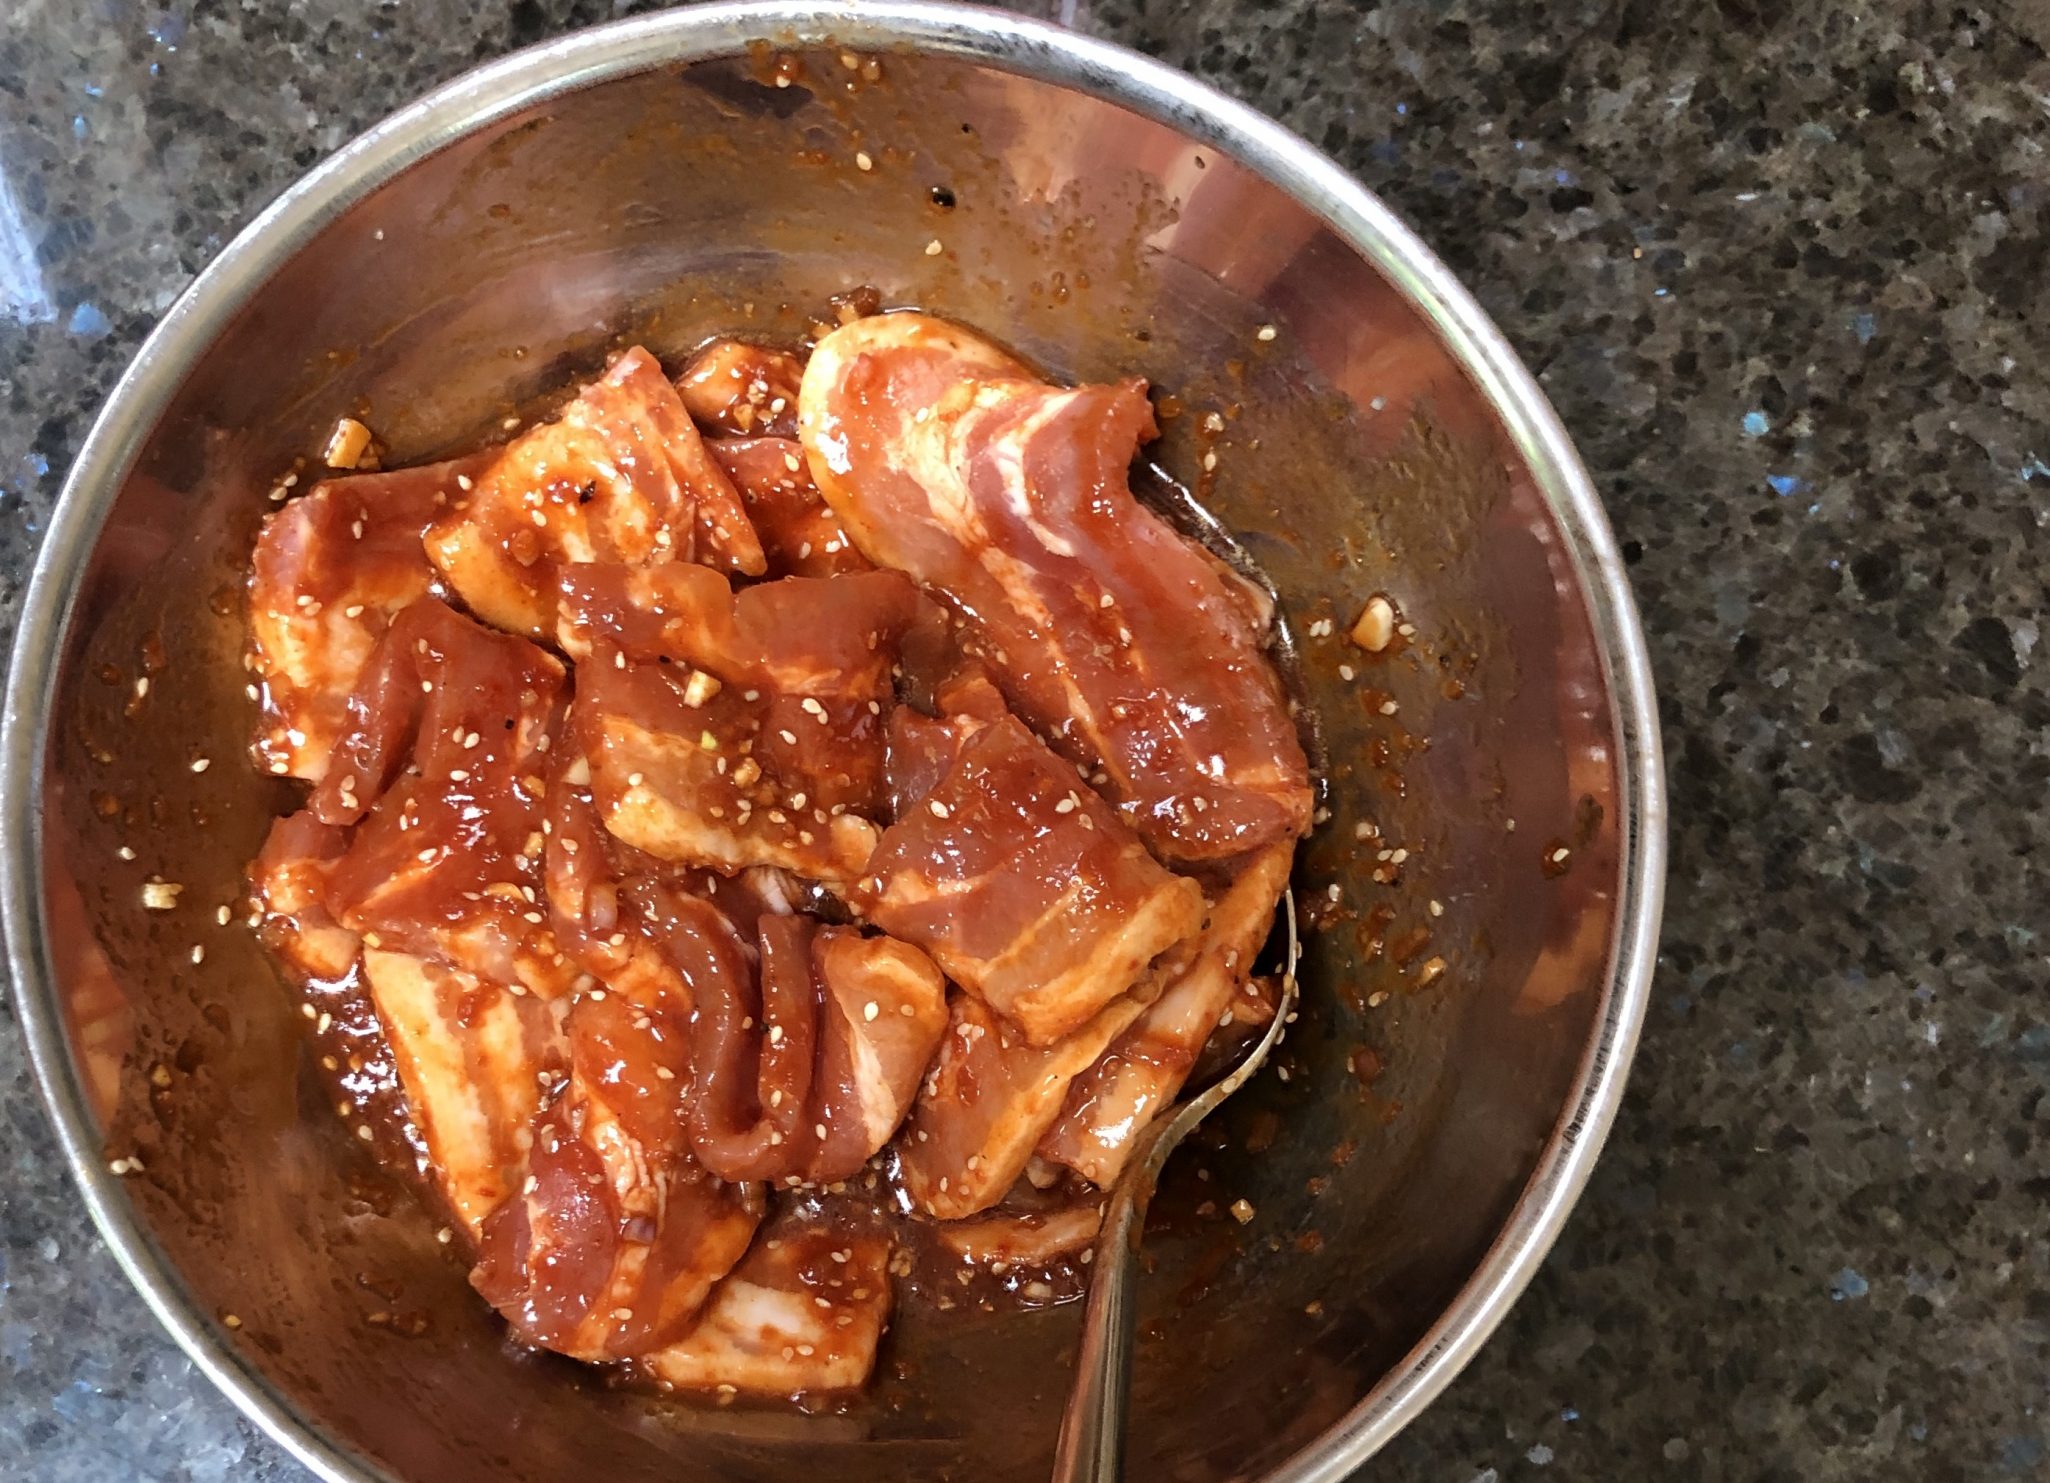
Stir together Gochujang (Korean Pepper Paste), soy, fish sauce, honey, sesame oil, ginger, and garlic.  Voila, a spicy, sweet, salty marinade that compliments the pork wonderfully. Finally, pour the marinade on the pork and let it sit for 30 minutes.

marinaded pork belly

Marinade for 30 minutes and fire up the grill.  Cook over direct heat for 4-5 minutes a side.  Garnish with green onions or cilantro and serve.  Serve with a bowl of rice or with lettuce/cabbage leaves to make wraps.  Don’t forget side dishes like cucumber salad, and kimchi.

Korean Style Grilled Pork Belly

Course Main Course, Meat, protein
Cuisine Asian, Korean
Keyword Grilled Pork Belly, Pork Belly
Prep Time 45 minutes
Cook Time 10 minutes
Servings 4 servings

Ingredients

  • 1 pound pork belly with or without skin
  • cilantro or green onions for topping optional

Pork belly Marinade

  • 1 teaspoon finely chopped garlic
  • 1 teaspoon minced ginger
  • 1 stalk green onion chopped, substitute 1 shallot, finely chopped
  • 1/4 cup grated Asian pear substitute pineapple juice
  • 2 tablespoon Korean hot pepper paste Gochujang
  • 2 tablespoon honey
  • 1 tablespoon soy sauce
  • 1 tablespoon fish sauce
  • 2 tablespoon sesame oil
  • 2 tablespoons toasted white sesame seeds save 1/2 T for garnish

Pork Belly Marinade Quick and Dirty

  • 1 teaspoon finely chopped garlic
  • 1 teaspoon minced ginger
  • 2 tablespoon Korean hot pepper paste
  • 2 tablespoon honey
  • 2 tablespoon soy sauce
  • 1 tablespoon oyster sauce
  • 2 tablespoon sesame oil
  • 1 tablespoon toasted white sesame seeds

Instructions

  • Combine ingredients for marinade, add pork and set aside for approximately 30 minutes.
  • While pork marinades, preheat grill, adjust to medium-high heat before grilling.
  • Grill over direct heat 4-5 minutes per side.
  • Garnish with cilantro or green onions and a sprinkling of sesame seeds
  • Serve immediately
Bi Bim Bap It! Homecoming in Seoul

Bi Bim Bap It! Homecoming in Seoul

Off to see Jorge in Korea!

Do you have a bucket list of things to do when traveling, if so, what’s yours? I’d love to know.  Here’s ours when we travel:

FIRST DAY- a tour of the city on bikes.  It’s a great way to get an overview of the city you are visiting and get a bit of exercise (guilt-free eating for the day, yay!)  It does have it’s heartbeat quickening moments when you ride in traffic and every big city in the world has traffic.  But we have biked in Rome, London, Boston, DC, Paris, and Seoul without mishap, just a couple of choice words from drivers.  But hey, I get that here too.

SPORTS:  We have watched rowing on the Thames, soccer in Italy, and now baseball in Korea and Japan.  BOSS, so much fun and gives you a taste of the folks that live there.

EATS:  Street food, hole-in-the-walls, local joints, my kinda food.  Ok, occasionally, a meal that breaks the bank.

I push the envelope sometimes with my search for local food.  I have waited in line for 90 minutes for Egg Tarts in Macau, meandered down small alleys looking for Won Ton Soup in Hong Kong or Okonomiyaki in Osaka.  Unfortunately, the combination of spotty maps and my non-existent sense of direction means a lot of wandering around and spewing expletives at my phone when looking for those food gems. Good thing my family loves me, or at least I think they do.

HOME COOKING:  Do you get tired of eating in restaurants?  Miss your kitchen? Take a cooking class!  We have made pasta and gelato in Florence and now homemade kimchi, seafood pancake-pajeon and Bi Bim Bap in Seoul.

Early morning at a local street market

Our cooking class with Joungy began with a visit to the market to buy ingredients, a Korean Veggie primer!

I was mesmerized watching this gentleman grind chili peppers into Gochugaro powder.
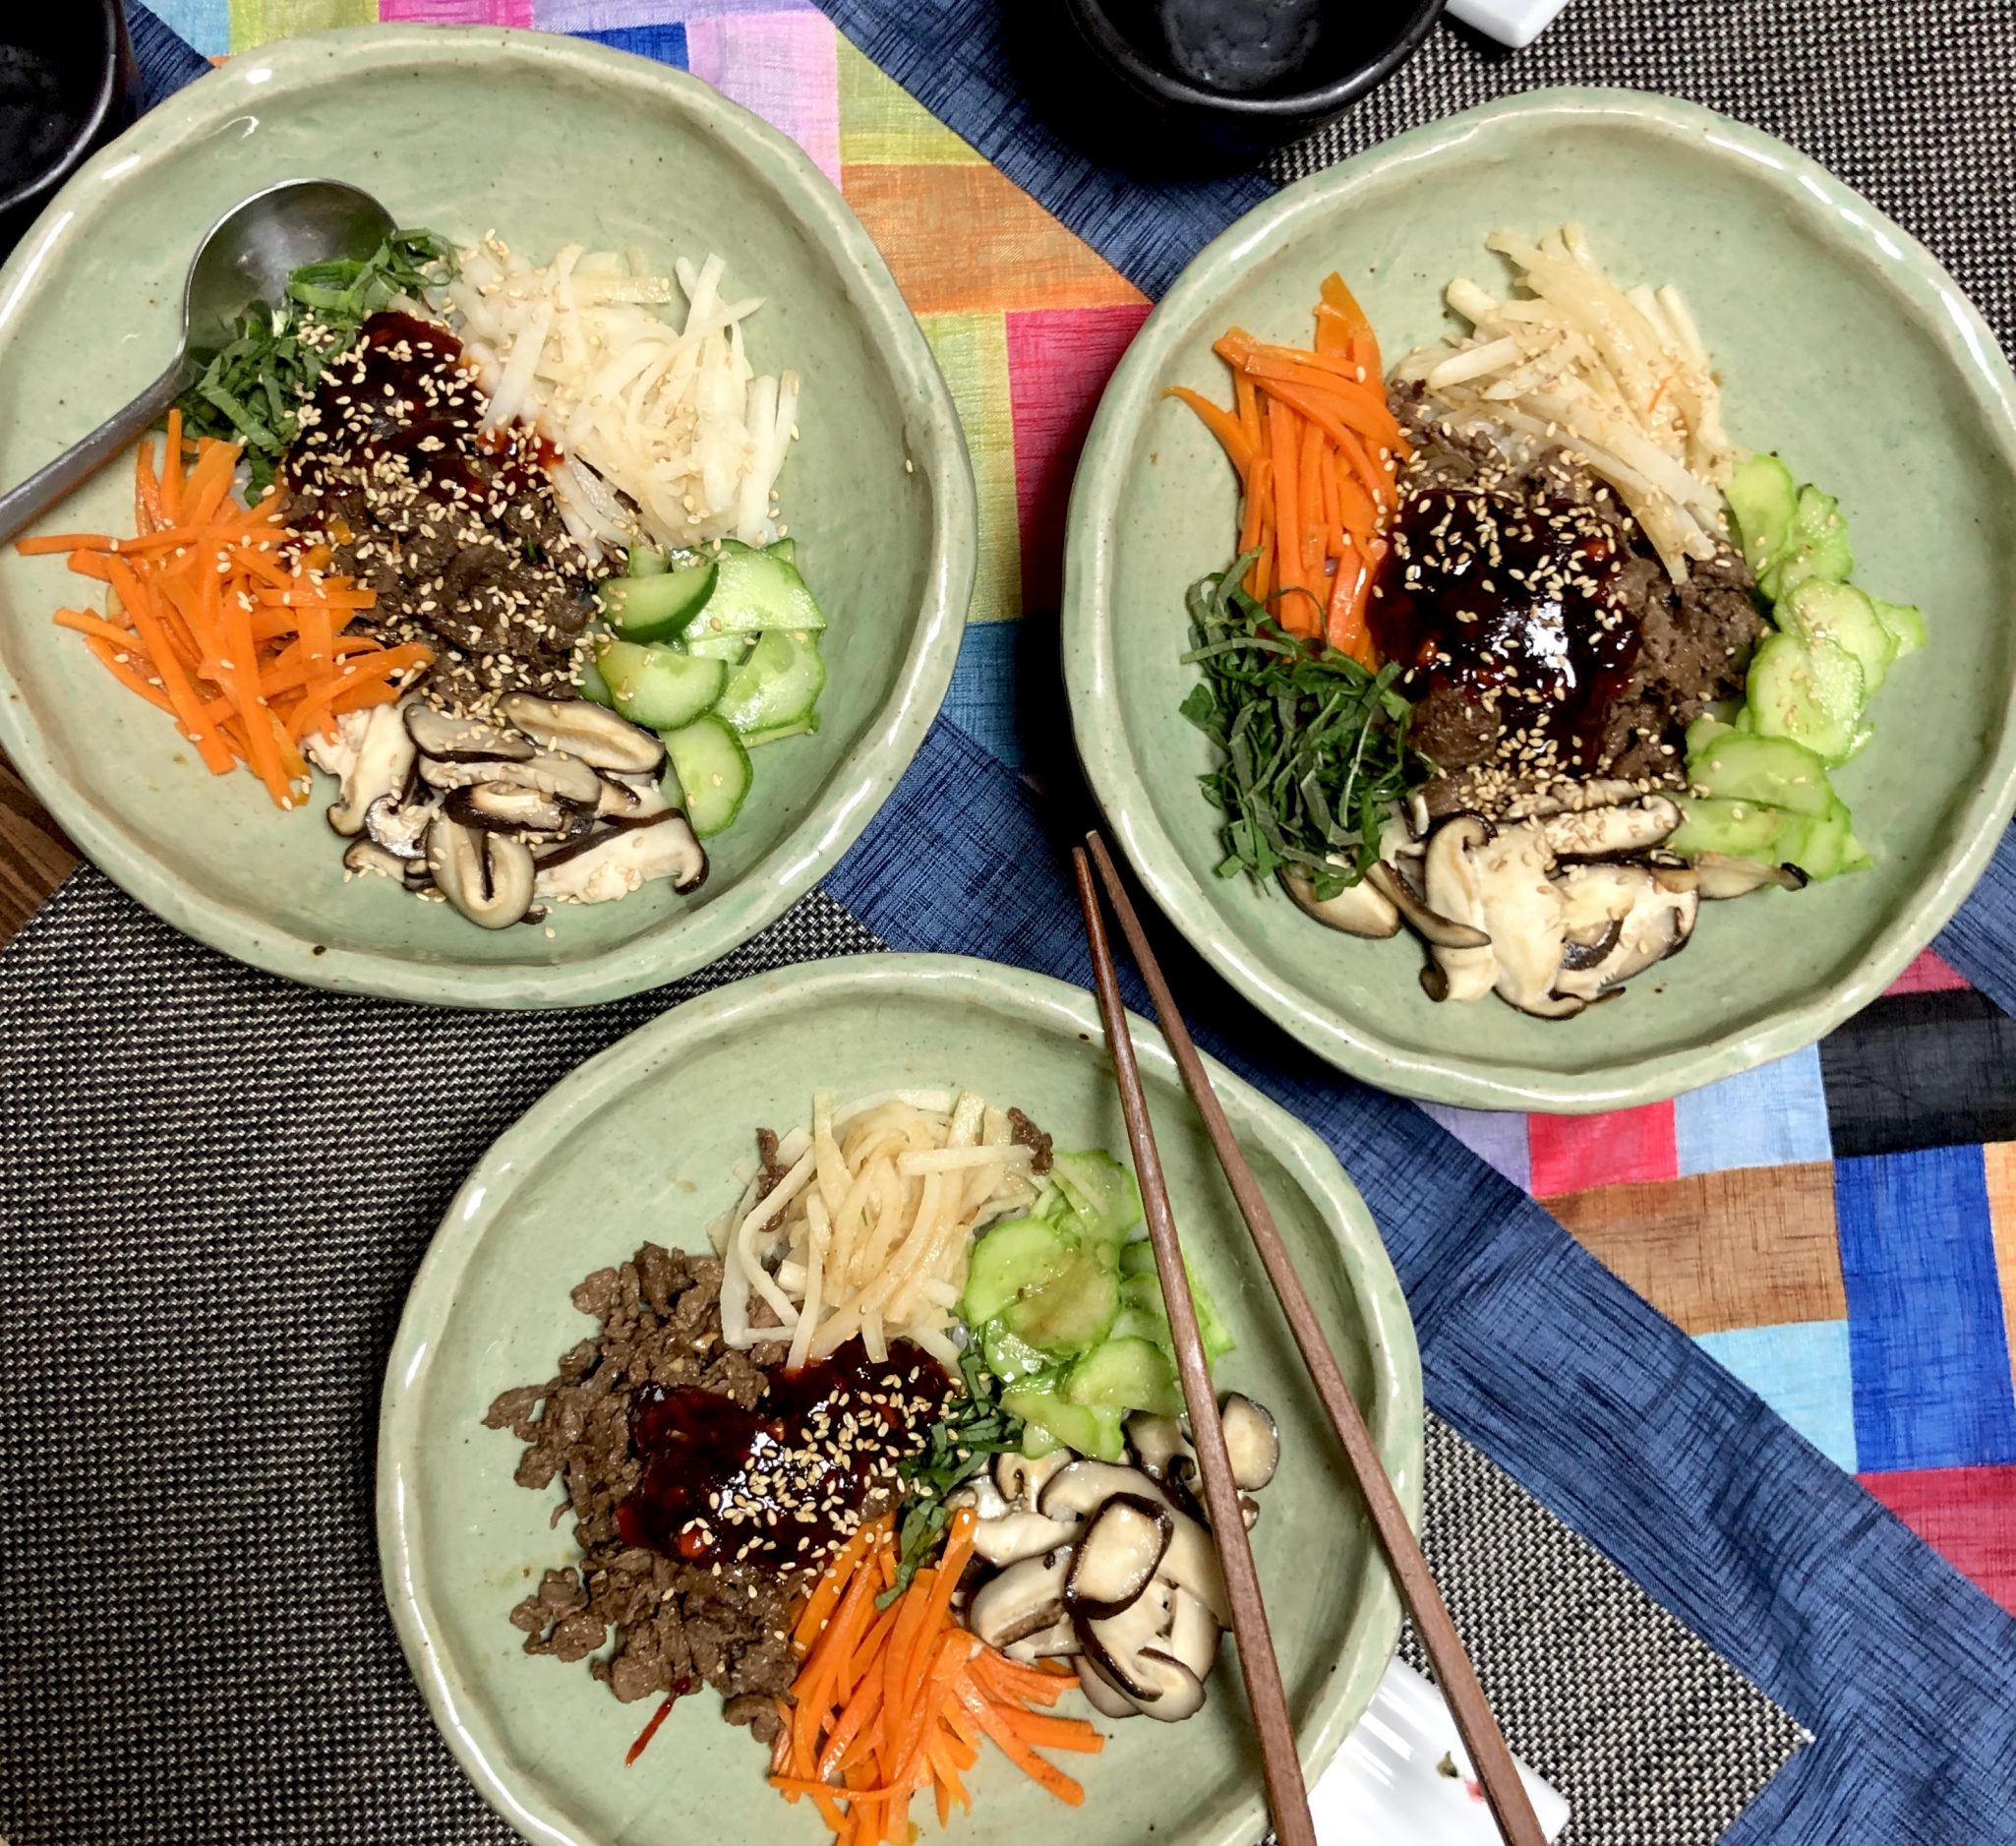
We made Seafood Pancakes or Pajeon, fresh kimchi, and my favorite bowl meal, Bi Bim Bap.  Bi Bim Bap starts with a pile of fluffy, warm rice and topped with julienned carrots, cucumbers, squash, spinach, mushrooms, yesterday’s banchan, seasoned beef or chicken.  You get the picture, you can use anything you desire for toppings.  For Joungy’s class, we had a wonderful array of veggies, carrots, cucumbers, daikon, shiitake mushrooms, shredded beef and a chiffonade of Perilla leaves.  Delicious!

The secret to her Bi Bim Bap is the extra attention given to the sauce.  Her Gochujang paste included corn syrup, a bit of soy sauce, and chopped garlic, stir-fried briefly. This brought the sauce to a new level.

Season each component, stir-fry, and place on top of the rice in neat little separate piles-kid-friendly, lol.  Top your masterpiece with a sprinkling of sesame seeds and a dollop of sauce.  It’s colorful, delicious, easy to prepare, flexible…what more could you ask for?  If you can’t find Perilla leaves, garnish with chopped green onions are good too.

A great primer for Bi Bim Bap can be found at My Korean Kitchen which has instructions to season the blanched bean sprouts and spinach.

Bi Bim Bap (Korean Mixed Rice)

Korean Rice Bowl, Easy to Make and Delicious!
Course Main Course
Cuisine Asian
Keyword Bi Bim Bap, Korean, Rice Bowl
Prep Time 20 days
Cook Time 45 days
Servings 1 serving

Ingredients

Bi Bim Bap Rice (proportions for 1 bowl)

  • 50 gm thinly sliced beef
  • 1 clove garlic finely chopped
  • 1/2 t brown sugar
  • 1 t corn syrup
  • 1/2 t salt
  • 1 T soy sauce
  • 1/2 t sesame oil
  • 2 fresh shiitake mushroomes, thinly sliced
  • 1/2 carrot, julienned
  • 1/4 c daikon, julienned or bean sprouts
  • 1/8 t pepper powder Gochugaru
  • 1 handful spinach leaves or sub 1/4 cup thinly sliced zuchinni or Persian cucumber
  • 5 perilla leaves aka sesame leaves can sub shiso leaves, julienned
  • vegetable oil for frying, 1/2 T for each vegetable
  • 2 cups Cooked white rice I use a rice cooker, its your call how to cook the rice!

Ingredients for Sauce for servings

  • 5 T Gochujang chili paste
  • 2 T Corn syrup light
  • 3 cloves garlic
  • 1 T brown sugar
  • 1/2 T vegetable oil

Instructions

For Sauce

  • In a nonstick skillet, add oil and chopped garlic. Turn heat onto medium high. Saute until garlic is brown color, don't burn!
  • Add remaining ingredients for sauce and stir over medium low heat for approximately 5 minutes. Set aside.

For Vegetables and Rice

  • Cooked medium grain white rice
  • In a small bowl combine soy sauce, brown sugar, corn syrup, pepper powder and chopped garlic. Add beef and stir to combine.
  • Stir fry each vegetable-mushroom, carrot, daikon, separately until tender crisp. Season with salt to taste. Place each vegetable on a platter, keep separate. Stir fry mushrooms in 1/2 T sesame oil, remaining vegetables can be saute in 1/2 T vegetable oil or a blend of sesame oil and vegetable oil
  • If using bean sprouts or spinach, blanch in hot water until tender crisp about 1 minute
  • Stir fry beef until cooked through.

Building Your Bowl

  • Divide hot rice between 3-4 bowls
  • Place vegetables in bundles around the bowl in a radial pattern. Place beef in the center.
  • Garnish with sesame seeds and perilla leaves and approximately 1 T sauce for each bowl. Place extra sauce in a bowl and serve along side bowls.
  • Optional (mandatory for me): Fry an egg for each serving, sunnyside up, and place on top of beef

Notes

Bi Bim Bap and creative expression.  The only absolutes for Bi Bim Bap is the rice and the sauce.  You could sub brown rice in place of white rice, but you need rice. The recipe from Joungy's class goes the extra mile by sautéing the red pepper paste with garlic and seasonings.  You could use Gochujang straight out of the jar, but the cooked sauce is really tasty.
Use whatever vegetables your little heart desires.  Great way to use extra Banchan you boxed from K-bbq the night before.  Why not? 

So good!  Bowled over by Bi Bim Bap!