Category: Food

Variation on a Thumbprint: A Cheesy Favorite

Variation on a Thumbprint: A Cheesy Favorite

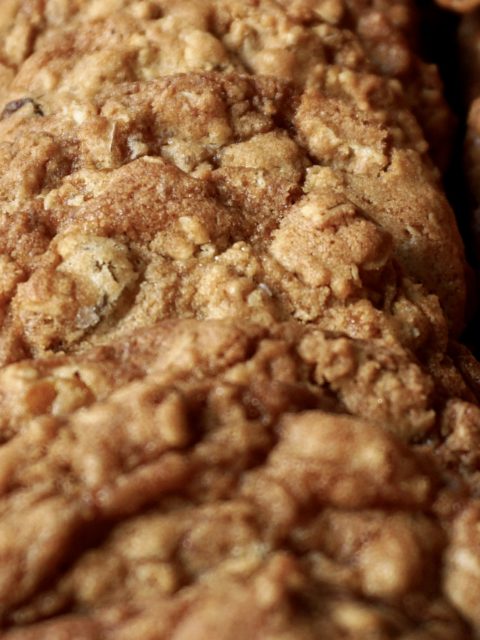
I wonder who came up with thumbprint cookies?  Was it intentional or a happy accident?  A baker grabbing a cookie sheet only to find she (he) had inadvertently stuck her thumbs in the cookies and thought, well heck might as well fill it with some jam.  And the rest is history as they say.  I actually googled thumbprints but alas no specific info on how they came about, just European in origin perhaps Swedish or Polish.  All I know for sure is the variations are infinite and each and every one is DELICIOUS.  It can be dolled up with nuts or not, filled with any flavor jam or jelly, or fancied up with lemon curd or chocolate ganache filling. Sky’s the limit. The cookie is buttery, with a sandy texture like a shortbread and easy to make.  When my kids were little they were in charge of the very important task of making the “the thumb holes”.

While I was flipping through Vivian Howard’s book Deep Run Roots (love, love, love) I came across a cookie that had BAKE ME written all over it, Hot Apple Jelly Thumbprints.  The twist, no sugar in the dough? A savory thumbprint made with smoked gouda or sharp cheddar and filled with a spicy apple jelly. I stuck two post-it notes on the page to make sure I try this recipe.  Here is a link to the recipe when she made them for a Tabasco Sauce function, yep a hot sauce jam-get it?

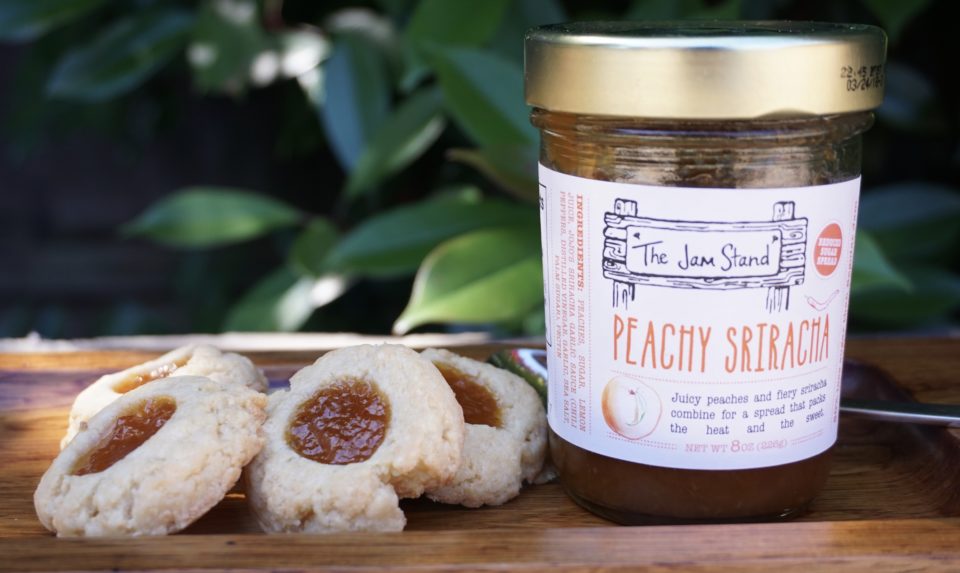
Okay, full disclosure.  I made the cookie but not the jelly. The jelly seemed infinitely more time consuming so I CHEATED.  A jar of Peachy Siracha Jam jumped out at me at the market.  It was fate.

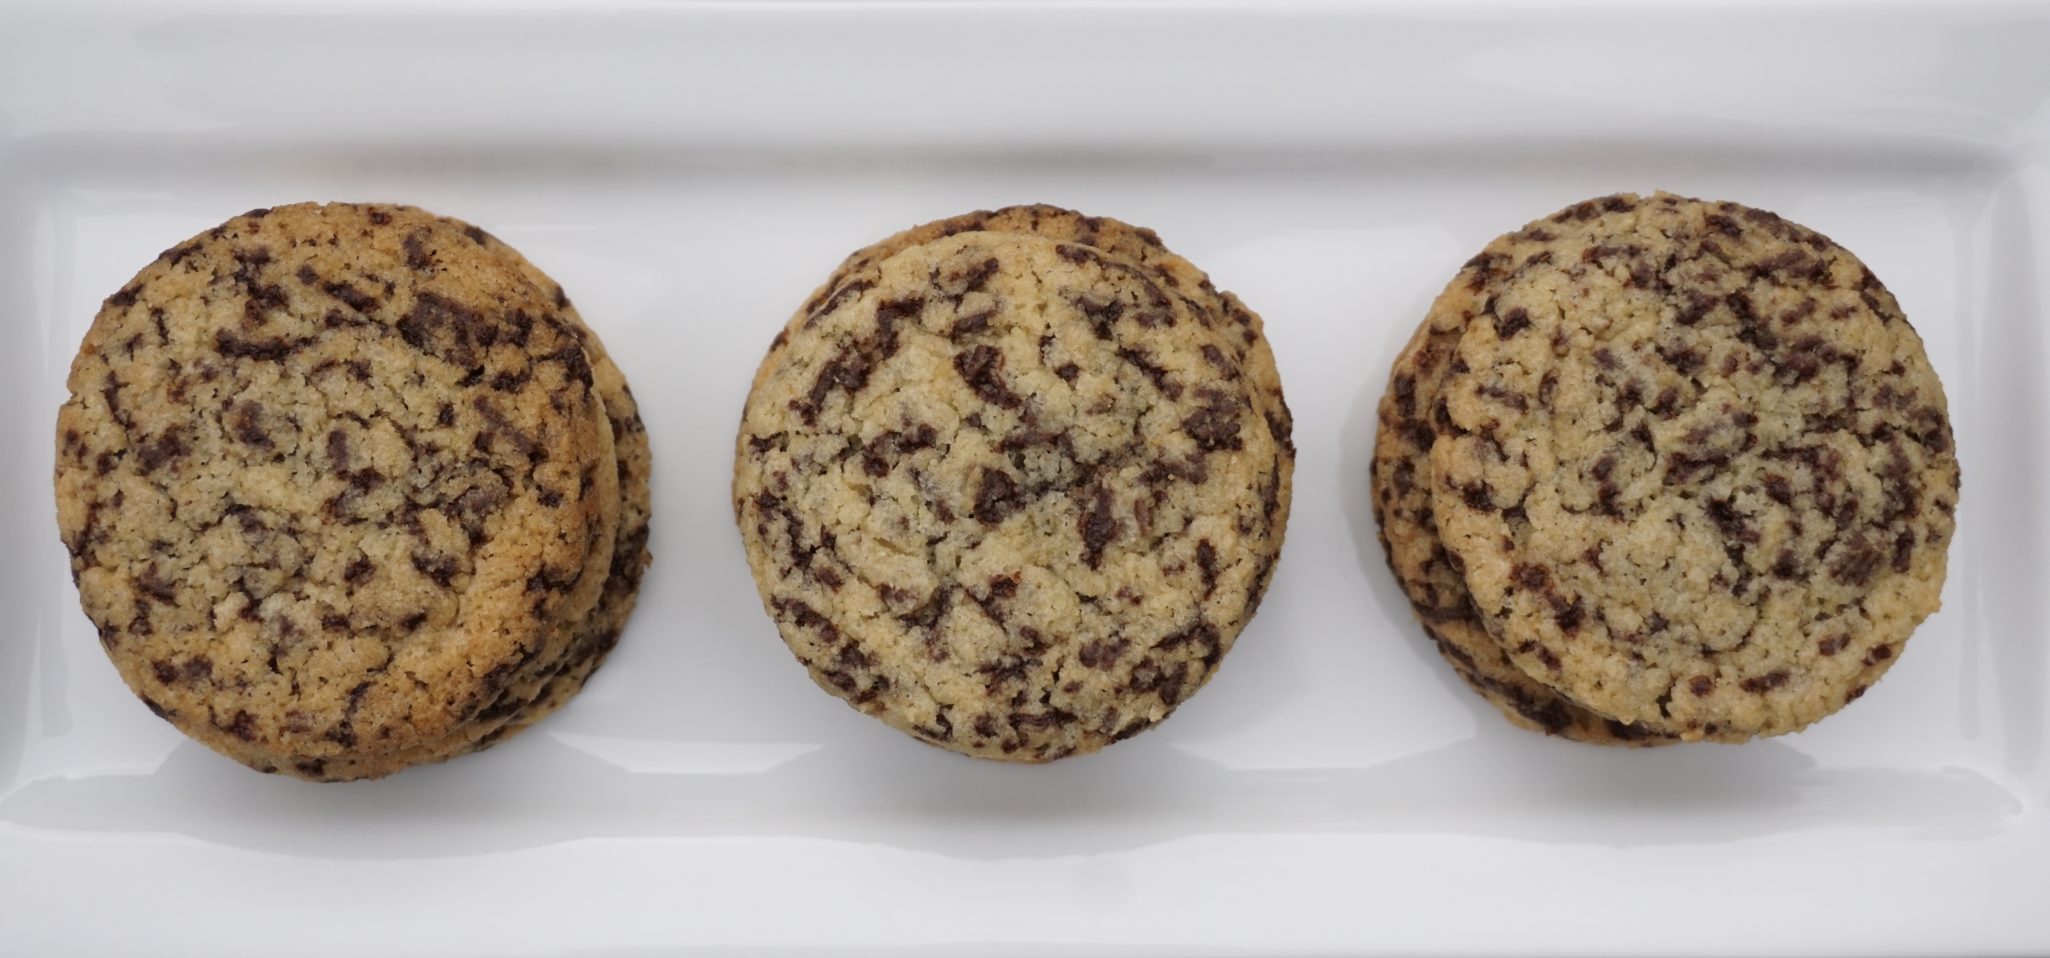
As simple as thumbprints are to make a question arose while I was making the cookies.  Hmmm, 1-1/2 cup grated cheese.  Is that finely grated? Coarsely grated? Enquiring minds want to know.  What to do?  Fire off an e-mail to Ms. Howard hoping she will answer?  I did a search which did not turn up anything.  I then looked at Dorie Greenspan’s Cookie book knowing she had a savory section.  Bingo, Smoked Cheese Cocktail Cookies.  (She is my cookie hero).  Her process called for coarsely grated/shredded cheese which is then pulsed with cold butter in a food processor. The cookie becomes even easier to make.  Butter pulsed with the cheese and then add the flour and pulse into the dough starts to clump..done.  How easy is that?  The texture is similar to shortbread with a tiny bit of crunch which I am guessing comes from the cheese caramelizing as it bakes.  I posted the question regarding grating the cheese on Food52 Baking Club and another member told me she finely grated the cheese before mixing the dough in a Kitchen Aid.  The tip came from a Serious Eats article she had read, her cookies came out beautifully, much like a shortbread.  I leave it to you to decide which method you use.

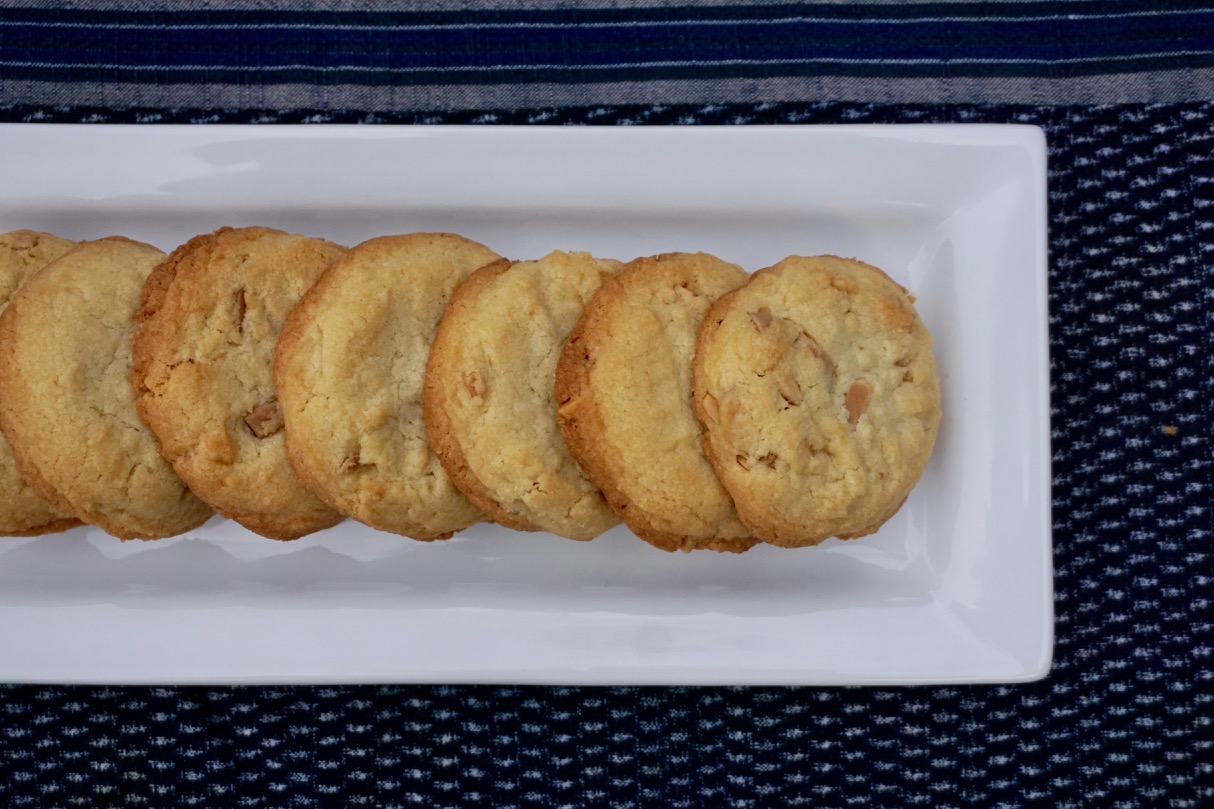
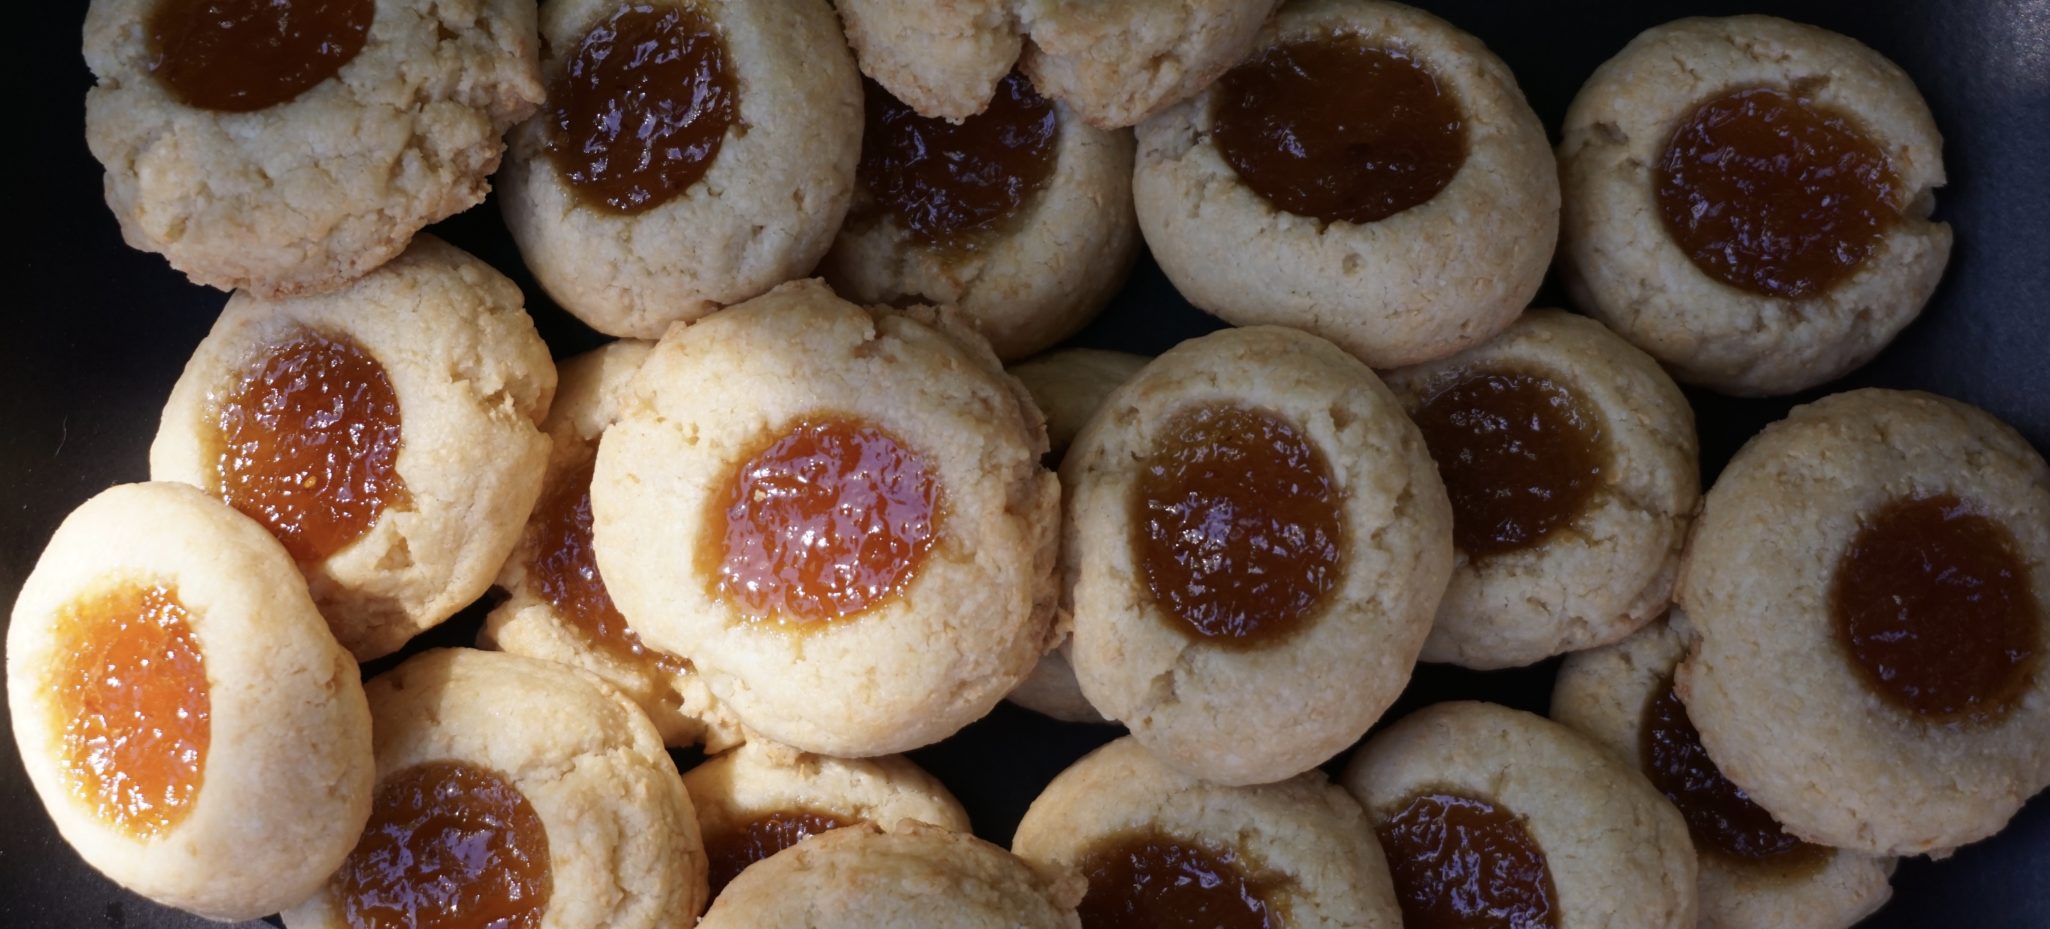
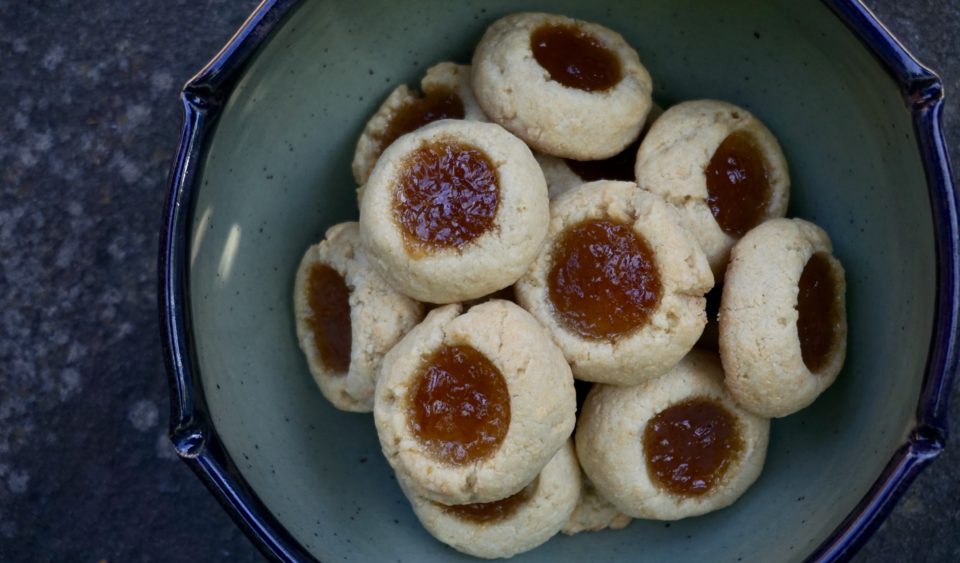
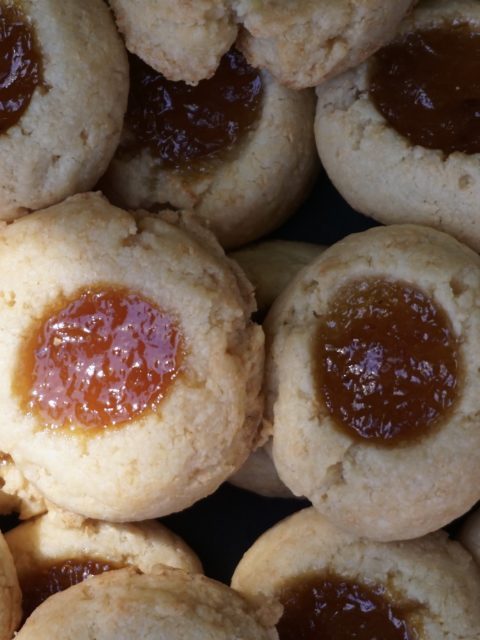
With a 2 teaspoon ice cream scoop I portioned the dough into balls and used my handy-dandy thumb of course for the centers (sadly my kids have flown the coop so I had to use my own thumb).  The original recipe calls for piping the dough out with a pastry bag.  I opted for the scoop method.  The touch of sweetness and spice comes from the jam while the cookie is infused with a savory smokey flavor from the gouda.  A beautiful balance of flavors.  I plan to make these for my next happy hour to go along with that bottle of Cava parked in my fridge.  Can’t wait.

Hot Apple Jelly Thumbprints

Ingredients

  • 2 cups all-purpose flour
  • 1/4 tsp. salt
  • 2 tsp. baking powder
  • 1 cup unsalted butter at room temperature
  • 2 1/2 cups smoked gouda shredded, at room temperature

Tabasco Jelly (recipe below)

Instructions

  • Preheat oven to 350.
  • Sift the dry ingredients. Using a stand or hand mixer, cream the butter and cheese well. Slowly add the dry ingredients and continue to paddle until nice and fluffy; about 3 minutes.
  • Using a piping bag, pipe about 2 tsp. of the cookie dough onto a nonstick baking surface. Using your thumb, make a small indentation in the center of each round. (You may want to have a little flour on hand to prevent your thumb from sticking.) Pipe or spoon about 1 tsp. Tabasco jelly into each indentation.
  • Bake for 12 minutes, or until lightly browned on the bottom.
  • Yields approximately 5 dozen small cookies.

Hot Apple Jelly

  • 10 lbs. apples of your choice (If you can find slightly unripe apples, use 5 lbs. ripe and 5 lbs. unripe, as unripe apples have more pectin)
  • 8 cups granulated sugar
  • 1/4 cup lemon juice
  • 1/4 – 1/3 cup Tabasco brand Original Red Sauce, depending on your preference for heat
  • Roughly chop the apples. Include everything—the stems, core, seeds, and skin are all important for pectin. Place the apples in a large pot and cover them with water. Bring the apples up to a boil and cook 10–20 minutes, until they are soft but not falling to pieces. Drain the water off quickly.
  • Place the apples in a colander lined with cheesecloth, and place the colander inside a larger bowl to catch the liquid that drains off. This liquid will be the “meat” of your jelly, so allow it to drain overnight for best results. You should be left with roughly 9–10 cups thickish apple nectar. (If you have more, it’s not a problem; you will just have to increase cooking time.)
  • Place a small plate in the freezer for testing your jelly. Transfer the apple liquid and the sugar to a heavy-bottomed pot and bring it up to a boil. Let this simmer for about 15 minutes. Check where you are by spooning a little of the jelly onto your super cold plate. If it firms up and wrinkles when you nudge it, you’re good to go. If not, cook it longer, testing every ten minutes or so.
  • Once you’ve reached the desired set, stir in the lemon juice and the Tabasco Sauce. The jelly should be a beautiful amber color and should be completely clear. Taste and adjust with more of either. Transfer to a container to chill.
  • In addition to using the Tabasco jelly in these cookies, it would be great served with goat cheese and crackers, or as a glaze over pork chops or ham, or as a sauce for chicken wings. It’s very versatile.


Weekend Warrior-Weekend Baker (Toasted Almond Cookies)

Weekend Warrior-Weekend Baker (Toasted Almond Cookies)

My New Year’s resolution every year is to make a concerted effort to try recipes out of the gazillions of cookbooks I own.  I generally cook or bake from only a handful of books I have, my go-tos.  One of my favorite blogs, Ipso Fatto, also collects cookbooks the difference being she actually uses hers.  Lucky for me we seem to have similar taste in cookbooks. My hubby is convinced its not so much that we have similar taste,  its because I buy every cookbook published so of course we would have the same books.  Her recent post featured a scrumptious almond cookie from Abigail Dodge’s Weekend Baker.  After reading it I spent the next hour rummaging through my bookshelves and mumbling to myself “I know I have that book, where is it”.  Eureka, finally found it.  Time to make some Toasted Almond Cookies, uh-huh.

Thanks to Ipso Fatto I am now making good on my annual new year’s resolution.

I love these cookies.  Not the prettiest cookies on the block but it was love at first bite. They’re buttery with a touch of sweetness and a nice crunch from the toasted almond slivers.  I had to stop myself from eating the whole batch. In all fairness the recipe only makes 20 cookies.  Yep, just a measly 20 cookies.

Note to self..double the recipe.

These are a snap to make.  Toasting the almonds adds flavor and crunch so don’t skip this step.  Throw the almonds on a baking sheet and toast in a 350 degree oven for approximately 5 minutes.  Easy peasy.  As the almonds cool make the dough. The cookies do not spread much so don’t forget to flatten the dough before baking.  I used a fork dipped in sugar and pressed each cookie with a criss cross pattern much like the classic peanut butter cookie.  I did not flatten the dough enough with the first batch resulting in the edges and bottoms browning before the center was completely baked.  The second pan of cookies turned out perfectly, golden crisp edges surrounding a sable’ like cookie and crunchy almonds.  Yums.

Weekend Warrior-Weekend Baker

Ingredients

  • 12 tablespoons unsalted butter at room temperature
  • ½ cup granulated sugar
  • Pinch of table salt
  • 1 yolk from large egg
  • ¾ teaspoon pure vanilla extract
  • 1/8 teaspoon pure almond extract
  • 1 ½ cups all-purpose flour
  • ½ cup slivered almonds toasted

Instructions

  • 1. Position an oven rack in the middle. Heat the oven to 350˚F.
  • Line 2 cookie sheets with parchment paper or nonstick baking liners.
  • 2. In a large bowl, combine the butter, sugar and salt. Beat with an electric mixer (stand mixer fitted with the paddle attachment or handheld mixer) on medium speed until well blended. Add the egg yolk and vanilla and almond extracts and beat until combined. Pour in the flour and toasted almonds and beat on low speed until the dough begins to clump together. The nuts will break up a bit, but that’s okay.
  • 3. Using a small ice-cream scoop or 2 tablespoons, shape rounded mounds of about 2 tablespoons dough on the prepared cookie sheets, spacing them about 1 ½”. Using your fingers, press down on each mound to flatten.
  • 4. Bake 1 sheet at a time until the cookies look dry on top and the edges are golden brown, about 17 minutes. Transfer the cookie sheet to a rack to cool for about 10 minutes. Using a spatula, lift the cookies from the sheet onto a rack and let cool completely.


Chocolate Sprinkle Cookies (Everything Is Better With Sprinkles)

Chocolate Sprinkle Cookies (Everything Is Better With Sprinkles)

Is anyone else feeling like me?  Where did the year go? I can’t believe it’s almost summer!   My kids are in the homestretch at school and finals are just around the corner.  We just dropped their care packages off at the post office, nothing like some sugar and munchies for those late-night study sessions.  I remember those days well.

Care Package Contest

Wes made his Good Cookies which truly are the study cookie of choice for our kids (I’m not jealous in the least bit, nope not at all….brats).  We packed homemade granola, Hawaiian-style sweet bread buns, and dried mangos.  I almost made the usual CCC but decided to change it up.  Back in the recesses of my mind, I remembered Jordan remarking how much he liked Chocolate Sprinkles Cookies.  Just maybe I could knock Wes’s Good Cookies off that number one spot in the care package derby….as you can tell I am not the least bit competitive.

The recipe for these kid-friendly cookies comes from Bake or Break, an absolutely wonderful site with easy, delicious recipes for all things baked.

Swap chocolate sprinkles for the chips for this riff on chocolate chip cookies. This transforms both the taste and texture of the cookie.  Chocolate flavor permeates the entire cookie rather than that burst of chocolate you get when you bite into a chip.  The edge of the cookie is crisp while the center is just a tad chewy.  Those in the No Nuts camp will be happy…not a nut to be found in this cookie.

NO Faux Sprinkles Please

The star of this cookie is the sprinkles, so please make sure you use good quality chocolate sprinkles. You know, real chocolate sprinkles not waxy pretend wanna-be sprinkles.  Guittard makes delicious chocolate sprinkles that can be ordered from King Arthur Flour or if you have an Asian market or a market that carries Dutch products, DeRuijter has a line of chocolate sprinkles that are very good.

Make these cookies soon and sprinkle some happiness and yumminess on your kids!

Everything Is Better With Sprinkles

Chocolate sprinkle cookies for the kid in all of us. Crispy edges, chewy center and chocolate everywhere
Course cookies, Dessert
Cuisine American
Keyword Chocolate Sprinkle Cookies
Prep Time 15 minutes
Cook Time 15 minutes

Ingredients

  • 2 & 1/2 cups all-purpose flour
  • 1 teaspoon baking powder
  • 1/2 teaspoon salt
  • 1 cup unsalted butter softened
  • 1 cup granulated sugar
  • 1 cup packed light brown sugar
  • 2 large eggs
  • 1 & 1/2 teaspoons vanilla extract
  • 1 cup chocolate sprinkles

Instructions

  • Preheat oven to 350°. Grease or line baking sheets.
  • Whisk together flour, baking powder, and salt. Set aside.
  • Using an electric mixer, beat butter, sugar, and brown sugar until fluffy. Add eggs, one at a time, beating just until combined after each addition.
  • Mix in vanilla.
  • Gradually add flour mixture, mixing until almost combined. Stir in chocolate. Do not over mix.
  • Using a small ice cream or cookie scoop (2 T) scoop and place dough onto lined pans.
  • Bake 10-12 minutes until edges are golden brown. Adjust cooking time for a chewy cookie decrease baking time ~1 minute for a crispier cookie increase baking time ~1 minute
  • Transfer from pan to wire racks to cool completely.
Thai Curry in a Hurry-Thanks to Instant Pot

Thai Curry in a Hurry-Thanks to Instant Pot

Have I convinced you to try an Instant Pot yet?  If not, here is the recipe that may just tip the scales in favor of that new kitchen gadget.  I came home after a long day at work and pulled out my pot.  Threw in sliced chicken, chopped veggies, coconut milk, curry paste and 30 minutes later we were sitting down for dinner.  Yep, thirty minutes to fragrant bowls of Massaman Curry Chicken over rice.  A complete meal, a party in a bowl and my mouth.  Chunks of cauliflower, peppers, potatoes, eggplant, and chicken surrounded by a rich autumn orange hued curry sauce that is creamy, spicy and sweet.

Curry On

Despite being somewhat of a purist (no box cake mixes or frozen pre-formed pie crusts in this house, nope) the key to this meal, besides the Instant Pot, is the pre-made curry paste.  I vow (lol, not) to one day make my own curry paste but for now I’m wimping out, life’s full of compromises.  Find my favorite curry pastes, either Mae Ploy and Aroy-D, at your neighborhood Asian market or on Amazon.  There are quite a few different ones you can pick from so I thought I would give you the quick and dirty on curries.

Green-Spiciest of the Thai curries, fresh green chilis, kaffir lime leaves, basil, shallots, ginger, garlic and coconut milk for sweetness

Red-Red chilis, lemongrass, shallots, ginger and fish paste and coconut milk. Not quite as spicy as green curry and a work horse for curries. Goes well with chicken, seafood, beef and a variety of vegetables

Yellow-Mildest of the curries.  It is a combination of kaffir lime leaves, turmeric, cumin, mustard seeds and coconut cream. Great with vegetables

Massaman- Finds its roots in Indian curries and is made of red chilies, galangal, shallots, garlic, lemongrass, turmeric, cumin, nutmeg, cardamom, coriander,  cloves, and cinnamon.  Coconut milk and kaffir lime leaves are then added to create the sauce.  Peanuts and potatoes finish off this delicious curry.  I used Massaman curry for the dish in this post

Panang-Found its way to central Thailand by way of Laos  It is milder and subtle, spicier than Thai curries.  It is made from dried chilies, kaffir lime leaves, coconut milk, lemongrass, cilantro, cumin, garlic, ginger, shallots.  Peanuts are often used in this curry

I am sure there are rules for what vegetables or meats and which you should use with each type of curry you should use but my motto is experiment.  Try different vegetables and meats with any of the curries and create your own favorites.

This recipe is an adaptation from Paint the Kitchen Red, a wonderful site devoted to Instant Pot recipes.  The OG recipe calls for sautéing the vegetables after the curry is cooked in the pot. I like my vegetables on the soft side so I cooked them with the chicken in the Instant Pot. Use your favorite veggies, or whatever is in the fridge. So good and so easy.

Thai Curry in a Hurry-Thanks to Instant Pot

Course Main Course, one bowl meal
Cuisine Thai
Keyword 3 Cup Chicken, Carnitas in an Instant Pot, Thai Curry

Equipment

  • 1 Pressure Cooker

Ingredients

  • 3 Tbsp Thai red curry paste or Massaman curry paste preferably Maesri or Mae Ploy brand
  • 1 14- oz can regular-fat coconut milk
  • 1 lb boneless chicken thighs sliced into good bite size pieces
  • 1/4 cup chicken broth

Vegetables

  • The vegetables will cook along with the chicken so don't make the pieces too small
  • 1 cup red and/or green bell pepper cubed
  • 1-2 carrots cut into 4-5 pieces (only 1 if using potato)
  • 1/2 cup onion cubed
  • 1 small eggplant cut into cubes
  • 1 russet potato cut into chunks
  • Really any vegetable of your choice-squash cauliflower

Seasonings

  • 2 Tbsp fish sauce more to taste
  • 2 tsp brown sugar or to taste
  • 1 Tbsp lime juice
  • 4 Kaffir lime leaves slightly bruised (I have a calamansi tree so I used the zest)
  • 12 Thai basil leaves or regular basil leaves in a pinch
  • Cilantro

Instructions

  • Press ‘Saute’ and stir fry onions and curry paste for 1-2 minutes, add 1/2 can of coconut milk until mixture is bubbly, about 1-2 minutes.
  • Press 'Keep Warm/Cancel'.
  • Stir in chicken, remaining coconut milk and chicken broth and add your fresh vegetables
  • Close Instant Pot and make sure steam release handle is in the ‘Sealing’ position.
  • Cook on 'Manual' mode for 4 minutes.
  • Do a Quick Release of pressure and open the Instant Pot.
  • Add in fish sauce, brown sugar, lime juice and Kaffir lime leaves.
  • Press saute' and stir curry, bring to a bubble and cook for additional 2-3 minutes
  • Taste and adjust with more fish sauce, brown sugar or lime juice.
  • Stir in the Thai basil leaves.
  • Serve over rice, garnish with cilantro
Instant Pot Adventures-Mushroom Risotto

Instant Pot Adventures-Mushroom Risotto

You can disregard this post if you do not have an Instant Pot. Well, you may want to do a quick read to see if it convinces you to add yet another appliance to your kitchen. After all you can never have too many kitchen gadgets.
My first try in the Instant Pot was a Spicy Pork Shoulder dish from Melissa Clark and then Corned Beef for St. Paddy’s Day.  Let’s face it…cuts of meat like pork shoulders or briskets lend themselves well to pressure cookers. But how versatile is the Instant Pot? Upon the recommendation of my sister-in-law I decided to try my luck at making risotto. The time savings was not super significant, what was boss WAS NOT HAVING TO STAND OVER THE STOVE STIRRING CONSTANTLY.  For those who have made risotto in the traditional way, it is like a dance. Stir, stir, stir, broth, stir, stir, stir, more broth… Step, step, step together, pause, step, step, step together pause….see just like doing the tango.

First saute’ your aromatics and rice as usual in the Instant Pot (one pot cooking yay!).  Add entire amount of stock called for in the recipe and any vegetables (in this case mushrooms), slap the lid on your Instant Pot, set it for 4 minutes and WALK AWAY.  Yes, you read that right, walk away.  The Instant Pot takes a couple of minutes to come to pressure and then cooks for the 4 minutes.  All you need to do is listen for the beep that signals its done.  Do a quick release (careful, don’t burn yourself), take the lid off, set your pot to saute’ and finish the risotto.  Finishing requires a minute or two of stirring to create the creamy texture and to finish off the risotto.  Test the risotto for doneness after removing the lid, you don’t want to overcook the rice.  I did not use the full 2 ounces of dried mushrooms, probably closer to 1 ounce and found it a bit overpowering.  I would use approximately 1/2 ounce of dried mushrooms soaked in broth to soften. You can adjust the amount of parmesan to taste.  A nice addition would be crispy, crumbled pancetta or prosciutto.

The risotto was pretty darn good if I say so myself.  It could have perhaps used a smidge less time so it was truly al dente but it was surprisingly good and so easy!  I am definitely going to give risotto made in an Instant Pot another whirl.  I will miss the arm workout I get from stirring risotto though…life’s little sacrifices.

Instant Pot Adventures-Mushroom Risotto

Ingredients

  • Adapted from This Old Gal Blog
  • 1 ounce Porcini/Wild Mushrooms/shiitakes dried soaked in warm water to soften
  • 6-8 oz Fresh Crimini Mushrooms roughly chopped or mix of fresh mushrooms such as shiitakes or oysters
  • 1 Tablespoon Butter
  • 1 Tablespoon Olive Oil
  • 1 1/2 cups 9oz Arborio Rice (or medium-grain white rice)
  • 3 Large Shallots chopped or 2 cloves of garlic and 1/2 finely chopped yellow onion
  • 1 Teaspoon Fennel Seeds crushed or 1 tsp. fresh thyme leaves
  • 1/2 cup Dry White Wine
  • 2 cups Chicken Broth
  • 1.5 cups Mushroom water or Water or Broth reserved from soaking dried mushrooms
  • 1/2 teaspoon Sea Salt
  • 1/2-1 cup 3 oz Parmesan
  • 2 Tablespoons Fresh Parsley chopped or chives
  • 1 T Butter to finish

Instructions

  • Dried Mushrooms, bring 2 cups water to boil in heavy small saucepan. Add mushrooms.
  • Cover and let stand until mushrooms soften, about 10 minutes.
  • Transfer mushrooms to cutting board and chop coarsely, reserve liquid.
  • Select Sauté or Browning on your Pressure Cooker and allow to heat.
  • Add oil and butter to Instant Pot and shallots or garlic/onion mixture, fennel seeds or thyme, stir and then add rice cook for three minutes.
  • Add wine and cook until almost evaporated, stirring frequently, about 1 minute.
  • Mix in 3.5 cups broth (or 2 cups broth/1.5 cups reserved mushroom soaking liquid), salt and mushrooms.
  • Lock lid in place and close Pressure Valve. Press manual and adjust time to 4 minutes. Cook at High Pressure for 4 minutes. After beep, do a Quick Release (careful its hot).
  • Turn Pot off and select sauté. Stir rice until creamy and tender but still firm to the bite, approximately 2 minutes.
  • If more liquid is needed, stir in a little more broth or reserved mushroom liquid. Add more until desired creaminess is achieved.
  • Mix in cheese and butter. Season risotto with salt & pepper to taste.
  • Transfer to heated plates or serving bowl.
  • Garnish with parsley or chives and serve while hot!
Strawberry Fields Forever-Strawberry Pie Now

Strawberry Fields Forever-Strawberry Pie Now

Tasked with dessert for Easter dinner at my brother’s this year, I pondered what to bring.  Inspiration hit at my local farmer’s market when I spied the baskets of luscious, red, ripe strawberries at the P&K Stand.

It’s PIE TIME, BABY

An image popped up in my head, fresh sweet ripe strawberries piled in a crispy buttery crust and topped with a dollop of whipped cream.   This perfectly describes Rose Levy Beranbaum’s Strawberry Pie recipe.  I own as many of her cookbooks as I do Dorie Greenspan’s and that’s saying a lot, both are baking gurus extraordinaire.  Rose’s recipes are organized, reliable, easy to follow, and delicious. First, the ingredients are listed by volume measurements and weights (ounces and grams, how great is that?) in all her books and then formatted in tables.  In addition, each recipe has pointers for success, helpful hints, and a Harold McGee/ Alton Brown-like blurb on understanding the recipe.  My favorites include Rose’s Christmas Cookies, Cake Bible, and her recent book  The Baking Bible.

Her Glazed Strawberry Pie recipe is from The Pie and Pastry Bible. In addition to being delish, it is super easy to make. The strawberries are the star of this pie so make sure your berries are ripe and sweet. Start by slicing the strawberries in half and then making the glaze.  The glaze calls for sugar, cornstarch as the thickener, and cranberry-raspberry frozen concentrate.  Yep, frozen fruit juice concentrate.  Finally, fold the strawberries in the glaze and pour them into a pre-baked crust.

It’s all about the crust and filling, uh-huh

Use your favorite pie crust recipe (or mine), fully pre-bake it, and as it cools, make the filling.  Keep in mind the pie will need to chill in the fridge for a good couple of hours before serving.  Serve with whipped cream (totally worth the calorie splurge).

Take advantage of strawberry season and MAKE THIS PIE.  Your family will love you. Your friends will love you.  You could run for office (hint, hint) after making this pie.

Glazed Strawberry Pie from Pie and Pastry Bible

No bake strawberry pie from Rose Levy Beranbaum! It's simple and delicious!
Course Dessert, Pie
Cuisine American
Keyword pie, Pie crust, strawberries, Strawberry Pie
Prep Time 30 minutes
Cook Time 40 minutes

Ingredients

  • 1 Basic Flaky Pie Crust for a 9-inch pie See post for link to pie crust recipe
  • 1 tablespoon egg white lightly beaten
  • 1/4 cup sugar
  • 3 tablespoons cornstarch
  • 1 cup liquid cran/raspberry concentrate thawed, undiluted
  • 3/4 cup water
  • 4-5 cups strawberries rinsed, hulled, dried, and halved

Instructions

For pie dough:

  • Favorite pie crust recipe, need only a single crust.
  • Remove the dough from the refrigerator. If necessary, allow it to sit for about 10 minutes or until it is soft enough to roll.
  • Roll dough 1/8 inch thick or less and about a 13-inch circle.
  • Transfer the dough to the pie pan. Fold under the excess and crimp the border using a fork or your fingers. Cover it loosely and refrigerate for a minimum of 1 hour and a maximum of 24 hours.
  • Preheat the oven to 425°F at least 20 minutes before baking.
  • Line the pastry shell with foil and fill with pie weights, rice or dried beans. Bake for 20 minutes. Carefully lift out the rice or beans with the foil. With a fork prick the bottom and sides and bake 5 to 10 minutes more or until the crust is a golden. Check after 3 minutes and prick any bubbles that may have formed.
  • Cool the crust on a rack for 3 minutes, so it is no longer piping hot, then brush the bottom and sides with the egg white.

Make the filling:

  • In a 2-quart saucepan, mix together the sugar and cornstarch. Gradually stir in the cran/raspberry concentrate and water until smooth. Over medium heat, bring to a boil, stirring constantly. Boil for 1 minute. Remove the pan from the heat and cool completely.
  • Gently fold in the strawberries and spoon the filling into the baked pastry shell. Refrigerate for 4 hours or until set.
  • Serve with freshly whipped cream
  • Store:
  • Refrigerated up to 2 days.
  • The Pie and Pastry Bible

Notes

Press for time? Go ahead, use a commercial pie crust!  
My favorite pie crust is from Dorie Greenspan 
Not Your Mama’s Graham Crackers

Not Your Mama’s Graham Crackers

For as long as I can remember, I have loved graham crackers.  Picture a kindergartener fidgeting in her chair, hands clasped on my lap (trying to look angelic of course), waiting for the carton of milk and graham crackers.  Once I got my milk and cookie, I would break the cracker in half, dip it in my milk, and quickly pop it into my mouth and feel it dissolve on my tongue.

Stepped up Grahams

The cookie of choice, Honey Maid Graham Crackers, and not just in school.  My mom always kept a box of graham crackers in our pantry.  The perfect after-school treat or bedtime snack.

One of my favorite farmer’s market stands is the 2nd Story Bake Shop (sadly gone now).  I usually stop by for my favorite indulgence, their pie cookie.  A delicious bite-size treat of a buttery crust filled with seasonal fruit- fall apples, spring strawberries, summer peaches.

Cracker Craft

On my last visit as I grabbed my pie bite, their cookie jars caught my eye.  The first one contained almond sticks. The second had graham crackers.  The graham crackers were slightly darker than golden brown, round not square with none of the characteristic markings. They looked rather unassuming.  The vendor exclaimed it was her favorite cookie. Ok, I’ll give it a go.  It was DELICIOUS, crispy, buttery, with a hint of cinnamon and honey.  Wow, not your mama’s boxed graham crackers.

After some cajoling, banking on me not knowing the book or pastry chef, they revealed the source of their recipe.  The Craft of Baking by Karen DeMasco  (Tom Colicchio’s pastry chef).  Wouldn’t you know it, I own a copy!  No big surprise there.

Homemade graham crackers.  I know, who would have thunk it that you can actually make graham crackers at home.  Of course, you won’t have that familiar blue box with the honey bee on it, but you won’t miss it after you try these.

Making these cookies is similar to shortbread cookies.  I opted not to roll out the dough but to form a slice and bake log.  Easy peasy.  The dough is pretty soft, chilling makes it easier to form a log.  I used clover honey which is very mild in flavor.  I’m sure you can experiment with other kinds of honey.  I am waiting for my embossed rolling pin to arrive so I can roll and stamp the dough before baking, an idea I saw on food52.  The cookies looked amazing.  The embossed version in a delicious dessert can be found here!

I couldn’t resist turning some of these homemade graham crackers into the quintessential campfire treat, S’mores.  I can almost hear all of you going hmmm, I remember making S’mores! So keep this recipe in mind, and when summer rolls around travel back to your kid days, get out the marshmallows, Hershey’s Chocolate bars, whip up a batch of these grammies, and enjoy!

Not Your Mama’s Graham Crackers

Course cookies, crackers, Dessert, Snack
Cuisine American
Keyword graham crackers
Prep Time 45 minutes
Cook Time 19 minutes

Ingredients

Da Dry MIx-Sift together and Set Aside:

  • 2 cups unbleached all-purpose flour plus more for rolling
  • 1/2 cup whole-wheat flour
  • 3/4 teaspoon kosher salt
  • 1/2 teaspoon baking soda
  • 1/2 teaspoon ground cinnamon

Cream Mixture:

  • 8 ounces 2 sticks unsalted butter, cut into small pieces, at room temperature
  • 1/4 cup packed dark brown sugar
  • 1/4 cup granulated sugar
  • 1/4 cup honey

Instructions

  • In a bowl, sift together the all-purpose flour, whole-wheat flour, salt, baking soda, and cinnamon.
  • In the bowl of an electric mixer fitted with the paddle attachment, combine the butter, dark brown sugar, granulated sugar, and honey. Mix on medium speed until well combined, about 1 minute. In two additions, add the dry ingredients, letting the first fully incorporate before you add the second.
  • Flatten the dough into a rectangular shape, wrap it tightly in plastic wrap, and refrigerate until chilled, about 30 minutes or up to 2 days. (The dough can be frozen, well wrapped, for up to 1 month.)
  • Preheat the oven to 350°F. Line two baking sheets with parchment.
  • Unwrap the chilled dough, and on a lightly floured surface, roll it out into a rectangle about 1/8 inch thick. Using a ruler and a pastry cutter or a sharp knife, cut the dough into 1-1/2-by-3-inch rectangles; use a spatula to transfer the rectangles to the prepared baking sheets as you go. Reroll the scraps of dough once, and cut out more cookies. Using a fork, pierce each rectangle with two rows of four to six marks.*
  • Bake the graham crackers, rotating the baking sheets halfway through, until they are golden brown, 15 to 20 minutes. Cool on a wire rack.
  • The graham crackers will keep in an airtight container at room temperature for up to 1 week.
  • *Or alternatively, shape dough into a log 3x3 square or 3 inch round, chill until dough is firm enough to cut. Slice 1/8 inch thick slices. Place on cookie sheet approximately 1 inch apart. Bake 11-12 minutes until golden brown. Optional" sprinkle with cinnamon sugar before baking.
  • Makes approximately 30 cookies
Blueberry Cobbler with a Cornmeal-Sugar Cookie Crust

Blueberry Cobbler with a Cornmeal-Sugar Cookie Crust

Have you been watching A Chef’s Life on PBS? You should. It follows Chef Vivian Howard who after hobnobbing in NYC for a couple of years moved back home to North Carolina and opened a farm to table restaurant. We are not talking Asheville or Charlotte, urban areas where the culinary scenes are blossoming but in her hometown of Kinston (where? get out your AAA map). From Kinston, she is creating beautiful down-home Southern food using local ingredients.
I may never find myself in Kinston but fortunately, she has written a cookbook, Deep Run Roots, that is filled with tantalizing recipes, gorgeous photos and wonderful stories about her hometown, family and friends. It’s a hefty book organized by ingredients and as I flipped through it I found myself marking quite a few of the recipes.

One of the many recipes I bookmarked with a post-it note was the Blueberry Cobbler with Cornmeal Sugar Cookie Crust.  Actually ,I might have put 2 sticky notes on it as I am a sucker for homey desserts like cobblers.  Start early if you want to make this as both the crust and the blueberries need “sitting” time. While the dough for the topping chills, the blueberries macerate in sugar and lemon juice.  Let me just tell y’all now, this cobbler is AMAZING.  The crust is tender and buttery with an ever so slight crunch from the cornmeal, it literally melts in your mouth.  Bubbling underneath is a sweet blueberry compote brightened by lemon zest and juice.  Of course, I took it up another notch by adding a scoop of vanilla ice cream.  Sometimes you just gotta go for it.

The nitty gritty.  I haven’t quite figured out the different types of cornmeal, stone ground vs. regular milled I am definitely open to advice or info on the different kinds.  I used Bob’s Red Mill Stone Ground Corn Flour which is pretty fine with just a slight crunch.  I tried fine stone ground cornmeal in scones before and was not crazy about the grittiness.  I guess I would choose whichever cornmeal you use and like for cornbread for this cobbler.

The crust is not a dough you would roll.  It is similar to a drop cookie dough.  I scooped out 1/3-1/2 cup portions and used saran wrap (it’s sticky) to shape the dough into 1/2 inch thick discs for my ramekins.  You could do the same for a 9×12 pan or any comparable sized baking dish and lay the discs side by side covering as much fruit as possible.

If using ramekins reduce the baking time to about 30 minutes.  Make sure to use a tray or sheet as they will bubble over (a picture is worth a thousand words).  I made half the recipe filling which filled four one cup ramekins.  I stashed the extra dough in the fridge for another day.

I plan on trying different berries and seasonal fruits with this recipe.  I’m already dreaming about  mixed berries (strawberries, blackberries and blueberries) and summer stone fruit (peaches, nectarines, plums) versions.

Blueberry Cobbler with Cornmeal Sugar Cookie Crust from Deep Run Roots

Course comfort food, Dessert
Cuisine American
Keyword blueberry, butter, cobbler, cornmeal, vivian howard

Ingredients

For the Filling:

  • 2 pound fresh blueberries or fruit of choice berries, stone fruit
  • 3/4 to 1 cup sugar
  • 4 tablespoons lemon juice
  • Zest of 2 lemons removed with microplane
  • 1 teaspoon salt

Cornmeal Sugar Cookie Crust:

  • 1 1/2 cups or 3 sticks unsalted butter softened
  • 1 cup granulated sugar
  • 1 tablespoon light brown sugar
  • 1 large egg
  • 2 teaspoons vanilla extract
  • 1 cup A.P. flour
  • 1 cup cornmeal
  • 1/2 teaspoon baking powder
  • 1/2 teaspoon salt

Instructions

Make the Filling:

  • Put all the ingredients in a bowl and press down with the back of a spoon to burst some of the berries. Stir it all together and cover.
  • Let the berries and sugar hang out for about two hours or overnight, stirring when it’s convenient.
  • After about two hours, lots of juice would have leeched out of your fruit. Strain the juice and and add it to a small saucepan. Reduce the juice by half, or until it’s nice and syrupy. Add the syrupy stuff back to your fruit and stir to combine. It should coat and cling to the fruit like that scary cherry pie filling from the can.

Make the Crust:

  • Combine the flour, baking powder and salt in a small bowl. Cream together the butter and sugars in a mixer fitted with the paddle attachment until light and fluffy. Add the egg and vanilla and paddle to incorporate. Slowly add the flour until just combined.
  • Remove the dough from the bowl, cover it well with plastic wrap, and let it rest. The cookie dough can be made several days in advance. You could even make a larger batch, freeze it.

Assemble the Cobblers:

  • Butter your 9x12 oven-safe dish and spoon the fruit into it. Or if you have ramekins/souffle dishes you can make individual servings.
  • What’s important is the filling to topping ratio. For every 1 1/2 inch of filling, you want 1/2 inch cookie crust. If your dishes go deeper, just increase both by the ratio.
  • If your topping is chilled, allow it to come to room temperature. Generally for something like this, you would be instructed to flour your work surface and roll out the dough, but for this recipe, that doesn’t really work. So just take your hands, grab a nice ball of the soft, kind of sticky dough and flatten it out between your palms until it’s approximately 1/2 inch thick. Lay that flattened, irregular disk on top of the fruit and move on to your next handful. The goal is to pretty much cover the fruit filling, without overlap but with very little exposed fruit in between. (I used plastic wrap to shape the dough)
  • Ideally you want to place the baking dish on top of a larger cookie sheet because, chances are, it’s going to bubble over, and I think that’s a good thing (unless I’m washing the dishes).
  • Bake it at 350 for about an hour. The top should be really nice and brown, not pale, but dark golden and slightly crispy looking.
  • Individual dishes will bake in less time, approximately 30 minutes.

Tips/Techniques

  • We’ve used the obvious like blueberries, blackberries, cherries, strawberries, plums, apricots and peaches for sure. But we’ve also used figs, apples, oranges, and a combination of tangerines and cranberries for a festive looking holiday cobbler. Feel free to combine fruits and add spices to suit the occasion. Clove, allspice and cinnamon work well with fruits like fig and apple.


Let’s Get Ready to Crumble! (Cranberry Apricot Oatmeal Cookies)

Let’s Get Ready to Crumble! (Cranberry Apricot Oatmeal Cookies)


There is this wonderful bookstore in the City (San Francisco for all you out of towners) called Omnivore. It is a tiny tiny storefront in the middle of a residential neighborhood (parking sucks) close to Delores Park that has become the mecca for cookbook lovers and foodies.  Their schedule of speakers is literally the A list of cookbook authors and chefs.  I drove up to Omnivore right after the election to see Dorie Greenspan the baking guru. I needed a pick me up and her new book Dorie’s Cookies was just the answer.

Last weekend Omnivore threw a cookie contest or as they called it a Cookie Crumble.  You could either bake a batch of cookies or pay 5 dollars to taste and judge ever tasty morsel. I signed up to bring cookies of course.

Tactically I knew if I was serious I needed to make a cookie that stood out, had some sort of chocolate in it, maybe a different spice, a catchy name and garnered attention at first glance (sprinkles, icing, I have no shame cookie bling).  After mulling it over and perusing through different baking books and blogs I came up with…….drum roll please…..

Oatmeal Cookie!

Whaaat?  I know, that hardly fits my criteria for a winning cookie.  In fact quite the opposite.

Let me explain, one of my favorite blogs Ipso Fatto had posted an oatmeal cookie that she had just made.  That one wasn’t particularly memorable but it brought to mind another recipe she had tried that she felt was much better, a delicious Cranberry Apricot Oatmeal Cookie from the Dahlia Bakery Cookbook (of course I have it, the beauty of an addiction). Oooh, it looked so yummy and sounded soooo good.  Bits of apricot and cranberry in an oatmeal cookie flavored with cloves, ginger, cinnamon…buttery, spicey, chewy with crispy edges.  Despite my initial strategic thinking this became THE one.

We headed to the city cookies in hand. Checking Omnivore’s FB page, eight people signed up.  Looking good…

Uh-oh, did ALL these people forget to sign up?  Sheesh!


Whoa! At least fifty entries and that’s the good news.  The bad news, a gazillion (slight exaggeration) of them looked like oatmeal cookies.  Oh well.

and the winner is…not me (damn) but……a chocolate cookie with white chocolate drizzles (the one on the right side of the plate, I admit it was pretty darn good).  I should have stuck to my tactical plan.

Five dollars for this plate of cookies. Guy in golden pants-SCORE.  He was determined to get one of each cookie and I think he came darn close.   I snapped a quick pic, I think I have plate envy.

So my cookies didn’t win, but they are yummy and if you like oatmeal raisin cookies add this one to your baking bucket list.  A little bit more spice than a classic oatmeal cookie and the addition of apricots, cranberries, not just raisins makes for a delicious cookie.

I do have a couple tricks up my sleeve when making them.  For uniformly sized cookies, use an ice cream scoop to portion out the dough. I often chill my dough to minimize spreading.  I scoop all the dough, put it on a sheet and place it in the fridge. To get the nice craggy tops, about 3-4 minutes before the cookies are done, (they’ll look puffy) quickly open your oven door, lift and rap the cookie sheet once or twice on the wire shelf.  The cookies will “deflate” and develop the crevices and ridges.  If you want the uniform top then ignore the rapping.  My baking time was shorter, closer to 12-14 minutes.  Not all your cookies come out round?  As soon as I remove the cookies from the oven I survey them for odd shapes.  The cookies are still soft and pliable so with a knife or spatula go ahead and gently push the edges of the cookie to shape them.  Voila perfectly round cookies. Is this cheating?…I won’t tell if you don’t.

Cranberry Apricot Oatmeal Cookies

Ingredients

  • 2 cups plus 2 tablespoons flour
  • 1 teaspoon baking soda
  • 1 teaspoon cinnamon
  • 1 teaspoon ground ginger
  • 1/2 teaspoon ground cloves
  • 2 1/2 cups old fashioned oatmeal
  • 1/2 teaspoon salt
  • 1 cup dried apricots diced
  • 1/3 cups golden raisins
  • 1/3 cup dried cranberries
  • 1 cup plus 2 tablespoons unsalted butter softened
  • 1 1/4 cup brown sugar packed
  • 3/4 cup + 2 tablespoons white sugar
  • 1 teaspoon vanilla extract
  • 2 large eggs

Instructions

  • Preheat oven to 375 degrees.
  • Sift together the flour, baking soda, and spices. Stir in the oats and salt. Set aside.
  • In another bowl combine dried fruits.
  • In the mixer using a paddle attachment on med-high cream butter, both sugars and vanilla until pale and fluffy, approximately 4-5 minutes.
  • Add eggs, one at a time.
  • On low speed, add the dry ingredients in 3 additions and mix until just combined. Do not overmix. Add the dried fruits and mix until combined.
  • Put on cookie sheets and flatten to 1/2 inch thickness.
  • Bake until golden brown around the edges and still slightly pale in the middle, 14-18 minutes, rotating the pan halfway through baking.
  • Remove and allow to cool at least 10 minutes before removing from the pan.