The political action group I belong to (please continue to read, that is as political as this post is going to get) hosted a fundraiser this past weekend. A garden party with a Mexican theme. Of course, I volunteered to make something sweet. Cookies, specifically, Mexican Wedding Cookies, instantly popped into my head. Usually, I bake a batch of these nutty, buttery, nuggets during the holidays but it is the middle of summer so I wanted to change it up just a bit. I found the perfect riff on the classic wedding cookie, a coconut lime version, on the blog Once Upon A Chef by Jenn Segal. Garden Party, Fiesta theme, coconut, lime-yep, spot on.
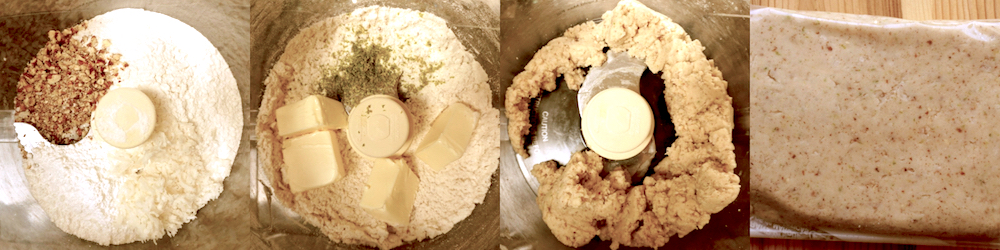
Delicious AND easy to make. The dough is made in a food processor which makes these cookies STUPID easy. You throw the dry ingredients into your food processor bowl, give it a couple of whirls, add the butter, vanilla and lime zest, pulse to it comes together and boom, you are done. Wrap the dough in plastic wrap, and forget about it in the fridge for about an hour. Use a teaspoon ice cream scoop to make balls of dough, bake, and roll in a ton of powdered sugar. HOW EASY IS THAT? Ipso Facto Dunzo.
1cupall-purpose flourspooned into measuring cup and leveled-off
1/4teaspoonsalt
1/2cupconfectioners' sugarplus about 3/4 cup more for coating
1/3cuppecans
1/4cupsweetened flaked coconut
1stick1/2 cup unsalted butter, softened
1packed teaspoon lime zestfrom 1 lime
1teaspoonvanilla extract
Instructions
In the bowl of a food processor fitted with the steel blade, combine the flour, salt, confectioners' sugar, pecans and coconut. Process until the pecans and coconut are finely ground, and the mixture looks like sand. Add the butter, lime zest, and vanilla extract; process until the mixture comes together into a cohesive dough. Remove the dough from the bowl and wrap in plastic. Chill until firm enough to roll, 45 minutes to 1 hour.
Meanwhile, preheat the oven to 350°F. Line two baking sheets with parchment paper.
Measure the dough into heaping teaspoon-size pieces and roll each piece into a ball. Place the balls about 1-1/2 inches apart on the prepared baking sheets. Bake until the edges of the cookies barely begin to brown, 12 to 14 minutes. Let cool on the baking sheets, then roll in the confectioners' sugar while still warm. Let the cookies cool on a rack, then roll again in confectioners' sugar once they are cool. Store in an airtight container at room temperature.
Well, they have graduated! While Jordan relaxes this summer before heading off to Korea, The hubster and I moved Jamie to Minneapolis. Yep, Minneapolis, the “polar” opposite of Houston weather-wise. We hopped in her ALL-WHEEL DRIVE car and took to the road. We only had a week which included driving and moving her into her new apartment.
Two and a half days later, 30 hours of sitting in a car, we arrived in Minneapolis. We did manage a few strategic pitstops.
First Stop- Truckee FOR COFFEE I don’t leave home without my Klean Kanteen, I don’t drive without my coffee, period.
Next stop Salt Lake City! We have been there before so this was a quick stop for food. Found a hole-in-the-wall One More Noodle House that hit the spot after a long drive. Handmade noodles were delicious and texturally pretty spot on. We tried their Eggplant and Pork noodles and House Beef Noodle Soup. Nothing fancy but homey, filling, comfort food.
Next stop South Dakota!
Drive, drive, stop…Everyone said “meh” I thought it was kinda cool..Welcome to Mount Rushmore
Drive, drive, drive through…Worth the detour, even when you are “Running on Empty“. Luckily there was a gas station right as we were leaving the Badlands
Welcome to the Badlands, eerily beautiful.
Are we there yet?
No.
The Corn Palace, really..as corny as this may sound..the murals are entirely made of corn and the theme changes annually. Why I don’t live in South Dakota.
Finally, I am skipping, Sioux Falls, and Mankato…it was a blur anyways …Minneapolis here we come!
Will Cook for Tomatoes (Pasta with Tomatoes, Garlic and Basil)
This is going to be a short post. I wanted to make sure I posted while all of you are harvesting your bushels of homegrown tomatoes (I am so jealous). Yes, I see your photos on FB and Instagram of all those love apples ripening on the vine in your backyard. I see the basket on your kitchen counter overflowing with heirloom tomatoes, Sweet 100’s and Early Girls and those gorgeous salads you are making with them. I hate you. Ok, I’m kidding, I don’t really hate you, but I do have tomato envy-so, so jealous. We just haven’t had much luck with tomatoes lately. After looking at our sad vines, I caved and bought some dry farm tomatoes at the Farmer’s Market, I couldn’t resist.
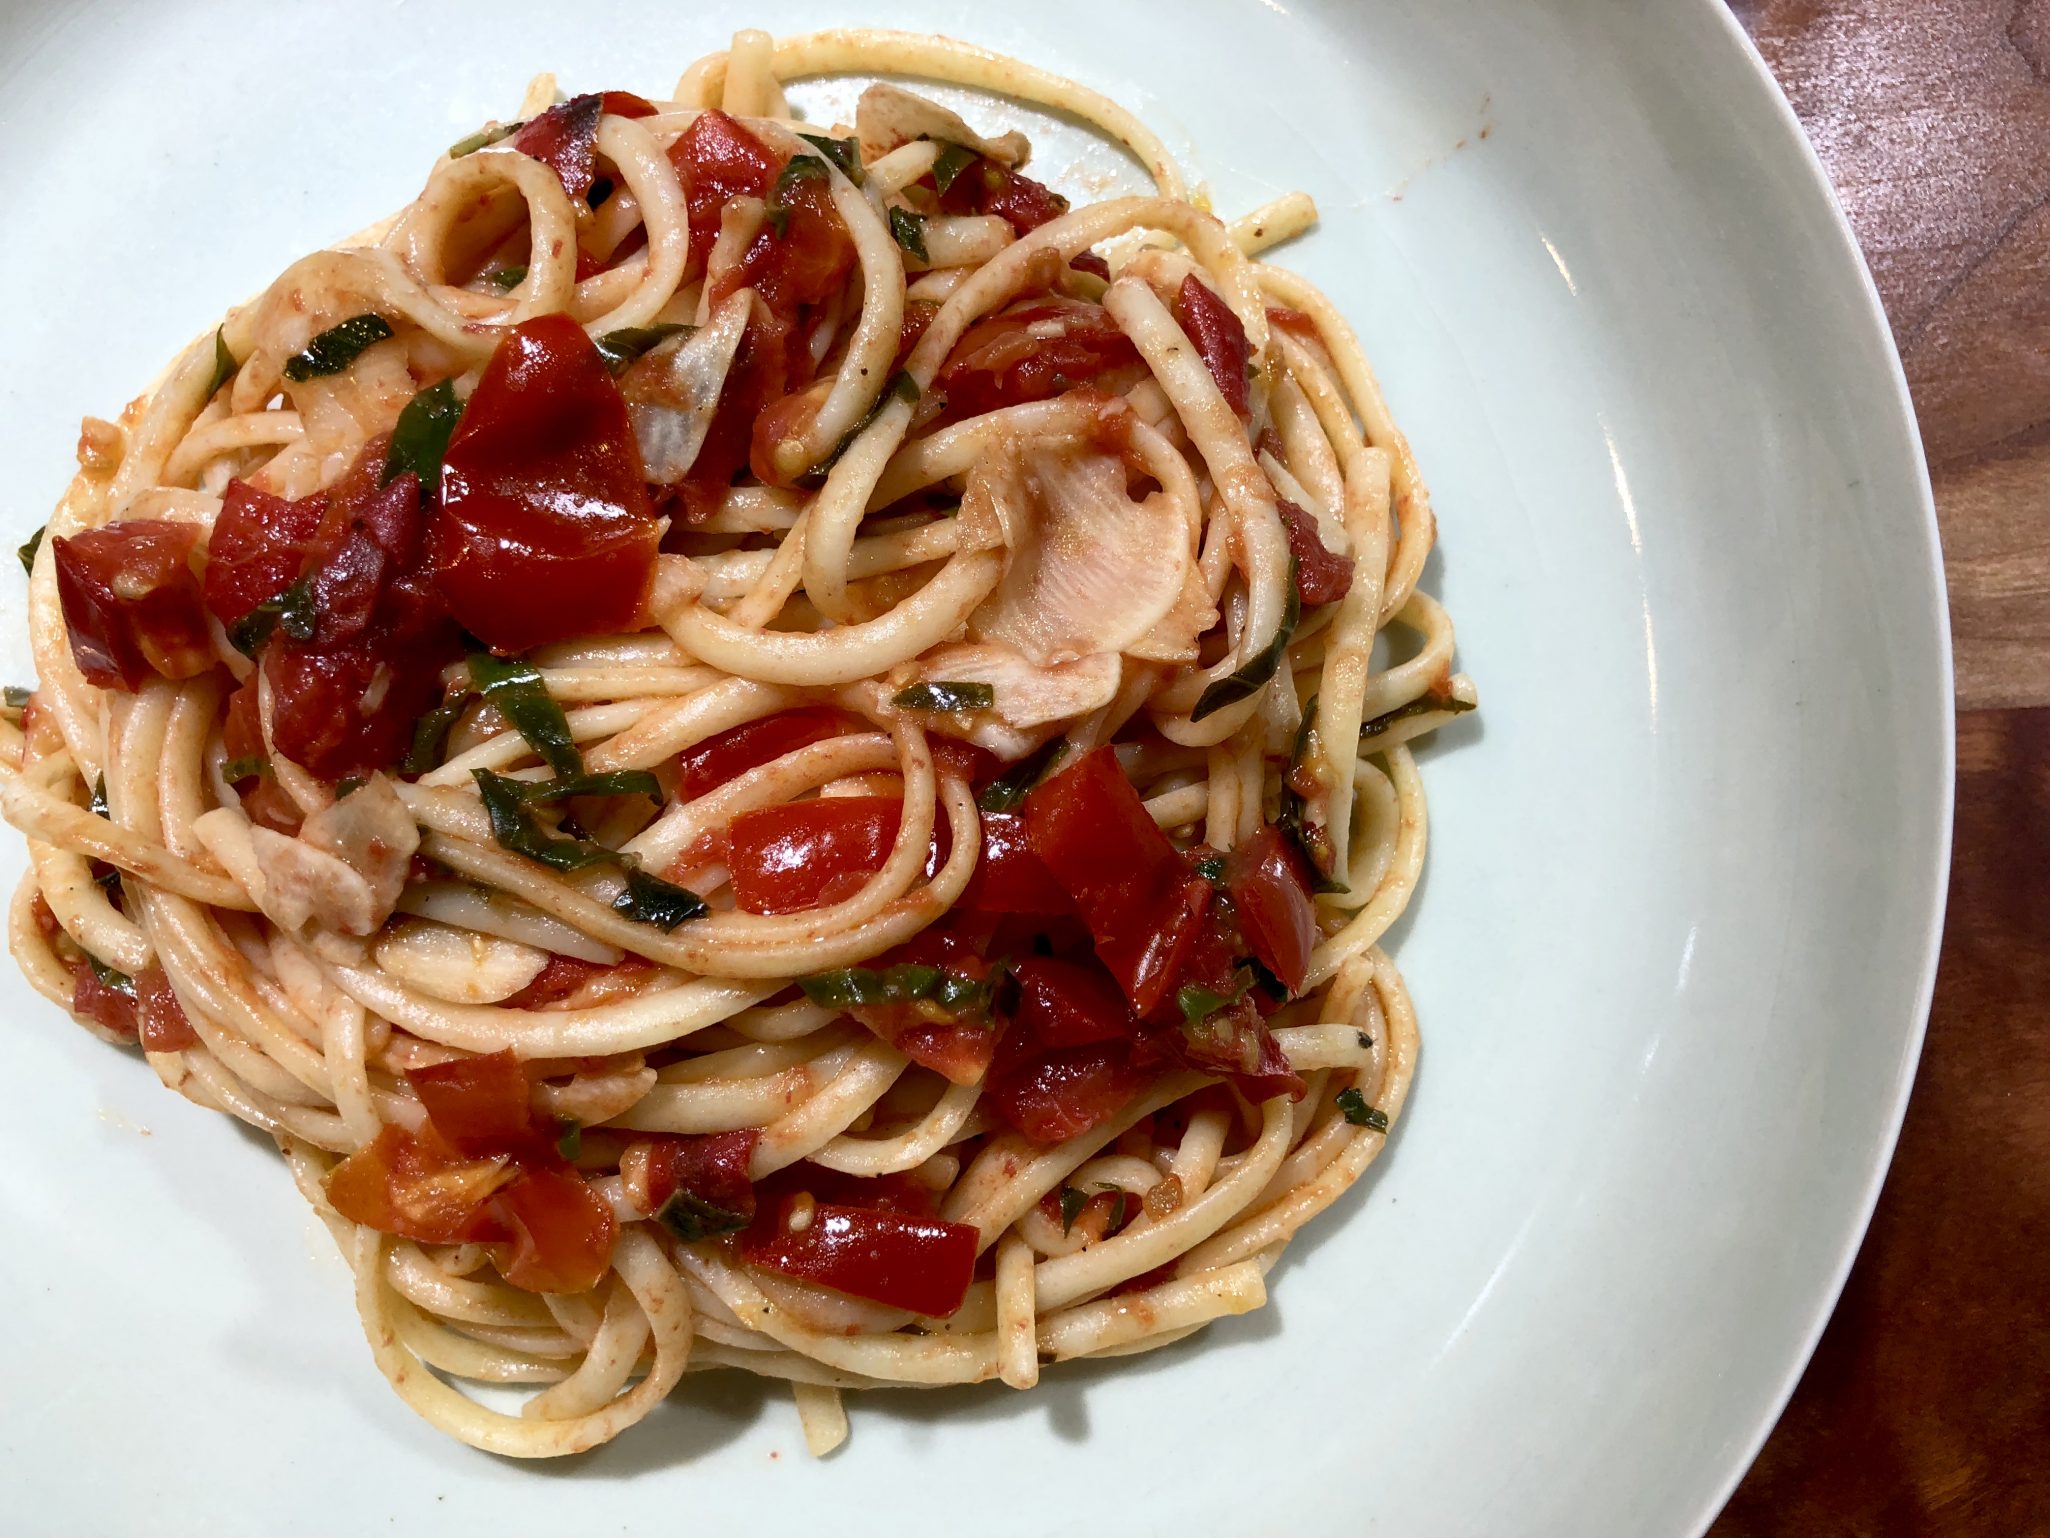
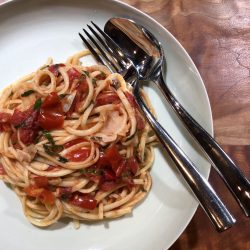
I made a beeline home and used those tomatoes, and the few I was able to pull off our vines (so few, so sad), to make my favorite pasta dish, Angel Hair Pasta with Tomato, Garlic, and Basil. This dish captures the essence of summer, where the star are those vine-ripened, luscious tomatoes. You know, the ones you grew and I had to buy (auugh, so fixated). I pulled out my dog-eared copy of Kuleto’s Contemporary Italian Cookbook and flipped to the page for Angel Hair Pasta with Tomato, Garlic and Basil and in barely 30 minutes we were sitting down to the best damn bowl of pasta. So delicious, so easy and so simple.
All you need for this dish, besides tomatoes, is noodles, olive oil, garlic, and basil. That’s pretty much it. How simple is that?! In full transparency, I didn’t have angel hair pasta so I used linguine fini. Normally I would say NBD, but in this case, use angel hair pasta, it is the perfect match for this sauce.
So, yes, despite my tomato envy I’m passing this delicious recipe along to all of you who have that “difficult task” of figuring out what to do with all those homegrown tomatoes. ALTHOUGH…another option, you could call me, I’ll gladly take some off your hands!
Fresh summer tomatoes, garlic and basil the building blocks for a classic, delicious pasta dish
Course Main Course
Cuisine Italian
Keyword Angel hair pasta, basil, garlic, tomatoes
Cook Time 15 minutesminutes
Servings 4
Ingredients
1/4cupgarlicthinly sliced
7 tbspolive oilextra virgin
2cups fresh tomatoesseeded and diced, ~ 1pound
2/3cupbasil leavesroughly chopped or julienned
3/4tspkosher saltor to taste
1/2TSPblack pepperfreshly ground
6ouncesAngel Hair PastaCapellini
Instructions
Heat 3 tablespoons of olive oil in sauce pan over medium high heat. Add garlic and cook slowly until garlic is lightly and evenly browned. Reduce heat to low add tomatoes, basil, salt and pepper. Cook just until tomatoes are heated through. Remove 1/3 sauce from skillet and reserve.Meanwhile, cook pasta according to directions in boiling, salted water. Drain and add pasta and remaining olive oil to skillet. Toss to coat with oil. Remove to serving bowl or leave in skillet and top with remaining sauce. Serve with freshly grated parmesan if desired.
Though a tough call, the favorite out of this holiday trio was the Snowy Topped Brownie Drops. A decadent, chocolatey, cookie finished with generous dusting of powdered sugar. Have an office party coming up? This is the cookie to make to guarantee an invitation to all of the holiday parties of the season! But don’t reserve these just for the holidays, they are too good not to bake any time of the year!
5tablespoons71 grams unsalted butter cut into small pieces
8ounces226 grams bittersweet chocolate*
3/4cup150 grams granulated sugar
2large eggs cold
1teaspoonpure vanilla extract
1/2teaspoonsea salt
3/4cup102 grams all-purpose flour
Confectioners’ sugar for rolling
Instructions
Coarsely chop the chocolate. Place 6 ounces of the chocolate together with the butter pieces in a heatproof, microwave safe bowl or the top of a double boiler. If using a microwave, microwave for 3-5 segments of 30 seconds on high, stirring in between to help melt. If using a double boiler, place the double boiler (or any heatproof bowl) over gently simmering water, taking care that the water doesn't touch the bottom of the pan. Stirring until the chocolate and butter are just melted, then remove the bowl from the heat.
Immediately whisk in the granulated sugar into the melted chocolate. The mixture will turn grainy.
One at a time, add in the eggs, whisking for one minute after each addition. The batter should become quite smooth, shiny, and noticeably thicker. Whisk in the vanilla and salt.
Using a silicone spatula, fold in the flour until it just disappears. Fold in the reserved 2 ounces of chopped chocolate. The dough will be very sticky.
Cover the batter with plastic wrap or in an airtight container and refrigerate for at least 3 hours.
Preheat the oven to 350 F. Line a baking sheet with parchment paper or a silicone liner. Place about 1/3-1/2 cup of confectioner's sugar in a small bowl. Using a small cookie scoop, scoop out round portions of the dough, and roll each ball in the confectioner's sugar to create the snowy top. Once the ball is generously coated in confectioner's sugar, place it on the baking sheet. Repeat for the remaining dough, spacing cookie balls 2 inches apart.
Bake only one baking sheet of these cookies at a time, for a total of 12 minutes, rotating after 6 minutes. The cookies should spread and crack, with set sides, but will still appear fairly underbaked in the middle. This is how they should look.
Set the cookies on a metal cooling rack to cool at least 2-5 minutes, then serve warm or at room temperature.
Unbaked dough can be stored in the refrigerator for up to 4 days and in the freezer for 1-2 months. Once baked, these cookies will keep 3-4 days but will gradually lose their softness.
Notes
You could use semi-sweet or a high percentage dark chocolate here instead, but the cookies will be a bit sweeter.
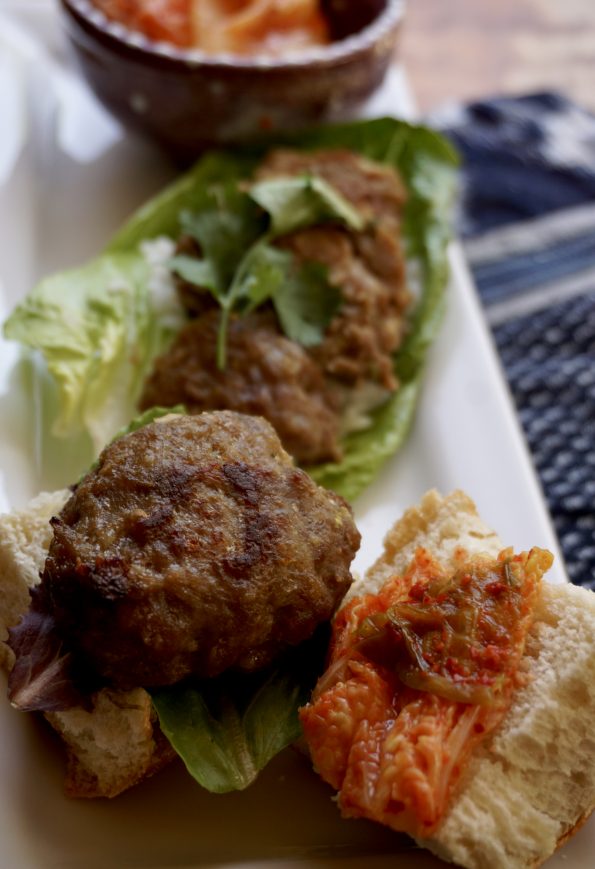
Korean bbq comes to mind when summer rolls around and barbecue gets top billing. I love Korean barbecue especially Kalbi and Bulgogi. Kalbi, cross-cut or flanken-style beef ribs, are marinated in a garlicky soy sauce mixture flavored with sesame oil, green onions, sugar to sweeten and fresh ground pepper. The ribs are marinated for at least a couple of hours before they’re thrown on the grill. Cut crosswise (genius), they cook in minutes, a good thing since the aroma the sizzling meat and marinade as it caramelizes makes me hungry. Bulgogi, thin strips of meat, marinaded in a similar manner, is cooked on the grill, wrapped in lettuce along with a bite of rice, a bit of kimchi and dollop of gochujang and then quickly STUFFED in your mouth…hot, sweet, salty, crunchy..so good. Party in my mouth.
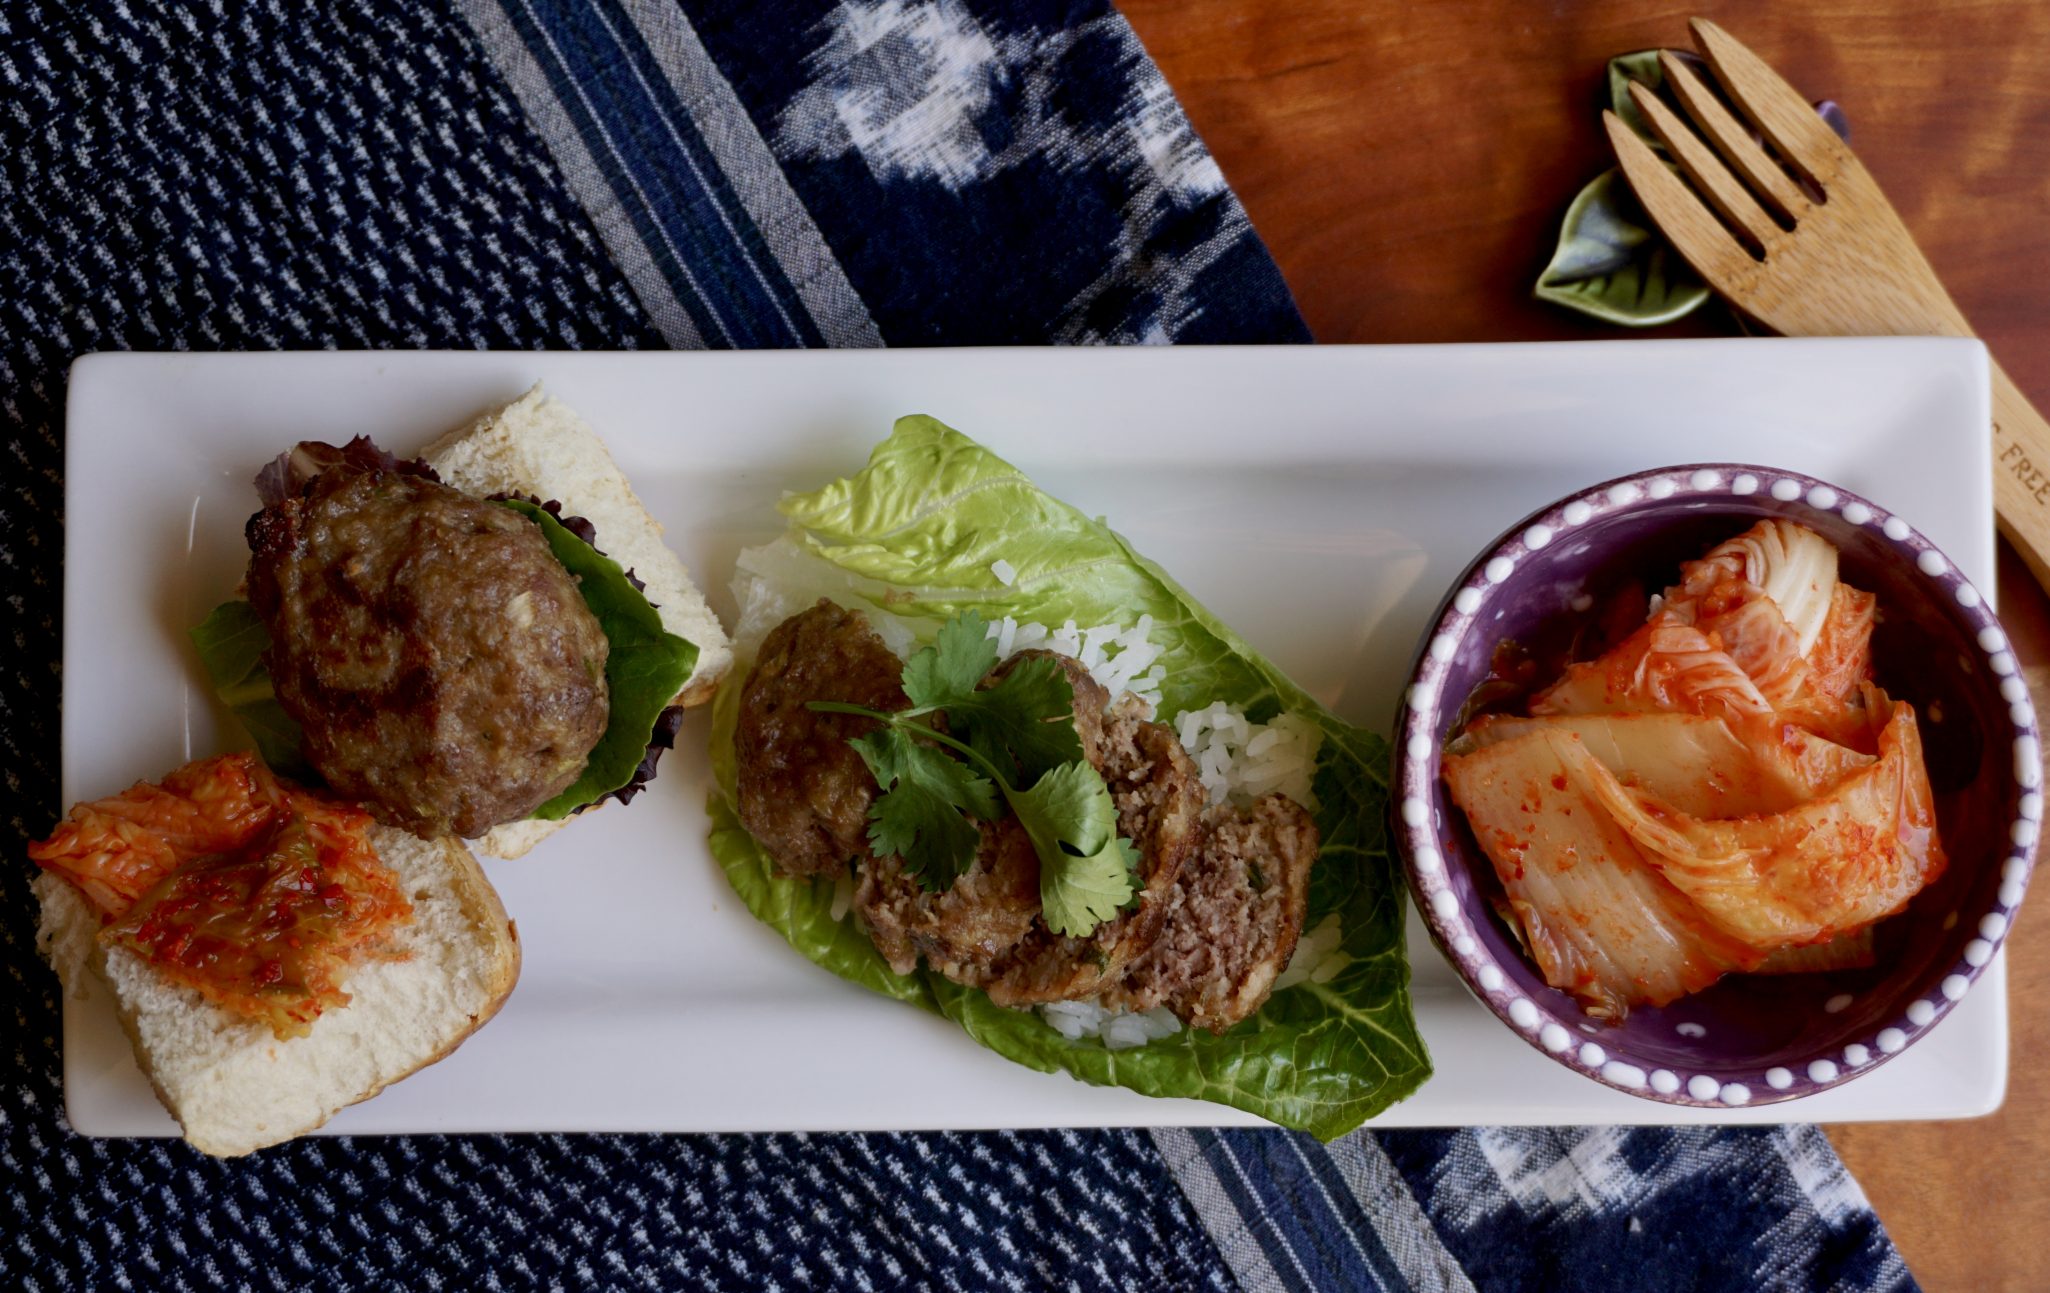
I came across a recipe for Bulgogi Meatballs, the perfect answer to when you are craving Korean bbq but don’t have the time to marinade the meat. A combination of ground beef and pork seasoned like Bulgogi, then formed into meatballs and fried or baked is a spot-on stand-in for Korean bbq. The Bulgogi meatballs can be served by themselves with various dipping sauces, wrapped in lettuce, served with rice or made into a slider topped with cheese and kimchi. It’s simple, quick and delicious.
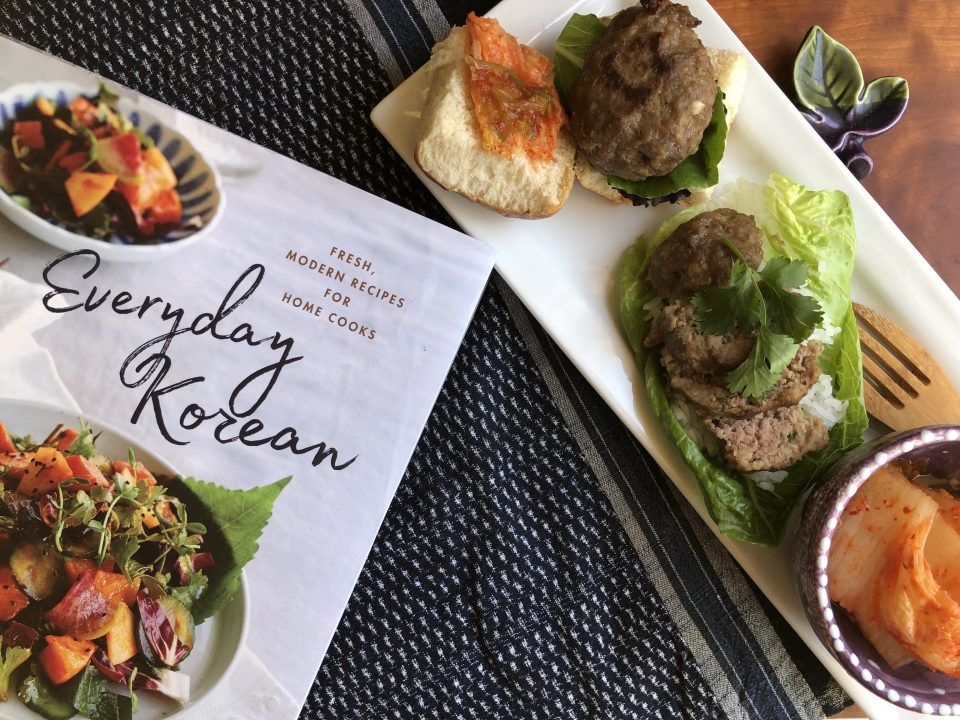
The recipe comes from Everyday Korean, yes, another cookbook I picked up recently. Gorgeous photos and a fusion twist caught my eye. A flatbread topped with a Gochujang Sour Cream and mozzarella will be my next foray in this book. Intriguing, different. I’ll keep you posted.
This recipe, from Everyday Korean by Kim Sunée and Seung Hee Lee, is a tasty spin on a familiar dish. Shape these into meatballs and serve with the dipping sauces along with lettuce leaves or steamed rice. Or make them into sliders to serve on toasted mini buns with grated Cheddar cheese, mayonnaise and mustard.
Author Everyday Korean
Ingredients
¼cuplow-sodium soy sauce
3Tbspdark brown sugar
3Tbspminced green onion
2Tbspminced garlic
2Tbsptoasted sesame oil
2tspfish sauce
¾tspfreshly ground black pepper
¼Asian pearor Bosc or Bartlett pear, grated
1⁄3 cup panko breadcrumbs
1lbground beefpreferably chuck and short rib
1lbground pork or veal
1large egglightly beaten
Toasted sesame seedsfor garnish (optional)
Ssamjang
½cupdoenjangfermented soybean paste or miso
¼cupgochujangKorean fermented chile paste
2Tbspsesame oil
1Tbspsugar
1Tbsprice vinegar or cider vinegar
1Tbspminced garlic
1Tbspminced green onionwhite parts only
1Tbspminced jalapeño serrano chilestems and seeds removed (optional)
Soy Vinegar Dipping Sauce
¼cuplow-sodium soy sauce
¼cuprice vinegar or cider vinegar
1Tbspsugar
1Tbspfinely chopped green onion
1tspgochugaruKorean red pepper flakes, optional
1tsptoasted sesame oiloptional
Toasted sesame seedsfor garnish (optional)
Instructions
To make meatballs::
In a large bowl, mix together first 8 ingredients. Add panko, ground meats and egg; mix just until combined (do not overmix). Cover; refrigerate 30 minutes and up to 2 hours.
Preheat oven to 425°F.
Form meat mixture into 40-50 mini meatballs or about 18 slider patties; place on a foil-lined baking sheet. Bake 18-20 minutes or until golden and cooked through but still tender and moist, turning the pan halfway through cooking time.
OR
Heat 1 tablespoon vegetable oil in a large pan over medium-high heat. Add meatballs or patties to pan, leaving space. Cook, shaking pan occasionally until meat begins to brown on one side (~3 minutes). Gently flip over and cook for another 3-4 minutes. Until just cooked thru.
Garnish with sesame seeds, if desired. Serve with Ssamjang and Soy-Vinegar Dipping Sauce.
To make Ssamjang::
In a small bowl, combine all ingredients. Refrigerate in an airtight container up to 2 weeks. Makes about 1 cup.
To make Soy-Vinegar Dipping Sauce:
In a medium bowl, combine soy sauce, vinegar, sugar, onion, and gochugaru and sesame oil, if desired. Sprinkle with toasted sesame seeds just before serving, if desired. Refrigerate in an airtight container in the refrigerator up to 3 days. Makes about ½ cup.
Instant Pot Easy Jook (Rice Soup) Soul Food Breakfast
Last weekend Jamie played her version of NYT’s 36 Hours. We picked her up at the airport (SFO NOT SJC, grrrr) at 1:00 am Friday night (ok Saturday morning, delays) and dropped her off Sunday at 11:00 AM. Her first words upon seeing her bleary-eyed parents? DID YOU BRING MY SUSHI WITH YOU? I AM STARVING! Lucky we like her.
Happy Hour Any Hour
With Jamie coming home, the call went out for a happy hour, which, due to schedules, morphed into a Saturday morning breakfast happy hour. Any time of day is Happy Hour when it involves friends, food, and fun. It just means tweaking the menu that’s all. We decided on a bowl of fresh strawberries and summer peaches, Belgium Waffles, candied bacon,Jule’s Granola and yogurt. Jamie chimed in with “I want Jook (rice soup) too” Rice Soup is soul food, comfort food, each bite reminds one of being home. With its addition and the various toppings like shredded chicken, assorted sweet and salty pickles, and slivers of green onions to go along, our breakfast menu was complete.
A small stumbling block to this plan, who was going to make Jook (Rice Soup) in the morning? Ugh, the last thing I wanted to do was get up early after a late-night airport pickup. Then it hit me, hello…you have anINSTANT POT, Deb. A quick Google search yielded plenty of recipes so I decided on a mash-up of myDad’s Jook and a couple of Instant Pot recipes I found online. Yay, I’ll get forty winks and have rice soup ready for breakfast.
Jook in an Instant Pot is so stupid easy it’s a crime. Saute a couple of slices of ginger in the Instant Pot add the washed rice, give it a few good stirs, add skinned chicken drumsticks, fill the pot with water and seasonings, seal it and set the timer for 20 minutes. That’s it. Jook Time. If you have chicken stock, use it for an extra rich and flavorful soup.
I have a confession, if I don’t have homemade stock or even low-sodium commercial chicken broth, I’ll add a tablespoon of a chicken stock base such as Better Than Boullion, or Chicken Powder by LKK or Knorr (a Chinese kitchen staple) just to kick it up a notch. It’s not necessary but it will add some depth of flavor. The soup will look thin when you first take off the lid. Stir it a couple of times to combine the rice and stock, hit the saute’ function, and bring it to a boil. Cook for an additional 5-10 minutes or until the Jook is the consistency you want.
*Notes from a Thanksgiving Table
My favorite post-Thanksgiving meals aka “What to do with your leftovers”.
Turkey Rice Soup (Congee or Jook)
DON’T THROW AWAY THE BONES AND CARCASS.
Get out your stockpot (or any really, really big pot). Throw the carcass, wings, drumsticks (sans stuffing) in and fill with water. Add a smashed chunk of ginger (2-inch piece) 1/2 cup of rice wine, a bunch of scallions, a large pinch of salt and bring it to a boil. Once it boils, reduce heat to a nice energetic simmer. Cover and fuggetaboutit for a couple of hours. You will end up with liquid gold to make any delicious soup you want. For a non-Asian bent, omit ginger and scallions and throw in carrots, celery, yellow onions instead. But honestly, it doesn’t matter, you could make jook with either stock.
I do make the stock separately so that I can strain the stock and remove all those little nasty bone fragments and seasoning vegetables. They have all done their job and can now exit stage left.
The stock will keep in the fridge for about a week or longer in the freezer.
Now go back to the top or to the bottom for the recipe on how to make jook….you’ll thank me, so so good.
Hello….Turkey Sammies a la Dagwood style which means all your Thanksgiving leftovers in between two slices of bread. Yep, turkey, stuffing, cranberry sauce, gravy, and a couple of slices of cheese from the appetizer plate. Don’t forget the leftover greens from the salad no one ate because WHO eats salad on Thanksgiving-puulease. Oh man-so good.
Jook or congee, the ultimate comfort food, when its cold outside, when you have a cold, anytime.
Course Soup
Cuisine Asian, Asian-American
Prep Time 10 minutesminutes
Cook Time 20 minutesminutes
Total Time 45 minutesminutes
Calories 140kcal
Ingredients
For the Soup:
1cuplong grain Jasmine ricehonestly you can use any kind of rice, long, medium or short grain
1.5Tspvegetable oil
3Slices thinly sliced fresh ginger size of quarters
1tspsalt
3-4skinless chicken drumsticks or thighsor 2 whole chicken legs, can also add pork such as pork butt 2-3 2 inch pieces
8 to 10cupswater, fill to the 10-cup mark on your IPor use stock and water 1:1
1/8cuprice wine
1 tbspBetter Than Bouillon (optional)Skip if you are starting with stock
At the Finish Line
2tspsesame oiltoasted, Asian sesame oil
1/3-1/2cupscallions-sliced on the biasgarnish
1/8Cupfinely shredded fresh gingergarnish
Salt and pepper to tastepreferably white pepper
Instructions
Wash rice. Add the rice to a bowl, and add enough water to cover the rice. Swirl the rice around. Drain and repeat a few times until the water is clear. Let drain and dry.
Turn on Instant Pot with Saute function. When hot, add 1 -1/2 teaspoon vegetable oil and ginger. Saute for 30 seconds, add rice and 1 teaspoon salt. Stir to coat rice with oil approximately 1 minute.
Add chicken pieces, bouillon, and rice wine to the pot . **If you are in a rush or feeling lazy, skip sauteing the rice and ginger. Just throw them into the pot, fill with enough water until it reaches the 10 cup mark in the Instant Pot.
Turn off saute, close the lid and make sure the knob is on "Sealing". Choose the "Porridge" button and set the time to 20 minutes.
While congee is cooking, shred ginger and slice scallions and place in small bowls for serving.
When the time is up on the timer, turn the Instant Pot off. Wait 15 minutes natural release before turning the knob from 'Sealing' to 'Venting'. Rice soup tends to splatter a lot, do not do a quick release.
Remove the chicken from the pot, when it is cool enough to handle, shred the meat and discard the bones. If the jook seems thin, turn saute' function on (without the lid on) and cook until desired consistency. If it is too thick, add water or broth.
Add the chicken back into the congee or put it in a bowl and let folks add at the table. Taste, add salt if necessary.
Ladle into bowls and top with desired amount of ginger, white pepper, sesame oil and scallions. Let folks add their own.
Toppings and Fixins'
My Dad's Jook calls for potatoes, I love them in my soup. Any kind of potato will work, peeled and quartered for large potatoes. Add at the same time as the chicken when making the soup.
For meatballs, follow instructions under Dad's Jook. This can be added at the end after pressure cooking. Remove lid and press saute function. When the rice soup comes to a boil, add meatballs and cook until done 2-3 minutes.
Additional toppings include cilantro leaves, fried garlic slivers, shredded fresh ginger, salted peanuts, shredded lettuce (iceberg works well)...the list goes on. Anything you eat with rice can be added. NO Rules!
My last trip to the Hankook Korean Supermarket, I took the plunge. Yep, finally bit the bullet and bought a BIG jar of Kimchi. No more little pint size containers for me. I didn’t go completely crazy and get the gallon size, although I thought about it for a fleeting moment since it was on sale, lol. I refrained and prudently bought a quart size jar.
The question running through your brain right now, which Kimchi did she buy? Am I right? Lucky for you I did the exhaustive, backbreaking, mentally draining research-so you don’t have to. I stood in the Kimchi section of HMart for an hour, watching which Kimchi customers were buying and then I repeated this at Hankook Market (much to Hubster’s chagrin). I also “interrogated” my friends and forced them to reveal their favorite Kimchi. Okay, I just texted them and they replied, consensus was Ocinet or Tobagi brands were good. So there I was in Hankook Market, upgrading to the quart size jar of Kimchi by Ocinet.
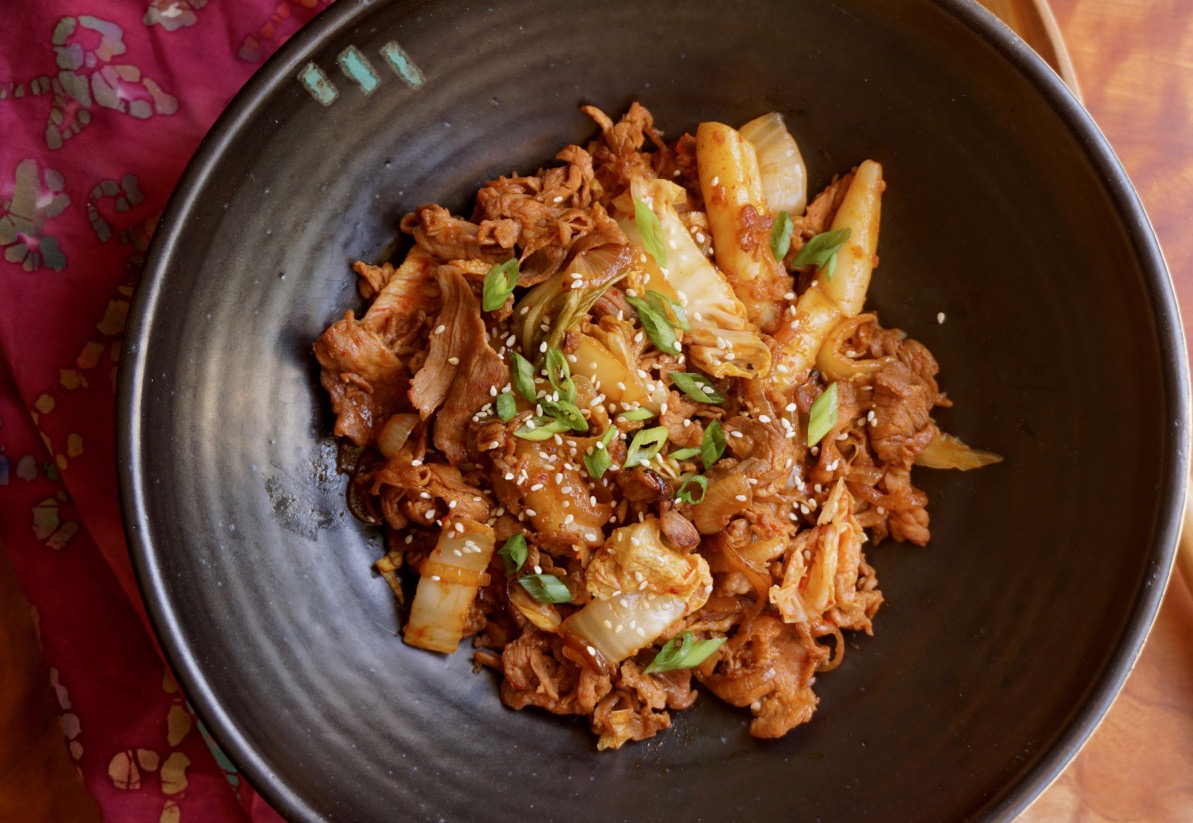
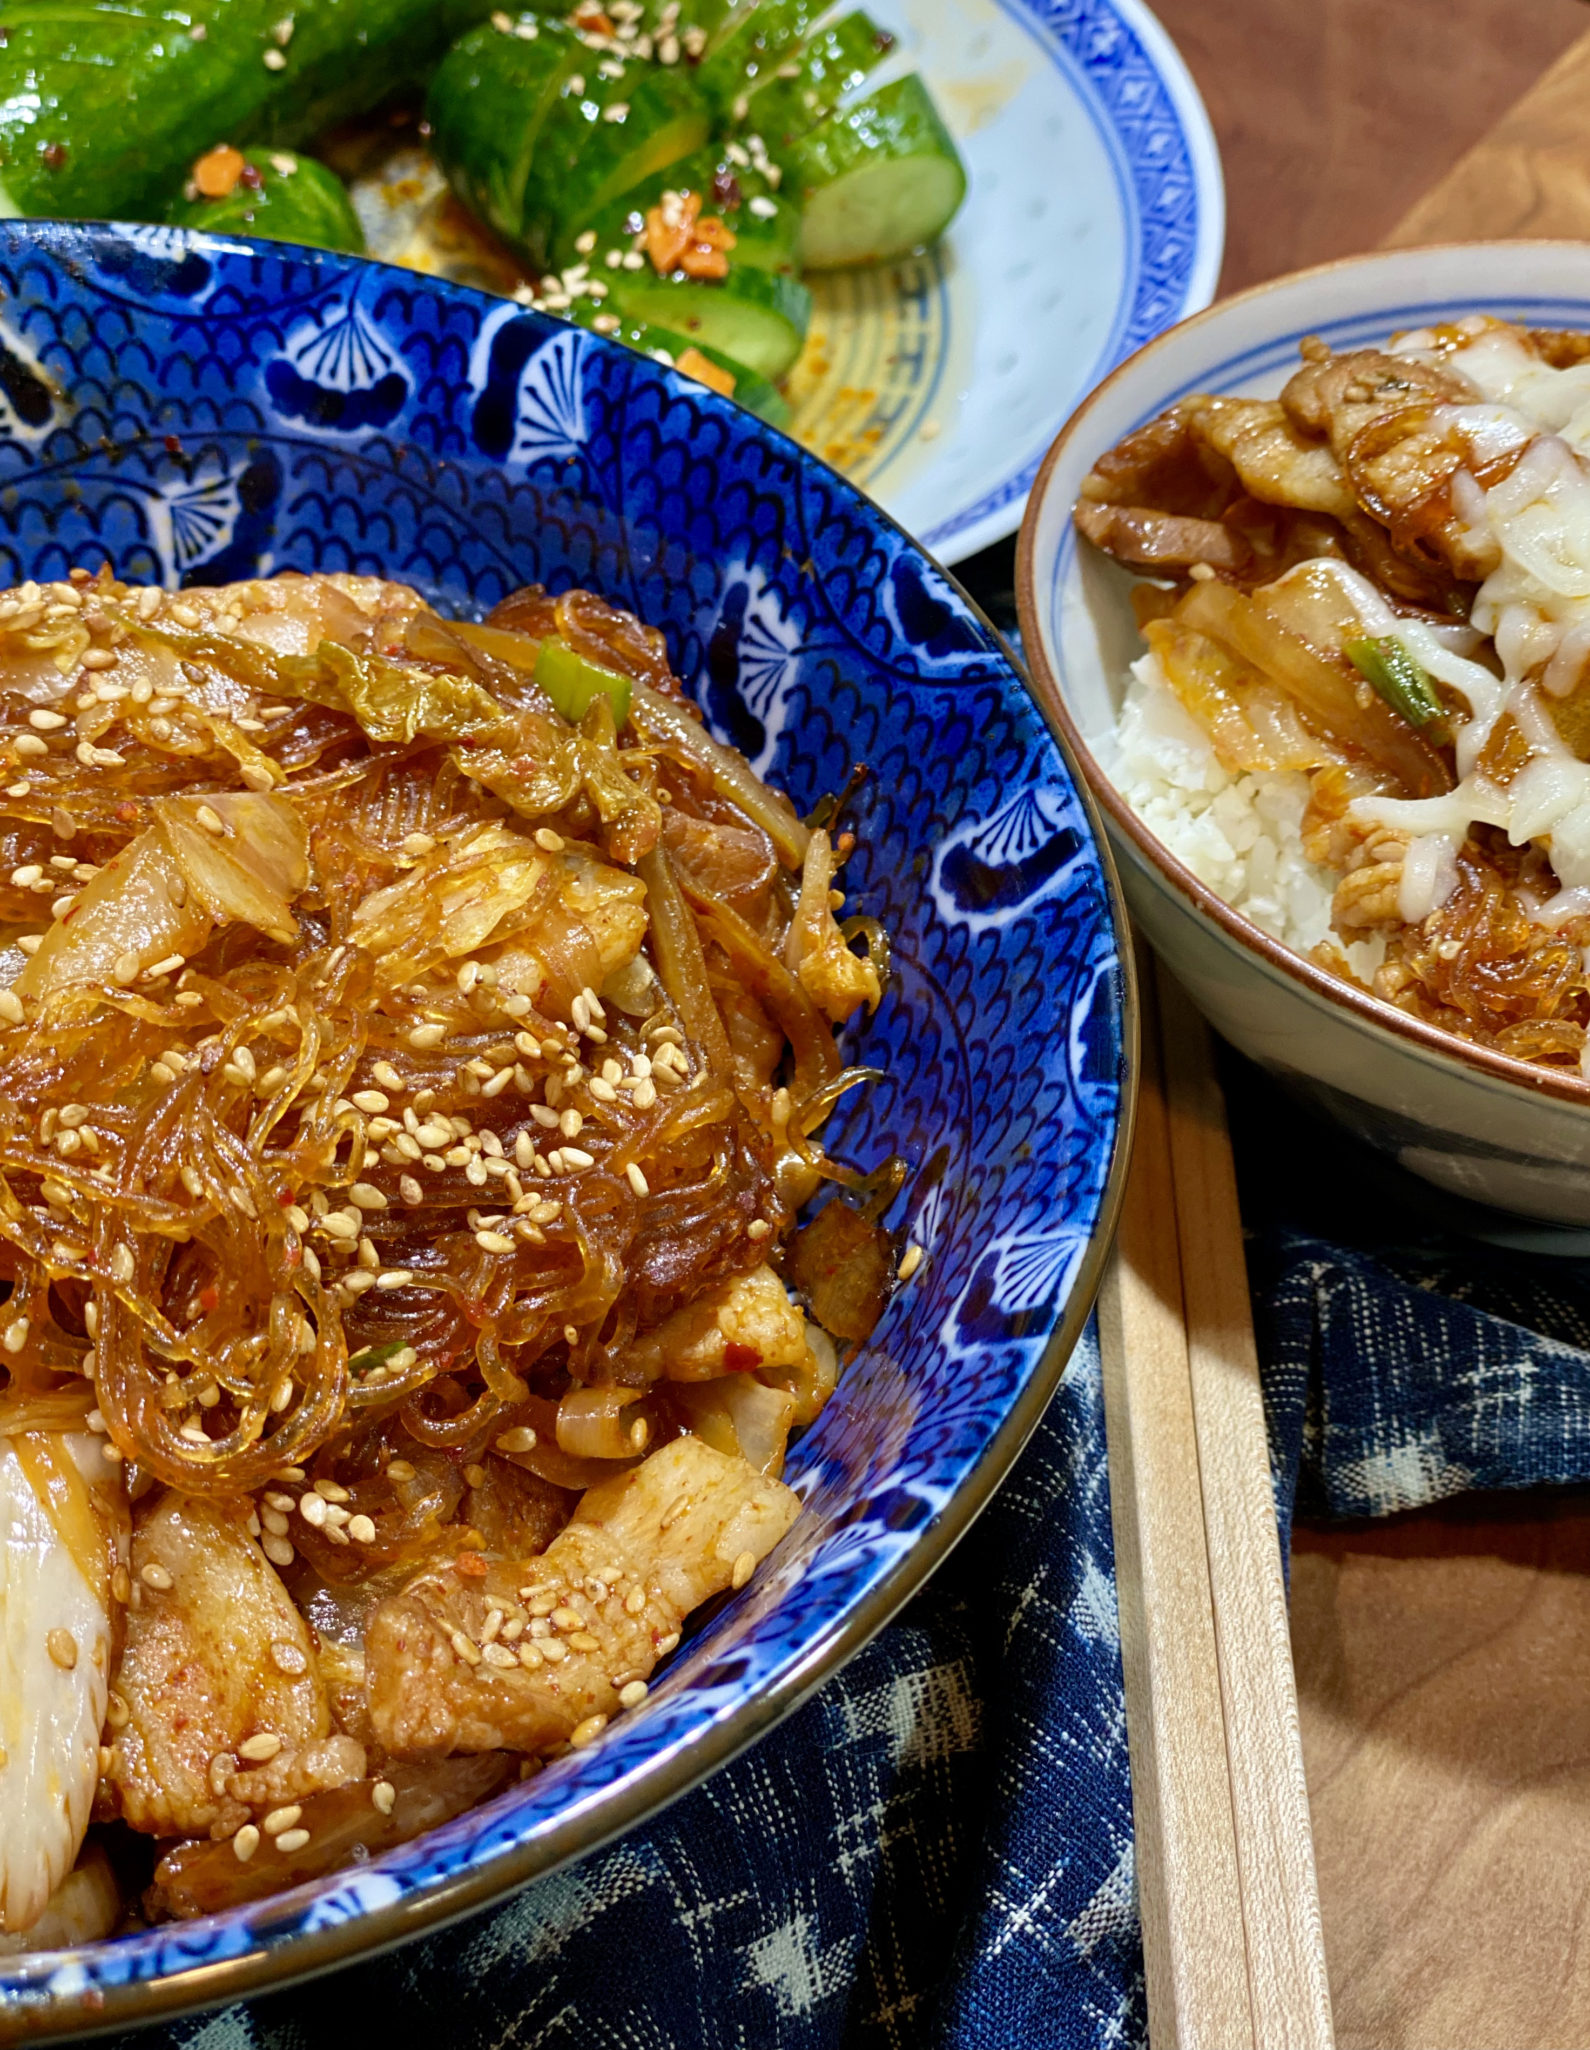
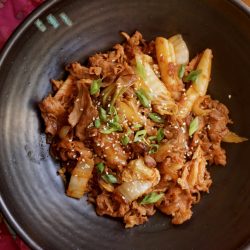
With a large jar of kimchi to consume, I searched for quick and easy Kimchi dishes to try. I scored big time when I found a Pork Belly Kimchi recipe on the blog, Spice the Plate. The kitchen gods were smiling on me, I had sliced pork belly, kimchi and Gochujang in the fridge, didn’t even need to make a grocery run. This dish literally comes together in minutes. While the rice is cooking, you have plenty of time to prep, cook and plate the Pork and Kimchi.
The pork is marinaded in Gochujang, soy sauce and a touch of sugar. While the pork marinades, thinly slice a yellow onion, grab some kimchi and slice the bigger pieces into strips. A couple of minutes of stir-frying, garnish with toasted sesame seeds and green onions to make it pretty, voila’ dinner is served. This pork and kimchi dish hits the spot, spicy with a touch of sweetness from the Gochujang, heat and crunch from the kimchi, and a bit of nuttiness from the sesame oil. This is “party in my mouth” food. Delicious and soooo easy.
I managed to pop a taste in my mouth before heading out for a meeting, pretty yummy. I foolishly thought I’ll have some when I get home. When I got home, the bowl was empty and my kid, a sheepish grin plastered on his face, gave me the two thumbs up. Consolation I guess.
Good thing I bought a big jar of Kimchi. To help you pick your own bottle of pickled goodness, Serious Eats also reviewed Kimchi which you can find here.
Update:
I love this simple, homey dish and it has become part of my regular rotation. Starting with ingredients like kimchi, Japanese curry blocks or Thai Curry pastes are such a boon to homecooks. A flavorful meal in minutes!
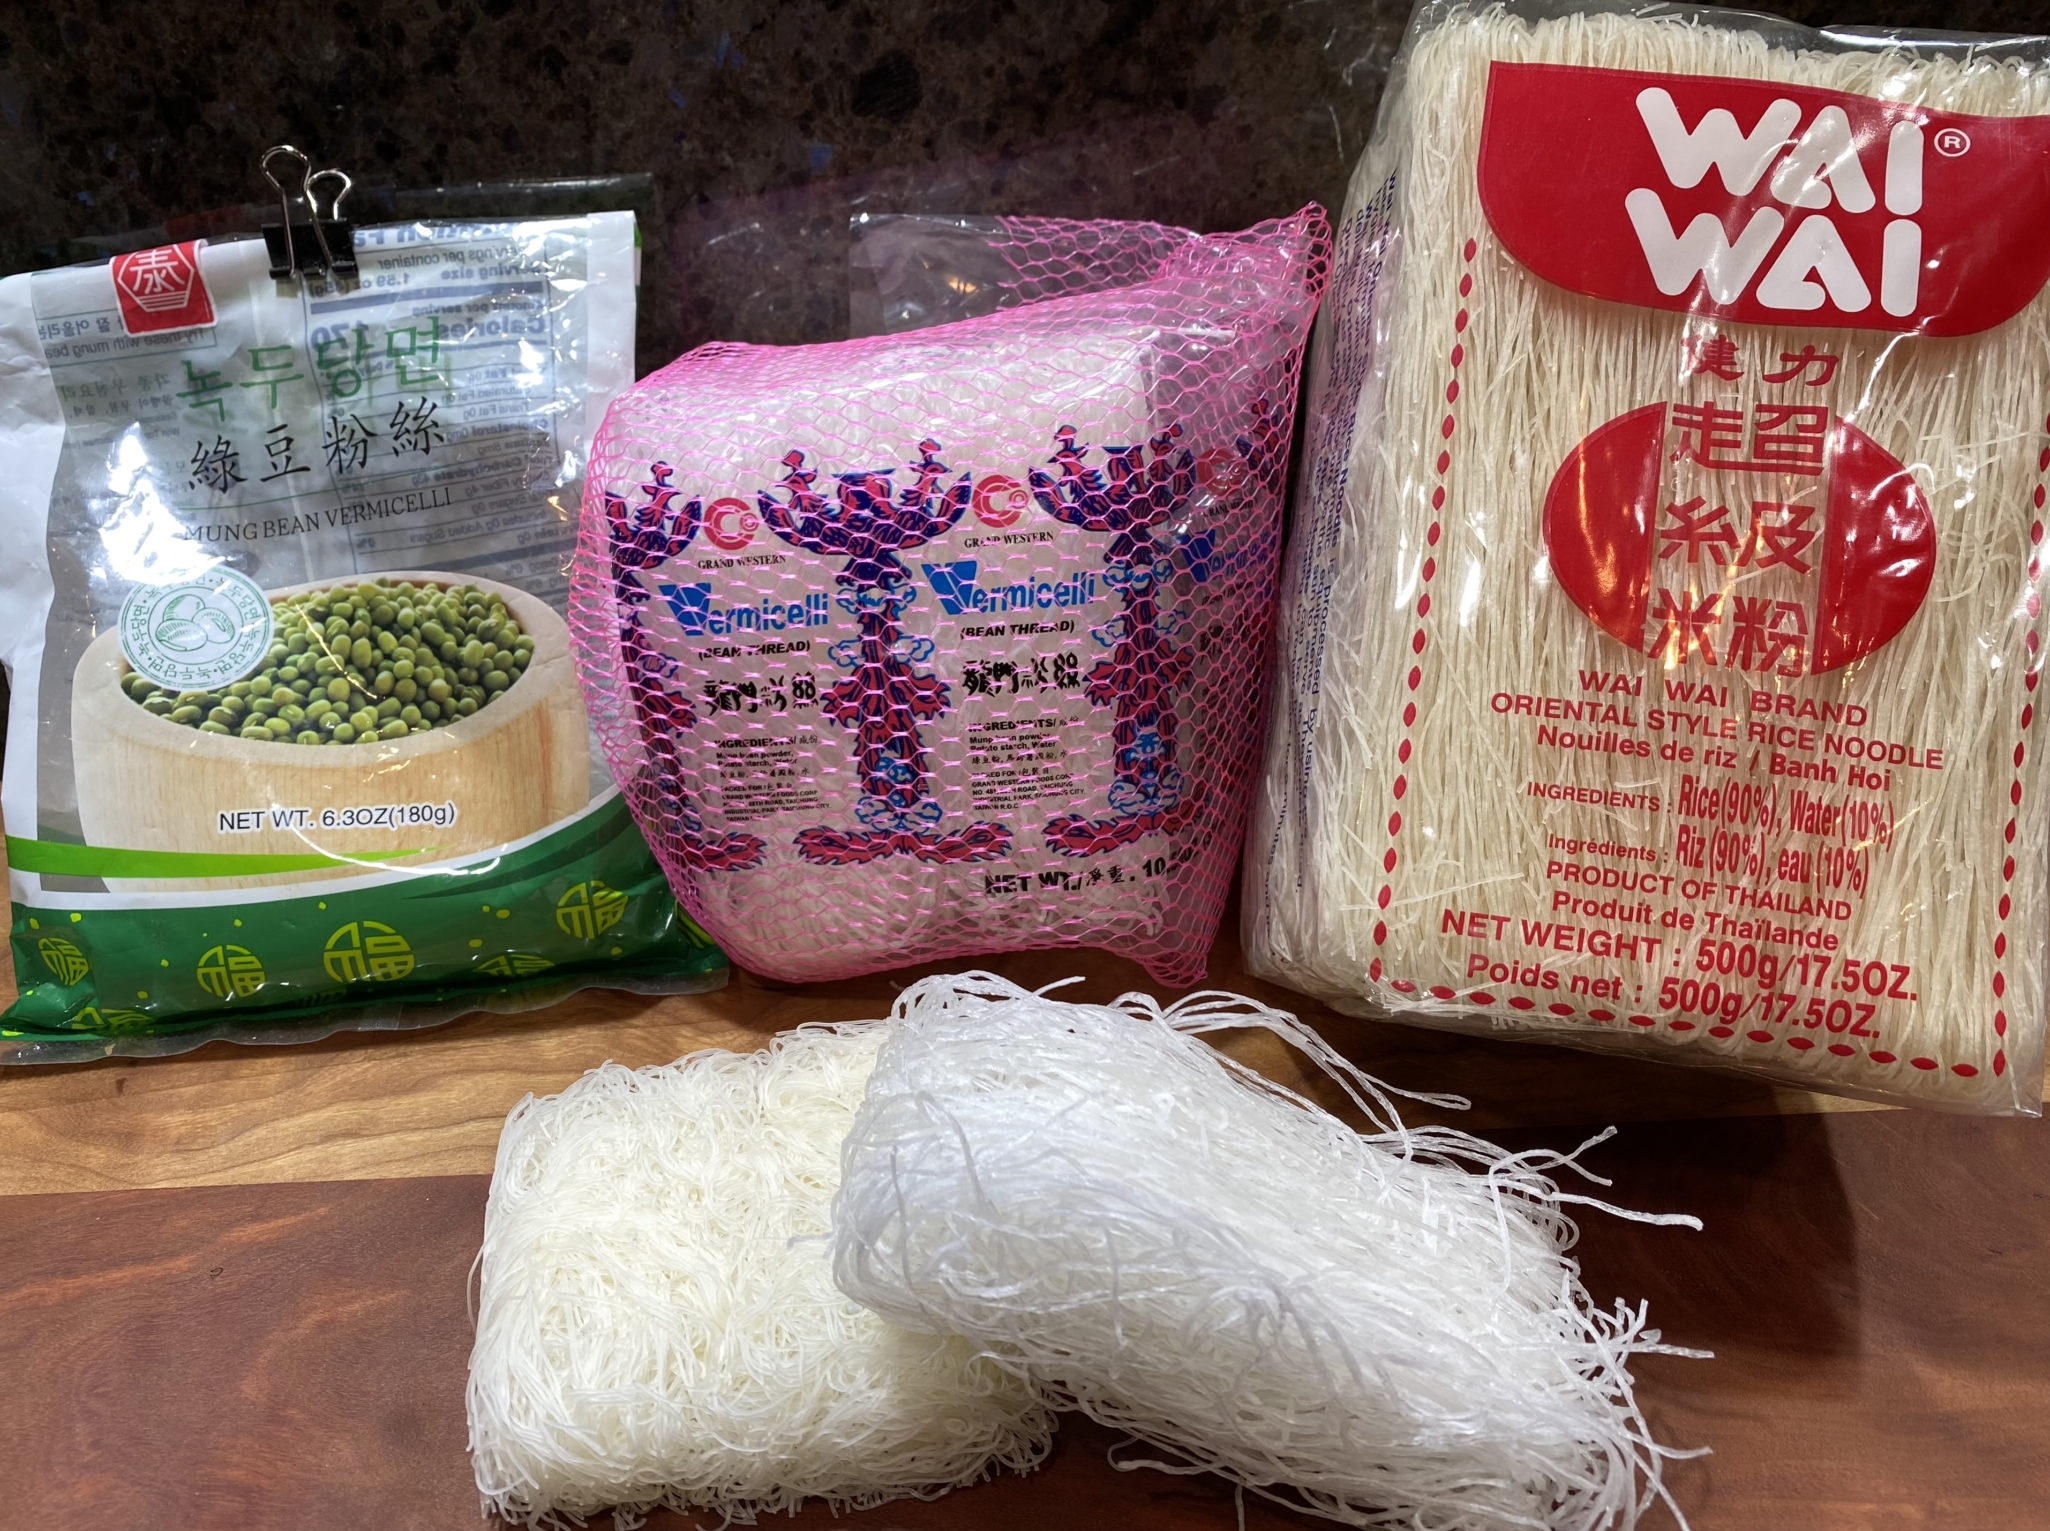
Added cellophane or bean thread noodles to this dish to give it even a little more “oomph” without adding more pork. Bean thread noodles are made of mung bean and once cooked are transparent, and are absolute flavor magnets.
A Deep Dive On This Thread
Cellophane Noodles are found in just about every Asian cuisine, Chinese, Korean, Vietnamese, Thai…you get the picture. The confusion begins with labeling. Bean thread noodles, glass noodles, and vermicelli refer to noodles made of mung bean or sweet potato. BUT the term vermicelli noodles are also used for thin rice noodles. Both come dry and look very similar.
On the left is bean thread noodles made of mung bean. Hydrate them in water and they turn transparent. On the right, once hydrated rice noodles or vermicelli are opaque white. If you have had pho or Pad Thai, the noodles are made of rice. Hawaiian Long Rice (don’t get me started), or Korean Japchae, the noodles are made of mung bean. I could be wrong, but most Cantonese dishes use glass noodles not rice noodles.
This past weekend we had dinner with our “Gourmet Club”. A group of us, 5 couples, started the club when our kids were in preschool. It was a way of committing to a grown-up event, enjoying a nice meal and great conversation, sans kids, balloons, and crayons.
Initially, our goal was once a month, and we would each take a turn at hosting. The host picked the menu and made the main dish. The other couples provided the rest.
Well, with baseball, hockey, soccer practices, piano lessons, homework, not to mention work…monthly became every couple of months. As the kids went in different directions, so did we, and our dinners became much more sporadic. The old adage, time flies rings true. It has been at least 8 years since our last get-together 🤦🏻♀️. Our kids are now all in their twenties…I gotta chew on that for a minute, so it was time to have another dinner. We were long overdue.
Good Food, Great Friends
We talked, laughed, bragged, and complained about our kids, parent’s prerogative. We drank way too many Mai Tais and ate way too much food. Besides Glen’s traditional toast, the best part of the evening was just being together again and enjoying each other’s company.
The days of “gourmet” meals are long gone, perhaps a reflection of where we are in our lives now, the food is unfussy, delicious, and comforting. We were such blowhards back in the day, now, if we want a fancy-schmancy meal, we’re going out. Casual is probably not quite accurate as our buffet included a platter of warm Roasted Cauliflower with a Raisin Caper Sauce from Serious Eats, a classic Greek Salad of garden tomatoes, cucumbers, feta, and onions, and a delicious stuffed pork roast.
I know, y’all are thinking, ok Deb…What did you bring to the table?
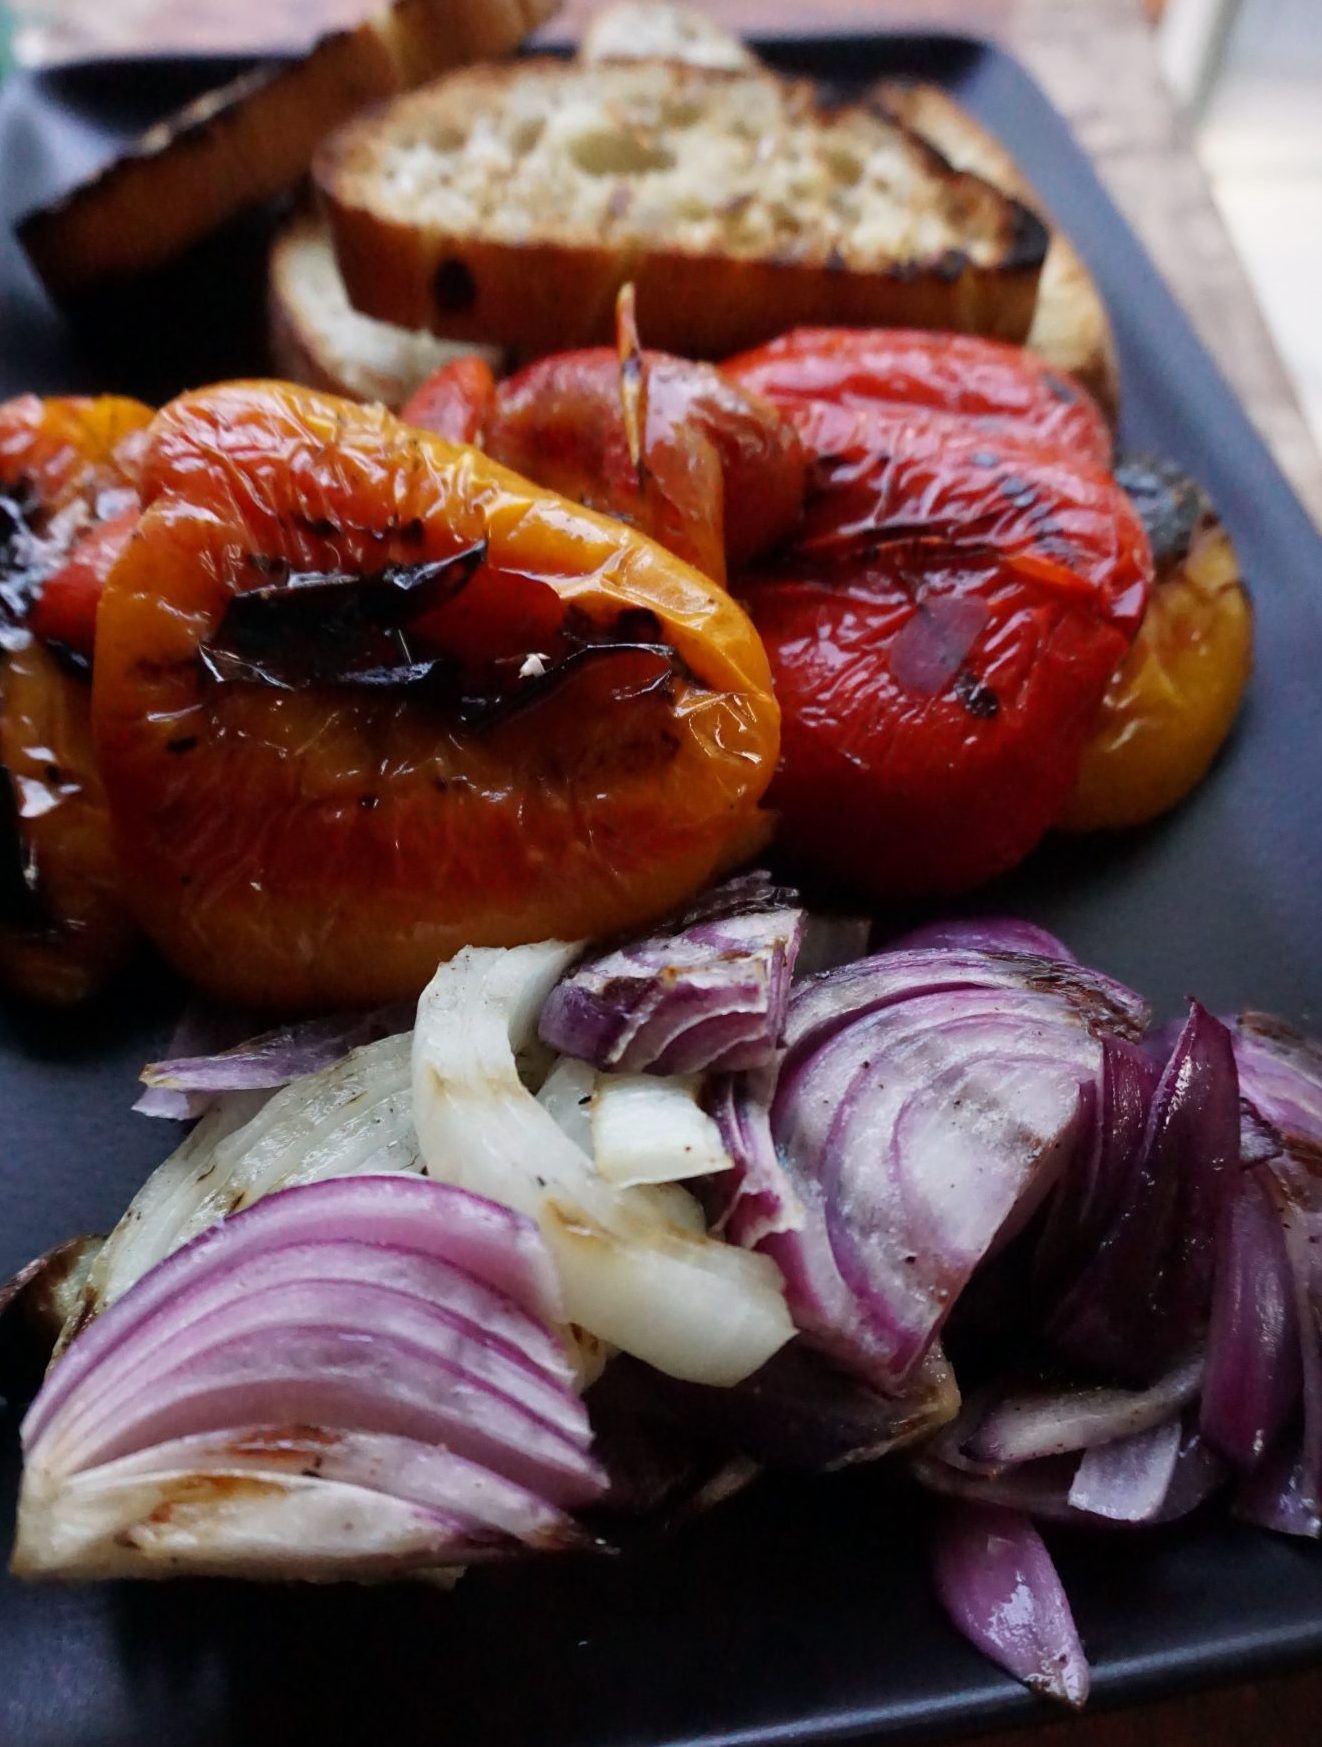
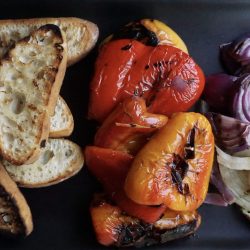
As I was looking for inspiration, a mouthwatering Grilled Peppers and Torn Mozzarella Panzanella popped up on my feed from Smitten Kitchen. Deb Perelman rocks. Maybe it’s a Deb connection, but this isn’t the first time a Smitten Kitchen recipe has popped up when I needed something delicious.
This dish couldn’t be easier. Why? Peppers, red onions, and a nice crusty bread are tossed in garlic, oil and GRILLED and…yay for me, hubby does ALL the GRILLING in our house. Yep. I prepped the veggies and bread and handed them off to Wes. Just like magic, while I was eating Bon Bons (jk), they came back perfectly grilled. Call it the grillin’ and chillin’ method. He grills while I chill-perfect! All I had to do was make a simple vinaigrette, let the peppers soften, tear up the bread and mozzarella, and toss it all in a bowl with the dressing, fini, and Panzanella ready to go. So good, so easy. Folks, you need to file this under “so gonna make this”.
1medium red onionpeeled and cut into 1/2-inch wedges
3tablespoonsolive oil
Kosher salt and freshly ground black pepper
My Part:
2tablespoonssherry vinegar
1garlic cloveminced
1/2teaspoonsugar
1tablespoonolive oil
1tablespoonscapersdrained (rinsed if salted)
4ouncesmozzarellatorn into bite-sized pieces, or 4 ounces bocconcini
Fresh herbs — snipped chivesbasil, or parsley or a mix thereof — to finish (optional)
Instructions
First Part is Mine: Place bread, pepper halves, and onion wedges in a large bowl and drizzle with 3 tablespoons olive oil, then sprinkle 1 teaspoon kosher salt and many grinds (or about 1/4 teaspoon) black pepper. Use your hands to toss everything together until oil coats everything.
Part I Get to Ignore: Heat your grill to medium-high. Spread peppers and onions across grill grates and grill, lid down, flipping as needed until onions are charred in spots (they’ll be done first) and peppers are blistered and blackened in many spots and beginning to soften. Transfer onions to a plate as they’re done; transfer peppers to a bowl. Use bread in bowl to swipe up any excess salt, pepper, and/or oil in it and place slices on grill. Grill until toasted on both sides. Transfer to plate with onions.
Back to Me: Place foil or a lid over peppers in bowl to trap heat. Once they’re cool enough to handle, remove as much of the skin as you can. Cut peppers into 1/2- to 1-inch wide strips.
In the bottom of a large bowl, whisk together sherry vinegar, remaining 1 tablespoon olive oil, sugar, about 1/4 teaspoon kosher salt (and more to taste), and garlic. Add capers. Add peppers to the bowl and let them marinate for as little as 5 minutes or up to a day, even. The longer they souse, the more pickled they’ll taste. After 5 minutes, however, they still have plenty of flavor.
To assemble and serve: Right before you’re ready to serve the salad, add onions to the bowl with the peppers. Tear bread into chunks and add to bowl, along with mozzarella. Mix gently, making sure the dressing coats the bread. Taste and add more seasoning if needed. Finish with basil and chives.
When I lived in Los Angeles my favorite place to eat was a tiny dumpling shop in Chinatown. Before entering I would stop and watch the woman in the window folding dumplings, it was mesmerizing. She would roll the dough into a long rope, deftly cut it into pieces and then with a small rolling pin, flatten each piece into a thin round disc. A spoonful of filling plopped in the center of the wrapper, a couple of turns, and a perfectly pleated potsticker was born.
Hoisin-sweet sauce, Sweet Bean flour is a bit more pronounced in flavor, Bean Sauce is salty with a fermented flavor-umami central. If you don’t have an Asian market near you, I have posted product links in the 3Jamigos Shop for HoisinSauce and Bean Sauce-but it would be WAY cheaper at an Asian market!
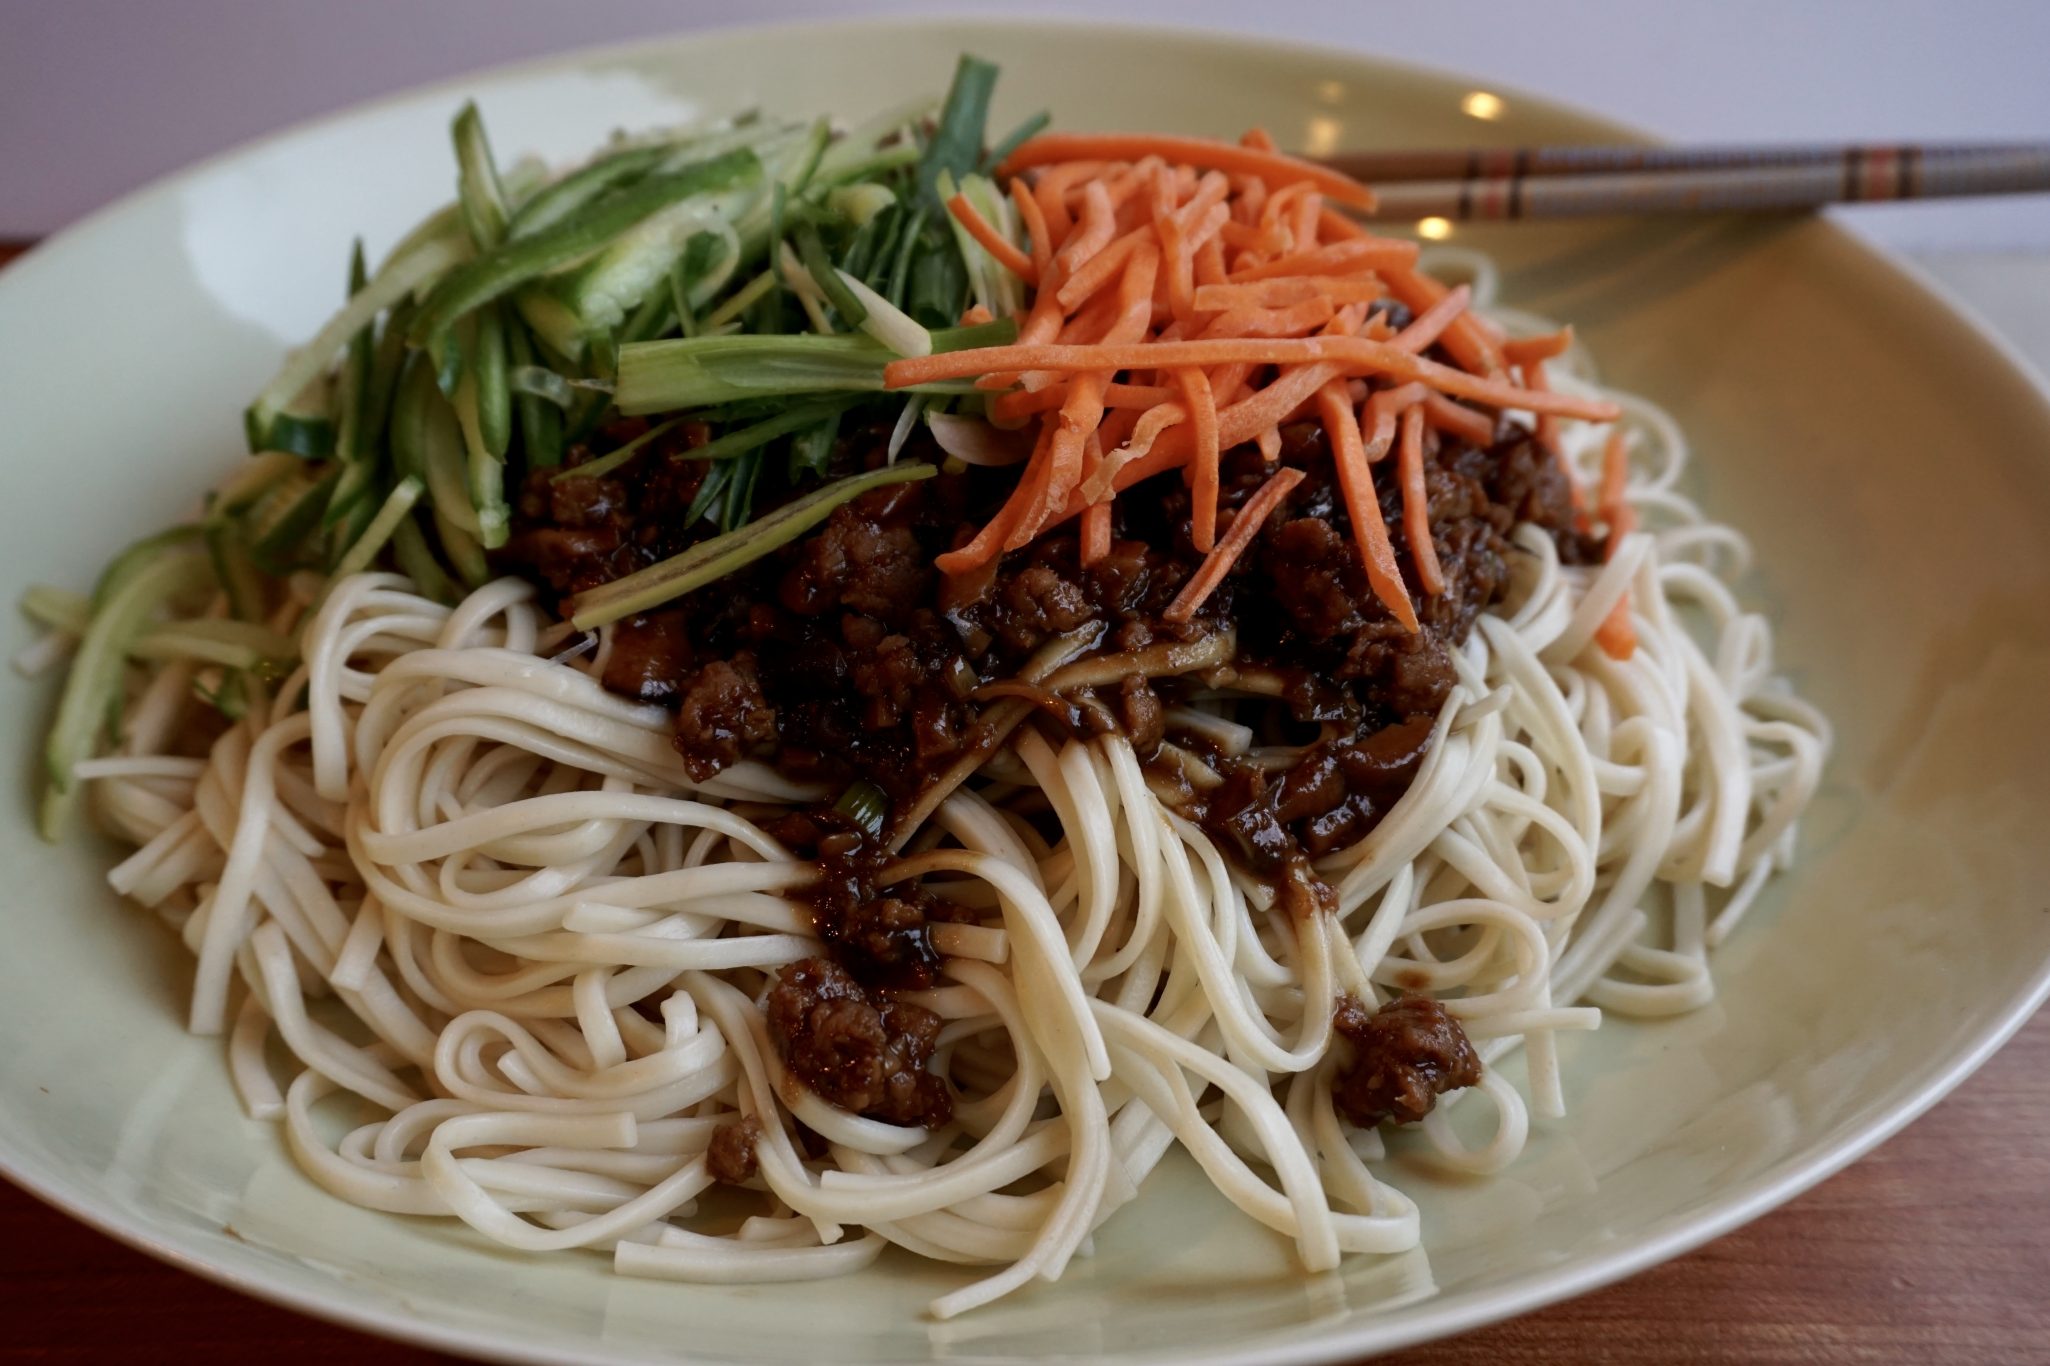
As delicious as the dumplings were, I actually went for the noodles. Their Zha Jiang Mian was “drop the mic” delicious. The literal translation is fried bean sauce noodles. Stir fry ground pork or chicken with shiitake mushrooms, garlic, ginger, sweet bean paste, and ground bean sauce-throw in some water and simmer. Toss with the warm noodles and top with slivers of green onions, crisp carrots, and refreshing cucumbers, it is really yummy.
If a celestial chef decided to create the perfect bowl of noodles-this would be in the running.
My quest to make my own perfect bowl of noodles started with the recipe on the blog “The Woks of Life” (mom, dad & 2 sisters blogging from different parts of the world, check it out). The recipe calls for ground bean sauce and either sweet flour sauce or Hoisin. I like Zha Jiang Mian with a touch of sweetness so I used Sweet Bean Paste and Hoisin with the Bean Sauce. Stir fry the pork, seasonings, and mushrooms and add water to create the sauce. Reduce the sauce until it has thickened and has a nice sheen. Pour over noodles, add your veggies, dunzo. A little bowl of goodness ready to eat. Sadly, the little shop is gone and it’s a long drive to LA just for noodles anyways. It’s a good thing I can make my own Zha Jiang Mian.
Zha Jiang Mian Korean style and Chinese Style, both delicious!
Course Main Course
Cuisine Asian
Keyword Zha Jiang Mian
Prep Time 10 minutesminutes
Cook Time 20 minutesminutes
Total Time 30 minutesminutes
Ingredients
6oz.ground pork
¼teaspoonsalt
1teaspooncornstarch
½teaspoonoilplus 1 tablespoon
⅛teaspoonwhite pepper
3slicesgingerminced finely
4clovesgarlicminced
2tablespoonssweet bean sauceI used 2 T Hoisin/1 T Sweet Ben Sauce
3tablespoonsground bean pasteReduce to 2 T
1tablespoondark soy sauce
1cupwater
8oz.fresh noodles flour-based noodle. Fresh or dry. I've used udon and a combination of spinach and plain
Additional Chinese Ingredients
4-6fresh shiitake mushrooms*finely chopped
1cupjulienned carrots
1cupjulienned cucumbers
½cupjulienned scallionsgarnish
Additional Korean Ingredients
3fresh shiitake mushroomsdiced
1mediumYukon Gold Potato*1/2 inch dice for Korean version
1smallzucchini1/2 inch dice for Korean version
1/2cupcarrots1/2 inch dice for Korean version
1/2small yellow oniondiced
1/4 headcabbageshredded, optional
1/2cupgreen onionschopped
1/2cupcucumbersdiced
Instructions
Marinade the pork with the following for 15 minutes: ¼ teaspoon salt, 1 teaspoon cornstarch, ½ teaspoon oil, ⅛ teaspoon white pepper.
Heat a tablespoon oil in your wok over medium heat, add the marinated ground pork to the wok. Cook for a minute to brown it, and then add the ginger, garlic, and mushrooms* Stir fry everything together for another 2-3 minutes.
**Add the Hoisin, sweet bean sauce, bean paste, dark soy sauce, and water, stirring everything together well. Lower the heat and cover the wok. Simmer the sauce for 15-20 minutes, stirring occasionally to prevent sticking.
Meanwhile, cook the noodles according to the package directions.
Top noodles with the sauce and garnish with the julienned carrots, cucumbers, and scallions.
Korean Style*
Stir fry pork, ginger, and garlic for 30 seconds add diced vegetables. Stir fry for 2-3 minutes. Continue with recipe**
If you like, add shredded cabbage in the last couple of minutes of cooking.
Place a mound of noodles in your bowl, top with sauce and garnish with cucumber and green onions. Plop yourself down in front of the telly and enjoy!