Category: Asian Dishes

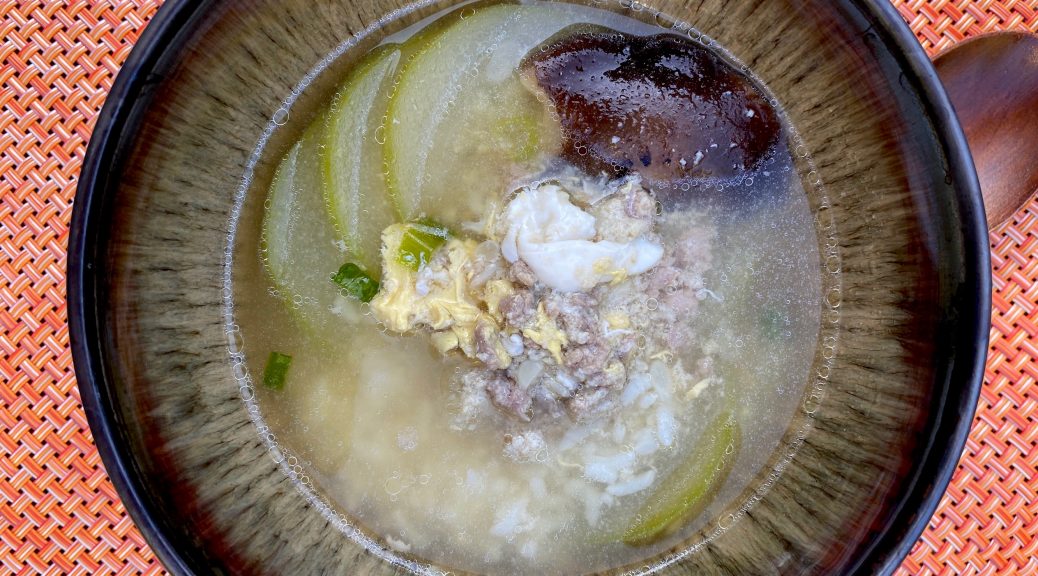
Itching for Fuzzy Melon Soup (Mo Gwa Tong=毛瓜汤)

Itching for Fuzzy Melon Soup (Mo Gwa Tong=毛瓜汤)

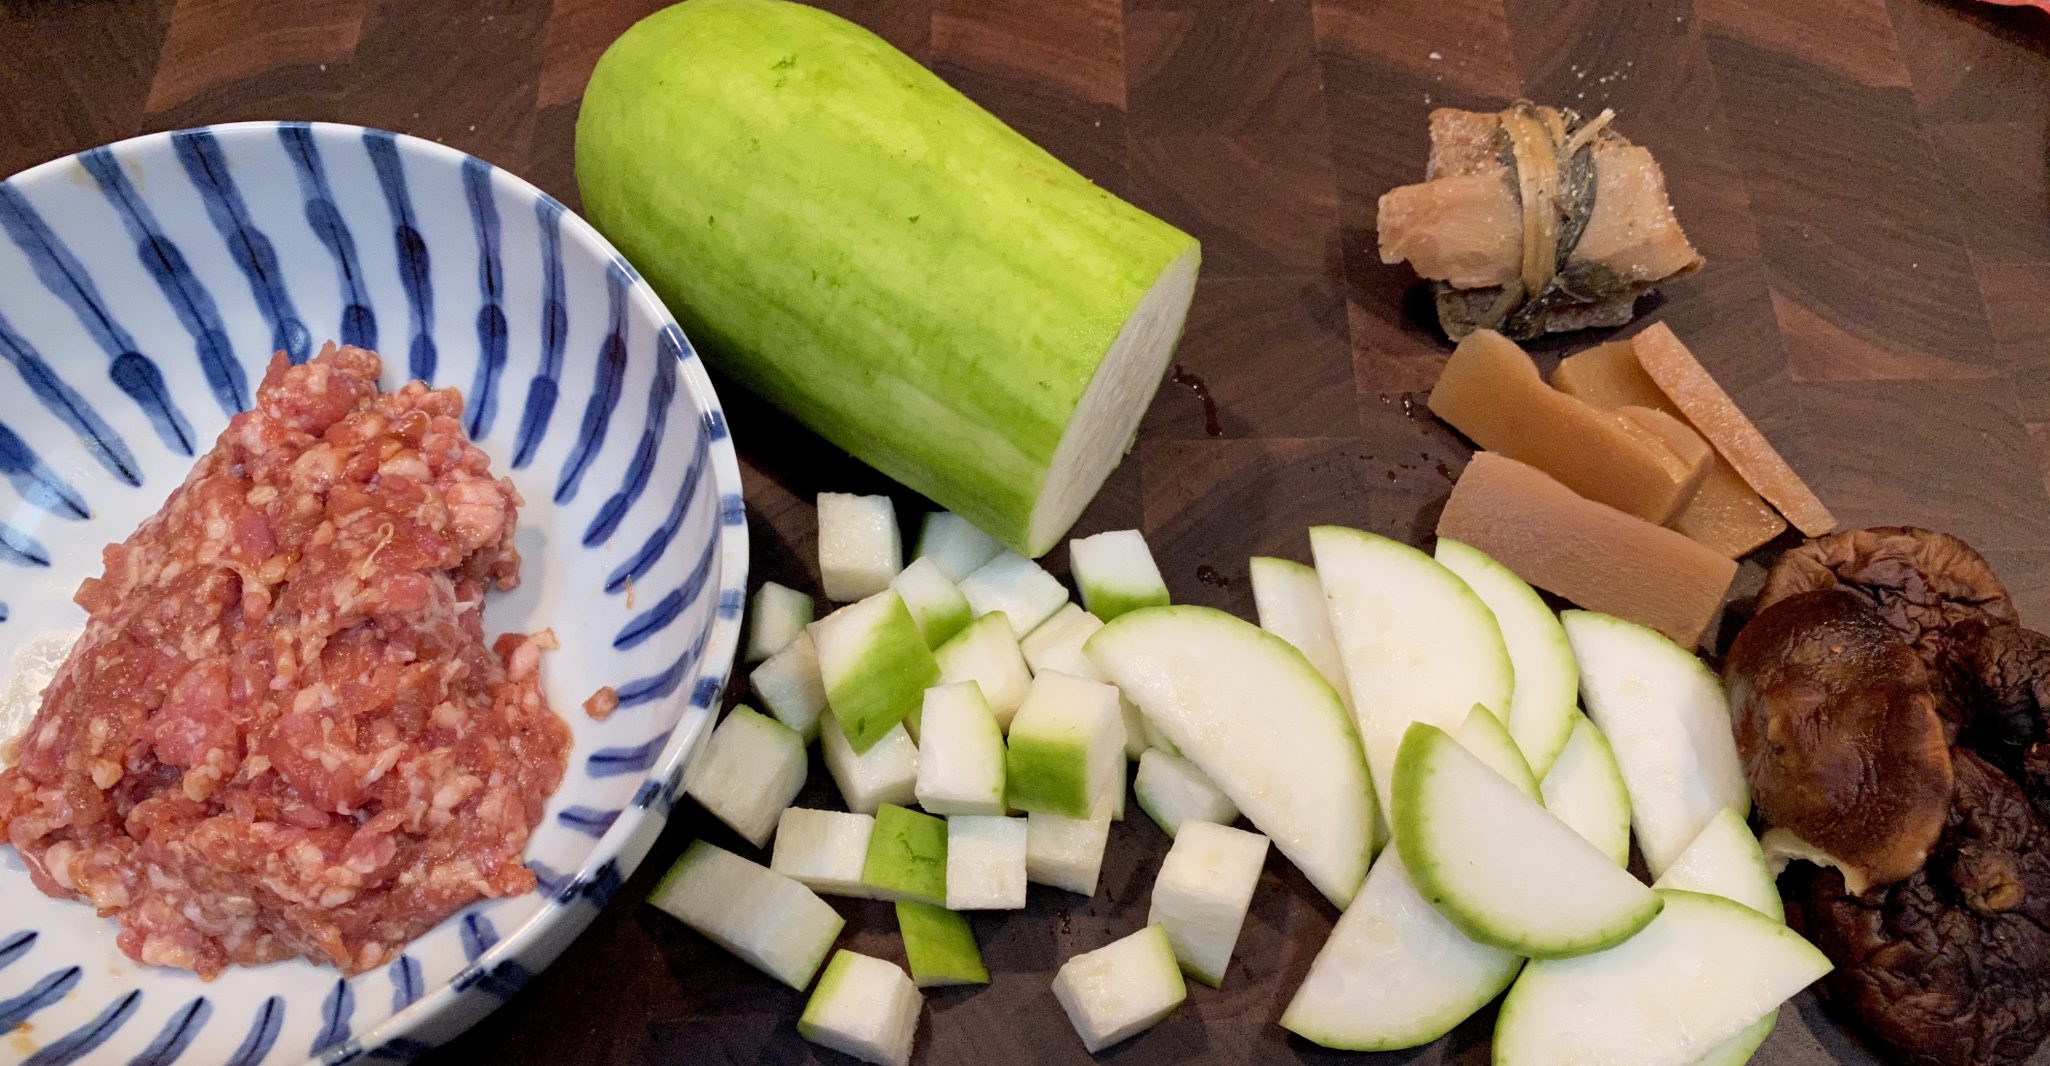
Now don’t freak over the term Fuzzy Squash or Melon.  This squash does have a fuzzy exterior but it is scraped off before cooking.  You are left with a sweet, mild, squash that is wonderful in soups, as a side dish with Chinese sausage and bean thread noodles, or stuffed with meat filling and steamed-my favorite, but for another post.  We’re talking soup today.

But Let’s Start with Soup ABCs

We can break down Chinese Soups into two categories, quick soups and long, slow simmer soups.  We tend to have quick soups on weekday workdays and save slow simmered soups (老火湯,) for the weekend.  Both types are delicious of course.  Many of the slow simmered soups are thought of as tonics.  Various herbs are added for their health benefits.  Valid?  I’m not sure, I just know they are delicious and comforting.  But if you ask my 90+-year-old mom, she would say she is living proof.

But This is About Quick and Easy

I learned how to make this soup from my Dad, the King of “dinner on the table in less than an hour”. To start, marinate ground pork for a couple of minutes (ok, more like 10-15min), then fry it with a couple of slices of ginger until it is no longer pink.  Add water or chicken stock along with the rehydrated mushrooms and salted turnip and simmer for 10-15 minutes.  Toss in the squash, bring to a boil, then lower the heat so the soup simmers for another 15 minutes or until the squash is translucent.  Finish by adding the tofu, and egg and simmer for a couple of minutes to cook the egg.  Taste for seasoning, add salt if needed. Garnish with scallions, and bada bing bada boom, ready to eat.  My kids always throw rice into their bowls of soup, just like I did when I was a kid.  This soup is a favorite, right after Corn Soup.  This is down-home Cantonese soul food, da best.

Print Pin
5 from 3 votes

Fuzzy Melon Soup

Down home Cantonese Soup, Fuzzy Melon Soup is quick and easy
Course One dish meals, Soup
Cuisine Asian
Keyword Fuzzy Melon Soup, mo gwa tong
Prep Time 15 minutes
Cook Time 15 minutes

Ingredients

  • 1 fuzzy melon Scraped and cut into slices, 1/4 inch thick
  • 1 salted turnip Separate pieces, you will have a center chunk wrapped with a slice of root and leaves. Use 1 piece, either the slice, or leaves or the center chunk, rinse the piece you are going to use lightly with cold water to remove salt. Return remainder to bag for later use.
  • 3 dried shiitake mushrooms Soaked in hot water to soften (20 minutes)
  • 8 cups water or 1:1 chicken stock:water or add 1 heaping T Better Than Boullion Chicken base to water.
  • 1-2 slices fresh ginger Smash slices with the flat of a cleaver or knife to help release flavors
  • 1 block tofu (1/2 carton tofu) soft, medium, or firm, diced to 1/2-3/4 inch cubes if using firm tofu.
  • 1 egg lightly beaten
  • 1 stalk green onion diced
  • 2-3 springs cilantro garnish
  • 1 tsp soy sauce

Marinade for Pork

  • 3/4 cup ground pork
  • 1 tsp rice wine
  • 1 tsp oyster sauce
  • 1/4 tsp sugar
  • 1/4 tsp salt and a dash of white pepper

Instructions

  • Combine marinade ingredients with ground pork. You can use chicken or turkey if you like. Let sit for 10-15 minutes
  • Scrape fuzzy melon with a knife to remove fuzz and top layer of melon. Once scraped it should still be light green in color. You can use a peeler but it will take more of the squash than necessary and the pale green layer will be removed. It's NBD. Cut melon in half lengthwise and then cut each half lengthwise to create quarters. Cut each quarter crosswise into ~1/4 inch thick slices. Set aside.
  • Heat 2 tsp of vegetable or peanut oil in a medium saucepan (3-4 qt). Add ginger and pork. Saute' until pork loses pinkness.
  • Add water/stock, mushrooms, and turnip to saucepan. Bring to a boil and lower heat to a low boil for 15 minutes. You can add soy sauce at this point or before tasting for salt in the next step.
  • Add squash to stock, bring back to a boil and immediately reduce heat again to a low boil. Cook until squash looks opaque rather than white and has softened but still retains its shape (about 10-15 minutes). Taste and season with salt if needed.
  • Add tofu and heat through. Once soup is hot again, lower heat to a gentle simmer or turn it off. Stir soup with chopsticks or spoon in one direction, add egg in a slow steady stream to create egg ribbons in soup (like egg drop soup). Or crack the egg into soup and let it poach without breaking the egg up. My dad always let me have the egg, lol. Daddy's little girl.
  • Garnish with green onions or cilantro, serve immediately.

Notes

Remove mushrooms from soup, thinly slice mushrooms and add them back to the soup. 
The egg is optional if you don't want to add it, fine.  My dad would crack the egg into the soup and let it poach, the winner gets the egg (or whoever whined enough to get it).
Salted Turnip-here is a link to a description of the one I use.  Found in most Asian markets, in particular Chinese Markets
Quick Fix: Cabbage with Butter and Soy Sauce

Quick Fix: Cabbage with Butter and Soy Sauce

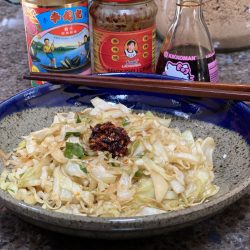
I love cabbage.  This has been a recent revelation.  I’m not quite sure why cabbage has grabbed my attention but I find myself throwing it into a variety of dishes-salads, curries, soups, and stir-fries.

With a head of cabbage in the fridge and little time,  I needed a quick side dish for dinner.  A recipe form Eric Kim on Food52 popped into my head, asparagus with soy sauce and butter.  Why not trade the cabbage for the asparagus?

Quick and Easy

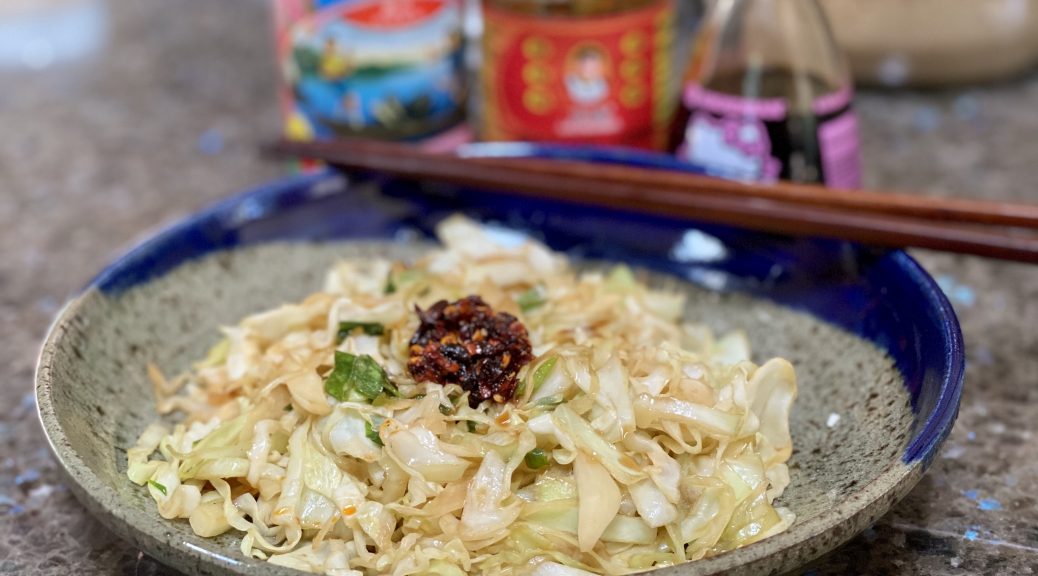
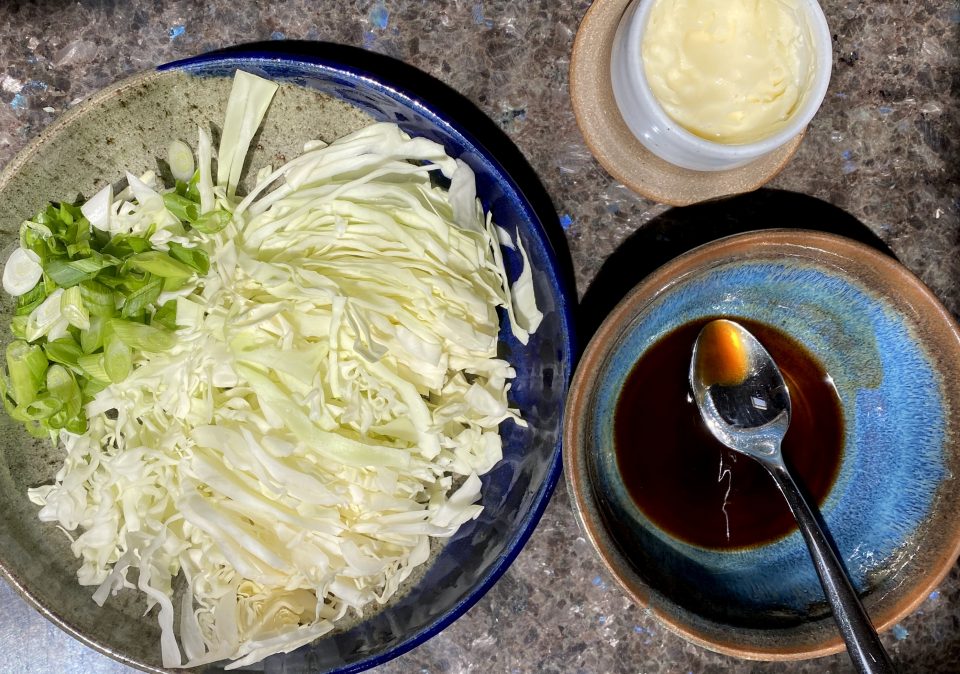
Shred cabbage, not too finely so it retains some crunch, and set it aside. Heat a pan large enough to hold the cabbage.  Melt the butter, add the cabbage and cook until it wilts.  Add soy sauce, and stir fry until the butter and soy sauce bubble.  Season with pepper and salt if needed.  Bada Bing Bada Boom, done.

Substitute ponzu soy for a touch of citrus or dashi soy for seafood twist or an equal amount of oyster sauce adds flavor also.  Garnish with sliced green onions.

Cabbage with Butter and Soy Sauce

Course Side Dish
Cuisine Asian-American
Keyword brown butter, cabbage, soy sauce
Prep Time 5 minutes
Cook Time 5 minutes
Servings 3 servings

Ingredients

  • 2 tablespoons unsalted butter
  • 1/2 head of green cabbage shredded into 1/2 to 3/4 inch strips
  • 2 tablespoon soy sauce or substitute Ponzu or Soy Dashi or use 1 T oyster sauce and 1 T soy sauce
  • Flaky sea salt and freshly ground black pepper garnish

Instructions

  • Heat a skillet over high heat and melt the butter. Add the cabbage, season with salt and pepper, and cook for 2-3 minutes until slightly wilted. Add the soy sauce and cook for another minute or until the butter and soy sauce bubble up into a sticky glaze. Garnish with sliced green onions. Serve immediately.

Notes

Okay, for you carnivores...saute' diced bacon (2 slices), omit salt and use half the butter with the bacon fat.  
Tomato Egg Soup (Souper Easy, Soul Food)

Tomato Egg Soup (Souper Easy, Soul Food)

My favorite category for foods is not dessert.  Nope, its soup. I LOVE soup. To the age-old question if you were stranded on a desert island and could only have three things…soup would most definitely be on my list.

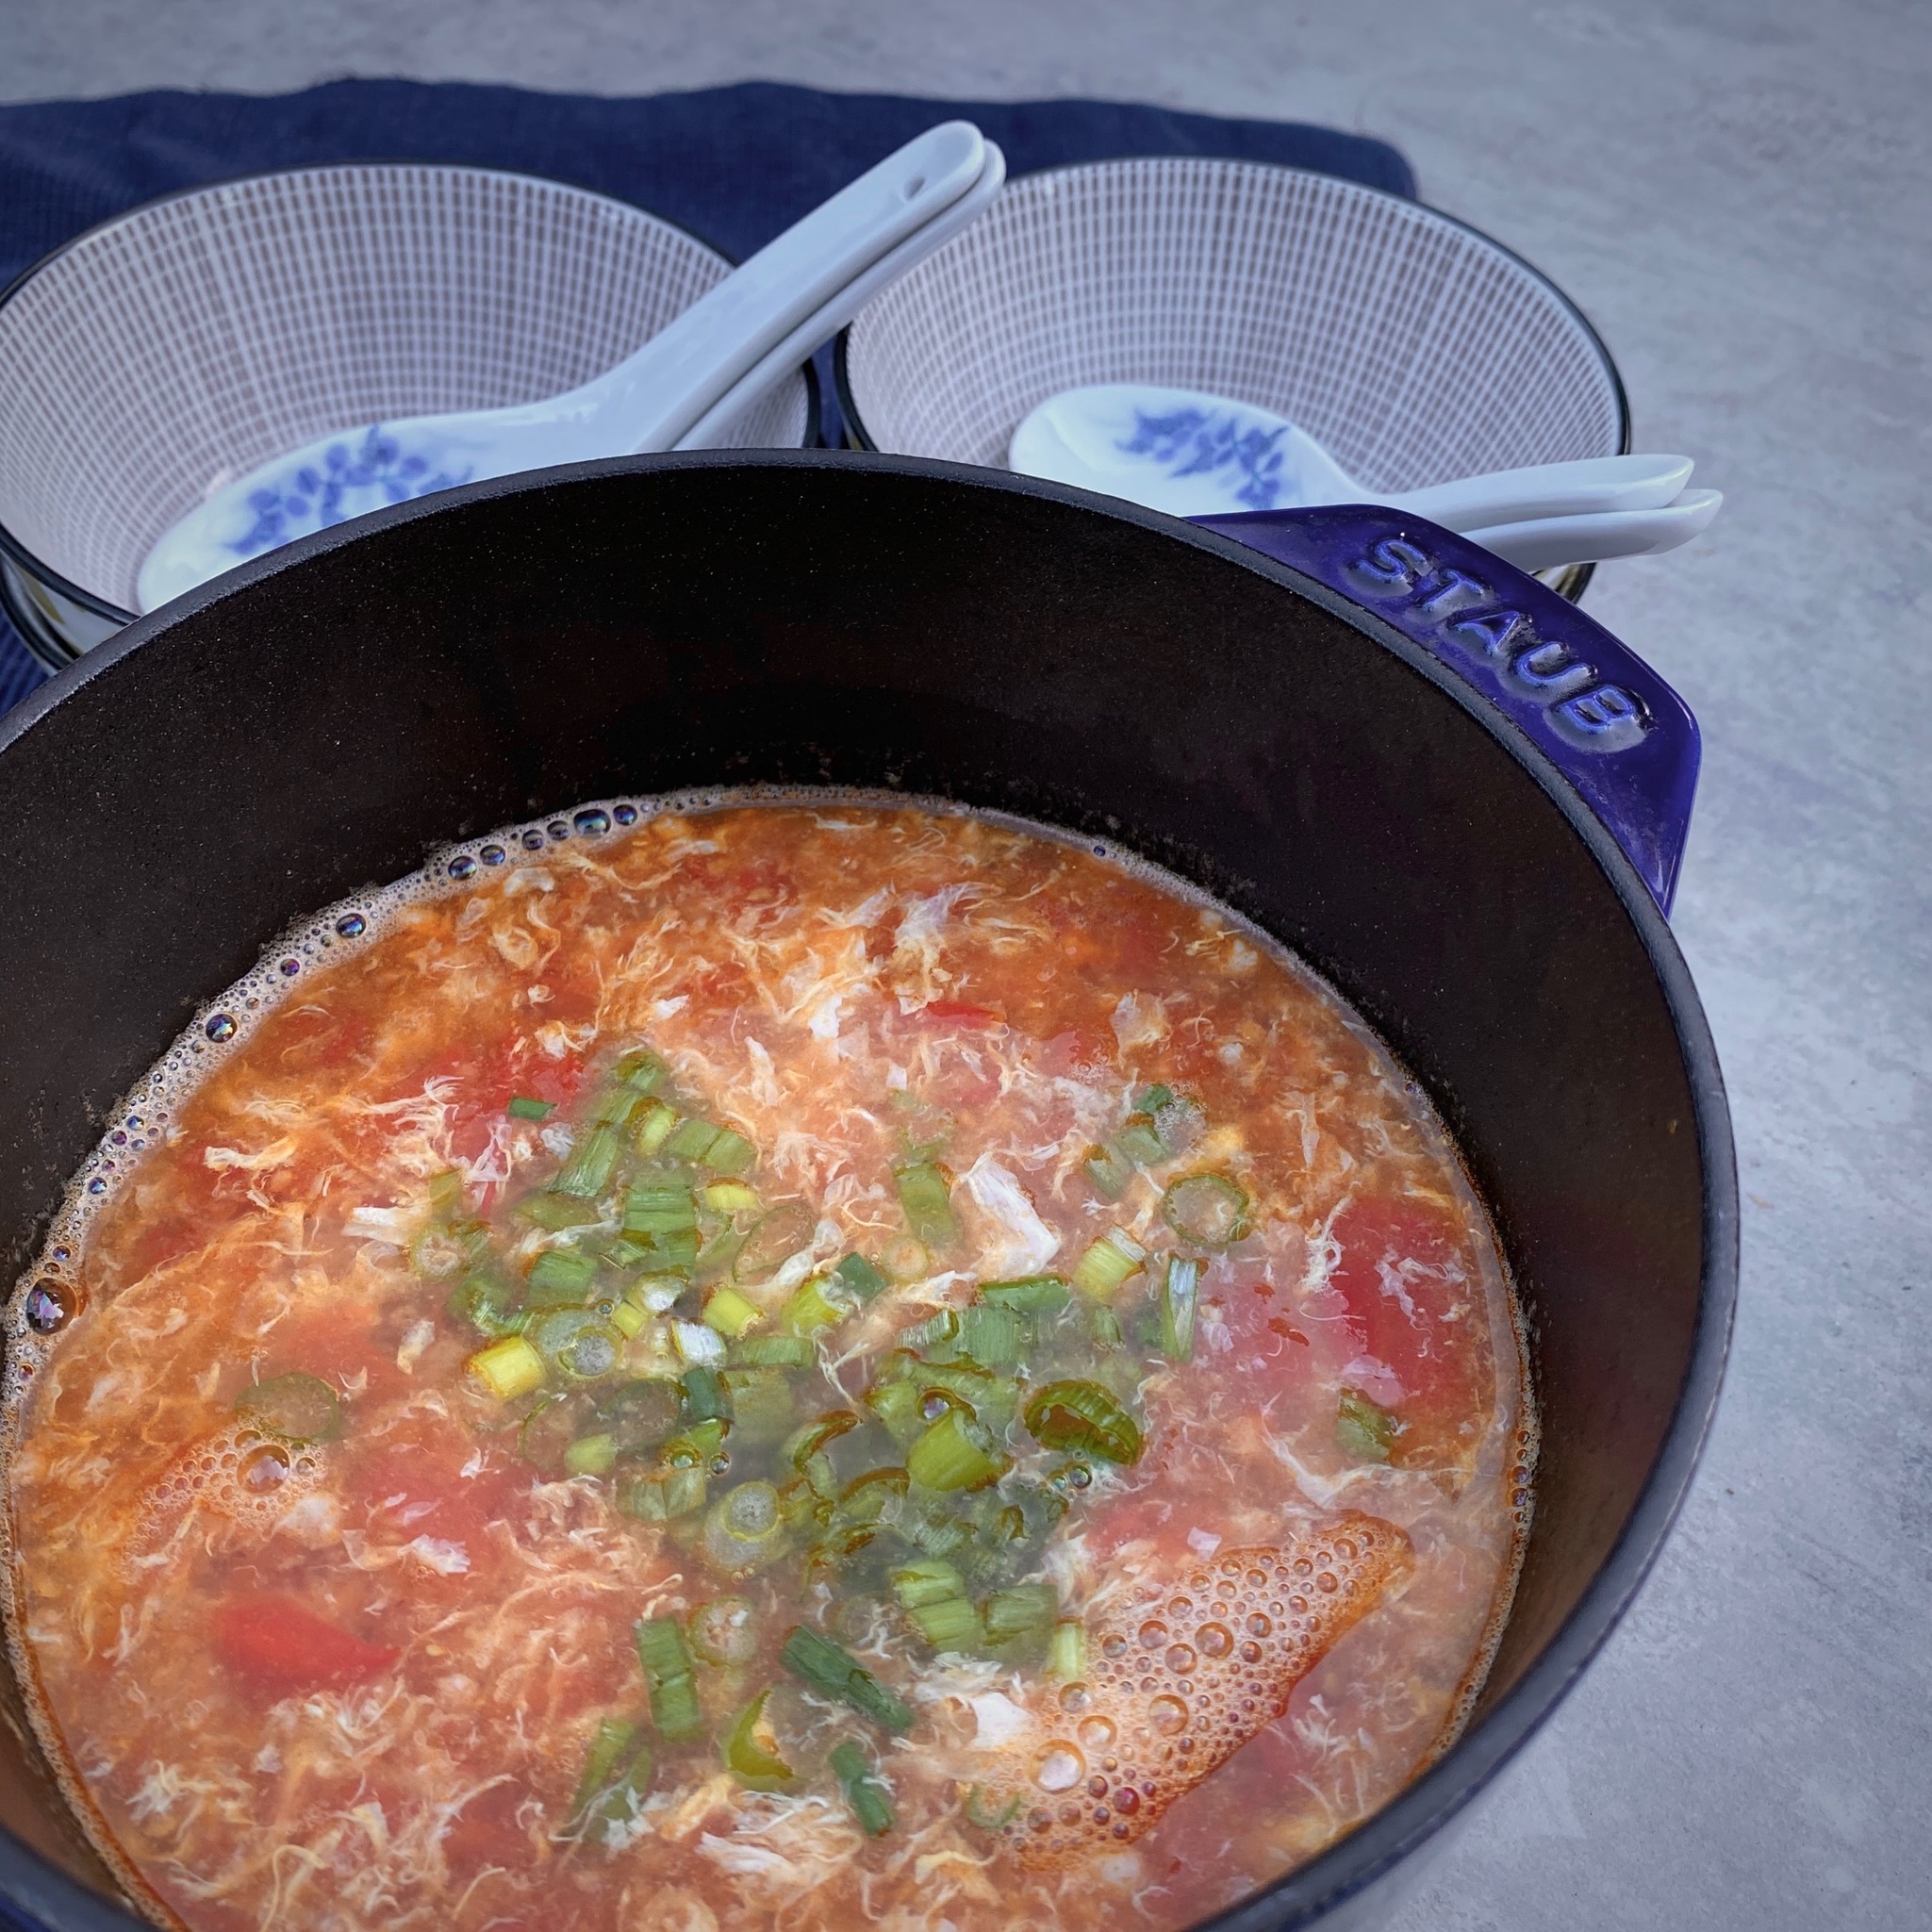
Growing up, my dad almost always made soup with dinner.  Weeknight dinners meant a quick soup like Corn Soup or Egg Drop Soup.  This is a twist on egg drop soup. With tomato season in full swing, this is the perfect time to make Tomato Egg Drop Soup.

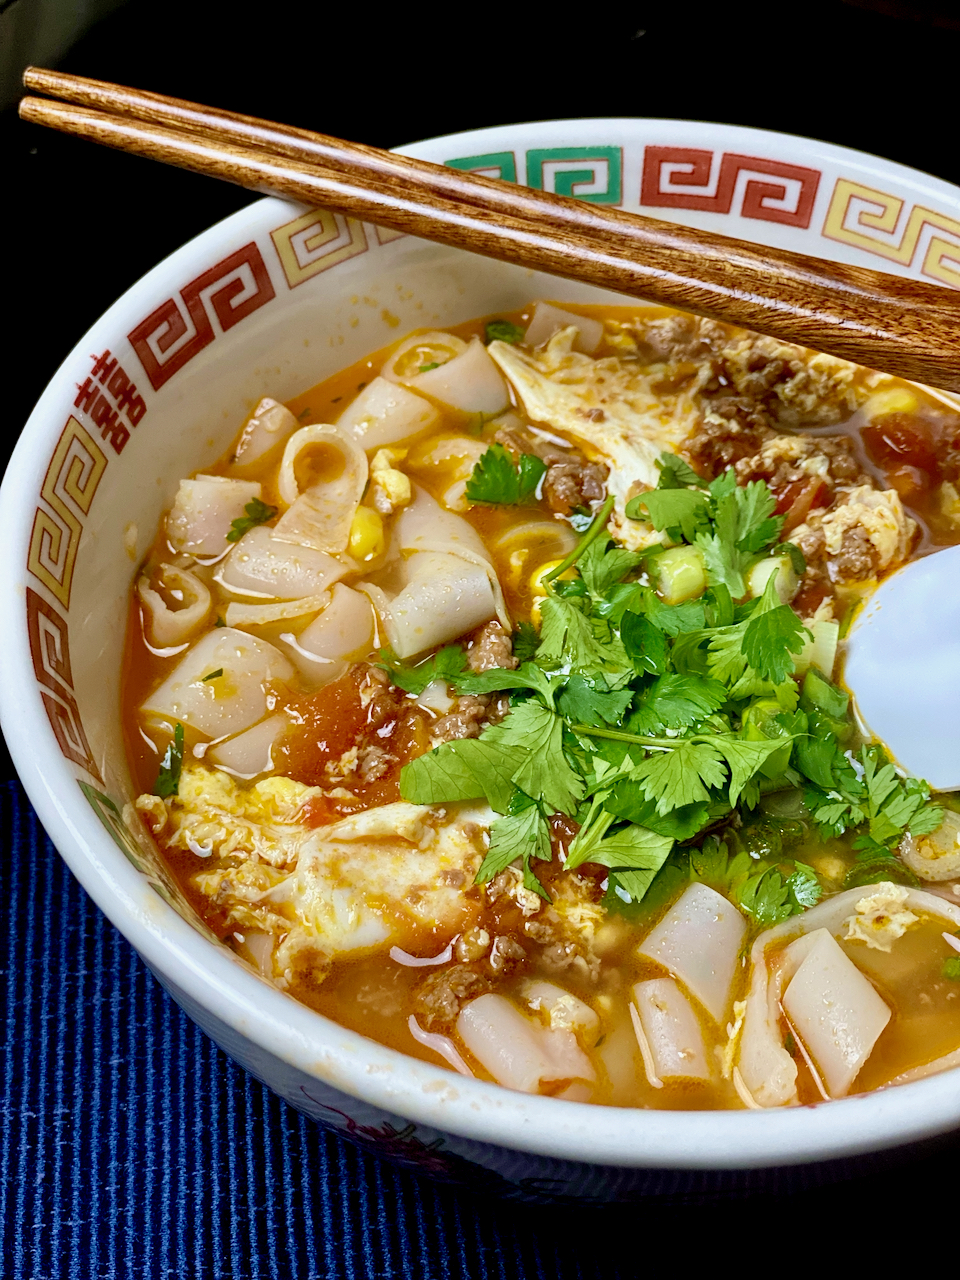
I adapted a recipe I found on The Woks of Life, a fabulous blog/website for Asian recipes and stories.  My version includes a bit of ground meat for flavor and texture because that’s how my Dad made it.  The cornstarch slurry gives the soup a bit of body, you can leave it out if you wish.  This is great as a noodle soup also.  Delicious with rice noodles, and hand-pulled noodles.

The Key

The key to this recipe is not just great tomatoes, but how to create the egg ribbons in the soup. The direct translation of the name is actually Egg Flower Soup as the egg resembles a flower.  When adding the egg, make sure the soup is on low heat so that the soup is at a gentle simmer.  Add the egg in a slow steady stream as you swirl the soup in ONE DIRECTION with either chopsticks or a spoon. If you move your utensil in different directions you will not get the ribbons of egg.  You can hold the soup at a gentle simmer, do not boil the soup as that can curdle the egg. Garnish with green onions or cilantro, I like both.

Try this quick and easy homey soup, I think you’ll like it.

Tomato Egg Drop Soup

A delicious quick and easy soup, Tomato Egg Drop Soup is a rift on the classic Egg Drop Soup
Course Soup
Cuisine Asian, cantonese
Keyword soup, Tomato Egg Drop Soup
Prep Time 15 minutes
Cook Time 15 minutes
Servings 4

Ingredients

  • 2 tablespoons oil
  • 10 ounces tomatoes, peeled 1 large or 3-4 small, about 280g; cut into small chunks

Stock

  • 2 cups chicken stock 480 ml
  • 1 cup water

Seasoning

  • 2 teaspoons light soy sauce or soup soy sauce
  • 1/2 teaspoon sesame oil
  • 1/4 teaspoon white pepper
  • salt to taste
  • 1 egg beaten

Thickener

  • 1 1/2 teaspoons cornstarch mixed with 2 tablespoons cold water or broth optional

Garnish

  • 1 scallion finely chopped
  • 2 tablespoons cilantro chopped, optional

Protein Option

  • 1 Tbsp Vegetable oil
  • 1/2 Cup Ground beef preferably can substitute ground pork or chicken

Marinade

  • 1 Tsp Soy sauce regular or light
  • 1 Tsp Oyster sauce
  • 1 Tsp Rice wine
  • 1 slice fresh ginger smash to release flavor
  • 1/4 Tsp Granulated sugar
  • 1/4 Tsp Salt
  • dash White pepper

Instructions

  • Combine seasonings for meat mixture, mix with ground meat Let sit for 10 minutes. Heat 1 tablespoon oil in 3-4 qt pot over medium heat. Add ground beef and sauté’ just until meat loses pinkness. Remove from pot and reserve.
  • In the same pot, heat 2 T oil over medium-low heat. Add the tomato chunks and stir-fry for 5 minutes until the tomatoes are softened and fall apart.
  • Add chicken stock, water, seasonings, and salt to taste*. Bring to a boil, then lower the heat so soup is just at a simmer with the lid on. Allow soup to simmer for 10 minutes.
  • *Add meat, if using, with the stock and water. Bring back to a boil and immediately lower heat so soup is at a simmer. Taste soup and add salt or soy sauce if needed. Do add the sesame oil and ground pepper. Then allow soup to simmer for 10 minutes.
  • Beat the egg in a small bowl and set aside.
  • Make the cornstarch slurry in a small bowl. If the soup is for noodles omit cornstarch slurry. If serving as a soup, increase heat to medium and add cornstarch slurry to soup. Bring soup to a soft boil to allow the cornstarch to thicken the soup. Once it thickens turn the heat back down to low.
  • Pour a thin stream of egg into the soup. Let it sit for a couple of seconds just to set the egg a bit, then, with chopsticks or a spoon, gently swirl the soup in a whirlpool motion in one direction. This creates the ribbons of egg characteristic of egg drop soup.
  • Ladle soup into bowls and garnish with green onions and cilantro. Serve immediately

Notes

Blanch tomatoes in boiling water to remove the skin before cutting into quarters.  Once added to soup the skin separates from the rest and you are left with fibrous skin in your soup. It's better to remove the skin despite being more work.  Or remove skin when frying tomatoes.  As tomatoes soften, use tongs to pull the skin off.  Then add stock and water.
Rolling for a Good Cause Lumpia Shanghai

Rolling for a Good Cause Lumpia Shanghai

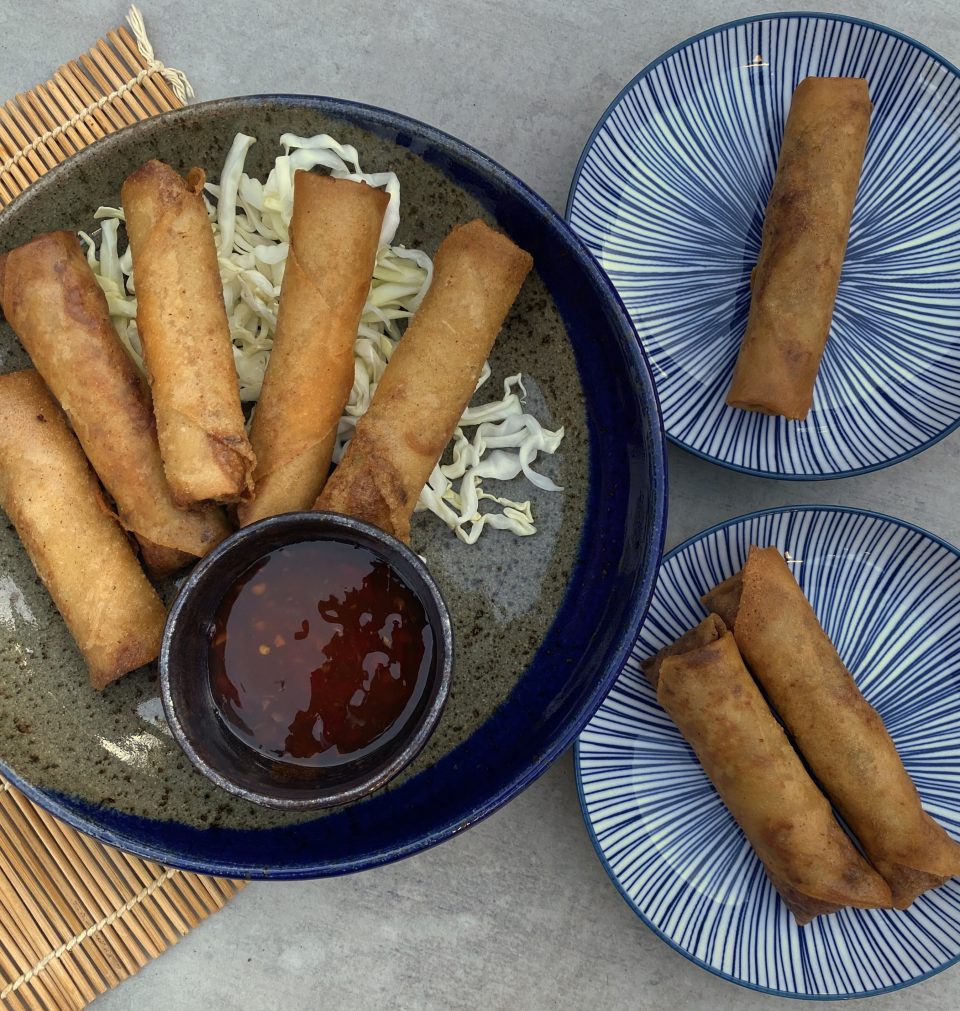
Our action group is hosting a fundraiser for one of only two Filipino-Asian American Representatives in the House, TJ Cox.  Normally we would have finger food at an event and Filipino spring rolls, Lumpia, would be perfect.  BUT, due to COVID, our event will be a virtual one.  The next best thing? How about an online tutorial on how to make Lumpia so people could make their own to enjoy during the event. Sounds like a plan.

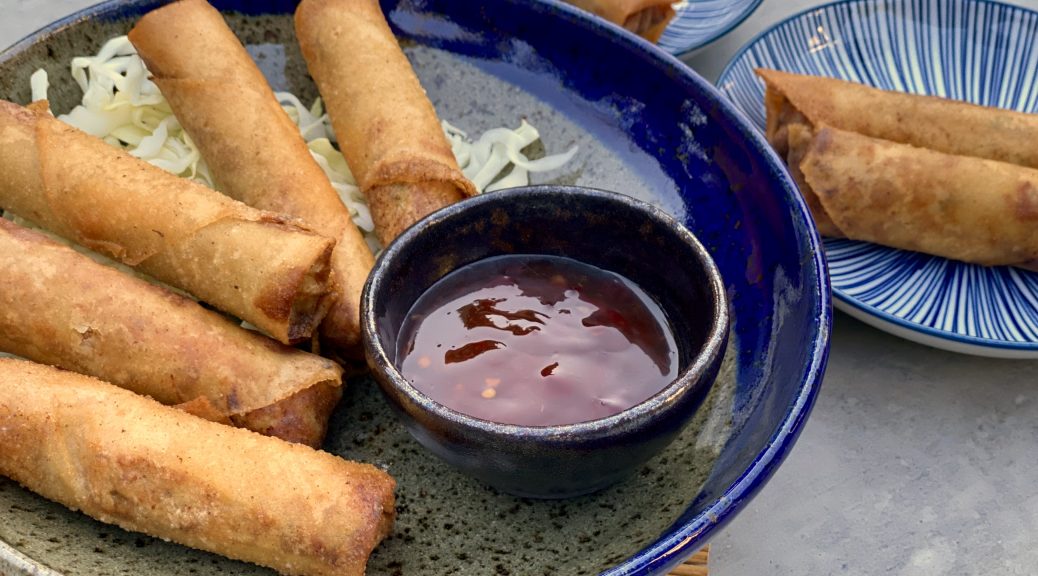
I was given 5 minutes for my “how to make Lumpia” video.  I’ve watched a ton of Tasty videos, I can do this, uh-huh. Lumpia is the Filipino version of an Egg Roll.  Filled with meat and vegetables and wrapped in a thin sheath made of flour, water, and salt.  The rolls are fried to a crispy, golden finish.  Crunchy, light, with a savory filling, in a word they are delicious.

Let’s Roll

The filling for Lumpia is made with ground beef or pork or a combination, I use 50:50.  You can substitute ground chicken or turkey.  Add to this, minced onions, grated carrots, shredded cabbage, and egg and seasonings.  I like a combination of salt and soy sauce, minced garlic, ginger for a hint of sweetness, and a couple of grinds of pepper.  The recipe can be halved.

That’s a Wrap

Vietnamese wrappers are made of rice paper while Chinese Egg Rolls are made with egg in the skin, are thicker, and when fried will have a bubbly surface. Lumpia are made with wheat flour, water, and salt and are super thin, resulting in a smooth surface, incredibly light and crispy roll.

The video shows two ways to wrap your Lumpia.  The key is to wrap them tightly.  This is done by tucking and pulling the wrapper taut while rolling.  Seal the egg roll with egg wash and that’s it.  Now repeat 50 times!

Added Bonus

Lumpia freezes beautifully.  Lay the Lumpia on a baking sheet in a single layer and place in the freezer.  When the lumpia is frozen, transfer to a zip lock bag and toss it back in the freezer.  No need to defrost before frying, just add a couple of minutes onto the cooking time.

You can fry the Lumpia in a pan with approximately 1 inch of oil, flip them when they are golden brown to cook the top half, 2-3 minutes per side. They can also be deep-fried.  Serve with your choice of dipping sauce such as Thai Chili Sauce, Vinegar-Soy dipping Sauce, or Banana Ketchup.  Enjoy!

Lumpia Shanghai

Course Appetizer
Cuisine Asian
Keyword Filipino Eggroll, Lumpia Shanghai, springroll
Prep Time 1 hour
Cook Time 4 minutes

Ingredients

  • 4 garlic cloves finely grated
  • 1 tbsp minced ginger
  • 1 medium onion very finely chopped, about 1 cup
  • 2 medium carrots grated on the large holes of a box grater, about 1 cup
  • 4 scallions white and light green parts, very finely chopped
  • 1 cup cabbage very thinly sliced
  • 2 eggs 1 whole, 1 white and yolk separated
  • 1 pound ground pork can substitute ground chicken
  • 1 pound ground beef
  • 2 teaspoons kosher salt
  • 2 tbsp soy sauce
  • 1 teaspoon freshly ground black pepper
  • 2 11-ounce packages lumpia wrapper or spring roll shells Recommend Menlo Wrappers found in freezer section in Asian markets

Changes and optional ingredients

  • 1/4 pound raw shrimp, peeled and deveined Chop finely and add to ground meat mixture
  • 1/2 cup water chesnuts substitute 1:1 for grated carrots

Instructions

  • Combine garlic, onion, carrots, scallion, cabbage, salt, pepper, 1 egg and 1 egg yolk in a large bowl and mix until well blended. Add beef, pork, salt, and pepper and using a wooden spoon or your hands, mix until everything is evenly distributed.
  • In a small bowl, whisk a splash of water into remaining egg white. Working one at a time, place lumpia wrapper on a work surface with 1 corner facing you. Place 1 heaping tablespoon of filling in center of wrapper and shape into a thin horizontal 5-inch long log. Dip your fingers in remaining egg white mixture and lightly brush edges of wrapper. Roll bottom corner up and snugly over filling, then tuck under filling. Fold left and right corners tightly over filling to enclose, use your fingers to crease the wrapper, then continue to roll bundle away from you. Both sides should be as close to sealed as possible; use a little egg wash to seal, as necessary.
  • In a large nonstick pan, fill bottom of pan until oil comes up 1 inch. Oil should cover lumpia at least halfway when frying; adjust amount if needed. Heat pan over medium-high heat. You’ll know oil is hot enough if you place the tip of lumpia into oil and it bubbles immediately. Cook lumpia, until deep golden brown and crisp, 2 to 3 minutes per side. Remove to a wire rack lined with paper towels. You can serve whole or cut in half. Serve with Vinegar-Soy Dipping Sauce or sweet chili sauce.

Notes

Vinegar-Soy Dipping Sauce:
1/4 cup plus 2 tablespoons rice wine vinegar
1/4 cup soy sauce
2 garlic cloves, thinly sliced or finely chopped
1 Thai chile, thinly sliced
1 scallion, thinly sliced
Stir all ingredients together and decant into a small dish.
Asian Soul Food: Steamed Chicken with Chinese Sausage & Mushrooms

Asian Soul Food: Steamed Chicken with Chinese Sausage & Mushrooms

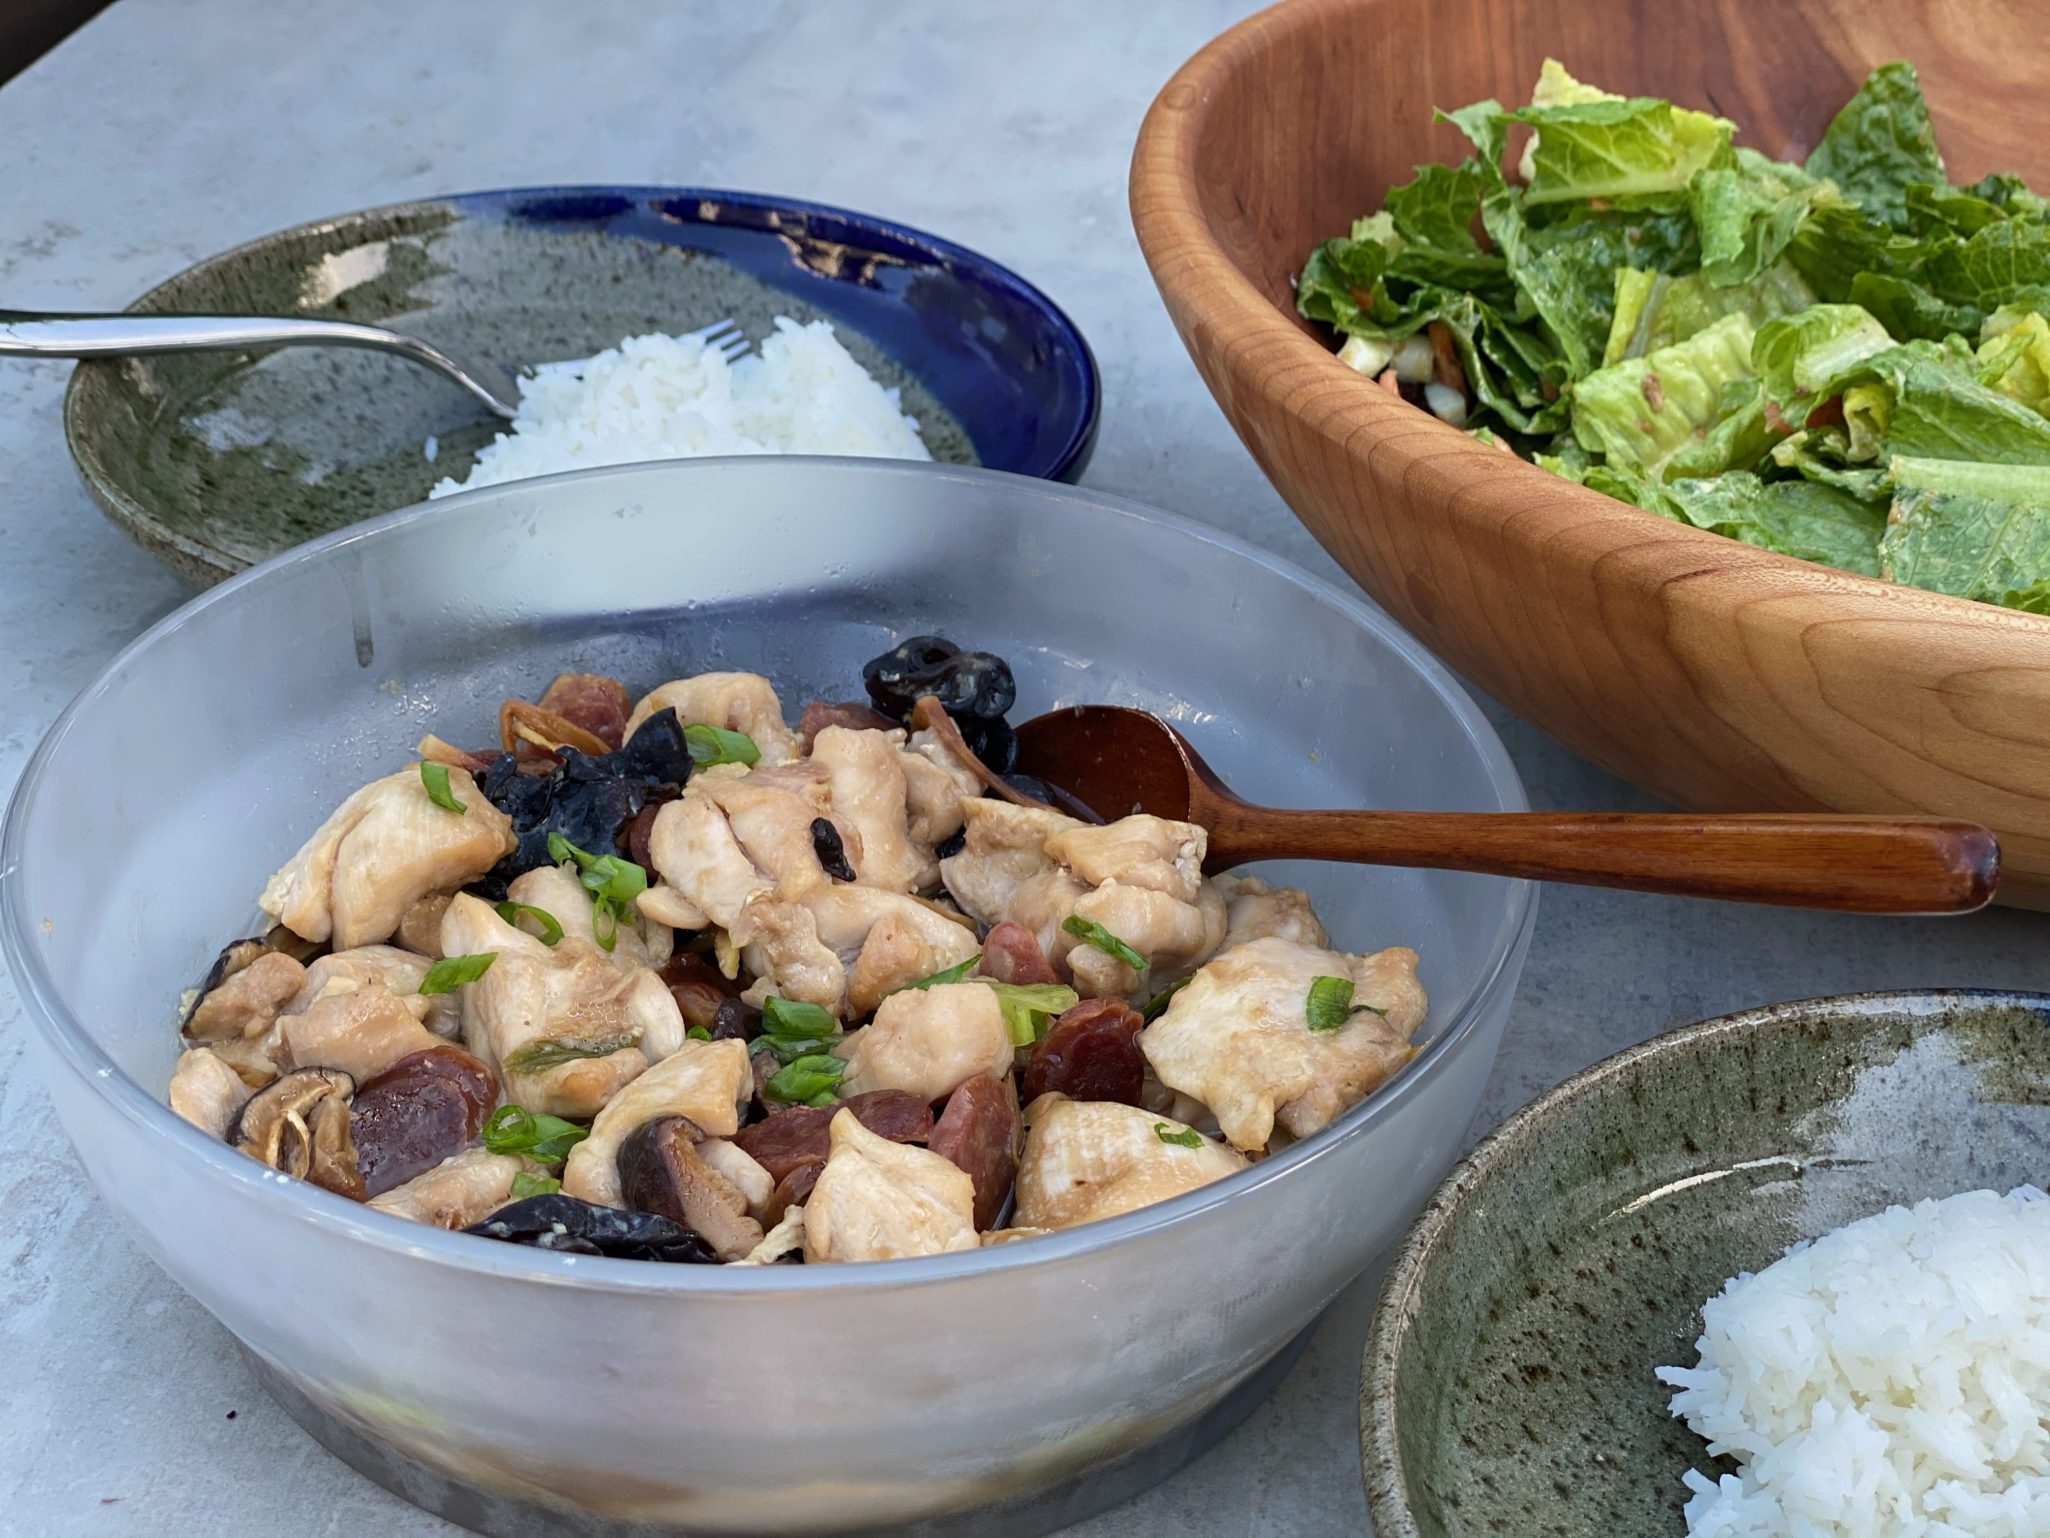
Dinner in the Time of COVID.  I find myself not just cooking more but cooking more of the dishes I grew up eating.  Favorite dishes that my father and grandfather cooked for us.  We all need a little bit of comfort these days, ain’t that the truth.

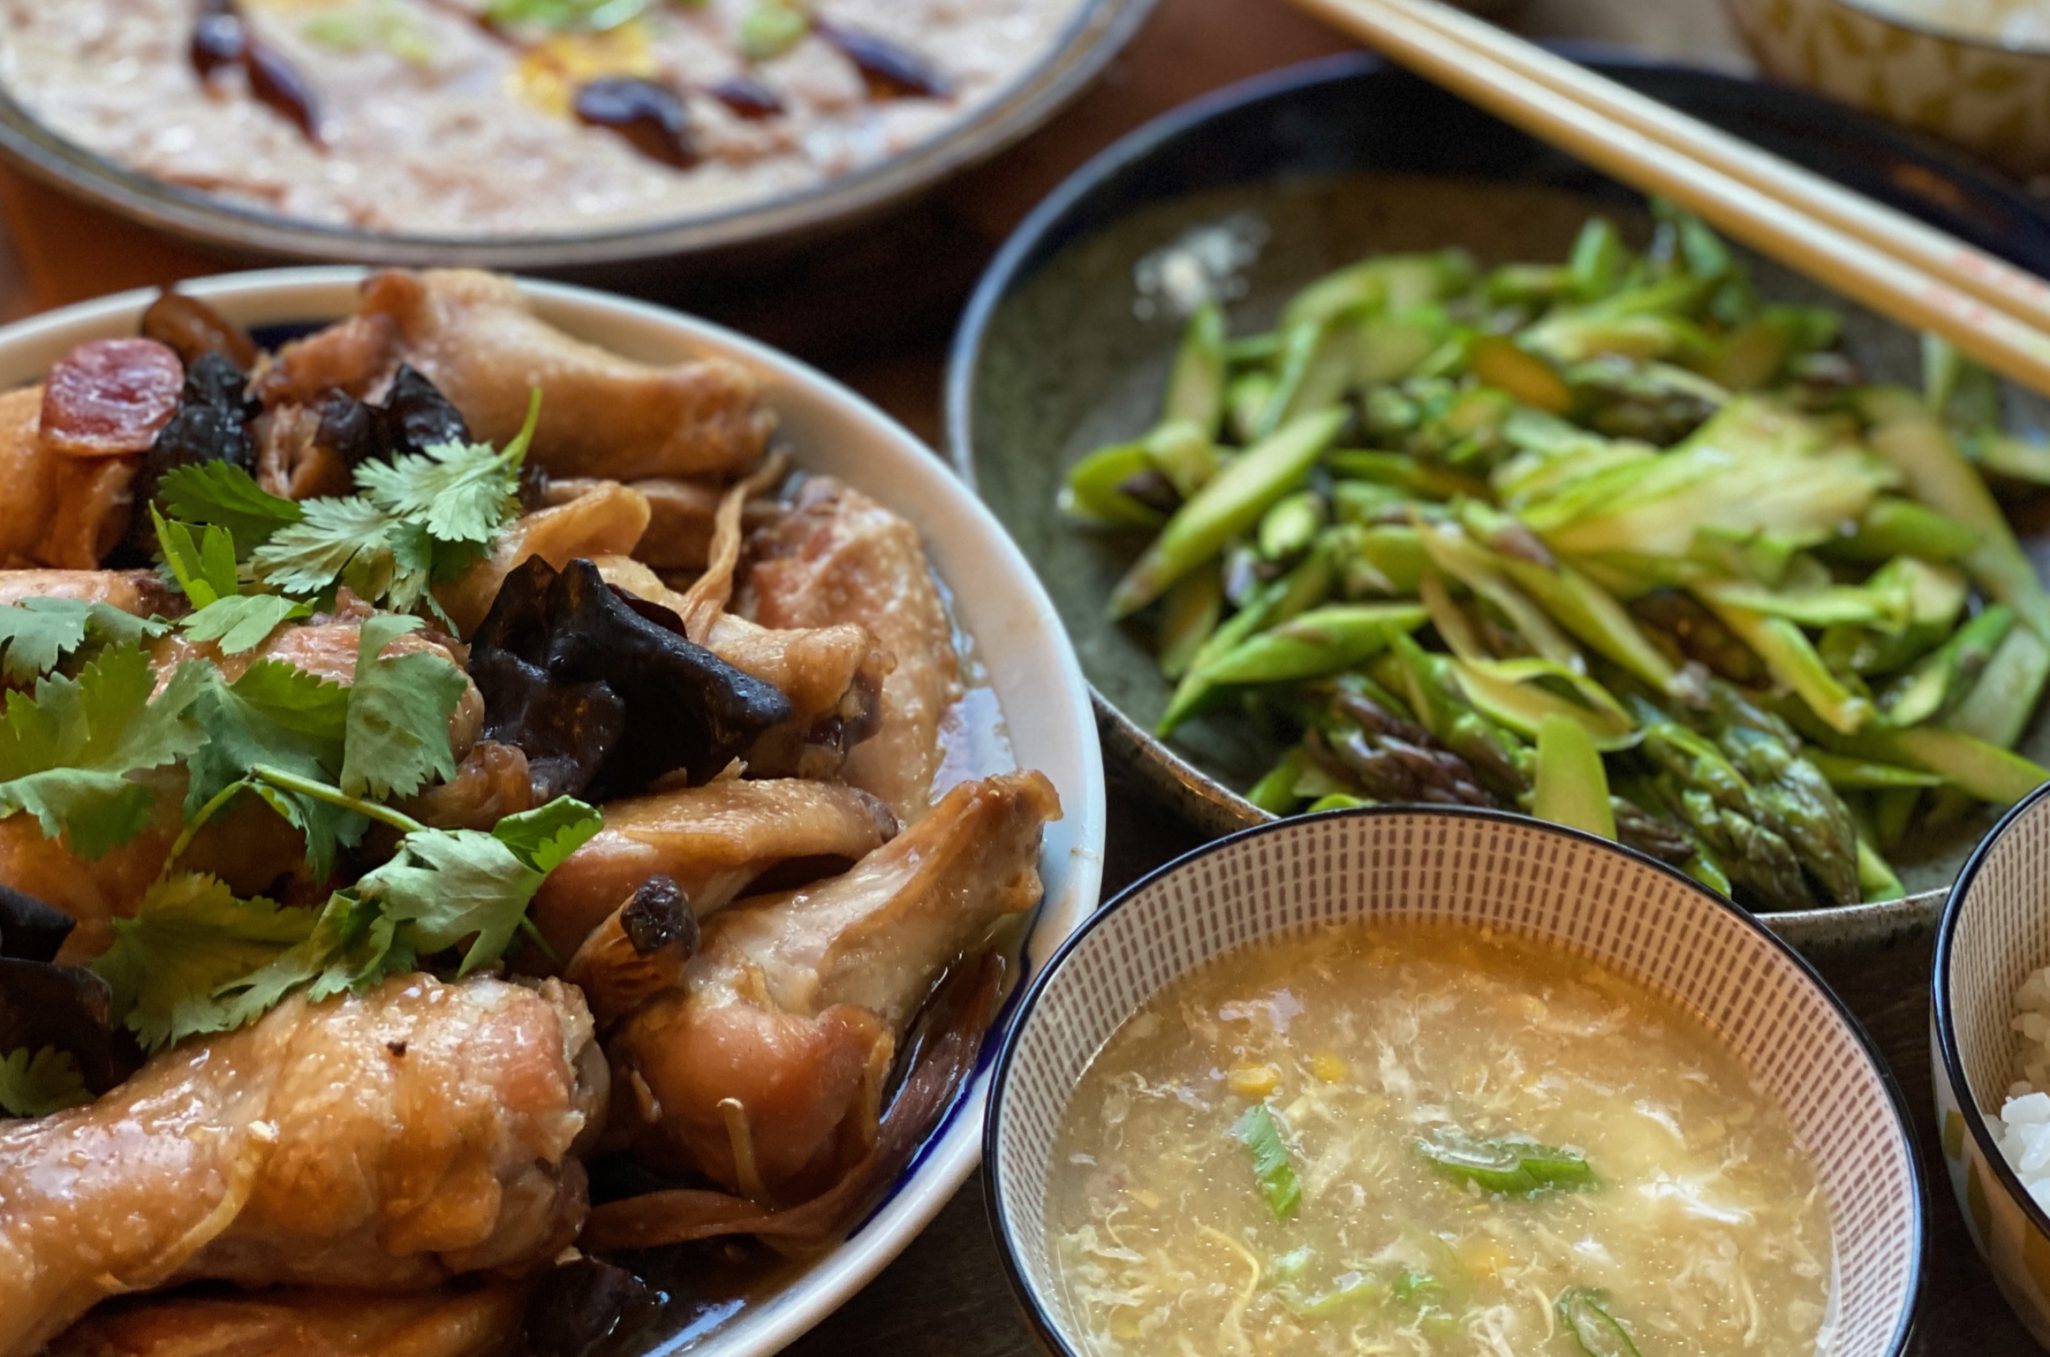
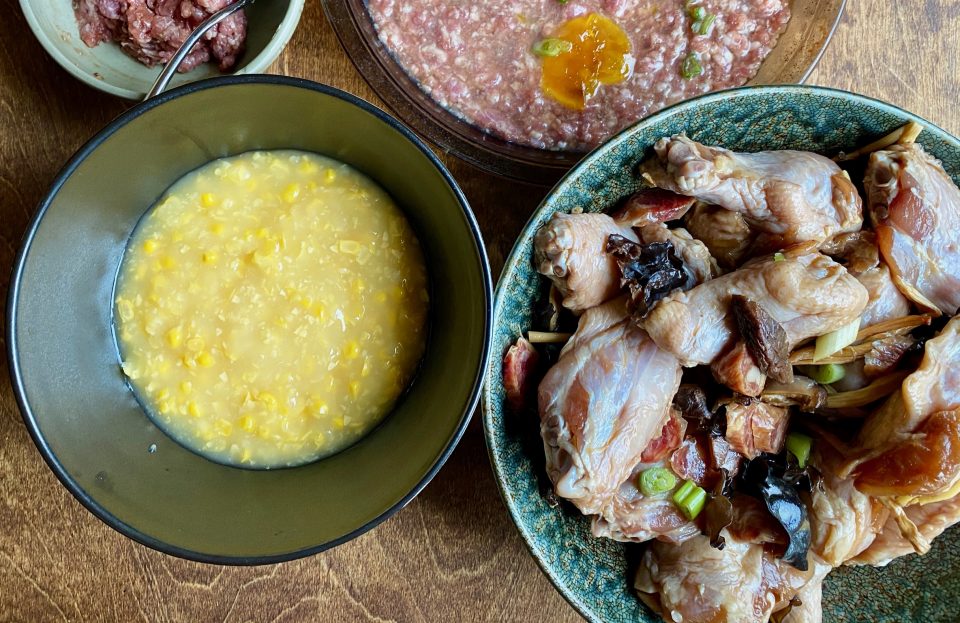
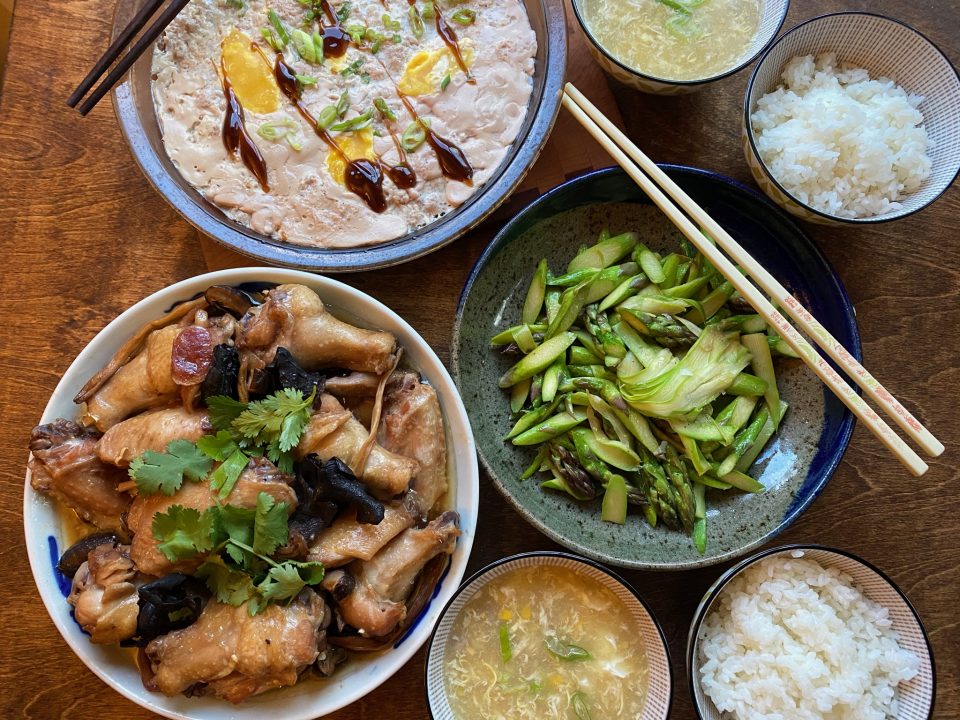
A favorite in our house is Steamed Chicken with Chinese Sausage and Mushrooms.  This time it was part of a meal that is as down-home as it gets.  We started with Kid-favorite Corn Soup Steamed Pork with Salted Egg, and Sauteed AsparagusI was exhausted from all the prep!  How my Dad pulled off dinners like this nightly after a full day’s work, continues to amaze me.

The keys to Delicious Steamed Chicken with Chinese Sausage & Mushrooms

Use bone-in chicken if possible.  The flavor is better when the meat is left on the bone…is there a scientific reason? Who knows, but I’m not about to buck my dad’s advice.  But, don’t let that stop you from making this dish, by all means, if all you have is boneless chicken, use it.  It will still be onolicious.  I like to use wings, but any part of the chicken will work.  Breast meat is a little trickier, it is less forgiving than dark meat and can overcook. 

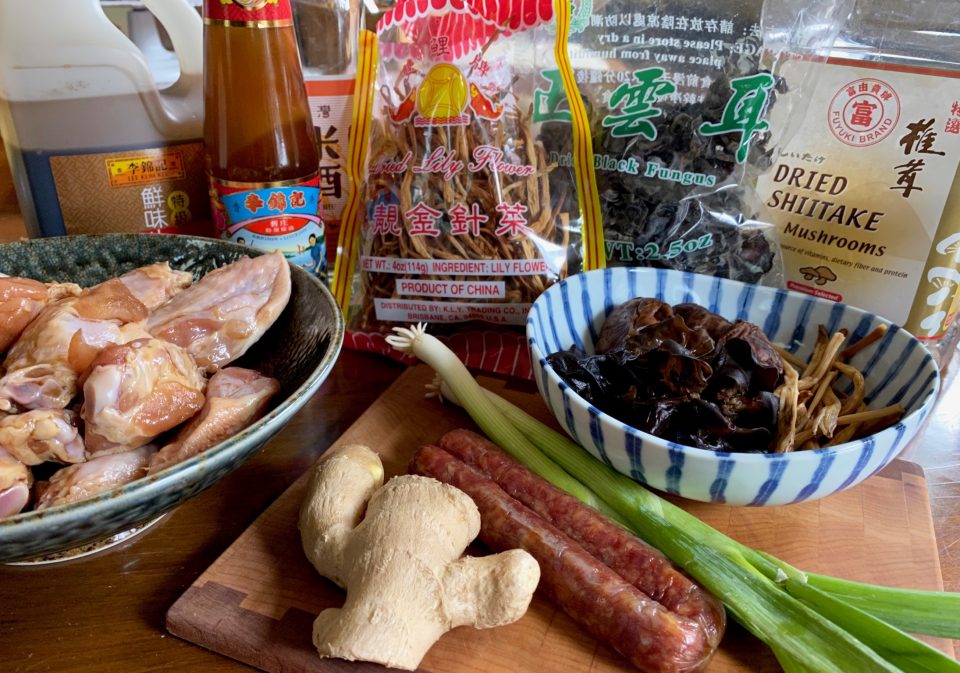
Chinese Sausage

Also known as Lop Cheung, a delicious sweet and slightly savory preserved meat that is found in tons of Chinese dishes.  I love Lop Cheung, when I am craving an easy comfort dish, I’ll throw a couple on top of the rice right before turning on my rice cooker, as the rice cooks so do the Lop Cheung.    You can find Lop Cheung at most Asian markets and at some of the larger supermarkets in the Bay Area.  There are several different varieties including pork, pork & chicken, and pork & liver.  Unless you grew up with Chinese Sausage, stay away from the liver one which is gamier and stronger in flavor.  The meat is marinated, stuffed into casings, set to dry, and then kept cool.  I still head to SF Chinatown to buy my Lop Cheung from Mow Lee or Wycen.   Old School all the way.

I hope they survive COVID19.  

Pre-cook stage

The Dried Stuff

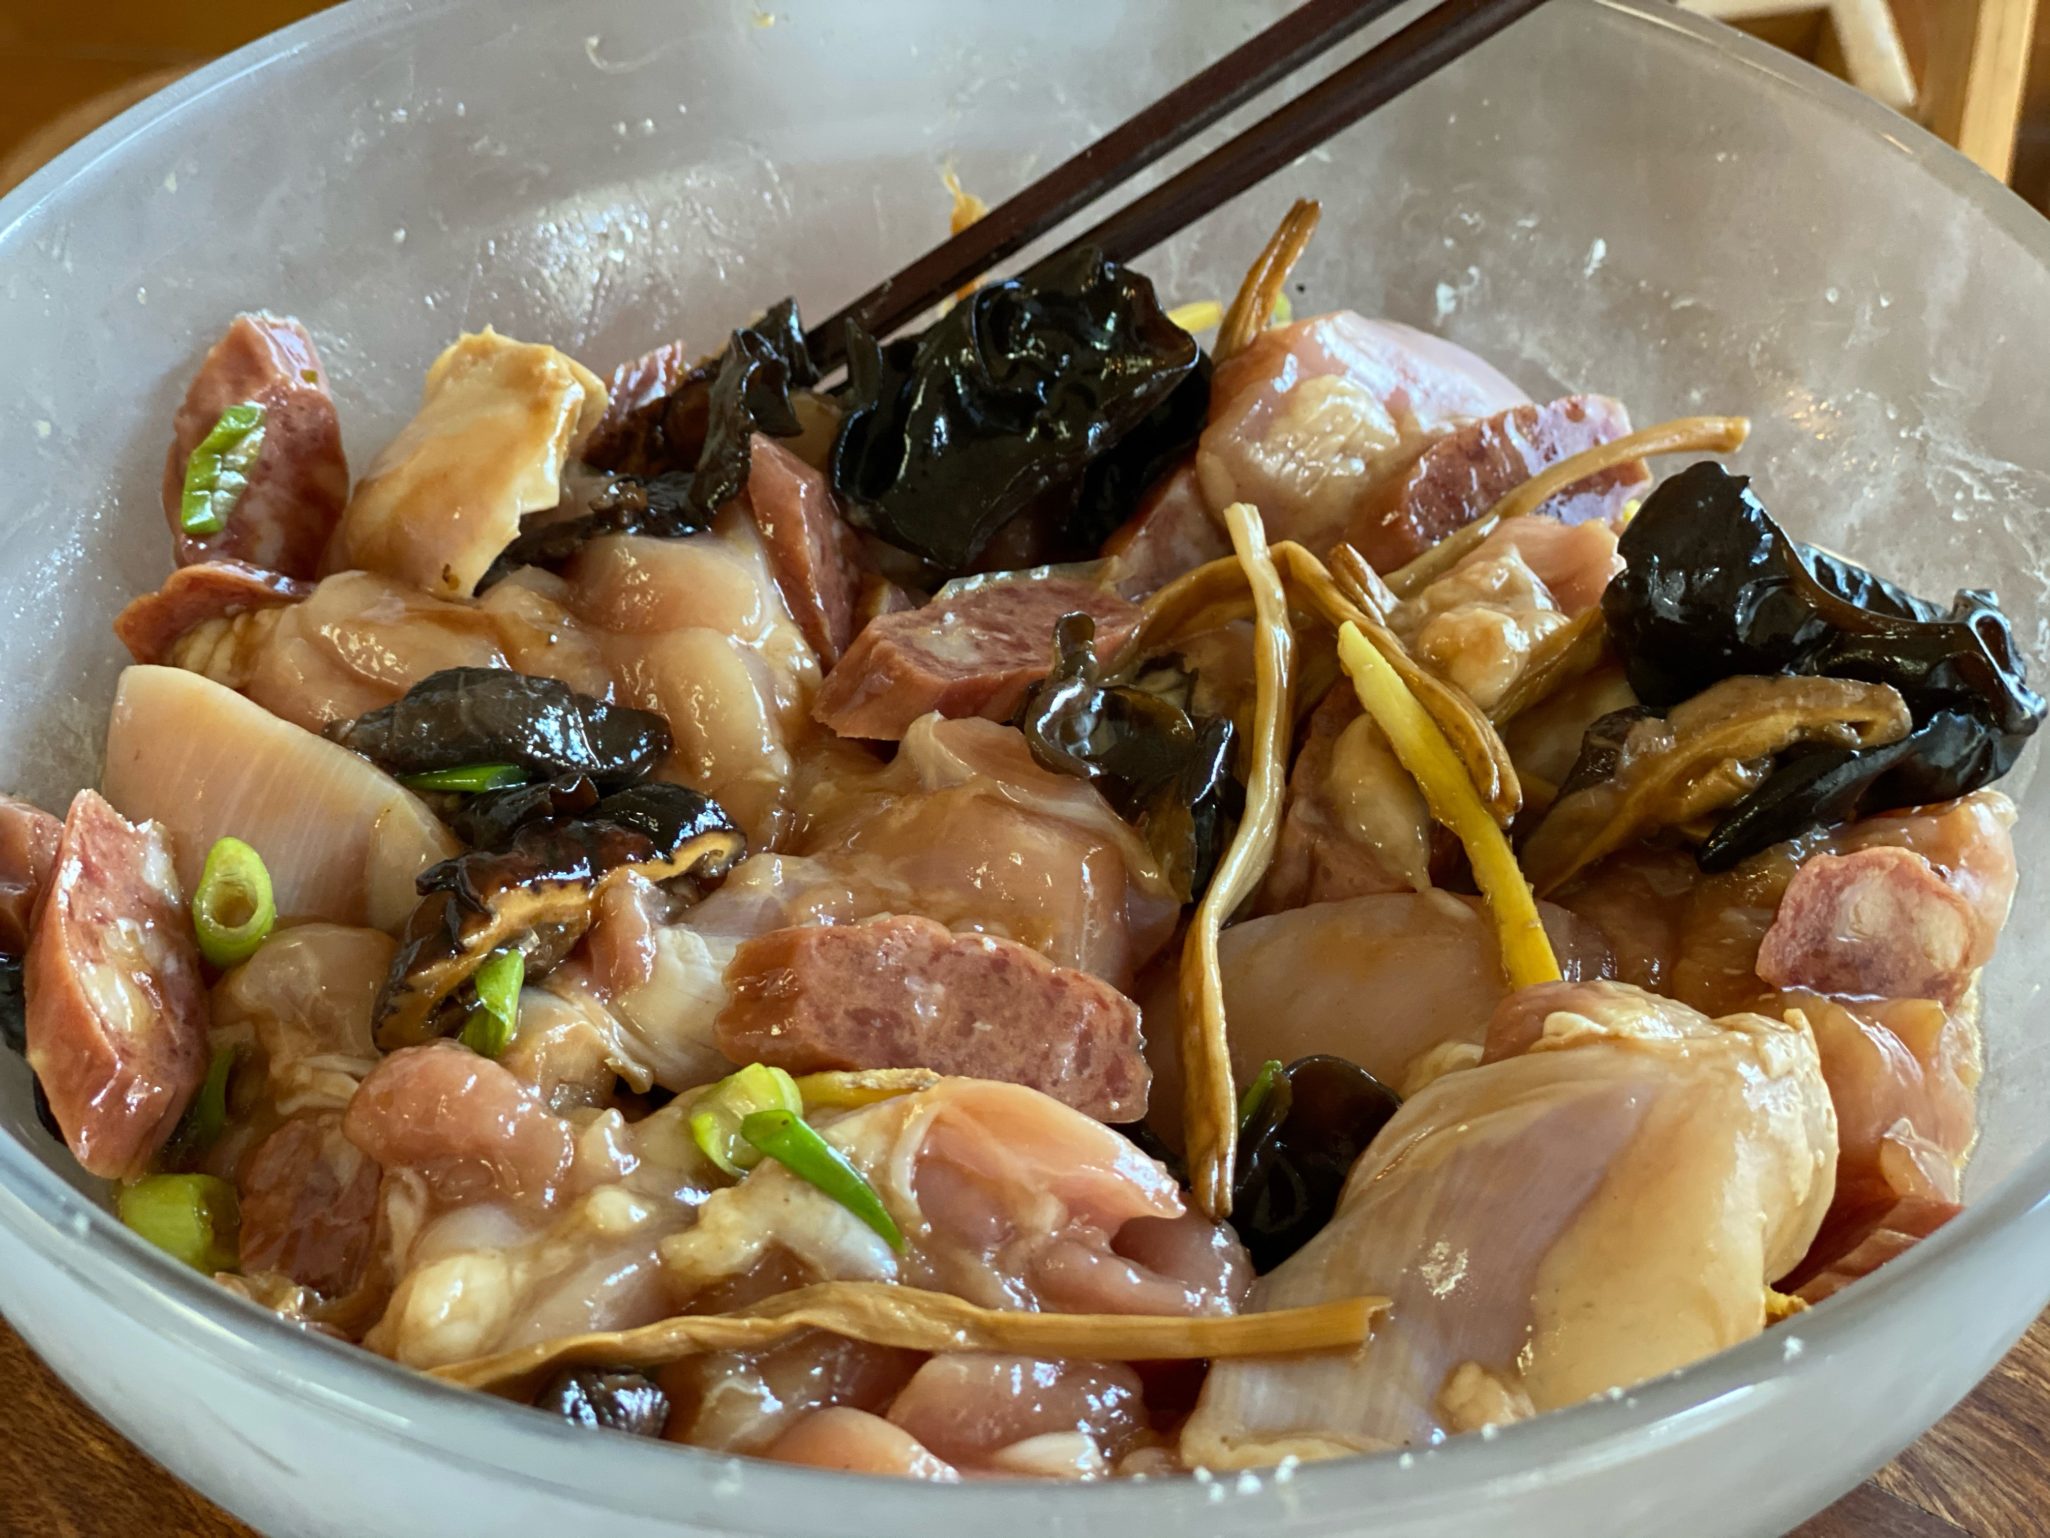
Dried Shiitake or Black Mushrooms, Cloud Ears (Dried Fungus), and Lilly Buds or Golden Needles round out the dish.  Soak the dry ingredients in warm water 15-30 minutes until soft.  Each provides flavor and texture to the dish.

Shiitake Mushrooms  Back in the day, shiitakes only came in dried form.  Nowadays you can get fresh shiitake mushrooms easily, they’re delicious BUT for the most part, in Chinese cooking we use the dried form.  Why? Concentrated flavor.  The flavor of the mushroom is intensified and that flavor is essential to the dish.  Soak the mushrooms first, (keep the soaking liquid for stocks and soups), trim the stems that can be kind of woody, and slice into desired thickness.

Cloud Ears or Black Fungus is just another kind of mushroom.  It doesn’t have a ton of its own flavor but adds texture, in the form of CRUNCH and absorbs the flavor of the marinade-YUM.  After soaking, pinch the stem-tip off.  The tip is where the stem connected to the tree, it’s a little crusty.  

Lily buds add an earthy flavor and texture.  After soaking the lily buds, pinch or cut off the ends (it will look a little darker than the rest of the bud and tie a knot in the middle of each strand.  Yeah, don’t know why, but I do it because my Dad told me to.

Don’t forget to add the green onions and cilantro at the end.

There you go, all the components to a down-home soul food dish.  

Microwave Madness 

Microwave directions

I bought microwave cookware, Anyday Cookware, on Dave Chang’s recommendation (Mr. Momofuku), boy, that guy can sell a product.  Pros and cons? Pros-no steamer set up, no pan with water, hassle-free steam cooking, and one bowl cooking. Cooking time cut by more than half.  Cons?  Finding space to store new bowls plus a major hit on latte money, lol.

Anyways, follow the same steps until you get to the point of putting the dish* in the steamer.  Instead, *put all your ingredients into a microwave cooking container and forget the steamer. 

Cover, vent, and place your dish in the microwave.  My microwave’s power output is 700watts (which is on the low side).  For this dish, I use full power for about 8 minutes.  You will have to adjust according to your microwave wattage.  The Anyday site has an interactive basic guide that allows input of wattage to determine cooking power and time.  In general, if your microwave wattage is higher, shorten the cooking time or reduce the power level and keep the same time.  You will need to experiment a little with your microwave.  I add 1-2 tablespoons of the saved mushroom liquid so I’ll have some sauce in the dish.

Steamed Chicken with Lop Cheung and Mushrooms

Course Main Course
Cuisine Asian
Keyword Steamed Chicken
Prep Time 20 minutes
Cook Time 30 minutes

Ingredients

  • 1.5 pounds chicken breast or combination of chicken pieces, bone-in cut into bite-sized pieces or chicken wings separated into drummettes and flats.
  • 2 Chinese sausages thinly sliced on the diagonal
  • 3-4 black mushrooms soaked in warm water until soft and julienned
  • 2 Tbsp Cloud ears soaked and root ends pinched off
  • 12 Lily buds soaked, ends pinched off and a knot tied in the middle, skip the knot tying if you want
  • 1-2 stalks green onions cut into 1-inch pieces, reserve some of the green part to finish the dish
  • 1/4 bunch cilantro for garnish

Marinade

  • 1 tsp. sugar
  • 1/2 tsp salt
  • 1 tablespoon soy sauce AP Pref chinese LKK Premium Soy Sauce
  • 1 tablespoon oyster sauce LEE KUM KEE with the kid and mom in boat
  • 1 tablespoon Shaoxing Wine or Chinese Rice Wine
  • 2 slices ginger julienned
  • 2 tsp oil I like peanut oil, but any vegetable oil will work
  • 2 tsp cornstarch
  • 1/2-1 tsp sesame oil optional, if you have it, definitely use it
  • 1/4 tsp white pepper

Instructions

  • Combine ingredients for marinade.
  • Add chicken, mushrooms, sausage, cloud ears and lily buds to marinade. Stir to combine well. Marinade for 15- 30 minutes. Place in a heatproof dish such as a shallow bowl or pie plate. Top with some of the diced green onions.
  • In a steamer or a stainless wok, set up steamer rack, fill with water up to but not touching the steamer rack. Place on heat and bring to boil.
  • Place chicken on steamer rack.
  • Steam for 25-30 minutes. Watch water level in pan, do not let it dry out.
  • Garnish with cilantro and extra green onions. Serve with plenty of rice.

Notes

If you don't have lily buds omit, don't make a special trip.  You can also place the ingredients on rehydrated lotus leaves (usually used as a wrap.  It imparts a nice flavor to the chicken.
Other additions dried red dates 2-3 soaked and smashed.  Add with mushrooms.
Do You Tteokbokki? Spicy Korean Rice Cakes

Do You Tteokbokki? Spicy Korean Rice Cakes

‘My fondest memories of traveling abroad, not surprisingly, revolve around food.  It started when my parents sent me on a summer exchange program in Taiwan for Chinese American college kids.  While our parents envisioned us hard at work learning Mandarin and Chinese culture, we were sneaking out to the night markets to eat, hooking up with newfound friends, and in general, having a good time.  A documentary made about the program says it all, Love Boat Taiwan.  My introduction to a whole new world of food, culture, and fun.

From the food stalls in Taipei long ago to the markets in Seoul and Osaka most recently; I have feasted on oyster omelets and dumplings (Xiao Lung Bao), Gimbap (Korean rice rolls), Galguksuk (hand-cut noodles), Hotteok (rice pancakes with sweet or savory fillings) and tteokbokki (rice cakes in a sweet and spicy sauce).  I have sampled Takoyaki (Fried Octopus fritters), Kaarage (fried chicken), Gyoza (Potstickers), and Manju (rice cakes) from tiny makeshift kiosks, so delicious.  A trip after college found me relishing the variety of Hawker Fare food in Singapore. Nonya, Indian, Muslim, Chinese dishes all in one spot. Who hasn’t drooled over the Hainanese Chicken enjoyed by Rachel and Nick in Crazy Rich Asians, all cheap and delicious.  Street markets are soul food.  Homey, simple, flavorful dishes remind me of family gatherings around the dinner table.

But, it’s not just about the food, it’s about getting a taste of daily life and culture-sitting next to that businessman as he hurriedly slurps his noodles down before going back to work  Watching the vendors entice their next customer with their hand-pulled noodles or steaming dumplings. Or amusedly watching school children clamoring for their afterschool snack of gimbap or bao from the corner vendor.

That’s My Favorite Part of Traveling

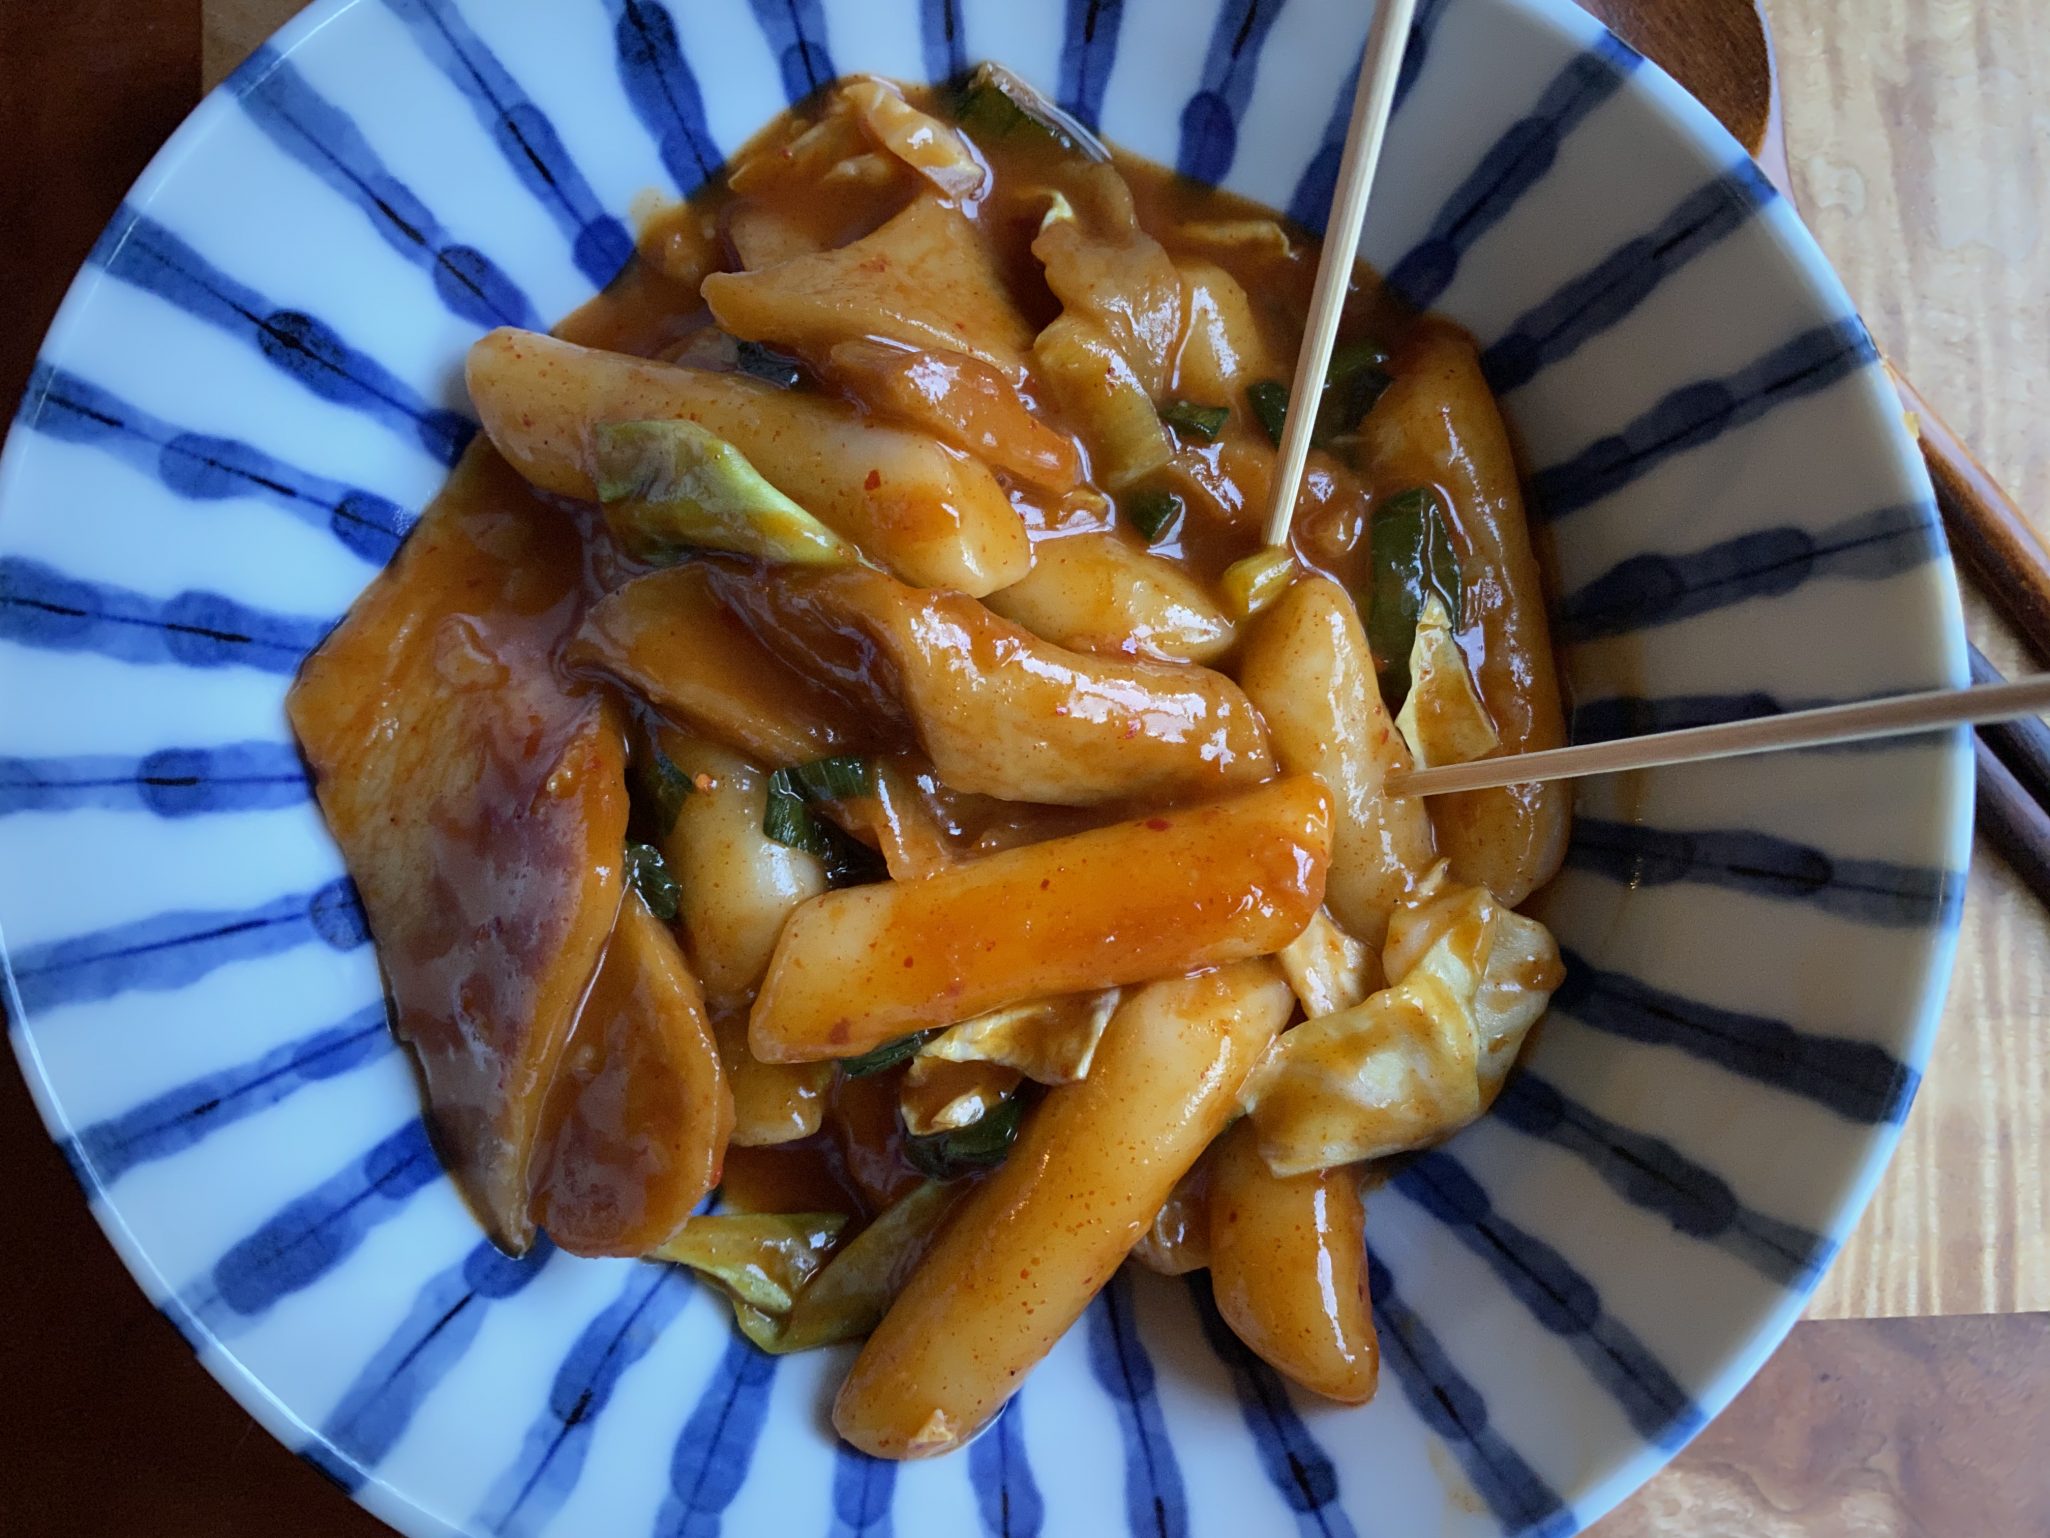
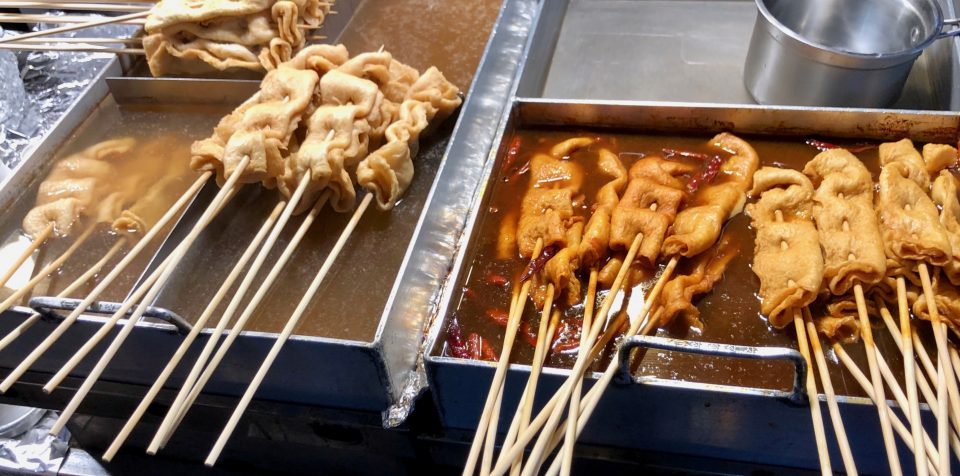
Dreaming about our travels last year has me hungry for the delicious street food we discovered. We took in a baseball game in Incheon and in place of traditional fries and hot dogs, we enjoyed Tteokbokki and KFC (Korean Fried Chicken).  The Tteokbokki, spicy, sweet, and chewy was served on sticks with cute little hot dogs.  I love watching baseball, it reminded me of watching a minor league game, lots of zaniness, fans with broomsticks, and cheerleaders to egg them on.  The icing on the “rice”cake was the food and walk-up music for each batter.

Crazy Fun Baseball Game in Korea

I’ve taken to hunting for recipes to make these tasty tidbits and I found, Korean Bapsang, an absolutely great site with a treasure trove of Korean recipes that are easy to follow and 정말 맛있다 (really delicious)!

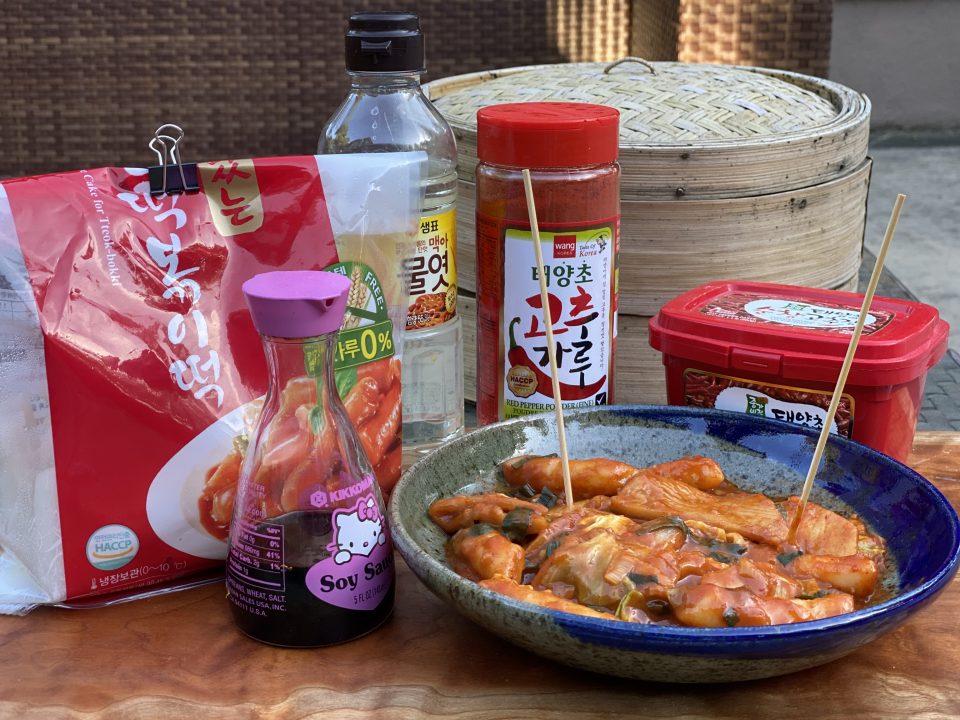
You can buy rice cakes and fish cakes in most Asian markets as well as the other needed spices. I didn’t have fish cakes for a batch, so I chose the next best thing in my pantry, SPAM.  Don’t laugh, it was pretty good!  Cook the rice cakes in an anchovy stock or water seasoned with Gochugaru (chili powder), Gochujang (chili paste), and corn syrup.  Fish cakes, cabbage, and onions round out the dish.   It takes all of 15 minutes to make.  A perfect snack while watching a Giants game or my favorite K-drama.

The Recipe

Tteokbokki - Sweet & Spicy Rice Cakes

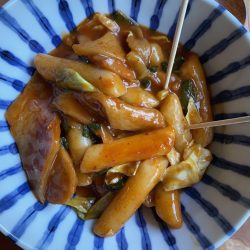
Tteokbokki, a popular Korean snack, are rice cakes in a spicy-sweet sauce found at street markets, fast food kiosks and baseball games!
Course Appetizer
Cuisine Asian
Keyword Korean Snack, Rice Cakes, Tteokbokki
Prep Time 5 minutes
Cook Time 15 minutes
Servings 4

Ingredients

  • 1 pound tteokbokki tteok 떡볶이 떡 about 24 3-inch long rice cake pieces - See note.
  • 1 sheet eomuk 어묵 fish cake - aka oden or SPAM! or Japanese fishcake
  • 4 ounces green cabbage yangbaechu 양배추
  • 1 - 2 scallions optional
  • 3 cups anchovy broth or water or any fish broth/dashi
  • 3 tablespoons Korean red chili pepper paste gochujang 고추장
  • 1-2 teaspoons Korean red chili pepper flakes gochugaru 고추가루 preferably finely ground)
  • 1 tablespoon soy sauce
  • 2 tablespoons sugar or use 1 tablespoon if you like it less sweet
  • 1 tablespoon corn syrup
  • 1 tablespoon minced garlic

Instructions

  • Make fish broth if using. Soak the rice cakes for about 20 minutes if hardened or refrigerated. Cut the fish cake, cabbage, and scallions into about 2-inch long pieces.
  • Add the anchovy broth (or water) to a large pan. Stir in the sauce ingredients. Bring it to a boil over medium high heat, stirring to dissolve the red chili pepper paste (gochujang).
  • Add rice cakes, boil until the rice cakes become very soft and the sauce is thickened, about 8 - 10 minutes. Stir frequently so the rice cakes don't stick to the bottom of the pan.
  • Add cabbage, green onions (optional) and fish cakes. Continue to boil, stirring constantly, for an additional 4 - 6 minutes. Depending on your rice cakes, it may need more time to reach a desired level of softness. Add more broth or water as necessary. Taste the sauce, and adjust the seasoning if needed. Serve immediately.

Notes

You can find tteokbokki rice cakes fresh, refrigerated, or frozen at Korean markets. Locally made fresh rice cakes are the best ones to use, but good quality refrigerated ones are okay too. Try avoiding frozen ones if you have other options.
 Tteokbokki doesn't reheat well in the microwave. Reheat any leftovers, along with a little bit of broth or water, in a small pan over low heat.
Don't have eomuk use the Japanese fish cakes-kamaboko or even surimi (imitation crab legs).

Soy Sauce Chicken (See Yao Gai-s Soon)

Soy Sauce Chicken (See Yao Gai-s Soon)

Growing up in Chinatown I took for granted that everyone had access to fresh vegetables, fish, poultry and meat.  If only I had an iPhone back in the day to capture the pictures of daily life in my Chinatown.  I’d have pictures of crates filled with live chickens sitting on the sidewalk, tanks filled with live fish and crabs, and baskets filled with just picked greens.

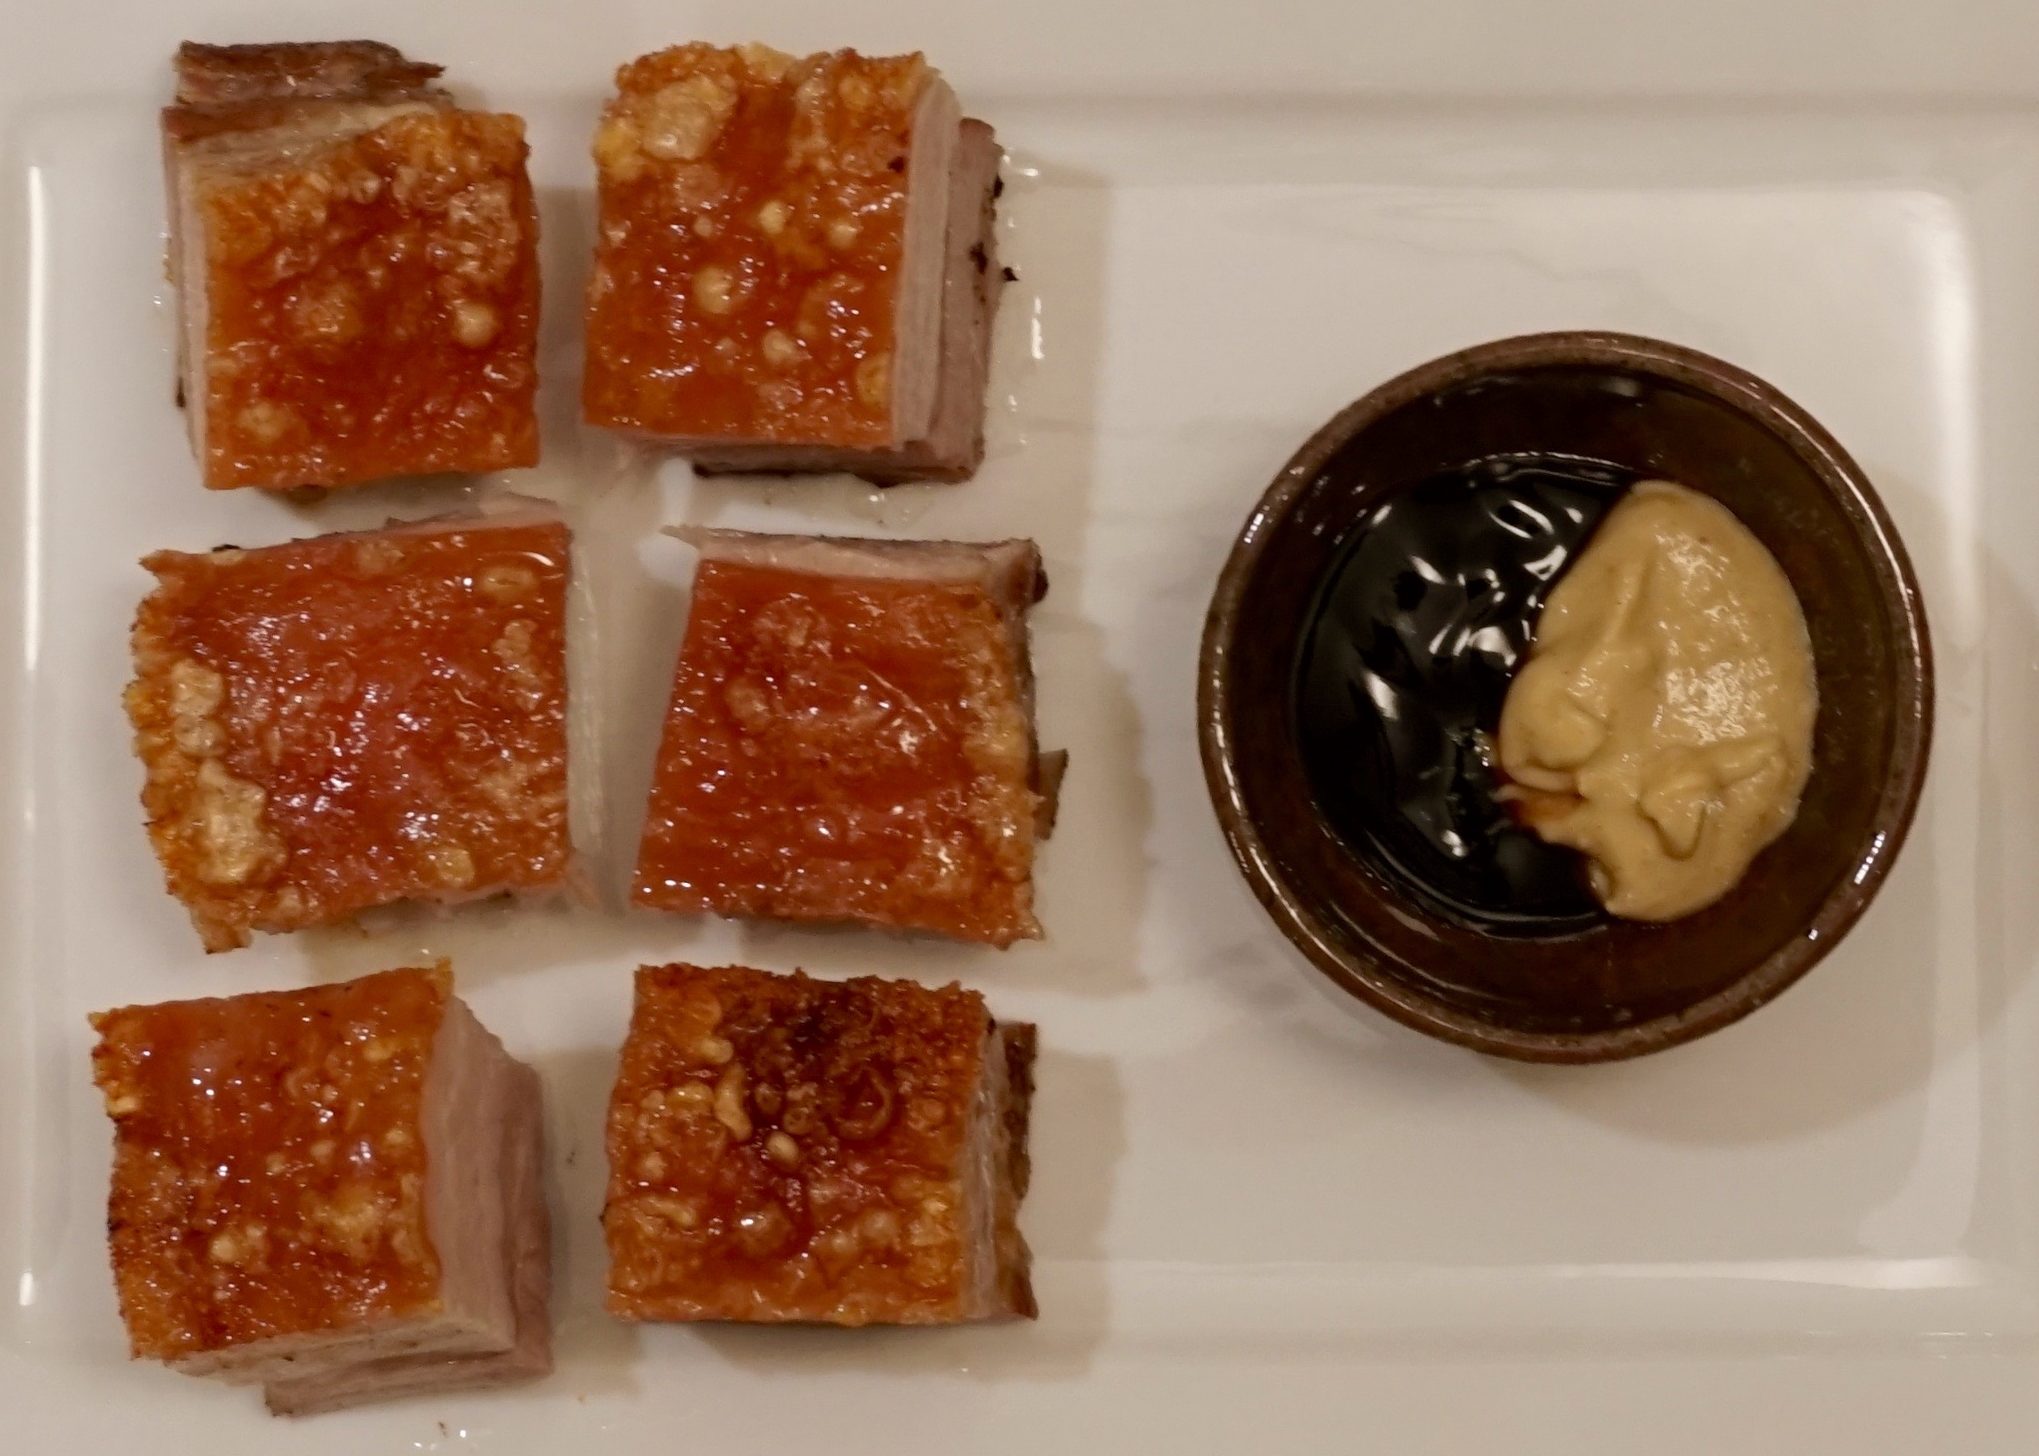
Many of the markets had delis, their counters loaded with trays of fried noodles, stir-fried vegetables, and stews. Storefront windows filled with roasted ducks, chickens and different sausages hung to entice passersby.   Whole roasted pig hanging on a hook with its skin roasted to a crispy rich caramel brown. Shoppers clamored in line while the butcher sliced off chunks to dole out. 

Fifteen minutes before my parents closed their office for the day, Dad would hurry down to the shops to buy fixings for that night’s dinner.  What he cooked was always predicated on what was fresh in the markets.

Our dinners consisted of my Dad’s dishes-squash soup, stir fried beef and greens or steamed fish with green onions and ginger and pre-made dishes bought from one of the many delis in Chinatown.  Dad would survey the window at Ping Yuen Market and select a roast duck or chicken, or pick a piece of Crispy Skin Pork or bbq pork .  Luckily many of these deli delights like Whole Poached Chicken and bbq pork, even crispy skin roasted pork can be made at home.  I gave it a try with a small piece of pork belly, and was surprised by the results.  Now I can make it at home.

Soy Sauce Chicken

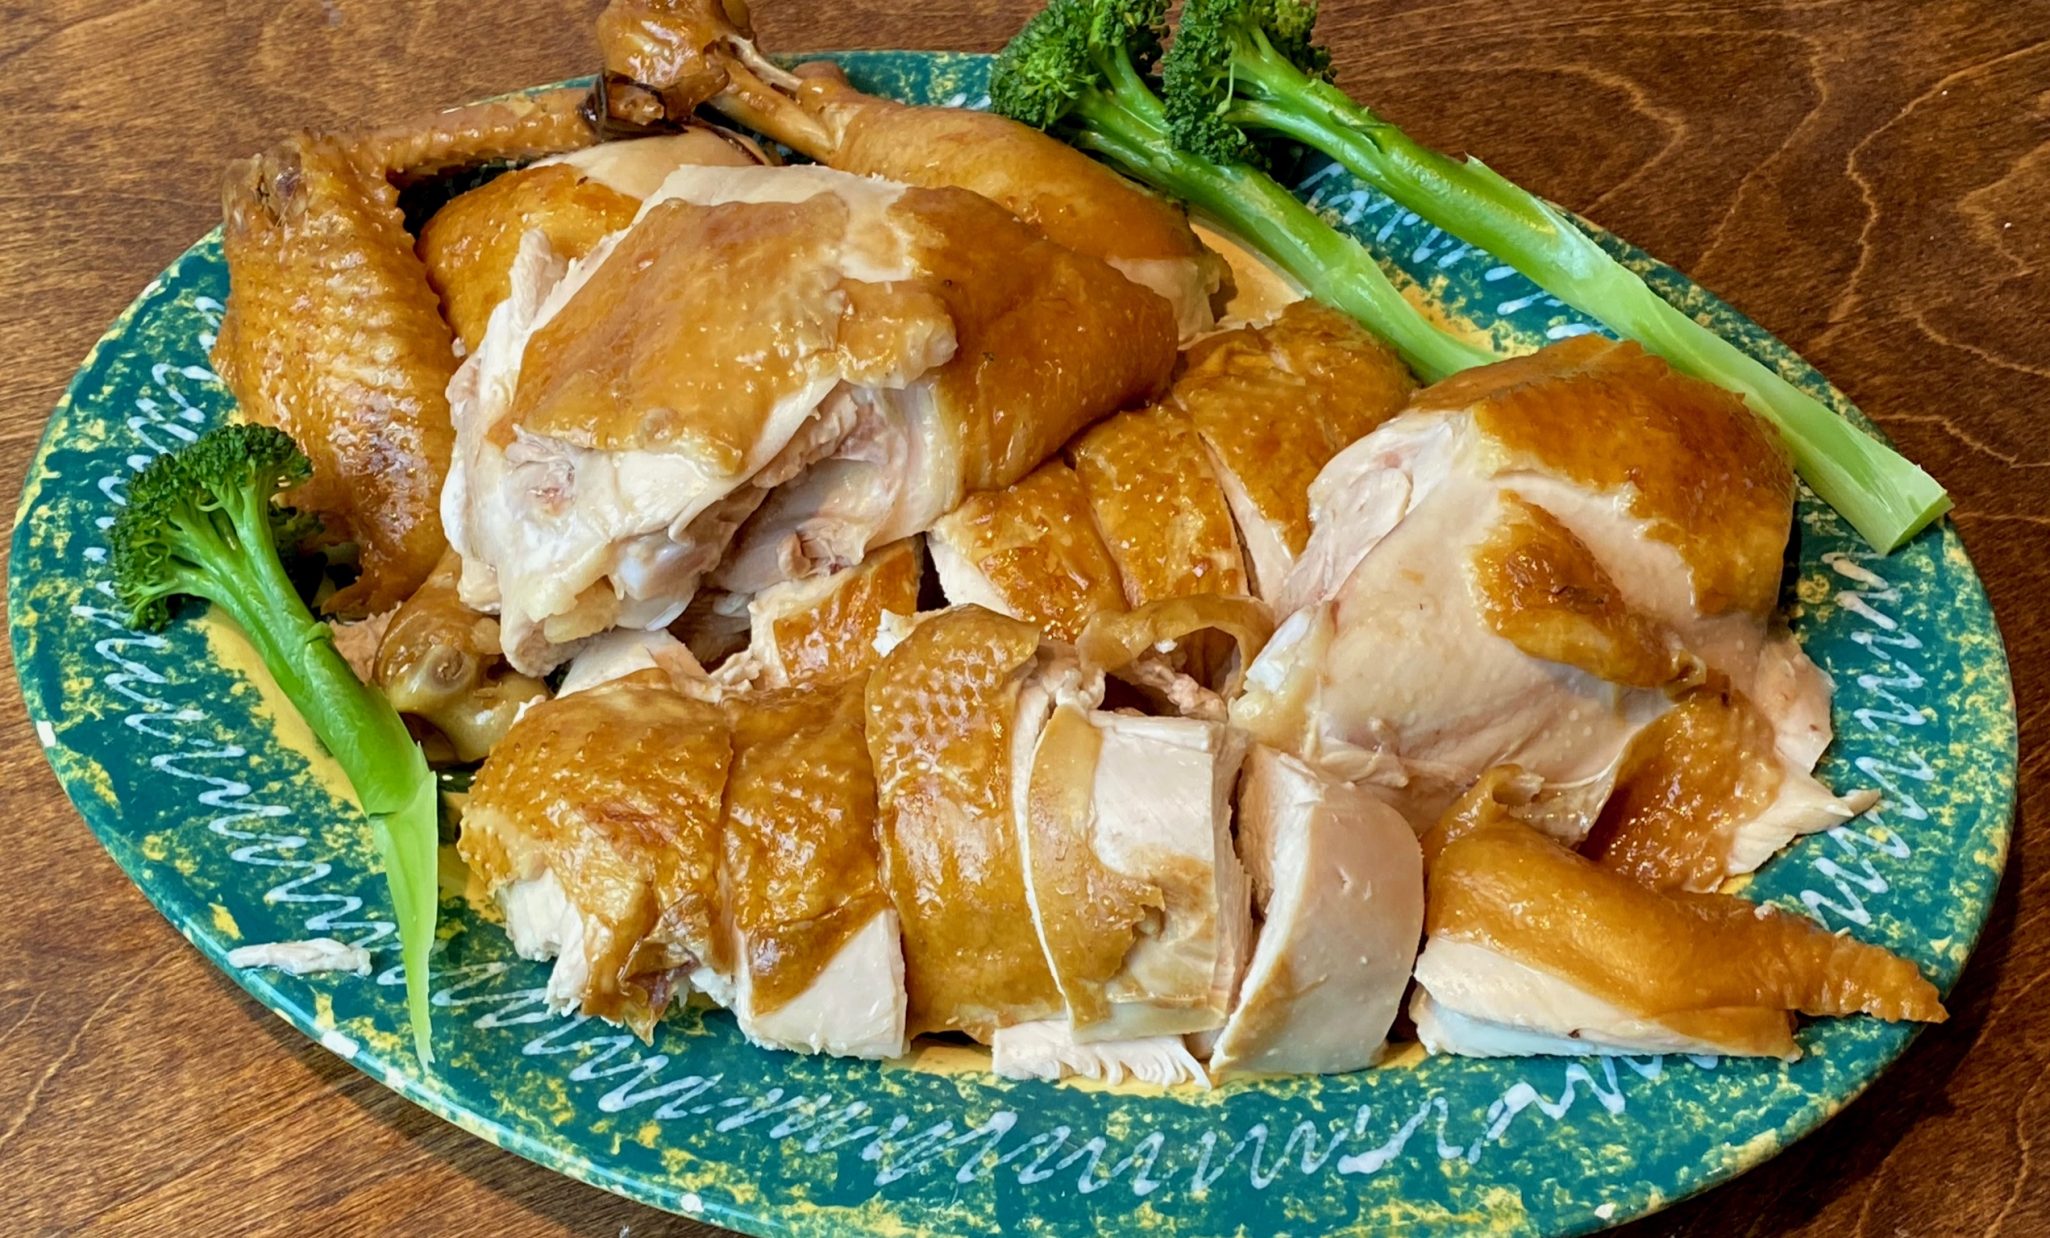
It never occurred to me to make Soy Sauce Chicken at home, it was too easy to head to my favorite Chinese deli and pick one up.  Staying at home has made me rethink “what can I make at home?” Time to tackle Soy Sauce Chicken.  The good news is it’s easy!  I googled Soy Sauce Chicken and found a recipe on The Woks of Life (an amazing Asian family cooking blog).  A few tweaks to their recipe and boom, no need to head to that Chinese deli anymore.  Delicious homemade Soy Sauce Chicken made by yours truly

Here’s the hard part.  Ingredients

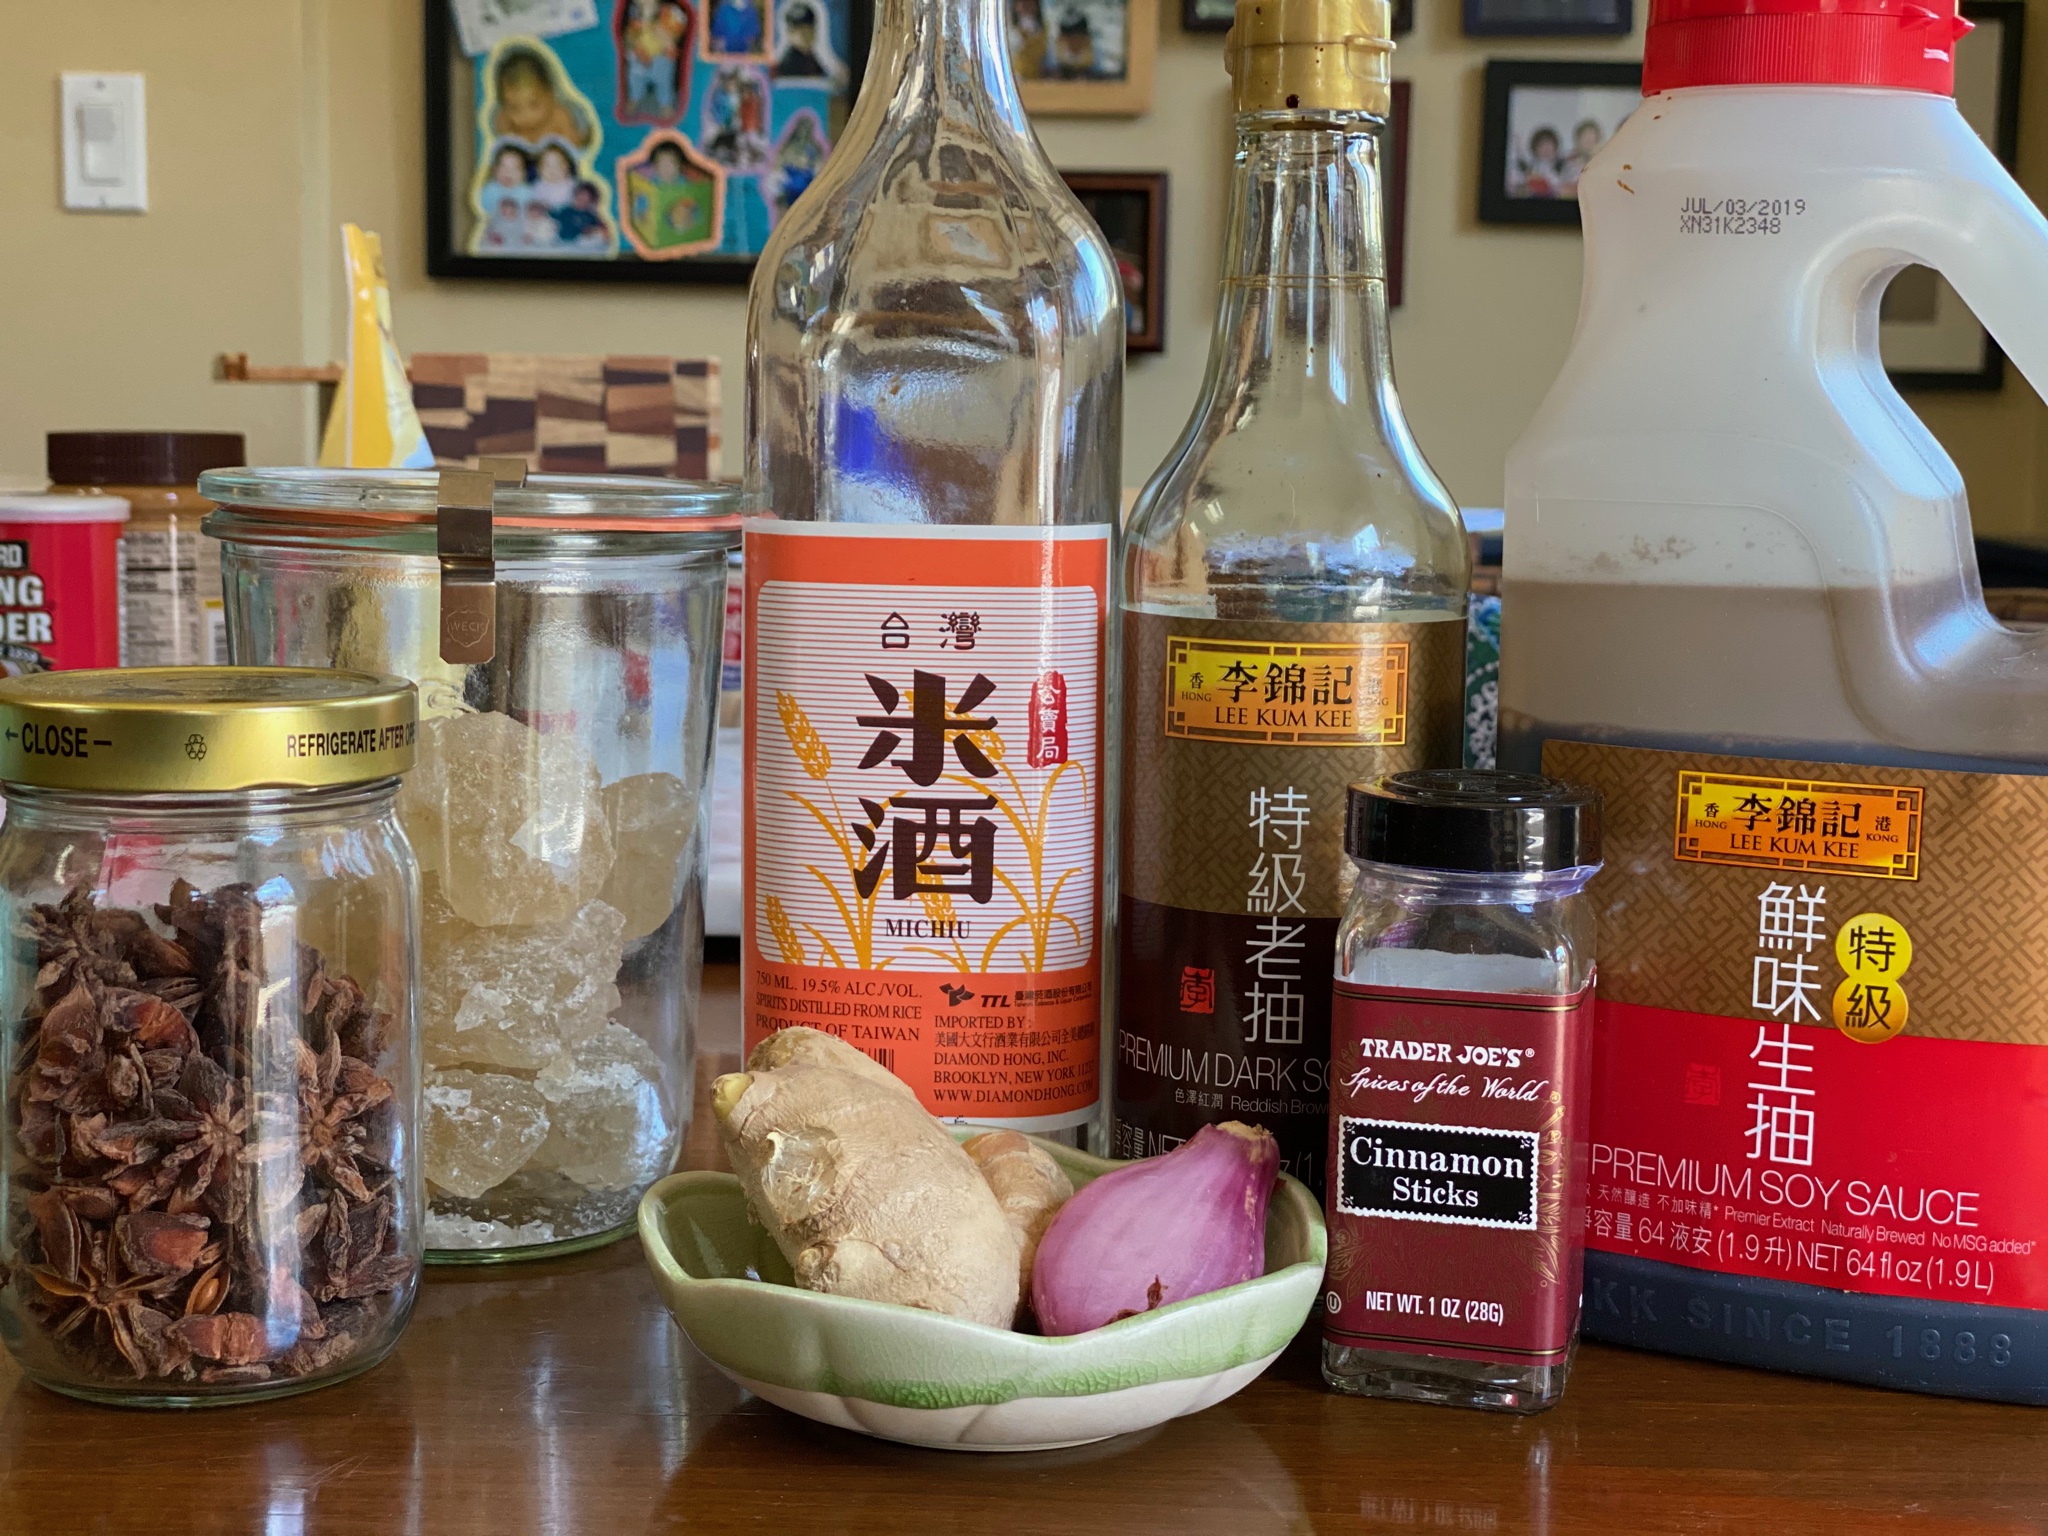
The seasonings include dark and regular soy sauce, star anise, sugar, cinnamon, rice wine.  Dark soy sauce has molasses which makes it sweeter than regular soy sauce.  Pictured in the left, back is rock sugar which I used along with granulated sugar.  You could use just granulated sugar or a combination of white and brown sugar.   Star anise is not my favorite so I cut back to 1-2 pieces and added half of a cinnamon stick instead.  Next time I will throw in 1-2 cloves in the poaching liquid.  Feel free to play around with the spices to make it your own, although stick to the spices in Five Spice Powder as a guide -Cinnamon, Star Anise, Fennel, Clove, Sichuan Peppercorns.  Keep in mind that all of these spices are pretty assertive, a little goes a long way.

The dark soy adds not only sweetness but color.  The skin turns a beautiful mahogany brown.  The regular soy sauce adds saltiness and flavor.  The original recipe calls for green onions, I didn’t have any, so I used shallots instead.  You definitely need a member of the allium family.

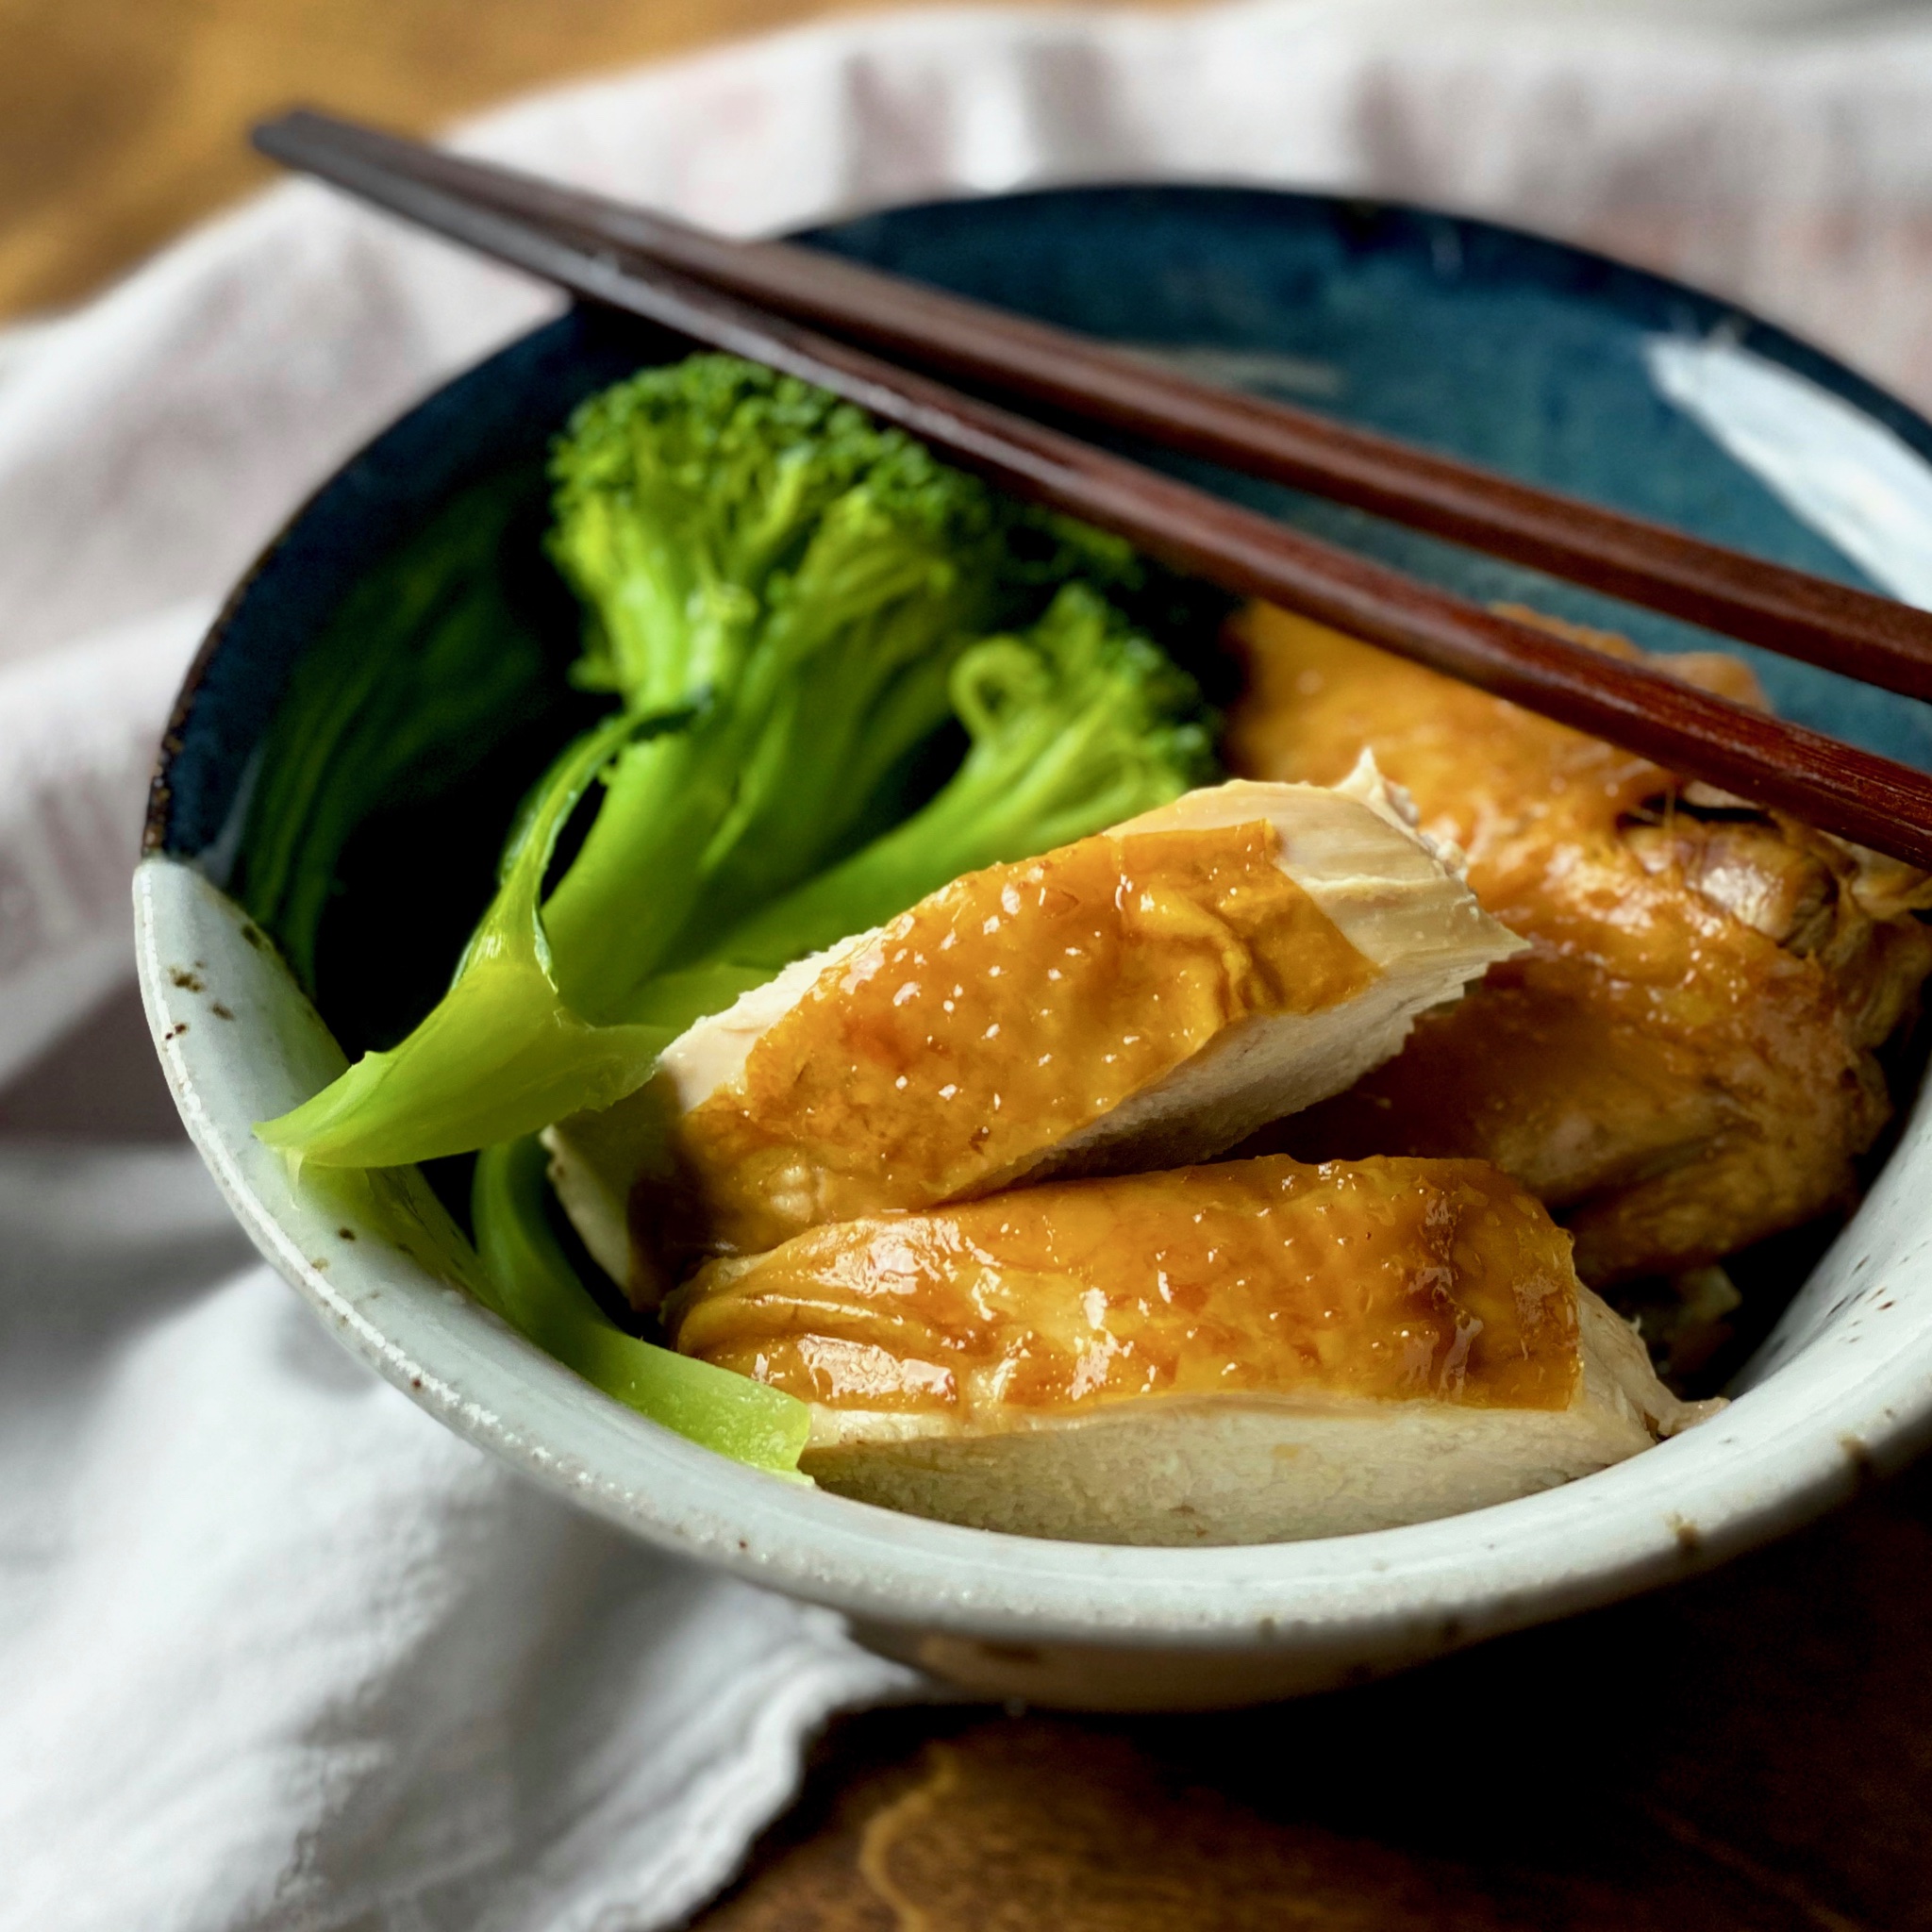
The result is tender, juicy, chicken that is sweet, salty, and spicy from the star anise and cinnamon.  It’s delicious.  Serve the chicken with simply prepared greens and either rice or noodles.  Drizzle with the poaching liquid and BOOM dinner is served.  Enjoy!

Soy Sauce Chicken (See Yau Gai)

Course Main Course
Cuisine Asian
Keyword Soy Sauce Chicken
Prep Time 15 minutes
Cook Time 1 hour 30 minutes

Ingredients

  • 1 whole chicken ~4 pounds; fresh
  • 1 T oil
  • 7 slices ginger smash lightly to release flavor
  • 2 scallions cut into 3-inch pieces and smashed flat
  • 3 star anise I use 1-2 only
  • 1 ½ cups Chinese Rice Wine aka shaoxing wine
  • 1 ½ cups soy sauce reg Kikkoman would work
  • 1 1/4 cup dark soy sauce or dark mushroom soy sauce
  • 1 cup sugar plus 2 tablespoons Can substitute rock sugar or brown sugar for 1/2 of amount
  • 2 teaspoons salt Kosher salt, if using diamond increase to 1 T
  • 10 cups water
  • 1-2 cloves optional

Optional spices

  • 2 cloves garlic peeled and smashed
  • 1/2 stick cinnamon
  • 1/4 tsp fennel seeds reduce star anise to 1 piece if using
  • 1-2 large shallots, sliced in place of green onions and garlic, sheltering in place-mother of invention!

Instructions

  • Take your chicken out of the refrigerator before you plan to cook, let it come to room temperature. Remove the giblets, and thoroughly rinse the chicken inside and out.
  • In a tall, narrow stock pot, that will just fit the chicken, (the chicken should be totally submerged in the cooking liquid) Heat pot over medium low heat add the oil. Add ginger when the oil is hot.
  • Fry ginger for about 30 seconds until it begins to brown. Then add the scallions and cook another 30 seconds. Add the star anise and rice wine, and bring to a simmer to let some of the alcohol cook off. Add the soy sauce, dark soy sauce, sugar, salt, and water. Bring to a simmer again and cook on low heat for another 20 minutes.
  • Increase the heat to bring the liquid to a slow boil (i.e. a little stronger than a simmer, but not a rolling boil). Lower the chicken slowly into the pot breast side up. Make sure any air pockets in the cavity fill up completely with liquid. The chicken should be entirely submerged at this point.
  • Bring the cooking liquid back to a boil and cook for about 5 minutes at medium heat, a nice rolling simmer. Next, carefully with tongs or a serving fork, lift the chicken out of the water and empty the liquid inside the cavity, which will be cooler than the liquid surrounding the chicken. Lower the chicken back into the pot, making sure once again to fill the cavity. If the chicken is not completely submerged, periodically baste the exposed area with cooking liquid.
  • Bring the liquid back up to a simmer, which should take about 10 minutes. Keep it at this slow simmer (the liquid will be about 210 degrees F) for 25 minutes. Turn off the heat, cover the pot, and let the chicken sit in the pot for another 15 minutes. Transfer the chicken to a cutting board. You can test the chicken, should be about 165 degrees F.
  • Use the sauce from the pot to occasionally baste the chicken and keep the skin moist as it cools. Serve over rice with some sauce from the pot!

Chicken Pieces

  • Don't want to poach an entire chicken?
  • This is enough poaching liquid to poach 4 chicken breast or 4 whole legs or 6 thighs. Follow directions up until putting the chicken into the liquid. Place chicken pieces in liquid. Bring it back to a boil. Lower heat so you have a nice energetic simmer going.. Cover and simmer for 10 minutes. Turn heat off and allow the chicken to sit covered for 20-25 minutes depending on size of pieces.
    That's it, enjoy!

Notes

Once you're done cooking the chicken, you can actually freeze the sauce/cooking liquid for use again later (though you may have to re-season the sauce)

Spring into Asparagus Season

Spring into Asparagus Season

For some silly reason, it never seems to dawn on me that spring has finally arrived until I see bunches of asparagus in the market.  This year is especially strange with the COVID-19 crisis, time just seems to be standing still.  On a dreary rainy day last week, I finally escaped to the market and the first display I saw was the asparagus.  I cracked a little smile, grateful that spring had arrived even in the midst of the Coronavirus pandemic.

While at the market, I bought a bunch of asparagus home knowing exactly what I was going to do with it.  I had just read a wonderful essay by Eric Kim entitled “The Man Who Hated Eating Alone”. Eric is a senior editor for Food52 and author of the column Table for One.  His latest essay on eating alone, (which many of us are experiencing with self-quarantine) intertwined with James Beard’s bio and his recipe for asparagus-delicious, so simple, and perfect for one person.

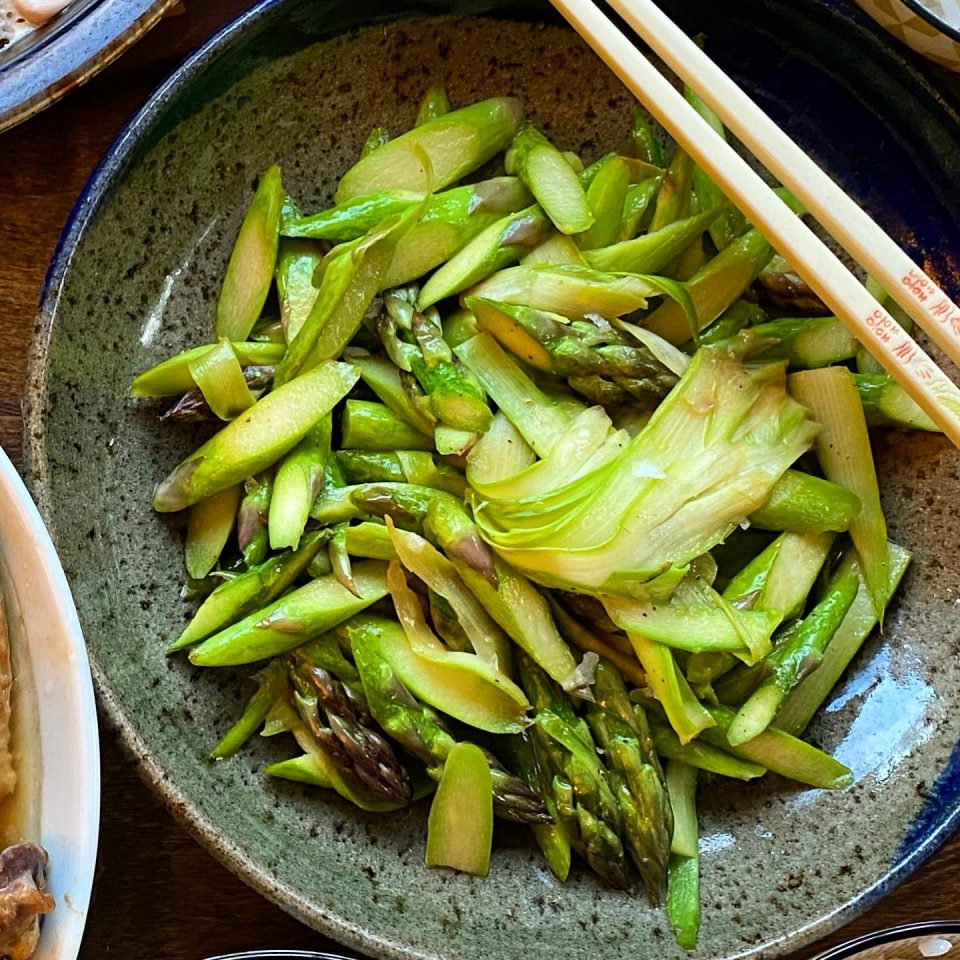
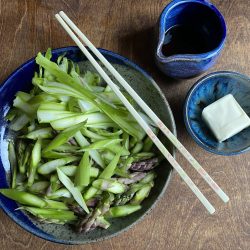
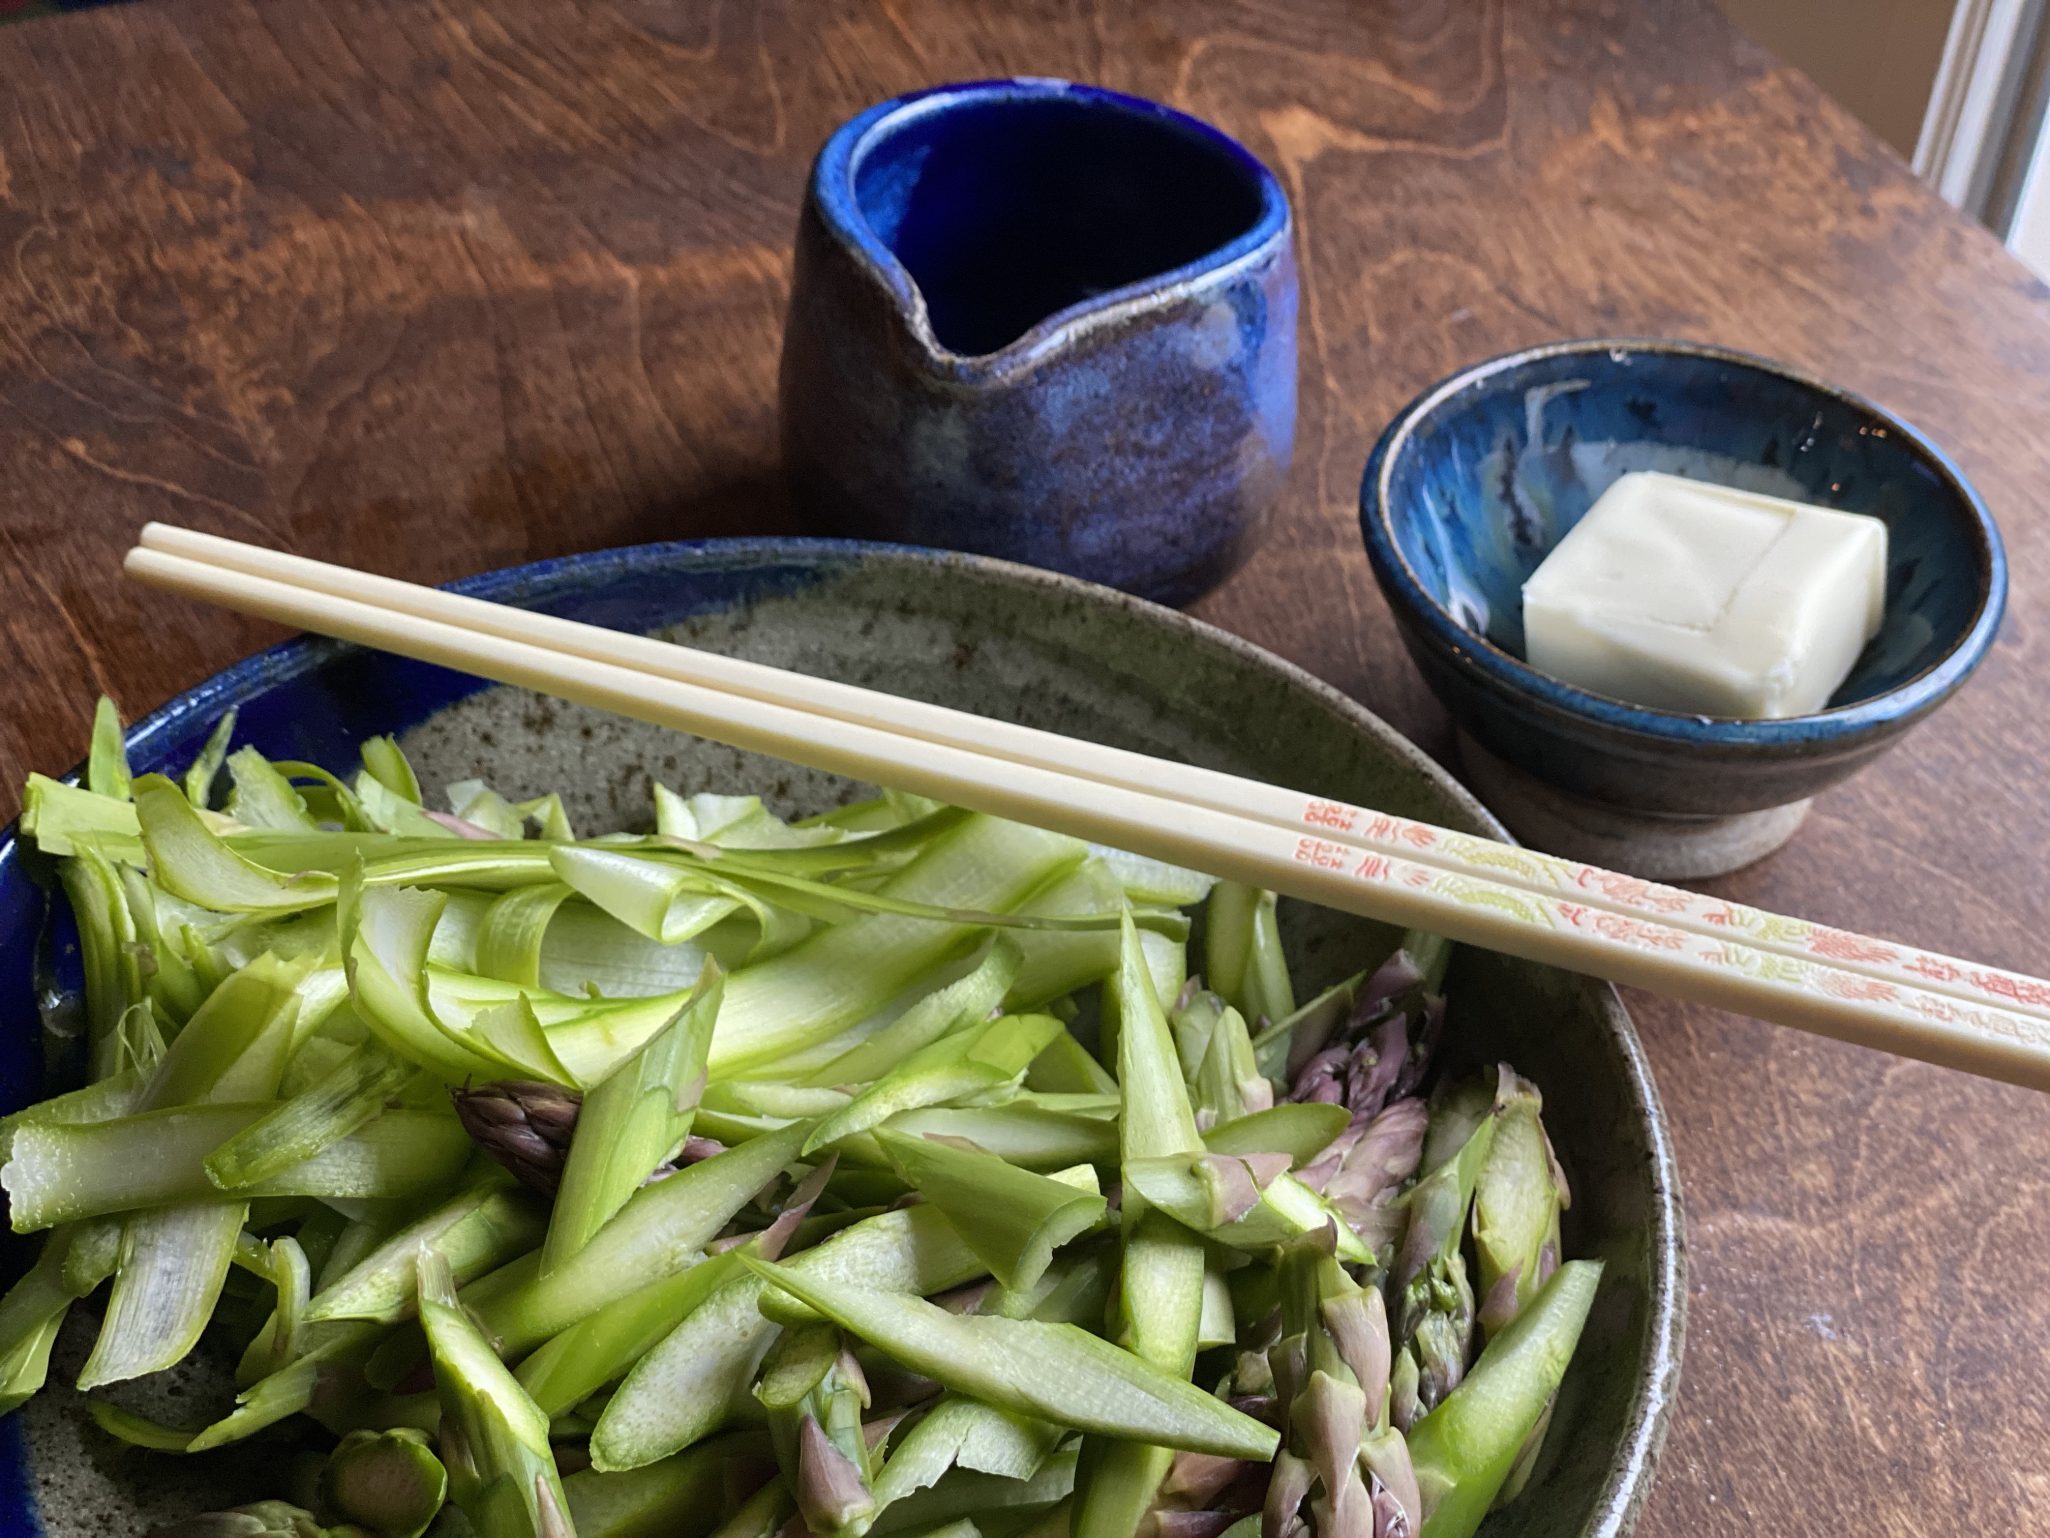
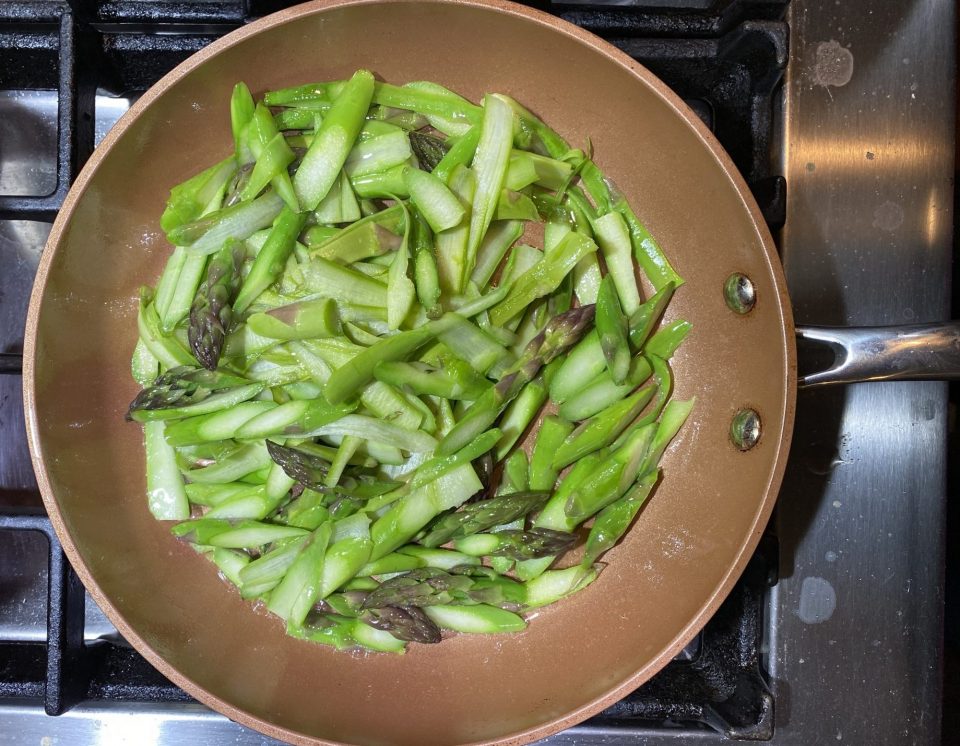
The recipe calls for asparagus, butter and soy sauce. That’s it.  Thinly sliced asparagus, melt a pat of butter in a pan, add a splash of soy sauce, and saute’ for a couple of minutes so it stays crispy. Sprinkle some coarse salt to finish-boom, done.  So delicious and so easy.  It’s criminal.

But if I think about it, I love most of my vegetables prepared simply.  I make my favorite Chinese dish of pea sprouts or spinach ALOT.  Just stir-fry greens with lots of garlic, a bit of soy sauce, oyster sauce and ginger and that’s it, ready to scarf it down.  Blanch lettuce, Iceberg or Romaine, quickly in water or stock and finish with oyster sauce and oil-done and delicious.  Can’t beat that.

So I shouldn’t be surprised that such a simple recipe would be wonderful. I prepped my asparagus two ways, cut on the diagonal and shaved into long thin strips with a peeler.  Use Ponzu Soy Sauce or Soy Dashi instead of soy sauce which adds a hit of citrus and a dash of sesame oil for pop.  this would also work beautifully with sugar snap peas or snow peas.

Enjoy, Stay home, stay well.

Paper-Thin Asparagus with Butter and Soy Sauce

A simple delicious recipe from Eric Kim of Food 52
Course Side Dish
Cuisine Asian-American
Keyword asparagus
Prep Time 5 minutes
Cook Time 2 minutes

Ingredients

  • 2 tablespoons unsalted butter
  • 8 ounces asparagus cut in paper-thin diagonal slices or shave with peeler
  • Flaky sea salt and freshly ground black pepper garnish
  • 1 tablespoon soy sauce substitute Ponzu or Soy Dashi

Instructions

  • Heat a skillet over high heat and melt the butter. Add the asparagus, season with salt and pepper, and cook for 1 minute. Add the soy sauce and cook for another minute or so, until the butter and soy sauce bubble up into a sticky glaze. Serve immediately.

Notes

Though written as a serving for one, as a side dish this would feed 2-3 people.


Everybody Have Jjigae Tonight (Kimchi Jjiggae-Korean Kimchi Tofu Soup)

Everybody Have Jjigae Tonight (Kimchi Jjiggae-Korean Kimchi Tofu Soup)

Y’all know I love soup, right?  I have about a dozen recipes for different soups on 3jamigos and now I am adding one more, Kimchi Jjigae or Kimchi Tofu Soup.  It is easy to make, super delicious and something a little different.  It’s a hearty soup with lots of yummy stuff. Along with kimchi, the soup has beef, or pork, tofu, mushrooms, onions, cabbage, basically, anything your little heart desires.  Jamie and I collaborated on this recipe (she made it, I ate it).  It is a mash-up of various recipes we found online.  If you like Korean food and would like to try making it at home, there are some really good blogs and Instagrammers you can check out, Korean Bapsang, and My Korean KitchenInstagrammer @Christy_l_kitchen’s video for kimchi tofu soup served as ground zero for Jamie’s delicious soup.

First, let’s run through the ingredients for Kimchi Jjigae.  If you live in the Bay Area, it will be easy to find the ingredients for this tasty pot.  Actually, any major metropolitan area probably has an Asian market and there are online sources. (Or call me, happy to take anyone Asian food shopping)  Once you have assembled the ingredients, putting the soup together is a SNAP.

Let’s start at the very beginning, a very good place to start…

Kimchi, or fermented cabbage, is essential to the soup.  It is the cornerstone of the soup providing umami, texture, and spice. Asian stores and larger supermarkets often carry Kimchi in their cold boxes.  My favorite brands are Ocinet and Im Soon Ja.  Use the one you like.

Tofu-made from soybean comes in various densities from super soft to extra firm.  Normally, SoonDubu Jjigae uses a very soft “silken” tofu. PERFECTLY acceptable to use firmer tofu if you like.  Tofu in tubes by Pulmone is a great choice. Kithcn has a nice primer on tofu that helps sort out the different varieties.

For protein, we used pork belly but again you can substitute beef or seafood such as shrimp or clams. Mushrooms are amazing and if you pull out the protein, the perfect vegetarian version.  Jamie added King Mushrooms (pictured) and Enoki Mushrooms (teeny tiny mushrooms), very tasty.

Gochugaru, Korean red pepper adds sweet, spicy, fruity, smoky-irreplaceable, look for it at Korean markets or online.  I like to use Gochujang (spicy sweet chili paste) along with the powder.

The soup can be made with water but if you want depth of flavor, use stock.  Traditionally an anchovy stock is used but we improvised by using a Japanese Shiro Dashi (fish-based stock) concentrate which I love.  In a pinch use chicken broth or a mushroom broth.  The recipe calls for 1 cup of liquid, I LOVE soup so I usually increase the amount of liquid 1.5-2 cups.  If you do too, taste for seasoning, you may want to increase the chili powder.

There you have it, all the ingredients for a pot of yumminess.

The hard part is over!  It’s downhill from here.  Saute’ your onions and pork, add kimchi and seasonings, stock, shrooms, and then the tofu. Top with green onions, Badda bing Badda boom, done.  Just a couple of minutes of work and dinner is served!  Koreans have a special little pot to cook Tofu Soup in, it retains heat, when you bring it to the table the soup is still bubbling furiously. Drop a raw egg in and let it cook in the piping hot broth.  We don’t have a special pot so we dropped the egg on top before taking the saucepan off the stove.

Variations on a Jjigae theme.  Did I mention we threw in mandu for good measure?  Because who doesn’t love dumplings!  To increase the veggie content without adding more kimchi, add sliced fresh cabbage or more mushrooms.

Korean Tofu Soup Kimchi Jjigae

Korean comfort food, Soondubu Jjigae or Tofu Soup. Tofu, pork, beef or seafood and Kimchi are the building blocks for this delicious, easy to make soup.
Course Main Course, Soup
Cuisine Asian
Keyword kimchij jigae, tofu soup
Prep Time 15 minutes
Cook Time 15 minutes

Ingredients

  • 1/4 yellow onion, thinly sliced
  • 1/2 cup thinly sliced pork belly or beef can sub seafood, shrimp or clams.
  • 1/2-3/4 cup thinly sliced kimchi
  • 2-3 shiitake mushrooms, thinly sliced or enoki mushrooms, 1 small pkg
  • 1-2 T red chili pepper flakes gochugaru add more for a spicier stew
  • 1 T Gochujang (chili paste)
  • 1 teaspoon minced garlic
  • 1/2 tablespoon sesame oil use a little more if using more gochugaru
  • 10 ounces soondubu extra soft/silken tofu, 1/2 carton of tofu
  • 1 cup anchovy broth can use water, dashi or chicken broth
  • 1/2-1 T soy sauce
  • 2 to 3 tablespoons juice from kimchi
  • pinch black pepper, dash of salt
  • 2 scallions divide white and green parts, finely chopped, add white part to yellow onion mix saute', reserve green part for garnish
  • 1 egg

Instructions

  • Heat 1 tsp oil in a small saucepan over medium heat. Add diced onion, scallions (white part) and pork or . Stir-fry until the meat is almost cooked, 3 - 4 minutes.
  • Add the kimchi, chili paste, garlic, soy sauce and sesame oil to pot. Stir to combine and saute for 1-2 minutes.
  • Pour in broth, juice from the kimchi and pepper flakes. Bring it to a boil, add mushrooms and continue to boil for 3 - 4 minutes.
  • Add the soft tofu in big chunks. Stir in salt to taste (I rarely add salt), start with 1/4 teaspoon, and black pepper.
  • Cook for 4 -5 minutes. Add chopped scallions just before removing the pot from the heat.
  • If desired, crack an egg into the soup to serve while it’s still boiling hot.
  • Serve with rice.

Notes

Shiro dashi concentrate is seasoned, reduce salt and/or soy sauce if used.