Tag: vegetarian

Back to My Lotus ROOTS (Renkon No Kinpira)


Back to My Lotus ROOTS (Renkon No Kinpira)


We are always looking for ways to increase our veggie intake.  Part of the problem is our everyday veggies are BORING.  Let me clarify, Veggies aren’t boring, it’s our method of prep.  We should be arrested for vegetable prep neglect and indifference.  We often find ourselves nuking frozen corn or mixed veggies as we sit down to eat. Veggies are a sad afterthought.

No More

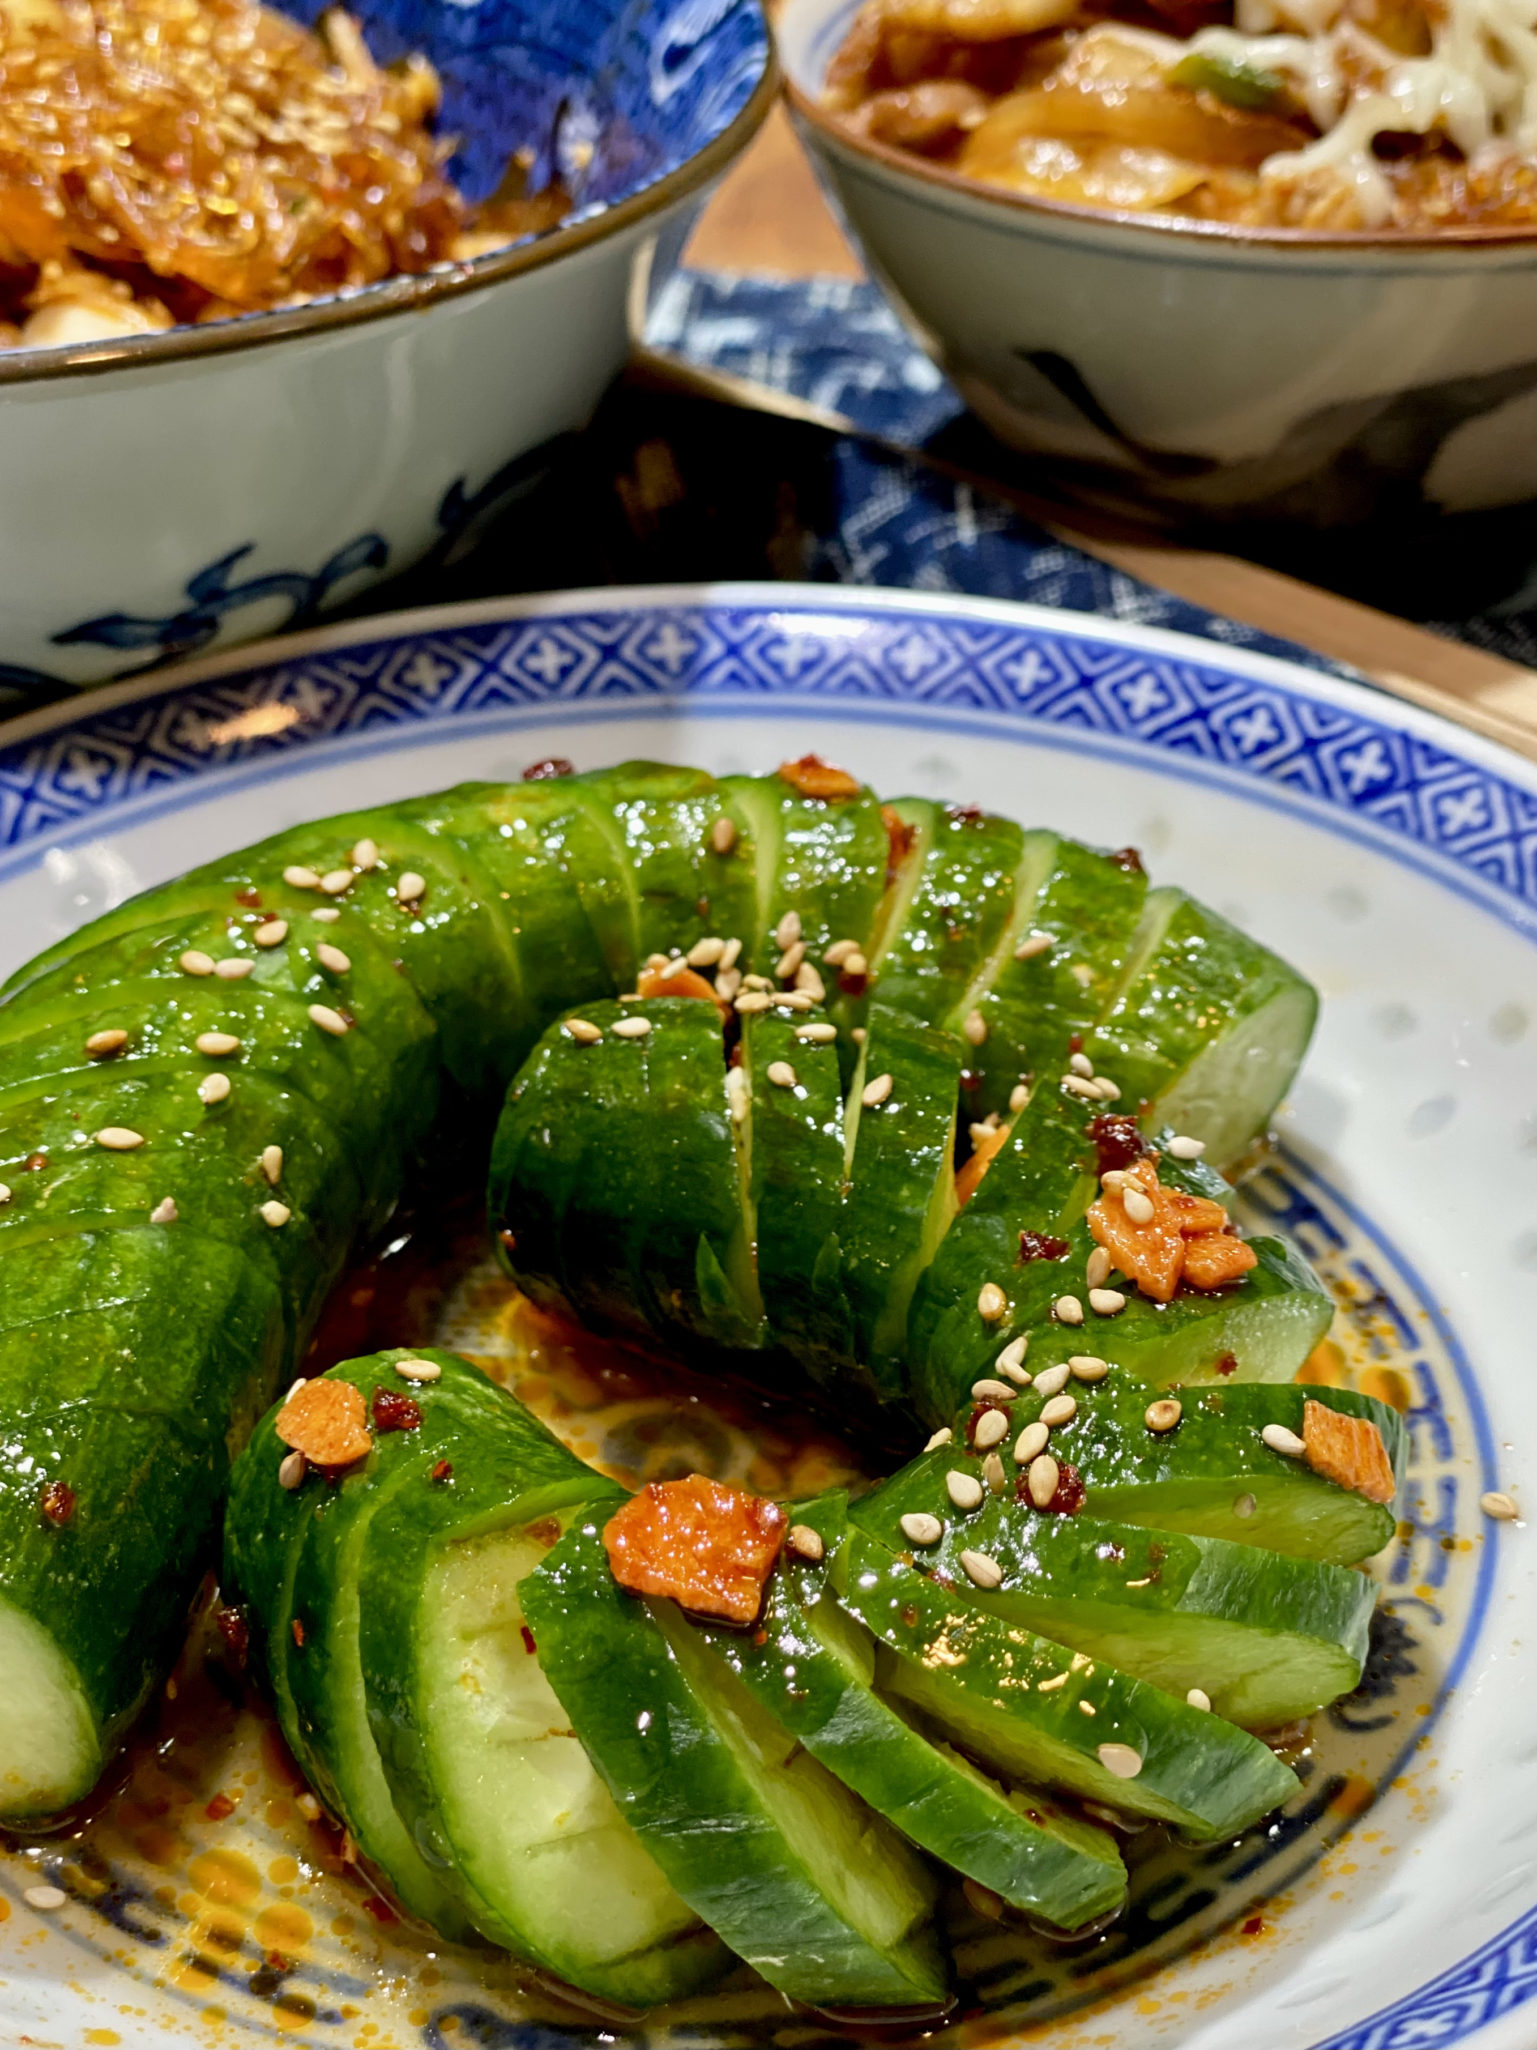
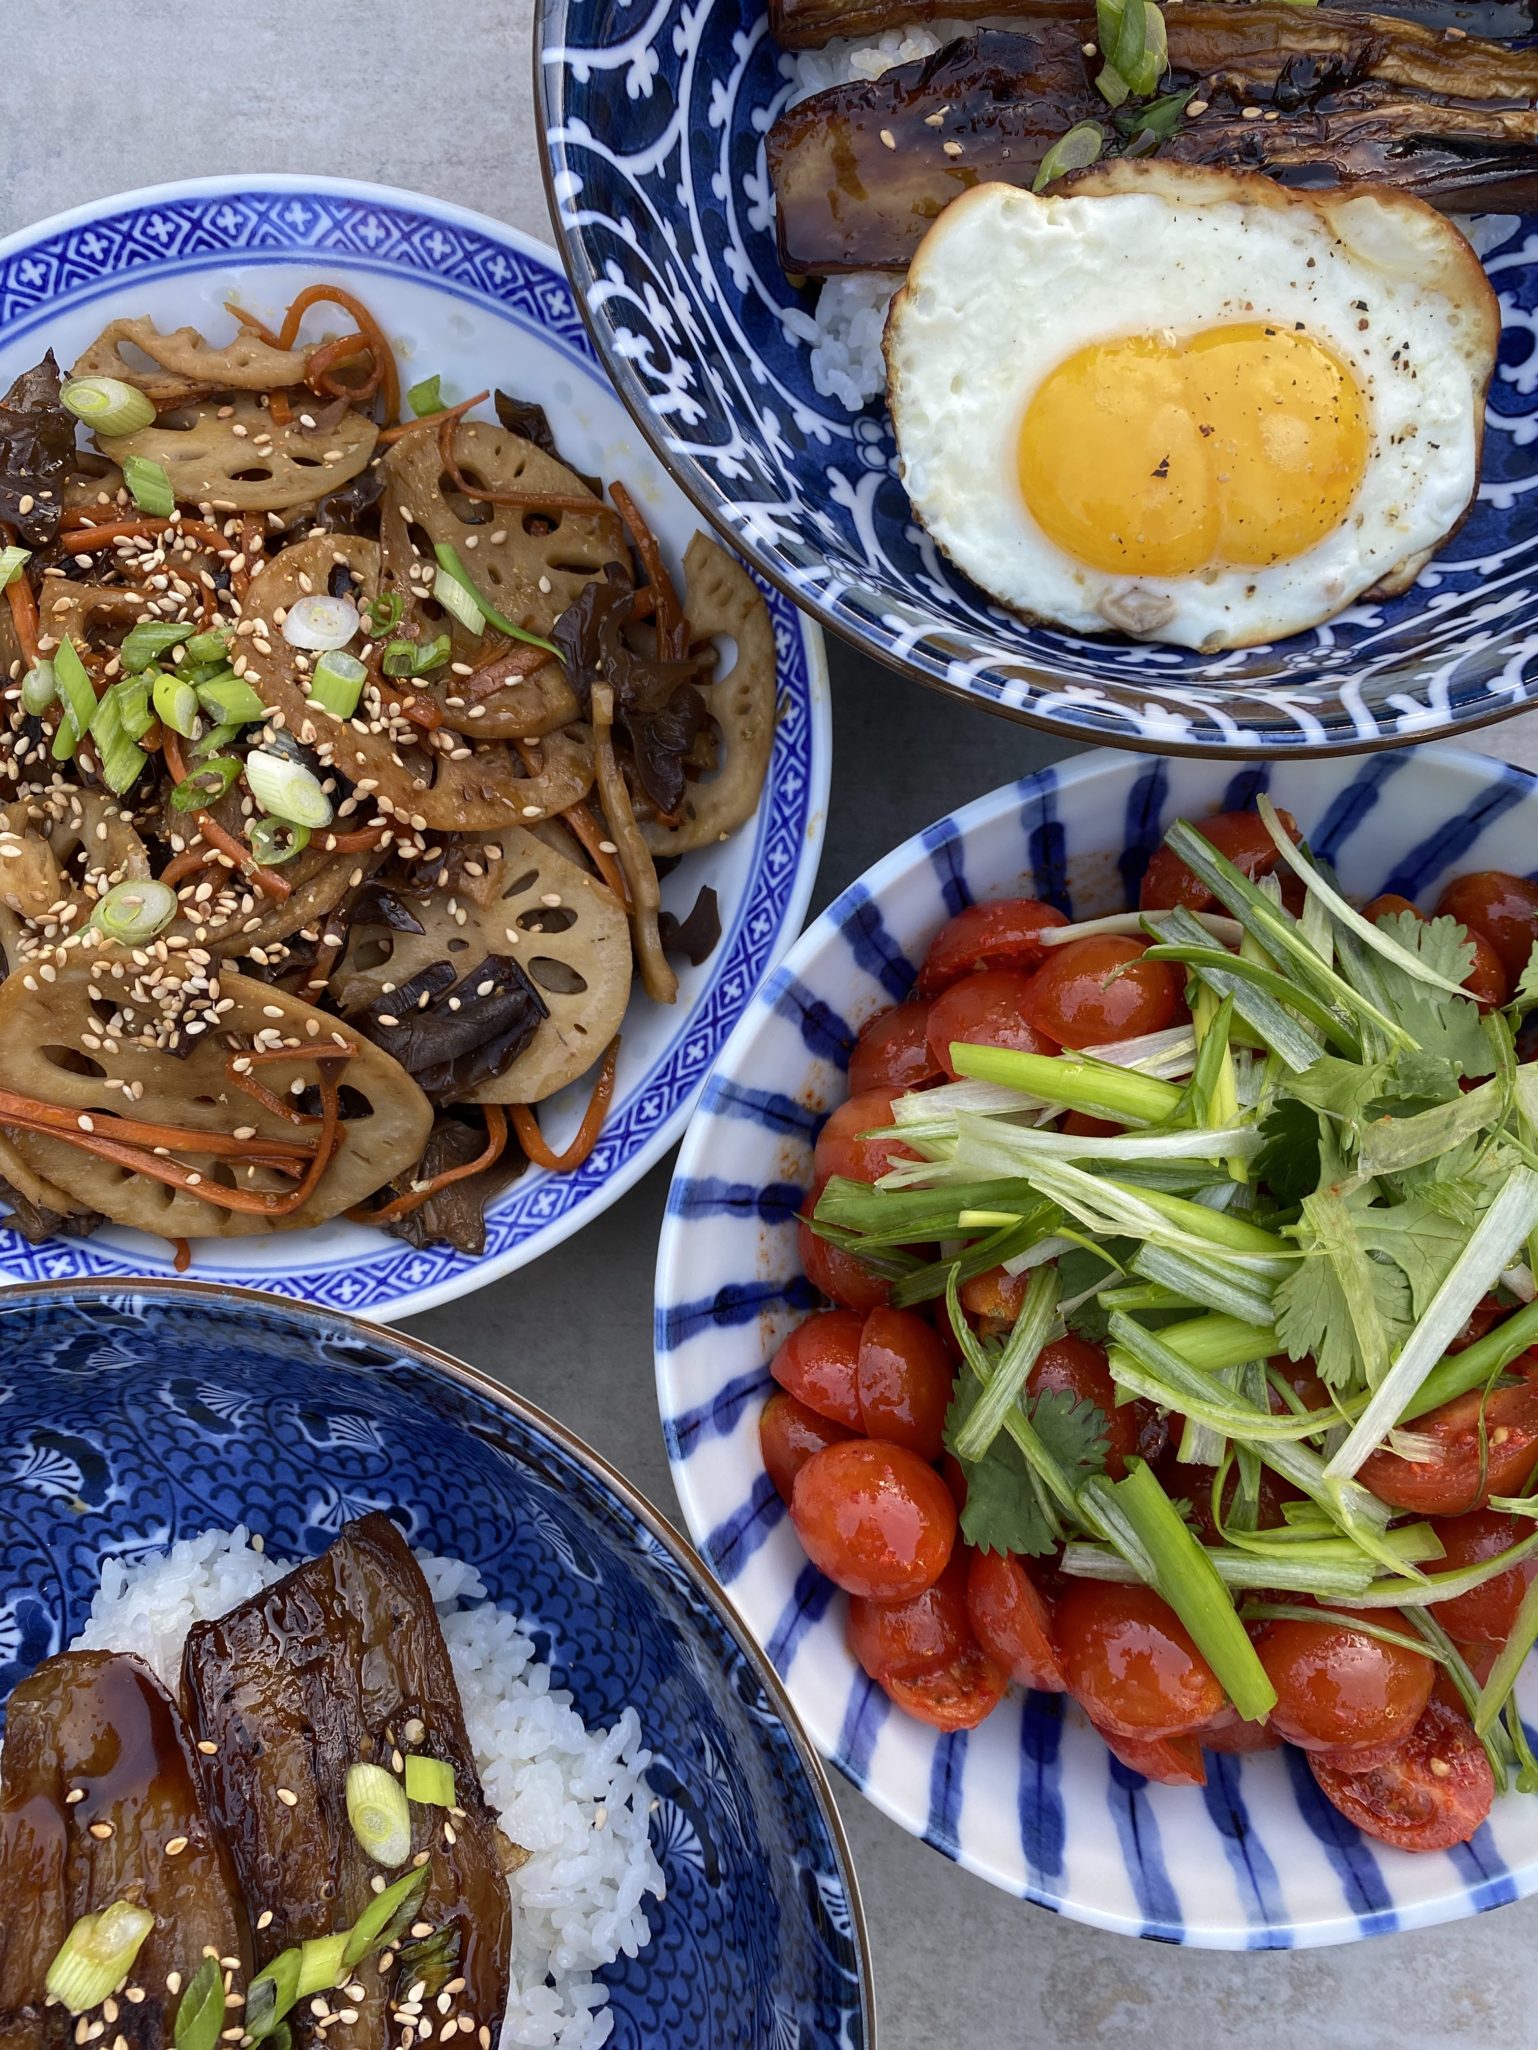
Expanding our veggie-verse has become a priority.  What we have discovered are the veggie-centric dishes such as Chinese Cucumbers, Indian Dal, Aloo Gobi, Korean Banchan,  or Japanese Tsukemono.  Make batches ahead of time so dinner on a busy night means pulling out the Tupperware from the fridge.  Win-win!

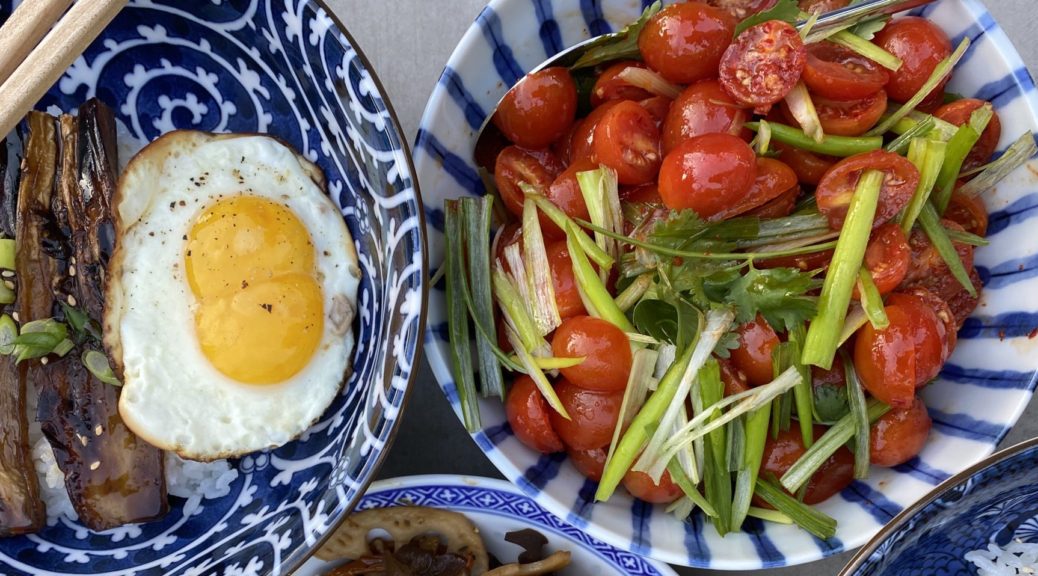
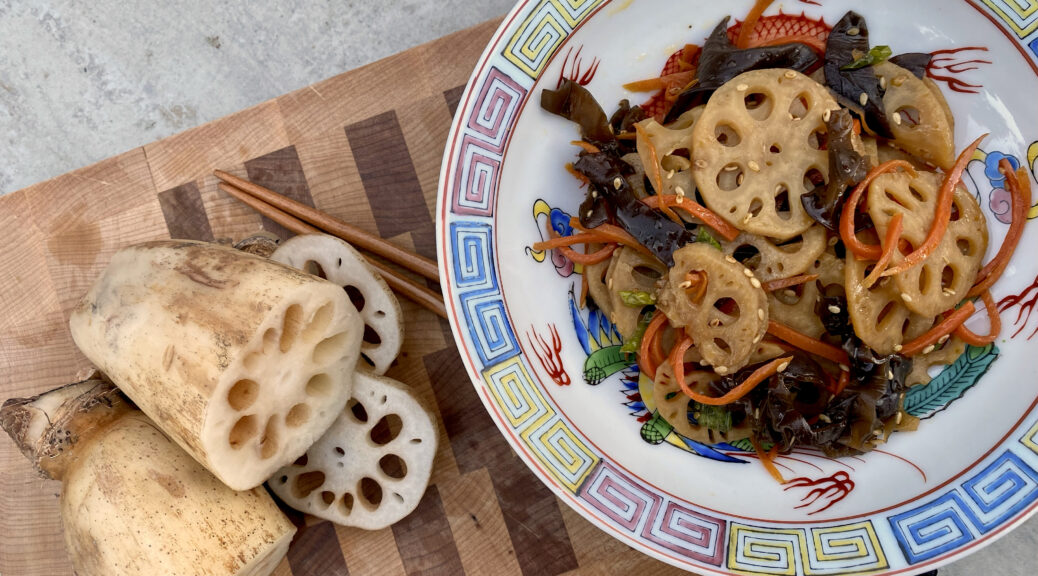
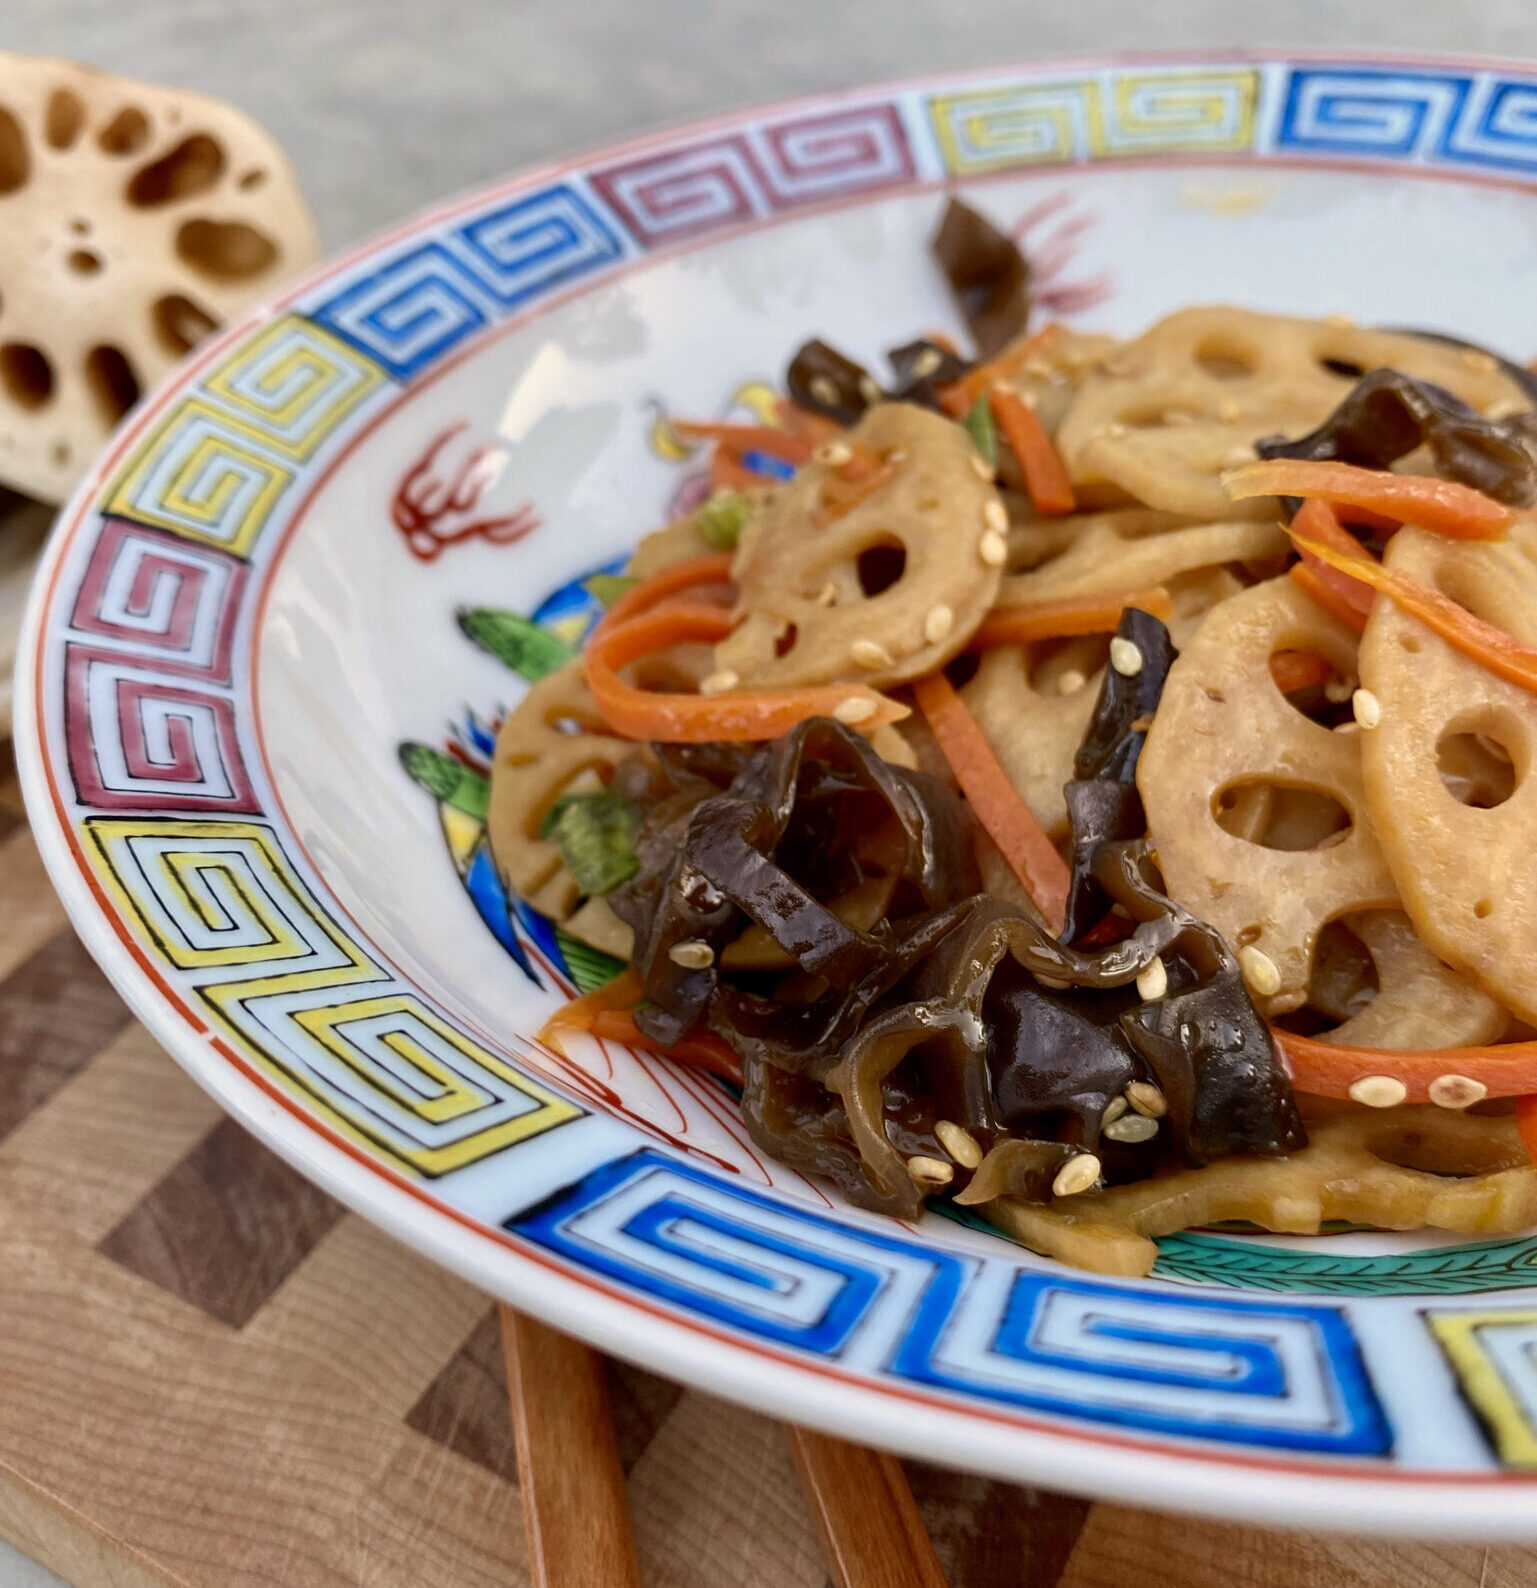
One of my favorites is Kinpira Renkon or Stir-fry lotus root.  Make a batch and store it in the fridge.  Super simple to make and a delicious accompaniment to rice.  I tweaked the recipe to include carrots and cloud ears (black cloud mushrooms).  Look for fresh lotus root in Asian supermarkets, it is mild in flavor, crunchy, and delish.   It also comes vacuum-packed, sliced, and ready to use.  If you can’t find it, Jicama might work.

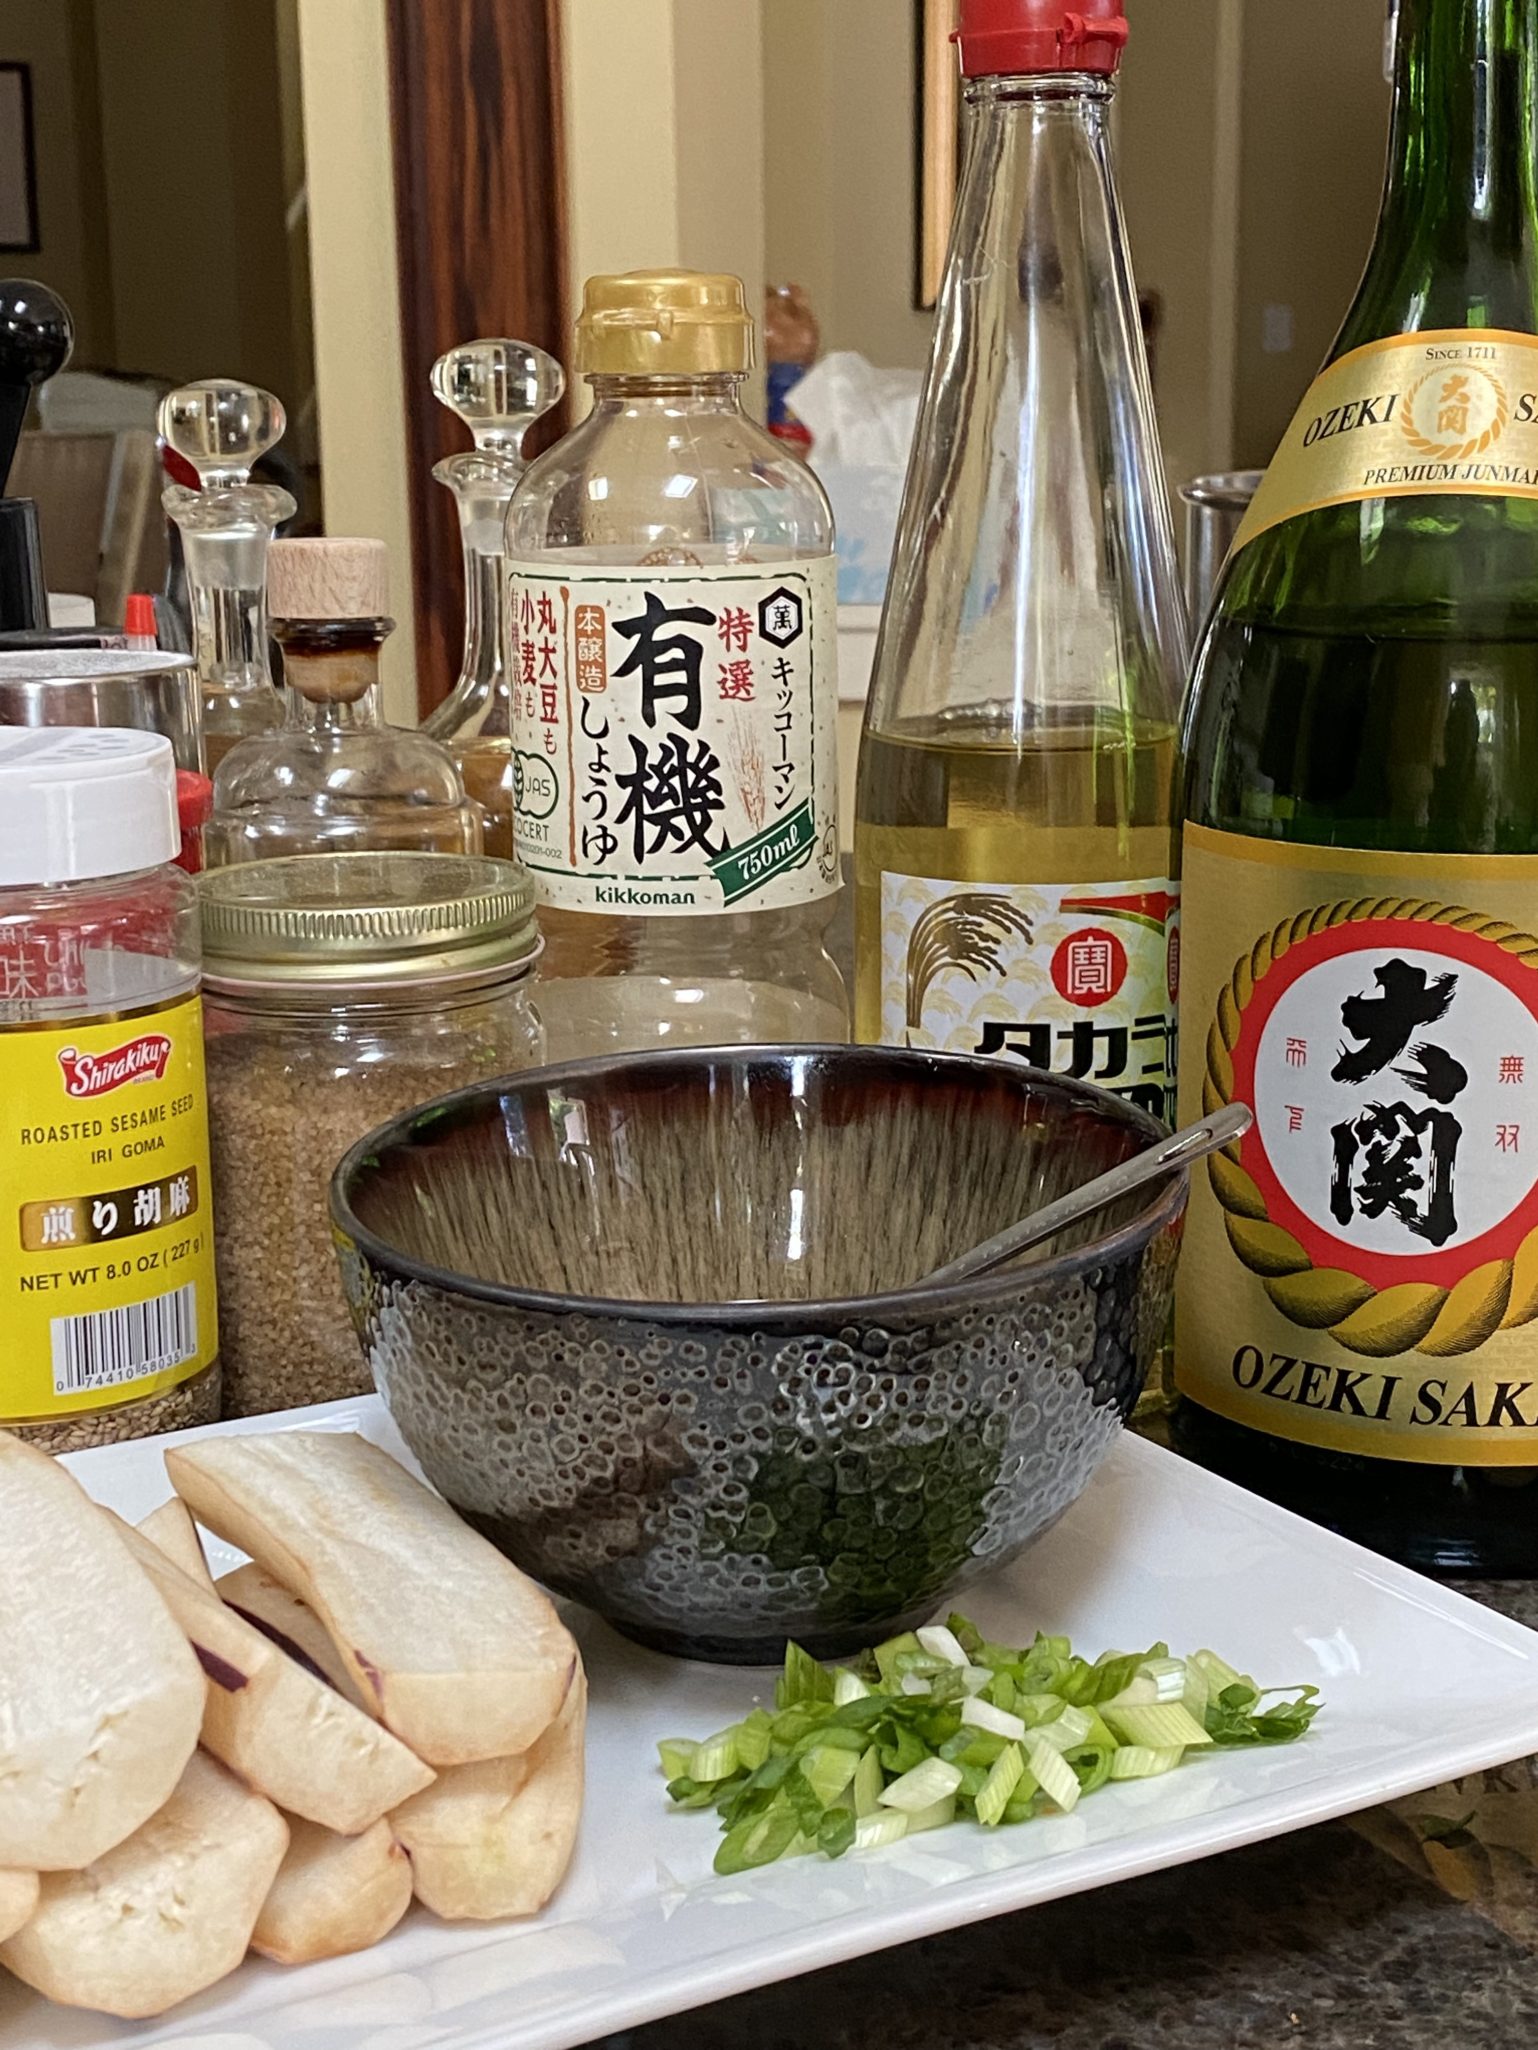
Slice the lotus root and place it in water with a touch of vinegar.  Julienne the carrots, and soften the cloud ear mushrooms in warm water.  That’s it. The veggies are then sauteed’ in soy sauce, Mirin (cooking wine), and sesame oil.  Easy peasy.

Enjoy!

Simmered Lotus Root (Renkon no kinpira)


An easy Japanese stir fry veggie dish
Course Appetizer, Side Dish
Cuisine Asian, Asian-American, Japanese
Keyword black fungus, Carrots, Kimpira, lotus root
Prep Time 15 minutes
Cook Time 5 minutes

Ingredients

The Star

  • 2-2.5 cups lotus root peeled and thinly sliced
  • 2 Cups water or enough water to cover lotus root
  • 2 Tsp vinegar

The Supporting Cast

  • 1/2 cup carrots julienned
  • 1 T dried cloud ear mushrooms Once soaked will yield about 1/3 cup
  • 1 tbsp toasted sesame oil
  • 1 tbsp vegetable oil
  • 2 tbsp mirin
  • 2 tbsp soy sauce or tamari

To Finish:

  • 1 tsp toasted sesame seeds
  • dash of chili flakes or 1 small fresh chili pepper, thinly sliced, for milder version de-seed and de-vein pepper optional (shichimi togarashi is recommended)
  • 1 stalk green onion, diced optional

Instructions

  • Soak the lotus slices in cold water and vinegar for 10 minutes and drain and rinse a couple of times.
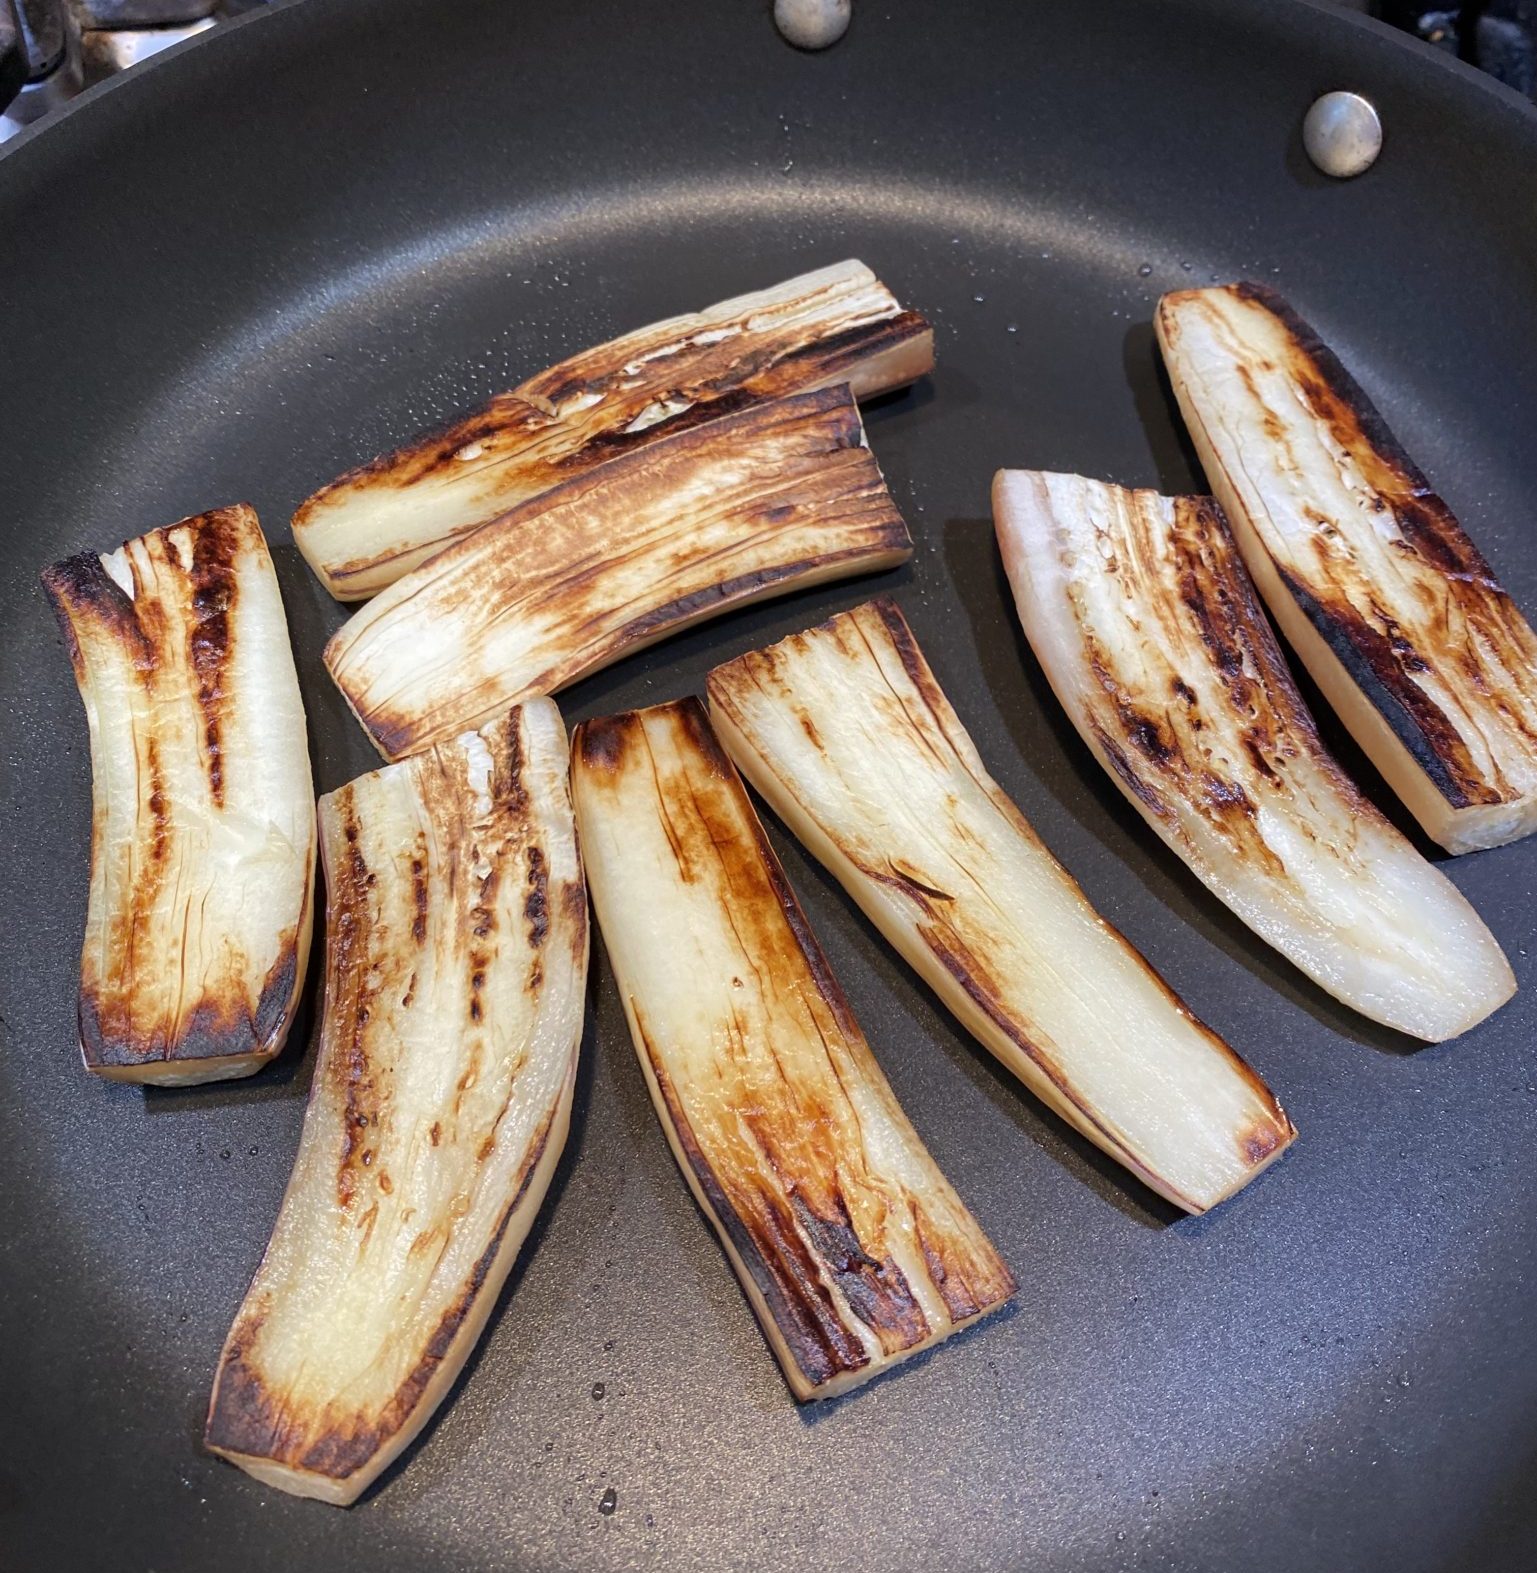
  • In a large saucepan over high heat, warm both oils. Once hot, add the lotus root slices and cook until they become soft, 4-5 minutes. Add carrots halfway through cooking time. Stir in the mirin, soy sauce/tamari and reduce heat to low. Add cloud ears when you add the sauce ingredients to pan.
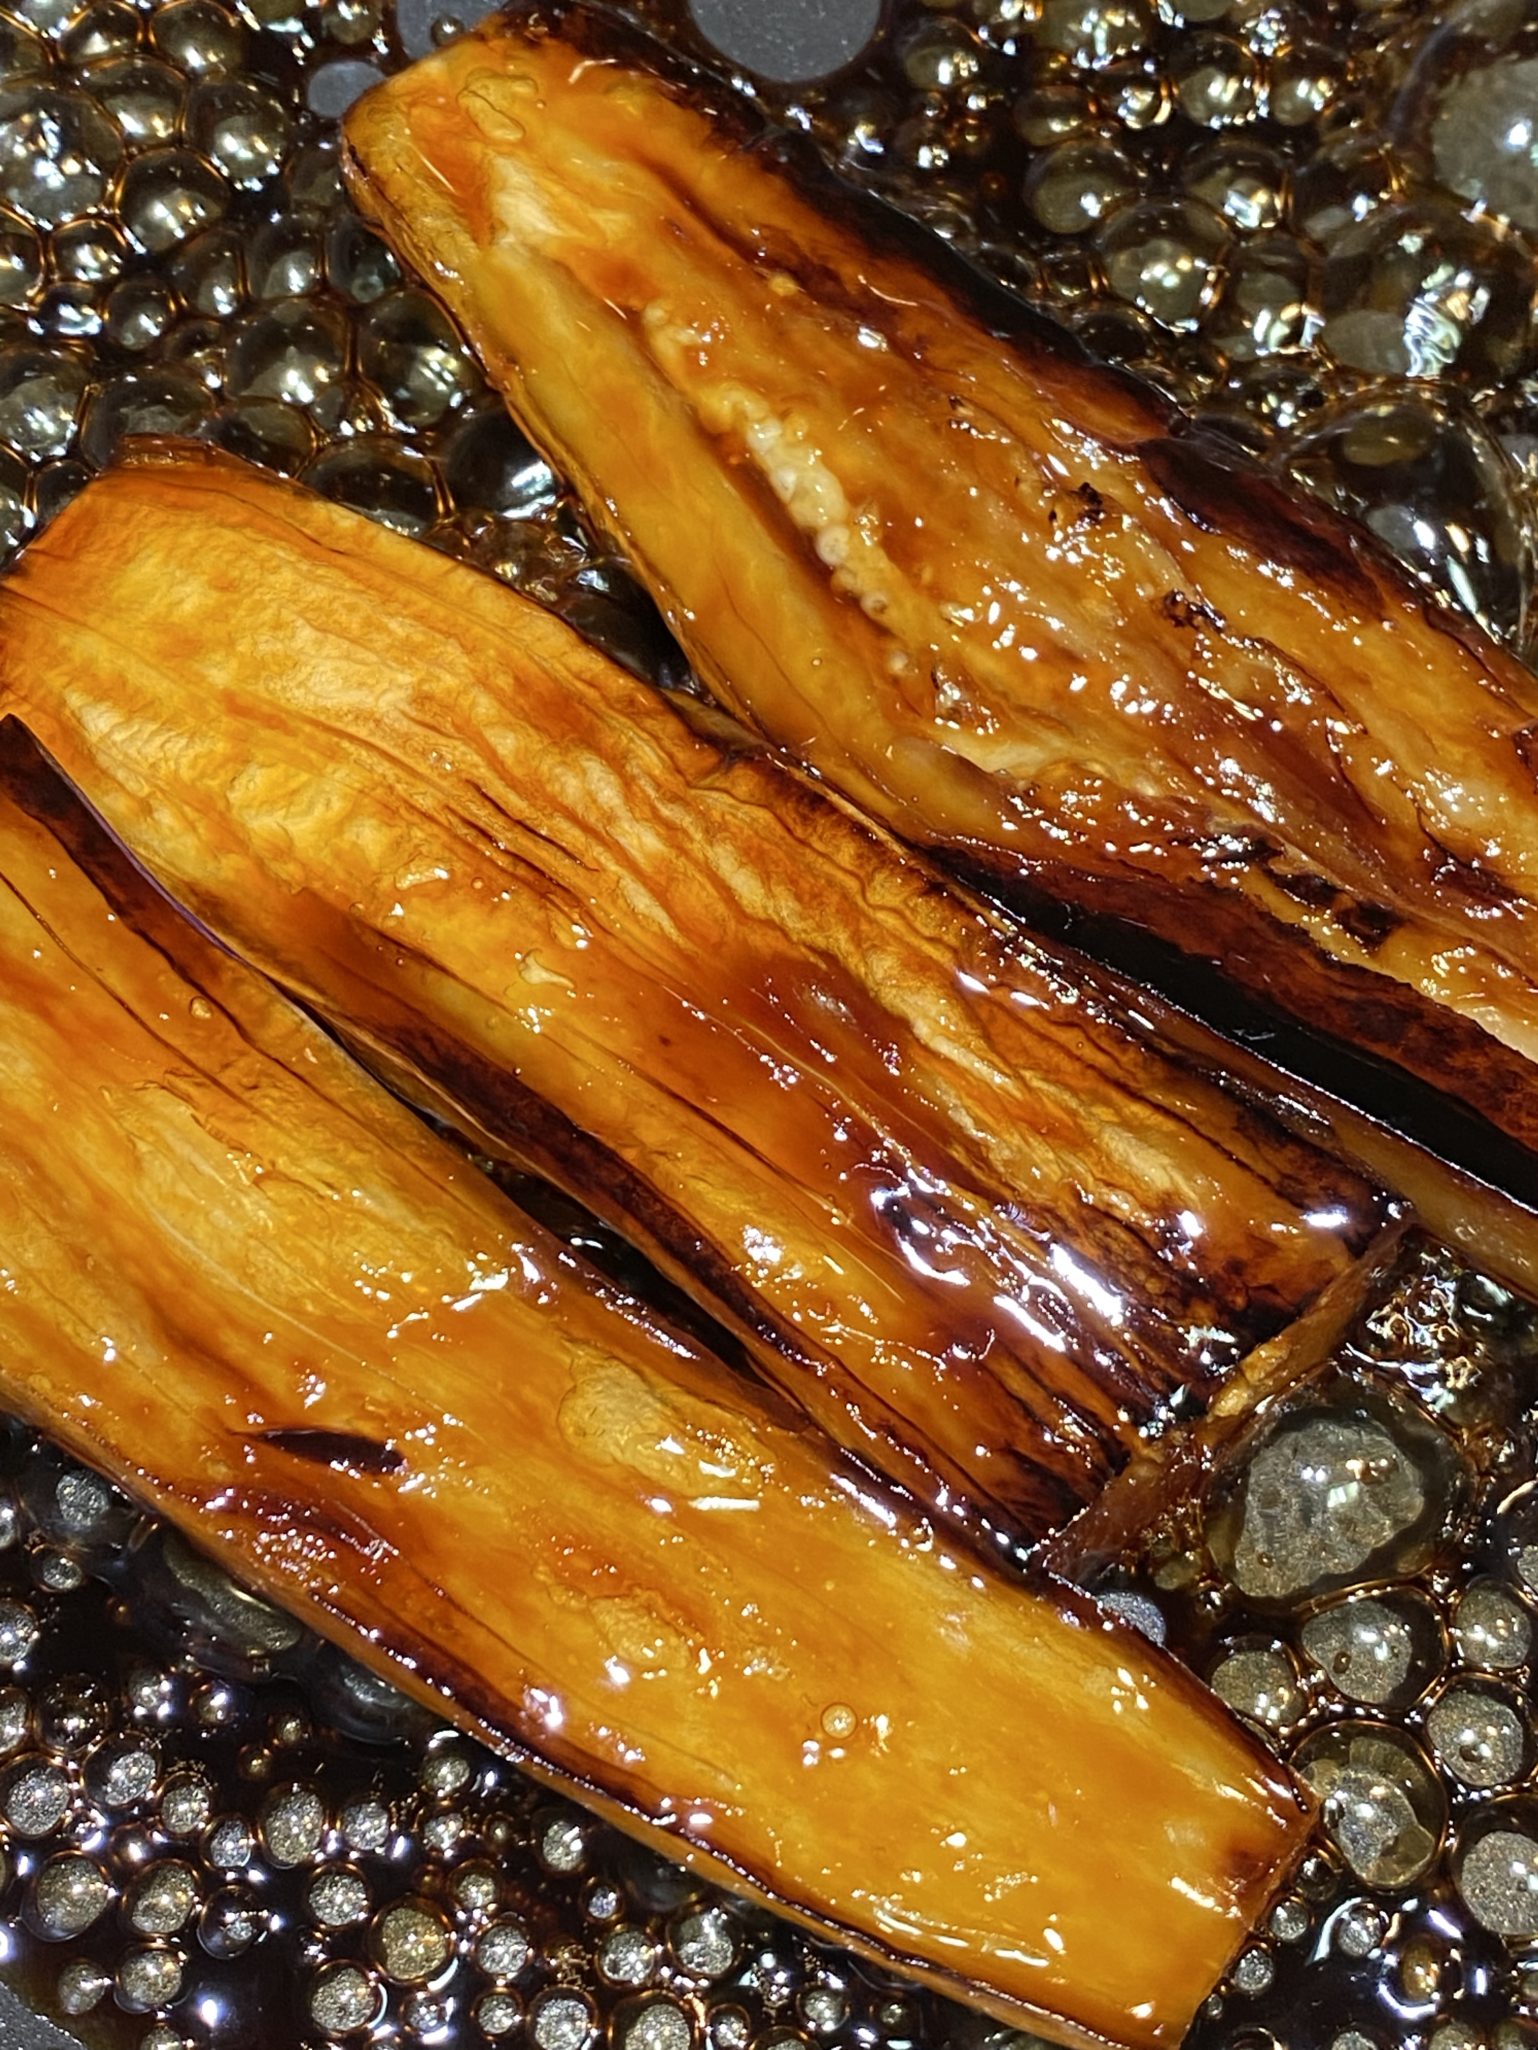
  • Simmer until the marinade has almost disappeared.
  • Remove from heat, sprinkle with sesame seeds and shichimi togarashi prior to serving.

Notes

Simmered Lotus Root (Renkon no kimpira)

Alternate recipe

Instructions

  • Peel and rinse the lotus root. Cut it in half and then thinly slice about 4-6mm thickness. Add the vinegar to the water and soak the lotus root in the vinegary water for about 3 minutes.
  • Julienned carrots and black fungus. Set aside.
  • De-seed and finely chop the chili pepper or slice into thin rings.
  • Heat sesame oil over medium heat and stir fry the lotus root. Once almost finished cooking (about 75% and starting to look more translucent), add the sake, mirin and sugar. Cook for about 2 minutes or until liquid is mostly evaporated. Add the soy sauce and fry for 1 minute, or until most of the sauce is soaked up. Lastly toss in the chili pepper and sesame seeds. Remove from burner, serve and enjoy!
Whip It, Whip It Good (Coconut Whipped Cream)

Whip It, Whip It Good (Coconut Whipped Cream)

We’re baaackkkkkkk!  In person meetings, dinners in restaurants instead of take-out, classes on campus instead of on Zoom, we are adjusting to living with COVID.  With midterms just around the corner, our political action group hosted a Democracy Dinner to re-engage and see folks in person.  What better way to entice folks to join us than with food!

Dinner was outside, we live in California, where grillin and chillin is a distinct possibility 24-7-365.  I stepped up to create a main dish and dessert for our Vegan dinner guests. The main dish was a no-brainer,  Spicy Noodle Salad, vegan, plus perfect with whatever came off the grill, protein or veggie. The only glitch was the original recipe called for honey in the dressing.  Made by bees, honey is on the no-fly list for vegans.  I substituted Agave Syrup for the honey which worked seamlessly.  Mission accomplished, onto dessert.

Pudding It All Together

The night of the last presidential elections, as I nervously watched the results roll in, I headed to the kitchen to make something to eat to calm my frayed nerves.  I landed on NYTcooking’s recipe for a Chocolate Pudding made with Oat Milk.  A snap to make, it was chilling in the fridge within minutes.  Intensely chocolate, which appealed to my grown-up tastebuds, while the smooth, creamy texture of the pudding made me feel like a kid again.  AND, it’s vegan, oh yeah. Dessert solved.

Nifty Thrifty Wow Factor

A layer of strawberry compote in between the chocolate pudding and a voluptuous coconut whipped cream on top gave the pudding a little more panache.   I rationalized splurging on expensive French yogurt by repurposing those cute little glass yogurt jars for the pudding.

Whip It, Whip It Good

I LOVE whipped cream.  So what’s a girl to do if she can’t have the perfect topping for vegan dessert?  Coconut Milk to the rescue.  A favorite vegan, gluten-free site, Minimalist Baker was ground zero for tips on how to make a delicious vegan whipped cream from coconut milk.

Start the day before you need whipped cream.  Why?  You need to chill the coconut milk to separate the cream from the liquid.  You will be using the cream part only.

My two favorite brands of coconut milk are Chaokoh and Aroy-D.  Having Aroy-D in my pantry, I placed a can in the fridge.  The overnight chill in the fridge is key to creating two distinct layers.  Aroy-D worked perfectly.  Both brands are found in most Asian Grocery stores.  Minimalist Baker likes Whole Foods 365 Coconut Milk, which might be more accessible.

Open the can, the solids will be on top, scoop all of the solidified coconut milk out and place in a chilled mixing bowl then place the coconut solids in a chilled bowl.  Whip for 30 seconds then add powdered sugar and vanilla.  I used 1/2 cup powdered sugar and it was pretty sweet. The range is 1/4 cup to 3/4 cup of sugar which you can to taste, definitely start with 1/4 cup and go from there.  Beat an additional minute or until light and fluffy.  Don’t overbeat as the cream will break down.

This is the perfect vegan substitute for regular whipped cream!  But, it is so good I would make it even if I didn’t need a vegan alternative.

Ridiculously easy Vegan Peanut Butter Cookies,Vegan Peanut Butter Cookies, like Fred and Ginger, a perfect pairing with Chocolate Puddin

To half of the puddings I added a layer of strawberry compote. Adapted from Sally’s Baking Addiction, it’s easy and delicious.  Think of it as additional bling.

Coconut Whipped Cream

A great vegan option for whipped cream, so good you may want to use this vegan or not!
Course Dessert
Cuisine American
Prep Time 15 minutes
Chill Time 1 day
Servings 4

Ingredients

  • 1 14-ounce can coconut cream or full fat coconut milk* (Savoy Coconut Cream, Aroy-D Coconut Milk, and Nature's Charm Coconut Whipping Cream work best!)
  • 1/4 - 3/4 cup icing/powdered sugar use organic to ensure vegan friendliness
  • 1/2 tsp vanilla extract optional

Instructions

  • Chill your coconut cream or coconut milk in the refrigerator overnight (see notes for top brands!), being sure not to shake or tip the can to encourage separation of the cream and liquid. See notes for more insight / troubleshooting.
  • The next day, chill a large mixing bowl 10 minutes before whipping.
  • Remove the coconut cream or milk from the fridge without tipping or shaking and remove the lid. Scrape out the top, thickened cream and leave the liquid behind (reserve for use in smoothies).
  • Note: if your coconut milk didn't harden, you probably just got a dud can without the right fat content. In that case, you can try to salvage it with a bit of tapioca flour - 1 to 4 Tbsp (amount as original recipe is written // adjust if altering batch size)- during the whipping process. That has worked for me several times.
  • Place hardened cream in your chilled mixing bowl. Beat for 30 seconds with a mixer until creamy. Then add vanilla (optional) and powdered sugar (or stevia) and mix until creamy and smooth - about 1 minute. Avoid overwhipping because it can cause separation. Taste and adjust sweetness as needed.
  • Use immediately or refrigerate - it will harden and set in the fridge the longer it's chilled. Will keep for up to 1 - 2 weeks!
  • Coconut whipped cream is perfect for topping desserts like pie, hot cocoa and ice cream. It's also ideal for french toast, pie fillings, mousse, and even no-churn ice cream!

Strawberry Sauce

Fresh strawberries in this topping for a quick, & easy topping that gives desserts that extra bling!
Course Sauce
Cuisine American
Keyword quick and easy, strawberries, strawberry sauce
Prep Time 15 minutes

Ingredients

  • 1 Tablespoon cornstarch
  • 3 Tablespoons cold water
  • 1 lb strawberries hulled and sliced in half
  • zest and juice from 1/2 small lemon
  • 1/4 cup granulated sugar 50g
  • 1 teaspoon vanilla extract

Instructions

  • In a small bowl, whisk the cornstarch and water together until all the cornstarch has dissolved.
  • Place the cornstarch mixture, along with the rest of the ingredients, into a small saucepan over medium heat. Using a wooden spoon or rubber spatula, stir the mixture as it cooks. Break up some of the strawberries as you stir.
  • Bring it to a simmer and allow to simmer for 5 minutes, stirring constantly. After 5 minutes, remove pan from the heat and allow to cool. Add vanilla extract. The mixture will thicken as it cools.
Napa Cabbage Salad-Summer’s Here

Napa Cabbage Salad-Summer’s Here

The dog days of summer are here, the perfect time for salads to be the star of any meal.  Ok, maybe not breakfast, but any other meal.  I don’t like making salads, but the convergence of hot weather and gorgeous produce at our local farmer’s market trumps the drudgery of making one.

Define Salad

Back in the day when I was dating a poor medical resident (now the hubster) we went out for dinner at the famed Angeli Caffe on Melrose Ave in LA.  If memory serves me, this quite possibly was our first solo date (without our mutual matchmaker friends-LONG STORY).  This was back in the day of a burgeoning dining scene in LA.  Think Spago, Mauro’s, and Michael’s.  I was a fledgling foodie, and friends with benefits for me meant they had an expense account for dining, LOL.

We ordered a Caprese Salad and a pizza with olives, onions, and sausage.  The salad arrived and my now hubster looked at it, then at me, and asked quizzically, where’s the lettuce?  I’ll save the pizza story for another post…

Winner, Winner, Salad Dinner

Tasked with making a salad for dinner at my kid’s place (I’ll do anything for smoked brisket), I took stock of what was available in the fridge, Napa Cabbage, red cabbage, scallions, carrots, and my laptop (not in the fridge).  I mashed together a couple of recipes found online and on Tik Tok (haha) and badabing-badaboom…my quick and easy version of an Asian Napa Cabbage Slaw was born. Stir sesame oil, a touch of soy sauce, honey, and rice vinegar together for the dressing and you’re done.  It’s very adaptable so add whatever veggies and or herbs that float your boat.  I like bell peppers, cilantro, mandarin oranges and nuts, peanuts, or almonds.  This is vegetarian BUT if you would like to add protein, shredded chicken is the bomb in this.

Why Napa Cabbage?  I usually cook Napa cabbage but rather recently discovered it is delicious raw.  Used as a wrap for  Korean bbq or Bosaam, it’s delicious.  It’s milder and sweeter than regular cabbage and is pretty nutritious, think fiber, and anti-oxidants.  It is crunchy, refreshing, and versatile.  You might see little black specks on the leaves, NOT to worry, not bugs, but rather a reaction with light that causes spots, it doesn’t affect the taste.

The dressing is a simple soy sauce, rice vinegar, and sesame oil blend.  Whisk all the ingredients together.  I add a bit of regular vegetable oil to give the dressing a nicer mouthfeel.   You can omit it if you want.  Garnish with additional sesame seeds, don’t forget a couple of grinds of black pepper when serving.

Asian Napa Cabbage Salad

A refreshing napa cabbage salad with a soy-sesame dressing perfect for summer!
Course dinner, lunch, Salad
Cuisine Asian-American
Keyword napa cabbage, napa cabbage salad, sesame dressing, vegetarian
Prep Time 20 minutes

Ingredients

  • 6 cups napa cabbage thinly sliced crosswise
  • 1/2 red bell pepper julienned
  • 1/2 cup carrots shredded
  • 2 stalks green onions thinly sliced on the diagonal

Options

  • 1 cup Red cabbage shredded, replace 1 cup of the napa cabbage with this
  • 1/4 cup cilantro chopped, optional
  • 1/2 cup Mandarin oranges or oranges segmented
  • 1/4 cup almonds or peanuts chopped

Dressing

  • 3 T rice vinegar
  • 1 T soy sauce
  • 1/2 T honey can substitute sugar
  • 1/2-1 tbsp toasted sesame oil to taste, I love sesame oil, I use 1 tbsp
  • 1 tbsp vegetable oil you can leave this out but it gives the dressing a little more body
  • 1 tsp toasted sesame seeds + extra for garnish

Instructions

  • Cut Napa cabbage in half lengthwise. Slice leaves crosswise into thin strips. Rinse and dry cabbage and place in a bowl. Add remaining ingredients, julienned bell peppers, shredded carrots, red cabbage, and half of the green onions.
  • Place dressing ingredients in a bowl and whisk to blend. Pour into the bowl of cabbage and other ingredients. Toss, and garnish with remaining green onions, cilantro, and chopped nuts/sesame seeds
Eggplant Unagi Don

Eggplant Unagi Don

From one of my favorite sites, Two Plaid Aprons, a vegetarian version of Unagi Don!  Eel grilled with a sweet and savory sauce or “tare” is called unagi.  Don is short for donburi, which refers to the bowl and rice that serves as the landing spot for toppings like unagi.  Rice bowls, in my humble opinion, scream comfort food and this riff is no exception. If you are looking for some protein try a fam fav like Oyako Donburi, a Chicken and Egg Donburi.

Grilled and sauced unagi yields a smoky, savory-sweet, melt-in-your-mouth bite of deliciousness.  Eggplant braised in the same fashion makes a great stand-in for the unagi.  According to the hubster, the resident carnivore in my house, this will satisfy any meat-eater.  The tare is made with soy sauce, Mirin (sweet sake), sake, and sugar; ingredients found in most Asian grocery stores.  I like substituting dashi soy for the soy sauce which is a blend of soy sauce and fish stock that gives the eggplant a hint of brininess.

Anyway You Slice It

Leave the skin on the eggplant if you like. The other thing you can do is score the eggplant crosswise to mimic the striations on unagi.  Fry the eggplant until nicely charred, lower the heat and pour in unagi sauce and green onions. Cover and let the eggplant braise for 5 minutes or until tender but not mushy.  As the eggplant braises, it picks up the flavor of the sauce and becomes tender and soft like…eel. YUMMO.

Take the eggplant out and place it over your rice.  Garnish with green onions and toasted sesame seeds.  Serve immediately.  OR, take it over the top with a runny, sunny-side-up egg.  Enjoy!

Eggplant Unagi Don

Eggplant Unagi Don, a delicious, easy prep, vegetarian version of Unagi Don
Course dinner, lunch, one bowl meal
Cuisine Asian, Asian-American, vegetarian
Keyword eggplant, mirin, Rice Bowl, soy sauce, vegetarian
Prep Time 5 minutes
Cook Time 15 minutes

Ingredients

Da Stars

  • 2 Japanese eggplant or Chinese eggplant washed, sliced in half lengthwise and crosswise if they are long.
  • 4 cups cooked white rice Feel free to use whatever grain you like, brown rice, farley, quinoa (not my choice but hey)

Da Sauce

  • 4 tbsp sake
  • 4 tbsp soy sauce regular or low sodium or Dashi Soy
  • 4 tbsp granulated sugar
  • 2 tbsp mirin
  • 2 stalks Green onion, sliced
  • 1/8 tsp dashi powder or granules optional use with low sodium soy sauce

Da Garnish

  • Toasted white sesame seed, sliced green onions

Instructions

Unagi sauce:

  • In a small bowl, mix together sake, soy sauce, sugar, mirin and dashi if using. If you use Soy Dashi, skip the powder. Set aside until needed.

Eggplant Prep

  • Cut off stem of the eggplant and peel the skin with a vegetable peeler, this is optional, if you like skin, save yourself a step. Cut the eggplant in half crosswise, then slice each half evenly lengthwise. Lightly score eggplant crosswise every 1/8-1/4 inch, don't cut thru! This makes it look more like unagi.

Cookin' It

  • In a 10-inch shallow pan over medium high heat, add a couple tablespoons of oil. Once the oil is hot, place eggplant flat side down and sear until golden brown, about 2 to 3 minutes. Flip eggplant and sear the other side for a minute or two until golden brown.
  • Stir the prepared unagi sauce and pour it into the pan. Reduce heat to medium/medium-low to keep the sauce at a simmer. Place a lid on the pan and cook eggplant slices for 5 minutes.
  • After 5 minutes, remove the lid and flip eggplant slices to their flat side. Add half of the sliced green onions to the sauce and continue simmering for 2 to 3 minutes, or until the eggplant slices are tender and the sauce is reduced to a thick glaze. Remove pan from heat.

To Serve:

  • Scoop a serving of hot rice into each bowl.
  • Place two slices of eggplant unagi flat side up on each bowl of rice. Garnish with the remaining green onion and sesame seeds. Bowl food is soul food!
Creamy Cashew Udon with Crispy Mushrooms

Creamy Cashew Udon with Crispy Mushrooms

I’m not a vegetarian but we are making a concerted effort to eat less meat and more veggies.  Good for us and good for the planet.  It’s much easier now with so many cookbook authors, bloggers, and chefs being much more veggie-forward.

The first new year recipe I tried was Cauliflower Steaks with a Smoky Tomato Rub from Cook the Vineyard.  Delicious, off to a good start!  I also received Hetty McKinnon’s To Asia with Love during the holidays.  A nod to her Chinese roots, she has penned a beautiful cookbook that relies on vegetables.  But before I even cracked open the book I found this recipe from her, Creamy Cashew Udon with Crispy Mushrooms, in Bon Appetit.  It’s so good.

The recipe can be broken down into 3 parts.  The creamy cashew sauce, the umami-filled chili crisp, soy, vinegar sauce, and the noodles.

Cashew Sauce

Who knew? Blending cashews with water, garlic makes an amazing, creamy, rich sauce that is the perfect stand-in for heavy cream.

It is super versatile, add herbs and spices for a sauce over roasted vegetables like carrots and broccoli. Or add some tahini for a sesame flavored sauce. Yummy.  I know, cashews can be pretty darn expensive.  I buy mine at Costco or local Indian markets which helps save some buckaroos,

The base sauce is cashews, water, garlic, salt, and a bit of oil.  It’s genius.  The cashews are hydrated first, in hot water, before tossing them in a blender or food processor with other ingredients and whirred into a sauce that provides flavor and a wonderfully creamy, decadent sauce.  Shazam.

Chili Oil

The chili sauce comes together quickly and provides that burst of flavor that brings it all together.  Use your favorite Chili Crisp Oil.  I use either the OG of Chili Crisp Oils, Lao Gan Ma, or Momofuku Chili Crisp.  Hetty McKinnon has a homemade chili crisp oil in her book.  It’s on my bucket list of things to try.

The Noods

Udon noodles are Japanese wheat noodles that are thick and springy.  Often overshadowed by its flashy cousin ramen. It is served in soup, hot or cold, and stir-fried.  My fav is in soup with shreds of beef, Niku Udon, with Aburaage, fried tofu, or simply with an egg.  Here is my Udon primerIt works really well in this dish, the creamy sauce coats the thick, sticky udon nicely. The noodles have a nice bite that compliments the mushrooms.  BUT, you could use different noodles, keep in mind you’ll want a thicker noodle, one that can stand up to the sauce (so not thin vermicelli noodles).  For a gluten-free option, a wide rice noodle would work well.

Not gonna lie, always going to love meat, but folks like Hetty McKinnon are making it much easier to make our meals much more veggie-centric.  This pasta dish is going in the regular rotation!

Creamy Cashew Udon with Crispy Mushrooms

From Hetty McKinnon an absolutely delicious pasta dish that uses cashews to create a creamy, decadent sauce, it’s vegetarian, it’s vegan, it’s yummy!
Course Main Course, one bowl meal, pasta
Cuisine Asian-American, vegan, vegetarian
Keyword Angel hair pasta, cashew, Creamy cashew sauce, mushrooms, Udon
Prep Time 1 hour 42 minutes
Cook Time 15 minutes
Servings 4 Servings

Ingredients

CASHEW CREAM

  • 1 cup raw cashews
  • 1 garlic clove coarsely chopped
  • 1 Tbsp. extra-virgin olive oil
  • ½ tsp. Diamond Crystal or ¼ tsp. Morton kosher salt

Chili Oil

  • 2 Tbsp. Chinkiang or Chinese Black Vinegar
  • 2 Tbsp. chili crisp or chili oil
  • 2 Tbsp. soy sauce
  • 1 Tbsp. toasted sesame oil
  • 1 scallion thinly sliced

The Shrooms

  • 2-3 Tbsp extra-virgin olive oil
  • 1 lb. oyster shiitake, crimini, or button mushrooms, cut into bite-size pieces
  • 1 clove garlic finely chopped
  • ½ tsp. Diamond Crystal or ¼ tsp. Morton kosher salt plus more serving
  • Freshly ground black pepper

Noodles and Garnish

  • 28 oz. fresh or frozen udon noodles Substitute wide rice noodles for gluten-free option.
  • 2 scallions thinly sliced

Instructions

Cashew Cream

  • Bring a large saucepan of water to a boil, then remove from heat. Add cashews and let sit until tender, 30–60 minutes.
  • Drain cashews and transfer to a blender (preferably high-speed) or food processor. Add garlic, oil, salt, and ½ cup water and purée until smooth.

Umami Sauce

  • Stir vinegar, chili crisp, soy sauce, sesame oil, and scallion in a small bowl to combine; set soy-vinegar sauce aside.
  • Heat 2 Tbsp. olive oil in a large skillet over medium-high. Cook mushrooms, tossing every minute or so but leaving mostly undisturbed, until mostly golden and crisp, 5–8 minutes, oyster and shiitakes will cook quicker, while crimini and button mushrooms will take a bit longer. Add garlic and kosher salt, cook, stirring often, add additional tablespoon of olive oil if the mushrooms look dry.

Noodles

  • Meanwhile, bring a large pot of salted water to a boil. Cook noodles according to package directions. You can use udon or any wide, thick noodle. For gluten-free option use rice noodles. Drain, reserving 1 cup cooking liquid.
  • Remove half of the mushrooms from the pan. Add noodles and cashew cream to pan with remianing mushrooms cook, stirring and adding reserved cooking liquid a little at a time, until cream is loose and coats noodles. Season with salt and pepper.
  • Divide noodles among bowls, garnish with reserved mushrooms generously drizzle each with reserved soy-vinegar sauce. Top with remaining scallions. Serve.

Notes

You could make this gluten free too!  Use a wheat free soy sauce, like a Tamari Sauce and a rice noodle for the udon. 
Blend the cashew sauce well, preferably use a blender or food processor.  Don’t be timid, you want a nice smooth sauce.


Roasted Tomato & White Bean Stew (Bean Craving a Good Stew)

Roasted Tomato & White Bean Stew (Bean Craving a Good Stew)

Friday night…my mind was thinking about the upcoming Memorial Day weekend.

The plan, grilling on Monday.  Something classic, burgers, potato salad, strawberry shortcake, the “Summer is finally here” meal.  Saturday’s dinner was taken care of, take-out and delivery from one of the legacy restaurants in SF Chinatown, Kam Po.  A fundraiser for Chinatown Community Development Center combined with helping a Chinatown mom and pop business.  A win-win, I ordered roast duck, crispy skinned pork and bbq pork plates…can’t wait.

What’s for Dinner Tonight?

But it was Friday and I still hadn’t started dinner.  I cooked quite a bit during the week and was admittedly ready for an easy cook meal.   I peered into the pantry hunting for inspiration…hmmm, a couple of cans of white beans. Further rummaging around the kitchen produced cherry tomatoes, a couple of Italian sausages, one lonely onion. Jamie had recently tried a recipe from the NYTimes, Roasted Tomato and White Bean Stew that she gave a hearty thumbs up to on all counts-ease of prep and deliciousness.

I Was In Business

Winner winner beanie dinner.  This dish is simple, quick and so satisfying.  Roast tomatoes in olive oil and thyme which intensifies their flavor and sweetness.  I used a medley of gold and red cherry tomatoes, use whatever you like. While they are roasting, saute’ the onions, garlic, and pepper flakes. Add beans-reserve the liquid from the cans just in case to adjust the consistency of the sauce.  Give the stew a couple of stirs and mash some of the beans with a big spoon to thicken it.  Make sure to scrape all the tasty bits from roasting the tomatoes and add them to the beans along with the tomatoes and their liquid.

Home Stretch

Simmer a couple of minutes and voila’, dinner is served.  This stew is really, really good, the sweetness of the tomatoes and onions, the nice mouthfeel from the beans, yummy, YUMMY, yummy.  I love the garlic and thyme, but I’m wondering if rosemary would work too.  We grilled a couple of Italian sausages, sliced, and added them to the pot right before serving.  You could also just serve them on the side. Grilled shrimp or cod would be a lovely match too.  OR, keep it vegetarian, this stew is so flavorful and satisfying you won’t even miss the protein.  Top it with the parsley and lemon gremolata which adds a herby-citrus zing and you are in business. The Hubs and Jorge don’t like beans but they both admitted that this was delicious.  Now that’s a strong recommendation!

Make this stew the next time you need a quick, easy, hearty meal.  It’s just so tasty!

Looking for other meatless recipes?  This Red Lentil Soup from NYTimes is delicious~~

Print Pin
5 from 2 votes

Roasted Tomato and White Bean Stew

Course Main Course
Cuisine European
Keyword easy, roasted tomato, stew, vegan, White Bean, white bean stew
Prep Time 30 minutes

Ingredients

Garnish

  • ½ cup roughly chopped Italian parsley leaves and tender stems
  • 2 teaspoons lemon zest from 1 large lemon

Stew

  • 2 10-ounce containers cherry or grape tomatoes
  • ¼ cup olive oil plus 2 tablespoons and more for drizzling (optional)
  • 1 tablespoon fresh thyme leaves
  • Kosher salt and black pepper
  • 1 medium yellow onion thinly sliced
  • 3-4 large garlic cloves thinly sliced
  • ½ teaspoon red-pepper flakes
  • 2 15-ounce cans white beans (such as butter or cannellini), rinsed
  • 1 ½ cups vegetable or chicken broth or water
  • 2 Italian sausage optional mild or spicy, your choice

Serve with

  • Flaky salt for serving (optional)
  • Toasted bread for serving

Instructions

  • Heat the oven to 425 degrees. In a small bowl, gently toss together the parsley and lemon zest with your hands until well combined; set aside.
  • In a large baking dish or on a sheet pan, toss the tomatoes with 1/4 cup oil and thyme; season well with salt and pepper. Roast tomatoes until they have collapsed and begin to turn golden around the edges, 20 to 25 minutes.
  • When the tomatoes are almost done roasting, heat 2 tablespoons oil in a large (12-inch), deep skillet or Dutch oven over medium. Add the onion, garlic and red-pepper flakes and cook until the onion is softened and the garlic is fragrant, 4 to 5 minutes. Stir in the rinsed beans and broth and bring to a simmer. With the back of a spoon or spatula, gently smash about ½ cup of the beans so they slightly thicken the broth. If you want a thicker stew, crush some more of the beans. Season with salt and pepper.
  • When the tomatoes are finished roasting, add them directly to the stew along with any juices that have been released. Simmer for 5 to 10 minutes more so the flavors meld; season to taste with salt.
  • Ladle into shallow bowls. Top each serving with some of the lemon-parsley mixture and drizzle with some more olive oil, and season with flaky salt, if you like. Serve with toasted bread.
Mushroom Bourguignon (New Year’s Resolution #1)

Mushroom Bourguignon (New Year’s Resolution #1)

I have a bucket list of New Year’s resolutions this year. Resolution #1, “EAT MORE VEGGIES and less meat”. This is going to be EASY and I am going to be a BOSS and slay this resolution. Why? Recipes like Smitten Kitchen’s Mushroom Bourguignon, that’s why.  It’s hearty, warming, a great stand-in for stews and it takes a fraction of the time to make as it doesn’t contain any meat.  I have been eyeing this recipe for quite awhile so with the cooler weather and my new year’s resolution it was definitely “fun”-ghi time.

Where’s the beef!? Sorry Sammy, you’re looking in all the wrong places

I decided to serve the mushrooms over a bed of creamy polenta, others have opted for noodles which looks equally delicious.  I’m a sucker for polenta or grits. When I was a kid I was a Cream of Wheat/Malto-meal fan whereas the rest of my family fell into the Quaker Oats oatmeal camp.  It’s a textural thing I guess, that and I loved the Cream of Wheat commercials, “Come in from the Cold”.

I used cremini mushrooms although I think a mushroom medley would work beautifully.  Next time I make this dish I think I’ll throw in shiitake mushrooms and portabellos to give it a meatier taste and texture.  Not being a strict vegetarian I opted for beef broth for the stock but feel free to use a vegetable broth. I’m also wondering if a little fish sauce (thank you Kenji Alt-Lopez) would up the umami factor for us omnivores.  I will let you know!

So 2018 resolution #1 gets a running start thanks to Smitten Kitchen’s Mushroom Bourguignon.  Next on my list? Cauliflower Steak and Puree from Genius Recipe.  Let the Veggie Times Roll.

(Mushroom Bourguignon) New Year’s Resolutions

Ingredients

  • 2 tablespoons 30 ml olive oil
  • 2 tablespoons 30 grams butter, softened
  • 2 pounds 905 grams Portobello mushrooms, in 1/4-inch slices (you can use cremini instead or a medley of mushrooms)
  • 1 cup 115 grams pearl onions, peeled (thawed if frozen)
  • 1/2 carrot finely diced
  • 1 small yellow onion finely diced
  • 1 teaspoon fresh thyme leaves or 1/2 teaspoon dried thyme
  • Table salt
  • Freshly ground black pepper
  • 2 garlic cloves minced
  • 1 cup 235 ml full-bodied red wine
  • 2 tablespoons 35 grams tomato paste
  • 2 cups 475 ml beef or vegetable stock (beef broth is traditional, but use vegetable to make it vegetarian; the dish works with either)
  • 1 1/2 tablespoons 12 grams all-purpose flour
  • Egg noodles for serving also goes well with polenta or grits
  • Sour cream and chopped chives or parsley for garnish (optional)

Instructions

  • 1. Heat 1 tablespoon olive oil and 1 tablespoon butter in a medium-sized Dutch oven or heavy saucepan over high heat. Sear the mushrooms and pearl onions until they begin to take on a little color— your mushrooms will make a delightful “squeak- squeak” as they’re pushed around the hot pan— but the mushrooms do not yet release any liquid, about 3 or 4 minutes. Remove mushrooms and onions from the pan and set aside.
  • 2. Lower the flame to medium, and add the second tablespoon of olive oil. Toss the carrot, onion, thyme, a few good pinches of salt, and several grinds of black pepper in the pan, and cook for 5 minutes, stirring occasionally, until the onion is lightly browned. Add the garlic, and cook for just 1 more minute. Season with more salt and pepper.
  • 3. Add the wine to the pot, scraping any stuck bits off the bottom, then turn the heat all the way up and reduce it by half, which will take about 4 to 5 minutes. Stir in the tomato paste and the stock. Add back the mushrooms and pearl onions with any juices that have collected, and bring the mixture to a boil; reduce the temperature so it simmers for 10 to 15 minutes, or until both the mushrooms and onions are very tender.
  • 4. Combine the flour and the remaining butter with a fork; stir this into the stew. Season to taste with salt and pepper. Lower the heat, and simmer for 10 more minutes. If the sauce is too thin, boil it down to reduce to a “coating” consistency. Season with additional salt and pepper if needed.
  • 5. To serve, spoon the stew over a bowl of egg noodles (polenta or grits would work well), dollop with sour cream, if using, and sprinkle with optional chives or parsley.
  • Do ahead: The mushroom stew reheats very well on the second and third days, in a large saucepan over low heat.
So Eat It, Just Eat it (Roasted Cauliflower with Cumin, Turmeric and Lemon)

So Eat It, Just Eat it (Roasted Cauliflower with Cumin, Turmeric and Lemon)

When I was a kid there was a definite hit list of vegetables we absolutely hated.  My brother and I had all sorts of tricks to avoid eating them.  We would stuff our mouths full of peas, run to the bathroom and spit them out.  We weren’t too big on brussels sprouts or cauliflower either, we would drop them in our napkins and again run to the bathroom to toss them out.  In defense of these veggies, our vitriol came not from the veggies themselves, but from the method of preparation.  Peas were often from a can (uh-huh, how many of you remember canned peas, greenish-gray mush balls-bleah). Cabbage and cauliflower were boiled-just the smell emanating from the kitchen would make us run and hide.  Brussels sprouts were absolutely horrible, bitter, sulfurous, and barely edible.

These days the quality of today’s produce is so much better. We can go to our local farmer’s market and find just picked brussels sprouts and cauliflower, vine-ripened tomatoes or corn that was still on the stalk that morning.  We have also discovered new ways to cook said vegetables that are INFINITELY better than boiling or steaming.

FOR EXAMPLE. I love roasted vegetables.  Roasting brings out the sweetness in veggies like cauliflower or brussels sprouts, making them absolutely delicious. Perusing Meera Sodha’s Made in India I came across a recipe for Roasted Cauliflower with Cumin, Turmeric, and Lemon. My first thought? Oh yeah, SO making that.

The recipe, like many in the book, calls for a mortar and pestle to grind the spices.  I know what you are thinking, oh please, you don’t have a mortar and pestle do you?  Way back when I graduated from pharmacy school I received a set of spatulas from Eli Lily (pharmaceutical gorilla) and a mortar and pestle.  They have served me well…just not in my profession.  The spatulas and the mortar and pestle were long ago re-purposed and added to my culinary gadget collection.  The mortar and pestle proved to be the perfect tool for grinding spices and making the spice paste for this dish.

The cauliflower is blanched for a quick minute, seasoned with the spice oil which gives it a vibrant golden yellow hue.  Pop it in the oven for a quick roast and yep, dunzo, dinner is ready.  A bowl of warm cauliflower, crispy on the edges, creamy in the center seasoned with cumin and turmeric in just thirty minutes.  I am thinking about adding cubed potatoes the next time I make this, a riff on Aloo Gobi.

Excuse me it’s time for me to run TO the dinner table.

Roasted Cauliflower with Cumin, Turmeric and Lemon

Ingredients

  • 1 large head of cauliflower around 1 1/4 pounds
  • 2 teaspoons cumin seeds
  • 1 to 1 1/4 teaspoons salt
  • 1 teaspoon chili powder
  • 1/2 teaspoon ground turmeric
  • 5 tablespoons canola oil
  • 1 lemon

Instructions

  • Preheat the oven to 350 degrees. Line two oven trays with foil and bring a deep-sided pan of water to a boil.
  • Wash the cauliflower, pull off the leaves from around the side, and discard. Break the cauliflower into small, fairly even-sized florets and set aside.
  • Put the cauliflower into the saucepan of boiling water and blanch for 1 minute, then drain really well. Let it dry for around 5 minutes in its own steam; if it is waterlogged it won’t crisp up nicely in the oven.
  • Using a mortar and pestle, grind the cumin along with the salt, then add the chili powder and turmeric, followed by the oil. Mix it all together really well.
  • Lay the cauliflower out onto trays in one layer and drizzle the spicy oil over it. Make sure the cauliflower is well coated
  • Put trays in the oven for around 30 minutes, shaking them every 10 minutes or so to ensure the florets roast and brown evenly. If they start to burn, loosely cover them with foil.
  • Put the roasted cauliflower in a dish or bowl, and squeeze the lemon over the top before serving.
  • Adapted From “Made in India” by Meera Sodha

Happy birthday Claire!

A Brief Cookie break (Mushroom Matar)

A Brief Cookie break (Mushroom Matar)

As I fixate on cookies for the holiday season, Wes continues his quest for interesting, delicious vegetarian dishes.  Not surprisingly this often means Indian food.  We had stopped at our favorite hole in the wall one evening and tried their Mushroom Matar.  We weren’t disappointed.  Peas and mushrooms surrounded by a sweet savory sauce.  The dish was a respite from the heat of the Biryani and Palak Paneer.  I am a wimp when it comes to spicy so I thoroughly enjoyed this dish.  I greedily wiped the last bits of sauce off the bowl with my naan beating Wes to the punch.  Dude, you snooze you lose.

We found a tasty recipe on the website/blog Veg Recipes of India.  A wonderful blog that contains a treasure trove of useful information, step by step instructions, photos and recipes for novices like Wes and me. I found the dish actually tasted better the next day as the spices seemed to meld together a bit more.  The recipe and step by step instructions for Mushroom Matar can be found on  Veg Recipes of India.

Enjoy!  Now back to my cookie obsession…..