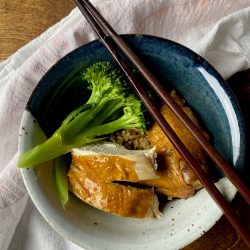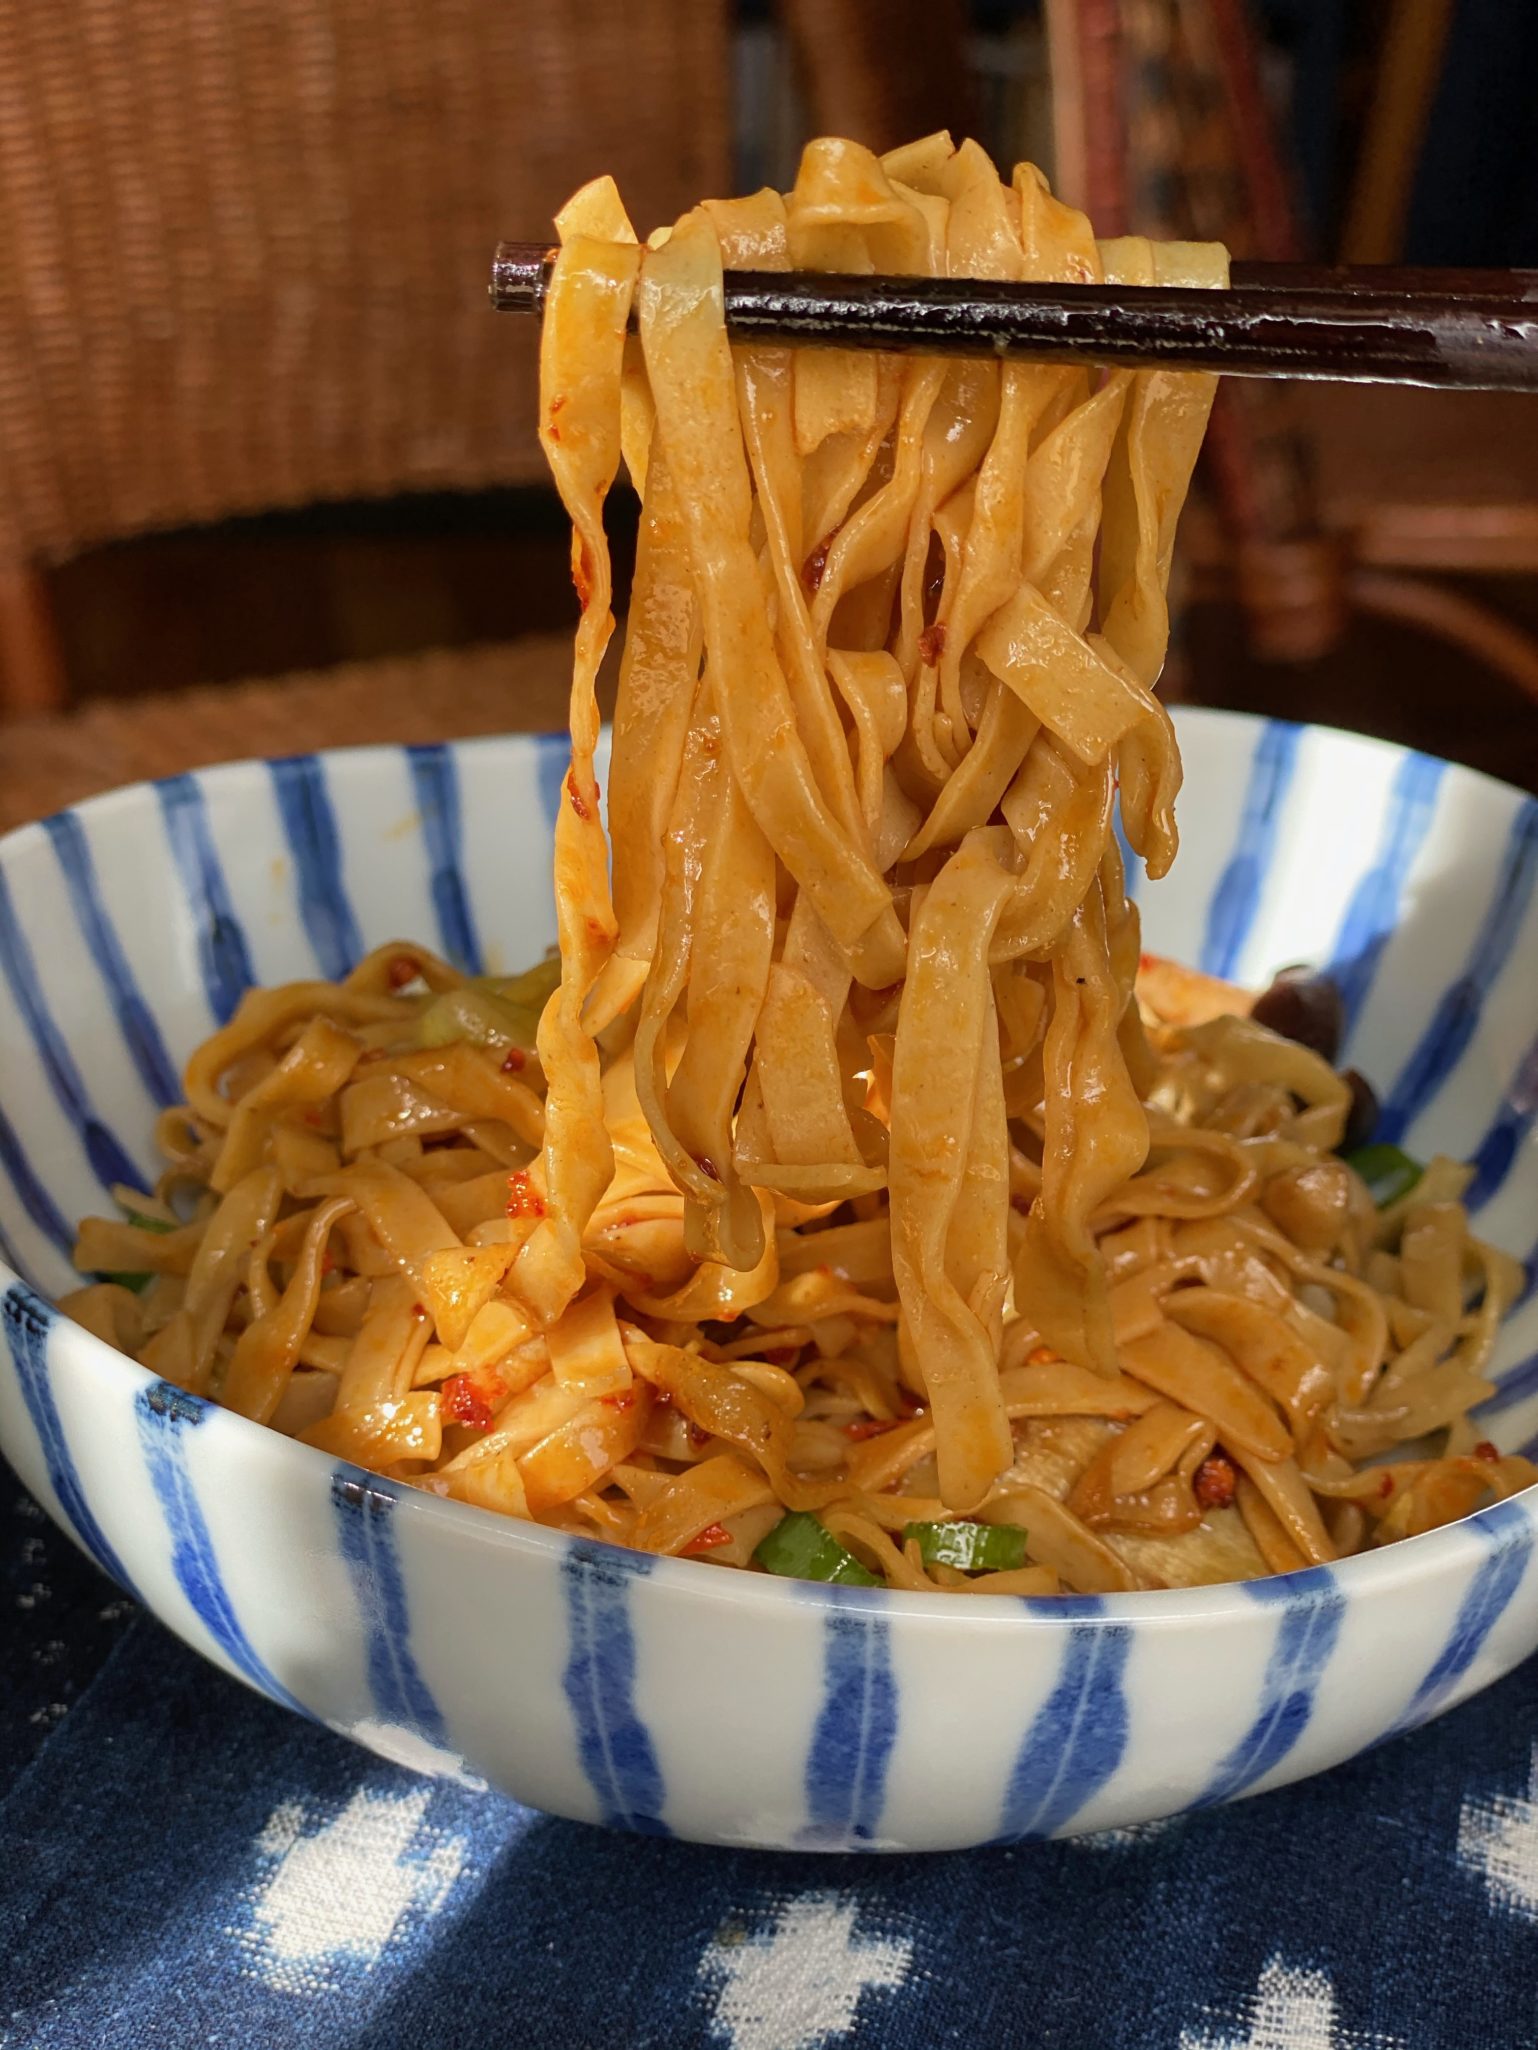
Soy Sauce Fried Noodles (Just Noodlin’ Around, 豉油王炒麵)
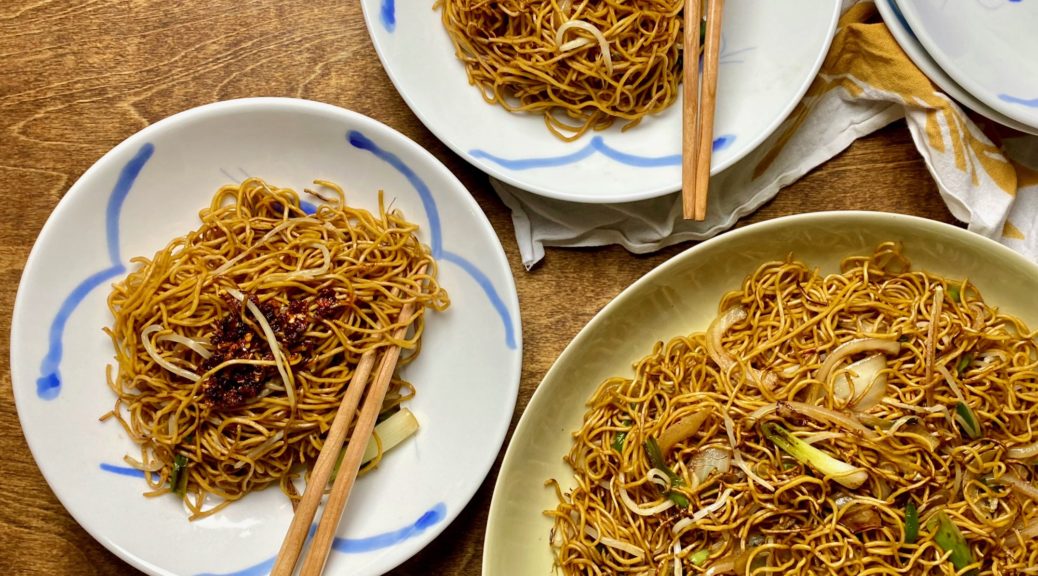
One of my favorite dishes, when we are out for dim sum, is Hong Kong Style Chow Mein or Soy Sauce Fried Noodles (豉油王炒麵). This is Cantonese soul food. Thin egg noodles fried with onions, scallions, and bean sprouts. It is deceptively simple. How does a dish with so few ingredients, taste so good? It’s the balance, skinny noodles dry-fried to retain their chew and texture; stir-fried onions for sweetness and texture, scallions for flavor and color, and last but not least, bean sprouts for textural crunch. There aren’t any big pieces of meat or greens that disrupt the balance of the dish. Everything is julienned or in slivers to compliment the noodles.
Like Yin and Yang, balanced and harmonious. It flies under the radar due to its simplicity and is the perfect side dish. These noodles are your bestie, your essential wingman, Goose to Maverick.
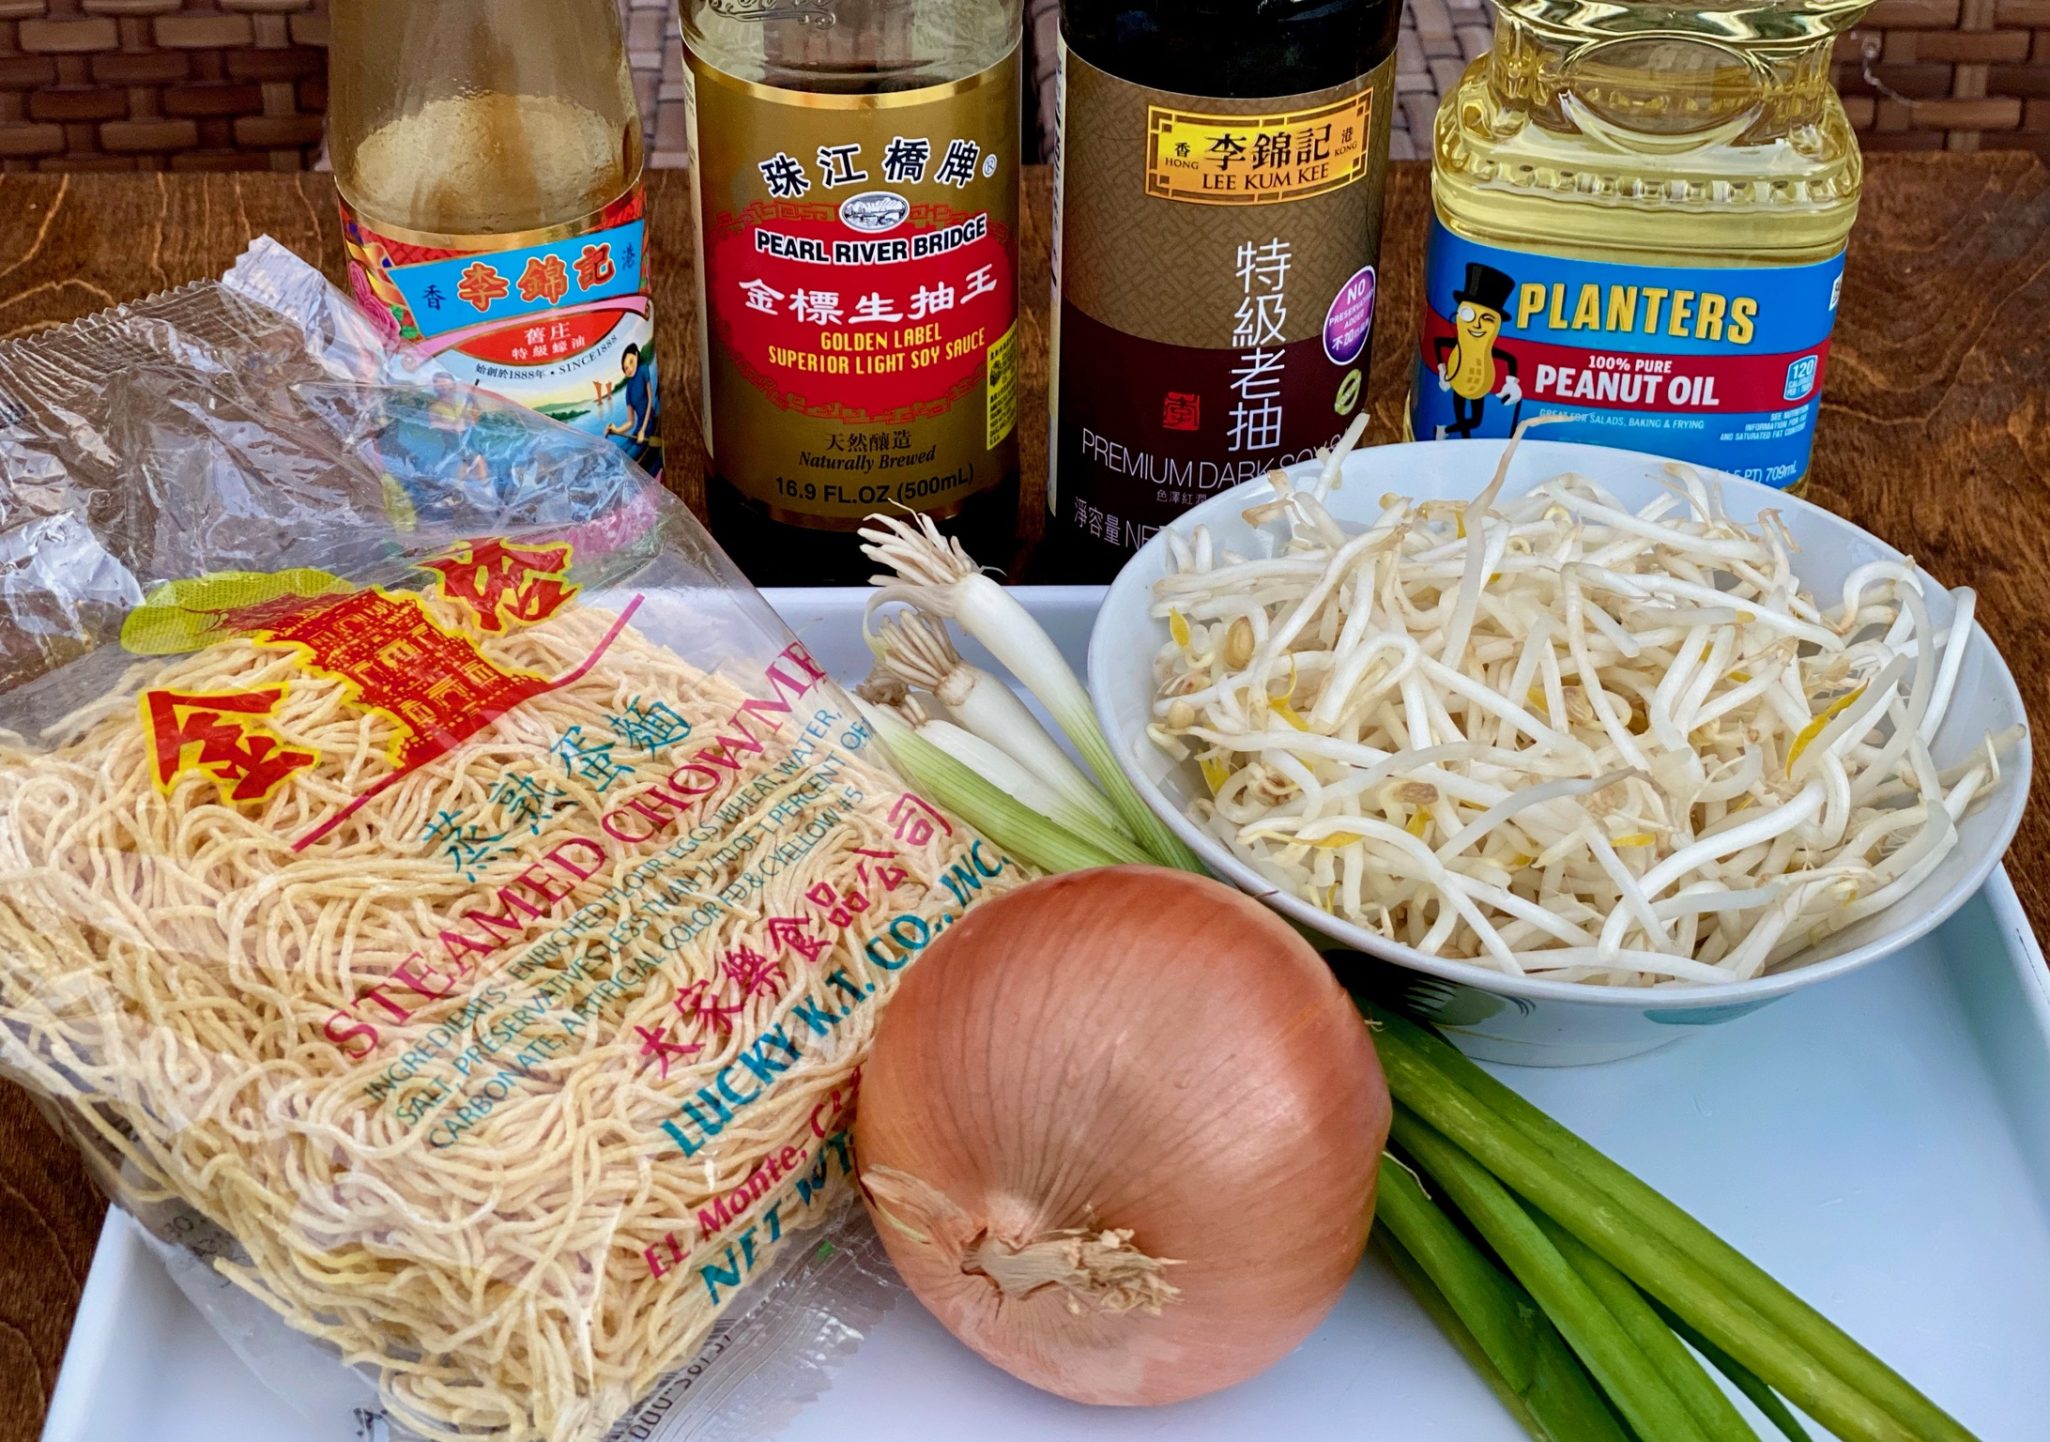
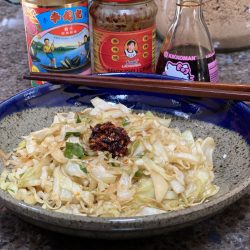
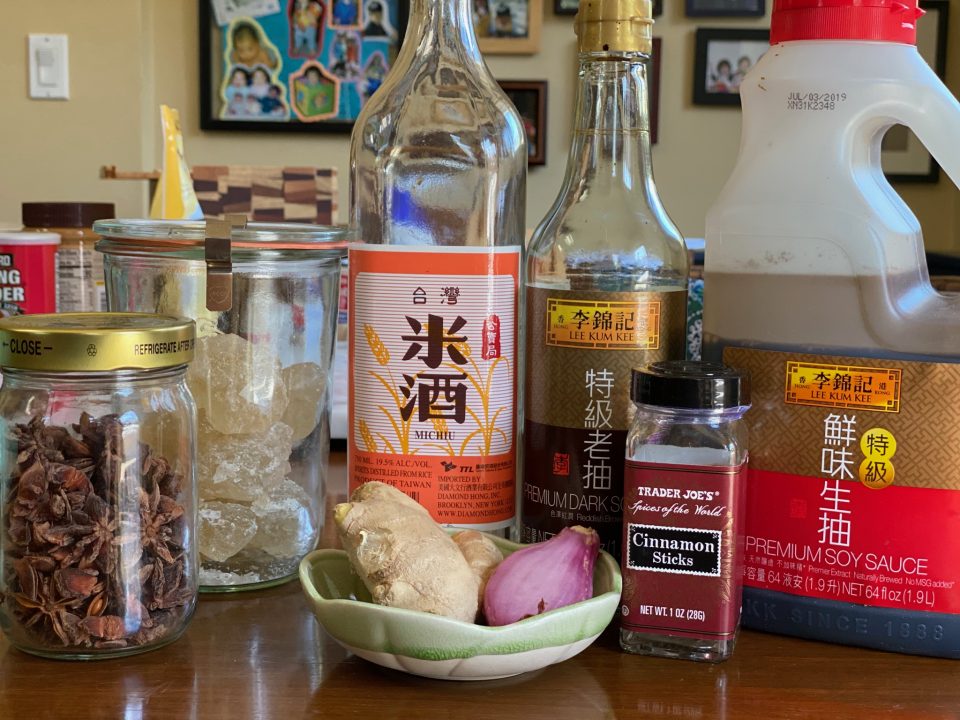
The seasonings are few, soy sauce, oyster sauce, a bit of sugar for balance, and that’s pretty much it. This means, start with great sauces, ones you like. My favorites? LKK oyster sauce, it is my go-to brand (Woman and Little Boy in a Boat). It’s the only oyster sauce I have in my pantry.
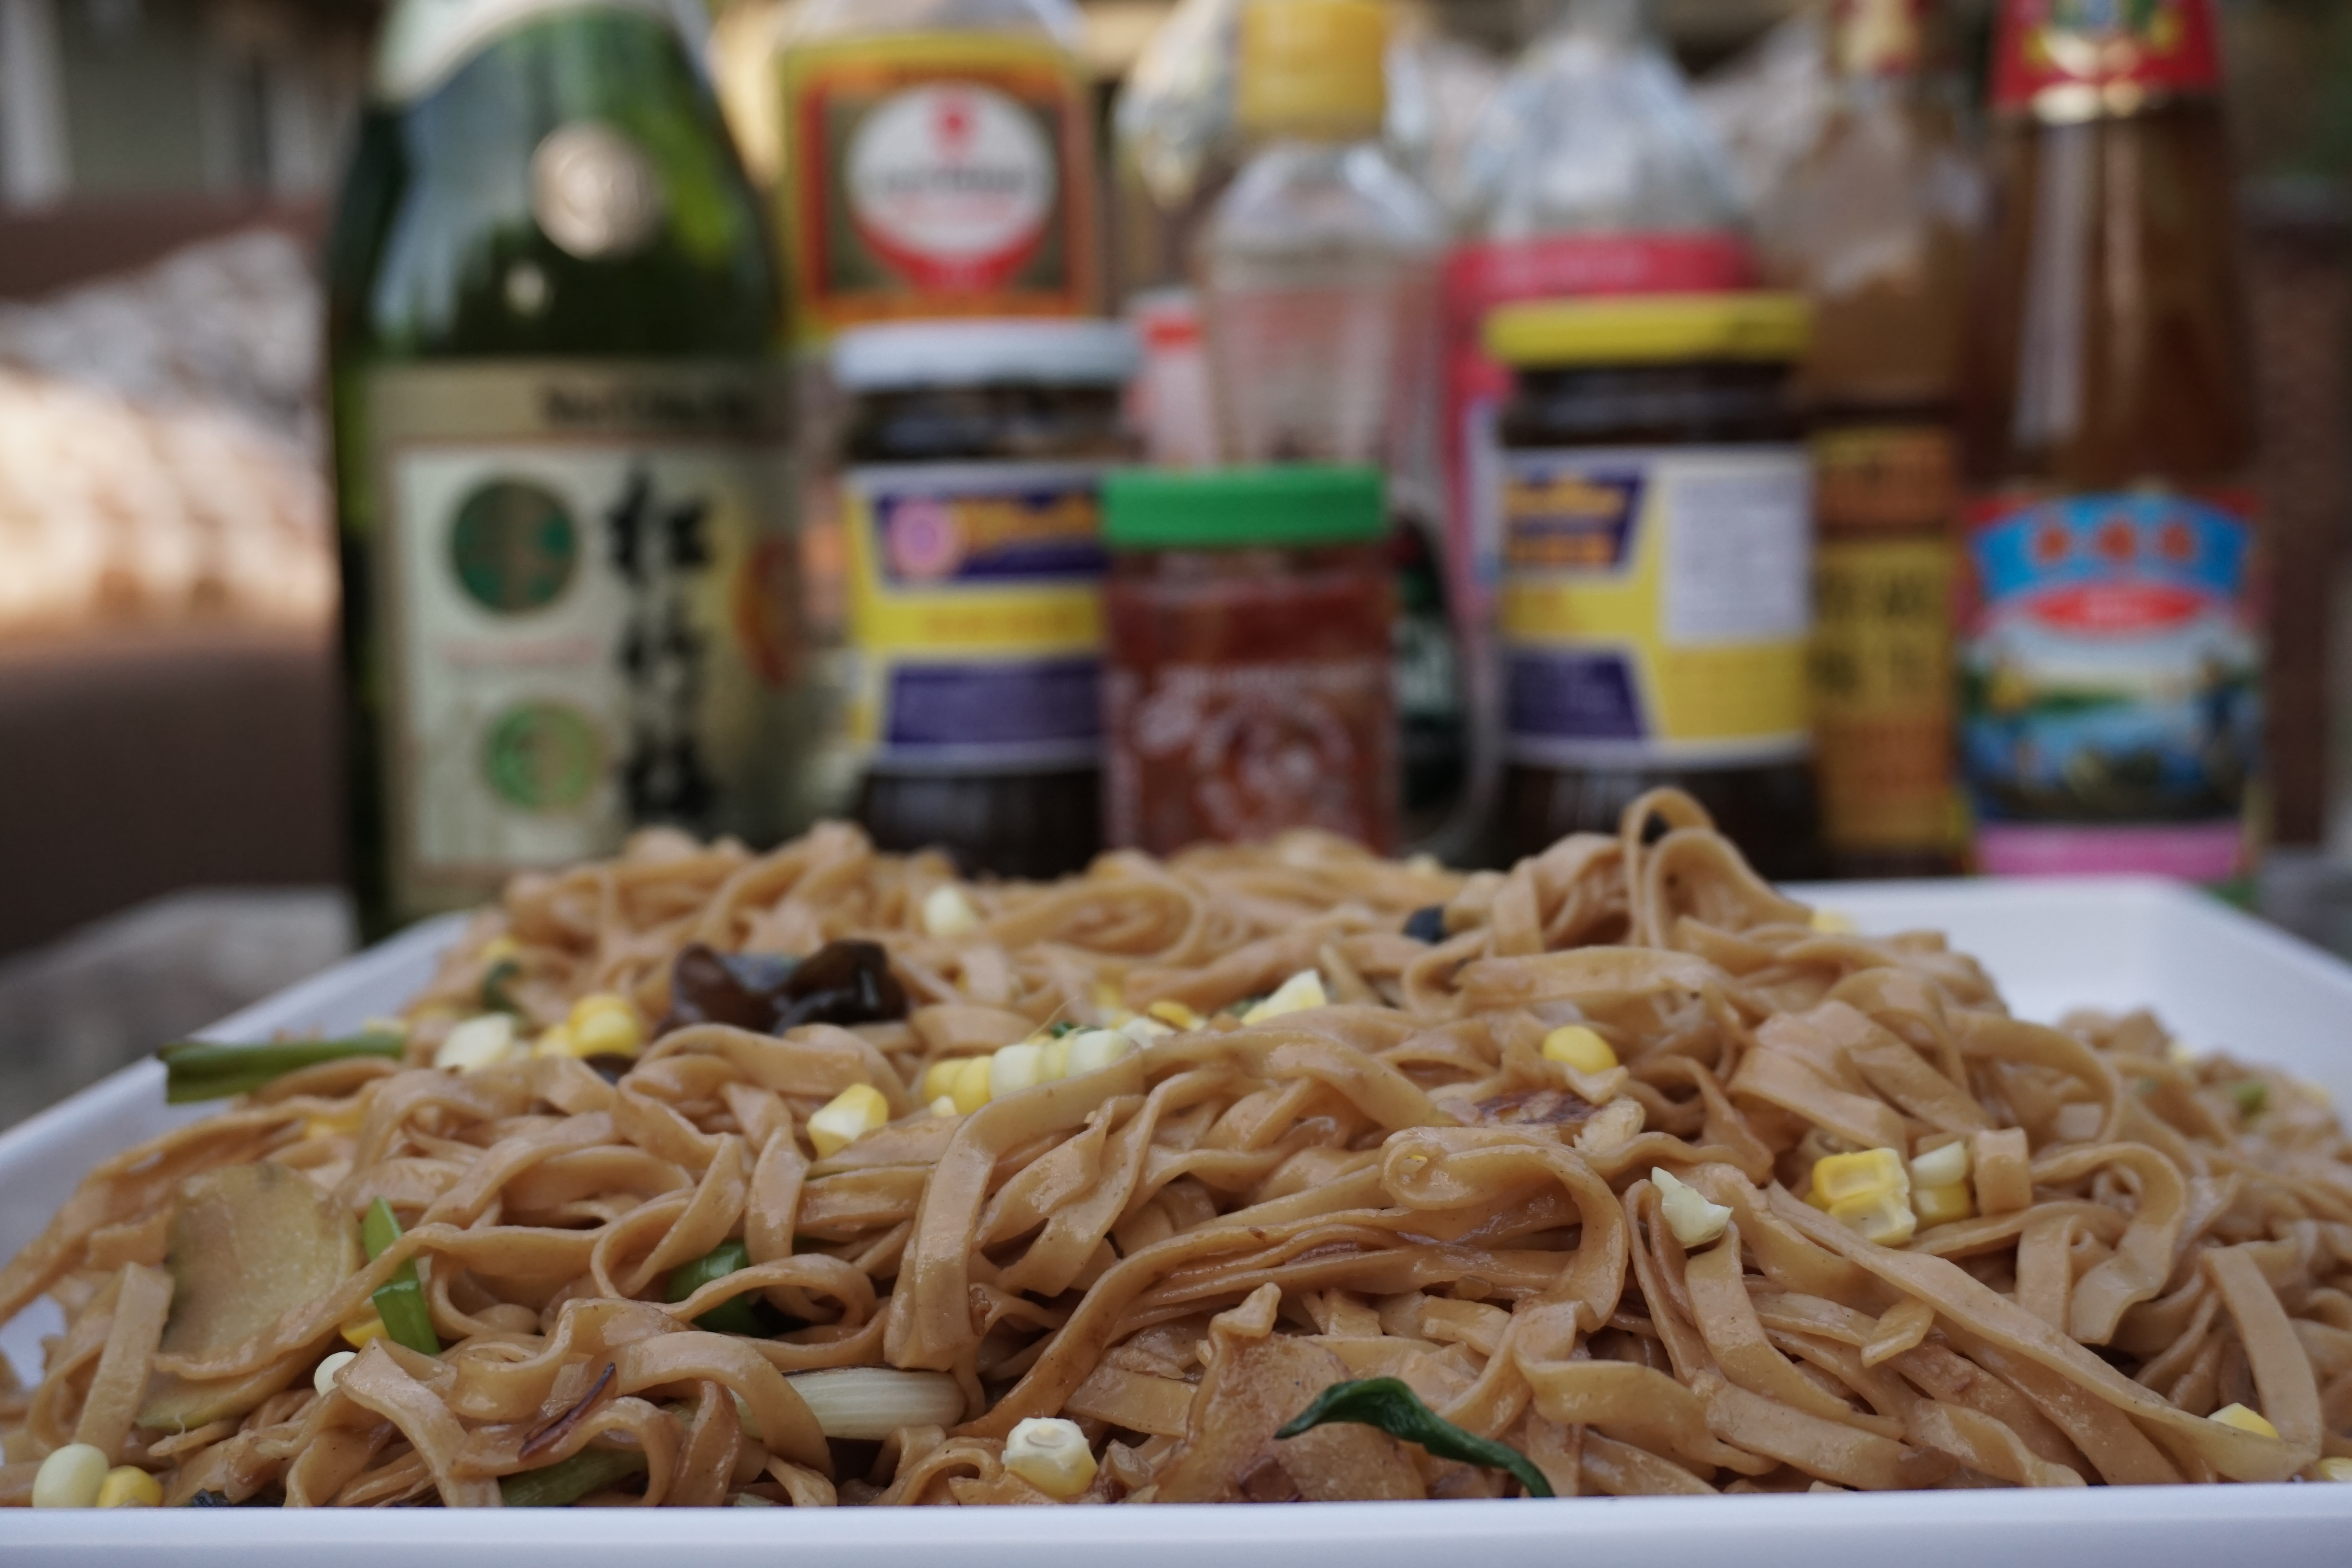
Soy Sauces are a different matter, there are so many. Different in style, use, and taste. Literally, I have over 12 different soy sauces, Chinese, Korean, Japanese, Taiwanese, and even Hawaiian.
SOY, Let’s Break It Down
In Cantonese cuisine, the dark soy sauce is actually not as salty as light soy sauce. Sugar or molasses is added to the base sauce for flavor, color and to balance the saltiness. It is used during marinating or cooking. Light Soy Sauce, is the first press of soybeans and is salty. It is the go-to sauce, to marinade, cook, and to use on the table, like salt. The soy sauce found on the table in Chinese restaurants is light soy sauce or often Kikkoman, which falls between light and dark soy sauce. A good all-purpose soy sauce. Koon Chun, a Hong Kong legacy company makes wonderful Light and Dark Soy Sauces (My Dad’s favorite)
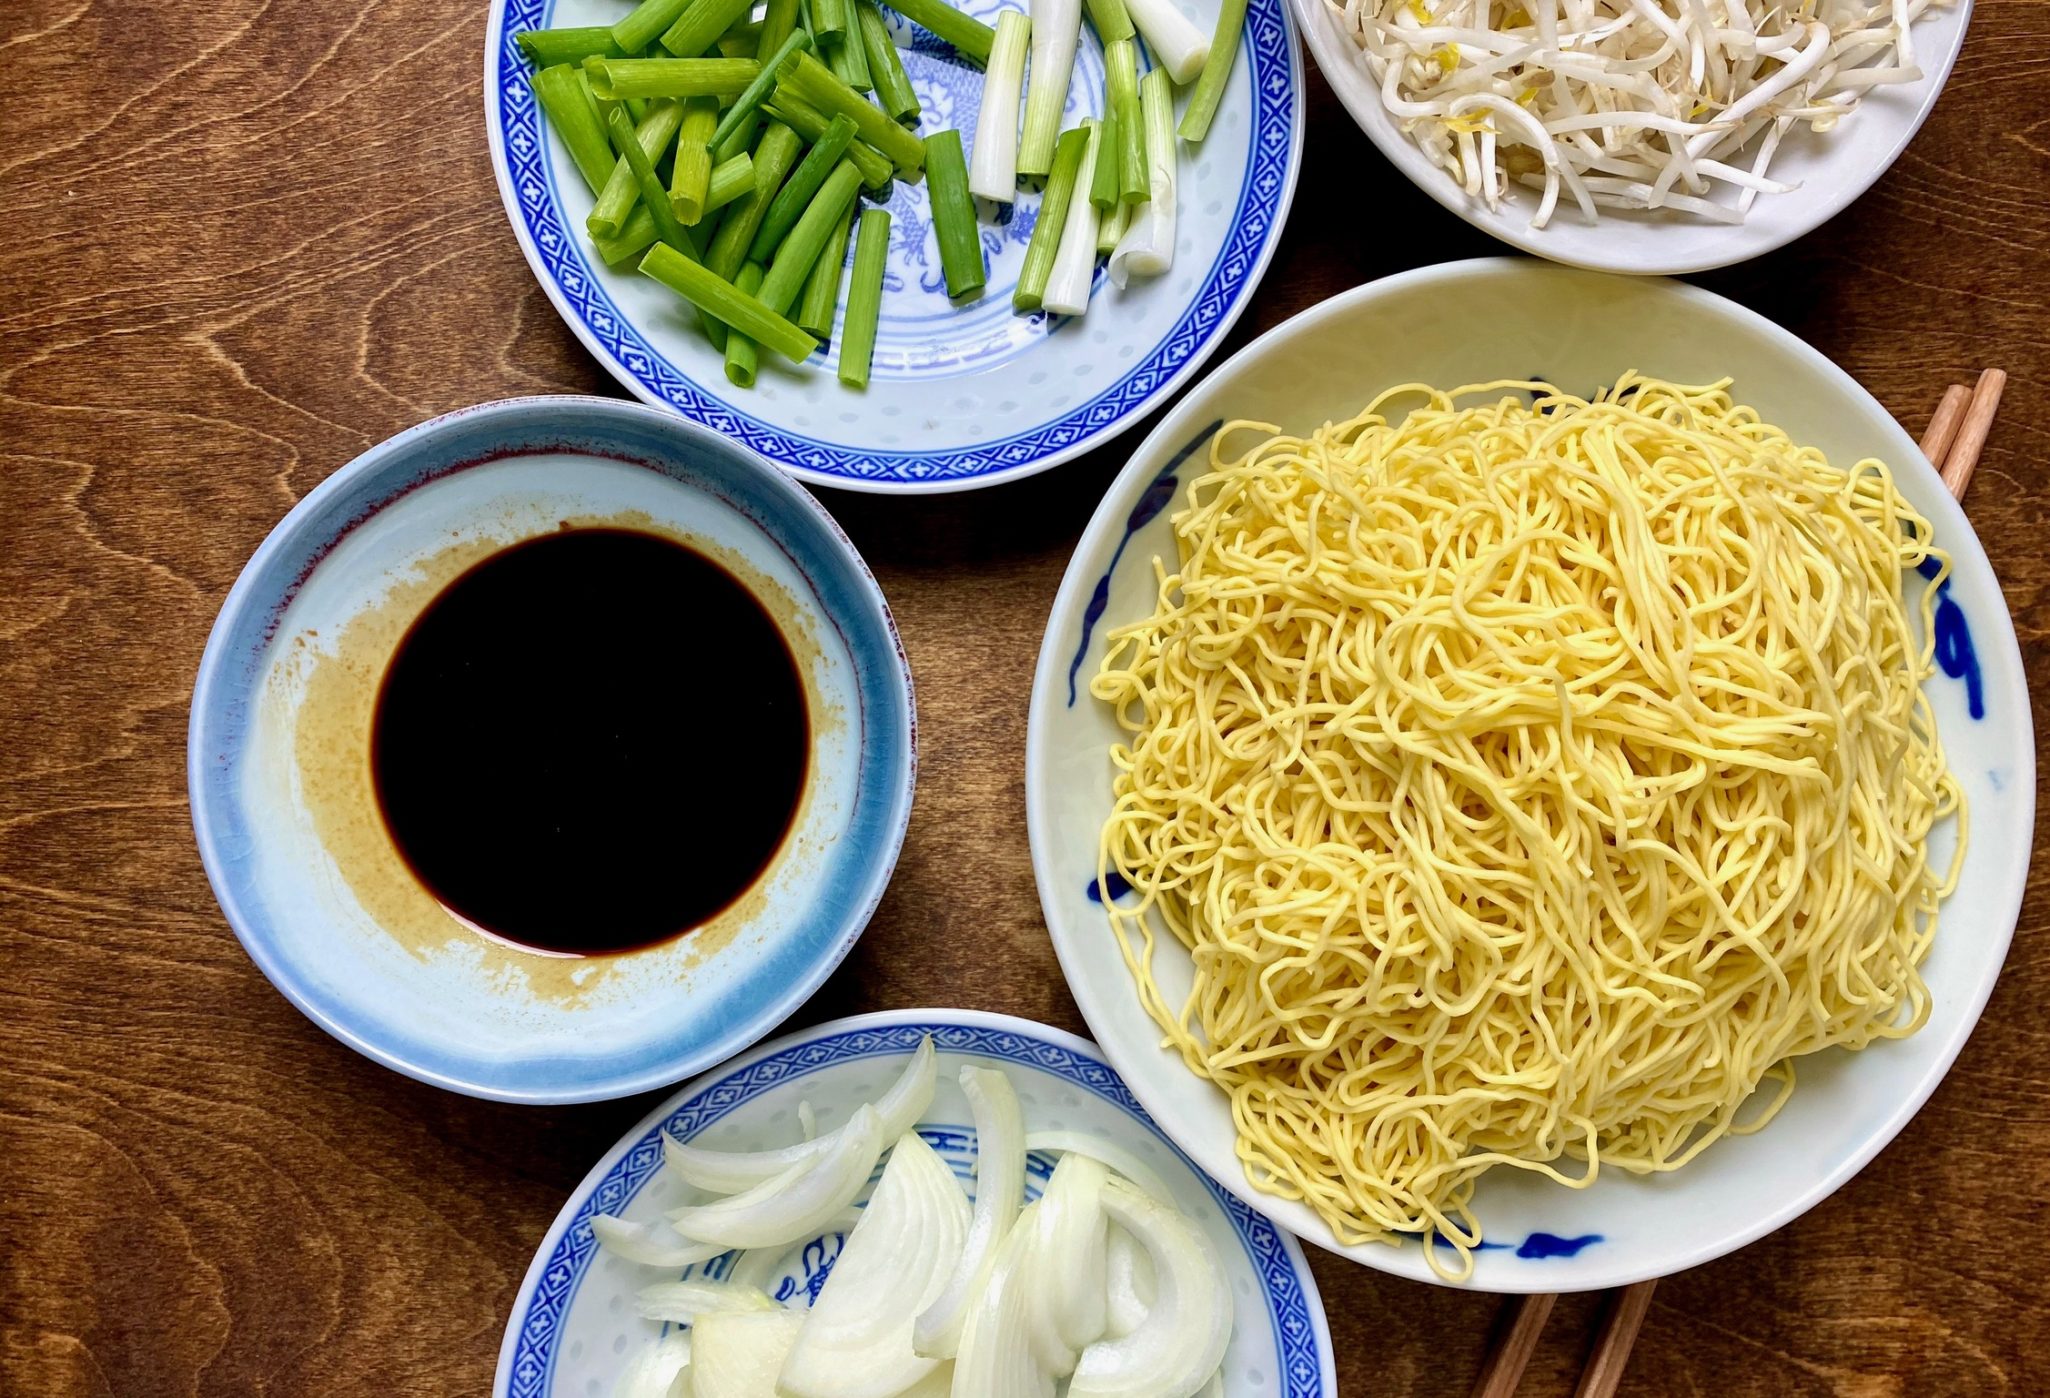
For these noodles, it’s imperative you use soy sauces you like since it is a predominant flavor ingredient. This dish requires 2 different soy sauces, light soy (shēng chōu, 生抽) and dark soy (Lǎo chōu, 老抽). The literal translation is “new sauce” for light soy and “old sauce” for dark soy. The dark and light soy is most prevalent in Canton, southeast China (ME!).
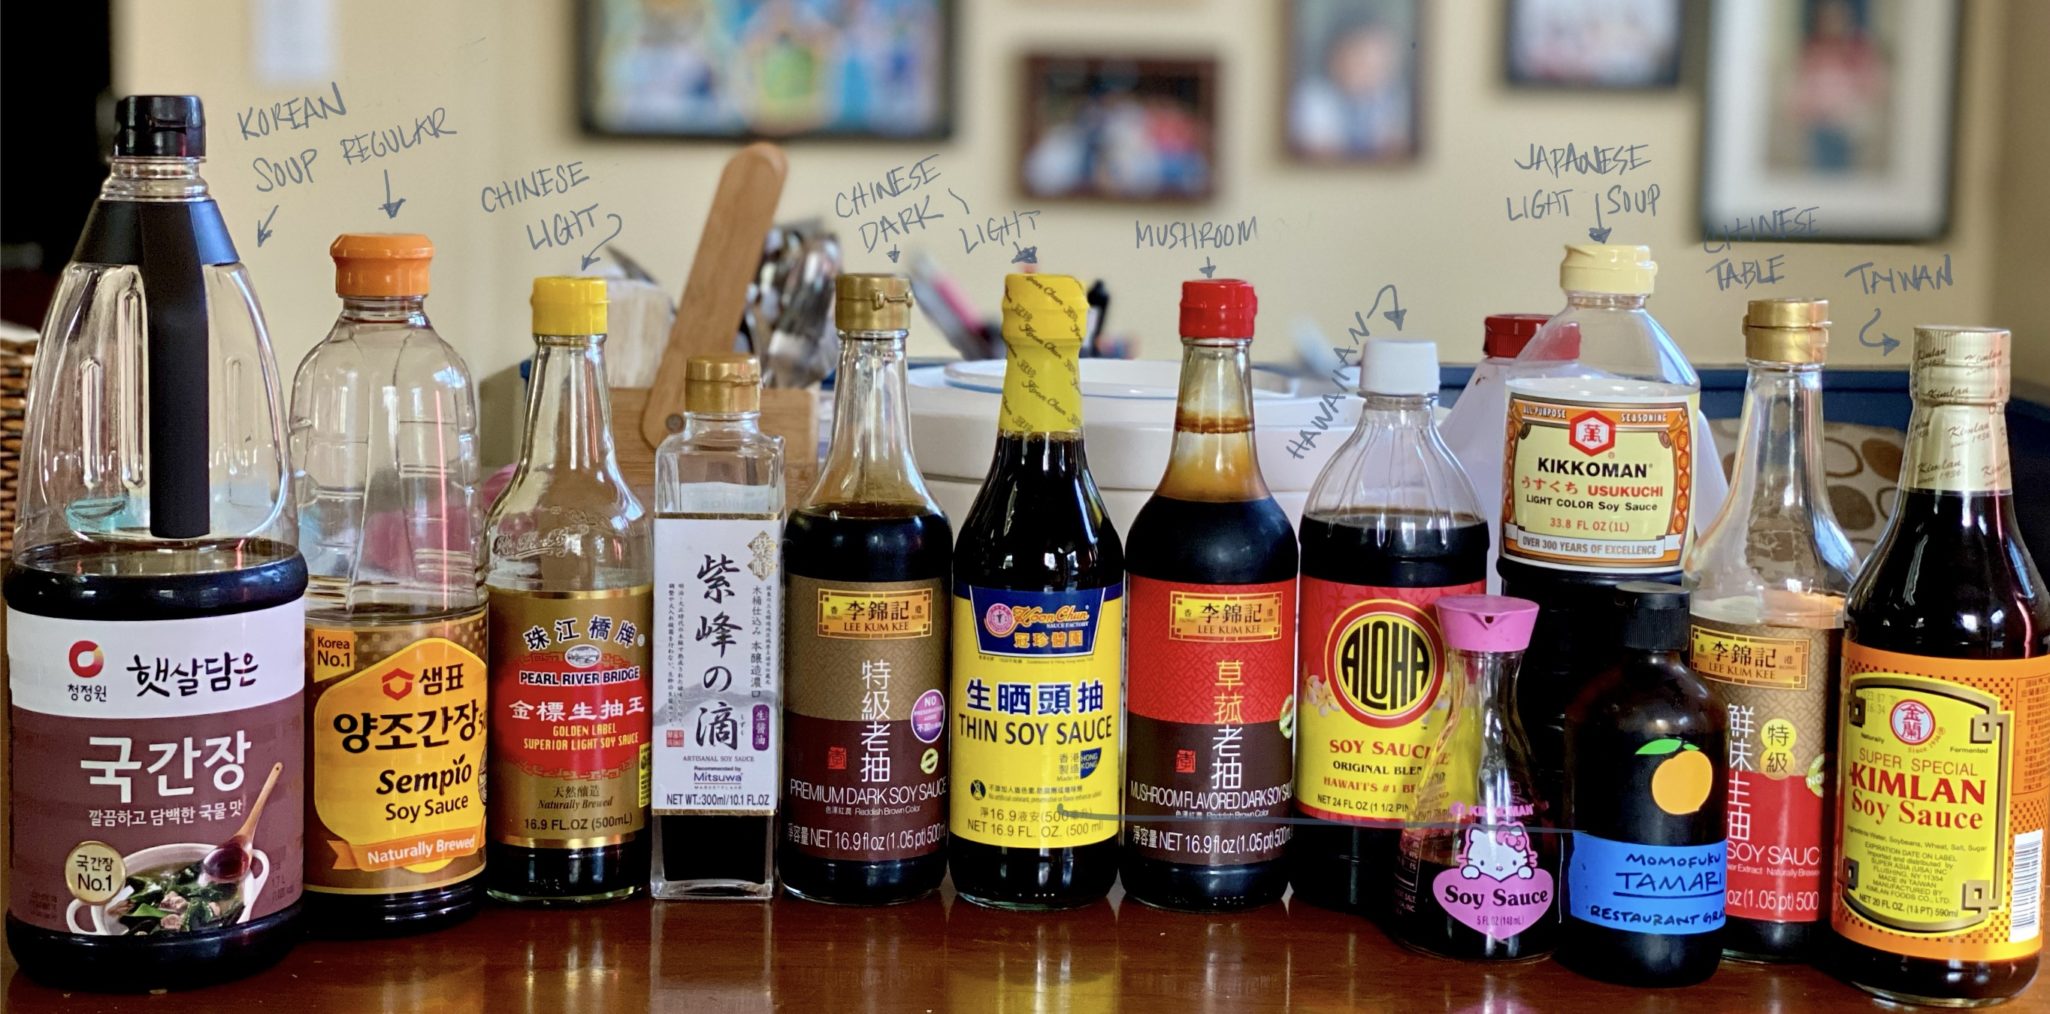
My favorites for this dish are Pearl River Bridge Light Soy Sauce and LKK Dark Soy Sauce. A great alternative is Korean Soy Sauce. I would use Sempio 701 which has a briny, rich, savory taste with a hint of sweetness. The Soup Soy seen in the picture (end left) is light soy and used mainly when making soup. It provides salt and umami without coloring your stocks. I use Aloha Soy Sauce for my marinades for bbq and any Hawaiian recipe (I have lots, love Hawaiian food-onolicious)
The NOODS
The other half of the equation is the noodles in this dish, so pick the right one!
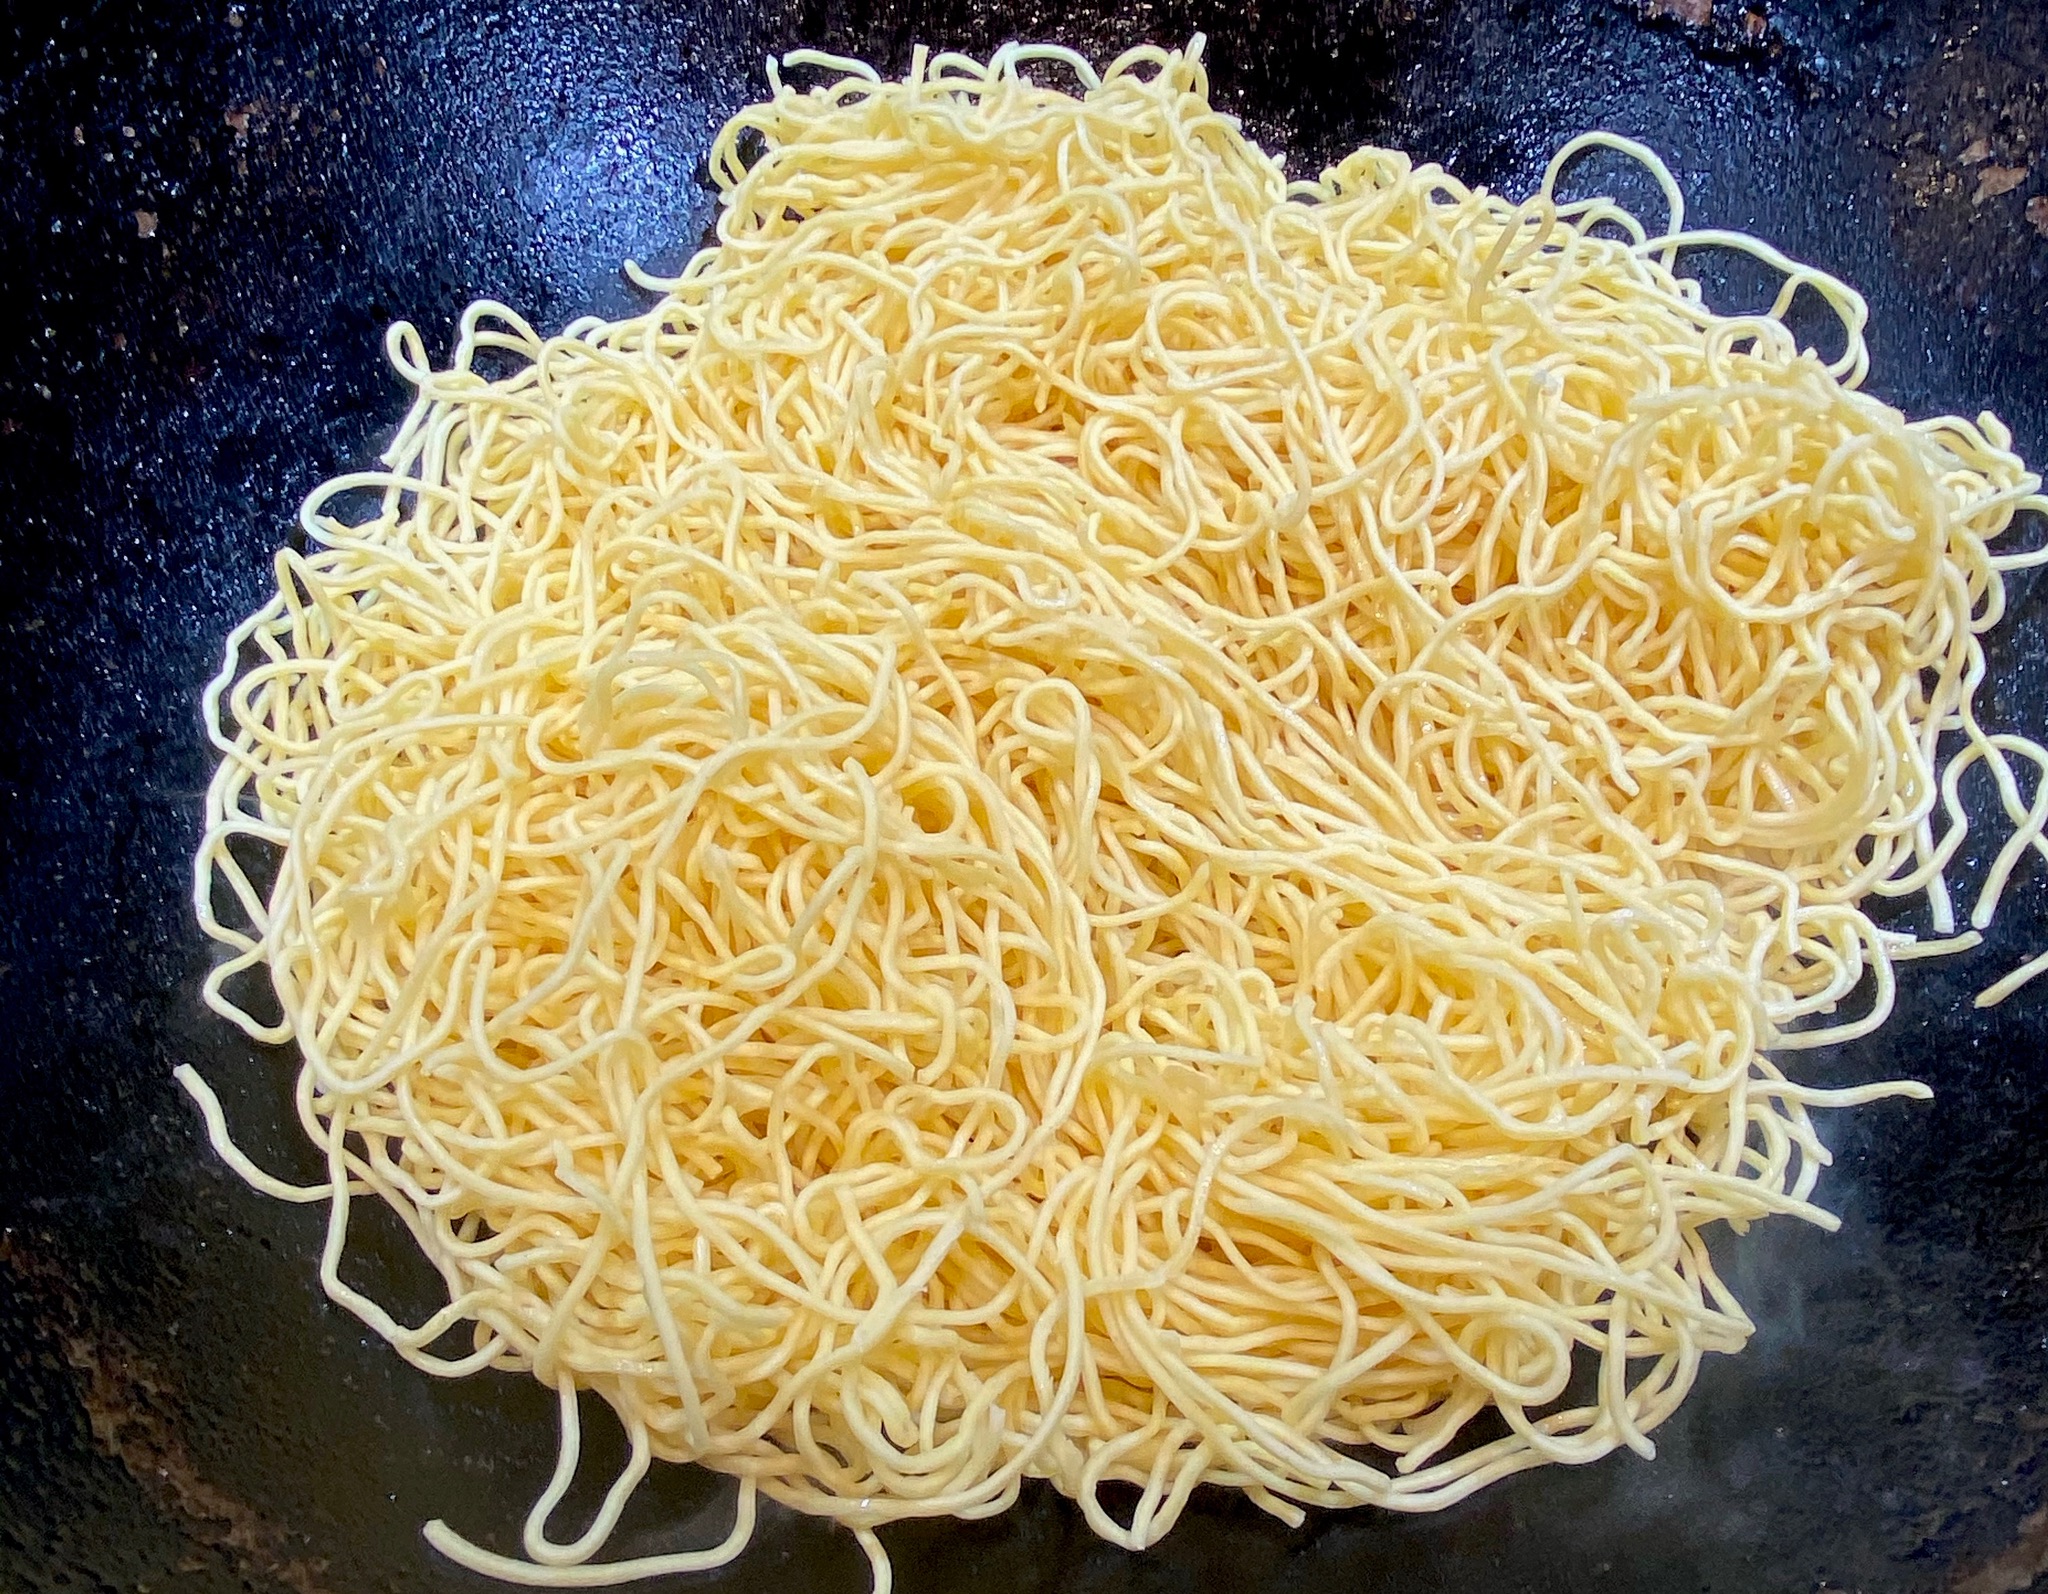
- Choose noodles that are THIN, ie. Cantonese style or Hong Kong-style noodles. Preferably egg noodles. Fresh or dry (I like fresh), I repeat THIN noodles. Look for Fresh Steamed, or fresh Hong Kong or Cantonese-style noodles.
- Don’t follow the cooking directions! You want to undercook these noodles so they don’t break or get mushy when frying.
- To ensure you don’t overcook the noodles. Separate the noodles and place them in a colander over the sink. Pour boiling water over the noodles and let them drain and dry. Voila noodles ready for pan-frying. Alternatively, put the noodles in boiling water for no more than 30 seconds after it comes to a boil. Remove and drain well.
Better to undercook your noodles!!! Made with Lau has a great video for making Hong Kong Style Noodles. This recipe is essentially his with a couple of tweaks and notes. Great site for down home Cantonese food from a pro!
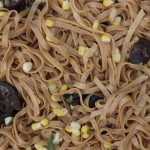
Once the wok is hot, add 1 tablespoon oil to pan, add noodles. On high heat, keep moving the noodles around to dry and crisp the noodles. Stir fry for 2 0r 3 minutes. Then flip the noodles over (big flip), drizzle another tablespoon of oil down the side of the wok or pan. Continue to fry and move the noodles around. The goal is a mix of both crisp and soft noodles.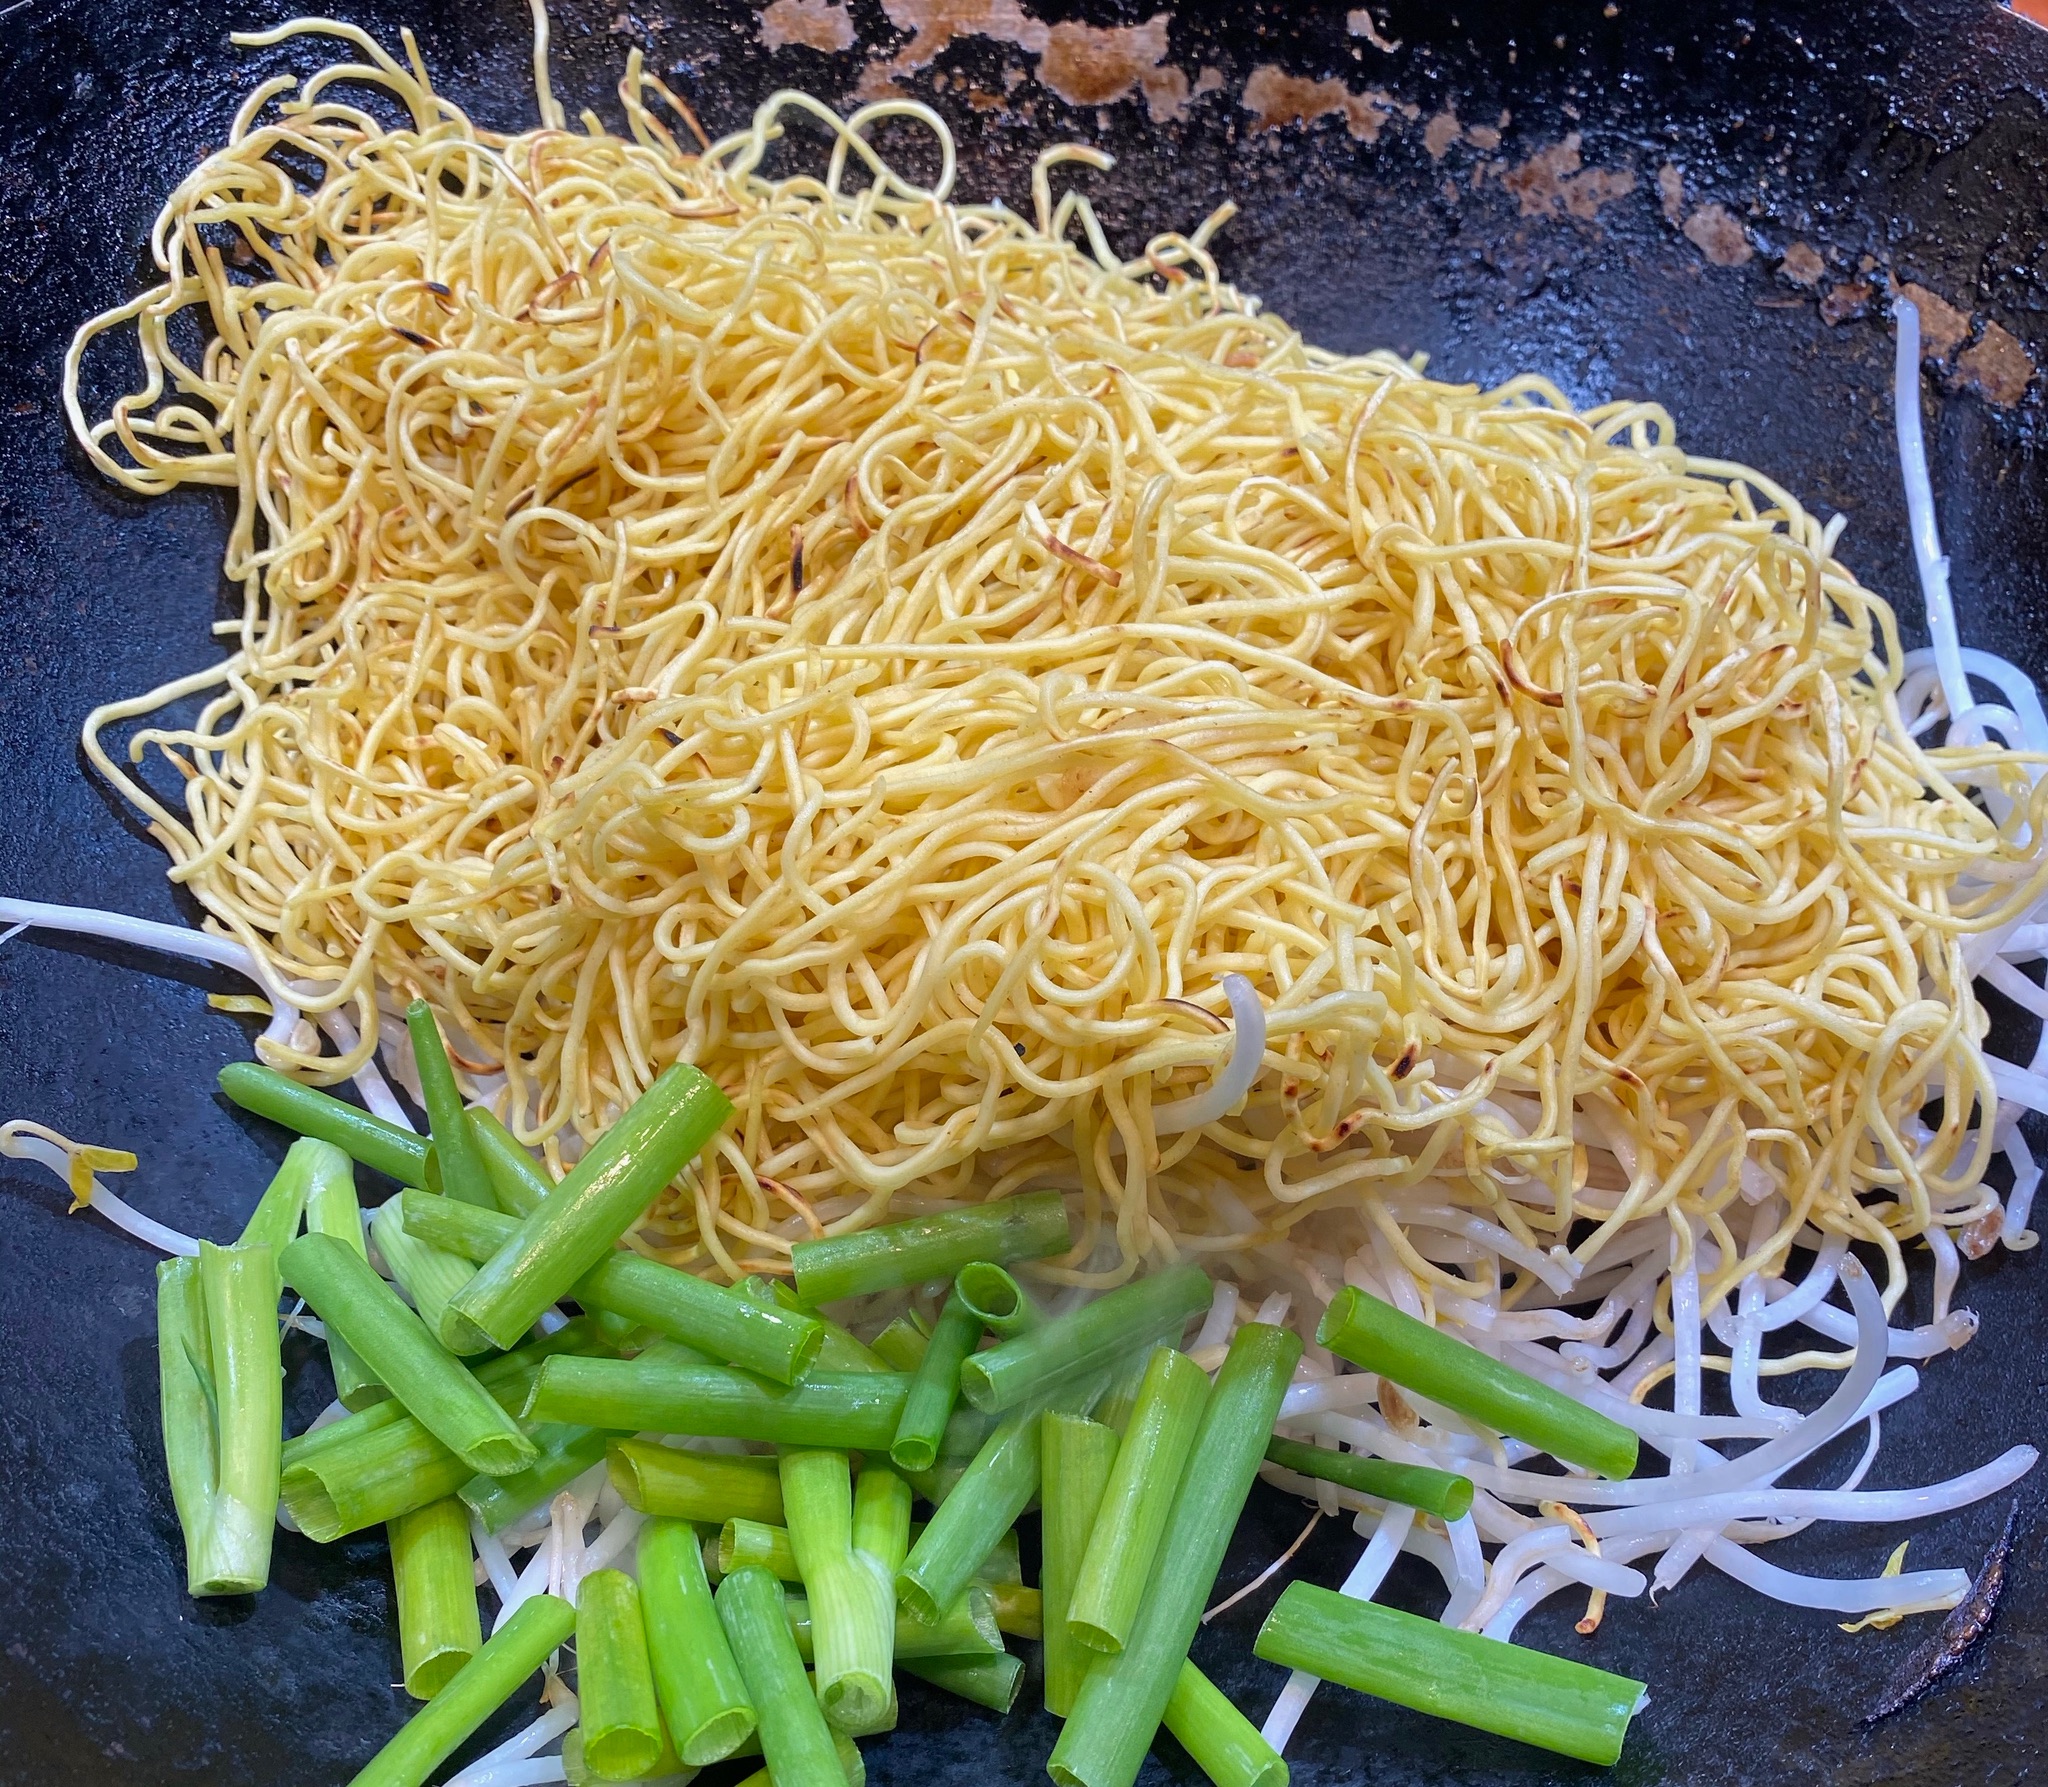 Add sprouts and onions to the wok and fry until heated through and a bit wilted. You want the sprouts to retain their crunch. Alternatively, you could quick-fry the green onions and sprouts separately and add them to the noodles with the yellow onions and scallion roots. If you really like the vegetables to stay crisp, fry the noodles and add sauce mixture before adding the vegetables.
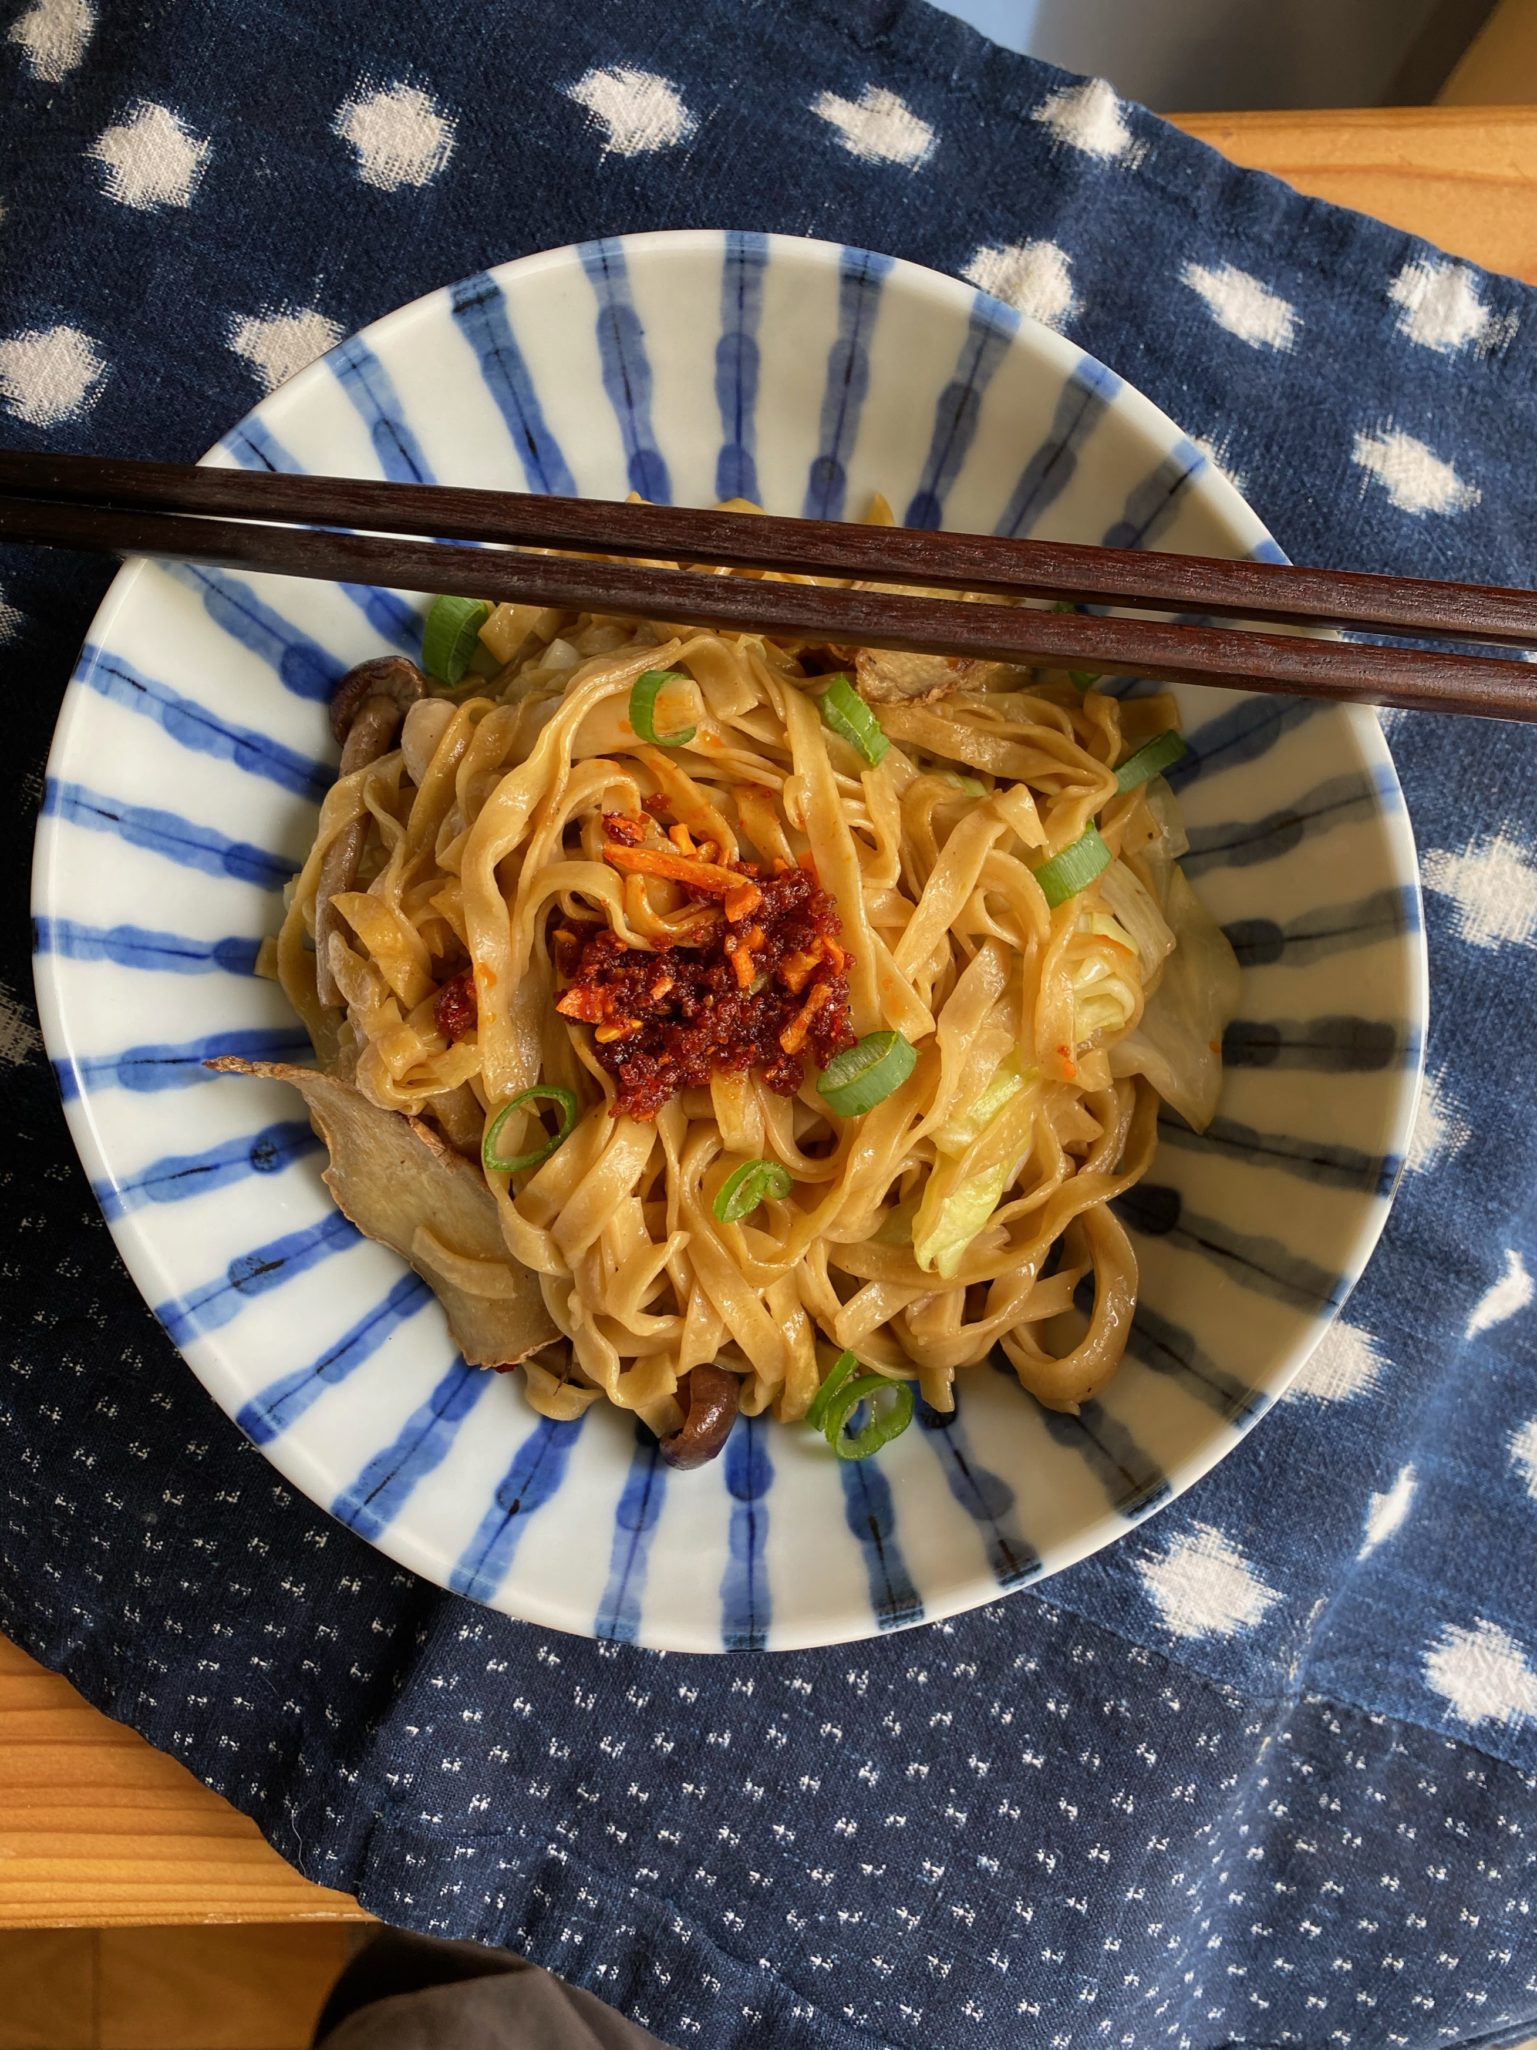
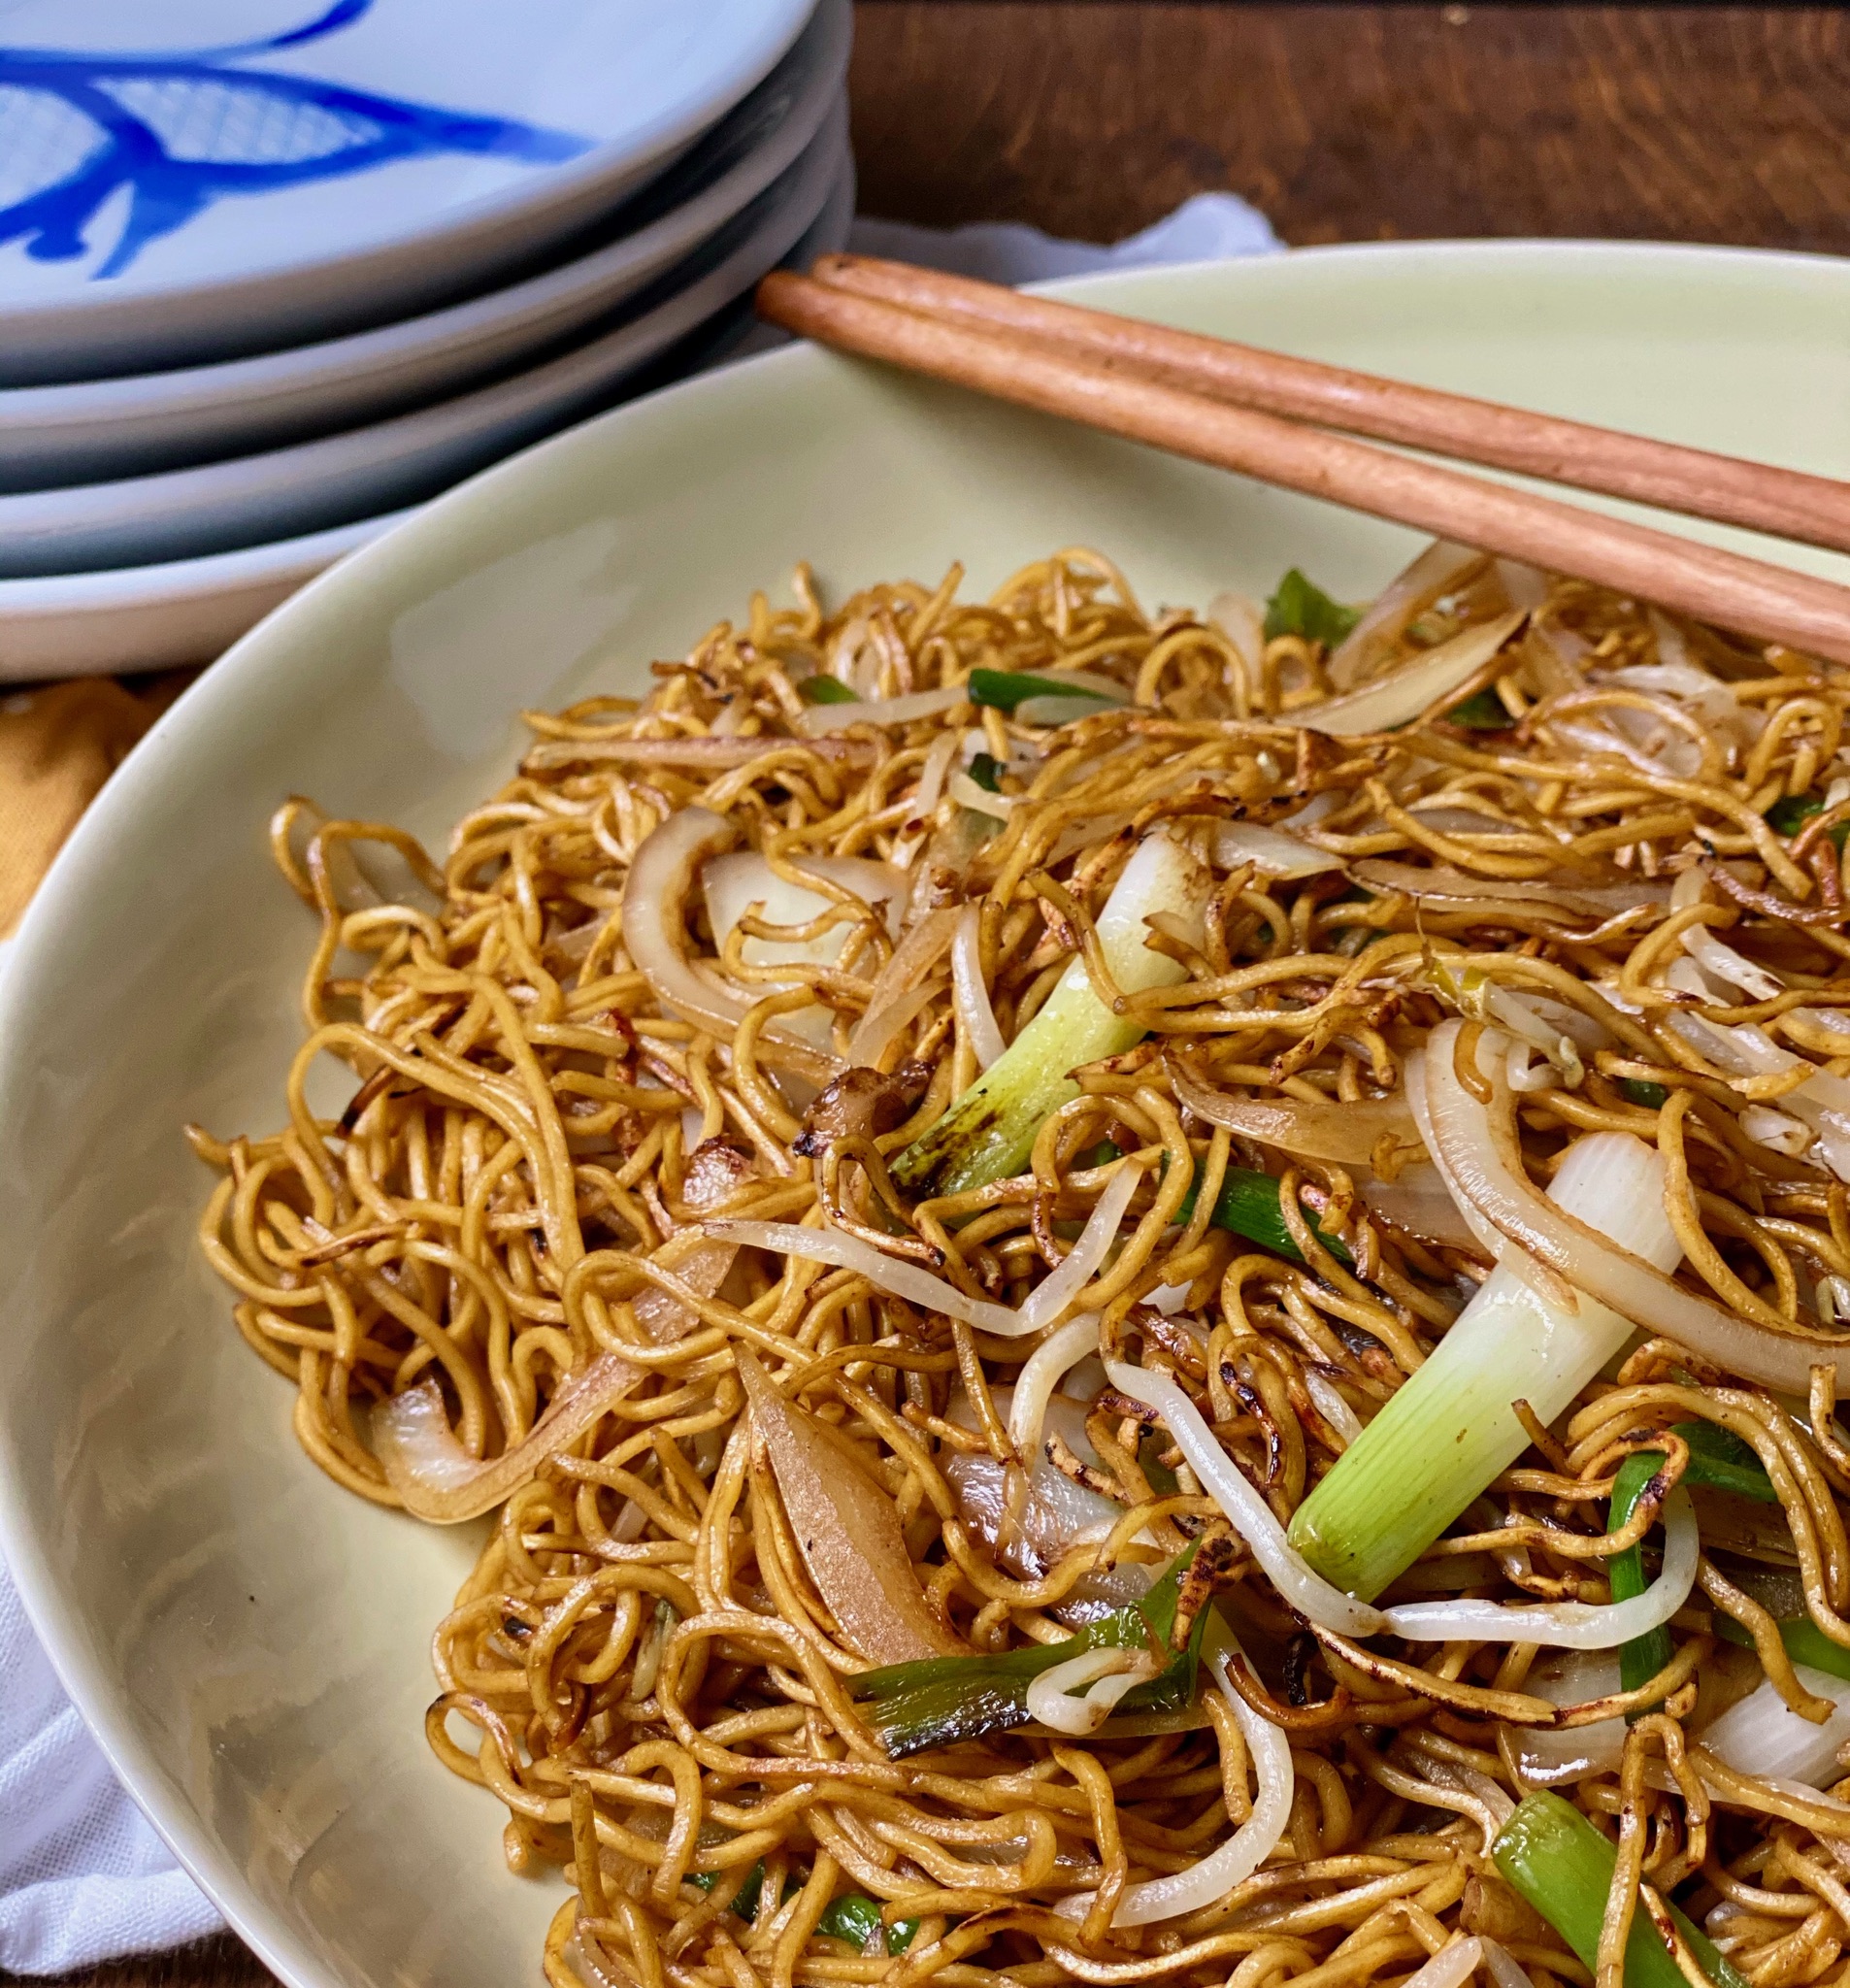
These are my favorite, a classic, Soy Sauce Fried Noodles!
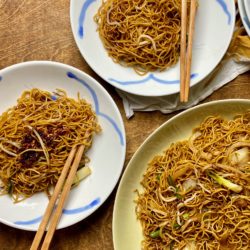
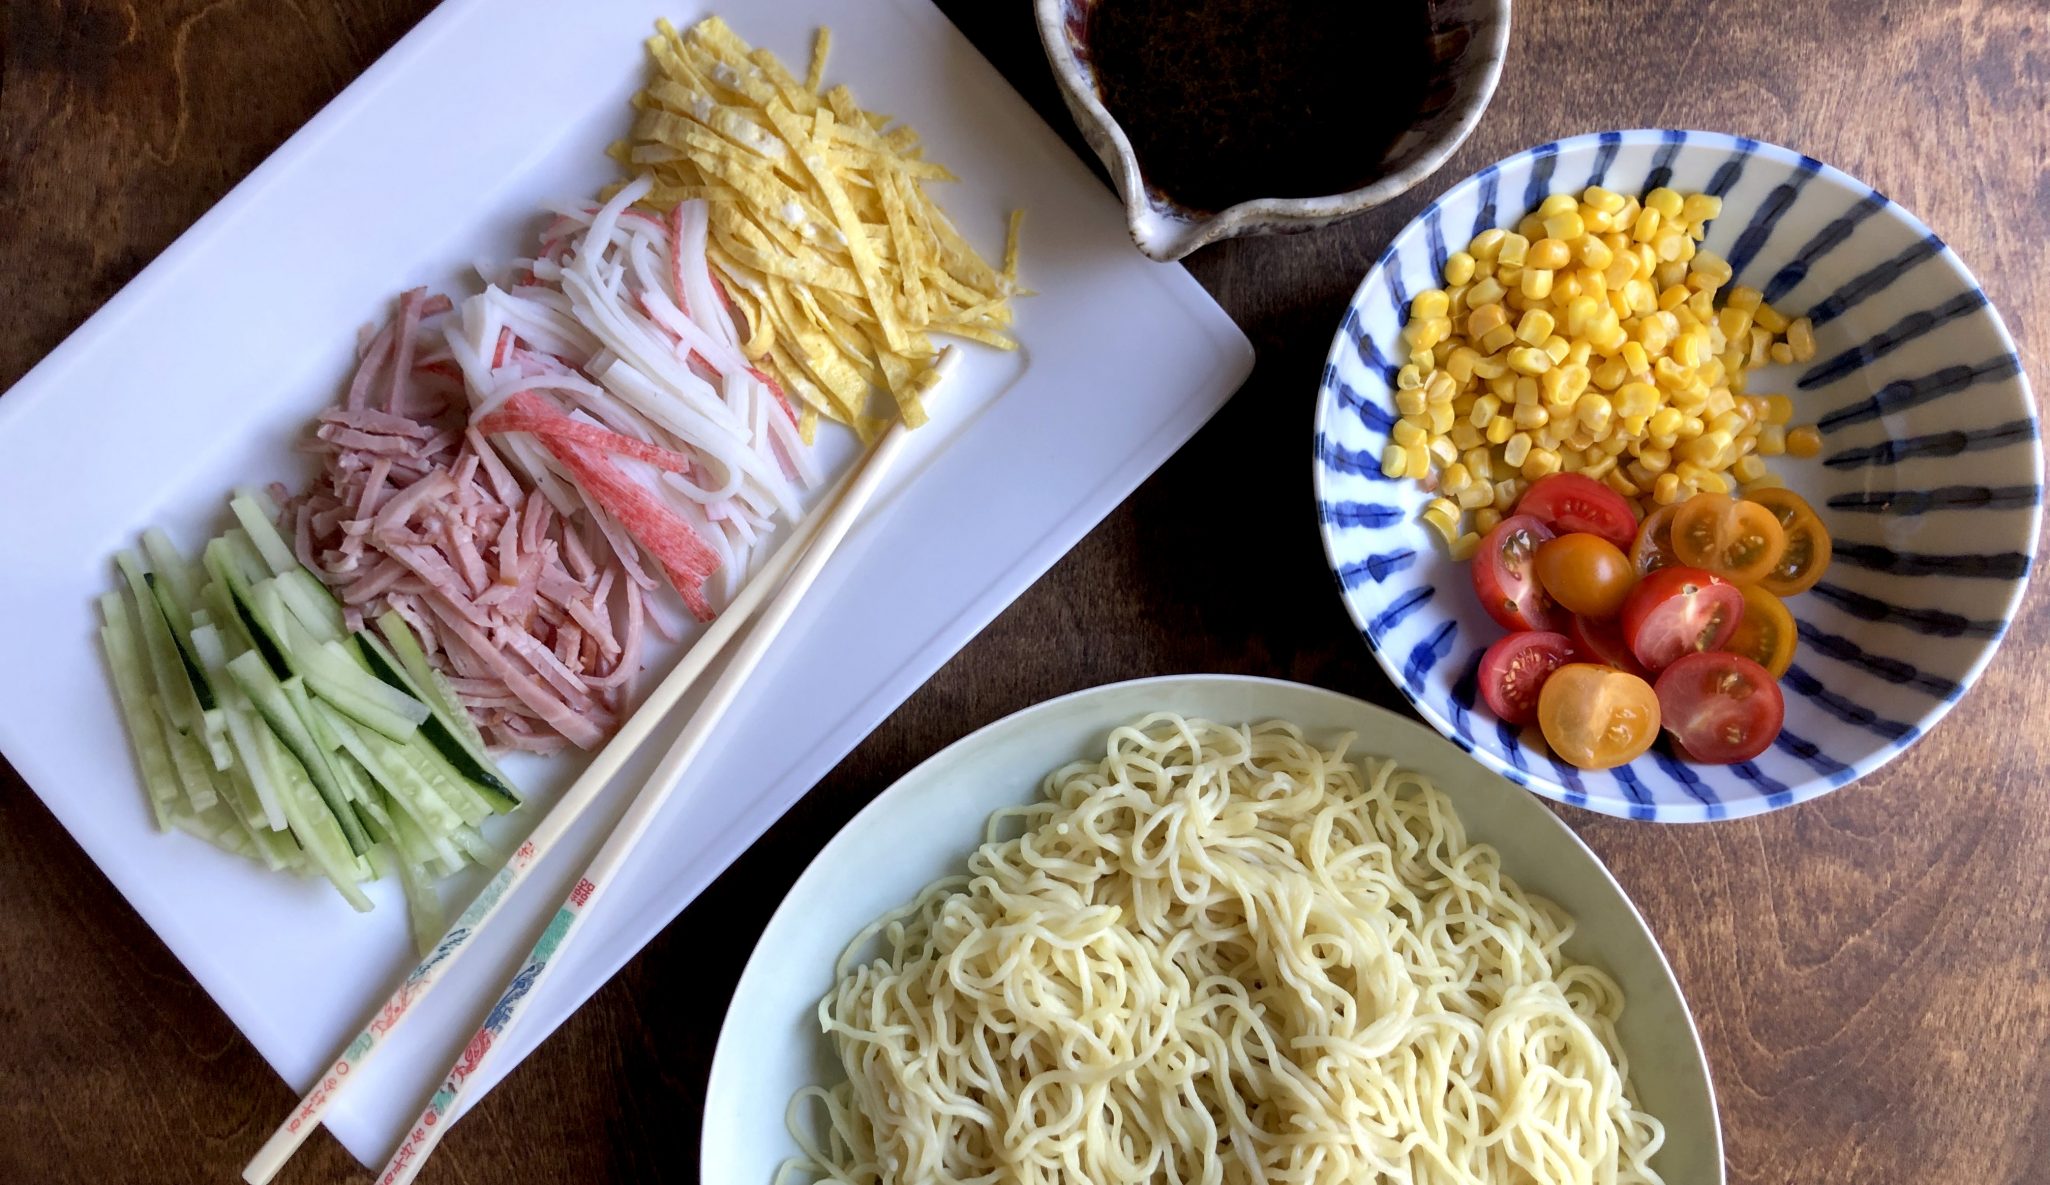
Soy Sauce Fried Noodles Hong Kong Style Chow Mein
Ingredients
- 16 oz Hong Kong style pan fried noodles unsteamed or steamed I’m lazy I get steamed
- 1/2 yellow onion cut into thin slices, lengthwise
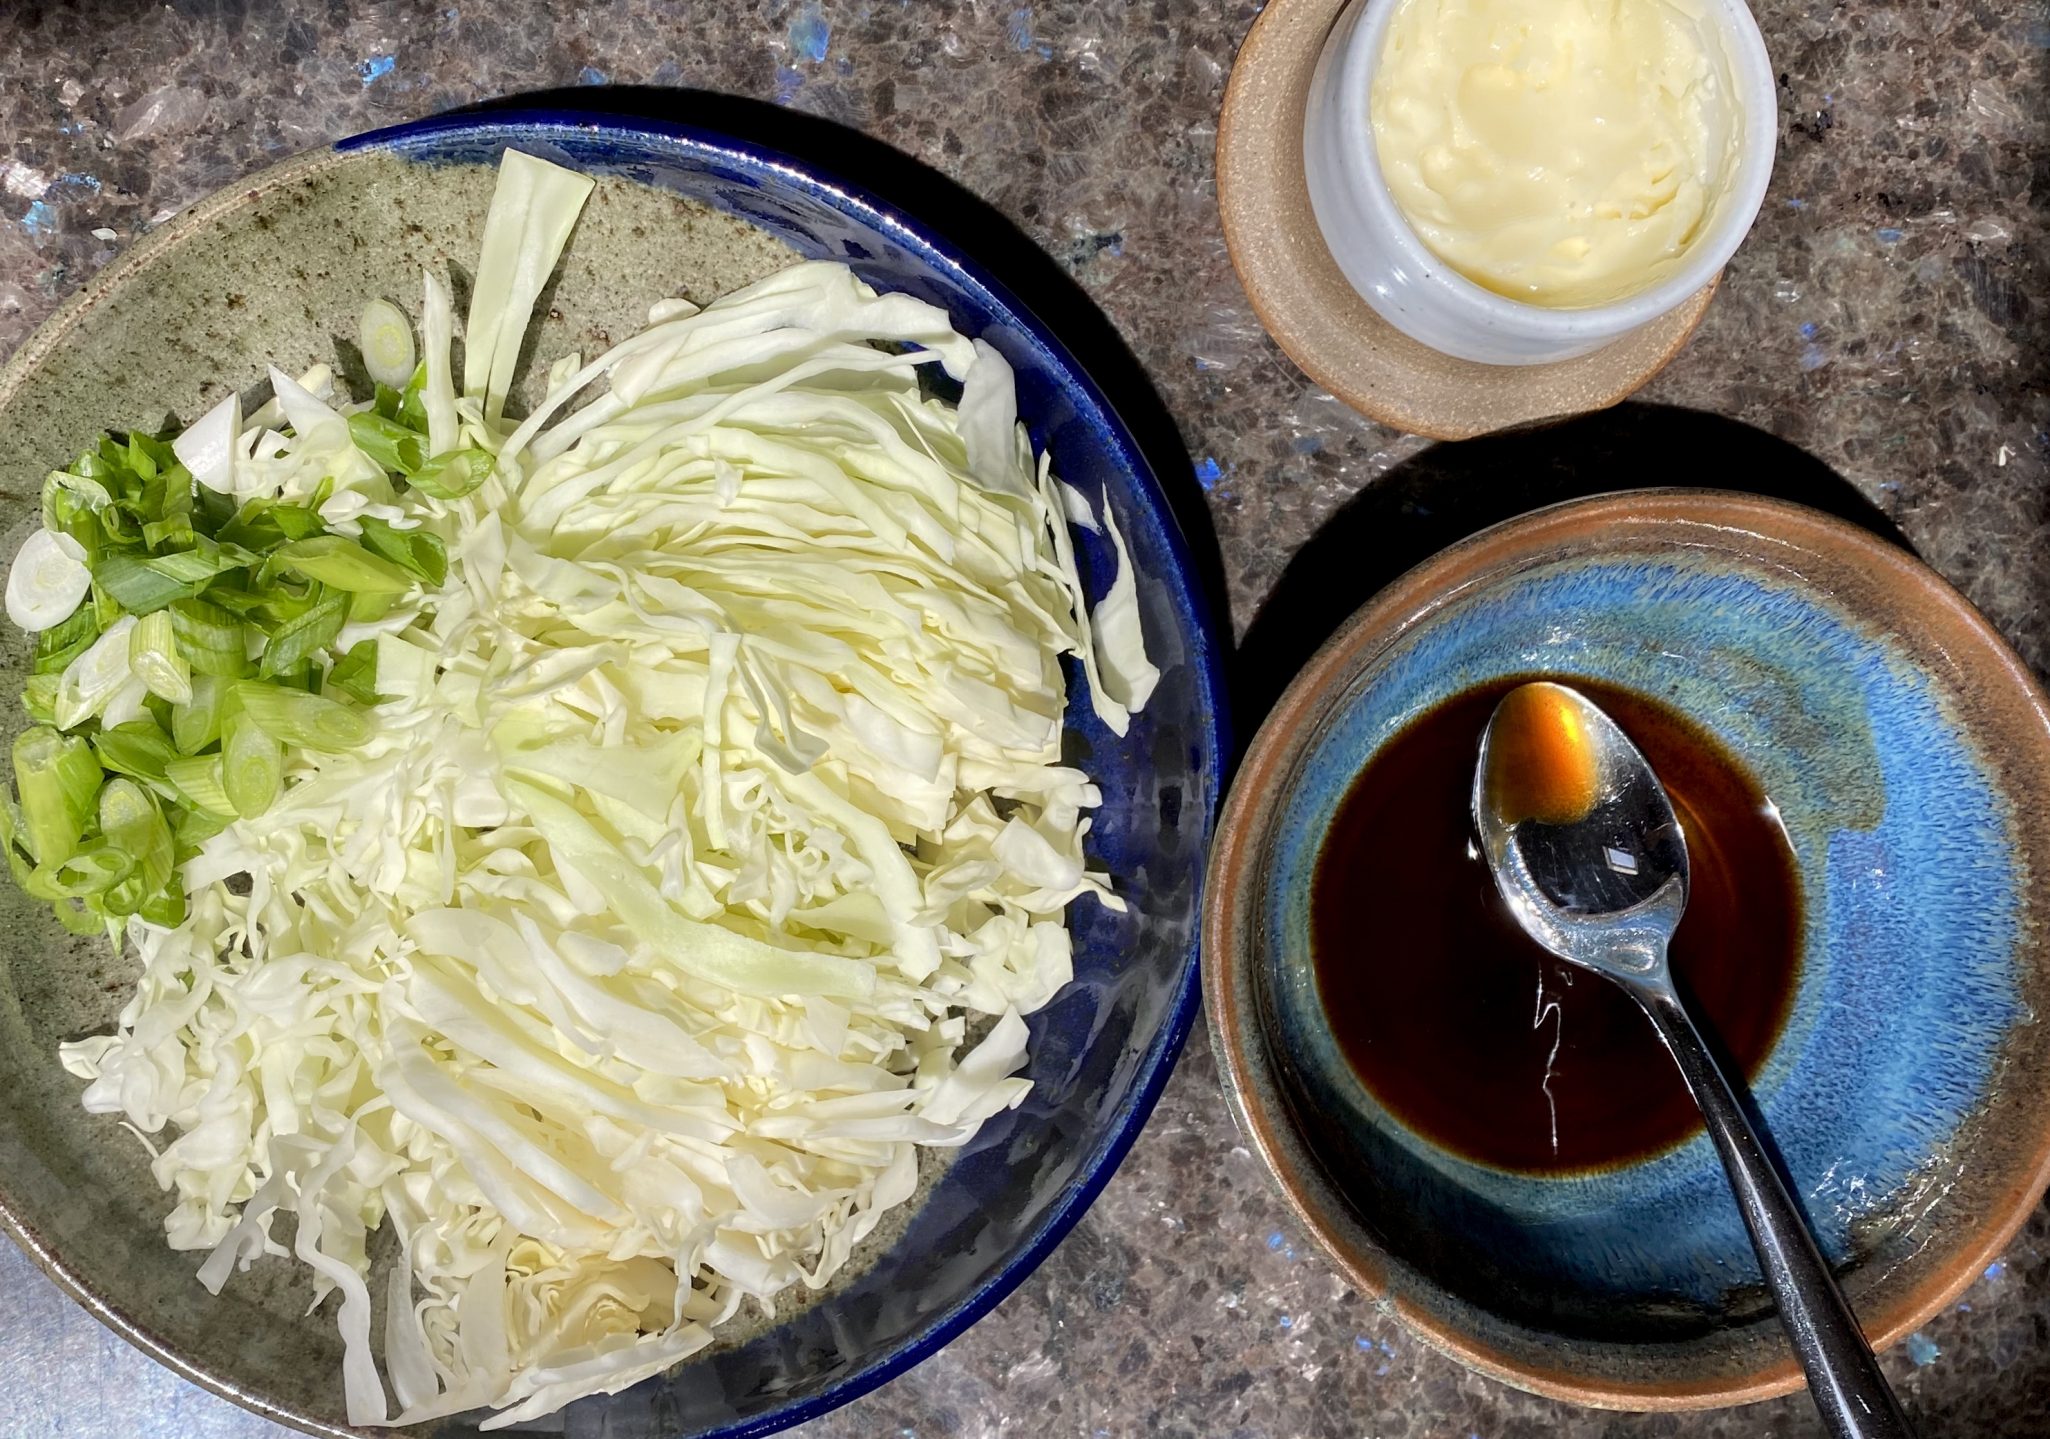
- 5 stalks green onion (or Chinese Chives) Cut into 1.5 inch pieces and then julienned.
- 6-8 oz bean sprouts Washed and drained
- 3 tbsp peanut oil or vegetable oil of choice
Sauce
- 1.5 tbsp dark soy sauce
- 1.5 tbsp light soy sauce
- 1.5 tbsp oyster sauce
- 0.5 tbsp shaoxing wine
- 2 tsp sugar
- 1 tbsp water
- 1 tsp sesame oil to taste
Instructions
Prep Noodles
- Steam noodles, drain, cool. Please DON’T over cook your noodles!!! This is the takeaway.
- For fresh, steamed noodles, bring pot of water to a boil. Drop in noodles (separated), bring the water back to a boil and take them out-pronto! Leave them in colander to drain and dry out a little.
- If you're using dried noodles, cook according to the package's instructions, erring on the more al-dente side, and rinse with cold water afterwards to stop the cooking. Drain well.
Veggies
- Cut green onions into about 1.5 inch pieces. Separate the light and the green sections. The light part will be cooked first with the yellow onion.
- Cut yellow onion in half, and julienne half (thinly slice lengthwise)
- Rinse and drain bean sprouts
Sauce
- Combine soy sauces, oyster sauce, sugar, and water in a bowl, stir until the sugar dissolves. Set aside.
Frying Time
- On high, heat wok, to around 350-400°F, basically smokin hot.
- When the wok is hot, add oil (1 tbsp) and heat to 350-400°F. The oil should be "shimmering" - rippling, but not smoking. If it's smoking, the wok is too hot. Little wisps of smoke is okay.
- Saute’ green onion whites and onions for about 1 minute and reserve.
- Heat the wok again and add 1 T oil. Once the oil is shimmering, add the noodles.
- Move the noodles around the pan gently. DO NOT flip them yet, move the noodles around so parts get crispy. Cook for about 3 minutes moving the noodles carefully.
- Turn the top noodles over so the noodles are on the bottom, add 1 T oil along the perimeter of the pan to help develop a nice crisp. Let the noodles cook on this side for another 3 minutes, occasionally prodding and moving the noodles.
- The noodles will not stick to the pan if they are not overcooked. Lifting the noodles as you fry helps release moisture.
- Add bean sprouts and stir fry for 30-45 seconds. Use tongs or cooking chopsticks to help you move the noodles around. Place the noodles over the sprouts to help cook them. Better to undercook sprouts, you want to retain their crunch!
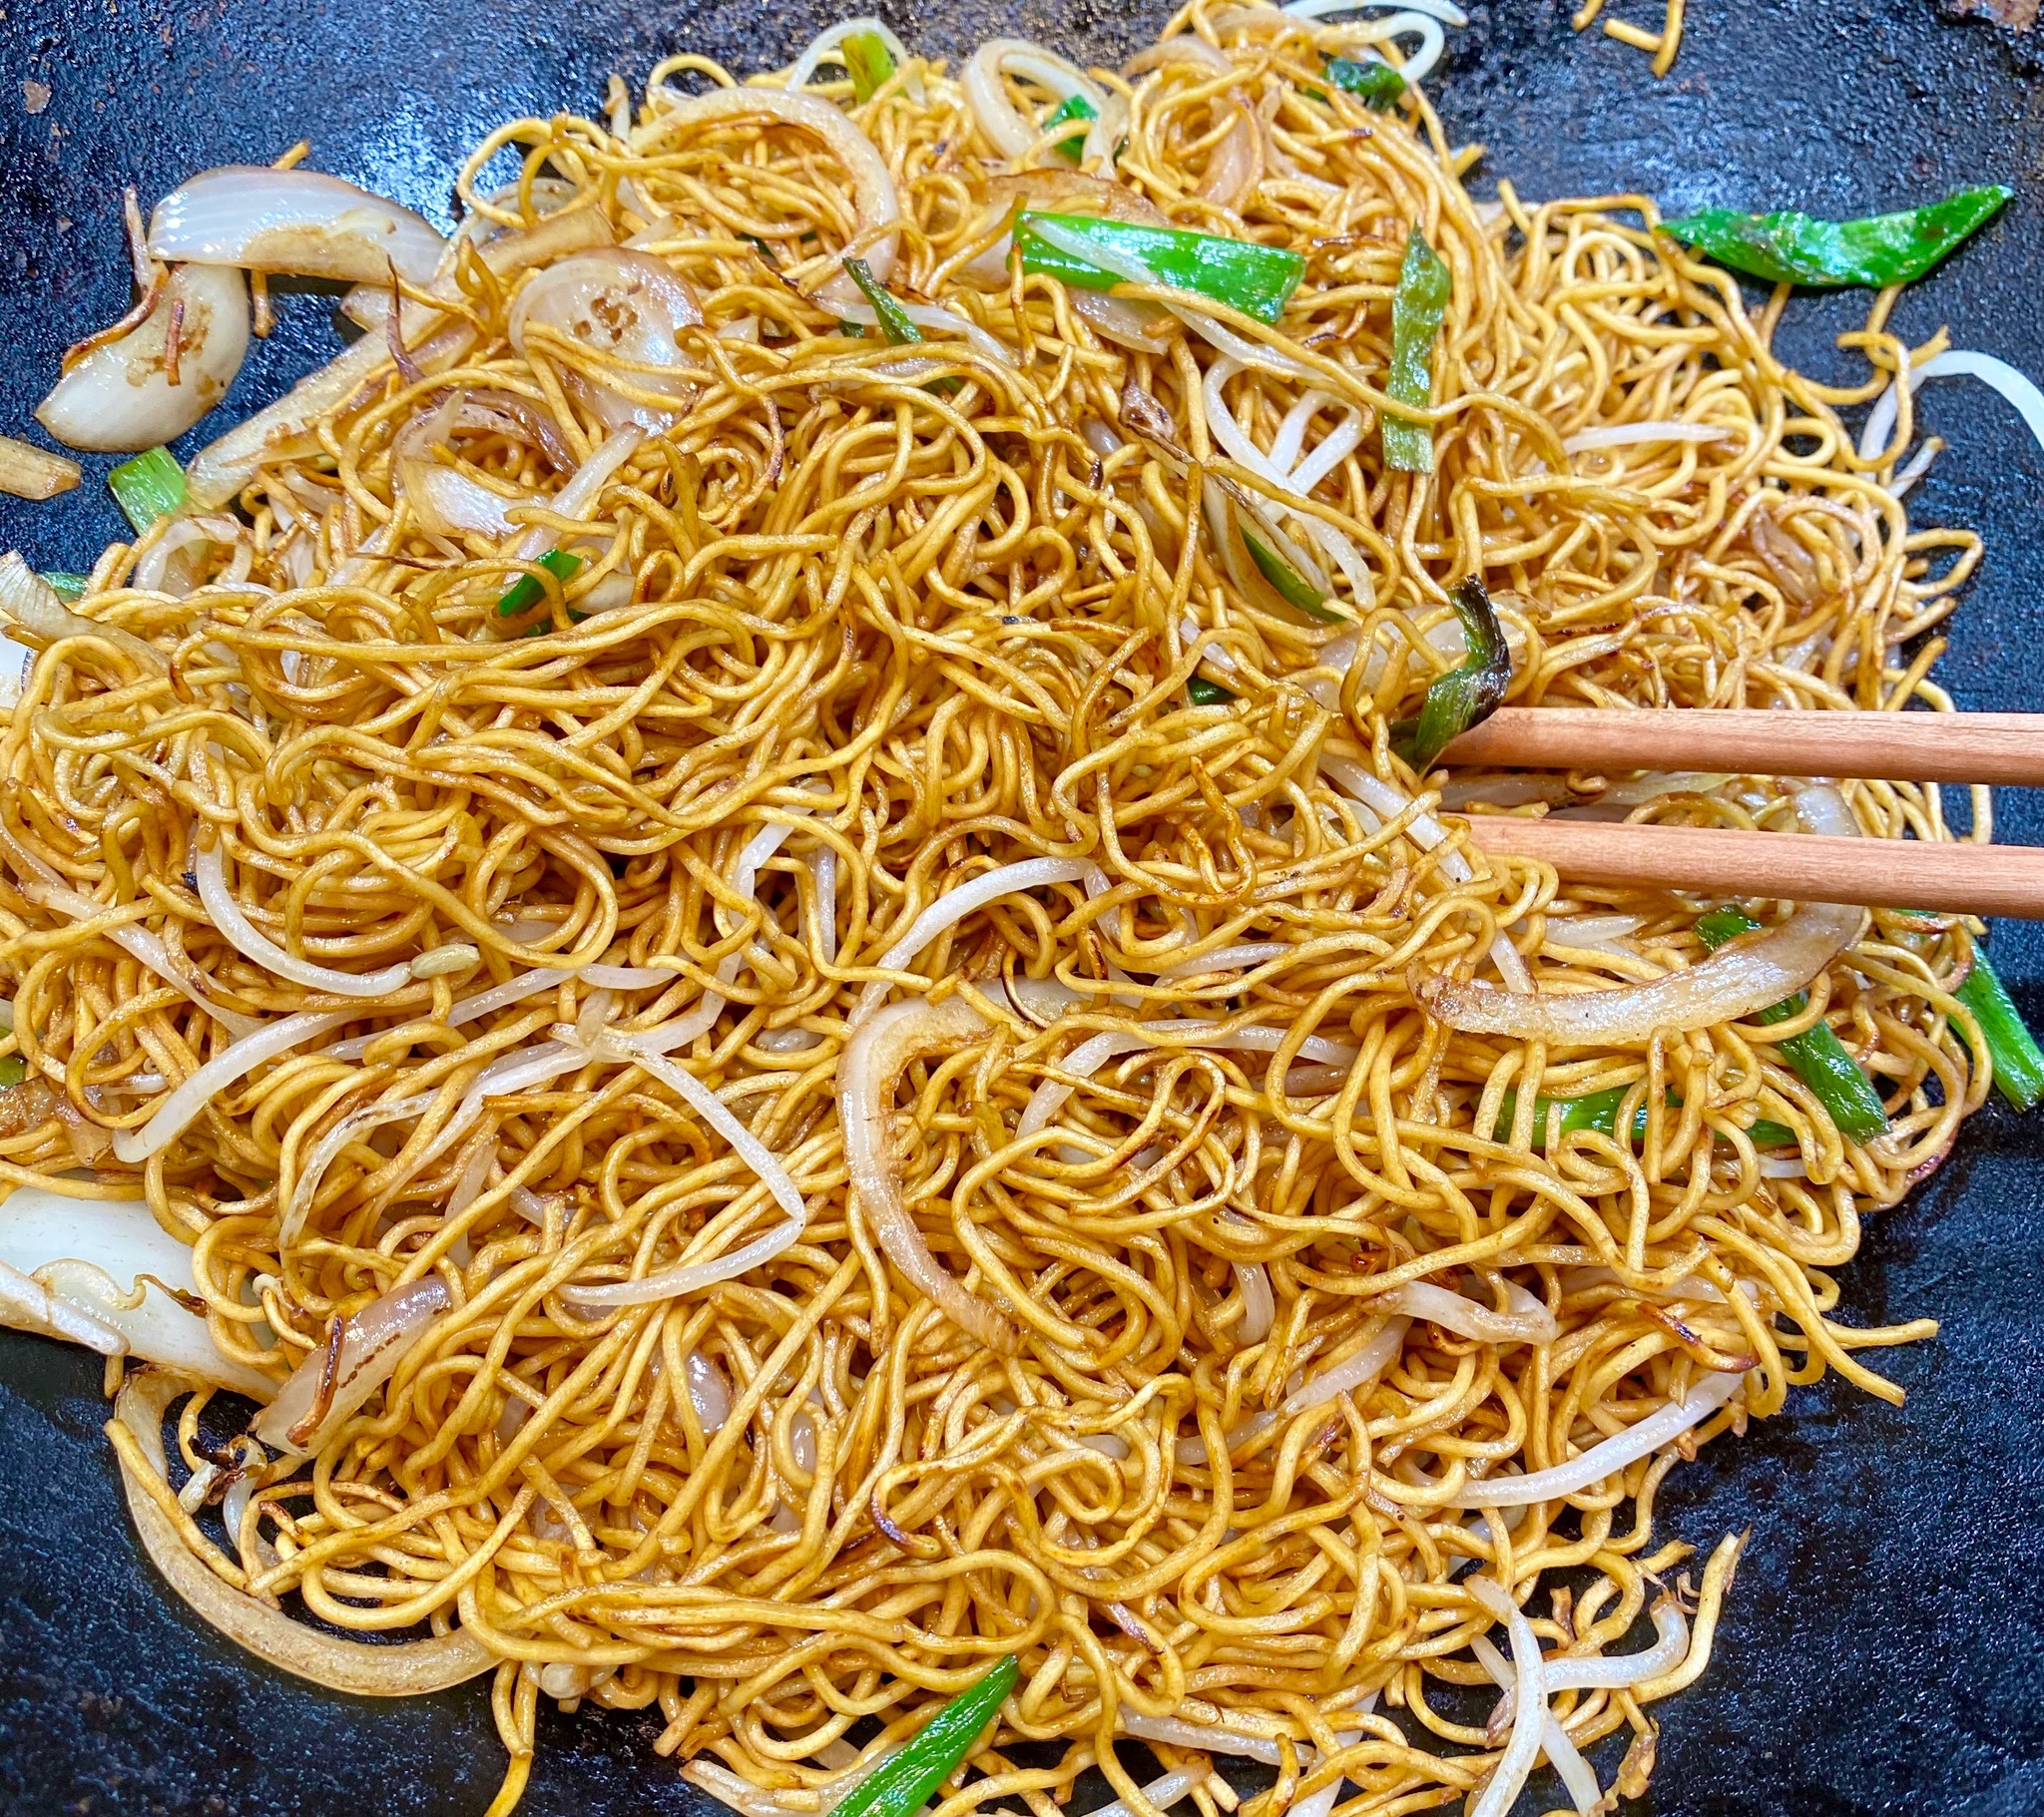
- Add sautéed onion-green onion mixture and mix to incorporate and heat onions. No more than a minute.
- Add sauce by pouring it in a steady stream all over the noodles and vegetables. Keep moving and lifting the noodles to coat with sauce and release any extra moisture.
- Add sesame oil and continue to mix and separate the noodles for another 1-2 minutes. If the noodles seem to be getting a bit soft, take them off the heat. The oil does not need to cook.
- Taste the noodles, season with salt and dark soy if the noodles are not dark enough. Add white pepper if you like.
- Garnish julienned green onion shreds. Serve immediately.