Tag: pork belly

Mille-Feuille Nabe Blooming Delish!

Mille-Feuille Nabe Blooming Delish!

I’m sure I saw this on TikTok or an IG Reel.  It looked so delicious I knew I was going to make it, if not today, definitely tomorrow.  Jackpot, making it today, why?  As most of you know I stop at grocery stores so often I should be classified as a professional food shopper.  The beauty of being a “pro”, I generally have the ingredients for any dish found on the internet, lol. This is a perfect example, a quick perusal of my kitchen and I was in business.

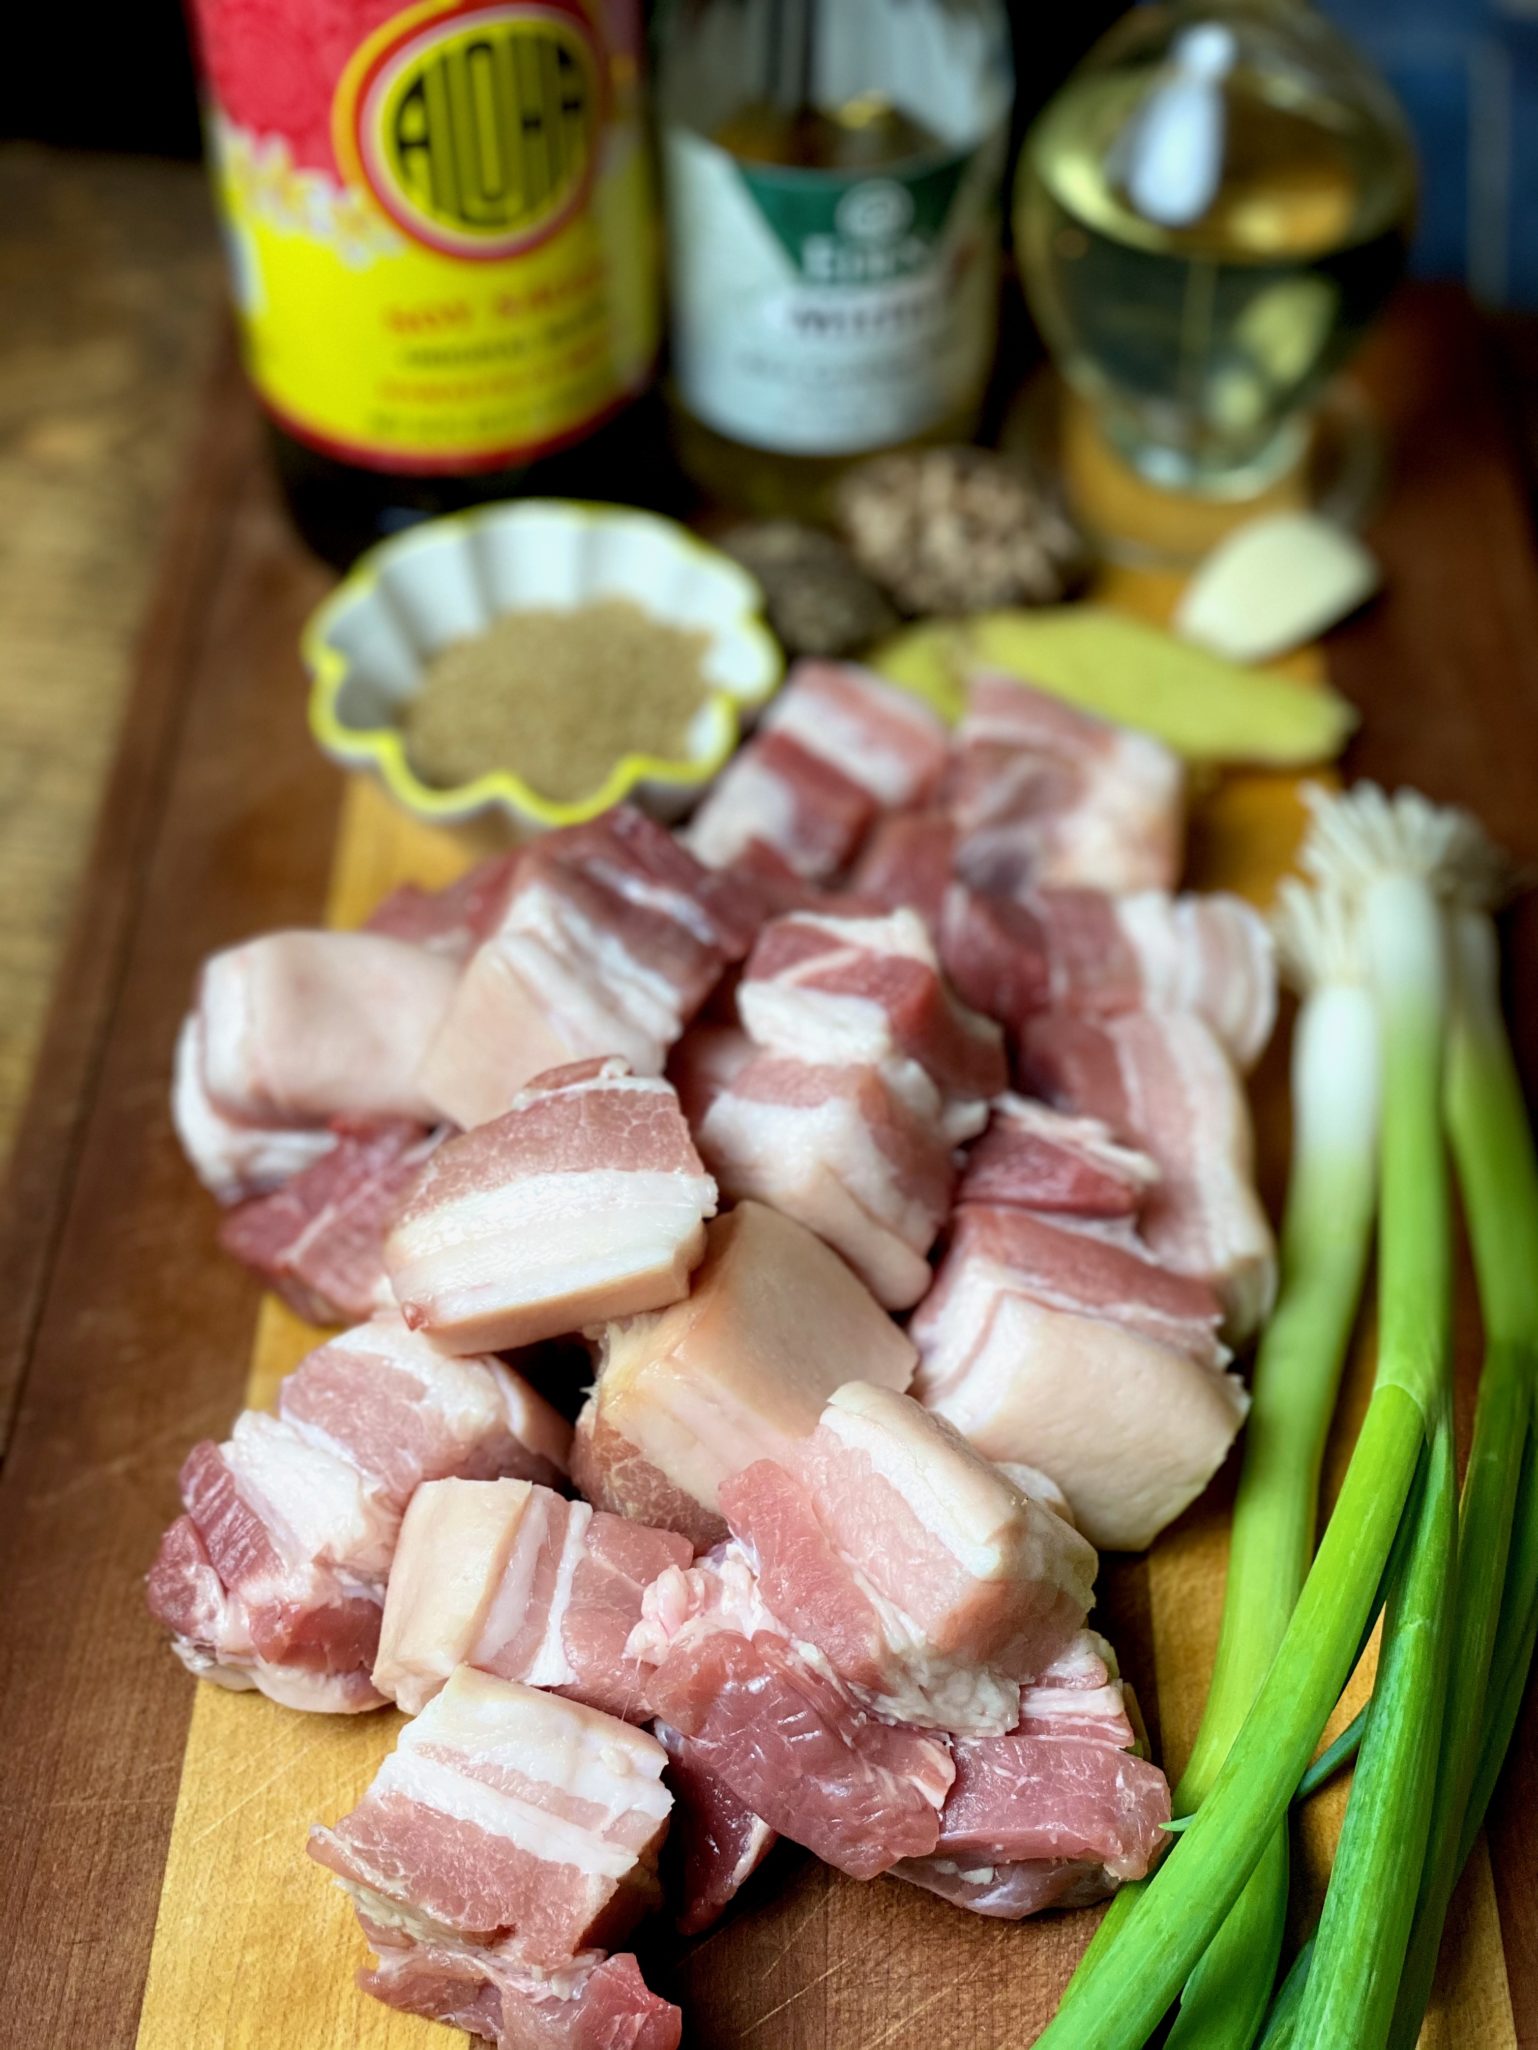
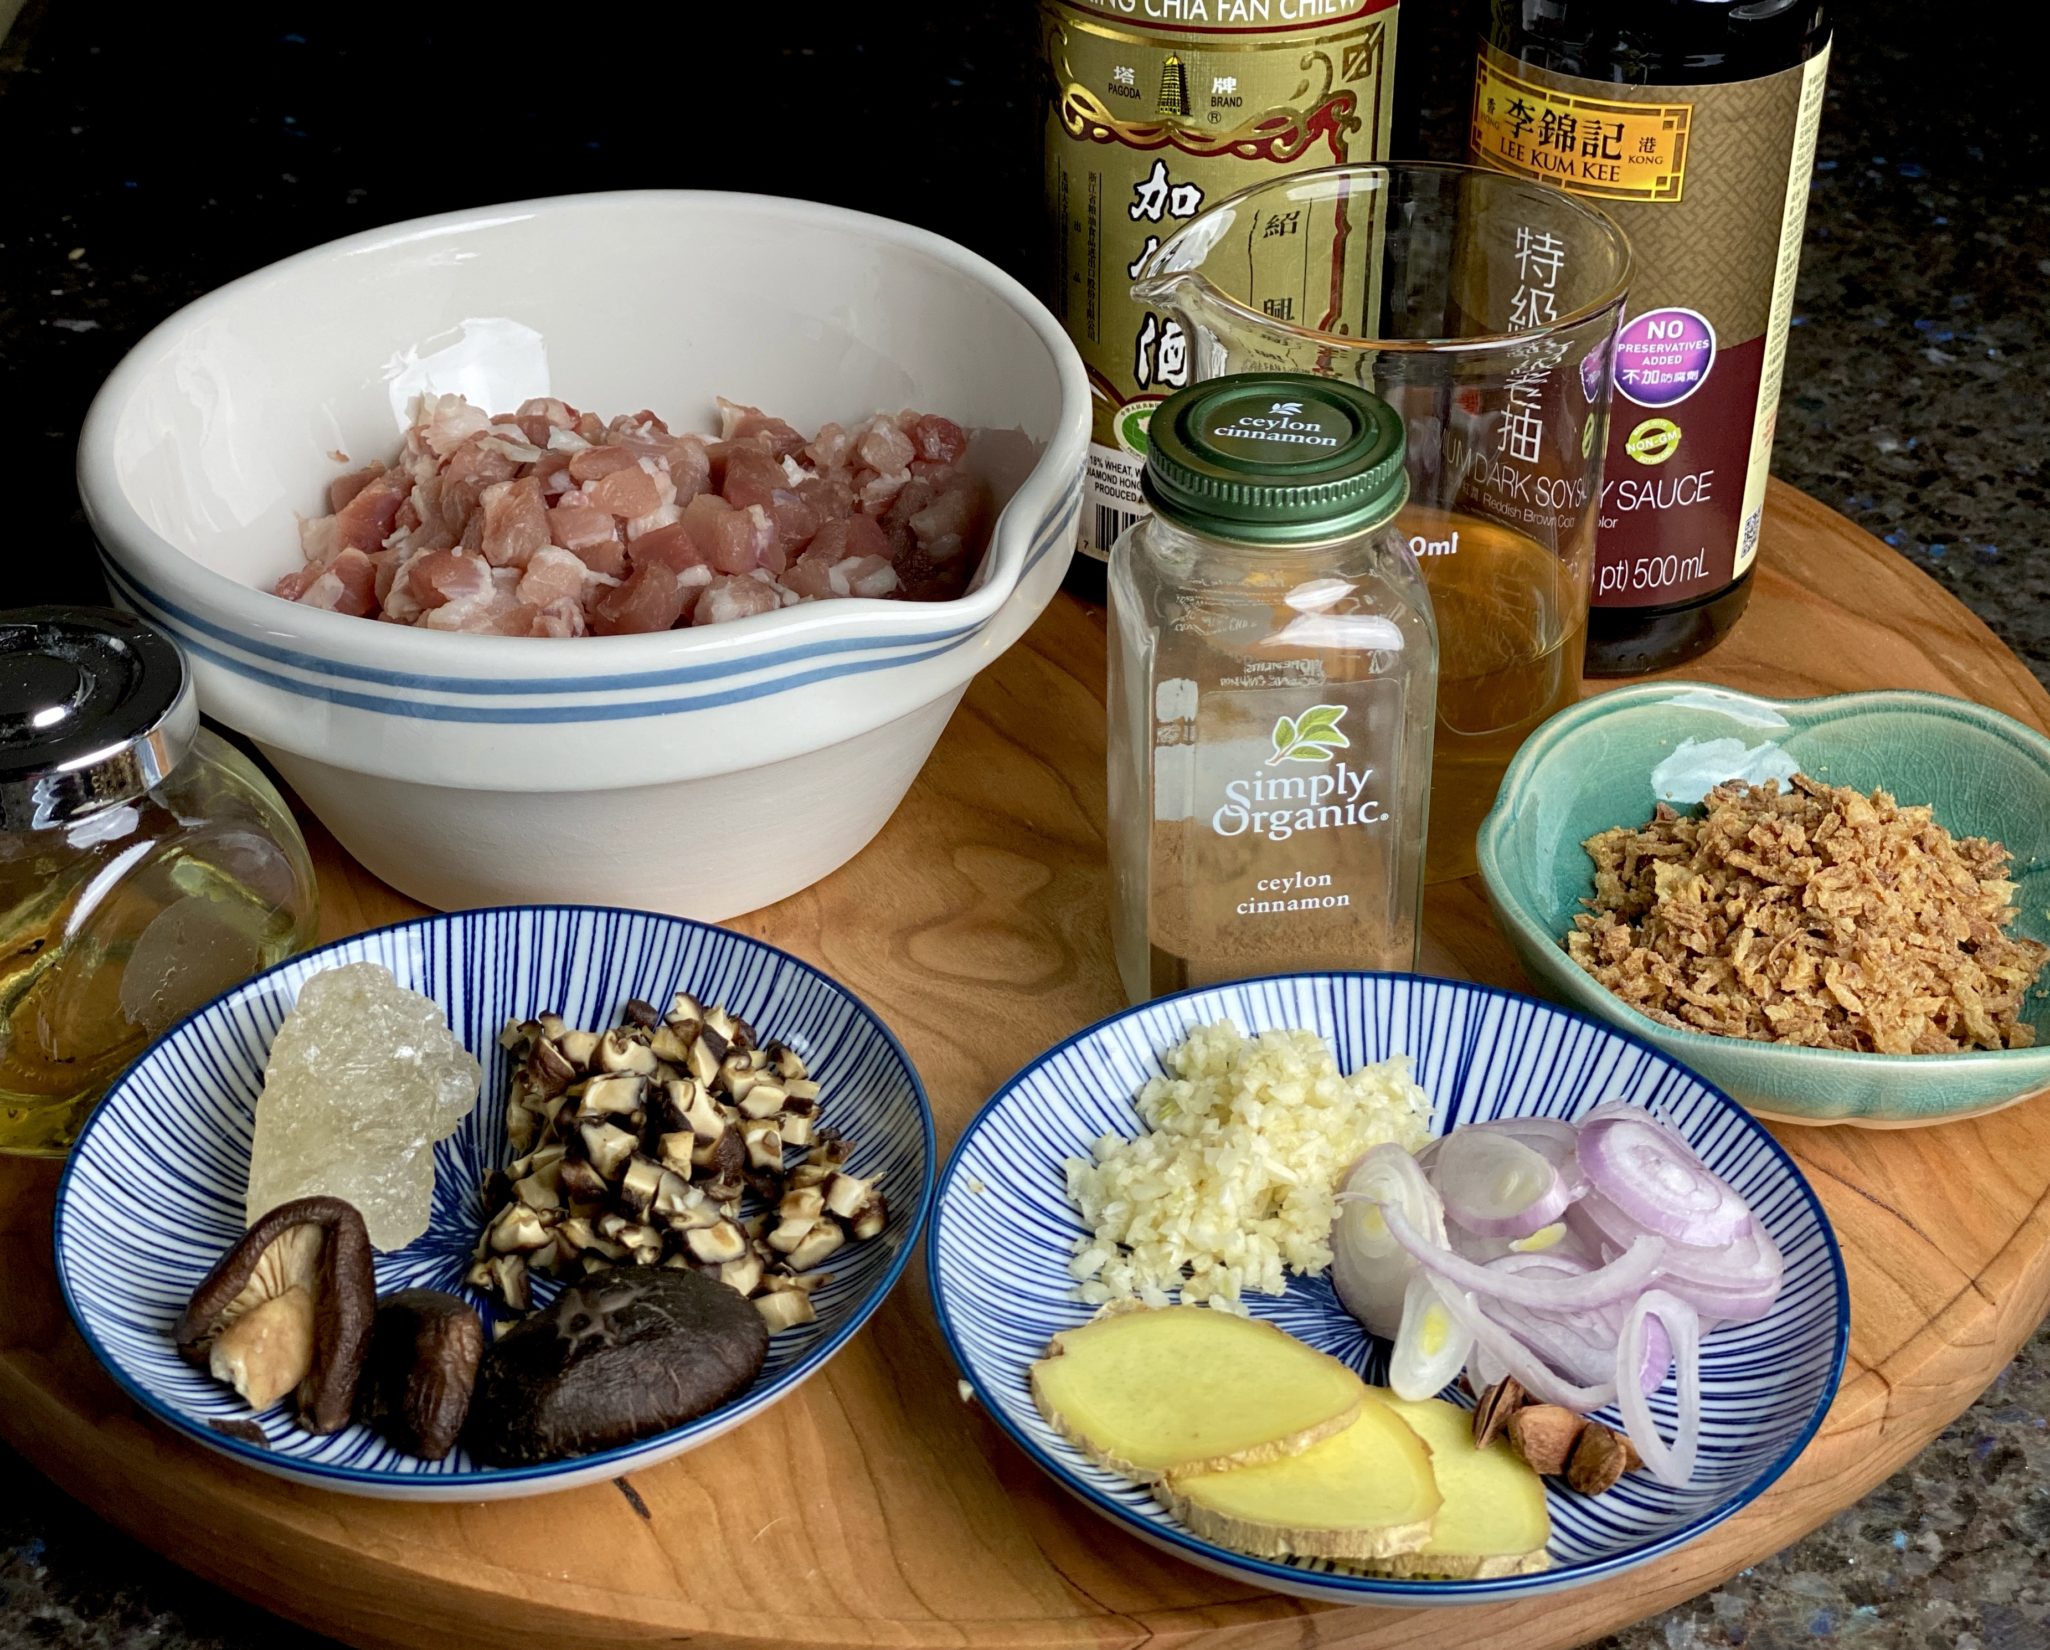
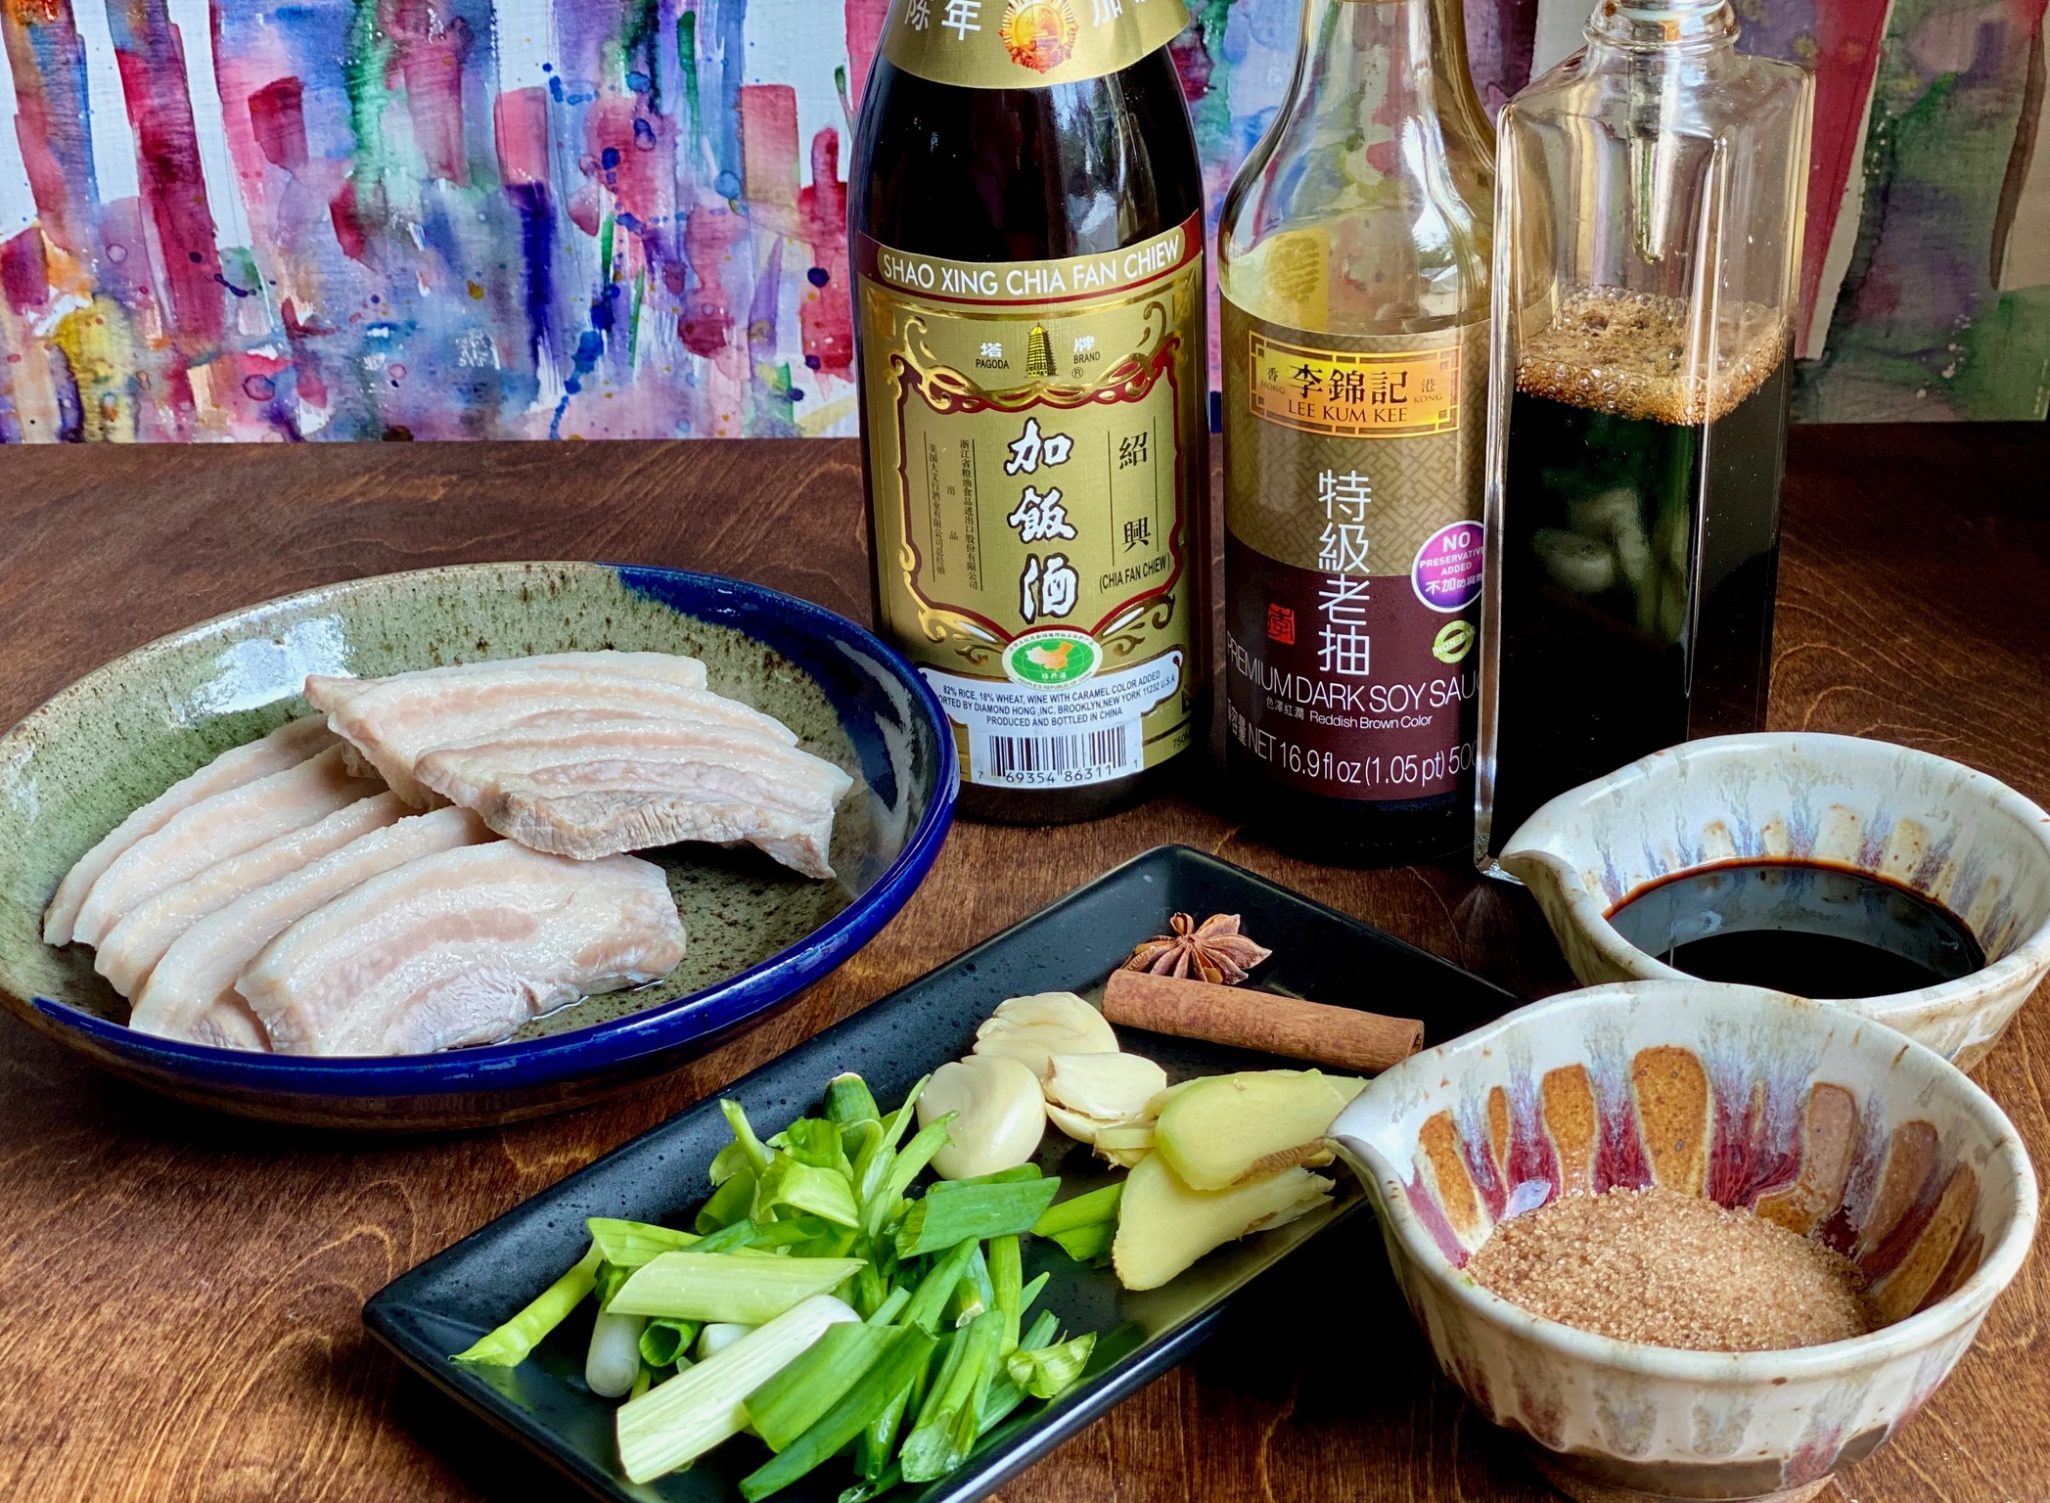
Thinly sliced pork – check. From Asian Market. I always keep some in the freezer, ALWAYS.

Napa Cabbage – check. Picked up a head at the Hankook Market last weekend, cause you never know when you might need some cabbage…

Mushrooms – check. My fridge qualifies as a certified mushroom farm most days.

Dashi or Broth – check. I pulled my bottle of Shiro Dashi from the fridge. Literally concentrated dashi that you dilute with water, VERY good, stupid easy. For a detailed run down check out Guide to Shiro Dashi

OR I can make Dashi with packets from Japan that I keep squirreled away in my pantry.  Again, VERY good,  a bit more work than Shiro Dashi, still super easy.

I won’t go into making my own Dashi cause that would defeat the dinner in a few minutes mantra.

Korean radish – check.  You don’t need it, I just happen to have some so why not?

Staples – check.  Green onions, sesame seeds, soy sauce S&P…Hello? Would not be caught dead without any of these.

Pot- check. Y’all know I didn’t have to list this but I wanted to mention the tiny Donabe I bought at the MANRESA fire sale.  It gives me JOY.  I also used my gorgeous Staub pot for the family-sized version.

So that’s it, all you need to make this scrumptious, perfect when it is cold and wet outside, quick and easy dish.

Let’s Goooooo!

This is super easy, TRUST ME.  Have I ever steered you wrong?  Start with your Napa Cabbage, wash and separate the leaves.  You only need 1 head of cabbage and you won’t use all of it, unless you are feeding a cast of thousands, then you’re on your own.

Take out your thinly sliced pork, I’m sure this would work with beef also. Use any protein cut for Shabu Shabu or Hot Pot.  I know you are thinking, 🤔, can I use bacon?  My inclination is no, as much as I love bacon, the flavor may be too much and too salty for this Nabe.  But if you are feeling bold, try it.  Definitely REPORT BACK to me!

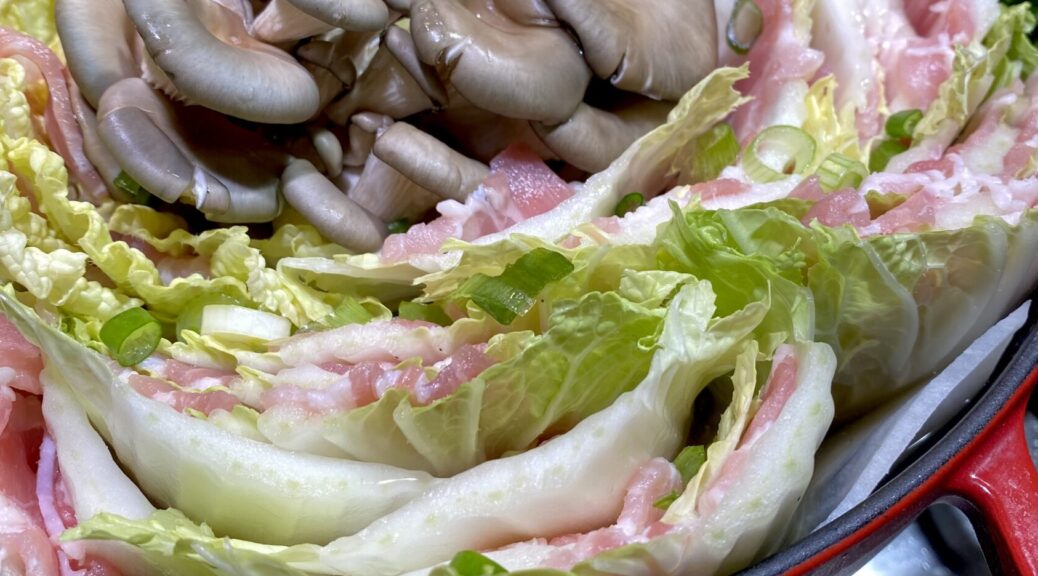
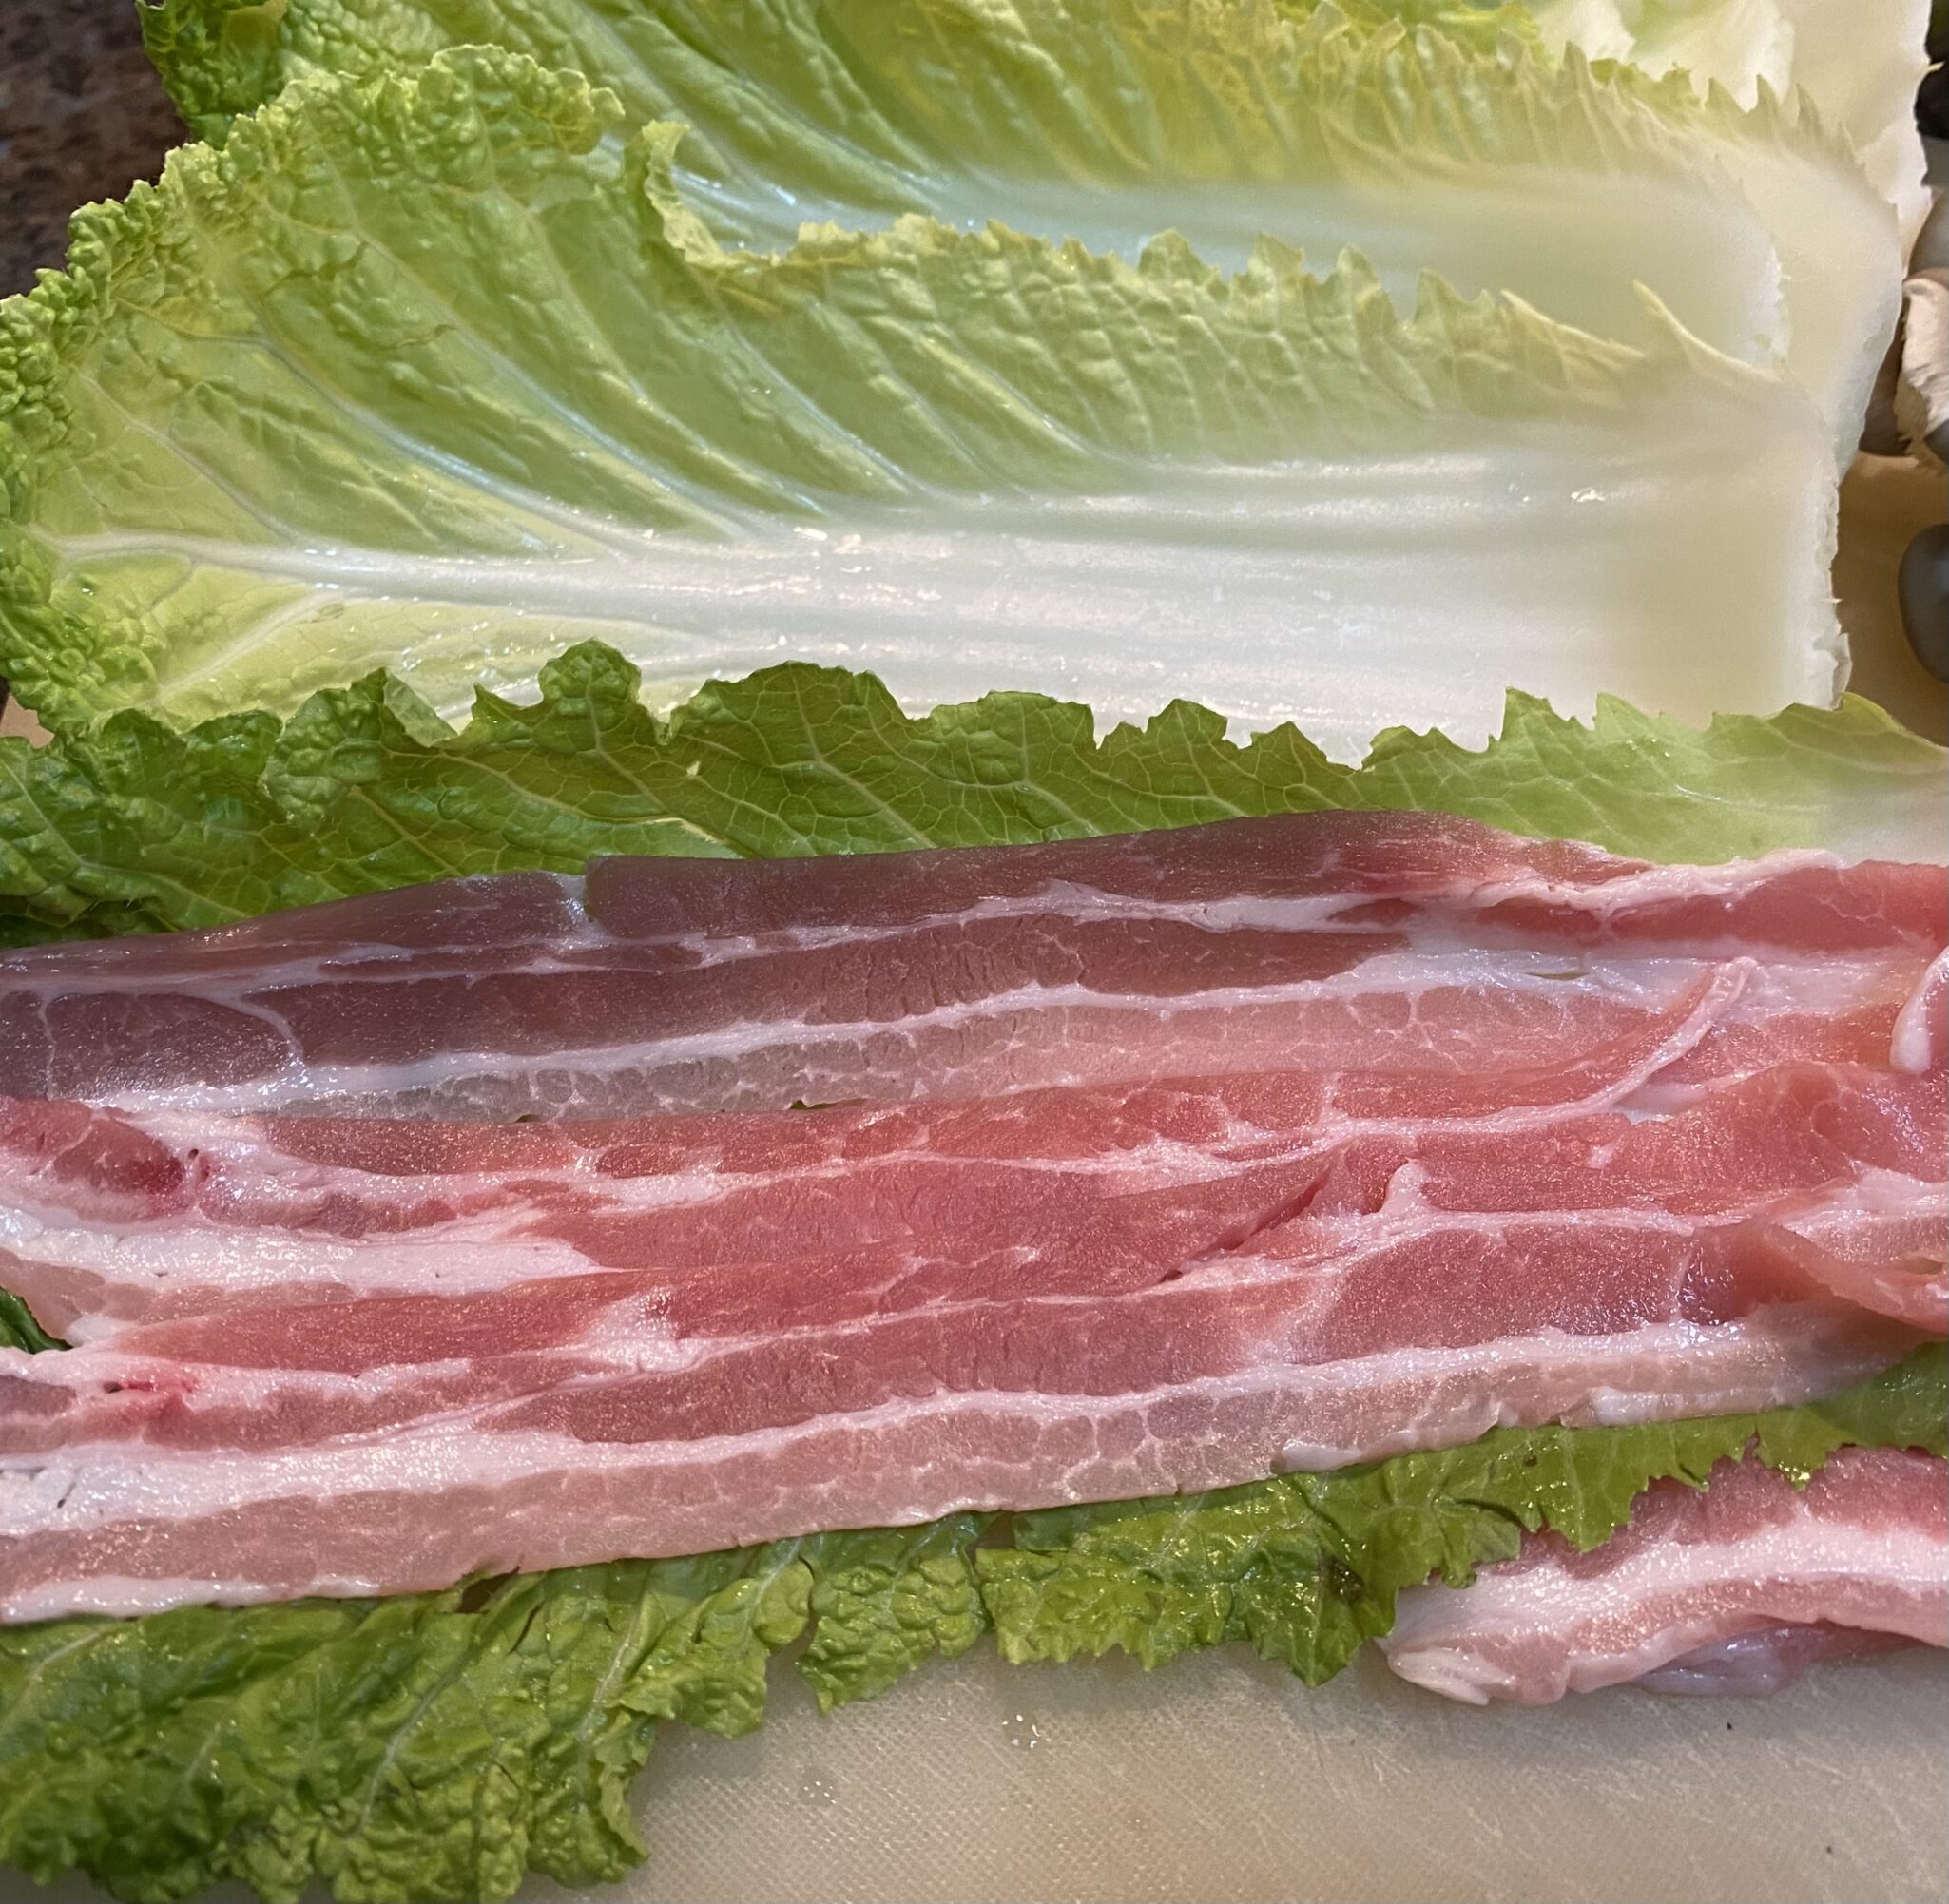
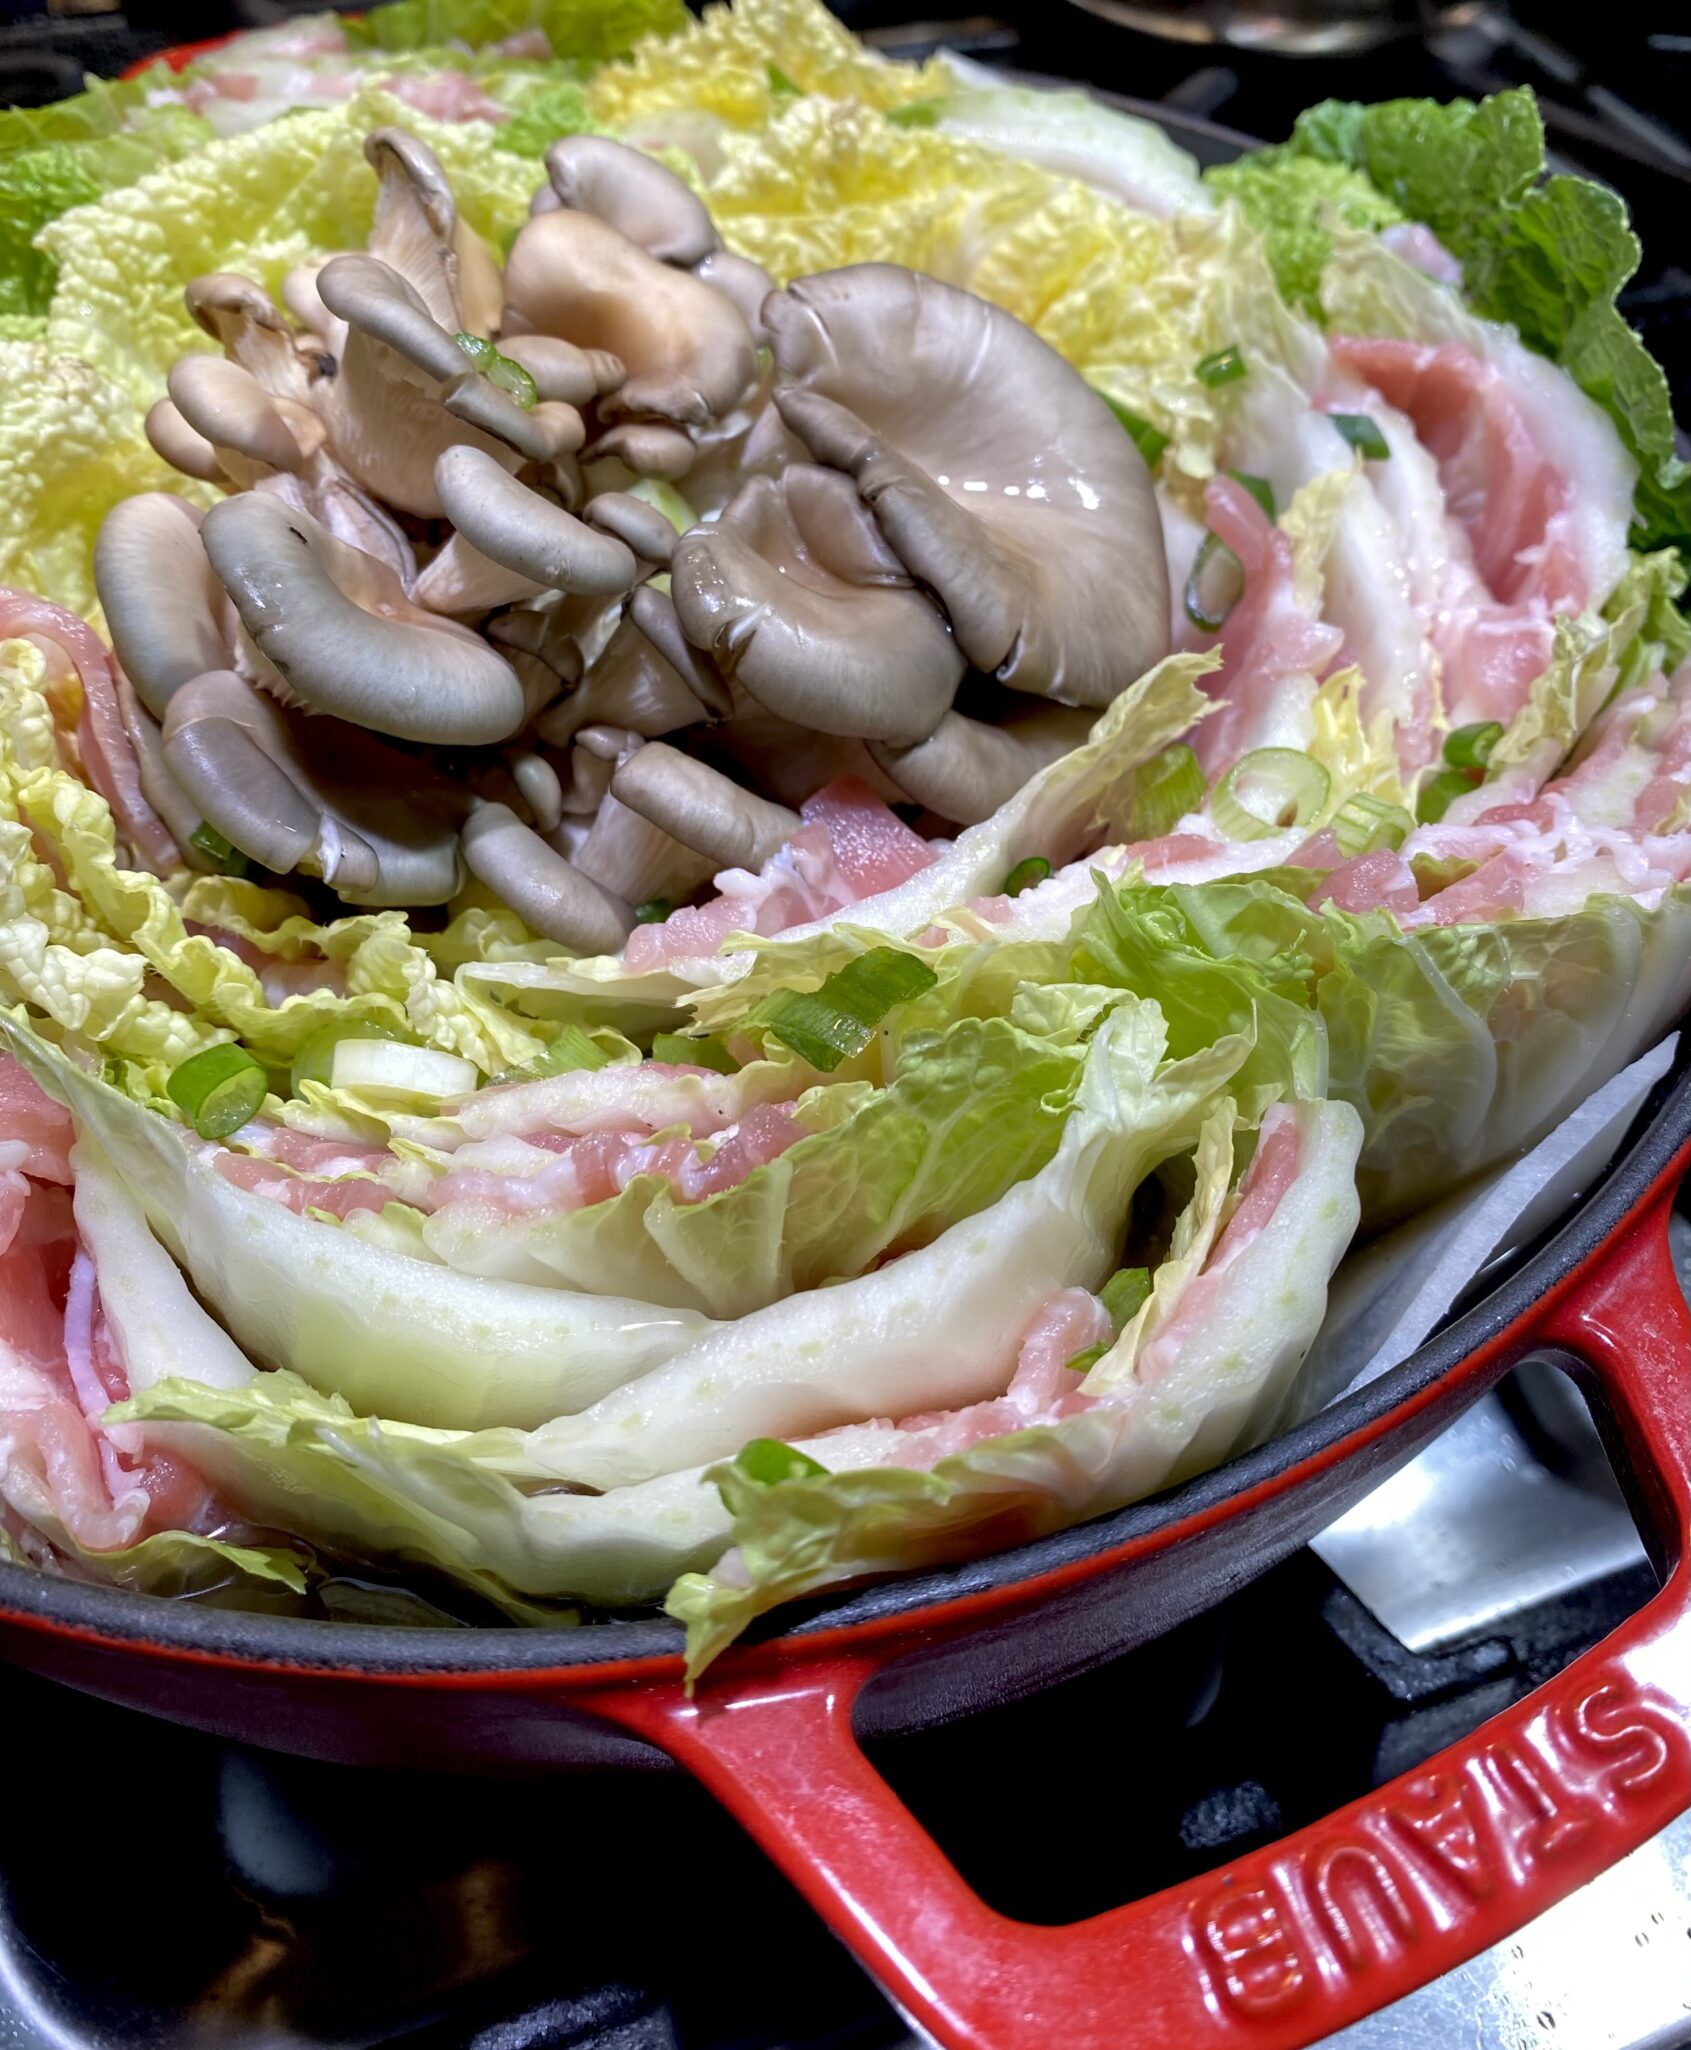
Layer the pork on the Napa Cabbage, covering most of the leaf. Continue layering until you have a stack of 3-4 leaves.  Cut crosswise into 3-4 sections, and try to match it up with your pot.  Each section should be about 2-2.5 inches in height. Definitely not taller as you will need to cover the pot when cooking.  Continue circling the pot with the sections until you reach the center.  I finished with slices of Korean radish surrounding a bouquet of mushrooms smack dab in the middle, totally optional.  But so good.

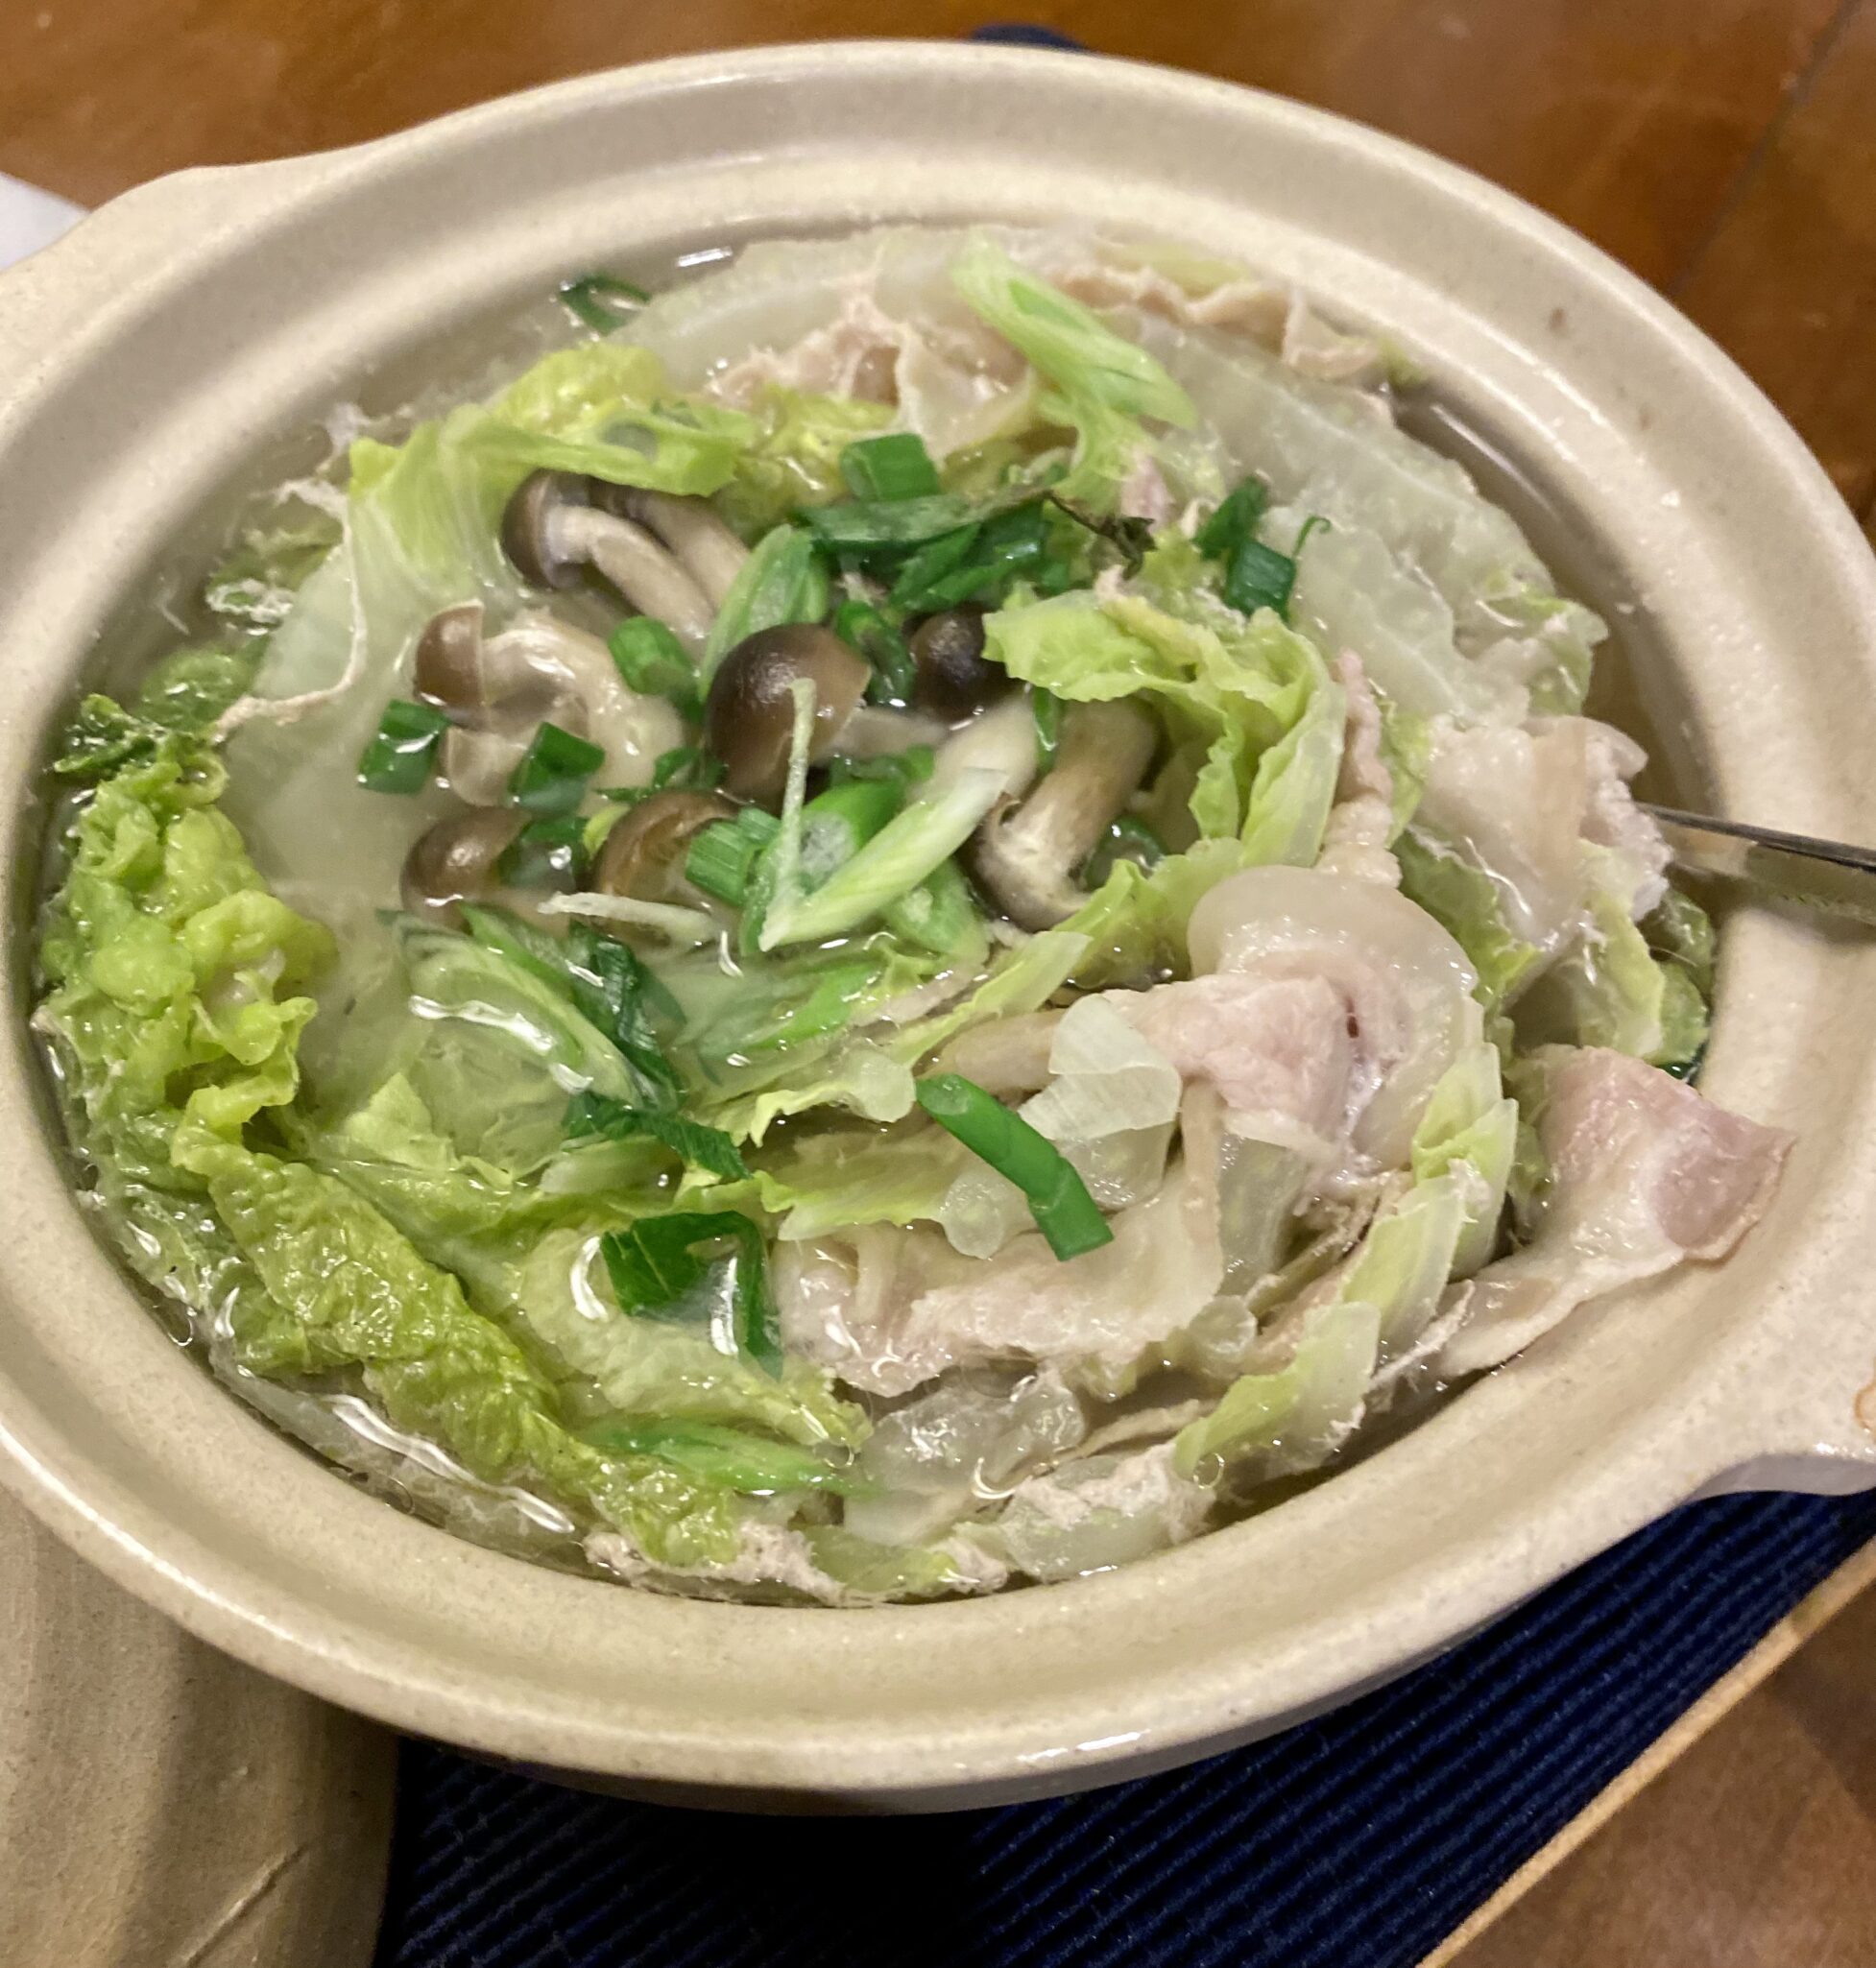
To finish, add dashi to barely cover the cabbage, cover, and cook.  Cook for 10-15 minutes, the beauty of thinly sliced meats and veggies.  Dinner is served! BACK to the dashi.  Dashi is a fish-based stock, used in many yummy Japanese dishes.  There are ka-zillions of ways to make dashi.  Skip the traditional and time-consuming options.  I use Shiro-dashi alot.  It is a seasoned concentrated fish stock that comes in a bottle.  Dilute Shiro-dashi 10-12 fold for soups and casseroles, EASY PEASY.  The other way is using dashi packets, kind of like tea bags.  Drop it into the water, let it sit to infuse the flavor from the packets, and presto dunzo.

CAVEAT: The Shiro Dashi is seasoned with salt and sugar while the dashi packets just impart the fish flavor.  You will need to add salt or soy if using the dashi packets.

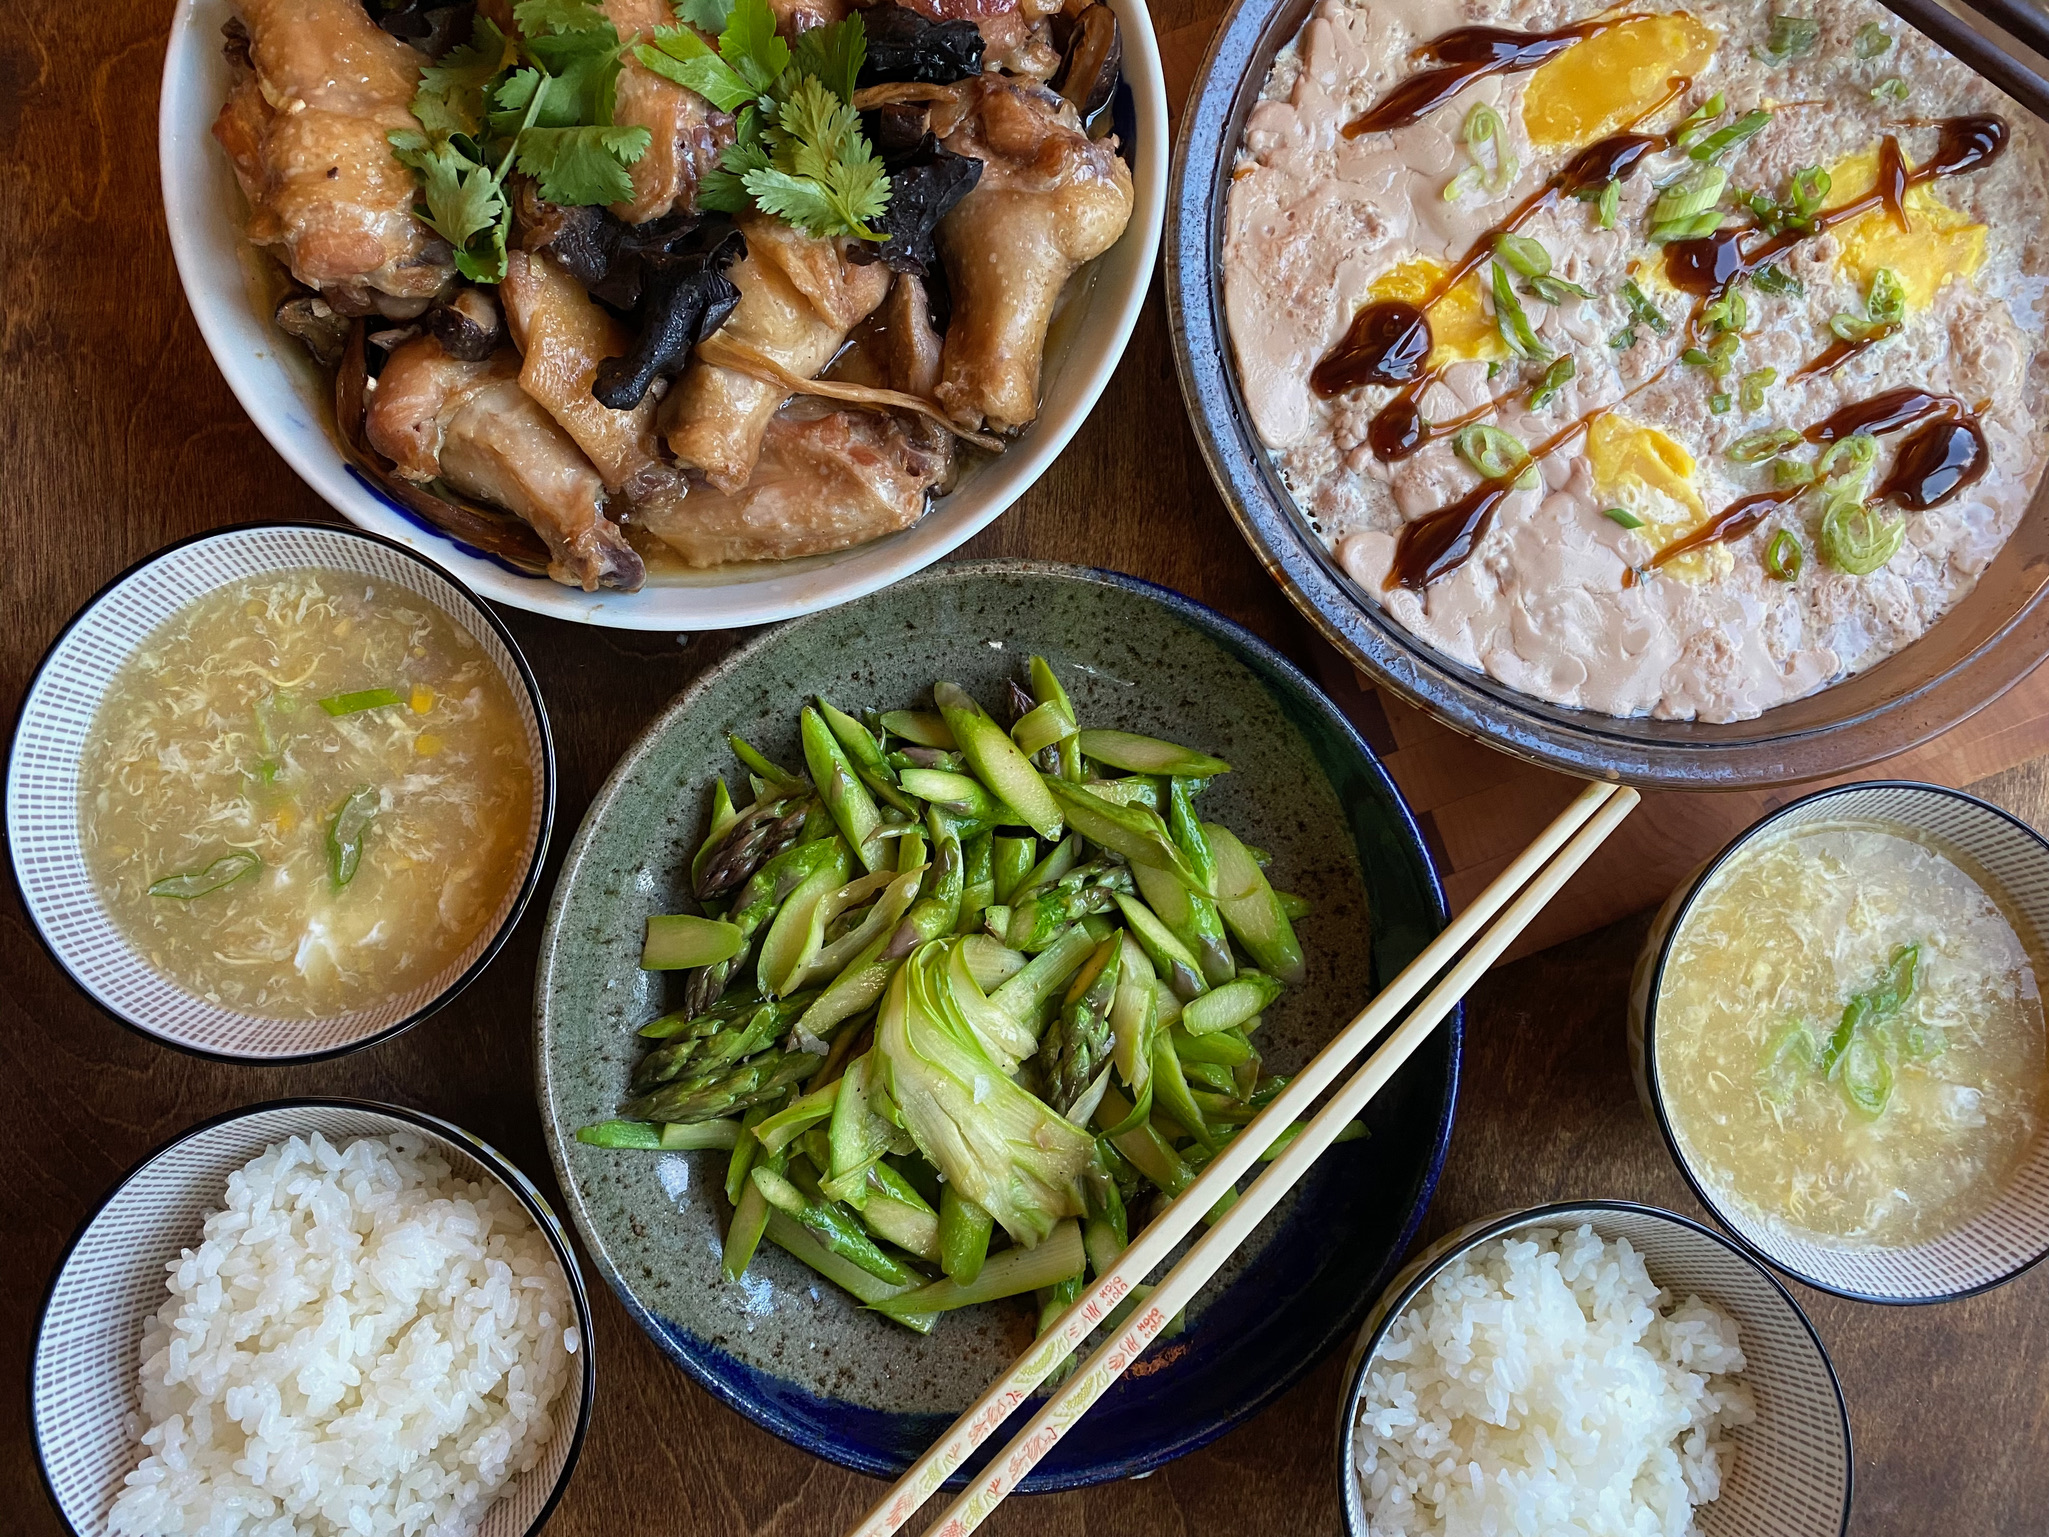
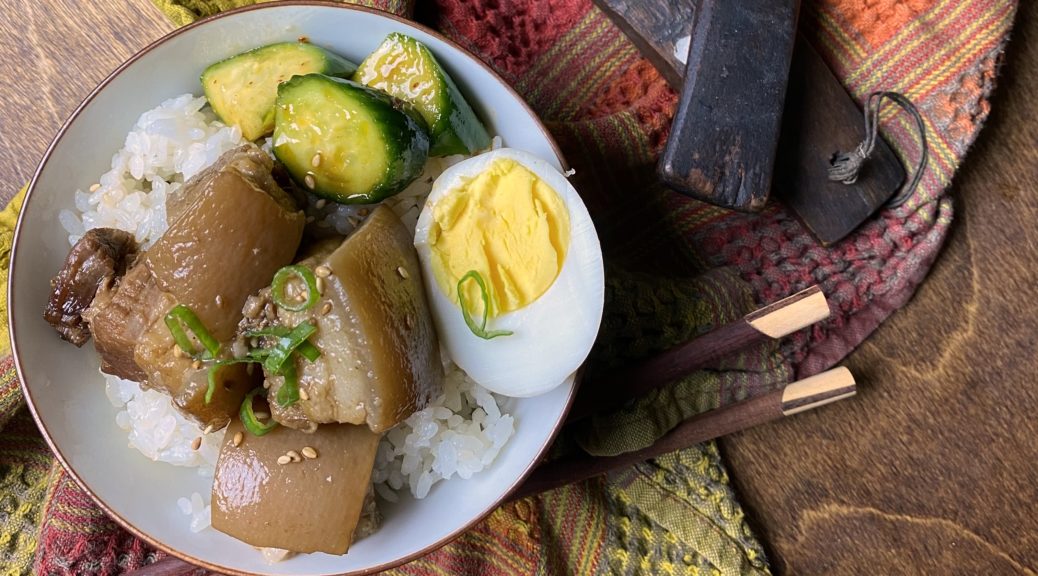
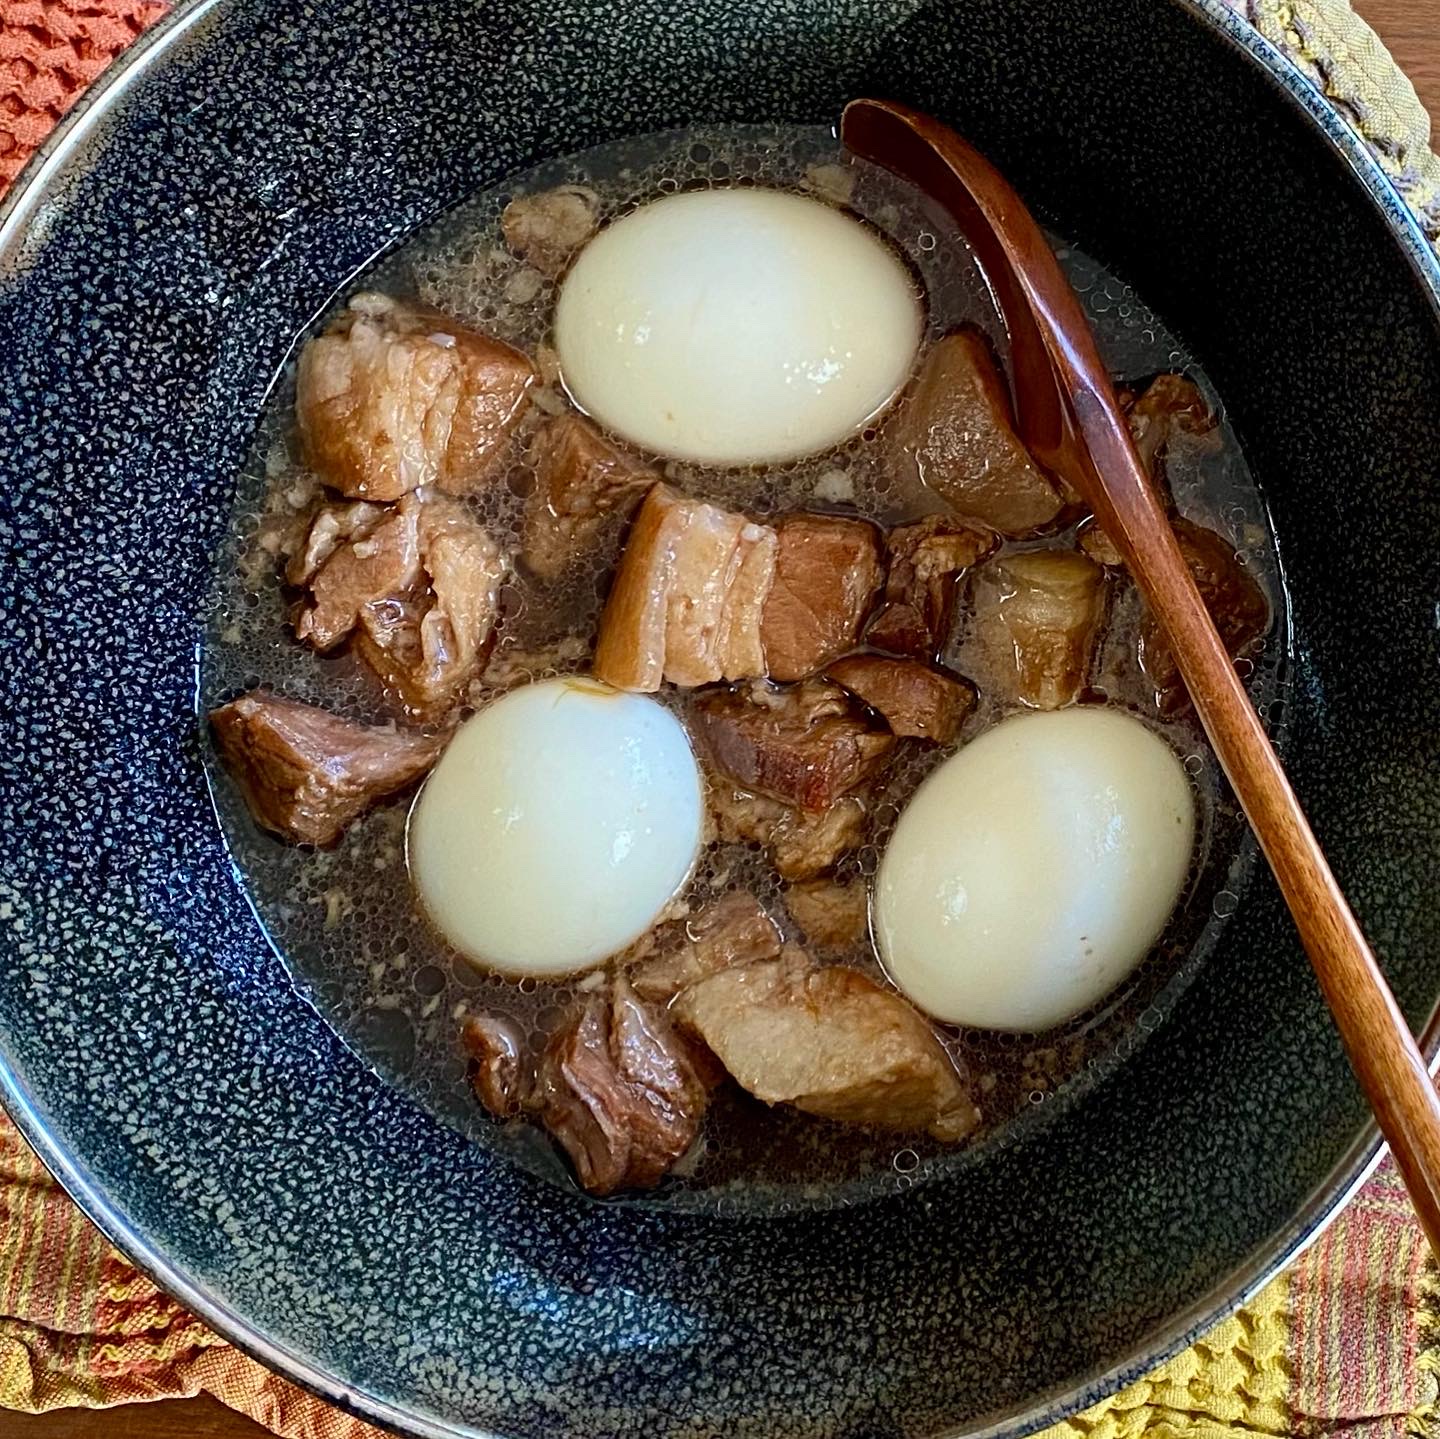
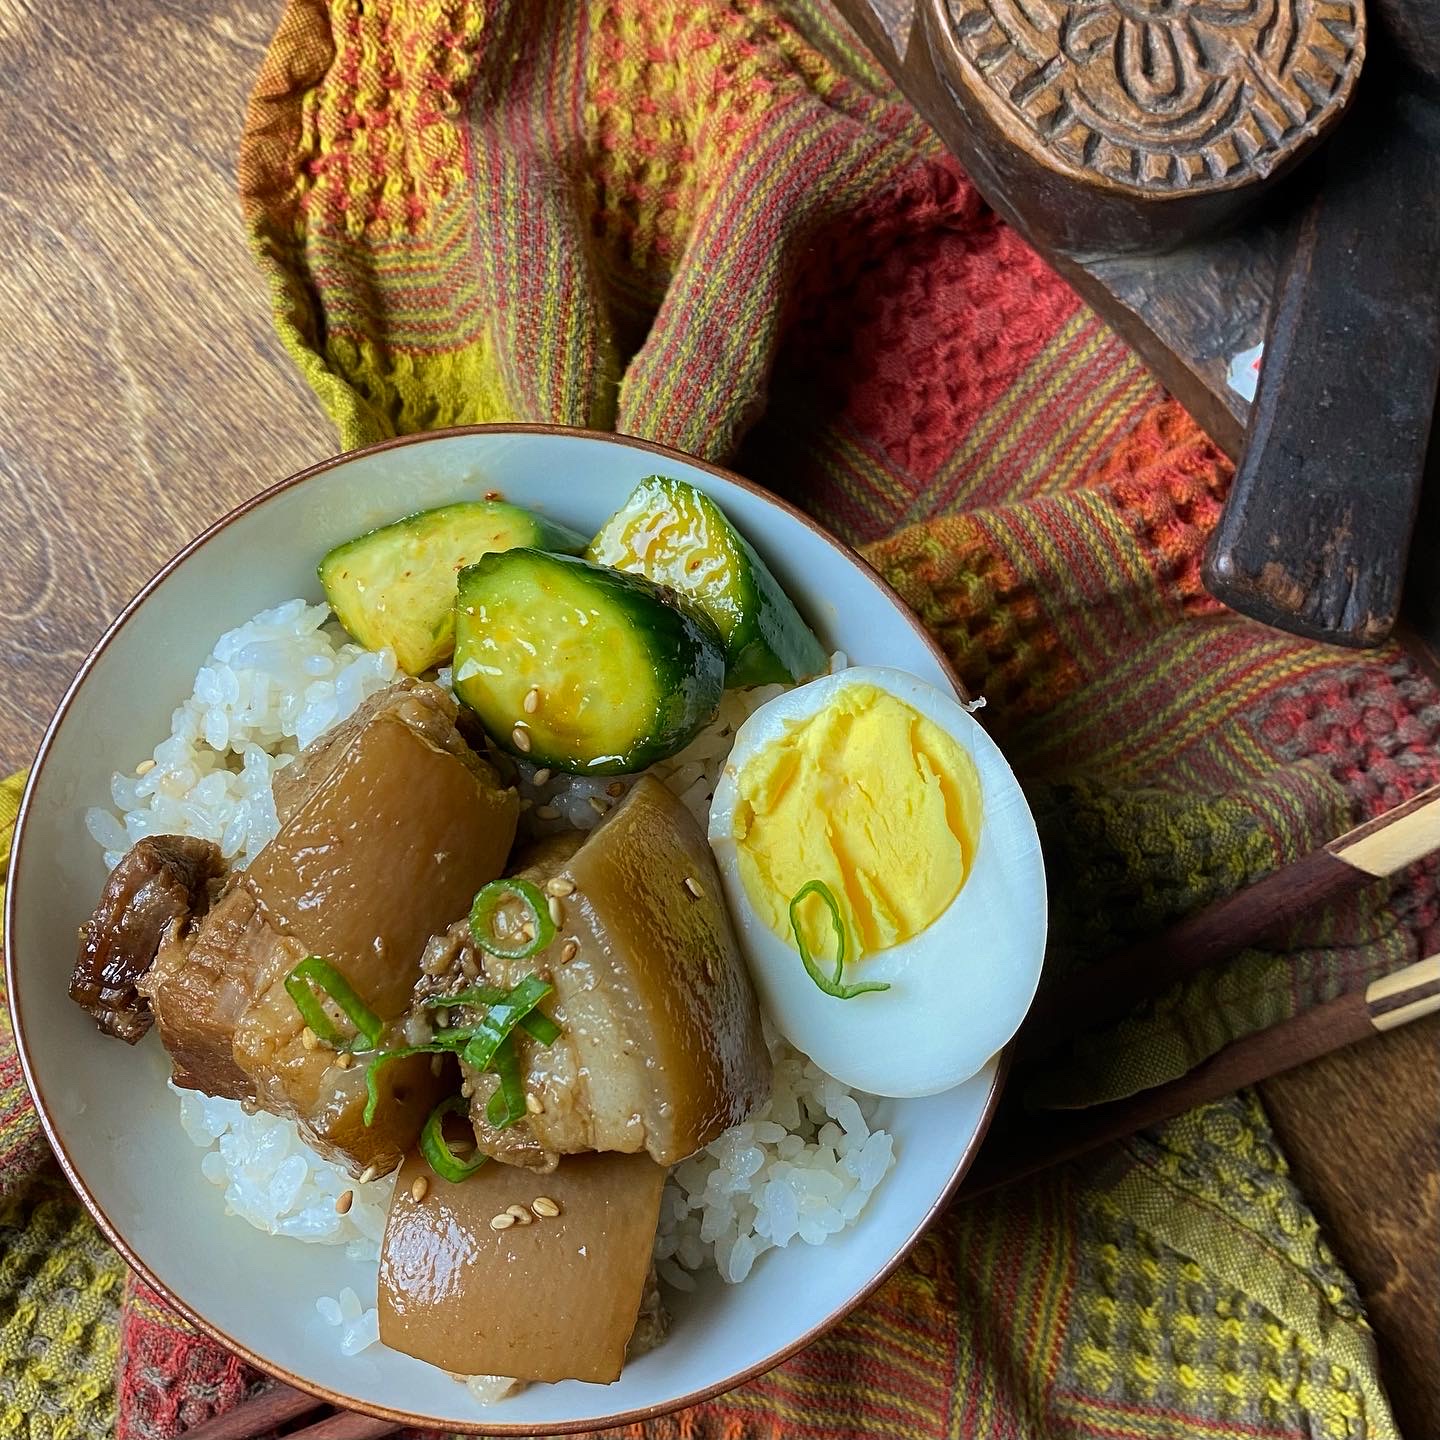
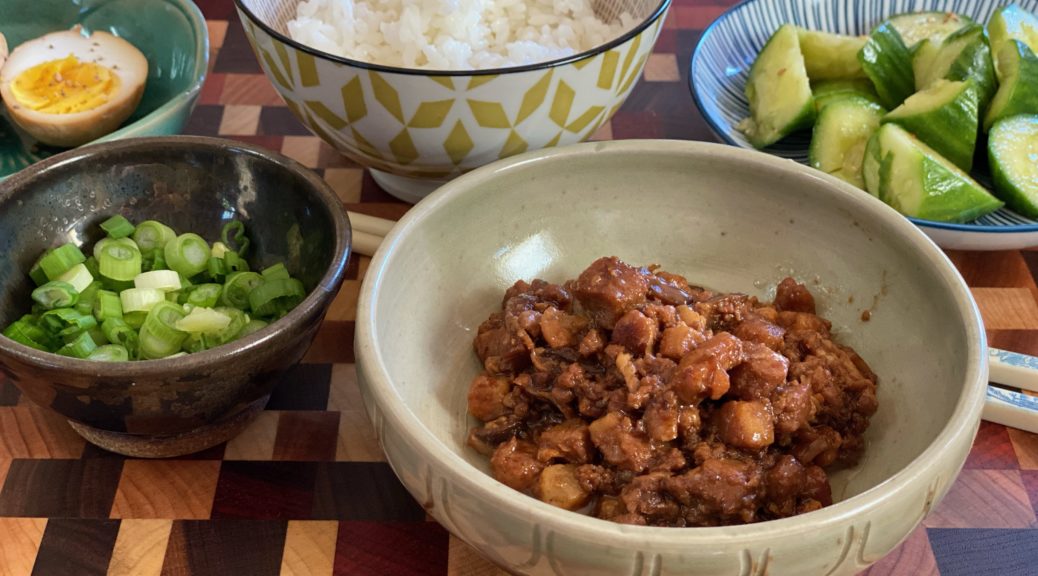
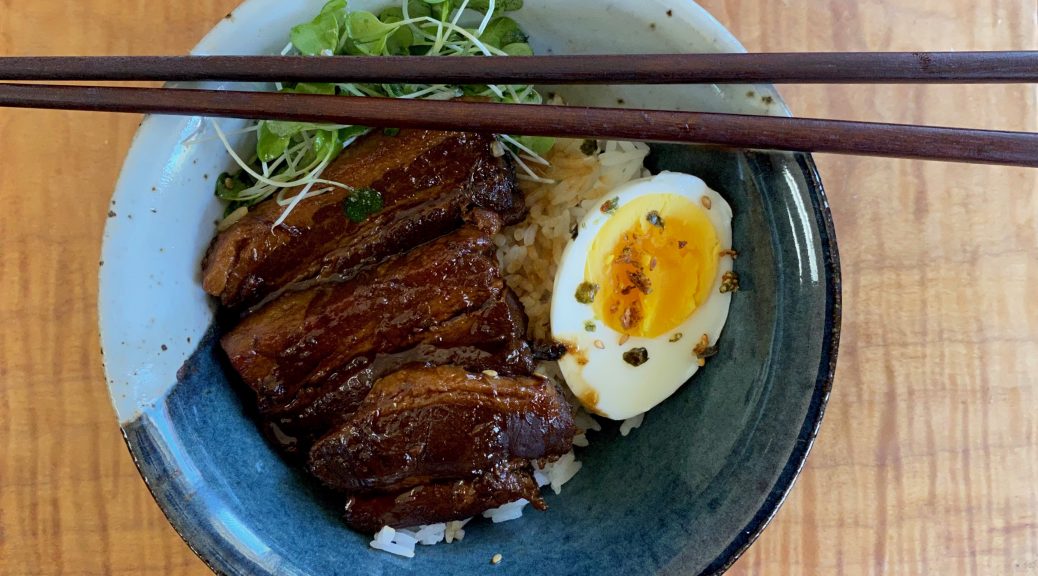
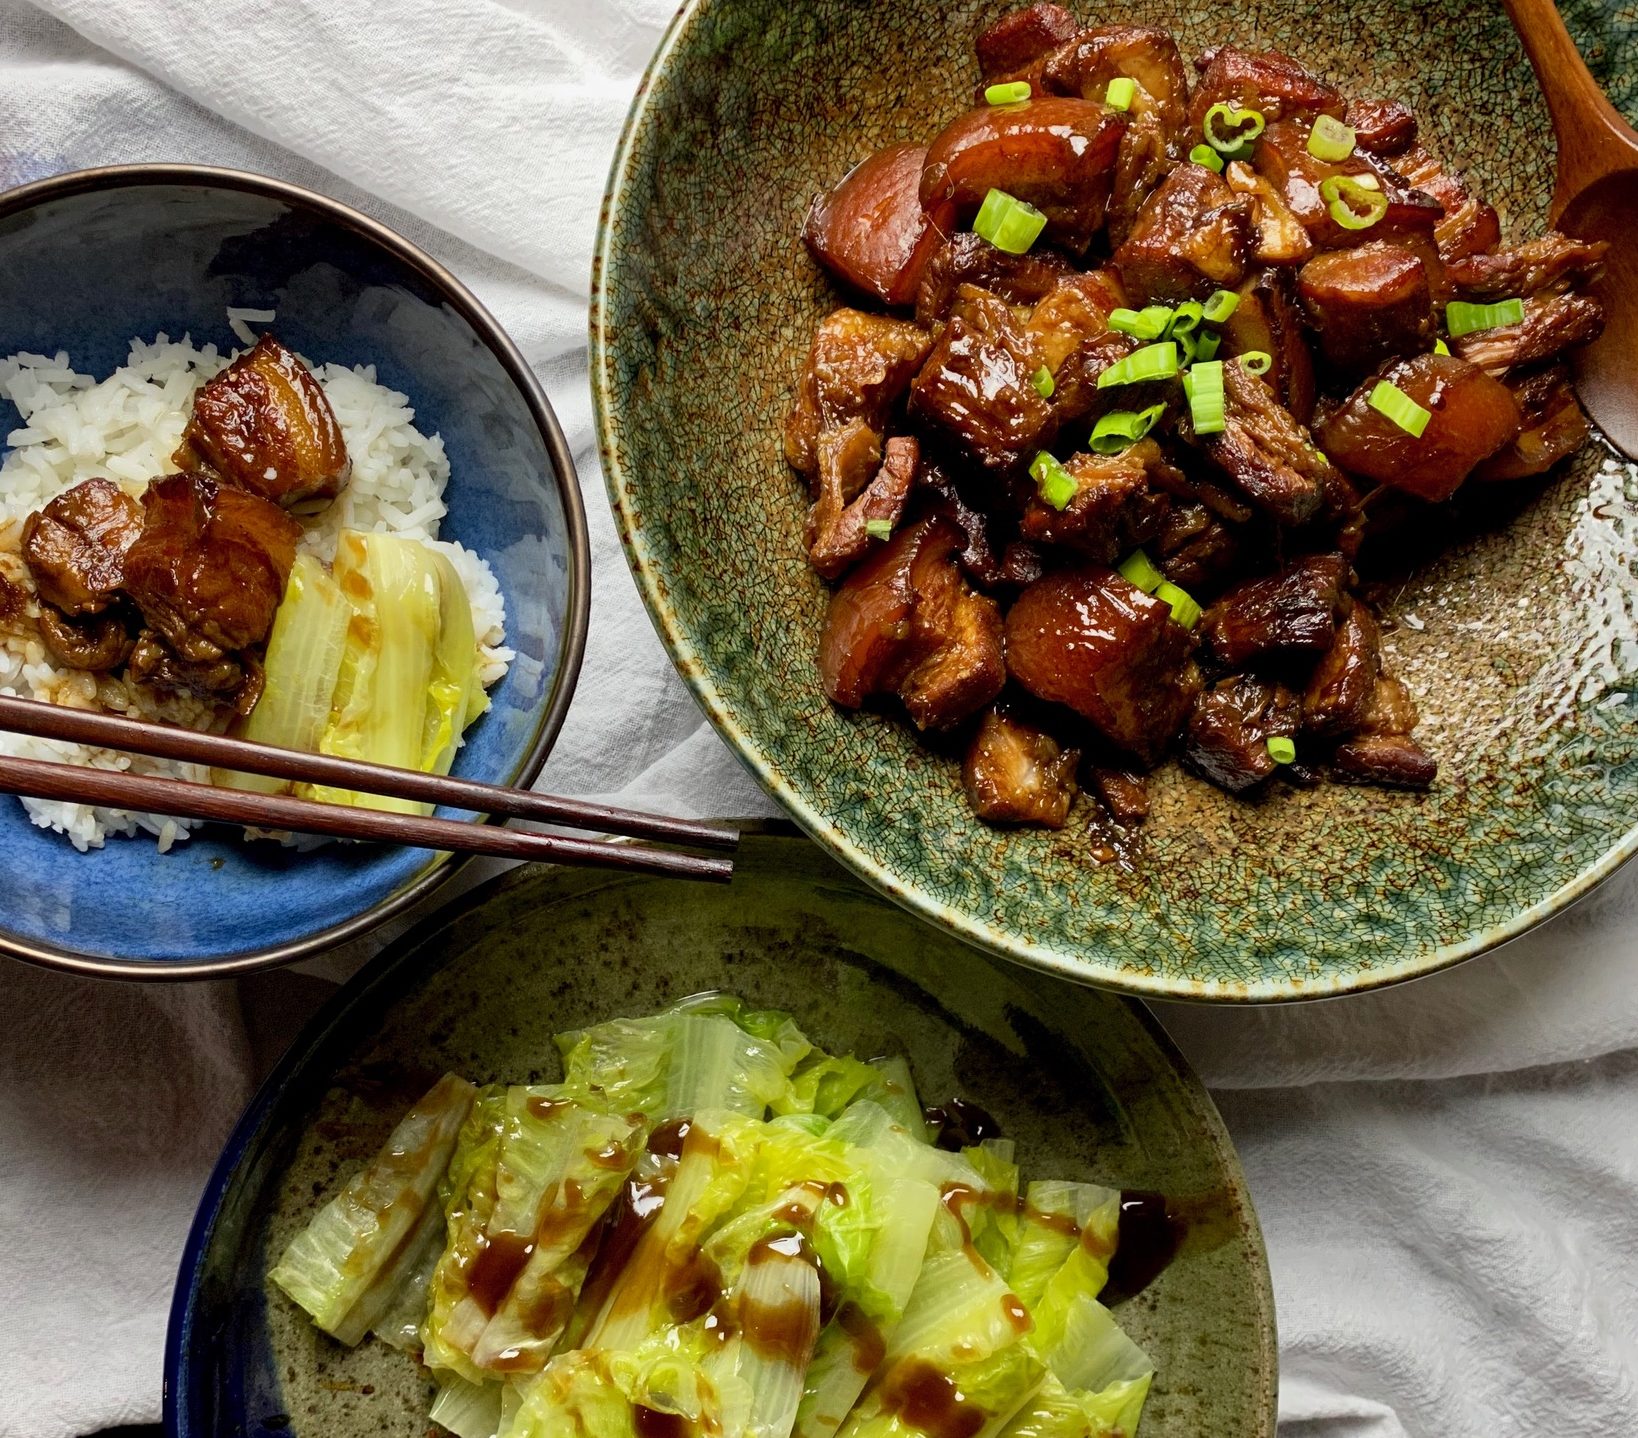
That’s it!  Serve it up with bowls of hot, steaming rice, maybe fry an egg or if you have Mayak Eggs or Ramen Eggs yum. So damn delicious it is criminal.  Or use the flavorful broth on a lovely bowl of noodles, udon noodles would be delicious.

A Picture is Worth a Thousand Words…check out my Instagram for a reel on Mille-Feuille Nabe!

Mille-Feuille Nabe

Japanese Hotpot with Napa Cabbage and thinly sliced pork belly arranged in layers in a donabe of casserole. Dashi serves as the cooking broth that turns this into a lovely dish perfect for cold weather.
Course dinner, Main Course, One dish meals
Cuisine Asian, Japanese
Keyword Mille-feuille, napa cabbage, Pork Belly, soup
Prep Time 15 minutes
Cook Time 15 minutes

Equipment

  • 1 donabe If you have one, but any casserole type pot will do.

Ingredients

Main Ingredients

  • 1 napa cabbage medium size should do
  • 1-1½ lb Thinly sliced pork belly smaller the pot the less you will need
  • 1 bunch of mushrooms like enoki or shiimeji optional
  • Korean Radish or Daikon, thinly sliced optional

Dashi

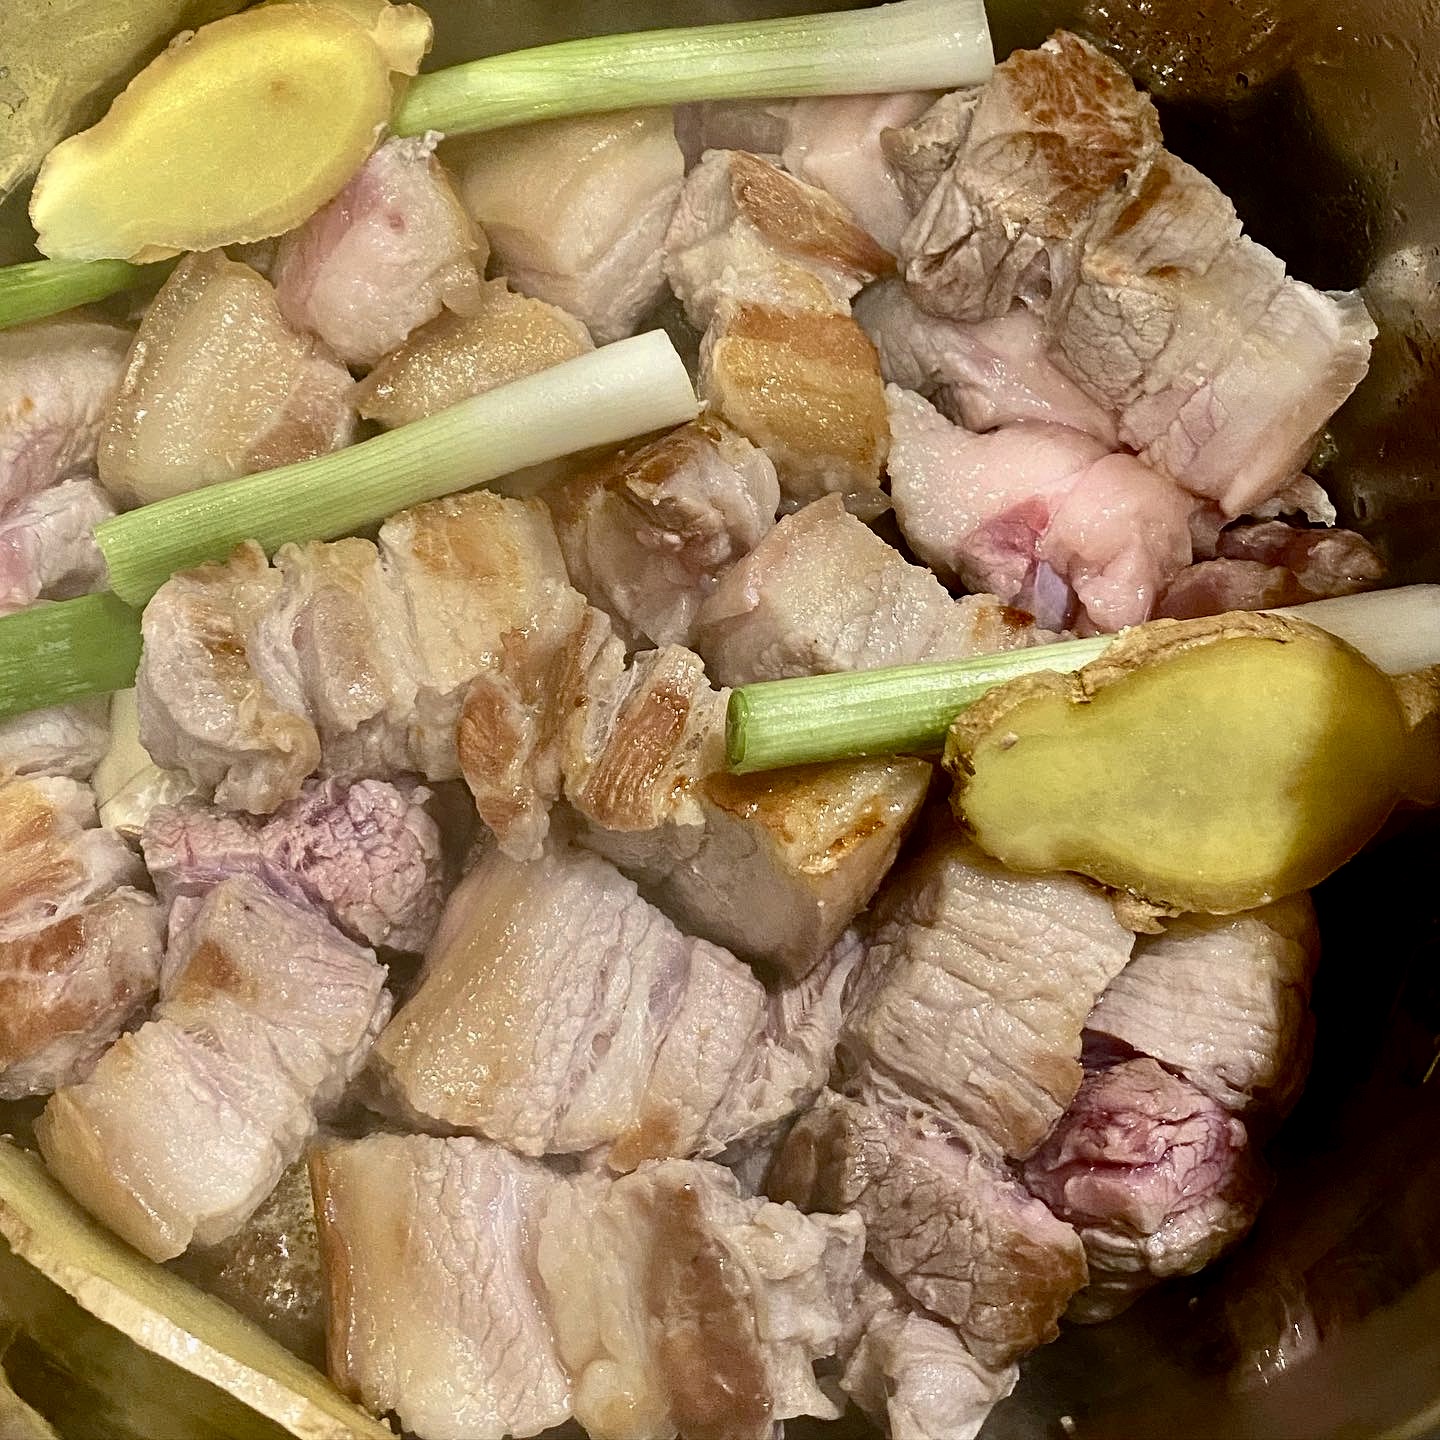
  • 1 knob ginger 1 inch, 2.5 cm
  • 5 cups dashi See post for dashi options!
  • 2 Tbsp sake cut in half or omit if using Shiro Dashi
  • 1 Tbsp soy sauce cut in half or omit if using Shiro Dashi
  • ½ tsp kosher salt Diamond Crystal; use half for table salt

Finishing Touches

  • green onions, diced for garnish
  • Chili oil or Shichim Togarashi at the table
  • Rice to serve with hot pot or boil some noodles to have with the flavorful broth!
  • Any kind of eggs-Ramen, Mayak or raw that you crack and cook in the broth

Instructions

  • Remove leaves carefully from the base, wash and drain well. Don’t throw away any leaves that naturally came off while rinsing. We’ll use these leaves later on. If you happen to get a ginormous cabbage cut in half or quarters lengthwise. I usually buy small ones so I use the whole leaf. Pat them dry before next step.
  • Layer the pork belly and napa cabbage by placing one slice between each of the leaves. Cover leaves with pork belly, trim if necessary to fit. Repeat 3-4 times depending on size of pot.
  • Cut each napa cabbage wedge into 3-4 pieces each about 2 to 2½ inches (5-6 cm) long. Each section should not be taller than your cooking pot. Try to keep the layers of napa cabbage and pork belly neatly stacked as you slice.
  • Next, start stacking the ingredients in a donabe, hot pot, or regular 10-inch pot. I used a shallow Staub pot with the grill top. Turn the stacks on their side as you pack them so the pink and green layers are visible. Start from the outer edges of the pot and work your way toward the center. Place the thicker cabbage leaves near the outside edge and the tender leaves in the center. Make sure that you pack the pot tightly as the layers will become loose once the ingredients start to cook.
  • If you don’t have enough layers to pack the pot tightly, consider using a smaller pot or place other ingredients in the center. I Like to stuff enoki mushrooms or shimeji mushrooms in the center. Or use slices of radish to surround the mushrooms.
  • Make you dashi. Don’t reduce the salt If you are using dashi from packets since the napa cabbage will release liquid during cooking and dilute the soup. If using Shiro Dashi that is seasoned omit half the soy sauce and sake. Taste your broth, it should not be too salty.
  • Pour the broth into the pot with the napa cabbage and pork belly. Start cooking on high heat. Once boiling, skim off the foam and fat on the surface using a fine-mesh skimmer. Then, reduce the heat to medium low and cook covered until the napa cabbage is tender and the pork belly is cooked through, roughly 8-10 minutes.

Garnish

  • Garnish with chopped green onion/scallion, have shichimi togarashi (Japanese seven spice) on table or sprinkle on top of dish. Serve while hot with rice or boil up some noodles to serve in the delicious broth!
    I like adding a ramen egg or a Mayak egg t round it out.
Stir-Fried Pork Belly and Bean Sprouts

Stir-Fried Pork Belly and Bean Sprouts

I created 3jamigos to chronicle our family’s food adventures, recipes, and stories, with my kids in mind.  Back in my college days, I often called home to ask my dad how to make homestyle Cantonese dishes I grew up eating.  Dishes like fuzzy melon soup, congee, and steamed pork patty, were the connection to my family, a sure-fire remedy to my homesickness.  Things have come full circle, I’m now on the receiving end of the “how do you make…?”.  When I come across a dish that is simple and delicious, and I think the kids would like this, I make a mental note to put it on 3jamigos.

Soul Food

The OG meal to cure homesickness! Corn Soup, stir-fried anything green, Steamed Pork Patty with Salted Eggs and Steamed Chicken with Chinese Sausage, and Mushrooms.

Soul food and comfort food for my family starts with Cantonese food (Roots, baby) but extends to other Asian cuisines.  You are just as likely to find Bulgogi, Japchae, and Teriyaki on our dinner table.  My latest find, is a cookbook that speaks to the melting pot we are, A Common Table by Cynthia McTernan.  Absolutely one of my favorites. It’s beautifully written, gorgeously photographed and contains delicious user-friendly recipes.

Along with Tofu Soup, this quick and easy, Stir-Fried Pork Belly with Bean Sprouts has become a family favorite.   Adapted from Korean Bapsang, it is a quick meal on a busy weeknight.  A couple of minutes of prepping and cooking is all it takes.  Before you know it you’ll be sitting down to a bowl of steaming hot rice topped with a generous scoop of yummy pork and sprouts…yep, bowl food is soul food.

Check It Out Now-Sprout Soul Sistah

Slivers of pork belly stir-fried with bean sprouts, onions, and scallions.  Seasoned with soy sauce and oyster sauce, it’s delicious and simple to make.  Frying the pork in sesame oil and adding fresh Thai chili pepper slices to the dish, my contribution.  Use thinly sliced pork butt or shoulder instead of pork belly if you like. Thinly sliced beef is also an option.  IN A PINCH, use regular thick-sliced bacon.  This would add that characteristic smoky flavor of bacon, which would be okay in my book 😉.

Sprouts

The only thing you need to know about the bean sprouts for this recipe…don’t overcook them!  Keep them crunchy!  That’s it, folks.  Make sure you pick sprouts that are white and shiny, with a nice yellow tip.  I also threw in a thinly sliced, de-seeded Serrano or Thai pepper, for a little spice.

Enjoy!

Stir-fried pork belly and bean sprouts-Samgyupsal sukju bokkeum

A quick and easy stir fry of pork belly and bean sprouts.
Course Meat, One dish meals, Vegetable
Cuisine Asian, Korean
Keyword Pork Belly
Prep Time 10 minutes
Cook Time 10 minutes

Ingredients

  • 8 ounces thinly sliced/shaved pork belly or other thinly sliced pork or beef
  • 1 tbsp sesame oil
  • 10 ounces bean sprouts
  • 1/4 medium onion thinly sliced
  • 2 teaspoons minced garlic or 2 -3 plump garlic cloves
  • 2-3 scallions or 2 ounces garlic chives cut into 1 inch segments, if they are large, cut in half lengthwise first
  • 2 tablespoons soy sauce or oyster sauce Use 1 T of each
  • 1 teaspoon sugar
  • salt and pepper to taste
  • 1 fresh red chili pepper, deseeded and sliced thinly

Instructions

  • If you are using pork belly, cut each slice into 1 inch segments, for other meats thinly sliced into bite sized pieces
  • Give the bean sprouts a quick rinse, and drain. Thinly slice the onion, and cut the scallions (or garlic chives) into 2-inch pieces.
  • Heat a large pan over high heat. Add the sesame oil to the pan and then the pork, stir-fry quickly until no longer pink.
  • Add the onion and stir fry briefly 30 seconds. Add bean sprouts chili pepper (if using) and scallions, continue to stir fry until the bean sprouts have wilted slightly but are still crunchy.
  • Add the soy sauce and/or oyster sauce, garlic, sugar and pepper to taste. Stir-fry quickly. Season with salt to taste if necessary. Serve with a big bowl of rice (although this would go well with noods too). Enjoy!

Notes

You can find a variety of extra thin cut meats in your local Korean/Asian markets.
If you want to thinly slice the meat yourself, freeze the meat until it's firm, but still sliceable. With a sharp knife, slice the meat as thin as you can.
Buta no Kakuni (Japanese Pork Belly) Skin in the Game ブタの角煮

Buta no Kakuni (Japanese Pork Belly) Skin in the Game ブタの角煮

Bowl + Spoon = Soul Food

My favorite equation, like Eat = MC(squared), which, in my book, stands for M-meat, C-Cooked & Crazy delish.  After trying several Chinese pork belly recipes I switched gears and made Japanese style braised pork belly, Buta no Kakuni.  Pork belly simmmered in a soy sauce-sugar mixture until the pork is meltingly tender and suffused with a sweet-salty flavor.

One of our frequent stops pre-Covid was a Ramen joint in Saratoga called Kahoo (sadly gone).  While the rest of the fam ordered bowls of delicious ramen and Karaage (fried chicken), I would order their Buta no Kakuni and a bowl of rice.  The pork was soft, unctuous, and tender. It literally jiggled when the pork is placed on the table.  A soft boiled egg sits, nestled in the pork, and ups the richness and decadence of the dish.  I would spoon the pork with some of the sauce on the rice and break the soft-cooked egg over the top so it oozed over pork and rice, it’s divine.  Finish with a side of greens like bok choy or broccoli (gotta have something healthy in the bowl) and this is a bowl made in heaven.

The Lowdown

Start with a slab of pork belly with the skin on.  Yep, skin on.  Pork belly with skin can be found in most Asian Markets.  The skin is Ah-mazing.  The braising turns the pork skin into this silky smooth, melt-in-your-mouth layer striated with flavor-infused meat. If pork belly was a dance it would be the perfect tango.  Splurge, look for pork belly with skin.  Not gonna lie, this is dish is not on the New Year’s resolution list so enjoy in moderation.  The dish is so flavorful that a little goes a long way.  Drizzle the sauce over the pork and rice and pair it with lots of greens.  You can also use Boston Butt or shoulder, which would still be delicious, just not porkfect.

Instantly Easier

Pull out your Instant Pot for this dish (adapted from Sylvia Wakana).   The pressure cooker shortens the cooking time and simplifies the process a little.  Cut the pork belly into 1.5-2 inch chunks, brown them in your IP, add water, ginger, scallion and shiitake mushrooms (optional) seal the pot, set the cooking time 35 minutes, and let the pot do its thing.  I add dried shiitake mushrooms just for a bit more umami, you could use dried anchovies or bit of dashi instead). Release the pressure at Drain pork and remove aromatics.  Rinse the pork and place it back into the cleaned Instant Pot bowl.  Add sauce ingredients, seal and set for another 10-15 minutes depending on size of pieces.

I like to make Buta no Kakuni in advance so I can stick it in the fridge and chill it.  When it is time to eat, I skim off the fat that has now congealed (making it easy to remove), throw a couple of ramen style eggs into the pot, and reheat the pork.  The flavors have saturated the pork, you have skimmed the fat to make it a bit healthier…win, win, time to enjoy!

Garnish with slivers of green onions, sesame seeds and a dash of Shichimi (Japanese Chili powder) for a little kick.  I have been sprinkling Momofuku Spicy Salt to finish my dishes, pretty yummy!

This is blustery weather, stay inside, curled up on the couch food. Enjoy.

Instant Pot Buta no Kakuni (Braised Pork Belly)

Buta no Kakuni, Japanese Braised Pork Belly made in an Instant Pot. Tender and delicious chunks of pork in a sweet-salty sauce. Served over rice is down home Asian Soul food..
Course Main Course
Cuisine Asian
Keyword buta no kakuni, Instant Pot, japanese, Pork Belly, Rice Bowl
Prep Time 10 minutes
Cook Time 1 hour 15 minutes

Equipment

  • Instant Pot

Ingredients

  • 2 lbs pork belly skin on cut into 1-1/2 to 2 inch cubes
  • 3 green onions washed and crushed with flat part of knife to release flavor
  • 1 inch ginger peeled and sliced
  • 3 dried shiitake mushrooms Shhhh, don't tell my mom, I don't soak them beforehand, I just throw them in the pot.
  • 1 tbsp oil
  • water for cooking the pork belly
  • Sauce
  • 1/2 cup water
  • 1/2 cup soy sauce
  • 1/2 cup sake
  • 1/2 cup mirin
  • 1/4 cup sugar
  • 4 soft or hard boiled eggs just cooked enough so you can peel each egg. yolk should be runny
  • green onions diced for garnish

Instructions

  • Prep ingredients: Cut pork belly into 2" x 2" cubes (or as close to that as you can get depending on the type of pork belly you have).
  • Press the "Sauté" function on your Instant Pot and set to high (or "More"). Heat the oil and sear the pork belly a little bit to render some of the fat from the pork belly.
  • Drain fat that has rendered out, pour enough water into the pot to cover the pork belly. Add in sliced ginger, green onions and shiitake mushrooms.
  • Cover and lock the lid. Press the "Cancel" button to stop the sauté. Press "Manual" to use the pressure cooker function. Set cook time to 35 minutes.
  • When it is finished, carefully move steam handle to the venting position to let out the steam until the float valve drops. Once depressurized, remove the lid carefully. Pour contents into a strainer/colander to drain the water. Discard aromatics. Rinse the pork belly under warm water.
  • Put the pork belly back into the Instant Pot and add the sauce ingredients. Press the "Sauté" function and set it to "More." Stir the pork and sauce mixture to combine, bring to a simmer for a minute (just enough to burn off the alcohol). Press "Cancel" to stop the sauté. Cover and lock the lid. Press "Manual" and set the cooking time for 10-15 minutes depending on size of pieces.
  • When it's finished cooking, carefully push the steam release handle to the venting position to let out the steam until the float valve drops (you can also let the pressure release naturally). Once depressurized, remove the lid carefully.
  • Press the "Sauté" and put it on "Less" (or low) to bring to a low simmer. Add in your soft or hardboiled eggs. Simmer until sauce is reduced slightly (couple of minutes).
  • Place 2-4 pieces of the pork on top of a bed of rice, drizzle generously with sauce. Garnish green onions. Split egg in half and place along side pork. Serve with greens of choice, bok choy, cabbage, your choice.

Notes

If you make this ahead of time, chill pork and skim off the fat before reheating.  I know it makes me feel better!  Place eggs in the pork & sauce to absorb some of the flavor from the braising liquid.  Take them out to skim the fat and add them back in when reheating.
Taiwanese Pork Belly Rice Bowl (Lu Rou Fan-卤肉饭)- In Hog Heaven!

Taiwanese Pork Belly Rice Bowl (Lu Rou Fan-卤肉饭)- In Hog Heaven!

Continuing my virtual traveling by cooking, I’m imagining myself in Taipei right now.  I have not been back to Taiwan in ages and yet I find myself thinking about Taipei and my visit so long ago.  Growing up in San Francisco the majority of Chinese are from Hong Kong and the Guangdong (Canton) region.  I was fortunate enough in college to spend a summer in Taipei (yes, on the Taiwan Love Boat Trip).  I sampled  Shao Lung Bao, Oyster Egg Omelets, Popcorn Chicken, Beef Noodle Soup, and Red Bean Shaved Ice while wandering around the night markets.  Everything was so delicious, different from Cantonese food, and yet familiar at the same time.

Bowl Food is Soul Food

If you have followed 3jamigos, you know I have an obsession with bowl food and eating with a spoon.  The Taiwanese dish Lu Rou Fan 滷肉飯 falls squarely in this category.  In fact, this iconic dish was the basis for Taiwanese Turkey Rice, a favorite bowl I posted around Thanksgiving.  Shreds of turkey garnished each bowl of Lu Rou Fan.  People liked the turkey garnish so much, it got its own gig, Turkey Rice, the spin-off.

Back to Lu Rou Fan.  Season diced pork belly with star anise, cinnamon, and aromatics like garlic, shallots, and ginger,  are braised in a soy sauce and sugar mixture until it is melt-in-your-mouth tender.  Place a generous scoop of the braised pork, half of a hardboiled egg, and greens on top of a bowl of steamed rice.  Grab your spoon and dig in, bowl food is soul food.

After surveying different sites for Lu Rou Fan, my version is a mash-up of recipes I found.  The non-negotiables are pork, ginger, shallots, garlic, and a sauce flavored with star anise, soy sauce, sugar, and rice wine.  Start with pork belly cut into approximately 1/3 inch slices then diced.  Thick slab pork belly can be found in most Asian grocery stores.  I also add ground pork to the diced pork belly for a saucier texture, like a ragu’. Shiitake mushrooms are used to pump up the umami as does dried shrimp.  Shrimp is optional, if you decide to use it, soak and finely mince it before adding.  I have mentioned my lack of affinity for star anise, so I use only one clove and add a cinnamon stick instead.  If you like star anise feel free to use two.  Last but not least…

Pull Out the Instant Pot!

The pressure cooker reduces the effort and time to making Lu Rou Fan, a win-win.  Saute’ pork, add the aromatics and liquid, and 30 minutes later your Lu Rou Fan is ready for the finishing touches.  How easy is that? Make this dish a day in advance to allow the flavors to meld and to chill the Lu Rou.  Skim the solidified fat off before serving.

Finishing Touches

When the pressure cooker is done, release pressure and set the pot to saute bring the pork mixture to a boil, and reduce to desired consistency OR if the sauce is not thick enough, add a cornstarch water mixture to thicken. You want lots of sauce to drizzle on your rice so do not reduce too much.

The star of this dish is the succulent, saucy pork belly dancing on the main stage of rice but there are supporting actors.  Hard-boiled eggs often accompany Lu Rou Fan.  Boil, peel, and place eggs in the pork sauce after it has finished pressure cooking.  While the sauce thickens, the eggs will absorb the color and flavor of the pork.  The eggs will be hard-boiled, so for those who have come to love six-minute ramen eggs-this ain’t it.  Use soft-boiled instead of hard-boiled eggs to add to the sauce for a less-cooked egg.  Or cook six-minute eggs ramen style and use this in place of the hard-boiled eggs.  It’s your bowl of goodness, do what you want.  Serve with greens such as seasoned cucumbers, or steamed bok choy or broccoli.  Garnish with green onions and more fried shallots. YUMMY.

Taiwanese Pork Belly Rice (Lu Rou Fan)

Another Soul Food Bowl, made a little quicker in an Instant Pot. Braised pork belly seasoned with soy sauce, garlic, ginger, star anise and shallots. Delicious over rice or noodles. Comfort food.
Course Main Course, Meat
Cuisine Asian
Keyword Lu Rou Fan, Taiwanese Pork Belly Rice
Prep Time 20 minutes
Cook Time 45 minutes

Equipment

  • Instant Pot

Ingredients

  • 1 lb skin-on pork belly diced into 1/3 inch pieces
  • 1/4 lb ground pork
  • 1 tbsp vegetable oil or shallot oil
  • 3 slices ginger
  • 2 tbsps shaoxing wine
  • 2 tbsps dark soy sauce
  • 1 tbsp regular soy sauce
  • 1/4 cup fried shallots or onions
  • 1 shallot, finely diced
  • 4 cloves garlic chopped (1.5 tbsp)
  • 1 star anise
  • 2-3 dried shiitake mushrooms soaked until mushrooms are softened, remove from water andnreserve soaking liquid, dice mushrooms
  • 1 tbsp dried shrimps chopped OPTIONAL
  • 1 stick cinnamon or 1/2 tsp ground cinnamon
  • 2 tbsp rock sugar or brown sugar (30gms rock sugar_
  • 2/3 cup hot water or reserved liquid from mushrooms
  • Soy sauce /salt to taste
  • fried shallots and green onions garnish
  • 2 eggs hardboiled or cooked Ramen style

Instructions

  • Turn on the "sauté" function of the pressure cooker, press "adjust" once to switch to "more" for browning.
  • Once the oil is hot, add pork belly and give it a stir so that it's not sticking to the bottom. Saute' just until pork belly starts to brown, add ground pork. Let pork cook until it loses its pinkness and the liquid evaporates.
  • Add ginger, shallot, garlic, saute briefly before adding soy sauces, Shaoxing wine, cinnamon, star anise, rock sugar, shiitake mushrooms, and fried shallots. Mix it well and add reserved mushroom liquid or hot water. Cover with the lid.
  • Turn on the "manual" function, set the timer to 25 minutes. Allow 10 minutes before release of pressure and opening. Skim off the fatty oil from the top.
  • If the sauce seems too thin, turn on the "sauté" function, and "adjust" to "more" to thicken and darken the pork belly. Saute to desired sauce thickness and color. Season with light soy sauce or salt to taste. Alternatively, taste sauce after opening the pot. If it has enough flavor but is thin, mix 1 tbsp cornstarch with 2 tbsp water. Add to mixture and bring to a boil to thicken sauce.
  • Ladle the braised pork over rice with some sauce. Top with an egg* and greens of choice. Garnish with green onions and more fried shallots.

Egg

  • Generally, eggs are hardboiled, peeled and added during cooking..which makes a very hard-boiled egg. I like ramen eggs or runny eggs
  • Boil eggs to just past soft boiled stage. See post for link to ramen eggs. Have eggs peeled and ready to go when pork is finished cooking. Add to pork and allow to sit in sauce until you are ready to serve. Cut eggs in half and place 1/2 in each bowl of rice.

Notes

Use skin-on pork belly as the skin becomes tender, juicy and flavorful after absorbing all the flavors from spices and soy sauce. 
Use leaner ground pork (e.g. pork shoulder) as a substitute if the pork belly is too fatty. But really, you don’t need a ton on your rice.  Reduce the cooking time accordingly.  
Red Cooked Pork 红烧猪肉, Sweet Relief

Red Cooked Pork 红烧猪肉, Sweet Relief

This post has been sitting on the back burner for a while, the majority of the time because I kept tinkering with the recipe.  The other reason for its relegation, Jamie and I have been on a tear baking cookies and desserts for the holidays.  It was time to circle back to this post-take a breather from all things sweet.  So here it is, a post on one of my favorite dishes, Red Cooked Pork

I grew up eating Chinese food 5-6 days a week.  Every meal more often than not featured pork.  Ground pork was steamed into a delicious patty with salted egg or simmered in soups.  Slices of pork were stir-fried with greens or with tofu and brown bean sauce for a quick meal.  Every Chinatown deli strategically displays a whole pig, slow-roasted to perfection, it’s amazing-crunchy, crackly skin and succulent, juicy, tender meat enticing shoppers into the store.  It goes toe to toe with any southern barbecued pork.  I make my own Crispy Roasted Pork, it’s not hard and not to worry, you don’t have to roast an entire pig! Yes, pork is king in Chinese cuisine.

Why pork?

The pragmatic, economical choice.  Pigs eat almost anything and don’t require grazing land, important in an agrarian society like China.  Pork can be steamed, boiled, baked, braised, fried, roasted-probably the only thing we don’t do is make it into ice cream-not surprising for lactose intolerant Asians.  Almost every part of the pig is used or consumed.  Ears, feet, snout, are pickled, braised, or fried.  The fat is turned into lard, the blood is congealed and eaten…you get the picture.

And the obvious answer, it’s DELICIOUS.

I am hooked on Chinese Red Cooked Pork which uses pork belly.  Now, don’t go Ewww, what do you think bacon is?  Yep, thin slices of pork belly given a nifty name so jillions of people will eat it.  Asian dishes often use pork belly in uncut slabs, in thick slices, cubed or diced.  Red Cooked Pork is a classic dish, every Sichuan family passes down grandma’s recipe for Red Cooked Pork or 红烧猪肉.  My go-to recipe comes from a favorite cookbook, A Common Table.

The easiest place to find pork belly is at your local Asian markets.  In particular, Chinese markets carry ALL things pork.  The pork belly is butchered into thick slabs-with or without skin, or into thin, medium, thick, or super thick slices.  Korean markets also offer a variety of pork belly cuts to grill, stir-fry, or braise.

I could be wrong but there really isn’t a Cantonese version of Red Cooked Pork.  Versions of red-cooked pork can be found in  Sichuan,  Shanghai, and Hunan where Chairman Mao’s Red Cooked Pork with chili peppers and aromatics is iconic.

The Tinkering Begins

If I am making Red Cooked Pork for buns (bao) to be eaten like a sandwich, I use the wide thick slices.  For rice bowls and noodle bowls, I like cubed or diced pork belly.  Either way, the KEY is long, slow cooking.  You can’t cut corners or the meat will not be meltingly tender.  Keep vigil over the braising liquid, adding water if needed.  There is a point where the meat will seem tender but dry and paradoxically you need to cook it longer to breakdown the fibers so the meat gives up and becomes this oozy delicious bite. That is pork-fection.

I’m not a big star anise fan, so I only use 1-star anise and add a cinnamon stick in place of additional star anise.  Feel free to play with the amounts.  The recipe calls for granulated or raw sugar, I prefer rock sugar.  I searched for an equivalence and all I found is a one-inch piece of rock sugar is approximately 1 tablespoon of sugar.  Crushed into smaller pieces, that 1 inch chunk was about 1.5 tablespoons of rock sugar.

Caramelize the pork in the sugar water mixture.  Add aromatics, soy sauces, water, and braise for 1.5 to 2 hours until pork is tender.

Serve over rice and with greens such as poached lettuce or bok choy.

Red Cooked Pork Belly, Sesame Slaw, and Gochujang Mayo for my Asian version of a BLT Burger.  How did I not win our annual burger cook-off?

Print Pin
5 from 1 vote

Red Cooked Pork adapted from A Common Table

Iconic Chinese Dish, Red Cooked Pork is pork belly slowly braised in soy sauce, sugar and aromatics until meltingly tender. Delicious over rice or in bao.
Course Main Course
Cuisine Asian
Keyword braised, Chinese, easy recipe, Pork Belly, red cook pork
Prep Time 20 minutes
Cook Time 3 hours

Ingredients

  • 2 pounds pork belly or pork shoulder cut in 3/4- to 1-inch (2- to 2.5-cm) chunks
  • 1/4 cup granulated sugar substitute rock sugar 3 tablespoons (50-75 gms) or to taste
  • 2 tbsp water to caramelize sugar
  • 2-3 cups water for braising liquid
  • 3 to 4 scallions cut on the diagonal into 2-inch (5-cm) lengths (about 1/4 cup sliced)
  • 3 to 4 garlic cloves smashed, or 1 tablespoon minced garlic
  • 1 inch piece ginger root sliced into 6 to 8 circles
  • 1 whole star anise 0-3 pods, your choice
  • 1 stick cinnamon
  • 1/3 cup Shaoxing rice wine dry sherry, or sake
  • 3 tablespoons light or thin regular soy sauce 生抽, NOT low sodium
  • 3 to 4 teaspoons dark soy sauce 老抽

Instructions

  • Bring a large pot of water to a boil over medium-high heat. Add the pork and gently boil for about 10 minutes, skimming off any scum as it forms on top of the water. Drain the pork and rinse to remove any remaining scum.
  • In a large wok or cast-iron skillet over medium-high heat, combine the sugar and 2 tablespoons water and stir until it dissolves. Tilt the wok or skillet to swirl the mixture, without stirring, just until it bubbles and begins to turn slightly darker in certain spots, 4 to 5 minutes. Be sure to watch it carefully so that the sugar doesn’t burn as the sugar can turn from brown to black in seconds.
  • Add the pork and cook it with the caramelized sugar, stirring frequently, until the pork is browned and smells fragrant, about 4 minutes.
  • Add the scallions, garlic, ginger, star anise and cinnamon, toss for 1 to 2 minutes to give the aromatics a quick cook. Add the rice wine, both soy sauces, and enough water to cover the pork, about 2 to 3 cups. Stir to combine and then cover and ever-so-gently simmer the pork over low heat until tender for approximately 2 hours. Stir every 15 to 20 minutes to prevent scorching and to make sure there is still enough liquid. Add water if the level gets too low.
  • Once the pork is tender, take a look at the cooking liquid. If you prefer a thicker sauce, transfer the pork to a plate, return the heat to medium-high, and simmer, uncovered, until the sauce reduces to the desired consistency, 10 to 15 minutes. Be careful not to reduce the sauce too far as you’re going to want enough sauce to go over the pork and rice. Taste the sauce and, if desired, adjust with more soy sauce or sugar. Spoon the pork and sauce over rice.
  • Serve over rice. Place pork on top of rice and drizzle a small bit of sauce over the cubes.

Pork Buns

  • Cut pork belly into 1-4 to 1/2-inch thick slices approximately 2-2.5 inches in width instead of cubes. Proceed with braising instructions.
  • Serve sliced pork with steamed Chinese buns. Garnish with green onions and cilantro.
Chinese Roast Pork 燒肉 (All Things Porksidered)

Chinese Roast Pork 燒肉 (All Things Porksidered)

Blog vacation is over…the vacation wasn’t intentional, it just kind of happened.  That’s life for you.  We just got back from Nashville where our kid Jordan goes to school.  We walked the campus, met his roommates’ families, went to the football game (they won!),  attended a couple of lectures, and spent time with Wes’s classmate from medical school.  After residency, Russ was smitten by a Southerner, Julia (the bomb), and moved to Charlotte, North Carolina. It has been years since we have seen each other.  As fate would have it, his son is now a freshman at Vanderbilt. It was great catching up!

We also found time to take in the sites, if you like country music and southern food, you should definitely visit Nashville.  Like any good southern town, there’s a lot of down-home comfort food, hot fried chicken, great biscuits, pulled pork, barbecued pork ribs, yum.

Version 2

When we got back from Nashville I had pork on the brain.  I didn’t find a recipe with Southern roots but I did find one for Chinese Roast Pork also known as Siu Yuk. The pork is roasted to perfection, the meat is juicy, slightly salty, and succulent.  The skin is the showstopper. Roasting turns the skin into a golden brown crispy crust. Not southern but delish!   I have always purchased roast pork from my favorite Chinese deli never giving a thought to making it at home.  As I read through the recipe I thought, okay, not quite as daunting as I imagined.  Unlike a Chinese deli, I didn’t have to start with an entire pig, just a nice slab of pork belly.  It didn’t require a whole lot of prep or exotic ingredients and your oven does most of the work.

I Can Handle That

DSC02190
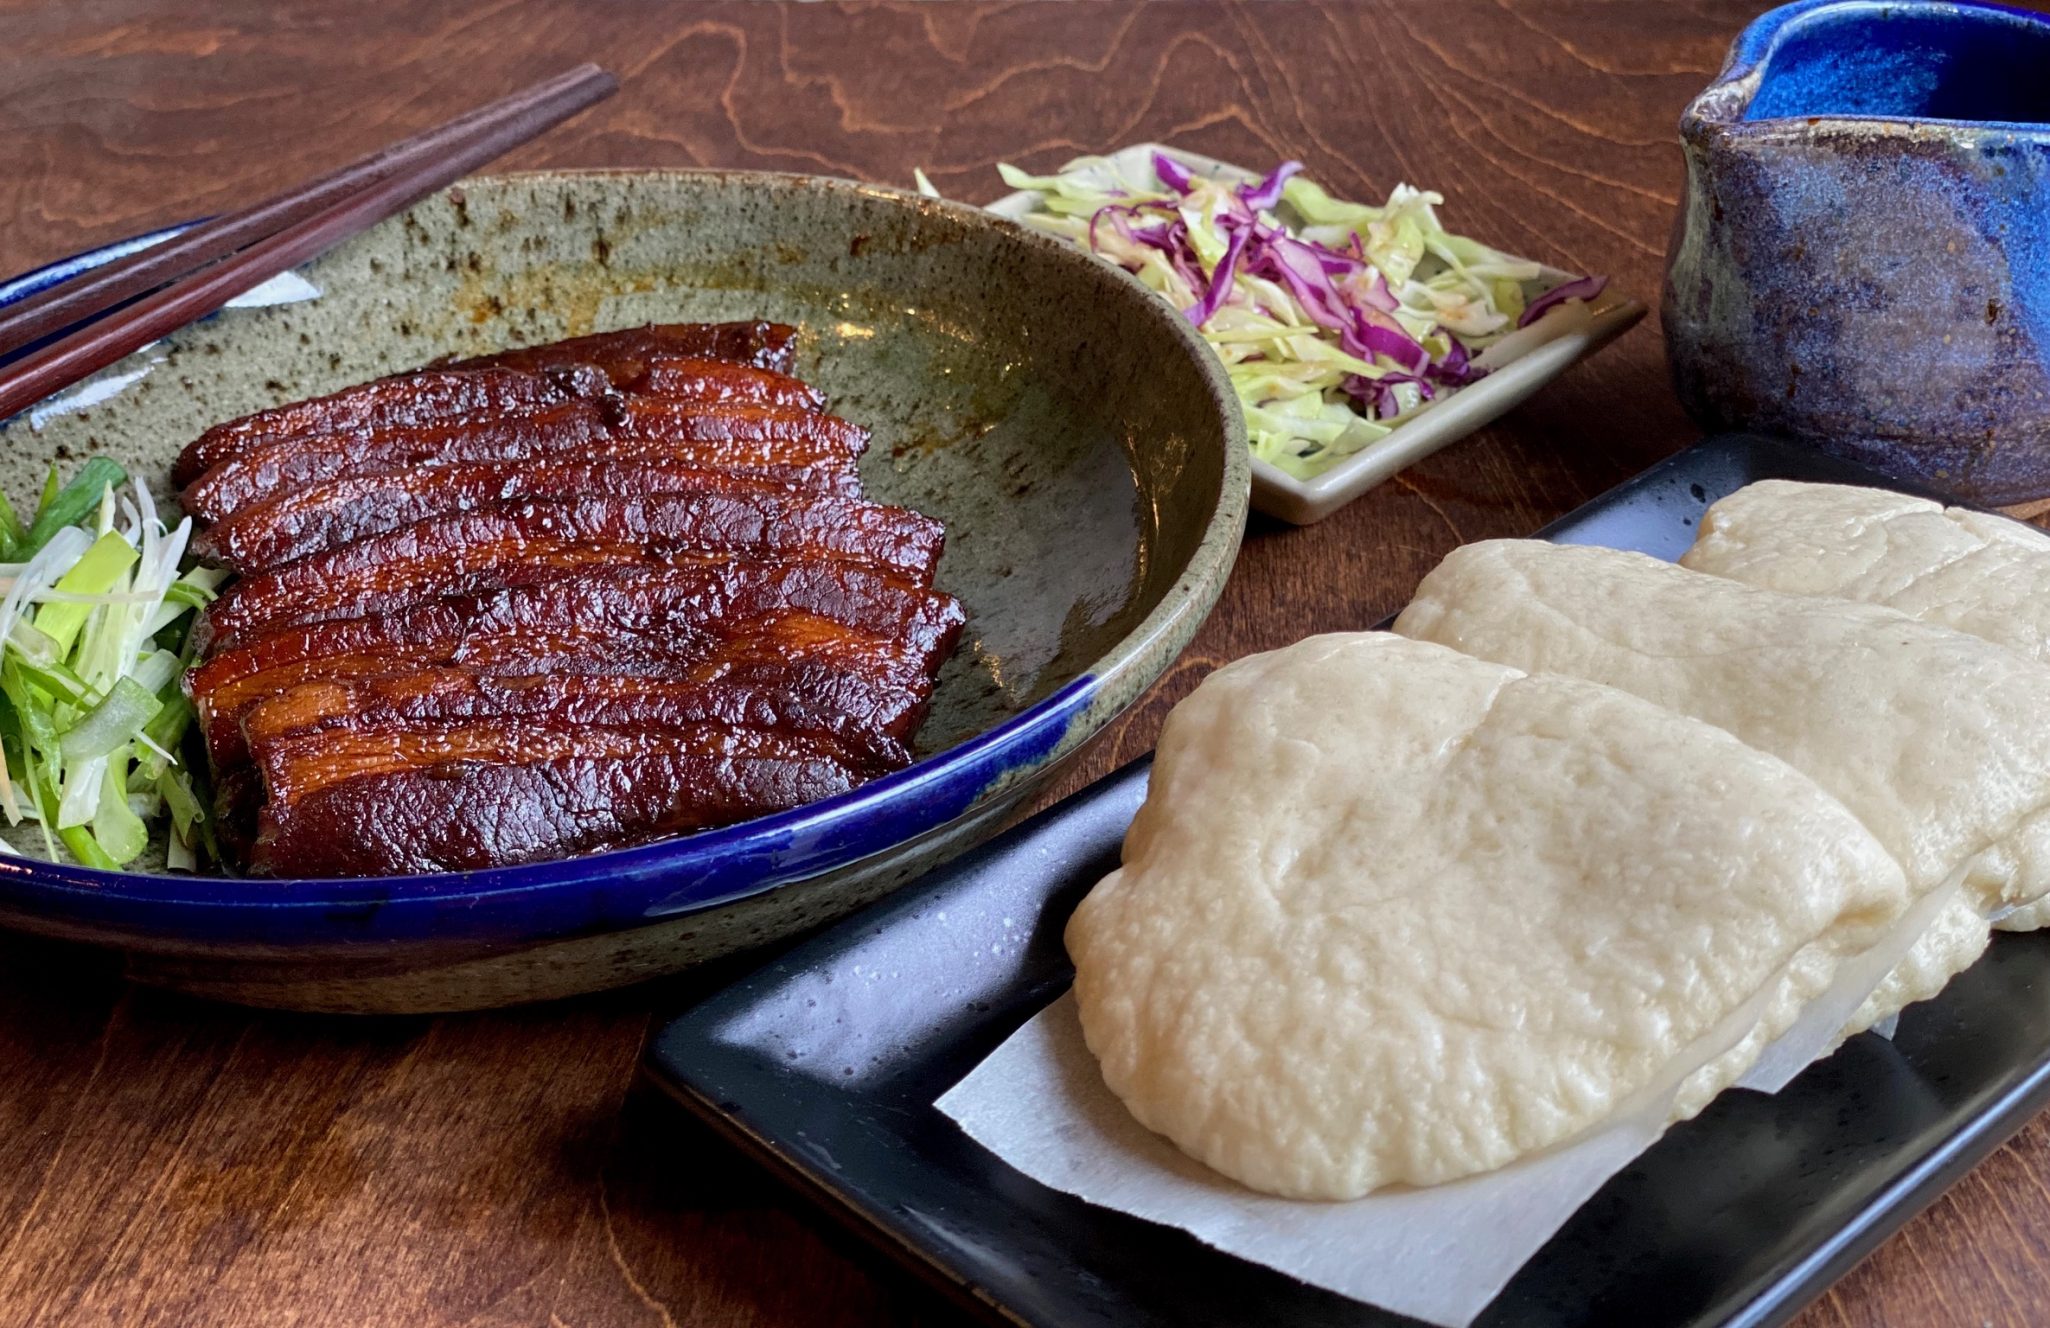
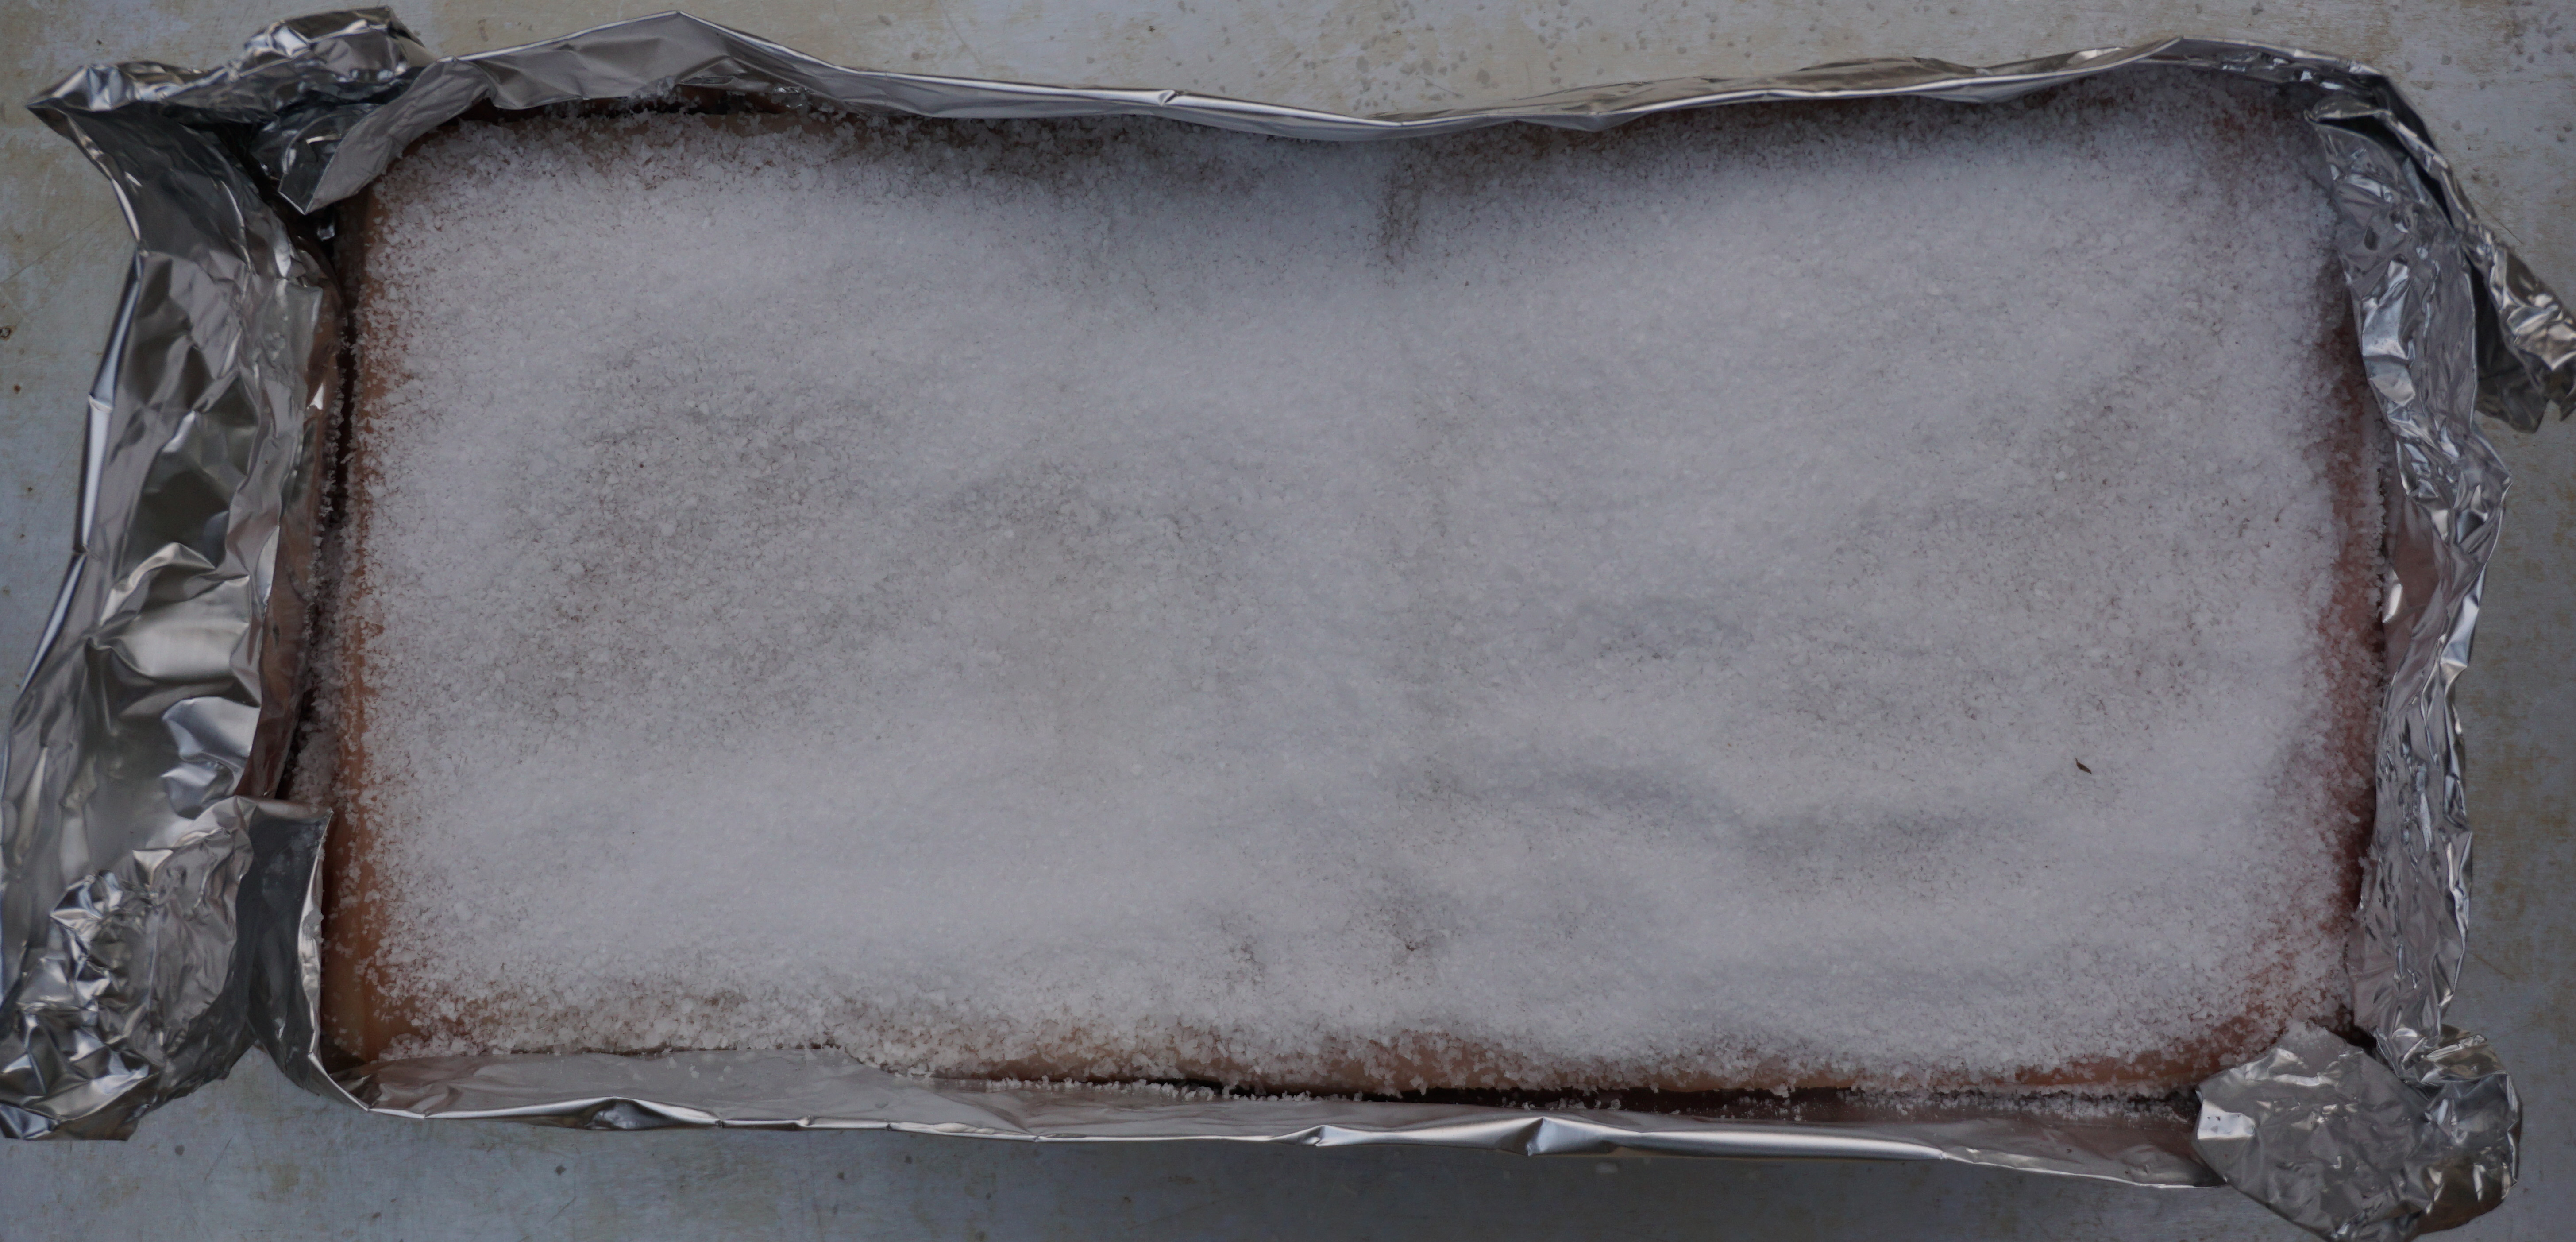
The first part of the recipe calls for seasoning the pork and letting it air dry to ensure a crispy skin.  After drying, the skin is poked to help release the fat while it is roasting. The pork is wrapped in foil and covered with salt.  I used coarse kosher salt.  I was surprised at how simple it was to make.

Chinese Roast Pork

Crispy skinned roasted pork
Course Meat
Cuisine Asian, cantonese
Keyword crispy skinned, roast pork
Prep Time 12 hours 15 minutes
Cook Time 1 hour 30 minutes

Ingredients

Adapted from The Woks of Life

  • 3 lb slab of pork belly
  • 2 teaspoons Shaoxing wine
  • 2 teaspoons salt
  • 1 teaspoon sugar
  • 1/2 teaspoon five spice powder
  • 1/4 teaspoon white pepper
  • 1 1/2 teaspoons rice wine vinegar
  • 2 cloves of garlic cut into slivers
  • 1/2 cup coarse Kosher salt

Instructions

  • Rinse the pork belly, and then pat it dry.
  • Place it skin-side down on a small tray (you’ll be putting it in the refrigerator for some time, so make sure you have space)
  • Rub the shaoxing wine into the meat (not the skin). Mix together the salt, sugar, five spice powder and white pepper. Thoroughly rub this spice mixture into the meat as well. Make incisions in the pork and push slivers of garlic into the slits.
  • Flip the meat over so it’s skin-side up and place it on a small tray.
  • Let it dry out in the fridge uncovered, for 12-24 hours.
  • Preheat the oven to 375 degrees F.
  • Poke holes ALL over the skin, which will help the skin crisp up, rather than stay smooth and leathery. The more holes there are, the better, really. You want lots of small, delicate holes. I used a multi-pronged ice pick. You could use turkey skewers.
  • Using heavy duty aluminum foil, wrap the pork like the bottom of the box. The top (skin) will remain exposed. Try to wrap the pork snugly so the edge of the foil meets the top edge of the pork sides. See pic above.
  • Rub the skin of the pork with the vinegar. Sprinkle with salt to create an even layer over the skin. Try not to the salt fall down the sides in-between the foil.
  • Bake in oven for 1 hour and a half.
  • Remove from oven. Take the pork out of the foil pouch, remove salt crust and place pork on a foiled lined pan fitted with a rack. Turn oven onto broil, low setting. Oven rack should be set in the lower portion of the oven. Place pork in oven and broil for 10-15 minutes until skin puffs and becomes crispy. There should be tiny bubbles formed on the skin, if not the skin will be tough.
  • Keep an eye on the pork while broiling!
  • Remove from oven and let rest approximately 10-15 minutes. Cut into bite size pieces making sure each piece as a crispy little hat of cracklin! Serve with Chinese mustard or hoisin or sugar and oyster sauce.