Tag: #King Arthur Flour

Piece of Cake, Chocolate Cake

Piece of Cake, Chocolate Cake

Surprise!  You are going to love this.  Did you click on CAKE-TWO from Vanilla Cake Pan Cake just out of curiosity?  The shameless two for one plug?

The Vanilla Cake Pan Cake is actually a riff on the Original Cake Pan Cake, a chocolate cake. It’s just as easy to make and just as delicious.  During WWII butter and eggs were rationed which led to the fortuitous creation of this moist, chocolatey cake. After all, necessity is the mother of invention, and chocolate cake IS a necessity.

Can you imagine a more quintessential, comforting American dessert than a chocolate cake topped with a luscious chocolate frosting?  Didn’t think so.  AND IT IS SO EASY TO MAKE!!!! Five minutes of prep and then into the oven, that’s it.  Thirty -five minutes later a rich, chocolatey, sweet, scrumptious cake is cooling on the rack.

Going Loco over Cocoa (Primer)

The cake is so easy I thought I’d talk about cocoa powder which is the foundation of this cake. For a deep dive into cocoa, here is the link to King Arthur Flour,  Here is my highlight reel on cocoa:

Cocoa powder is the powder created from dry roasted cocoa beans, grinding them to create a paste (there’s still cocoa butter in the beans). The butter or oil is extracted from the paste leaving solids that are then pulverized into a powder, cocoa powder, ta-da!

The end product is Natural Cocoa Powder which is acidic.  Good examples are Ghiradelli, Scharffenberger, and Hersey’s.

Dutch-processed is a procedure that alkalizes that natural cocoa powder (neutralizes it) so it is no longer acidic. In the process, this mellows out the flavor and makes the powder darker.  Think Oreo Cookies! Since it is no longer acidic, but has a neutral pH.  Right about now you should be having flashbacks to freshman chemistry.

Confused?  You are not alone.  The best rule of thumb, use whatever the recipe calls for, sorry not much help.  Not to worry, let’s keep going…

Recipes without Leavening Agents

Use whatever cocoa powder you like, end of story. So simple.

Recipes with Leavening Agents ie. baking powder or baking soda

If a recipe calls for baking powder and cocoa, chances are you can use Dutch-processed cocoa. This is because you don’t need an acidic medium for baking powder to work. In a pinch,  you could use natural cocoa powder since you don’t need an acid to trigger baking powder.  Flavor and color will be different but your dessert will still rise.

Recipes with only baking soda will need acid to get it going, use natural cocoa. Stay away from Dutch-process cocoa since baking soda needs an acidic medium to work.  BUT, if your recipe also has an acid like buttermilk, citrus, fruit purees, brown sugar, molasses, you might be able to use Dutch-process, all these ingredients are acidic.

You can use Natural Cocoa for Dutch-process because if you need an acidic environment you are covered.  You can’t use neutral Dutch-process for Natural cocoa without an acidifier.

So, you have Grandma’s recipe for brownies or chocolate cake that calls for cocoa powder (unspecified).  Chances are what she had available in her day was Hersey or maybe Ghiradelli.  Use a natural cocoa powder.  If the recipe calls for baking soda, definitely use natural cocoa.

To the Rescue

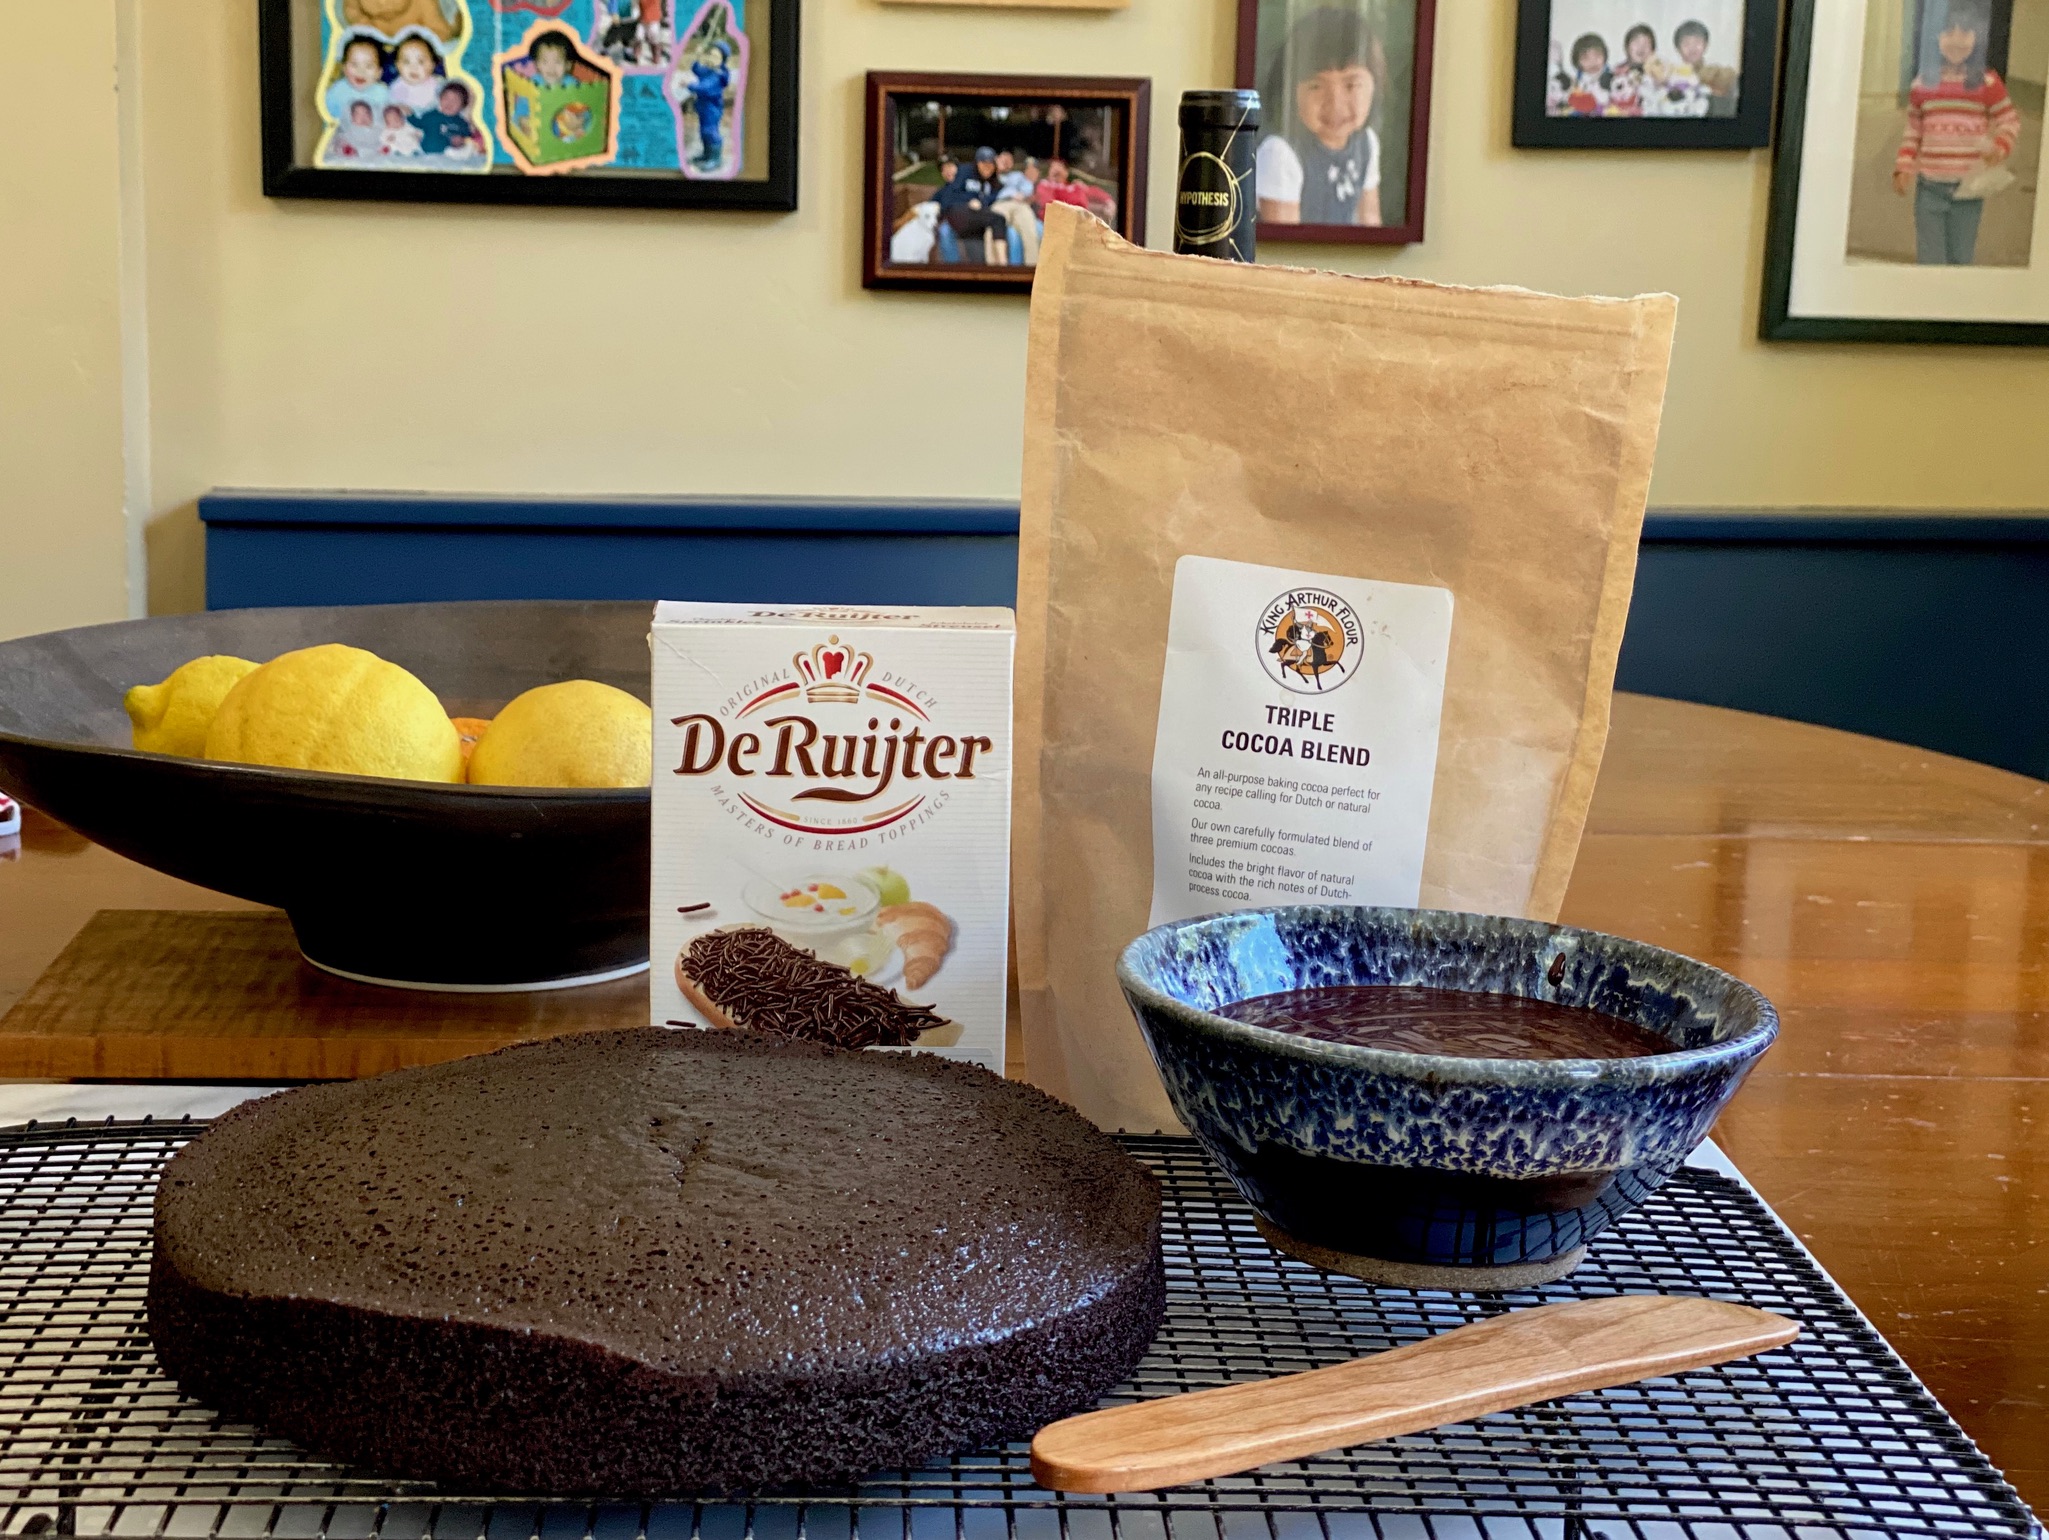
King Arthur flour makes the Triple Cocoa Blend which is natural and Dutch-processed combined.  YEP, doing the happy dance cause I can use this for almost any recipe that calls for cocoa powder.  No thinking involved.

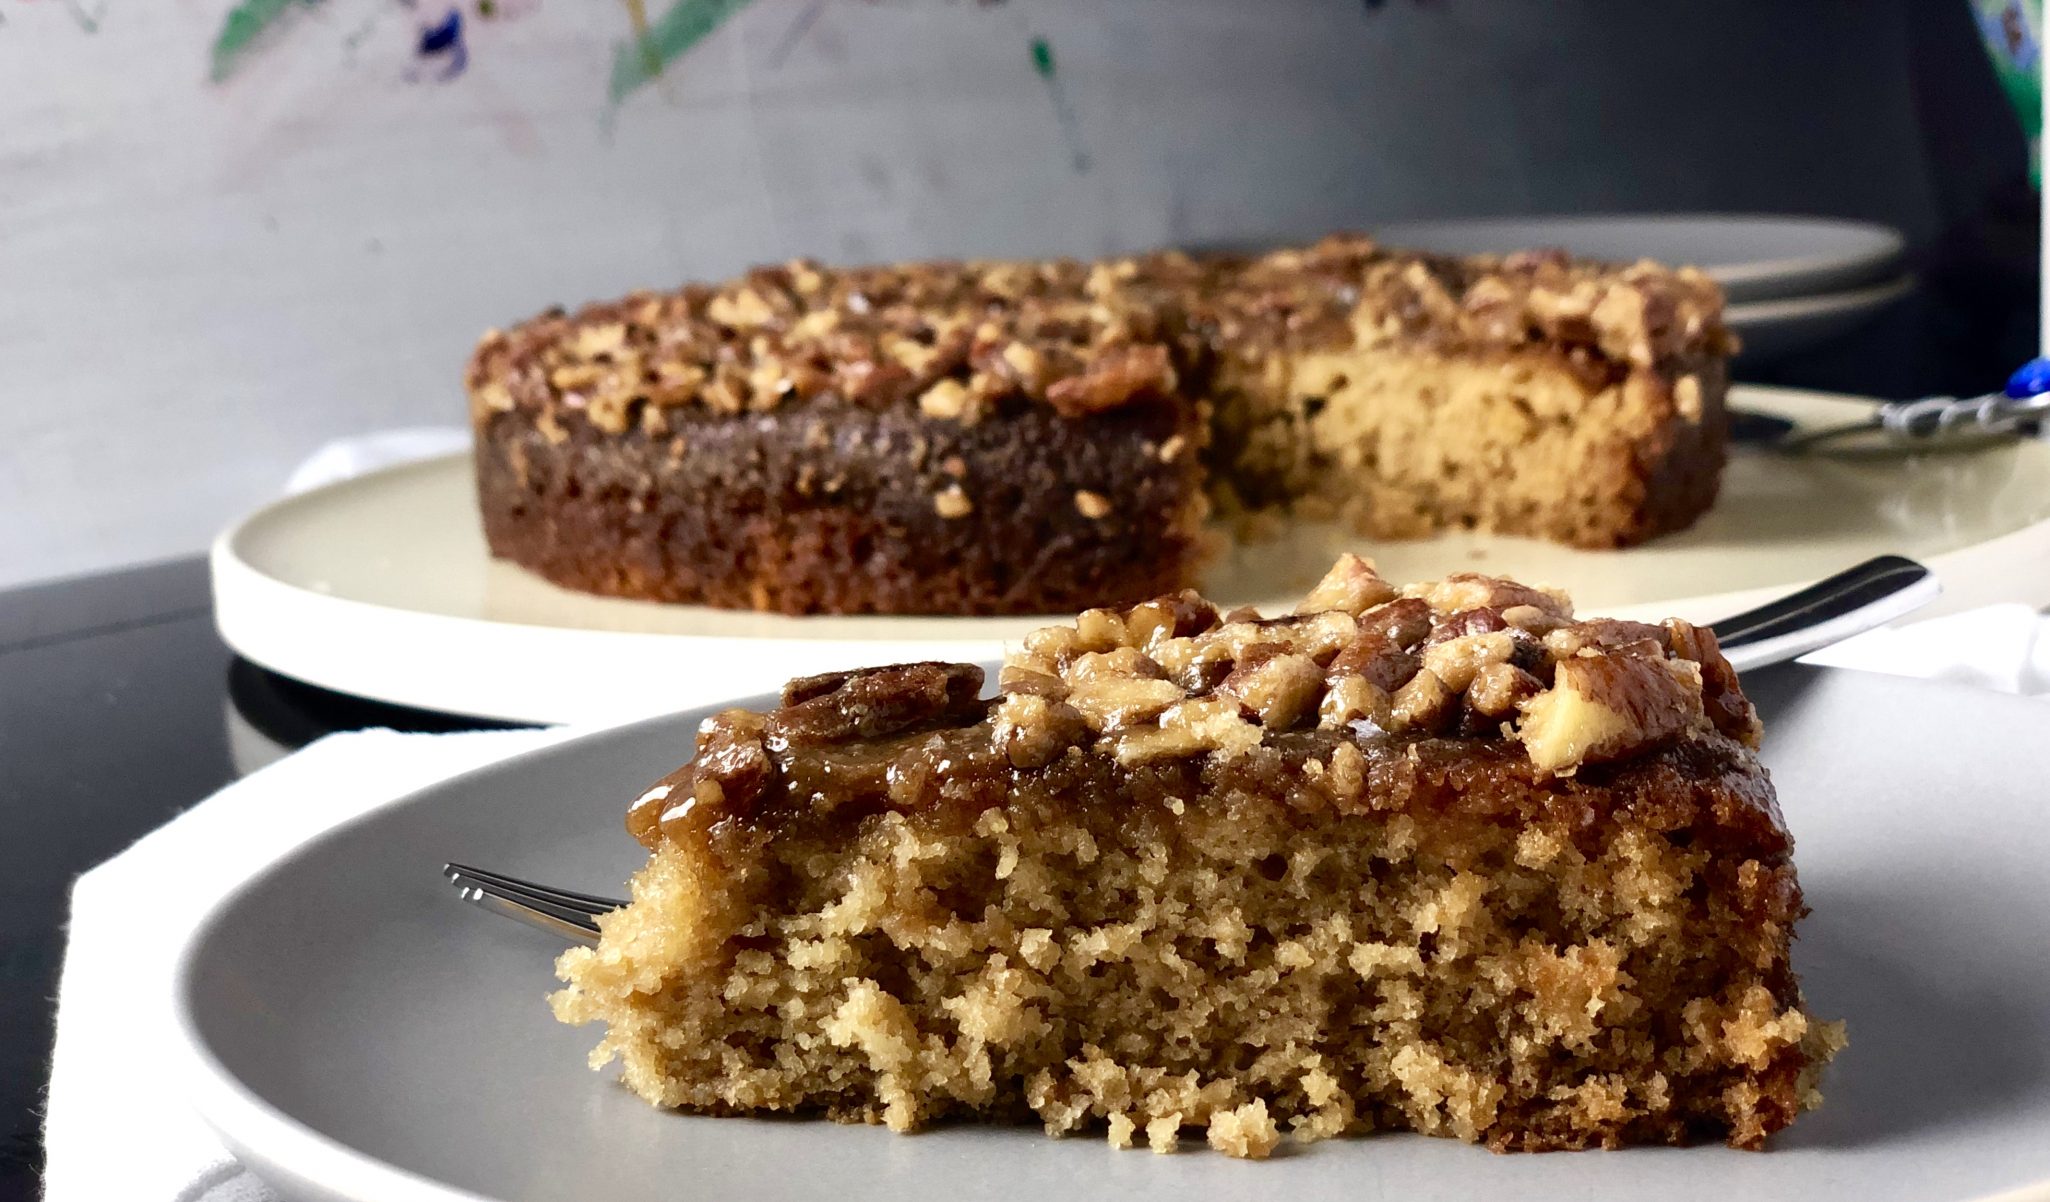
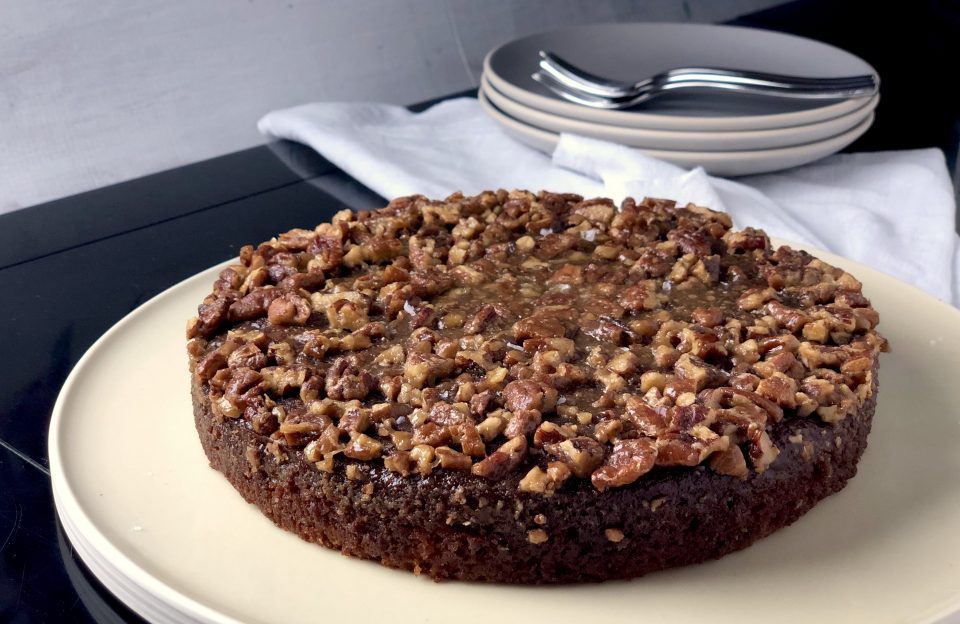
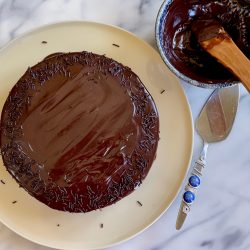
I used it for this cake.  Although it doesn’t matter because the cake also has vinegar, thus creating an acidic environment.  You can use any cocoa you want for this cake. The triple cocoa created a beautiful deep brown, moist, flavorful cake-delish.

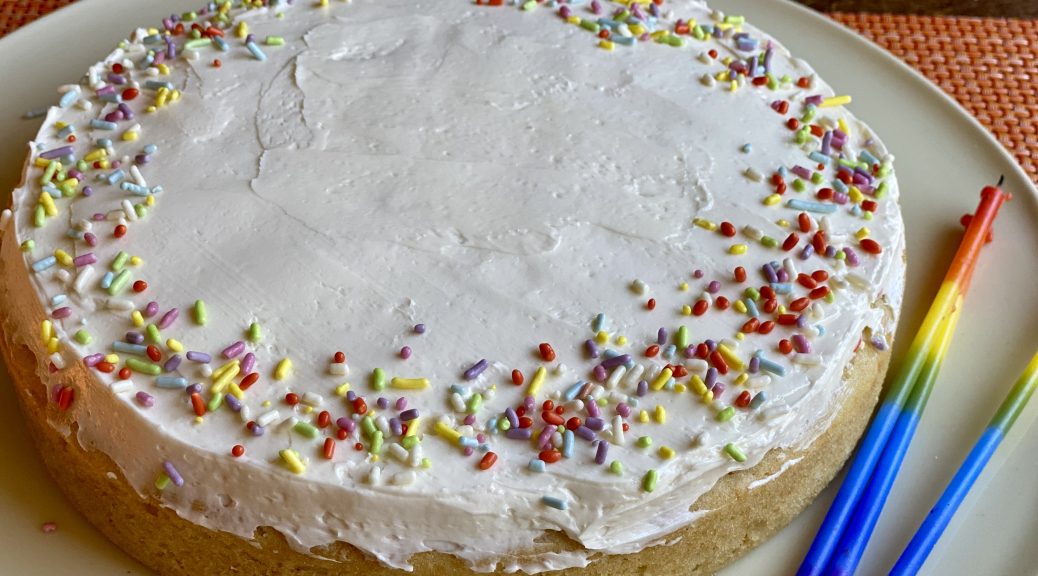
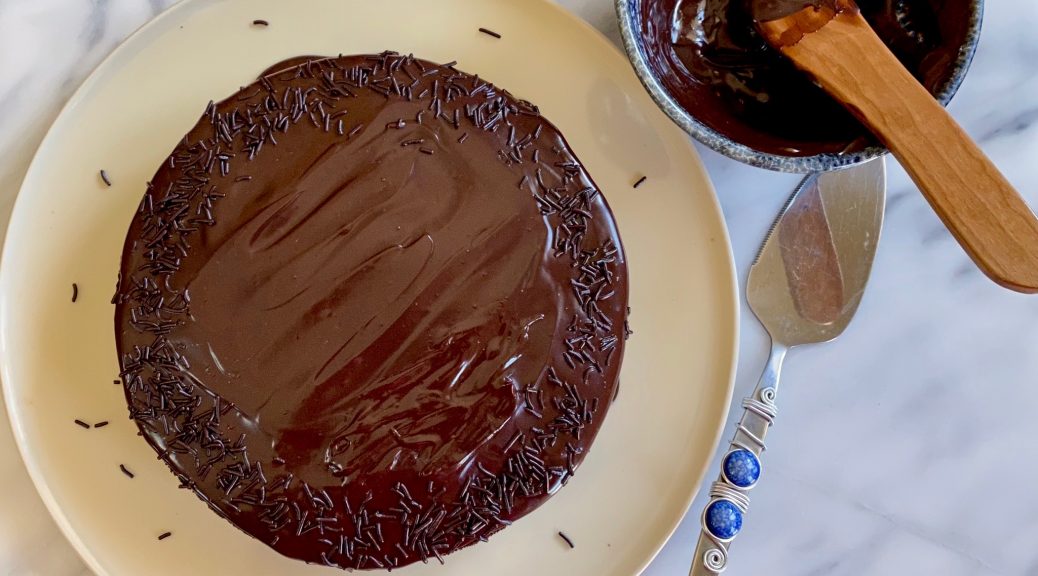
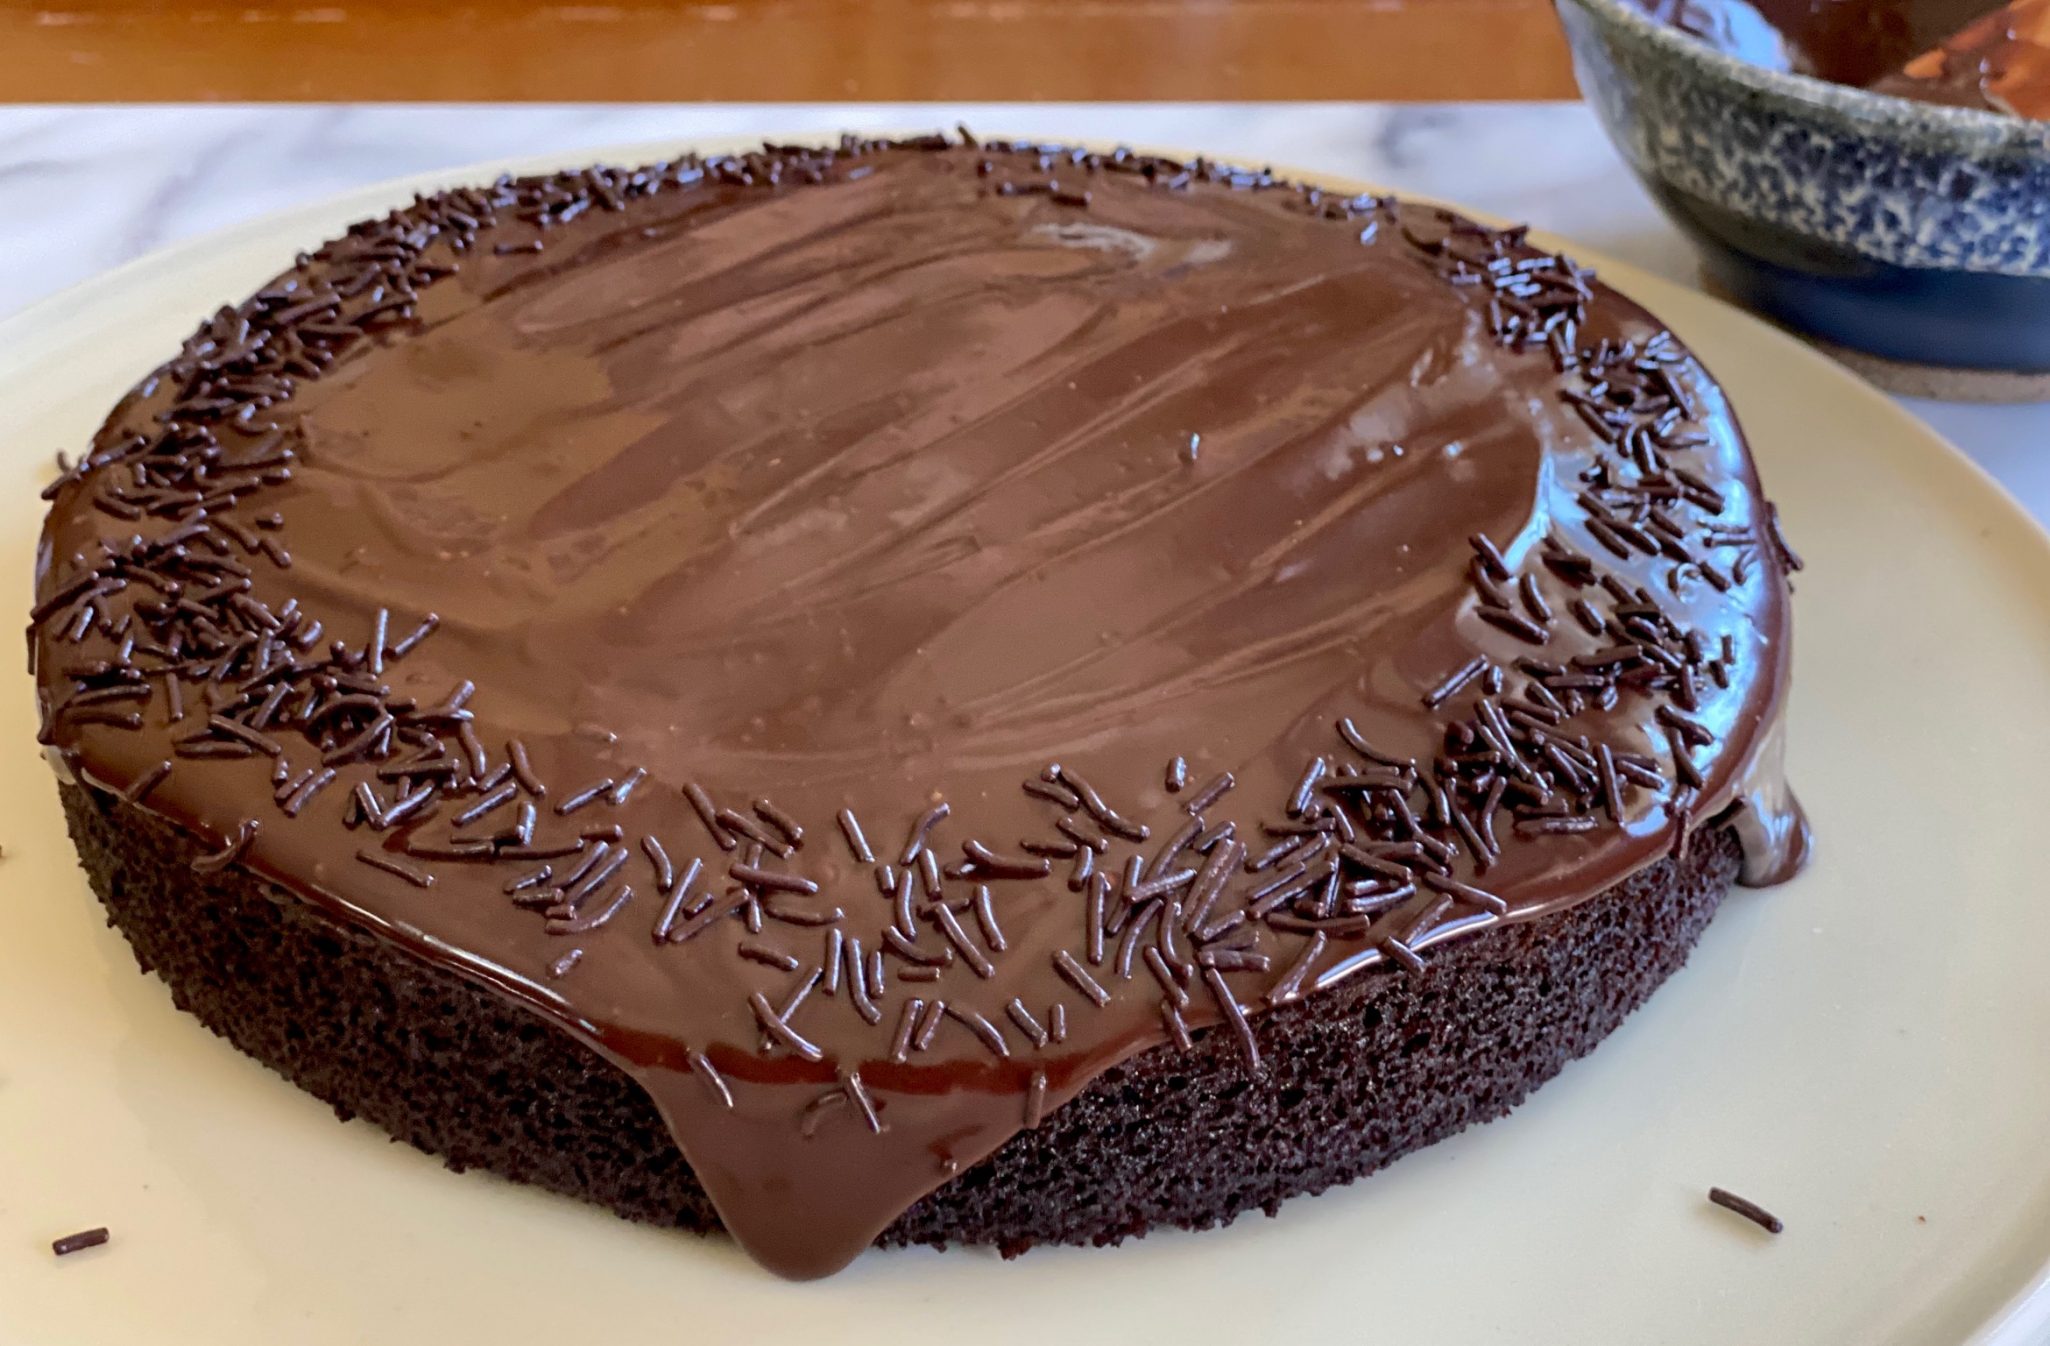
The cake is ridiculously easy.  If you need a quick dessert, add sprinkles or jimmies and you have yourself a very fine celebration cake.

King Arthur's Original Cake Pan Cake

Course Cake
Cuisine American
Keyword chocolate cake, easy recipe, king arthur flour, One pan cake
Prep Time 5 minutes
Cook Time 35 minutes

Ingredients

Cake

  • 1 1/2 cups King Arthur Unbleached All-Purpose Flour 177g
  • 1 cup sugar 198g
  • 1/4 cup unsweetened cocoa, Dutch-process or natural 21g
  • 1/2 teaspoon salt
  • 1/2 teaspoon espresso powder substitute and instant coffee powder
  • 1 teaspoon baking soda
  • 1 teaspoon vanilla extract
  • 1 tablespoon vinegar, cider or white 14g
  • 1/3 cup vegetable oil 67g
  • 1 cup cold water 227g

Icing

  • 1 1/2 cups semisweet chocolate chips 255g
  • 1/2 cup half-and-half 113g

Instructions

  • Preheat your oven to 350°F. Lightly grease an 8" square or 9" round pan that's at least 2" deep.
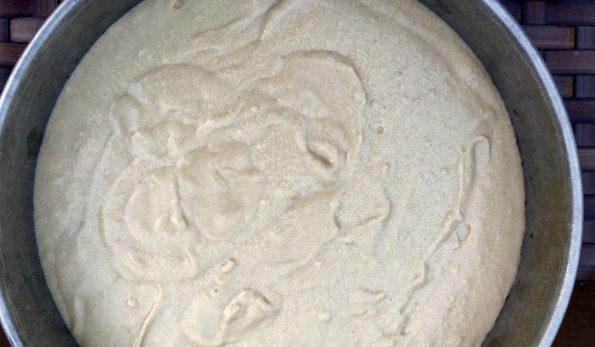
  • Whisk the dry ingredients together in a medium-sized bowl.
  • Combine the vanilla, vinegar, vegetable oil, and water in a separate bowl.
  • Pour the wet ingredients into the bowl of dry ingredients, stirring until thoroughly combined. Pour the batter into the prepared pan.
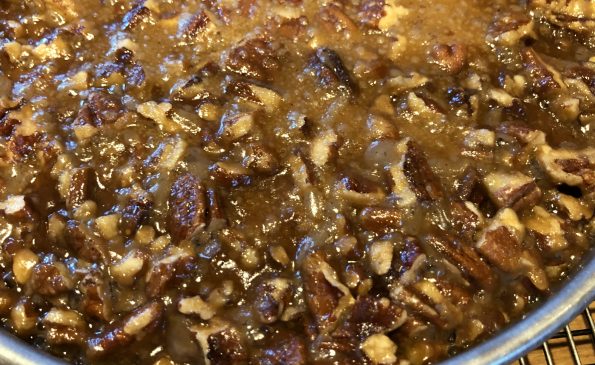
  • Bake the cake for 30 to 35 minutes, until a toothpick inserted into the center comes out clean, or with a few moist crumbs clinging to it.
  • Serve the cake right from the pan; warm from the oven, it's wonderful with a big glass of milk. This is a great VEGAN by accident recipe! Dust with powdered sugar and serve with berries.

Chocolate Icing

  • Or, once cool, frost the cake with chocolate frosting:
  • Heat the chocolate chips with the half-and-half until the chips melt. Microwave or doubleboiler. Stir until smooth, and pour/spread over the cake. For a non-dairy icing, substitute 1/3 cup cold-brewed coffee (or water) for the half-and-half.
  • Store cake, well covered, at room temperature for several days; freeze for longer storage.
Vanilla Cake Pan Cake, ABC-Easy as 123, That’s How Easy Cake Can Be

Vanilla Cake Pan Cake, ABC-Easy as 123, That’s How Easy Cake Can Be

This is your lucky day!  This post is a twofer.  That is I will be posting two recipes today! Ok, maybe not so lucky as we are smack dab in the middle of a smokefest alternating with a heatwave and this post is about baking.  Although, the upside is both cakes are INCREDIBLY easy to make so your time in the kitchen will be minimal.  You can wait until it cools down if you are in a hot zone, either way, these should be in your “need a quick homemade dessert right now” file.

But Why a Twofer?

Funny you should ask.  I sat down to write a post on CAKE-TWO, thinking I had already posted this Vanilla Cake Pan Cake recipe.  Nope, not to be found.  It is on my Instagram (shameless plug) but apparently I had yet to wax poetically about that cake on my blog.  My bad.

Both recipes are from King Arthur Flour and are INCREDIBLY EASY TO MAKE.  This is one bowl baking territory.

Without further ado, CAKE-ONE.

A couple of months back,  at the start of COVID, I needed a simple cake for a virtual birthday celebration for a friend.  Since it was virtual, the fam and I would be eating most of it, so quick, easy, and small were my guidelines.  Vanilla Cake Pan Cake on King Arthur Flour fits the bill.  Get this, no butter and no eggs.  Not gonna lie, I was dubious, no butter, no eggs?  It works!  Oil as the fat, baking soda and baking powder as the leavening agents, and vanilla for flavor.  A nice little tasty cake. The cake itself is vegan, if you use a butter sub for the frosting, the entire cake can be vegan.  This cake falls in the stupid easy category.  The frosting is a classic buttercream.  You could forego the frosting for a generous dusting of powdered sugar and some berries.  But if you need a festive cake, frosting with sprinkles or jimmies is the ticket.

So, need a quick dessert?  Here’s your answer. Now, onto the second post. Heh, heh, heh.  CAKE-TWO

Vanilla Cake Pan Cake

Ingredients

Cake

  • 2 cups King Arthur Unbleached All-Purpose Flour 241g
  • 3/4 teaspoon salt
  • 1 1/2 teaspoons baking powder
  • 1/2 teaspoon baking soda
  • 3/4 cup + 2 tablespoons water 198g
  • 1/2 cup vegetable oil 99g
  • 3/4 cup granulated sugar 149g
  • 4 1/2 teaspoons cider vinegar or white vinegar 21g
  • 1 tablespoon vanilla extract 14g
  • 1/2 teaspoon almond extract

Frosting Ingredients

  • 4 tablespoons butter, regular at room temperature 57g
  • 2 1/2 cups confectioners' sugar, sifted if lumpy 283g
  • 1/8 teaspoon salt
  • 1/2 teaspoon vanilla extract
  • 2 tablespoons water about 28g

Instructions

  • Preheat the oven to 350°F. Lightly grease an 8” square or 9” round pan that’s at least 2” deep.

To make the cake:

  • In a medium-sized bowl, whisk together the flour, salt, baking soda, and baking powder. Set aside.
  • In a separate bowl or large measuring cup, whisk together the water, vegetable oil, sugar, vinegar, vanilla, and almond extract. Add the wet ingredients to the dry and stir to combine. It's OK for a few small lumps to remain. Pour the batter into the prepared pan.
  • Bake the cake for 30 to 35 minutes, until the top feels set, the edges are beginning to pull away from the sides of the pan, and a toothpick inserted into the center comes out clean.
  • Remove the cake from the oven and either serve the cake warm from the oven or allow it to cool completely in the pan before frosting.

Frosting

  • To make the frosting: Beat together the butter, confectioners’ sugar, and salt until no large pieces of butter remain. Add the vanilla and 1 tablespoon of the water, beating to incorporate. Add enough additional water, a teaspoon at a time, to make a spreadable frosting.
  • Leaving the cake right in the pan, if desired, use a spatula or flat knife to apply the frosting.
  • Store the cake, well wrapped, at room temperature for several days. Freeze for longer storage.
Crispy Cheesy Pan Pizza, Knighted by King Arthur… Flour That Is

Crispy Cheesy Pan Pizza, Knighted by King Arthur… Flour That Is

In this topsy turvy year, where flour has been in short supply since the COVID crisis, King Arthur Flour selected a pizza as their recipe of the year.  It’s easy to make with the caveat it does require a good amount of time, so plan in advance.  But it is so worth the time, it’s delicious.  

Years of pizza filled kids’ events-birthday parties, sports parties, playdates at Chuckie Cheese, and school functions, have left me with an aversion to pizza.  But the kids have grown up, no more bad pizza, only pizza by choice, my choice.  

During quarantine, our daily routine always includes someone asking, what’s for lunch?  To which Wes has lately been replying, how about pizza?  A couple of friends have raved about King Arthur’s 2020 recipe, Crispy Cheesy Pan Pizza which meant, pizza time baby.

Crispy Cheesy Pan Pizza-Doing the Happy Dance

If you haven’t ever made your own bread, this is a great place to start.  This is one of those insanely popular, deservedly so, no-knead bread recipes.  Zero intimidation, a little bit of folding and lots of raves at the end, yep, it’s a keeper. The extended rest time gives rise (lol) to a crispy, airy, yummy crust.  The center is soft and pillowy and as you move to the perimeter it takes on a nice crunch.  

I’m sure the flour shortage during the time of COVID was pushed to new heights with this recipe. I used a 00 flour from Central Milling, I was out of KA AP flour.  You could sub bread flour by Gold Medal of Pillsbury as the protein content is a little higher and closer to King Arthur AP flour.  You make the dough, let it rest overnight in the fridge before putting on the final touches, TOPPINGS and then baking.

So a day later, take the dough out of the fridge and  smoosh it into a cast-iron skillet, I used my Staub pan or a 9-inch cake pan would work too.  But, keep in mind a heavy bottom skillet, especially cast-iron, enhances the crispiness.

Toppings

The King Arthur Flour recipe is all about the crust, no toppings so I went in search of a BOSS tomato sauce for the pizza.  First and last stop, Serious Eats.  New York Style Pizza Sauce, easy, tasty, a little spicy, a little sweet, a touch of basil, onion, and oregano, the perfect match.  Then the killer, butter is added to the sauce, which accentuates the crust.  OMGoodness, make this pizza.

Toppings are whatever your heart desires.  Our usual includes sausage and the triple-play of mushrooms, onions, and peppers.  Pre-cook toppings first.  My latest kick is adding arugula or micro-greens to the finished pizza.

Let me reiterate…Make this pizza, SOON.

Crispy Cheesy Pan Pizza

King Arthur Flour 2020 Recipe of the Year Crispy Cheesy Pan Pizza
Course Main Course
Cuisine Italian-American
Keyword Crispy Cheese Pan Pizza
Prep Time 30 minutes
Cook Time 25 minutes
Resting Time 1 day
Servings 6

Equipment

  • Cast-iron skillet or heavy bottom pan

Ingredients

Crust

  • 2 cups King Arthur Unbleached All-Purpose Flour 240g I used 00 flour from Central MIlling
  • 3/4 teaspoon salt
  • 1/2 teaspoon instant yeast or active dry yeast
  • 3/4 cup lukewarm water 170g
  • 1 tablespoon olive oil 13g
  • 1 1/2 tablespoons olive oil for the pan 18g

Toppings

  • 6 ounces mozzarella, grated about 1 1/4 cups, loosely packed* 170g
  • 1/3 to 1/2 cup tomato sauce or pizza sauce 74g to 113g homemade or storebought
  • freshly grated hard cheese and fresh herbs for sprinkling on top after baking optional
  • handful of fresh greens like arugula optional
  • toppings of choice

Tomato Sauce from Serious Eats

    Instructions

    • Weigh your flour; or measure it by gently spooning it into a cup, then sweeping off any excess. I really like using a scale.  Place the flour, salt, yeast, water, and 1 tablespoon (13g) of the olive oil in a medium-large mixing bowl.
    • Stir everything together to make a shaggy, sticky mass of dough with no dry patches of flour, about 1 minute by hand, using a spoon or spatula. Scrape down the sides of the bowl to gather the dough into a rough ball; cover the bowl.
    • After 5 minutes, uncover the bowl and reach a bowl scraper or your wet hand down between the side of the bowl and the dough, as though you were going to lift the dough out. Instead of lifting, stretch the bottom of the dough up and over its top. Repeat three more times, turning the bowl 90° each time. This process of four stretches, which takes the place of kneading, is called a fold.
    • Re-cover the bowl, and after 5 minutes do another fold. Wait 5 minutes and repeat; then another 5 minutes, and do a fourth and final fold. Cover the bowl and let the dough rest, undisturbed, for 40 minutes. Then refrigerate it for a minimum of 12 hours, or up to 72 hours. It'll rise slowly as it chills, developing flavor; this long rise will also add flexibility to your schedule.
    • Refrigerate it for a minimum of 12 hours, or up to 72 hours. It'll rise slowly as it chills, developing flavor.
    • About 3 hours before you want to serve your pizza, prep pan. Pour 1 1/2 tablespoons (18g) olive oil into a well-seasoned cast iron skillet that’s 10” to 11” diameter across the top, and about 9” across the bottom. Heavy, dark cast iron will give you a superb crust; but if you don’t have it, use another oven-safe heavy-bottomed skillet of similar size, or a 10” round cake pan or 9” square pan. Tilt the pan to spread the oil across the bottom, use a brush to spread some oil up the edges, as well.  
    • Transfer the dough to the pan and turn it once to coat both sides with the oil. After coating the dough in oil, press the dough to the edges of the pan, dimpling it using the tips of your fingers in the process. The dough may start to resist and shrink back; that’s OK, just cover it and let it rest for about 15 minutes, then repeat the dimpling/pressing. At this point the dough should reach the edges of the pan; if it doesn’t, give it one more 15-minute rest before dimpling/pressing a third and final time. 
    • Cover the crust and let it rise for 2 hours at room temperature. The fully risen dough will look soft and pillowy and jiggle when you gently shake the pan.
    • About 30 minutes before baking, place one rack at the bottom of the oven and one toward the top (about 4" to 5" from the top heating element). Preheat the oven to 450°F.
    • When you’re ready to bake the pizza, sprinkle about three-quarters of the mozzarella (a scant 1 cup) evenly over the crust. Cover the entire crust completely for those crispy, caramelized edges. Spread small spoonfuls of the sauce over the cheese. The first cheese layer helps prevent sogginess from the sauce. Sprinkle on the remaining mozzarella.
    • Bake the pizza on the bottom rack of the oven for 18 to 20 minutes, until the cheese is bubbling and the bottom and edges of the crust are a rich golden brown (use a spatula to check the bottom). If the bottom is brown but the top still seems pale, transfer the pizza to the top rack and bake for 2 to 4 minutes longer. On the other hand, if the top seems fine but the bottom's not browned to your liking, leave the pizza on the bottom rack for another 2 to 4 minutes. Home ovens can vary a lot, so use the visual cues and your own preferences to gauge when you’ve achieved the perfect bake.
    • Remove the pizza from the oven and place the pan on a heatproof surface. Run a table knife or spatula between the edge of the pizza and side of the pan to prevent the cheese from sticking as it cools. Let the pizza cool a little then transfer to a cooling rack or cutting surface. No soggy crusts.

    New York-Style Pizza Sauce

    Perfect sauce for King Arthur Crispy Chessy Pan Pizza
    Course Main Course
    Cuisine Italian-American
    Keyword New York Style Pizza Sauce
    Prep Time 15 minutes
    Cook Time 1 hour

    Equipment

    • Food mill, food processor, or hand blender

    Ingredients

    • 1 28-ounce can whole peeled tomatoes
    • 1 tablespoon extra-virgin olive oil
    • 1 tablespoon unsalted butter
    • 2 medium cloves garlic grated on microplane grater (about 2 teaspoons)
    • 1 teaspoon dried oregano
    • Pinch red pepper flakes
    • Kosher salt to taste
    • 2 6-inch sprigs fresh basil with leaves attached
    • 1 medium yellow onion peeled and split in half
    • 1 teaspoon sugar

    Instructions

    • Combine butter and oil in medium saucepan and heat over medium-low heat until butter is melted. Add garlic, oregano, pepper flakes, and large pinch salt and cook, stirring frequently, until fragrant but not browned, about 3 minutes.
    • Add tomatoes, basil sprigs, onion halves, and sugar. Bring to a simmer, reduce heat to lowest setting (bubbles should barely be breaking the surface), and cook, stirring occasionally, until reduced by 1/2, about 1 hour.
    • Discard onions and basil stems. Season to taste with salt. Allow to cool and store in a covered container in the refrigerator for up to 2 weeks.

    Notes

    The sauce makes enough for 2 12 inch pizzas so you will have plenty.  Keep the onion, don't discard it.  This sauce would probably work over some pasta too, with that onion!

    Birthday Cake: A Labor of Love (Farmhouse Buttermilk Cake)

    Birthday Cake: A Labor of Love (Farmhouse Buttermilk Cake)

    We celebrated a couple of family birthdays in June.  Most notably my kid’s and my brother’s.  They share the same day, just different year, different decade, but at least not a different century.  The day my kid was born I had actually invited my brother down for dinner, a birthday bbq, since I was not allowed to travel too far from home.  As we, I should say “they”, my brother, his wife, my mom and hubby enjoyed a dinner of rib eye steaks and the fixings, I sat on the couch, trying to regulate my breathing and ignore the pain.  I finally couldn’t take it anymore and unceremoniously shoved the chocolate birthday cake I had made into his chest; wished him a happy birthday, and told him (with clenched teeth), eat the cake at home, I was headed to the hospital.

    Whenever possible, we celebrate their birthdays together.  An excuse for a family get together and to retell (ad nauseam) to unknowing guests, the “birth”day story.  This year’s celebration was a bit more significant, the kid turns 25 and the bro signs up for Medicare, lol. Time marches on.

    The request came through from the birthday boys for Wes’s Carrot Cake.  Good choice, it was delicious and I was off the hook.  But what to do with the extra buttermilk in the fridge?

    I think my FB page has ESP, smack dab in the middle of my newsfeed,  a recipe popped up for Farmhouse Buttermilk Cake.  Not only did the recipe have buttermilk, it included my favorite nut, pecans, in a caramel-like topping on top of a tender, tangy, buttermilk cake.

    Pulling out my cake pan now.

    The recipe, originally from King Arthur Flour, and then tweaked by The Cafe Sucre Farine is a winner. A tender crumb cake topped with a caramel-like nutty topping is sweet, salty, and buttery, everything a little slice of heaven should be.

    The cake is a snap to make.  You could easily make this with a bowl and a wooden spoon.  Taking the lazy way out, I used my mixer.  Classic directions, cream butter and sugar, add wet then dry, pour into pan and bake.  See, how easy is that?   I used the proportions from Cafe Sucre Farine to make a 9-inch round cake. King Arthur Flour’s recipe makes a 9×13 cake, so if you are feeding a crowd, go to KA site for the recipe.

    While the cake is baking, make the topping.  Don’t make it too soon as it will cool and thicken.  You want it warm so it is pourable.  You could easily substitute any nut you like, almonds, walnuts or even a mix of nuts would work.  I followed CSF’s lead and sprinkled some flake salt at the end to really pump up that play on sweet and salty.  YUM.

    Bake the cake for approximately 30 minutes, top with the pecan-sugar mixture and bake an additional 10 minutes.  Remove from oven and sprinkle with flake salt.  Not TOO much, just a hint.  Let cool.  The cake can be served warm but I think the flavors come out when the cake is allowed to cool and rest.  The topping hardens a bit as it cools.

    Perfect with coffee, tea or an ice cold glass of milk!

    Farmhouse Buttermilk Cake

    Tender buttermilk cake topped with a caramel like pecan mixture
    Course Dessert
    Cuisine American
    Keyword Pecan Topped Buttermilk Cake
    Prep Time 15 minutes
    Cook Time 40 minutes
    Total Time 1 hour
    Servings 12 servings
    Calories 289kcal

    Equipment

    • Mixer
    • 9" cake pan

    Ingredients

    For the cake:

    • ¼ cup butter soft
    • 1 cup light brown sugar
    • 1 large egg
    • 1 cup buttermilk
    • 1 teaspoon vanilla extract
    • 1 teaspoon baking soda
    • ½ teaspoon salt
    • 1 ½ cups all-purpose flour

    For the topping:

    • 3 tablespoons melted butter
    • ½ cup light brown sugar
    • 2 tablespoons half and half
    • teaspoon salt
    • ¾ cup diced pecans

    Instructions

    For the cake:

    • Preheat the oven to 350°Spray a 9" round cake pan with baking spray and line with parchment paper. Set aside.
    • Combine flour, baking soda and salt in a small bowl and set aside.
    • Combine the butter and brown sugar in mixer bowl on medium-low speed until smooth
    • Add the egg, beating again till smooth.
    • Stir in the buttermilk and vanilla extract.
    • Sprinkle dry ingredient mix evenly over the top and stir until well combined.
    • Pour the batter into prepared pan.
    • Bake the cake for 30 minutes or until a toothpick inserted in the center comes out clean and/or the cake springs back when lightly touched in the center.
    • During the last 10-15 minutes of baking time, prepare topping. Stir the butter and the sugar together. Add the milk, pecans, and salt. The glaze will be thick, but pourable.
    • After the cake has baked for 30 minutes, pour the topping over the cake and return it to the oven for another 10 minutes (for a total baking time of 40 minutes). Remove cake from the oven and allow to cool for 20 minutes in the pan. Sprinkle lightly with flaky sea salt, if desired and serve warm or at room temperature. Topping firms up as the cake cools.
    • Cake can be served with ice cream, well that's my suggestion, vanilla ice cream-nom,nom.

    Notes

    Adapted from King Arthur Flour and Cafe Sucre Farine


    Pumpkin Bread, A Darty for Lucky

    Pumpkin Bread, A Darty for Lucky

    I bet you are wondering about 2 things right now.  What is a “darty” and what’s with the picture of pumpkin bread and dog biscuits? Am I right?

    The answers begin with our dog Sammy receiving an invitation to a darty, a doggy birthday party for his buddy Lucky.  Yes, even our dog has a social life.  We decided only homemade doggy treats would do for Lucky.  Sammy’s favorite, which we made for our 12 days of Christmas cookies, are these doggy-licious pumpkin peanut butter treats  I found on the blog Use Real Butter.  For this batch, I  had some applesauce so I added a scoop of it to the dough just to sweeten the deal.

    What to do with the extra pumpkin puree and applesauce…Pumpkin Bread of course.  It was a no-brainer, despite the fact that we are on the cusp of summer not fall, it would be a shame to let the extra go to waste.

    I do have a favorite pumpkin bread recipe but I remembered I had purchased a jar of pumpkin pie spice from King Arthur Flour.  So instead of using my favorite recipe, I searched and found a new version on the blog  My Baking Addiction that uses pumpkin pie spice.  Game on…

    This bread is easy to make and delicious I will be baking loaves year around.  It is moist not gummy and just sweet enough, perfect with a cup of tea or coffee.  The spice mix adds that familiar cinnamon and clove but doesn’t overpower the pumpkin.  The flavors develop so it is even better the second day.  Toasted with a smear of cream cheese or a pat of butter? Delish.  Yummy enough to stand in line for a slice..but behind me, please.

    Two for the Time of One

    The recipe makes 2 loaves so freeze the second loaf for a rainy day.  As with many quick bread recipes, it lends itself well to additions and substitutions, I couldn’t resist tweaking it.  I added a cup of chopped apples, reduced the oil to 3/4 cup, and replaced the remaining 1/4 cup with applesauce.  To finish the bread I added chopped pecans to the top of the batter and liberally sprinkled the top with cinnamon sugar. In place of apples, raisins, and nuts or chocolate chips would be crazy good.

    DSC04186

    That’s it for now, oh wait…more mail for Sammy. Ah, the life.

    Pumpkin Bread with Apples

    Traditional fall treat, Pumpkin Bread with Apples and Streusel Topping. Delicious!
    Course quick breads
    Cuisine American
    Keyword Pumpkin Bread
    Prep Time 15 minutes
    Cook Time 1 hour

    Ingredients

    • 1 15 ounce can pumpkin puree
    • 4 eggs
    • 1 cup vegetable oil or 3/4 cup oil & 1/4 cup applesauce
    • 2/3 cup water
    • 2 teaspoons vanilla extract
    • 2 1/2 cups sugar
    • 3 1/2 cups all-purpose flour
    • 2 teaspoons baking soda
    • 1 1/2 teaspoons kosher salt
    • 2 tablespoons pumpkin pie spice
    • 1 cup diced apples granny smith or pippin or fuji which is less tart

    Topping:

    • 1/2-1 cup chopped pecans or walnuts
    • cinnamon sugar 1T granulated sugar + 2 teaspoon cinnamon

    Instructions

    • Preheat oven to 350 degrees
    • Grease and flour two loaf pans. 8.5x 4 although with additions use 1 8.5x4 and 1 9.5x5 pan
    • Combine dry ingredients flour, baking soda, pumpkin pie spice, and salt in a bowl and set aside
    • In a large bowl add pumpkin puree, eggs, oil, applesauce, water, vanilla and sugar. Whisk until well combined. This can be done by hand or in a mixer.  Fold in dry ingredient mix.  
    • Add diced apples and half of nuts.
    • Divide batter between loaf pans. Top with remaining nuts and sprinkle with cinnamon sugar.
    • Bake 50-60 minutes. Loaves are done when cake tester comes out clean.
    • Cool and remove from pans.
    • Enjoy!

    DSC04155

    Birthday party for Lucky!

    Let It Snow, Let It Snow, Let It Snow (Almond Clouds)

    Let It Snow, Let It Snow, Let It Snow (Almond Clouds)

    I manage to combine everything I love in one trip.  How cool is that?  Crew, travel, photography, food..life is good, eat pie.

    Let it Snow, let it snow, let it snow by Diana Krall

    New England Bucket List  

    Row at Head of the Charles in Boston:  Check   
    1017SenMast8W040-01-1In Boston:

    • Jane, Mary and Debbie’s Excellent Adventure:  Check
    • Experience New England Fall colors   Semi-check (a little too late)
    • Visit Quechee, Vermont.
    • Walk the covered bridge to get to Simon Pearce Glass
    • Listen to SiriusXM Radio  They play 6 artists from each decade over and over and over
    • Chocolate-covered oyster crackers? Yep, Cocoa Bean Montpelier, Vermont

    IMG_0781

    Find obscure pie shed in the middle of nowhere and eat scrumptious pie:  Check

    Poorhouse Pies  Underhill, Vermont, get the Key Lime Pie, you won’t regret it.  After watching A Few Good Pie Places on public television, this was our destiny….

    DSC02375

    Visit baking mecca King Arthur Flour:  Check

    Is this Heaven? No, it’s Vermont.  Is it possible to pack 15 pounds of flour in my suitcase and not exceed airline weight limit?  Apparently not.

    DSC02346 (1)

    And now for that cookie recipe I promised.  Straight from King Arthur Flour, Almond Cloud Cookies.  Yes, gluten-free and ridiculously easy, child’s play…just saying.  I recommend a food processor to make the batter, an idea from Just Get Off Your Butt and Bake, making it incredibly easy to make.

    DSC02688

    DSC02696DSC02698


    I used almond paste from the King Arthur Flour catalog.  It calls for bitter almond oil, but, you can substitute vanilla extract and still taste the almond.


    The dough is fairly stiff.  I made my cookies a little smaller using a tablespoon ice cream scoop. Instead of sifting powdered sugar over the batter before baking, just roll the balls of dough in the sugar.


    Do not skip the 3 finger indentations.  The cookies look better.  Baking time was approximately 15 minutes. The edges will be crisp and light brown and the centers soft and chewy.  If you love almond and have a sweet tooth, this is the cookie for you.

    Almond Cloud Cookies

    Ingredients

    • 1 10 ounce can of almond paste
    • 1 cup sugar
    • 2 egg whites lightly beaten
    • 1/2 tsp almond extract
    • 1/4 tsp. bitter almond oil substitute vanilla extract for this
    • 1/4 salt

    Instructions

    • Preheat oven to 325 degrees
    • Place almond paste and sugar in food processor bowl. Pulse to blend until mixture looks crumbly
    • Add egg whites, salt, extracts to almond sugar paste.
    • Blend until smooth. Batter will be fairly stiff, should be able to scoop batter out with tablespoon ice cream scoop.
    • Roll in powdered sugar until evenly coated
    • Place on parchment lined baking sheet. Gently press three fingers into the top of each dough ball.
    • Bake 15 minutes until the edges are golden brown and the center still chewy.