Waat Dan Fan (滑蛋飯) is one of my absolute all-time favorite down-home Cantonese dishes. The literal translation is Slippery Egg Rice. This version includes beef so it’s called Waat Dan Gnow Yuk Fan (滑蛋牛肉飯). Although it comes together quickly, it can be a little tricky to get the texture of the eggs right. Don’t let that put you off though, it is well worth it. It may take a couple of tries, as it did with me, but the return is HUGE. You will be rewarded with a homey, satisfying, tasty dish of stir-fried beef nestled in a pool of silky, scrambled-swirled eggs flavored with scallions and ginger. Soooooo good! 真好吃!
Don’t Slip Up on the Mise on Place
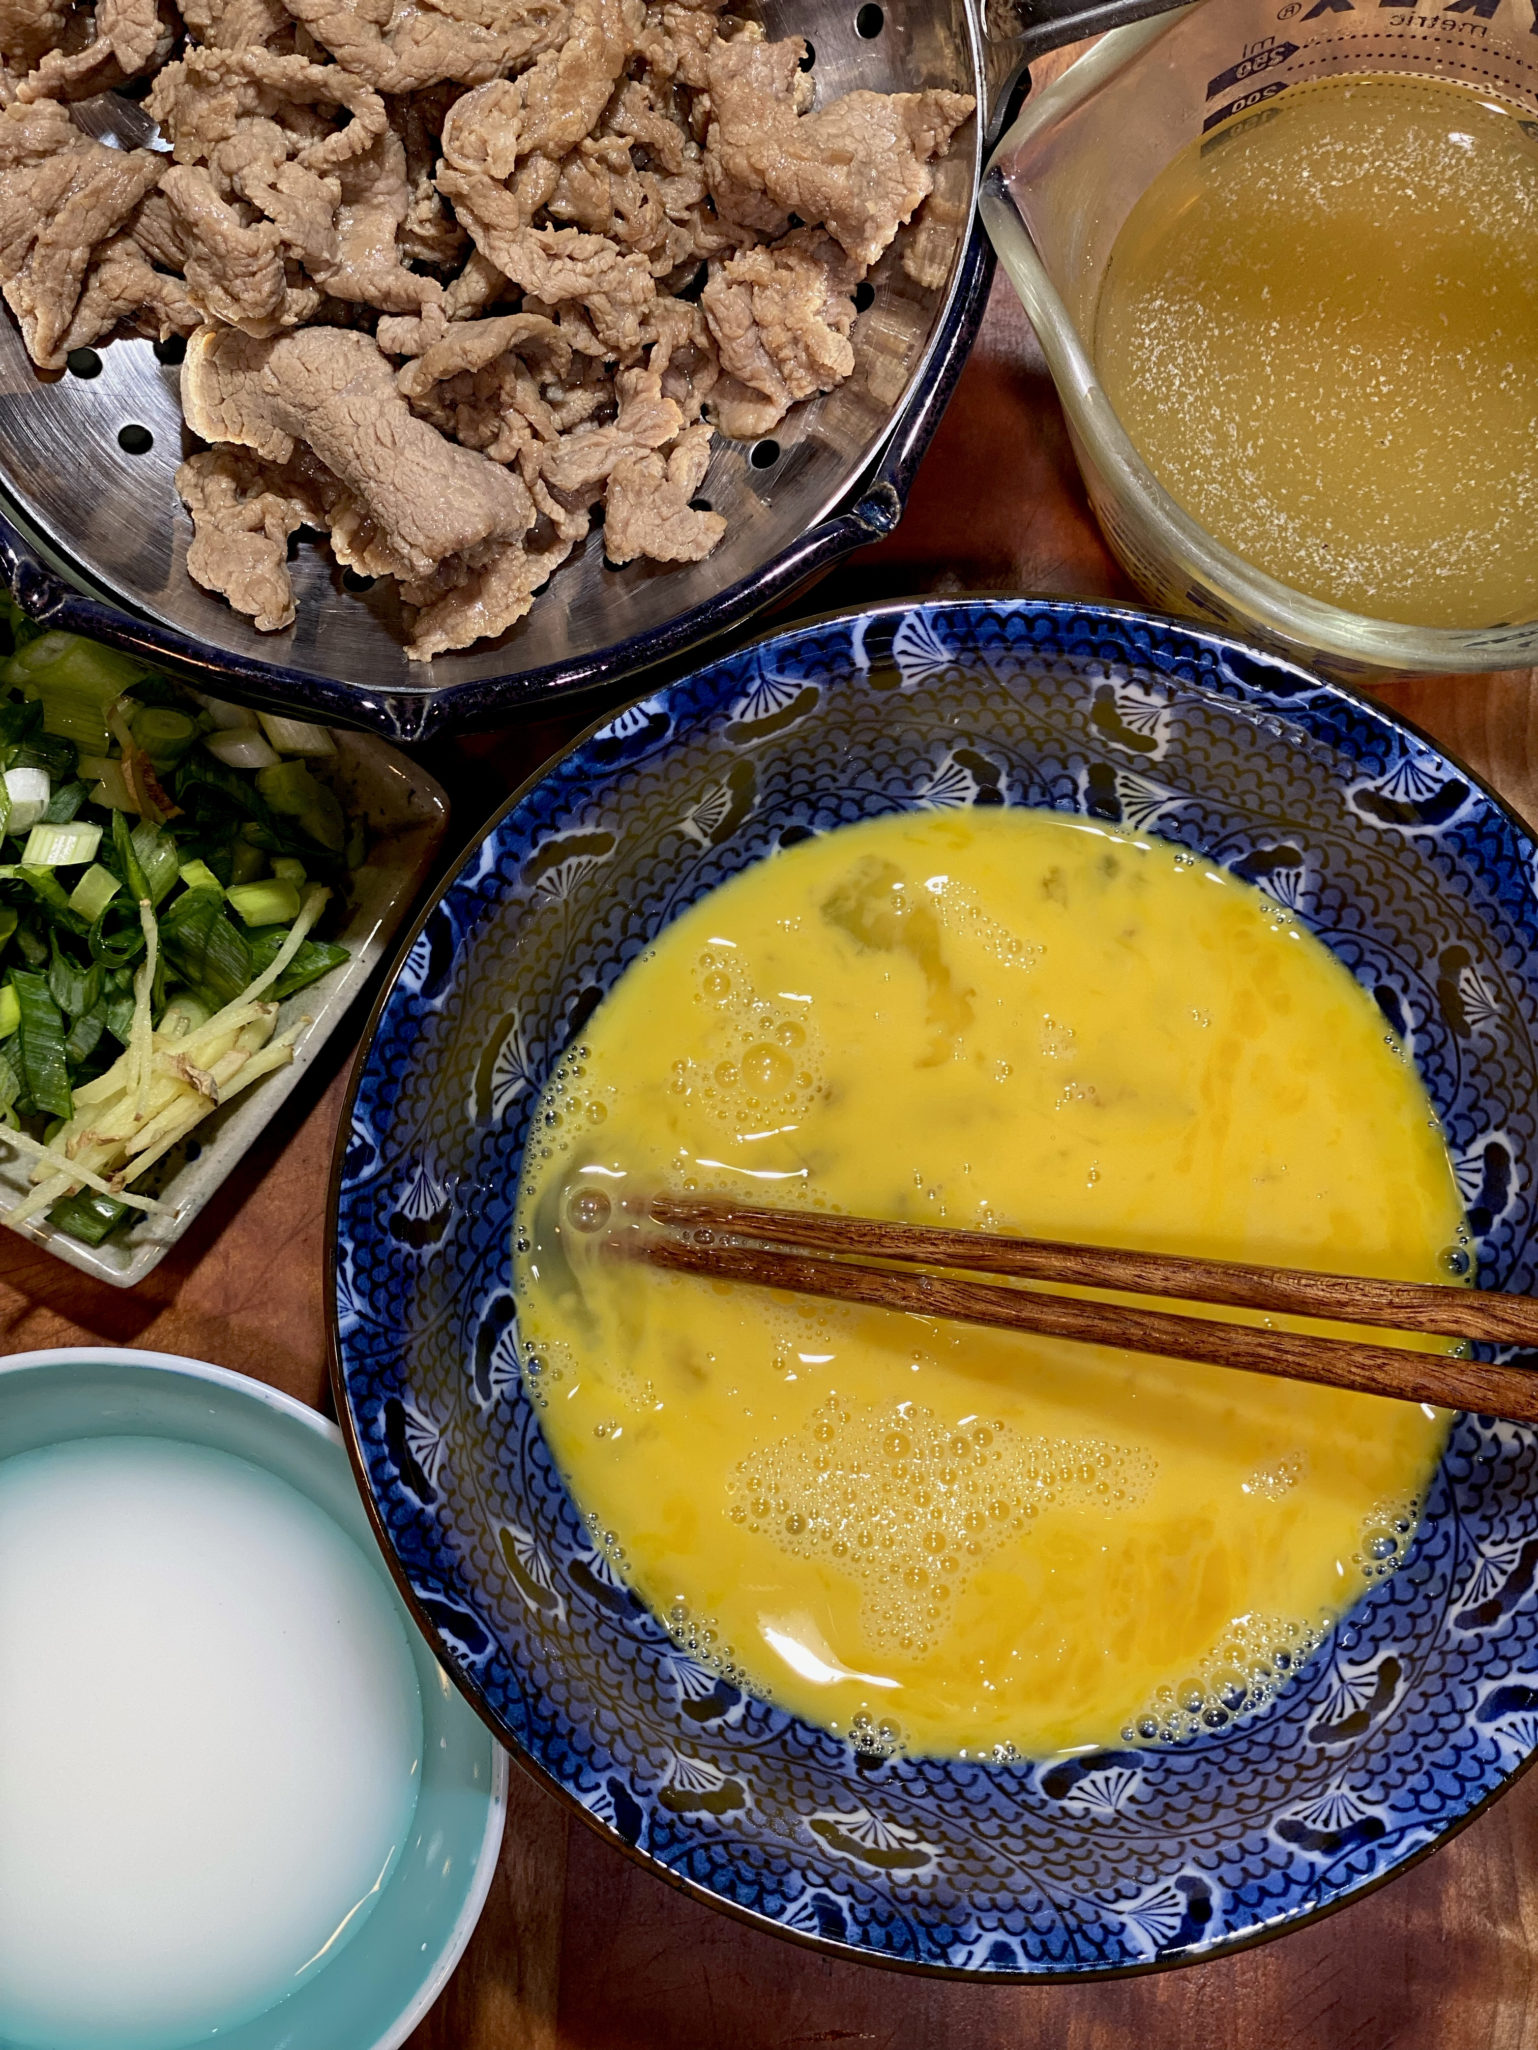
Everyone thinks stir-frying is quick and easy, although the cooking portion is quick, it’s the prep that takes time. Everything has to be ready for the stir-frying to look effortless. This dish is no egg-ception.
Slice and marinate your beef and put it in a bowl to the side. Note, the oil in the marinade goes in last AFTER the beef has sat for 15-20 minutes and absorbed the marinade.
Crack your eggs into a bowl and whisk them with a pinch of salt. Set it near the beef and close to the stove.
Slice your green onions and set them aside.
Have your 1/2 cup of stock to which you have added the sugar and salt along with the slurry of cornstarch and water ready.
Place the prepped ingredients next to the stove.
You’ll thank me
This is a classic Cantonese dish, the epitome of soul food. I love serving it in a bowl with a spoon. Looking for a vegetarian rift? Try Tomato & Egg Rice. Enjoy!
4ouncesFlank steak, flat iron or sirloin, thinly sliced
2largeeggscan use extra large or jumbo
1/2cupwater or chicken stock (low sodium)
2tbspsliced green onions
1/4tspsalt
1/4tspsugar
peanut oil
1tspcornstarch + 3 tbsp waterMIx in a small bowl and set aside
Mainade for Beef
1tbspsoy sauce
1/2tbspoyster sauce
1-2slicesfresh ginger, julienned
1tbspsugar
dash of white pepper
1tbspShaoxing wine
1tspcornstarch
1tbsppeanut or vegetable oil
3tbspwater
Serve over hot rice or rice noodles
2-3cupsof steamed white rice
Instructions
Slice the beef to 0.2 mm thick, add the marinade ingredients except for the oil, marinade for 20 minutes. As the beef sits it will absorb alot of the water. Add oil after the beef has sat. Set aside.
In a small bowl, beat eggs with a pinch of salt. Set aside.
Heat oil in a pan over medium-high heat, add beef, stir-fry until it is no longer pink. Remove the beef and set aside. If beef has a lot of liquid, pour it into a strainer placed over a bowl to drain.
Pour the broth or water into the pan used to stir-fry the beef, add salt and sugar, and bring it to a boil.
Add the cornstarch water mix, and bring to a boil again. The mixture will thicken to a thin sauce consistency. Lower the heat to medium-low.
Pour the eggs into the sauce in a stream moving around the pan. Let it set a bit and then stir gently to allow eggs to continue to cook and set a bit more. It will still be very loose and the stock slurry will still be visible.
Add the beef and sliced scallions and cook for 30 seconds to one minute, stirring gently to blend the sauce and eggs. The mixture will be saucy.
Spoon cooked hot rice into shallow bowls large enough to hold 1-2 cups of rice. Pour the beef and egg mixture over the rice. Garnish with additional sliced scallions and cilantro. Serve immediately.
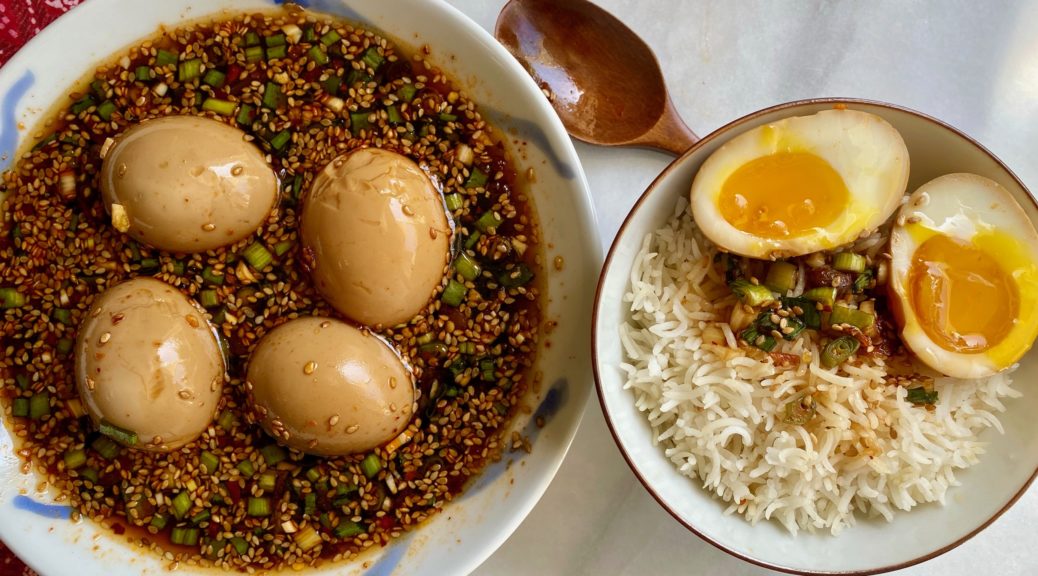
Originally this post was going to just be about the latest Korean craze, Mayak Eggs (마약계란). Tik Toks, Reels, IG Stories, folks “egging” everyone on to try Mayak Eggs. The eggs are cooked Ramen Style (we’ll get into that later) and soaked in a bath of soy sauce, sweetener, chilis, garlic, and green onions. Yep, pretty darn tasty, a flavor explosion of sweet, salty, spicy, and garlicky.
Egg-a-Licious
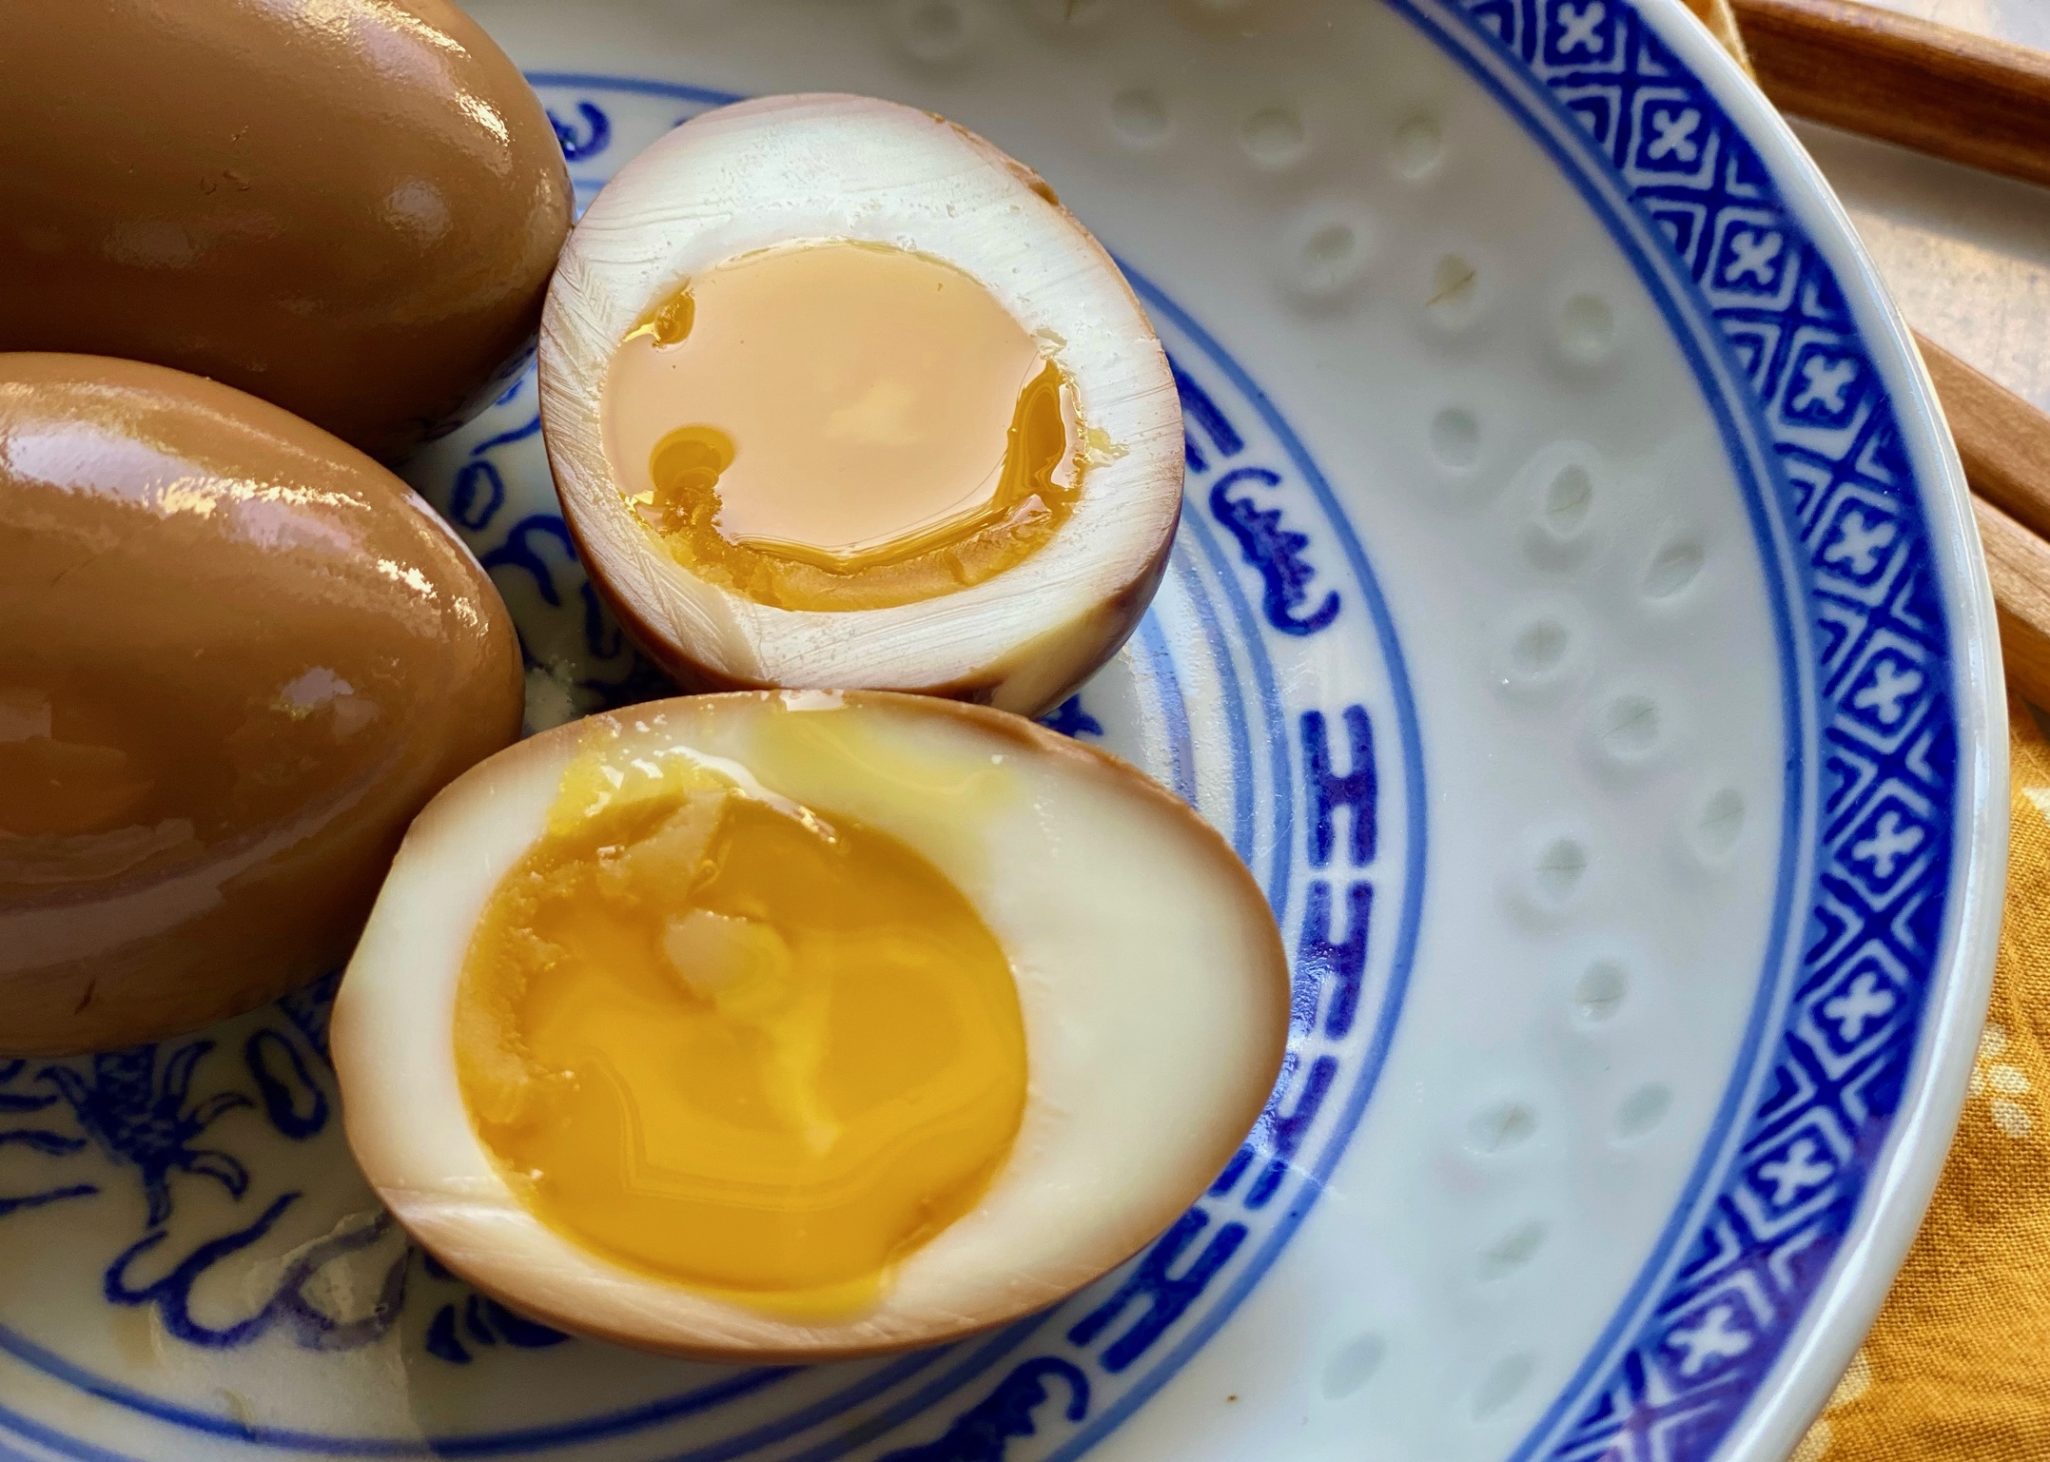
Ramen Style eggs are cooked in a pretty specific way. Bring water to a boil and carefully drop your eggs in the boiling water. Let them boil for 6 minutes before immediately plunging them into an ice bath to stop the cooking. The end result is a soft-boiled egg, where the egg white is cooked through but still tender and the yolk is just beginning to set around the edges. The center of the yolk is oozy, unctuous, and scrumptious, perfect in a bowl of ramen.
I have a confession to make…
I didn’t cook my Mayak Eggs this way. A couple of years ago, (you all know I LOVE kitchen gadgets right? Donut pan, meat grinder, Instant Pot….) I bought an egg cooker. Yep, a good for only one thing gadget, cooking eggs. So I used it for my Mayak Eggs.
Well, I am not going to tell you to go buy an egg-cooker (don’t do it) so I needed to make Six Minute Ramen Eggs for myself. I still had Mayak Eggs in the fridge so I decided to make Dave Chang’s Momofuku Ramen Eggs. His recipe was part of Food52’s 10 all-time favs, so this was an easy call.
6 Things You Need to Know
Both these recipes are incredibly EASY.
Both are riffs on a soy sauce-based brine to flavor the eggs
Plan to make them in advance as the eggs need to sit in the brines for awhile
Mayak means drug in Korean. Yes, they are addicting-that good
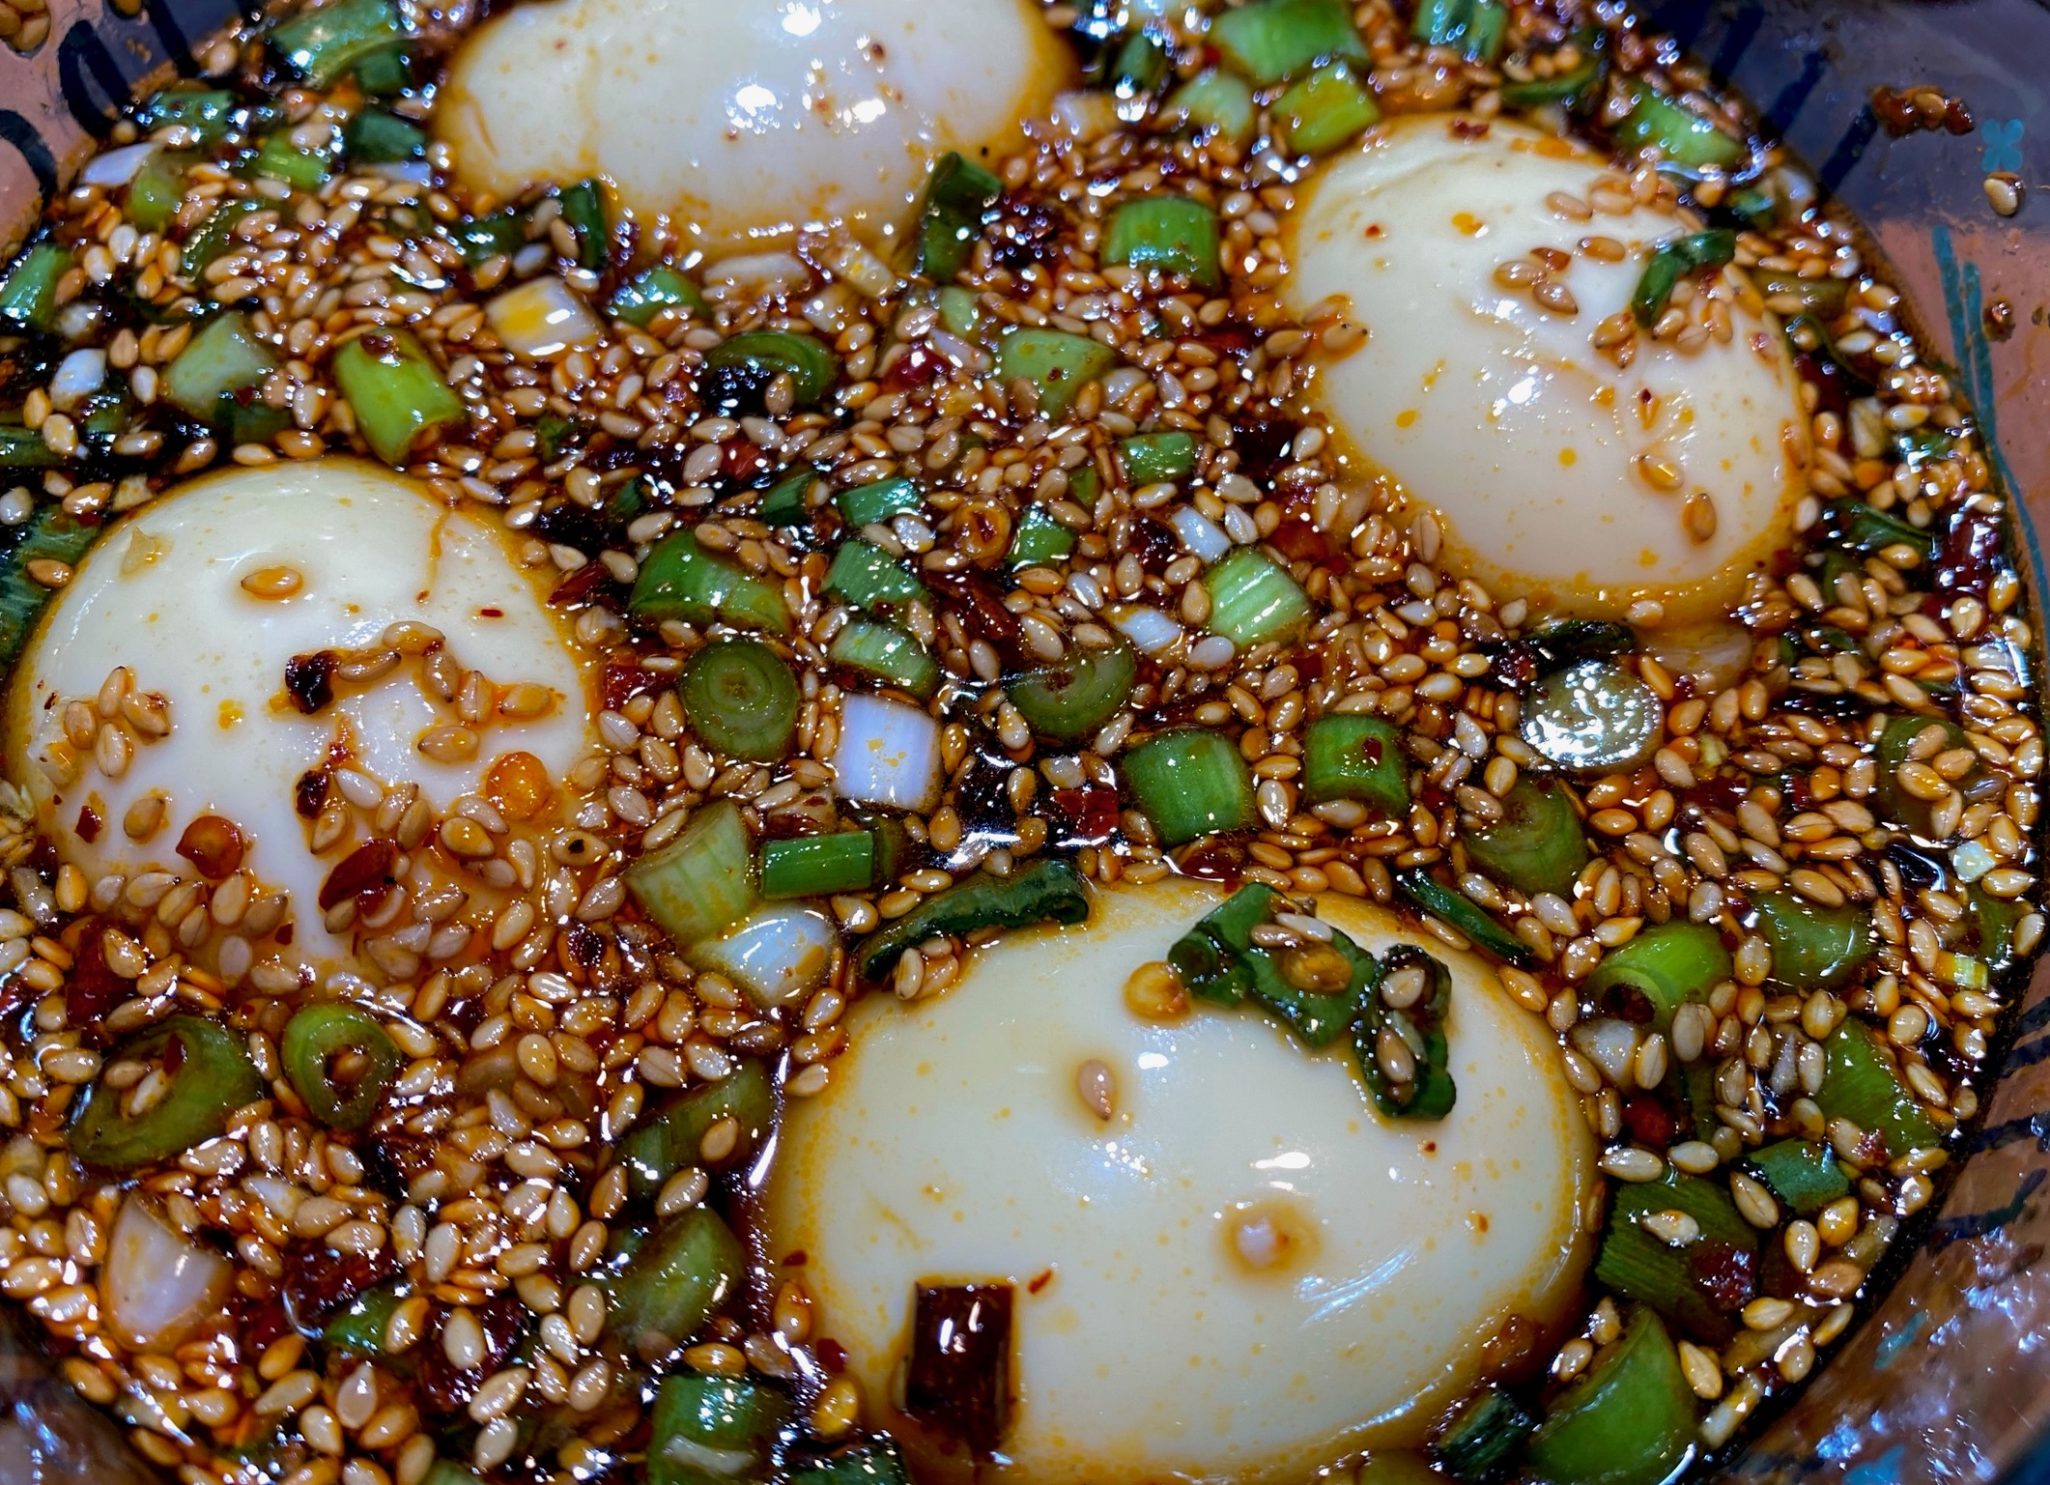
The longer the eggs are left in the brine the more color and flavor they will absorb
I saved the best for the last…
The hardest, most frustrating THING will be peeling those damn eggs!
Key points before the deep dive into the unappealing task of peeling.
Do You Mayak?
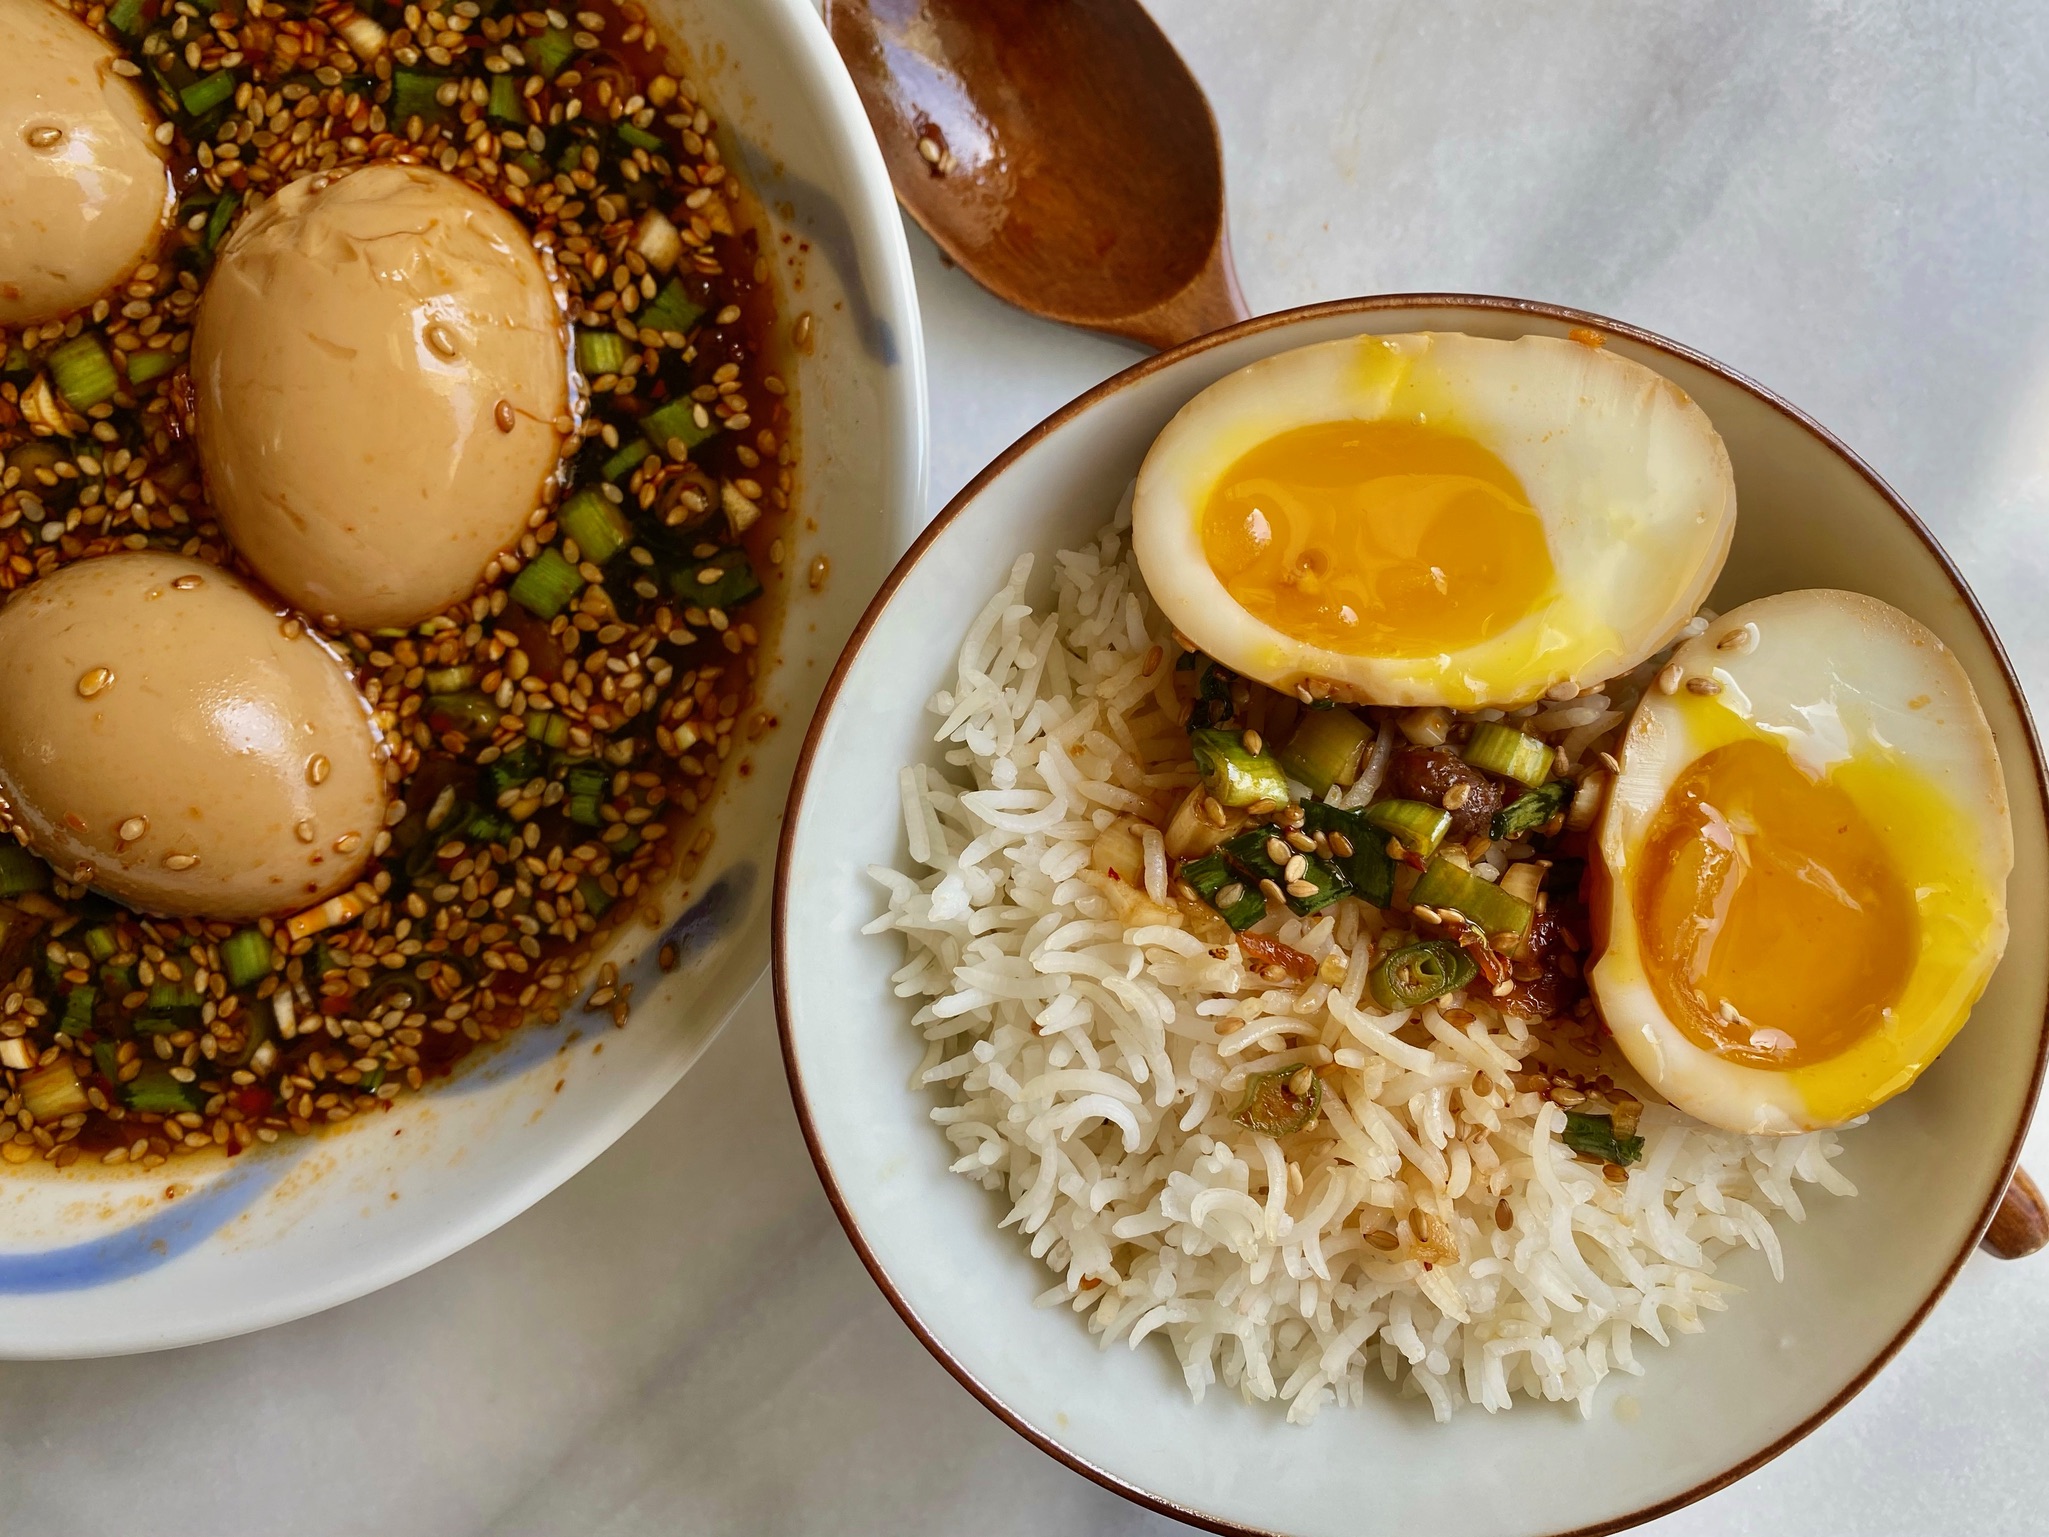
The sauce for the Mayak Eggs is delicious on rice or noodles. The soy sauce and sweetener (you can use corn syrup, rice syrup, or honey) balance each other so it is okay to leave the eggs in the brine/sauce to store. The aromatics, garlic, chilis, scallions pump up the flavors in the sauce and take the eggs to a whole new level. Absolutely delish. Mayak Eggs can be served as a banchan (side dish) or as a topping on a bowl of rice (my fav) or noodles. I tossed one in my bowl of Congee, along with a splash of the sauce this morning. Delicious.
For less spicy eggs, de-seed and/or de-vein the chilis or reduce the number of chilis. You can definitely play with this sauce and make it your own. Add a little fish sauce for a briny flavor or a Ponzu instead for citrus notes. Go crazy, it’s all good.
Dave is a Good Egg
Momofuku Eggs are closer to a traditional ramen egg. Not only great with ramen or Udon, but also delicious as part of a rice bowl like Taiwanese Pork Belly Rice Bowl or Buta no Kakuni (Japanese Pork Belly)or Simple Minced Pork Bowl. The brine is salty. Marinade your eggs for no more than 4 hours and use a low-sodium soy sauce. Once made, the eggs can be stored sans sauce in an airtight container. For a sweeter egg, add another tablespoon of sugar.
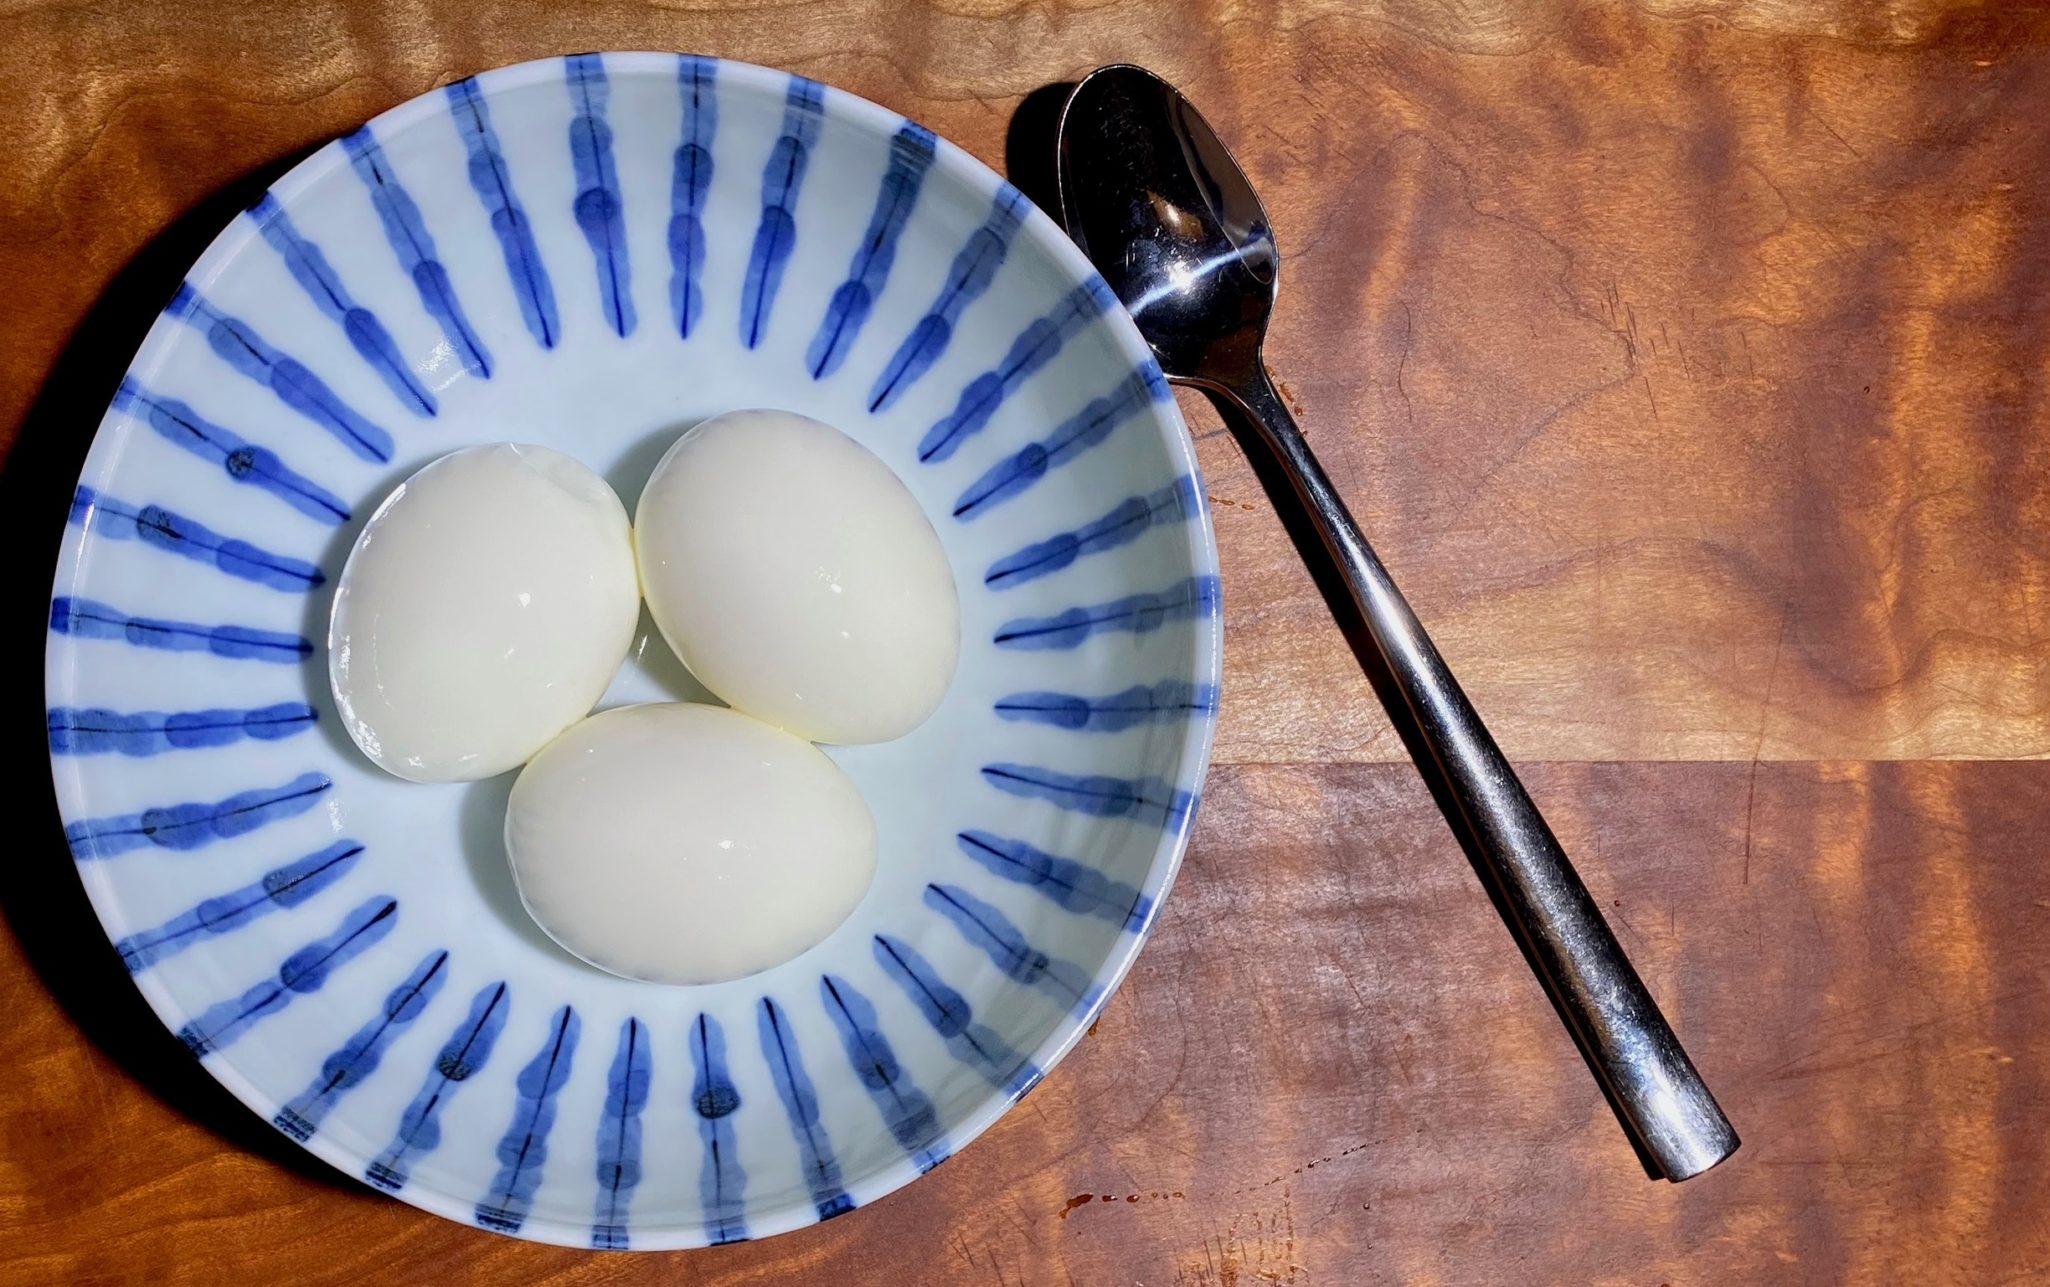
It’s the Big Egg…Here’s the Hard Part…Peeling
The goal is to end up with a smooth, pristine, beautiful egg…after peeling it. The eggs are a little softer than a hard-boiled egg adding another layer of difficulty. Peeling without leaving little divots in the eggs, not an easy task.
Boil enough water such that the water level is one inch over the eggs.
Add 1 tablespoon vinegar and 1 teaspoon salt to the water. ( I see just as many recipes that don’t include this-optional)
When the water comes to a boil, carefully lower the eggs into it.
For the first minute of boiling, stir the eggs around the pot, this helps center the yolk.
Boil (not crazy boil, gentle rolling boil) for 6 minutes for a runny yolk, an additional minute for a jammy egg.
Have an ice bath ready to transfer the eggs into.
Allow eggs to cool for 5 minutes in the ice bath.
Crack the eggshell by tapping on it with a spoon. Carefully peel the eggshell off along with the membrane between the shell and egg. It helps to peel the egg in water or under running water.
Invert your teaspoon so the bottom is facing you, and slide it under the eggshell and membrane, lift the spoon to separate the shell from the egg.
Rinse any shell fragments off eggs and place them in brine. Done!
1/2cupsoy sauce I use Sempio 701 Soy Sauce for this dish
1/2cupwater
1/2cuprice syrupcorn syrup or honey
3garlic cloveschopped
3 to 4green onionschopped
1green chilichopped (optional)
1red chilichopped (optional)
1tbspsesame seeds
Instructions
Cookin Da Eggs
Heat enough water to cover 6 eggs by 1 inch in a pot. Add salt and vinegar and bring it to a rolling boil. Using a slotted spoon add eggs to water. Cook the eggs for 6 minutes for runny yolk or up to 10 minutes (Nooo, don't do it!) for hard-boiled eggs. While eggs are cooking, make a water bath of ice and water in a medium-size bowl. When the eggs are done, Immediately transfer them to the ice water bath. Cool for 5-7 minutes before peeling.
Da Sauce (marinade)
Combine soy, water, and sweetener and stir to blend. Add garlic, green onions, chilies and sesame seeds, stir.
Peel the eggs carefully without damaging them (easier said than done) and place in an air-tight container. Pour the sauce mixture over the eggs, cover and store in a refrigerator for at least 6 hours to overnight before serving.
It will last 5 to 7 days in fridge!
Drizzle with sesame oil! Serve with hot steamed rice.
Momofuku 6-minute eggs perfect topping on ramen or by itself as a snack
Course Appetizer
Cuisine Asian
Keyword egg, ramen egg
Prep Time 5 minutesminutes
Ingredients
6tablespoonswarm water
1tablespoonsugaraddtional tablespoon for a sweeter egg
2tablespoonssherry vinegar
3/4cupsoy saucelow-sodium or Tamari
4-6large eggs
Instructions
In a medium bowl, whisk together the water and sugar to dissolve the sugar, then stir in the sherry vinegar and soy sauce.
Bring a large pot of water to a boil. Carefully put the eggs into the boiling water and cook for exactly 6 minutes and 50 seconds, stirring slowly for the first 1 minute. Meanwhile, fill a large bowl with cold water and ice. When the eggs are done, transfer them to the ice bath.
Once the eggs are cool, (5-7 minutes) peel them in the water. See notes above.
Transfer the eggs to the soy sauce mixture and marinate in the fridge for at least 2 hours and up to 4 hours, making sure they are completely submerged or occasionally rotate eggs.
Remove the eggs from the sweet and salty marinade. You can save the soy sauce mix for another round of eggs, if you wish. Refrigerate eggs in a tightly sealed container.
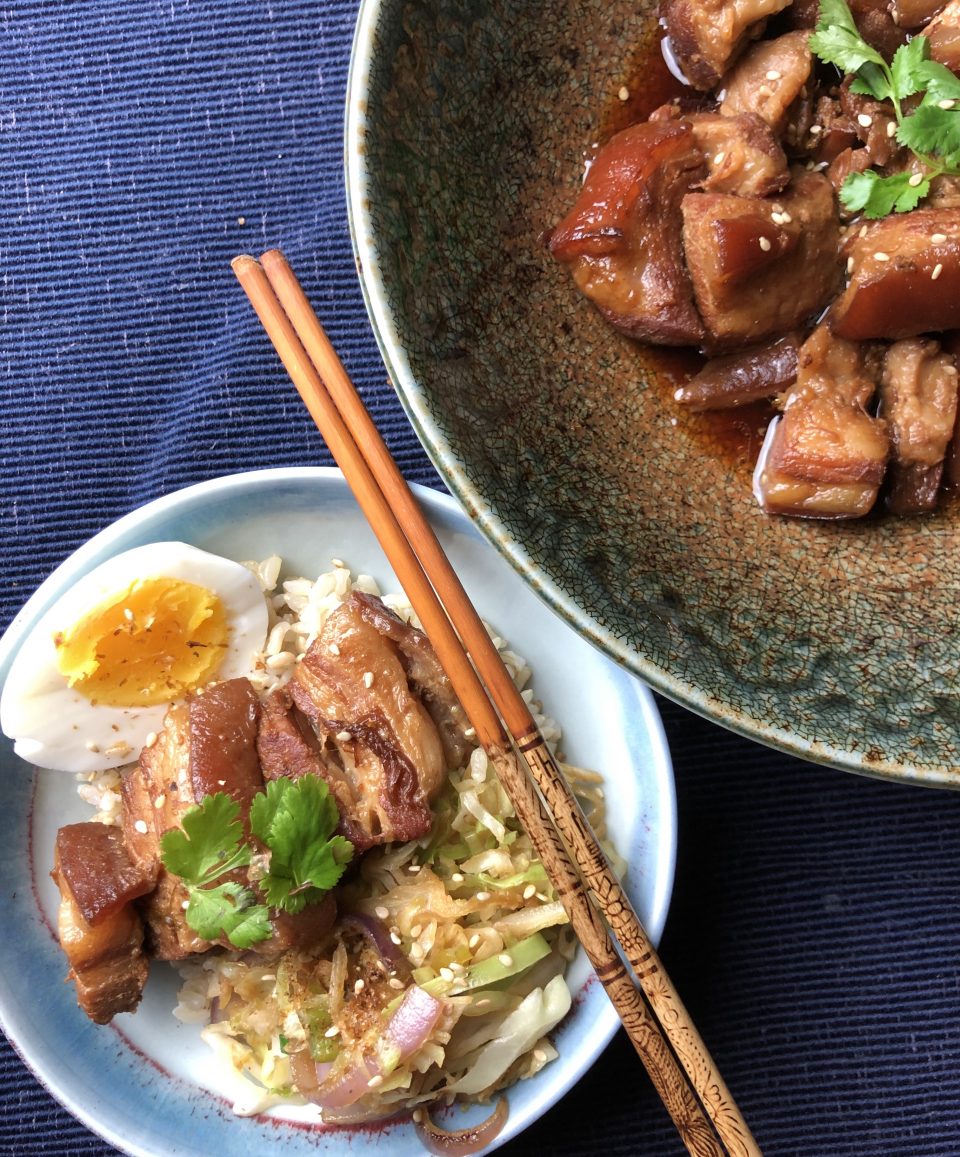
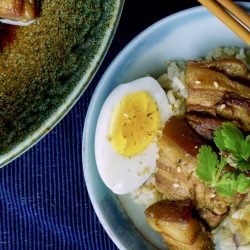
Rainy Day Eats: Braised Pork Belly ala Instant Pot
I am a sucker for rice bowls and noodle soups, especially when the weather turns cold and dreary. There is something comforting about eating out of a bowl. I love sitting by the window watching the falling rain and listening to the blustering wind while holding a bowl of deliciousness. My Dad’s stew, my Mom’s won ton soup, spicy Thai curry or gooey mac and cheese all come to mind.
Yep, living life one bowl at a time.
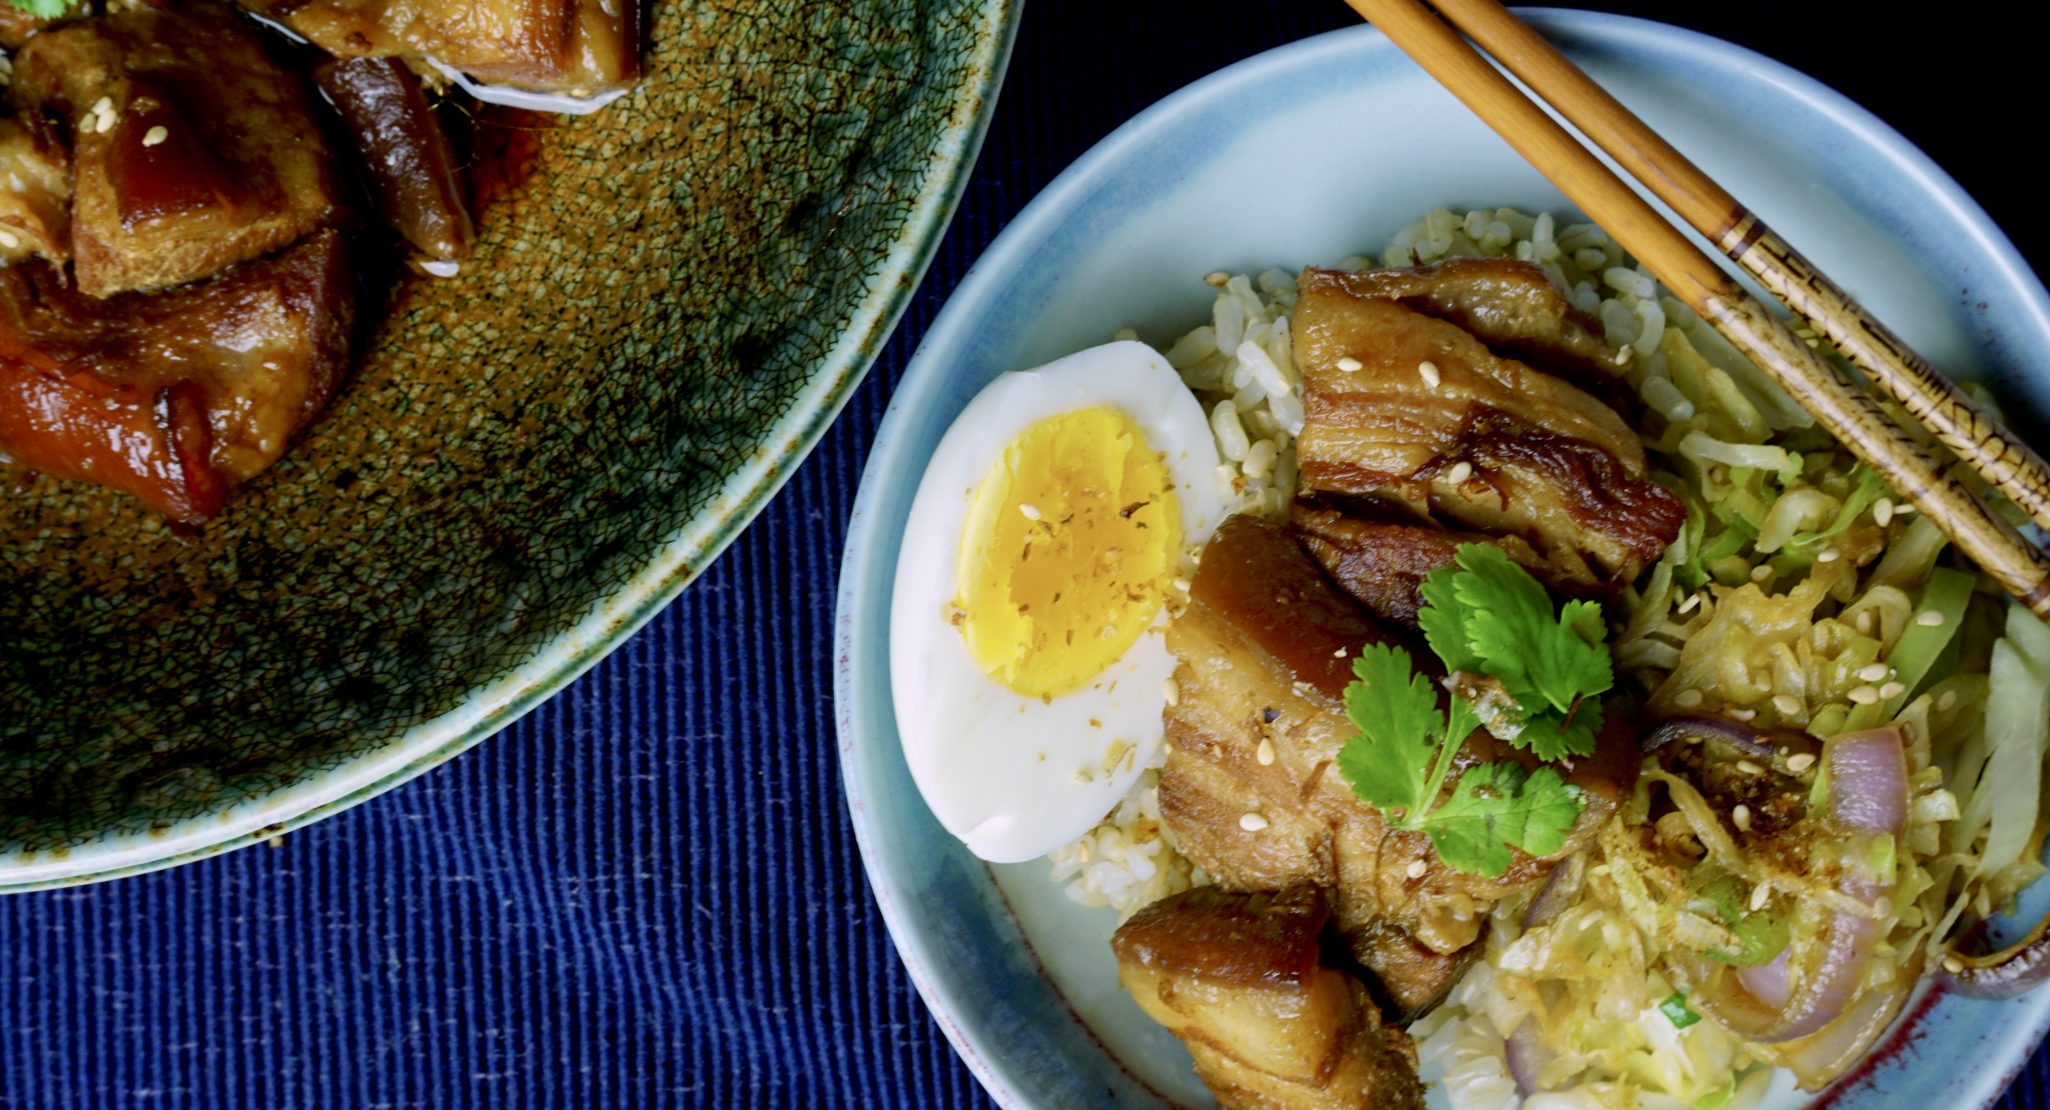
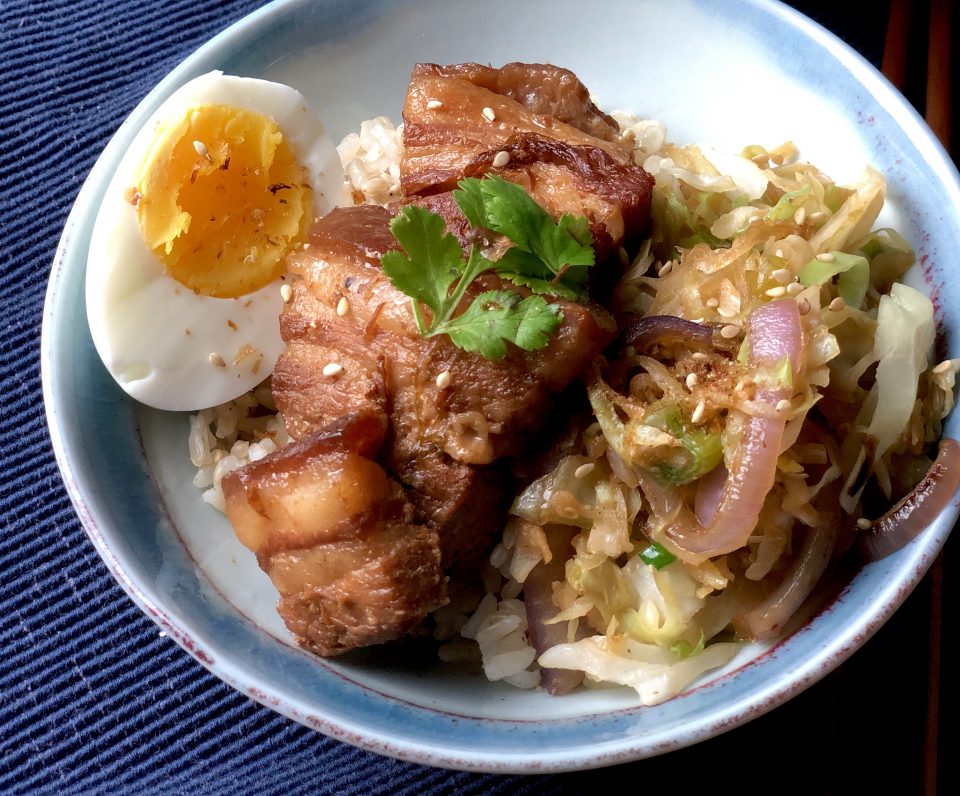
Japanese braised pork belly, Buta Kakuni falls neatly into this scenario. Simmered in soy sauce, sake and sugar, the pork becomes so tender it melts in your mouth and has that sweet salty flavor that I love. It is rich and flavorful, so a little goes a long way. Grab a good sized bowl, add a big scoop of steamy hot rice, lay 2-3 pieces of the pork on top and drizzle the braising liquid over it. Serve with a ramen style soft boiled egg and vegetables. Yep, a bowl of rockin’ goodness.
Normally, this dish takes a couple of hours to make, but thanks to the Instantpot, you’ll be sitting down to eat in less than an hour.
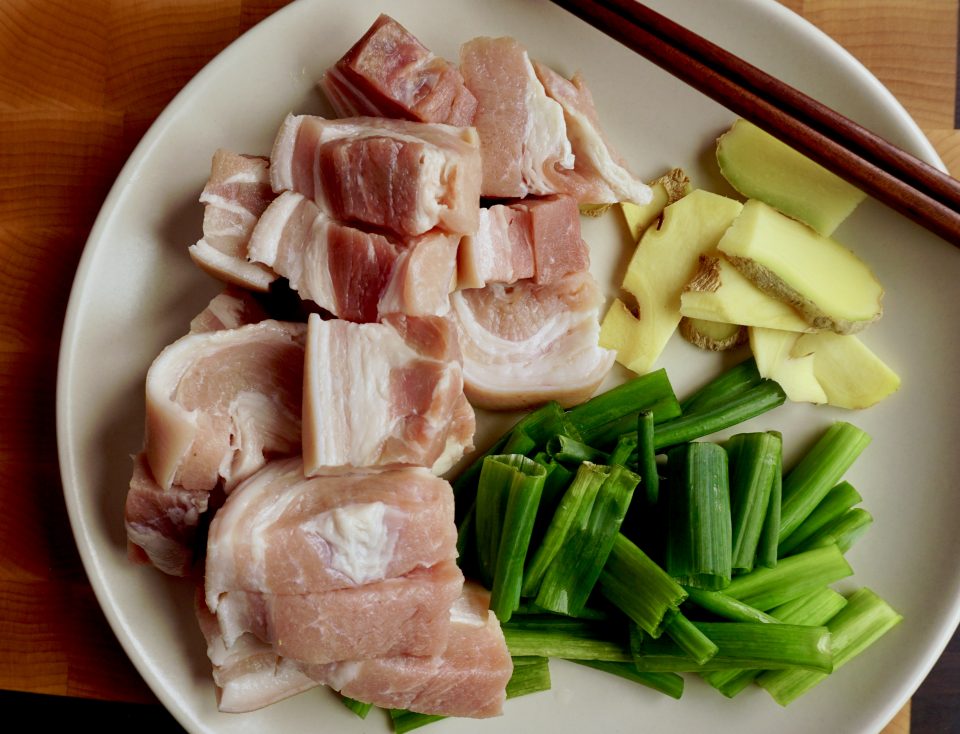
This recipe is adapted from the blog Just One Cookbook, another favorite for Asian recipes. Slab pork belly can be found in most Asian markets or ask your butcher to save you a piece. If time is tight, you can forego browning the pork, but I think it does add flavor and color. Reduce the Mirin to 1/4 cup and increase the sake to 1/2 cup to cut the sweetness. The recipe calls for adding soft boiled eggs to the pork to finish cooking. Instead, cool the braising liquid and put the peeled soft boiled eggs in to seep overnight a la ramen style eggs. Love oozy runny egg yolks. Feel free to follow the recipe or try Serious Eats’s recipe for ramen eggs, both are delicious!
This is classic comfort food. I stir-fried some shredded cabbage and onions with the braising liquid as an accompaniment. Another option is a super simple Asian Cucumber Salad. The crisp cucumbers provide a nice contrast to the soft pork. Plus, it’s nice to get some veggies in for a “well-rounded” bowl.
Peel and cut ginger into slices. Using the green part only, cut scallions into 2 inch segments
Switch Instant Pot to Saute' function and add oil to pot. When the oil is hot, add pork and brown (3-5 minutes). Add water to pot to cover the pork. Add green onions and ginger to pot.
Cover Instant Pot and seal, make sure the knob is set to sealing. Cancel saute' function and set function on stew/meat (35 minutes)
When the pork is finished, carefully vent to quick release pressure. Drain pork. Add seasoning ingredients to the Instant Pot and return pork to pot. Add soft boiled eggs to pot unless seasoning them separately. See notes.
Seal and set pot on stew/meat function and set time to 10 minutes. When finished, quick release vent pot.
Remove pork and eggs from pot. Taste the seasoning liquid, if it seems to dilute, set pot on saute' and reduce. Reserve sauce for serving.
Serve pork and eggs over rice or ramen. Garnish with Shichimi Togarashi. Drizzle sauce over rice and serve with mustard. Enjoy.
Notes
If you don't have Mirin, increase Sake to 3/4 cup and add 1 tablespoon sugar. If you like a soft runny egg, do not put it in the Instant Pot to cook. Cook your eggs separately. You can cool the cooking liquid and place the peeled soft boiled eggs in the liquid to seep for a couple of hours or overnight. You do not have to seep the eggs. You can serve the eggs in your rice bowl drizzled with the cooking liquid and sprinkled with seaweed seasonings (furikake) if you want.
An Easy “Egg”cellent Dish (Stir-Fried Tomato and Eggs)
I grew up running the streets of Chinatown. My parents had a mom-and-pop business right in the heart of Chinatown on Grant Ave. (Yep, Grant Ave…San Francisco…California…USA made quasi-famous by the musical Flower Drum Song). There are a gazillion restaurants to eat at or take out, but the trick is knowing where to go for the best of whatever you crave. The best egg tarts? Golden Gate Bakery. BBQ Pork Buns and dim sum? Yung Kee (sadly gone now), or Good Luck Dim Sum. Best stuffed rice noodles? Sam Wo. Best fried chicken Wings? Golden Daisy or Capitol Restaurant. Call me for the 411.
Down Home, My Home, Chinatown
My favorite down-home dishes were and are found in the quirky little hole-in-the-wall places. Many of these joints are a fusion of Asian and American food-you will find beef stew, apple pie, stir-fried beef with bitter greens, and wonton soup all on the same menu. I love going to Kam Po next to the Broadway Tunnel where rice plates are a mainstay. A mountain of rice covered with crispy roast duck or soy sauce chicken with a side of stir-fried garlicky greens, my go-to quick meal.
A couple of weeks ago I was perusing the NYT cooking site and a recipe for stir-fried tomatoes and eggs by Francis Lam caught my eye. This immediately transported me back to my days in Chinatown. This Cantonese soul food dish is quick, simple, and perfect after a long day at work and slow commute home.
As soon as you walk in the door make a pot of rice. This will be the rate-limiting step of the entire meal. In fact, you will have a couple of minutes to kick back and relax before starting on the eggs. Yes, it’s that easy.
A little music to cook by, Grant Ave. from Flower Drum Song- Pat Suzuki and Ensemble
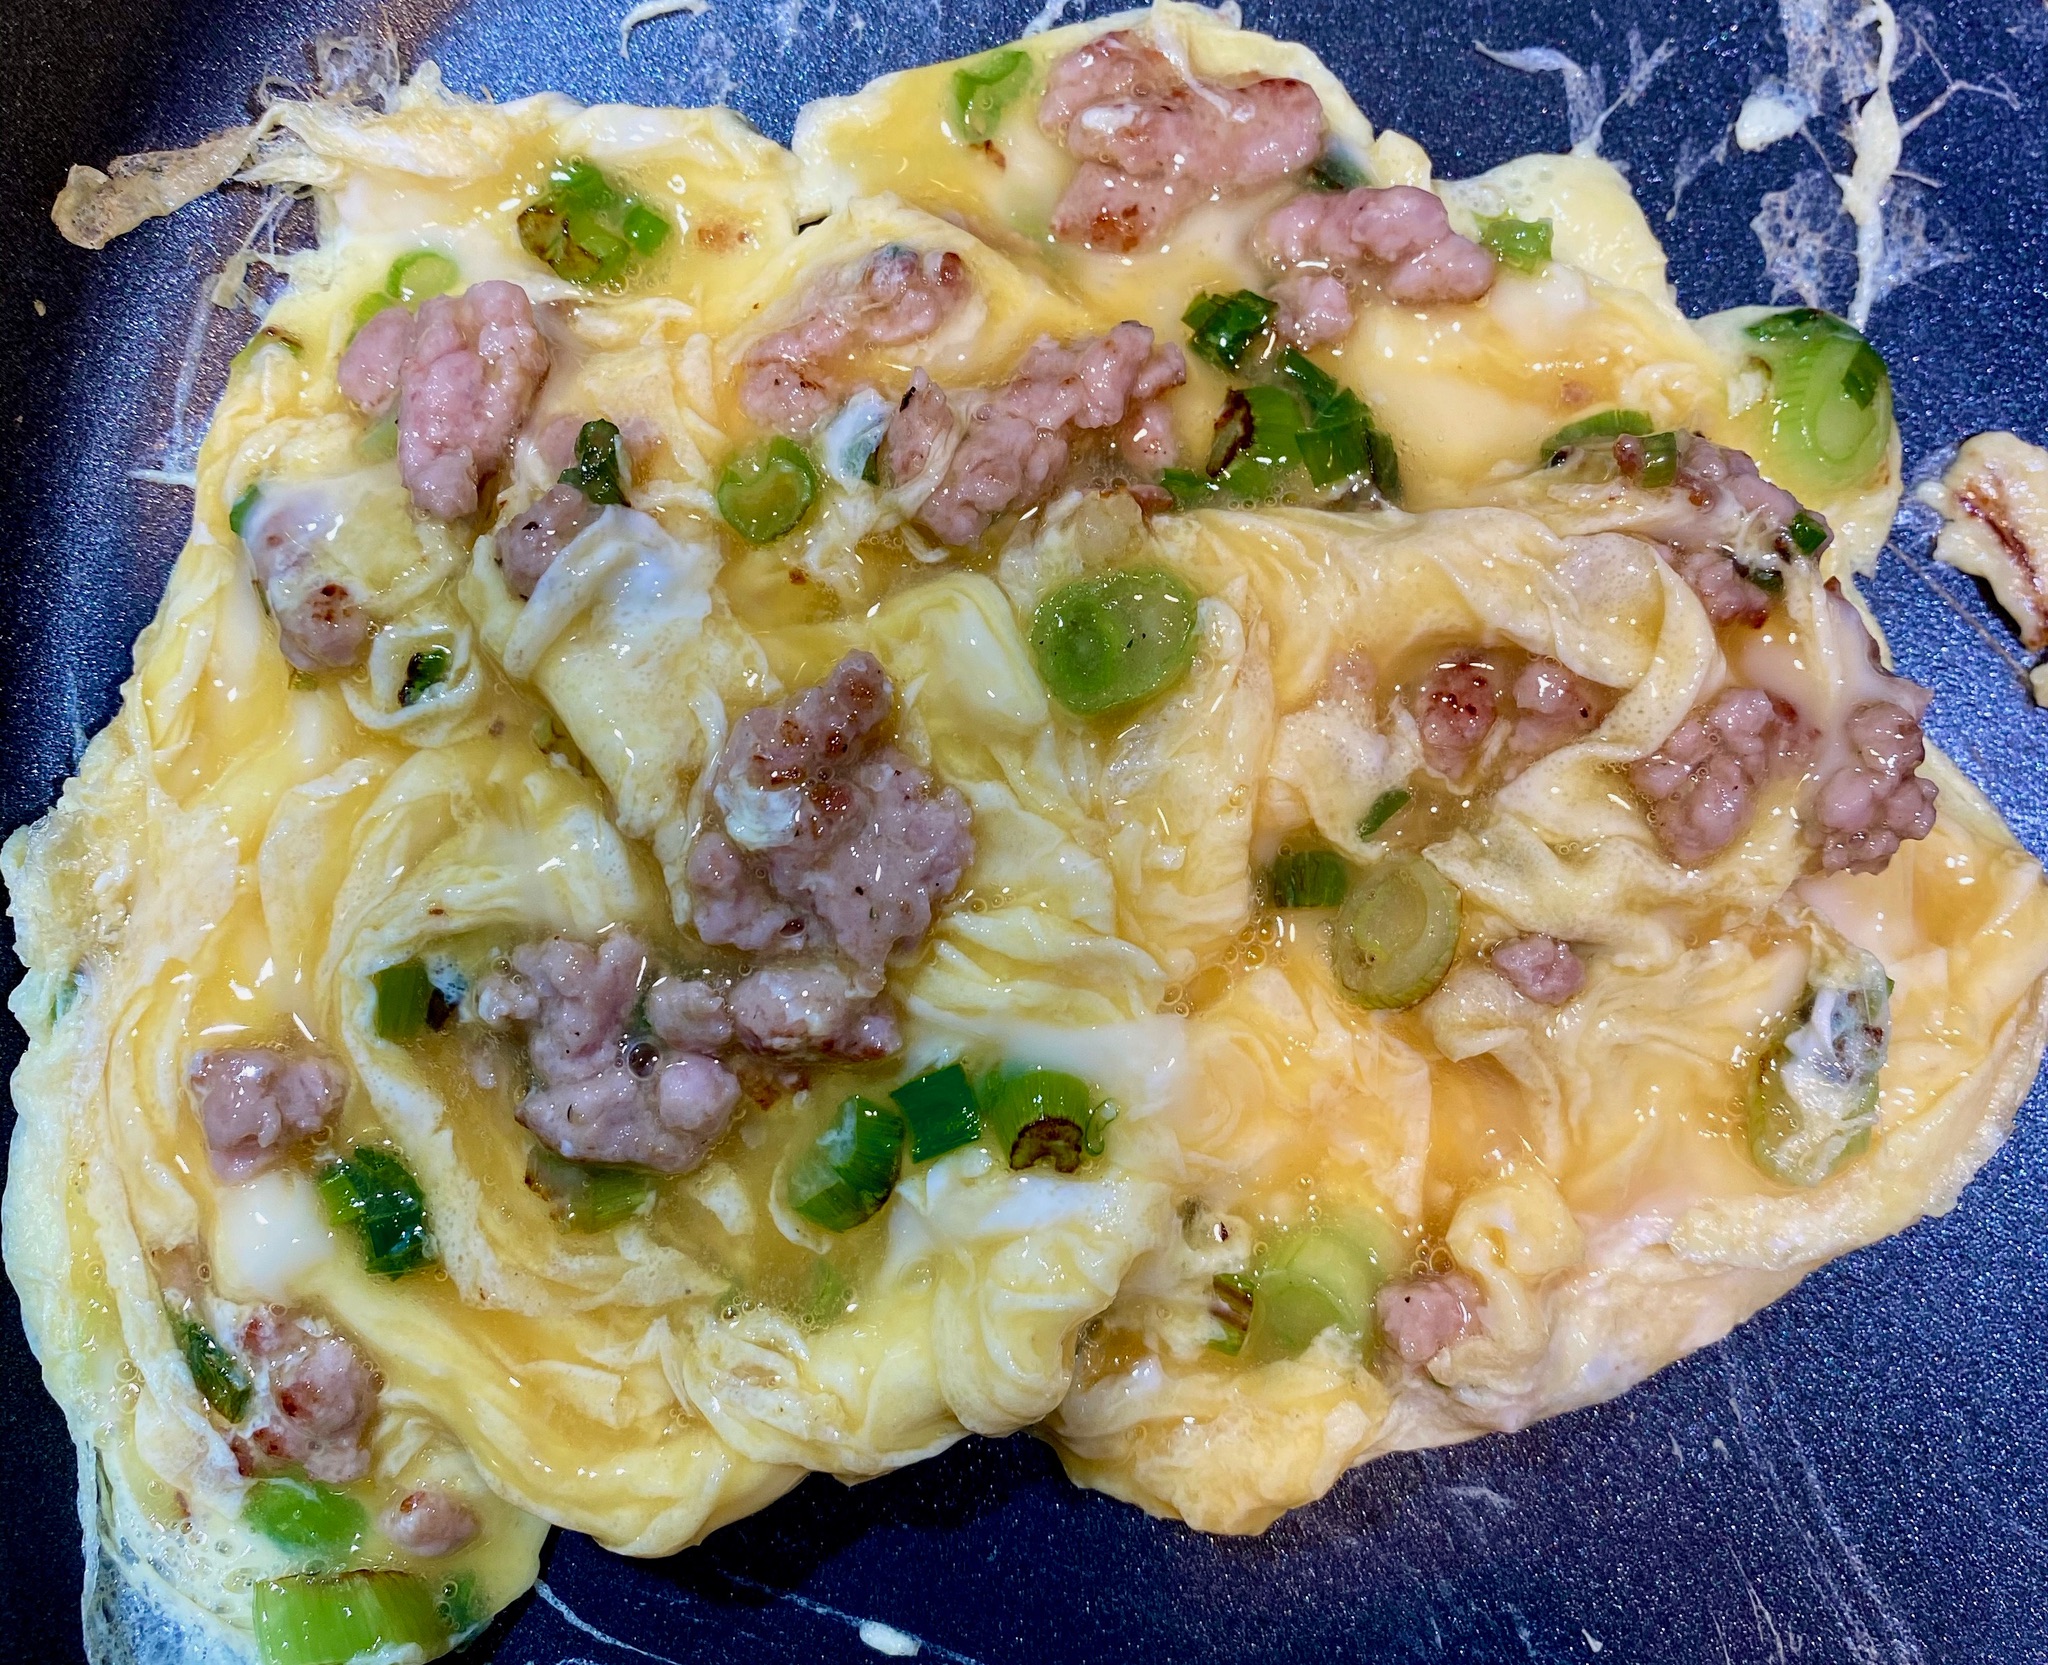
Quick stir fry, do not overcook, keep em’ runny! Eggs will be added to the tomato mixture.
The eggs are flavored with sesame oil and salt and then whisked lightly so that there are still streaks of egg white left. For fluffier (technical term) uniform color eggs, whisk them thoroughly. Scramble eggs quickly until barely set and remove from heat and pour into a dish. Stir fry the tomatoes to the desired doneness. Add the eggs to the tomatoes and cook just long enough to stir the tomatoes and eggs together.
That’s It.
A word of caution, I am THAT person who orders scrambled eggs, very soft and runny. In fact, the runnier the better, so cook the eggs to your taste. Scoop steaming hot rice into a bowl or on a plate, top with the tomato-egg mixture and garnish with green onions. Turn on the tube, plop yourself down on the couch and watch your favorite reruns while you gobble up your eggs and rice. You deserve it, there’s nothing better.
If you need protein, throw in bite-sized pieces of chicken, beef, or shrimp while cooking the green onions. I had a bit of ground beef left, so in it went. Don’t have green onions? Use thinly sliced yellow or red onions.
2-3scallionssliced, reserve 1/3 of green portion for garnish
Tomatoes
1poundbeefsteak tomatoes in season, any juicy tomato would workor 1 14.5-ounce can of diced tomatoes in juice-DON'T EVEN-its here because its in the original recipe-bleah
1teaspoonminced gingerfrom about 1/4-inch nub
Sauce
1teaspooncornstarch
1teaspoonsugarcan subtitute light brown sugar
2tablespoonsketchupYES, ketchup
2tablespoonswater or stock(chicken or veggie stock will work)
To Serve
Steamed ricefor serving
Instructions
In a bowl, beat the eggs with 1 teaspoon salt, sesame oil and rice wine or sherry.
In a small bowl, stir together the cornstarch and 2 tablespoons water until well combined, then stir in the sugar (can substitute brown sugar) and ketchup.
Core and cut tomatoes into 1/2-inch wide wedges.
Heat a wide nonstick skillet over high heat with 2-3 tablespoons of vegetable oil. When the oil shimmers, add most of the scallions, saving some to garnish. If adding protein or another vegetable, add now. Cook, stirring, until very aromatic, about 20 seconds.
Add the eggs, and cook, stirring well with a spatula or chopsticks, until just set but still runny, about 45 seconds.
Remove eggs to a plate and wipe out the pan.
Reheat the pan over high heat with the remaining tablespoon of oil. When it is hot, add the ginger and cook until aromatic, about 15 seconds. Add the tomatoes and salt to taste; cook, stirring occasionally, until the flesh has softened but still has some shape and the juices have begun to form a sauce, 2-3 minutes. (If using canned tomatoes, add the juice as well and cook about 4 minutes, to reduce it to a saucelike consistency.)
Reduce the heat to medium. Give the cornstarch-ketchup mixture a stir in its bowl, then stir it into the pan. Cook, stirring, until the sauce returns to a boil and thickens. Taste and adjust seasoning with salt, sugar or more ketchup — you want a savory, tart-sweet sauce. Stir the eggs in the bowl to cut up the curds a bit, then return them to the pan. Cook, stirring, for a few seconds to finish cooking the eggs and to combine. Top with the reserved scallions, and serve with steamed rice.
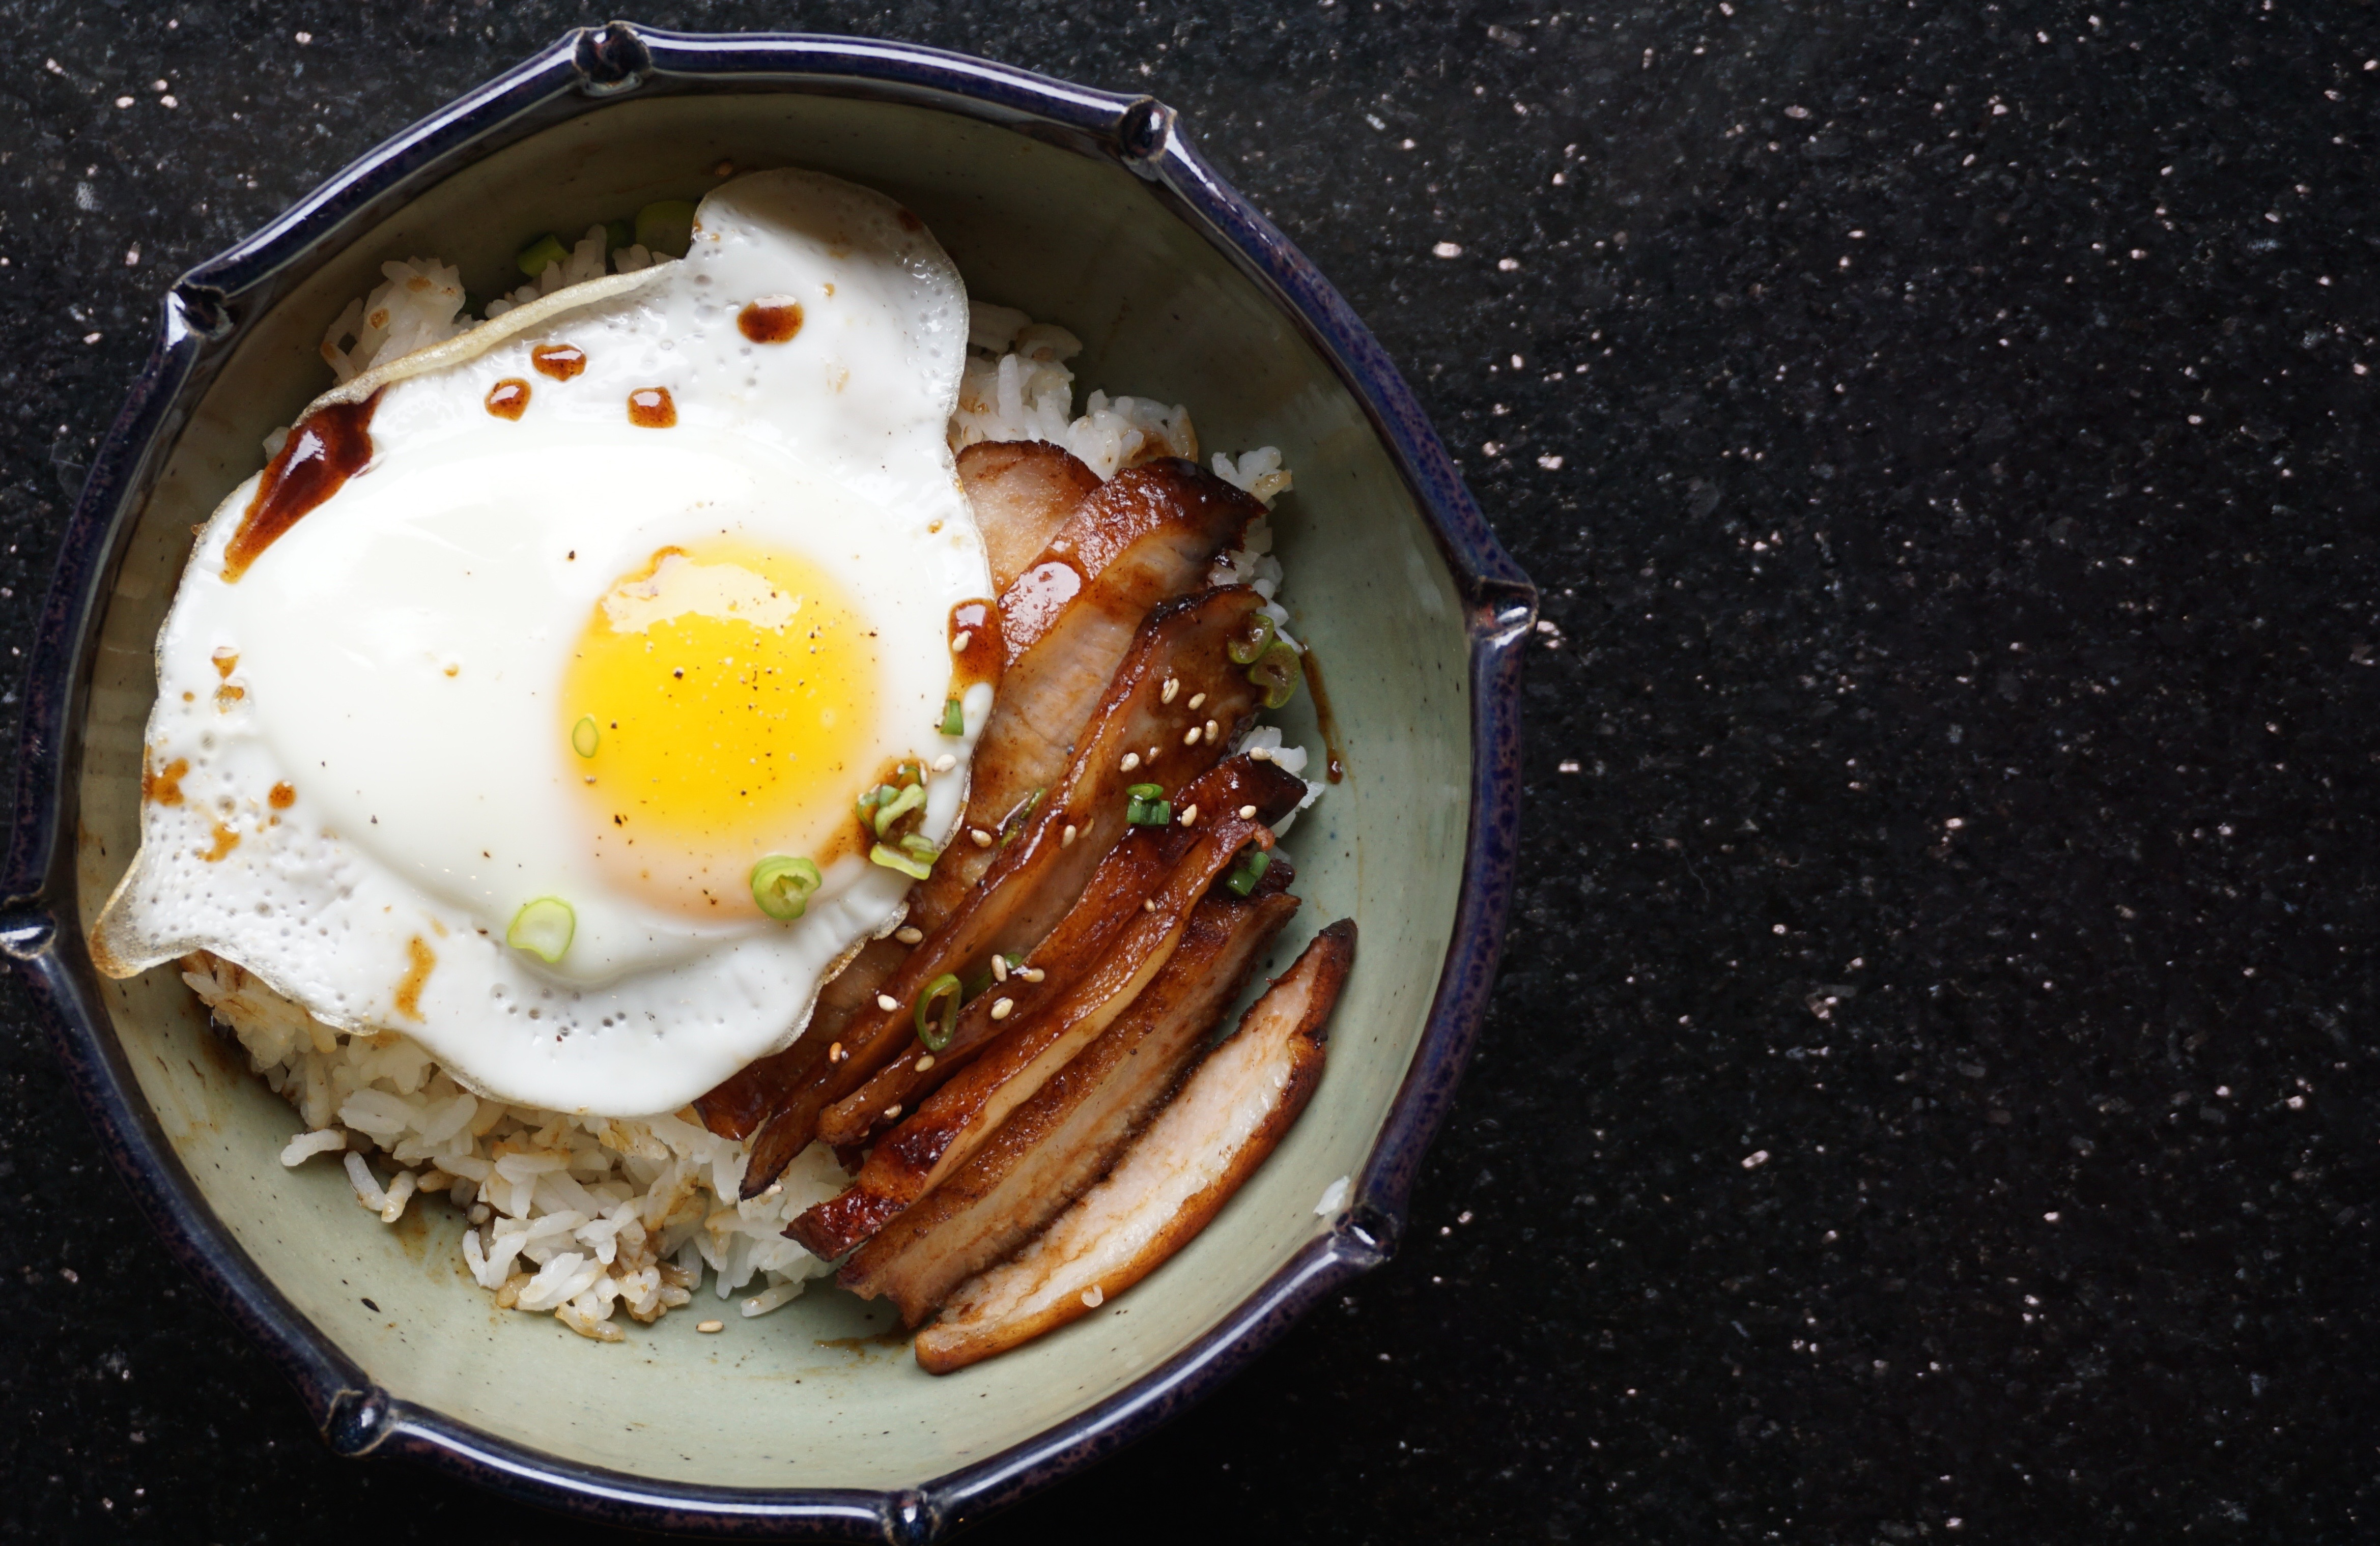
Anatomy of a Breakfast Bowl (Char Siu & Egg Over Rice)
I love Sunday morning breakfast. Instead of the rushed quick bite Monday through Friday grind, weekend breakfasts are leisurely and quite the production.Waffles, pancakes, bacon, sausage, scrambled eggs, and homemade buttermilk biscuits or if we are feeling ambitious, puffy French omelets. Just brewed coffee and fresh-squeezed orange juice round out the meal, or mimosas for special occasions, ahhhhh the good life. Often, our Sunday breakfasts will have an Asian vibe.
During football season you will always find a big pot of congee sitting on the stove. Congee or jook is a delicious savory rice soup and is great for breakfast or halftime. The soup starts with chicken stock flavored with ginger and scallions. Add rice and simmer until the kernels have softened to an almost creamy consistency. Hot steaming bowls are brought to the table where everyone adds their own toppings. Shredded chicken, green onions, pickles, lettuce, and cilantro. To go along with the jook, Chinese donuts–deep-fried pillows of yumminess that give beignets a run for their money.
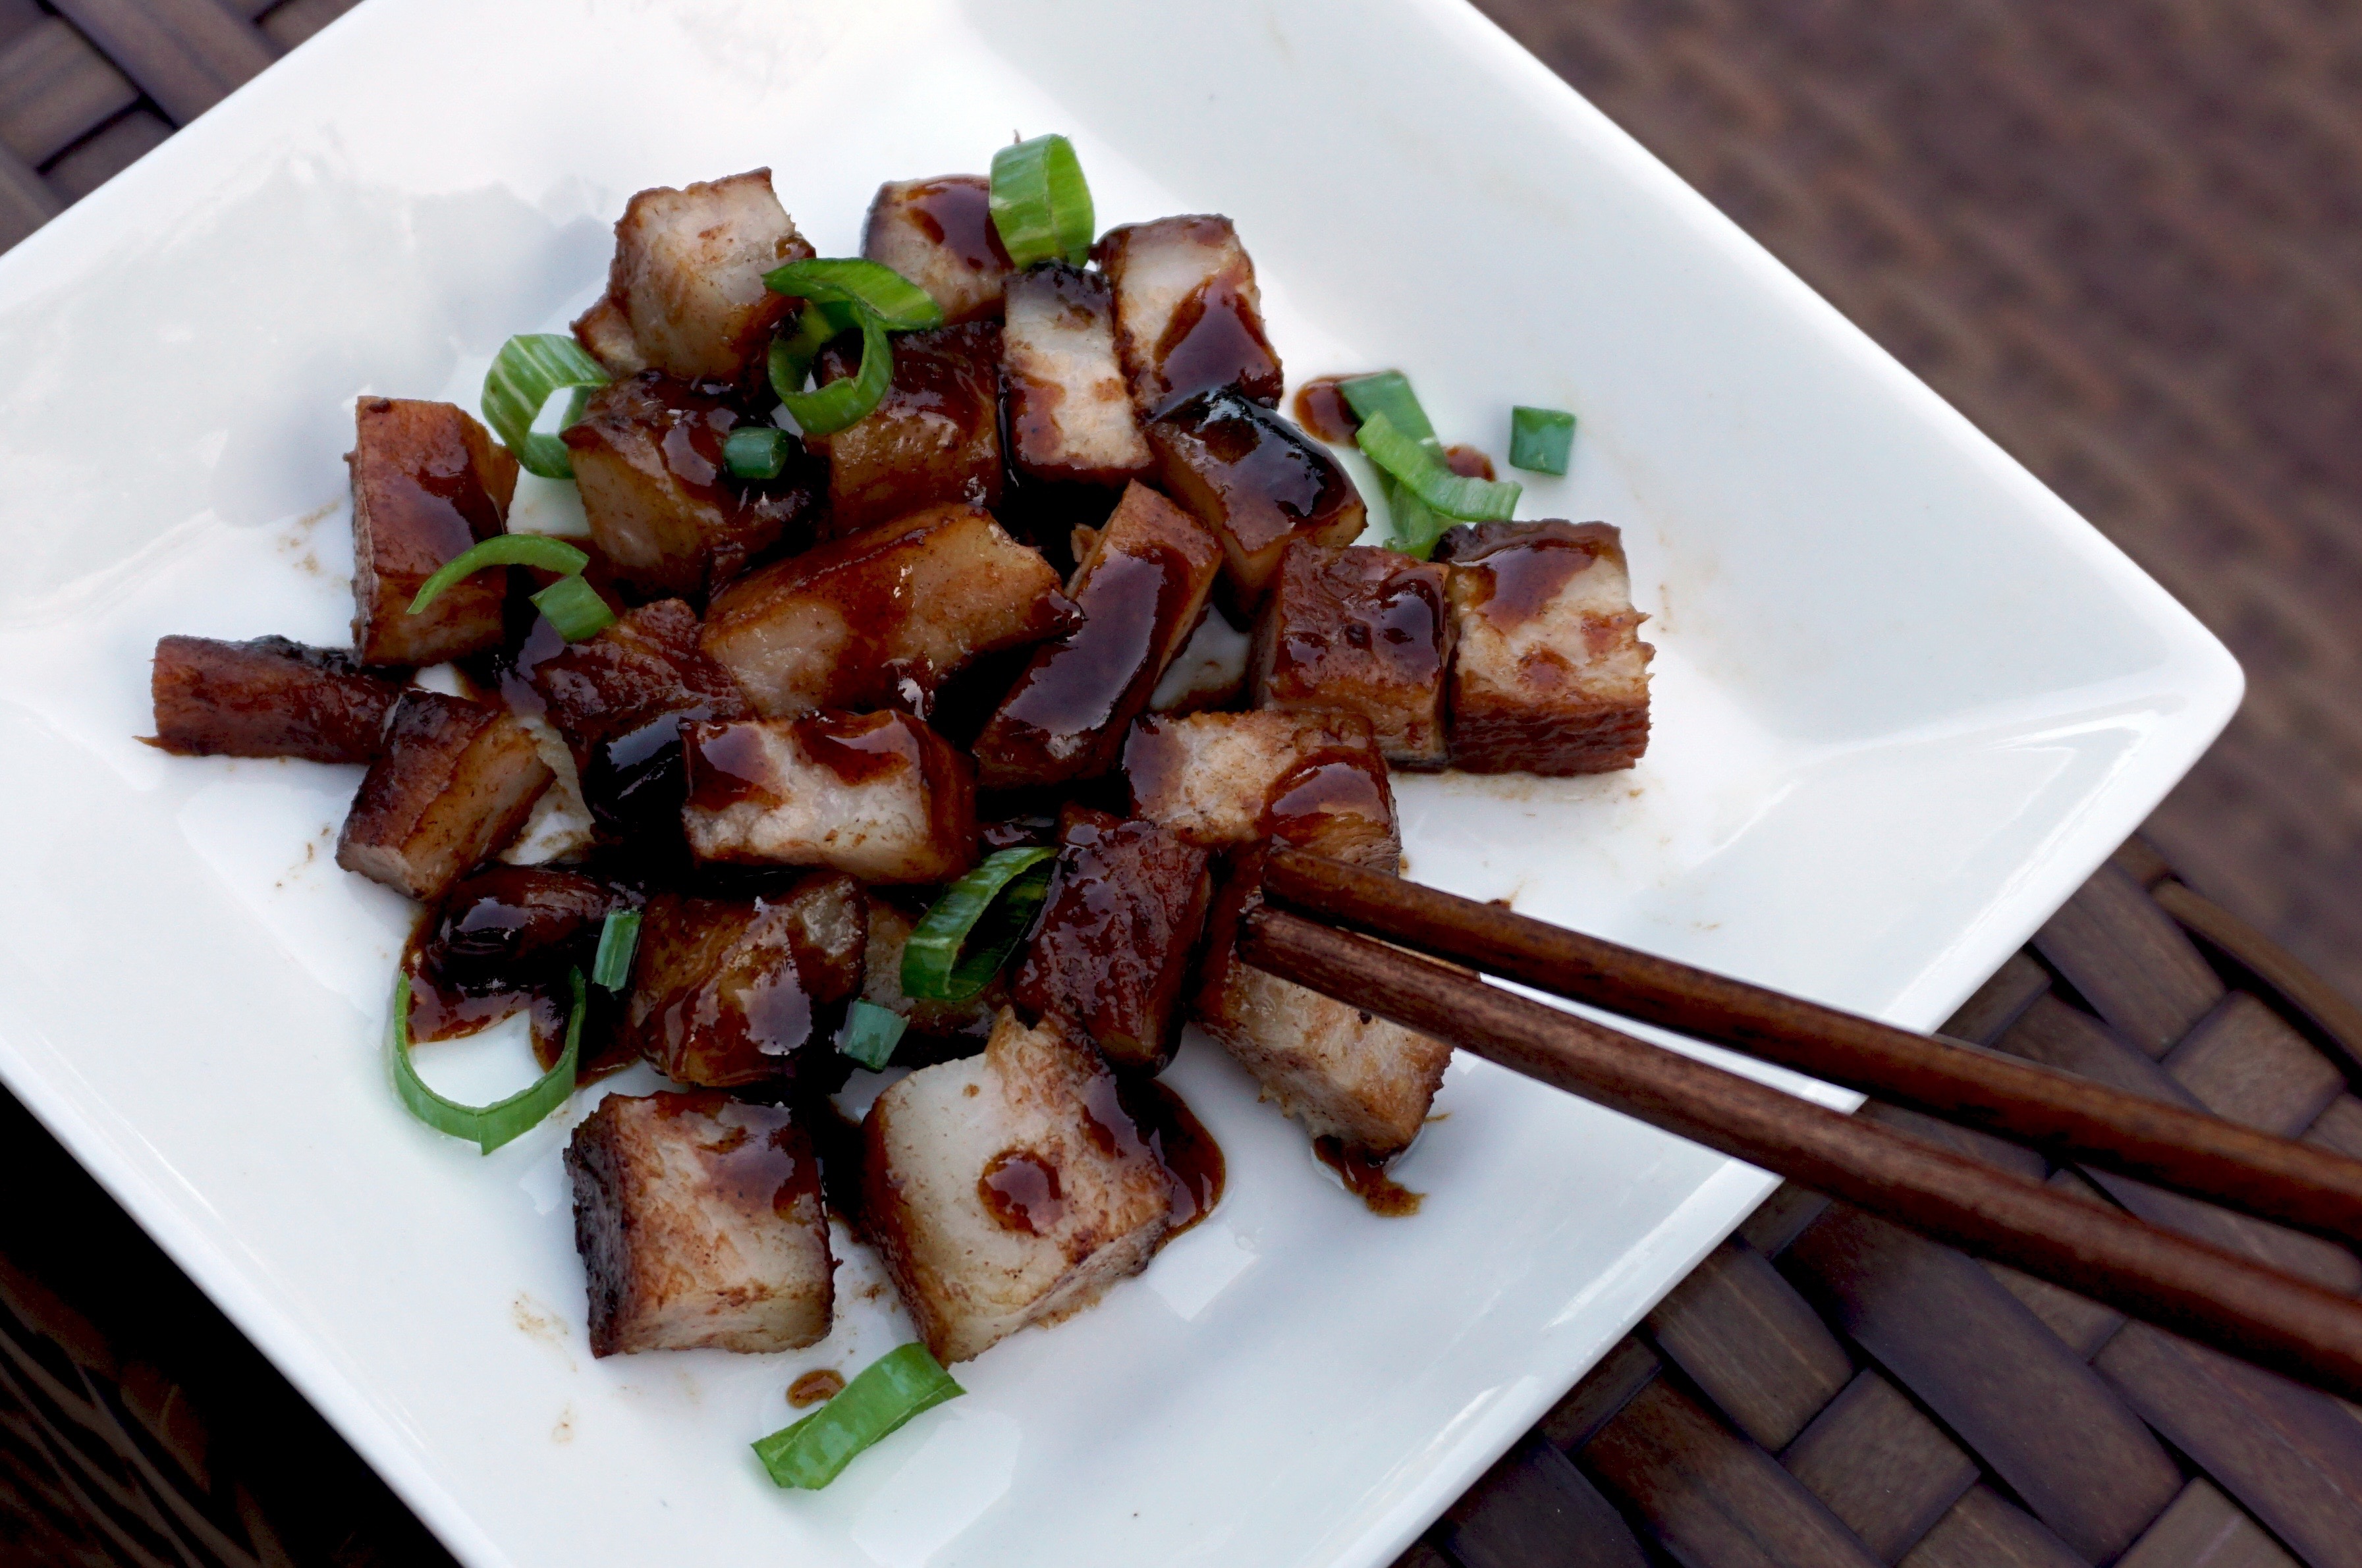
Hands-down, a favorite breakfast for my kids is homemade Chinese bbq pork (char siu) served with eggs–barely scrambled or sunny side up (keep that yolk runny) on top of a bowl of steamed white rice. I found a new recipe for char siu on Burp Appetit’ that looked and sounded mouthwateringly good. Naturally, I had to try it. Instead of oven roasting, it calls for braising the pork in a sweet, salty sauce which includes hoisin paste and 5 spice powder. By braising, we don’t need marinading which shortens the cooking time. Best of all, it’s delicious! With a batch of char siu made, this past Sunday’s breakfast was a no-brainer, Char siu, eggs, and rice. Yep living life one bowl at a time.
Char Siu and Egg over Rice: Anatomy of a Breakfast Bowl
~1-1.25 pound pork belly without skin, or pork neck or cheek meat cut into strips (3)
Marinade/Sauce
1teaspoonsalt
1teaspoonsesame oil
1teaspoondark soy sauce
1/2teaspoonwhite pepper
2tablespoonhoney
2tablespoonsugar
2tablespoonHoisin sauce for a less sweet version, sub oyster sauce
1tablespoonChinese rice wine
1/2 -1tsp5-spice powder
To cook:
2tablespoonoil
1cupwater
Instructions
Method:
1. Heat wok on medium heat. When the wok is hot enough, pour 2 tbsp vegetable oil into the wok.
2. Place the pork belly strips into the wok and brown both sides for about 3-4 minutes. Add the rest of the sauce ingredients into the wok. Stir and ensure the pork strips are coated well with the sauce.
3. Turn the heat to low and gently simmer for 40 minutes or until pork is tender. Turn the pork every 10 minutes to ensure both sides are evenly cooked.
4. By 30 minutes, the sauce will be reduced by half and start turning sticky. Once the pork belly is tender to touch, remove from the wok. Then pour the sauce into a clean bowl and reserve that to dress your steamed rice. Leave a tbsp of sauce/oil in the wok.
5. Heat the wok on medium heat and return the pork belly back into the wok. Sear the meat on both sides for about 2-3 minutes each side until they are charred to your liking.
6. Remove and glaze with honey. Then, slice the pork belly. Serve with warm steamed rice, noodles or bao.