Tag: #easyrecipe

Tryin’ to Squash A Cold! (Instant Pot Butternut Squash Soup)

Tryin’ to Squash A Cold! (Instant Pot Butternut Squash Soup)

How does that old adage go? Feed a cold, starve a fever?  The thought crossed my mind as I was miserably lying in bed, achy, congested, and generally feeling like crap.  Thank goodness for laptops and search engines…I found a Scientific America article that addressed this very proverb and whaddya know, going all Mythbuster, Scientific America, not only debunked it, but concluded it really should be “Feed a cold, FEED a fever”.  Yeah baby, I love science.

What is the perfect antidote when it is cold, when you are sick, when you crave comfort, but you are too tired to fuss?  SOUP.  Am I right?  Yep, bowl therapy to the rescue.  It didn’t take long to find a soup that fit the bill.  From the blog Creative Bites, Pressure Cooker Creamy Butternut Squash Soup.  Lucky for me I had bought a butternut squash at the market and had all of the ingredients handy.  “Kold karma” pointed me to this quick (thanks to my Instant Pot) and easy, delicious soup.

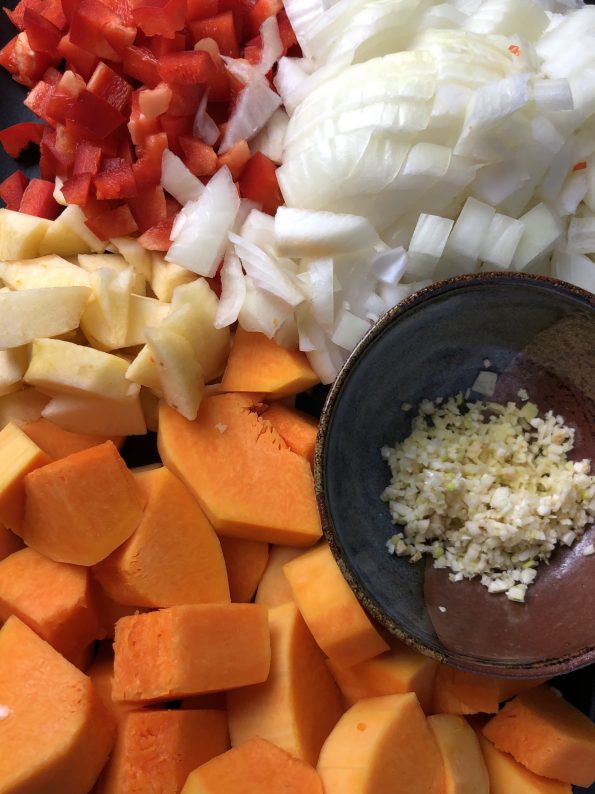
Here’s the HARD part.  The PREP.  Yeah, no getting around peeling that butternut squash and dicing ALL THOSE vegetables.  Well,  I suppose you could buy pre-cut squash, diced onions and minced garlic, but that’s your call. It’s part of cooking therapy for me.

Butternut Squash soup Prep

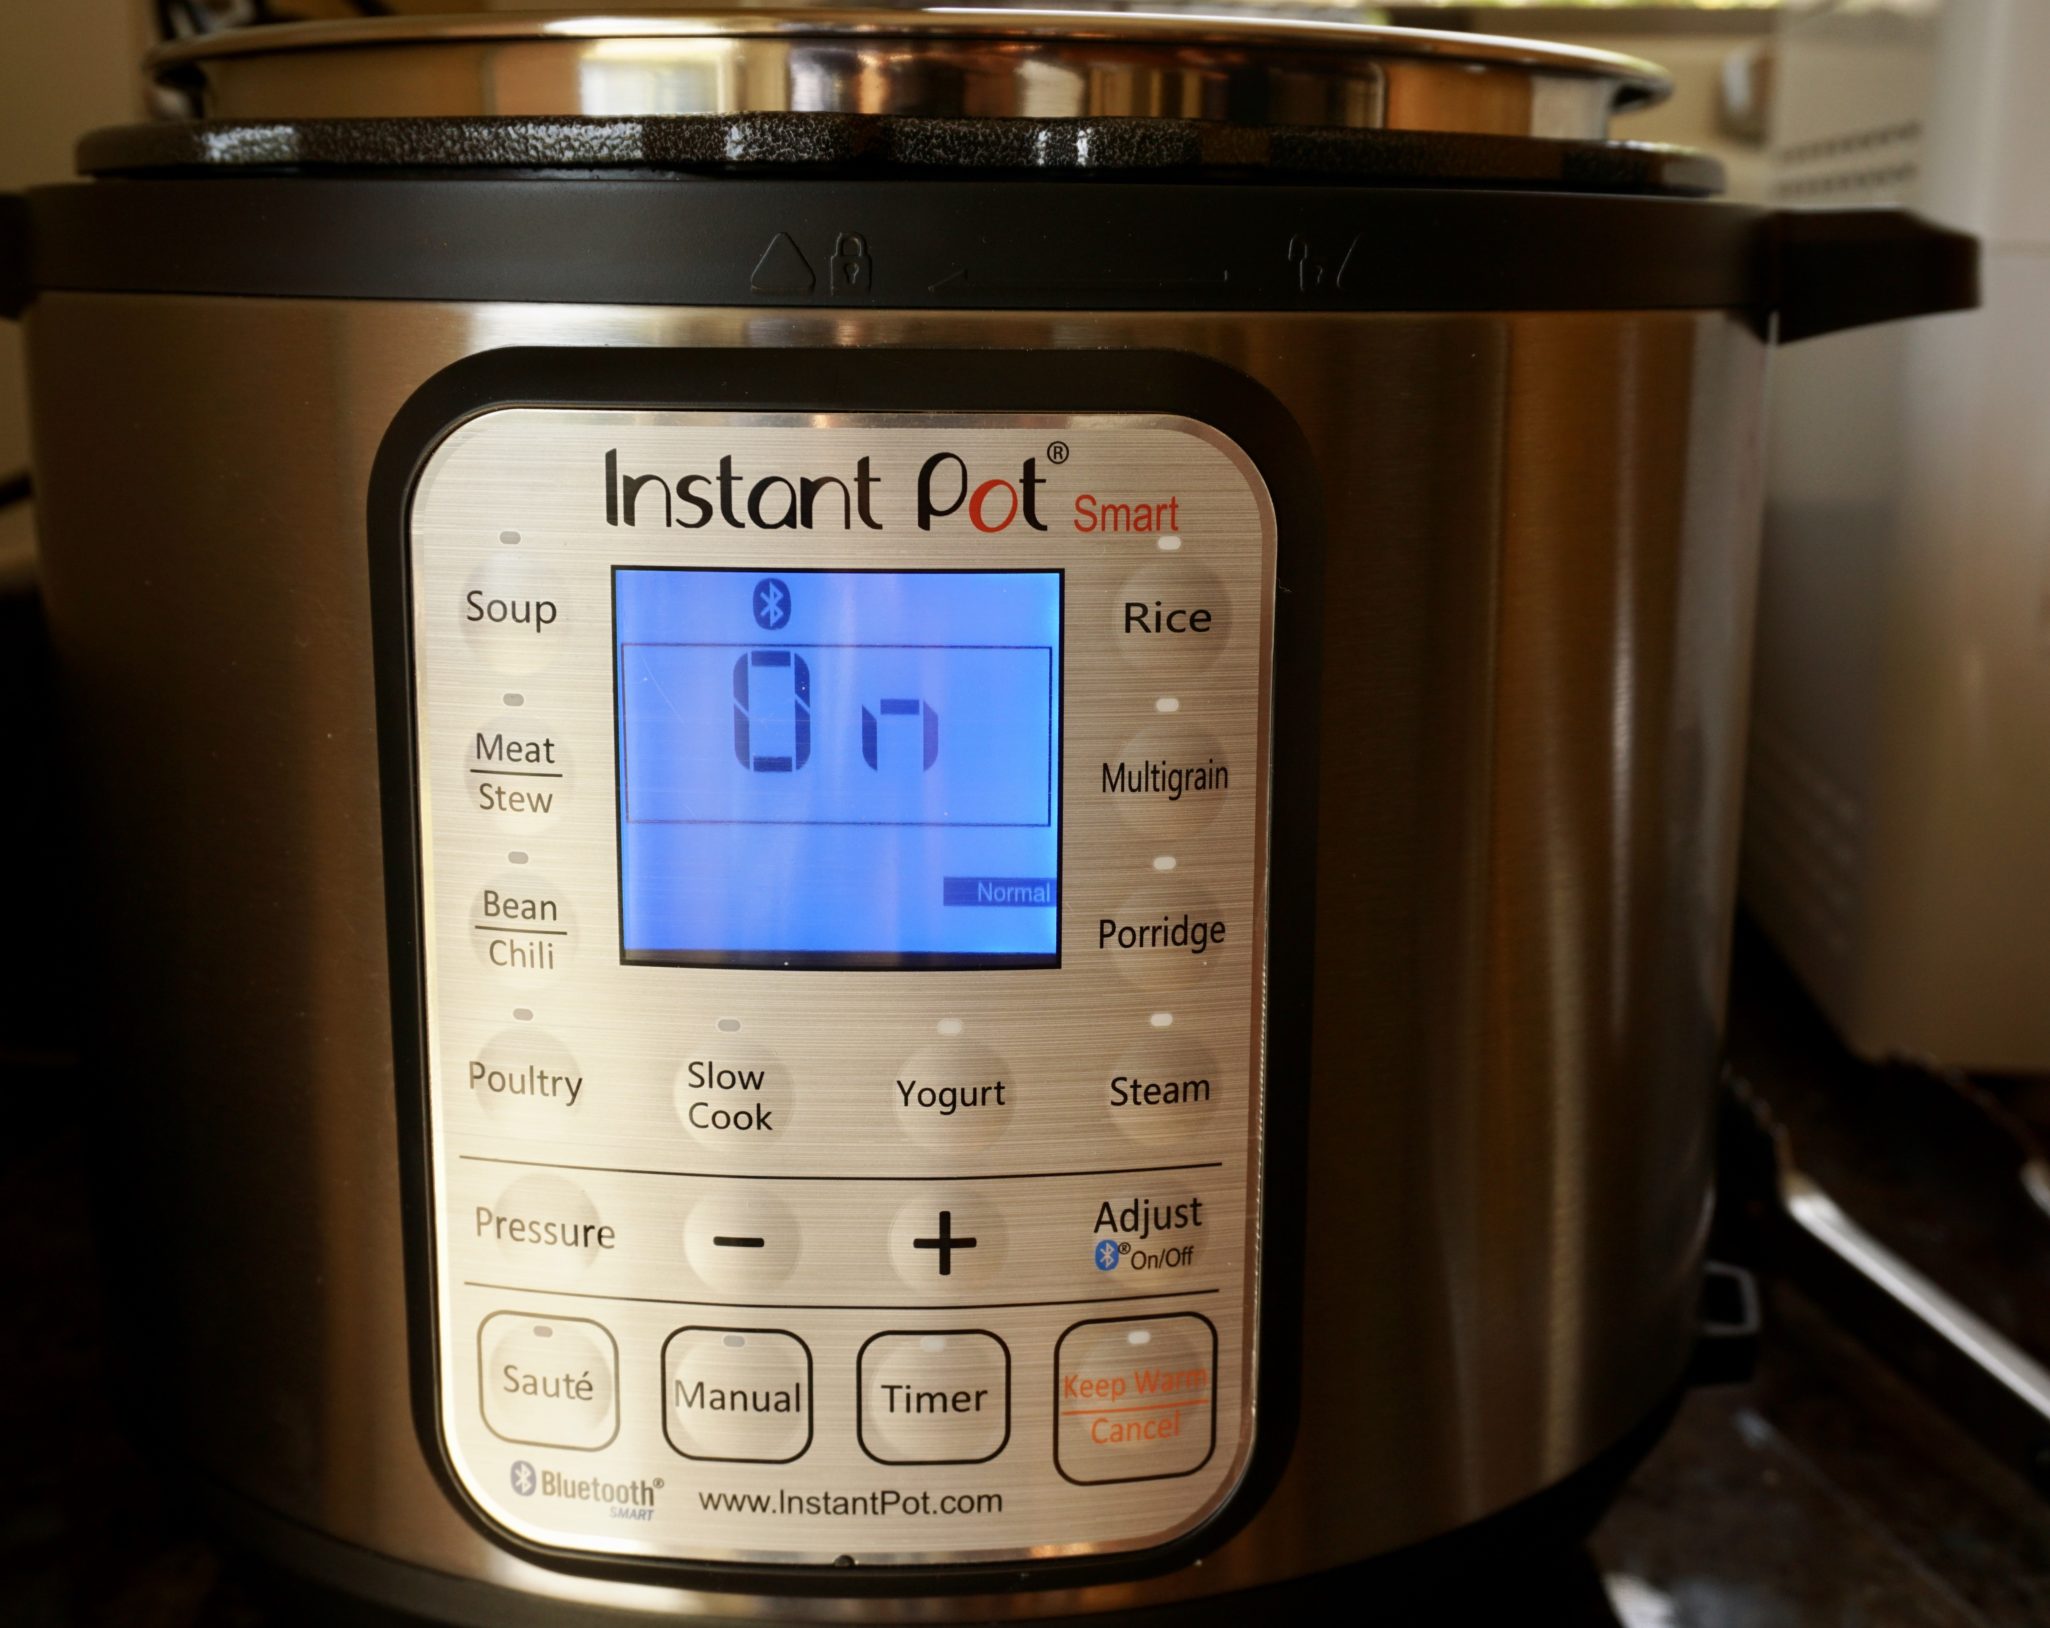
NOW, the EASY part.  Prep was 90% of the game.  You’re now sitting pretty on 3rd base ready to score, just a mere minutes from homebowl. Get it?  I love the apples and red bell pepper, they add a nice sweetness.   Saute the veggies in your Instant Pot.  It’s important when you add the stock, really stir the bottom of pot to release all those bits of saute goodness.   The pot is very sensitive to bits stuck on the bottom and will turn off as a safety precaution if the bottom isn’t clean.  Add the stock, seal the pot, and then set the timer for 5 MINUTES.  Yep, five minutes and quick release at the end.  With the time it takes to come to pressure, you’re still only looking at 15 minutes of cooking time.  Not bad.

I used an immersion blender in the pot to puree the soup.  There are a lot of comments online about how it doesn’t work as well as a blender.  BUTTERNUTS.  Not creamy enough?  Throw the immersion stick back in and blend some more.  I’m willing to sacrifice a bit of creaminess (though I don’t think I am) to do this, as oppose to pouring HOT soup, in batches, into my blender.  I’m saving my blender for smoothies and Margaritas.

Butternut Squash Soup in Mugs

Go ahead and play around with this soup recipe. It’s very forgiving.  Got thyme?  Substitute for sage.  Got time?  Skip the Instant Pot, roast the vegetables instead.  See the prepped veggies above? Throw it all in a roasting pan, give it a good swig of olive oil, toss, salt and pepper and roast at 425 for about an hour).  The vegetables caramelize in the oven and add a sweetness to the soup that’s “souper” yummy.  Creative bites calls for goat cheese or cream cheese.  I like cream cheese because it adds a whole lot of mouth feel and just a slight tanginess.  You could probably use sour cream, creme fraiche or even just a touch of heavy whipping cream instead.  This would lighten the soup but you might lose that creaminess.

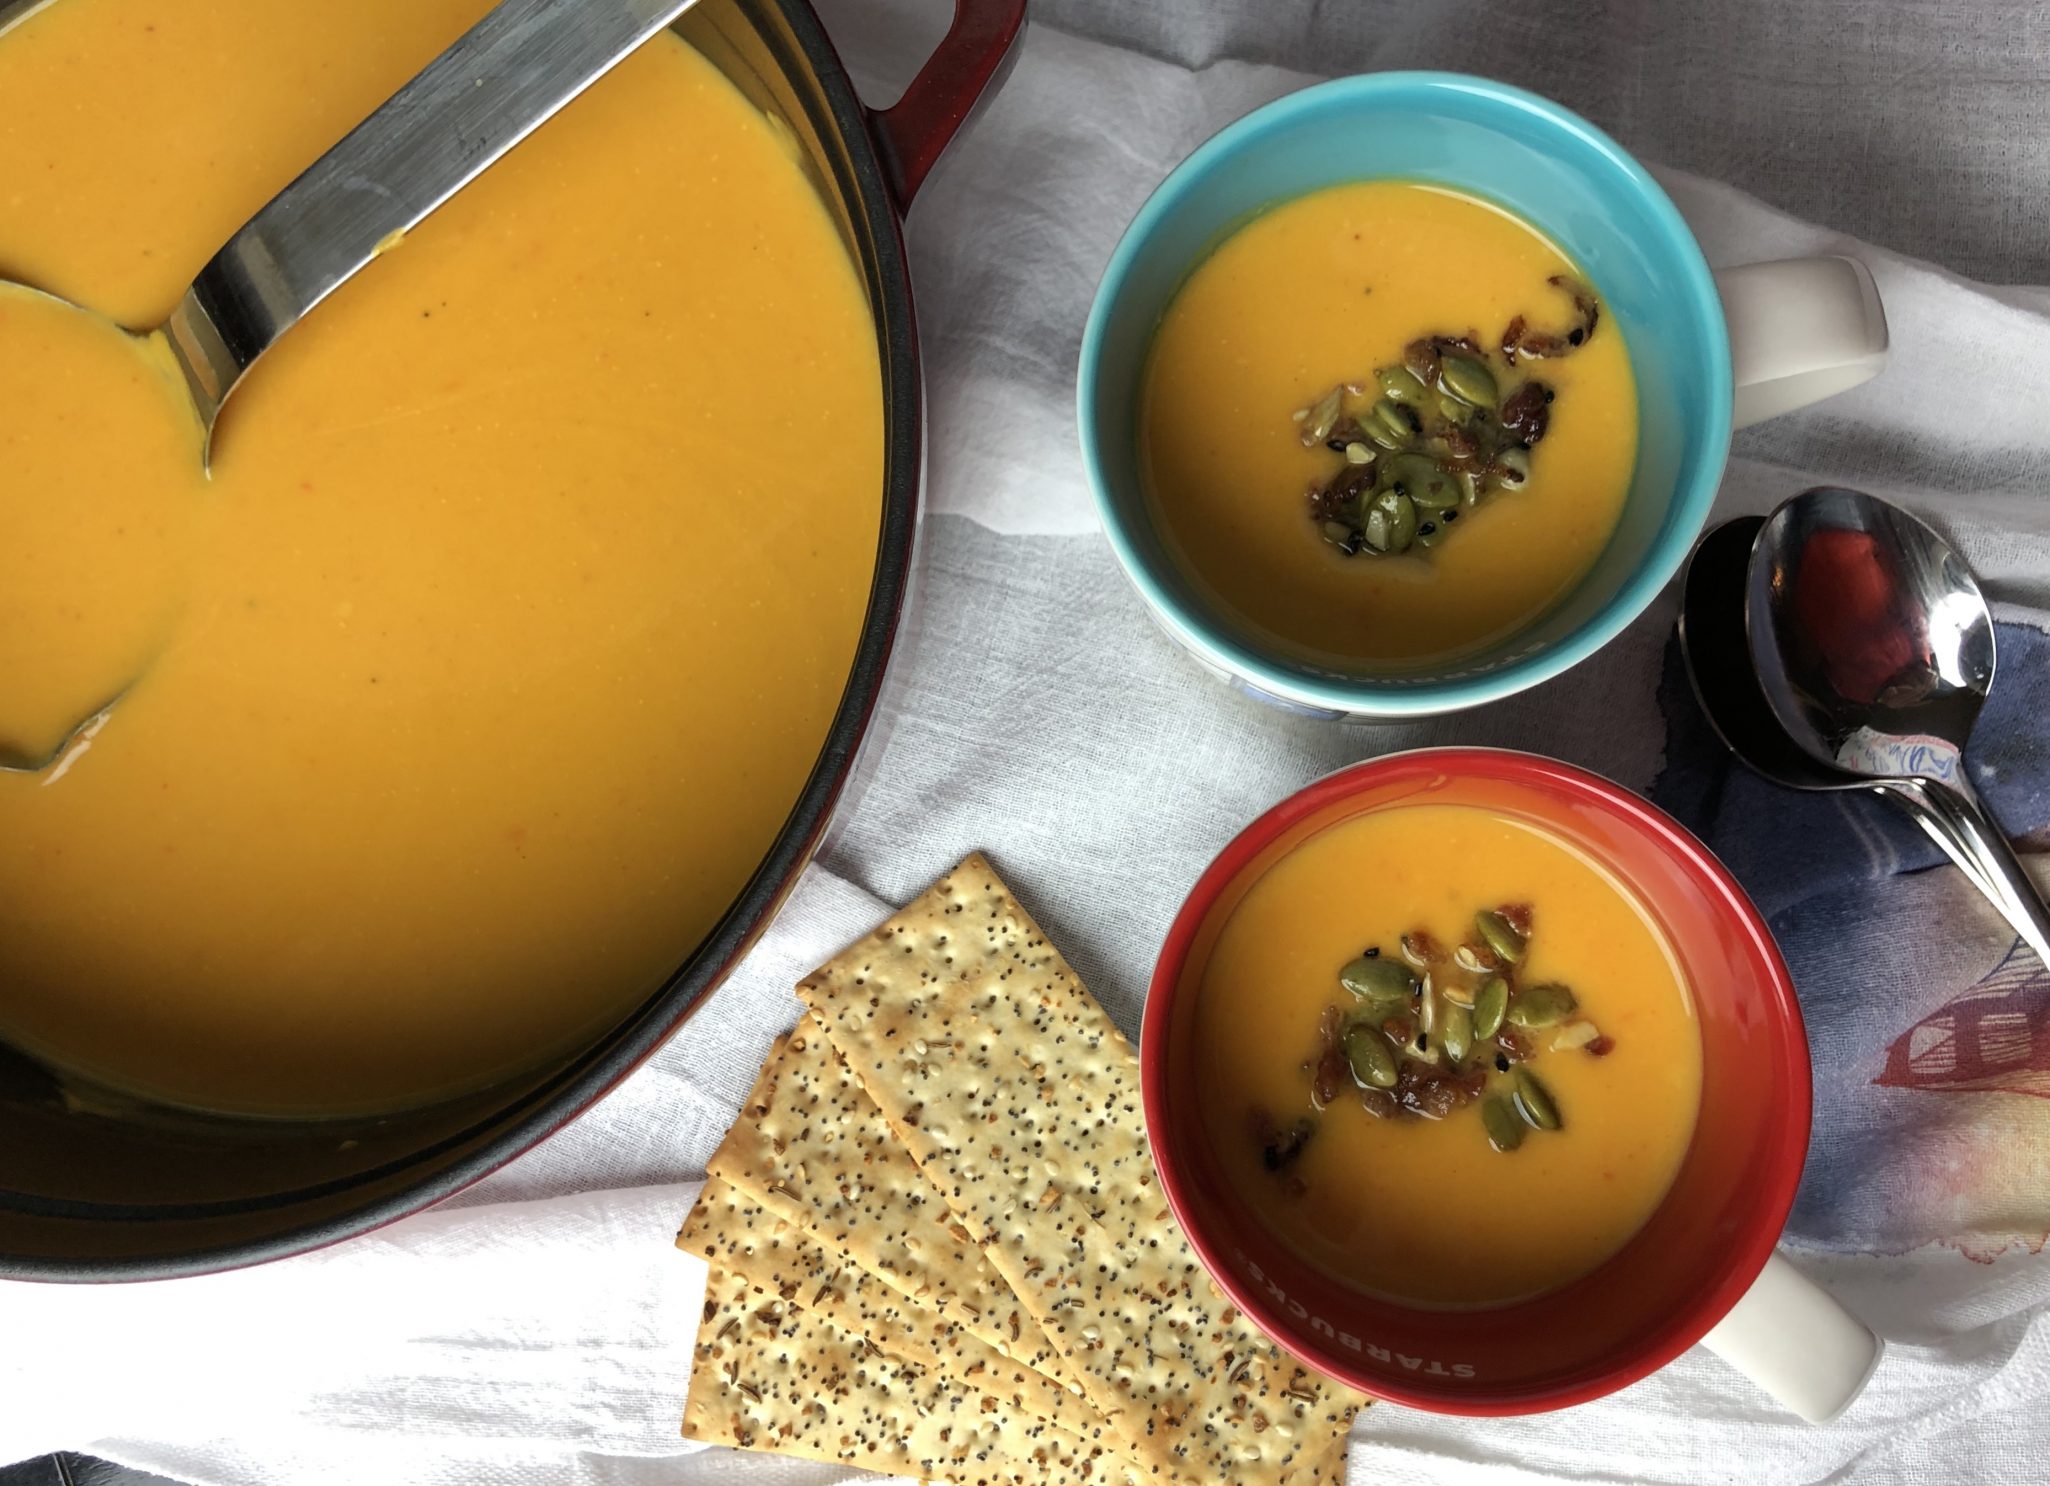
FINISH WITH TOPPING MADNESS.  Once your soup is done, garnish with ANYTHING your little heart desires.  Toasted nuts or pepitas, bacon, sliced apples, or more BACON, croutons.  Did I mention bacon?  I was sent a mix of nuts as a soup topping by my Food52 Holiday Gift Swap buddy- it was perfect.

Creamy Butternut Squash Soup Instant Pot

Course Soup
Cuisine American
Keyword butternut squash
Prep Time 15 minutes
Cook Time 15 minutes
Total Time 30 minutes

Ingredients

  • 1 Tbsp. olive oil
  • 1 large yellow onion diced
  • 1 red bell pepper chopped
  • 2 tsp. diced garlic
  • 1 tsp. fresh ground ginger
  • 2 lb. butternut squash peeled and cubed 1 medium squash
  • 1 medium apple peeled cored and chopped
  • 1 tsp. sage Substitute thyme or curry powder
  • 1/8 tsp. chili powder
  • 1/4 tsp. sea salt
  • 3 c. chicken stock I used additional cup to thin down the soup a bit
  • 3 oz. cream cheese Sub goat cheese
  • 1/3 c. Parmesan cheese
  • Salted Pepitas for garnish Or anything you like, like BACON BITS, spicy nuts, chives, sliced apple, sautéed wild mushrooms...
  • 1 Tbsp Brown sugar, optional To add roasted squash’s sweetness

Instructions

  • Turn on the Saute function on Instant Pot. Add the olive oil, onions and bell pepper. Saute on high for 4 minutes. Add the garlic and ginger and cook for 1 minute. Add the cubed squash, apple, sage, chili powder, sea salt and chicken stock.
  • Place the lid on your Instant Pot and move the knob to seal. Cook on high pressure for 5 minutes and do a quick release of the pressure.
  • Using an immersion blender in the Instant Pot, puree the mixture. Add the cream cheese and Parmesan, stir to melt and continue to puree until very smooth.
  • Garnish and serve.
Keep Calm and Salmon On

Keep Calm and Salmon On

Growing up, most meals included at least one seafood dish.  Steamed rock cod with ginger and scallions, flounder with brown bean sauce sitting on a bed of tofu or stir-fried prawns with tomato and garlic (SOUL FOOD).  My dad would finish work and then head out to the shops in Chinatown to find the fresh catch of the day.  The markets carried locally caught cod, bass, or flounder kept cold on a bed of ice. My dad checked the freshness by looking at the clarity of the eyes. Sometimes he opted for live fish, crab, or shrimp from the tanks that lined the wall.  He peered into each tank before selecting the one he wanted. Once satisfied with his choice he would barter with the fishmonger for a good price.

So my exposure to seafood was two extremes

Freshly caught fish steamed and flavored with ginger, green onions, and cilantro. The sauce was pure heaven, an amalgamation of liquid created from the fish juices, soy sauce, and aromatics.  My brother and I fought over who could ladle the most sauce over their rice, a tradition my kids have continued.

On the flip side was Friday night frozen FISHSTICKS with catsup!  Date night for the folks meant dinner in front of the TV for my brother, my cousins and me.  I hate to admit it, but from the ages of 4-10, I probably liked the fish sticks more. Silly girl.

One fish not typically part of Asian cuisine is Salmon. I discovered salmon late in the game and ironically it’s the fish we prepare at home now more often than any other fish. I am always on the lookout for new and different recipes for salmon.  Whaddya know…from Everyday Korean Cookbook, one of my current favs (check out her site to preview a couple of recipes), I found the recipe, Roasted Salmon with Gochujang Mayo. The sauce, sweet from the mayonnaise, spicy from the Gochujang, and citrusy (is that a word?) from a squeeze of lime is pretty darn tasty.  The mayo comes together in a snap.  Slather it on the fish, pop it in the oven and finish it under the broiler.  So easy and so delicious.  It’s a keeper.  The recipe calls for the Japanese mayo, Kewpie, but you can make your own with Best Foods mayo.

From the Japanese cookbook, Just One Cookbook. Kewpie imposter recipe!

For 1 cup of American mayonnaise (like Best Foods), add 2 Tbsp rice vinegar and 1 Tbsp sugar. Whisk until the sugar dissolves. For 1 Tbsp of American mayonnaise, add 1/2 tsp rice vinegar and 1/8 tsp sugar.

That’s a WRAP

What is my favorite way to serve this salmon? Classic Korean style-bibb lettuce used as a wrap.  It’s the Asian version of a taco. I put a bite of rice or noodle, bit of kimchi, morsel of salmon and dab of chili sauce in the lettuce, wrap it, and eat the whole thing in one bite.  Hmmm…. Crispy cool lettuce, warm soft kernels of rice, spicy sweet salmon, salty, briny umami-packed kimchi topped with scallions, cilantro and lime.  A party in my mouth, sooooo good!

Next time you need a delicious marinade for your salmon, give this one a go!

Roasted Salmon with Gochujang Mayo adapted from Everyday Korean

Quick and tasty roasted salmon with spicy, sweet Gochujang Mayo. Perfect meal at the end of a long day.
Course Main Course
Cuisine Asian
Prep Time 10 minutes
Cook Time 20 minutes
Total Time 30 minutes

Ingredients

  • 1 1 1/2-to-2-pound wild salmon fillet (skin on is fine), pin bones removed
  • 2 tablespoons mayonnaise preferably Kewpie.
  • 2 tablespoons oyster sauce Lee Kum Kee-please
  • 1-2 teaspoons gochujang Korean red pepper paste
  • 1 teaspoon fresh grated ginger
  • 3-4 cloves garlic minced (~2 teaspoons)
  • 1 tablespoon fresh squeezed lemon lime, or tangerine
  • 1 Garnish scallions, cilantro, toasted sesame seeds, lime wedges,

For serving: Steamed rice, kimchi or sliced cucumbers and bibb lettuce leaves

    Instructions

    • Place 1 oven rack on the highest level of oven and a second rack below. Heat oven to 475 degrees. Line sheet pan (shallow baking sheet) with aluminum foil; lightly grease foil with cooking spray.
    • Pat salmon dry with paper towels. Place fillets (skin-side down) on foil-lined baking sheets; set aside.
    • Mix together mayonnaise, oyster sauce, gochujang, ginger or garlic, lime juice in a small bowl. Brush or spoon sauce evenly over salmon.
    • Place baking sheet on second rack in oven, and roast 8 minutes, until sauce sizzles and begins to brown. Heat oven to broil. Place salmon on top rack of oven, and broil on high another 3 to 5 minutes, depending on thickness of fillet and desired doneness. 
    • Serve with bibb lettuce, rice and garnish, if desired, with toasted sesame seeds, sliced green onion, cilantro, lime wedges, kimchi, and/or cucumber slices.

    Notes

    Serve with bibb lettuce, rice and garnish, if desired, with toasted sesame seeds, sliced green onion, cilanto, lime wedges, kimchi, and/or cucumber slices.


    Tropical Flair to Mexican Wedding Cookies when Married with Lime and Coconut

    Tropical Flair to Mexican Wedding Cookies when Married with Lime and Coconut

    The political action group I belong to (please continue to read, that is as political as this post is going to get) hosted a fundraiser this past weekend.  A garden party with a Mexican theme. Of course, I volunteered to make something sweet.  Cookies, specifically, Mexican Wedding Cookies, instantly popped into my head.  Usually, I bake a batch of these nutty, buttery, nuggets during the holidays but it is the middle of summer so I wanted to change it up just a bit.  I found the perfect riff on the classic wedding cookie, a coconut lime version, on the blog Once Upon A Chef by Jenn Segal.  Garden Party, Fiesta theme, coconut, lime-yep, spot on.

    Delicious AND easy to make.  The dough is made in a food processor which makes these cookies STUPID easy.  You throw the dry ingredients into your food processor bowl, give it a couple of whirls, add the butter, vanilla and lime zest, pulse to it comes together and boom, you are done.  Wrap the dough in plastic wrap, and forget about it in the fridge for about an hour.  Use a teaspoon ice cream scoop to make balls of dough, bake, and roll in a ton of powdered sugar.  HOW EASY IS THAT? Ipso Facto Dunzo.

    Coconut-Lime Mexican Wedding Cookies

    Course cookies, Dessert
    Cuisine American
    Keyword Mexican Wedding Cookies
    Prep Time 10 minutes
    Cook Time 12 minutes
    Total Time 22 minutes

    Ingredients

    • 1 cup all-purpose flour spooned into measuring cup and leveled-off
    • 1/4 teaspoon salt
    • 1/2 cup confectioners' sugar plus about 3/4 cup more for coating
    • 1/3 cup pecans
    • 1/4 cup sweetened flaked coconut
    • 1 stick 1/2 cup unsalted butter, softened
    • 1 packed teaspoon lime zest from 1 lime
    • 1 teaspoon vanilla extract

    Instructions

    • In the bowl of a food processor fitted with the steel blade, combine the flour, salt, confectioners' sugar, pecans and coconut. Process until the pecans and coconut are finely ground, and the mixture looks like sand. Add the butter, lime zest, and vanilla extract; process until the mixture comes together into a cohesive dough. Remove the dough from the bowl and wrap in plastic. Chill until firm enough to roll, 45 minutes to 1 hour.
    • Meanwhile, preheat the oven to 350°F. Line two baking sheets with parchment paper.
    • Measure the dough into heaping teaspoon-size pieces and roll each piece into a ball. Place the balls about 1-1/2 inches apart on the prepared baking sheets. Bake until the edges of the cookies barely begin to brown, 12 to 14 minutes. Let cool on the baking sheets, then roll in the confectioners' sugar while still warm. Let the cookies cool on a rack, then roll again in confectioners' sugar once they are cool. Store in an airtight container at room temperature.

    Steamed Pork Patty with Salted Duck Egg-This is My Soul Food

    Steamed Pork Patty with Salted Duck Egg-This is My Soul Food

    In Asian speak, this is how we say I love you…

    “Have You Eaten Yet?”

    When my kids come home I get busy in the kitchen making EVERY SINGLE DISH they love. Their favorites, from soup to dessert/ I usually have a pot of chili or spaghetti sauce simmering on the stove while they’re home and I pull out my Dad’s recipes for down-home Chinese dishes. Wes makes short rib stew and carrot cake. It’s 24-7 cooking and eating.  What can I say?  The Asian language of love is food.

    Like Father Like Son

    My dad and grandfather were the cooks in my family.  My grandfather cooked for a living.  Before going off to work we would often have early dinner with him. Always Chinese food,  I was surprised when I found out later he was a line chef at Original Joe’s on Broadway and also at the famed Tonga Room at the Fairmont Hotel. For my Dad cooking was his passion.

    Both of them made down-home dishes like Steamed Pork Patty with Salted Duck Egg, Fuzzy Melon soup, Steamed Chicken with Lop Cheung (Chinese sausage) and Black Mushrooms, or whole fish (yes,that means the head too) with green onions and ginger.  I loved watching them cook and savored eating these dishes even more.  When I went off to school in Los Angeles, I would often call home to ask my Dad how to cook a favorite childhood dish. It was my connection with home and family and a way to keep them close.

    A flurry of cooking this past week while the boys were home and the multiple “how do you make” calls from Jamie (who was stuck in Houston) prompted me to add a new section to 3Jamigos. I call it Soul Food.  It’s down-home cooking, cherished recipes to share with family and friends.  Take a peek, it might bring back some great memories.  Or share a family favorite, I would love to post it on my blog.

    My inaugural post for Soul Food is a down-home favorite, savory Steamed Pork Patty with Salted Duck Egg (咸蛋蒸肉饼). You can find it in hole-in-the-wall Cantonese (southern China) restaurants or if you get invited over for family dinner at any of your Cantonese friends’ homes. In Chinatown, the best place for this dish was Sun Tai Sam Yuen on Jackson Street in my humble opinion, lol.

    The ground pork is seasoned with soy sauce, oyster sauce and topped with the salted duck egg. Think of this as a version of a sausage patty topped with a fried egg.  See, not so strange after all.  My kids scoop up chunks of the patty and egg and mix it into their rice. Yum.

    Things They Don’t Tell You in Cookbooks

    Although simple to make, there are pearls of kitchen wisdom on how to prepare this dish.  First, the pork. My mom would tell me to buy pork butt or shoulder and hand-chop the pork at home, better texture.  The pork itself should not be too lean as the fat adds flavor and keeps it from drying out.  This primer on pork pretty much holds for any dish that requires ground pork-don’t buy pre-ground (ok, sometimes I cheat-there is a coarse ground version in Chinese markets), and ask for “bun fei sau-half fat, half lean” (半肥半瘦).  This is not a health-conscious choice, lol.

    Duck, Duck, Go…get Chicken, it’s Ok

    Raw salted duck eggs are hard to find.  I was really excited when I found local salted duck eggs at Marina Foods from Metzer Farms.  Great quality. The eggs are brined in a salt solution for approximately a month. At the end of the month, the yolk has hardened, the white has a gelatin-like consistency, and the egg has a wonderful briny flavor that goes well with pork.  You are more likely to find salted chicken eggs which are perfectly acceptable.

    When mixing the seasonings and egg into the pork, stir in ONE DIRECTION only.  So pick, clockwise or counter-clockwise and stick with it.  DON’T ASK ME WHY (ok, I googled it, supposedly it keeps the meat tender).  My Dad told me to do it this way.

    This is How We Do It

    Place seasoned pork in a glass pie plate, smooshing it around the plate.  Fill a Chinese rice bowl 1/3-1/2 full with HOT water.  Slowly pour the hot water into the pork, stirring and breaking up the pork further.  The final mixture will be loose and wet looking. Slice the yolk of the duck egg into quarters or 4 slices.  A word of warning, it will be a little slimy feeling.  Flatten the pieces of yolk with the side of the knife.  Place the flattened pieces of yolk on top of the pork distributed evenly around the patty.  Top with green onions.  Place in steamer and steam over medium-high heat for about 15 minutes or until the juice runs clear when pierced with a knife or chopstick.

    Just before serving, garnish with more green onions or cilantro and a drizzle of oyster sauce.  Serve with a big ass bowl of rice!

    Microwave Magic

    You can also cook this dish in the microwave instead of steaming it!  I have Cook Anyday microwave cookware now, but if you have a vented microwave dish use that.  I have a teeny 600-watt microwave.  Cook at full power for 8 minutes, done!  Adjust for your microwave, for example, a 1000-watt microwave, I might just use 70% power and nuke it for the 7-8 minutes.  For foods that are traditionally steamed, you don’t want to zap it quickly as much as gently cook it   All in one bowl, no messing with a steamer contraption.  Mind-blown microwave cookin’.

    Easy peasy, microwave easy!

    Steamed Pork Patty with Salted Duck Egg

    Classic Cantonese Homestyle dish, steamed minced pork and salted eggs, bowl of steaming white rice is essential!
    Course homestyle, Main Course, pork
    Cuisine Asian
    Keyword cantonese cuisine, salted duck eggs, Steamed pork patty
    Prep Time 15 minutes
    Cook Time 20 minutes
    Microwave time 8 minutes

    Ingredients

    • 3/4 Pound Ground Pork
    • 1/4-1/3 Chinese rice bowl of hot water approximately 1/3 cup of water
    • 1 Egg large
    • 1 Salted Duck Egg Found in Chinese Groceries in refridgerator section or with egg, should be uncooked.

    Seasonings

    • 2 tsp. Soy Sauce
    • 1 tsp oyster sauce
    • 2 tsp rice wine or sherry or sake
    • 1/2 Tsp. Sugar
    • 1/4 tsp Salt
    • Dash of white pepper

    Garnish

    • Green Onions And Cilantro chopped or sliced to look pretty

    Instructions

    • Separate duck egg yolk from the egg white. Reserve the yolk.
    • Place pork in a shallow bowl or glass pie plate that you will end up using to steam/microwaving it in. Scramble the salted duck egg white with the whole egg, add to the pork.
    • Stir pork with egg mixture and seasonings, stir in one direction!
    • Slowly add hot water to the pork mixture, and scrambling the mixture as you add the water. This will make it will look soupy.
    • Garnish with reserved egg yolk that has been cut Into slices. This is a process. The egg yolk is sticky and ok, kind of slimy (like an egg-duh). Since it has been brined it will be solid. I cut it into quarters and then gently smash it with the side of a knife to flatten each piece. Sprinkle half of the sliced green onions on top.
    • Steam for approximately 15-20 minutes, when pierced with a chopstick or knife the juices should run clear not pink.
    • Drizzle with oyster sauce and top with cilantro and the rest of the green onions. If you want a nice sheen, hit it with a little hot oil. (This will also bring out the flavor of the cilantro and green onions when you pour the oil over it.
    • Serve with rice, lots of rice, copious amounts of rice. Really.
    Soured by Cookies, Saved by Lemon Cake

    Soured by Cookies, Saved by Lemon Cake

    I tried a couple of new cookie recipes recently and as the saying goes, you win some you lose some.  The first recipe Malted Milk Chocolate Cookies came from a book I received to review, Holiday Cookies.  Decidedly MEH.  The malt flavor was barely discernible and the milk chocolate did not stand out.

    Another Cookie Bust

    A few days later with the fall season in full swing, a recipe for pumpkin snickerdoodles popped up on my feed. Never get swept up by fall pumpkin fever.  But they looked delicious so I baked a batch.  I waited for the first batch to cool, grabbed one off the rack, and took a bite…MEH.  Noooo, another cookie bust.  Little pumpkin or spice flavor, very nondescript.

    It’s Not a Lemon

    A new recipe caught my eye, not a cookie but a cake recipe.  Food52 posted a lovely lemon poppy seed cake from Ottolenghi.  I am a sucker for lemon and poppy seeds.  Hoping my luck would change, and having the utmost confidence in Food52 and Ottolenghi, I decided to make the cake.  After all, I can’t have three lemons in a row, even if the last recipe actually calls for lemons.

    The cake is quick and easy. The recipe starts with beating eggs and sugar together until thick and frothy. Heavy cream is then added to the egg and sugar blend. I took the heavy whipping cream straight out of the fridge and with the mixer running, added it in a steady stream to the egg mixture. Beat until it has the consistency of pancake batter. The flour is then folded in along with the melted butter, lemon zest, and poppy seeds. The recipe calls for 3 lemons to make 1 tablespoon lemon zest but I only needed two good sized lemons and that’s with really packing the measuring spoon (because I LOVE lemon). The lemon was not overpowering. While the cake was baking, I made the lemon icing.  Easy peasy lemon squeezy.

    Spread the icing over the top as soon as you remove the cake from the oven.  Do not even think of forgoing the icing.  It adds that sweet-tart lemony oomph and creates a beautiful glossy sheen.  The cake has a nice crumb and is denser than say a sponge cake but lighter than a traditional pound cake. If you are a poppy seed addict you could increase the amount as you like. Thankfully this cake saved my week of baking.  From cookie bust to cake champ. Sweet success.

    Bookmark this cake and make it soon, you’ll thank me.

    Lemon Poppy Seed Cake (National Trust)

    An easy, absolutely delicious lemon poppy seed cake from Ottolenghi
    Course Cake, Dessert
    Cuisine British
    Keyword banana cake, lemon, poppyseed
    Prep Time 20 minutes
    Cook Time 1 hour
    Cooling time 16 minutes

    Equipment

    • 1 standard loaf 9x5 loaf pan

    Ingredients

    The Dry Stuff

    • 1 1/3 cups all-purpose flour 170 grams
    • 1 1/4 teaspoons baking powder
    • 1/4 teaspoon salt

    The Wet Stuff

    • 3 large eggs
    • 1 cup plus 2 tablespoons granulated sugar 225 grams
    • 1/2 cup heavy cream, cold 120 milliliters

    Butter Mixture

    • 5 tablespoons 70 grams unsalted butter, cubed, plus extra for greasing
    • 1 -1.5 tablespoon poppy seeds
    • 1 tbsp Finely grated zest of 3 lemons I needed only 2 lemons

    The Icing

    • 3/4 cup 90 grams confectioners' sugar, sifted
    • 2 tablespoons lemon juice

    Instructions

    • Heat the oven to 350° (180° C).
    • Grease the loaf pan(s) and line with parchment paper, then set aside.
    • Sift the flour, baking powder, and salt together into a bowl, then set aside.
    • Melt the butter in a small saucepan over low heat, stir in the poppy seeds and lemon zest, and set aside.
    • Place the eggs and granulated sugar in the bowl of an electric mixer fitted with the paddle attachment and beat on medium-high speed for about 2 minutes, until pale and frothy.
    • Add the cold whipping cream and continue to beat for about 2 minutes, until the mixture has combined, thickened a little, and turned pale.
    • Use a rubber spatula to fold the dry ingredient mix into the egg mixture. Then fold the melted butter, poppy seeds, and zest mixture in.
    • Spoon the mixture into the loaf pan(s) so that it rises three-quarters of the way up the sides.
    • Place on a baking sheet and bake for about 50 minutes, or until a skewer inserted into the center comes out clean.

    The Glaze

    • To make the glaze, whisk the confectioners' sugar with the lemon juice in a bowl. Pour the glaze over the top of the cake as soon as it comes out of the oven, spreading it over the top so that it sinks in and creates a nice coating.
    • Set aside to cool for 30 minutes before removing from the pan.
    • Let it come to room temperature before serving.
    Sesame Noodles (Ancient Family Secret)

    Sesame Noodles (Ancient Family Secret)

    Jamie was home for the week so of course, we pulled out the party plates and hosted a happy hour at our house. Though we usually stick to finger foods, we broke out the forks and chopsticks for a delicious, perfect for hot weather dish, Sesame noodles.  A combination of soy, vinegar, sesame oil in the dressing packs a flavor punch followed by a spicy kick courtesy of chili oil.  The dish is prepped in advance and left to sit overnight for the flavors to meld.  Just before serving, give the noodles a last toss, a sprinkle of green onions and sesame seeds on top, and then watch friends gobble it up.  Really, that good.

    My friend Sarah asked for the recipe for these tasty noodles to which I teasingly replied “it’s an old family recipe”.  I had her for a second until I finished with “from my dear Aunt, Martha Stewart”.  Yep, the recipe is from Martha Stewart’s Entertaining.  An iconic tome filled with delicious recipes and the ABCs on “how to host” a fabulous party. It changed the way my generation viewed “The good life”.  I was on a student’s budget when Entertaining was published so the best I could do was pour over the pages of her book and dream. An elegant Manhattan penthouse cocktail party or Hawaiian Luau in the Hampton’s were not within reach but her recipes were.  A girl can dream, and eat delicious tasty food.

    We served the noodles with grilled flank steak and a cucumber salad.  A big hit!  The recipe is simple and easy.  The hard part happens way before you start making this delicious dish.

    FINDING THE INGREDIENTS

    The dressing calls for Chinese Black Vinegar and Dark Soy Sauce.  Whaat? Isn’t there just one soy sauce to rule them all?  Nope.  Chinese dark or black soy sauce is actually thicker and less salty than regular Chinese Soy Sauce or Kikkoman Soy Sauce.  It is fermented a little longer and contains either molasses or sugar which adds a bit of sweetness.

    The other ingredient is Black Chinese Vinegar.  Chinese Black Vinegar, also known as Chiankiang Vinegar, is best described as a slightly less sweet Balsamic Vinegar.  I did painstaking intensive research (googled it) and found the best substitution (from America’s Test Kitchen) equal parts red wine vinegar and balsamic vinegar blended together.  I did my own taste test and it did seem to be pretty close in flavor, maybe a touch sweeter than black vinegar.

    The Line-up

    A picture is worth a whole lotta words so here are my bottles of the different sauces.  I prefer Pearl River Dark Soy, it is a little mellower and not quite as salty as Koon Chun.  For those of you in my neck of the woods, I will gladly point you in the right direction for where and which ones to buy.

    I have added my own twists to this dish of course.

    Decrease the amount of salt (the original seemed like a ton) and use kosher salt.

    Add 1 -2 tablespoons of oyster sauce to add umami (I know what your thinking noooo, not another sauce. This is optional but everyone should have a bottle of this miracle sauce in their pantry.  Make sure it is made by the Lee Kum Kee one with the kid and mom in the boat.  Cut chili oil amount by half.  I’m a wimp.

    Add blanched asparagus, sugar snap peas, snow pears, fresh corn, and-or shredded chicken for a more substantial dish.  The sky’s the limit.  Garnish with green onions and cilantro (if you like cilantro) and toasted sesame seeds.  Voila’ KILLER NOODLE SALAD ready to go!

    Old Family Secret (Sesame Noodles)

    Course Main Course, Side Dish
    Cuisine Asian, Asian-American
    Keyword Sesame Noodles
    Prep Time 30 minutes
    Cook Time 6 minutes

    Ingredients

    • Make this dish the night before
    • 2 pounds chinese egg noodles
    • 1/2 cup sesame oil
    • 1/2 cup black soy sauce
    • 3 T black Chinese vinegar
    • 3 T sugar
    • 1 1/2 T salt kosher coarse
    • 2 T hot pepper oil chili oil (start with 1 T it is really spicy with 2)
    • 1/2 cup finely sliced scallions white and green part
    • Recipe can easily be halved**

    Instructions

    • In a large pot of boiling water, cook the noodles 1 pound at a time. Boil 4-5 minutes, until just tender.
    • Drain, rinse well under cold running water until chilled, and drain again. Put in a large bowl.
    • Combine remaining ingredients. Reserve approximately 1/4 of the dressing. Stir the rest into cold noodles, mixing well.
    • Chill overnight.
    • Just before serving toss with reserved dressing. Garnish with toasted sesame seeds and additional green onions.
    • Variations: Reduce salt to 1 T kosher, add 1-2 T oyster sauce. Add blanched asparagus or snow peas or sugar snap peas or cucumbers.
    • For a more substantial dish add shredded chicken or cooked shrimp.
    That’s a Wrap, Happy Hour Time! (Korean Tacos)

    That’s a Wrap, Happy Hour Time! (Korean Tacos)

    Jamie is in Atlanta for the summer working but fortunately she will be coming home for a couple of weeks.  I miss my Happy Hour buddy.  We both agree happy hours are the best of all worlds.  It’s much more relaxed than throwing a dinner party. People come and go as they please and help themselves to food and drink, it’s all good.  The food is casual and the attire is flips and anything comfortable. It’s all about chillin’ with friends and family. You can hang outside so don’t bother cleaning the house, noone cares, especially after a couple of wine coolers.

    Luckily for us, we finally landscaped our yard. Yay.  Years of drought and an invasion of gophers left our yard looking like a moonscape of dirt, holes and mutant weeds.  It was bad.  We called gopherbusters (not really their name but that’s what they do) and a gardener and got to work.  In my defense, I grew up in San Francisco.  The ratio of cement to grass is like a bajillion to one.  Lawn mower? Never seen one much less owned one. But the yard is done, PARTY TIME.

    Just need Jamie to come home.

    In anticipation  of when she does, I have been checking out recipes that would be perfect for our little casual soirees’.  Korean Chicken Lettuce Wraps from SkinnyTaste caught my eye. SkinnyTaste started out as a blog on healthy seasonal cooking your family will love and has blossomed into a full fledge book.  The Korean wraps remind me of a Chinese appetizer, San Choy Bao, which literally means lettuce bun, think of it as an Asian Taco.  The filling is seasoned Korean BBQ style which I happen to LOVE.  Each bite is sweet, salty, spicy and the lettuce adds a refreshing crunch.  It’s a party in your mouth.  The original recipe calls for brown rice but if you are going low carb like I SHOULD be, you can substitute squash, diced carrots, zoodles or sautéed mushrooms.

    We are serious about our happy hour bites and this dish meets the rigorous criteria we set for a date with a wine cooler or bottle of ice cold beer.

    STRINGENT Happy Hour Food Standards:

    Bite sized- check (2 bites)

    Eat with your hands- check

    Its YUMMY- check

    It’s STUPID EASY- check

    4 out of 4!  Lets go make some wraps.

    That's a Wrap! (Korean Style Lettuce Wraps)

    Ingredients

    • 1/4 cup low sodium soy sauce or tamari
    • 2 teaspoons light brown sugar
    • 1 teaspoon sesame oil
    • 1/2 teaspoon crushed red pepper flakes
    • cooking spray
    • 1 pound lean ground chicken or turkey
    • 1/4 cup chopped yellow onion
    • 2 garlic cloves crushed
    • 1 teaspoon grated ginger
    • 1/4 tsp fresh ground black pepper

    FOR WRAPS

    • 12 large outer lettuce leaves such as green leaf Bibb lettuce or even iceberg lettuce which creates a nice round bowl
    • 2 1/4 cups cooked brown rice
    • 2 tablespoons Gochujong or more if desired
    • 1/2 tablespoon sesame seeds plus more for topping
    • 2 sliced scallions white and green parts

    Instructions

    Filling:

    • Combine soy sauce, brown sugar, sesame oil and chili flakes in a small bowl. Set aside.
    • Heat non-stick pan over medium high heat, add small amount of vegetable oil, add onions to pan and cook for 1-2 minute. Add garlic and ginger, sauce for additional minute before adding ground chicken to pan. Break up the chicken with a spatula or wooden spoon.
    • Cook until the chicken loses its pinkness.
    • Add sauce ingredients to pan and stir to incorporate, reduce heat to medium-low, cover and simmer mixture another 5 minutes.

    In place of brown rice:

    • Sauteed diced zucchini, mushrooms
    • Kid friendly version use corn or cooked zucchini zoodles

    To Serve:

      You can set up a serve yourself taco bar or assemble each wrap.

      • In each lettuce leaf place 2 tablespoons of rice or prepared vegetables
      • Top with approximately 2 tablespoons of chicken mixture
      • Garnish with a dab of Gochujong or Siracha sauce, green onions and sesame seeds.
      • Serve immediately.

      Spicy Pulled Pork InstantPot, InstantGratification

      Spicy Pulled Pork InstantPot, InstantGratification

      I just received an InstantPot pressure cooker for my birthday!  This is right up my alley since I am a KITCHEN GADGET FREAK.  Not exaggerating, I love kitchen appliances.  I am the “what was I thinking, forehead slap” owner of donut hole pans, a strawberry corer, spiralizer, brownie squares pan, sous vide thingy, Ebelskiver pan, bread machine, the list goes on and on…

      When I was a kid I went to Woolworth’s with my mom (yes baby boomers, Woolworth’s, remember?) in anticipation of a slice of their delicious gooey cheese pizza.  Instead, I found myself in front of a demonstration booth, entranced.  A voice boomed “it slices, it dices, it does it all. This is going to revolutionize cooking and help you escape from the kitchen” I watched as he deftly created mountains of julienned squash, chopped onions, sliced carrots, even waffle-cut potatoes. How I convinced my mom to buy this new fangled tool I will never know.  But we walked out of Woolworth’s, a slice of cheese pizza in one hand and a Slice-o-Matic with a bonus Chop-o-Matic in the other! These days if I go to the mall with my kids they know there will be the prerequisite stop at Sur La Table or Williams Sonoma to peruse because YOU CAN NEVER HAVE TOO MANY Kitchen tools.

      The Pressures Off with an Instant Pot

      The Instant Pot is the latest, hippest iteration of a pressure cooker. There are blogs, Facebook pages, and books devoted to the Instapot.  It is a slow cooker, saute pan, rice cooker, yogurt maker all in one.  For you tech geeks you can download the app and program it using your phone.  Crazy huh.

      A few weeks ago NYT Cooking published Melissa Clark’s recipe for Pressure Cooker Spicy Pork Shoulder along with a video of her using the Instant Pot. It’s easy and delicious and best of all cuts cooking time by at least half.

      The overnight marinade adds to the bold flavor of the dish

      The liberal use of Korean chili flakes and Kochuchang, a sweet chili pepper paste in the sauce adds an Asian flair. If you are a pulled pork fan you will absolutely love this version. Marinade the pork in a mixture of chili flakes, honey, salt, and garlic overnight and then brown it the next day.  Then saute’ the pork in the Instapot (which surprisingly took less time than I imagined) until browned.  Add a bit of water, twist and clamp the lid shut, set the timer for 70 minutes, and chill out for a couple of minutes before making the sauce. Easy peasy.

      Fusion BBQ Sauce

      The sauce is made with chili paste, ketchup, garlic, fish sauce, honey, and ginger.  As delicious as this sauce is it packs a punch in heat and flavor.  A little goes a long way so add the sauce in small increments to taste.

      The first day we shredded the pork, mixed in bbq sauce and juice (from the Instant Pot), and broiled the pork to crisp the edges.  We served it on a bed of rice with sliced cucumbers and carrots, a Porki Bowl (get it?).

      The quiet nods and hmms as we ate confirmed we had a winner.

      This makes a more than generous amount of pulled pork.  Luckily the kids were home for spring break and made quick work of the pork.  Beyond our rice bowls, we had it with scrambled eggs for breakfast and in Hawaiian sweet rolls with a cabbage slaw for lunch.  So good! This is a definite keeper.

      The maiden voyage of my Instant Pot was a resounding success.  Can’t wait for another opportunity to use it.

      InstantPot Spicy Pork Shoulder from NYT

      Spicy Pulled Pork made in an Instant Pot
      Course Main Course
      Cuisine American, Fusion
      Keyword Instant Pot, NYTcooking, Spicy Pork Shoulder
      Prep Time 20 minutes
      Cook Time 2 hours

      Ingredients

      • 5 garlic cloves grated on a Microplane or minced
      • 2 tablespoons brown sugar or honey
      • 1 tablespoon Korean chile flakes gochugaru or other chile flakes (Maras, Aleppo or crushed red pepper)
      • 1 tablespoon kosher salt more to taste
      • 1 teaspoon ground black pepper
      • 5 pounds boneless pork shoulder cut into two or three pieces

      FOR THE SAUCE:

      • 1 tablespoon peanut oil
      • 4 garlic cloves grated on a Microplane
      • 2 tablespoons grated fresh ginger root
      • cup gochujang Korean chile paste or other chile paste or sauce such as Sriracha
      • ¼ cup soy sauce
      • 2 tablespoons ketchup
      • 2 tablespoons mirin
      • 2 tablespoons honey
      • 1 tablespoon rice wine vinegar
      • 1 teaspoon Asian fish sauce
      • 1 teaspoon sesame oil

      FOR THE SESAME PICKLED CUCUMBERS:

      • 6 Persian cucumbers thinly sliced (or about 4 cups sliced cucumbers)
      • 1 ½ tablespoons rice vinegar
      • 2 teaspoons sesame oil
      • 2 teaspoons brown sugar
      • ½ teaspoon fine sea salt
      • ¼ cup thinly sliced red onion
      • 2 teaspoons sesame seeds

      Instructions

      • To prepare pork, combine garlic, brown sugar, chile flakes, salt and pepper. Rub marinade all over pork. Cover and refrigerate for 1 hour to up to 24 hours.
      • Set electric pressure cooker to sauté (or use a large skillet). Add pork in batches and sear until browned all over, about 2 minutes per side. Add 3/4 cup water to pot (or to skillet to deglaze, then move to pot), cover, and set to cook for 90 minutes on high pressure. Make sure to scrape the bottom of the pot so it doesn't scorch or the pot will turn off.
      • While pork cooks, prepare sauce: In a small pot, warm peanut oil over medium heat. Add garlic and ginger, and sauté until fragrant, 1 to 2 minutes. Add remaining ingredients and bring to a simmer. Cook until thickened, 1 to 2 minutes. Set sauce aside. (It can be made up to 1 week ahead and stored in the refrigerator.)
      • Manually release steam. Let pork cool until you can handle it, then shred it into bite-size pieces. Pork can be made in advance.
      • While pork cools, strain liquid from bottom of pot. Pour off fat (or chill liquid, then scoop off solidified fat with a spoon). Reserve.

      Cucmber Salad

      • Prepare cucumbers: In a small bowl, combine all ingredients except sesame seeds, and let sit, tossing one or twice, for at least 20 minutes. Stir in sesame seeds.
      • To serve, heat broiler. Toss pork with sauce and 1 to 2 tablespoons cooking liquid — just enough so pork is evenly coated but not wet or runny. Spread mixture on a rimmed baking sheet, and broil until crisp on top, 2 to 3 minutes a little char is fine. Think burnt ends or tips, those are yummy.
      • Make a porki bowl! Top steamed rice with generous portion of pork and cucumbers. . Or make sliders with an Asian slaw

      Addendum:  St. Patrick’s Day, a week later was the perfect time to use the Instant Pot.  Literally threw corned beef, pickling spices, an onion, and some garlic in the pot.  An hour and a half later I had a platter of tender melt in your mouth corned beef with cabbage, potatoes and carrots (ok I slightly mis-timed the vegys so a bit on soft side) on the table.  It’s a good thing.


      Variations on a Thumbprint Day 2: 12 Days of Cookies

      Variations on a Thumbprint Day 2: 12 Days of Cookies

      Who doesn’t like thumbprints? Not me, my kids, my hubby, nor Santa (the thumbprints were always gone from Santa’s cookie plate on Christmas morning).  While perusing the internet for holiday cookie recipes I came across the blog, Chew Out Loud.  Their most requested cookie recipe (hands down winner)  is for Buttery Jam Thumbprint Cookies. Really, is it so surprising?  A buttery meltingly tender cookie filled with a “thumbleful” (get it? thumb + thimble) of sweet jam in the center, finished with a dusting of powder sugar.  Heavenly.

      So of course I included thumbprints in this year’s 12 Days of Cookies.    My favorite recipe comes from an old copy of Ladie’s Home  Journal (yes, I am that old).  I have made these every year for as long as I have been baking Christmas cookies.  The addition of ground walnuts to the dough gives these cookies a nutty edge and a slightly sandier texture.  I like filling the centers with raspberry jam, its rich ruby red color playing off the surrounding cookie. The sweet and tart flavor of the jam compliments the cookie perfectly.  You can substitute pecans for the walnuts although I prefer walnuts which have a bit of a bite that works really well.   Did I mention they are super easy to make?  Run, don’t walk to your kitchen and make these cookies now.

      Over the years I have found little tricks that help when making cookies.  Ice cream scoops are the secret to uniform sized cookies and definitely speed up the process of scooping out the dough.  I make the indentation for the jam with my wine opener (nifty huh) and creates the perfect sized circle in the middle of the cookie, much better than my thumb!

      You can use any flavor jam you like.  Put jam in a squeeze bottle and shoot approximately 1/4 teaspoon of jam into each indentation made. As the cookies are cooling, you can add a spot more jam in the center if you wish.  Sprinkle with powdered sugar.  I use a wire mesh tea strainer for my powdered sugar, works like a charm.


      And for your listening pleasure the King-Blue Christmas

      Variations on a Thumbprint Day 2: 12 Days of Cookies

      Ingredients

      Ladies' home journal 12/93

        Prep time: 20 minutes

          Baking time: 10-12 minutes

          • 1 1/2 cup coarsely chopped walnuts
          • 1 cup butter at room temperature
          • 3/4 cup granulated sugar
          • 2 1/4 cups all-purpose flour
          • 1/4 cup seedless raspberry preserves
          • Powdered sugar
          • Dash of salt

          Instructions

          • Preheat oven to 350 degrees.
          • Chop nuts in food processor until very fine. Beat butter, nuts, salt and granulated sugar in mixer bowl until light. Beat in flour into blended.
          • Shape dough into 1 inch balls.
          • Place 2 inches apart on ungreased cookie sheets and flatten to 1 1/2 inch circle.
          • Press into centers with a fingertip.
          • Fill each indentation with 1/4 teaspoon preserves.
          • Bake 10-12 minutes, until golden.
          • Cool.
          • Sift confectioner's sugar over cookies.
          • Makes 6 dozens.