Tag: #easyanddelicious

Lemon Curd, So Nukalicious!

Lemon Curd, So Nukalicious!

When Tree Gives You Lemons…..Make Lemon Curd!

Outside my kitchen window grows one of my few garden successes,  a lemon tree.  While Meyer Lemon trees are ubiquitous here, I have a beautiful Eureka Lemon tree that despite me, produces a ton of lemons year-round.  I actually fertilized it this year…I now have a gazillion of lemons.  As I stare at my bowl of overflowing lemons this question comes to mind, what do I do with all these lemons?

Lucky for me, I found Melissa Clark’s Lemon Curd recipe on NYT Cooking.  Not only did I make a dent in my lemon stash (albeit, a tiny dent) but the recipe calls for making the curd in the microwave, super easy. Win-win.  Is it less time and work than the conventional doubler-boiler, on the stove process?  Not by much, but I do like the one bowl,  incremental cooking and intermittent stirring with the microwave recipe. You don’t have to stand over the stove constantly stirring.

Microwave Mania

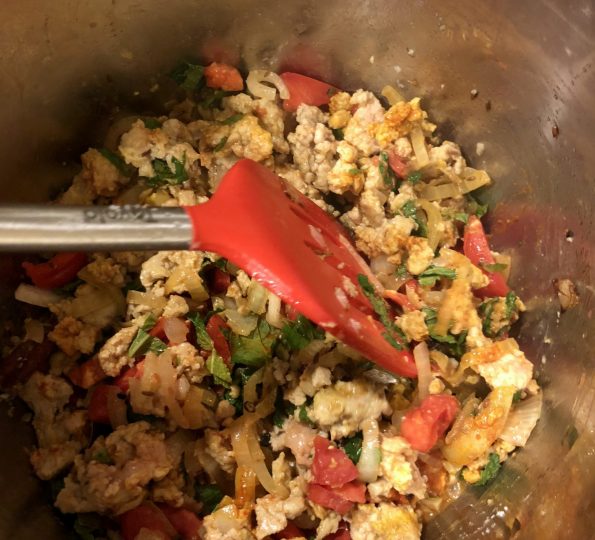
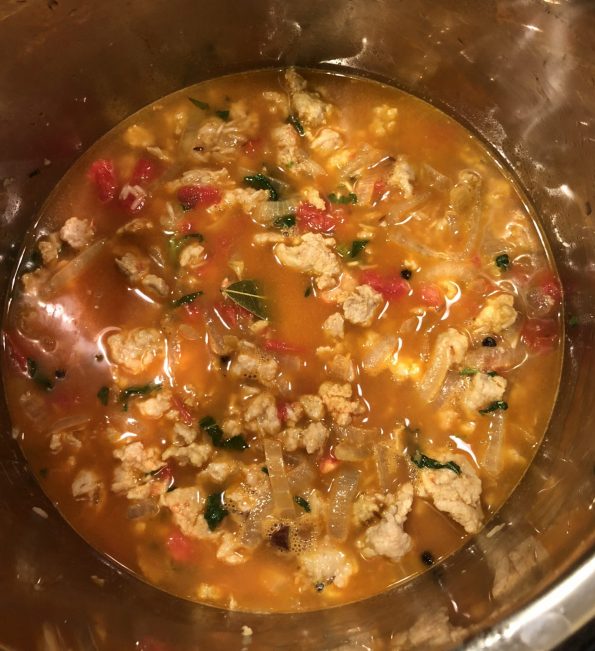
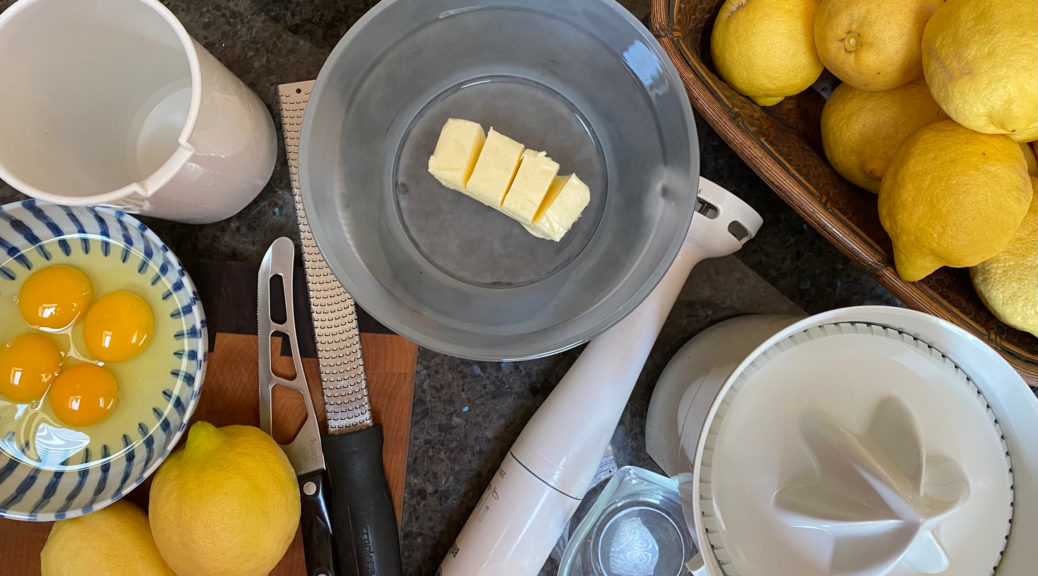
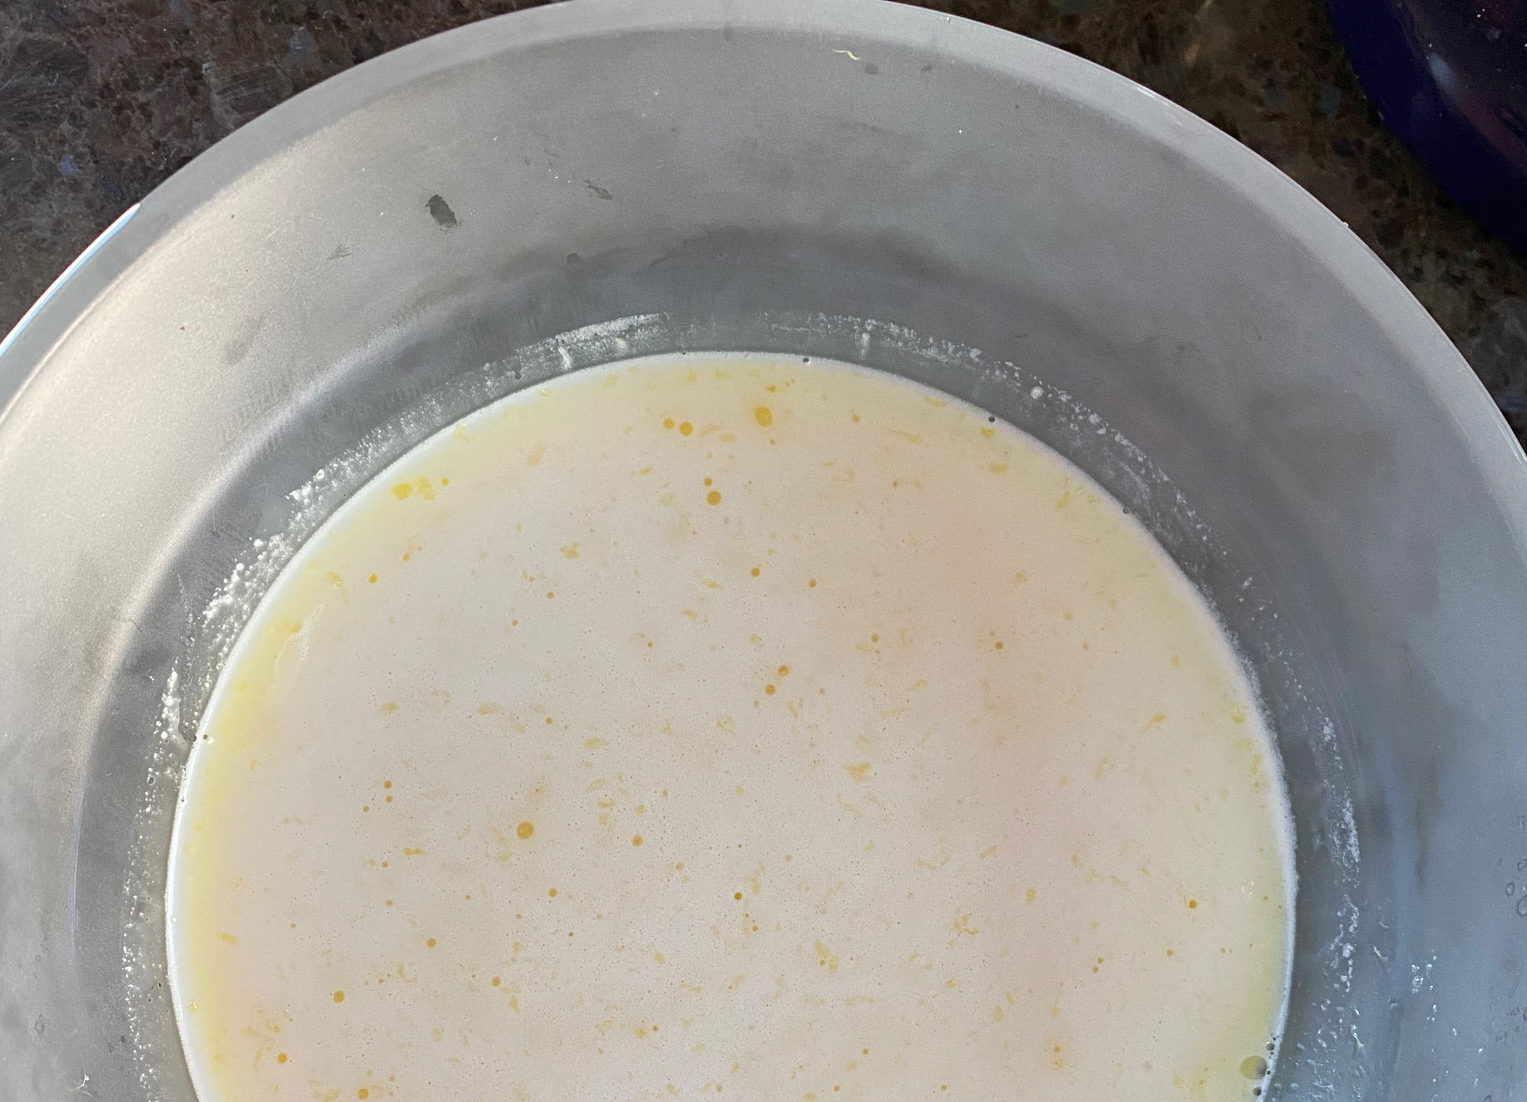
I have a 600-watt microwave, the LOW end of the microwave power spectrum (hey, I got it to reheat leftovers, don’t judge me).  This is my process.  Combine the ingredients using a blender or stick blender and pour blended ingredients into a microwave bowl (like a Cook Anyday bowl!).

The OG recipe directions-microwave at full power in 1-minute increments, stirring between each minute.  When it starts to thicken, reduce power to 70% and microwave in 30-second intervals, once again whisking between intervals.

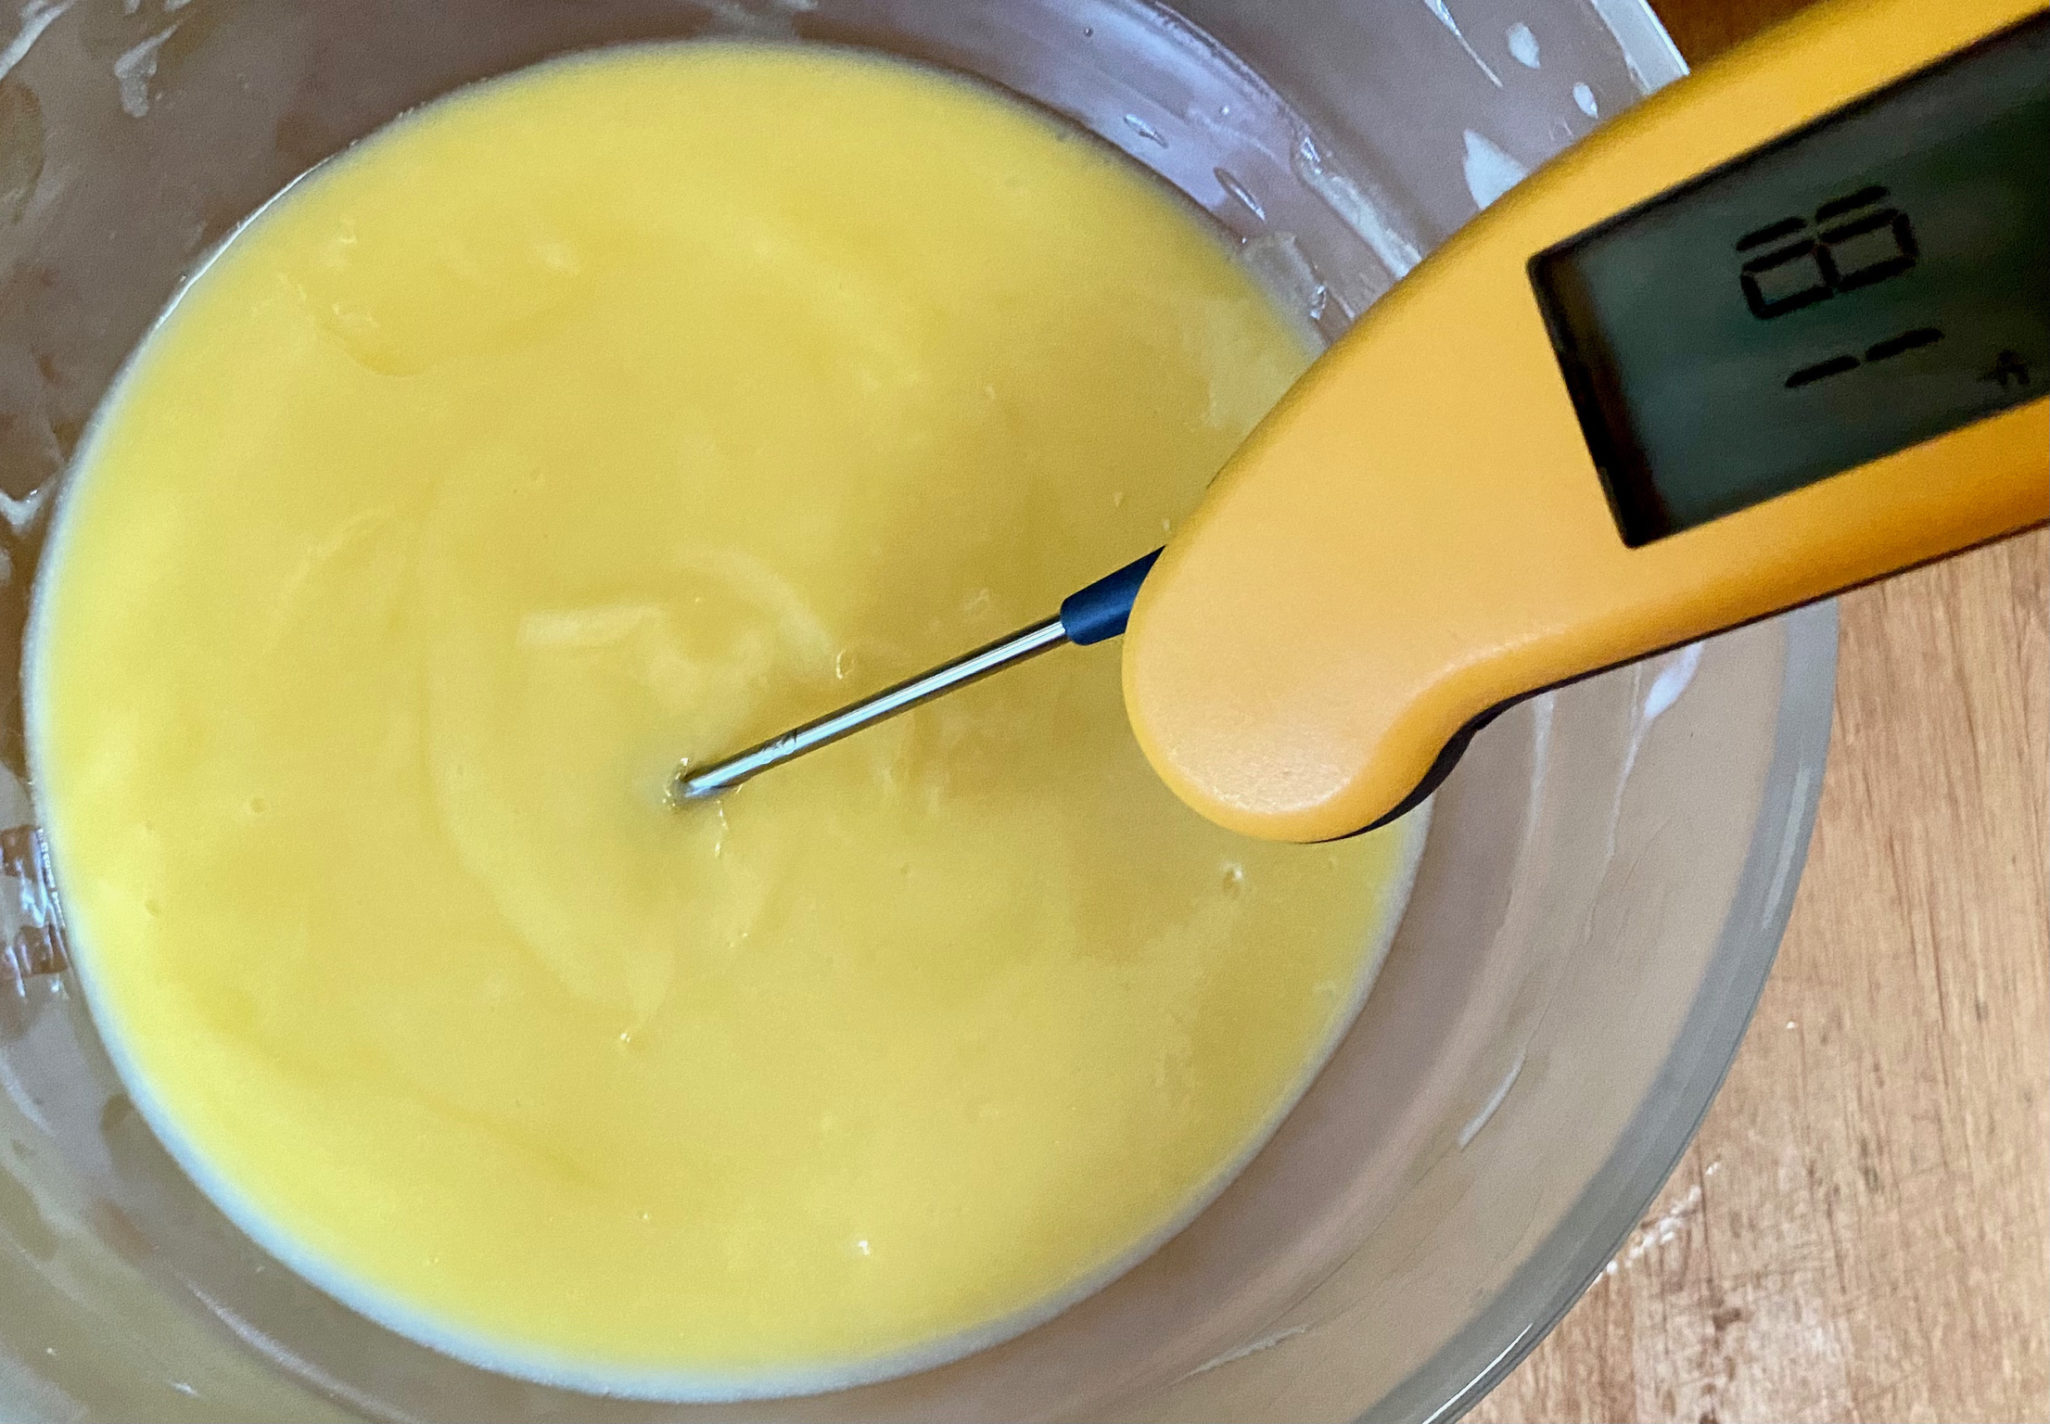
What I did-I started at full power but lengthened the first increment to 2 minutes before taking it out to whisk for the first time (low wattage adjustment).  At the 5 minute mark, the curd was still pretty thin, I added one more full power minute before reducing the power to 70%.  My lemon curd took another 2-1/2 minutes at 70%, 1 min increment for the first minute, and then 30-second increments, stirring each time.  The curd will thicken more as it cools. The cooking process  is done when the curd reaches a temperature of 180 with a thermometer or when it coats a spoon or spatula.

Moral of the Story

Adjust times according to your microwave and whisk well!

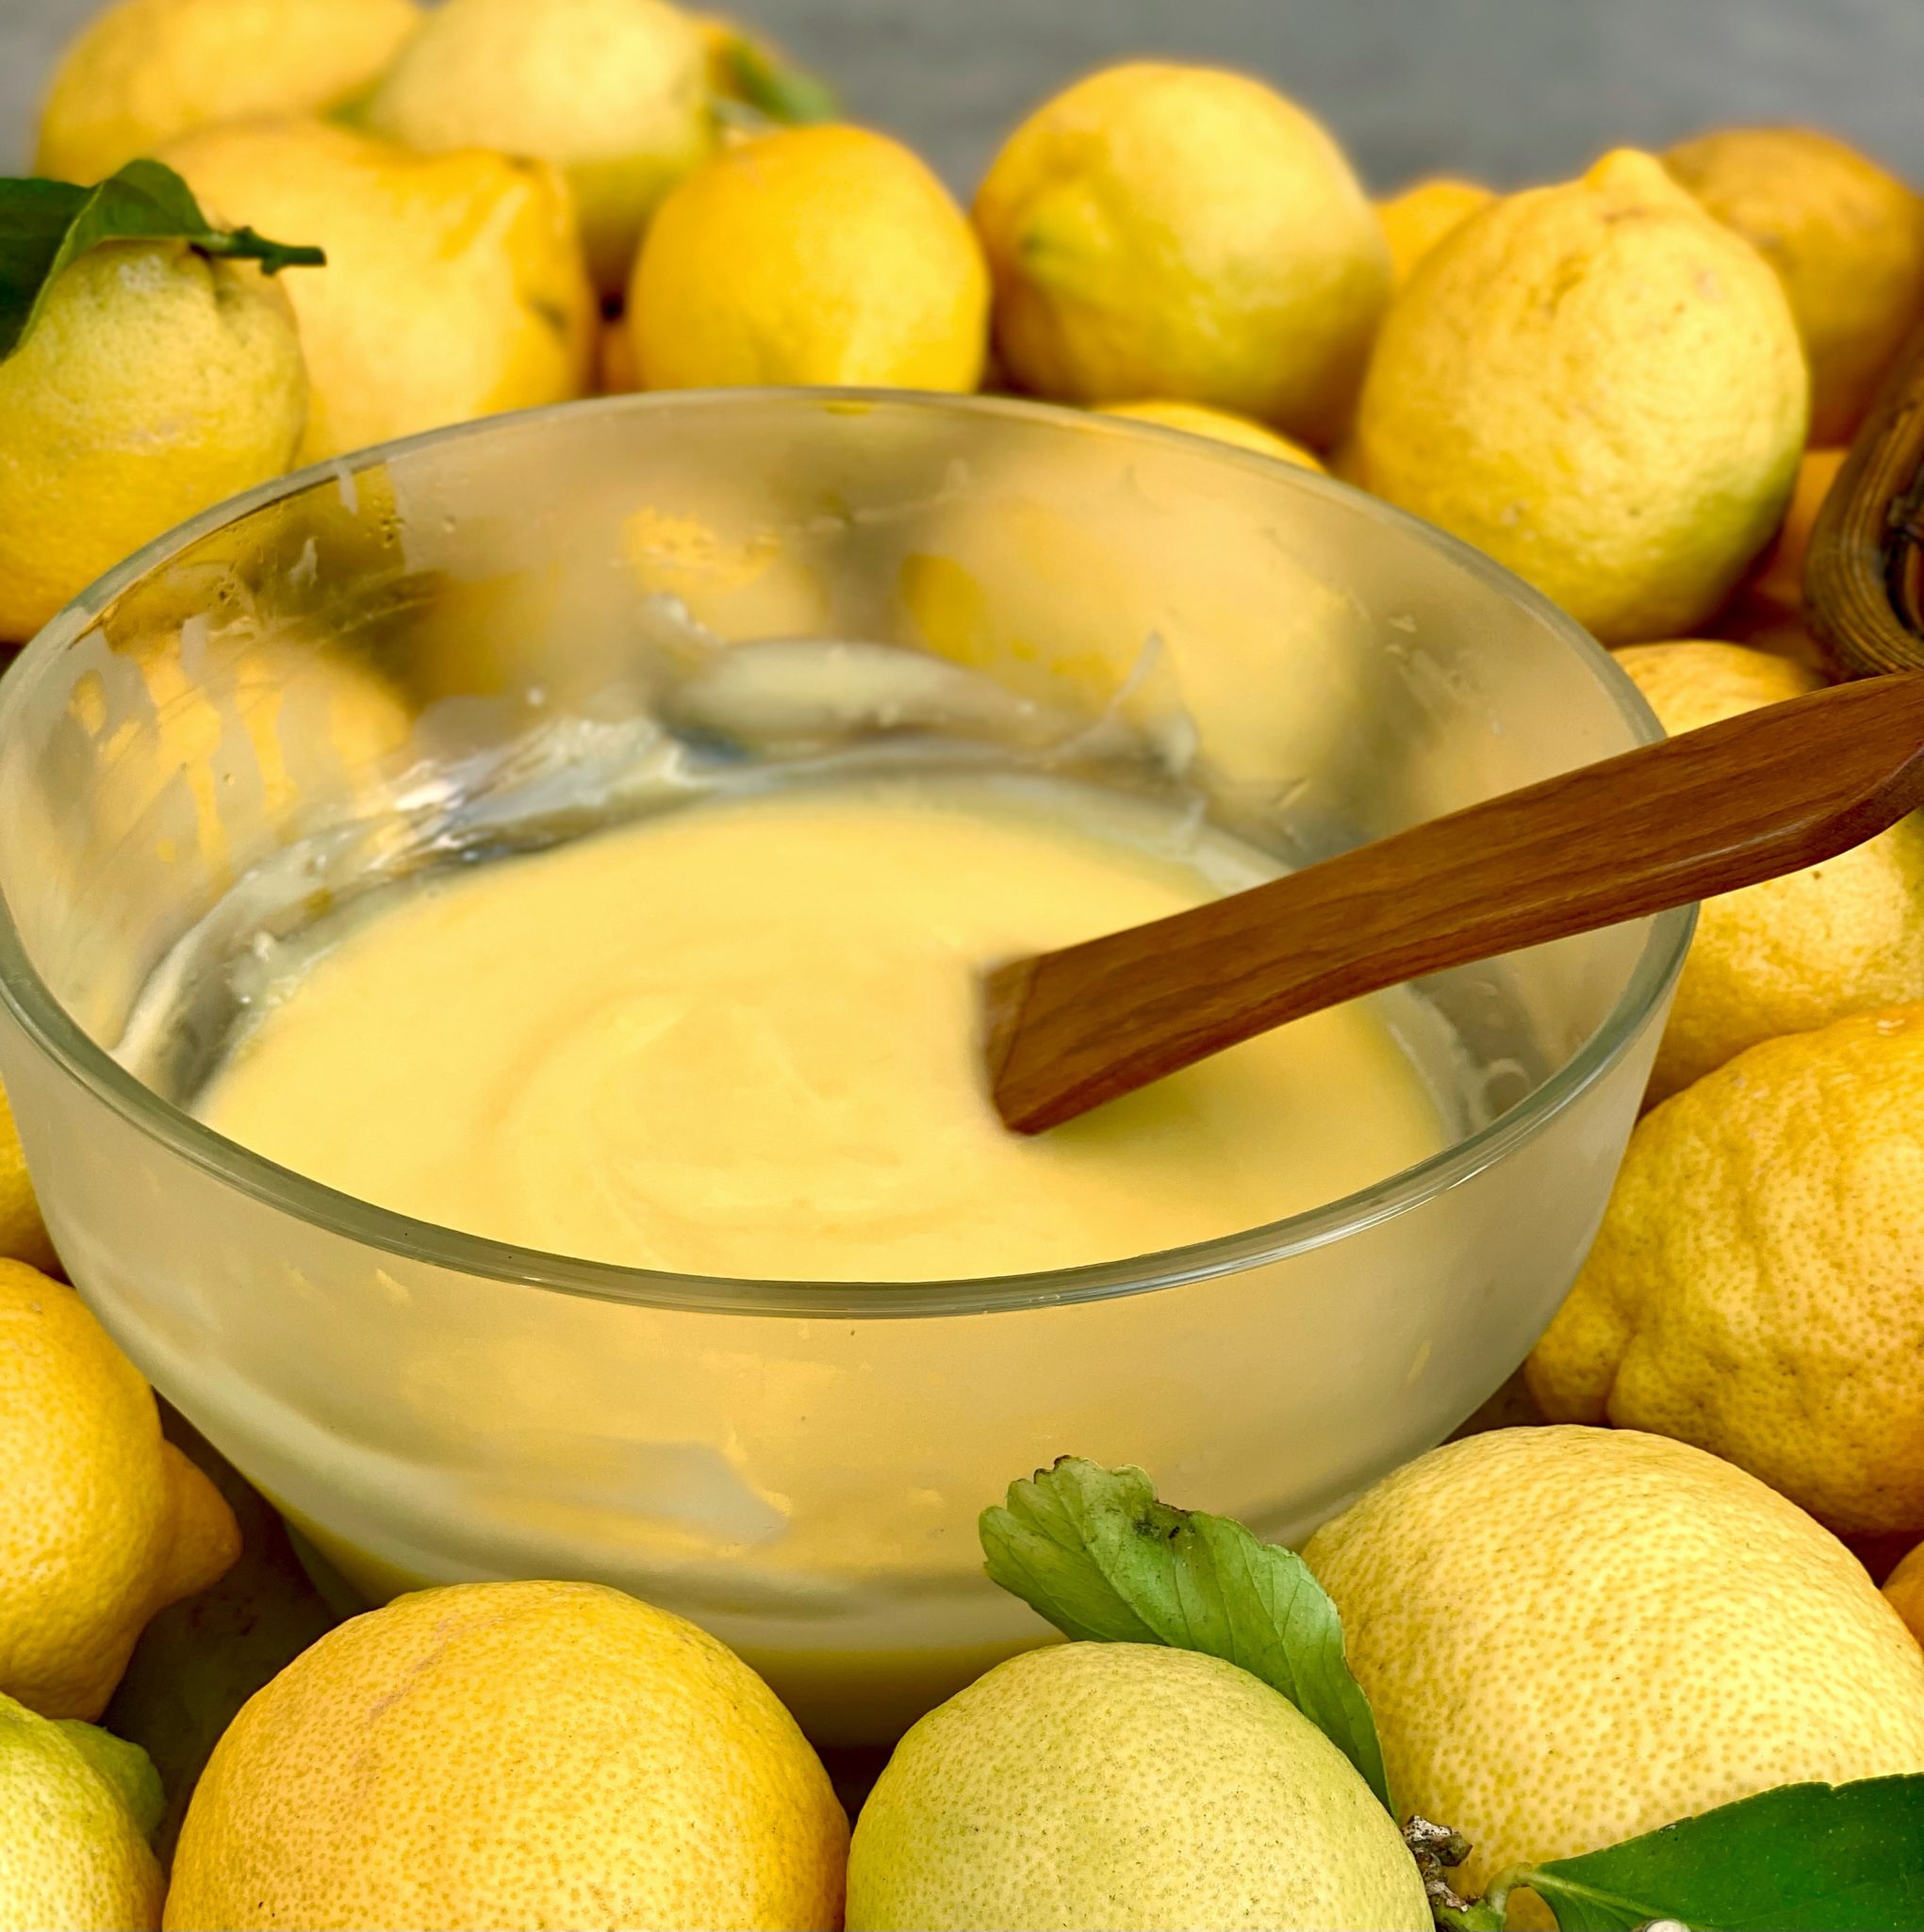
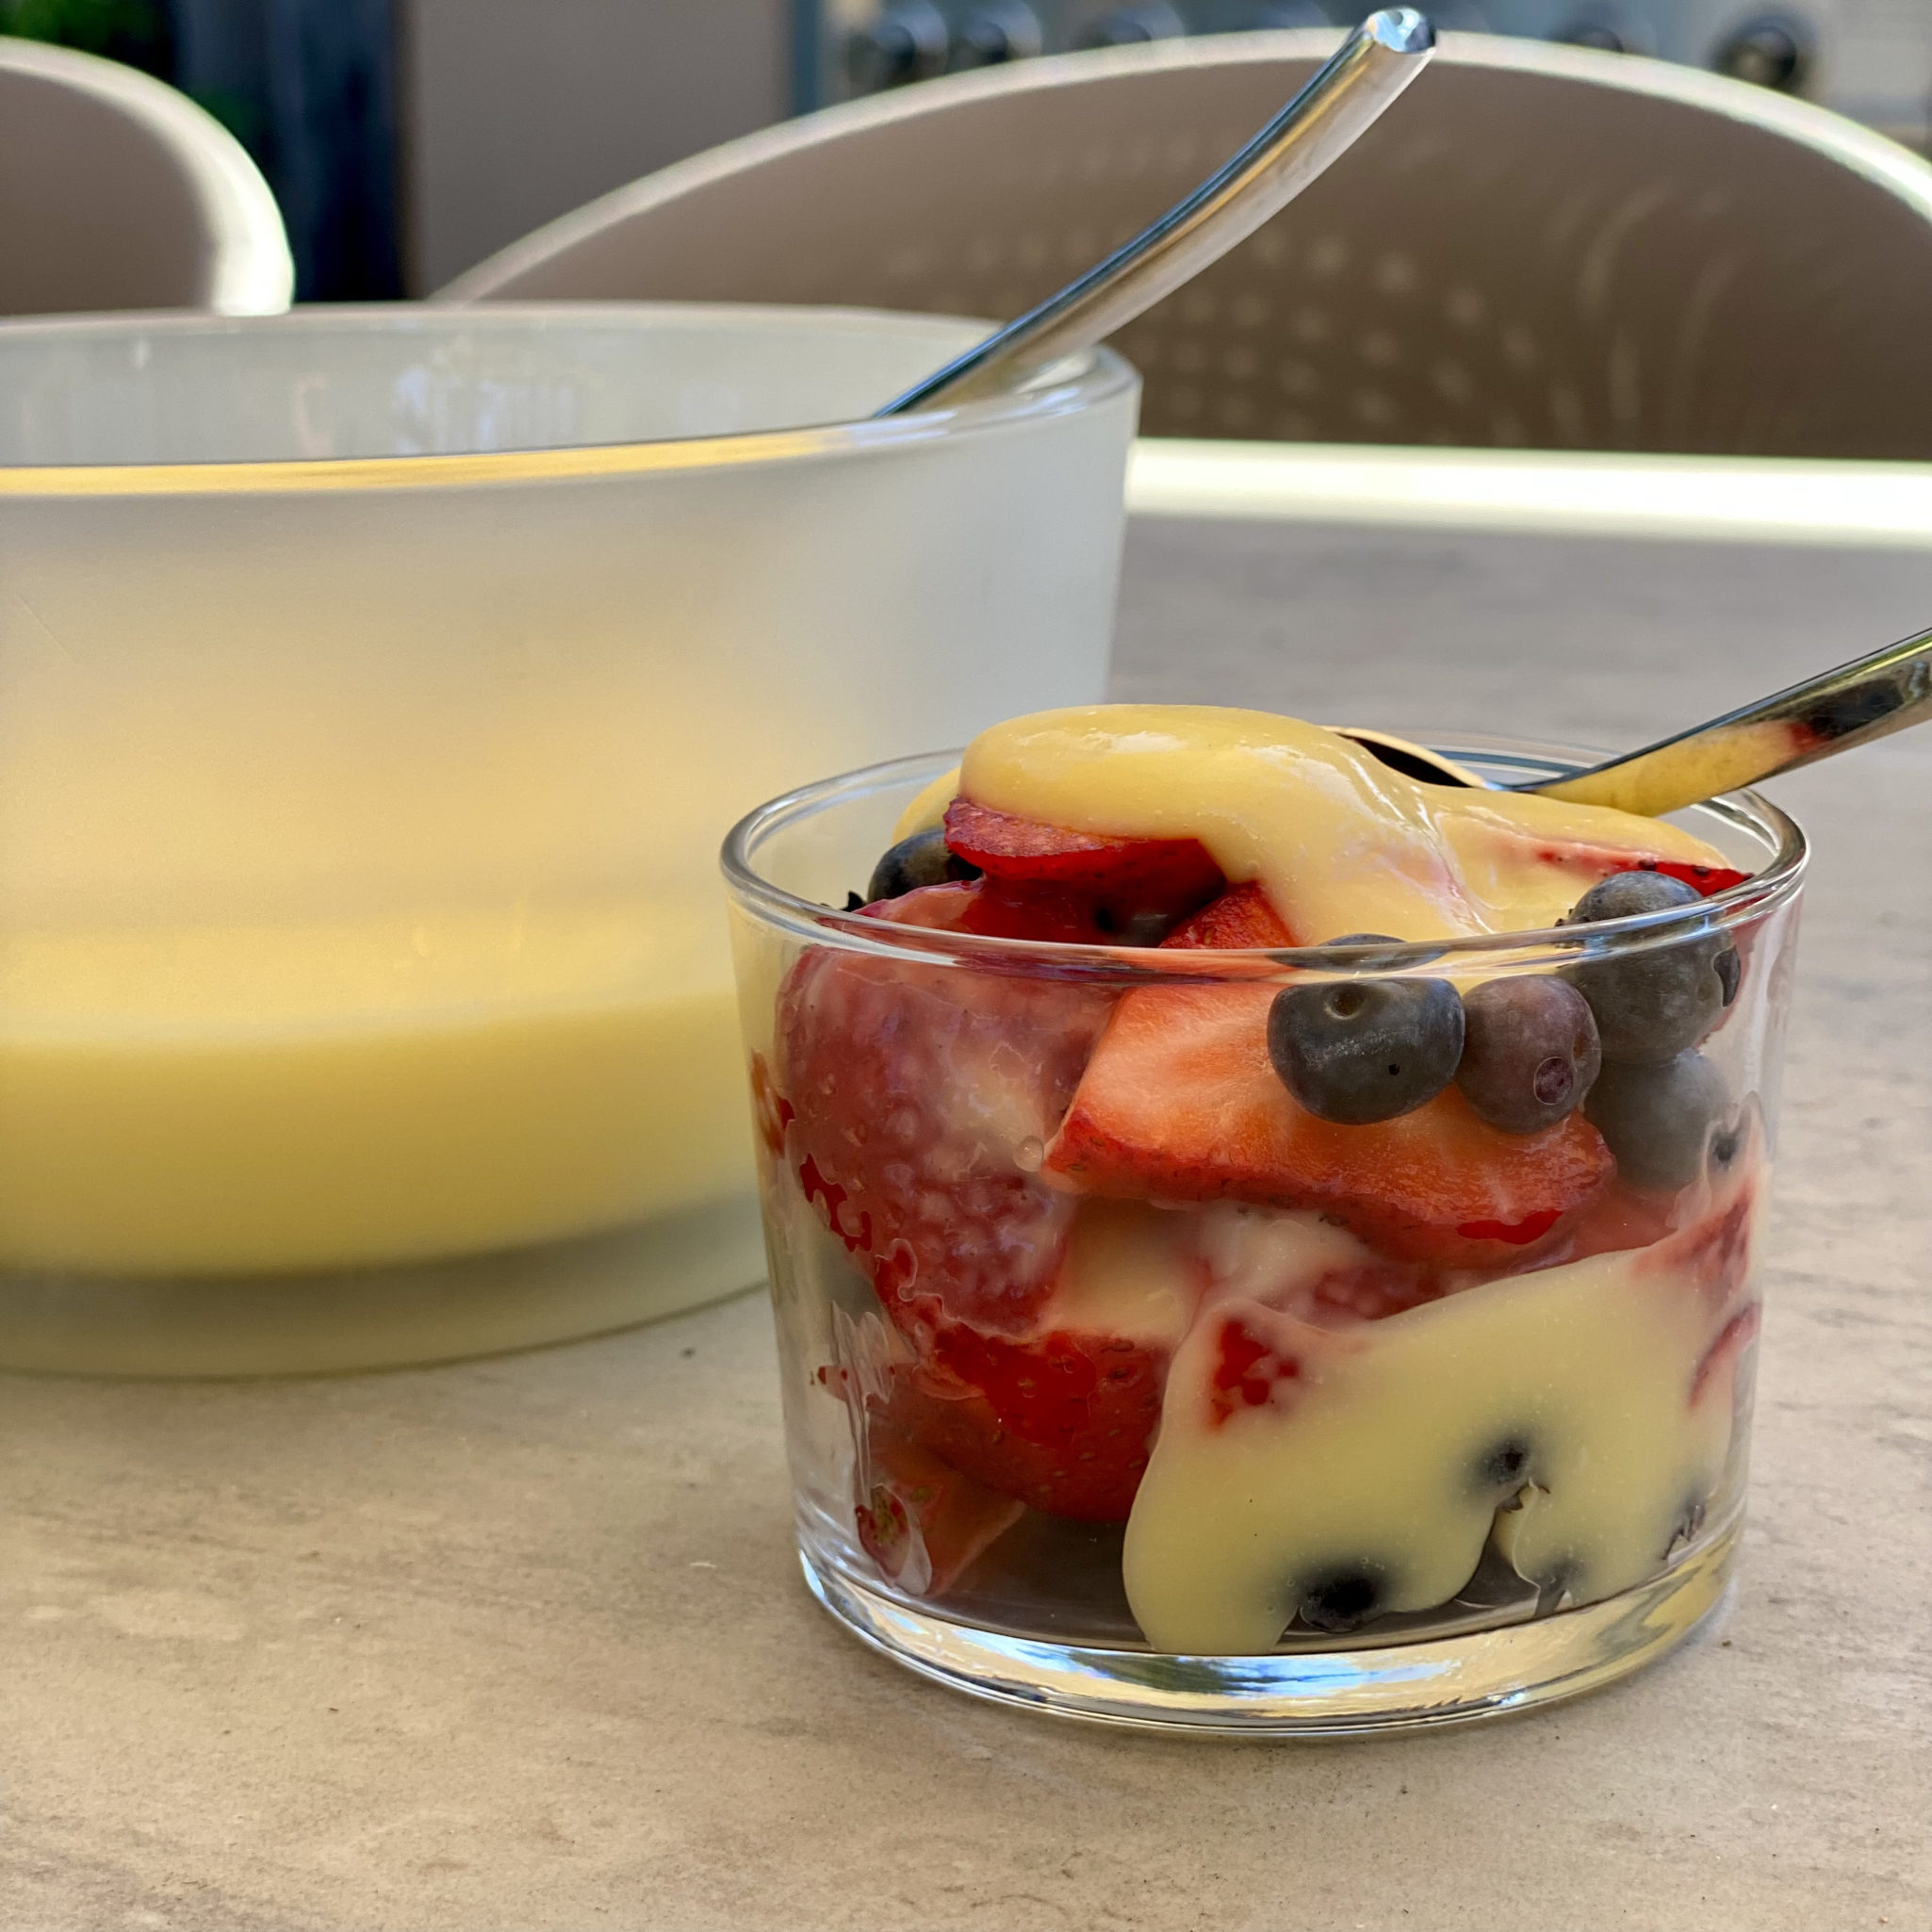
The Lemon Curd is silky smooth, luscious, and lemony.  I used 3/4 cup of sugar and it was fairly tart, if you like it sweeter use one cup of sugar.  Different fruits such as passionfruit or grapefruit would work well with this recipe too!

Easy Lemon Curd

Delicious lemon curd made in the microwave from Melissa Clark and NYT Cooking!
Course Breakfast, Dessert
Cuisine American
Keyword lemon, lemon curd
Prep Time 5 minutes
Cook Time 10 minutes

Ingredients

  • ½ cup (113 grams unsalted butter) 1 stick
  • 2 teaspoons finely grated lemon zest
  • 1 cup (240 milliliters) freshly squeezed lemon juice from 4 to 6 lemons
  • ¾ cup to 1 cup (150 grams to 200 grams) granulated sugar
  • 3 large eggs
  • 1 egg yolk
  • Pinch of salt

Instructions

  • Put the butter in a large (at least 6 cup) microwave-safe glass bowl or measuring cup. Cover bowl and set your microwave on 50 percent power, melt the butter. (~1 to 1 1/2 minutes).
  • Pour butter into a blender and add lemon zest, juice, sugar, eggs, egg yolk and salt. Blend until smooth. You can also use a stick blender. Pour mixture back into the same glass bowl you melted the butter in.
  • Microwave mixture, on full power, in 1-minute intervals for 5 minutes. Whisk furiously between intervals, especially around the edges of the bowl. It should start to thicken. (If it looks like it’s starting to thicken before 5 minutes, stop and continue to the next step; microwaves can vary.) See post for details.
  • Reduce power to 70 percent and continue to microwave for another 1 to 2 minutes, stopping to whisk every 30 seconds until the curd thickens enough to coat the back of a spoon. (It will continue to thicken as it chills.) An instant-read thermometer should register 180 degrees (yet another reason to get a thermometer)
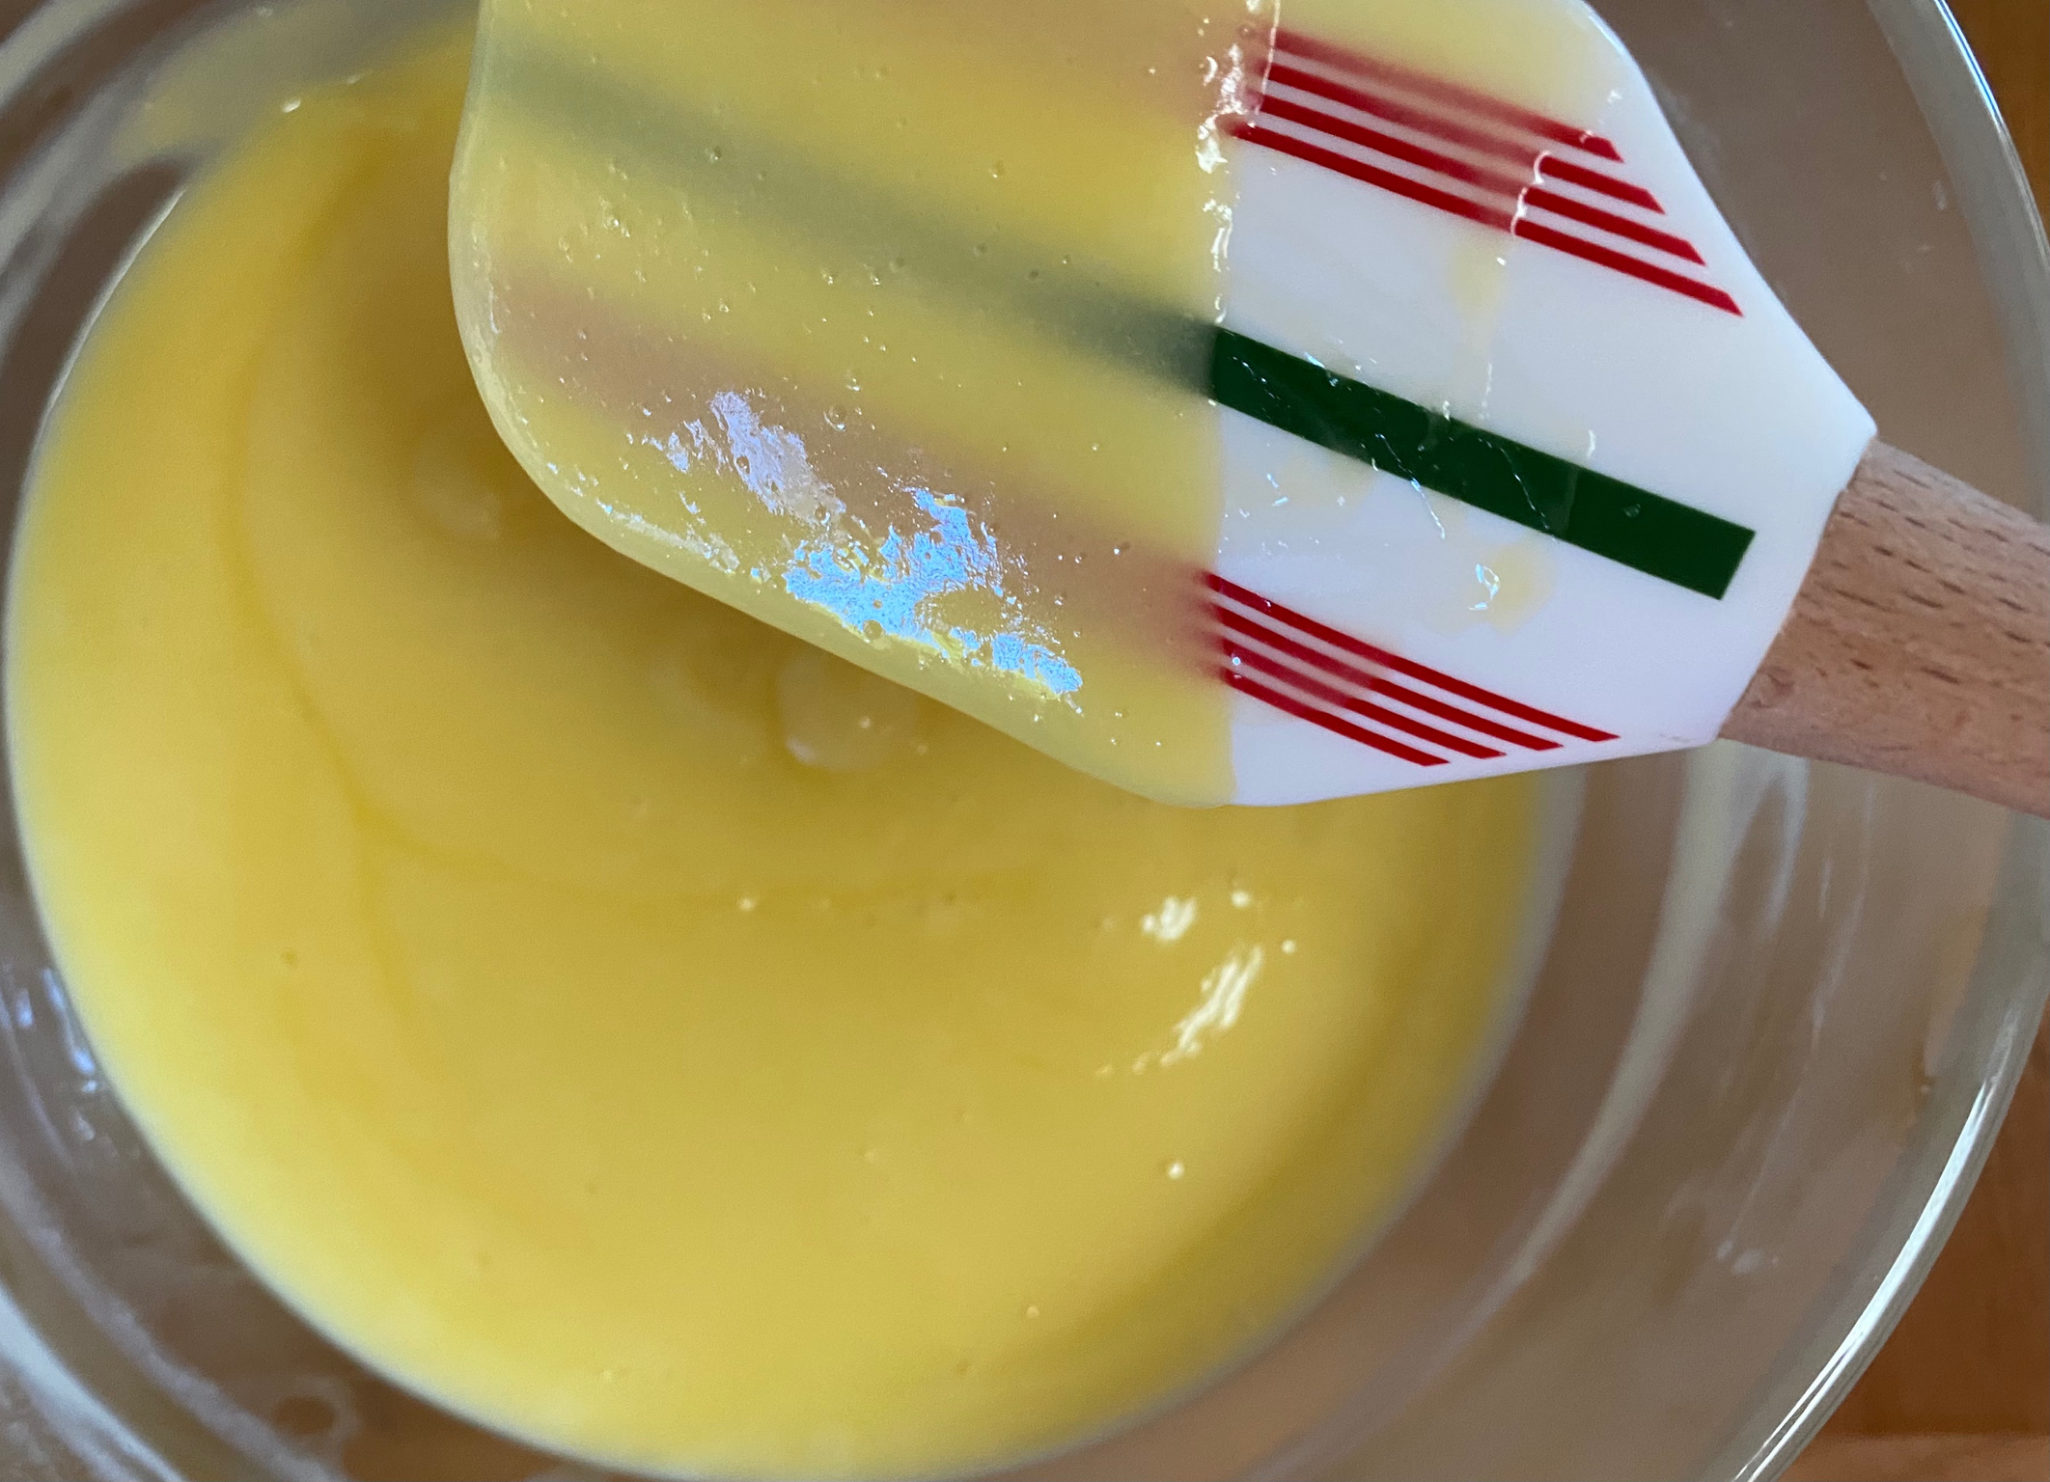
  • Whisk well. If you think there are any coagulated bits of egg, strain curd through a fine-mesh sieve into a clean bowl. Or if it looks smooth, you can leave it in its current bowl. Press a piece of plastic wrap against the surface to create an airtight seal and let the curd cool to room temperature. Refrigerate until cold, at least 3 hours.
  • Enjoy! Pair your curd with fresh berries, scones, or fold it into whipped cream for cake filling. Eat it off a teaspoon!
Focaccia: The Deb Breadbake Trio-Take Three

Focaccia: The Deb Breadbake Trio-Take Three

Yes. In the Time of COVID, where the staple shelves at the supermarket look like a scene out of Mad Max, I still have flour and yeast.  Now don’t get your Hot Crossed Buns in a bunch, in all fairness, I normally have lots of flour and yeast on hand.  I love to bake.  Although, after 3 batches of Focaccia, I find myself perusing my King Arthur Flour wishlist to see if yeast or flour have made it back on their virtual shelves.  Bread has become an obsession for me and so many others.  The result of staying home and harkening to a simpler time.

The trio of Focaccia I tried were all pretty good but one stood out, Serious Eats No-Knead Olive-Rosemary Focaccia with Pistachios.  But they’re all excellent.  I’ve included links to the two “runner-ups” since they are both totally worth making.  My favorite is the finale of this post along with the full recipe.  Enjoy!

Foccacia Number One

From Kitchn, a recipe for No-Knead Focaccia that takes the least amount of time of the three we tried.  It does start with a food processor which makes quick work of making the dough.  The dough needs to sit for only 2-3 hours before spreading the dough in a 10-inch iron skillet, letting it rest for 30-40 minutes before baking.

I put the dough in the fridge overnight before proceeding.  The dough did not rise as much as expected, operator error?  Overzealous pressing it into the skillet?  Too long in the fridge?  Dense and chewy, reminiscent of pizza crust with a nice flavor from the garlic and rosemary.  I’d like to try this recipe again, wondering if I had compressed it too much or inadvertently used water that was too hot.  If it didn’t rise any more I’d just use it to make mindbogglingly good pizza.  Oh, and my skillet is probably wider than the classic 10″ inch iron skillet, did I pat down my dough too much?  My inquiring mind wants to know.

Guess I’ll have to bake more Focaccia


Focaccia Number Two

Back In the day, Jenny Jones was a singer, comedian and talk show host…now she does cooking and baking videos from home.  Go figure. How I stumbled upon her site, I don’t know, but her No-Knead Focaccia Bread is pretty darn good.  Easy to make, the end result leans towards a pizza-like consistency, chewy inside with nice air bubbles with an exterior that was a wonderful toasty brown and so crispy.  She describes her Focaccia aptly, “This is no ordinary focaccia. It’s not the soft kind that you bake in a pan. This is focaccia the way I like it: thin and crispy. It’s like a slice of pizza without the pizza stuff”  The search was still on for that soft, pillowy texture of classic Focaccia.  Still, this was so good, I’d make it again in a heartbeat (if it wasn’t for my hipspread, lol)  You will need a pizza stone or steel to bake this on.

Above is what the dough looks like after resting in the bowl.  It doubled in size.

Below is after tucking (folding) the dough under a couple of times

The finished Focaccia! Airy and springy and soft inside, crispy and chewy on the outside, it’s delicious.

And the winner is…Serious Eats No-Knead Olive Rosemary Focaccia with Pistachios

I think we have found a Focaccia recipe that my entire quarantined family likes!  Serious Eats Focaccia by Kenji-Alt Lopez has that soft, pillowy texture inside like traditional Focaccia and a nice crispy outside.  With that first bite, we were all nodding our heads-this is it!  Not a moment too soon as my bread flour supply is dangerously low.

Start the day BEFORE you want bread on the table, like all no-knead bread, time takes the place of kneading.  We did not use olives or pistachios.  Quarantine forces improvisation, instead, we used cherry tomatoes, garlic, red onions, and rosemary from our herb box.  A tasty combination.  Feel free to add your own toppings! #Lunchleftovers found me making Ottolenghi’s Charred Tomatoes with Labneh to dip into with my focaccia-absofrigginlutely delish.

This is the Serious Eats dough after resting 12 hours, at most, it tripled in size but more like two and half times (pure eyeball measurement).  My bowl was plenty big enough.  I thought it would rise more and was a bit worried, but the Focaccia turned out beautifully.  Sorry, I will not doubt the master Kenji Alt-Lope again!


Olive Rosemary Focaccia with Pistachios

Delicious, easy to make No-Knead Focaccia from Serious Eats
Course Breads
Cuisine American, Italian
Keyword Homemade No-knead focaccia
Prep Time 15 minutes
12 hours
Servings 10

Equipment

  • iron skillet

Ingredients

  • 500 grams all-purpose or bread flour 17 1/2 ounces, about 3 1/4 cups, prefer bread flour
  • 15 grams kosher salt .5 ounces, about 1 tablespoon Diamond brand) reduce by a third if using Mortons
  • 4 grams instant yeast .15 ounces, about 1 teaspoon
  • 325 grams water 11 1/2 ounces, about 1 1/2 cups minus 1 tablespoon
  • 1/4 cup extra-virgin olive oil divided
  • 4 ounces pitted green olives sliced
  • 1/4 cup roasted pistachios roughly chopped or lightly pounded in a mortar and pestle
  • 2 tablespoons fresh rosemary leaves very roughly chopped
  • Coarse sea salt

Alternate Toppings

  • thinly sliced red onion
  • fresh thyme leaves
  • cherry tomatoes, halved
  • garlic, slivers

Instructions

  • Place flour, salt, yeast, and water in a large bowl. Mix with hands or a wooden spoon until no dry flour remains. The bowl should be at least 4 times the volume of the dough to account for rising.
  • Cover bowl tightly with plastic wrap, making sure that edges are well-sealed, then let rest on the countertop for at least 8 hours and up to 24 hours. Dough should rise dramatically and fill bowl, although mine did not rise that dramatically, it spread more than rise.
  • Sprinkle the top of the dough lightly with flour, then transfer it to a lightly-floured work surface. With well-floured hands, form into a ball by tucking the dough underneath itself.
  • Pour half of oil (1/8 cup)in the bottom of a 12-inch cast iron skillet or large cake pan (your Le Creuset or Staub pan would be perfect)Transfer dough to pan, turn to coat in oil, and position seam-side-down. Using a flat palm, press the dough around the skillet, flattening it slightly and spreading oil around the entire bottom and edges of the pan.
  • Cover tightly with plastic wrap and let the dough stand at room temperature for 2 hours. After the first hour, adjust an oven rack to the middle position and preheat oven to 550°F. My oven only goes to 500 degrees, this works fine. It actually baked in about the same amount of time, but you may need to go at least the full 24 minutes at 500 degrees.
  • At the end of the 2 hours, dough should mostly fill the skillet up to the edge. Use your fingertips to press it around until it fills every corner, popping any large bubbles that appear. Lift up one edge of the dough to let any air bubbles underneath escape and repeat, moving around the dough until there are no air bubbles left underneath and the dough is evenly spread around the skillet.
  • Spread olives and pistachios or your choice of toppings, over the surface of the dough and press down on them with your fingertips to embed slightly. Drizzle with remaining olive oil. Sprinkle with rosemary and coarse salt.
  • Transfer skillet to oven and bake until top is golden toasty brown and bottom is golden brown and crisp when you peek underneath, 16 to 24 minutes. Using a thin spatula, loosen focaccia and peek underneath.
  • Transfer to a cutting board, allow to cool slightly, slice, and serve. Serve with cheesy butter or Ottolenghis tomatoes and Labneh, so good.
  • Extra bread can be stored in a brown paper bag at room temperature for up to 2 days. Reheat in a 300°F oven for about 10 minutes.
Bi Bim Bap It! Homecoming in Seoul

Bi Bim Bap It! Homecoming in Seoul

Off to see Jorge in Korea!

Do you have a bucket list of things to do when traveling, if so, what’s yours? I’d love to know.  Here’s ours when we travel:

FIRST DAY- a tour of the city on bikes.  It’s a great way to get an overview of the city you are visiting and get a bit of exercise (guilt-free eating for the day, yay!)  It does have it’s heartbeat quickening moments when you ride in traffic and every big city in the world has traffic.  But we have biked in Rome, London, Boston, DC, Paris, and Seoul without mishap, just a couple of choice words from drivers.  But hey, I get that here too.

SPORTS:  We have watched rowing on the Thames, soccer in Italy, and now baseball in Korea and Japan.  BOSS, so much fun and gives you a taste of the folks that live there.

EATS:  Street food, hole-in-the-walls, local joints, my kinda food.  Ok, occasionally, a meal that breaks the bank.

I push the envelope sometimes with my search for local food.  I have waited in line for 90 minutes for Egg Tarts in Macau, meandered down small alleys looking for Won Ton Soup in Hong Kong or Okonomiyaki in Osaka.  Unfortunately, the combination of spotty maps and my non-existent sense of direction means a lot of wandering around and spewing expletives at my phone when looking for those food gems. Good thing my family loves me, or at least I think they do.

HOME COOKING:  Do you get tired of eating in restaurants?  Miss your kitchen? Take a cooking class!  We have made pasta and gelato in Florence and now homemade kimchi, seafood pancake-pajeon and Bi Bim Bap in Seoul.

Early morning at a local street market

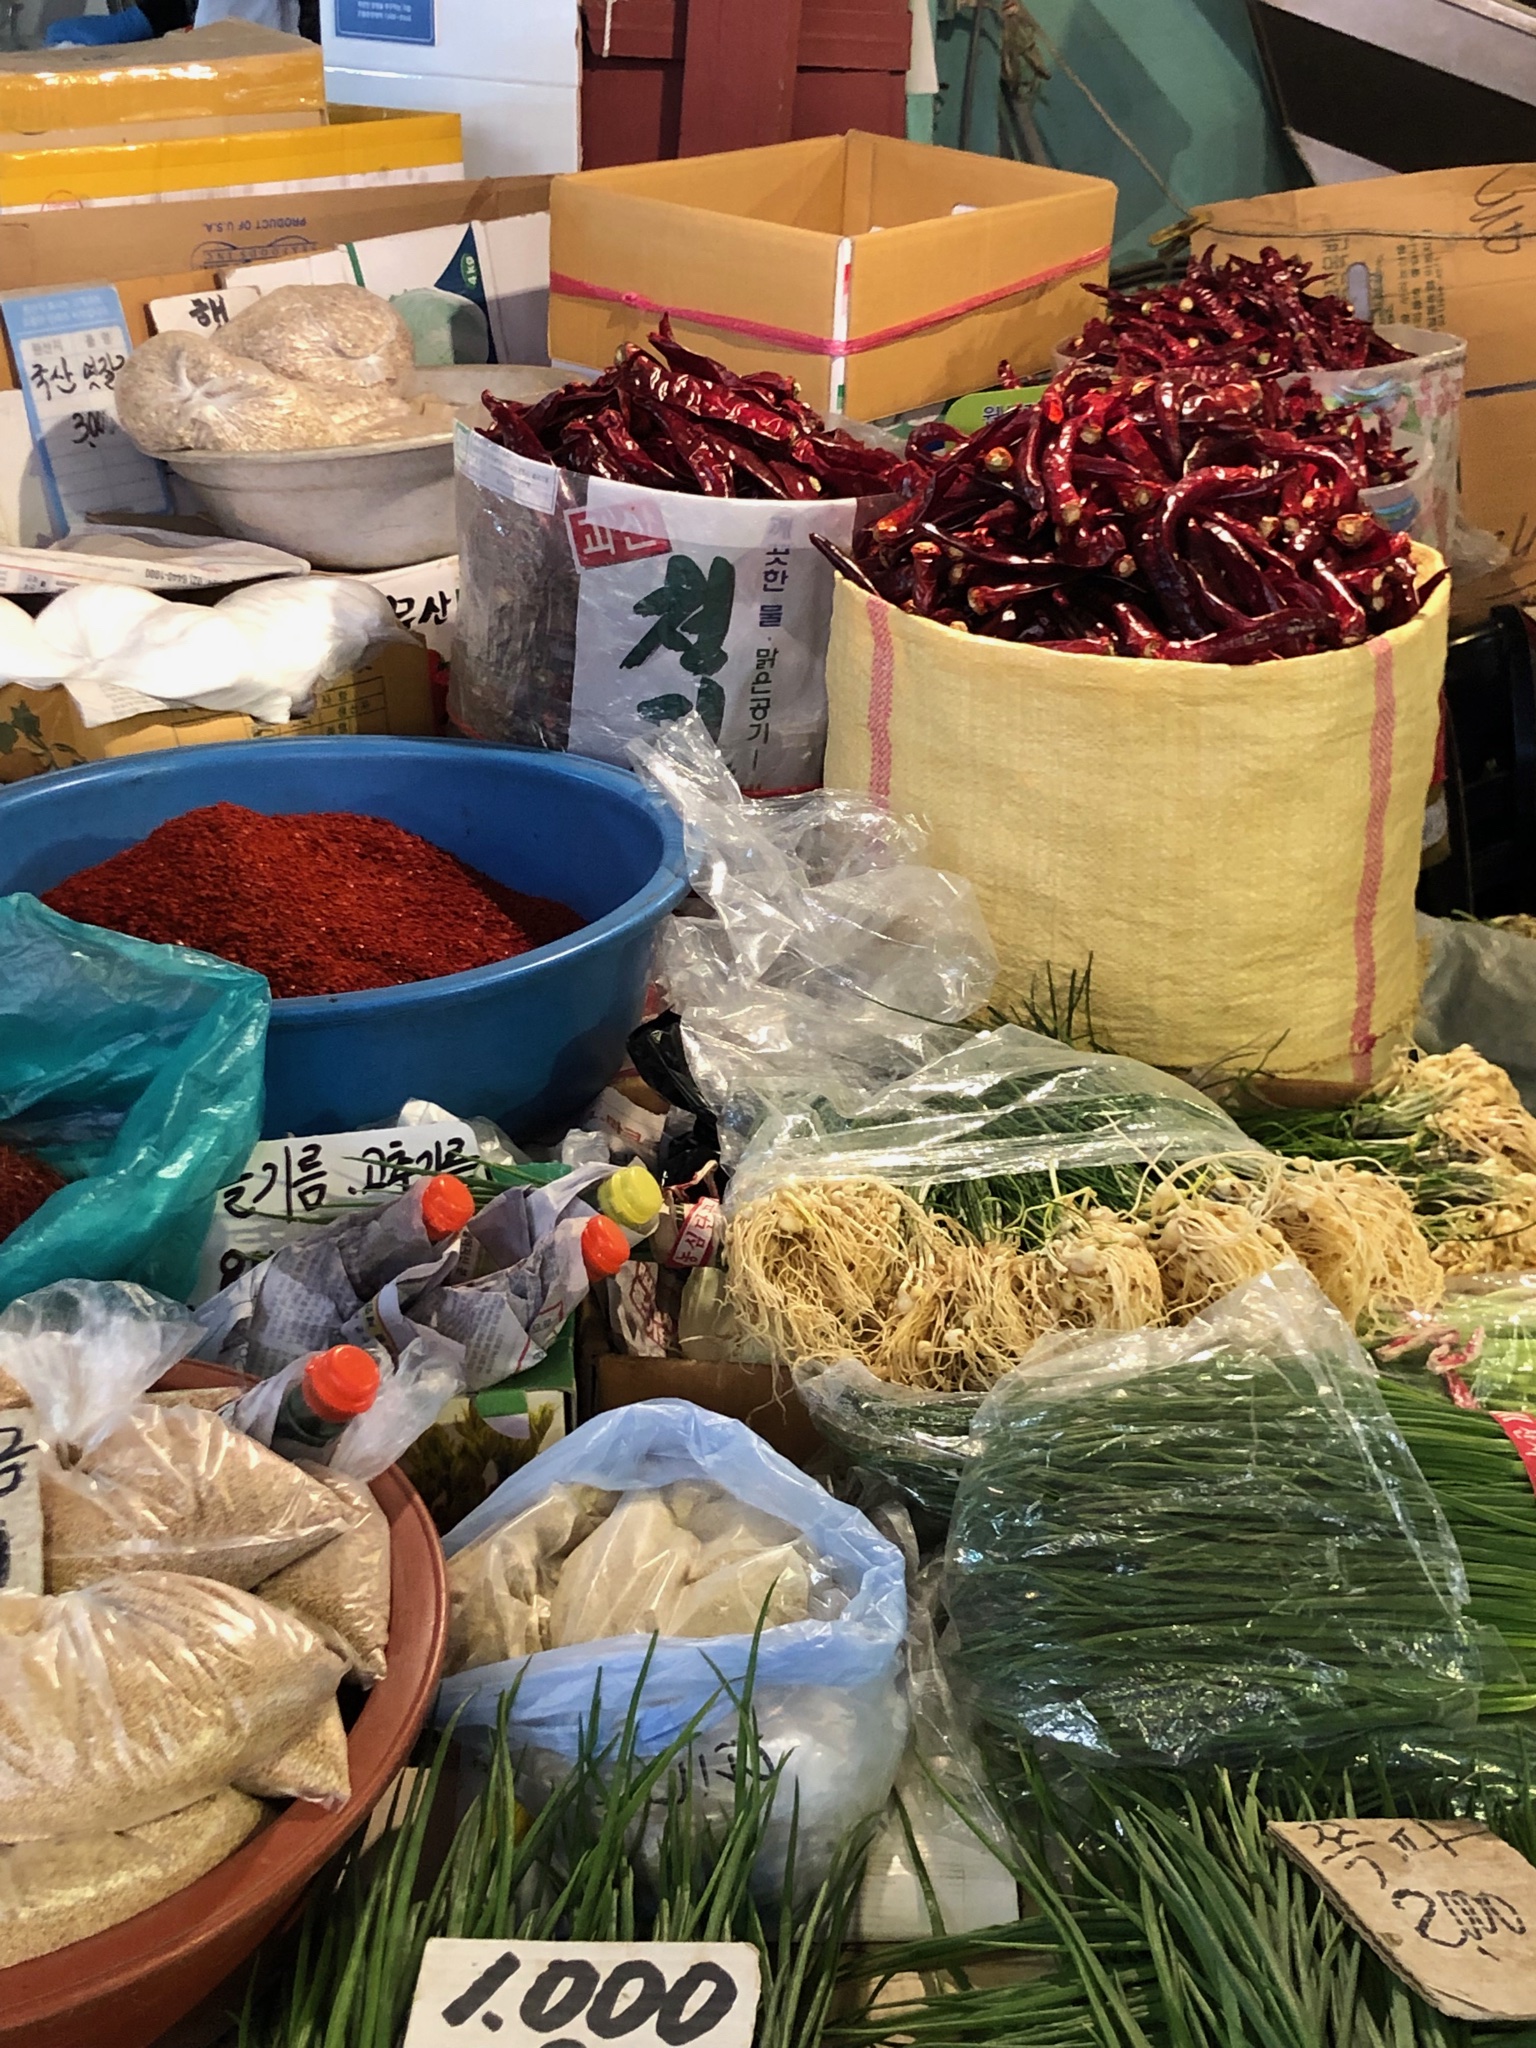
Our cooking class with Joungy began with a visit to the market to buy ingredients, a Korean Veggie primer!

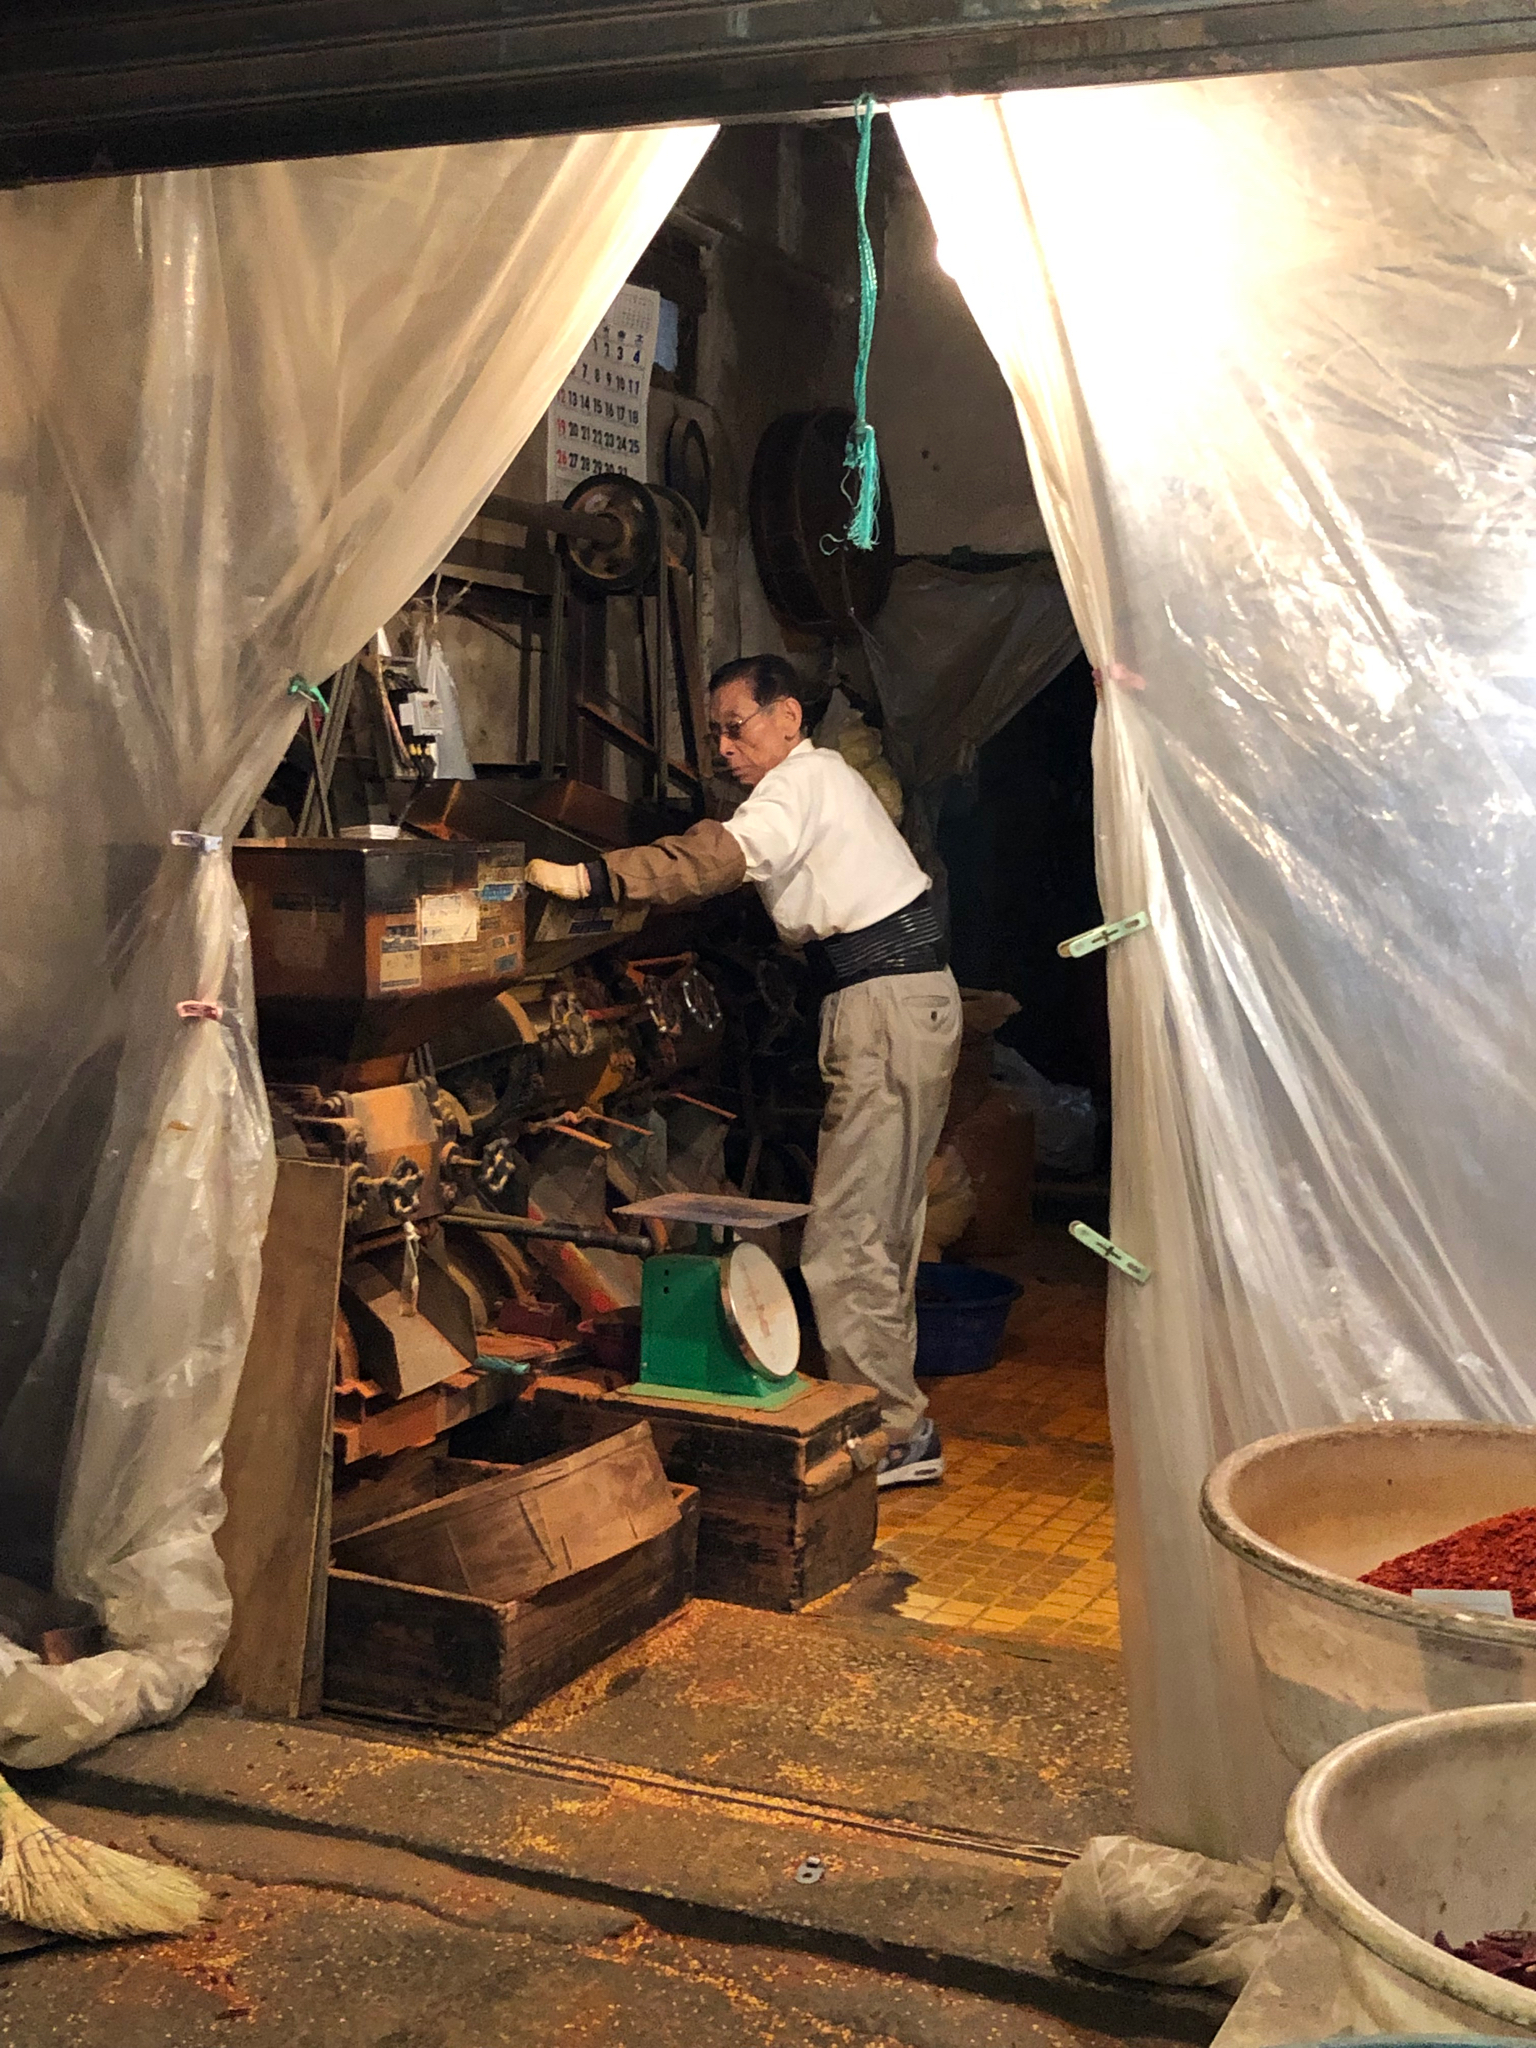
I was mesmerized watching this gentleman grind chili peppers into Gochugaro powder.

We made Seafood Pancakes or Pajeon, fresh kimchi, and my favorite bowl meal, Bi Bim Bap.  Bi Bim Bap starts with a pile of fluffy, warm rice and topped with julienned carrots, cucumbers, squash, spinach, mushrooms, yesterday’s banchan, seasoned beef or chicken.  You get the picture, you can use anything you desire for toppings.  For Joungy’s class, we had a wonderful array of veggies, carrots, cucumbers, daikon, shiitake mushrooms, shredded beef and a chiffonade of Perilla leaves.  Delicious!

The secret to her Bi Bim Bap is the extra attention given to the sauce.  Her Gochujang paste included corn syrup, a bit of soy sauce, and chopped garlic, stir-fried briefly. This brought the sauce to a new level.

Season each component, stir-fry, and place on top of the rice in neat little separate piles-kid-friendly, lol.  Top your masterpiece with a sprinkling of sesame seeds and a dollop of sauce.  It’s colorful, delicious, easy to prepare, flexible…what more could you ask for?  If you can’t find Perilla leaves, garnish with chopped green onions are good too.

A great primer for Bi Bim Bap can be found at My Korean Kitchen which has instructions to season the blanched bean sprouts and spinach.

Bi Bim Bap (Korean Mixed Rice)

Korean Rice Bowl, Easy to Make and Delicious!
Course Main Course
Cuisine Asian
Keyword Bi Bim Bap, Korean, Rice Bowl
Prep Time 20 days
Cook Time 45 days
Servings 1 serving

Ingredients

Bi Bim Bap Rice (proportions for 1 bowl)

  • 50 gm thinly sliced beef
  • 1 clove garlic finely chopped
  • 1/2 t brown sugar
  • 1 t corn syrup
  • 1/2 t salt
  • 1 T soy sauce
  • 1/2 t sesame oil
  • 2 fresh shiitake mushroomes, thinly sliced
  • 1/2 carrot, julienned
  • 1/4 c daikon, julienned or bean sprouts
  • 1/8 t pepper powder Gochugaru
  • 1 handful spinach leaves or sub 1/4 cup thinly sliced zuchinni or Persian cucumber
  • 5 perilla leaves aka sesame leaves can sub shiso leaves, julienned
  • vegetable oil for frying, 1/2 T for each vegetable
  • 2 cups Cooked white rice I use a rice cooker, its your call how to cook the rice!

Ingredients for Sauce for servings

  • 5 T Gochujang chili paste
  • 2 T Corn syrup light
  • 3 cloves garlic
  • 1 T brown sugar
  • 1/2 T vegetable oil

Instructions

For Sauce

  • In a nonstick skillet, add oil and chopped garlic. Turn heat onto medium high. Saute until garlic is brown color, don't burn!
  • Add remaining ingredients for sauce and stir over medium low heat for approximately 5 minutes. Set aside.

For Vegetables and Rice

  • Cooked medium grain white rice
  • In a small bowl combine soy sauce, brown sugar, corn syrup, pepper powder and chopped garlic. Add beef and stir to combine.
  • Stir fry each vegetable-mushroom, carrot, daikon, separately until tender crisp. Season with salt to taste. Place each vegetable on a platter, keep separate. Stir fry mushrooms in 1/2 T sesame oil, remaining vegetables can be saute in 1/2 T vegetable oil or a blend of sesame oil and vegetable oil
  • If using bean sprouts or spinach, blanch in hot water until tender crisp about 1 minute
  • Stir fry beef until cooked through.

Building Your Bowl

  • Divide hot rice between 3-4 bowls
  • Place vegetables in bundles around the bowl in a radial pattern. Place beef in the center.
  • Garnish with sesame seeds and perilla leaves and approximately 1 T sauce for each bowl. Place extra sauce in a bowl and serve along side bowls.
  • Optional (mandatory for me): Fry an egg for each serving, sunnyside up, and place on top of beef

Notes

Bi Bim Bap and creative expression.  The only absolutes for Bi Bim Bap is the rice and the sauce.  You could sub brown rice in place of white rice, but you need rice. The recipe from Joungy's class goes the extra mile by sautéing the red pepper paste with garlic and seasonings.  You could use Gochujang straight out of the jar, but the cooked sauce is really tasty.
Use whatever vegetables your little heart desires.  Great way to use extra Banchan you boxed from K-bbq the night before.  Why not? 

So good!  Bowled over by Bi Bim Bap!

Bowled Over, Udon Want to Miss My Newest Obsession (Udon)

Bowled Over, Udon Want to Miss My Newest Obsession (Udon)

Hang on to your hats, imagine Times Square, with all its neon signs and flashing lights dedicated solely to FOOD.  Yep, that’s the only way I can describe the Dotonbori area of Osaka.  Swarms of people, whose sole purpose is to find all things delicious to eat.  A giant 3-D crab, or shrimp or potsticker over the door of a dining establishment making it easy to figure out their specialty.  The delicious aromas swirling around, changing with every step as they walk by tempura houses, ramen joints, crab feasts and yakitori vendors.

Welcome to Crazy Town for food

Yep, we bit.  Drawn by the people, hypnotized by the lights, we ate our way down the street.  We tasted Takoyaki, octopus cakes, (not really cakes, I just couldn’t bring myself to call them balls).  Think Ebelskiver with octopus bits.  We munched on skewers of yakitori, sampled matcha and black sesame soft serve and found taiyakis, fish-shaped cakes filled with red beans.

Udon want to miss the noodles

Our last stop was the perfect cap for the evening.  Walking back to our hotel we found a local shop in Namba with a trio of old cooks serving up delicious udon noodles.  We decided what toppings we wanted on our noodles, slipped our yens (=TWO DOLLARS A BOWL) into the machine, and handed the tickets to the chef.  Minutes later 3 hot steaming bowls of udon were placed in front of us.

Unlike ramen, the noodles are much thicker with a definite chew.  The broth is flavorful but clear and light, fish-based, different than the rich, heavy broth that you find with ramen.  Toppings are simple-fried tofu (abura-age), a raw egg that cooks in the steaming hot broth, a single tempura shrimp, or a clump of shredded seasoned beef and a sprinkling of green onion.  We slurped our noodles and tipped the bowls to spoon out the last drops of broth.  You’d think we hadn’t eaten all day.  Ha!


Oyako-Udon combo set

Thus My Obsession with Udon Began…

As soon as I got home plus 12 hours of catch-up sleep, I pulled out my copy of Japanese Soul Cooking by Tadashi Ono.  A gem of a book on homey Japanese comfort food.  I flipped to the udon section and then I was off to the market to look for ingredients.  I had purchased a delicious Dashi base in Tsujiki Market in Tokyo, perfect for my udon.  To make your own Dashi here is a great primer from Just One Cookbook. OR, Kikkoman makes a soup base Hon Tsuyu that makes a pretty good dashi broth base.

Working down my list, next the udon noodles. Udon comes fresh, frozen, and (if you can’t find fresh or frozen udon) dried.  Sigh, just not the same.  I also found abura-age or fried tofu skin which is used to make Kitsune Udon. The fried tofu skins are flattened and seasoned with soy sauce and placed on top of the udon.  Really delicious, and substantial enough for a satisfying vegetarian bowl of udon. It can be difficult to find abura-age though and in that case, Inari-age, seasoned deep-fried tofu pouches used to make Sushi Rice balls, is a convenient and easy substitute.  No need to season, just plop them on top of the cooked noodles.  Confused about tofu? Serious Eats’s Tofu primer is your ticket.  The carnivore in me though, bought some thinly sliced beef (sukiyaki beef is perfect) to make Niku Udon, yummo.

Making udon is very approachable.  It’s perfectly acceptable to start with a broth made from Dashi bags and pre-made noodles.

Udon Ingredients

Travel to Eat

People travel to buy clothes and souvenirs, I buy food, Dashi, Furikake’, Soba Boro cookies…yep, travel driven by food.

Studying up, here’s the scoop, on udon.

I used Dashi packets to make the Tsuyu.  This is your base,  add soy sauce and mirin to flavor the Tsuyu.

Optimally, use Sanukiya noodles, most likely found in the frozen section of your favorite Asian market.  The noodles are a bit firmer and hold up well.  The pre-cooked noodles only take a couple of minutes to separate and heat in hot water, presto-dunzo.  There are Korean versions of Udon noodles too, and they are very good.

Toppings for udon can be as simple as an egg, gently poached for the raw egg-squeamish, Abura-age, tempura, fishcake, or really ANYTHING you feel like putting on your noodles!

Kitsune Udon

Simple, satisfying, soulful, best describes a bowl of Udon, thick, slurpable, noodles, in a clear broth.
Course noodles, one bowl meal, One dish meals
Cuisine Asian
Keyword Kitsune, Udon
Prep Time 20 minutes
Cook Time 10 minutes

Ingredients

Abura-age (Tofu)

  • 1 package Abura-age or 4 Abura-age

For Simmering Abura-age:

  • 3/4 cup dashi soup stock
  • 2 Tbsp. sugar
  • 1 Tbsp. soy sauce
  • 1 Tbsp. mirin

For Soup:

  • 5 cup dashi soup stock
  • 3 Tbsp. mirin
  • 2 Tbsp. soy sauce
  • Salt adjusting the amount of salt to your preference

Noods and Garnishes

  • 4 packages pre-boiled udon noodles
  • Optional: 4 slices kamaboko fish cake for topping
  • green onions, sliced

Instructions

  • Heat dashi, mirin, sugar, and soy sauce in a medium pan and bring to a boil. Adjust the flavor with salt as you like.
  • Simmer aburaage in the soup on low heat until the liquid is almost gone. Set aside.
  • Boil water in a large pan and heat udon noodles as indicated in the package.
  • Drain the udon and divide into four bowls.
  • Pour the hot soup over udon noodles.
  • Top with seasoned aburaage and kamaboko slices.
  • Garnish with green onions

OR buy the more readily available Inari age or seasoned tofu pouches and just plop those straight into your bowl. Inari age is the fried tofu pouches used to make Inari Sushi

    Or the carnivore delight…

    Niku Udon

    Udon Noodles topped with stir fried seasoned beef and onions.
    Course Soup
    Cuisine Asian
    Keyword japanese, Noodle, soup, Udon
    Prep Time 20 minutes
    Cook Time 15 minutes
    Servings 4 servings
    Author Adapted from Japanese Soul Food

    Ingredients

    Niku Ingredients

    • 1/4 cup sake
    • 1/4 cup sugar
    • 1/4 cup soy sauce
    • 1 pound sukiyaki beef or thinly sliced flank steak, ribeye
    • 1/4 yellow onion, thinly sliced optional

    Soup

    • 6 cups udon tsuyu*
    • 4 bricks fresh or frozen udon noodles can substitute dried Sanuki Udon
    • 1-2 green onion thinly sliced
    • Shichimi togarashi

    Udon Tsuyu

    • 6 cups dashi
    • 1/2 cup mirin
    • 1/2 cup Usukuchi soy sauce light soy sauce
    • 1/2 - 1 teaspoon salt or to taste

    Instructions

    Tsuyu

    • Prepare broth and keep warm.

    Beef

    • Combine sake, sugar and soy sauce in a bowl and stir well. Add beef and mix together, coating meat well. Marinade beef for 10 minutes.
    • Preheat dry non-stick skillet or well seasoned wok/iron skillet. If including onion, saute onion slices just until soft before adding the beef. Add beef and marinade to skillet. Spread beef in skillet to cook evenly. Cook over high heat until beef has lost its pinkness and most of liquid has evaporated, approximately 5 minutes. Remove from heat and set aside.

    Udon Noodles

    • Bring large pot of water to a boil. Add each packet of noodles. gently spread noodles out. When water comes back to a boil, the noodles are done. Drain well and divide among bowls.
    • Pour hot broth over noodles. Divide beef among bowls, garnish with green onions and shichimi togarashi. Serve immediately.
    Tryin’ to Squash A Cold! (Instant Pot Butternut Squash Soup)

    Tryin’ to Squash A Cold! (Instant Pot Butternut Squash Soup)

    How does that old adage go? Feed a cold, starve a fever?  The thought crossed my mind as I was miserably lying in bed, achy, congested, and generally feeling like crap.  Thank goodness for laptops and search engines…I found a Scientific America article that addressed this very proverb and whaddya know, going all Mythbuster, Scientific America, not only debunked it, but concluded it really should be “Feed a cold, FEED a fever”.  Yeah baby, I love science.

    What is the perfect antidote when it is cold, when you are sick, when you crave comfort, but you are too tired to fuss?  SOUP.  Am I right?  Yep, bowl therapy to the rescue.  It didn’t take long to find a soup that fit the bill.  From the blog Creative Bites, Pressure Cooker Creamy Butternut Squash Soup.  Lucky for me I had bought a butternut squash at the market and had all of the ingredients handy.  “Kold karma” pointed me to this quick (thanks to my Instant Pot) and easy, delicious soup.

    Here’s the HARD part.  The PREP.  Yeah, no getting around peeling that butternut squash and dicing ALL THOSE vegetables.  Well,  I suppose you could buy pre-cut squash, diced onions and minced garlic, but that’s your call. It’s part of cooking therapy for me.

    Butternut Squash soup Prep

    NOW, the EASY part.  Prep was 90% of the game.  You’re now sitting pretty on 3rd base ready to score, just a mere minutes from homebowl. Get it?  I love the apples and red bell pepper, they add a nice sweetness.   Saute the veggies in your Instant Pot.  It’s important when you add the stock, really stir the bottom of pot to release all those bits of saute goodness.   The pot is very sensitive to bits stuck on the bottom and will turn off as a safety precaution if the bottom isn’t clean.  Add the stock, seal the pot, and then set the timer for 5 MINUTES.  Yep, five minutes and quick release at the end.  With the time it takes to come to pressure, you’re still only looking at 15 minutes of cooking time.  Not bad.

    I used an immersion blender in the pot to puree the soup.  There are a lot of comments online about how it doesn’t work as well as a blender.  BUTTERNUTS.  Not creamy enough?  Throw the immersion stick back in and blend some more.  I’m willing to sacrifice a bit of creaminess (though I don’t think I am) to do this, as oppose to pouring HOT soup, in batches, into my blender.  I’m saving my blender for smoothies and Margaritas.

    Butternut Squash Soup in Mugs

    Go ahead and play around with this soup recipe. It’s very forgiving.  Got thyme?  Substitute for sage.  Got time?  Skip the Instant Pot, roast the vegetables instead.  See the prepped veggies above? Throw it all in a roasting pan, give it a good swig of olive oil, toss, salt and pepper and roast at 425 for about an hour).  The vegetables caramelize in the oven and add a sweetness to the soup that’s “souper” yummy.  Creative bites calls for goat cheese or cream cheese.  I like cream cheese because it adds a whole lot of mouth feel and just a slight tanginess.  You could probably use sour cream, creme fraiche or even just a touch of heavy whipping cream instead.  This would lighten the soup but you might lose that creaminess.

    FINISH WITH TOPPING MADNESS.  Once your soup is done, garnish with ANYTHING your little heart desires.  Toasted nuts or pepitas, bacon, sliced apples, or more BACON, croutons.  Did I mention bacon?  I was sent a mix of nuts as a soup topping by my Food52 Holiday Gift Swap buddy- it was perfect.

    Creamy Butternut Squash Soup Instant Pot

    Course Soup
    Cuisine American
    Keyword butternut squash
    Prep Time 15 minutes
    Cook Time 15 minutes
    Total Time 30 minutes

    Ingredients

    • 1 Tbsp. olive oil
    • 1 large yellow onion diced
    • 1 red bell pepper chopped
    • 2 tsp. diced garlic
    • 1 tsp. fresh ground ginger
    • 2 lb. butternut squash peeled and cubed 1 medium squash
    • 1 medium apple peeled cored and chopped
    • 1 tsp. sage Substitute thyme or curry powder
    • 1/8 tsp. chili powder
    • 1/4 tsp. sea salt
    • 3 c. chicken stock I used additional cup to thin down the soup a bit
    • 3 oz. cream cheese Sub goat cheese
    • 1/3 c. Parmesan cheese
    • Salted Pepitas for garnish Or anything you like, like BACON BITS, spicy nuts, chives, sliced apple, sautéed wild mushrooms...
    • 1 Tbsp Brown sugar, optional To add roasted squash’s sweetness

    Instructions

    • Turn on the Saute function on Instant Pot. Add the olive oil, onions and bell pepper. Saute on high for 4 minutes. Add the garlic and ginger and cook for 1 minute. Add the cubed squash, apple, sage, chili powder, sea salt and chicken stock.
    • Place the lid on your Instant Pot and move the knob to seal. Cook on high pressure for 5 minutes and do a quick release of the pressure.
    • Using an immersion blender in the Instant Pot, puree the mixture. Add the cream cheese and Parmesan, stir to melt and continue to puree until very smooth.
    • Garnish and serve.
    Instant Pot Easy Kheema Pulao (Spicy Indian Rice Dish)

    Instant Pot Easy Kheema Pulao (Spicy Indian Rice Dish)

    Sometimes other events dominate your life for a bit…but I’m back!

    After weeks of knocking on doors to get out the vote, I was ready for some downtime.  I drove home from Bakersfield (four hours each way, ugh) and wanted to chill and enjoy some home cooked food.  As yummy as it is, (Wo)”Man”(me) cannot live on taqueria fare alone. I arrived home right around the dinner hour so I needed something quick and easy to make, but still comforting and delicious. I pulled out my Instant Pot, clicked on Ministry of Curry “Kheema Pulao” (think Indian version of a mixed rice dish) in my saved links, and voila’ 40 minutes later I was curled up on the couch, watching my favorite K-drama (Goblin), spooning hot, spicy pulao into my mouth.  Ahhh, my reward for doing my part to save Democracy…and that’s all I will say about that (thanks, Forrest).

    Kheema Pulao

    I love Biryani, a spicy Indian Rice dish that is both complex in flavor and in preparation. That means going to a restaurant and letting them make it for me. My job is to enjoy every bite. On the other hand, pulao is a simple version of a biryani, easily made at home and delicious.  Vegetables, ground meat, aromatics, and spices are sauteed, then rice is added along with water or stock. A touch of sweetness from the cinnamon and onions, spicy from the ginger, garlic, and chili, then finished with cilantro and lime.  Welcome to Flavortown.  So good.

    Kheema means minced or ground, in this recipe, ground chicken is used but you could use turkey or beef.  The flavors are infused into the meat and the ground chicken cooks quickly, win-win.  The rate-limiting step would be the time it takes for the rice to cook which, ta-da, is shortened by using your Instant Pot, PLUS the entire dish is done in one pot…no muss, no fuss, I’m doing the happy dance now.

    Saute’ ingredients in the pot.


    Add liquid and rice, cover, seal, set for 5 minutes, wait 5 minutes then quick release and done.  How easy is that?

    Kheema Pulao finish

    Garnish with cilantro and lime to make it pretty.

    Add this to your things to make in my Instant Pot.  Really.

    Kheema Pulao

    A one pot meal made with long grain basmati rice cooked with ground chicken and a host of aromatics ginger, garlic, onions, bay leaves, black pepper, cumin seeds and cinnamon.  A flavor explosion. Adapted from Ministry of Curry
    Course Main Course
    Cuisine Indian
    Keyword Kheema Pulao
    Prep Time 15 minutes
    Cook Time 30 minutes
    Total Time 45 minutes
    Servings 4 people
    Calories 422kcal

    Ingredients

    • 2 tablespoons ghee
    • 1 teaspoon shah jeera or cumin seeds
    • ½ teaspoon black peppercorns
    • 2 inch cinnamon stick
    • 2 bay leaves
    • 1 medium onion thinly sliced
    • 1 teaspoon ginger grated
    • 1 teaspoon garlic grated
    • 1 pound ground chicken can use , beef or turkey
    • 1 tomato, diced
    • 1 teaspoon red chili powder
    • ¼ teaspoon turmeric
    • Handful of mint leaves chopped
    • 2 teaspoon kosher salt
    • 1 cup long grain Basmati rice
    • 1 ½ cups water

    Garnish

    • 1 lime
    • ½ cup cilantro chopped
    • 1 teaspoon black pepper freshly ground

    Instructions

    • Set the Instant Pot to sauté(more) mode and heat ghee. Add cumin seeds, black peppercorn, cinnamon and bay leaves. Saute for 30 seconds.
    • Add onions and sauté for 5-8 minutes or until the onions start to brown. Add ginger, garlic and chicken. Sauté, breaking the chicken and browning it for a minute. Add tomatoes, red chili powder, turmeric, mint leaves, and salt. Mix well.
    • Add rice and water. Gently mix making sure all the rice is under the liquids. Close the Instant Pot lid with pressure valve to sealing. Cook on Manual /Pressure cook (Hi) 5 mins with 5 min NPR.
    • Open the Instant Pot and gently fluff the top rice (Note, if the rice looks uncooked on the top, just mix it with the rice under and close the Instant Pot for 5 minutes)
    • If rice seems a little wet, let it sit for a couple of minutes, top open.
    • Add lime juice, cilantro and black pepper. Turn the Instant Pot off and take the insert out so the rice does not overcook or get mushy. Enjoy hot.
    Finding Ranger Cookies

    Finding Ranger Cookies

    We are a divided family. Hubby likes chewy oatmeal cookies and ooey-gooey chocolate chip cookies.  Me? I love shortbread, crumbly, buttery, melt-in-your-mouth cookies with a hint of sweetness, and decidedly not chewy. Perhaps, cookie preference is a dominant gene trait?  ALL my kids love chewy cookies just like Wes.  I thought it was a kid thing (I consider the hubs a kid).  I assumed when they got older their palates would become more refined, sophisticated m.  Surely, they would come around.

    Nope

    Even now, when I make cookies that aren’t chewy the response is “They’re ok” or “I like chewy cookies better” or “Wonder if Dad can make some Good Cookies.” The only rational explanation?  Mendelian Genetics. Yep, a predisposition to chewy cookies. Ooh, did you just have an involuntary flashback to high school biology? I concede, in our house, chewy cookies reign supreme.

    I Went to a Garden Party

    For a summer fundraiser, I volunteered to make Mexican Wedding Cookies. My partner at the dessert table, Emily, brought an unassuming looking oatmeal cookie,   They disappeared in a flash which caught my attention.  I grabbed one and took a bite.  Yum!  This cookie was CHEWY, sweet, buttery, with a bit of crunch.  It definitely fell into the Wes and kids’ cookie camp.  I snuck a couple (ok, more than a couple) onto my cookie plate to take home.

    As soon as I got home, Jordan grabbed one of the cookies and gobbled it down, then he grabbed another and exclaimed: “This might be the best cookie yet!”

    Determined to make them asap, I Googled cookies, coconut, Rice Krispies, and oatmeal, the ingredients Emily had rattled off to me.  Instantly, a bunch of recipes popped up for Ranger Cookies.  Some had chocolate or butterscotch chips, and some had different cereals.  The blog, Let’s Dish, contained all the ingredients Emily mentioned so this became my starting point.  I hit the jackpot, these were just like hers.

    Ranger Cookie Tips

    Start by creaming butter and sugar until light and fluffy should take about 2-3 minutes tops. Then add eggs and vanilla, mix until well combined.  The recipe calls for gradually adding dry ingredients.  My detour, add it all at once and combine at low speed just until dry ingredients are fully incorporated.  Finally, stir cereal, coconut, and oatmeal in by hand.

    Chilling the dough before baking prevents spreading.  Use an ice cream scoop to portion out the dough. Bake cookies on parchment paper.  With 3-4 minutes left to bake, rap the pan on the wire rack to get the cookies to fall, this helps create those cool crevices.

    If your cookies aren’t perfectly round, after taking the cookies out of the oven, quickly invert a glass over each cookie and swirl it around.  This will shape cookies into perfect little circles.  Or skip it, they’ll be gone before anyone besides you notices.

    Feel free to add chocolate chips or butterscotch chips for a twist. You can replace the Rice Krispies with partially crushed Corn Flakes, they’rrrrre great!  All you Tony the Tiger fans.

    Ok, maybe chewy is not a genetic thing…maybe chewy cookies are just really, really delicious (don’t tell my kids I said that).  Either way, they belong on your gotta bake cookie list.

    RANGER COOKIES

    Chewy oatmeal cookies loaded with coconut and crisp rice cereal. Simple and delicious, these cookies are a favorite with kids and grown-up kids as well!
    Course cookies, Dessert
    Cuisine American
    Keyword coconut, cookies, oatmeal, ranger cookies, rice krispies
    Prep Time 15 minutes
    Cook Time 15 minutes

    Ingredients

    Creaming Mixture

    • 1 cup butter softened, this is an old recipe, before unsalted butter was so widely available. I would guess folks normally used salted butter. If using unsalted butter, increase salt in recipe to 1 teaspoon.
    • 1 cup white sugar
    • 1 cup packed brown sugar light or dark

    The Wet Ingredients

    • 2 eggs
    • 1 tablespoon vanilla extract

    The Dry Ingredients-Combine and set aside

    • 2 cups all-purpose flour I use King Arthur Flour and it worked fine. Once again an old recipe, Gold Medal was probably the standard, which has slightly less protein than KA.
    • 1 teaspoon baking soda
    • 1/2 teaspoon baking powder
    • 1/2 teaspoon salt

    The Adds

    • 2 cups quick cooking oats NO instant oatmeal please
    • 2 cups Rice Krispies cereal
    • 1 cup flaked sweetened coconut you could probably use unsweetened coconut too.

    Instructions

    • Preheat oven to 350 degrees.
    • In a medium bowl, whisk together flour, baking soda, baking powder, and salt. Set aside.
    • In a large bowl, cream butter and sugars until light and fluffy. (2-3 min) Beat in eggs and vanilla.
    • Gradually add flour mixture to creamed mixture and mix well (do not overmix though). Stir in oats, cereal, and coconut.
    • Drop by rounded tablespoonfuls onto ungreased baking sheets. If you have a #40 ice cream scoop (1.75 Tablespoons) use that to create uniform dough balls.
    • Bake 8-10 minutes or until golden brown. Let cool on pan for 3-5 minutes before removing to a wire rack to cool completely.

    Notes

    I use parchment paper to line my baking sheets.  These cookies can be baked directly on an ungreased cookie sheet.
    Soup with Silken Tofu & Chicken Dumplings (A Thai-rrific, Easy Soup)

    Soup with Silken Tofu & Chicken Dumplings (A Thai-rrific, Easy Soup)

    This month’s Food52 Cooking Club selection is Simple Thai Food by Leela Punyaratabandhu, a book I have had sitting on my shelf for quite awhile. The only recipe I have tried from the book is the Shrimp Pad Thai which was pretty darn tasty.  But thanks to Food52 I am discovering it is a gem of a book.  Each month the club features a different cookbook. A variety of old and new cookbooks, of which shockingly (lol), I own quite a few. Yes, confessions of a cookbook junkie.

    Food52ers post photos and comments on recipes they try from the month’s selection.  It’s a great way to find out which recipes are winners and which may need a bit of tweaking.  It has definitely pushed me to actually try more recipes from the gazillions of cookbooks I have sitting on my shelf.  Raindrops on roses and a cookbook treasure trove, Dumplings that are meatballs for soup simmering on the stove..these are a few of my favorite things…..lalala.

    Yep, singing led to this delicious soup from Simple Thai Food, Clear Soup with Silken Tofu and Chicken Dumplings

    It is quick, easy and DELICIOUS with just a teeny weeny caveat…hope you like cilantro!

    Break It Down

    The soup comes together in a snap.  I used a commercial chicken stock to start with but you could use homemade stock.  The chicken dumplings, really meatballs, start with ground chicken to which just a few ingredients are added, cilantro, fish sauce, garlic, pepper and an egg white for texture.  Dump it in your food processor and blend until mixture is sticky and smooth.  These dumplings are light with a fine grain texture not as chunky as meatballs, think city versus country rustic.

    The stock is seasoned with onions and soy sauce and brought to a gentle boil.  I used a small ice cream scoop to shape and drop my dumplings into the broth to cook.  Add cubed soft tofu once it is heated through, literally a few minutes later, you have a delicious, flavor-packed bowl of soup.  Finish with a garnish of cilantro and green onions.

    This would be perfect as a light lunch or as a starter for dinner.  The following day I took some liberties and added shredded Napa Cabbage and carrots and poured it over udon noodles for a satisfying, tasty noodle soup.  Yumminess in a bowl.

    Soup with Silken tofu and Chicken dumplings

    These are a Few of My Favorite Things (Soup with Tofu and Chicken Dumplings)

    Ingredients

    • 2 medium cloves garlic peeled
    • 2 tablespoons cilantro stems or 2 cilantro roots chopped
    • 1/4-1/2 teaspoon ground white pepper
    • 1/2 pound ground chicken dark or a mix of dark and light chicken, should not be too lean
    • 2 teaspoons fish sauce such as 3 Crabs brand
    • 4 1/2 cups homemade chicken stock or low-sodium store bought chicken broth
    • 2 teaspoons fish sauce
    • 1 tablespoon thin soy sauce
    • 1 pound silken tofu packed in water drained and cut into 1-inch cubes
    • 2 green onions cut into 1-inch pieces separate the white from the green parts
    • 1/4 cup cilantro leaves for garnish

    Instructions

    • 1.In a mortar or a small chopper, make a fine paste out of the garlic, cilantro stems/roots,
    • 2.Place the ground chicken into a mixing bowl and add prepared paste. Add 2 teaspoons of fish sauce. Mix until homogenous; set aside. You can use 1 teaspoon soy sauce in place of 1 of fish sauce if you desire.
    • 3.In a large saucepan combine broth with soy sauce, 2 teaspoons fish sauce and white parts of green onions. Bring to a boil and then reduce to a gentle boil. Scoop chicken mixture into 1-inch balls and gently drop into simmering stock. Repeat until all the chicken mixture is gone. Cook until dumplings float to the surface about 1-2 minutes.
    • 4. Gently add the tofu cubes to the broth; return to a simmer, then add the remaining green onions and remove from heat immediately. Adjust the seasoning as necessary with more fish sauce or soy sauce.
    • 5. Ladle soup into a serving bowl. Garnish with cilantro leaves. Some freshly-ground white pepper on top is optional, but recommended.
    • 6. Is this blasphemous? I don't know, but it is delicious, add a handful shredded Napa cabbage and carrots to broth, simmer additional 2-3 minutes until vegetables are soft. Top udon or ramen noodles with broth, dumplings and vegetables. Garnish with cilantro and green onions. You can use a firmer tofu instead if serving with noodles. Hmmm...


    There’s Always Room for J-E-L-L-O

    There’s Always Room for J-E-L-L-O

    Do Not Laugh.  Yes, this is a recipe for jello, not the boxed Jello you made with your mom when you were a kid (your job-pour the contents into a big bowl), oh no. The Asian version of Jello, Almond Jello. So good, it brings a whole new dimension to Jello. It’s delicious, light and refreshing.

    If you have ever had a meal in a Chinese restaurant which served dessert other than fortune cookies, it might have been Almond Jello.  Unfortunately, much of the Almond Jello served in restaurants isn’t very good.  I have a theory, LOTS of Asians are lactose intolerant so milk is used sparingly.  Well, that’s what makes Almond Jello YUMMY, the addition of milk-like the white layers of finger jello or the cream cheese in that funky but delicious Lime and Pineapple Jello Ring that everyone’s aunt (who couldn’t cook) brought to every potluck. Jello with Moo-magic.

    When I was a kid the fanciest restaurant in Chinatown was The Empress of China. In its heyday celebrities and politicians clamored there.  My folks would take us there for very special occasions-birthday dinners for grandparents, wedding banquets and Chinese New Year. High on the 6th floor, it had the most breathtaking views of the City and the East Bay.  I loved the Green Jade Mist Almond Delight, their version of Almond Jello.  Served in a goblet with a touch of Creme de Menthe it was the glitzy ending to a fancy meal.

    Typically Almond Jello is topped with fruit, not creme de menthe.  You can use mandarin oranges or fruit cocktail (when is the last time you had fruit cocktail out of a can, strictly nostalgic choice) or Lychees. Use fruit packed in light syrup or its own juice.  I add the syrup or juice to the jello so it just slides down your throat, like having jello soup. Confession, I loved pouring milk on my jello, same effect. Canned fruit makes it a great winter dessert when fresh fruit can be hard to find. You could jazz it up seasonally by adding fresh strawberries or blueberries.  This recipe makes soft jello which I happen to like. If you like jello that has the consistency of finger jello, reduce the amount of the water in the recipe to 3/4 cup of each and the milk to 2 cups.

    When I was pregnant with my oldest, my craving was Almond Jello.  I made vats of it, doubling, tripling, even quadrupling the recipe. Seriously, it was like gestational crack.

    These days I make Almond Jello when my oldest kid comes home.  He loves it. If I don’t steal a couple of scoops before I let him know there is a bowl in the fridge, I will have lost my window of opportunity to have some.

    It’s stupid easy, so delicious.   Try it, who doesn’t like jello?
    Almond Jello

    Almond Jello

    Course Dessert
    Cuisine Asian-American
    Keyword almond, almond jello, Dessert
    Prep Time 10 minutes

    Ingredients

    • 2 packets gelatin
    • 1 cup cold water
    • 1 cup hot water
    • 3/4 cup granulated sugar you can adjust the sugar to the sweetness of your liking
    • 2 1/4-2 1/2 cups whole milk
    • 2 teaspoons almond extract
    • 1/2 teaspoon of vanilla extract
    • 1 15 ounce can of Mandarin oranges packed light syrup

    Instructions

    • Put cold water in a mixing bowl.
    • Sprinkle gelatin on surface of cold water. Let it sit for one minute
    • Add sugar and stir.
    • Add hot water and stir until completely dissolved. (I cheat, if it doesn't look fully dissolved, zap it for 15 seconds in the microwave)
    • Stir in milk and extracts. Pour mixture into individual serving bowls or 1 large glass bowl such as a souffle dish
    • Chill until firm (at least 2-3 hours)
    • Cut jello into cubes if desired. Top with mandarin oranges