Tag: cauliflower

Whole Roasted Cauliflower Takoyaki Style-Ahead of the Game

Whole Roasted Cauliflower Takoyaki Style-Ahead of the Game

So, you drew the short straw, didn’t you?  Yep, the proverbial boring Thanksgiving dish.  Vegetables, sheesh.  Auntie has drawn dessert, ugh, means lime green jello mold with pineapple.  Which is not dessert actually but it’s ok, she’s your Aunt.

Could be worse, you could have drawn salad.  Really, who goes for salad first on Thanksgiving?  Sure I take the customary 2 lettuce leaves and a crouton to make my plate look balanced.  It’s all for show I don’t actually eat it.  At least we can salvage the veggie dilemma.

I am here to make you the belle of the ball, a prince among paupers.  Along the way, we are demystifying the twenty-dollar whole roasted cauliflower.  Yeah, fess up, you have paid that much and didn’t even blink an eye when you did.

You will never order whole roasted cauliflower again.

Well, at the least, you won’t pay twenty bucks for it.

You don’t have to core it this much, I was a bit overzealous

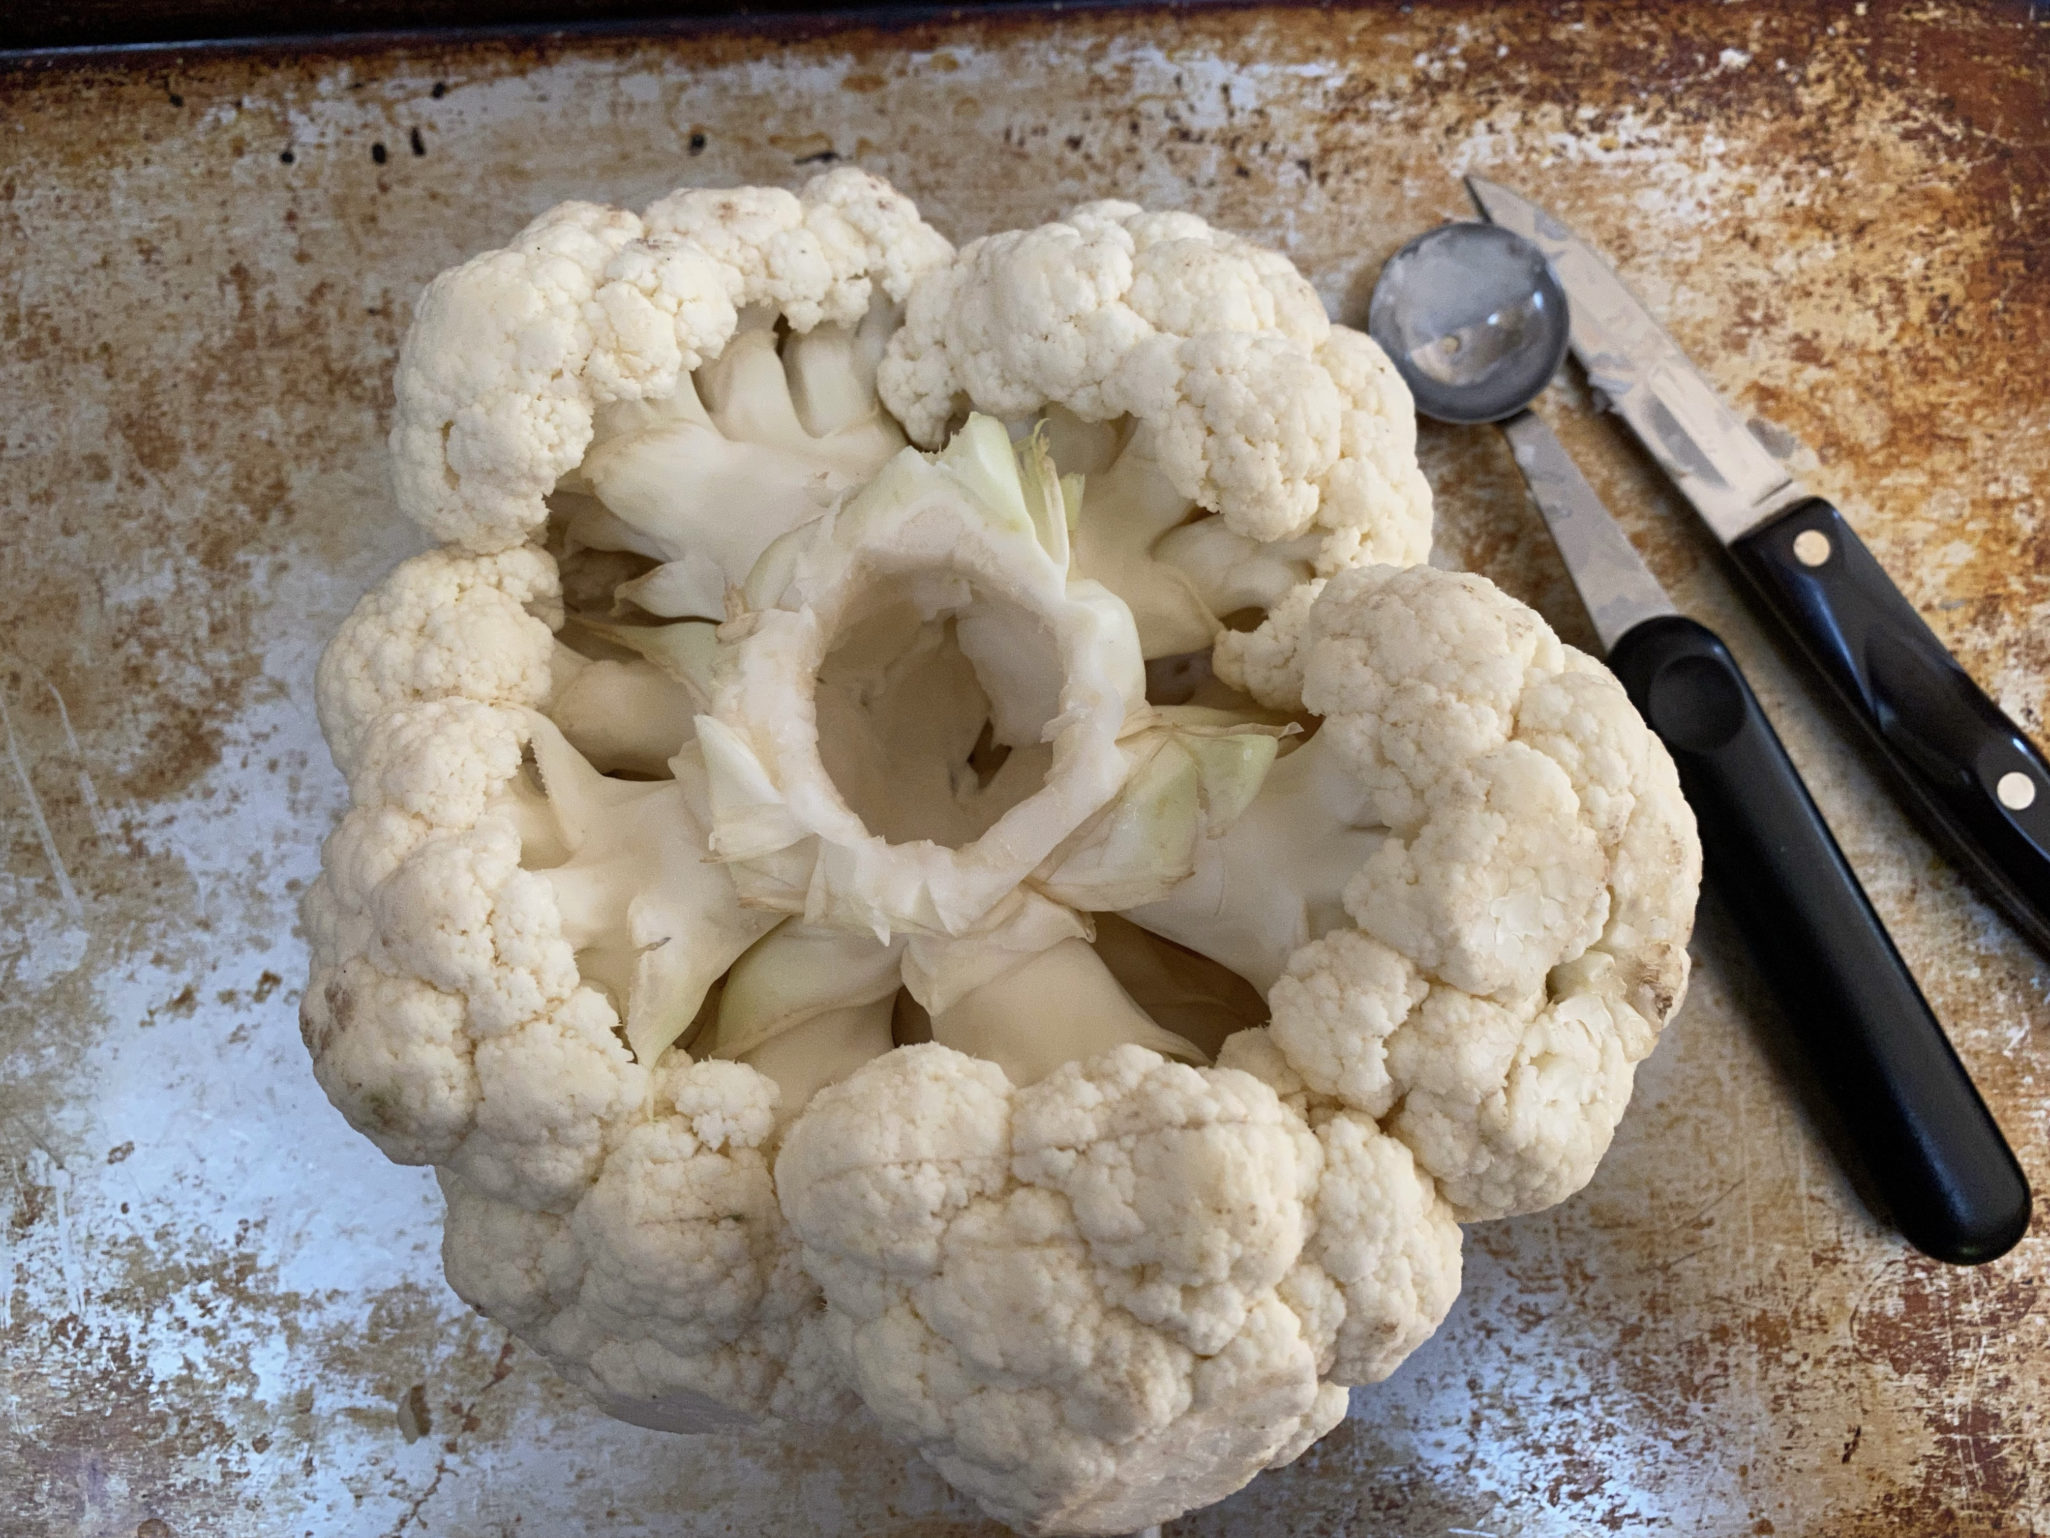
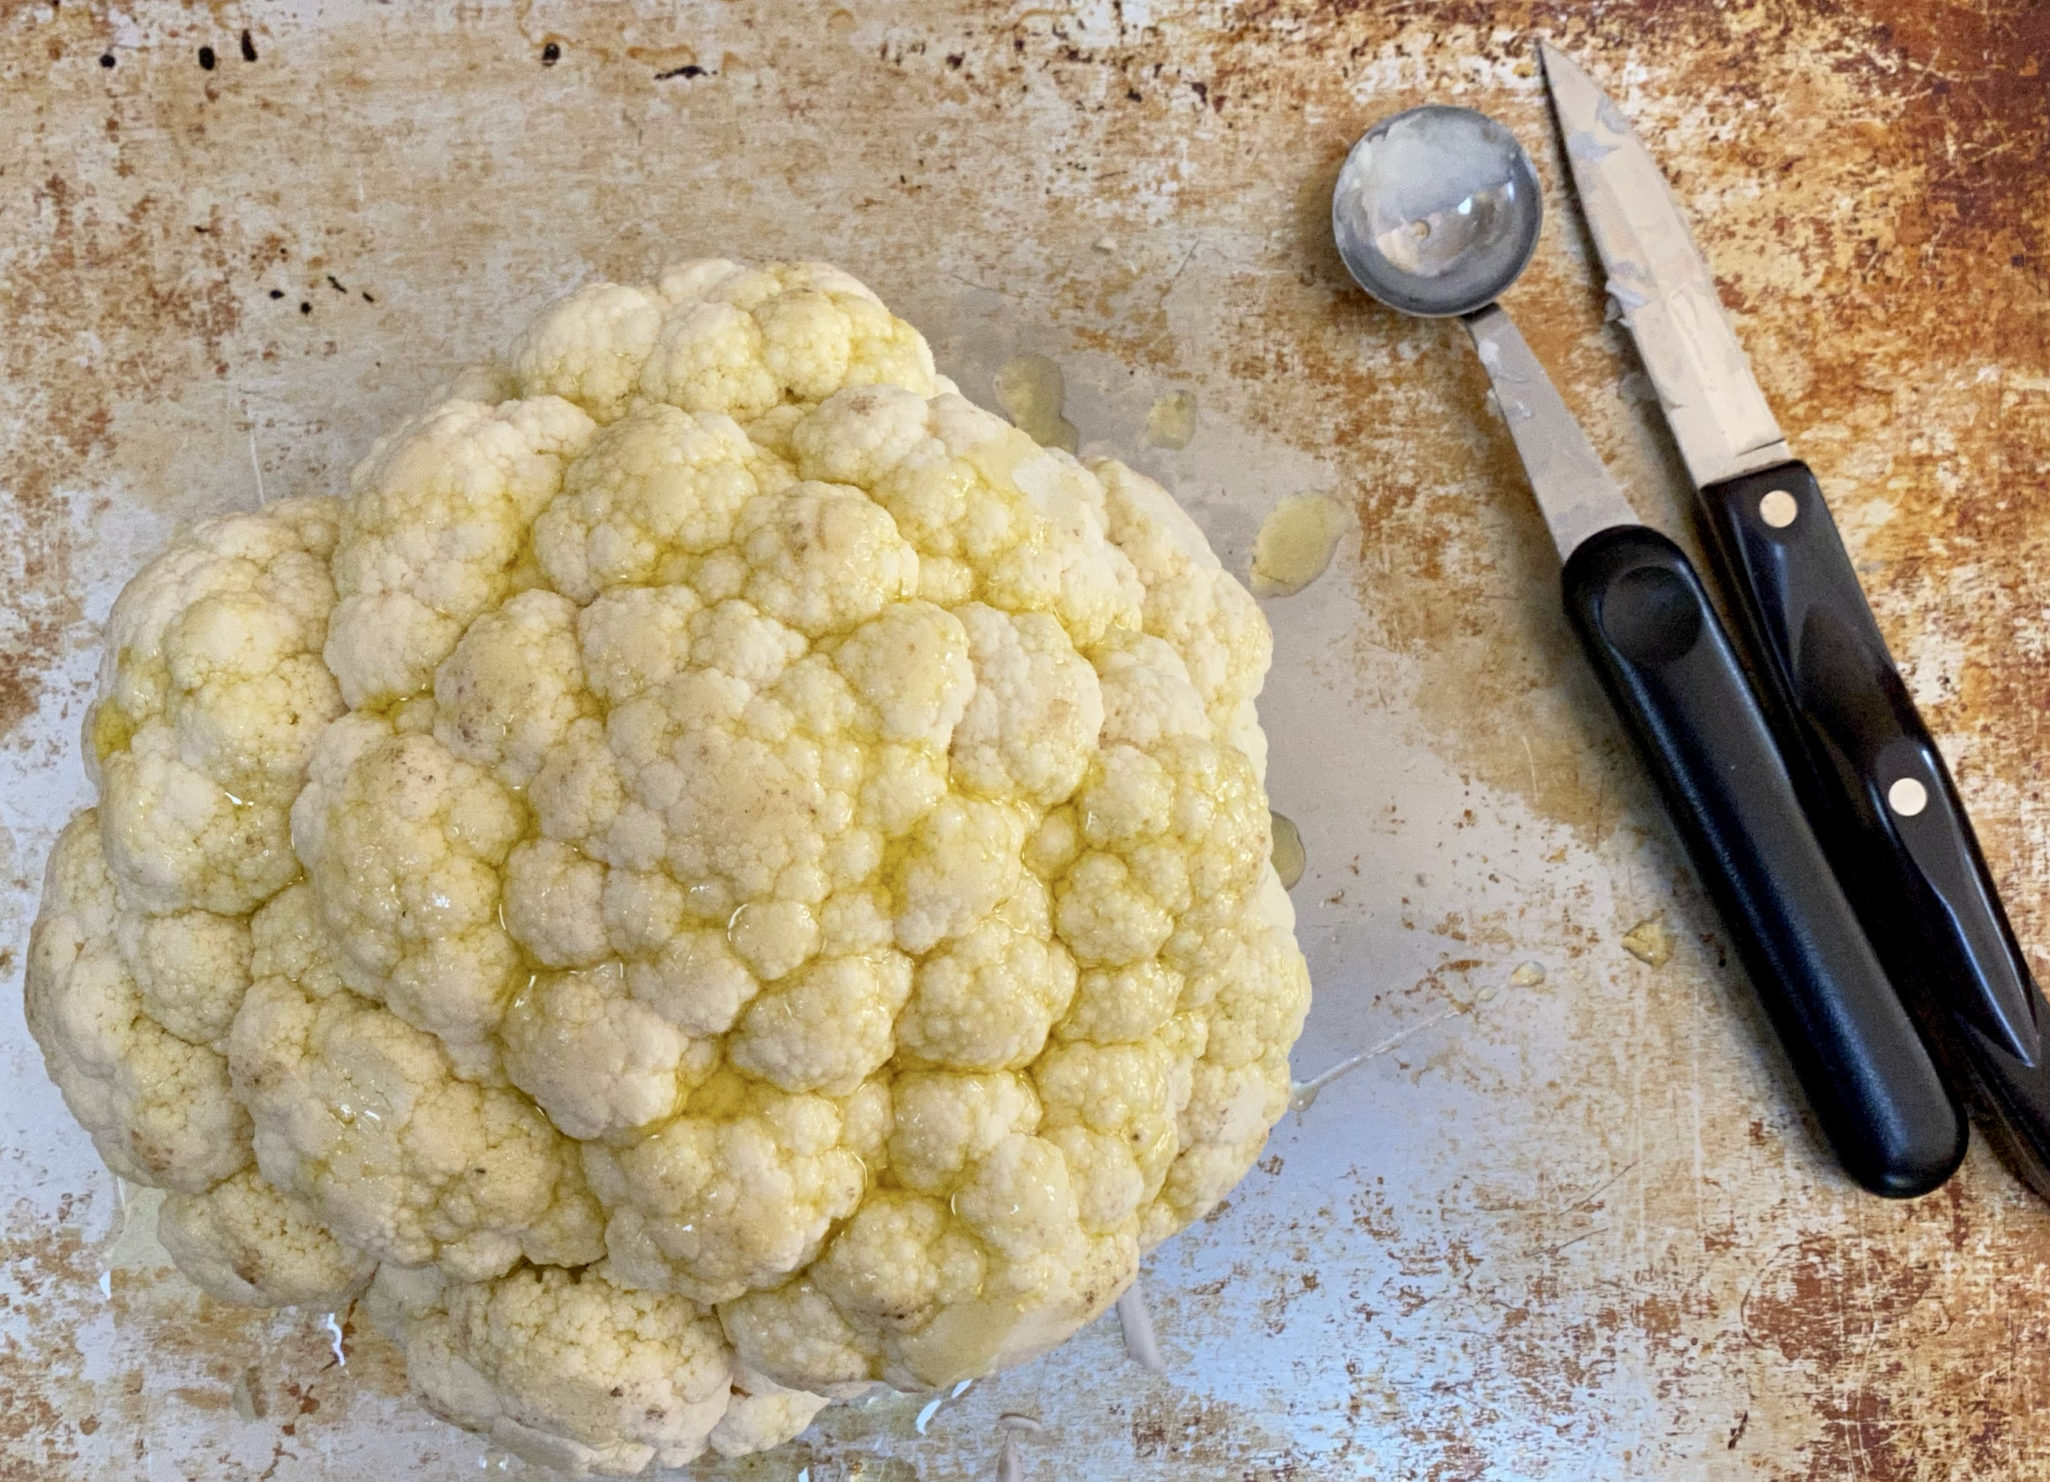
Start with a nice looking head of cauliflower,  Wash it, trim off the outer leaves, (here is my hack) core the center stem with a melon baller if you have one. If not use a paring knife.  Coring shortens cooking time.

Slather the cauliflower top and bottom with olive oil.  I use a squirt bottle, a brush would work also.  Season with salt and pepper, again, top and bottom.  Place on a parchment or foil-lined baking sheet.

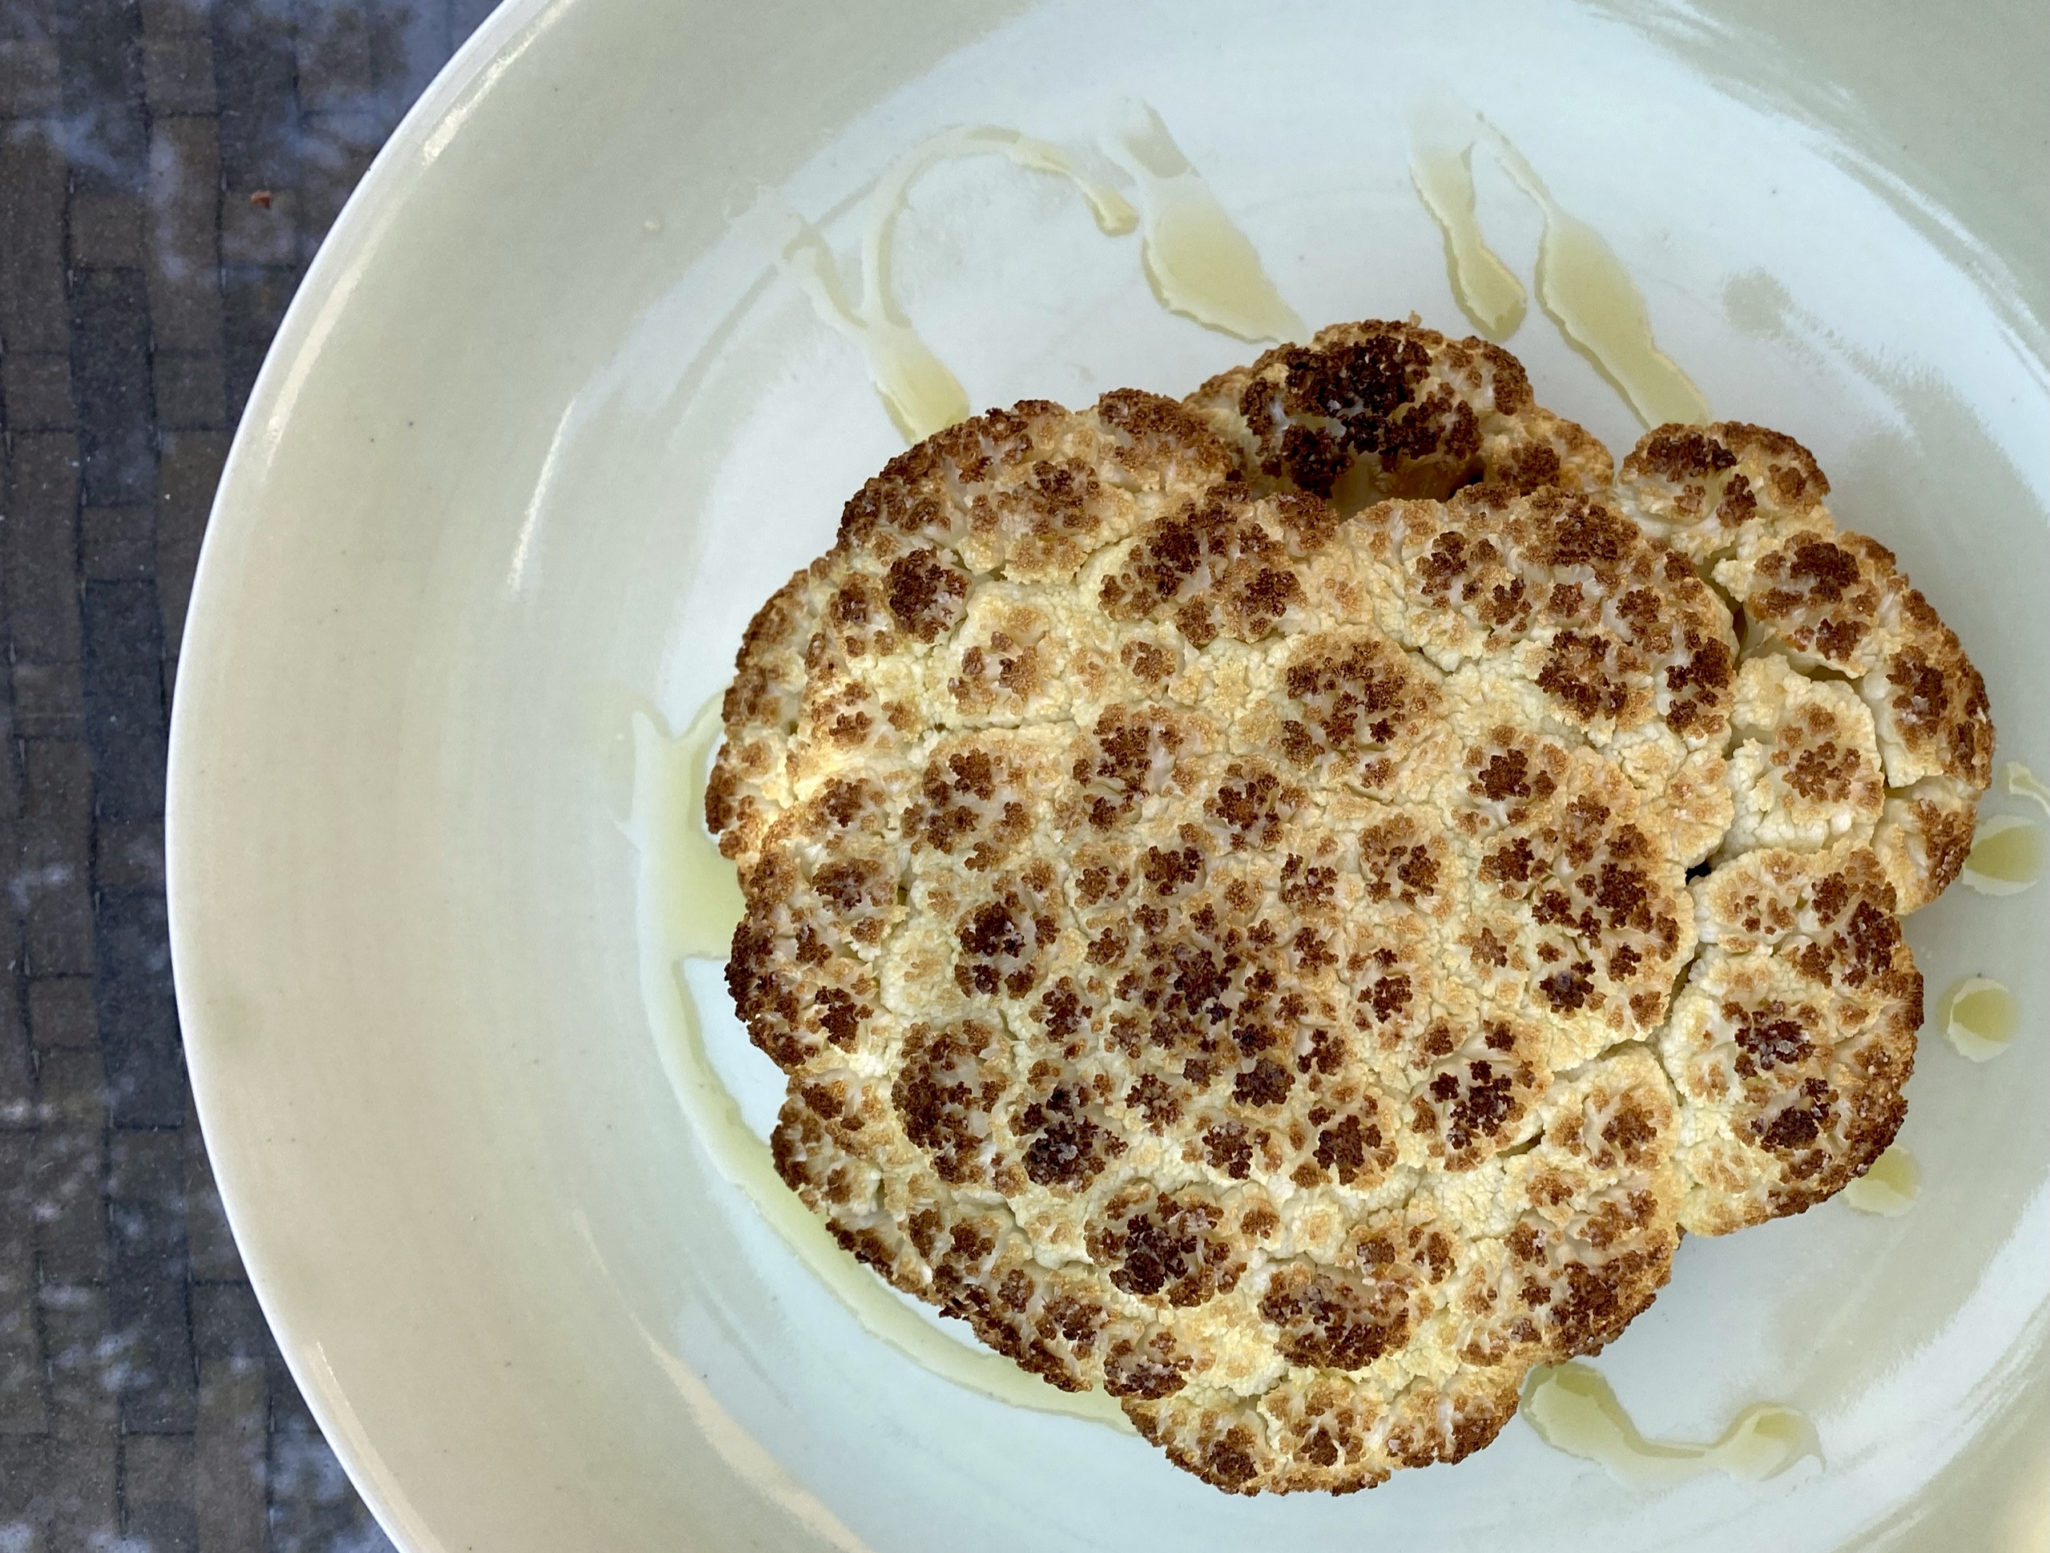
That’s it.  Your work is done.  Your oven does the rest of the heavy-lifting. Roast for about 45-50 minutes.  Pierce it with a knife, if it goes through fairly easy, it’s done.  Out comes a beautiful toasty, crispy edged, soft- centered, delicious, cauliflower canvas, ready to be painted.

You can top your cauliflower with just about anything.  I have served it with roasted tomatoes, or brushed with a garlic and herb butter, it’s your cauliflower, go crazy.

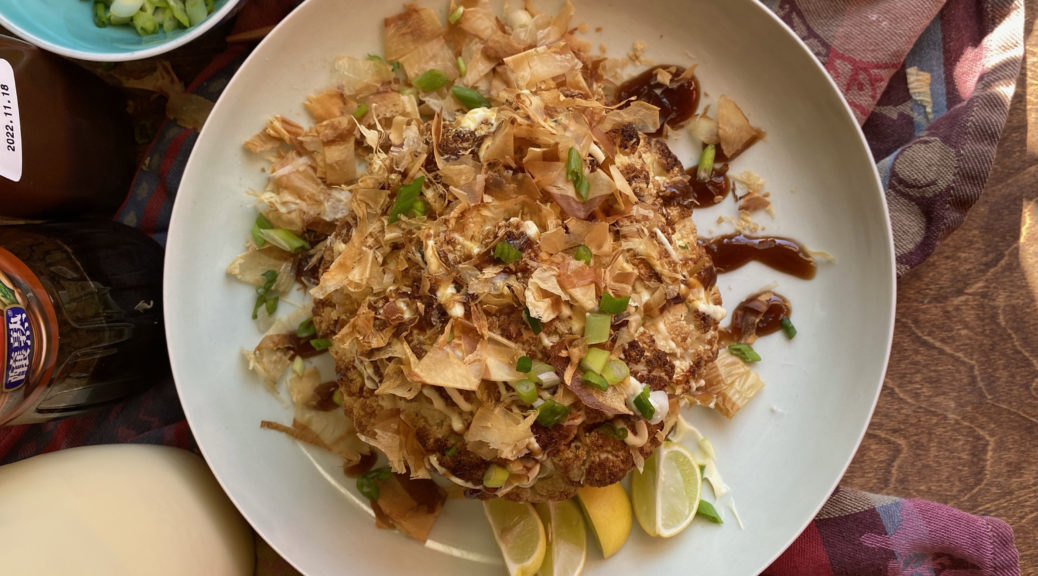
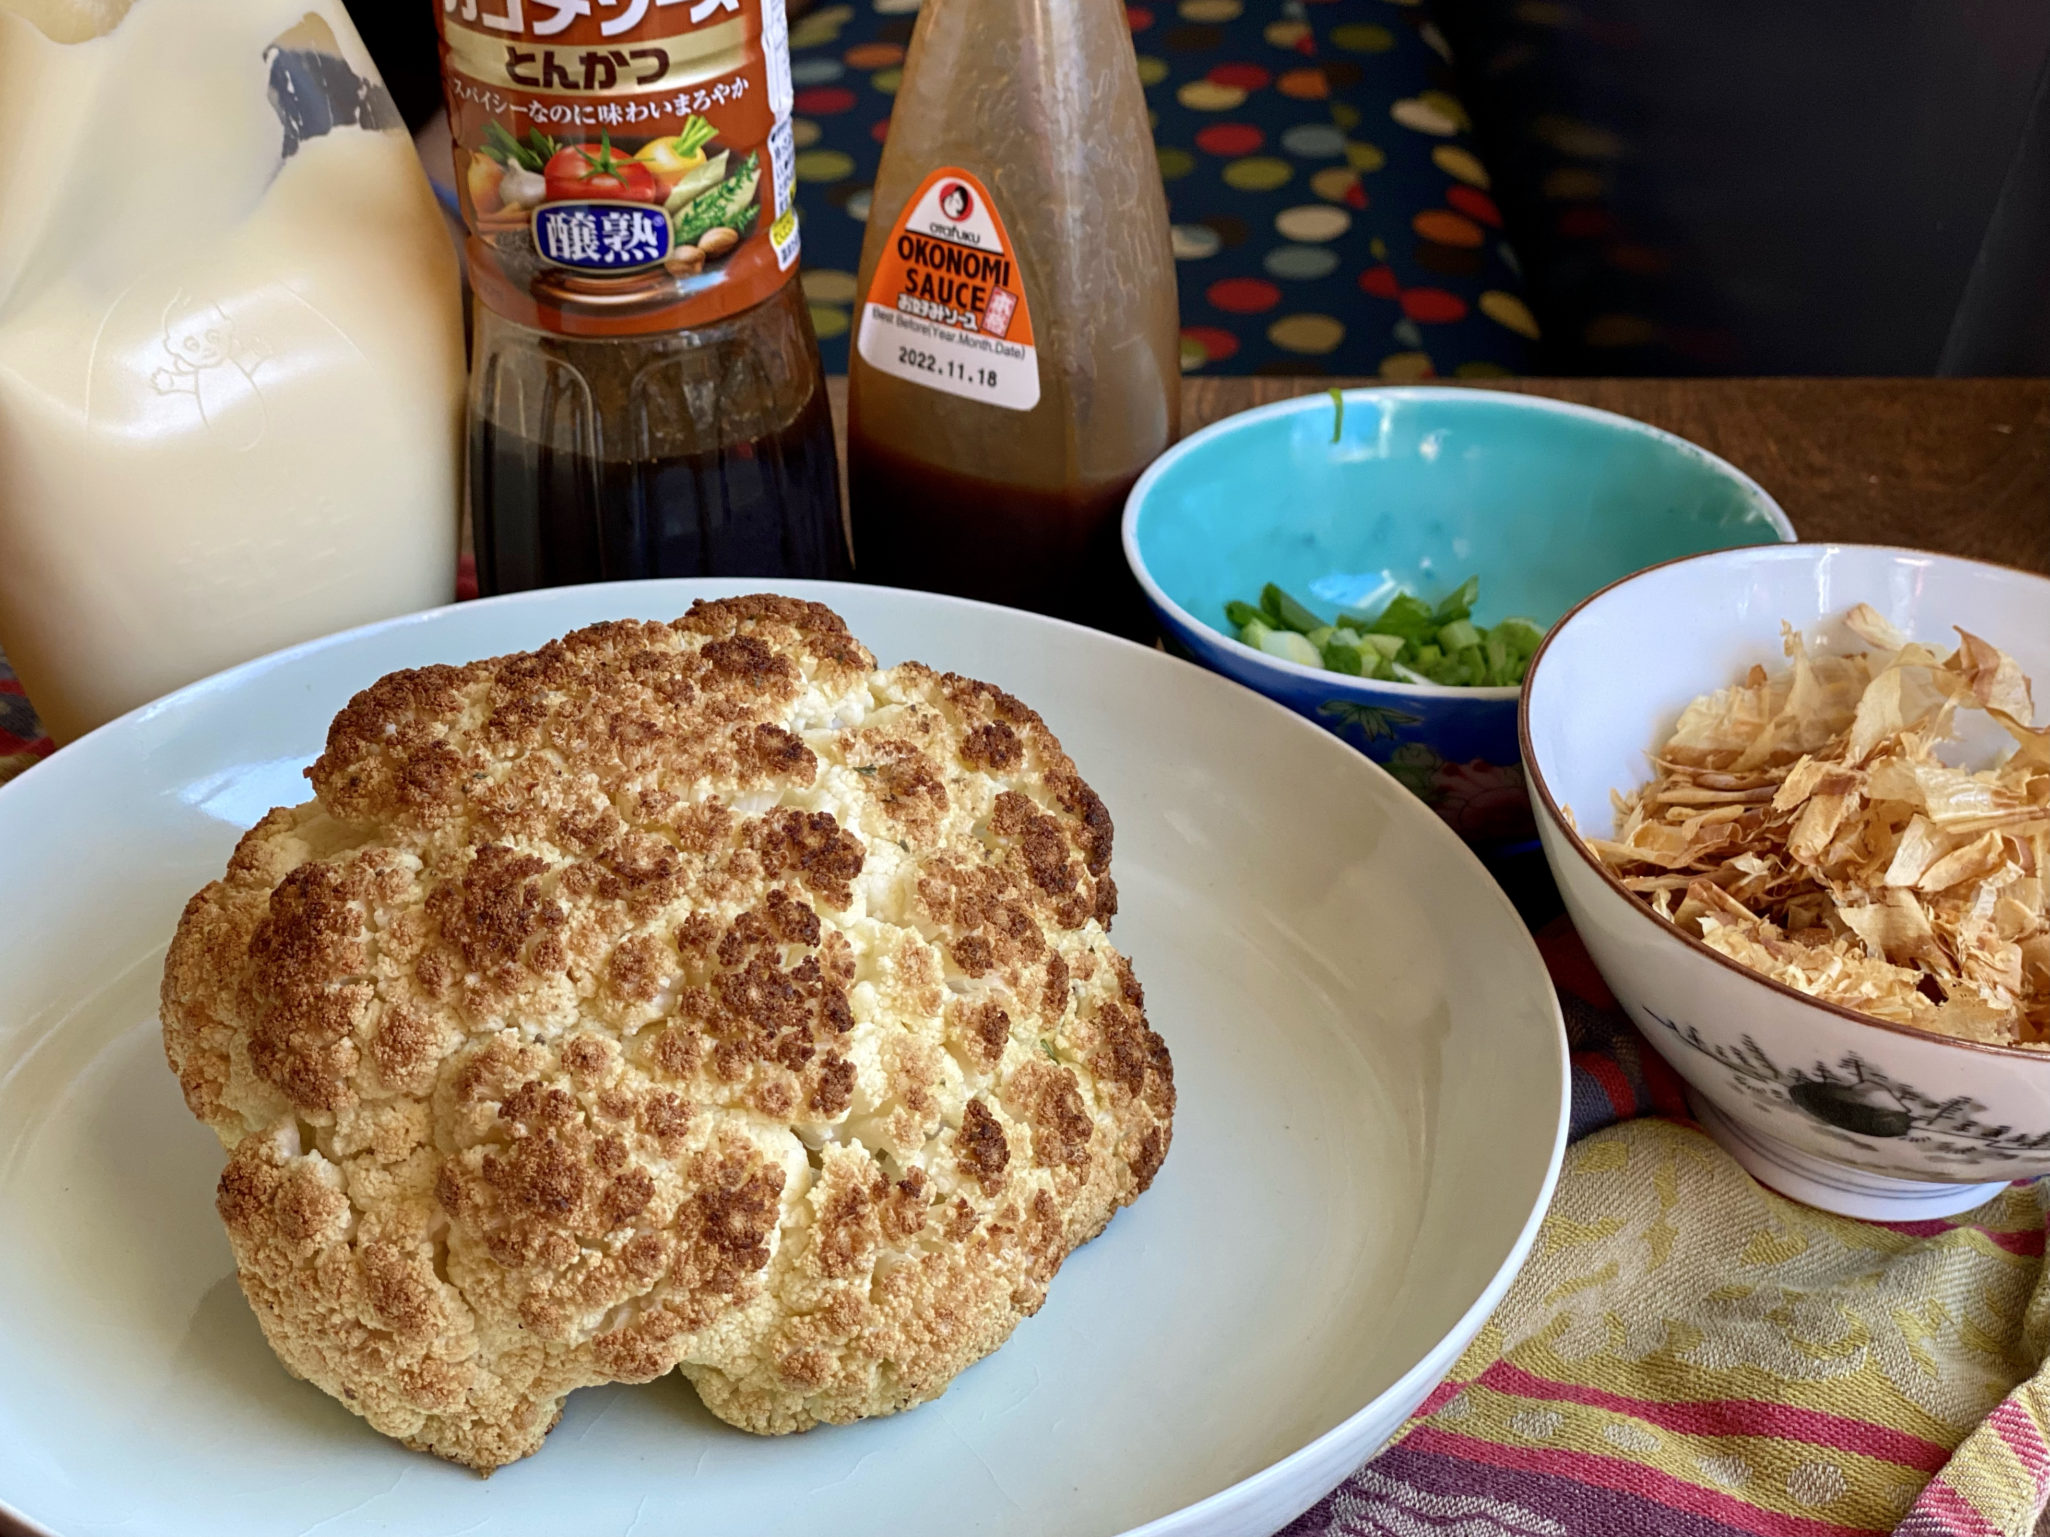
My latest razzle dazzle topping was inspired by a recipe I found in a little book called Emily the Cookbook. Emily is a pizza joint in Brooklyn that is on my bucket list of places to try.  They serve a roasted broccoli dish that is based on the toppings for Takoyaki, a popular Japanese seafood-filled round pancake.  So simple, yet so good.  In fact, it’s so simple I’m using pics to show you how to make it.

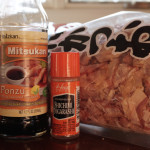
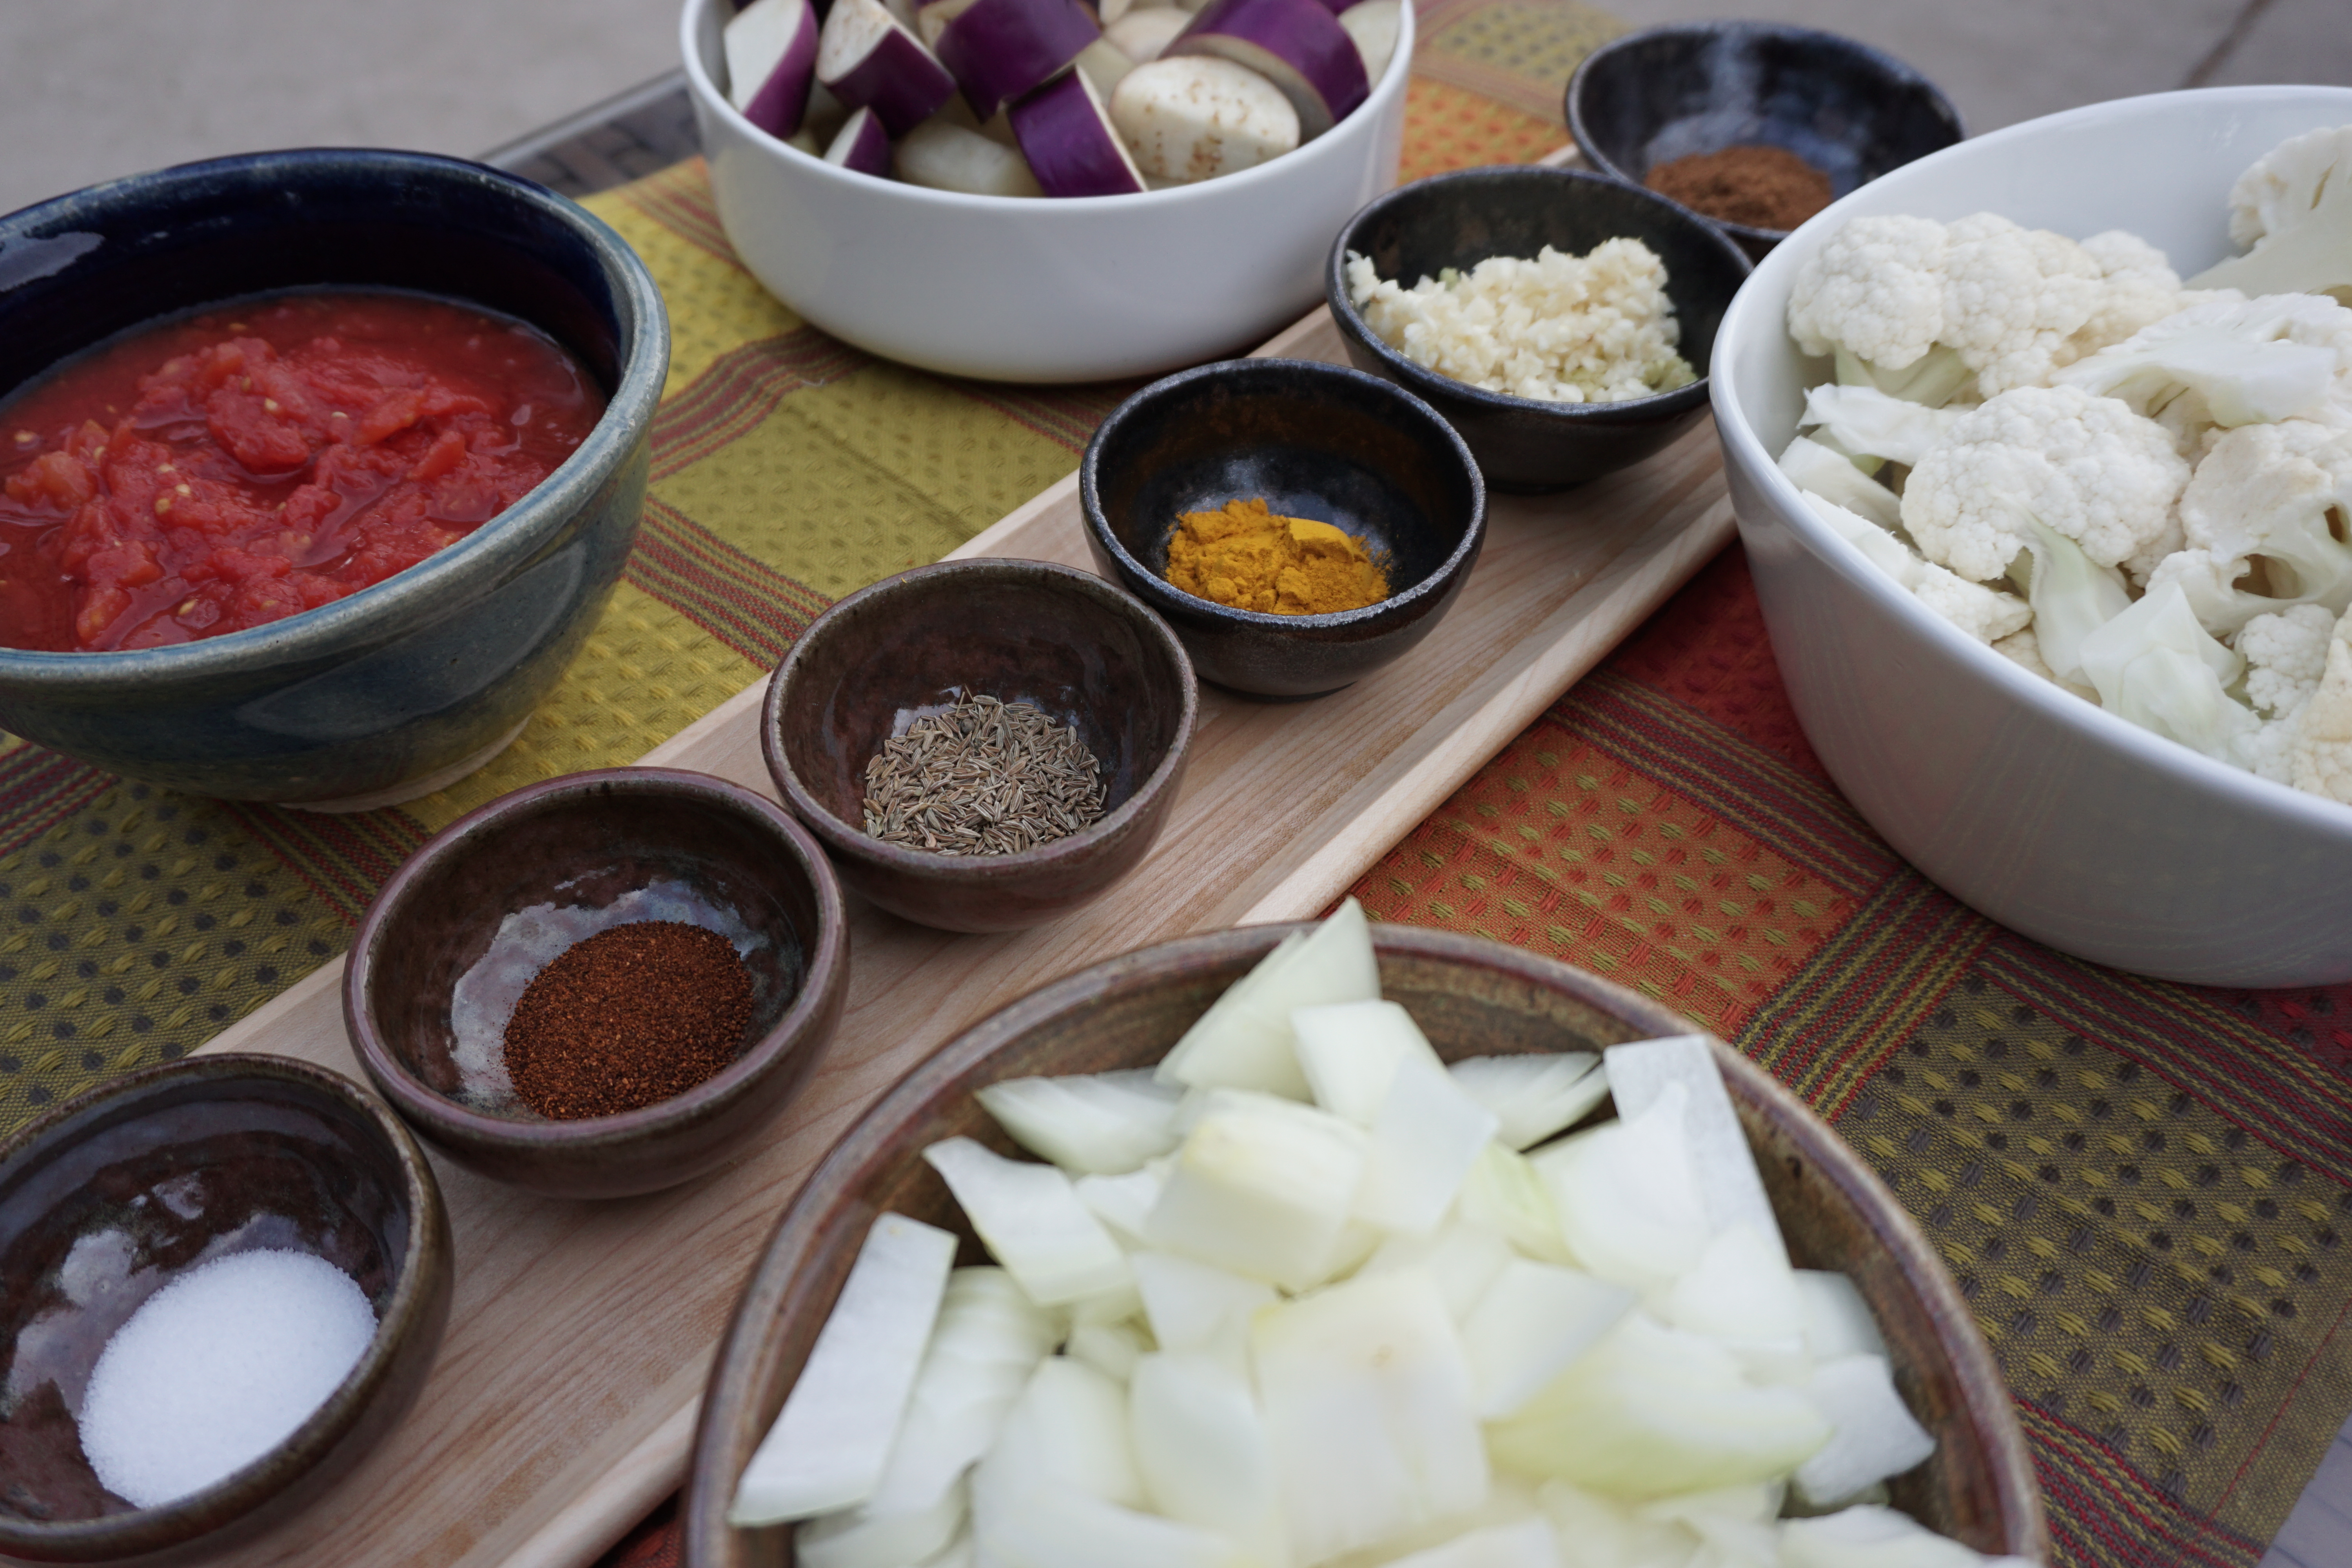
All you need is Okonomi Sauce (preferred) or Tonkatsu Sauce (think Worchestershire/Steak Sauce but better), Kewpie Mayonnaise (Japanese mayo), Bonita Flakes (fish flakes) and green onions.

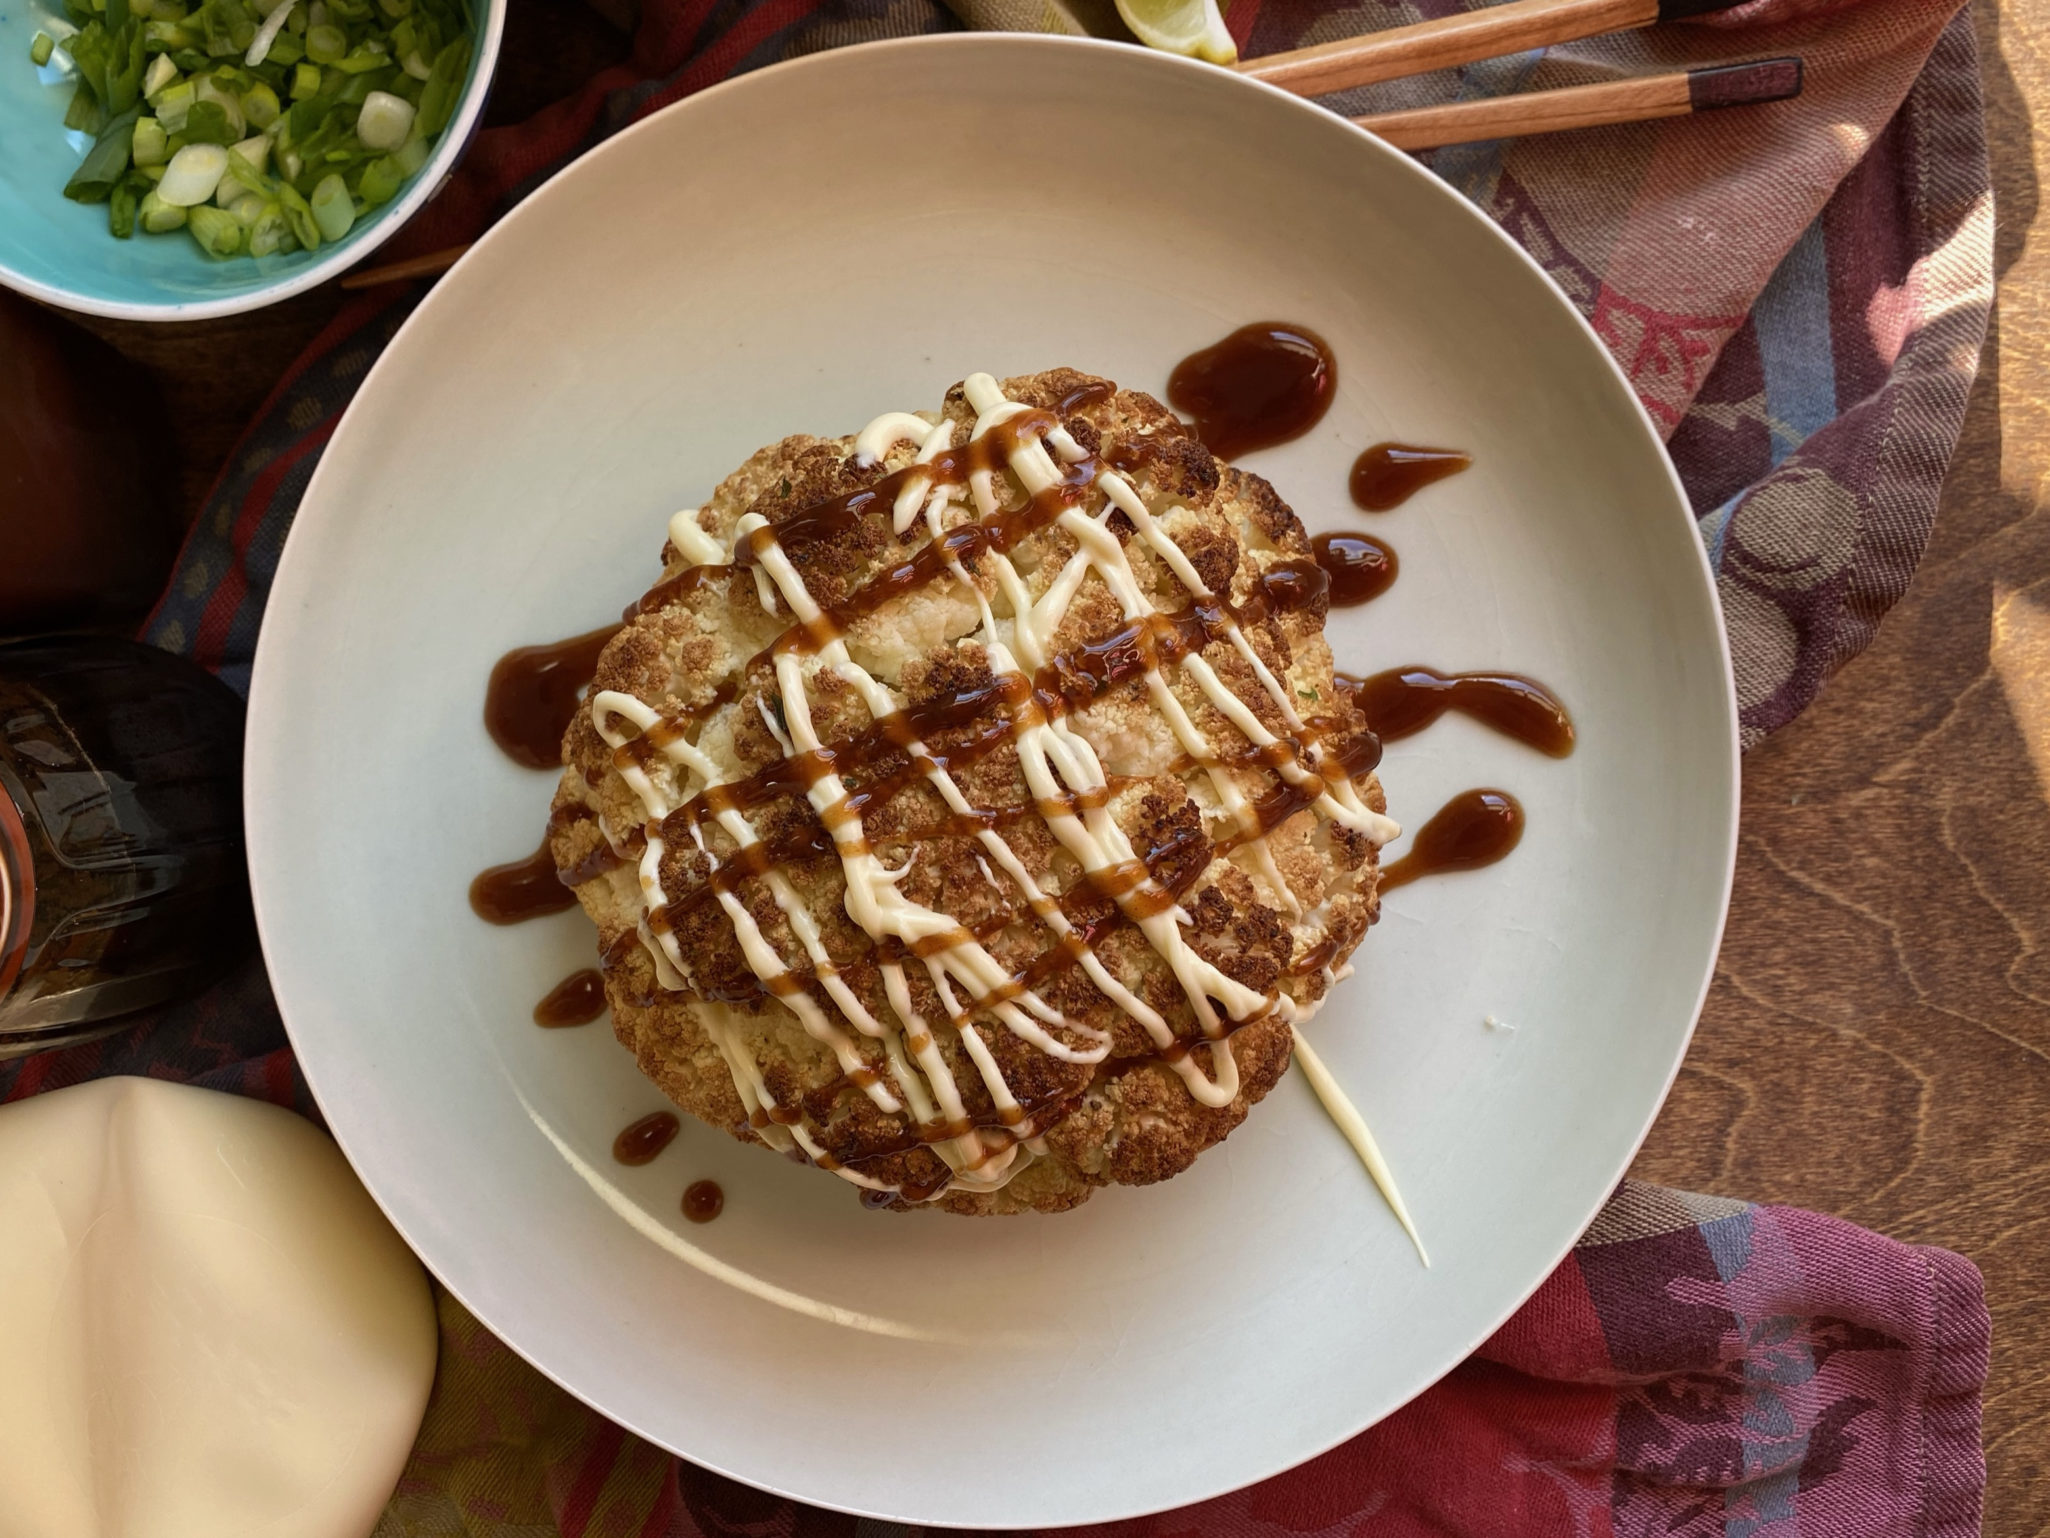
Squirt a bunch of the mayo (it even comes in a squirt bottle-how easy is that?) all over the top.

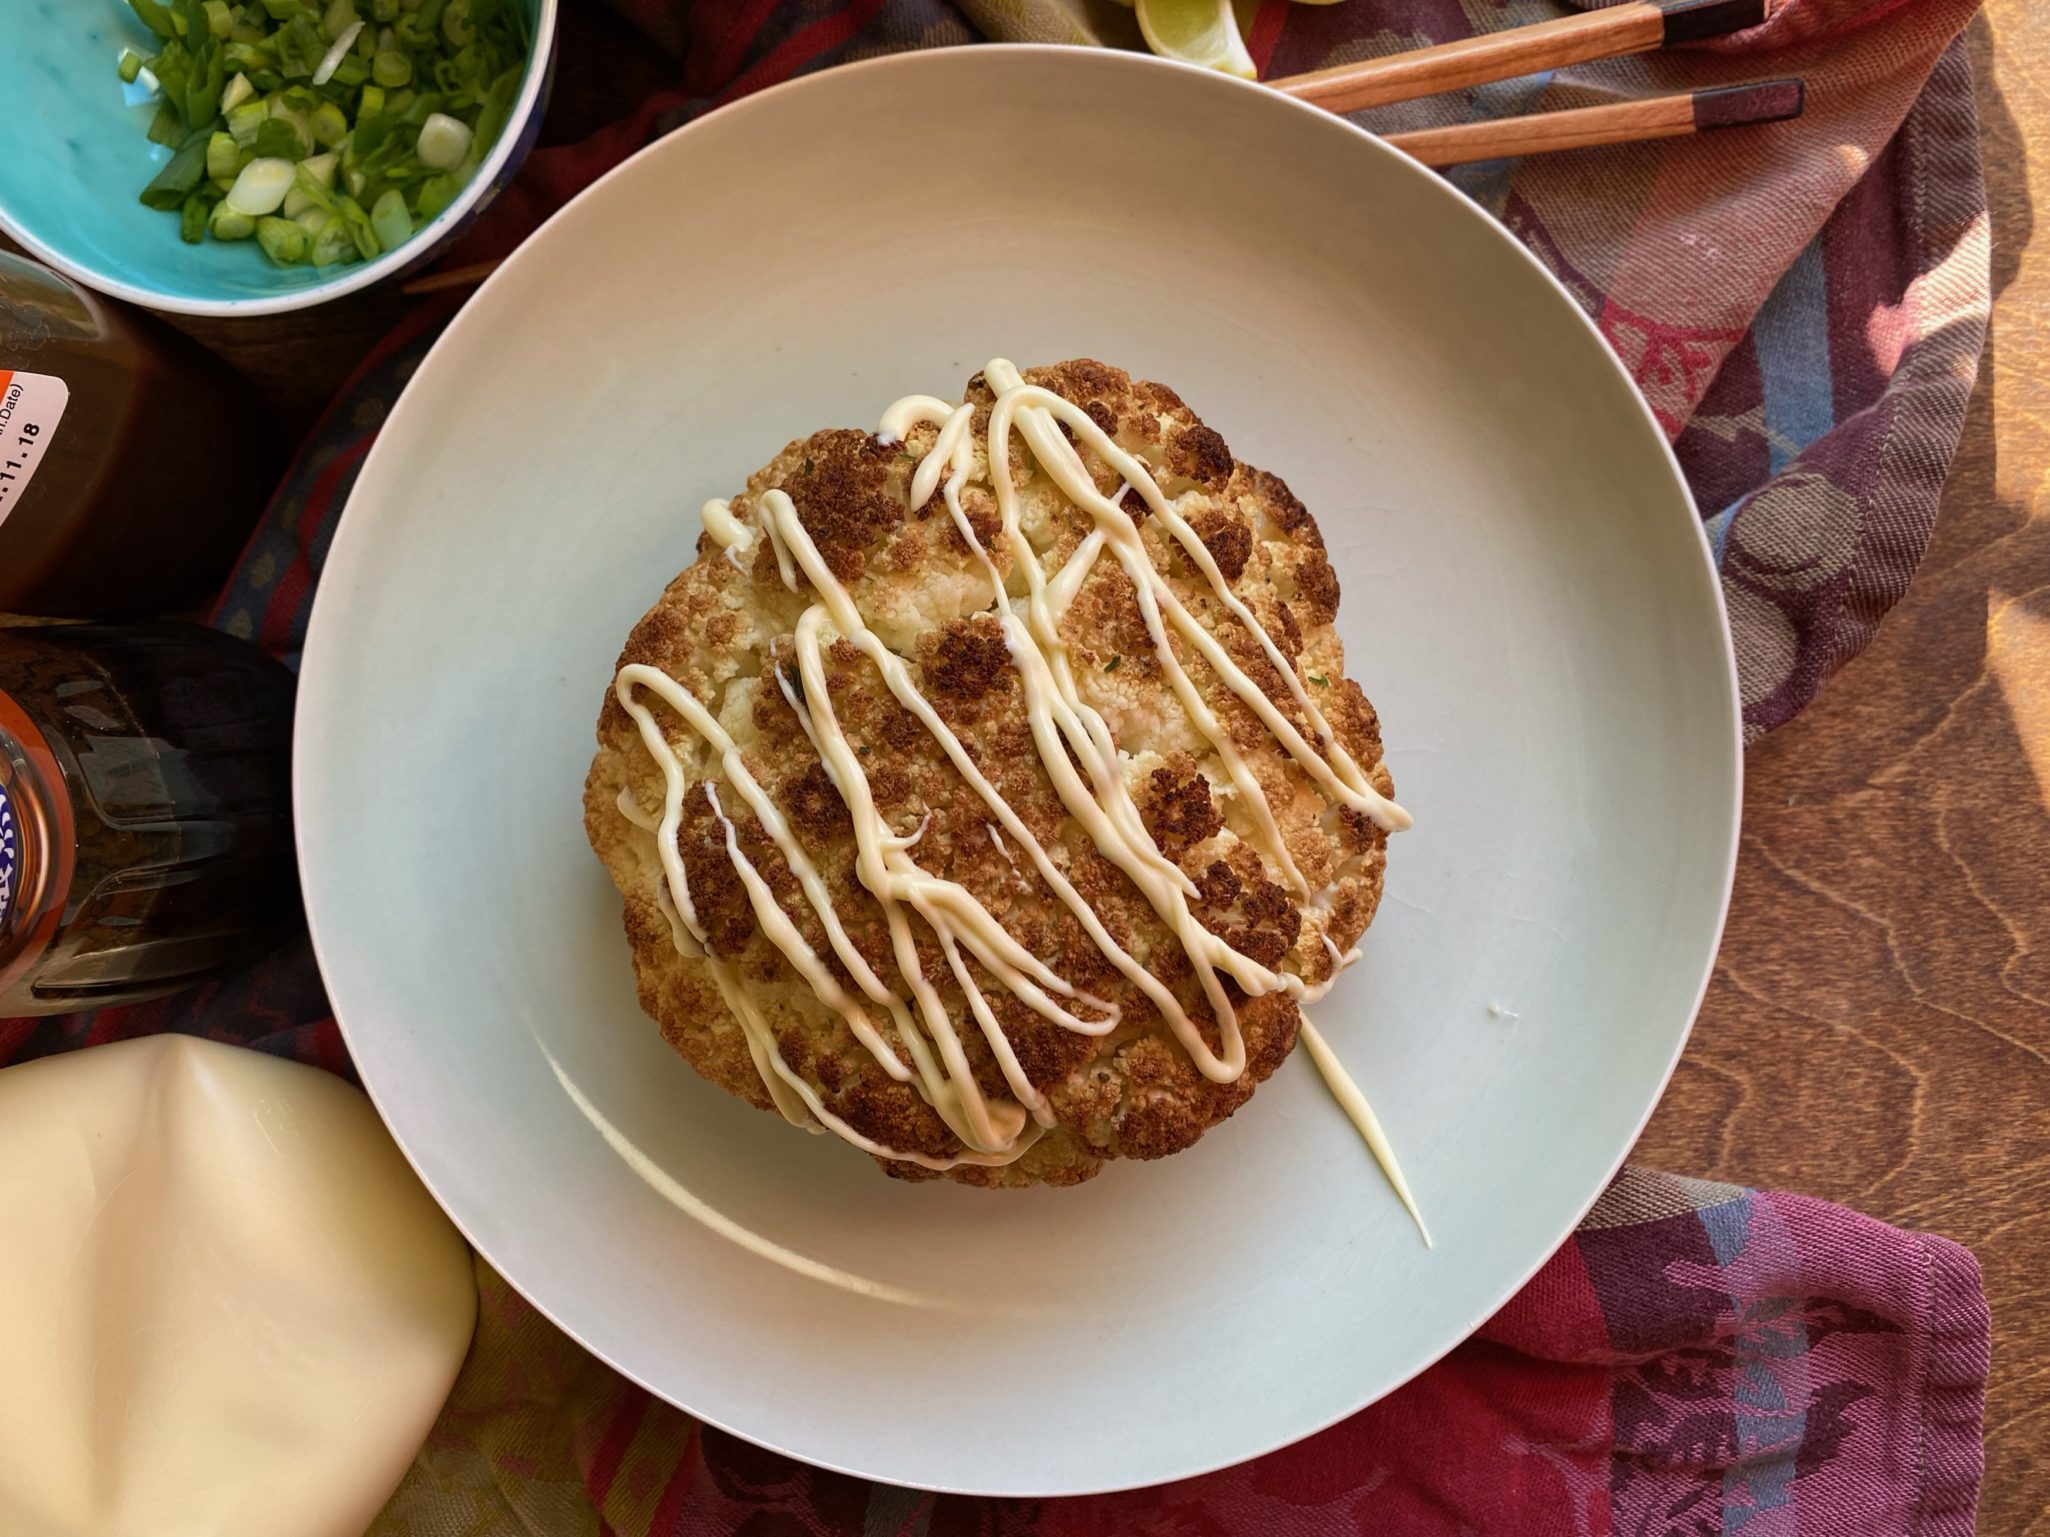
Then squirt a bunch of Okonomi Sauce on top.

Finish with a flurry of bonita flakes, green onions and some sesame seeds if you like. Want to keep it vegetarian? Instead of bonita flakes,  TJ’s has a fish-free furikake.

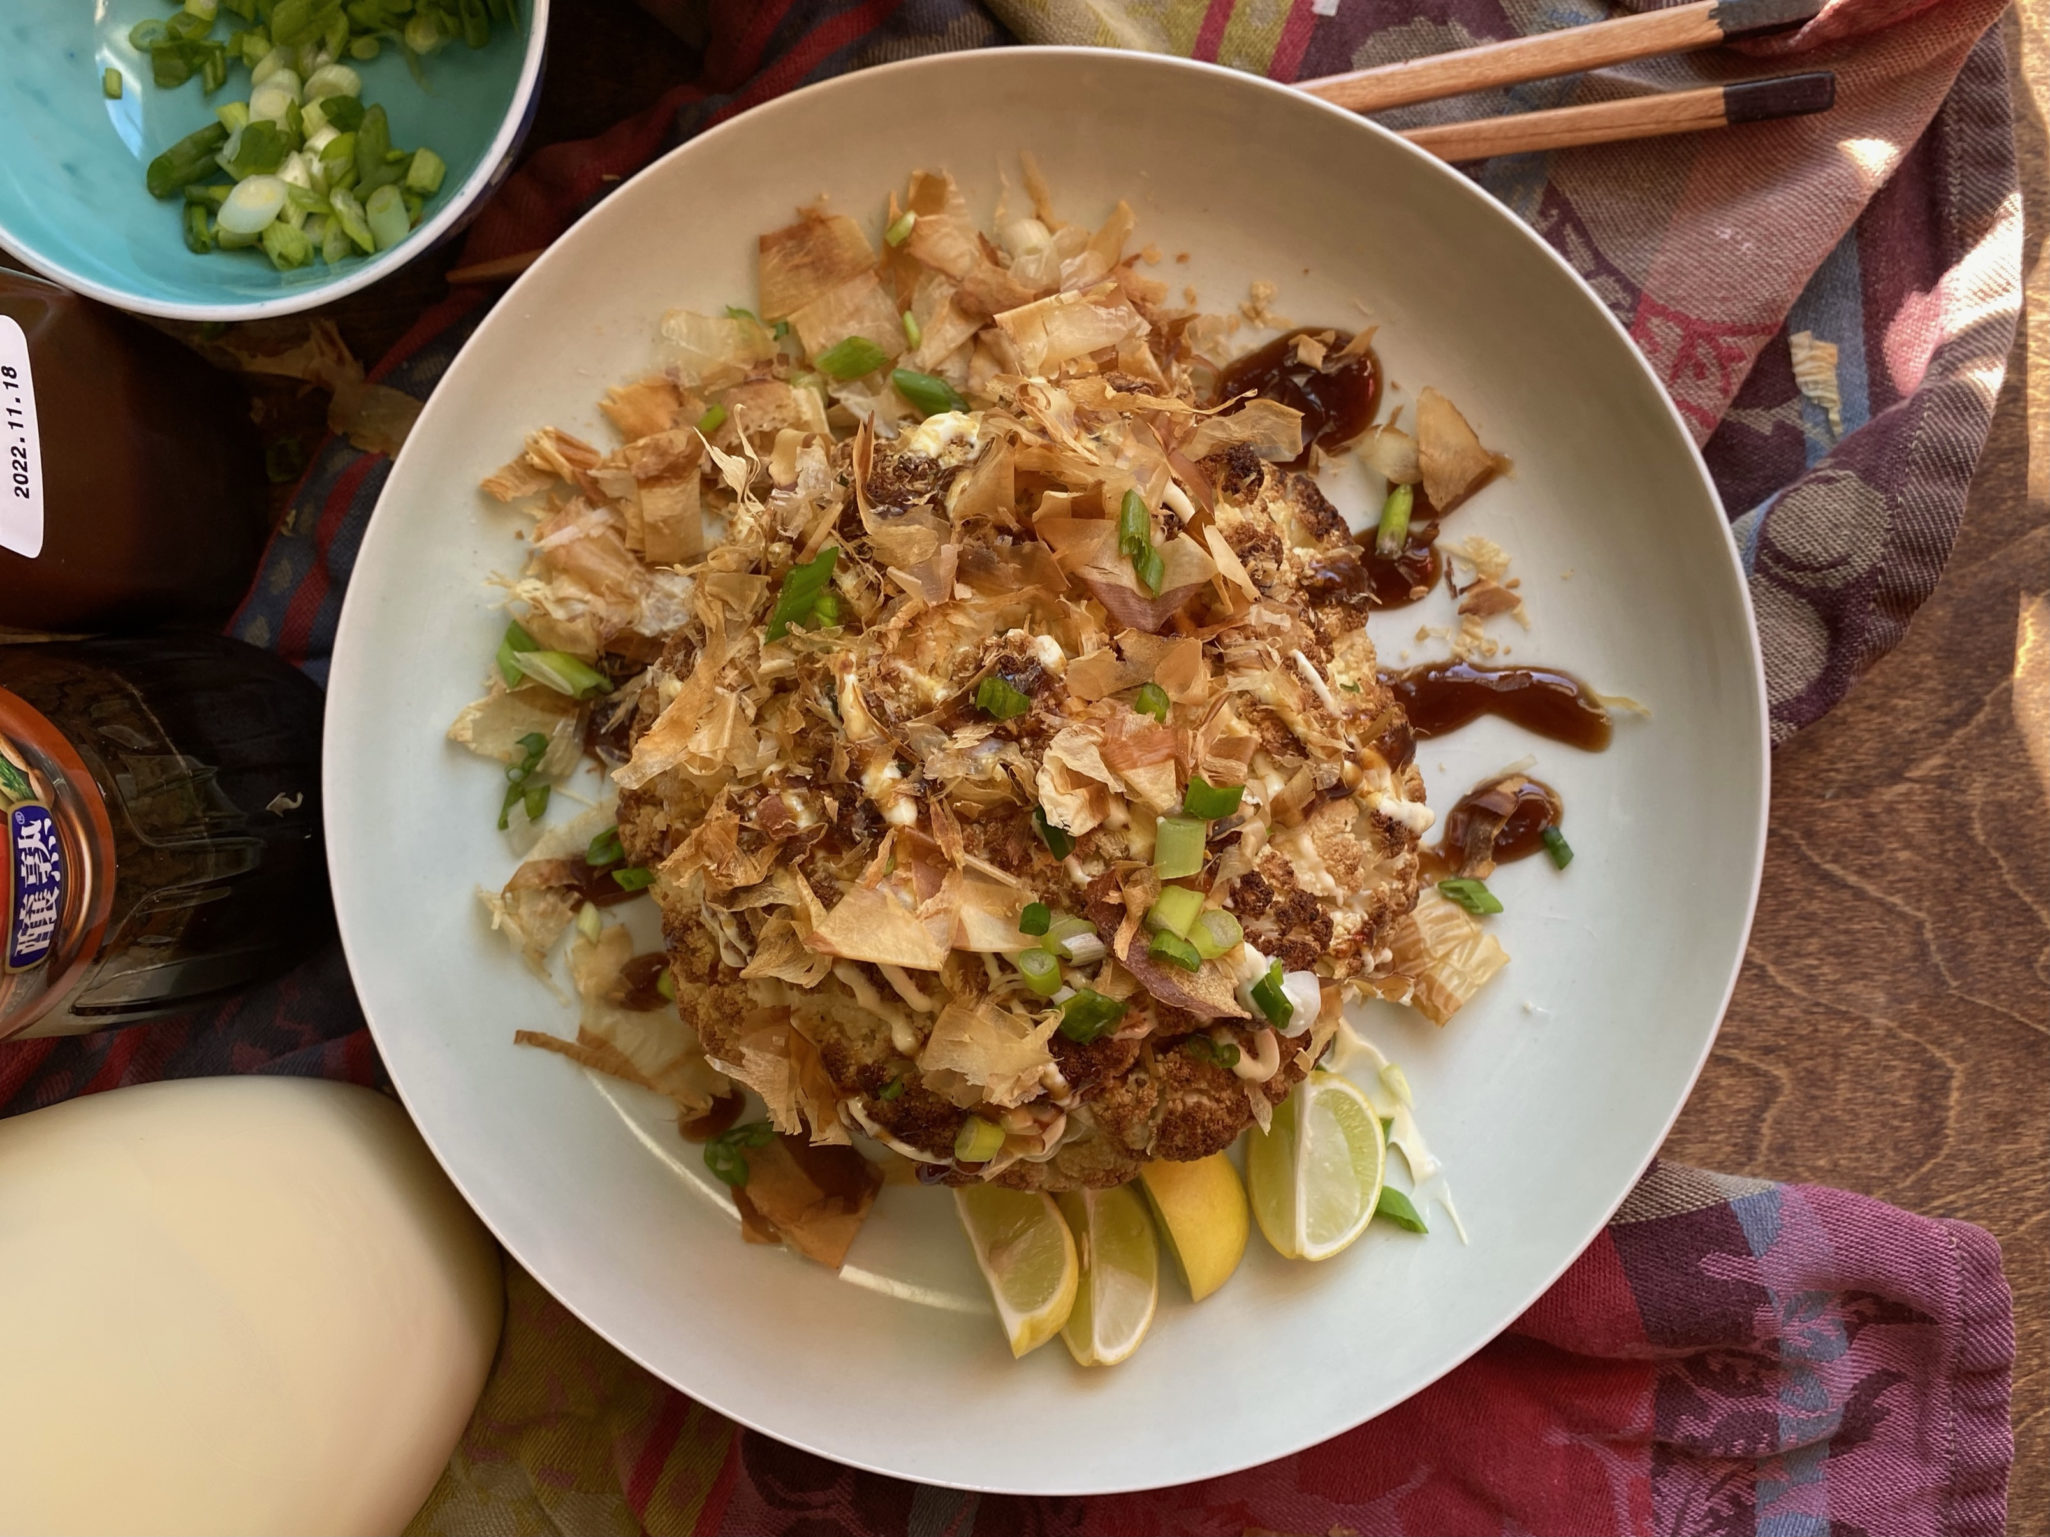
That’s it.  Easy and Monster tasty!

Whole Roasted Cauliflower with Takoyaki Style Sauce

Easy and delicious way to serve cauliflower. Whole roasted with a umami bomb sauce.
Course Appetizer, Main Course, Vegetable
Cuisine Fusion
Keyword Cauliflower, takoyaki sauce, Whole roasted cauliflower
Prep Time 10 minutes
Cook Time 50 minutes
Servings 4

Ingredients

  • 1 head cauliflower 1.5-2 pounds
  • 3-4 tbsp good quality olive oil
  • salt and pepper

Takoyaki Sauce

  • Kewpie Mayonnaise
  • Okonomi Sauce
  • Bonita Flakes or Furikake
  • Green Onions for garnish
  • Toasted Sesame Seeds for garnish
  • Lemon wedges for garnish

Instructions

  • Preheat oven to 450 degrees
  • Wash and trim cauliflower. Remove leaves and cut stem even with the bottom of the cauliflower. Using a melon baller or paring knife, core cauliflower stem. Take care not to cut too much, you want to leave the stalks connected to the stem.
  • Brush or squirt olive oil all over the top and bottom of the cauliflower. Season with salt and pepper and a little garlic salt (optional). I have used Momofuku Savory Salt for a bit more punch. The sauce will give it alot of flavor though.
  • Roast for about 45-50 minutes.  Pierce it with a knife, if it goes through fairly easy, it's done.

Takoyaki Sauce

  • Can I call this a recipe? Basically squirt copious amounts of Kewpie mayo and Okonomi Sauce in zig zag lines all over the cauliflower. Sprinkle Bonita Flakes or Furikake all over and hit it with green onions and tossed sesame seeds let.
  • Done. Bring it to the table in all it's whole roasted glory!

Notes

From the Japanese cookbook, Just One Cookbook. Kewpie imposter recipe!
For 1 cup of American mayonnaise (like Best Foods), add 2 Tbsp rice vinegar and 1 Tbsp sugar. Whisk until the sugar dissolves. For 1 Tbsp of American mayonnaise, add 1/2 tsp rice vinegar and 1/8 tsp sugar.
Showstopper When You InstantPotter Some Cauliflower Soup

Showstopper When You InstantPotter Some Cauliflower Soup

Sorry if the title made you groan. But as the weather turns cooler and the days grows shorter all I can think about is soup. My perfect fall meal is a bowl of hearty soup, a chunk of warm crusty bread spread with sweet butter, a bottle of Chianti and some nice fava beans…just KIDDING, no Chianti or fava beans.  I came across a recipe on Pressure Cooker Recipes for a cauliflower soup that #1-looked and sounded delicious and #2-can be made in a snap in an Instant Pot- WIN-WIN.

Pressure Cookr Recipes (not the most original title but spot on) is a great resource not just for recipes but for tips and info on how to use your pressure cooker.  There are quite a few soup recipes but this one stood out since I really like cauliflower. For the soup I used red potatoes but any waxy potato will do such as white rose or Yukon Gold. If cauliflower doesn’t float your boat, I think broccoli would work well also. To lighten the soup  you can use half and half or whole milk in place of heavy cream or decrease the amount of cream by half and add a bit more stock.  A nice green salad, a baguette and a bowl of this soup…yep, living the good life.


Cauliflower Soup

Ingredients

  • 1 head of cauliflower floret
  • 2 small red potatoes chunked
  • 4 cups 1 L of unsalted homemade chicken stock
  • 6 cloves of garlic minced
  • 6 slices of bacon chopped
  • 1 medium onion diced
  • 1 cup 250 ml of heavy cream
  • 2 bay leaves
  • 2 stalks of green onions chopped
  • Optional: 2 tablespoons 30 ml fish sauce
  • Optional: freshly grated Parmesan cheese for garnish

Instructions

  • Place chopped bacon in your Pressure Cooker and turn heat to medium (Instant Pot: press Sauté button). Stir occasionally and allow the bacon bits to crisp (~4 mins). Remove bacon bits from pressure cooker and place on paper towel to absorb the excess fat.
  • Sauté onions in bacon fat for roughly 1– 2 minutes until soften. Add in garlic and half of the green onions. Season with a pinch of kosher salt and pepper if you like. Sauté until fragrant.
  • Deglaze: Pour ~ ⅓ cup (100 ml) chicken stock. Scrub all the brown bits off the bottom of the pot with a wooden spoon. Keep the brown bits as they are very flavorful.
  • Pressure Cook the Cauliflower Potato Soup: Add 2 bay leaves, cauliflower, and 2 red potatoes in the pressure cooker. Pour the remaining chicken stock into pressure cooker.
  • Close the lid and cook at High Pressure for 3 minutes. Turn off the heat and use a 10 minutes Natural Release. Open the lid carefully.
  • Remove Bay Leaves. Blend cauliflower soup into desired consistency with an immersion hand blender. Add 1/2 -1 cup (250 ml) of heavy cream. Taste the soup and season with 2 tablespoons (30 ml) of fish sauce and kosher salt.
  • Serve: Garnish with green onions, crispy bacon bits, and freshly grated Parmesan cheese. Enjoy immediately. I think you will love it 🙂

Notes

  • Thinner Consistency: If you like a thinner soup consistency, add hot homemade unsalted chicken stock to adjust the thickness of the soup.
  • Smaller Cauliflower Florets: break the larger pieces into smaller florets, so it'll be easier to blend.
  • Crispy Bacon: It's important to place the bacon in the cold pot before turning on the heat (see tips section in the article).

Sheet Pan Magic (Chicken Tikka)

Sheet Pan Magic (Chicken Tikka)

Miss me?  I have been on an extended break from the blogosphere.  Knocked down by the flu during the holidays, my post-election blues (I promise to refrain) and the wet dreary weather kind of got the best of me.  But I’m back!  Ready to tackle 2017. This year’s theme will be comfort food from soup to dessert, food for the soul.  Food for family and friends-dishes to share, meals that bring us together and make us happy. Nothing better than sitting around the table eating, talking and laughing.  What better buffer to our crazy mixed-up world right now.  If you have a favorite recipe I would love to share it on my blog and if there is a story behind your dish, I definitely want to hear it.

This first post was going to feature soup.  You know how much I love soup, yep I could live on just soup.  Not to mention soup is the perfect antidote for cold wet weather and when you’re not feeling 100%.  In fact, I had an easy soup recipe in mind, a family favorite that I make whenever my kids are home but a recipe for Chicken Tikka from one of my favorite blogs, Smitten Kitchen caught my eye.  I had to try it.  It is a one pan meal loaded with flavor from spices like garam masala, chili, cumin, paprika and garlic.

Sheet Pan Chicken Tikka
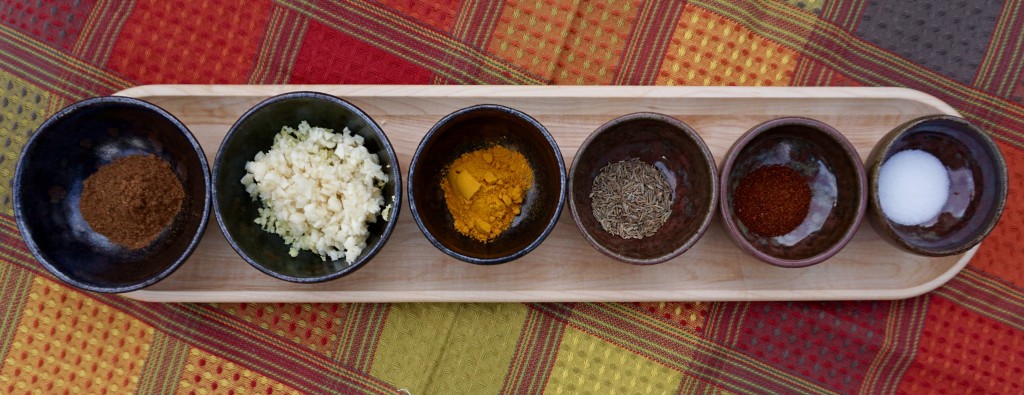
The hard part maybe rounding up the different spices used in this recipe.  Fortunately quite a few markets now carry Indian and Asian spices.  Try Whole Foods or there is always Amazon or online spice stores like Penzey’s.  If you have an Indian market or Middle Eastern market in your area, definitely check them out.  Spices are usually very reasonable.  Once you have the spices the rest is easy peasy.

Marinate the chicken pieces in the yogurt, cut cauliflower and potatoes into chunks, season and scatter them on a sheet pan. Place chicken pieces in between the vegetables and bake in the oven for 30-40 minutes. Voila’ dinner is ready to be served.  With my first bite, I could taste the tang of the yogurt and the kick from the chili and jalapeño. The cauliflower and potatoes, with their crispy edges and smooshy (is that a word?) centers, were the perfect foil to the chicken.   I can’t wait to make this again.  Added bonus, JUST ONE PAN to wash, uh-huh, uh-huh.

Sheet pan Chicken Tikka


Sheet Pan Magic (Chicken Tikka)

Ingredients

Adapted from Smitten Kitchen

    For the chicken

    • 1 3/4- inch piece of ginger peeled and minced
    • 4 cloves of garlic minced or pressed
    • 1 fresh green chili jalapeno, seeded and minced
    • 1/2 cup whole-milk yogurt
    • 1 teaspoon kosher salt
    • 1/2 teaspoon chili powder or cayenne or adjusted to taste
    • 1/2 teaspoon ground turmeric
    • 1/2 teaspoon ground cumin
    • 3/4 teaspoon granulated sugar
    • 1 teaspoon paprika
    • 1 teaspoon garam masala
    • 2 pounds chicken thighs drumsticks or halved chicken breasts (skin-on, bone-in)

    For the vegetables

    • 3 tablespoons olive oil
    • 1 1/4 pounds about 4 medium Yukon Gold potatoes, peeled if desired, cut into 3/4-inch chunks
    • 1 3/4 pounds 1 small or half a very large head cauliflower, cut into 3/4-inch-wide florets
    • 1/2 teaspoon kosher salt
    • 1/2 teaspoon cumin seeds

    To finish, if desired

    • A few thin slices of red onion
    • Lemon wedges
    • Salt
    • Dollops of yogurt optional
    • A few tablespoons roughly chopped cilantro parsley or mint, or a mix therof

    Instructions

    • Combine ginger, garlic, fresh chili, yogurt, salt, spices and sugar in a bowl. Add chicken pieces and toss to coat evenly. Let marinate for 15 minutes or up to a day in the fridge.
    • Heat your oven to 425°F.
    • Line a half-sheet (13×18-inch) with foil and coat it with 1 T of olive oil or use parchment paper.
    • Add potatoes, cauliflower, salt, cumin and remaining 2 tablespoons olive oil and toss together until evenly coated. I like garlic so I added a minced glove of garlic as I was tossing the vegetables.
    • Remove chicken from marinade and leave excess behind.
    • Nestle the chicken pieces among the vegetables throughout the pan.
    • Roast in oven for 20 minutes, then toss the potato and cauliflower to ensure they’re cooking evenly
    • Return the pan to the oven for 10 to 20 minutes more (i.e. 30 to 40 minutes total roasting time) until chicken and vegetables are cooked through.
    • If necessary remove chicken from pan and turn broiler on to crisp the potatoes and cauliflower
    • While it roasts, if you’d like to use the lightly pickled onion rings that we did on top, which added a nice tangy fresh zip to the dish, separate the rings and toss them in a small bowl with a squeeze of lemon juice and a pinch of salt. Set aside until needed.
    • When chicken and vegetables are cooked, top with garnishes of your choice.
    • I used thinly sliced red onions, cilantro, mint and diced scallions to garnish.
    Let The Vegy Times Roll (Roasted Brussels Sprouts)

    Let The Vegy Times Roll (Roasted Brussels Sprouts)

    Our foray into eating vegetarian would have ended a long time ago (for me it may have never started) if it were not for the Fab Five, mushrooms, cauliflower, brussels sprouts, eggplants, and potatoes.  Admittedly, vegetables have always been relegated to the side dish category, an afterthought to that juicy ribeye or grilled chicken.   Vegetables were like breadth requirements, something you were required to have.  Taking meat out of the diet meant finding ways to bring vegetables front and center, making them the star attraction. Just steaming broccoli or microwaving frozen corn wasn’t going to cut it anymore.

    DSC00932The magic bullet, roasting.  With winter upon us (which in Californians’ warped minds means temperatures in the low 50’s..brrr, put on a sweatshirt) we have taken to roasting our vegetables, especially the fab 5.  Roasting intensifies the flavor of the vegetables,  the caramelized edges add a smoky sweet flavor and everything ends up crispy on the outside and soft on the inside. We often roast or grill portabello mushrooms that stand in well for burger patties or diced and mixed with roasted potatoes, corn and poblanos for a taco filling, yum.

    Meat?  Who needs meat?

    Lucky for me brussels sprouts and cauliflower are trending.  Every restaurant serves sprouts or cauliflower roasted, grilled, or stir fried.  I never jumped on the kale bandwagon but give me a bowl of sprouts or cauliflower and I’m happy, happy, happy.  Perusing online I found a recipe adapted from Denis Lee’s Namu.  It looked easy to make and sounded delicious.  For Namu’s recipe you can stir fry or roast the brussel sprouts first.  I roasted my vegetables and used a combination of both.  The recipe calls for soy dashi (a combination of fish stock and soy sauce) and ponzu (citrus soy sauce).  Both products can be found in any Japanese market.  Don’t sweat the soy dashi, there are hon dash’s or sauces made for noodles that you can easily substitute.  The bonito flakes are also found in Japanese markets.  To make this kinda vegetarian, omit the guanciale (bacon, pancetta) and substitute shaved parmesan for the bonito flakes to add some salty contrast.  For the soy dashi, try a mushroom broth 1:1 with soy sauce.

    Roasted Brussels Sprouts with Ponzu, Fried Garlic, Guanciale, and Bonito Flakes

    Ingredients

    • 1 lb. Brussels sprouts Can use cauliflower cut into bite size pieces.
    • 1 ⁄4 lb. guanciale Use pancetta or bacon instead did not boil
    • 1 tablespoon fried garlic Use chopped garlic and roast with vegetables
    • 4 oz. ponzu
    • 4 oz. soy dashi
    • 1 tablespoon butter
    • Extra virgin olive oil Shichimi or Togarashi spice Bonito flakes

    Instructions

    Adapted from Lick My Spoon

      I use cauliflower or brussel sprouts or a combination of both, cut into bite size pieces. Use pancetta or bacon in place of guanciale. Roast vegetables with bacon and chopped garlic, no need to blanch vegetables. Finish in skillet.

        FOR THE BRUSSELS SPROUTS:

        • Half the heads keeping the leaves together.
        • Optional step: Blanch the Brussels sprouts. Always blanch in a large pot (large enough that it won't stop boiling when you drop the sprouts into it) of water with a healthy dose of salt (2-3 tablespoons). While waiting for the water to boil, prepare an ice bath. Boil the sprouts until they turn bright green, then immediately shock them in the ice bath. This can be done up to a day in advance and the sprouts can be stored, in the refrigerator covered. The Brussels sprouts or cauliflower can either be roasted or pan fried.

        TO ROAST:

        • Roast the sprouts, chopped garlic and bacon/pancetta in the oven at 400 degrees F until golden brown with enough olive oil to coat, making sure to stir it every 10 minutes or so to get an even color. Cook al dente as you will be sautéing to finish the dish. (~35 minutes)
        • Once everything is nicely browned, add ponzu and soy dashi. Be careful as the pan will be very hot and will sizzle when you add the wet ingredients.
        • Let this reduce to the desired flavor, making sure to regularly toss the sprouts, it can be pretty salty so taste as you go along.
        • Top with shichimi and bonito flakes.
        Aloo Gobi (Spice Up Your Life)

        Aloo Gobi (Spice Up Your Life)

        Pity the guy who doesn’t attend the “Health and Wellness” lecture presented at work but depends on colleagues to give him or her (in this case, Wes the hubby) the highlights and takeaways from the lecture.  For the last month since, Wes has gone total vegy (his colleague that went to the lecture lasted only 36 hours sans meat).  I love meat but being the loyal and loving wife (my friends are laughing heartily right now) I am also living the vegy life.  I have fallen off the bandwagon (lots, totally busted on Instagram) but usually without him present.  Hey, a girl needs her protein.

        What we have found is there are certain cuisines that lend themselves well to vegetarianism (is that a word?) like Indian cuisine.  We have had Indian food no less than once a week so it is about time we try making it at home.  Our first attempt, Aloo Gobi, well known thanks to the movie Bend It Like Beckham, is a bowl of yumminess comprised of potatoes and cauliflower, not too spicy but packed with flavor.  The starchiness and density of the vegetables gives the dish a great mouth feel and punch to suppress your carnivore cravings.  I looked at lots of recipes and the first thing I noticed was there are about a GAZILLION different spices used in Indian food, most of which I have never used. I fought the urge to give up and call our favorite Indian restaurant for take out.

        DSC02441

        Lucky for me I have a co-worker I can go to for Indian cooking advice.  I have peppered her with questions regarding all the different spices, how to use them, how long to saute’ the vegetables, how to prep the beans or lentils, on and on. My takeaways for newbies attempting Indian food; find a good Asian or Indian grocery store, time and patience is required to toast the spices and aromatics and have lots of cute little bowls (Thanks Snookies) to hold your spices.

        Tips for the recipe.  Its really important to toast the spices & aromatics in the oil to develop flavor.  I actually added the garam masala in with the tumeric and salt.  I also used dried coriander (1 tsp) instead of the cilantro stalks.  I personally think it was too tomato-ey, I would use 1 fresh tomato chopped in place of the canned tomatoes.  I pre-cooked my potatoes and cauliflower by steam microwaving each for 3-5 minutes.  The vegetables should be cut into bite size pieces. I used 2 potatoes instead of 3 and tossed in some eggplant for good measure.

        Aloo Gobi from Bend It Like Beckham (food.com)

        Ingredients

        • 1 ⁄4 cup vegetable oil
        • 1 large onion peeled and cut into small pieces
        • 1 bunch fresh coriander cilantro, separated into stalks and leaves and roughly chopped
        • 1 small green chili chopped into small pieces (or one teaspoon chili powder)
        • 1 large cauliflower leaves removed and cut evenly into eighths
        • 3 large potatoes peeled and cut into even pieces
        • 2 8 ounce cans diced tomatoes
        • fresh ginger peeled and grated (1 generous tablespoon)
        • fresh garlic chopped (1 generous tablespoon ~4 cloves)
        • 1 teaspoon cumin seed
        • 2 teaspoons turmeric
        • 1 teaspoon salt
        • 2 teaspoons garam masala

        Instructions

        • Heat vegetable oil in a large saucepan.
        • Add the chopped onion and one teaspoon of cumin seeds to the oil.
        • Stir together and cook until onions become creamy, golden, and translucent. Will take 10-15 minutes
        • Add chopped coriander stalks, two teaspoons of turmeric, and one teaspoon of salt.
        • Add chopped chillis (according to taste) Stir tomatoes into onion mixture.
        • Add ginger and garlic; mix thoroughly.
        • Add potatoes and cauliflower to the sauce plus a few tablespoons of water (ensuring that the mixture doesn't stick to the saucepan).
        • Ensure that the potatoes and cauliflower are coated with the curry sauce.
        • Cover and allow to simmer for twenty minutes (or until potatoes are cooked).
        • Add two teaspoons of Garam Masala and stir.
        • Sprinkle chopped coriander leaves on top of the curry.
        • Turn off the heat, cover, and leave for as long as possible before serving.