Category: Travel

Photos from vacations!

Fresh Tomato & Sausage Pasta-When Comfort Food is Required

Fresh Tomato & Sausage Pasta-When Comfort Food is Required

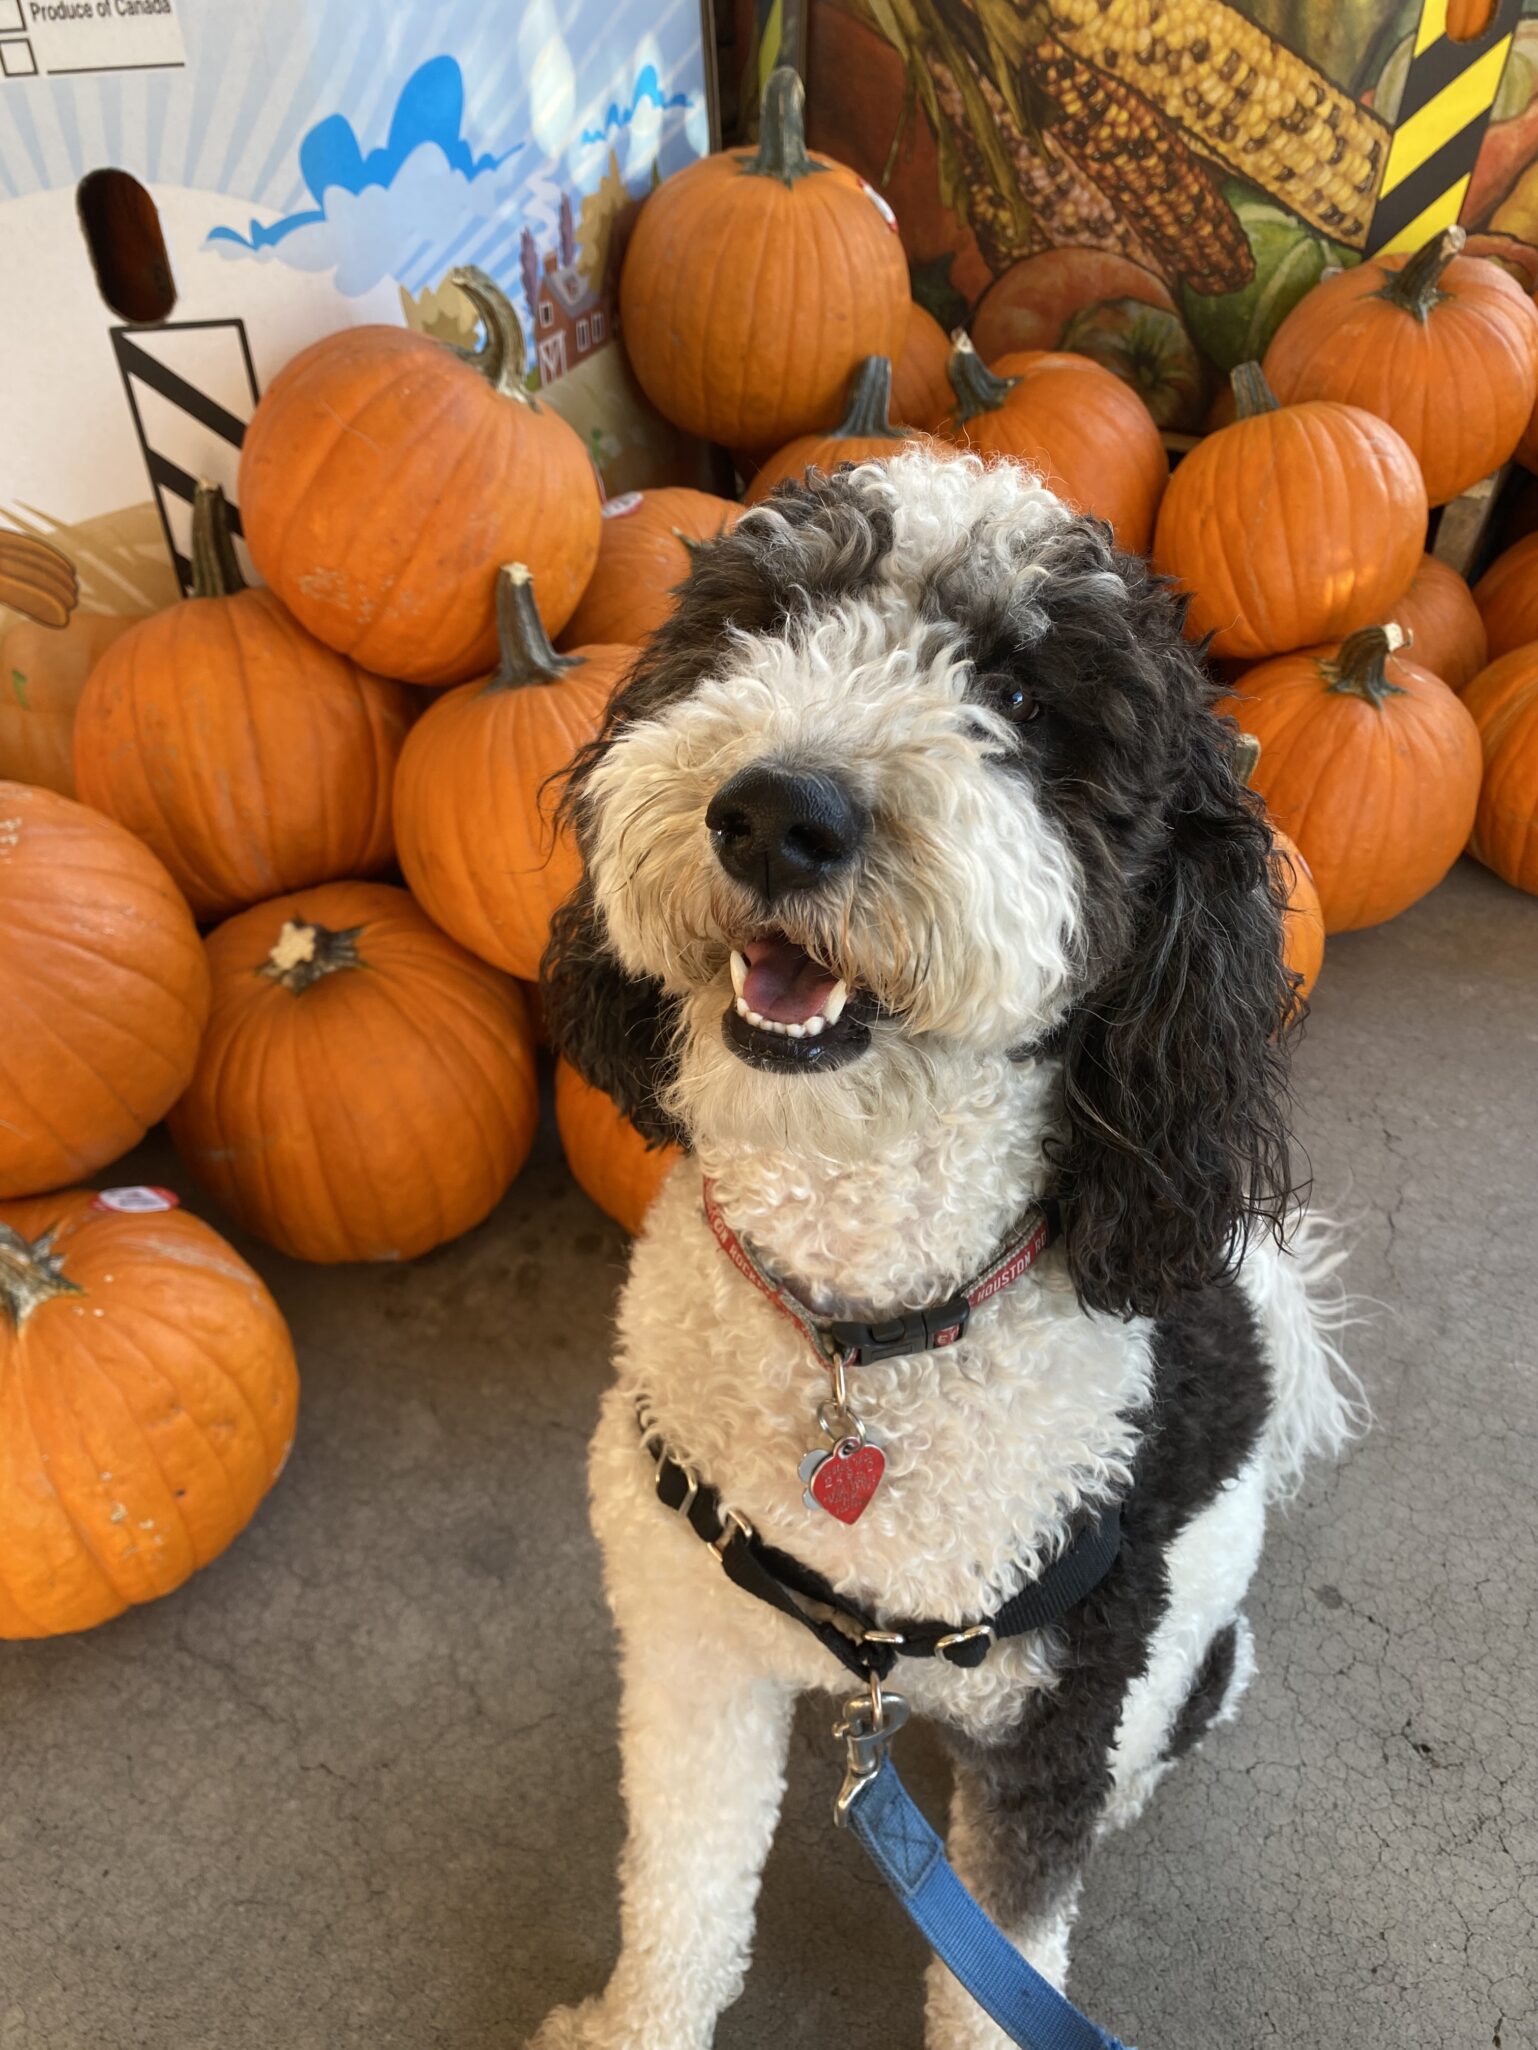
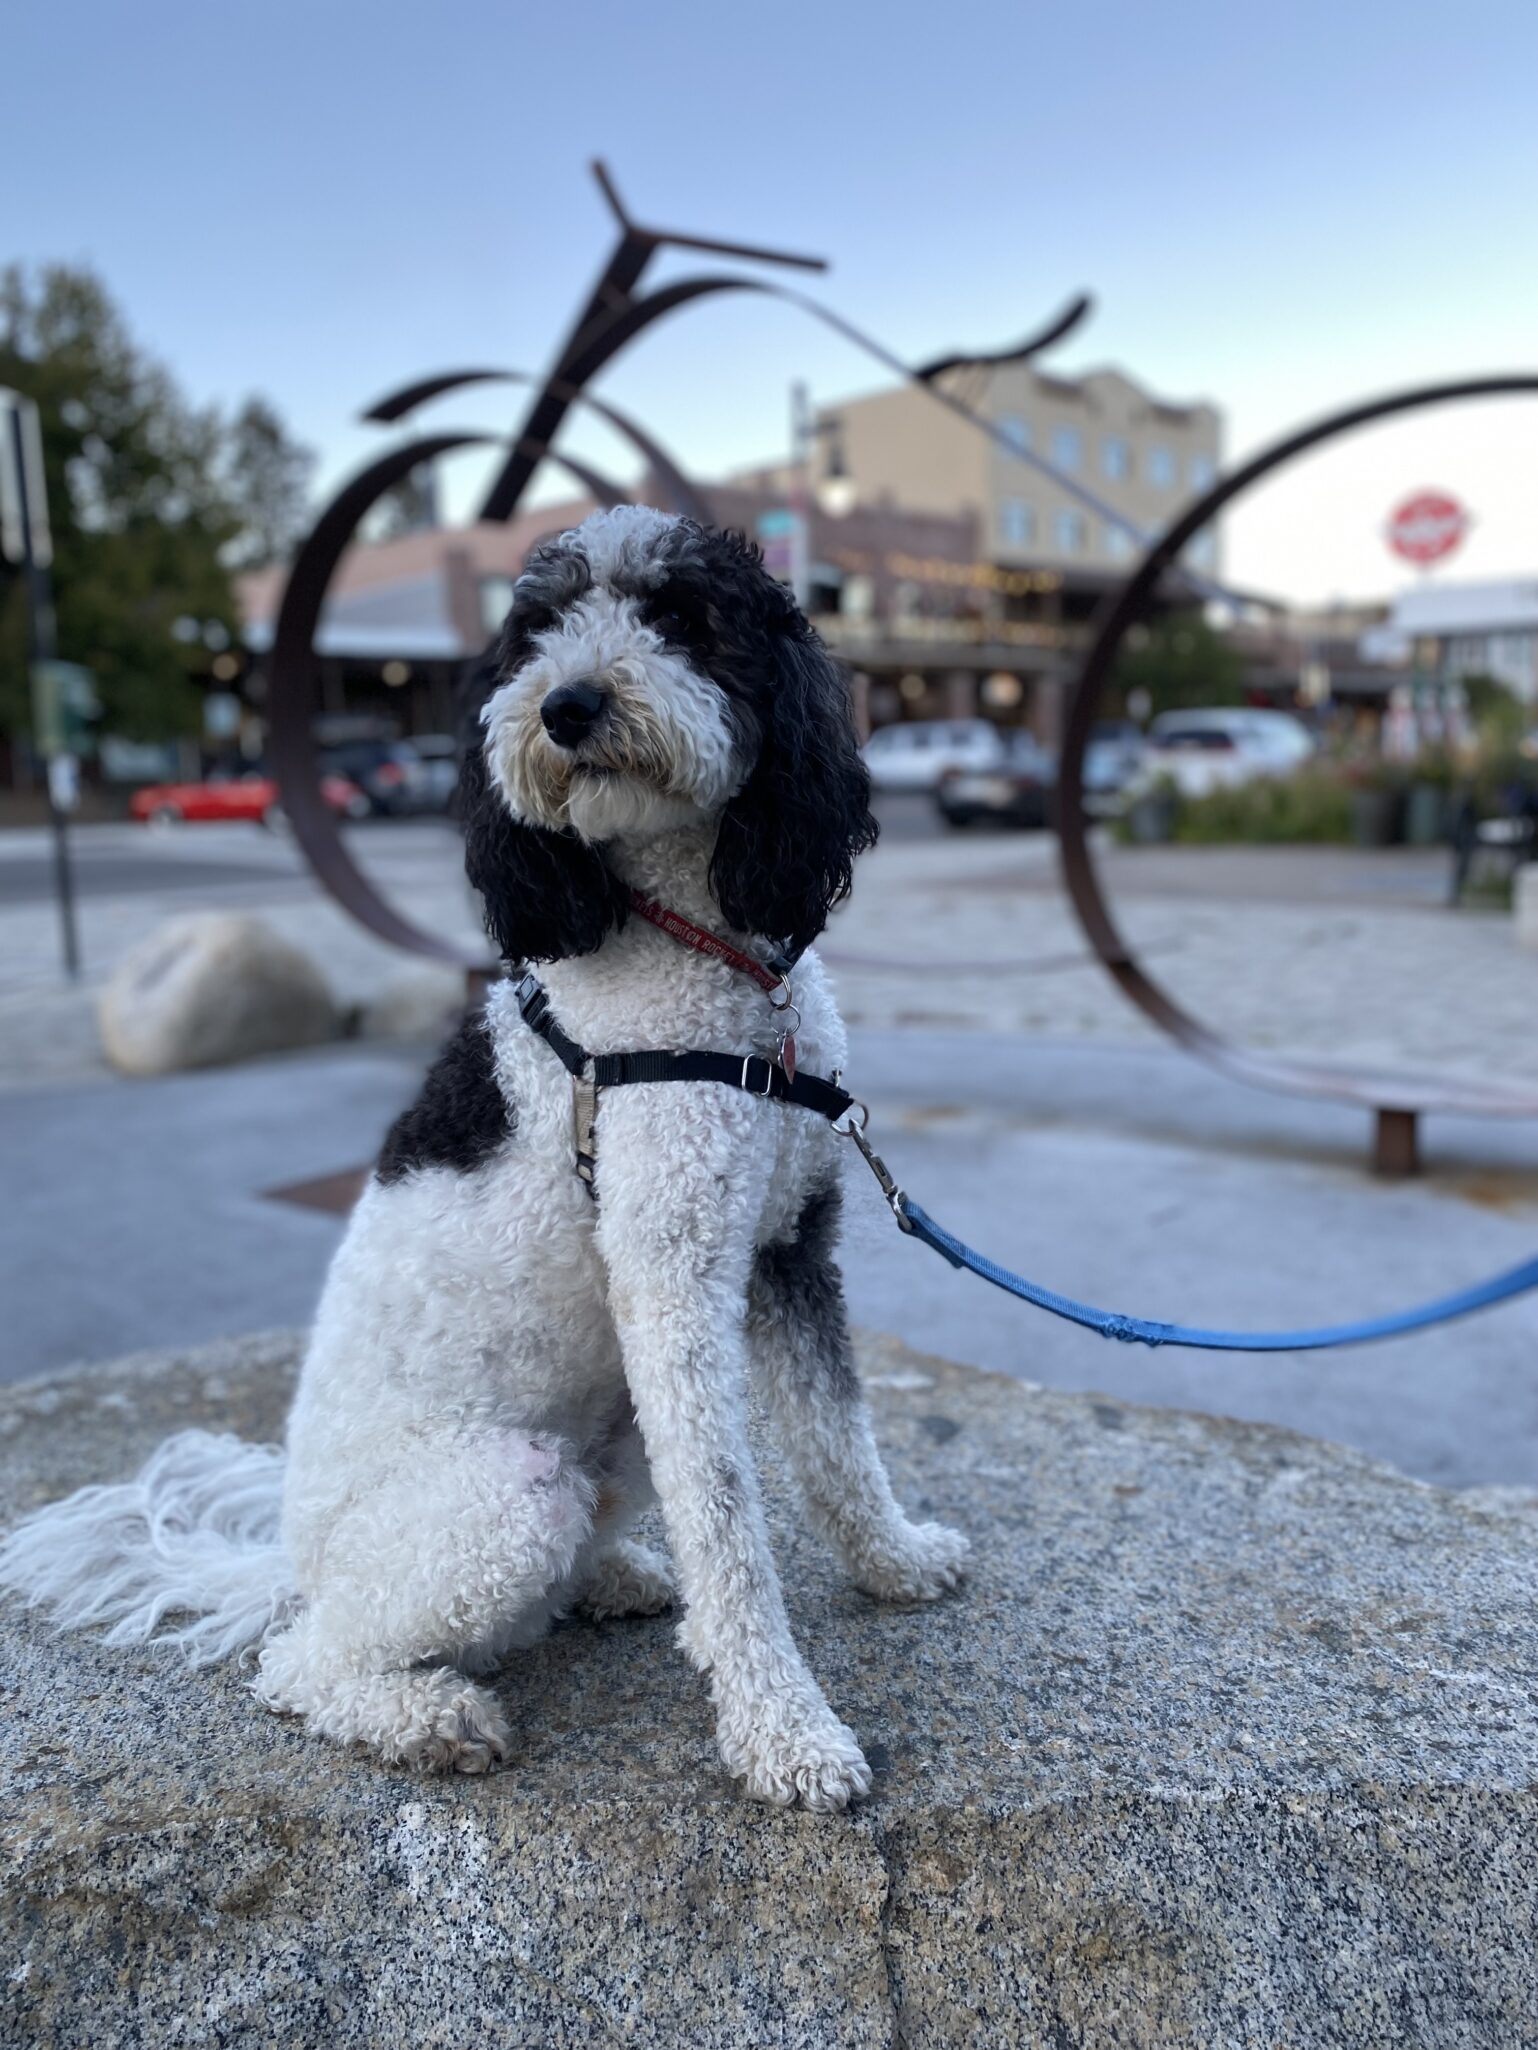
Our final road trip with Moosie (for context, my daughter’s Bernedoodle whom we have been sitting for the last 4 months) took us first to Lake Tahoe for a couple of days.  A pit stop before our final destination, Salt Lake City, where we were to hand off the pooch to Sam.  Moose was bound for New York, back to Jamie and Sam. 😢

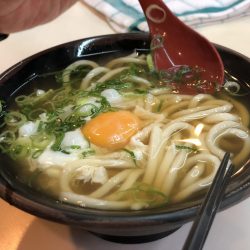
It has been a while since we last spent time in Tahoe.  We took time to wander around and check out some the new eateries.  Our favorites include  Coffeebar (☕️☕️☕️☕️/5), Great Gold (🍝🍝🍝🍝+/5),and Truckee Food Stop (🥙🥙🥙🥙/5).   We also perused the shelves at a very cute bookstore Word After Word (📕📕📕📕+/5).  I LOVE bookstores.

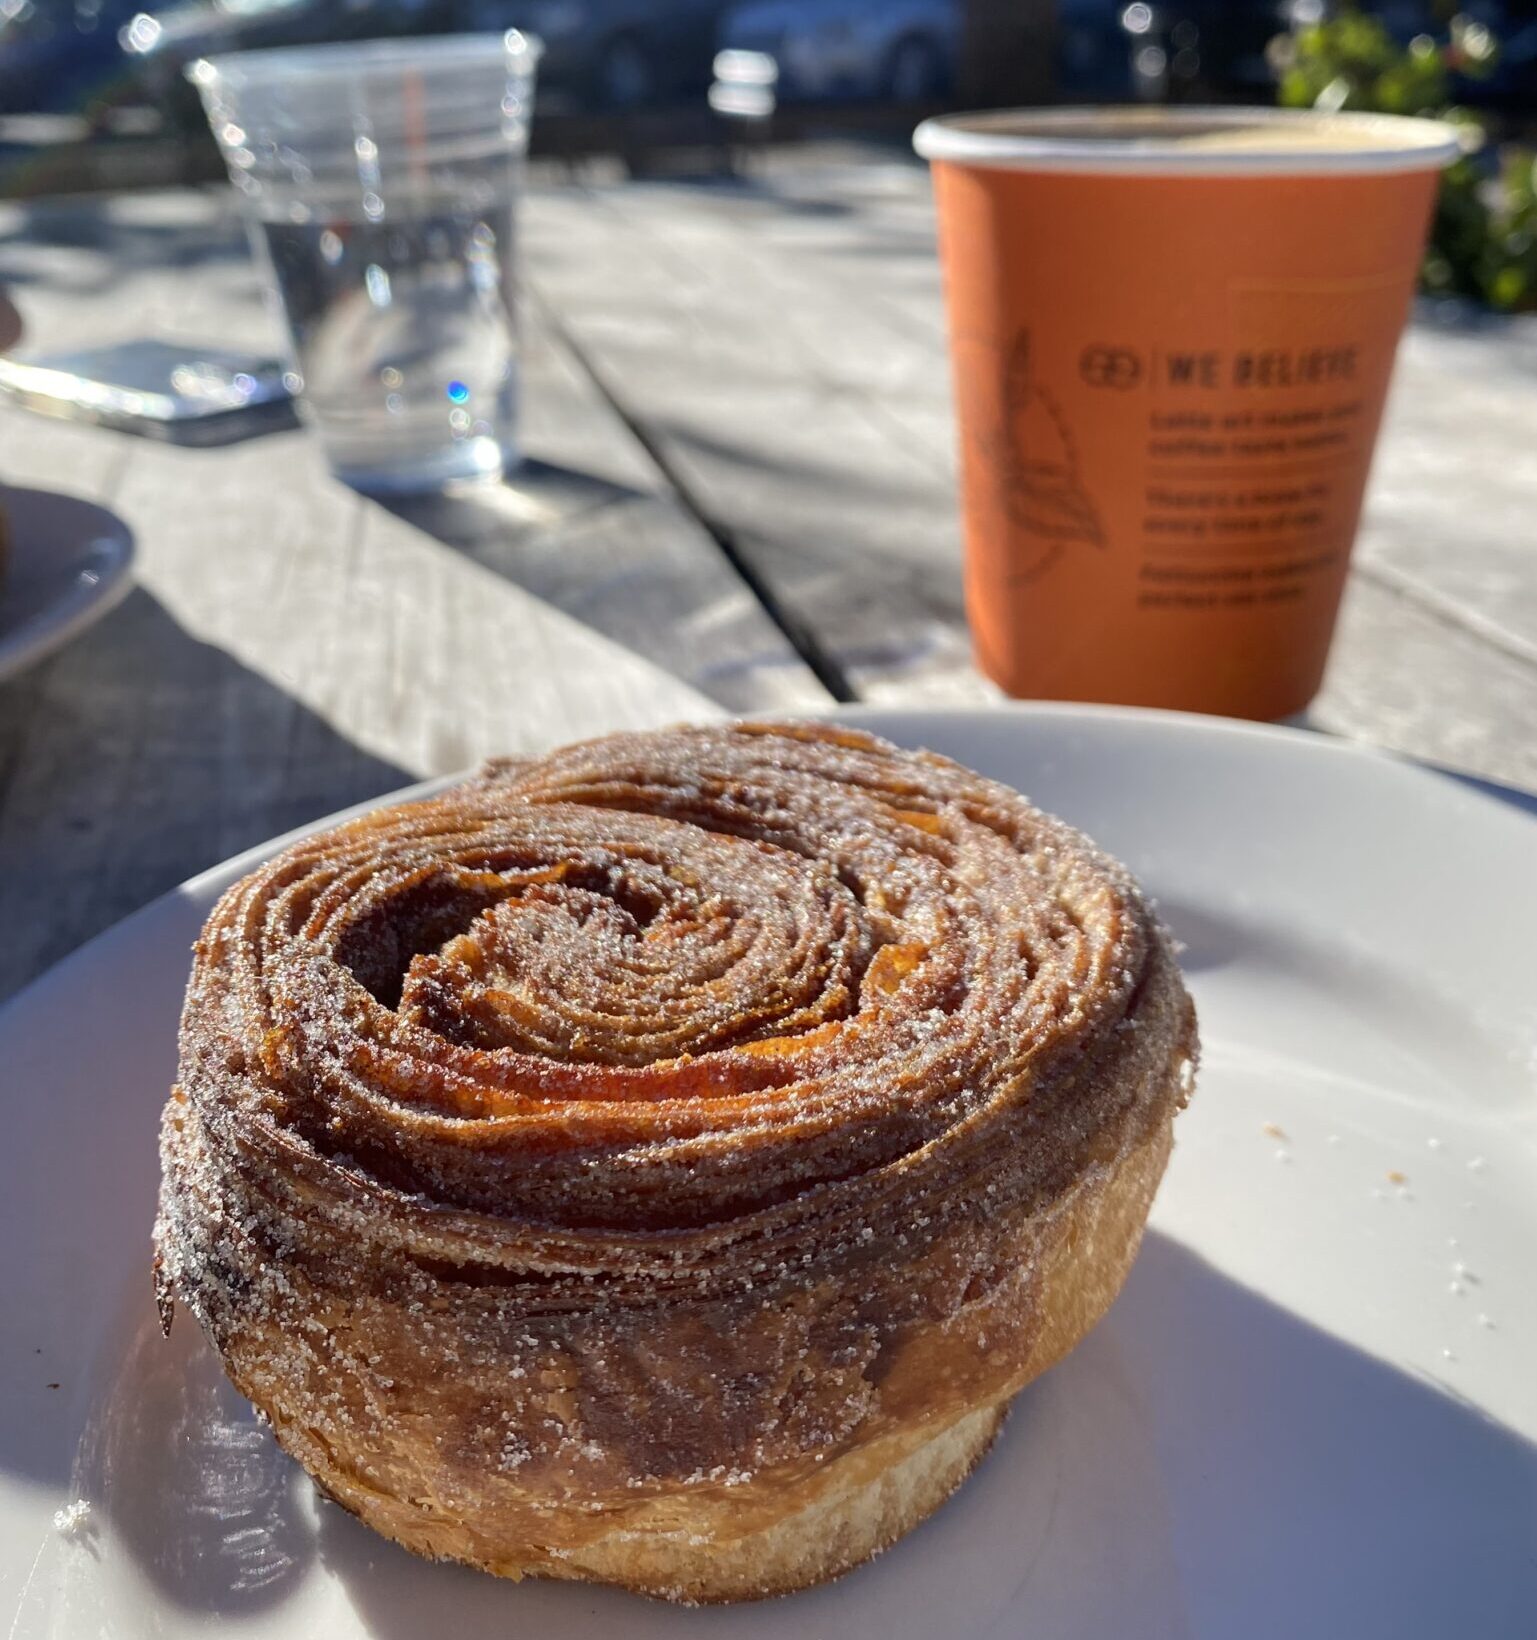
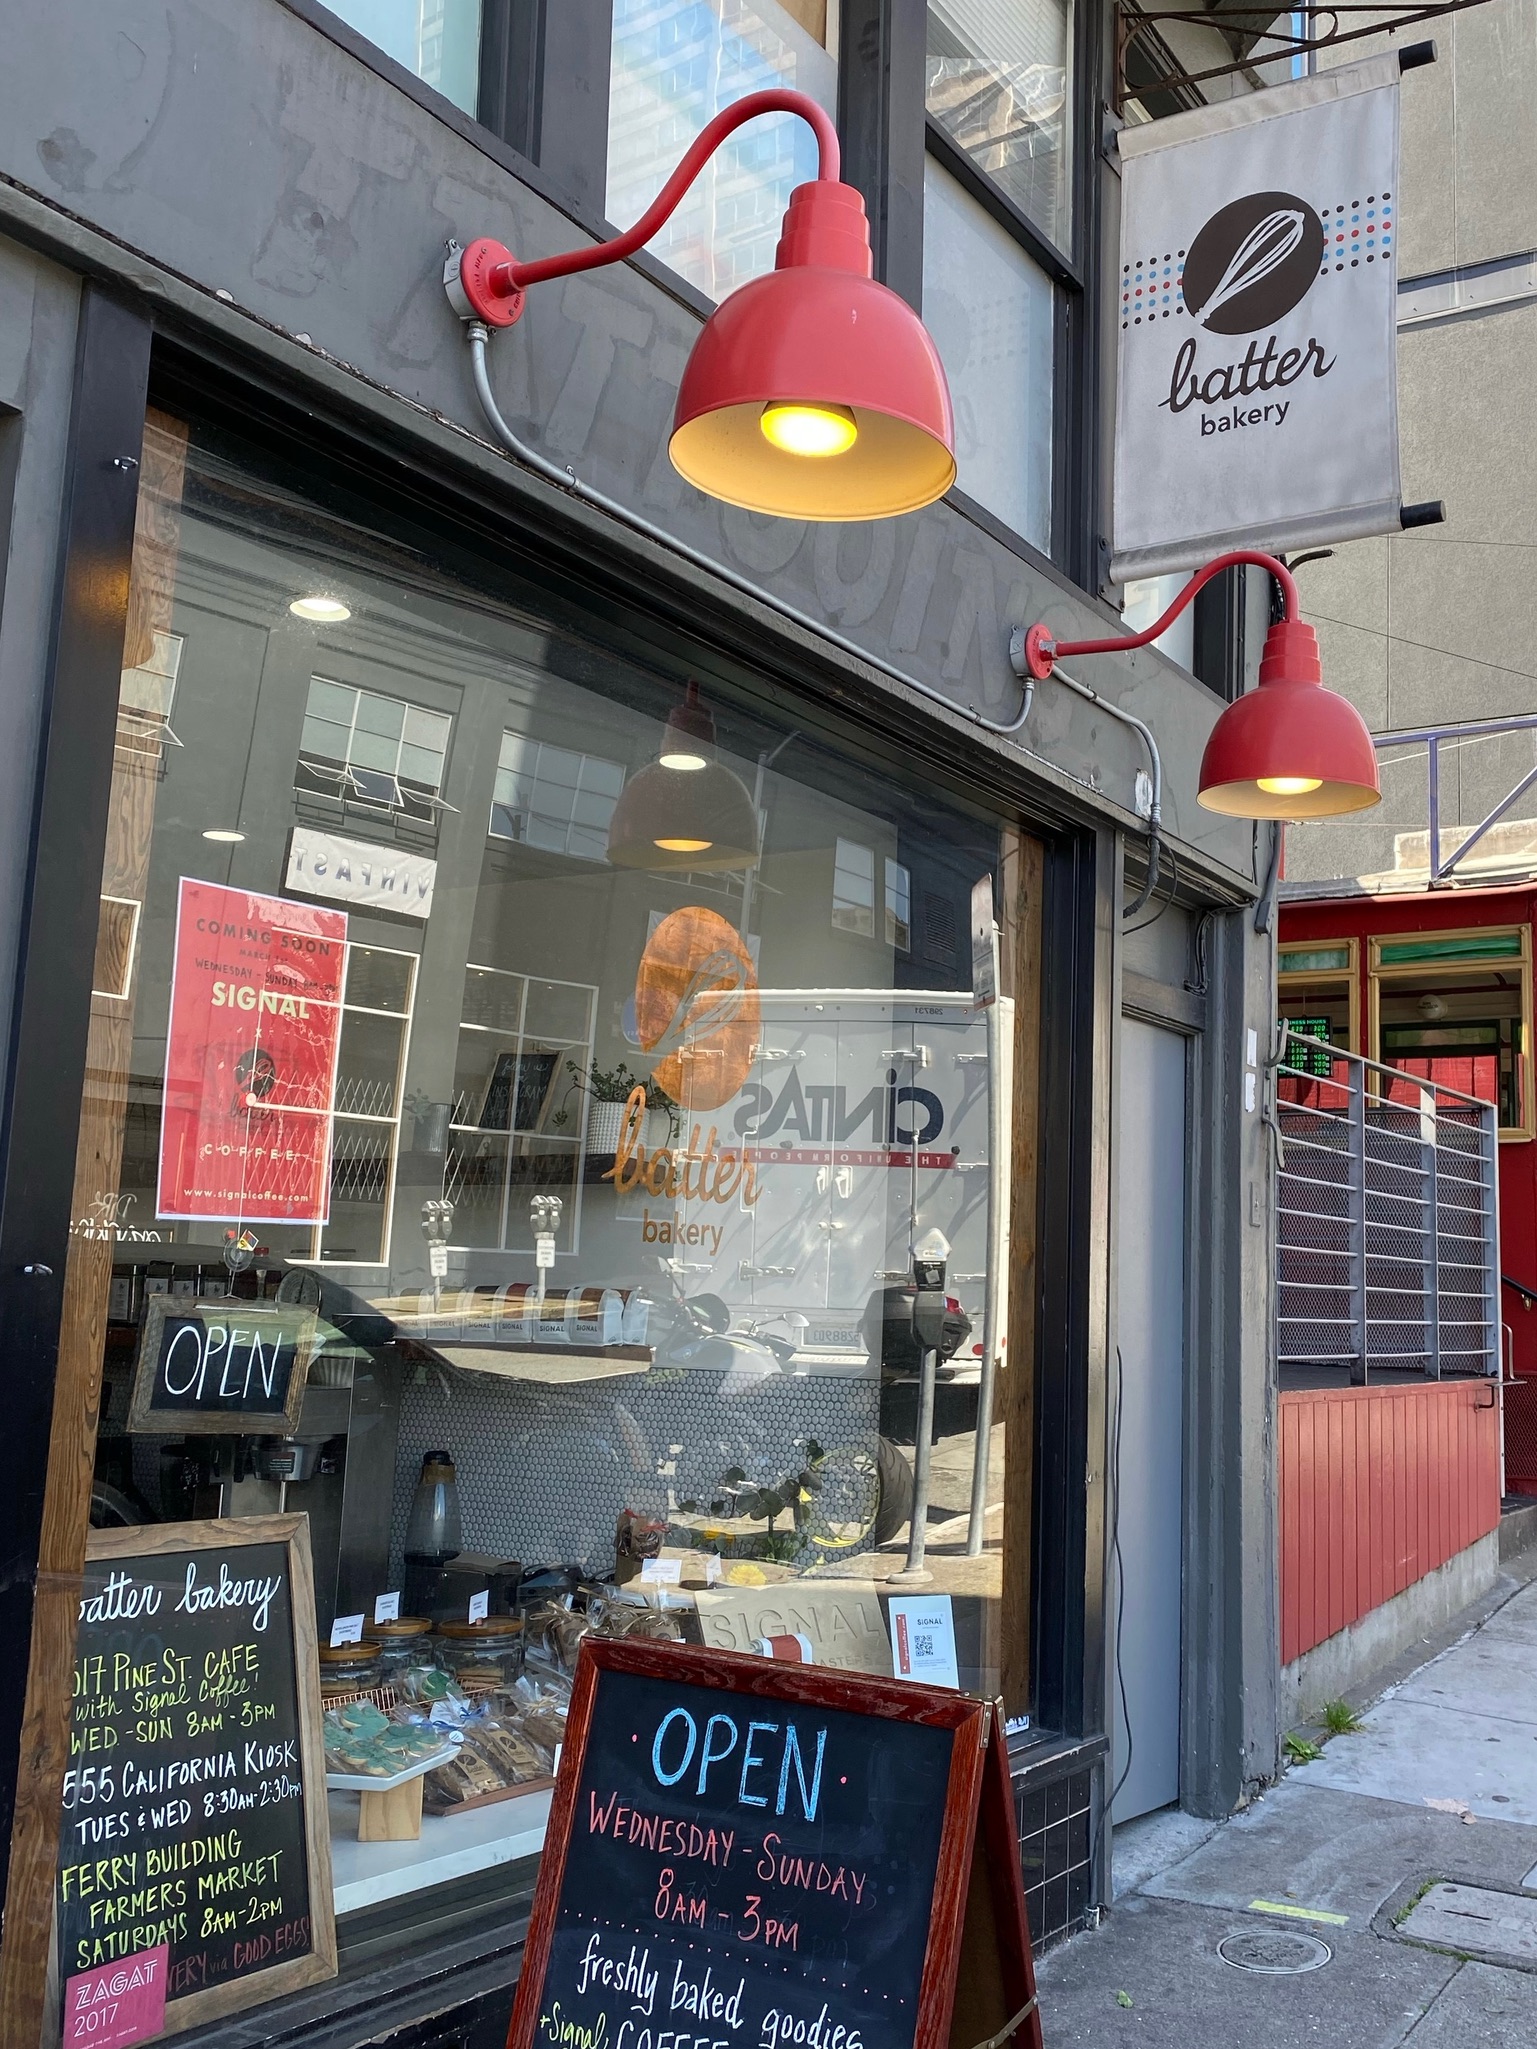
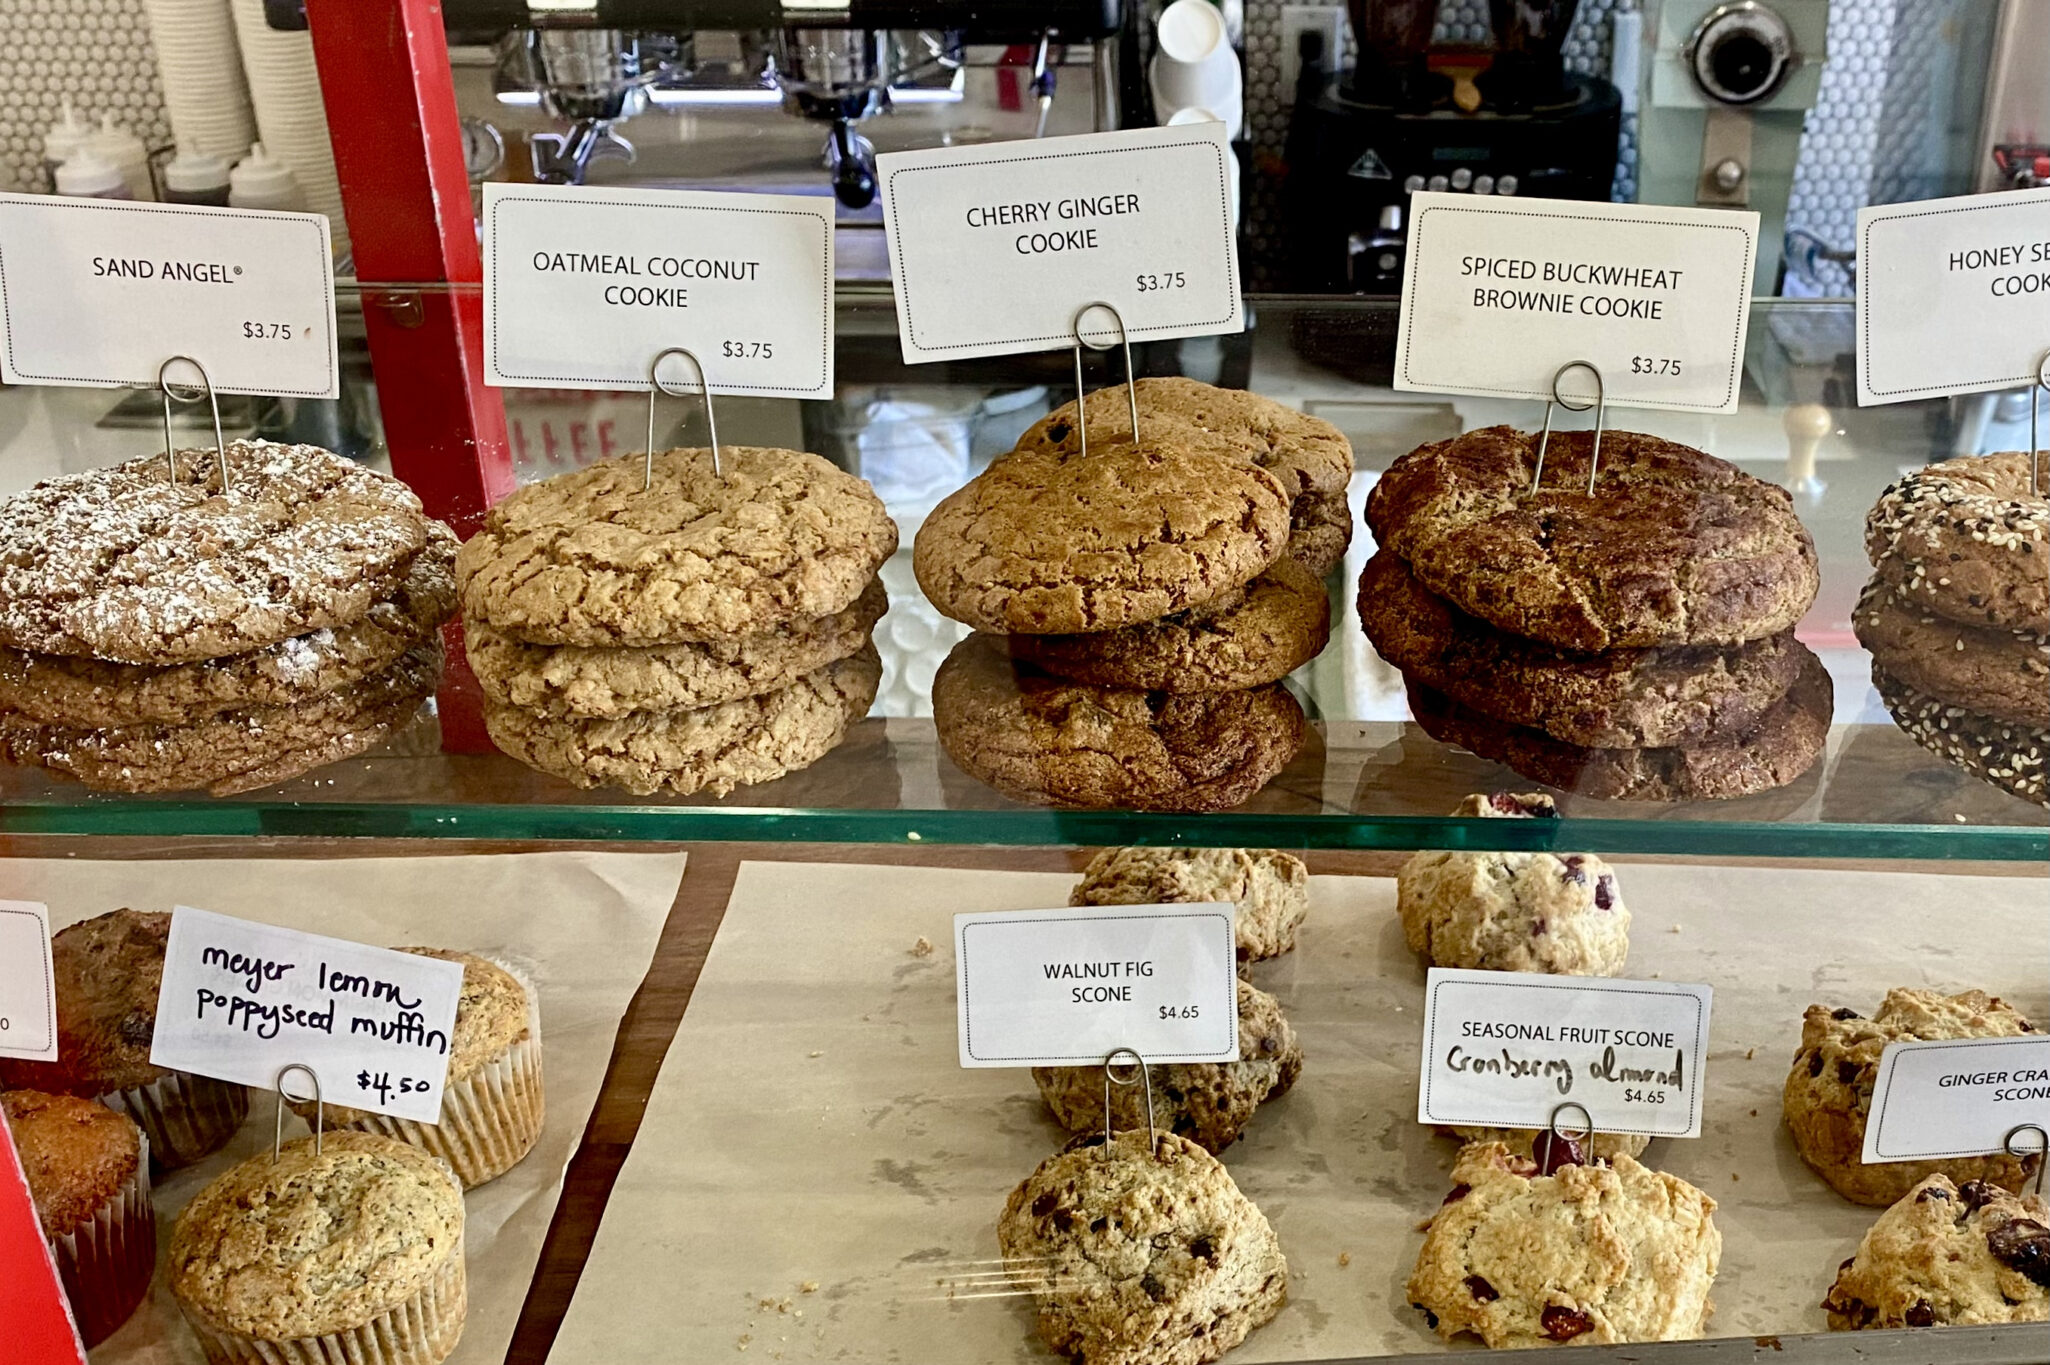
Perfect way to start the morning, coffee and a buttery, delicious pastry.

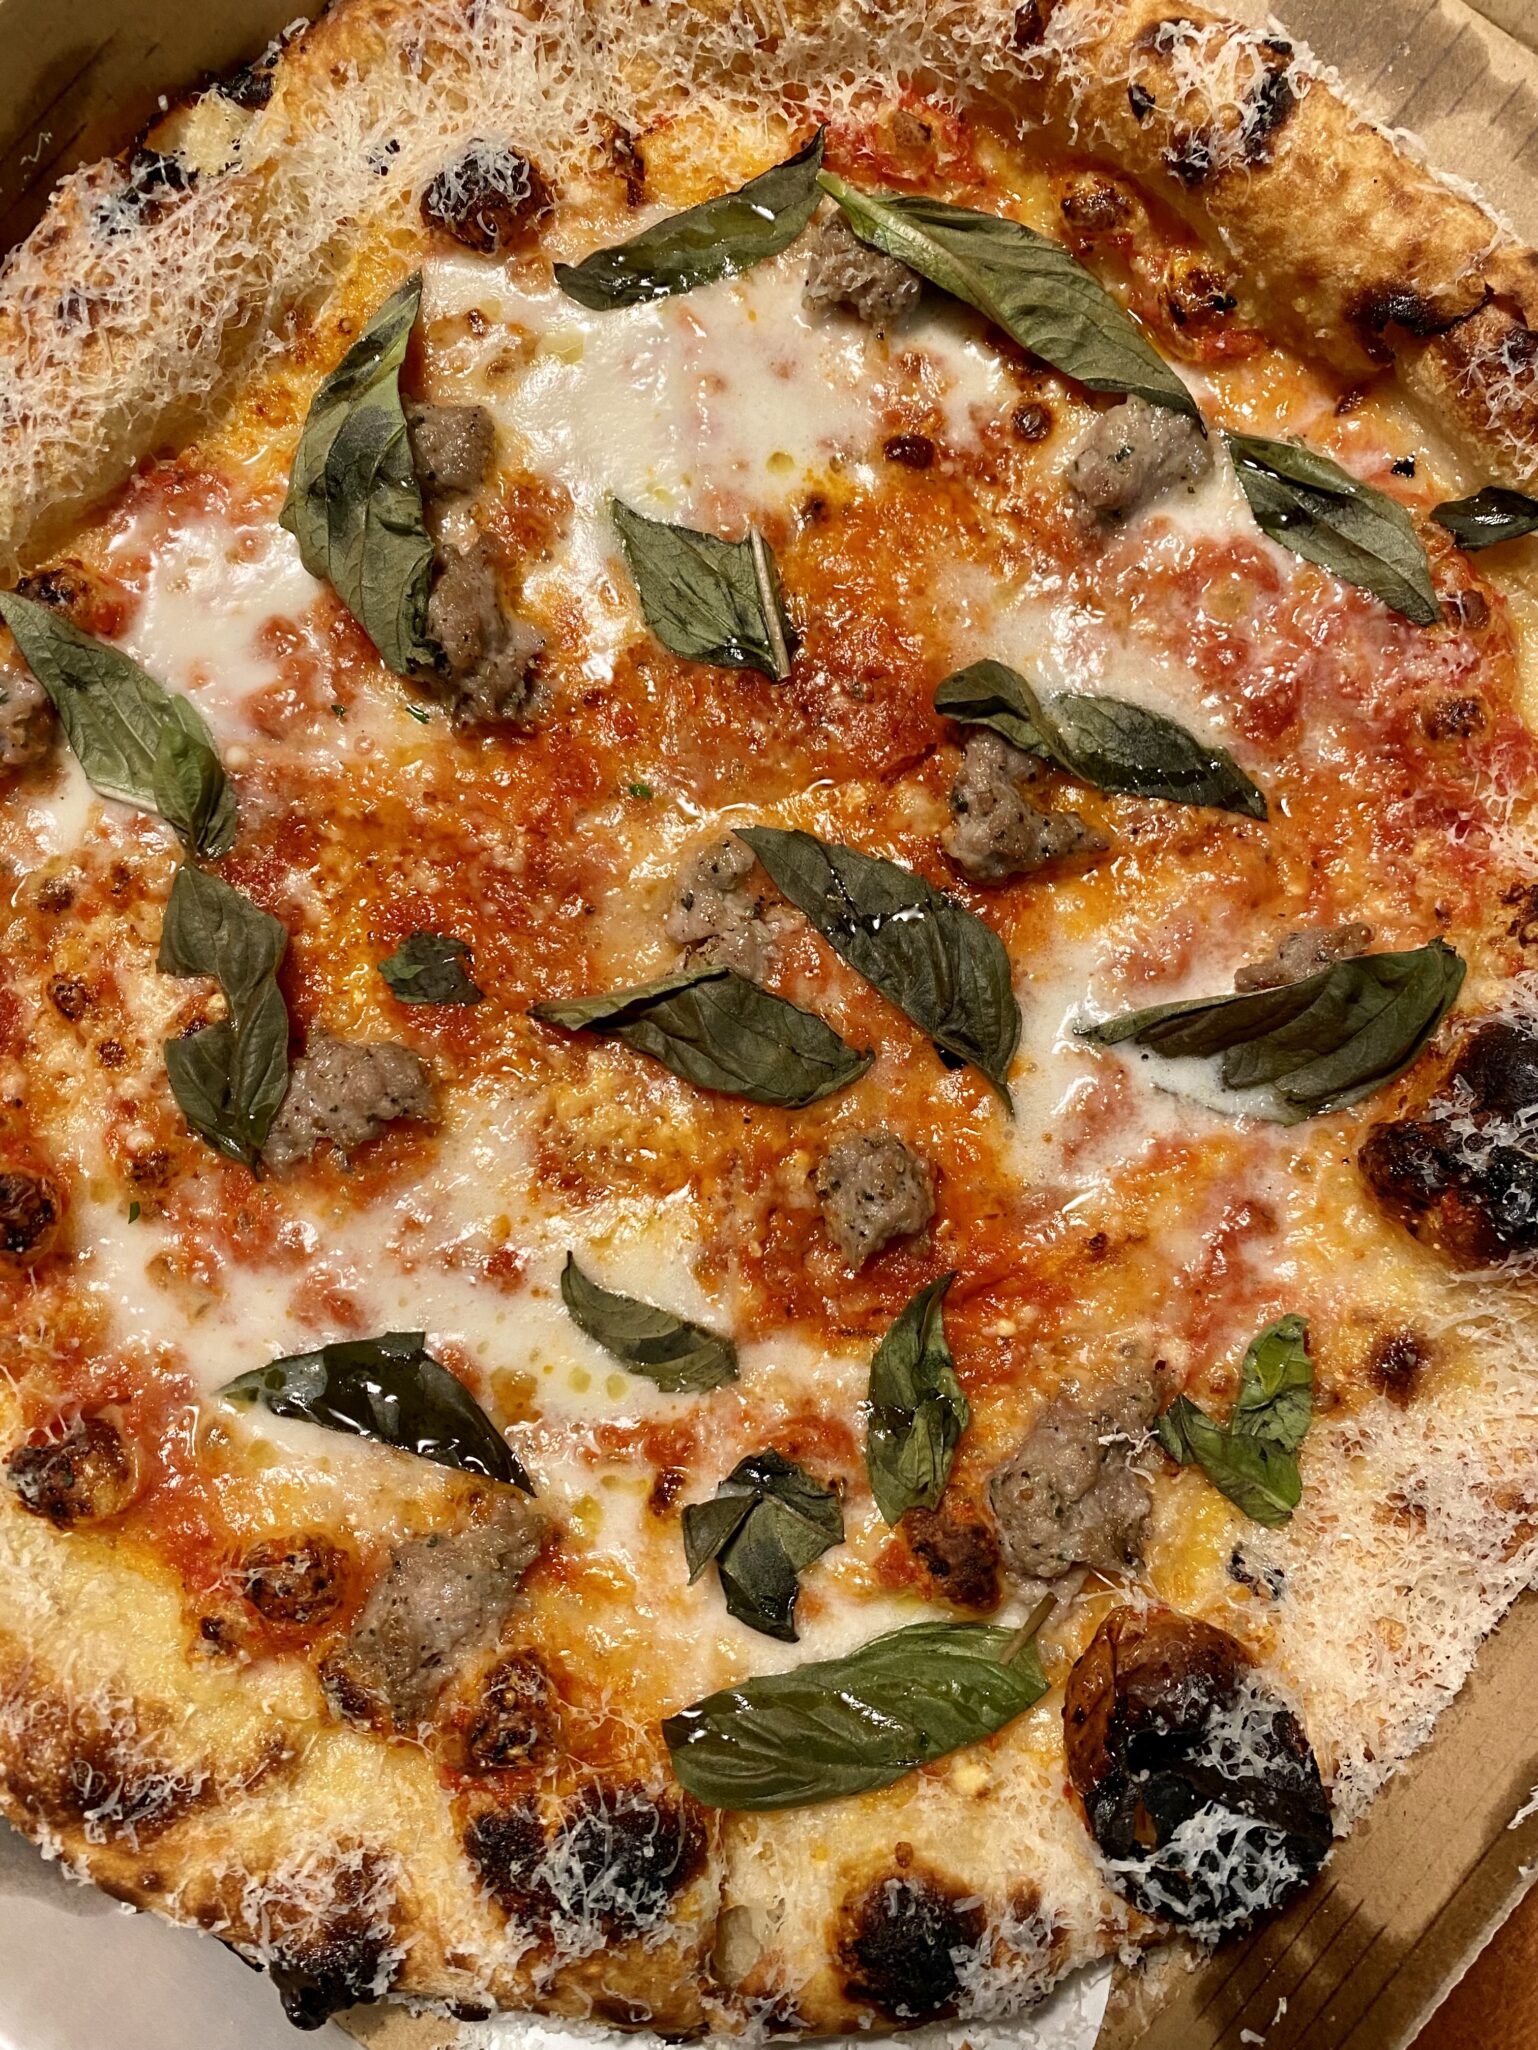
Great Gold, its roots are from Flour + Water in San Francisco, a beautiful restaurant, with great pizza and pasta, don’t pass on the Brussels sprouts!


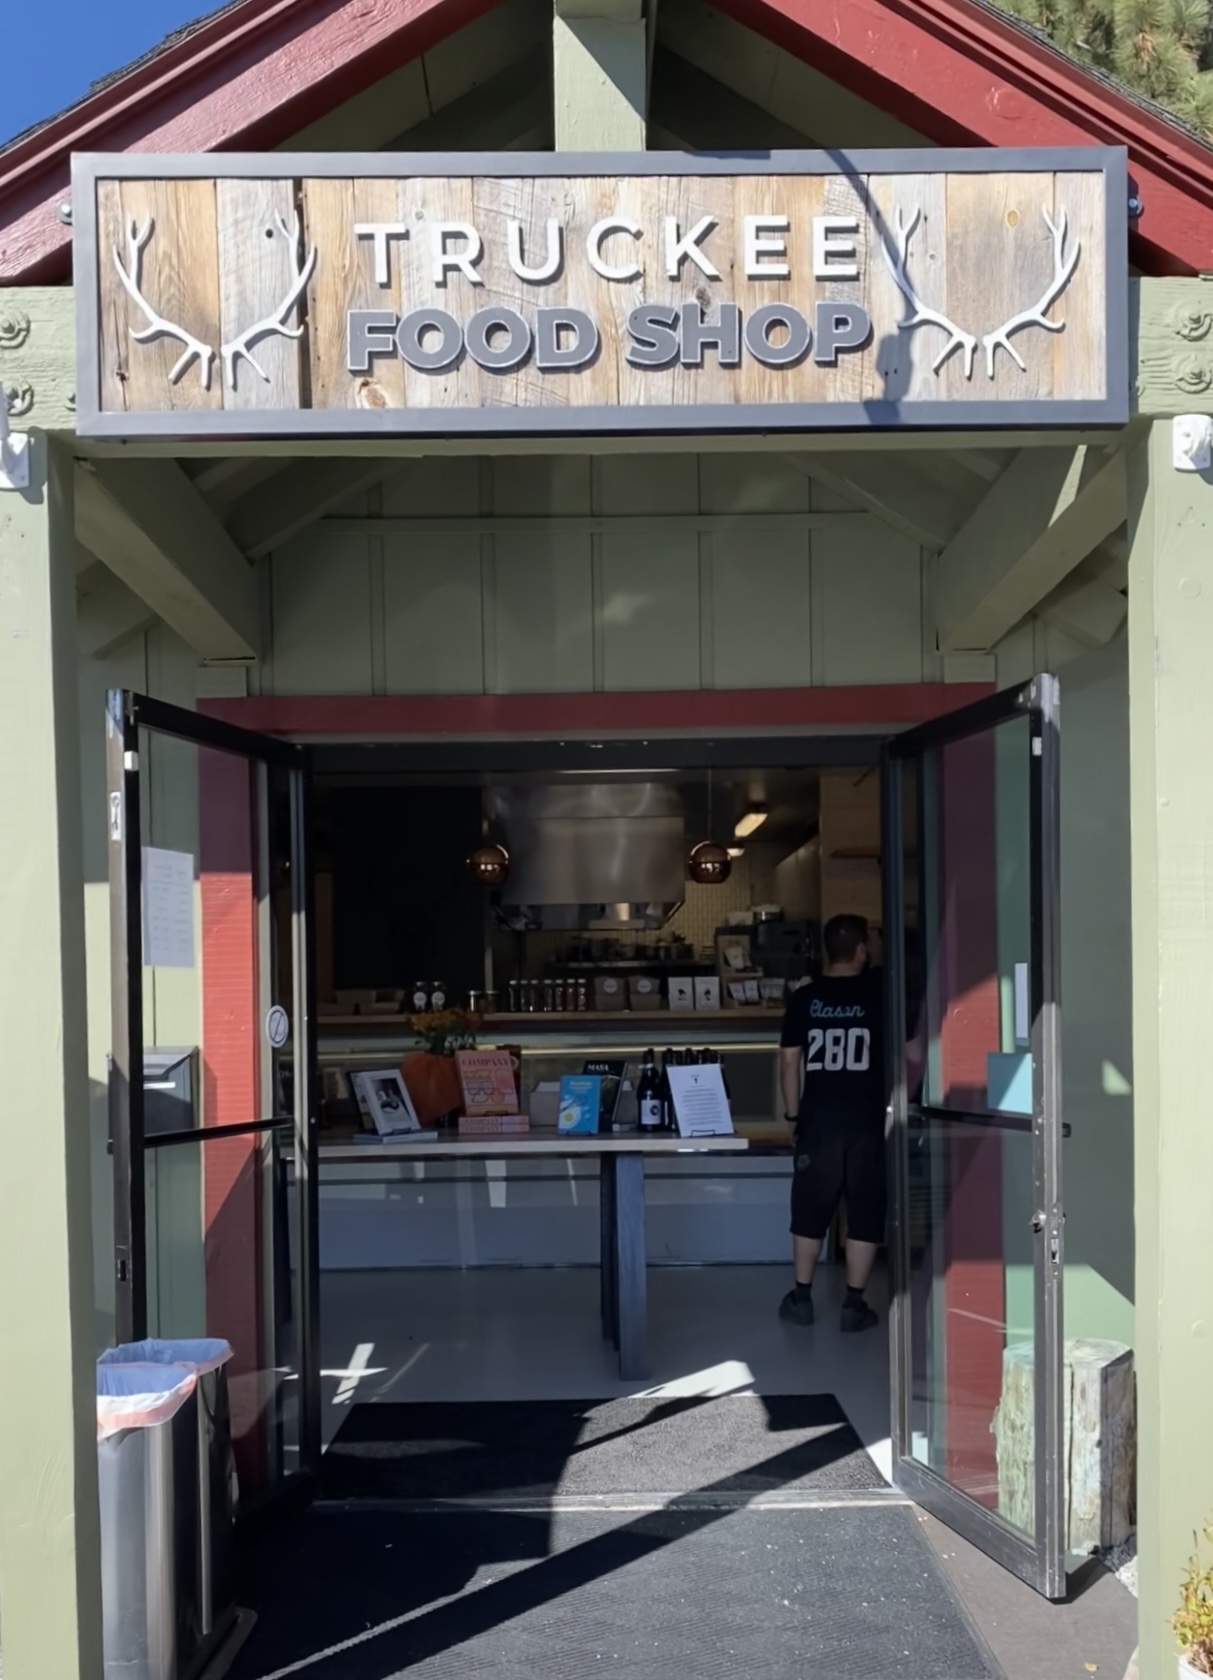
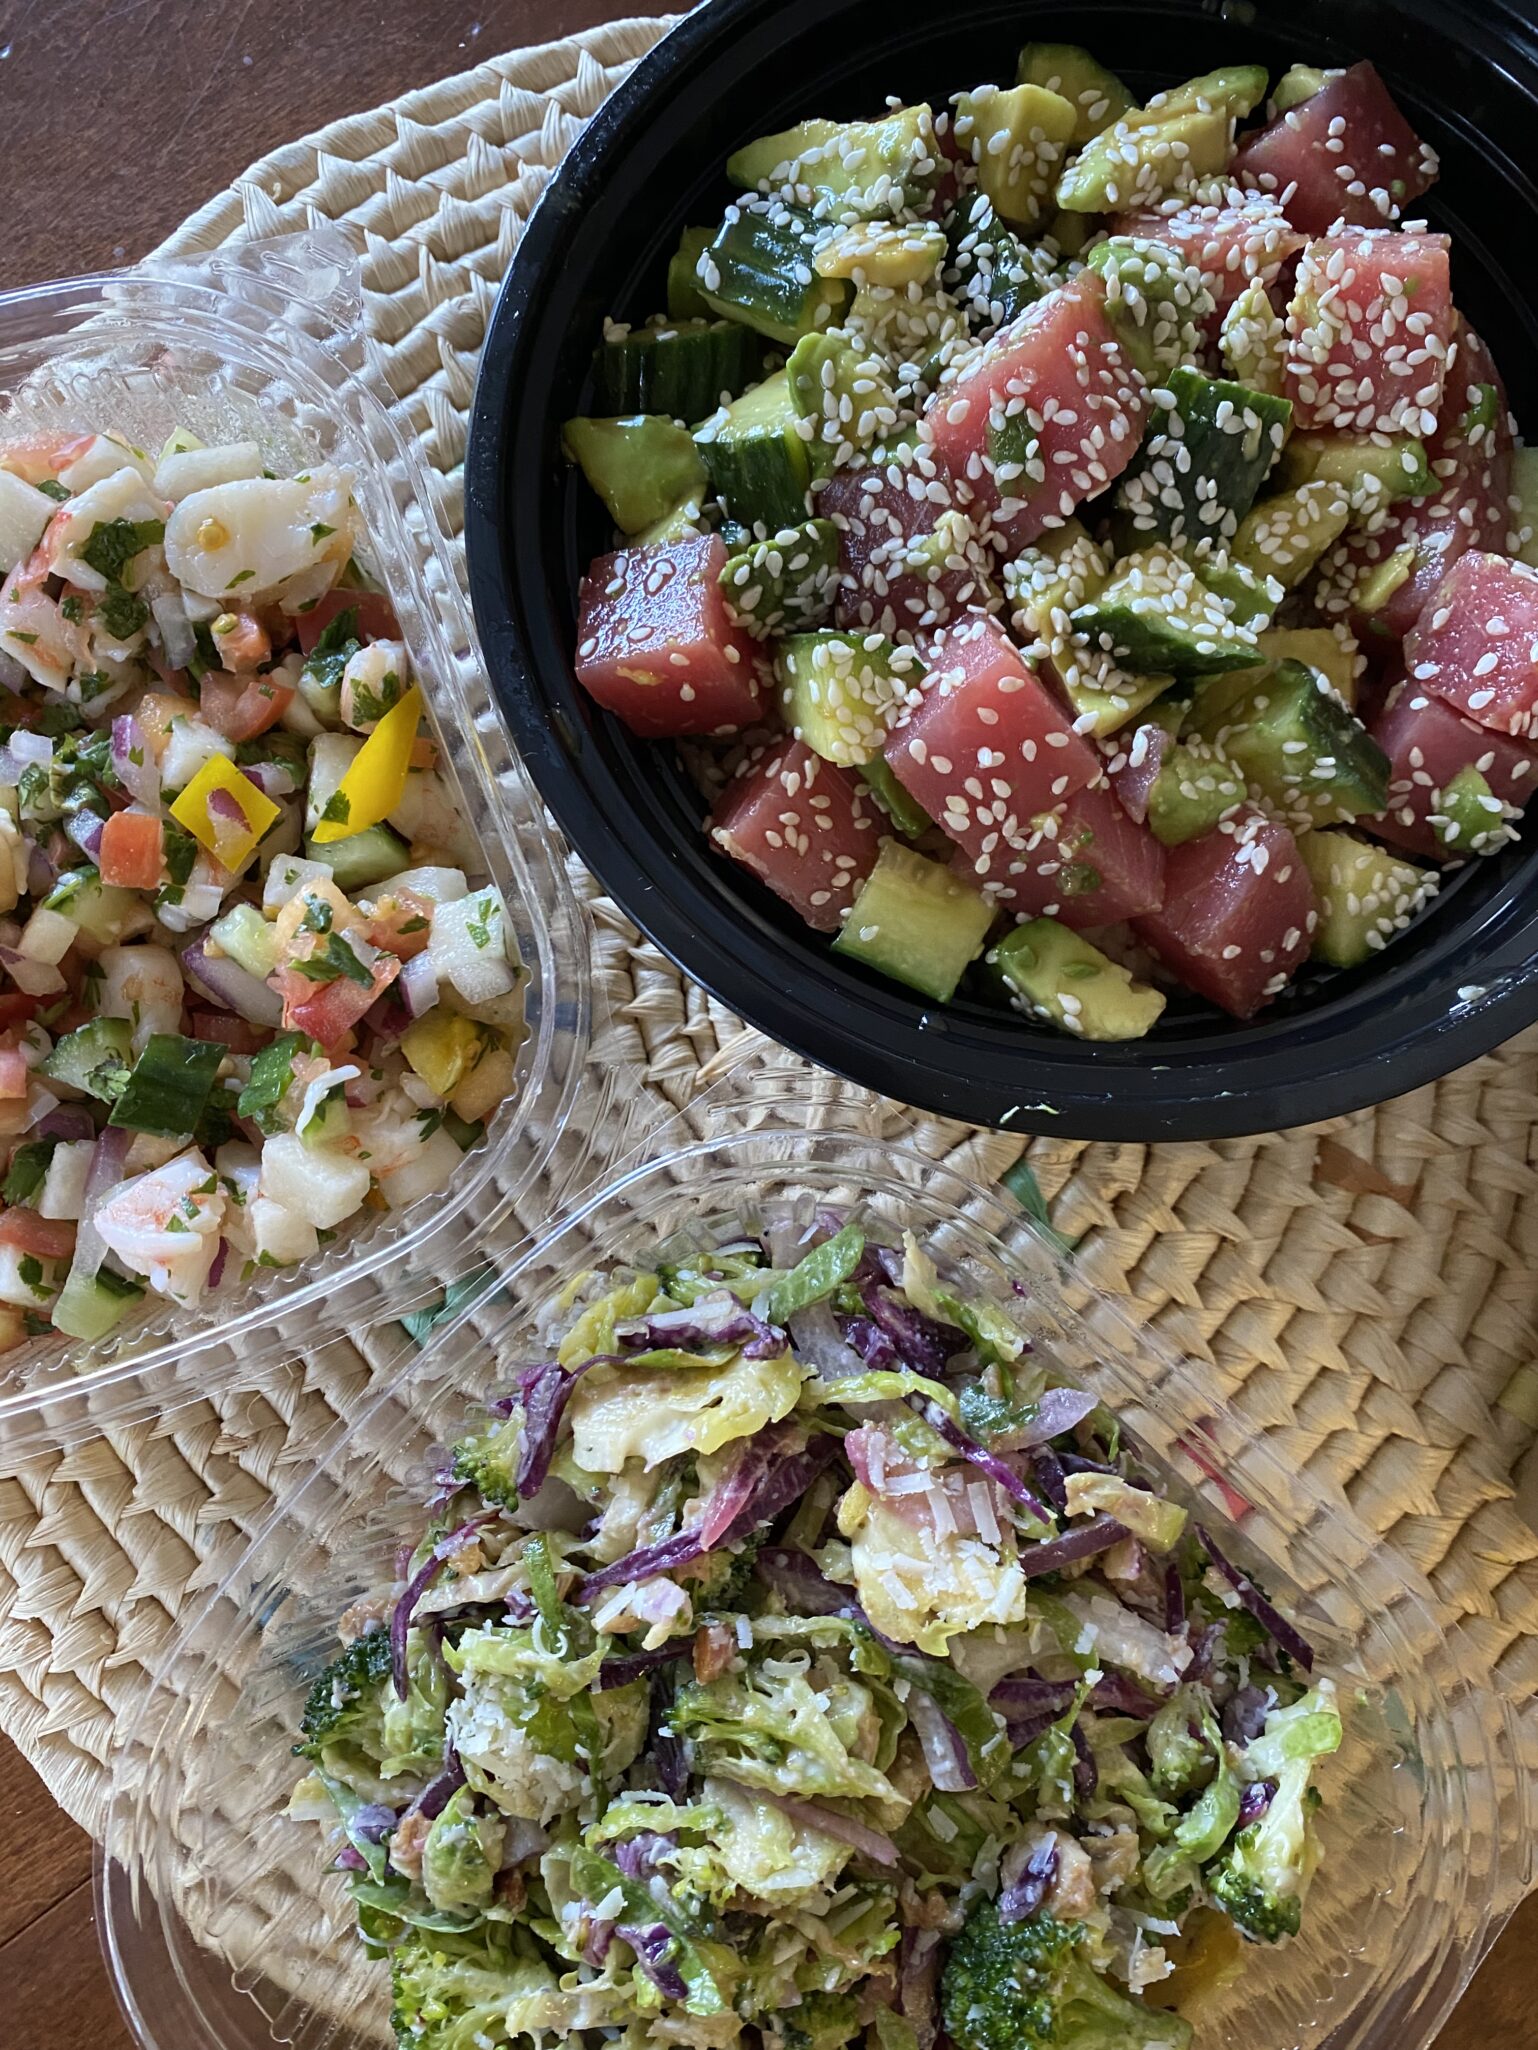
Truckee Food Shop features pre-made meals to take home.  They also have a nice curated selection of wines, pastas, spices, and cookbooks.  Don’t walk out without an order of their ceviche.

Comfort Food

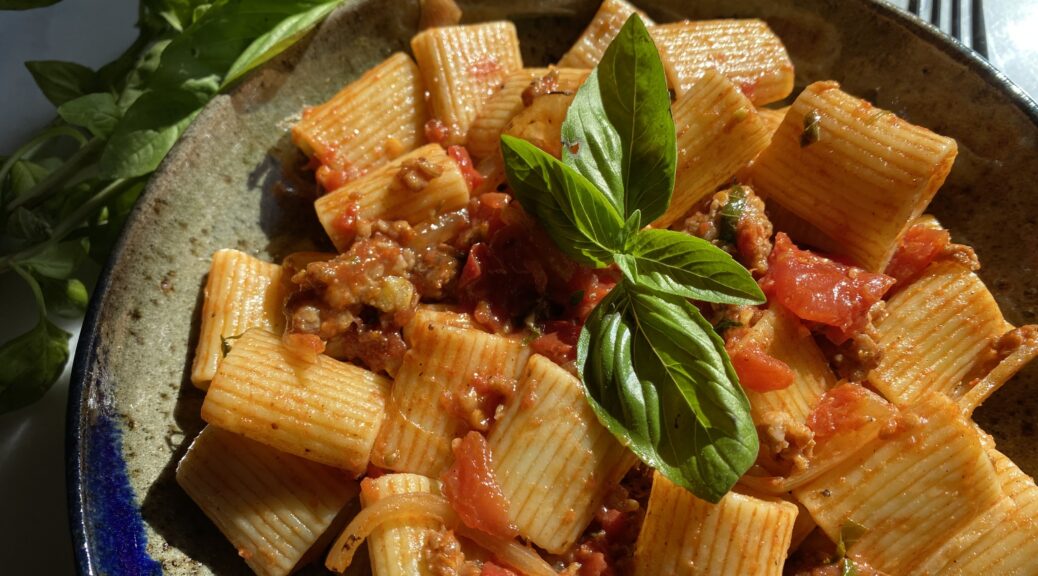
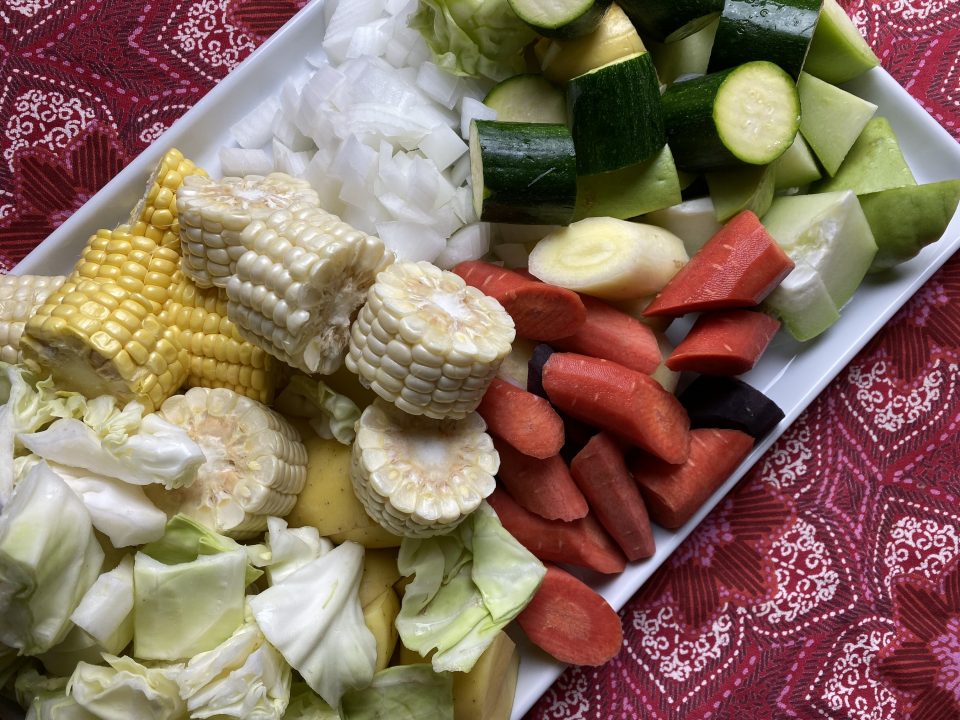
We spent our last evening in the cabin cooking, sipping wine (thanks to whoever left that nice bottle of Chardonnay in the fridge), and playing with Moose.  I had brought this week’s farmers market bounty, dry-farmed tomatoes, onions, and basil from my garden (apparently the only thing I can grow) with us.  We picked up Italian Sausages and pasta and made a quick and easy dish, Fresh Tomatoes, Sausage, and Pecorino Pasta.

Used spaghettini the first night, I prefer a tube pasta like rigatoni mezze

Tomorrow we start the drive to Salt Lake City, maybe we should turn around and head home?  Guess that would be considered dog-napping though, lol.

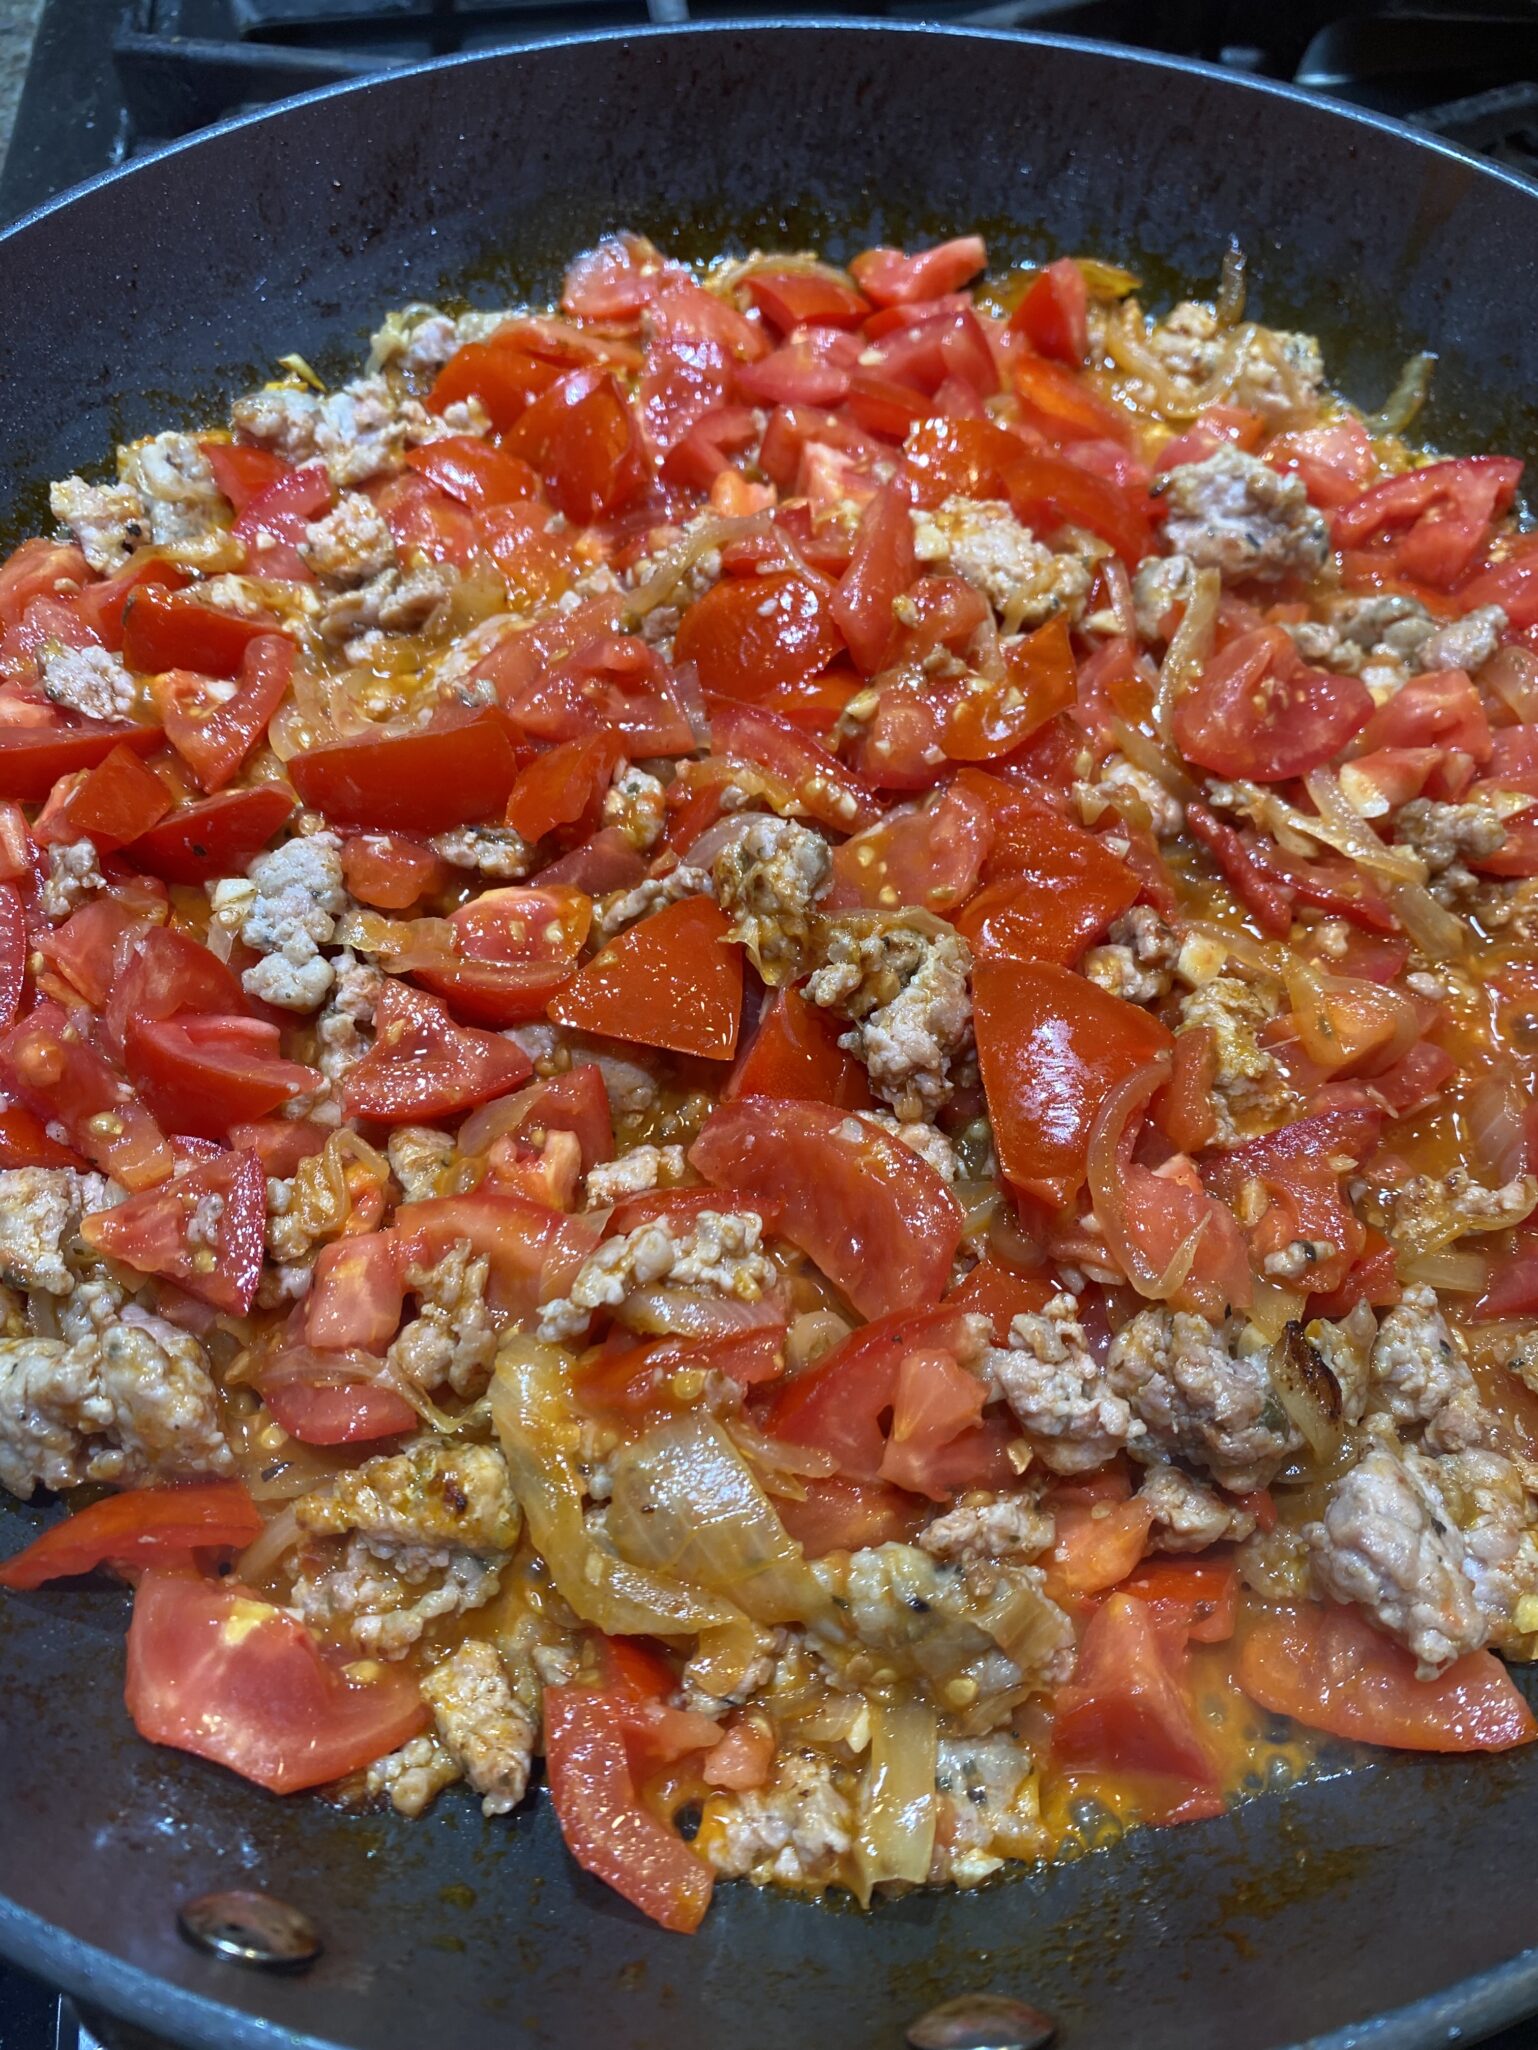
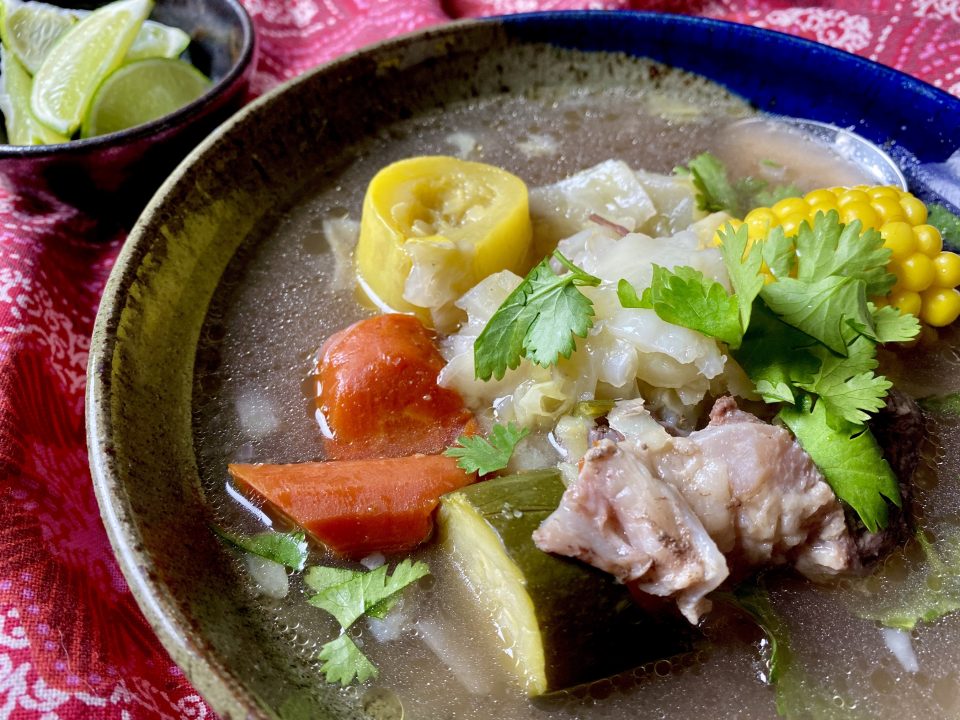
Just what I needed a nice, big, bowl of pasta to ward off the pending “I ain’t got me a dog no more blues”.  This sauce comes together in the time it takes for you to cook the pasta.  Chop your tomatoes, thinly slice an onion, smoosh some garlic, crumble the sausage, combine, and saute for a couple of minutes.  That’s pretty much it.  Right before serving, hit it with some fresh herbs, and grated cheese. The OG version calls for Pecorino Romano, which packs a bigger punch than Parmesan so I cut it back a little.  You could also use Parmesan.

So, while you can still get wonderful fresh tomatoes (we are so spoiled in California) this is an easy, lovely meal.  Bowl food is soul food has always been my mantra.  Round it out with a glass of wine, a fresh salad, and some crusty bread.  Boom, done.

I tried this with canned tomatoes and my advice is, don’t. I doctored it with some sugar and butter but still not the same.  Unless it is the dead of winter and fresh, summer tomatoes are a distant memory…no, still don’t.  This dish is meant for fresh, sweet, tomatoes.  I’m thinking of making a batch and freezing it.  That might work.

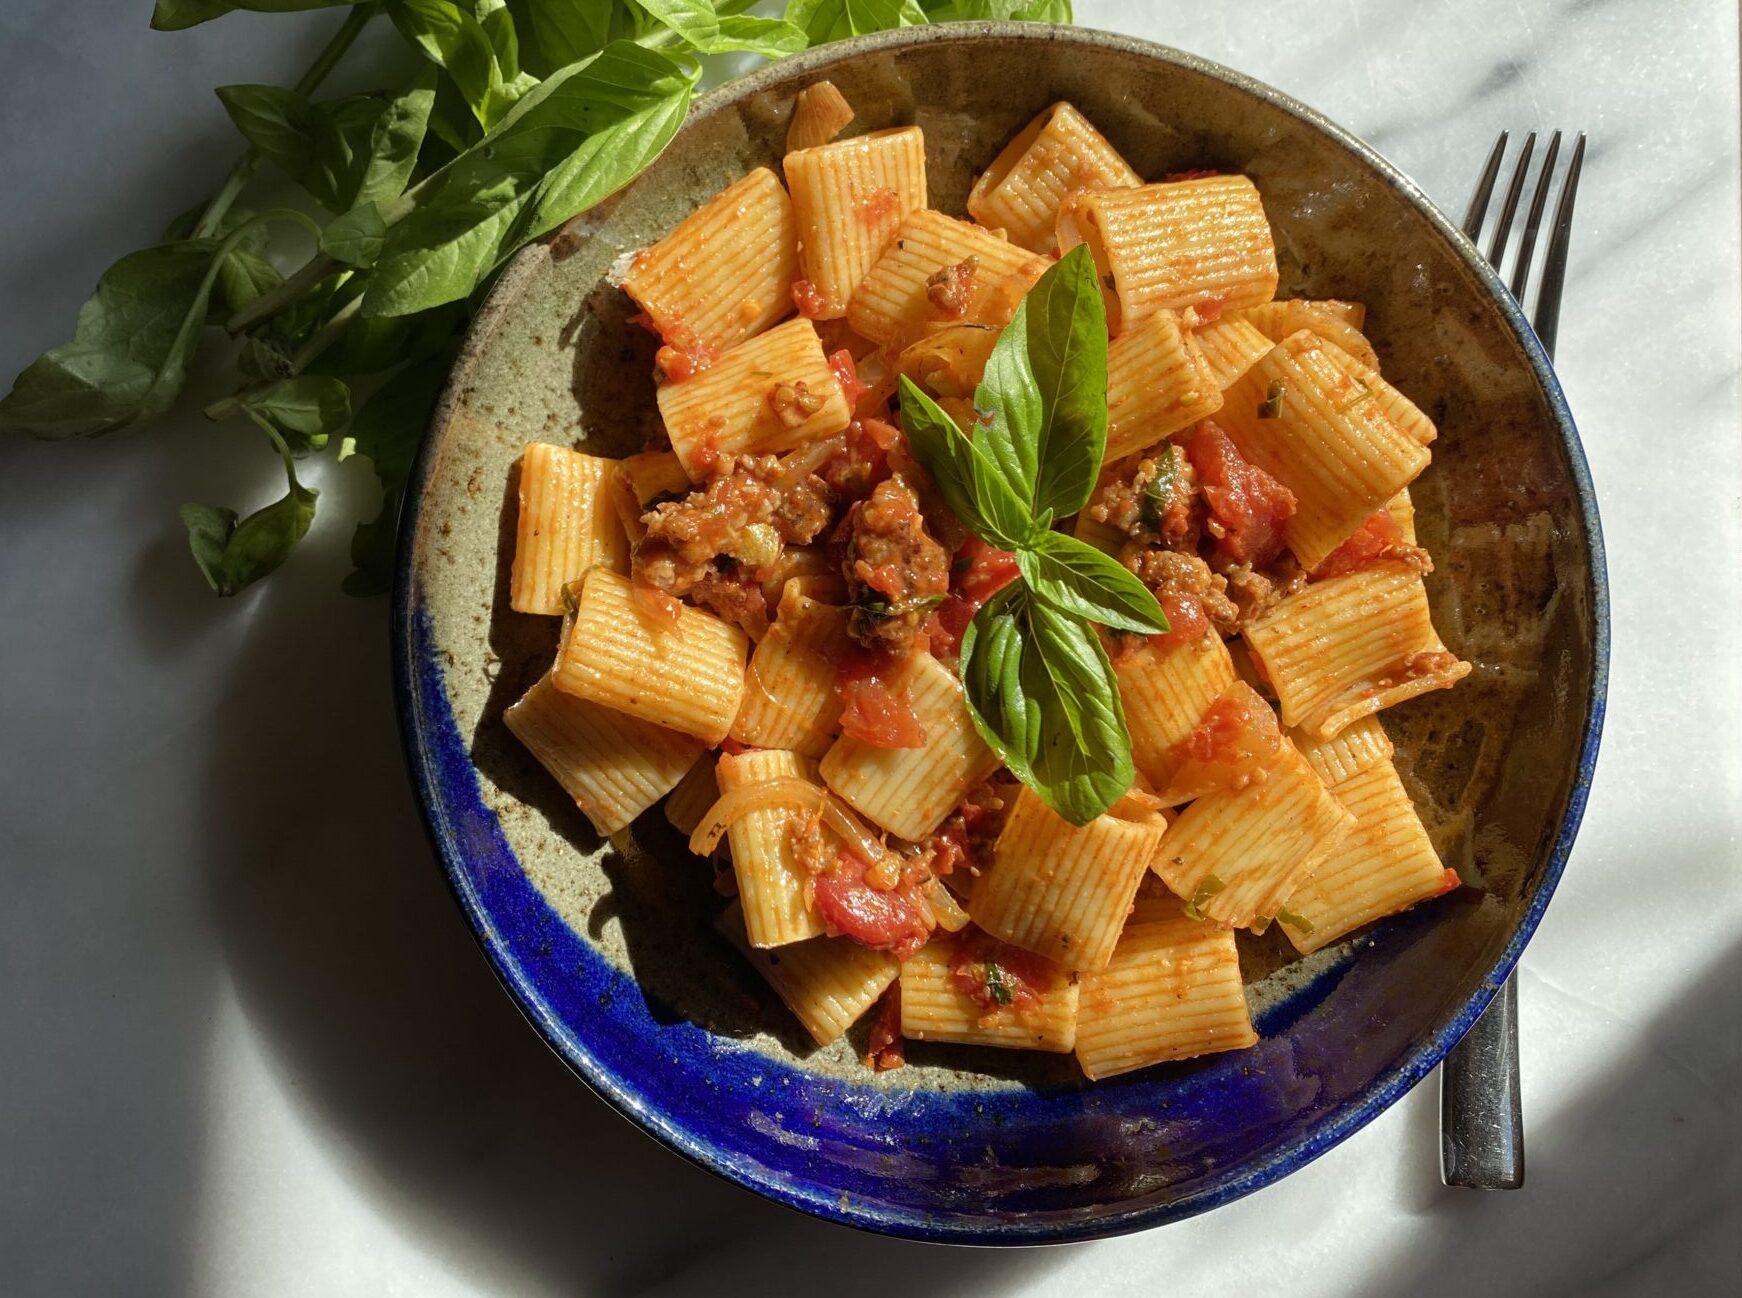
Fresh Tomato, Sausage, and Pecorino Pasta

Ripe, summer tomatoes are juicy and delicious in this pasta dish, with no seeding or peeling necessary.
Course dinner, lunch
Cuisine Italian-American
Keyword comfort food, fresh tomatoes, italian sausage, one dish meal, quick and easy, rigatoni
Prep Time 10 minutes
Cook Time 12 minutes

Ingredients

  • 8 ounces uncooked penne or meze rigatoni, or tubular pasta of choice
  • 8 ounces sweet Italian sausage or spicy works too
  • 2 teaspoons olive oil Go crazy, use a tablespoon of oil, lol
  • 1 cup vertically sliced yellow onion
  • 2 teaspoons minced garlic
  • 1/2 teaspoon chili pepper flakes optional
  • 1 ¼ pounds tomatoes, chopped dry farmed or Romas work well, or any ripe sweet tomato, some may have more moisture
  • 6 tablespoons grated fresh pecorino Romano cheese divided. sub Parmesan if you want
  • ¼ teaspoon salt to taste
  • teaspoon black pepper to taste
  • ¼ cup torn fresh basil leaves
  • 2 tbsp Italian parsley, chopped optional

Instructions

  • Cook pasta according to package directions, drain and set aside. In the Cooking Light edition this is adapted from, the recipe omits the salt and oil when cooking. I add salt to the pasta water.
  • A carryover from when the kids were little. I drain the pasta and hit it with butter and parmesan cheese. It seems to give the dish that extra oompf. I then add sauce to the pasta. I do this with my ragus, bolognese recipes also. TOTALLY OPTIONAL
  • If using sausage links, remove casings from sausage.
  • Heat a large nonstick skillet over medium-high heat. Add oil to pan; swirl to coat. Add sausage and onion to pan; cook 4 minutes, crumble sausage. by smooshing with your spatula.
  • Add garlic; cook 2 minutes.
  • Stir in tomatoes; cook 2-5 minutes depending on how you like your sauce.
  • Lower heat; stir in pasta, julienned basil, 2 tablespoons cheese, salt, and pepper. If I have Italian parsley I throw that in too.

Final Touches

  • Pour into a big serving platter or individual bowls. Sprinkle with remaining 1/4 cup cheese or let folks sprinkle their own. Garnish with remaining basil leaves. Enjoy!

Notes

Nutrition Facts
Per Serving: 389 calories; fat 10.7g; saturated fat 4g; mono fat 4.5g; poly fat 0.7g; protein 21.6g; carbohydrates 53.5g; fiber 4.5g; cholesterol 27mg; iron 3.3mg; sodium 595mg; calcium 159mg.
Molasses Snickerdoodles: Walking for Cookies

Molasses Snickerdoodles: Walking for Cookies

More rain, more gray…will it ever end?  Of course, it will but when?  Last week, the high winds took out our power at home so we escaped to San Francisco for the day.  Luckily, we had a brief, much-welcomed break in the weather and made the most of it.  It was too gorgeous not to take a walk and hit some of the scenic spots in The City.

Polk Gulch-Polk Street

There are a couple of streets that come to mind for me that define life in the city, and Polk Street is one of them. If you haven’t visited this area of the city, put it on your list.  Polk Street stretches from the  Civic Center area near City Hall, the gritty Tenderloin, all the way to the tony Russian Hill area, Aquatic Park, and Fisherman’s Wharf. To walk from Aquatic Park, the northern end of Polk to Civic Center, the southern tip, encapsulates San Francisco.

How can one street be home to Michelin-Starred Restaurants, trendy coffee kiosks, and French Bakeries, but also drug addicts and homeless sleeping in doorways or living in tents?  City life is uncensored and chaotic, where you see Everything, Everywhere, All at Once

We made a beeline for Polk Street which is only 2.5 blocks away…uphill.  The perfect way to start a walk since we’ll inevitably end up at one of the many bakeries on or near Polk.

We stopped at Batter Bakery for a cup of coffee and some cookies.  Known for their cookies, I had a tough time choosing what to try.  As much as I love shortbread, which they have so many permutations, we decided on their Sand Angel and a Sesame Cookie that looked scrumptious.  The Sand Angel had me at first bite.  A molasses cookie with a crispy edge and soft, slightly cakey center, best described as a cross between a Snickerdoodle and Molasses Cookie.  Yummy on the cookie meter, 🍪🍪🍪🍪

Grabbing our coffee and cookies we continued on our walk.  I pointed out spots of interest to the hubster.  Places that were part of my childhood-my elementary school, Victor’s Pizza (still there!), and the corner my favorite dessert cafe, Blum’s occupied (sadly not there).  We passed Bob’s Donuts and Swan’s Oyster Depot, SF icons that have been around for as long as I can remember.

On our walk back we stopped to take a peek at a new neighborhood park, Francisco Park. Built on top of an old reservoir, it’s a nice respite with gorgeous views.  With a community garden, playground, picnic tables and a doggy-run on street level, the park is worth a visit.  Just a note those two highrises, the Fontanas, led to the restrictions on building heights in the city. 😉

So, after a fun day in the city, I returned home with one thing on my mind, Molasses Snickerdoodles.  Adapted from Grandma’s Molasses, it isn’t quite the same as the Batter Bakery cookie, but it’s pretty darn good!

Key points: Beat butter and sugar until light and fluffy.  This will give this cookie a cakier texture in the middle. If you prefer a less cakey texture and a chewier center, two things, beat only until smooth and creamy, and during baking when the cookie puffs, pull the pan out and bang the sheet on the oven rack. Do this a couple of times.  More on this later.

If the dough seems too soft to work with, chill it for 10 minutes.  A #40 scoop (2 tablespoons) will yield a 2.5-3 inch cookie.  Perfect dunking size.  The dough balls are rolled in a mixture of cinnamon and granulated sugar.  Substitute turbinado or raw sugar for a crunchier finish.

Variations on a Cookie

One dough, two different bakes.  The cookies on the left received Sarah Kieffer’s pan-banging baking treatment.  This means about two-thirds of the way through baking, when the cookies are puffy, rap the pan on the oven rack to deflate the cookies. Repeat this a couple of times.  The result is flatter, chewier cookies with crisp edges.  The cookies on the right were allowed to bake undisturbed, they puffed and fell naturally creating cracks.  This results in cookies that are a little thicker and cakier than the pan-banging cookies.

Enjoy!

Molasses Snickerdoodles

A rift on Snickerdoodles, adding molasses gives these cookies a nice earthy flavor. Crispy-edged, tender, slightly cakey, cookie.
Course cookies, Dessert
Cuisine American
Keyword Cookie recipe, cookies, Molasses Snickerdoodles
Prep Time 15 minutes

Ingredients

Dry Stuff

  • 1 3/4 C. all-purpose flour
  • 1/2 tsp Cream of Tartar
  • 1/2 tsp Baking Soda
  • 1/8 tsp salt

Creamed Ingredients:

  • 1/2 C. unsalted butter room temperature
  • 3/4 C. granulated sugar
  • 1/4 C. Light or mild Molasses
  • 1 large egg
  • 1 tsp Vanilla Extract

Dredge

  • 3 Tbsp. granulated, raw or turbinado sugar
  • 1 tsp Cinnamon

Instructions

  • Preheat oven to 375° F.
  • In a bowl, whisk together flour, cream of tartar, baking soda and salt until well blended. Set aside.
  • In a large mixing bowl or the bowl of a stand mixer, beat butter and sugar on medium-high speed until light and fluffy, 1 to 2 minutes.
  • Add molasses and beat until combined, scraping down the sides of the bowl as needed.
  • Add egg and vanilla and mix until smooth.
  • Add dry ingredients and mix on low speed until incorporated and no dry flour remains.
  • In a small dish, mix raw sugar together with cocoa powder and cinnamon until well blended.
  • Drop dough by the tablespoonful into sugar mixture, rolling until completely coated. (Dough will be sticky, but the sugar mixture should keep it from sticking to your hands.).
  • Arrange on non-stick or parchment-lined baking sheets, leaving 2 inches of space between cookies. Repeat with remaining dough.
  • Bake for 9 to 10 minutes or until cookies are just set on top and bottoms are lightly golden brown.
  • Let cool for 5 minutes on baking sheets and transfer to a wire rack to cool completely.
Rowing for Coconut & Jam Oat Bars

Rowing for Coconut & Jam Oat Bars

About this time of year, I wax nostalgic about one of my passions (not food this time), rowing.  Say what?  Yes, rowing.  I started rowing, gosh too many years ago to count, and it changed my life.  Instead of trudging toward a sedentary, middle-aged lifestyle, it became my sport and form of exercise.

Spending early morning hours on the water (trust me, I am not a morning person) watching the sunrise, the first rays of light hitting the ripples of water made by the boat, it’s magical.  Beyond that (there’s more?), I have made lifelong friends, found a community, and experienced the camaraderie created by competition, joy, and pain.  #Crewlife

Rock Star Regatta

Boston annually hosts the largest regatta (rowing competition) in the world, the Head of the Charles.  Every October, collegiate, high school, Masters (anyone out of school) converge for the regatta.  Imagine the Boston Marathon but with a bunch of really tall people, wearing spandex (lol) in boats on the Charles.  We row as hard as we can for 5km.  All the while navigating through boats, under bridges (5), and around turns.  Throngs of spectators line the bridges and banks of the Charles to watch and root their rowers on.  It’s exhilarating, I haven’t raced there in a while and I miss it.

Side Trip Fun

If you go that far to race for twenty minutes, you might as well take advantage of being there.  We began taking side trips after Head of the Charles. One year we went to Vermont to find pie, visit King Arthur Flour, and tour Ben and Jerry’s.  Another year found us in Martha’s Vineyard.  The crowds of summer long gone, we wandered the island taking in the cool, crisp, fall weather, foliage colors, and FOOD!  We stopped at 7aFoods for pastries and coffee which I highly recommend.  Finally, a stop at  Morning Glory Farm to roam their pumpkin patch and eat more pie, the Buttermilk Pie was a standout.

The 7AFoods Oat and Fruit Bars were dreamy-a buttery crust topped with blueberry preserves, dried fruits, oat, and a delicious crumble. I asked for the recipe which they graciously sent BUT I have yet to try as it makes two full sheets of bars!  So I searched for a simpler, smaller recipe that would satisfy my 7AFoods bar craving.  Luckily, I found a delightful, easy-to-make Raspberry Coconut Oat Bar cookie from One Girl Cookies that did the trick.

So, I made a batch of these delicious bars while watching this year’s Head of the Charles Regatta.  Sigh, maybe next year I’ll be rowing instead of baking.

Finally, Notes on the One Girl Cookies Raspberry Coconut Oat Bar

These bars are easy to make.  The base crust and crumble are from the same dough.  The dough starts with cold butter, eliminating the time to soften butter, and can be made in a mixer or by hand.  Yep, that easy.  Use a mixer, add the flour, sugars, salt, and butter (diced into little pieces) and mix until it forms a crumble, then add coconut and oatmeal.  Use a pastry blender to cut butter into flour and sugar mixture.  This is much like making pie dough.  Do not blend until it forms a single mass as that would result in a tough crust.  As it bakes, the bits of butter in the dough melt and create steam that makes a tender, flaky crust.

NACL Note

The recipe calls for 1 teaspoon of salt.  It is intentionally salt-forward, a play on the salty and sweet vibe.  If you use a really sweet jam, I would leave the amount of salt.  If you are salt sensitive, try 3/4 teaspoon instead.  You do need some salt as a flavor booster.

Reserve 3/4 to 1 cup of the crumble mixture.  Press the remaining dough into a 9×13 baking pan that has been lined with parchment.  The recipe calls for baking the crust for 14 minutes, it took a couple of minutes more for the edges to brown for me.  Spread preserves over the cooled crust.  I have used blueberry, mixed berry, and apricot, it’s your choice. The base crust is pretty thin so a thin layer of jam is all that is needed.  I might sprinkle the jam layer with dried fruit and sliced almonds before adding the crumble next time.

Before adding the crumble, squeeze the crumble mixture so there are some bigger crumbs, it looks nicer.

With Blueberry Lichi Jam!

With apricot cherry preserves!

JAMMY COCONUT OAT BARS

Jam & Coconut Oat Bars, a buttery shortbread base topped with preserves and a coconut oatmeal crumble. Adapted from One Girl Cookies.
Course bar cookies, cookies, desserts
Cuisine American
Keyword bar cookies, Jammy Coconut Oat Bars, One Girl Cookies
Prep Time 15 minutes
Cook Time 25 minutes
Resting Time 10 minutes

Ingredients

All About the Dough

  • 1-1/4 cups (150g) all-purpose flour
  • 3/4 cup (150g) packed light brown sugar
  • 1/3 cup (67g) granulated sugar
  • 12 tablespoons (170g) unsalted butter, cold and cut into small pieces
  • 1 teaspoon salt Very salt forward, decrease to 3/4 tsp. if desired

Add to Dough Crumble

  • 3/4 cup (85g) unsweetened shredded coconut
  • 1-1/2 cups (148g) old-fashioned rolled oats

The Finish

  • 1/2 cup raspberry preserves or use your favorite preserves

Optional Adds

  • 1/4-1/3 cup diced dried fruit that compliments the preserves you use
  • 1/4-1/3 cup sliced almonds or chopped nuts of your choice

Instructions

  • Preheat oven to 350°F.
  • Spread the coconut on a baking sheet. Toast 2-3 minutes. Remove from the oven and allow to cool. Keep your eye on it as coconut will brown quickly
  • Grease a 9"x 13"x 2" baking pan. Line the bottom with parchment paper.
  • In an electric mixer on low speed, mix the flour, brown sugar, granulated sugar, and salt until combined. Add the butter and continue mixing until the dough begins to come together. Stir in the coconut and oats.
  • Remove 3/4-1 cup of the crust dough. Set aside. If adding optional ingredients remove 3/4 cup of crumble.
  • Pour the remaining dough to pan. Press evenly into the bottom of the prepared pan, I use a flat bottom cup to press dough into pan. Bake 14-17 minutes, rotating the pan halfway through baking. The crust should be golden brown around the edges. Allow the crust to cool for 10 minutes.
  • Spread the preserves evenly over the crust, leaving a scant 1/2-inch border. If you are adding nuts or dried fruit, sprinkle on preserves now then crumble the reserved dough over the top. Bake 7 minutes, or until the preserves are bubbly. Cool completely in pan.
  • Run a knife around the edges of the bars. Place a baking sheet on top of the pan and flip the pan over to release the bars. Peel the parchment paper off. Then flip again. Using a sharp knife, cut the bars into squares, which in a 9x13 won't be exactly squared, lol.
Hawaiian Butter Mochi (Mo Buttah’ Mo Bettah’)

Hawaiian Butter Mochi (Mo Buttah’ Mo Bettah’)

Right before the pandemic hit we capped off a year of traveling by going to Maui.  A celebration for the hubster’s birthday and his early retirement was our excuse to pack our bags and head out for some sun, fun, and food.  Little did we know it would be our last trip for quite a while.

Hawaiian Delights

I am a sucker for Hawaiian food.  A fusion of Native, Chinese, Japanese, Filipino, Portuguese, Korean and all of it tweaked so it taste great and is easy to eat while sitting on a beach!  Our bucket list of food included Spam Musubi, a hunk of rice topped with a fried slice of SPAM and wrapped in seaweed, Poke’ (seasoned raw fish in a bowl with rice), island style bbq, Huli, Huli Chicken. YUM.

Then there are the sweets, Malasadas (best damn donuts), Haupia (coconut jello) and my favorite, Butter Mochi. Hawaiian Butter Mochi is the island’s answer to Blondies or Brownies but better (I know, them is fighting words).  Buttery, gooey, sweet and so satisfying.  Like our Spam Musubi quest, we went out of our way to find all things mochi.

This isn’t my first mochi rodeo, I posted a Butter Mochi Muffin recipe a while back that peeps really like (so says Google analytics, lol).  Since then it has been off to the “rices” trying recipes with Koda Farms Sweet Rice (glutinous rice flour).  Mochi now merits its own category in my recipe index.  These muffins started it all, dense, chewy, with a touch of familiar cakiness, and the perfect amount of sugar. They are a great introduction to mochi-based desserts.  BONUS: Mochi is gluten-free!

Butter Mochi Muffins
The Muffins that started it all!

Mochi Mania-Island Style

Hawaiian Butter Mochi takes mochi back closer to its Japanese roots, lighter, springier, and less cakey.  The recipe calls for coconut milk and regular milk.  The regular milk and less mochi flour are the “denseness” buster and gives the mochi its characteristic texture.  Butter adds flavor.  It is usually baked in a pan and then cut into squares but I decided to bake them in muffin tins.  All for the edges folks.  Each person ends up with their own gooeylicious mini-cake highlighted by a crispy, buttery edge, and finished with toasty shredded coconut and a sprinkle of Fleur de Sel, soooooo yummy.

Inspired by Aloha Kitchen and the website Catherine Zhang, these Butter Mochi Mini-Cakes are onolicious.  I hope you will try them!

The two key ingredients you can find at most Asian stores, sweet rice flour and coconut milk. My go-to brands are Koda Farms Mochiko and Chaokoh or Arroy-D for coconut milk.

The batter will be very pourable due to the use of milk as part of the liquid and less mochi flour.

Don’t be afraid to fill the cups to 7/8.  The mini-cakes will puff up but will fall as they are cooling.  You will end up with a flat top or sometimes even a slight depression, it’s all good.

Enjoy!

Print
5 from 1 vote

Hawaiian Butter Mochi Muffins

This muffin is a mash-up of Hawaiian Butter Mochi and Butter Mochi Muffins! Gooier and less cake-like than my butter mochi muffins. Baked as muffins they have crispy edges and a soft center-onolicious!
Course Dessert, Snack
Cuisine Asian, Fusion
Keyword butter mochi, hawaiian, Mochi, muffin
Prep Time 15 minutes
Cook Time 45 minutes
Total Time 1 hour

Ingredients

Da Wet Stuff

  • 1/4 cup Unsalted butter 55gm
  • 3/4 cup Coconut milk 170gm
  • 1 cup Whole milk 240gm
  • 2 Eggs

Da Dry Stuff

  • 1 3/4 cup Glutinous rice flour 225gm
  • 1 cup Granulated sugar 200gm
  • 1 tsp Baking powder
  • Flaked or shredded coconut for garnish, preferably unsweetened but use what you like

Prep Yo Pan

  • Butter
  • Rice flour optional

Instructions

  • Preheat the oven to 375 degrees
  • Generously grease 12-cup muffin tin with butter and dust with rice flour, if you don't have rice flour, skip it. The flour does help the batter rise in the pan and getting crispy edges.
  • In a large, microwave safe bowl combine the coconut milk and butter, heat in the microwave for 1 minute
  • Add the milk and 2 eggs, whisk until combined. I like whole milk but you can use 2% milk or alternative milk like oat milk.
  • In a medium sized bowl combine the glutinous rice flour, sugar and baking powder
  • Add the dry ingredients to the wet ingredients and whisk until smooth
  • Pour the batter evenly into the 12 muffin cups
  • Sprinkle with coconut and bake for 45 minutes, or until golden brown
  • Remove and cool. Muffins will keep for a couple of days on the counter. Pop them in a toaster oven to re-crisp edges. They also freeze pretty well.
A Sweet Mash-Up (Helmand Palace Kaddo)

A Sweet Mash-Up (Helmand Palace Kaddo)

I found myself in the city one evening last week driving down Van Ness Ave.  If you have driven down that boulevard lately, it has been under major construction for what seems like an eternity.  Major swaths of the street have been dug up and walled off with wood barriers and fencing.  I can’t even imagine how the businesses on the street are coping with such a major disruption.

On this night I reached the section near Green and Van Ness and much to my surprise, the walls and giant cranes were gone.  I spotted  the restaurant Helmand Palace, an Afghani restaurant I have been meaning to try for a long time.  A spot opened up (in the City that’s a sign) in front so I immediately parked my car and headed into the restaurant.  Obviously I was meant to have Afghani food tonight!

I zeroed in on the one dish I had to try, Kaddo.  What’s Kaddo, you ask? It’s pumpkin slow roasted in sugar and cinnamon until tender and smothered with a tomato based sauce of ground beef flavored with ginger, coriander and turmeric.  It’s topped with a cold yogurt sauce spiked with garlic and mint. Every bite is a melt-in-your-mouth revelation—soft, satiny, DELICIOUS.  It is mind bogglingly good.

I asked for TWO orders of Kaddo for take-out (the fam was at home), and, while I waited, I told the host that I found their recipe for Kaddo on Epicurious and it is one of my favorites.  His restaurant and the Kadoo, in particular, have been my gotta try bucket list for a long time.  It didn’t disappoint.  Their Aushak, a dumpling filled with leeks and scallions layered with a meat sauce and yogurt was equally scrumptious.

A while back we celebrated mom’s birthday with a visit to  Cala in San Francisco.  The food was delicious but their slow-roasted Sweet Potato with Bone Marrow Salsa Negra had me in a tizzy.  How could something so simple taste so delicious?  Smitten Kitchen posted a recipe for slow roasted sweet potatoes that sounded so much like the amazing dish at Cala, it gave me an idea. You know where I’m going with this right?  Beautifully charred, meltingly soft sweet potatoes topped with Kaddo….oh yeah we are so going there.

SWEET MASH-UP TIME

I slow-roasted the sweet potatoes until they were soft, caramelized, and charred on the outside. While the sweet potatoes were roasting, I made the Helmand Palace meat and yogurt sauces. Remove the potatoes from the oven and let them cool so you can handle them.  Brush the roasted sweet potatoes with browned butter and top with sugar/cinnamon before adding the warm meat sauce and cold yogurt.  Offer to the highest bidder.  I’d raise my hand and bid for this.

You can also set up a SWEET little fixings bar so everyone can choose their own toppings. Have the Kaddo sauces and any of the toppings from Sam Kass’s, Eat a Little Better at the ready for everyone to pick their favorite.  Indescribably delicious and fun!

For vegetarians, skip the meat sauce and slather the cool minty, garlic yogurt sauce on the hot, charred sweet potato.

Potatolicious, you’re welcome.

Kaddo

Delicious appetizer adapted from Helmand Palace in San Francisco. Roasted sweet potatoes topped with a savory meat sauce and a cool mint-garlic yogurt.
Course Appetizer
Cuisine Middle Eastern
Keyword Kaddo
Prep Time 30 minutes
Cook Time 2 hours
Servings 4

Ingredients

  • 4-6 Sweet potatoes
  • butter
  • sugar
  • cinnamon

For the yogurt sauce

  • 2 C plain yogurt
  • 2 garlic cloves minced
  • 1 tsp dried mint
  • 1/2 tsp salt
  • For the meat sauce
  • 1/4 C vegetable oil
  • 1 large onion finely diced
  • 1 1/2 lbs. ground beef or mixture of lamb and beef
  • 1 large tomato seeded and finely chopped
  • 2 large garlic cloves minced
  • 1 1/4 tsp ground coriander
  • 1 1/2 tsp salt
  • 1 tsp freshly ground pepper
  • 1/2 tsp ground turmeric
  • 2 tbsp tomato paste
  • 1 1/3 C water

Slow Roasted Sweet Potatoes

  • 4 medium sweet potatoes (about 3 pounds), scrubbed clean
  • 4 teaspoons olive oil
  • 2 teaspoons kosher salt
  • 1 teaspoon freshly ground black pepper

Instructions

Slow Roasted Sweet Potatoes

  • Heat your oven to 275°F. Arrange sweet potatoes on a large, foil-lined baking sheet. Rub each with 1 teaspoon olive oil, 1/2 teaspoon salt (which will make a quite salty skin, use less if desired) and 1/4 teaspoon pepper until well coated.
  • Bake until very soft inside and caramelized on the bottom, about 2 1/2 hours.
  • Heat your broiler and run the potatoes underneath it — mine is fairly weak, and this took 5 to 10 minutes, but check in regularly, a more robust one might do it in 1 to 2 minutes — until lightly charred on top.
  • Let potatoes cool 10 minutes, then gently crush potatoes with your hands to expose the flesh.
  • Split sweet potatoes, brush insides with melted butter. Sprinkle with sugar and a dash of cinnamon.

Sauces (Make while sweet potatoes are roasting)

  • YOGURT SAUCE: Mix all the ingredients together. Refridgerate.
  • MEAT SAUCE: Brown the onions in the oil in a heavy-bottomed saucepan. Add meat and cook over medium-high heat, stirring, until browned. Add all other ingredients (except for the tomato paste and water) and cook, stirring, for another 5 minutes or so. Stir in the tomato paste, then add the water and bring to a boil. Lower the heat and let simmer, covered, for about 15 minutes.
  • Top each sweet potato with cold yogurt sauce and hot meat sauce. Serve immediately

Notes

The original recipe calls for 2 sugar pumpkins which are prepared as follows:
Make the pumpkin: It helps to have a serious vegetable cleaver for this bit. Preheat your oven to 300º. Wash off the outside of the pumpkins. Cut them in half. Scrape out the stringy stuff on the inside. Cut the halves into 3#-4# pieces or so. Peel them. Get rid of all the green and rind. Find a baking pan large enough to hold all the pumpkin pieces in a single layer. Cover the pumpkin pieces in the oil and place them hollow side up in the pan. Pour the sugar evenly over the pumpkin pieces. Cover the pan with aluminum foil. Bake for 2 1/2 hours, then baste the pieces with the pan juices, cover them up again, and bake for another 45 minutes. The sugar will all melt away and end up partially absorbed. The pumpkin pieces will turn dark orange and translucent. They will have a stunningly novel texture. 
You can substitute butternut squash for either the pumpkin or sweet potatoes.
Kindness of Strangers: Three Amigos Soup (Beef and Vegetable Soup)

Kindness of Strangers: Three Amigos Soup (Beef and Vegetable Soup)

Last week I headed up to the City to run some errands, check on my mom’s house and visit her at the assisted-living home.  We moved mom to a care facility after a couple of health emergencies and declining cognitive ability, sadly she could no longer live independently.

I arrived at her place around lunchtime and it was such a beautiful day, I decided to take her to Los Trinos, a little hole-in-the-wall down the block that serves delicious El Salvadorean food.  Using the walker to steady herself, we slowly made our way to Los Trinos.  The most difficult part of the walk is the Mission Street crossing.  She made it across like a real trooper.

A Hole in the Wall but Not in My Soul

Los Trinos, a tiny unassuming place with about 10 tables, serves the surrounding neighborhood.  It’s down-home cooking-Pupusas, Tacos, Churrasco, Sopa de Res, all made in a tiny family-run kitchen.  We settled on Carne Asada Tacos, pupusas filled with cheese and chicken, and a bowl of their Sopa de Res (beef and vegetable soup).  The soup is the epitome of comfort food, filled with carrots, chayote, zucchini, corn on the cob, and chunks of beef, it nourishes the body and the soul.  Beef shank is part of the leg, the meat is tough, sinewy, and lean (it does a lot of work after all) but with long slow cooking, morphs into tender and flavorful morsels and develops into a tasty stock.  Oxtails would be a good (but pricey) substitute for both flavor and texture.

On the way back, mom’s legs gave out and she collapsed crossing the street (Mission is a big fast street). I frantically tried to pick her up while grabbing her walker.  Immediately 3 guys came running to help us, literally carrying mom to the corner out of harm’s way. Luckily there is a bus stop there with seats. I told her I would run and grab a wheelchair.  One of the guys immediately said he would stay with her until I got back. I was so grateful to them. With all the craziness going on right now its acts of kindness and decency that restore your faith in people. They probably won’t see this but I wanted to thank the three of them who without hesitation jumped in to help us.

I got mom back and settled her in, told her she almost gave me a heart attack, she laughed.  She Was OK

In appreciation of the three guys who helped us, I have named my version of Caldo or Sopa de Res, Three Amigos Soup. It is soul food.  Comfort food made with love and made to be shared with family and friends.  My mom, notorious for not being a great cook (she left the cooking to my dad), somehow could fill a pot with water and like magic turn it into the most delicious soups.  Her beef and veggie soup, one of my favorites, starts like Three Amigos soup with beef shanks but veers Asian with the addition of ginger and shiitake mushrooms.

Inspired by the three gentlemen who helped me it felt right to make a pot of soup.  I made the soup in a pressure cooker and it takes half the amount of time.  If you have a 6-quart pressure cooker like me, half the recipe.  If you have the big Kahuna of Instant Pots, you can make the full recipe.

Confession time, I cheat by adding a heaping tablespoon of Better Than Bouillon Base, totally optional.  Or start with beef broth or stock instead of water for a richer flavor.

Three Amigos Soup (Caldo de Res)

Food for the soul, this beef and vegetable soup is nourishing, comforting, and just plain delicious. Filled with a variety of vegetables, including, carrots, potatoes, chayote and onions it makes a wonderful meal in a bowl.
Course Soup
Cuisine Mexican
Keyword Beef and Vegetable Soup, Beef shank, Caldo de Res, Carrots, chayote, comfort food, food for the soul, onions, potatoes
Prep Time 30 minutes
Cook Time 3 hours
Instant Pot 1 hour
Total Time 1 hour
Servings 10

Equipment

  • Instant Pot

Ingredients

The Stock

  • 10 cups water divided, for a richer stock, use beef stock instead of water or 1:1 water:stock
  • 2 pounds bone-in beef shank Substitute 2-2.5 pounds of oxtails, or a mix of both, chuck roast cut into 2-3 inch chunks would also work
  • 4 cloves garlic peeled
  • 2 bay leaves
  • 1.5 tablespoon coarse kosher salt
  • 1-2 Tbsp Better than Bouillon Beef Base optional, not necessary if using beef stock

The Veggies

  • 1 white or yellow onion Diced
  • 2 potatoes cut into eighths (Idaho, Russet or Yukon Gold)
  • 2-3 medium ears of corn shucked and cut into 2 inch pieces
  • 2 zucchini cut into thick chunks
  • 4 carrots sliced into thick coins
  • 1/2 head cabbage cut into eighths, leave the center stalk to keep cabbage together
  • 2 fresh tomatoes, cut in wedges optional but recommended, adds sweetness

Garnishes

  • 1 cup chopped cilantro for serving
  • 4 limes cut into wedges for serving
  • diced jalapenos, optional for serving

Mom's Beef and Vegetable soup

    Omit bay leaves, chayote, lime and jalapeños

    • 4-6 dried Shiitake Mushrooms, Cleaned and soaked in warm water for 10-15 minutes. reserve soaking liquid to use as stock for soup
    • 4 stalks celery, cut into 2-inch pieces
    • 1 1-inch piece fresh ginger Smashed Or cut into slices, in place of bay leaves
    • 1/4 Cup Rice wine or Shaoxing Wine Add with beef
    • 1-2 Fuzzy melons or piece of winter melon (1.5 pounds) Daikon or Korean radish would also work In place of zucchini and chayote,
    • 1 Tbsp Light soy sauce Just before serving, stir into soup
    • 1-2 Green onions sliced, to add when serving

    Instructions

    • In a large dutch oven or soup pot, add 10 cups of water, beef shanks, garlic, bay leaves, and salt. Bring to a boil, cover, reduce heat to a low simmer and continue cooking for 1 1/2 to 2 hours, or until the meat Is tender.
    • Skim off and discard any white or brown foam floating at the top of the pot as well as the bay leaves and garlic cloves. Transfer the cooked bone-in beef shank to a medium bowl and set aside to cool slightly.
    • Add the onions, potatoes, corn, zucchini, carrots, cabbage and remaining 2 cups of water to the pot.
    • Bring soup to a boil, reduce heat to a low simmer and continue cooking until all the vegetables are tender and cooked through, about 15 minutes.
    • While the vegetables are cooking, remove the bones and any tough sinewy parts from the beef shank and discard. Cut the tender meat into small bite-sized chunks. When the vegetables are fully cooked, add the meat.
    • Stir everything together and taste. Season with salt and pepper, if desired.
    • Ladle soup into large bowls, each bowl should have bit of everything. Garnish each bowl with cilantro, freshly squeezed lime juice and diced jalapeño peppers or a few dashes of Tobasco hot sauce (optional).

    Instant Pot Version

    • Place beef, shiitake, garlic, salt and 1/2 of diced onions in pot. Fill pot to 10 cup line.
    • Seal pot and set to cook at high pressure for 35-40 minutes. NPR for 10 minutes
    • While soup is cooking, prep vegetables. Remove meat from stock and add vegetables to Instant Pot, you might have to leave some out, it’s a lot of veggies. Seal and set cooktime for 15 minutes.
    • Quick release, season with salt and pepper. Ladle soup and goodies into large bowls. Garnish with cilantro and green onions and serve. Enjoy!
    Do You Mandango? Mango Sticky Rice

    Do You Mandango? Mango Sticky Rice

    I recently posted a pic on Instagram of this luscious dessert I had up in San Francisco at U Dessert Story, Mango Sticky Rice Bingsoo.  A generous layer of fresh sweet mango precariously perched on a mound of superfine shave ice drenched in sweetened condensed milk, and finely shredded coconut.  This mega bowl of bingsoo is flanked by an array of sticky rice, housemade coconut crumble, more sweetened condensed milk, and fresh mango puree.  It was mind-bogglingly delicious.

    mango sticky rice bingsoo
    Cubes of fresh mango, powder-like ice, tender but chewy sticky rice and the crunchy crumble, a veritable smorgasbord of textures and flavors.

    Since that day I have had mango on the brain.  I picked up a bunch of Manila mangos, because you can’t just buy one, because I had decided I had to make Mango Sticky Rice.  It’s sweet, filling, refreshing, and gluten-free.  A classic fixture at Thai restaurants, you’ll be surprised at how easy it is to make at home.

    WARNING: Dissertation Ahead + The Ulitmate Rice Guide

    The biggest hurdle is probably tracking down the ingredients.  Mango Sticky Rice calls for Sweet or Glutinous Rice.  This is not regular rice, it is not arborio or risotto rice, and it is not to be confused with sushi rice (short grain) which is stickier than long-grain rice but not actually sticky rice.  Sweet rice, also known as sticky rice or glutinous rice, is low in amylose, and high in amylopectin (starches) which allows it to absorb liquids and create that trademark stickiness.

    To add to the confusion-sweet rice also comes as short grain or long grain.  Thai cuisine uses long-grain sticky rice, while Chinese and Japanese dishes generally use short grain.  I used short-grain sweet (glutinous) rice from Koda Farms (Sho-Chiku-Bai) which is a little easier to find (most Chinese, Japanese and Korean markets will carry this) and it’s what I have on hand.  I’ll be looking for Thai long grain Sticky rice the next time I’m at an Asian market.  I foresee an America’s Test Kitchen session soon.

    Glutinous rice absorbs liquids well, so the traditional, easy method for cooking it is to soak the rice for a good couple of hours (2-8 hours) and then steam it.  You COULD buy a special bamboo steamer for sticky rice or you could improvise.  I lined my steamer with cheesecloth to spread the rice on.

    sticky rice

    The rice steams for approximately 25 minutes.  It will look translucent and should not be chalky in the center.  Pull out a couple of kernels and taste them.

    While the rice is steaming, prepare the coconut milk that will be used in the rice and as a sauce alongside.  Warm coconut milk and add sugar, stir to dissolve.  Remove 1 1/4 cups to use in the rice.  Add 1 teaspoon of cornstarch, dissolved in 2 teaspoons of cold water, to the coconut milk remaining in the pot. Stir constantly until the sauce begins to thicken.  Set aside.

    To cut mango, slice in half lengthwise, as close to the seed as possible. For cubes, score mango in grid pattern and scoop flesh away from skin. Or flip the mango inside out to expose flesh making it easy to cut it away from skin.

    When the rice is done, pour it into a bowl, add the 1 1/4 cups of coconut milk and stir to combine. Cover the bowl and let it sit for 20 minutes so the milk is absorbed by the rice.  Stir rice again, cover, and let it sit for a few more minutes.

    mango sticky rice

    Slice or cube mango and serve alongside a scoop of sticky rice.  Drizzle coconut sauce on rice and garnish with sesame seeds.  Enjoy!

    Mango Sticky Rice

    Gluten-free delicious Thai dessert
    Course Dessert
    Cuisine Asian
    Keyword mango, sticky rice, Thai
    Prep Time 6 hours
    Cook Time 20 minutes
    Servings 4 Servings

    Ingredients

    • 1.5 cups Long-grain Sticky Rice (aka sweet or glutinous) can use short grain
    • 1 can coconut milk 13.5 ounces, like Chaokoh
    • 1/4 cup sugar + 2-4 Tablespoons
    • 1/2 teaspoon salt
    • 1 teaspoon cornstarch dissolved in 2 t cold water
    • 1 big ripe mango or 2 Manila mangoes peeled and sliced or cubed
    • Toasted sesame seeds for garnish black or white
    • fresh strawberries for garnish optional

    Instructions

    • Rinse the sticky rice with tap water and use your hand to gently stir it. Drain the water to remove the excess starch. Repeat once, then add water to cover. Soak the sticky rice for a minimum of 2 hours, up to 8 hours. Rinse again and drain the water.
    • Transfer the rice to a heatproof bowl, add about 2 inches of water to your steamer (not into the rice), place the heatproof rice bowl on the steaming rack in the steamer, and cover the steamer. Turn to medium-high heat to bring the water to a boil. When the steam starts to come out of the pot, turn to medium heat. Steam for 20 to 25 minutes, until the rice is cooked through, with no hard raw bits in the middle. Or use a steamer rack lined with cheesecloth. Spread rice evenly over cloth and steam as directed above.
    • While rice is steaming, add can of coconut milk, 1/4 cup + 2 T of sugar, and salt to a saucepan. Cook over medium heat until the mixture is hot and the sugar is melted. Do not bring the coconut sauce to a boil. Taste for sweetness, if it needs more sugar, add another 1-2 tablespoons. Remove 1-1/4 cups sauce to be used with the rice.
    • Carefully remove the sticky rice bowl from the steamer with your oven mitts on. Pour the 1-1/4 cups of sauce over the bowl of rice. Stir to mix well. Allow to stand covered for 20 minutes. Remove cover and stir the rice again. Allow mixture to sit another few minutes.
    • For the remaining sauce, combine the cornstarch and 2 teaspoons water in a small bowl. Stir to completely dissolve the cornstarch. Over medium-low heat, remaining sauce to a small saucepan. Add half of the slurry to the sauce. Stir immediately to thicken the sauce. You can adjust the thickness of the sauce by slowly adding a bit more water or cornstarch slurry, if needed. The sauce shouldn’t be too thick, but should coat the back of a spoon.
    • Serve when the rice mixture and the sauce cool to room temperature. You can serve it or store the extra sauce and the sauce-rice mixture separately in the fridge until ready to serve, up to 3 days. The sauce will further thicken when cooled.
    • To serve, transfer the coconut rice into serving bowls or plates. Place the sliced mango on the side. Pour a few spoonfuls of the extra coconut sauce on top of the rice. Garnish with toasted sesame seeds and fresh sliced strawberries if desired.

    Notes

    • If you use refrigerated sticky rice, you can gently heat it in the microwave to bring it to room temperature before serving, for a better texture. However, it’s highly recommended to serve the rice when it’s fresh, for best results. Do not freeze the sticky rice, as it will create a very tough texture.
    • Use a small ramekin to mold sticky rice and place on the plate.
    Bi Bim Bap It! Homecoming in Seoul

    Bi Bim Bap It! Homecoming in Seoul

    Off to see Jorge in Korea!

    Do you have a bucket list of things to do when traveling, if so, what’s yours? I’d love to know.  Here’s ours when we travel:

    FIRST DAY- a tour of the city on bikes.  It’s a great way to get an overview of the city you are visiting and get a bit of exercise (guilt-free eating for the day, yay!)  It does have it’s heartbeat quickening moments when you ride in traffic and every big city in the world has traffic.  But we have biked in Rome, London, Boston, DC, Paris, and Seoul without mishap, just a couple of choice words from drivers.  But hey, I get that here too.

    SPORTS:  We have watched rowing on the Thames, soccer in Italy, and now baseball in Korea and Japan.  BOSS, so much fun and gives you a taste of the folks that live there.

    EATS:  Street food, hole-in-the-walls, local joints, my kinda food.  Ok, occasionally, a meal that breaks the bank.

    I push the envelope sometimes with my search for local food.  I have waited in line for 90 minutes for Egg Tarts in Macau, meandered down small alleys looking for Won Ton Soup in Hong Kong or Okonomiyaki in Osaka.  Unfortunately, the combination of spotty maps and my non-existent sense of direction means a lot of wandering around and spewing expletives at my phone when looking for those food gems. Good thing my family loves me, or at least I think they do.

    HOME COOKING:  Do you get tired of eating in restaurants?  Miss your kitchen? Take a cooking class!  We have made pasta and gelato in Florence and now homemade kimchi, seafood pancake-pajeon and Bi Bim Bap in Seoul.

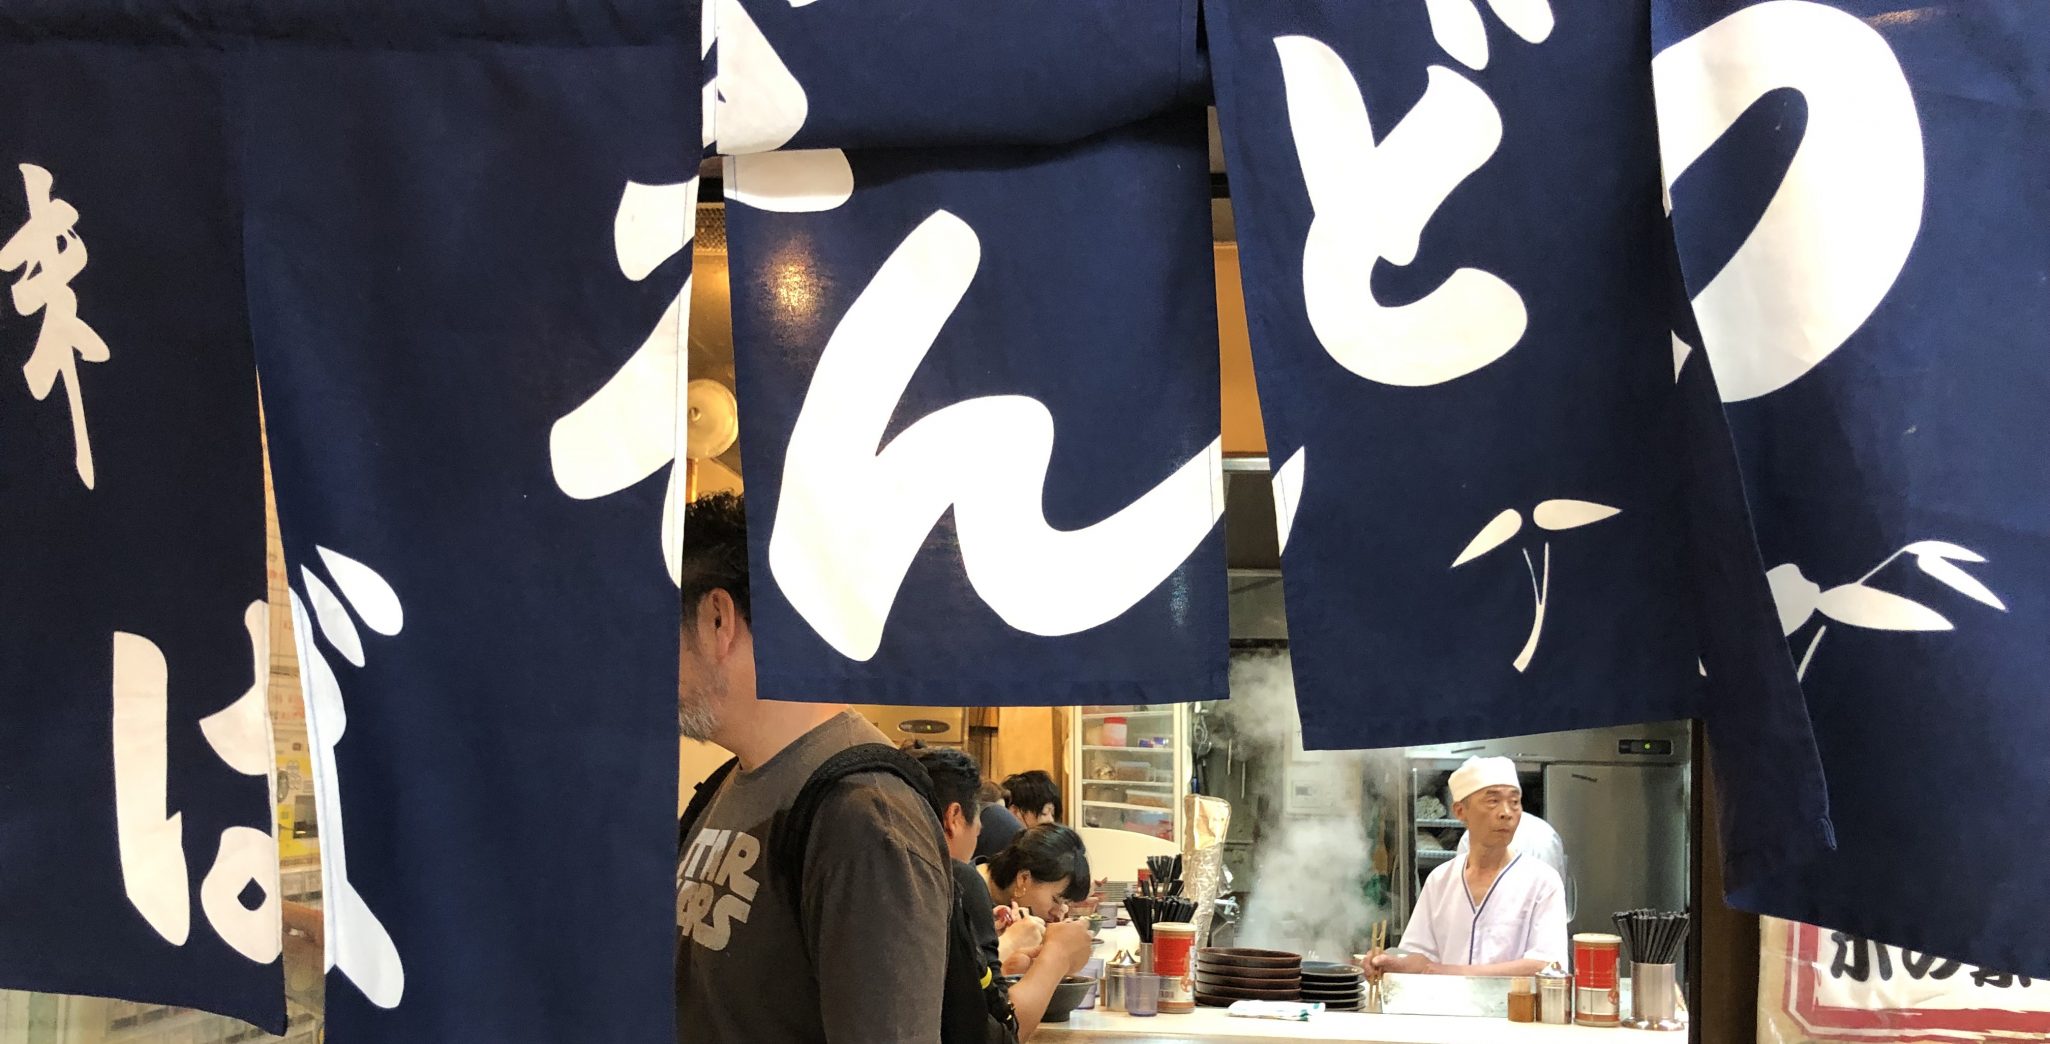
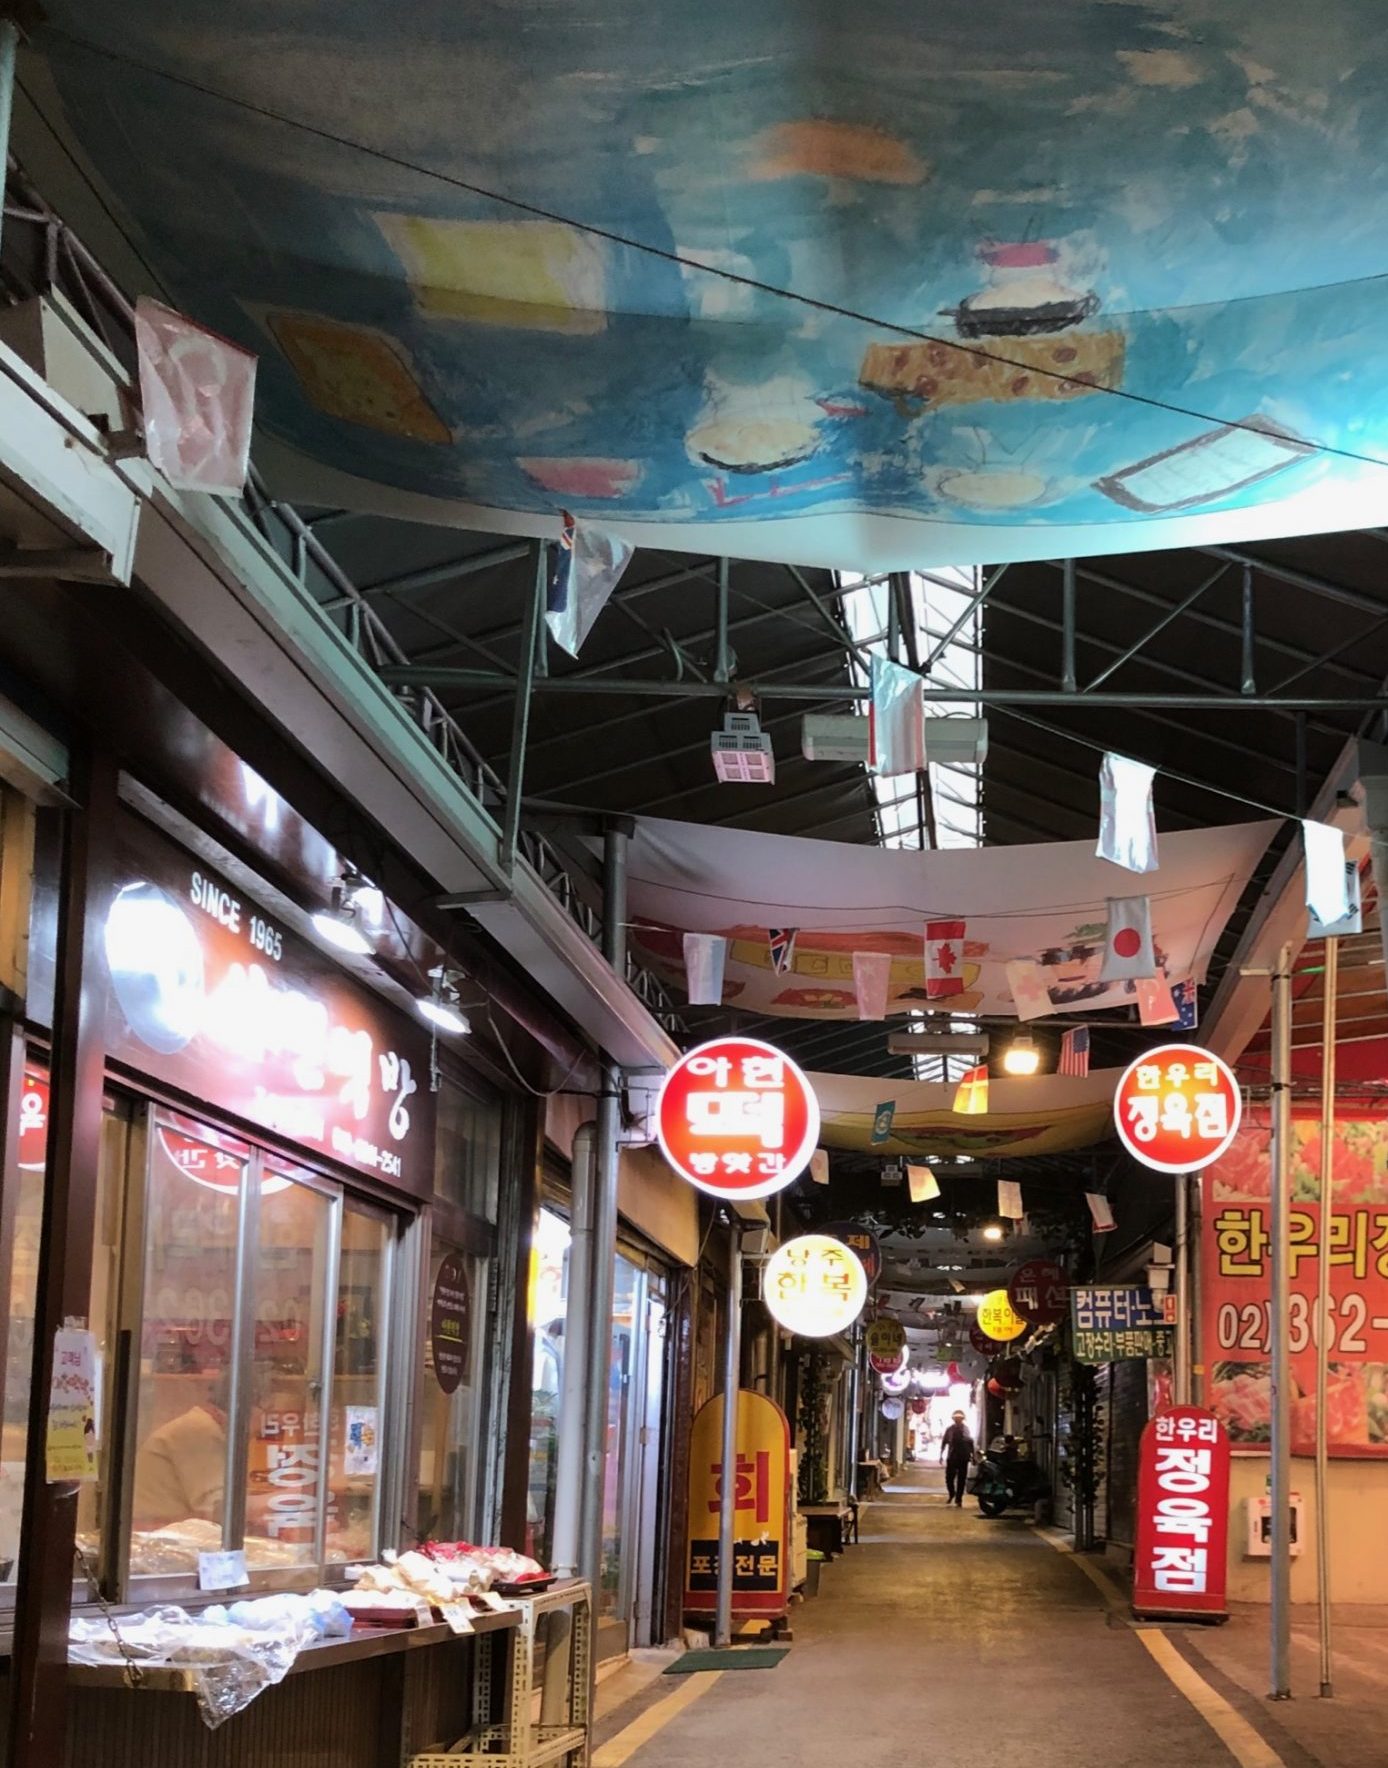
    Early morning at a local street market

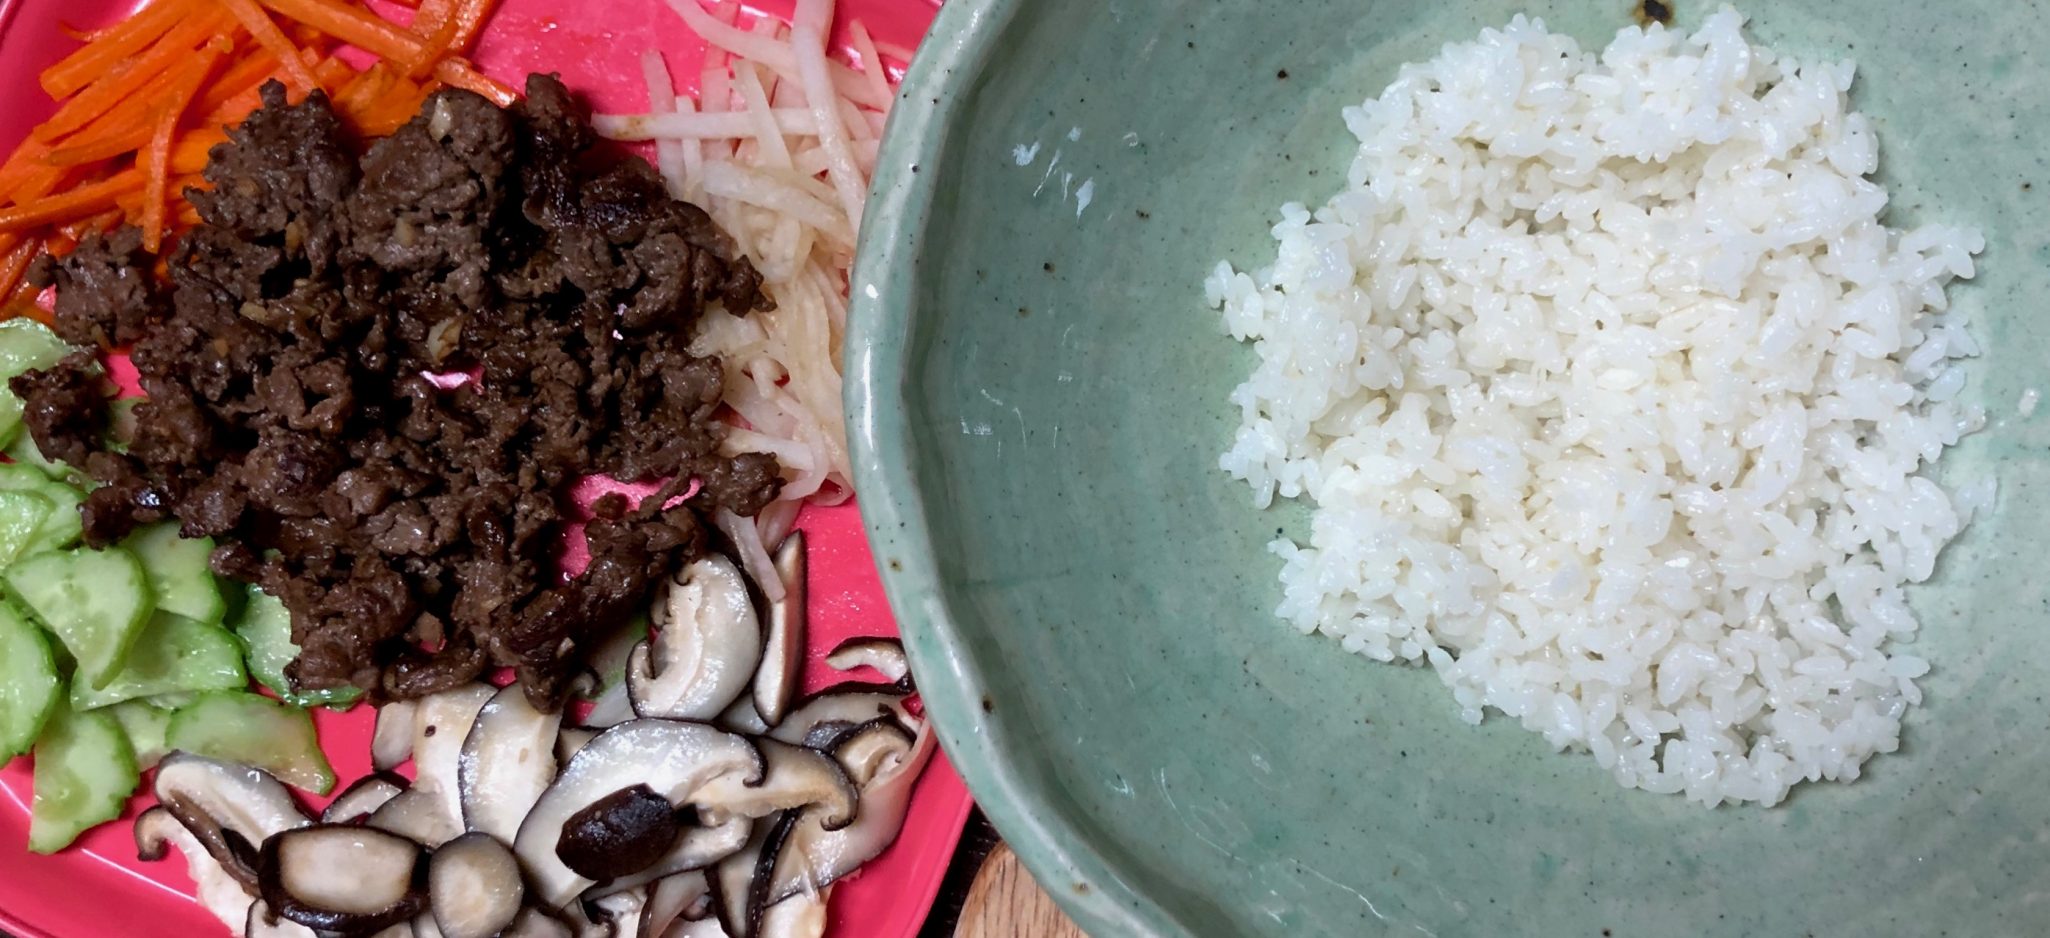
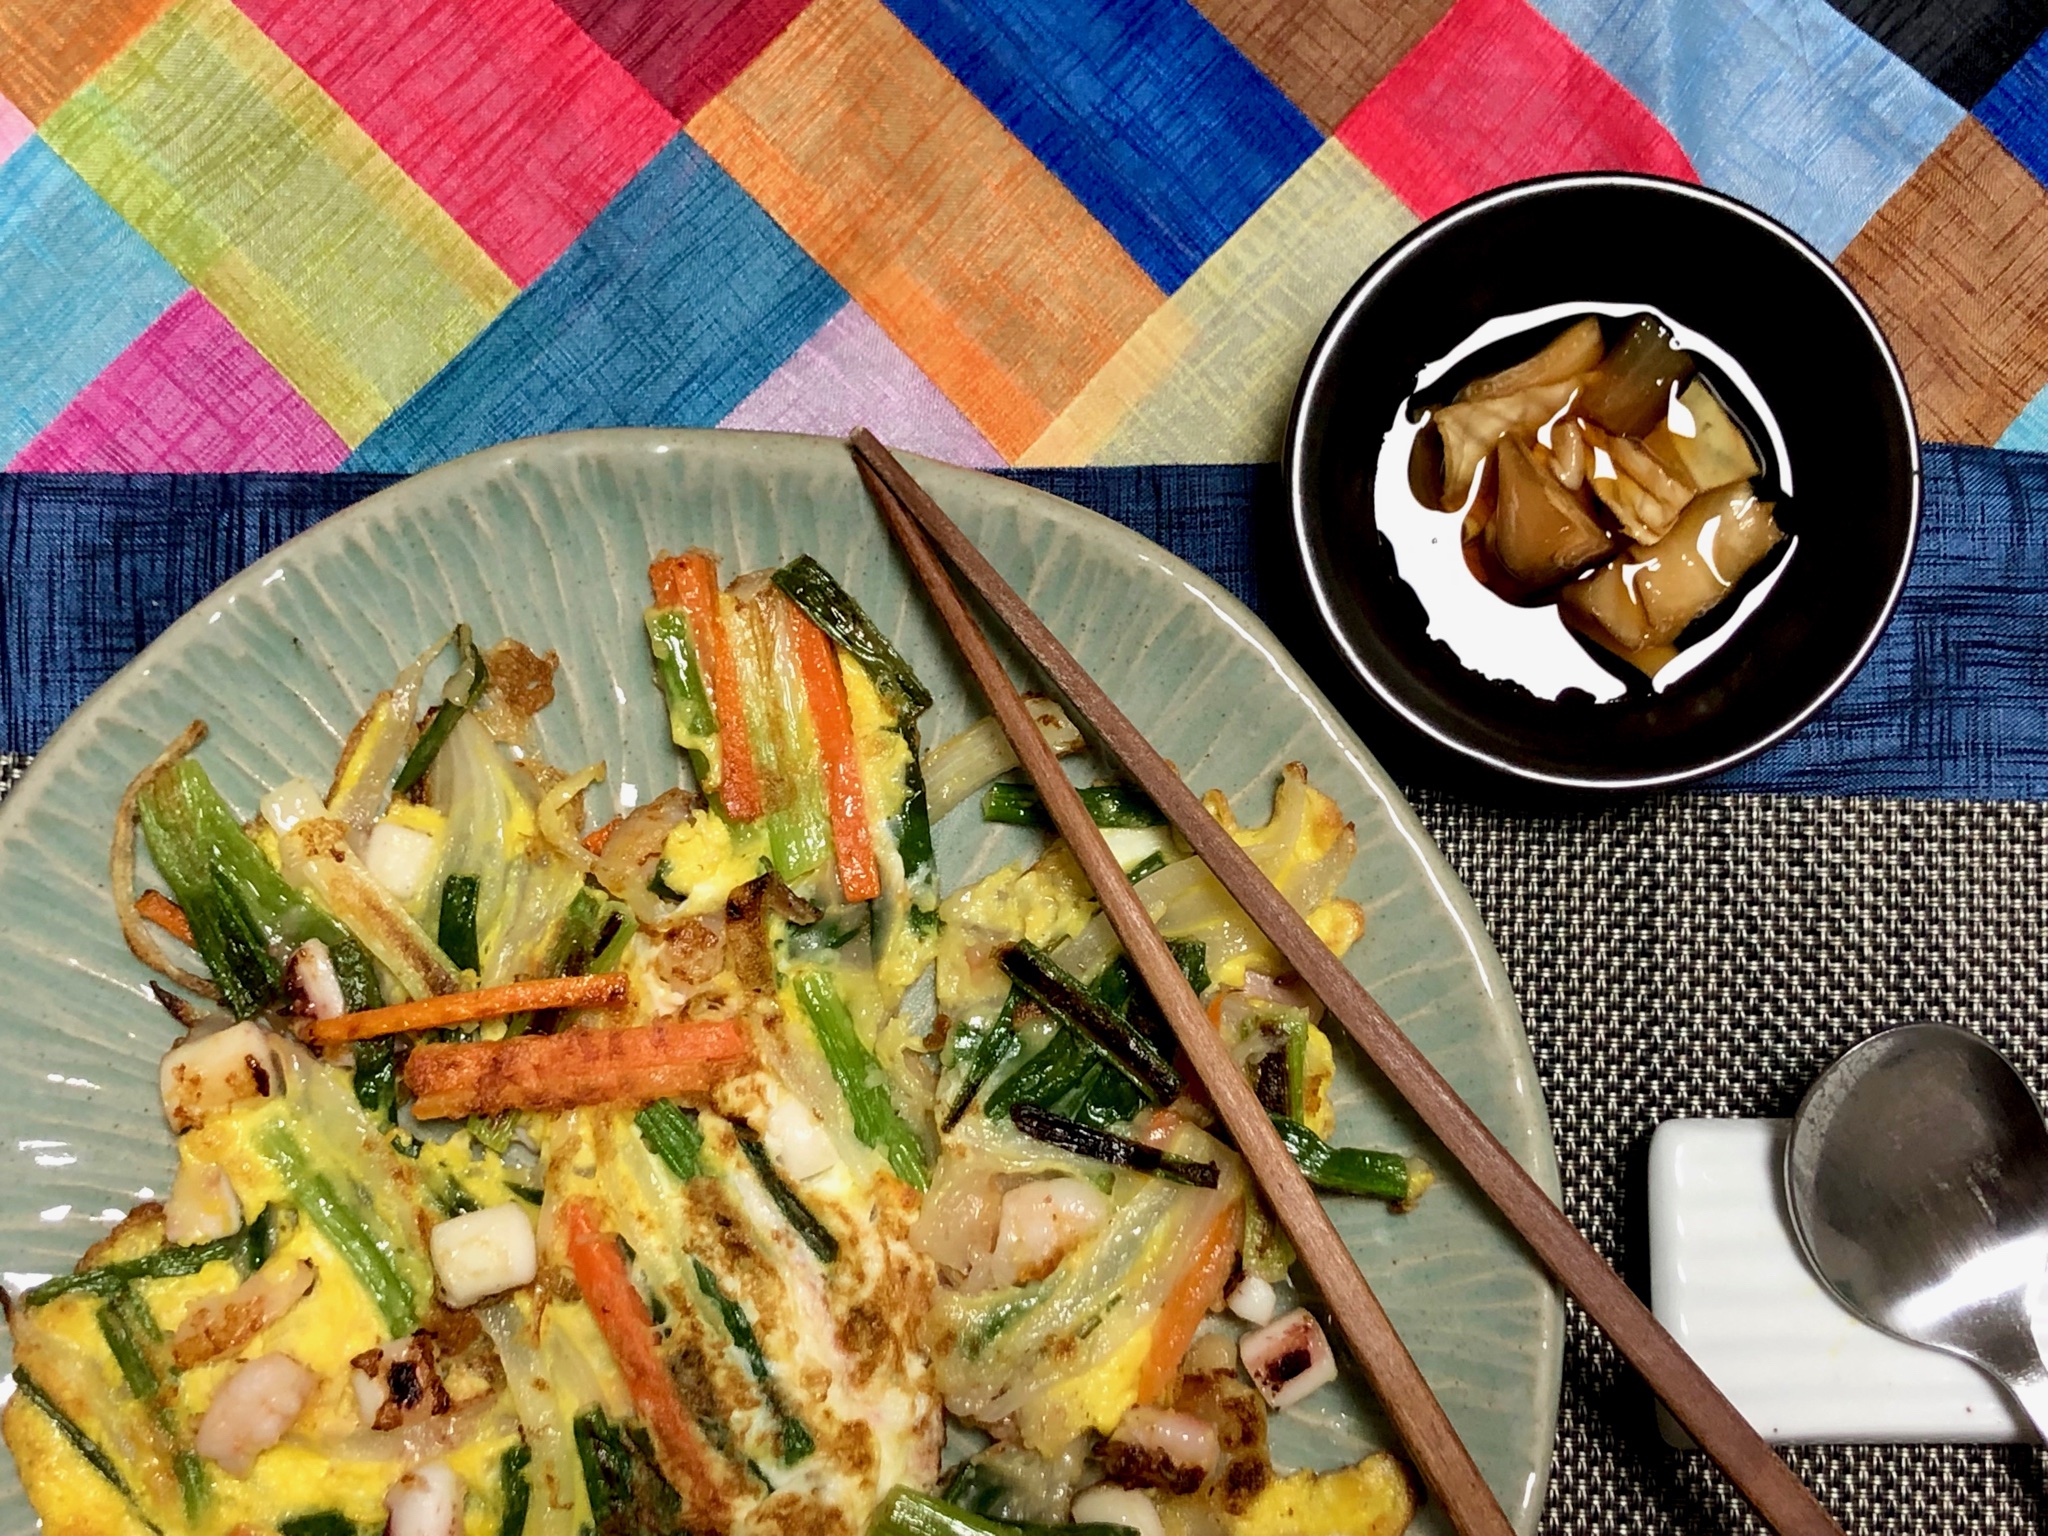
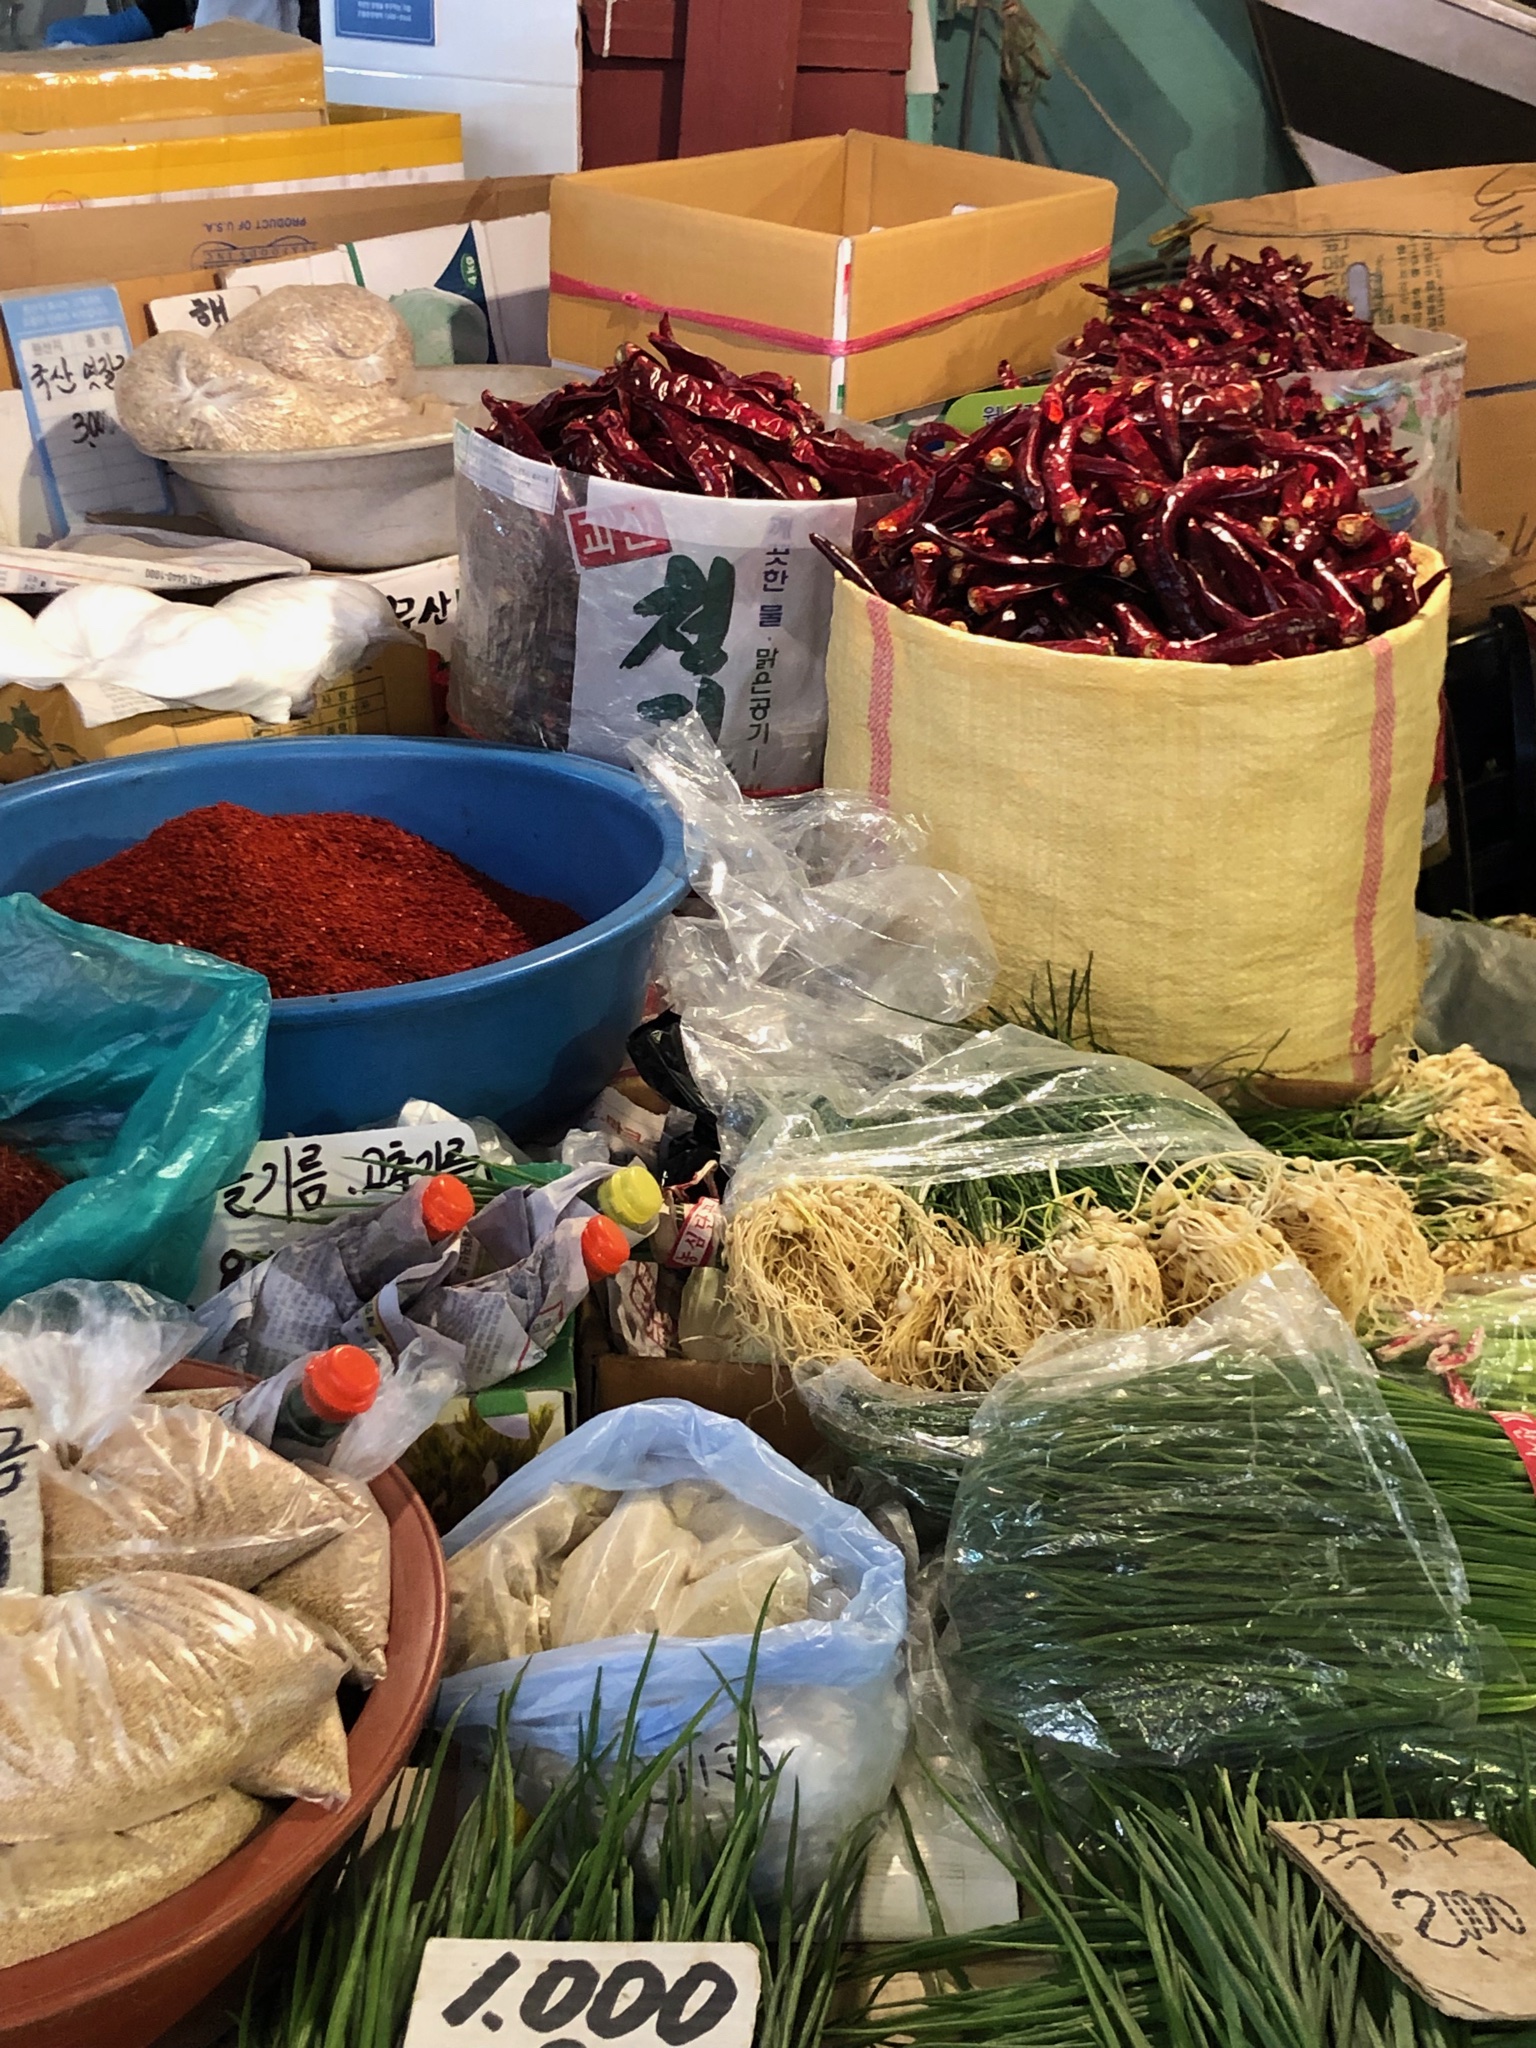
    Our cooking class with Joungy began with a visit to the market to buy ingredients, a Korean Veggie primer!

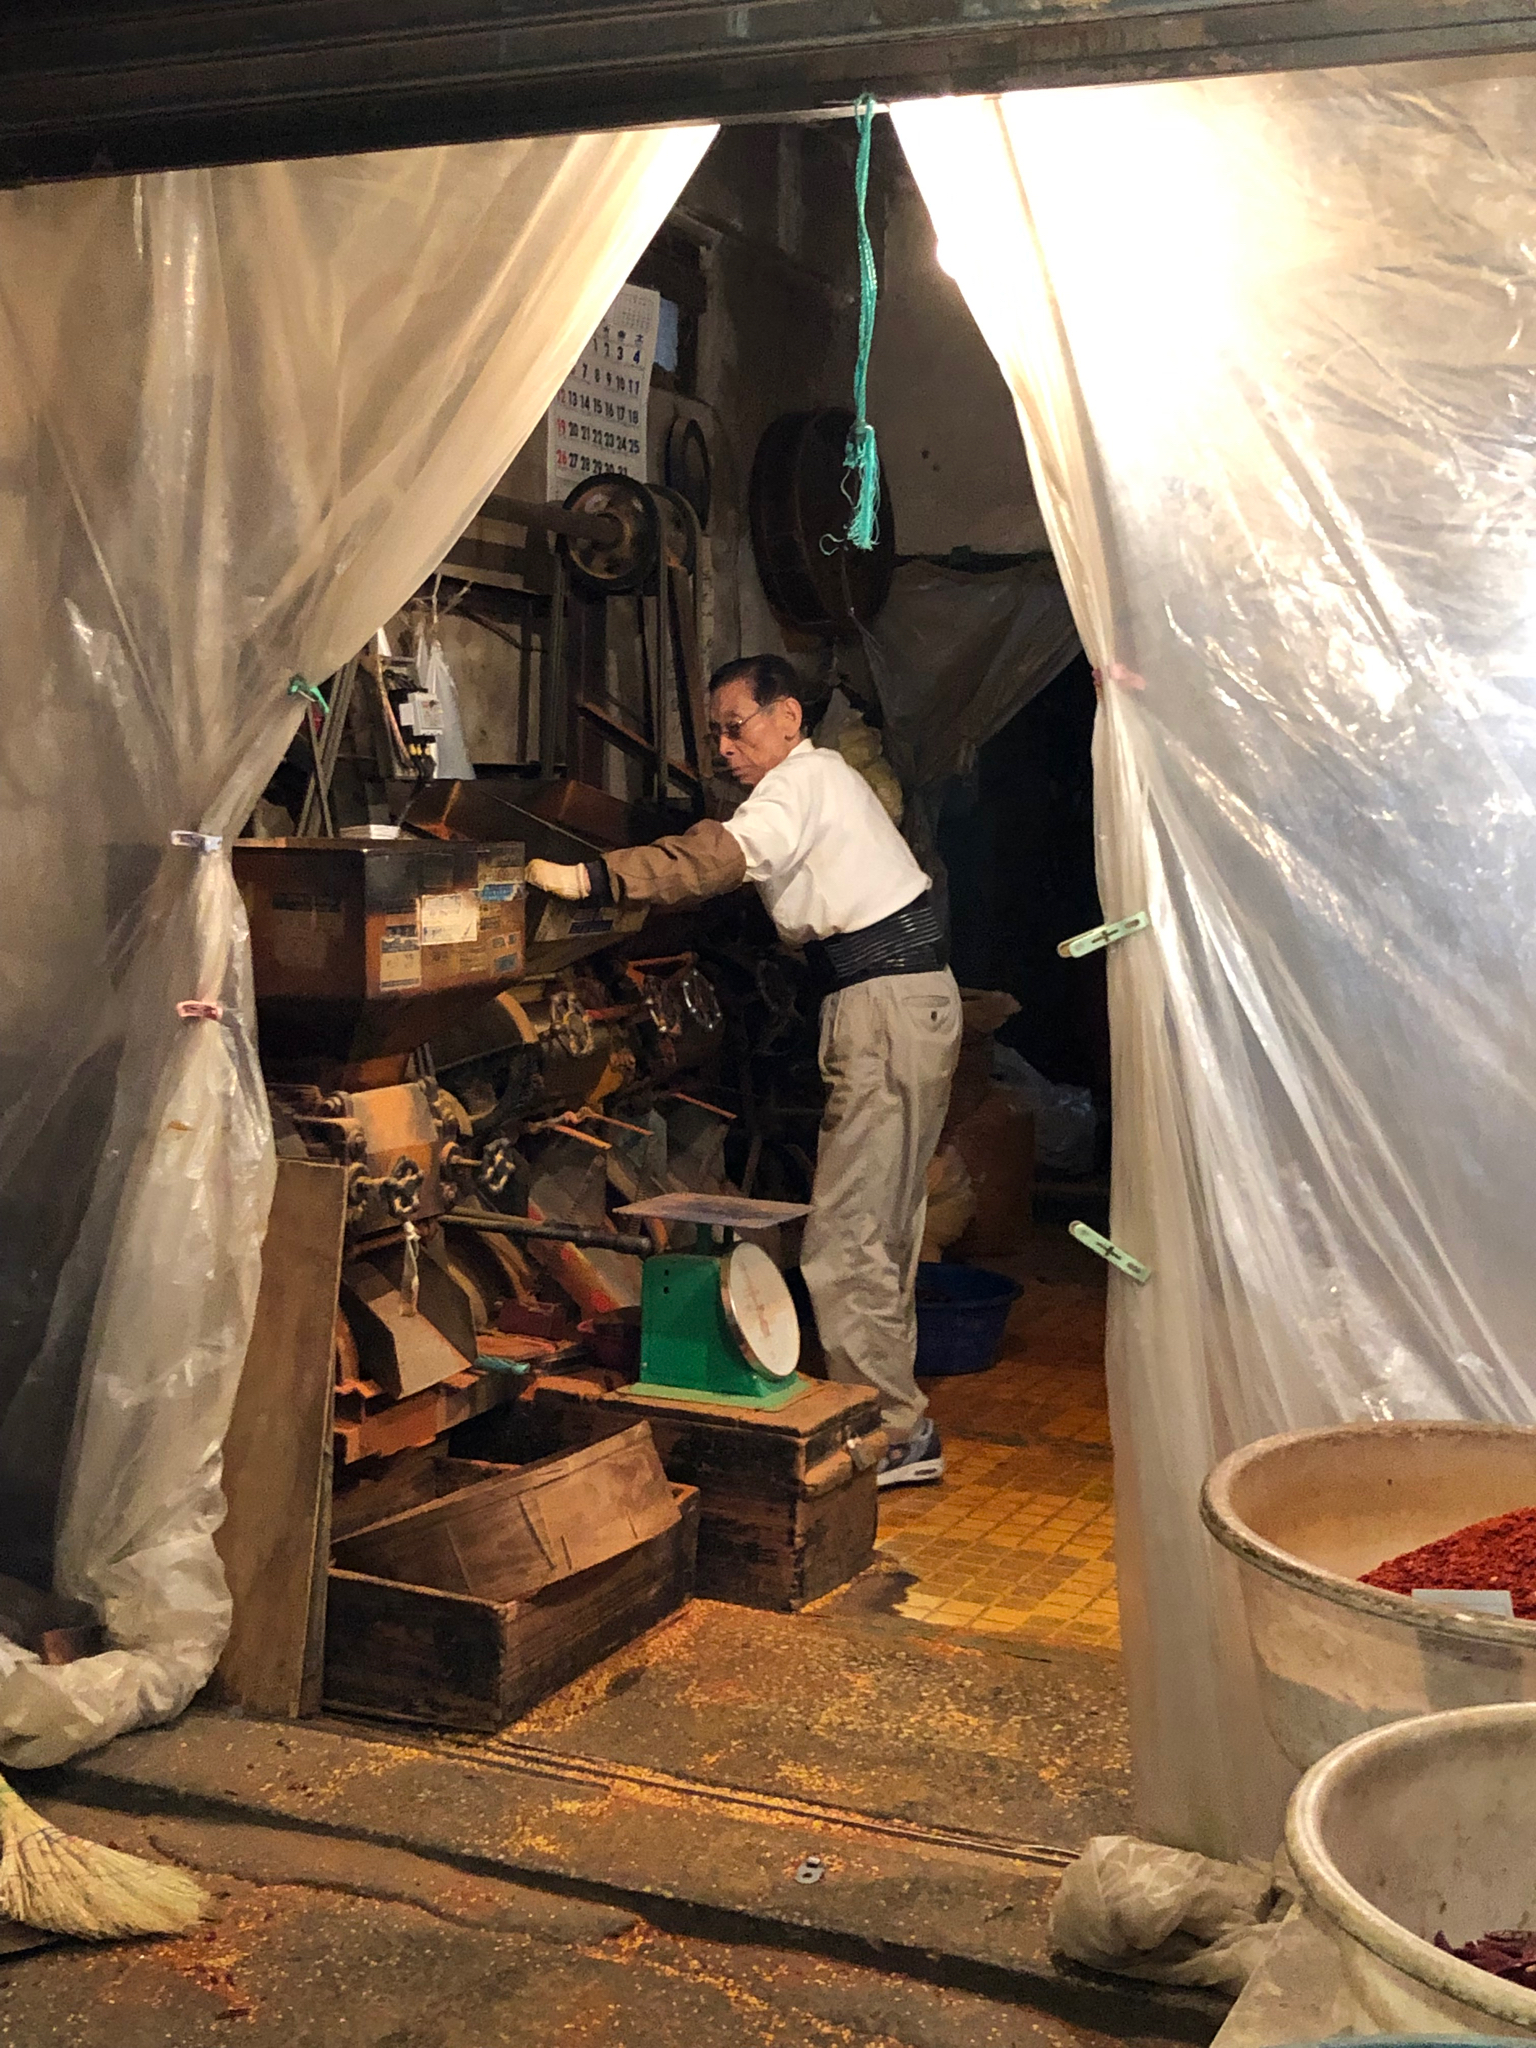
    I was mesmerized watching this gentleman grind chili peppers into Gochugaro powder.

    We made Seafood Pancakes or Pajeon, fresh kimchi, and my favorite bowl meal, Bi Bim Bap.  Bi Bim Bap starts with a pile of fluffy, warm rice and topped with julienned carrots, cucumbers, squash, spinach, mushrooms, yesterday’s banchan, seasoned beef or chicken.  You get the picture, you can use anything you desire for toppings.  For Joungy’s class, we had a wonderful array of veggies, carrots, cucumbers, daikon, shiitake mushrooms, shredded beef and a chiffonade of Perilla leaves.  Delicious!

    The secret to her Bi Bim Bap is the extra attention given to the sauce.  Her Gochujang paste included corn syrup, a bit of soy sauce, and chopped garlic, stir-fried briefly. This brought the sauce to a new level.

    Season each component, stir-fry, and place on top of the rice in neat little separate piles-kid-friendly, lol.  Top your masterpiece with a sprinkling of sesame seeds and a dollop of sauce.  It’s colorful, delicious, easy to prepare, flexible…what more could you ask for?  If you can’t find Perilla leaves, garnish with chopped green onions are good too.

    A great primer for Bi Bim Bap can be found at My Korean Kitchen which has instructions to season the blanched bean sprouts and spinach.

    Bi Bim Bap (Korean Mixed Rice)

    Korean Rice Bowl, Easy to Make and Delicious!
    Course Main Course
    Cuisine Asian
    Keyword Bi Bim Bap, Korean, Rice Bowl
    Prep Time 20 days
    Cook Time 45 days
    Servings 1 serving

    Ingredients

    Bi Bim Bap Rice (proportions for 1 bowl)

    • 50 gm thinly sliced beef
    • 1 clove garlic finely chopped
    • 1/2 t brown sugar
    • 1 t corn syrup
    • 1/2 t salt
    • 1 T soy sauce
    • 1/2 t sesame oil
    • 2 fresh shiitake mushroomes, thinly sliced
    • 1/2 carrot, julienned
    • 1/4 c daikon, julienned or bean sprouts
    • 1/8 t pepper powder Gochugaru
    • 1 handful spinach leaves or sub 1/4 cup thinly sliced zuchinni or Persian cucumber
    • 5 perilla leaves aka sesame leaves can sub shiso leaves, julienned
    • vegetable oil for frying, 1/2 T for each vegetable
    • 2 cups Cooked white rice I use a rice cooker, its your call how to cook the rice!

    Ingredients for Sauce for servings

    • 5 T Gochujang chili paste
    • 2 T Corn syrup light
    • 3 cloves garlic
    • 1 T brown sugar
    • 1/2 T vegetable oil

    Instructions

    For Sauce

    • In a nonstick skillet, add oil and chopped garlic. Turn heat onto medium high. Saute until garlic is brown color, don't burn!
    • Add remaining ingredients for sauce and stir over medium low heat for approximately 5 minutes. Set aside.

    For Vegetables and Rice

    • Cooked medium grain white rice
    • In a small bowl combine soy sauce, brown sugar, corn syrup, pepper powder and chopped garlic. Add beef and stir to combine.
    • Stir fry each vegetable-mushroom, carrot, daikon, separately until tender crisp. Season with salt to taste. Place each vegetable on a platter, keep separate. Stir fry mushrooms in 1/2 T sesame oil, remaining vegetables can be saute in 1/2 T vegetable oil or a blend of sesame oil and vegetable oil
    • If using bean sprouts or spinach, blanch in hot water until tender crisp about 1 minute
    • Stir fry beef until cooked through.

    Building Your Bowl

    • Divide hot rice between 3-4 bowls
    • Place vegetables in bundles around the bowl in a radial pattern. Place beef in the center.
    • Garnish with sesame seeds and perilla leaves and approximately 1 T sauce for each bowl. Place extra sauce in a bowl and serve along side bowls.
    • Optional (mandatory for me): Fry an egg for each serving, sunnyside up, and place on top of beef

    Notes

    Bi Bim Bap and creative expression.  The only absolutes for Bi Bim Bap is the rice and the sauce.  You could sub brown rice in place of white rice, but you need rice. The recipe from Joungy's class goes the extra mile by sautéing the red pepper paste with garlic and seasonings.  You could use Gochujang straight out of the jar, but the cooked sauce is really tasty.
    Use whatever vegetables your little heart desires.  Great way to use extra Banchan you boxed from K-bbq the night before.  Why not? 

    So good!  Bowled over by Bi Bim Bap!

    Bowled Over, Udon Want to Miss My Newest Obsession (Udon)

    Bowled Over, Udon Want to Miss My Newest Obsession (Udon)

    Hang on to your hats, imagine Times Square, with all its neon signs and flashing lights dedicated solely to FOOD.  Yep, that’s the only way I can describe the Dotonbori area of Osaka.  Swarms of people, whose sole purpose is to find all things delicious to eat.  A giant 3-D crab, or shrimp or potsticker over the door of a dining establishment making it easy to figure out their specialty.  The delicious aromas swirling around, changing with every step as they walk by tempura houses, ramen joints, crab feasts and yakitori vendors.

    Welcome to Crazy Town for food

    Yep, we bit.  Drawn by the people, hypnotized by the lights, we ate our way down the street.  We tasted Takoyaki, octopus cakes, (not really cakes, I just couldn’t bring myself to call them balls).  Think Ebelskiver with octopus bits.  We munched on skewers of yakitori, sampled matcha and black sesame soft serve and found taiyakis, fish-shaped cakes filled with red beans.

    Udon want to miss the noodles

    Our last stop was the perfect cap for the evening.  Walking back to our hotel we found a local shop in Namba with a trio of old cooks serving up delicious udon noodles.  We decided what toppings we wanted on our noodles, slipped our yens (=TWO DOLLARS A BOWL) into the machine, and handed the tickets to the chef.  Minutes later 3 hot steaming bowls of udon were placed in front of us.

    Unlike ramen, the noodles are much thicker with a definite chew.  The broth is flavorful but clear and light, fish-based, different than the rich, heavy broth that you find with ramen.  Toppings are simple-fried tofu (abura-age), a raw egg that cooks in the steaming hot broth, a single tempura shrimp, or a clump of shredded seasoned beef and a sprinkling of green onion.  We slurped our noodles and tipped the bowls to spoon out the last drops of broth.  You’d think we hadn’t eaten all day.  Ha!


    Oyako-Udon combo set

    Thus My Obsession with Udon Began…

    As soon as I got home plus 12 hours of catch-up sleep, I pulled out my copy of Japanese Soul Cooking by Tadashi Ono.  A gem of a book on homey Japanese comfort food.  I flipped to the udon section and then I was off to the market to look for ingredients.  I had purchased a delicious Dashi base in Tsujiki Market in Tokyo, perfect for my udon.  To make your own Dashi here is a great primer from Just One Cookbook. OR, Kikkoman makes a soup base Hon Tsuyu that makes a pretty good dashi broth base.

    Working down my list, next the udon noodles. Udon comes fresh, frozen, and (if you can’t find fresh or frozen udon) dried.  Sigh, just not the same.  I also found abura-age or fried tofu skin which is used to make Kitsune Udon. The fried tofu skins are flattened and seasoned with soy sauce and placed on top of the udon.  Really delicious, and substantial enough for a satisfying vegetarian bowl of udon. It can be difficult to find abura-age though and in that case, Inari-age, seasoned deep-fried tofu pouches used to make Sushi Rice balls, is a convenient and easy substitute.  No need to season, just plop them on top of the cooked noodles.  Confused about tofu? Serious Eats’s Tofu primer is your ticket.  The carnivore in me though, bought some thinly sliced beef (sukiyaki beef is perfect) to make Niku Udon, yummo.

    Making udon is very approachable.  It’s perfectly acceptable to start with a broth made from Dashi bags and pre-made noodles.

    Udon Ingredients

    Travel to Eat

    People travel to buy clothes and souvenirs, I buy food, Dashi, Furikake’, Soba Boro cookies…yep, travel driven by food.

    Studying up, here’s the scoop, on udon.

    I used Dashi packets to make the Tsuyu.  This is your base,  add soy sauce and mirin to flavor the Tsuyu.

    Optimally, use Sanukiya noodles, most likely found in the frozen section of your favorite Asian market.  The noodles are a bit firmer and hold up well.  The pre-cooked noodles only take a couple of minutes to separate and heat in hot water, presto-dunzo.  There are Korean versions of Udon noodles too, and they are very good.

    Toppings for udon can be as simple as an egg, gently poached for the raw egg-squeamish, Abura-age, tempura, fishcake, or really ANYTHING you feel like putting on your noodles!

    Kitsune Udon

    Simple, satisfying, soulful, best describes a bowl of Udon, thick, slurpable, noodles, in a clear broth.
    Course noodles, one bowl meal, One dish meals
    Cuisine Asian
    Keyword Kitsune, Udon
    Prep Time 20 minutes
    Cook Time 10 minutes

    Ingredients

    Abura-age (Tofu)

    • 1 package Abura-age or 4 Abura-age

    For Simmering Abura-age:

    • 3/4 cup dashi soup stock
    • 2 Tbsp. sugar
    • 1 Tbsp. soy sauce
    • 1 Tbsp. mirin

    For Soup:

    • 5 cup dashi soup stock
    • 3 Tbsp. mirin
    • 2 Tbsp. soy sauce
    • Salt adjusting the amount of salt to your preference

    Noods and Garnishes

    • 4 packages pre-boiled udon noodles
    • Optional: 4 slices kamaboko fish cake for topping
    • green onions, sliced

    Instructions

    • Heat dashi, mirin, sugar, and soy sauce in a medium pan and bring to a boil. Adjust the flavor with salt as you like.
    • Simmer aburaage in the soup on low heat until the liquid is almost gone. Set aside.
    • Boil water in a large pan and heat udon noodles as indicated in the package.
    • Drain the udon and divide into four bowls.
    • Pour the hot soup over udon noodles.
    • Top with seasoned aburaage and kamaboko slices.
    • Garnish with green onions

    OR buy the more readily available Inari age or seasoned tofu pouches and just plop those straight into your bowl. Inari age is the fried tofu pouches used to make Inari Sushi

      Or the carnivore delight…

      Niku Udon

      Udon Noodles topped with stir fried seasoned beef and onions.
      Course Soup
      Cuisine Asian
      Keyword japanese, Noodle, soup, Udon
      Prep Time 20 minutes
      Cook Time 15 minutes
      Servings 4 servings
      Author Adapted from Japanese Soul Food

      Ingredients

      Niku Ingredients

      • 1/4 cup sake
      • 1/4 cup sugar
      • 1/4 cup soy sauce
      • 1 pound sukiyaki beef or thinly sliced flank steak, ribeye
      • 1/4 yellow onion, thinly sliced optional

      Soup

      • 6 cups udon tsuyu*
      • 4 bricks fresh or frozen udon noodles can substitute dried Sanuki Udon
      • 1-2 green onion thinly sliced
      • Shichimi togarashi

      Udon Tsuyu

      • 6 cups dashi
      • 1/2 cup mirin
      • 1/2 cup Usukuchi soy sauce light soy sauce
      • 1/2 - 1 teaspoon salt or to taste

      Instructions

      Tsuyu

      • Prepare broth and keep warm.

      Beef

      • Combine sake, sugar and soy sauce in a bowl and stir well. Add beef and mix together, coating meat well. Marinade beef for 10 minutes.
      • Preheat dry non-stick skillet or well seasoned wok/iron skillet. If including onion, saute onion slices just until soft before adding the beef. Add beef and marinade to skillet. Spread beef in skillet to cook evenly. Cook over high heat until beef has lost its pinkness and most of liquid has evaporated, approximately 5 minutes. Remove from heat and set aside.

      Udon Noodles

      • Bring large pot of water to a boil. Add each packet of noodles. gently spread noodles out. When water comes back to a boil, the noodles are done. Drain well and divide among bowls.
      • Pour hot broth over noodles. Divide beef among bowls, garnish with green onions and shichimi togarashi. Serve immediately.