Category: Desserts

Apple Almond Galette (You’re the Apple of My Pie)

Apple Almond Galette (You’re the Apple of My Pie)

When the fall season rolls around, apples begin to crop up at our farmer’s market.  Gone are the days when the only available apples were Red or Golden Delicious (thank goodness)!  The variety of apples is mindblowing.  My intention is to just get a few, but I invariably end up with what feels like a bushel of apples.

Here, There, and Everywhere…Apples

This is why I am constantly bookmarking recipes that sound wonderful and highlight apples knowing full well I won’t be able to resist the fall bounty of apples.  Luckily, I found an Apple Almond Galette from Zoe Bakes.  It’s the perfect recipe “to show off them apples”.  Get a combination of apples, Fujis, Mutsus, Braeburns, Jonagolds, or Honeycrisps.  Yes, you can get them ALL these days.

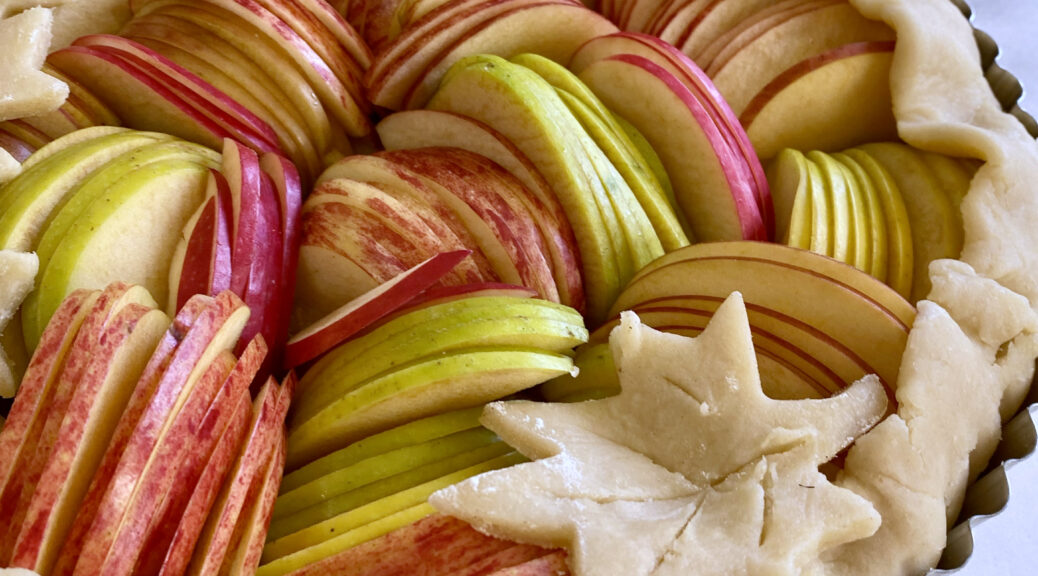
Better yet, you don’t have to peel the apples as the PEEL is part of the apPEAL of this galette, it’s a win-win and why you want a variety of apples.  Use a mandolin (carefully) to thinly slice the apples.  A knife is very doable, it will just take a bit longer than a mandolin.  The filling is an almond cream easily made in a food processor and consists of almond paste, eggs, butter, and a touch of almond extract.  A lovely combination-apples and almonds.

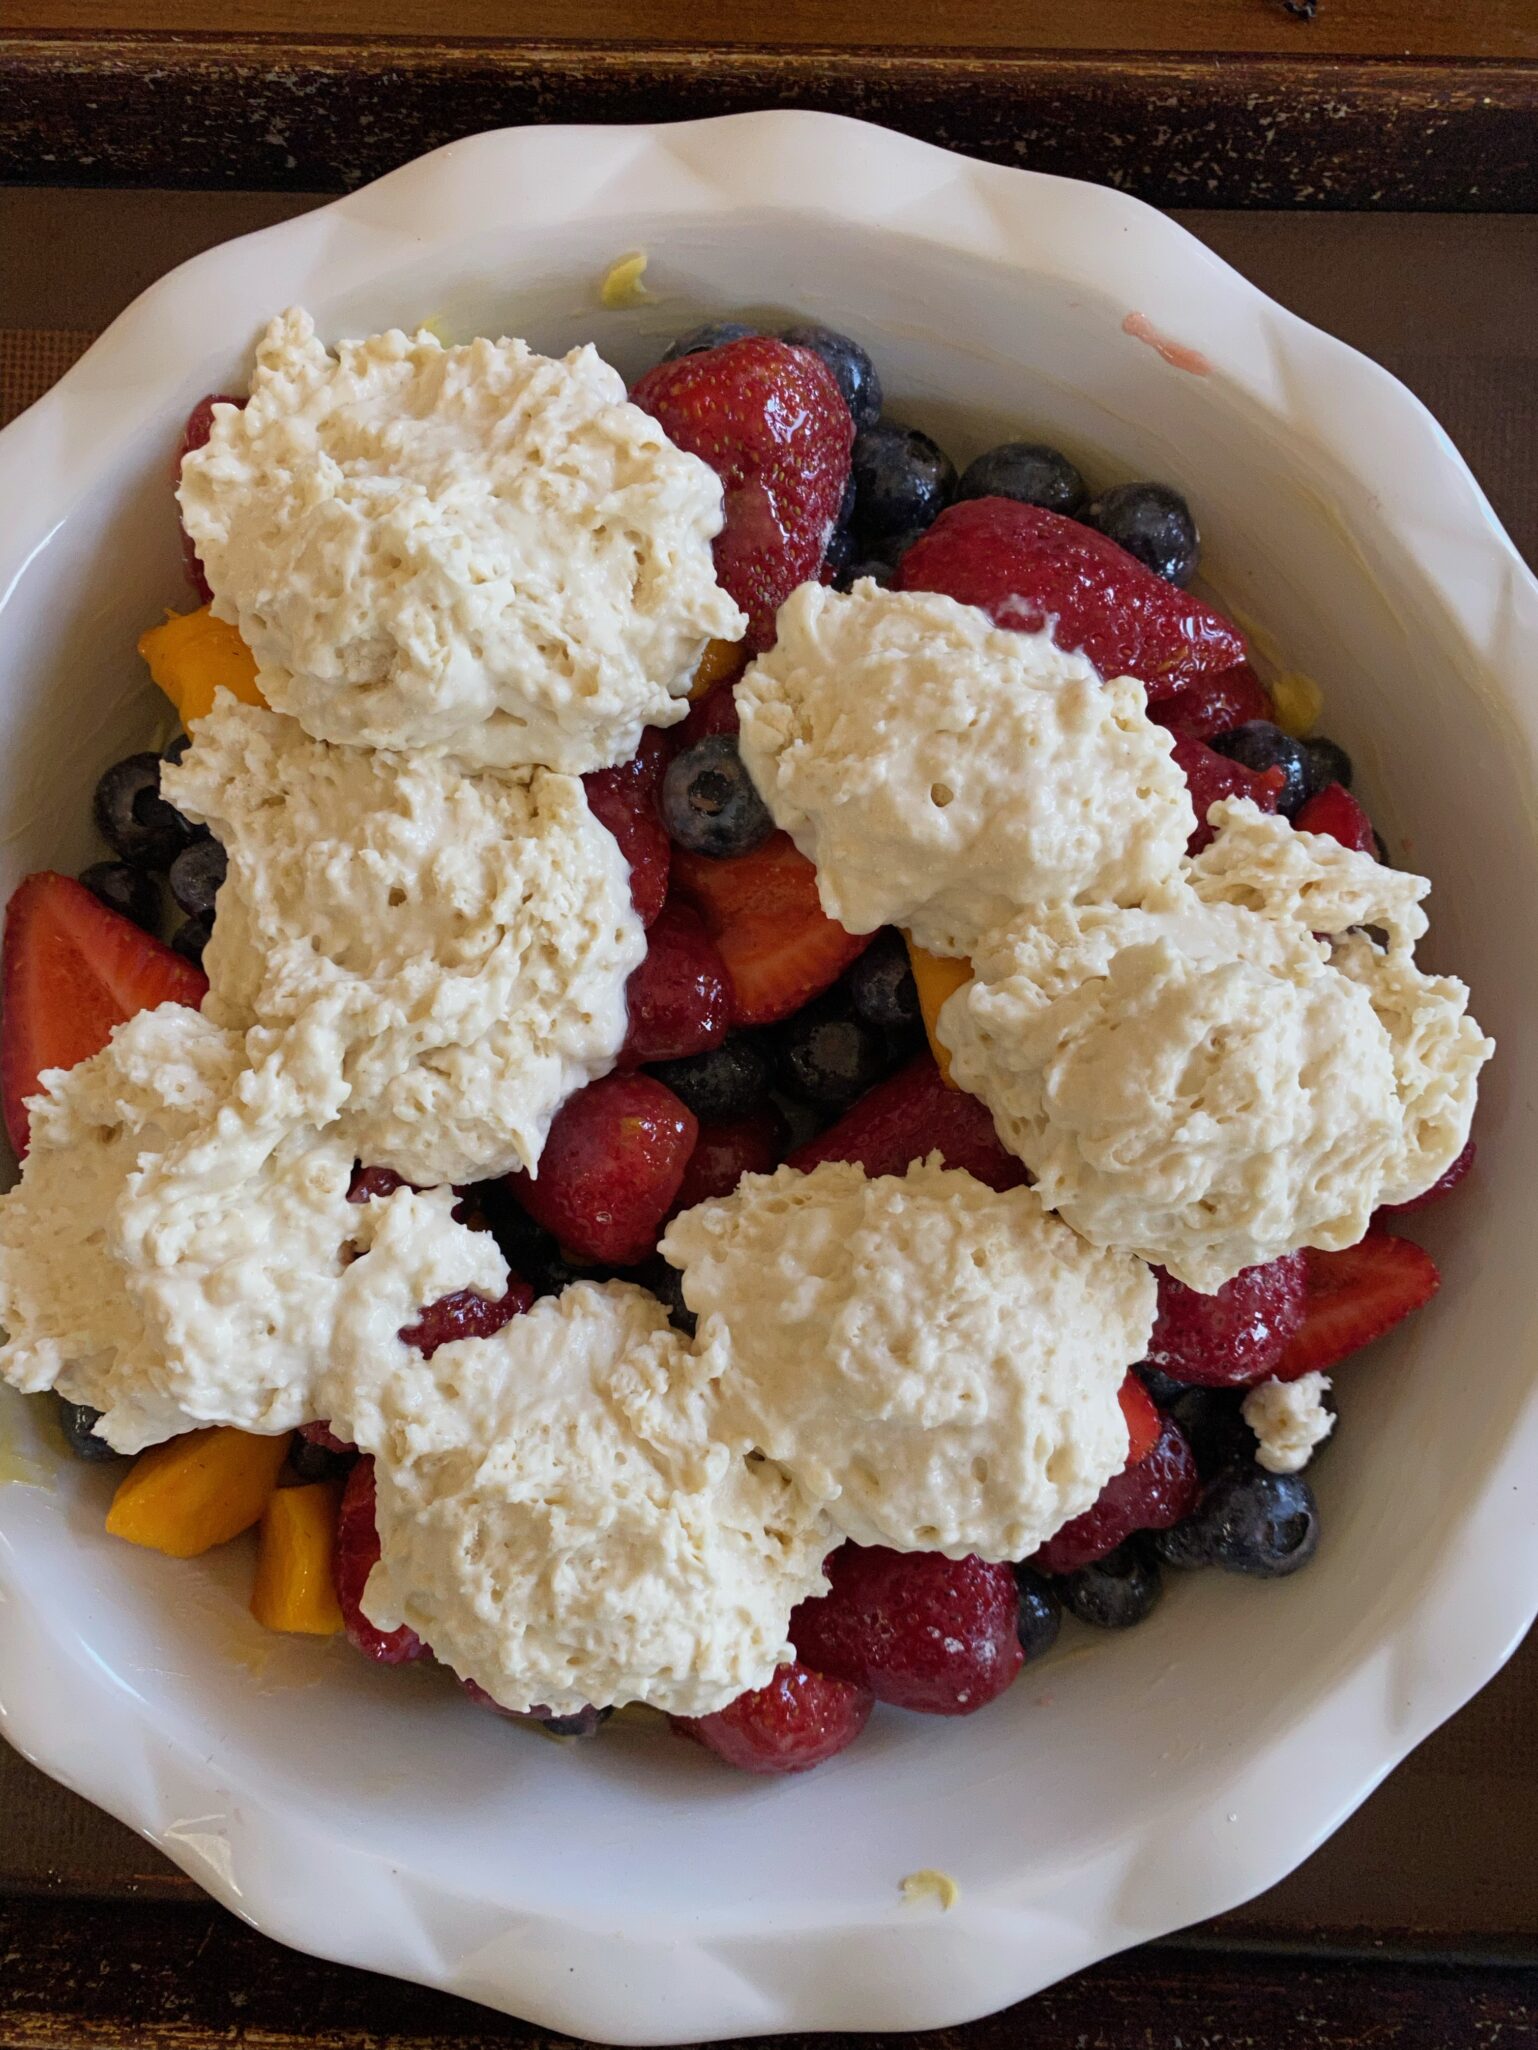
For the galette crust, I used Dorie’s pie dough (1/2 recipe), but feel free to use your favorite pie crust.  You will need enough dough to create a 13 to 14-inch circle.  Roll your dough on parchment paper so you can then slide it all onto a baking sheet, easy peasy.  Spread the almond filling in the center of the dough leaving a 2-inch border.  Next, take stacks of your sliced apples and arrange them ARTFULLY on the almond filling.  Then fold the edge of the dough over the apples.

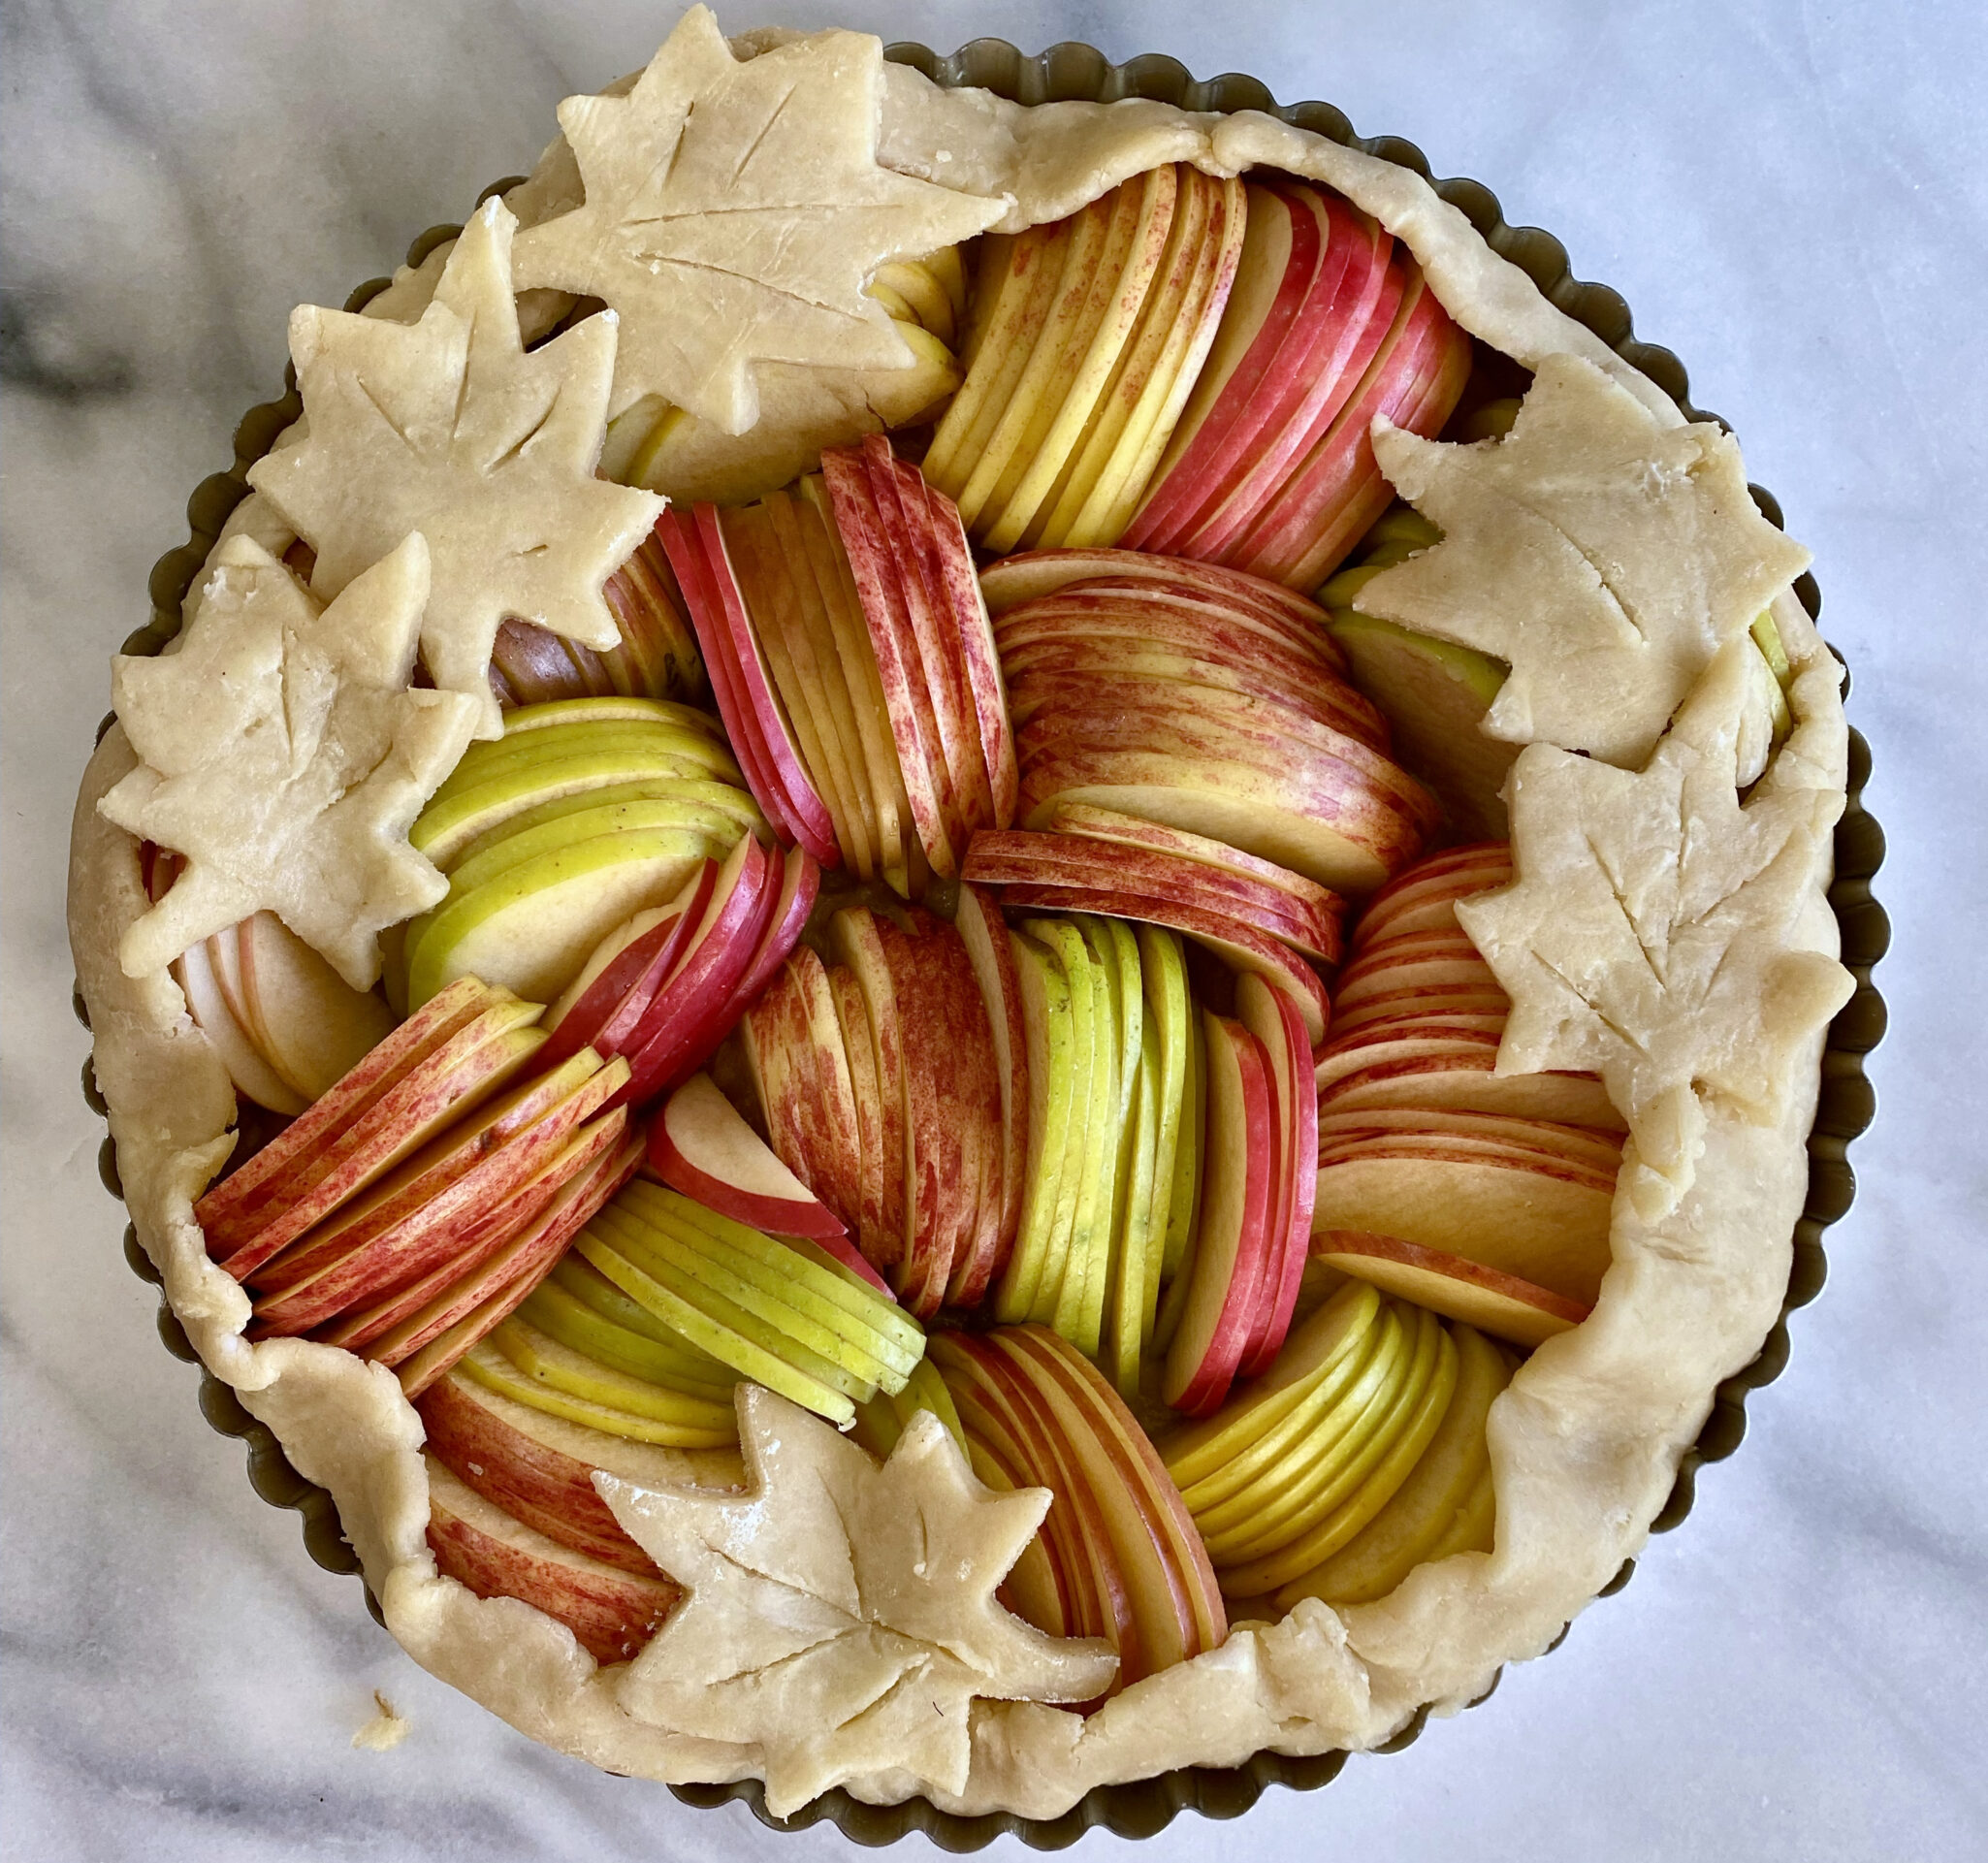
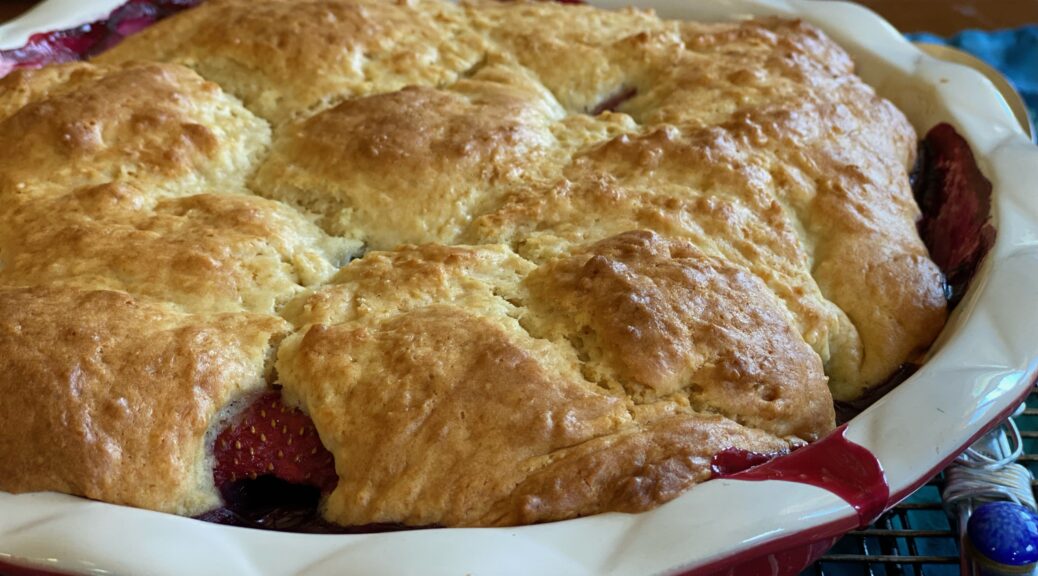
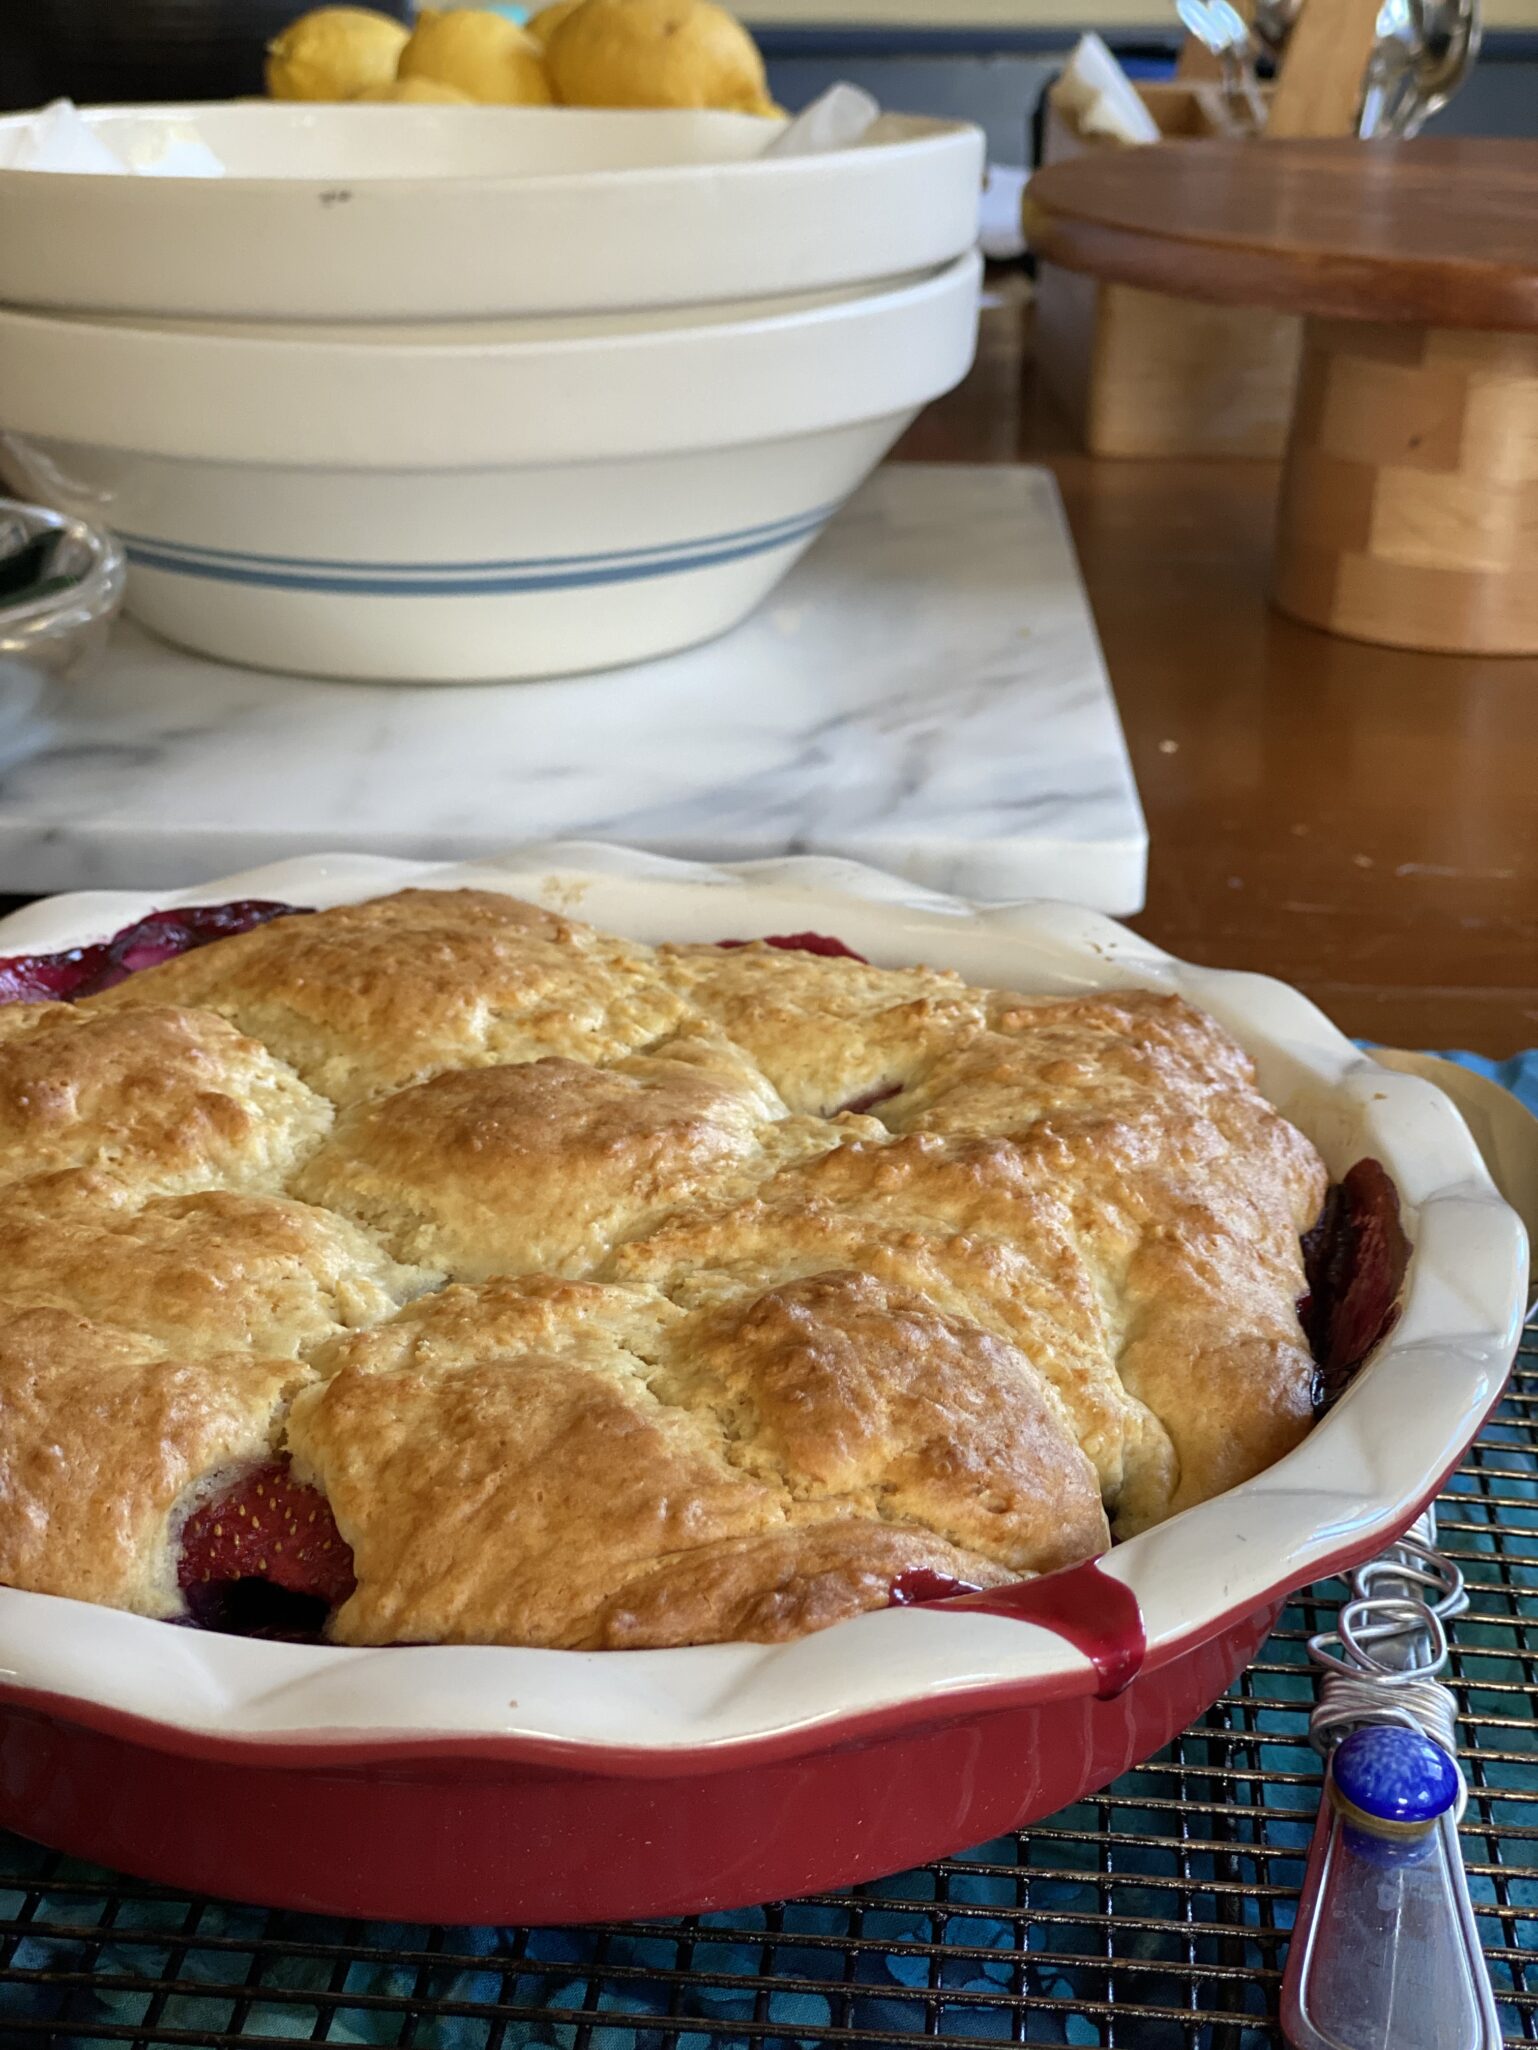
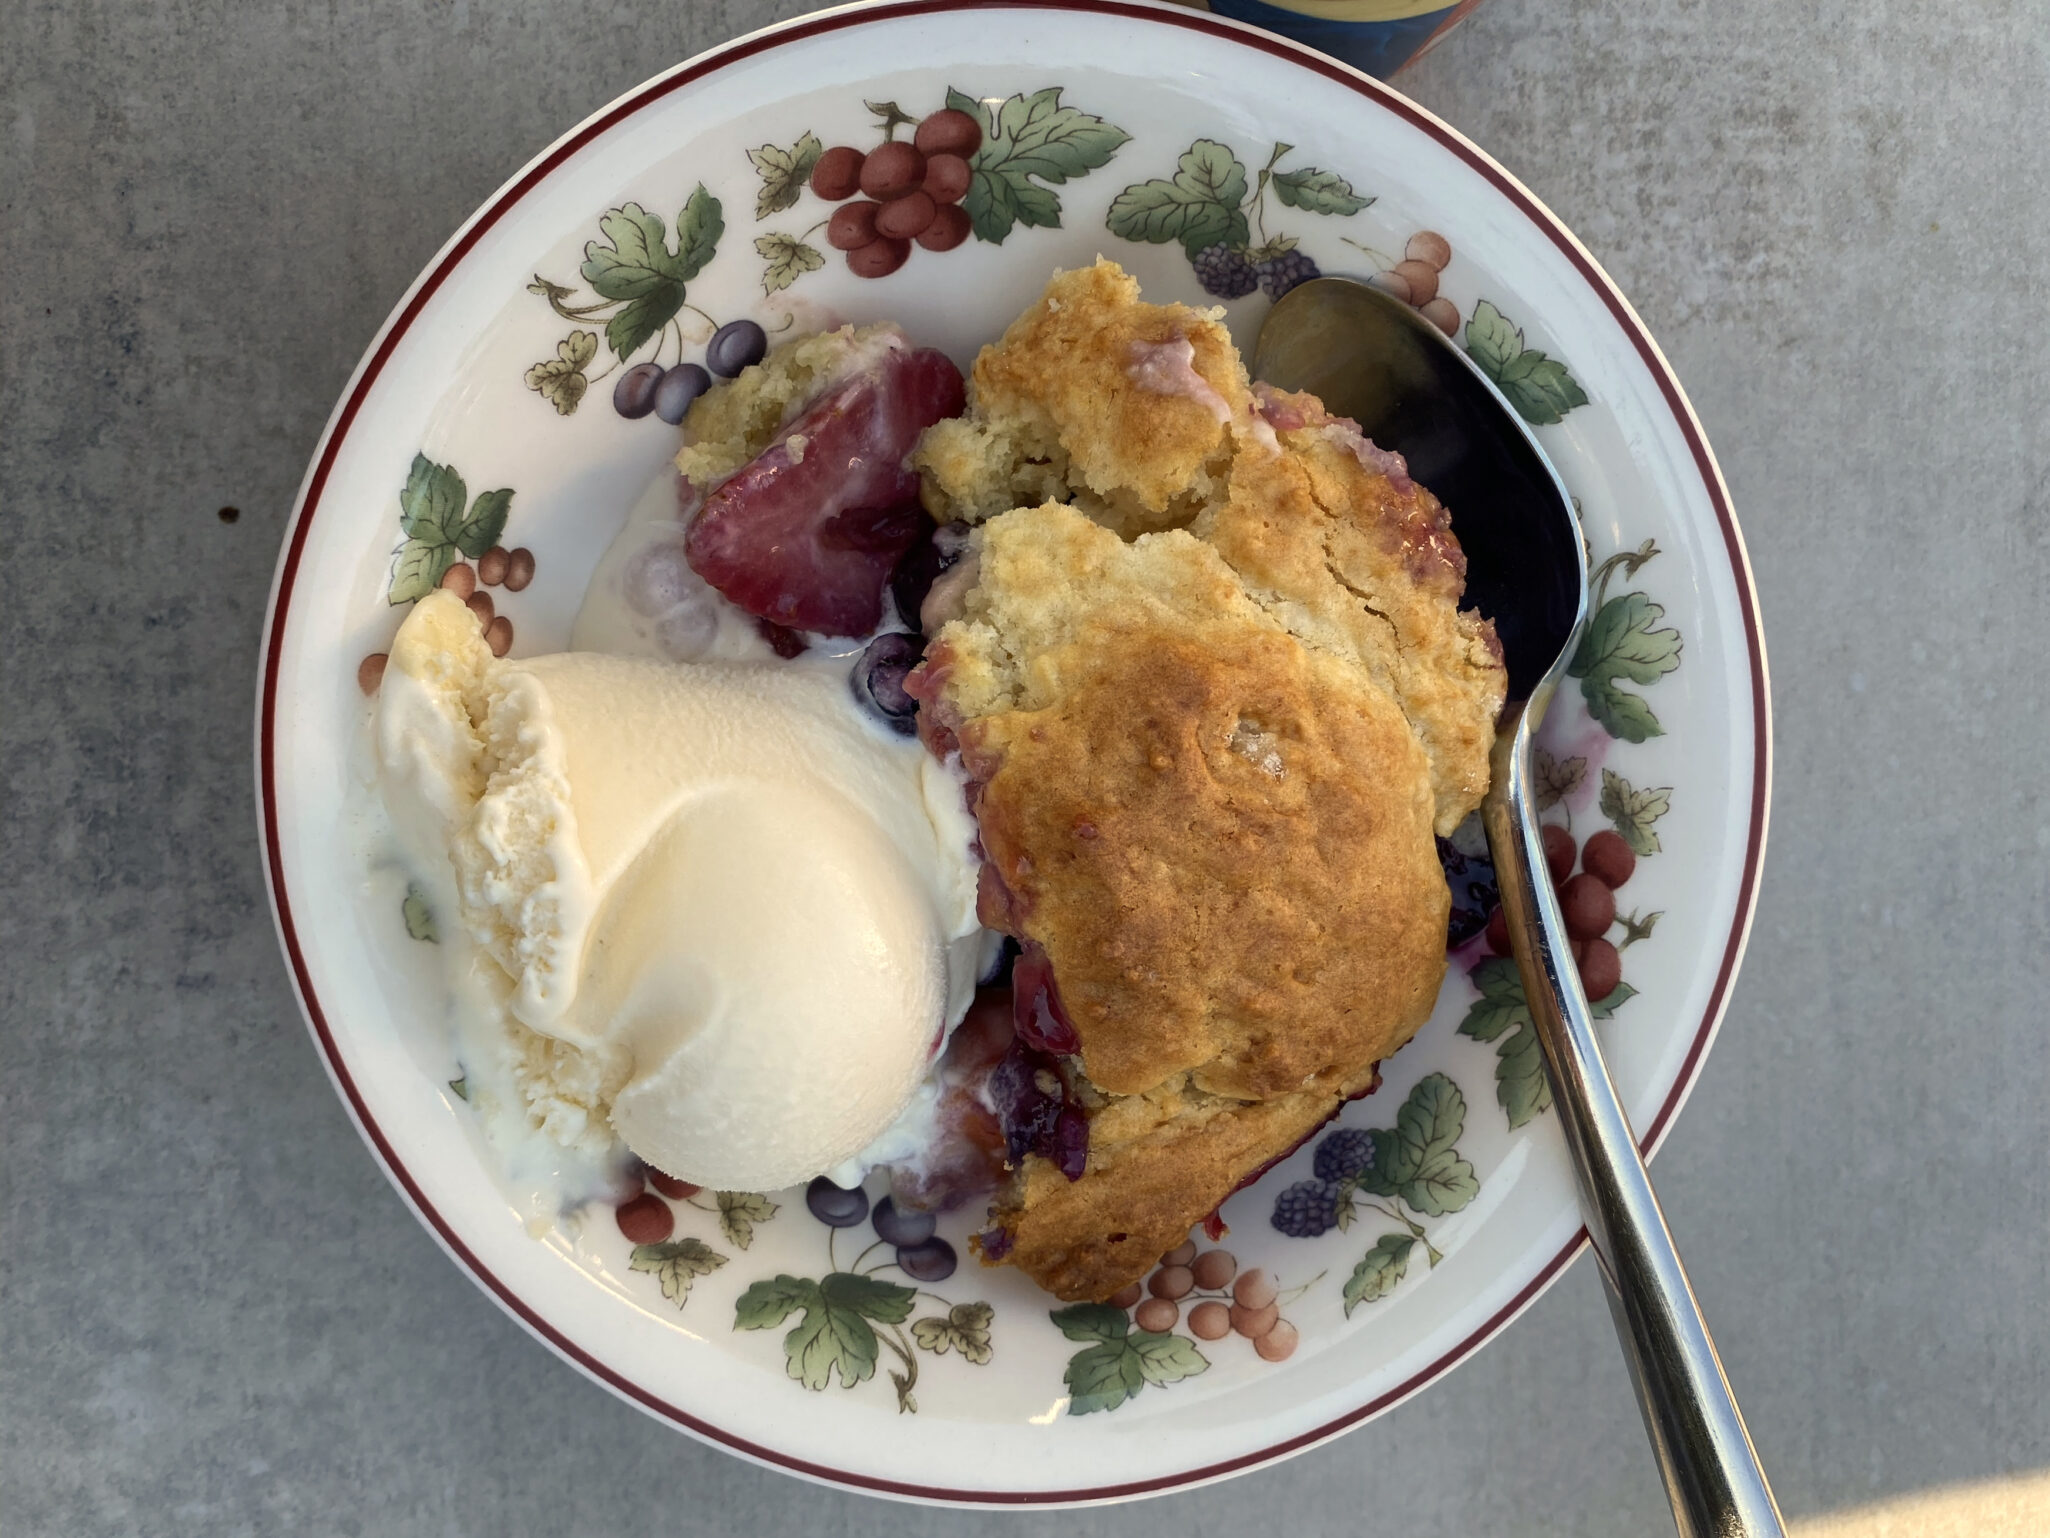
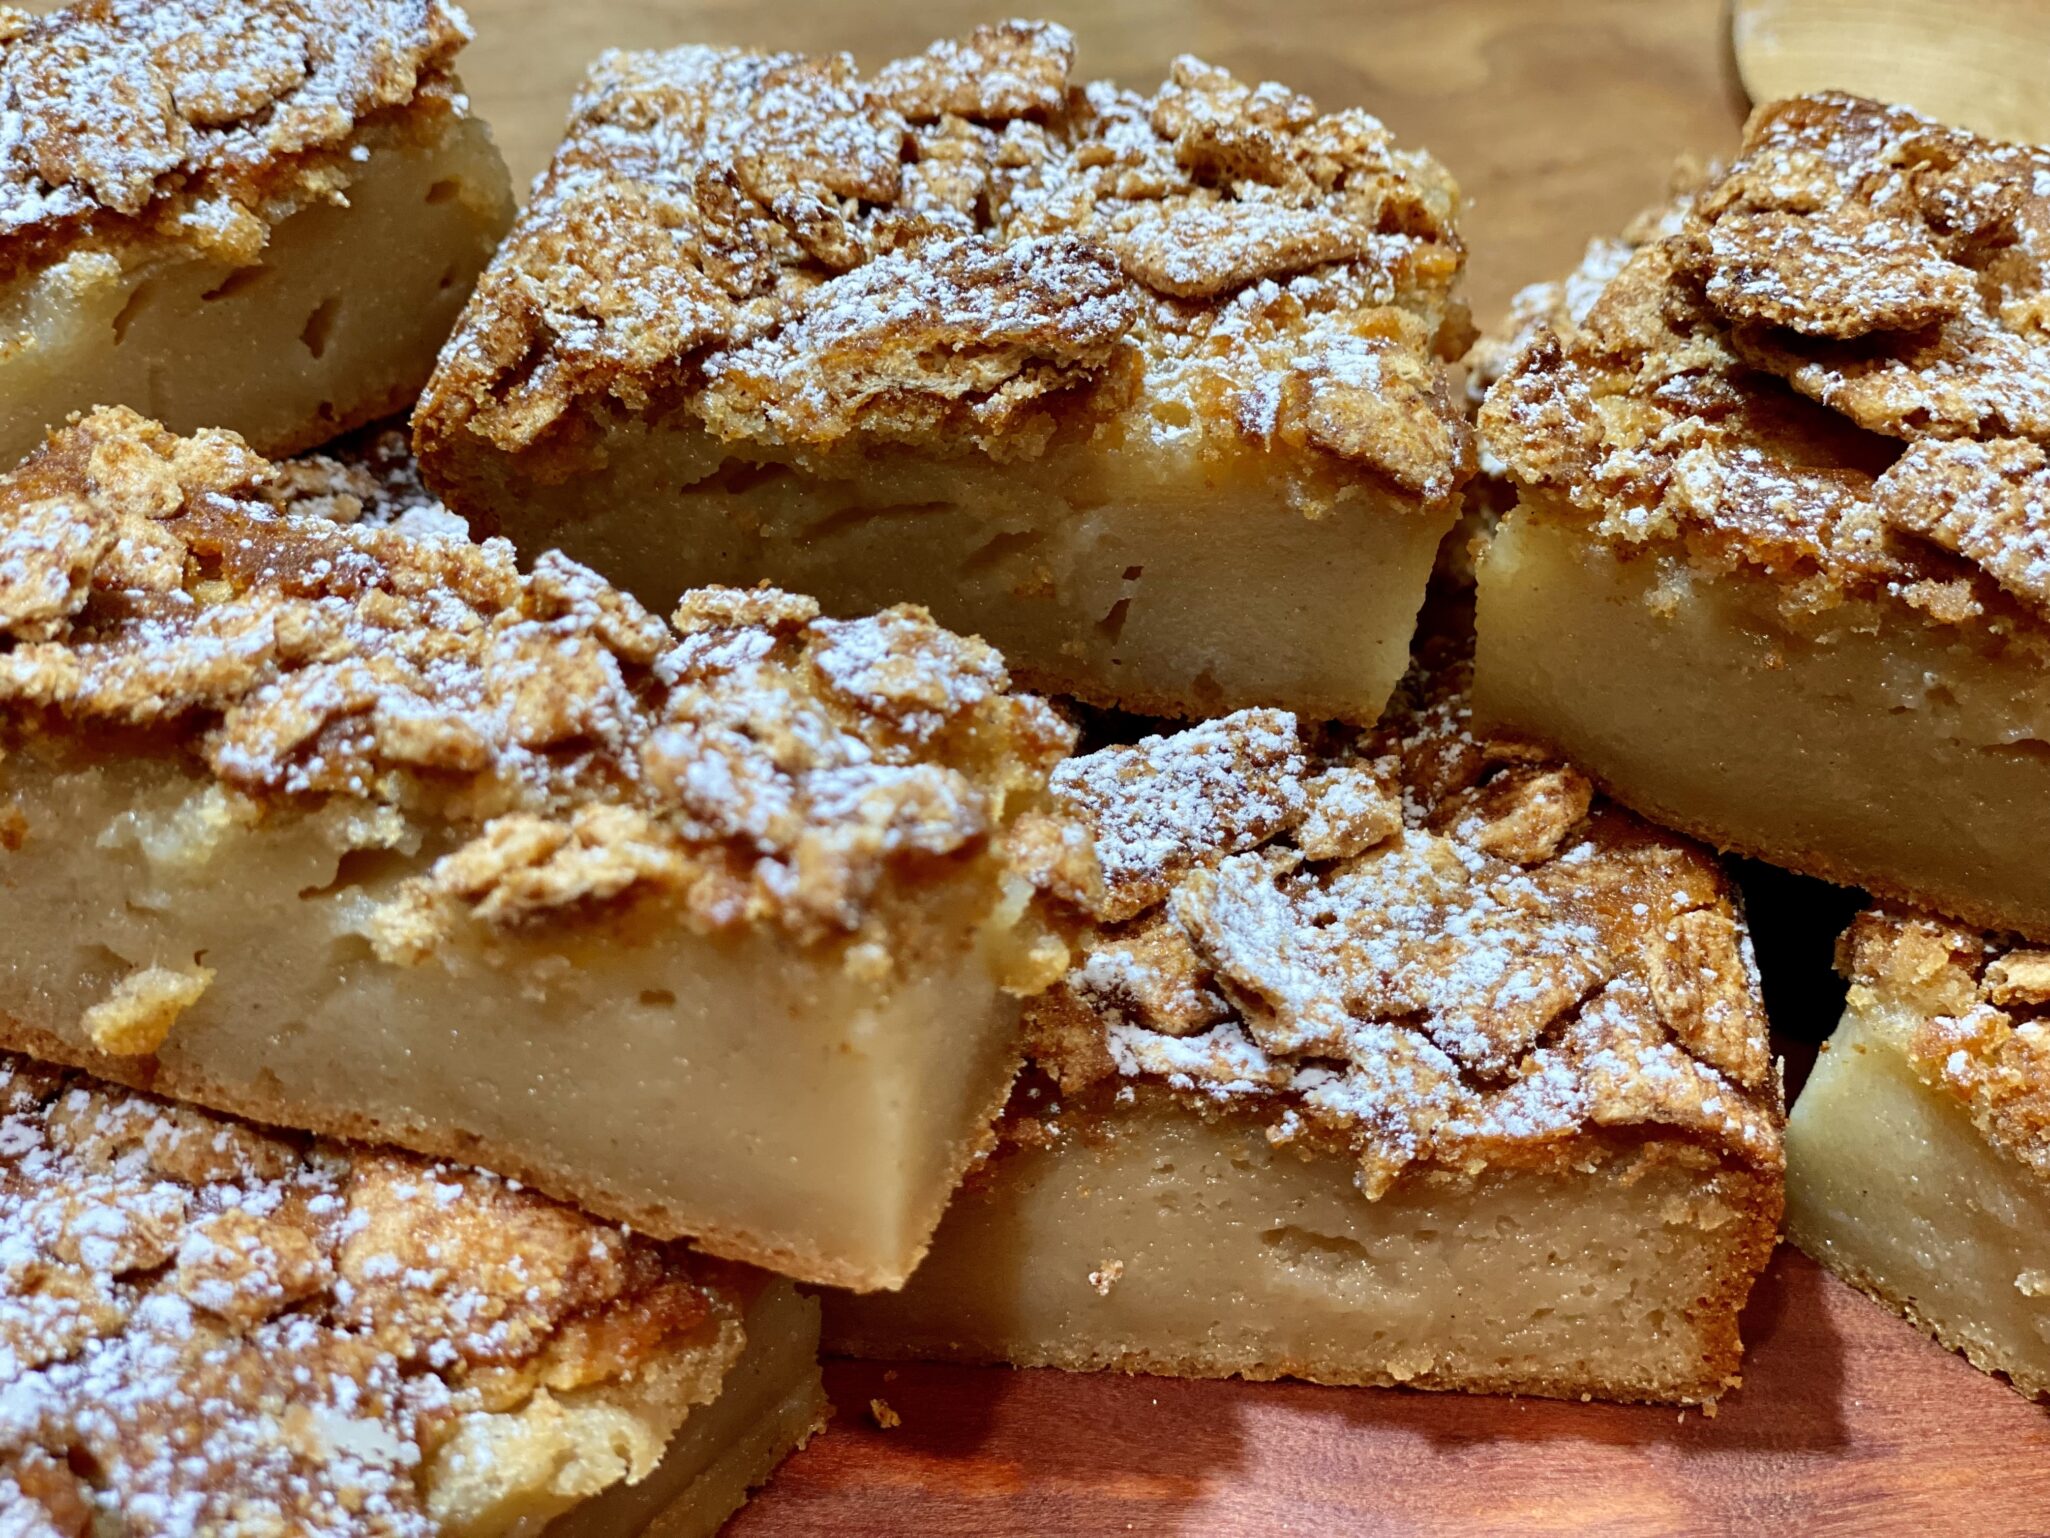
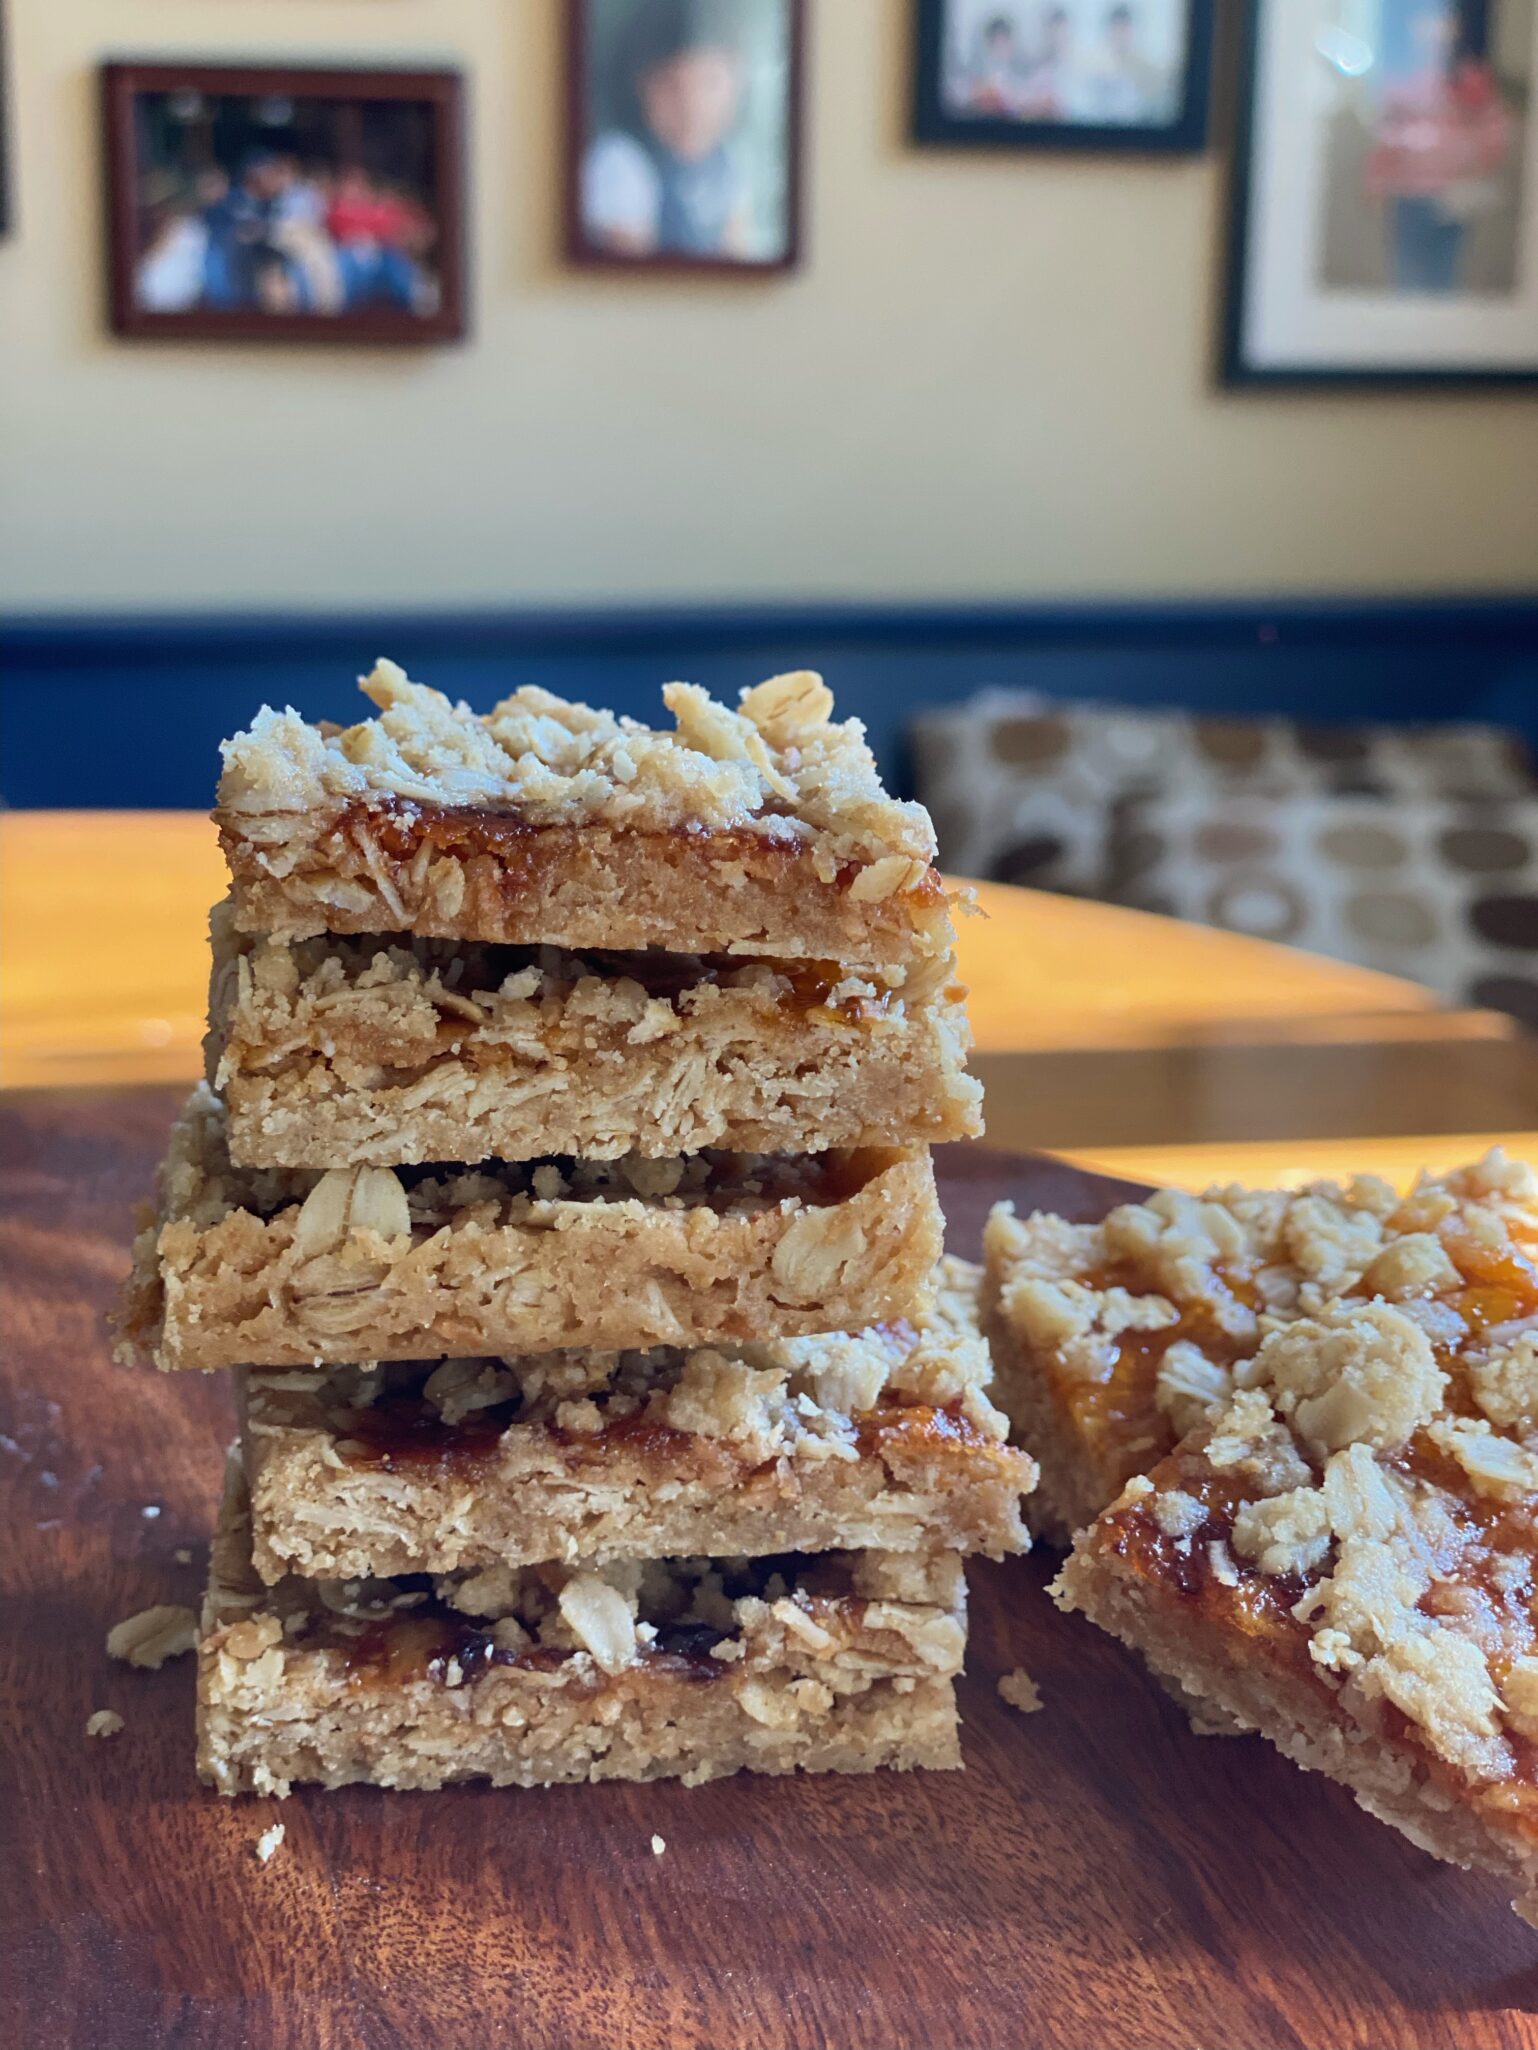
The finished galette is not only gorgeous, it’s delicious.  Serve it with softly whipped cream or ice cream.

This galette is now part of our holiday dessert menu every year. It’s a keeper!

Apple Almond Galette

A rustic, delicious riff on apple pie. The apples sit on a layer of almond cream encased in a buttery, flakey pie crust.
Course Dessert, Snack
Cuisine American
Keyword almond cream, Apple galette, apples, zoe bakes
Prep Time 25 minutes
Cook Time 45 minutes

Equipment

  • 1 mandolin optional
  • 1 food processor

Ingredients

Pie Crust

  • 1 recipe of Dorie's pie dough will make 2 galettes

Almond Cream Filling

  • 4 oz almond paste
  • 2 tbsp unsalted butter room temperature
  • 1 tbsp all-purpose flour
  • 2 tbsp sugar
  • 1 egg yolk
  • 1 tsp vanilla
  • 1/2 tsp almond extract

Da Apples

  • 5 large Apples thinly sliced on a mandoline or use a sharp knife and slice
  • Egg wash 1 egg mixed with 1 tablespoon water
  • 2 tbsp granulated sugar for sprinkling over top Can substitute raw or Demerara sugar

Instructions

Galette shell: Use Dorie's Pie crust recipe link below

  • Roll the chilled pie dough to an 1/8-inch-thick circle = 13-14" circle on a piece of parchment paper on a baking sheet or slide the parchment onto a baking sheet.

Almond Cream

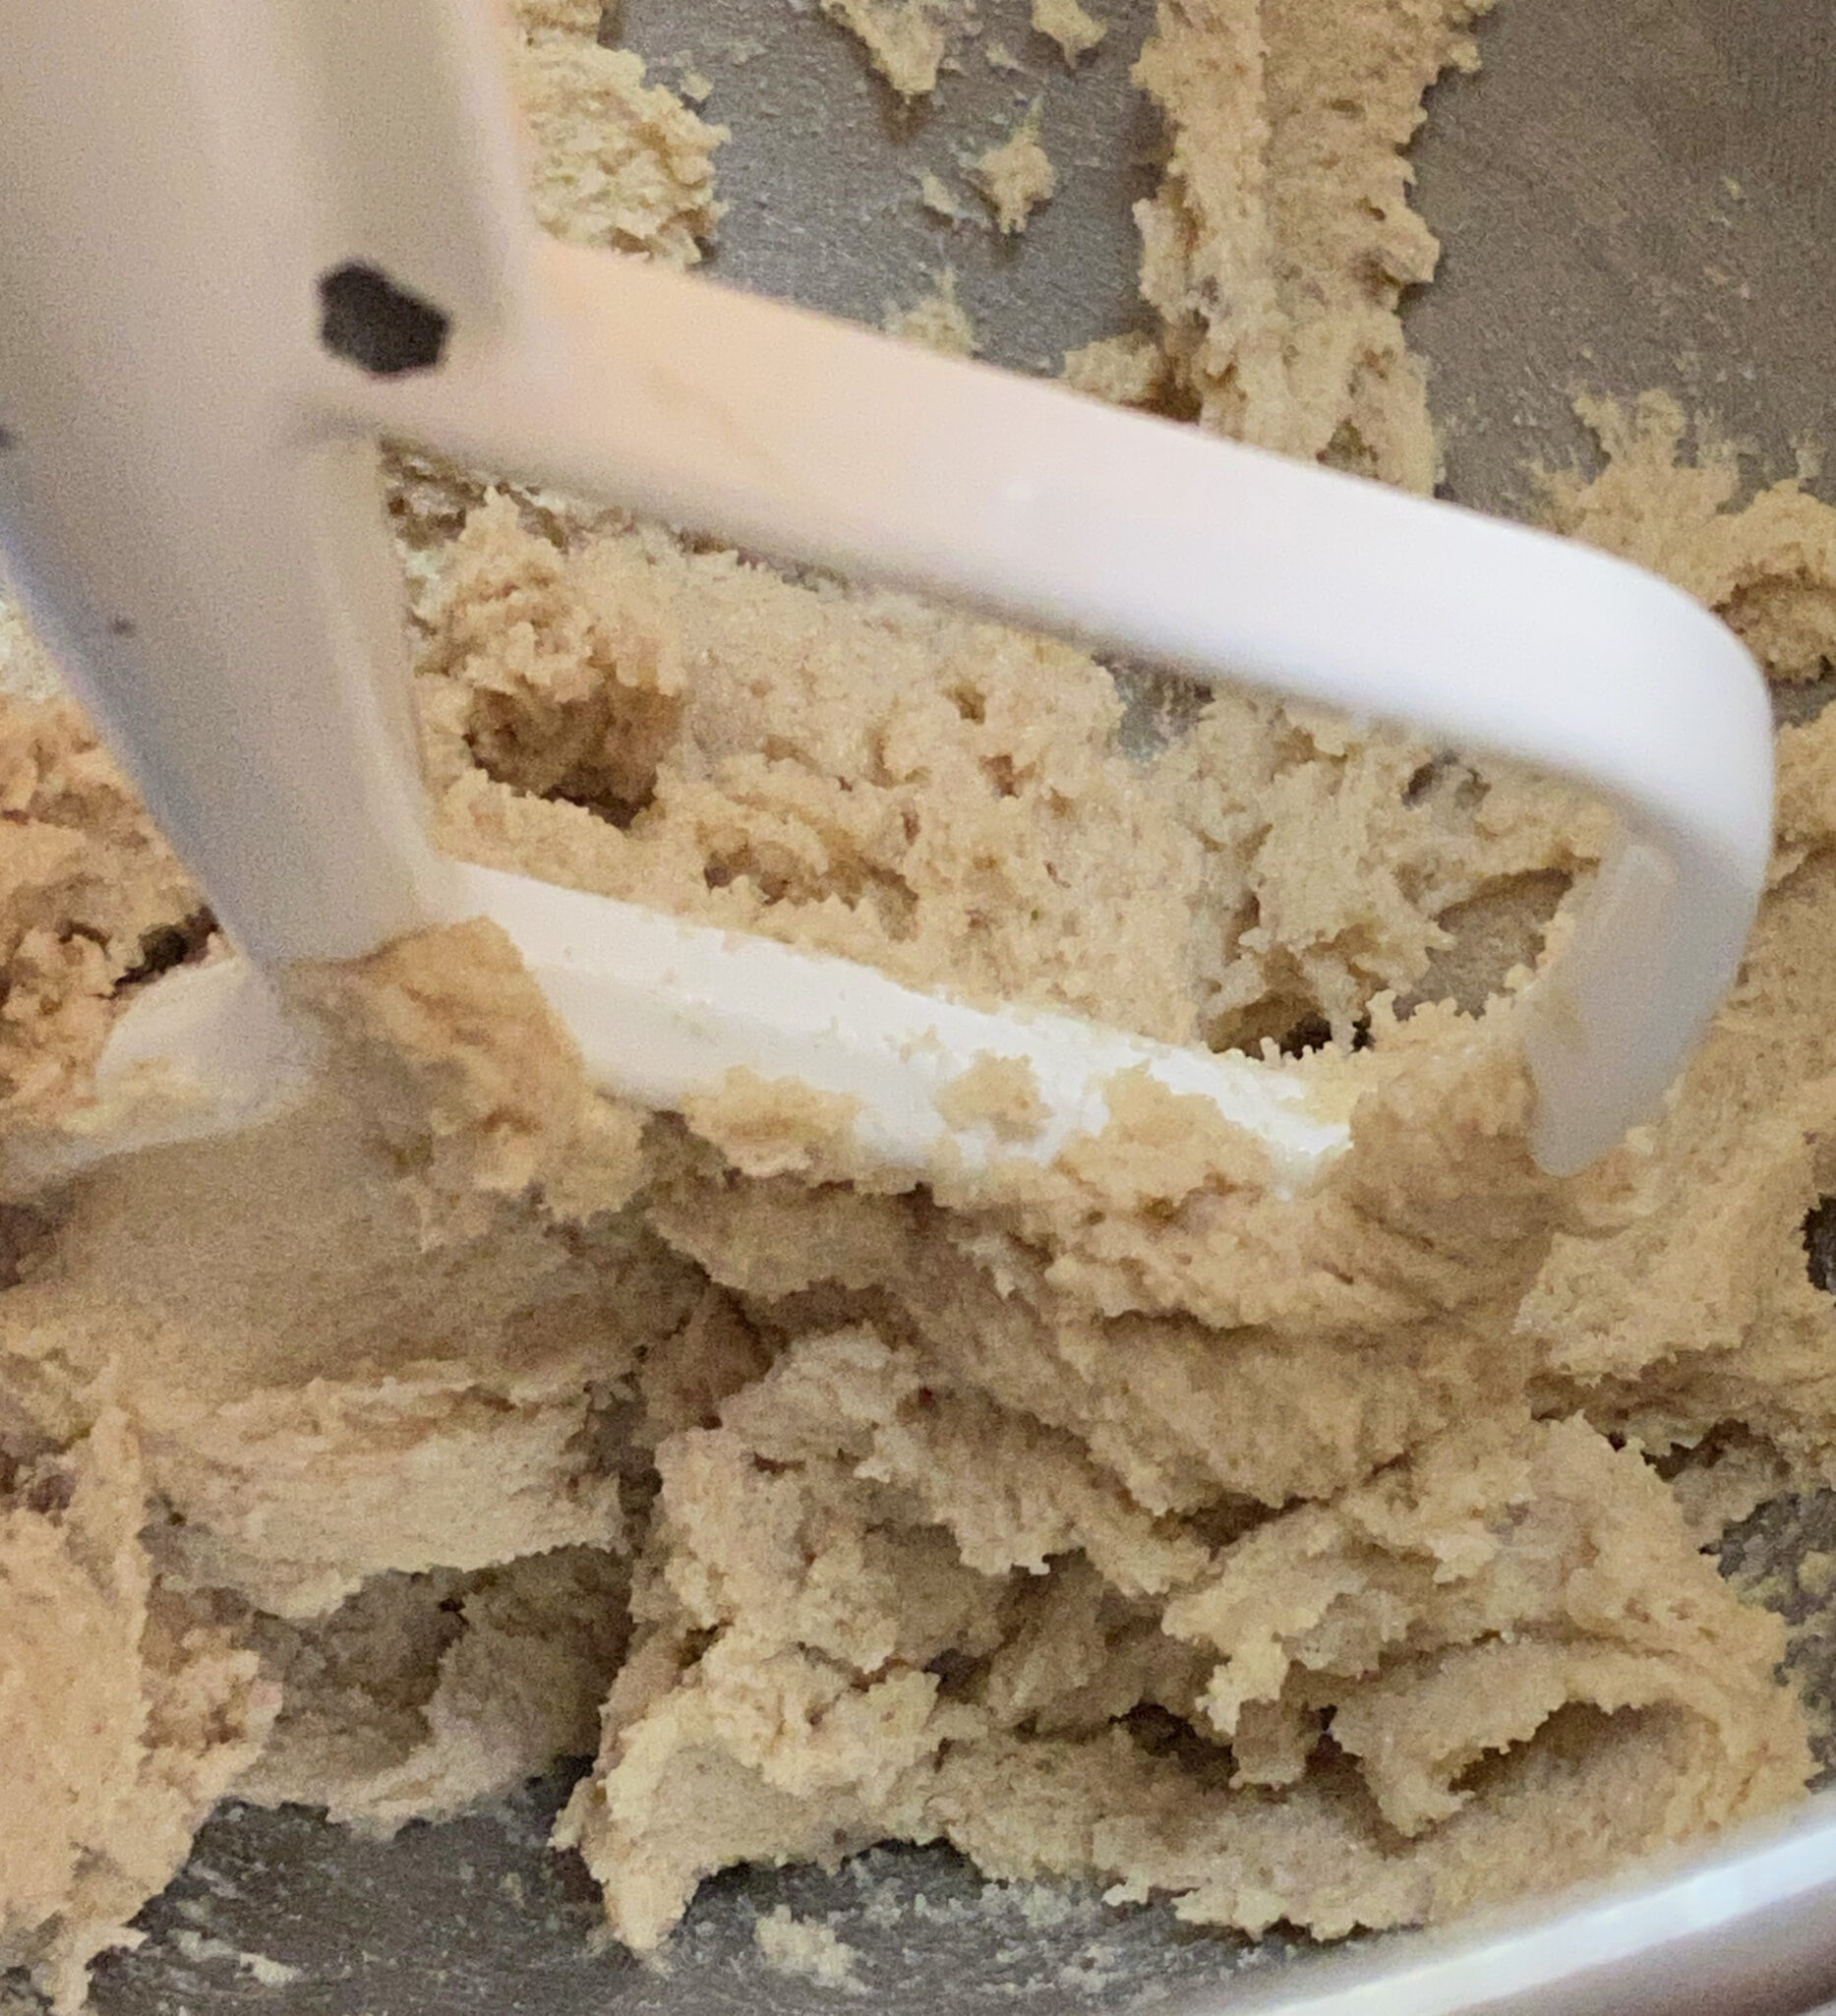
  • In a food processor blend the almond paste, flour, sugar, butter, almond and vanilla extracts and yolk until smooth. Spread over the center of the dough, leaving about a 2-inch ring on the outside.

Assemble

  • Arrange apples over the almond cream. Fold the uncovered dough over the apples and pleat to keep it in place. Freeze the galette while you preheat the oven to 425°F.
  • Brush the crust with the egg wash and sprinkle the sugar over the crust and apples.
  • Bake at 425°F for 20 minutes, then reduce the heat to 350°F and bake for an additional 25 minutes or until the apples are tender. Allow the galette to cool to room temperature before sliding it onto a serving plate.
  • Garnish with toasted almonds if you like and serve with a bit of Greek yogurt or whipped cream or ice cream (I like vanilla!).
Yet Another Peanut Butter Cookie, Soft and Chewy

Yet Another Peanut Butter Cookie, Soft and Chewy

Peanuttttt, peanut butter….cookie!  If asked what my favorite cookies are, Shortbread, Snickerdoodles, and Thumbprints immediately come to mind.  Peanut Butter Cookies would not make the cut and yet a quick search of 3Jamigos will reveal more than a few recipes for peanut butter cookies.  This leads to my 🤦🏻‍♀️ forehead slap moment  “I LOVE peanut butter cookies, they should be on my fav list.” Life’s little epiphanies.

The other night our postcard posse reconvened to write cards for Reverend Warnock in Georgia.  How he is in a run-off with Hershel Walker is beyond me and beyond the scope of this blog.  I made a half-hearted promise to keep this site apolitical.  Just food, friends, and fluff.  So in the immortal words of Forest Gump… “that’s all I have to say about that.”

For our postcard session against He who shall not be named, my friend’s daughter, Avery, of Kentucky Butter Cake fame, dropped off some just baked Peanut Butter Cookies for our crew.  I’m sure in solidarity and because she loves to bake (and she is darn good at it).

One Bite…

and I knew there was going to be yet another peanut butter cookie recipe on 3Jamigos.  Yep, Avery’s PB Cookies were tender, chewy in the center, super peanut buttery, sweet, and salty, and just darn delicious.  I got on the horn (ok, I texted) faster than you can say Mr. Planter’s Peanuts and asked “can I PLEASEEE have the recipe”.

Lucky Her Mom Likes Me

Voila’ the recipe showed up in my text message, lickity-split.  Adapted from a very cute blog Dessert Now Dinner Later, the recipe for Thick and Chewy Peanut Butter Cookies is easy and does not require chilling before baking.  You can have a batch of these bad boys done in less than an hour.

I use King Arthur flour which has a higher protein than GM or Pillsbury.  Feel free to bake off a test cookie, if it spreads too much, add a bit of flour.

Cream the butter and sugar for 1-2 minutes until it is well blended and smooth looking, not fluffy.

Add the peanut butter, egg, and vanilla.  If you like more texture, feel free to use chunky peanut butter.  Beat until well combined.

Add the flour mixture and mix on low speed just until combined with no remaining traces of flour.  Do not overbeat as this will toughen the cookie.

Use a #40 scoop (approximately 1.6 tablespoons) and place the dough on a parchment-lined cookie sheet.  Bake one sheet at a time.  Cause that’s how I roll or row actually, lol.  The final cookies will be just shy of 3 inches in diameter.

The cookies on top were baked for 12 minutes.  The cookies on the bottom with sprinkles, about 11 minutes.

This would be a lovely holiday cookie to gift or for Santa along with an ice-cold glass of milk or a hot toddy (don’t tell the kids).

Peanut Butter Cookies

A thick but tender Peanut Butter Cookie that is delicious and easy to make!
Course cookies, Dessert
Cuisine American
Keyword Dessert Now, Dinner Later, easy recipe, peanut butter, Peanut Butter Cookies
Prep Time 15 minutes

Ingredients

Dry Ingredients

  • 1 1/2 cups all-purpose flour
  • 1 tsp baking soda
  • 1/2 tsp salt

Ingredients to Cream together

  • 1/2 cup unsalted butter softened
  • 1/2 cup granulated sugar
  • 1/2 cup light brown sugar
  • 1/2 cup creamy peanut butter or chunky if you like I use Skippy Natural Style peanut butter
  • 1 large egg
  • 1 tsp vanilla

Options

  • chocolate chips or sprinkles, raw sugar, Maldon Salt

Instructions

  • Preheat oven to 350 degrees. Lined cookie sheets with parchment or silpat. (note silpats retain heat, check cookies a minute or two earlier.
  • In a small bowl, combine the flour, baking soda, and salt, using a whisk.
  • Cream the butter and sugars together in the bowl of a stand mixer for 1-2 minutes until well combined. Batter should be smooth and creamy not fluffy which would give you cakey cookies. Use the paddle attachment.
  • Add the peanut butter, egg, and vanilla. Mix well and scrape the bowl.
  • Add flour mixture to the butter mixture all at once and mix on low speed just until incorporated.
  • Scoop dough onto parchment-lined baking sheets about 2 inches apart. Bake at 350 degrees for 10 to 12 minutes or until just set*.
  • Allow cookies to cool slightly on the sheet for approximately 2 minutes before transferring them to a cooling rack. Store cookies in an airtight container.

Notes

For softer, chewier cookies, bake approximately 10 minutes, +/- 30 seconds.  The cookies will not color much and the top may still have some sheen.  The cookies will continue to bake outside the oven.  
For a denser, cookie that's a bit crumbly (in a good way), bake for 12 minutes.  The cookies will have some color on top and the edge.  The bottoms will be a bit darker.
Feel free to embellish. Add mini-chocolate chips to dough or add sprinkles.  I use a blend of dark chocolate sprinkles, Demerara Sugar or raw sugar, and a sprinkle of Maldon Salt.
Rowing for Coconut & Jam Oat Bars

Rowing for Coconut & Jam Oat Bars

About this time of year, I wax nostalgic about one of my passions (not food this time), rowing.  Say what?  Yes, rowing.  I started rowing, gosh too many years ago to count, and it changed my life.  Instead of trudging toward a sedentary, middle-aged lifestyle, it became my sport and form of exercise.

Spending early morning hours on the water (trust me, I am not a morning person) watching the sunrise, the first rays of light hitting the ripples of water made by the boat, it’s magical.  Beyond that (there’s more?), I have made lifelong friends, found a community, and experienced the camaraderie created by competition, joy, and pain.  #Crewlife

Rock Star Regatta

Boston annually hosts the largest regatta (rowing competition) in the world, the Head of the Charles.  Every October, collegiate, high school, Masters (anyone out of school) converge for the regatta.  Imagine the Boston Marathon but with a bunch of really tall people, wearing spandex (lol) in boats on the Charles.  We row as hard as we can for 5km.  All the while navigating through boats, under bridges (5), and around turns.  Throngs of spectators line the bridges and banks of the Charles to watch and root their rowers on.  It’s exhilarating, I haven’t raced there in a while and I miss it.

Side Trip Fun

If you go that far to race for twenty minutes, you might as well take advantage of being there.  We began taking side trips after Head of the Charles. One year we went to Vermont to find pie, visit King Arthur Flour, and tour Ben and Jerry’s.  Another year found us in Martha’s Vineyard.  The crowds of summer long gone, we wandered the island taking in the cool, crisp, fall weather, foliage colors, and FOOD!  We stopped at 7aFoods for pastries and coffee which I highly recommend.  Finally, a stop at  Morning Glory Farm to roam their pumpkin patch and eat more pie, the Buttermilk Pie was a standout.

The 7AFoods Oat and Fruit Bars were dreamy-a buttery crust topped with blueberry preserves, dried fruits, oat, and a delicious crumble. I asked for the recipe which they graciously sent BUT I have yet to try as it makes two full sheets of bars!  So I searched for a simpler, smaller recipe that would satisfy my 7AFoods bar craving.  Luckily, I found a delightful, easy-to-make Raspberry Coconut Oat Bar cookie from One Girl Cookies that did the trick.

So, I made a batch of these delicious bars while watching this year’s Head of the Charles Regatta.  Sigh, maybe next year I’ll be rowing instead of baking.

Finally, Notes on the One Girl Cookies Raspberry Coconut Oat Bar

These bars are easy to make.  The base crust and crumble are from the same dough.  The dough starts with cold butter, eliminating the time to soften butter, and can be made in a mixer or by hand.  Yep, that easy.  Use a mixer, add the flour, sugars, salt, and butter (diced into little pieces) and mix until it forms a crumble, then add coconut and oatmeal.  Use a pastry blender to cut butter into flour and sugar mixture.  This is much like making pie dough.  Do not blend until it forms a single mass as that would result in a tough crust.  As it bakes, the bits of butter in the dough melt and create steam that makes a tender, flaky crust.

NACL Note

The recipe calls for 1 teaspoon of salt.  It is intentionally salt-forward, a play on the salty and sweet vibe.  If you use a really sweet jam, I would leave the amount of salt.  If you are salt sensitive, try 3/4 teaspoon instead.  You do need some salt as a flavor booster.

Reserve 3/4 to 1 cup of the crumble mixture.  Press the remaining dough into a 9×13 baking pan that has been lined with parchment.  The recipe calls for baking the crust for 14 minutes, it took a couple of minutes more for the edges to brown for me.  Spread preserves over the cooled crust.  I have used blueberry, mixed berry, and apricot, it’s your choice. The base crust is pretty thin so a thin layer of jam is all that is needed.  I might sprinkle the jam layer with dried fruit and sliced almonds before adding the crumble next time.

Before adding the crumble, squeeze the crumble mixture so there are some bigger crumbs, it looks nicer.

With Blueberry Lichi Jam!

With apricot cherry preserves!

JAMMY COCONUT OAT BARS

Jam & Coconut Oat Bars, a buttery shortbread base topped with preserves and a coconut oatmeal crumble. Adapted from One Girl Cookies.
Course bar cookies, cookies, desserts
Cuisine American
Keyword bar cookies, Jammy Coconut Oat Bars, One Girl Cookies
Prep Time 15 minutes
Cook Time 25 minutes
Resting Time 10 minutes

Ingredients

All About the Dough

  • 1-1/4 cups (150g) all-purpose flour
  • 3/4 cup (150g) packed light brown sugar
  • 1/3 cup (67g) granulated sugar
  • 12 tablespoons (170g) unsalted butter, cold and cut into small pieces
  • 1 teaspoon salt Very salt forward, decrease to 3/4 tsp. if desired

Add to Dough Crumble

  • 3/4 cup (85g) unsweetened shredded coconut
  • 1-1/2 cups (148g) old-fashioned rolled oats

The Finish

  • 1/2 cup raspberry preserves or use your favorite preserves

Optional Adds

  • 1/4-1/3 cup diced dried fruit that compliments the preserves you use
  • 1/4-1/3 cup sliced almonds or chopped nuts of your choice

Instructions

  • Preheat oven to 350°F.
  • Spread the coconut on a baking sheet. Toast 2-3 minutes. Remove from the oven and allow to cool. Keep your eye on it as coconut will brown quickly
  • Grease a 9"x 13"x 2" baking pan. Line the bottom with parchment paper.
  • In an electric mixer on low speed, mix the flour, brown sugar, granulated sugar, and salt until combined. Add the butter and continue mixing until the dough begins to come together. Stir in the coconut and oats.
  • Remove 3/4-1 cup of the crust dough. Set aside. If adding optional ingredients remove 3/4 cup of crumble.
  • Pour the remaining dough to pan. Press evenly into the bottom of the prepared pan, I use a flat bottom cup to press dough into pan. Bake 14-17 minutes, rotating the pan halfway through baking. The crust should be golden brown around the edges. Allow the crust to cool for 10 minutes.
  • Spread the preserves evenly over the crust, leaving a scant 1/2-inch border. If you are adding nuts or dried fruit, sprinkle on preserves now then crumble the reserved dough over the top. Bake 7 minutes, or until the preserves are bubbly. Cool completely in pan.
  • Run a knife around the edges of the bars. Place a baking sheet on top of the pan and flip the pan over to release the bars. Peel the parchment paper off. Then flip again. Using a sharp knife, cut the bars into squares, which in a 9x13 won't be exactly squared, lol.
It’s The Great Pumpkin Bread, Charlie Brown!

It’s The Great Pumpkin Bread, Charlie Brown!

Who else besides me groans at the first sign of the fall season.  You walk outside, take in the fall air, admire the color of the leaves on the trees, the golden orange rays of sunlight that filter through…

When you notice

All around, everywhere you look…PUMPKIN, pumpkin lattes, pumpkin soup, pumpkin yogurt, pumpkin ice cream, yes, ALL THINGS PUMPKIN. There is no escape.

Consequently, aside from the mandatory Thanksgiving pumpkin pie, I have developed a slight aversion to pumpkin.  This year, still cautious, we needed only one pumpkin pie for Thanksgiving.  So, what to do with the remaining pumpkin puree (Libby’s of course).  I took a family poll, and it was a unanimous vote (except for me, lol) for pumpkin bread.  Despite having numerous pumpkin bread recipes on 3Jamigos, I decided to do a search. The first recipe that popped up was Pumpkin Bread from Once Upon a Chef.  Her family’s favorite, the recipe was given to her by her grandmother who had clipped it out of a magazine eons ago.  With a 5-star rating and over two thousand ratings, this was a no-brainer.

The recipe reminded me of my Best Damn Banana Bread, instead of oil, the recipes call for butter.  Hmmm, good start. The butter is combined first with sugar, it’s a lot of sugar, and the mixture will be crumbly not creamy so don’t keep beating it until the cows come home.  Add eggs one at a time and combine thoroughly.  Beat until mixture is light and fluffy.  Add the pumpkin puree.  The mixture might look curdled or separated, but that’s ok.

BTW, the recipe calls for 16 ounces of pumpkin, std cans are 15 ounces 🤷🏻‍♀️. Don’t sweat the one ounce. If you happen to have some applesauce you need to use up, throw in a heaping tablespoon. I had some yummy apple butter so I threw that in. You’ll be fine skipping it. Don’t open another can of pumpkin purée!
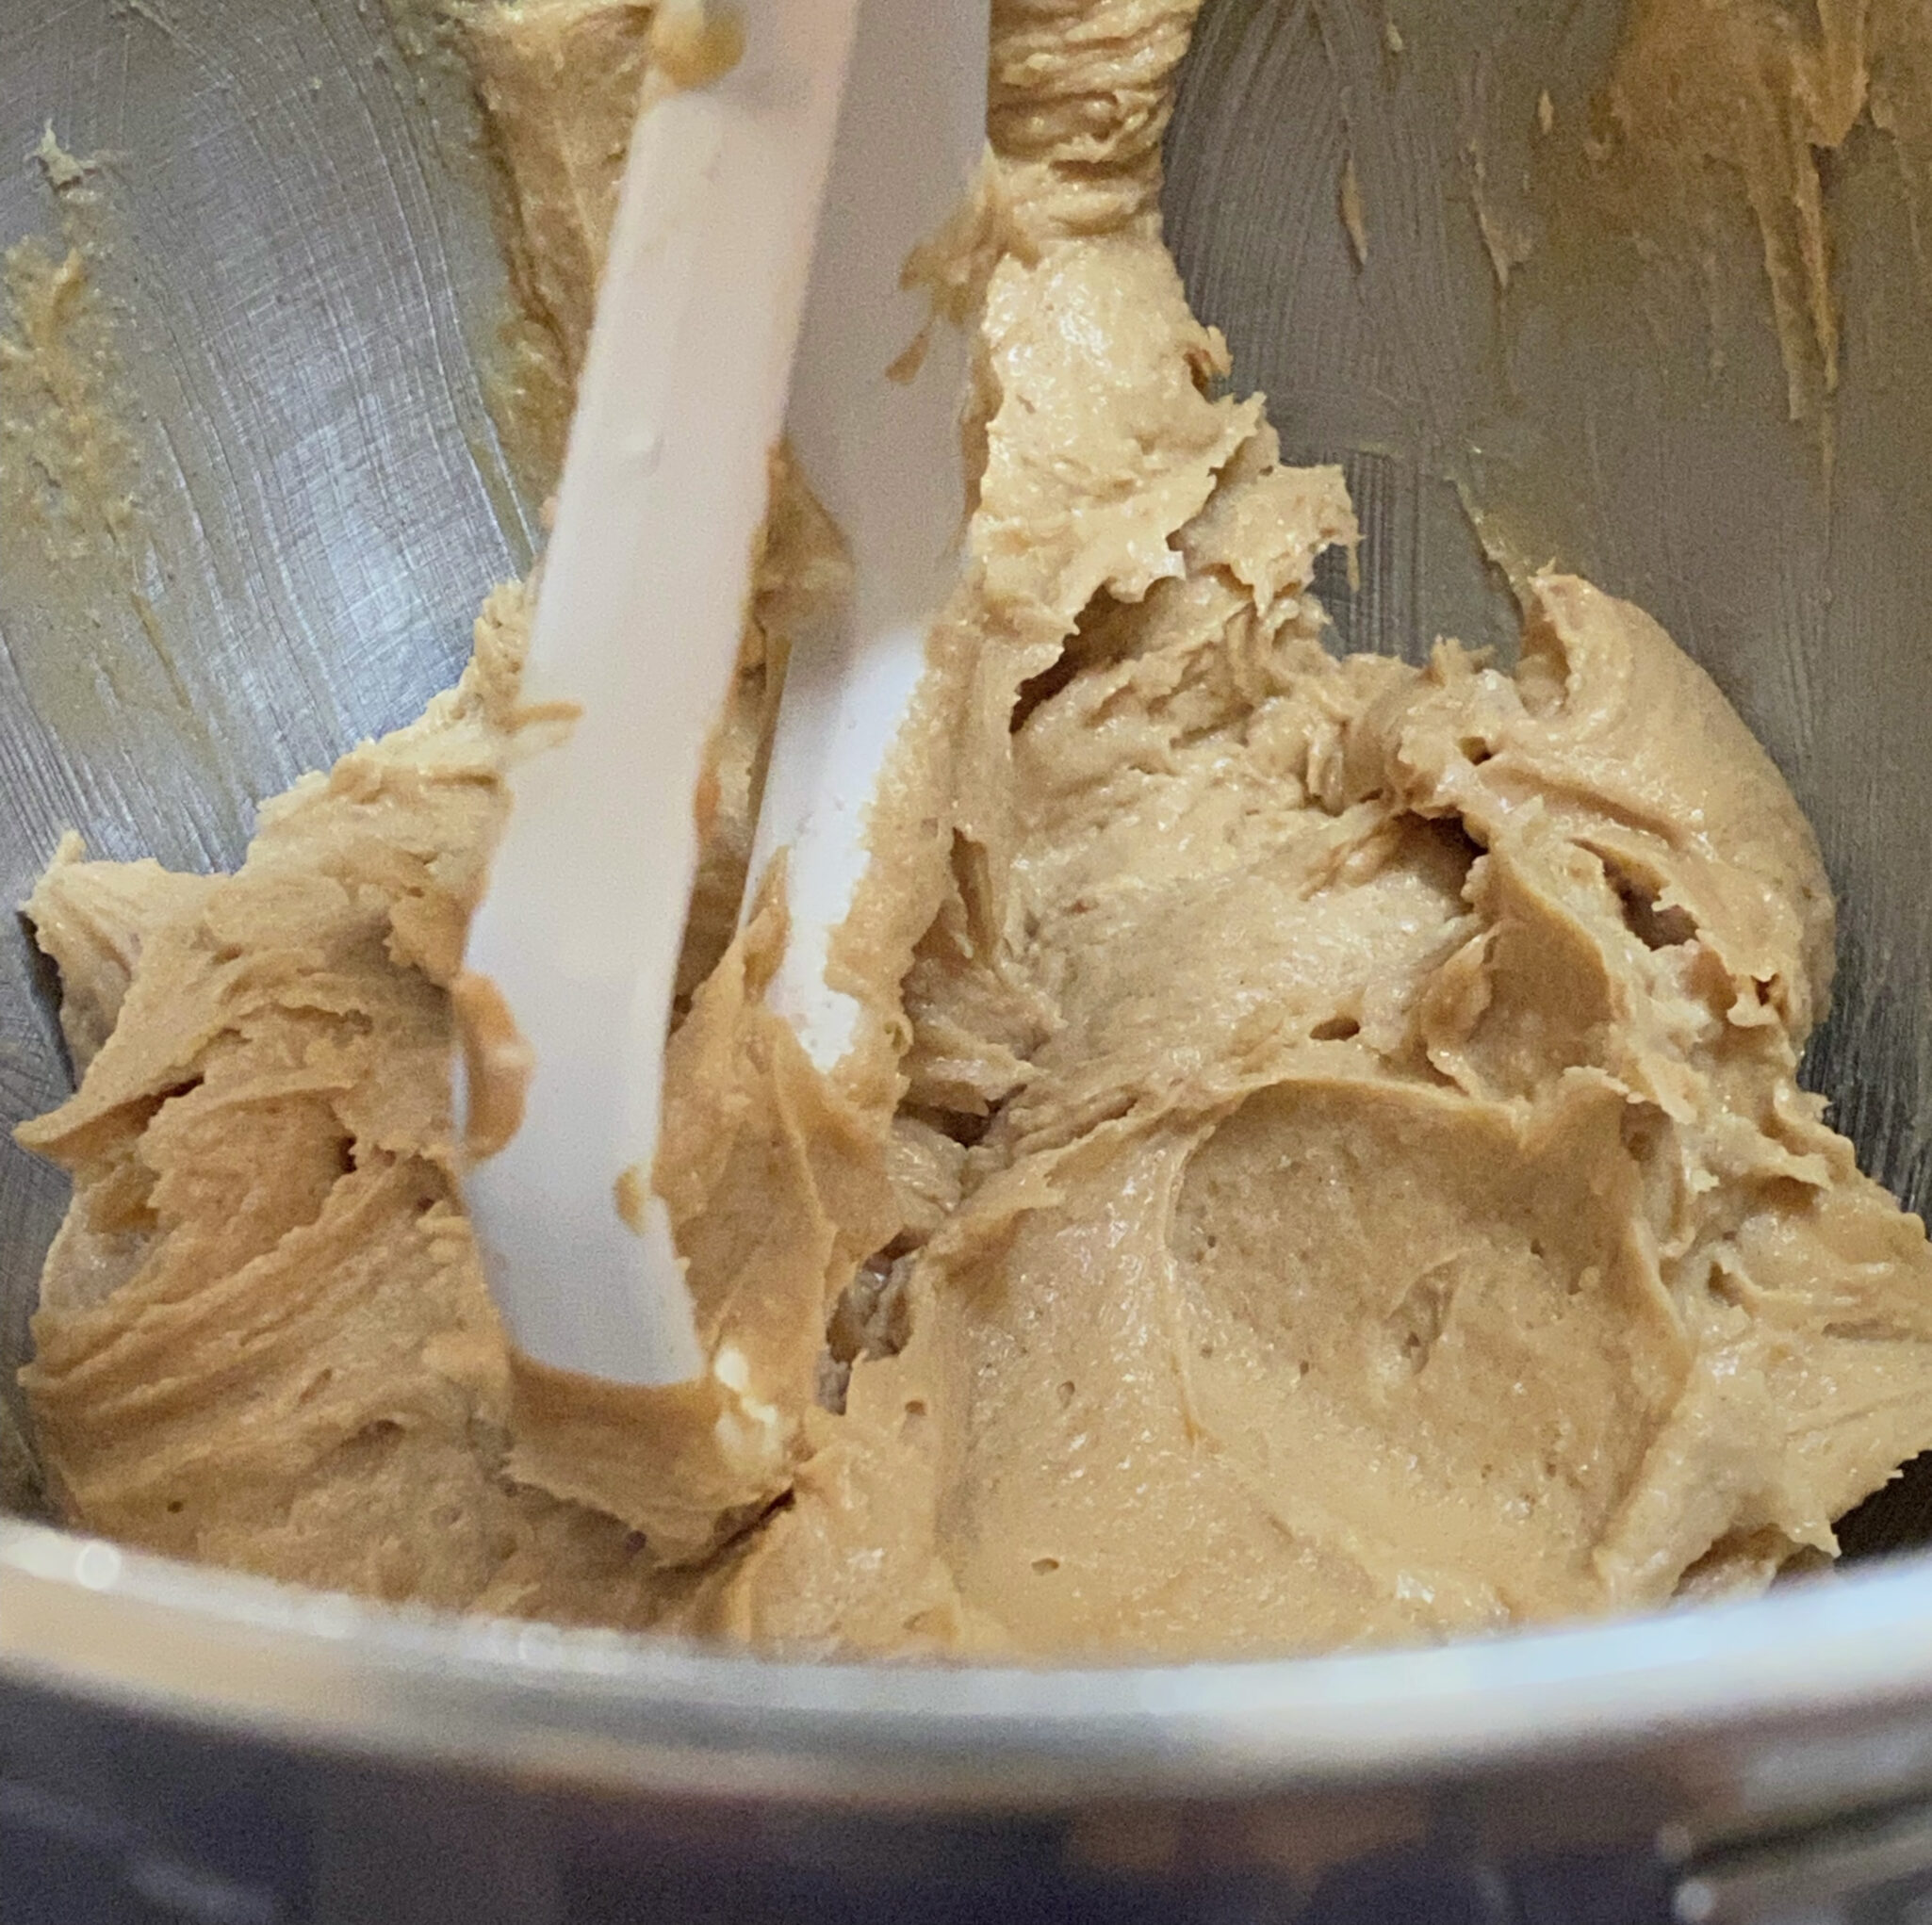
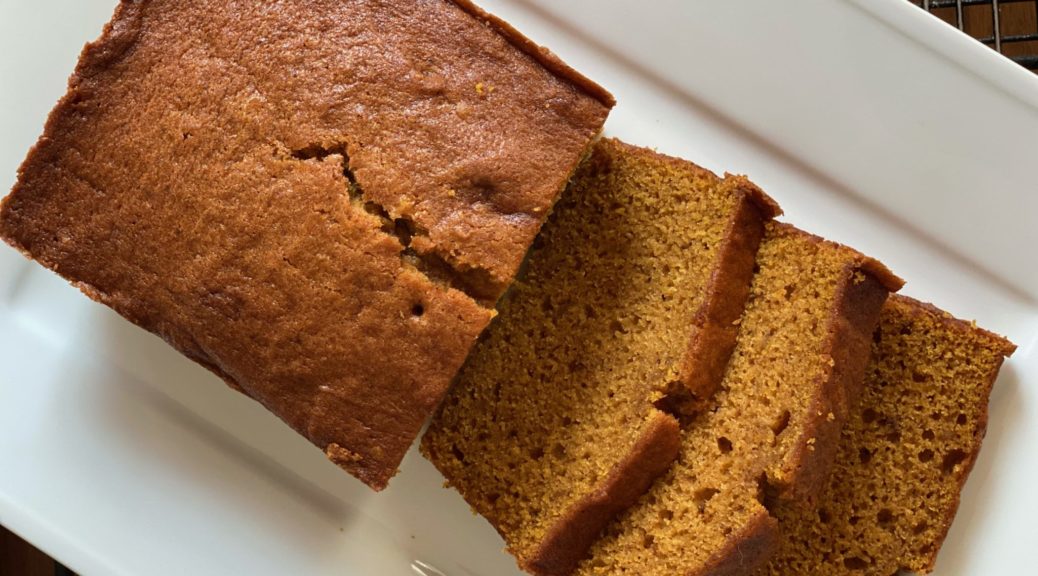
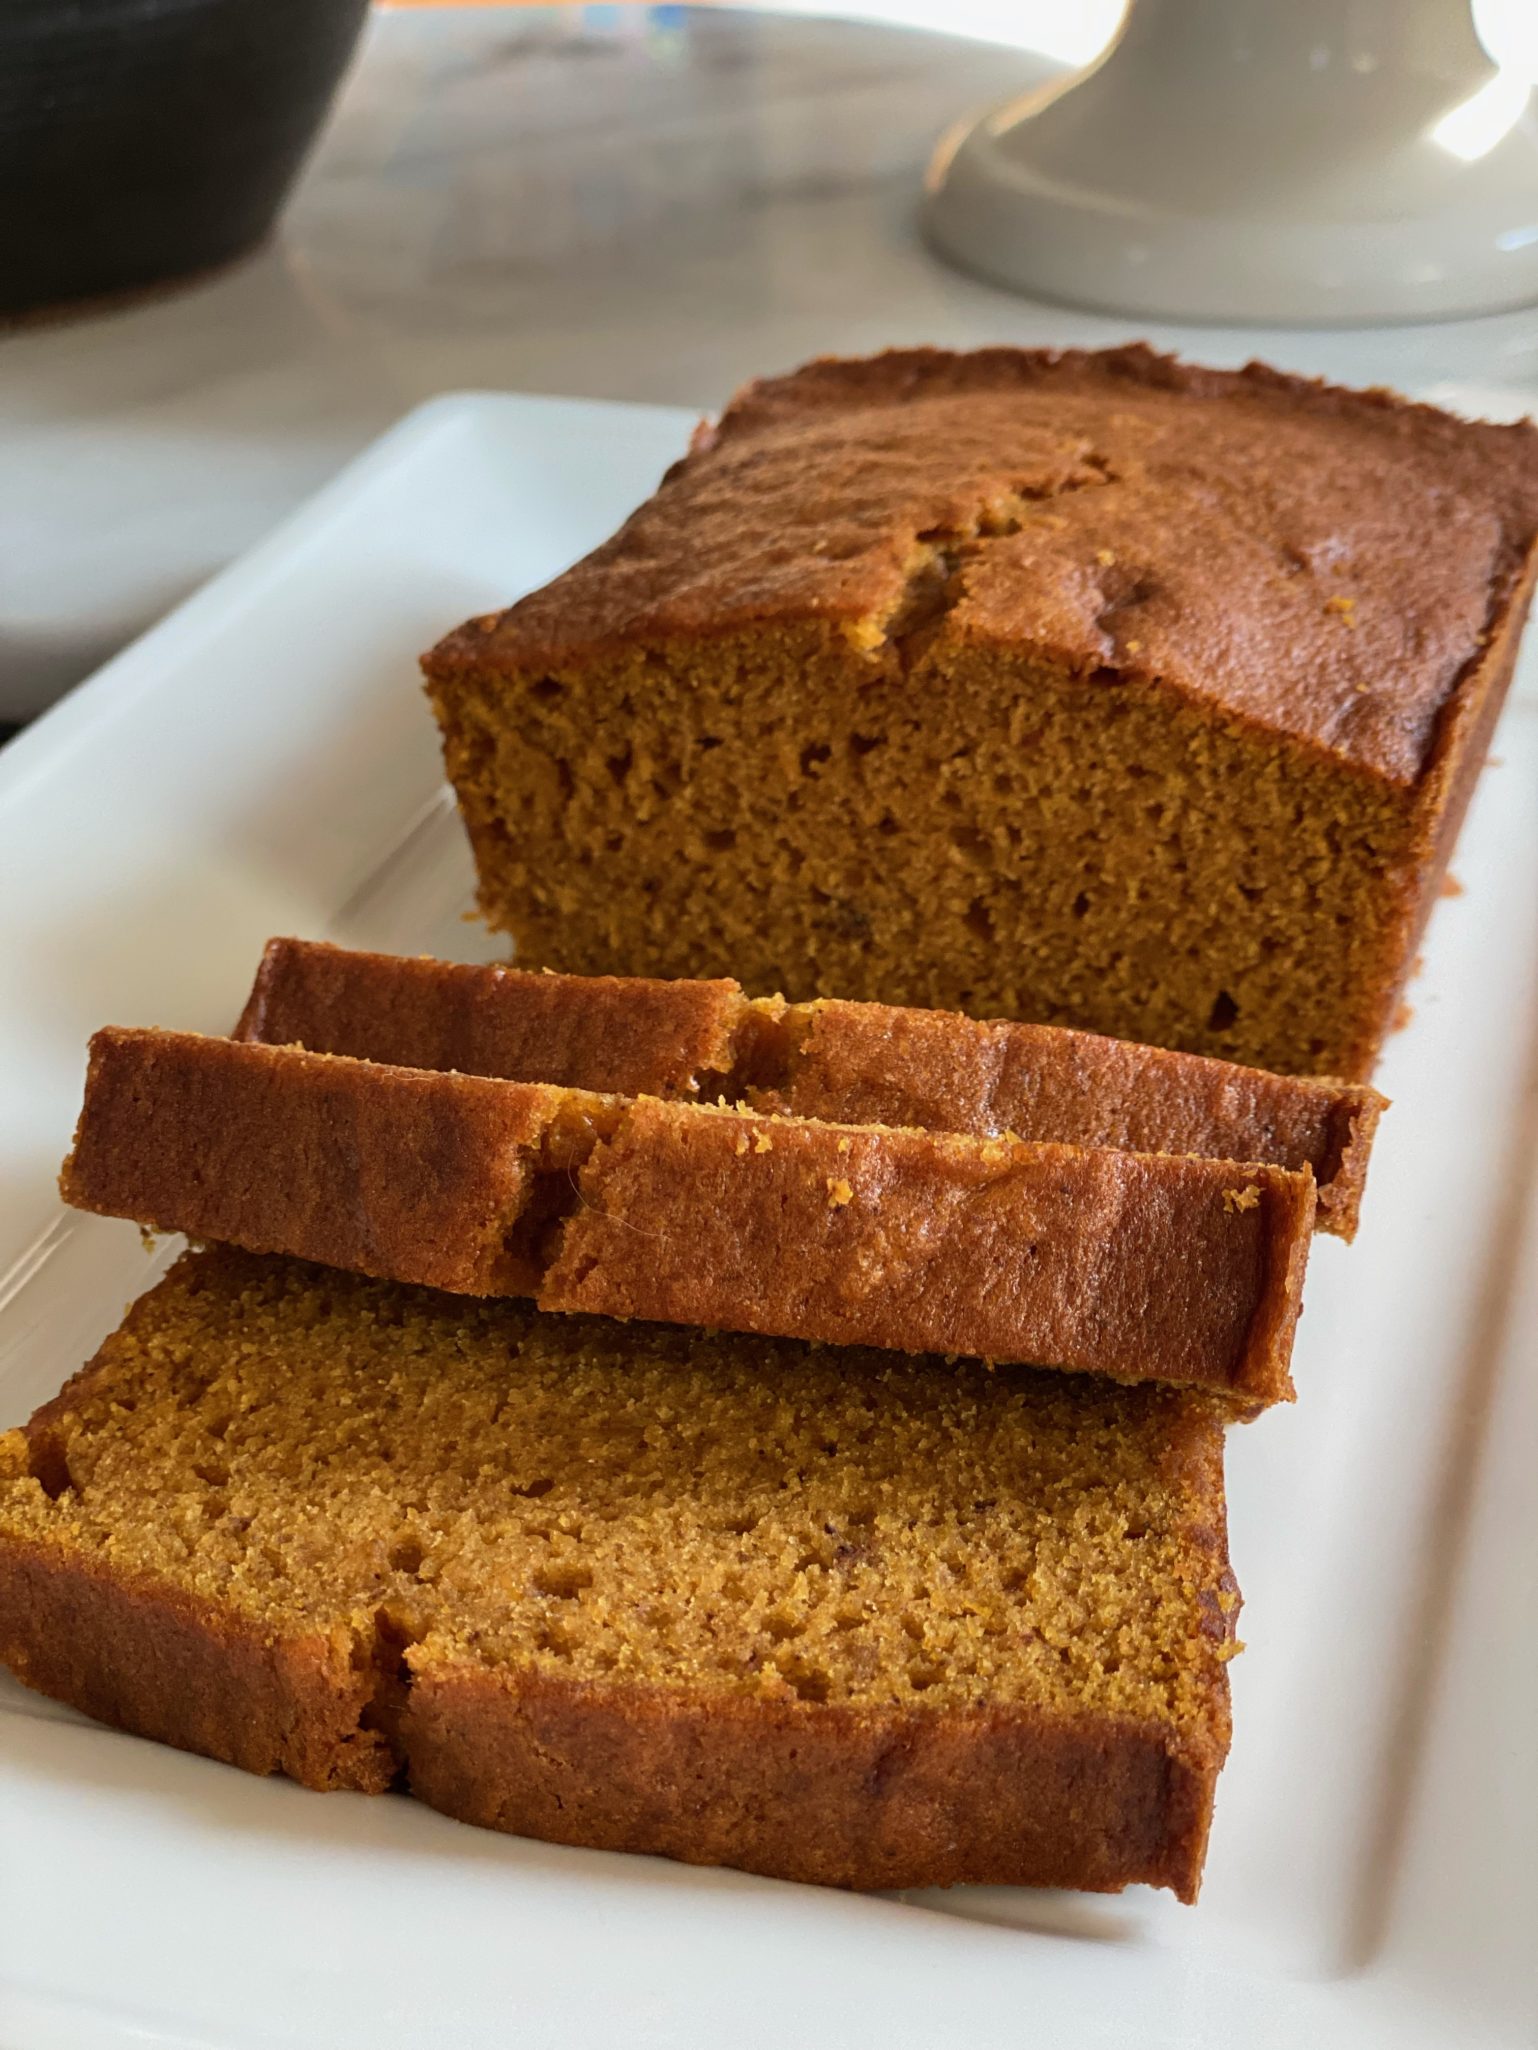
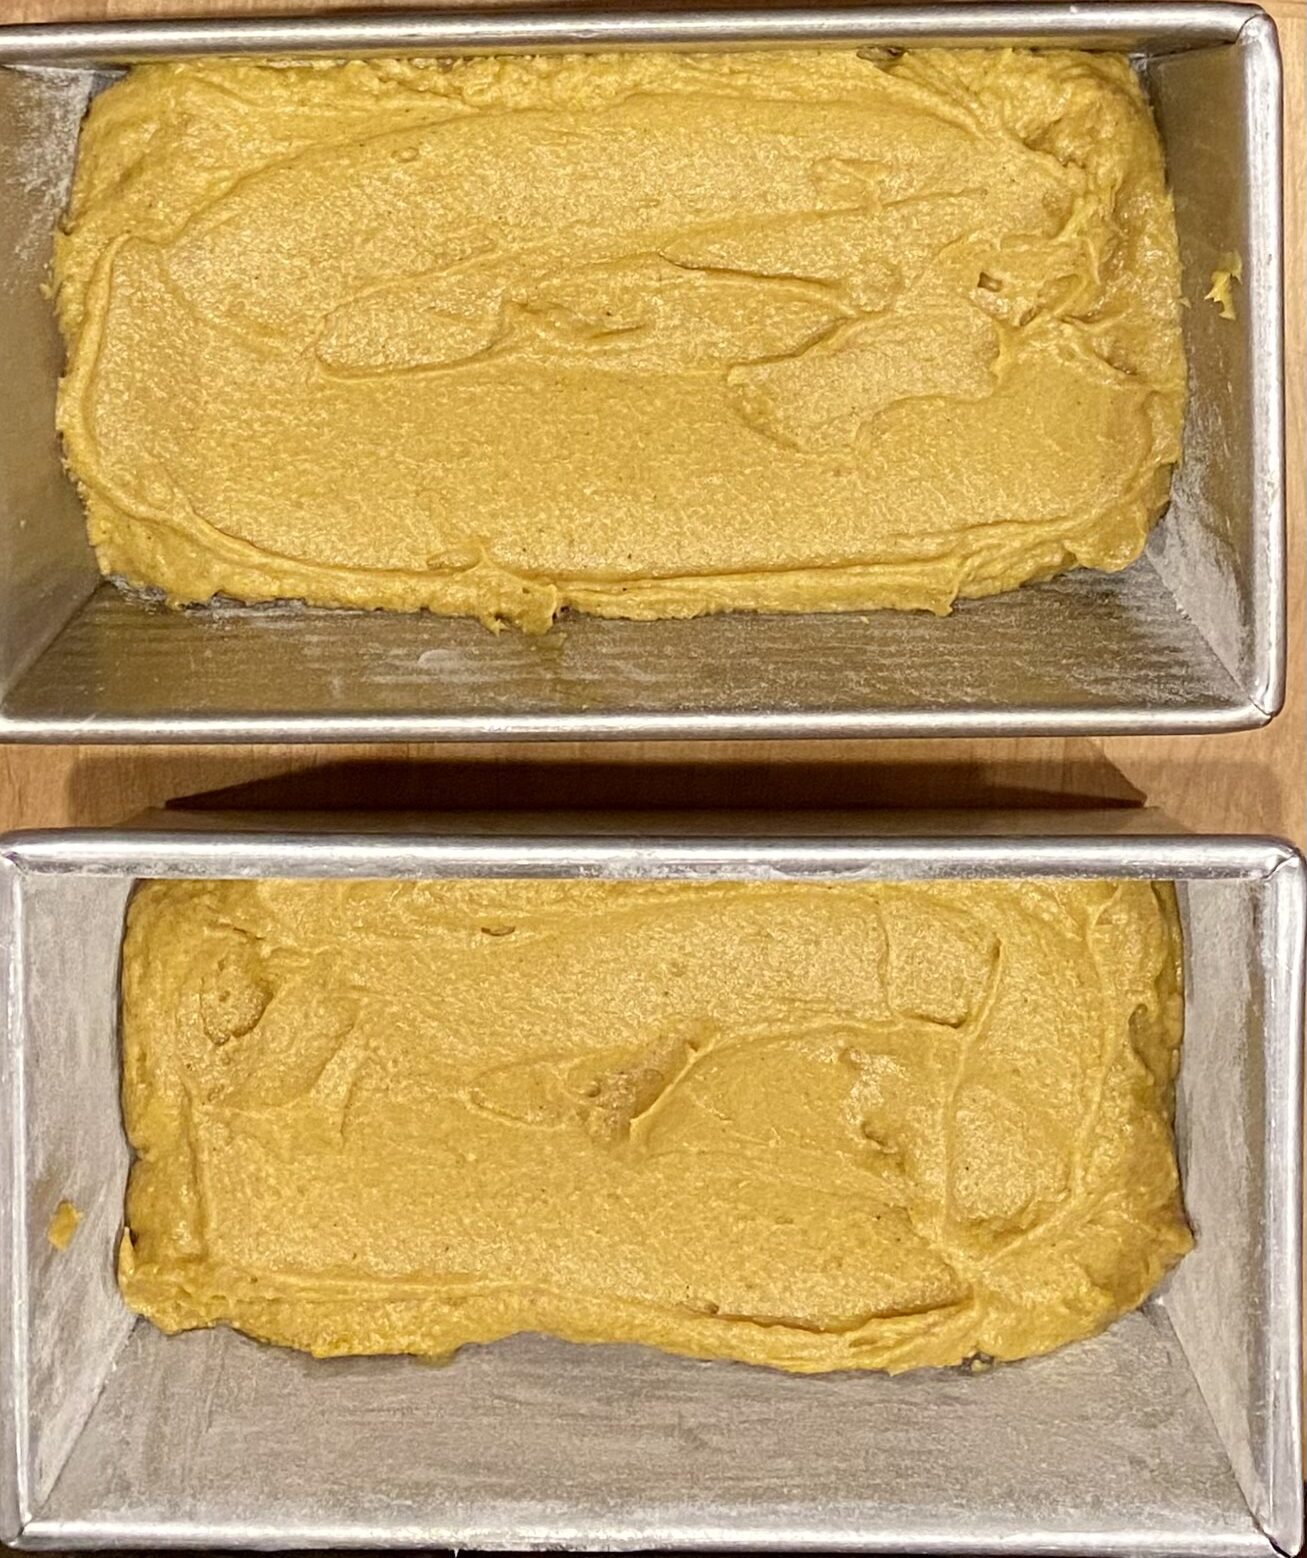
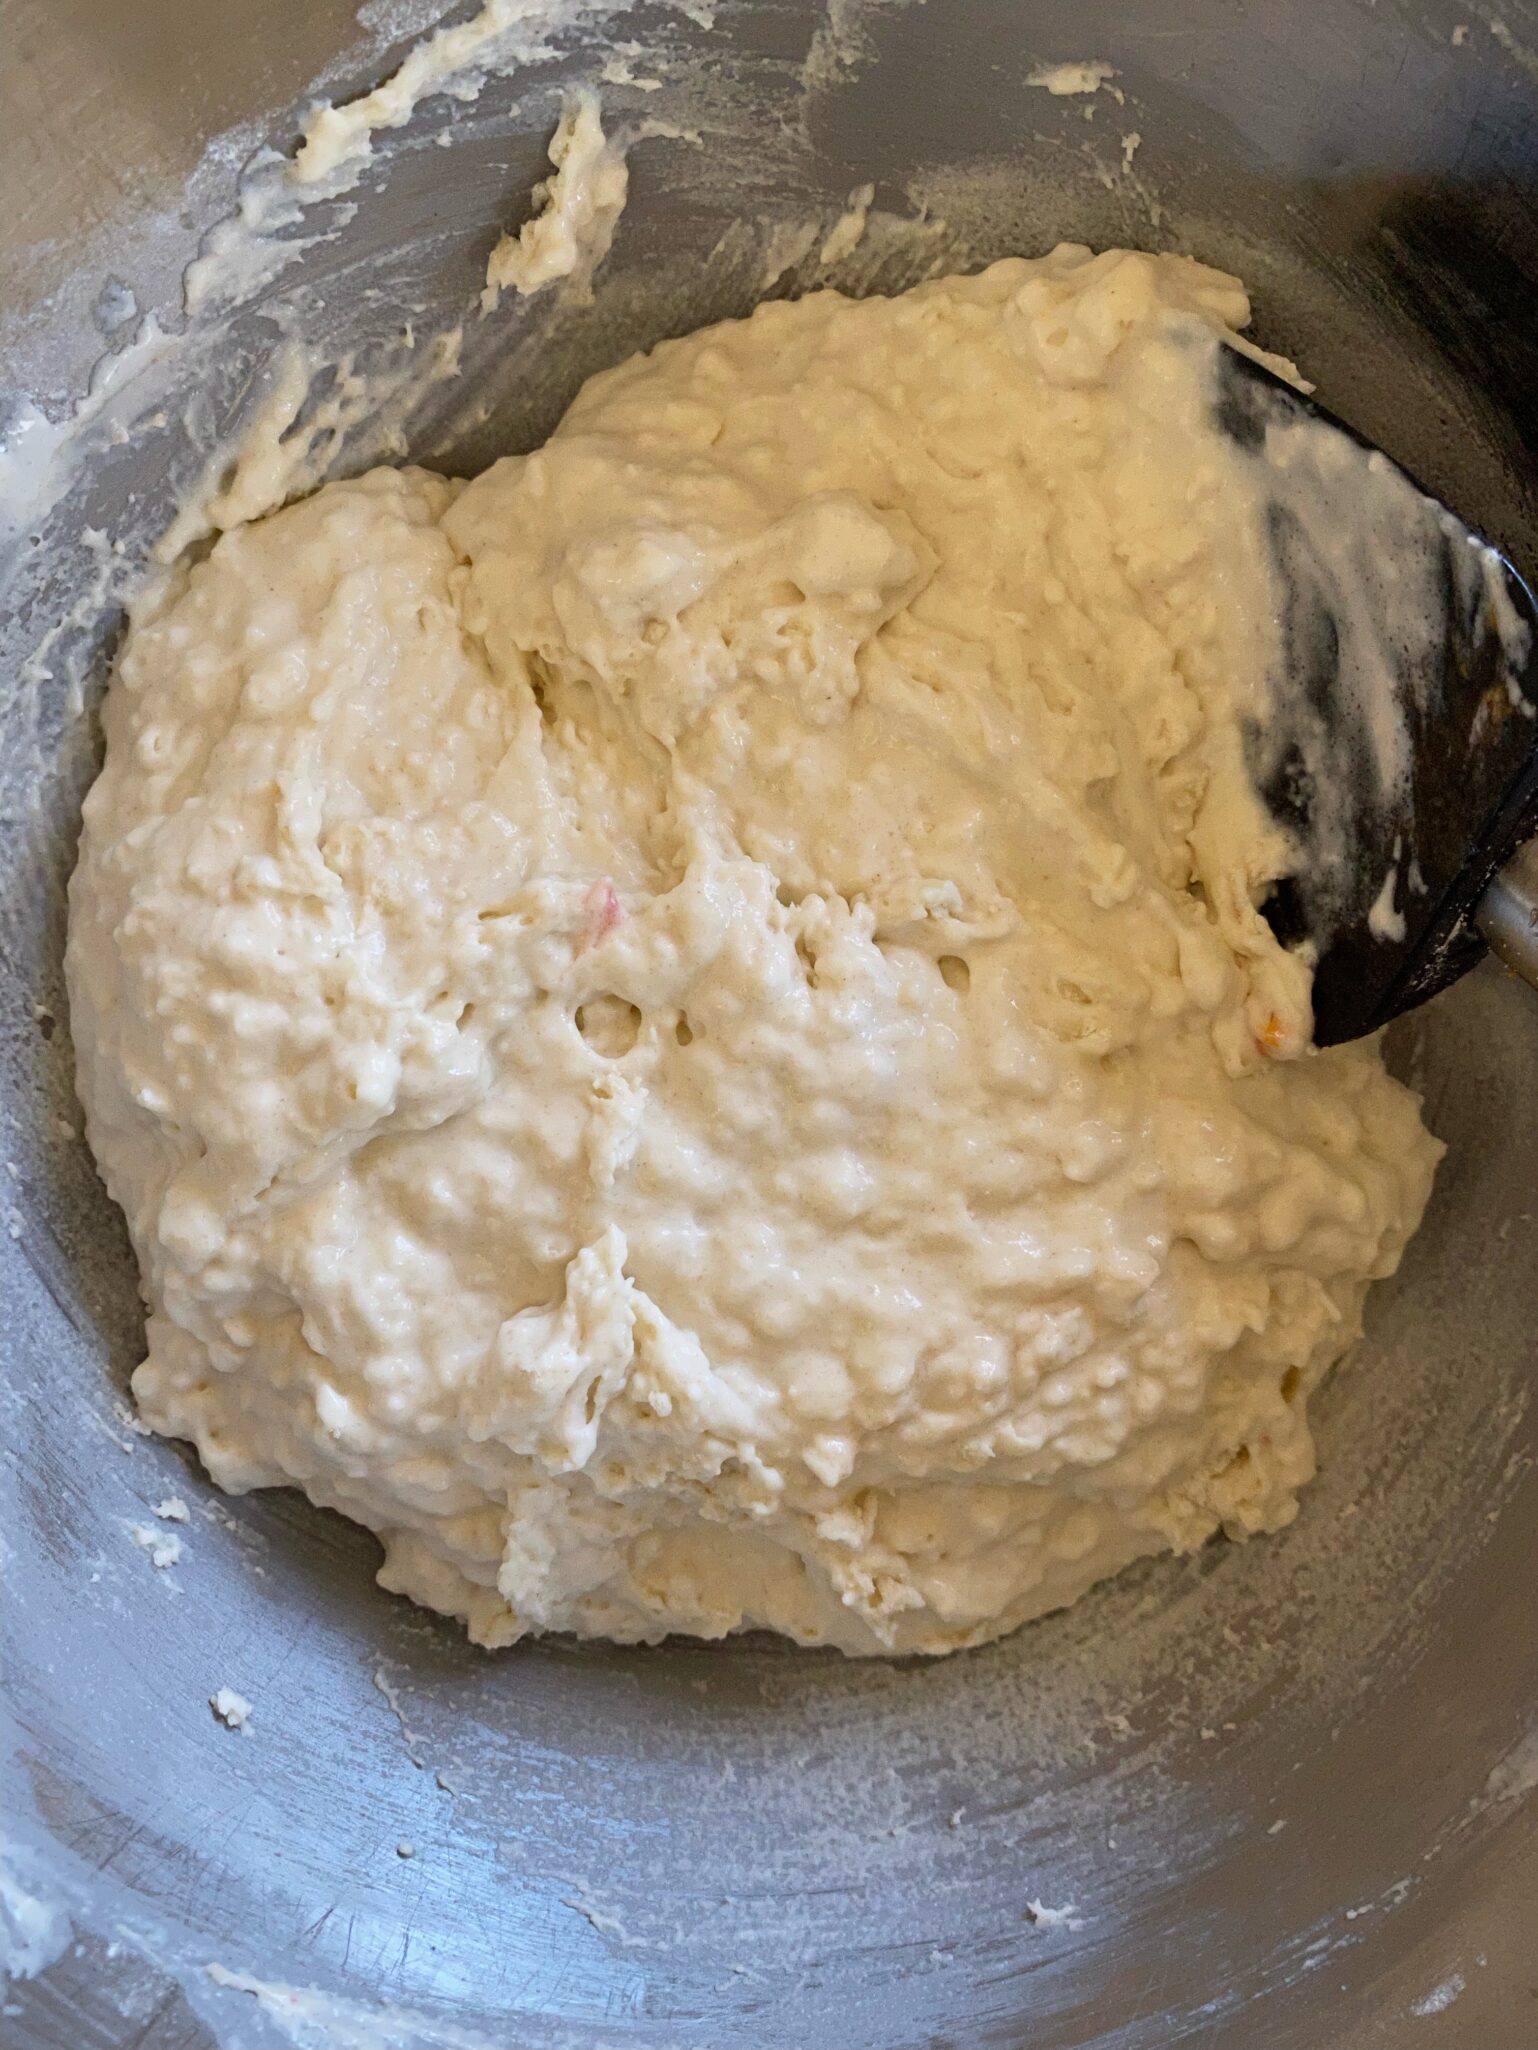
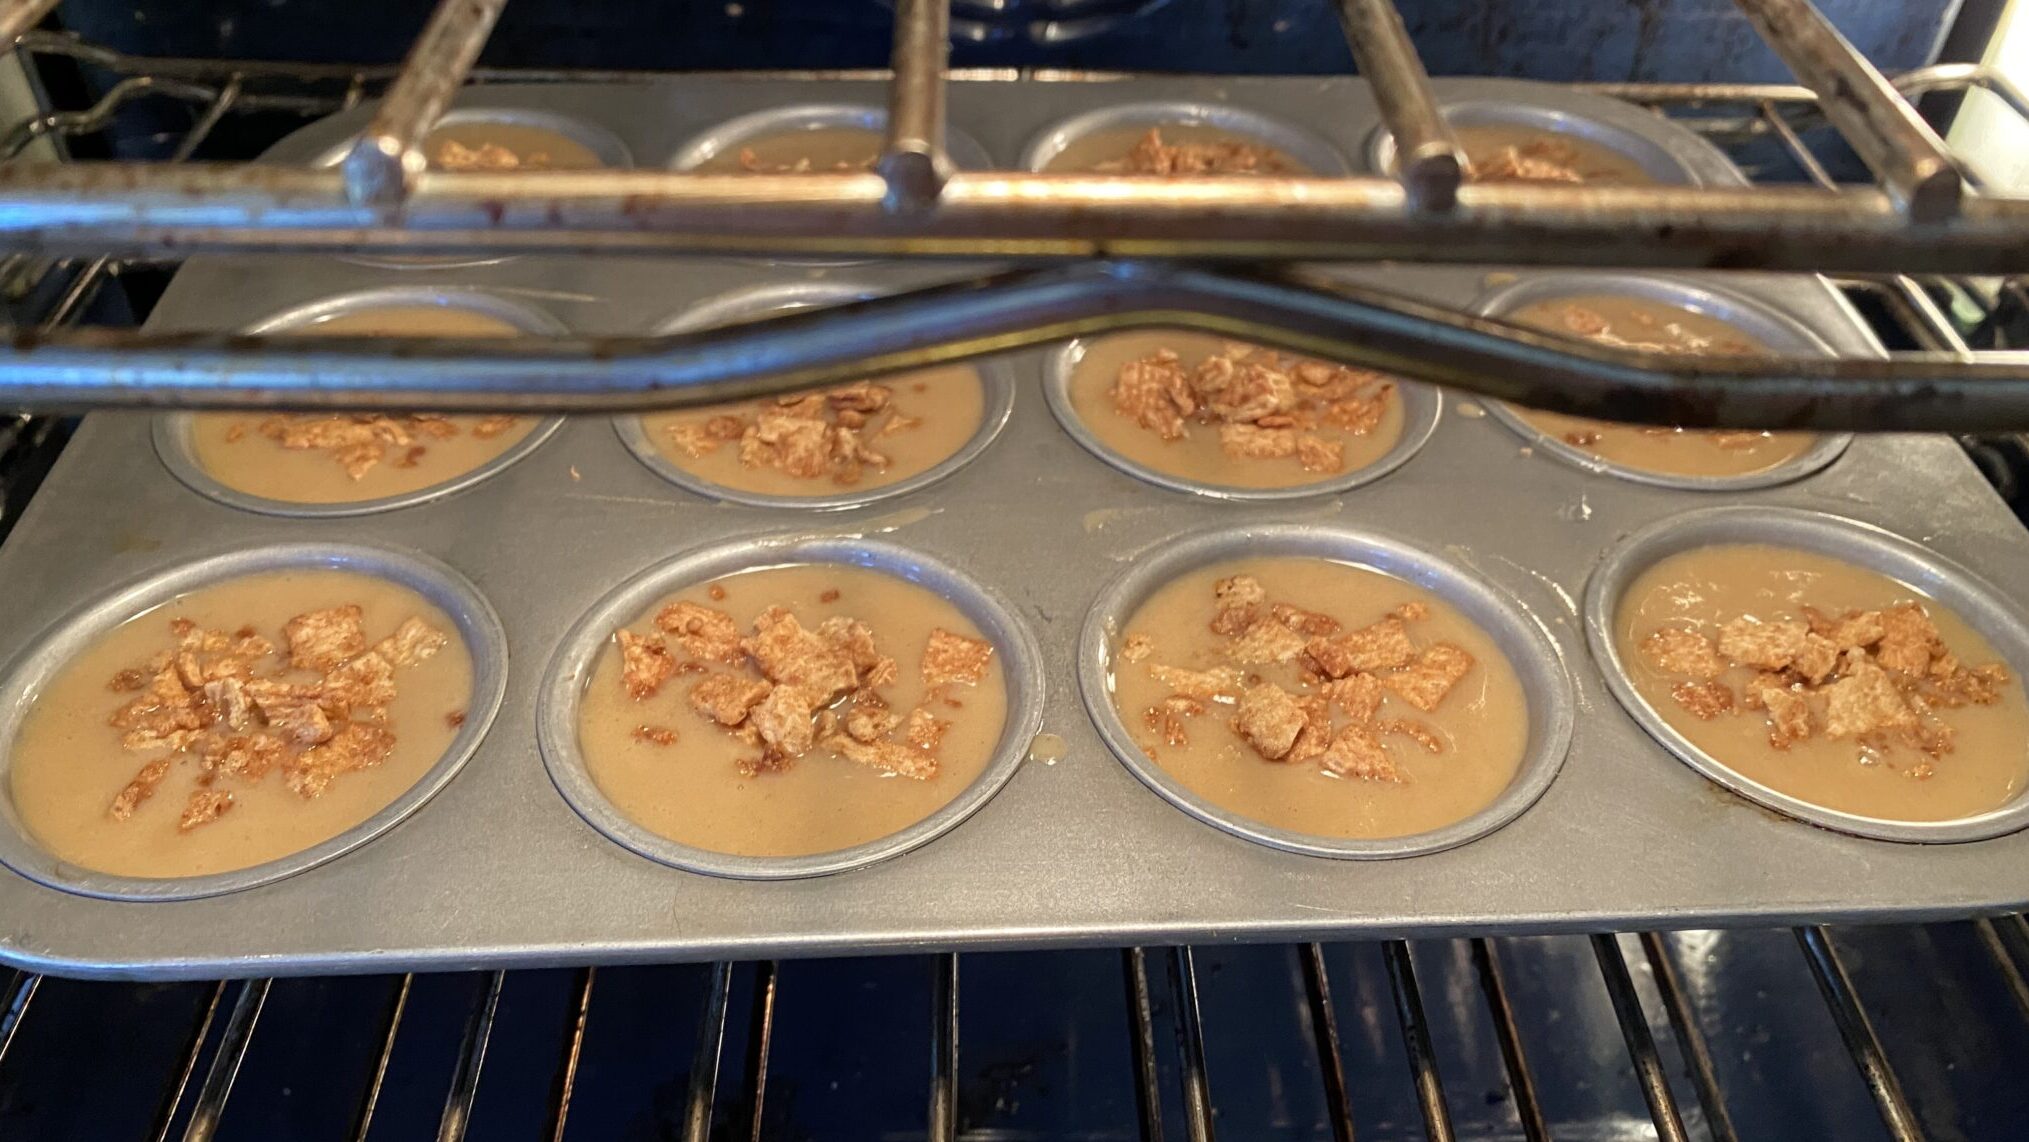
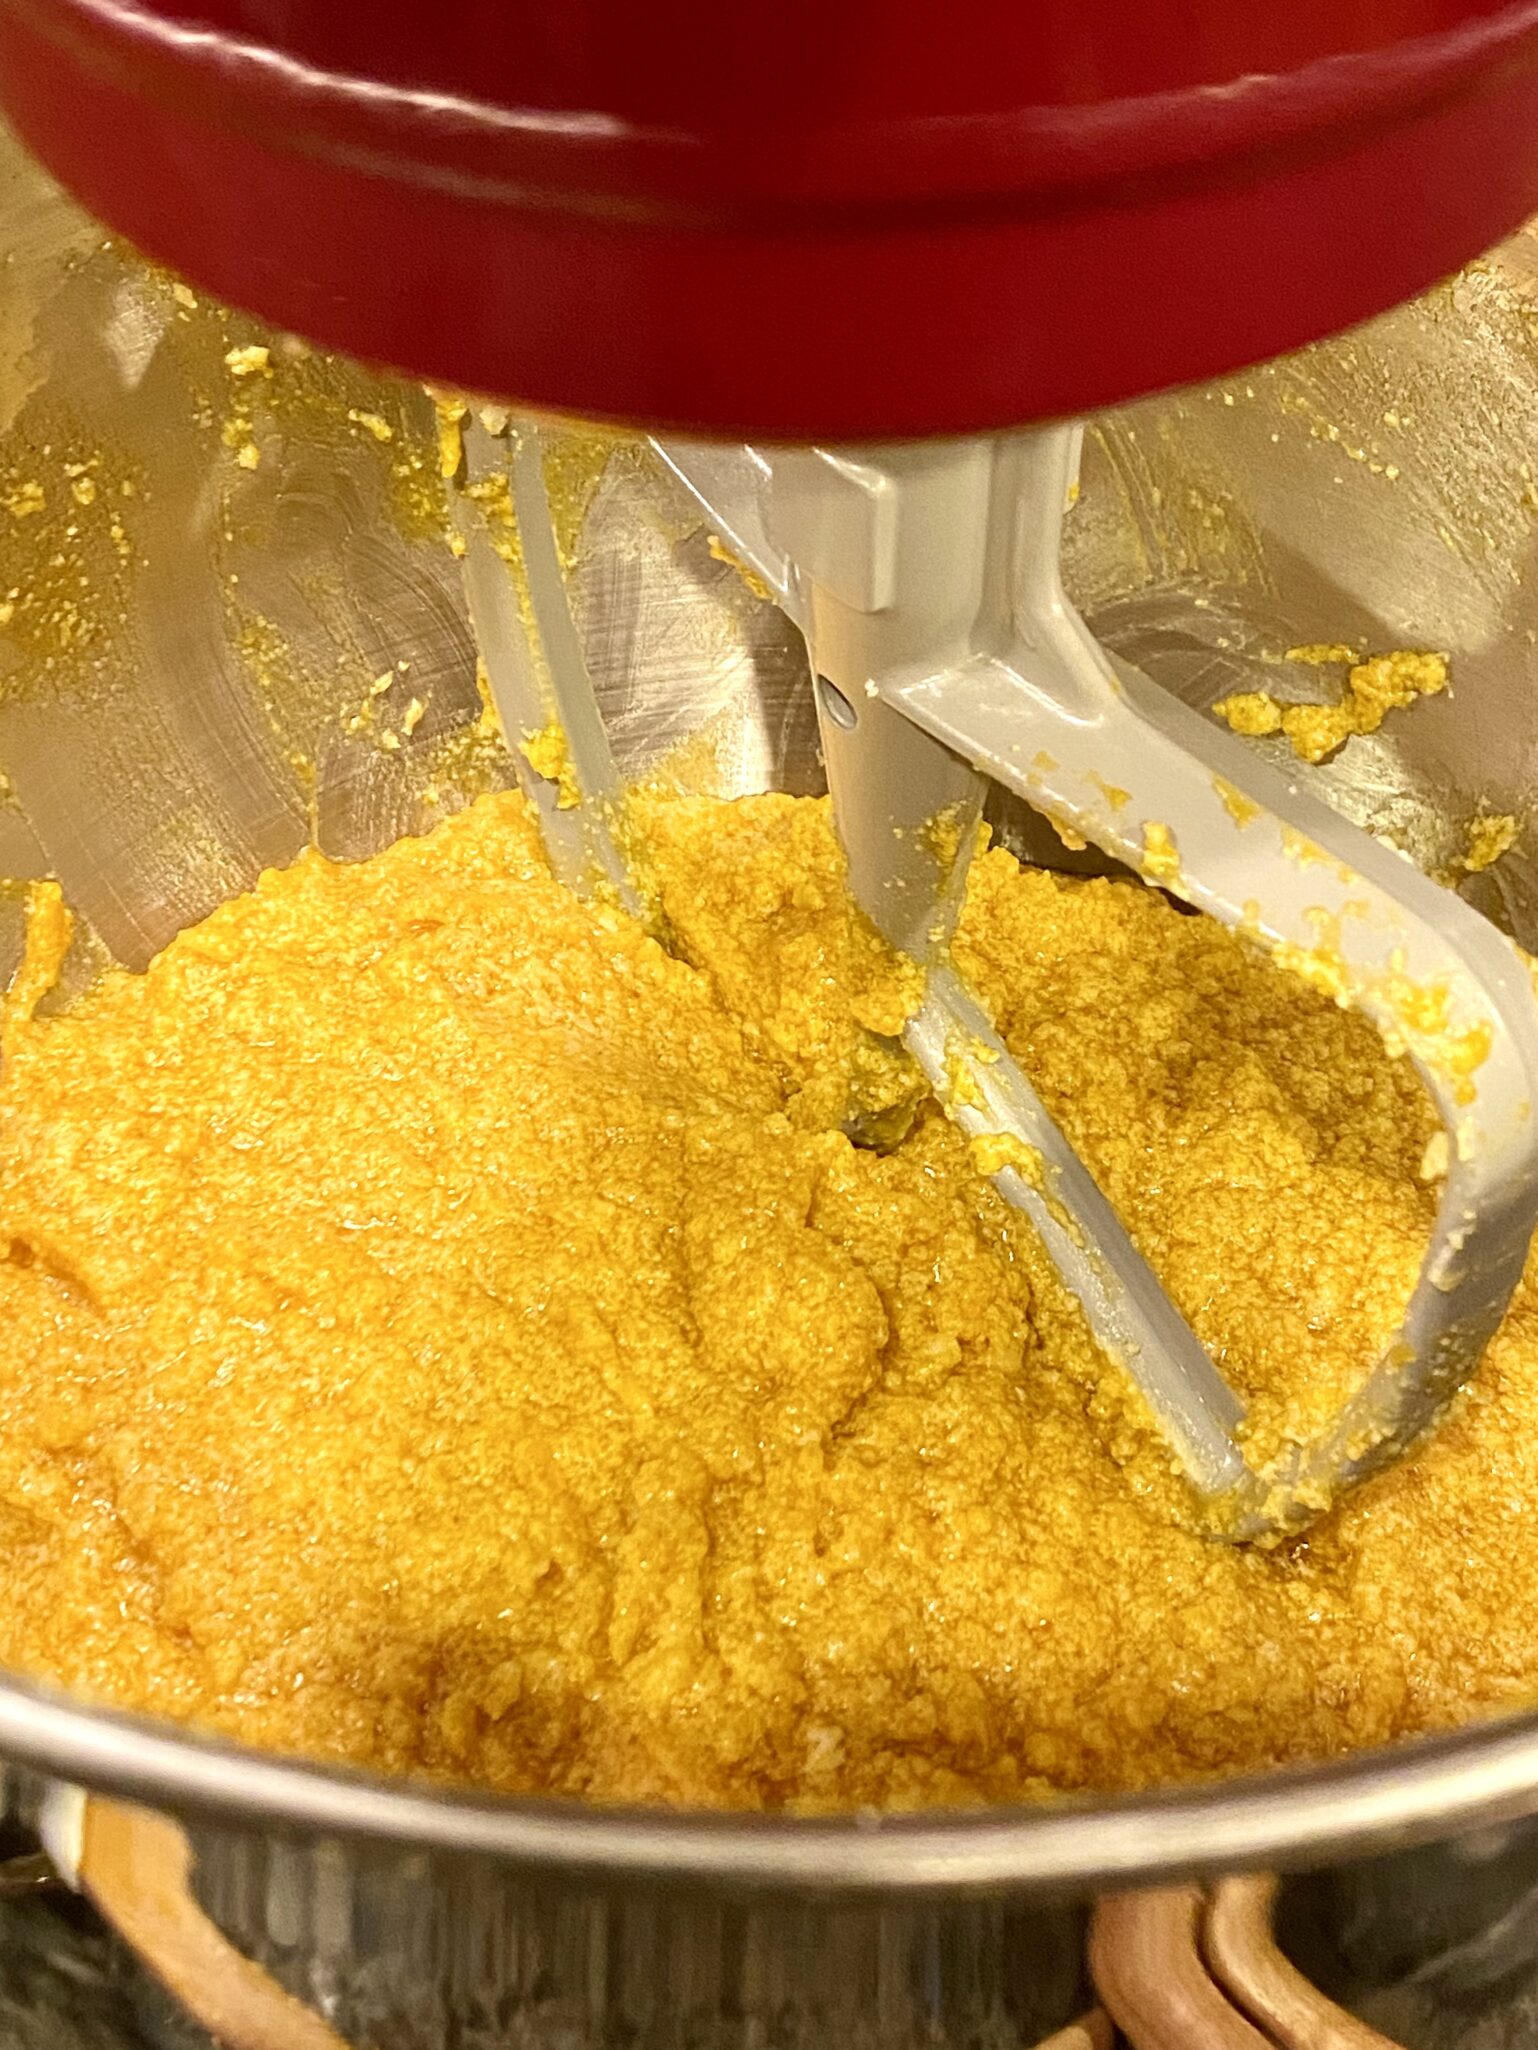
At low speed, add the flour.  Mix just until combined.  The batter will lose that grainy look. This is a pretty thick batter so you will need to scoop rather than pour it into your loaf pans.  Divide between 2 8×4 loaf pans.

I mulled over adding a streusel topping but since this was the first time I was making it, I deferred.  I’ve included a simple topping for those of us who cannot leave well enough alone.

Made another batch to take to work. Added the sugar topping from Midwest Made. Adds a bit of crunch.

This bread is delicious!  It has a nice crumb, cake-like, not as tight as pumpkin bread made with oil.  A nice balance of spices although I’m already tweaking it in my mind (less clove, add ginger) but totally good as is.  One note, sift the dry ingredients together.  I didn’t, and a few bites had too much clove.

I had forgotten how much I like pumpkin bread and how easy it is to make.  This recipe is definitely going in the rotation!

Best Damn Pumpkin Bread

Moist and delicious, best damn pumpkin bread recipe
Course Breakfast, Snack
Cuisine American
Keyword Pumpkin Bread, quick bread
Prep Time 20 minutes
Cook Time 1 hour
Servings 24 servings
Calories 166kcal

Equipment

  • 2-8x4 loaf pans

Ingredients

Da Dry Stuff

  • 2 cups all-purpose flour spooned into measuring cup and leveled-off
  • 1/2 teaspoon salt
  • 1 teaspoon baking soda
  • 1/2 teaspoon baking powder
  • 1 teaspoon ground clove or 3/4 tsp clove and 1/4 tsp ginger
  • 1 teaspoon ground cinnamon
  • 1 teaspoon ground nutmeg can substitute mace

Da Butter-Sugar

  • 1-1/2 sticks unsalted butter, softened 3/4 cup
  • 2 cups sugar

Da Wet Stuff

  • 2 large eggs
  • 1 15-1/2 oz can 100% pure pumpkin

Instructions

  • Preheat the oven to 325°F and set an oven rack in the middle position. Generously grease two 8 x 4-inch loaf pans with butter and dust with flour, or use a baking spray with flour in it, such as Pam with Flour or Baker's Joy.
  • Sift flour, salt, baking soda, baking powder, clove, cinnamon, and nutmeg into a medium bowl. Set aside.
  • Using an electric mixer, beat the butter and sugar on medium speed until just blended. It will be grainy not creamy. Add the eggs one at a time, beating well after each addition. Continue beating until very light and fluffy, a few minutes. Beat in the pumpkin. The mixture might look grainy and curdled at this point -- not to worry, flour to the rescue in the next step.
  • Add the flour mixture and mix on low speed until combined. Do not overmix.
  • Turn the batter into the prepared pans, dividing evenly, and bake for 65 – 75 minutes, or until a cake tester inserted into the center comes out clean. Start checking at 55 min. Let the loaves cool in the pans for about 10 minutes, then turn out onto a wire rack to cool completely.

Notes

This bread freezes well.  Eat one now and save another for a rainy day or surprise guests!  Wrap well, you know the drill, and store for up to 3 months.
Gotta have a topping? Check the ones out for these:
Or this simple sugar topping from Midwest Made: 
  • Place 3 tablespoons of granulated sugar in a small bowl. Dampen your fingertips with water and work them into the sugar until it just begins to look like snow-if you pinch some, it should just barely hold together. Sprinkle the dampened sugar over the batter, aiming to get it clumped up together in spots. If you want, add a 1/2-1 tsp of cinnamon.
  • Right before baking, sprinkle the batter in loaf pans with the nuts and finish with cinnamon sugar.  Adds a bit of crunch.
It is delicious when toasted! 
Whip It, Whip It Good (Coconut Whipped Cream)

Whip It, Whip It Good (Coconut Whipped Cream)

We’re baaackkkkkkk!  In person meetings, dinners in restaurants instead of take-out, classes on campus instead of on Zoom, we are adjusting to living with COVID.  With midterms just around the corner, our political action group hosted a Democracy Dinner to re-engage and see folks in person.  What better way to entice folks to join us than with food!

Dinner was outside, we live in California, where grillin and chillin is a distinct possibility 24-7-365.  I stepped up to create a main dish and dessert for our Vegan dinner guests. The main dish was a no-brainer,  Spicy Noodle Salad, vegan, plus perfect with whatever came off the grill, protein or veggie. The only glitch was the original recipe called for honey in the dressing.  Made by bees, honey is on the no-fly list for vegans.  I substituted Agave Syrup for the honey which worked seamlessly.  Mission accomplished, onto dessert.

Pudding It All Together

The night of the last presidential elections, as I nervously watched the results roll in, I headed to the kitchen to make something to eat to calm my frayed nerves.  I landed on NYTcooking’s recipe for a Chocolate Pudding made with Oat Milk.  A snap to make, it was chilling in the fridge within minutes.  Intensely chocolate, which appealed to my grown-up tastebuds, while the smooth, creamy texture of the pudding made me feel like a kid again.  AND, it’s vegan, oh yeah. Dessert solved.

Nifty Thrifty Wow Factor

A layer of strawberry compote in between the chocolate pudding and a voluptuous coconut whipped cream on top gave the pudding a little more panache.   I rationalized splurging on expensive French yogurt by repurposing those cute little glass yogurt jars for the pudding.

Whip It, Whip It Good

I LOVE whipped cream.  So what’s a girl to do if she can’t have the perfect topping for vegan dessert?  Coconut Milk to the rescue.  A favorite vegan, gluten-free site, Minimalist Baker was ground zero for tips on how to make a delicious vegan whipped cream from coconut milk.

Start the day before you need whipped cream.  Why?  You need to chill the coconut milk to separate the cream from the liquid.  You will be using the cream part only.

My two favorite brands of coconut milk are Chaokoh and Aroy-D.  Having Aroy-D in my pantry, I placed a can in the fridge.  The overnight chill in the fridge is key to creating two distinct layers.  Aroy-D worked perfectly.  Both brands are found in most Asian Grocery stores.  Minimalist Baker likes Whole Foods 365 Coconut Milk, which might be more accessible.

Open the can, the solids will be on top, scoop all of the solidified coconut milk out and place in a chilled mixing bowl then place the coconut solids in a chilled bowl.  Whip for 30 seconds then add powdered sugar and vanilla.  I used 1/2 cup powdered sugar and it was pretty sweet. The range is 1/4 cup to 3/4 cup of sugar which you can to taste, definitely start with 1/4 cup and go from there.  Beat an additional minute or until light and fluffy.  Don’t overbeat as the cream will break down.

This is the perfect vegan substitute for regular whipped cream!  But, it is so good I would make it even if I didn’t need a vegan alternative.

Ridiculously easy Vegan Peanut Butter Cookies,Vegan Peanut Butter Cookies, like Fred and Ginger, a perfect pairing with Chocolate Puddin

To half of the puddings I added a layer of strawberry compote. Adapted from Sally’s Baking Addiction, it’s easy and delicious.  Think of it as additional bling.

Coconut Whipped Cream

A great vegan option for whipped cream, so good you may want to use this vegan or not!
Course Dessert
Cuisine American
Prep Time 15 minutes
Chill Time 1 day
Servings 4

Ingredients

  • 1 14-ounce can coconut cream or full fat coconut milk* (Savoy Coconut Cream, Aroy-D Coconut Milk, and Nature's Charm Coconut Whipping Cream work best!)
  • 1/4 - 3/4 cup icing/powdered sugar use organic to ensure vegan friendliness
  • 1/2 tsp vanilla extract optional

Instructions

  • Chill your coconut cream or coconut milk in the refrigerator overnight (see notes for top brands!), being sure not to shake or tip the can to encourage separation of the cream and liquid. See notes for more insight / troubleshooting.
  • The next day, chill a large mixing bowl 10 minutes before whipping.
  • Remove the coconut cream or milk from the fridge without tipping or shaking and remove the lid. Scrape out the top, thickened cream and leave the liquid behind (reserve for use in smoothies).
  • Note: if your coconut milk didn't harden, you probably just got a dud can without the right fat content. In that case, you can try to salvage it with a bit of tapioca flour - 1 to 4 Tbsp (amount as original recipe is written // adjust if altering batch size)- during the whipping process. That has worked for me several times.
  • Place hardened cream in your chilled mixing bowl. Beat for 30 seconds with a mixer until creamy. Then add vanilla (optional) and powdered sugar (or stevia) and mix until creamy and smooth - about 1 minute. Avoid overwhipping because it can cause separation. Taste and adjust sweetness as needed.
  • Use immediately or refrigerate - it will harden and set in the fridge the longer it's chilled. Will keep for up to 1 - 2 weeks!
  • Coconut whipped cream is perfect for topping desserts like pie, hot cocoa and ice cream. It's also ideal for french toast, pie fillings, mousse, and even no-churn ice cream!

Strawberry Sauce

Fresh strawberries in this topping for a quick, & easy topping that gives desserts that extra bling!
Course Sauce
Cuisine American
Keyword quick and easy, strawberries, strawberry sauce
Prep Time 15 minutes

Ingredients

  • 1 Tablespoon cornstarch
  • 3 Tablespoons cold water
  • 1 lb strawberries hulled and sliced in half
  • zest and juice from 1/2 small lemon
  • 1/4 cup granulated sugar 50g
  • 1 teaspoon vanilla extract

Instructions

  • In a small bowl, whisk the cornstarch and water together until all the cornstarch has dissolved.
  • Place the cornstarch mixture, along with the rest of the ingredients, into a small saucepan over medium heat. Using a wooden spoon or rubber spatula, stir the mixture as it cooks. Break up some of the strawberries as you stir.
  • Bring it to a simmer and allow to simmer for 5 minutes, stirring constantly. After 5 minutes, remove pan from the heat and allow to cool. Add vanilla extract. The mixture will thicken as it cools.
Apricot Oat Bars Delicious and Easy, Bar None

Apricot Oat Bars Delicious and Easy, Bar None

Finally, after months of being a COVID couch potato, I got off my duff and headed up to the reservoir to row again.  I had forgotten how nice it was to be on the water in the early morning, to get in a shell, grip the oars, press with my legs, and propel the boat through the water.  Gliding through the water I would catch glimpses of the resident bald eagles soaring then diving toward the water.  I live for these moments…


Who Am I Kidding?

What I really look forward to is COFFEE after the row, lol.  After every row, we head to our favorite spot for coffee and something to nosh on.  Lately, that nosh has been a tasty apricot bar. It reminds me of an Apricot Oatmeal Bar I used to make when the kids were little.

The recipe is from the Williams-Sonoma Kids Cookbook, that granola was a family fav once upon a time.  I decided to find it, dust it off, and make it again.

Kind of like a naughty granola bar, the bars are buttery, sweet, tart, dense, and chewy with a hint of cinnamon and vanilla.  They are incredibly easy to make, all you need is a bowl and a spoon.  Toss old-fashioned oatmeal, brown sugar, cinnamon, salt, and flour into a large bowl. stir to combine, then add the melted butter, vanilla, and chopped apricots. Add nuts too if you like.

Bake, cool, and cut.  How easy is that?  These bars are great after a hard workout, a long hike, or anytime!

Apricot Oatmeal Bars

Course bar cookies, Breakfast, Dessert
Cuisine American
Keyword apricots, bar cookies, oatmeal
Prep Time 15 minutes
Cook Time 36 minutes

Ingredients

  • 12 tablespoons 1 1/2 sticks unsalted butter, cut up
  • 1 cup firmly packed dried apricots
  • 1 1/2 cups old-fashioned rolled oats
  • 1/4 - 1/3 cup chopped nuts of your choice like almonds pecans or pistachios (optional)
  • 1 cup all-purpose flour
  • 1 cup firmly packed dark brown sugar
  • 1/4 teaspoon salt
  • 1/4 teaspoon ground cinnamon
  • 1 1/2 teaspoons vanilla extract
  • soft butter for greasing pan

Instructions

  • Melt 12 tablespoons (1 1/2 sticks) butter in the microwave. Cut butter into pieces and place in microwave-safe bowl. ?Cover with a small plate or paper towel ( I use the paper the butter comes in) and set power to 50%. Set time to 30 seconds. If butter is not completely melted, continue at 50% power and 15-20 second increments. Or place butter in a small saucepan set over medium-high heat, stir with a wooden spoon until the butter is melted, about 2 minutes. Remove the saucepan from the heat and set it aside to cool.
  • Preheat an oven to 350°F. Line the bottom and sides of a 9-inch square baking pan with a large piece of aluminum foil (some foil hanging over the edges is fine). Lightly grease the foil with the soft butter. YOu could also use parchment paper.
  • Cut apricots into about 1/2-inch pieces. (Use kitchen shears to snip apricots works like a charm)
  • In a bowl, combine the rolled oats, flour, brown sugar, salt and cinnamon. Stir with a spoon or spatula until well blended and no lumps of sugar remain.
  • Add apricots, nuts if using, melted butter and vanilla to the bowl. Stir until well blended. The dough will be moist and crumbly. Dump the dough into the prepared baking pan. Press the dough into the pan with your fingers.
  • Bake until the top is golden brown, 35 to 40 minutes. Using oven mitts, remove the pan from the oven, set on a wire cooling rack and let cool completely.
  • Lift the foil and the oatmeal bars from the pan and place on a work surface. Peel away the foil from the sides and bottom. Using a small, sharp knife, cut the big square into 1 1/2-by-3-inch rectangles. Store in an airtight container. Makes 18 bar cookies.

Notes

Adapted from Williams-Sonoma The Kid's Cookbook, by Abigail Johnson Dodge (Time-Life Books, 2000).
“Drop” Everything & Make This Biscuit Berry Cobbler

“Drop” Everything & Make This Biscuit Berry Cobbler

Are you like me? Our farmer’s market in the summer is like a candy store and I’m the kid in it, running around and grabbing baskets of berries, peaches and whatever looks delish.  The past few weeks I’ve come home with way too much fruit for the hubs and me.  Thankfully, Dorie Greenspan came to my rescue with a recipe for a  Drop-Biscuit Peach Blueberry Cobbler.  It is so good and so easy, I have made this more times than I can count this summer.

Cobbler, Crisp, Crumble…explained

I LOVE pies…but even I have to admit, when I want an easy dessert, pies do not come to mind.  Enter the 3 Cs, cobbler, crisp and crumble, easy, homey and delicious.

First, a cobbler is your choice of fruit baked with a biscuit topping.  Second, a Crisp is fruit covered with a streusel topping that contains butter, flour, sugar, and oats.  You can find me making Apple Crisps in the fall to chase away the summer is over blues.  A crumble is the English version of a crisp and does not usually have oats in the streusel. But it can, as in this Strawberry Rhubarb Hazelnut Crumble that I adore!  Finally, from Vivian Howard of  A Chef’s Life, her  Blueberry Cobbler with a Cornmeal-Sugar Cookie Crust is so amazing and worth the calories.

So, get thee to a Farmer’s Market now.

Dorie’s original recipe calls for peaches and blueberries. I’ve used all berries, berries plus peaches, nectarines, and mangoes-it’s all scrumptious.  Berries and fruits with a lot of moisture will need cornstarch to thicken the juices.  Adjust the sugar depending on the sweetness of the fruit (and to your taste of course).  Add lemon juice and a bit of lemon zest, for a refreshing citrus zing.

Biscuits Until I Drop

The biscuit dough is essentially a cream biscuit and comes together in a snap, no butter to mess with!).  Combine dry ingredients in a large bowl and stir in the buttermilk and heavy cream.  The fat in the heavy whipping cream stands in for butter.  Mix just until combined without any dry spots, try not to overmix.  The dough will be wet and loose. Use a large ice cream or cookie scoop (about 2-3 T) to drop the dough onto the fruit.  Leave a bit of space between dough scoops (aesthetics).

Bake until the crust is a nice golden brown and the fruit is bubbling.  The biscuits will be tender, light, and cakey, the perfect foil for the delicious fruit compote underneath.

Spoon out warm, just baked wedges into bowls and top with vanilla ice cream or whipped cream.  It doesn’t get much better than this although my family would beg to differ.  They actually like it straight out of the fridge the next morning.  The biscuit has had time to absorb some of the lovely juices, the fruit has a toothier bite.  It’s all good in my book.  Let me know if you like this cobbler straight out of the oven or fridge!

Drop Biscuit Berry Cobbler from Dorie

A quick, easy and DELICIOUS Cobbler perfect for the summer fruit season! Berries, mangoes, peaches, or nectarines all work beautifully in this summer dessert. Thanks Dorie!
Course Berries, Biscuits and scones, Cobbler, Dessert, Stone fruit
Cuisine American
Keyword blueberries, cobbler, Cream Scones with peaches, drop biscuits, strawberries, summer fruits
Prep Time 20 minutes
Cook Time 1 hour
Servings 8

Ingredients

Da Fruit- Use whatever fruit you like! You will need 6 cups of cut fruit.

  • 3 pounds ripe peaches or nectarines, peeled or not, your choice. about 1 1/2 kg
  • 1/4 cup sugar, or to taste 50 grams
  • Freshly squeezed lemon juice, and zest of 1/2 -1 lemon Zest is optional but I love the flavor zest imparts
  • 1 cup blueberries 150 grams
  • 2 teaspoons cornstarch and up to 1-2 tablespoons for juicy fruit

Biscuit Top

  • 1 1/2 cups all-purpose flour 204 grams
  • 3 tablespoons sugar
  • 2 teaspoons baking powder
  • 1/2 teaspoon fine sea salt reg table salt
  • 1/4 teaspoon baking soda
  • 1 cup cold heavy cream 240 ml
  • 1/2 cup cold buttermilk (shake well before measuring) 120 ml
  • Ice cream or whipped cream for serving (optional, although in my universe this is not optional)

Instructions

  • Center rack in oven and preheat it to 350 degrees F. Line a baking sheet with parchment paper or a silicone baking mat. Butter a 9-inch deep-dish pie plate and put it on the baking sheet.
  • If you want peeled peaches, cut a shallow X in the base of each peach. Blanching makes peaches very easy to peel. Bring a pot of water to a boil. Drop in the peaches a few at a time, leave for about 15 seconds, lift out and transfer to a bowl filled with very cold water and ice cubes. Leave for a couple of minutes, then drain and peel.
  • Cut the peaches into bite-sized chunks or slices and toss them into the pie plate. Taste and decide how much sugar you want and then, if you’d like, add some lemon juice. Add the blueberries and then make a decision about the cornstarch: It’s only a tiny bit, but it will thicken the juices a little. If your peaches are very ripe, I’d add it. Give everything a good stir and set aside.
  • To make the biscuit topping: Whisk together the flour, sugar, baking powder, salt and baking soda in a medium bowl. In a measuring cup or another bowl, whisk together the cream and buttermilk. Pour the liquid ingredients over the dry and, using a table fork, stir until the flour is evenly dampened and you’ve got a moist batter.
  • Using a medium (1 1/2-tablespoon capacity) scoop or a tablespoon, dollop the topping over the fruit — leave a little space between each pouf of batter.
  • Bake the cobbler for 45 to 55 minutes, until the topping is golden brown and the fruit juices are boiling under, and maybe up, through and over, the biscuits.
  • Transfer to a rack and let cool for at least 20 minutes, or until the cobbler reaches room temperature, before serving, with or without ice cream or whipped cream.

Notes

You can vary the cobbler according to what fruits are in season and within reach: Keep in mind you need about 6 cups of cut-up fruit, sugar to taste and juice of 1/2 freshly squeezed lemon. For an all-berry cobbler — mix whatever berries you can get and, if you want, cut in some ripe mango; add 1 to 2 tablespoons of cornstarch to the berries — they’re very juicy. I've used 3 cups of halved strawberries, 2 cups blueberries and a cup of mango, delish.  Let your imagination go...plums make a pretty cobbler and work well with peaches or nectarines. Early summer, try rhubarb and strawberries (and some cornstarch).
STORING: The cobbler is best the day it is made. You can keep it covered overnight at room temperature or in the refrigerator.
Cinnamon Toast Crunch Butter Mochi-Cereal Killa

Cinnamon Toast Crunch Butter Mochi-Cereal Killa

I am always on the lookout for mochi recipes.  Aside from being downright delicious, it is nice to have gluten-free options in your arsenal.  The blog, Little Fat Boy caught my attention with a recipe for Cinnamon Toast Crunch Butter Mochi.  Holy moly, dessert with not just one but TWO of my favorite foods, mochi and cereal, I am all in.

Bad, Bad Mom

I’m going to admit, I was one of those crazy militant moms about snacks and cereals.  The only cereals that graced our table included Special K, Honey Bunches of Oats, and Rice Krispies.  BORING.  The grams of sugar had to be in single digits for any box to make the cut.  Hostess was not part of our family’s vernacular.   To this day, I’m not sure if my kids have had a Hostess Twinkie.

Eventually, I came clean to my kids, and the flood gates opened.  They rolled their eyes with righteous indignation as I rattled off my favorite childhood snacks and cereals-Captain Crunch, Lucky Charms, HoHos, Milk Duds, BigHunks…lol.  Hey, I was a latch-key kid…unlike them…so lucky to have a mom to constantly police, I mean, watch over them!

Welcome to Adulthood

The perks of growing up, my days of being their sugar police are long over.  In fact, during their college days, care packages with Dad’s Good Cookies, Brownies, Chocolate Chip Cookies, and candies were sent on a regular basis.  We made up for years of deprivation.

All Things Mochi

Ground Zero for mochi recipes is Butter Mochi Muffin, adapted from Snixy Kitchen (a gorgeous blog featuring gluten-free recipes), and still the most popular recipe posted on 3Jamigos.  Variations followed, Mango Mochi Muffins, Chocolate Mochi Donuts and Brownies, and Misugaru Mochi Muffins…in fact mochi has its own category on 3Jamigos.  This is the latest in my mochi mania recipes, Cinnamon Toast Crunch Butter Mochi. Remember the cereal milk at the bottom of your bowl you savored when you were a kid?  Yep, use it to make your mochi.

Soak the cereal for a minimum of an hour in one and a quarter cups of milk, stirring occasionally.  The recipe calls for 1 cup of milk and half a can (200ml) of coconut milk.  The cereal will absorb some of the milk, after soaking, if there is less than 1 cup of milk, add extra coconut milk to bring it to 1 cup.

For the first batch, I followed Little Fat Boy, made them in a pan, and cut them into squares.  For the second batch, I made muffins because everyone deserves their own sweet treat.

To further crisp the Cinnamon Toast Crunch topping, I used Christina Tosi’s method to make cereal crunch.  Toast crushed cereal bathed in butter in the oven.

Delicious, sweet, with cinnamon and caramel undertones and the characteristic gooey, springy texture of mochi, this is a keeper.  Add this to your bucket list.

Cinnamon Toast Crunch Butter Mochi

Butter Mochi flavored with Cinnamon Toast Crunch. Another delicious, gluten-free treat!
Course Cake, Dessert, Muffins
Cuisine Asian, Asian-American, Hawaiian
Keyword butter mochi, cereal, Cinnamon Toast Crunch, coconut milk
Prep Time 2 hours
Cook Time 1 hour
Servings 12 servings

Ingredients

Wet Stuff

  • 2 large eggs
  • 1.25 cups milk, I like whole but lowfat, skim and alternative milks will work to soak Cinnamon Toast Crunch
  • 1/2 can of coconut milk 200ml I prefer full fat coconut milk
  • 1/4 cup unsalted butter melted
  • 1 Tbsp maple syrup or Golden Syrup
  • 1 teaspoon vanilla extract

The Dry Stuff

  • 1/2 box Mochiko sweet rice flour (glutinous rice flour) 254 g
  • 1 cup brown sugar preferably dark brown
  • 1/4 teaspoon kosher salt
  • 1 tsp baking powder
  • 1-1.25 cups Cinnamon Toast Crunch Cereal to soak in milk

Topping

  • 1 cup Cinnamon Toast Crunch Cereal for topping
  • 2 tbsp unsalted butter, melted
  • unsalted butter to grease pans

Instructions

  • Soak 1.25-1.5 cups of milk with Cinnamon Toast Crunch for at least an hour or overnight. Strain milk into a measuring cup. You should have 1 cup. If it is less than this, use extra coconut milk to make up the difference,
  • Preheat an oven to 350° F. Generously butter an 8x8 baking pan. For muffins, butter a 12-cup muffin tin.
  • In a separate mixing bowl, mix together rice flour, brown sugar, baking powder, and salt. Set aside.
  • Mix wet ingredients in large bowl, 2 large eggs, 1 cup milk (soaked in Cinnamon Toast Crunch), coconut milk, maple syrup, and vanilla extract. Blend until smooth.
  • Slowly pour dry ingredients into a bowl of wet ingredients, whisking as you pour until it becomes a smooth batter. Mix in melted butter into the batter until incorporated, then pour batter into the buttered pan. If making muffins, pour batter into each muffin tin approximately 7/8 full. Should fill 12 cups. Tap pans on the counter to release air bubbles.

Topping

  • Crush the extra Cinnamon Toast Crunch in a small bowl and add melted butter. Stir to coat cereal with butter. Pour onto a small baking sheet and bake at 275 degrees for 20 minutes or until toasty and fragrant. Remove and cool.
  • Sprinkle toasted cereal on batter just before baking. You can forego the toasting of the cereal but you lose some of the crispiness.

Da Finish

  • Cake pan mochi: Bake for approximately 60 minutes until golden brown and set. Stick a toothpick or bamboo skewer in, it should go in smoothly and come out without any sticky stuff. If you like your mochi a little more set bake a bit longer. The less time you bake the gooey-ier your mochi will be.
    For muffins bake approximately 40-45 minutes.
  • Once cool, sprinkle powdered sugar on mochi before serving. Slice cake into squares like brownies and serve.
  • Will keep a couple of days at room temp. Do not refrigerate. Mochi is freezable.
The Cookie Bible from Rose Levy Beranbaum!

The Cookie Bible from Rose Levy Beranbaum!

I have been a big fan of Rose Levy Beranbaum’s books for a very long time. I went to my bookshelf to see just how many of her books I have, I counted six. Of these six, my absolute favorite is Rose’s Christmas Cookies. I can’t recall a Holiday Cookie Tin that has not featured at least one of her cookies.  I was eager to take a sneak peek at her newest book coming out, The Cookie Bible.

See below for the recipe for Lemon Madeleines.

 The Layout

  • Intro – brief description and a memory or an anecdotal story for the cookie.
    Temperature, baking time, and equipment – organized into a table.
    Ingredients – listed in volume and weight measurements also organized in a table, easy to see and follow.
    Directions
  • Mise en place-steps that need to be done before making the dough ie. taking out butter to soften or bringing eggs to room temp.
  • Making the dough-If a particular cookie can be made in either a food processor or stand mixer, both methods are listed. I love this.  Followed by:
  • Forming cookies
  • Baking cookies
  • Cooling cookies

All her cookbooks are organized this way, meticulous and thorough. It’s like getting a Master Baking class in the comfort of your own kitchen.

Each recipe finishes with Baking Gems, MORE valuable tips, and tweaks!

The Recipes

I flipped through the book to earmark recipes I wanted to try. This is where I felt like the book came up a bit short. The selection of cookies seemed just a bit dated. Today’s cookies include new flavors and spices and eye-catching colors created by using freeze-dried fruits.

Few recipes in this book jumped out at me and shouted MAKE ME!  Quite a few recipes in the book are also in Rose’s Christmas Cookies. Recipes I already make and love like Cloud Cookies, Meltaways, Lion Paws, and Spritz Cookies.  If I didn’t have Rose’s Christmas Cookies I might have been putting Post-Its on those very pages.  Recipes have been scaled back in the new book to yield smaller batches of cookies, a good thing, as it limits how many cookies I can eat.


Read through the recipe before making it.  I found this book even more detailed than her older books.  Explicit directions like when to take the butter and eggs out before making the dough or what type of flour to use for each recipe.

If only I had taken my own advice and read the recipe first

I plowed through the first recipe, Dream Chocolate Chip Cookies, only to be stumped when I found I hadn’t added the egg. Turns out that twenty minutes before making the dough, I was supposed to crack the egg into the mixer bowl, add the vanilla, and cover it so it can come to room temp first. The egg should have been in the mixer when I creamed the butter and sugar.

Lemon Poppy Seed Madeleines were next up.  Once again, detailed instructions produced a tender sweet-tart Madeleine.  Next time, I would reduce the poppyseeds, a bit too much crunch.  I actually liked them more the next day as the syrup had time to absorb so the cookies weren’t sticky to touch and the tartness had mellowed.

The Verdict

With all that being said. Here is my take. If you do not own a Rose Levy Berenbaum Cookbook, this would absolutely be a lovely addition to your kitchen.  This book will make you a better baker.  Filled with invaluable tips and technique information, it takes that extra step of explaining why specific ingredients and techniques work in a recipe.  Although there isn’t a photo for every cookie in the book, the photos included are gorgeous.

Happy baking!

I reviewed The Cookie Bible via NetGalley

Lemon Madeleines

From Rose Levy Beranbaum's upcoming book, The Cookie Bible
Course cookies
Cuisine American, French
Keyword easy recipe, leomn poppy seed madeleines, madeleine, rose levy beranbaum
Prep Time 20 minutes
Cook Time 15 minutes
Servings 24 servings

Ingredients

Oven Temp 350f/175c. Baking Time: 14-15 min for large madeleines Special Equipment: Madeleine molds-lightly coat with baking spray with flour. Disposable pastry bag fitted with a 3/8-1/2 inch pastry tube. 2 baking sheets lined with plastic wrap and lightly coated with nonstick spray.

    Batter

    • 8.5 tablespoons + 2 teaspoons, unsalted butter 120 grams
    • 2 large eggs 100 grams 1/3 cup plus 1 T, (94ml)
    • 1 teaspoon vanilla 5ml
    • 2 tablespoons milk 30 grams (30ml)
    • 1 cup bleached cake flour, sifted into the cup and leveled off 100 grams
    • 1/2 cup sugar, preferably superfine 100 grams
    • 1/2 teaspoon baking powder, preferably aluminum-free
    • 1/4 teaspoon fine sea salt
    • 3/4 cup sugar 5.25 ounces = 150 grams
    • 2 teaspoons loosely packed grated lemon zest 4 grams (from about 2 lemons)
    • 2 tablespoons poppy seeds, optional 19 grams I would use a little less

    Lemon Syrup

    • 1/4 cup sugar 50 grams
    • 3 tbsp freshly squeezed lemon juice, strained 47 grams

    Instructions

    Preheat Oven

    • 20 minutes or longer before baking, set oven racks in the upper and lower thirds of oven. Set oven to 350°F.

    Mise En Place

    • 30 minutes to 1 hour ahead, cut butter into tablespoon-size pieces. Set on the counter to soften.
    • 30 minutes ahead, into a 1 cup/237 ml glass measure with a spout, weigh or measure the eggs. Whisk in vanilla. Cover tightly with plastic wrap and set on counter.
    • Wash lemons with dishwashing liquid, rinse, and dry before zesting. Finey grate lemon zest. Freeze any extra for future use.

    Make the Batter

    • Add the milk to the egg mixture and whisk it in.
    • In the bowl of a stand mixer fitted with the flat beater, mix the flour, sugar, baking powder, salt, lemon zest and optional poppy seeds on low speed for 30 seconds. Add the butter and half the egg mixture. Mix on low speed until the dry ingredients are moistened. Raise the speed to medium and beat for 1 minute. Scrape down the sides.
    • With the mixer off between additions, add the remaining egg mixture in two parts. Beat after each addition, starting on medium-low speed and gradually raising the speed to medium, then beating on med speed for 30 seconds, to incorporate the ingredients and strengthen the structure. Scrape down sides of bowl.

    Pipe the Batter into the Molds

    • Fill the prepared pastry bag about 3/4 full with batter. Pipe the batter into the molds. filling them about 3/4 full (4gms for each mini-mold, 16 gms for large cavity). No need to smooth the batter. Refill the bag as needed.
    • Ok, I didn't pipe I just used two spoons and scooped the batter into the molds.

    Bake the Madeleines

    • Bake the mini-madeleines for 10-12 minutes, large ones for 14-15 minutes, or until a wooden toothpick inserted near the centers comes out completely clean and the madeleines spring back when pressed lightly in the centers. While they are baking, make the lemon syrup.

    Make Lemon Syrup (1/3 cup/95gms/79ml)

    • In 1 cup/237ml glass measure with a spout, stir together the sugar and lemon juice. Heat in the microwave just until the sugar is dissolved. (Or use a small sauce pan over medium heat.)

    Brush the Medeleines with Syrup, Unmold, and Cool

    • As soon as the madeleines come out of the oven, place the pans on a rack, poke the madeleines all over with a wire tester, and brush it with 1/3 of the syrup.
    • Metal molds, use a toothpick or pin to carefully dislodge them from molds and then invert them onto the prepared cookie sheets (this prevents sticking)
    • Brush madeleines with remaining syrup and allow to cool completely. Let sit for 2 hours for syrup to distribute.
    • STORE: Airtight one layer; room temp, 3 days; refrigerated, 5 days; frozen, 3 months.

    Baking Gems

    • Use superfine sugar for the best texture
    • After coating with baking spray with flour, brush molds with pastry brush to remove excess spray to prevent air bubbles from forming in the fluted tops of the madeleines.
    • If you do not have enough molds to bake all at once, chill batter in fridge until ready to use.
    • When done, madeleines will spring back when pressed lightly in the center even before they are done.