Category: Desserts

Nubby Granola Shortbread…More Than Cookies

Nubby Granola Shortbread…More Than Cookies

Me.  The cookbook addict missed a book signing at Omnivore Books.  Literally, took my eye off the book and completely missed Natasha Pickowicz’s More Than Cake book signing event.

In my effort to curtail my cookbook acquisitions, I have limited my cookbook buying to books by POC authors.  There are exceptions of course, anything by Dorie Greenspan and if you own a restaurant in the middle of nowhere, Maine, and pub a new book, iykyk 😉, I’m all in.

Here is my weak defense.  Pickowicz, at first glance, is not an Asian last name, so the fact that she is part Chinese escaped me.  The title, More Than Cake also threw me off.  I’m not a big cake person, more of a cookies and pies gal.  As soon as I saw the word Cake…I tuned out, the MORE THAN got by me.

When I realized she was Asian and that her book contained WAY more than just cake, her book landed on my radar.  Then I found out she organizes amazing BAKE Sales for Planned Parenthood and Brigid Alliance and has raised thousands of dollars (lots of thousands), so I ordered a copy immediately.  It now has a spot on my cookbook shelf.

Holiday Traditions

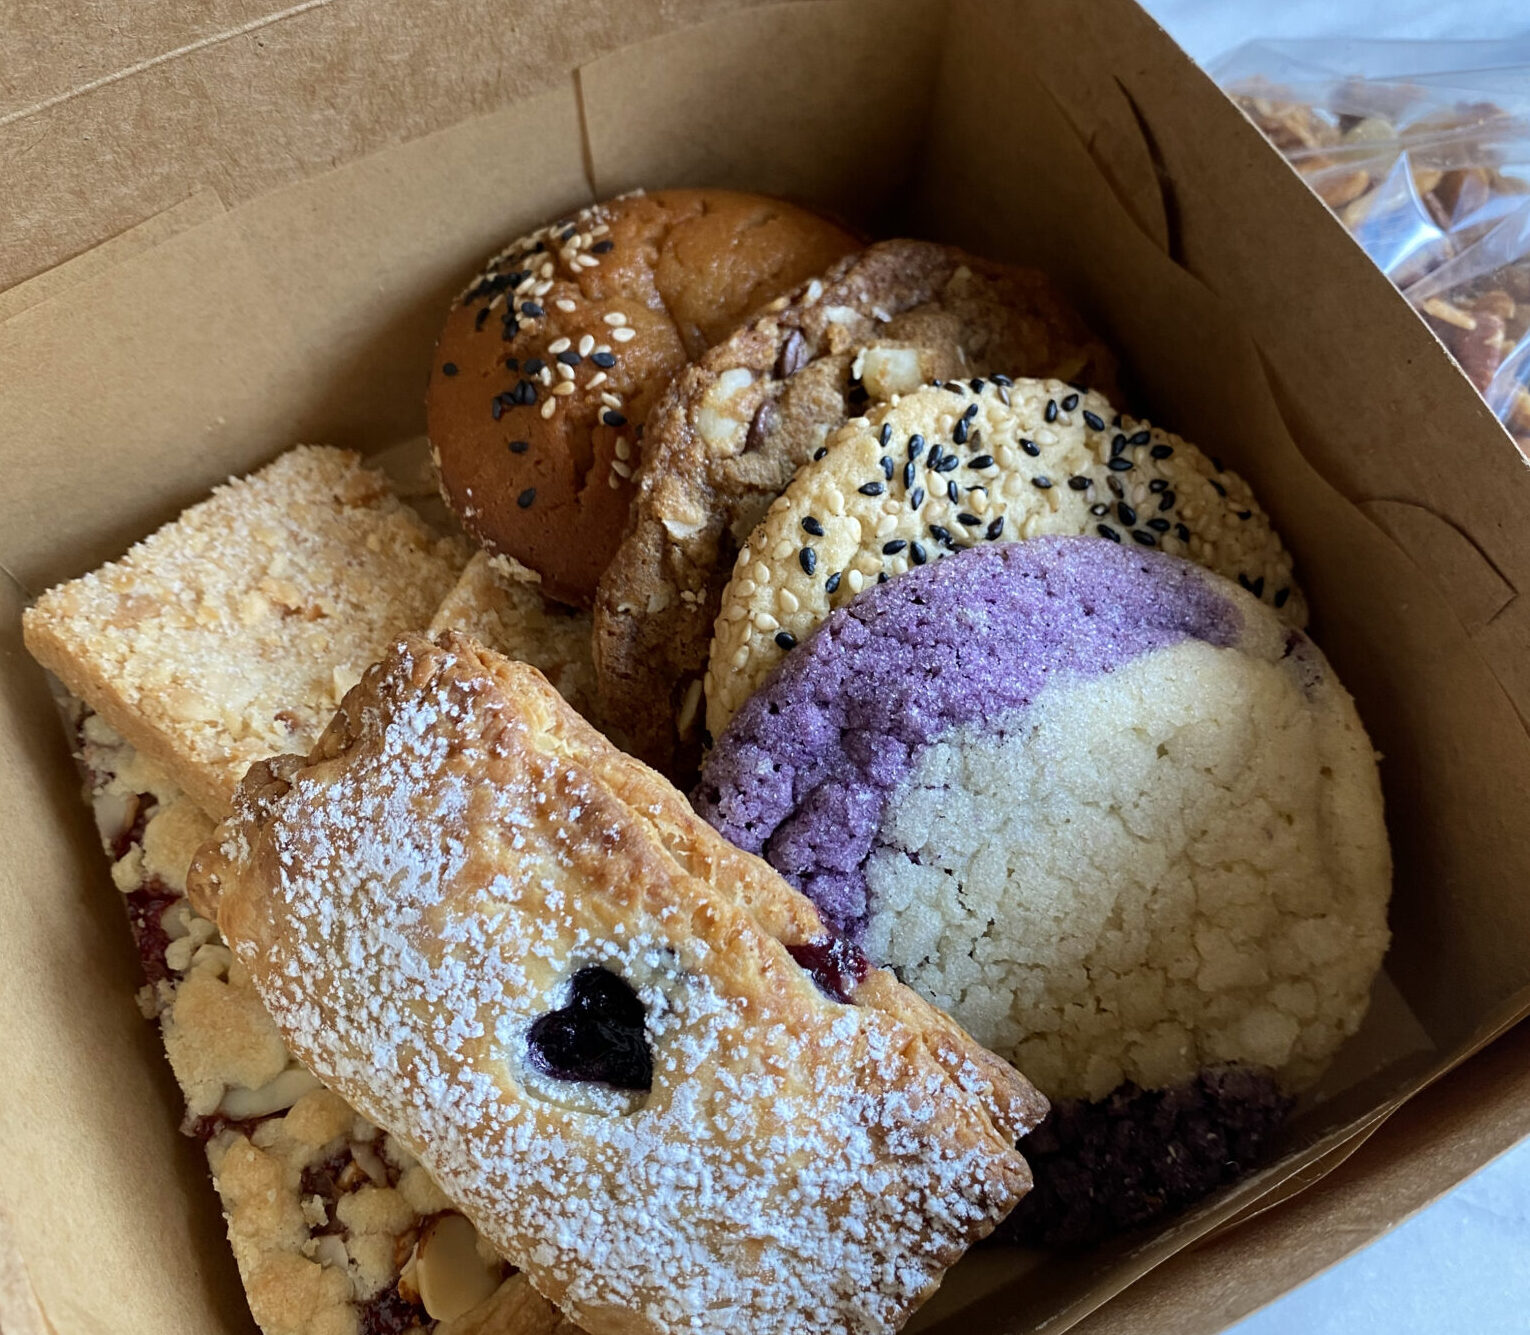
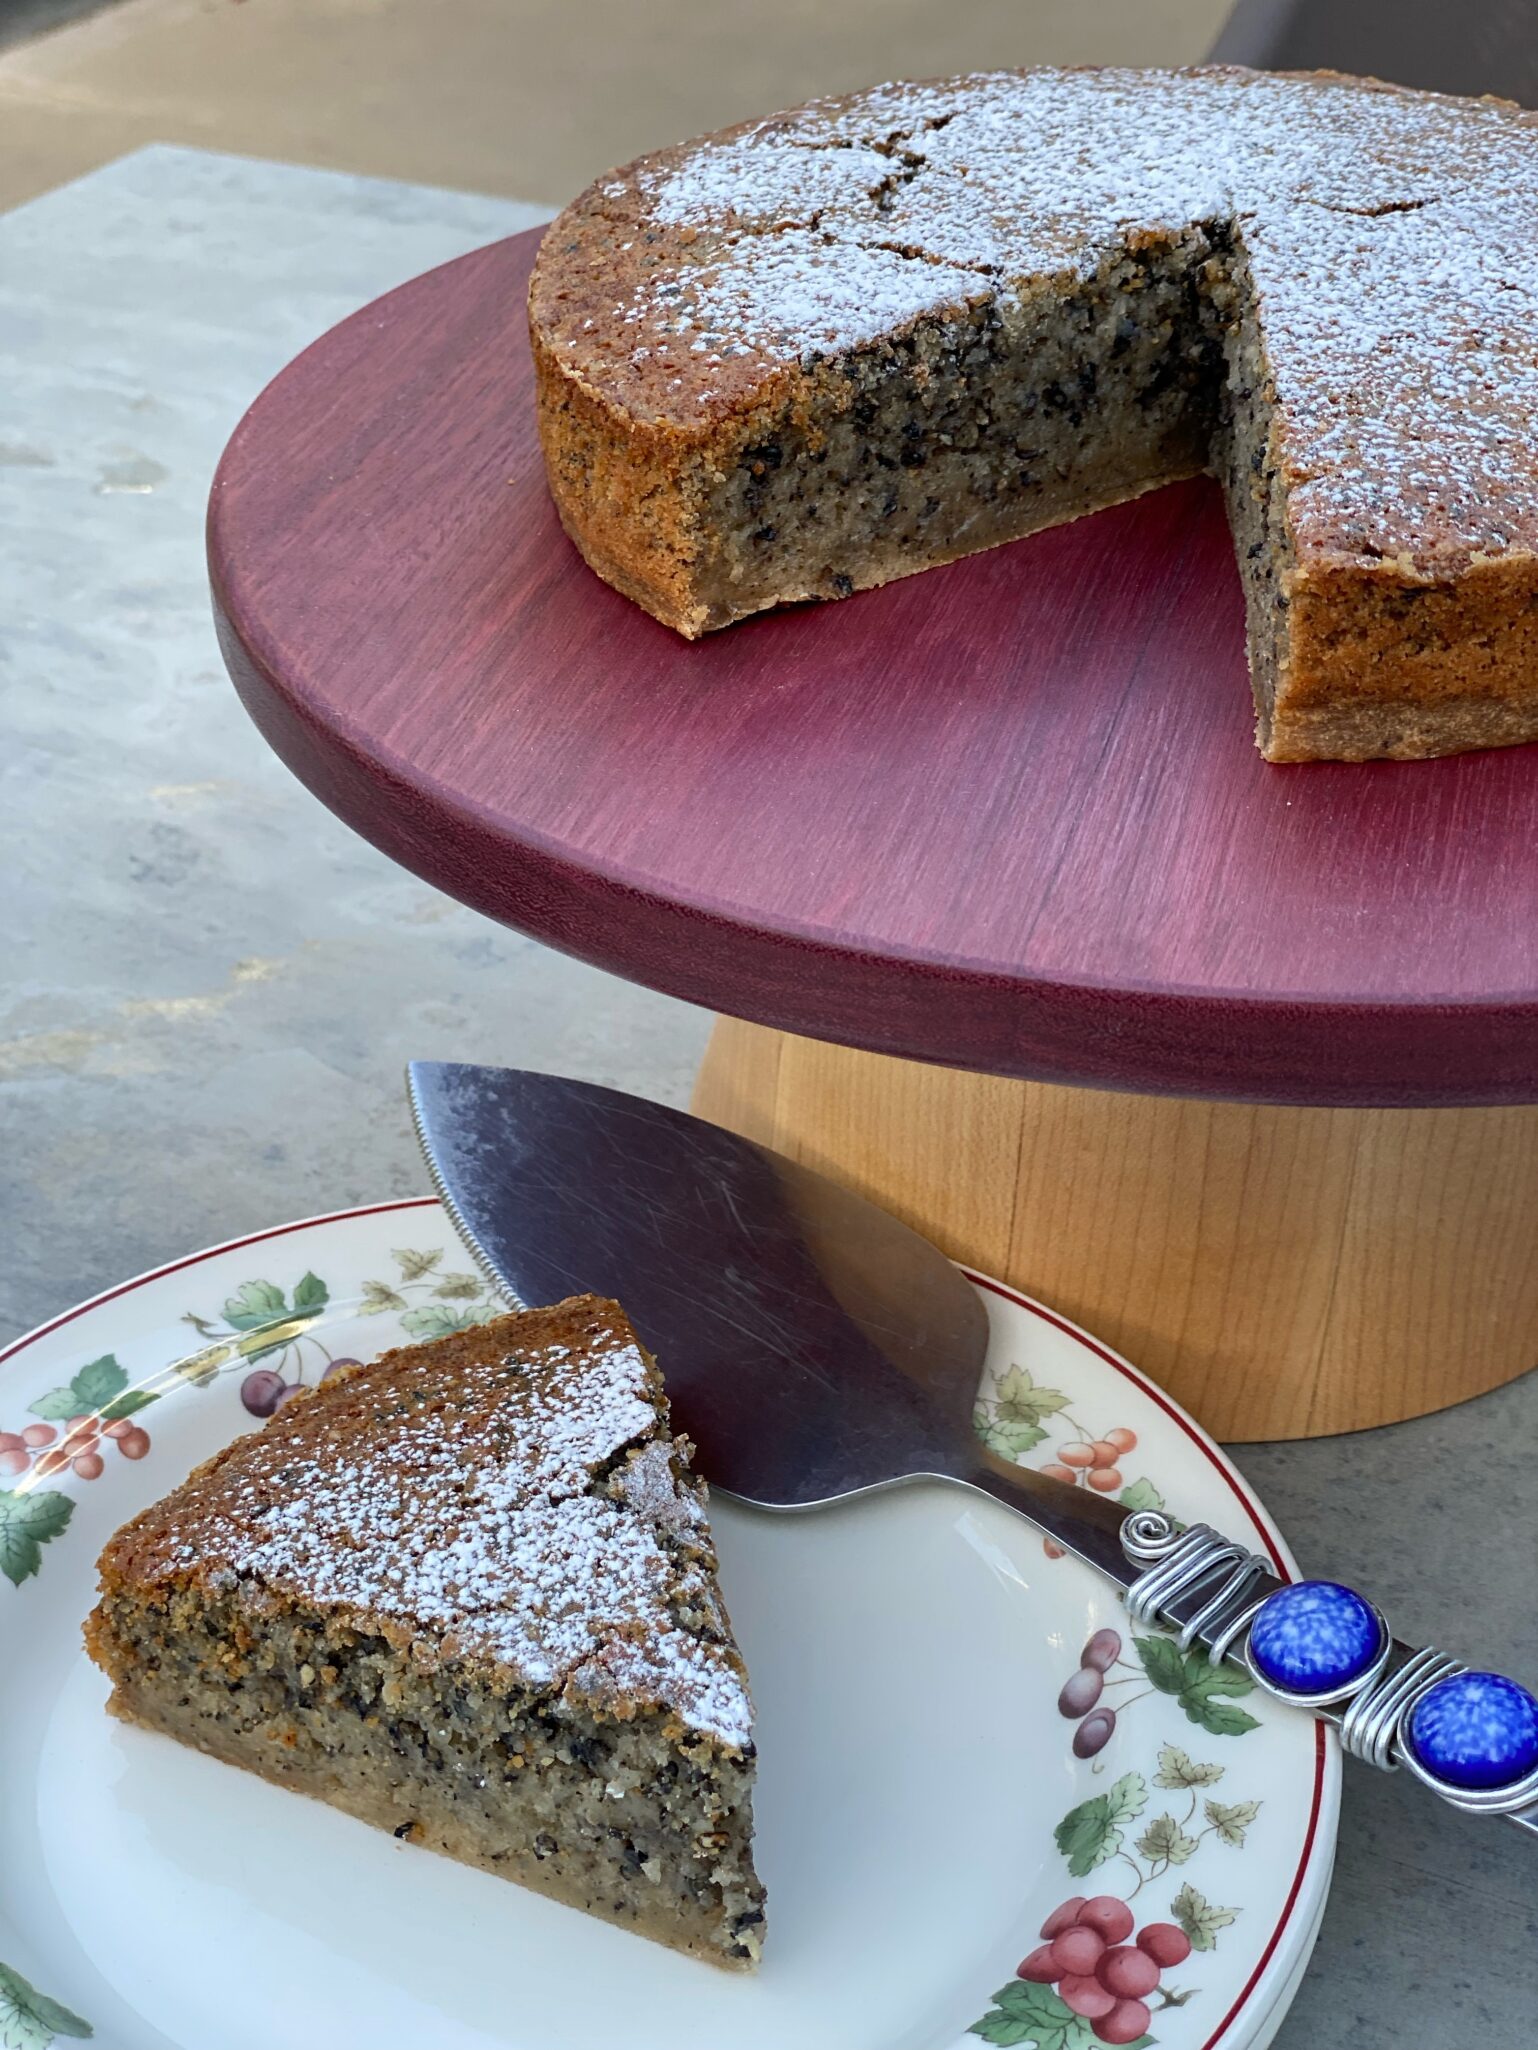
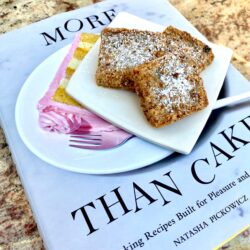
Thanksgiving is in the books (no pun intended) which means a couple of things in our house.  First, I play Patrick Stewart’s version of A Christmas Carol which also kicks off 24-7 holiday music in our house, I am so stoked.  Second, time to plan those holiday cookie boxes!  I pulled out More Than Cake and found her recipe for Nubby Granola Shortbread.  Shortbread, y’all know I LOVE shortbread.  Time for a test run.

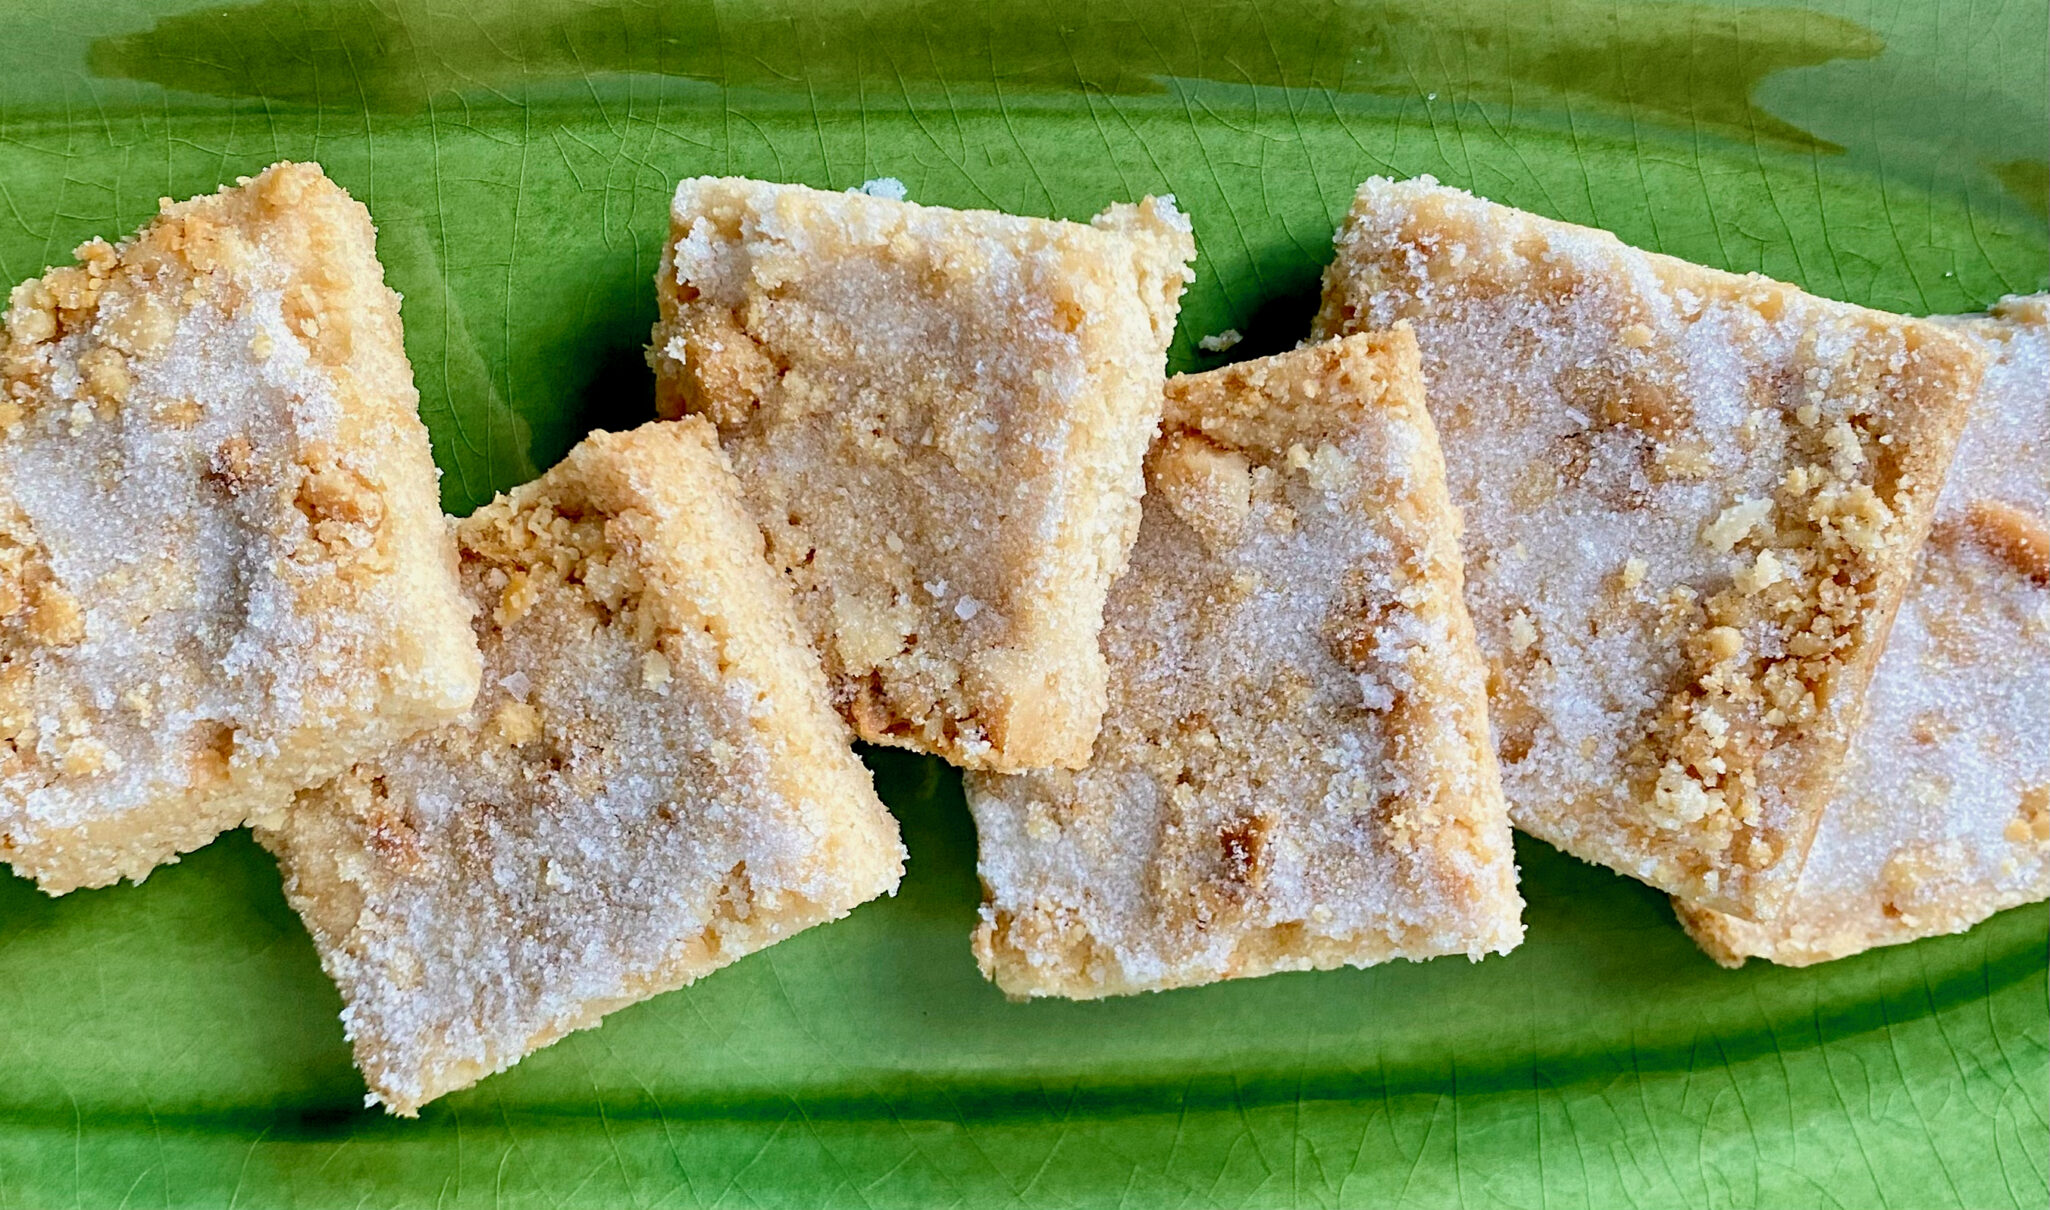
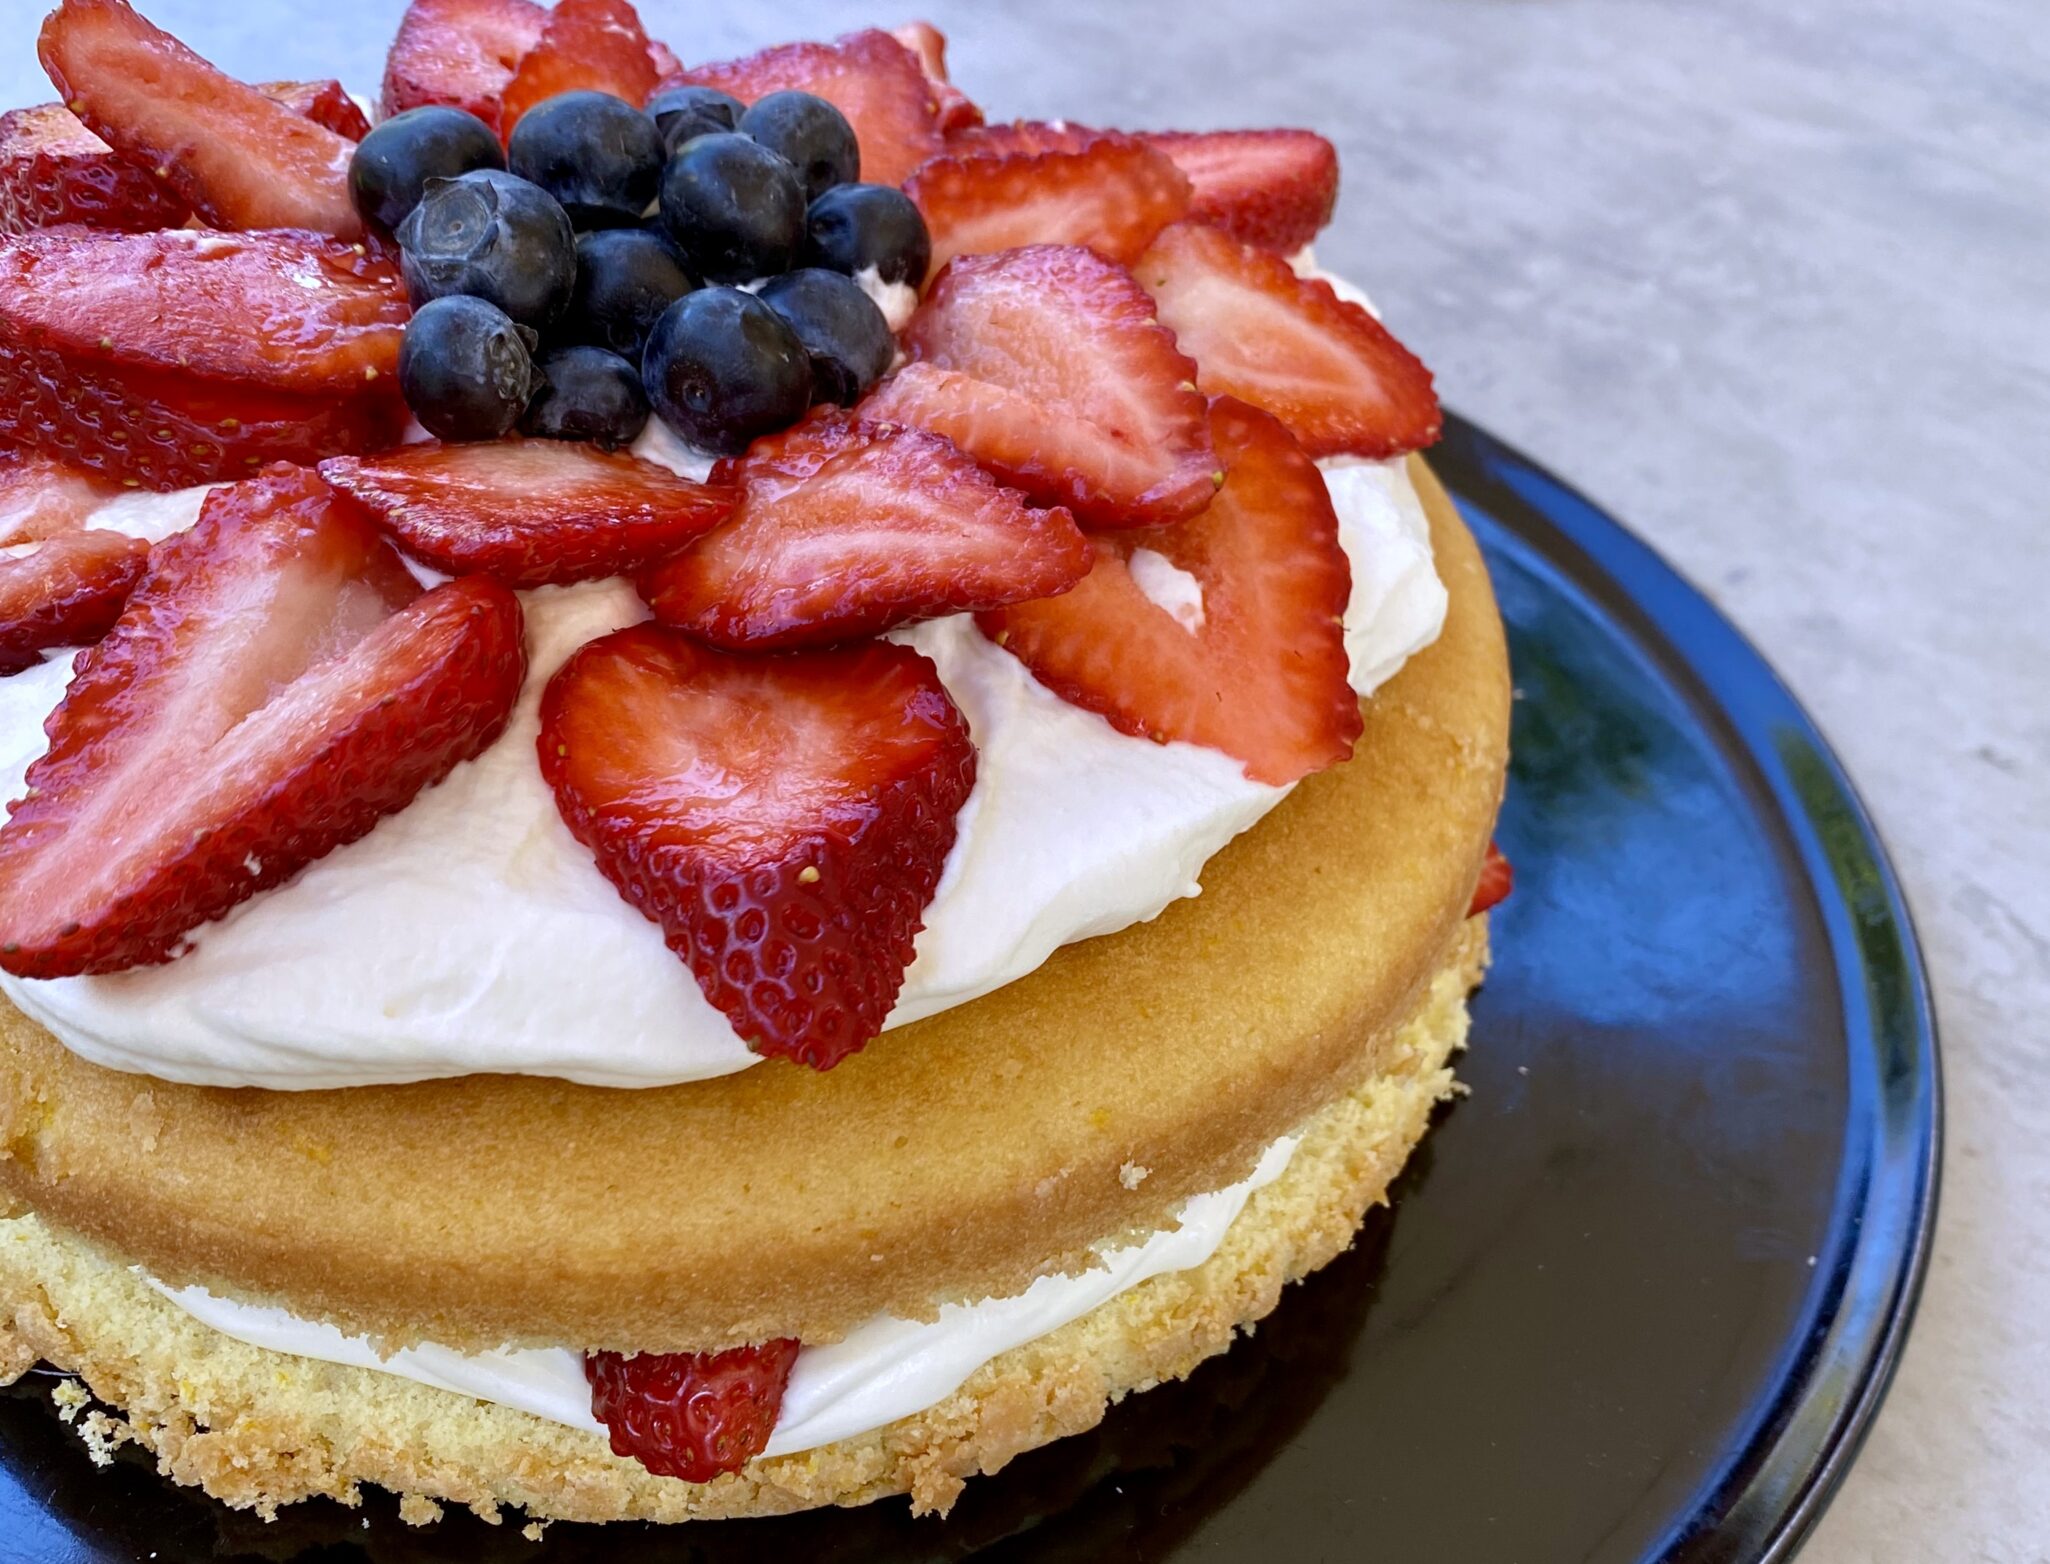
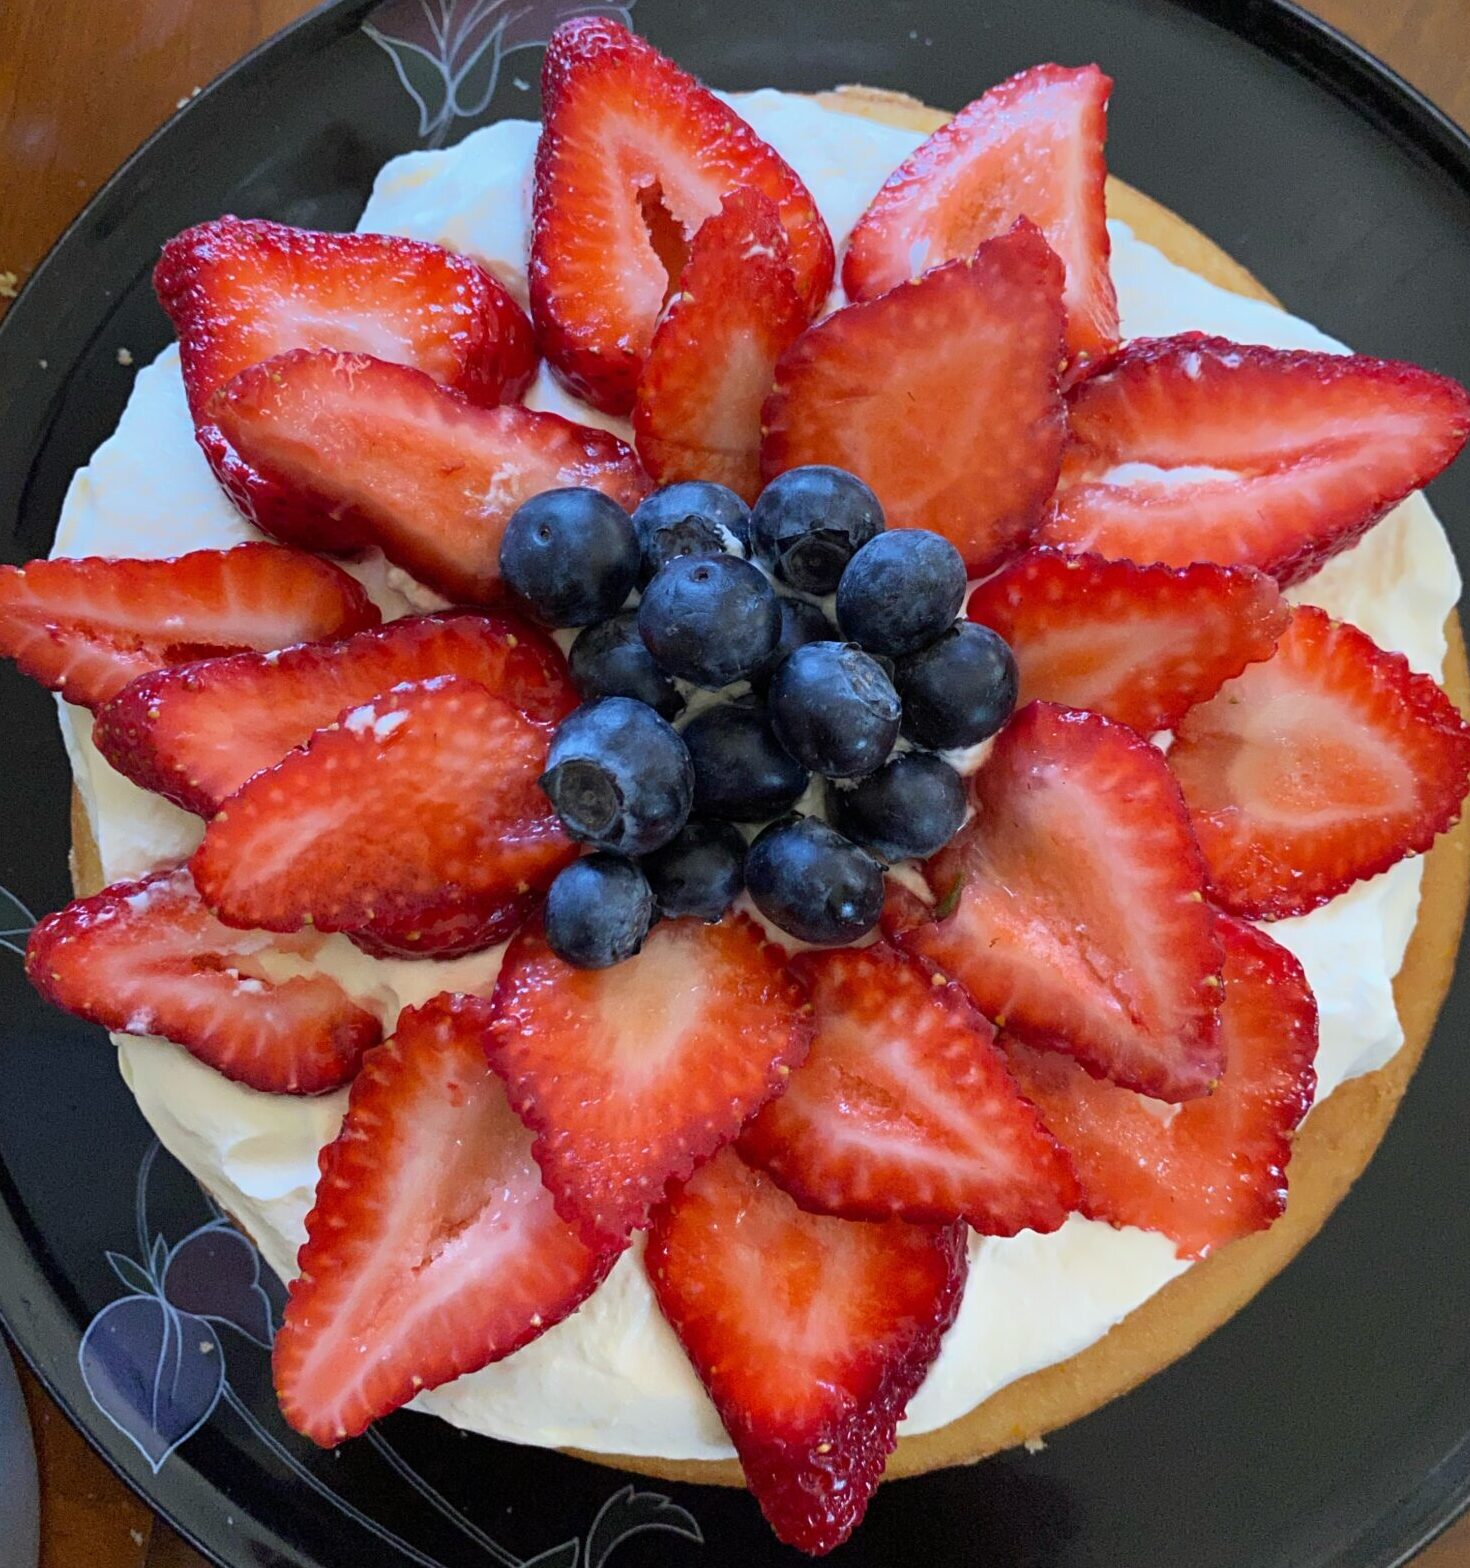
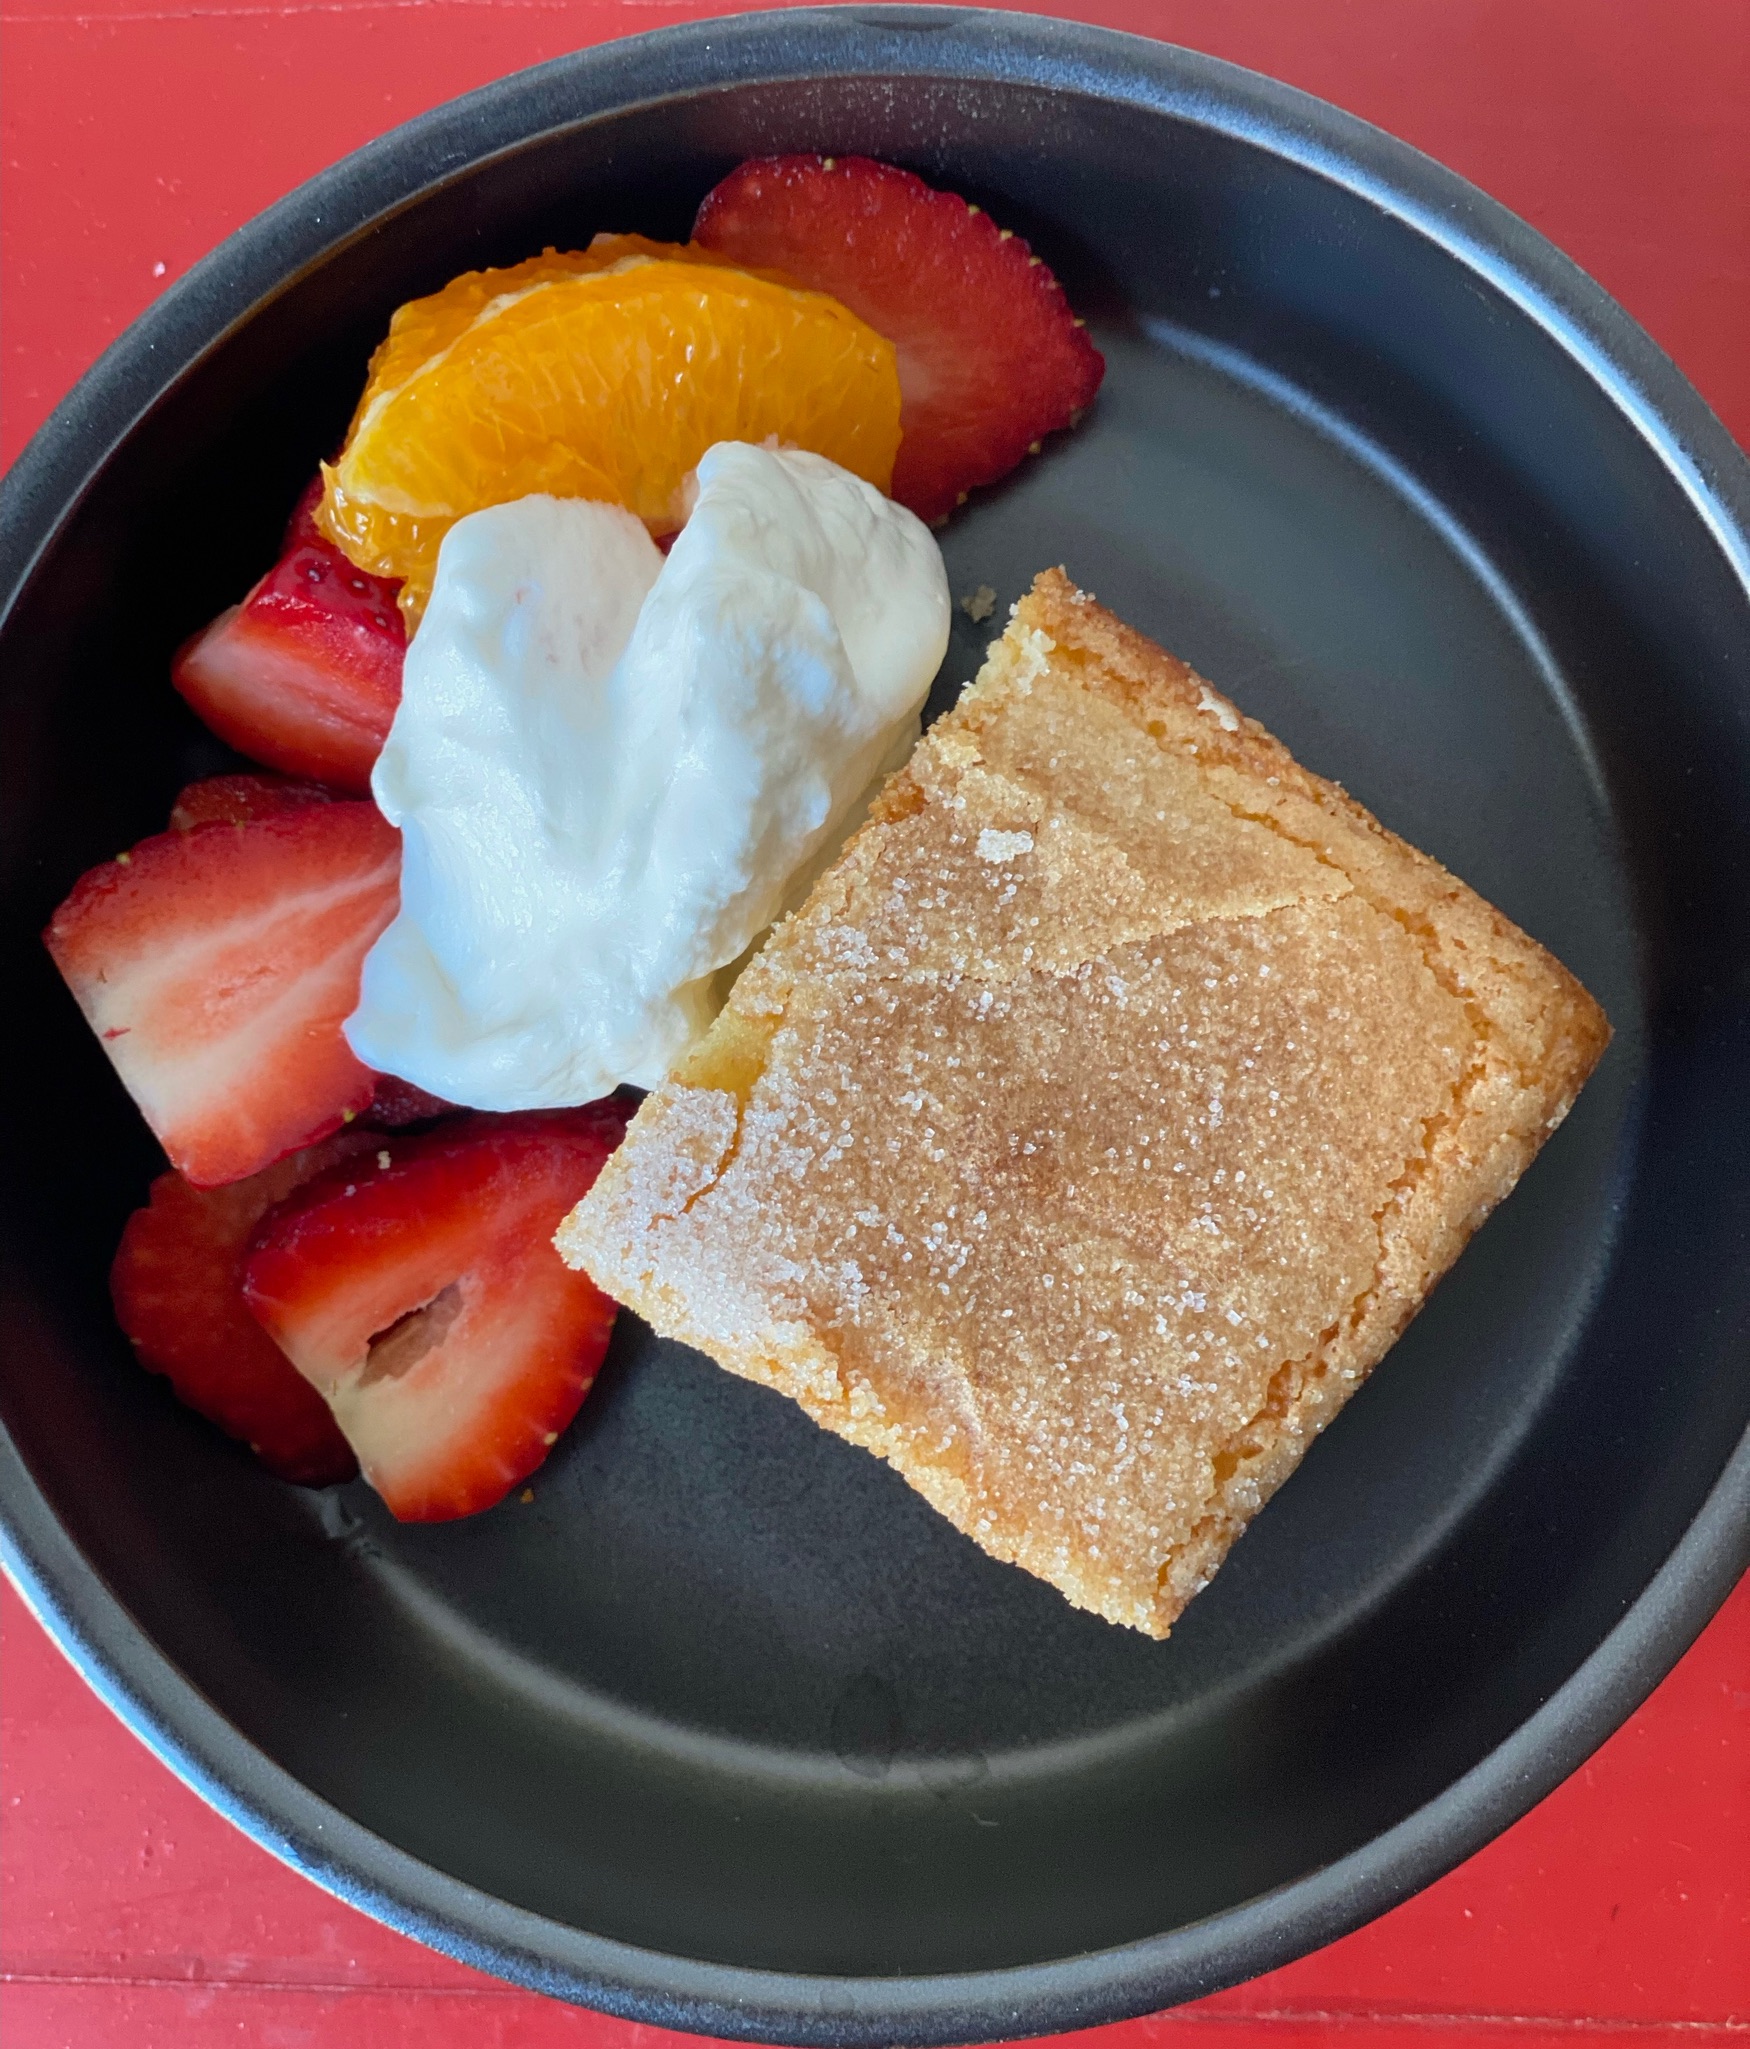
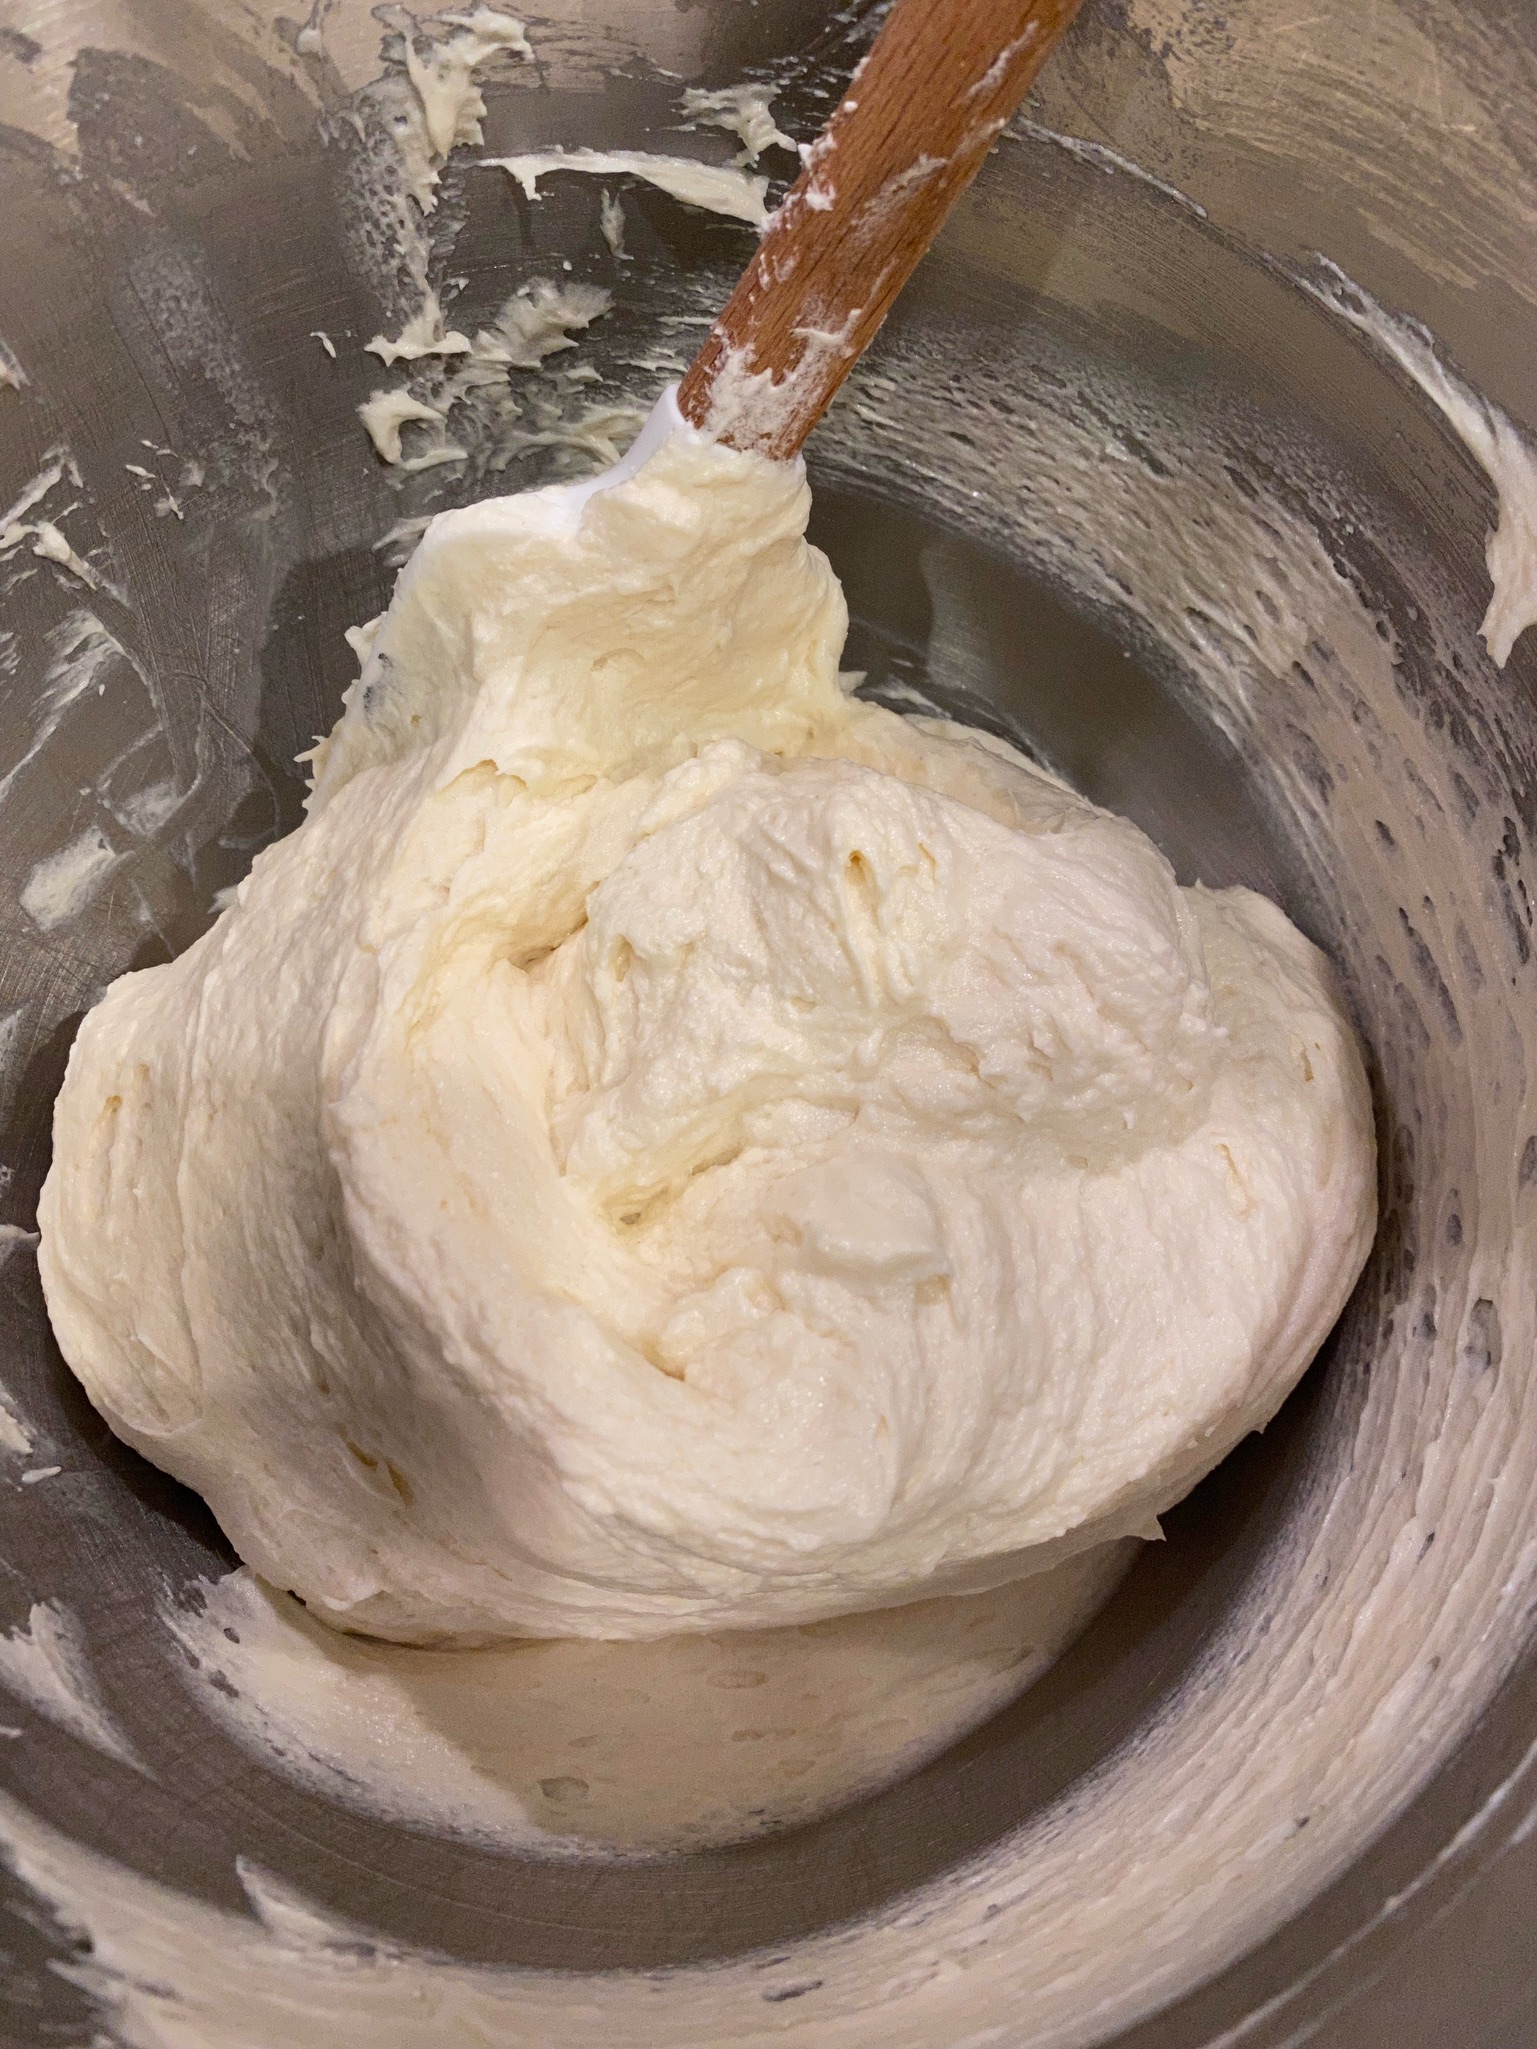
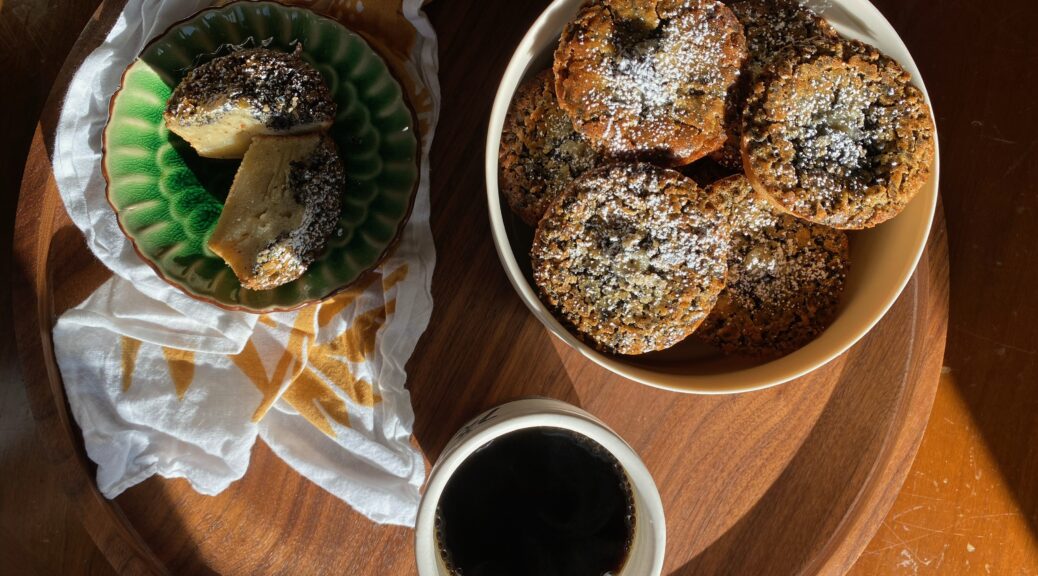
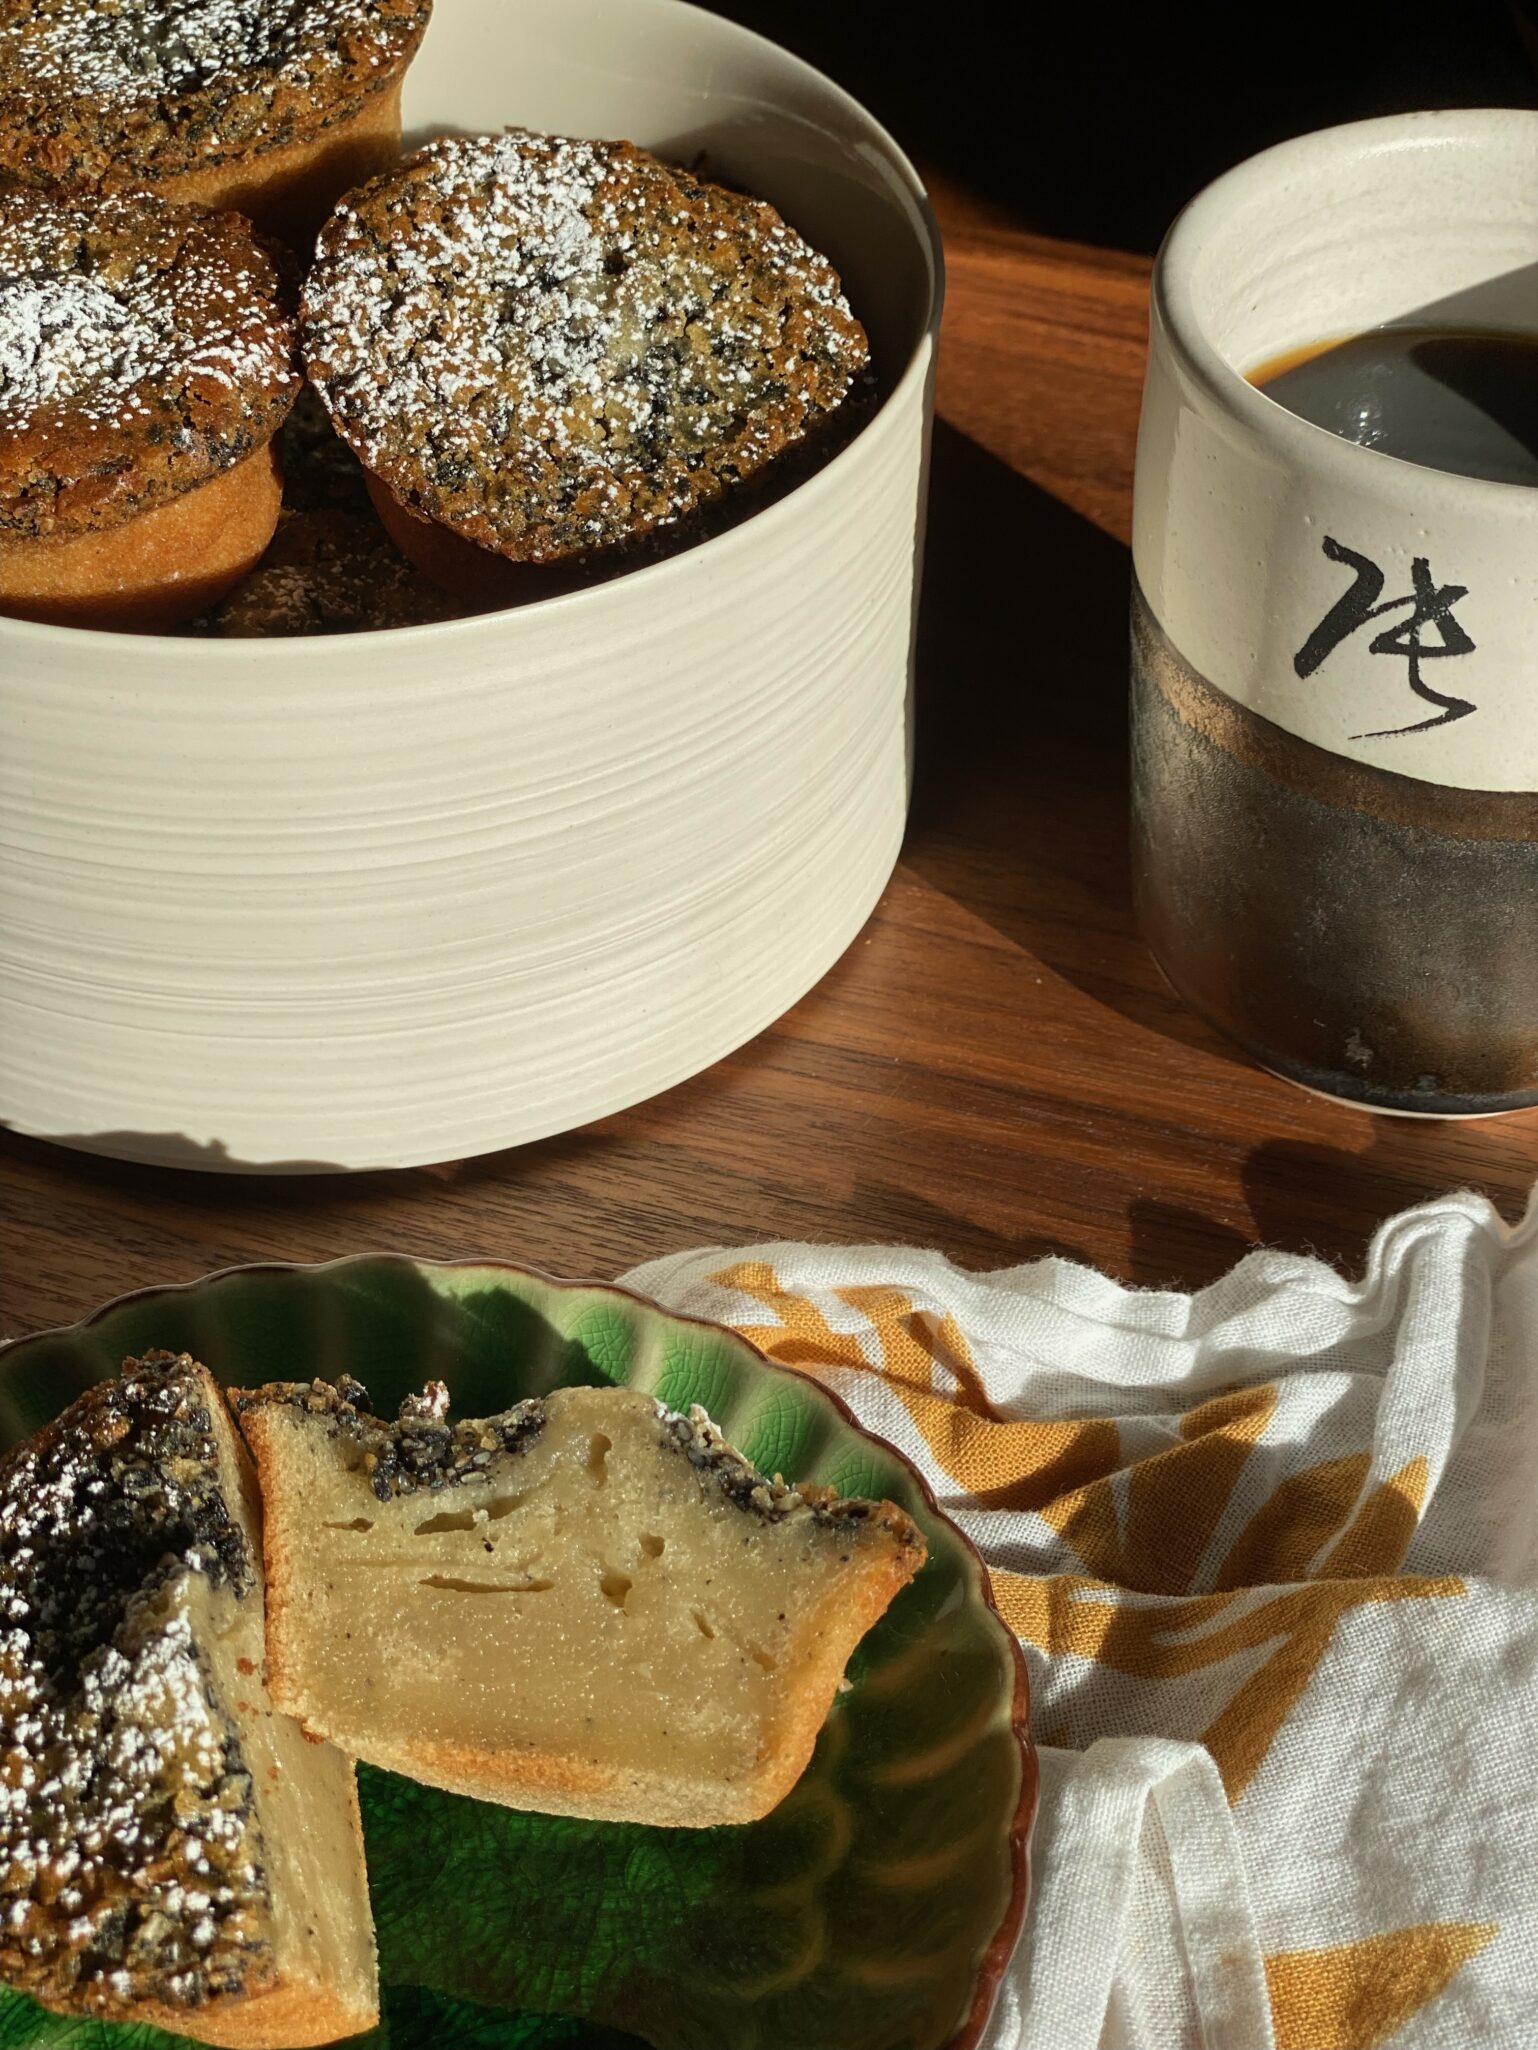
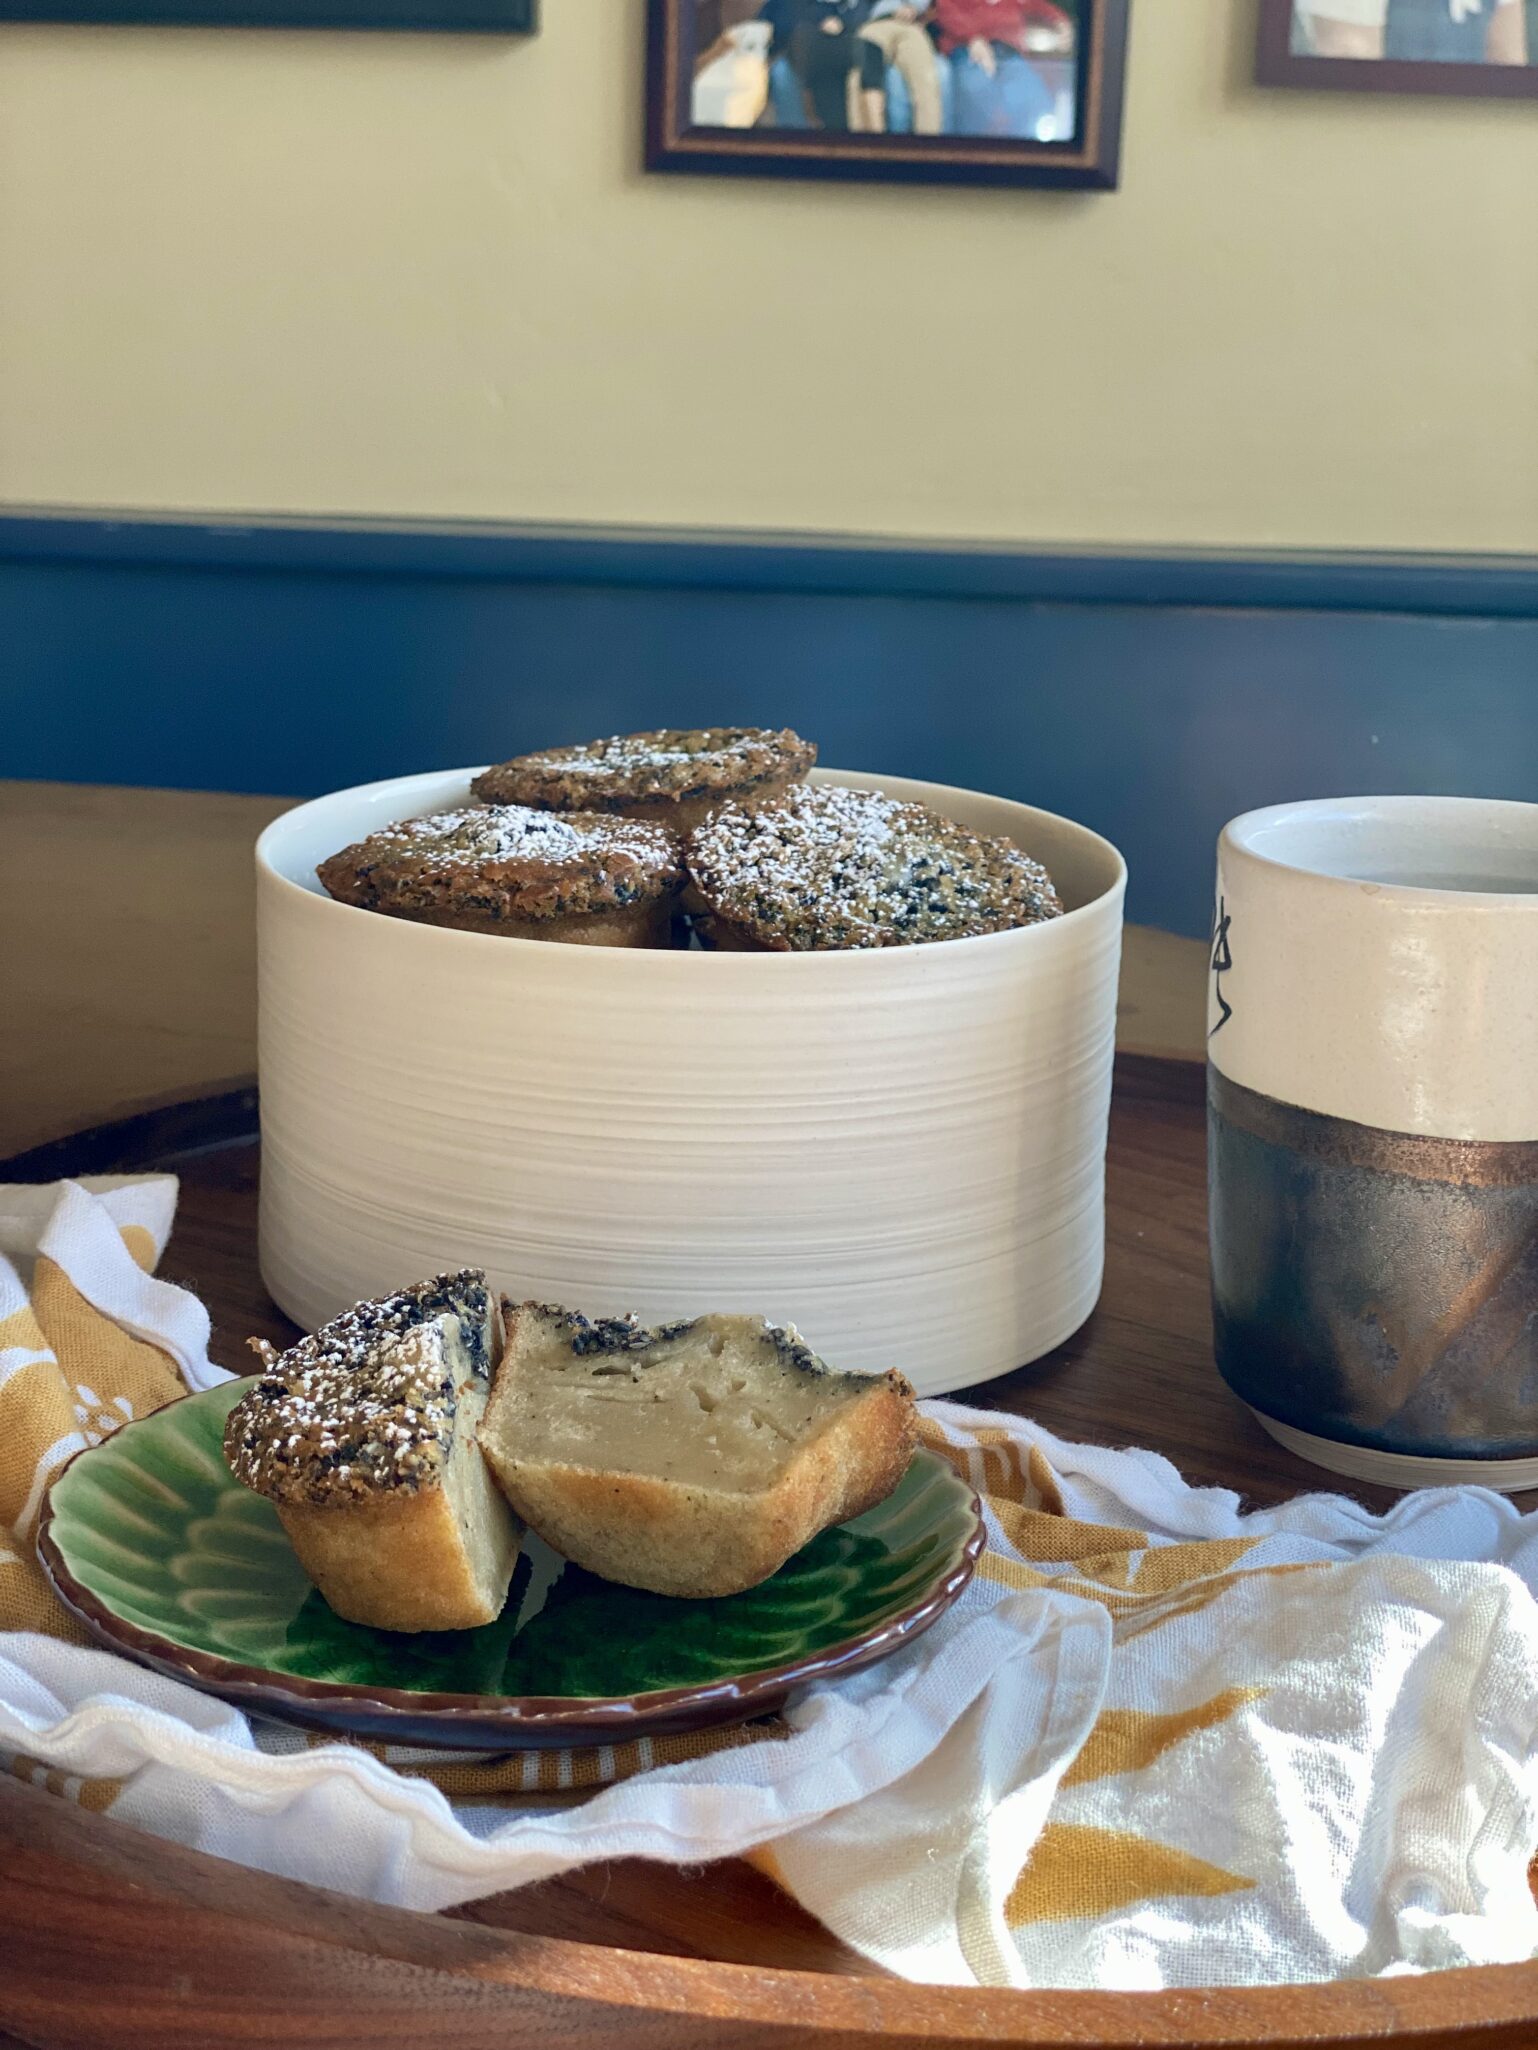
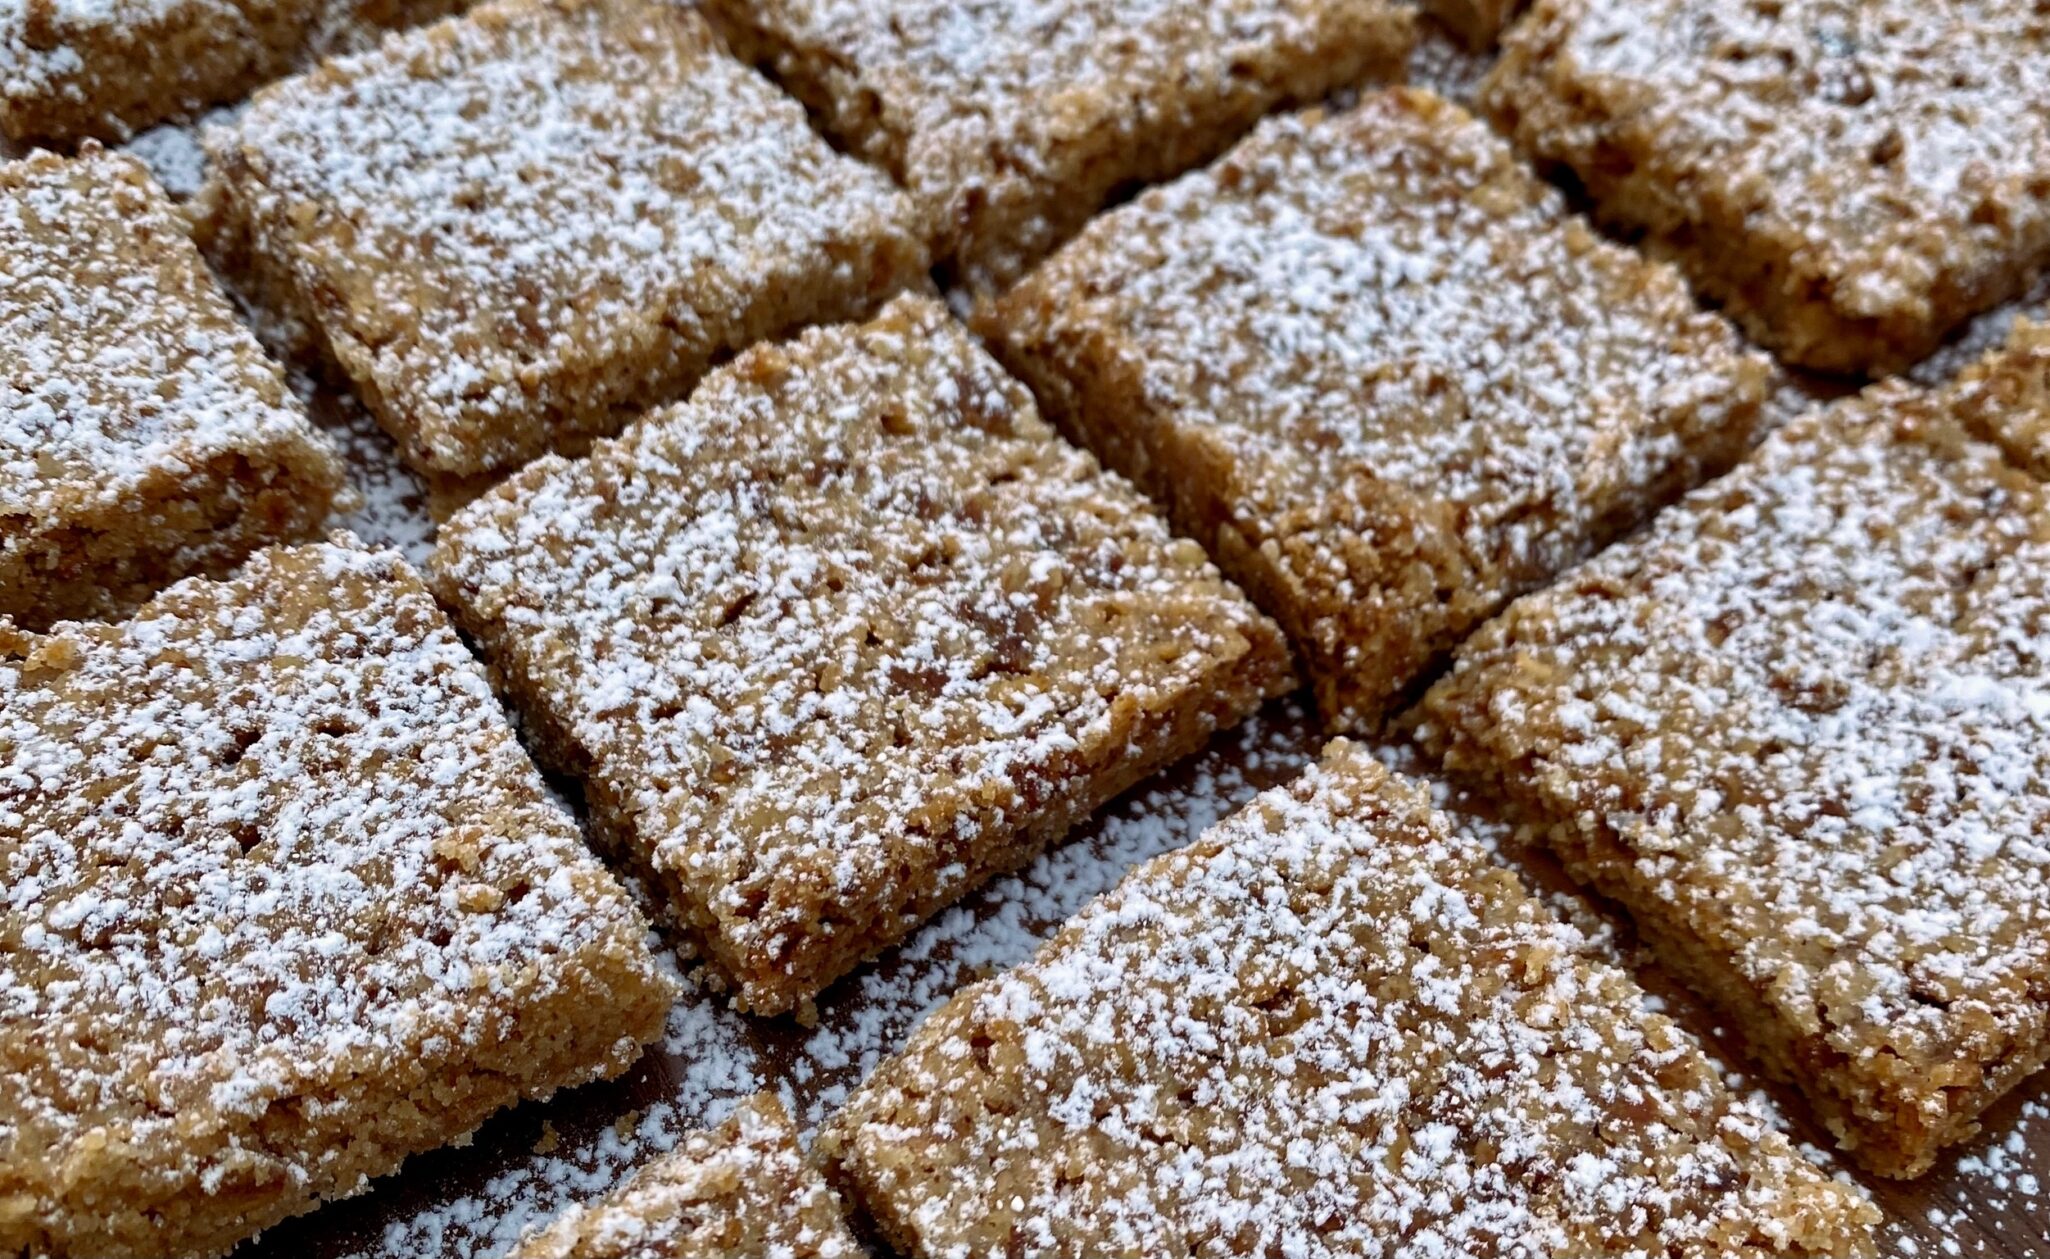
These crispy, buttery bites are made in a food processor.  A little pulse magic and the dough is done. How easy is that?  Plus, shortbread cookies travel well and keep longer than most cookies. These are delicious, lighter, and crunchier than traditional shortbread, perfect with a cuppa coffee or tea.  I made a batch of Jule’s Granola which worked perfectly in these cookies.  Flecks of dried fruit from the granola added a bit of color and sweetness to the shortbread, an unanticipated bonus.

PLUS, I’ll fill cute canning jars with the remaining granola to give away.  Oh this cookie is definitely going in the holiday cookie box.

Tips

  • Use your favorite granola, store-bought or homemade. You don’t have to make your own.  I love making granola so NBD.
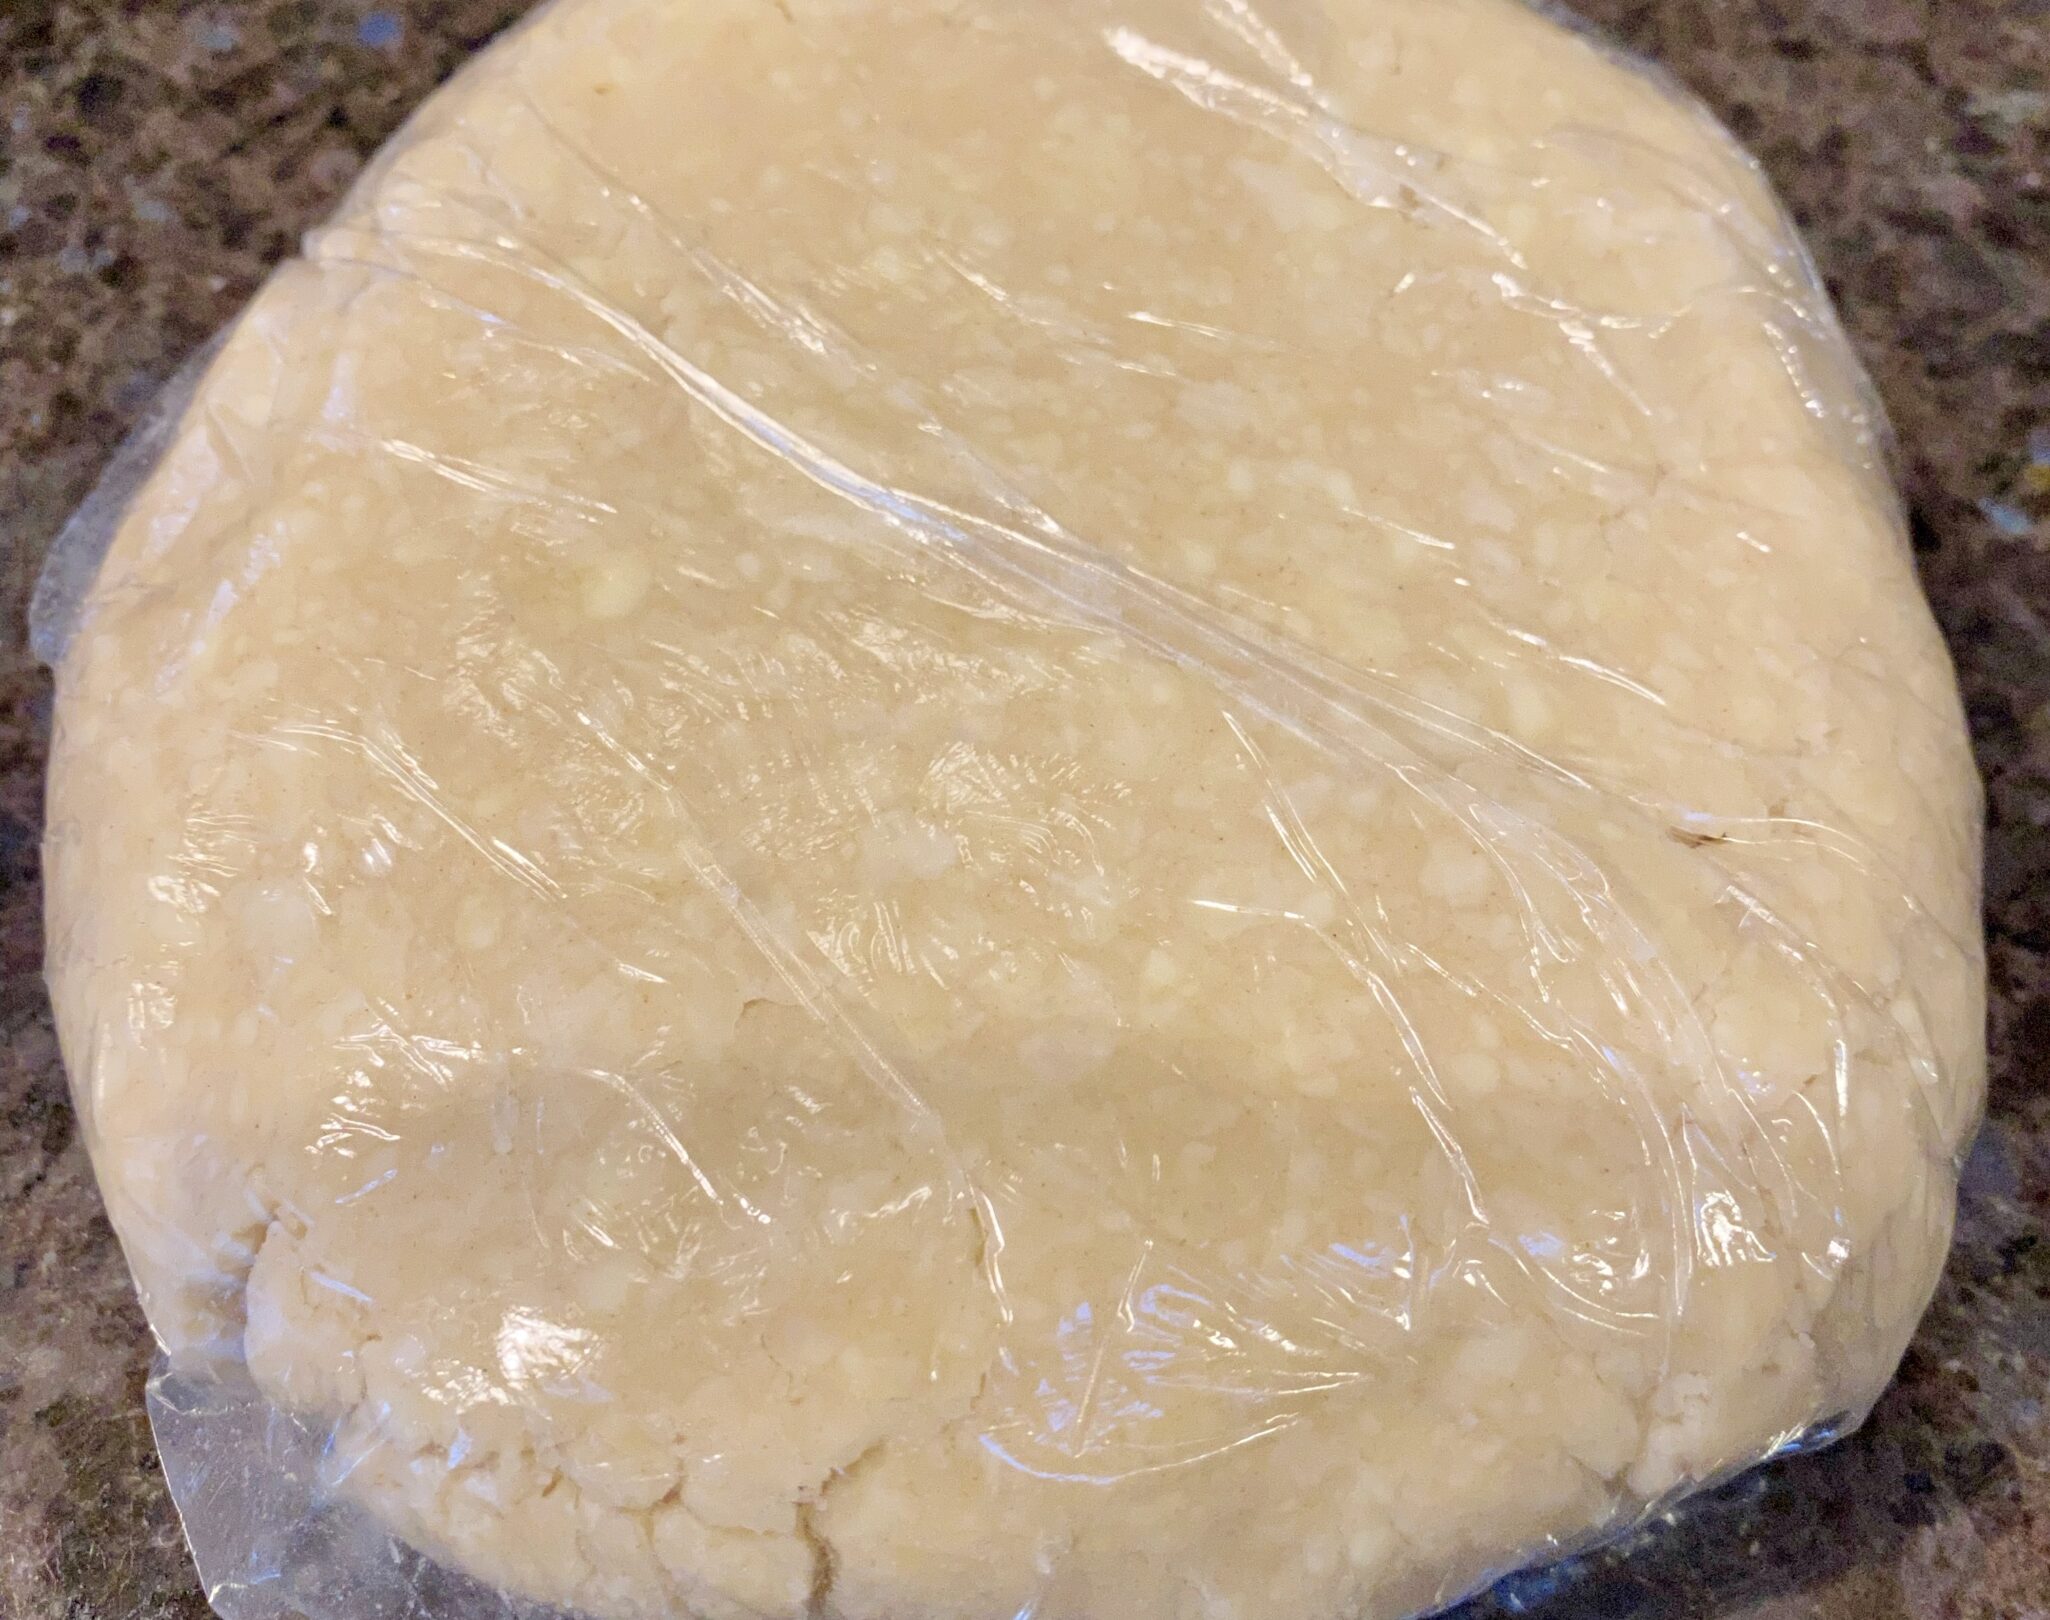
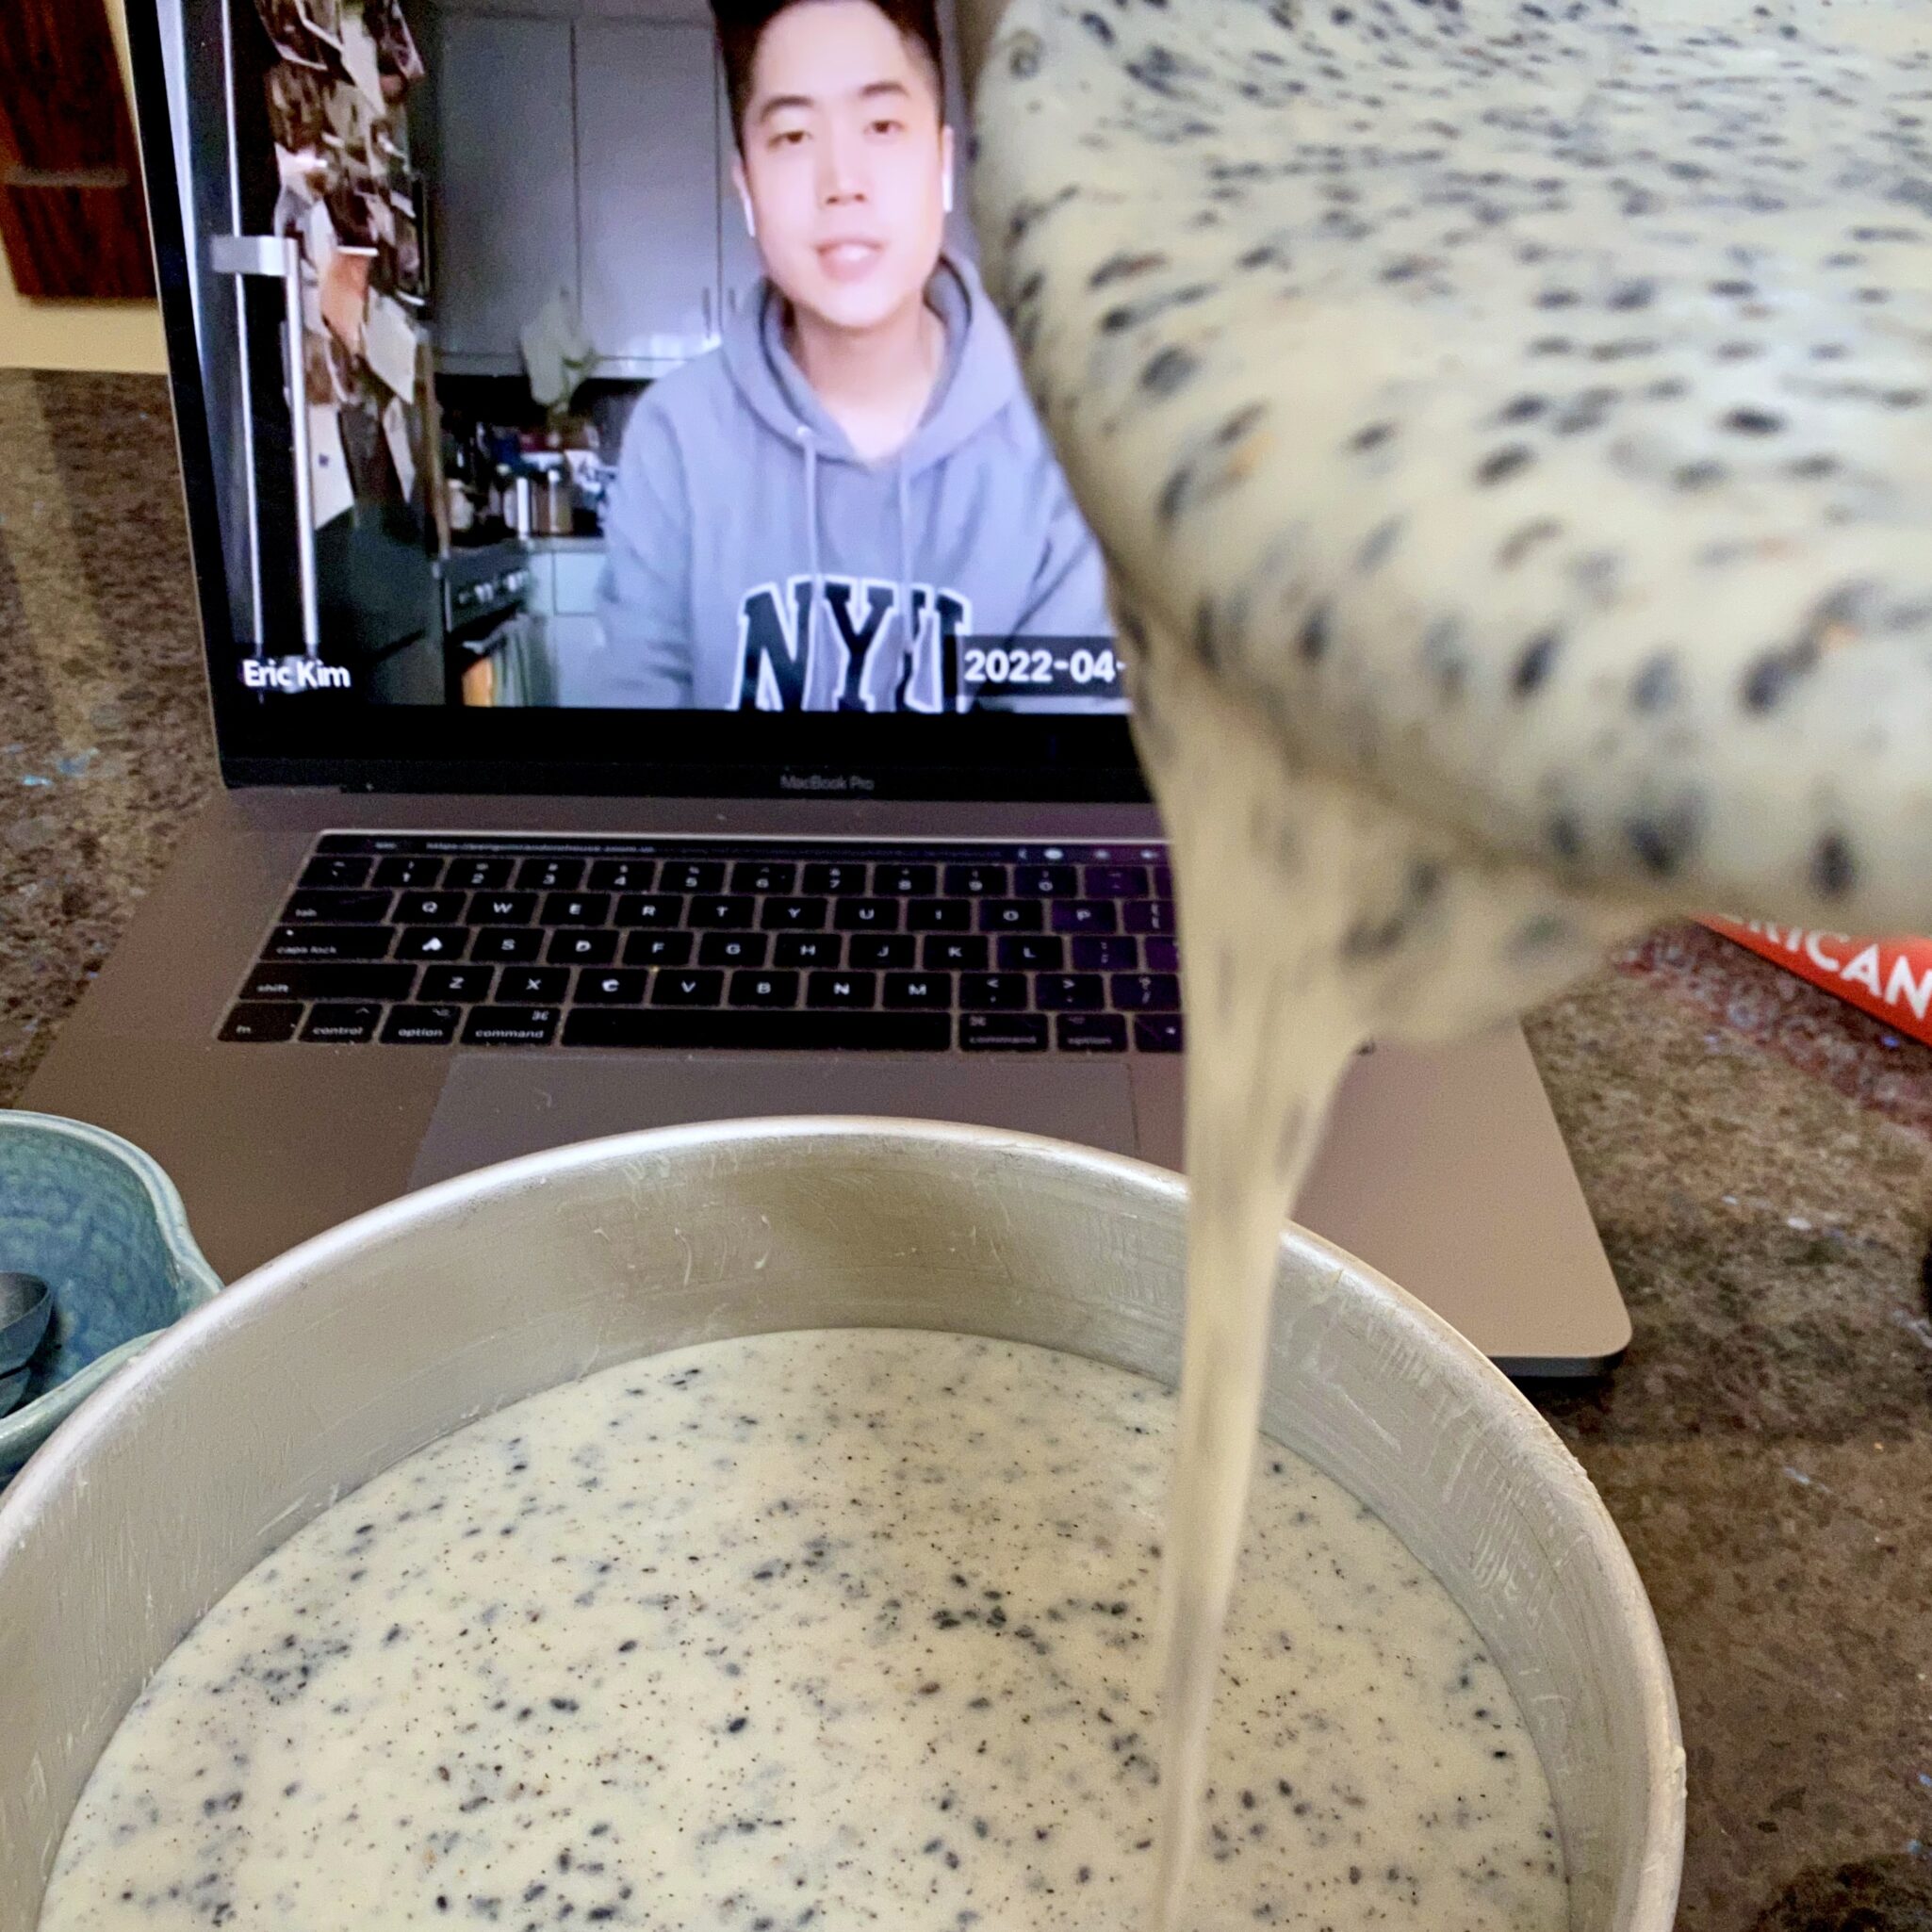
  • Using a food processor makes quick work of the dough.  It starts with chilled butter (yay no waiting for butter to soften).

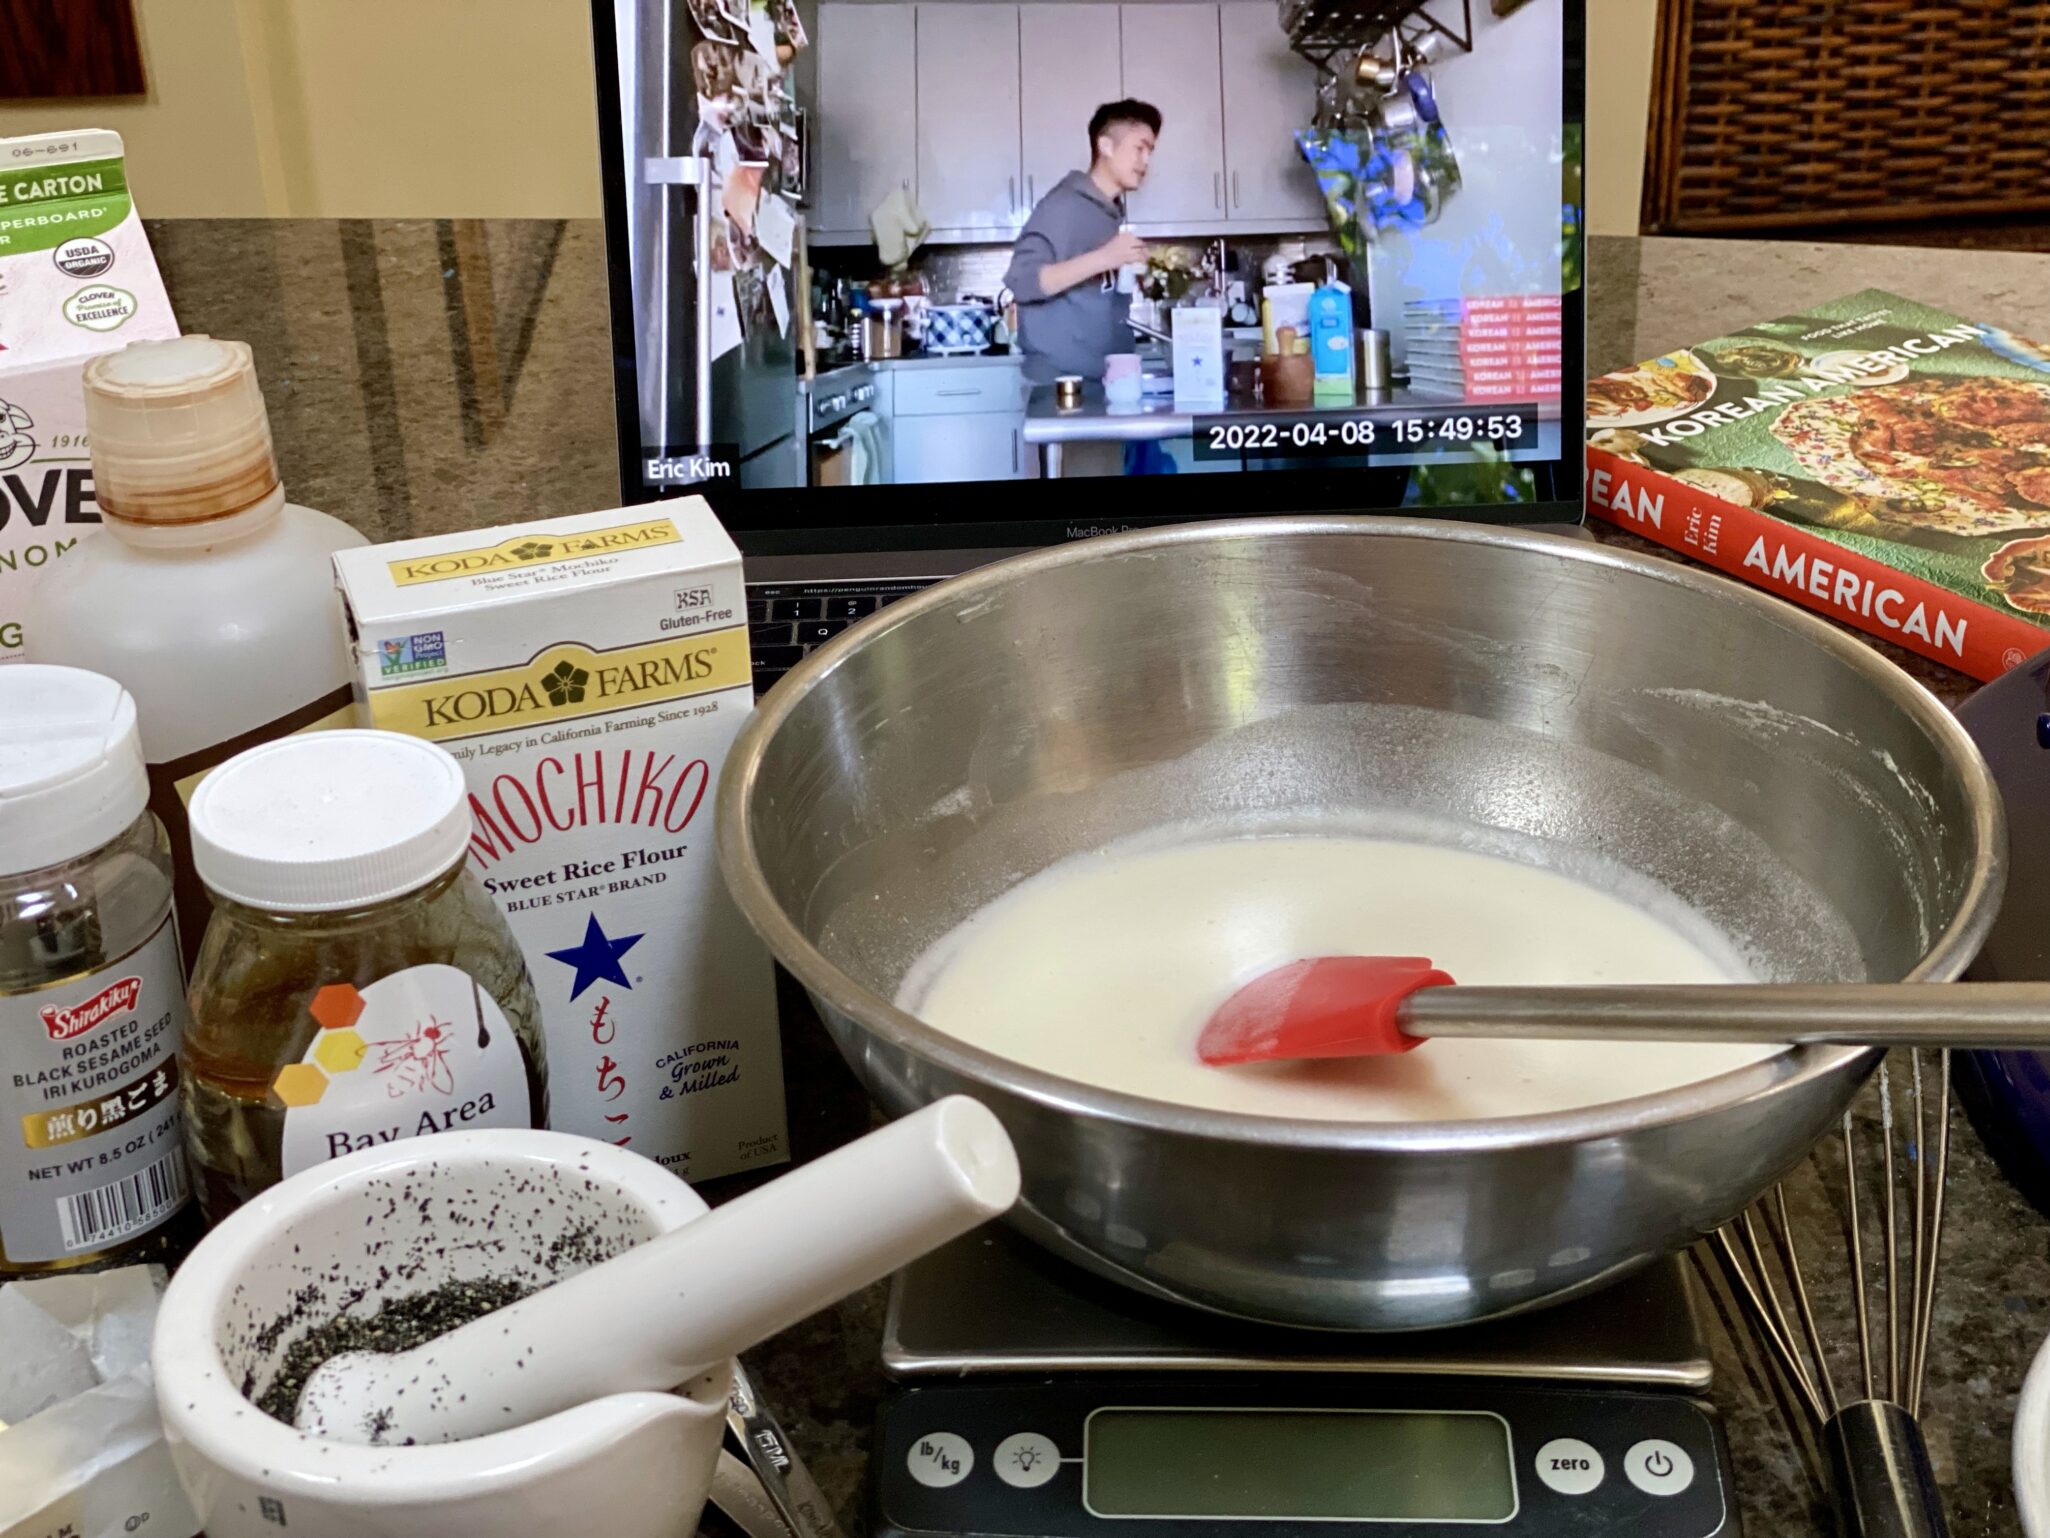
  • Rice flour makes for a fine texture, crumbly, melt-in-your-mouth-cookie. Bob’s Red Mill has rice flour and can be found at larger supermarkets, Whole Foods, and online.
  • No rolling out dough, the dough is pressed into the pan.  The recipe can be cut in half and baked in an 8×8 pan.

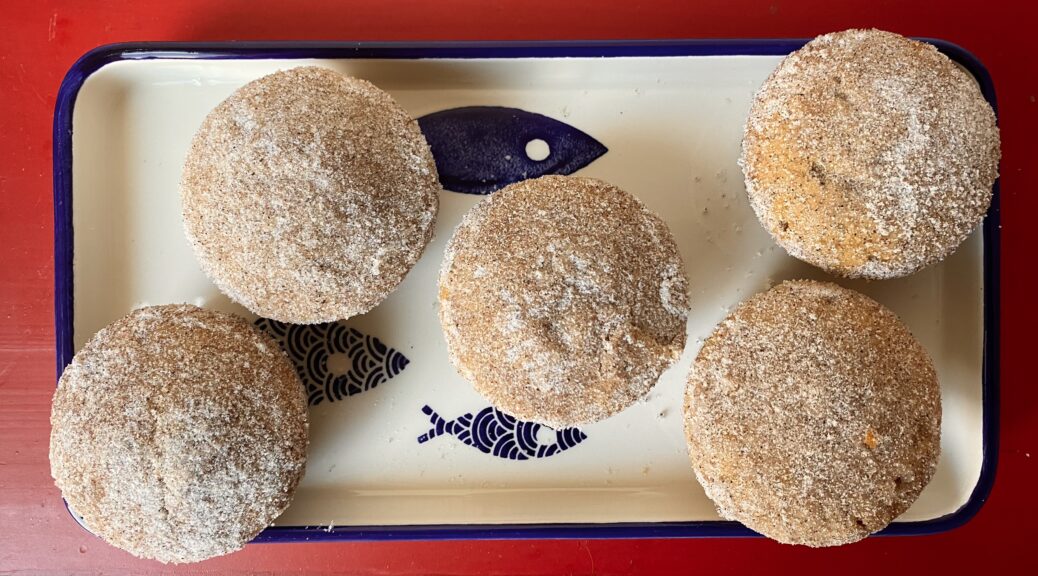
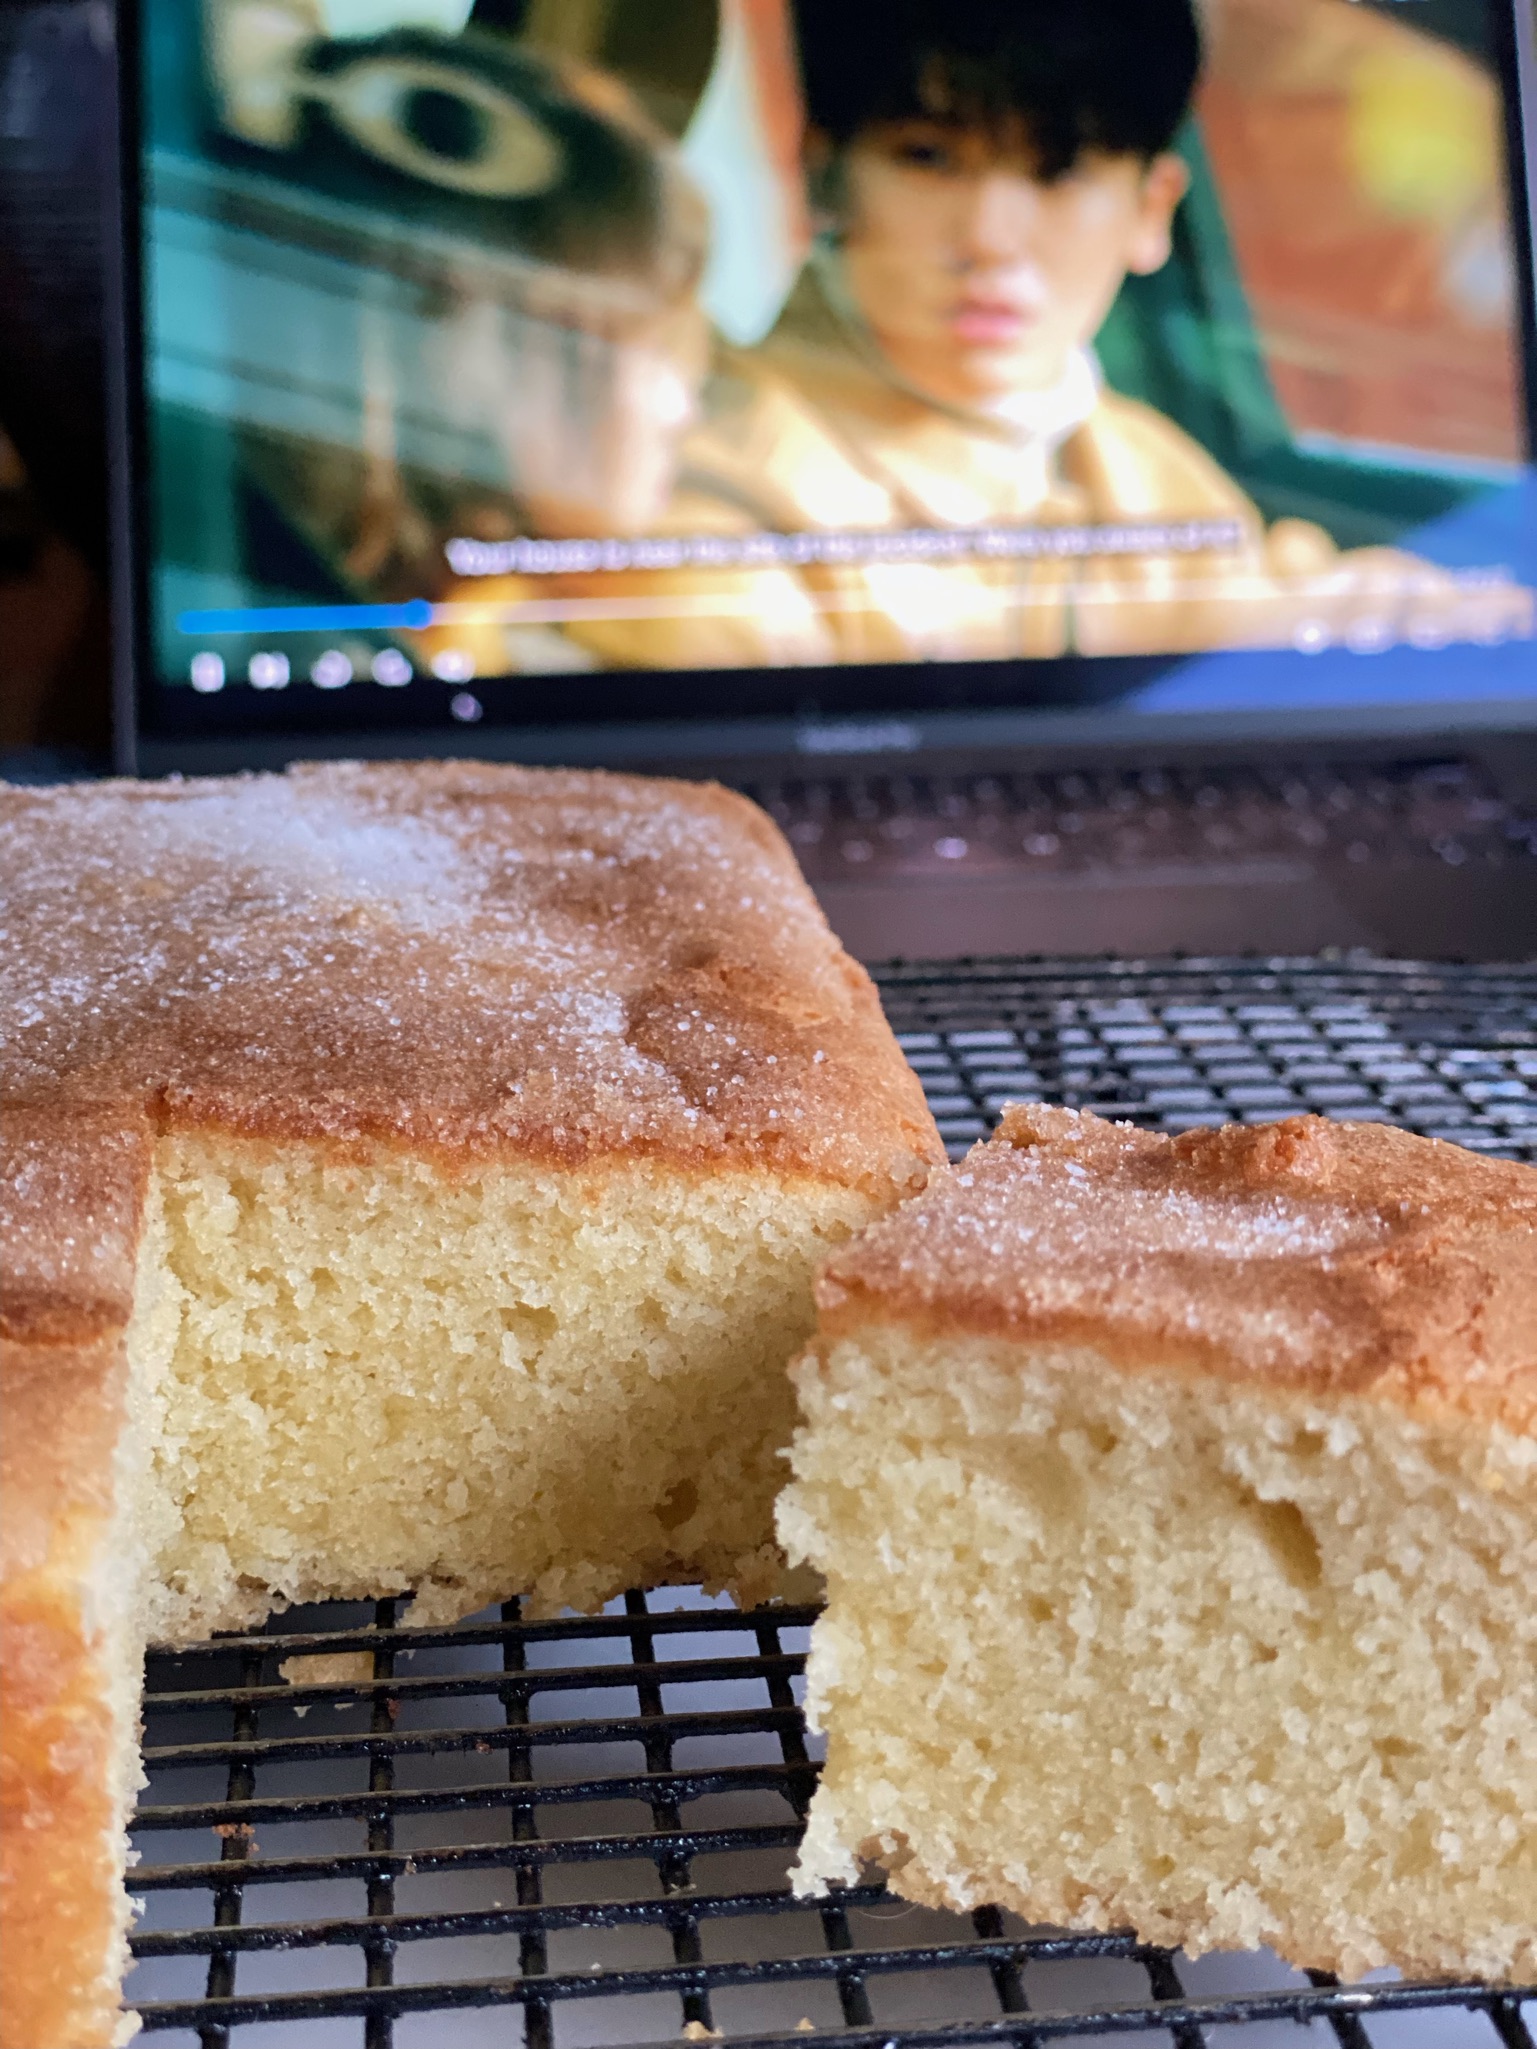
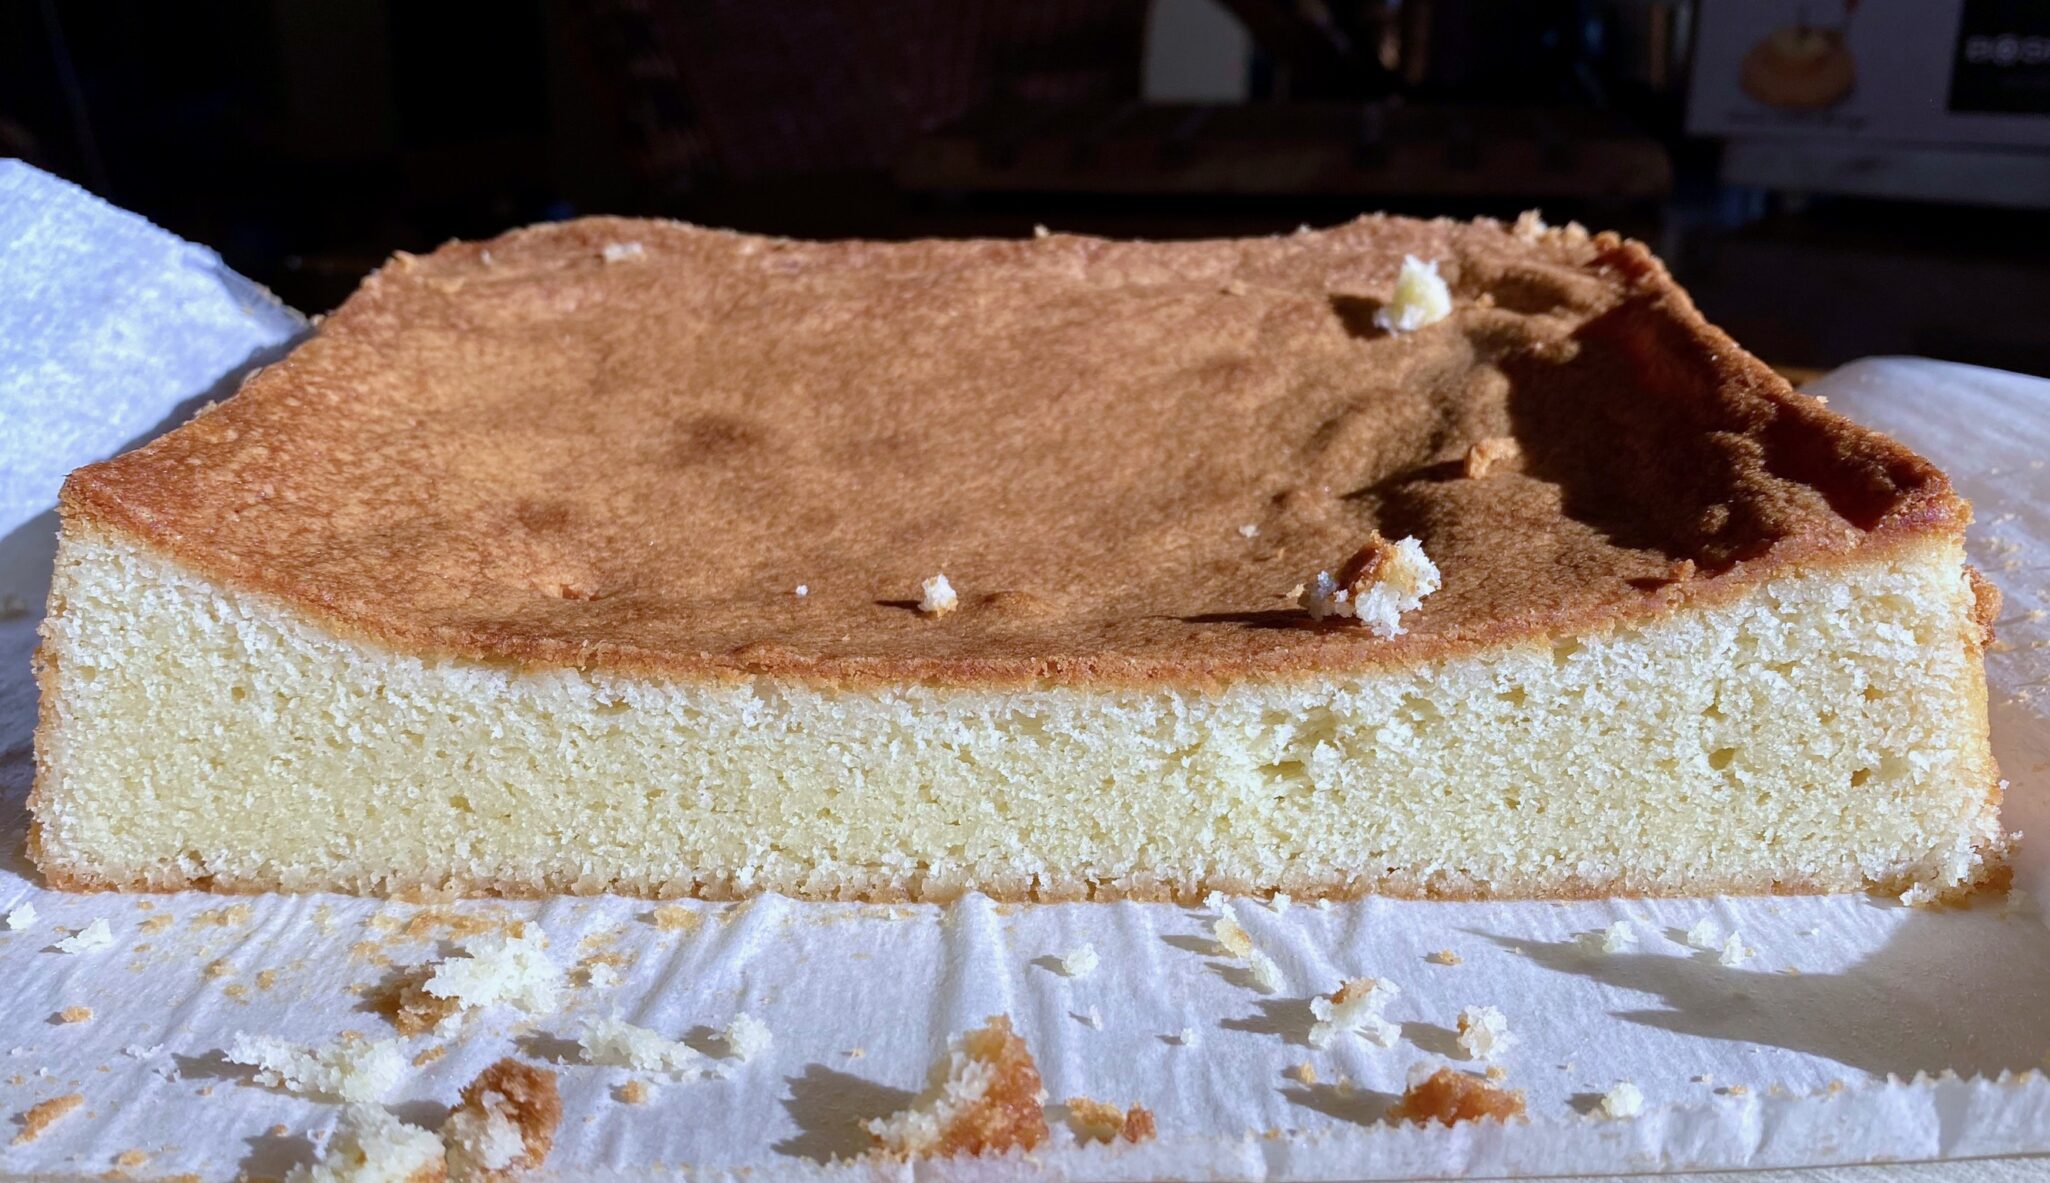
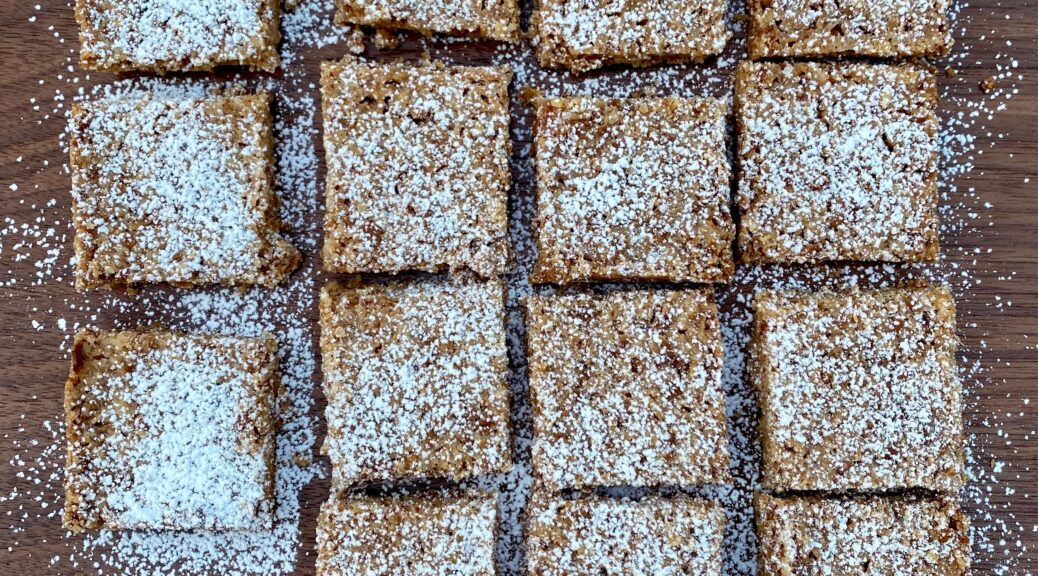
  • The tricky part of this recipe is the baking time.  Rice flour produces a drier cookie than AP flour therefore try not to overbake these cookies.  After removing the pan from the oven, lightly score the dough and allow to cool.  Once cooled, cut through the score marks.  Sprinkle with flaky salt and dust generously with powdered sugar to finish cookies.

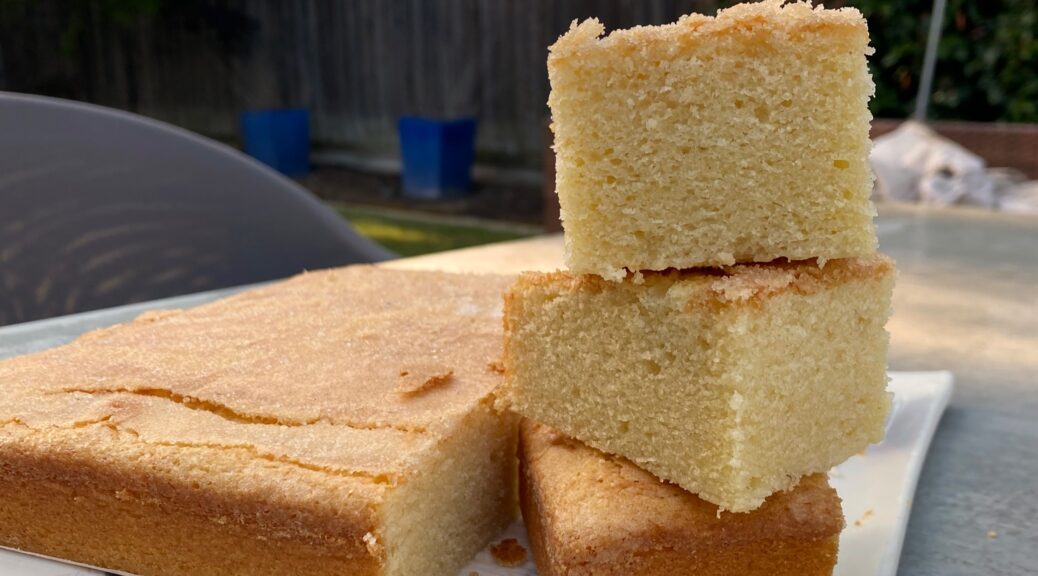
A buttery, crunchy, gluten-free shortbread cookie that keeps and travels well.  This is a keeper.

Nubby Granola Shortbread

This breakfast-inspired shortbread is a great way to use your favorite granola. It adds a nice crunch to the buttery cookie. Sandy ultrafine rice flour makes a melt-in-your-mouth fine texture. It's delicious!
Course cookies, granola, shortbread
Cuisine American, Asian-American
Keyword granola, Shortbread
Prep Time 15 minutes
Cook Time 27 minutes

Ingredients

  • 2 cups your favorite granola
  • 3/4 cup walnut pieces pecans or almonds would work but lack that characteristic tannic edge of walnuts
  • 2 cups white rice flour
  • 3/4 cup granulated sugar
  • 1 teaspoon kosher salt
  • 8 ounces unsalted butter (2 sticks) cut into 1/2-inch cubes, well chilled

Finish

  • flaky sea salt
  • powdered sugar for dusting

Instructions

  • Preheat the oven to 350 F. Fit a sheet of parchment paper into a quarter-sheet pan (9 by 13 inches). Lightly mist the parchment with cooking spray.
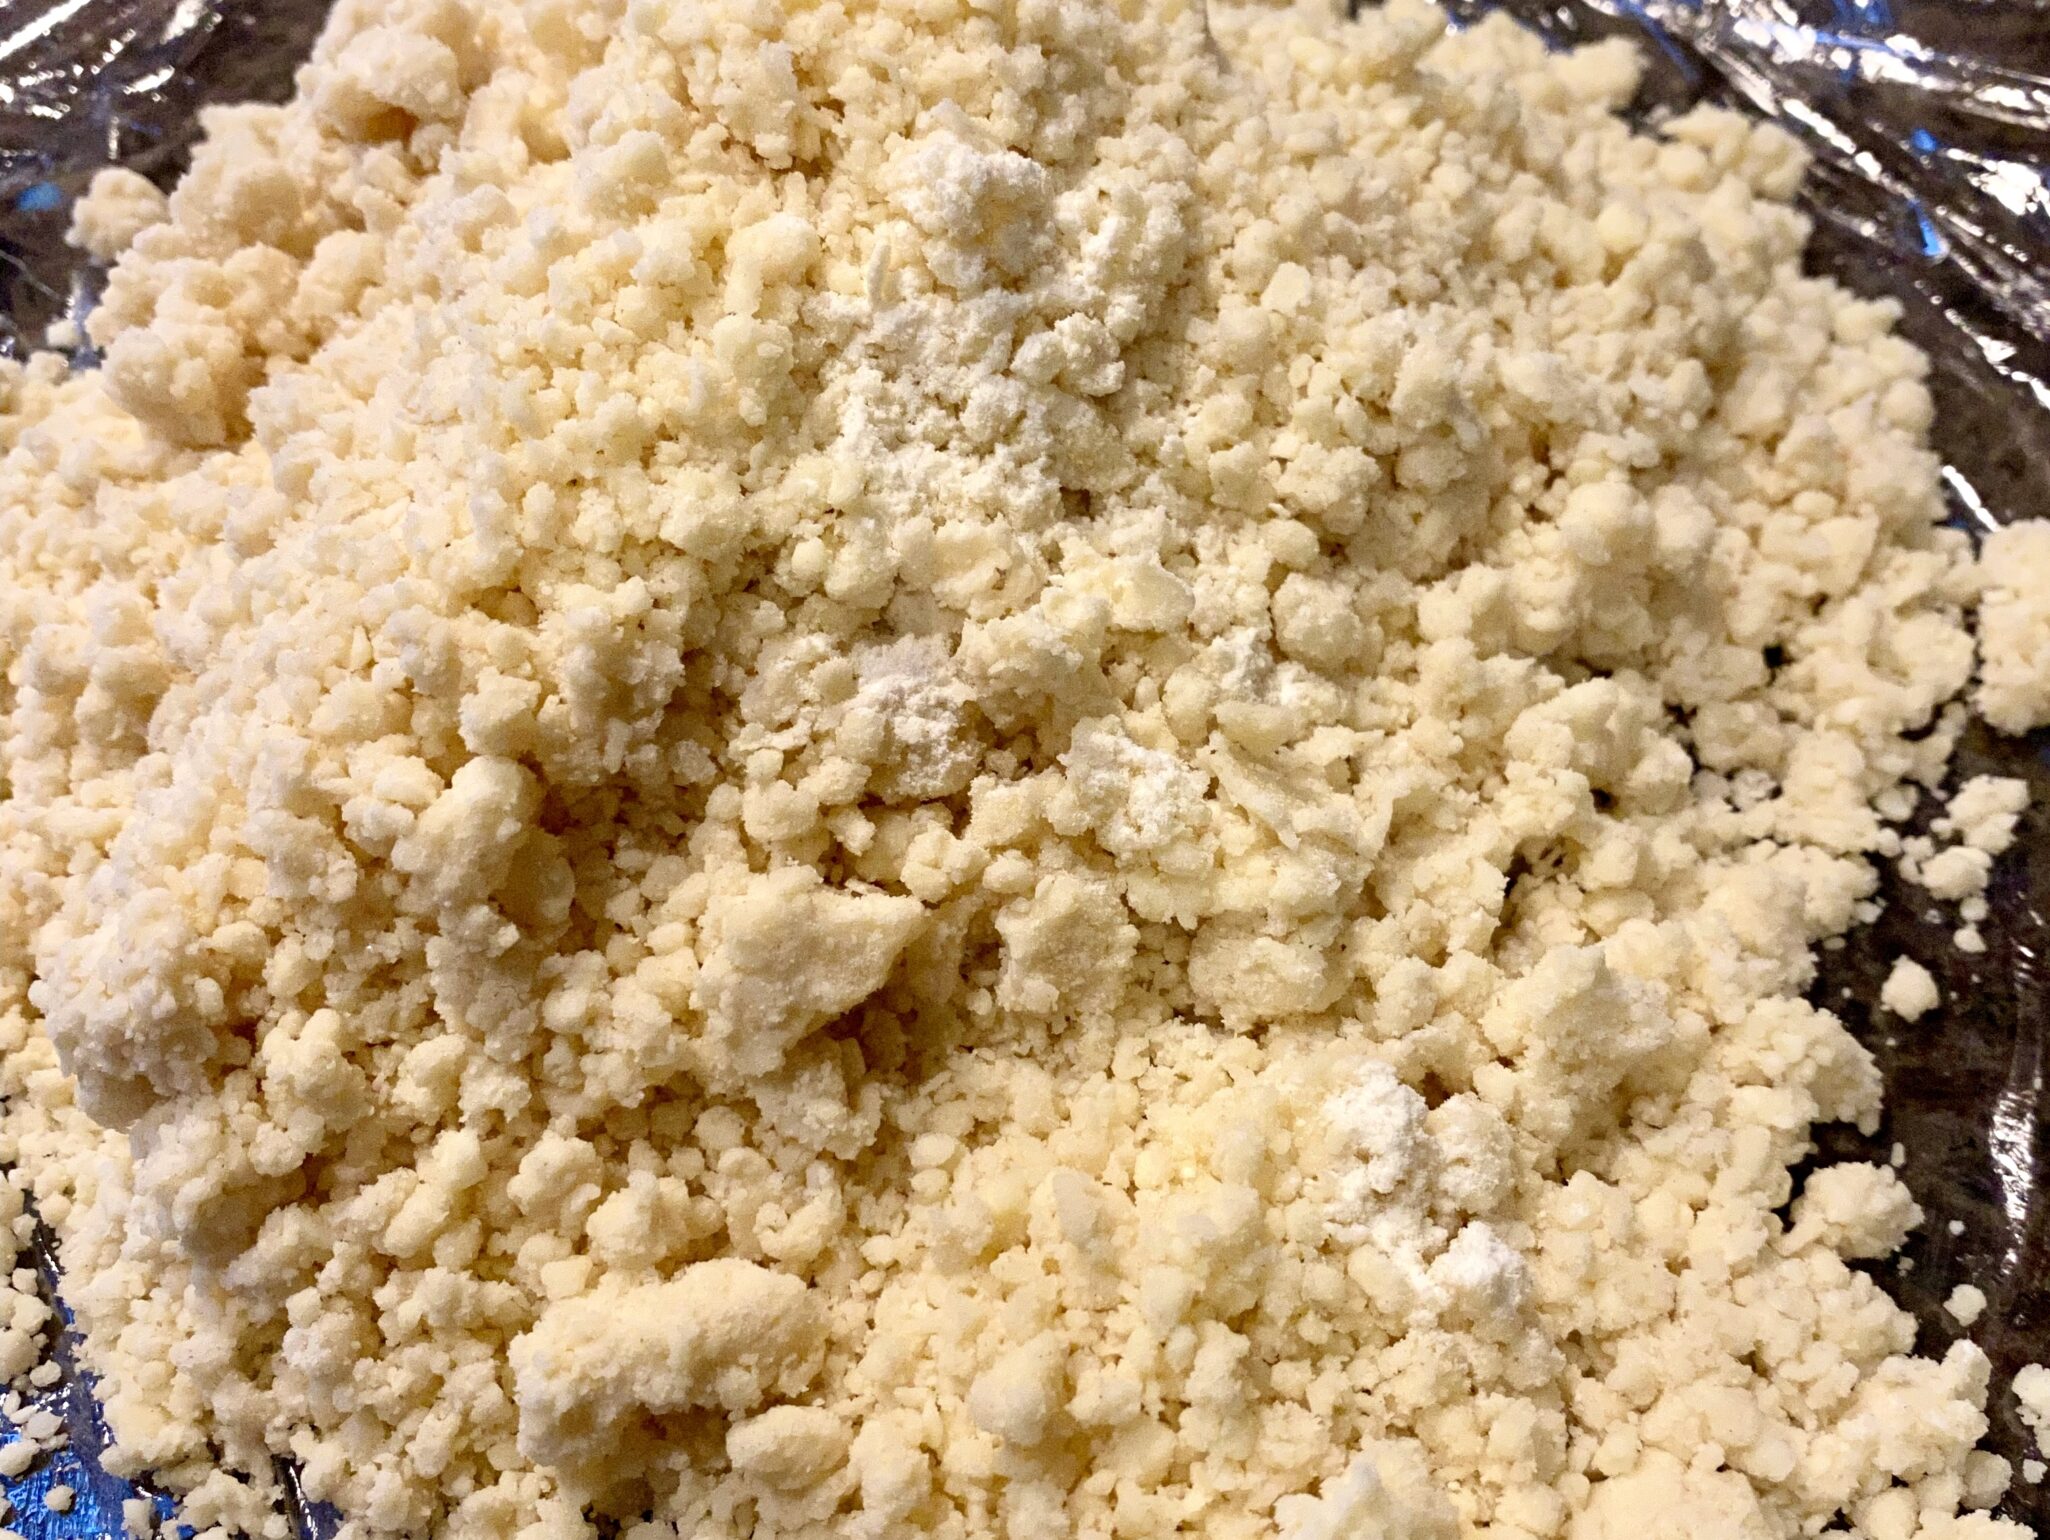
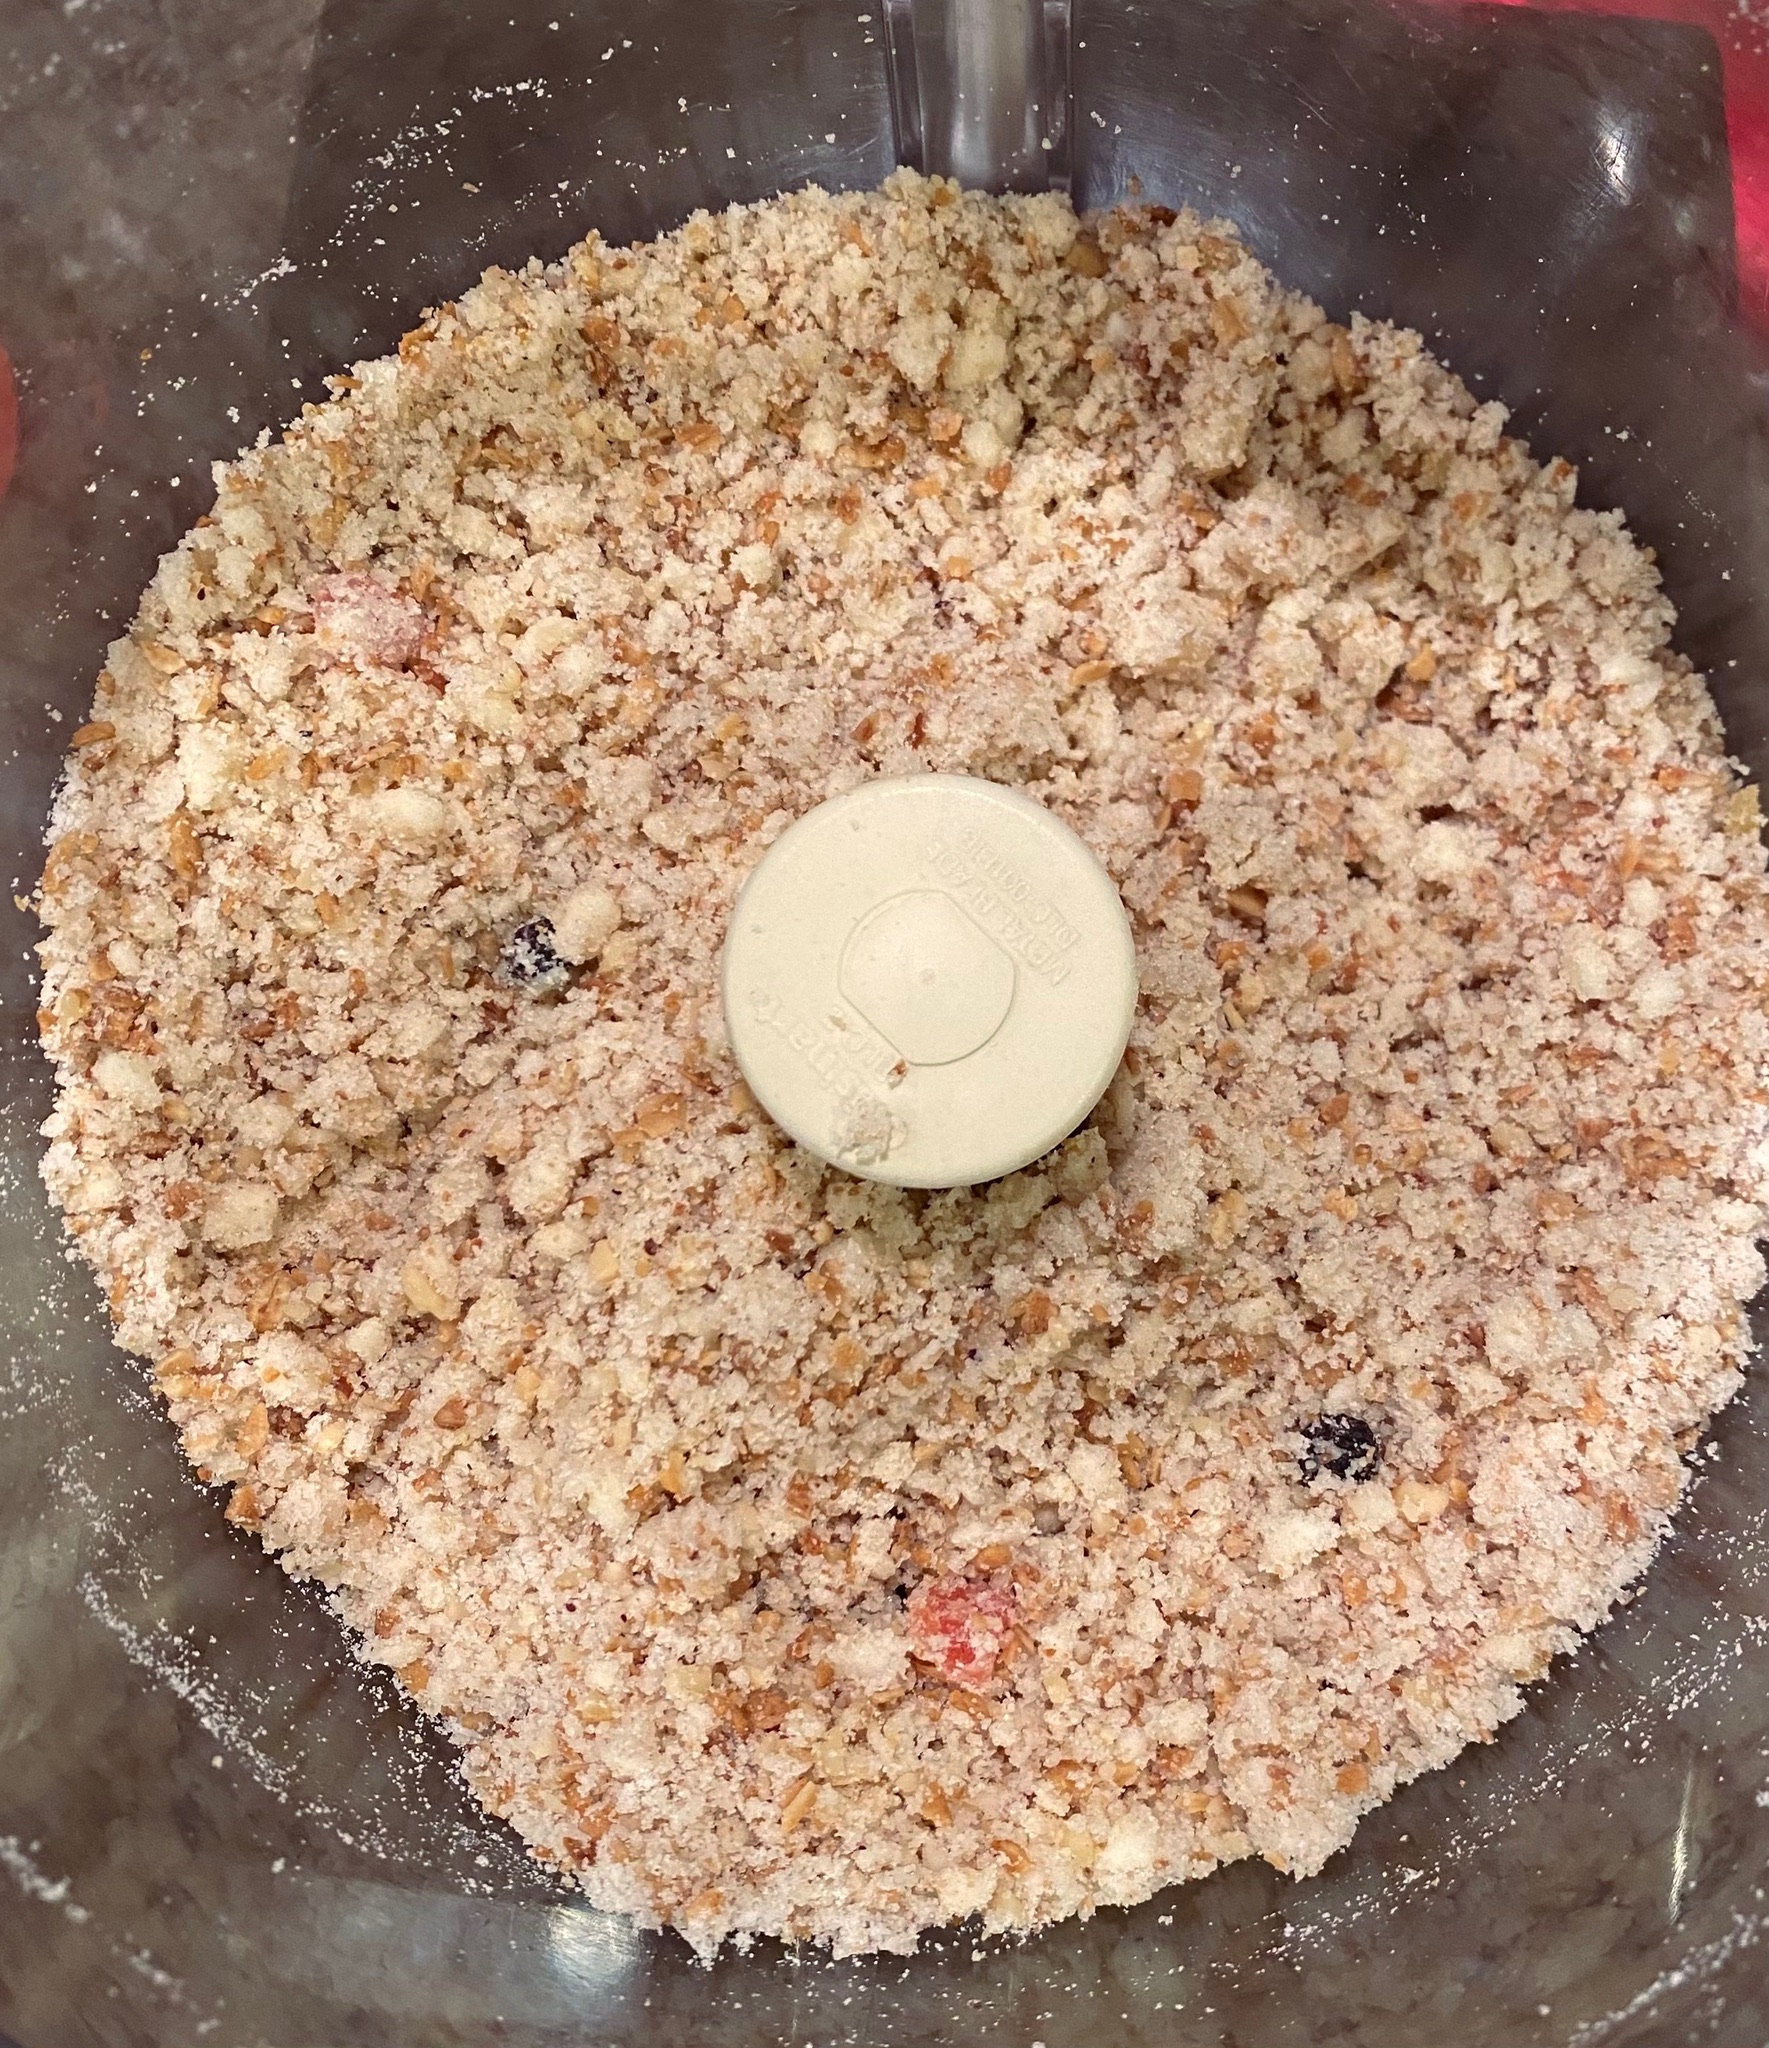
  • In a food processor, combine the granola, nut pieces, white rice flour, granulated sugar, and kosher salt, and pulse until the mixture is pebbly and fine.
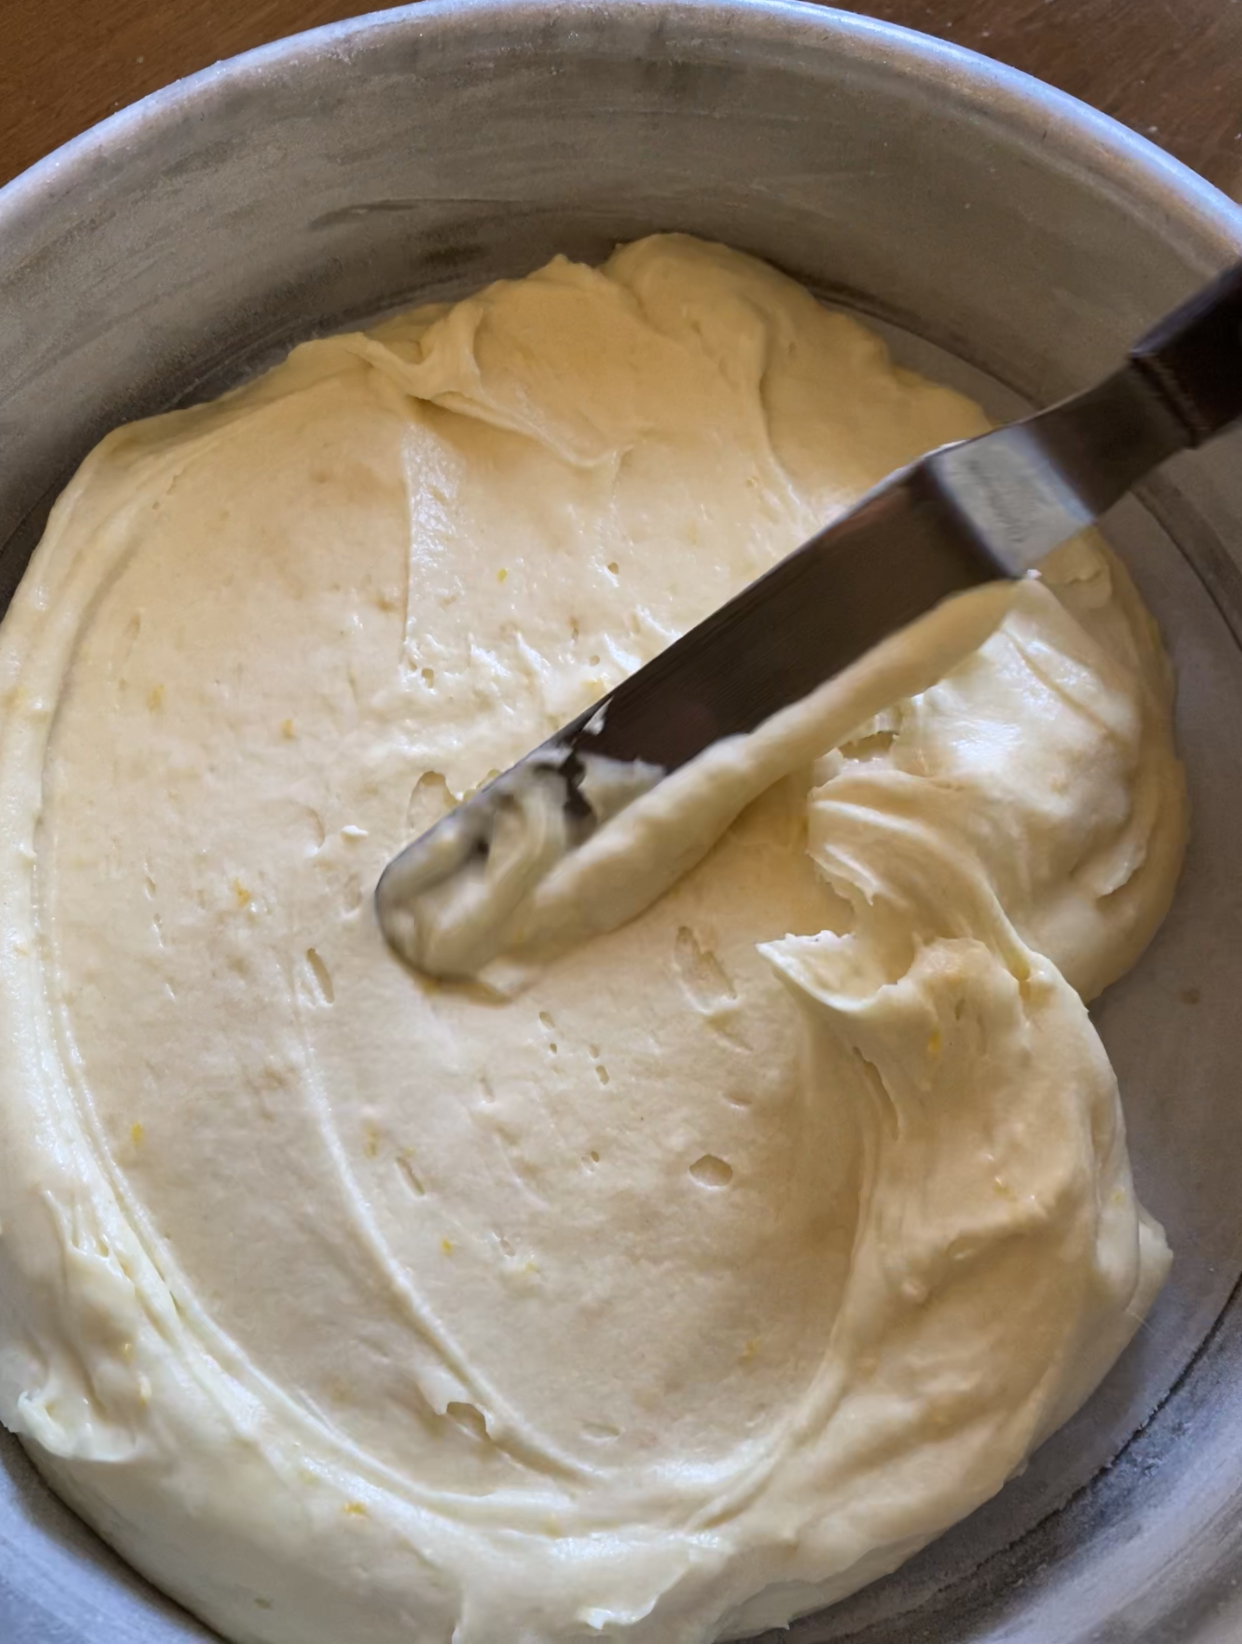
  • Add the butter and pulse another 8 to 10 times, until the mixture feels like damp, coarse breadcrumbs. The butter should almost disappear into the dry ingredients but not be taken so far that the dough is clumping and gathering around the blade.
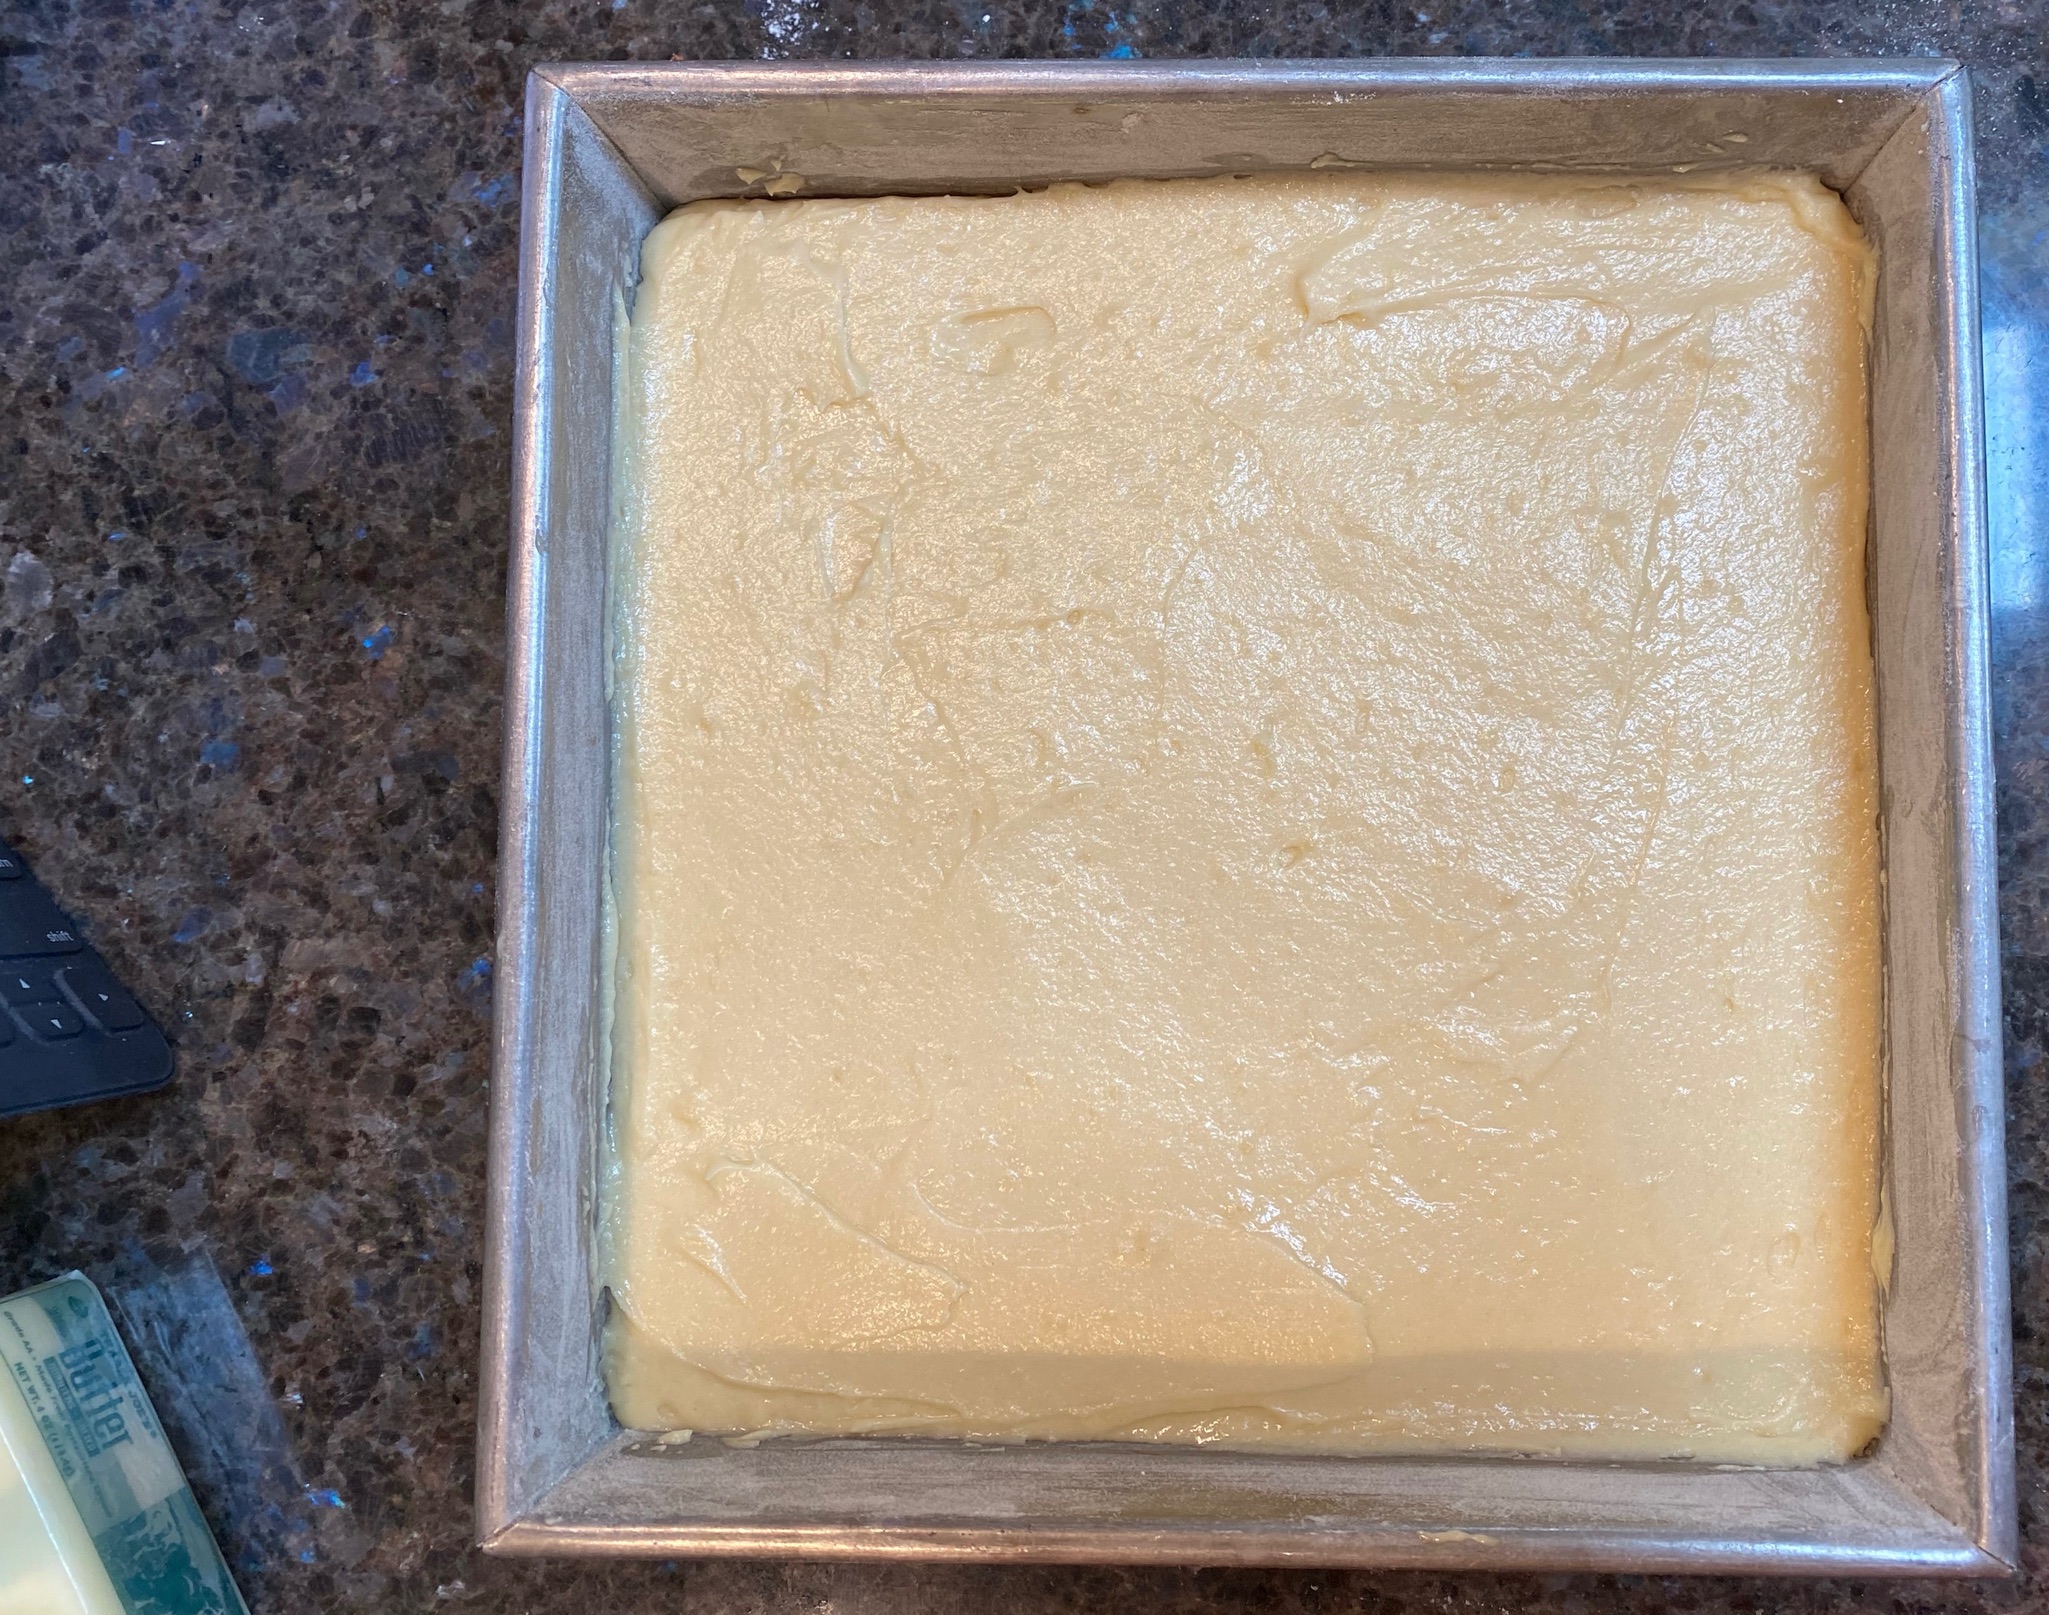
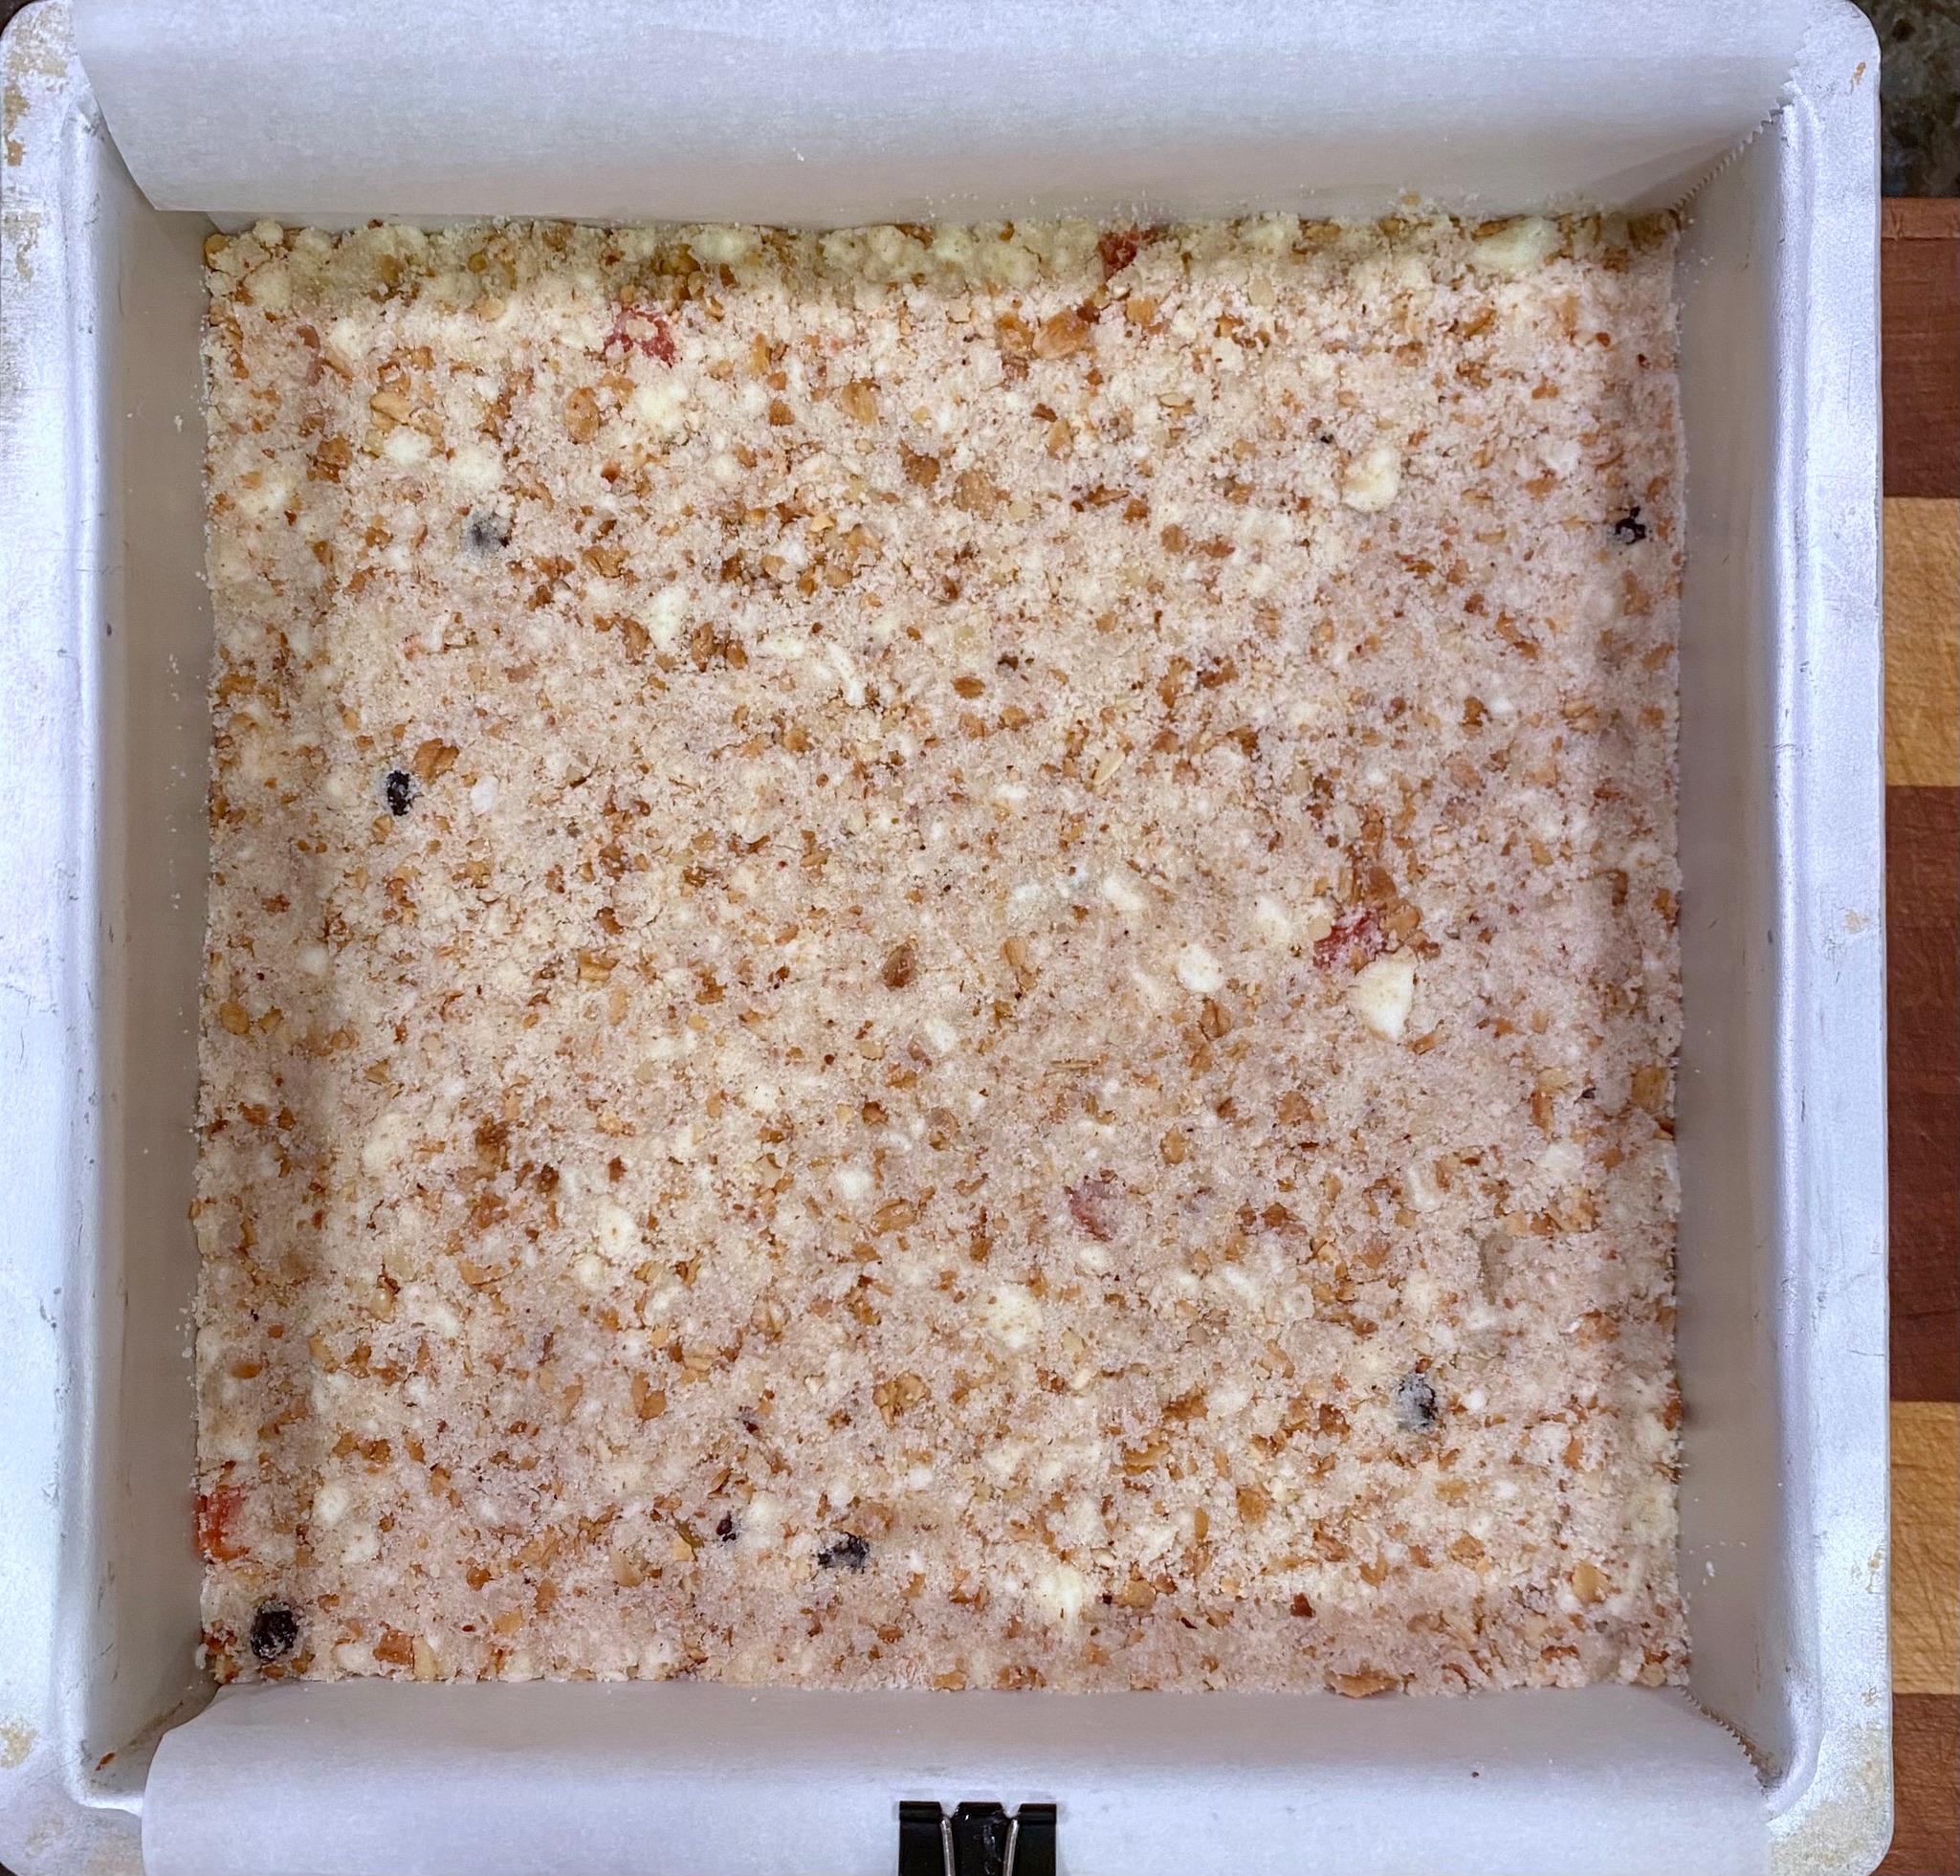
  • Scatter the dough evenly in the prepared sheet pan. Use your knuckles to lightly press the crumb into an even layer. It should be about 1/2 inch thick. Do not apply too much pressure, as this would make the shortbread dense and gummy.
  • Bake until the edges of the shortbread are lightly browned, and the center feels soft but cooked through, 35 to 40 minutes (see tip).
  • Remove the pan from the oven and sprinkle the surface with flaky sea salt. While the shortbread is still hot, use a small knife to score it into 24 squares.
  • Let cool completely, then cut the cookies, still in the pan, along the scored lines and dust with powdered sugar.

Notes

The pan of shortbread can be held in the freezer for up to 1 month and baked from frozen.
The shortbread can be stored, tightly wrapped at room temperature, for up to 1 week.
TECHNIQUE TIP: It's tricky to tell when an unfamiliar recipe is done in your oven. Never throw away a seemingly botched batch of anything — there's always another purpose for it. If the baked shortbread tastes undercooked or feels gummy, invert the shortbread onto a clean sheet pan, so the crumbs spill out. Break it up with your fingers and bake again at 325 F for 10 minutes. Now you have instant streusel. Is the shortbread overbaked and dry? Tip the crumbs into a food processor and blend until fine and add big handfuls to your next layer cake.
Marbled Ube Cookies (Star Powered)

Marbled Ube Cookies (Star Powered)

I wanted to include an ube dessert or cookie in my “Maui Strong” box for Lahaina.  Since I had made Ube Mochi Muffins for the Ukraine Cookie Box I opted for Constellation Inspiration’s Marbled Ube Cookie.  I have been eyeing her recipe for quite a while, and here was my chance to try it.  I baked the first sheet of cookies, and waited patiently (not really) for the cookies to cool.  With that first bite, I knew this cookie was going in the box. Not only are they delicious but they are so eye-catching.  A great addition to the cookie box.  In fact, I think…

Prince Would Love This COOKIE

Adding Ube extract and powder creates this gorgeous purple color that just POPS.  Ube, or purple yam or potato is popular in Southeast Asia, in particular the Philippines.  It has a vanilla, kind of nutty flavor, and “coconutty” aroma that lends itself well to desserts, bread, and pastries.  It’s definitely having a moment right now with the rising popularity of Filipino food.

Making the Cookie

The cookie dough is essentially a vanilla sugar cookie.  Start by creaming softened butter and sugar until smooth, not fluffy (to avoid a cakey cookie).  Add the egg and vanilla extract, beat to combine, and stir in the flour mixture.

Here comes the hard part, well, actually the hard part comes before making the dough.  Where to find ube powder and extract.  If you live in the Bay Area, you can find ube powder and extract by Butterfly or McCormick at most Asian grocery stores.  If not, there is always Amazon 🤷🏻‍♀️

Divide the dough in half (this is where a scale comes in handy).  Put half of the dough back in the mixing bowl and add ube extract and powder to it.  On the lowest speed of your mixer, blend the ube into the dough being careful not to overmix. You can do this by hand to avoid overworking the dough if you like.

.Using a tablespoon scoop, form dough balls with each dough and place them on a cookie sheet.  It is like having all your ducks in a row before the next step.

Smoosh together a dough ball of each color. Try to wrap one of the dough around the other to create the marble effect.  Then roll each in granulated sugar.  Place on a parchment-lined cookie sheet, 2 inches apart, and bake 11-14 minutes, rotating the sheet at the halfway mark.  Remove when the edges are just golden.

If you like ridges on the edge (all the rage right now) tap the cookie sheet 2-3 minutes before they come out of the oven.  This causes the cookie to deflate and make a ripple effect.  Sometimes the cookies are wonky in shape, if so, place a cookie cutter or glass (slightly bigger) over the cookie and swirl it to shape them into circles.  Or don’t, they’ll be delicious either way.

These Marbled Ube Cookies are a showstopper.  A lovely ube-flavored vanilla cookie with crispy edges, a chewy center, with a nice crunch from the sugar.  I’ll be making these again, and again…and again.

Marbled Ube Cookies

Ube Marbled Cookies, a gorgeous cookie that tastes as good as it looks.
Course Dessert, Snack
Cuisine Asian-American
Keyword drop cookie, marbled ube cookie, sugar cookie, ube
Prep Time 20 minutes
Cook Time 12 minutes

Ingredients

Dry Ingredients

  • 2 1/4 cup all-purpose flour 270gm
  • 1/2 tsp baking powder
  • 1/4 tsp baking soda
  • 1/2 tsp salt

Creamed Mixture

  • 1 cup unsalted butter, room temperature 227gm
  • 1 1/4 cup granulated sugar, and more for rolling 250gm
  • 1 large egg room temperature
  • 2 tsp vanilla extract

Additions to Dough

  • 2 tbsp ube purple yam powder, see note
  • 1 tsp ube extract

Instructions

  • Preheat the oven to 350°F (177°C). Line a large baking sheet with parchment paper.
  • In a medium bowl, whisk together the flour, baking powder, baking soda, and salt and set aside.
  • In the bowl of a stand mixer fitted with a paddle attachment, beat together the butter and 1-1⁄4 cups (250 g) of the sugar on medium speed until they are smooth, about 30 seconds. Add the egg and vanilla and beat to combine.
  • Add the flour mixture to the butter mixture and mix on low speed just until combined and no more streaks of the flour mixture remain, about 45 seconds.
  • Divide the dough into two equal portions (a scale comes in handy here) and leave one portion in the mixer. Add ube powder and extract to the mixer bowl. Mix on low speed until combined. The combination of ube powder and extract makes a nice purple color, no need for food coloring.
  • Take a heaping tablespoon of each dough and combine the dough by rolling between the palms of your hands to create a ball. I used a #40 ice cream scoop.
  • Toss the dough balls in a bowl of granulated sugar until each is coated.
  • Place dough balls on baking sheet, leaving 2 inches between each ball. Bake cookies for 11 to 14 minutes, until the edges of the cookies are light golden brown. Right before the cookies are ready to come out of the oven, tap the baking sheet on the oven rack a few times to create the ripple edges. Do not overbake.
  • Remove cookies from oven. If the cookies aren't round, place a circular cookie cutter or glass over the warm cookie and gently swirl the cookie to reshape. Then allow cookies to cool on the baking sheet for 10 minutes before transferring to a wire rack to cool completely.

Notes

Ube powder and extract can be found in most Asian markets or online.
Nuts for Macadamia Shortbread (Cookies for Lahaina)

Nuts for Macadamia Shortbread (Cookies for Lahaina)

It sucks to feel helpless which is exactly how I felt while watching the coverage of the wildfires in Maui.  In a twisted way it brought back memories of a family trip to Maui right before COVID, to celebrate hubby’s birthday and retirement.  We spent his b-day in Lahaina.  We grabbed shaved ice at Ululani, strolled down Front Street, and took in the majesty and beauty of the ancient Banyan Tree in the heart of town.  The day ended with a scrumptious dinner at Lahaina Grill and a stroll on the beach.  The stark reality of the devastation in Lahaina jolted me out of my memories and morphed into a voice in my head, “how are you going to help, Deb”.

Today, in the midst of the ruins, that Banyan Tree is struggling to survive.  Arborists are hopeful that the tree will survive, emblematic of the resiliency of the people of Maui.

I resorted to what I do when I am sad or stressed and feeling helpless, I bake.  For a box of homemade goodies, I asked friends and family to donate any amount to either Chef Hui Maui Relief to help feed folks displaced by the fire, and to Hawaii Community Foundation/Maui Strong to provide immediate and long-term resources for recovery.

A Big Mahalo

We raised over 1,500 dollars which was split between the two organizations ❤️❤️❤️.  Thank you for your generosity and for giving me a reason to bake!   👏👏👏.  It is greatly appreciated.

The Box

I wanted the box of cookies to feel connected to Maui in some small way.  I turned to cookbooks and blogs written by folks from Hawaii like Top Chef Sheldon Simeon and Alana Kysar. Sheldon has two restaurants on Maui, Tin Roof and Tiffany’s, and recently published his cookbook, Cook Real Hawai’i.  Alana is a blogger and the author of Aloha Kitchen Cookbook.  Her cookbook evokes the spirit of islands and her Butter Mochi recipe is amazing.  Find these books at Bookshop.org which supports independent bookstores.  I also culled recipes using my favorite tropical ingredients like pineapple, macadamia nuts, and coconut.  All of these baked goodies are on 3Jamigos or will be soon, promise.

Starting at the top right:

Travel Bites

Shortbread is perfect for a box, they travel well, keep longer than drop cookies and just happen to be my favorite cookie.  I found the perfect recipe in Nick Malgeri’s Modern Baker.  Using your food processor to make these cookies really makes it quick and easy.  This is one bowl (albeit, a food processor bowl) territory.

Process the nuts with the sugar until FINELY ground, add flour and baking powder, pulse to combine, add cold butter, and pulse until the dough is powdery then STOP.  Pour this mass into your prepared pan and press it down with a lightly floured flat glass or your hand.  Use a spray bottle to mist the dough with water which will help the nuts adhere to the dough.

Use either lightly salted or unsalted macadamia nuts.  I bought macadamias at Trader Joe’s, a bag of each, salted and unsalted. I used a 2:1 ratio of salted to unsalted nuts both in the cookie and on the top.  Cut the recipe in half and bake in an 8×8 pan as I did…cause I would eat the whole damn pan if given the chance.

Grind nuts by pulsing in a food processor or chopping by hand.  You want the pieces fairly small, but not pulverized. The nuts provide both flavor and texture.  Line the pan with parchment.  The OG recipe calls for lifting the cookies out of the pan using the parchment but that’s pretty hard to do and not crack it.  I let them cool for a couple of minutes and then used a bench scraper to cut the still-warm shortbread into squares before removing them from the pan.  Easy-peasy.

The finished cookie should be crispy.  If they aren’t, return the shortbread to the oven set at 300 degrees for 10-15 minutes.  I love these cookies, sweet, crispy, infused with macadamia nut flavor, and just delightful.

MACADAMIA SHORTBREAD

Adapted from Nick Malgeri Modern Baker, an easy, delicious Macadamia Shortbread. Buttery, nutty, crispy with a crunchy top of nuts and sugar. Simply divine.
Course Dessert
Cuisine American
Keyword butter, Crispy, macadamian nuts, Shortbread
Prep Time 20 minutes
Cook Time 30 minutes

Equipment

  • 1 food processor
  • 1 9x13 pan
  • parchment paper to line pan

Ingredients

Shortbread Base

  • 1/2 cup granulated sugar 100gm
  • 1-1/2 ounces unsalted or lightly salted macadamia nuts, chopped 42gm
  • 2-1/4 cups all-purpose flour 270gm
  • 1/2 teaspoon baking powder
  • 12 tablespoons cold unsalted butter, cut into tablespoon-size pieces 170gm

Topping

  • 1/3 cup granulated sugar 67gm
  • 3/4 cup unsalted or lightly salted macadamia nuts, finely chopped 111gm

Instructions

  • Preheat oven to 325°F. Line a 9″x 13″x 2″ baking pan with parchment paper or foil, leaving a couple of inches hanging over each short side. Butter the lining.
  • Combine 1/2 cup sugar and 1 & 1/2 ounces macadamias, (I use both salted and unsalted nuts in a 2:1 ratio) in a food processor. Pulse until finely ground. Add the flour and baking powder. Pulse until mixed. Add the butter and pulse until the mixture is combined and powdery.
  • Using a lightly floured, flat bottom glass or hands, press the dough firmly into the bottom of the prepared pan. Sprinkle the top of the dough with water. Sprinkle the finely chopped macadamias and then 1/3 cup sugar on top of the dough. Press firmly into the dough.
  • Bake for 30-35 minutes, or until the cookies are golden and firm.
  • While the cookies are still warm, use the overhanging lining to remove the cookies from the pan onto a cutting board. Cut into squares, using a sharp knife.
  • Let the cookies cool completely. They should become crisp as they cool. If they aren’t crisp after cooling, place them back in the pan and bake for 10-15 minutes at 300°F.

Ina Garten’s Country Cake with Strawberries (The Comeback Cake)

Ina Garten’s Country Cake with Strawberries (The Comeback Cake)

When my oldest was a tyke his favorite cake was the Barefoot Contessa’s Strawberry Country Cake.  This was his cake of choice for his birthday for quite a few years… Then Along Came Daddy (his Carrot Cake actually) that put the kibosh on the strawberry cake, so sad.  After I shoved my ego aside, I was FINE with Wes’s Carrot Cake becoming the birthday cake of choice.  It is pretty damn tasty.

The other birthday tradition we have, which thankfully has stayed the same, is going to a Giants game.  His birthday is in June, right about the time baseball is in full swing and school is out for the summer.  This year was no exception, we planned the perfect day for his b-day.

Giants versus the Cubbies plus SF Giants Pride Jerseys for the first 20K fans, dinner at our favorite neighborhood Chinese Restaurant, Gourmet Carousel (which recently re-opened with the OG owners-yay), and to round out the day, birthday cake at home.

Surprise, Surprise, Surprise

Every year around this time, when the weather warms up, the days are longer, this thought pops into my head, “Hey, shouldn’t P&K Farms Strawberries and Triple Delight Blueberries be showing up soon?”.  As luck would have it, both P&K and Triple Delight were at the Farmer’s Market the week of his birthday.  I made a command decision…Ina’s Country Cake with Strawberries for his birthday this year, NOT Carrot Cake.  He’s a big boy, he can handle it.

It Was A Hit, He Loved It

This version of Ina Garten’s Country Cake with Strawberries is from a long-ago issue of Food & Wine.  If you Google Ina Garten’s Strawberry Country Cake you will find multiple sites that have published her recipe.  Why Food & Wine’s version?  First, I had a subscription to F&W back in the day and that’s where I found the recipe.  Second, the recipe makes a single-layer cake that you split into two layers.  Finally, the recipe calls for large eggs. Barefoot Contessa fans know she often uses extra-large eggs in her recipes (which I rarely buy). So this version is my go-to.  I baked another one and ended up freezing it.  We pulled it out of the freezer on Father’s Day and left it on the counter to thaw.   It was delicious, so feel free to use one of the double recipes and freeze the second layer for another day!

I adore this cake, it is buttery, has a nice crumb, and is not too sweet.  Classic prep, cream butter and sugar, add eggs one at a time, and then the sour cream and zest.  Scrape down the sides of the bowl with each addition.  Add the flour mixture and beat on low speed until the batter is well combined and homogenous looking but do not overbeat.  The addition of lemon and orange zest adds a refreshing citrus hint that is terrific with berries.  Sour cream adds a hint of tang and moisture to the cake.  Spread batter into an 8-inch round cake pan that has been buttered and floured or sprayed.  The batter is fairly thick, not pourable, and will need an offset spatula to spread evenly in the cake pan.

I would increase the amount of whipping cream to 1-1/2 cups, and decrease the sugar to 2 tablespoons, especially if your berries are sweet.  Your whipped cream fans will be happy.

Split the cake into two layers.  The easiest way I know how to do this is with a serrated bread knife.  Place knife level to at the midline of your cake and slice through to the middle only, keeping your knife level.  Rotate the cake and continue to slice from the outside to the middle.  The first cut acts as your knife’s guide for an even cake.  Easy peasy.

Whip It, Whip It Good

Start with heavy whipping cream, preferably pasteurized, not ultra-pasteurized, which is heated to a higher temperature and does not whip as well.  Heavy whipping cream has a higher percentage of butterfat than whipping cream (36% vs 30%) and heck, it’s dessert, so we are going for the gusto. Chill your heavy whipping cream, bowl, and whisk attachment before whipping.  This kickstarts the process and results in the lightest whipped cream possible. Place the cream, sugar, and vanilla in the chilled bowl and whisk at medium-high speed until soft peaks form.  You want peaks that will stand up but the tip will slowly fold over.  Don’t overdo it, if the cream looks a bit grainy, or curdled that’s too far.  If you go too far, add a bit of heavy cream and fold it in with a spatula.  This will loosen the whipped cream and smooth it out again.

This is what your whipped cream should look like.

Plop a generous amount of cream on the bottom layer of your split cake. Spread to the edge leaving a small border.  Arrange your berries on the cream.  If you like, dice the strawberries for this layer, so you can maximize the number of berries.  Top with the second split layer cut side down and top with the remaining cream.  Arrange halved strawberries in a cool pattern, and place blueberries and raspberries, if using, in the center of the cake or scatter blueberries in the crevices between the strawberries.  Serve to oohs and ahhs from the cake gallery.


Add this cake to your Bake It Bucket List.  Now.

Country Cake With Strawberries and Whipped Cream

Like a family sized Shortcake, Ina Garten's iconic Strawberry Country Cake
Course Cake, Dessert
Cuisine American
Keyword barefoot contessa, cake, ina garten, shortcake, strawberries, whipped cream
Prep Time 20 minutes
Cook Time 37 minutes
Servings 8

Equipment

  • 1 8-inch cake pan

Ingredients

Dry Ingredients

  • 1 cup all-purpose flour
  • 2 tablespoons cornstarch
  • 1/4 teaspoon baking soda
  • 1/4 teaspoon salt

Creamed Mixture

  • 6 tablespoons unsalted butter softened
  • 3/4 cup granulated sugar
  • 2 large eggs
  • 1/4 cup plus 2 tablespoons sour cream
  • 1 1/2 teaspoons finely grated orange zest
  • 1/2 teaspoon finely grated lemon zest
  • 1/2 teaspoon pure vanilla extract

Topping

  • 1 cup heavy cream I use`1.5 cups of heavey whipping cream!
  • 3 tablespoons granulated sugar adjust sugar to taste, I use 1.5 tablespoons of sugar
  • 1/2 teaspoon vanilla extract
  • 1 pint strawberries or berry medley hulled and sliced, blueberries and raspberries left whole

Instructions

  • Preheat the oven to 350°. Butter and flour an 8-inch round cake pan. In a medium bowl, sift the flour with the cornstarch, baking soda and salt.
  • In a large bowl, using a handheld mixer, beat the butter until creamy. Add the 3/4 cup of sugar and beat at medium speed until light and fluffy. Add the eggs, 1 at a time, beating until incorporated. Add the sour cream, the orange and lemon zests and 1/2 teaspoon of the vanilla and beat until blended. Add the dry ingredients and beat at low speed until smooth.
  • Scrape the batter into the prepared pan and bake for about 40 minutes, or until golden and a wooden skewer inserted in the center comes out clean. Transfer the pan to a wire rack and let the cake cool for 15 minutes before turning it out onto the rack to cool completely.
  • Beat the cream with the remaining 3 tablespoons of sugar and 1/2 teaspoon of vanilla until soft peaks form.
  • Slice the cake in half horizontally. Spread most of the whipped cream over the cut side of the bottom cake half. Layer most of the sliced strawberries on top. Replace the top half of the cake and garnish with the remaining whipped cream and strawberries. make ahead .

Notes

The cake can be frozen for up to 1 month. Let it cool completely before wrapping in plastic and then foil. The assembled cake can be prepared up to 2 hours ahead.

Read More Read More

Another Butterful Cake! (Everyday Butter Cake)

Another Butterful Cake! (Everyday Butter Cake)

Growing up, one of my favorite places was Ping Yuen Bakery on the corner of Grant Ave. and Pacific Ave.  A hop, skip, and a jump from my parent’s real estate office, you would find us there often, breakfast, lunch, dinner, and tea time.  Though called Ping Yuen Bakery, it was an all-encompassing, eat-in Chinese American diner that served noodles and won-ton soup alongside hamburgers and fries.

Their layout was genius, the front deli window enticed passersby with roast ducks, crispy-skinned pork, char siu (bbq pork), fried chicken, and an array of prepared braised and stir-fried dishes. On the other side was a full-service bakery that featured apple pies, custard pies, fresh strawberry cakes, chocolate cakes, and almond cookies.

One of my favorites (there were many) was their pound cake or butter cake.  The cake, tweaked to be a little lighter, a little less sweet, but still buttery, is the Asian version of a classic butter pound cake.

A post featuring a gorgeous, simple butter cake flittered through my feed and caught my eye.  Buttermilk by Sam, a baking blog from a political analyst by trade (gotta love that) described her Everyday Butter Cake as somewhere between a tea cake and a pound cake, it reminded me of Ping Yuen’s Butter Cake, so of course, I had to try it.

A Butter-ful Cake

The beauty of this recipe is that it is not just DELICIOUS it’s also pretty darn easy to make.  It can be made by hand or in a mixer with the admonishment to not overmix.  You start with semi-melted butter for the cake, no waiting for the butter to soften, just zap it in the microwave or melt it on the stove.  Do not melt it all the way, you want the butter to be slightly viscous with some lumps left.  Using cake flour ensures a tender, fine crumb cake, and the sour cream does the same plus adds moisture.  The cake flour and cornstarch create a lower protein content flour=less gluten= tender, light cake. Ta-da.

Make This Cake by Hand-It’s a Good Workout

Finally, sprinkle the remaining granulated sugar over the top of the cake batter.  This morphs the top into a sweet crunchy layer during baking.  This cake is a keeper.

I first made this cake a couple of months back on a cold, rainy day.  While the cake was baking I turned on a favorite K-drama to pass the time.  The aroma of sugar and butter wafted through the air and the heat of the oven warmed the house.  The perfect antidote to the dreary weather.

Fast Forward to Spring-Finally

Beautiful, sweet strawberries from P & K Farms and plump, juicy Triple Delight Blueberries back at our local farmer’s market prompted me to make this cake again.  It also reminded me that I had yet to share this cake with you.  Make this cake, go to your local farmers market pick up some berries or peaches, and enjoy!

Everyday Butter Cake

A delicious, easy butter cake from Buttermilk by Sam
Course Cake
Cuisine American
Keyword butter cake, pound cake
Prep Time 15 minutes
Cook Time 45 minutes
Servings 16 servings

Ingredients

Wet Ingredients

  • 1 cup unsalted butter (226 gm)
  • 1 cup granulated sugar (200-210gm)
  • 1 tsp fine sea salt
  • 1 tablespoon pure vanilla extract
  • 3 large eggs

Dry Ingredients

  • 2 cups cake flour, sifted (250gm)
  • ¼ cup powdered sugar can sub with granulated sugar
  • 2 teaspoons baking powder
  • ¾ cup sour cream (180gm)

Instructions

  • Preheat the oven to 350 F. Grease and flour a 9” square or round cake pan.
  • Place the butter in a large glass or heatproof bowl and microwave it until it’s almost but not completely melted. You will still have some lumps. Or place is a small saucepan and melt over low heat. Remove from heat before it is completely melted.
  • Add the sugar and whisk very well, a full 30 seconds.
  • Add the salt and vanilla and whisk for another 30 seconds.
  • Add the eggs one by one, whisking to fully incorporate before adding another then whisk for a full minute, until it’s light and creamy.
  • Sift in the cake flour, powdered sugar and baking powder together and add to creamed mixture.
  • Whisk in the sour cream. Fold the batter until it’s smooth.
  • Pour the batter into the prepared pan. Sprinkle with an additional 3 tablespoons of granulated sugar.
  • Bake for 30-45 minutes, until a cake tester comes out clean and the top is golden brown.
Happy Chicken Pot Pi Day!

Happy Chicken Pot Pi Day!

Here in California, we have been battered by some extreme weather…more rain, snow and high winds than we have seen in a long, long time.  I hope folks are staying safe, warm and dry.

So we are having a somewhat subdued, quiet Pi Day.  Especially since we haven’t had power all day!  That’s not gonna stop me, pi golly.  I adore pies, sweet or savory, by the slice, as a potable hand pie, you get the pic. So Pi Day is just an excuse to make pie.  A day of cold, wet, blustery weather calls for comfort food so what better dish than Chicken Pot Pie?  

I LOVE Pot Pie.  As a kid, it was a special treat if mom pulled out Swanson’s Chicken or Beef Pot Pies for dinner.  Little did I know, it meant an easy meal for her.  As I got older and my taste became more refined I left behind those Swanson’s pies.

I discovered Marie Callendar’s Pot Pies!  So good, more crust, bigger pie, yum.

My love of pies logically led to making my own pies and this includes savory pies, top on the list is Chicken Pot Pie.   

The Elephant In the Room

Not everyone wants or has a compelling need to start from scratch and that’s OKAY!  It’s perfectly fine to start with cooked chicken (a Costco rotisserie chicken comes to mind), commercial low-sodium chicken stock AND a premade pie crust. Making a Chicken Pot Pie is a labor of love.  If any step, homemade PIE CRUST comes to mind, gives you anxiety, use a shortcut. There are great frozen pie crusts dough and puff pastry doughs that can be used to make a fabulous pot pie. Hate prepping veggies?  Frozen WORKS, really.  But if you want to go the whole nine yards…read on 🙂

For novice pie makes, this is a good recipe to make over a couple of days so it doesn’t seem overwhelming.  Make the pie crust and throw it in the fridge to chill. You could do this up to a couple of days before.  This also applies to poaching the chicken and making the filling too.  The chicken can be shredded, the stock reduced, and the filling made and kept in the fridge until you are ready to assemble the pie.

Pick your favorite veggies, I like mushrooms, carrots, celery, broccoli, potatoes, and peas.  Pretty classic aside from the broccoli.  Blanching the veggies ensures they will be nicely cooked in the pie.  Blanch 10 minutes, the goal is al dente + so they don’t get too soft.  The veggies should be cut roughly the same size for even cooking.  The exception to this would be mushrooms, saute’ these before adding to the sauce.

Sauce Me Up

What holds everything together is a simple bechamel sauce of butter, flour, milk,and stock.  Start by making the roux .  Sauté onions with the butter for flavor and add the flour. Cook this for a couple of minutes before adding the chicken stock and milk.  Simmer sauce until it is thick like gravy, stir constantly.  Season well with salt and pepper.  

Two Pie Camps

There are 2 kinds of pie people in my book, those who like crust (ME) and those who like filling (Can’t even imagine who that is).  So I’ve searched far and wide for a pie crust I like.

I love Dorie Greenspan’s pie crust recipe. It’s buttery and flaky, and best of all, it makes a generous amount of dough, enough for a two-crust pie and a small single-crust pie. That’s a lot of crust.  Which is exactly what I want.

Make the crust by hand or in a food processor.  Be extra vigilant that you don’t overprocess the dough.

This is what your dough should look like coming out of the food processor. 

Gather it up into a disc shape and chill.  Roll out 2 crusts one for the top and one for the bottom.  Follow my tweak below or line your baking dish with the bottom crust and chill again.

Let’s Get to the Bottom of the Pie

Bake your chicken pot pie with a top crust only.  What Deb?!  That’s less crust!  Hold on now…here is the tweak.  Roll out the pie dough for the bottom crust then cut out circles or squares from this sheet equal to a serving of your pie.  Bake them separately.  When it’s pot pie time, place one of these buttery, flaky rounds on the bottom of each plate then topped with a generous wedge of your baked pie over it.  Buttery, flaky, crispy, crust on the top and bottom. This, my friends, is chicken pot pie nirvana.

Let it sit for 5-10 minutes before serving!

So, Happy Pi Day, now go make some pie! Check out my IG Reel for Chicken Pot Pie!

Classic Chicken Pot Pie

Ultimate comfort food. This is the classic Chicken Pot Pie. Buttery, flaky crust with a thick, velvety Bechamel filled with chunks of chicken and veggies. A keeper!
Course comfort food, dinner, One dish meals
Cuisine American
Keyword Chicken, chicken pot pie, comfort food, food for the soul, made from scratch, pie, pot pie, savory
Prep Time 1 hour
Cook Time 1 minute
Servings 6 servings

Equipment

  • 1 food processor

Ingredients

The chicken and stock:

  • 1 3 1/2-pound whole chicken (approximately 3 cups of cooked chicken, shredded or cubed) Shoretcut 1: Sub chicken parts for whole chicken Shortcut 2: Costco Roast Chicken Yeah, you read that right
  • 1 carrot
  • 1 stalk celery
  • 1 small onion halved
  • 2 teaspoons salt or 1 t salt and 1 tablepsoon Better Than Bouillion Chicken Base

Simply Irrecrustable: or Dorie's MoRe CrUsT RecipE

  • 1 1/2 cups all-purpose flour
  • 1/2 teaspoon salt
  • 1/2 cup 1 stick chilled unsalted butter, diced into 1/2-inch cubes (best to chill cubes in the freezer for at least 15 minutes before using)
  • 1/4 cup vegetable shortening chilled
  • 3 to 4 tablespoons ice water

It's All About the Filling

  • 3 med carrots sliced about 1.5 cups
  • 2 stalks celery sliced about 1 cup
  • 3/4 cup green peas frozen or fresh
  • Use any veggies you like broccoli, squash, potatoes. You want about 3 cups of vegetables sliced or chopped.

Da Sauce: This is a generous amount of sauce so you can increase your veggies if you like.

  • 6 tablespoons unsalted butter
  • 1 1/4 cups yellow onion (you have leeway use 1 med or large onion which yields 1 cup to 1-1/2 cups diced onions diced
  • 1/2 cup all-purpose flour
  • 2 1/2 cups chicken stock reserved from cooking chicken
  • 1 1/2 cups milk
  • 1 teaspoon chopped fresh thyme leaves
  • 1/4 cup dry sherry
  • 2 tablespoons minced fresh parsley
  • 2 teaspoons salt to taste
  • 1/2 teaspoon freshly ground black pepper to taste
  • For the egg wash: optional
  • 1 egg whisked with 1 tablespoon water

Instructions

Da Chicken: A whole chicken in a large stockpot with water to make a chicken pot pie casserole. Yep, you read that right.

  • Combine the chicken, carrot, celery, onion and salt or chicken base into a large stock pot. Add cold water until just covered and bring to a boil over high heat.
  • Reduce the heat to a simmer and cook for 45 minutes. Remove the chicken from the pot and let cool for 15 minutes. While the chicken is cooling, continue to boil the remaining water and vegetables in the pot.
  • When the chicken is cool enough to touch, strip away as much of the meat as you can. Place the meat on a dish, set aside. Shred chicken or cube. You should have about 3 cups.
  • Return the chicken bones to the stockpot and continue to boil, on high heat, until the stock has reduced to a quart or quart and a half.
  • Set aside 2 1/2 cups of the stock for this recipe. Freeze remaining stock for a rainy day.

All About the Crust: Simply Recipe Yields only 1 crust. You will need to double it or make Dorie's omitting the sugar

  • Combine the flour and salt in a food processor. Add the chilled butter cubes and pulse 5 times to combine. Add the shortening and pulse a few more times, until the dough resembles a coarse cornmeal, with some pea-sized pieces of butter.
  • Slowly stream in ice water, a tablespoon at a time, pulsing after each addition, until the dough sticks together when you press some between your fingers.
  • Empty the food processor onto a clean surface. Use your hands to mold into a ball, then flatten the ball into a disk. Sprinkle with a little flour, wrap with plastic wrap, and refrigerate for at least 30 minutes, or up to 2 days, before rolling.

Filling It Up

  • Blanch prepped carrots, celery, potatoes, broccoli (if using) in water for about 10-15 minutes. Veggies should be al dente but cooked through. Set aside.
  • In a large skillet, melt butter on medium heat. Add the onions and cook until they're translucent, about 10 minutes. Add the flour and cook, stirring, one minute more.
  • Whisk in 2 1/2 cups of the chicken stock. Whisk in the milk. Decrease the heat to low and simmer for 10 minutes, stirring often until thickened and creamy.
  • Add the chicken, thyme, sherry, peas, blanched veggies, parsley, salt and pepper and stir well. Taste and adjust seasoning if necessary. Pour into prepared baking dish(s)

Pieformers: Assemble

    Bake: Preheat oven to 375

    • Roll out dough on a lightly floured surface to a little less than a quarter-inch thick.
    • Roll roughly to the shape and size of your baking dish. A little bigger so you crimp the edge. Lay pastry over filling and dish.
    • Fold the excess dough under itself and crimp edge of pie.. Cut a 1-inch vents into pie. Use a pastry brush to apply an egg wash to each pie.
    • Line a baking sheet with foil, place pie on baking sheet. Bake at 375°F for 45 minutes, or until the pastry is golden and the filling is bubbling. If the edge gets too dark, cover with foil.
    • Let cool for at least 5 minutes before serving.
    Everything Everywhere All At Eri-onCe (Cream Cheese Pound Cake)

    Everything Everywhere All At Eri-onCe (Cream Cheese Pound Cake)

    I am seriously thinking about adding a new category to 3Jamigos. I’m going to call it “Everything Everywhere All at Eric”.  Serving a dual purpose, a nod to the movie EEAAO and its amazing cast, and of course to Eric.  For those of you not “in the know”, I am referring to Eric Kim, food writer, cookbook author (Korean American: Food that Tastes Like Home), Food52 alum, and current columnist of lots of yummy stuff at the New York Times.

    I’ve been following him since his days at Food52 where he wrote a column, Cooking for One.  His writing is gorgeous and his recipes are simple, straightforward, and delicious.  I have a backlog of his recipes I have made but just haven’t had the time to do them justice in a post.  I will get to them soon, promise!  During the holidays I made his Cream Cheese Pound Cake, it’s divine. Posting about it is long overdue! So here is the list of Eric recipes I have made and love. Links to the ones I have posted. Hope you will try them!

    Savory

    Sweet

    Well, the list of savory is overwhelming at this point so I am going to finish off the Sweet category with his Cream Cheese Pound Cake.  It’s delicious and something you should bake right now. It will fill your home with the aroma of butter and sugar and help keep the house warm, since our cold, wet, weather is back again.  This is the perfect antidote.

    Does it bother you when you make something from scratch and the person eating it says, “wow this tastes just like the one in the grocery store!” Unless it is your hubby, who you would slug, you politely smile, laugh, and let it go.  Well, this cake is reminiscent of the Sara Lee Poundcake we all grew up with.  Don’t be surprised if someone exclaims “this is like Sara Lee’s” and definitely take it as a compliment.

    Lets Get Baking

    Make sure your butter and cream cheese are at room temperature (about 68 degrees).  Cream cheese adds moisture, richness, and flavor to the cake. Three cups of sugar is pretty typical for a pound cake although this cake may be a little sweeter since it has a smaller amount of flour.  Cream the butter, cream cheese, sugar, salt, and vanilla.  Then add the eggs, one at a time, beating until smooth.  Finally, add the dry ingredients at low speed.  Do not overbeat after adding the flour, this would toughen the cake.

    I cut the recipe in half using weights to split it and baked it in an 8×8 square pan. The cake dipped in the middle despite being fully baked. Looking at a couple of recipes for pound cake, for the equivalent amount of butter and sugar, most used 3 cups of flour. Using less flour, in this case, 2.5 cups, may make a softer cake with less structure and therefore lower in the center.   It was still delicious and nothing a nice dollop of whipped cream couldn’t hide.

    The whipped cream, jam and raspberry dust are nice additions to the cake but not absolutely necessary.  I skipped the jam and the cake was delicious with just whipped cream and a dusting of ground freeze-dried raspberry.  Fresh berries instead of jam would be lovely too.

    Cream Cheese Pound Cake

    Just like Sara Lee's Pound Cake! Buttery, slightly dense but tender with a fine crumb. From Eric Kim and the NYT, an absolutely delicious pound cake that will transport you to your childhood.
    Course Dessert
    Cuisine American
    Keyword buttery, Dessert, ERic KIm, freeze-dried raspberries, NYT Cooking, pound cake, whipped cream
    Prep Time 20 minutes
    Cook Time 1 hour 5 minutes

    Ingredients

    It's All About the Cake

    • cups all-purpose flour (320 grams)
    • 1 teaspoon baking powder
    • cups unsalted butter (345 grams) at room temperature
    • 8 ounces cream cheese (226 grams) at room temperature
    • 3 cups granulated sugar (600 grams)
    • 1 tablespoon vanilla extract
    • teaspoons fine sea salt
    • 5 large eggs at room temperature

    The Bling Finish

    • 2 cups cold heavy whipping cream (473 milliliters)
    • 2 tablespoons granulated sugar
    • ½ teaspoon fine sea salt
    • 1 cup raspberry preserves (305 grams) see notes
    • cups freeze-dried raspberries (34 grams)

    Instructions

    Make the cake:

    • Position a rack in the center of the oven and heat the oven to 325 degrees. Grease a 9-by-13-inch baking pan; line the bottom and long sides with parchment.
    • In a medium bowl, add the flour and baking powder. Whisk to combine and to break up any lumps. Set aside.
    • Add the butter,cream cheese, sugar, vanilla and salt to the bowl of a stand mixer fitted with the paddle attachment. Mix on medium-low speed to combine. Increase the speed to medium-high and beat until fluffy, almost white, and the sugar is mostly dissolved about 5 to 7 minutes. With the mixer on medium speed, add the eggs one at a time, mixing until smooth after each addition. Use a flexible spatula to scrape the bowl, then beat over medium speed for another minute.
    • With the mixer on low speed, gradually add the dry ingredients and mix until most of the flour streaks have disappeared. Using the spatula, scrape the bowl and gently stir until you eliminate the flour streaks. Scrape the batter into the prepared pan, then smooth out the top.
    • Bake, rotating the pan halfway through, until golden brown and a skewer or cake tester inserted in the center comes out clean, 60 to 65 minutes. When you gently press on the center of the cake with your fingertip, you shouldn’t leave a dent. The internal temperature of the cake should be about 205 degrees. Let cool completely in the pan. (The cooled cake can be covered and kept at room temperature for up to 3 or 4 days.)

    Putting it all together

    • If using the jam, spread layer on top of the cake. You could use strawberry or a mixed berry jam also.
    • In the bowl of a stand mixer, whisk the heavy whipping cream, sugar and salt over medium-high until billowy soft peaks form. When you lift the whisk out of the bowl and turn it upside-down, a peak of cream should flop over slightly like a Santa hat. Evenly spread the whipped cream over the jam-topped cake.
    • Add the freeze-dried raspberries to a fine-mesh sieve and hold it over the cake. Using your fingers, pass them through until most of the magenta powder rests atop the frosting like fresh snow and most of the seeds are left behind in the sieve. The entire surface of the whipped cream should be covered in pink dust. Discard the raspberry seeds. Serve immediately.

    Notes

    Personally, the cake is so damn good, I don't think it needs the jam.  The whipped cream is great and the sprinkling of raspberry dust is more than enough. YOu could also substitute strawberry for raspberry.
    This is from the original recipe
    Look for a brand of raspberry preserves with minimal ingredients: They should consist of only raspberries, sugar, pectin and some kind of citrus. That will taste more tart and less artificial than one with, say, high-fructose corn syrup and other fruit juices that muddy the natural raspberry flavor. If your preserves taste especially sweet, you can stir in up to 3 teaspoons of fresh lemon juice for added tartness.
    Chewy Black Sesame Rice Cake #CakeforTimmy

    Chewy Black Sesame Rice Cake #CakeforTimmy

    I first made Eric Kim’s Chewy Black Sesame Mochi Cake after a “Bake-a-long” with him, a perk for purchasing his book, Korean American. I was on a “mochi-bender”, if a recipe called for sweet or glutinous rice, I made it.  His cake is not only made with mochi, it has black sesame seeds.  I LOVE sesame seeds in any form, game on.

    Bake-A-long

    For those of you who #1 Have read this far down, #2  Pretty darn observant…yes, the Bake-A-Long was quite a while ago.  While I loved the sesame flavor and texture of the cake, not gonna lie, the cake was pretty sweet.  Eric seems to have a pretty high sugar barometer.  I made a mental note to file it away in my brain to try again with a smidge less sugar.

    52 Reasons To Try It Again

    For all the evils of social media (I say this with a half chuckle) the best thing about it has been finding my peeps.  Finding folks with similar interests that I would never in a million years have connected with if not for Facebook or Instagram. A virtual community that shares a common interest.  Groups like Food52’s Cookbook Club on Facebook (yep, you need to use FB) where folks like you and I can share recipes, reviews, and kitchen adventures.

    Each month features a new (or old) cookbook, which, if you are like me, a cookbook addict, probably have or are in the process of getting.  It gives me that little shove to open up that cookbook and try it.  It’s also a great resource for tips and reviews for many of the recipes.

    This month the selected cookbook is Korean American by Eric Kim.  Which reminded me that I haven’t made anything from it in a while.  Time to tweak that Chewy Black Sesame Rice Cake again.

    Oops, I Did It Again.  But as Muffins

    I decreased the amount of sugar in the recipe and made muffins instead of a cake.  Kinda like having my own personal dessert.

    Sweet or glutinous rice flour is not to be confused with rice flour.  Sweet rice is much stickier than rice flour.  They are not interchangeable.  Koda Farms sweet rice is known as Mochiko and is pretty easy to find especially at Asian grocery stores.

    Black sesame seeds can be found at most grocery stores in the spice section.  Asian grocery stores will also carry sesame seeds in larger quantities and not quite as expensive.  You

    To reduce the sweetness cut sugar by 1/4 to 1/2 cup.  I cut it by 1/2 and it was still sweet enough for my taste. You may have to play with a little.  The time between making the original recipe (full sugar load) and when I made the muffins with half sugar taxes my memory as to whether the texture was different

    The batter is fairly runny and pourable.  Very doable as a cake or muffins.  Shorten baking time to 20-25 minutes if making muffins.

    Looking for something just a little different, gluten-free, and delicious, look no more, it’s right here.

    Chewy Black Sesame Rice Cake

    A delicious, dense, chewy, sesame flavored cake from Eric Kim
    Course Dessert
    Cuisine Asian-American
    Keyword Black Sesame Seed, cake, chewy, ERic KIm, Mochi
    Prep Time 20 minutes
    Cook Time 1 hour

    Equipment

    • 1 9 inch cake pan or
    • 1 12-cup std muffin pan

    Ingredients

    • Cooking spray or butter and flour with plain rice flour

    Eggs and Tings'

    • 2 large eggs
    • 1 cup sugar (it's pretty sweet, I use 1/2 cup)
    • ¼ cup honey mild
    • ¾ teaspoon kosher salt

    The Wet Stuff

    • 1 cup whole milk
    • 2 tablespoons unsalted butter melted
    • 1 tablespoon vanilla extract yes, 1 TABLESPOON
    • ½ teaspoon toasted sesame oil

    The Crunch

    • 4 tablespoons toasted black sesame seeds divided equally in half

    The Dry Stuff

    • 1 teaspoon baking powder
    • 8 ounces (227g) glutinous rice flour aka mochiko or sweet rice flour NOT plain rice flour

    The Finish

    • Powdered sugar for serving

    Instructions

    • Preheat the oven to 350°F. Mist an 8-inch round cake pan with cooking spray or buttered and dusted with rice flour.
    • In a large bowl, whisk together the eggs, sugar, honey, and salt until fluffy and pale yellow, about 2 minutes. Whisk in the milk, vanilla, melted butter, and sesame oil until combined. Ain't gonna lie, I use my mixer on medium speed.
    • Using a mortar and pestle (or a coffee/spice grinder), pulverize 2 tablespoons of the black sesame seeds into a rough powder. It should smell very fragrant. Add this sesame powder, along with the remaining 2 tablespoons of whole black sesame seeds, to the bowl with the egg mixture, followed by the baking powder and rice flour. Whisk to combine, then carefully pour the batter into the greased cake pan. This part you can do by hand or machine.
    • Bake until the top is nicely browned and cracked slightly (this is a good sign), 50 to 60 minutes. You can also insert a chopstick or toothpick into the center of the cake, and if it comes out clean, then it’s done.
      For muffins, fill a 12-cup muffin tin that has been buttered to 7/8 full. Bake for approximately 25 minutes.
    • Cool completely before dusting with the powdered sugar and slicing into wedges to serve. The cake will keep in an airtight container at room temperature for up to 5 days.