Category: Stupid Easy

These recipes are seriously easy and delicious!

Goblin-g Up Some Delicious Short Ribs

Goblin-g Up Some Delicious Short Ribs

Greetings from rainy Quebec City!  Hubby and I decided to take a quick trip to Montreal and Quebec City.  Our last trip to the eastern side of Canada was for a hockey tournament for Jeffrey quite a few years ago.  We made it as far as Toronto that time.  This time we were off to Montreal.  W (the hubs) has decided that his criteria for traveling is “what sporting event can I go to”.  The Sharks versus the Montreal Canadians met this criteria.  Hmmm, would I go along?  I am a sports junkie too, but maybe not to the same extent.  BUT, (picture me looking very sheepish as I type this), I am a HUGE Korean drama fan.  It’s my escape. Even though their political dramas do hit a little too close to home, I am hooked.  Every politician in the K-Drama World is corrupt, all the way up to the top banana (or should I say orange?). Imagine that.

So, besides going to a hockey game in Montreal, I bartered for a couple of days in Quebec City.  My favorite K-Drama, Goblin-The Great and Lonely God, features this beautiful city.  So, like a drama groupie, I wanted to visit the different sites featured in Goblin. Think I’m crazy?  At least I’m not alone, check this out Asian Tourism to Quebec City.  Curious about the door?  Wait for my Quebec City post!

Just before heading to Canada, I went to my favorite little cookbook store in the City, Omnivore Books for a book signing event.  Ivan Orkin and Chris Ying stopped by to introduce their new book, The Gaijin Cookbook-Japanese Recipes from a Chef, Eater, Father, and Lifelong Outsider.

While his ramen book can be intimidating, this book is very user friendly and kid friendly, win-win.  Food you feed your family everyday, from classic Japanese recipes to off-beat recipes that are definitely mash-ups from his life in New York and Japan.

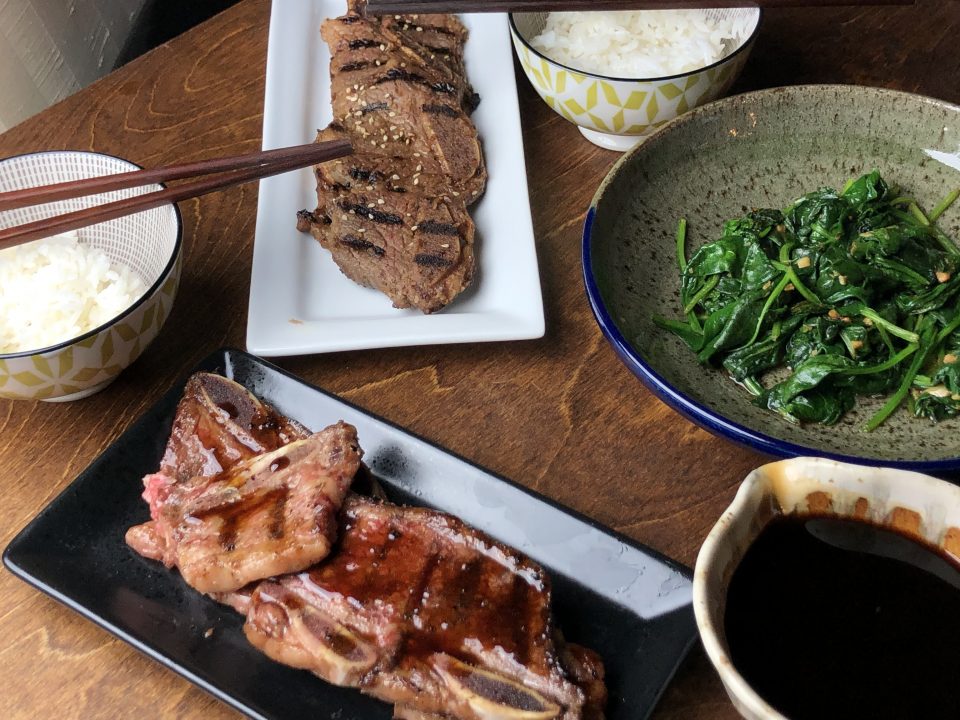
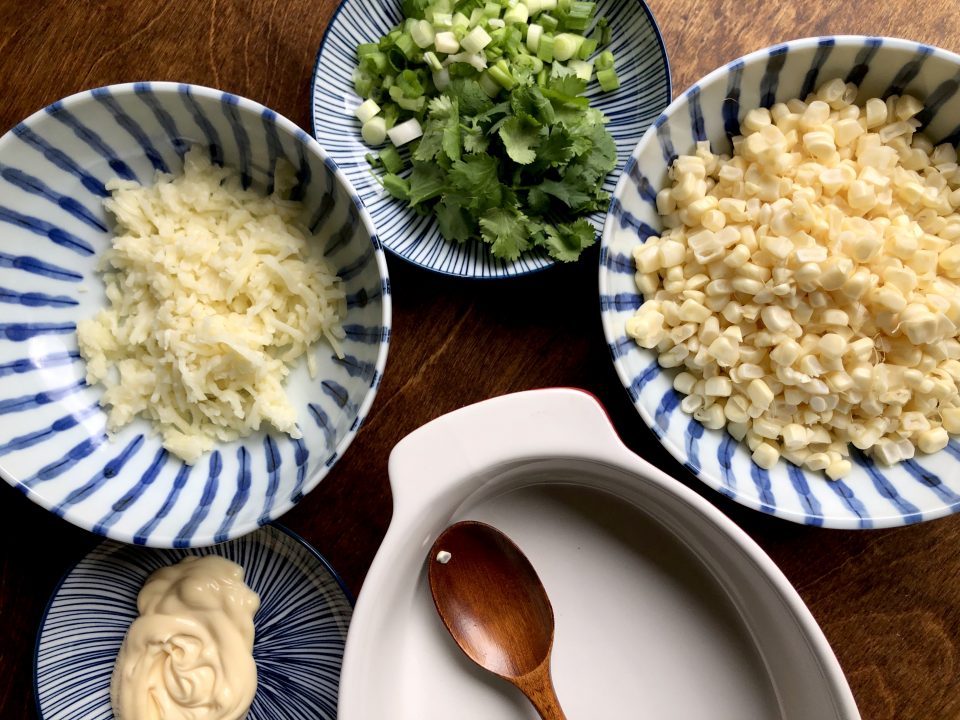
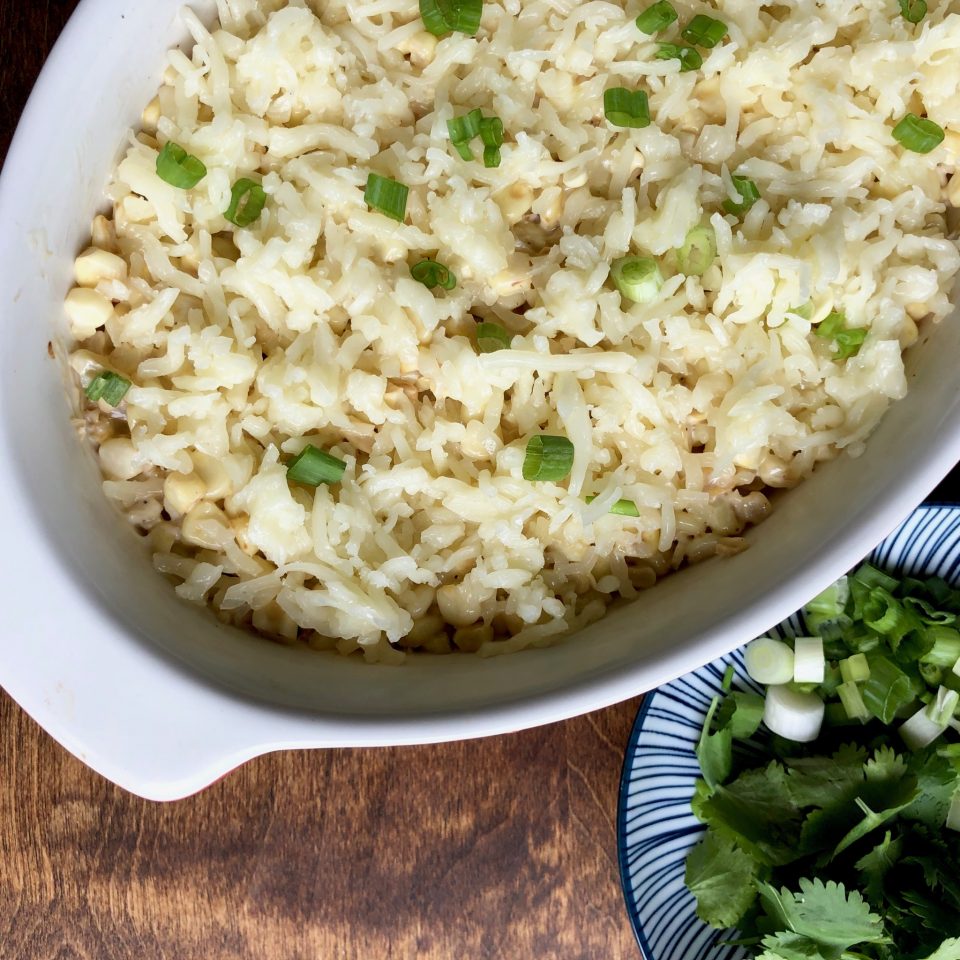
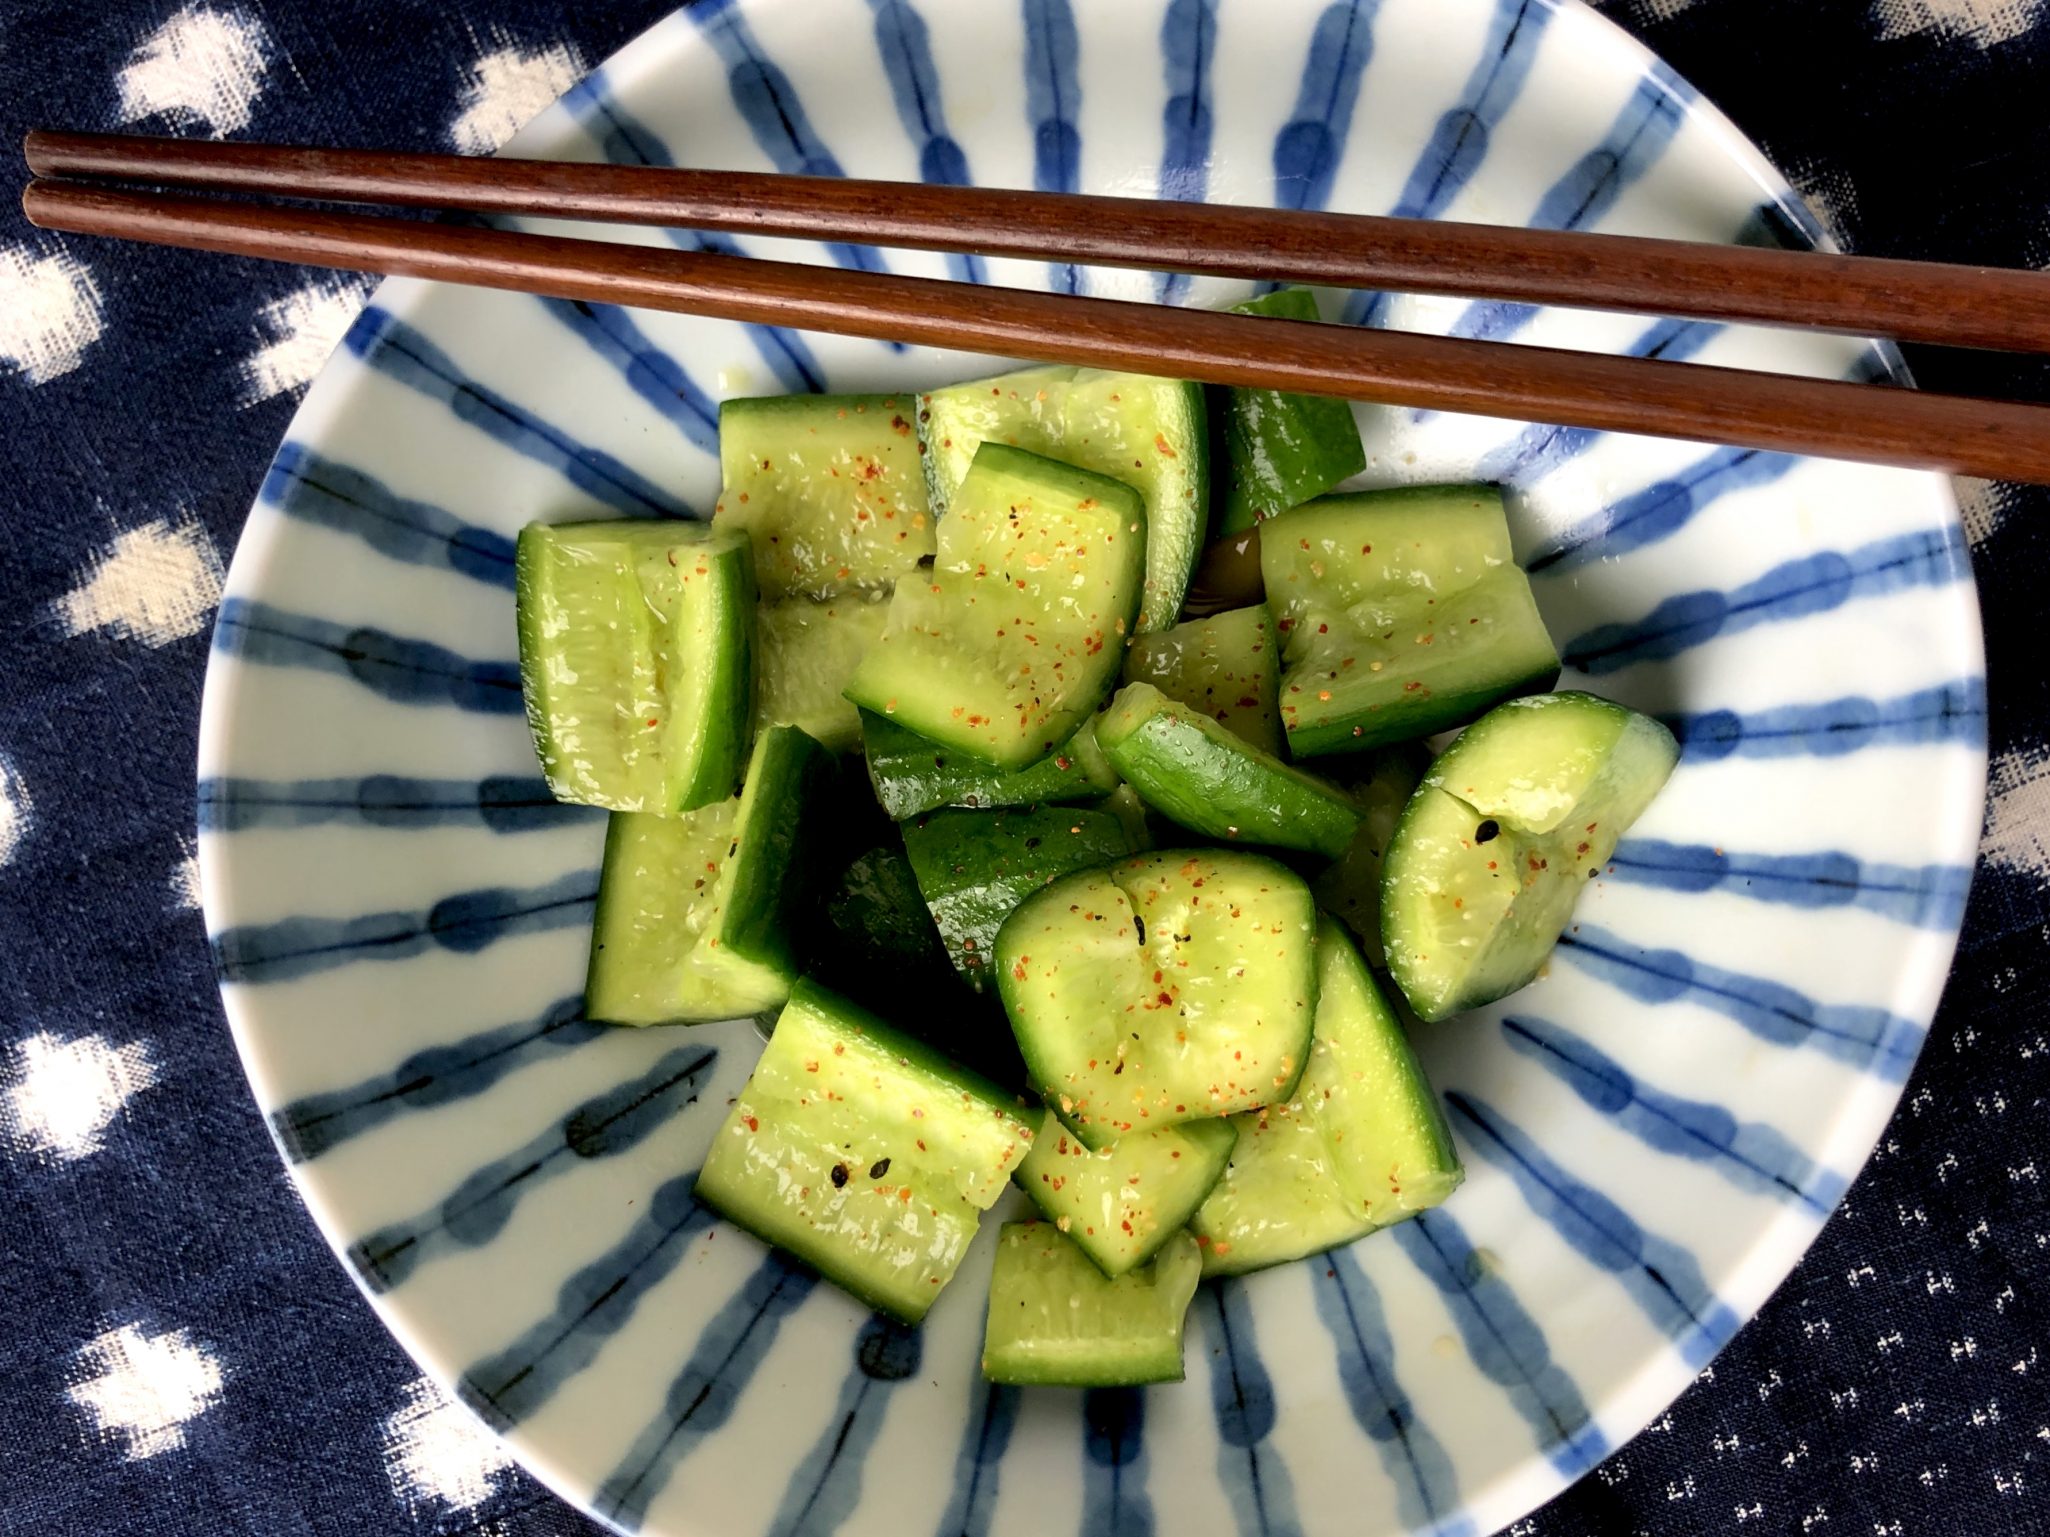
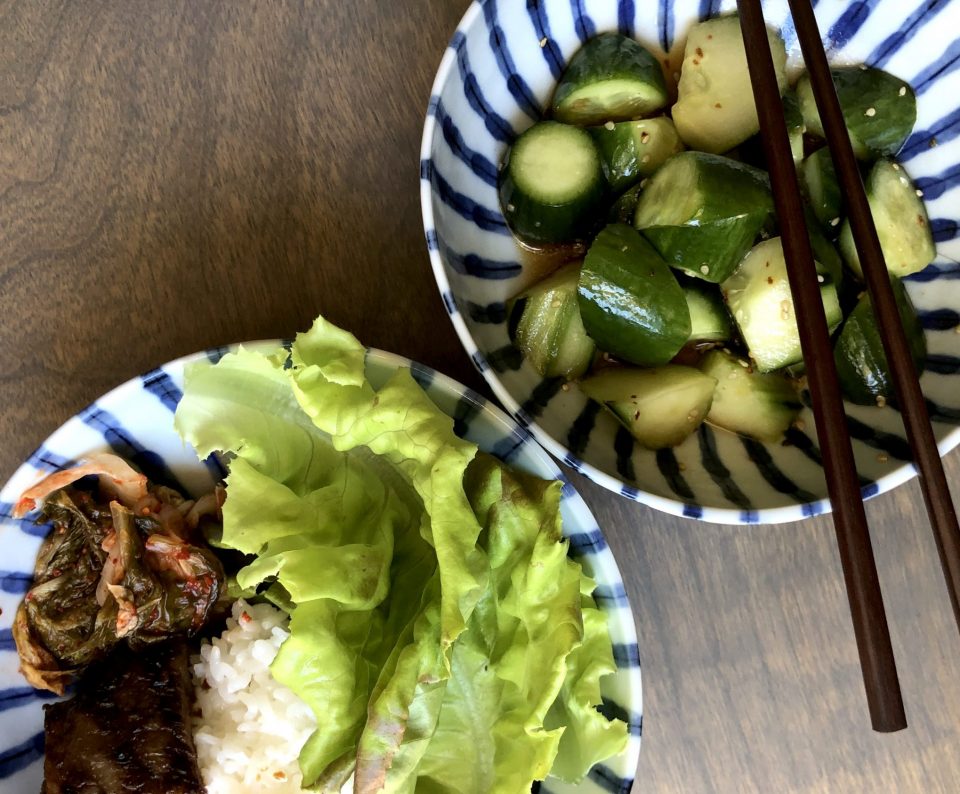
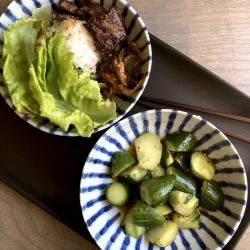
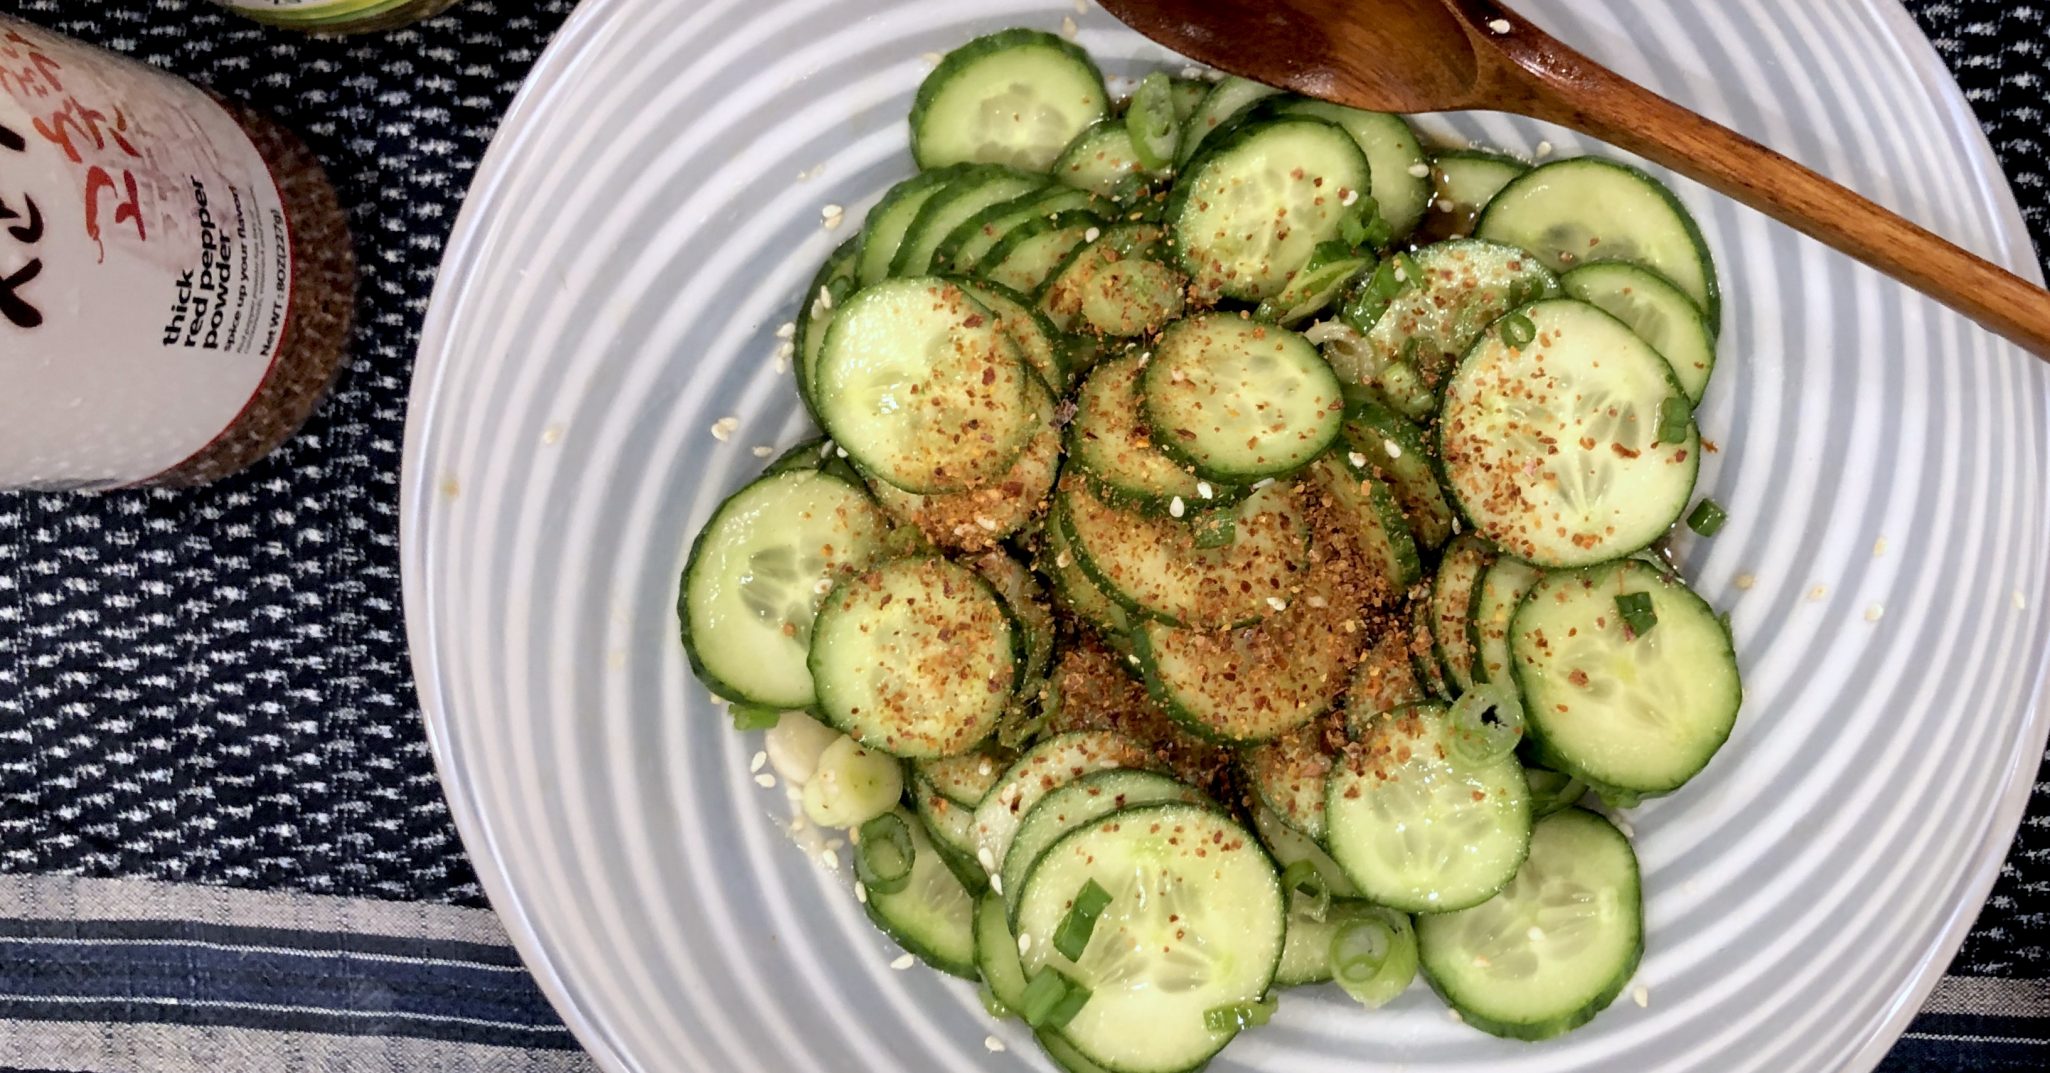
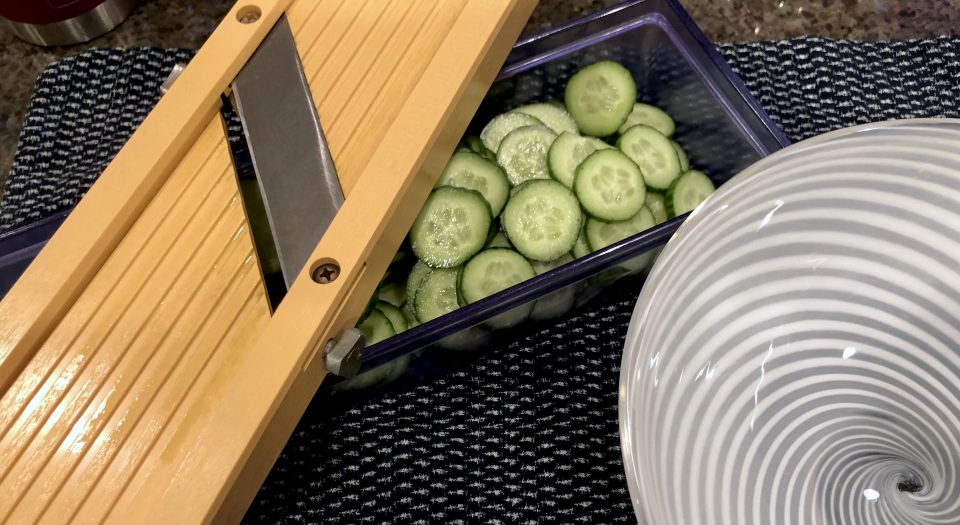
I pulled Korean style short ribs out of the fridge and decided to marinade half in my go-to Kalbi recipe and for the other half, I made the Teriyaki Sauce recipe from Ivan Orkin’s book.  Incredibly easy with just 5 ingredients (so user friendly-amirite?).  His tweak is genius, he adds oyster sauce to his recipe, so good.  Yep, short rib, two ways, perfect for the Goblin who only eats meat, and perfect for the rest of us who love Teriyaki.

The Teriyaki Sauce can be made ahead of time and keeps in the fridge.  It is delicious on not just beef, but chicken, salmon or pork.  I mean, really, what isn’t tasty with Teriyaki sauce on it.

Teriyaki Sauce from Ivan Orkin

A stupid easy, incredibly tasty Teriyaki Sauce that goes well with beef, chicken, fish and pork. From Ivan Orkin‘s new book, The Gaijin Cookbook.
Course Main Course
Cuisine Asian
Keyword beef, ivan orkin, japanese food, teriyaki sauce
Prep Time 10 minutes
Cook Time 4 minutes

Ingredients

  • 1/4 Cup Sake
  • 1/4 Cup Mirin Sweet cooking wine
  • 1/4 Cup Soy sauce Kikkoman is perfect, but any all-purpose soy sauce will work
  • 1/4 Cup Oyster Sauce Repeat after me Lee Kum Kee, woman and little boy in a boat on the label
  • 1 Tbsp sugar Granulated or raw

Instructions

  • Combine all ingredients in a small bowl. Whisk together until sugar dissolves. Store in refrigerator. Keeps for min of a couple of weeks.
  • This sauce is not a marinade. Cook protein by your method of choice. Cook your steak or chicken using your favorite method.
  • Pour teriyaki sauce until a small skillet. Over medium heat cook sauce until it reduces and seems syrupy. Approximately 4-5 minutes.
  • Drizzle sauce over your main and enjoy! Serve sauce on the side for anyone who needs to help.

Thinking about checking out Montreal and Quebec City?  My post on these two fabulous cities is coming soon!

Cheesy Corn, Are You Ready for Some Football Food?

Cheesy Corn, Are You Ready for Some Football Food?

I love the fall season. Aside from all things pumpkin and apples, I start thinking about foods that go hand in hand with watching football.  My dad was a sport’s junkie and he definitely passed the sports-watching gene to my brother and me.  He also liked to cook.  Every Sunday he would have a big pot of Rice Soup or Congee simmering just for the 49er game. I’m not sure what I looked forward to more, the Rice Soup (Instant Pot) filled with bits of chicken, potatoes, tiny pork meatballs, topped with green onions and cilantro, or the football game.  

Football Food

In addition to the soup, football watching requires yummy totally bad for you snack food and I just discovered one that would fit in perfectly with a sport-watching spread.  One of my favorite cookbooks this year, A Common Table, has a popular Korean snack that must have been created to go with beer and fried chicken and therefore football.  Korean Cheesy Corn. Yep, the best thing since sliced bread. Okay, I’m kidding but it is good and stupid easy.

Start with fresh corn from the Farmer’s Market.  It is so good right now.  Frozen corn or canned corn (lots of Korean recipes start with canned corn) would work, but, come on, go fresh and support your local farms.

And now a public service announcement, a video on how to take corn off the cob from Saveur using a bundt pan! It works like a charm!

From here on in it’s a downhill slide.  Stir-fry corn in oil or butter until it is soft.  Combine corn with mayonnaise and place in an ovenproof dish. I use Kewpie Mayo which is slightly sweet but use whatever mayo (better be Best Foods) you have in the fridge.  Sprinkle a crap ton of Mozarella cheese on the corn and bake at 500 until the cheese is browned, gooey and melty. So delicious.  Versions of Korean Cheesy Corn add sugar.  If your corn is sweet you won’t need to, but if you like it sweeter add 1-2 teaspoons of sugar.  If you use Best Foods or Hellman’s add 1 tsp of sugar.

The corn, mozzarella, mayo, green onions, and cilantro are the basic ingredients for this yummy super easy dish.  Of course, you can go CRAZY and add extra fixings to bring it to a whole new level.  A bucket list of add-ons includes bell pepper, red onion, jalapeno peppers, or crumble in bacon (cuz everything is better with bacon).   You can also add cut-up rice cakes cause what’s a few more calories in a totally not-on-your diet dish.

Ready set, dig in!

Korean Cheesy Corn

Delicious, decadent and easy. Korean Cheesy Corn a popular Korean dish. Perfect as a side dish or snack.
Course Side Dish
Cuisine Asian
Keyword cheese, Corn, Korean, Korean Cheesy Corn, snack
Prep Time 15 minutes
Cook Time 5 minutes
Servings 4 servings

Ingredients

  • 1-1/2 cups fresh corn about 2 ears, canned or frozen can be used
  • 2 tbsp mayonnaise, preferably Kewpie add 1-2 teaspoons sugar if using regular mayo
  • 1 tbsp unsalted butter or vegetable oil
  • 1/4 tsp salt
  • 1/4 tsp fresh ground pepper
  • 1/2 cup shredded mozzarella or more if you are a cheese freak. Additional 1/4 cup stirred into corn with mayo.
  • 1/4 cup sliced green onions
  • 1/4 cup cilantro coarsely chopped
  • 1/8-1/4 cup additions ie. bell pepper, diced red onions, bacon, optional

Instructions

  • Preheat oven to 500 degrees
  • In a large non-stick skillet, heat butter or oil. Over medium heat, add corn and if using bell peppers, jalapeno or onions. Cook, stirring frequently until soft about 4-5 minutes. Season with the salt and pepper.
  • Transfer corn to an ovenproof dish, stir in mayo and sugar if using.
  • Sprinkle cheese evenly over the surface and bake for 5-7 minutes until cheese is melted, bubbling and starts to brown. Like a pizza!
  • Garnish with green onions and cilantro and serve immediately.
Cool Hand Cuke (Cucumber Salad from A Common Table)

Cool Hand Cuke (Cucumber Salad from A Common Table)

This summer I have been the lucky recipient of what seems like a bushel of cucumbers from the gardens of friends and neighbors.  Luckily, I LOVE cucumbers.  I saute’ julienned strips of cucumbers for Bi Bim Bap, put crispy slices in sandwiches in place of lettuce, and thrown every salad I toss together.  What’s a cheeseboard with an array of dips without cucumbers to serve as a “dip-stick” (lol) for them?  So much better than celery if you ask me.

But what is my favorite way to serve cucumbers?  As a refreshing cold dish.  I posted a simple Korean Cucumber Banchan (side dish) recently that is flavored with soy sauce, chilis, and sesame oil and sprinkled with green onions and Korean chili powder.  It’s incredibly easy and TASTEE!

I also love the Smashed Cucumber Salad from A Common Table cookbook (love, love, love).  A classic Chinese dish that is perfect on a hot summer day.  Cukes, crisp and refreshing are dressed in a blend of soy sauce, vinegar, and chilis. The secret is to lightly smash the cut pieces of cucumber and salt them.  The added surface area allows the salt to extract more moisture and the cucumbers to then absorb the dressing.   It’s so simple, comes together in minutes, and makes a lovely side dish.  I use English or Persian cucumbers, fewer seeds and the skin is much thinner, no peeling necessary!  American cucumbers, on the other hand, have a thick waxy skin, which means peeling.  They also have more seeds and higher water content. Stick to the English or Persian cucumbers, trust me.

As summer comes to an end and you fire up the barbecue for the last time, this would be a perfect, refreshing side dish.

Chinese Cucumber Salad

A cool and refreshing cucumber salad which has its roots in Chinese cuisine.
Course Salad, Side Dish
Cuisine Chinese
Keyword cucumber salad
Prep Time 10 minutes

Ingredients

  • 1 lb Persian or Kirby cucumbers unpeeled (2 to 3 small cucumbers if using Persian)
  • 1/2 teaspoon kosher salt or more to taste
  • 1 to 2 teaspoons rice vinegar I use 1 teaspoon
  • 1 teaspoon sesame oil
  • 1/2 to 1 teaspoon soy sauce 1 teaspoon or more to taste, substitute Ponzu, Soy Dashi or Yuzu Soy Sauce
  • 1/4 teaspoon crushed red pepper flakes to taste or use Korean chili powder, Gochugaru

Instructions

  • Slice the cucumbers in half lengthwise, then into 1-inch pieces or cut at a diagonal and rotate cucumber 1/4 turn, cutting angled 1-inch pieces.
  • Place the pieces cut-side down on a cutting board. Working with a few pieces at a time, lay the broad side of a wide chef's knife or cleaver on top of the cucumbers, and carefully use the palm of your free hand to smash down lightly on the blade.
  • Place the smashed cucumbers in a colander and sprinkle them evenly with the salt. Set aside until cucumbers release water, 20 to 30 minutes.
  • Stir 1 teaspoon rice vinegar, 1 teaspoon sesame oil, 1 teaspoon soy sauce, and red pepper flakes together and add to drained cucumbers. Taste and adjust seasonings, if desired. Let sit at room temperature or in the refrigerator for a minimum of 30 minutes to 1 hour (*note: the salad will taste better with more time, so if time allows, refrigerate and marinate for 6 hours or longer to let the flavors develop.

Notes

The key for crispy cucumbers is to smash and salt the cukes!
NO Bake Peanut Butter Cookies, Pssst….You Got 5 Minutes?

NO Bake Peanut Butter Cookies, Pssst….You Got 5 Minutes?

This past weekend we had a retreat for our political action group.  I know what you are thinking. This is a fun, food, foto, blog.  You promised NO politics Deb.  Not to worry.  I only mention it because I was once again tasked with bringing desserts including a vegan one to the retreat.

First, I made the butter, sugar, and flour dessert, a delicious Tunisian Orange Cake (next post) from Zingerman’s. Which did not leave me with much time to crank out a vegan dessert.  What to do, what to do.  I went straight to the blog site Minimalist Baker, an amazing site filled with simple, quick, plant-based food to find a recipe .  The last time I looked there, I found a yummy  Banana Pecan Shortbread that knocked my socks off.  

Second, I found another gem.  3 Ingredient-No Bake Peanut Butter Cookies.  5-10 minutes is all you need to put these bad boys together.  Yep, from the pantry to your mouth, 5-10 minutes.  In fact, it will probably take you longer to read this post than to make these cookies.  You will find this recipe in the STUPID EASY category.  I almost feel like creating a new tag, INCREDIBLY STUPID EASY or STUPID  SQUARED-stupid easy and stupid delicious.

The first step, whirl the oatmeal in your food processor or blender until it resembles coarse flour.  Add (PITTED-ya never know) dates, make sure your dates are soft and moist. It will help keep the cookies together.  Pulse to combine, add the peanut butter and let her rip.

Scoop up approximately 2 tablespoons of dough and form into balls. Press with a fork, just like classic peanut butter cookies, and…DUNZO. That’s it.  Well, not quite done, take it to the next level.  Melt chocolate chips and dip these babies into it to cover half the cookie.  Then you’re done. Too much work to melt chocolate?  Add 1/4-1/3 cup mini chocolate chips to the dough right before shaping the cookies.


Chill the cookies and serve to everyone…not just your Vegan friends.  Think of these as a cross between peanut butter cups and an oatmeal cookie.  Delish.

3 Ingredient No Bake Peanut Butter Cookies

Delicious peanut butter cookies made with just 3 ingredients! No baking required, stupid easy to make, cross between a cookie and a peanut butter cup! Vegan!
Course cookies
Cuisine American
Keyword NO Bake Peanut Butter Cookies
Prep Time 10 minutes
Total Time 10 minutes
Servings 12 cookies
Author Adapted from Minimalist Baker

Ingredients

  • 1 cup rolled oats old fashioned gluten-free
  • 1 Pinch sea salt optional
  • 3/4 cup medjool dates pitted // measured after pitting
  • 1/2 cup natural salted peanut butter creamy or crunchy

CHOCOLATE GLAZE optional

  • 1/2 cup semi-sweet or dark chocolate chips "accidental" vegan chips
  • 1 tsp vegetable oil

Instructions

  • Add oats and salt (optional) to a food processor and blend into a flour. Add dates and blend for 30 seconds more or until finely chopped.
  •  Add peanut butter and blend until a dough forms.
  • Scoop out 2-Tbsp amounts of dough and carefully form into mounds. Place on a parchment-lined pan or tray. 
  • Use the back of a fork to create a cross hatch on the top of the cookies 
  • Place chips and oil in a heatproof bowl.  Melt chocolate chips in microwave at 50% power, stirring occasionally until it is melted and has a sauce-like consistency 
  • Dip the cookies in (about halfway), let excess drip off, and place on a parchment-lined pan or tray. Freeze 10 minutes or place in fridge until chocolate hardens,
  • Cookies can be kept in the refrigerator up to 1 week or in the freezer up to 1 month. 
  • Optional: Instead of glaze, add 1/4-1/3 cup mini-chocolate chips to dough right before shaping.
Cool as a Cucumber Banchan (Simple Asian Cucumber Salad)

Cool as a Cucumber Banchan (Simple Asian Cucumber Salad)

Are you like me? I hate making salads. I love salads, but prepping veggies, not so much. I only have enough bandwidth to prep maybe 1-2 fixings for a salad. Which means my salads are pretty darn boring. Helloooo, Banchan.  Banchan are little appetizers plates that come with every Korean meal.  Banchan can include seafood like fishcake but are generally comprised of vegetables such as soybeans, radishes, potatoes or CUCUMBERS (my favorite). It’s my veggie salvation.  Instead of a salad, I pull out my jar of kimchi or pickled radishes, slice some cucumbers and splash a soy sauce, sesame oil, and green onion dressing on the cucumbers.  So refreshing and delicious.  Yep, rockin’ the banchan.

One of my favorite kitchen gadgets is the Japanese Behringer mandoline.  I purchased mine when I was in school in  Los Angeles a long time ago, and I mean a LONG time ago.  Thirty years later it’s still going strong, it’s a great option if you don’t have a mandoline.  It is sturdy, inexpensive and apparently very durable (I can vouch for that), find it here.

I love this little salad.  It is stupid easy to make and delicious. I use soy dashi, (a combination of soy sauce and dashi, a fish-based stock) when I want a smokey, slightly briny taste to the cucumbers.  Would be a lovely side dish with the Gochujang-Lime Salmon or the Braised Pork Belly rice bowl.

Cucumber Banchan

Course Side Dish
Cuisine Asian
Keyword cucumber salad
Prep Time 10 minutes

Ingredients

  • 1 cucumber Japanese, English, Persian about 1 1/2 cup sliced for 1 cucumber

Dressing

  • 1 Tbs soy sauce or Soy Dashi
  • 2 Tbs rice vinegar
  • 1 Tbs sugar
  • 1/2 tsp Korean red chili powder
  • 1 tsp sesame oil

Garnish

  • 1/4 tsp sesame seeds
  • 2 green onions chopped

Instructions

  • Slice cucumbers into thin slices. Around 1/8 inch (3 mm).
  • Mix soy sauce, vinegar, sesame oil and sugar in a bowl. Pour soy vinegar into the bowl with cucumbers.
  • Then, add 1/2 tsp chili powder and sesame seeds. Mix and taste. Add more chili powder if you want. Doing it in this order allows you to taste and control the amount of chili powder based on how spicy you want it.
  • Add chopped green onions and mix again.
  • YOU ARE DONE!! Serve immediately for the freshest and crunchiest cucumbers. You can also let it sit for 10-15 minutes for the cucumbers to absorb the dressing before serving.
East Meets West for Happy Hour (Korean Style Flatbread Pizza)

East Meets West for Happy Hour (Korean Style Flatbread Pizza)

Right around this time, I catch myself wondering how quickly the year has flown by.  Summer was a blip on the screen and now Labor Day Weekend is here.  As a kid, Labor Day signaled the end of summer and BACK TO SCHOOL.  Since the weather is still warm enough, an outdoor happy hour and bbq is the perfect way to officially say goodbye to summer and usher in the fall.

Which means HAPPY HOUR FINGER FOOD, YUMMY, YUMMY, YUMMY.  What do you know, I found a winner in my latest favorite cookbook, Everyday Korean.  Pizza with an Asian riff, Korean Style Flatbread Pizza.

I test drove these bad boys on my postcard posse last week and got the thumbs up.  The base of our fusion pizza is Naan bread, which you can purchase at just about any self-respecting grocery store or at Costco.  I keep a stash in my freezer to warm in my toaster oven as needed.  The sauce for the pizza is made with Gochujang and sour cream.  The sour cream mellows the spicy pepper paste but you still get a nice kick.  Top the pizzas with shredded mozzarella and ANY TOPPING YOUR LITTLE HEART DESIRES.  I covered a couple with the classic fresh tomatoes and basil and a sprinkle of Parmigiano.  The next set had bits of leftover Korean bbq beef, green onions, and sesame seeds which proved to be a delicious combo.  I scattered spicy pickled cucumbers and leeks, a traditional banchan (Korean side dish), on the remaining Naan.  I can’t decide which was my favorite, I liked them all.

My next batch might have pineapple and prosciutto or teriyaki chicken and red onions.  Use your imagination or try your favorite pizza toppings.  Having friends over? Let them create their own. Enjoy!

Korean-Style Flatbread

A fusion pizza that is both easy and delicious!  Korean Pepper Paste and sour cream replace traditional tomato sauce on top of Naan bread base.

  • 4 naan (fresh store-bought or frozen)
  • 2 cups mozzarella (8 ounces)
  • 1/2 cup Gochujang Sour Cream

Gochujang Sour Cream Sauce

  • 1/2 cup sour cream
  • 1/4 cup Gochujang
  • sesame seeds, green onions (or fresh herbs of choice)

Toppings

  • tomatoes, basil, Korean bbq,
  • Your choice!
  1. Preheat oven to 425 F.Place naan on baking sheet.  Brush each naan with 2 tablespoons of Gochujang Sour Cream.  Divide the mozzarella among the top of naan.  Go crazy with your toppings.  Bake 10-12 minutes until cheese bubbles and the naan crisps.

Place sour cream and gochujang in a small bowl: stir to combine. Add any optional garnishes. Store in airtight container in fridge for up to 1 week. Stir before using.


Tropical Flair to Mexican Wedding Cookies when Married with Lime and Coconut

Tropical Flair to Mexican Wedding Cookies when Married with Lime and Coconut

The political action group I belong to (please continue to read, that is as political as this post is going to get) hosted a fundraiser this past weekend.  A garden party with a Mexican theme. Of course, I volunteered to make something sweet.  Cookies, specifically, Mexican Wedding Cookies, instantly popped into my head.  Usually, I bake a batch of these nutty, buttery, nuggets during the holidays but it is the middle of summer so I wanted to change it up just a bit.  I found the perfect riff on the classic wedding cookie, a coconut lime version, on the blog Once Upon A Chef by Jenn Segal.  Garden Party, Fiesta theme, coconut, lime-yep, spot on.

Delicious AND easy to make.  The dough is made in a food processor which makes these cookies STUPID easy.  You throw the dry ingredients into your food processor bowl, give it a couple of whirls, add the butter, vanilla and lime zest, pulse to it comes together and boom, you are done.  Wrap the dough in plastic wrap, and forget about it in the fridge for about an hour.  Use a teaspoon ice cream scoop to make balls of dough, bake, and roll in a ton of powdered sugar.  HOW EASY IS THAT? Ipso Facto Dunzo.

Coconut-Lime Mexican Wedding Cookies

Course cookies, Dessert
Cuisine American
Keyword Mexican Wedding Cookies
Prep Time 10 minutes
Cook Time 12 minutes
Total Time 22 minutes

Ingredients

  • 1 cup all-purpose flour spooned into measuring cup and leveled-off
  • 1/4 teaspoon salt
  • 1/2 cup confectioners' sugar plus about 3/4 cup more for coating
  • 1/3 cup pecans
  • 1/4 cup sweetened flaked coconut
  • 1 stick 1/2 cup unsalted butter, softened
  • 1 packed teaspoon lime zest from 1 lime
  • 1 teaspoon vanilla extract

Instructions

  • In the bowl of a food processor fitted with the steel blade, combine the flour, salt, confectioners' sugar, pecans and coconut. Process until the pecans and coconut are finely ground, and the mixture looks like sand. Add the butter, lime zest, and vanilla extract; process until the mixture comes together into a cohesive dough. Remove the dough from the bowl and wrap in plastic. Chill until firm enough to roll, 45 minutes to 1 hour.
  • Meanwhile, preheat the oven to 350°F. Line two baking sheets with parchment paper.
  • Measure the dough into heaping teaspoon-size pieces and roll each piece into a ball. Place the balls about 1-1/2 inches apart on the prepared baking sheets. Bake until the edges of the cookies barely begin to brown, 12 to 14 minutes. Let cool on the baking sheets, then roll in the confectioners' sugar while still warm. Let the cookies cool on a rack, then roll again in confectioners' sugar once they are cool. Store in an airtight container at room temperature.

Stop the Madness with Lemon Syrup

Stop the Madness with Lemon Syrup

If you have a lemon tree in your backyard you will know what I am going through. Our one lemon tree produces enough lemons for my entire neighborhood.  Too bad EVERY house in my neighborhood has a lemon tree.

So, if you have any suggestions on what to do with all my lemons, PLEASE forward them to me. I am always looking for ways to use them because man (or woman) cannot live on Lemon Bars alone…

Well, I probably could but that wouldn’t be wise.

Fortunately, I do have a suggestion for an abundance of lemons.

lemon syrup

Jamie is home.  Which means marathon kitchen sessions of baking, cooking, and CLEANING.    We picked a bunch of lemons and made a stupid easy lemon syrup that we keep in the fridge for lemonade, drinks, lemon tea, just about anything that needs some sweet lemon goodness.  It keeps for at least a month and is a fabulous way to make use of all those lemons.  I have had a cold for the past week (feels like forever) and my go-to comfort drink has been a steaming cup of tea and a couple of tablespoons of lemon syrup.

Counting down: Top Five List of Ways to Use Your Homemade Lemon Syrup

5. As mentioned, a couple of tablespoons in a steaming hot cup of tea, so good.

4. Drizzled on berries and yogurt for a morning kickstart

3. Drizzled on pound cake for that extra zip

2. LEMONADE, nothing better on a hot summer day but a tall ice cold glass of lemonade-oh yeah.  This is a mandatory summer fridge item.

  • Tall glass, Ice,1 part lemon syrup  to 3-4 parts water, to taste… ahhhhhhhh, garnish with a sprig of mint or basil, life is good, drink lemonade

1. LEMON DROPS for Happy Hour  (or any hour)

  • 2 ounces lemon syrup, 1/2 ounce triple sec, 2-ounce vodka.  Take a martini glass, dip rim in lemon juice then into granulated sugar.  If you are cool enough to already own a cocktail shaker ( I want one), pour vodka, triples sec, lemon syrup into the shaker with ice.  Shake, shake, shake.  Strain into martini glass. ENJOY.

Stop the Madness with Lemon Syrup

Ingredients

Adapted from Taste of Home.

  • 3 cups sugar
  • 1 cup boiling water
  • 3 cups lemon juice about 16 lemons
  • 2 tablespoon grated lemon zest

Instructions

  • In a 1-1/2-qt. heat-proof container, dissolve sugar in boiling water. If necessary heat on stove to dissolve sugar. Cool.
  • Add lemon juice and zest; mix well.
  • Cover and store in the refrigerator for up to 1 week. Although I have a jar in my fridge that has been there for a month, still delish!
  • Yield: 5-1/2 cups syrup (number of batches varies depending on concentration of lemonade).
  • When using the syrup, pour through a strainer to remove the pulp or zest. I'm a pulp girl so I generally don't bother staining the syrup.
  • To prepare lemonade: For 1 serving, combine 1/4 to 1/3 cup syrup and 3/4 cup cold water in a glass; stir well. For 8 servings, combine 2-2/3 cups syrup and 5 cups cold water in a 2-qt. pitcher; stir well. Yield: 1 serving.

Variations on a theme.  You could use Meyer Lemons cutting back the sugar a tad.  You also use limes or a combination of lemons and limes.  Its up to you!  Enjoy!


Just in Time for Cinco de Mayo! Ridiculously Easy Salsa

Just in Time for Cinco de Mayo! Ridiculously Easy Salsa

A while back on a visit to The Big Apple, we stopped at Brookfield Place for a quick bite.  Near the World Trade Center, The Brookfield has an upscale food court (this is an understatment).  You won’t find corn dogs and pretzel bites, what you will find-organic kale and quinoa salads, Pad Thai, avocado toast, sushi…the trendy hipster options are endless.  After agonizing over what to eat, grab your food and pounce on the first table near the windows.  Enjoy the spectacular view of the Hudson while you eat.

I decided on an egg dish (can’t remember exactly what I had) but it needed a punch of flavor.  Back to the stand where I ordered my eggs.  “Do you have any salsa”? The woman in line behind me rudely interjects “RIGHT in front of you”. I glance at the counter, turn to her and say “SALSA not salt” (you schmuck).   The counter guy hands me a couple of packets of hot sauce with an apologetic “uh, will this do?” I take them and quickly walk away so he doesn’t hear me sigh.

New York City, you don’t know what you are missing…

With Cinco de Mayo coming up I pulled out a salsa recipe I had come across in the blog Cookie + Kate. This salsa is SUPER EASY and a snap to put together.  This leaves plenty of time to mix up a batch of your favorite Margaritas, the perfect foil for chips and this salsa.

Easy salsa

The secret?  The salsa starts with a can of FIRE-ROASTED TOMATOES.  TJ’s has their house brand version that I have used with good results and Muir Glen makes organic fire-roasted tomatoes. Drain the tomatoes well or it will be watery.  Throw the tomatoes in your food processor along with coarsely chopped garlic, jalapeno, diced onion, cilantro and a bit of lime juice and salt.  Give it a whirl and voila’ SALSA TIME.  Want it spicier, add more jalapeno.  Bit more tangy? Extra squeeze of lime.  Added punch? 2 garlic cloves instead one.  It’s entirely up to you.

Just in Time for Cinco de Mayo! Ridiculously Easy Salsa

Ingredients

  • 1 can 15 ounces diced fire-roasted tomatoes
  • 1-2 cloves of garlic roughly chopped
  • ½ cup roughly chopped white onion about ½ small onion
  • ¼ cup lightly packed fresh cilantro leaves
  • ½ medium jalapeño seeds and ribs removed, and roughly chopped
  • 1 tablespoon lime juice more if needed
  • 1 teaspoon Kosher salt or 1/2 teaspoon sea salt

Instructions

  • Drain off about half of the tomato juice from the can (about ⅓ cup) and discard it.
  • In a food processor:
  • Add the tomatoes and all of the remaining juice from the can. Add the garlic, onion, cilantro, jalapeño, lime juice, and salt.
  • Pulse the mixture until it is mostly smooth and no big chunks of tomato or onion remain, scraping down the sides as necessary.
  • Season to taste with additional lime juice and salt, if you like.
  • Serve the salsa immediately or store it for later.
  • This salsa keeps well in the refrigerator, covered, for about 1 week.